I’ve spent the past few months pondering back and shoulder adjustments and trying them out. While making my first Wanderulst dress I realized I needed a swayback adjustment to remove the extra folds of fabric at the back of my waist. But I also noticed that my shoulders slope down quite a bit so I tried a sloped shoulder adjustment as well in my second and third Wanduderlust dresses.
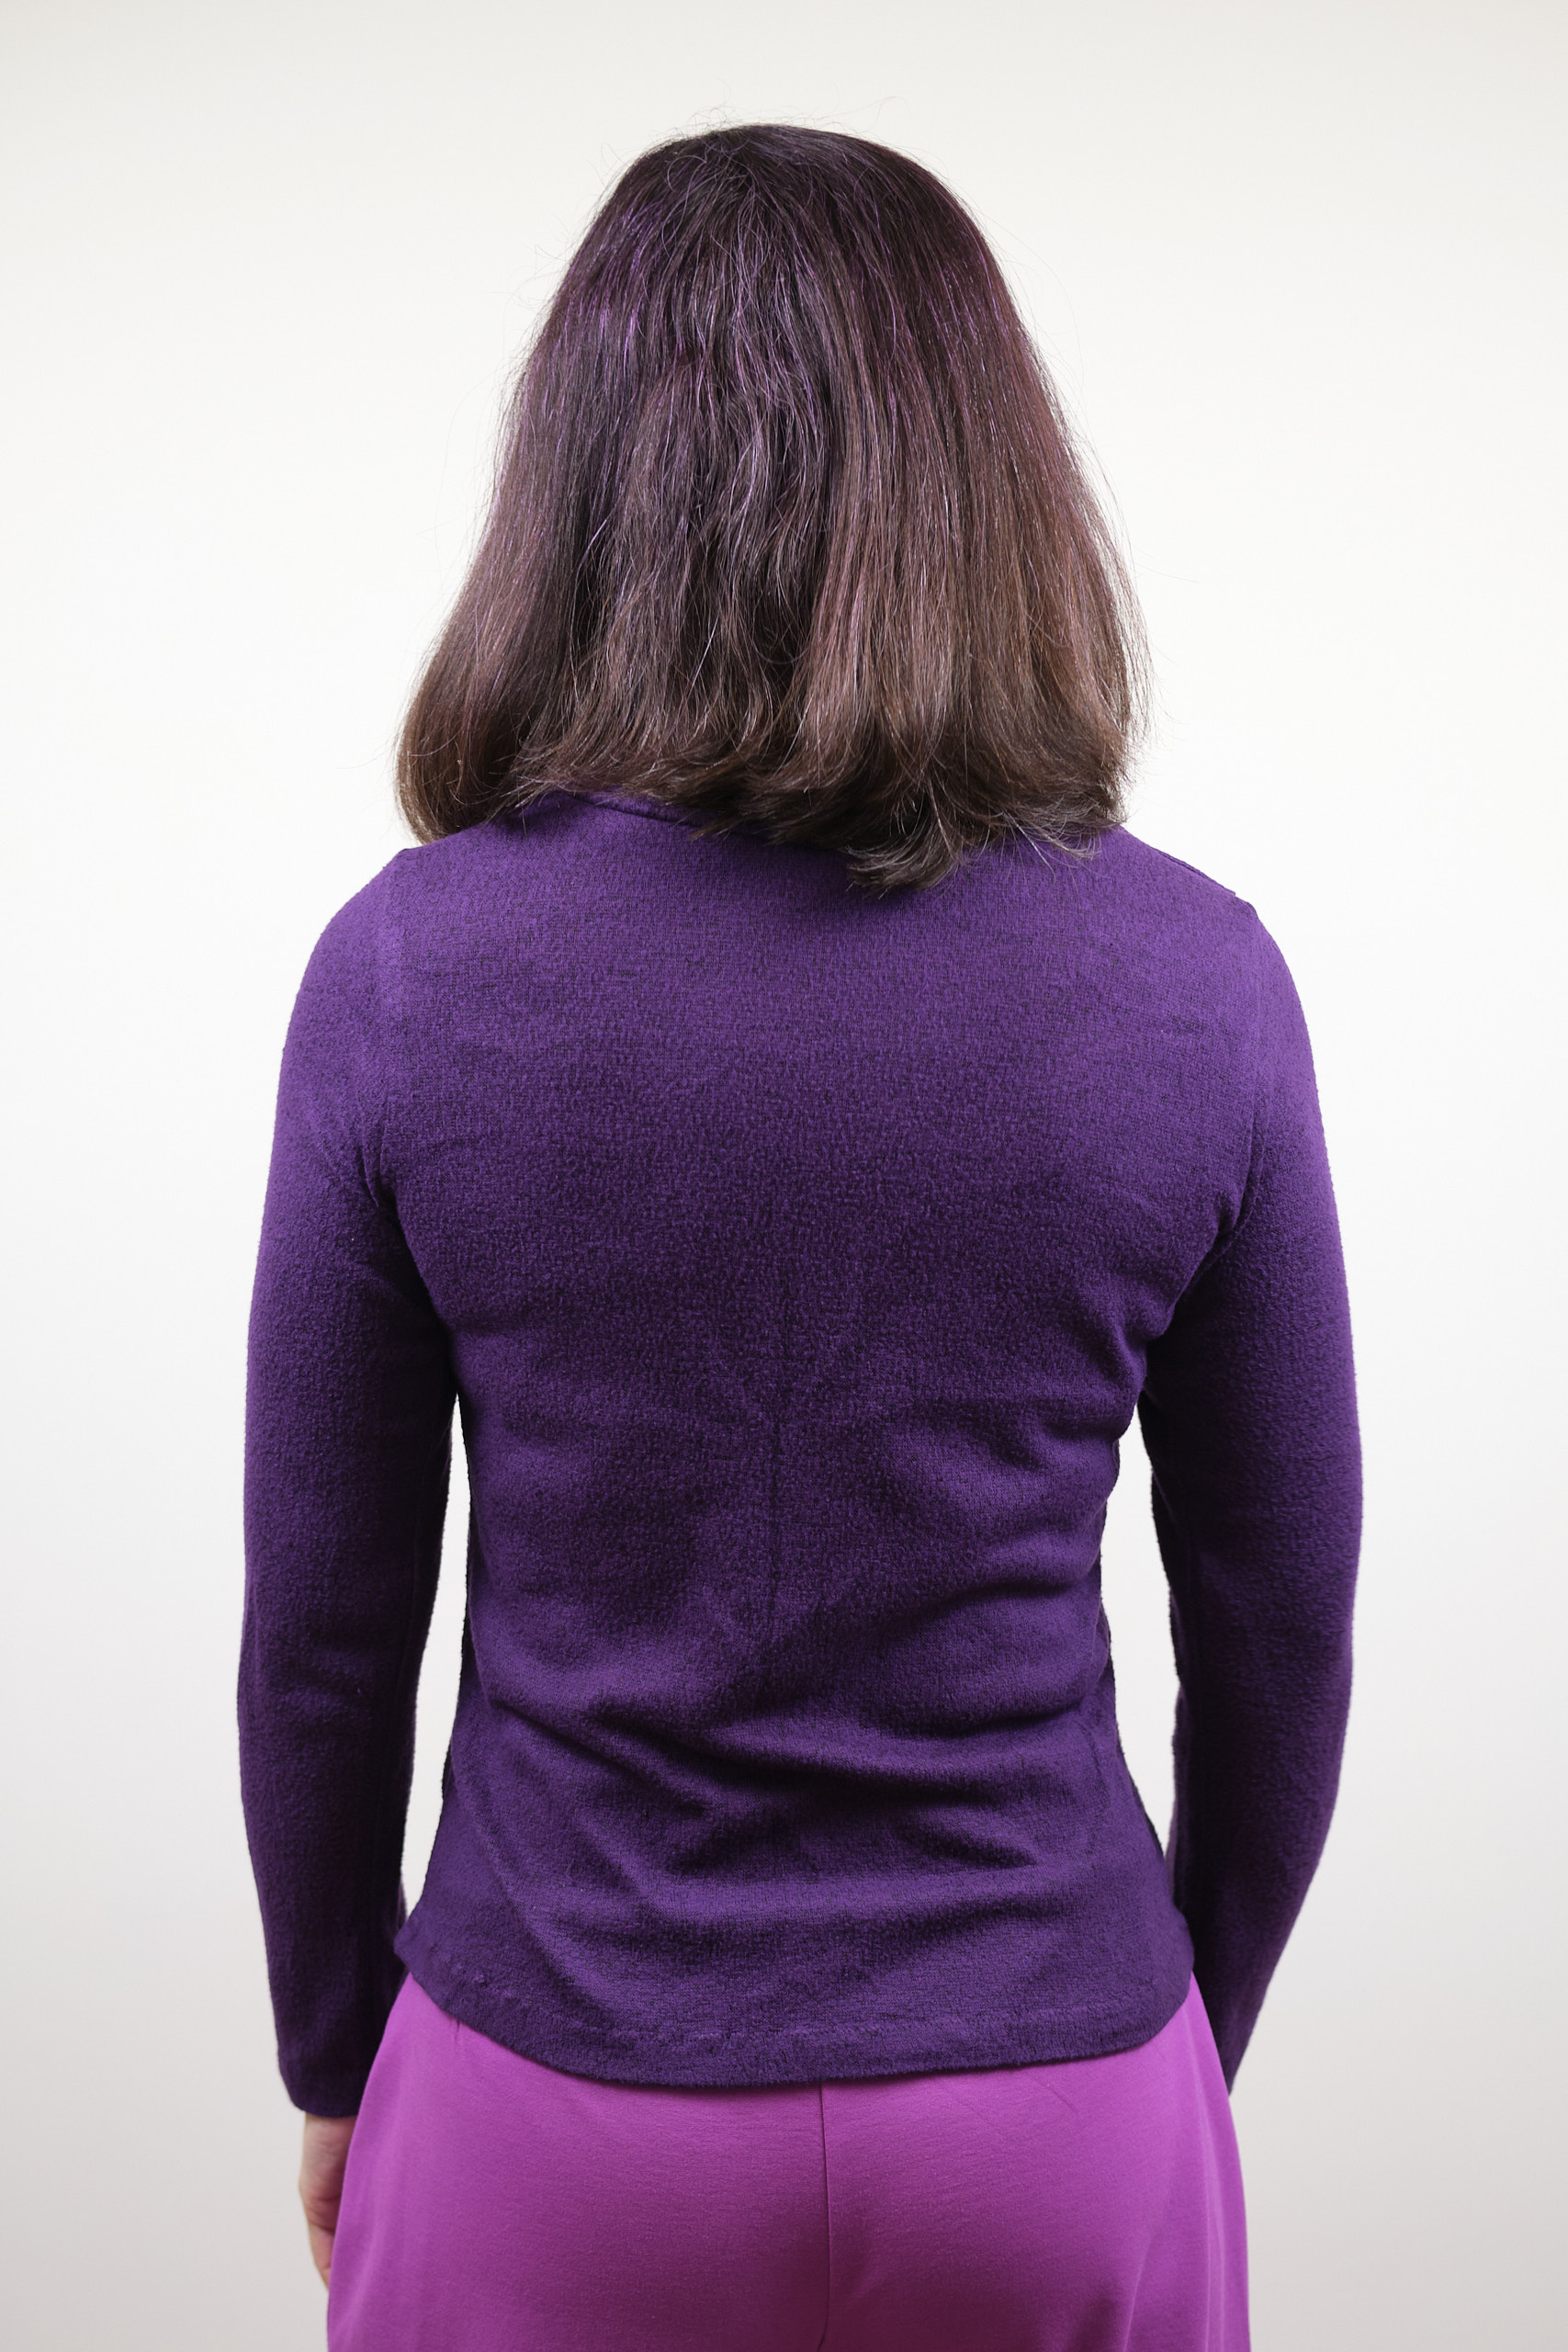
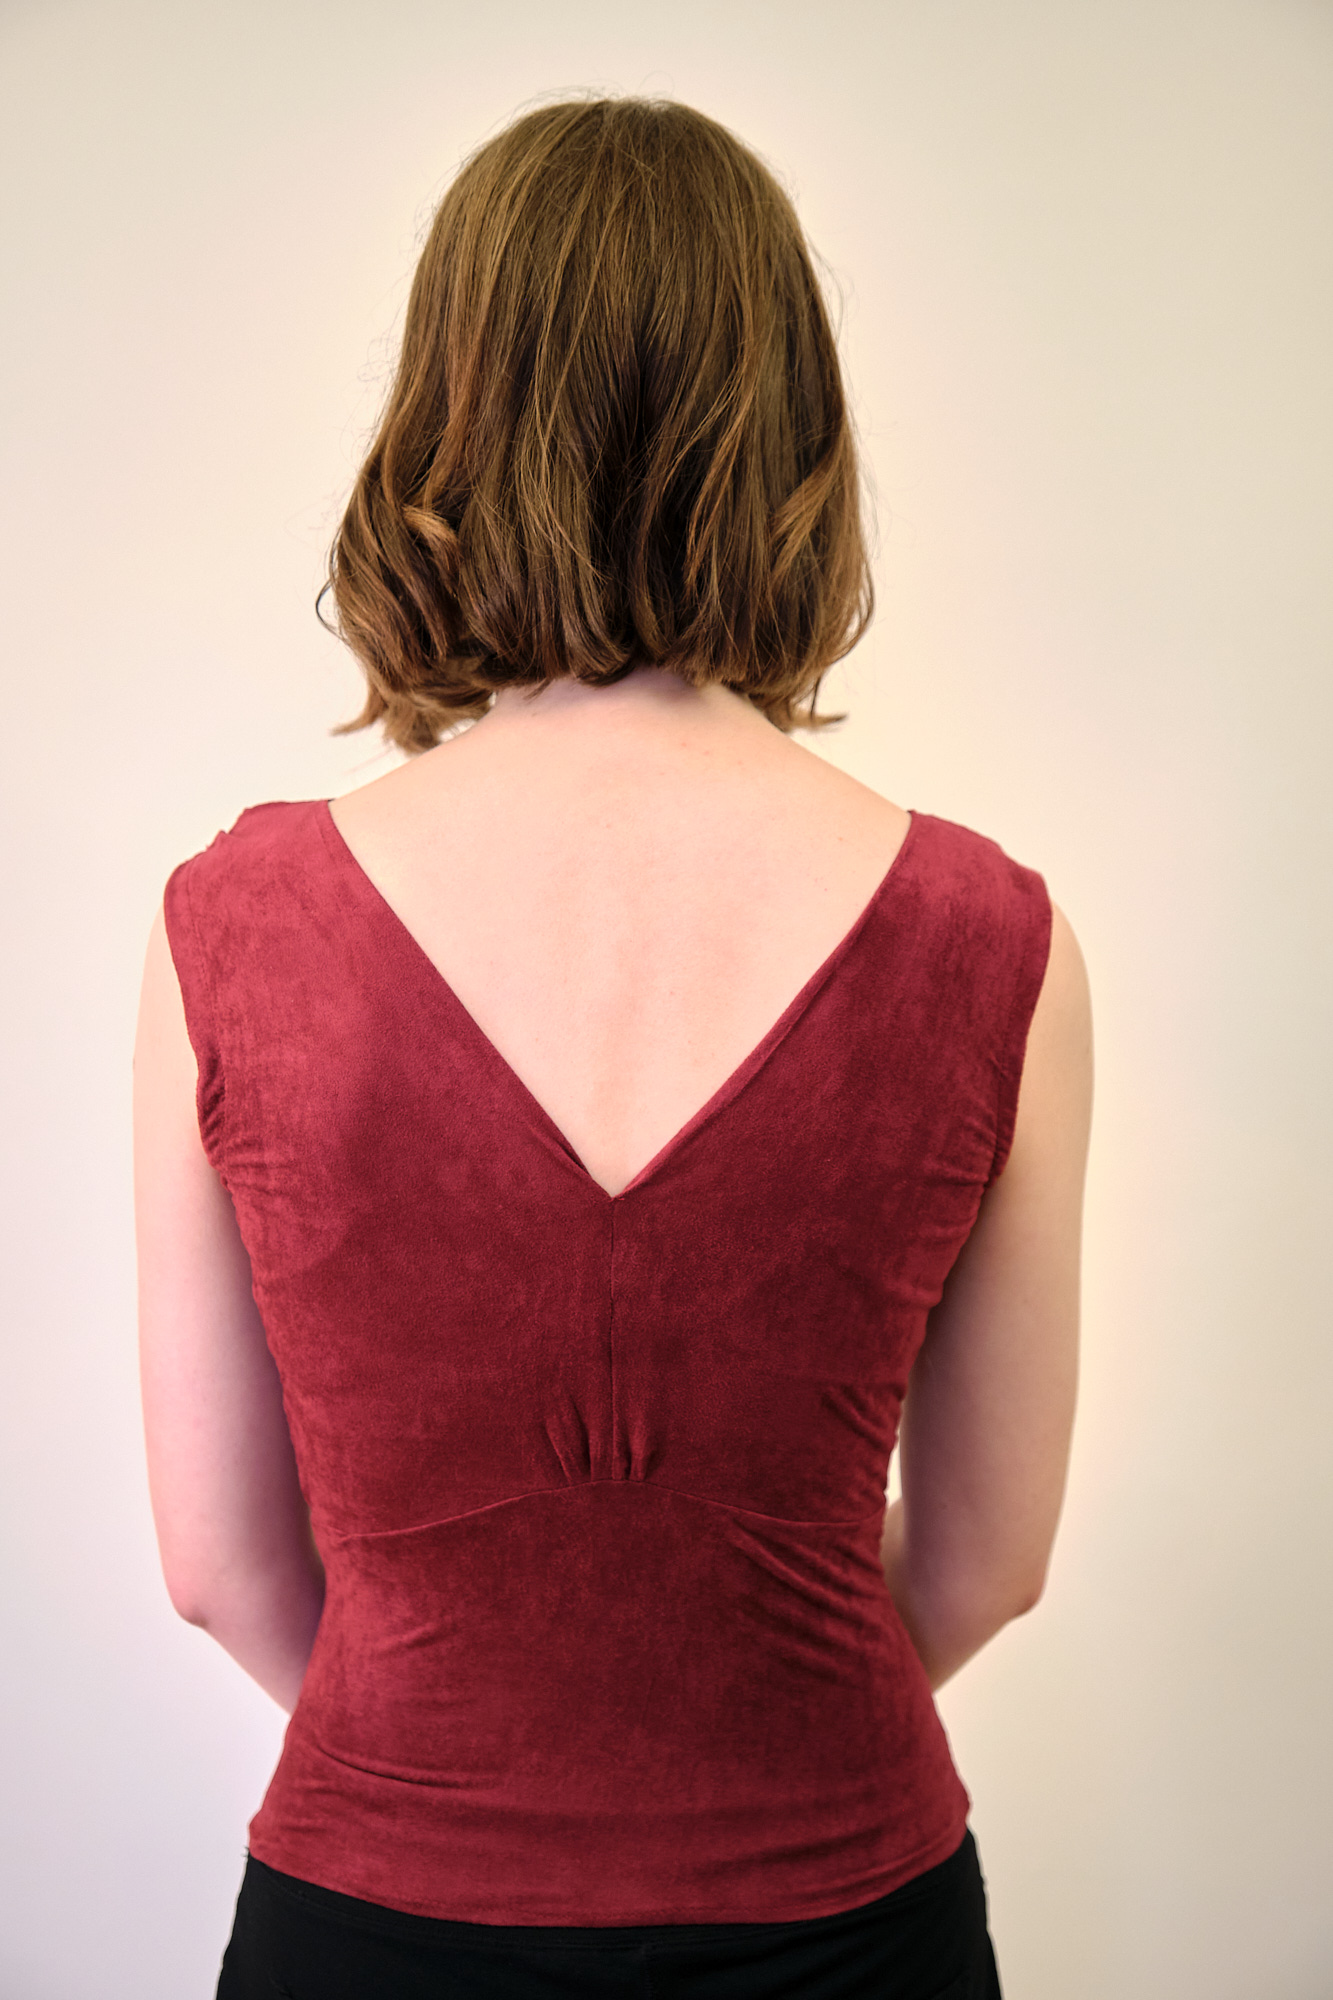
I also noticed that my Sinclair Bondi t-shrts and sweaters didn’t look as good in the back as they did in the front. Here’s one that I made recently in size 6p from rayon/poly/spandex plum sibley brushed sweater knit from Surge Fabrics. The fabric is super soft and stretchy and it fits reasonably well but you can see some minor issues in the back.
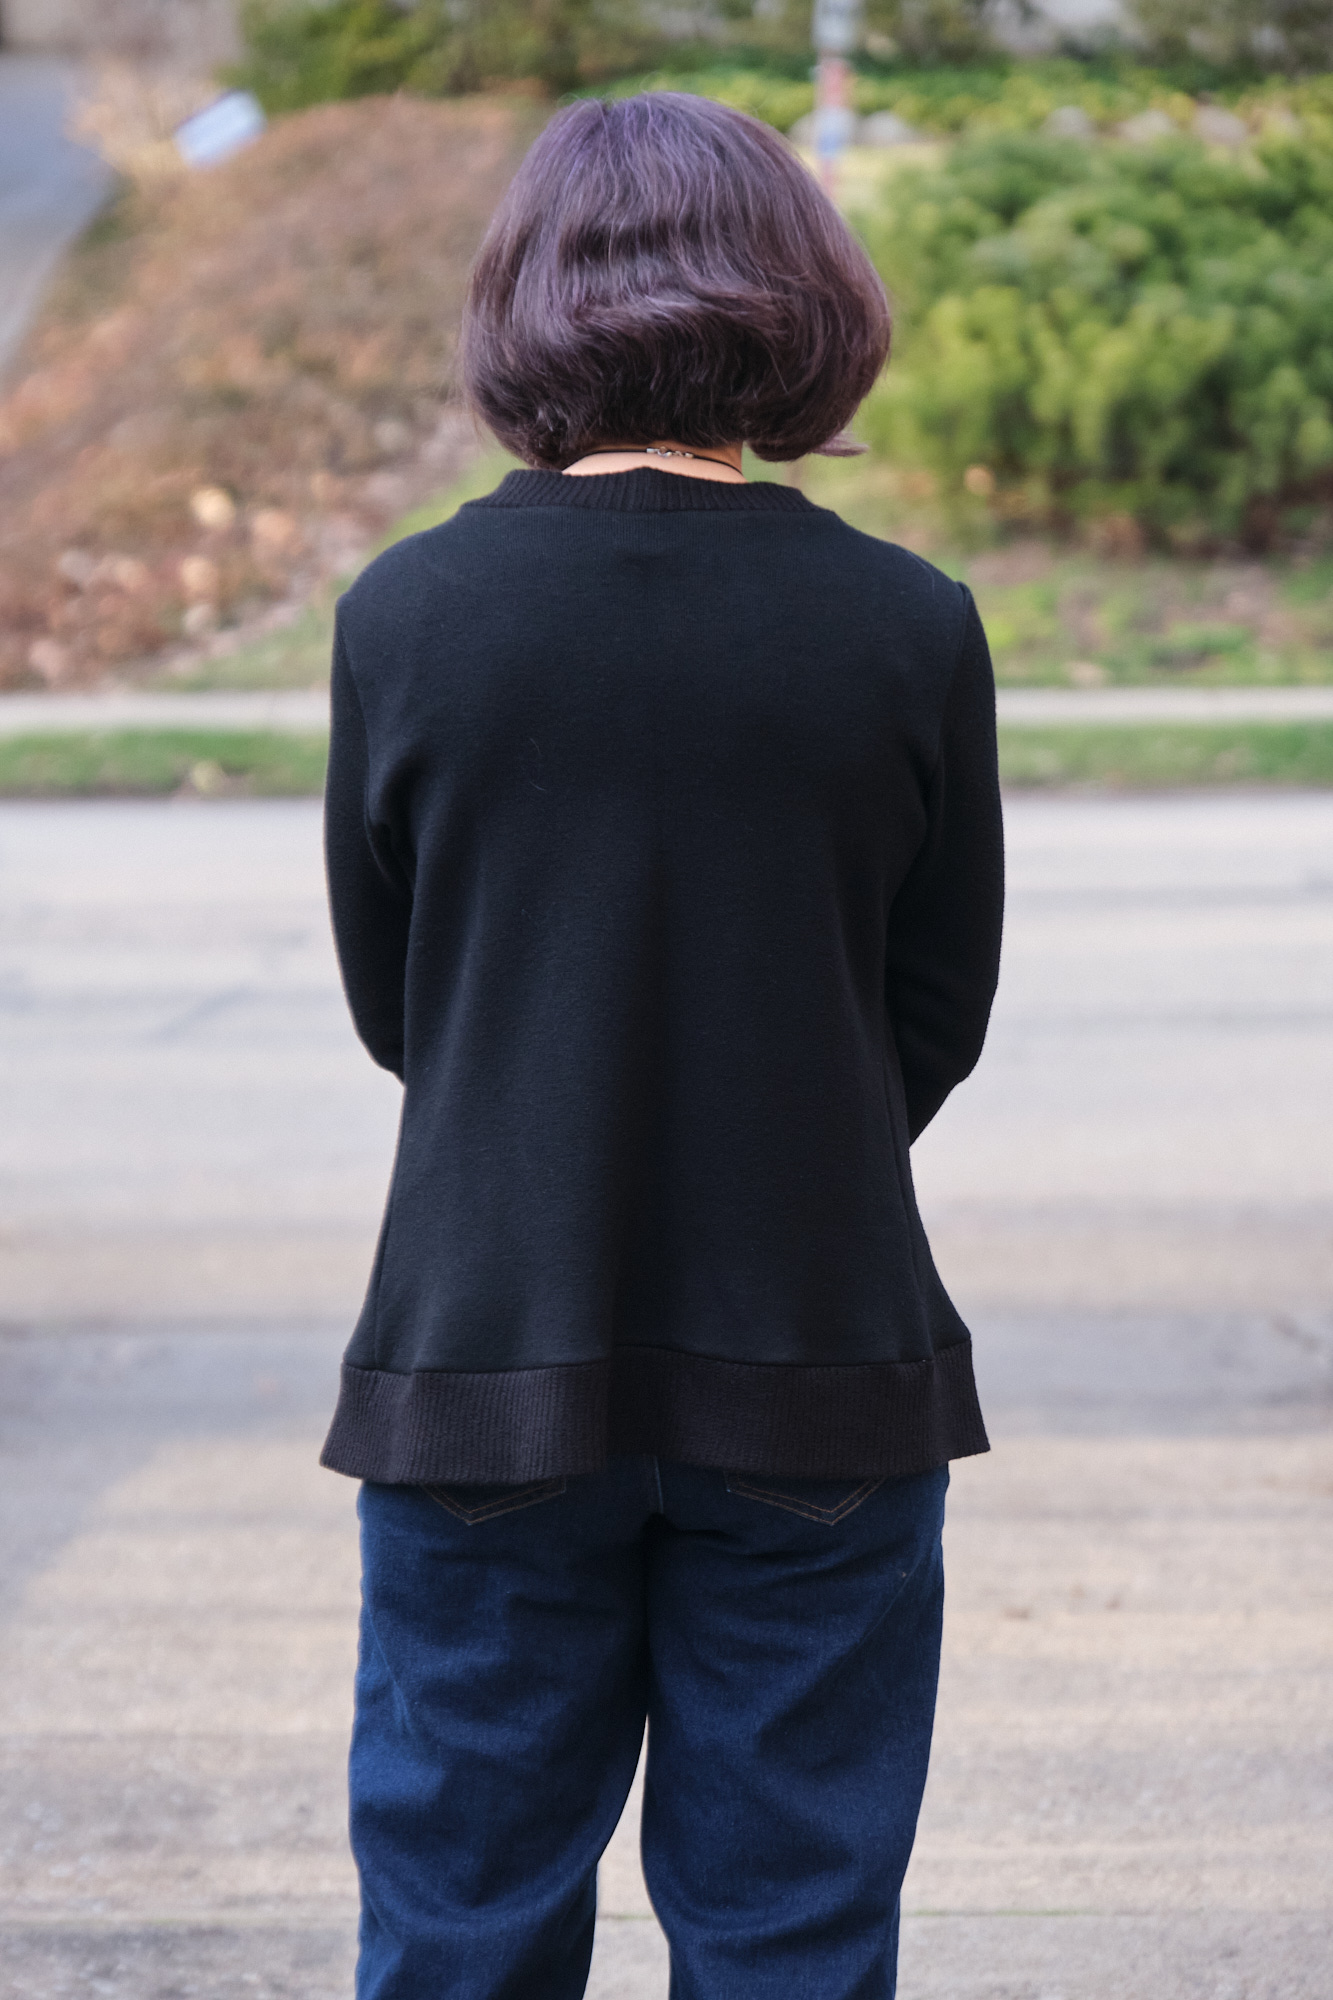
Then I made a Bondi sweater with the sloped shoulder adjustment from a washable wool with only about 25% stretch. I noticed that I have more significant drag lines under my arm pits in the back, probably due to the fact that this fabric is not very stretchy. I posted photos in one of the online sewist Facebook groups and someone pointed out to me that my shoulders are both sloped and broad. I set up my cell phone behind me transmitting its camera image to my laptop so I could study my back, and tried on a bunch of different tops and jackets so I could see what was going on.
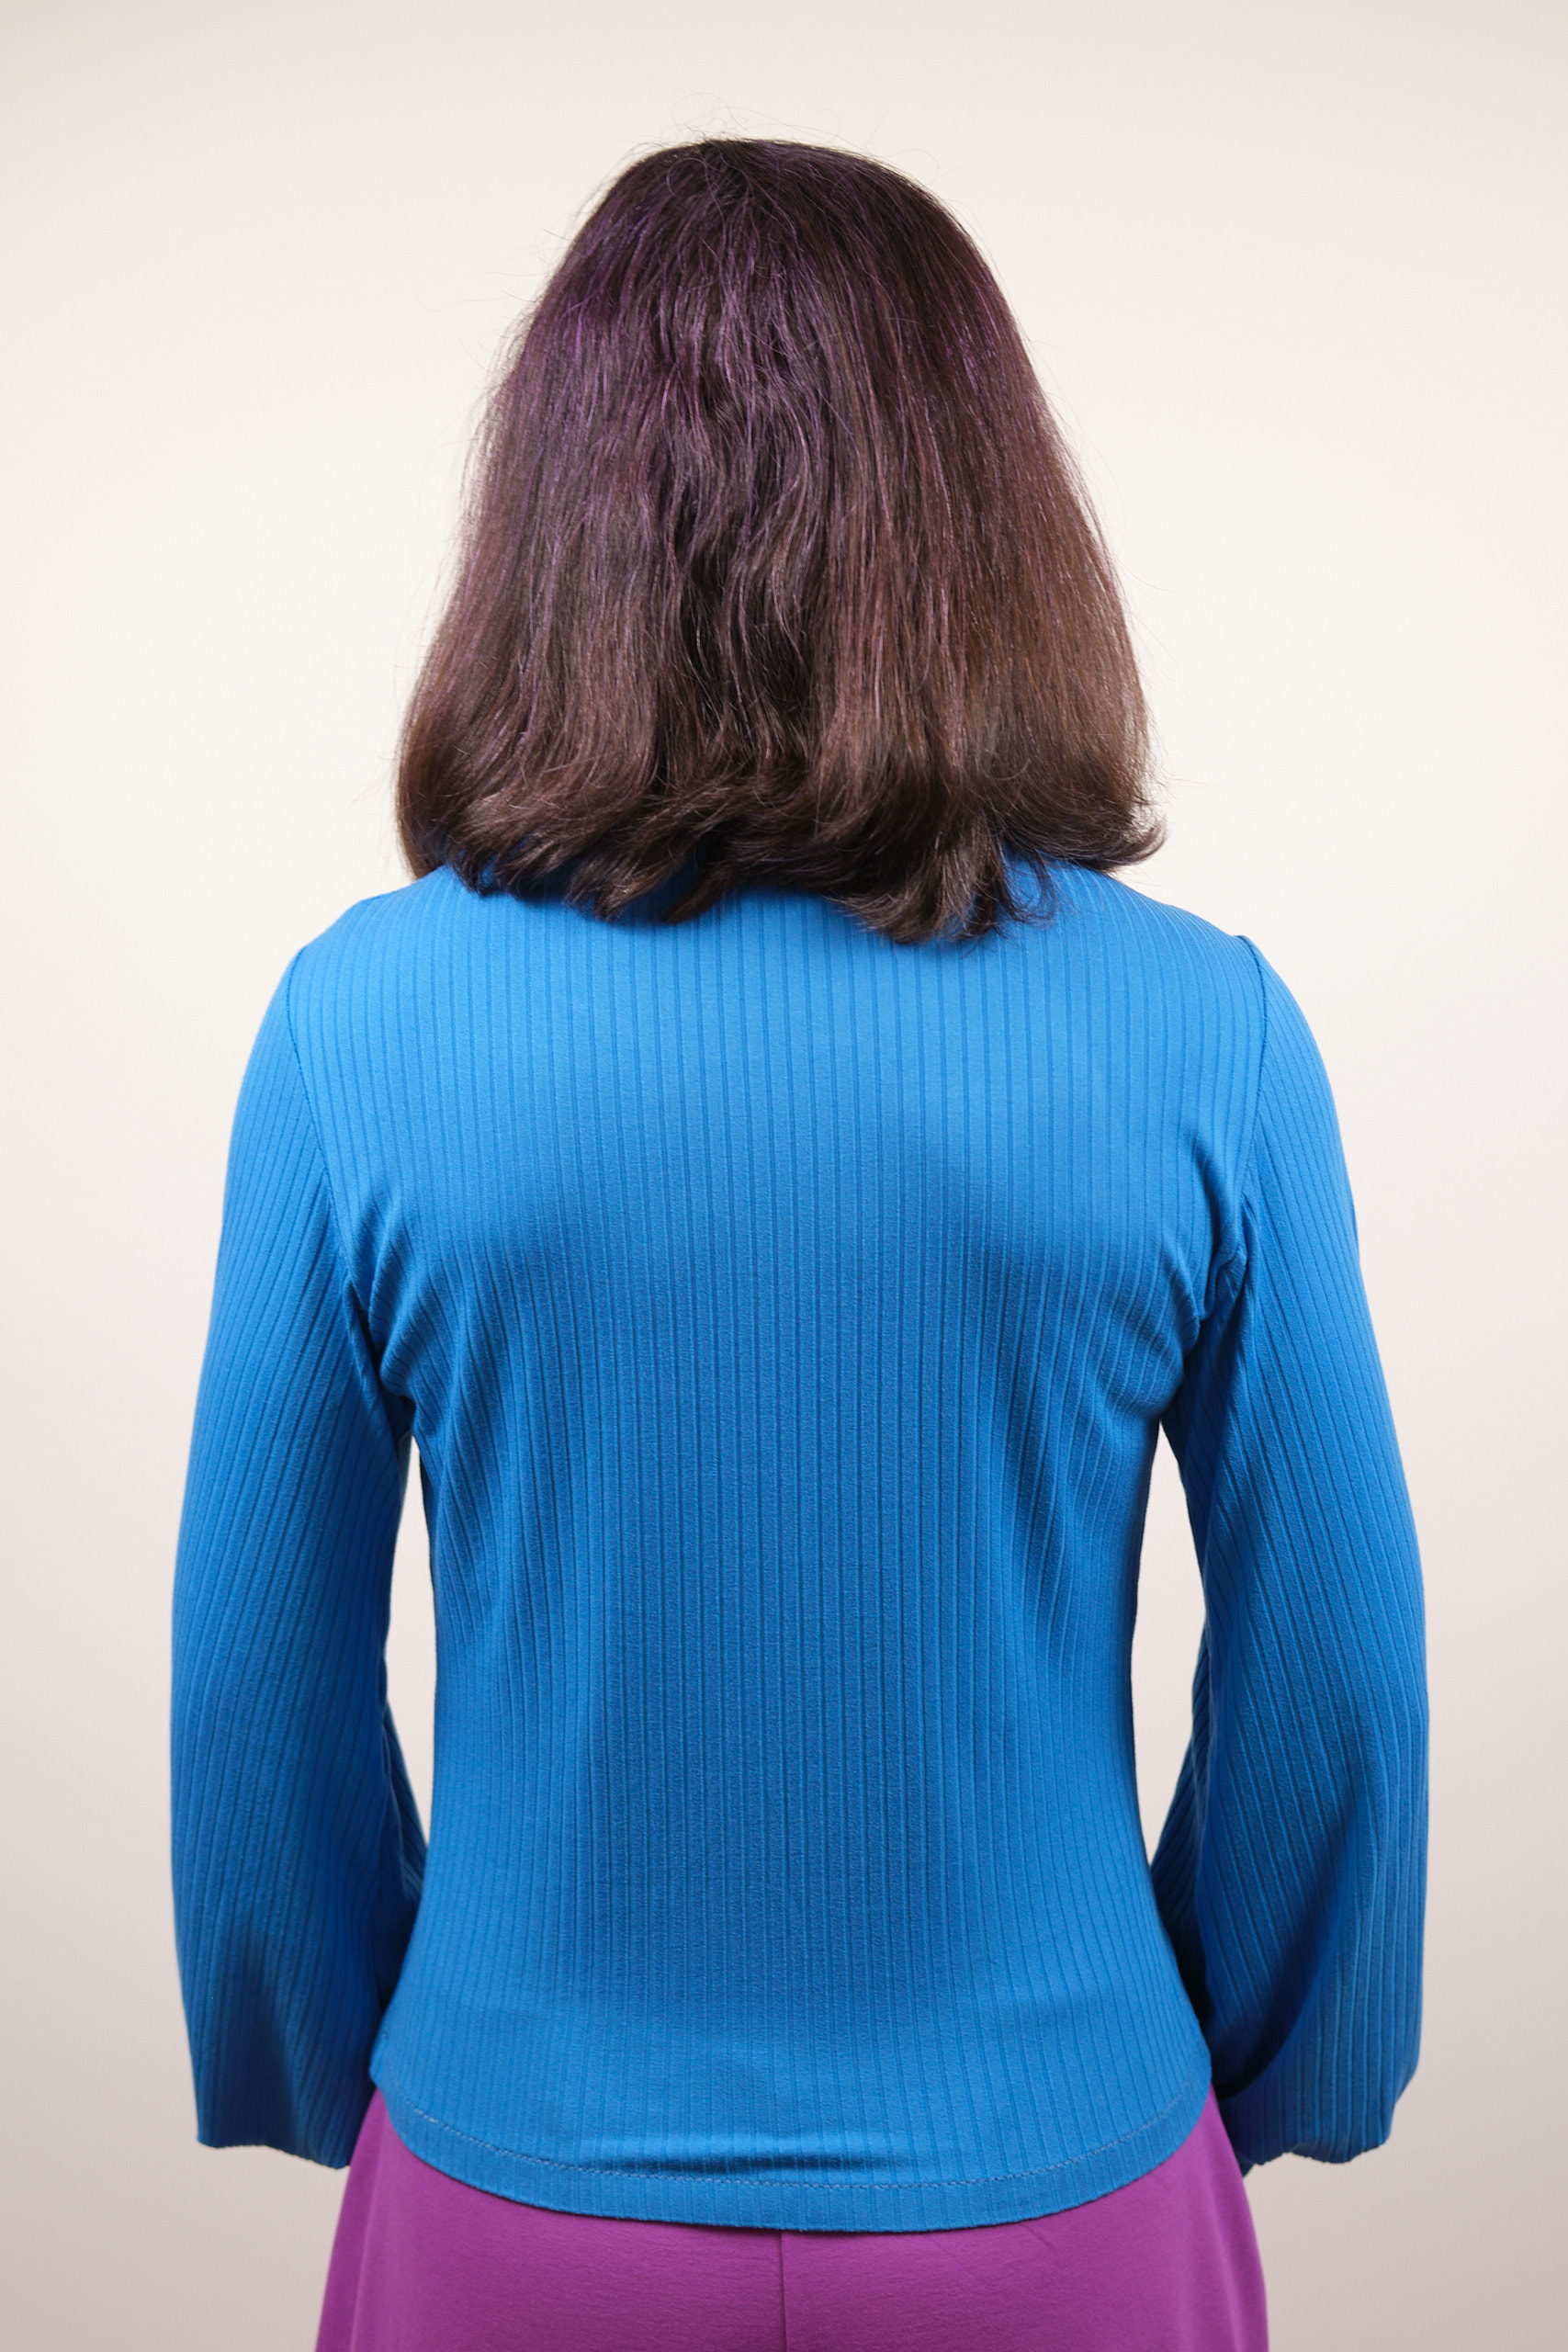
I made a Bondi t-shirt in size 6p with both sloped and broad shoulder adjustments (and bishop sleeves) from an aqua wide lush poly-spandex fabric from Mily Mae. This was better, but the drag lines were not completely gone.
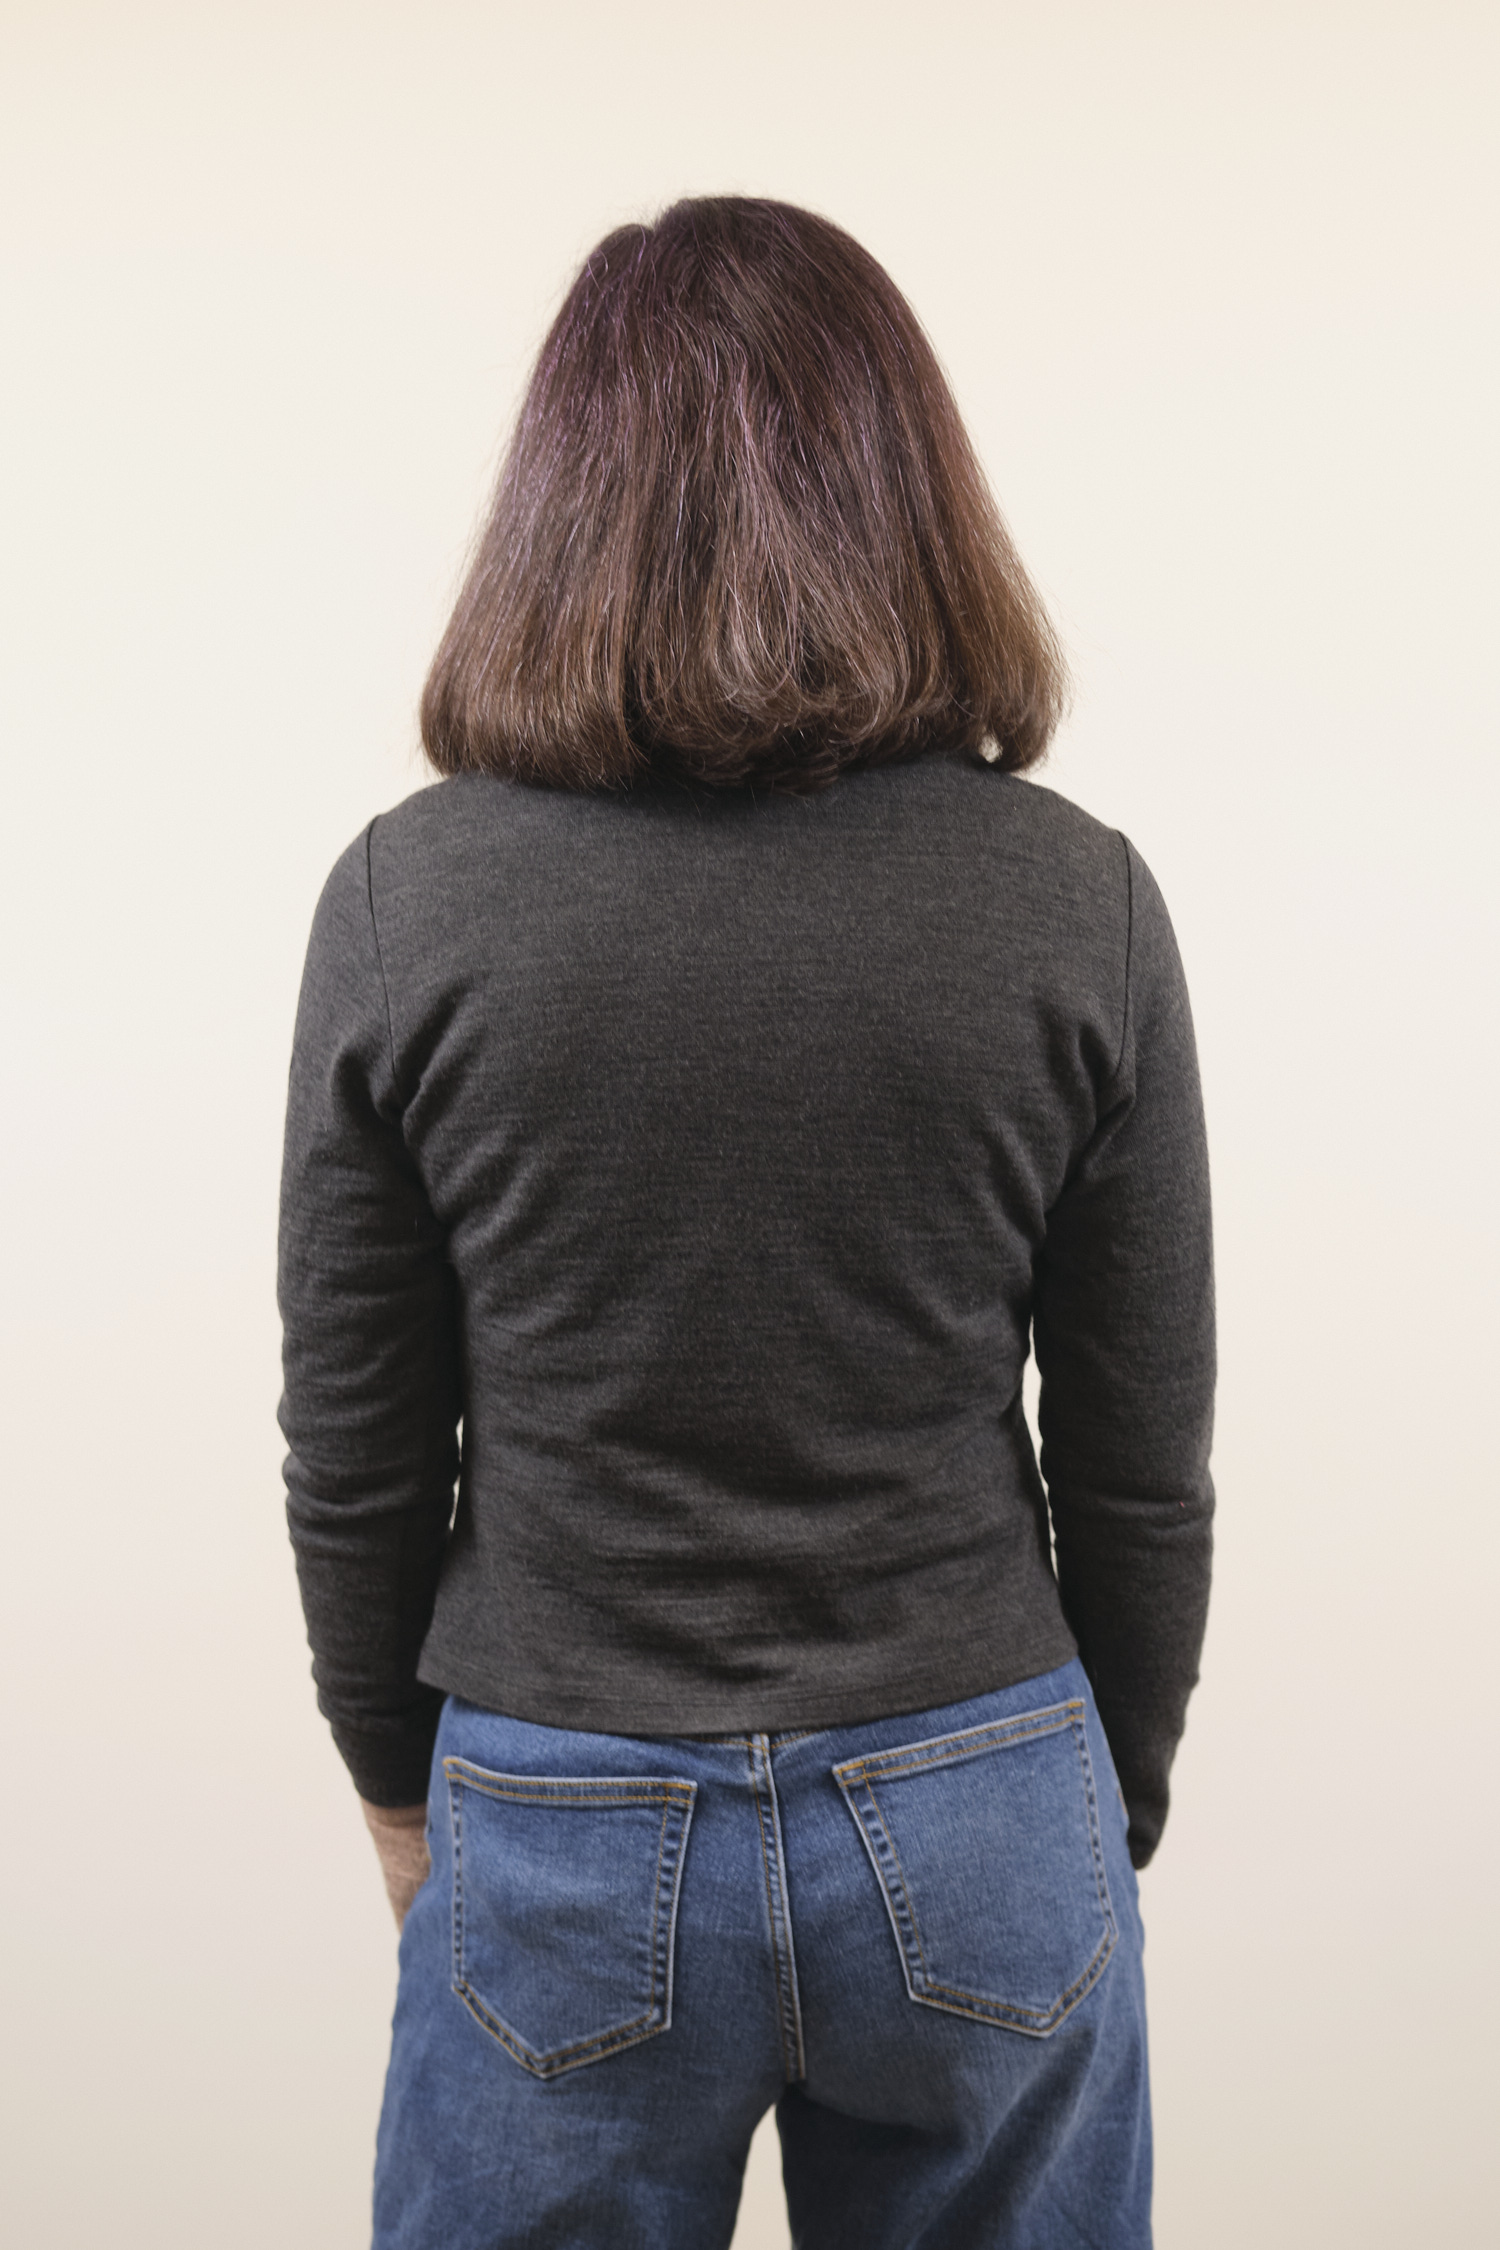
After studying the black ponte Onyx blazer I made a few months ago, I eventually noticed that the top of the shoulder seam was not actually at the top of my shoulder and had a tendency to slip down my back. I realized that when I pulled my shirt or jacket forward to get the shoulder seam where it belonged, it tended to bunch up around my neck. And this is why I find it uncomfortable to wear most jackets with collars! I thought perhaps what I needed was a forward shoulder adjustment, which involves basically taking the top of the shoulder from the front pattern piece and moving it to the back. I went into Affiinty Designer and moved an inch of the Bondi tshirt pattern (already adjusted for sloped and broad shoulders) from the front to the back and cut out another tshirt. I didn’t take a photo, but the results were not great.
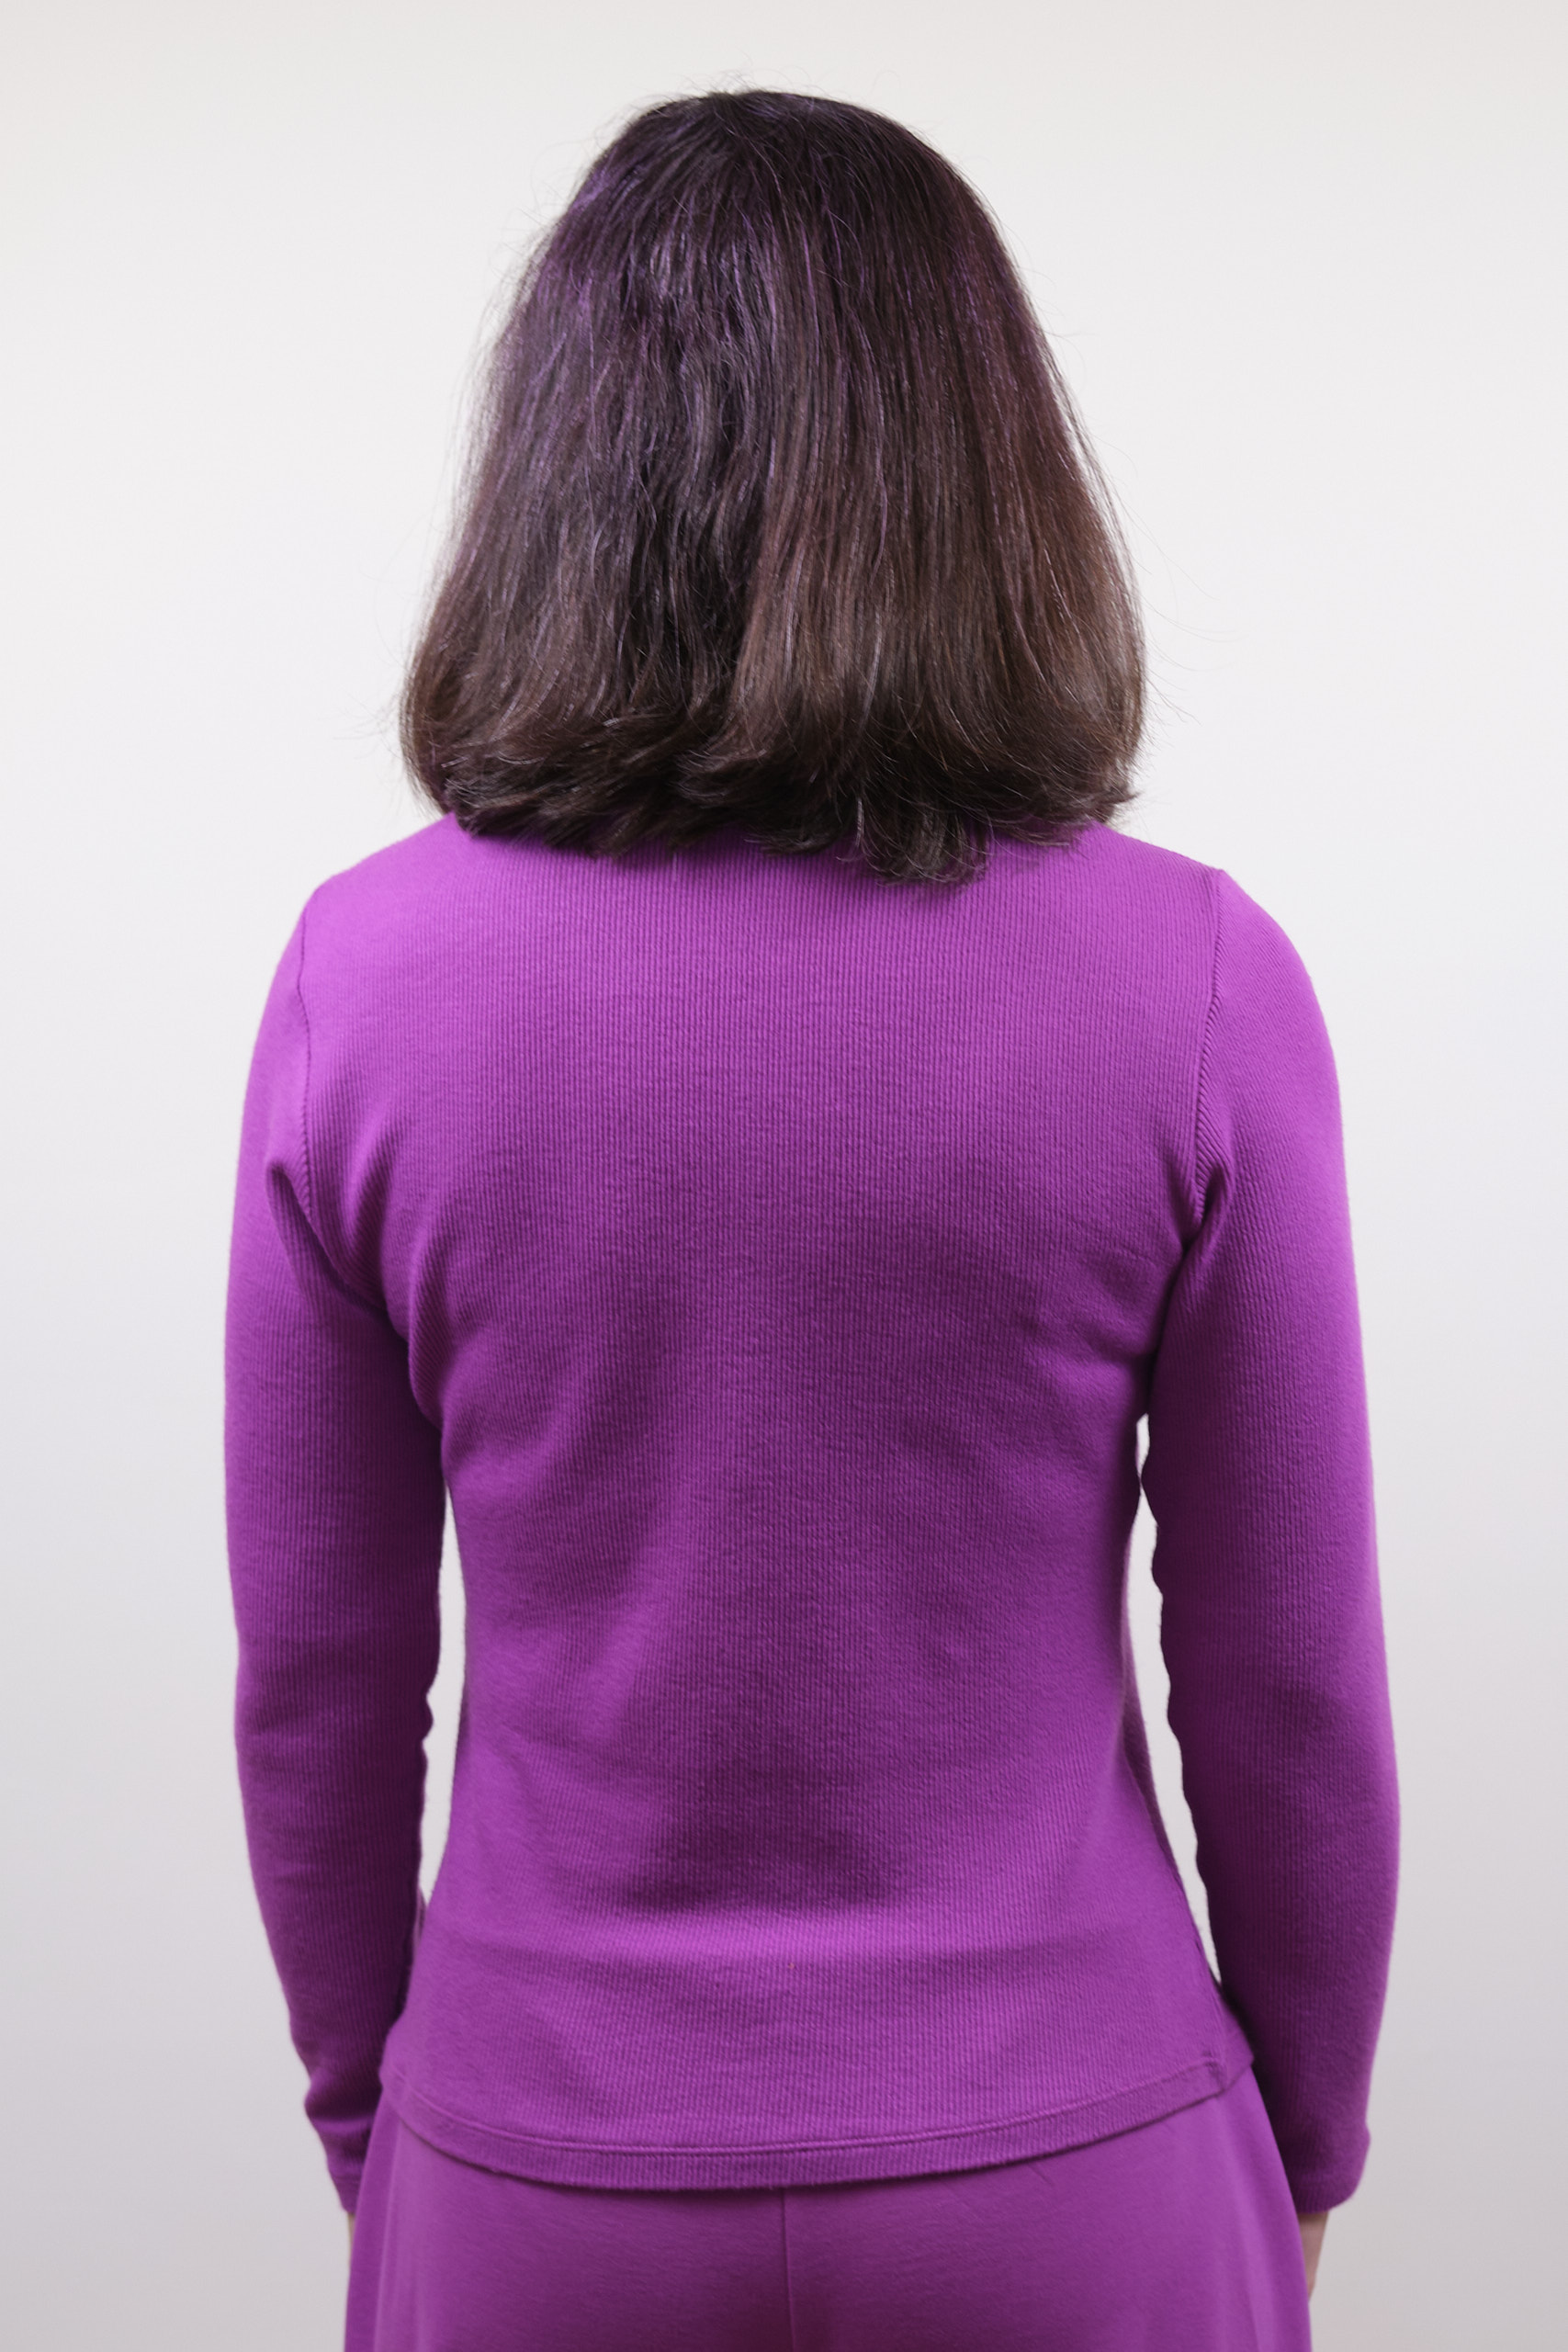
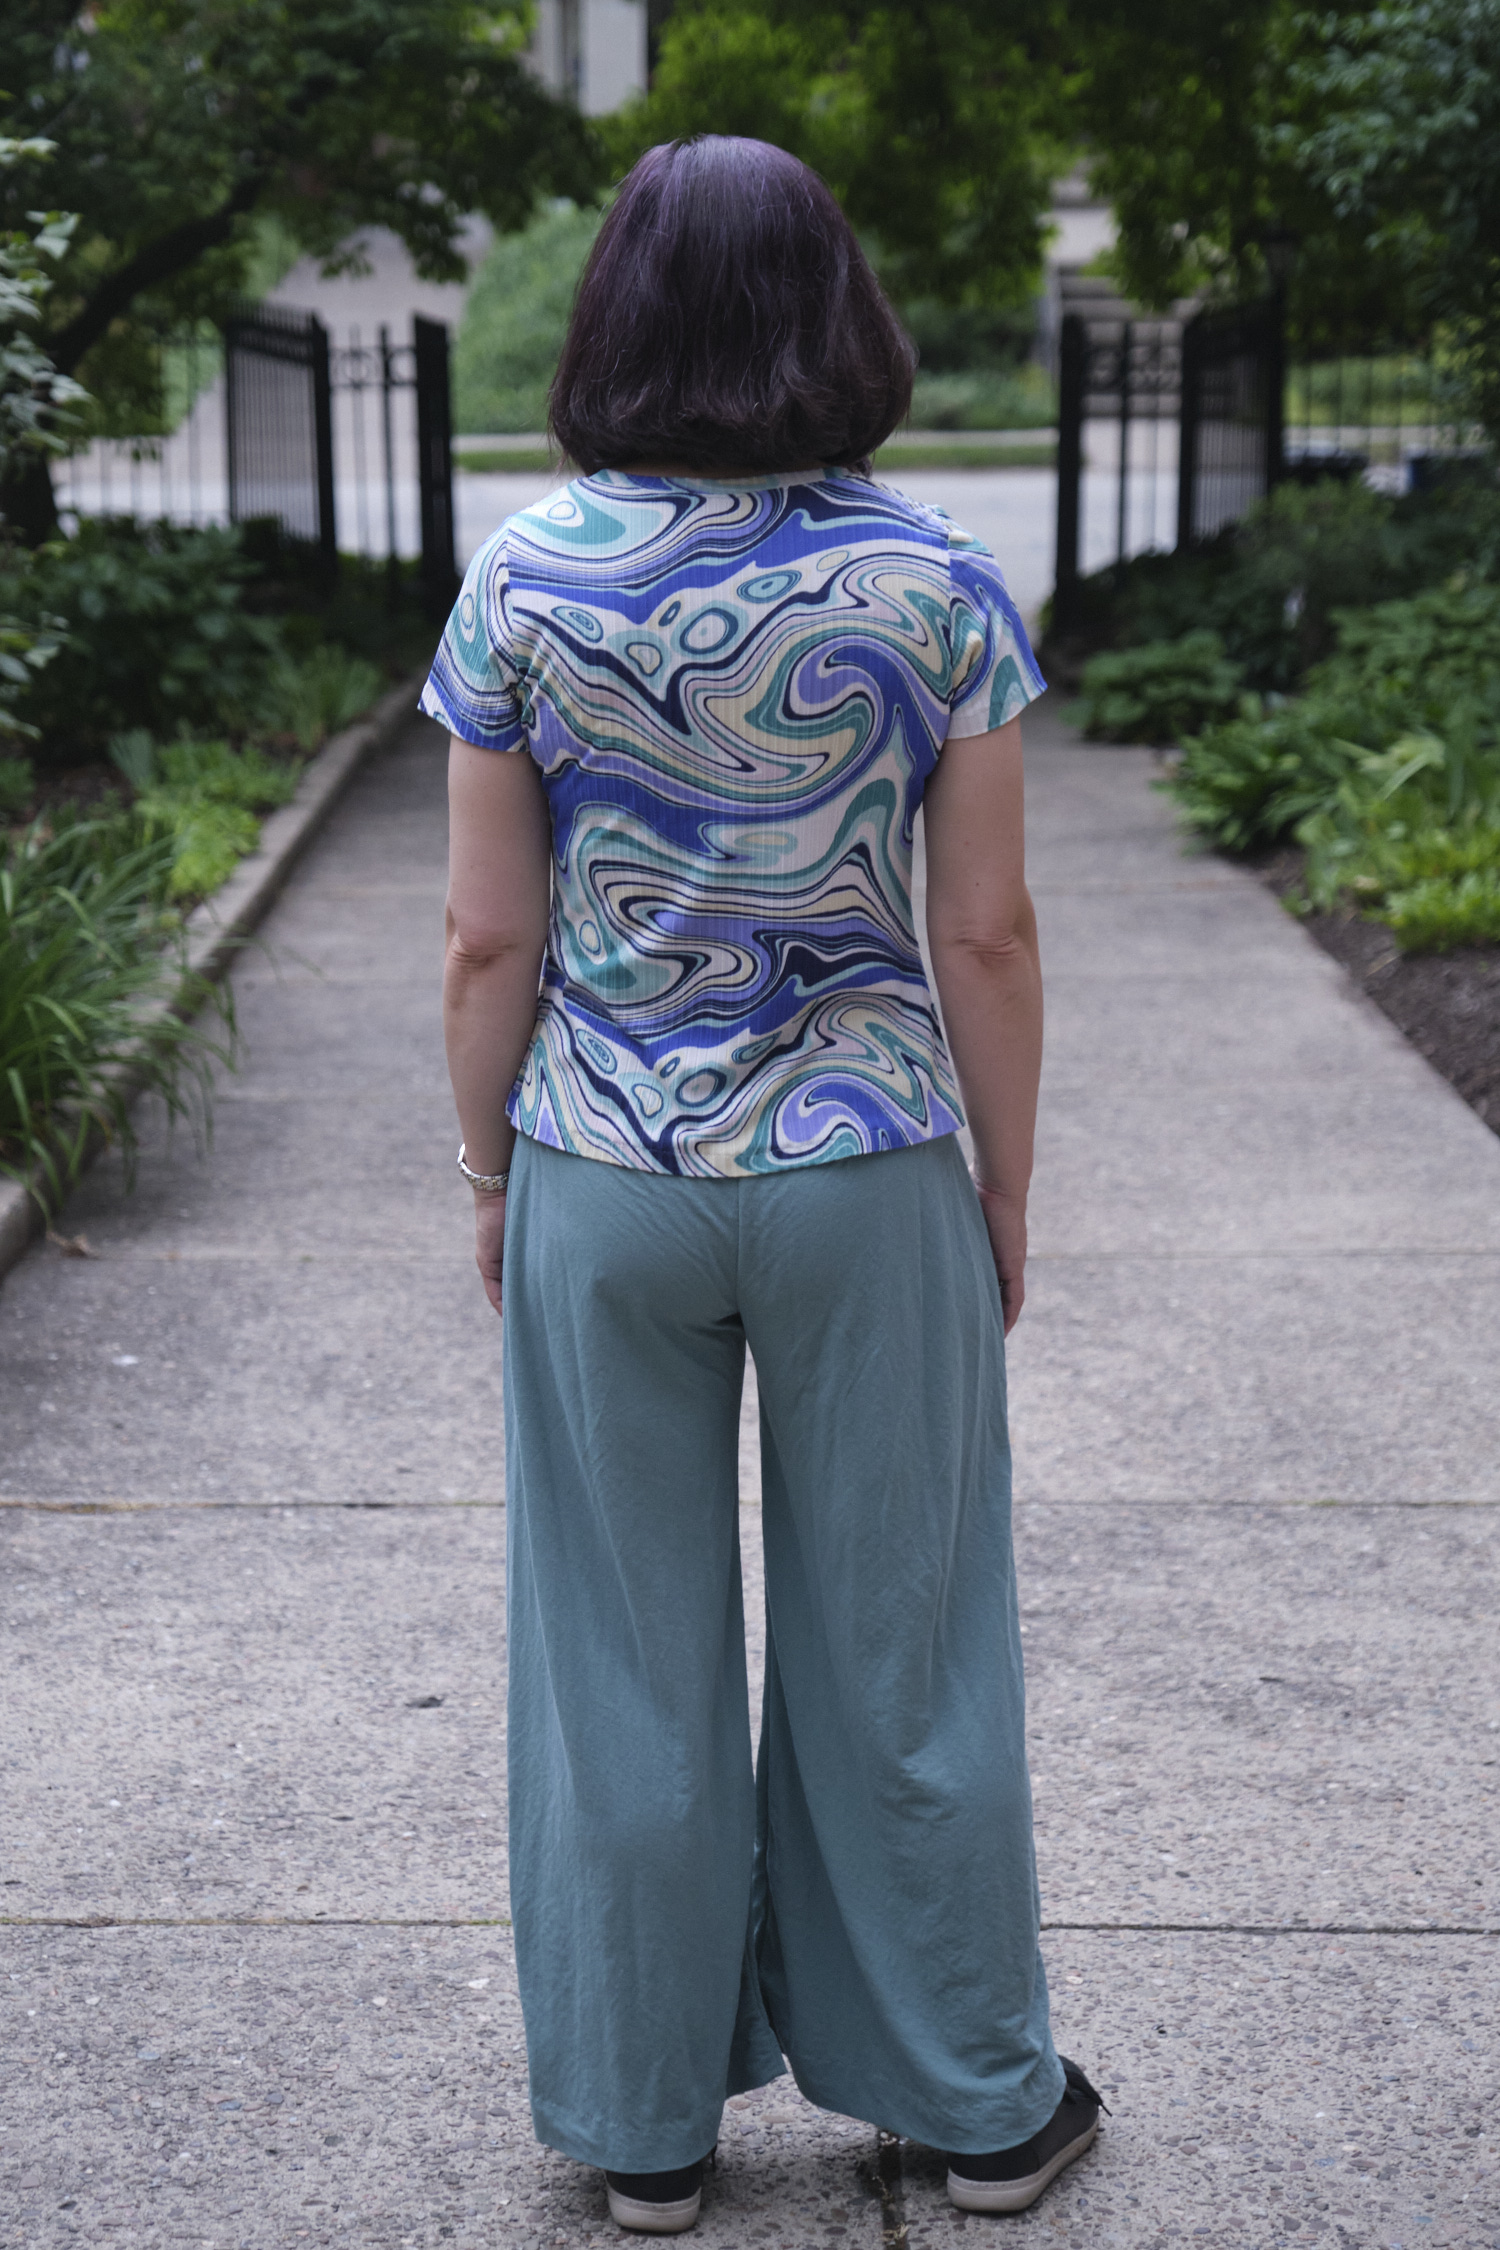
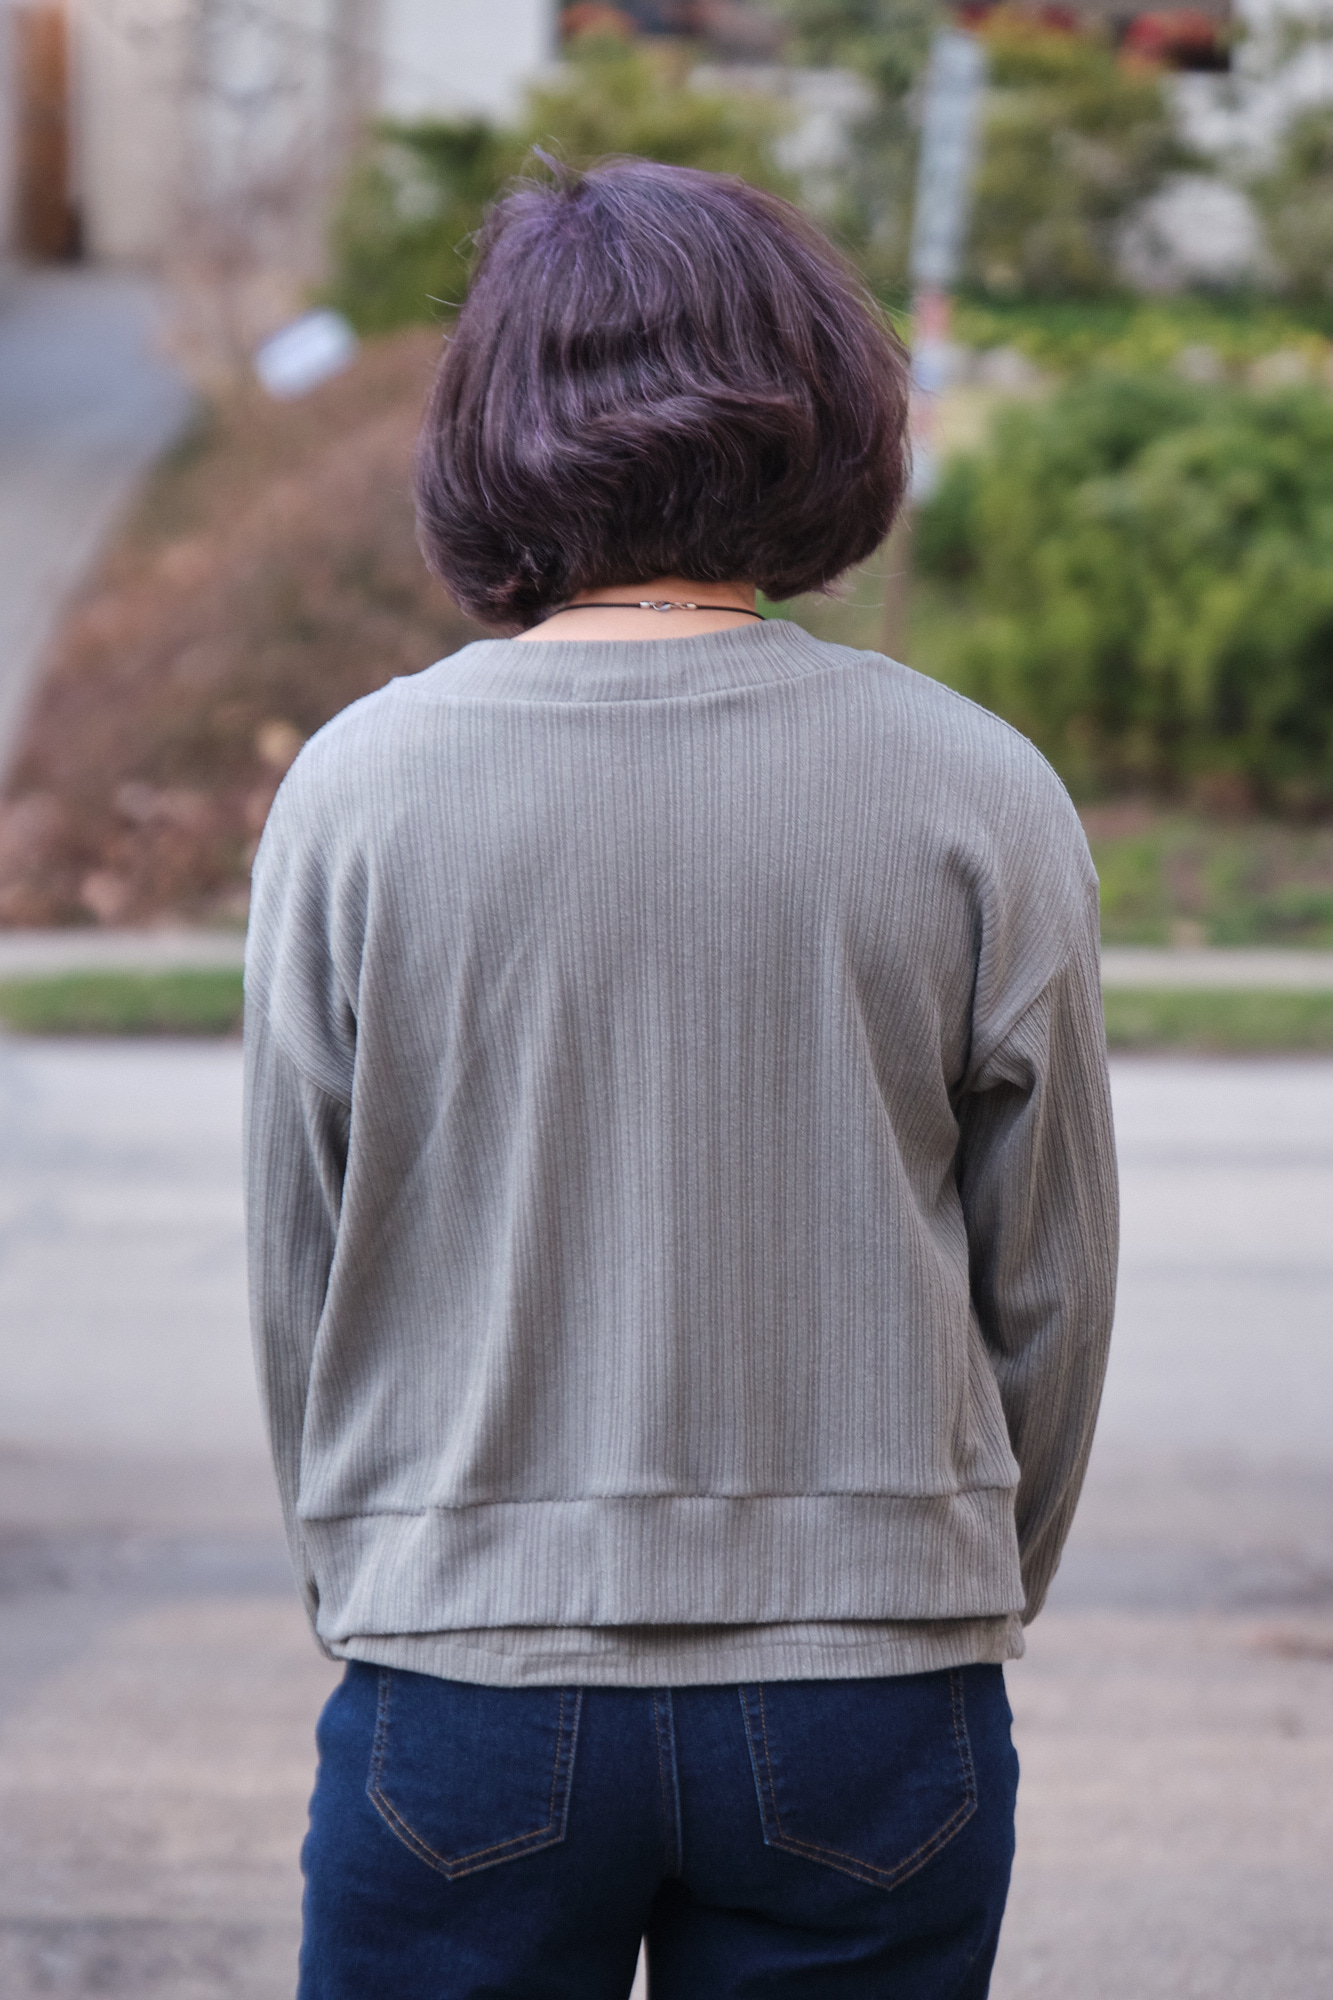
I decided to stick with the sloped and broad shoulder adjustment for my next Bondi in size 4p, made from purple (looks like magenta) monaco rib poly/rayon/spandex from Mily Mae. I think it came out pretty well, despite some minor back issues. I think I’m done adjusting the Bondi for now.
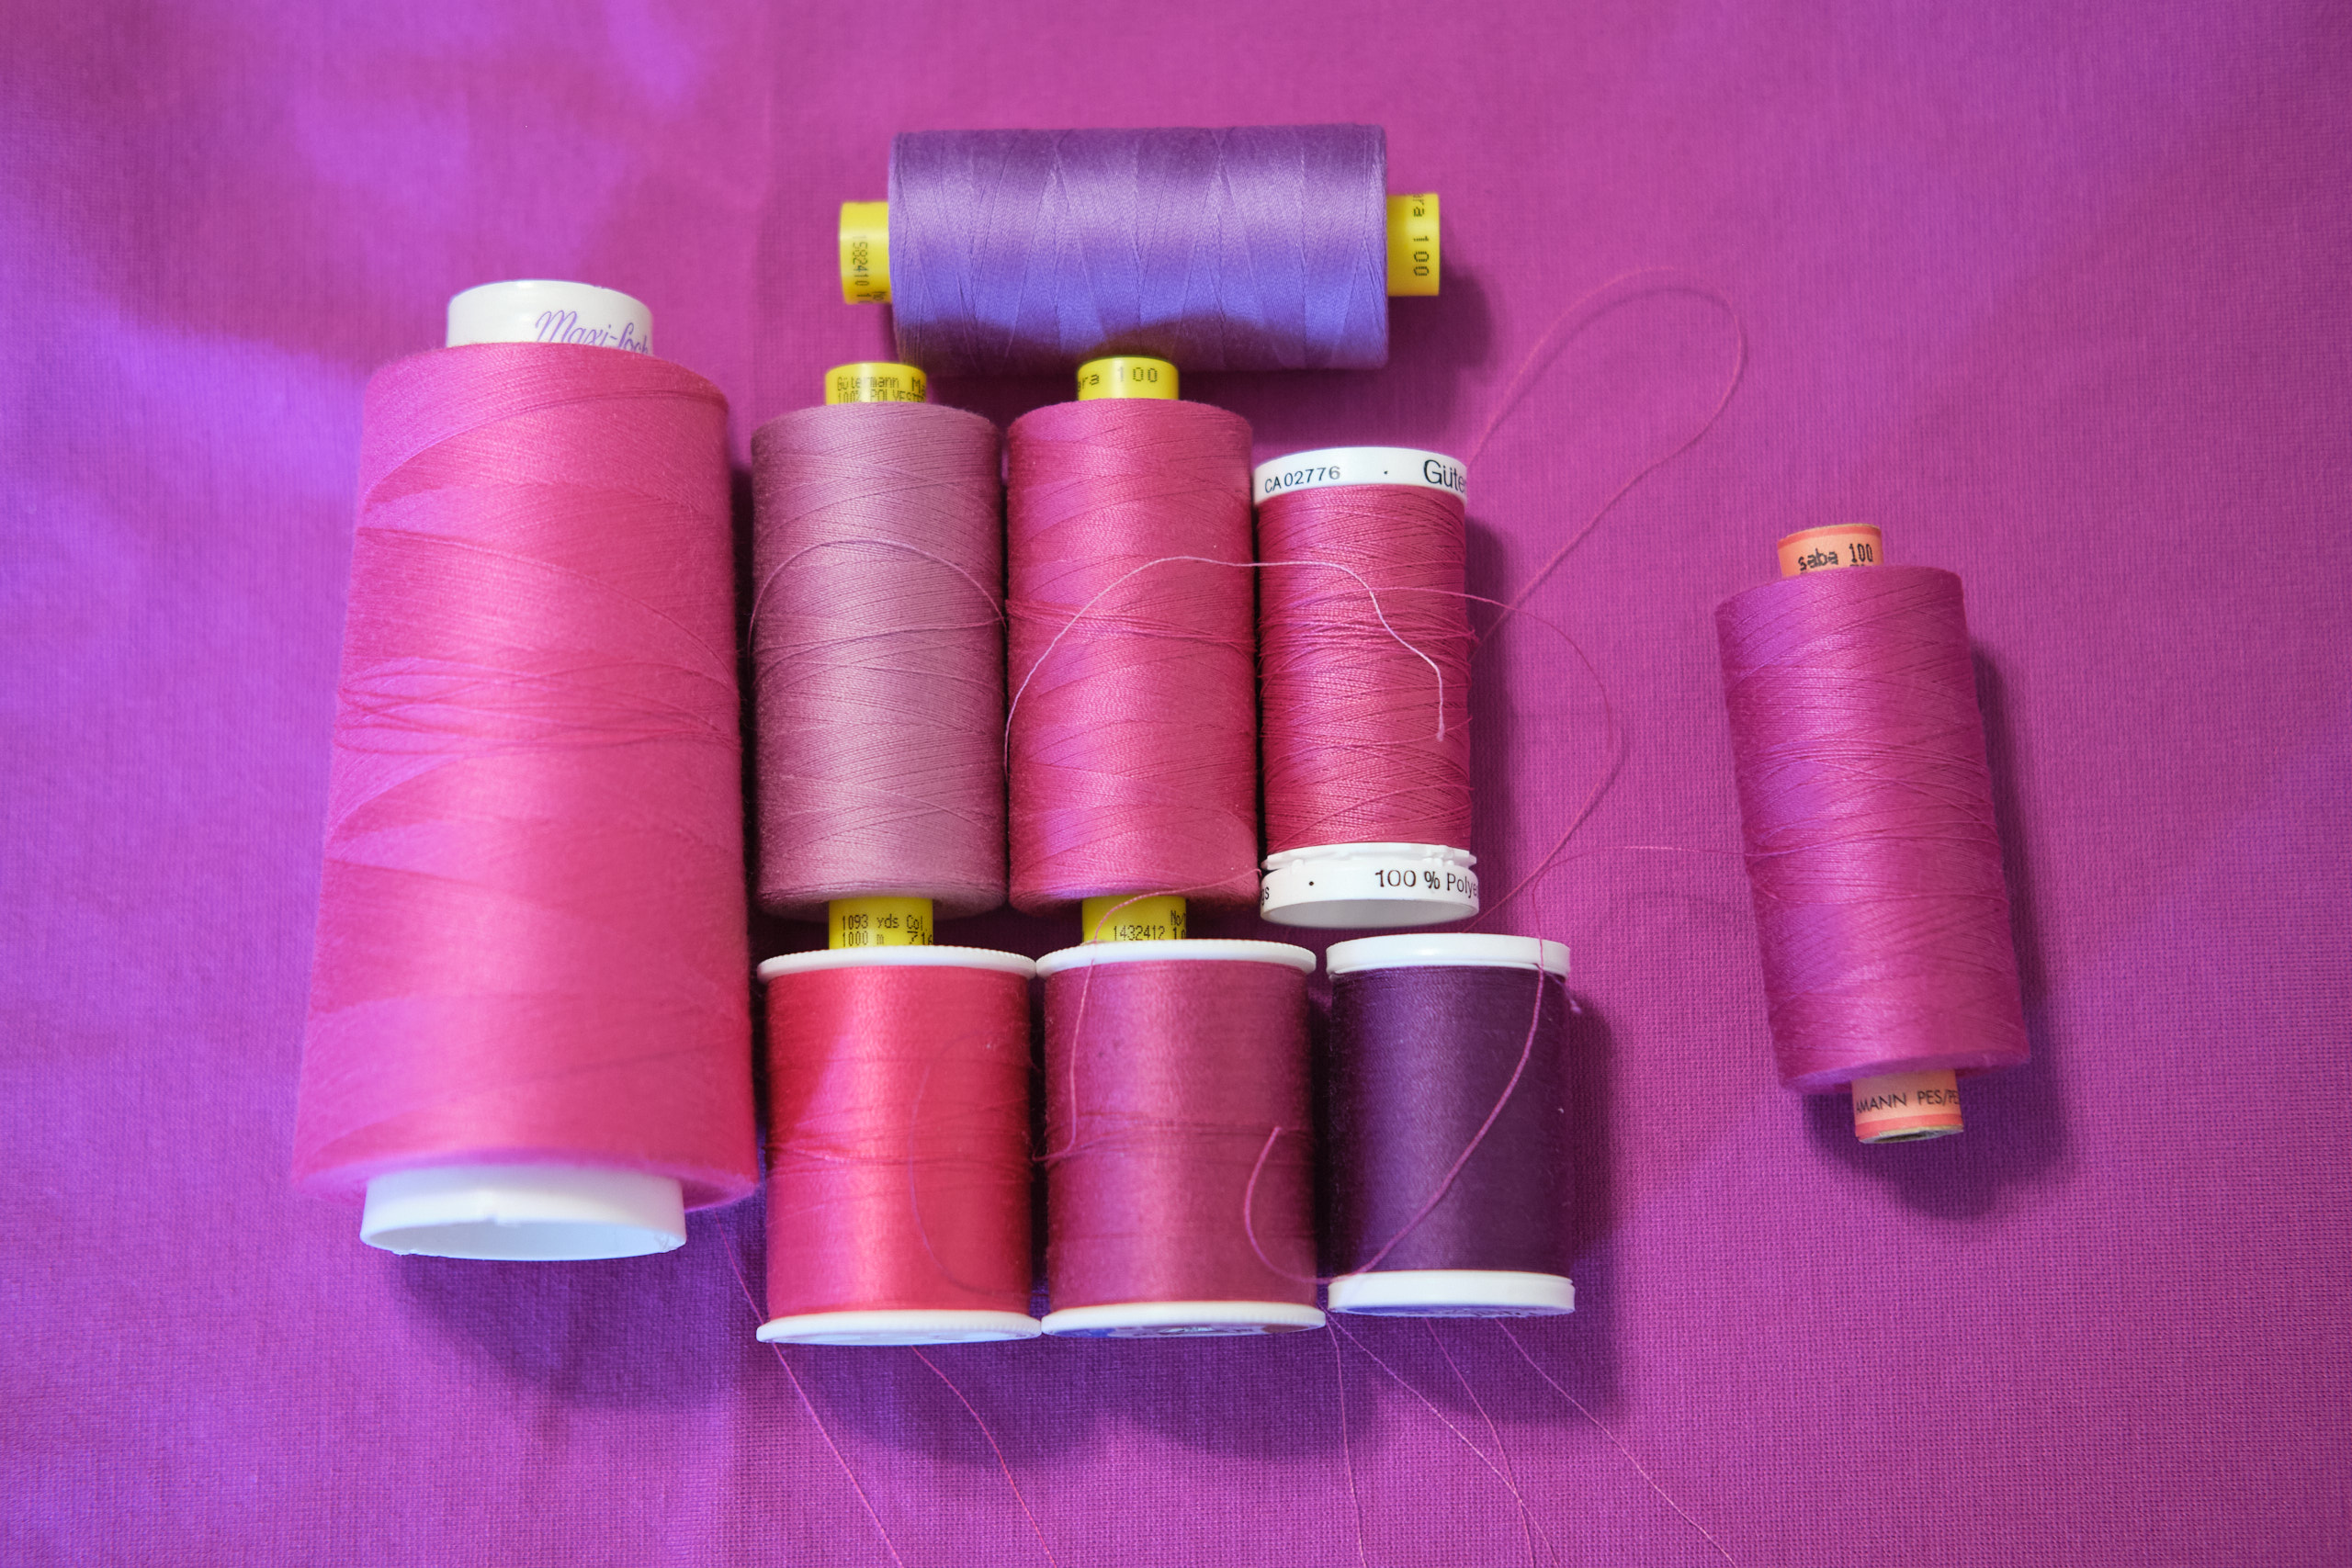
I bought three yards of a beautiful magenta ponte fabric from Mily Mae last year because I love the color (it matches the highlights in my hair) and I love working with this kind of ponte (67% Rayon/28% Nylon/5% Spandex). I thought about making a dress out of it, but eventually decided on a magenta suit. I already have a (store-bought, me altered) purple suit, but I don’t have a pink suit. Magenta is on the more purply side of pink, which means it can be interpreted either as pink or purple.
Unfortunately, magenta doesn’t seem to quite match either pink or purple threads, so I had to order several threads online until I found a close match that I could use for top stitching that would blend into the fabric. None of the Gutermann or Coats & Clark threads I ordered were quite right, but Amann Saba all purpose poly wrapped poly core thread tex 30 color 1059 did the trick.
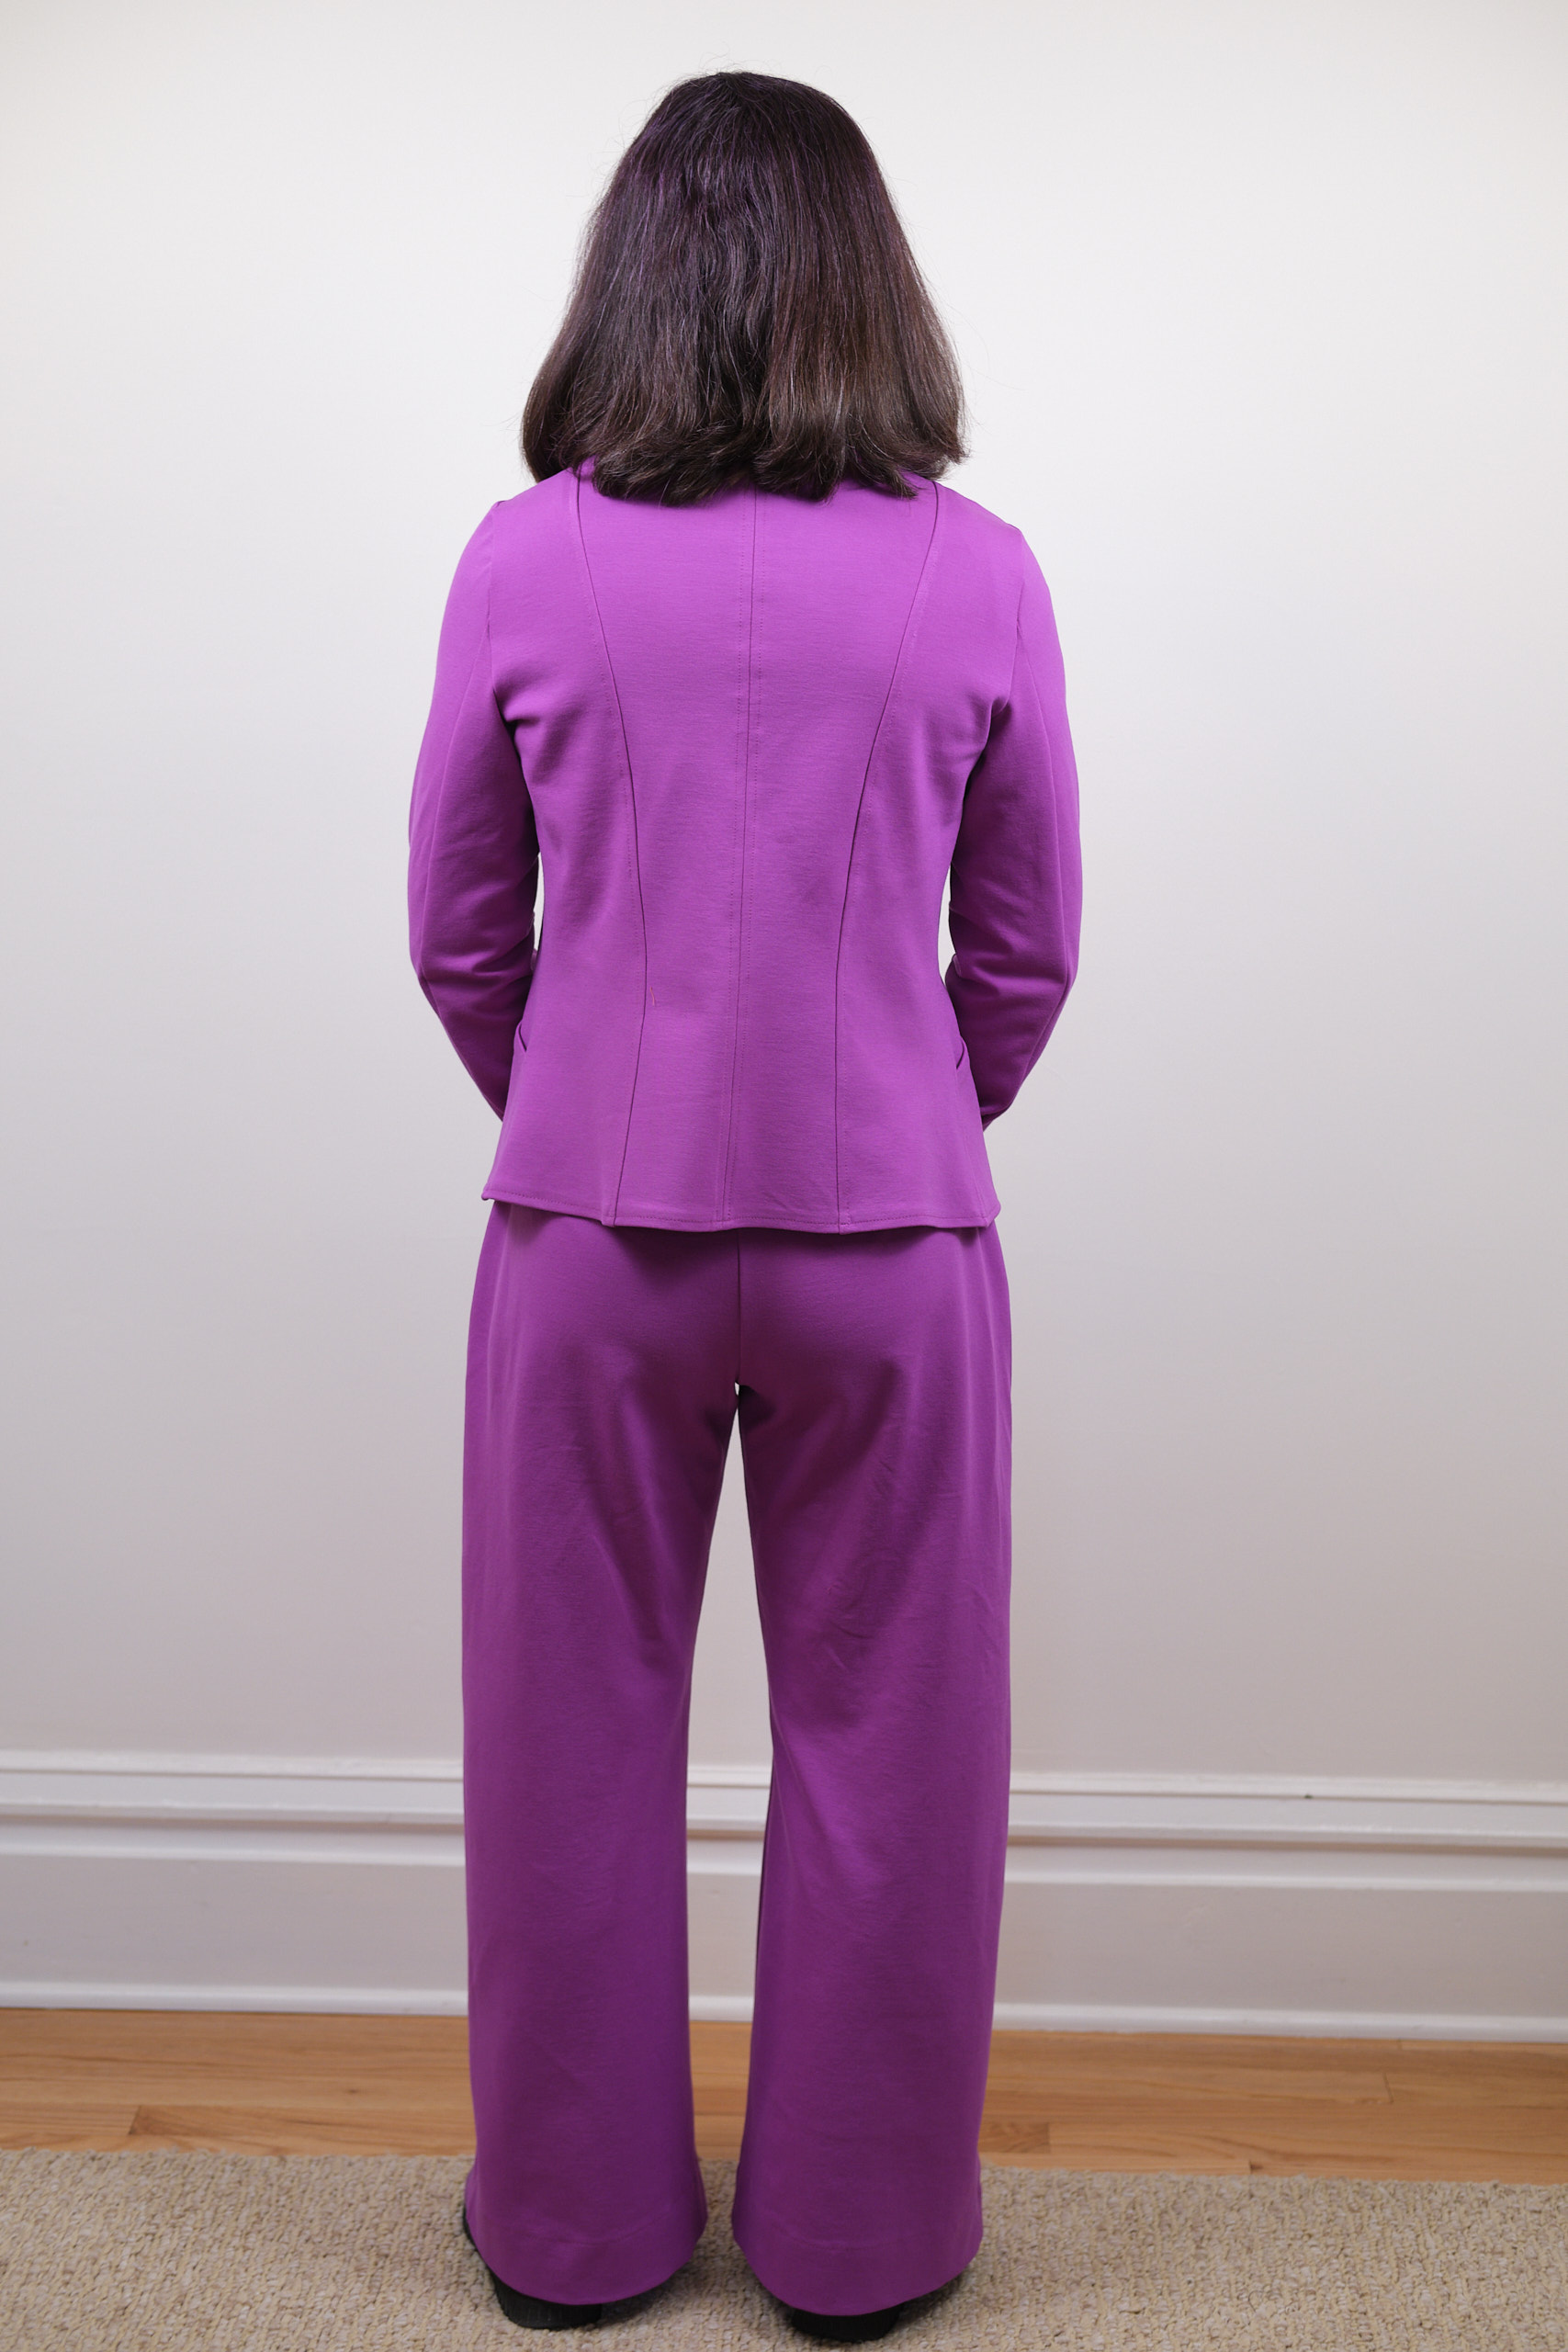
I used the Boo & Lu Onyx blazer pattern for my magenta suit jacket, with the same modifications I used for my hip length grey ponte version with pockets. I had hoped to get the facings interfaced and catching in the top stitching properly this time, but still ran into problems that required extra gluing and fusing to resolve. I still feel there must be a better way to make the facings, and if I make another Onyx maybe I will figure out what it is.
I used the Pattern Emporium Urban Wide Leg pants pattern to make magenta pants to go with the jacket. I haver previously made three tapered and three wide-leg pants with this pattern (plus a few mashups with this pattern and the PE Walk Boldly pants). I made these size AU10 low-rise (which ends up being high-rise on me), with the waist graded in and the waistband modified to be a contour waistband lined in athletic knit and with elastic added. I added front jeans pockets with straight pocket openings.
Last winter I also bought some super soft purple 86% Poly/12% Rayon/2% Spandex Monaco Rib fabric from Mily Mae, and it turns out to be almost the exact same color as the magenta ponte. Why they don’t call them both by the same name is a mystery to me, but regardless, I clearly needed to make a rib-knit sweater to go with my suit. I used my favorite Sinclair Bondi classic fitted t-shirt patten in size 4p hip length with a screwp neck, adjusted slightly for a broad and sloped shoulder. I cover stitched the hems, using the magenta thread spool and a bobbin wound with the same thread for the needle threads.
The whole outfit looks great together, and I will wear it as a suit with my matching magenta booties! I expect I will also wear the pieces as separates. Although this is a color I wear year round (I also have a cashmere sweater and a winter parka in this color), to me it is really a spring color.
April update: I couldn’t resist some magenta jacket photos with the magnificent magnolia trees in front of my house!
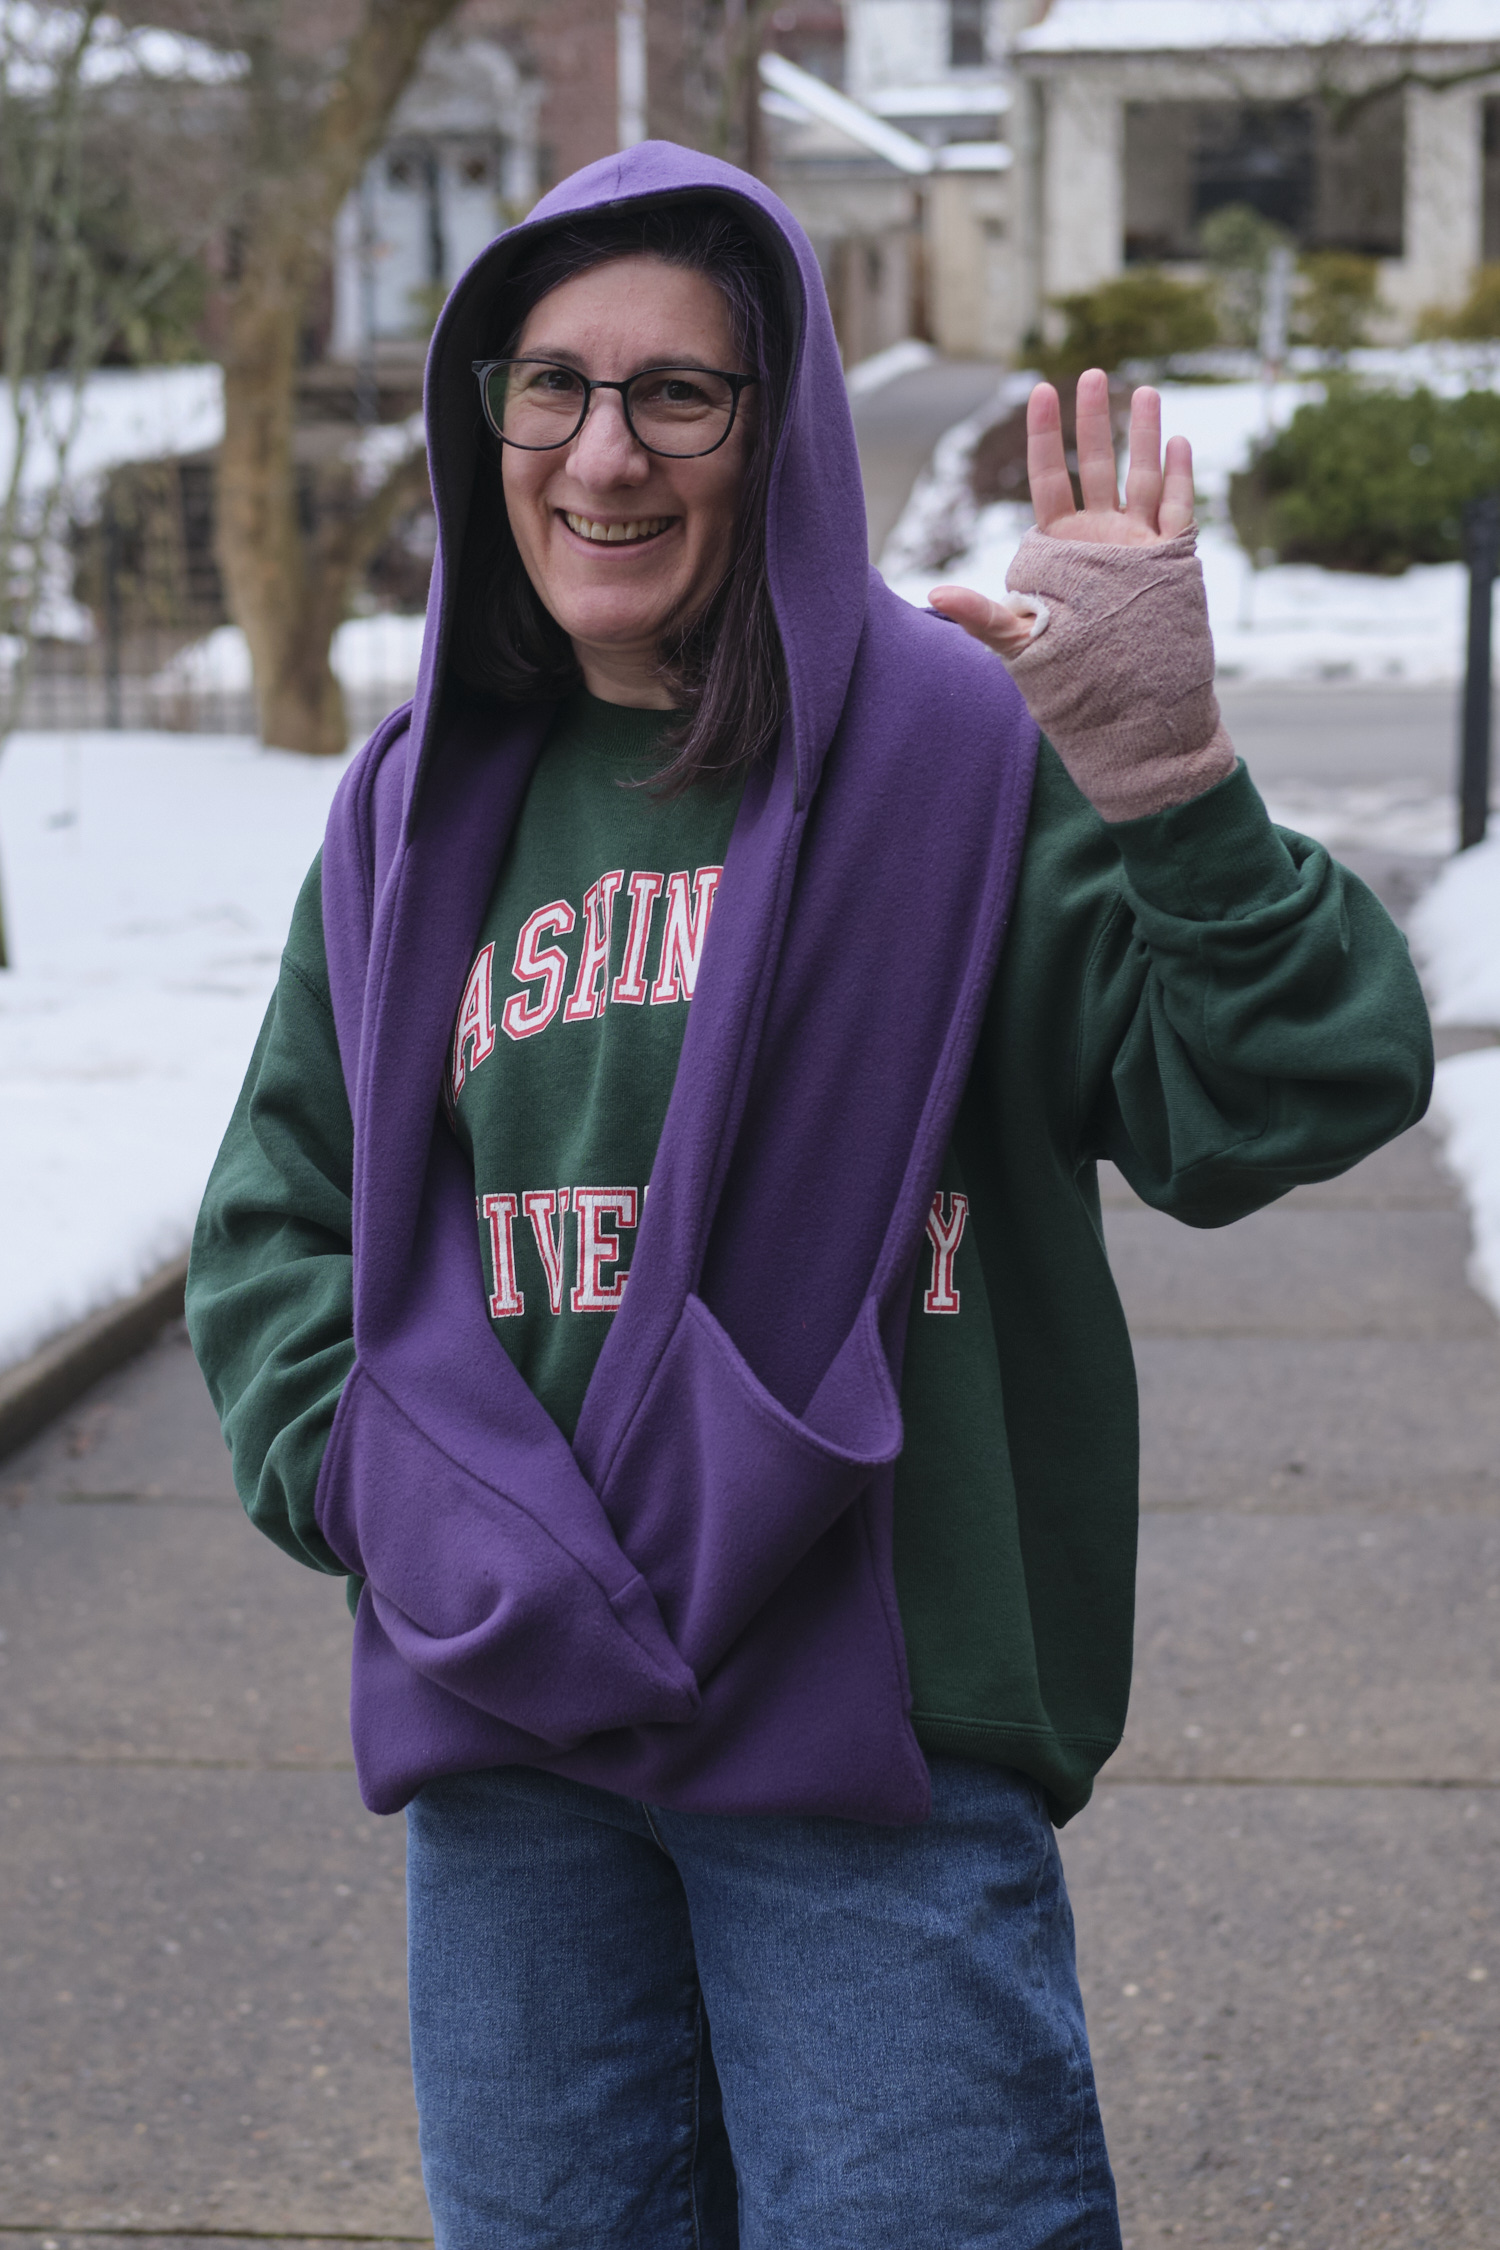
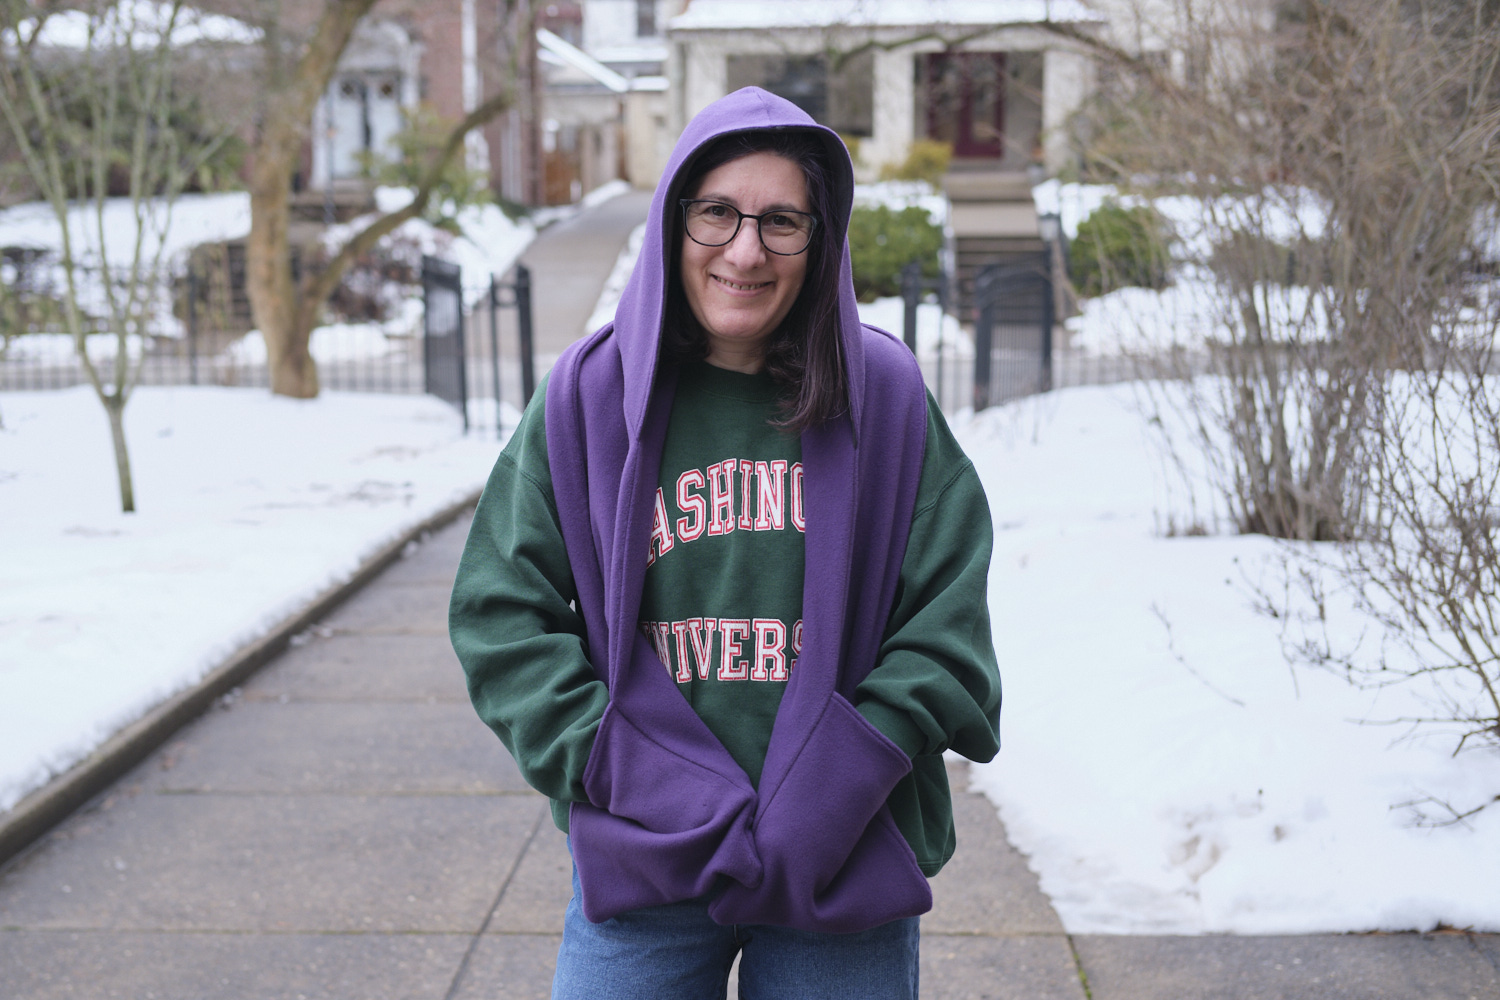
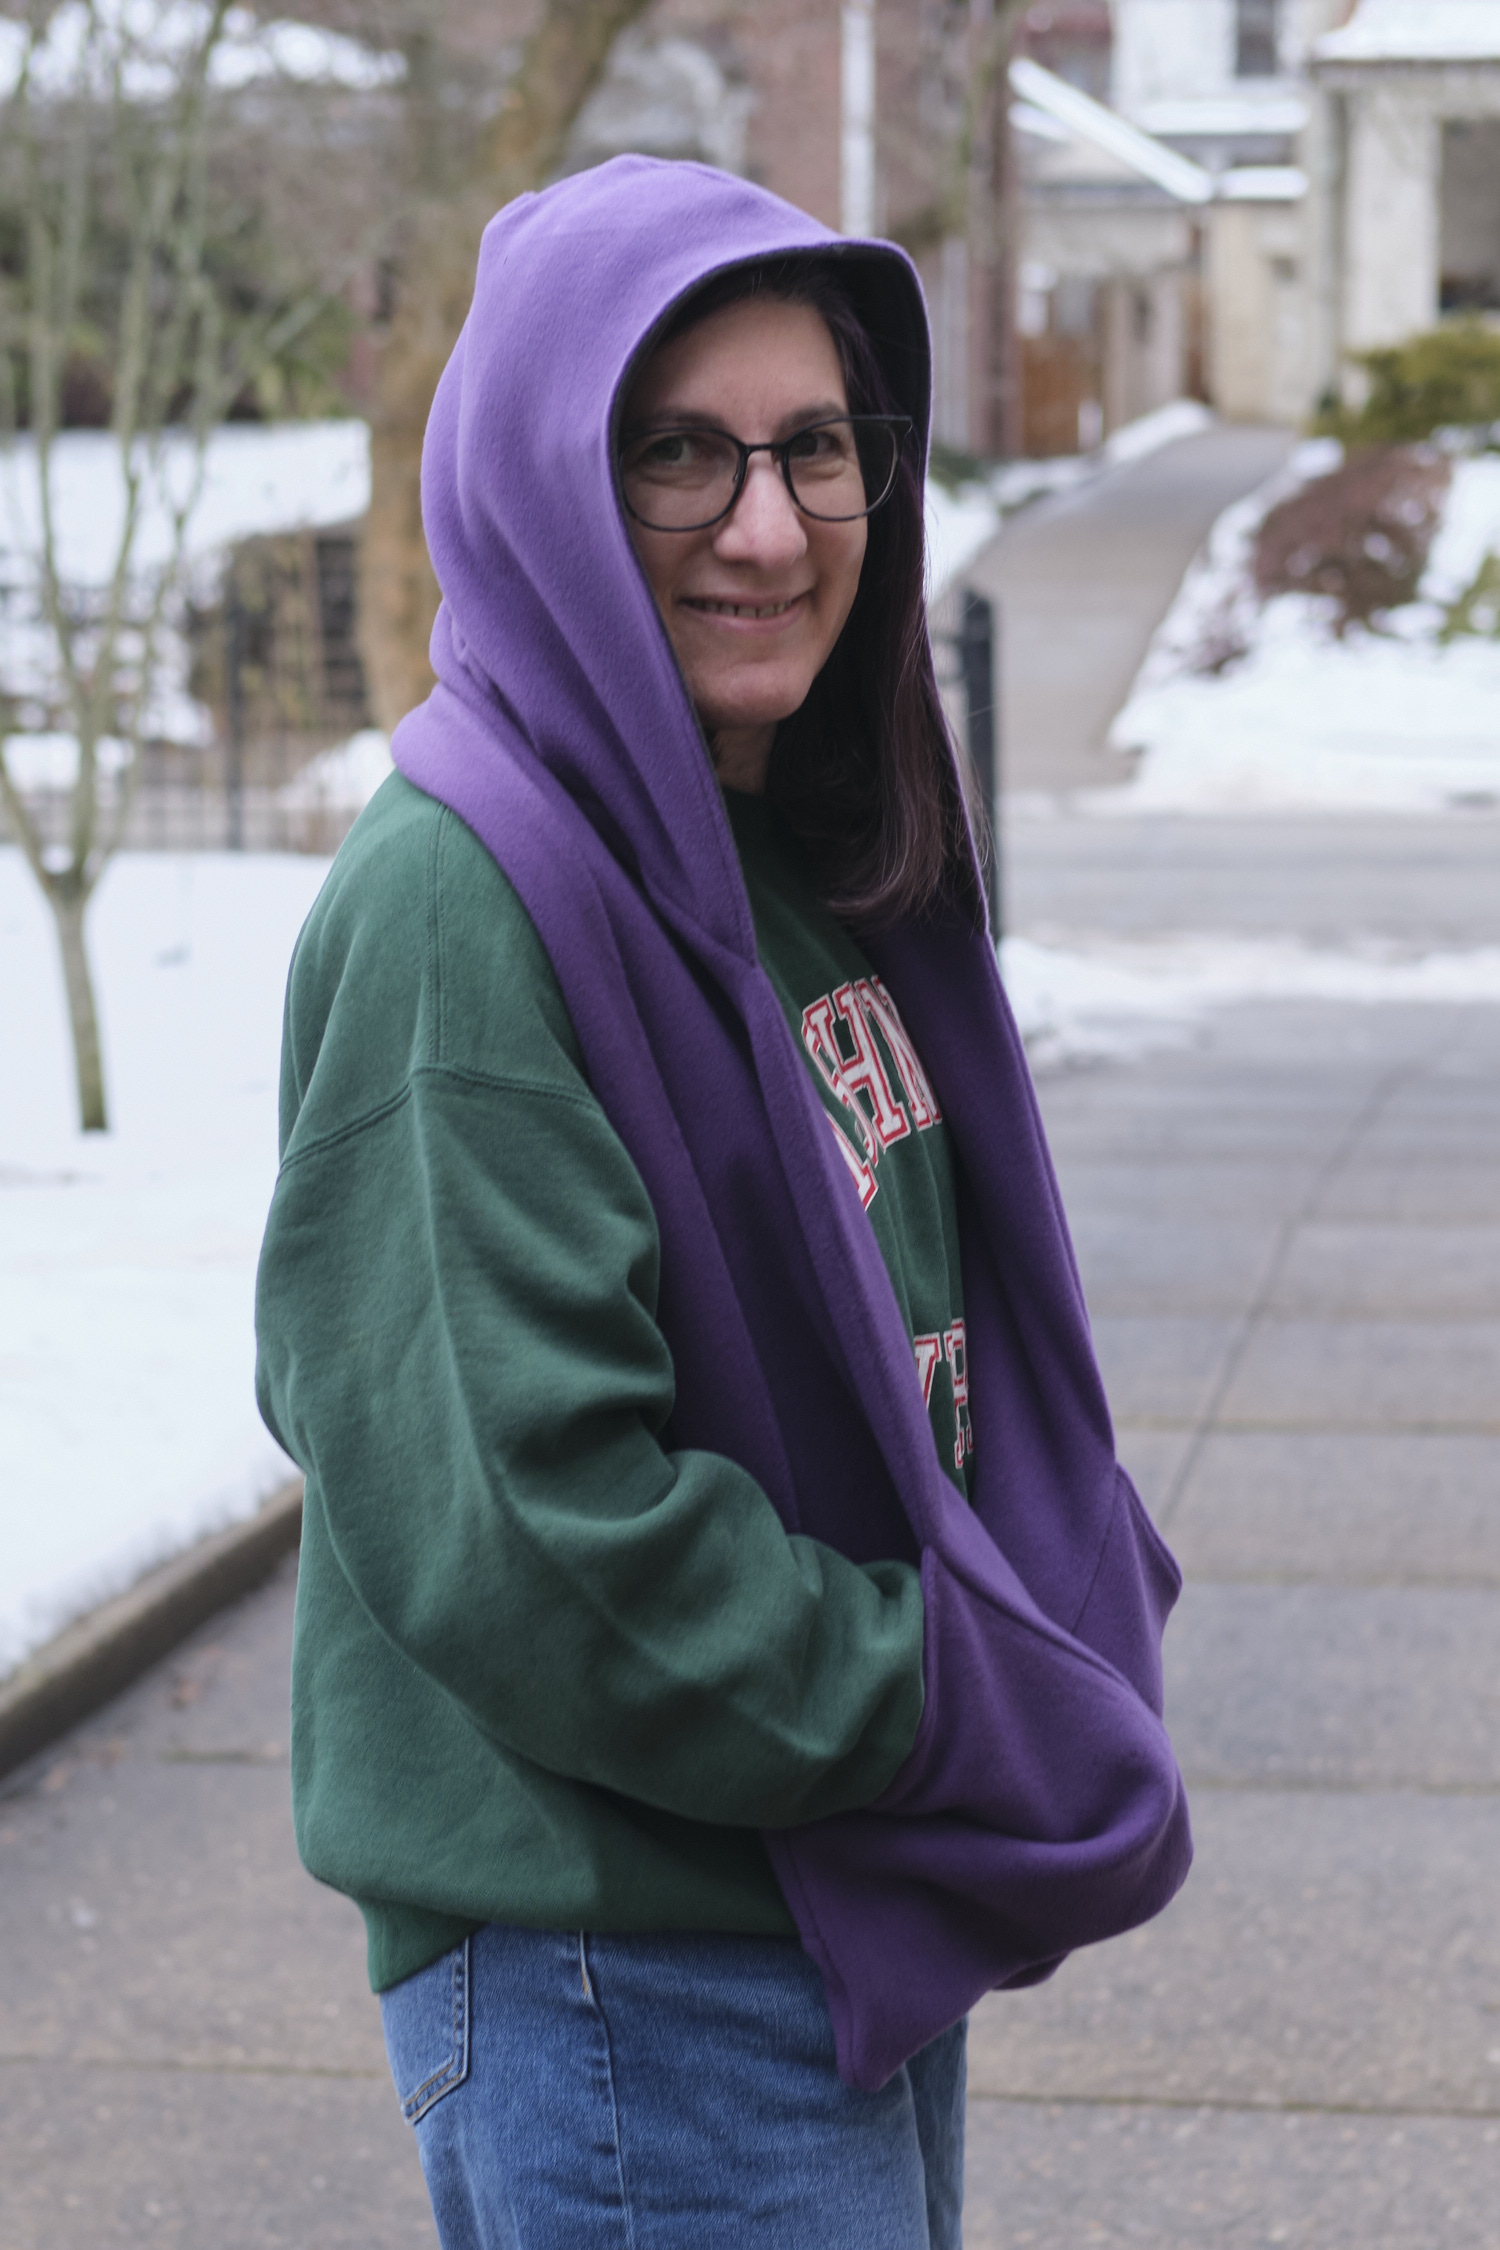
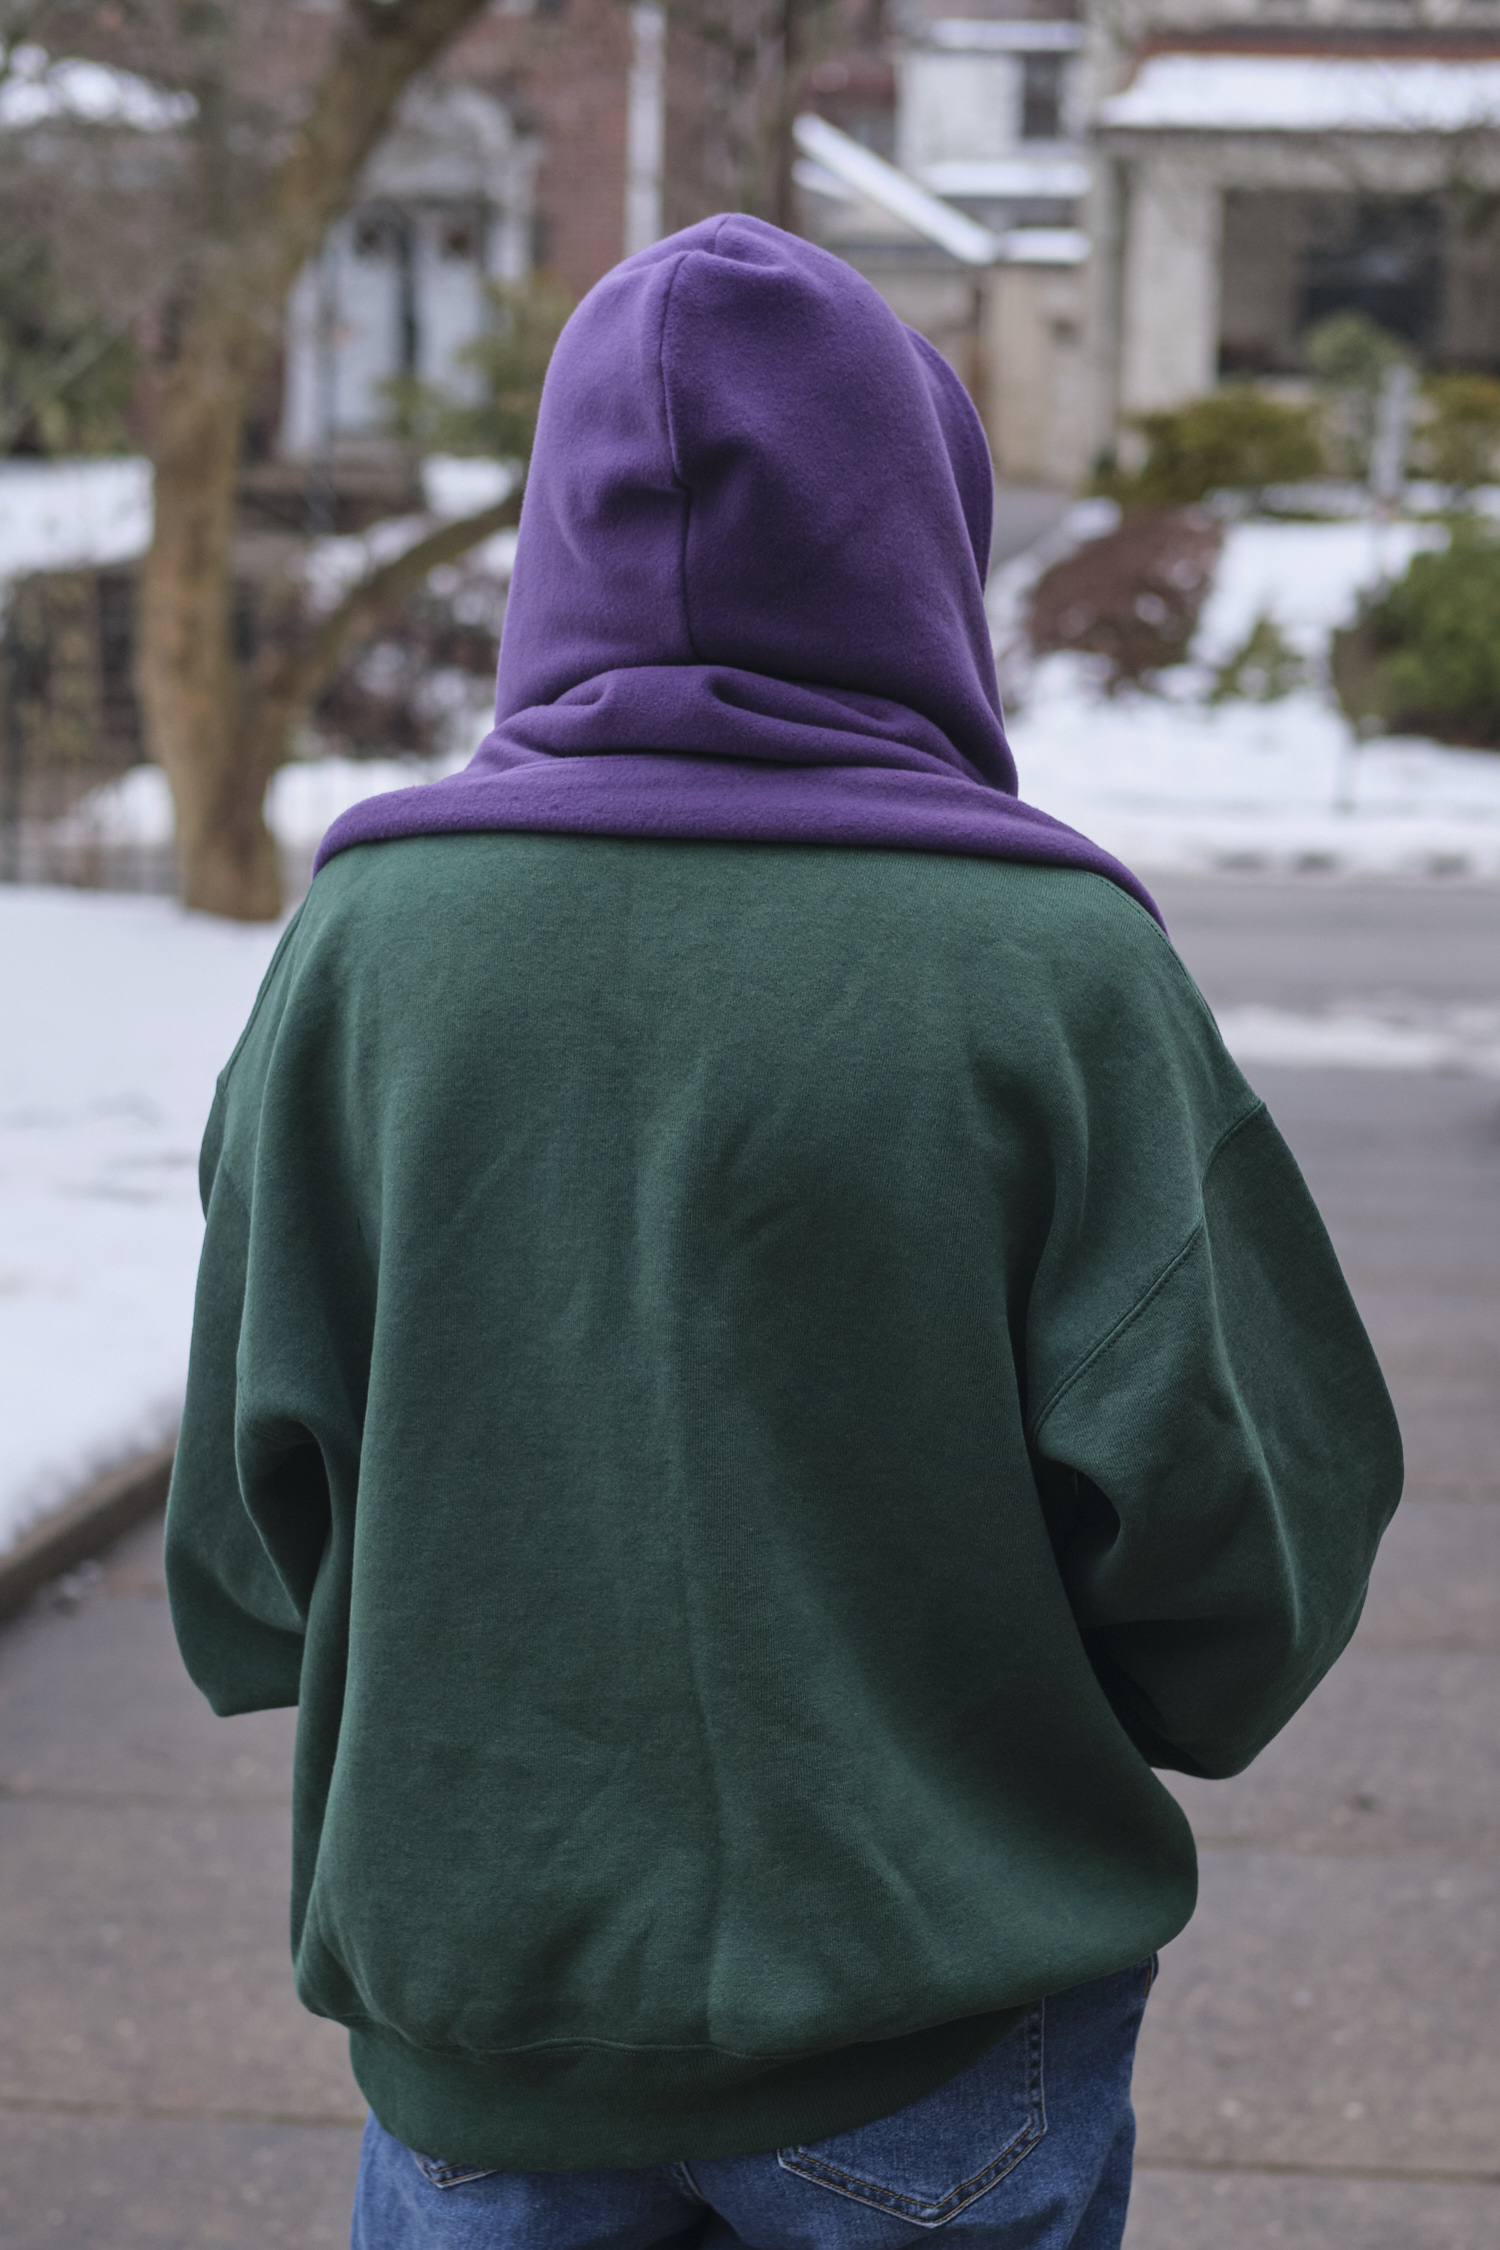
I had carpel tunnel release surgery on my left hand this week (I did the right hand a month ago), and its healing well but I have to keep it bandaged up for a week. A polar vortex is forecasted here for the coming week and I was concerned about not being able to fit a glove over my left hand. I thought about sewing a large mitten, but I saw the free pattern from Sinclair for a Mojo scarf with pockets, I decided to give it a try. I do, after all, like to put pockets on everything. The pattern comes in Sinclair’s full range of sizes, in a narrow and wide width, and with the option of adding a hood, ears, and cape. I went with my usual size 4p, narrow width, and hood. I decided I didn’t need a cape and ears, although those could be fun too.
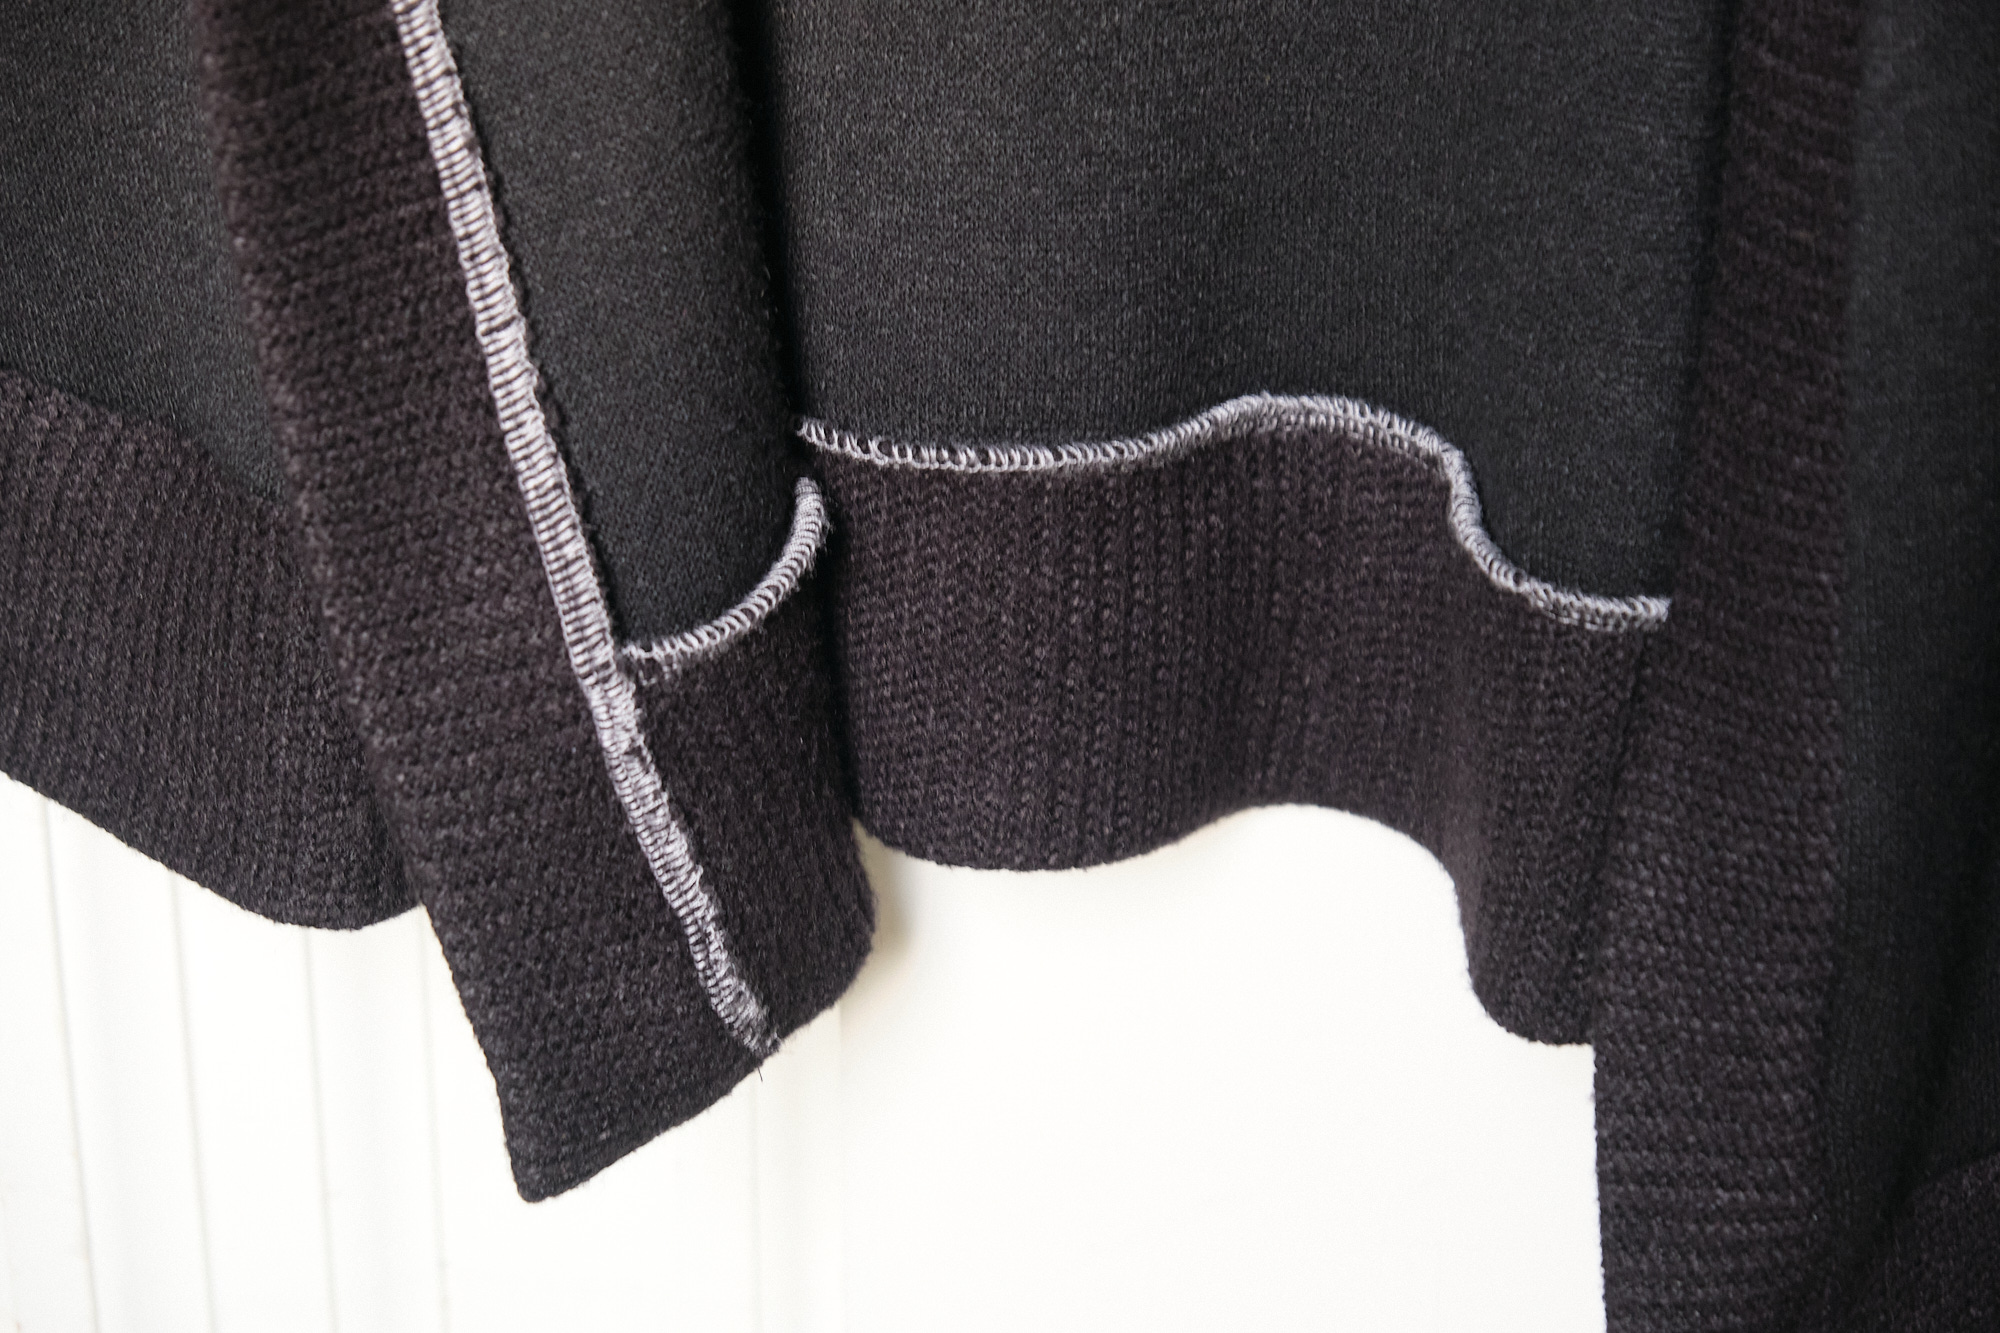
I used leftover Polartec sweatshirt fleece from a sweatshirt I made recently, and sewed it with the fuzzy side out. The fabric is about 70 inches wide so I cut the length of the scarf as one piece and chopped off some of the end for a pocket. This resulted in a scarf that was slightly too short, so when I realized that I added three inches on to each end. You can see the extra seam near the bottom of the back of each pocket.
It was pretty straightforward to sew, but took longer than I expected. I guess it is just a lot of fleece and layers to sew as everything is double-layered, which makes it warm and reversible with a nice clean finish. I sewed almost all of it on my serger (except for some basting, topstitching and closing the seam in the back after I turned it right-side out), and was glad to have a machine that could easily sew through so many layers of plush fleece.
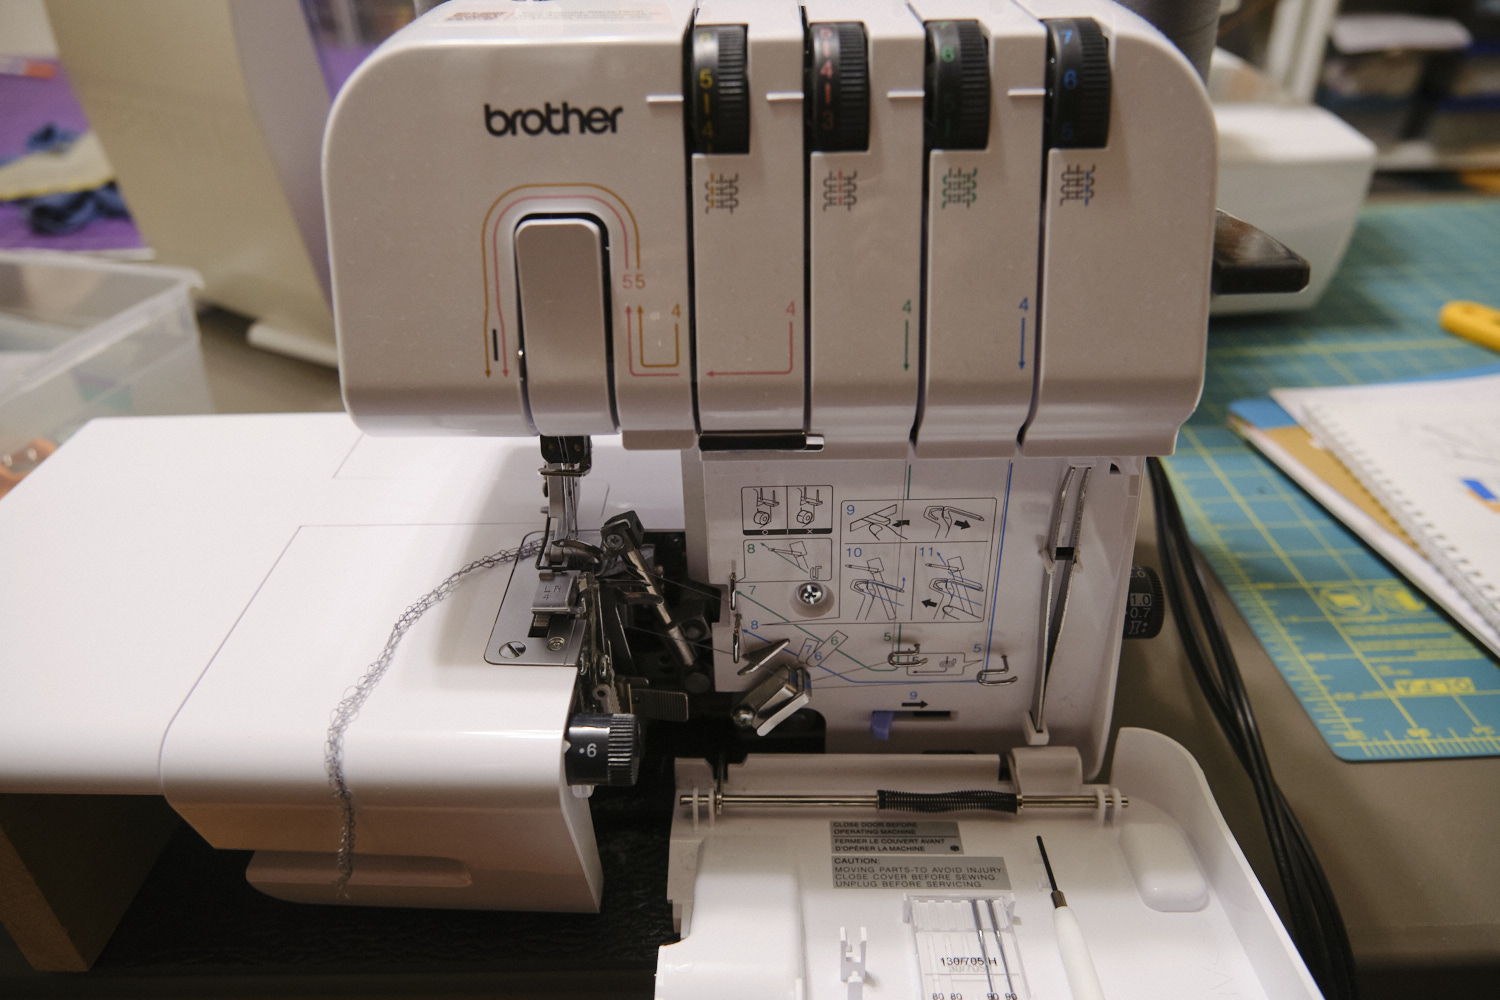
In August 2023 I bought my first serger, a Brother ST4031HD that I bought on Amazon for $379.99. I paid a $100 premium for this “heavy duty” version rather than the very popular Brother 1034D, which is a very similar machine but known to struggle with serging fleece and heavy fabrics. Even so, it is still on the low end of serger pricing but offers pretty good bang for the buck as far as being a perfectly functional serger at a very reasonable price point, that is not too difficult to thread because it comes labeled with a color-coded threading system.
Even with the color coding, there was definitely a learning curve to figure out how to thread it and I did have to watch the YouTube video multiple times and use the tweezers it comes with. And sometimes I had to fiddle with the four tension adjustment knobs. And I did try to just use grey thread for as long as possible so I wouldn’t have to rethread the machine very often. And the machine sure does make a racket. Even so, I would probably have been content with this starter machine for quite some time, except that about a year after I bought it, I did something I shouldn’t have and broke it. I’m not actually entirely sure what I did, but in the process of disengaging and re-engaging the knife blade, I managed to swing the knife around into a position that it should not be possible to get it into and the only way I could figure out to get it out was to unscrew the blade, take it off, and put it back on again. I did that, but the knife would not cut any more. I took it off and put it back on again multiple times and then brought in my husband to try. He could not get it to work either. We inspected the blade and saw no signs that it was broken, and yet, it would not cut. I tried to order a replacement blade and found that the official replacement blades for this machine are very difficult to get and cost over $100.
So I took the machine to a sewing machine repair shop and asked them what to do. They refused to accept my “disposable” serger for repair, telling me that their minimum price for putting it on their repair bench would not be worth it for such a cheap machine. I did get the repair technician to take a peak without putting it on his repair bench, and he couldn’t find anything obviously wrong with it but thought it couldn’t hurt to try changing the blade. The repair place also sold sergers so I took a look at a couple of Baby Lock sergers they had on display and was intrigued.
When I got home I went back to searching for blades and found that inexpensive blades that fit other Brother models, such as this one, reportedly worked with the ST4031HD even though they were not advertised for that machine. So I ordered a new blade for $13.98 and then browsed the Baby Lock website. (We eventually fixed the Brother serger after my husband realized that the knife holder had been upside down when we screwed in the knife — it had appeared symmetrical but he finally noticed that it wasn’t. We rotated it 180 degrees and everything worked fine. But by that point I had already ordered a new serger.)
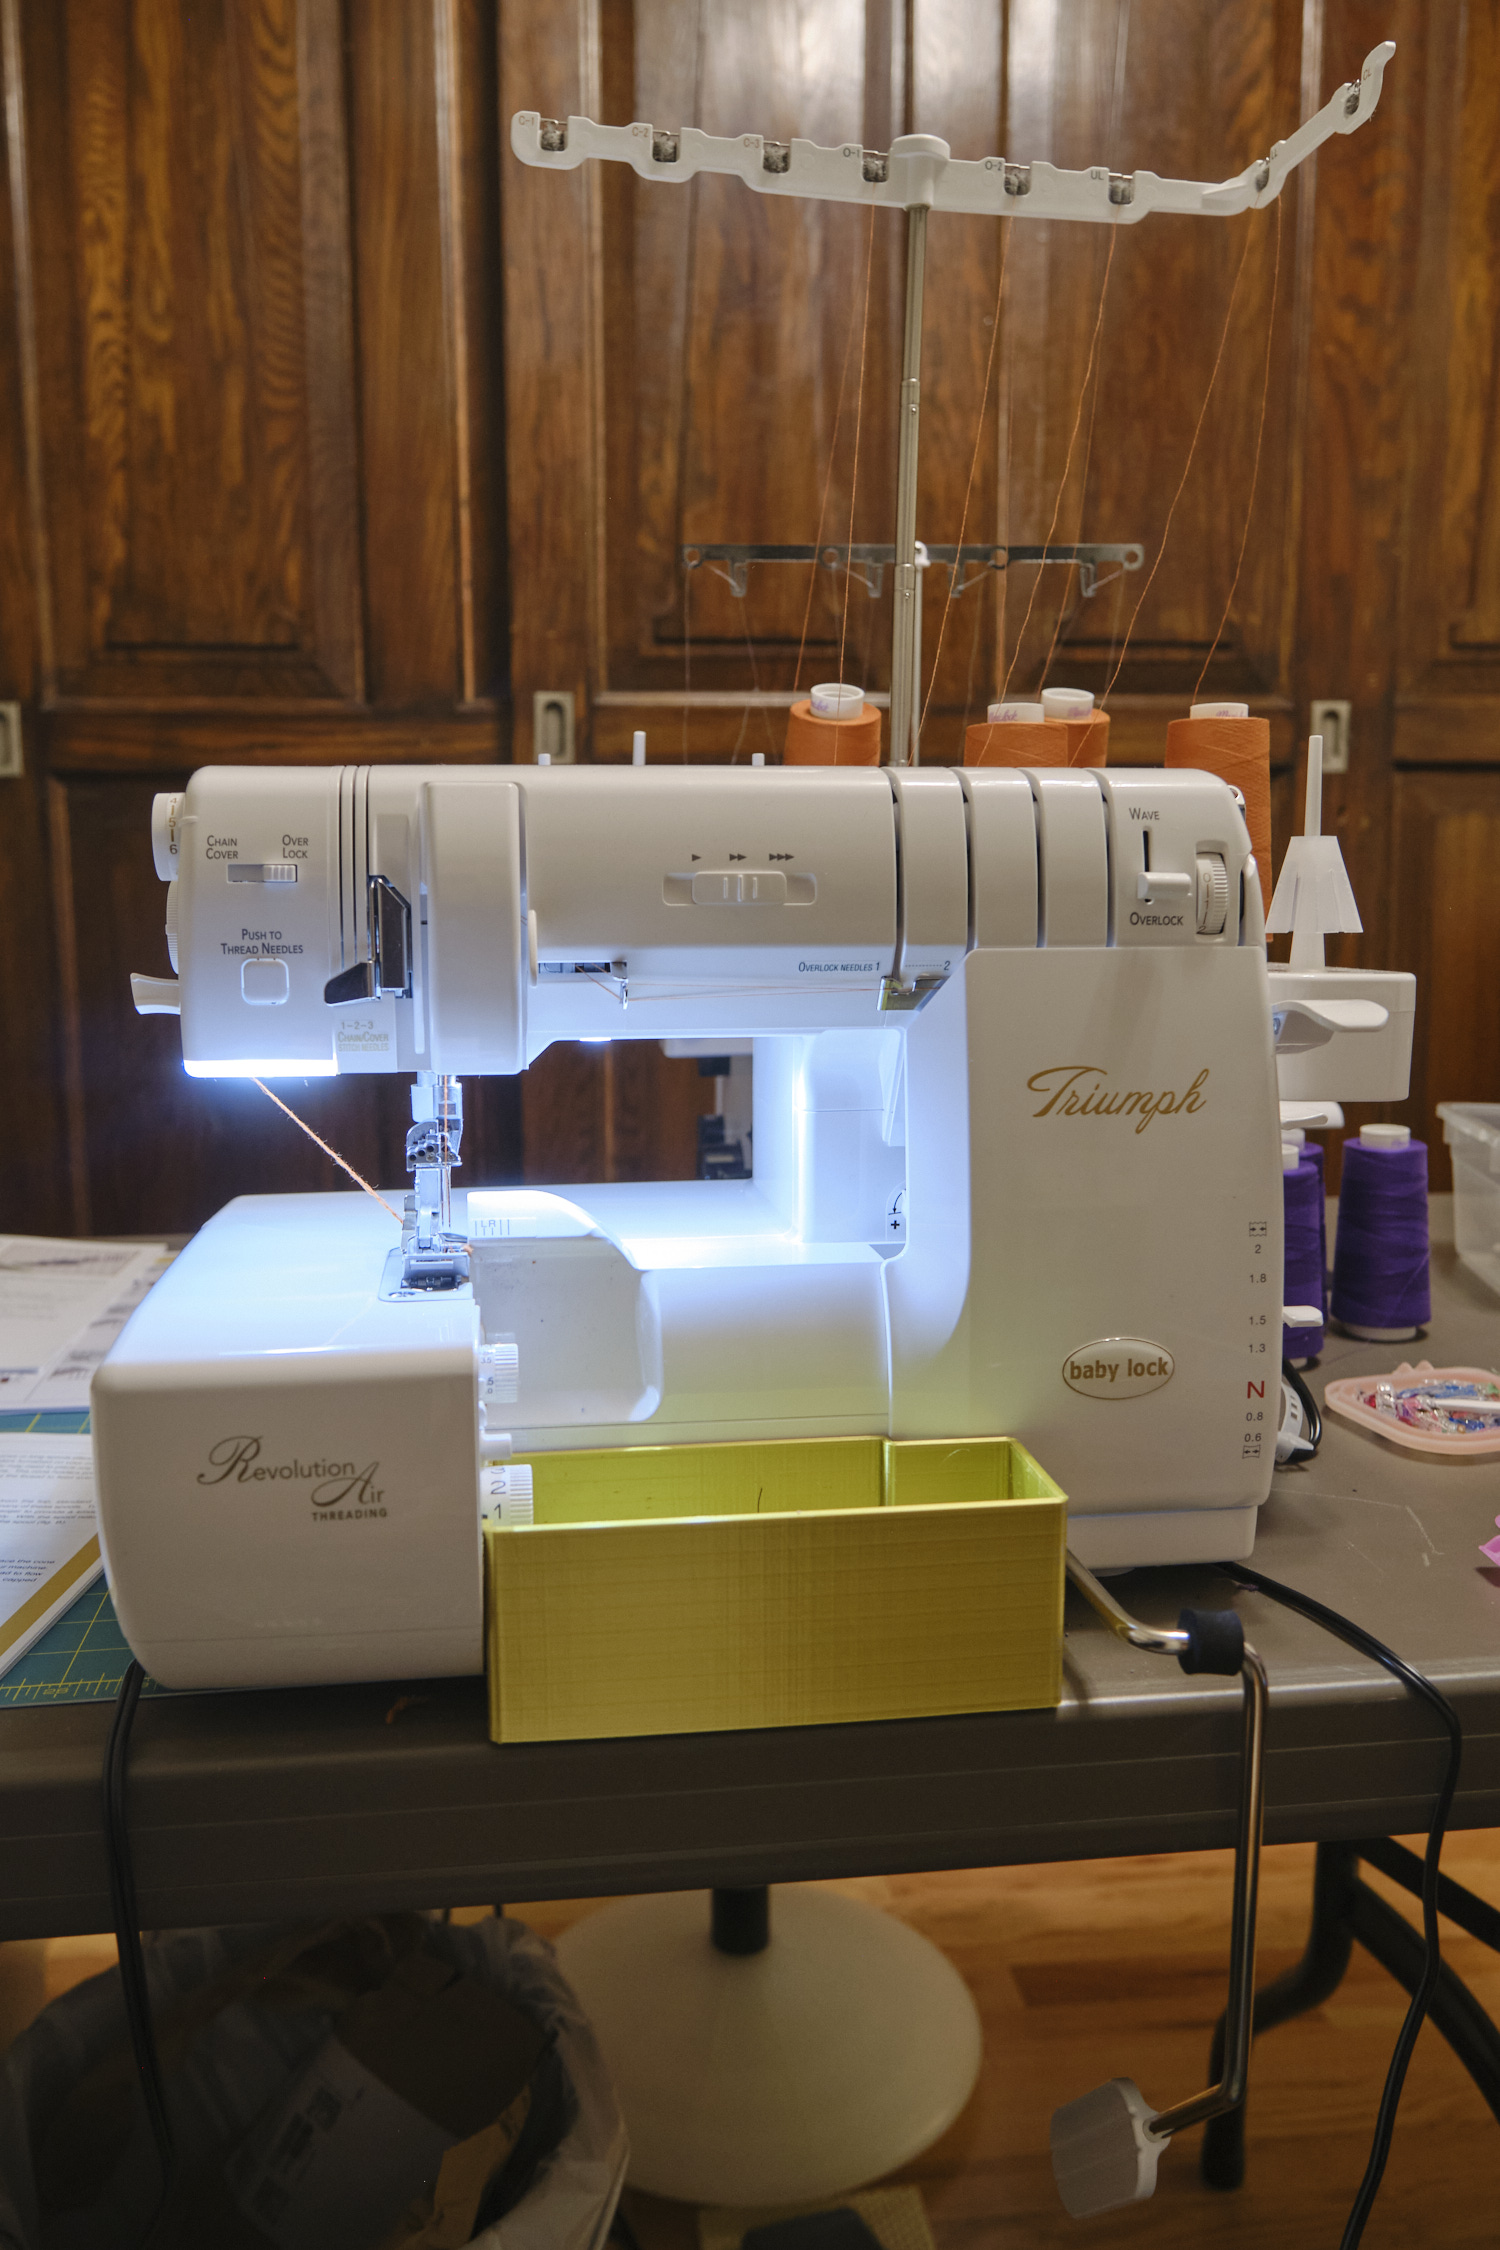
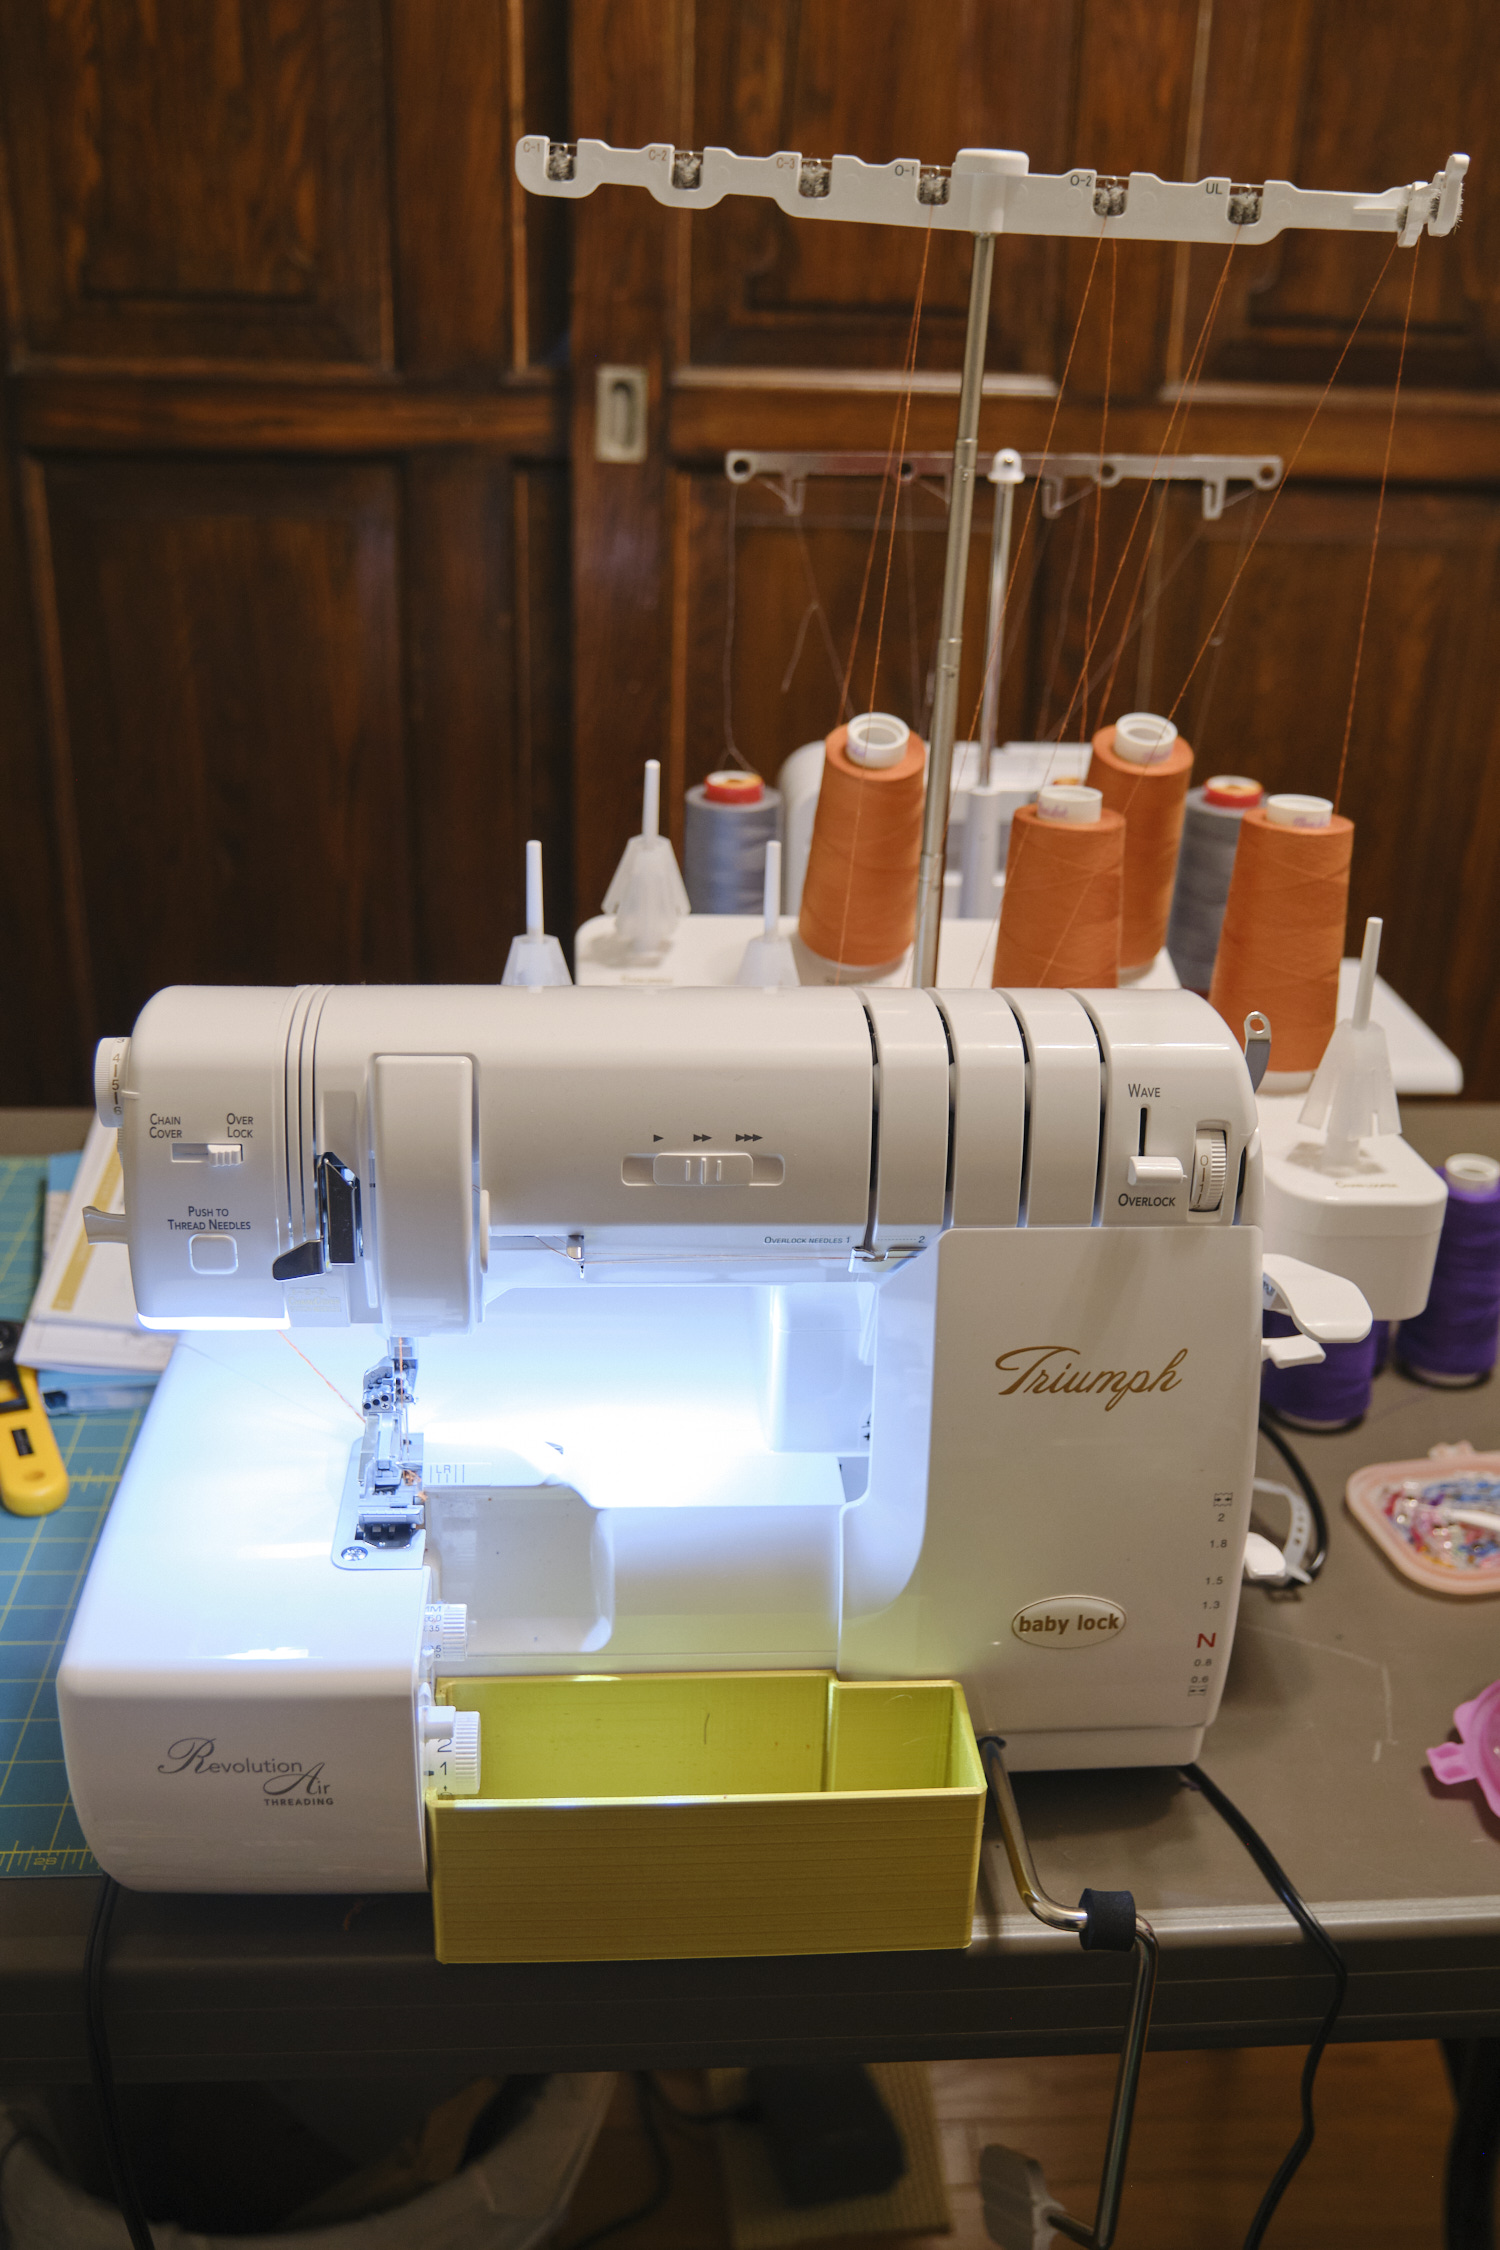
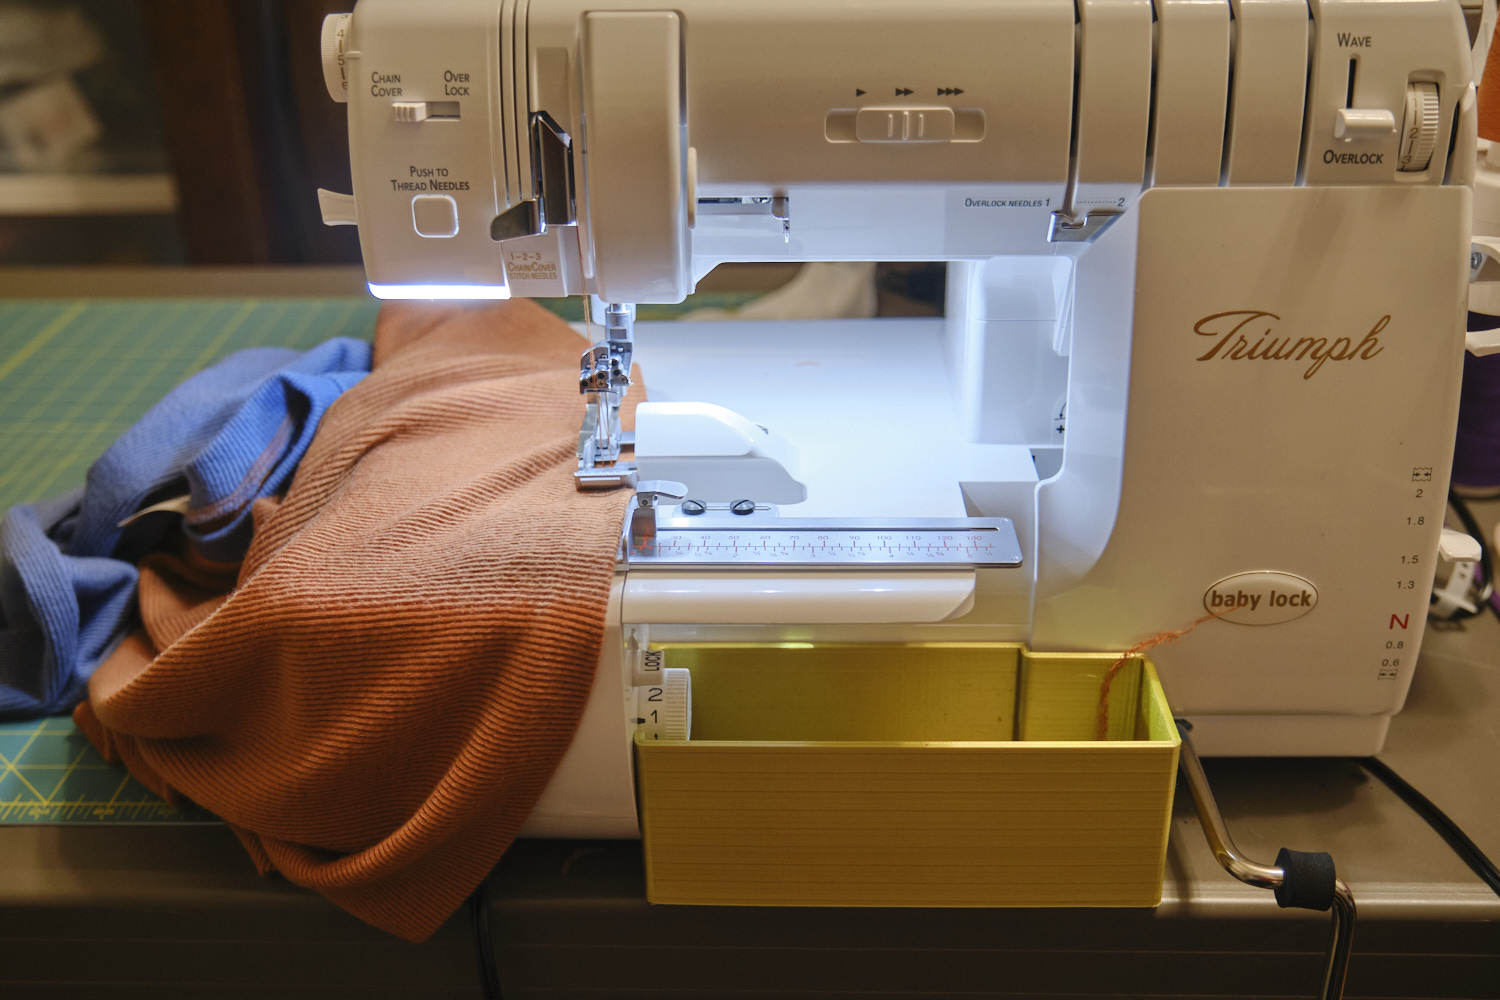
I started reading about Baby Lock sergers — they all have really positive sounding names. I started with the inexpensive Baby Lock sergers and worked my way up. Each machine had more features and I wanted all of them. Air threading, YES. No tension adjustments, sign me up. If I’m going to buy a new machine I want one that doesn’t require tweezers to thread or tension fiddling for every different kind of fabric. I was ready to buy a Baby Lock Victory (list price $1,649) but then I realized that it’s threading was only partially automatic. The Acclaim (list price ($2,749) had a more advanced threading and tension adjustment system. But then I realized if I went up a step to the Accolade (list price $3,849) I could also get cover stitch features. I had considered previously whether to get a serger or a combo serger/cover stitch machine, and settled on just a serger because the reviews of most of the combo machines complained that it was too much of a hassle to switch machines between serging and cover stitch mode. But, if the machine could thread itself automatically, maybe it wouldn’t be so bad. Maybe I do want a combo machine. I kept reading the web site and finally got to the ultimate Baby Lock serger: the Triumph (when they inevitably come out with a new model that is better than this one, what will they call it?). It is a combo machine with all the features of the Accolade, and a few extras, but most importantly, it has a knee lift. My Bernina sewing machine has a knee lift that I absolutely adore. It let’s me raise and lower the presser foot with my knee, without having to take my hands off the fabric. Since I use the same leg to run the peddle, I never accidentally start sewing without lowering the presser foot. In contrast, my Brother serger does not have a knee lift and I regularly forget to lower the presser foot, start sewing, and end up with a nasty thread nest. The knee lift sold me on the Triumph, but I was taken aback by the $5,499 price tag (typically available for about $500 less at sewing machine stores) — and the fact that buying all the accessories I might want for it would cost even more (another $1,500 or so).
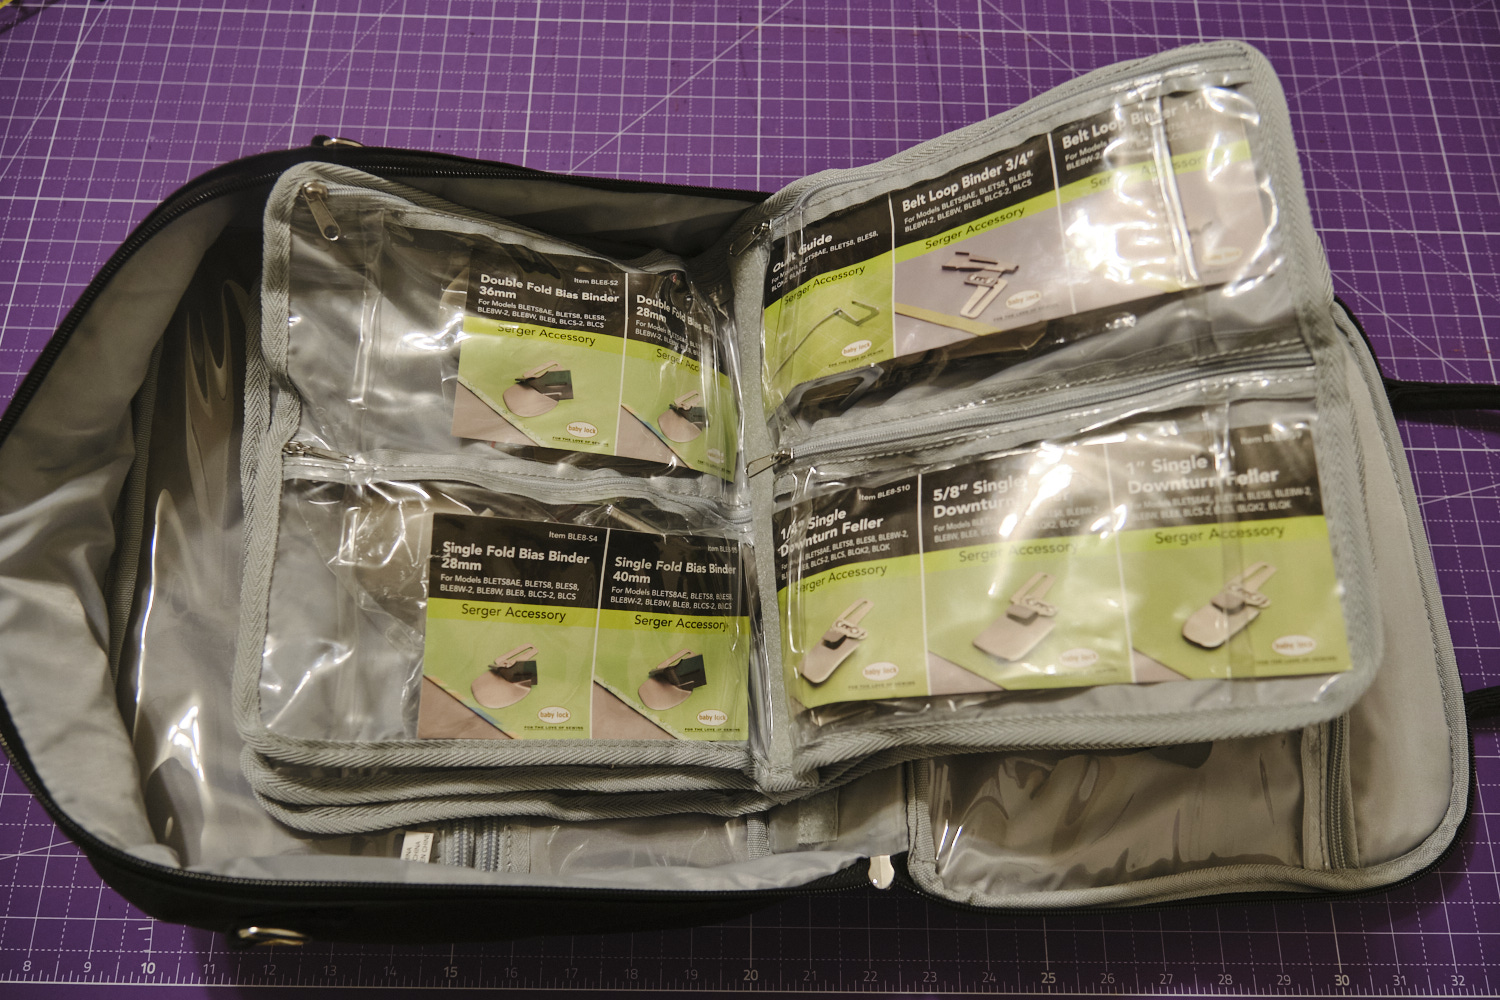
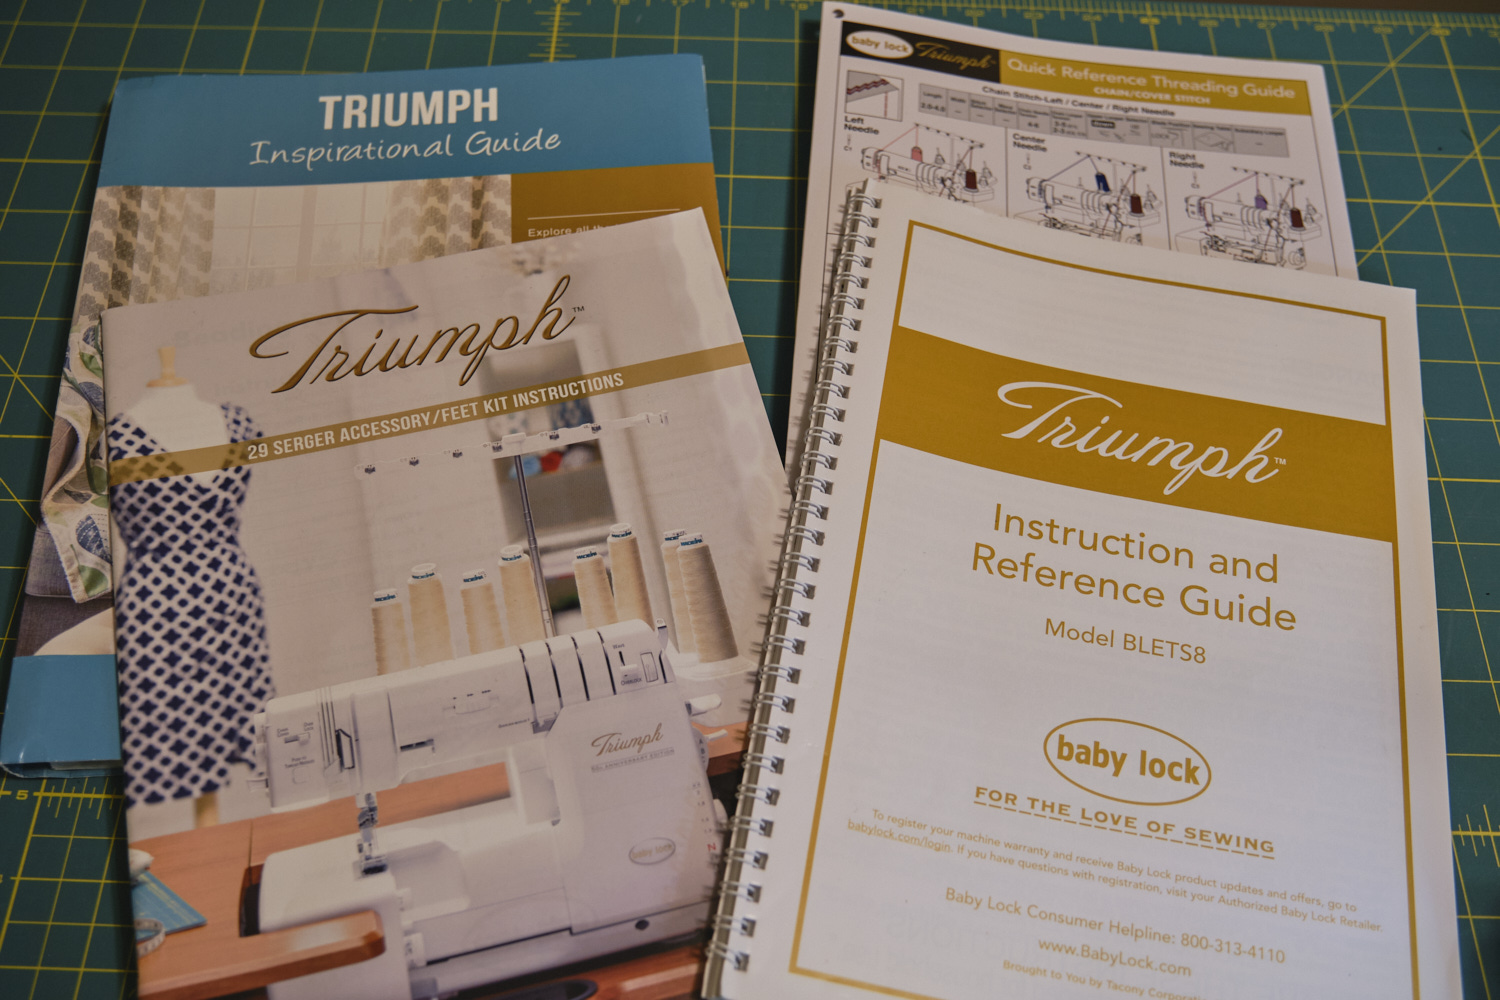
I decided to read some reviews of Baby Lock sergers and watch some videos to see how easy or difficult they looked to use. I stumbled upon a review titled “Was it Worth it? Why I bought Babylock Accolade Serger Coverstich Machine” by Jessica Capalbo. I don’t know if Jessica gets a commission from Baby Lock, but by the time I got through her 6-minute video, I was completely sold. Besides her account of how much easier it was to sew with a high-end serger, her justification to spend the money on a serger if your hobby is sewing since other people spend money on ski vacations, completely resonated with me. I would have bought an Accolade right then and there, but I really wanted that knee lift, which required stepping up to the top-of-the line Triumph. In some of the Facebook sewing groups, people had mentioned getting good deals on refurbished Baby Lock machines so I checked out eBay, and sure enough found several Triumphs for sale. I found one in excellent condition that came with all the books and almost every extra foot (in a handy carrying case) and accessory that Baby Lock makes for this machine (not including a trolley — it is huge and if you want to take it anywhere you really do need a trolley with wheels) plus a DIY 3D printed thread bin that someone had made as the machine doesn’t come with a thread bin, all for $4,128.95. I decided to buy it, and a few days later it arrived on my doorstep.
(Incidentally, I briefly also considered the Bernina L-890, which is a similar high-end combo machine that also has a knee lift. People seem to really like the fact that a lot of the control is through a touchscreen with good instructions. But it’s list price is $7,999 and it’s fairly new and so it doesn’t have much of a used market.)
The first time I threaded the Triumph, I followed the instructions in the manual very carefully. It took some time to fully understand some of the diagrams, but once I understood what I needed to do I succeeded in threading it properly with four spools of black serger thread on my first try! With just a few adjustments to stitch height and width, I produced nicely balanced 4-thread serging stitches. I immediately noticed that the Triumph was much quieter than my Brother serger and sewed much more smoothly. I had two pairs of black pants cut out so my first project was to sew them.
After my triumphant first projects, I was traveling and busy for a couple of weeks. My next project was to serge the unraveling edges of a green shawl that a friend brought me. I showed her my Triumph, unthreaded the black thread, and started trying to thread the green thread. Only this time I didn’t read the manual carefully enough and inadvertently skipped some essential steps. I had to unthread and rethread a couple of times and learn how to change the needles after I broke one. But eventually I got it sorted out and produced a beautiful serged edge. After my friend went home I unthreaded and rethreaded the Triumph twice to make sure I could do it. I would say it is still not completely trivial and I could still easily forget a step, but threading a serger completely without the use of tweezers and having it sew perfectly without any tension adjustments is really awesome.
I read through the accessory book and watched a video on using the overlock table and fabric guide accessories and gave them a try. The table has a slot for the serger knife and gives you a bigger surface for serging and allows you to use accessories that normally would not work in overlock mode. The fabric guide makes it easier to sew a straight and consistent distance from the edge of the fabric. It will be quite some time before I figure out how to use all the other feet and accessories, and even though in theory you can sew with 8 threads at the same time, I probably won’t try it any time soon.
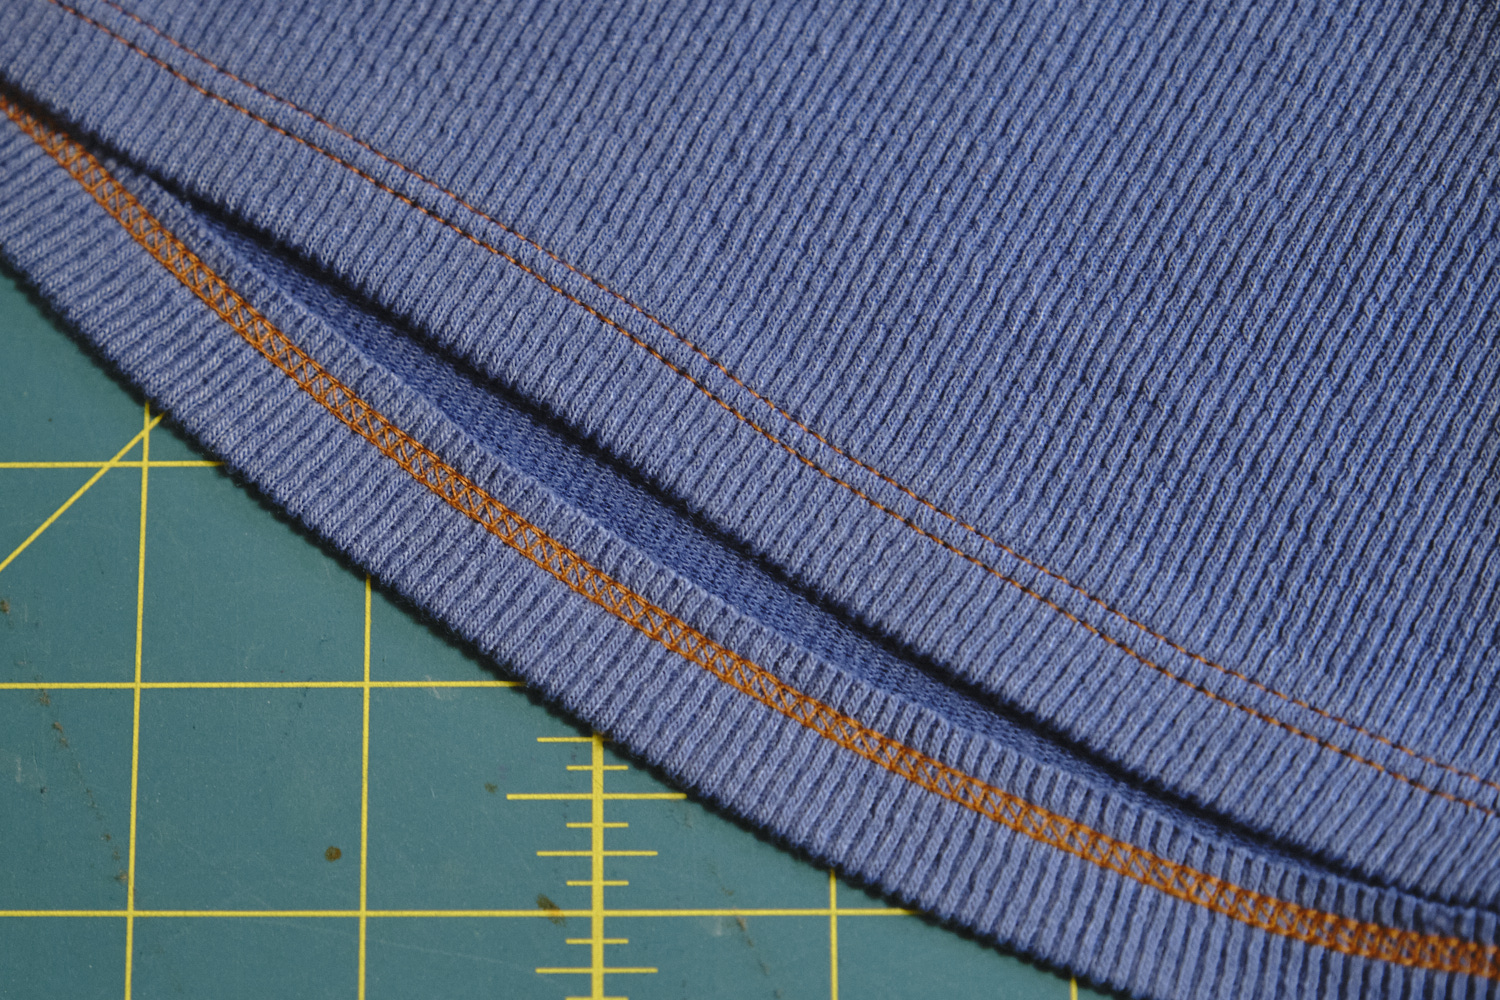
I finally worked up the courage to try cover stitching. This requires getting the included small screwdriver out of the convenient side compartment, unscrewing and removing the two needles, moving the needles over into cover stitching position and screwing them back in. While I was at first taken aback by the need to use a screwdriver and move the needles to switch back and forth between serging and cover stitching, it was actually pretty easy to do. It is easy to align the needles and see whether they are properly in place before screwing them in, and if you accidentally drop one while screwing it in there is a convenient drawer with a magnet to catch the needles that slides out from the bottom of the machine so you can retrieve the dropped needle without having to open or lift the machine. I selected the wide cover stitch and followed the instructions to setup three spools of thread. I sewed some practice cover stitches on some heavy sweatshirt fleece and admired the results. Then I tried a stretchy rib knit and was not as happy. After adjusting a few settings I decided that this stretchy fabric would be better off with a narrow cover stitch. I moved one of the needles and rethreaded it and tried again, and was pleased with the results. When I was done cover stitching I moved the needles and threads back to serging position without too much difficulty. I can see why a lot of sewists prefer to have a separate cover stitch machine as it would be annoying to have to switch back and forth multiple times during a project. However, I think as long as I’m doing most of my cover stitching together at the end of a project, switching is not too bad.
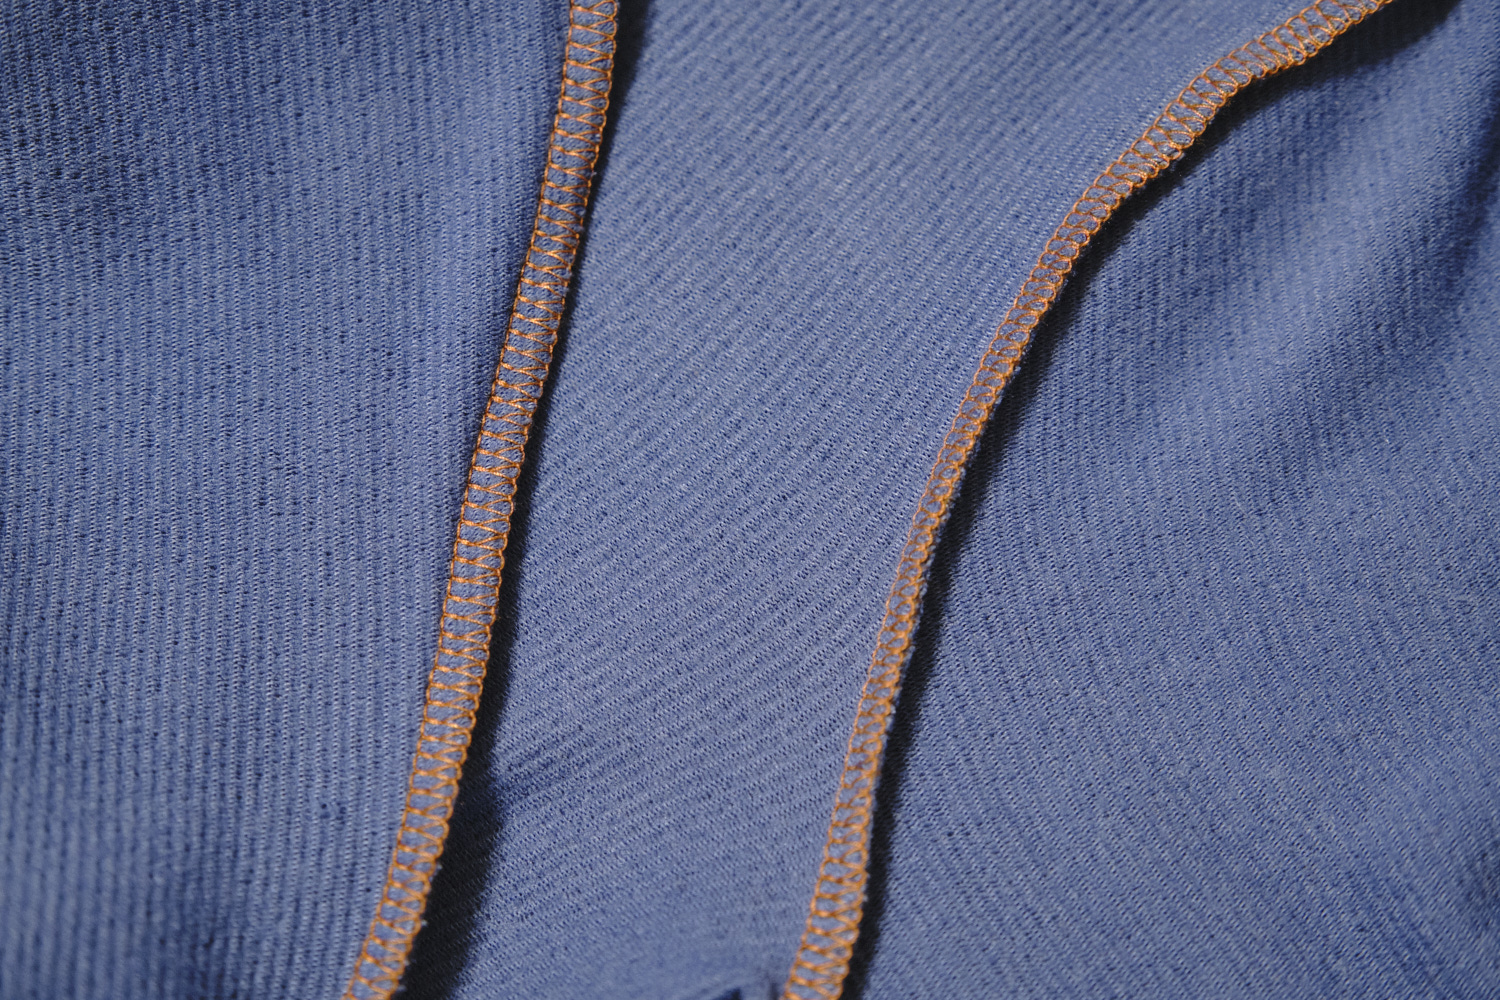
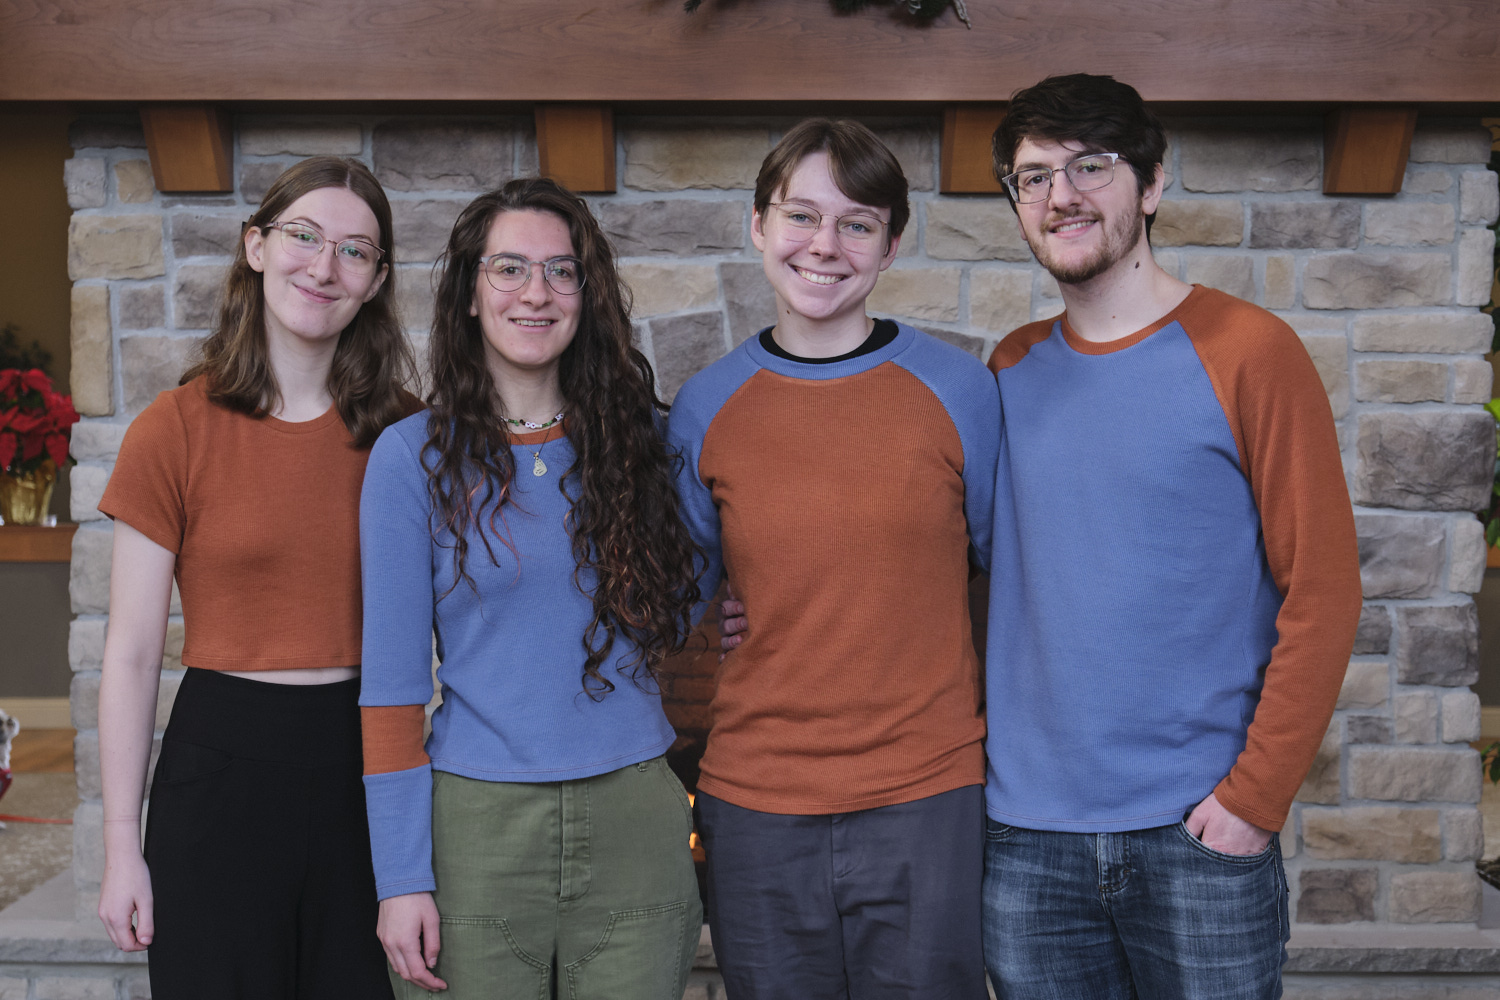
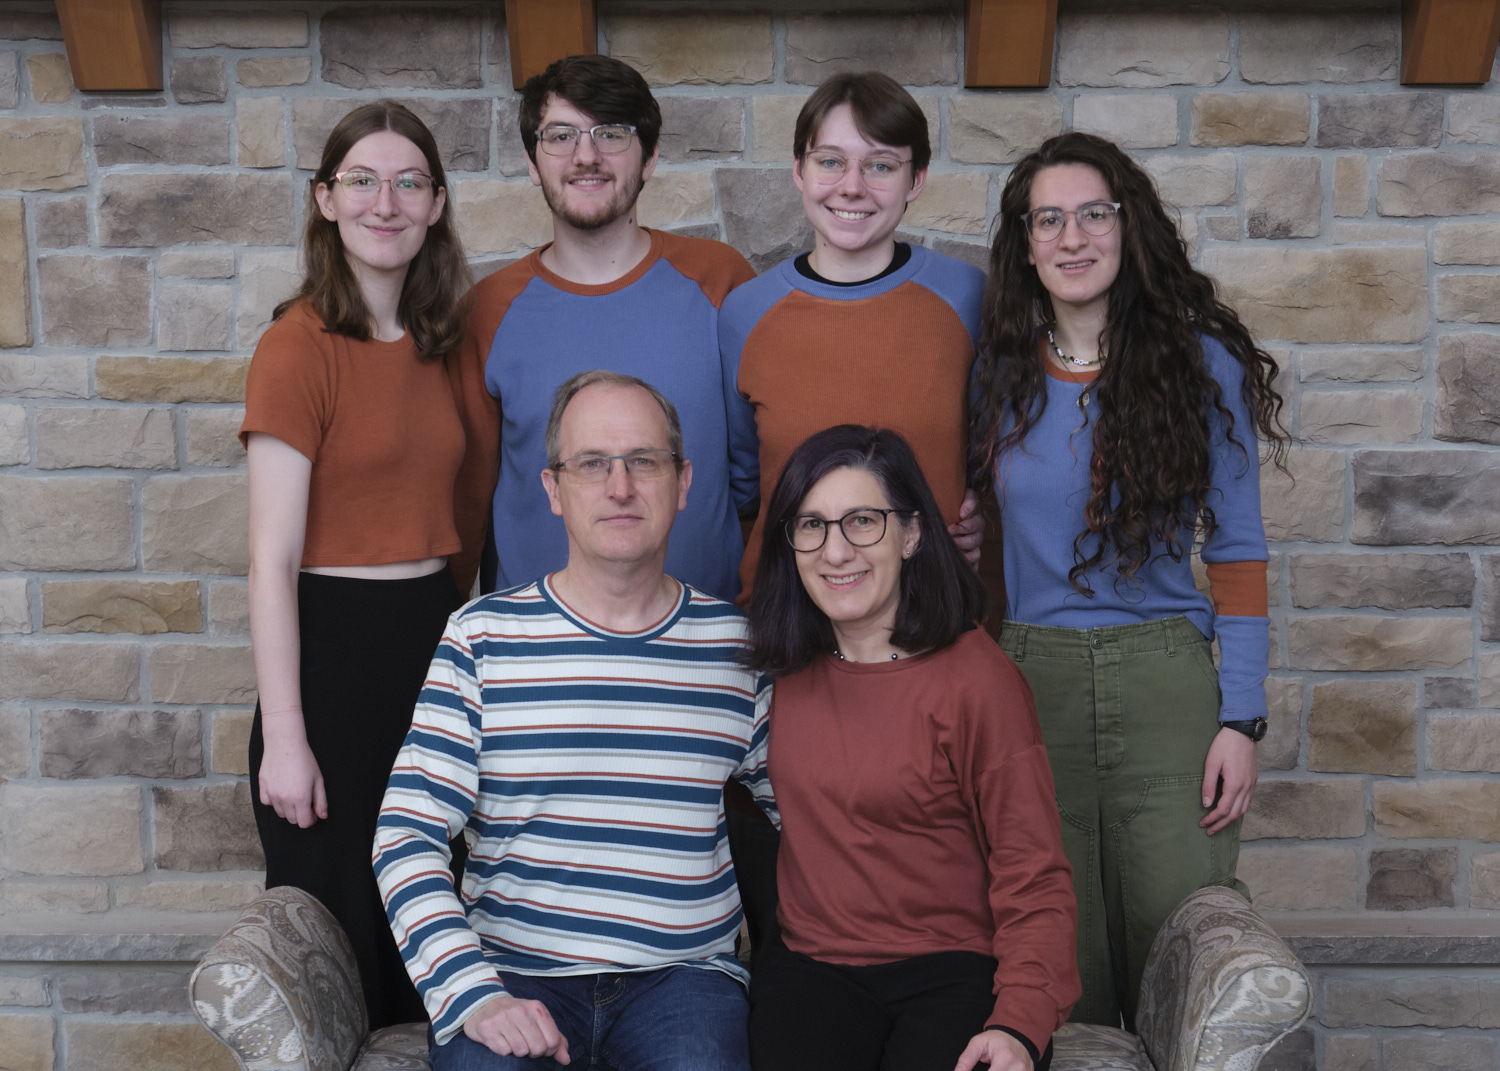
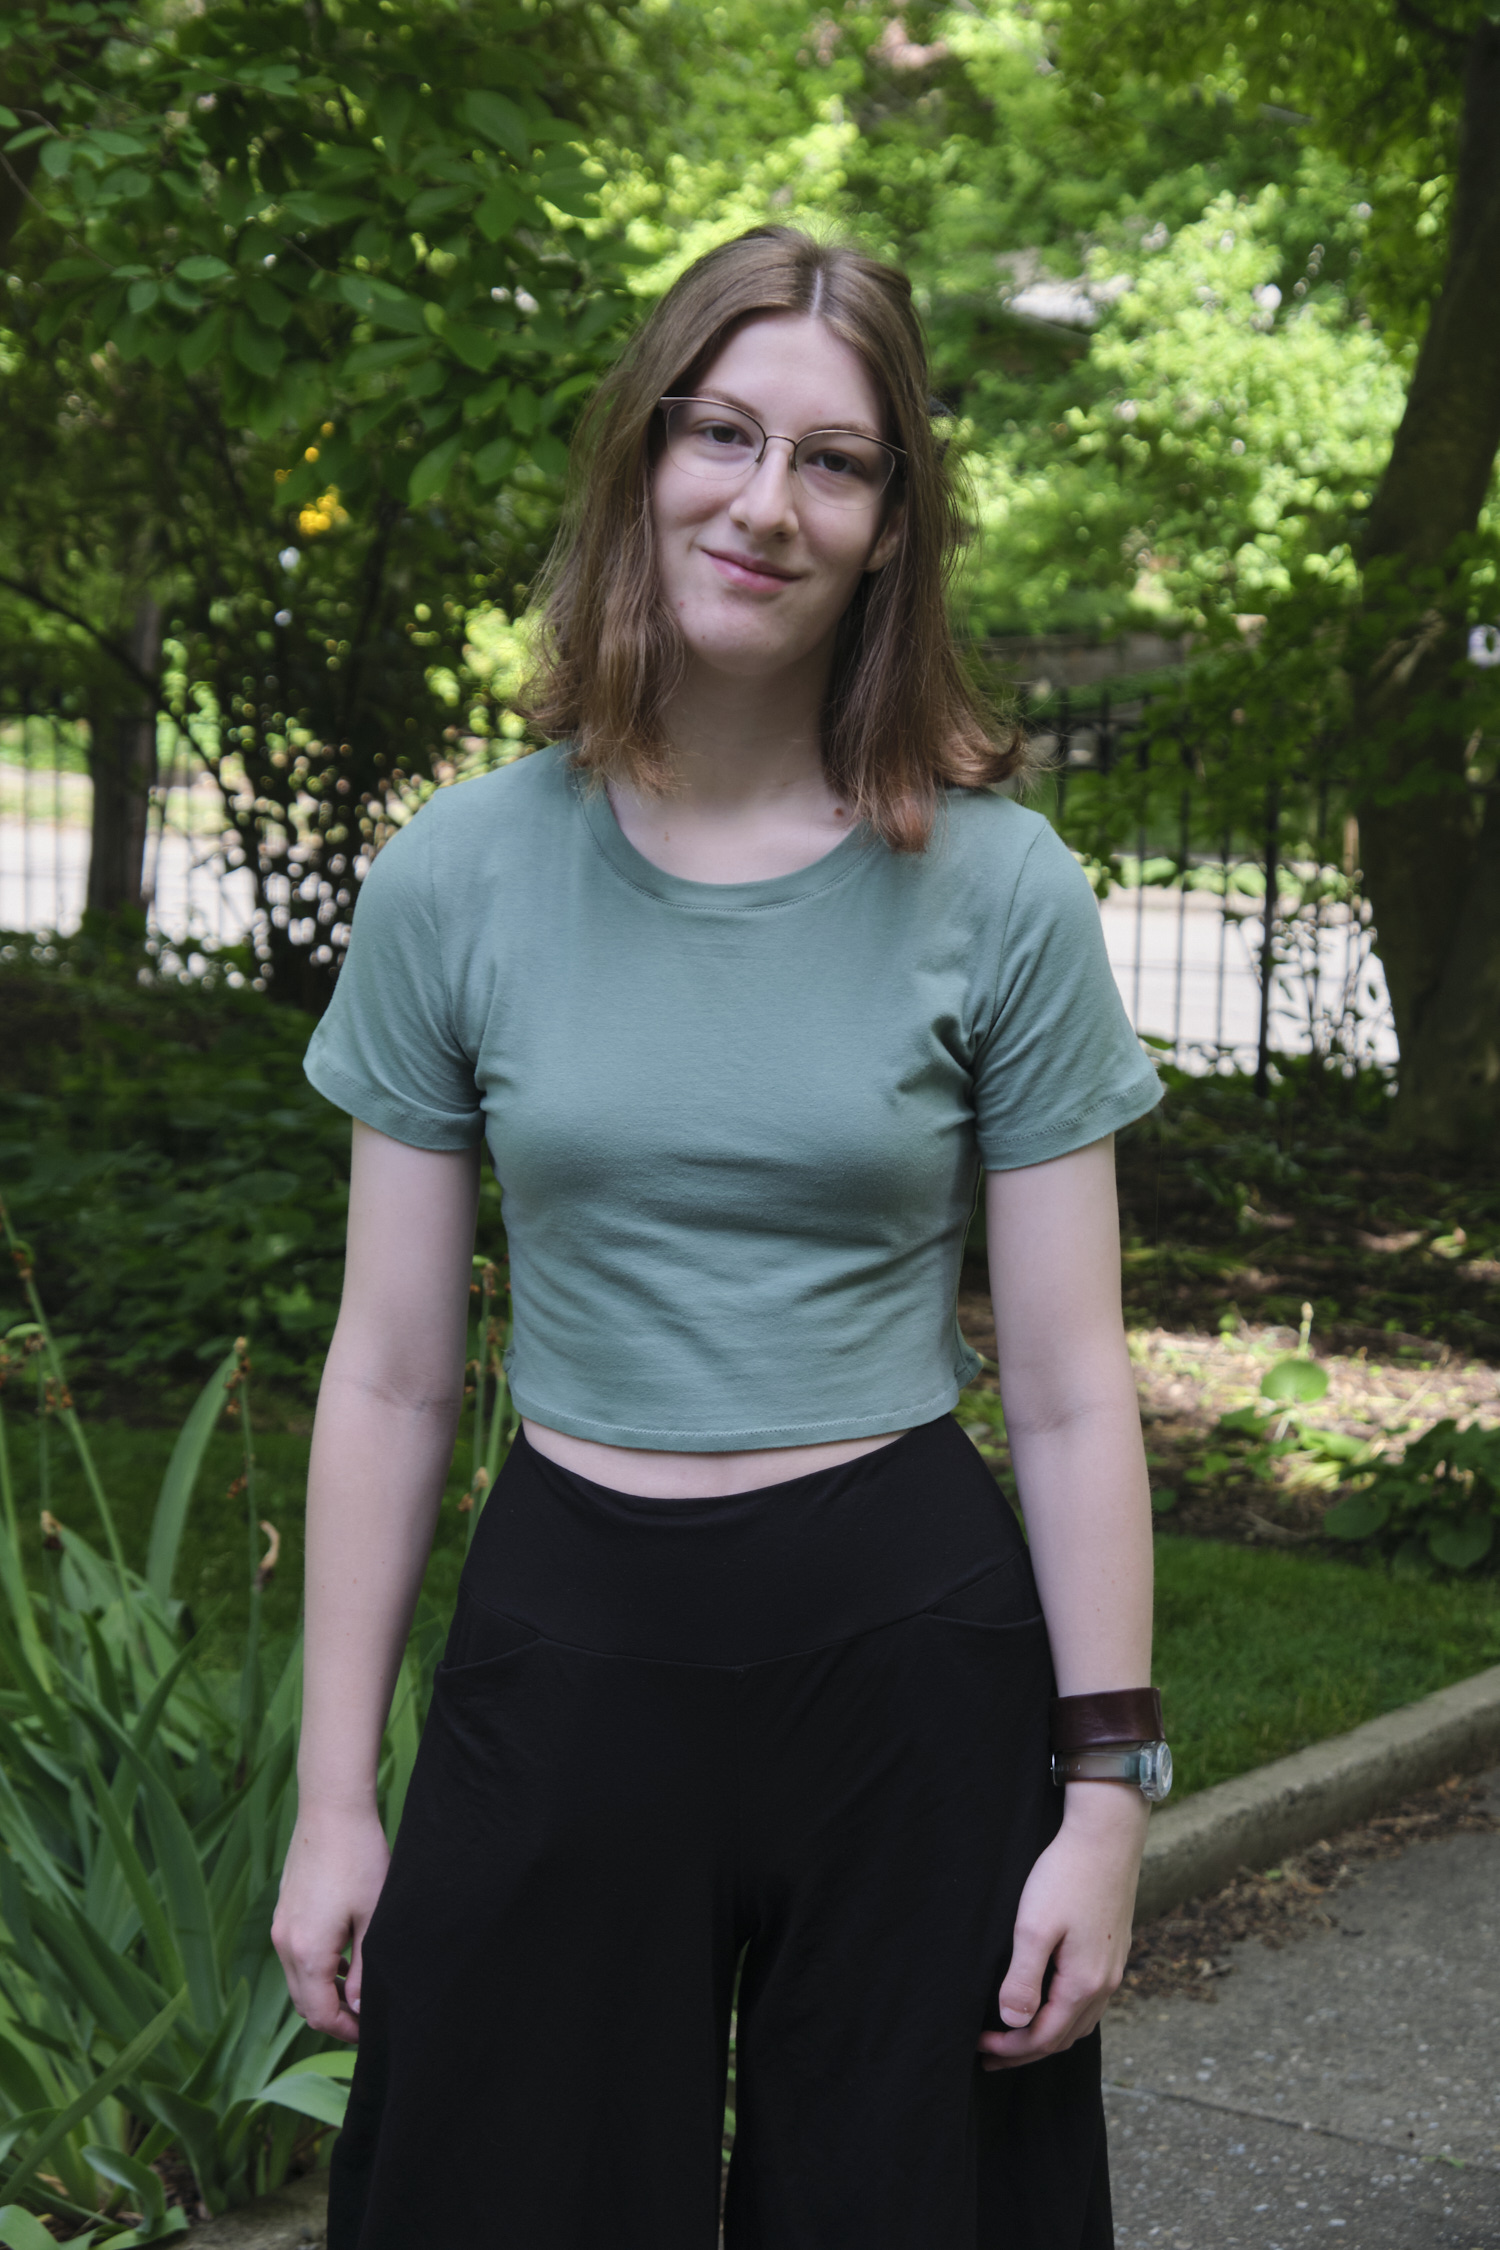
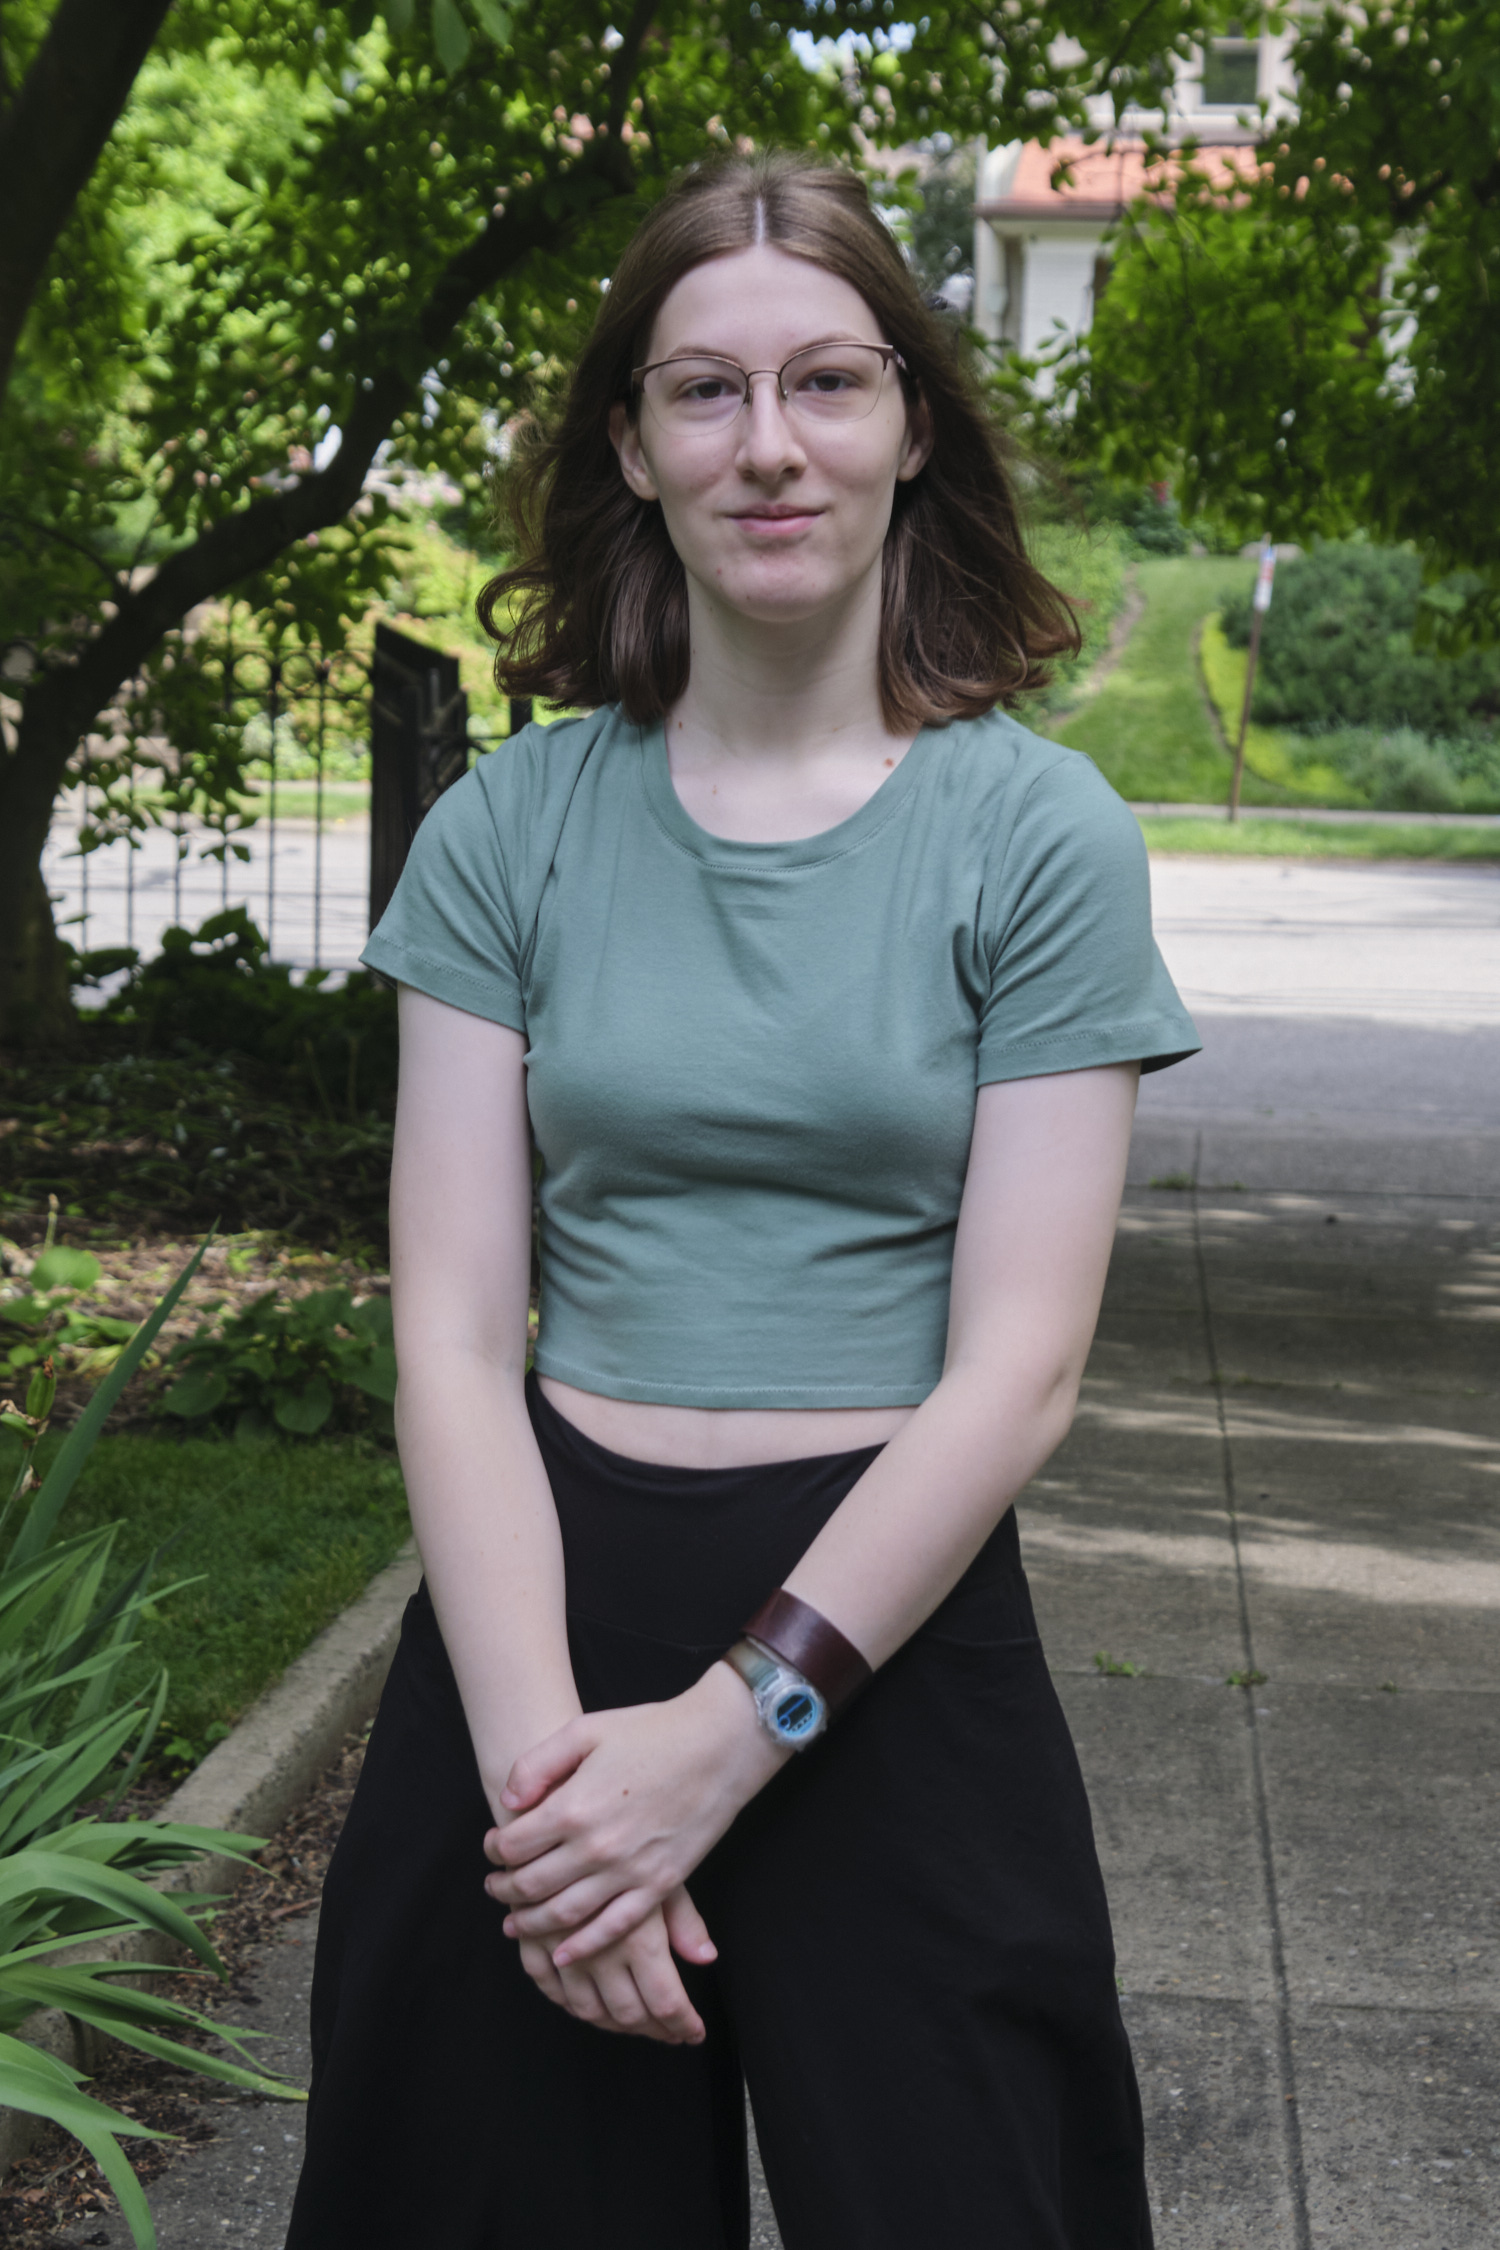
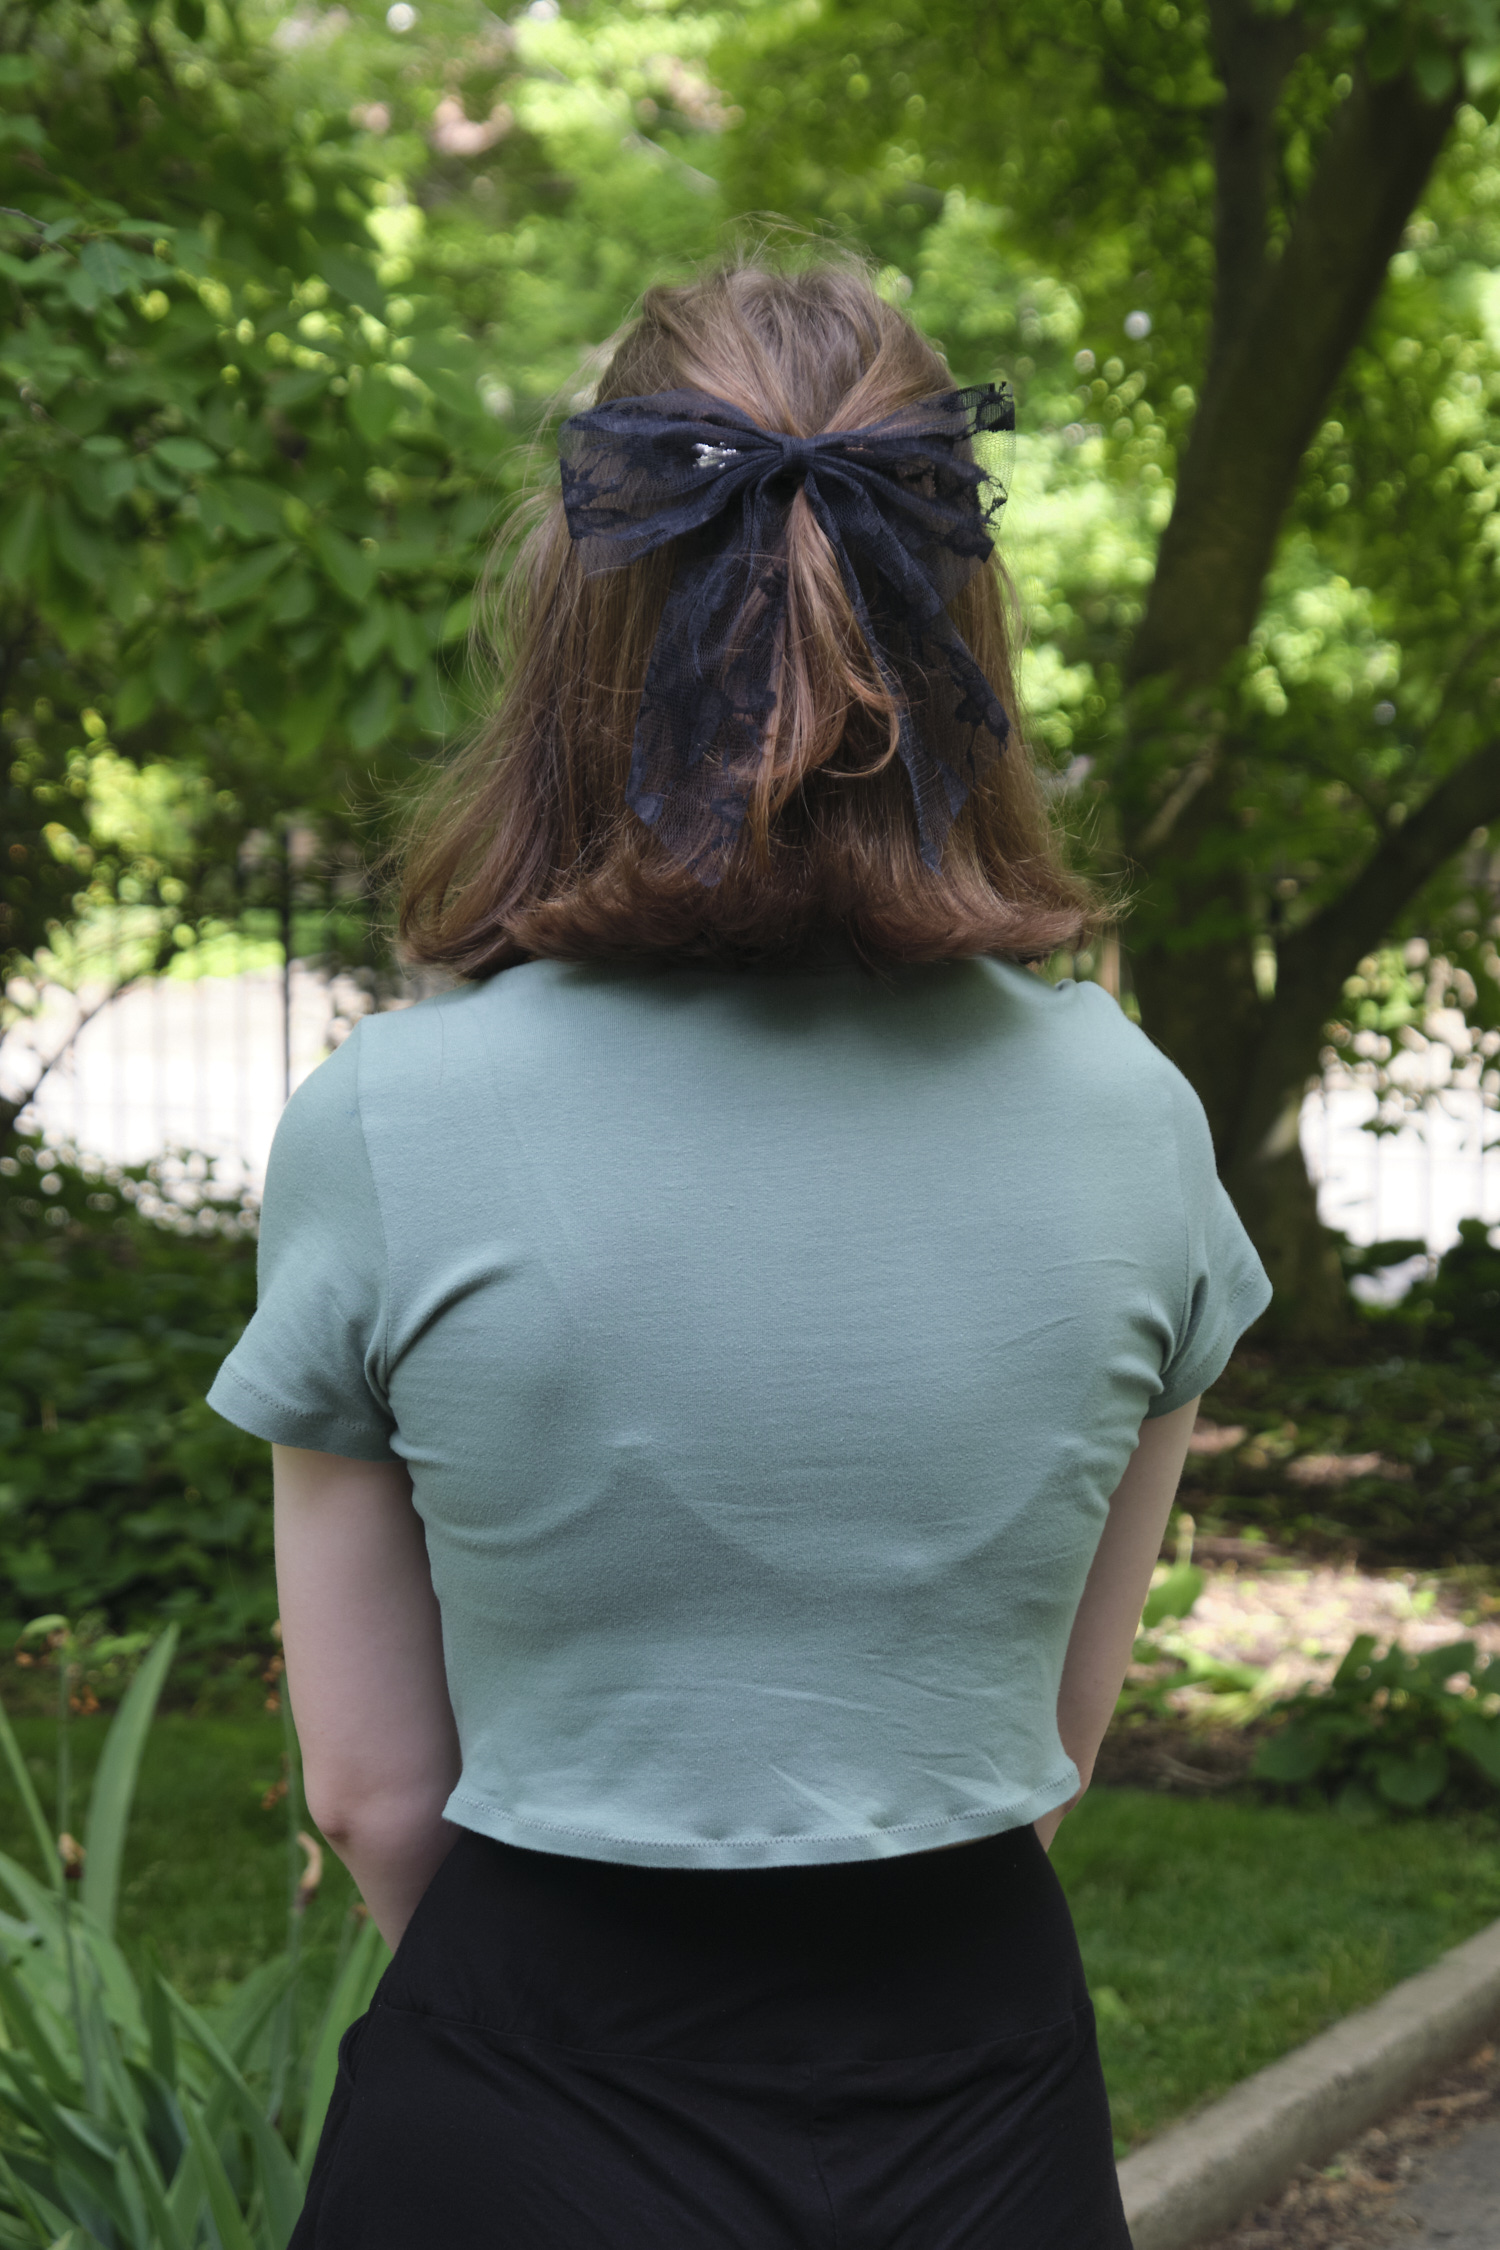
For my first big combo project I ended up serging four shirts and then cover stitching the bottom hems and sleeve hems of all of them at once. The shirts are made from a soft rayon/nylon/spandex Monaco rib knit from Mily Mae Fabrics. I used the Sinclair Demi and Tao patterns for the raglan shirts and the Sinclair Bondi pattern, cropped to the waist line for the short-sleeve shirt. I also used Bondi and color blocked the sleeves for the last shirt.
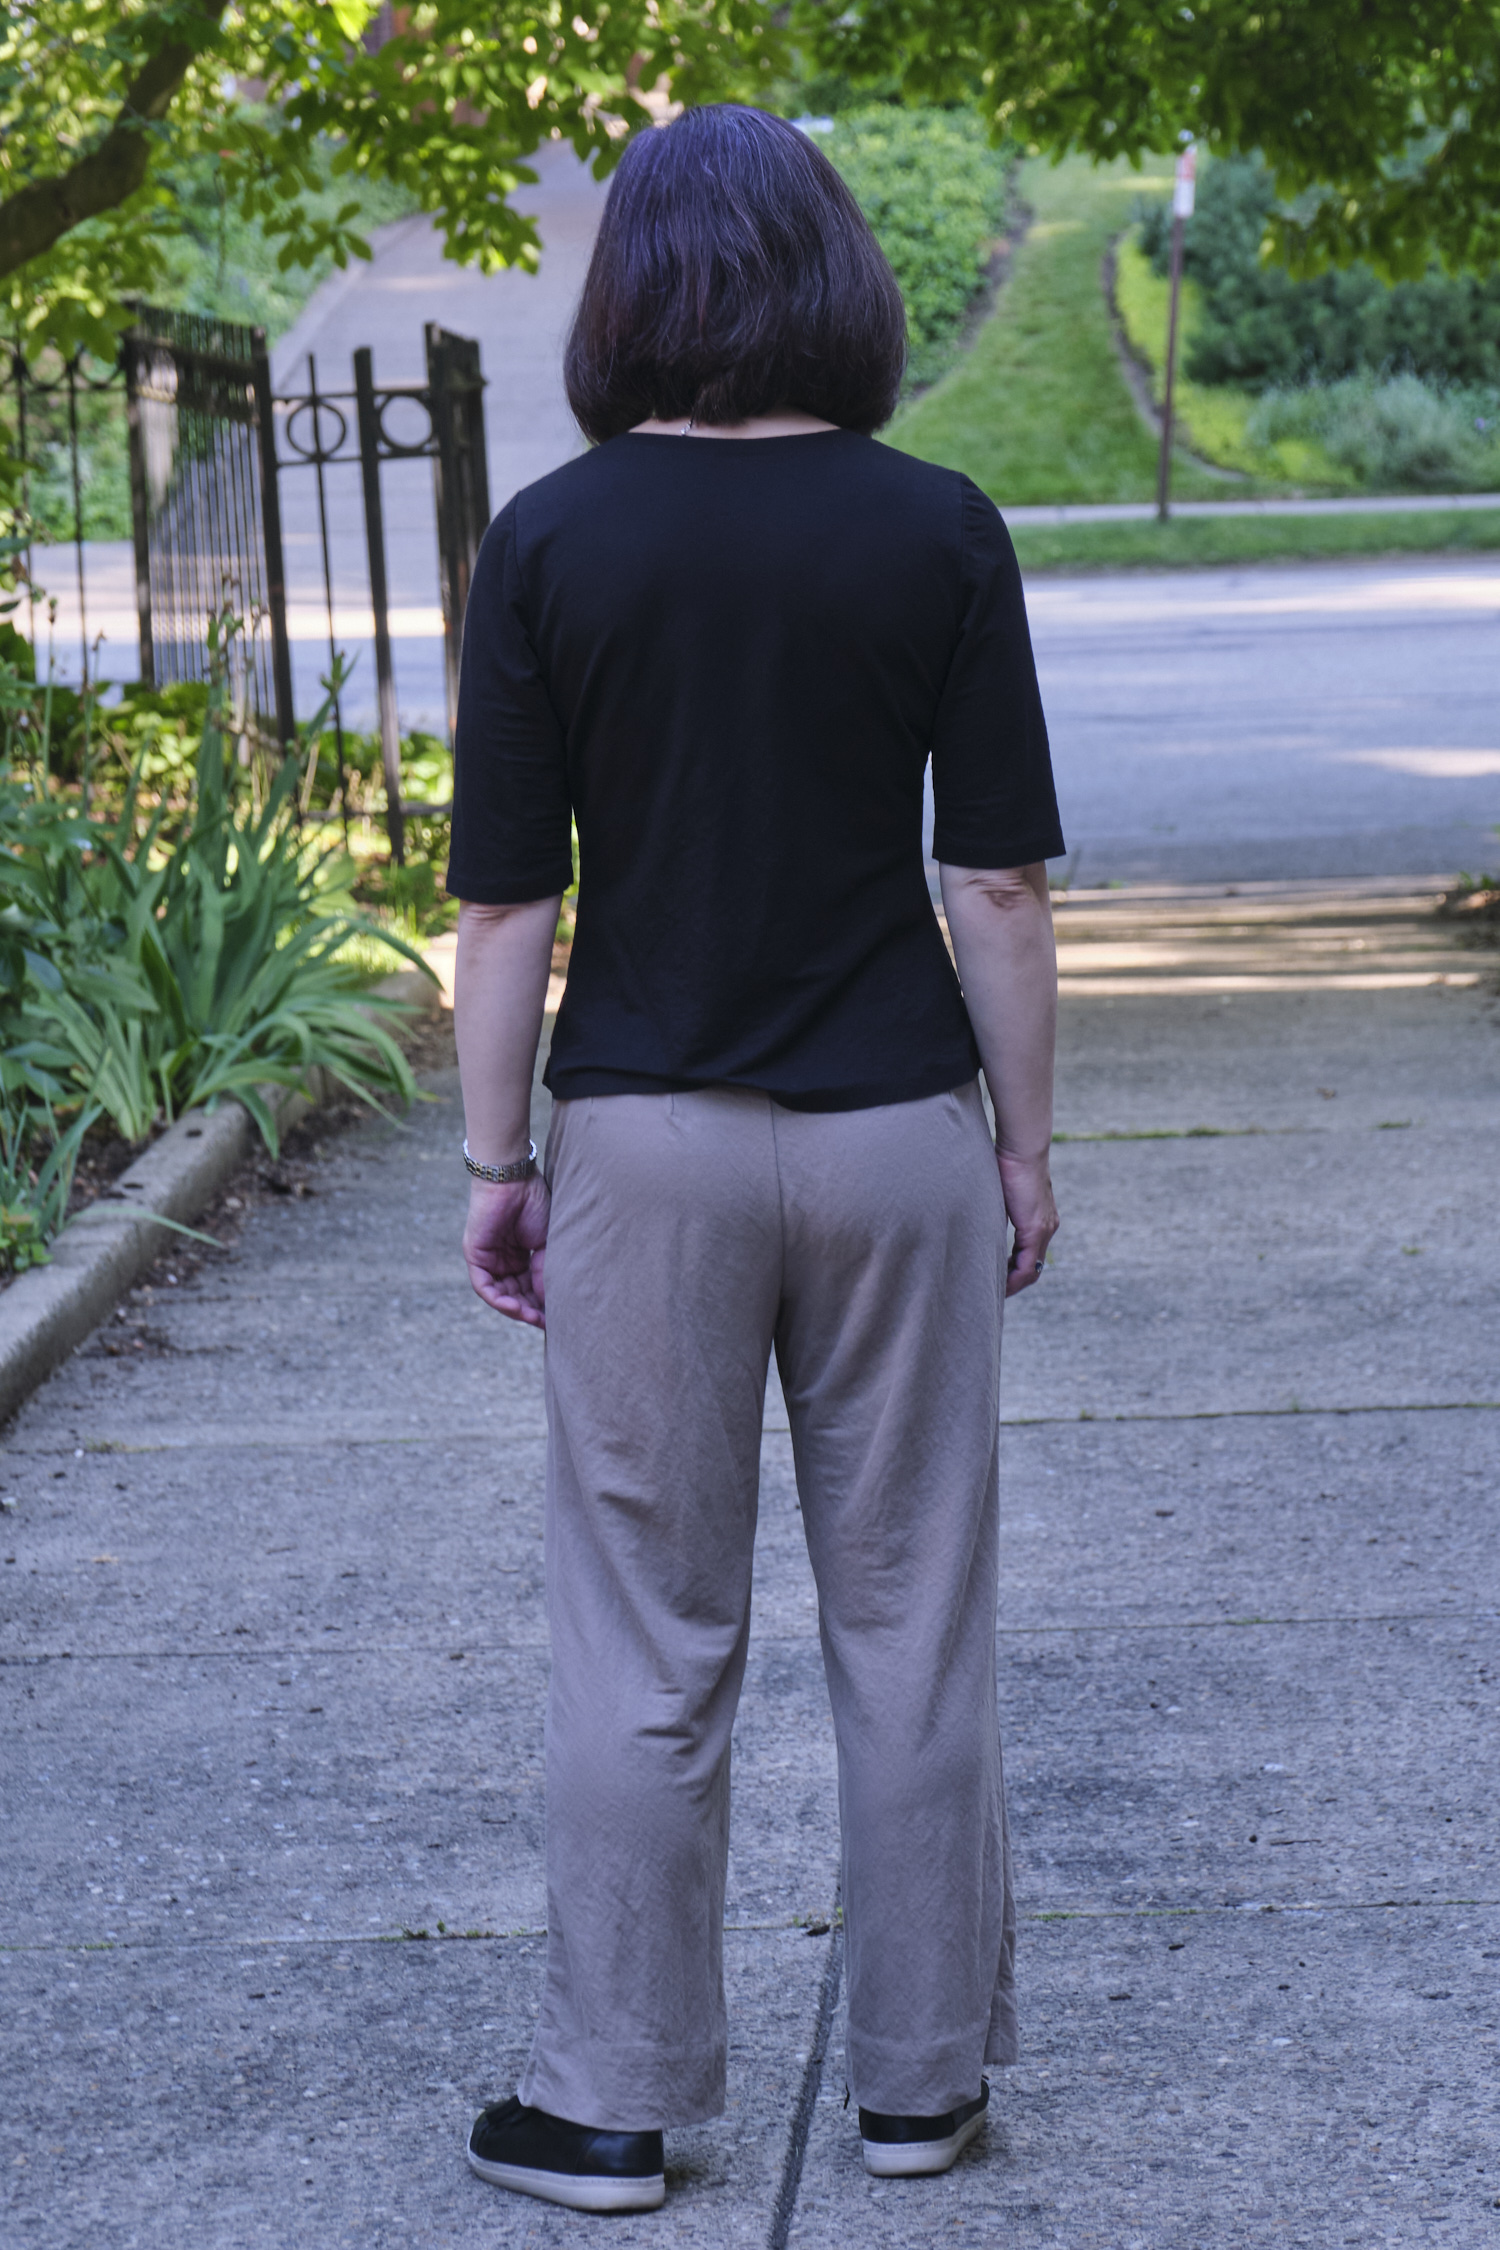
And I made a Sinclair Kai for my husband from a cotton lycra yarn-dyed rib knit in colors that coordinated with the kids’ shirts. (I’m wearing a Pattern Emporium Sweet Cheeks sweater in this photo that I made last winter in a cuddly brushed hacci sweater knit.) I was able to switch the serger back to serging mode and switch to off-white thread pretty quickly. But I was pressed for time and a bit lazy so I just zigzagged the hem on my sewing machine rather than switching it back to cover stitch mode again.
I’m looking forward to a lot more triumphant sewing yet to come!
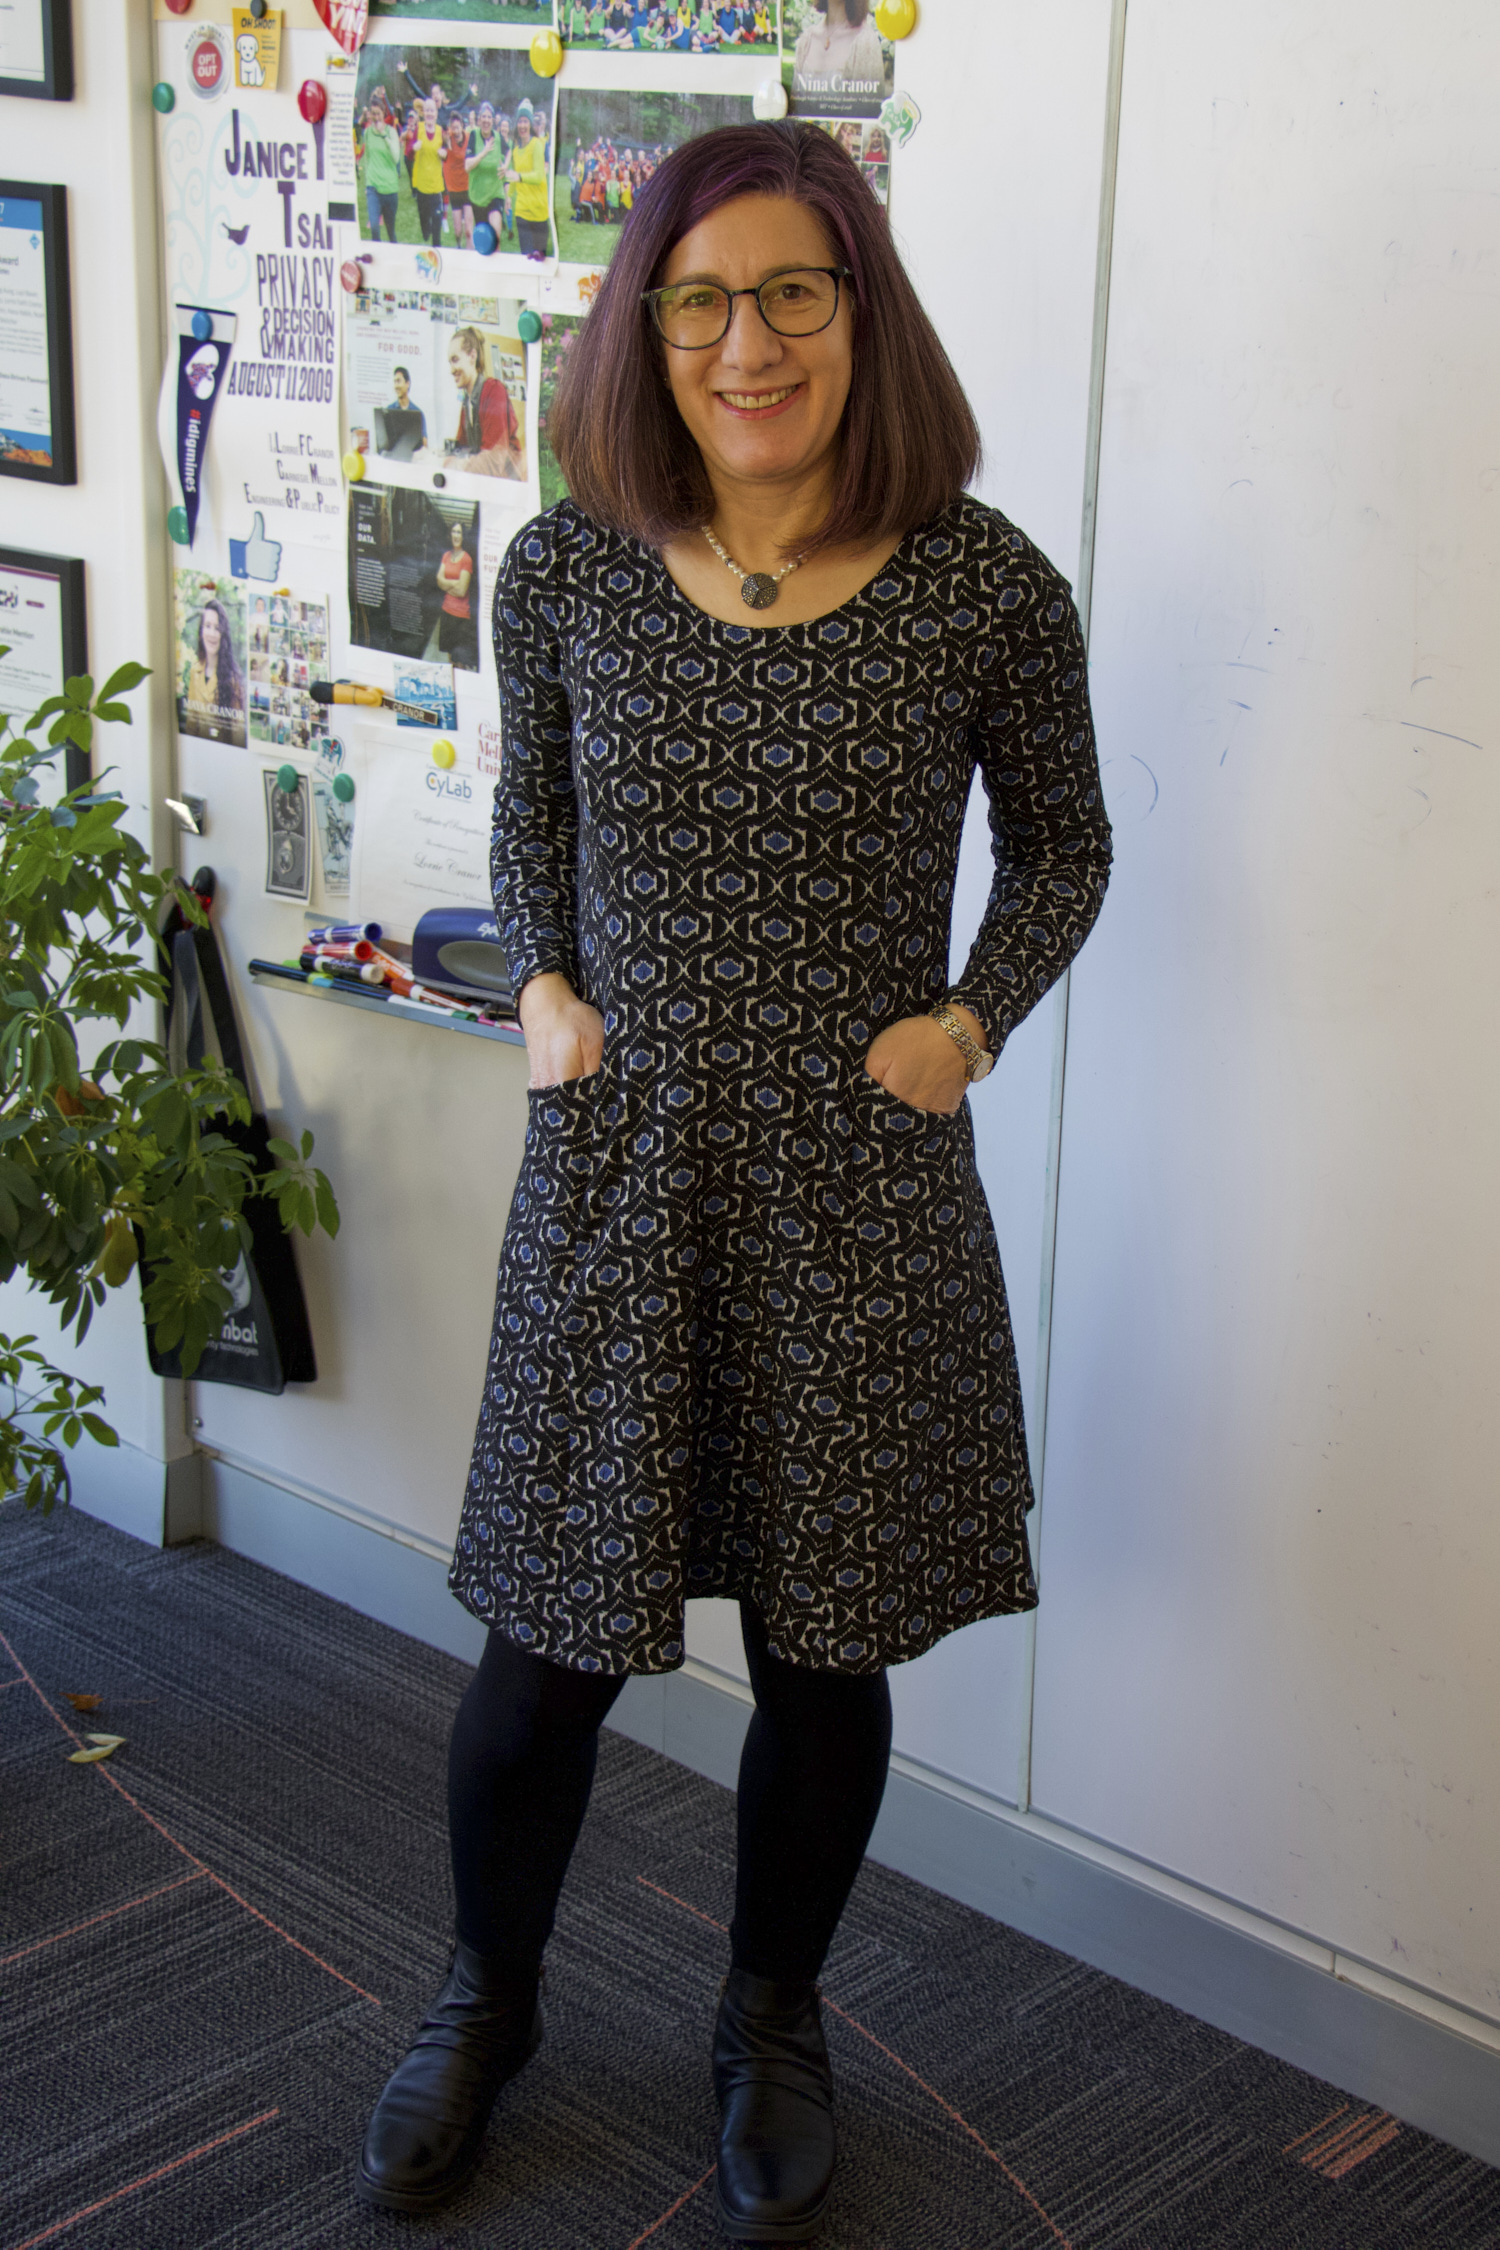
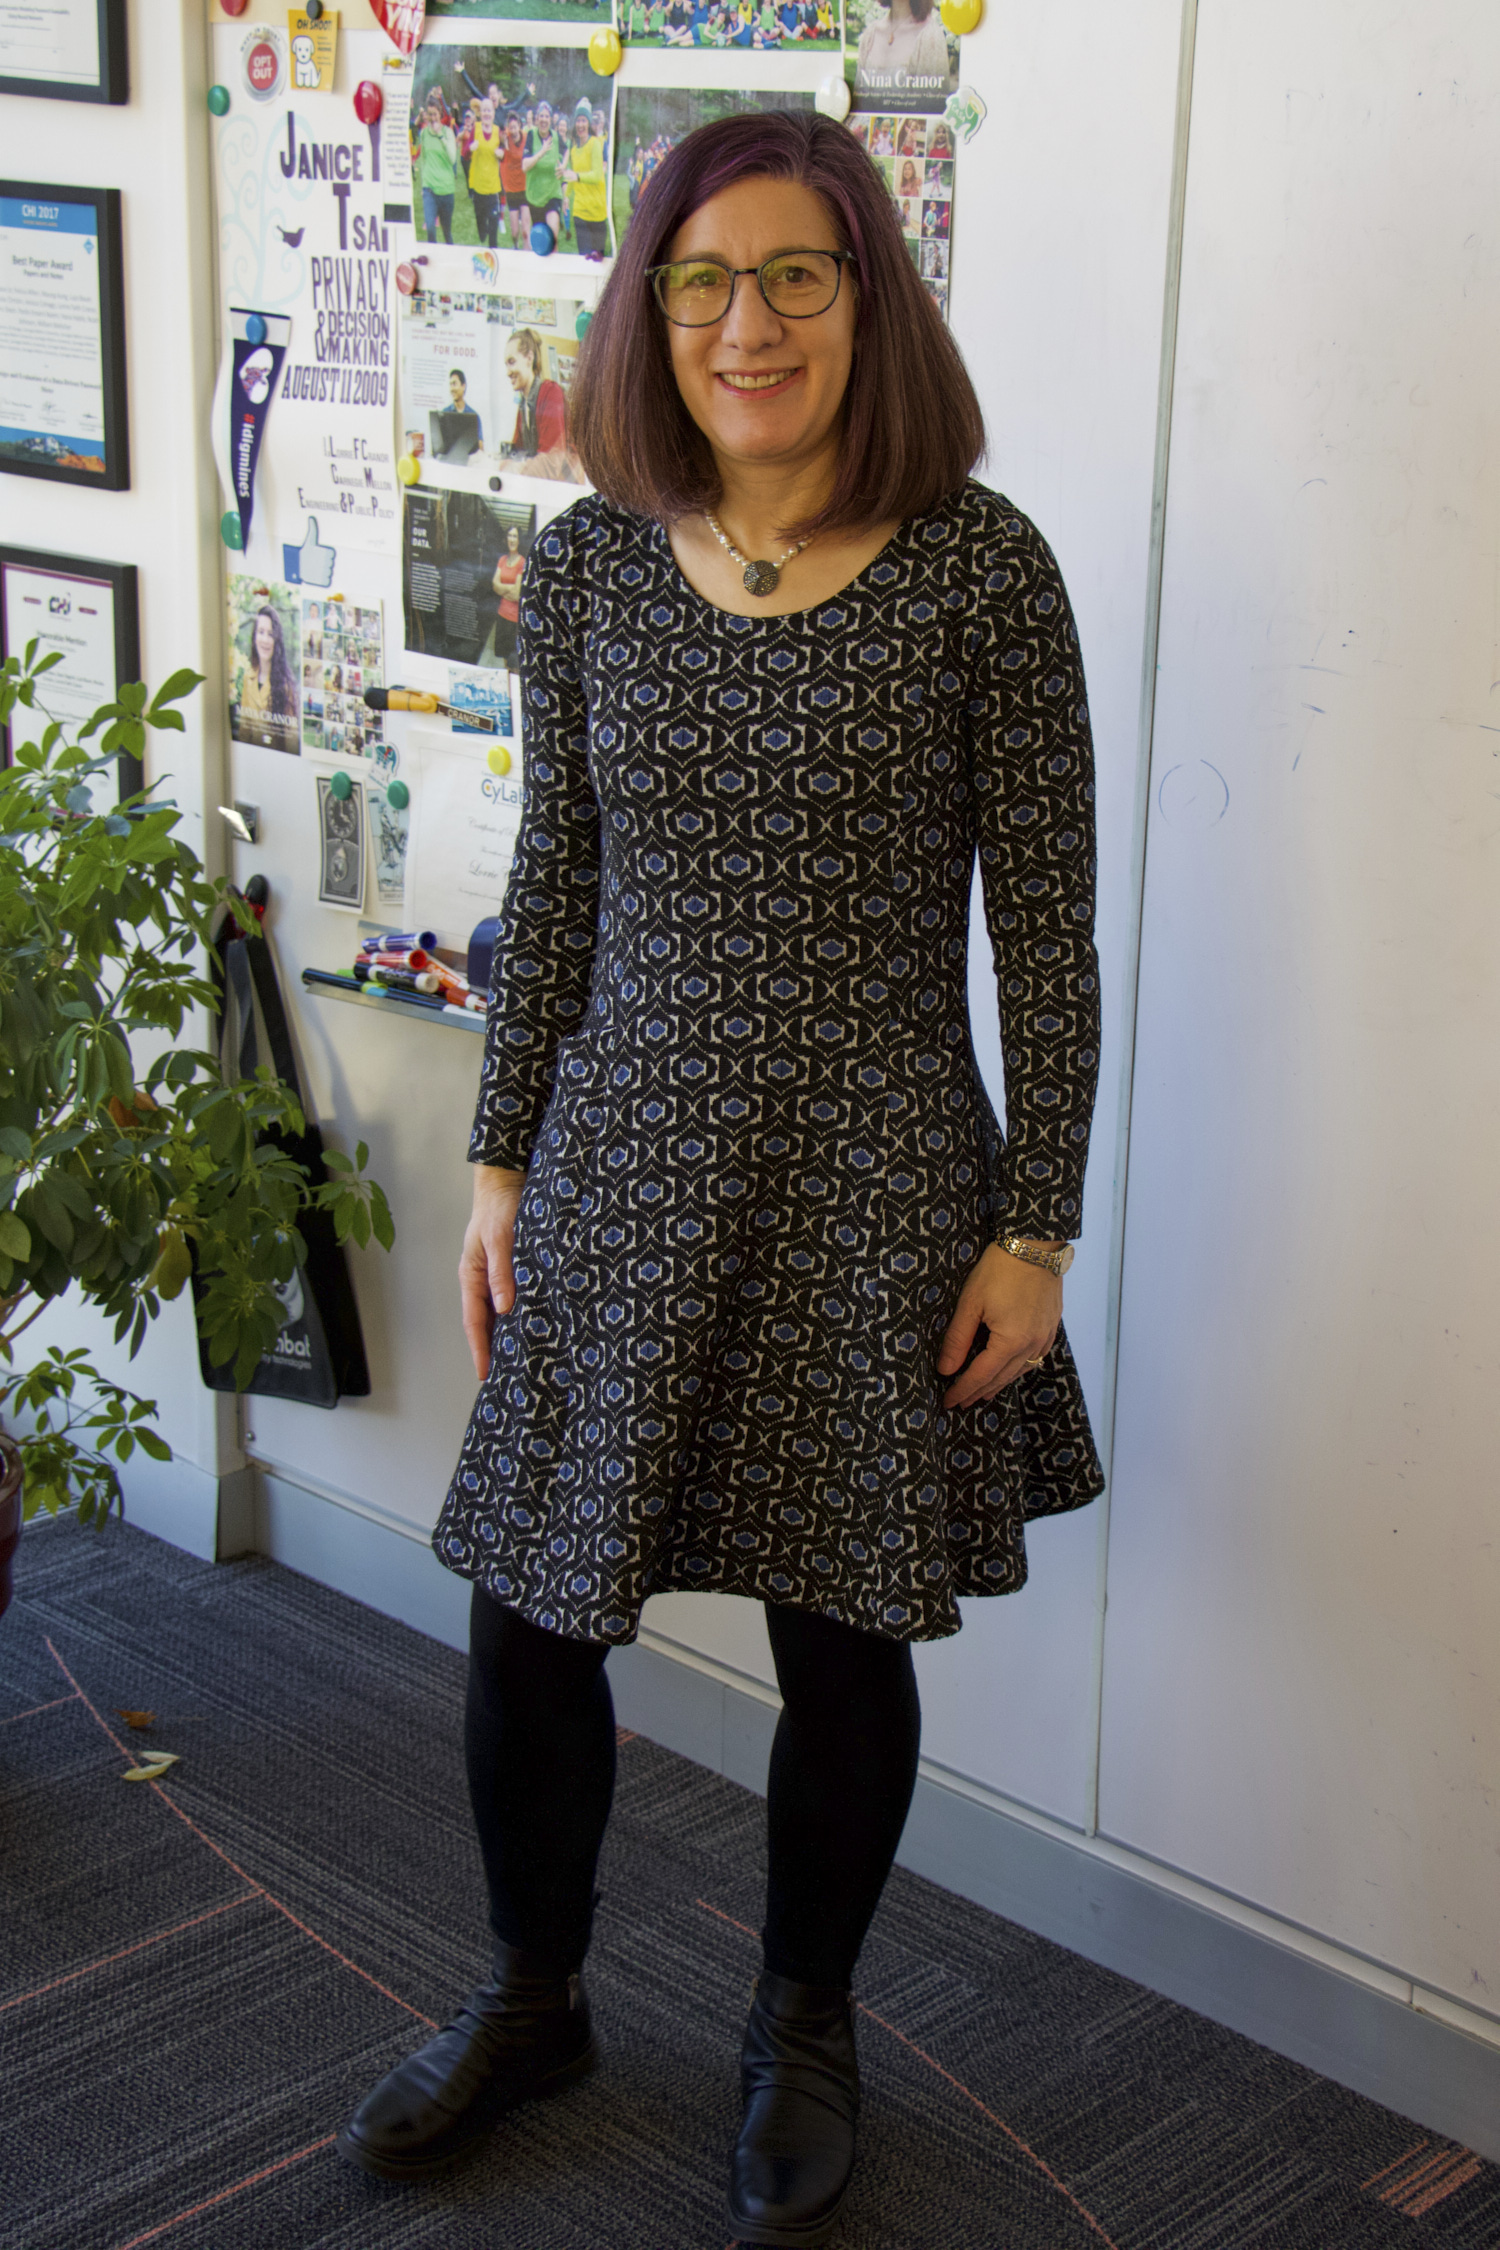
Over Thanksgiving weekend I made my fourth Alana dress. It was my first Sinclair pattern and still one of my favorites. It’s supposed to fit somewhat loosely at the waist, but I’ve altered the size 4p pattern a bit to remove most of the ease at the waist to get exactly the fit I want. After initially making it according to the pattern and then experimenting with shaving a bit off all the princess seams, I now have my alterations marked on my PDF pattern and I was able to cut my modified version from the start. (Also, having recently tweaked my projector setup I can project each pattern piece onto my cutting table in its entirety without the need to shift.) The only other alteration I make is extending both the front and back facings to below my bra line, as I have done before. This time I made the above-the-knee-length option, so it is a couple of inches shorter than my other Alanas.
And, of course, I make the version with pockets! I love how the pockets fit between the front princess seams and don’t require the addition of side seam pocket bags.
For this version I selected a black, blue, and white geometric textured poly/rayon/spandex double knit that I bought from Cali Fabrics last spring. It’s a midweight, almost heavy knit with four-way stretch. It stretches well over the bodice, but also has enough body to give a nice fit and flare shape to the skirt. It is a comfortable cold-weather dress that will never need to be ironed.
I projected and cut this dress out on one day and sewed the whole thing together on another. There is a lot of princess seaming but it comes together pretty quickly, especially with a serger. There is no gathering, easing, or tricky seams to line up so it is a pretty straightforward pattern to sew.
I was so excited about my new dress that I wore it to work today and took some photos in my office!
A while ago I bought a couple of yards of PyLos LiKnit in almost every color. I’ve previously used the black, seafoam, lavender, and linen colors. There are also several lovely warm Fall colors that I have been contemplating using in coordinating garments for months.
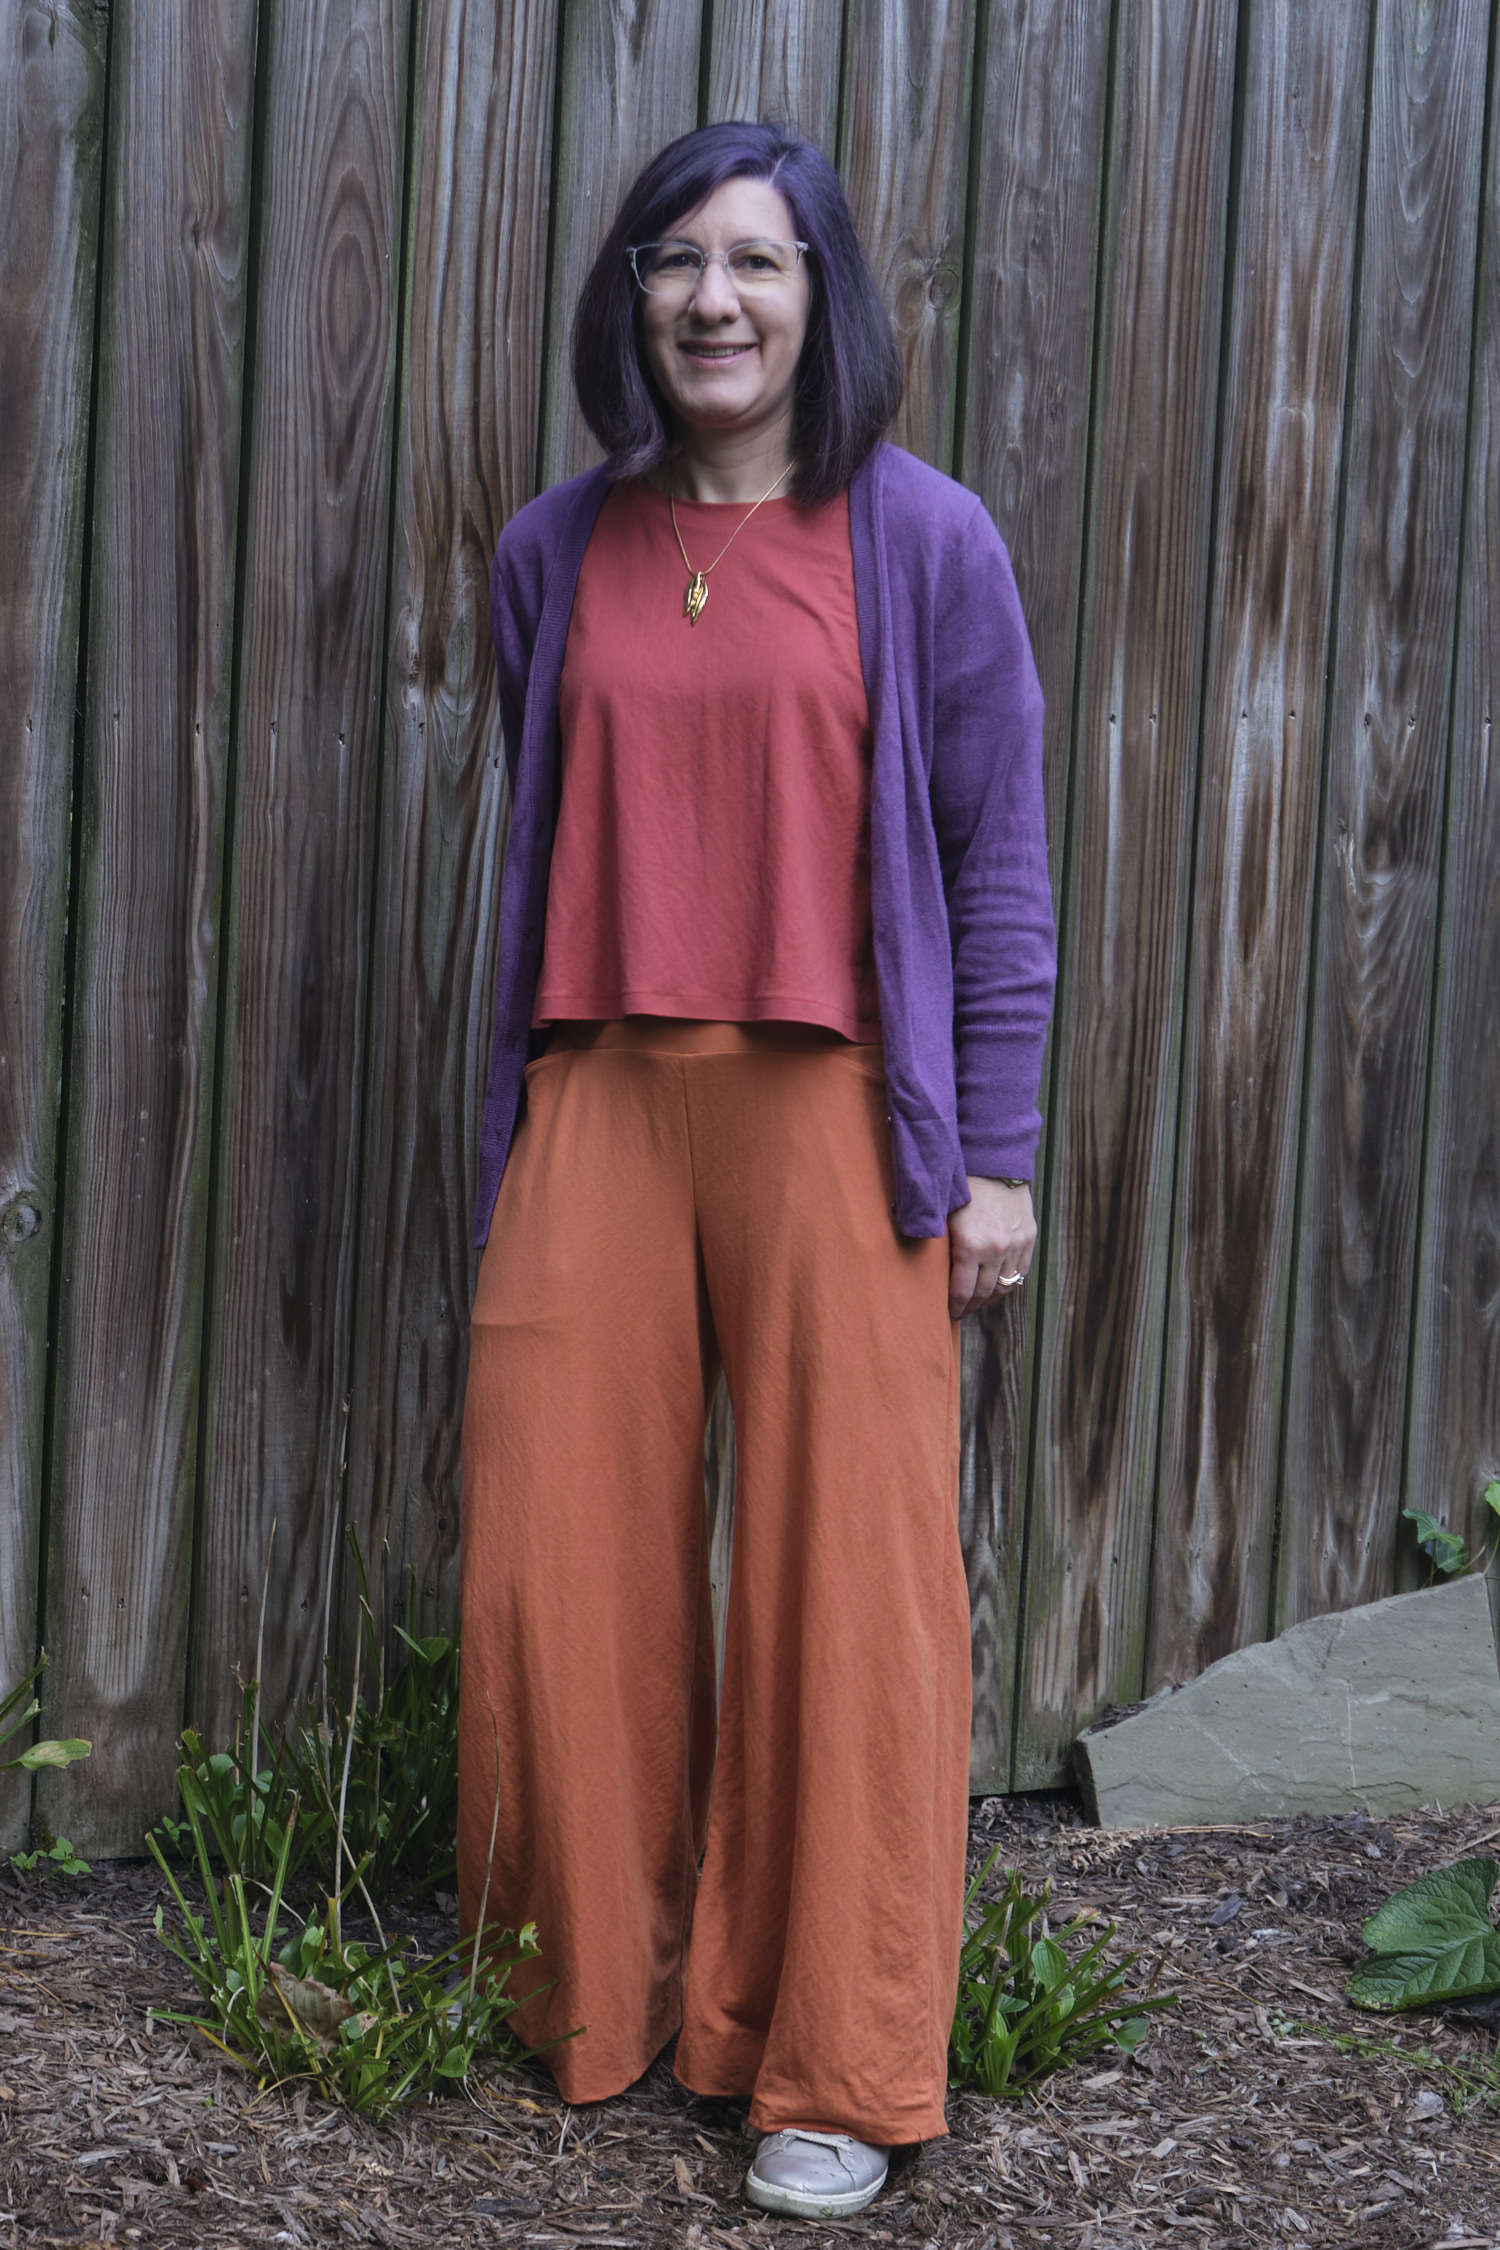
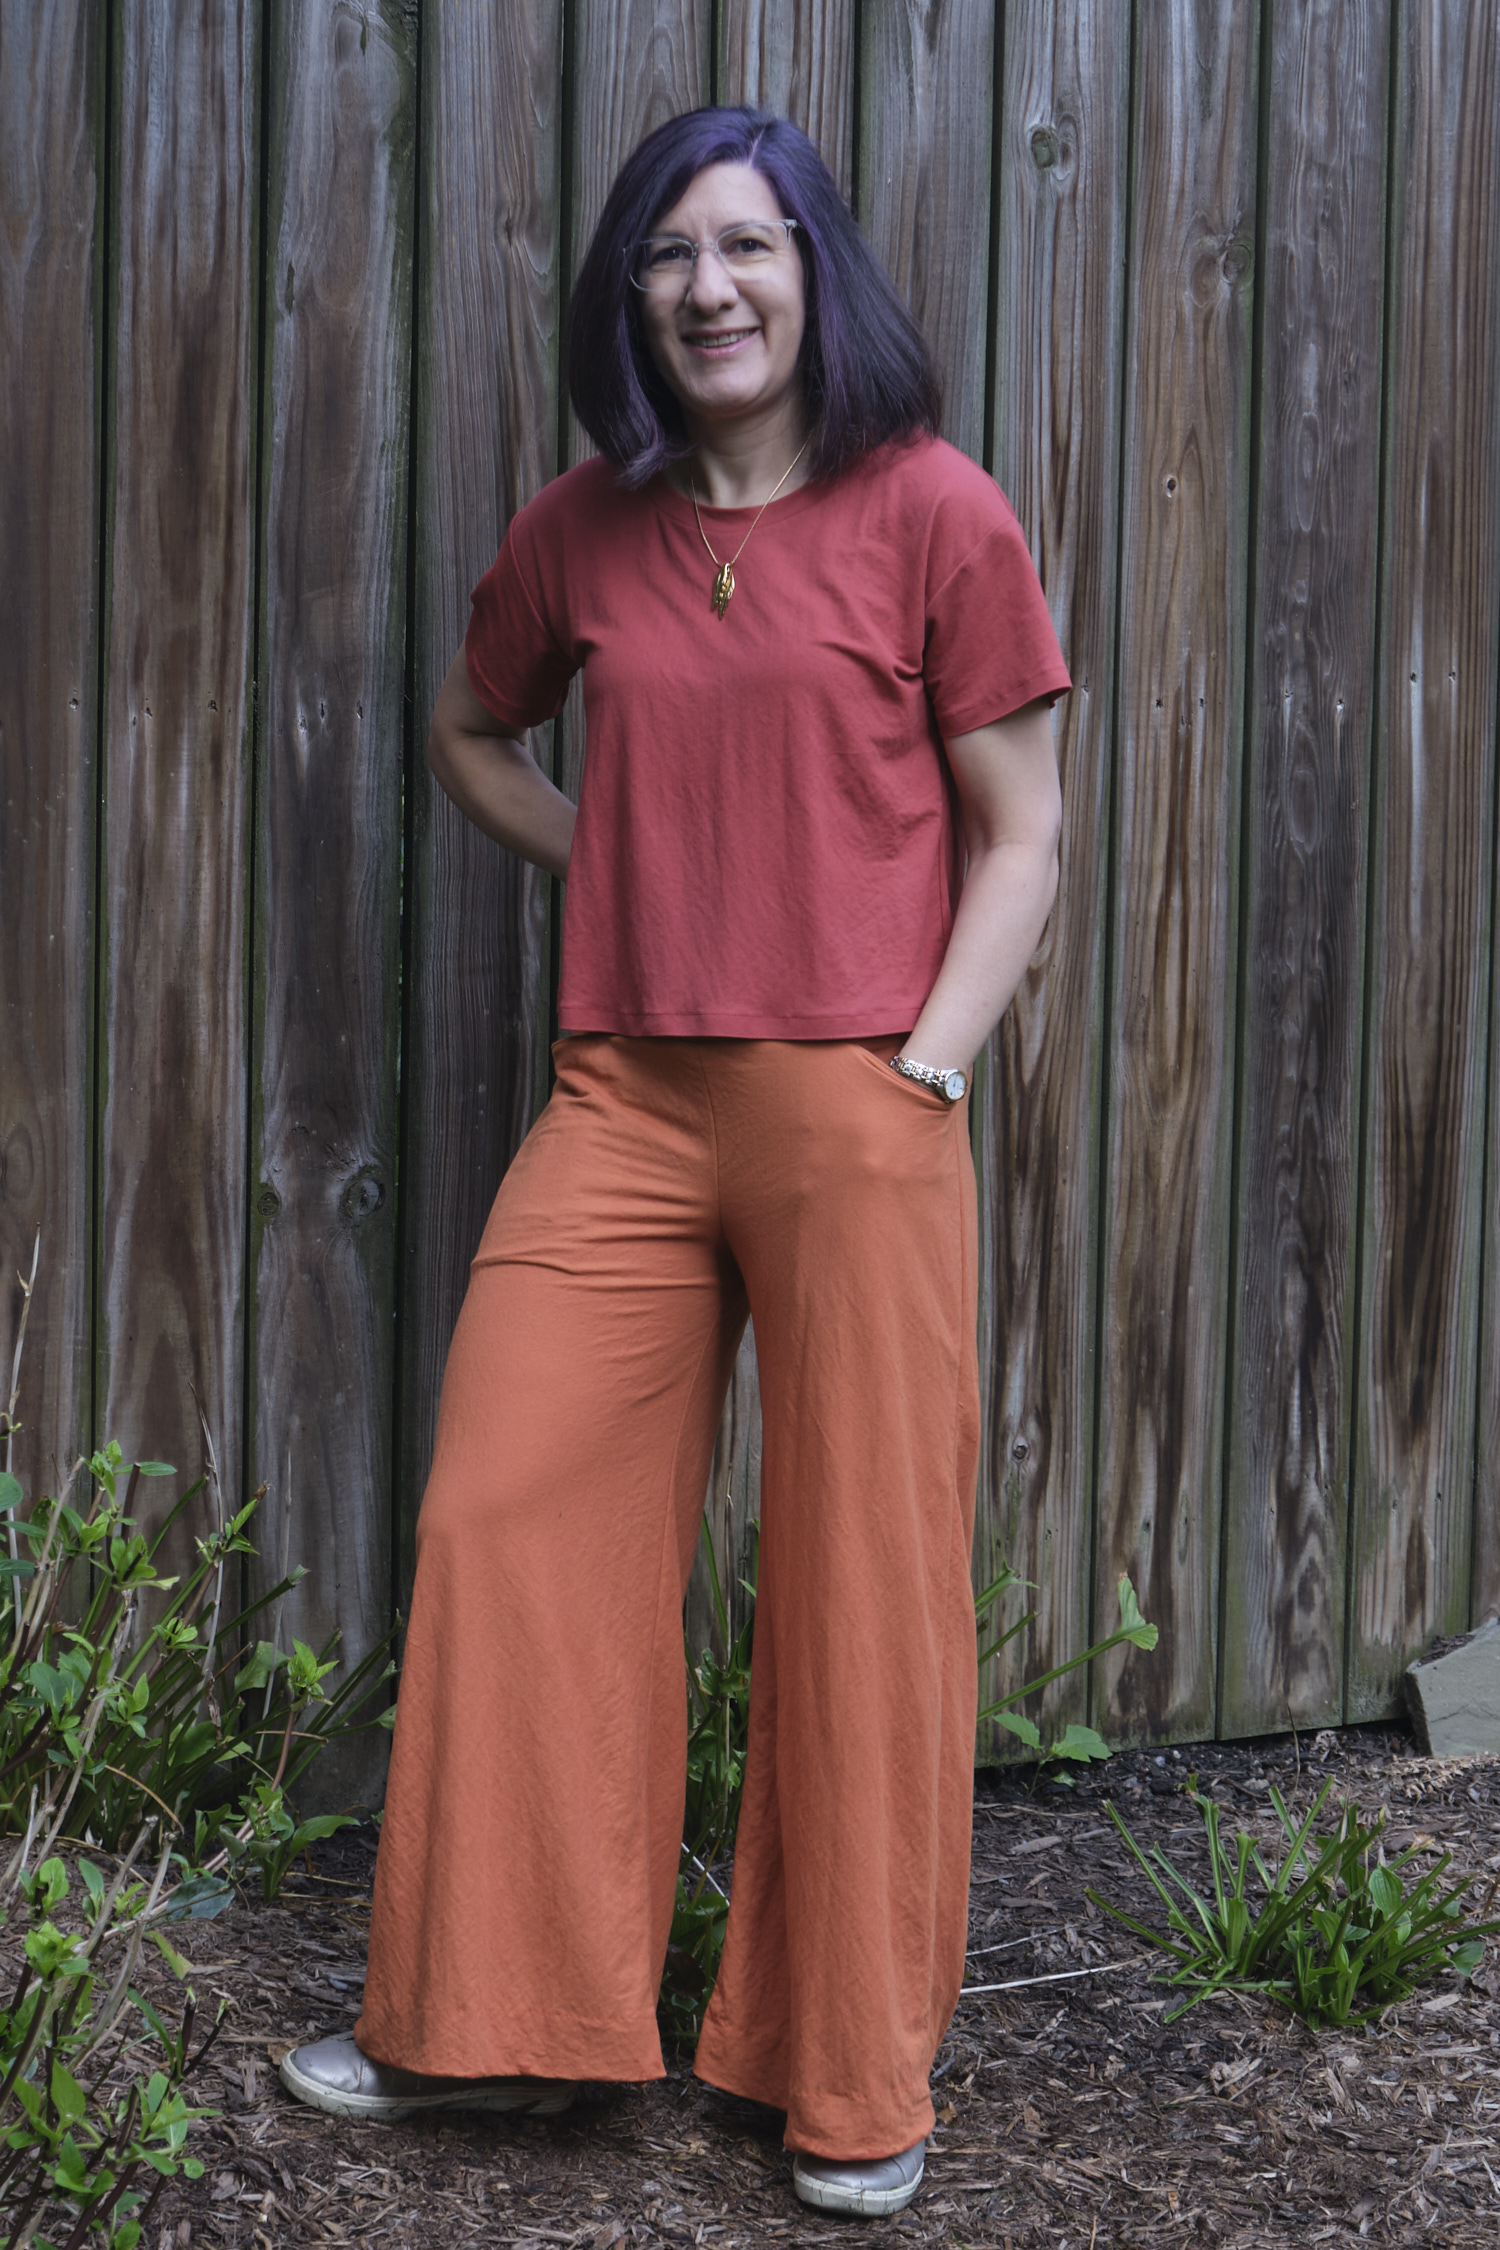
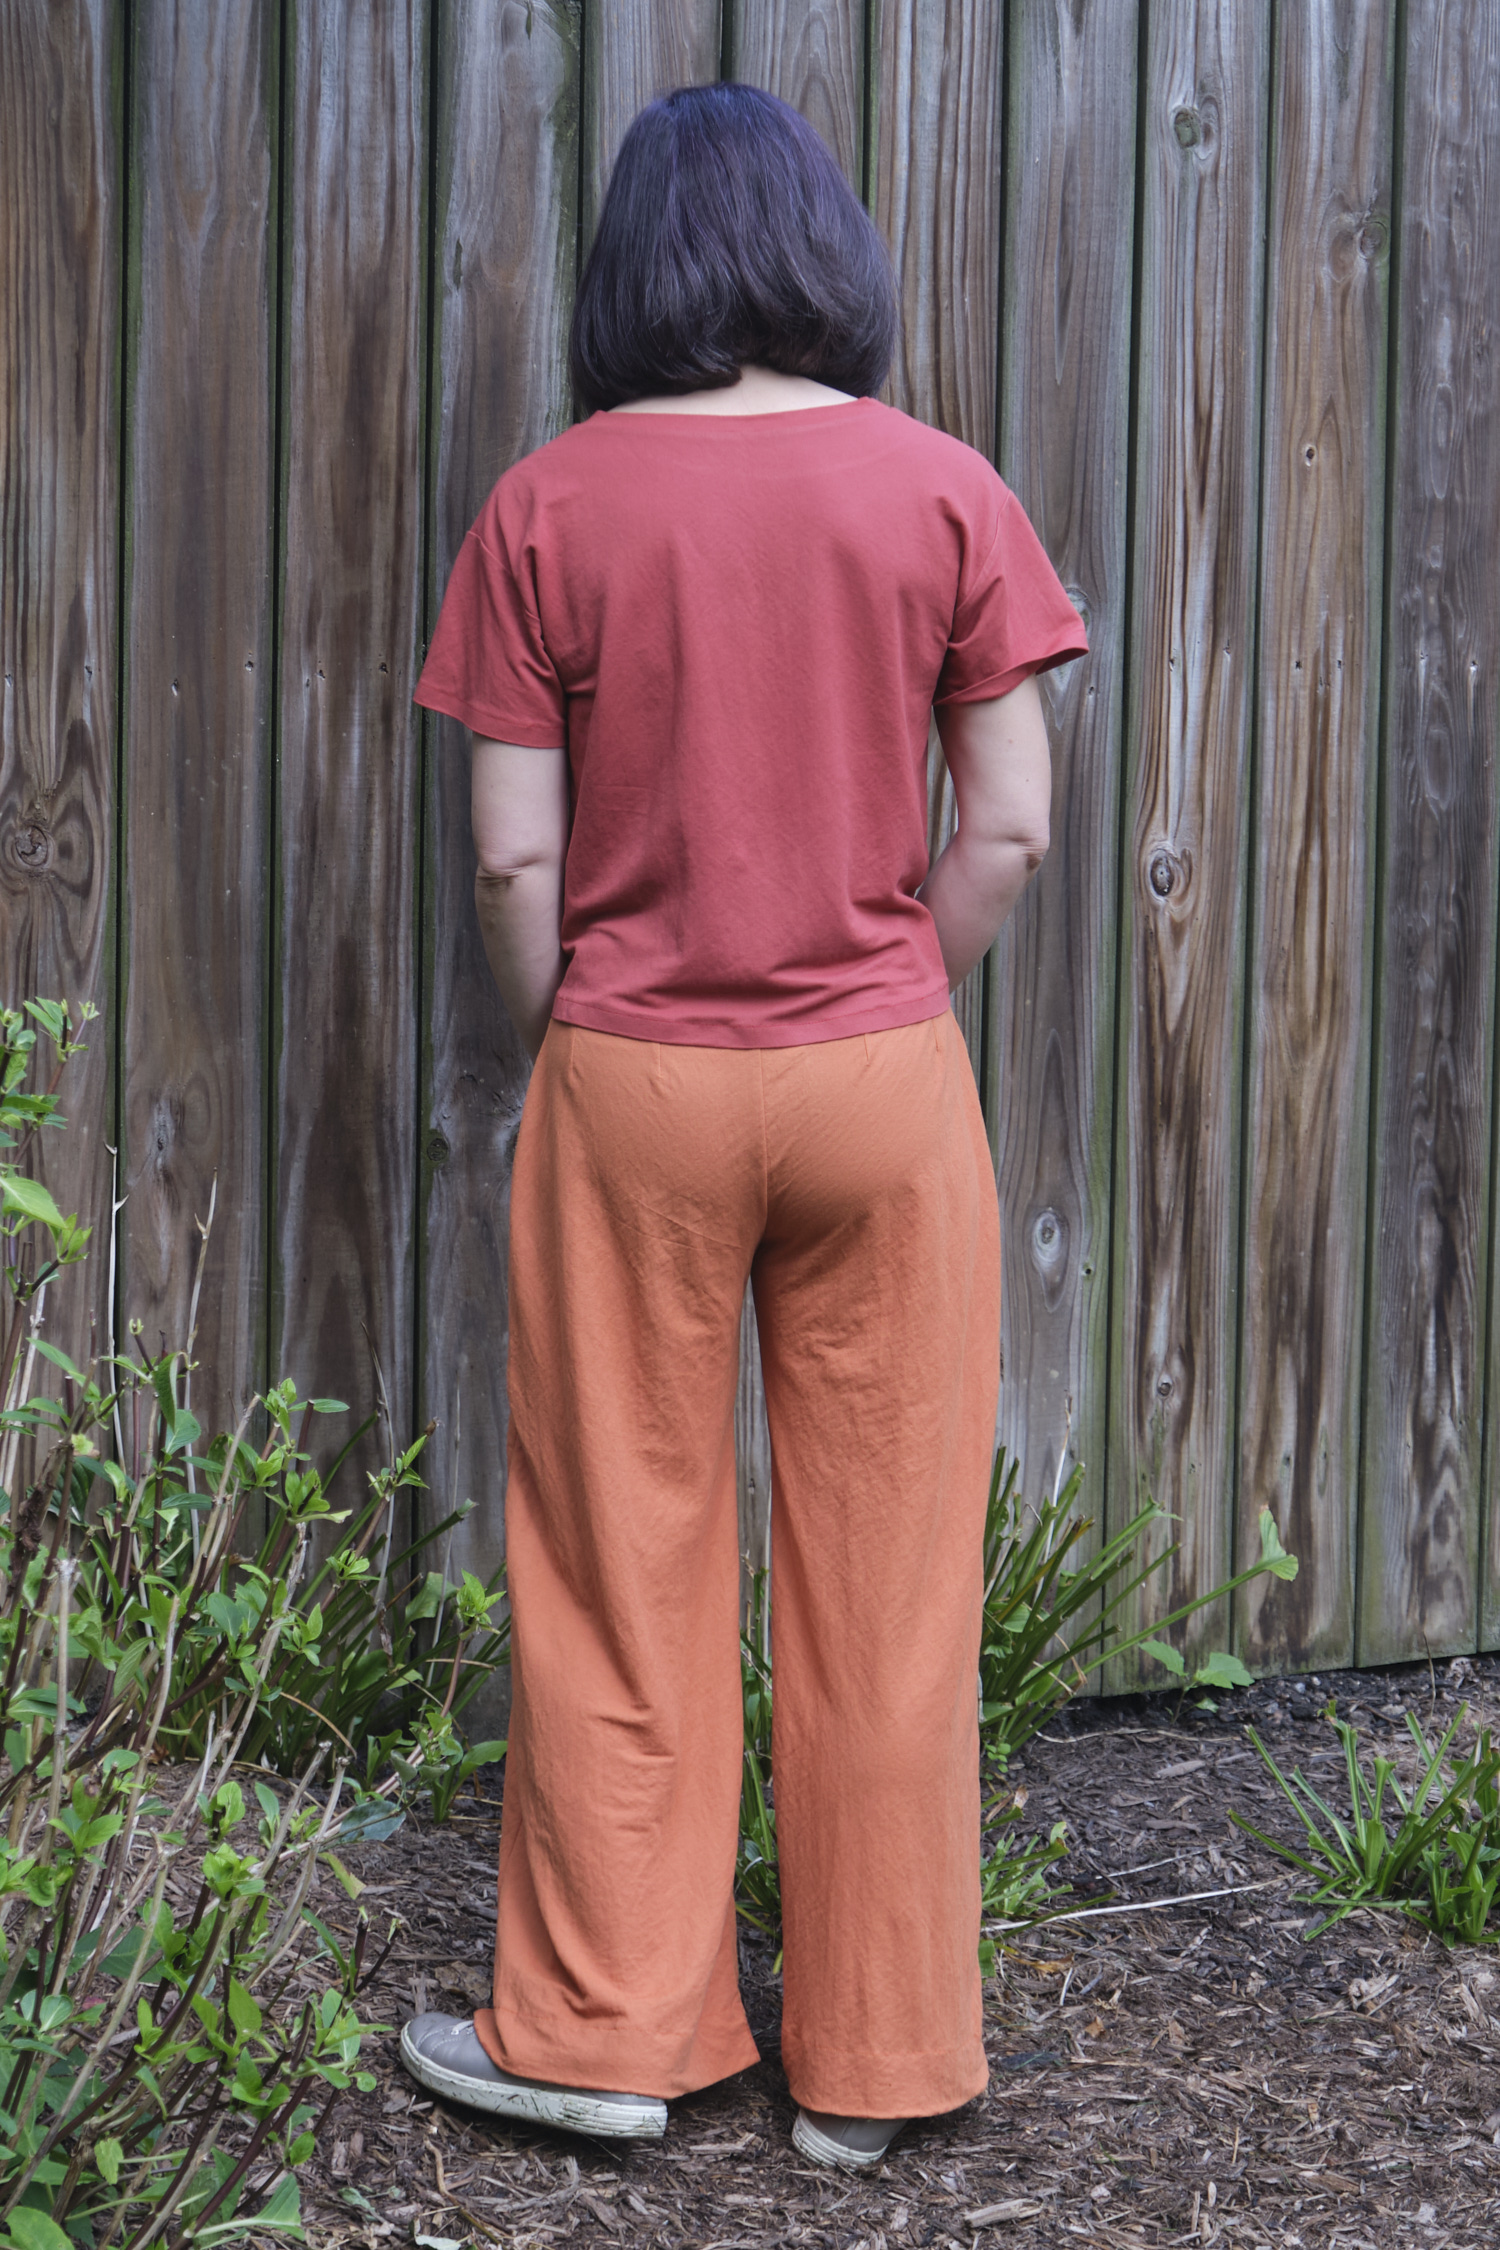
I started with a pair of orange pants (LiKnit “metal rust” color), very similar to my previous Pattern Emporium Urban Boldly mashup pants with the low rise size AU 10 Urban pants mashed with the Walk Boldly wide leg and a high contour waistband lined in athletic knit. This time I tweaked the contour waistband a bit from my last mashup and sewed half-inch elastic into the waistband.
I wanted a LiKnit top to go with the pants. I previously had made a black Sinclair Bondi LiKnit top, but I find the LiKnit doesn’t quite stretch enough around the bust and has drag lines, even though I sized up. I decided either darts or a boxier cut was probably needed for a LiKnit top so I went with the Sinclair Loop drop shoulder knit top pattern, which I had previously used to make a sweater. I made this one in Marsala LiKnit with the scoop neck, cropped length, simple hemmed bottom. I think this pattern works well with the LiKnit fabric. The LiKnit stretches surprisingly well for the neck band. I would like to try this pattern with a narrower neck band too. I think the split hem might also work well with this fabric.
I actually finished the top and pants back in August and took them on my Switzerland trip. I didn’t post these photos earlier because I have plans to complete my me-made Fall ensemble with a jacket made from light mustard LiKnit. But I’ve been super busy with other things, my sewing machine is in the shop, and I need to finish a quilt and some pants for my daughter before I sew any more clothes for myself. So the mustard jacket may not materialize for a while. In the mean time, I’ve been wearing the outfit with a store-bought purple sweater. I also have a surprising number of other tops and jackets in my wardrobe that go with orange pants… who knew?
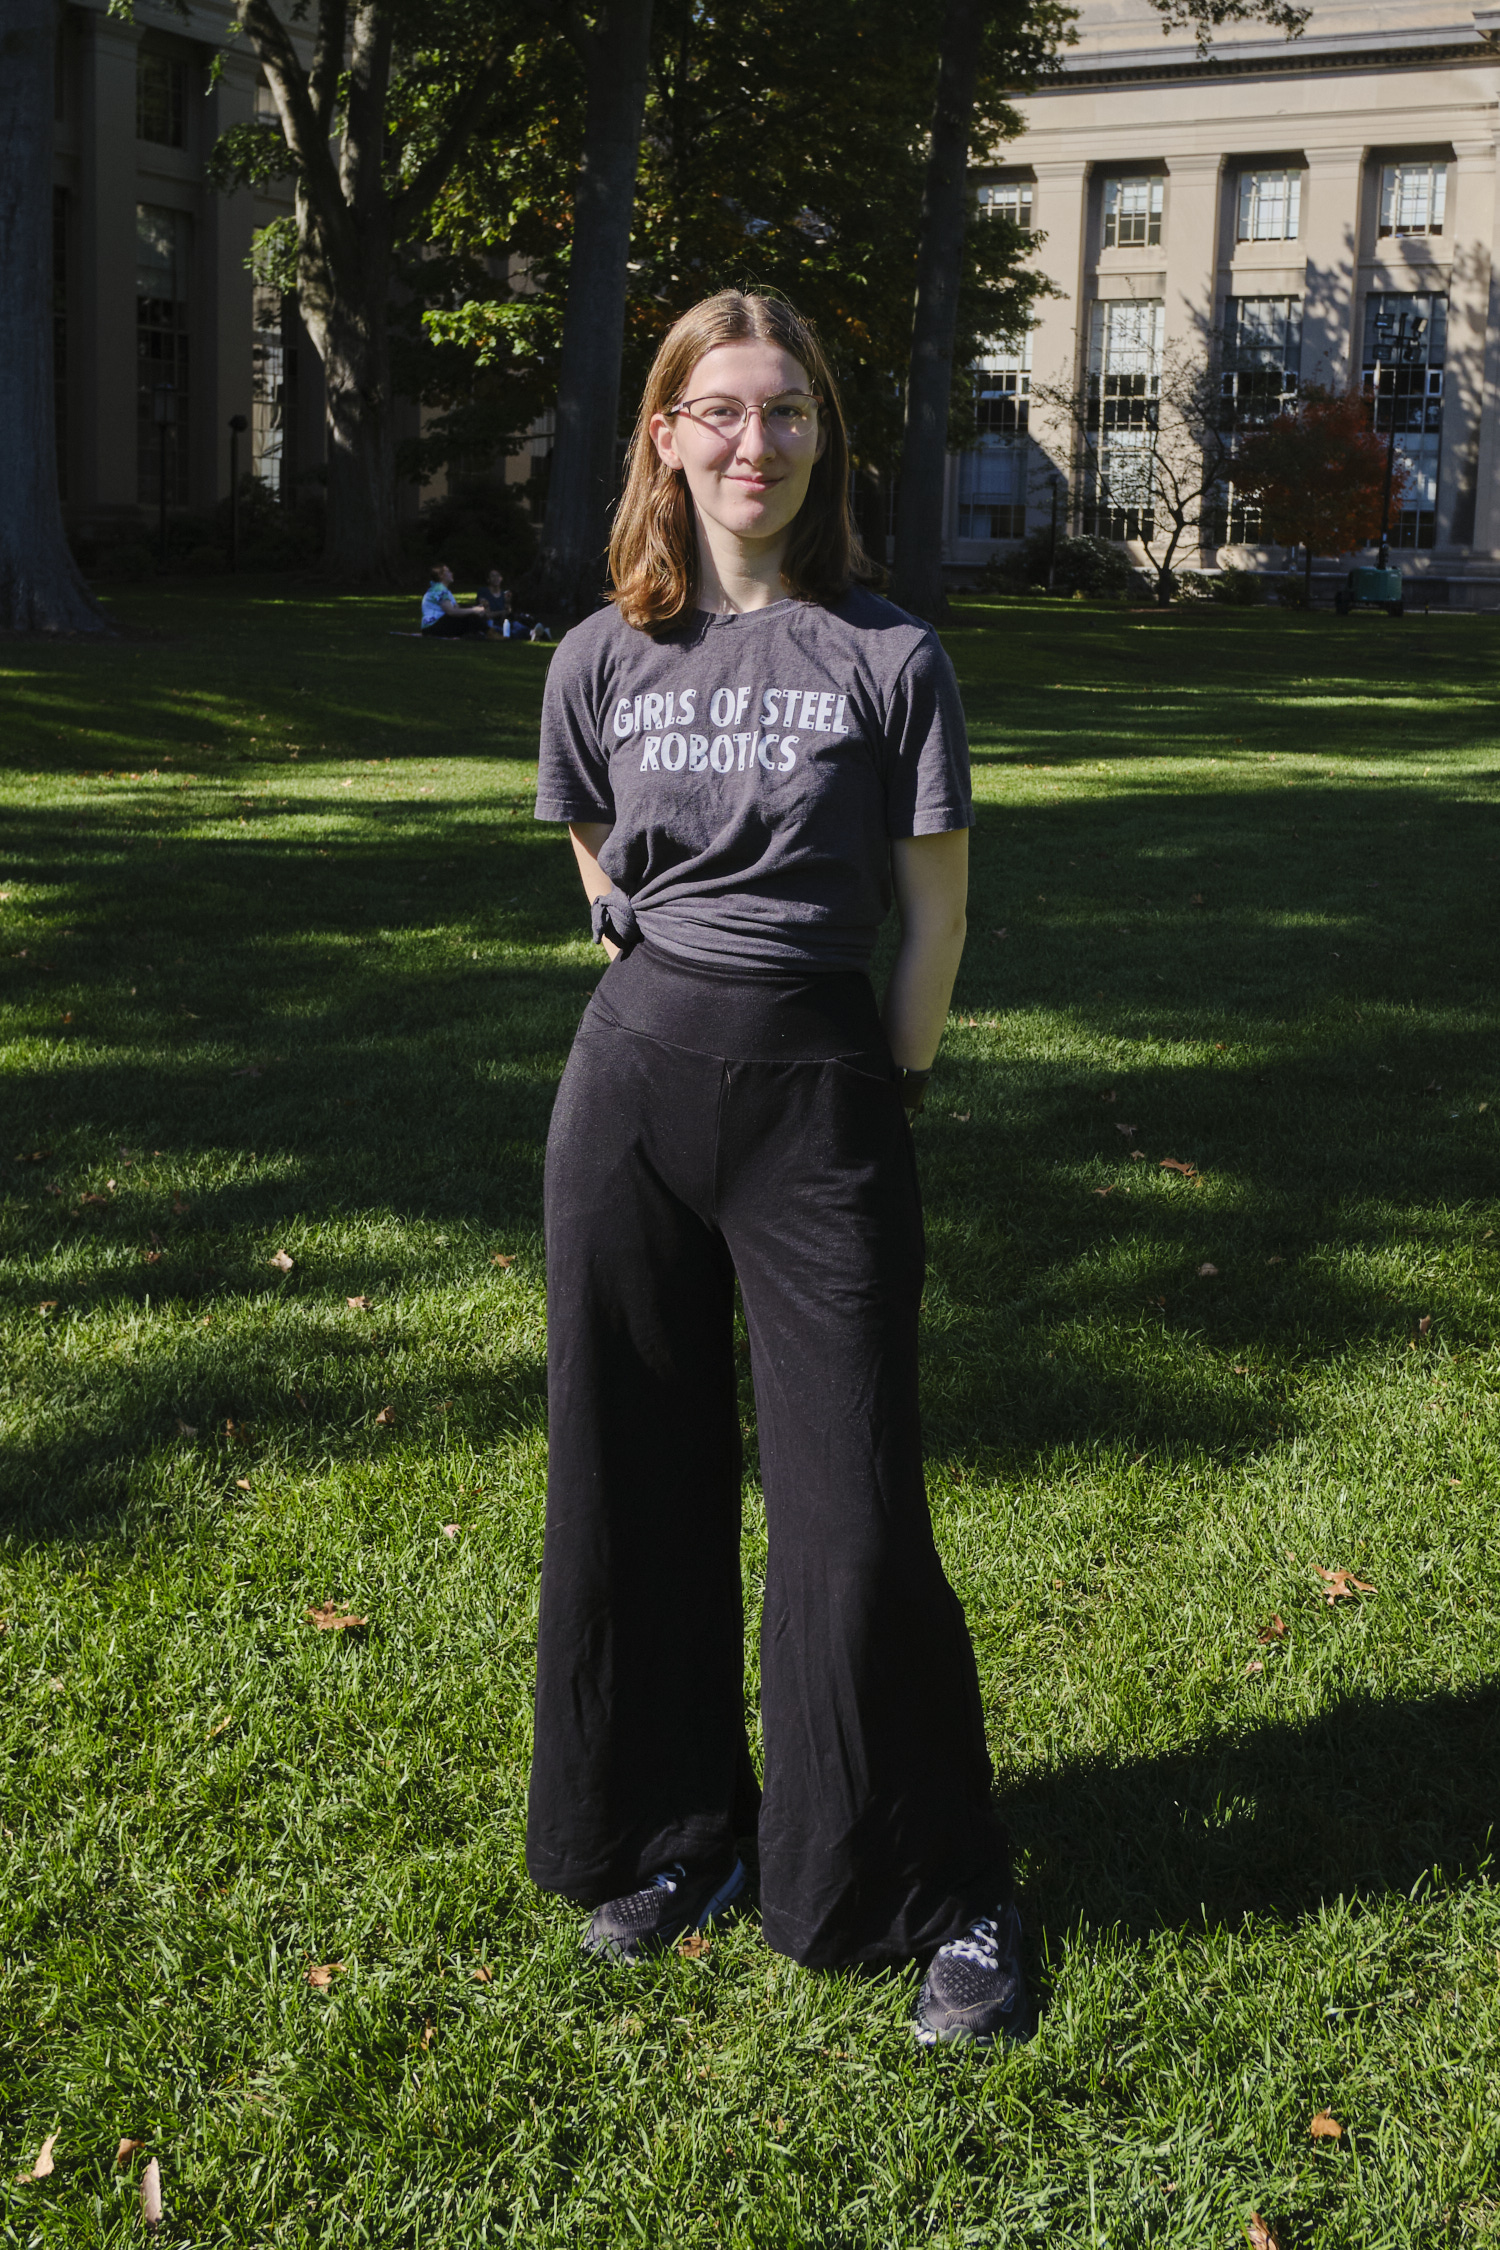
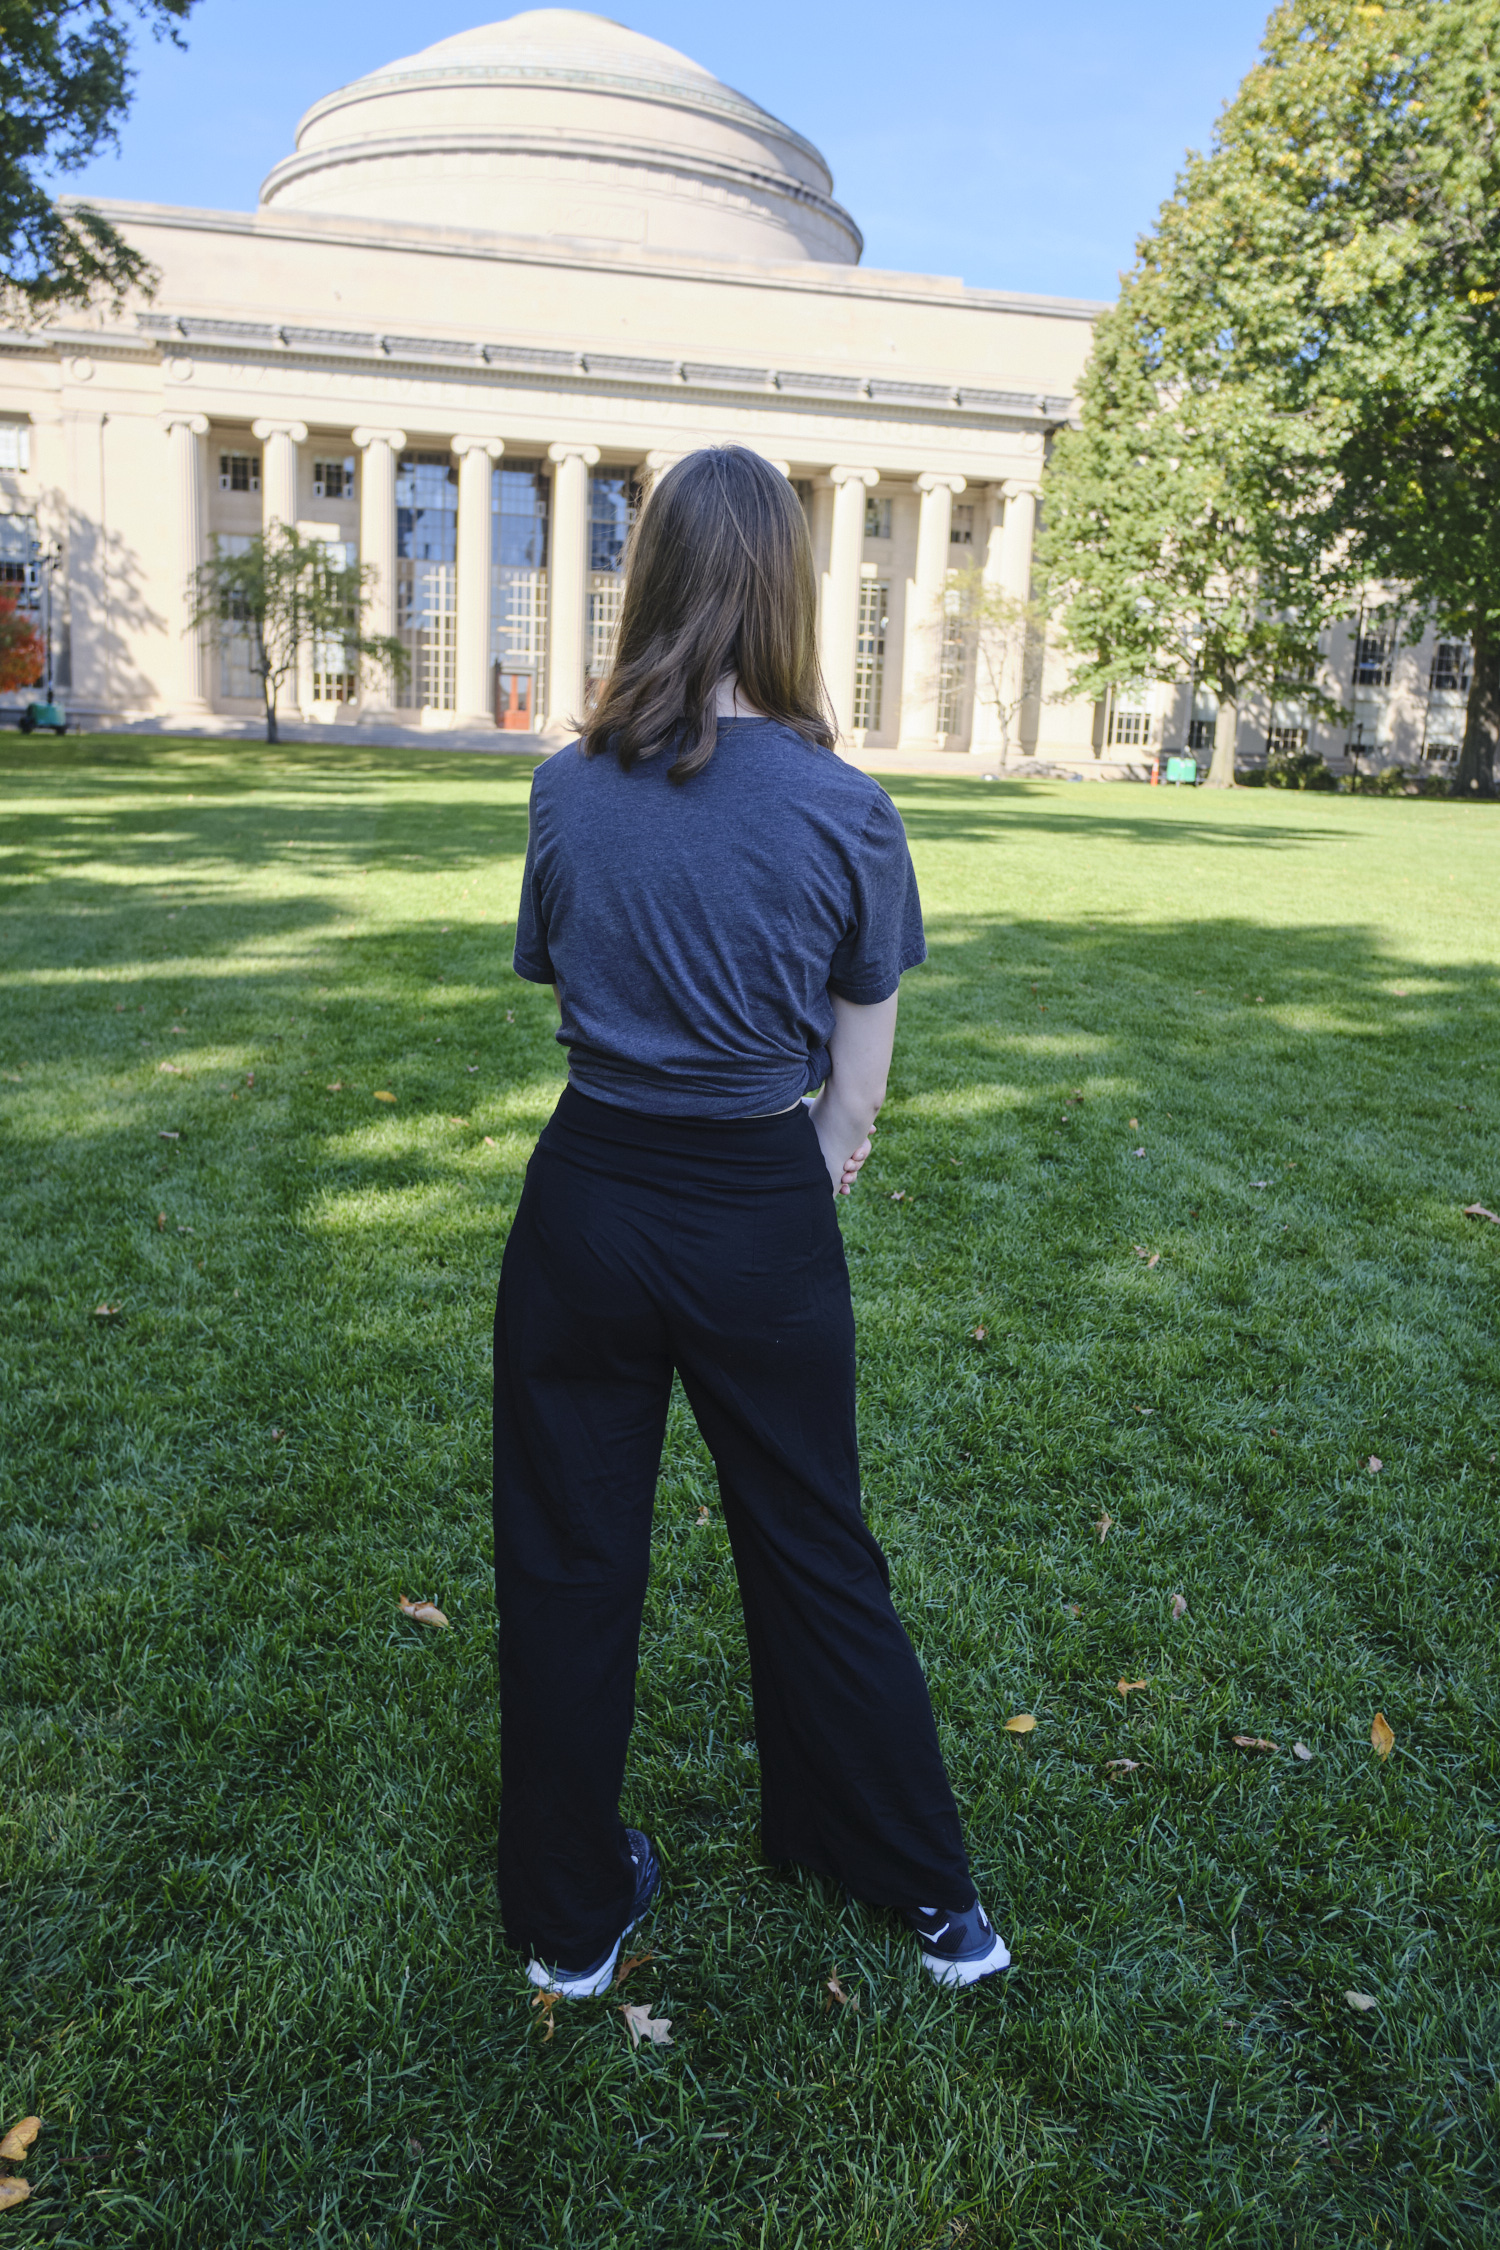
Before I took my youngest daughter to college in August, she insisted that I make her some more black “flowy pants.” She has a pair of black LiKnit pants I made using the Sinclair Cleo pattern extended into palazzo pants that she wears pretty much non-stop. They have held up really well through lots of wear and wash and dry cycles. They are not stretched out and have no pilling. Unfortunately, they did come in contact with a spot of bleach, so there is a light spot that my daughter periodically colors in with a black sharpie. Anyway, she asked for another pair of black LiKnit flowy pants, as well as black ponte pants for cooler weather. She is about the same size as me but taller and a little slimmer so I used the same Pattern Emporium Urban Boldly mashup approach with the same base size as I used for my orange pants, but added 1.5 inch to the waist height (basically the high-rise version plus an extra half inch) and didn’t shorten the leg before hemming. The pants fit her very well and she loves them, but I didn’t manage to get a photo before she packed them up to take to college. She asked me to make another pair just like them in black ponte and send them to her.
October update: Ponte pants finished and delivered. She was wearing the LiKnit pants when I saw her so I got photos of the LiKnit pants (outside) and the ponte pants (inside).
I have made several pairs of pants and a cardigan from PyLos LiKnit fabric and I adore all of them. I made a Sinclair Bondi elbow sleeve top from black LiKnit which is ok, but the LiKnit doesn’t really have enough stretch for this pattern without some adjustments (more ease or maybe adding darts?). Since the LiKnit behaves almost like a woven, I decided to try making a woven top with seafoam LiKnit and I selected the recently-released Sinclair Bloom. I made the sleeveless version at the shortest length with the rounded back neck. I treated the LiKnit fabric exactly as if it were woven, using regular straight stitches for the seams and top stitching.
There is some complexity to this pattern, but as usual, the Sinclair pattern is fairly detailed and pretty easy to follow. The front and back yoke are lined (I used the same LiKnit fabric), and the front yoke is interfaced with fusible woven interfacing. I used a medium weight, which was probably a little heavier than needed–next time I’ll try a lighter weight interfacing. The front and back have some gathers, which I’m afraid I didn’t distribute evenly enough, but they’re mostly ok. The sleeveless version uses the “burrito” method to encase the neck and shoulders, which is a fun technique.
Despite being a knit, the LiKnit fabric worked pretty well with this pattern. I may try one in another color of LiKnit with sleeves. I would also like to try this pattern with cotton double gauze.
I’m overall pretty happy with how this top came out, and it looks great with my seafoam LiKinit Urban Boldly mashup pants! In fact I wore this outfit to a conference last week and got complements from complete strangers. Also it was very light weight and packable, and doesn’t need to be ironed.
The Pattern Emporium Heartlight Stretch Flared Skirt pattern is a versatile pattern for very flattering flared A-line knit skirts of all lengths. It’s also super fast and easy, unless you’re me and you make it harder for yourself. I did two things that made constructing my skirt harder the first time (adding pockets and using a waistband fabric a lot firmer than the skirt fabric), but now that I know what I’m doing I can continue to add pockets and add firmer waistbands and it shouldn’t be too bad the second time around. And if you want to try either of these things, keep reading for some tips.
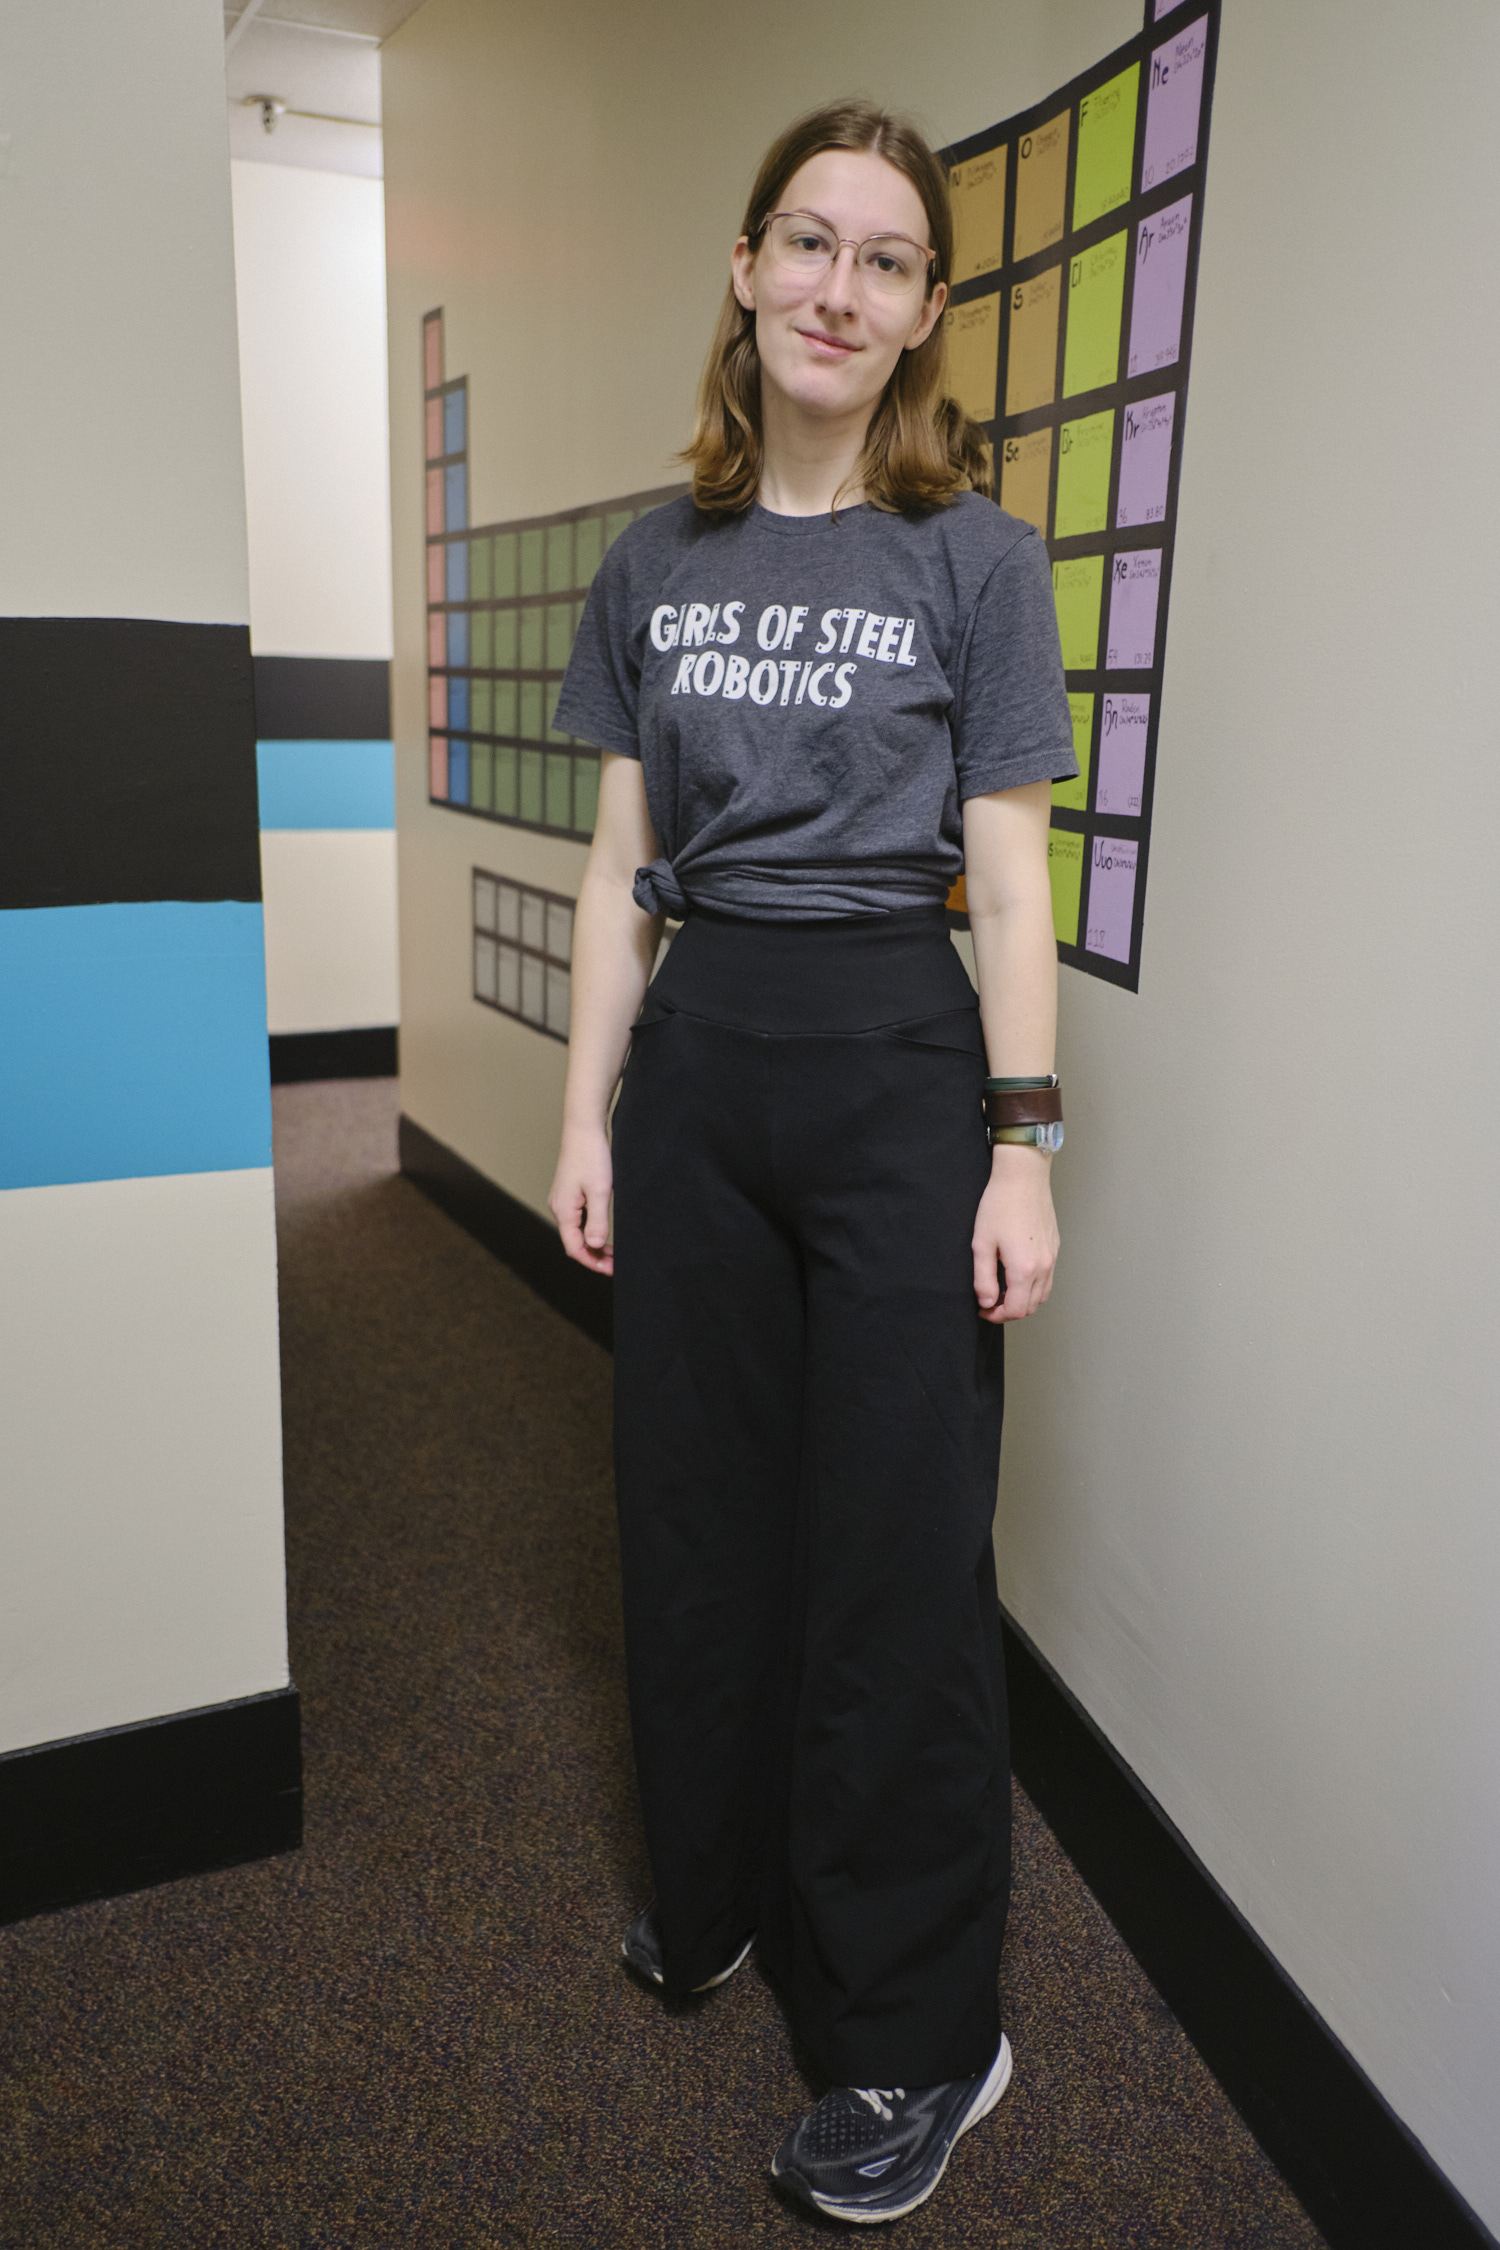
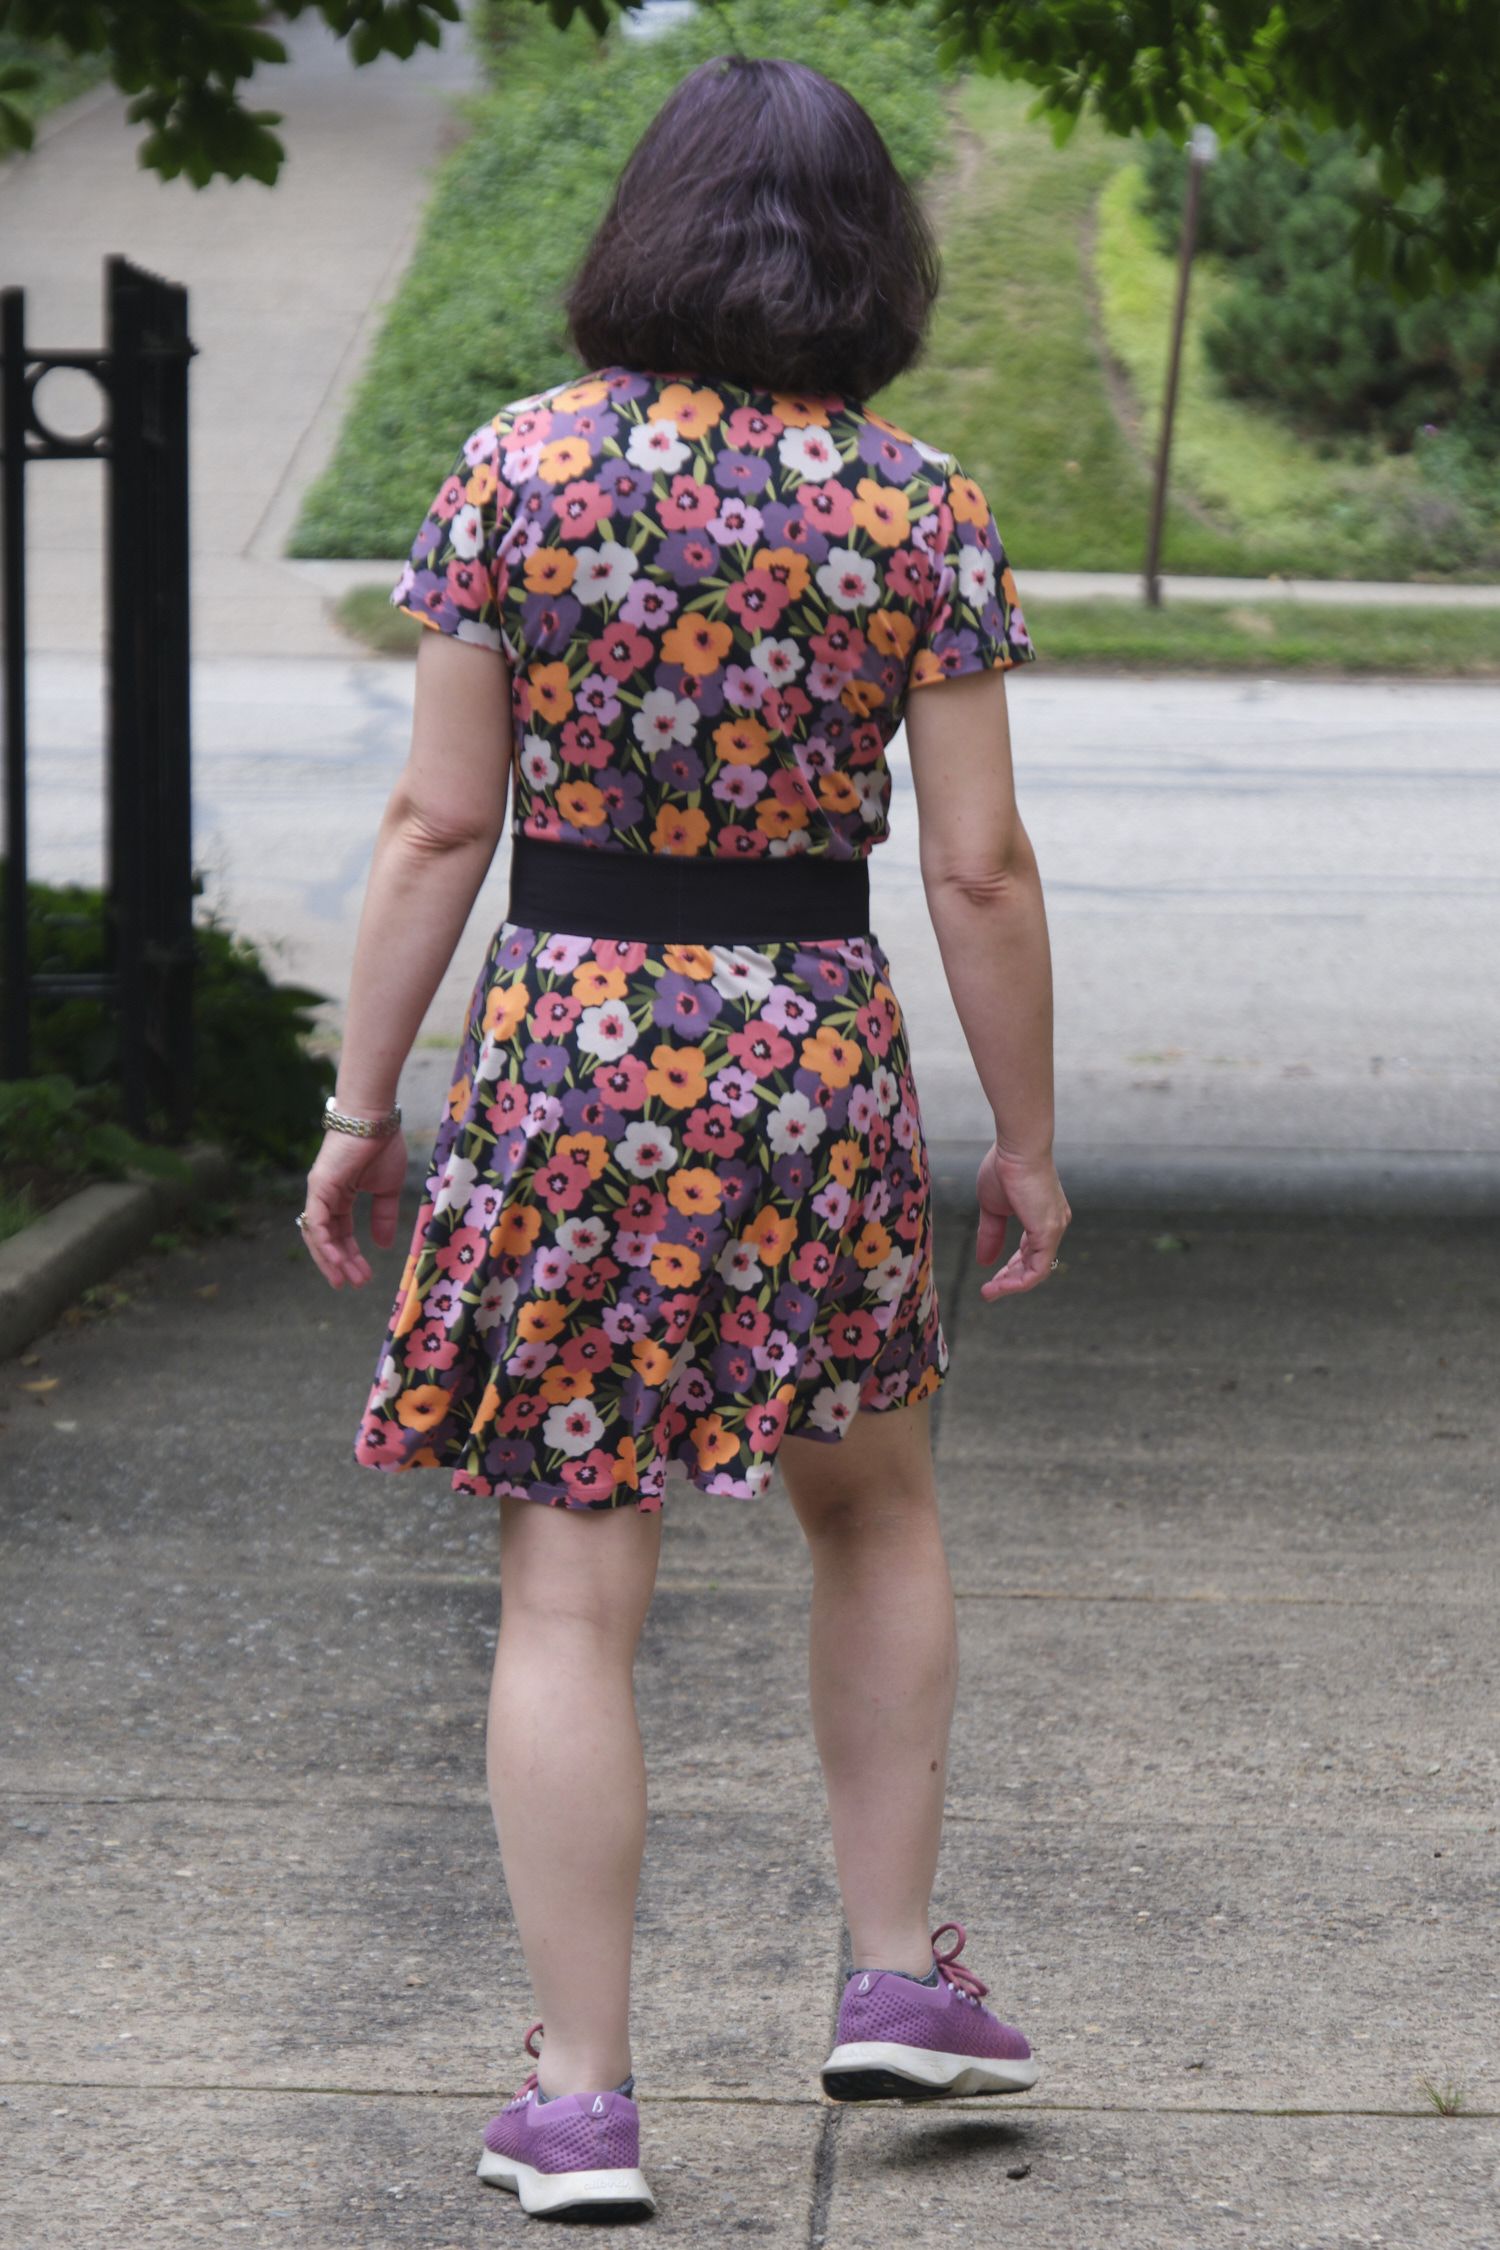
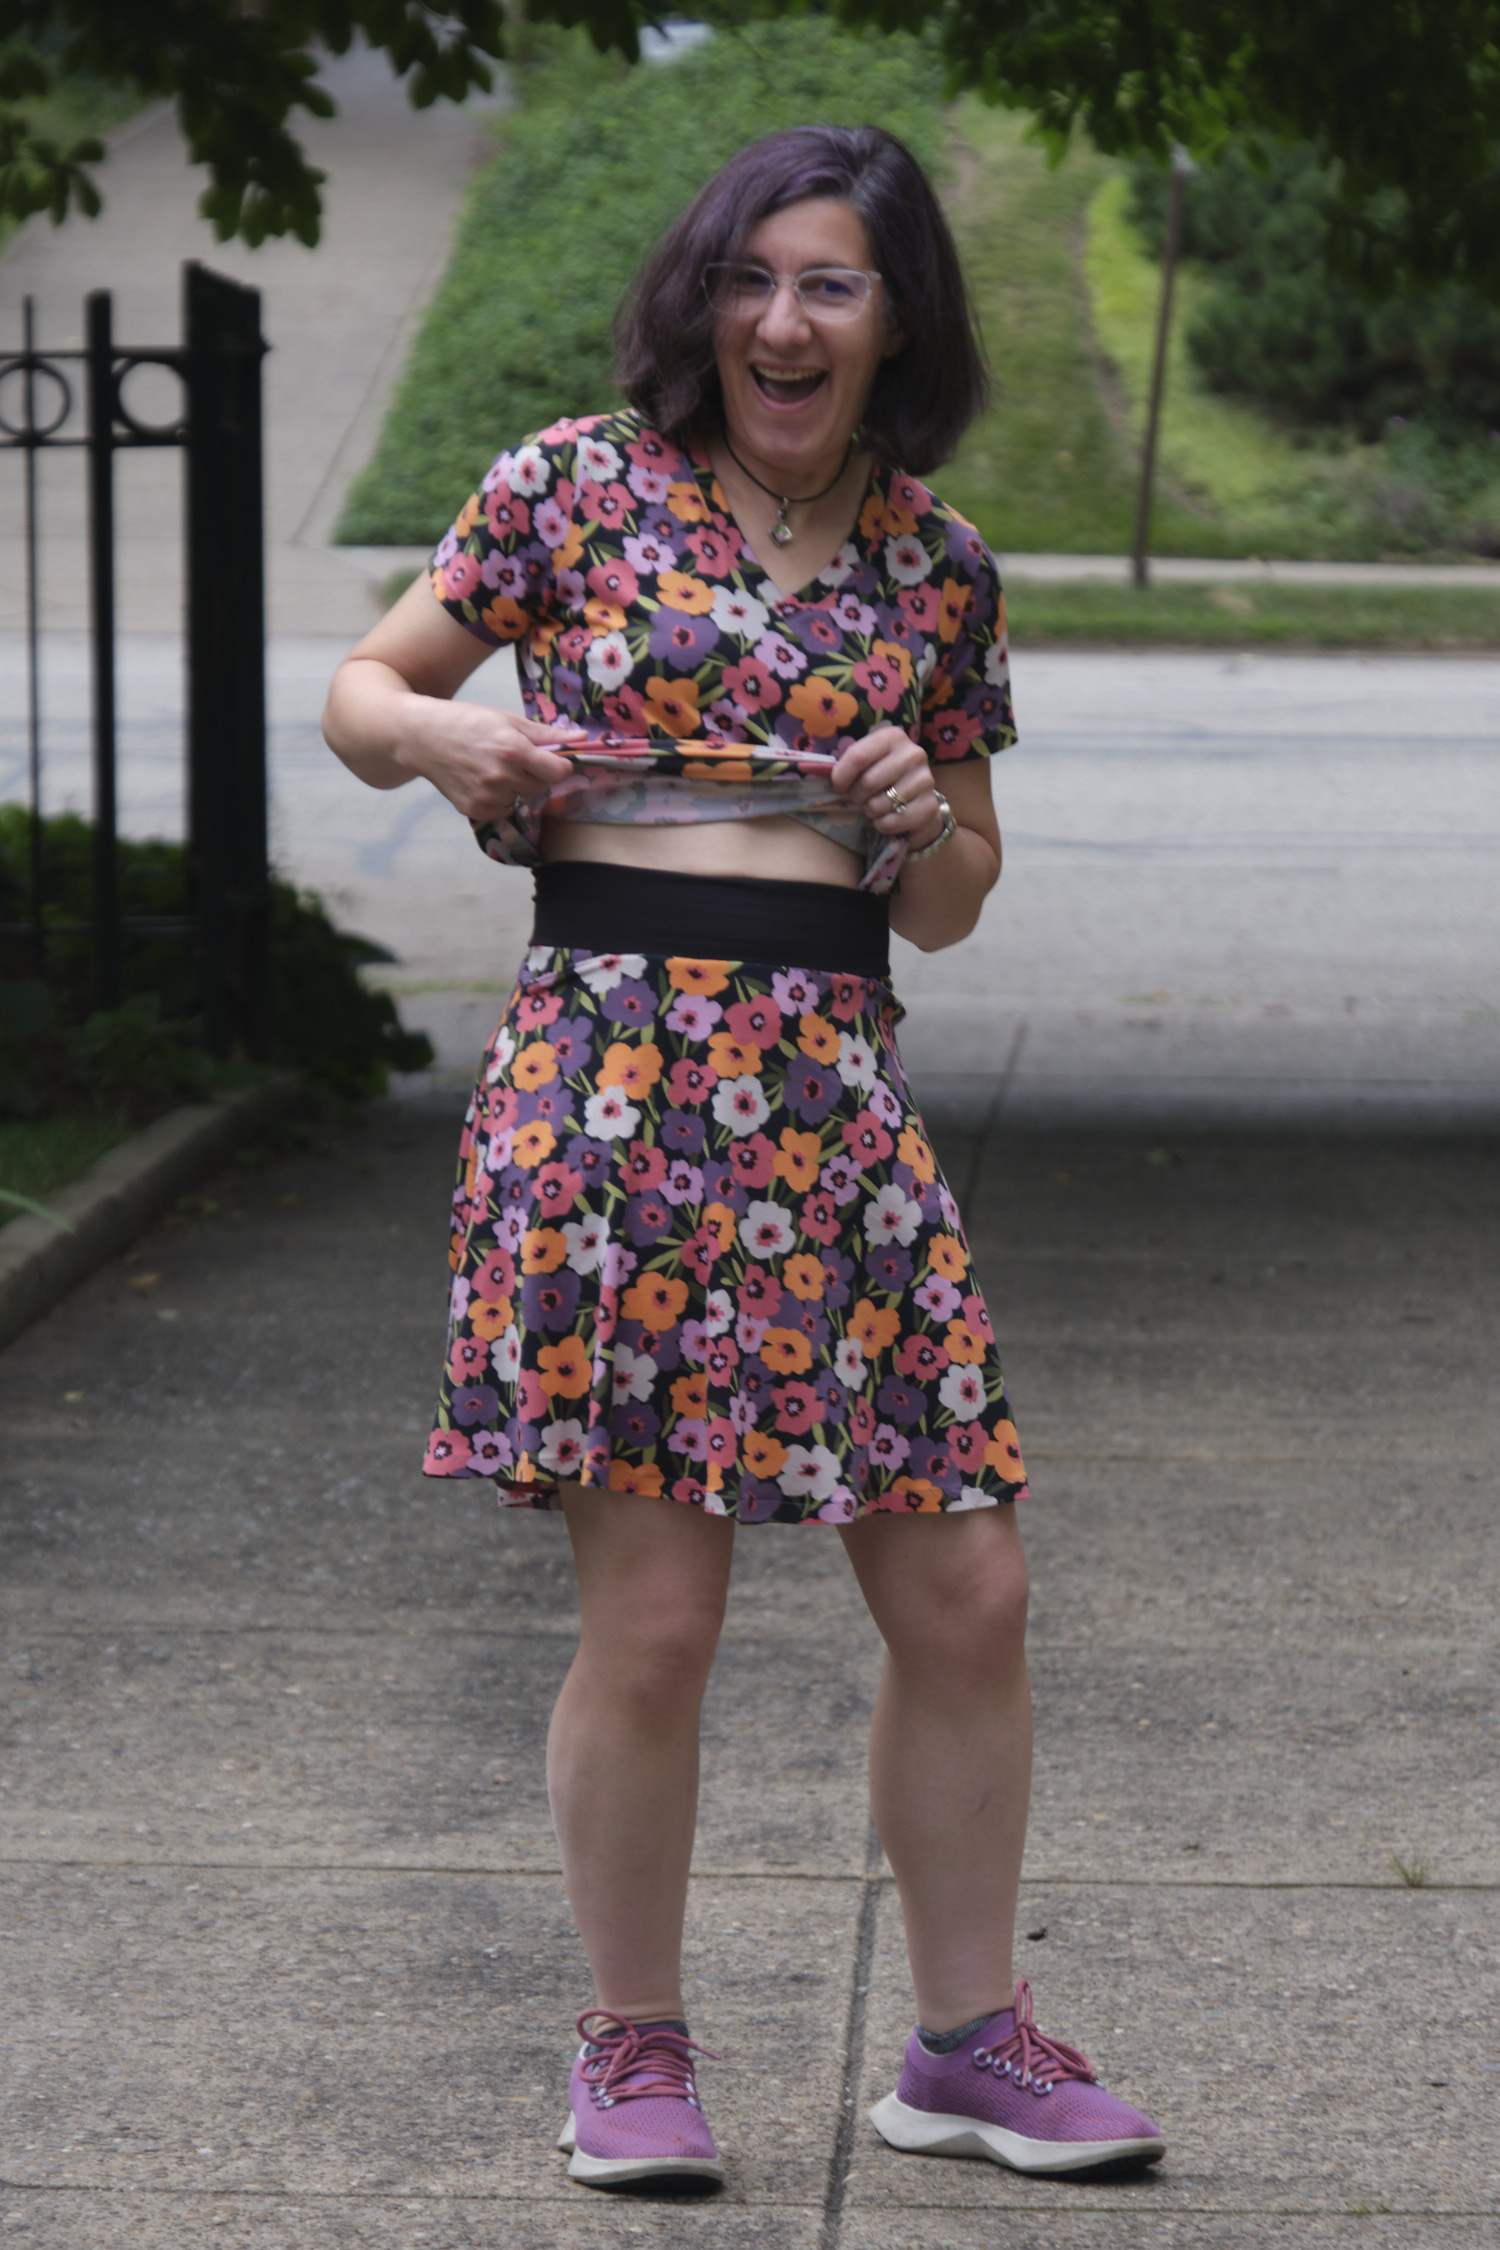
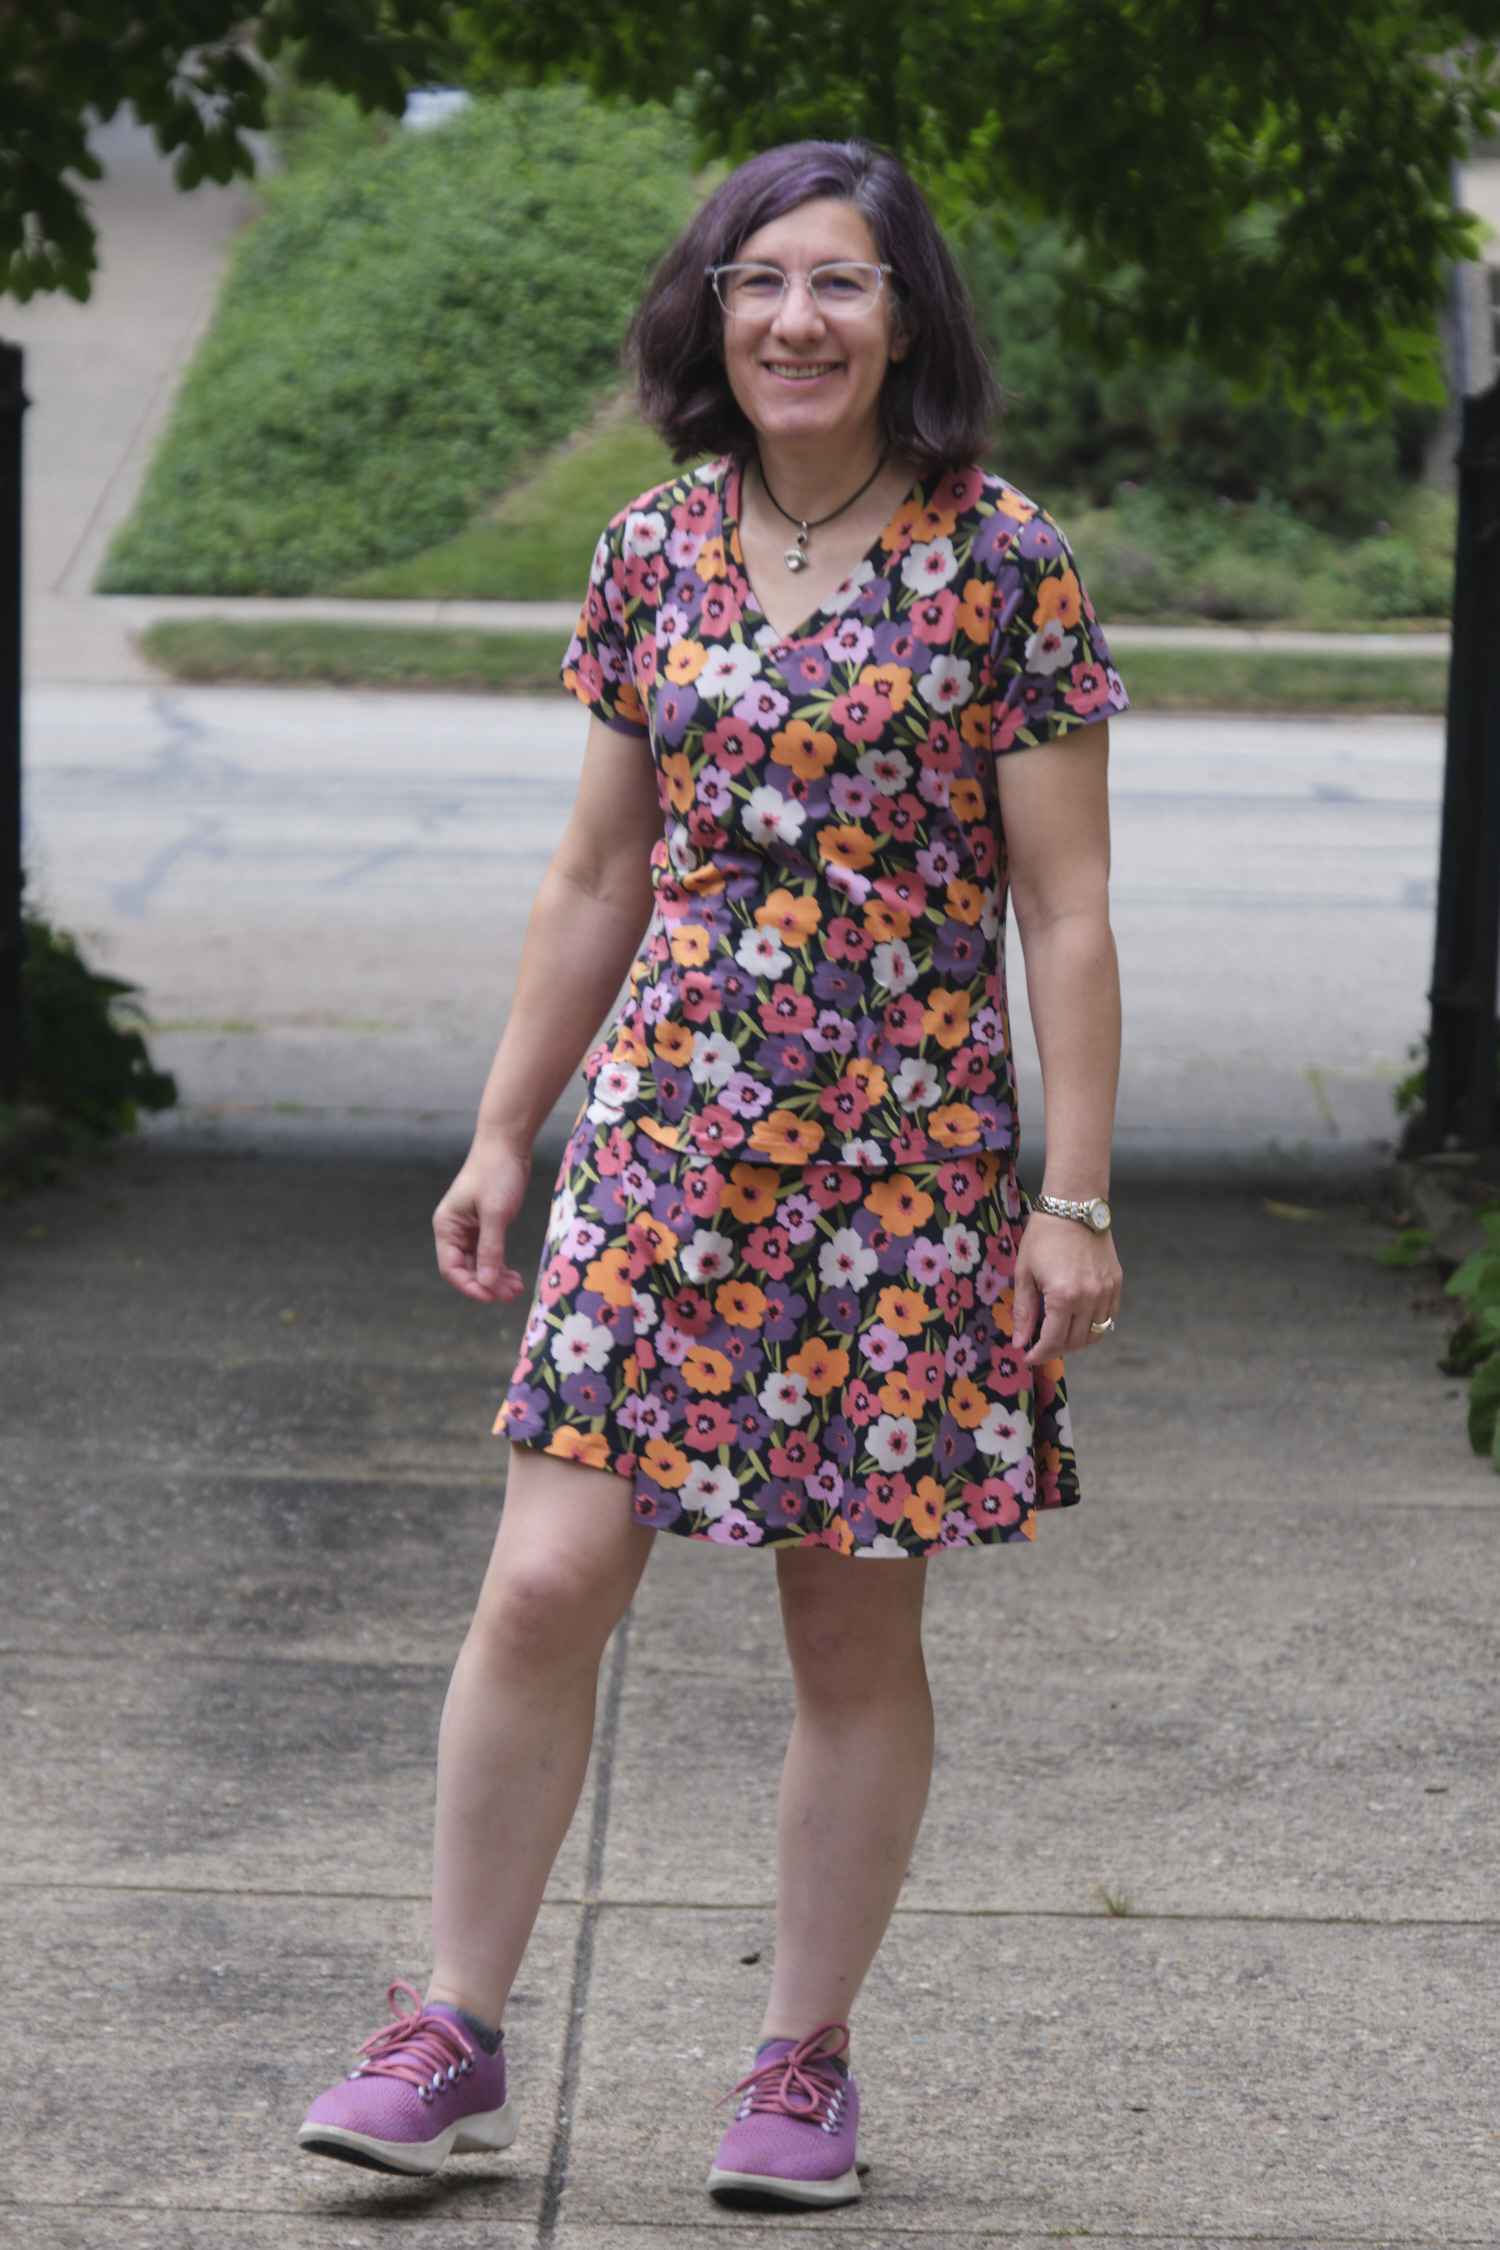
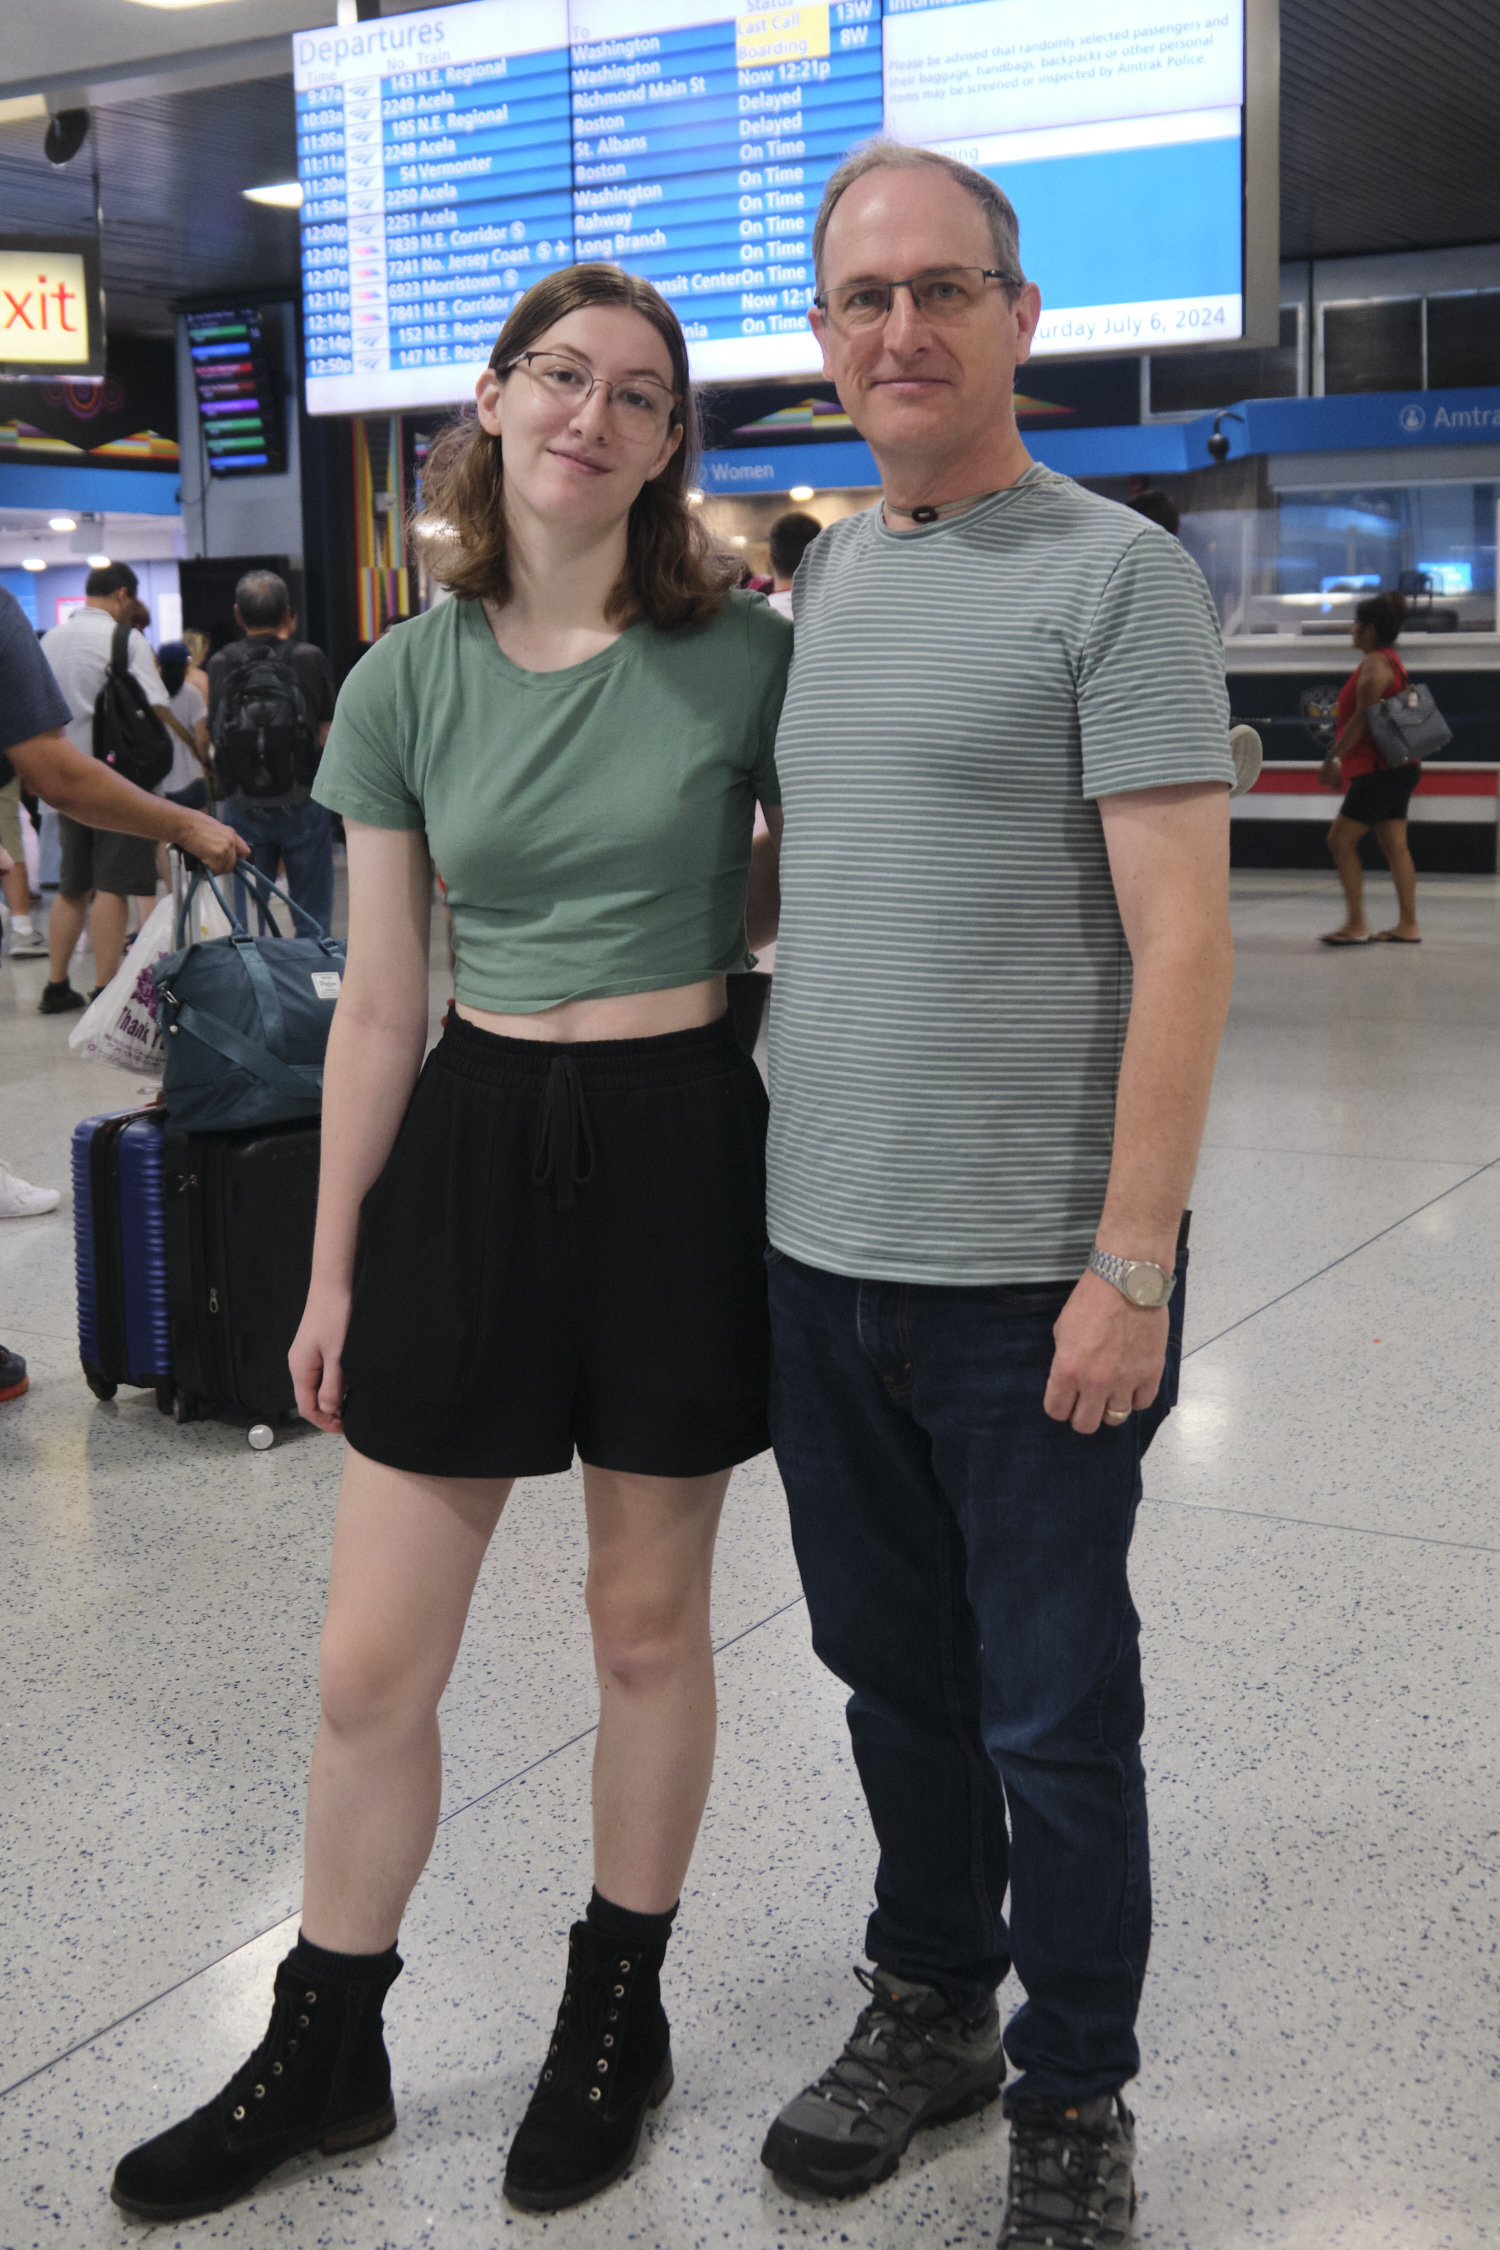
I was planning to use this bright floral DBP fabric for a dress, but liked how it went with my purple double-gauze pants, so made a Sinclair Bondi v-neck t-shirt instead. I also realized that the colors in the fabric coordinate with a number of other things I own (including my sneakers), so having separates in this fabric would be useful. I decided to make a skirt, and coincidentally Heartlight was the Friday discount pattern a couple of weeks ago, so I bought it and figured I would give it a try. I loved the shape of the skirts this pattern makes and the soft yoga waistband, but I was disappointed it didn’t come with pockets. I read on the PE Facebook page that people had added pockets, some using another PE pattern that I don’t own, and others improvised based on the pockets in PE pants patterns.
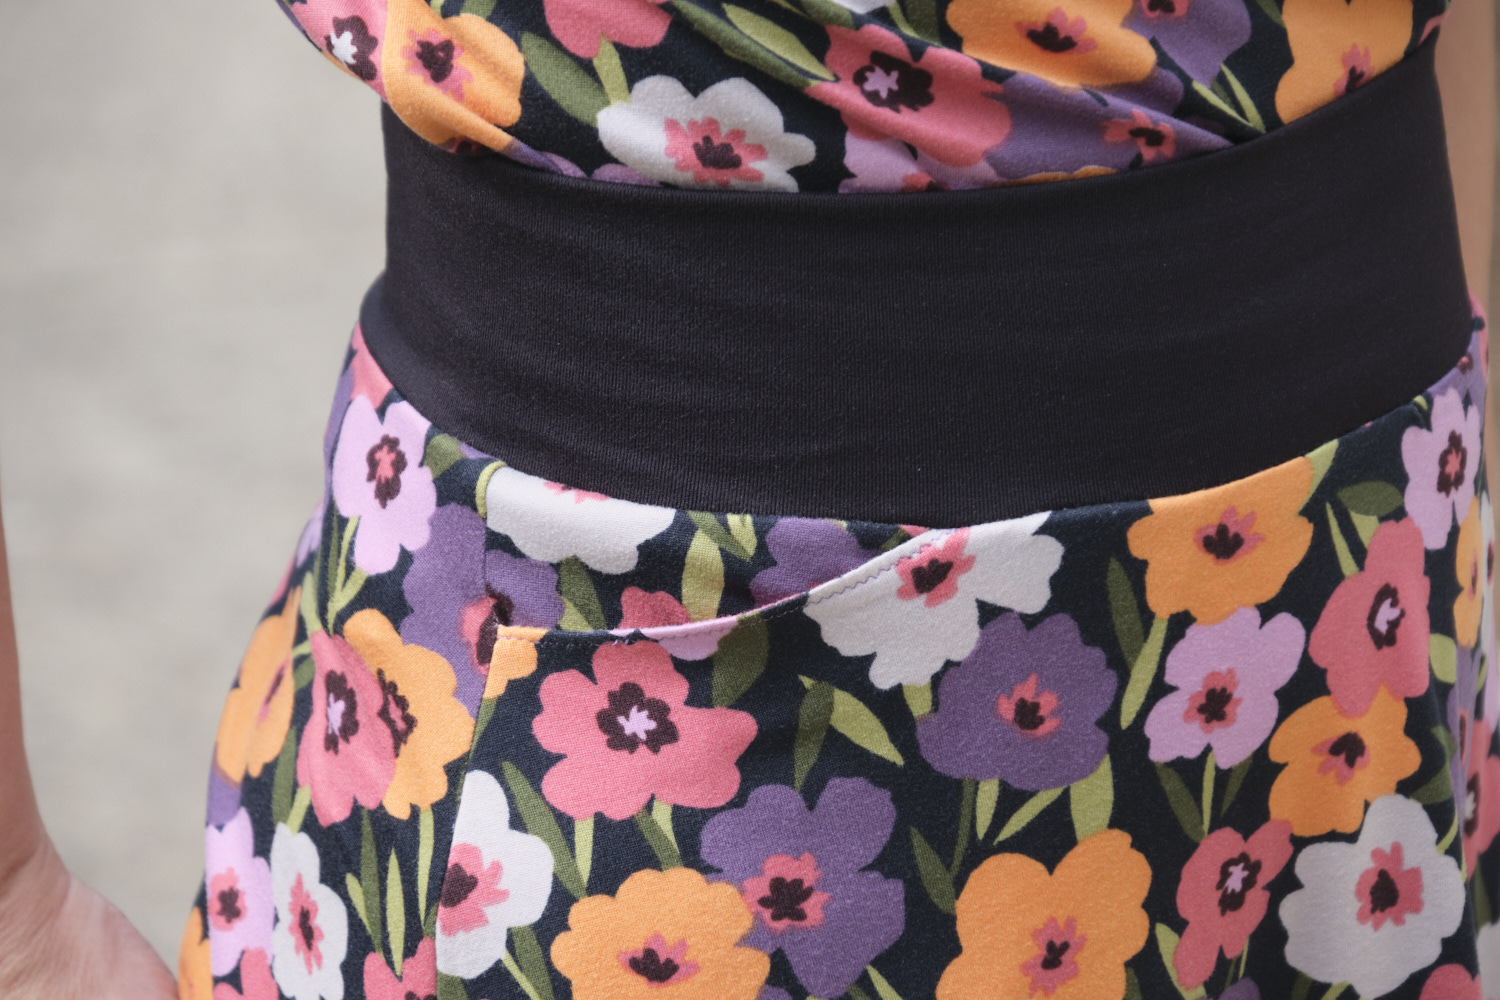
I cut the pattern out using my projector. I cut a size AU10 about 2 inches above the knee length (thinking that since this wasn’t a petite pattern, this is what I would need, but it actually ends up being more above the-knee than I was expecting). The skirt front and back plus the pocket pieces I cut used less than a yard of fabric. If you are taller or want a longer skirt it will obviously use more fabric, but the pattern has some tips about how to cut the skirt in pieces to use the fabric more efficiently and to allow this pattern to be used with narrower fabrics. Because DBP is very soft and stretchy, it does not have enough hold for a yoga waistband unless you add elastic or line it with another fabric. Especially since I was planning to add pockets, I knew I needed a different fabric for the waistband. I also realized that my floral fabric was very busy and might benefit from being broken up by a black waistband. I decided to use black 256 GSM athletic brushed poly for a nice firm yoga waistband.
I referred back to the PE Walk Boldly pants pattern jeans pocket instructions. As the shape of the hip on the pants does not match the skirt I could not use the pants pattern piece, but I improvised following the same concept. I made pocket rectangles about 6 inches wide and 8.5 inches deep, and then doubled them for the front and back of the pocket bag. I angled the rectangle to align with the skirt side seam and adjusted the top edge to align with the waist of the skirt. I opted for a straight slash pocket opening.
Once I figured out how to make the pockets work they were pretty easy to cut and sew. I stitched the top of the pocket to the skirt front, understitched and topstitched, then folded it in half, surged the bottom, and then basted the rest of the pocket top and side to the skirt front piece (ok I realize that really requires an entire tutorial and not just a diagram and single sentence unless you are already familiar with making these sorts of pockets). The pockets are big enough for my phone and are well anchored in the waistband.
My biggest problem came attaching the waistband, largely due to the difference in stretch and firmness of the two fabrics. I followed the pattern instructions and used the quarter method to distribute fabric and pinned in place with 8 pins. I knew that stretching the athletic knit waistband to fit the DBP skirt would be difficult, so I decided to machine baste it before sewing it together. It was a complete disaster, with parts bunched up too much and some parts not joined together at all because the waistband had curled under. I unpicked a few spots and tried to fix them, and grew increasingly frustrated as I went. I eventually declared it a mess and went out to dinner. After I came back I unpicked the entire waistband (easy because it was basting stitches) and started over. This time I started by basting the two edges of the yoga waistband together with a wide zigzag stitch over the edge. This ensured the two edges would stay together and prevented them from curling. Then I applied the quarter method again, but this time used a lot more pins. I machine basted the whole things and it looked much better. Finally, I surged the layers in place, stretching the waistband as I went. After that all that was left was to hem the bottom, which I did using hem tape and a zigzag stitch.
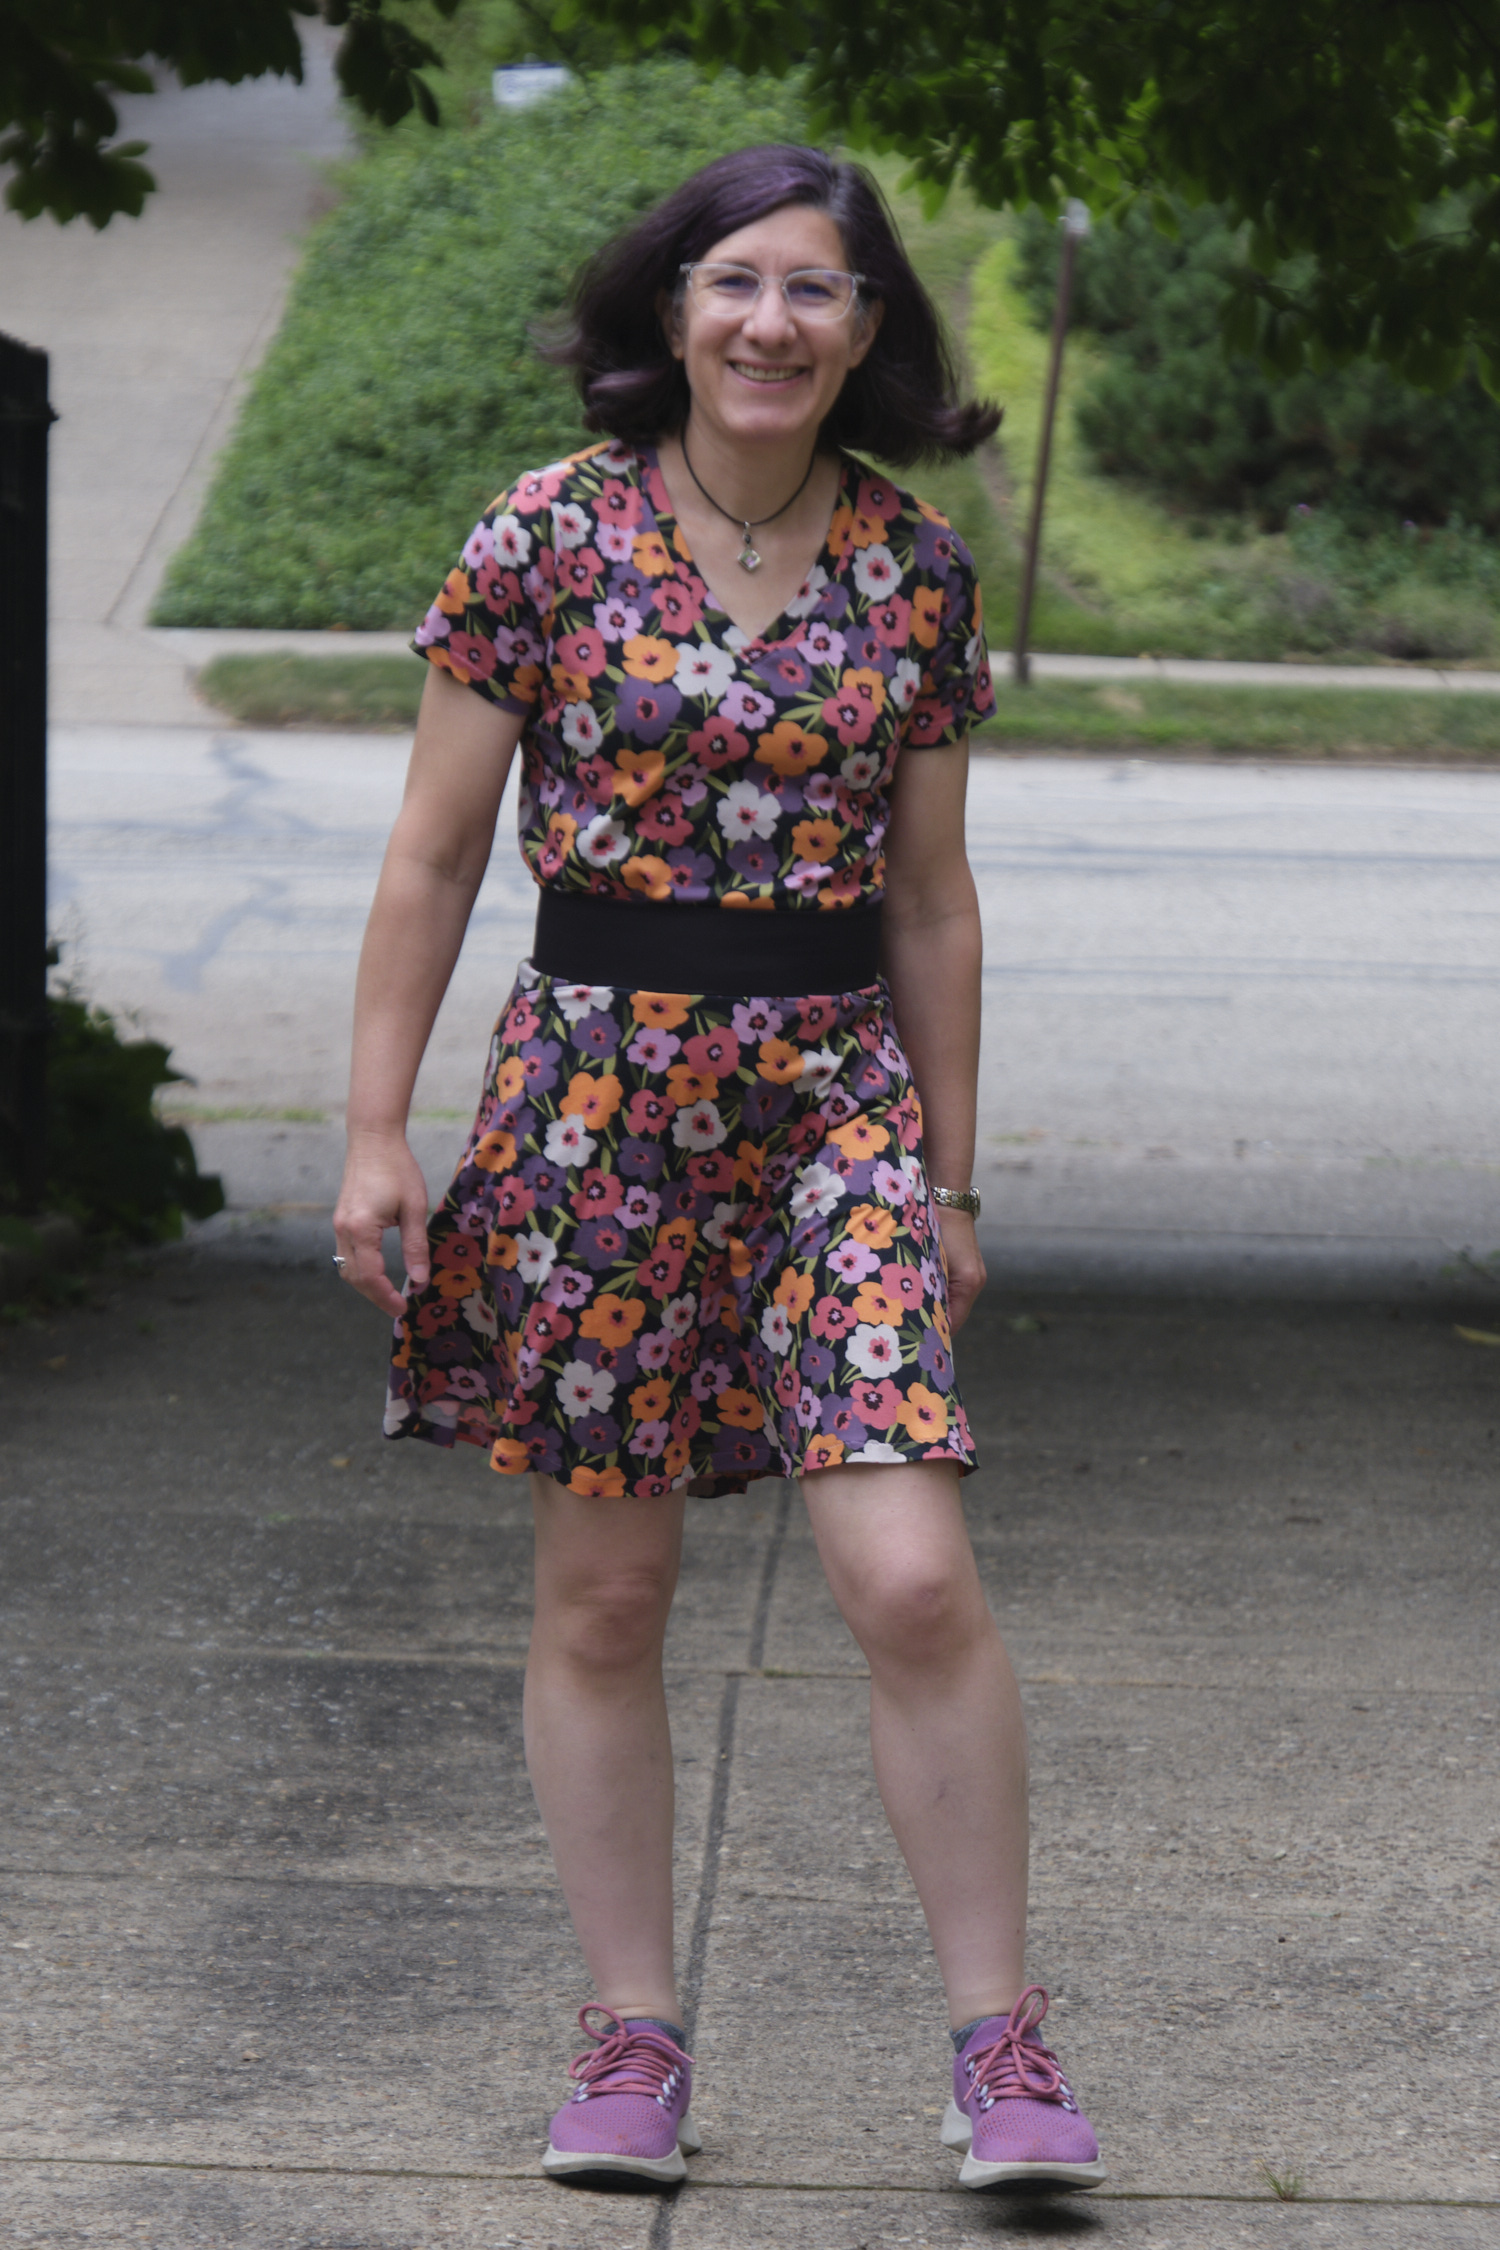
The end result is comfortable and looks good, and I even like it untucked too… actually I’m more likely to wear it that way. I like the fact that the skirt is a little big swishy, without having all the fabric of a full-circle skirt (I love those too, but not for every occasion) and that it doesn’t require any gathering to make it. I’m pretty happy with how the pockets came out, although with DBP you always have to be careful how you load pockets to keep them from stretching out awkwardly. The PE “foxy” pocket style would also probably work with this pattern. Although the firm athletic knit was a bit of a pain to deal with, it makes for a great waistband that feels like it will stay put as I wear it, even with loaded pockets. I might make a black skirt entirely out of this fabric. I would also like to try this pattern in a rayon ponte and also try a longer length.
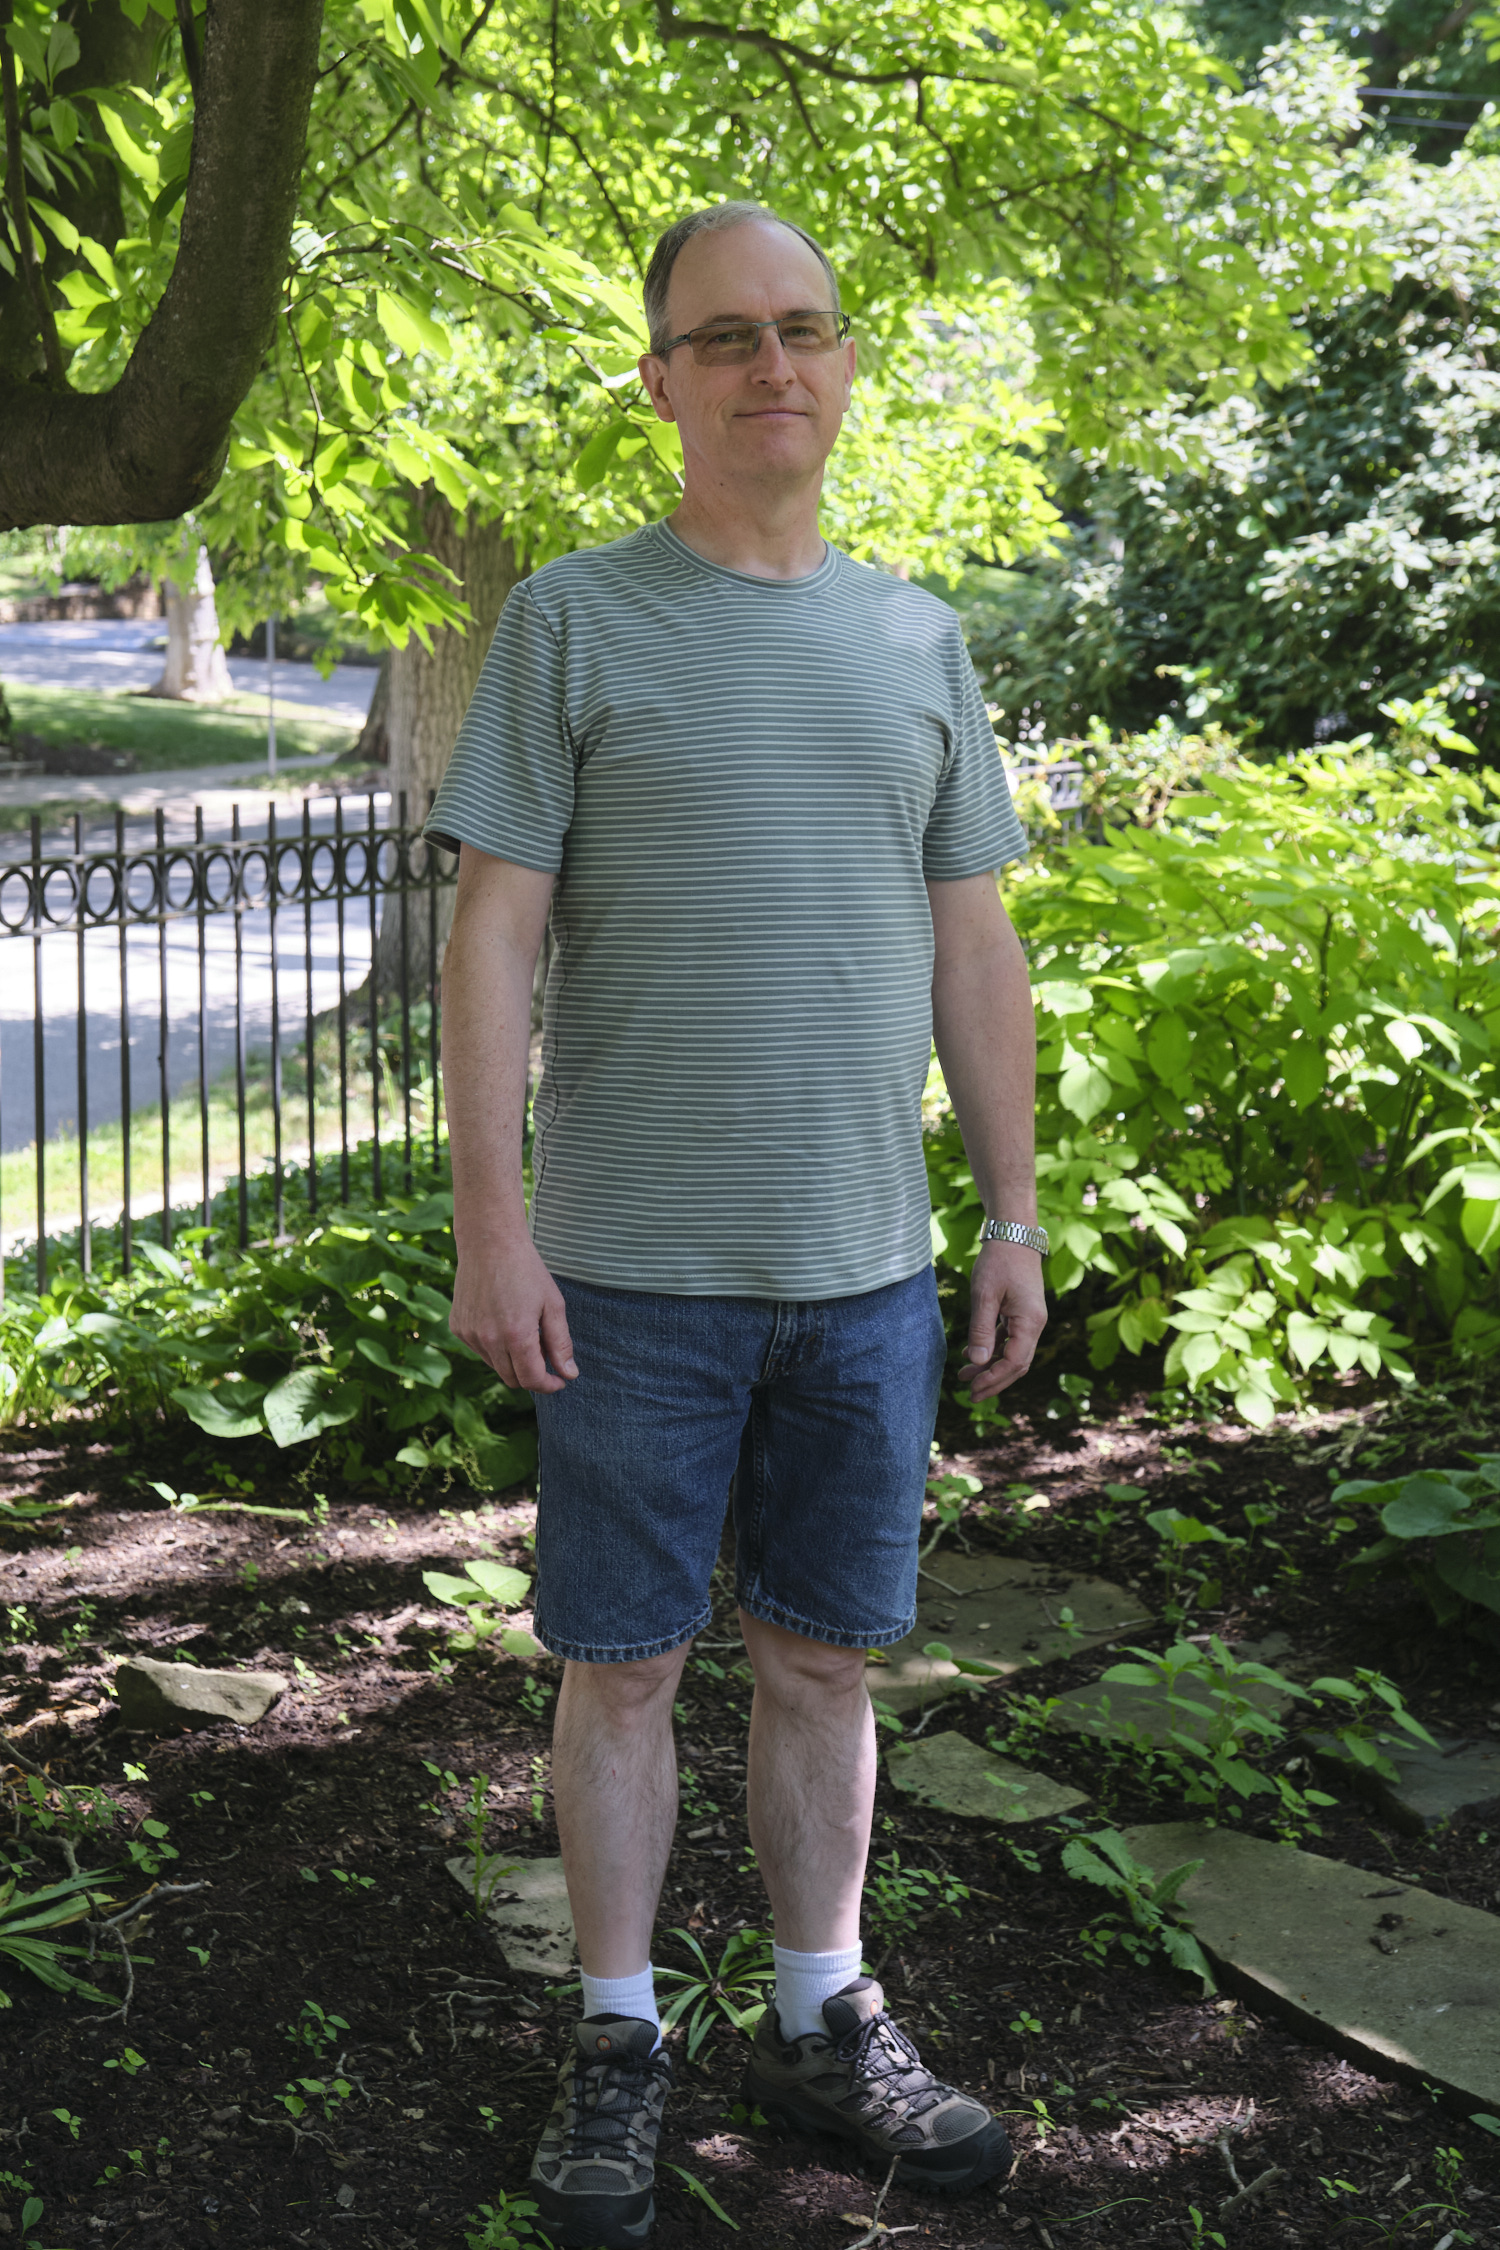
For my husband’s birthday I made him a Sinclair Kai short-sleeved t-shirt in a soft yarn-dyed pine green two-tone striped cotton-Lycra fabric (looks like sage to me) from knitfabric.com. It’s an easy pattern to sew and it looks great! I previously made him two long-sleeve Kai shirts; this was my first short-sleeve Kai.
My husband loves cotton yarn-dyed knit stripes but they aren’t so easy to find in interesting colors (lots of blue and white or off-white stripes). I really like this green stripe and it goes well with all the sage and sea foam I’ve been sewing for myself and my youngest daughter.
I haven’t sewn many garments with woven fabric lately because I don’t like to iron my clothes after I wash them and I would also rather not deal with zippers. I also find knit clothes just tend to be more comfortable to wear. However, “fluffy” cotton double gauze is trendy right now, you don’t have to (and you really should not) iron it if you wear it crinkled, and when you use it for loose fitting summer clothes it is cool and comfortable and does not need a zipper. I bought three yards of purple fluffy from Mily Mae Fabrics and decided to make some woven palazzo pants.
I love the Pattern Emporium Walk Boldly and Urban knit pants patterns so selected their Vacation Vibes pattern for woven palazzo pants. The pattern has both a low-rise and high-rise option, as well as several pocket choices and options for subtle or dramatic flare legs. I love wearing high-rise pants so I went with the high rise waist, subtle flare leg, and foxy pockets. I cut a size AU10 short and made no pattern modifications whatsoever.
I washed and dried my fluffy fabric before use and did not iron it at all to keep it nice and fluffy. I projected the pattern onto the fluffy and cut it with a rotary cutter. It is a little tricky to sew because you want to avoid having it stretch out. I used a walking foot on my sewing machine with a slightly longer stitch length and surged all the seams after I sewed them to tidy up the edges. every time the pattern suggested pressing with an iron I ignored it, and just did some light finger pressing. I made a bias binding for the large foxy pockets (big enough for my phone without any modifications), but it requires several passes through the sewing machine to attach. By the time I got it attached it had stretched out a bit so I moistened the pocket openings with a damp cloth, reblocked them to their proper shape with my hands, and let them dry before I finished attaching the pockets. The pants were very easy to sew, and went together quickly. The waistband was super easy to assemble as there was nothing to stretch: I made a casing and threaded a piece of 2″ elastic through it. I’m 5’2″ and ended up hemming the short length 2.25 inches to wear with flats. The only time I touched my iron was to very lightly press the hems.
Here I am modeling the pants with my new Chorus top. I tucked it in so you could see the waist band but I will probably wear this shirt untucked. I like the subtle leg option, which is plenty wide on me. The dramatic leg could be fun with the right fabric, but may be more pants than I really need.
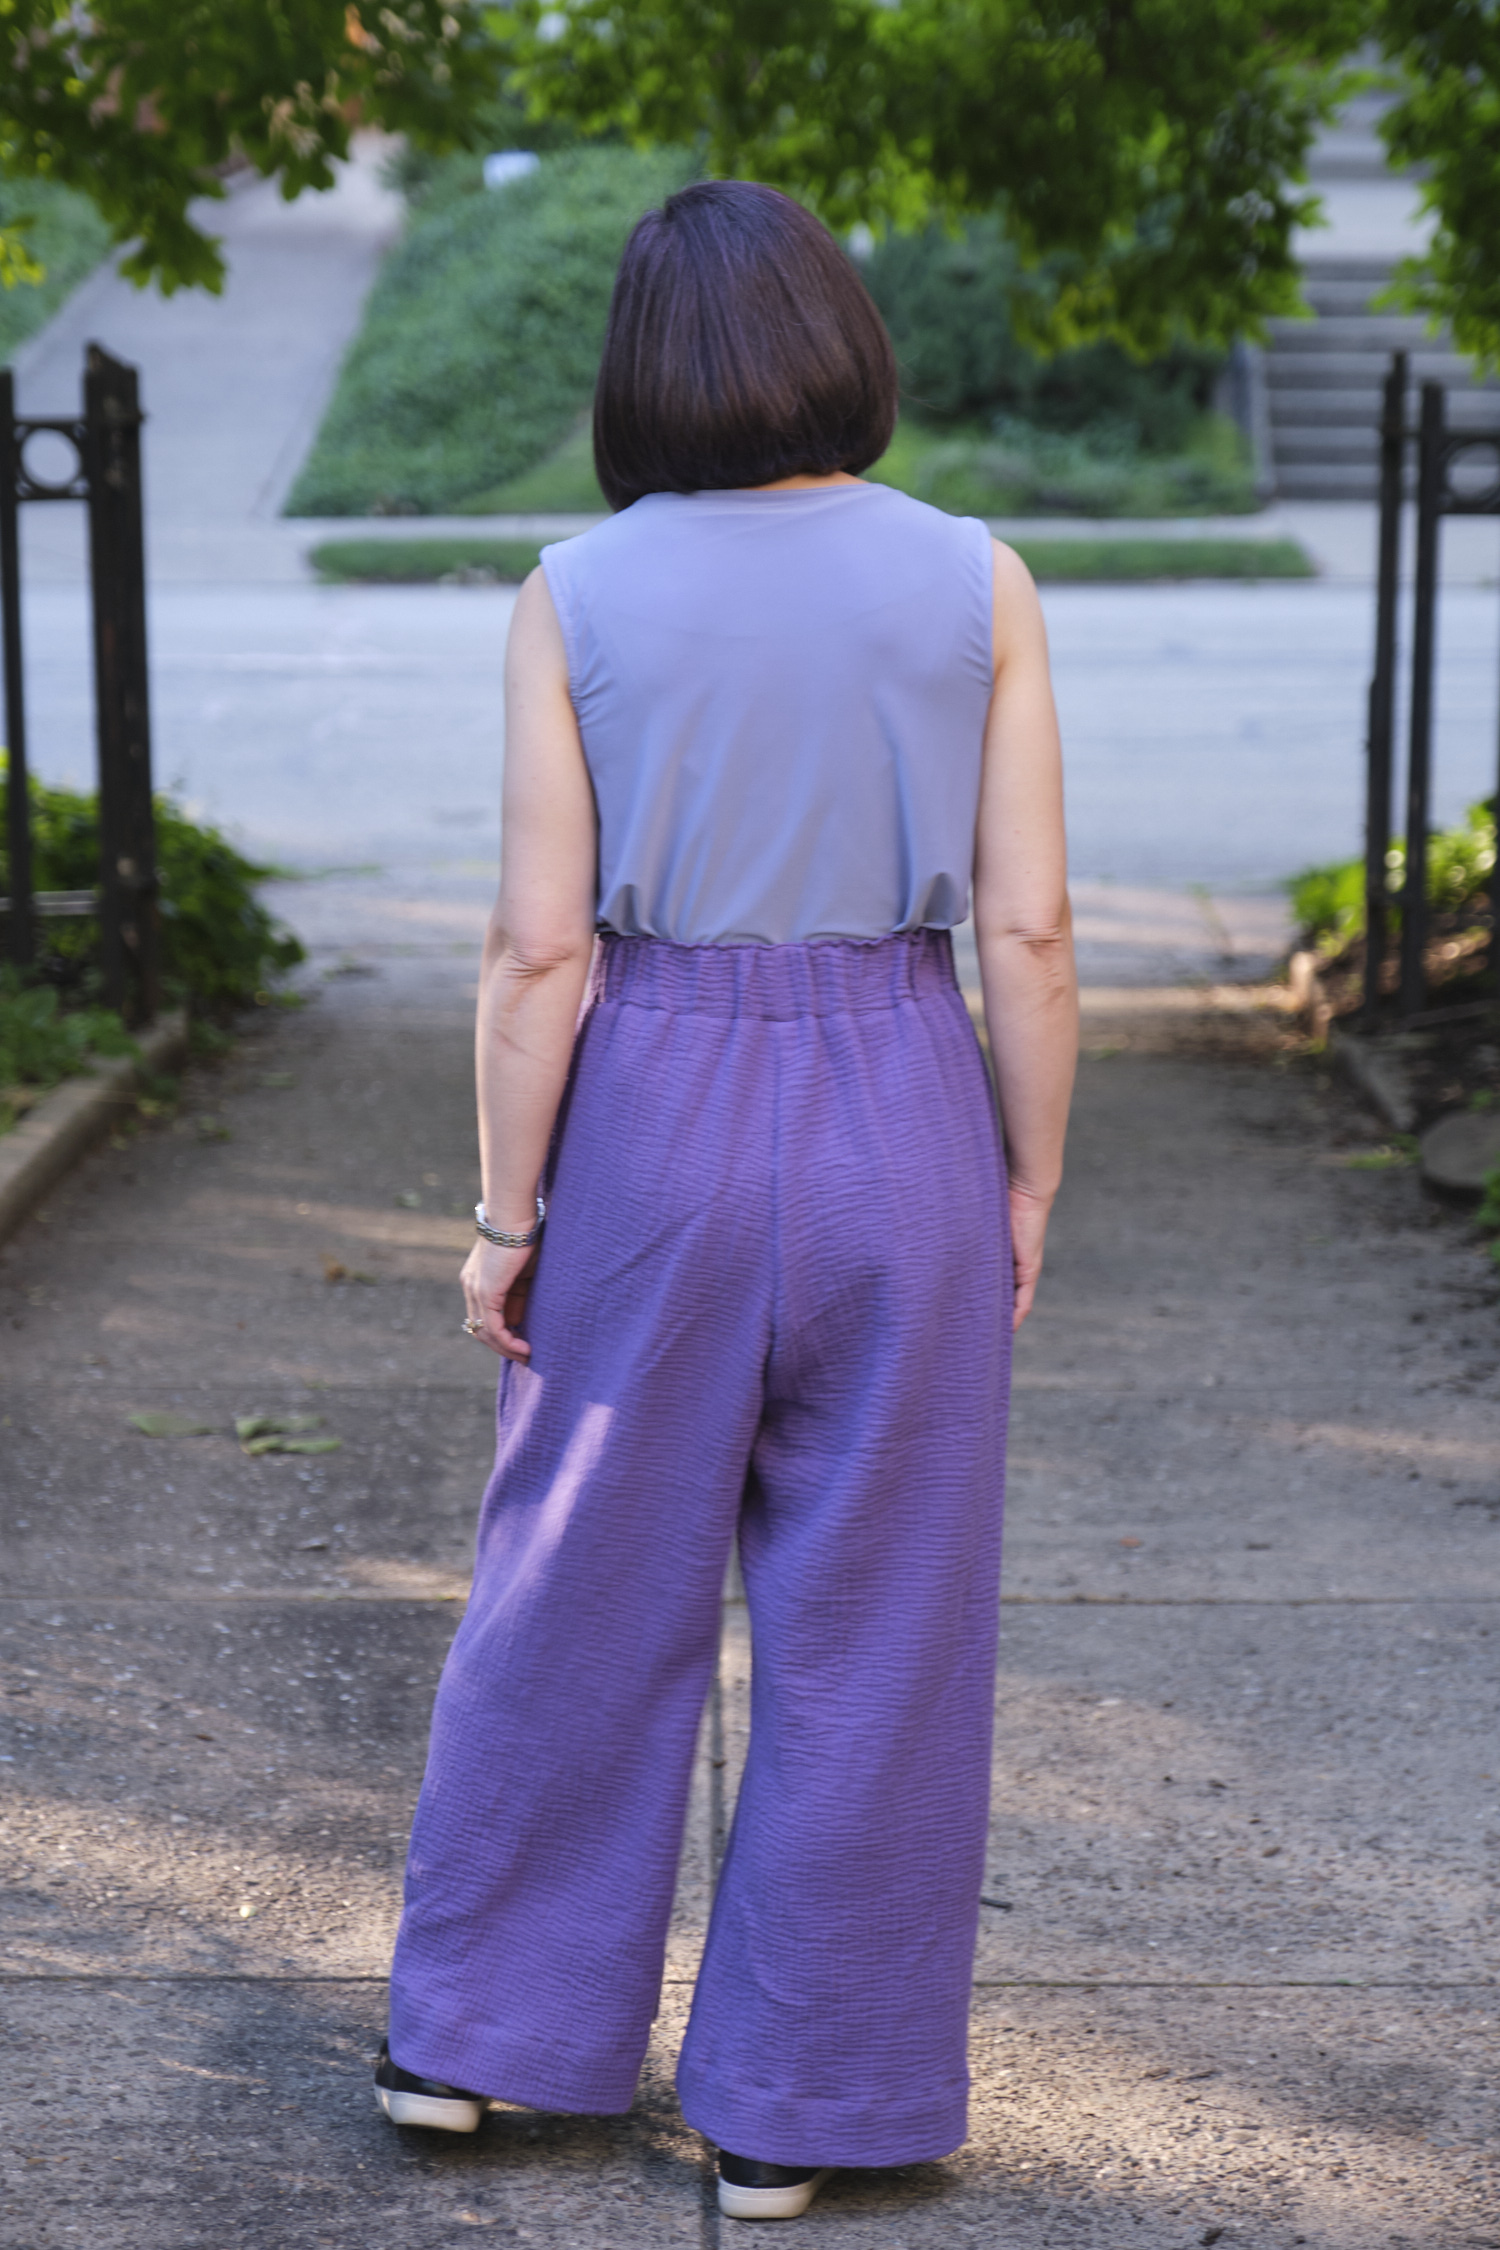
I thought the pants looked pretty good and were comfy to wear. But the rise was really sky high on me and the crotch was sitting pretty low. I am a big fan of high-rise pants, but as a short person, I sometimes find high-rise too high when there is no petite version. I also find I frequently have to size down and/or grade in the waist on PE patterns, despite choosing sizes that match my measurement. I decided to wear my pants to work all day and see how they did. They were comfortable and looked alright, and the double gauze was just right in both the 75-degree F outdoor weather and indoor air conditioning. but by the end of the day I was convinced that the waist was definitely too high for me. I also noticed that the pants slipped down a bit as I wore them and I kept stepping on the hem. The pockets were kind of droopy and I was concerned my phone could fall out when I sat down.
I cut off the waistband, removed about 2 inches from the top of the pants and graded in the sides from the hip up to the waist. I took about 3 inches out of the waistband circumference and sewed it back on. I think they fit much better now. They sit right at my natural waist rather than above it and there isn’t so much extra fabric around the waist. Next time I make these I think I would cut a size smaller (especially if I use double gauze since it stretches out a bit when you wear it), low rise, and still probably grade in the waist. I would also reshape the pocket opening to attach higher on the leg and hem them a bit higher. I might try a yoga waist band in a coordinating athletic knit (the pattern has instructions for that too!).
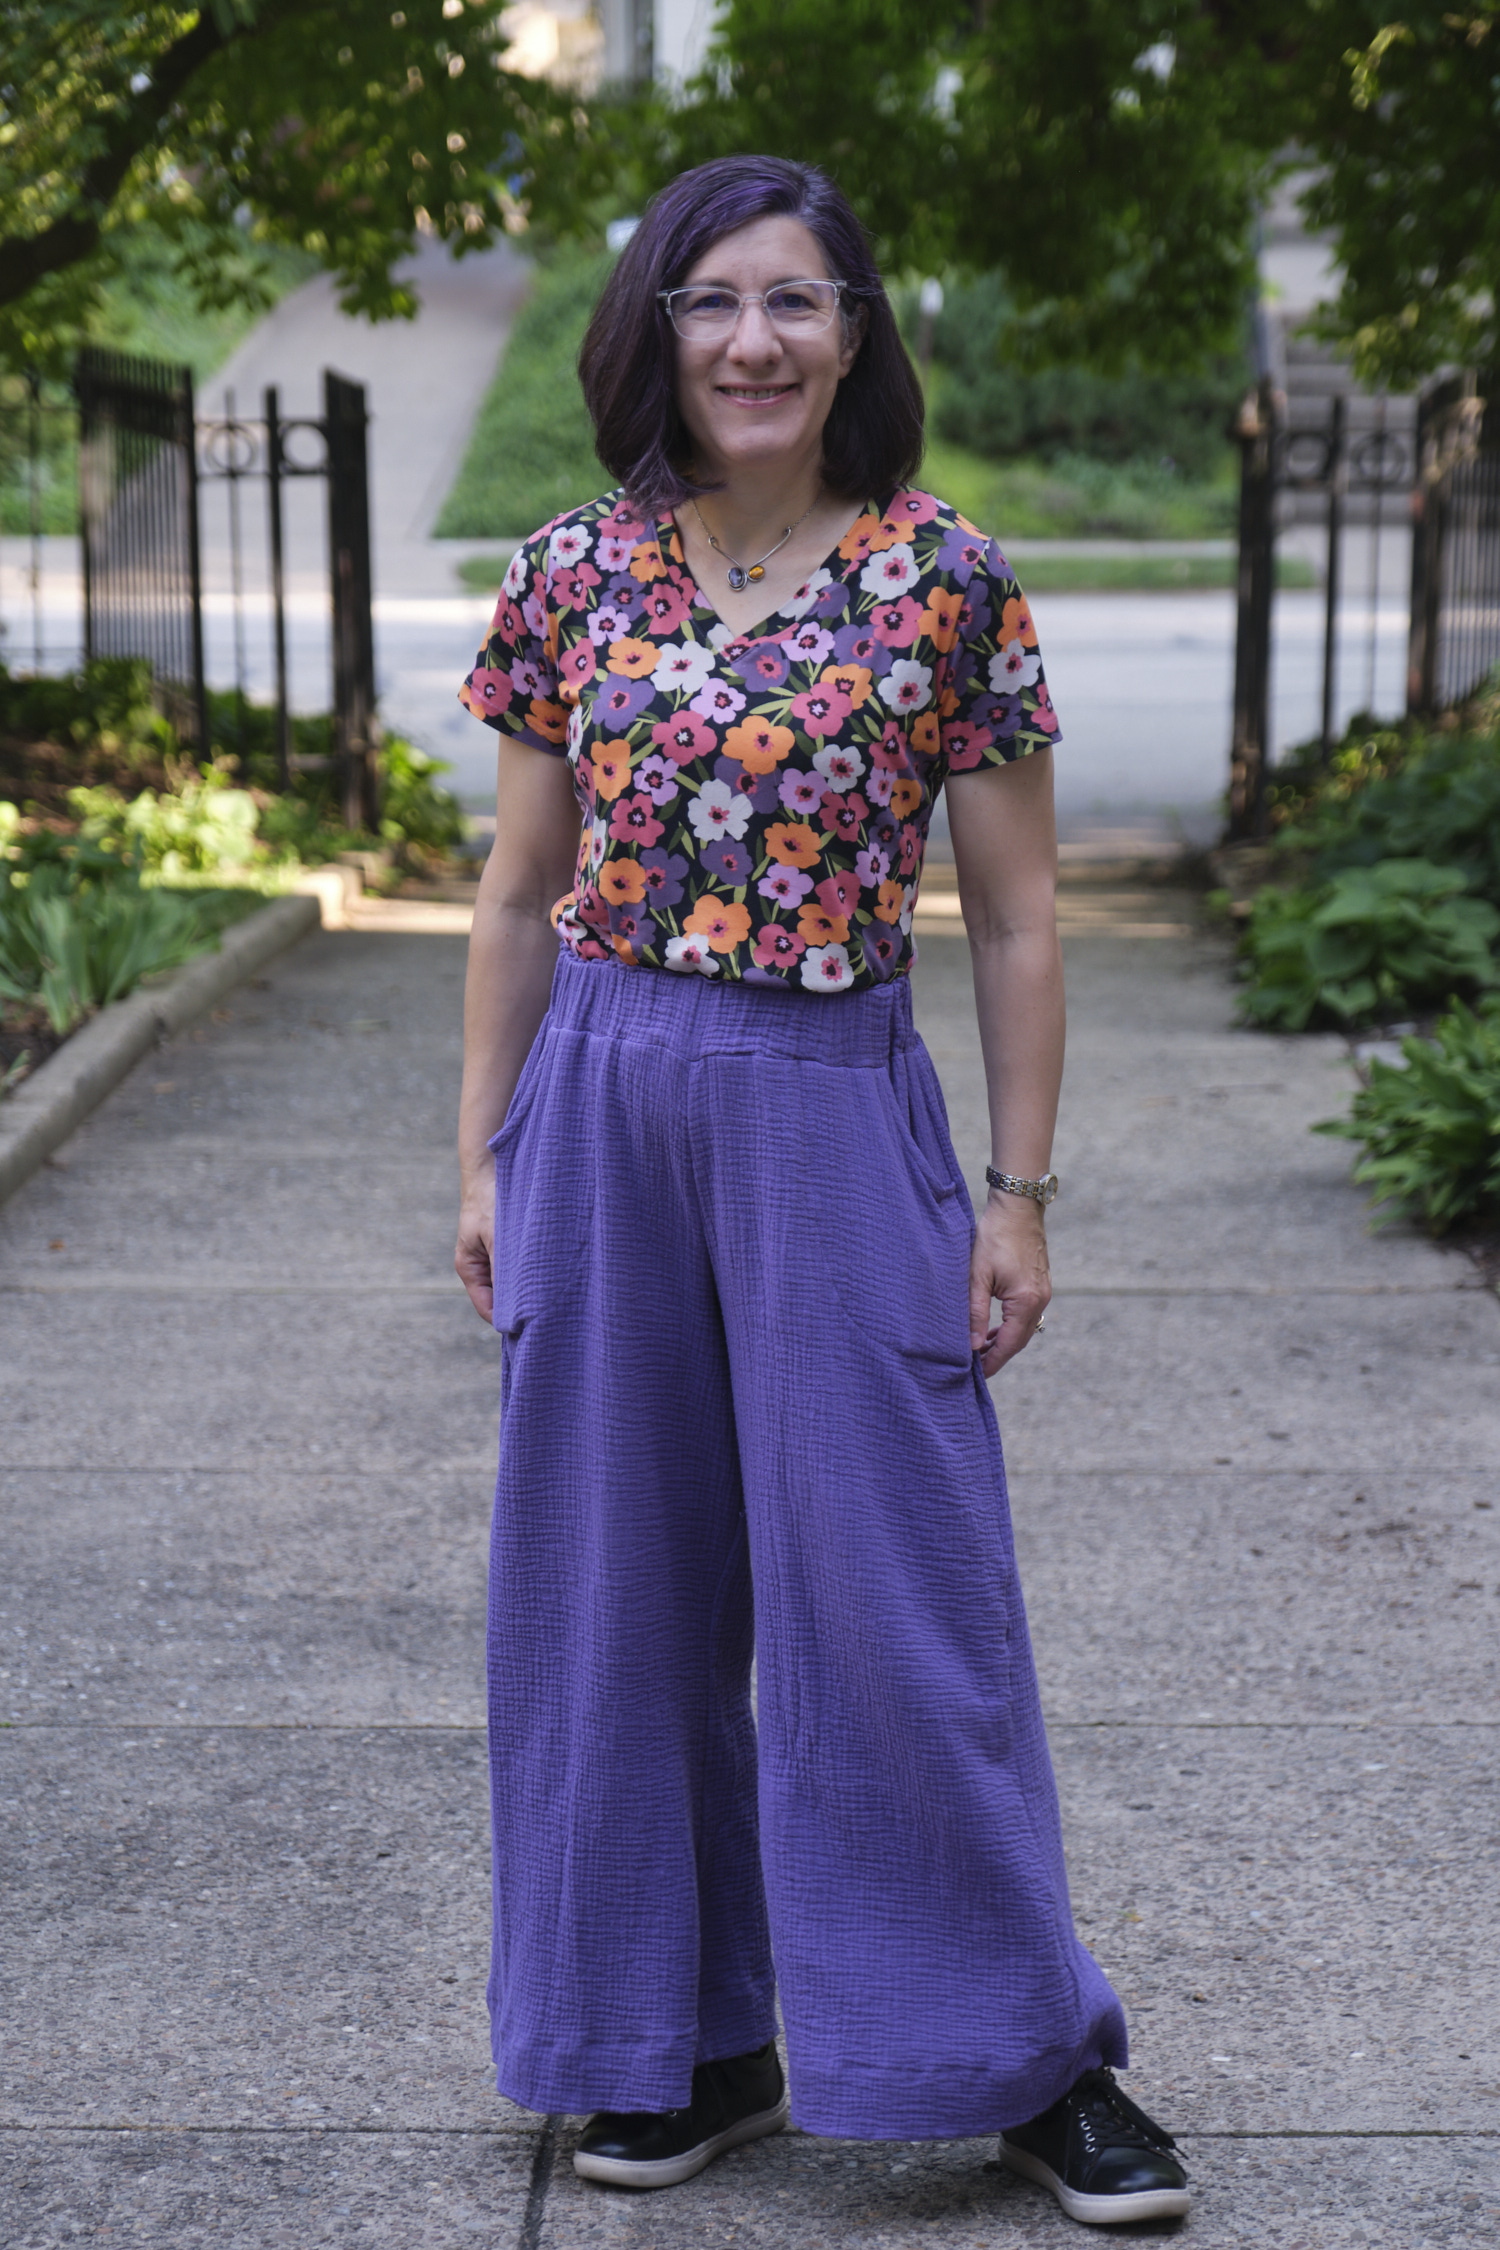
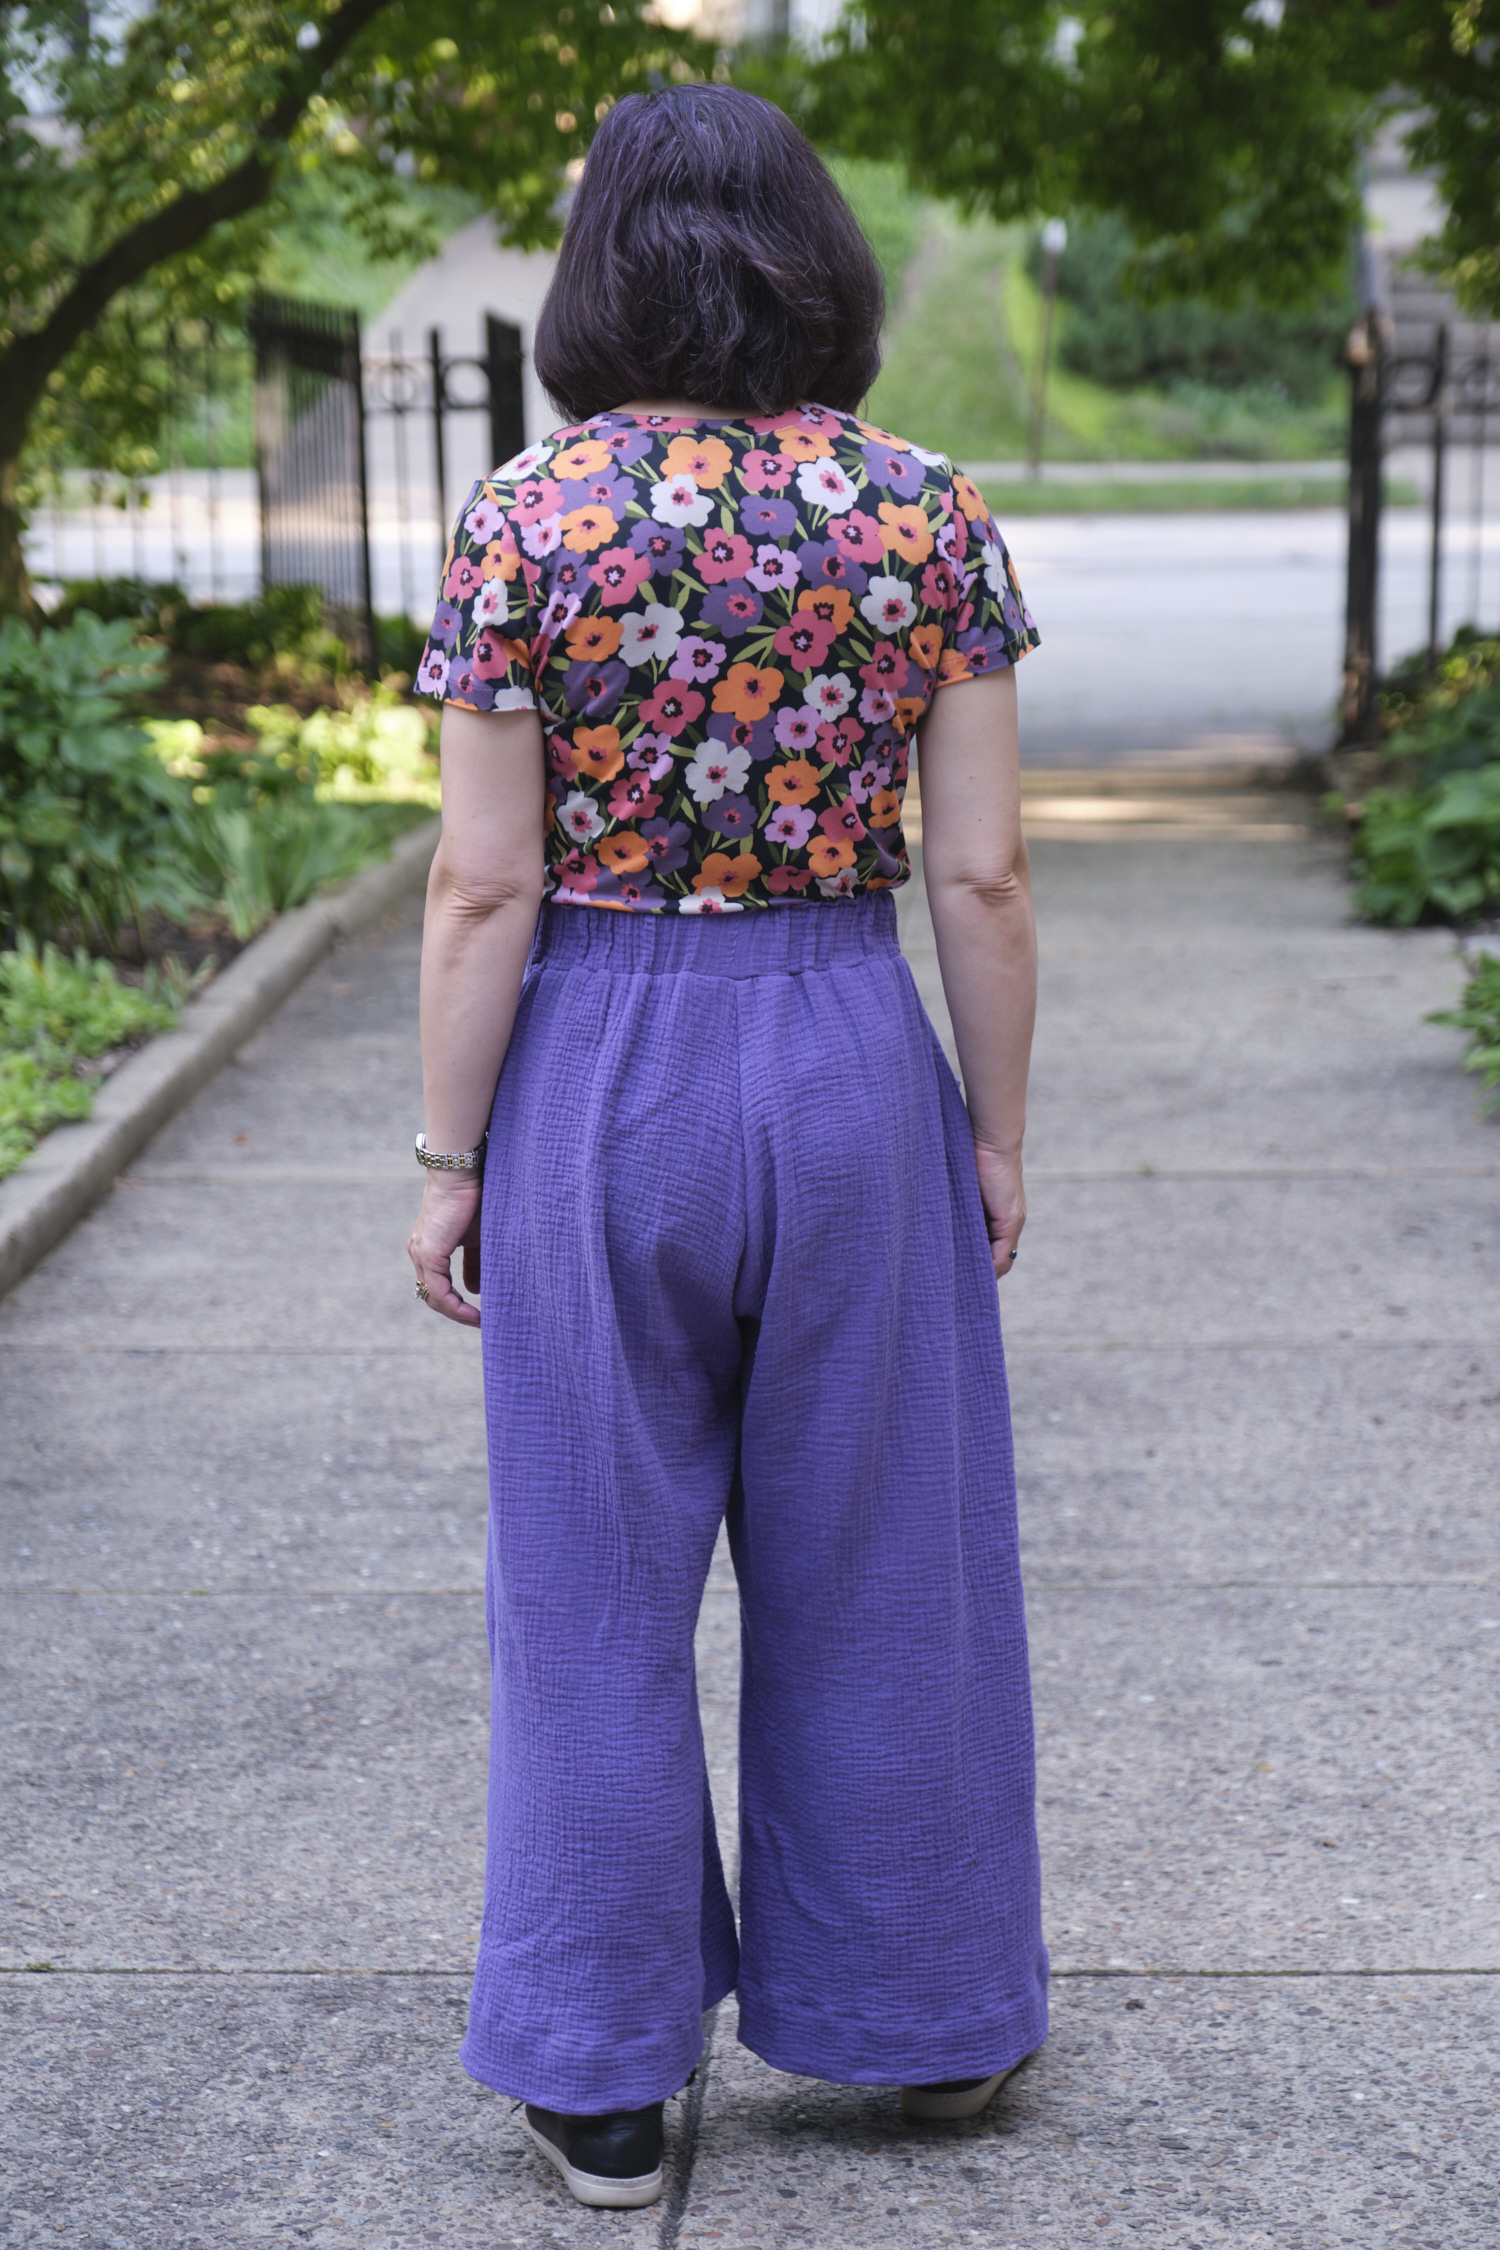
New photos show the reconfigured waistband. As an added bonus, since the pants are pulled up more the hems have risen and I no longer trip over them. I made a Sinclair Bondi v-neck tshirt (my first Bondi v-neck) out of a floral DBP in my stash to match the pants. I was going to make a dress from this fabric, but I liked how it paired with the pants so decided to make separates instead. I also like the shirt untucked. Skirt coming soon. I wore this outfit to work, and by the time I walked home it was 92 degrees F. The whole outfit was still comfortable, even in the heat and humidity!
I ordered a few colors of cotton Lycra to have on hand, and my daughter spotted the sage fabric and requested a cropped short-sleeve tee. I made this one in a size 4R but graded the waist to a size 0 and cut the bottom at the horizontal waist line shown on the pattern. In hindsight I probably should have cut it a half-inch longer, so I ended up sewing about a 3/8-inch hem rather than my usual 5/8-inch t-shirt hem. Actually, she probably wouldn’t have cared if I hemmed it shorter, as it does seem to be what everyone her age is wearing. I used the crew neck and cut the sleeves about an inch shorter than the short-sleeve length marked on the pattern. It seems to be exactly what she wanted.
I didn’t have enough black Pylos Liknit fabric for another pair of palazzo pants (my daughter is wearing the last pair of black LiKnit pants I made in the photo above and would desperately like me to make her another pair when it restocks), but I had enough for a Bondi. I made this one with a screwp neck and elbow sleeves in a size 6P. The Liknit has only horizontal stretch so you can see some lines at the side of the bust, but it still fits pretty well and is very lightweight and comfortable to wear. It looks great with my black LiKnit pants and also these LiKnit pants in the linen colorway.
Finally, I used some light-weight, wide-rib poly-spandex in a groovy print that I bought on $3/yard clearance from Mily Mae Fabrics last year to make a short-sleeve screwp-neck Bondi in size 6p that pairs perfectly with my seafoam LiKnit pants.
So now I’m up to 12 Bondis and I’m sure there will be more! I still need to try the V-neck version… perhaps I will try that next.
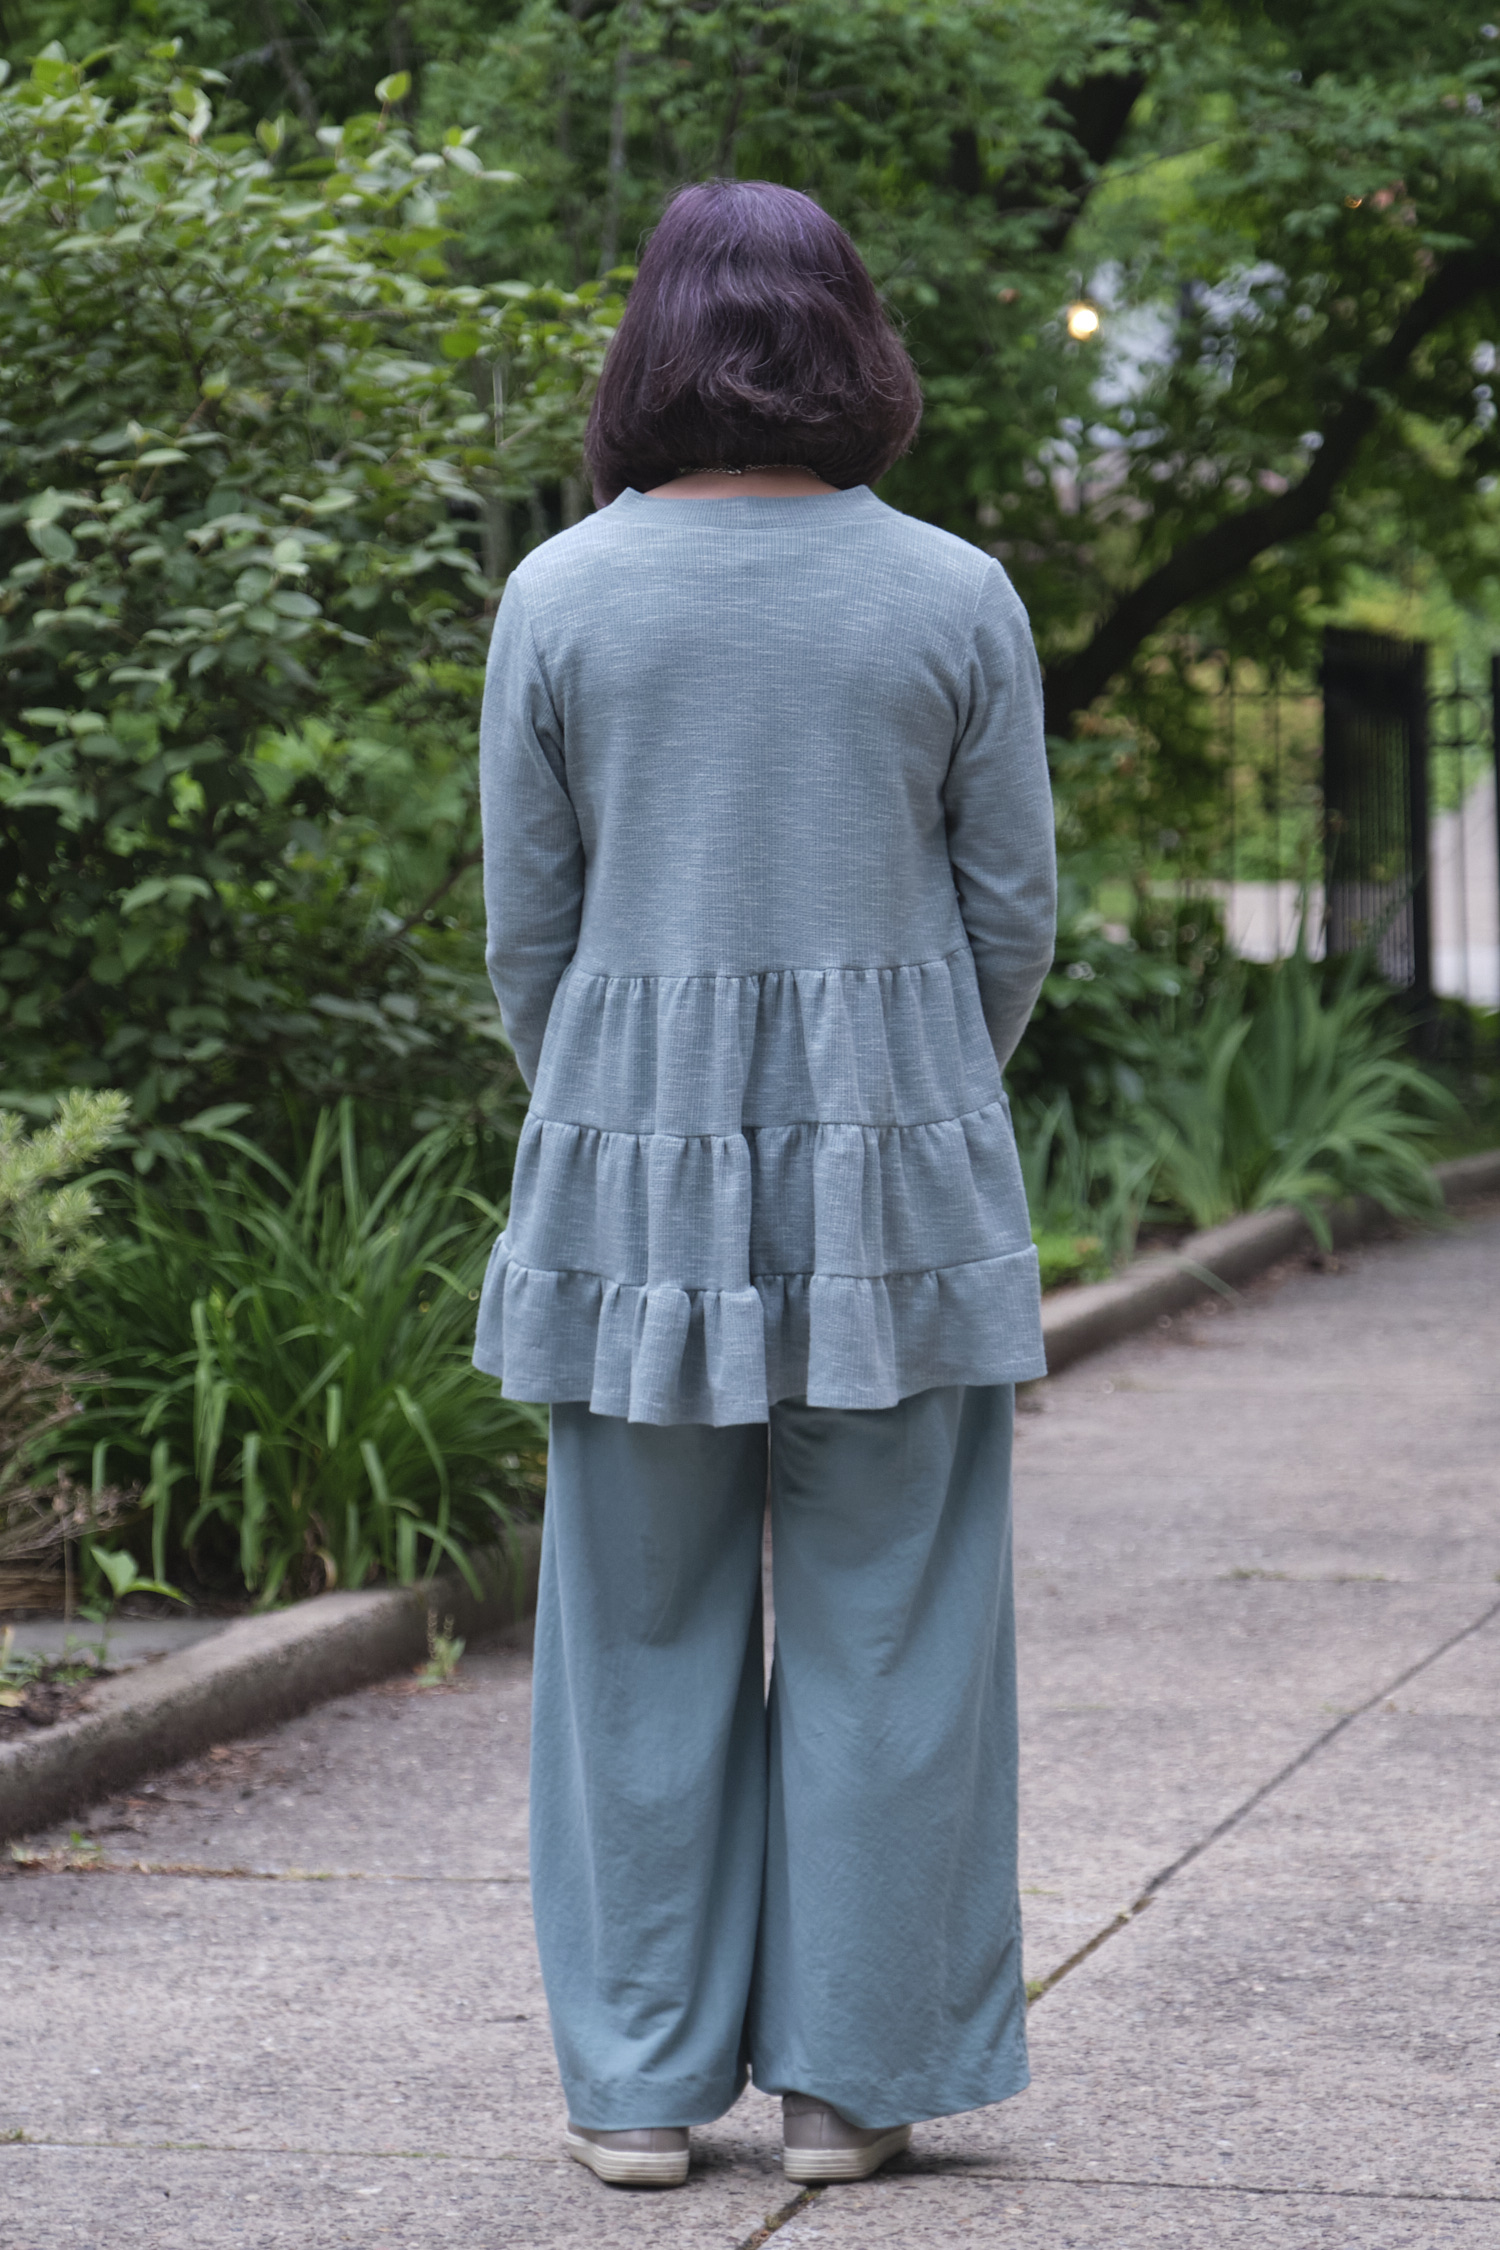
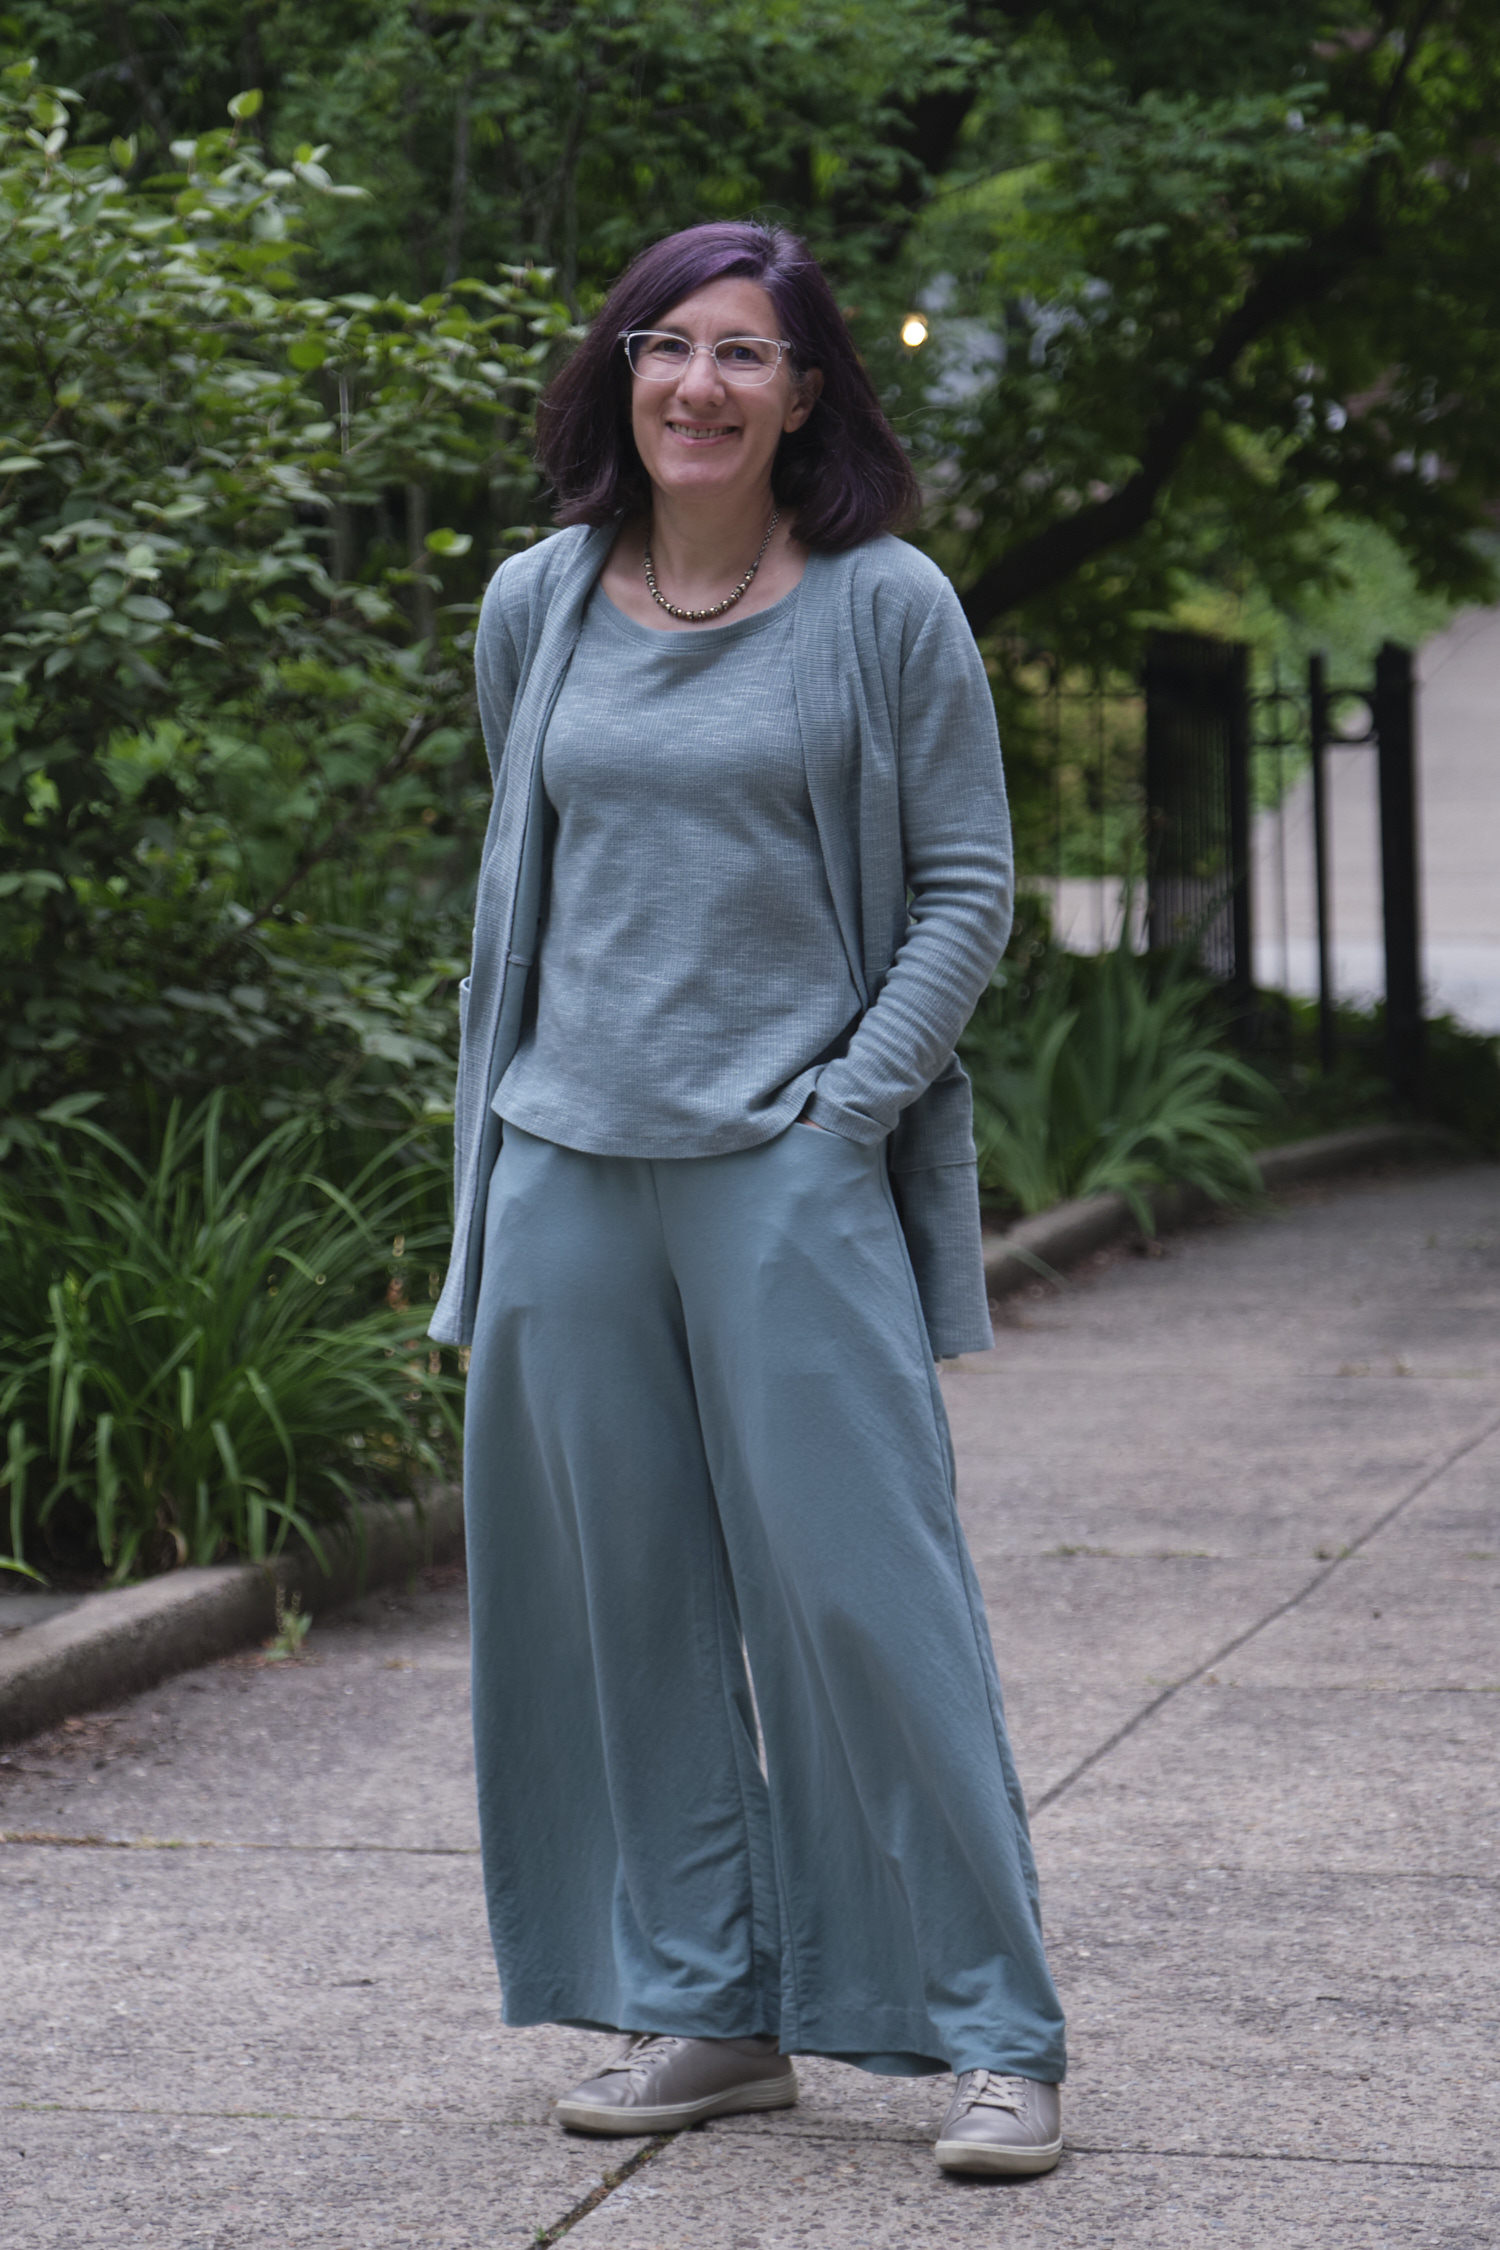
I followed the instructions for the Harper cardigan hack on the blog with a few modifications. I started with a size 6p. Since I prefer not to have neckbands that creep up my neck, I lowered the back neck band and narrowed the whole band, just as I had done for a previous Harper sweater I made. I used patch pockets (but without the top band) but still split the front pieces as was done in the hack. I also added a slight flare to the outside seam of the lower front pieces. I omitted the sleeve cuffs and lengthened the sleeves slightly to compensate. I was able to cut all the pieces from 1.5 yards of fabric in my size. I’m very happy with how the ruffled harper came out! It is a jacket I can wear to work and look professional, with a fun ruffle in back. This one is a light-weight sweater knit good for spring and fall or keeping warm in overly air-conditioned buildings. I might make a warmer one for winter in French terry or a cozy sweater knit.
Since I had fabric leftover I made a Sinclair Cache top to go with the cardigan. I followed the cache pattern but added a scoop neck and cut the back hem to match the front. I actually don’t love how the Cache came out in this fabric with the scoop neck as it doesn’t lie flat under the cardigan, but I’ll wear it anyway.
The Demi is semi-fitted, similar to the Sinclair Cachet relaxed top (which does not have separate sleeve pieces). It is not as fitted as the Sinclair Bondi. I really like the scoop neck option, which is not as low as the Bondi scoop neck — more like my invented Bondi screwp neck. The fit of the Tao is almost identical to the fit of the Sinclair Kai semi-fitted crew neck for men.
If you haven’t read Part 1, read that first, and when you’re done with this read Part 3.
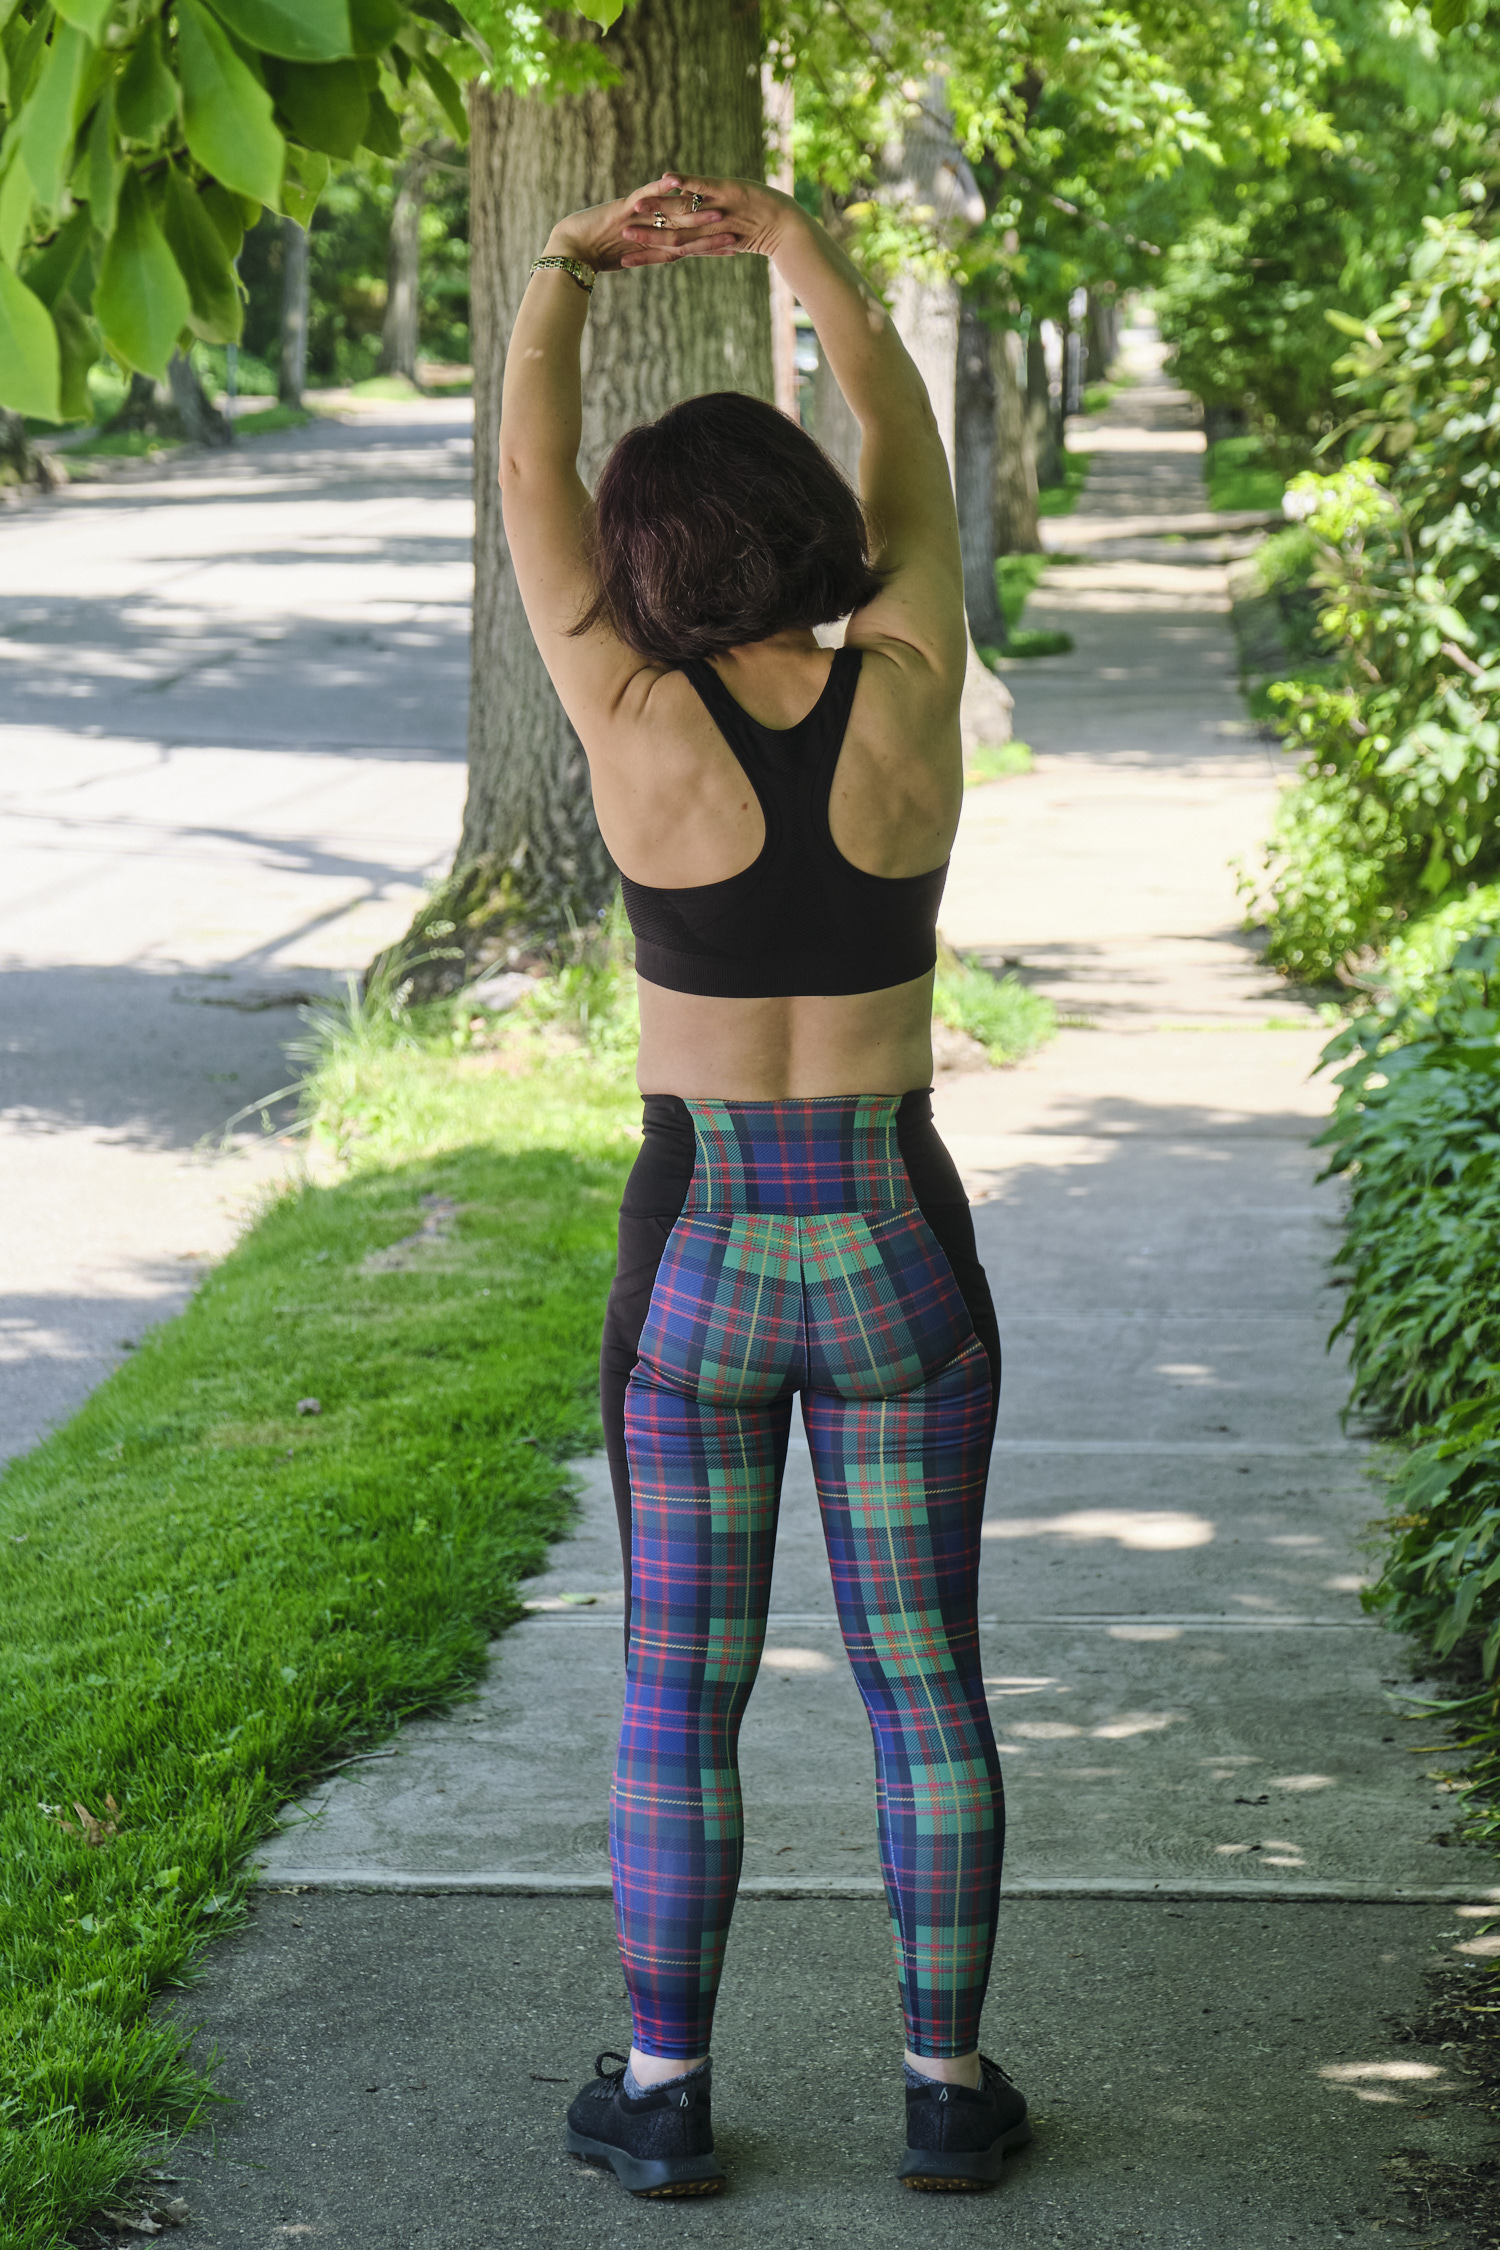
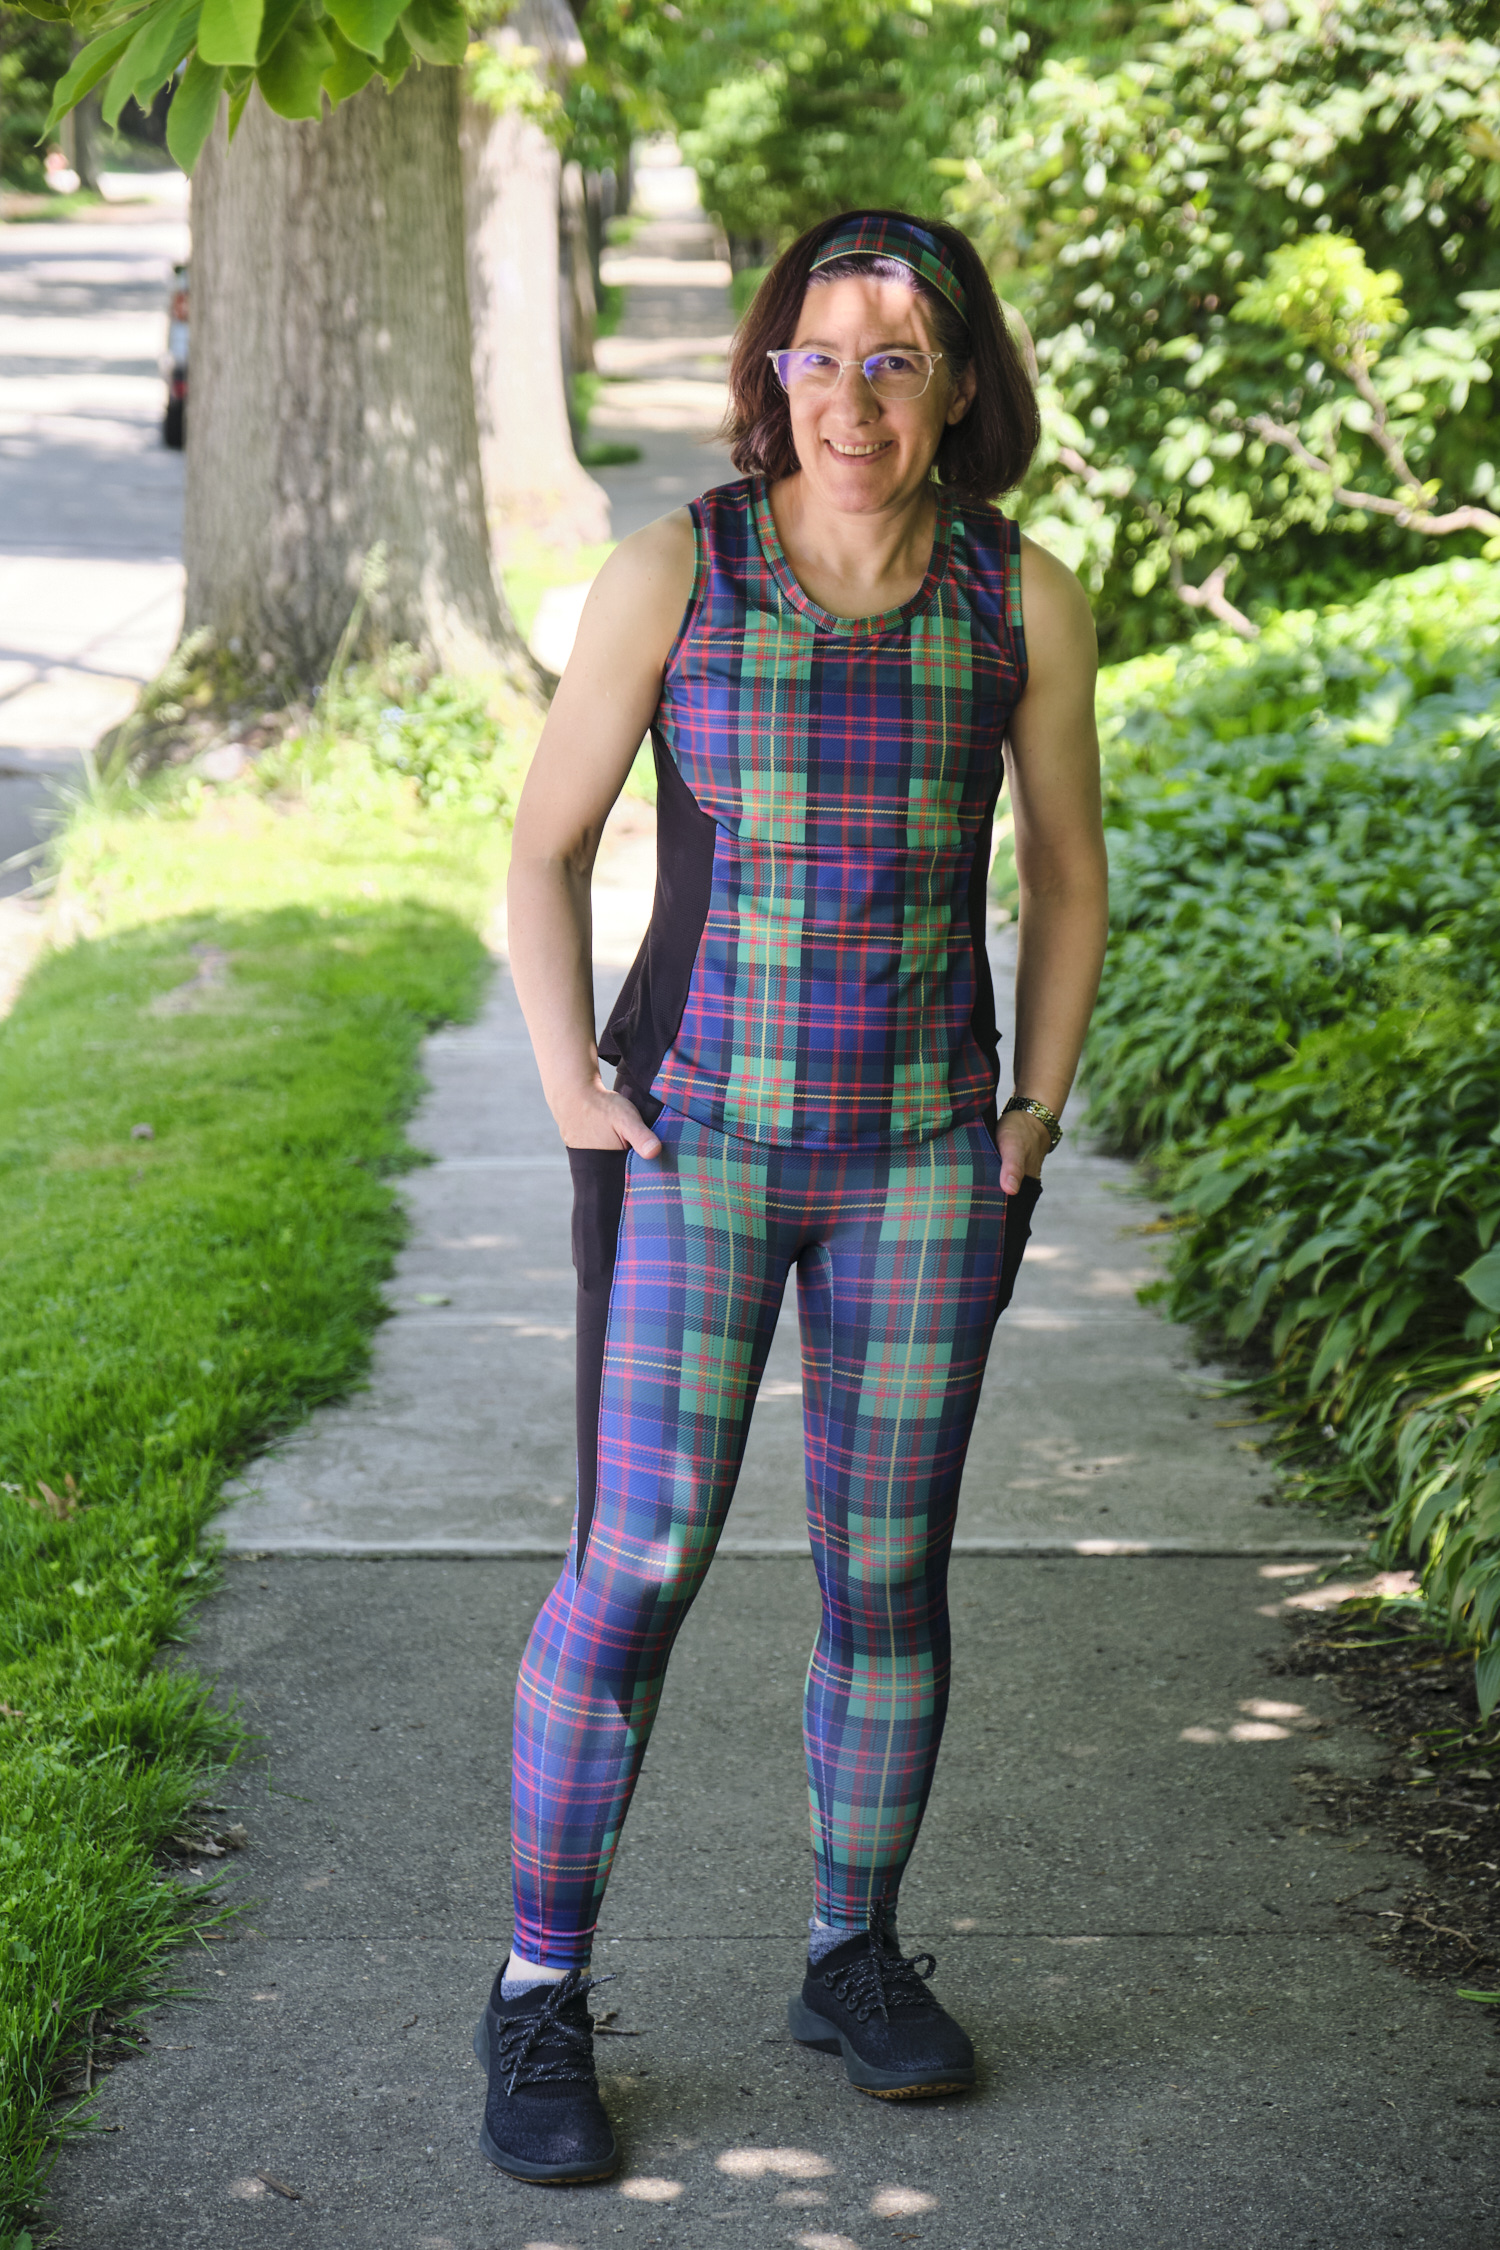
Ready for a bigger challenge, I decided to make a pair of pocket leggings out of the tartan Spoonflower sport Lycra. I selected the Sinclair Flex No Front Seam Leggings pattern in size 4p. No front seams meant no worries about matching plaids in the front: all I needed to do was center the main front leg pattern piece on a vertical line in the plaid. Of course, then I had to align the waistband piece to the main front pattern piece and figure out how to cut the two back leg pieces symmetrically and somewhat aligned with the front leg piece. I decided to use the color blocking option and make the side pocket pieces in a solid black 300 gsm QUAD performance jersey knit from Surge Fabric Shop to avoid any plaid matching issues. The QUAD fabric is a similar weight and composition to the sport Lycra, but has more stretch and a brushed side that feels really nice. I wish it came in more prints because I really like this fabric. I ended up using up almost all my remaining QUAD fabric, which was too bad because I accidentally folded down and trimmed the wrong pocket pieces. Since I didn’t have enough black fabric to recut those pieces, I carefully unpicked them and then sewed a small patch on the corners I had trimmed off. It’s not very noticeable unless you know where to look (in the black section just below the waistband in the back).
The leggings were more challenging than most of my other recent projects, in part because of the slippery plaid fabric, but also because the waist construction involves joining many layers. As I rarely pass up a pocket opportunity, I included the back waistband pocket (highly recommended by the pattern designer). Adding the waistband pocket was fairly quick and easy, but it meant an extra two layers to join when I attached the waistband to the rest of the leggings. I did most of the sewing on my serger, but had so much trouble aligning the waistband that I basted it on my sewing machine. Even then, it still didn’t align and I had to unpick and ended up hand basting and then finally serging. The pattern also calls for optional top stitching. I top stitched some of the seams with a zigzag on my sewing machine, but wasn’t super happy with how it looked on the plaid so I didn’t top stitch all of it.
In the end, the leggings came together, the plaid is mostly (though not perfectly) aligned where it needs to be, and the leggings actually fit me. I chose the high-waist option and they stay in place pretty well, even though I did not include the optional drawstring (because I like my leggings to fit tight without a drawstring). I think on my next pair of Flex leggings I might add elastic in the waistband fold for a little extra hold. Overall, I think the leggings look good. However, one disappointment is that when the sport Lycra stretches, a lot of white shows through between the printing (“whiteout”). Since the legging pattern is designed to stretch the fabric, it means the fabric is not so bright, especially in the hip area. You can see it looks l a lot brighter near the ankles, where it is not as stretched. I think if I had a rotated the pattern 90 degrees on the fabric the whiteout might have been reduced.
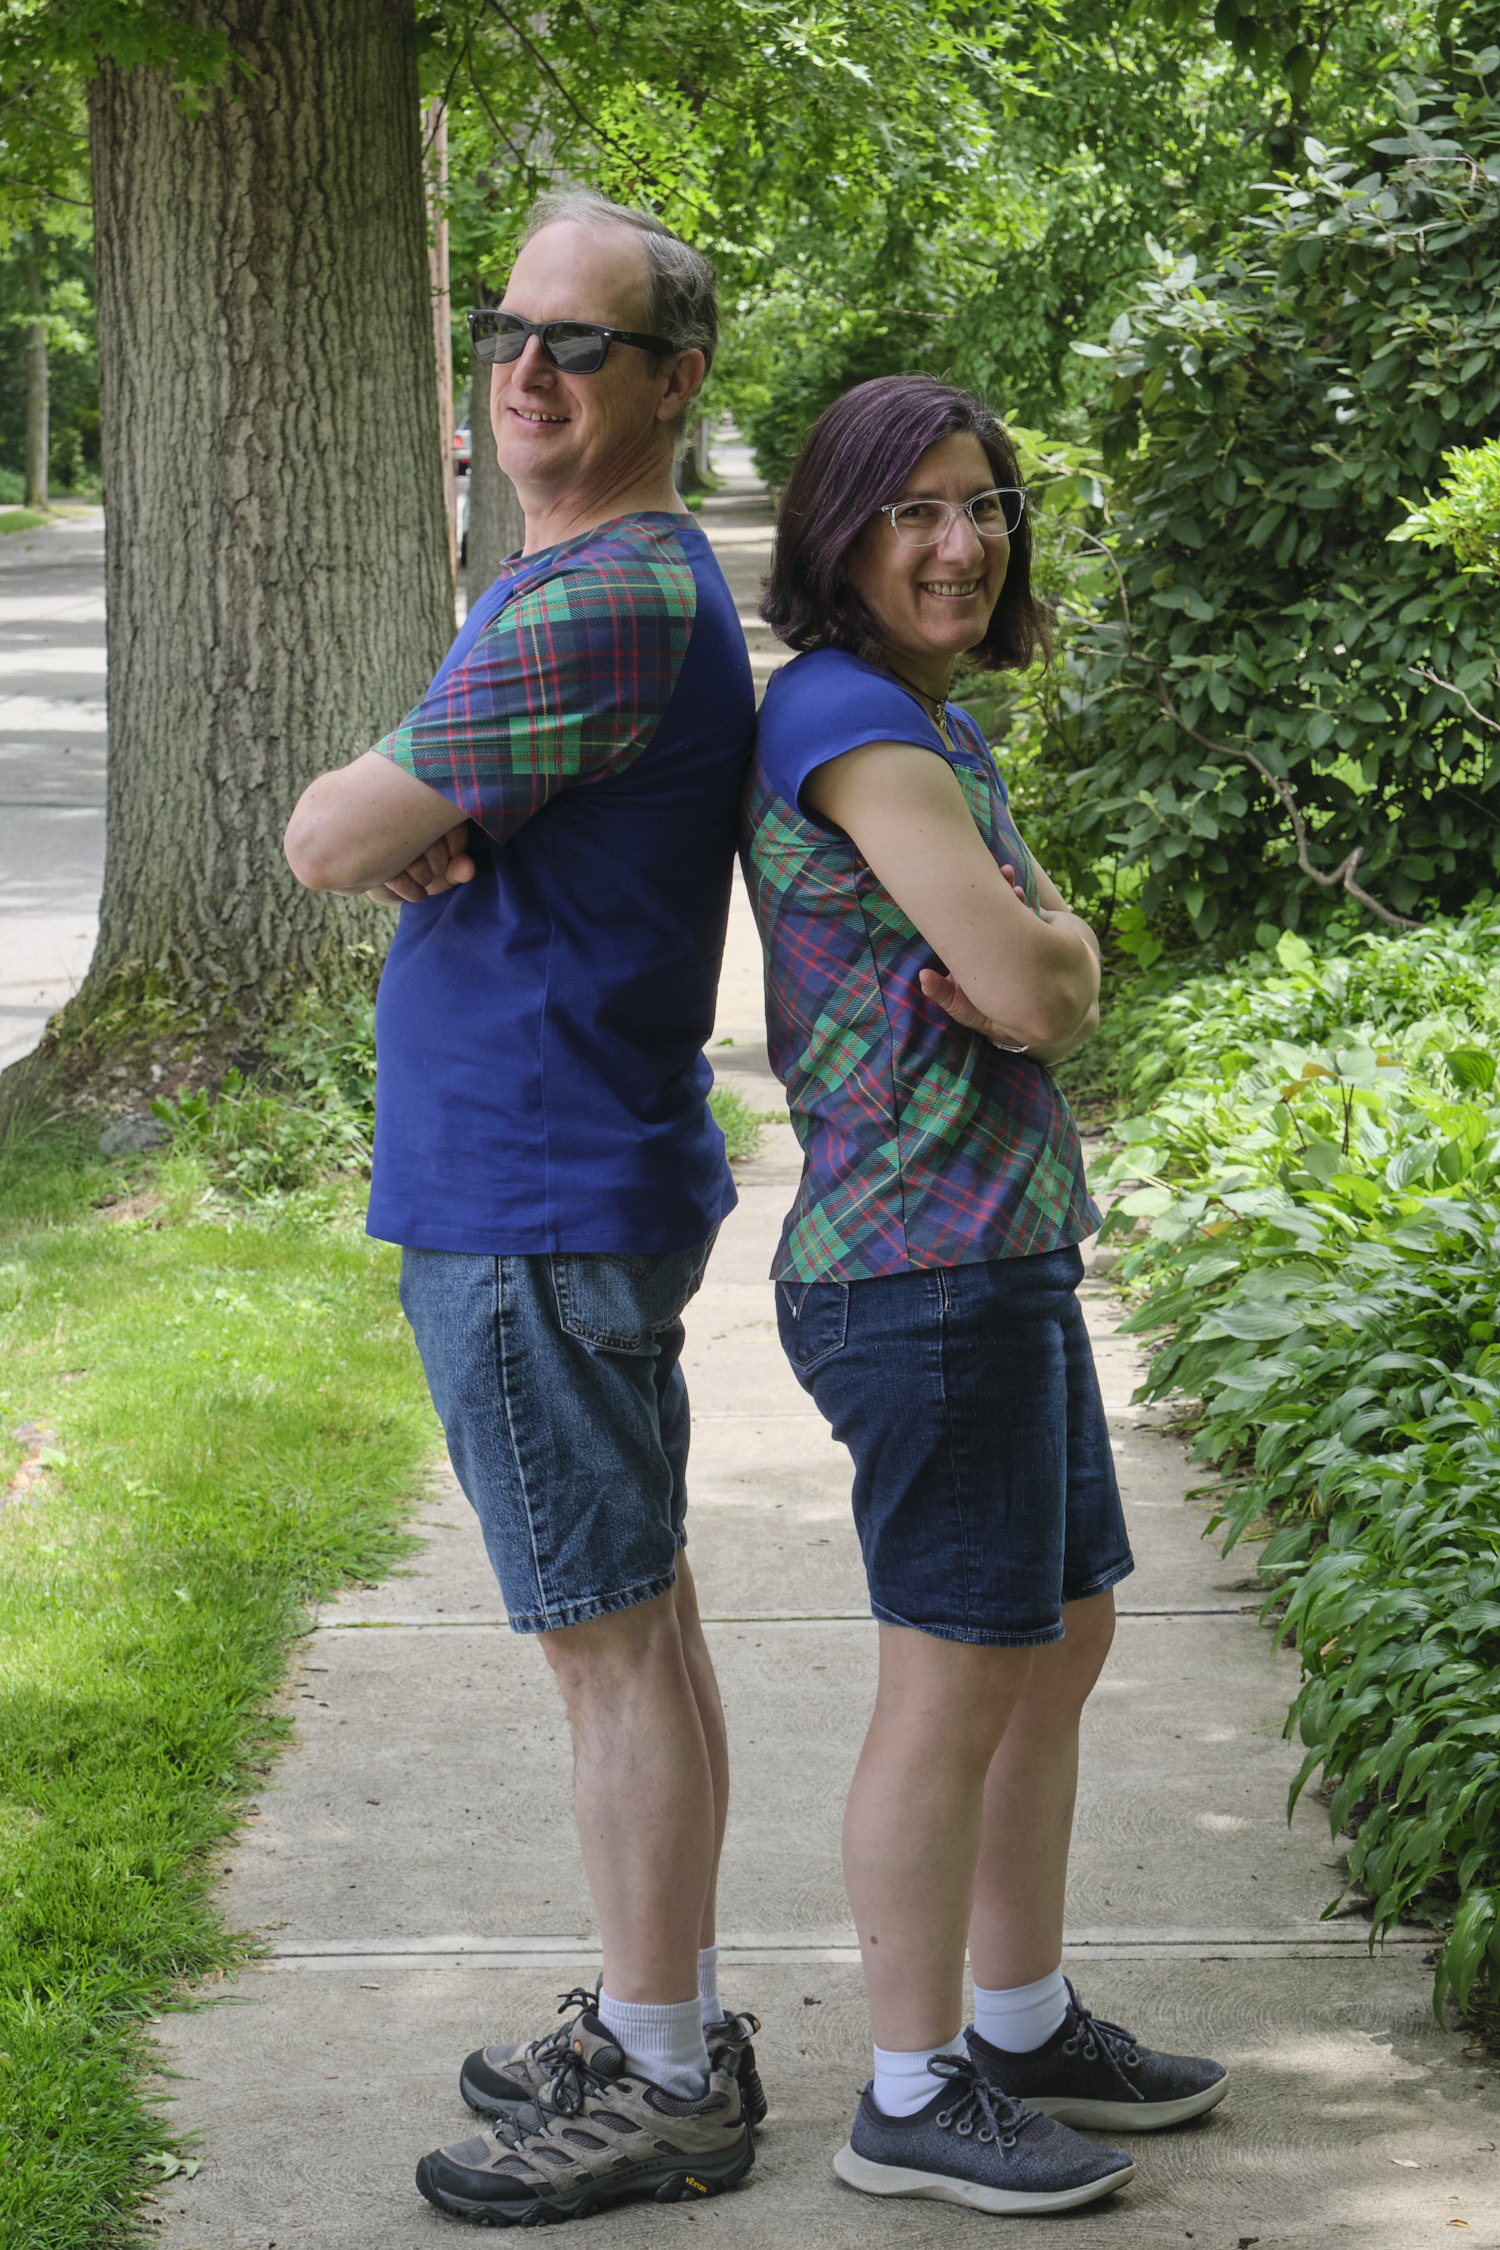
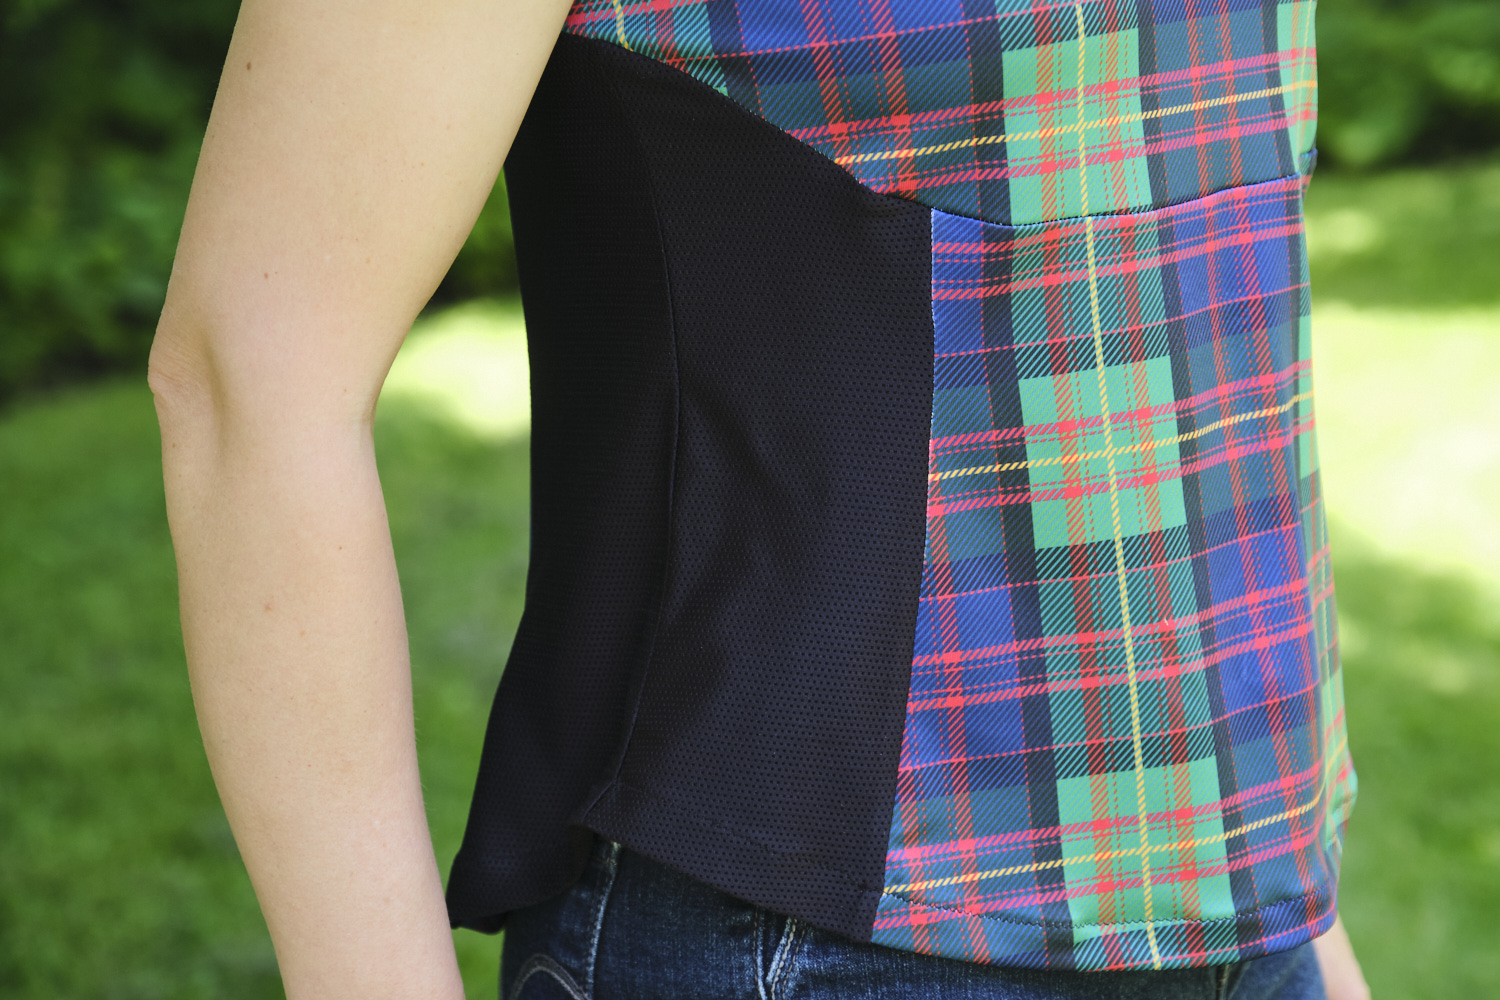
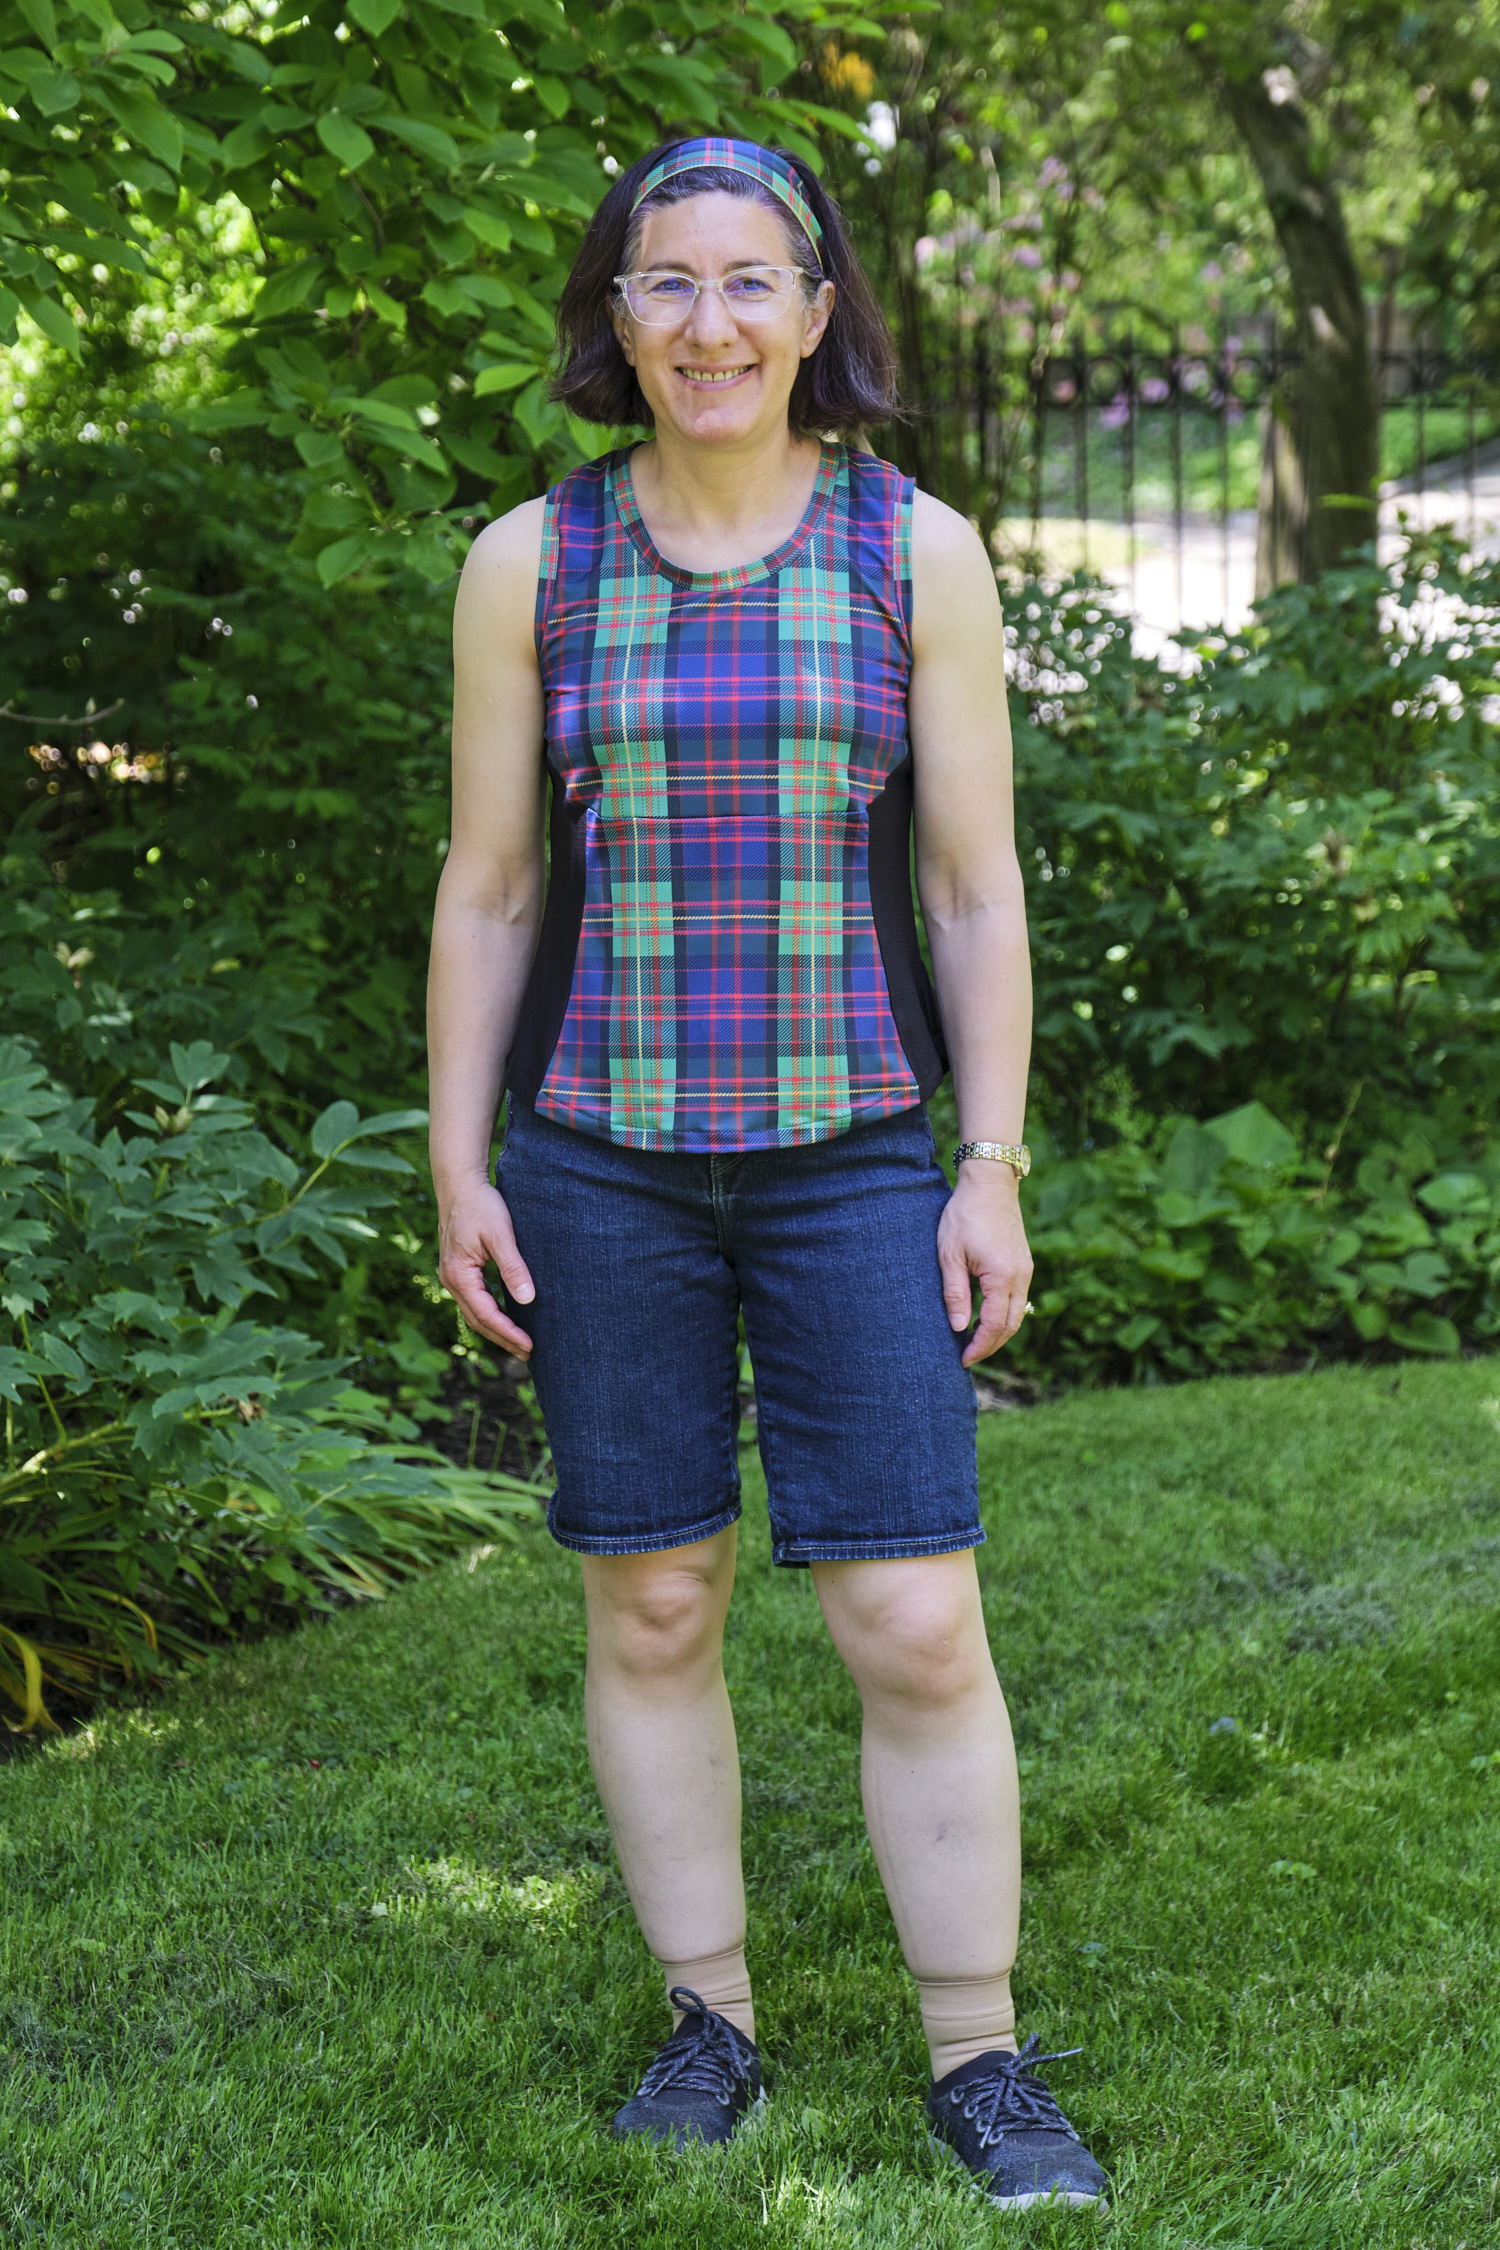
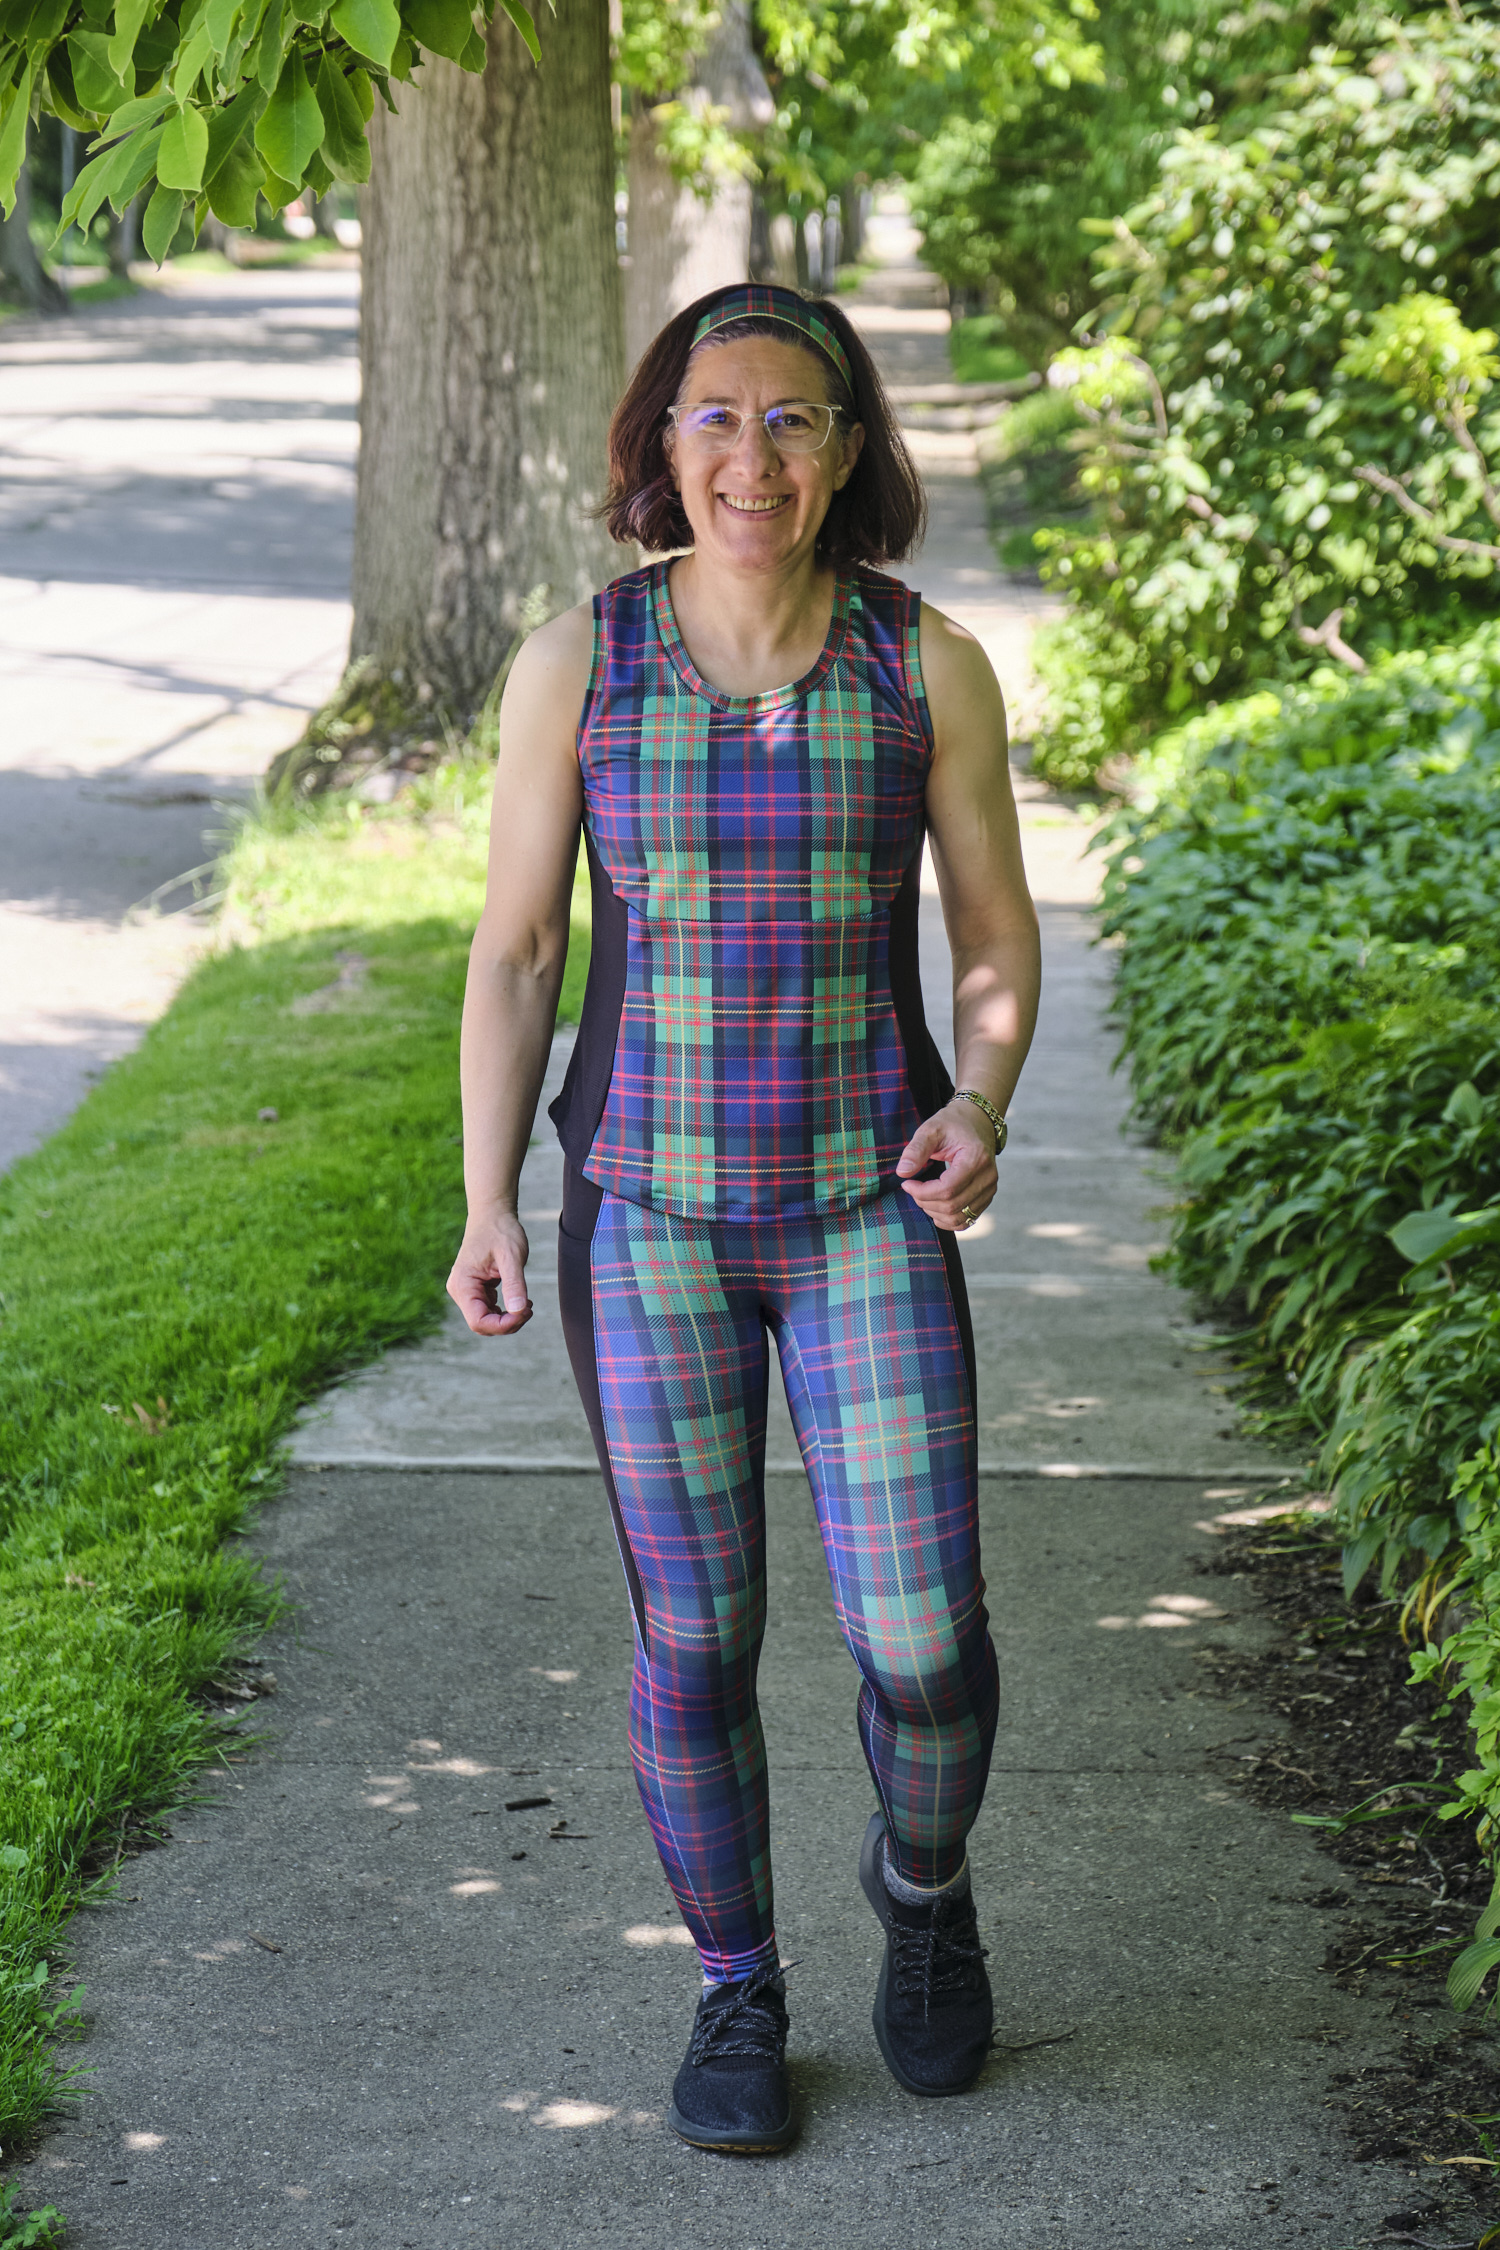
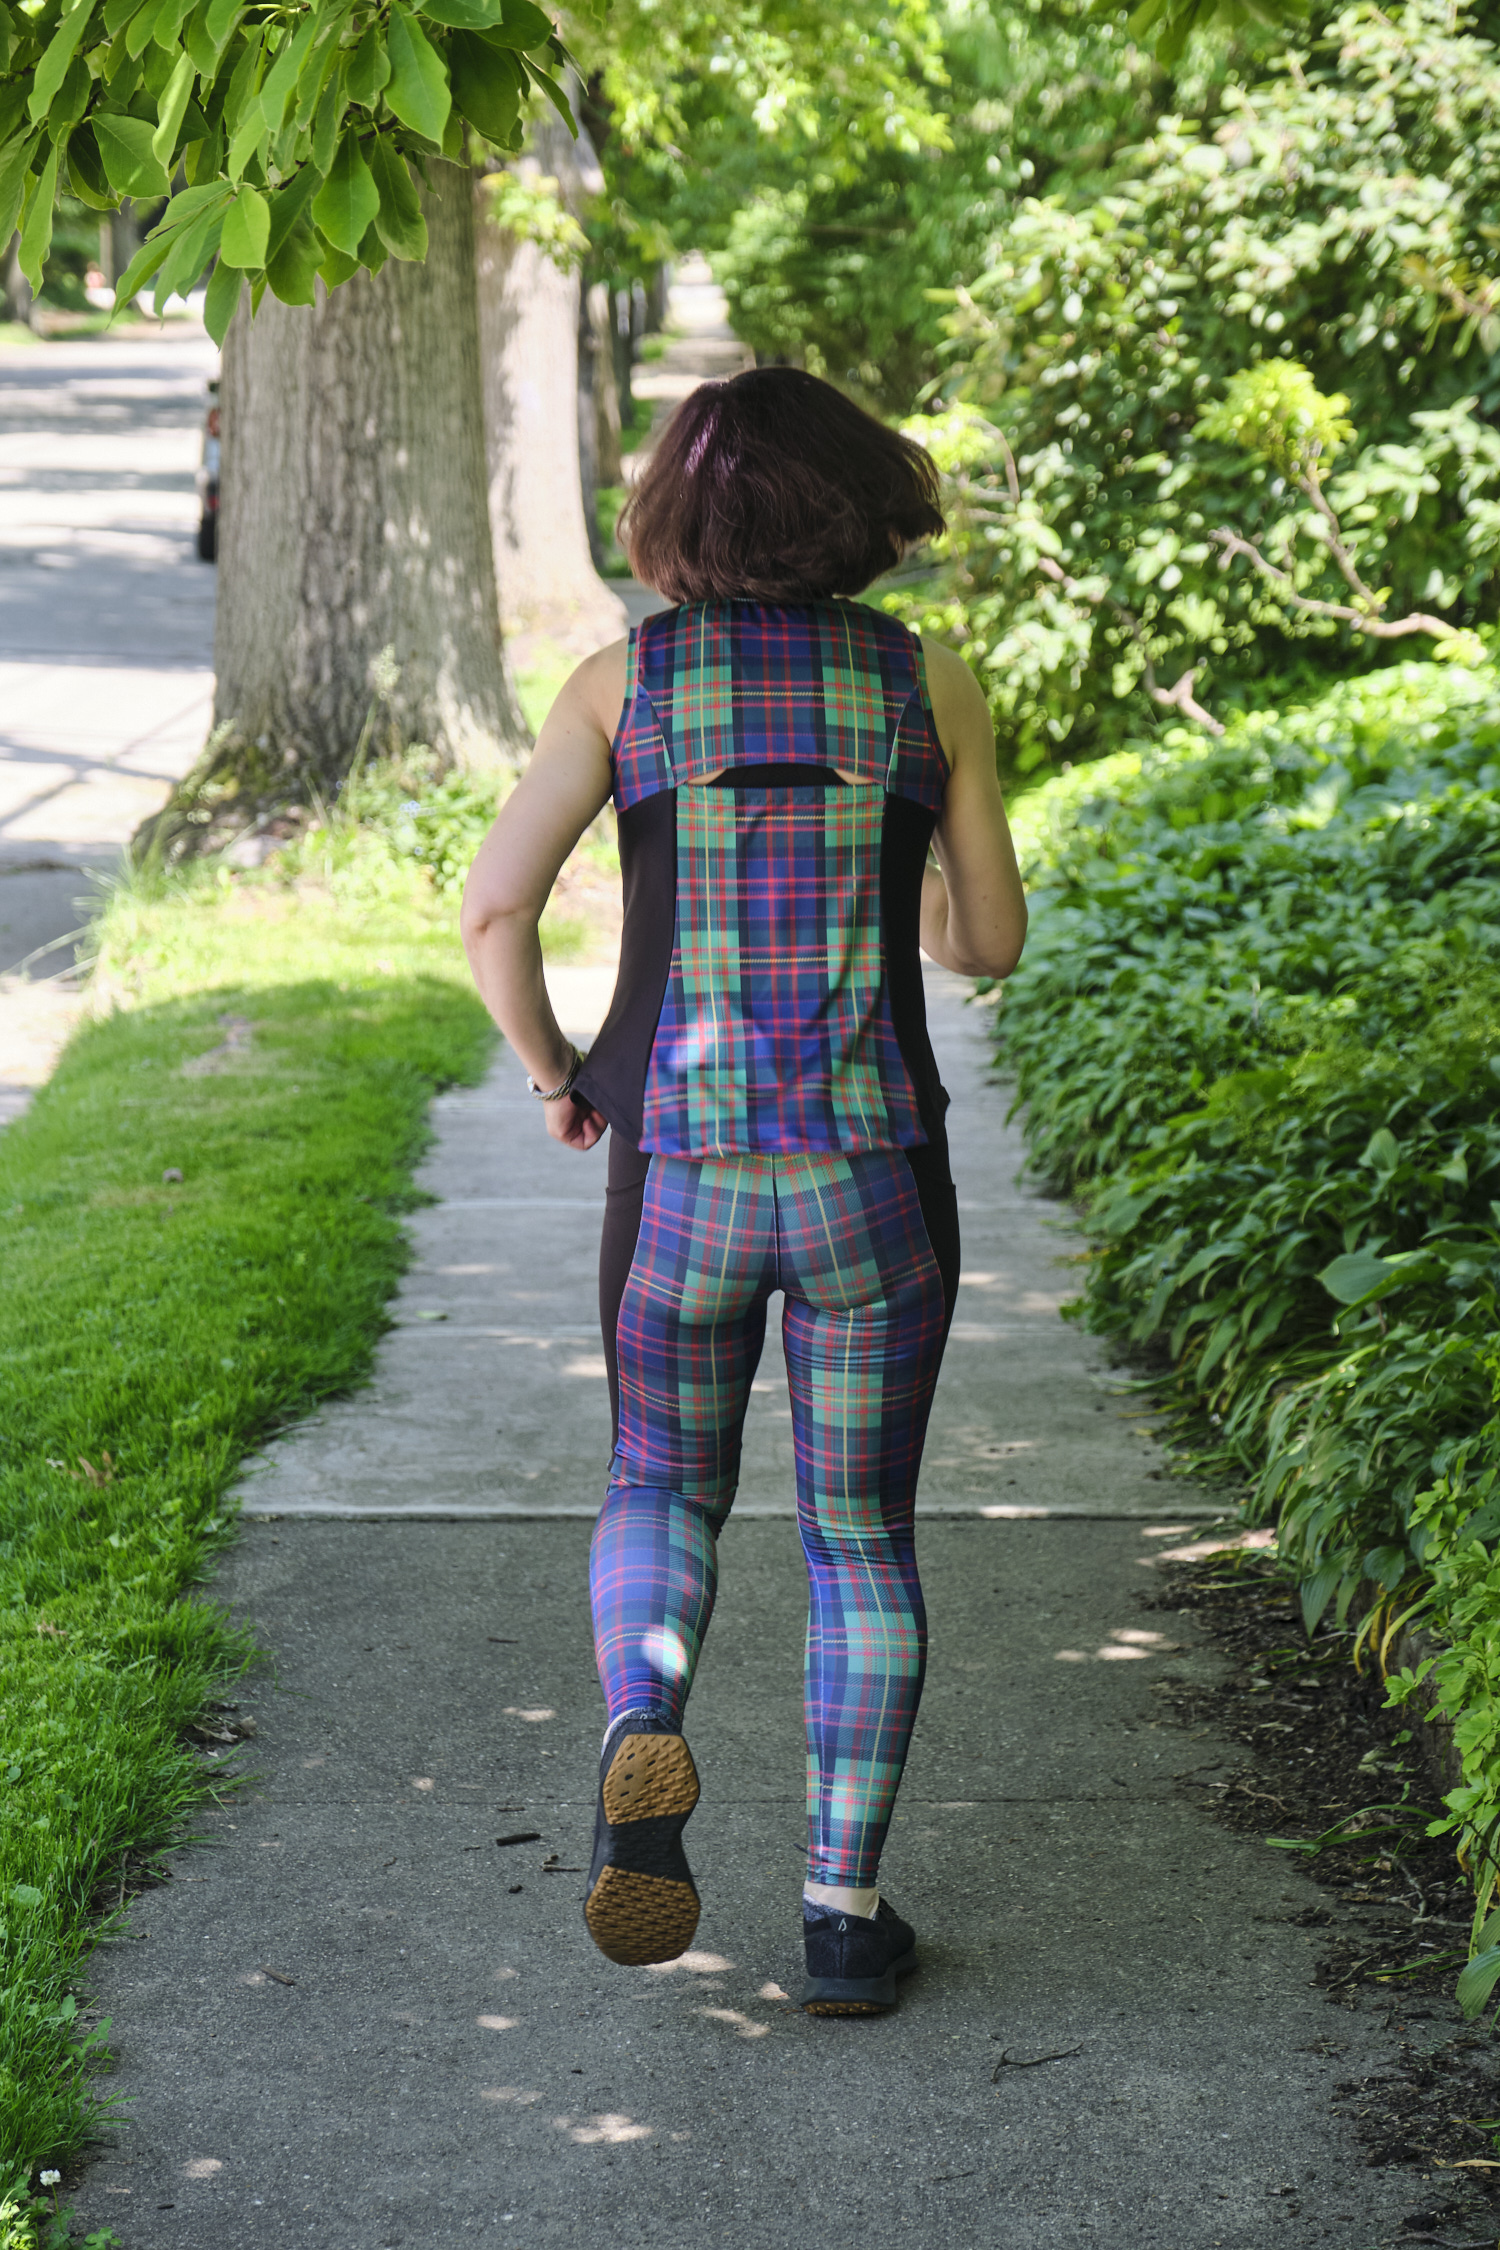
I debated whether to go for a 4p or 6p and in the end decided to sew the Wave in a 6p because I prefer my athletic tops to be loose. I think the 4p could have worked but would have been tight across the bust. Next time I might grade the sides in towards the bottom. I used the scoop neck option with bands, the cutout back, and hemmed bottom. The cutout back is a super cute feature that is easy to make. I ended up not doing any top stitching except on the hem and cutout.
Putting the wave pieces together is a little bit like assembling a puzzle, but it all worked out ok. My main frustration was with the Spoonflower sport Lycra fabric, which is slippery and doesn’t press easily. It made the bands and curved hem more painful to sew than they should have been. I did reasonably well with the plaid matching on this one, and even aligned the plaid on the top with the plaid on the leggings, although the top is darker because it doesn’t get stretched as much.
This is a top I will workout in, but it also looks great with jeans. I like the fact that there is enough shoulder coverage that this can be worn with a regular bra or a racerback, and it offers more sun protection on the back than a lot of sleeveless sports tops.
Because I don’t know when to stop and you can never have too much tartan, I made a headband to match and now I have a totally tartan athletic kit! I love the pockets in the leggings and the fact that the black panels on the top align with the black pocket panels on the leggings. I wore the leggings a few weeks ago in the Carnegie Mellon “Random Distance Run” and will certainly wear the entire outfit for future CMU races.
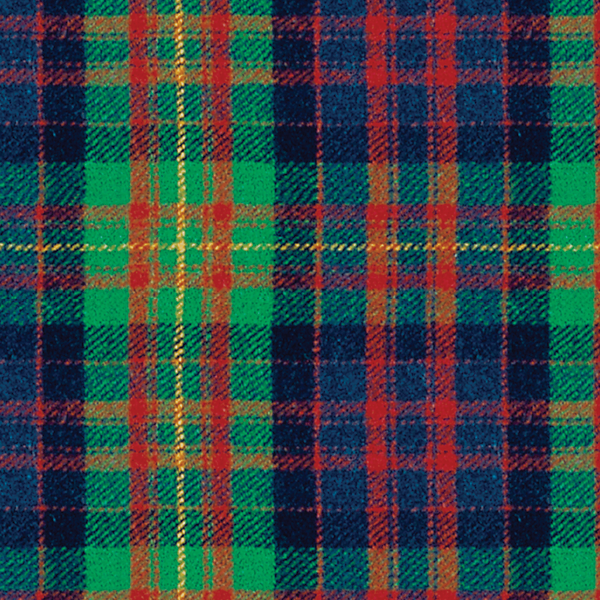
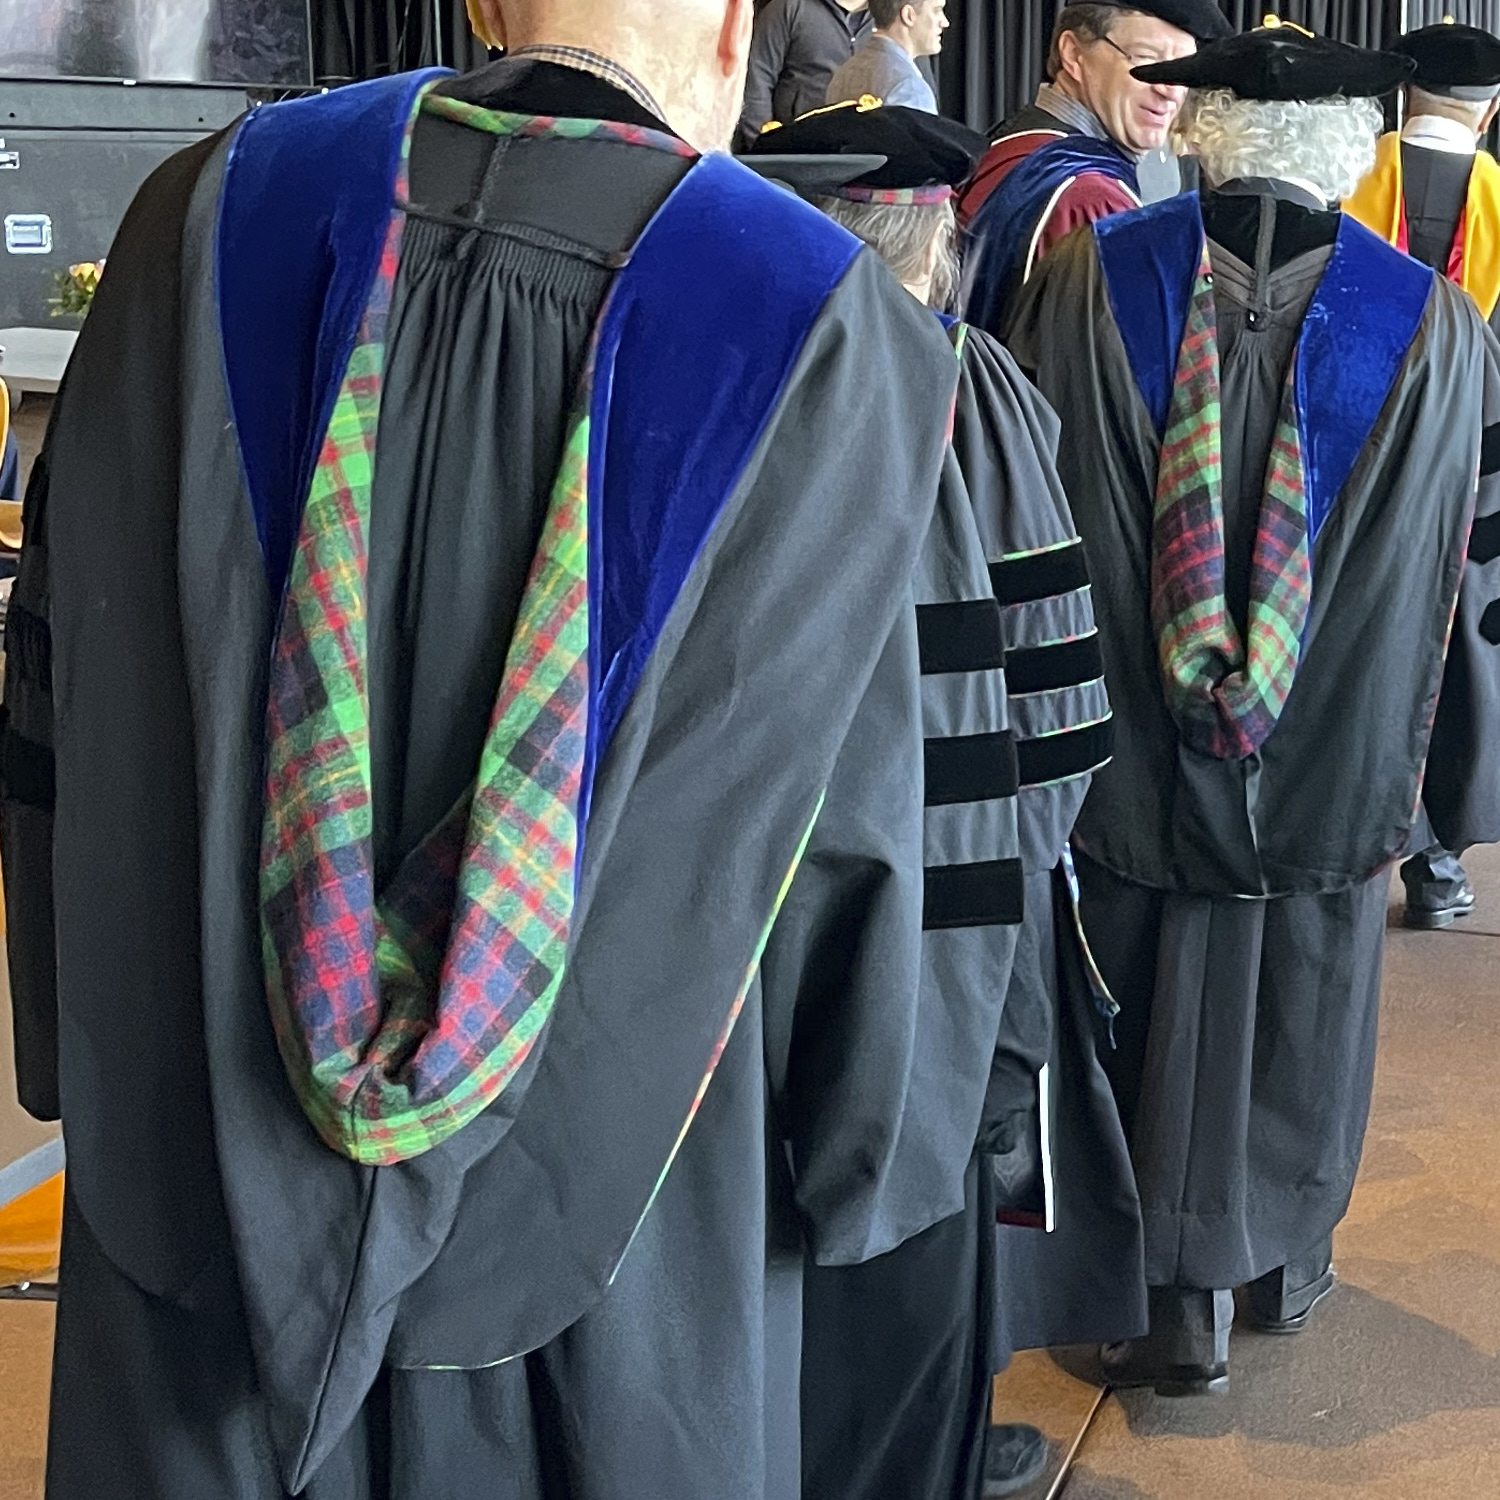
When I joined the Carnegie Mellon University faculty in 2003, the school mascot was tartan. Yes, a plaid scarf. Kind of strange, but maybe not in a town where the terrible towel is also a thing. But in 2007 CMU decided to adopt the Scotty Dog as the official mascot, which is much better if you want someone to put on a costume and run around at sporting events. Nonetheless, the official CMU tartan remains a major part of the university identity. The CMU Kiltie band (affectionately referred to as the band without pants) wears tartan kilts and the CMU doctoral robes and hoods are adorned with wool tartan trim. You can even buy wool tartan fabric at the book store along with matching tartan flannel pajamas. I have purchased both and have even used the wool tartan in an original quilt design and as part of an original fabric design.
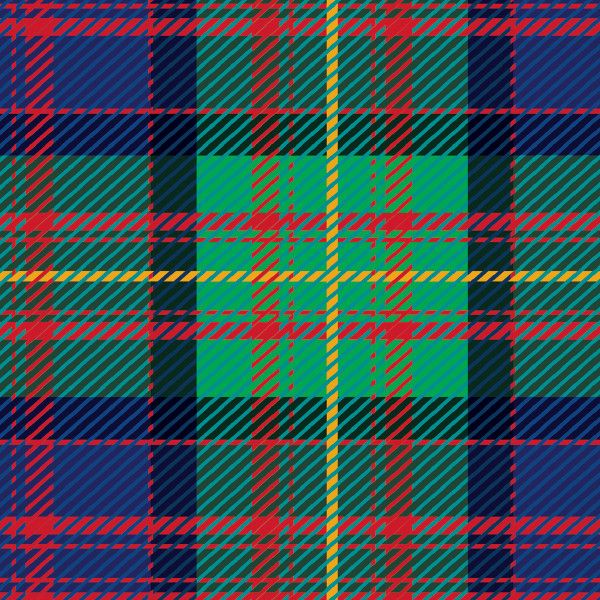
I’ve wanted to buy the tartan design in a fabric other than wool or flannel, and thought I might just digitally print some tartan knit fabric. However, the digital tartan file on the university website since 2010 does not actually properly tile for a fabric repeat. I have spent many hours futzing with it and trying to figure out if there was a way to crop it so that it would tile. I succeeded in a vertical tile, but not a proper horizontal tile. I came close, and maybe nobody else would notice that it is a little off, but I couldn’t bring myself to use it. You might say I was “mad about plaid” and you would be right. So last Fall I reached out to friends in CMU marketing and communications and asked if anyone knew where I could find a version of the digital tartan that would properly tile. After a few weeks of searching my friends reported the answer was “no.” Apparently the lack of repeatability was a known problem and I wasn’t the first to ask, but nobody had ever fixed it. But as CMU was winding down for winter break, one of the designers offered, in the holiday spirit, to fix the digital tartan for me for. I was thrilled! A few days later I received my first repeatable digital tartan files and uploaded them to Spoonflower for printing. I printed a sample of a cotton spandex jersey knit, a couple of yards of polyester modern jersey with 4-inch squares, and a couple of yards of sport Lycra with 5.5-inch squares.
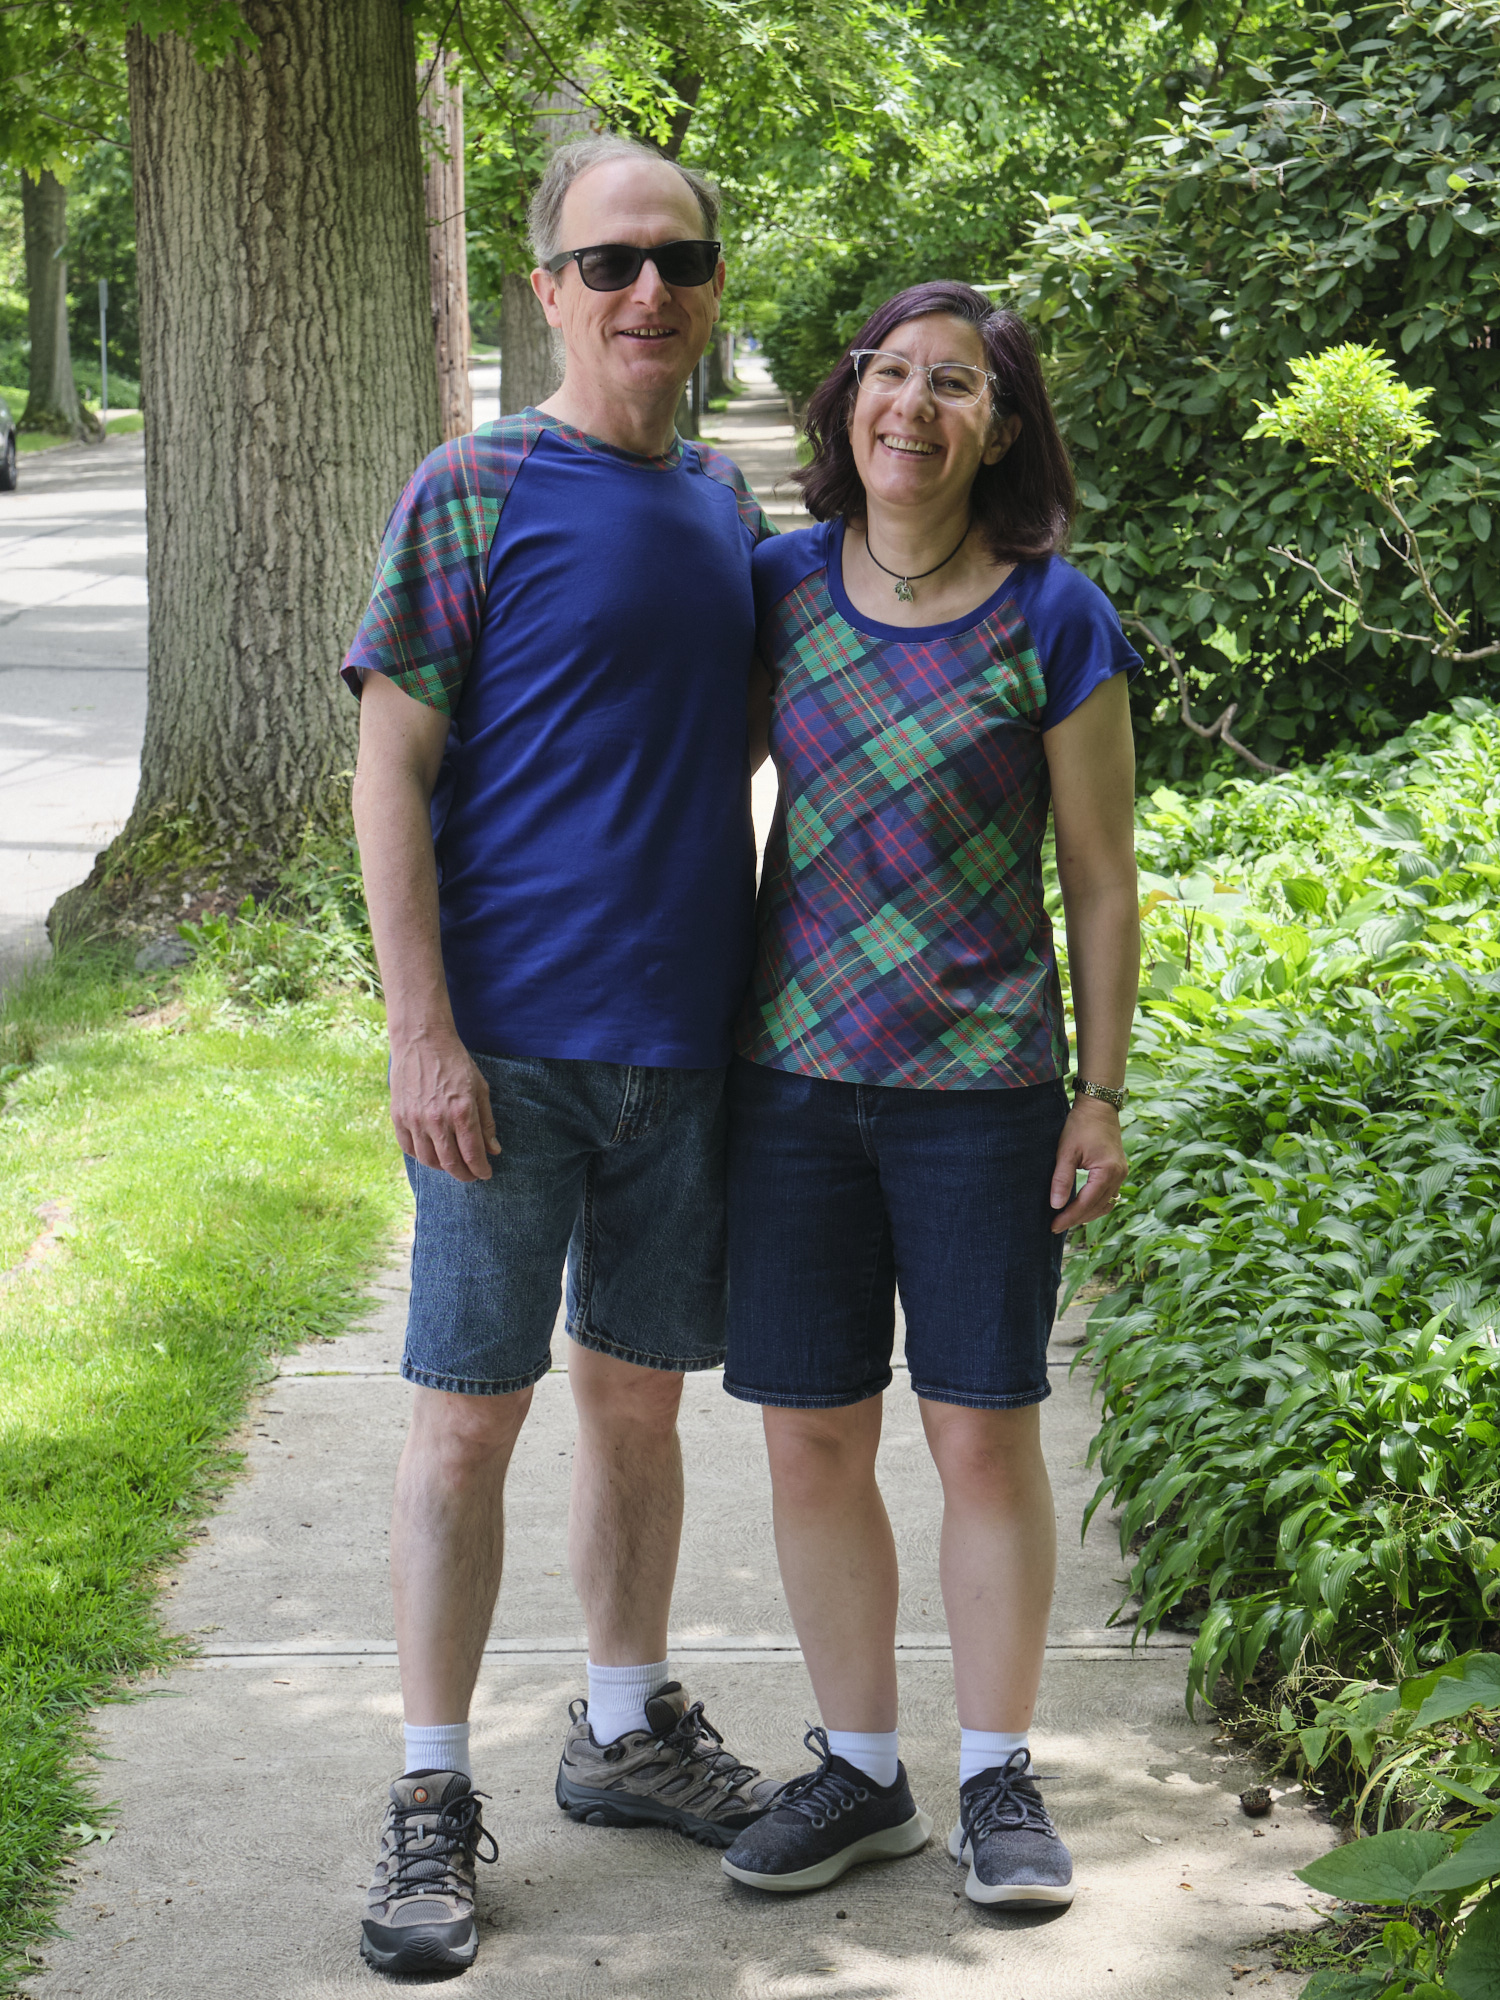
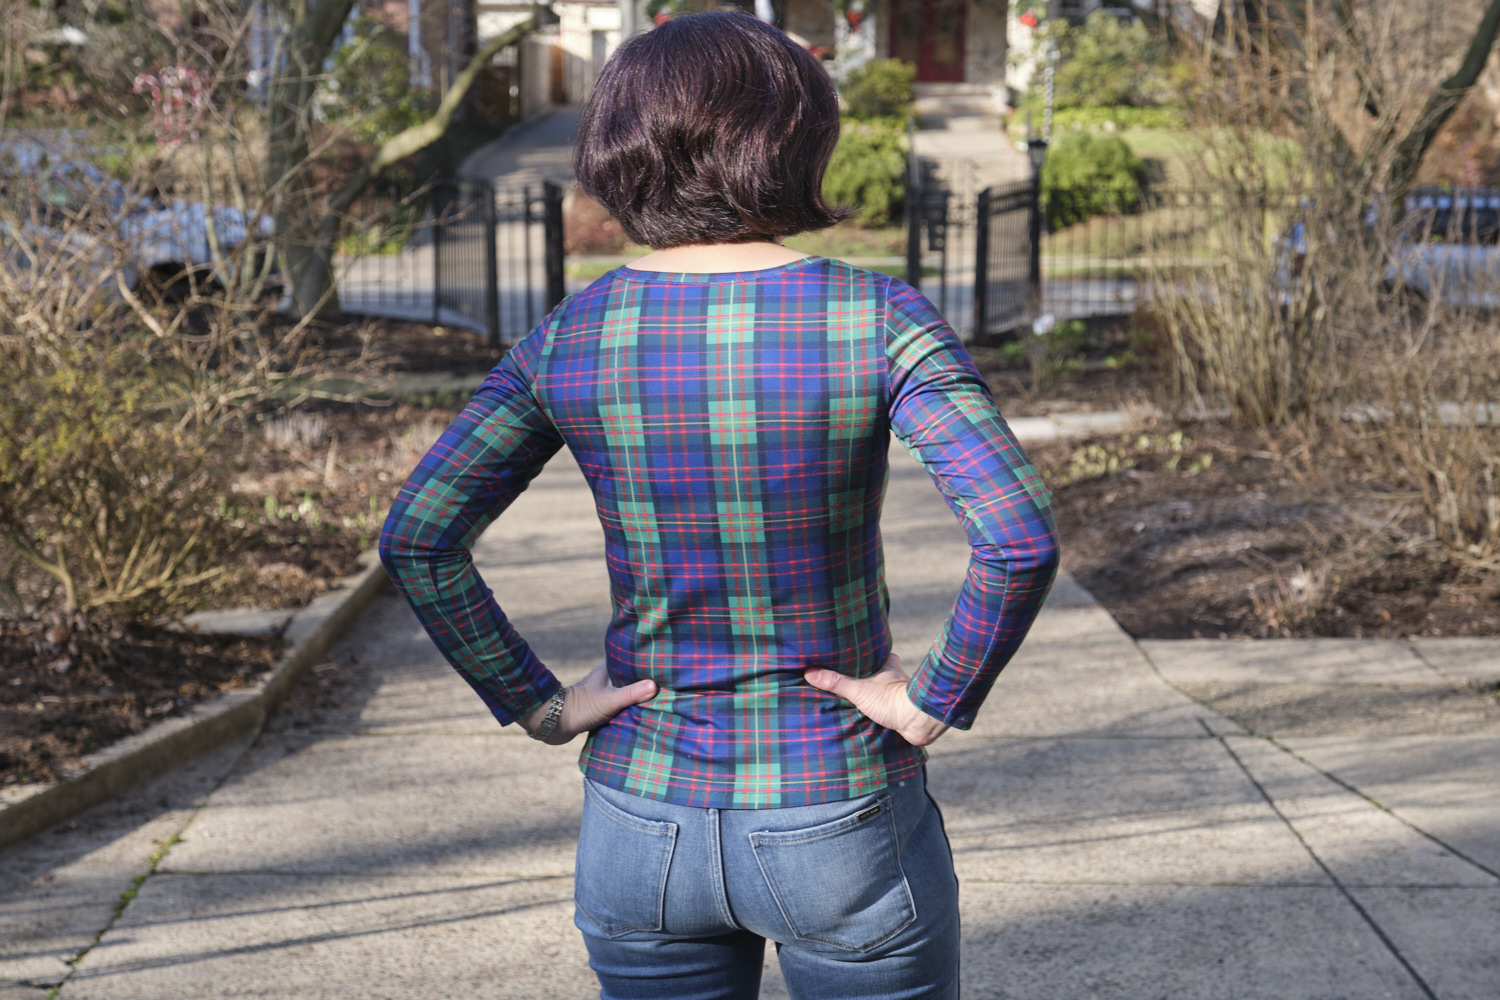
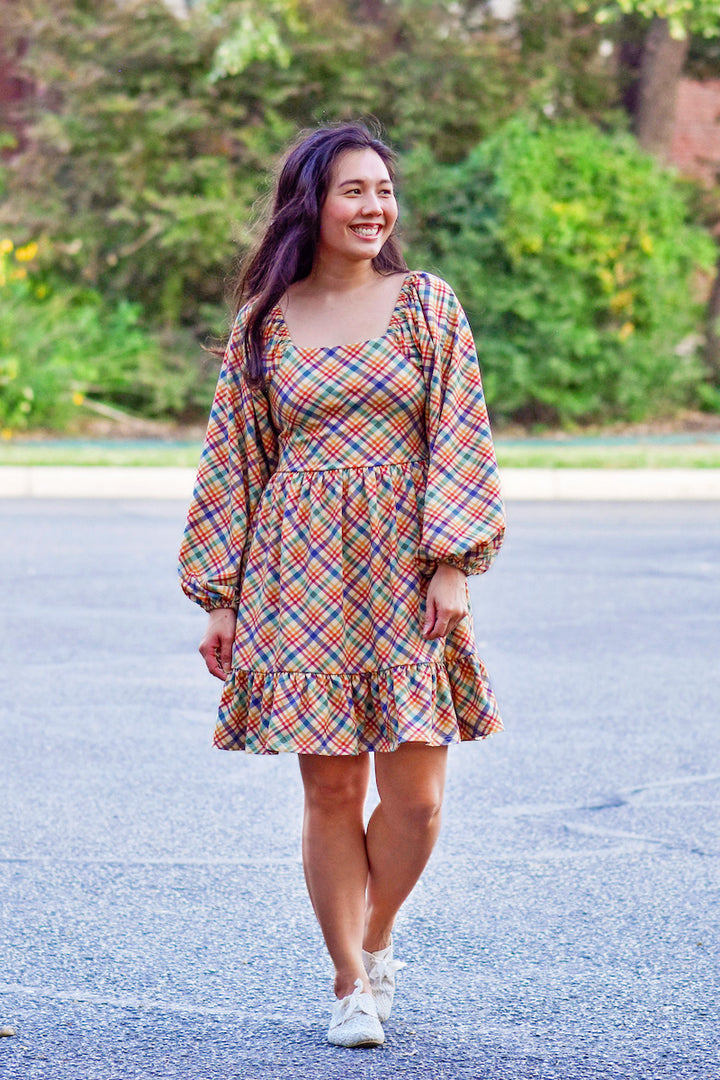
When my fabric arrived I checked out the printing and the sizes of the plaid. After looking at lots of pictures of plaid dresses, I decided I wanted the 5.5-inch version printed on point for a dress, so sent a request to the designer for a diagonal version. In the mean time I decided to make a shirt out of the modern jersey, using the Sinclair Bondi pattern, a pattern I have used many times before. I tried to cut the plaid so it would match horizontally, but otherwise didn’t worry about plaid matching. I’m pretty happy with the results.
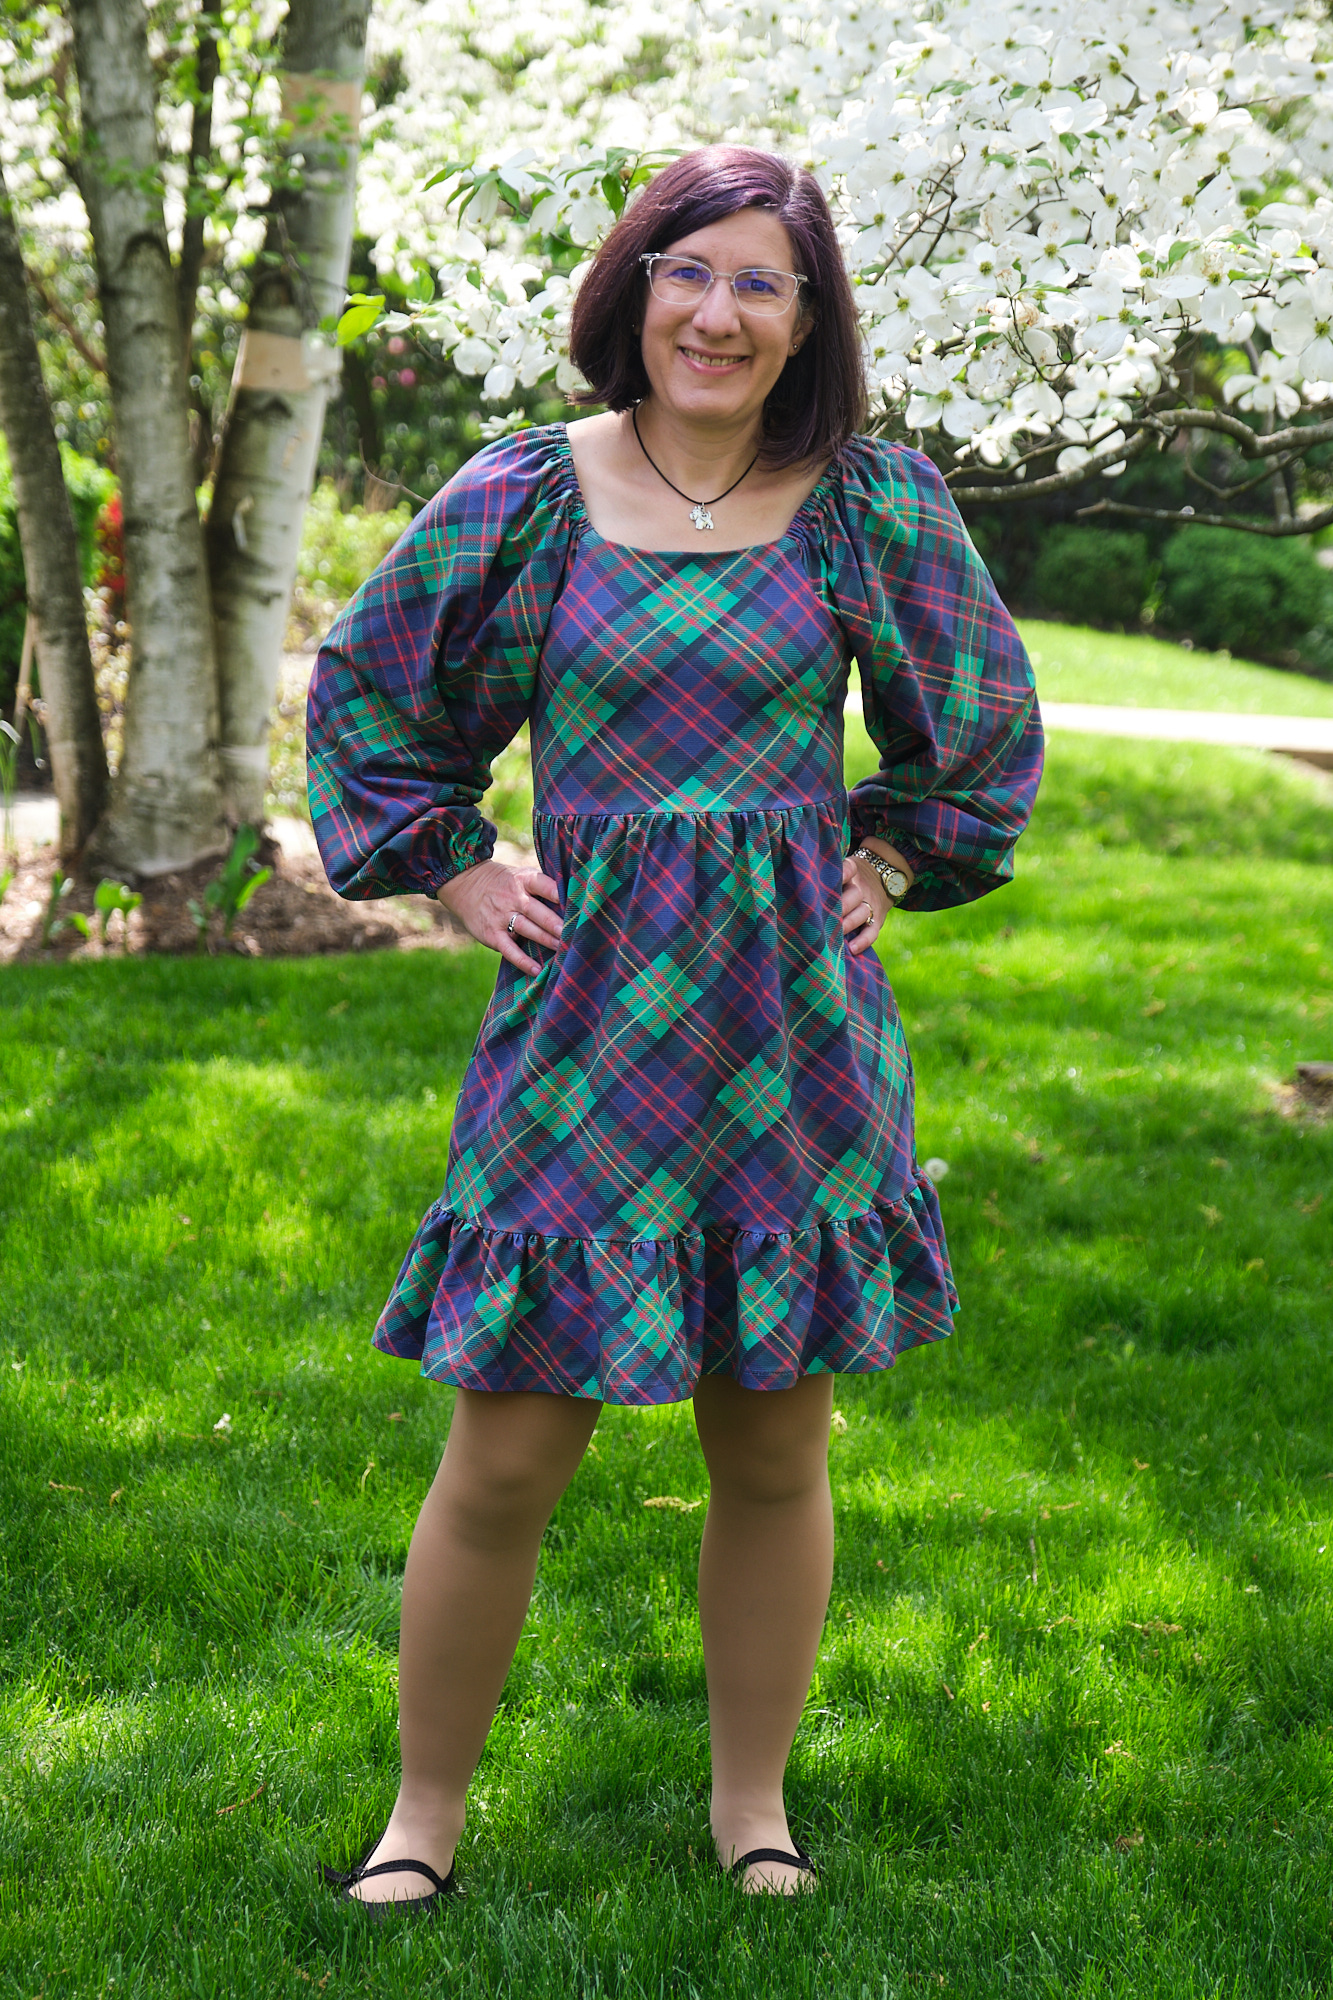
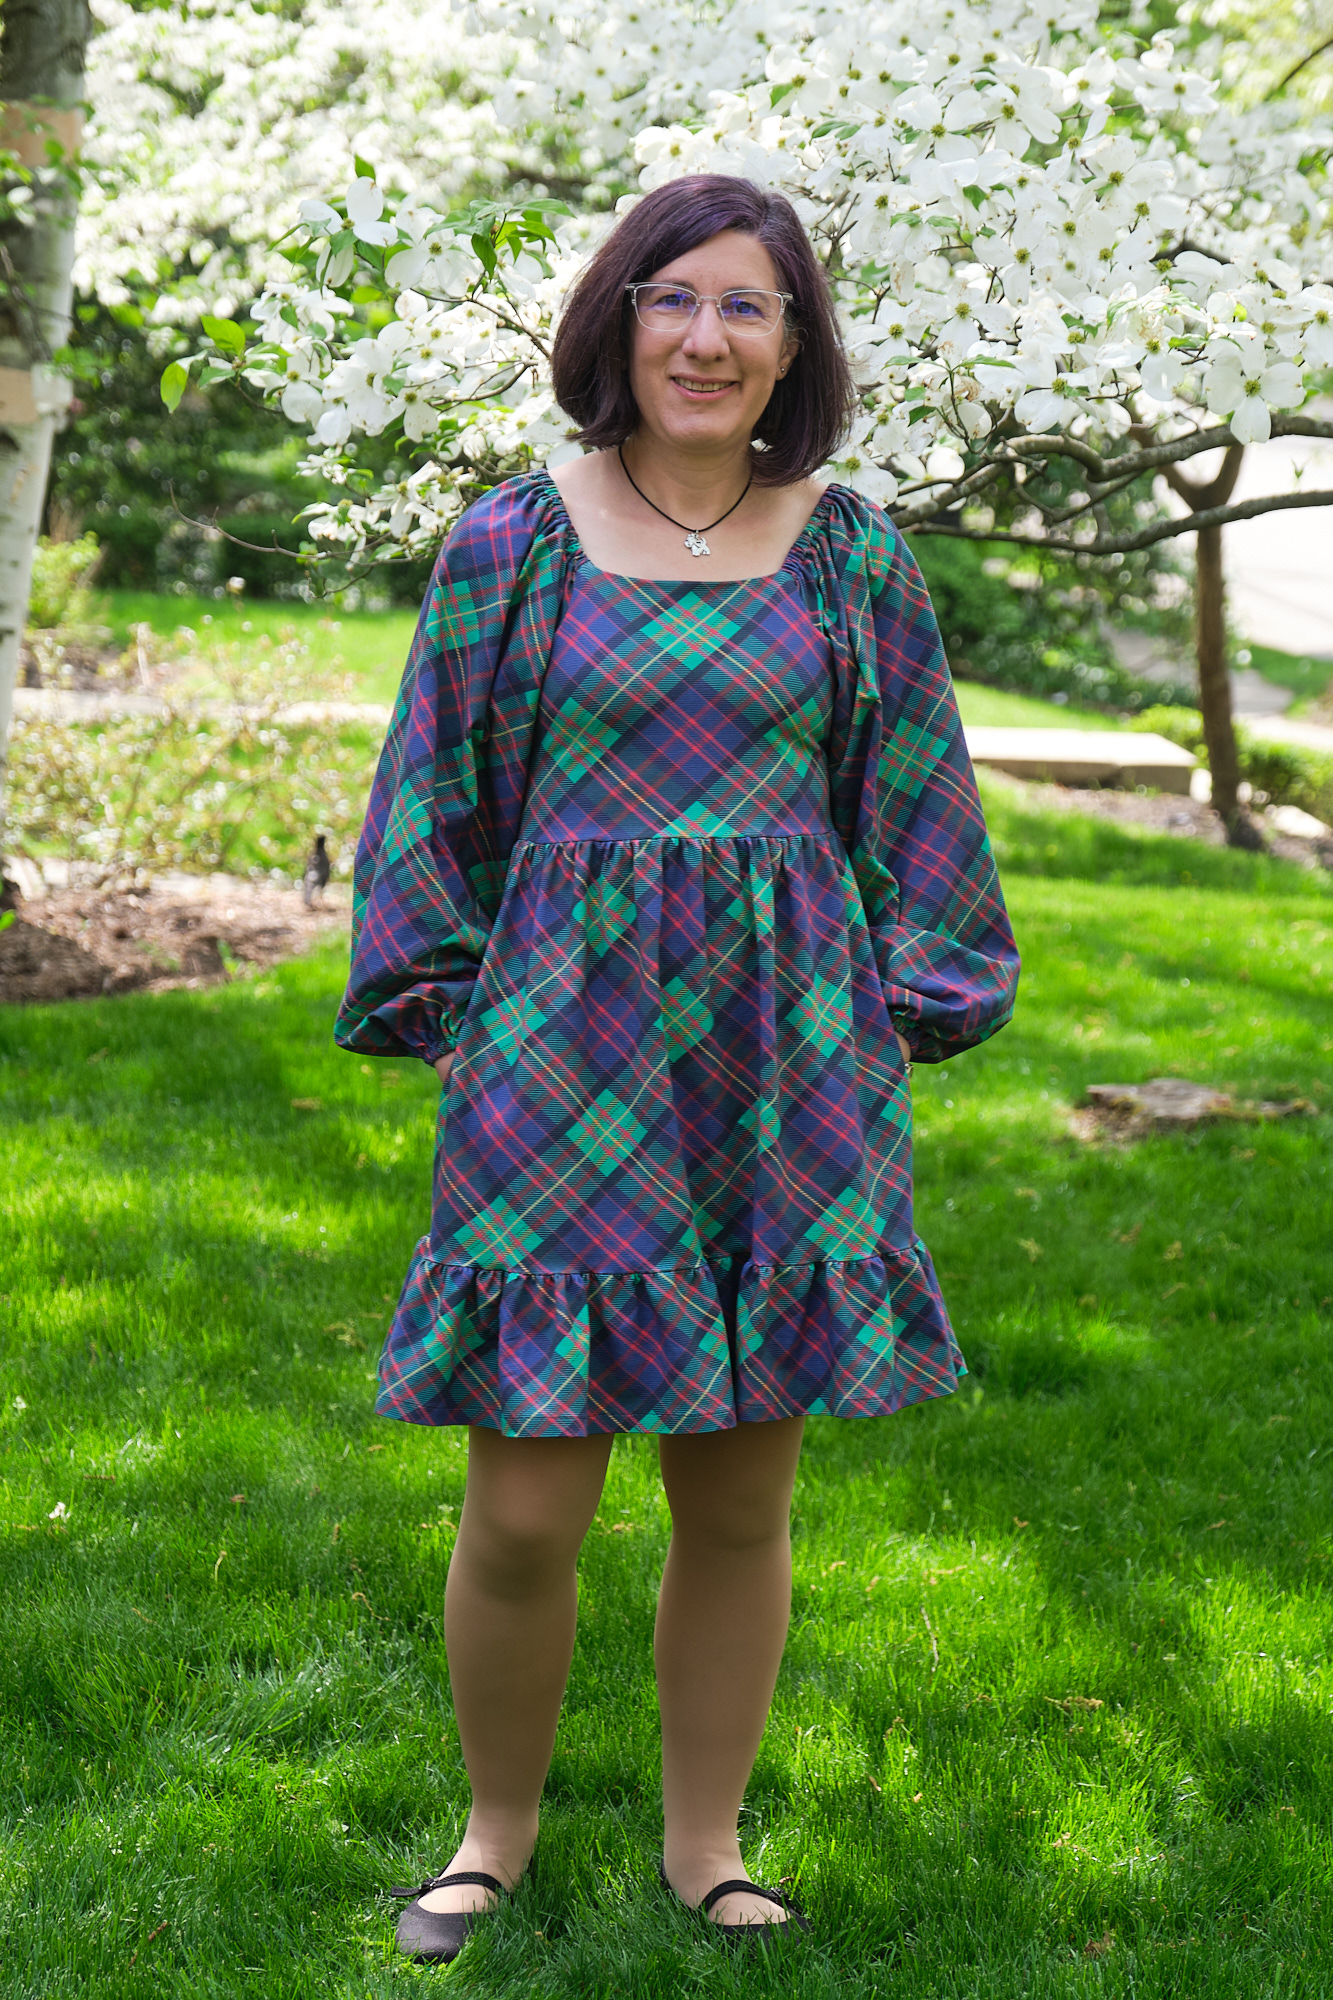
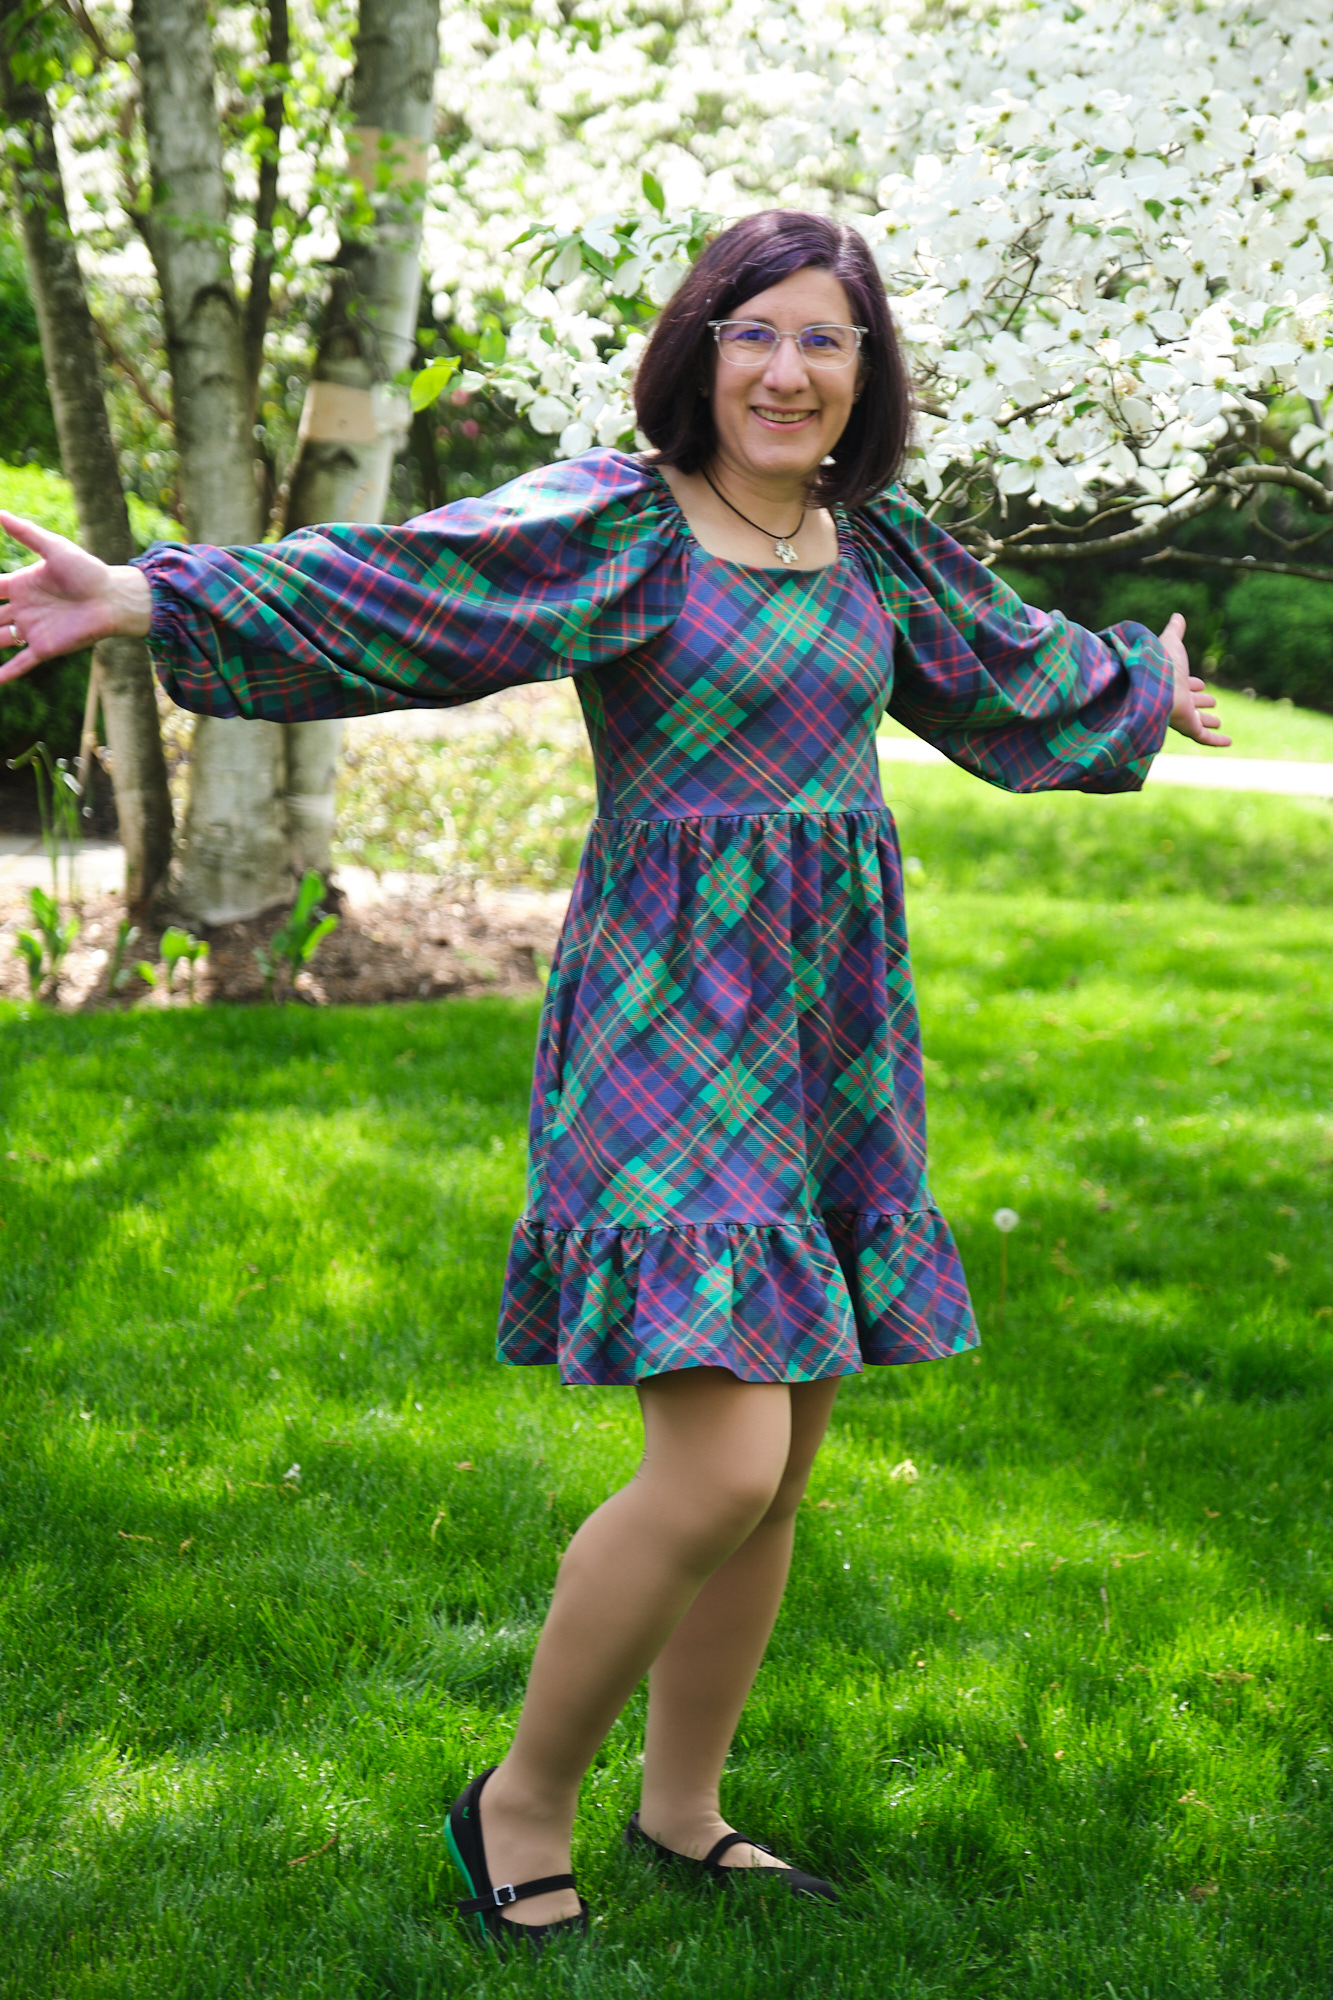
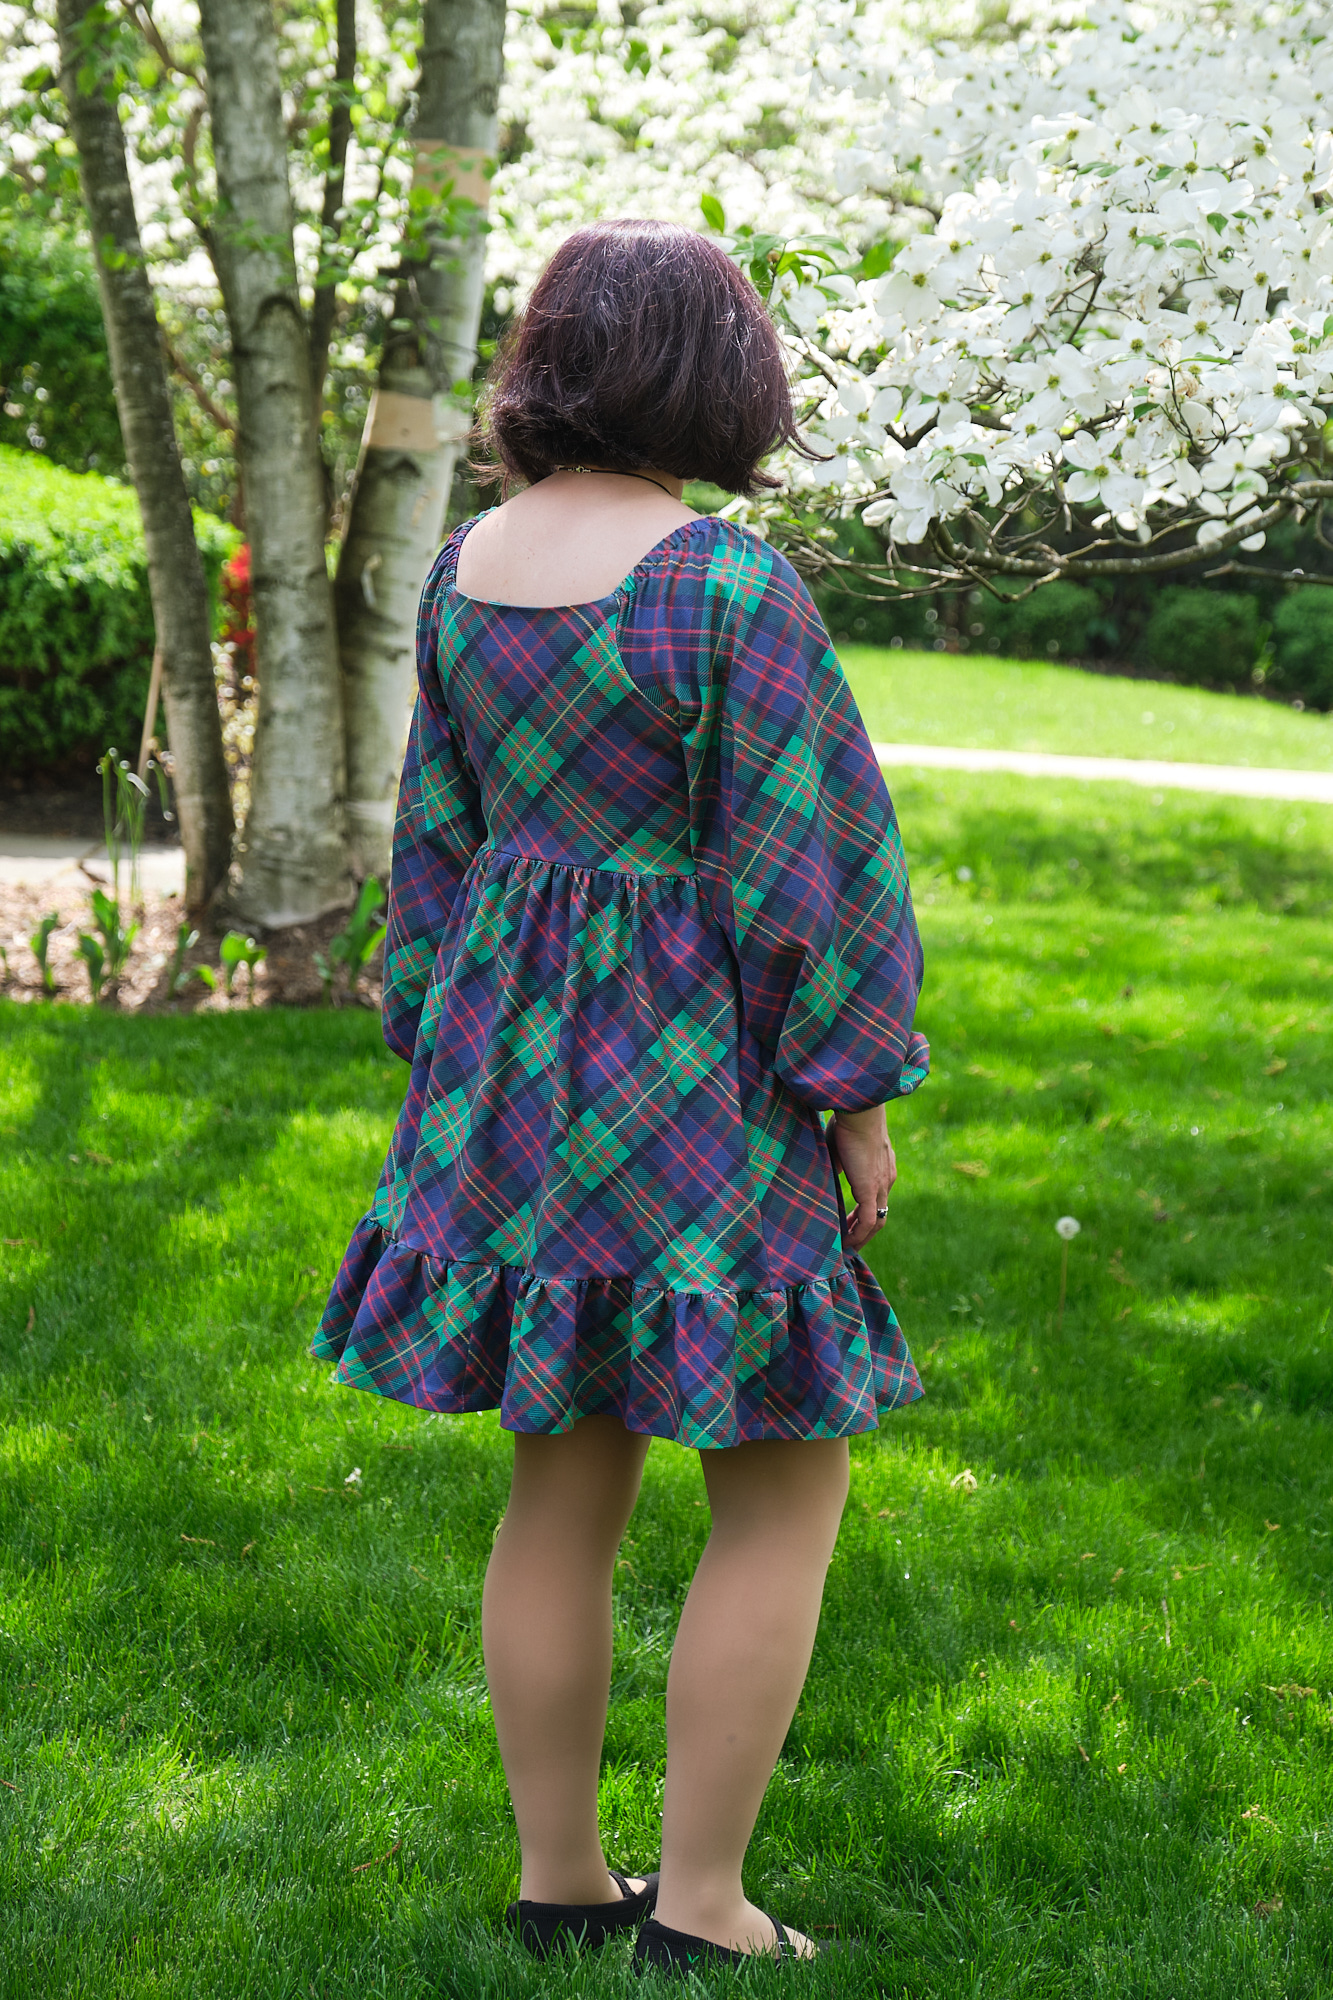
After printing up the diagonal tartan in Spoonflower cotton spandex jersey knit, I started working on my tartan dress. I was looking for a pattern that would allow me to keep all the tartan running in the same direction, and thus chose a gathered skirt rather than a circle or semi-circle skirt (which would have had the plaid appear to curve). When I saw a Styla Dublin dress with enormous puff sleeves sewn up in cotton-lycra plaid by another sewist, I decided to try the Dublin pattern. I first used the pattern to make a cotton-lycra Dublin top. Since this pattern didn’t come in a petite size, I was tempted to shorten the skirt of the dress, but decided to go ahead with the size 6 pattern as written, only shortening the shoulder elastic. This seems to have worked just fine. My tartan dress came out great and looks much like the plaid dress that inspired it. And, of course, I made it with usable pockets (lengthened slightly to better hold my phone). The pattern suggests optionally adding clear elastic at the neckline. I didn’t do that but I did understitch the font and back neckline and also understitched the pocket openings.
This is a bit of a different style than I usually wear, and I usually prefer circle or semi-circle skirts for less bulk around the waist. The Spoonflower cotton spandex is somewhat stiff from the saturated inks that sit on top of the fabric rather than absorbing into it so the gathers do poof out a bit. I don’t think this is the most flattering waist style for me, but I still think the dress looks pretty cute. I do love how the stiffer fabric poofs out the sleeves and the ruffle at the bottom of the skirt. The dress is fun to wear and looks great with my Scotty dog necklace (an inexpensive online purchase to keep the outfit on theme). Also, thanks to my neighbors for letting me pose in front of their dogwood, which was in full bloom on the day we took these photos.
I’ve started working on making some athletic wear out of the sport Lycra fabric and have ideas for using up the rest of the cotton spandex fabric. Stay tuned for more totally tartan posts in Part 2 and Part 3!
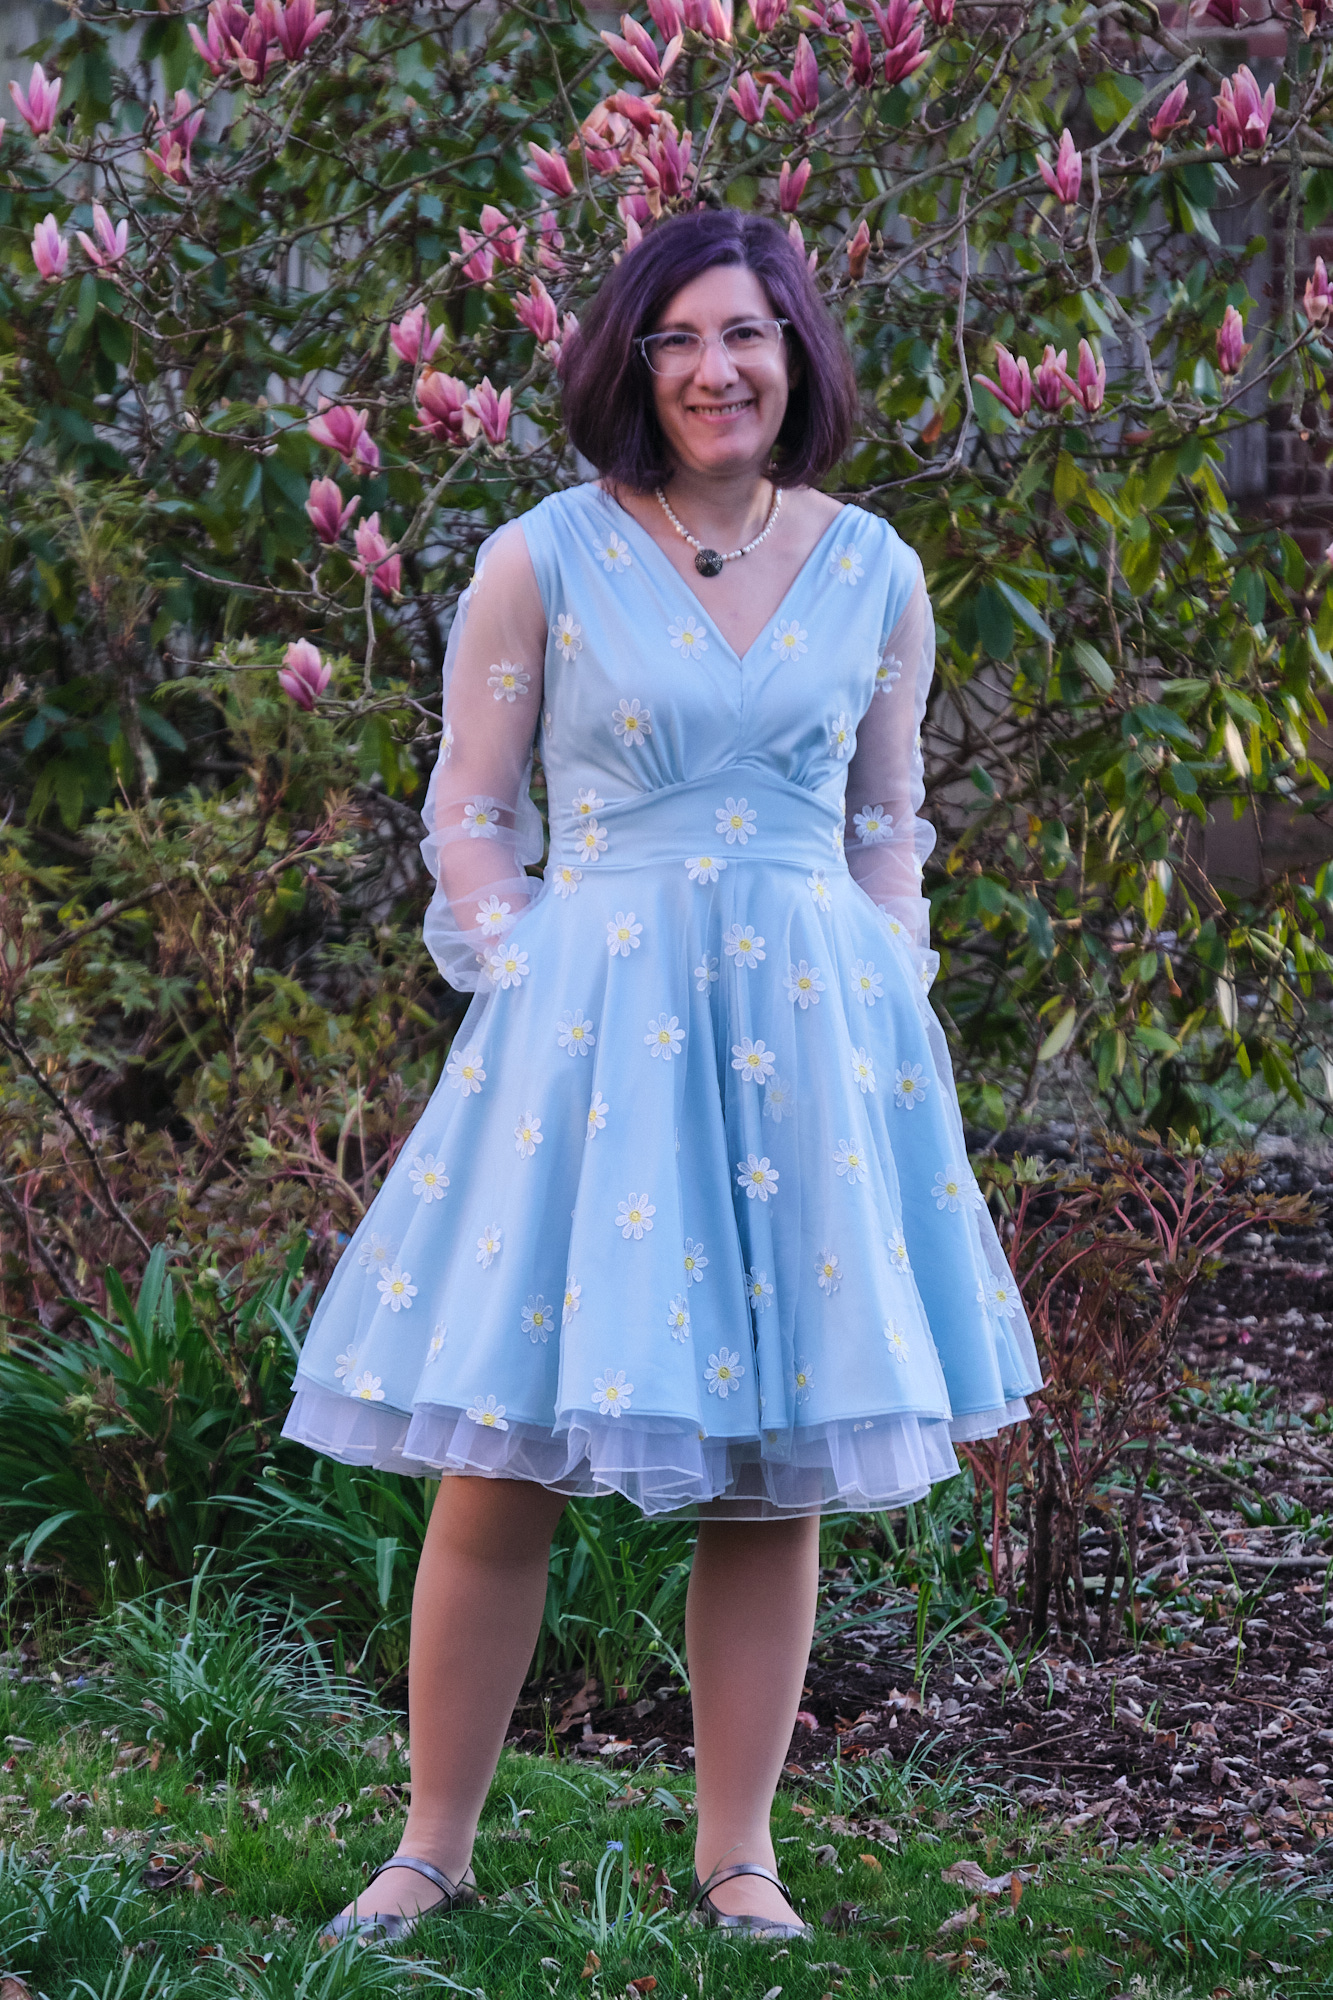
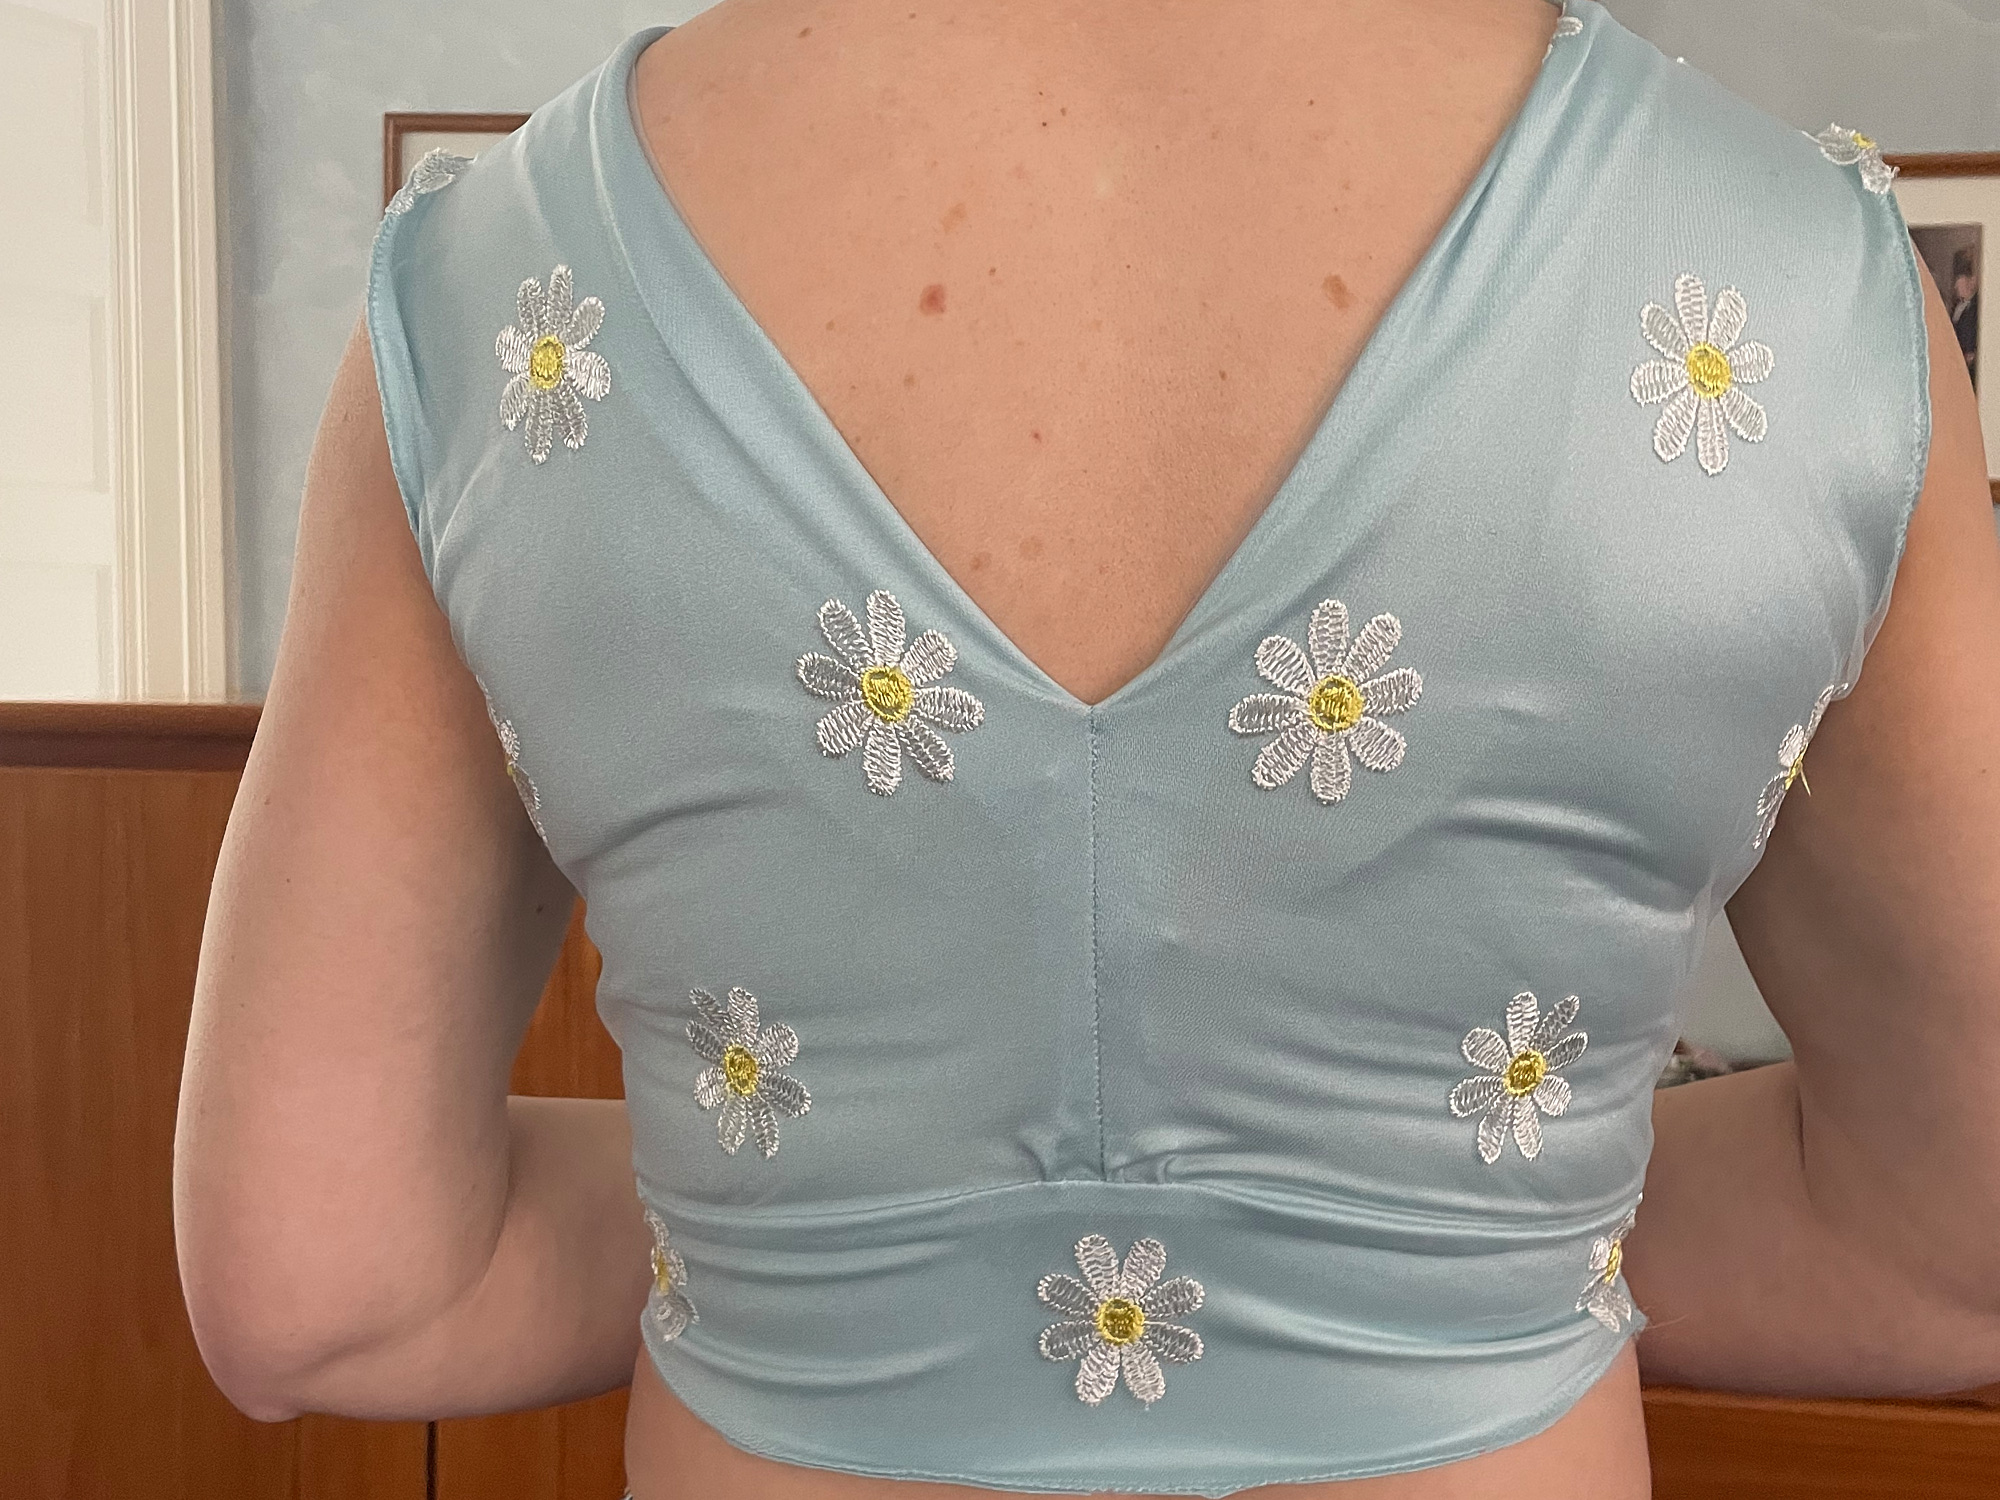
Having selected the Sinclair Yasminpattern to modify for the prom dress and prototyped bodice modifications, my next step was to prototype with a tulle overlay and sleeves, and a full circle skirt. Since the floor-length gown version will require a lot of fabric and I fear I won’t get it right the first time, I decided to prototype a knee-length dress with some inexpensive blue daisy embroidered tulle on Etsy and matching blue nylon spandex for the lining (tranquil aqua 82% nylon, 18% spandex, 210 GSM stretch bodycon satin from Zelouf Fabrics).
I modified the bodice pattern using the same approach I used for my daughter’s top to add deep front and back Vs. Then I mashed the Yasmin sleeve with the bishop sleeve pattern from the Sinclair puffed sleeve add-on pack so that the puffed sleeves would fit the Yasmin armscye. I used the full skirt pattern (with pockets!) from the Sinclair flared skirt add-on pack for the Valley Skater Dress. I prepared all the pattern pieces in Affinity Designer and projected them onto the tulle and lining fabric. In total I cut 16 pieces from the lining fabric and 12 pieces from the tulle fabric (but who’s counting?).
I wanted to attach the tulle to the corresponding lining pieces for all the bodice pieces so I could treat them each as one unit. My original plan was to do this with my serger (and I even rethreaded it with a suitable light grey thread), but I found the serger stitching a bit bulky for this purpose. Instead I used a zigzag stitch on my regular sewing machine to prepare the lining-tulle units. In the end I sewed the whole dress with my sewing machine and did not use my serger at all. I think I could have used it to join the 4 pieces of the lining for the circle skirt, and when I sew the full-length skirt for the prom dress I may go ahead and do that.
Once I had the lining-tulle units prepared, I worked on creating the micro pleats in the bodice. It wasn’t as hard as I thought it might be with the units properly joined. I did use scotch tape to hold down both sides of the pleats. I had marked the dots for pleating with a pink washable Crayola marker, and some of them are just barely still visible on the finished dress. Next time I will mark them closer to the edge to avoid that problem.
Next I sewed the bodice together, carefully wrapping both sides of the shoulder seams. I hand basted the waistband to the bodice to keep all the pieces aligned. Even so, the point in the center front did not come out very sharp and I ended up redoing it. Actually, that point did not come out particularly sharp in my previous practice pieces either. I found that if I sewed one side of the V all the way to the edge and then sewed the other side, it was easier to get a sharp point than if I sewed it all in one line with a pivot at the point. Someone probably has pointers on how to do this better than I did.
Once the bodice was fully assembled, I tried it on with some trepidation, as I wasn’t entirely sure it would fit. While the lining is a nice 4-way stretch fabric, the tulle only stretches side-to-side (horizontally the way I cut the bodice), and not nearly as much as the lining. Thankfully, I was able to get the bodice on (and off), but it was a bit tight and suffered a bit from not having any real vertical give. This wasn’t so noticeable in the front due to all the pleating, but the back had numerous creases and pulled against the back of my bra in an undesirable way. I also wasn’t entirely happy with the way the back V folded under without quite laying flat; again, the front V worked fine.
I decided to unpick the side seams and add a resew with a wedge of fabric inserted. I experimented with different size and shapes of fabric based in. Eventually I settled on adding about a 1.25 inch wedge on each side at the bottom of the waistband that tapered to nothing when it reached the armscye. I cut the wedges from the lining, layered them with the tulle, and reassembled the bodice (you can see the wedge below the armpit in the finished dress). I will add a bit extra to the side seam of the front and back bodice on my daughter’s dress, baste the side seams, and adjust until I get it right. Even after adding the wedge, I still wasn’t fully happy with the when the back V was folded, but decided to hold off on further modifications until I attached the skirt, as I expected the weight of the skirt to pull the bodice down a bit.
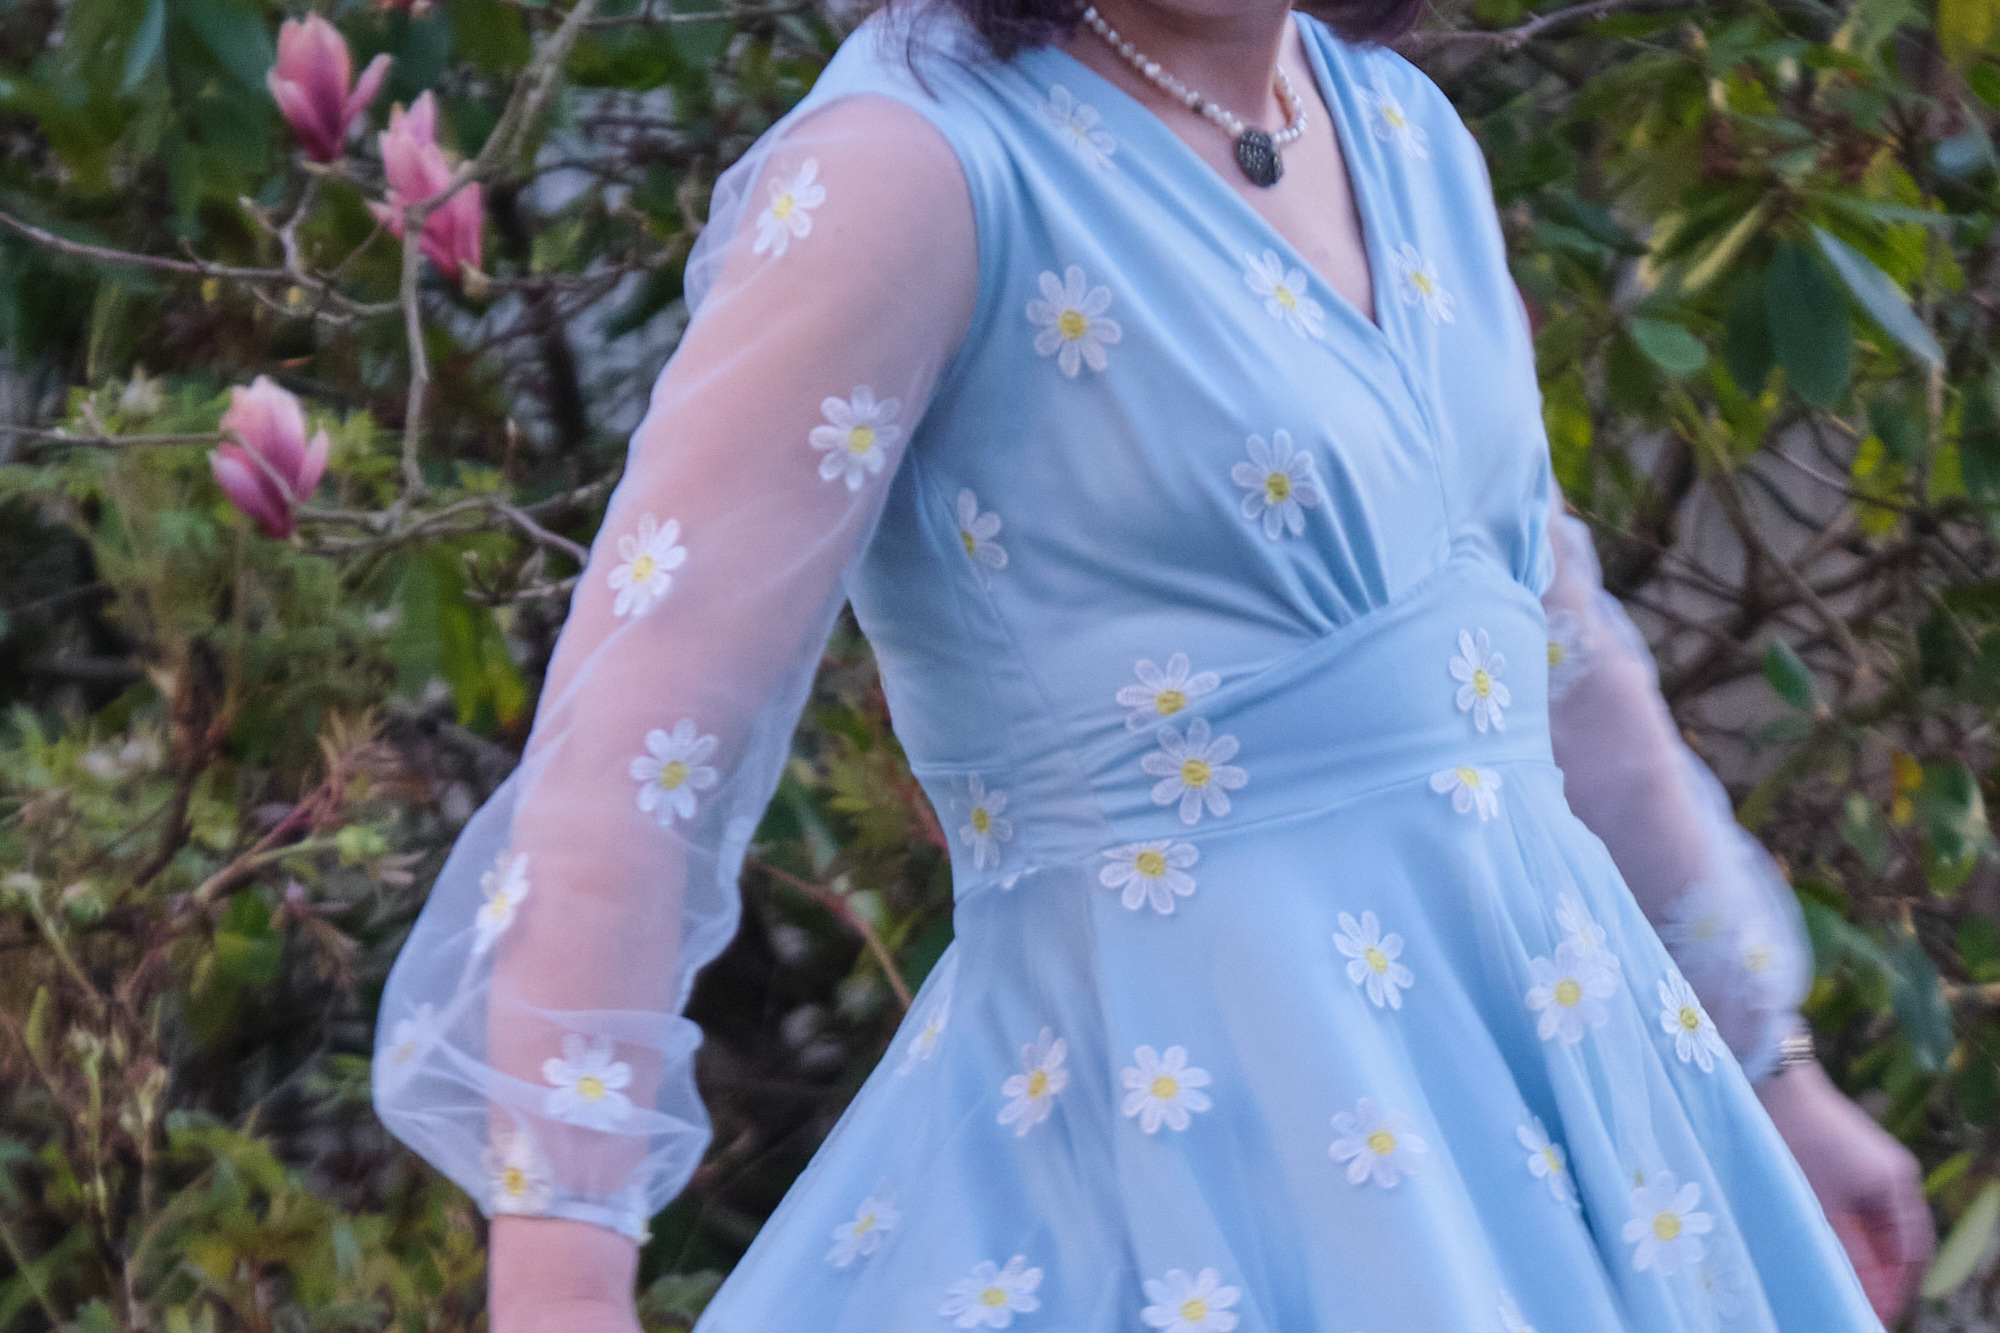
I moved on to the sleeves. I sewed the long seam of the tulle sleeves and then basted and sewed the sleeves to the armscyes. I then folded the sleeve wrists under about half an inch and stitched down a casing, leaving a small opening to add 1/4-inch elastic. It all worked out fine, but as soon as I finished the sleeves I could see that they were not as big and puffy as my daughter wanted. I’m happy with them on my dress, but I will need to go much bigger on my daughter’s dress. I tried on the bodice to confirm that the sleeves fit and that I could still get the bodice on and off without ripping anything. This was not too difficult as long as I took it off by slipping my arms out of the sleeves and then dropping the bodice past my hips rather than trying to pull it over my head.
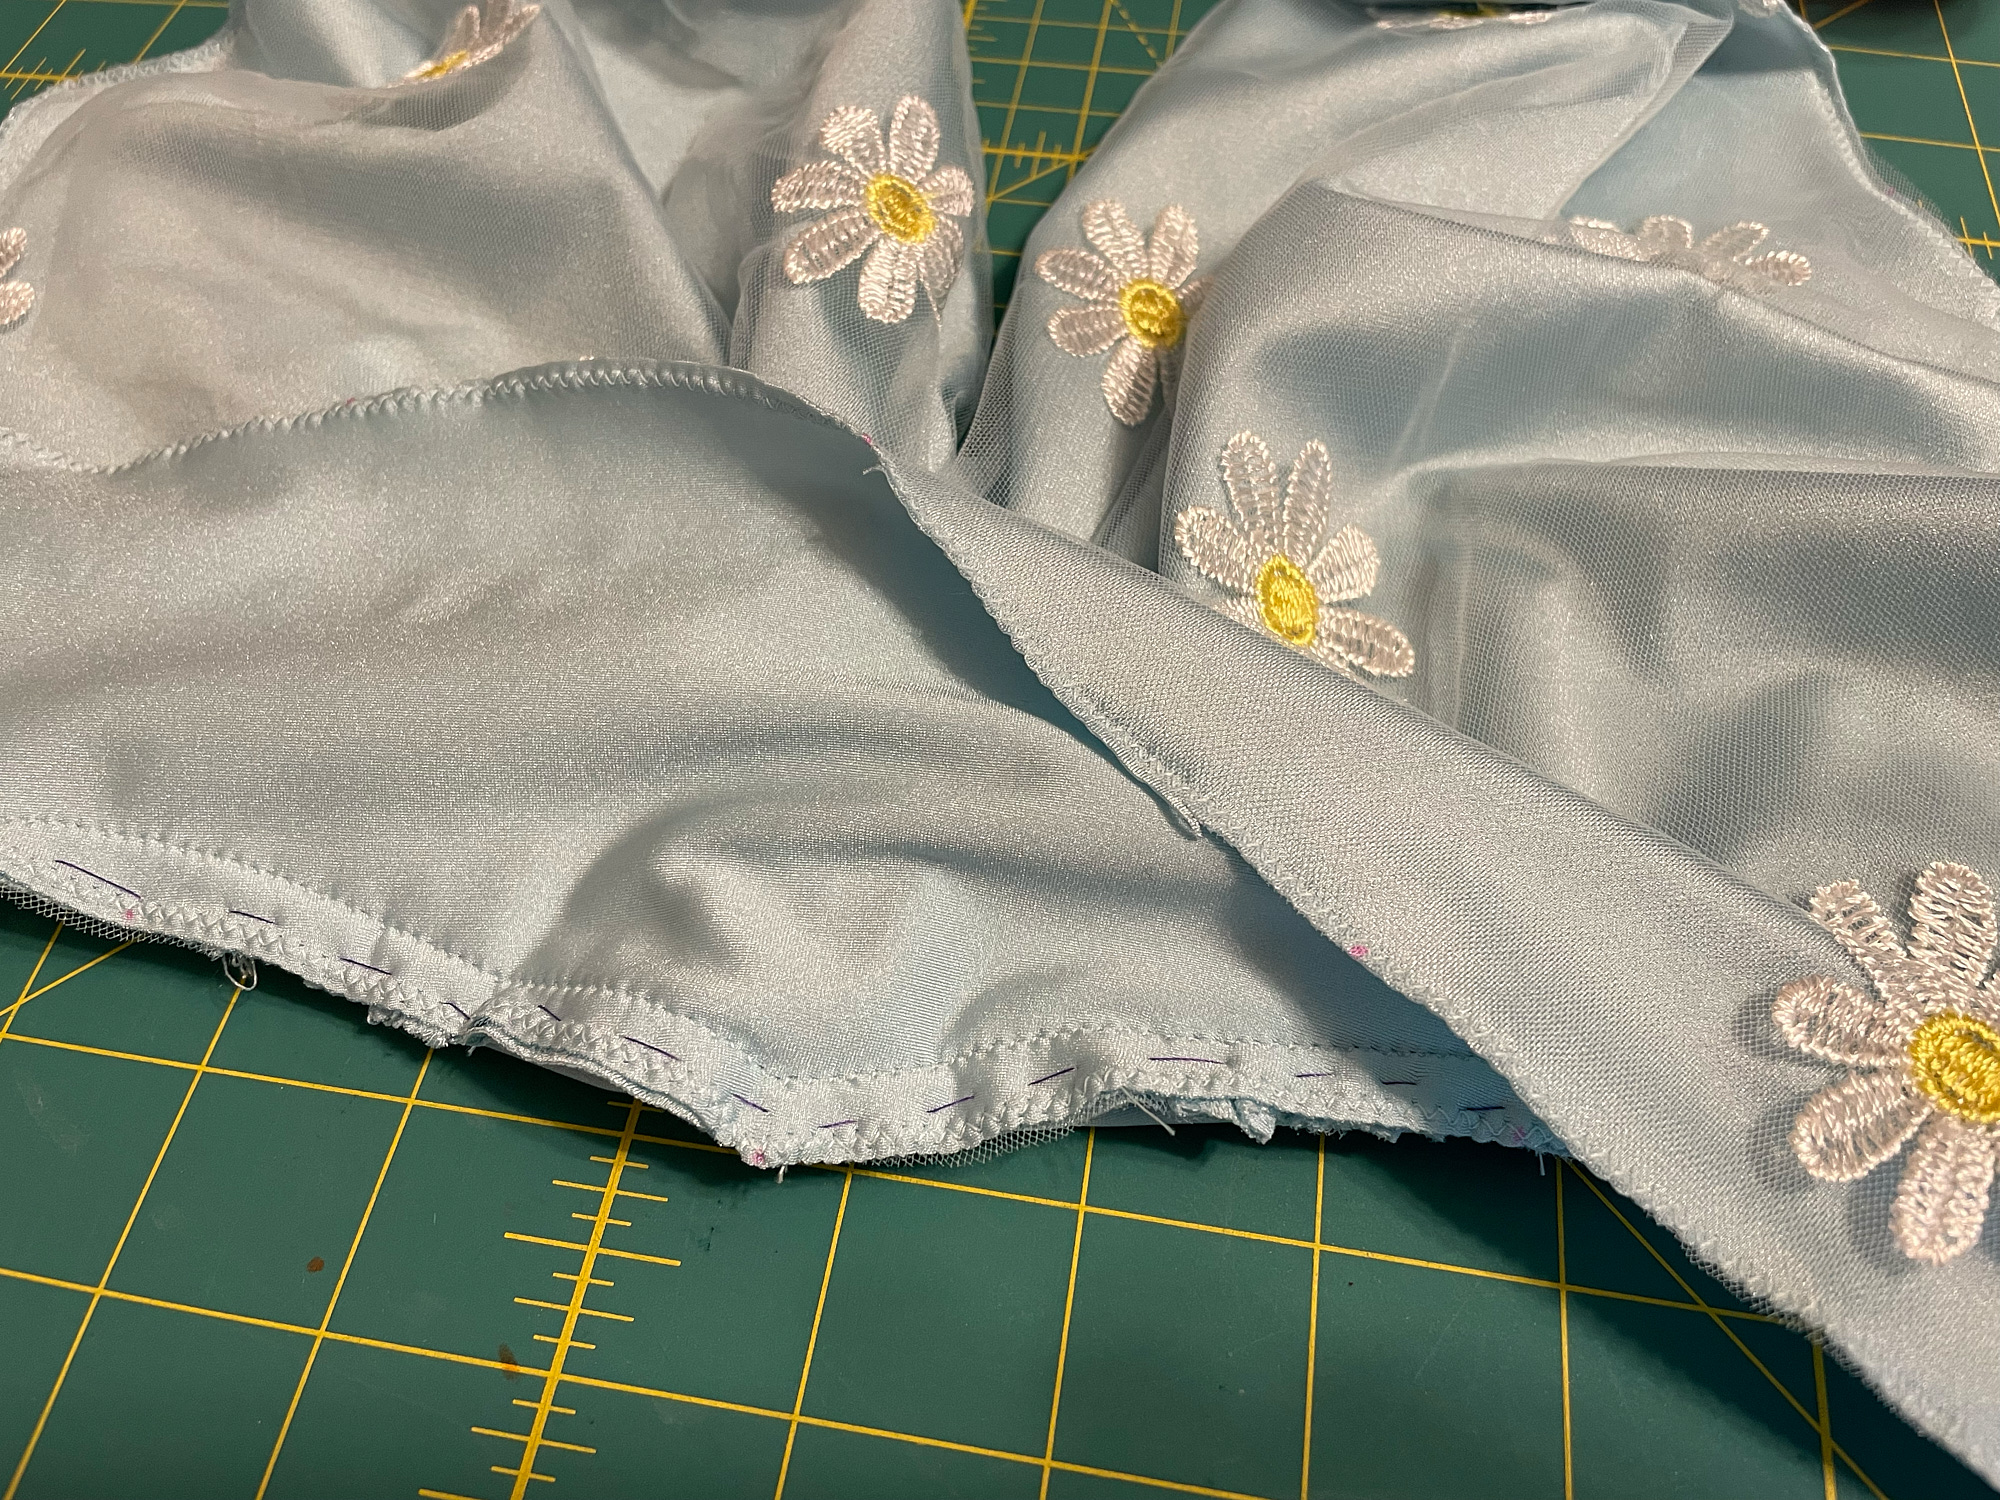
Next I worked on the skirt. I had cut the full-circle skirt in four sections with pockets in the lining. I attached the pockets flush with the top of the skirt, understitched the pockets and stitched the top and bottom of the pockets into the side seam with pocket openings from 1.5 inch to 7 inches. Once the lining was assembled into a complete skirt, I assembled the four tulle sections, stitching with a narrow zigzag stitch. I did not add tulle pockets, but left slits to match the pocket openings in the lining, as I have seen with some ready-to-wear dresses. Next I machine basted the tulle to the lining at the top of the skirt, and then hand basted the skirt to the waistband. I tried it on and everything seemed to have worked, so I went ahead and sewed the skirt to the waistband with a zigzag stitch.
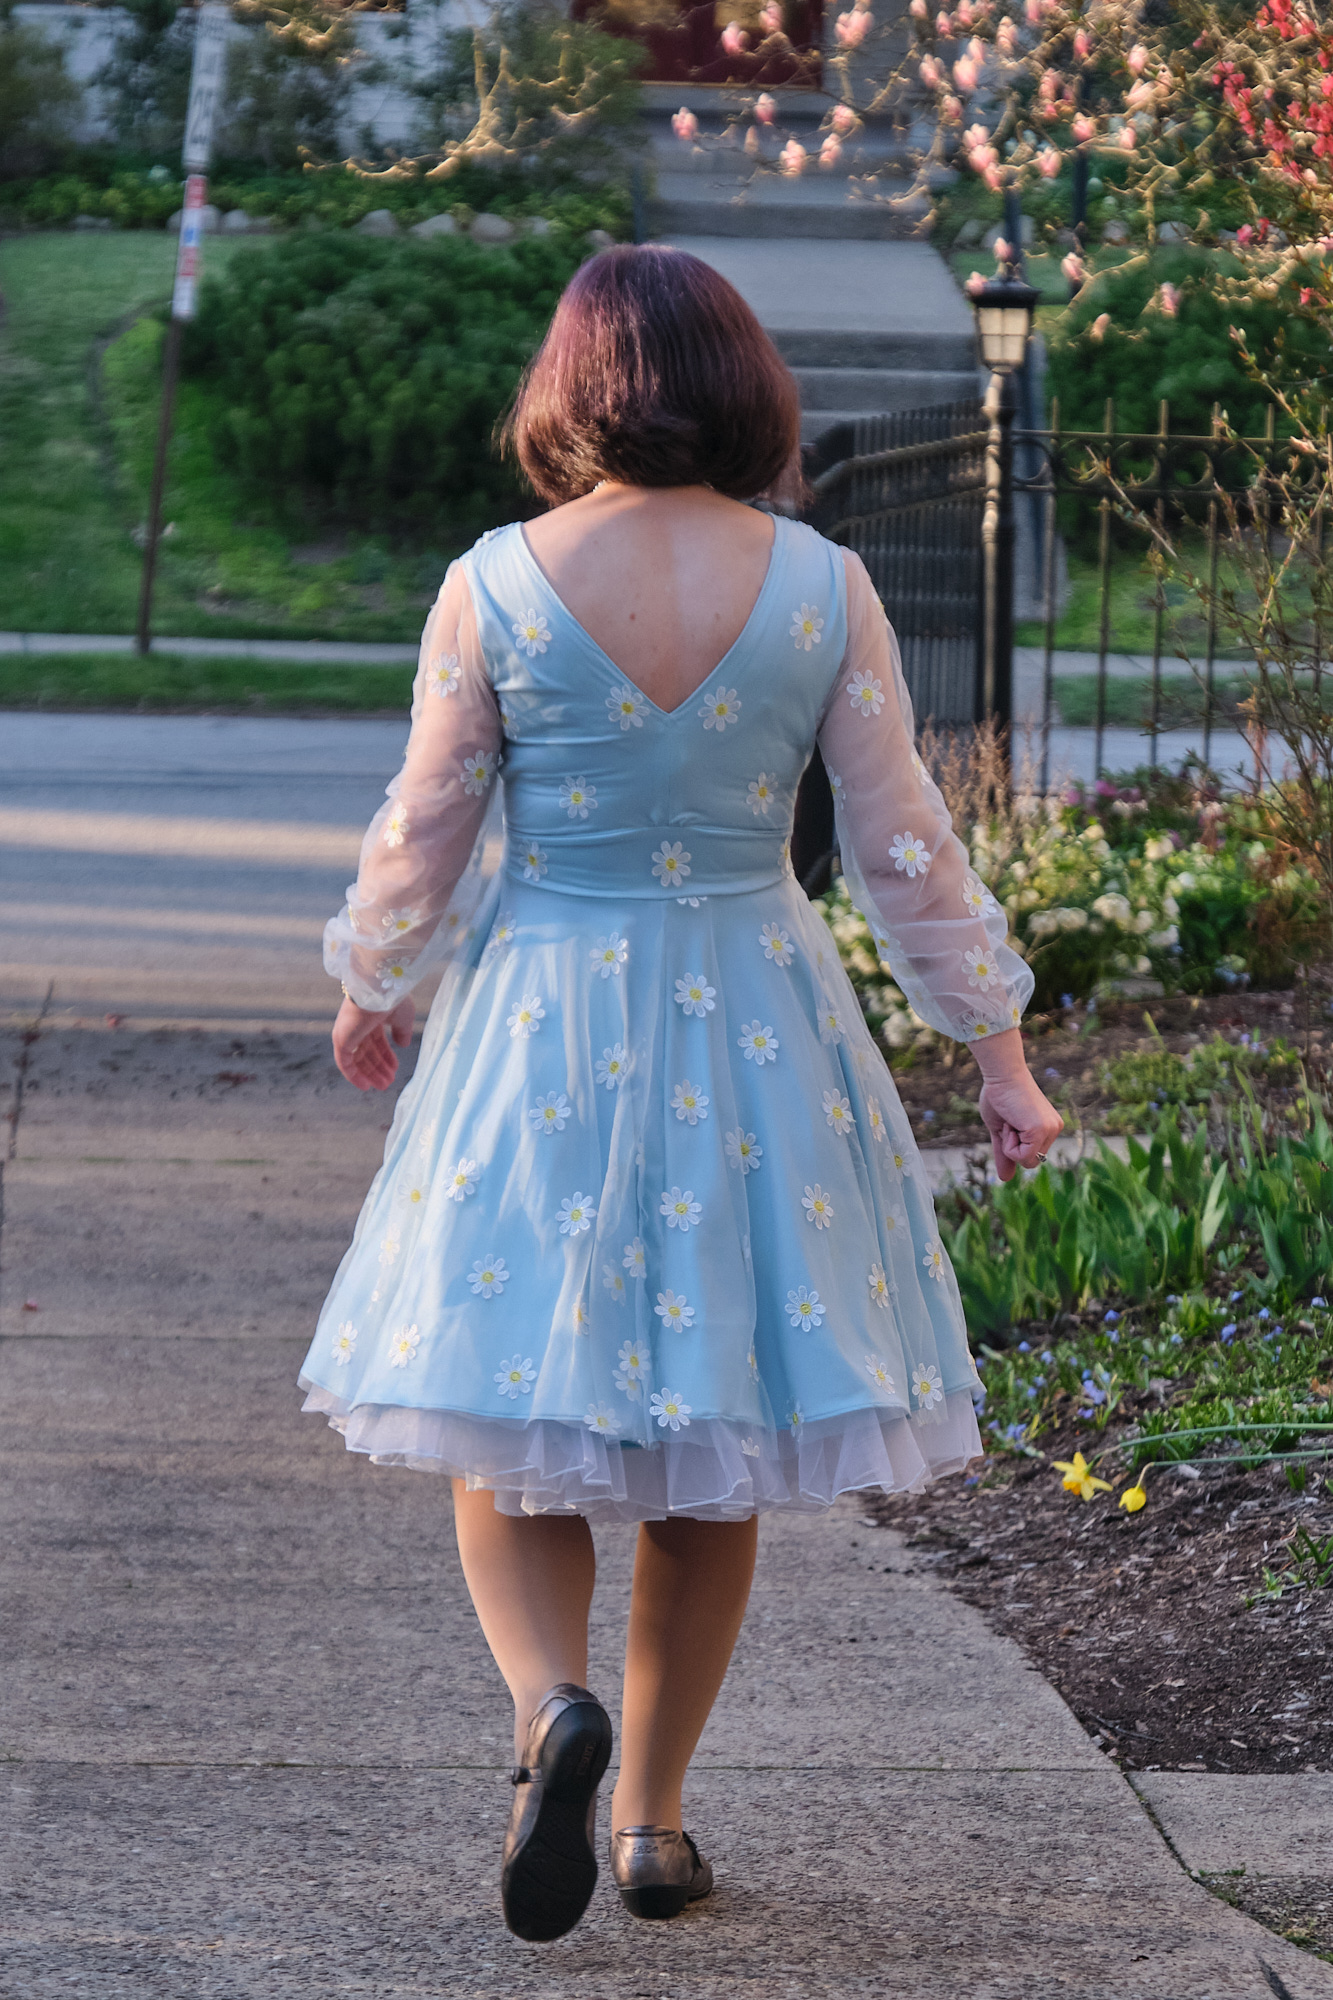
The moment of truth: I tried on the whole dress… and it fit! And it mostly looked good, but I still wasn’t happy with the back V. I futzed with the folds on the back V a bit and top-stitched the V along the edge. I still wasn’t entirely happy with it so I trimmed the underfold of the V down to about half an inch and then added another row of top stitching at 3/8 inch. This resulted in a much cleaner finish. I plan to modify the pattern for my daughter’s dress to use this approach from the beginning.
The last step was the hem. A full-circle skirt involves a lot of hemming (and usually a lot of hem tape). There are multiple techniques for doing this, which all require multiple passes with a sewing machine or iron. The lining fabric doesn’t unravel or roll so I could have left it unhemmed but hemming gives a nicer finish. I decided to invest in a folded hem foot (Bernina 66 foot) to do the hem in just one pass. It took some practice to learn how to use my new foot, but once I got going I did the whole hem in about 45 minutes without using any hem tape. I expect without the hem foot it would have taken a couple of hours. As the full-length skirt on the prom dress has an even bigger circumference, this approach will save even more time. I did not hem the tulle as that seemed completely unnecessary.
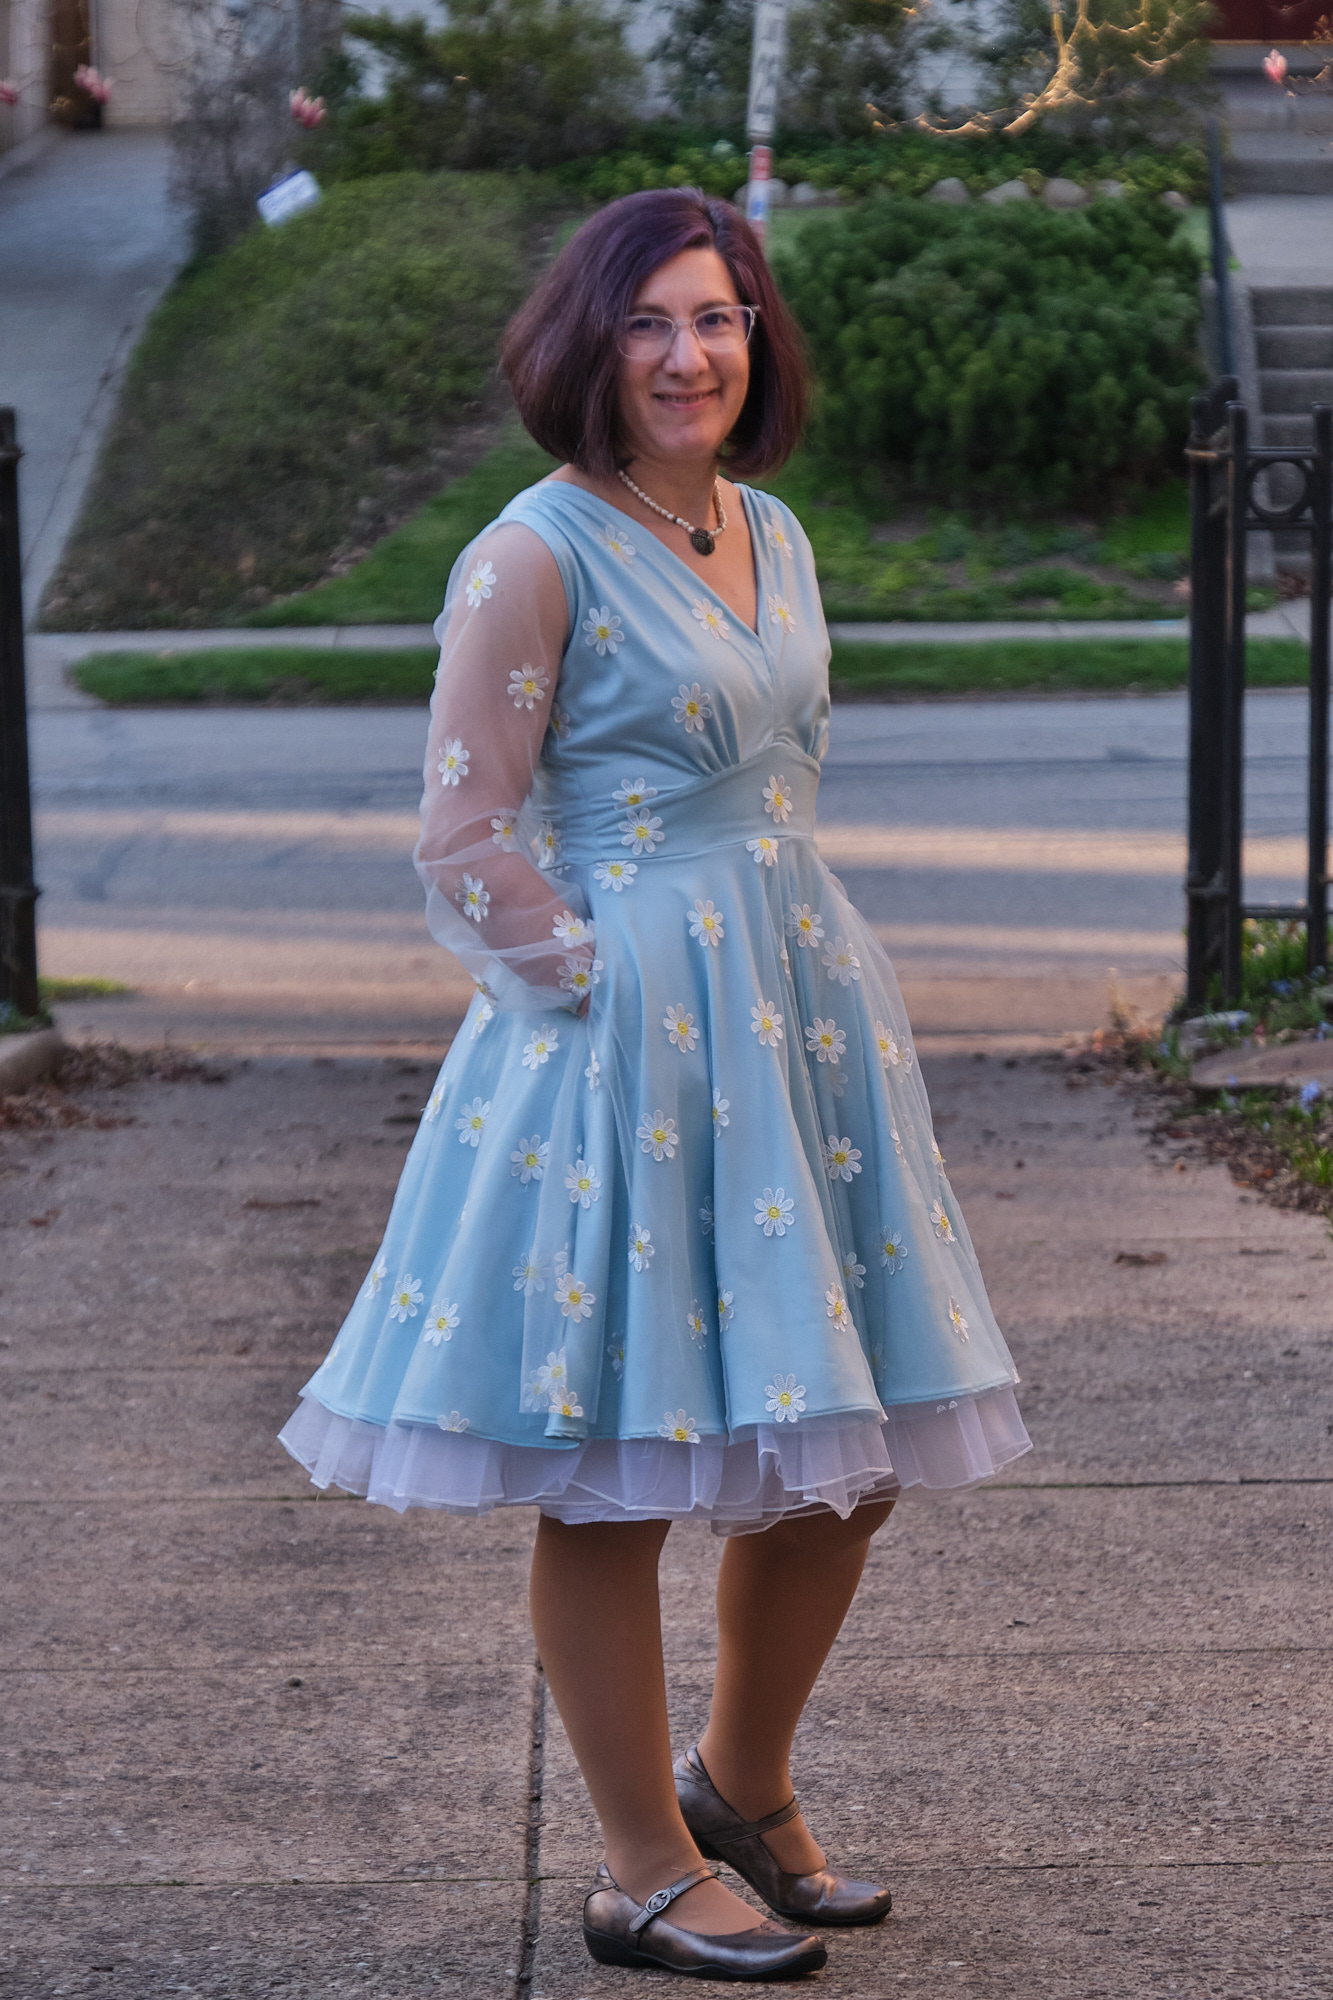
The dress looked great on, and with its 50s vintage vibe, I decided it totally needed a crinoline. (I also love that I achieved a vintage look with modern spandex fabric and thus no need for a zipper or fasteners of any sort). I tried it with my daughter’s short crinoline, but it was too puffy, so I found an inexpensive 50s crinoline available for next-day delivery on Amazon with a smooth waist and puffs that start a bit further down. I can wear it sticking out the bottom of the dress or pull it up further to hide it. The dress is totally wearable without the crinoline but so much more fun with it! I don’t really have an occasion to wear this dress, but I will find one.
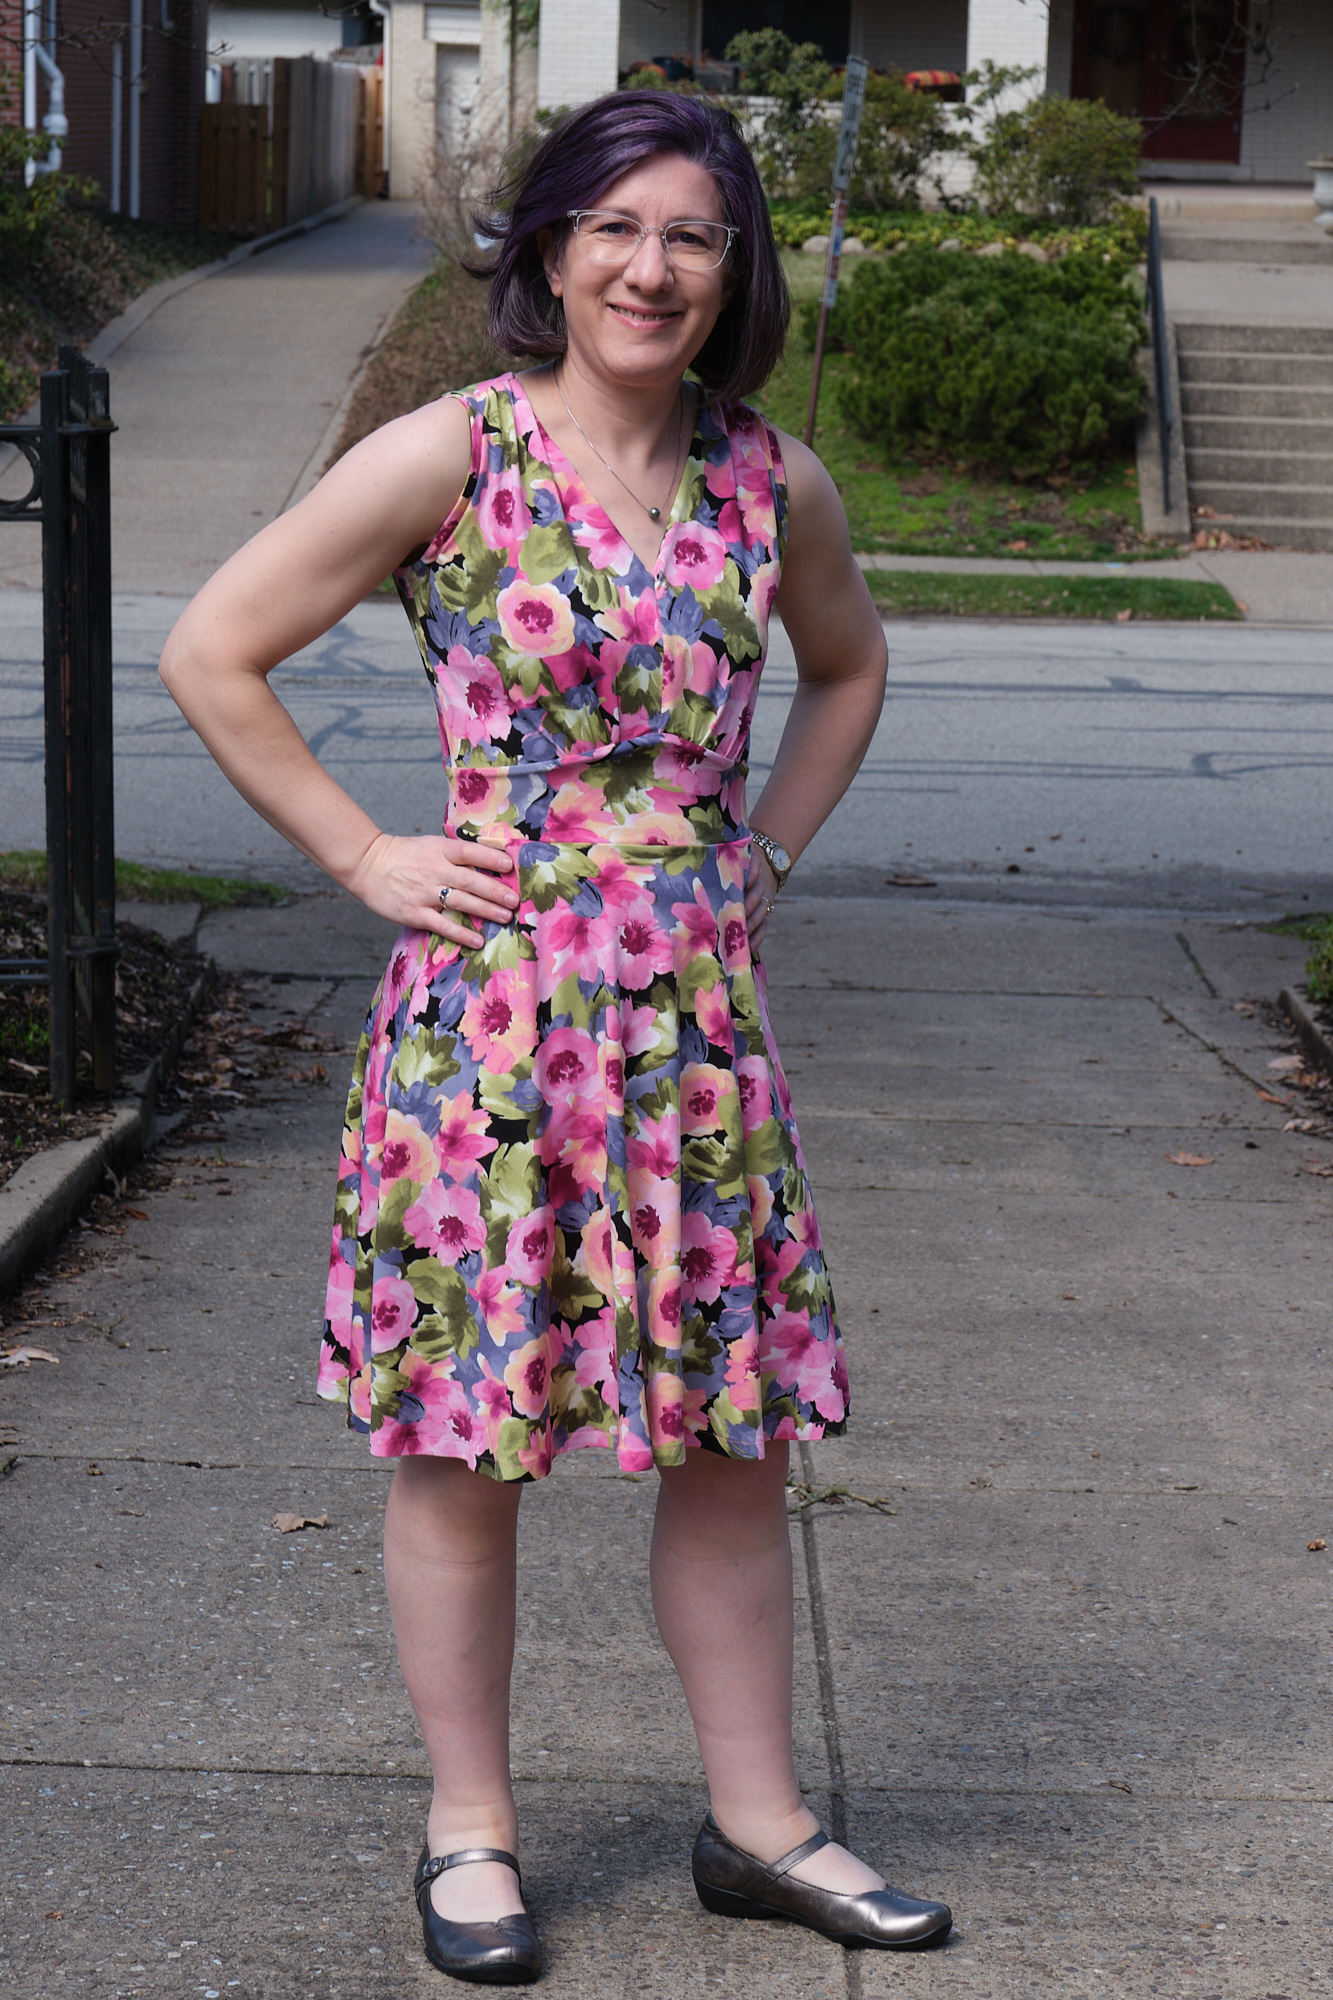
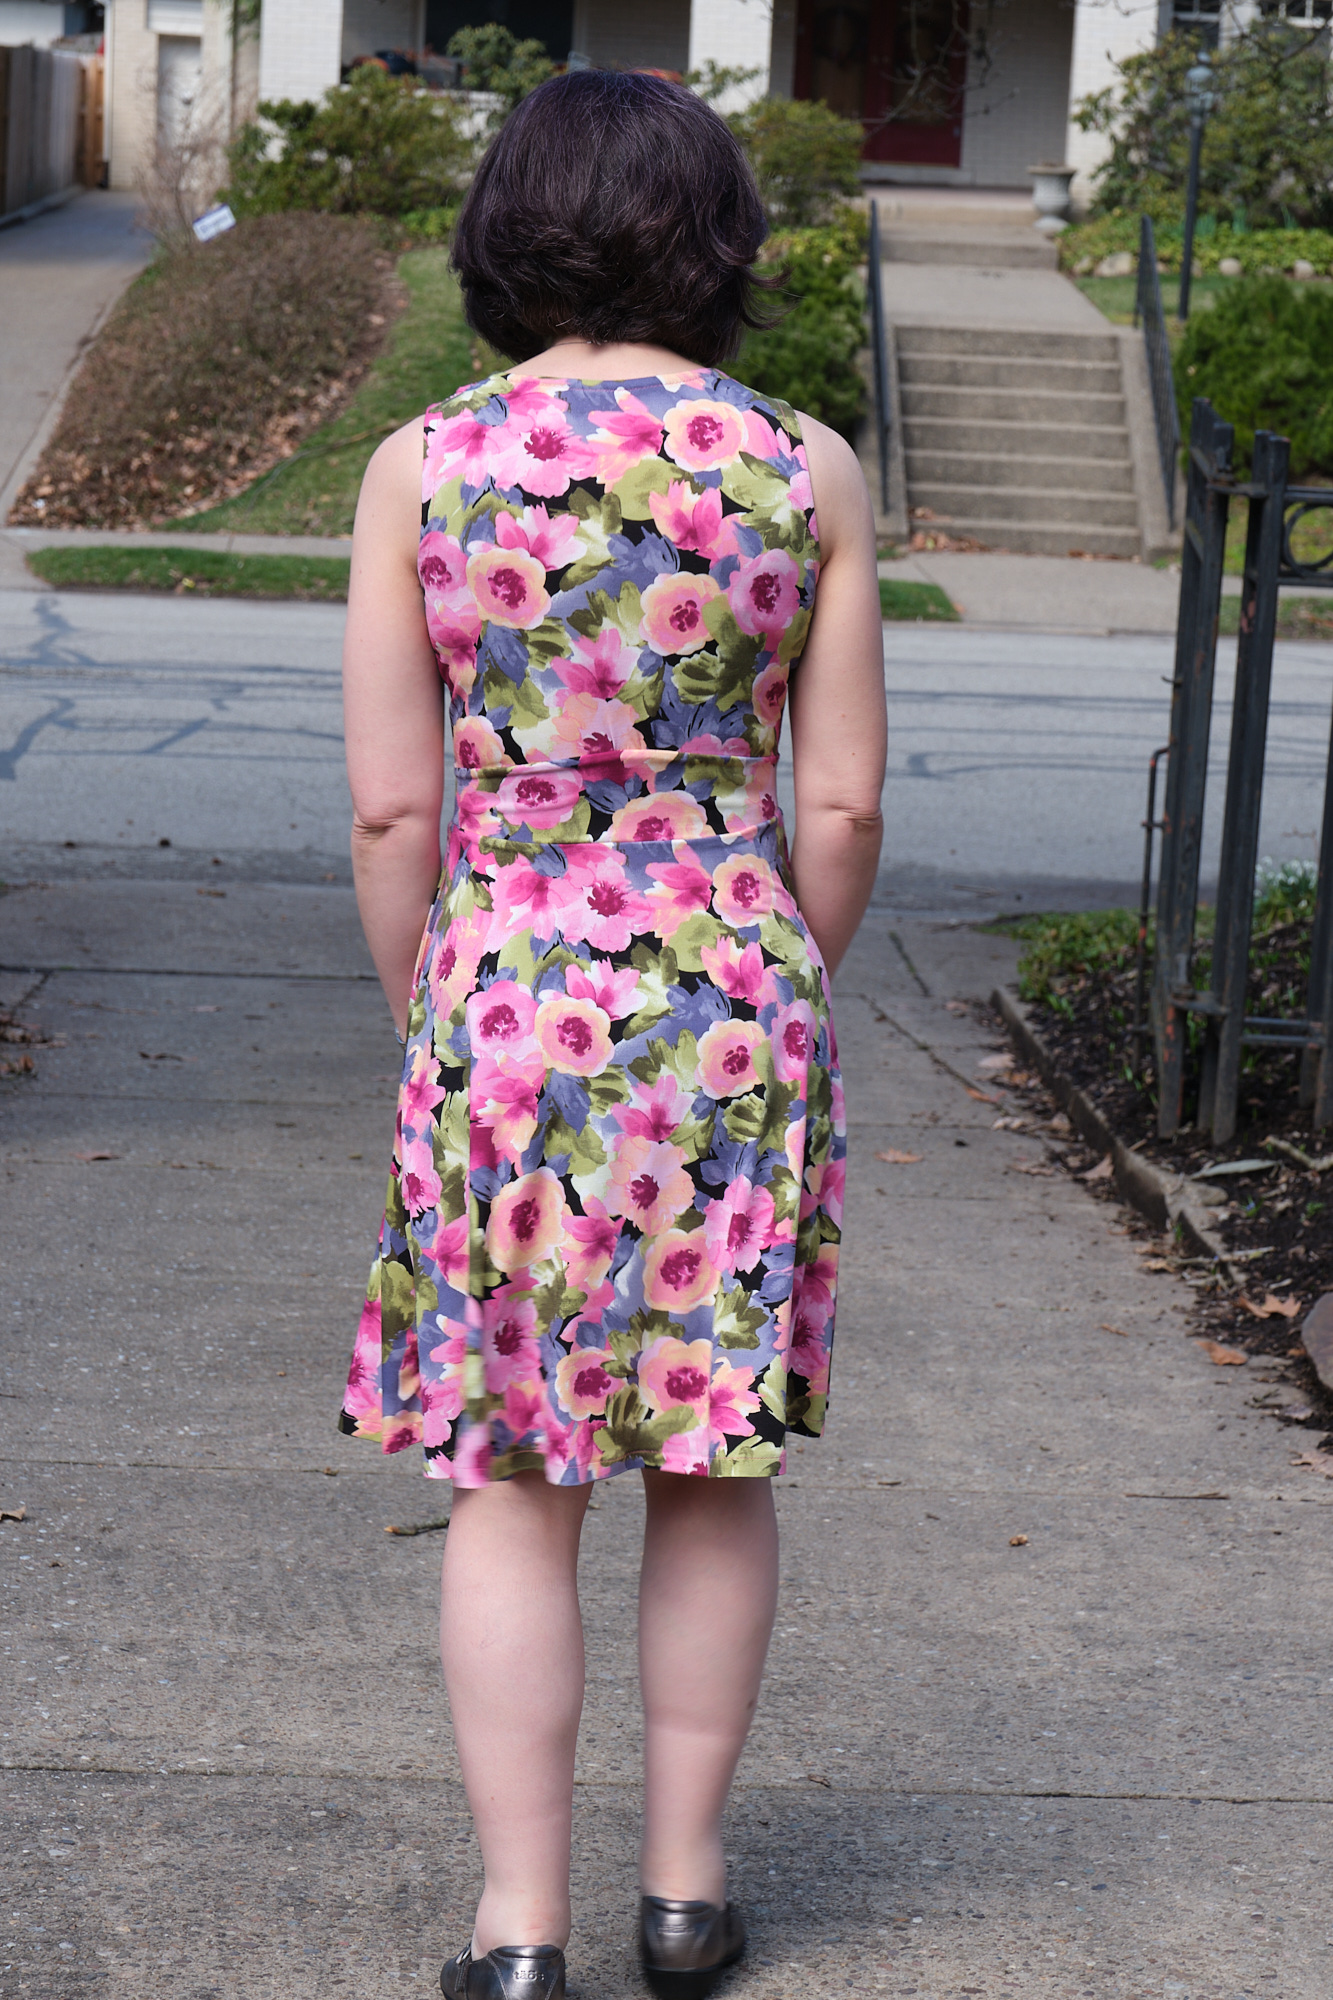
I have been commissioned by my high school senior to make the prom dress of her dreams, styled off some photos of ~$1000 Teuta Matoshi gowns with tulle overlays she fell in love with. I was looking for a pattern to use… and I think the Sinclair Yasmin V neck knit dress with pleated accents will do the trick with some tweaks (I was inspired by seeing another sewist post in the Sinclair Facebook group about using this pattern to make her version of the famous Lirika Matoshi strawberry dress which also has a tulle overlay). The original dresses have zippers and were likely lined with woven fabrics, but I think a knit dress will be easier for me to sew and fit, and it will be more comfortable to wear. But before I start altering this pattern, I thought it would be a good idea to sew the pattern as designed first to make sure I understand it.
This is not a projector pattern, but the A0 copyshop pattern projected just fine after I ran it through PDFstitcher to unlock it.
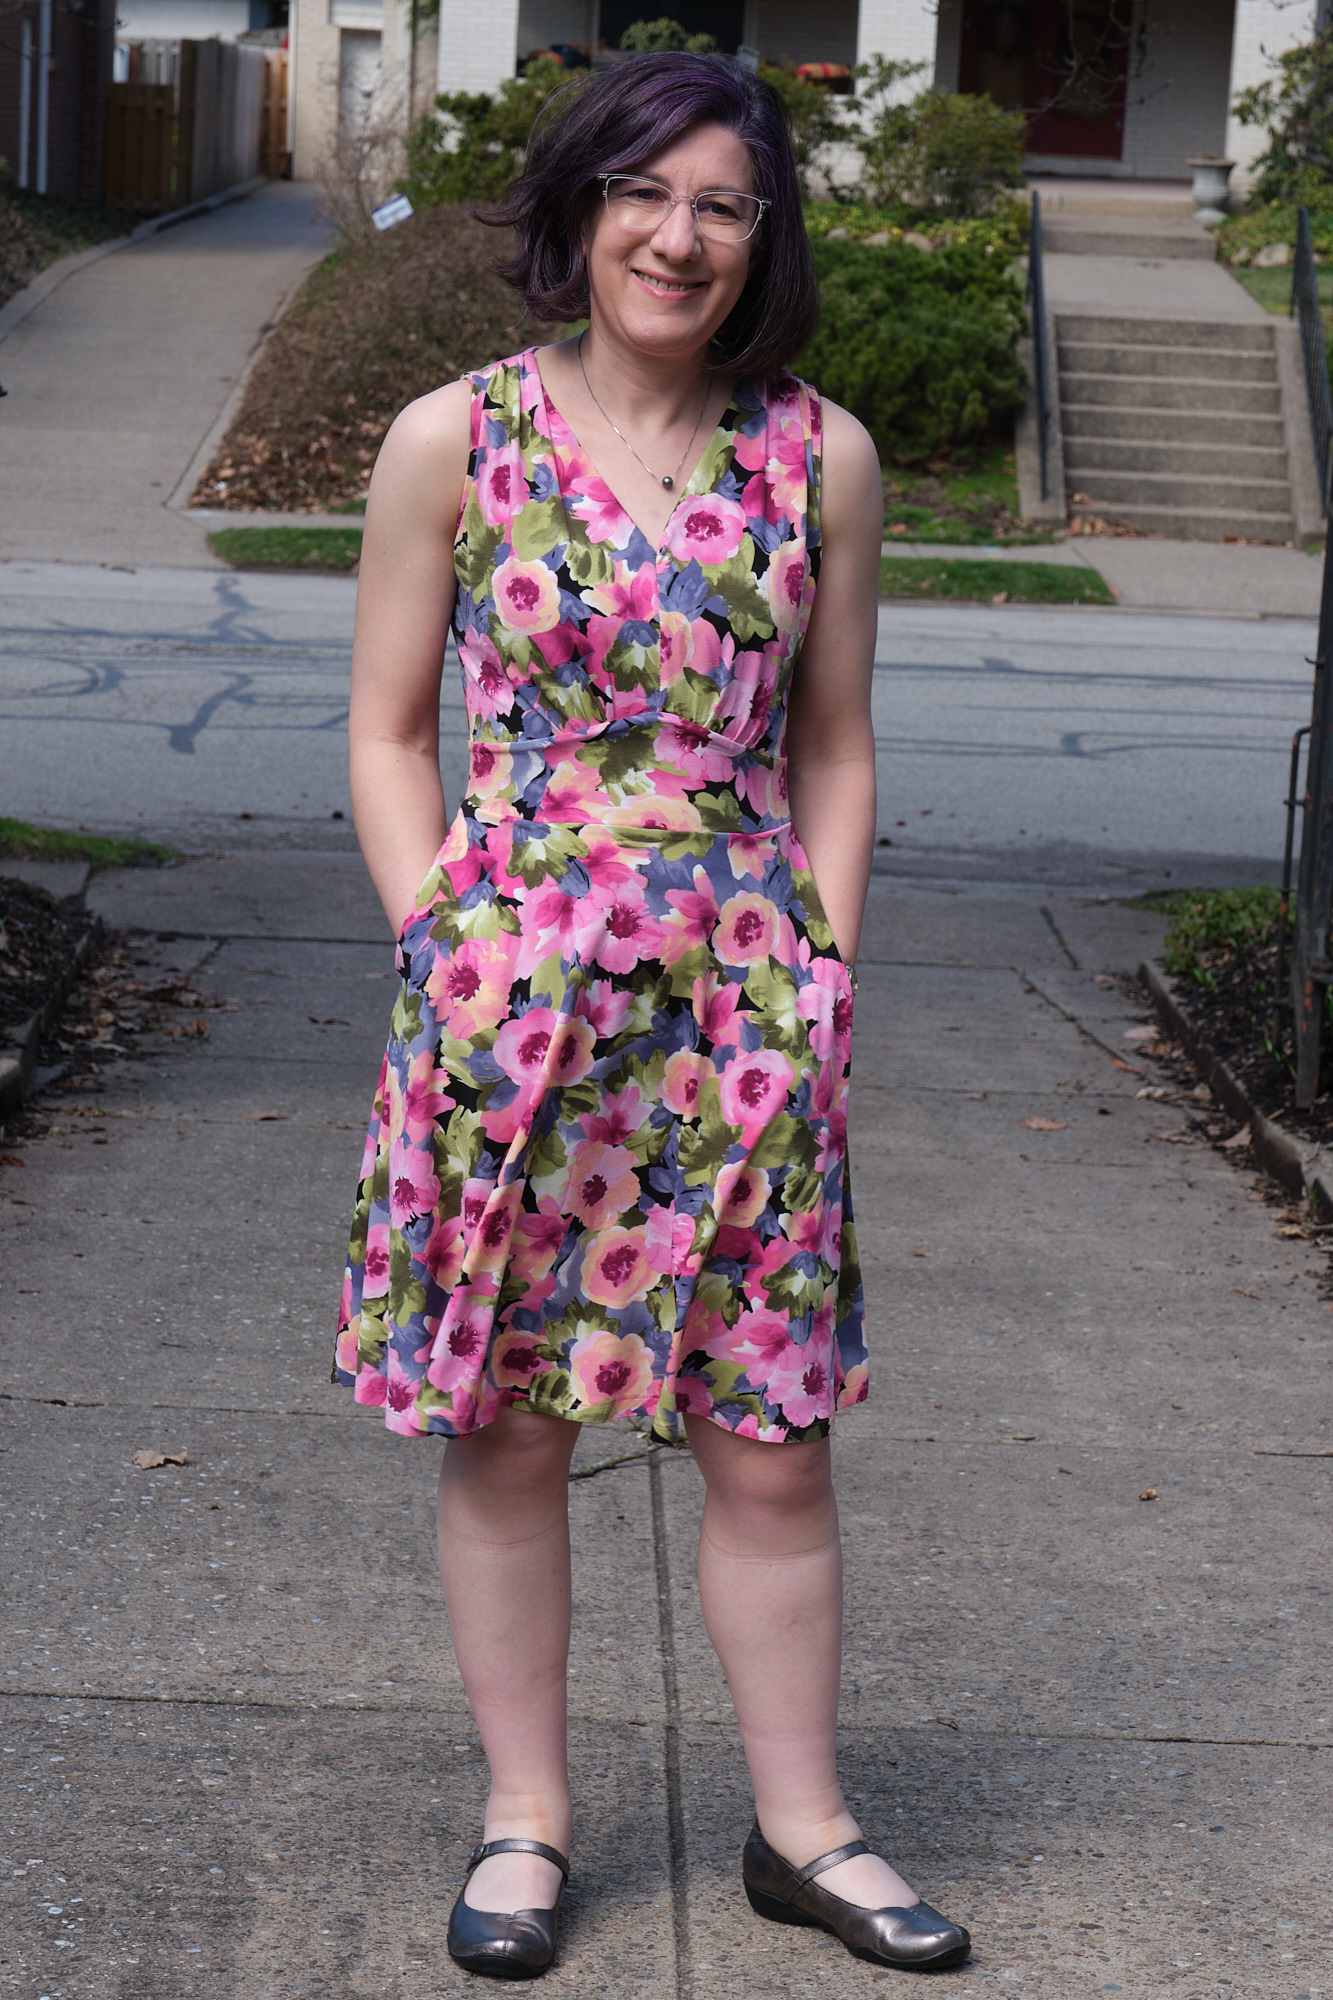
I chose a floral ITY from my stash that I had purchased at Stylishfabrics.com and cut it as a sleeveless dress in my usual Sinclair 4p size with the knee-length non-gathered skirt option (basically a half-circle skirt). I used a heavy 300 gsm poly-spandex athletic knit for the waistband lining. I cut the pockets about an inch deeper than the pattern called for. I also added about an inch of stitching along the side seams from the top of the skirt down into the pocket to hold the top of the pocket flat.
I had never sewn pleats before, and this pattern requires pinning and sewing 24 little tiny pleats. This was not straightforward to achieve with slippery ITY fabric. I did a lot of unpicking and basting until I got it (sort of) right. There are a lot of layers that have to come together at the waist and that also proved difficult. I basted the layers and still didn’t get it right the first time.
The finished dress looks great. I think it is quite figure flattering and also comfortable to wear, and I don’t think the bad pleat job is easily noticed (at least not until I point it out). This is a dress I expect to get a lot of wear out of this summer. Some how it was warm enough to model it outside in the first week of March in Pittsburgh, but I’m not actually expecting this to be a dress I wear much for another couple of months. The 300 gsm lining means the waist is quite secure and not going anywhere, even with stuff in the pockets. It is a bit thick though and perhaps that weight for the lining was overkill on a summer dress.
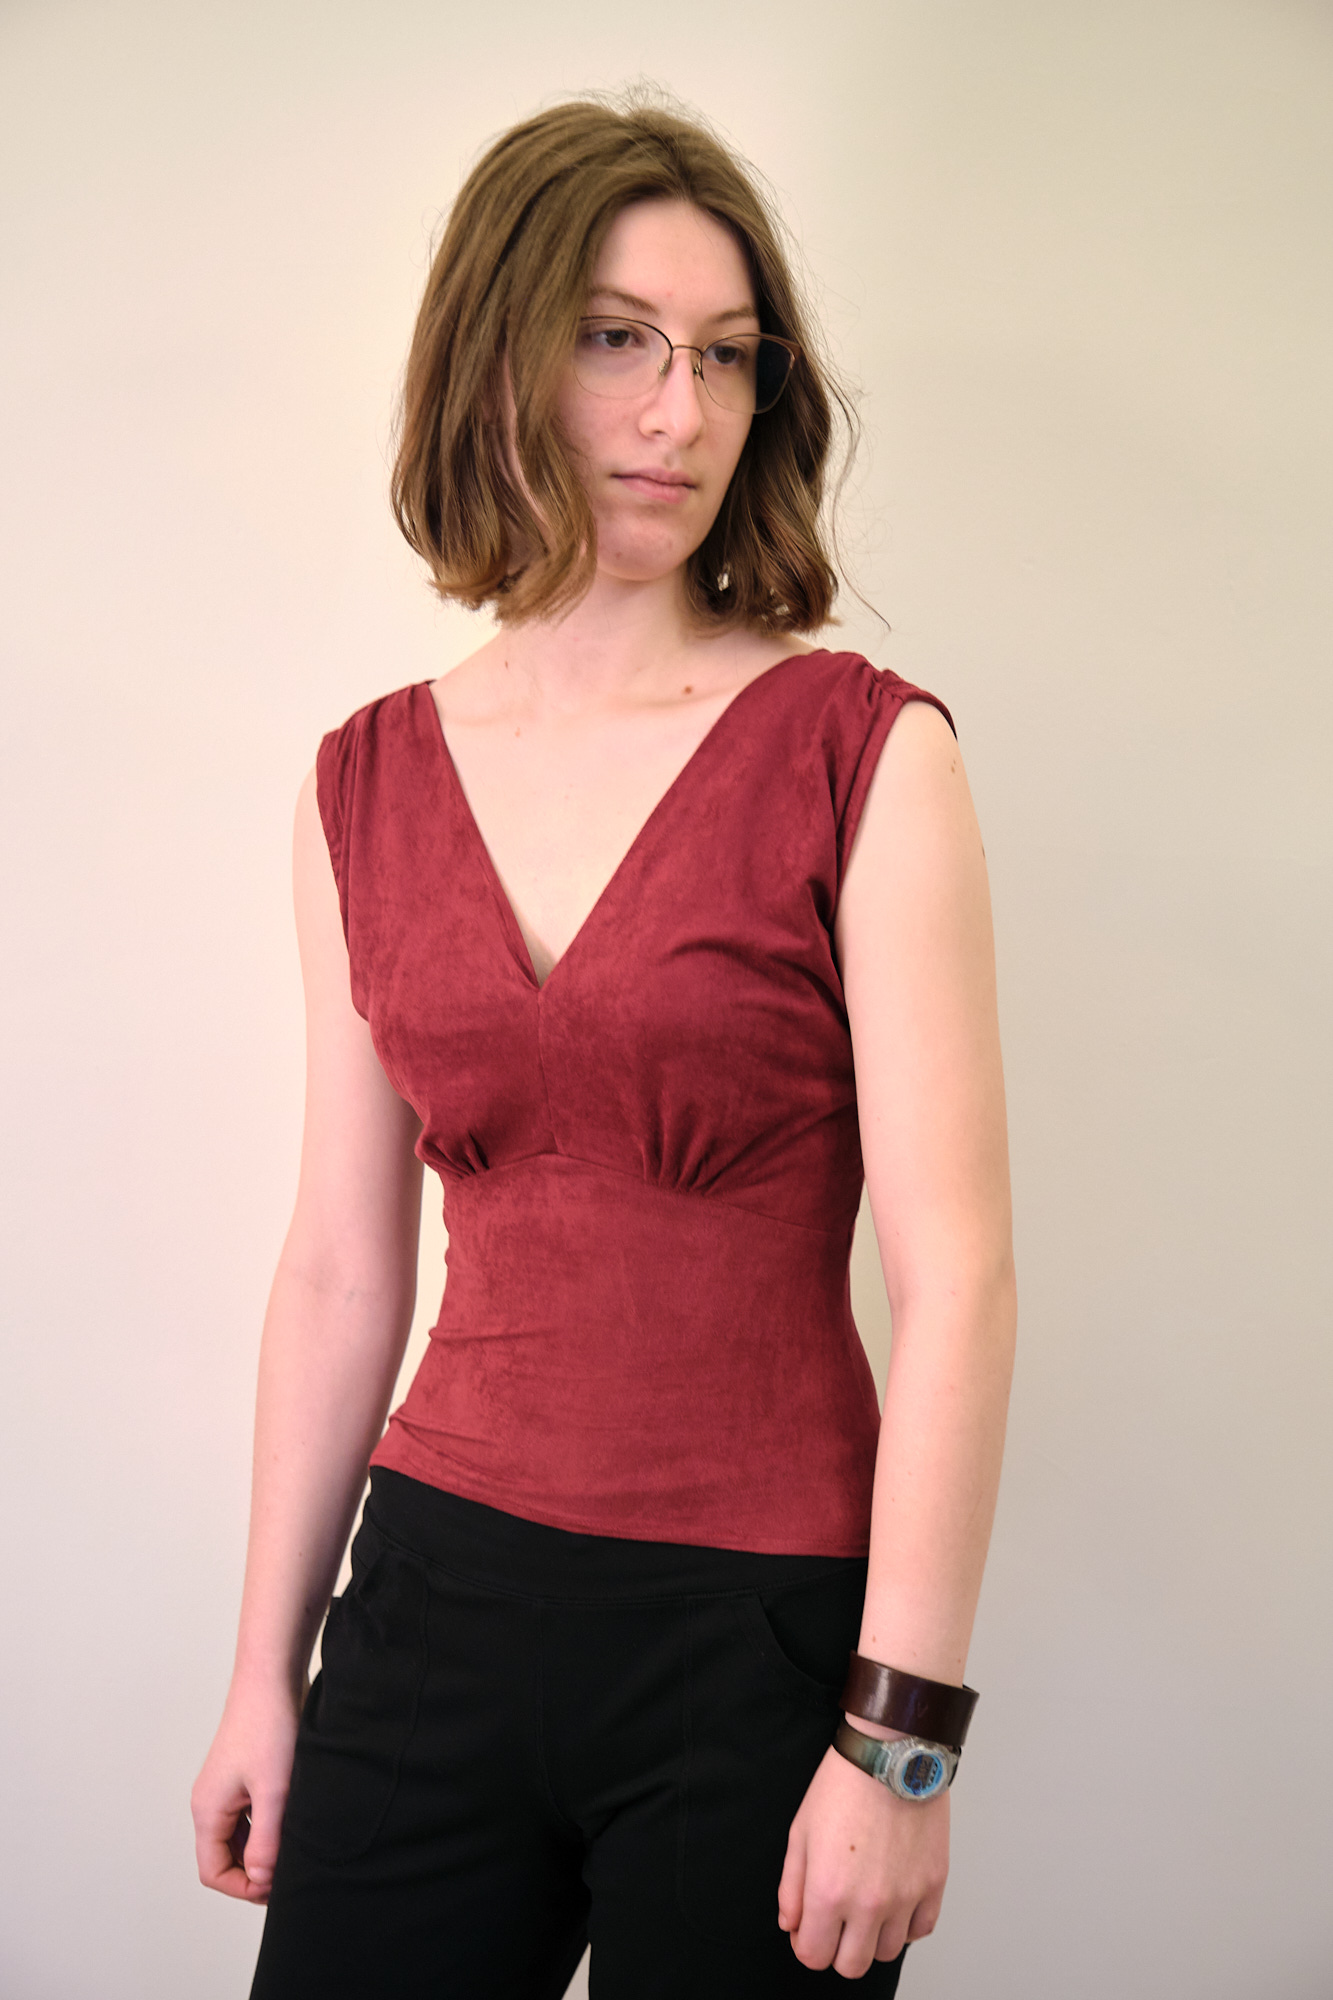
Now that I understood the basics of how this dress goes together and fits, I hacked the bodice pattern to make it more like a prom dress. First I lowered the front V by about 2 inches. Next I split the back bodice on the fold and copied my new lower front V to the back. I chose the depth of the Vs so that the dress would be wearable with a normal bra. I wanted to test this out with just the bodice and not an entire dress, so I added about 5 inches to the height of the waist pieces so I could hem the bottom and make this a wearable top. I didn’t bother with the inner waistbands. I cut this out of sangria microsuede jersey knit from Surge Fabrics leftover from another project. (This is not my favorite fabric to sew with due to it being both slippery and rubbery/clingy at the same time, but my daughter likes the color and I had enough scraps for this project.) I made this in size 2R, my daughter’s size.
This time I taped the pleats down on the front and the back with scotch tape about a quarter inch from the edge before I sewed them down an eighth inch from the edge. The pleats came out a lot better this way. I seem to have inadvertently miscalculated the back shoulder width when I added the back V and they ended up slightly wider than the front shoulders so I added a couple of pleats to even them out. I will widen the back V slightly next time. My daughter tried it on and liked the deep Vs. However, there was extra fabric under the bust. To adjust for her small bust, I ended up removing about 1.25 inches from the front and back inner shoulder, thus changing the slope of the shoulder seams (a square shoulder adjustment), but also raising the bust area that wasn’t been filled out. Since I did this after it was already sewn and pleated it doesn’t all lie as smoothly as I would like (so much for my beautiful pleats), but I think it will work fine when I cut it this way to begin with. The actual dress will also have weight from the skirt pulling the waistband down, which I think will also hold the V neck in place better (I considered top stitching along the Vs but I think it is ok without that – and I can always add top stitching later if she wants it.)
My daughter selected a fancy embroidered tulle fabric for her dress, which I will line with a sparkly nylon/spandex fabric. She wants long puff sleeves made from unlined tulle and a full-length circle skirt. Before cutting into all this fancy fabric, I want to test out sewing this pattern with tulle and adding sleeves and a circle skirt. My plan is to make the V-neck modifications in my size and sew myself a knee-length dress with inexpensive tulle and lining. Then if all goes well I will be ready to sew the prom dress. Stay tuned!
I stocked up on sweater knits from online fabric stores during the winter clearance sales and now my sewing room is overflowing with soft and cuddly sweater fabric. Most of it will wait until next fall before I use it, but I was eager to sew up some of it while it is still winter.
I decided to start by making a cardigan sweater out of the super plush and warm ebony Morraine Double Cashmere Sweater Knit from Surge Fabrics. This fabric is 44.5%Rayon/35.9%Poly/19.6%Nylon with a weight of 320gsm and 75% horizontal/50% vertical stretch. It is a thick, lofty fabric with a somewhat squishy and very soft feel, but it is also fairly stable with good recovery. I used the Banff Ultra Thick 1×1 Rib Sweater Knit for the bands and cuffs. Banff has similar fiber content — 50%Rayon/28%Poly/22%Nylon — but it is slightly heavier at 350 gsm and has 75% horizontal/25% vertical stretch. Although the specs are similar, the Banff is much less stable and tends to stretch out (as I discovered when I used Banff to make a dress a couple of months ago) and unravel at the edges. In fact I had a hard time cutting the bands out without inadvertently stretching it in the process. But it produces lovely bands and it matches the Morraine perfectly!
I thought about using the Grab A Cuppa cardi pattern I tried last week, but decided I didn’t want to make something so slouchy out if this heavy fabric. Instead I went with the free Sinclair Harper pattern with some modifications. Based on my previous Harper sew, I knew my usual size was fairly snug so I sized up one size to 6p. I also wanted a slightly shorter length, but not as short as the crop length, so I shortened the classic-length bodice by 2.5 inches. I don’t like the feel of neck bands that creep up my neck so I lowered and widened the back neck and narrowed the band by .5 inches on each side (cutting the band 1-inch narrower). To compensate I widened the inner edge of the front bodice by .5 inch and narrowed the shoulder to match the altered neckline on the back bodice. I estimated the new length for the neck band, but it ended up being much too long, so I iteratively shortened it until I got it right.
I serged my black cardi with my usual medium-grey serger thread. That’s the only serger thread I have and when I bought my serger last year I swore I would never rethread it. But threads break and I was forced to learn how to rethread it earlier this year. After many failed attempts I think I am now capable of performing a complete rethread of all four threads in about 5 minutes. Now I think having black serger thread on hand would be a good idea, as I have a number of projects planned with dark fabrics and it would look a bit nicer.
My Harper modifications worked pretty well. The Morraine was easy to sew on my serger. The Banff was mostly ok, but my serger was definitely not happy about sewing through four layers of Banff where the two bands meet. I resorted to sewing one side on my sewing machine. In the end the bottom corners did not work out as well as I had hoped (same problem I had with the Cayambe last week), but with some hand sewing and a lot of pressing I got them mostly straightened out ok. I debated whether to top stitch the seam allowance of all the bands but decided not to as the top stitching would add a significant ridge to this squishy fabric. I can always go back and add the top stitching later.
Overall I’m very happy with this cardigan. It is very warm and cuddly feeling, and has a nice tailered look.
Last week I made a Pattern Emporium Grab a Cuppa Cardi out of rosemary Cayambe rib knit from Surge Fabrics (95%Poly/5%Spandex, 240 gsm, 75% horizontal/25% vertical stretch). This is an oversized pattern and I didn’t want it to swallow me, so I sized down from an AU 8/10 based on my measurements to an AU 4. I’m glad I did as it is still is quite ample width, but now the sleeves fit pretty well. I used the hip-length pattern. I don’t like the feel of collars creeping up my neck, so I lowered and widened the back neck by about an inch and adjusted the front bodice so the shoulder width matched the lower back neck.
The cardi went together pretty quickly using my serger and the neck adjustment worked well. The pattern includes some good tips, including pointers on adjusting the differential feed and great advice on how to gather the sleeves and attach the cuffs. I accidentally serged the bottom band on backwards (seam on the outside of the sweater… oops), so I ended up just cutting it off and resewing, but I lost about 3/4-inch of length in the process. I could have cut a new band out and lost only 1/4-inch, but I was feeling lazy and decided I was happy with the shorter length for this cardi. I struggled a bit with the bottom of the front band and it isn’t quite as even as I would have liked, despite following instructions to baste, etc. I think the stretchy ribs made this harder.
Since I had more of the Cayambe left, I decided to make a short-sleeved sweater and create a twin set. I used the Sinclair cachet relaxed tshirt pattern, with some modifications. Before cutting the fabric I tried on a Cachet I made previously with my new cardi and noticed the back hem of Cachet hung down considerably lower than the back of the cardi. So I adjusted the back bodice of the Cachet so that it was similar to the bottom of the front bodice and did not dip down so low. It is now uniformly a bit longer than the cardi, rather than just in back. I also wanted more of a scoop neck so I borrowed my screwp neck modification for the Sinclair Bondi pattern.
The Cayambe fabric is kind of a light-weight sweater knit, good for a spring/summer sweater. (Not really appropriate for winter weather, but it warmed up enough today that I ran outside for a quick photo shoot. I’m laughing in the photo because my photographer is making fun of me for standing outside in Pittsburgh in February in short sleeves without a coat.) The Cayambe has a bit of a sheen on the right side of the fabric and nice ribs. The web site suggests not putting it in the dryer, I’m assuming to avoid it catching on other garments as opposed to a danger of shrinkage. I did put the fabric in the dryer when I initially washed it without any problem. The rosemary color is similar to sage, kind of herby. It could be called sage too I guess.
Overall I’m reasonably happy with how this came out and I’m looking forward to wearing this set in warmer weather. I don’t love the Cayambe as much as I thought I would — it is soft but also kind of looks and feels like polyester (which it is) and isn’t as soft as I thought it might be. I like the Grab A Cuppa cardi pattern and think it will be nice with wide pants, but even sizing down 3 sizes it still looks slouchy and I think I generally prefer a more fitted look for tops.
I just bought some custom woven clothing tags from wunderlabel.com so I sewed them into these garments as a finishing touch.
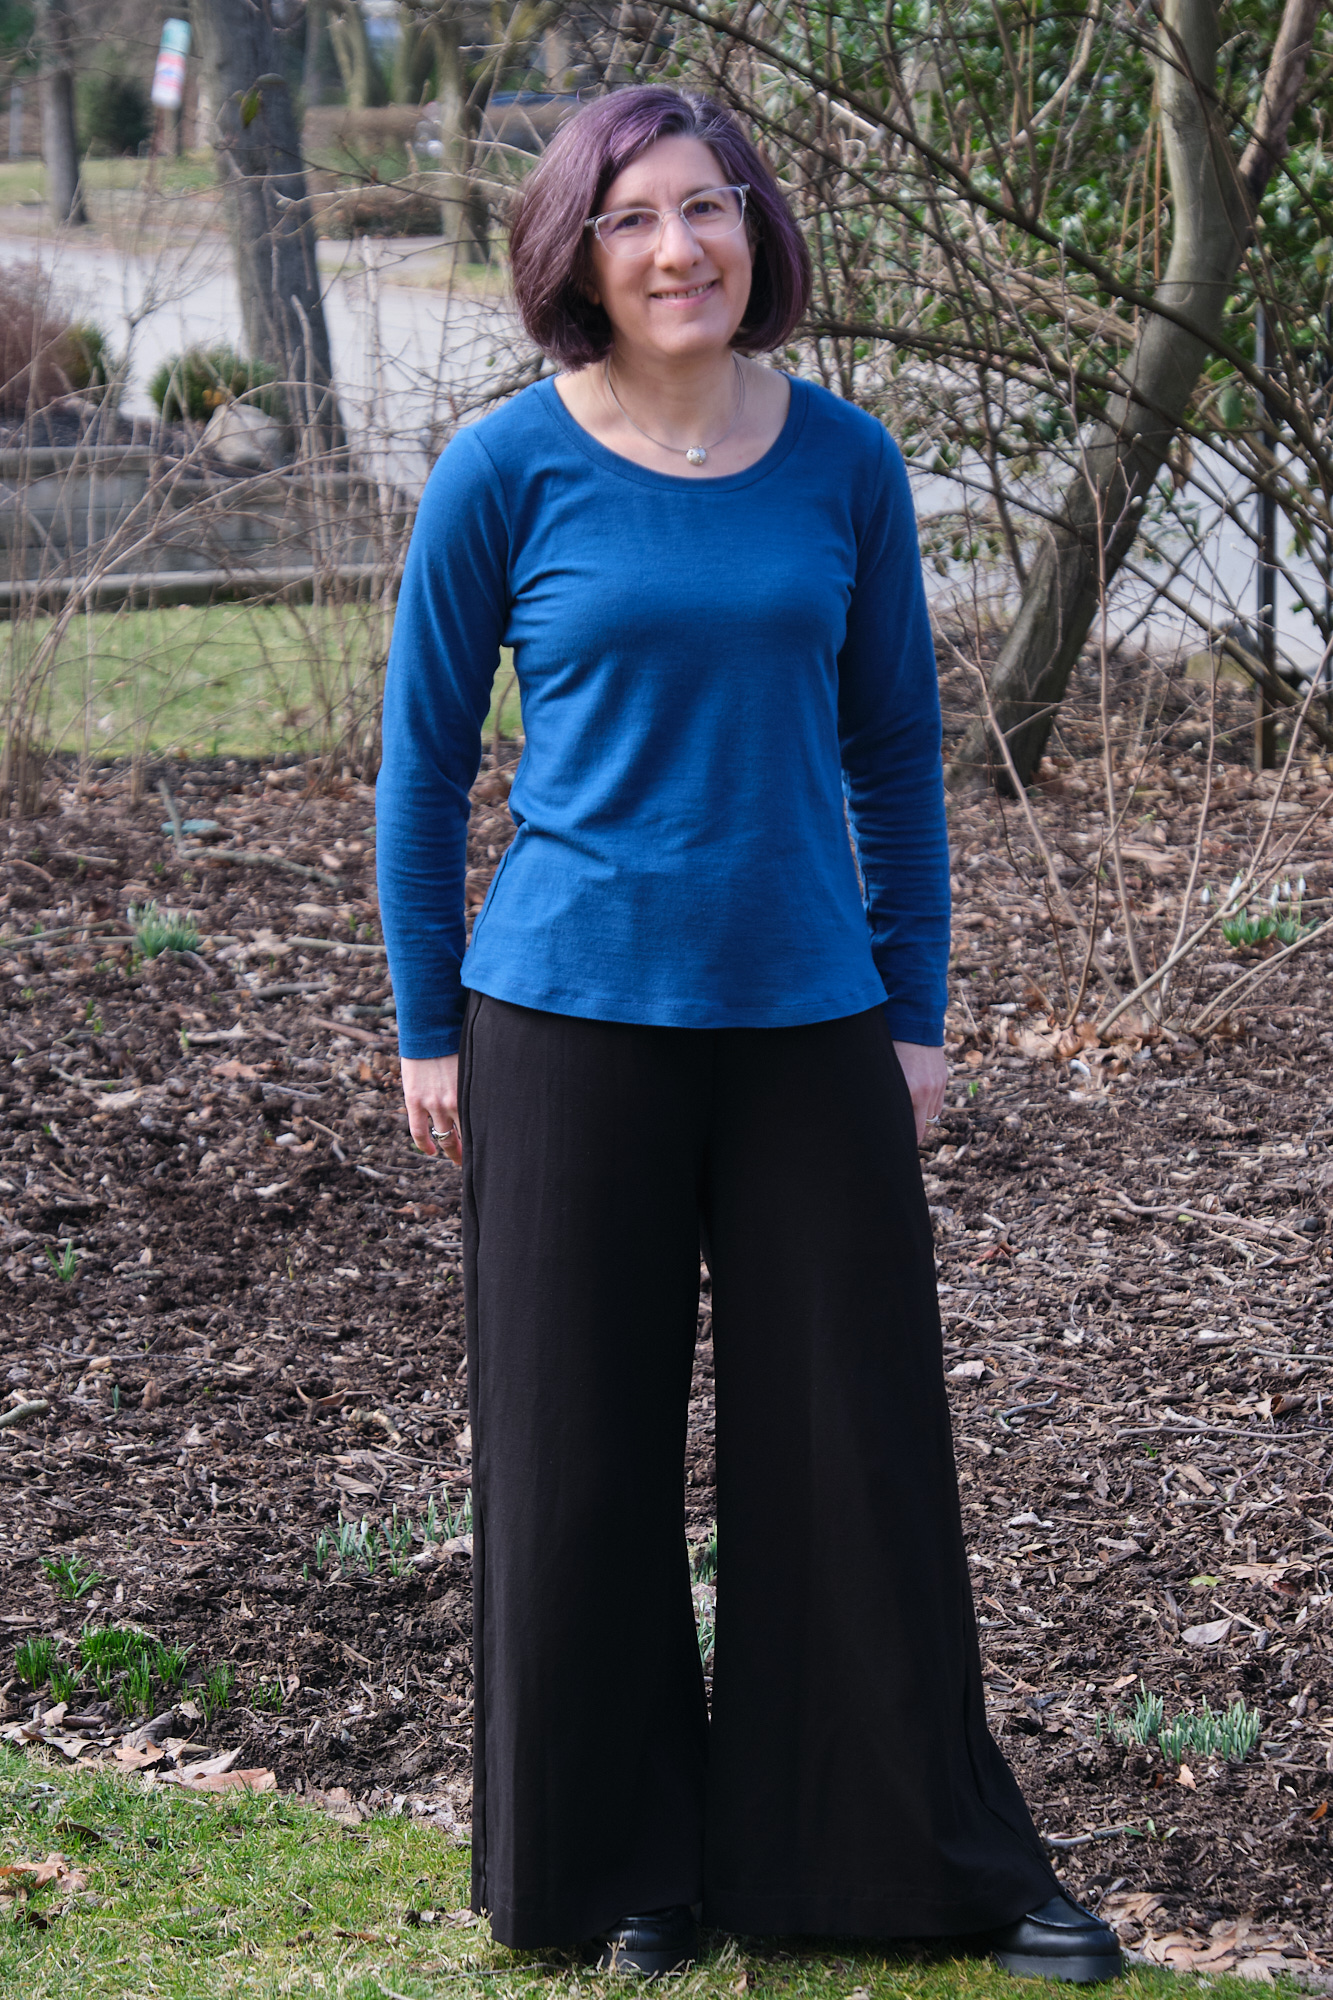
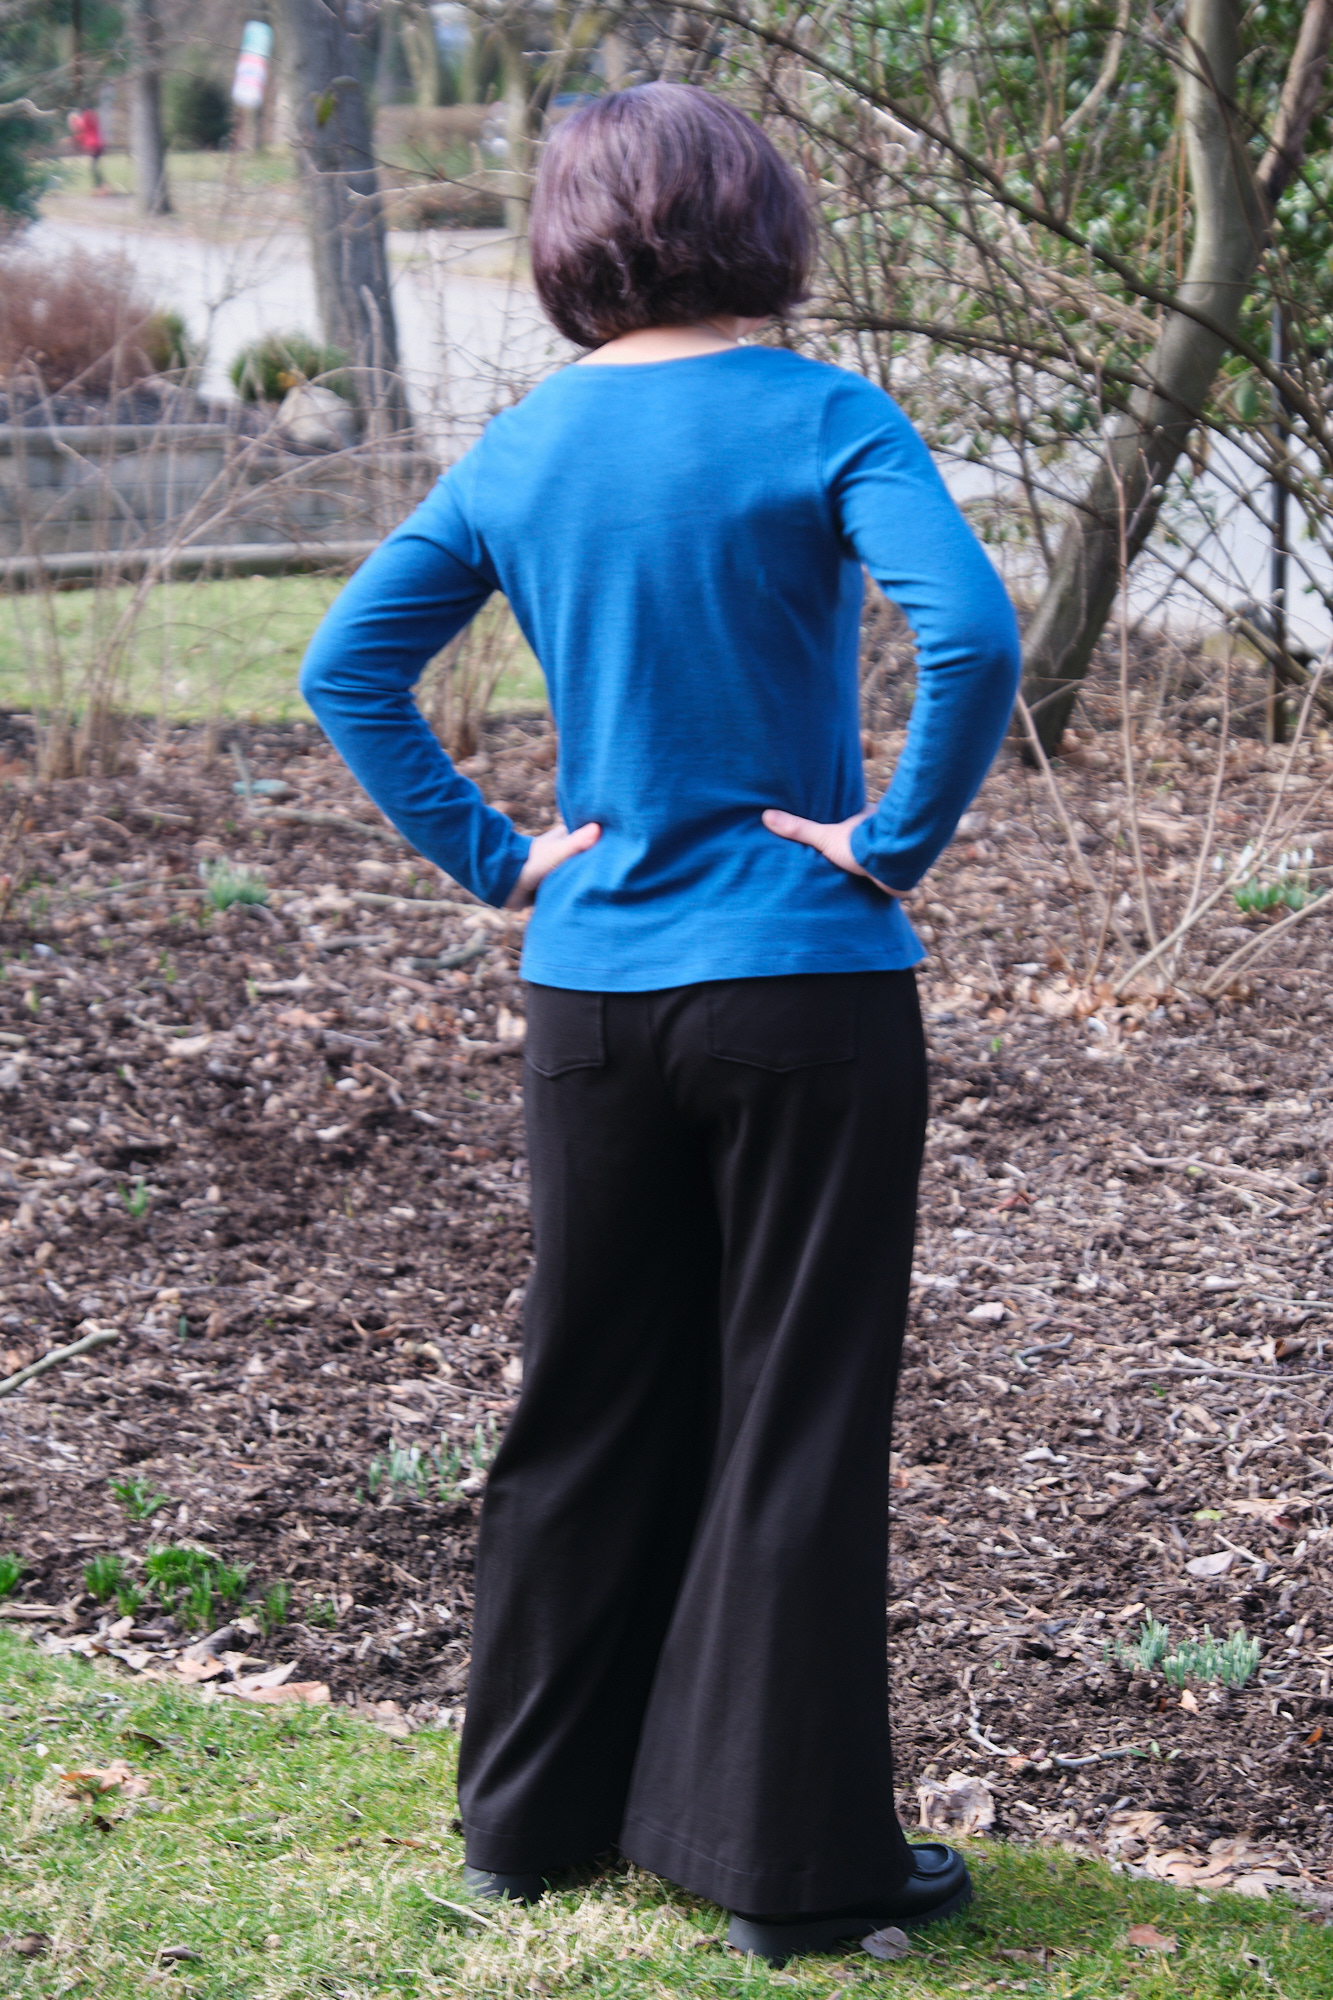
I bought some sapphire blue wool spandex jersey from knitfabric.com and decided to make a quick sweater. This is a lightweight wool with 3% spandex, 220 gsm. It has 4-way 75% stretch and it is machine-washable (and it seems to have survived its first wash just fine). At $12/yard, it is also a great price for wool (although it is only 44-inches wide). I wouldn’t describe it as super soft, but it is also not itchy. I found it comfortable against my skin. I’ll probably buy more in other colors when they restock.
I was planning to make a dolman sleeve sweater, but realized I only had 1.5 yards and at the 44-inch width, that wasn’t enough. So I turned to my trusty Sinclair Bondi screwp-neck t-shirt pattern, and sized up one size (to a 6p) for a looser sweater fit that could be layered with a t-shirt underneath.
This was my first time sewing with wool. The sweater was quick to cut and sew and it looks and fits great. (Modeled here with Walk Boldly pants.)


