I’ve always liked the idea of linen pants, but have never actually liked wearing and maintaining linen pants. They are cool and breathable, until they become a wrinkly mess and you have to iron them. Some have a texture that isn’t that soft against your skin. This spring I ordered several pairs of linen pants online from a popular retailer and ended up returning all of them because I wasn’t crazy about the fit and I could see they were going to need a lot of ironing. So when I saw a new fabric from Surge Fabrics described as a “faux linen knit,” I was intrigued. The fabric is called Pylos LiKnit, which is kind of a weird name that I struggled to pronounce until I realized the K is silent. I’m not sure if other fabric stores offer it under a different name; this one seems to be unique to Surge. It is 55% rayon and 45% nylon, with 50% 2-way stretch (it stretches side-to-side but not up and down). It comes in lots of colors, although some seem to be selling out. This fabric does not contain any linen. It is not a linen knit; it is a rayon/nylon (viscose) knit that looks and feels somewhat similar to a woven linen, but with stretch.
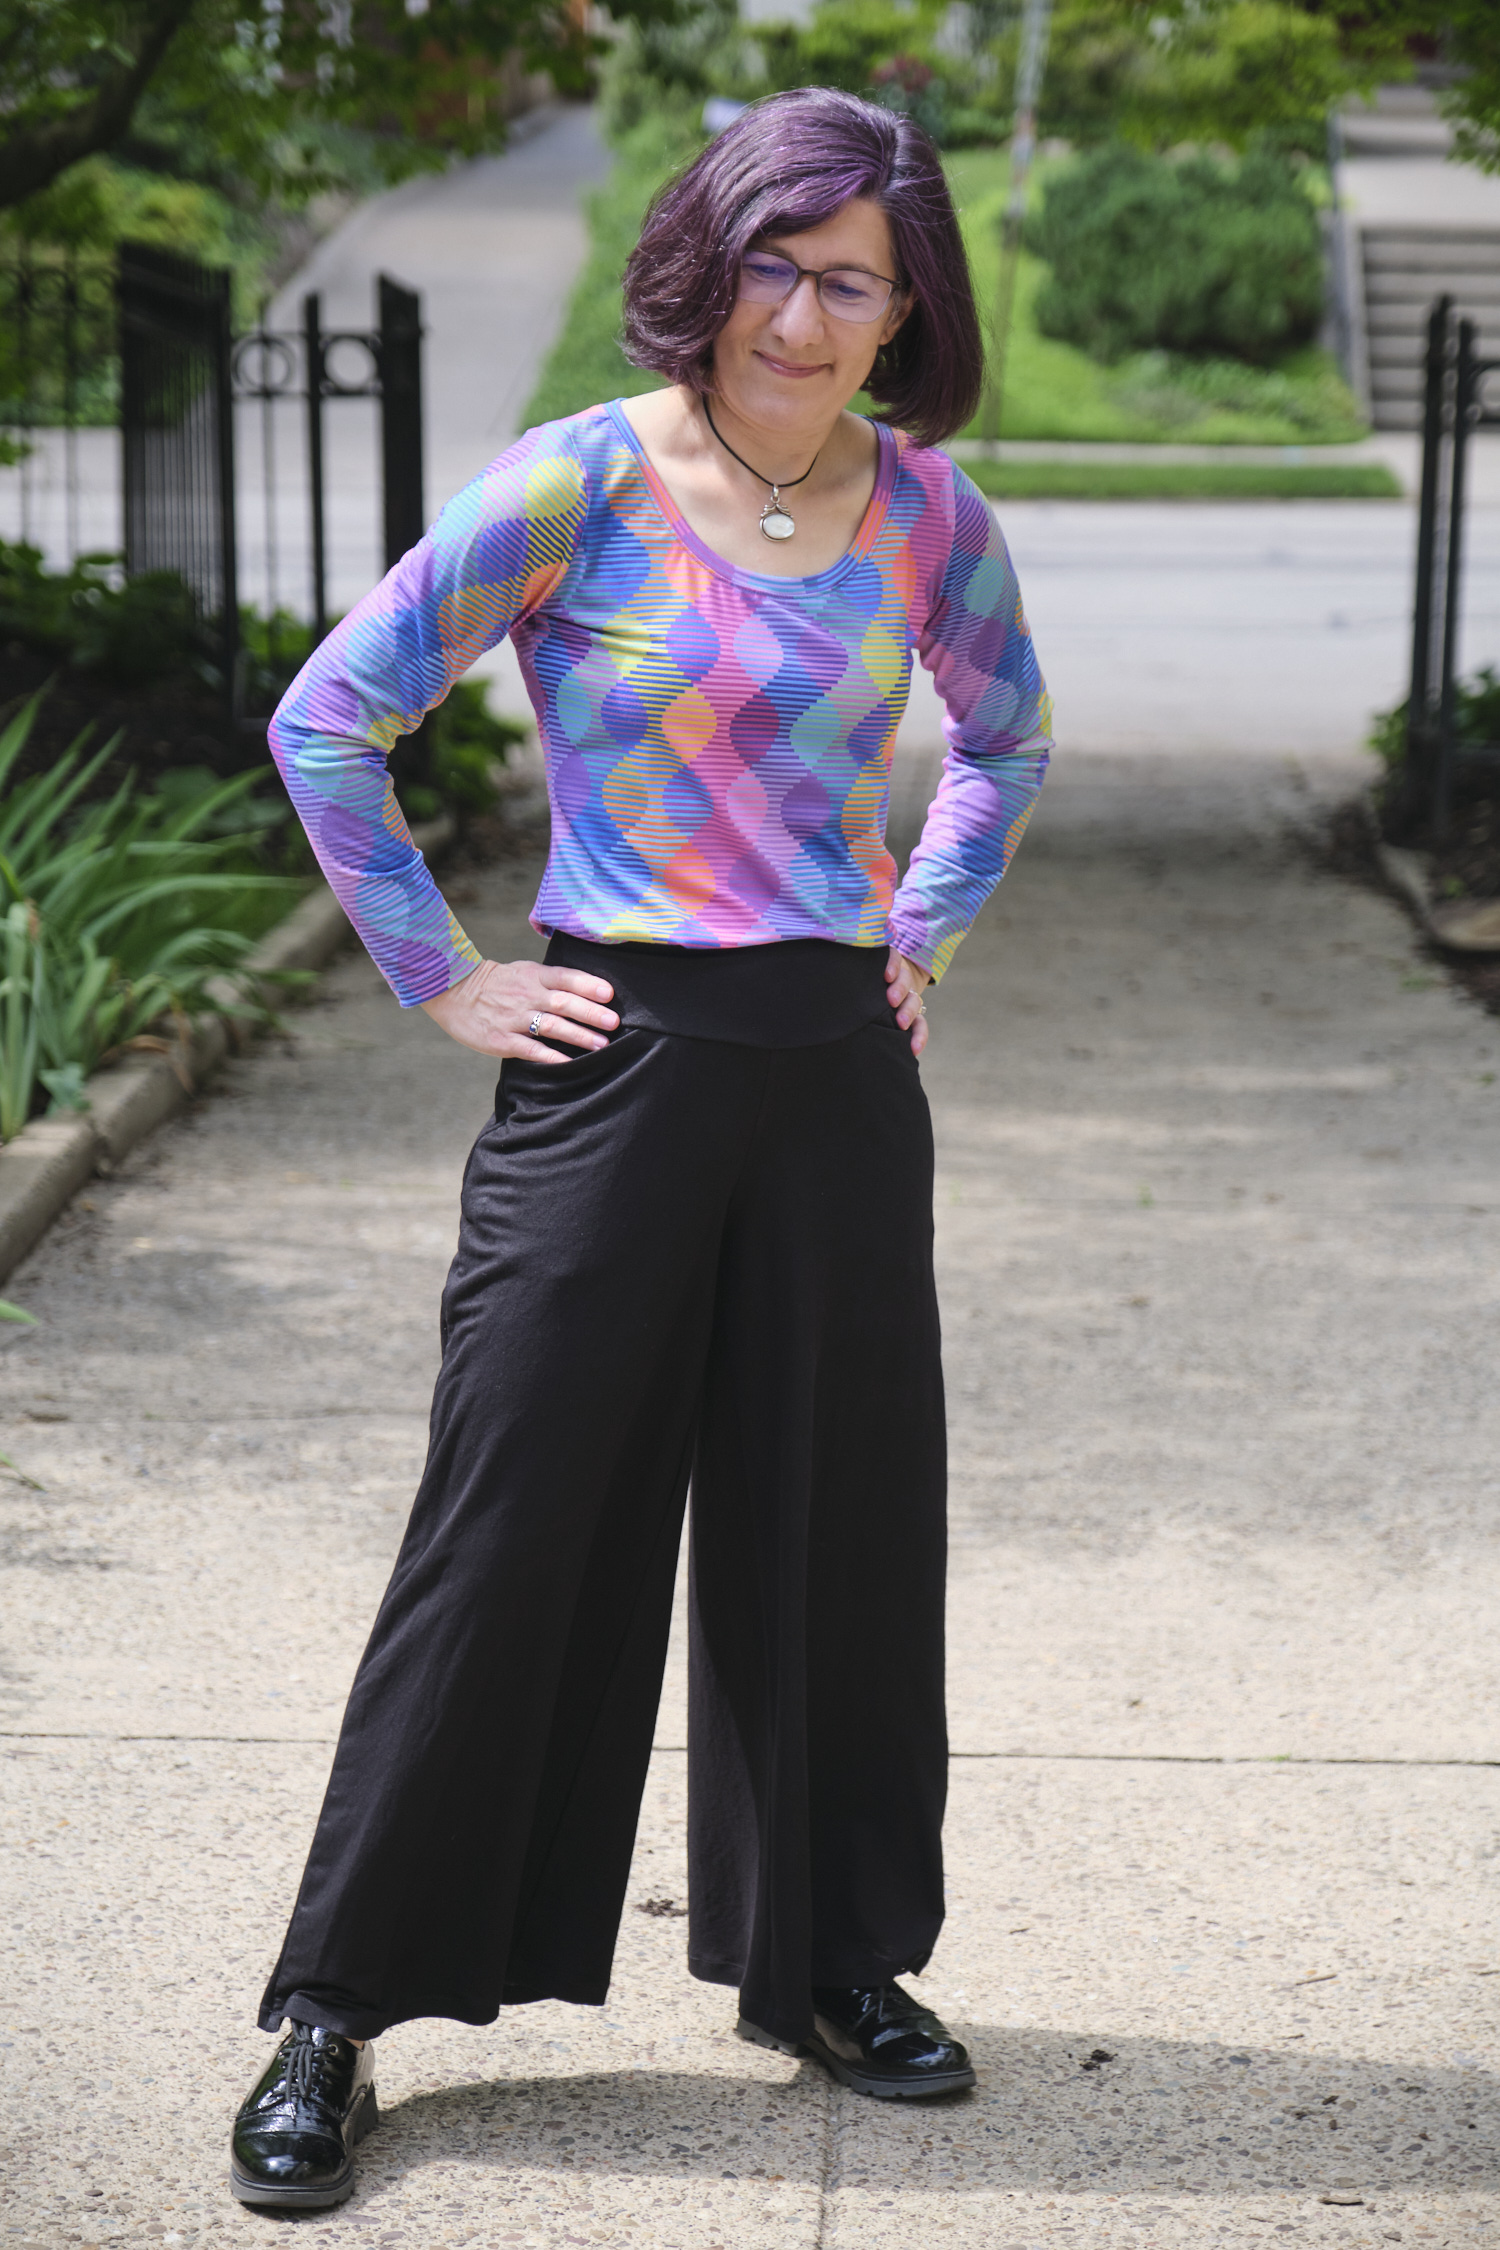
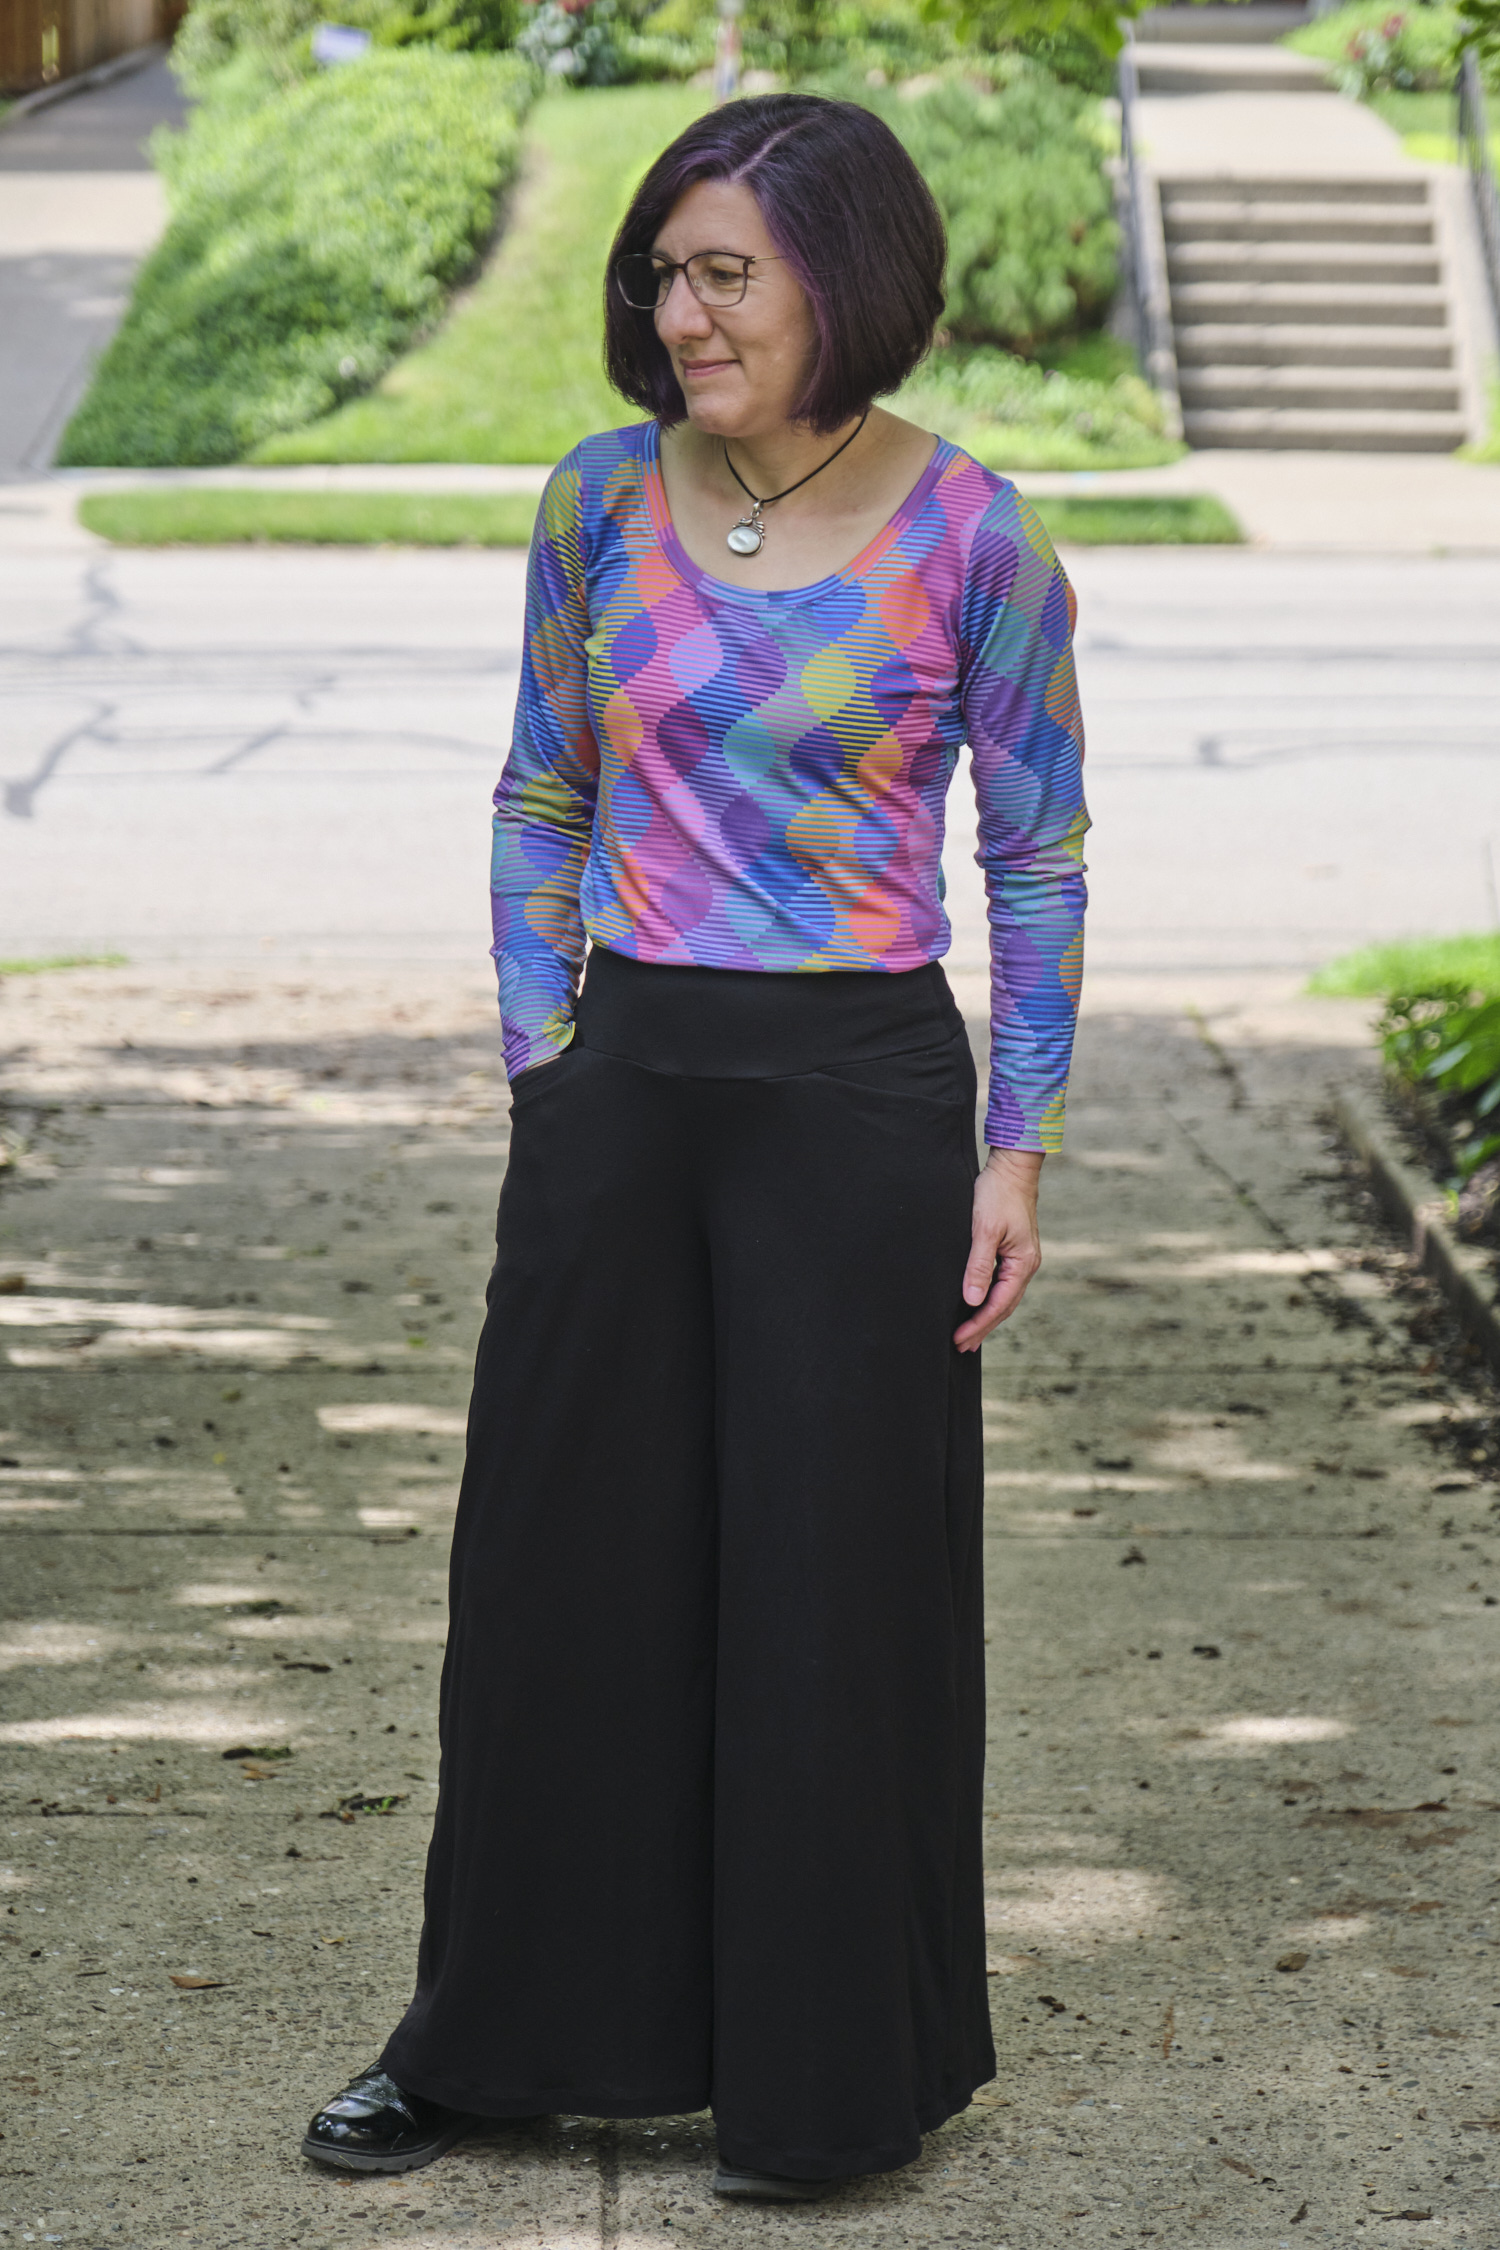
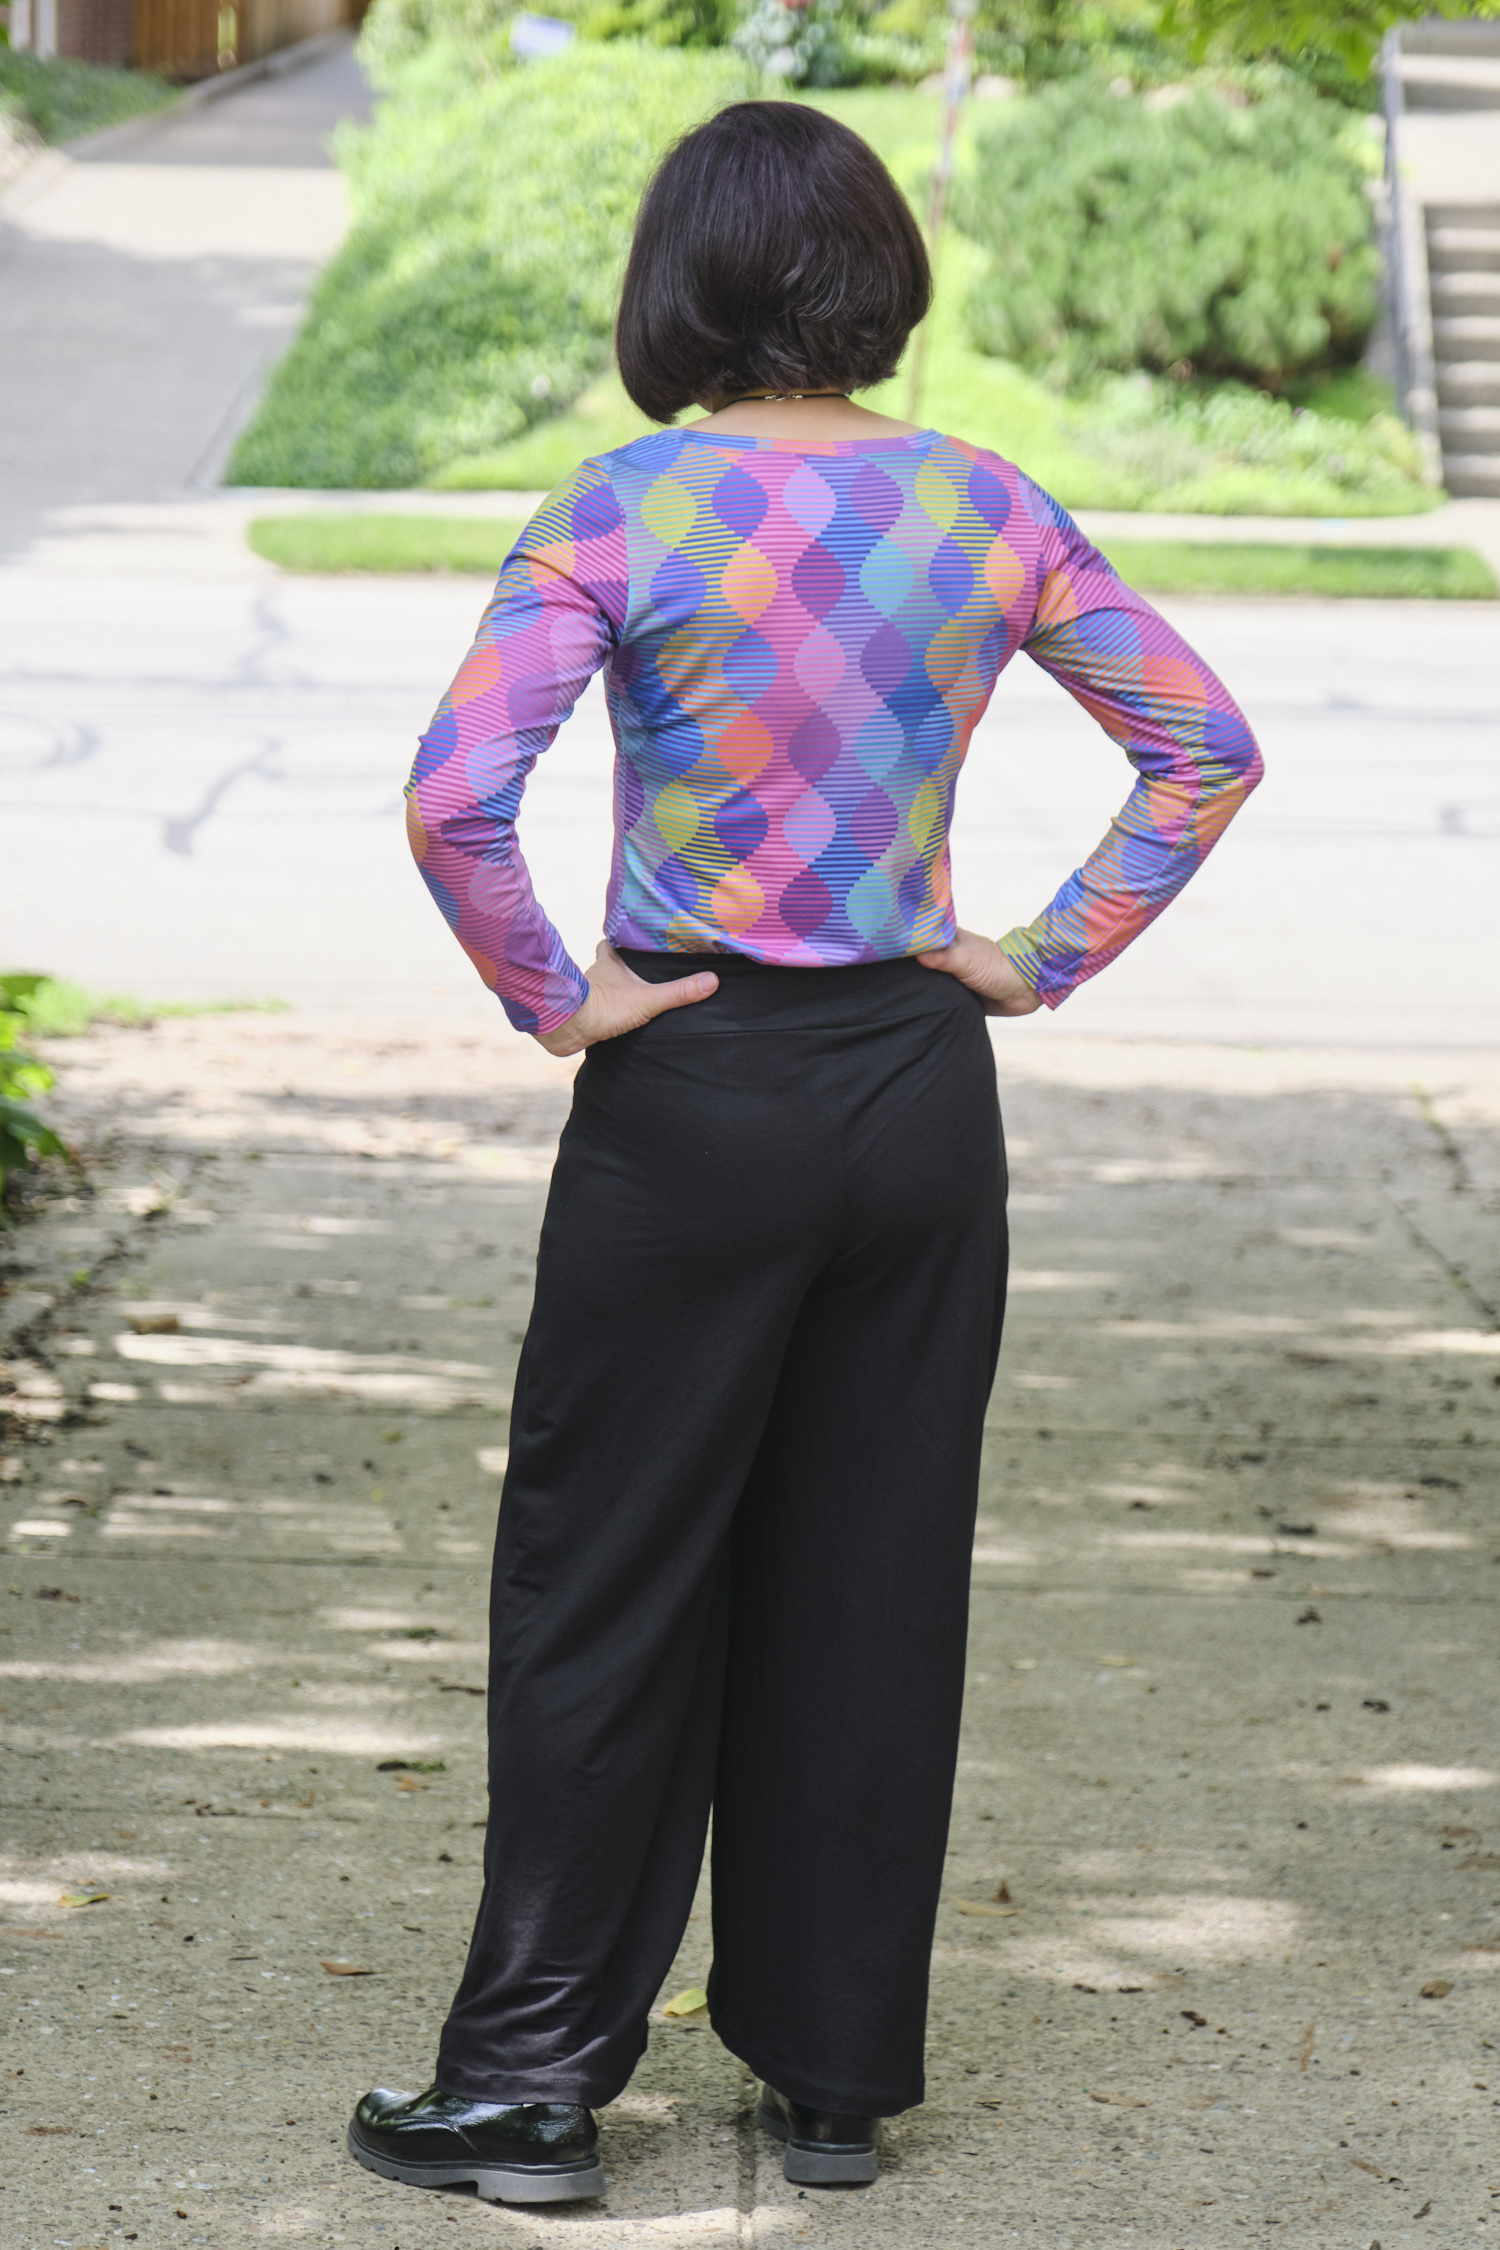
I decided to use black Pylos LiKnit for my second pair of Cleo palazzo pants. I used the same approach as last time to hack the Sinclair Cleo shorts and culottes pattern into palazzo pants with self-drafted slash pockets, with a couple of modifications. First, I wanted to reduce the fullness at the bottom of the legs a bit, so instead of extending the outside seam straight to the bottom of the leg, I curved it in starting at the notch below the hips and the sent it straight down parallel to the inseam. This reduced the circumference of the pants legs from 40 inches to 32 inches. Second, because this fabric is a lot less stretchy than double-brushed polyester, I did not narrow the waistband. I used a stretchy athletic knit (Surge’s black quad performance jersey knit) for the waistband lining. This 300 gsm fabric is 88% polyester and 12% spandex, with 75% 4-way stretch. This gives the pants a waistband that feels just like a pair of leggings or yoga pants, and that doesn’t slip down when I put my phone in my pocket.
The pants were a pretty fast sew. The PyLos is cool and comfortable to wear and the quad performance jersey knit keeps the waistband in place. I love the results of putting performance knit in the waistband lining, and will try that with other patterns too. The reduced leg fullness makes them look more like normal pants. But I wasn’t entirely happy with the drape of the leg.
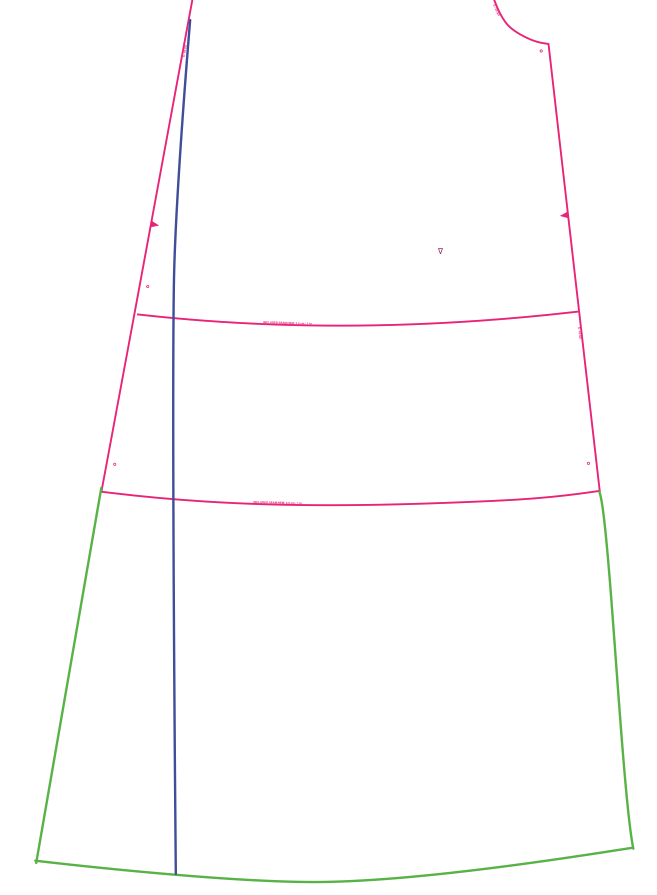
After finishing the pants one evening, I decided to work on the drape again the next day. I basted a new outside seam, starting the curve on the front pant leg about even with the bottom of the crotch, but ending up at the same place at the bottom. This seemed better so I sewed it in place. You can see on the image below part of the original front piece of the shorts/culottes pattern outlined in red. The green line is the full palazzo extension that I used for my first pair of Cleo pants. The blue line is the final narrower palazzo extension that I ended up with this time after a bit of trial and error (I started with a line that curved in from the notch, but ultimately ended up with the blue line you see here).
Even after getting the side seam the way I wanted it, I still wasn’t completely happy with the drape and realized that it looked a lot better when I hitched the sides of the pants up a bit. It seems in my effort to raise the rise to be more of a high-rise fit, I added too much fabric to the outside of the waist. The adjustment to the center of the rise was good, but the outside of the waist did not need that much adjustment. The right thing to do at this point would probably have been to remove the waistband, cut off the extra fabric, and sew it back together. However, the idea of picking out all those zigzag stitches was not appealing. So I basted a new seam connecting the pants to the waistband, taking the sides up about three-quarters of an inch and grading towards the center. That seemed to do the trick, so I sewed a zigzag along the basting line and pressed it in place. While the inside is not beautiful, the outside of these pants looks much better with this adjustment. I’ve marked my pattern so I can just cut it this way to begin with next time I make this pattern. I’m learning a lot about fitting pants and clearly I have more to learn.
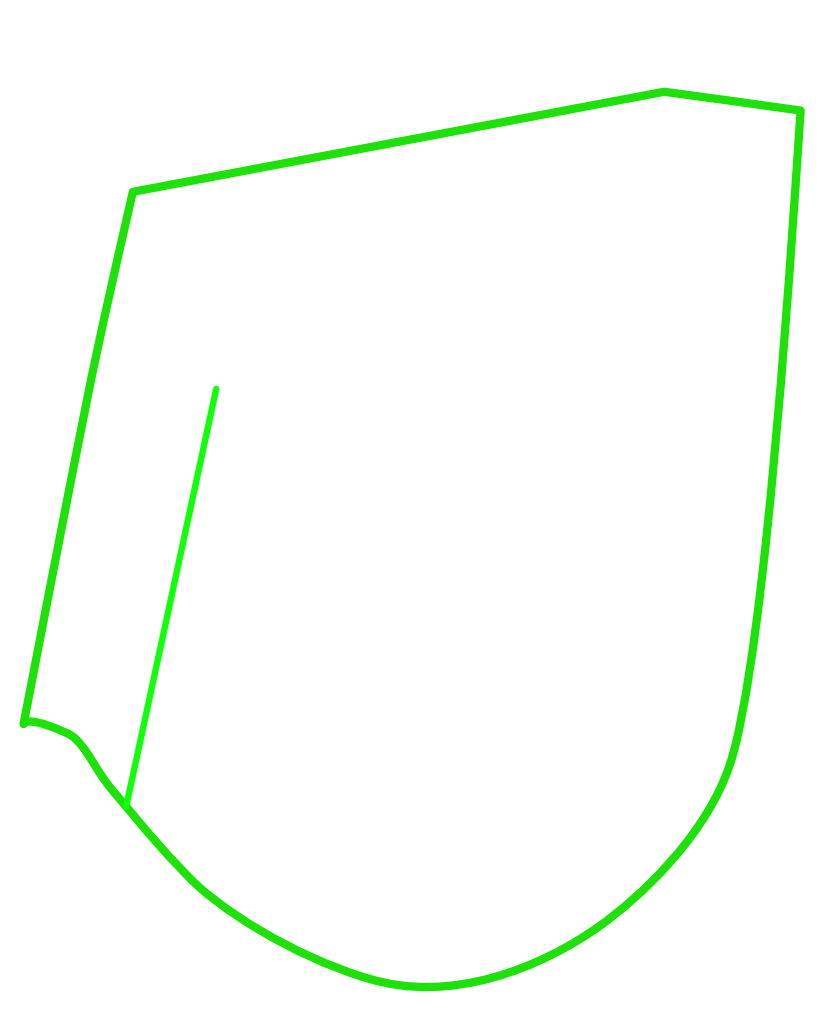
After wearing the pants with the phone in my pocket I realized that the phone tends to tilt outward and cause a bulge to the side. I added a zigzag seam to the pocket bag from the bottom up about 4 inches, placed about an inch in from the outer edge of each pocket. This is completely invisible on the outside of the pants but it keeps my phone more vertical. I went back and added this to my palazo pants too. Here’s the self-drafted pattern I used for the front part of my slash pocket bag with the extra vertical seam (the back part of the pocket bag is cut straight across the top without the slash).
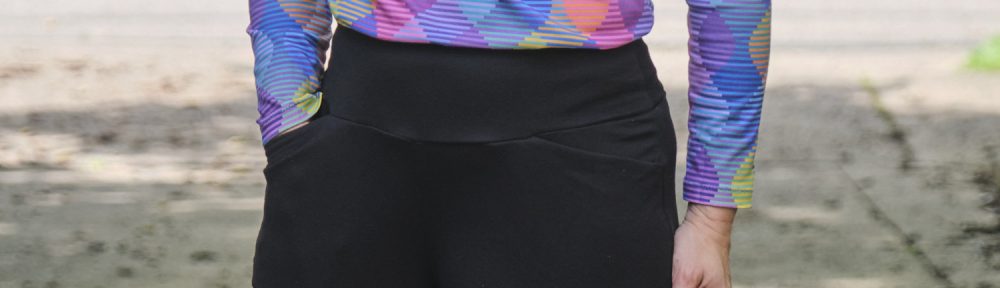
In any case, the final product looks and feels great. I took these pants on a business trip and they were very comfortable and did not wrinkle in my suitcase. I wore them for three days and the waistband did not stretch out. They were comfortable in the outdoor heat and kept my legs warm in the over air-conditioned meeting rooms. Here are the photos, modeled with a Bondi top I made last Fall. At the bottom I have a close up of the waistband, including the slash pockets.