I’ve been pondering buying a serger ever since I started sewing lots of knit clothing a year ago. I didn’t take the plunge because I have a really nice (somewhat high-end Bernina) sewing machine, I couldn’t decide which kind of serger to buy, and I was also worried about the learning curve. But so many people rave about them and they seem to save a lot of time… and I figured how hard could it be.
My first dilemma was whether to buy a combo serger and cover stitch machine or just a serger. If you don’t know what i’m talking about look at your favorite t-shirt. Chances are most of the seams have thread that wraps around the seam in sort of a zig-zaggy pattern. That’s done with a serger. If you look at the hem at the bottom of the shirt there are probably two lines of stitching on the outside. That’s done with a cover stitch machine. You can fake both of these things on a regular sewing machine, but not really well. The idea of a machine that can do both serging and cover stitch is appealing — there’s only so much space I have in my sewing room to collect more machines. But as I started reading up on combo machines I saw that many sewists who had them said that it was too difficult to switch them between serging and cover stitch mode, so most of them left them in serging mode and never switched to cover stitch — and then some of them went out and bought another machine for cover stitch. Since combo machines are more expensive than plain old sergers, I decided to just go with the serger and consider buying a cover stitch machine later.
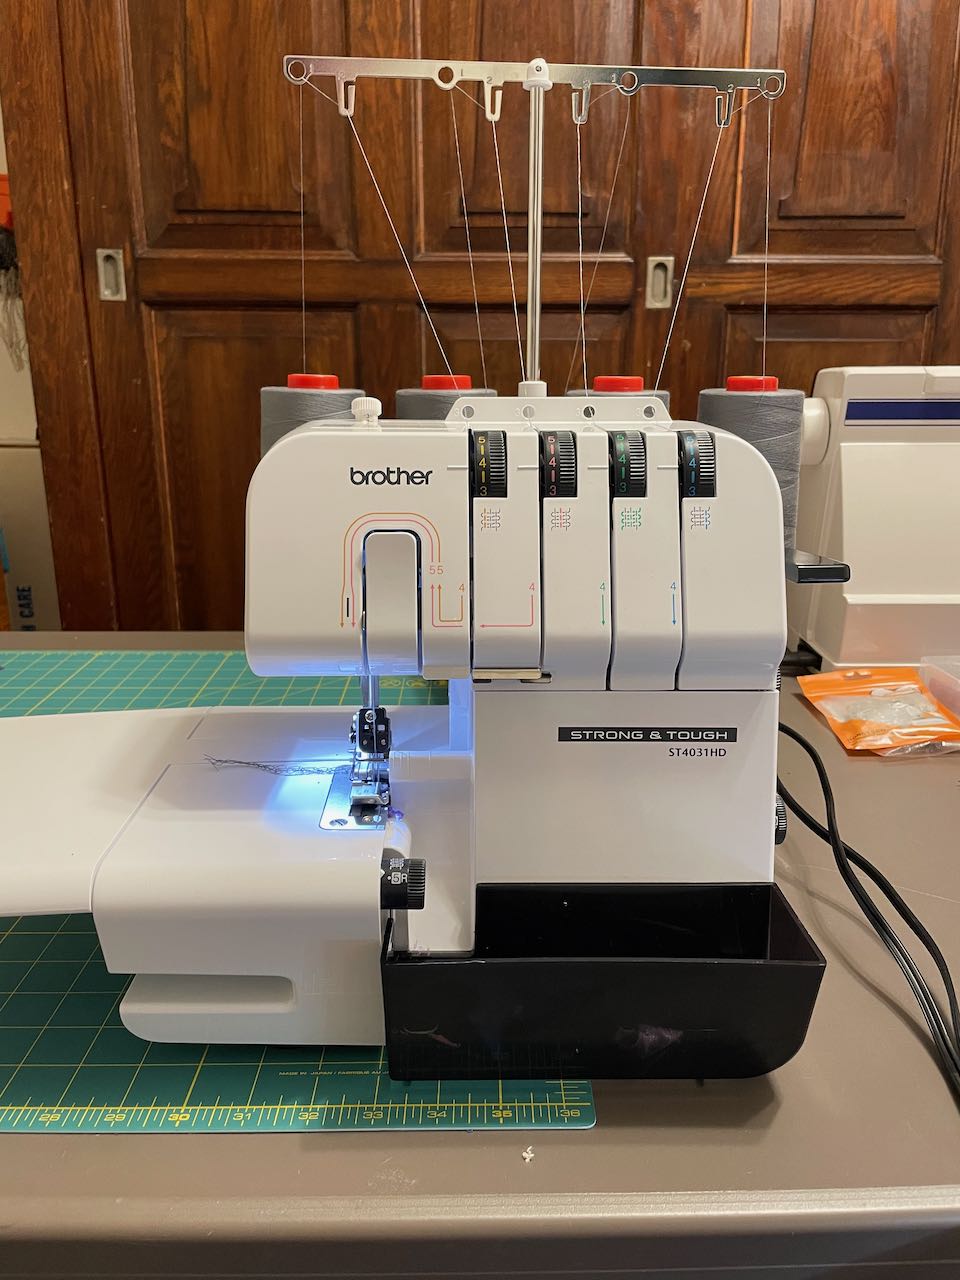
There is a pretty big price range for sergers, from a couple hundred dollars to thousands of dollars. The expensive high-end sergers are very fast and can thread themselves. Self threading (often referred to as “air threading”) is nice because sergers typically have four threads (some have more) and they are notoriously difficult to thread. So I was pretty excited about the idea of a self-threading serger, but I wasn’t sure I was ready to invest in one given that I have never used a serger of any sort. Looking at the low-end sergers, the Brother 1034D and 1034DX seem to have great reviews and are frequently recommended on lists of best Sergers for beginners. They are at a low price point (around $275) and they have a color-coded threading system that makes the complicated task of threading slightly easier. When I asked on Facebook what type of Serger I should get, two of my friends mentioned they had 1034DX sergers. But one concern I saw in the reviews is that they don’t handle thick fabrics like fleece well. I don’t know how much fleece sewing I will do, but when I saw that for $100 more I could get the Brother ST4031HD, I decided to go for that one. ST stands for “strong and tough.” It is almost identical to the 1034D except that it is built to handle thick fabric and it has an extension table, both of which were features I thought I could use. So I ordered a Brother ST4031HD on Amazon and it arrived two days later.
Having never serged before, I was still a bit intimidated to use my new serger. I took it out of the box, registered it, and watched all the videos provided on the Brother website (note that it claims to come with a DVD with the videos, but they don’t seem to send the DVD any more; but they are all on the website, although not that easy to find). Finally I gave it a try with some scrap fabric and adjusted the differential feed to work with knits. So far so good. It sews very fast, but it didn’t take too long to get the hang of it.
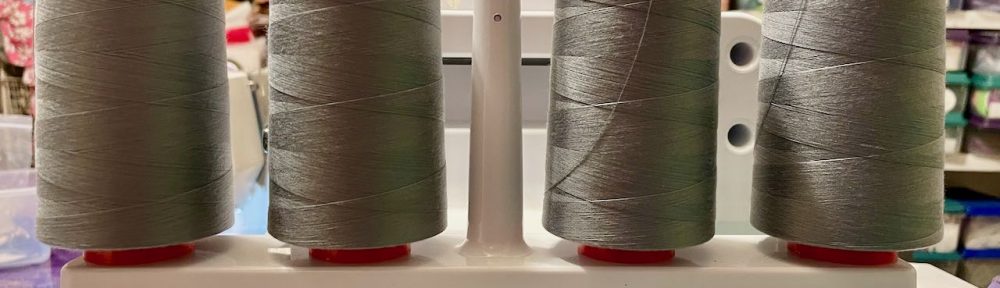
The next challenge was threading the serger. The machine comes pre-threaded with color-coded thread to show you how to do it, but that thread won’t last long, and you probably don’t want to use a rainbow of thread on all your garments. I bought four large spools of medium grey polyester thread and worked on threading. I decided to use the easy approach, which is to cut the existing thread and tie it to the new thread, and carefully pull the new thread through the machine. This was much easier that figuring out all the threading details, but even this approach was not easy. Each time the thread stopped pulling I had to figure out where the knot was stuck and gently ease it to the next spot without breaking or jamming the thread. I figured it out and got it threaded, but was glad I chose grey thread, which will likely work with most sewing projects and maybe won’t need to be replaced for a long time. Later when I broke a thread I did have to watch the threading video so I could rethread the lower looper.
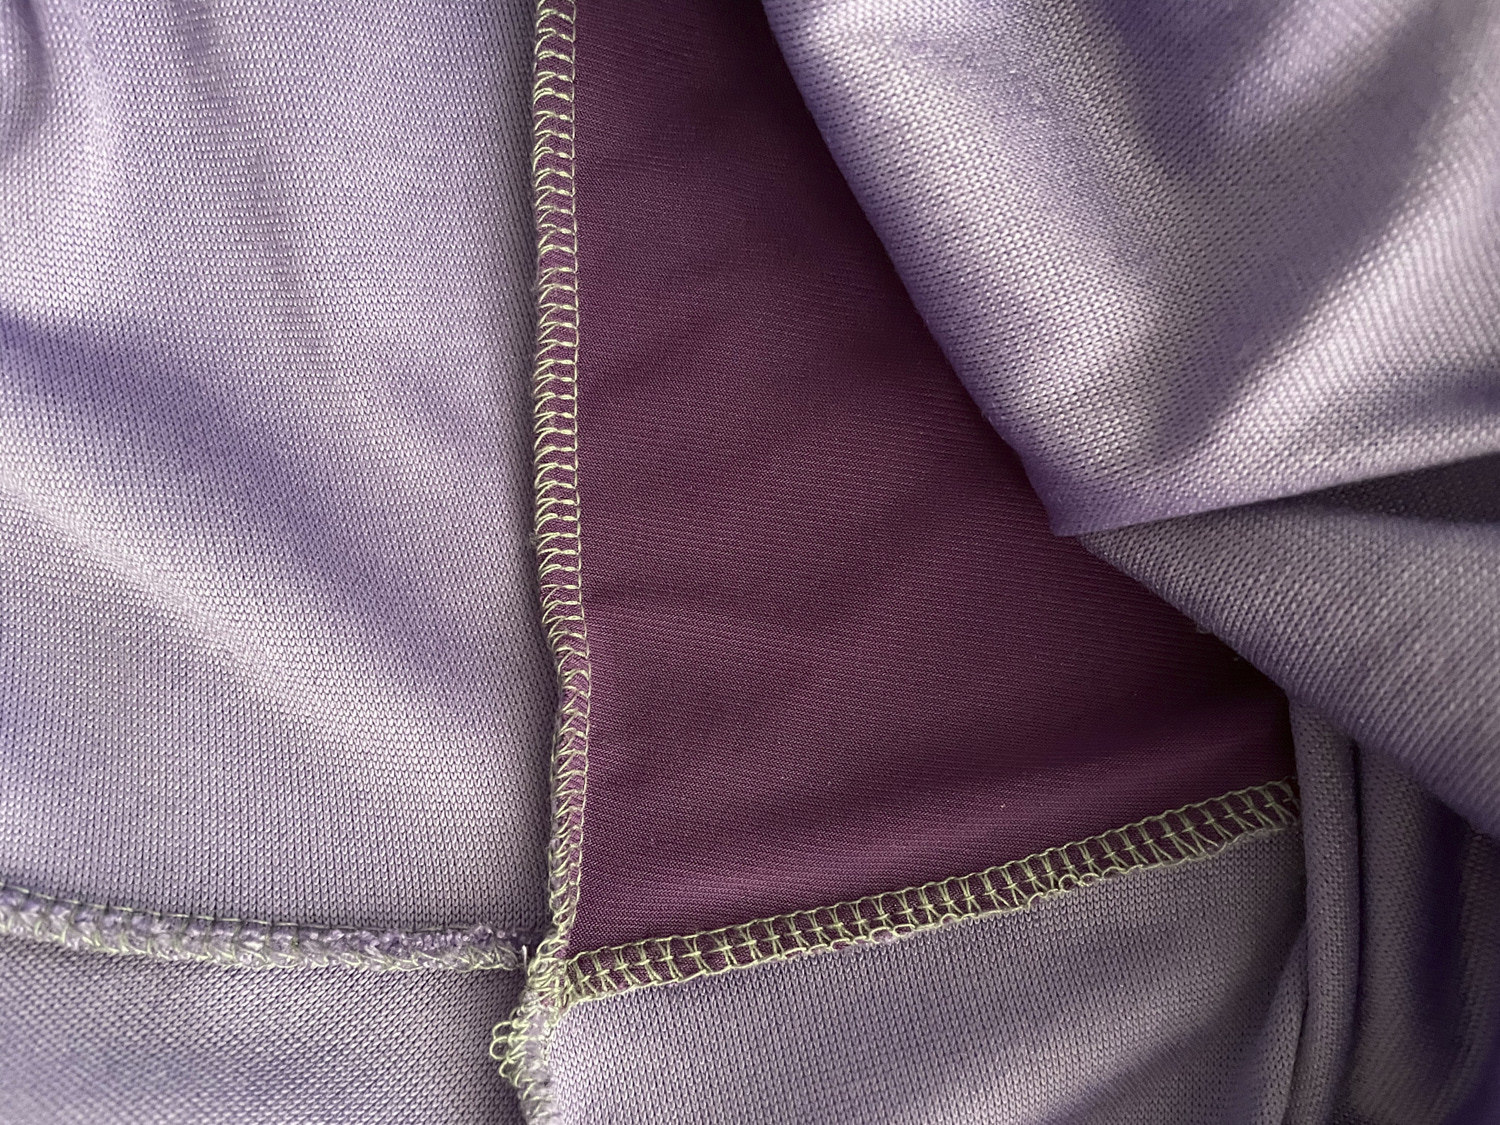
I had a stretch velour dress cut out and ready to sew, so I decided to take the plunge and serge it. In hindsight, stretch velour was probably not the best fabric to start with as it is very slippery, and should have been basted before sewing. Nonetheless, I jumped right in and it mostly worked out ok. A few seams slipped so much that I had to go back and baste them and then resew them. I also learned the hard way how to lower the cutting knife and why you might want to do that. By default, sergers include a cutting knife that trims the fabric before sewing it. This is great, but it does mean you can accidentally cut your fabric in places you don’t want it cut. I did fine until I got to a point where I needed to pivot around an inside corner. I sewed to the point of the pivot, put my needle down to pivot, and then realized that the knife is in front of the needle and thus had already made a cut into the fabric where I didn’t want it. Fortunately, I was able to repair that problem and it was a good excuse to figure out how to lower the knife. I can see for some projects it is probably best to sew the whole thing with the knife lowered.
My serger has two other feet and all sorts of adjustments I haven’t tried. But the test run went pretty well and I’m excited about how fast it is to sew knits. Typically when I sew knit clothes I sew every seam twice: first with a narrow zigzag stretch stitch, and then with a wider zigzag that serves as a fake overlock. Both of these stitches take longer to execute than a simple straight stitch because of the side-to-side motion. With a serger I can sew each seam with one pass instead of two, and that one pass is faster than either pass with my regular sewing machine.
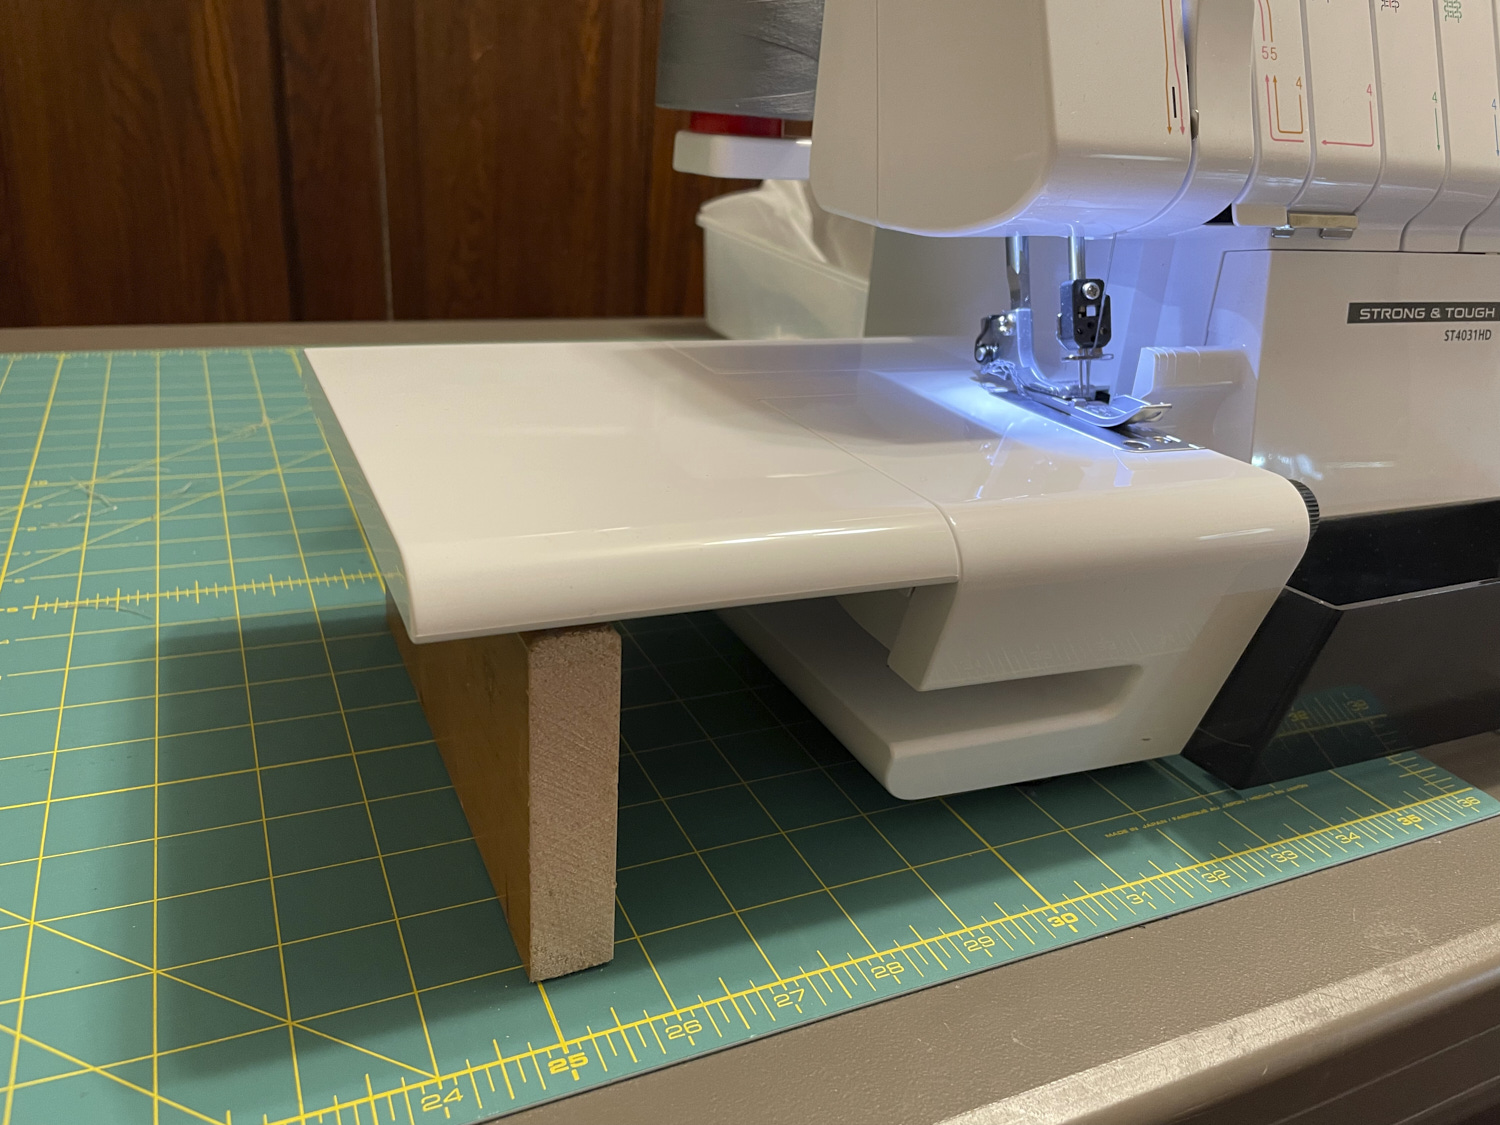
October 8, 2023 update — One minor issue I’m having with this serger is that I keep pressing down on the extension table and popping it out of place. I was able to solve this problem by cutting a board 3-3/8 inches tall and 8 inches long and sliding it under the table.