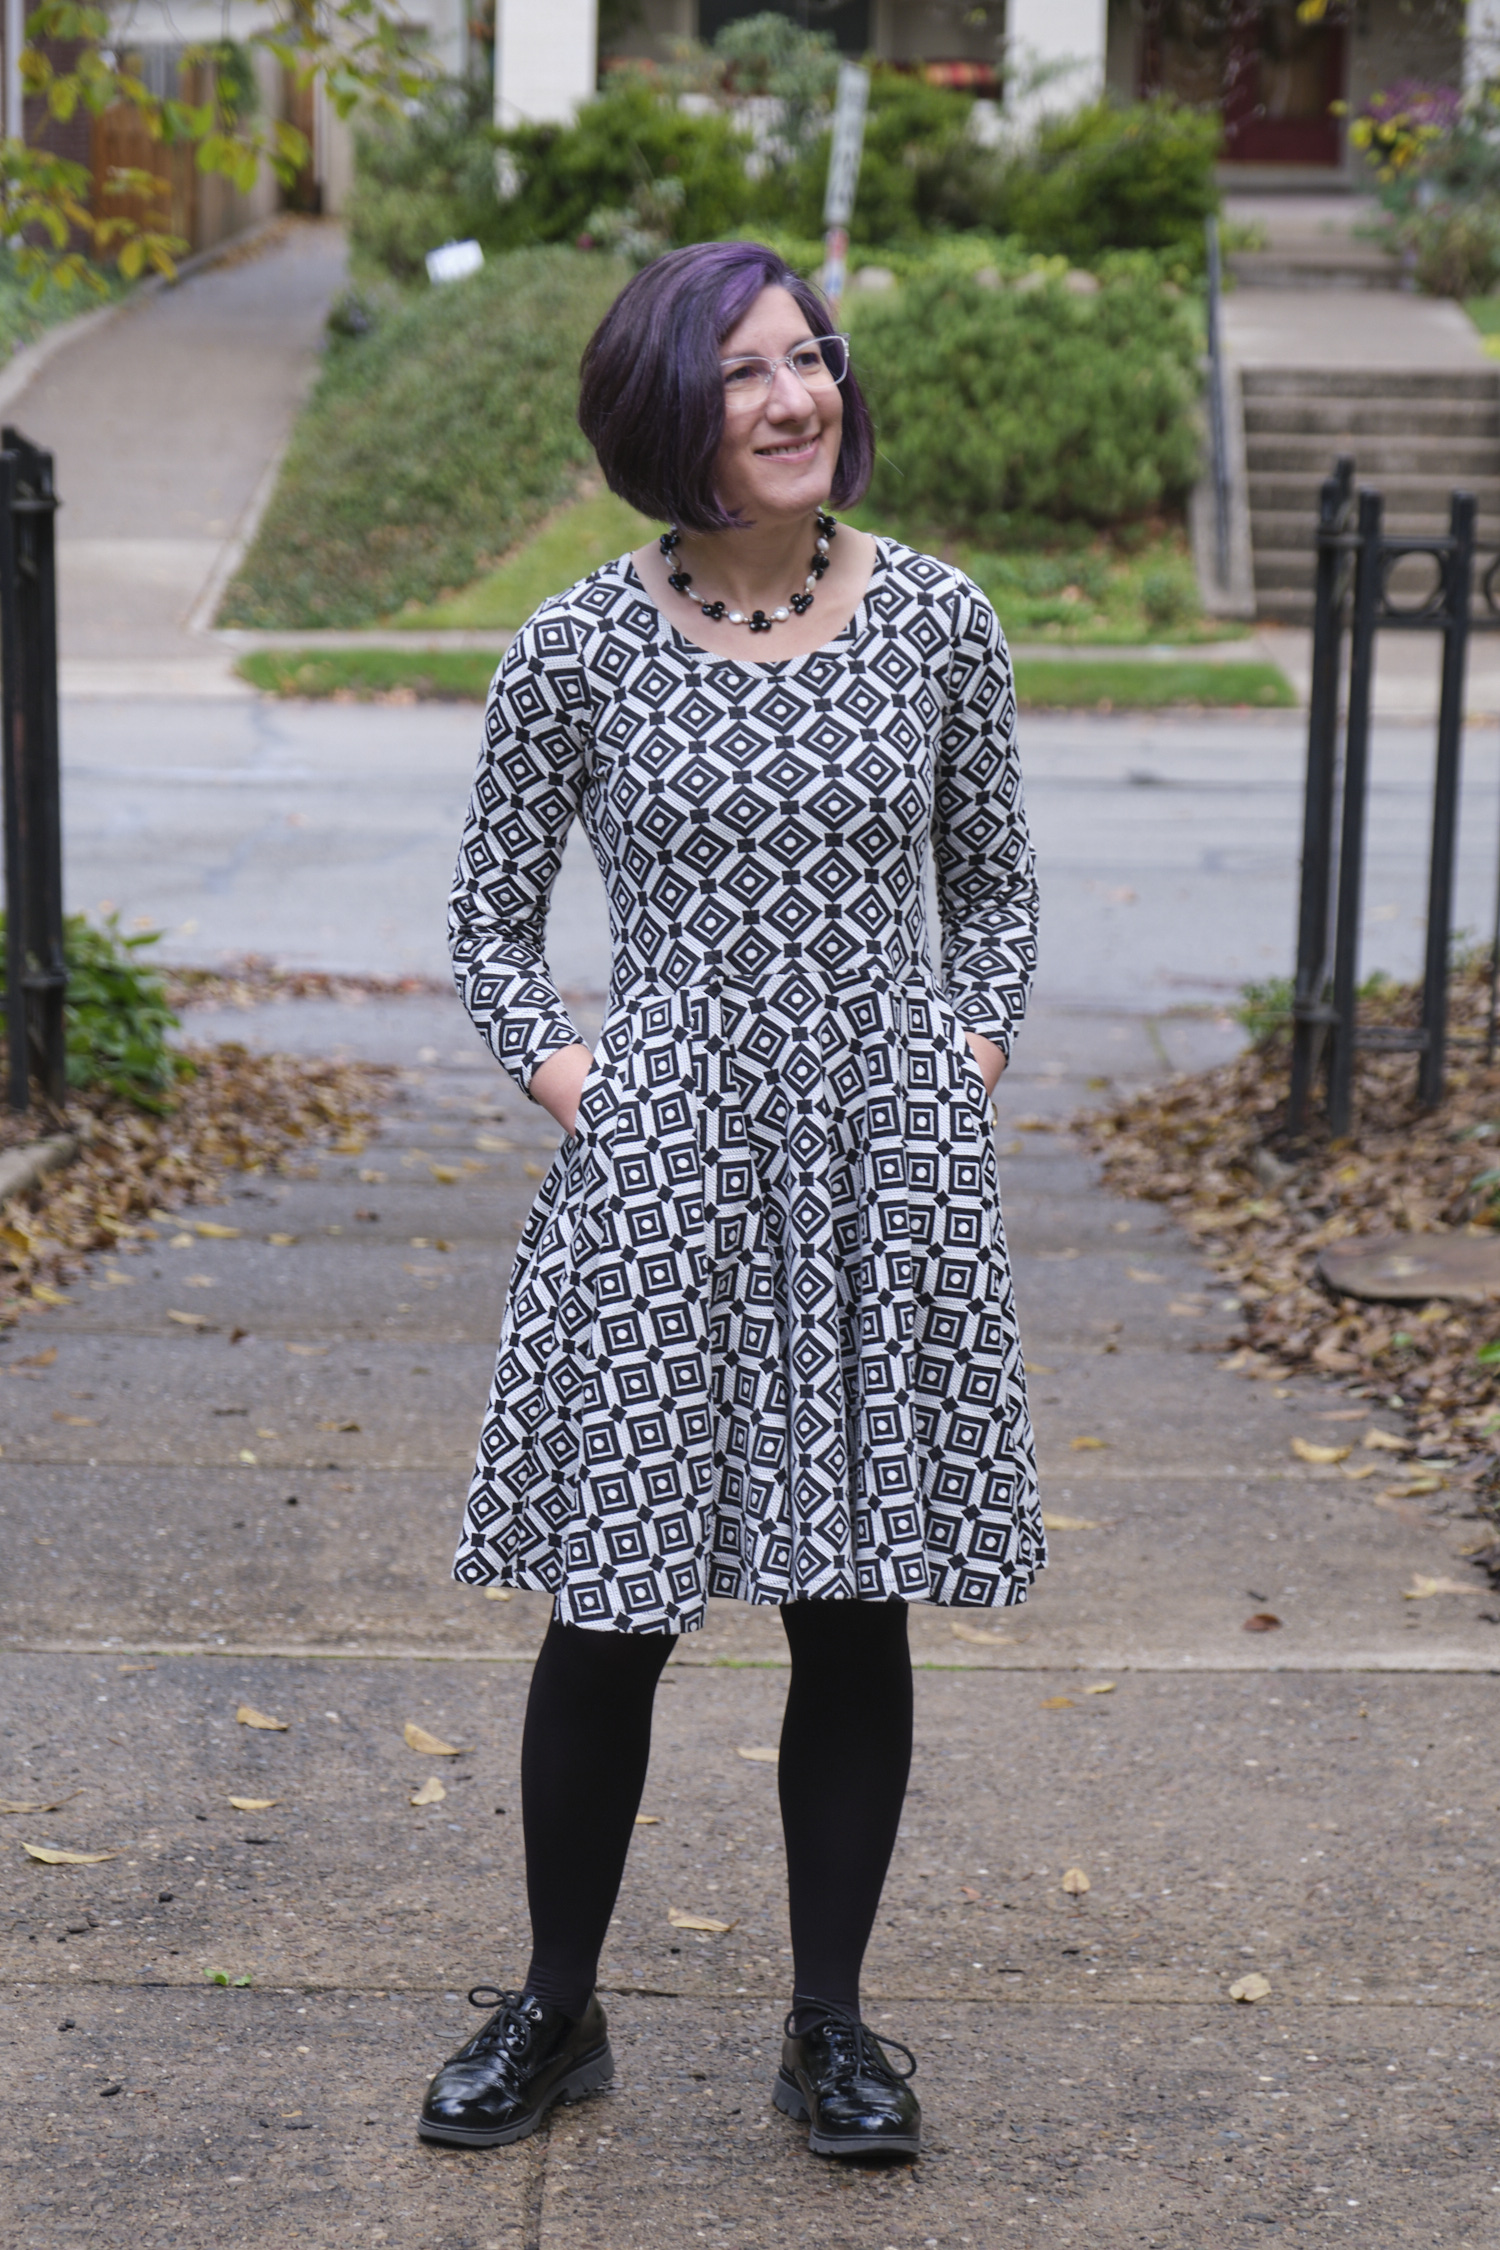
I’ve been holding onto this fabulous ivory and black geometric polyester double-knit fabric since last spring, with the plan to turn it into a long-sleeve Sinclair Valley Knit Skater Dress. The fabric has some body (and just barely enough stretch for this pattern) and a nice drape, so I decided to use the full-circle skirt from the add-on pack for a skirt that would naturally poof out. Unfortunately, I didn’t have quite enough fabric, so it took some tetrising to cut it all out (with my projector), and I ended up having to split two of the skirt panels in half and turn the long sleeves into 3/4 sleeves. But by splitting the skirt panels I was able to avoid a seam in the center front of the dress. I probably should have gone up to a P6 for a bit more ease as the P4 is snug, but it still looks great.
Sinclair Valley Knit Skater Dress with full circle skirt in black and white geometric double knit
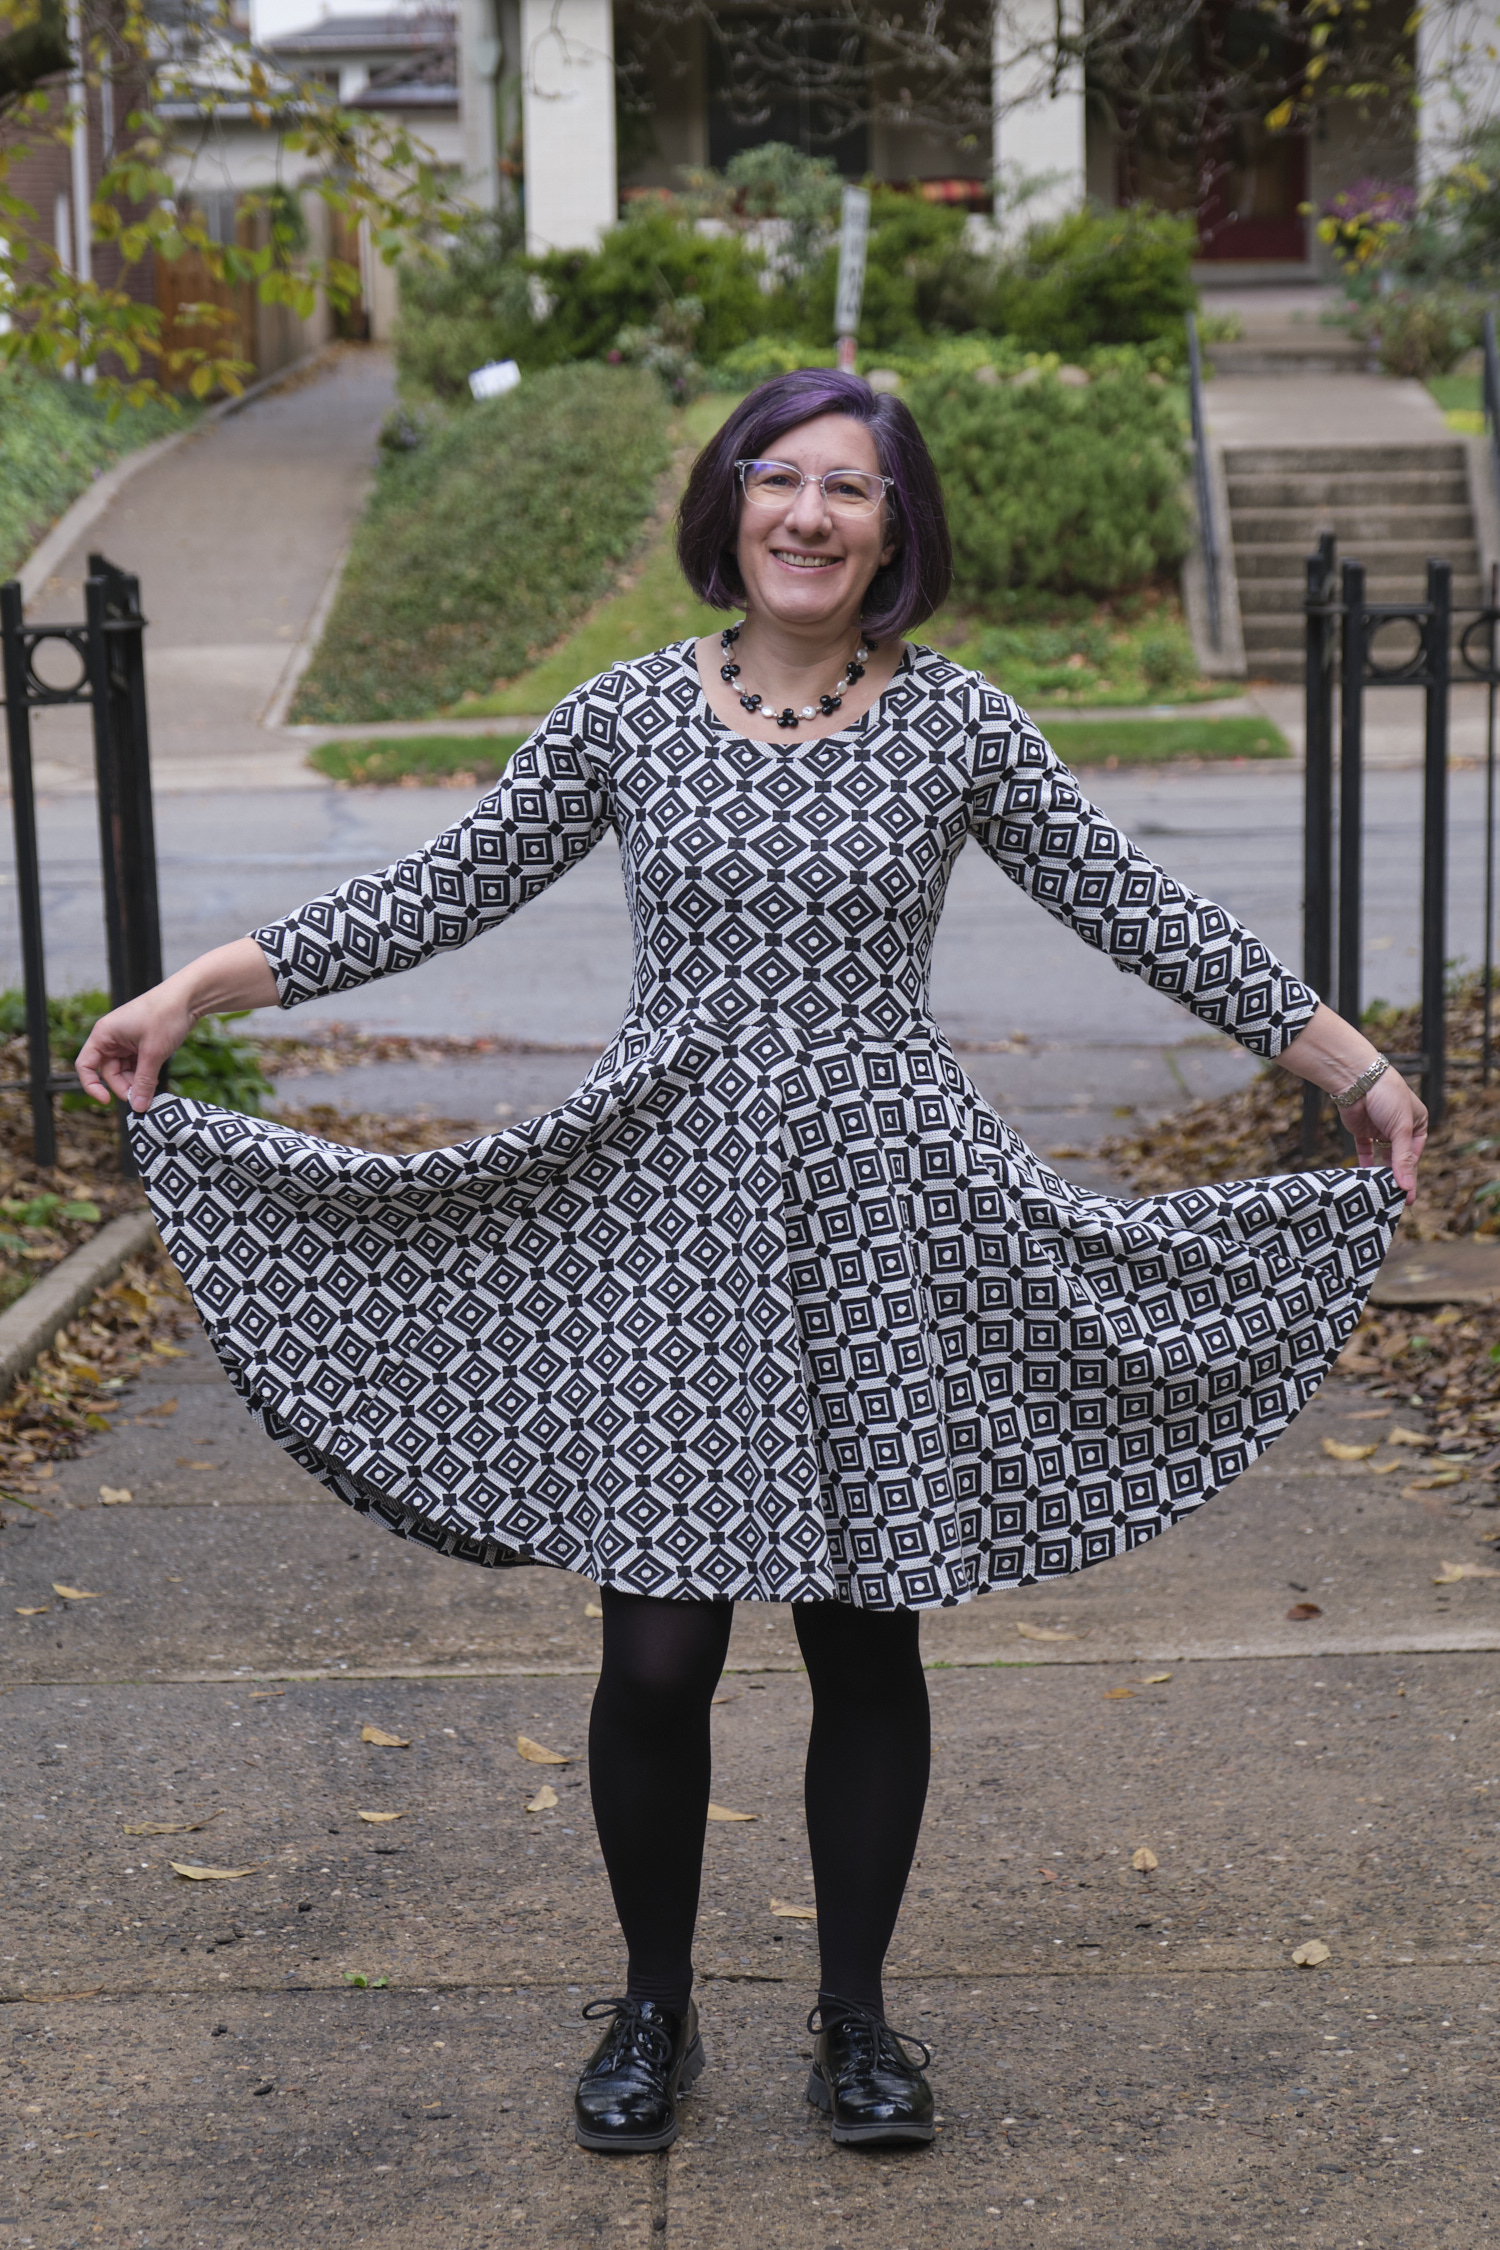
I made the pattern mostly as written, lengthening the bodice as recommended when omitting the waistband. I also used my Bondi screwp neck modification, as I have done for my previous Valley dresses. This time I sewed the pockets to the waistband as the pattern suggests, since this is a pretty stable knit and I wasn’t worried about the pockets getting pulled down. I did lengthen the pockets by about an inch to reduce the risk of my phone falling out. The pockets on the finished dress are great and with the full skirt they are nearly invisible, even when full.
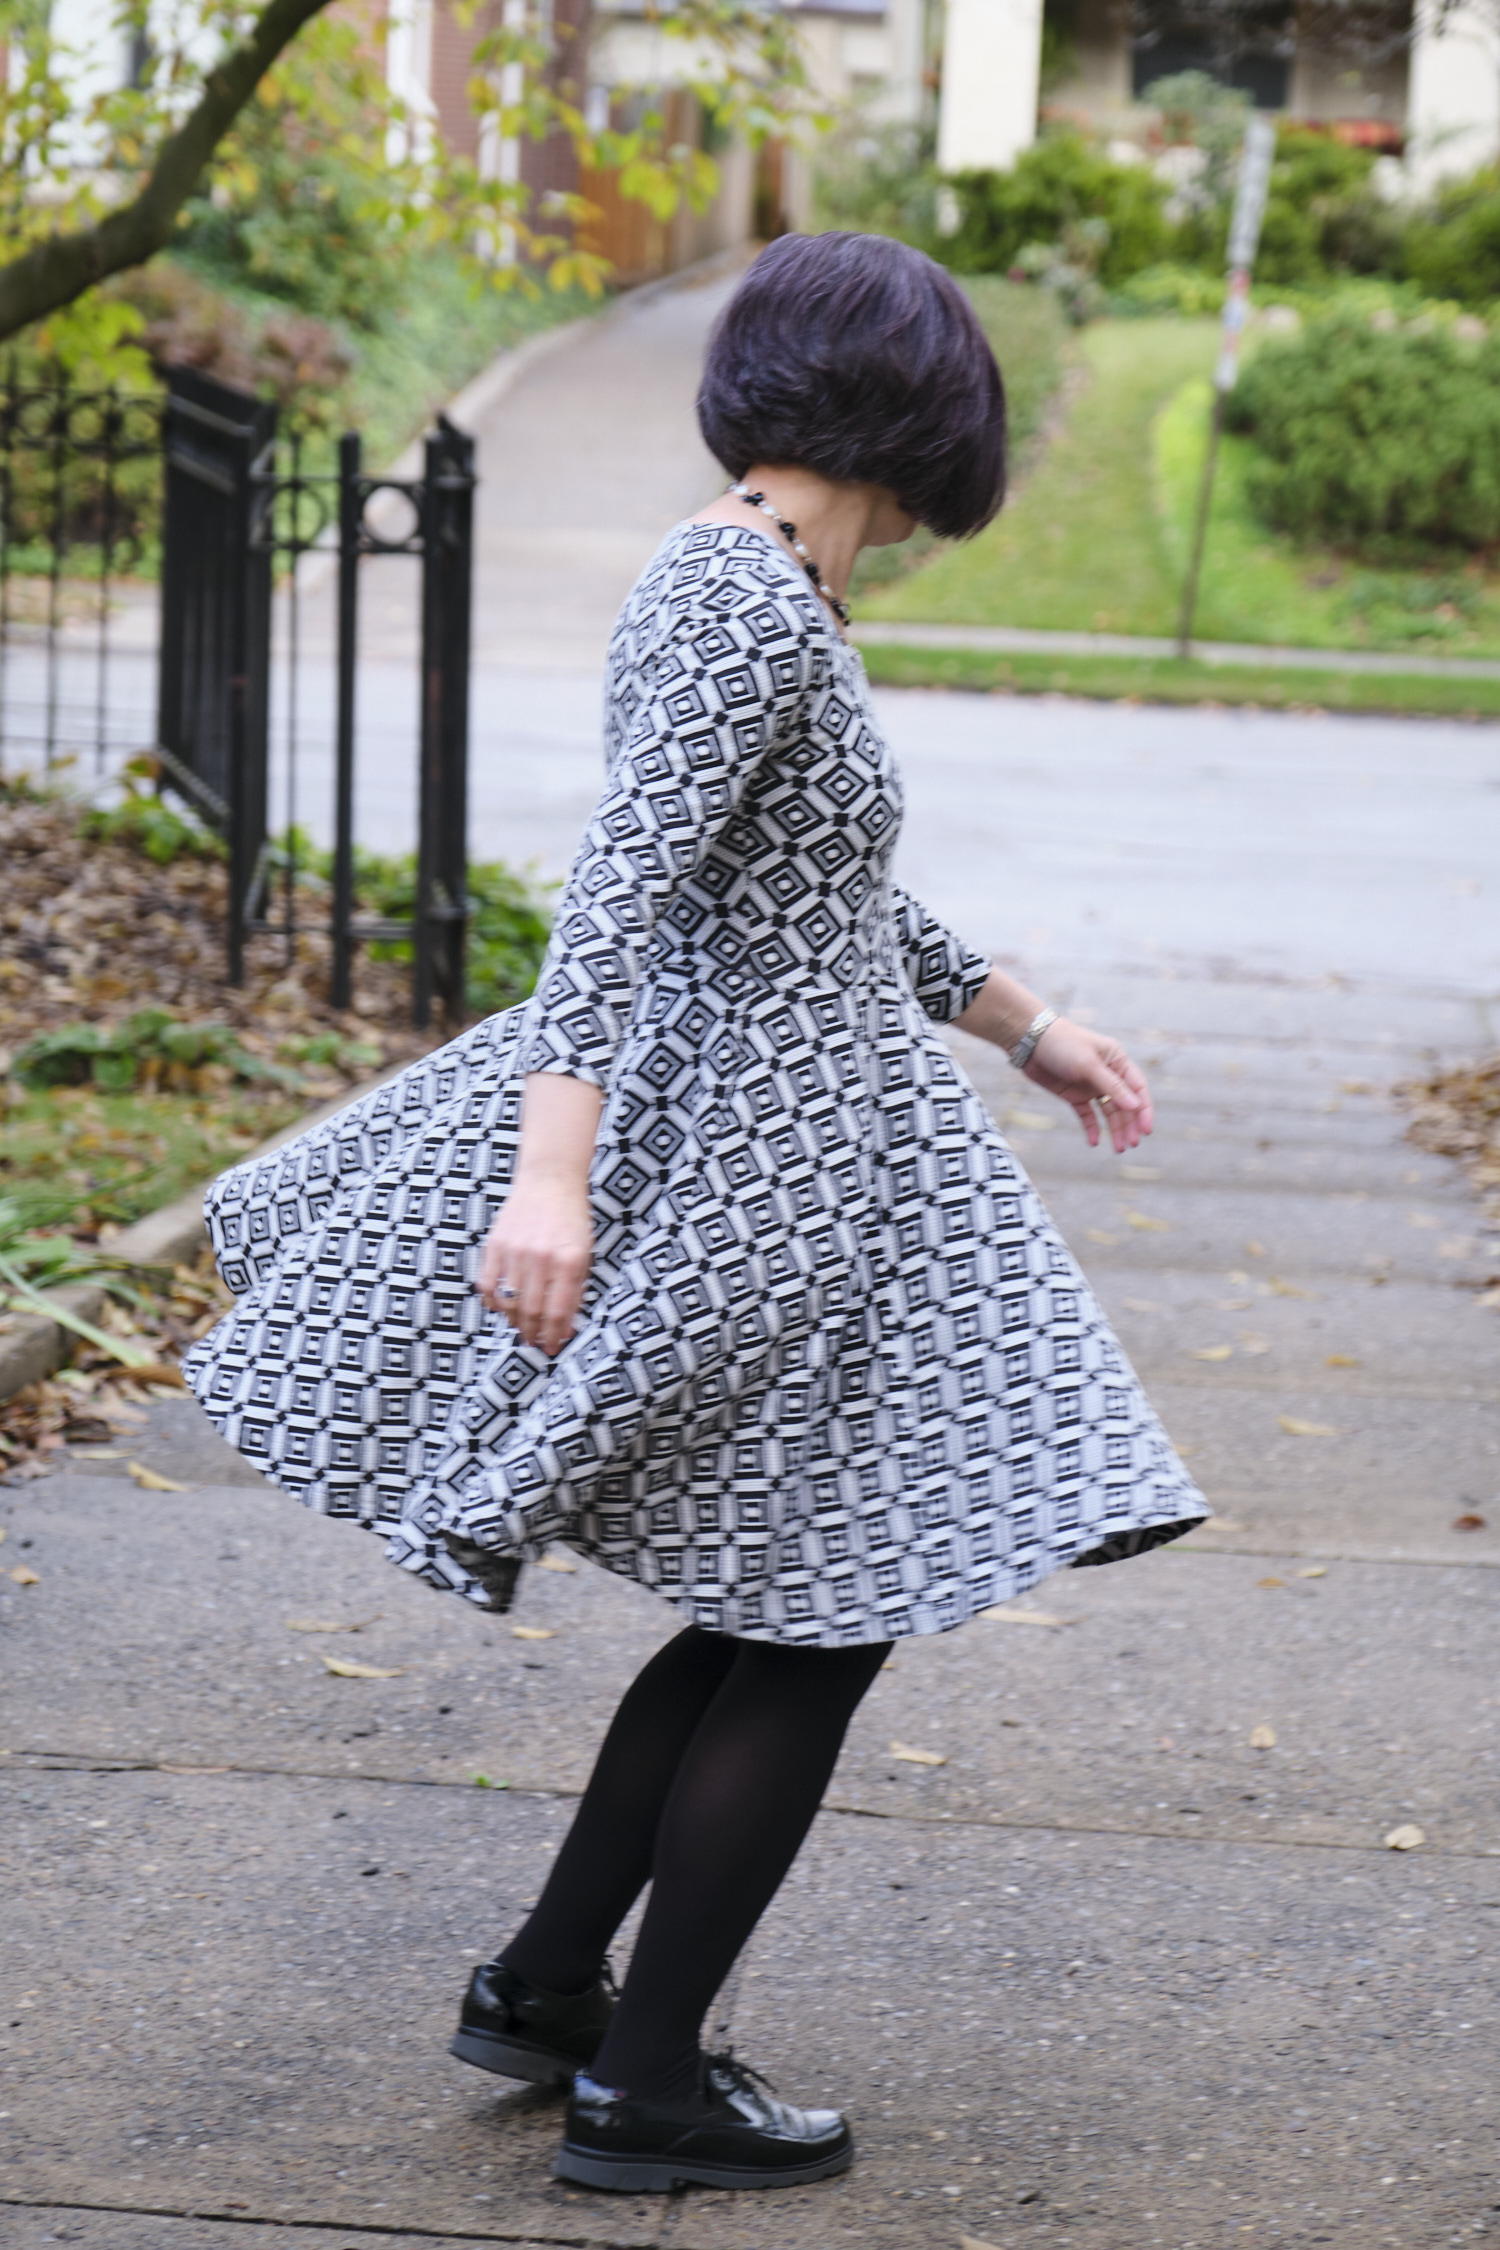
This is the first Valley I sewed with a serger, and it went very quickly. It only took about 3 hours to sew after cutting the fabric. Of course, it took a while to hem the 13-foot circumference full-circle skirt. But my teen daughter approves and says the full-circle skirt was definitely worth the effort. Indeed, this is a dress that really is fun to wear.
Sinclair Valley Knit Skater Dress with full circle skirt in black and white geometric double knit. A perfect fall dress?Such nice pockets!Fun to twirl!The circle skirt has a 13-foot circumference.
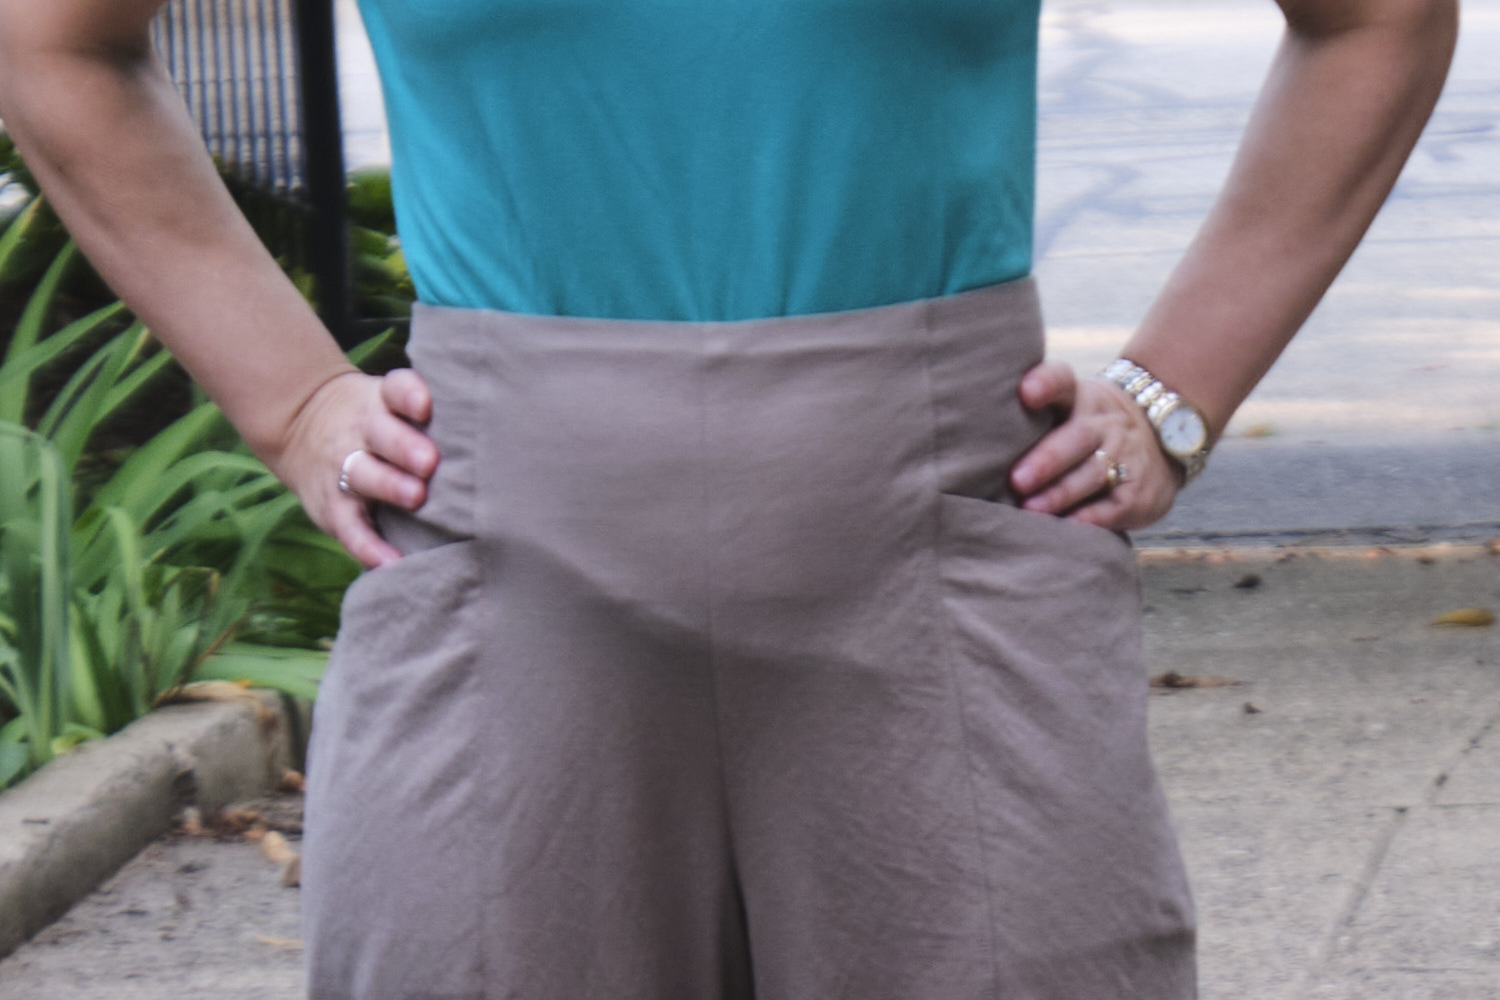
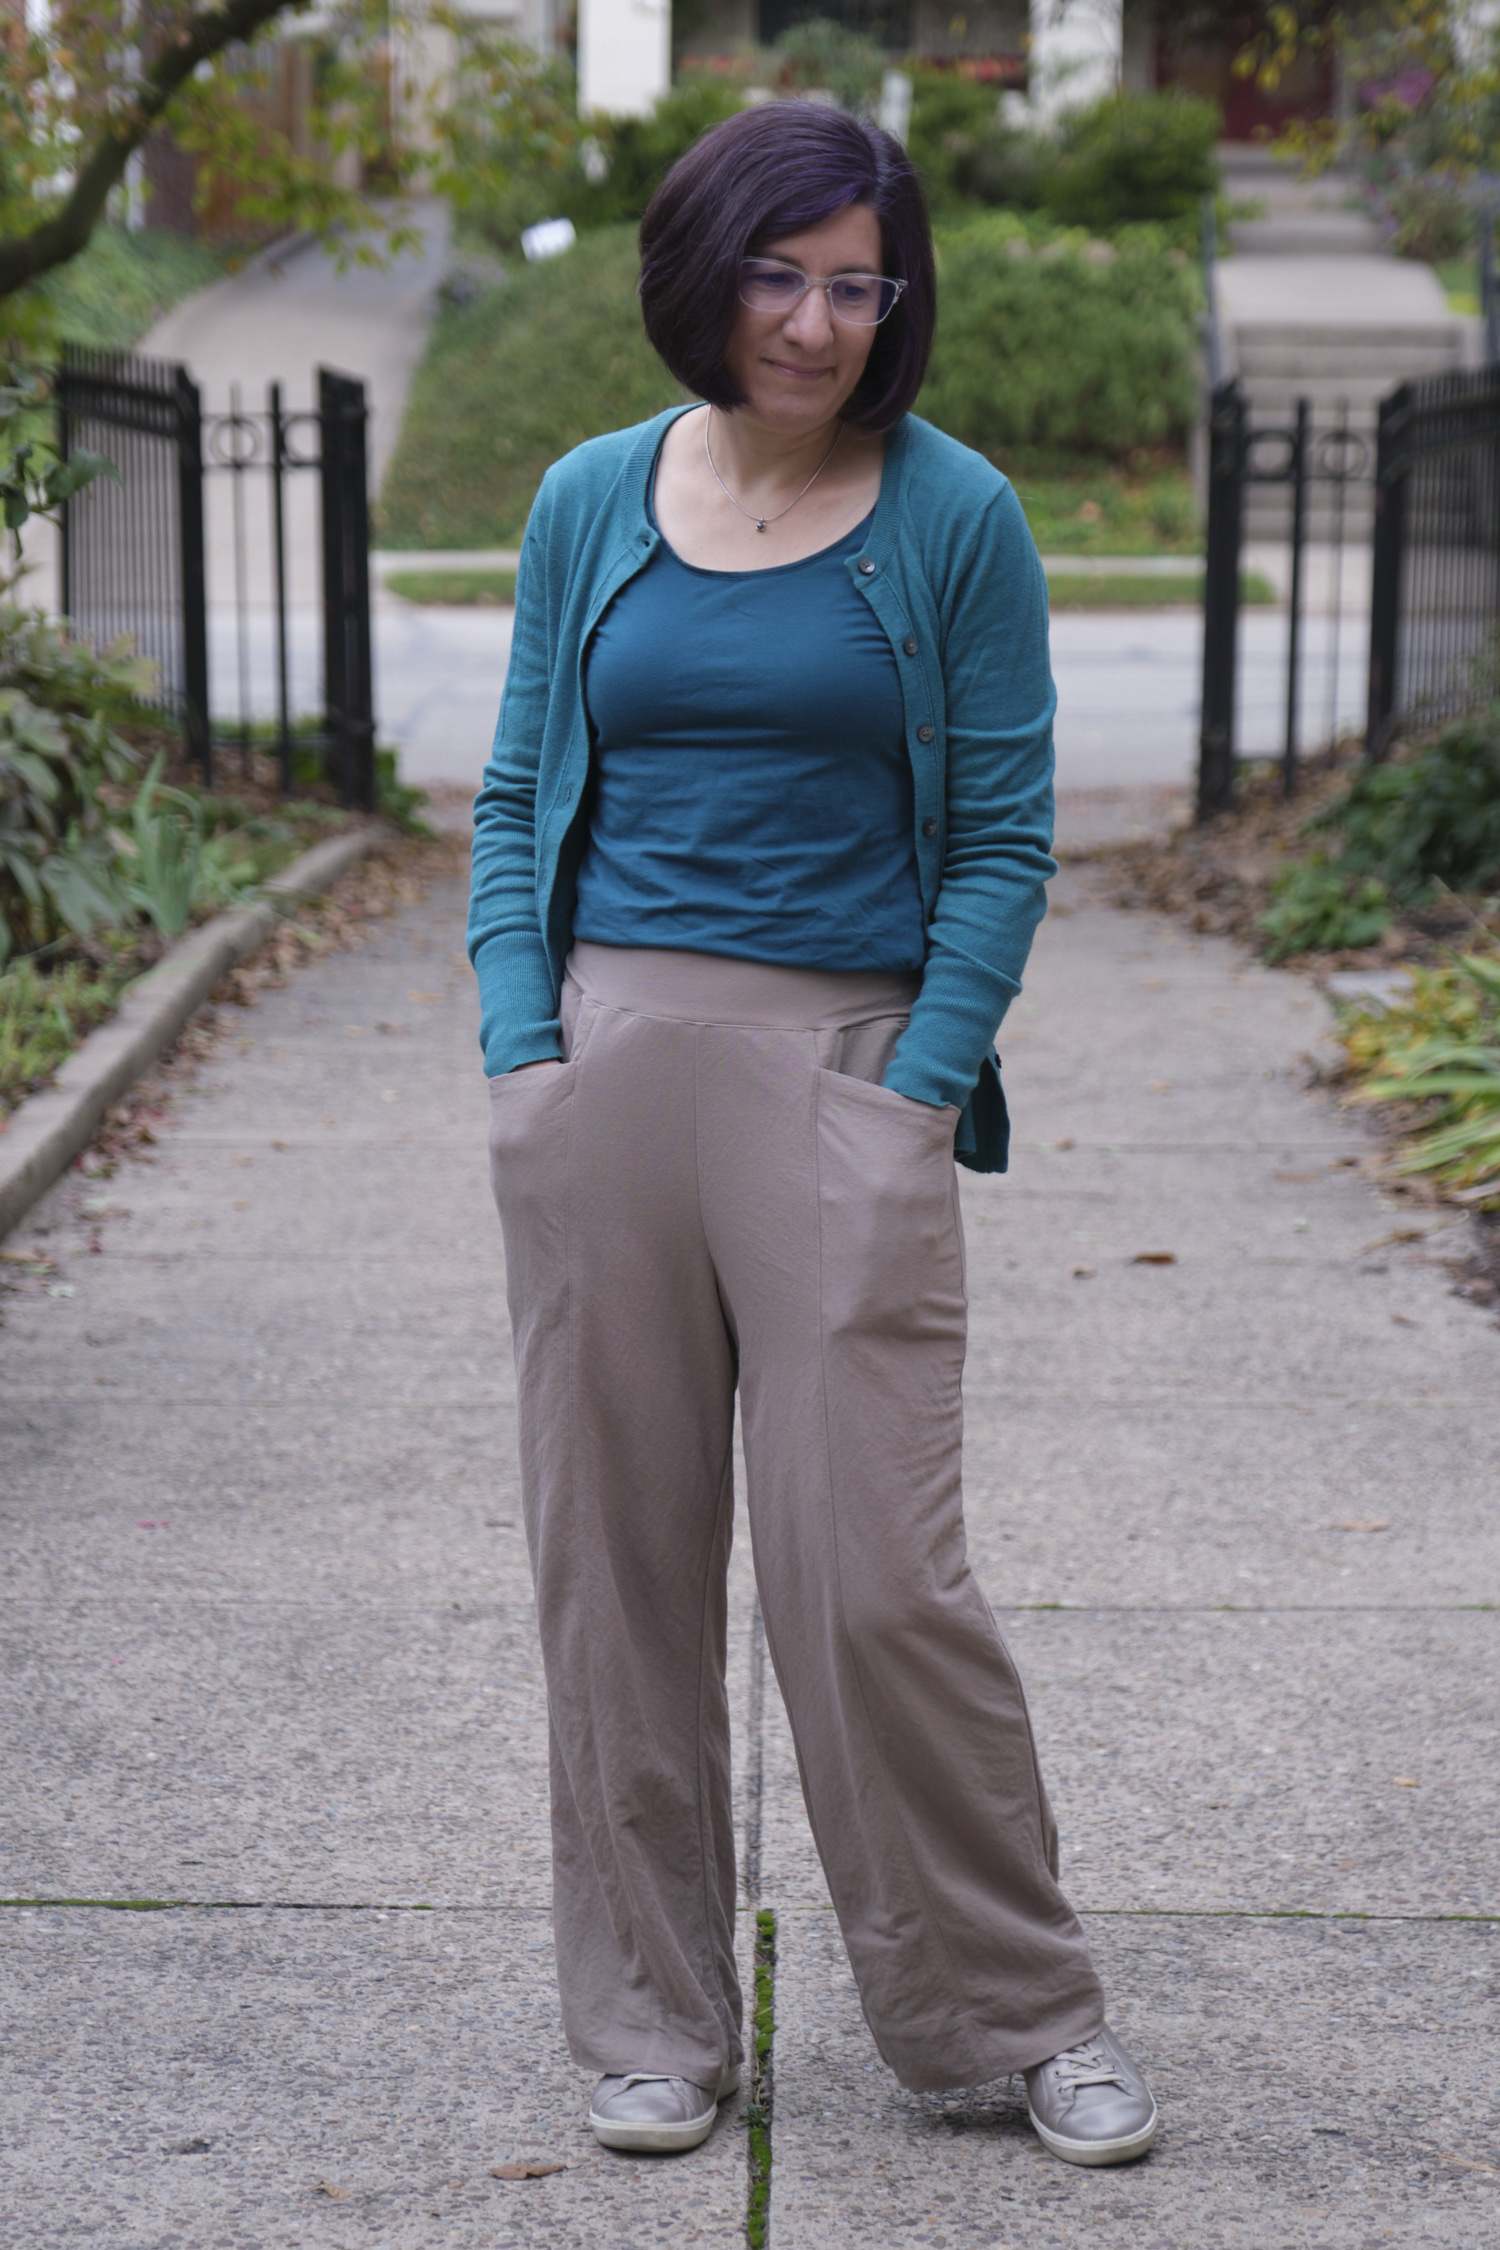
Back in August I tried out the Pietra Pants and Shorts pattern from Closet Core Patterns. A friend made a couple of pairs of these pants and the pocket design immediately caught my eye.
Closet Core does not seem to offer projector files, so I used their copyshop pattern, designed to be printed on two A0 pages. I used Affinity Designer to select the layer for the size I wanted, thicken the lines, copy and paste the pieces onto one large page, and rotate them all in the correct direction for cutting. This was pretty easy to do.
The pattern did not come in a petite size, but as I like high-rise pants, the only modification I thought would be needed for my short stature was to shorten the pants. I cut out size 6, but shortened the bottom hem of all the pieces by 4.5 inches. I made view A, the wide leg pants. There are also instructions for tapered leg pants and shorts.
Although the pattern was designed for lightweight woven fabrics, I used Pylos Liknit fabric, which is actually a knit fabric. But having used Liknit for two other pairs of pants, I knew it doesn’t stretch a lot and is fairly stable, so I decided to treat it as if it was woven. I used the linen colorway. The main part of the Pietra pants that you don’t want to stretch is the front waist band, and since that is interfaced, there wasn’t any issue with unwanted stretching. I think this fabric worked out well for this pattern. But I had a lot of trouble with the back of the waist band and it is possible the fact that it wasn’t actually a woven contributed to the difficulties I had, but I’m not sure.
The instructions were clear and easy to follow for the most part and the pattern is nicely drafted. The pocket and waistband are a bit tricky, and some of the construction is not completely intuitive. However, I found if I carefully followed the instructions, used the diagrams, basted all the seams where the instructions recommended basting, and matched all the notches (I marked the notches on my fabric with my trusty Crayola washable fine-point markers), it all came together the way it was supposed to. The result is a very clean and professional look in the front. I topstitched the front leg seams, which was optional, but I thought it gave a nice finished look.
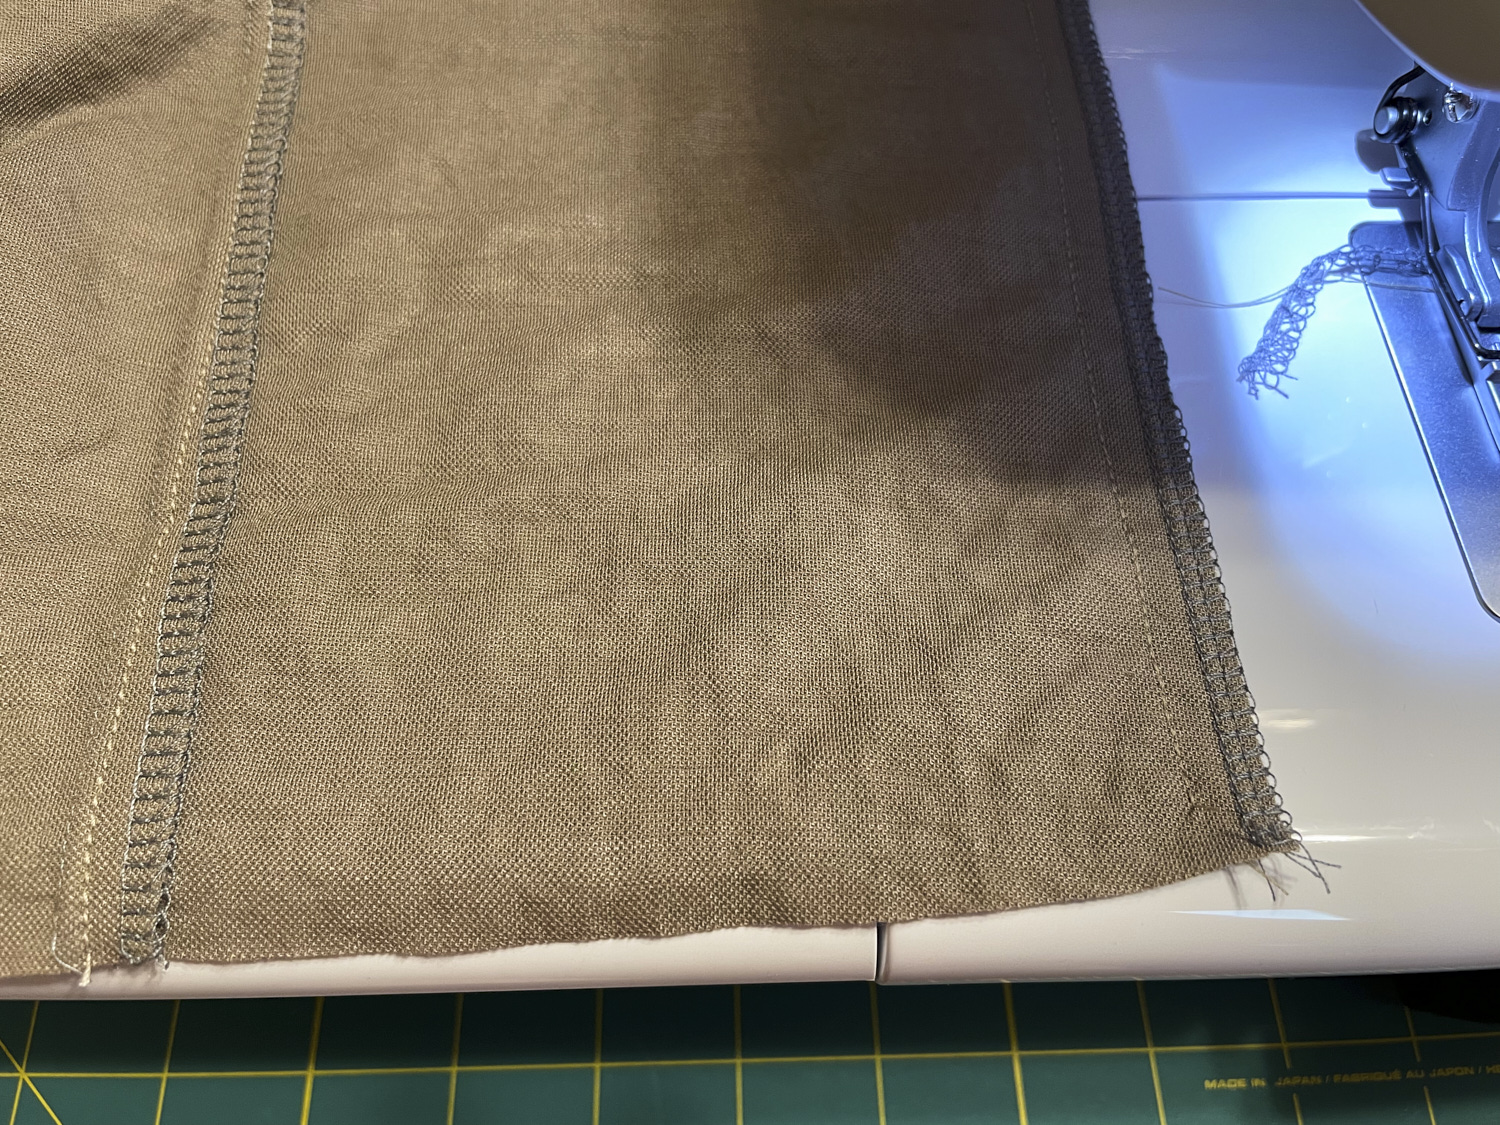
I sewed all the seams with my regular sewing machine at 5/8 inch as instructed, and trimmed to 3/8 inch and serged in one step with my serger. This is only my second serger project and the first one with any major amount of trimming, so I’m still fascinated by watching the trimmings slide into the bucket. The pattern didn’t specify trimming on the inner our outer leg seams but I went ahead with that as I had for the other seams.
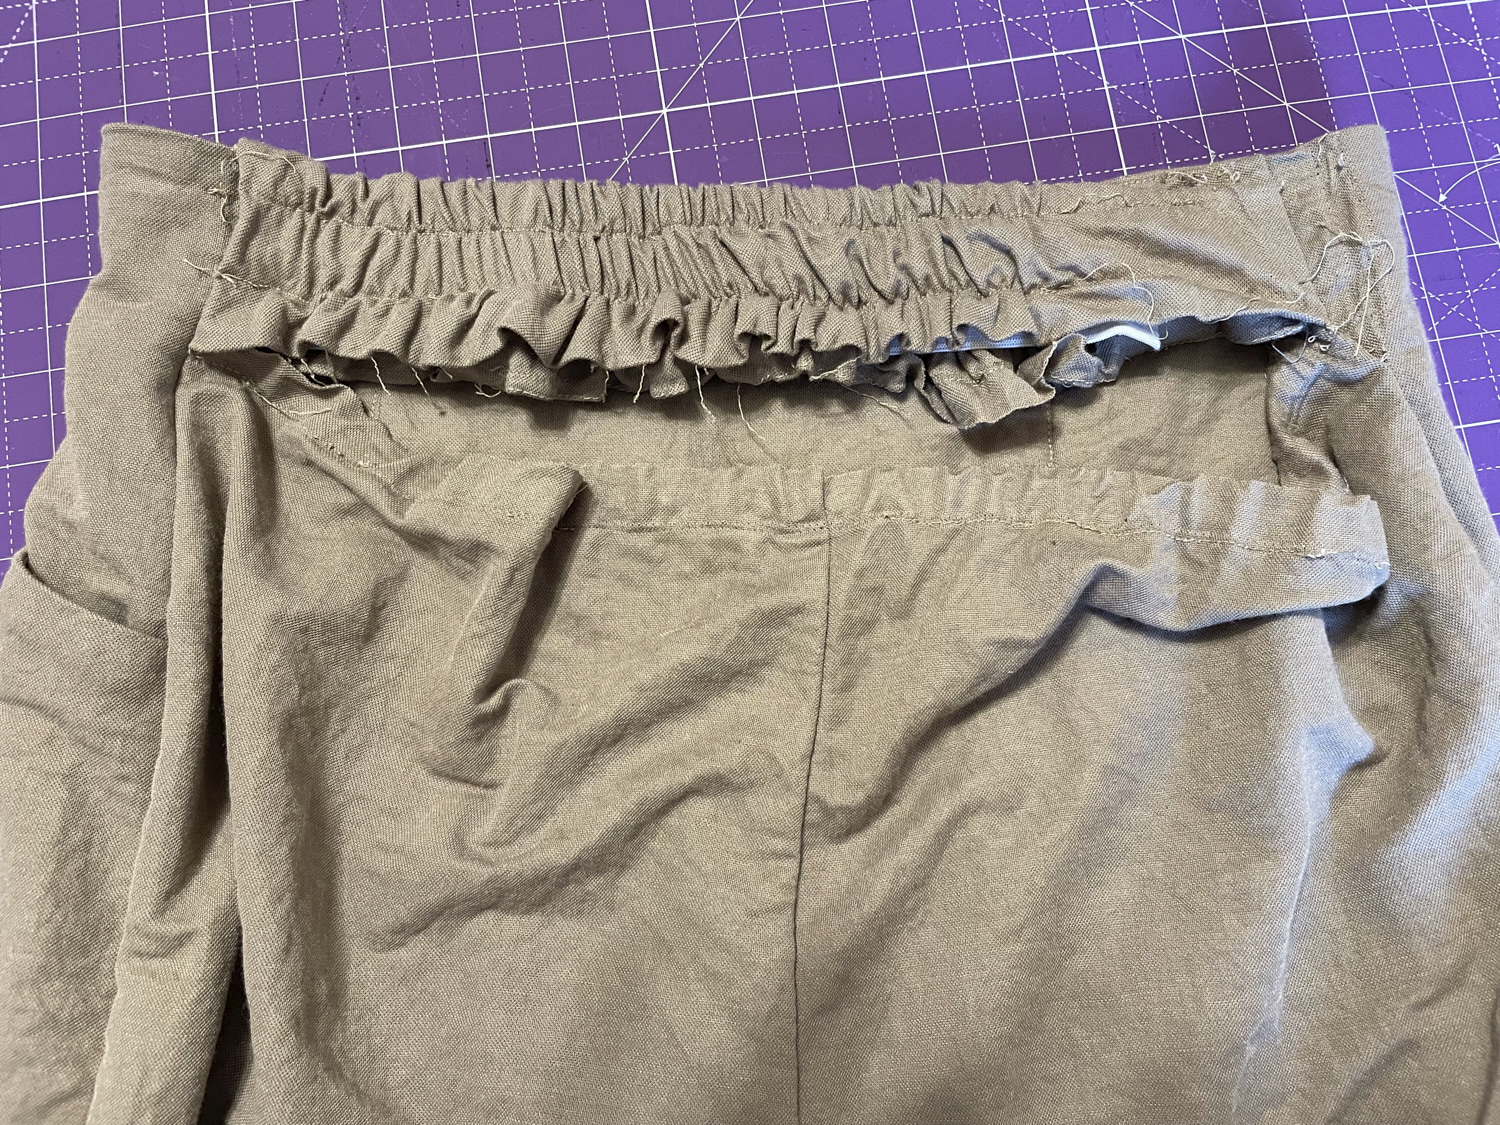
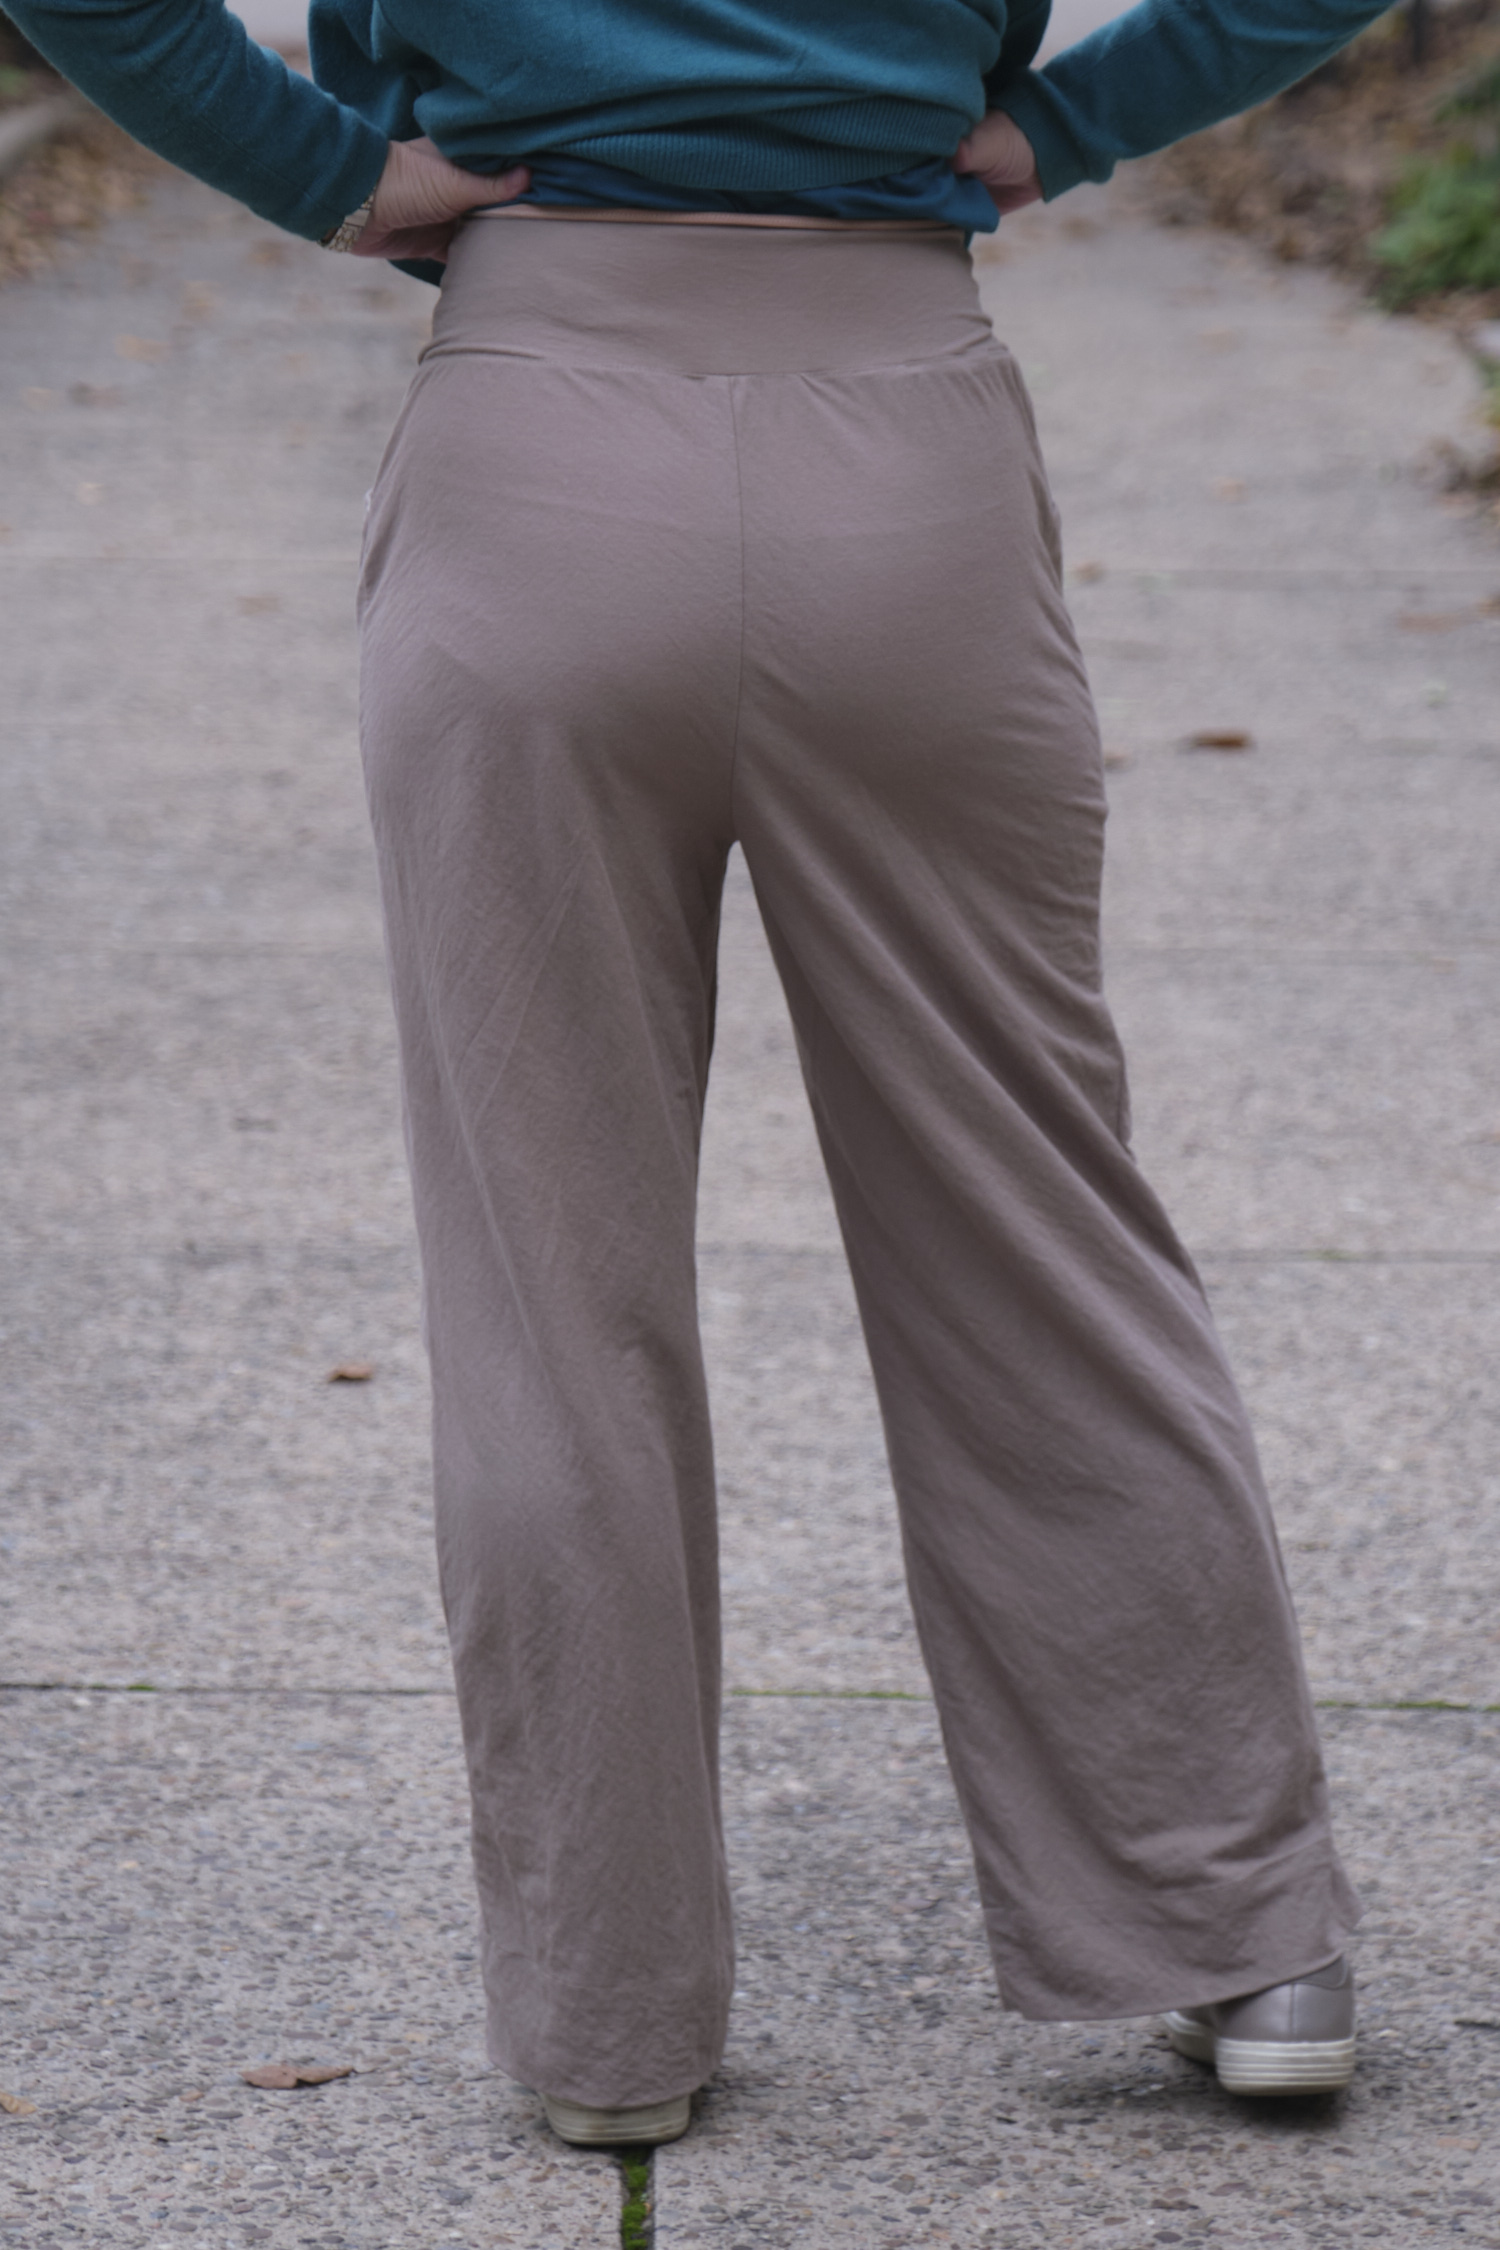
Everything went really well until I got to installing the waist elastic. For a size 6, the instructions said to use 12 inches of 2-inch wide elastic. I attached one side and pinned the other and tried on the pants. The waist was way too big. I pinned the elastic shorter, but the front of the pants pulled to the back. I decided some grading was in order. I unpicked part of the inner waistband seam so I could grade both sides of the waist by .75 inches, bringing the new line of stitching down about 6 inches to right above the pockets. I probably could have graded it even more. Then I shortened the elastic to 10.5 inches and sewed it into the waistband. The instructions direct you to sew two parallel rows of stitching in the back waistband, through the elastic, while stretching the elastic. This was easier said than done. I could have used some more hints about how to achieve this. In the end I got it done, but my back waistband looks messy. That said, even if I had sewn it well, I think this style of gathered waistband would look messy, and it pulls the front more than I would like, which is not very flattering. With an untucked shirt it looks much better.
The instructions call for a 2-inch hem, but I ended up doing a 2.5-inch hem to get it to the right length. Of course, I could have trimmed .5 inches off before I hemmed it.
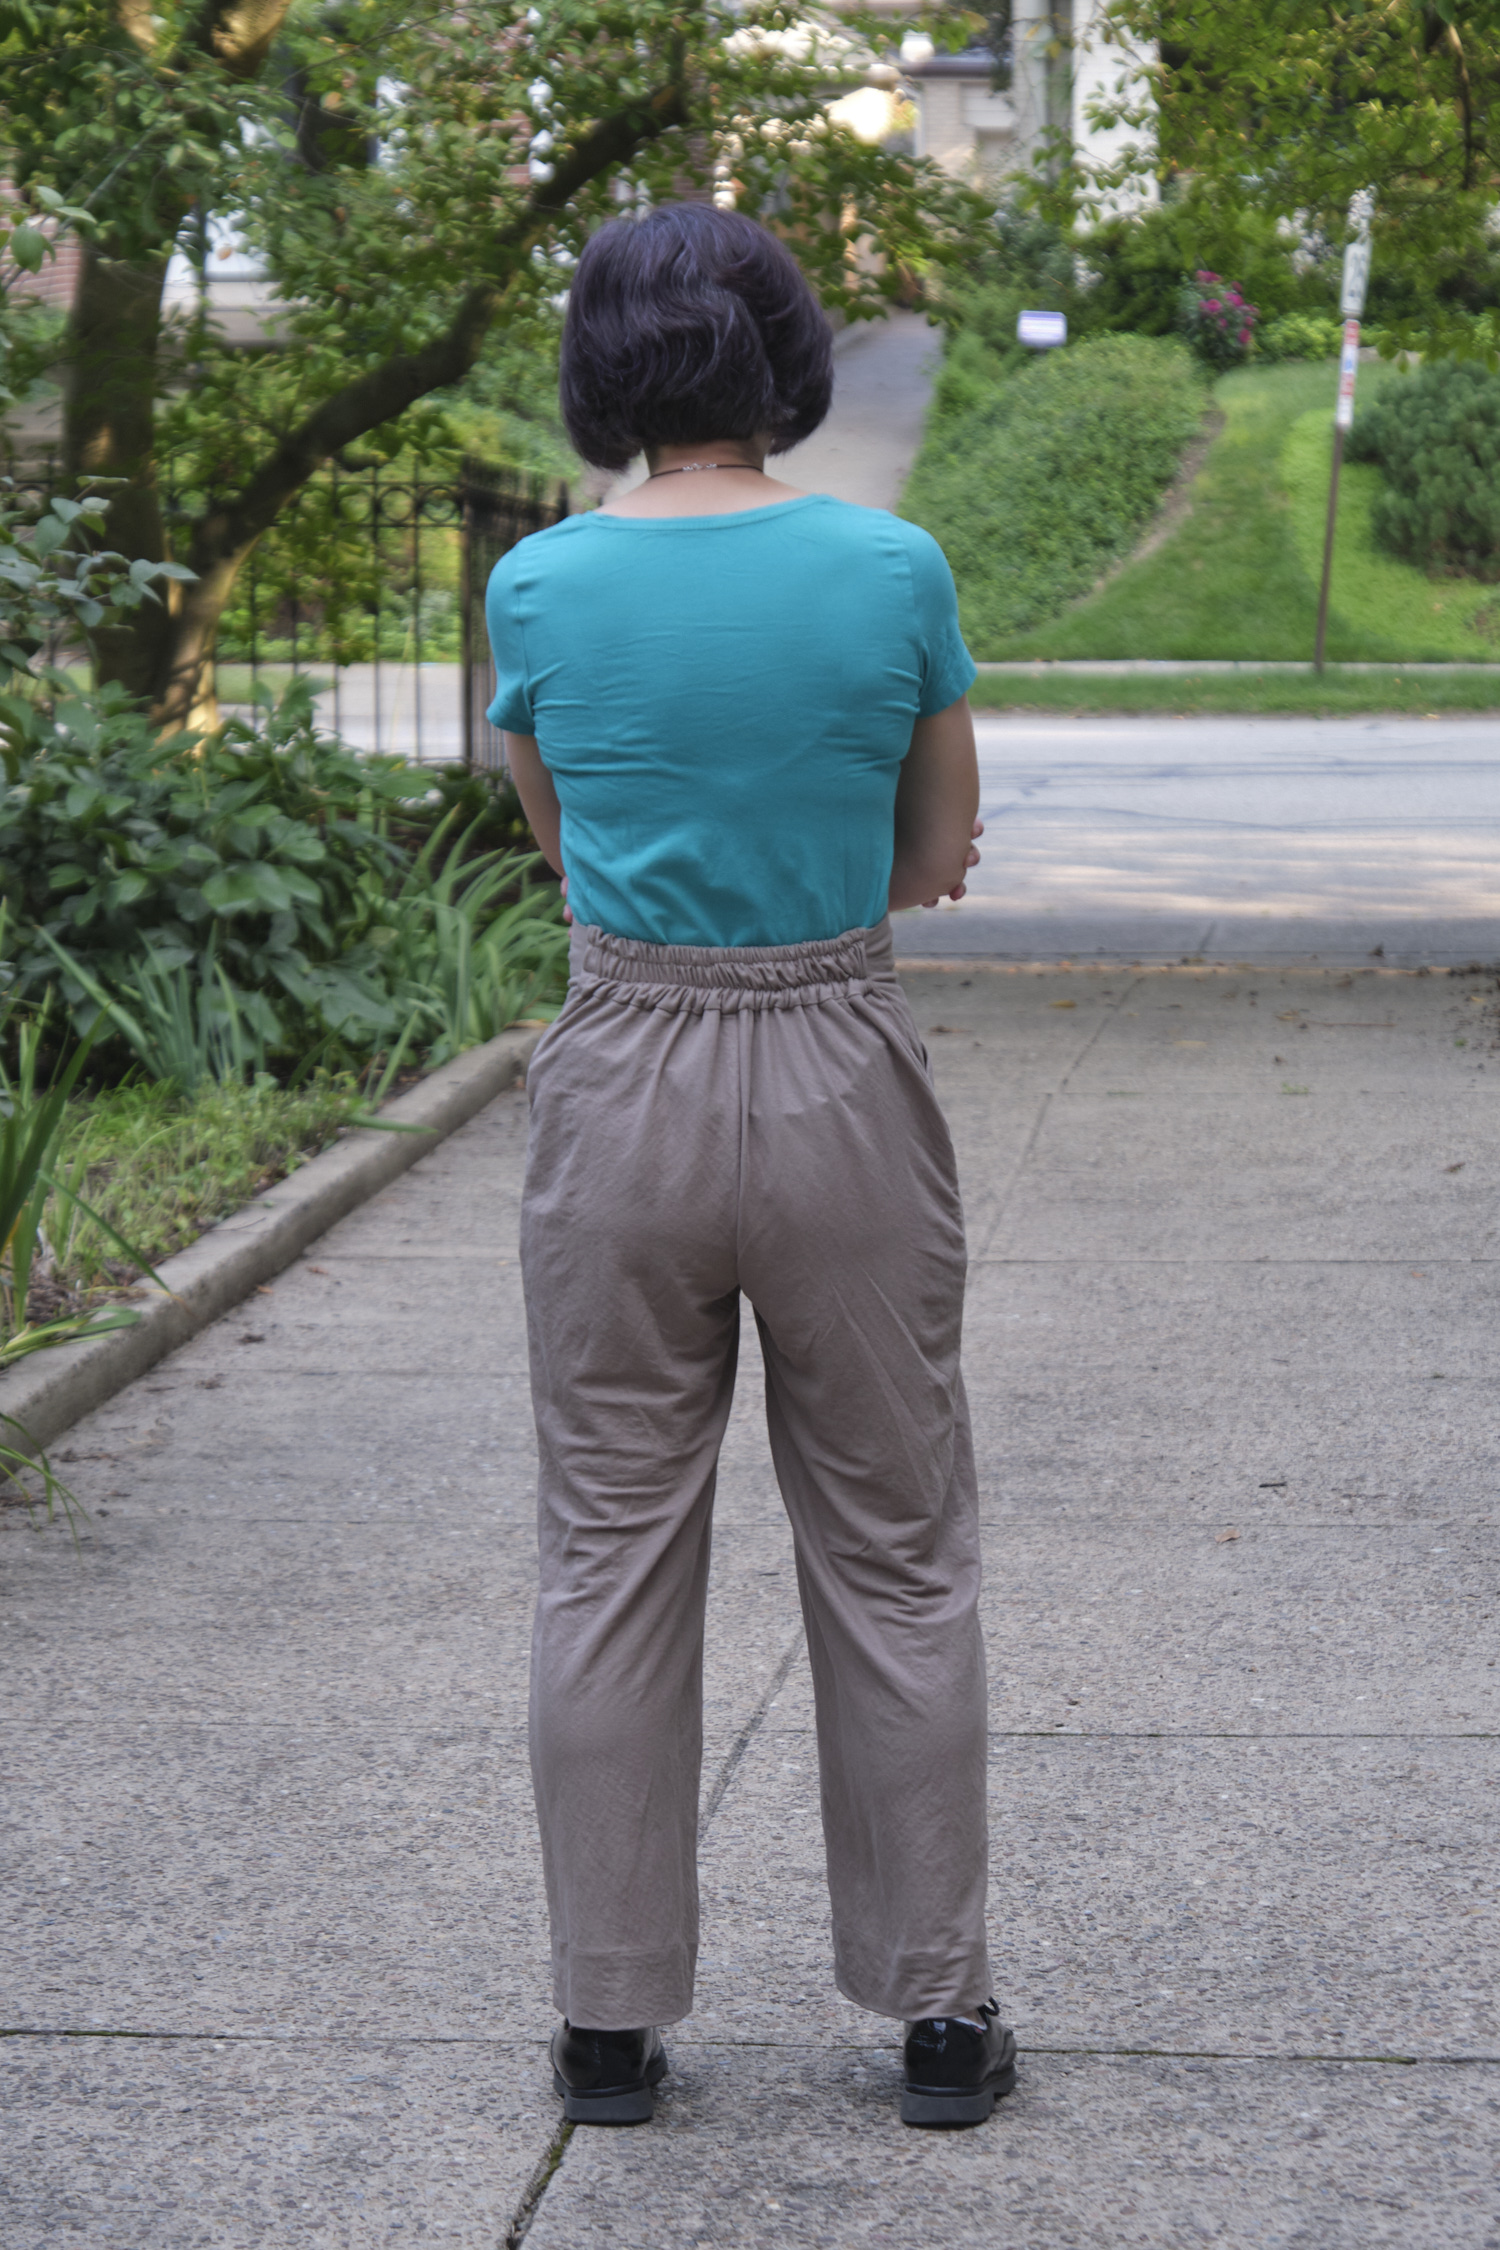
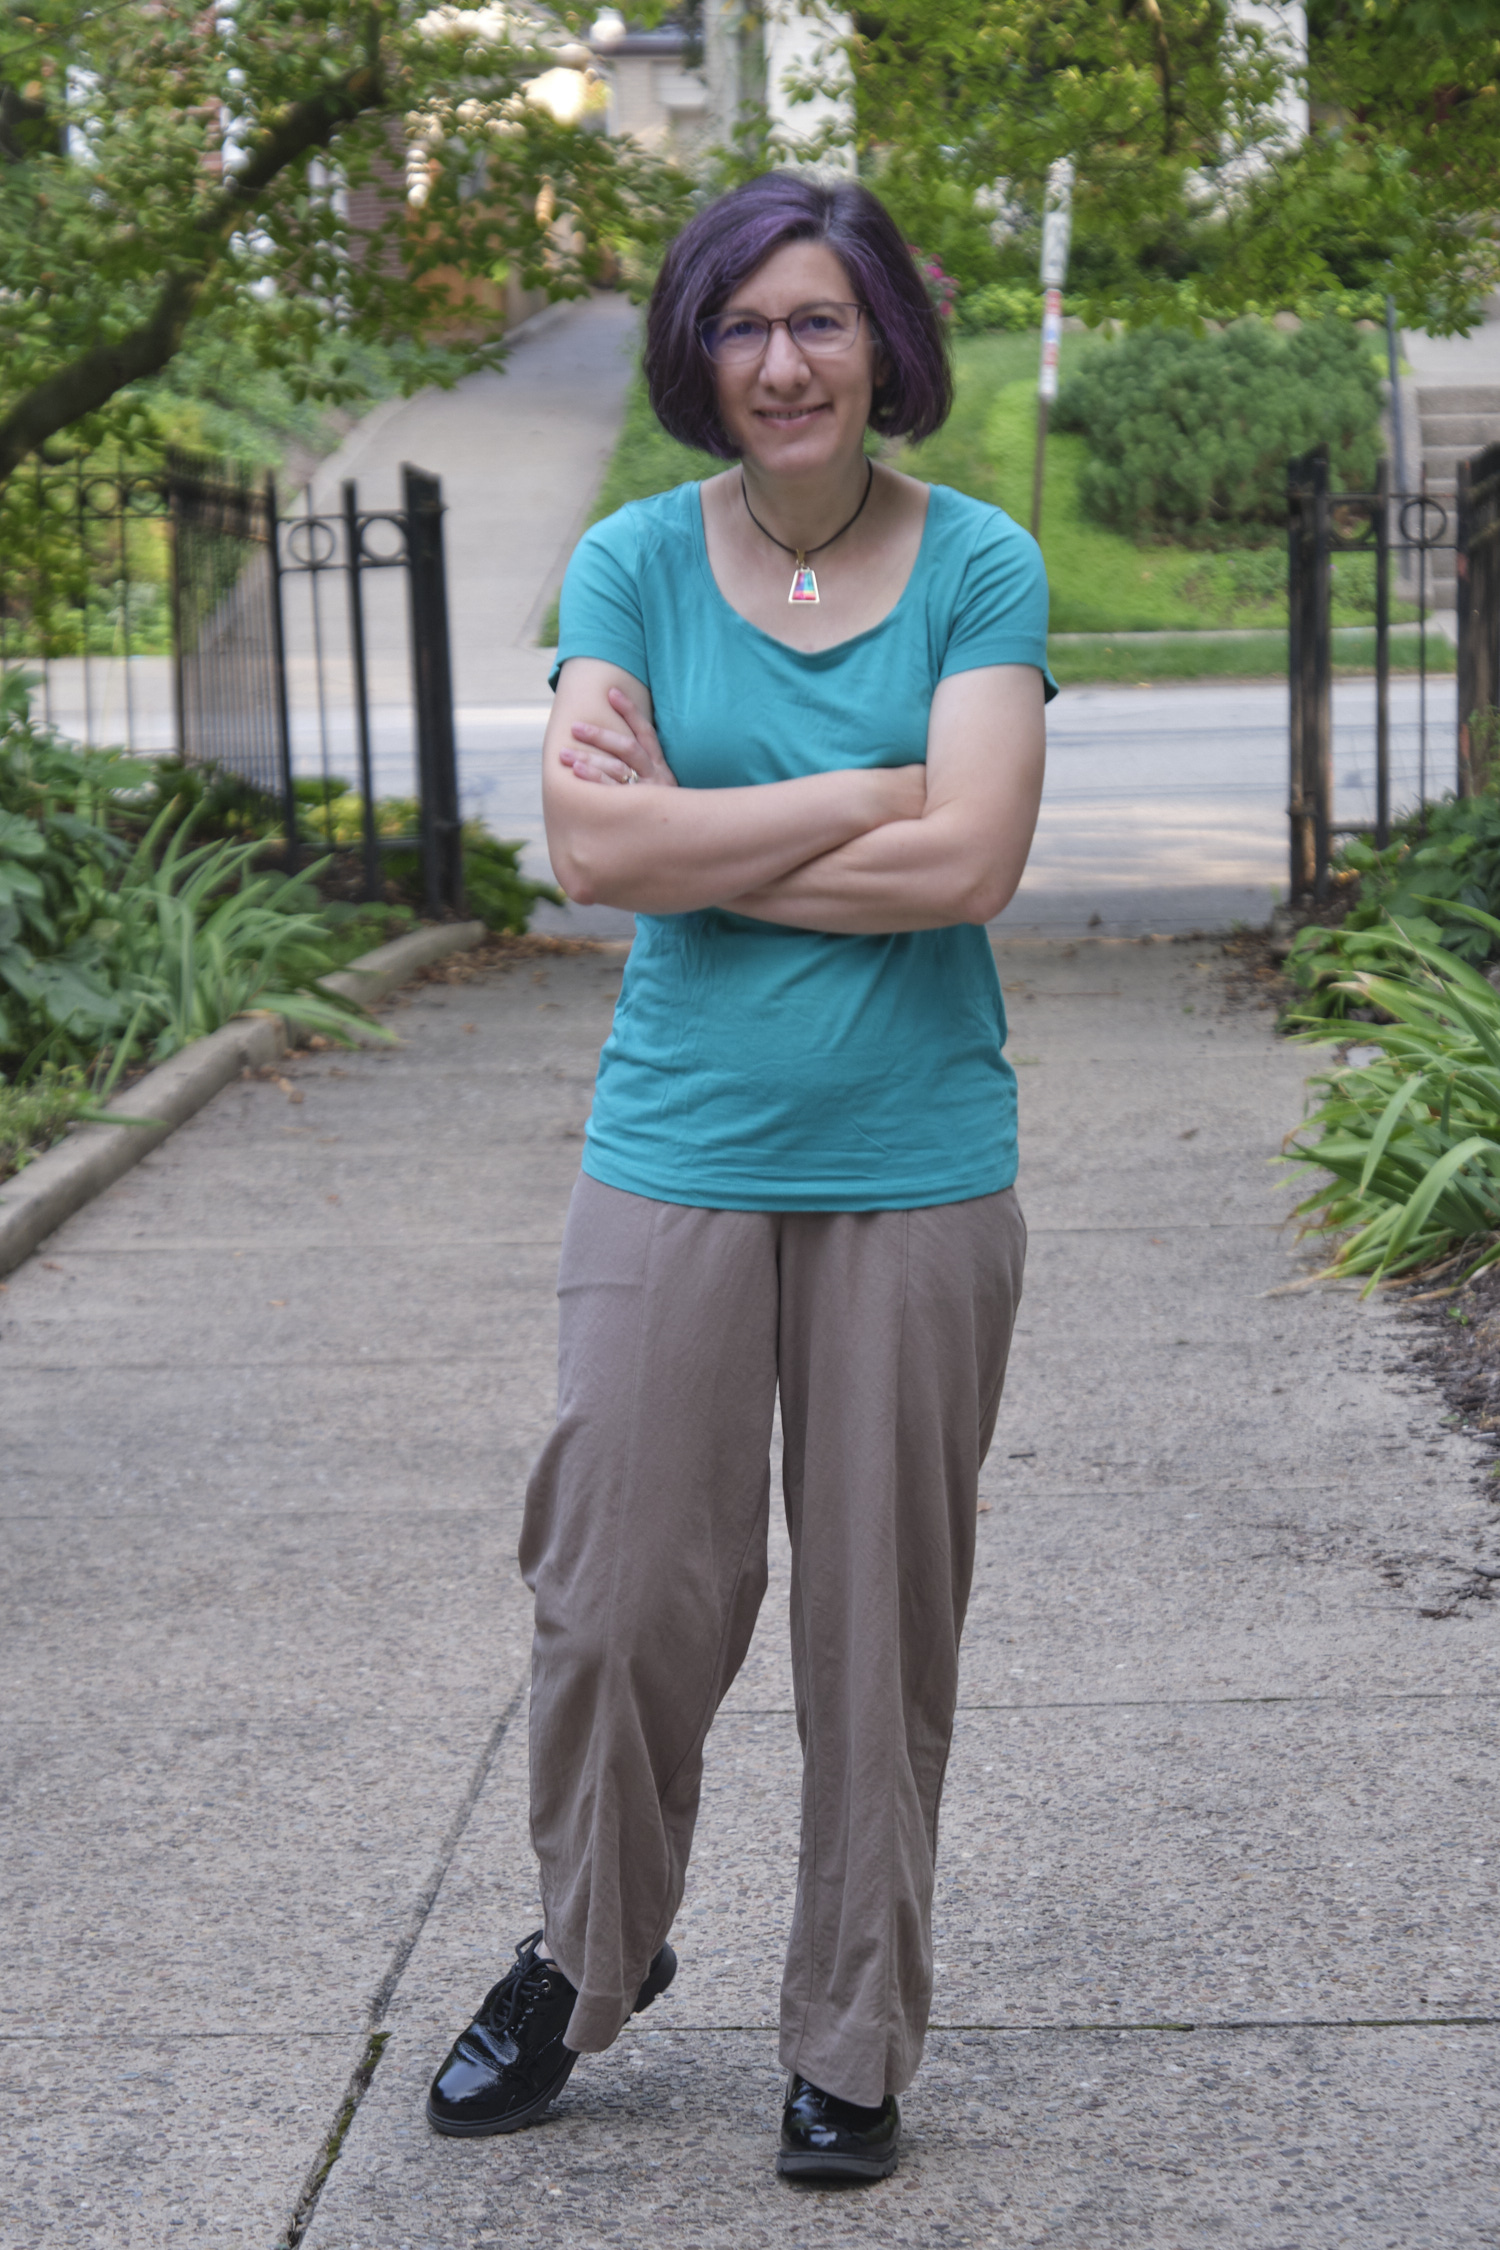
The pants didn’t take that long to make and they are very comfortable to wear. I love the fit of the high waist, but I really don’t like the look of the back waistband, and the way the elastic pulls the front in, it ends up not being all that flattering against my tummy. As long as I keep my shirt tucked in, I think the pants look pretty good.
I’m apparently not the only one who has had some trouble with the elastic waist. Closet Core offers instructions for adding a zipper, and other bloggers have reported having to redo the waist with darts. I think the elastic works better on some figures than others, and may also work better with some types of fabric. I considered adding a zipper, as suggested for those with smaller waists in proportion to hips, but figured it would make these otherwise comfy pants less comfortable. So Instead I decided to unpick the back waistband and chop off the top 2 inches of the pants so I could add a yoga waistband. It was a shame to cut into the beautiful finished front panel, but this seemed like the best way to turn these into pants I would actually wear.
I constructed a 3-inch yoga waistband using the Sinclair Cleo pattern I have used successfully for other Liknit pants. Since the Liknit has some stretch to it I was able to make the outside of the yoga waistband in the same fabric as the rest of the pants. I used beige QUAD Performance Jersey Knit for the inside of the waistband for a nice snug fit and didn’t add any elastic. I basted the waistband in place, tried it on, unbasted, made some adjustments, rebasted, tried it on again, and then surged the waistband to the pants. I topstitched the seam in place.
I think the pants look a lot better now. I still love the Pietra pockets and the front leg seam, but now the waistband looks good too. I might make another pair in another fabric (maybe a ponte) with the yoga waistband modification, perhaps only 2 inches next time. By the time I got around to doing this modification the Fall weather had kicked in so it is getting a bit chilly here for such light weight pants, but I expect I will wear them a lot next summer.
I feel strongly about pockets. When I sew my own clothes I make sure they have pockets large enough to hold my stuff. It is very frustrating when I buy ready-to-wear clothes with inadequate pockets. I’ve seen blazers advertised as having “adorable faux pockets” that make me want to scream. There is nothing adorable about faux pockets. But even worse, perhaps, is buying a pair of pants with pockets, only to find out that my phone does not fit in them, or that it fits but slides out every time I sit down. My husband can fit his phone, his wallet, his keys, a tube of chapstick, some change, and other odds and ends in the front pockets of every pair of pants he owns. I should be able to do that too!
What about the back pockets? Pocketing a phone in a back pocket may be ok while standing, but on me, back pockets are usually placed such that I end up sitting on my phone, which can be uncomfortable or cause the phone to fall out of my pocket. Plus, putting valuables in back pockets makes you more of a target for pick-pockets.
With pleated pants, a phone can often be completely concealed in a front pocket if the pocket bag is deep enough. However, with tight fighting pants made of stretch fabric, it is hard to avoid a phone bulge. I can sometimes fit my phone in the pocket horizontally, but it produces a bulge across my stomach that isn’t very flattering. I personally prefer to see that bulge further down the leg or more on the hip, but that requires deeper pocket bags.
I have started seeing some women’s pants advertised as having “utility” pockets. The best I can tell these are special pockets that are actually large enough to be used. Shouldn’t all pockets have utility?
I have started retrofitting the pockets of my pants that otherwise fit well, adding pocket bag extensions. It’s actually not that hard to do. Here’s how I augmented the pockets bags of a pair of black dress pants recently.
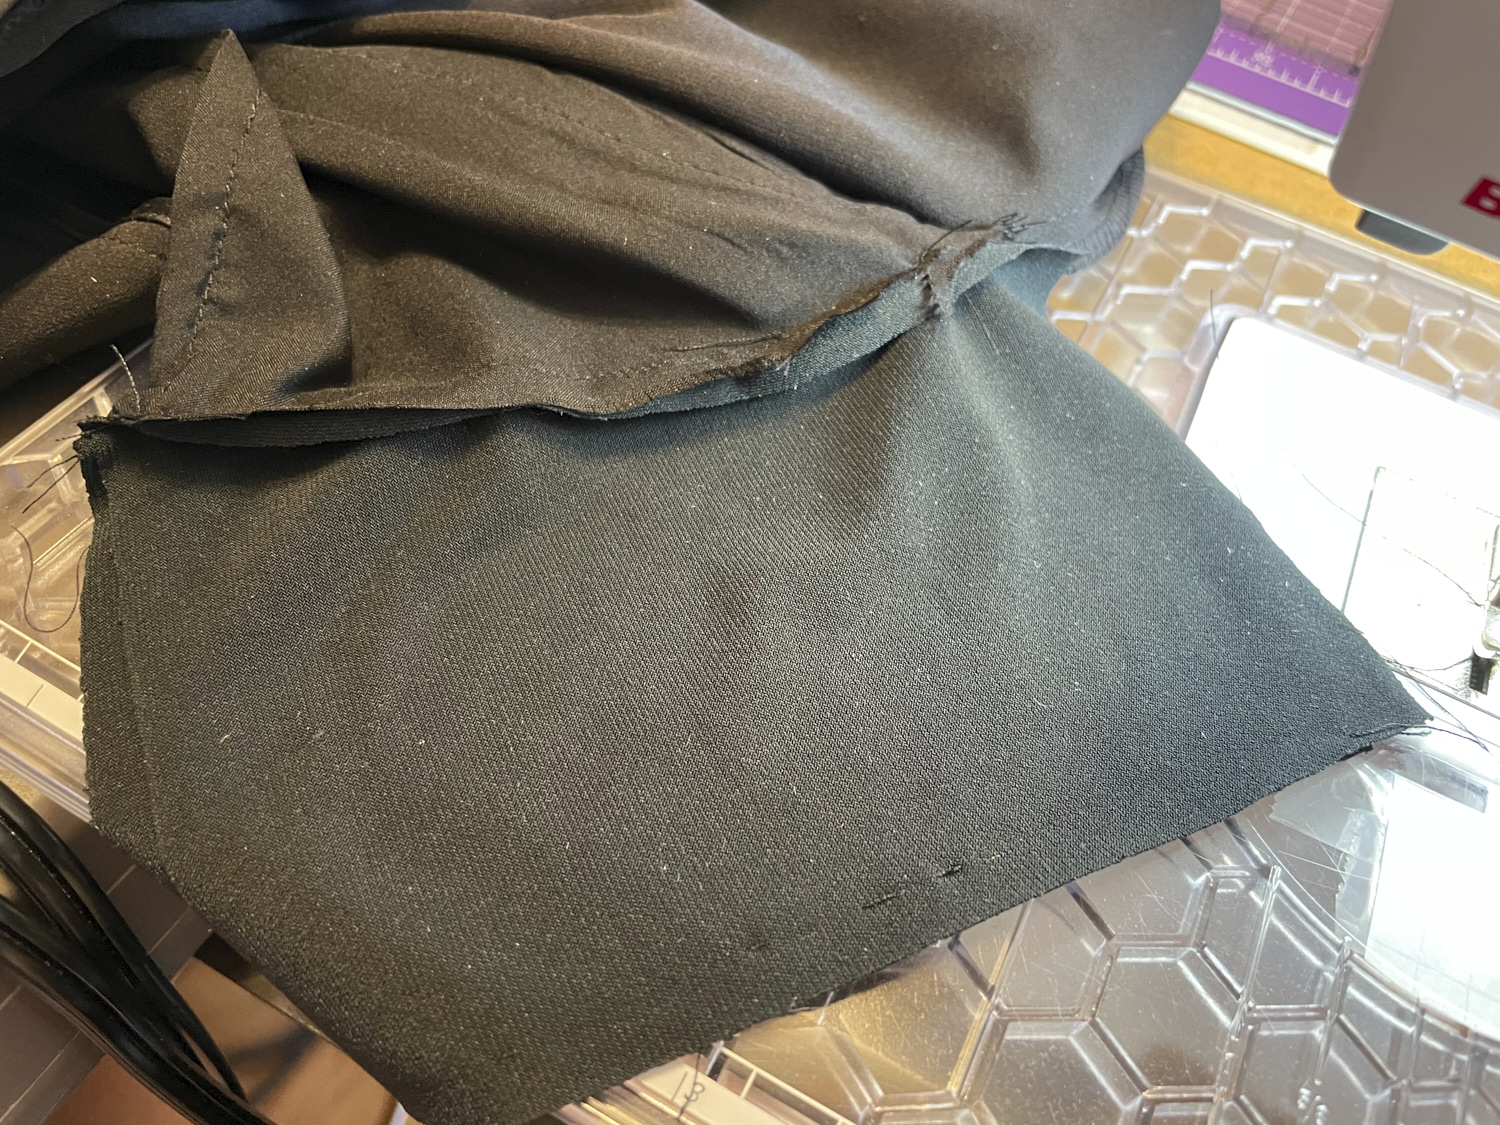
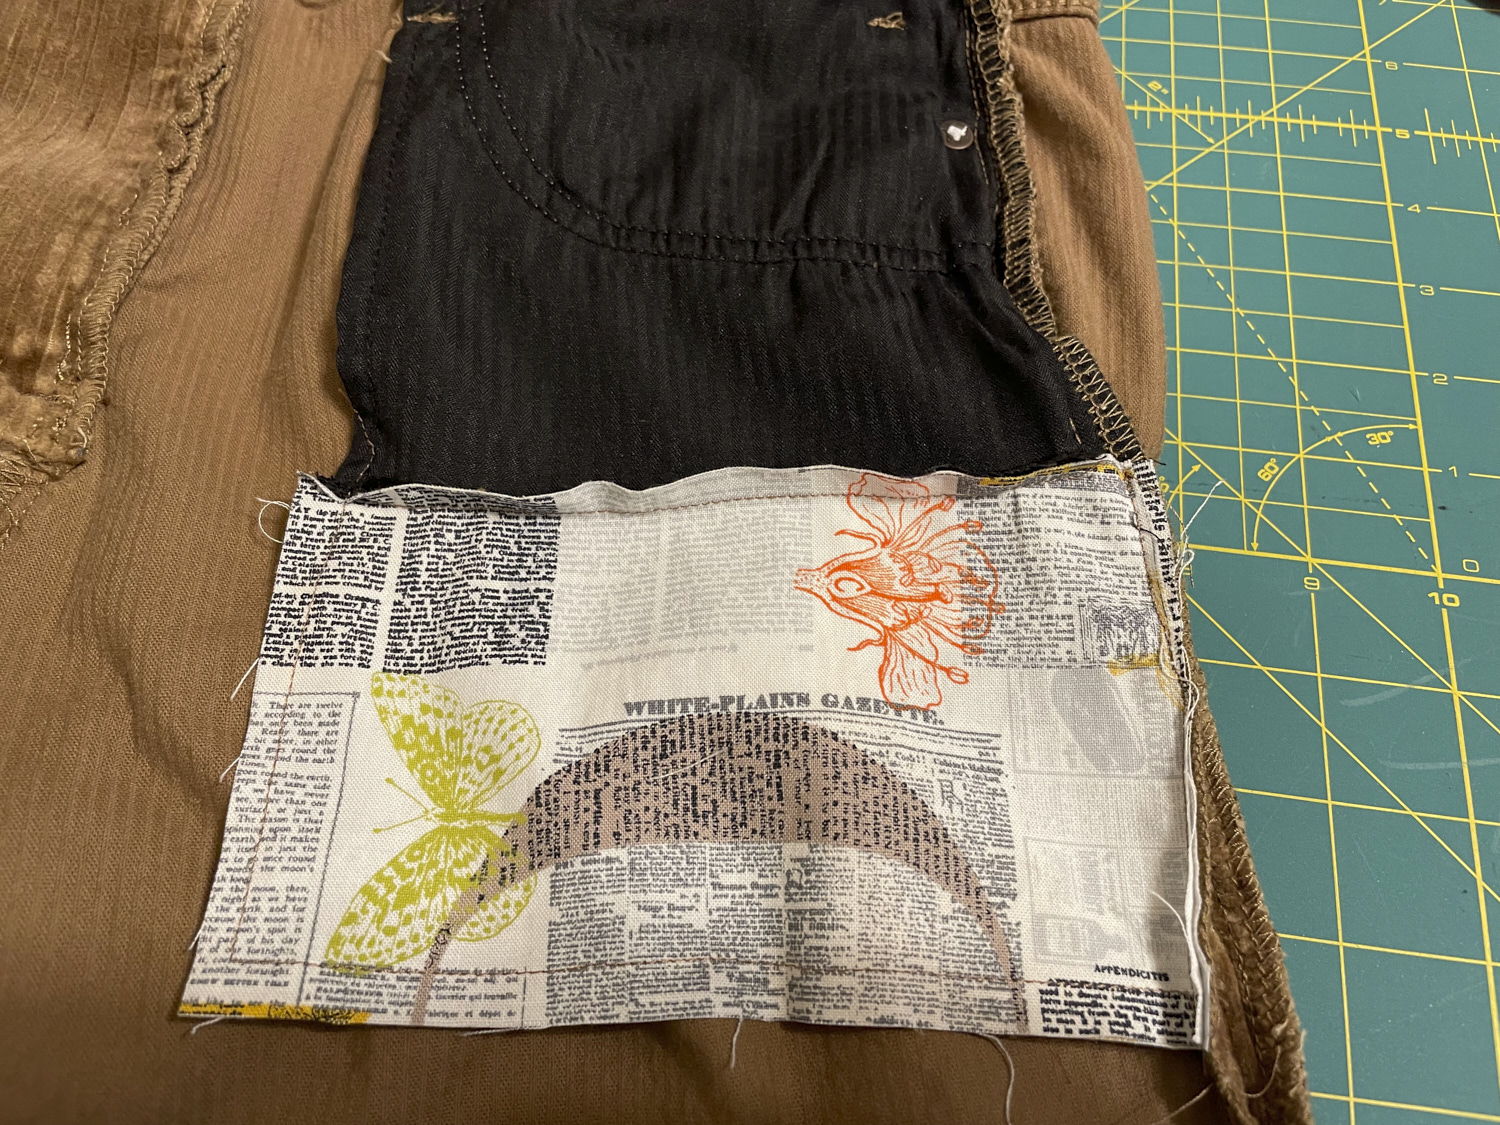
Here’s the pants turned inside out. You can see that the original pocket bag is big enough to hold a credit card and not much else. My cell phone fits, but as soon as I sit down it slides out.
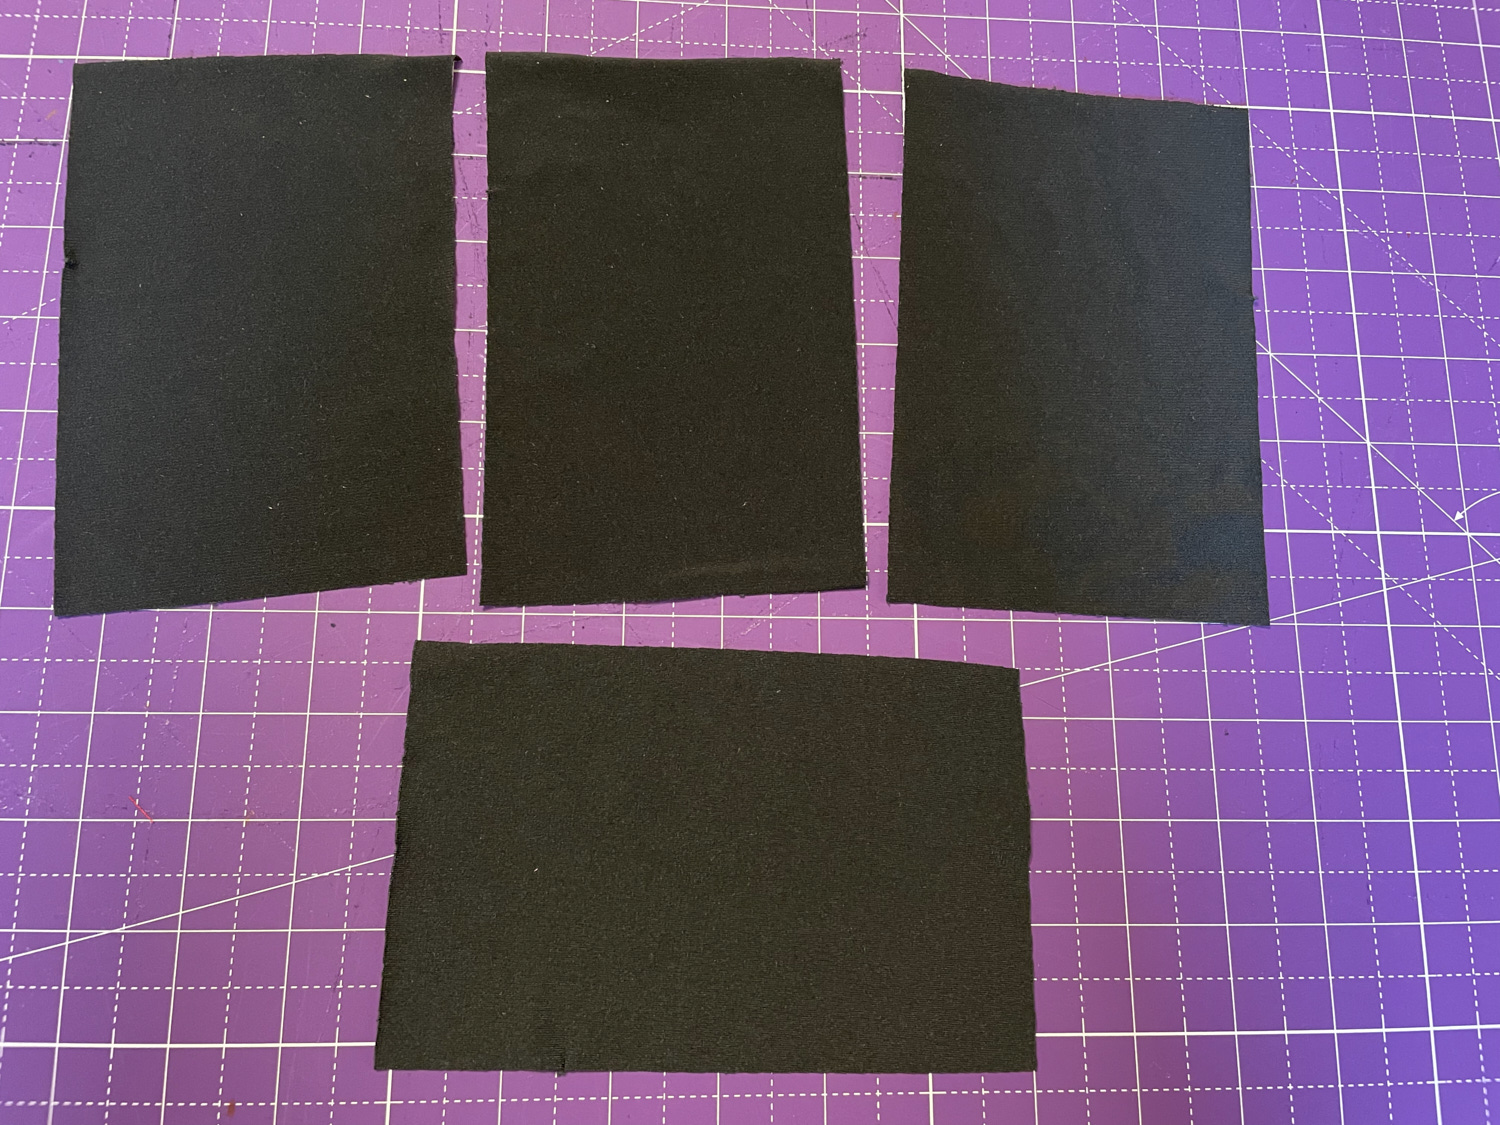
To improve this situation, the first step is to figure out how much you need to add to the pocket. I like my pockets to be long enough so that my phone will sit entirely below my hip crease when I’m sitting down. If my phone sits above the crease, it will fall out. If it sits in the middle of the bend, it will be uncomfortable to sit down. For this pair of pants, the pocket bag needed to be about 3.5 inches longer. So I cut 4 pieces of fabric 6 inches wide by 4 inches tall. You can use any sort of lightweight fabric for this. Generally people use woven fabrics for pocket bags. But I used some ITY with a little bit of stretch for these pants, which can be a little more forgiving as you sew.
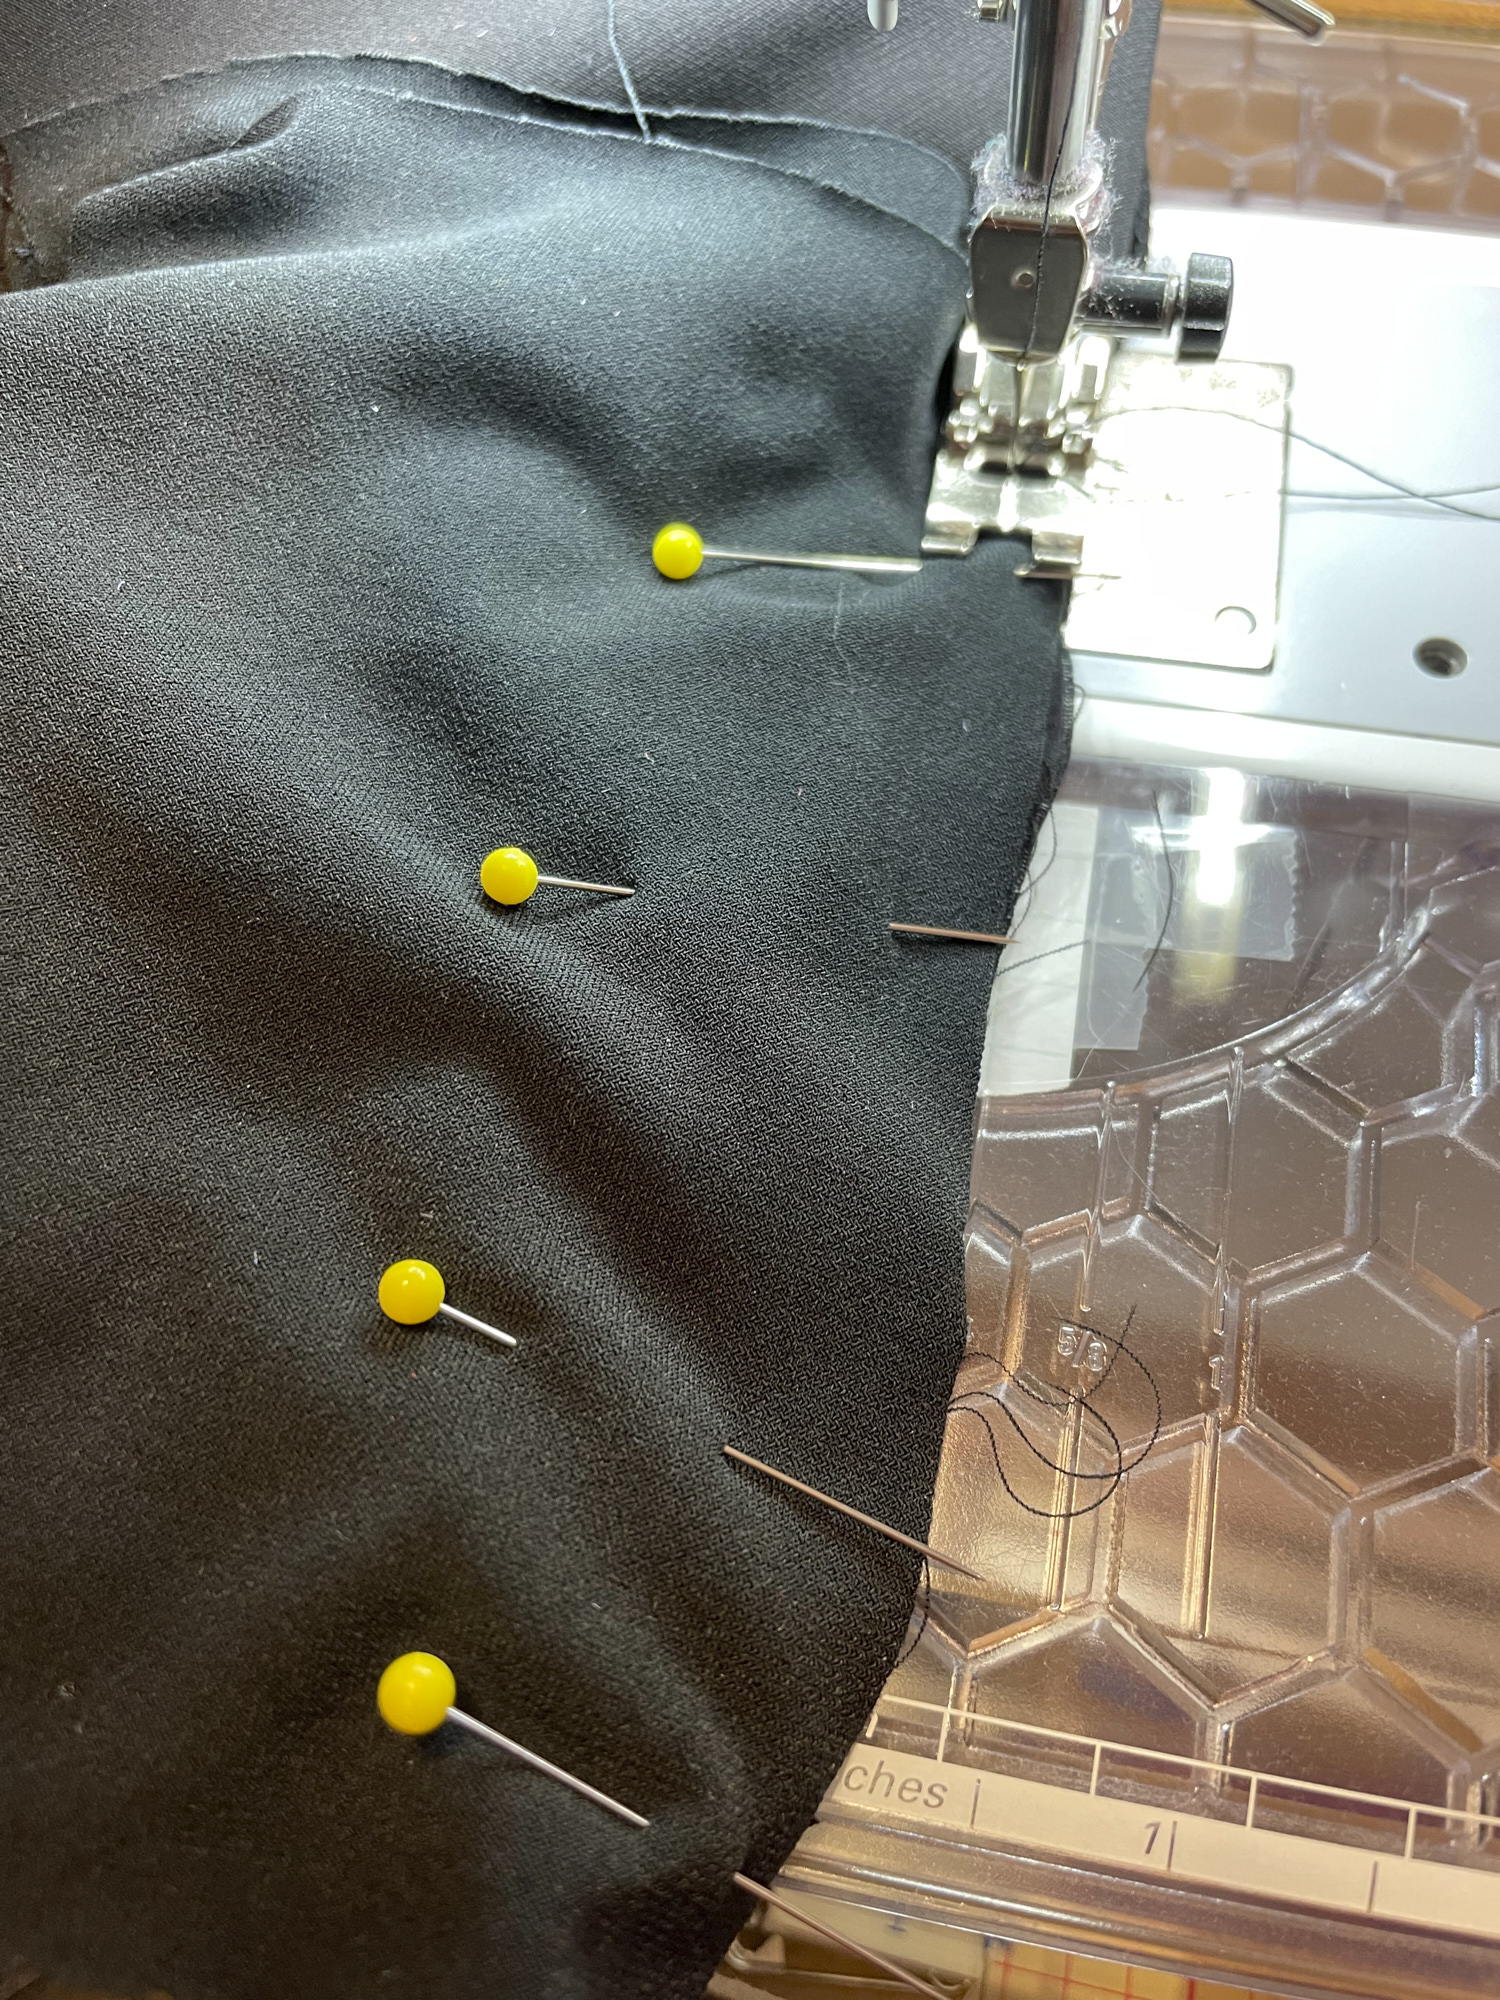
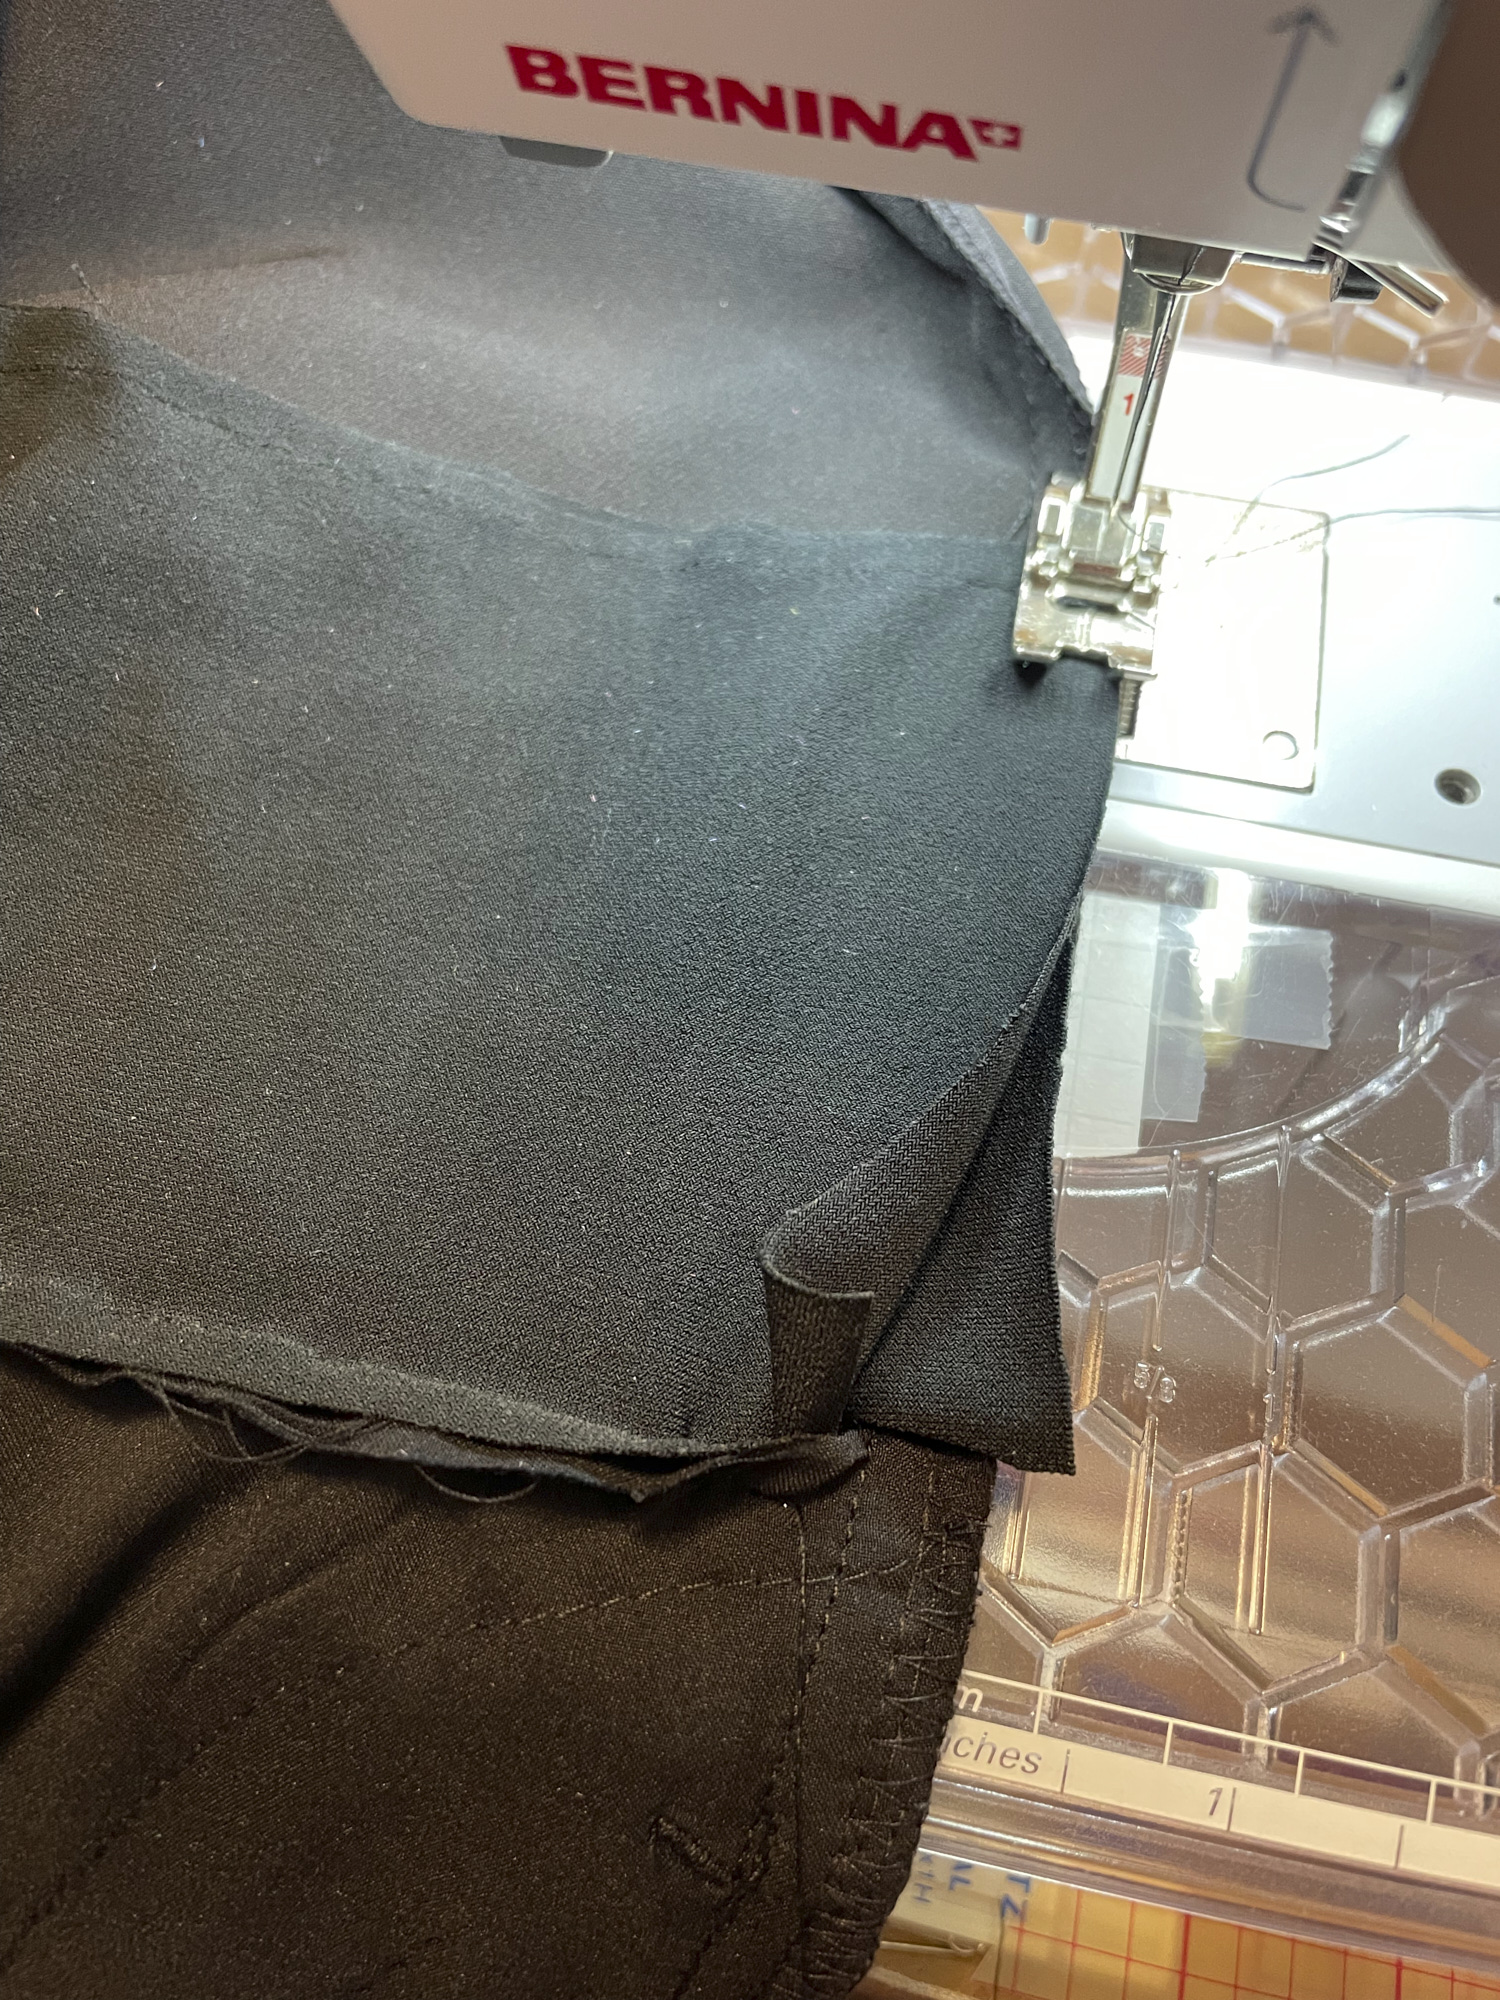
The next step is to turn your pants inside out, slit open the bottom of the existing pocket bag, and pin one piece of the new pocket bag material to the inside of the old pocket bag. If the bottom of the pocket bag is rounded, you may want to square it off. I think it works best when the seam is on the outside of the pocket so nothing catches on it when you put stuff in the pocket. Once the pocket piece is pinned, carefully sew it on. This requires some tight maneuvering with the sewing machine. Alternatively, you can use a fusible tape to fuse the old and new pocket pieces together, and then zigzag to secure.
Then pin an sew the other new pocket piece on.
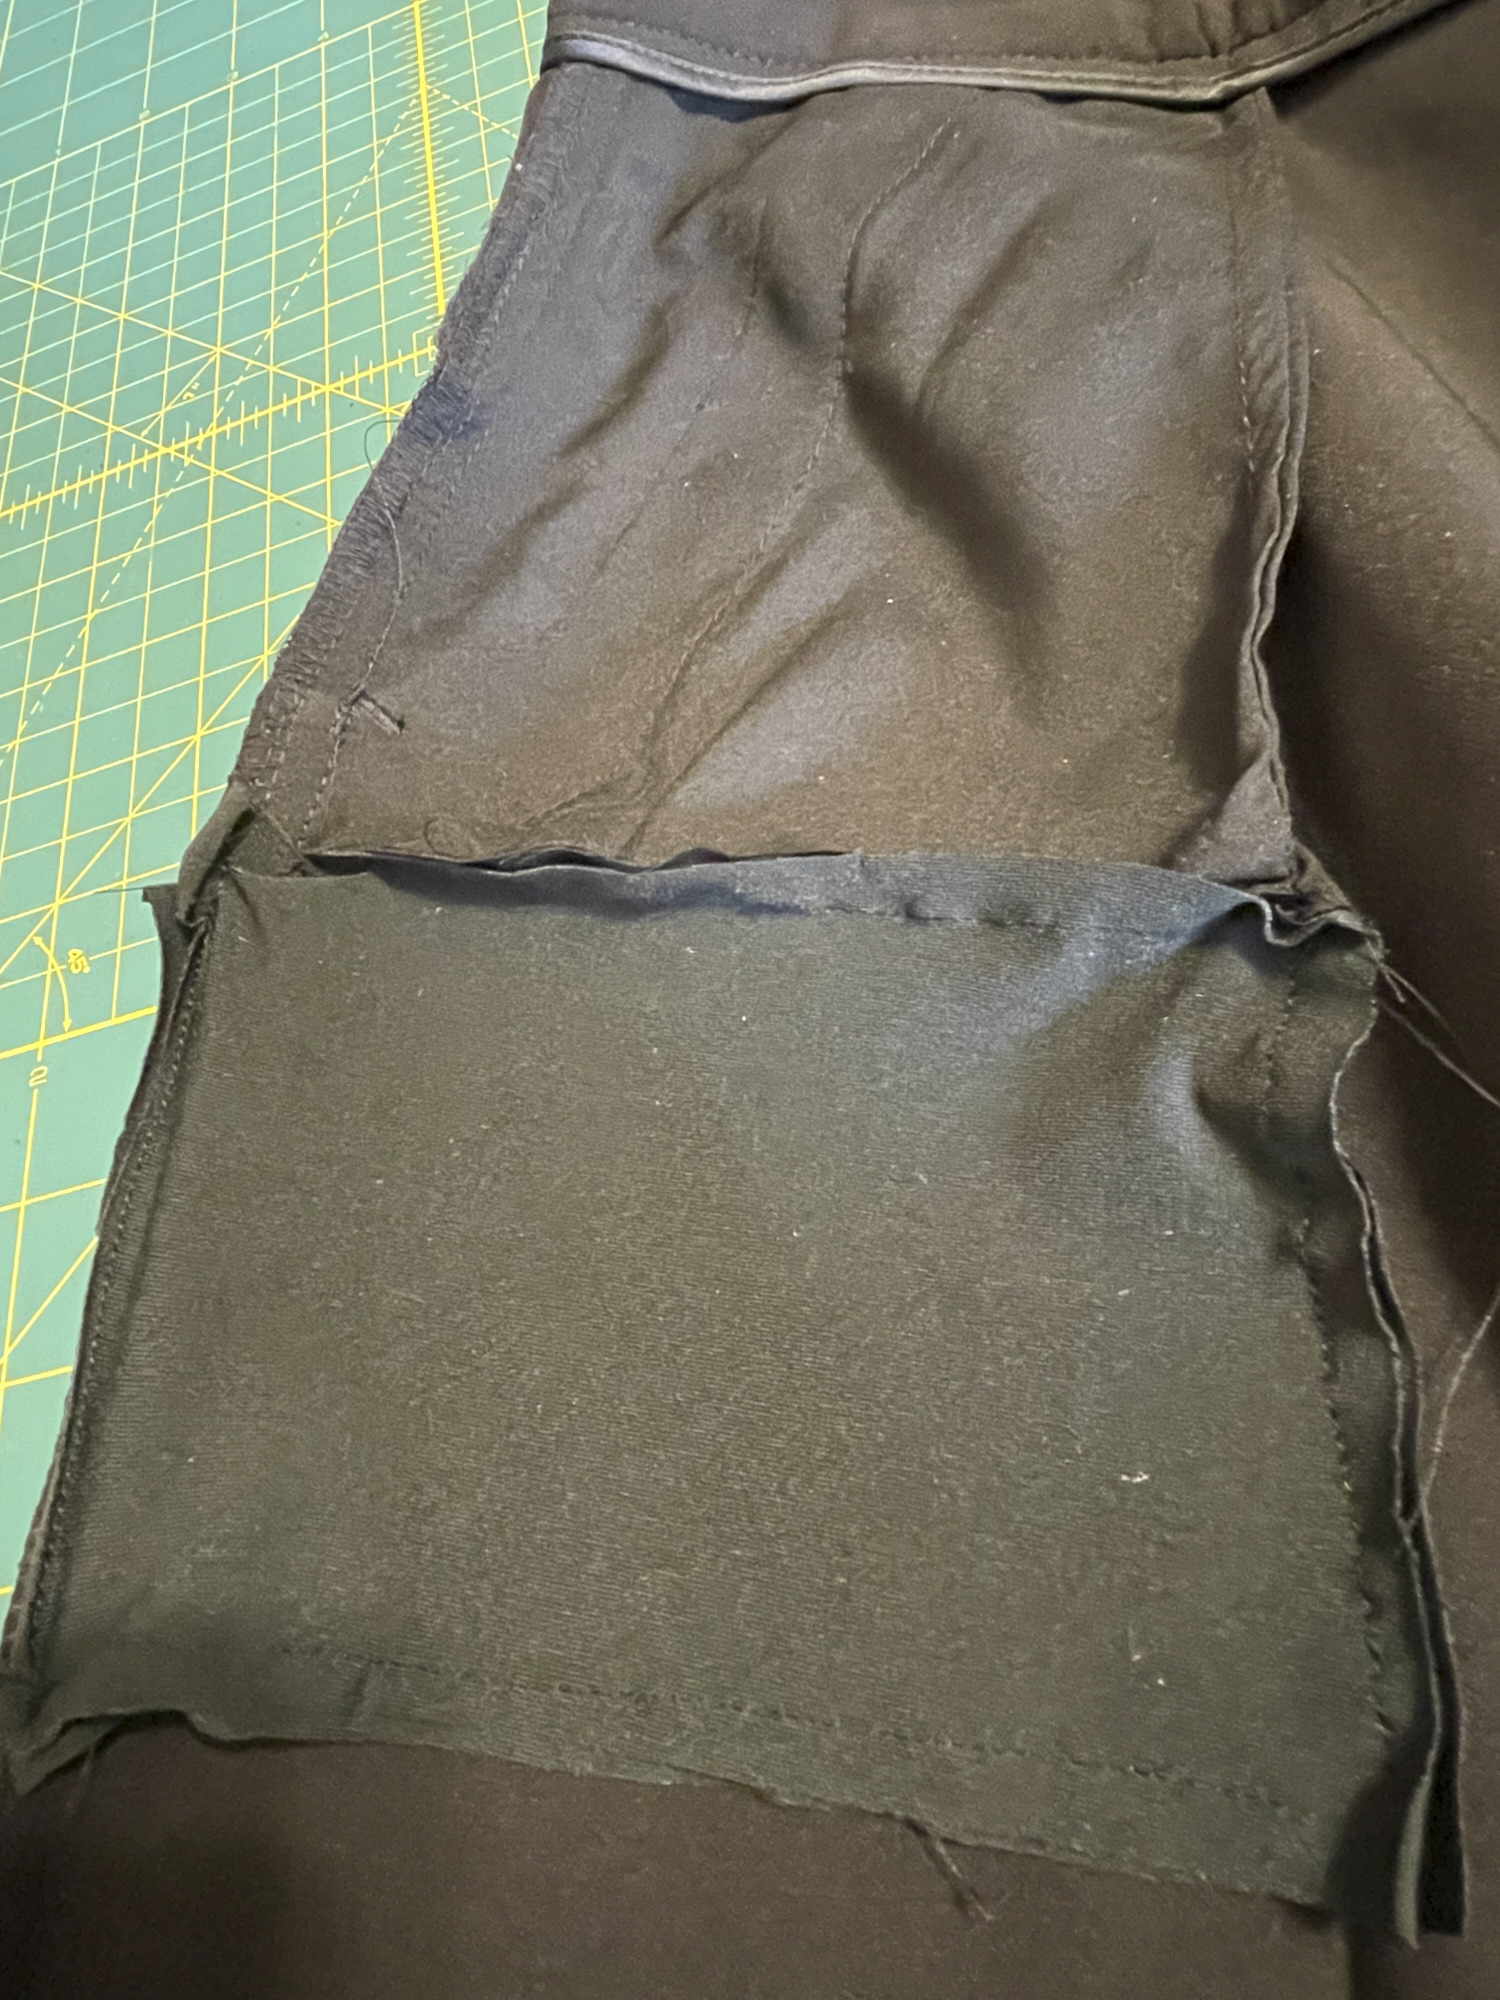
You will then have a pocket bag with two flaps on the bottom. It is not a very useful pocket at this point because it is completely open at the bottom. The next step is to sew around the three open sides. If the original pocket is anchored in the side seam of the pants, you can attache the pocket bag extension to the side seam too.
And that’s it. Now you have and extended pocket big enough to actually hold your stuff. Once you have sewn a couple of pockets this way, you will probably be able to do it without any pinning. It is important to realize that without a lot of unpicking, it is nearly impossible to make all the seams line up perfectly due to the limited space you have to maneuver, but it doesn’t really matter. As long as your pants are not see-through and any gaps you have are not so big that anything is in danger of falling out of your pocket, nobody is going to see the gaps in the pocket bag inside your pants and it will not impact the functionality of the pocket.
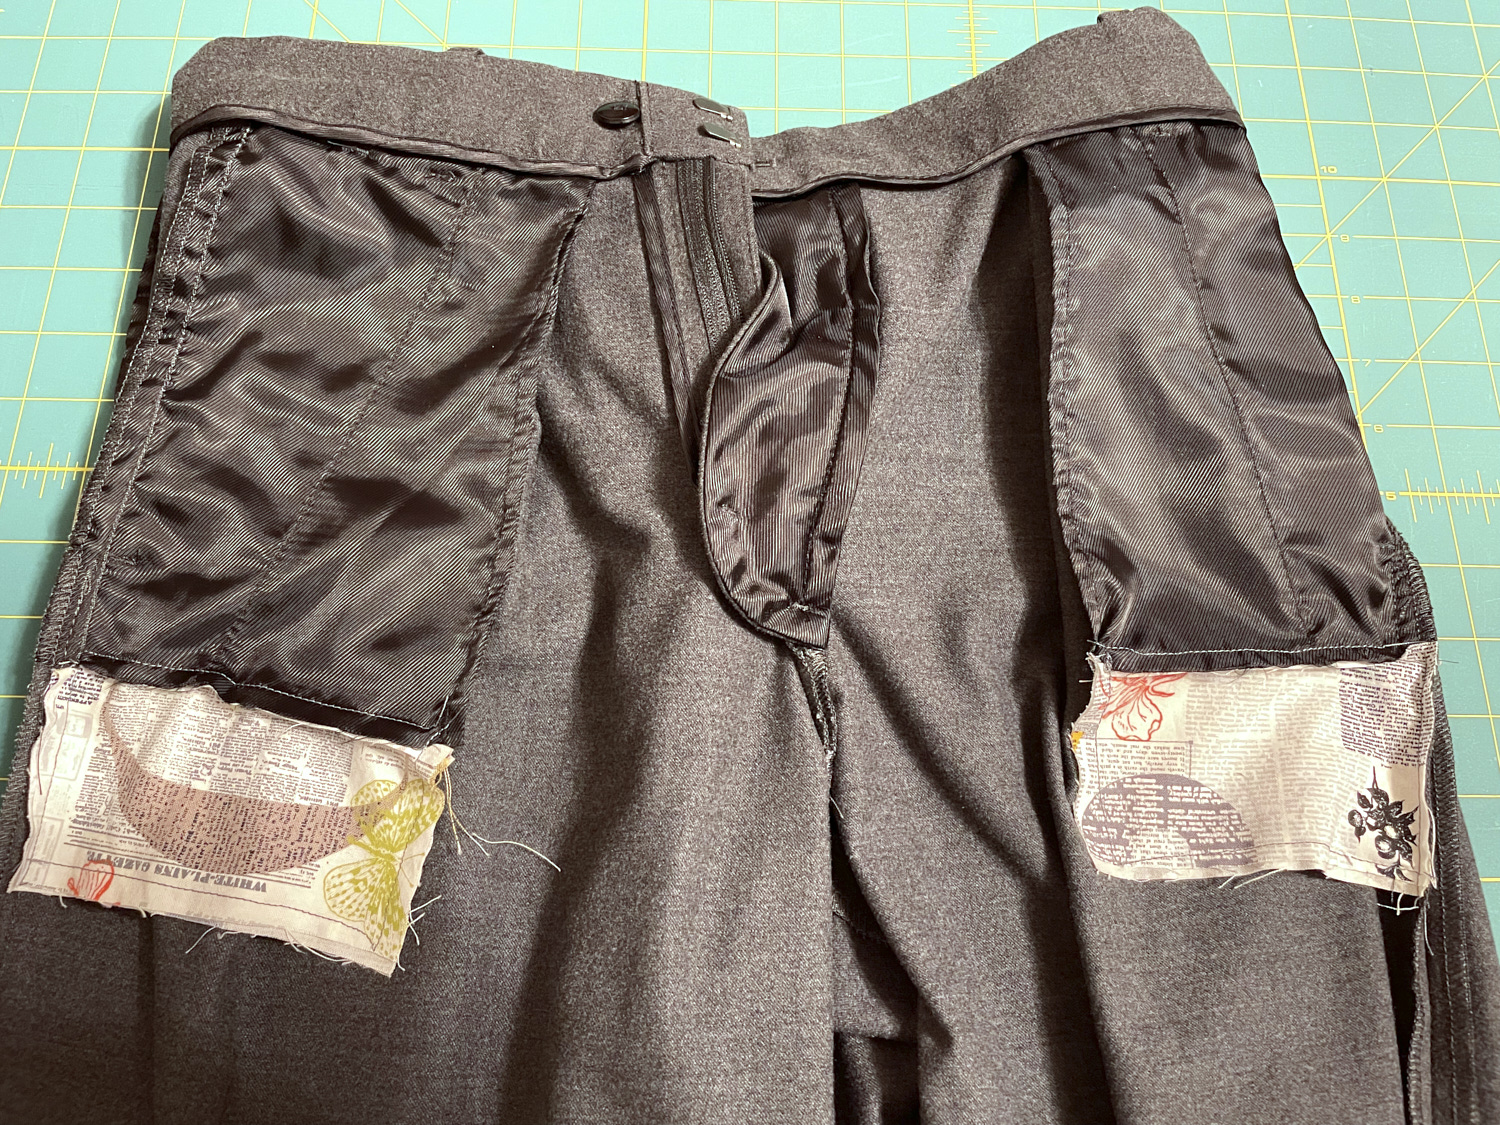
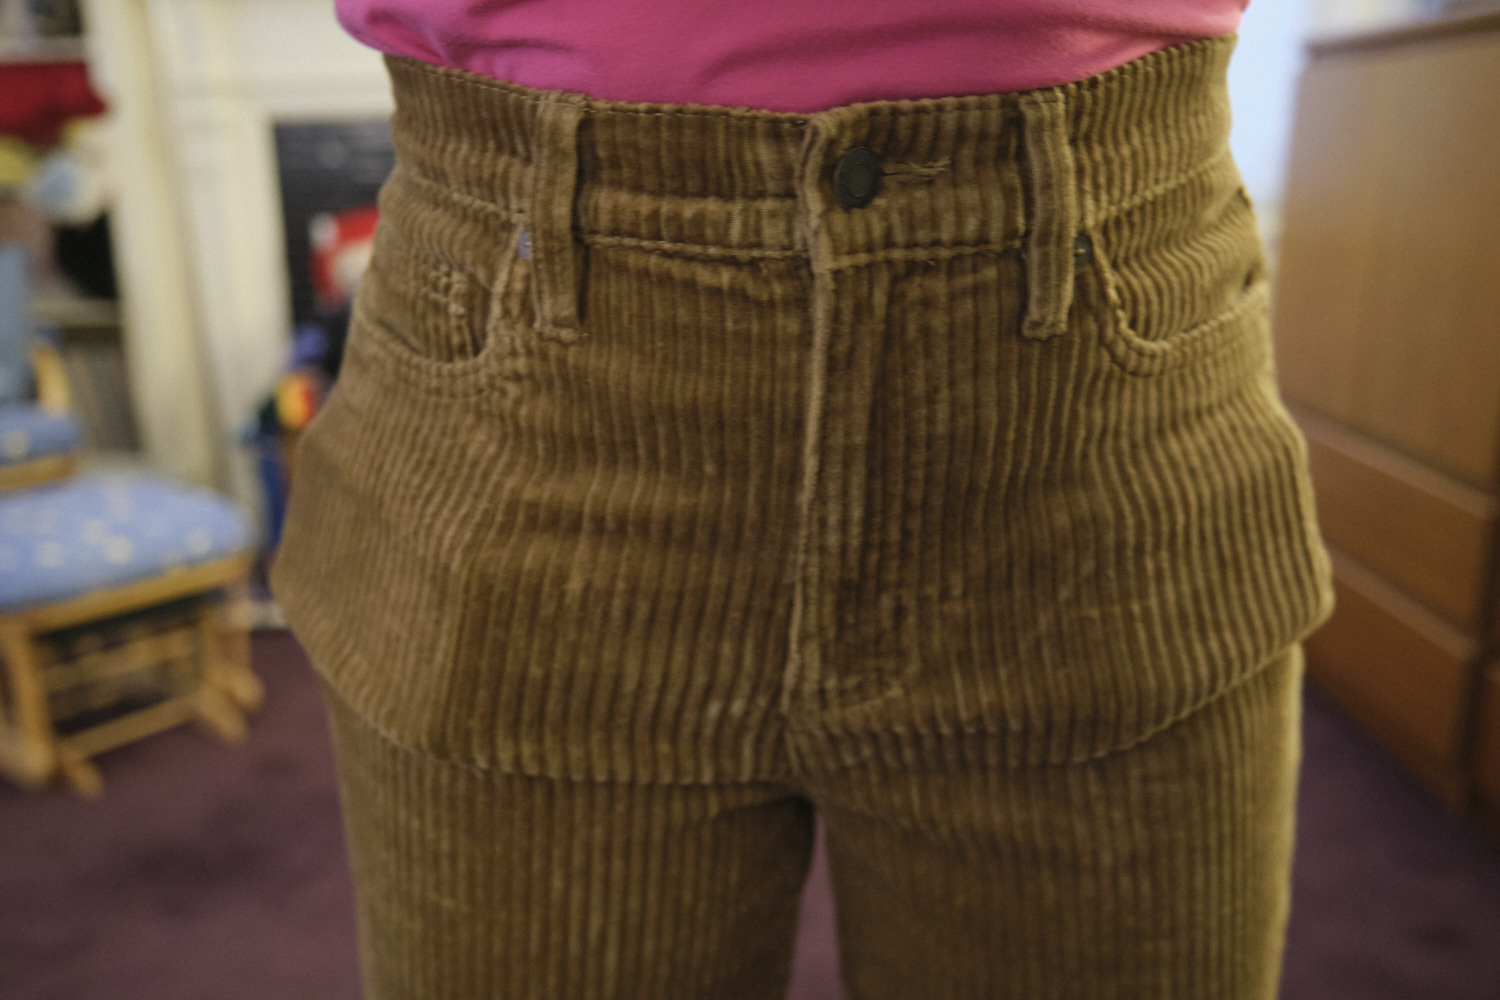
Here are two other pants with extended pocket bags: a pair of pleated flannel dress pants and a pair of wide-leg stretch cords. I used scraps of quilters cotton for these. The grey pants only needed a small extension, but it made a huge difference in having my phone sit comfortably and not fall out. When I wear this pants with a phone in my pocket, you can’t really tell. The cords needed a longer extension, Although these are wide-leg pants, they are fairly tight at the waist. With the original pockets, my phone produced that ugly waist bulge. Now the phone sits just below my hip crease — it is still visible, but I think it looks better there.
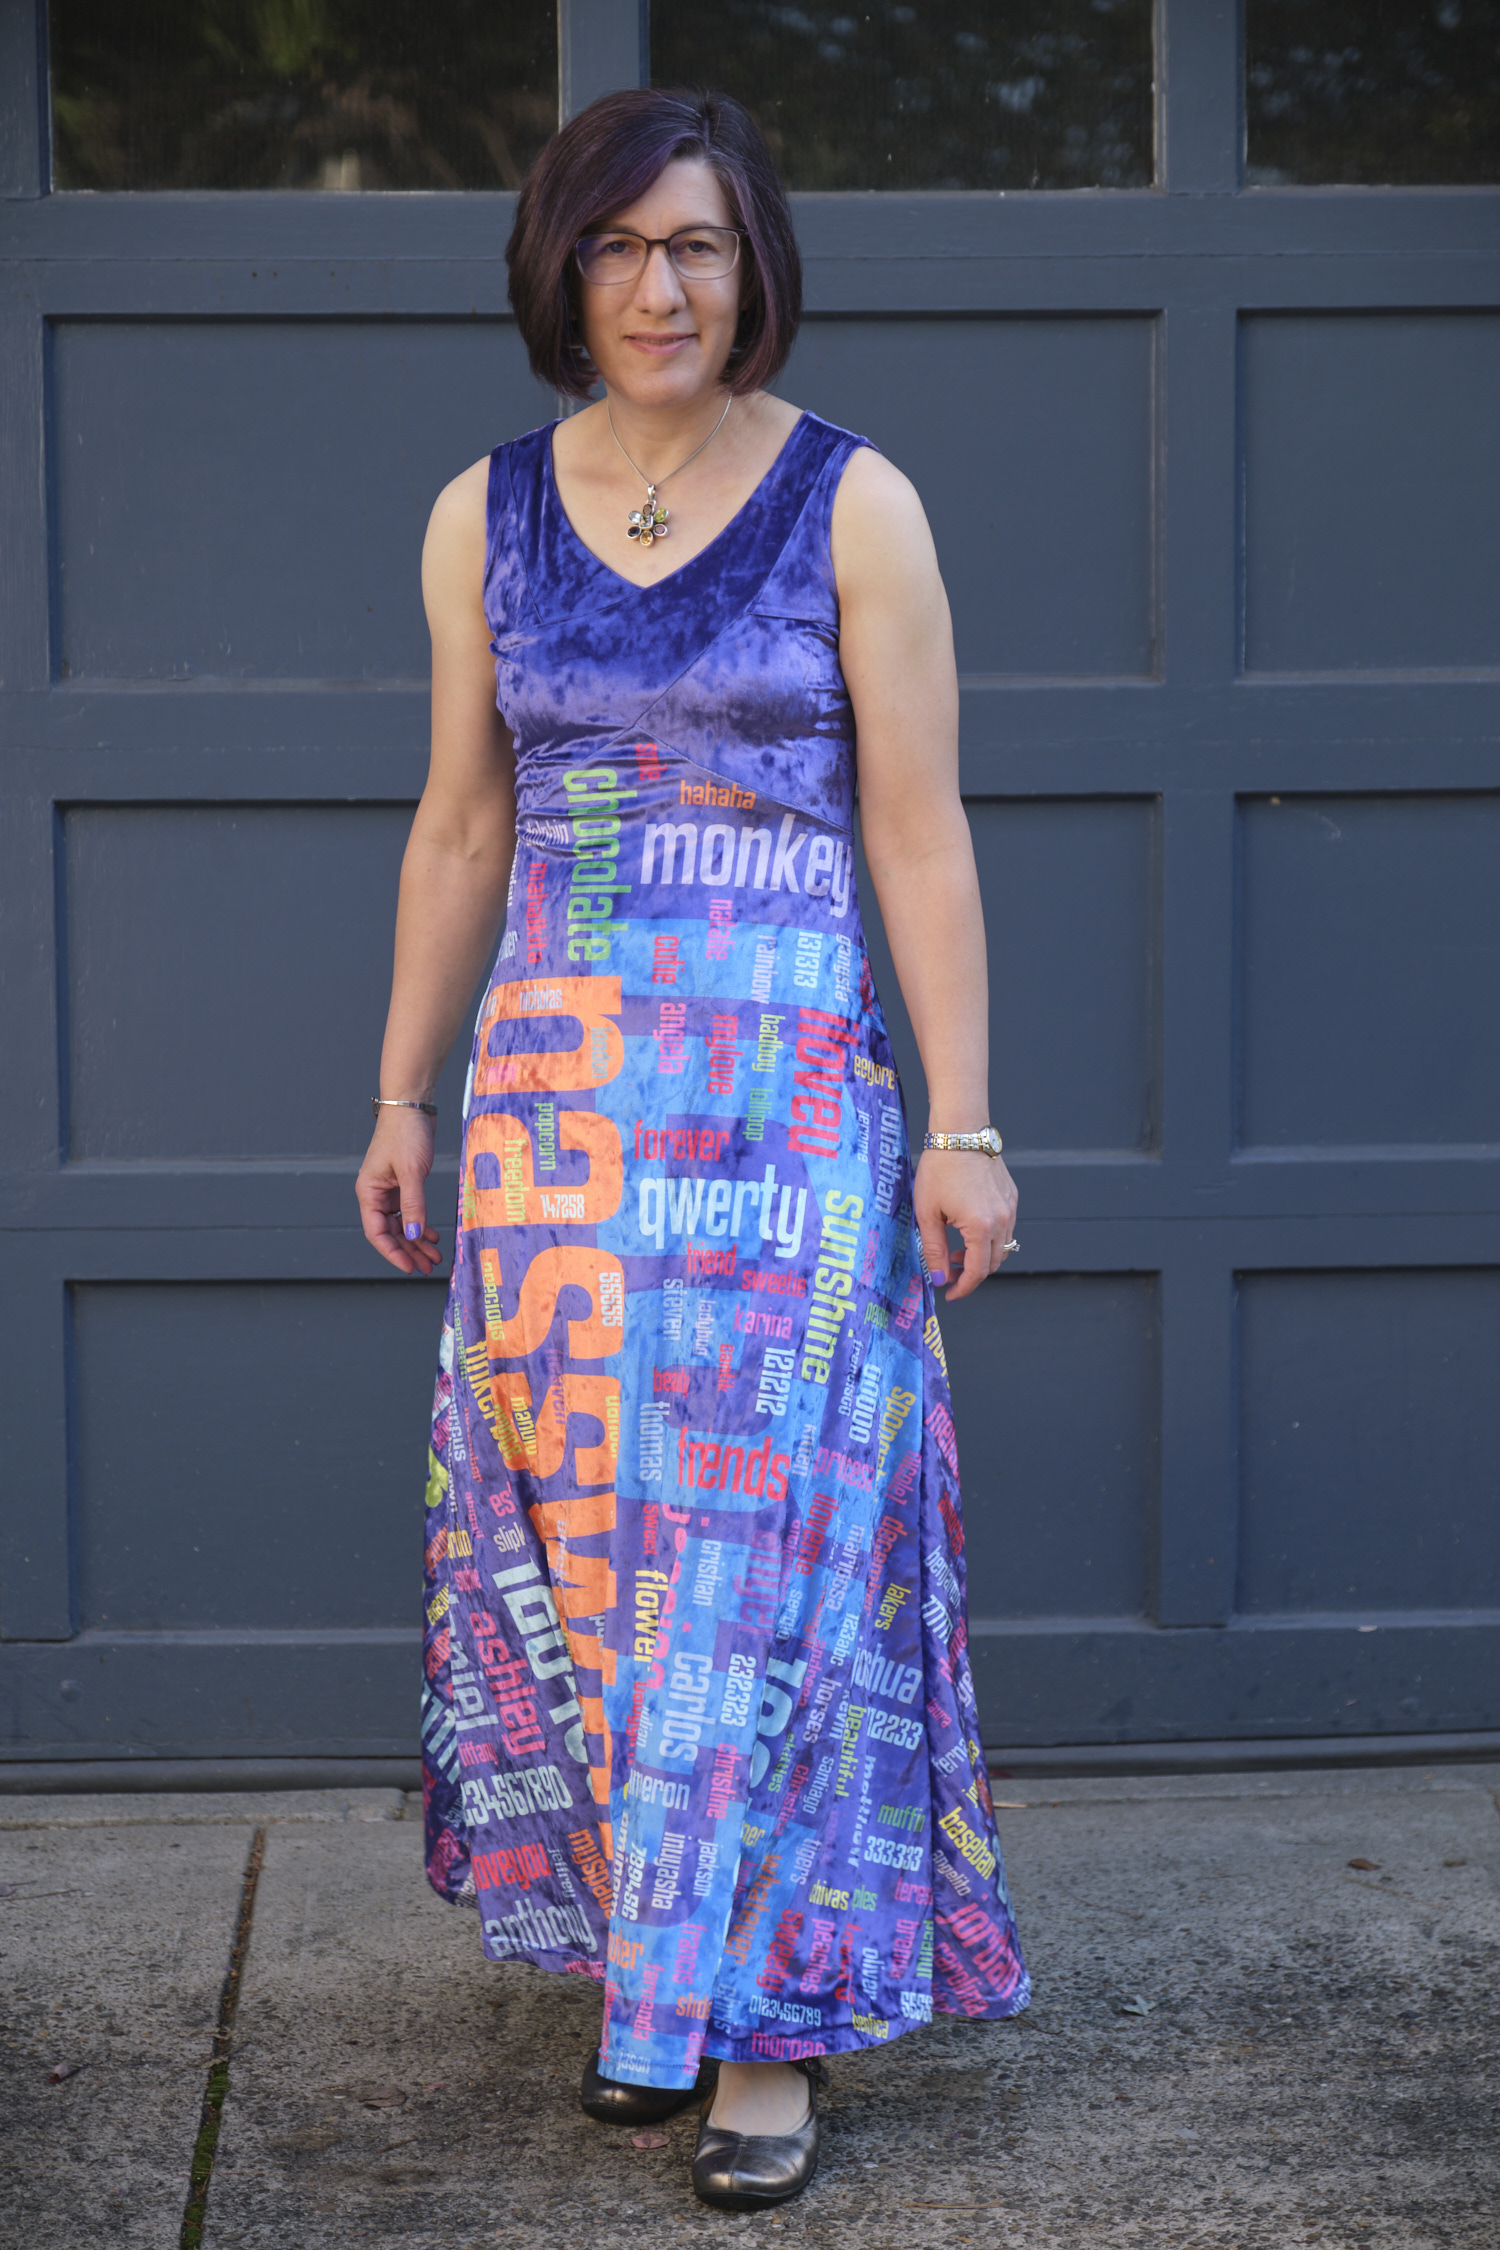
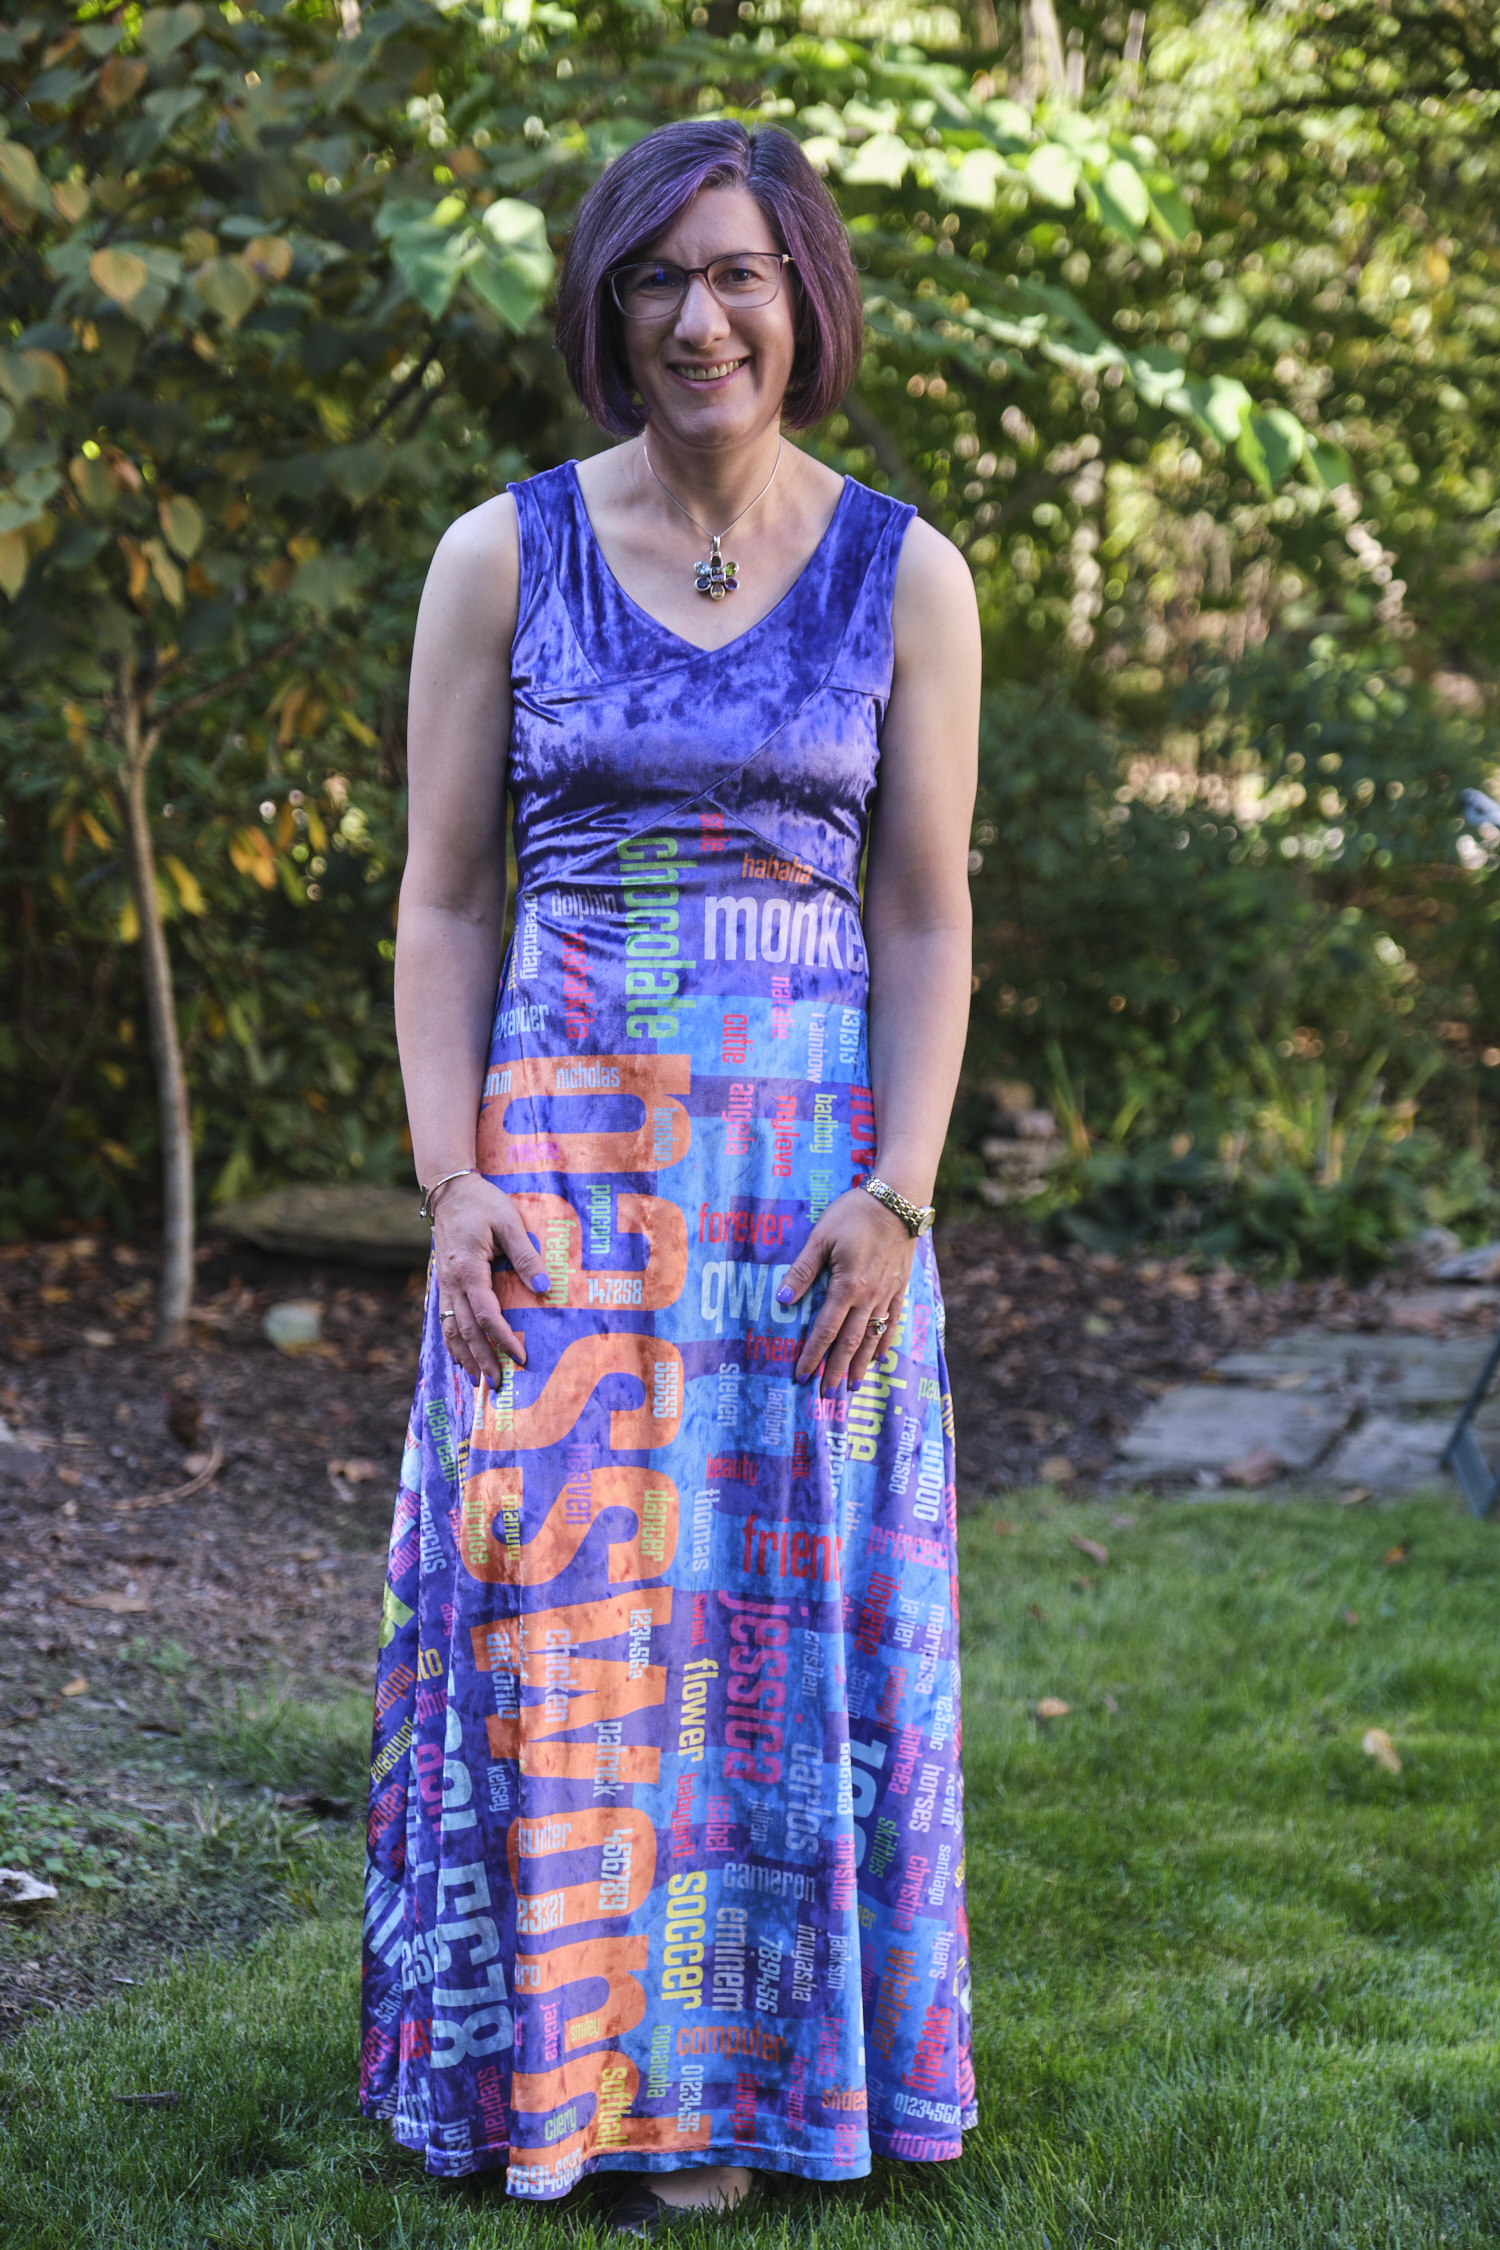
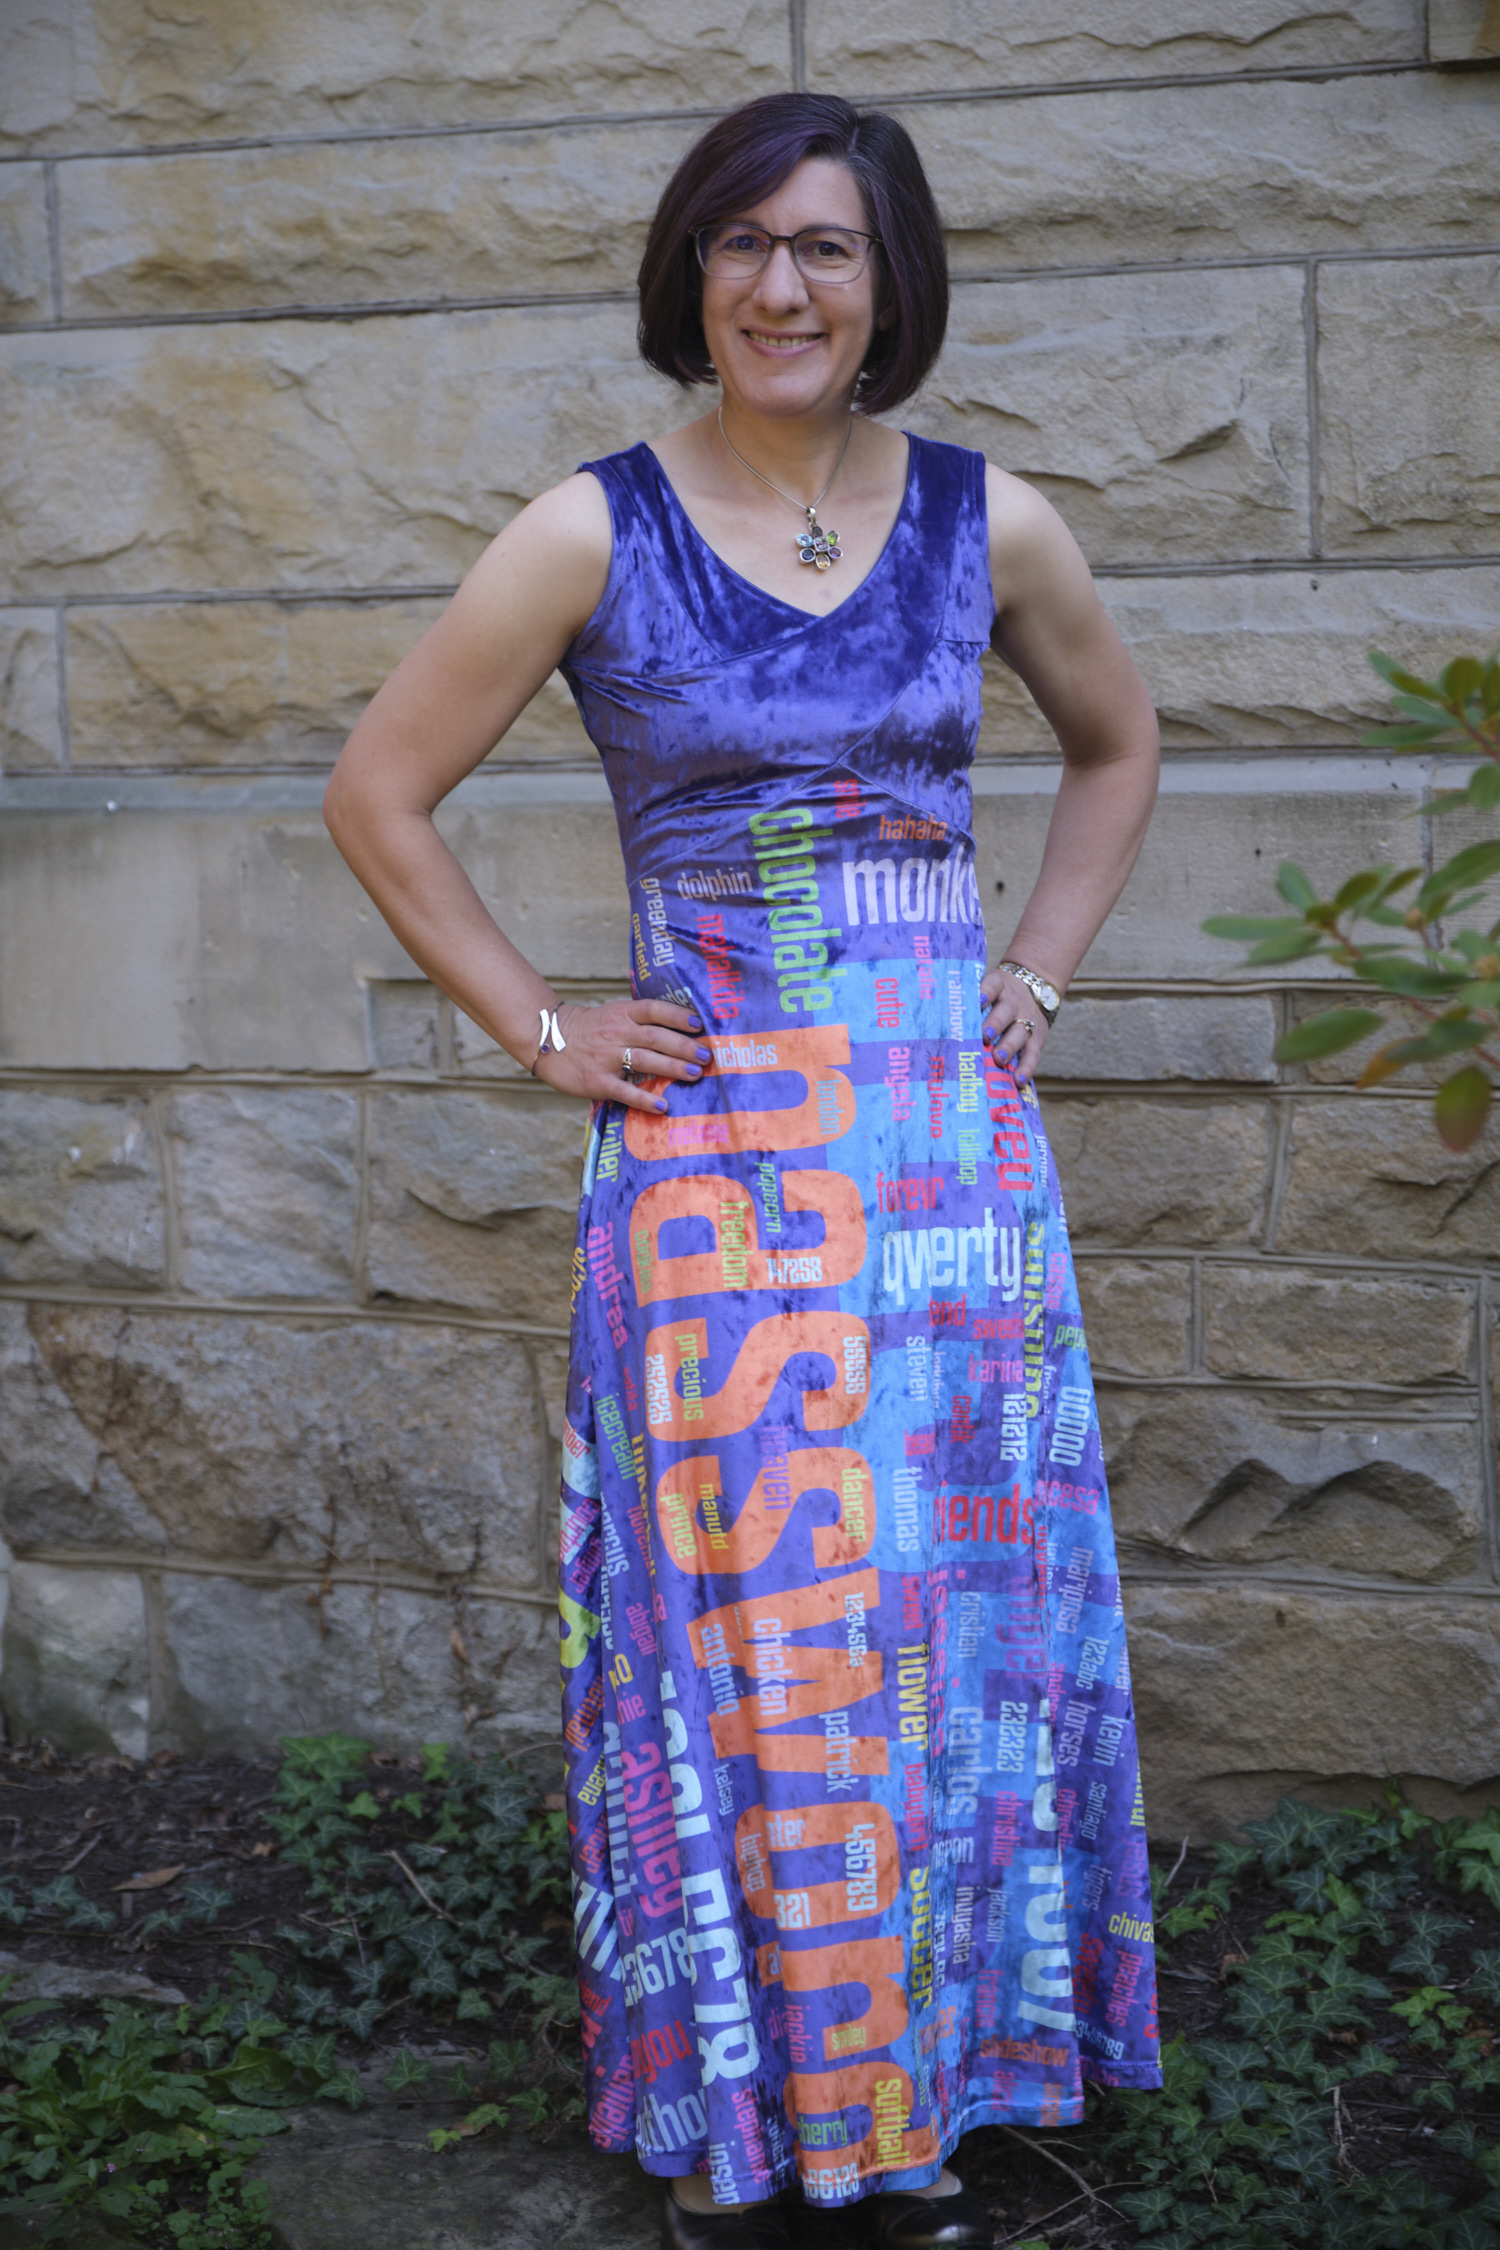
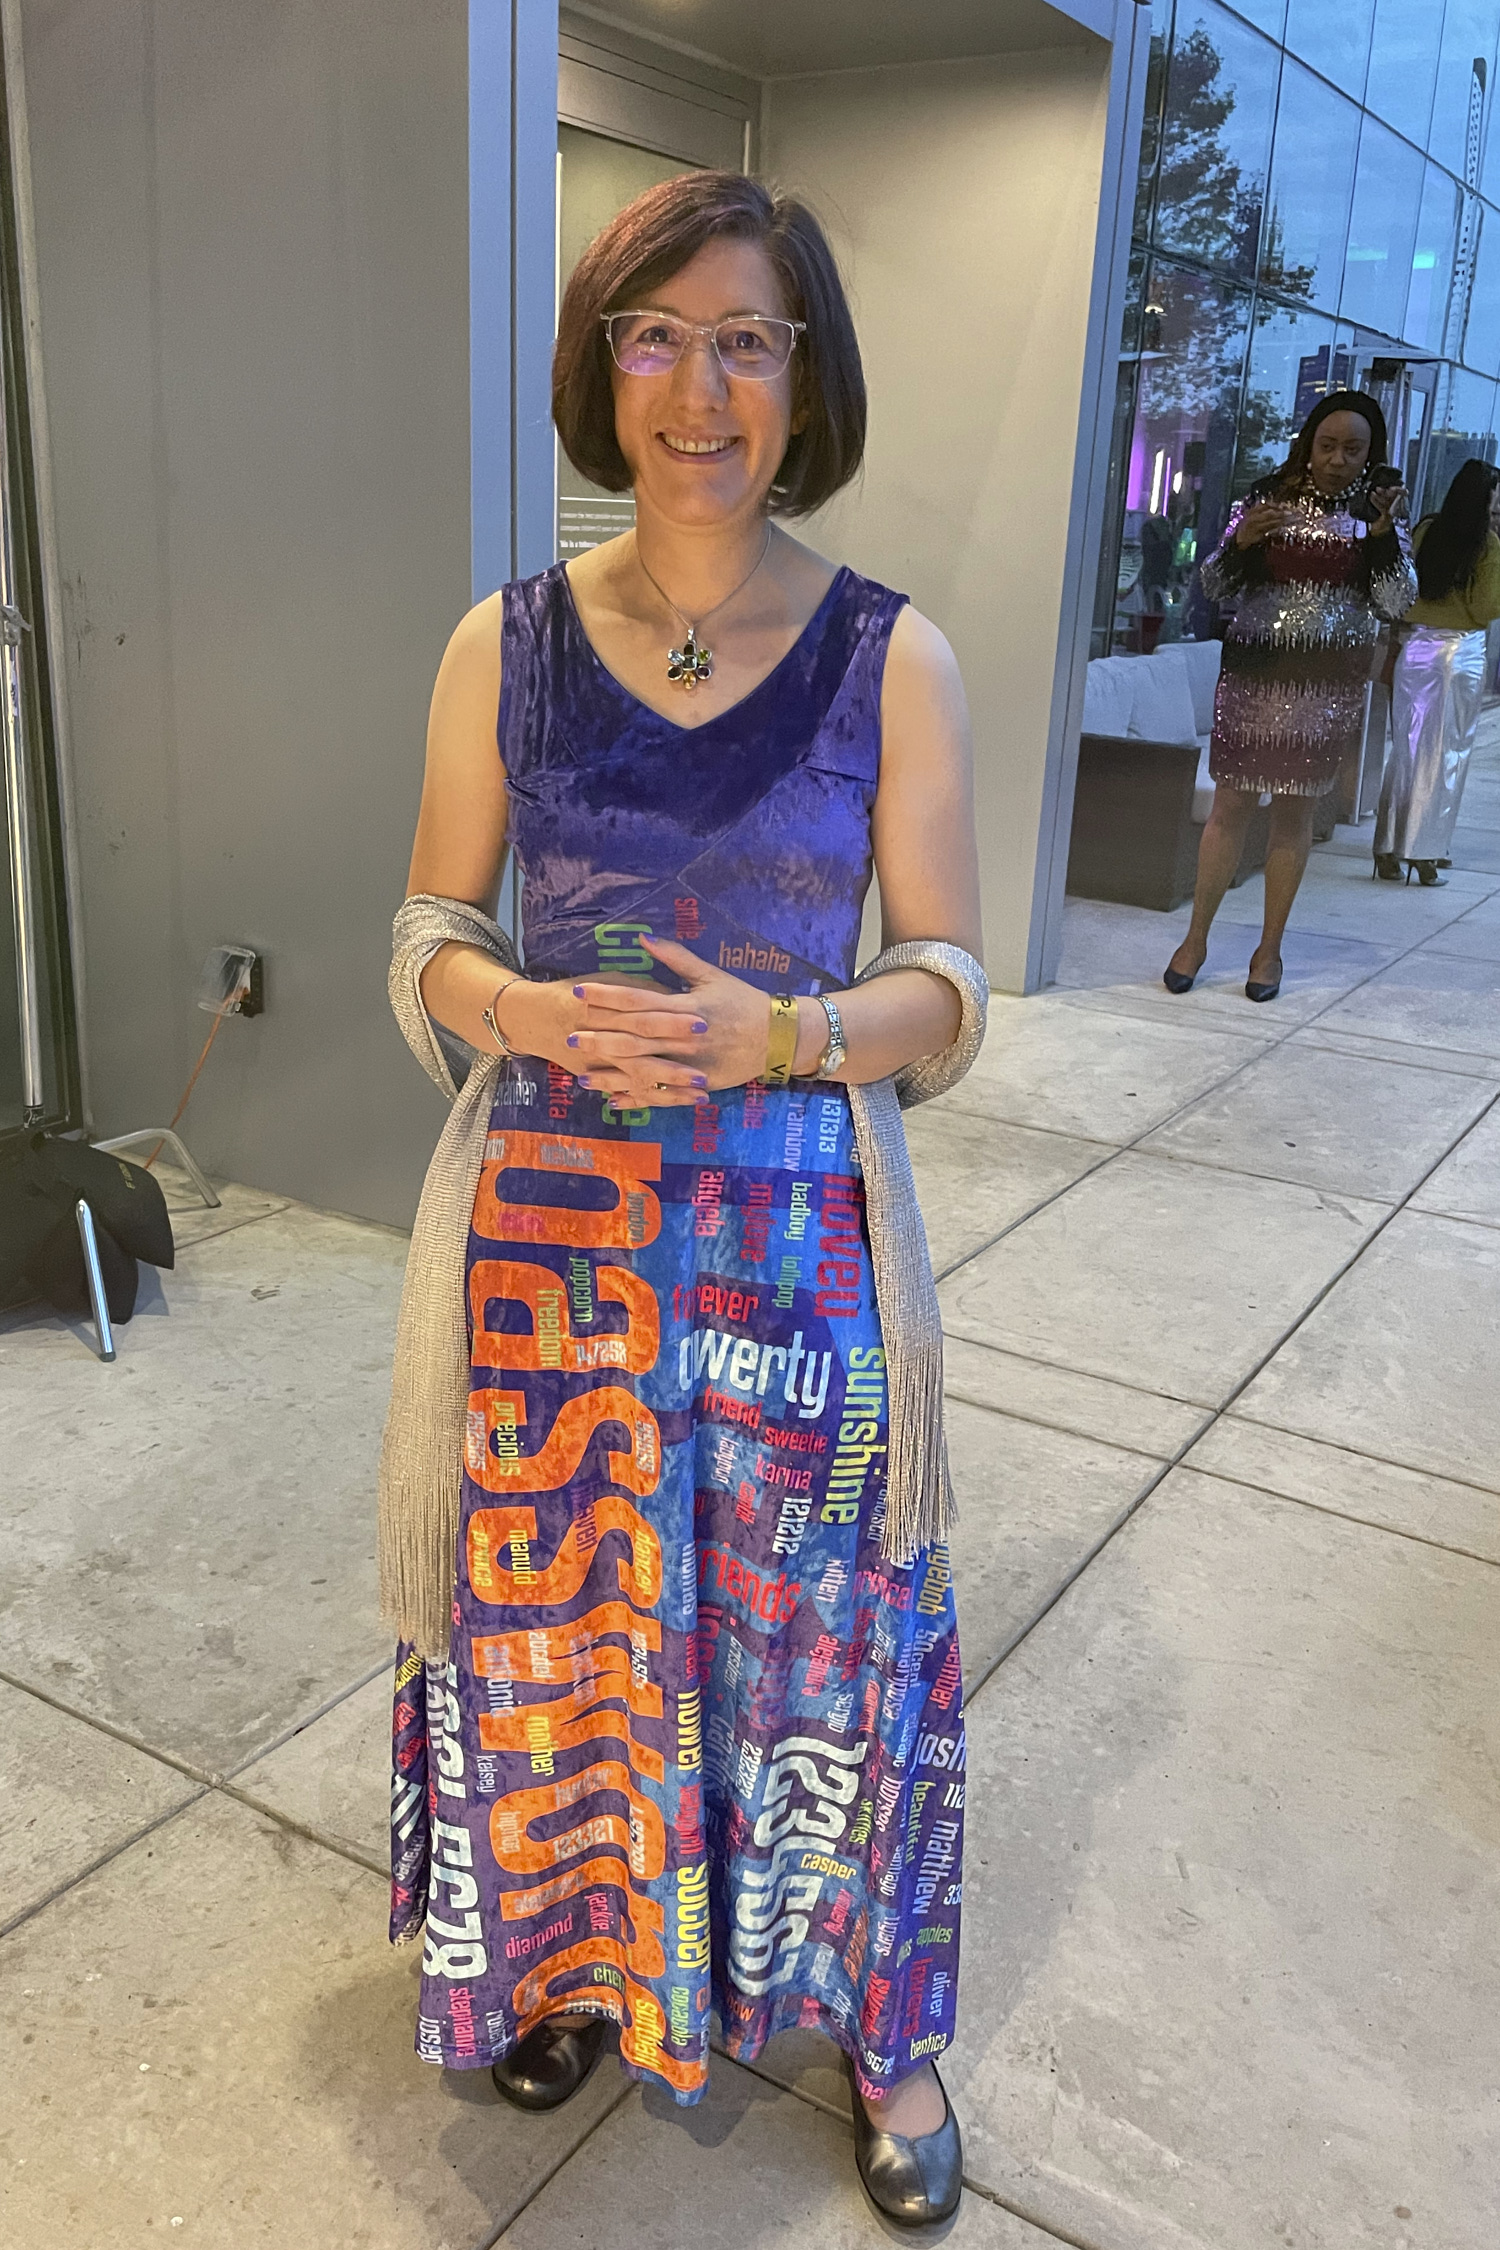
It’s made from a luxurious custom printed crushed velour fabric from Contrado. It’s vibrant and shiny, especially in the sun. And it feels stretchy and soft and is the most comfortable ball gown ever. All of my past custom password fabric orders have been from spoonflower.com. But they didn’t offer a suitable fabric that was both dressy and stretchy, so I started looking for other custom fabric vendors. Contrado is based in the UK so I was a little bit uncertain about placing an international order, but they offer a ton of fabric options so I ordered a fabric swatch kit. A few days later I opened an envelope with more fabric swatches than I knew what to do with. I didn’t count them, but I think there were over 100. So many fabric choices! I dumped them out on the floor and tested each one for light weight, softness, and stretchability, narrowing down the pile to a short list of scuba variants and crushed velour. They were all nice, but I loved the feel of the crushed velour and the way it catches the light. So with that in mind I ordered some cheap crushed velour to make a muslin of the pattern I intended to make (Sinclair Serena), but at a shorter length. The cheap crushed velour did not feel luxurious at all, but it made a nice dressy summer dress that I have worn several times this summer.
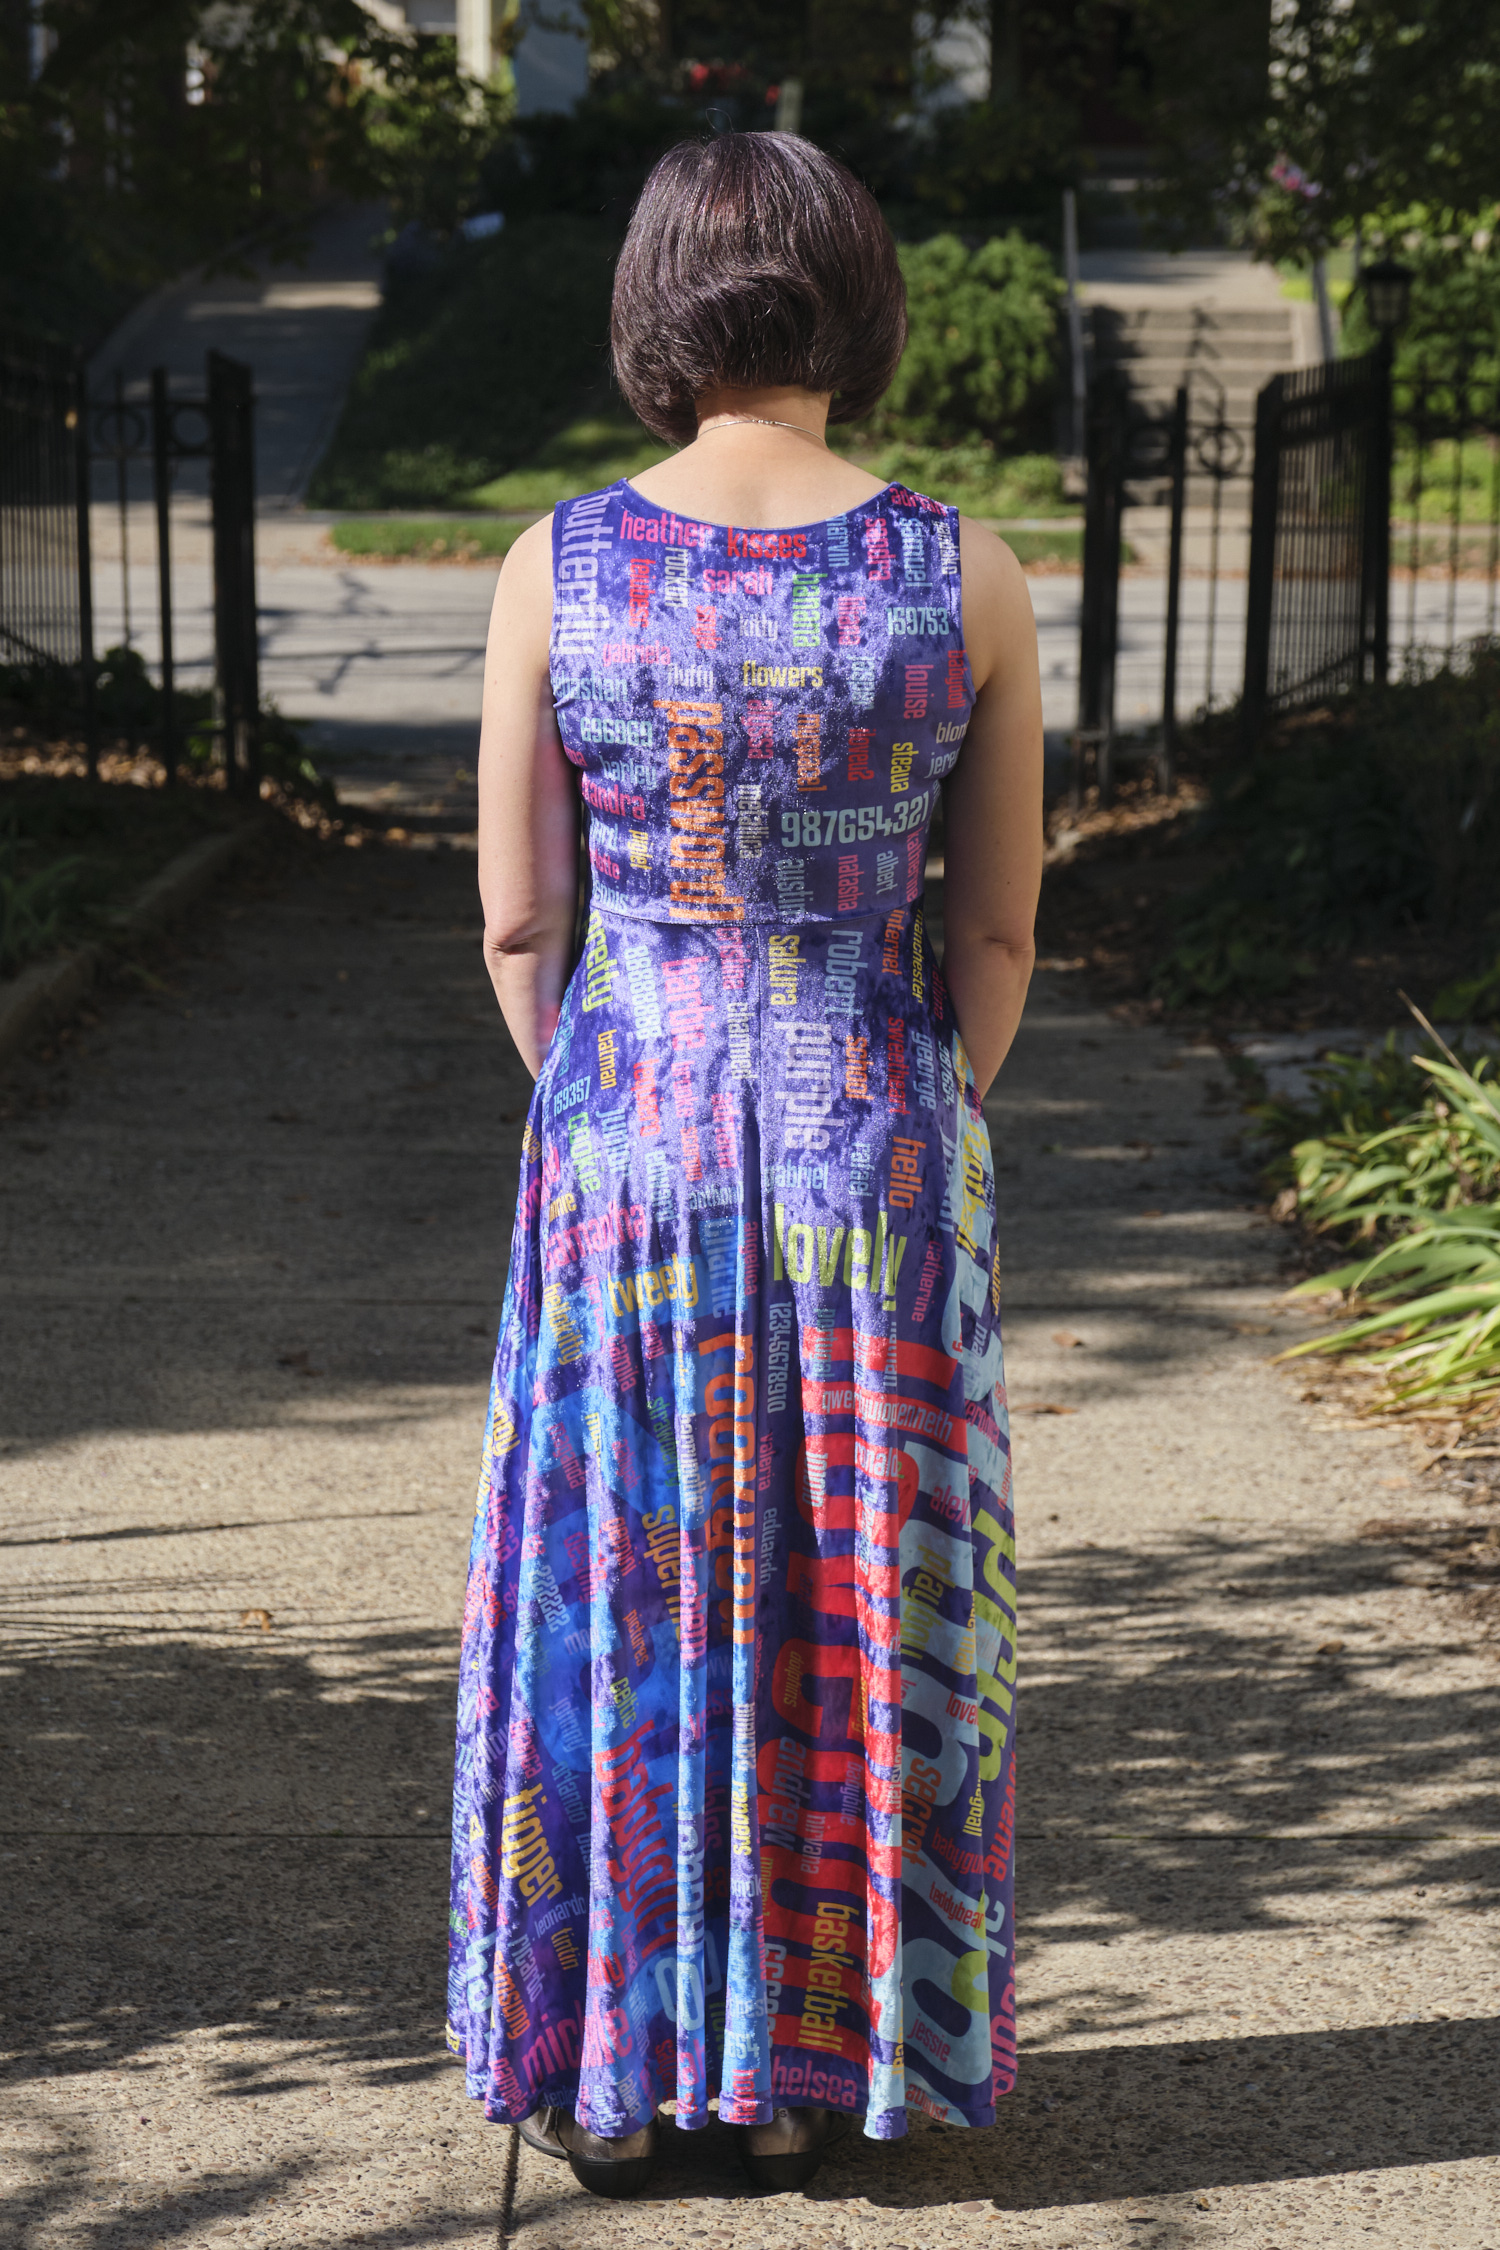
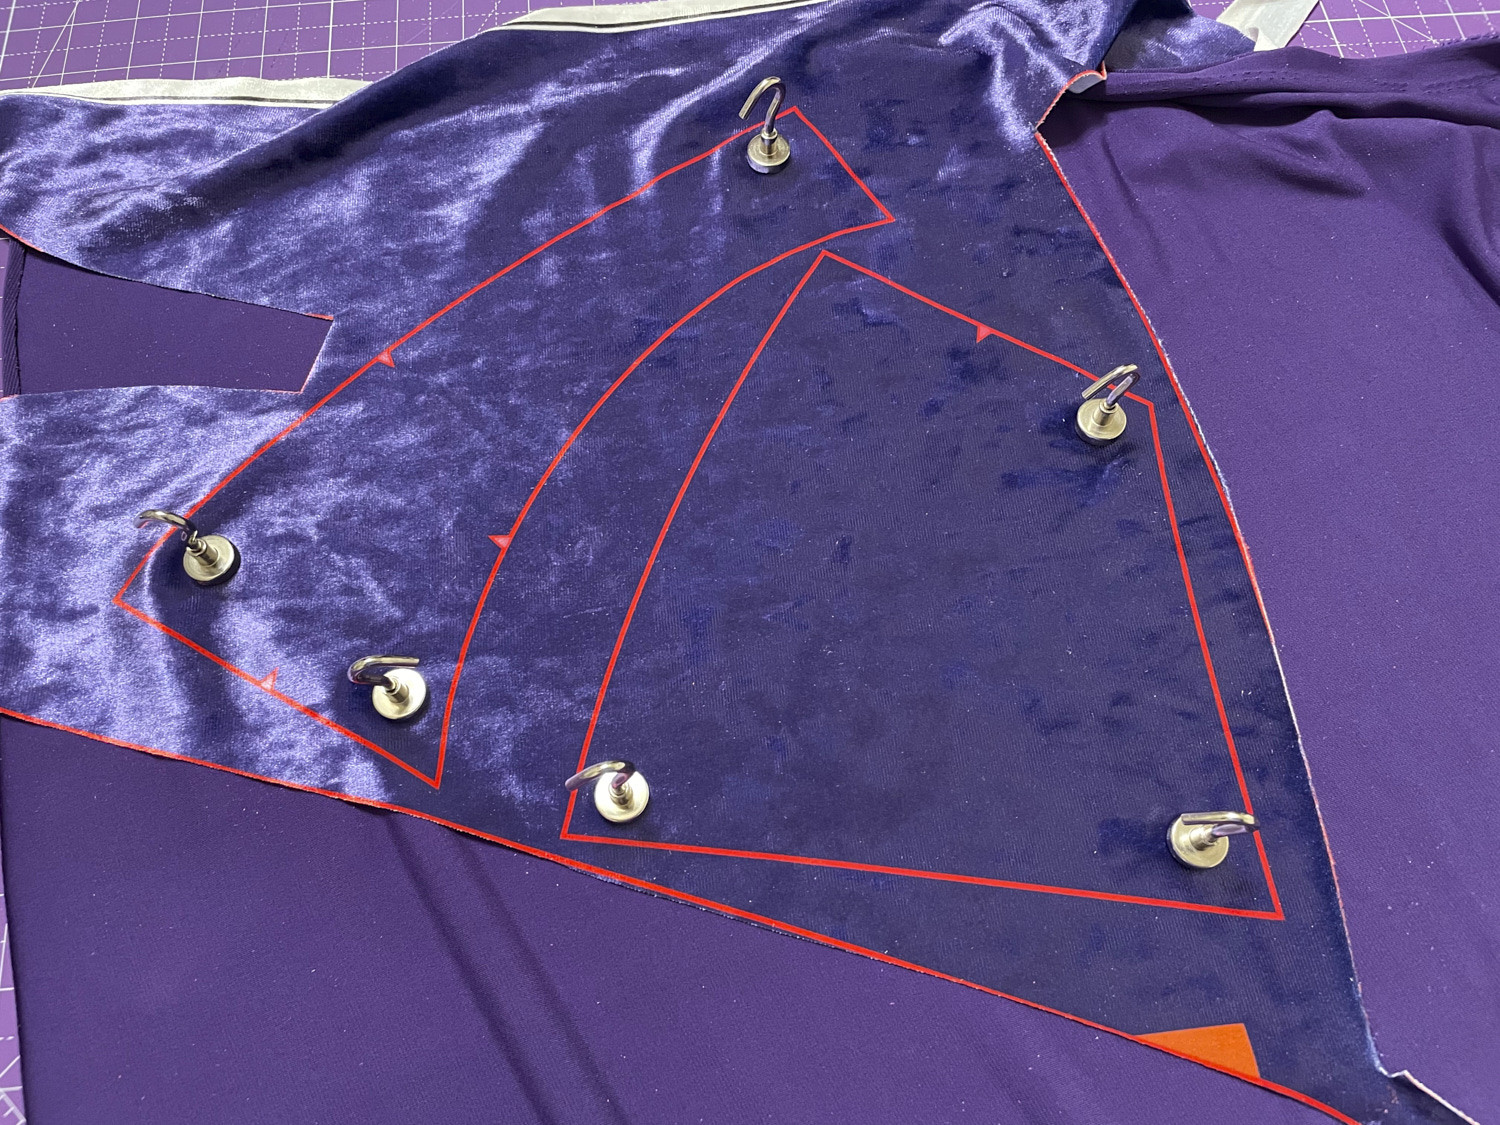
Once I had picked out the fabric and settled on the pattern, I worked on the fabric design. I took the PDF file for the Serena dress in the size 4 petite, and extended the skirt length to be long enough to graze the tops of my feet after hemming. I then created a PDF file the width of the fabric (53.15 inches) by 108 inches long in Affinity Designer. I pasted the Serena pattern pieces into the file, mirroring those that needed to be mirrored. The skirt back at that length was wider than 53 inches, so I decided to add a back seam and print the skirt back in two pieces. I split the skirt back and added a seam allowance to the center back seam. The skirt front is not as full so it fit the fabric width without a problem. I made all the pattern lines red and deleted all of the internal pattern markings, keeping only the outlines. Then I added a solid purple layer under the pattern pieces. The next step was to add all the passwords to the dress. I started with my previous password dress fabric and cut and pasted the passwords inside the pattern pieces (removing the naughty words this time). In some cases I rotated them or scaled them slightly from the previous design. I spent a lot of time rearranging the passwords to fit them all into the puzzle. I also chose some of my favorites for prominent placement. I decided to cover the entire skirt and back of the bodice with passwords but leave the bodice front solid purple.
I could have continued futzing with the password layout for quite some time, but I was not sure how long it would take for my order to be delivered and I had a deadline for finishing the dress, so I saved a giant jpg file and called it done. (I subsequently spotted several small glitches but hopefully nobody else will notice.) I went ahead and placed the order on a Sunday morning in August. Much to my amazement, the fabric was printed in the UK, shipped across the ocean, and was delivered via FedEx to my doorstep in Pittsburgh, PA just TWO DAYS LATER on Tuesday! The custom fabric is expensive. Even with a discount coupon it was $42 per yard. But I paid only $9.95 for standard international shipping.
The Contrado website said the fabric would be machine washable, but was a little vague on whether to expect shrinkage. Given that it was 100% polyester fabric I took a chance that there would be minimal shrinkage (definitely a risk if you print your pattern pieces directly on the fabric) and I was right.
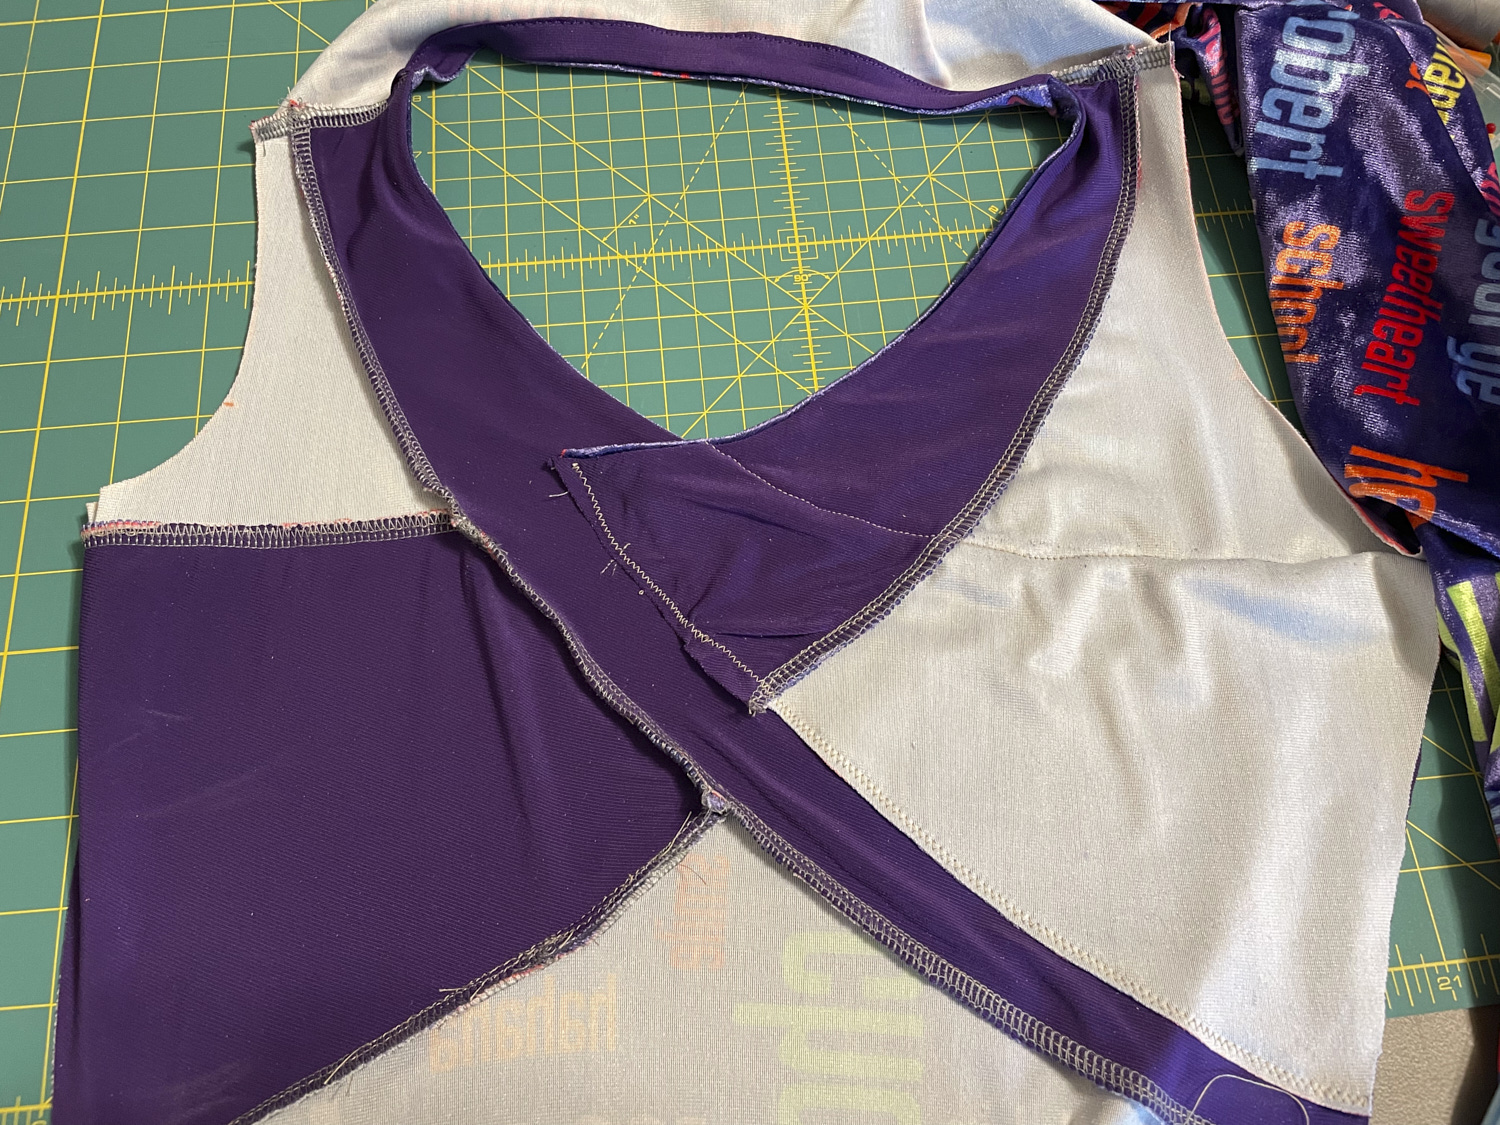
I laid the fabric out on my magnetized cutting mat and cut it out along the red lines with my rotary cutter. I knew from sewing the muslin that crushed velour is slippery and hard to pin in place, so I did a lot of hand basting and then serged most of it, leaving the cutting knife retracted so I wouldn’t accidentally cut anything I didn’t want to cut (since the pattern had 1/4-inch seam allowances there wasn’t really any need to trim as I sewed). The first few steps of the bodice assembly went pretty well, until it came time to join the F1 piece to the F2/F5 piece of the bodice. There are multiple points to line up and after basting and unbasting multiple times I realized that there was no possible way to get everything simultaneously lined up. After about three hours of this I finally gave up and sewed it together so the outside looked good, but the inner lining (purple ITY) looked like a train wreck. But nobody will ever see it, except for the fact that I am showing you this photo right here so that you can see that the inside is a complete disaster but the outside still looks really good. You will see there is a diagonal piece that goes from the top left to the bottom right. There is another diagonal piece that starts in the middle and goes to the bottom right. Those two pieces are supposed to be sewn together on top of each other, but yet there is a bout a 1 inch gap between them. So that nothing would be flapping in the breeze, I sewed the loose edge to the inner lining. I believe the problem has to do with the fact that my fabric stretches only in the horizontal direction and has almost no vertical stretch (going against the advice of the pattern maker). The fabric I used for my muslin was similar, yet somehow I did not end up with this particular problem. I’m perplexed, but it all worked out in the end.
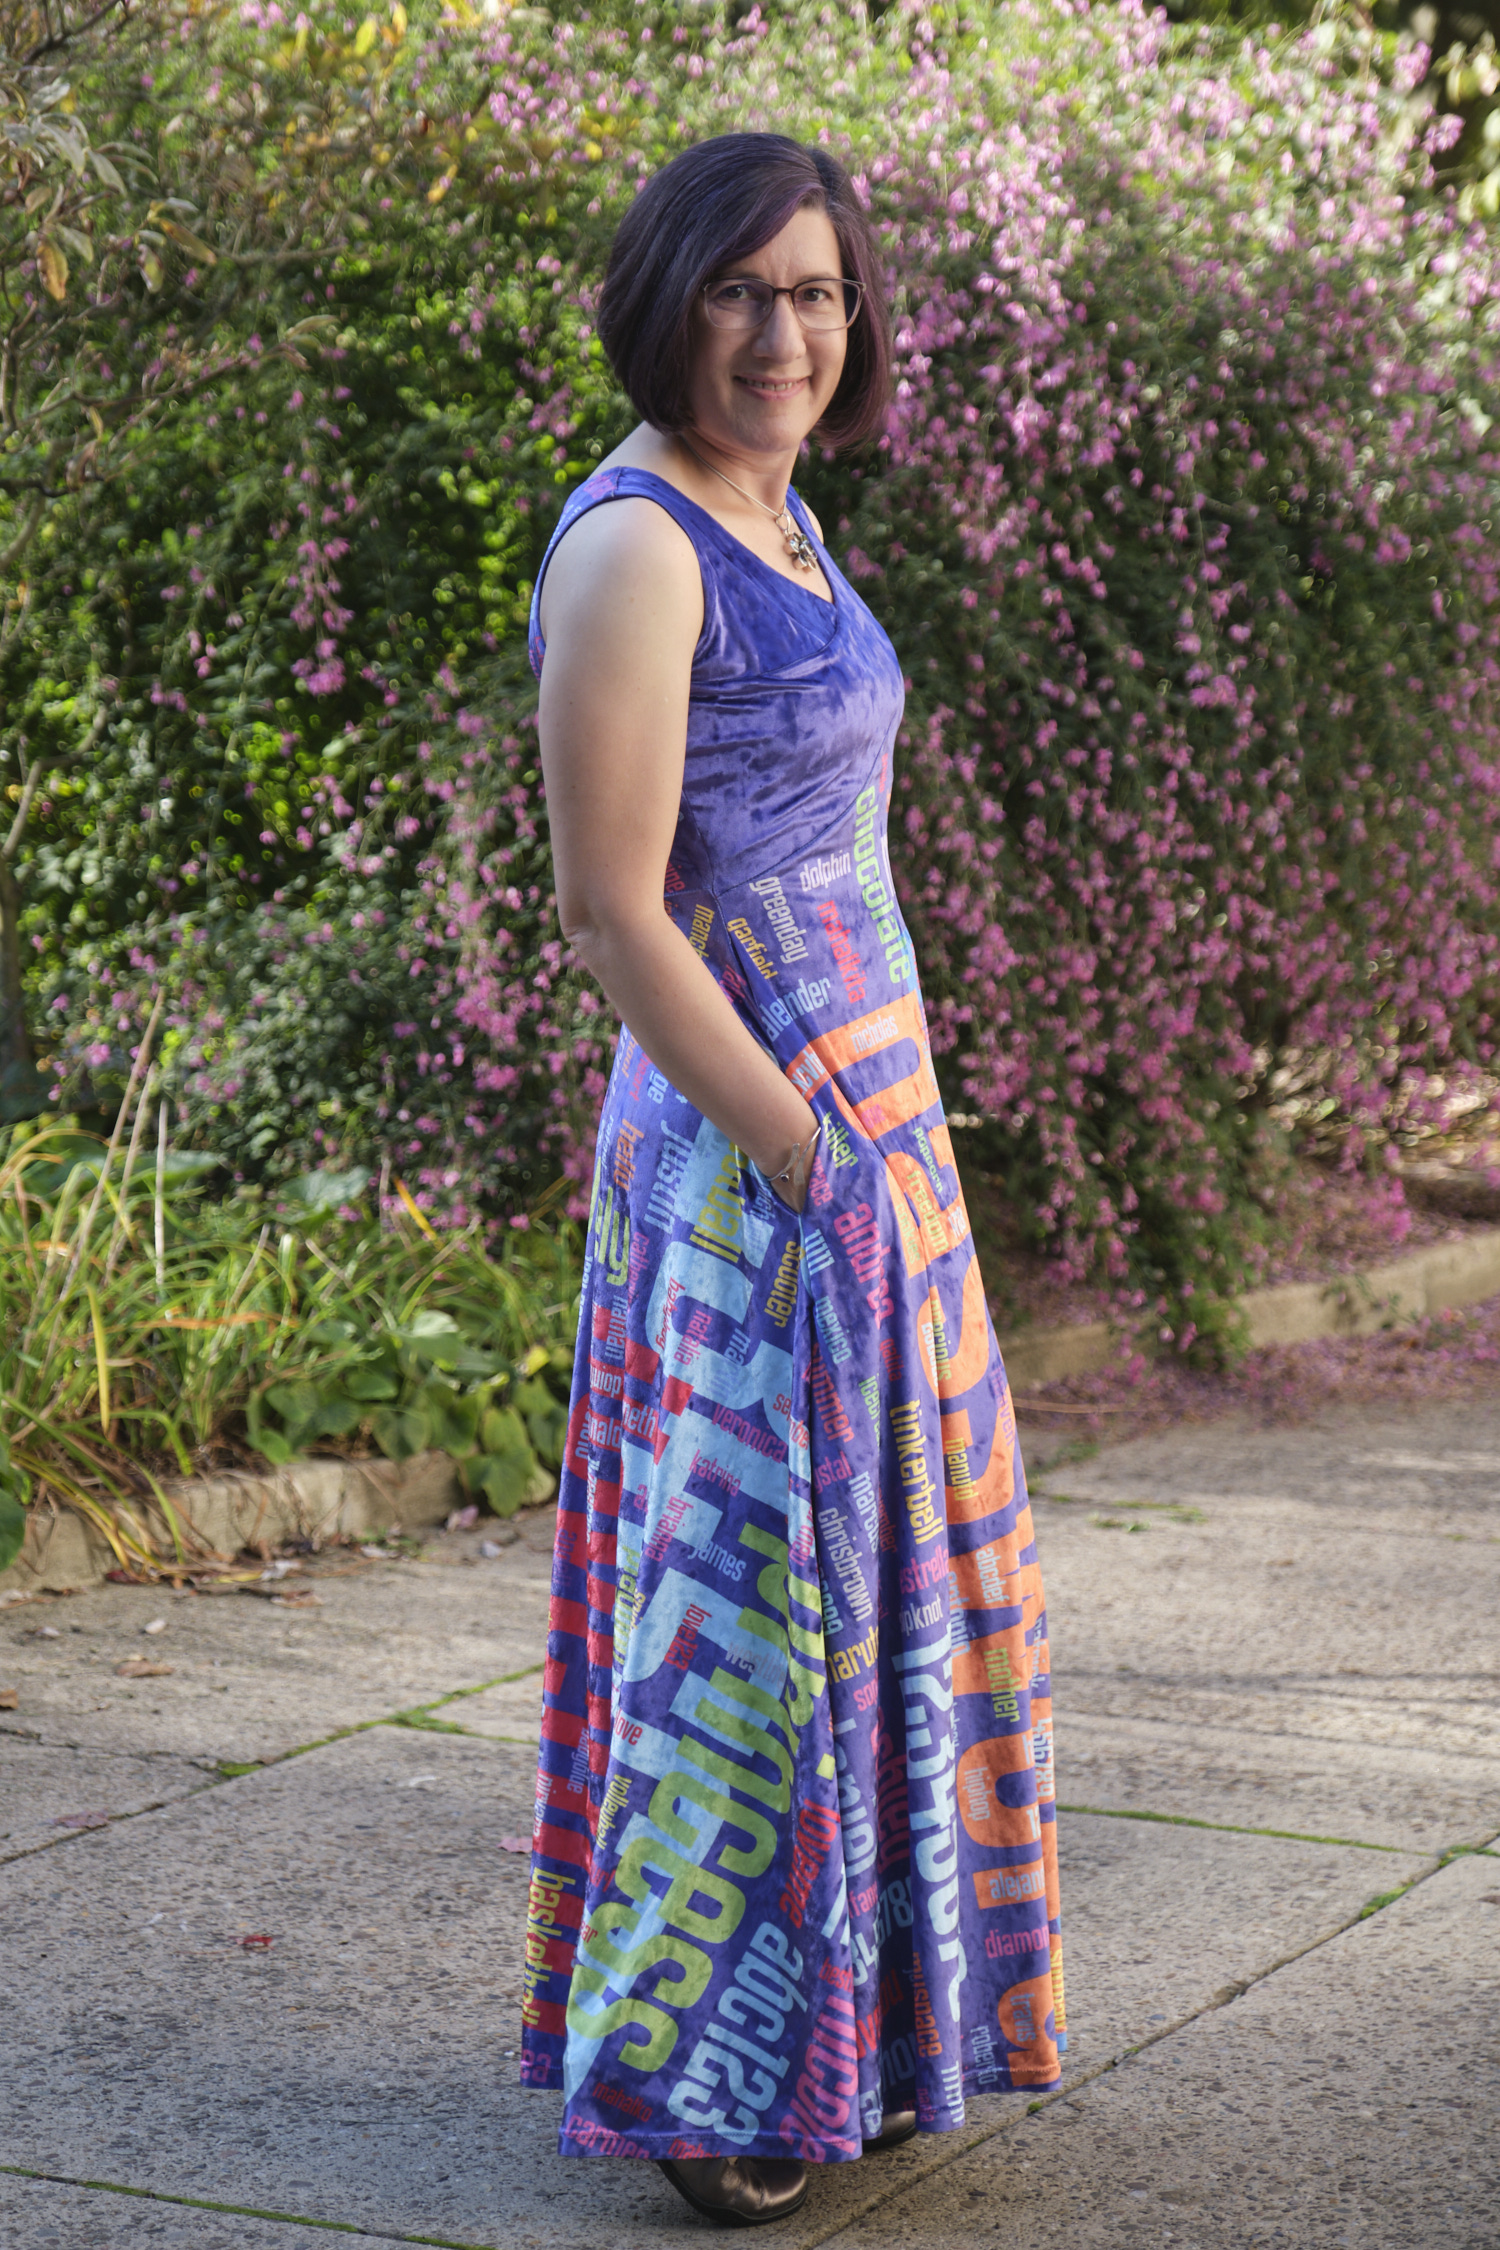
Of course, I chose the pocket option, since Cinderella and I always need pockets, even when we go to a ball. I decided to make the pocket bags out of the purple stretch velour so that they would not show if they fell open. Stretch velour is not really ideal pocket bag material, especially since I stitched the pocket openings up a bit to prevent things from falling out. Sticking my hand in a pocket tends to cause the pocket bag to come out with my hand, but it works well enough for holding my phone and a small wallet. From past experience with this pattern, I know that I prefer the pockets to sit a bit higher than the pattern calls for so they don’t jiggle around when I walk, so I ignored the marks and just tried on the partially completed dress and pinned the pockets where I wanted them to go.
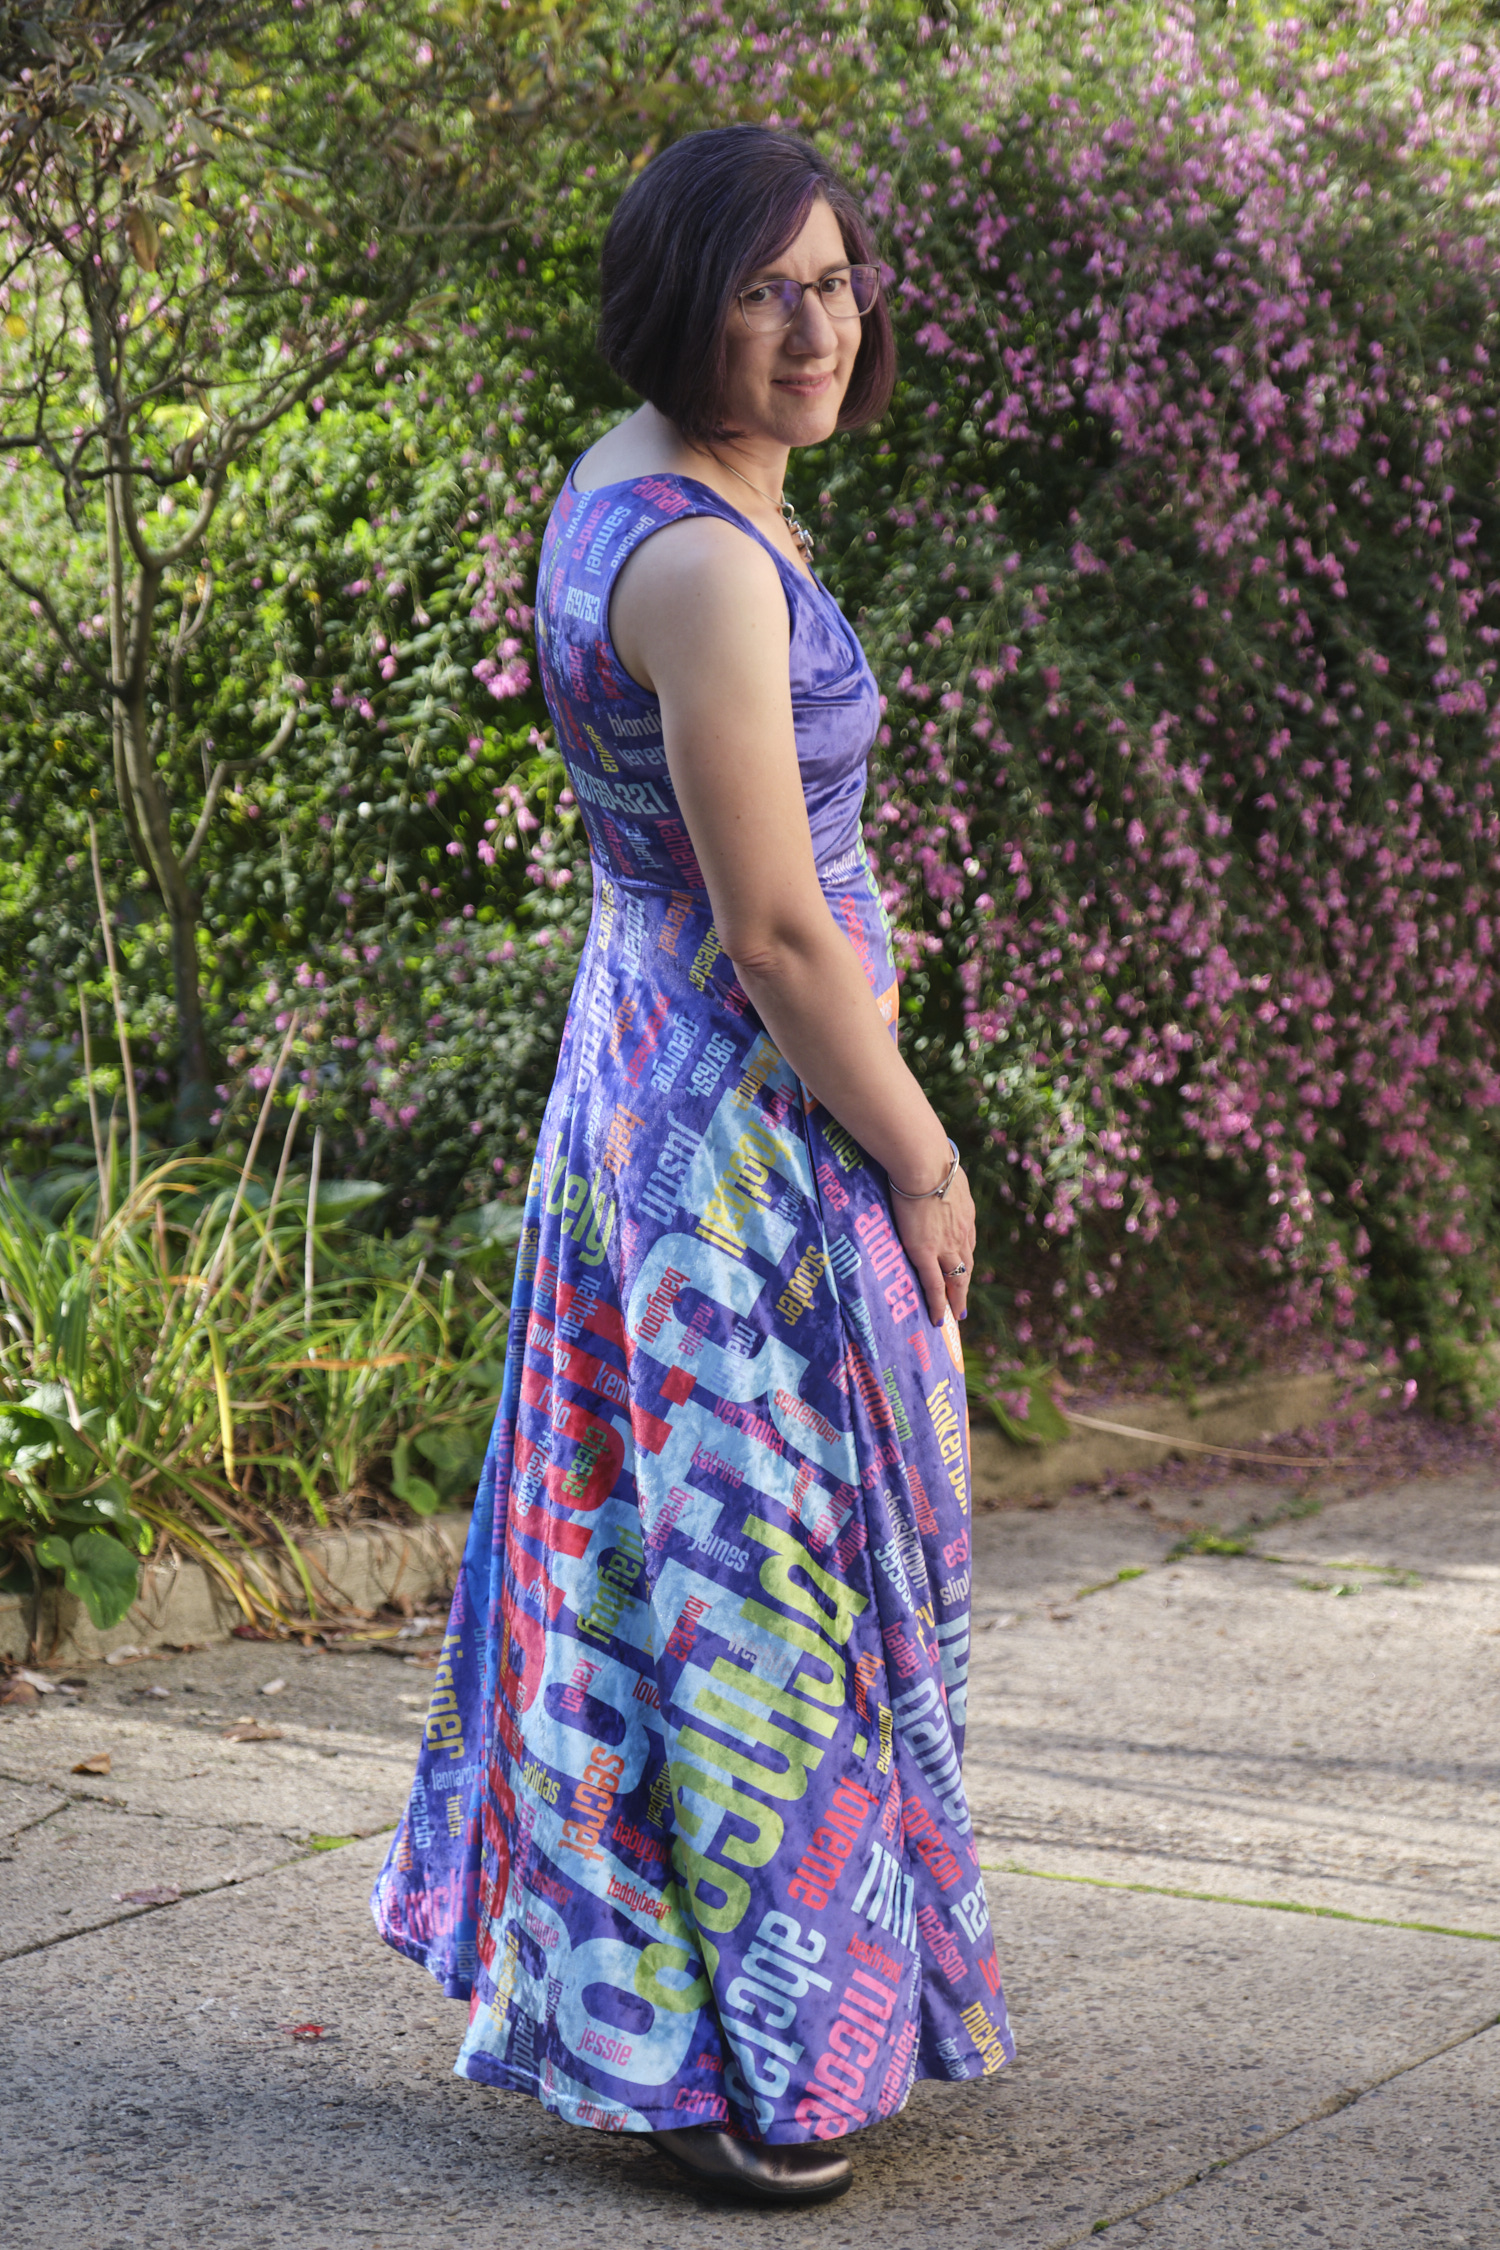
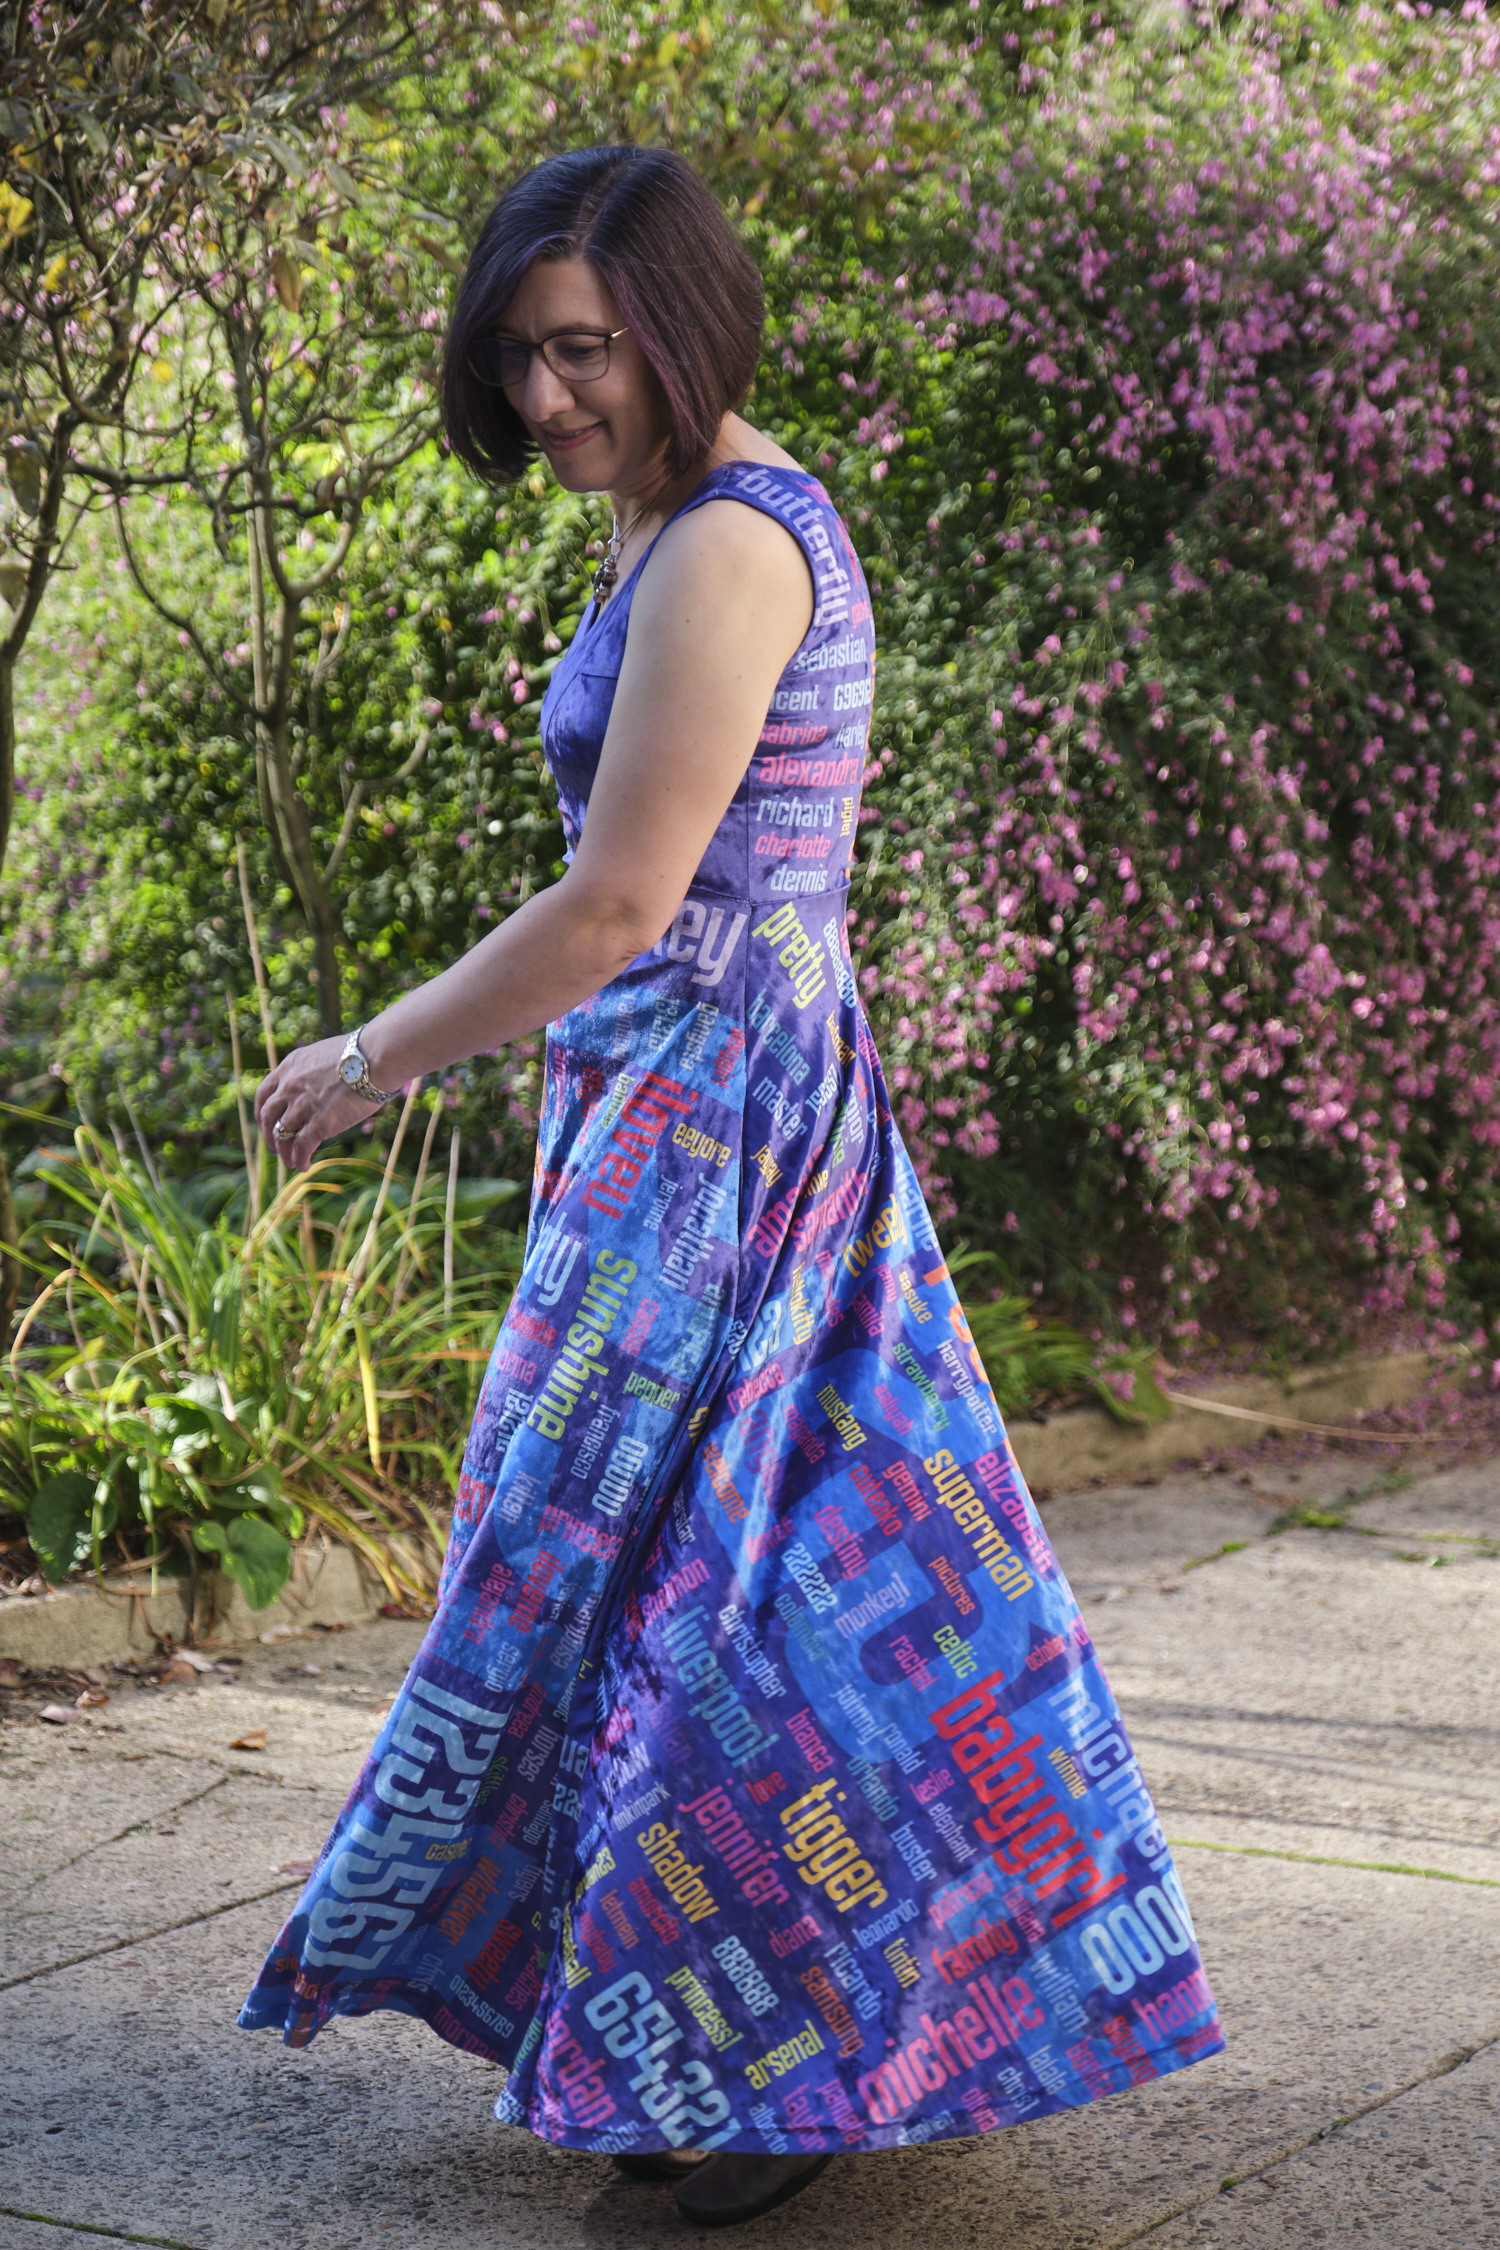
I’m really happy with the end result. It is exactly what I wanted. I was so excited that I put it on and made my husband follow me around my yard with my DXLR camera while I played fashion model and posed for photos. He has no formal photography training but he is starting to get the hang of fashion photography as I explain to him that there is a difference between zooming in and moving closer to the subject.
Did I mention that this dress has some twirlability?
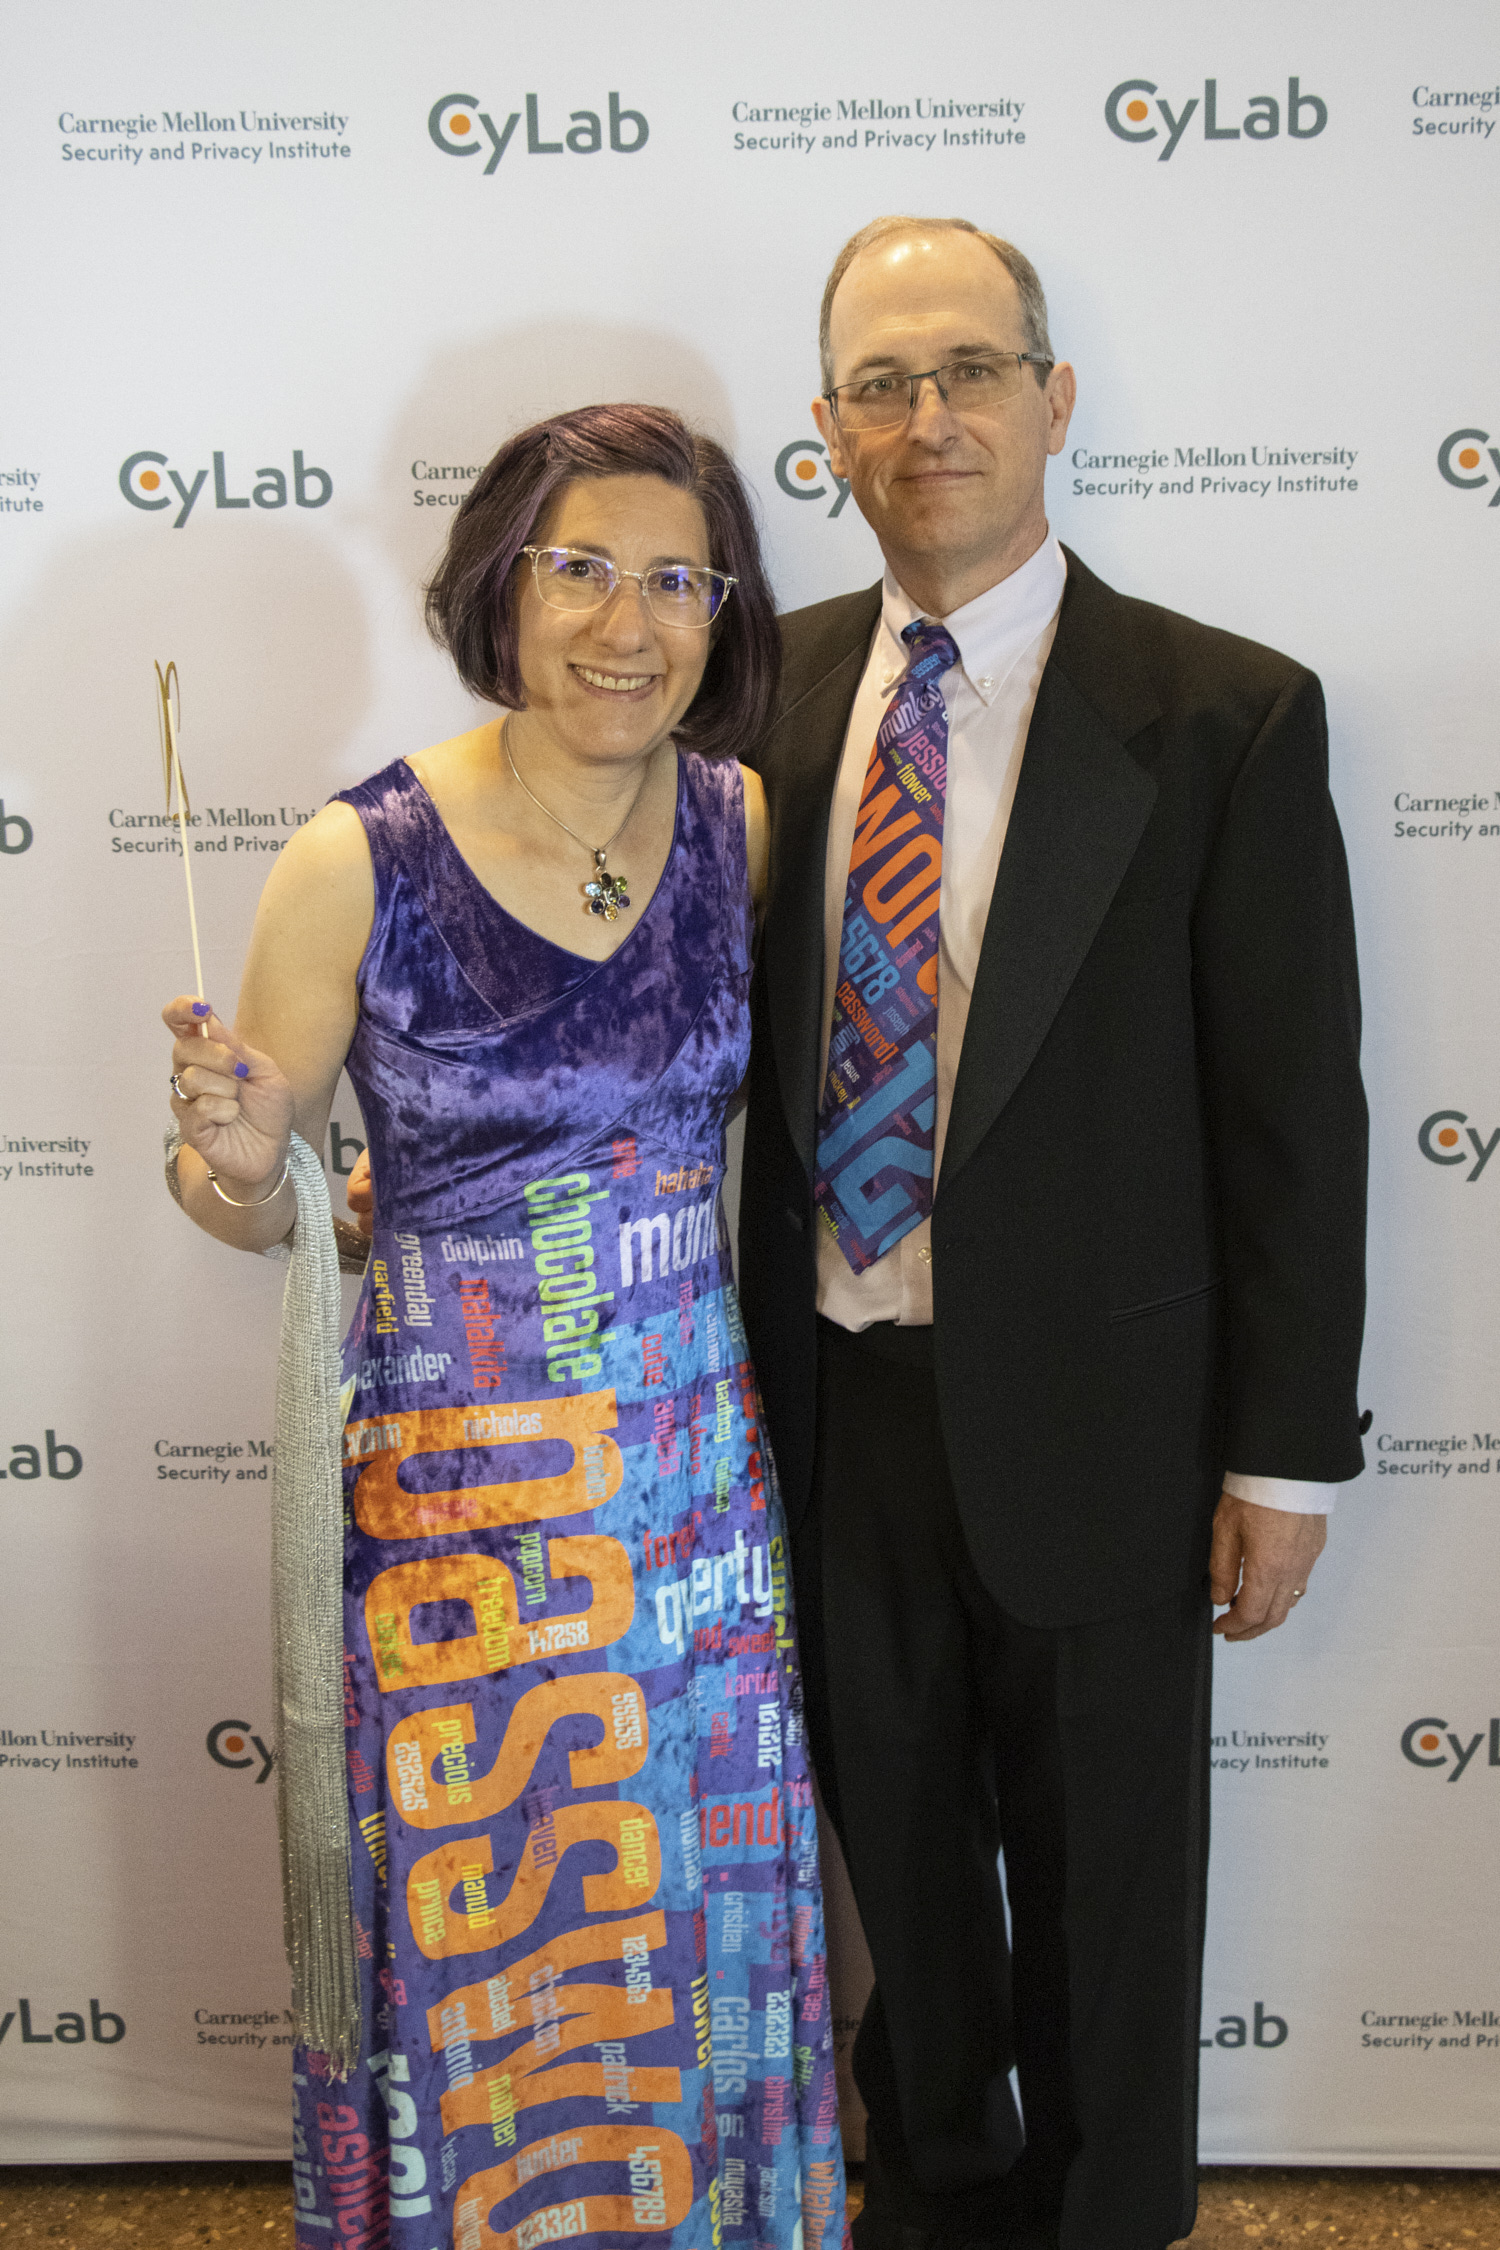
Ok, so why did I make this dress? Well I’m the director of the CyLab Security and Privacy Institute at Carnegie Mellon University. This is our 20th anniversary year and we held a gala to celebrate on Tuesday. Obviously, I need a password ball gown to wear to the gala. (And of course my husband needed a matching tie.)
CyLab 20th Anniversary Gala
As an added bonus, the Carnegie Science Center held their Geek Out Gala on Thursday, and this was the perfect outfit! So many people I didn’t know came up to me to talk with me about my dress.