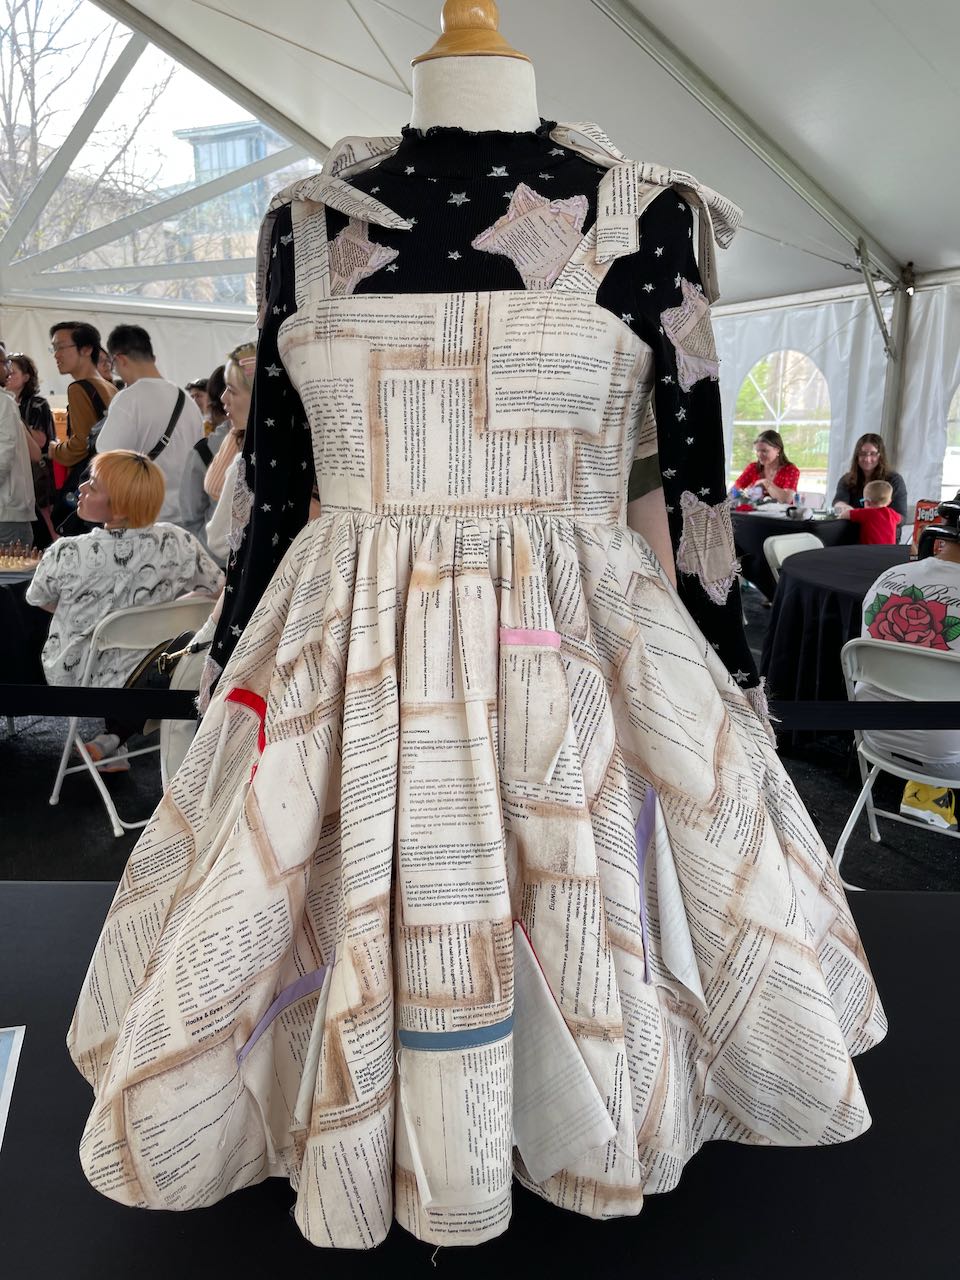
I asked my 17-year-old daughter what she would like me to sew for her. After perusing some patterns I suggested she told me what she really wanted was a vintage sundress in a woven fabric with a full-circle poofy, twirly skirt, perhaps like the one she had recently seen worn as a costume in Carnegie Mellon’s student production of Godspell. (See photo below of said costume on display at the CMU carnival.)
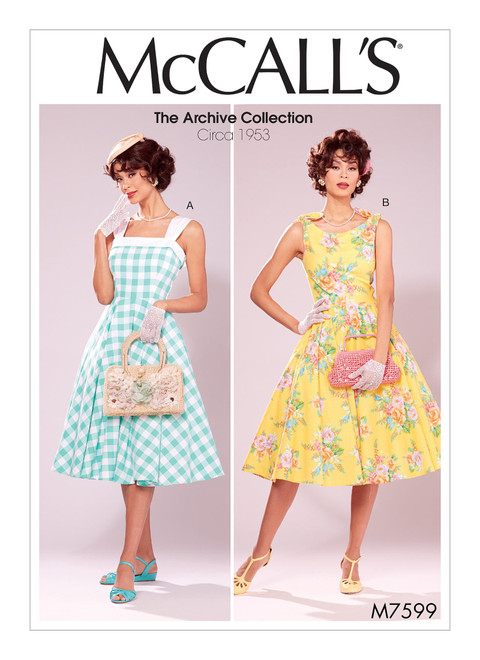
So I visited all my favorite PDF pattern websites and found some candidate patterns, but none were quite what she was looking for. I searched the Internet for vintage sundress patters with circle skirts and found a number of patterns from the 1950s that were available from resellers as classic paper patterns. And then I stumbled upon McCall’s M7599, which has been reissued as a PDF pattern. I found some reviews of the pattern, and even a how-to video (and I found another video after I finished sewing that might have been useful to watch too). My daughter examined M7599 and decided that view A was almost perfect. Except she wanted it without the contrast band, above knee length, and, of course, with pockets. These seemed like doable modifications, so I bought the pattern and downloaded the PDF.
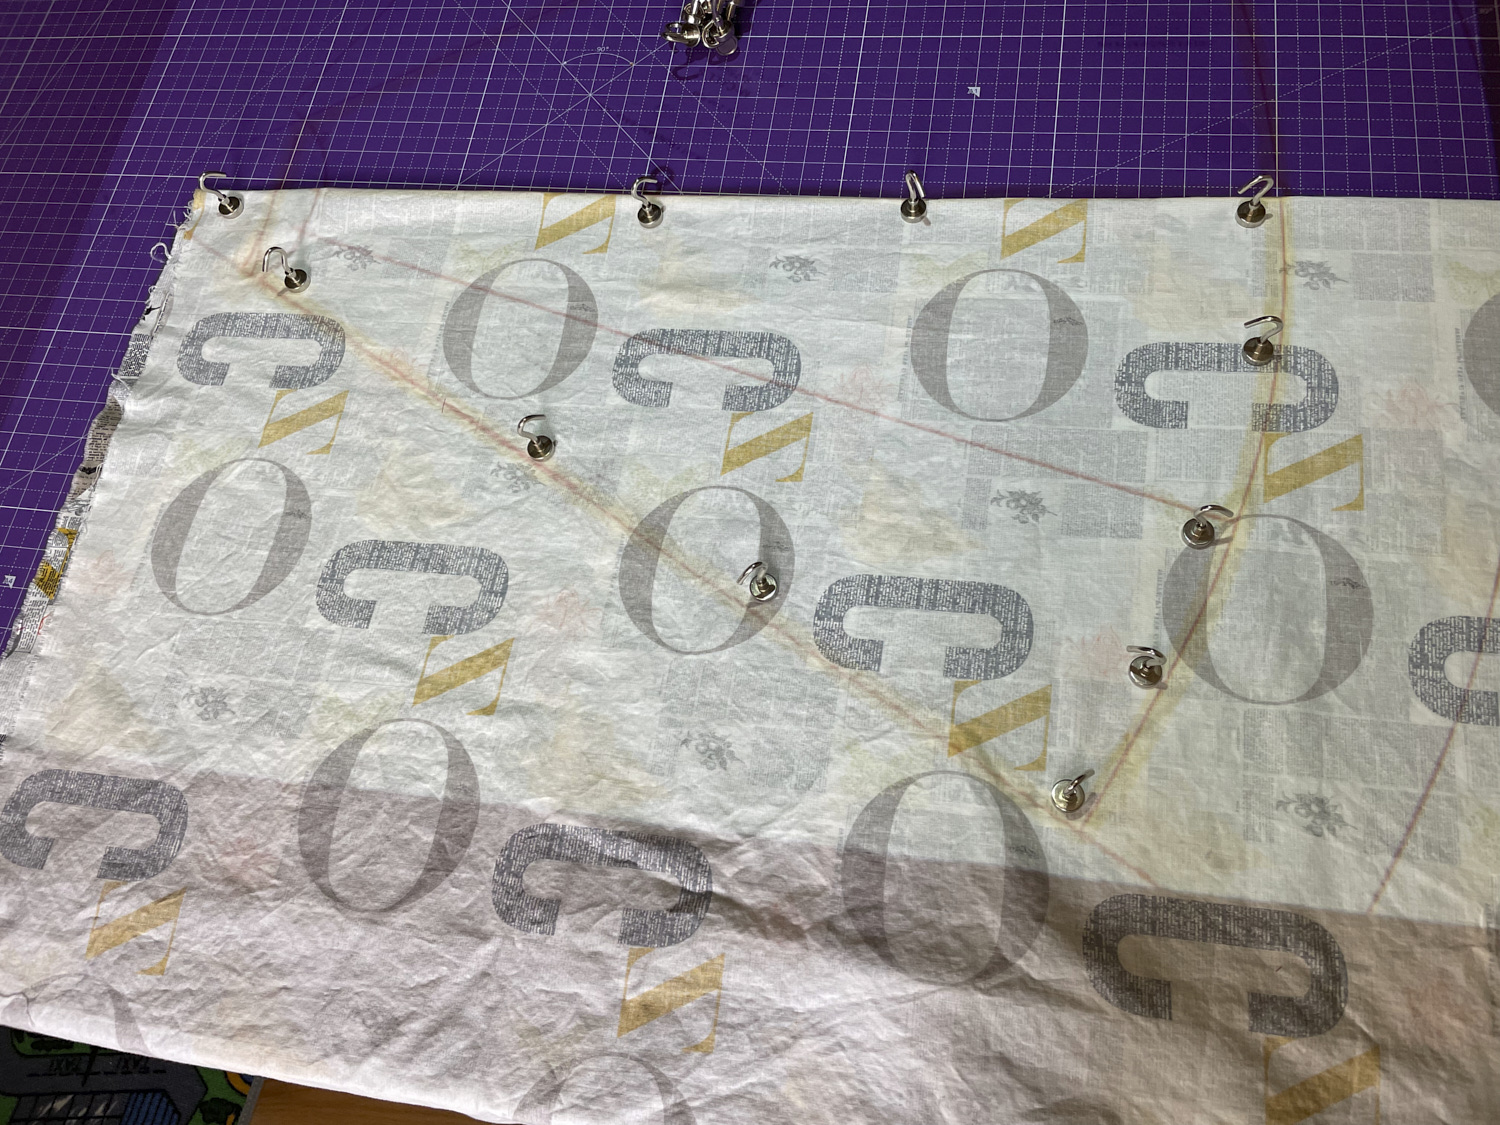
The PDF pattern came with a fairly terse set of instructions and was basically a scan of the original pattern with all the layers on one sheet, tiled into 8.5×11 pages, not a convenient modern PDF layered pattern. I was able to assemble the pages into one giant PDF using PDFStitcher, an awesome free tool developed by a sewist. Then I loaded the resulting PDF into Affinity Designer (AD) on my iPad and traced the pattern pieces I was going to use in the correct sizes with a nice thick red line that would show up well when projected onto fabric (see photo below of skirt gores projected on fabric, held in place with magnets, ready for cutting with rotary cutter).
The sizing of vintage patterns is strange. My daughter normally wears a 2 or 4 dress size but according to the size chart she needed a 12. Ultimately after making a muslin and futzing with the pattern I ended up making a size 10 with parts graded to a size 8.
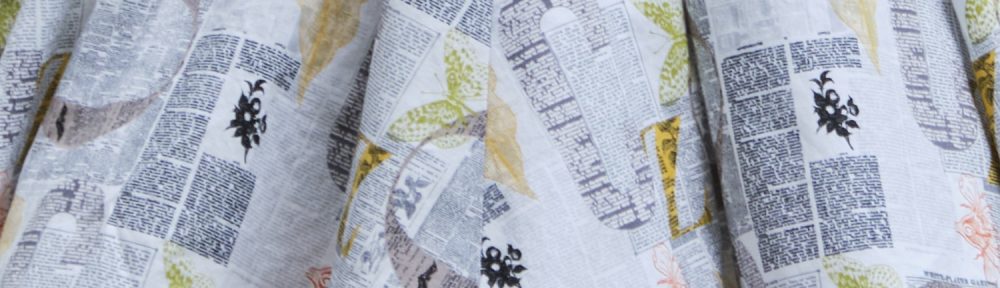
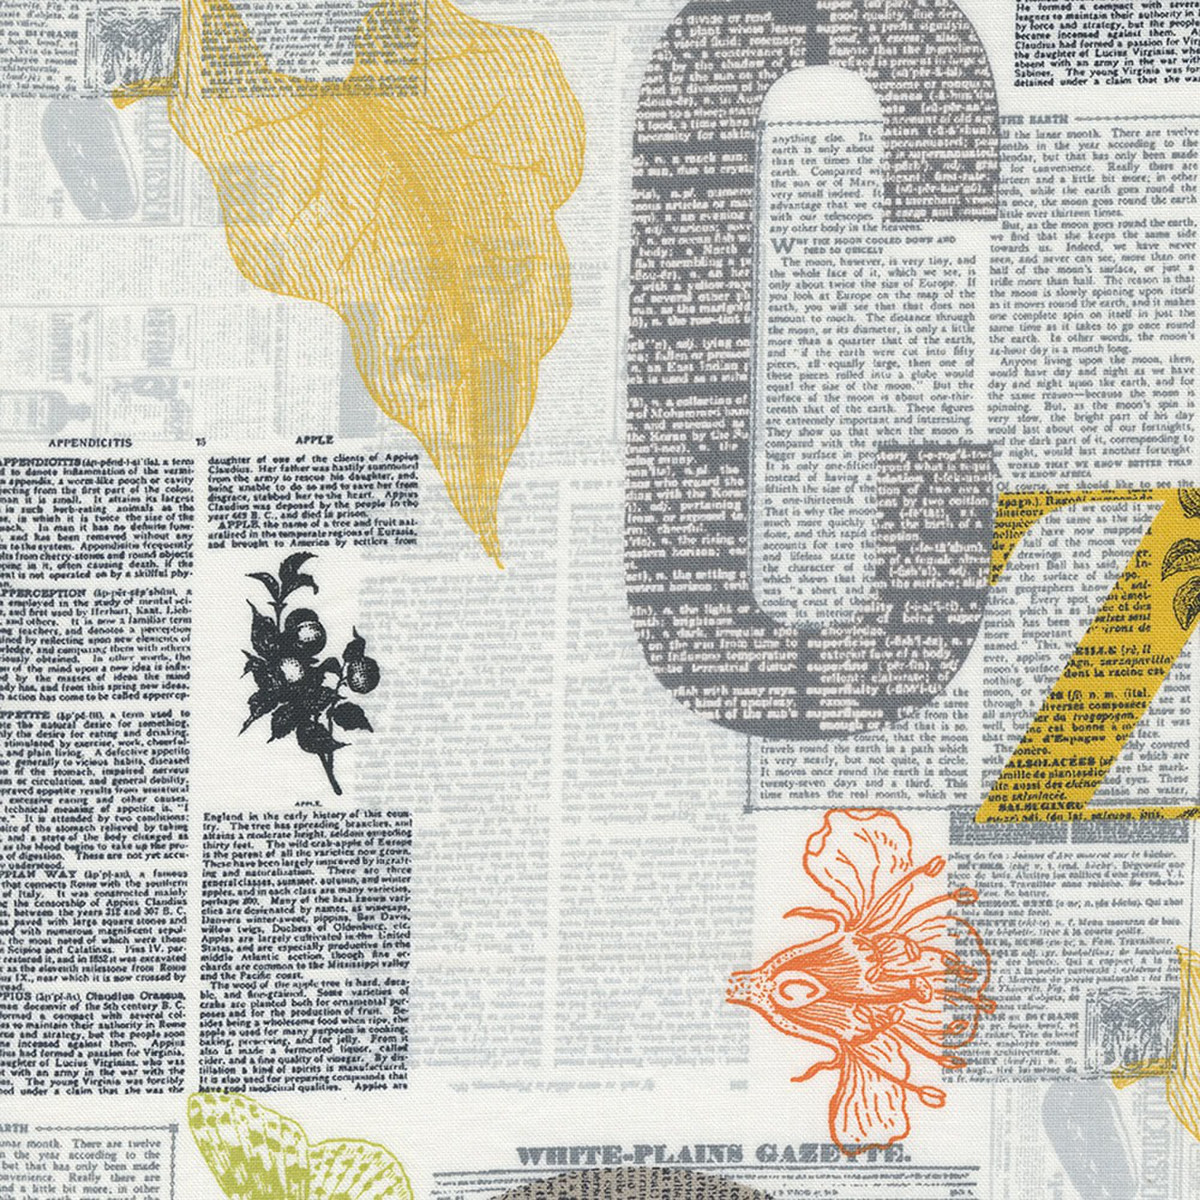
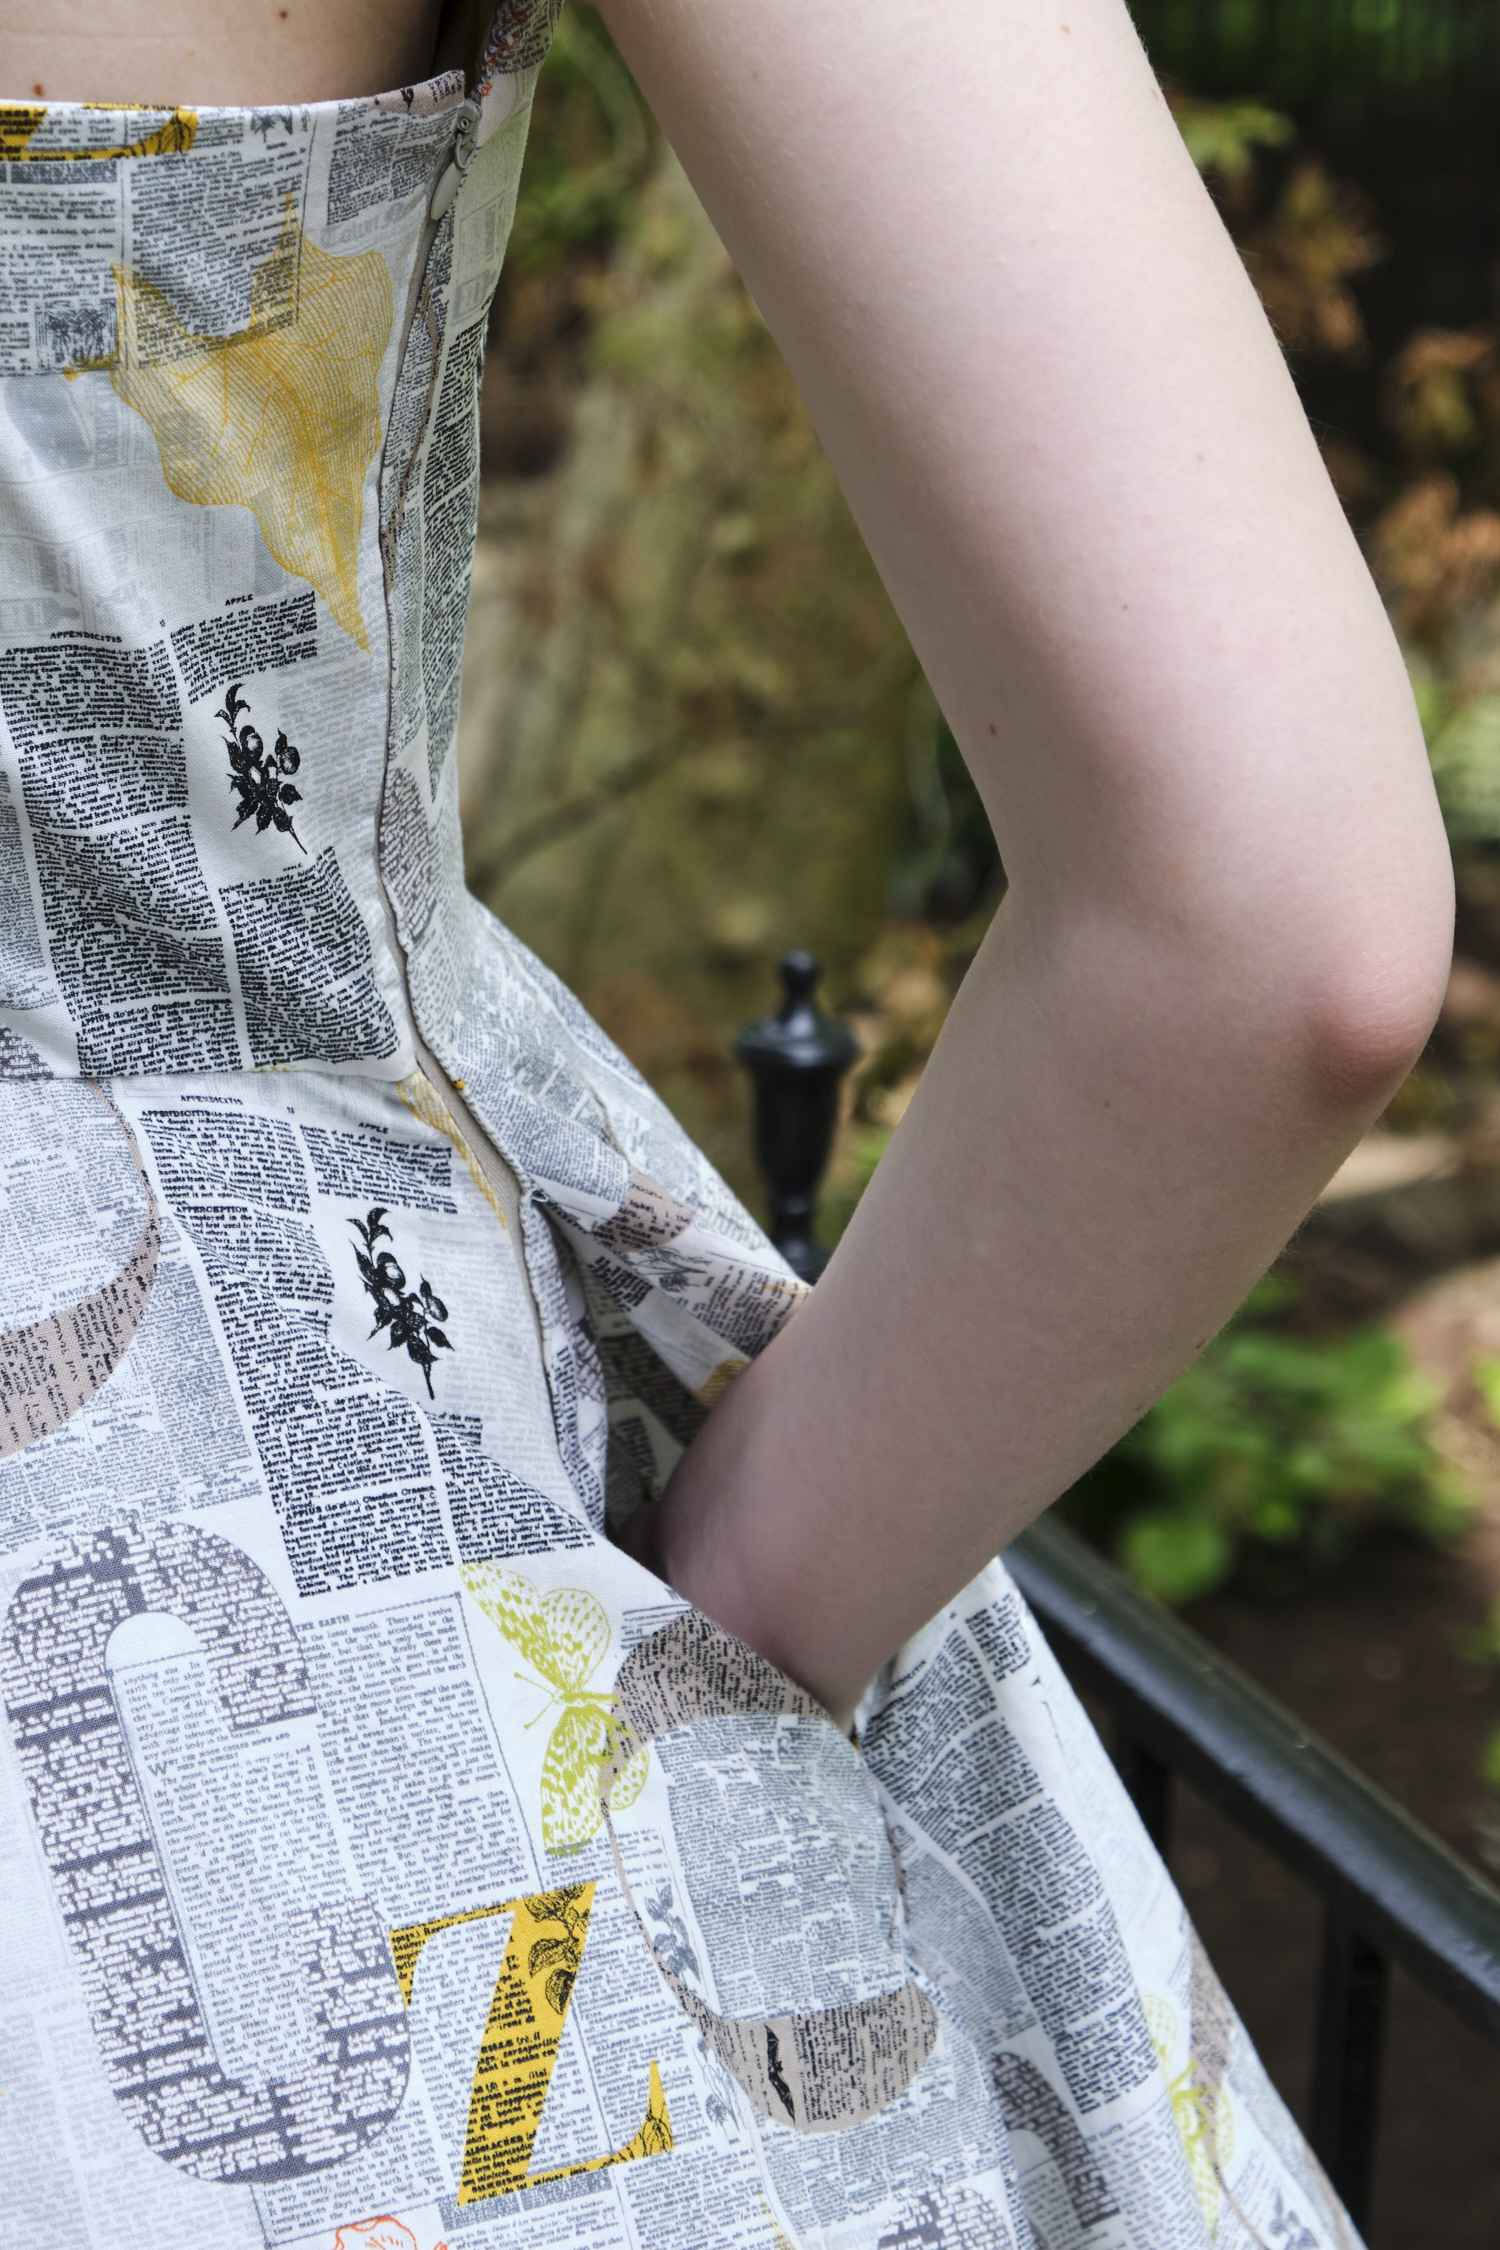
Inspired by the Godspell costume, my daughter searched online for fabric with pages of text, and ultimately settled on the Filigree Zen Chic Newsprint Text and Words fabric from Moda Fabrics in the white colorway. It is a lovely quilter’s cotton fabric, but it occurred to me that it is quite directional and the circle skirt would result in some of the design being upside down. To compensate I divided the full circle into six gores so that I could cut them each right-side up. I drafted the gores directly on the PDF pattern in AD. Of course, this increased the amount of fabric I would need — I ended up using six yards!
Removing the band from the bodice was straightforward — I basically just sewed the pattern as written but without attaching a band. I decided to also leave off the petticoat so that my daughter would have the option of wearing the dress either with or without a petticoat (she can wear a separate petticoat). Since I wasn’t attaching a petticoat I decided the yoke under the petticoat wasn’t needed either so I left that out as well.
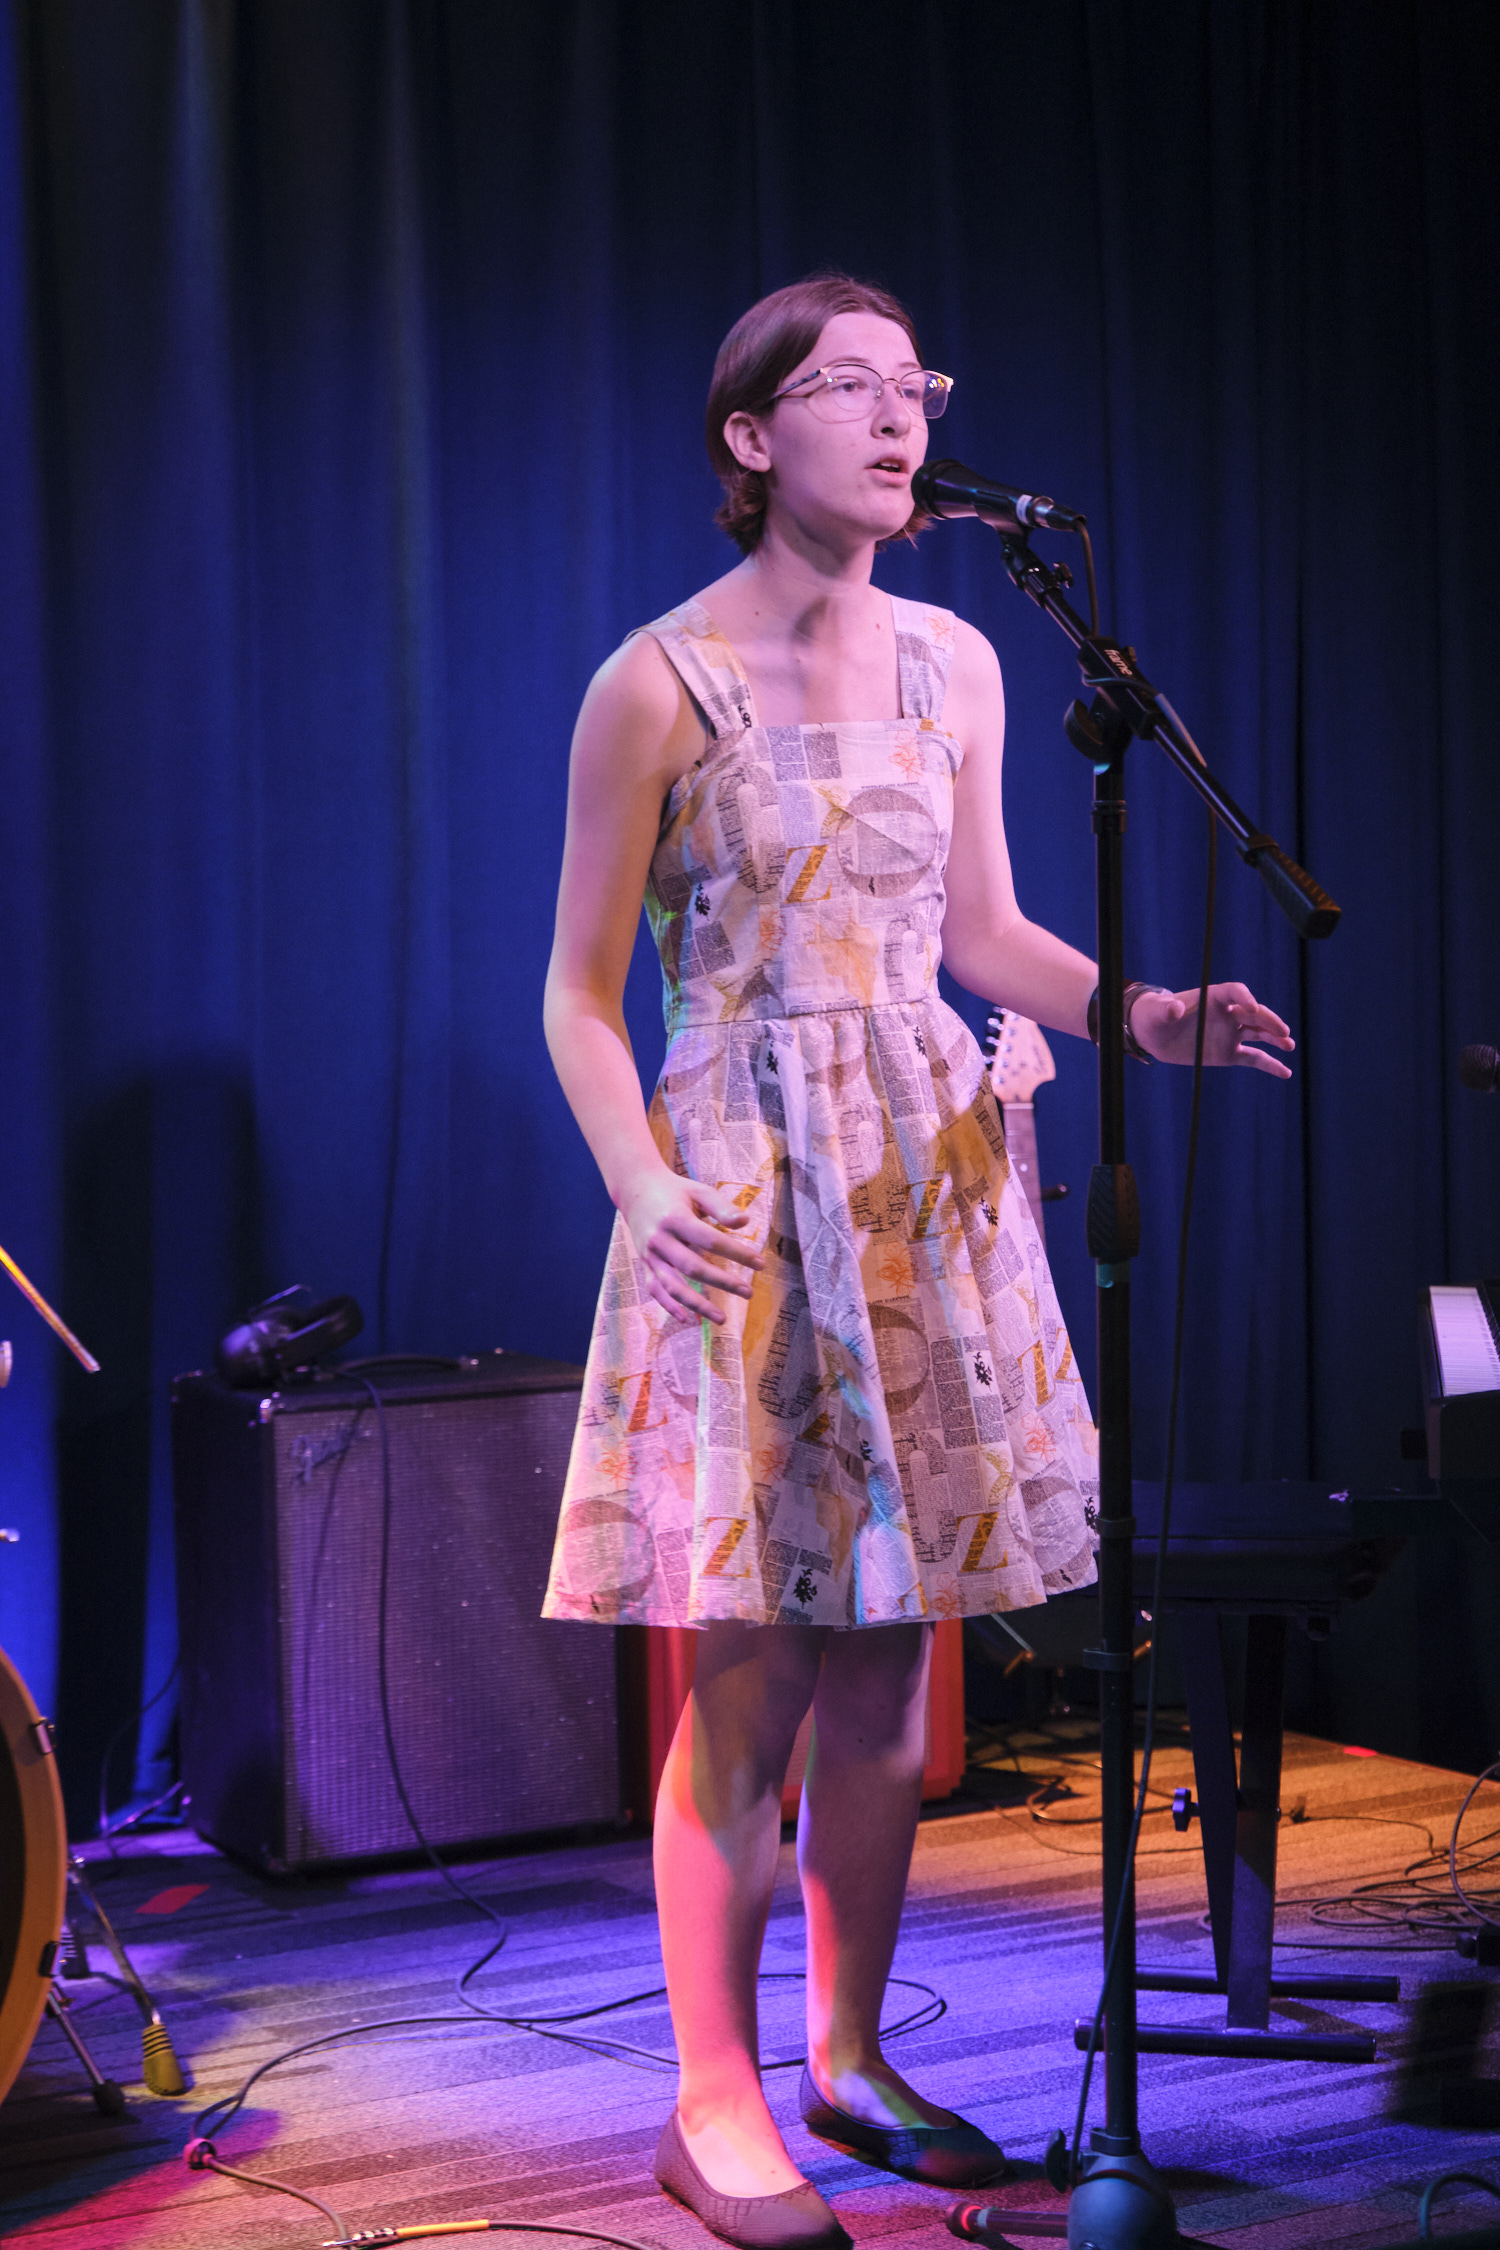
I made a muslin of just the bodice so I could adjust the fit. I reduced the size of the bust darts, and brought the straps in a bit. It was also a good opportunity to practice using my zipper foot, which I haven’t used in many years (and zippers kind of scare me). It turned out to be a nice enough crop top that my daughter decided to wear the muslin outside in public. In fact she even wore it to perform with her rock band. She requested thinner straps for the dress and I decided to continue futzing with the bust darts, and ultimately just removed them altogether for the dress.

Figuring out how to implement side-seam pockets was another challenge, as the pattern includes a side zipper, which means the zipper has to attach to the pocket. Fortunately I have a RTW dress with pockets sewn this way so I used it as a model. I drafted pockets in AD and then reverse engineered how to sew it all together. (There are actually instructions online for sewing a pocket in a zipper and a nice video that I will probably watch if I ever attempt something like this again.) This isn’t the most beautiful invisible zipper job, but it doesn’t look terrible, and both the zipper and the pockets are fully functional so I consider it a win.
The penultimate step in the pattern involved slip stitching the bodice lining to the zipper and then to the skirt. Until I reached that step I didn’t fully comprehend how that final finishing would be done or realize how much hand sewing was involved, but I got through it and it turned out fine. The final step was the hem. I knew my daughter wanted the skirt quite a bit shorter than the pattern called for so I had cut it shorter in anticipation. But I hadn’t cut it short enough and it would have required a 2.5 inch hem, which was going to be hard to sew on a circle. So I folded the skirt into quarters and carefully lopped off 1.5 inches with my rotary cutter. Then I sewed a line .5 inch from the edge of the circle all the way round. This allowed me to easily fold the skirt on the stitch line and then fold it again and press to form a 1-inch hem. I stitched the hem down with a straight stitch about 1/8 inch from the edge of the hem. All this was reasonably straight forward but I would like to point out that the circumference of this skirt was about 12 feet, which means that each step (stitching, folding, folding, pressing, stitching again) has to be done over a distance of 12 feet, so it takes a while.
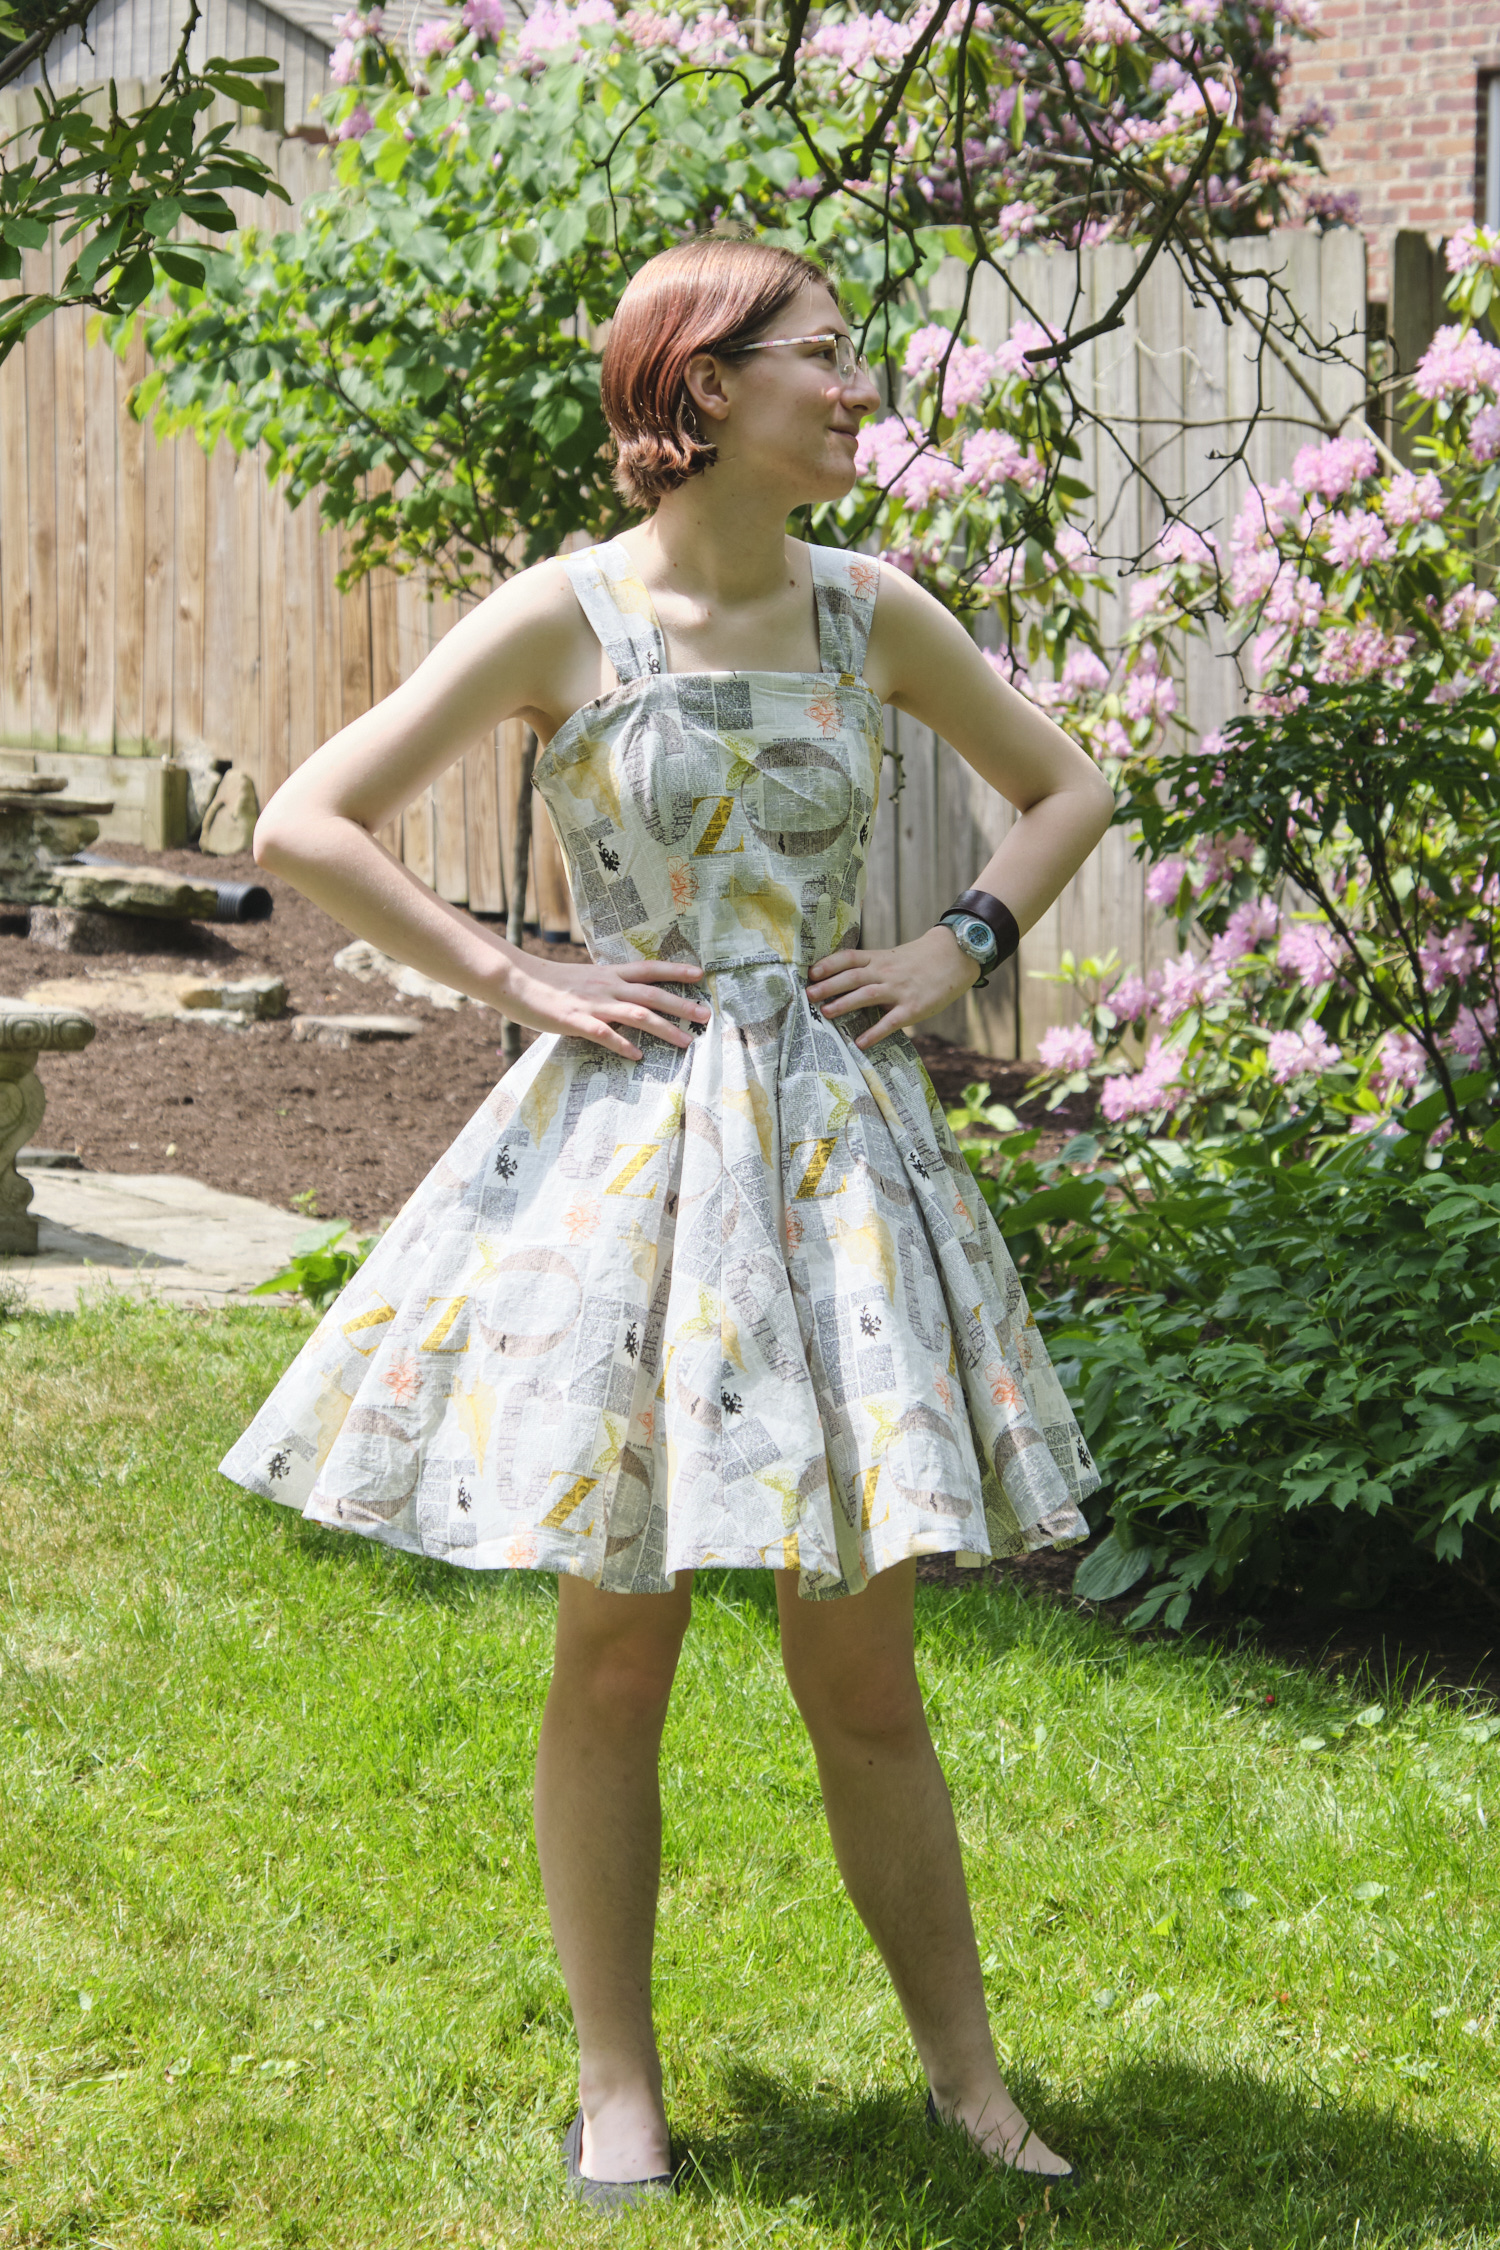
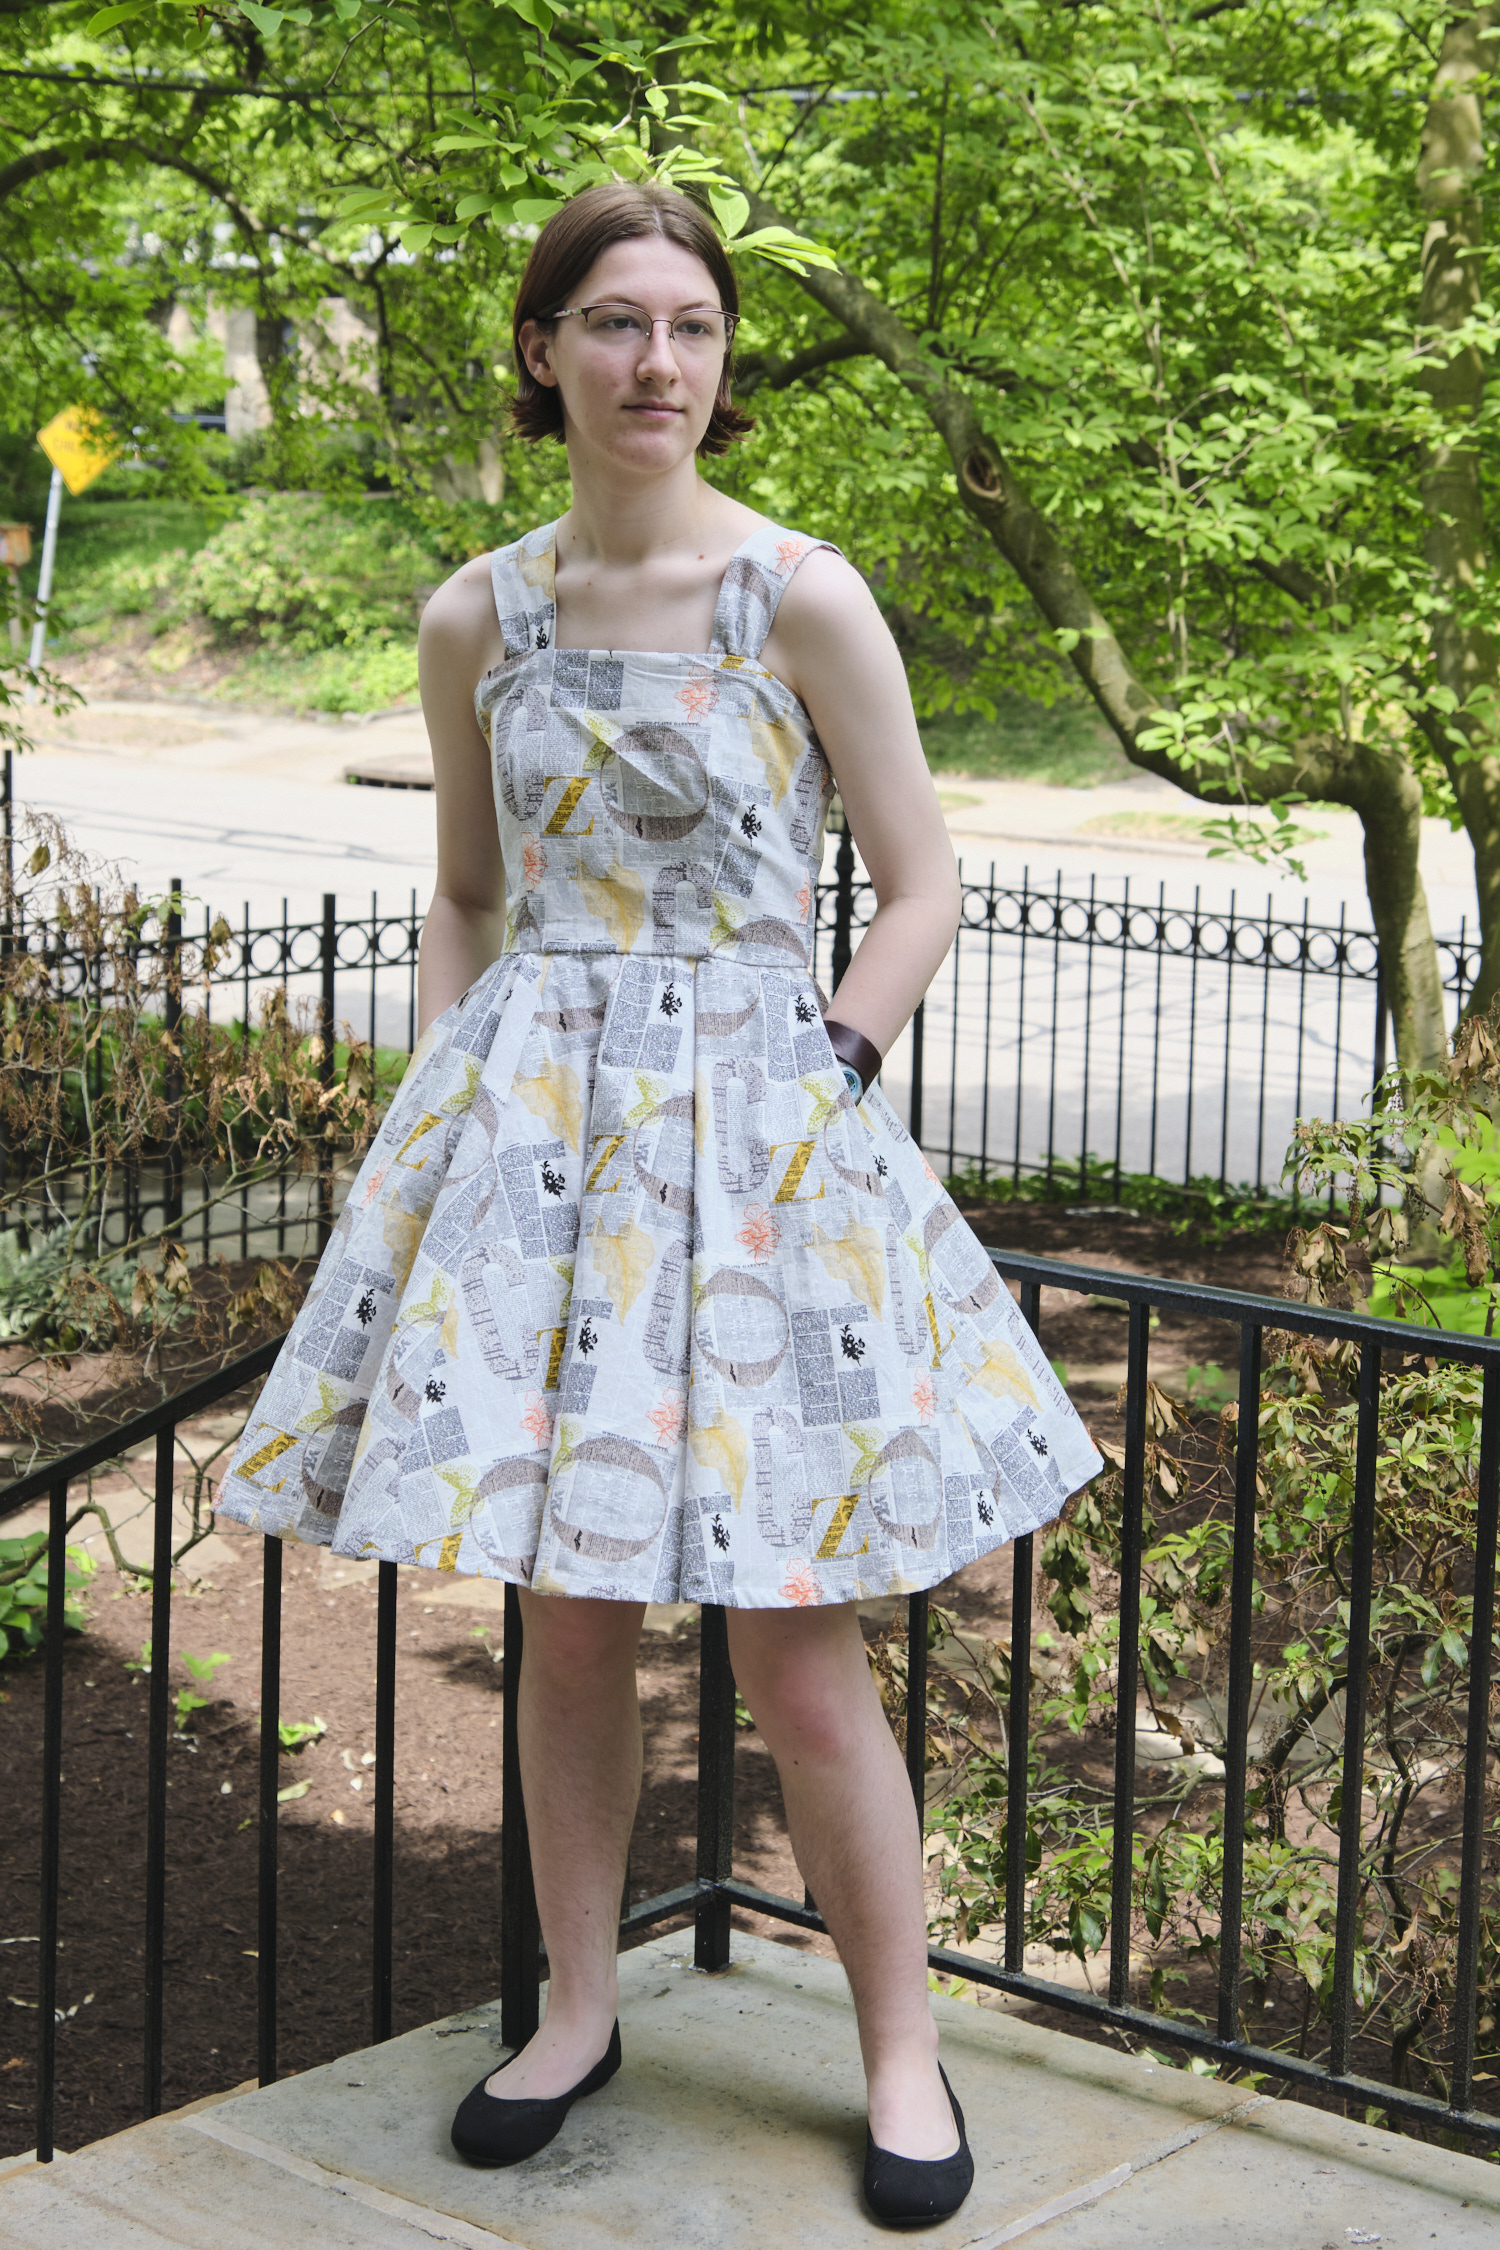
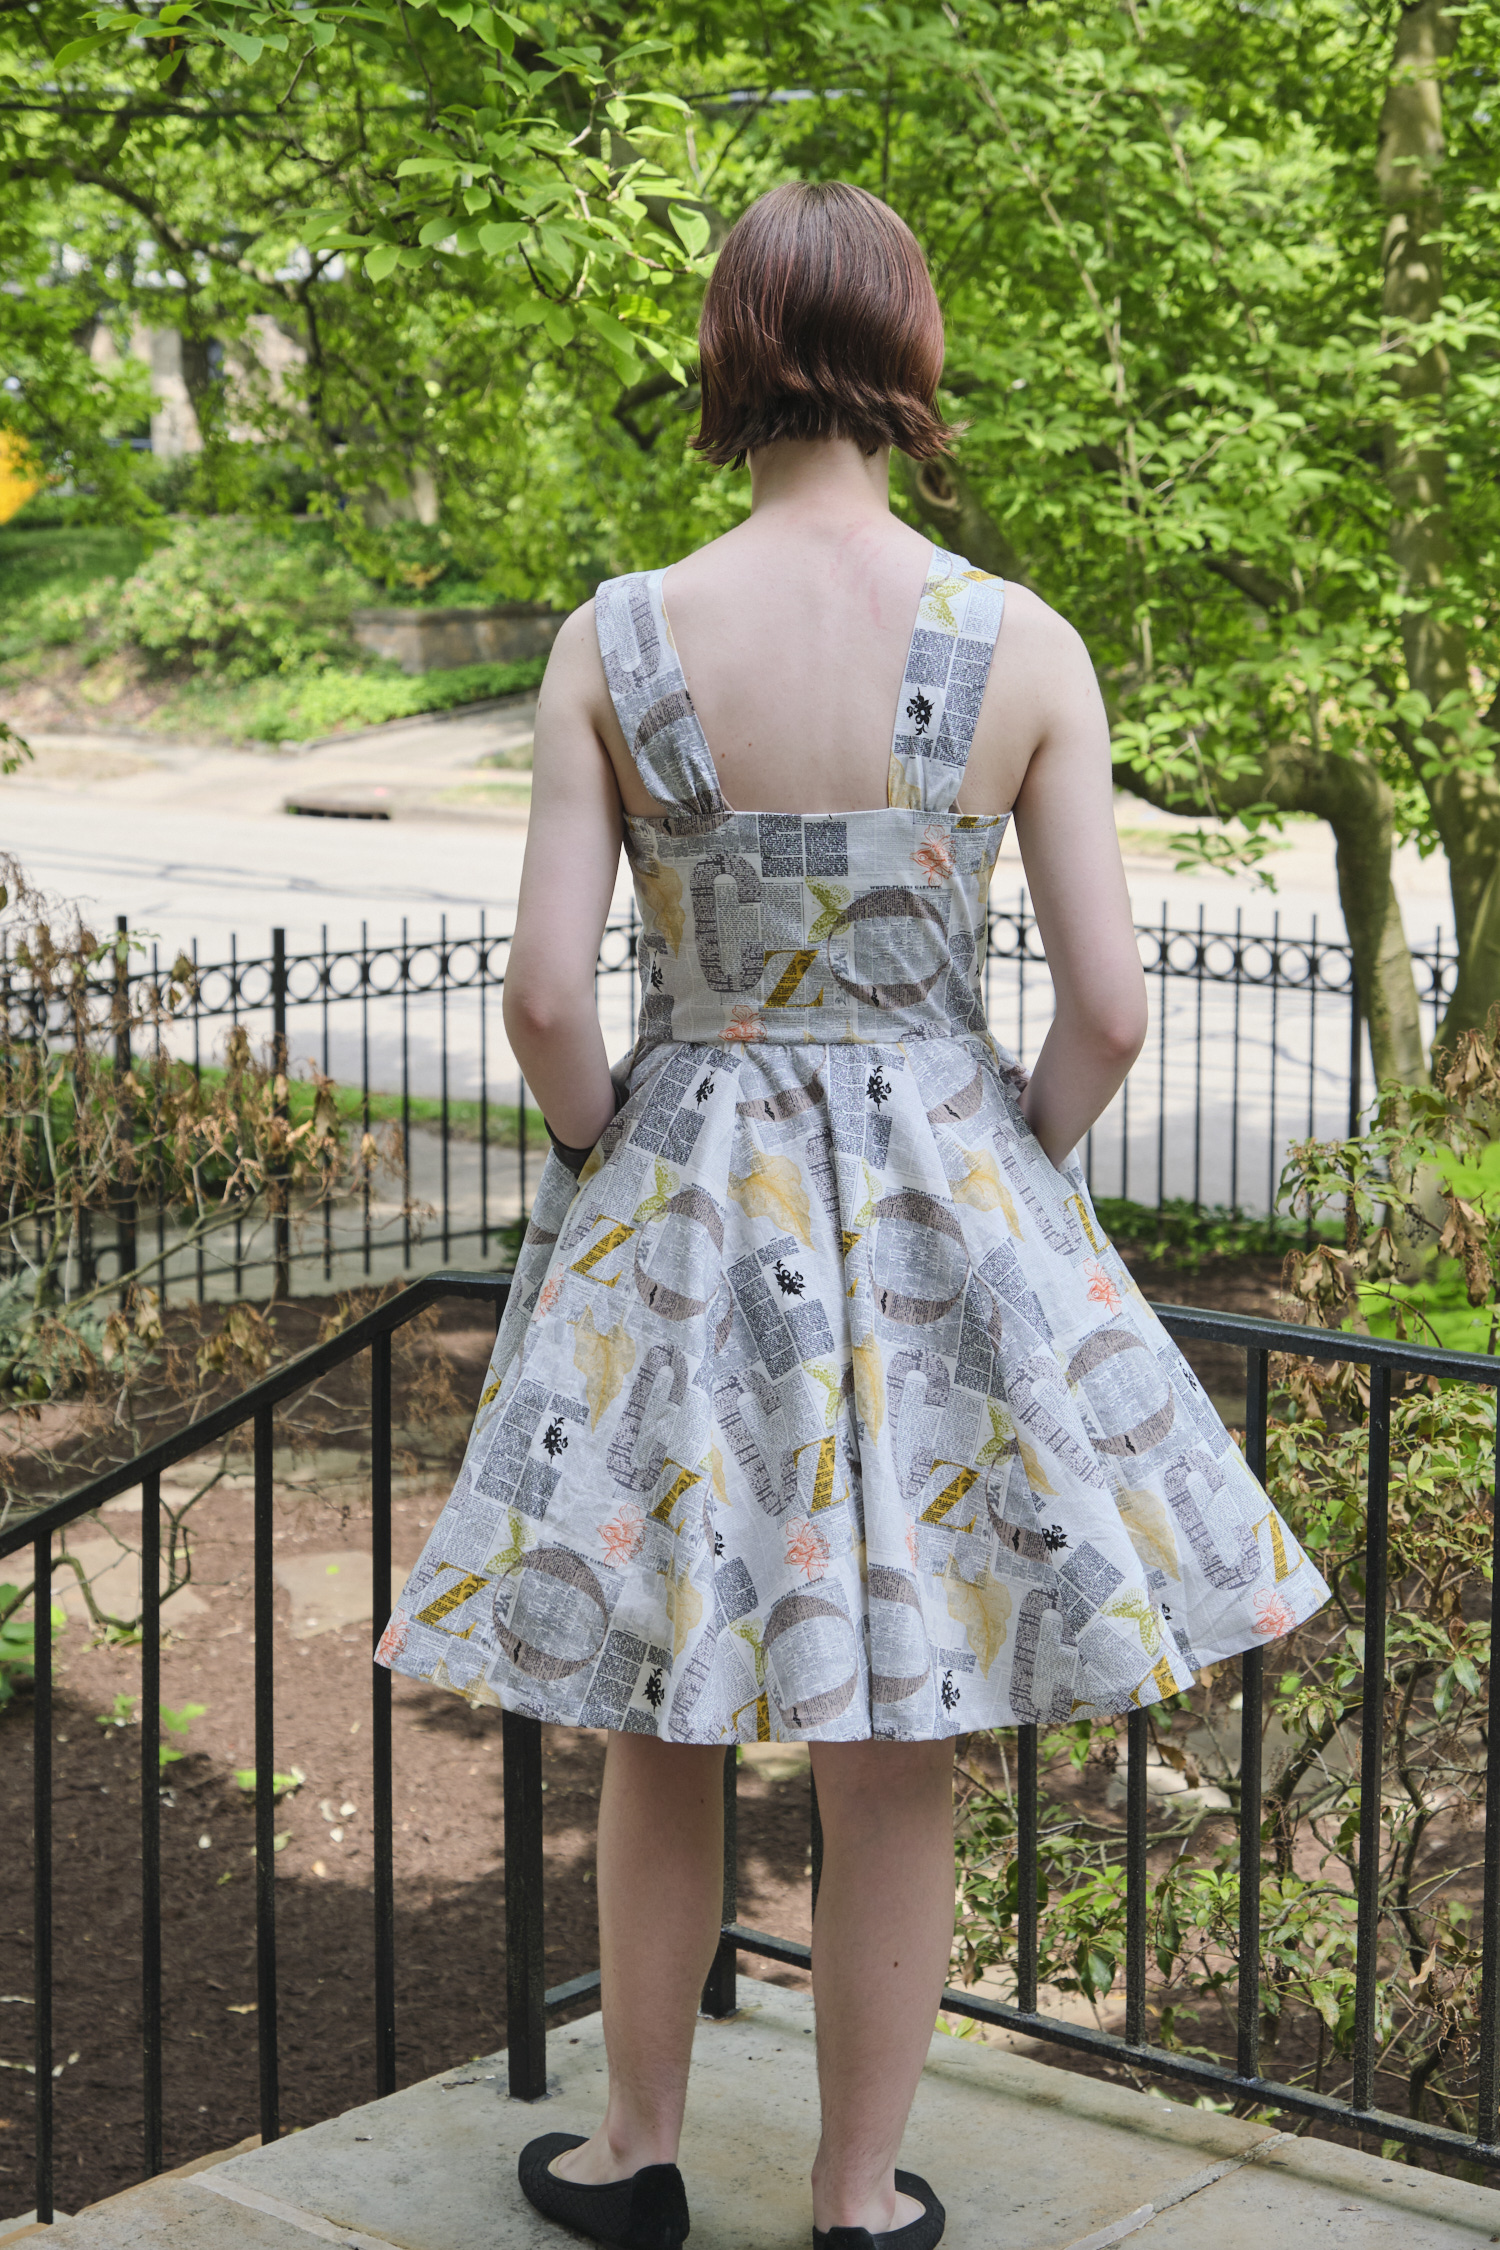
Other than figuring out the bodice fit adjustments, sewing the zipper pocket, and all that hemming, the dress actually came together pretty quickly and wasn’t that difficult to make. And the results are pretty nice. Here it is modeled without a petticoat. (And below that, while performing at her music recital.)

And here it is with petticoat, in full 1950s glory!