My husband is a big fan of Mexican green tomatillo salsa. As I was struggling to grow vegetables in our small Pittsburgh yard, he suggested I give tomatillos a try. I was skeptical, but I got a couple of tomatillo plants and planted them by the driveway. One flourished and the other did not. I read that you need to have at least two tomatillo plants for cross pollination, so I bought another and soon I had two plants full of tomatillos and later in the season we made salsa. Over the years my tomatillo farm has expanded, and now it takes up a good chunk of the garden above my retaining wall. The plants seem to do well in Pittsburgh weather, and for whatever reason, the critters in my garden seem to mostly leave them alone. I’ve learned to let them grow in pots on my deck until they are about 18 inches high so the young leaves don’t get devoured by beetles. And spraying them with insecticidal soup also helps keep the bugs away. Once they get to about two-feet tall, they seem to do fine. I typically plant about 6 of them now, and I get a few volunteers growing besides them.
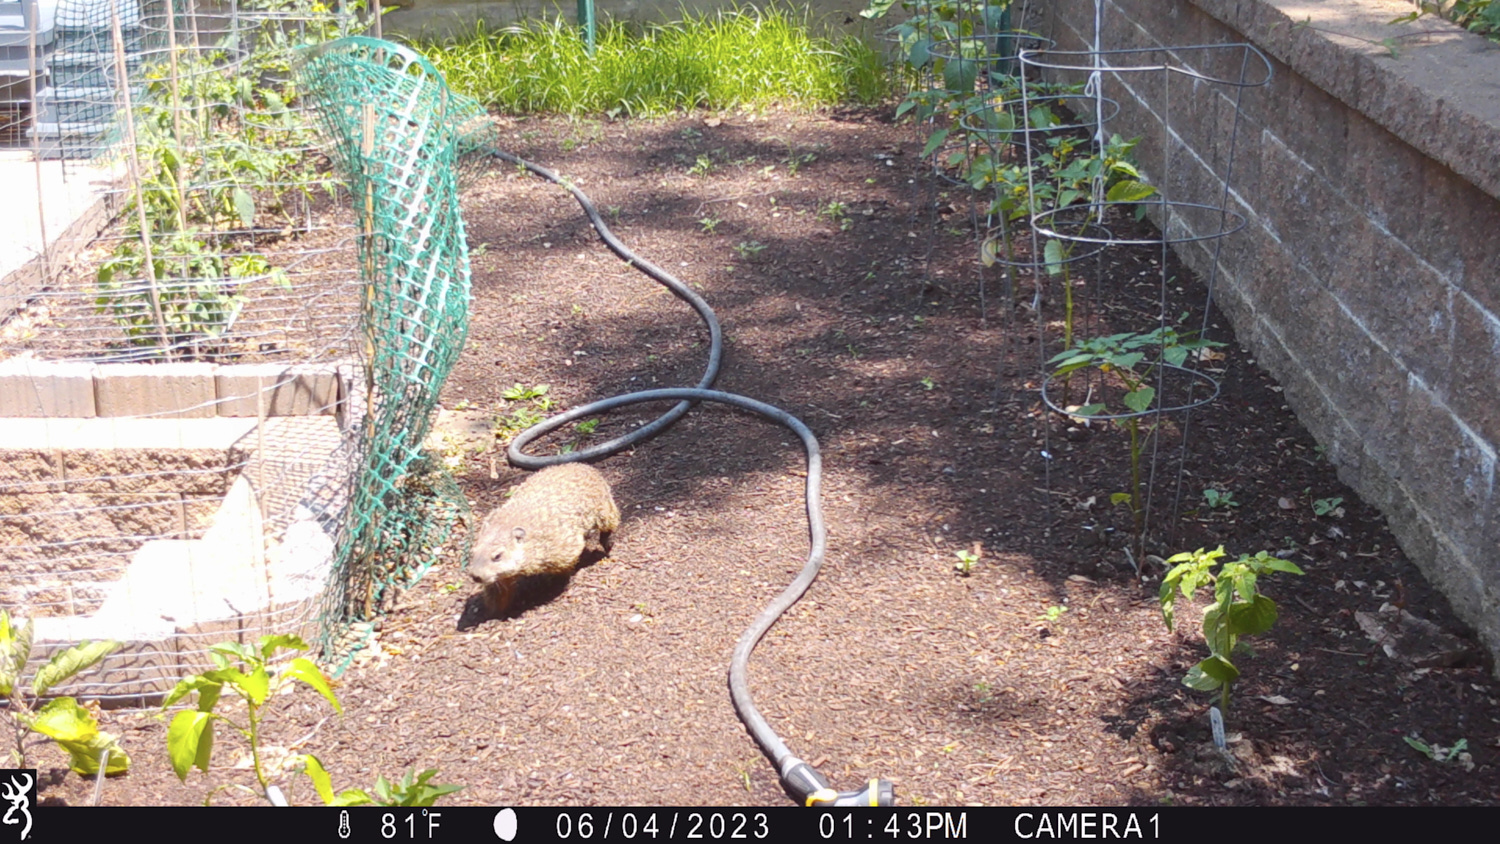
The tomatillos are in cages along the back wall. The groundhog ignored them and nibbled on the eggplant leaves instead.
By August, my tomatillo farm is a mess. Most of the plants have outgrown their cages, and some have toppled over and resist my efforts to upright them. This year the adjacent tomato plants have taken over, with lots of volunteers as well. Note to self: next year pull out most of those volunteer tomatoes!
Tomatillos grow in little husks. They are ready to harvest when they fill their husk. Sometimes you can tell they are ready because the bottom of the husk has burst open, revealing bright green or purple fruit. Sometimes you have to gently squeeze the husk to figure out whether it is full. I also collect the fruit that falls off the plan and the fruit growing on branches that have been severed from the plant. The plants grow taller than me, and finding all the ripe fruit requires crawling around under a canopy of tomatillo leaves, buzzing with pollinators.
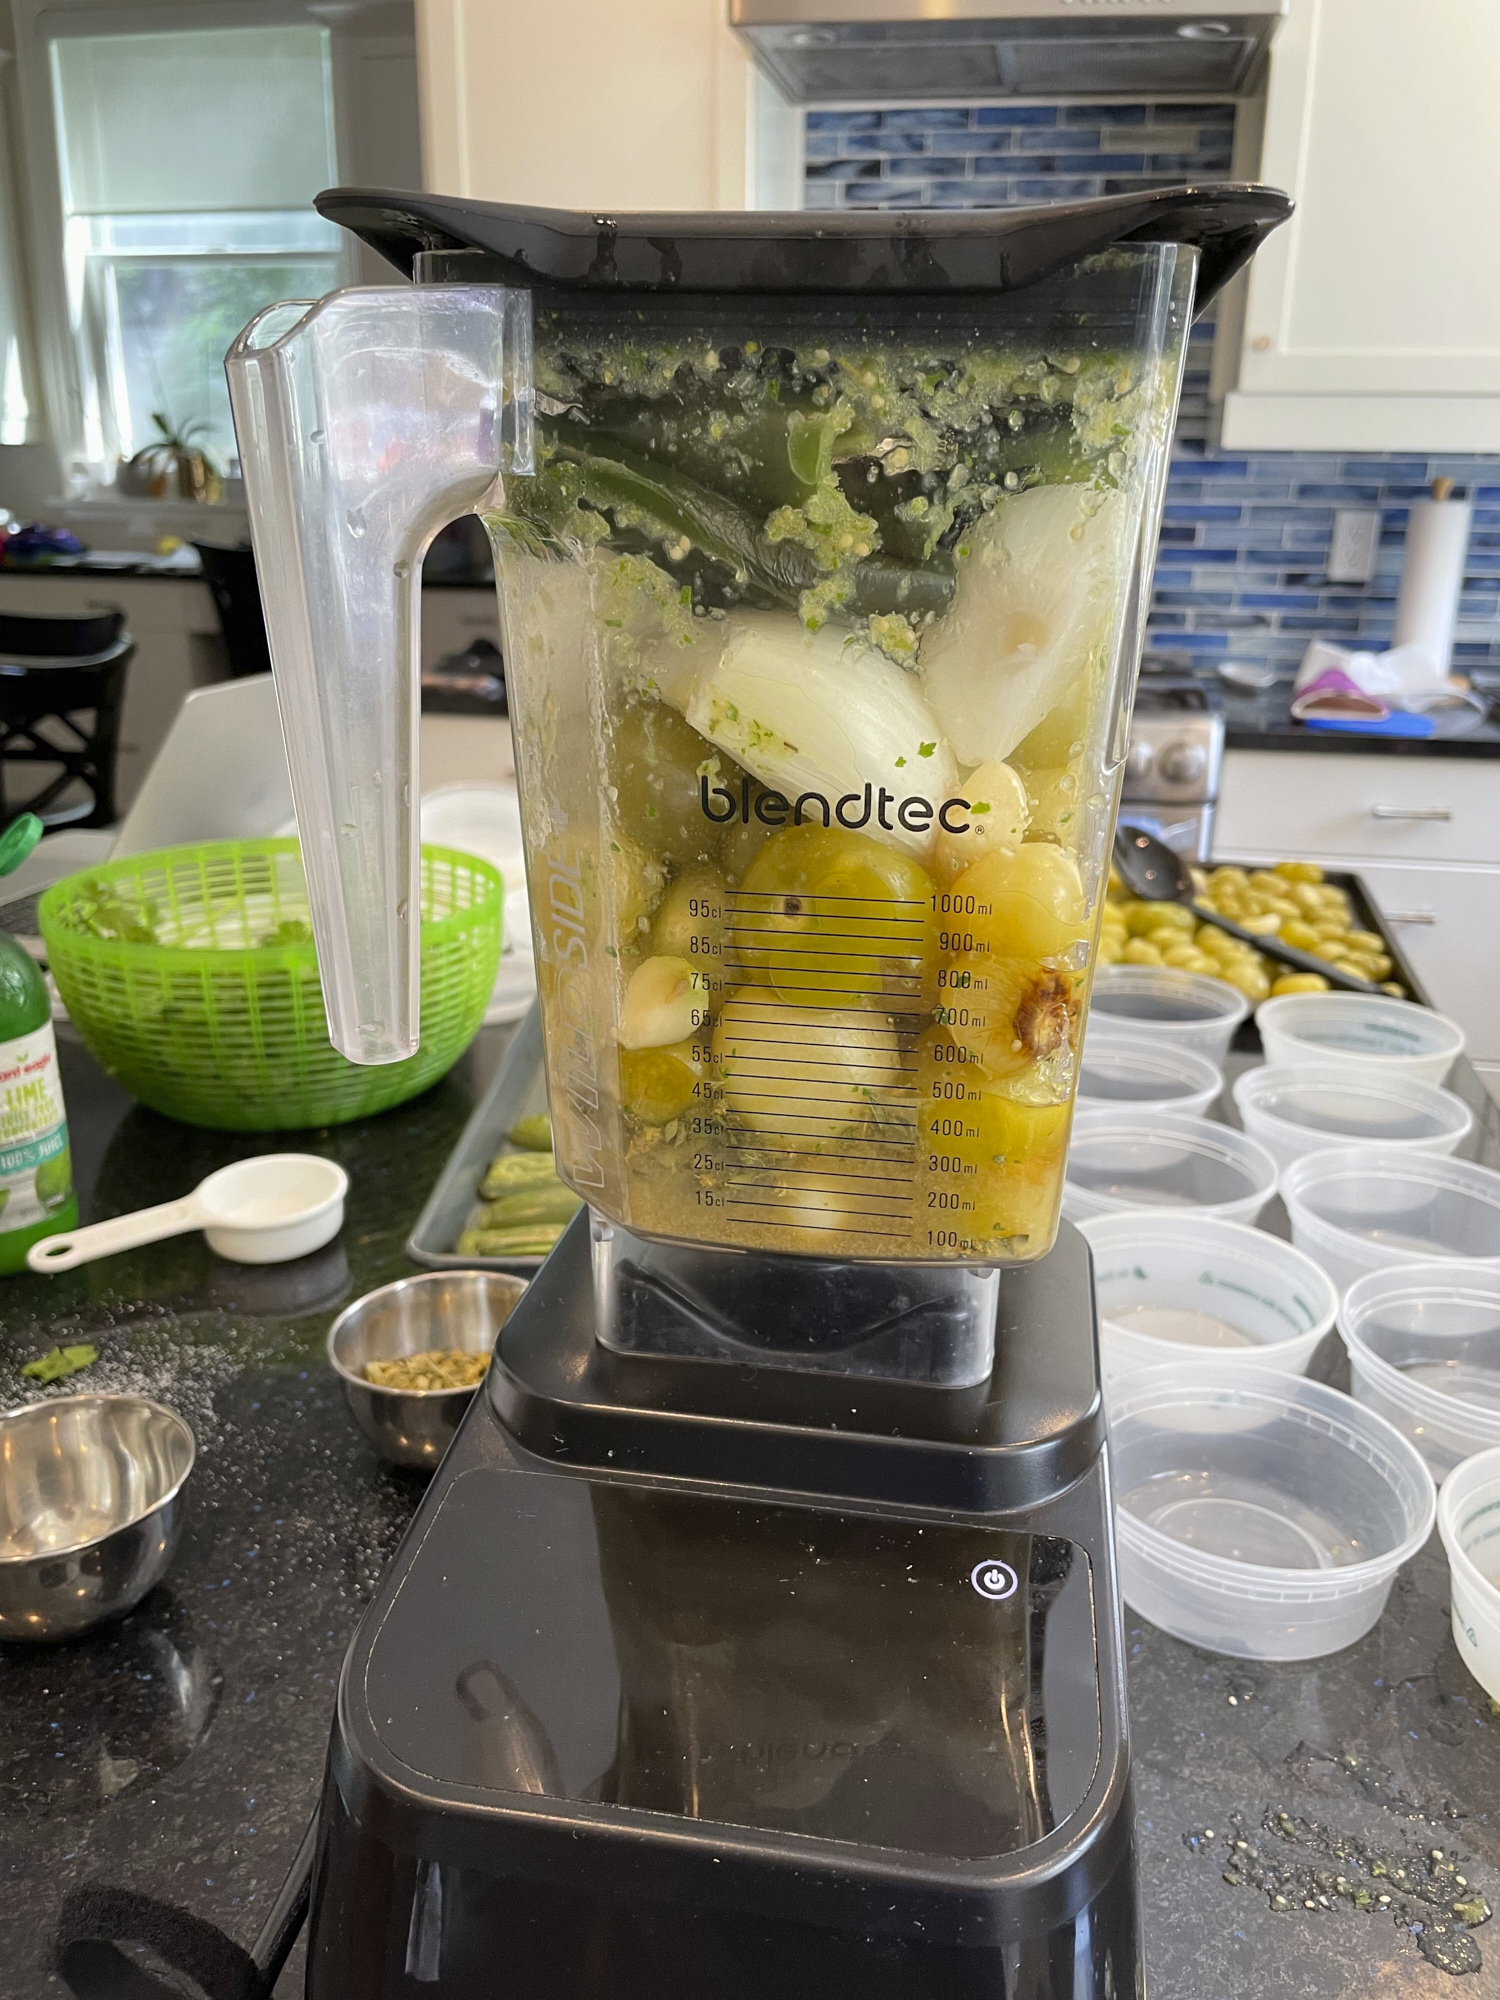
Last year I grew over 30 pounds of tomatillos and this year I’m on track to grow a similar amount. Last week’s harvest was 6 pounds, and this week’s harvest 12. Over the years I’ve experimented with a variety of tomatillo recipes: I’ve pureed them raw, I’ve boiled them, I’ve sauted them, and I’ve roasted them. My current favorite recipe involves roasting all the vegetables together in 3-pound batches and pureying them in my blender. Here are some photos of the process, with the recipe at the bottom of the page.
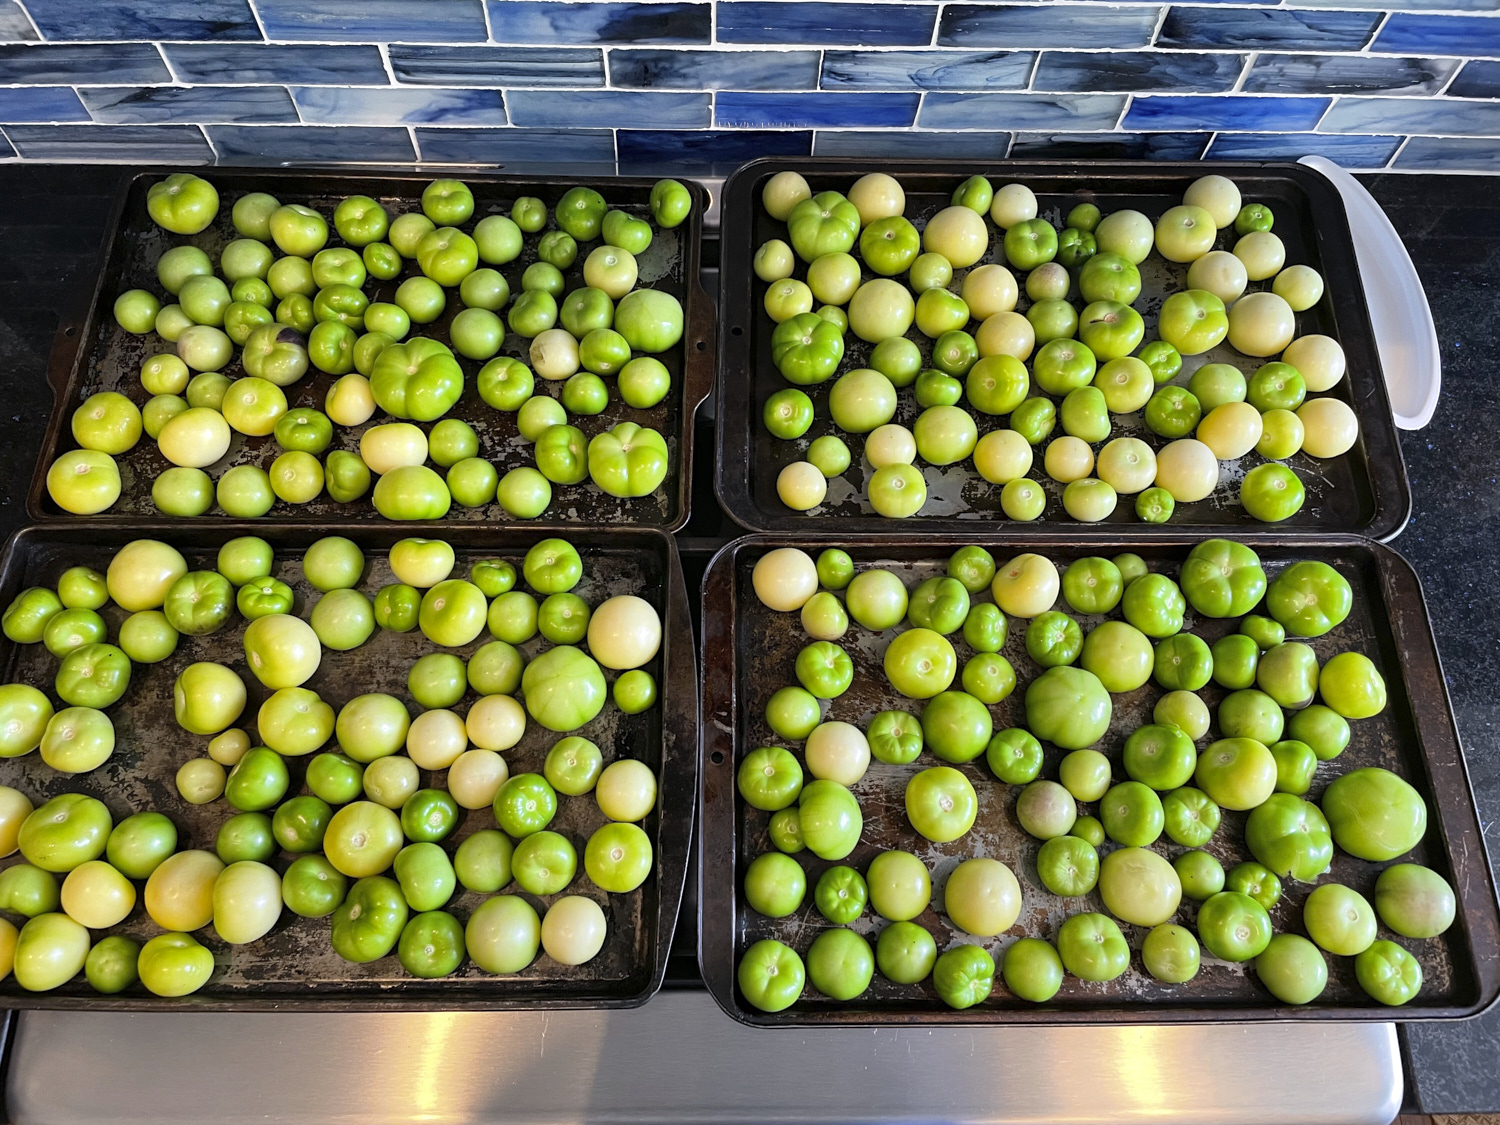
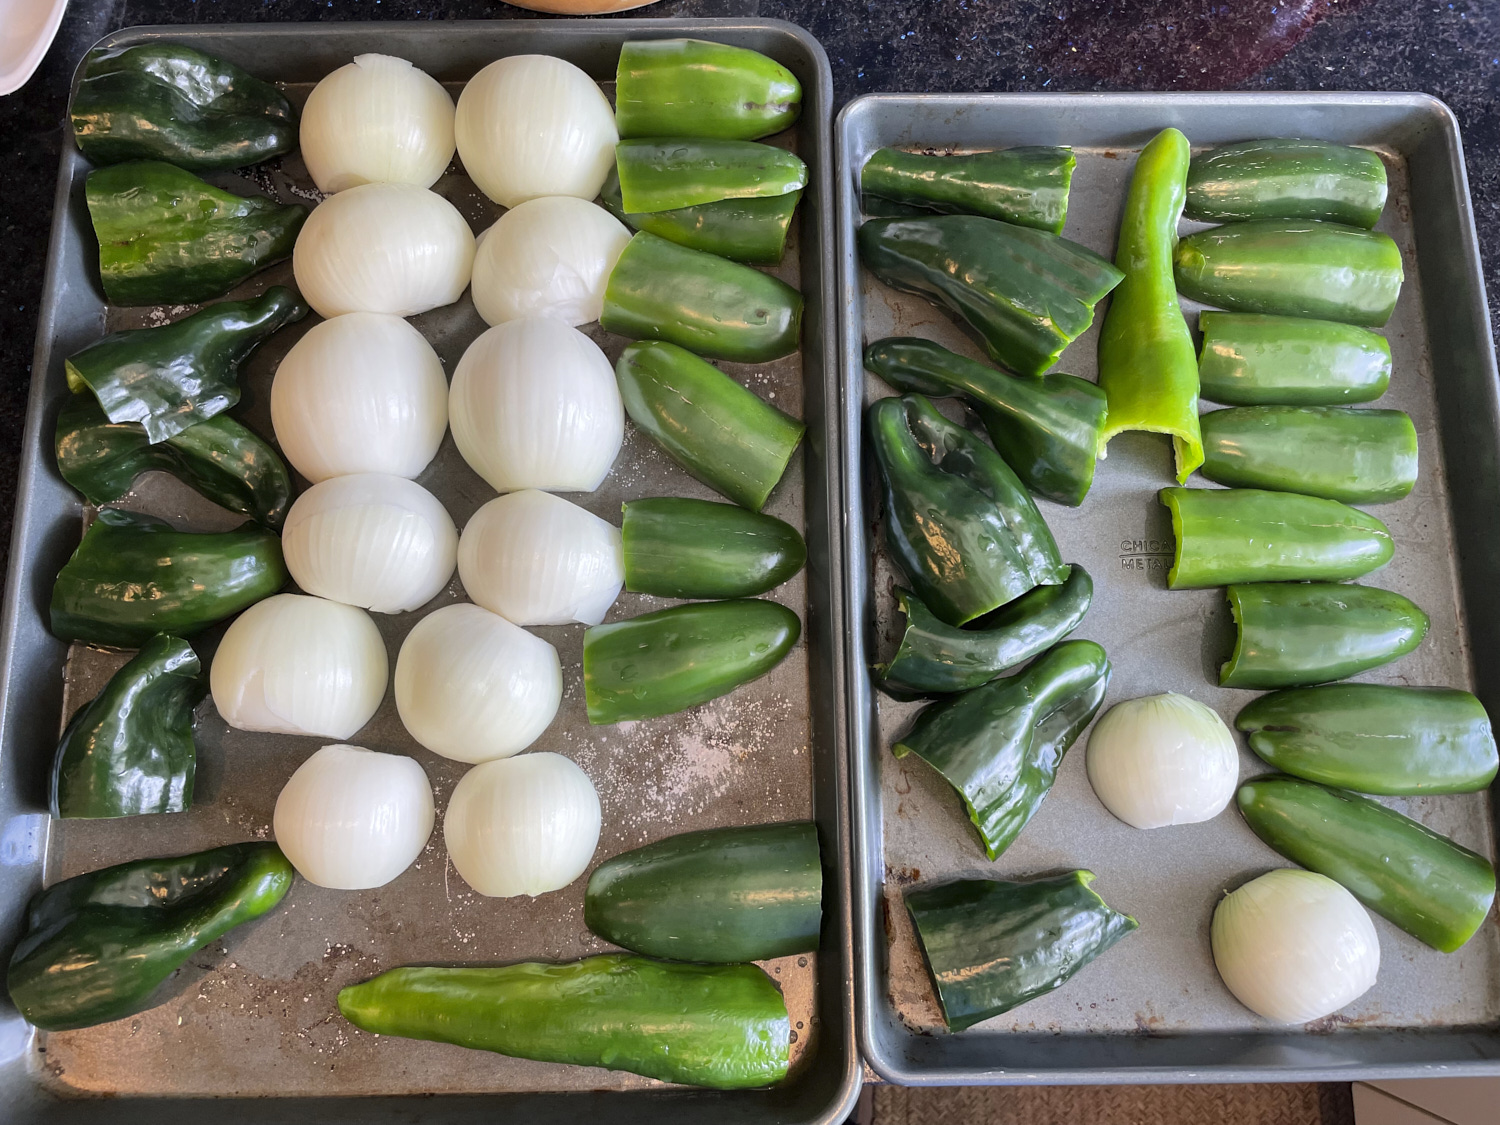
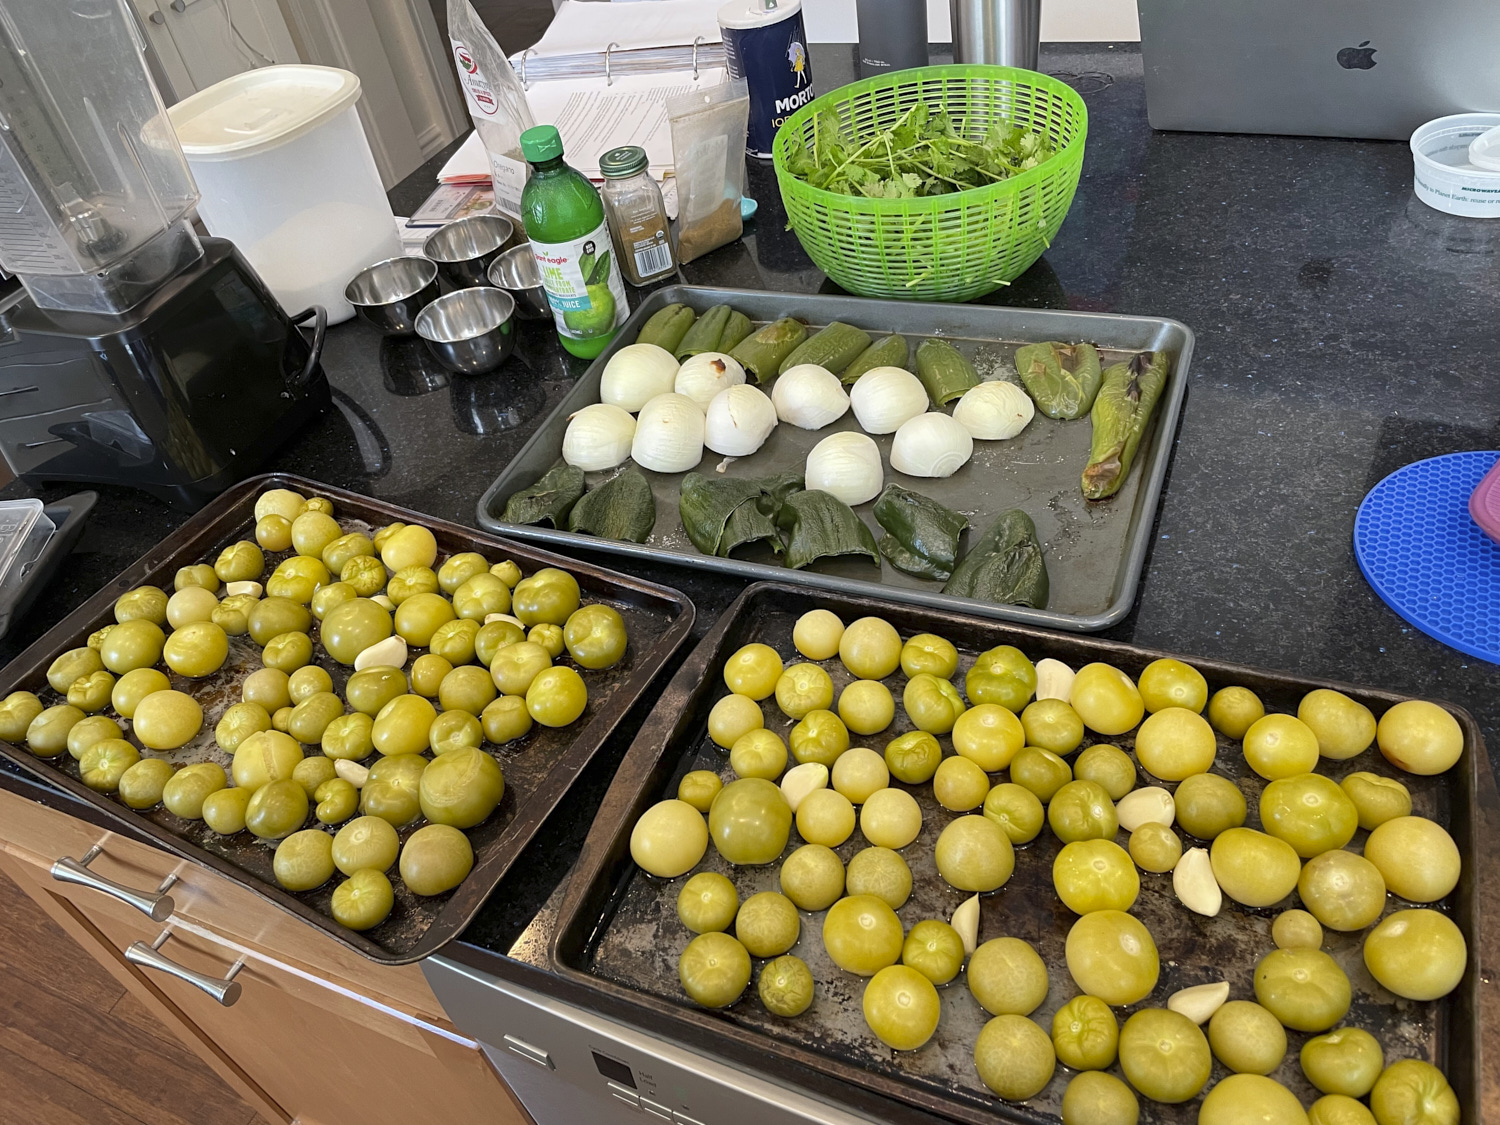
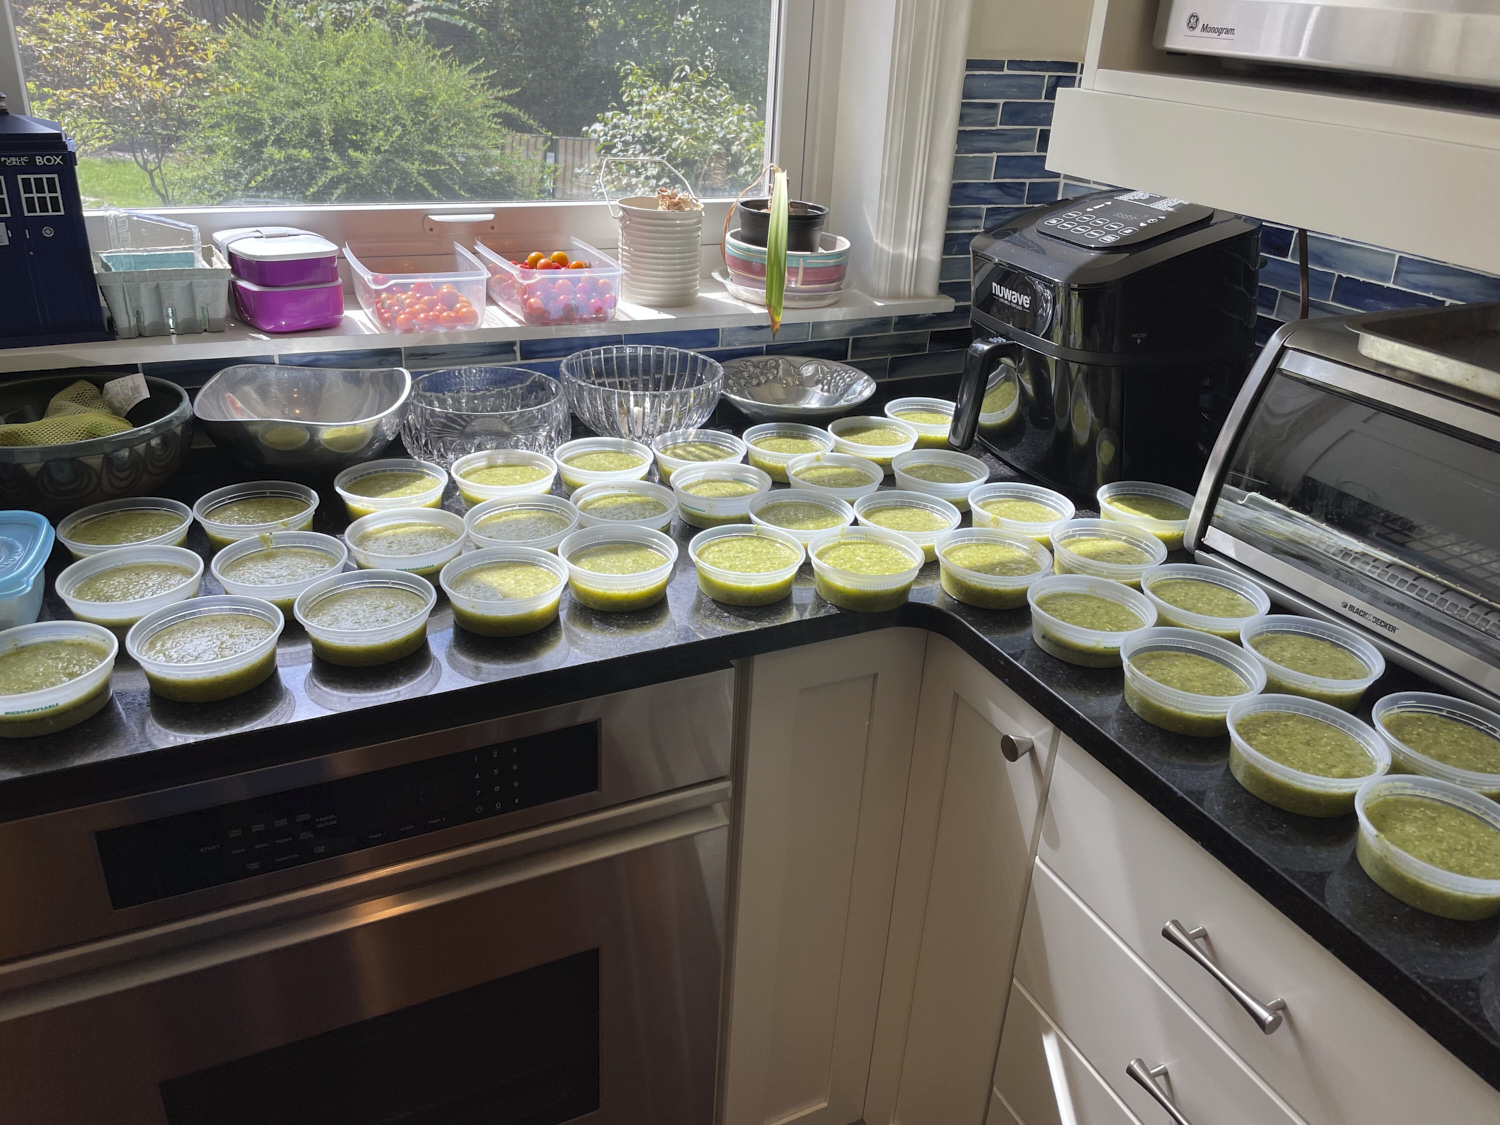
Tomatillos on the vine. The ones in the foreground are not quite ready to harvest.About 10 pounds of tomatillos in these two bowls.12 pounds of tomatillos with husks removed. The husks are sticky and leave your hands sticky too. My husband husked all 12 pounds of tomatillos himself today. I’ll add the garlic for each 3-pound batch to the tray with the tomatillos (to prevent the garlic from burning) and then these will be ready for the oven. I usually roast two batches together at a time along with their peppers and onions.Here are the peppers, and onions for 4 batches.Here’s two batches after they came out of the oven. The cilantro and other ingredients are in the background. I measure all the dry ingredients into the little bowls so I can just dump in a bowl with each batch I blend.I put everything in the blender for one batch except the cilantro. I blend for 5 seconds and then add the cilantro.I pour the salsa into deli containers and let it cool on the counter before putting lids on the containers and putting them in the freezer.
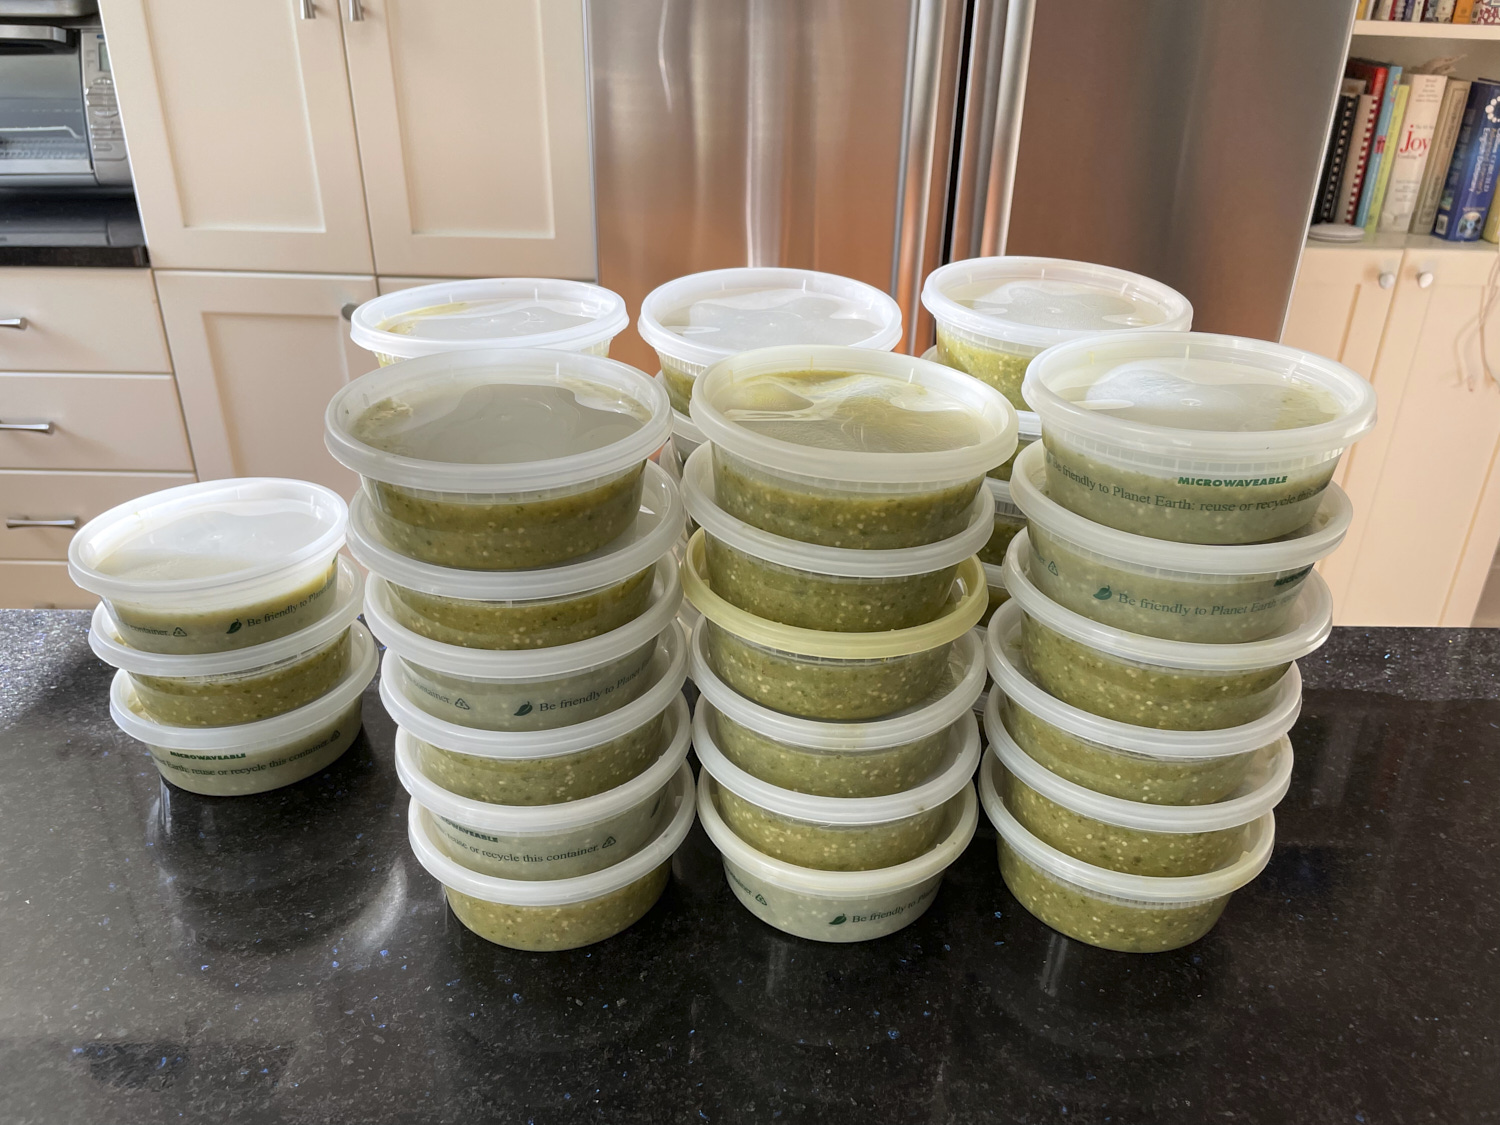
So the next question is what do you do with 40 6-oz containers of tomatillo salsa? We put most of it in the freezer to eat all winter and share with friends. We used it to dip chips, put it on fish tacos, and use it as enchilada sauce. One of my friends said it made a tasty pasta sauce too. It has a tangy taste with just a small bit of heat (but of course you can make it hotter).
2 Anaheim, poblano or similar medium-hot peppers, seeded and sliced into a few strips
1-2 serrano or jalapeno peppers, seeded and sliced into a few strips (for spicier salsa use more, peppers, spicier varieties of peppers, or don’t remove the seeds)
½ to 1 bunch cilantro (1-2 cups)
1 teaspoon sugar
1.5 teaspoons cumin
3 teaspoons dried Mexican oregano (regular oregano can be substituted but reduce to 2 teaspoons)
½ teaspoon salt
¼ cup lime juice
Preheat oven to 500 degrees
Place tomatillos, garlic, onions, and peppers on 2-3 medium baking sheets and roast for about 20 minutes until tomatillos and peppers are charred and oozing juices. Make sure the garlic roasts between tomatillos so it doesn’t burn.
Take vegetables out of the oven and let cool for at least 10 minutes
Place roasted vegetables and all other ingredients in blender jar and mix on medium setting to chop, but not puree. Depending on your blender and how chunky you like your salsa you may be able to just run the blender for 5-20 seconds, or you may need to pulse it about 10 times. With my Blendtec blender I like to put in all the ingredients except the cilantro and blend for 5-6 seconds. Then I add the cilantro and blend for 5-6 seconds more.
Makes about 7 cups of salsa, which can be poured into about 10 6-oz containers and frozen.
This salsa is pretty mild. If you like it spicy add more hot peppers. This quantity will fit in a regular Blendtec Wildside+ blender jar but for many standard home blenders this is more than will fit. If you have a smaller blender jar, divide ingredients proportionally and blend in batches. It is easier if you blend each batch together with all its ingredients rather than try to mix batches together later (e.g. blend half the tomatillos, half the peppers, etc. in one batch).
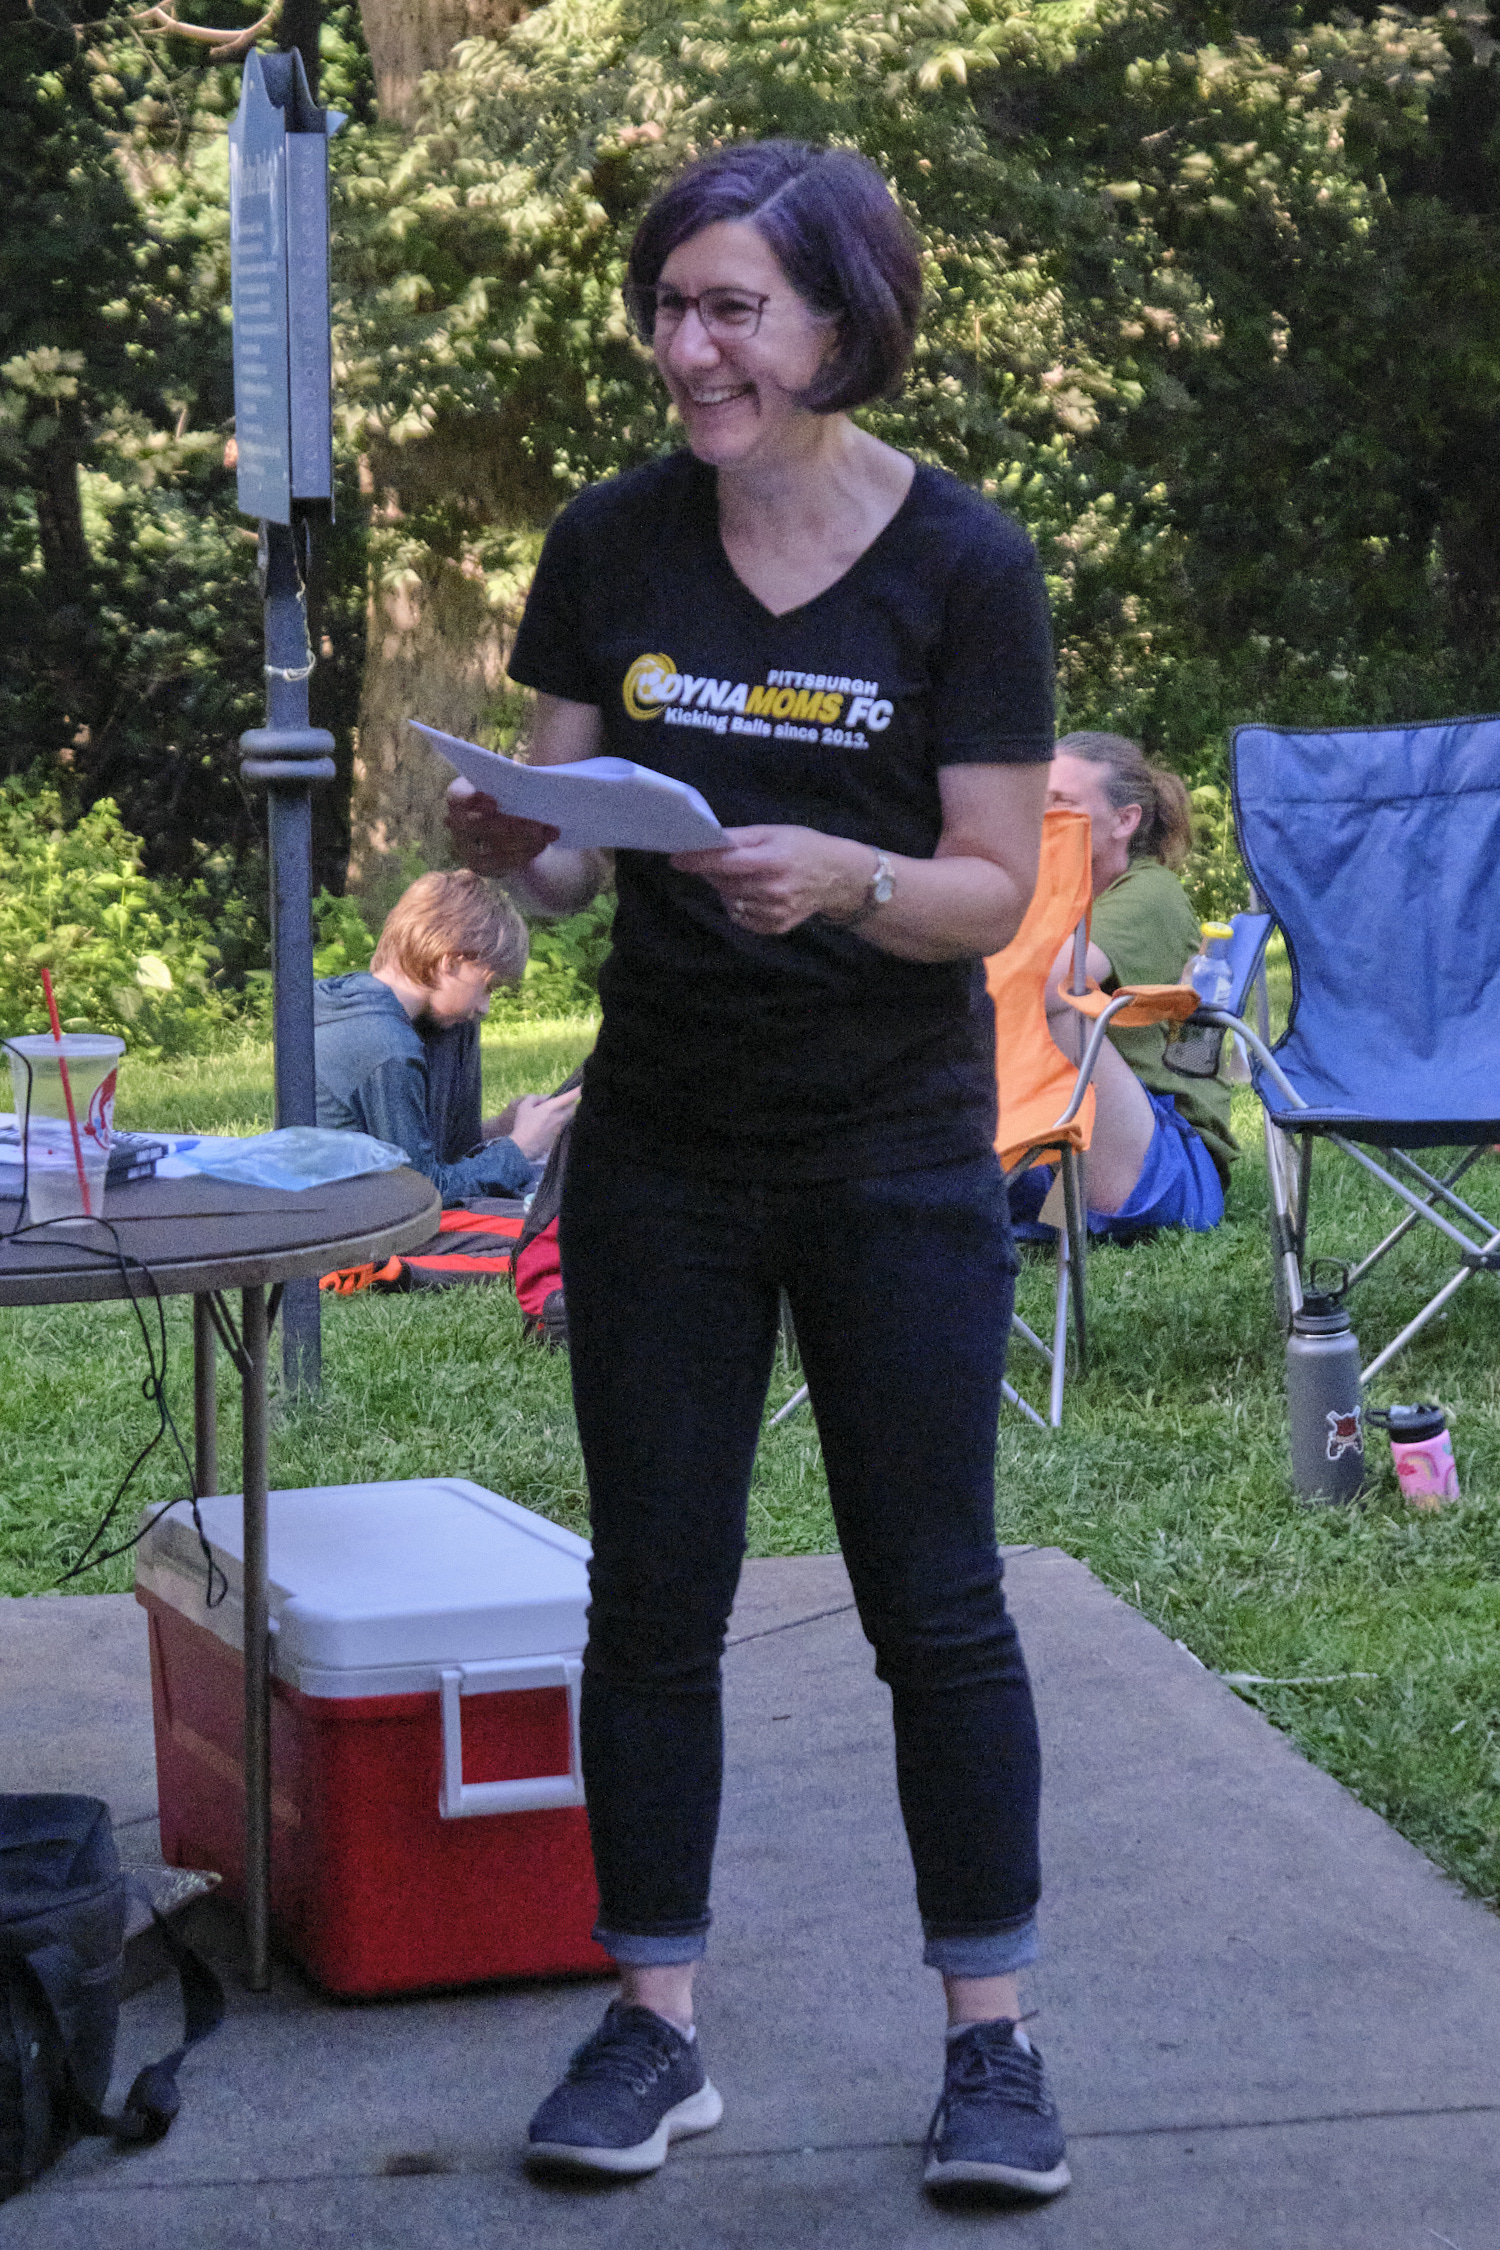
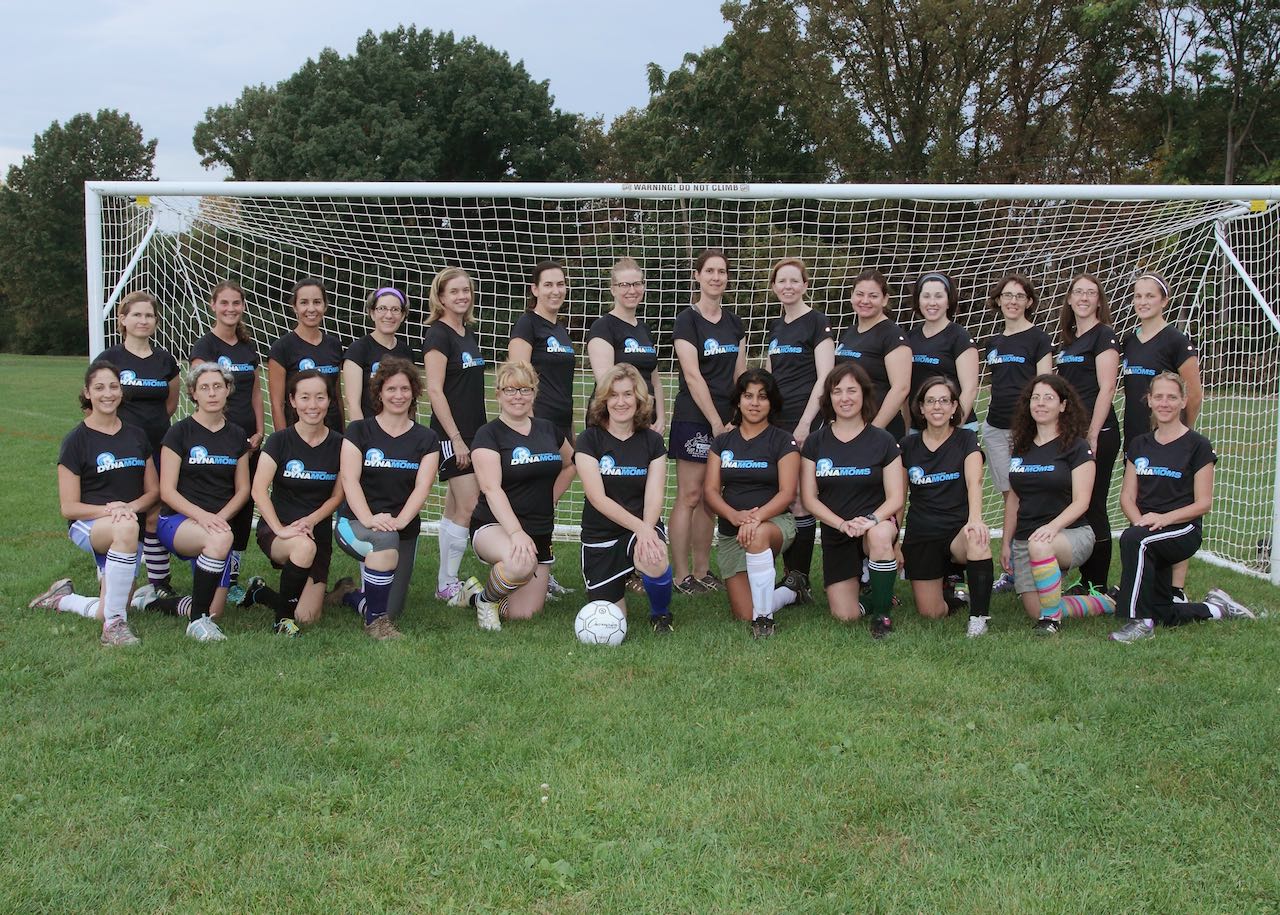
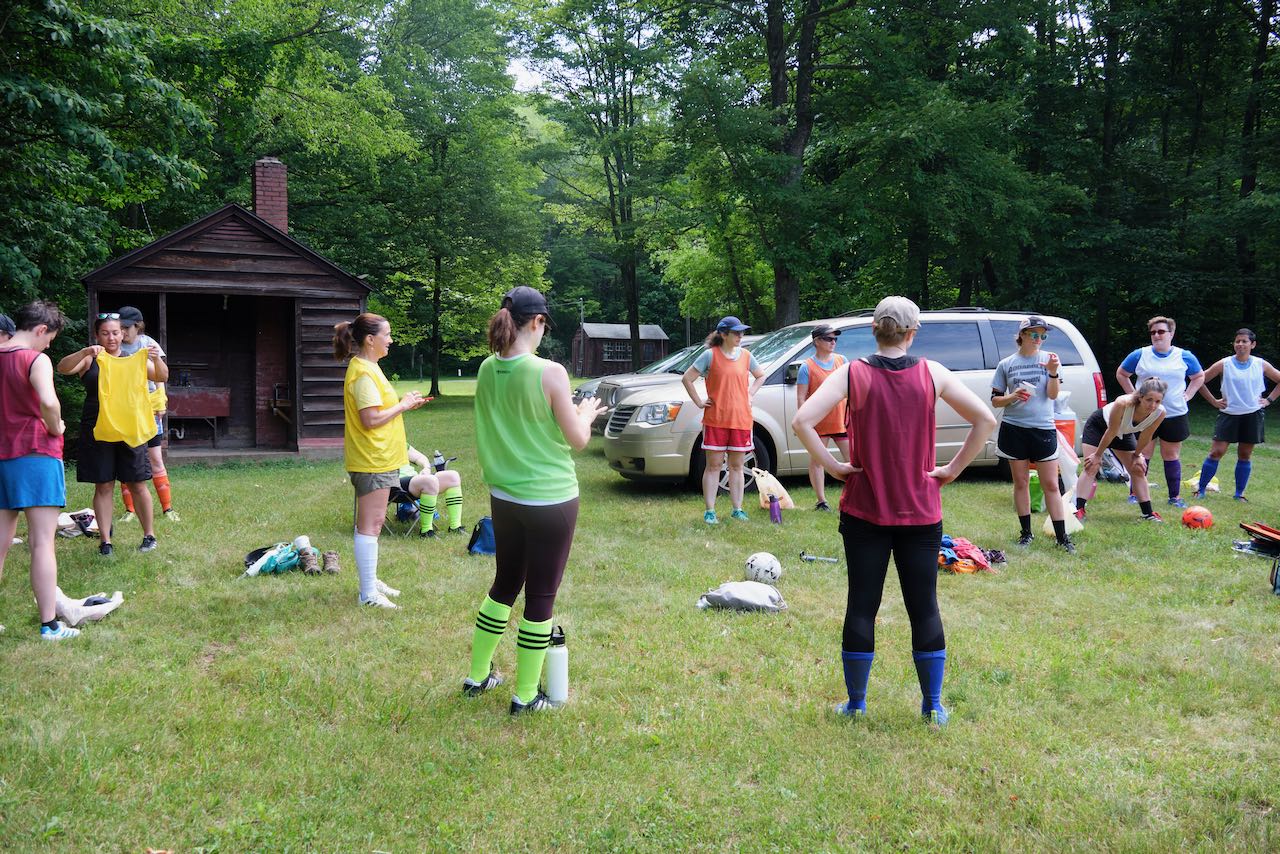
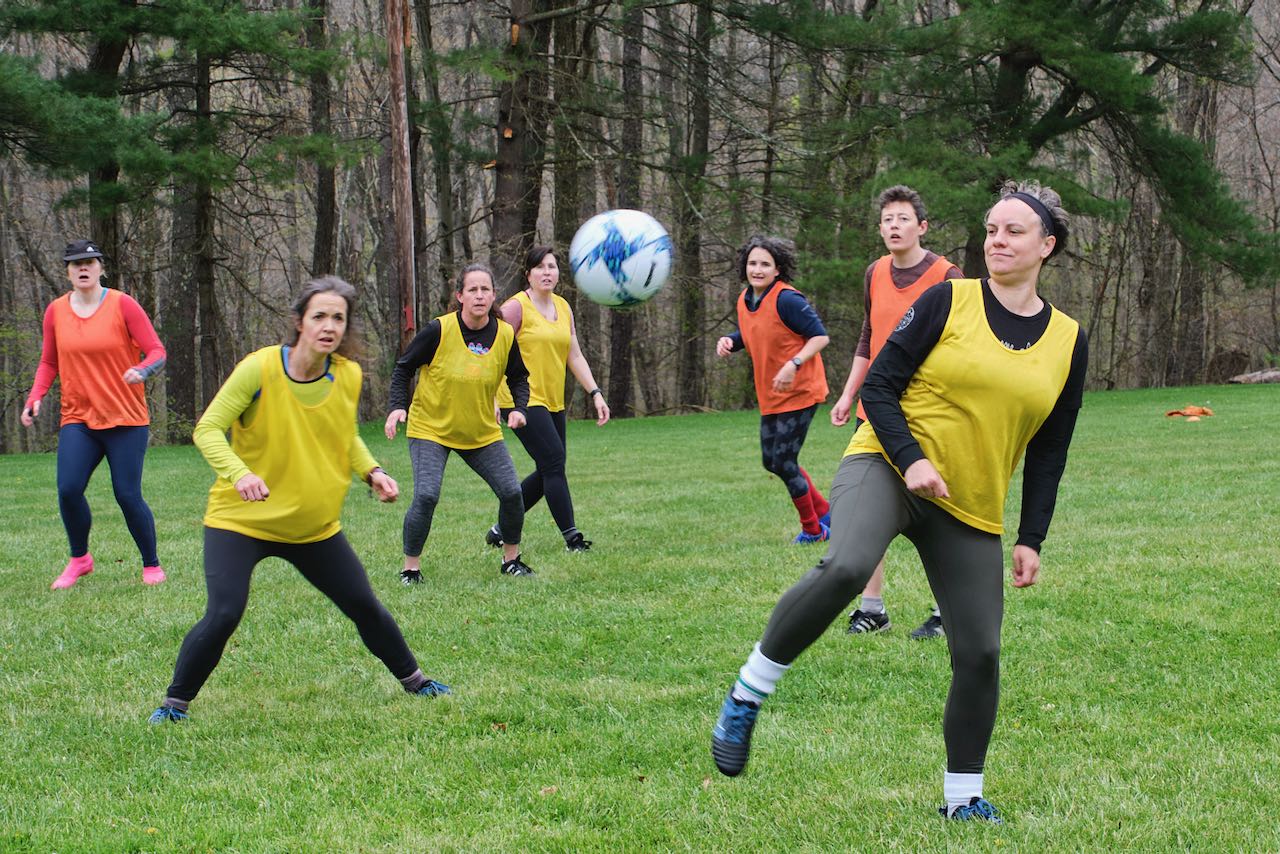
We celebrated 10 years of our women over 30 recreational soccer club at a picnic this weekend and I gave a little speech…. Ok, it was kind of a long speech. Sharing for my soccer buddies who missed it, and for others who might be inspired to learn to play soccer or start their own soccer club.
It all started back in Spring 2013 at a Dynamo boys U13 end-of-season parents vs kids game. My son had played in the Pittsburgh Dynamo recreation league since he was in U6. Although I didn’t have much in the way of athletic skill, I always enjoyed the end-of-season parents vs. kids games, where the parents always let the kids win. But as my son got older, the kids were increasingly able to win without the parents going easy on them, and I watched as most of the moms stepped back and let the dads compete in the end-of-season game.
At the end of the Spring 2013 parents game I observed that soccer seemed like a fun sport, but it would be a lot more fun if I actually knew how to play. I chatted with some of the other moms on the sidelines and asked them if they would like to learn to play too. Some of them seemed interested. I was an age-level commissioner in the Dynamo rec league, so I reached out to the head rec commissioners and asked if we could have a soccer clinic for moms during the 2013 Fall season. My recollection is that the suggestion was met with some skepticism that anyone would actually show up, and a definite lack of enthusiasm to put effort into organizing it. But I was told that if I was willing to put together a proposal and be the one to organize it, the Dynamo board would consider it. Someone on the board mentioned they had heard of something similar in New Jersey and someone had written a book about it.
I’m not sure they actually expected that I would follow through. I didn’t know much about soccer but I know how to organize things.
And I tracked down the book, “Alive and Kicking: When Soccer Moms Take the Field and Change Their Lives Forever.” The book told inspiring stories about a group of soccer moms who learned to play soccer and formed a soccer league in Montclaire, New Jersey in the late 1990s. These women approached the director of a for-profit youth soccer camp to organize soccer clinics for them, and their clinics were largely coached by men. In addition, when an indoor soccer dome opened, the soccer moms quickly organized themselves into teams. The teams got very competitive very quickly, encouraged by their male coaches, and also by some very competitive women organizers who started bringing in 20-something au pairs and other younger women to help their teams win. Not too surprisingly, both bodies and feelings were regularly injured, and the group had to split into divisions with different levels of play. I liked the initial idea the New Jersey moms had for soccer clinics, but was hoping for something less competitive, so I decided from the beginning to set a minimum age of 30 to participate and to try to find female coaches.
I drafted a proposal for “Dynamoms,” which I described as having the purpose of providing “opportunities for mothers and other female role models of Dynamo youth players to learn about soccer, improve their skills, and have fun.” I also argued that “besides promoting fitness and fun,” Dynamoms would help mothers become “more comfortable with their soccer skills” and thus “they will be more willing to step in and assist with their kids’ soccer practices as needed, referee games, practice kicking soccer balls with their kids, or even volunteer as coaches.” As Dynamo was struggling to sign up enough middle school girls to field rec teams at the time, I added, “This may also encourage more girls to stick with Dynamo soccer longer. Having more girls playing Dynamo soccer supports the league’s mission, and having more mothers volunteering as coaches benefits the league as a whole.”
I talked to a friend who had coached Dynamo teams and played in an adult soccer league herself. She agreed to lead the Dynamoms clinics and we settled on holding three 90-minute clinics during the Fall season on the Schenley Oval grass at 5:30 pm, which was at the same time the Dynamo U16 rec teams played on the turf. We decided to spend 45 minutes each week on soccer skills and then split into two teams for a scrimmage with a referee. I created a budget and convinced the Dynamo board to let us give it a try if I could find at least 10 women who would pay a $50 registration fee. The board agreed. But then my friend ended up moving to another city that summer and I needed to find other coaches.
I talked to Courtney, who had coached my son’s rec team as a volunteer, and offered to pay her to coach a group of moms. Someone on the board suggested reaching out to Julie, a mom who coached a Dynamo team and had played college soccer. Courtney and Julie agreed to coach. I designed a black t-shirt based on the Dynamo logo with “ms” appended to the end, added Dynamoms to the Dynamo online registration system, and sent an email to all the Dynamo parents. We quickly exceeded the minimum 10 women needed, and in the end I believe about 40 women signed up, far exceeding my expectations.
Our Fall 2013 clinics were a lot of fun. As I recall, we were all terrible soccer players, but the coaches were patient with us and we did at least mostly listen to them and try to do their drills. When we scrimmaged the play stopped frequently because we all had lots of questions we wanted to ask about the rules of soccer. By the end of the three sessions, about half the women who participated had concluded that soccer was not for them, but the other half loved it and wanted to know when our next season would start and “could we do this every week?”
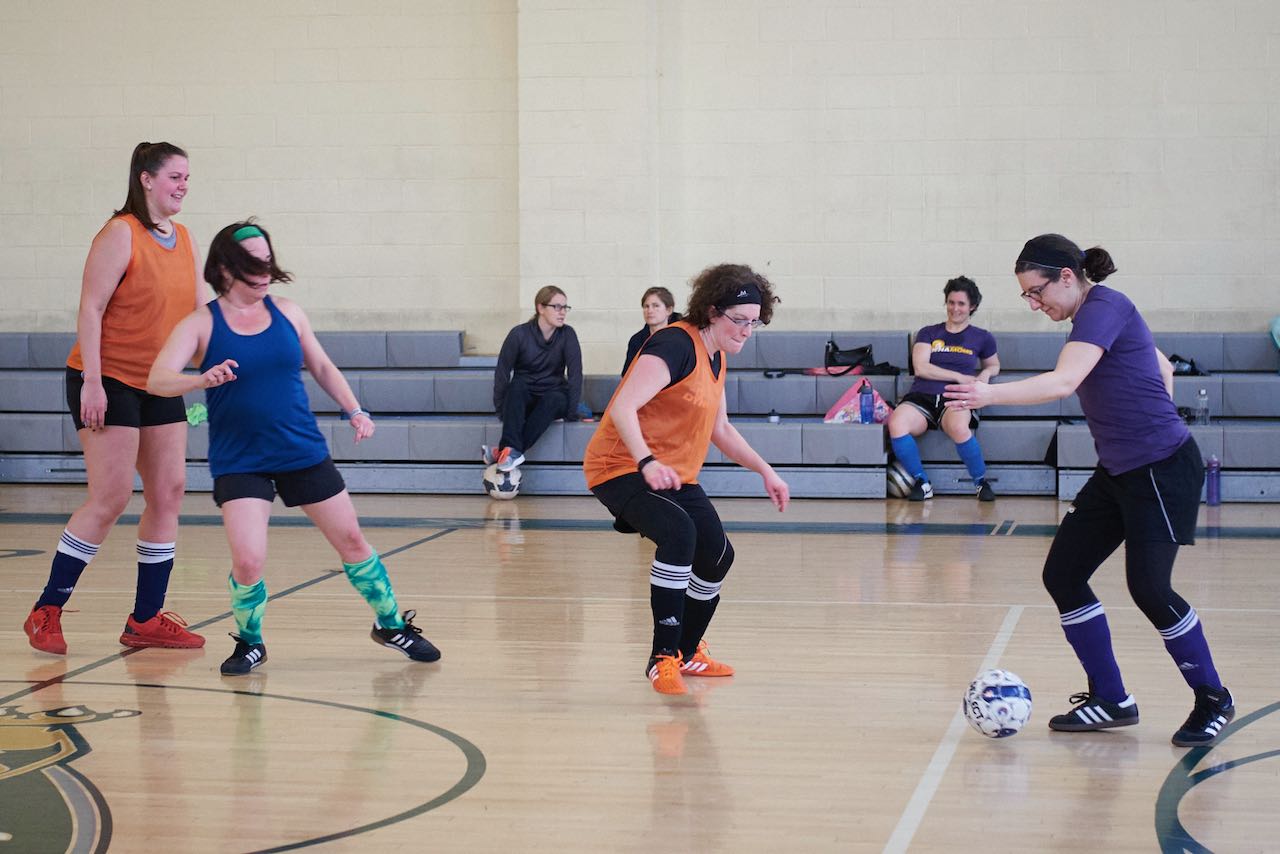
Not wanting to wait six months until April for more soccer, we decided to organize an indoor season that would start in January. I knew nothing about where one could play indoor soccer in Pittsburgh or how to rent a gym, but the enthusiastic soccer moms had suggestions. Kitty suggested renting the gym at the Ellis School, and on Saturday afternoons in January and February we held Dynamoms indoor clinics. Then in April 2014 we had a full 8-week outdoor season. Dynamoms had become a thing.
Along the way we had a minor crisis when members of the Dynamo board, who hadn’t actually expected Dynamoms to take off, started wondering whether Dynamoms actually fit the mission of a youth league and whether we would be covered by Dynamo’s insurance. We resolved the insurance issue and the board agreed to let us continue.
Somewhere along the way I hired Rebecca, one of my PhD students, as a third coach. When Rebecca and Julie moved away in the same summer we searched for coaches again and ended up hiring two younger women with soccer skills. They were good coaches, but some of us were old enough to be their mothers. When they moved on we recruited some of our more skilled players to become coaches.
We also had to find alternate gyms for indoor soccer after Ellis stopped renting their gym. We played for a couple of years in a tiny gym on the top floor of the Beth Shalom synagogue, and then for several years in the gym at the Sterrett middle school.
Another great thing that happened along the way was pickup soccer. Some of the women started asking about having games before our season started and after it ended. Some wondered whether we might play on a weeknight in addition to Saturday afternoon. And people other than me started organizing pickup games. Beth took the lead on pickup, finding fields, announcing when the games would be, and making sure we had a bag full of pinnies.
We adopted the Dynamo recreation league rule of not keeping score. As Deanna likes to say, the score is always “rainbows to unicorns.” And Kitty reminds us “The stakes cannot be lower.”
By the time the COVID 19 pandemic started in spring 2020, Dynamoms had been around for over 7 years and had settled into a pattern of 8-week fall and spring seasons on Saturday afternoons, 8-week winter indoor seasons on Sunday afternoons, and Wednesday night or Saturday afternoon pickup games whenever the weather was conducive. We typically had between 20 and 30 women sign up for each season, and a dozen or so would show up for a pickup game.
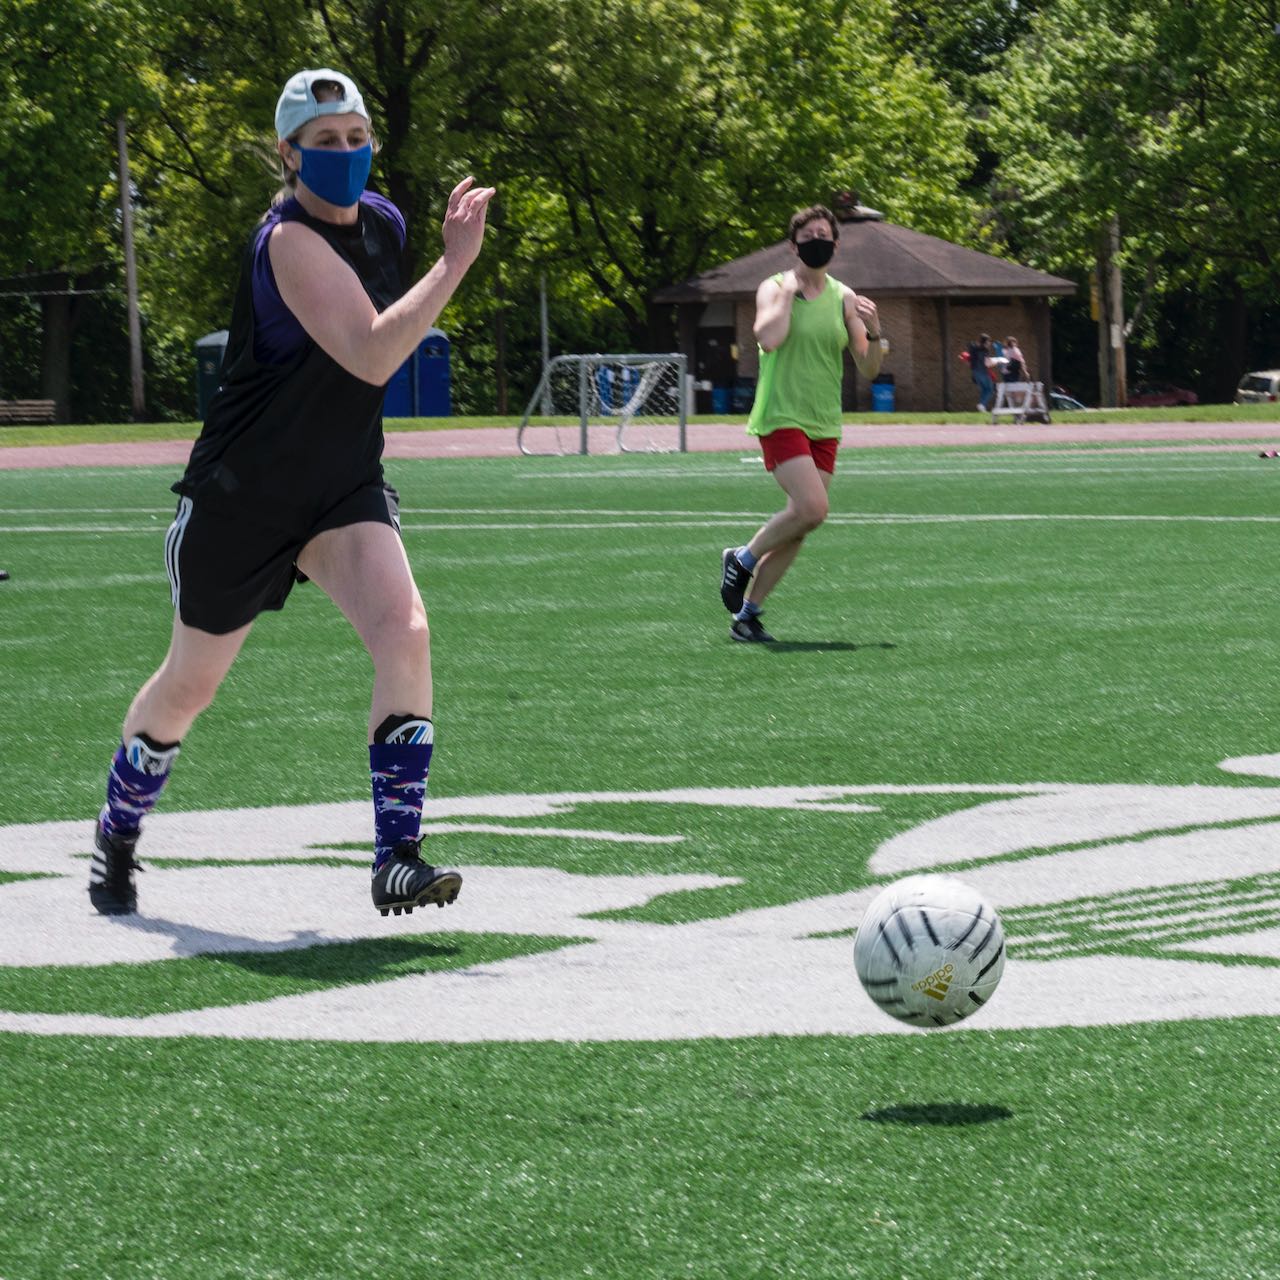
When schools and workplaces rapidly shutdown in March 2020, we initially discontinued our pickup games. But as we learned more about ways to reduce the risk of COVID transmission, and at the same time became more and more desperate to get out of our houses and interact with other grown women, we developed COVID rules and resumed pickup games. Jynene, who is a nurse, advised us on how we could play soccer safely during a pandemic. We brought our own light and dark shirts rather than sharing pinnies, we tried to social distance and stay six feet apart from each other, and we all wore masks. As we played pickup soccer through the summer, other women walking by our games asked to join us. Our numbers increased, and we added more games, until we were regularly playing three times per week. And the more we played, the more women asked to join us.
Winter came and we kept playing. Indoor soccer was not going to happen due to COVID so we had to keep playing outdoors. It was cold outside, but we soon realized that if you bundle up with lots of layers to warm up, once you start moving on the soccer field, you can shed your outer layers and most of us were playing comfortably in a single layer shirt, joggers, gloves, and a hat, in below freezing temperature.
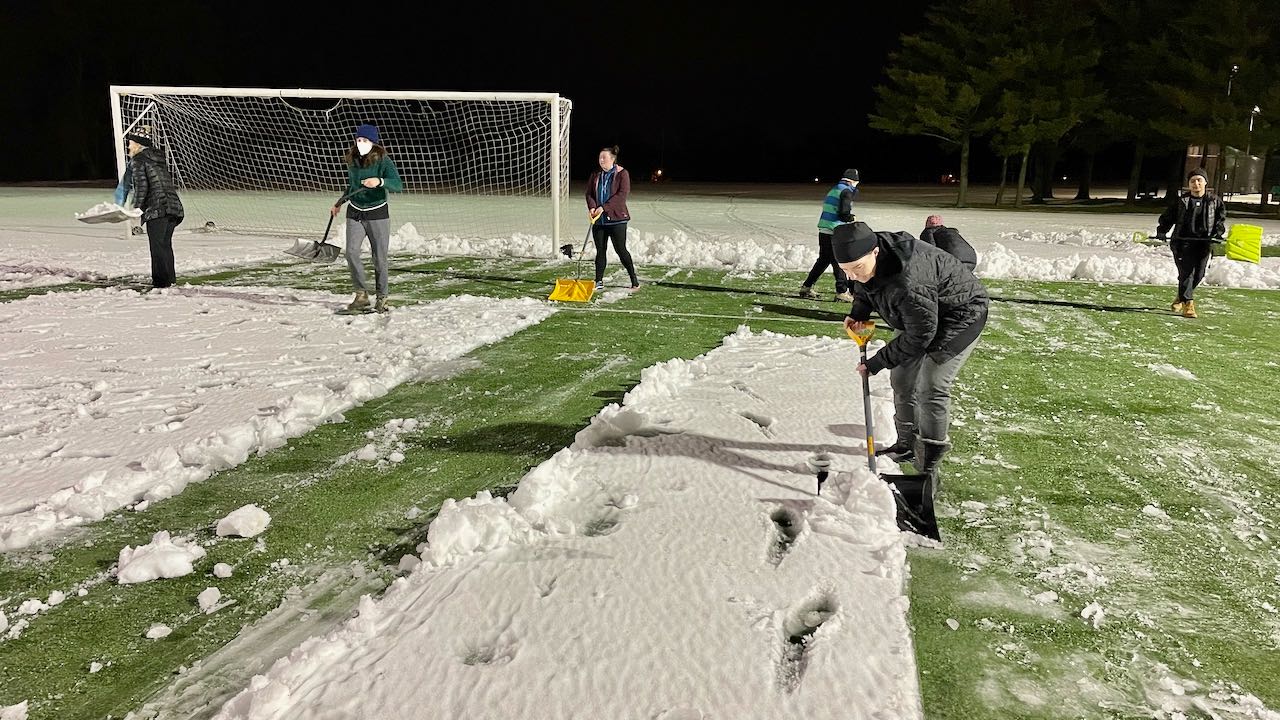
The only thing that could stop us was the snow. The first time it snowed during the pandemic, we started emailing each other. What was the field like? Someone went to the oval to take a photo of the snow-covered turf. It didn’t look like we would be able to play. Fortunately, the snow melted quickly and we were soon back to soccer. But then it snowed again. After a couple of small snow storms, someone suggested that snow was nothing that 20 determined women with snow shovels couldn’t handle. So we arrived for our usual pickup game, snow shovels in hand, and shoveled enough of the Schenley Oval turf to have a small game.
It turns out this was a service to other soccer players too, and we noticed other groups using our shoveled area. Some of them sometimes enlarged our field or created a second one nearby. As the snow got deeper we developed some new rules. If the ball hits a snow bank and bounces back into the field, play it. If the ball lands in the snow, whoever retrieves it gets the ball, regardless of which team kicked it out. This led to some friendly races through the snow to get the ball. Snow rules brought a whole new dimension to the game.
One day while shoveling, Kitty remarked that it would be really fun if we could all get together in warmer weather and have a soccer camp. We all agreed and kept shoveling, but I’m not sure any of us except Kitty thought it would actually happen.
In spring 2021 we resumed our Dynamoms clinics, still wearing masks and practicing social distancing. And Kitty brought up the idea of soccer camp again. She had ideas for venues, she was looking at dates. We realized she was serious. Kitty organized an adult women’s soccer camp for us at Raccoon Creek State Park. The cabin rentals were super cheap, but the accommodations were quite rustic, full of spiders and mice. The toilets didn’t flush and the showers didn’t drain. But despite the rustic accommodations, we had a blast.
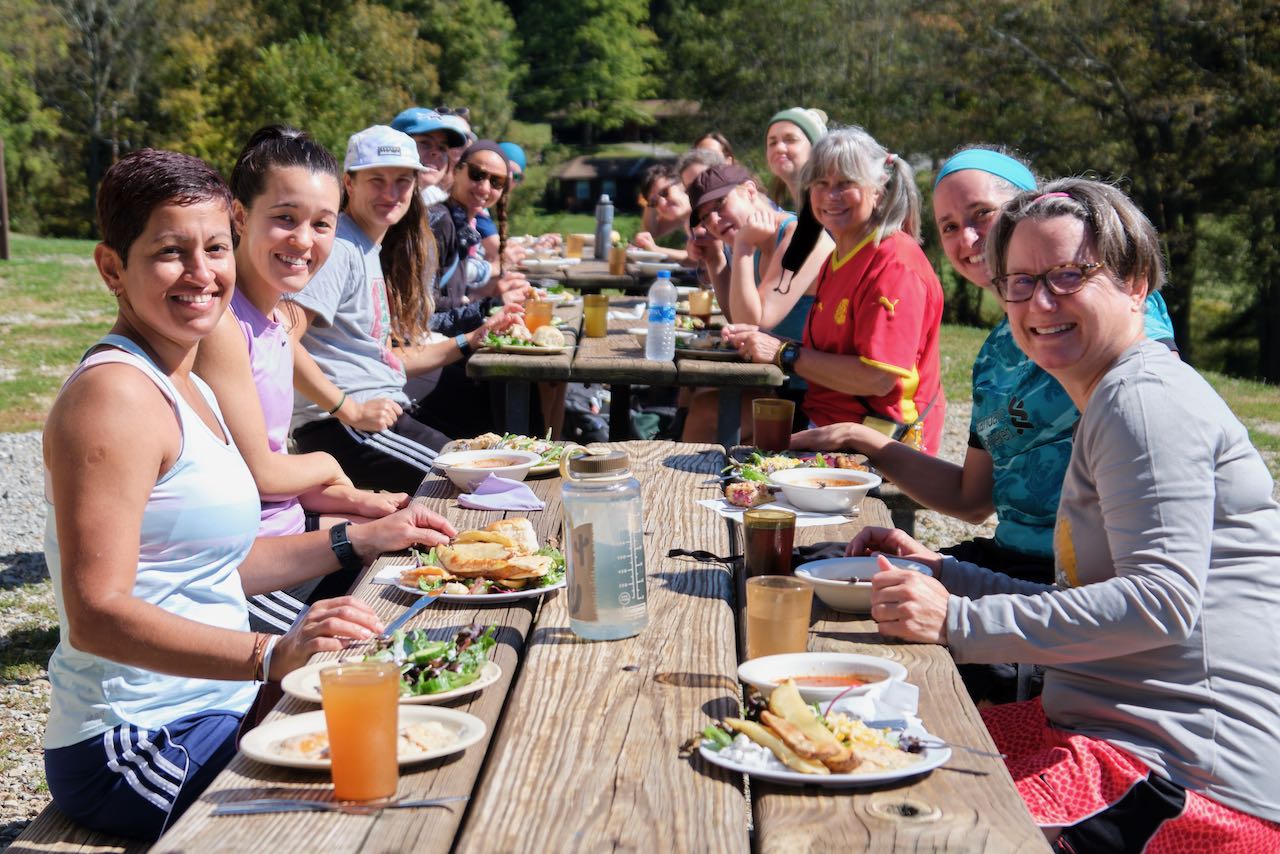
Soccer camp 1.0 was such a success that Kitty decided not to wait another year and immediately began searching for better accommodations for holding soccer camp 2.0 in the fall. We found wonderful camp facilities at Camp Soles and we’ve been going back there twice per year ever since. We’ll have soccer camp 6.0 in September with lots of soccer joy, camp fires and other camp activities, dance parties, euchre, beer soccer, and more.
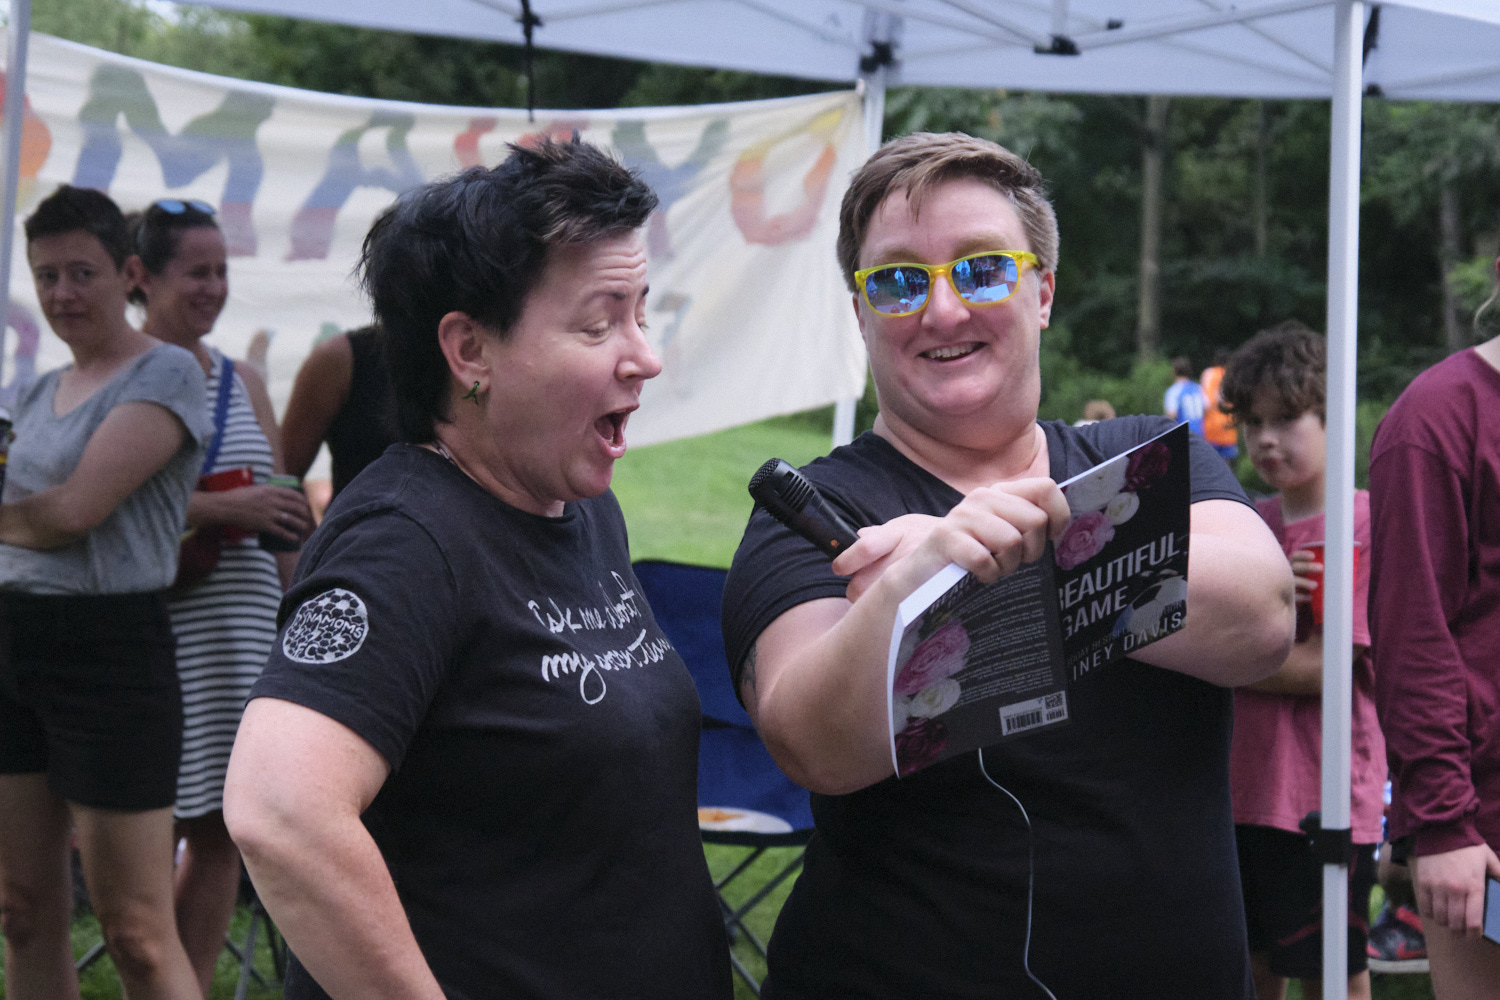
And in a case of life imitating art imitating life (or something like that), our second camp shirt was designed by Pati (AKA Professor Haute), who was also a character in a romance novel about a soccer team very similar to Dynamoms that was written by one of our players. The real Pati produced camp shirts that resembled a shirt worn by the fictional Pati in the book.
Now we no longer have to wear masks and practice social distancing, and fingers crossed that doesn’t change. And our clinics have gotten more popular than ever. Last spring 69 people signed up for our soccer clinics, and we are well on our way to those sorts of numbers for our Fall season.
As we’ve grown, we’ve encountered a few growing pains. We used to let men play pickup with us if they asked nicely and agreed to play by our friendly rules. But when too many men showed up for a game, it really changed the character of the game and made people worry about injury. We had a meeting to discuss and we decided to prohibit men on “Women Wednesdays” and allow a limited number of “man spots” on Mondays. Later, we decided to only let women play unless we had a shortage of players, and to strictly enforce the 30+ rule.
When we started 10 years ago, we used the Dynamo youth permit for our clinics, and didn’t worry about permits for pickup games. But as more groups have started to use the Schenley Oval and the city changed their field use policies, we had to start paying for our own permits and often found we had trouble getting field space if we showed up without a permit. I have learned more than I ever thought I would about getting field permits and I have names and numbers of a whole slew of other field users that I have negotiated with over field space.
Over time, running Dynamoms has become increasingly time consuming and complicated. So earlier this year I asked people to volunteer to be part of a Dynamoms Coordinating Committee (the DCC) to help spread the workload around. I was pleased to get a whole bunch of volunteers, and now we have a committee of 12 of wonderful women sharing the work of running pickups, obtaining permits, maintaining the mailing list, running the registration system, ordering t-shirts, and more. Sometimes having a committee can be a little frustrating because we all have opinions, and we are all very respectful of listening to other peoples’ opinions, so we are sometimes hesitant to do anything until everyone has weighed in. But we’re learning how to work together more efficiently and make decisions and get things done. And if any of you would like to volunteer to take over my job as the Dynamoms Commissioner, please let me know. I’ll keep doing it for a while but would be happy to make plans to turn it over to someone else.
One of the difficult decisions the DCC has struggled with is whether to keep the name Dynamoms or change to something more inclusive, considering that a large number of our players are not actually moms. After much debate, a big survey, and more debate, we were unable to find one name that satisfies everyone, so we decided we would just use two names. Thus, we are now the Pittsburgh Dynamoms Football Club, as well as Pittsburgh DFC. Everyone can choose what they want to call it and which t-shirt they want to wear.
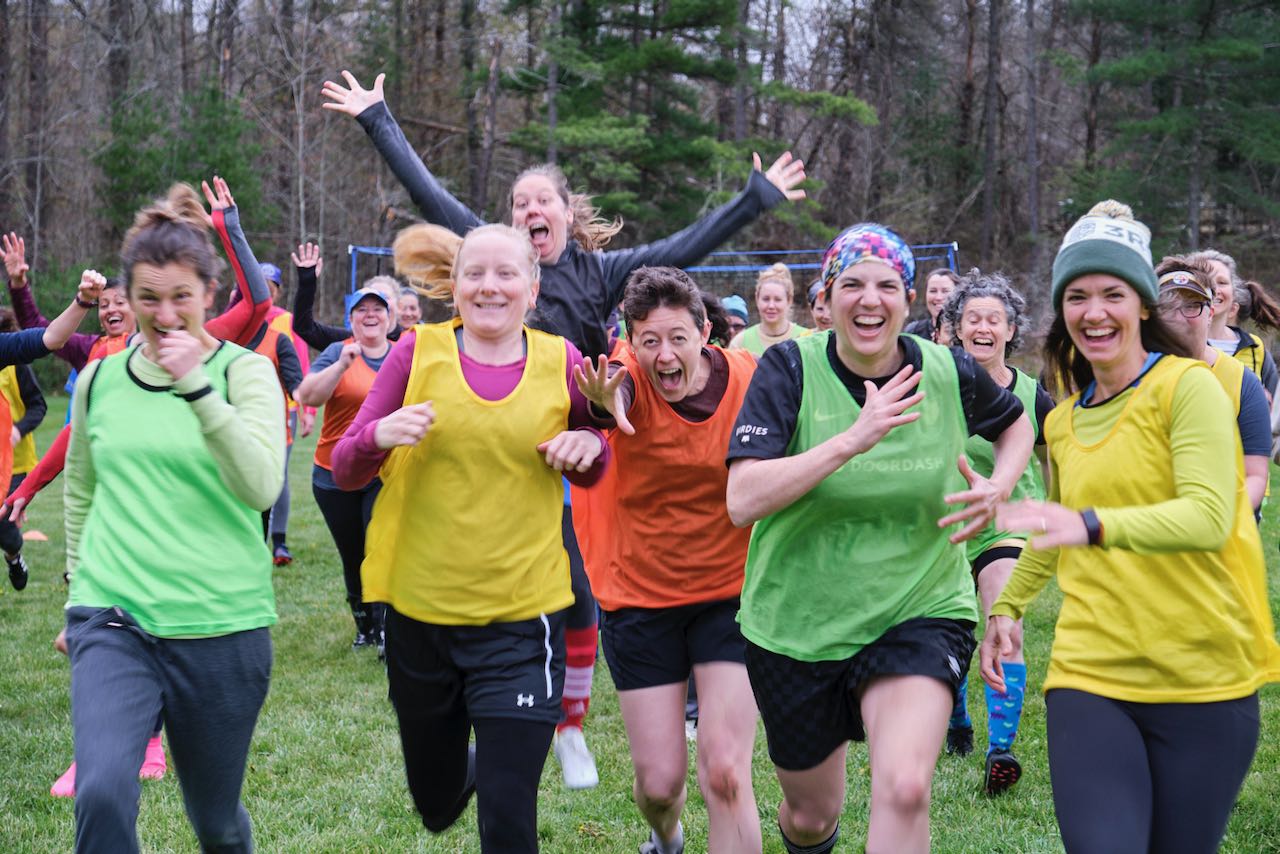
So now, as we enter our 10th year of Dynamoms/DFC soccer, it is hard to believe we have come this far. Who would have thought three clinics for soccer moms who didn’t know how to kick a ball would turn into a football club with over 100 members with well-attended clinics, camps, and pickup games 2 or 3 times per week year round? We’ve inspired some of our members to coach their kids’ teams and some of them to travel to Australia to watch the women’s world cup. Dynamoms has sparked many new friendships, social events, and support for our members when they need it. A large number of our members are professionals in a diverse set of fields. There’s a group who, like me, are professors. There are teachers, doctors, nurses, lawyers, social workers, photographers, bakers, designers, non-profit leaders, romance novelists, small business owners, and stay-at-home moms. It’s been fun to learn about what everyone does when they are not playing soccer, as well as some of the more unique interests people have. Bee keeping. Pet portraits. Sexy bird legs?
I want to close by just remarking on what Dynamoms has meant to me personally. I joined a recreational soccer team in first grade. My lack of athletic skill and a bully on my team insured that my first elementary school season was my last. So when I started Dynamoms, I didn’t honestly know if would actually be able to play soccer.
But 10 years later, look at me now. Who would have thought that I would ever own a pair of adult soccer cleats, let alone 5 pairs – like I needed another excuse to buy more shoes! Who would have thought that I would take time off of work and abandon my family for three days to go to soccer camp twice a year?
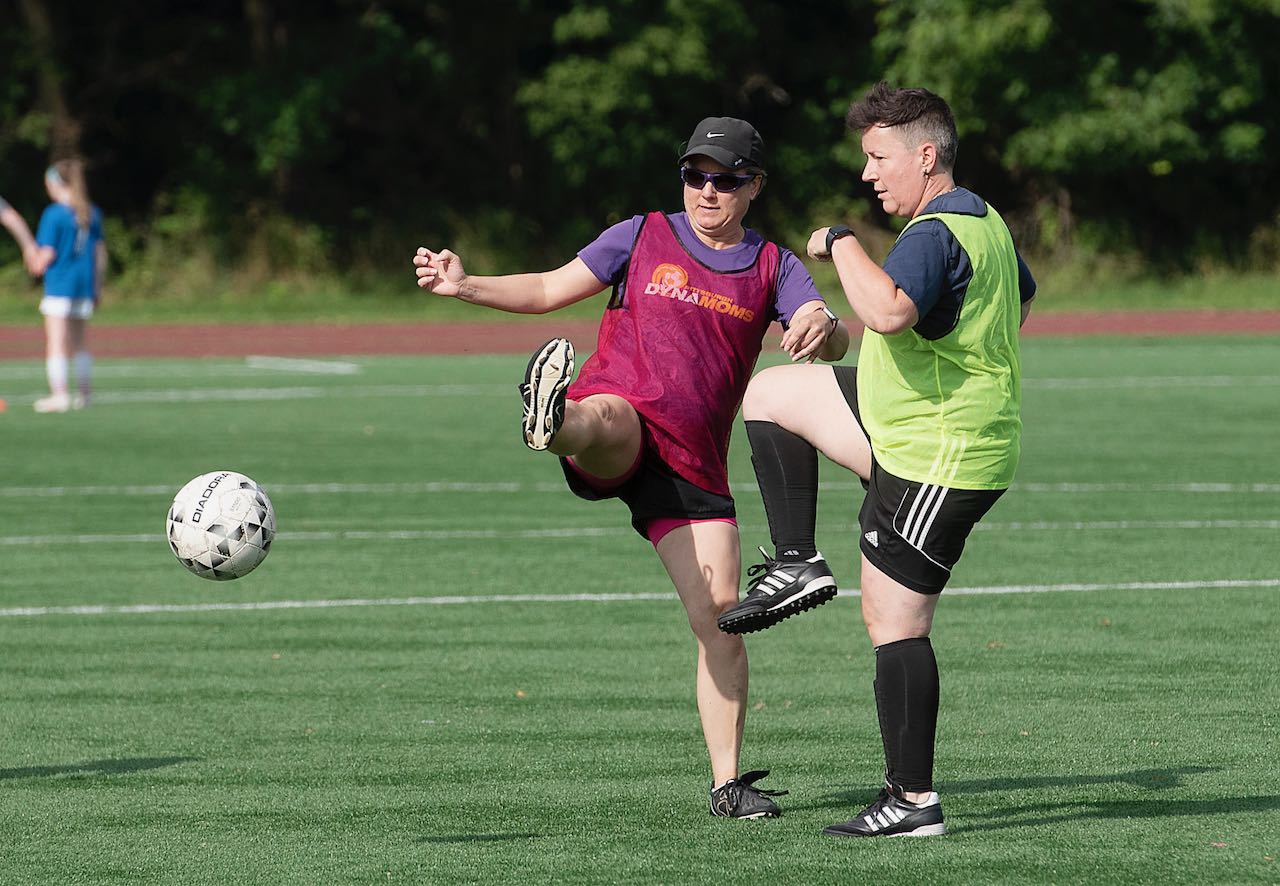
When we play a soccer game, you can see that some of our players are really good. Some of them played a lot of soccer as kids and in college. Some of them came to soccer later in life but picked it up very quickly, generally because they were experienced in other sports. They run fast, their kicks are accurate, they can readily intercept balls. And then there are the rest of us.
When I started playing with Dynamoms I had pretty much zero soccer skill. I was worried that everyone would figure this out pretty quickly and then nobody would pass the ball to me. But that didn’t happen. People passed to everyone, including me, and over time, I was able to successfully receive some of the passes that were sent my way. People cheered me on when I ran after a ball that was just out of my reach, and congratulated me when sometimes I actually stopped it before it rolled out of bounds. I’ve learned that when one of the better players has the ball, I can pressure them, and while I can’t usually steal the ball from them, I can slow them down and force a pass. And occasionally when I do steal a ball, it feels really good. I can kick the ball with both my left foot and right foot now, and can competently play both left and right wing and pass the ball to a teammate in the center of the field. I still feel completely awkward playing in the center of the field myself, I can’t boot the ball all that far, and I have trouble running and communicating with my teammates at the same time. I still have a lot to learn, but hopefully I have many years of soccer ahead of me.
I would like to personally thank all of you for being so supportive of me and everyone else who comes out to give soccer a try. I love you all! It’s been a great 10 years and I’m looking forward to many more!
My college-student brought home a pile of jeans that mostly fit her but gap at the waist. She asked if I could fix them. I asked the Internet and found a number of complicated solutions. Then I found a really easy solution involving elastic. My daughter was skeptical but agreed I could give it a try on one pair. I mostly followed the instructions and It worked so well she brought me several more pairs to de-gap. I have a few pairs of my own jeans that will likely get this treatment too.
The technique takes advantage of the fact that most pants waist bands are basically a tube that goes around the entire waist. There is an inside and an outside and empty space in between. I have previously improved the fit of several pairs of yoga pants by opening up the side seam on the the inside of the waistband and threading elastic all the way around, and sewing the two ends of the elastic together. For jeans, you just need a piece of elastic across the back. So the problem is what to attach it to. The solution is to sew the elastic to the waistband under a belt loop so it is hidden. (Even if you don’t sew it under a belt loop, if you use thread that matches the jeans it is not going to really show. And of course, if you wear a belt, it is not an issue at all. But one of the reasons to add the elastic is so that you do not need a belt to hold your jeans up.)
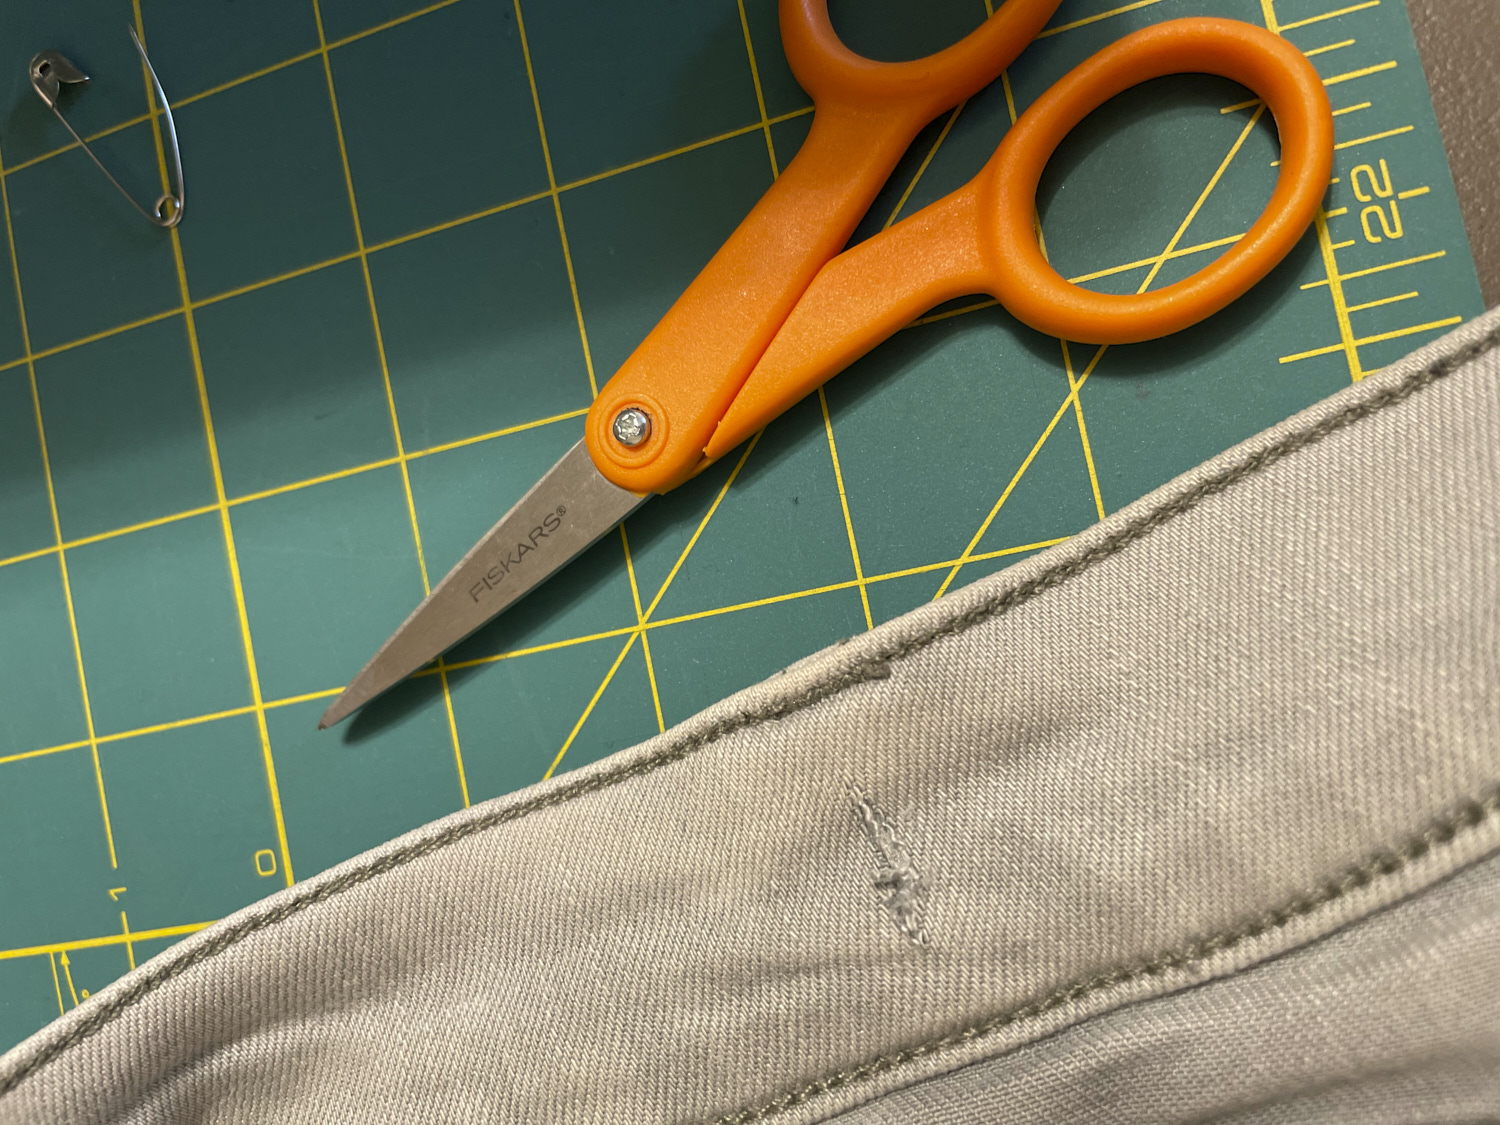
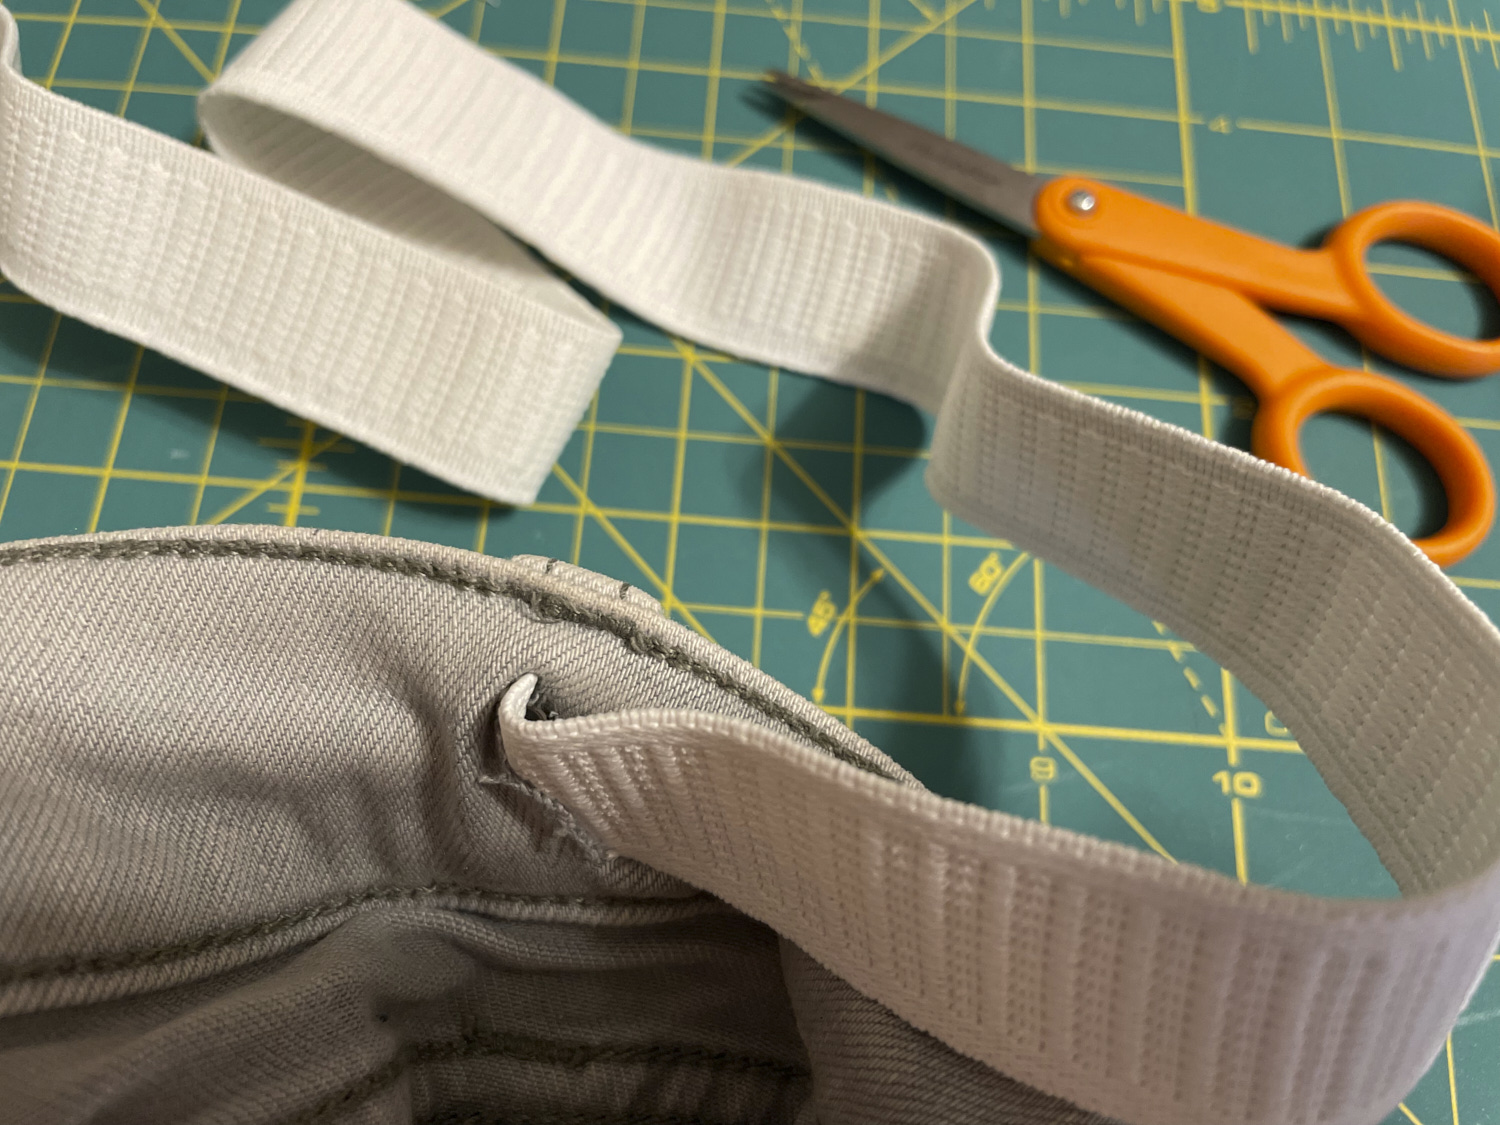
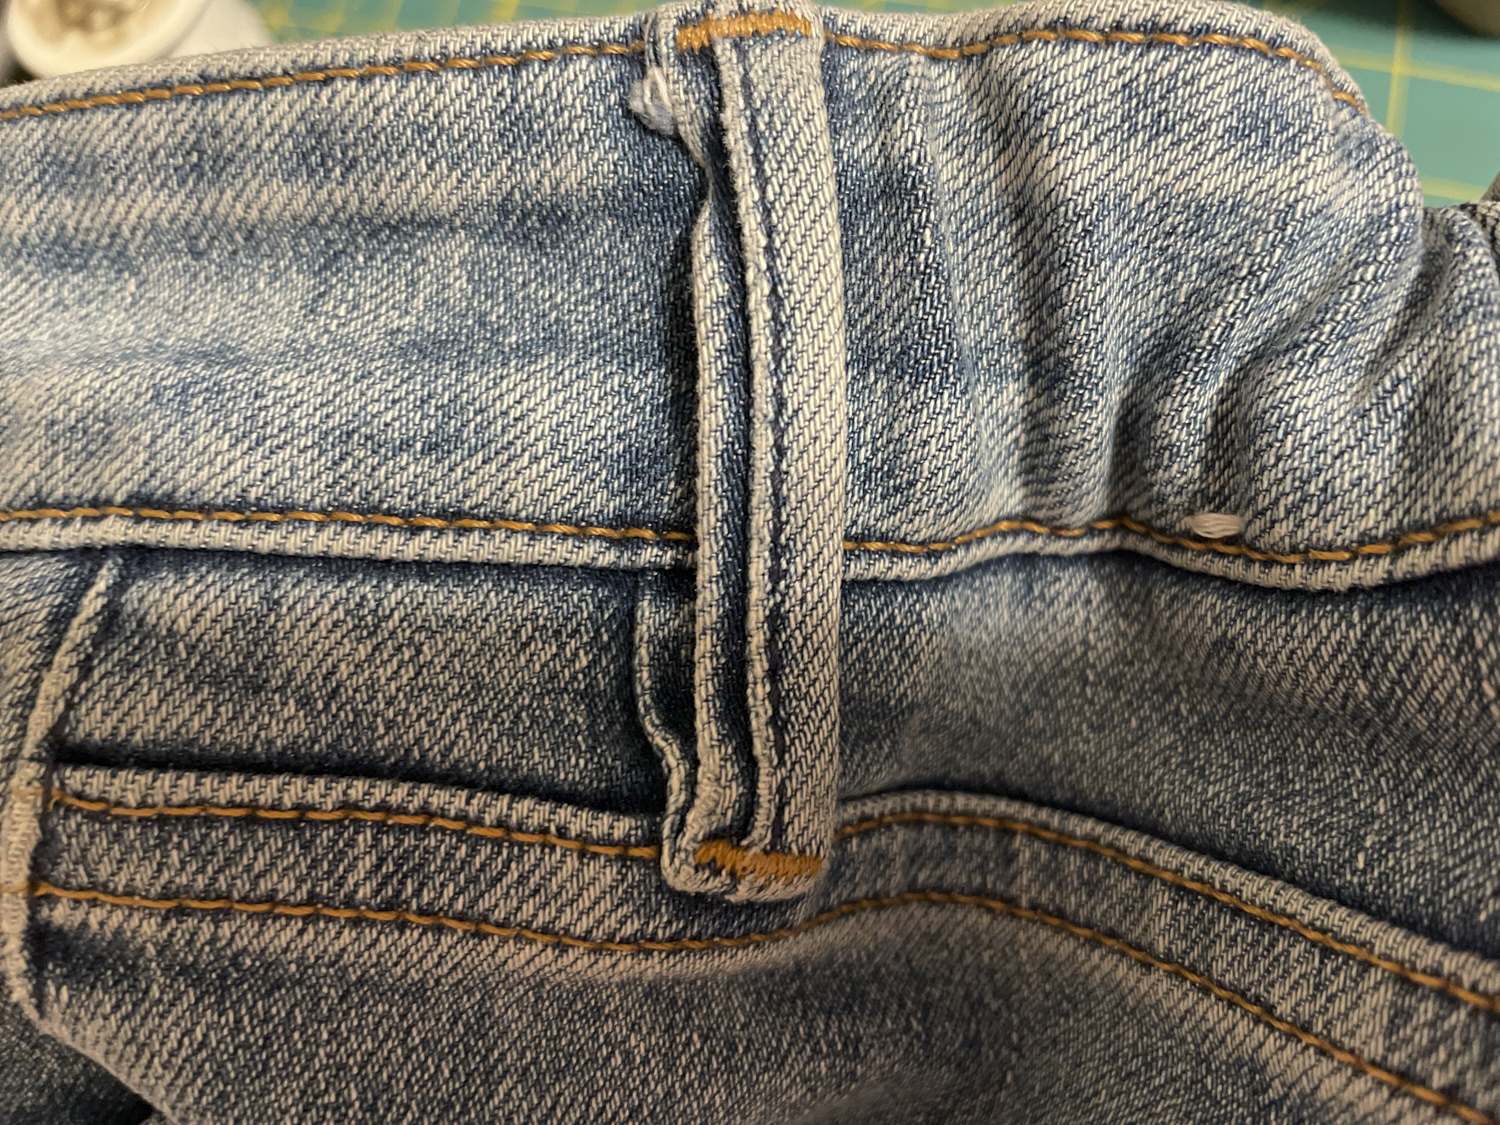
Most jeans do not have a convenient side seam as the inner waistband is a continuous piece (although one of the pairs of pants my daughter brought me were actually pants, not jeans, and they had a convenient seam that I popped right open with my seam ripper). So for the jeans, I just used a small sewing scissors to cut a little vertical slit through the inner waistband, positioned right under a belt loop on each side of the back.
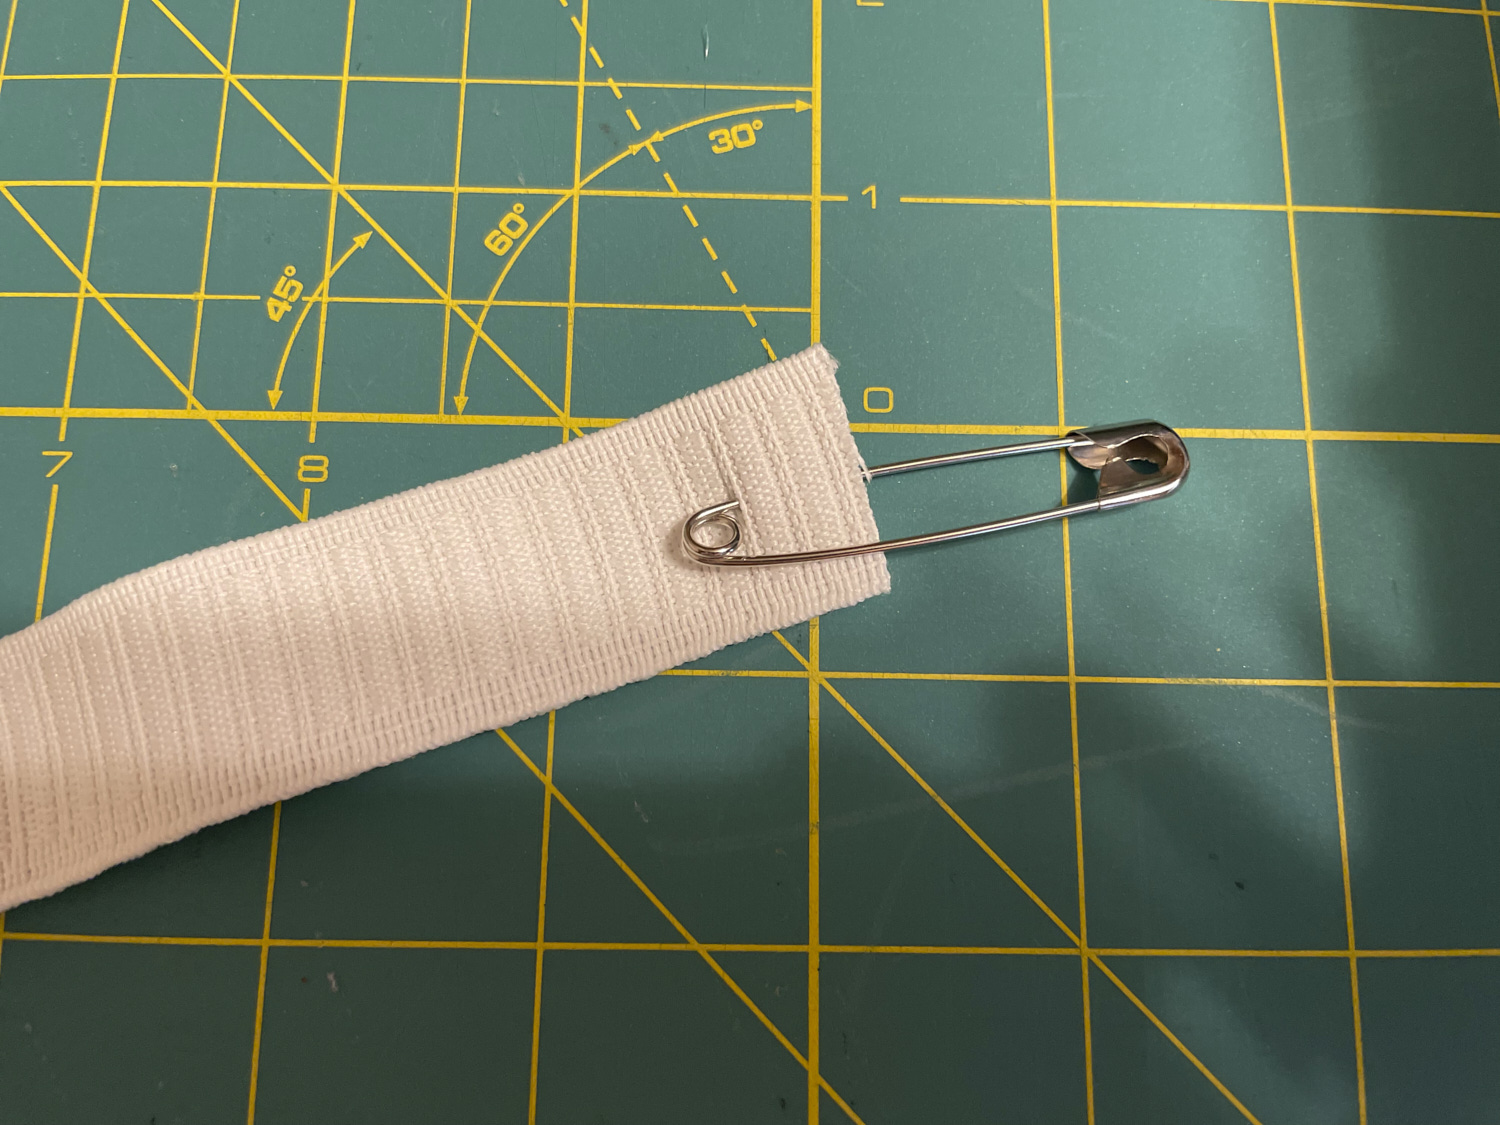
Then I used a safety pin to thread elastic inside the waistband between the two slits.
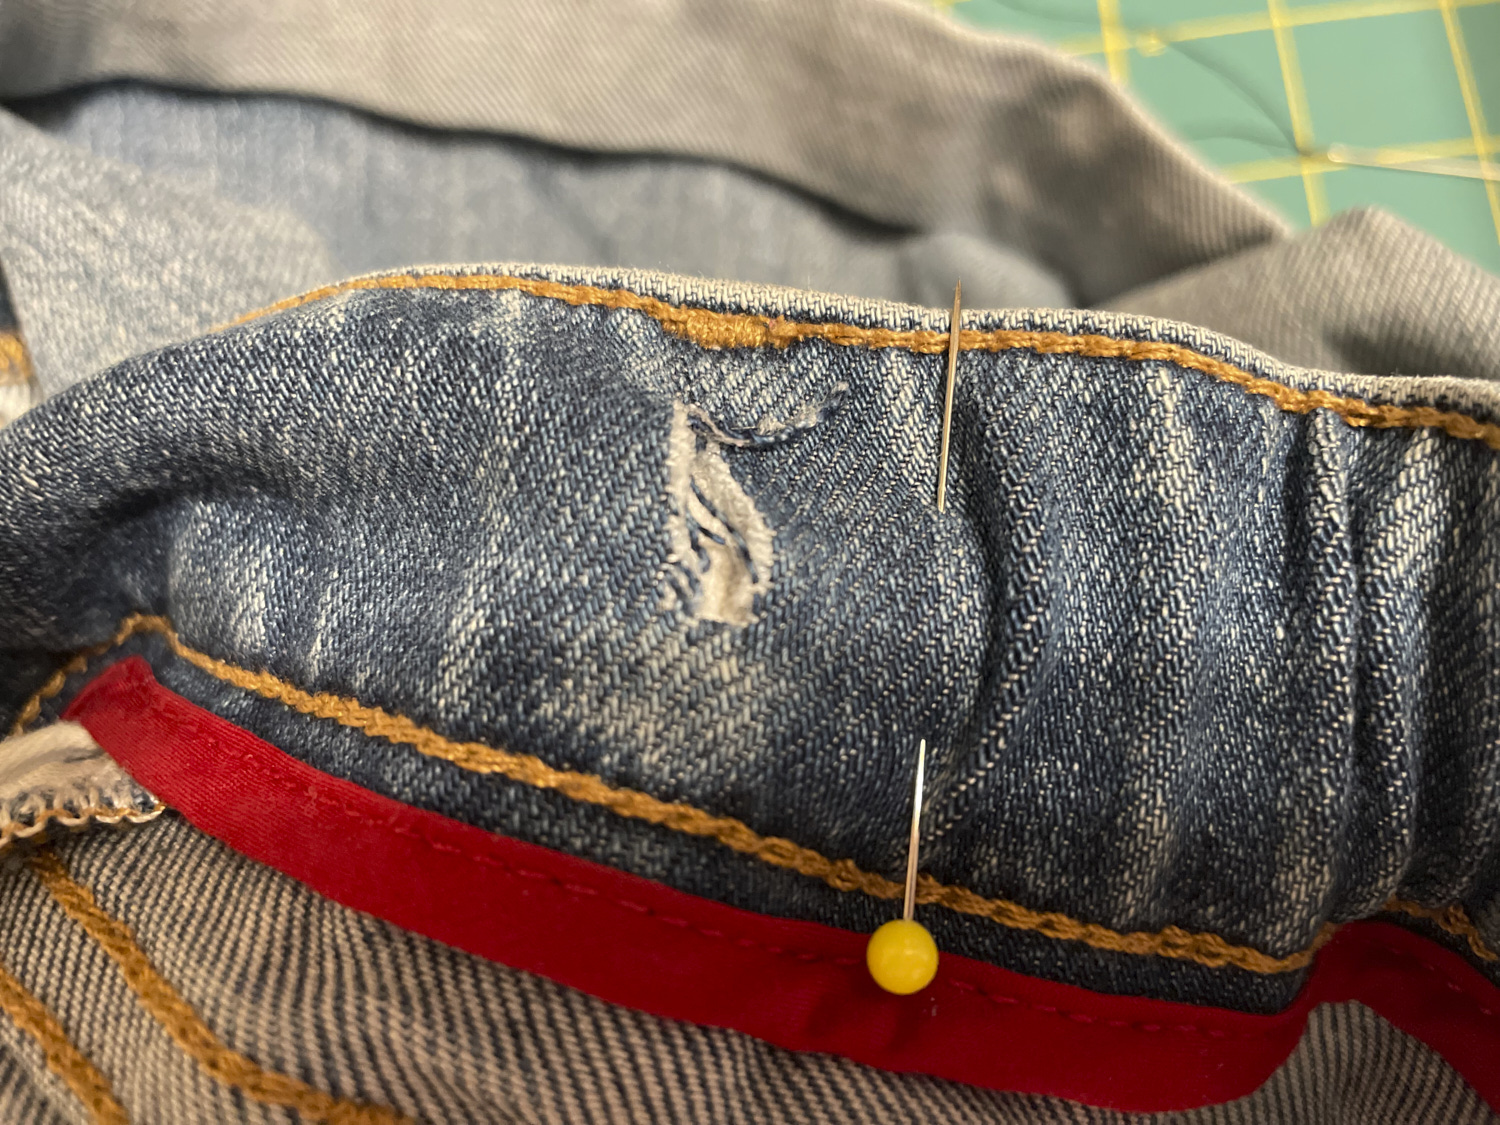
I trimmed the elastic, leaving the waist bunched up a bit (it will smooth out when you wear the pants). I pinned the elastic a bit inside each slit so it wouldn’t pull out while I sewed. (Yes I know the photo below is from a different pair of jeans than the one above, but trust me, I did the same thing on all of them.)
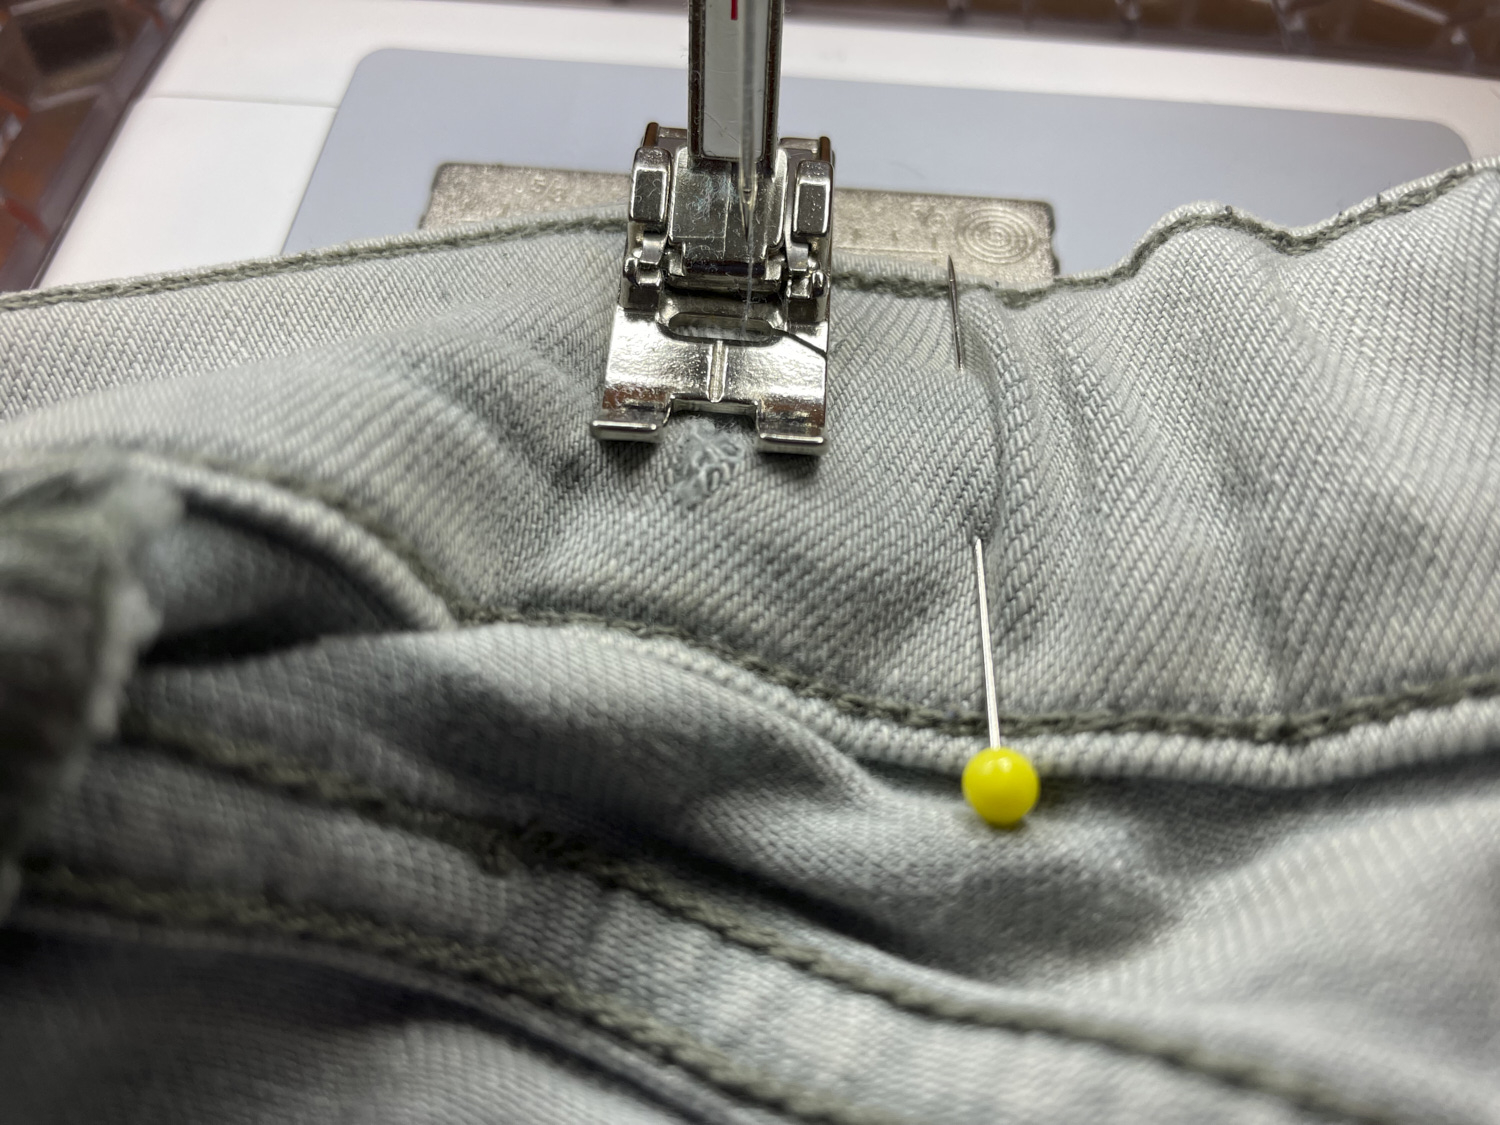
Then I used my sewing machine to sew a wide zigzag over the slit, holding the belt loop out of the way so it didn’t get caught in the stitches. I did this for both slits and removed the pins.
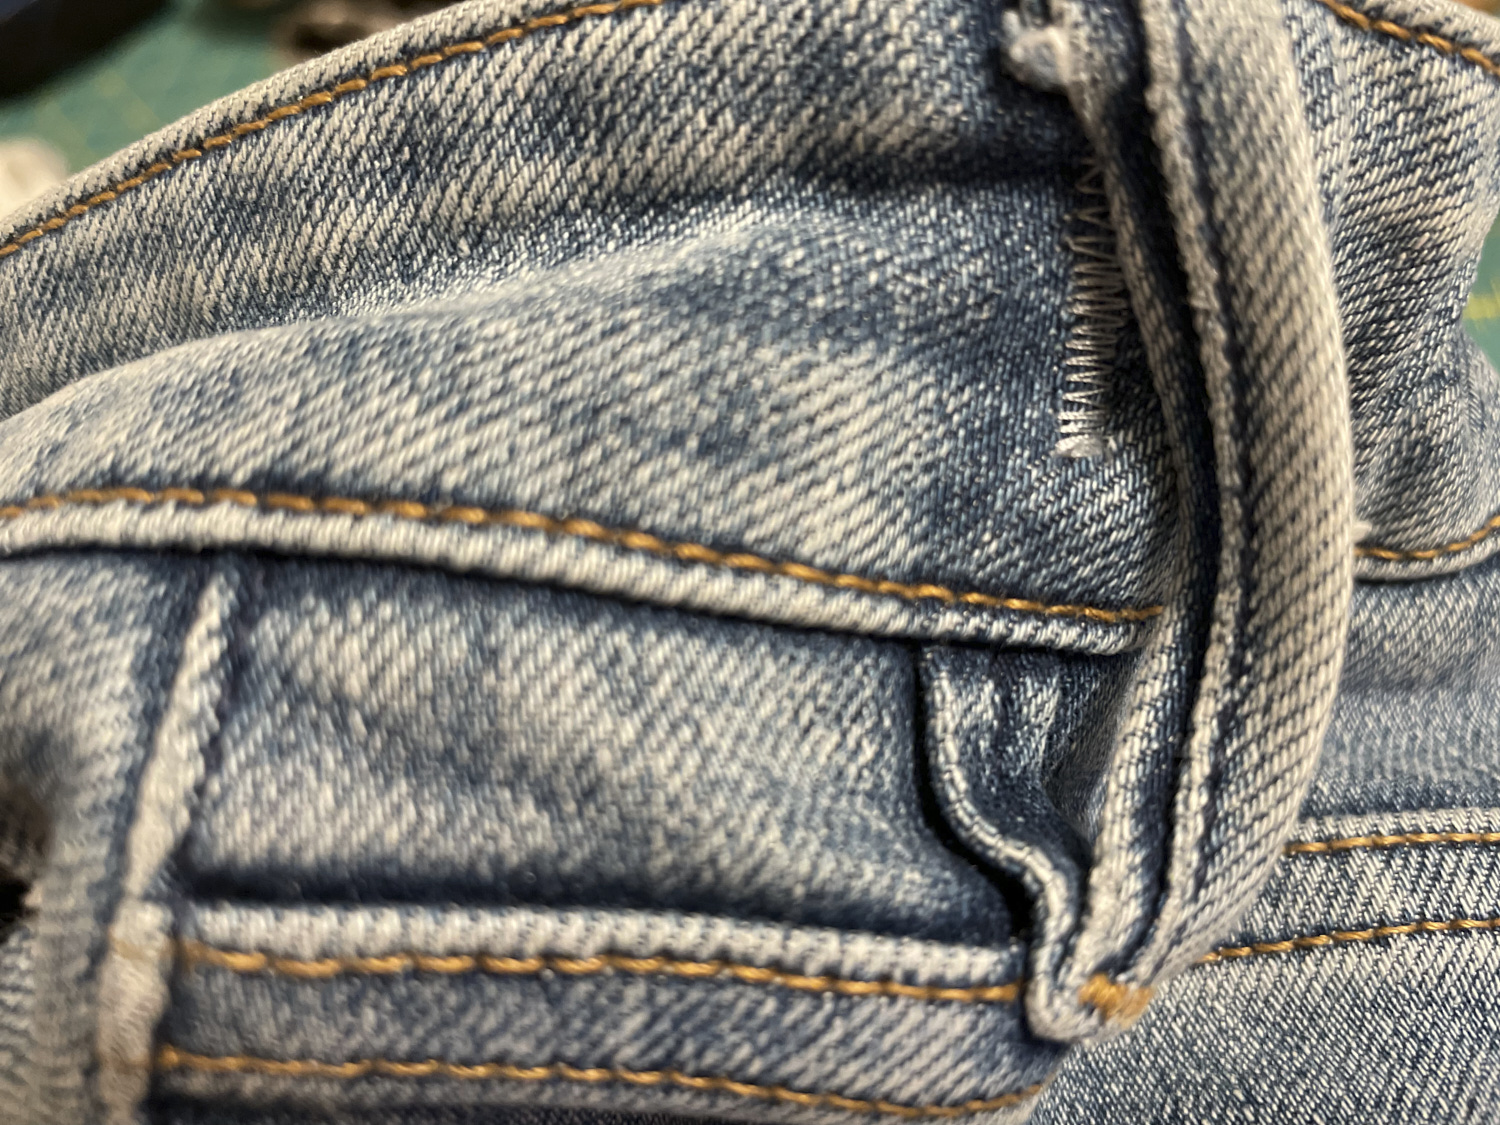
Now her pants fit and the stitches holding the elastic in place are hidden under the belt loops.
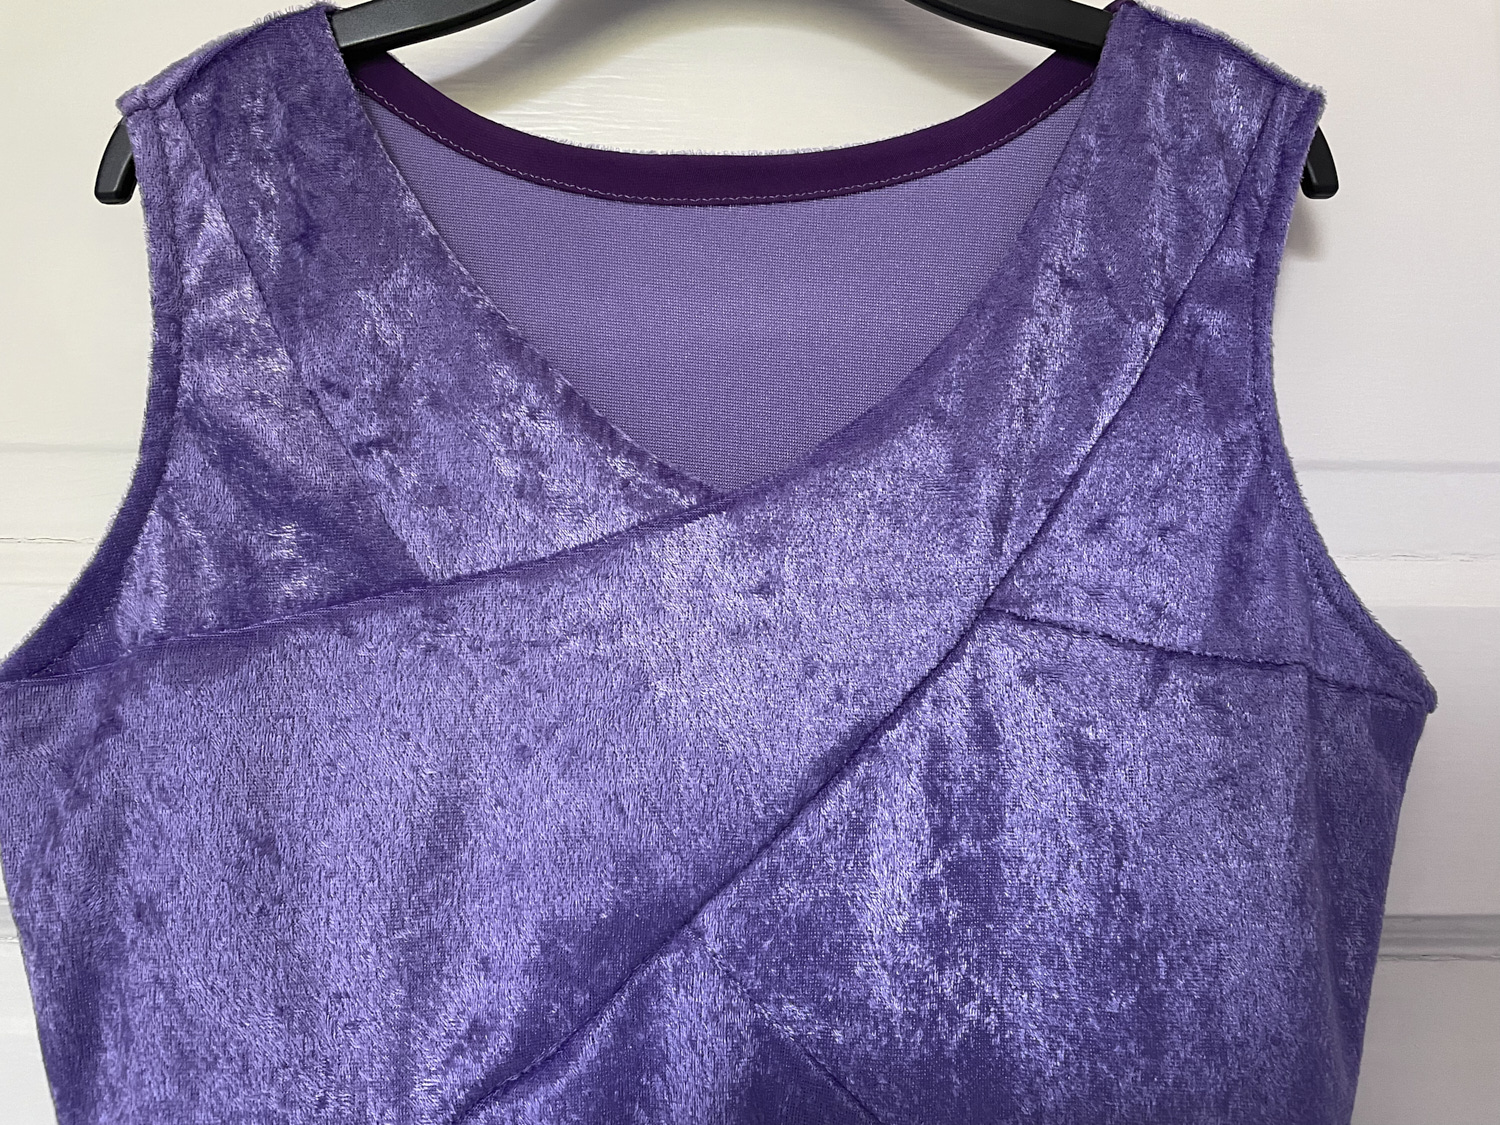
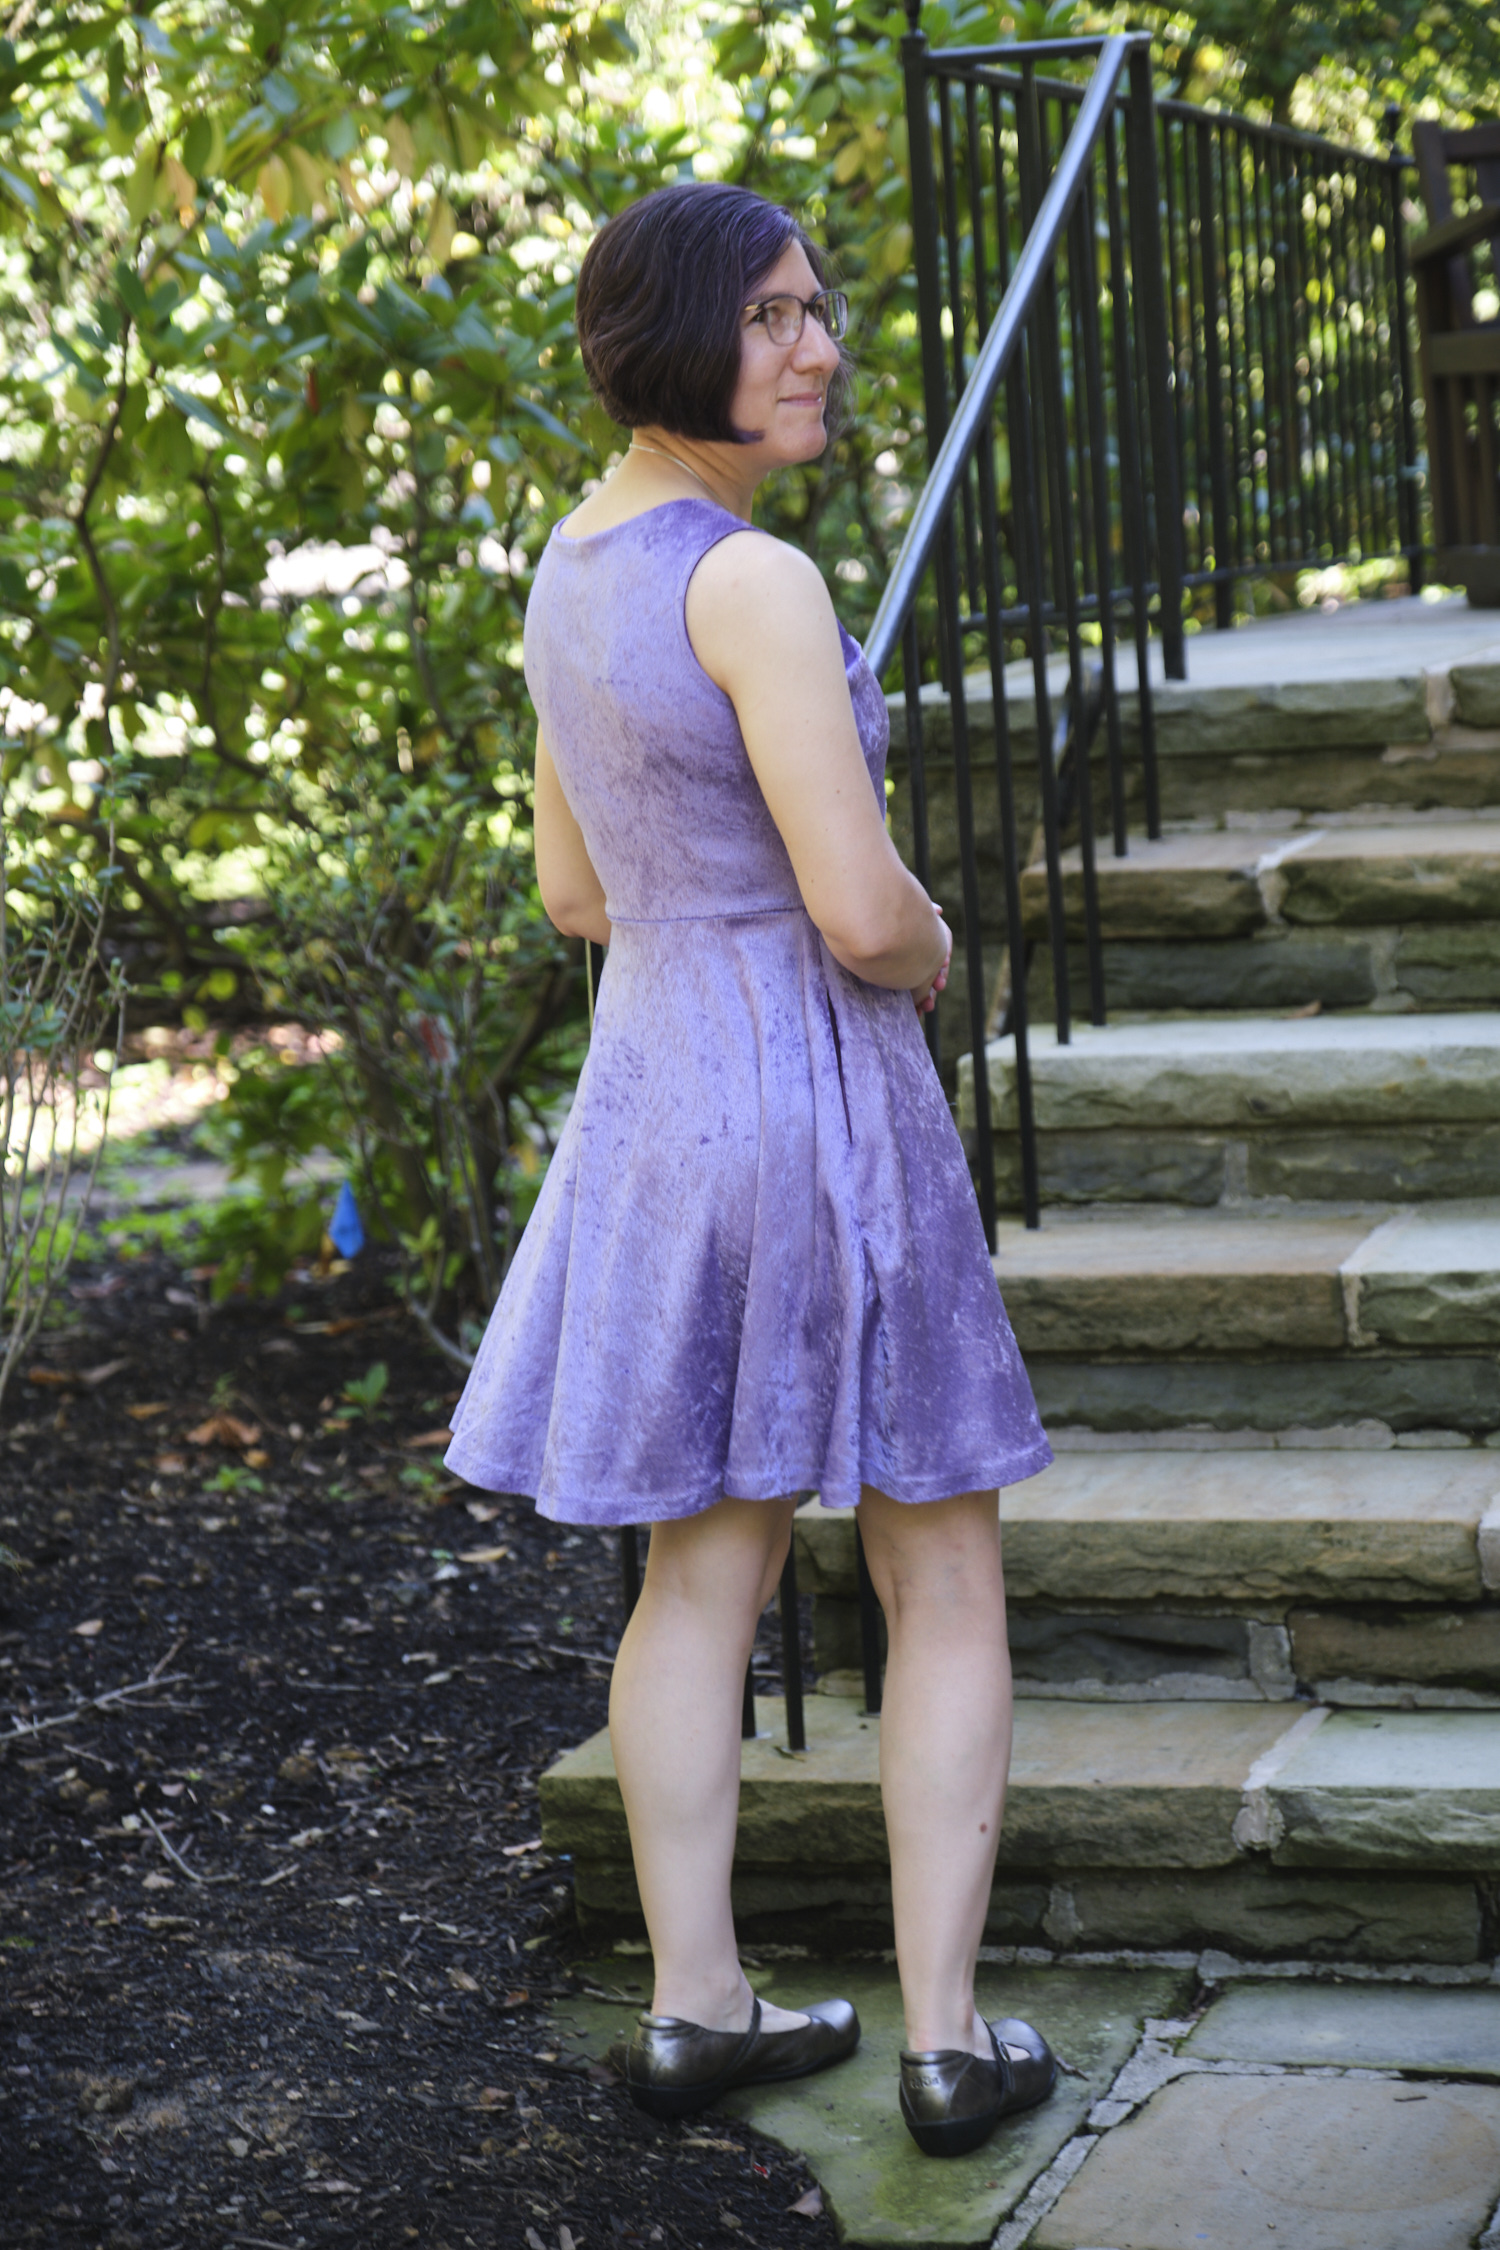
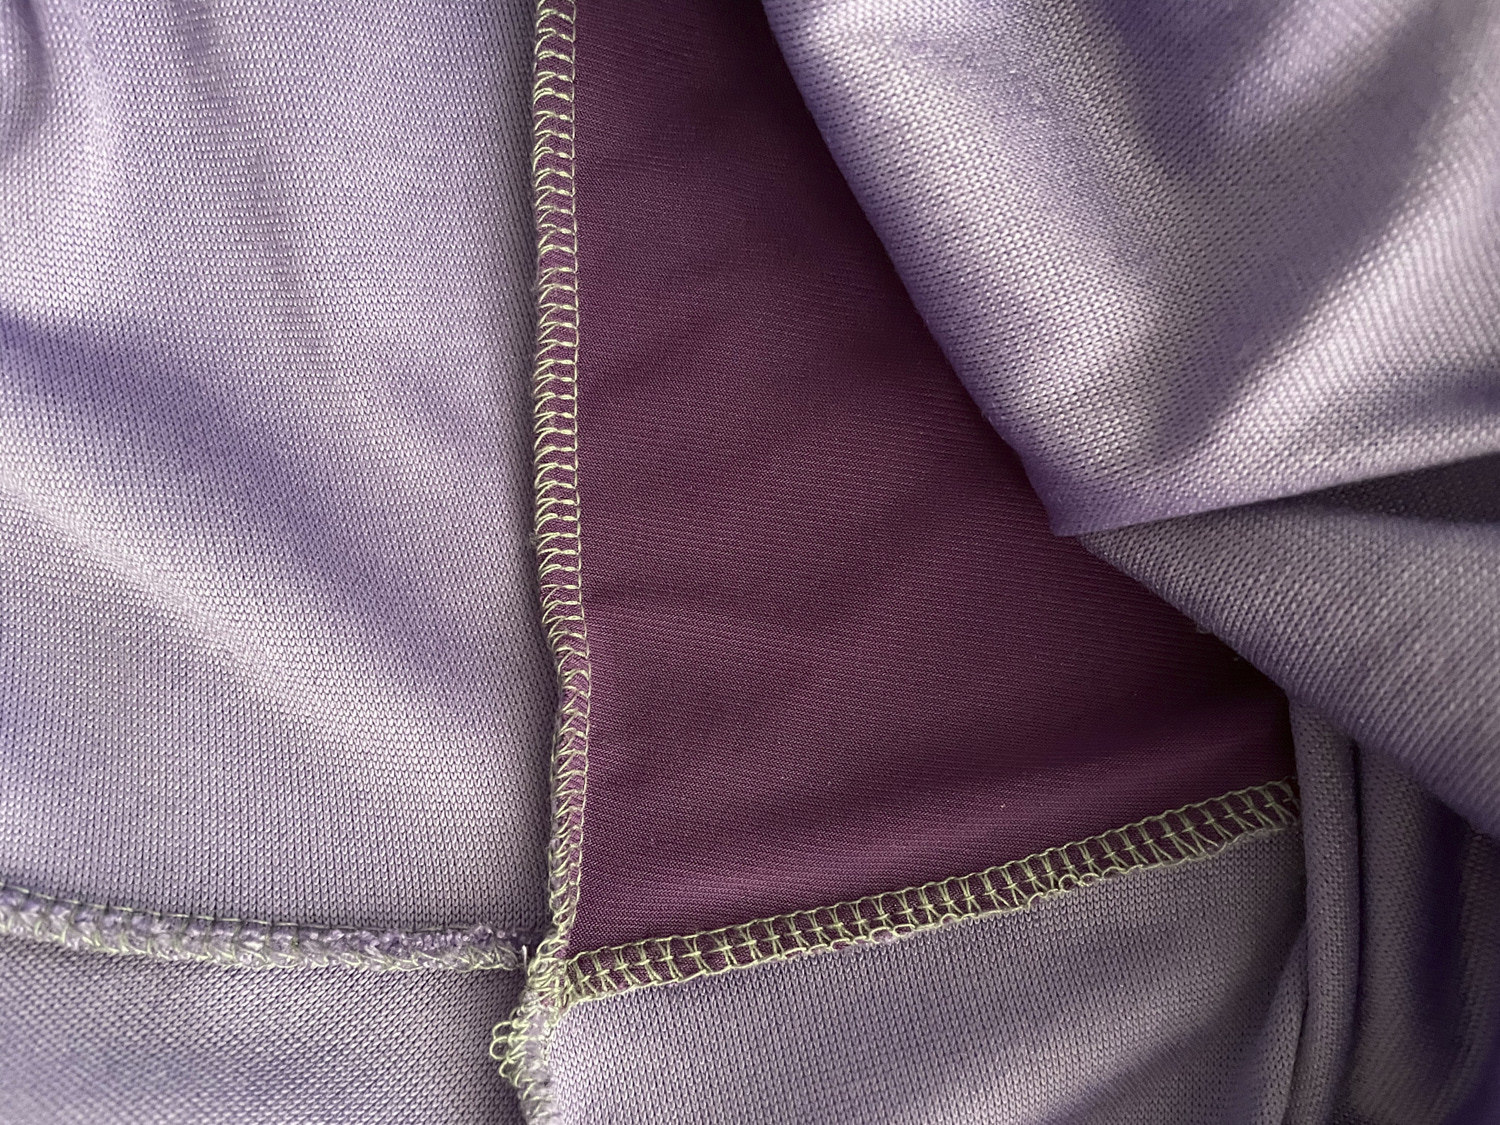
A few weeks ago I made a Sinclair Serena dress to try out the pattern, which I plan to use to make a fancy gown. The pattern worked out pretty well in double-brushed polyester, but I’m planning to use a fancy (expensive) custom-printed crushed stretch velour fabric for the gown, so I decided to make the pattern again with some cheap velour. I bought two yards of purple crushed panne velour from Cali fabrics for $4.99 a yard. This fabric is pretty and has similar stretch as the fabric I plan to use, but it is not as soft and doesn’t feel quite as nice. It is also not really purple – I would call it lavender, but it is not the royal purple shown on the website. This is not meant as a high-end fabric, but it is fine for a muslin.
I projected the pattern and cut out the velour. I decided to use a purple ITY fabric for the lining pieces. Then, throwing caution to the wind, I decided to sew the dress together using my brand new Serger, having never serged before. It actually wasn’t that hard, except for the fact that velour is a super slippery fabric and no amount of pinning could get it to hold still. The slippery ITY lining just made it worse. There are parts of this pattern that call for two layers of regular fabric and 2 layers of lining, and getting them all lined up to complete the jigsaw puzzle bodice was a real challenge. I eventually basted together the layers before sewing, and it was fine. But parts of it that I sewed early on are not quite lined up right, although I managed to mostly hide them. Note to self when I make the gown, plan to do a lot of basting.
Besides being very slippery, the velour as almost no vertical stretch. That doesn’t seem to be a problem with this pattern, other than reducing the ability to ease out mistakes. Somehow the back ended up being and inch longer than the front when all was said and done (I’m pretty sure it was cut correctly, but there were numerous sewing errors), and I ended up just trimming it before hemming.
I did make a few mistakes that are mostly attributable to learning how to use my serger while making this dress. I now have a full understanding of the knife function and how not to use it when turning a corner. Repairing some of these mistakes might be one of the reasons the back ended up longer than the front.
I did manage to fix some problems from my last Serena dress. This time I added clear elastic to the neckline for good measure, and I sewed the crossover all the way to the edge. With both of these improvements, there is no possibility of drooping. I also did a better job stretching the armhole bands around the curves, so they look better than last time. In order to reduce pocket flapping,I made the pocket bags a little slimmer and attached them to the skirt a bit higher than the pattern calls for – about 1 inch below the point where the skirt meets the bodice. I made the pocket openings a bit smaller to keep my phone from falling out. I used the velour for the back pocket bags and the lining for the front to reduce bulk. But the lining still peaks out a bit so I may just use the velour for both sides next time.
The good news is that the whole dress did end up coming together nicely. The proof of concept worked and the muslin is a dress I would actually wear in public. In fact I wore it to an outdoor theater production this evening and can report it was both stylish and confortable.
I’ve been pondering buying a serger ever since I started sewing lots of knit clothing a year ago. I didn’t take the plunge because I have a really nice (somewhat high-end Bernina) sewing machine, I couldn’t decide which kind of serger to buy, and I was also worried about the learning curve. But so many people rave about them and they seem to save a lot of time… and I figured how hard could it be.
My first dilemma was whether to buy a combo serger and cover stitch machine or just a serger. If you don’t know what i’m talking about look at your favorite t-shirt. Chances are most of the seams have thread that wraps around the seam in sort of a zig-zaggy pattern. That’s done with a serger. If you look at the hem at the bottom of the shirt there are probably two lines of stitching on the outside. That’s done with a cover stitch machine. You can fake both of these things on a regular sewing machine, but not really well. The idea of a machine that can do both serging and cover stitch is appealing — there’s only so much space I have in my sewing room to collect more machines. But as I started reading up on combo machines I saw that many sewists who had them said that it was too difficult to switch them between serging and cover stitch mode, so most of them left them in serging mode and never switched to cover stitch — and then some of them went out and bought another machine for cover stitch. Since combo machines are more expensive than plain old sergers, I decided to just go with the serger and consider buying a cover stitch machine later.
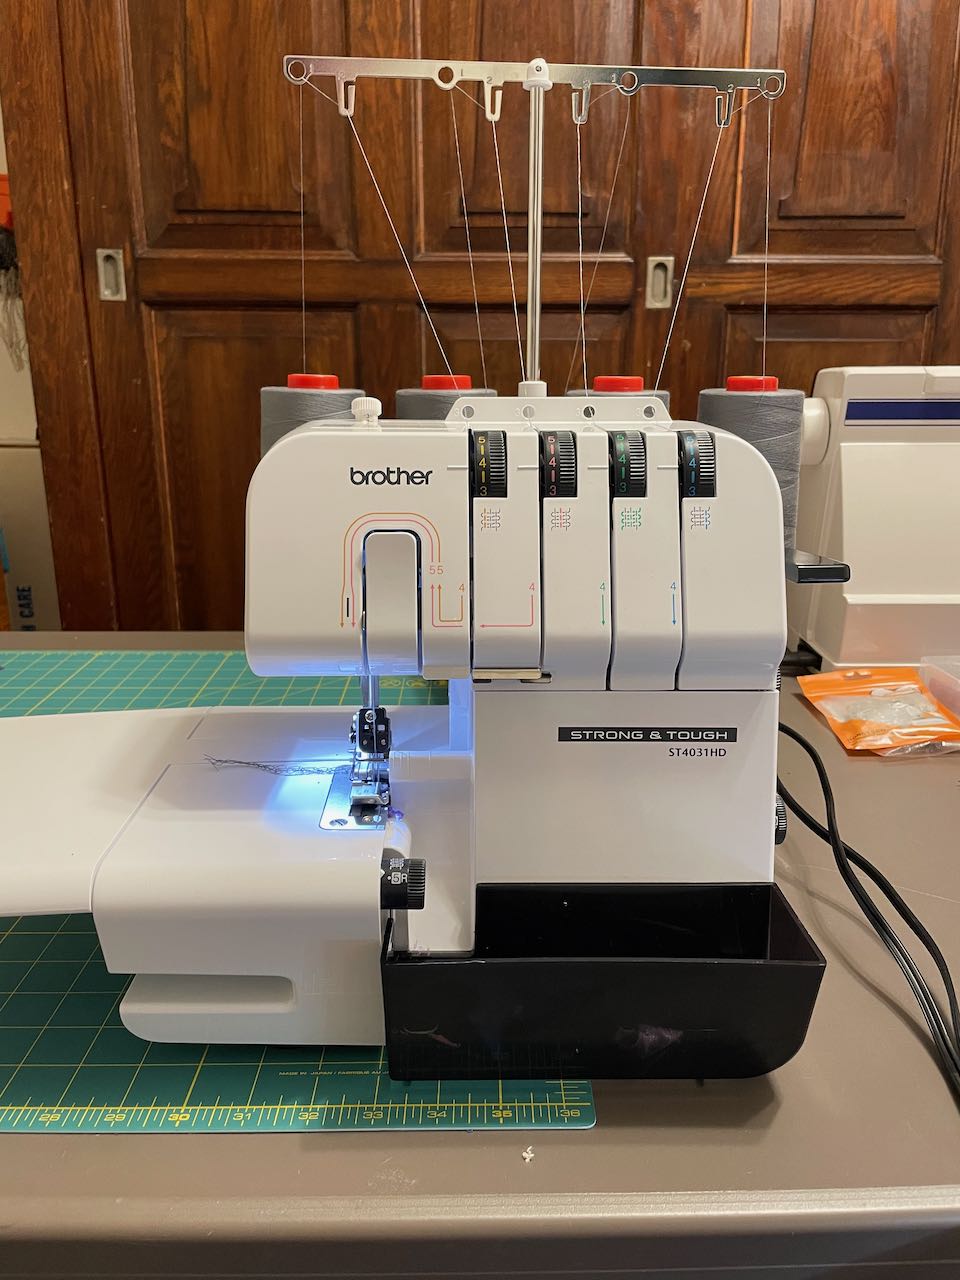
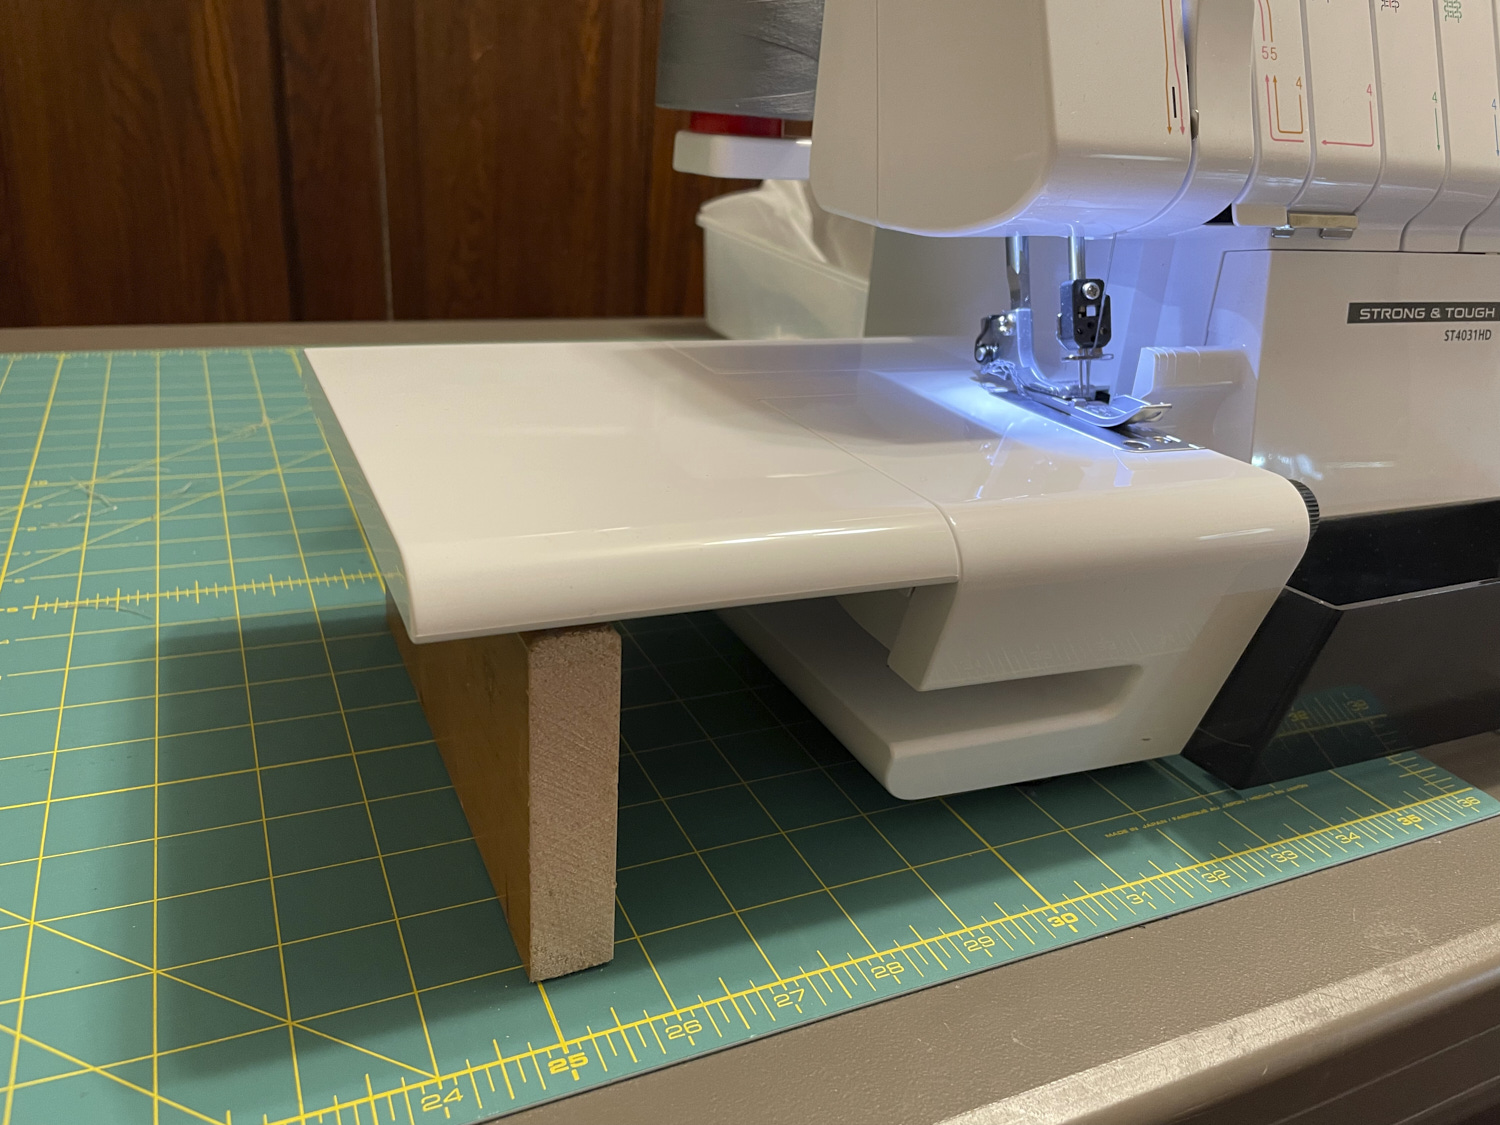
There is a pretty big price range for sergers, from a couple hundred dollars to thousands of dollars. The expensive high-end sergers are very fast and can thread themselves. Self threading (often referred to as “air threading”) is nice because sergers typically have four threads (some have more) and they are notoriously difficult to thread. So I was pretty excited about the idea of a self-threading serger, but I wasn’t sure I was ready to invest in one given that I have never used a serger of any sort. Looking at the low-end sergers, the Brother 1034D and 1034DX seem to have great reviews and are frequently recommended on lists of best Sergers for beginners. They are at a low price point (around $275) and they have a color-coded threading system that makes the complicated task of threading slightly easier. When I asked on Facebook what type of Serger I should get, two of my friends mentioned they had 1034DX sergers. But one concern I saw in the reviews is that they don’t handle thick fabrics like fleece well. I don’t know how much fleece sewing I will do, but when I saw that for $100 more I could get the Brother ST4031HD, I decided to go for that one. ST stands for “strong and tough.” It is almost identical to the 1034D except that it is built to handle thick fabric and it has an extension table, both of which were features I thought I could use. So I ordered a Brother ST4031HD on Amazon and it arrived two days later.
Having never serged before, I was still a bit intimidated to use my new serger. I took it out of the box, registered it, and watched all the videos provided on the Brother website (note that it claims to come with a DVD with the videos, but they don’t seem to send the DVD any more; but they are all on the website, although not that easy to find). Finally I gave it a try with some scrap fabric and adjusted the differential feed to work with knits. So far so good. It sews very fast, but it didn’t take too long to get the hang of it.
The next challenge was threading the serger. The machine comes pre-threaded with color-coded thread to show you how to do it, but that thread won’t last long, and you probably don’t want to use a rainbow of thread on all your garments. I bought four large spools of medium grey polyester thread and worked on threading. I decided to use the easy approach, which is to cut the existing thread and tie it to the new thread, and carefully pull the new thread through the machine. This was much easier that figuring out all the threading details, but even this approach was not easy. Each time the thread stopped pulling I had to figure out where the knot was stuck and gently ease it to the next spot without breaking or jamming the thread. I figured it out and got it threaded, but was glad I chose grey thread, which will likely work with most sewing projects and maybe won’t need to be replaced for a long time. Later when I broke a thread I did have to watch the threading video so I could rethread the lower looper.
I had a stretch velour dress cut out and ready to sew, so I decided to take the plunge and serge it. In hindsight, stretch velour was probably not the best fabric to start with as it is very slippery, and should have been basted before sewing. Nonetheless, I jumped right in and it mostly worked out ok. A few seams slipped so much that I had to go back and baste them and then resew them. I also learned the hard way how to lower the cutting knife and why you might want to do that. By default, sergers include a cutting knife that trims the fabric before sewing it. This is great, but it does mean you can accidentally cut your fabric in places you don’t want it cut. I did fine until I got to a point where I needed to pivot around an inside corner. I sewed to the point of the pivot, put my needle down to pivot, and then realized that the knife is in front of the needle and thus had already made a cut into the fabric where I didn’t want it. Fortunately, I was able to repair that problem and it was a good excuse to figure out how to lower the knife. I can see for some projects it is probably best to sew the whole thing with the knife lowered.
My serger has two other feet and all sorts of adjustments I haven’t tried. But the test run went pretty well and I’m excited about how fast it is to sew knits. Typically when I sew knit clothes I sew every seam twice: first with a narrow zigzag stretch stitch, and then with a wider zigzag that serves as a fake overlock. Both of these stitches take longer to execute than a simple straight stitch because of the side-to-side motion. With a serger I can sew each seam with one pass instead of two, and that one pass is faster than either pass with my regular sewing machine.
October 8, 2023 update — One minor issue I’m having with this serger is that I keep pressing down on the extension table and popping it out of place. I was able to solve this problem by cutting a board 3-3/8 inches tall and 8 inches long and sliding it under the table.
I love the Sinclair seeing all the things people make and post to the Sinclair patterns Facebook group. It’s exciting when a new pattern comes out and all the testers post what they made over the first few days. There are some sewists who seem to test every pattern, and many of them make several versions when a new pattern comes out. I assume they don’t have the sort of day job that I have, and maybe they sew faster than I do. Or maybe they have a serger? Maybe I should get one? Anyway, I’m enjoying their posts and I feel like I’m starting to get to know some of the regulars.
I’ve been tempted by the last few calls for pattern testers. I’ve now sewn over half a dozen Sinclair patterns, so maybe I could get selected. But generally you have only 3 or 4 days to make the pattern, and that usually doesn’t fit my schedule. But when Sanna Sinclair announced the call for testers for their new Linda twist neckline knit top and dress pattern, I checked my calendar and saw that the timing might work. I filled out the application form and waited to see if I would be selected. Early Friday morning I got the email from Sanna Sinclair with the link to the test pattern, the private tester Facebook group, and a request to finish a garment and post fit pictures by Sunday evening.
By the time I got home from work on Friday, the first testers had already finished their tops and posted photos. I thought about getting right to work on mine, but first I had to finish sewing a pair of black Cleo palazzo pants (to match mine) that I promised my daughter. I got those done Friday night and selected fabric from my stash and decided to sew a top rather than a dress, as I was a little concerned about whether I would have enough time for a dress.
The pattern called for very drapey fabrics, so I selected a medium weight modal-spandex knit in turquoise. This was my first time sewing with this type of fabric. It is soft and stretchy like double-brushed polyester, but more breathable and a little less tightly knit. I think it has less body and a more fluid drape, which makes it a little bit harder to work with, but it is very comfortable to wear and it suited this pattern well.
On Saturday I projected the pattern on my fabric, cut it out, and began to sew. I periodically checked the Facebook group to see what other sewists were working on and their comments on the pattern. One small error on the pattern was caught early on and a clarification posted. There were concerns about a few fit issues, but otherwise people seems to be doing well with this pattern. The completed tops and dresses looked pretty good. I thought about making a dress instead of a top, but decided not to over reach on my first pattern test.
I followed the instructions without too many issues. Doing the twist itself was very easy, in part due to the short video provided with the pattern that demonstrates exactly how to do it. I had some trouble overcasting the flimsy fabric with my sewing machine and contemplated buying a serger. I think I will buy one as soon as I figure out which one. I had some pressing issues, again mostly due to this particular type of fabric, but eventually I got them sorted out. The sleeves were a tad too short and the length was a couple of inches too long. So I used a narrow hem on the sleeves and chopped off some of the length before hemming the bottom. I observed the same problem with the keyhole flopping open as everyone else in the Facebook group, and followed the advice to hand stitch it closed. I posted my feedback and my V1 fit photos. All of these problems have been corrected in the final pattern so you shouldn’t have these any of these problems.
Monday morning Sanna posted her comments on our feedback and her plans for adjusting the pattern. She announced that V2 would soon be available the next day but said it was fine to take final photos of our V1 creations. So I put on my new shirt and asked my husband to snap some photos. When I got home from work I selected my favorite photos and uploaded them. I had a busy week at work and did not have time to make a V2 top, let alone a dress. But I enjoyed watching the Facebook group and seeing the sewists who had time to create several garments from this pattern over the course of the week.
I usually like to wear twistneck tops. I had a couple of ready-to-wear dresses with twistnecks, and found I kept futzing with and repositioning the twist as they never seem to lie perfectly right, and I just can’t leave well enough alone. I have to admit I did my share of futzing with this one as I was sewing it. But once I got it set I let it be and it stayed put. Then my husband washed it and called me over as he pulled it out of the dryer because he thought the twist had gotten messed up. But it happily popped right back into position. I expect with a more substantial fabric it would not have popped out at all. I will probably make more of these some time (maybe in ITY, double-brushed polyester, or cotton lycra). I love some of the results other testers got sewing this pattern with prints. I still love the simplicity and fit of the Bondi top and think that style works better under sweaters and blazers since it is smooth and symmetrical. But Linda is a cute top for wearing on its own that looks more elevated than a basic t-shirt, but is just as comfortable to wear.
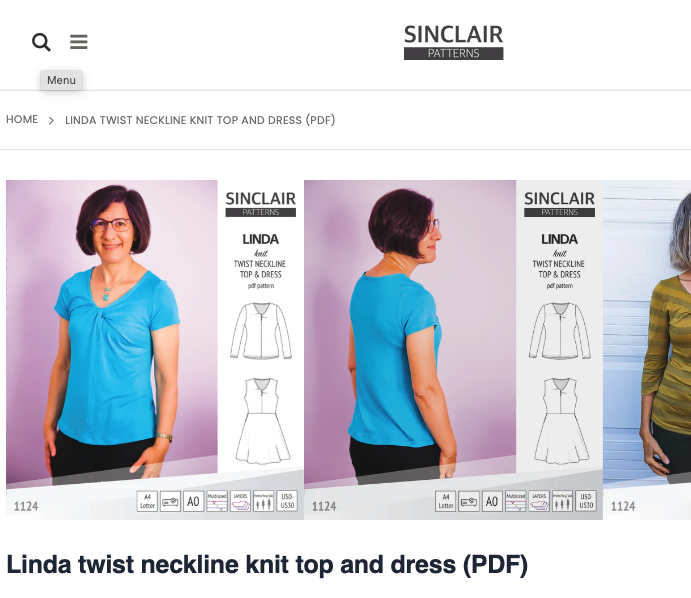
This morning was the pattern launch and I was excited to see that the first two photos on the Linda pattern web page were mine!
It was fun to be a pattern tester and if Sinclair does another test at a time when my calendar is relatively clear I will definitely sign up to do it again. Also, this is such a good excuse for keeping more fabric than I really need on hand… these testing opportunities come up quickly and there isn’t time to shop for more fabric on short notice!
My resident teen daughter liked my Cleo PyLos LiKnit Palazzos so much she requested her own pair. They meet all her criteria for pants: feel like yoga pants, pockets, flowy, and black (she hates wearing jeans). She tried mine on and said she just needed them longer with a higher rise and they would be perfect. So that’s what I did. She put them on so I could take a photo and decided to wear them to her band gig.
And here we are wearing all our me-made clothes. I’m wearing my self-drafted cups dress and my daughter is wearing the muslin top for her vintage sundress with her new palazzo pants.