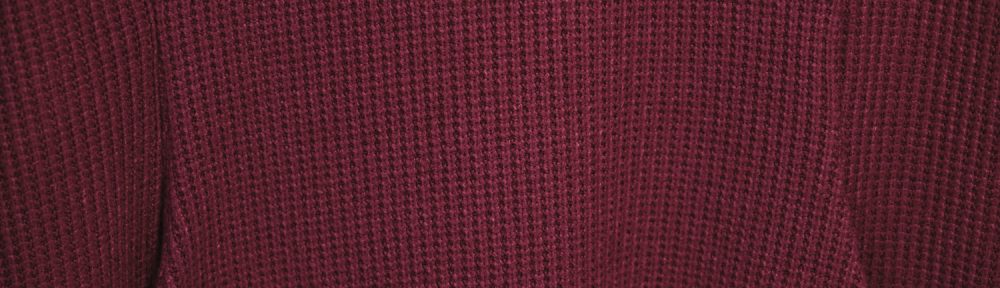
As the temperatures dropped this week and I was preparing for the start of the new semester, I figured I had time to sew one more garment before the semester started, and I wanted something warm and cozy that I could wear to work. I purchased some Banff ultra thick 1×1 rib sweater knit in cranberry from Surge Fabrics back in November, so I got it out and looked for a sweater dress pattern to make with it. This is a 350 gsm chunky fabric in a 50% rayon/28%poly/22%nylon blend, brushed on one side.
I wanted a sweater dress with pockets, and somewhat fitted at the waist. I saw that some sewists had make the Ellie and Mac Effortless Hourglass Swing Dress in a sweater knit so thought I might give that a try. Looking through the photos and Facebook comments, I saw mixed success with the pattern. There were warnings that the pocket construction was not so effortless and I saw a number of dresses that looked more baggy than swingy. But I liked the bishop sleeves and the pockets, and was hoping I could get results similar to the red checked dress on the pattern website. The “hourglass” part of the pattern name refers to the fact that the front panel is shaped like an hourglass and if you use contrasting fabric for the pockets, you get the illusion of an hourglass figure. As I didn’t have another sweater knit that I thought would go well with my fabric, I decided to make it all one color, which also looked nice in some of the examples.
I checked the size chart and settled on size small, cut to the mid-thigh length in the hopes that it would come out above-knee length on me since this pattern does not have petite sizes. I checked for the recommended size adjustments, but all my measurements seemed to suggest the pattern did not need to be adjusted.
I projected the pattern onto my fabric and cut it out quickly, using the more-textured unbrushed side as the right side and the softer, brushed side against the skin. Then I began the pocket assembly and quickly came to realize why people said it was not effortless. Each pocket includes a pocket piece and a pocket liner. The pocket piece has a very narrow protrusion, about a half-inch wide. my first problem was sewing a quarter-inch seam in this very narrow protrusion. When I attached the pocket pieces to the dress and tried to sew it all together I found that the sweater knit had unravelled a bit in the narrow piece and got caught in the seam. Furthermore, my attempts at stretching the pocket a bit to meet the bottom of the pocket liner resulted in a seam that would not possibly lie flat. That’s when I saw the note in the pattern explaining that the bottom of the pocket liner might not match the bottom of the pocket piece and you should just trim accordingly. I don’t know why I was so far off, and after perusing the Facebook group I saw that a lot of other people had this problem too. I watched the pattern video and saw the pockets on the example dress worked perfectly. I attempted to unpick the pocket seams, but that did not go well. I finally gave up, and since I had enough leftover fabric, recut the dress front and pocket pieces. This time I cut them very carefully and made sure my fabric did not stretch while I was cutting. I also added about 3/8 inch to the narrow protrusion (it would probably be easier if the pattern had a wider protrusion to begin with and instructed people to trim it later).
I repeated the pocket assembly process, careful not to catch the frayed edge or stretch anything while I sewed. It went much better the second time, but the pocket liner ended up about two inches longer than the pocket. I considered cutting off two inches from the bottom of the liner, but realized that my pocket would be two small for my cell phone. So instead I added a pocket extension by sewing on a piece of lighter weight knit fabric. Having extended the pocket, I proceeded to sew together the rest of the pattern. I used my sewing machine for the pocket and then used my serger for most of the rest.
All went fairly well until I got to the bishop sleeves. I gathered the heavy sweater fabric for the bishop sleeves, basted it to the cuffs, and then attempted to sew it in place with my serger. This did not go well, and now I need to untangle the mess and rethread my serger. I ended up finishing everything else on my sewing machine and will figure out how to rehabilitate my serger later.
I finally got the dress put together, tried it on, and was fairly disappointed. While the big bishop sleeves were fun, the dress was not swingy at all and the neck opening had stretched out quite a bit. My husband said it looked like a sack, which is true.
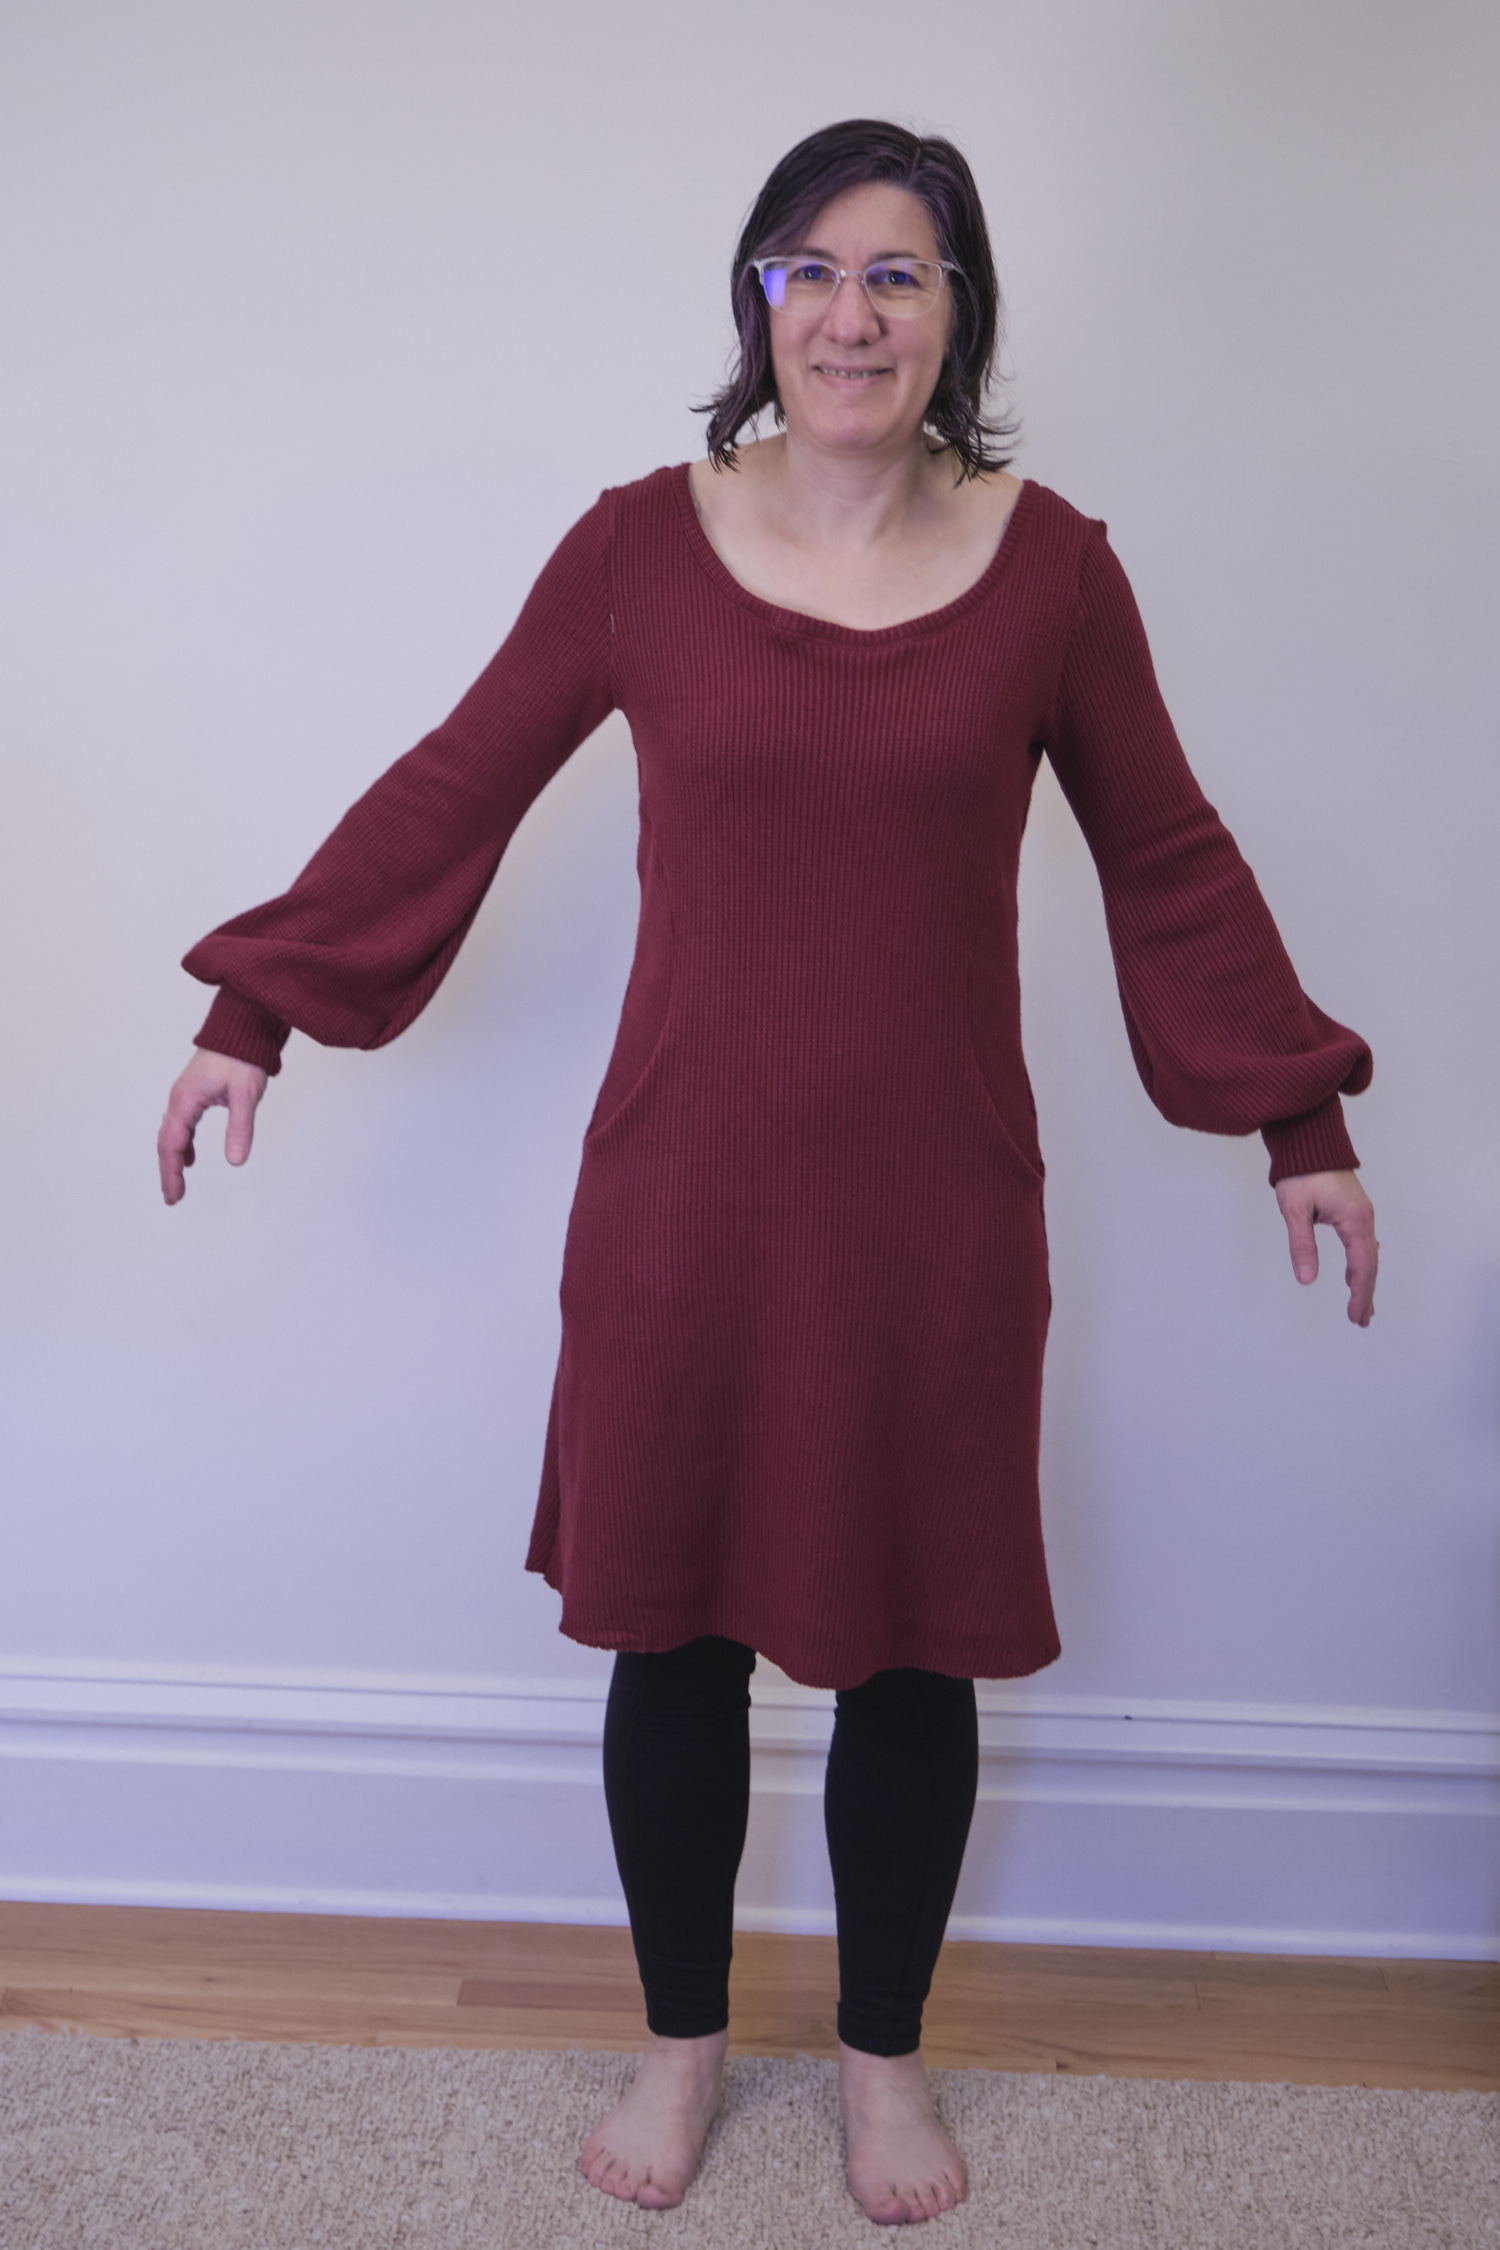
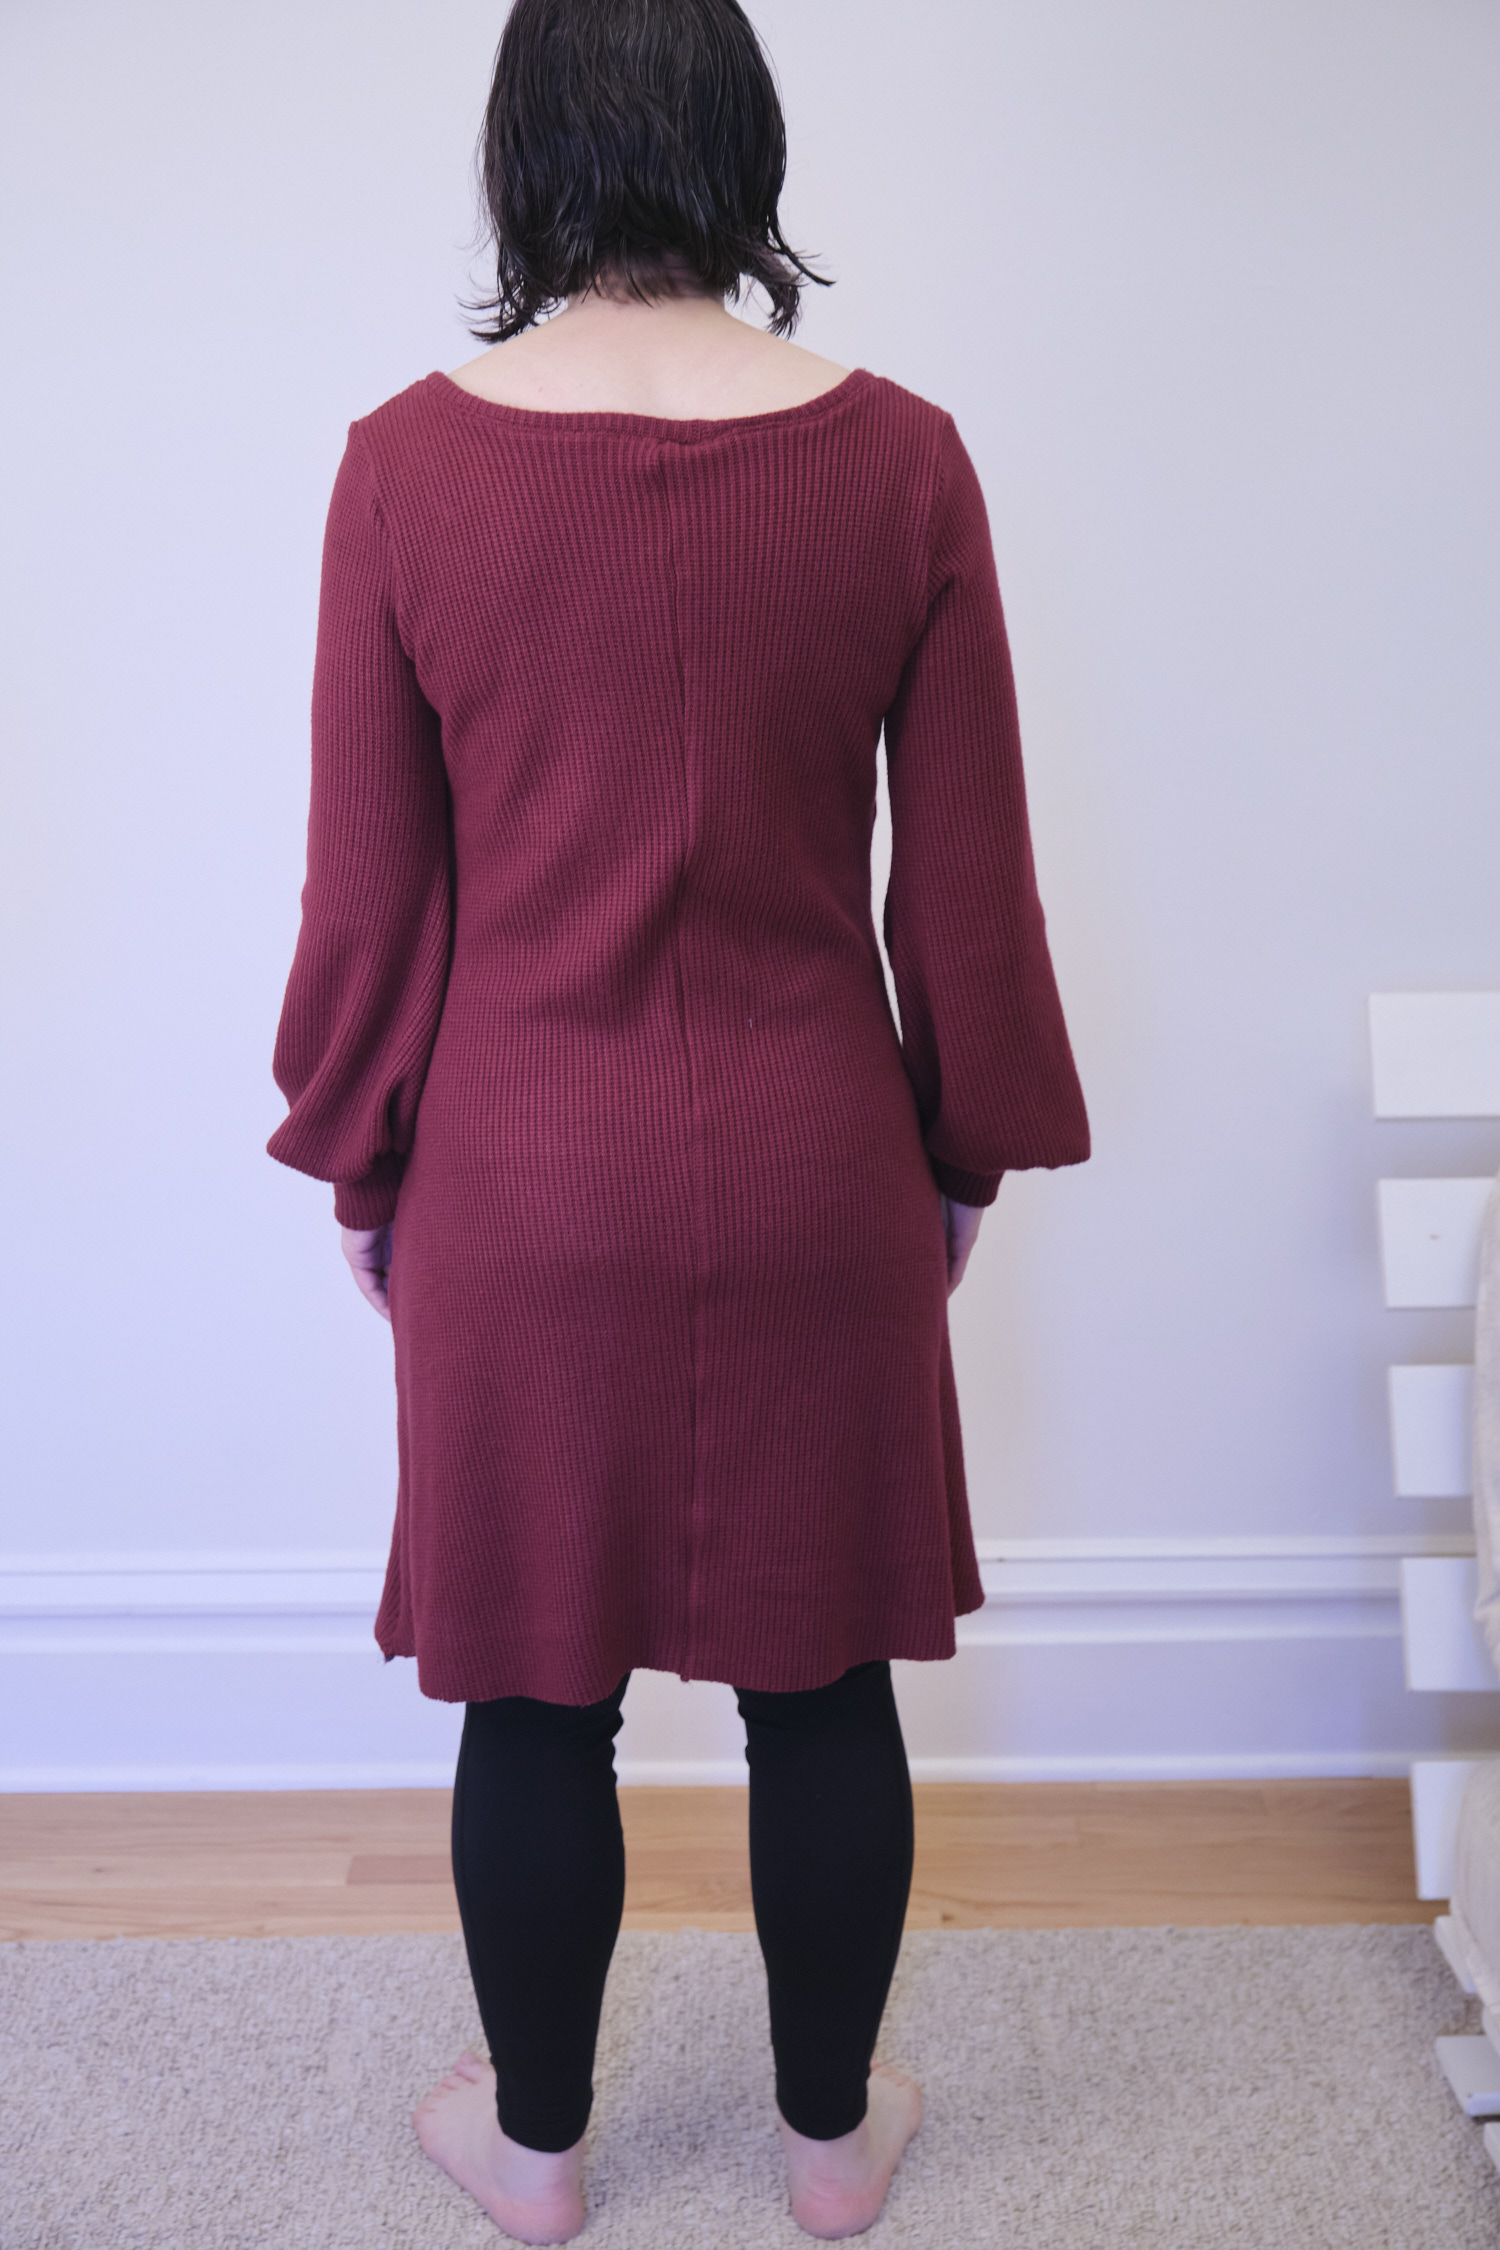
But the dress was warm and had pockets, and after all the time I had already invested in it, I decided to try to fix it. To make it less baggy, I pinched in the top of the back seam about 2 inches and graded it down to the waist. I basted that in place and tried it on and like the fit better so I sewed it in place. The neck was still too wide so I cut the neck band open at the center back and threaded 3/8-inch elastic through it and tightened it until I was happy with it. This approach worked pretty well, but even after a lot of ironing, I could not get the neck band to like completely flat. (The pattern should have offered multiple neck heights and some advice on adding interfacing to the neck and pockets for some types of fabric.) Finally, I turned under the bottom edge of the dress and sewed a chunky 2-inch hem to raise it above my knees and give it some more swing.

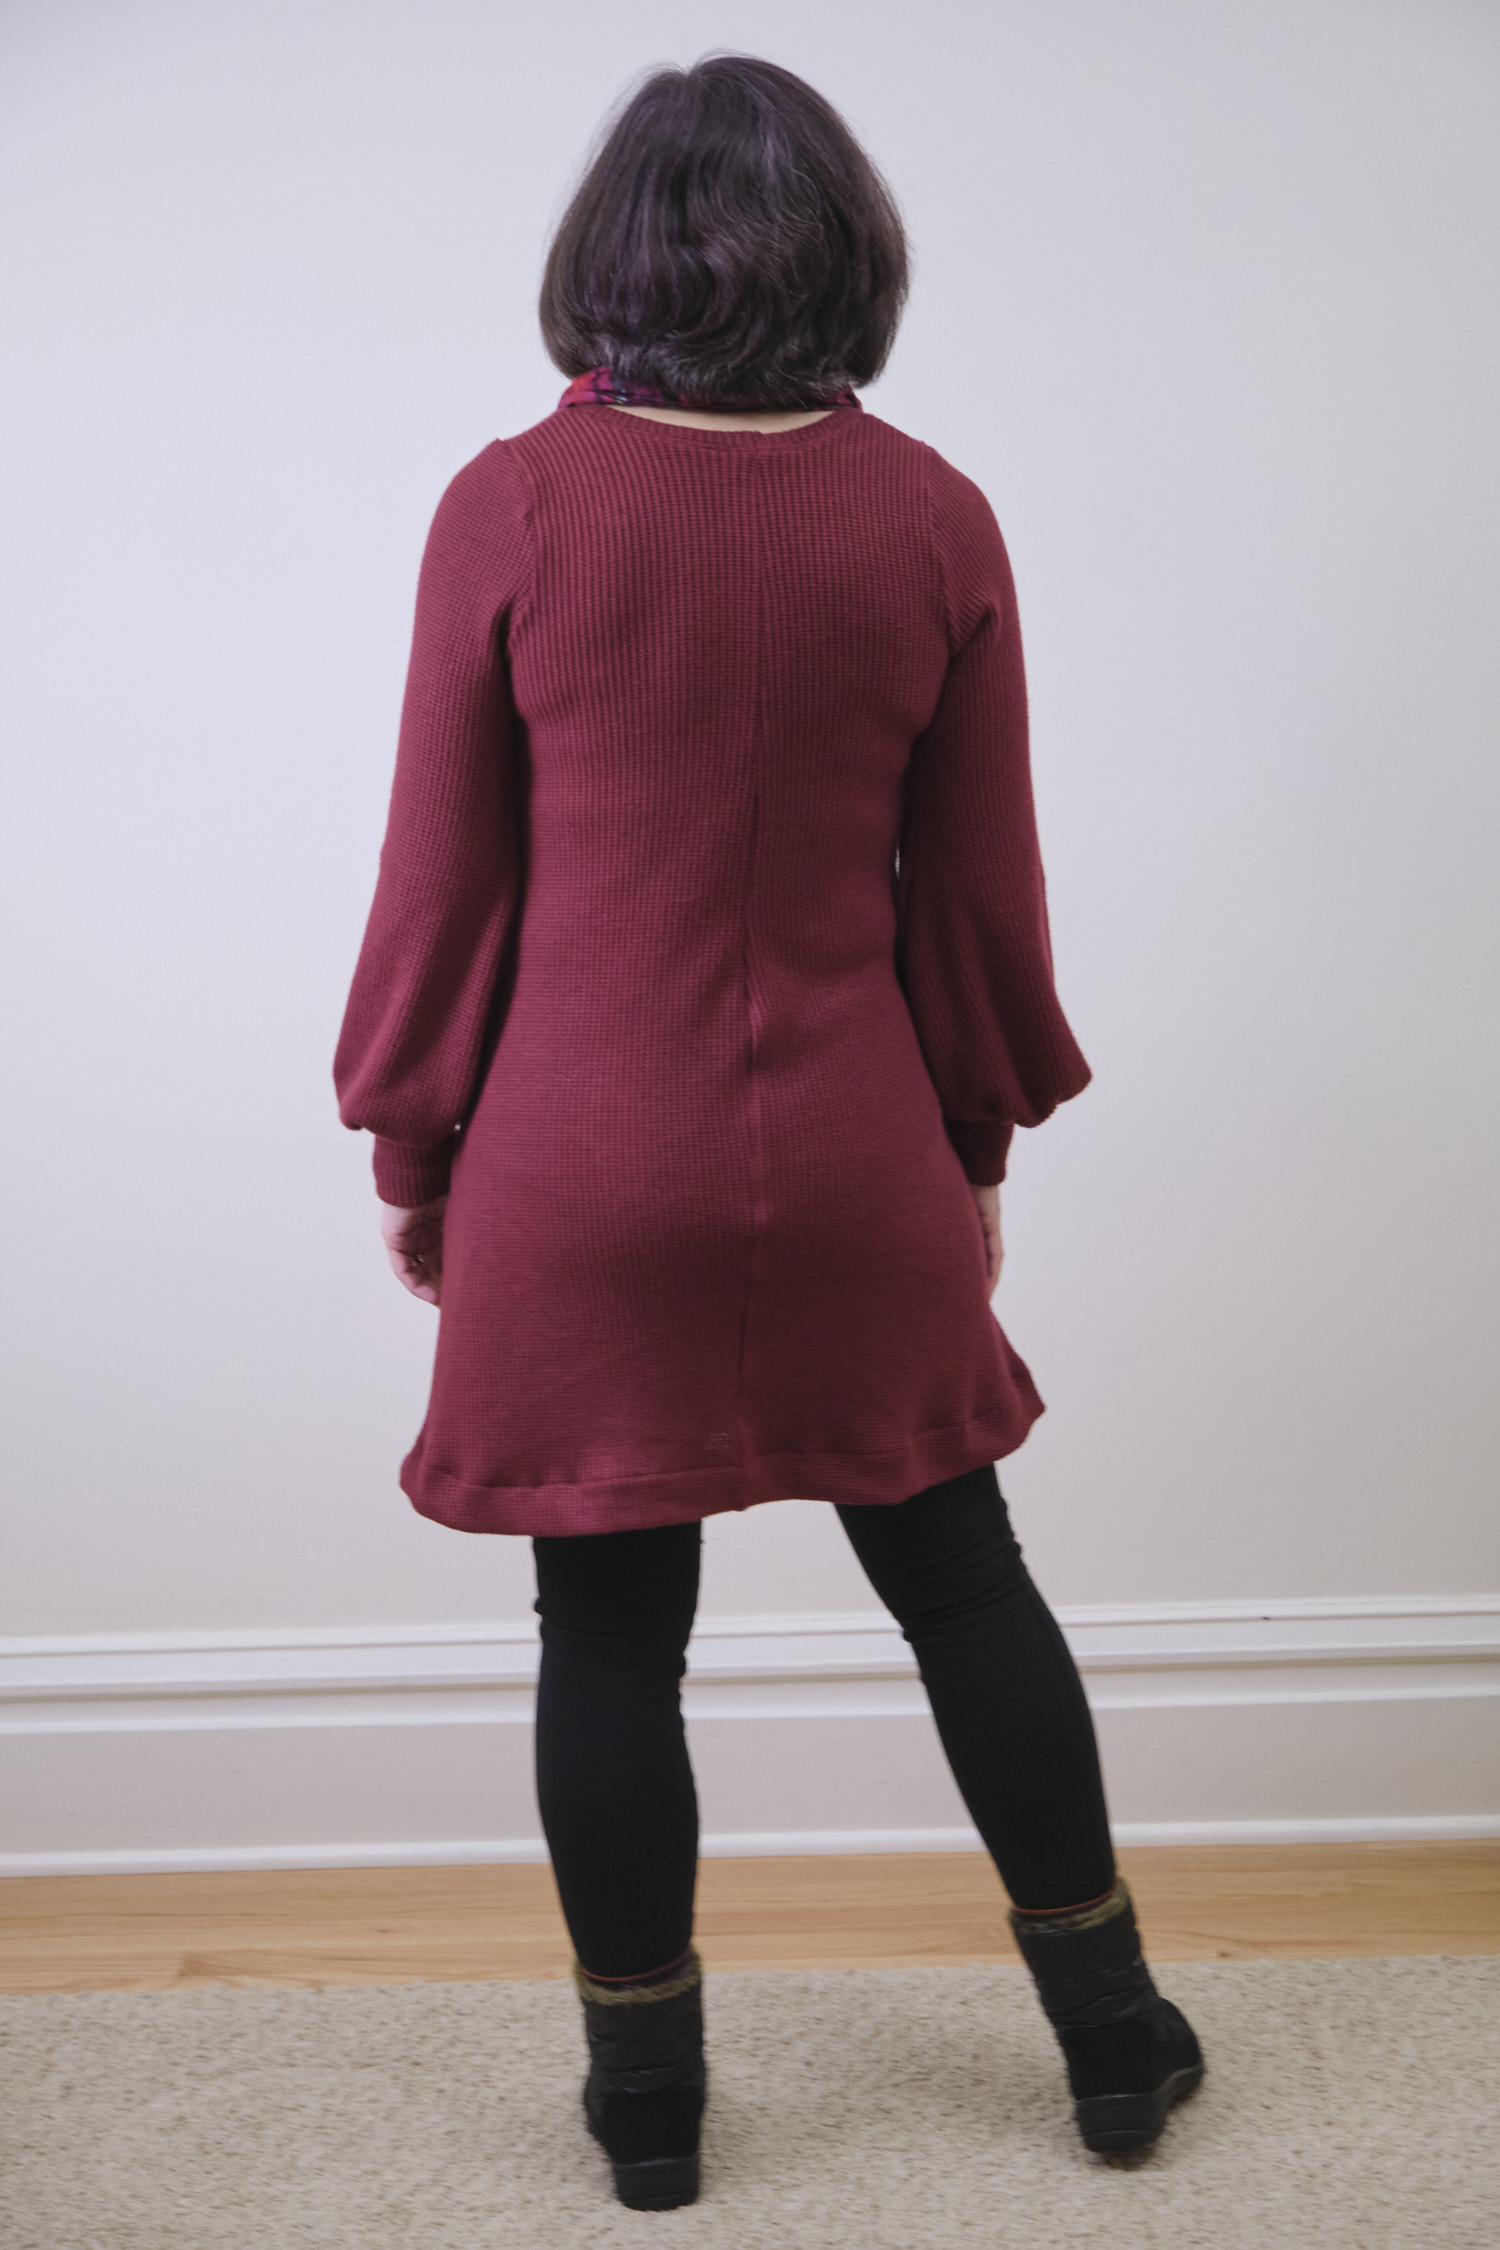
The alterations were a big improvement. The dress has more of an hourglass fit now and is almost even swingy. And with a strategically placed scarf, you don’t see the wavy neckline. It is warm and has functional pockets and fun sleeves, so I will actually wear it now. However, I don’t think I’ll be using this pattern again. It looks great on some people but doesn’t seem well-suited for me. I also don’t think it was a good choice for a chunky sweater knit (which I love, and choose a more suitable pattern in the future).