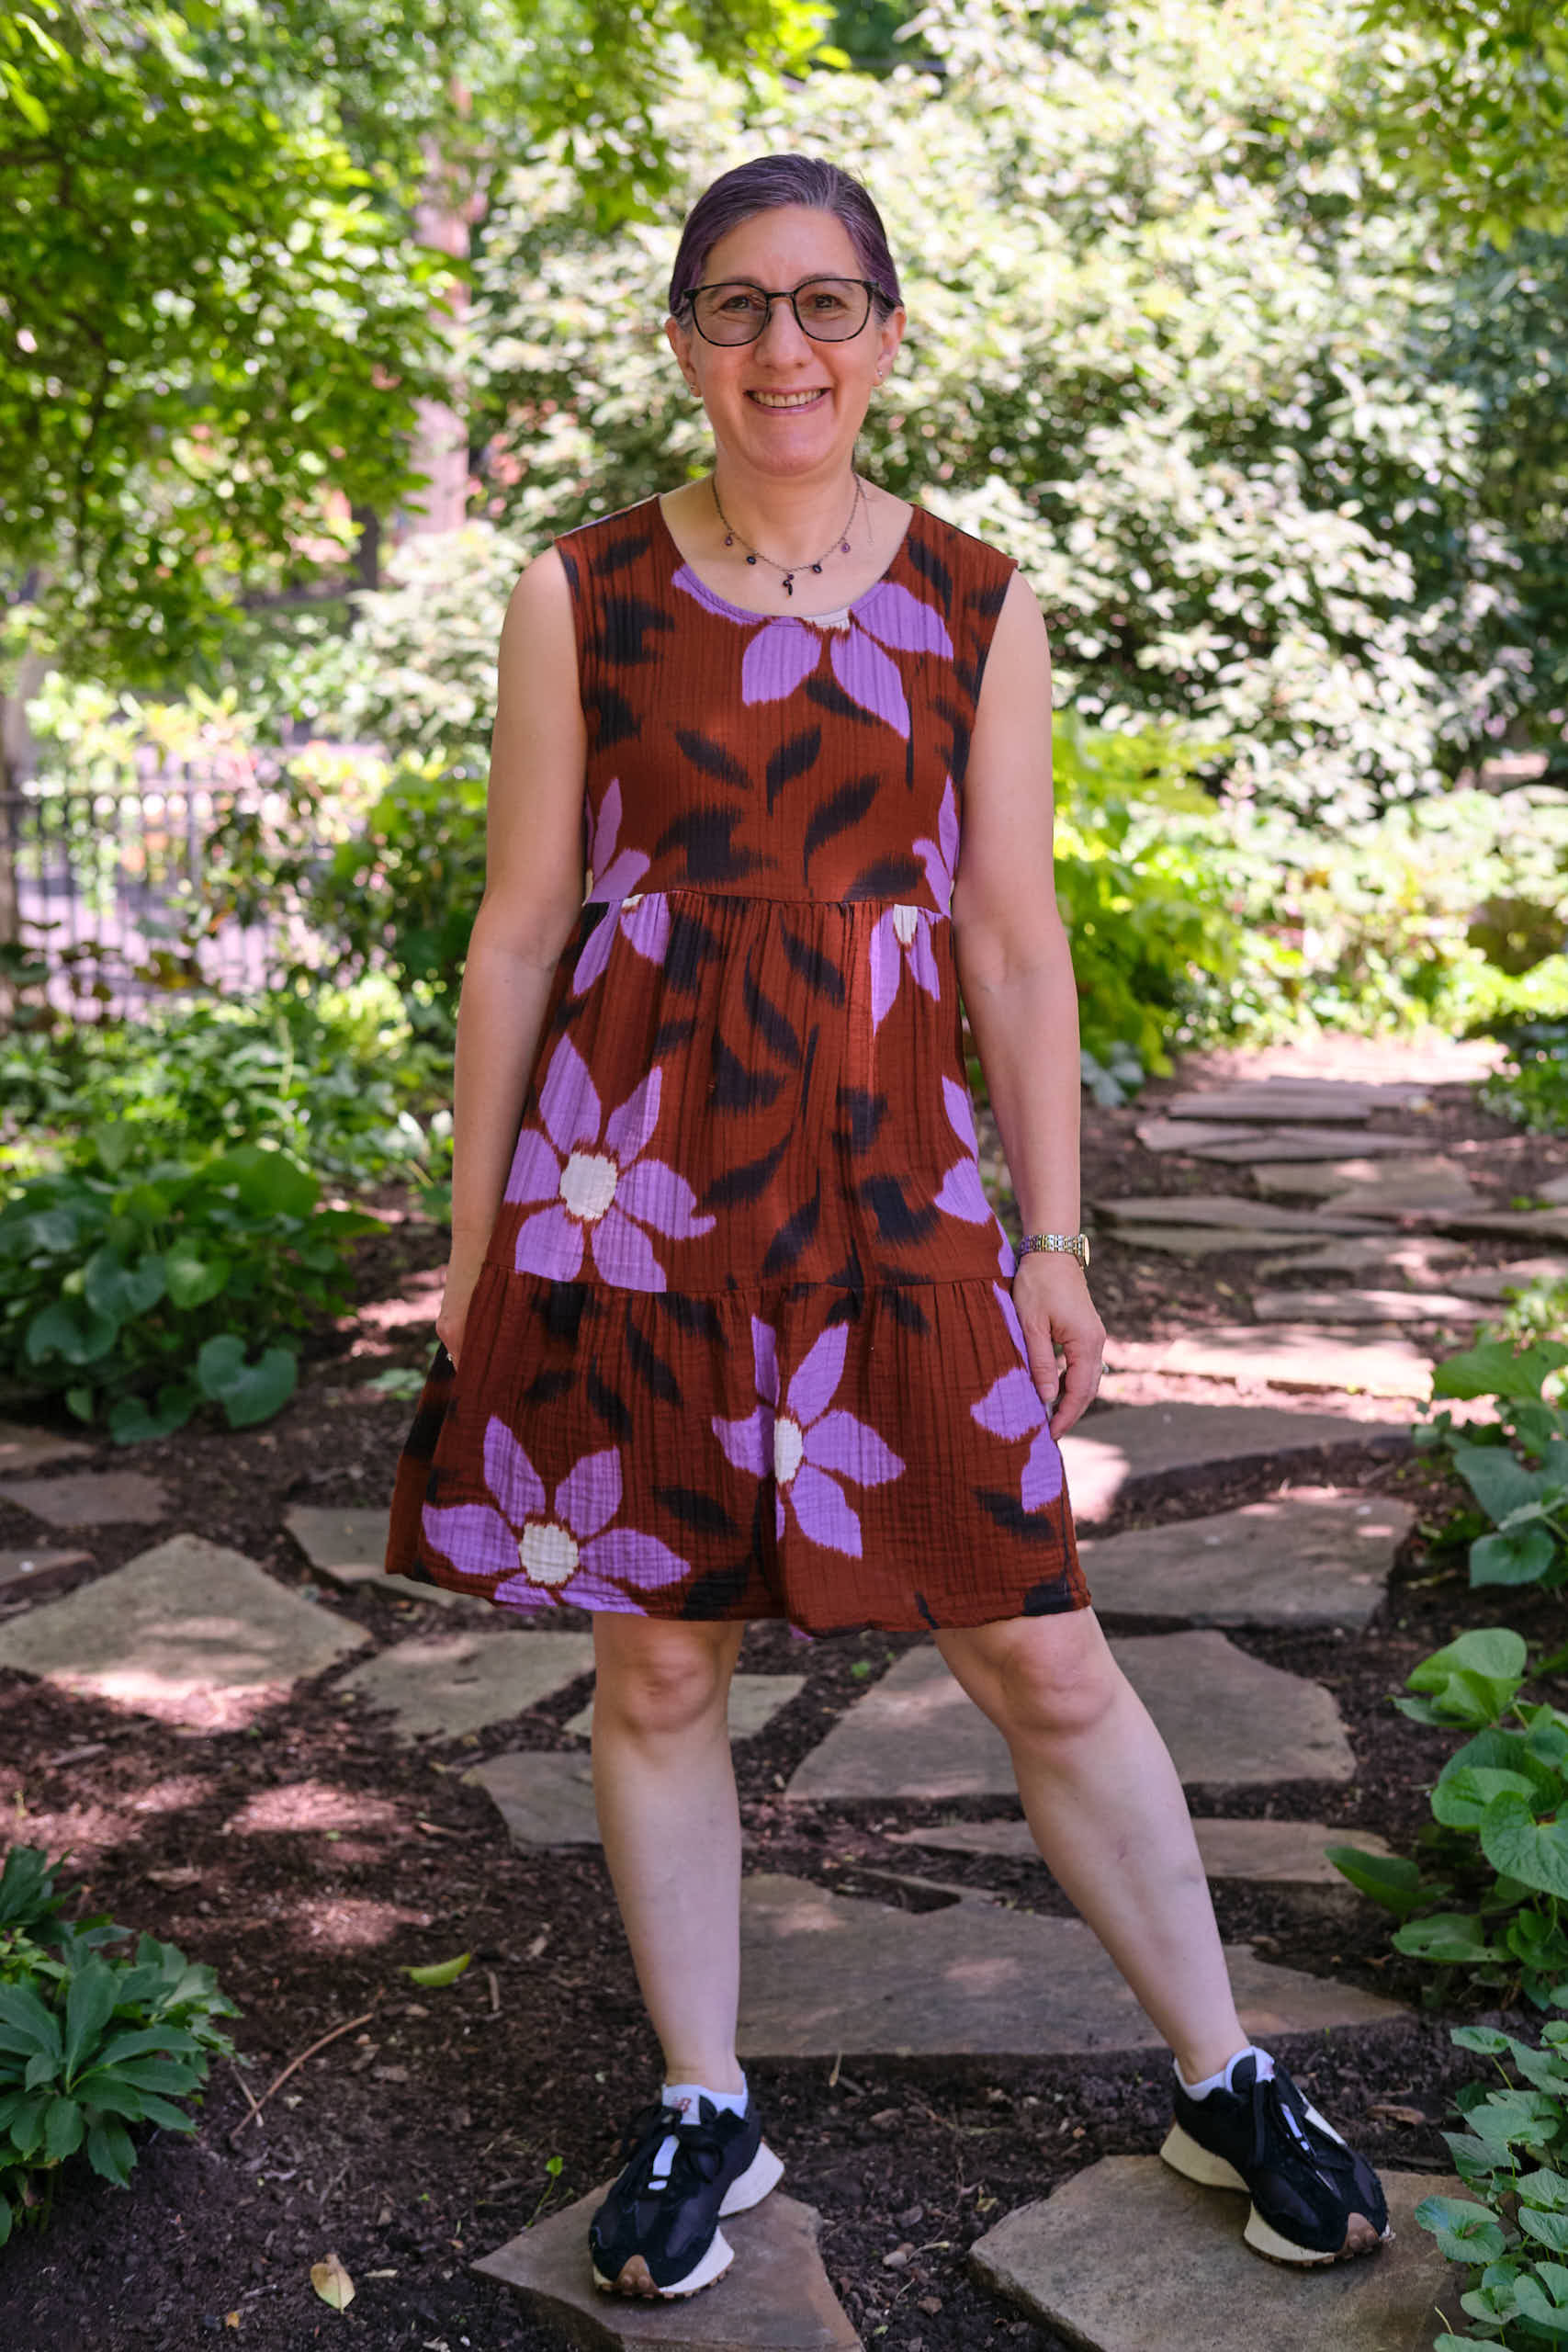
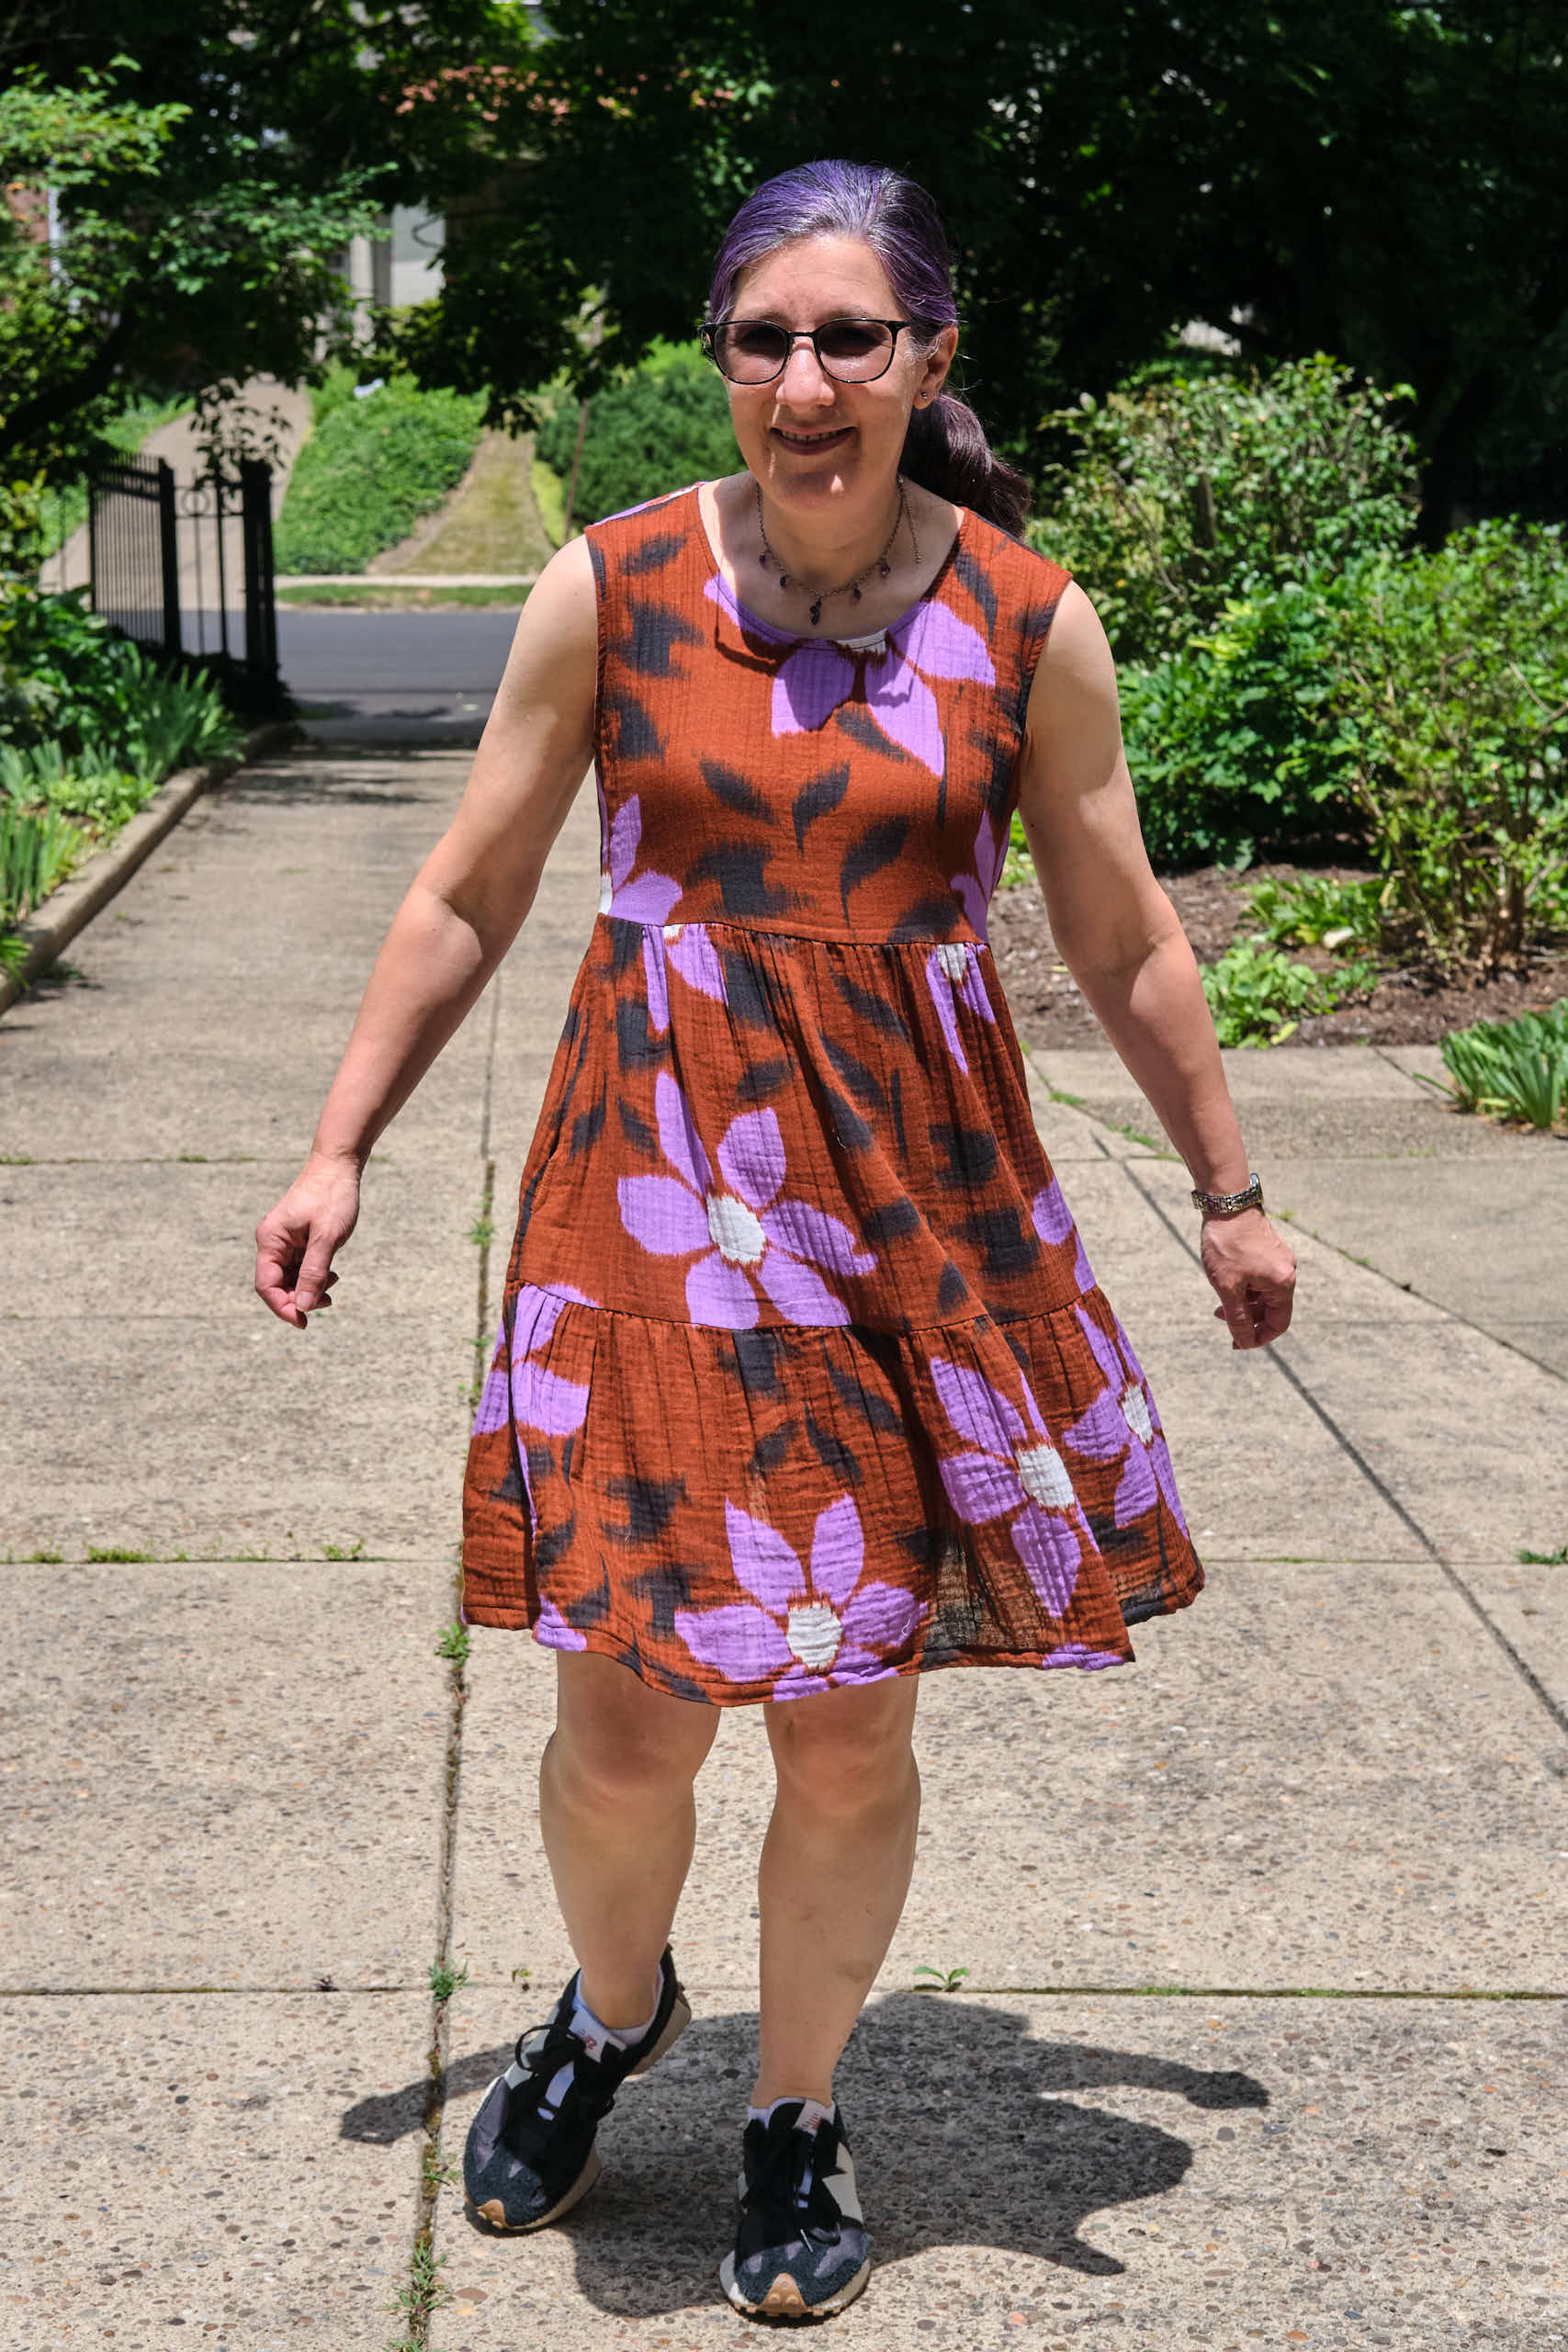
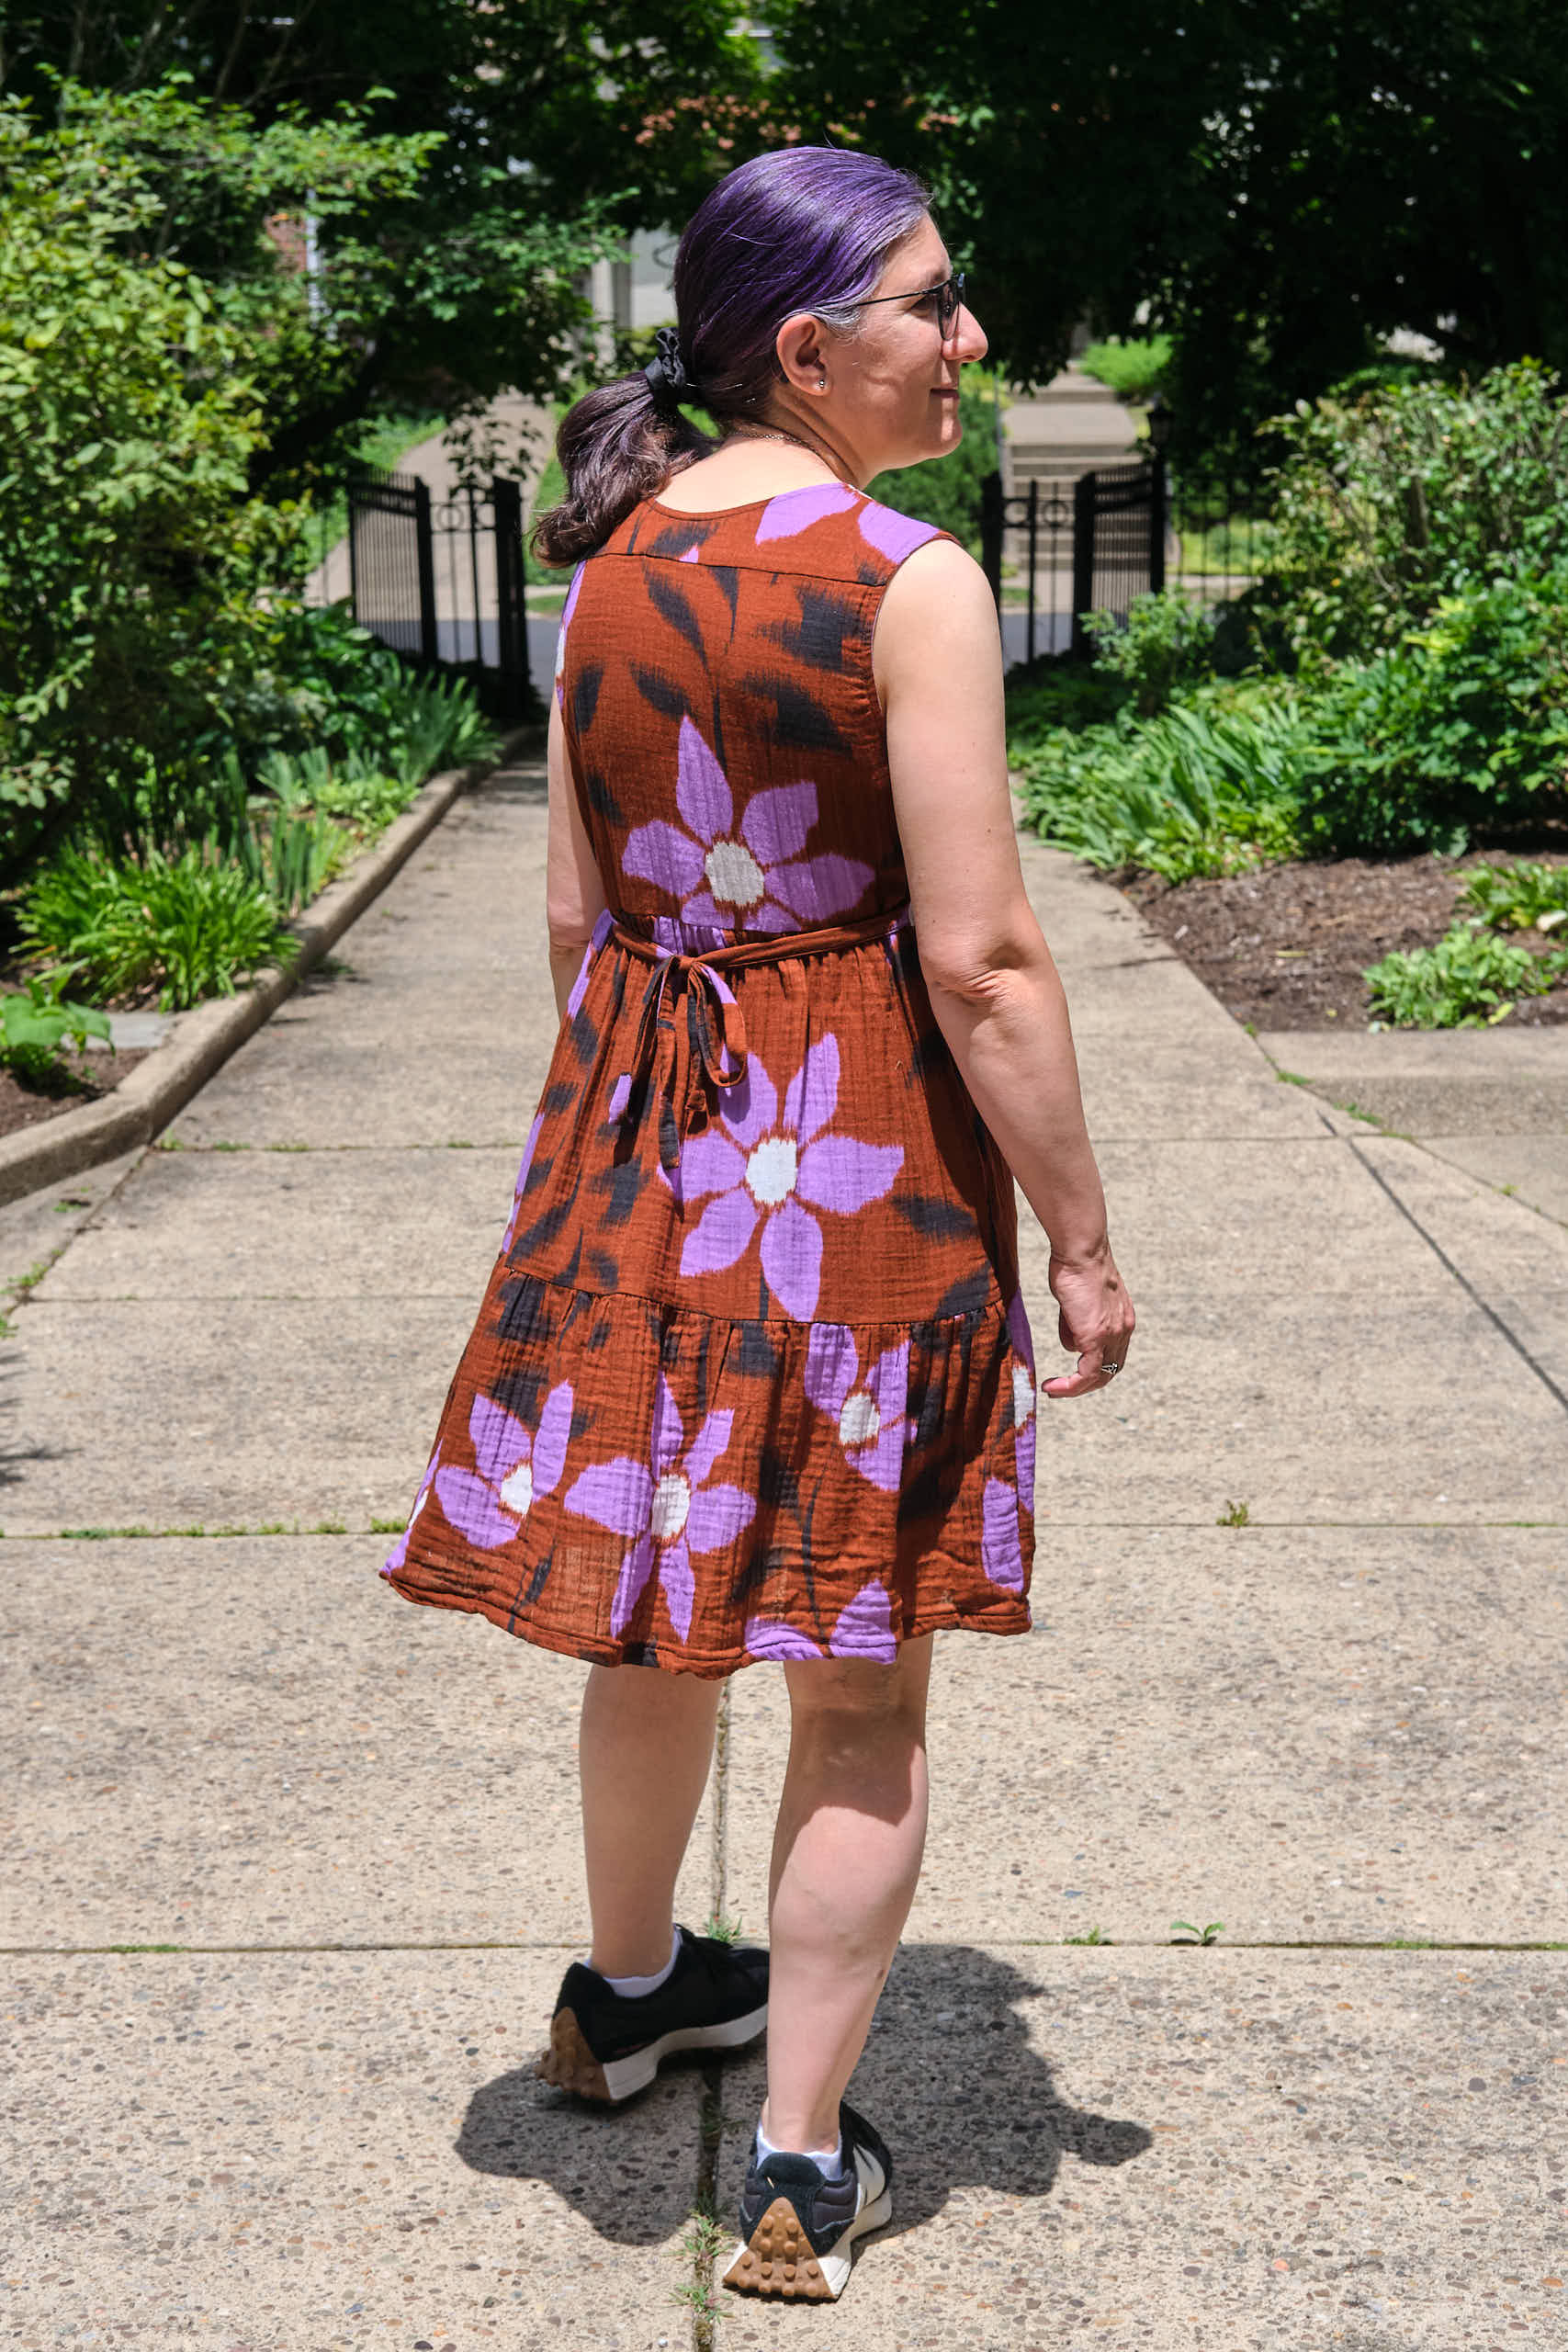
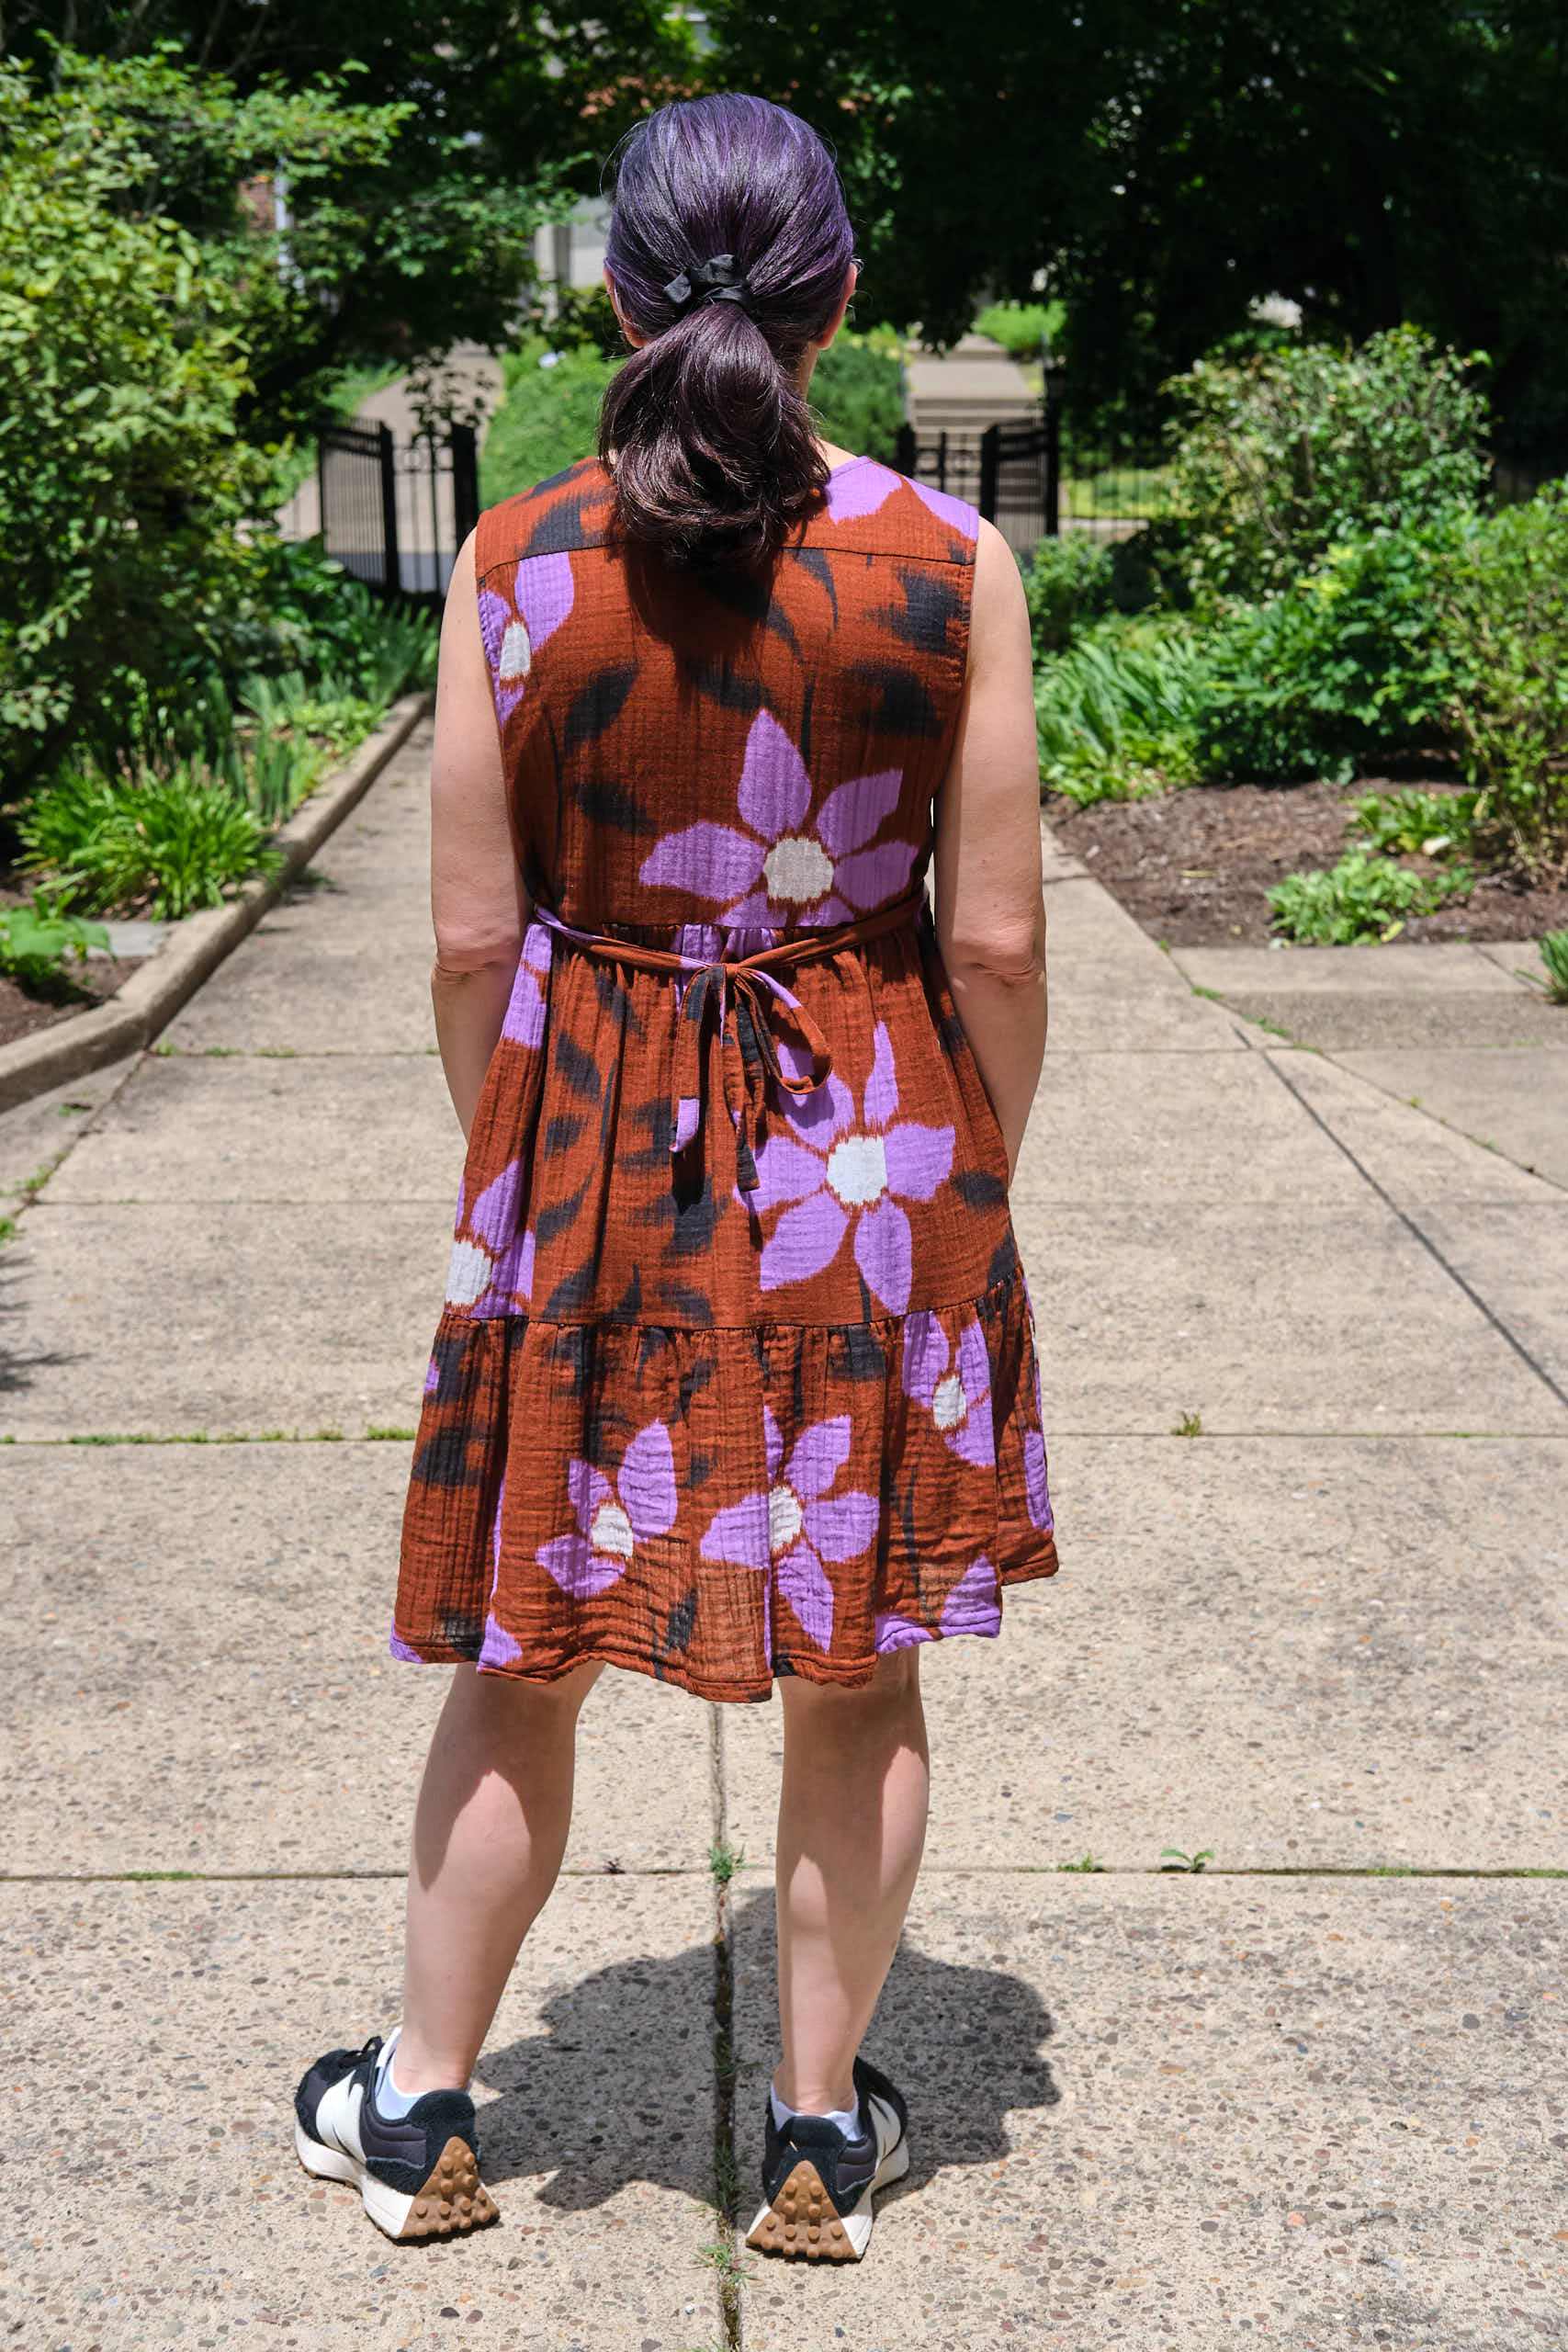
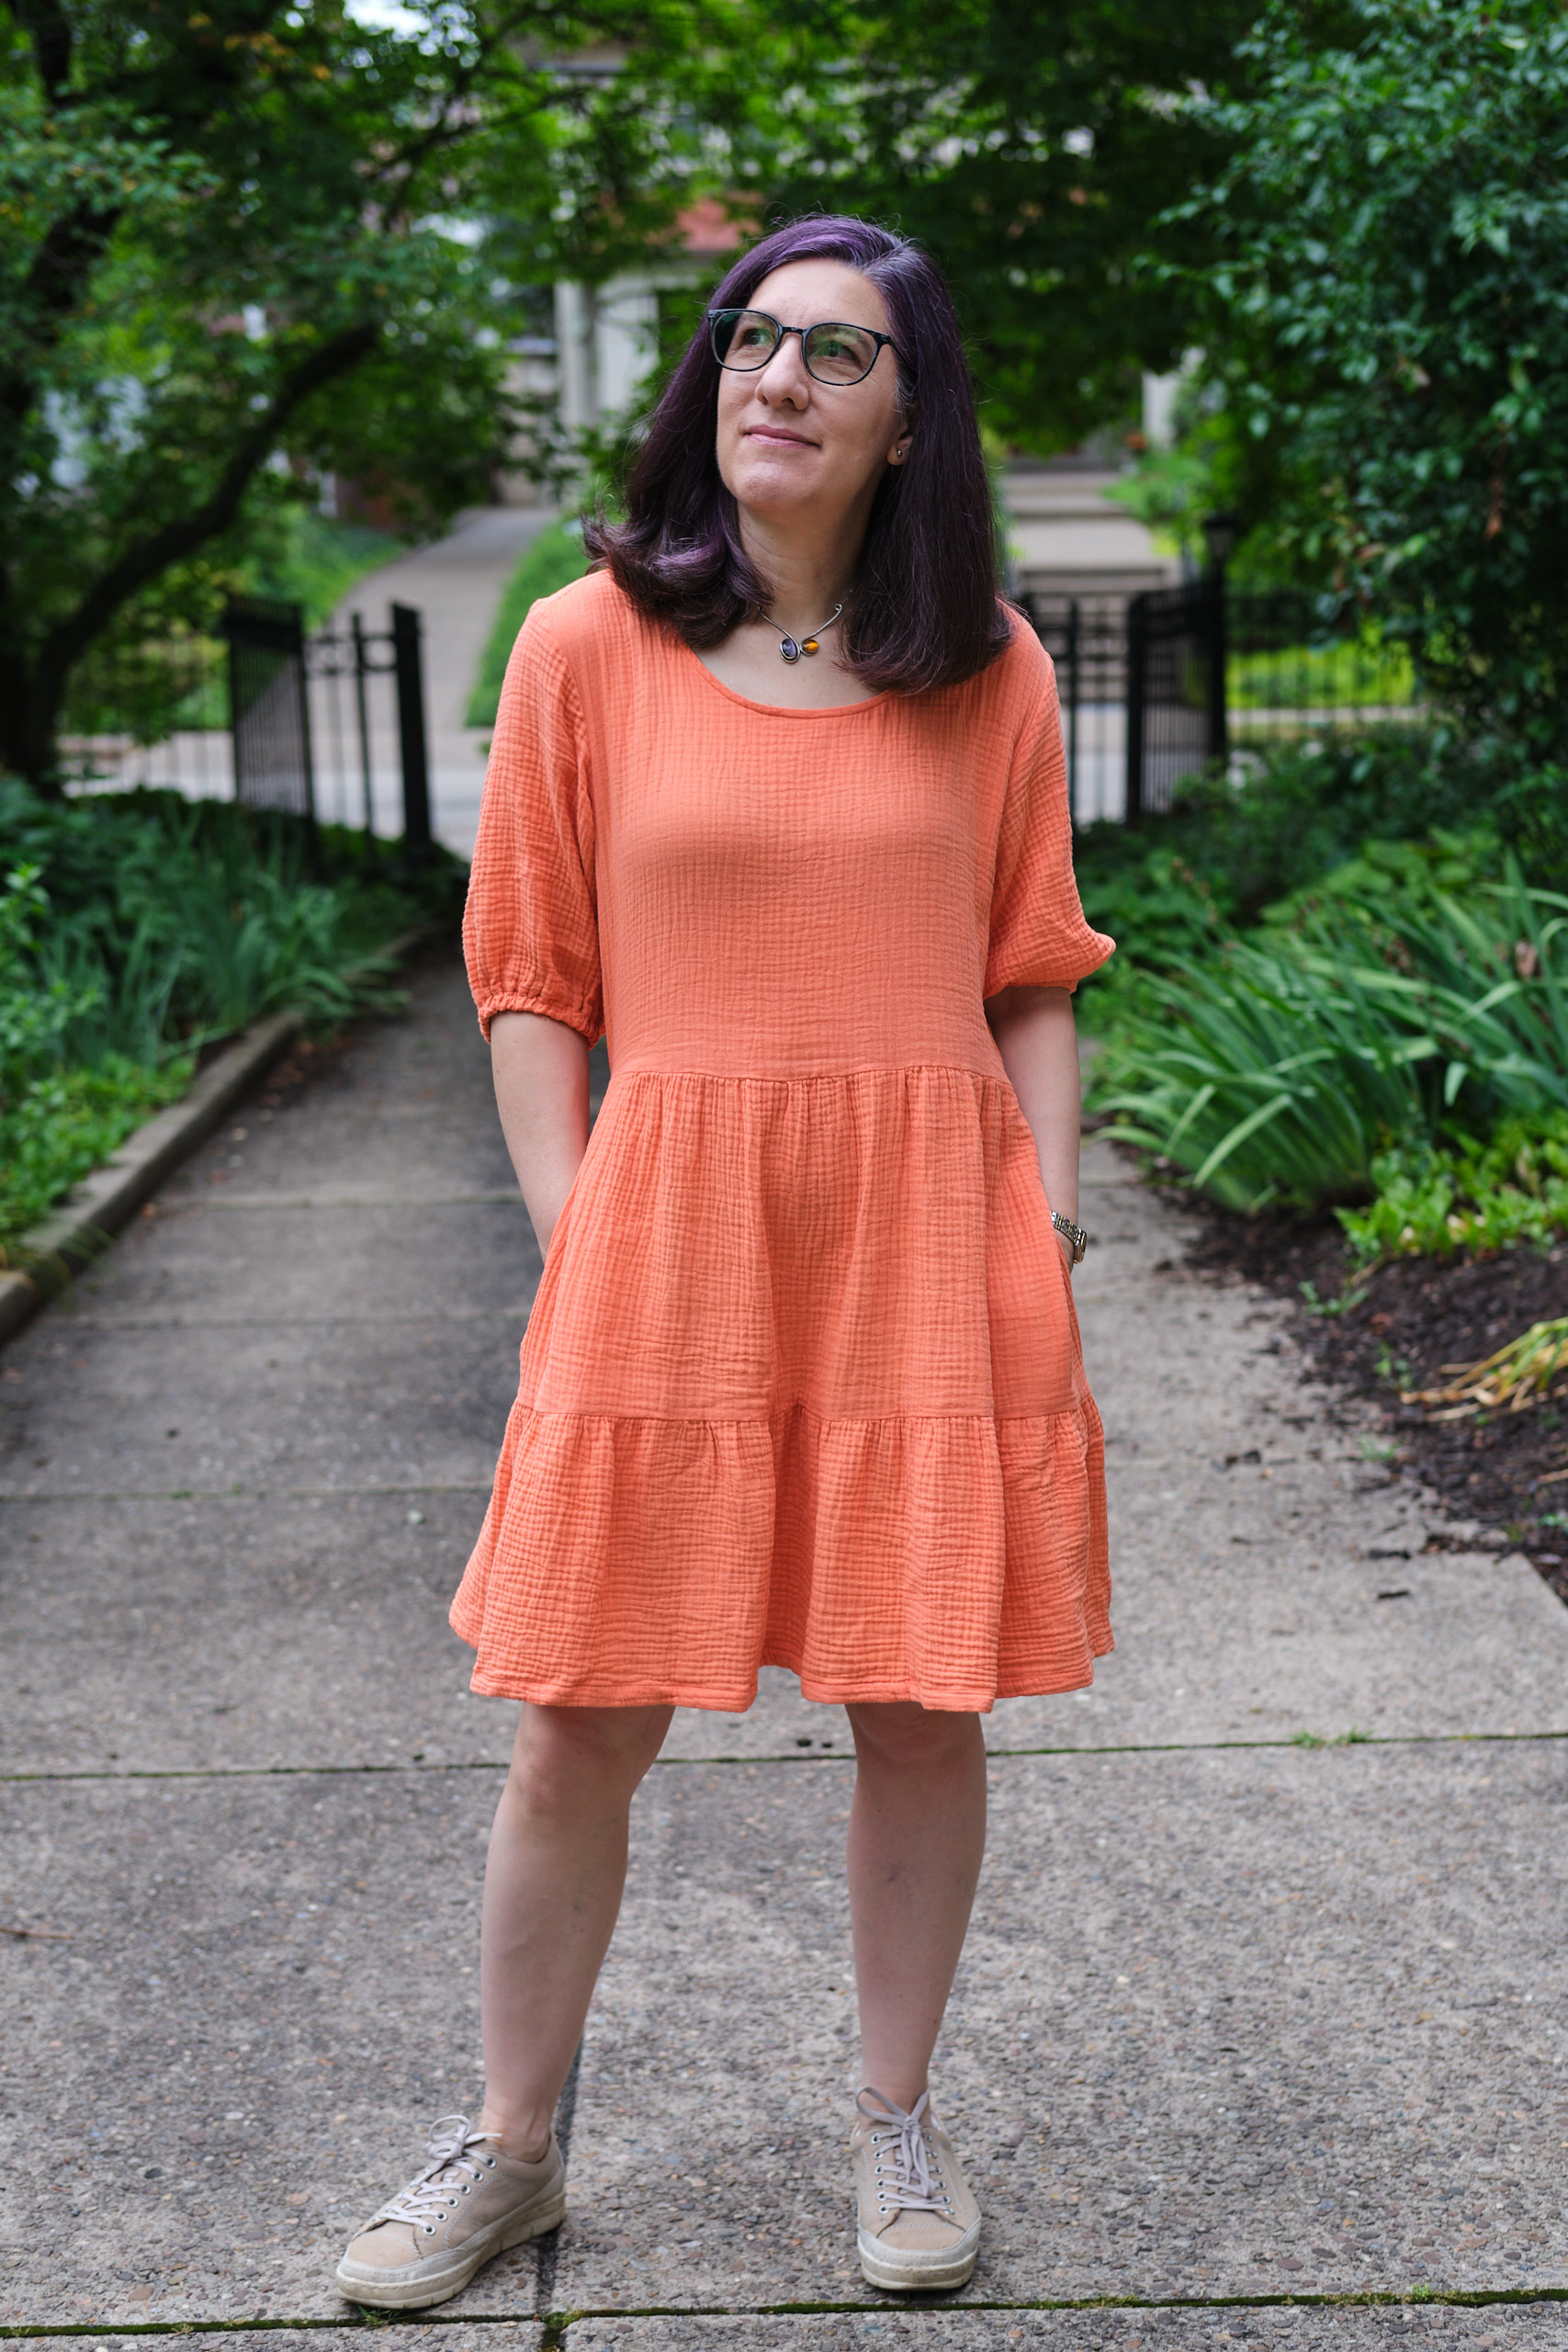
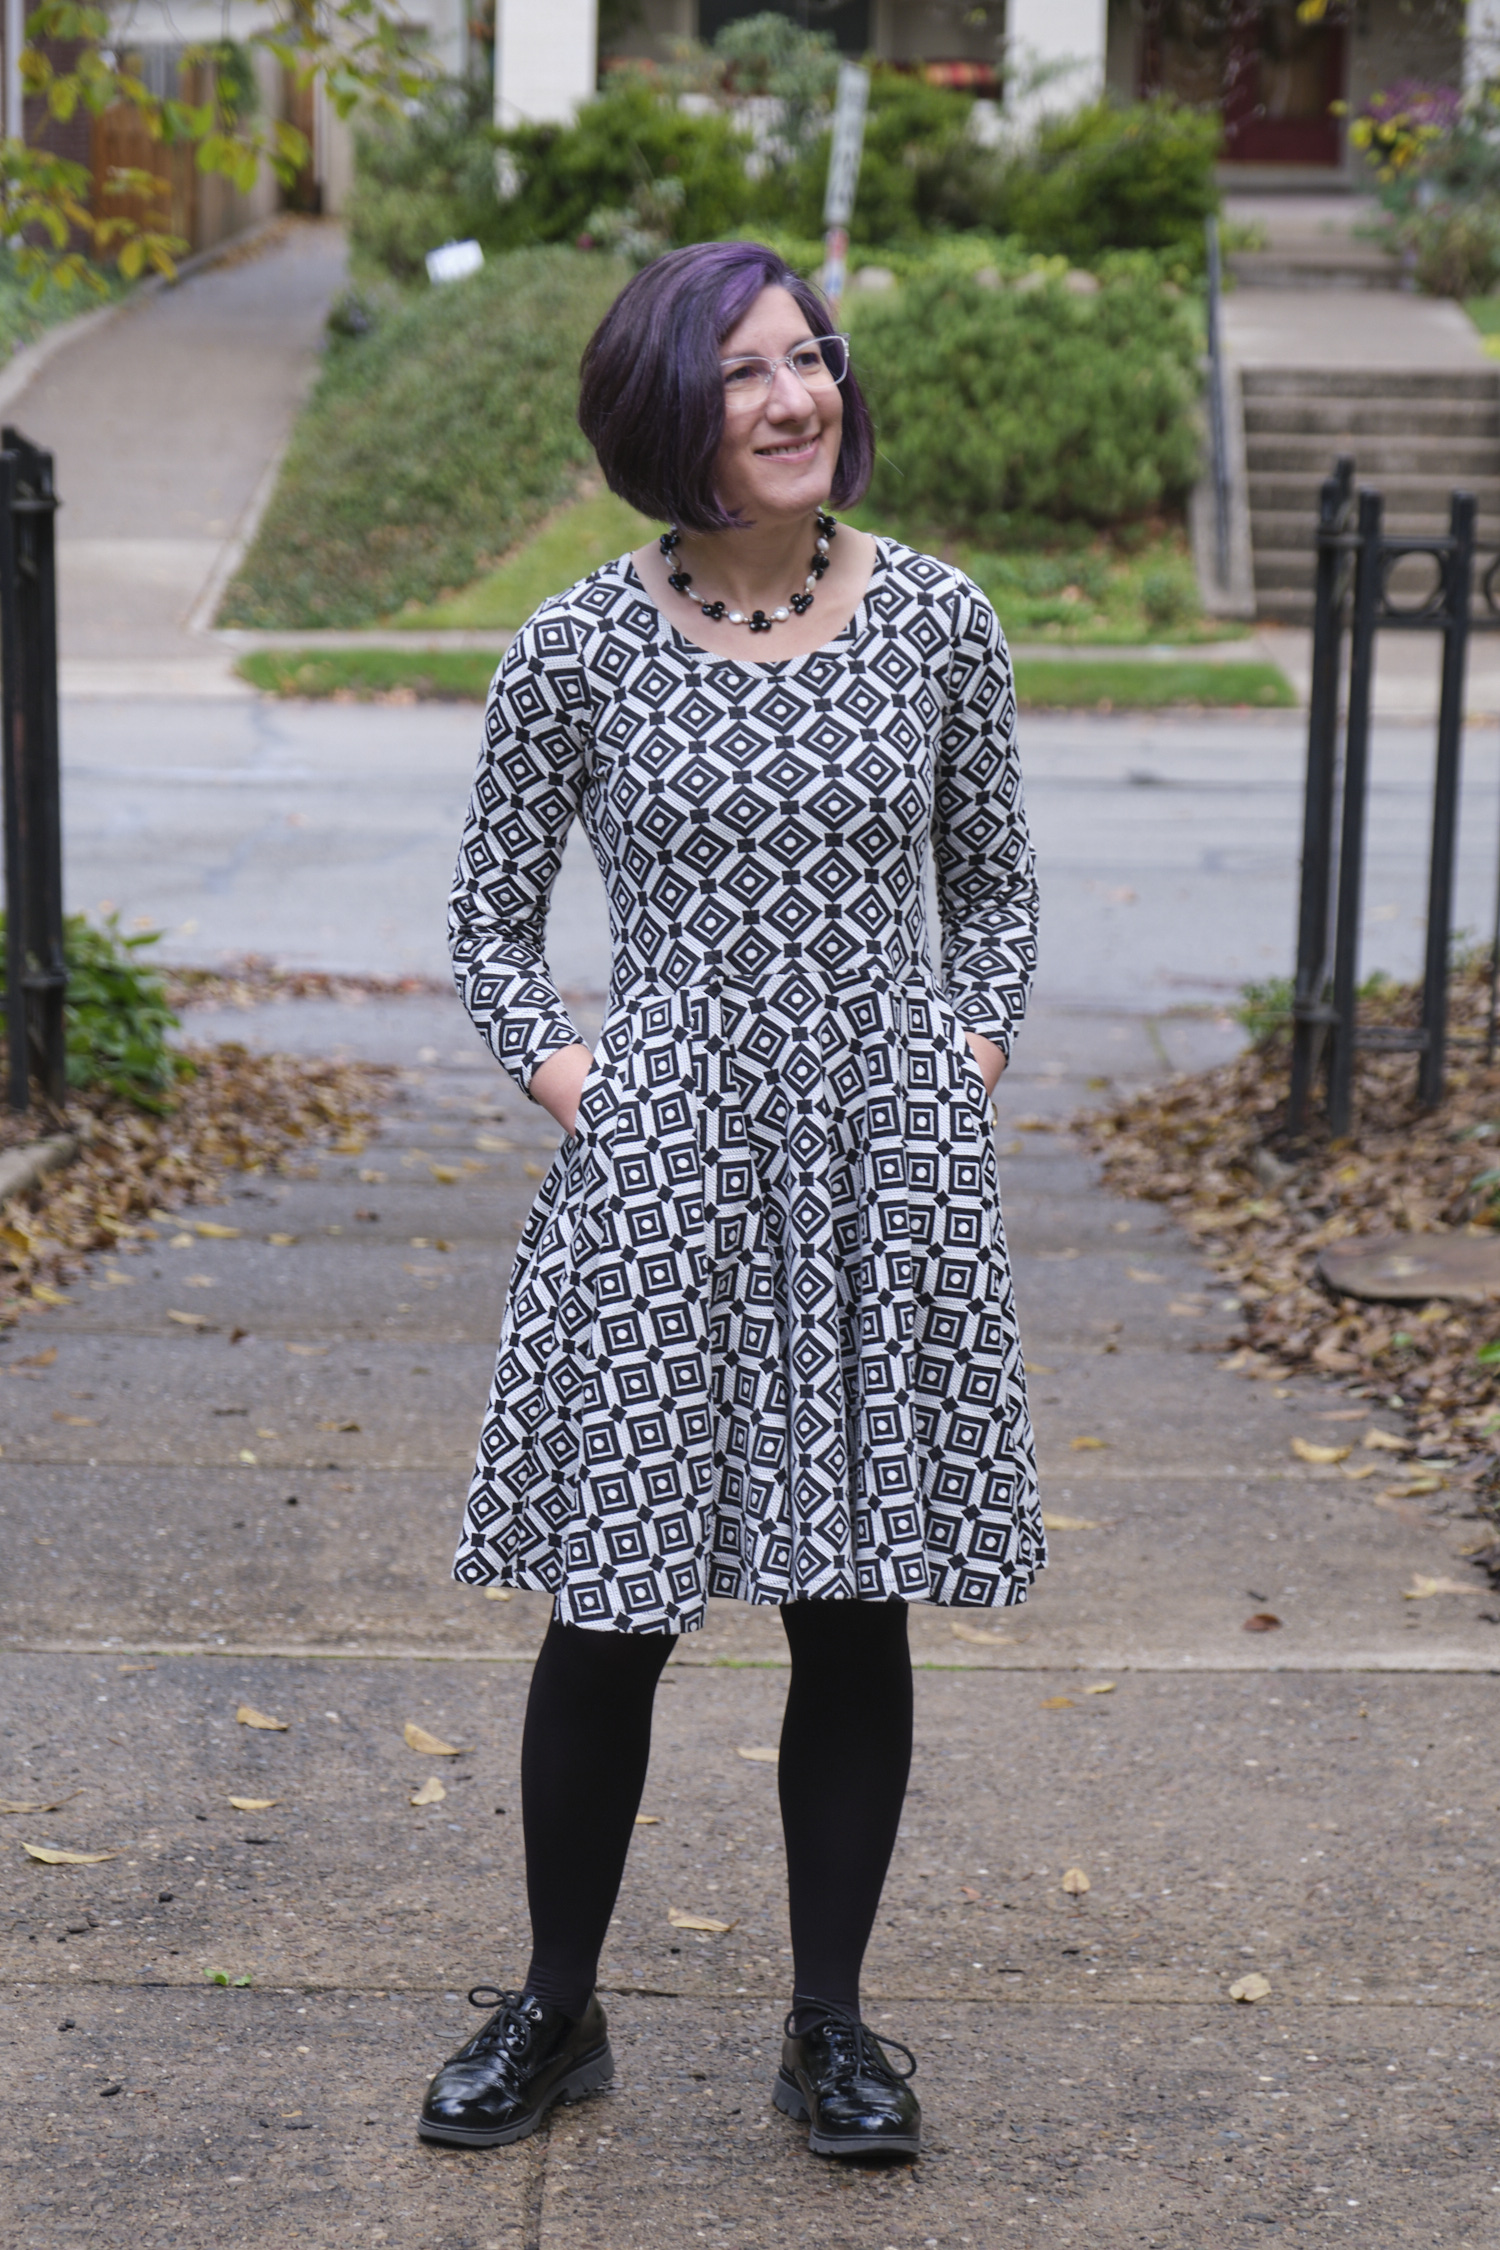
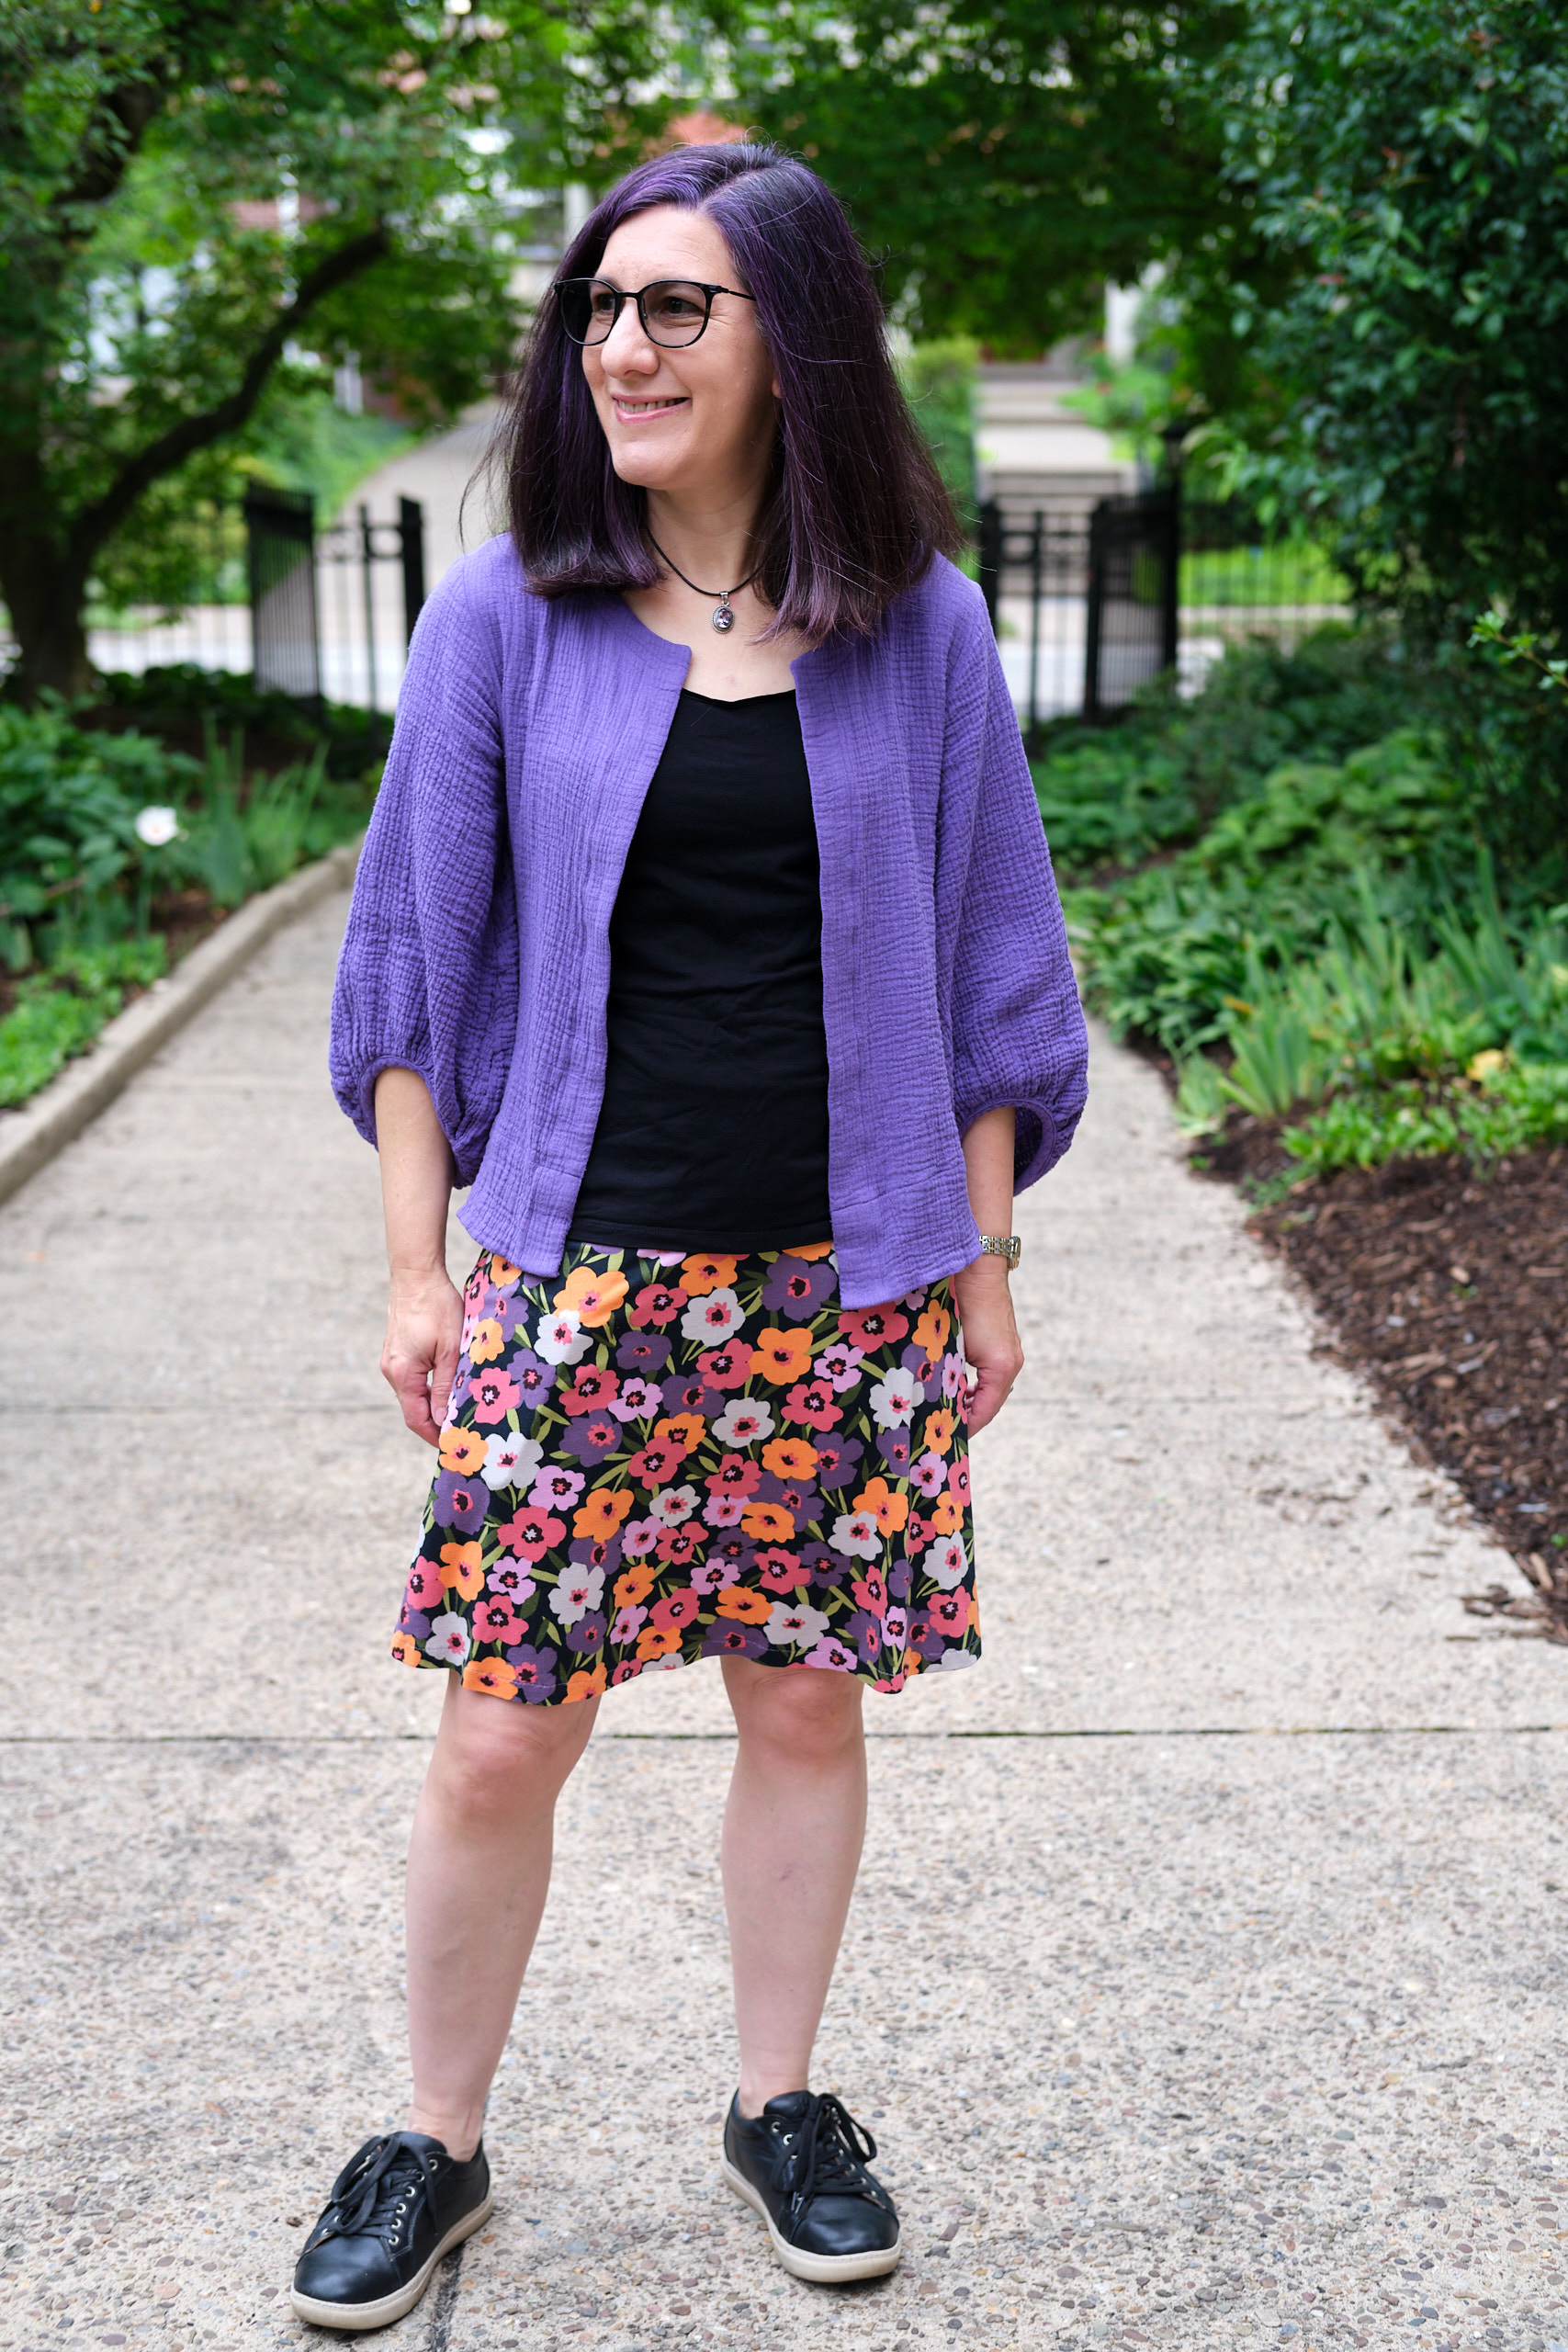
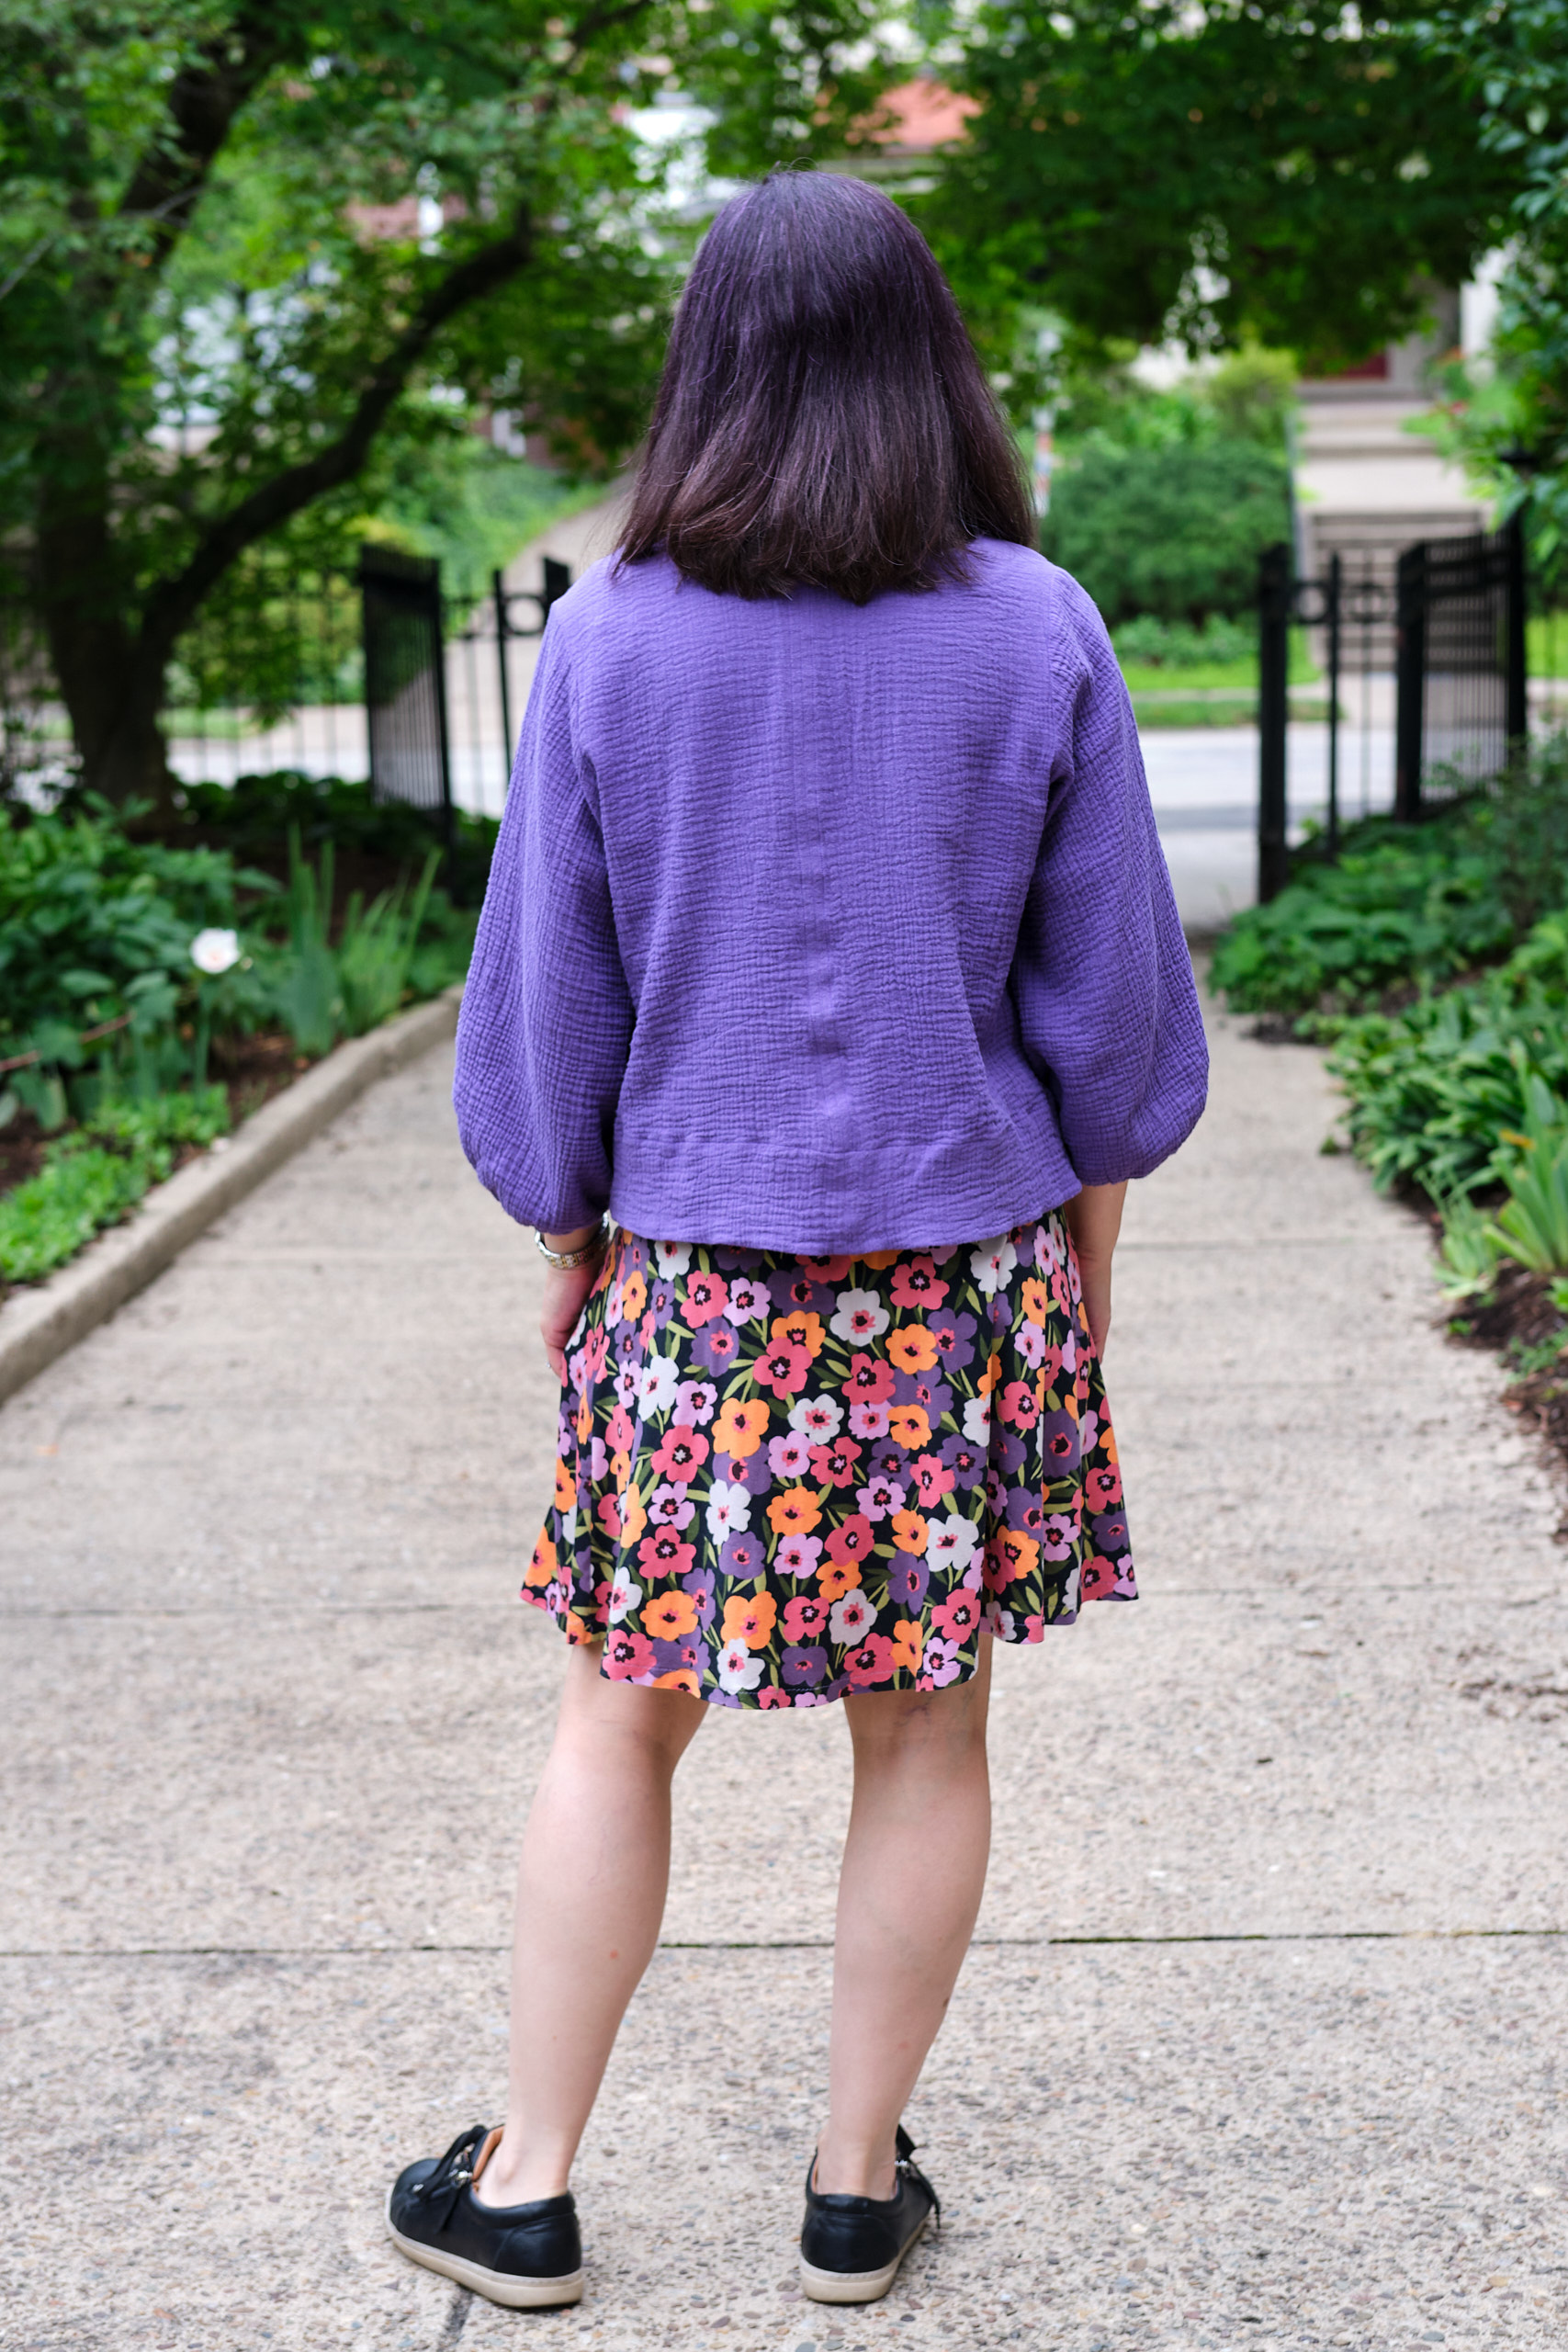
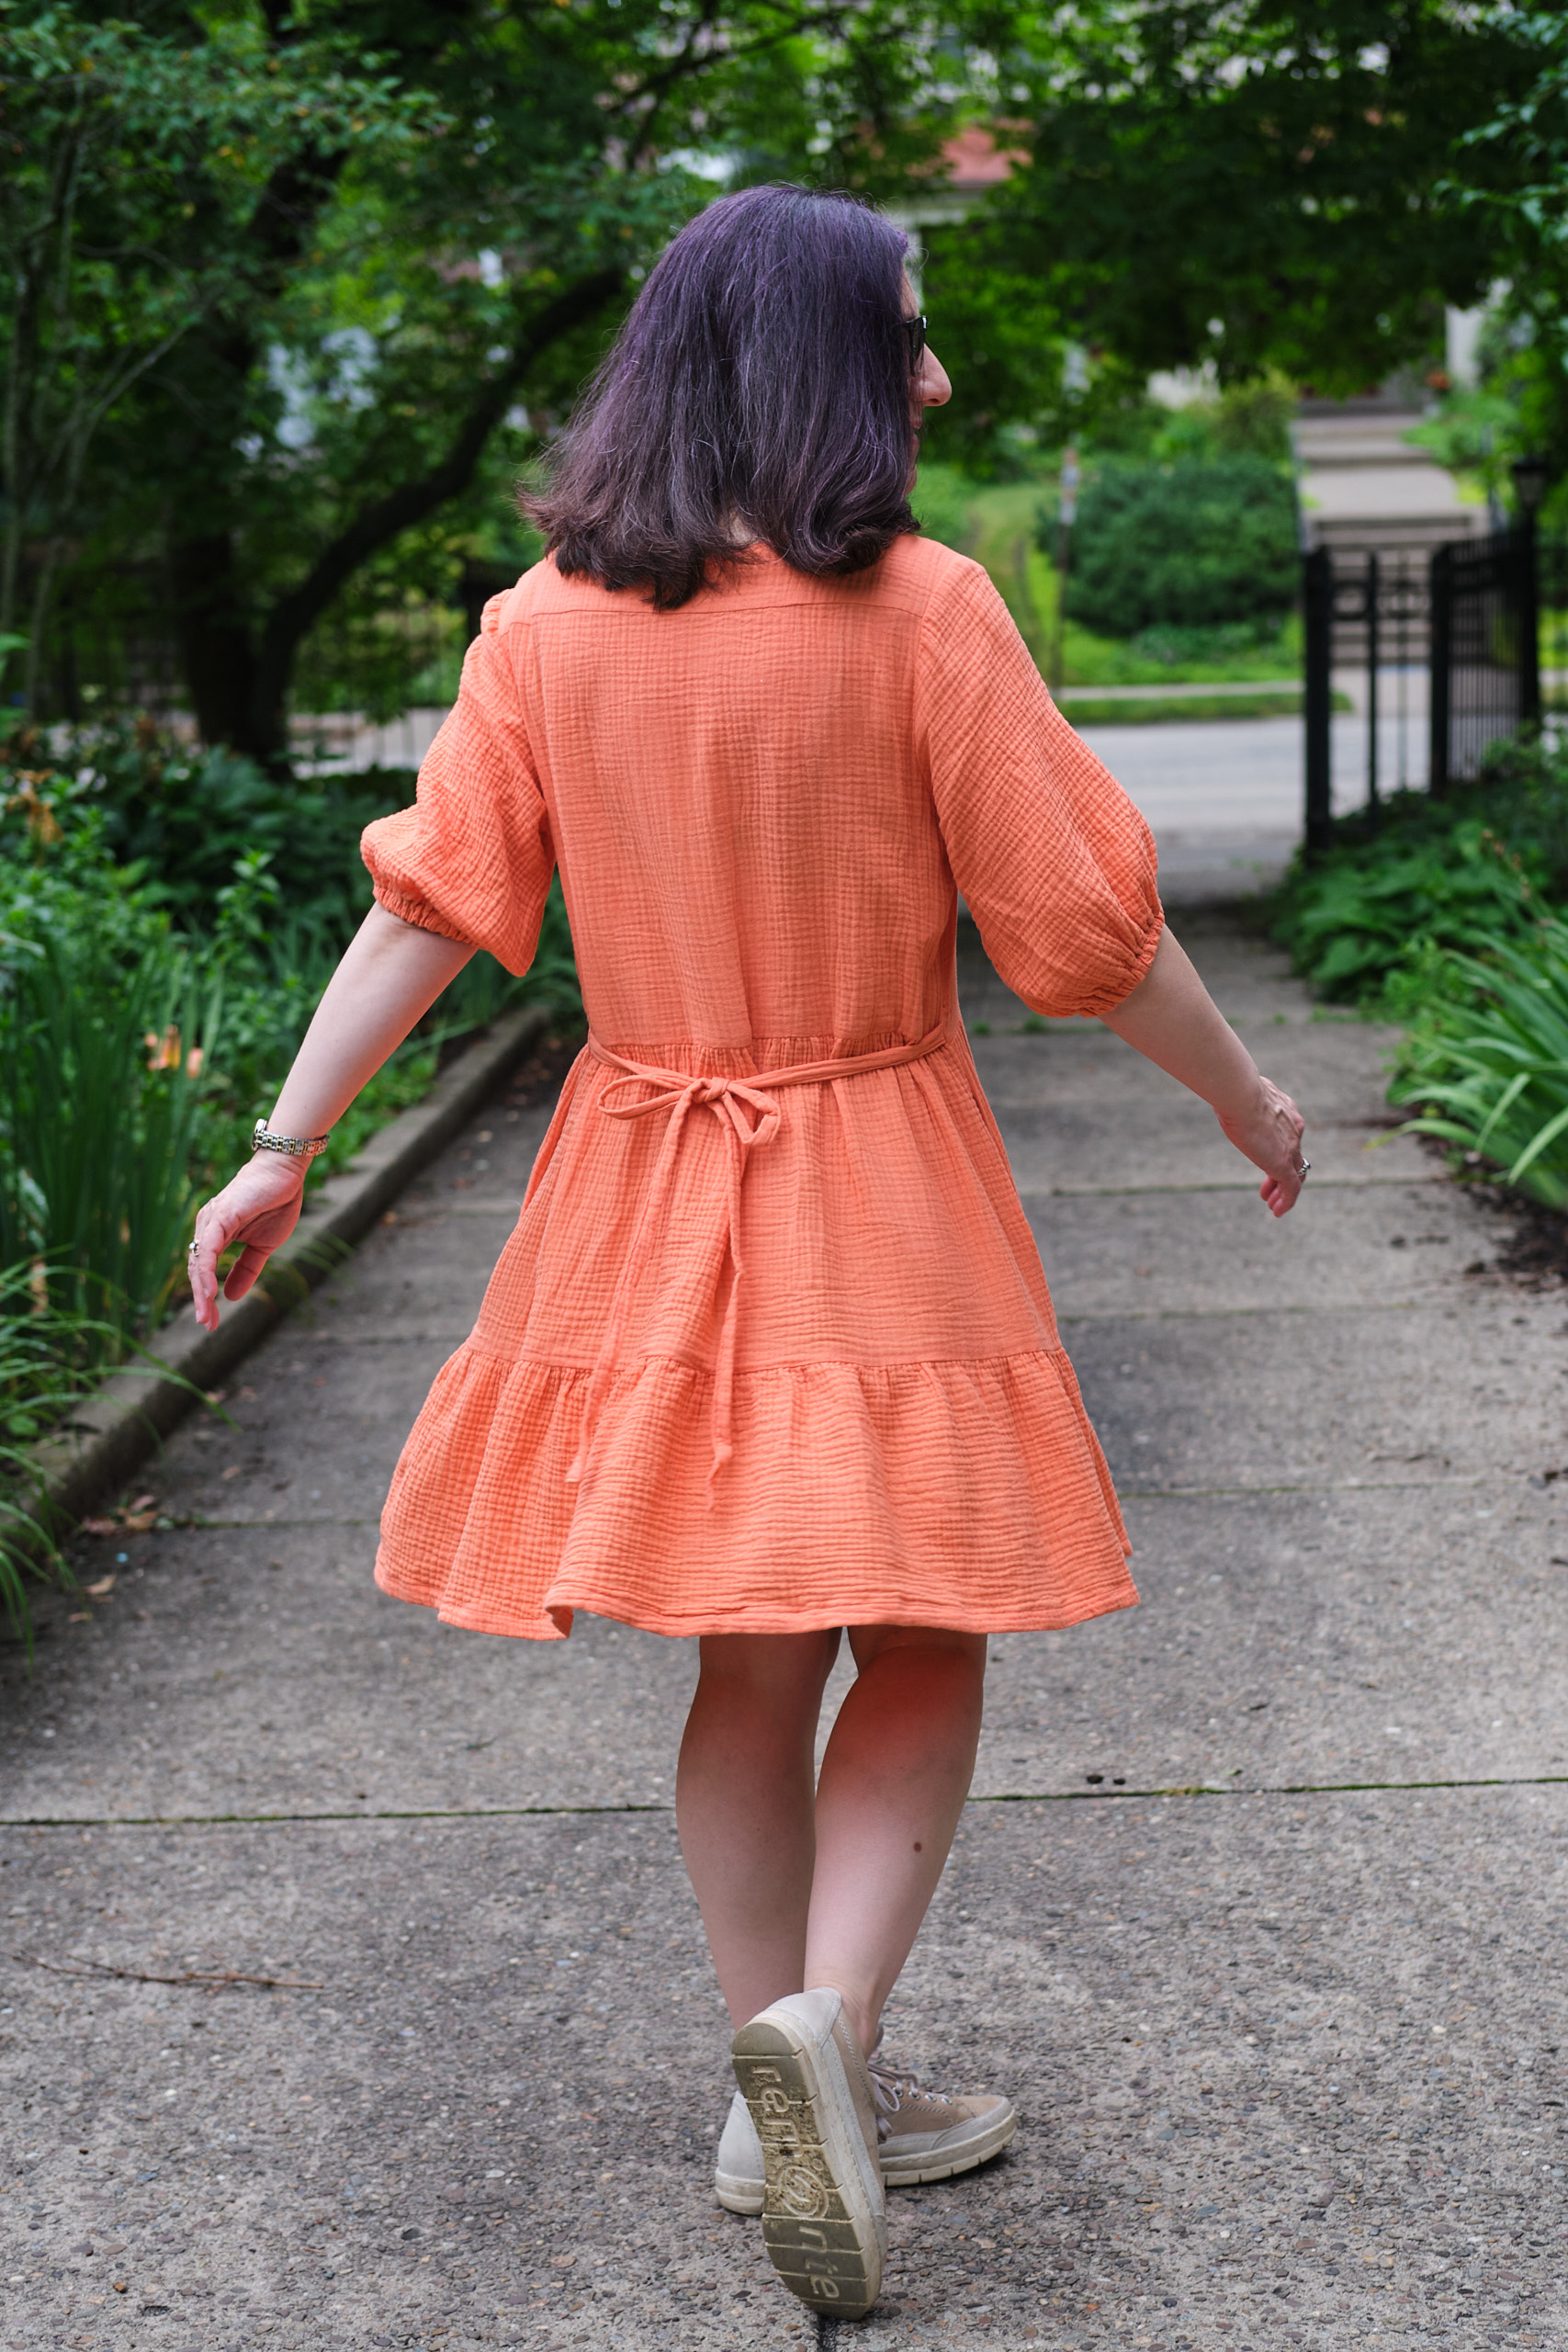
Pattern Emporium Meet You There dress, made with 1.5 yards brown and purple large floral print double gauze fabric (washed and ironed before cutting), size AU8, knee length (with 2 long tiers), regular bodice shortened by 2 inches, mid neck, sleeveless back ties, pockets (sewed down bottom of pocket openings), used batik quilting cotton for facings
I’ve enjoyed my orange cotton double gauze Meet You There dress from last summer, and have been looking for a nice double-gauze print to use to make another one. I found this lovely brown and purple large floral print at Califabrics last December and finally got around to sewing it up.
I decided to size down from an AU10 to an AU8 to make the dress a little less roomy, and I shortened the bodice by 2 inches and kept the tiers at their full length. I also made the sleeveless version this time, shortened the ties by about 3.5 inches and sewed up the bottom of the pocket openings (as I did for the orange dress).
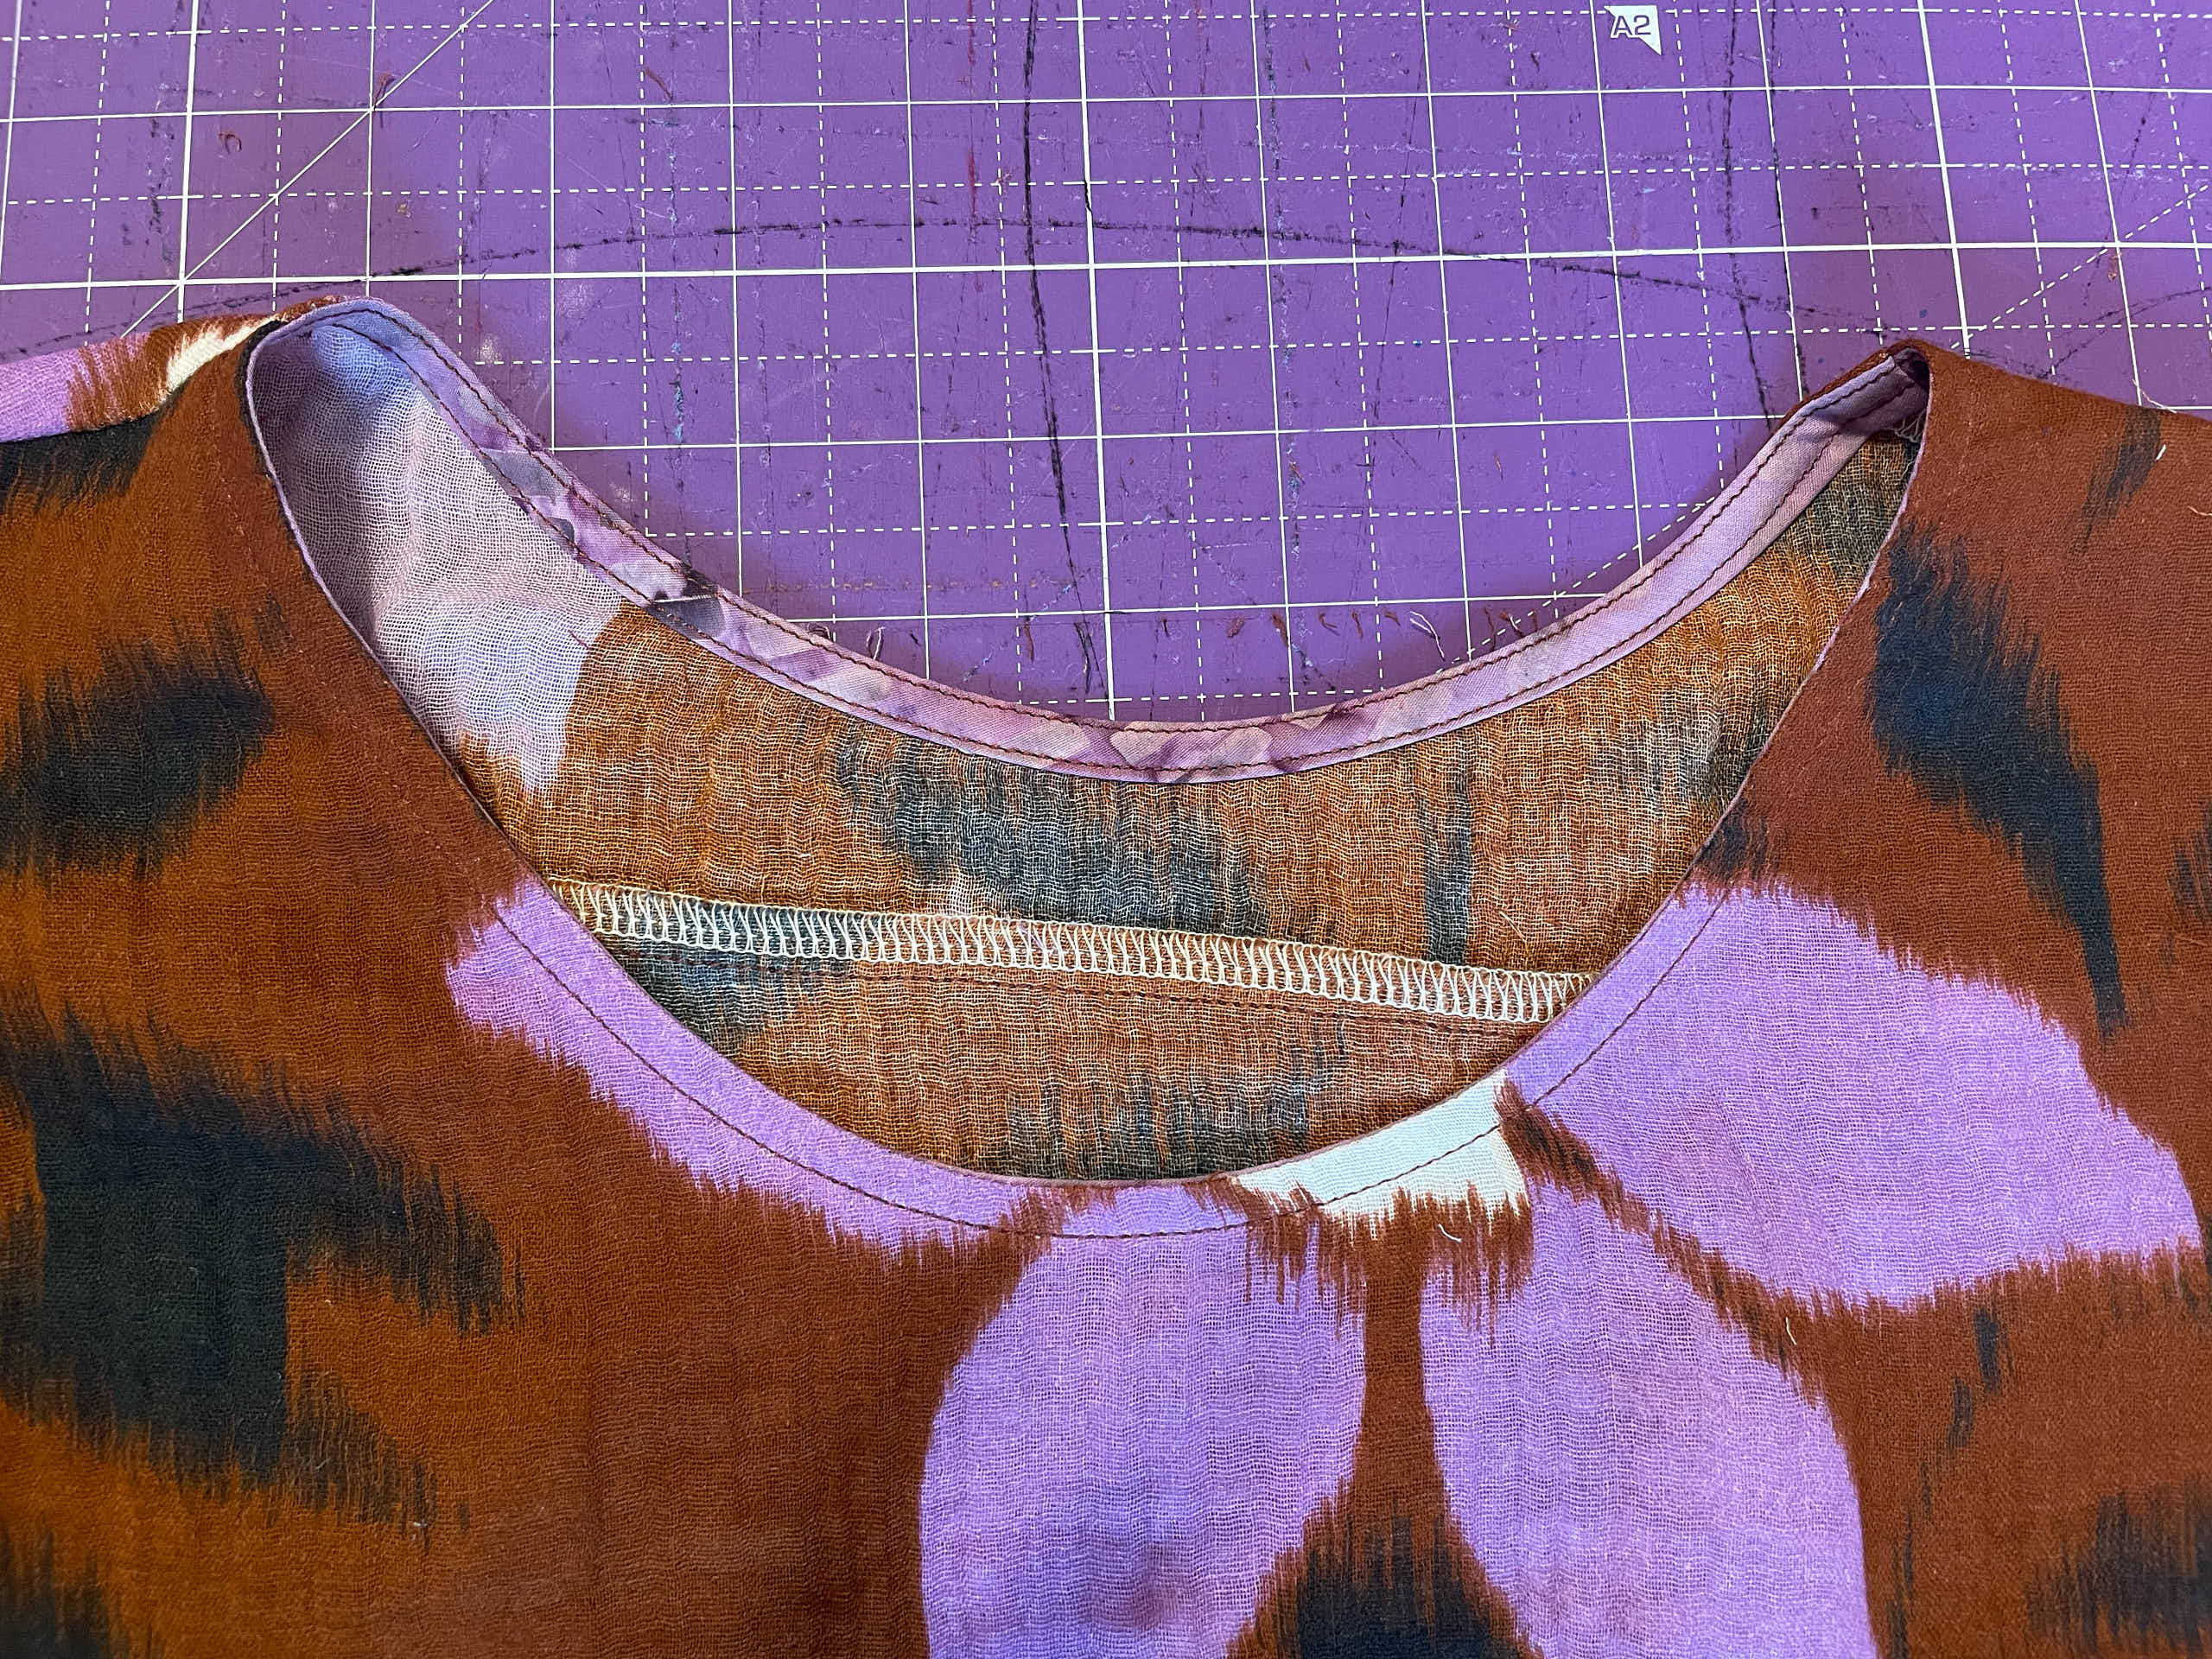
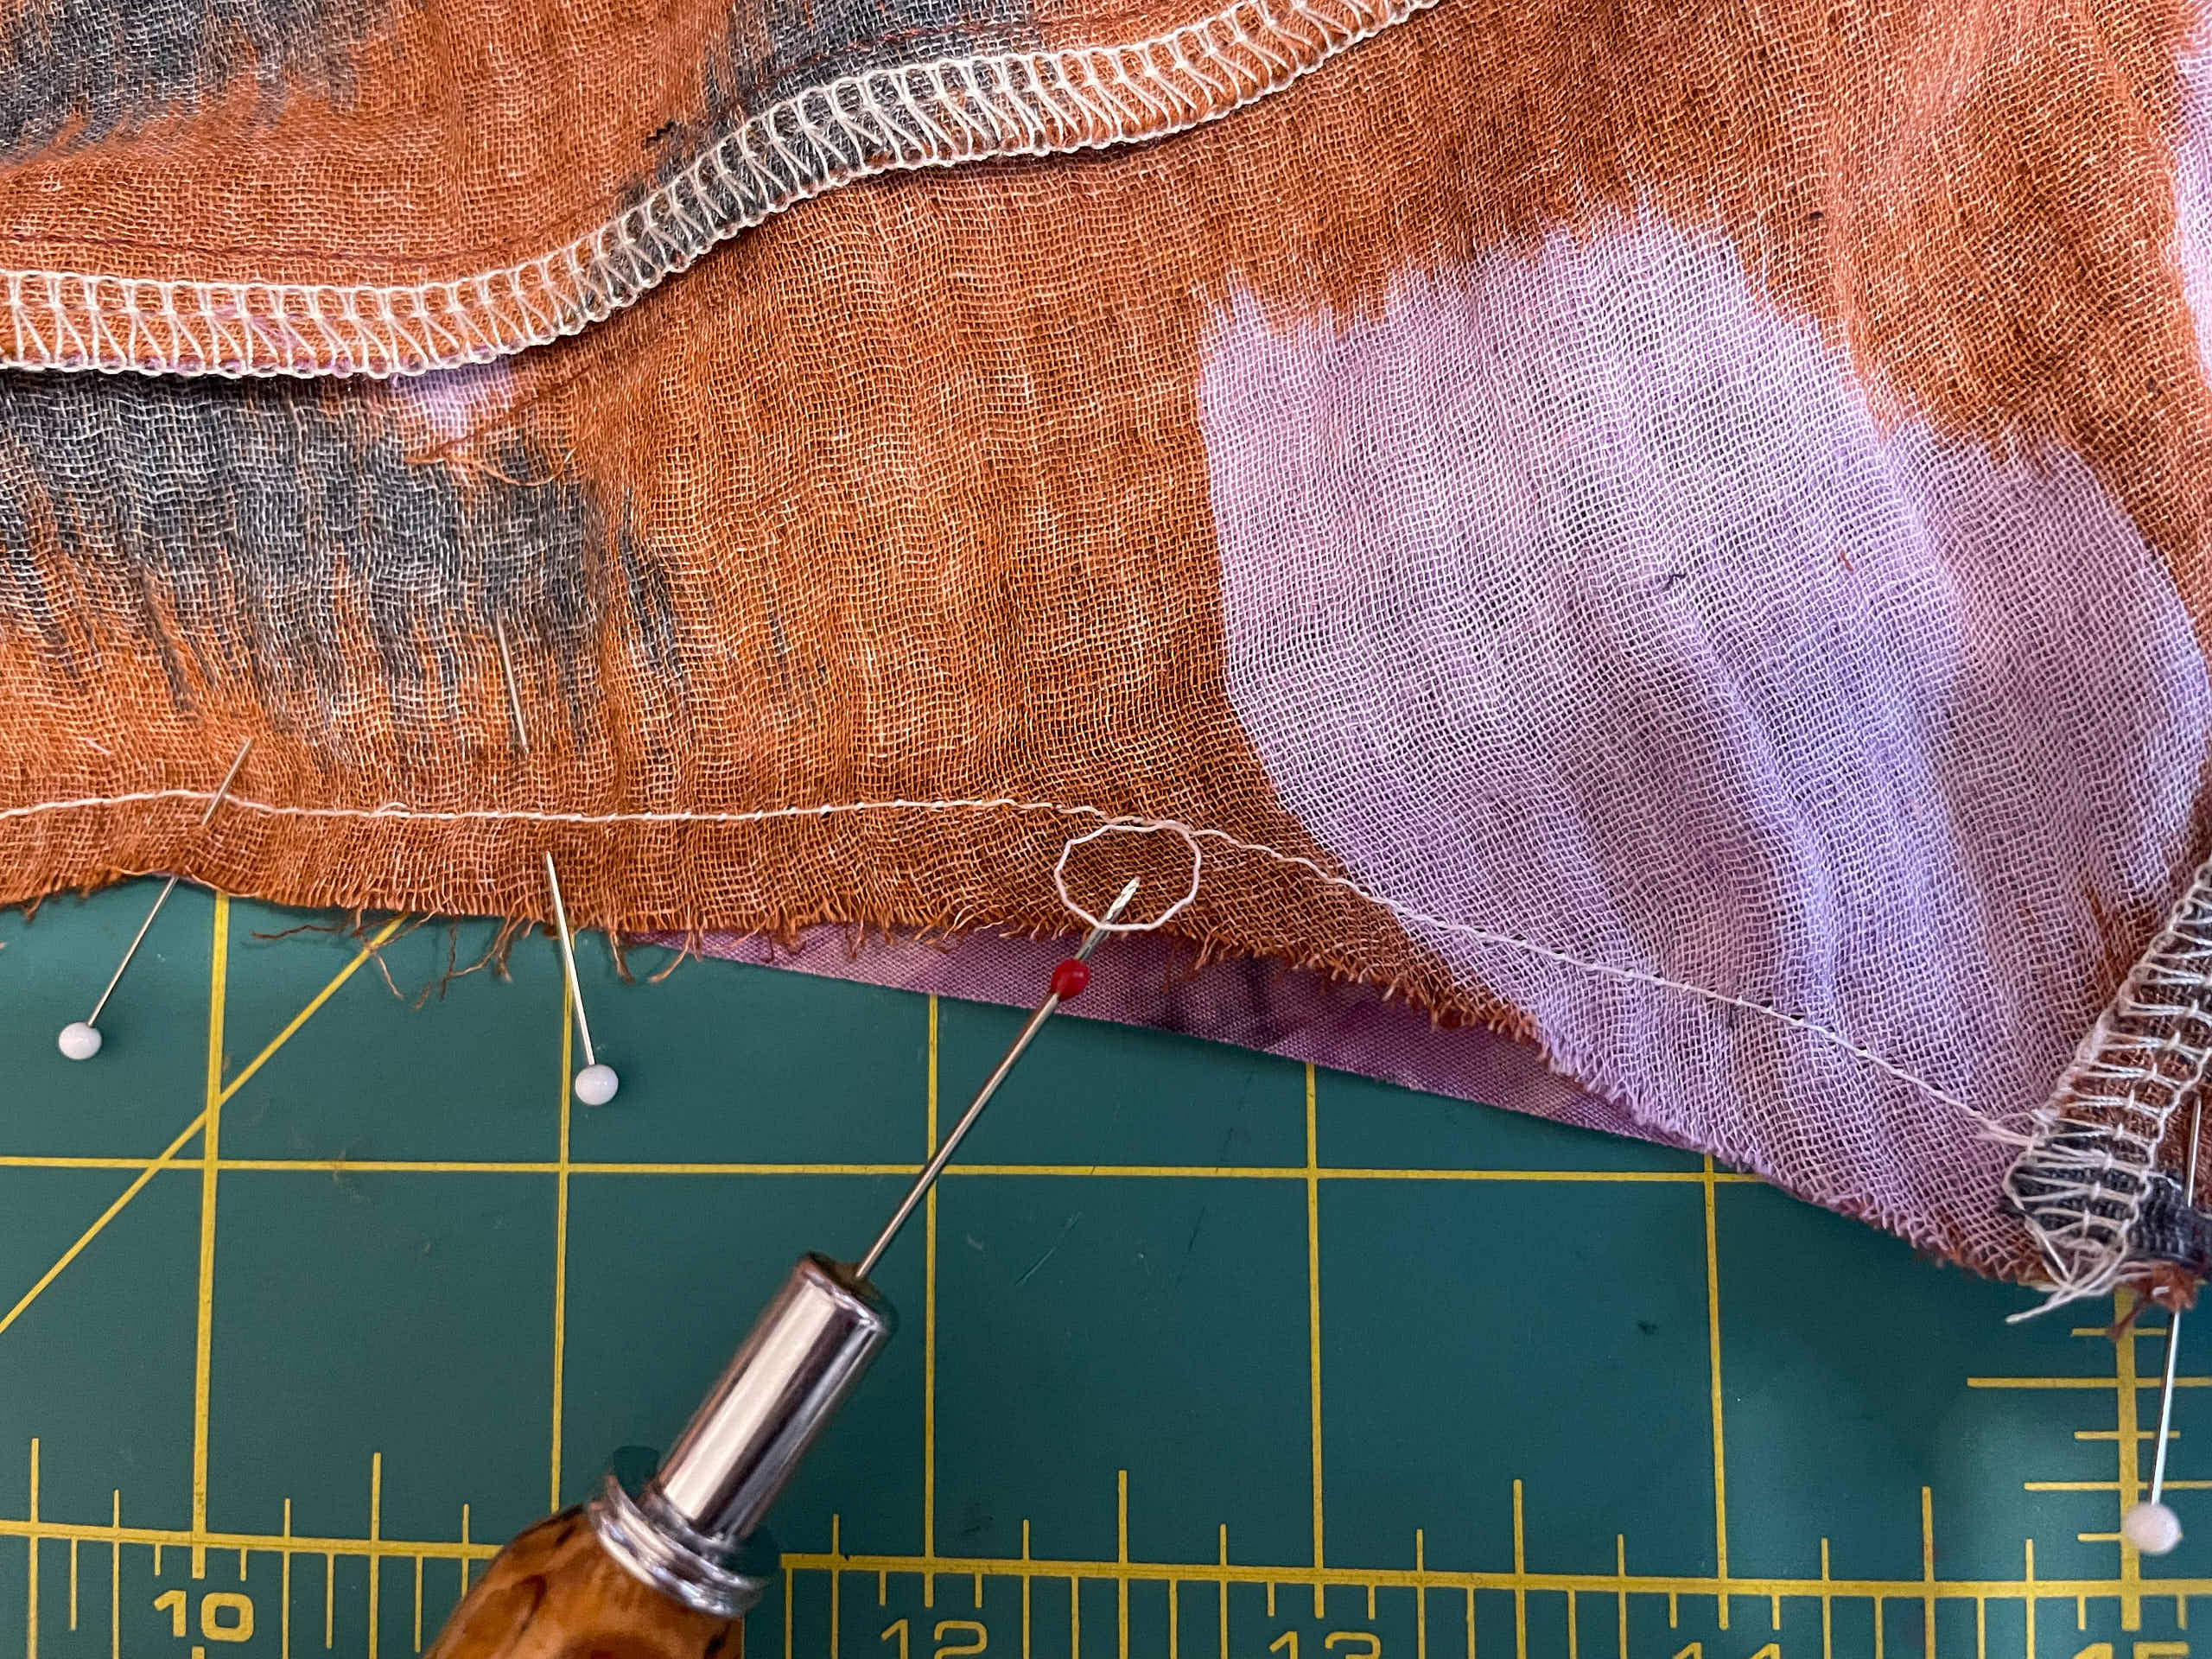
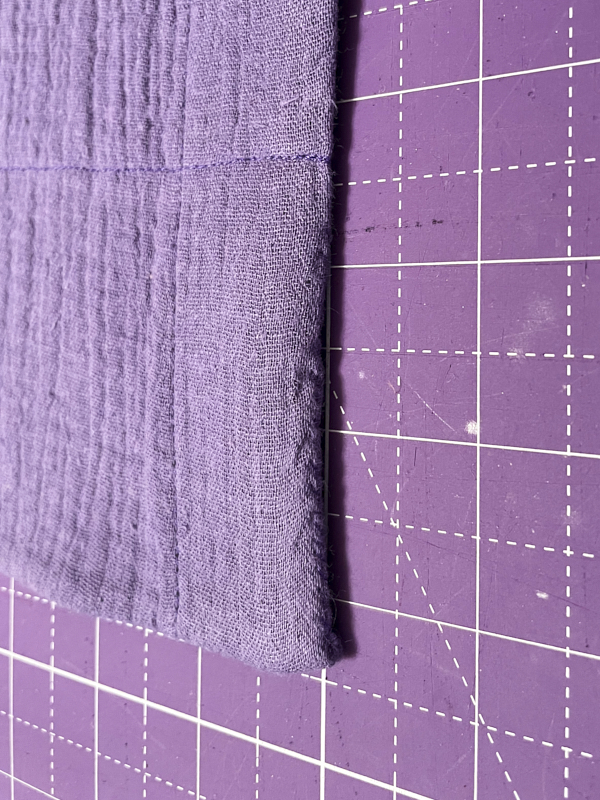
The other change I made that I really like is I cut the facings from purple batik quilting cotton instead of from the double gauze. From my previous double-gauze sewing experiences I’ve discovered that it is really difficult to keep double-gauze facings from stretching. Kate constantly warns us not to stretch the facings in her fantastic instructions. However, when sewing double-gauze, I find this nearly impossible. It was so much easier to use the batik fabric for the facing — no stretching. I gently pulled the stay stitching to bring the neck and arms in a smidge to fit the facing. I picked a batik that coordinates nicely, but since it is sewn on the inside of the dress you don’t actually see it so you could use anything that isn’t going to show through. Since I made this one sleeveless I had to sew facings on the neck and two arms holes so was happy to use this technique!
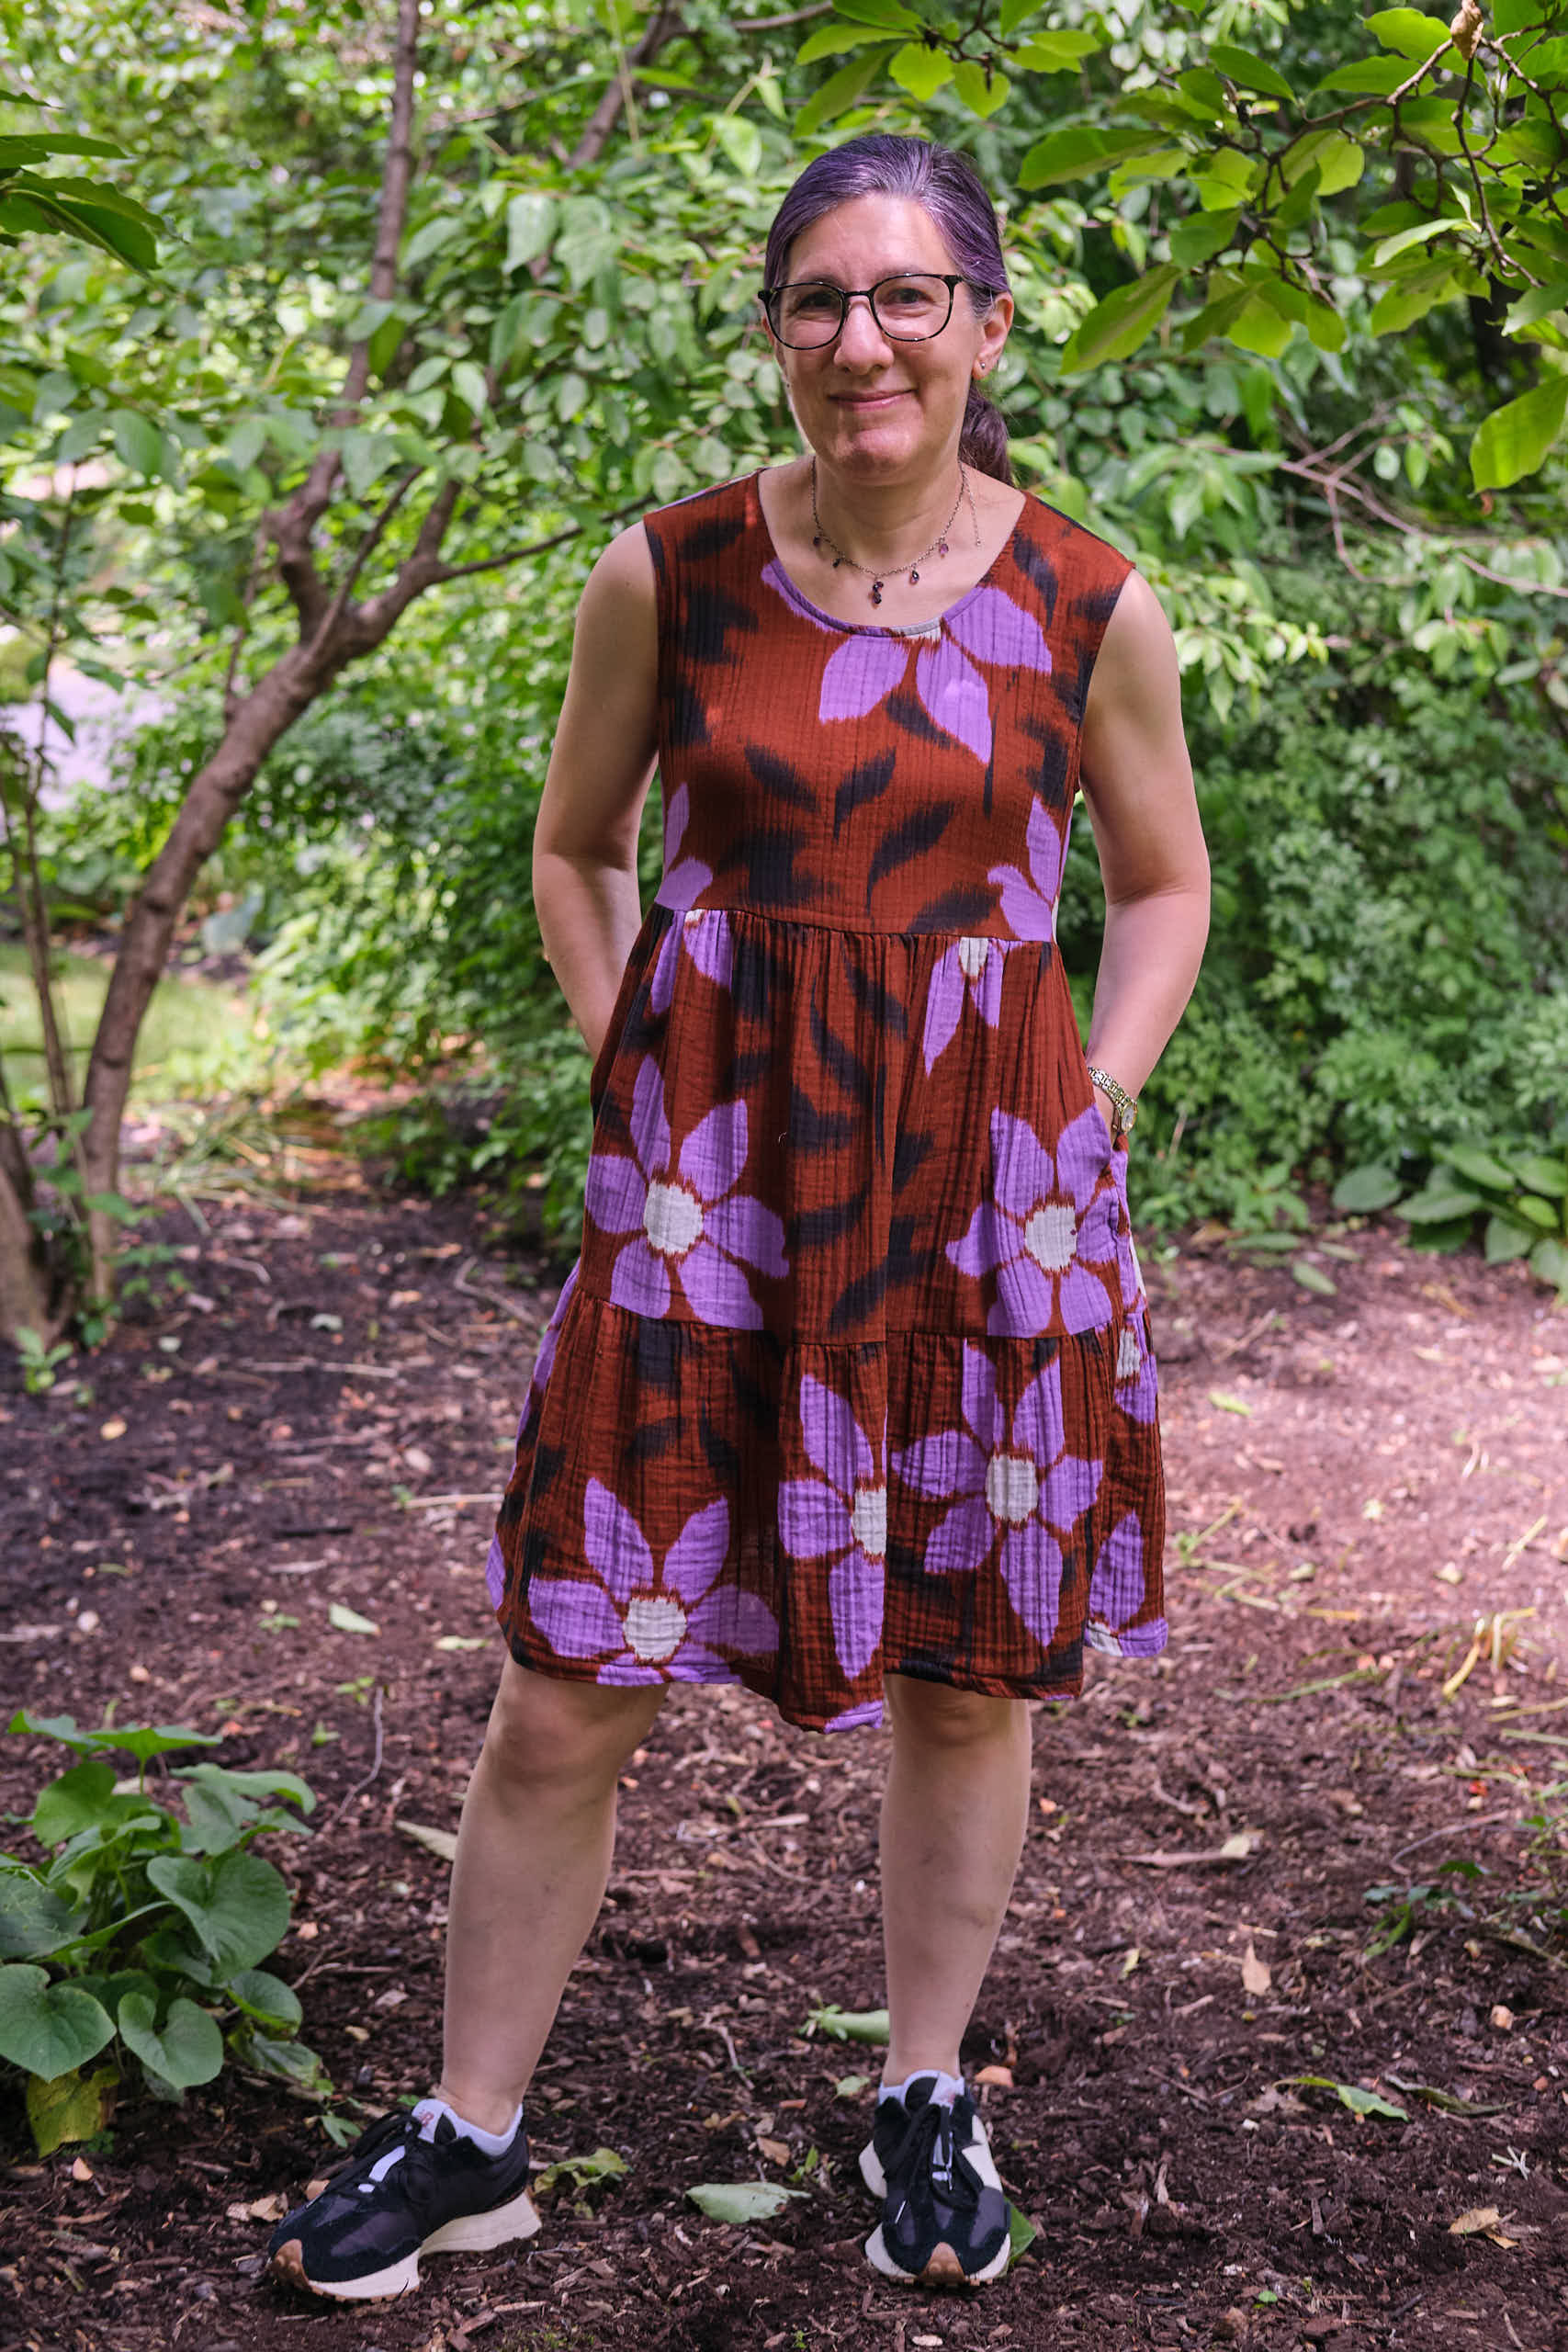
After I finished sewing the dress, I ran it through a quick wash and hung it up to dry. This light and airy fabric was completely dry in a few hours. This will be a nice dress to travel with in the summer as it is lightweight and can be easily washed in a sink.
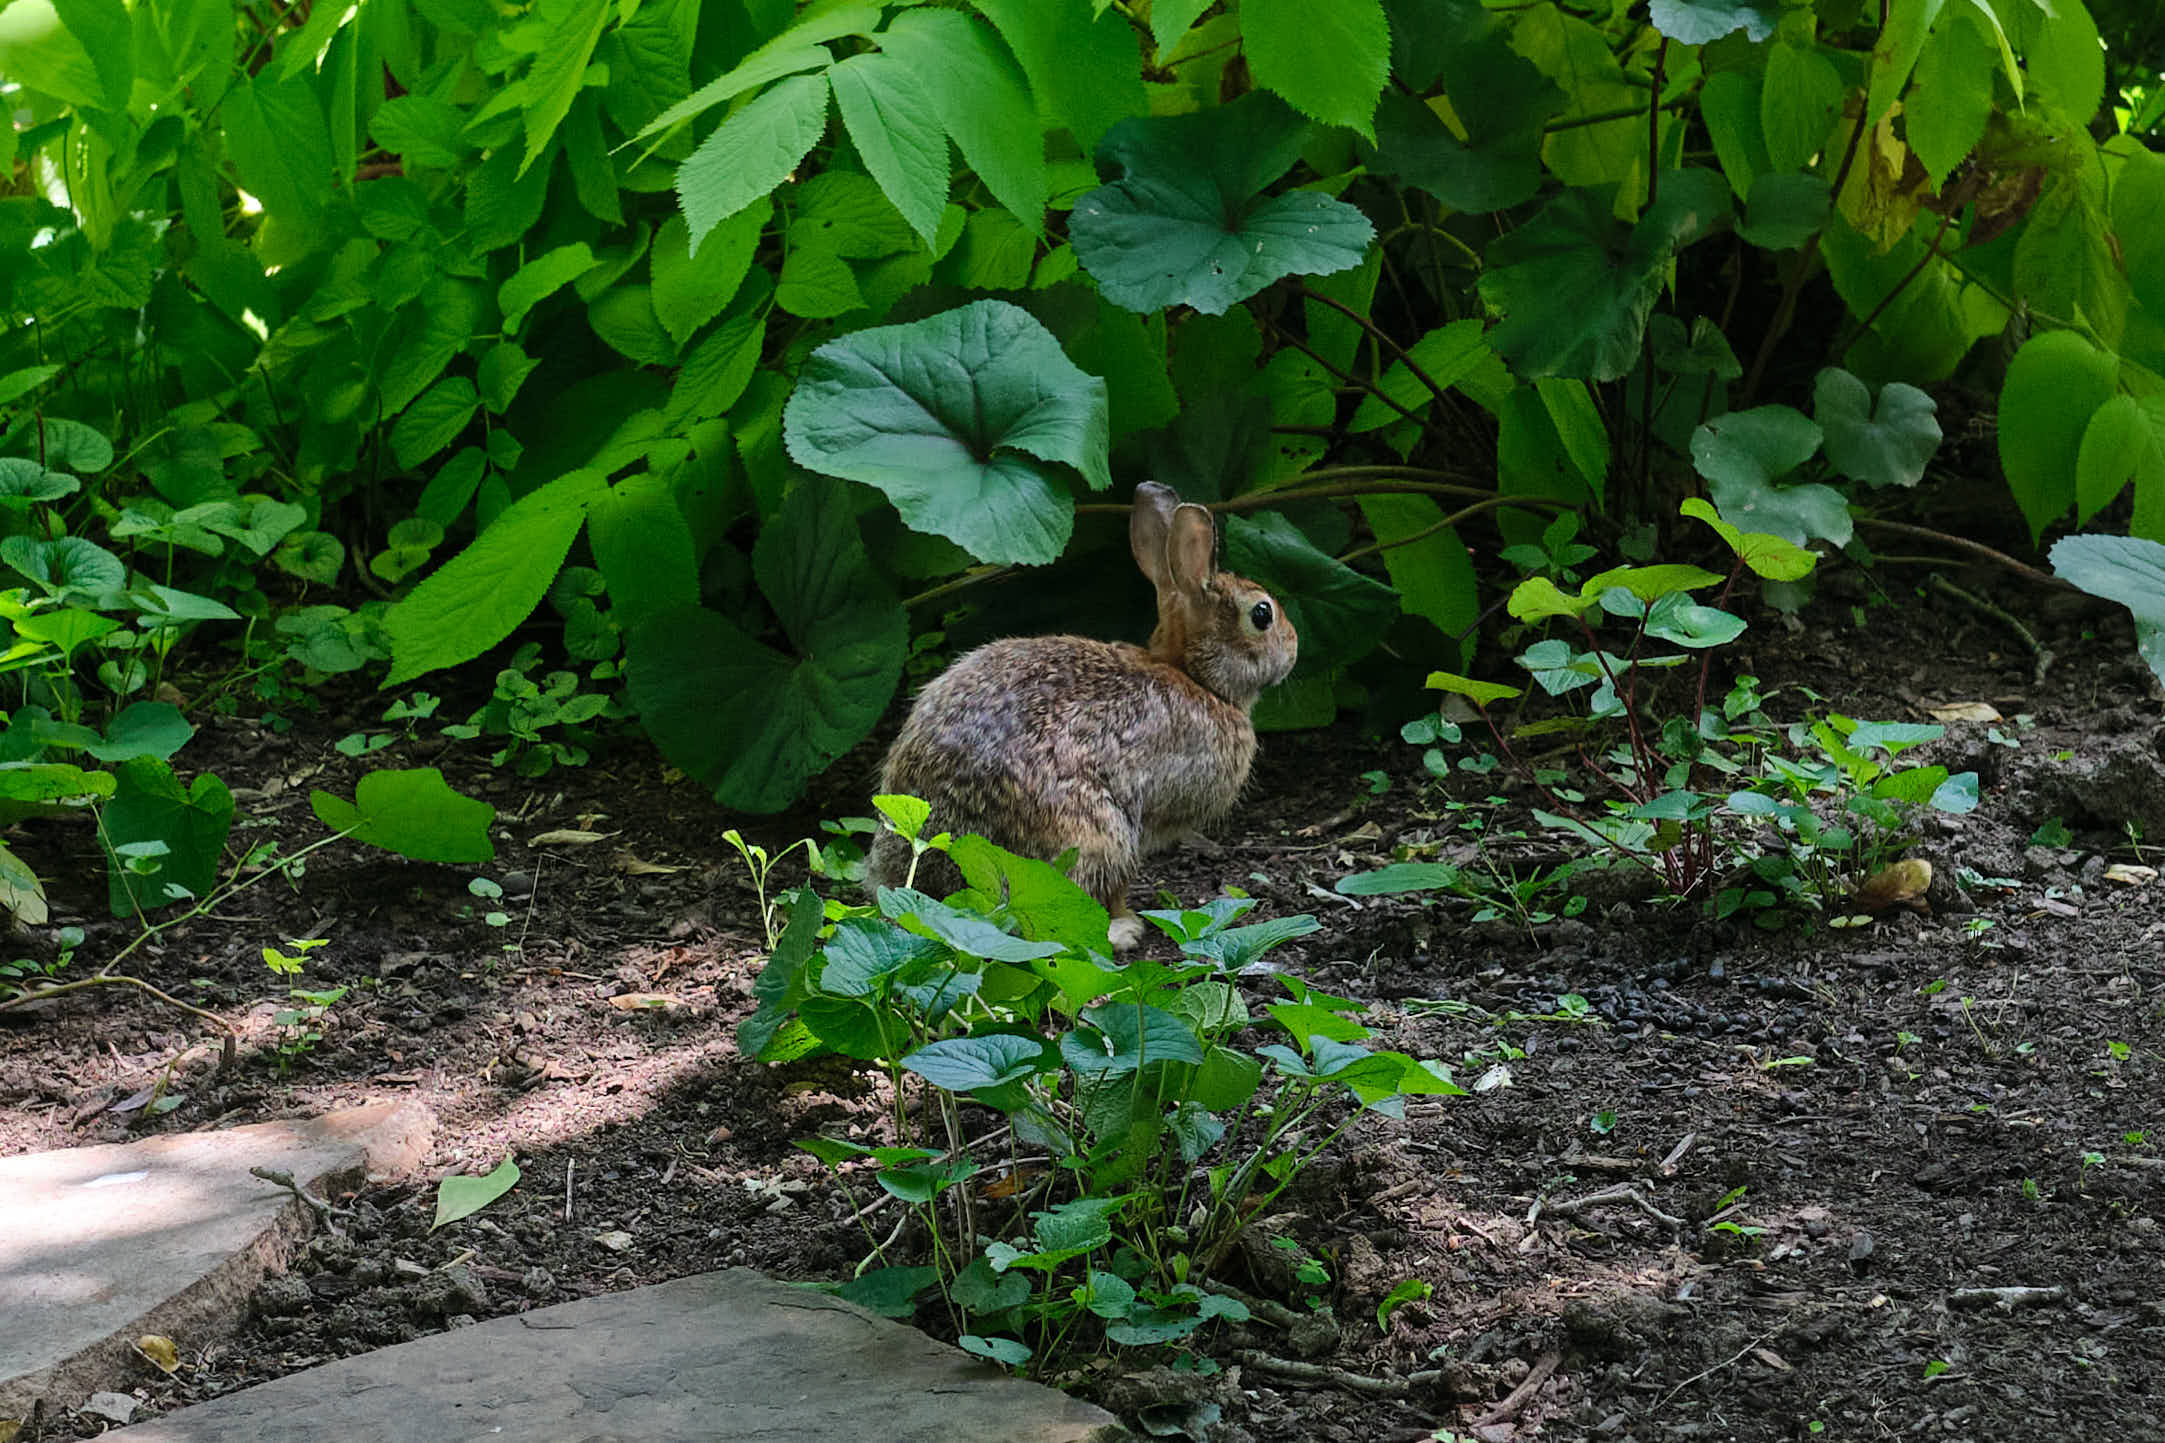
I’m very happy with how this dress turned out! Here are some more photos and a bonus picture of the rabbit who joined our photo shoot.
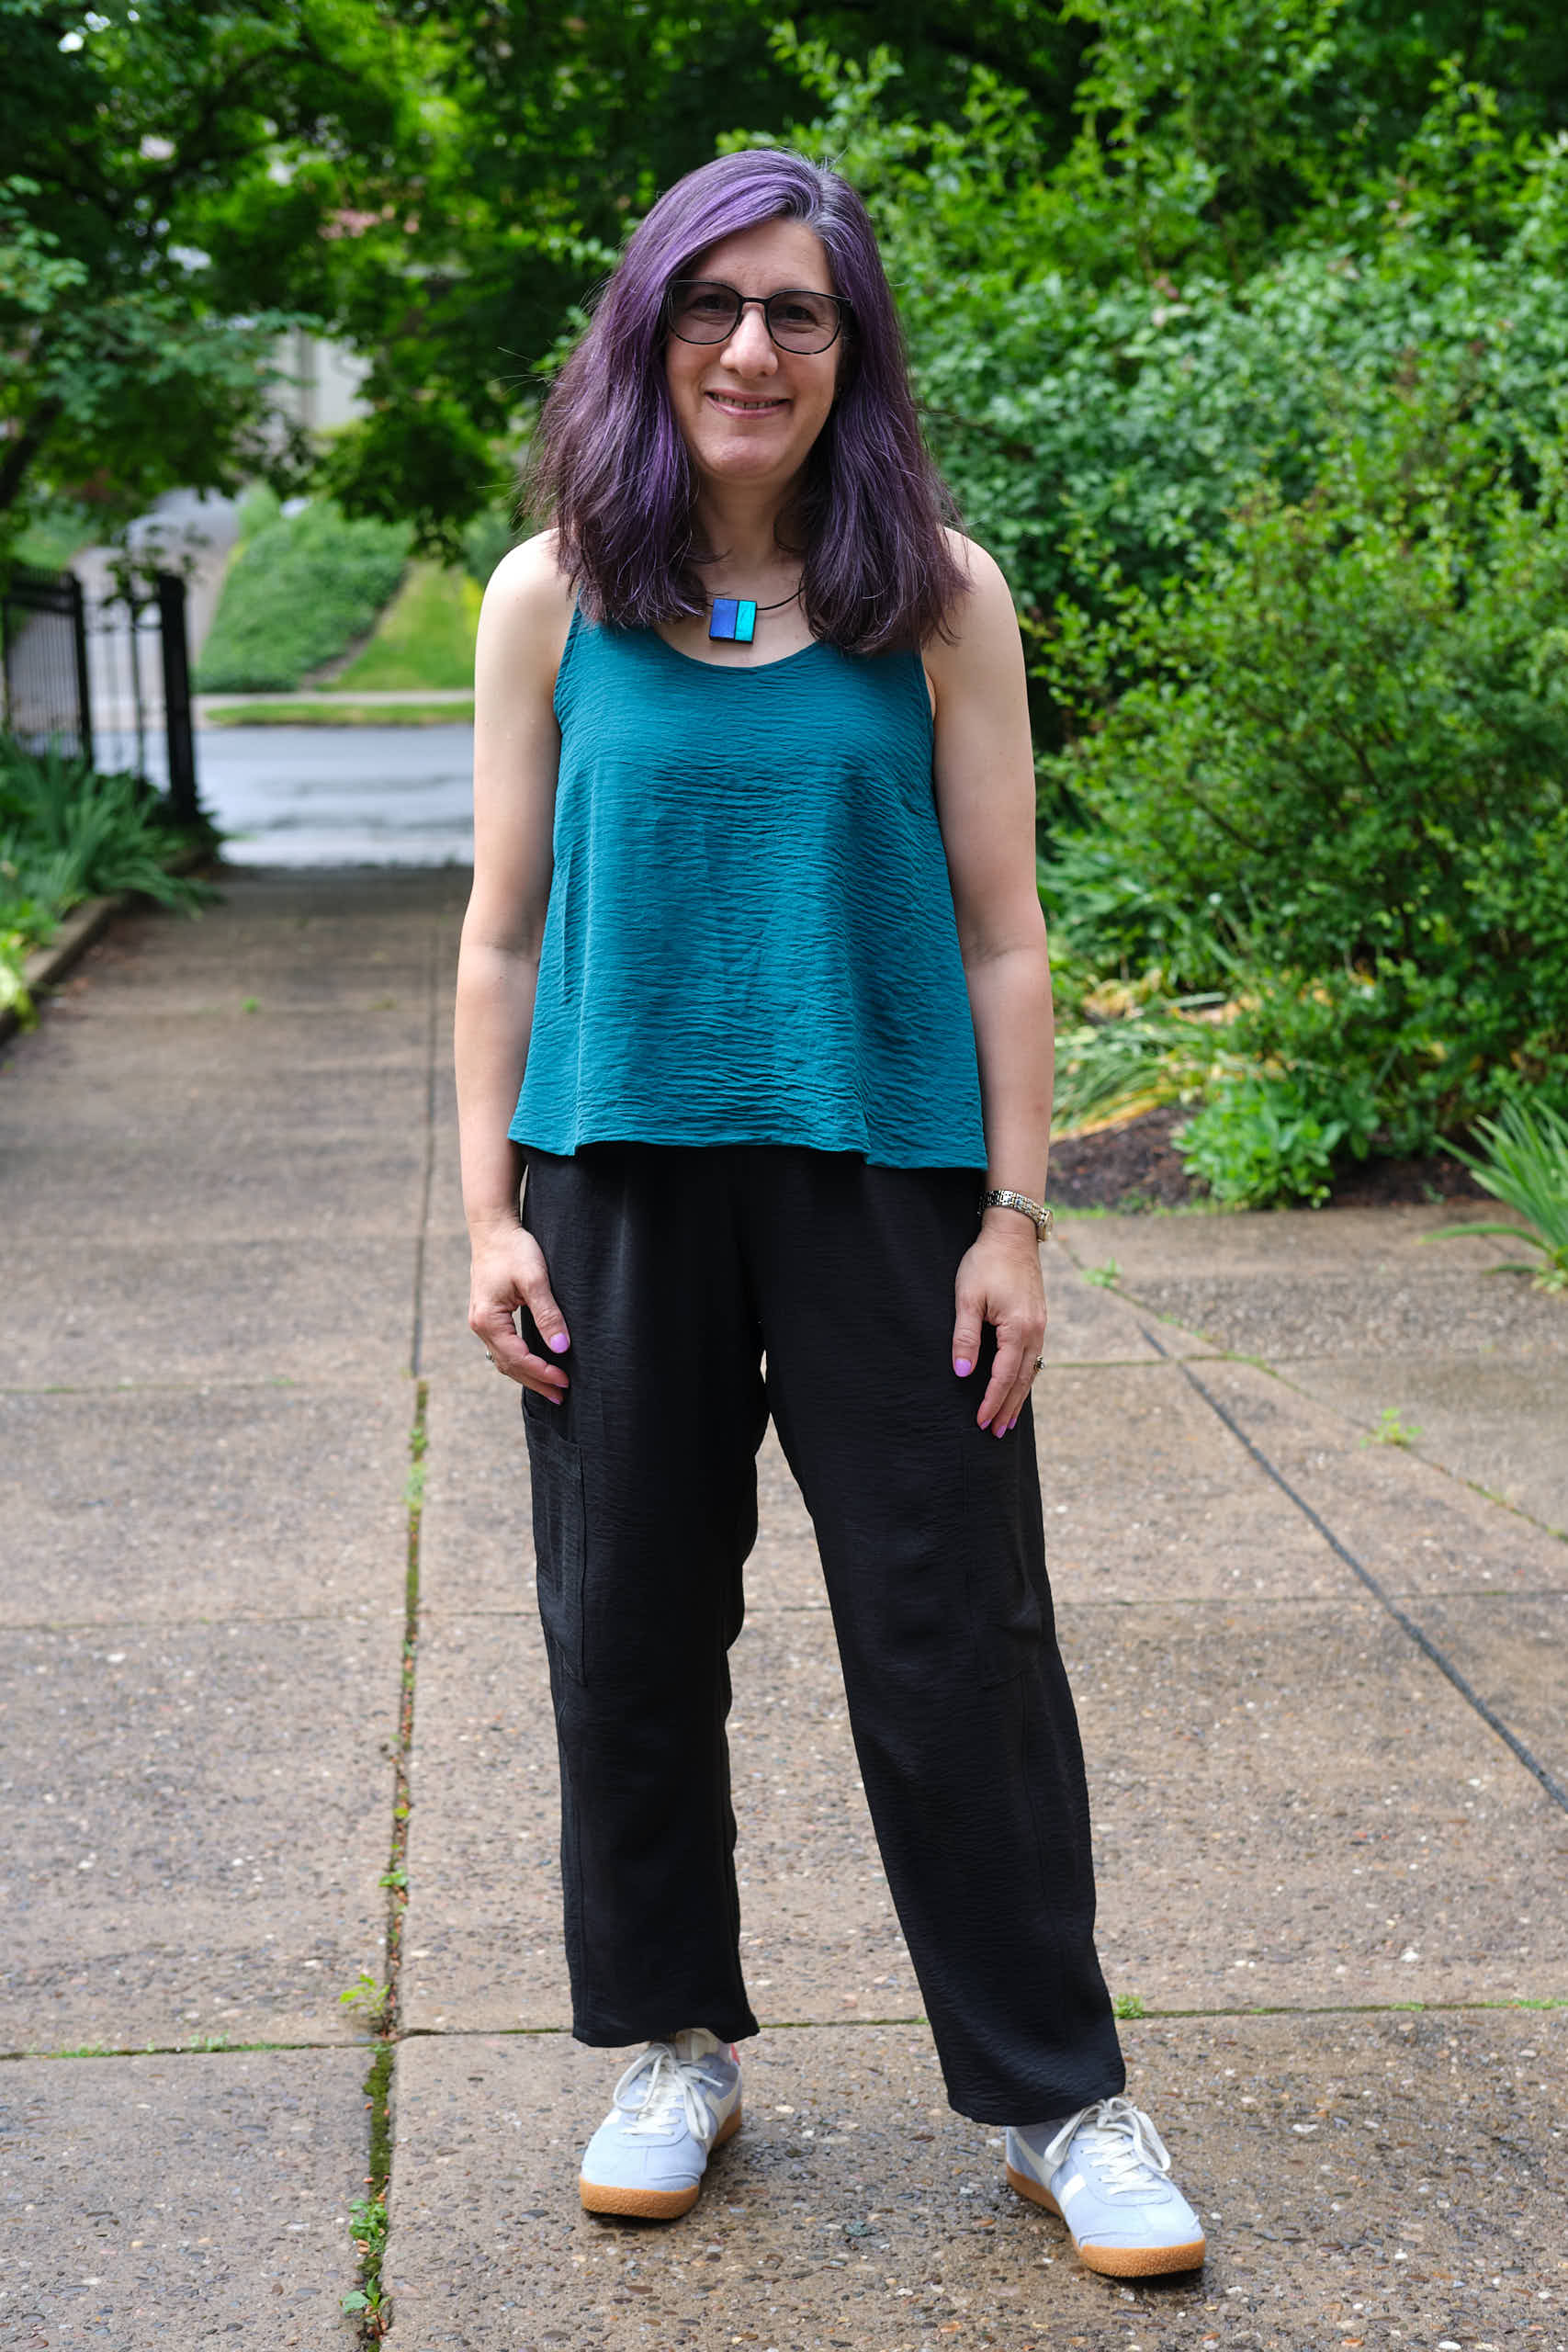
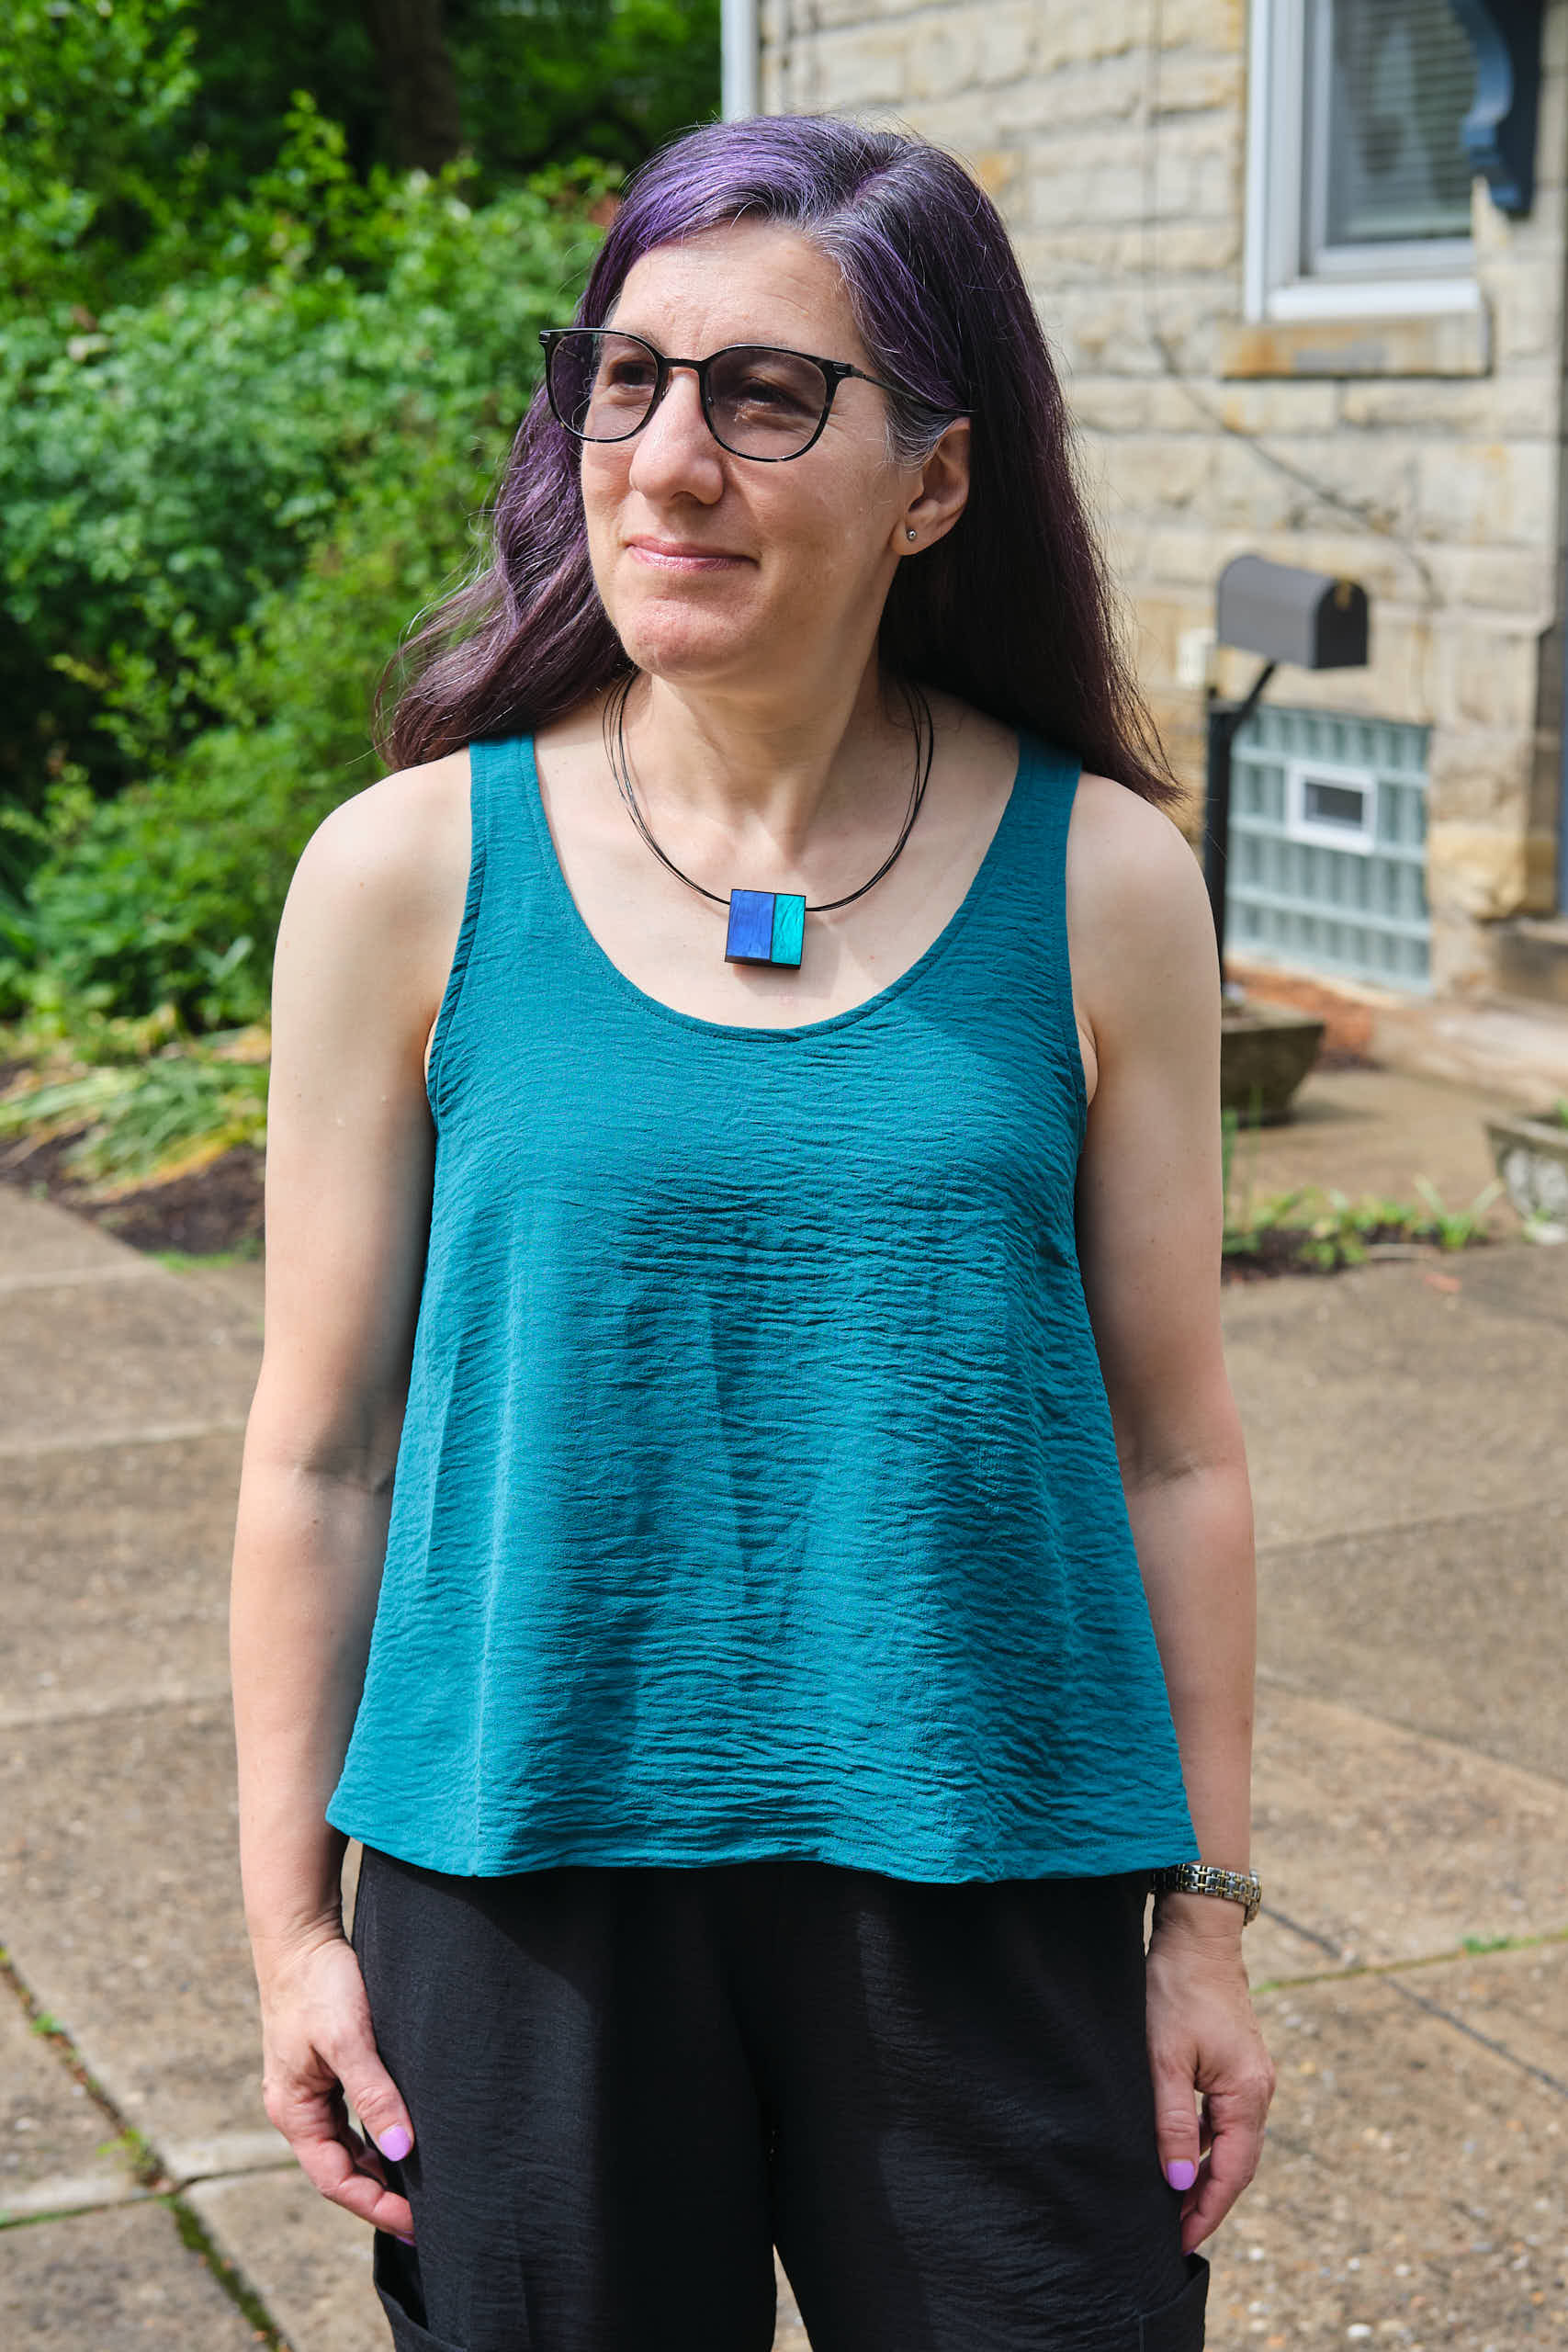
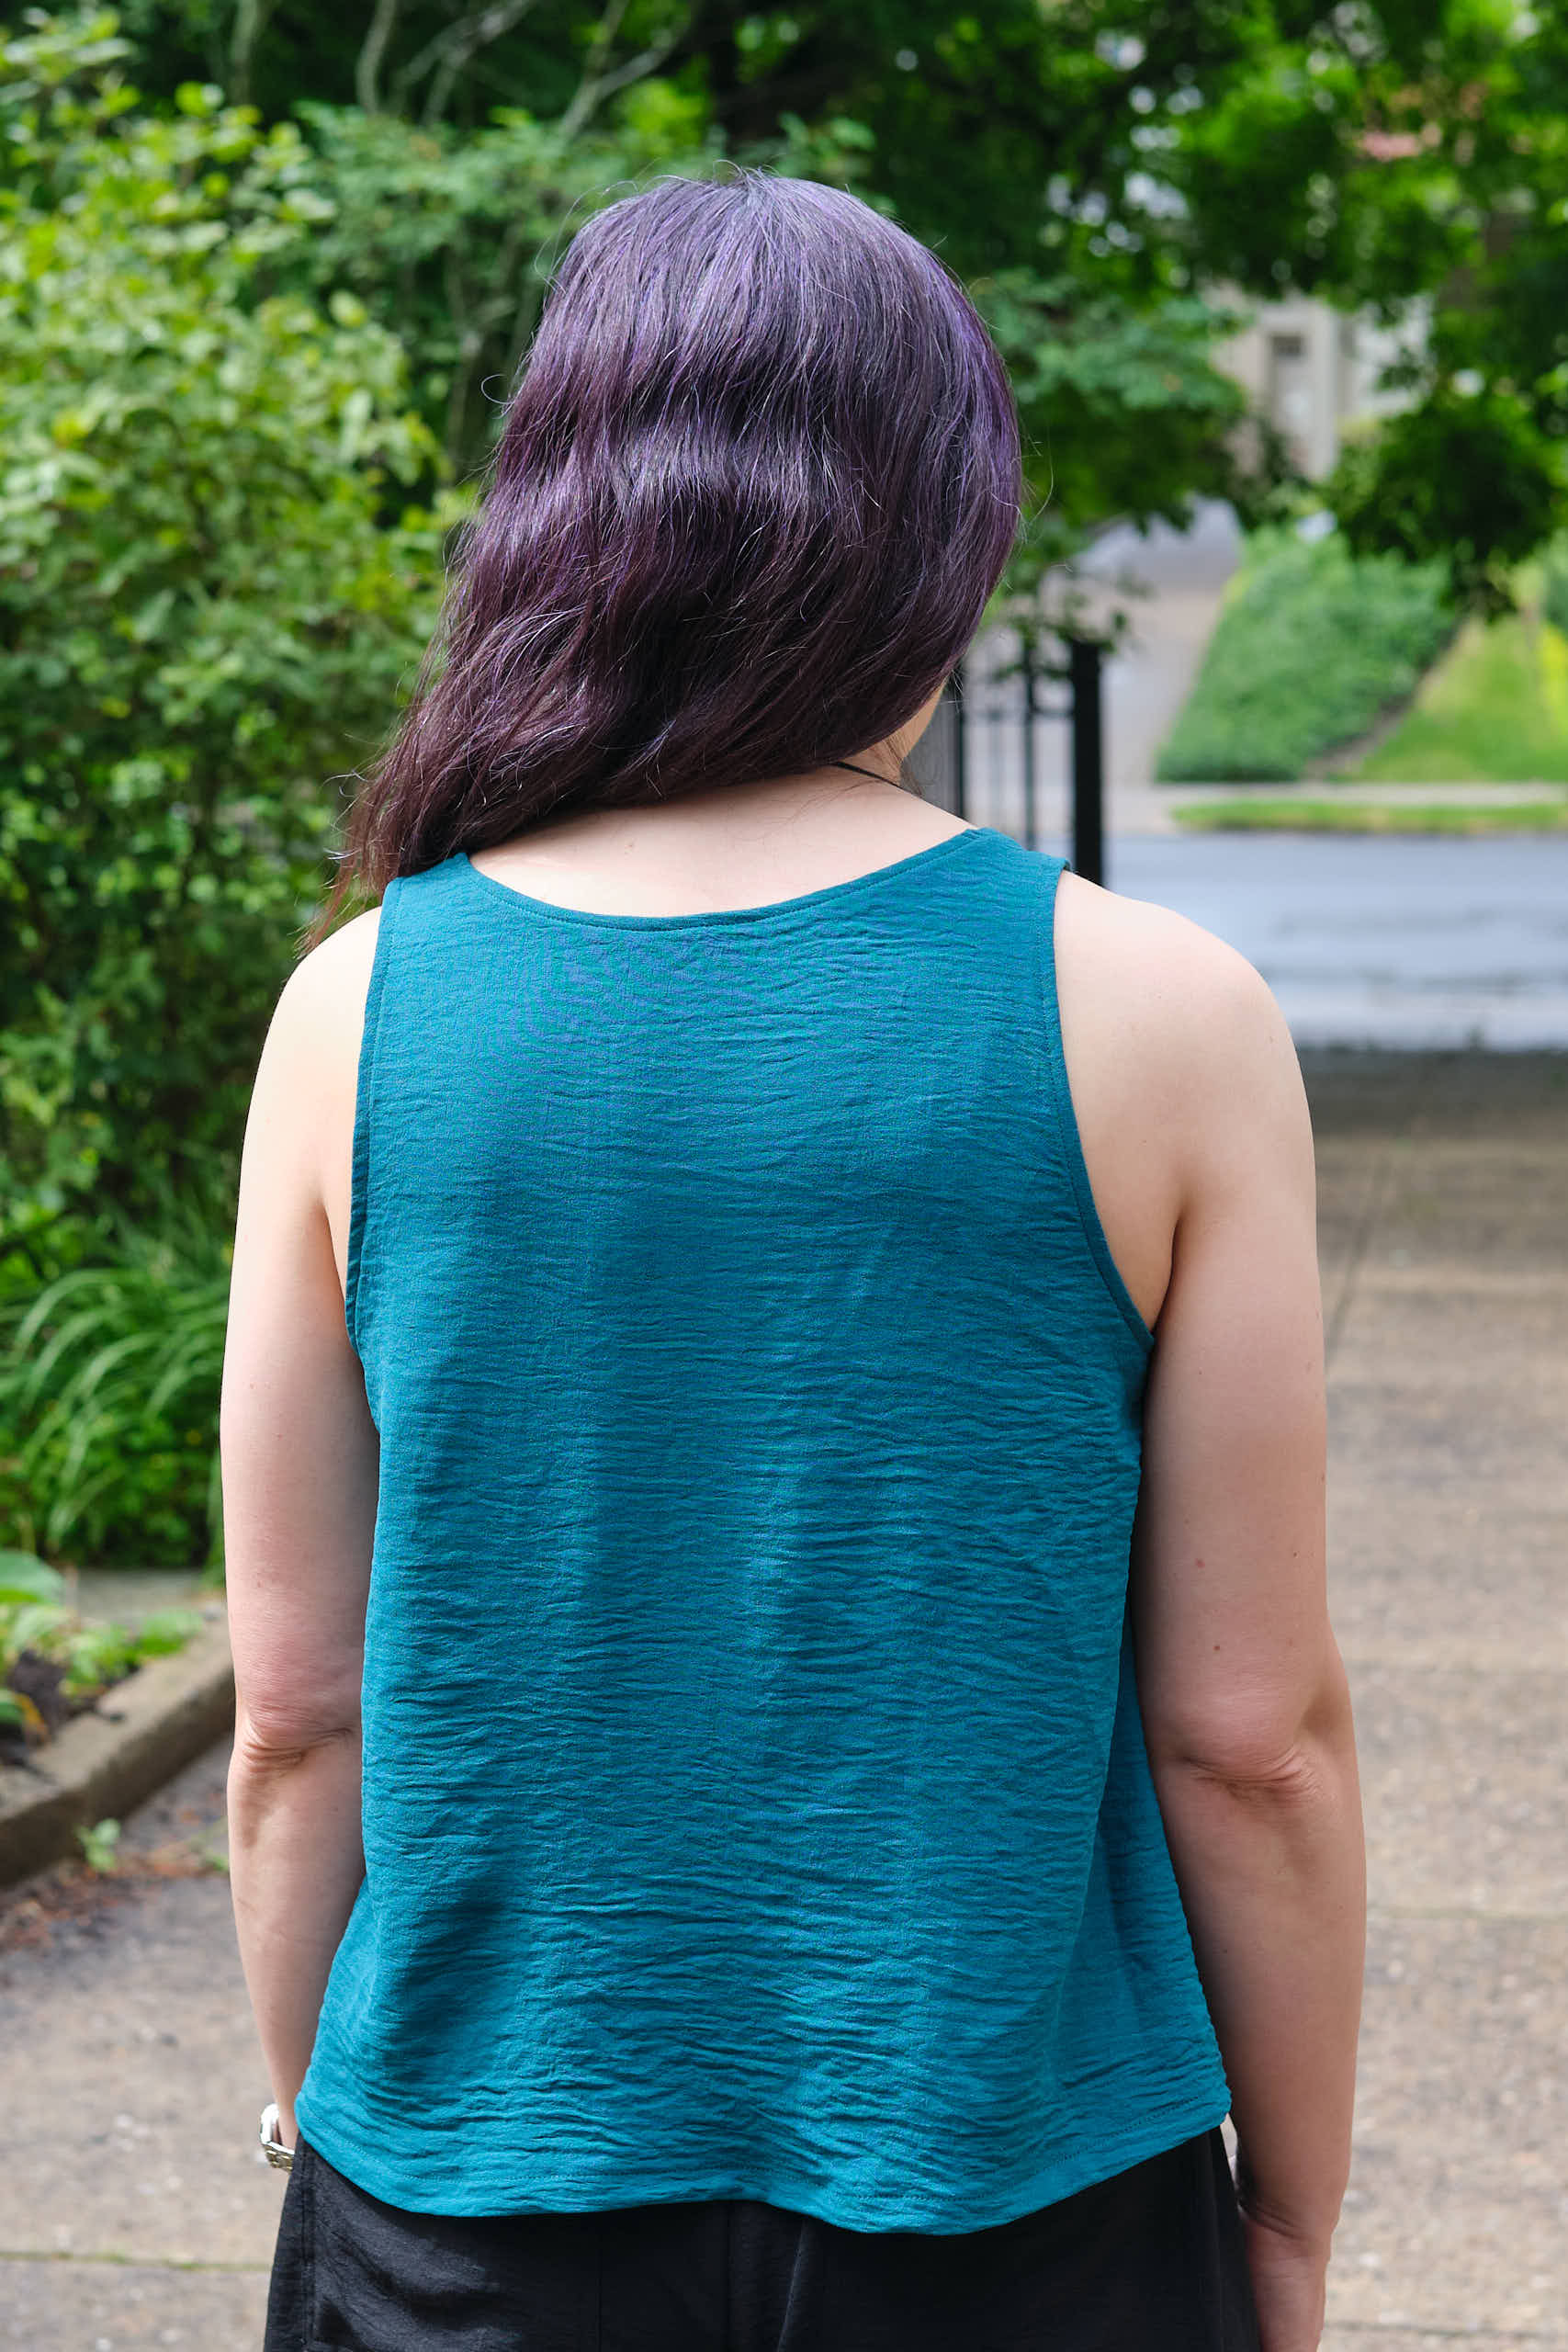
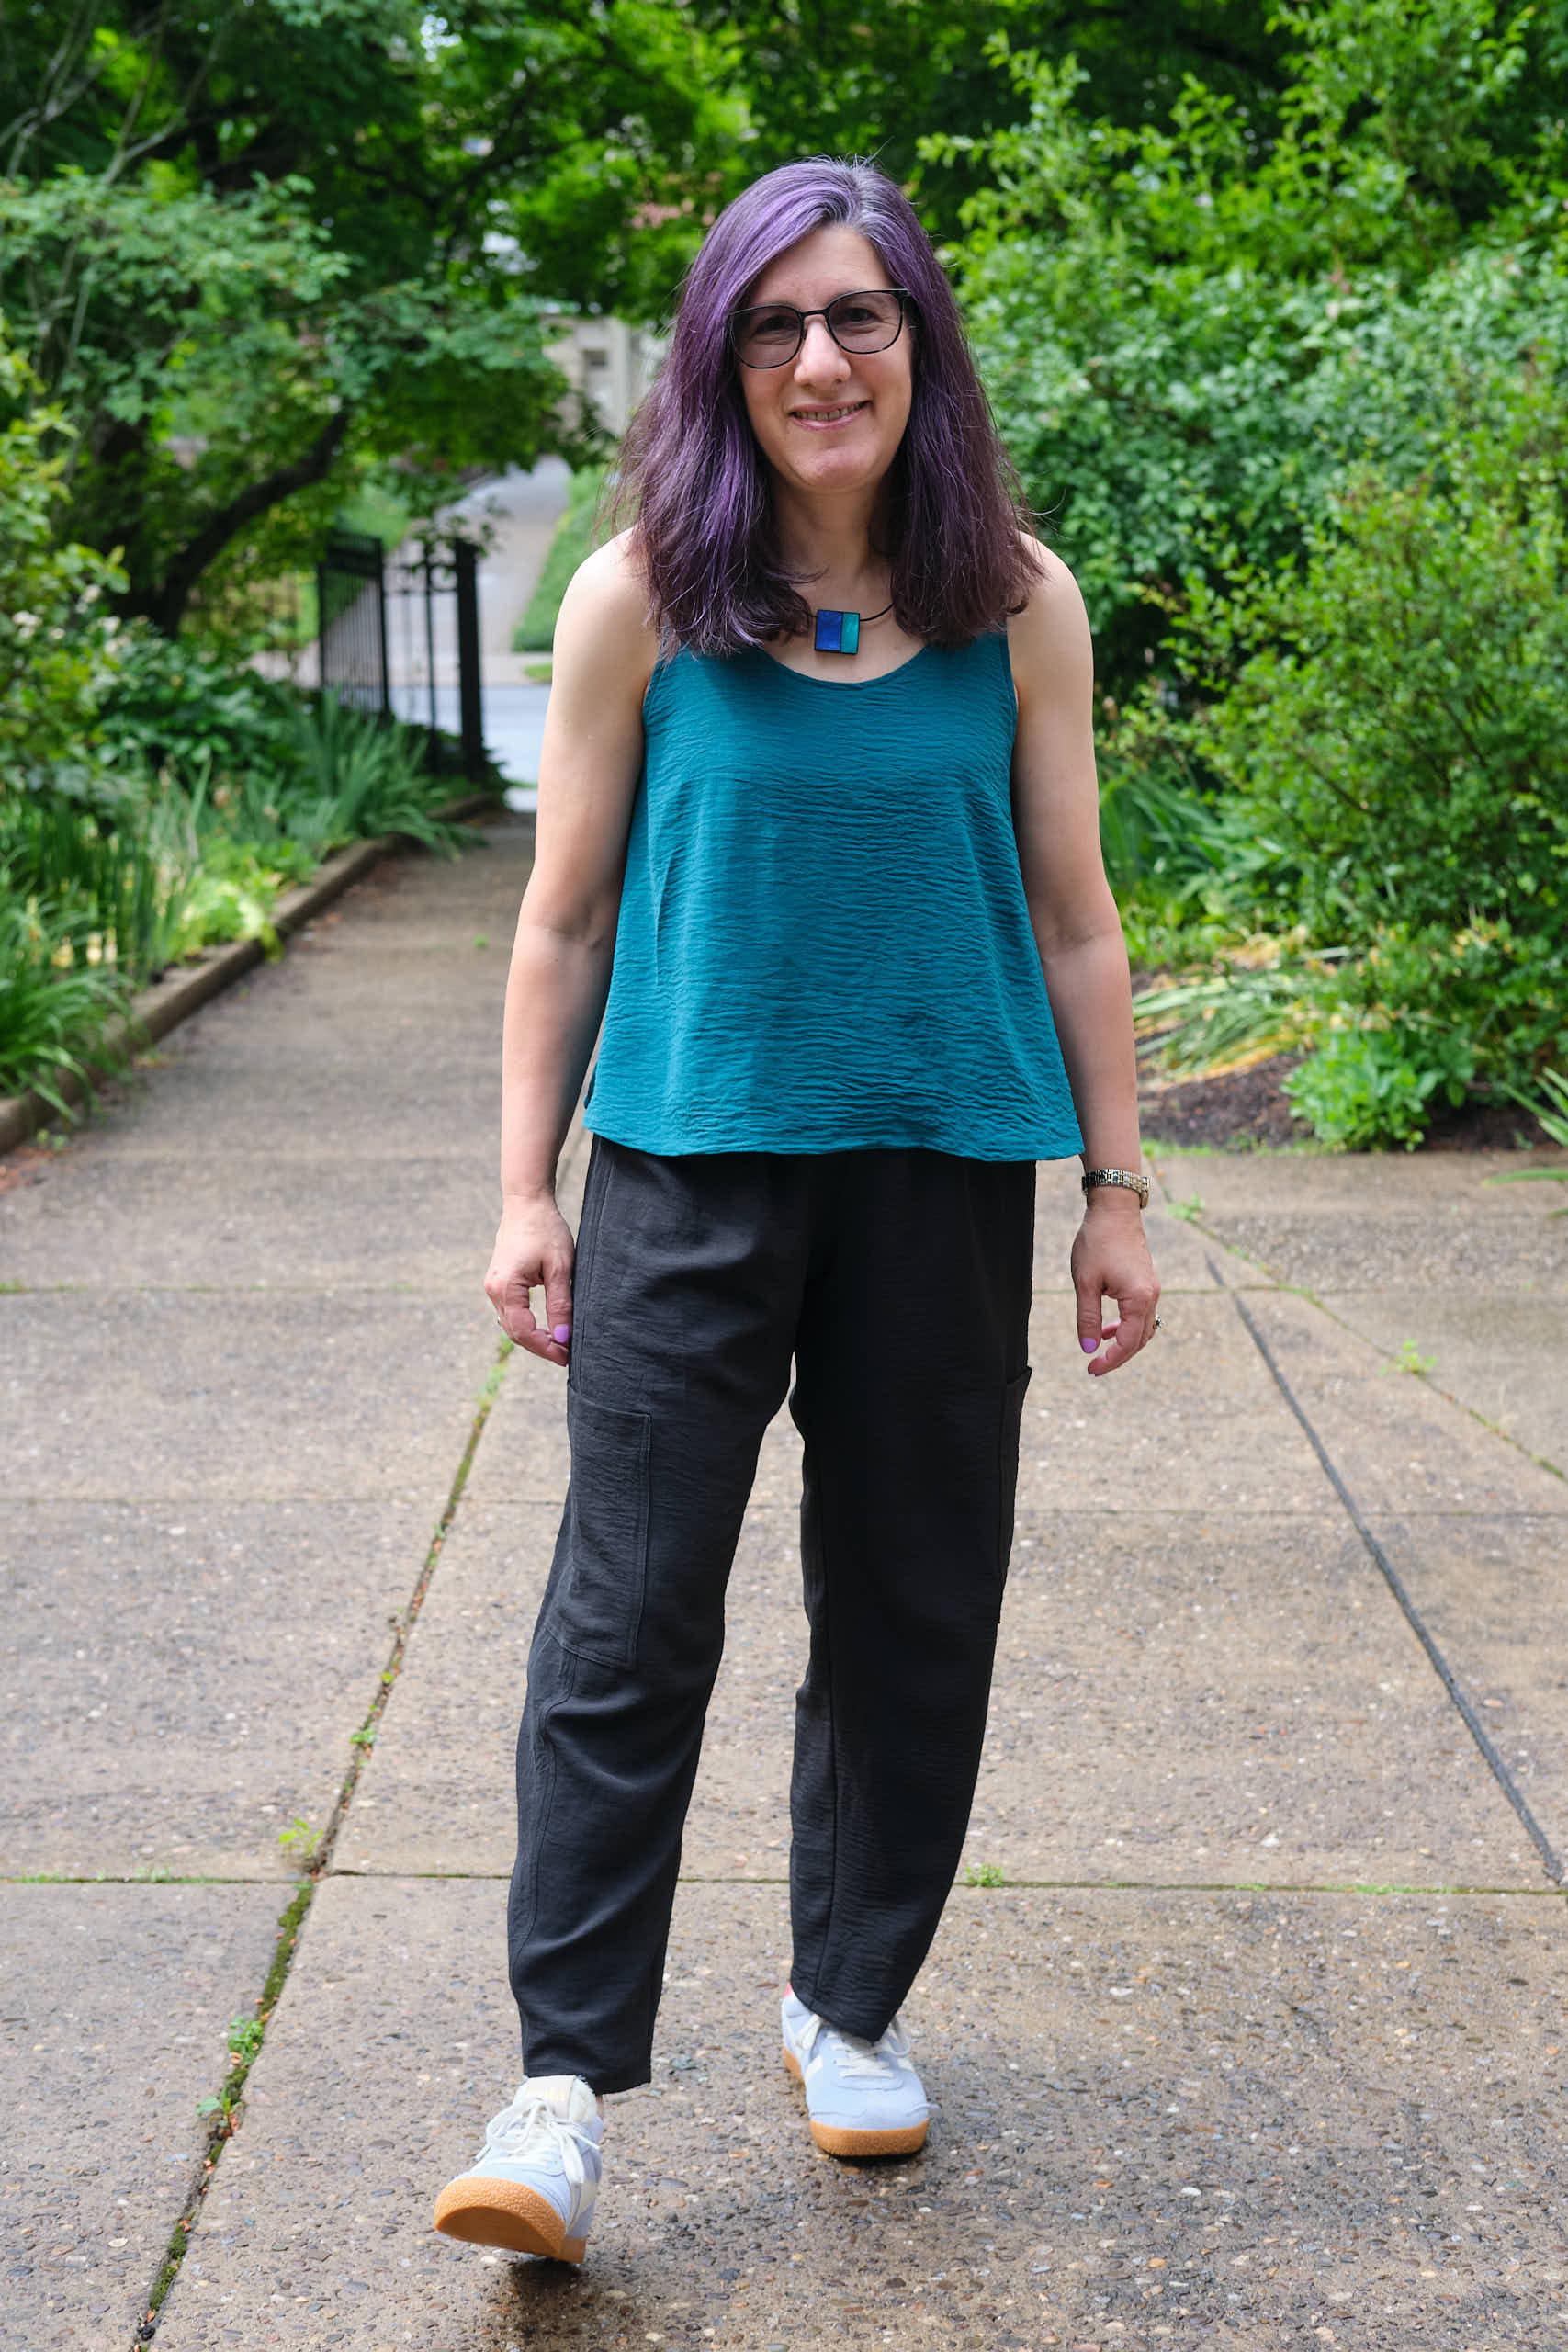
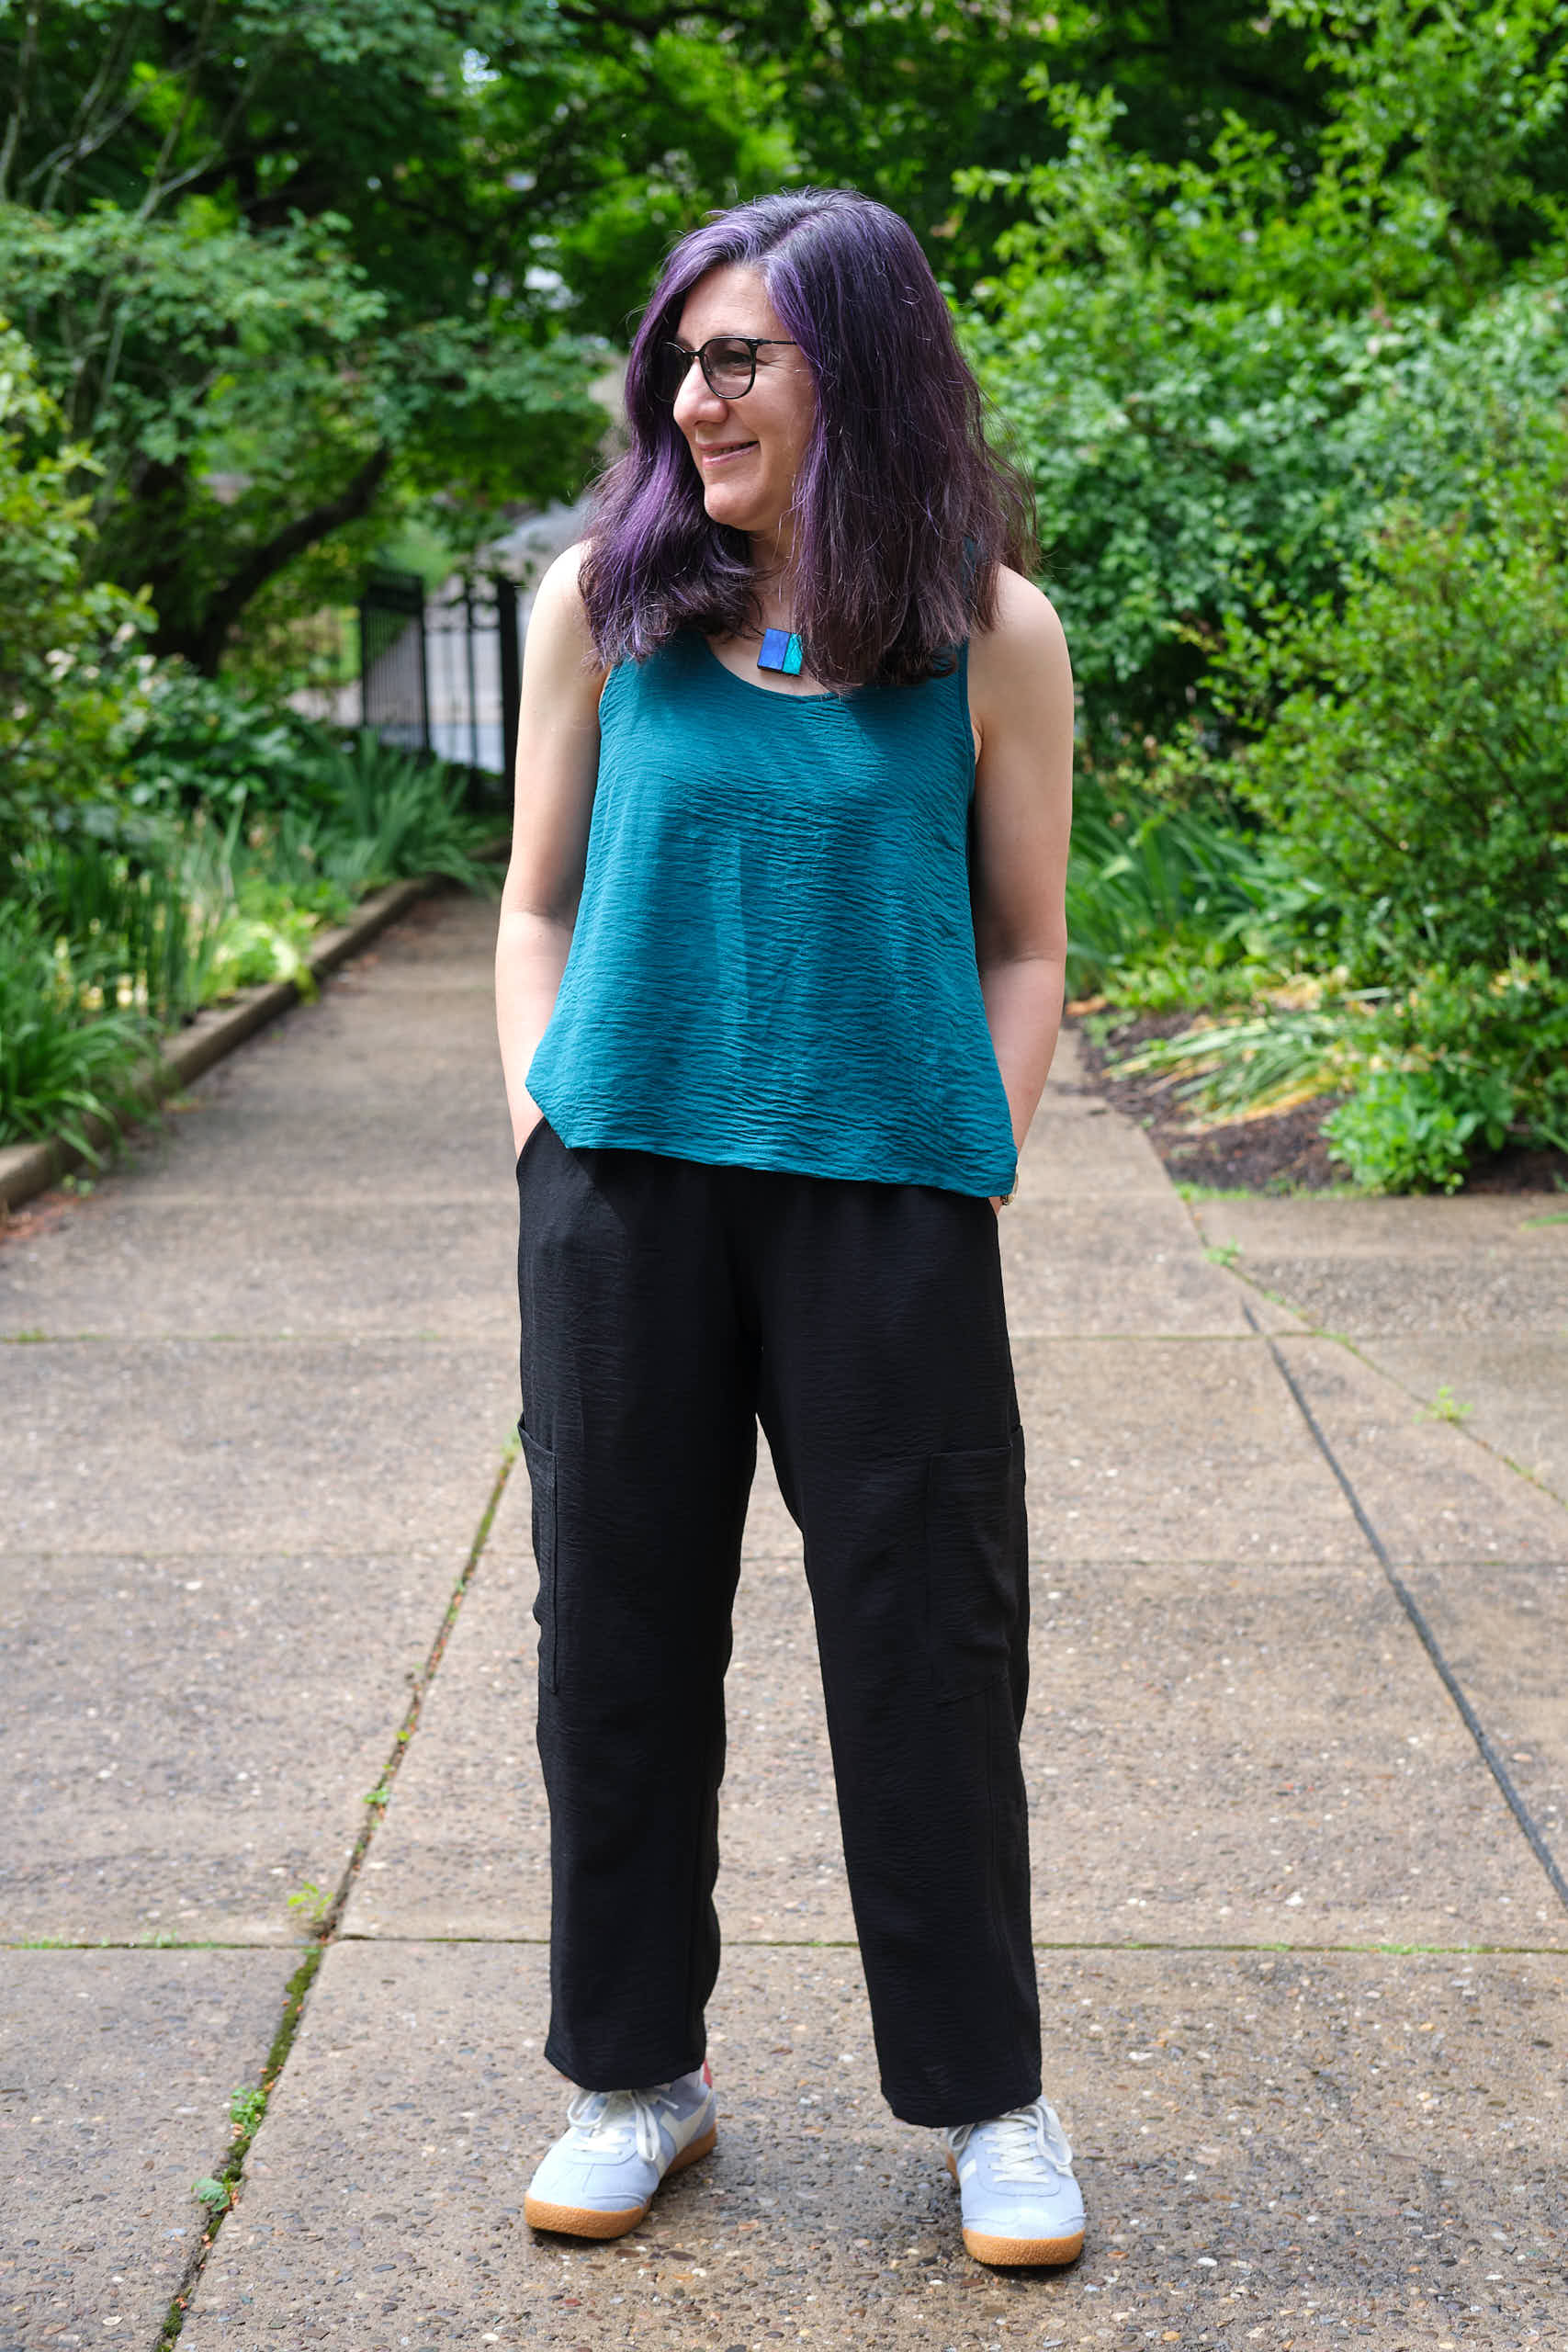
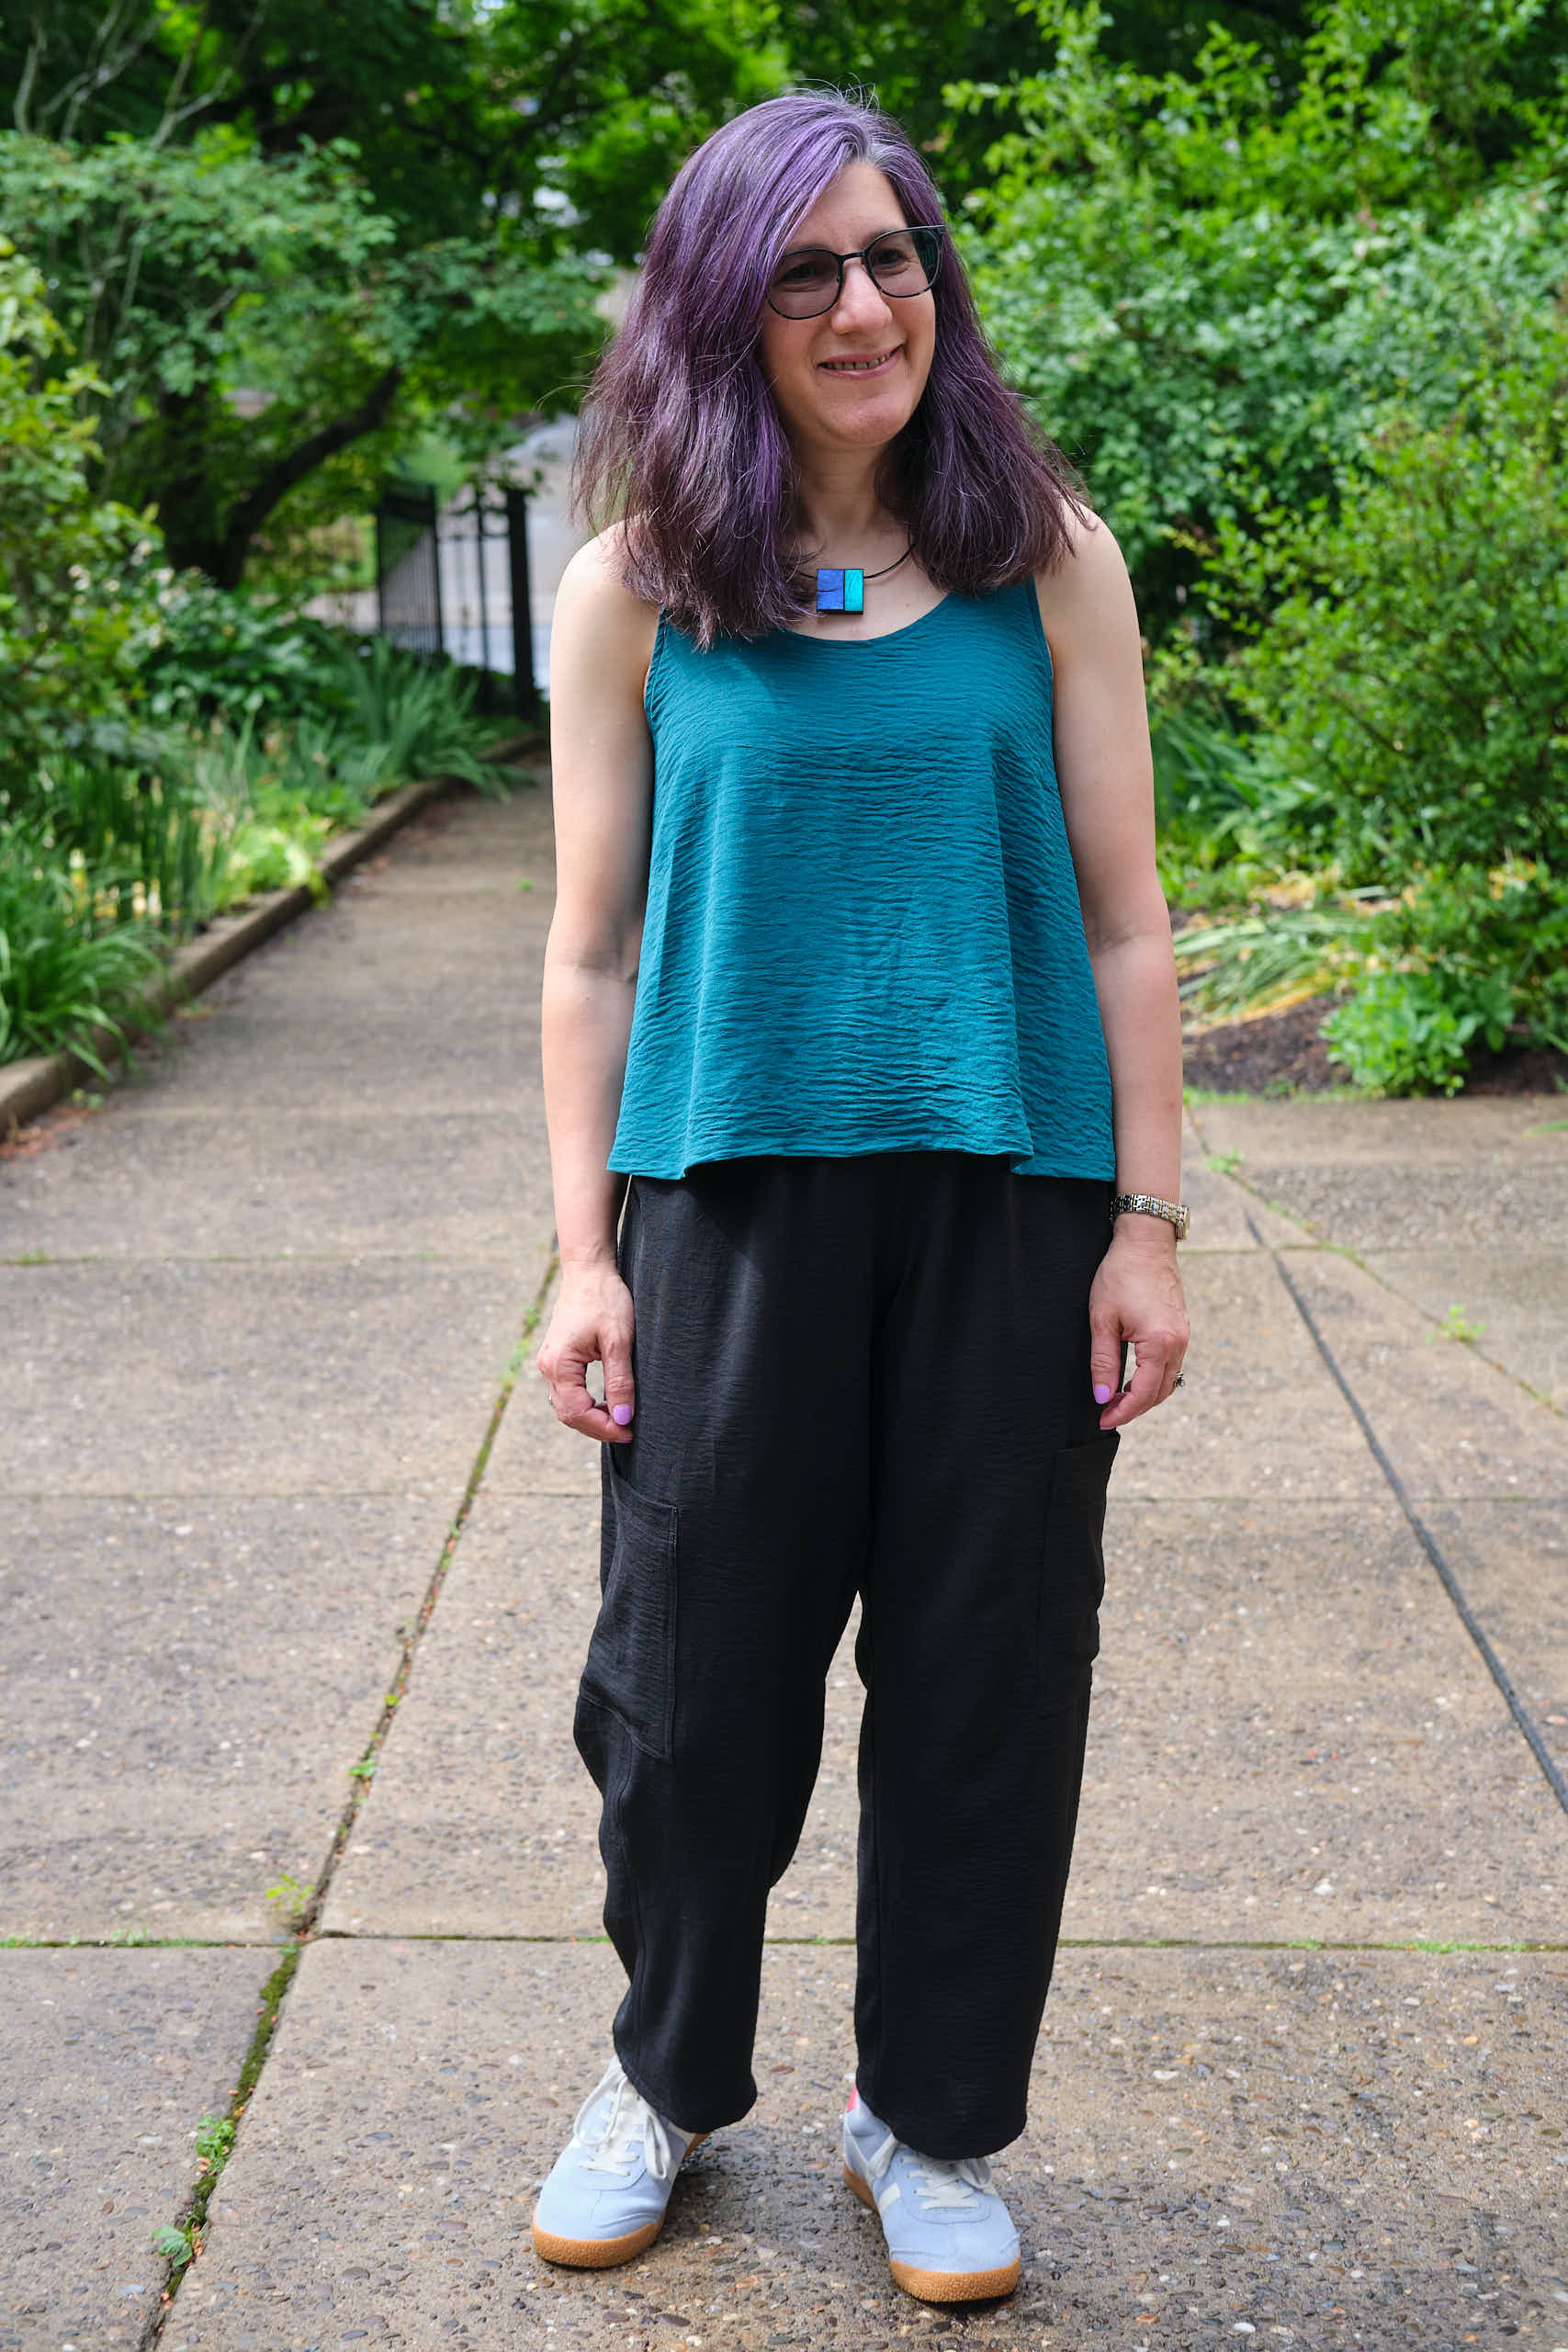
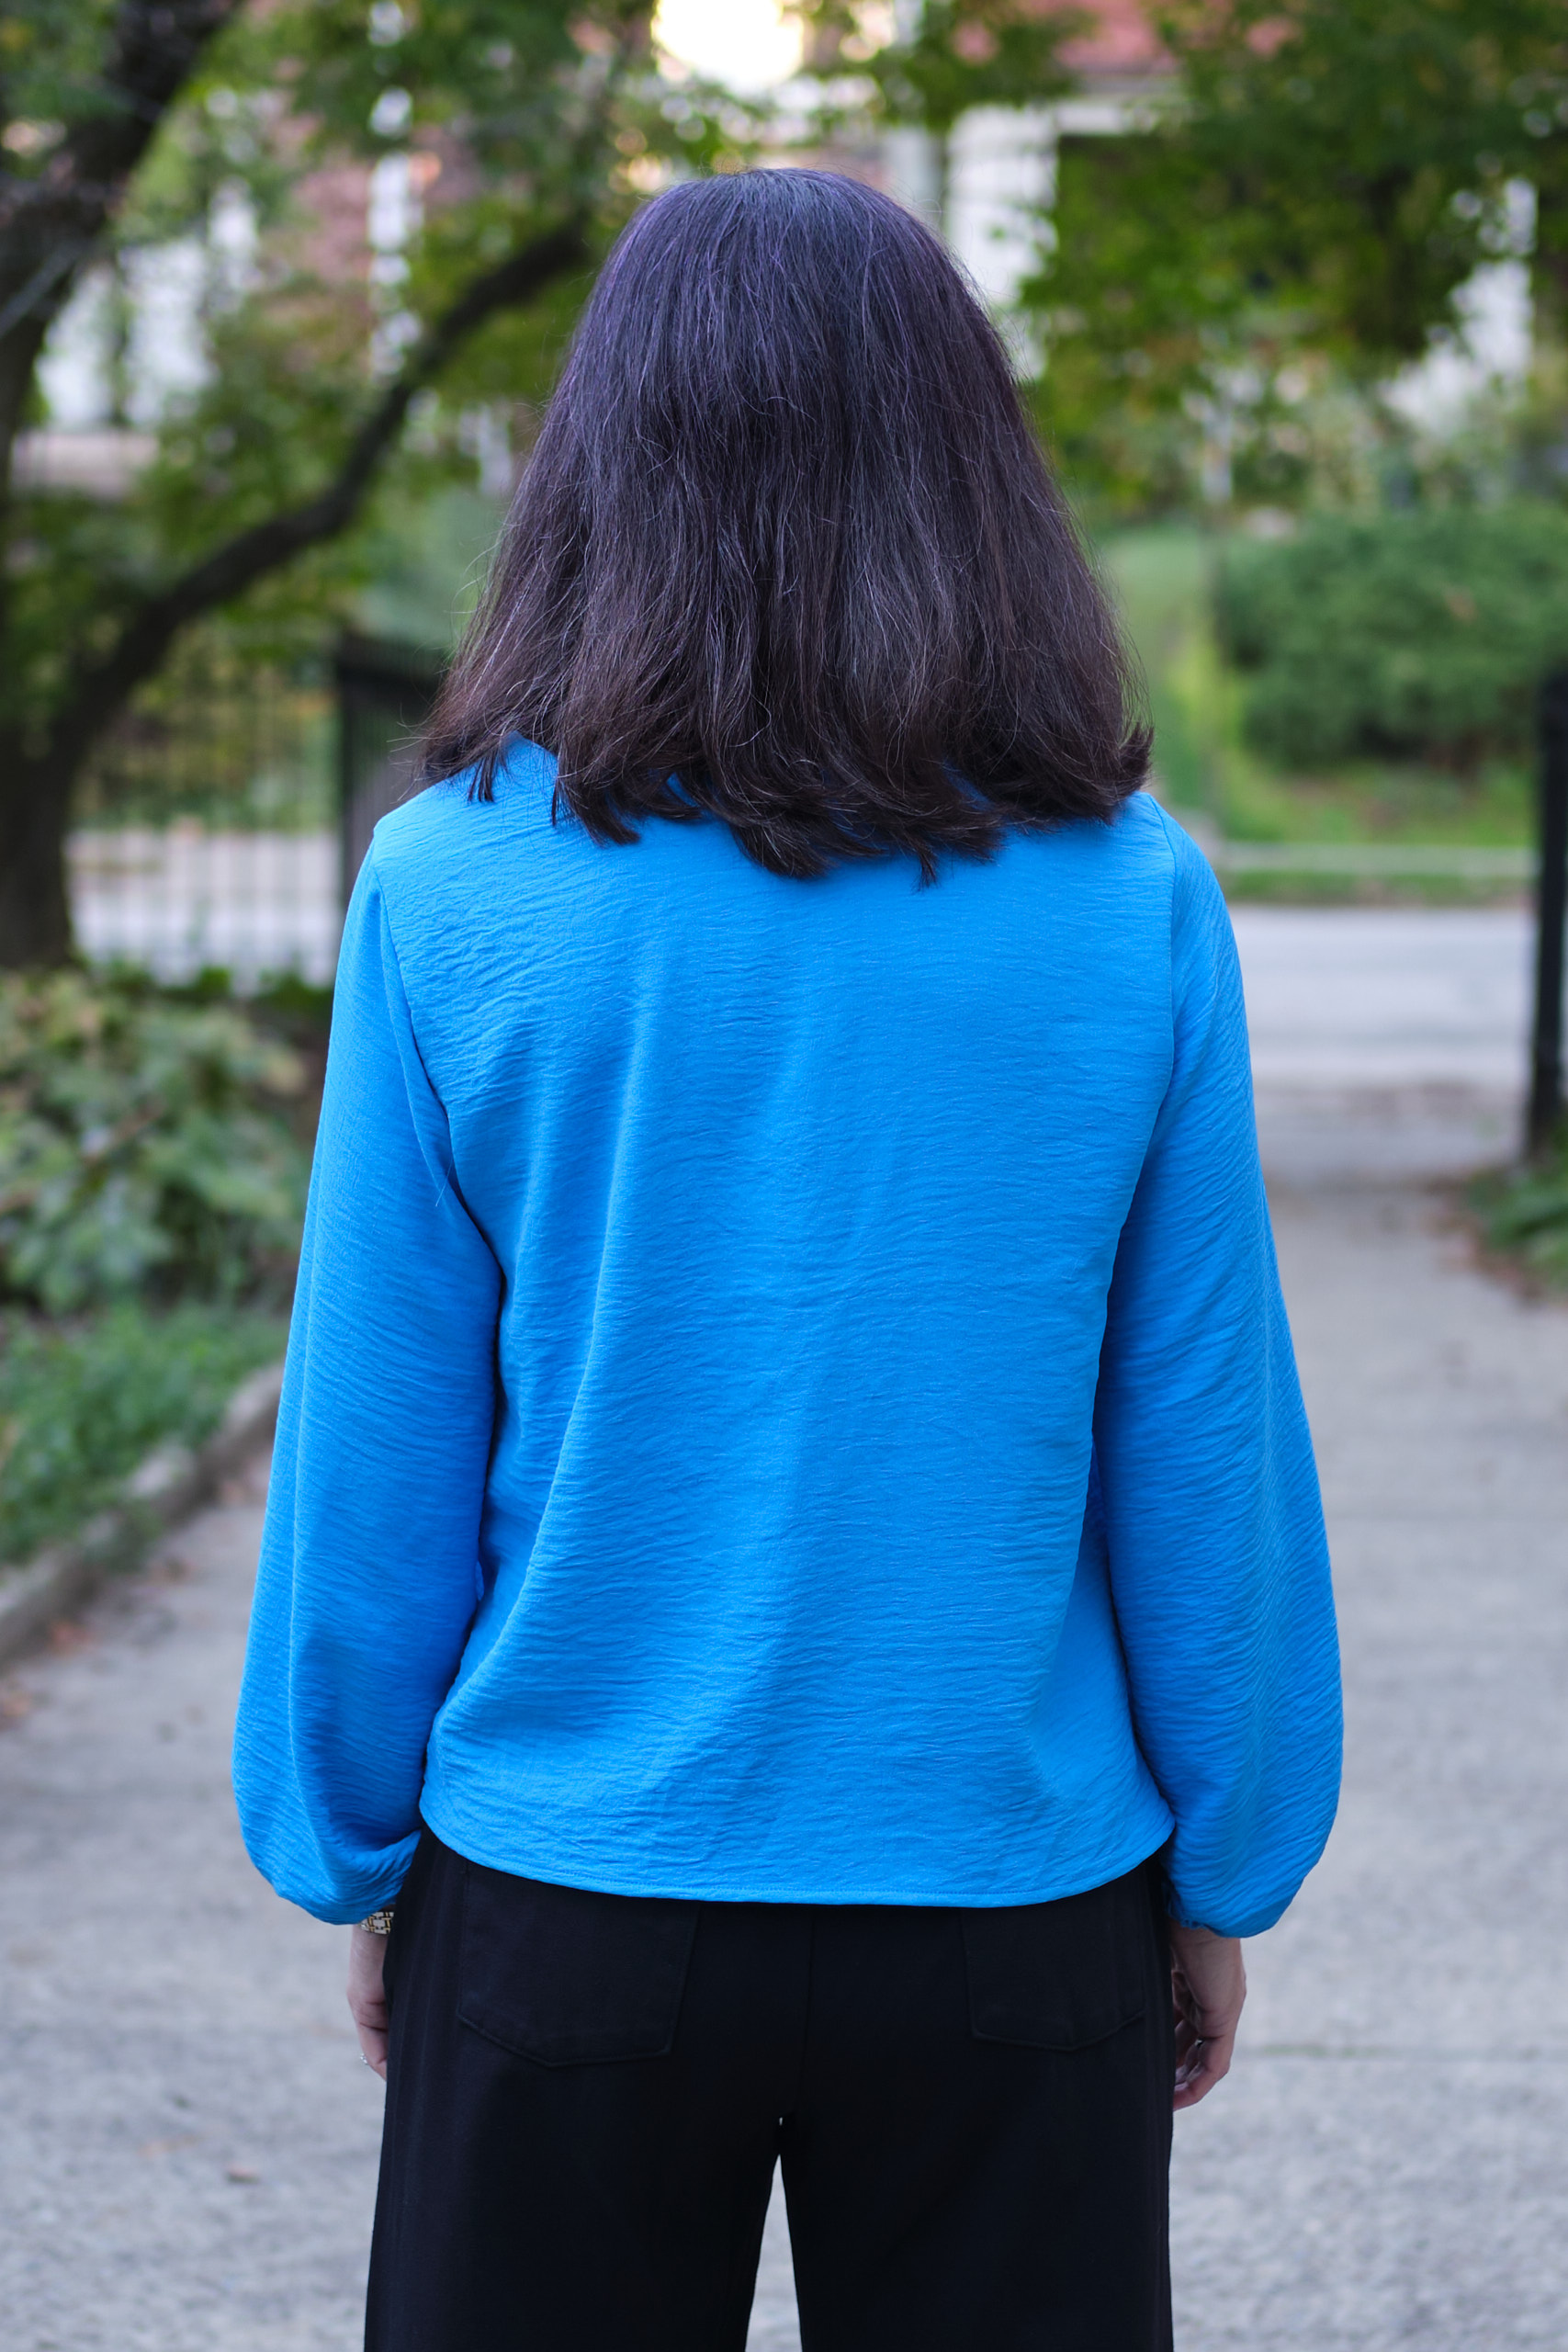
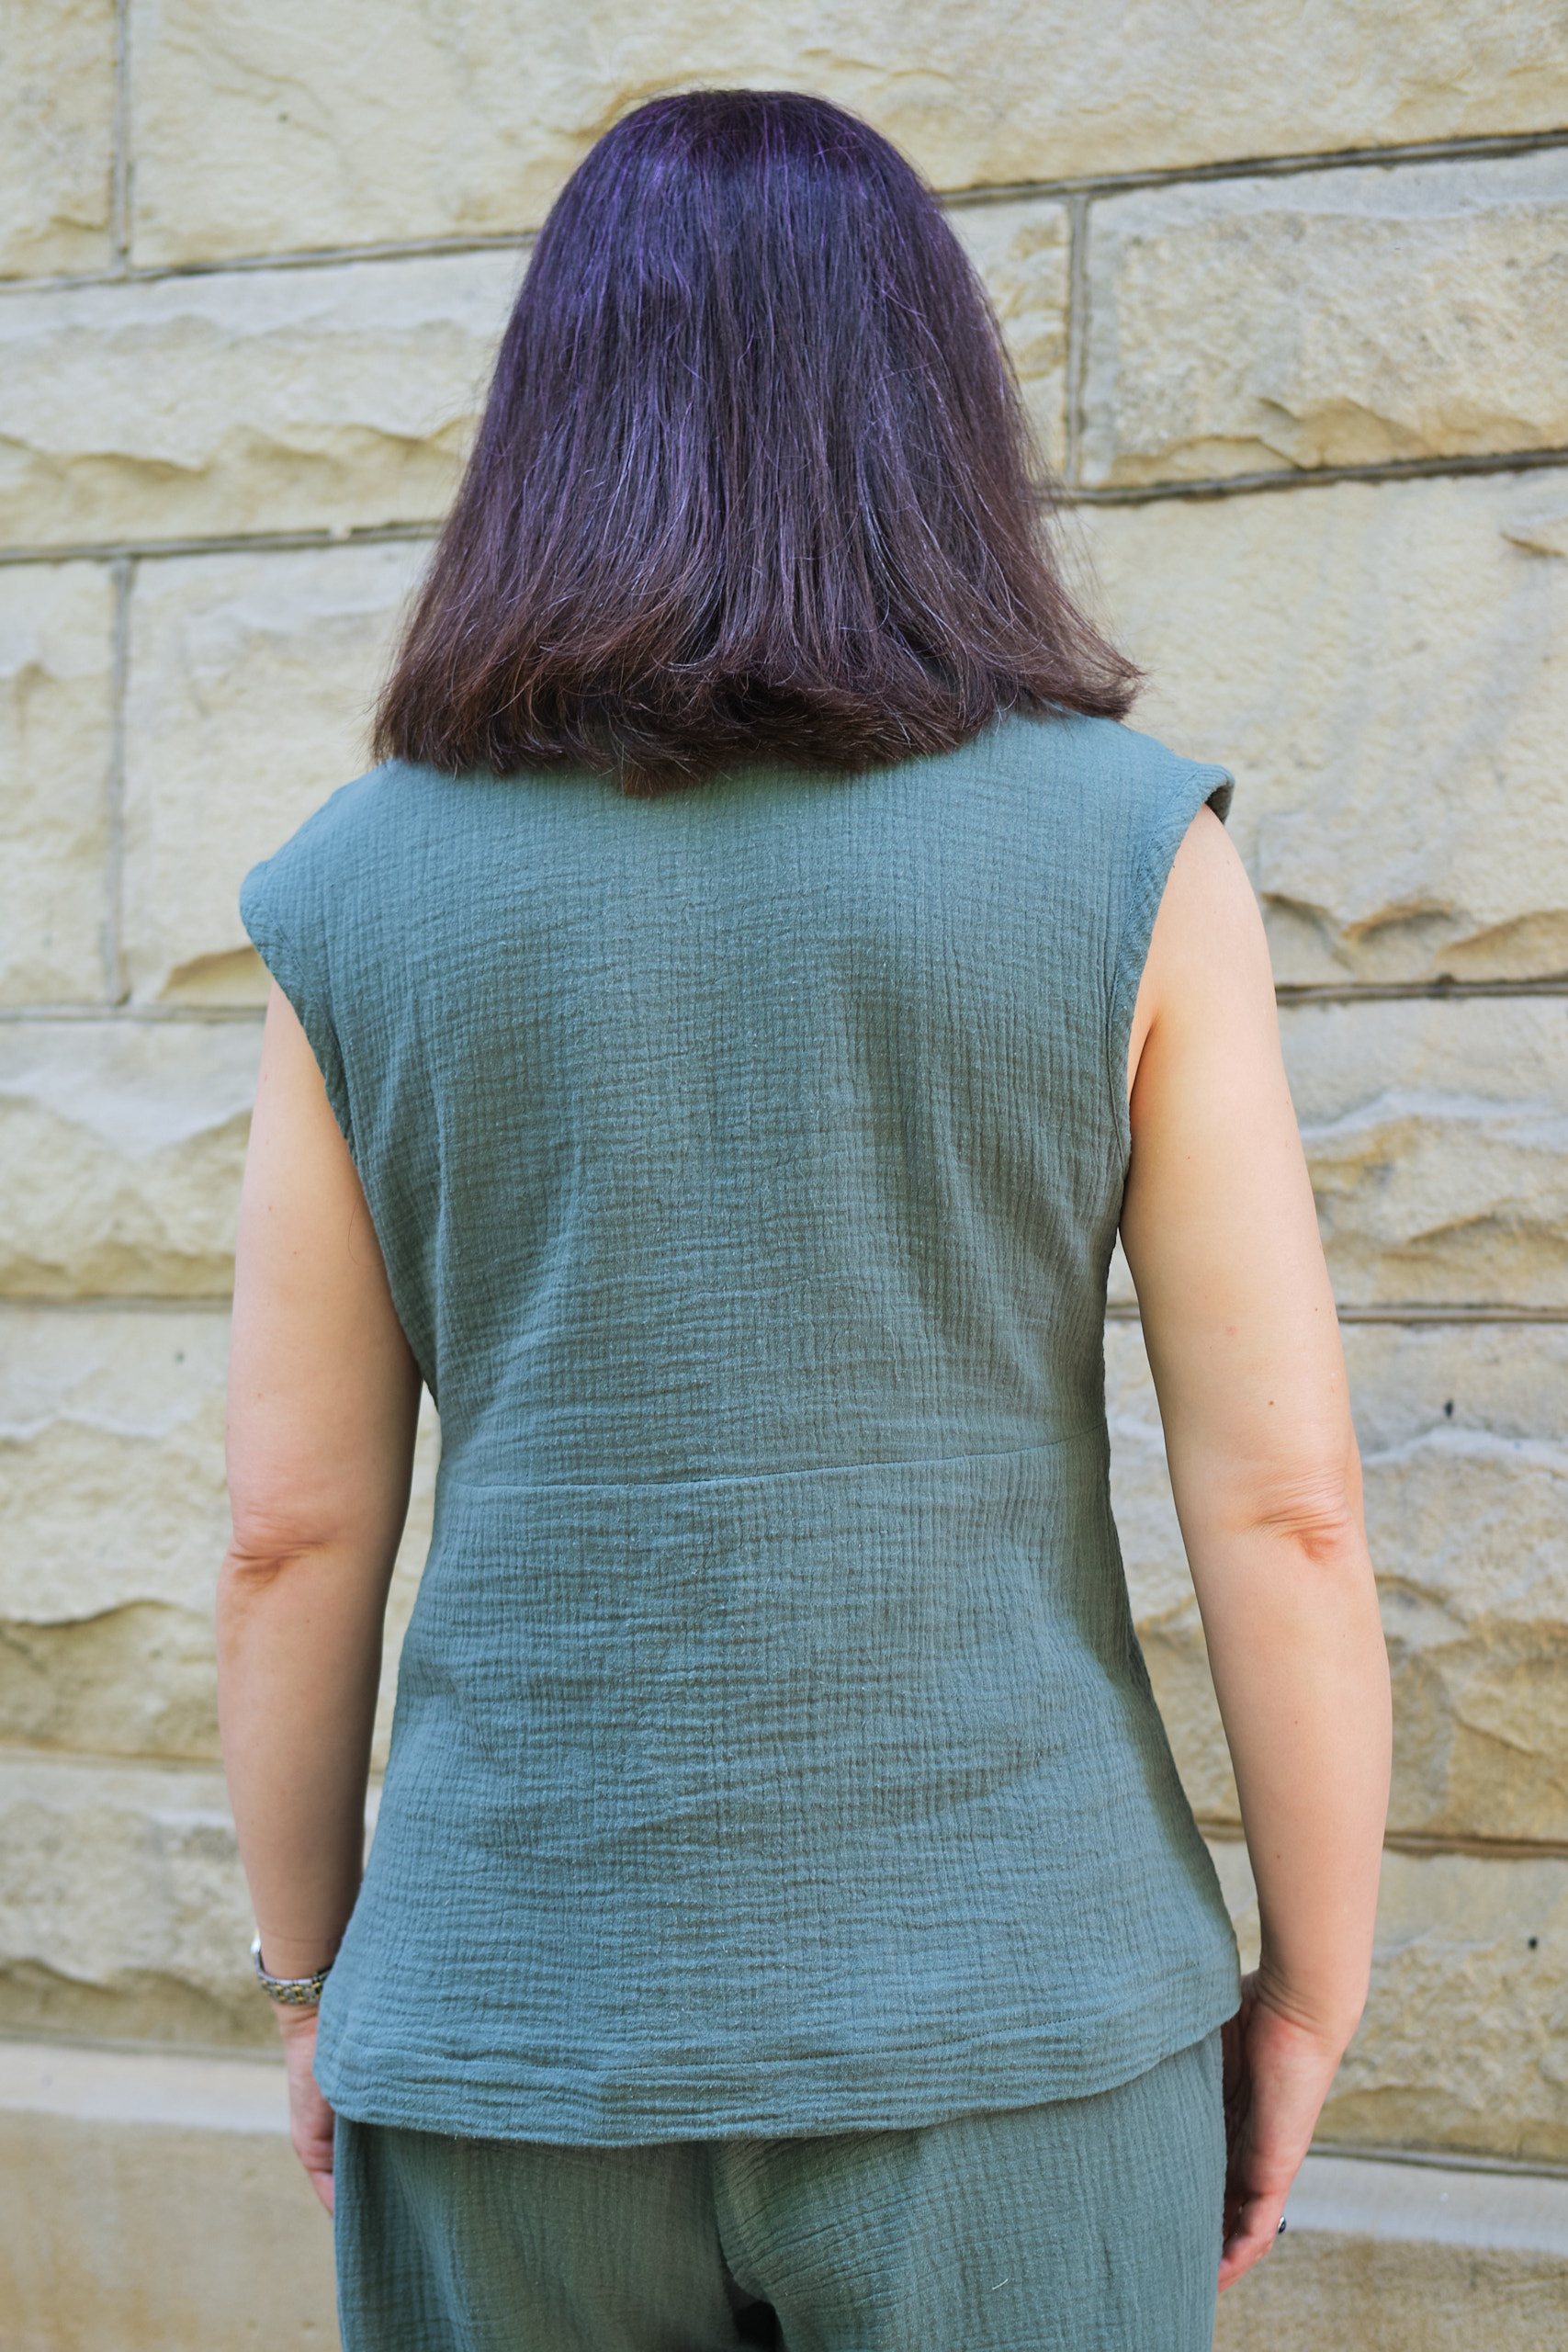
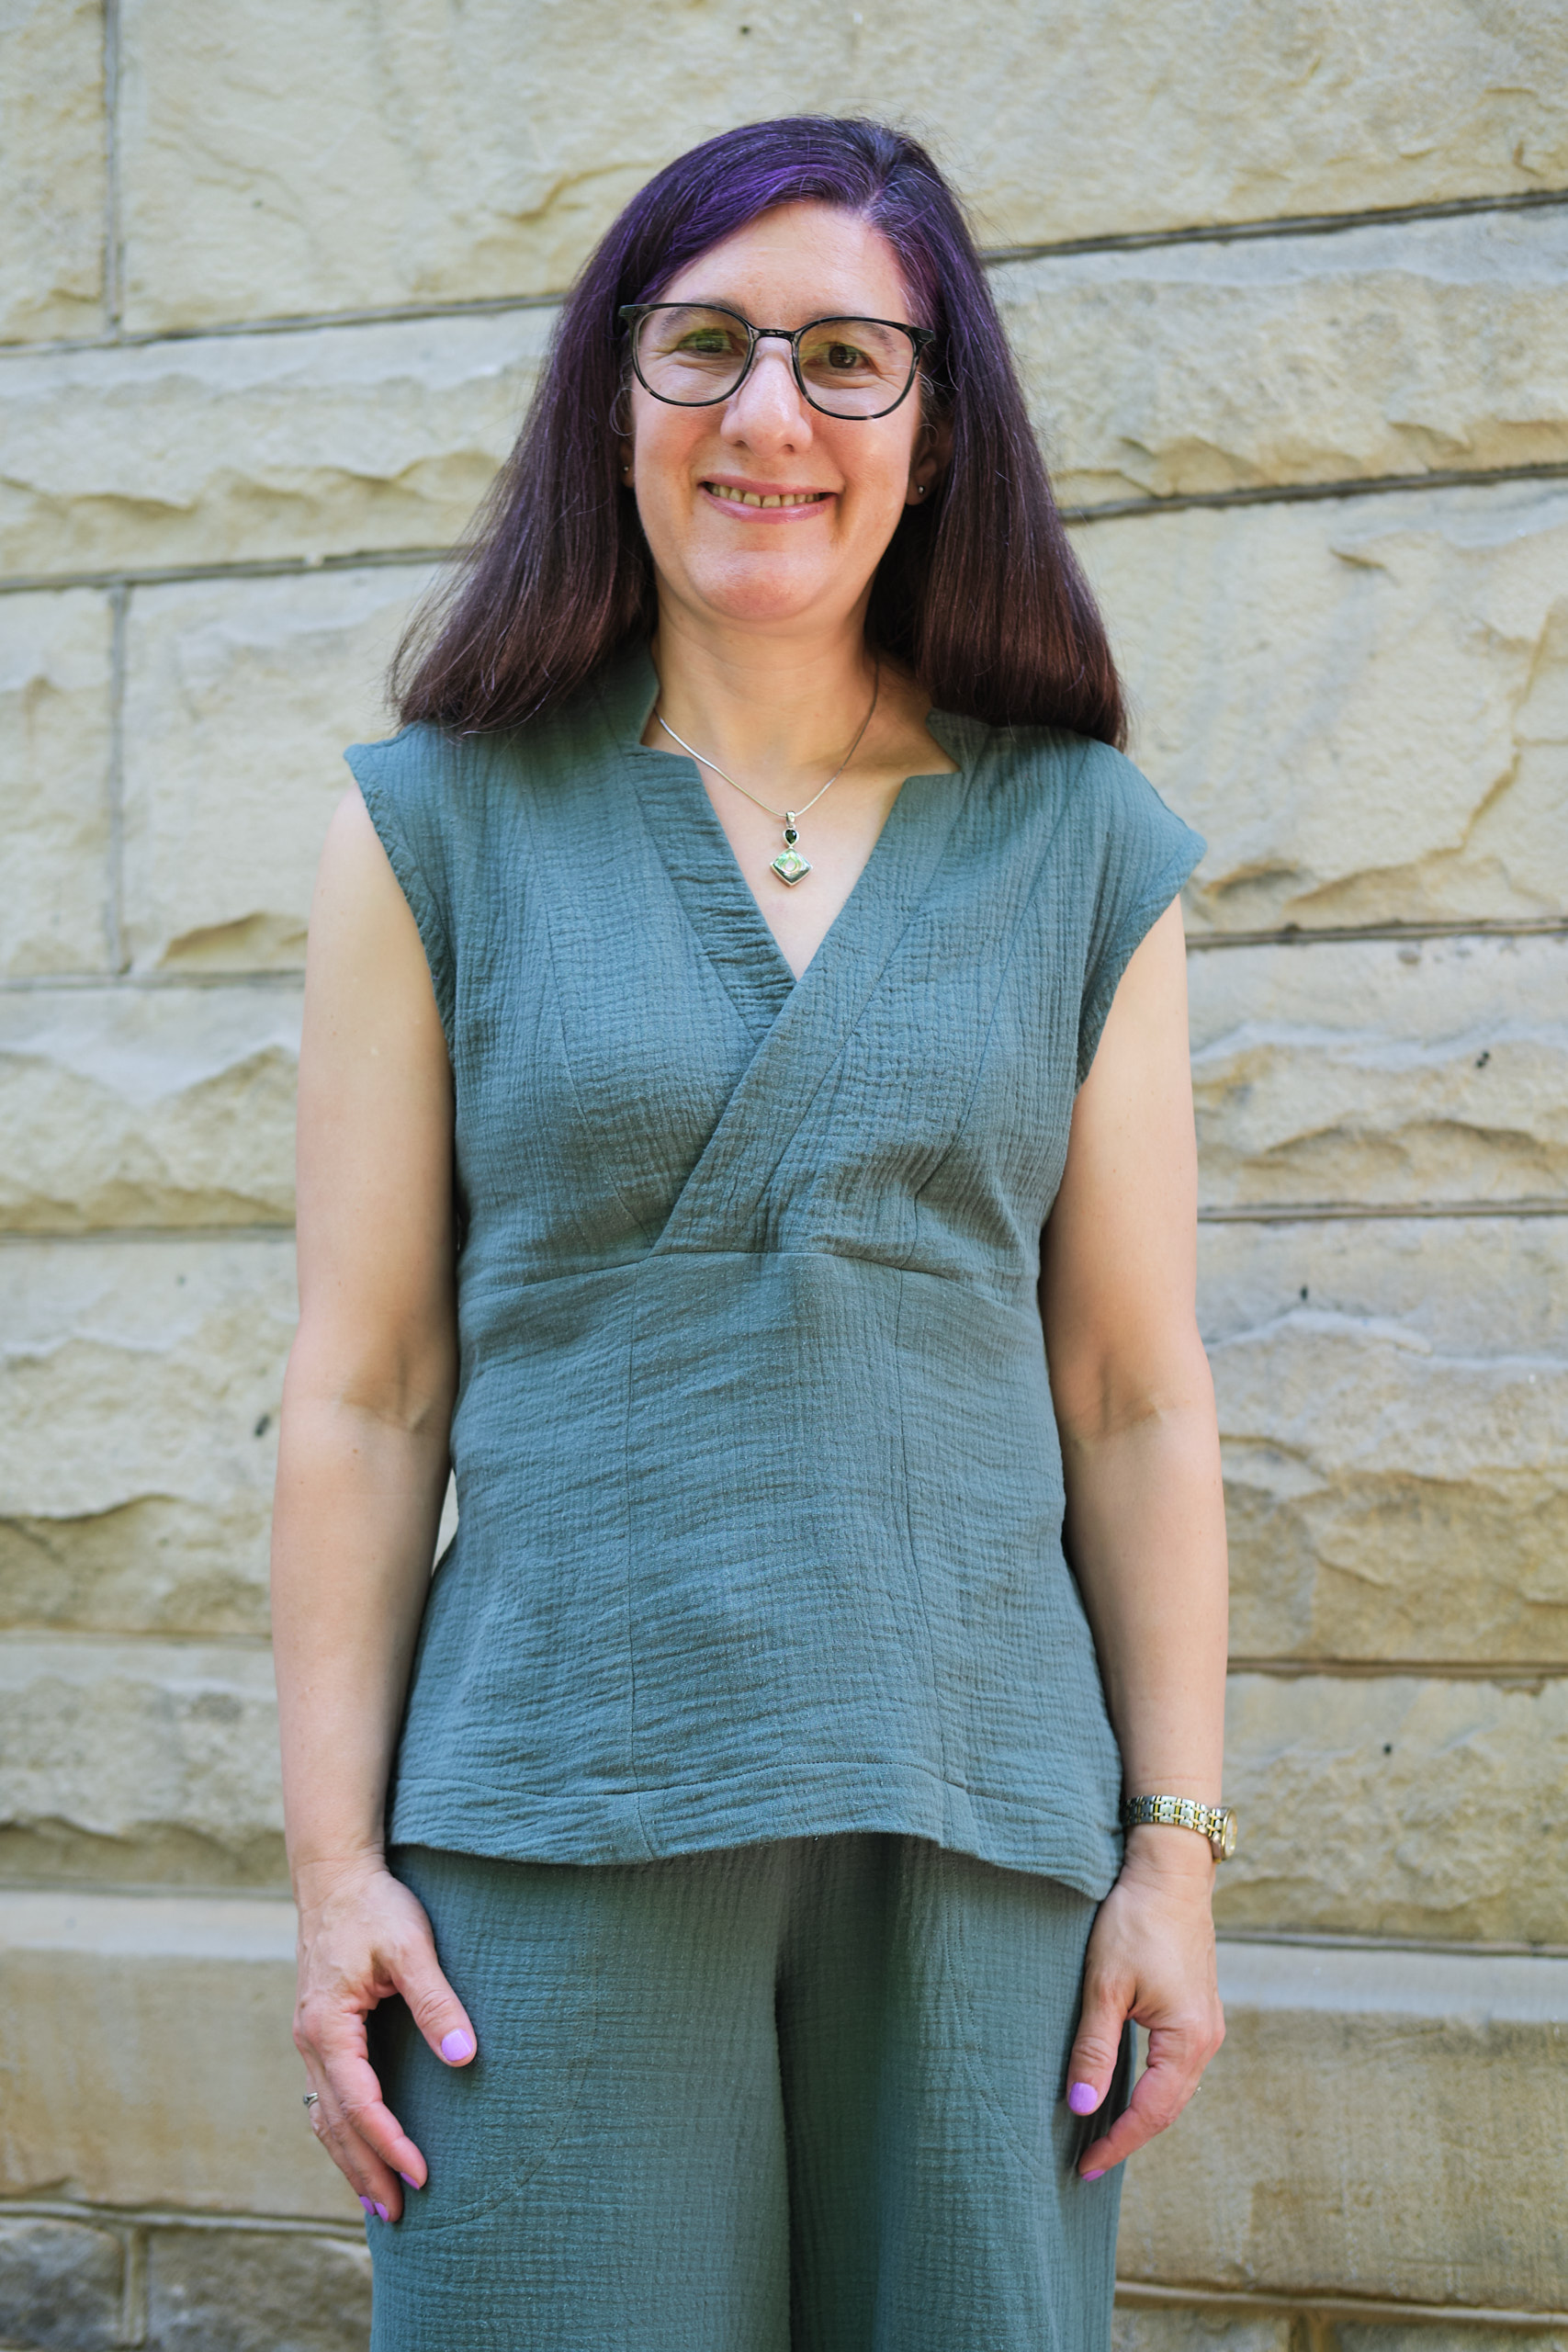
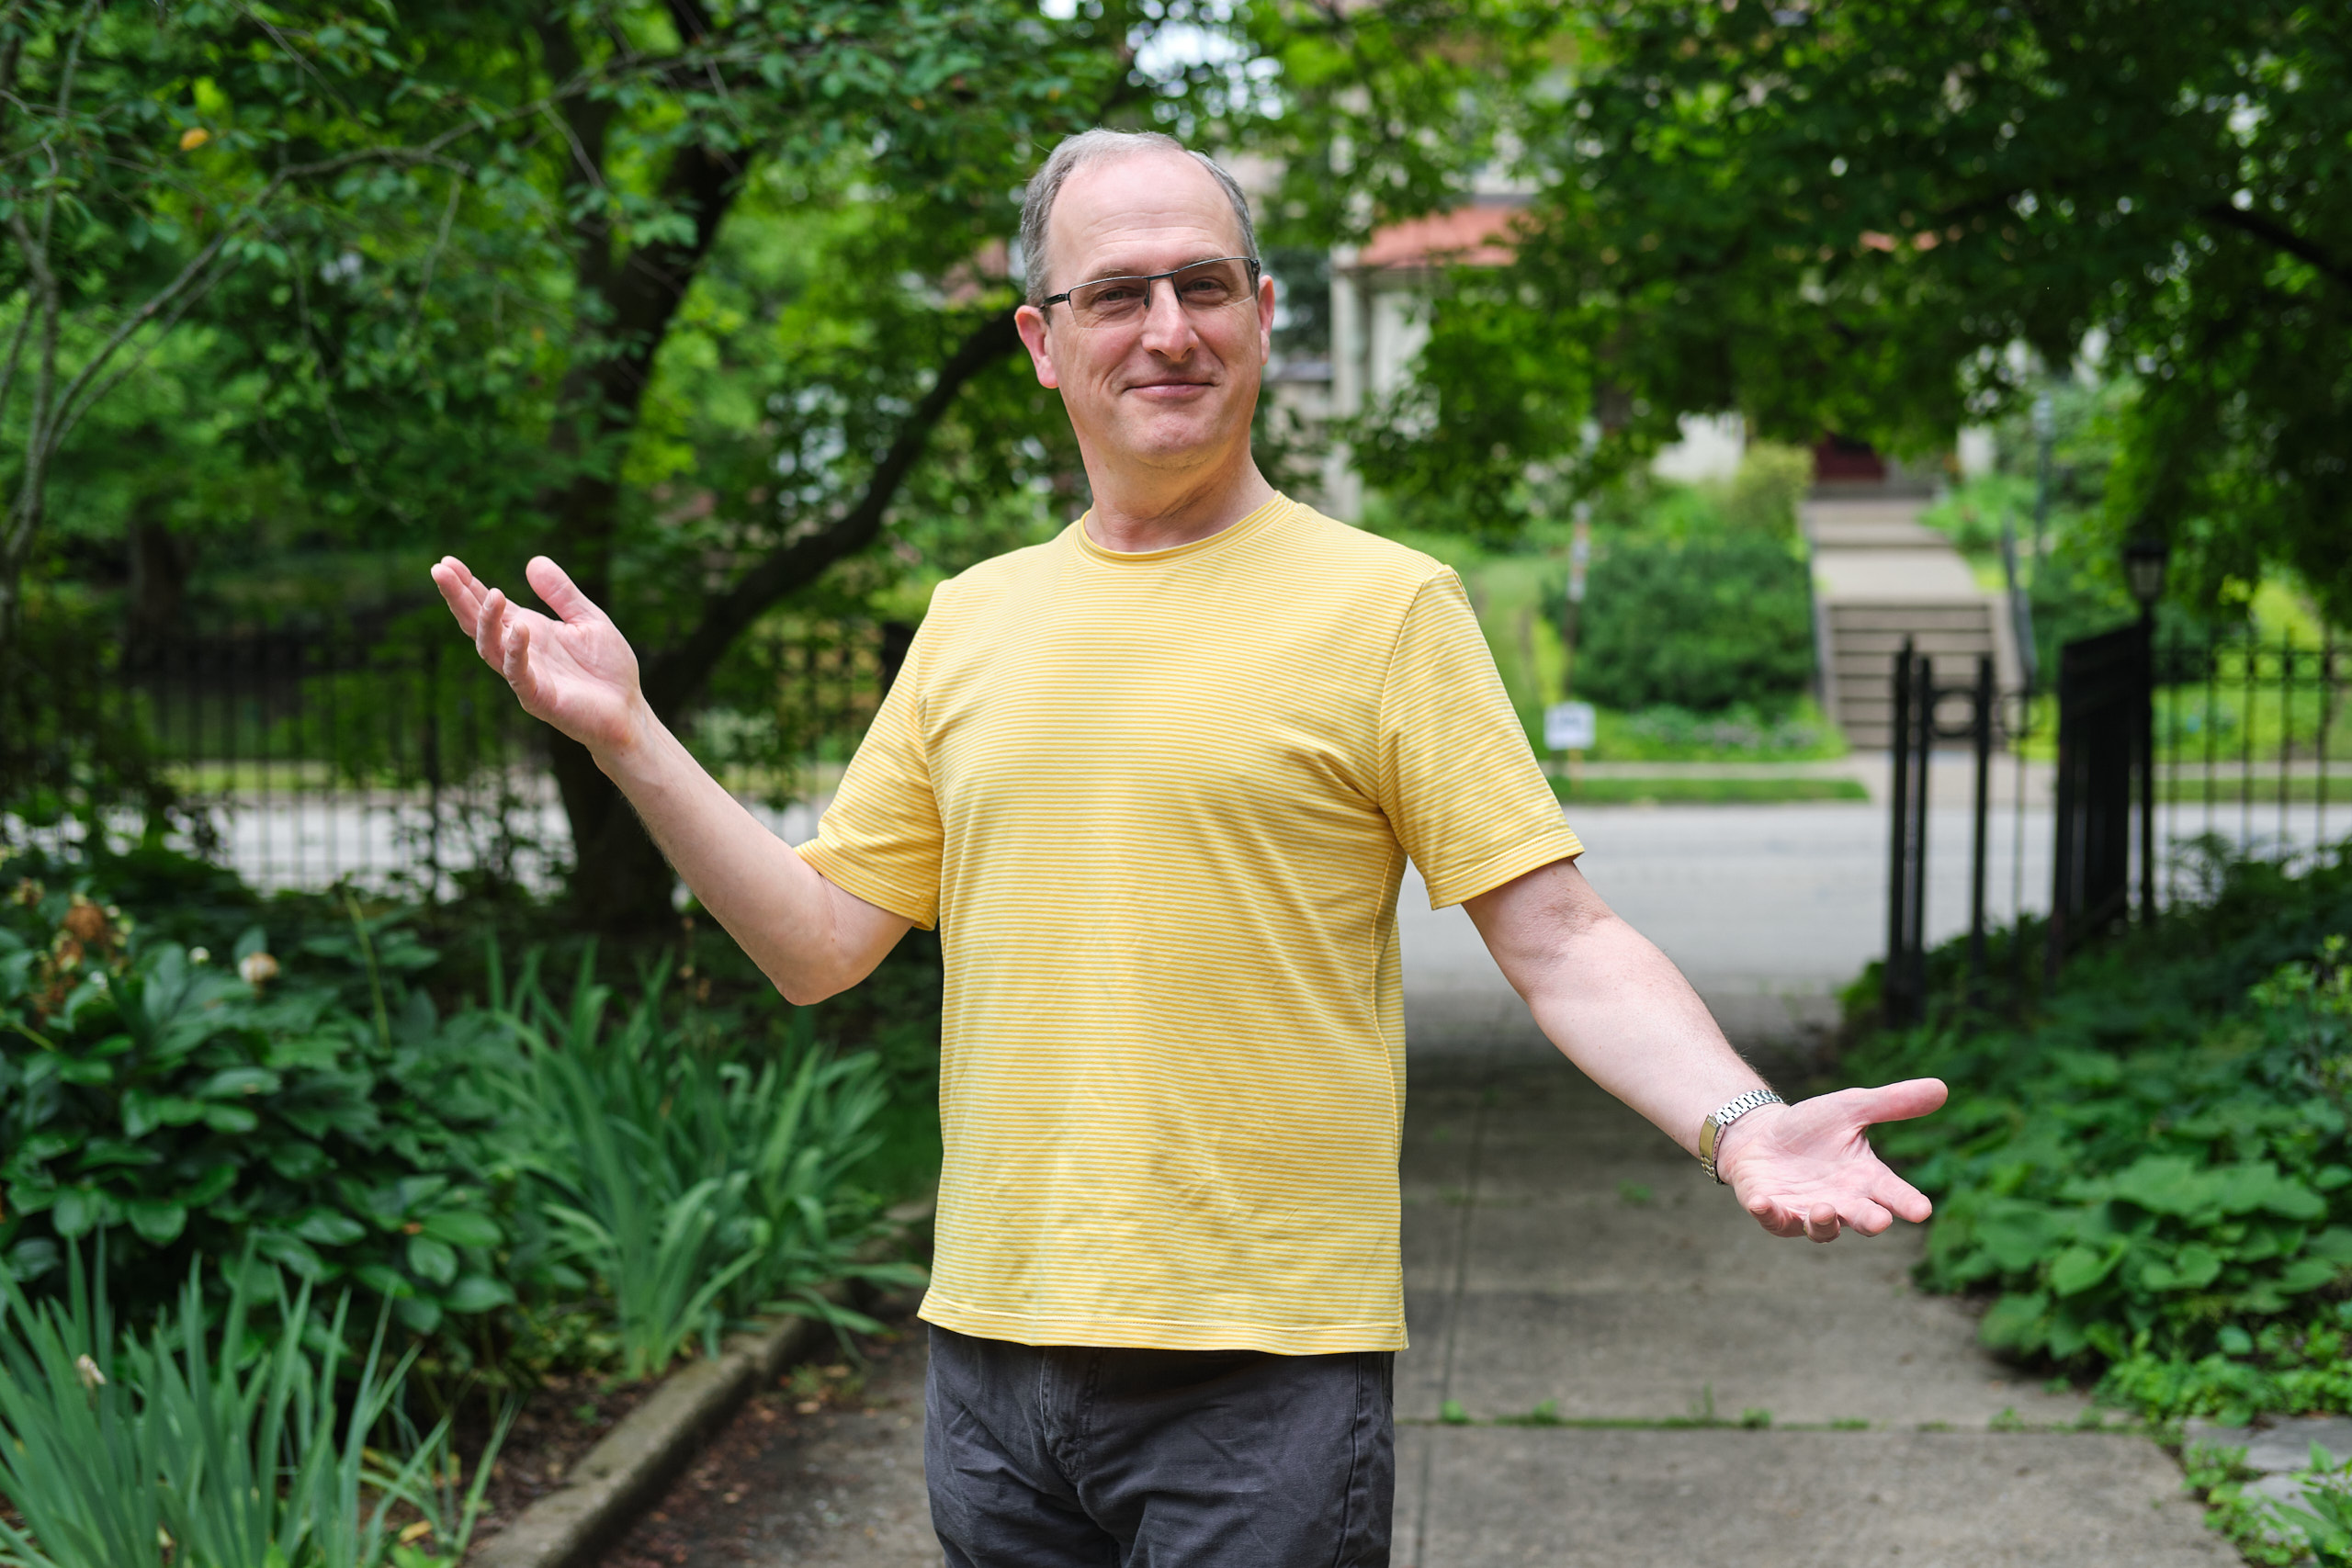
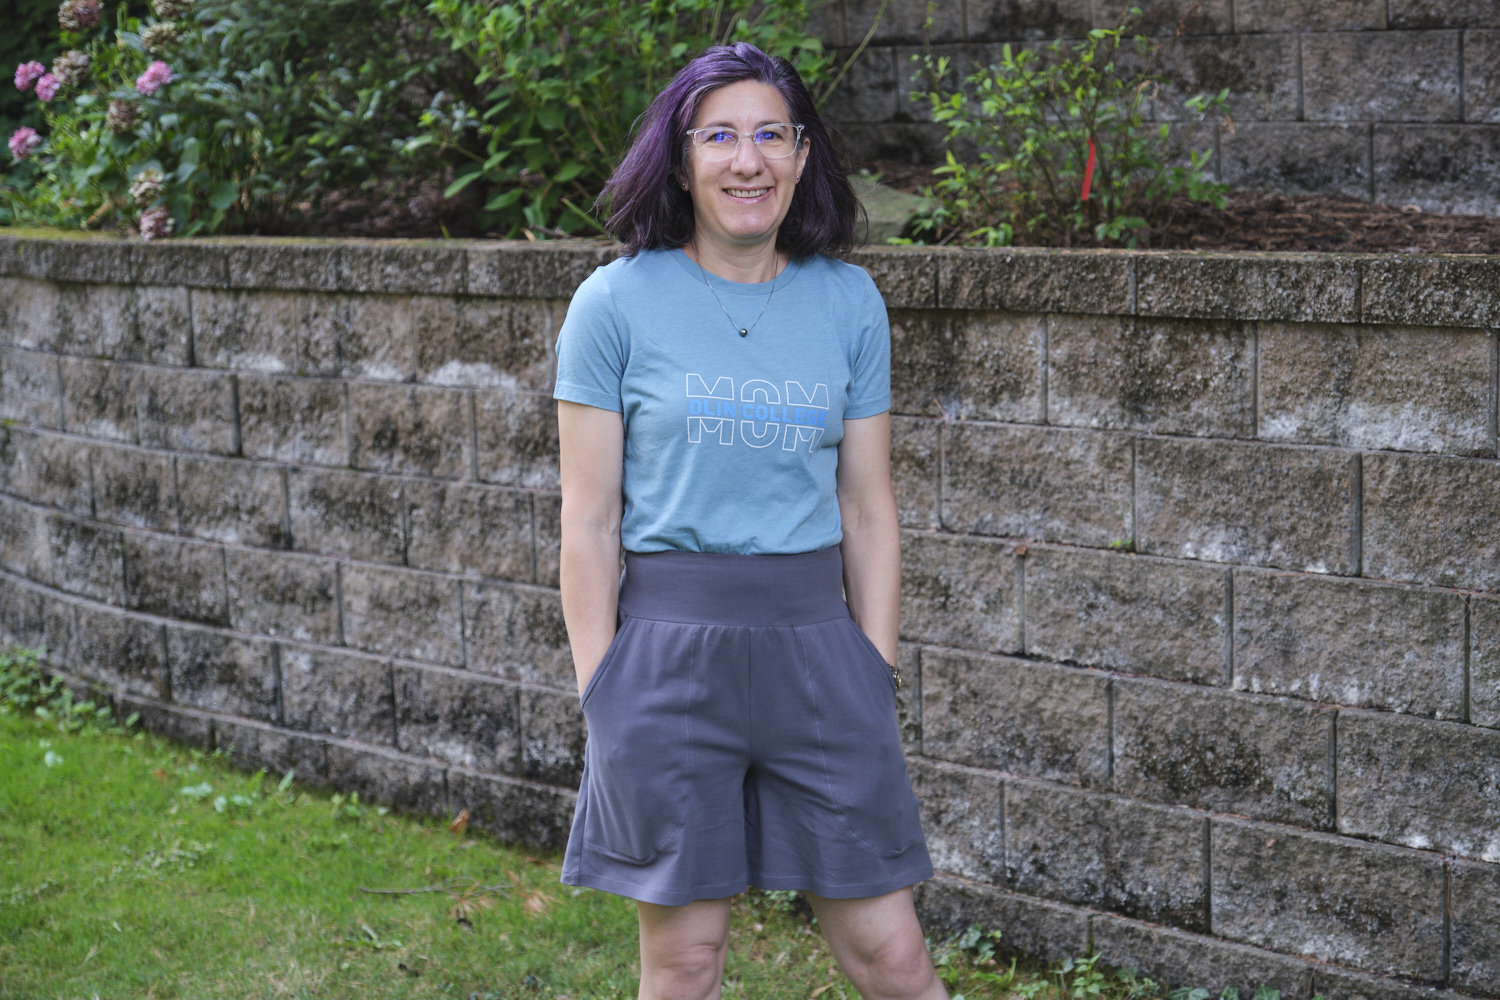
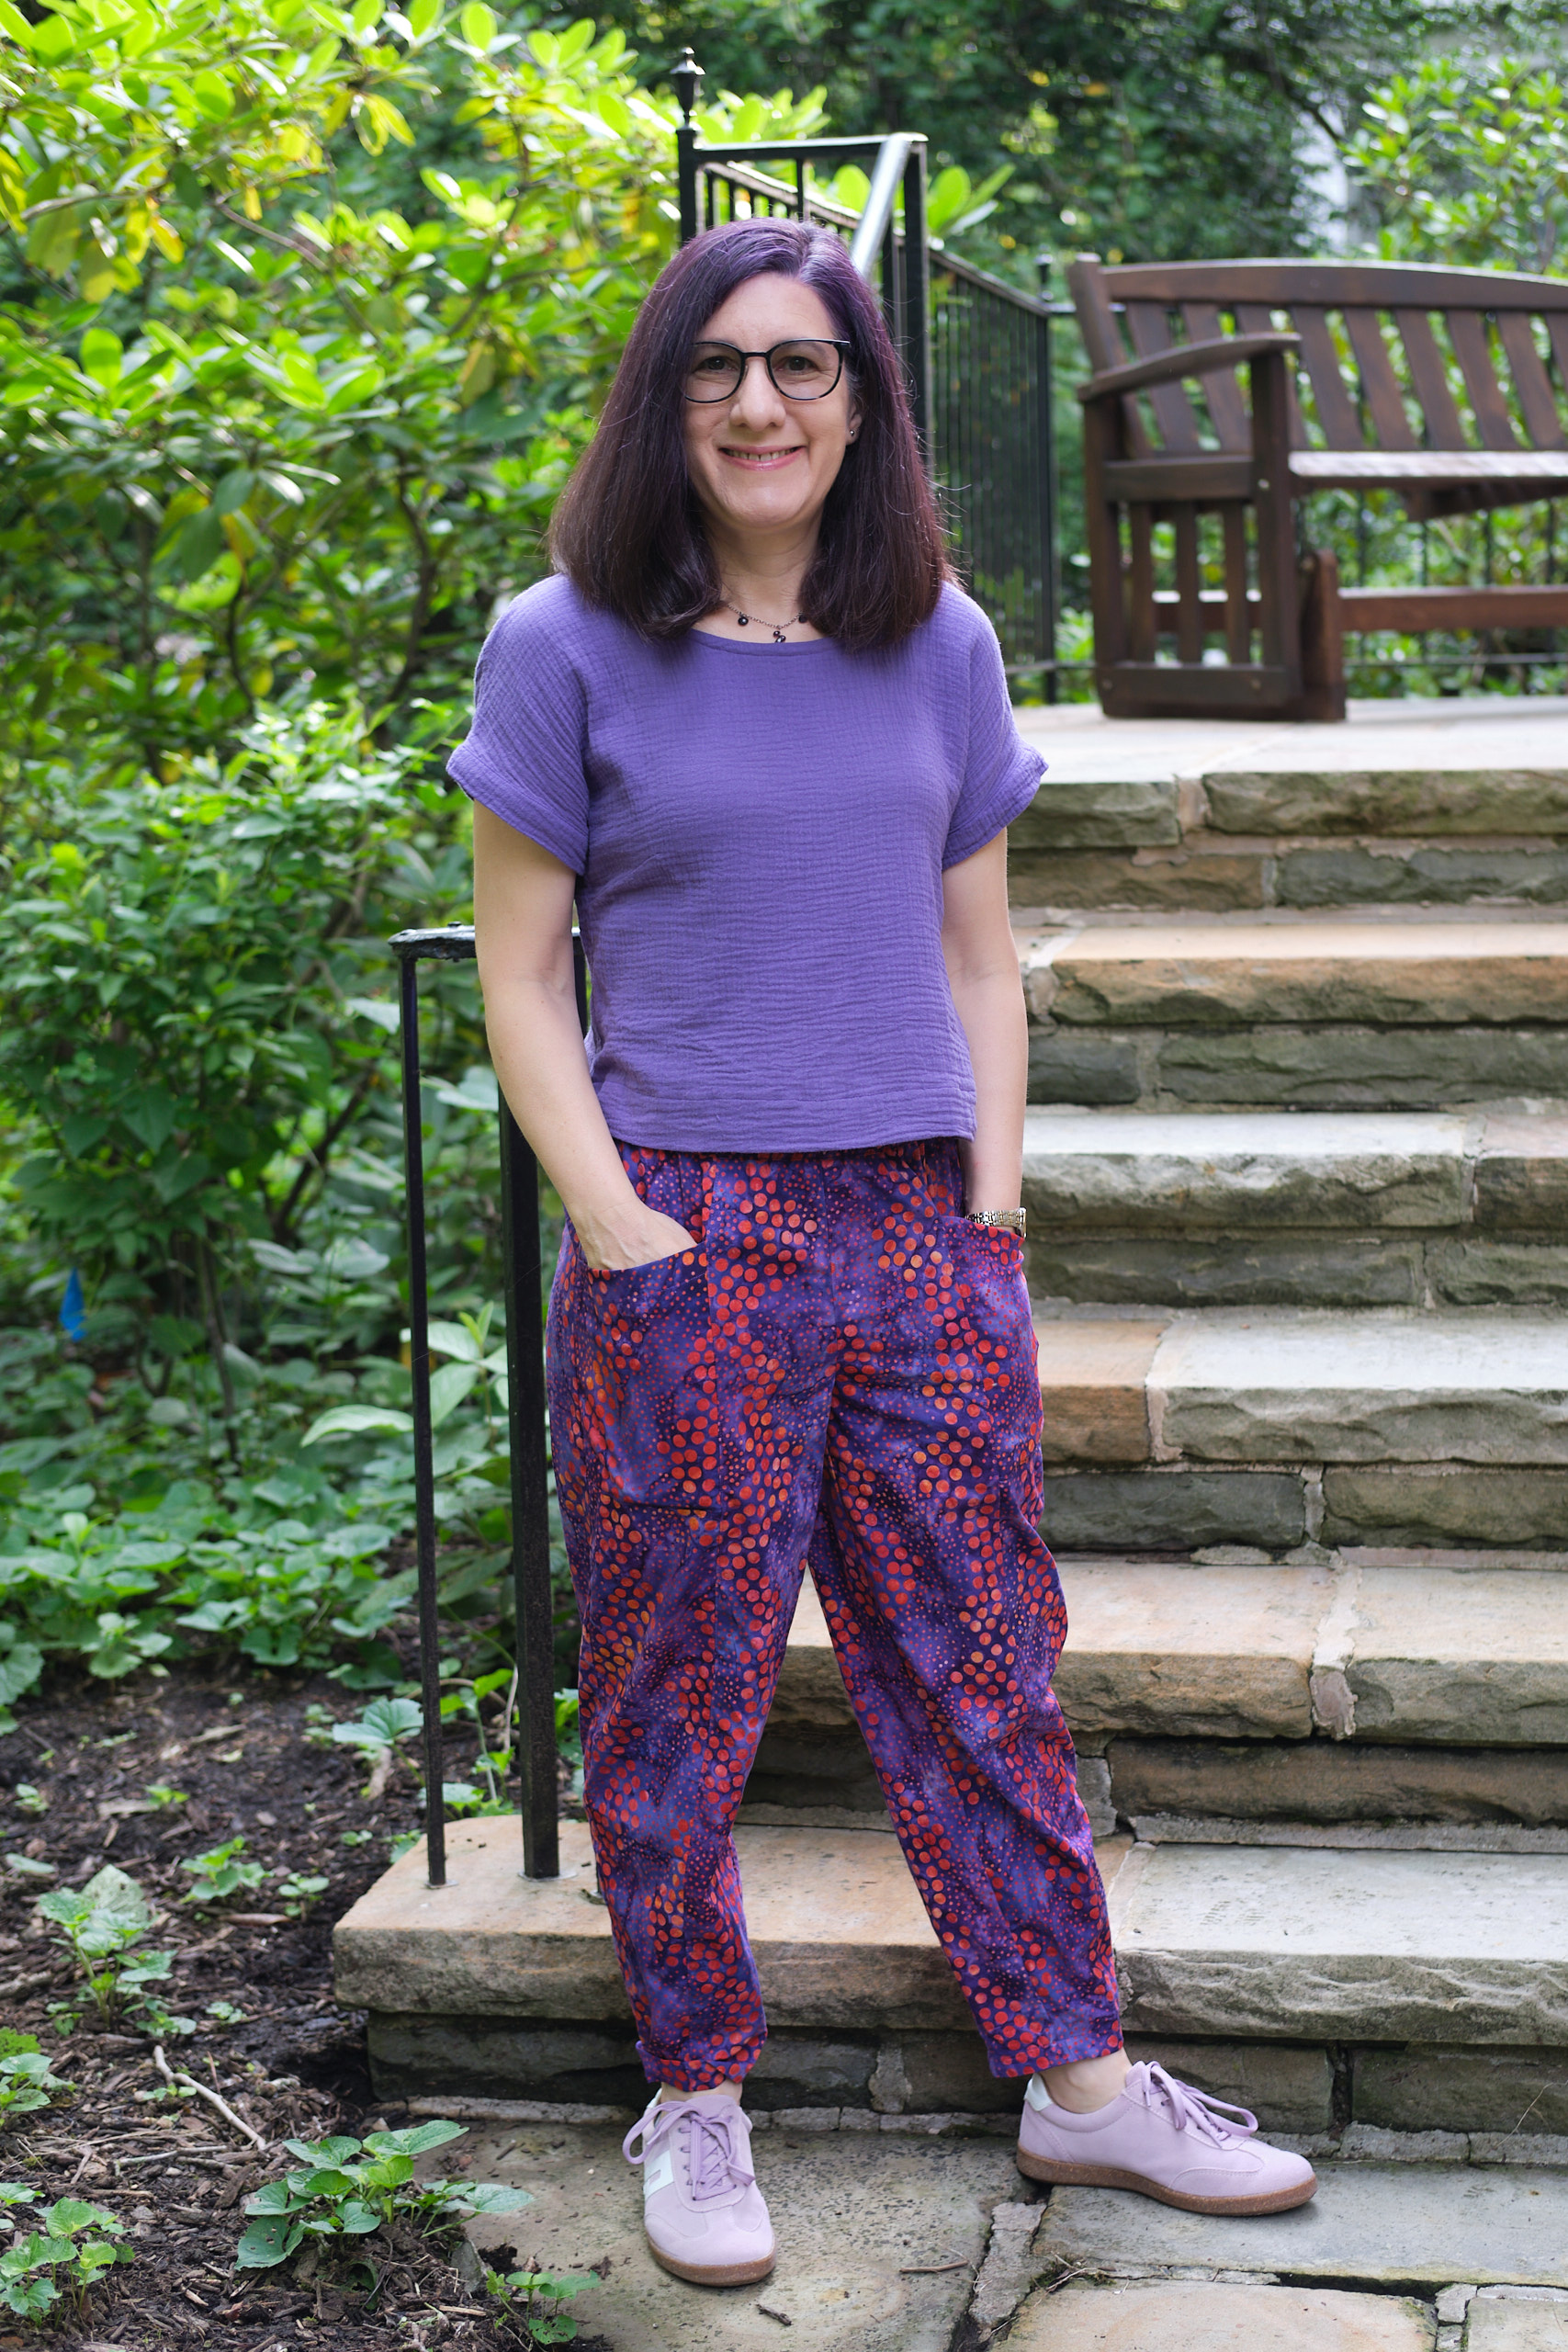
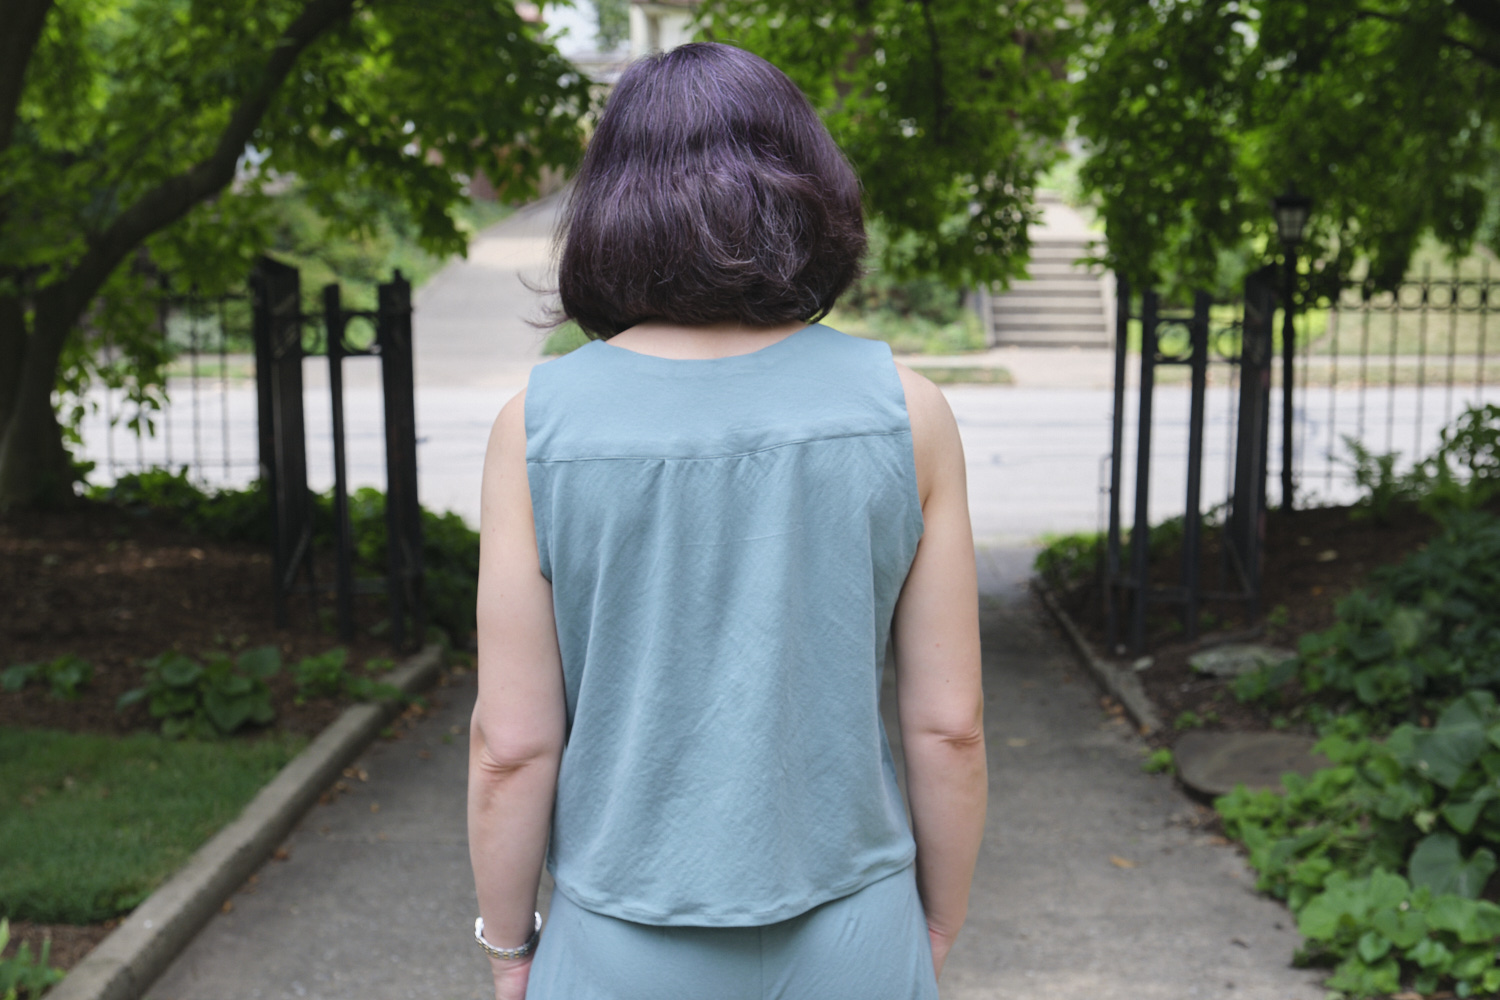
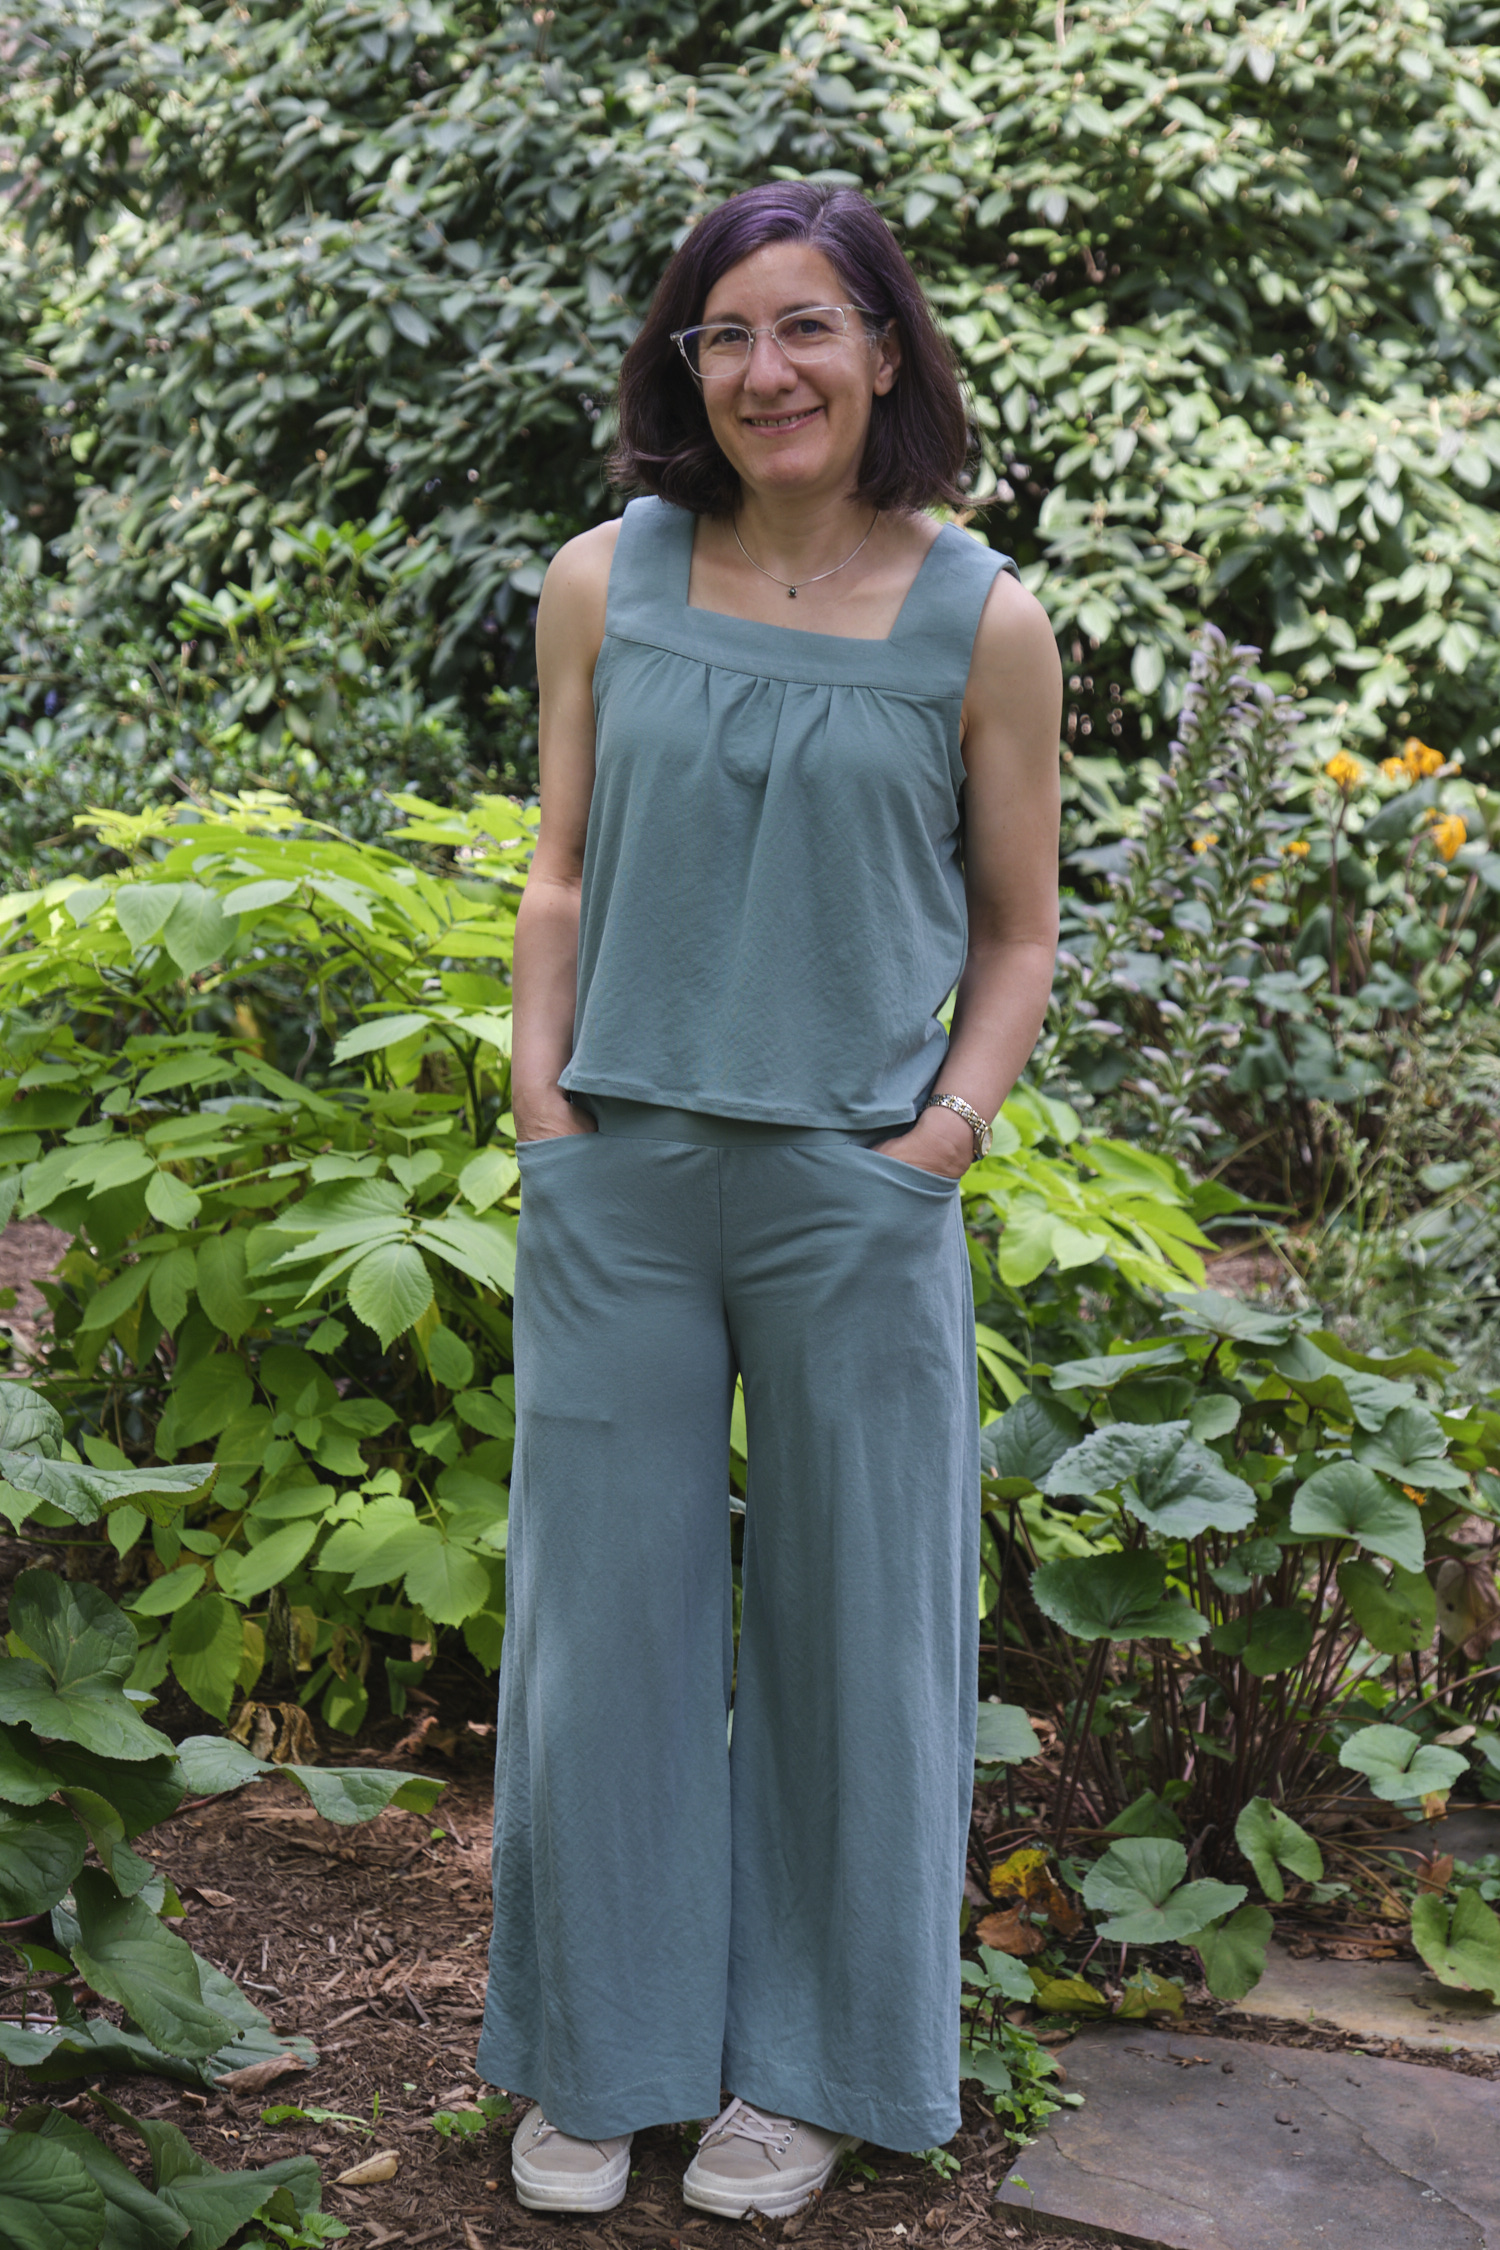
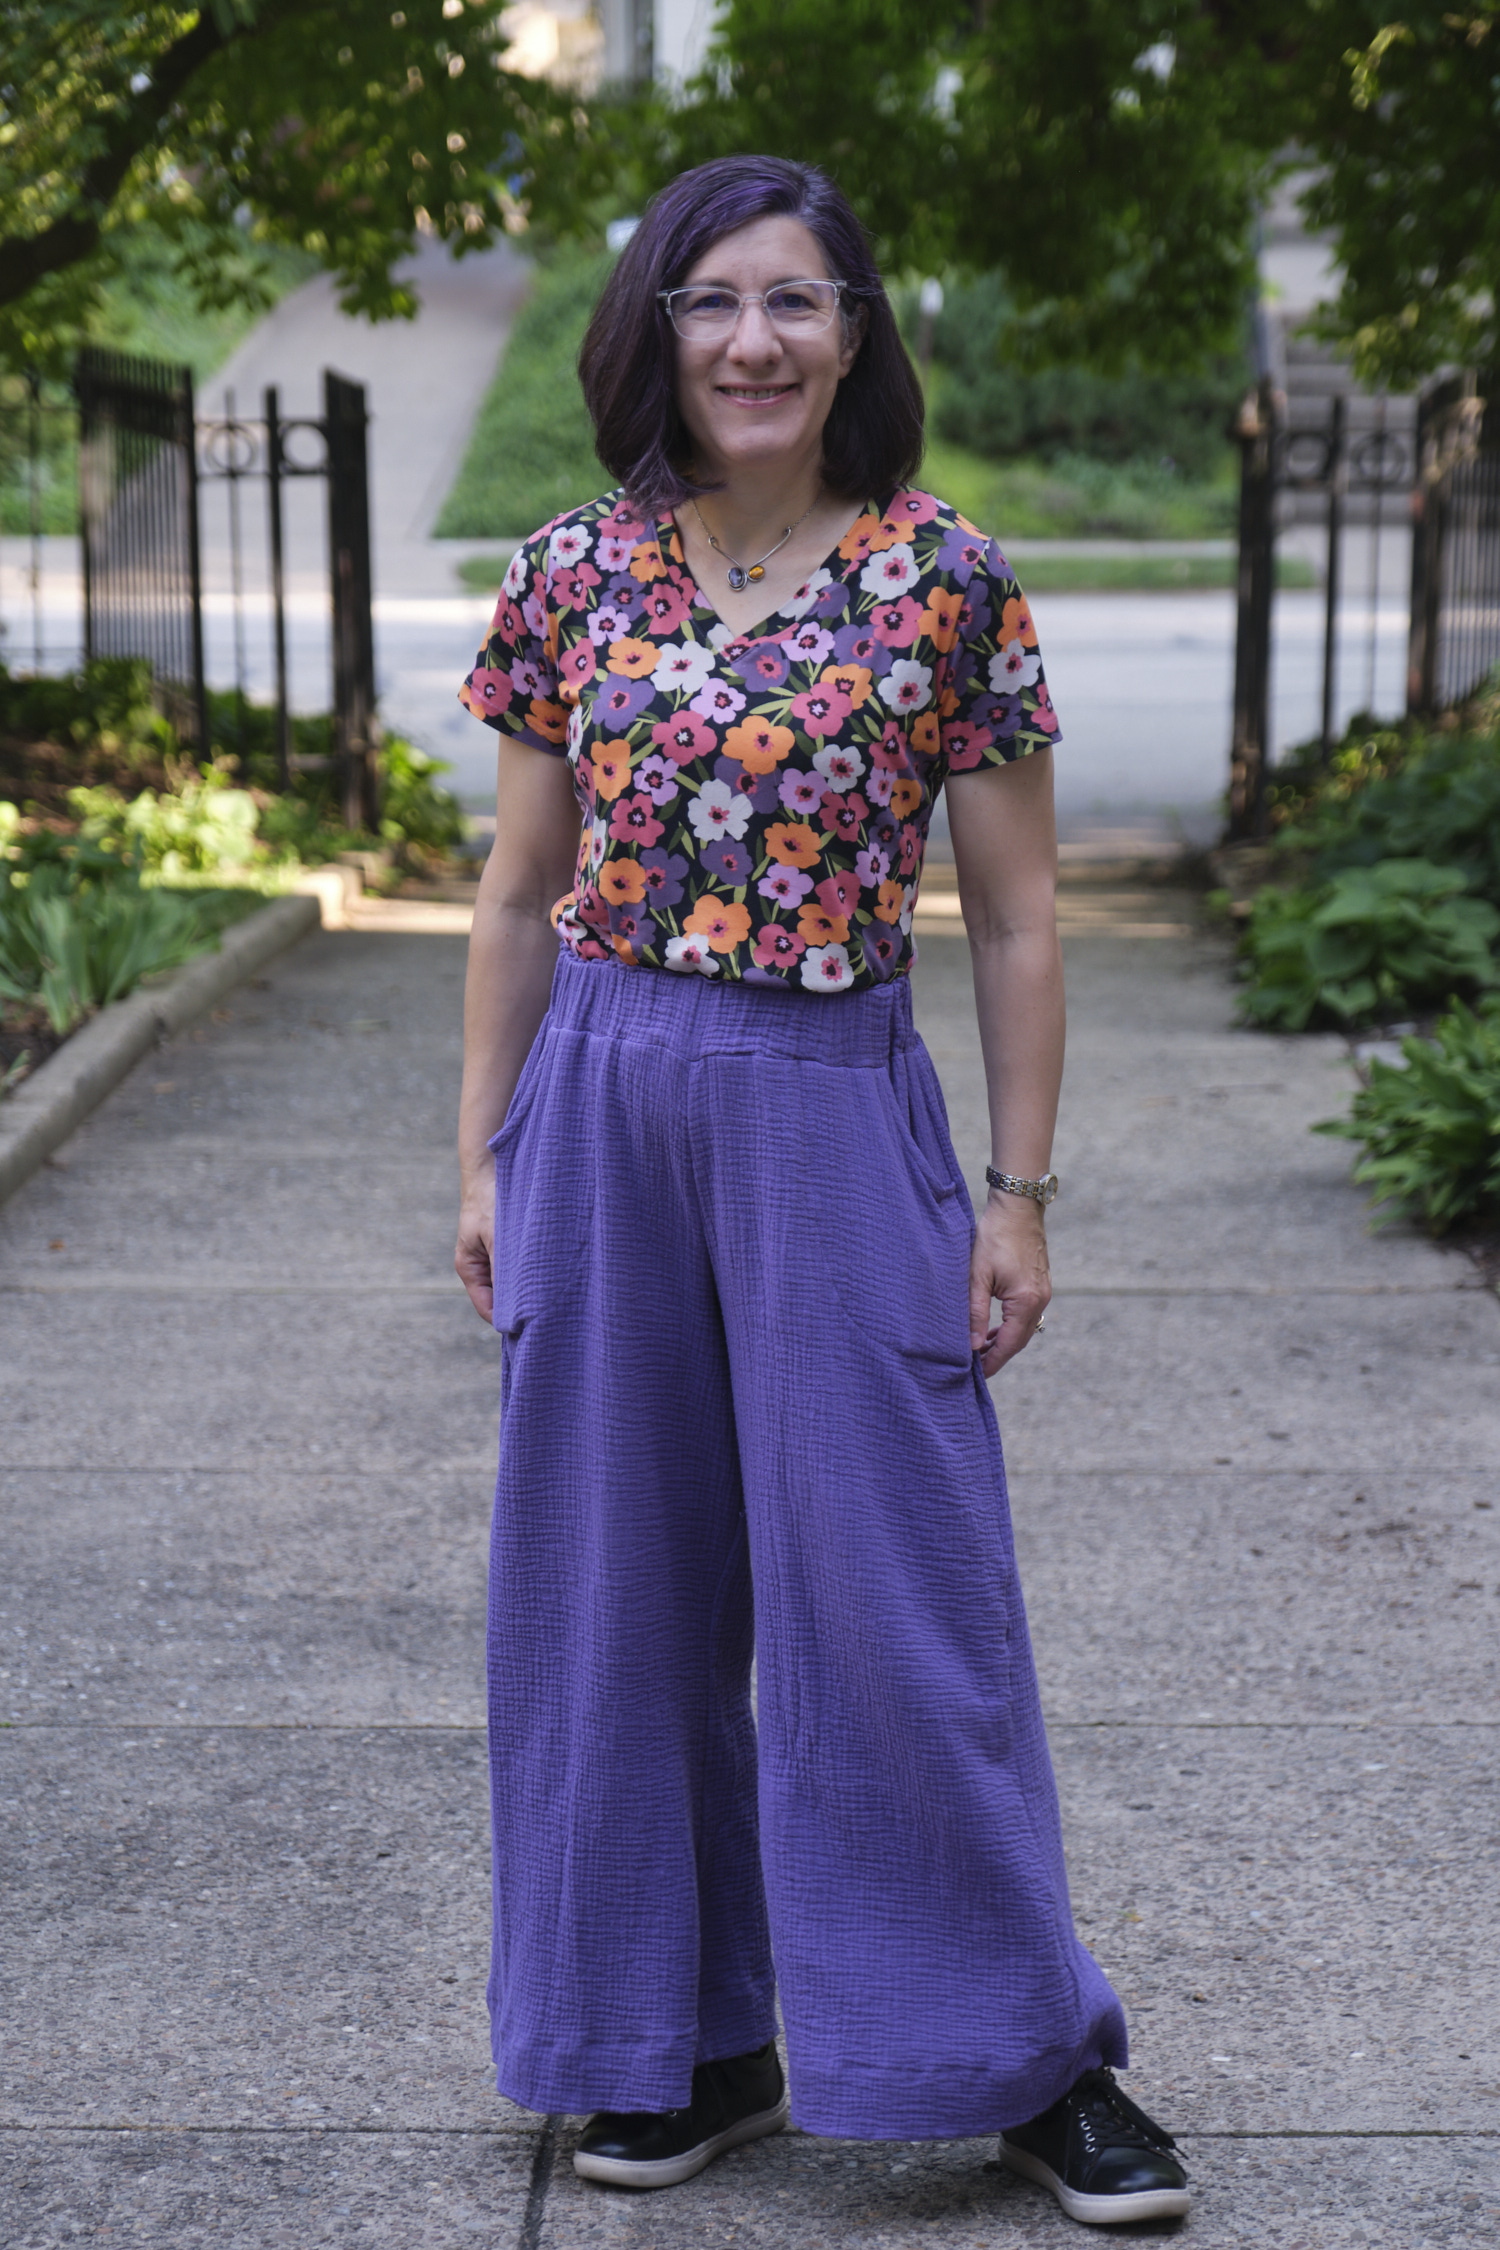
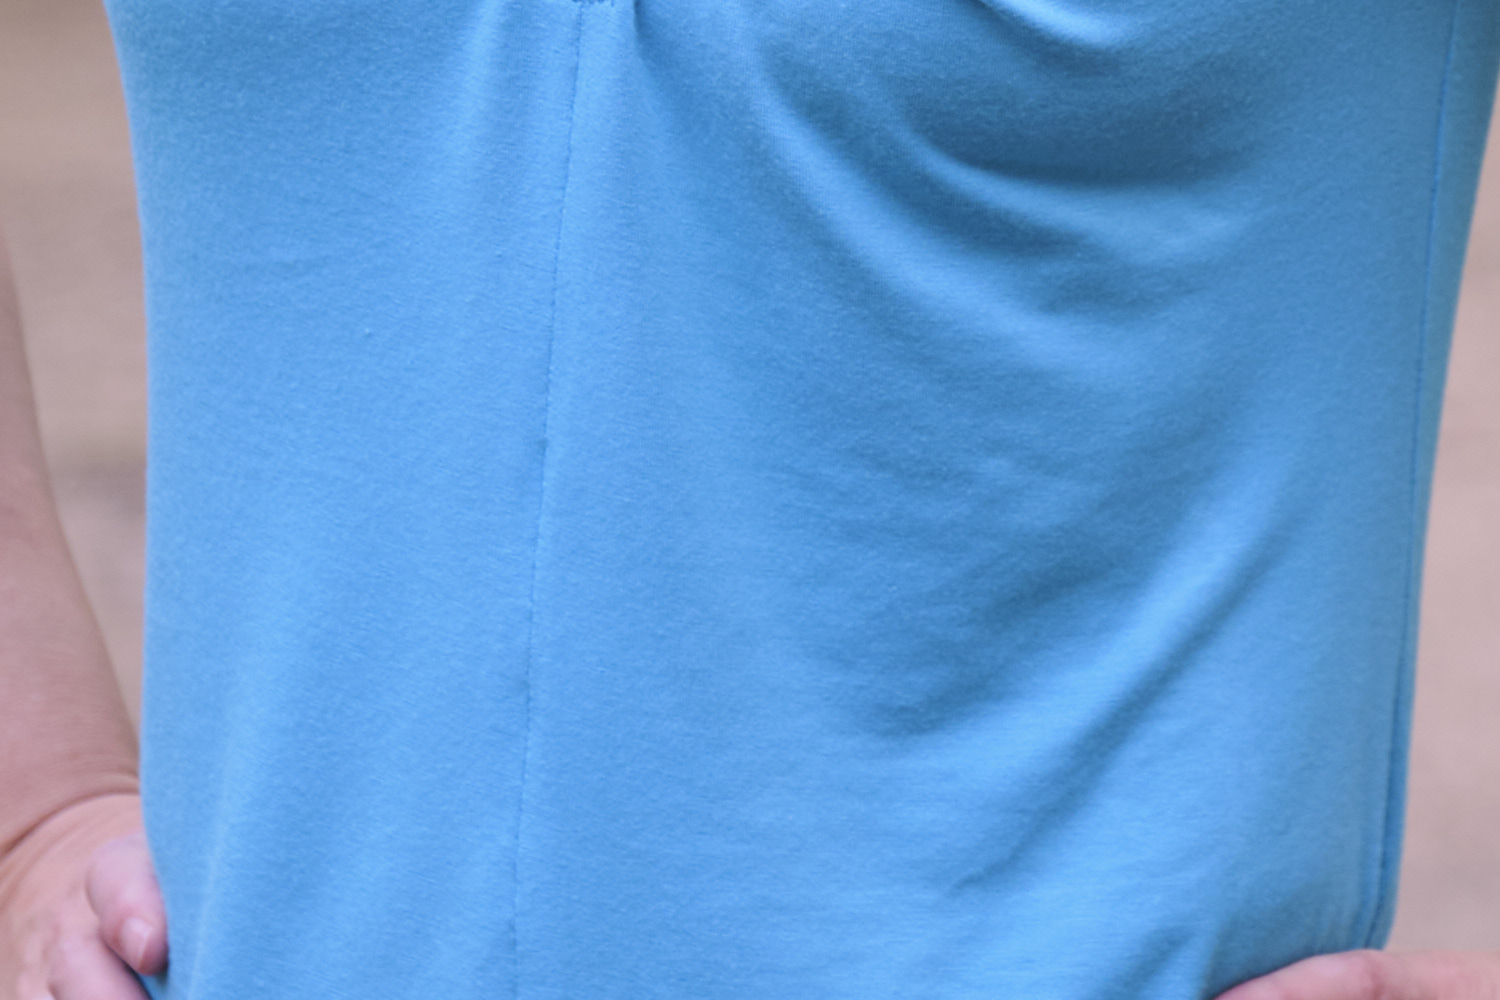
I decided to make a new airflow top to go with my new black airflow Making Moves pants and selected the Pattern Emporium Rise & Shine Sleeveless Top pattern, which I had never tried before. I made it in a size AU8, length 2, low neckline, simple hem, without a center seam or bust darts. This version is easy to cut out: just a front, a back, and 1-inch bias-cut facing strips for the neck and two armholes. Kate’s instructions and video on sewing the neck and armhole facings are clear and easy to follow, but I had to take it pretty slow, so it took a while.
I made the pattern as written, and it came out pretty perfect. I did struggle with a few things, which I’ll note here.
When I projected the pattern I found the notch marks on the neck facing too small to easily see projected on my fabric so I extended them and made them darker.
The airflow fabric grows and spreads a bit (but not as much as double gauze), but pops back. However, the folded facing does come out a bit wider than it should. This is not a problem, as the facing is on the inside of the shirt.
Joining the right shoulder after sewing on the neck facing was challenging. I had to try three times to get it right, and the seam is still a bit bulky. However, following the advice to tack it dow helped.
To sew a 5/8-inch simple hem I machine-basted 5/8″ from the edge (after serging), then folded at the basting line and pressed. I was able to sew at 1/2″ from the front side of the fabric without needing to pin it. When I was done, I pulled out the basting stitches.
I used less than a yard of 58″-wide 175gsm 100% polyester airflow fabric. The airflow has no spandex and thus officially no stretch, but it does have a bit of give due to the crinkle texture. Airflow is very inexpensive (especially when Mily Mae Fabrics puts it on sale), requires no ironing, and is less slippery to sew than a lot of other polyester wovens. However, it doesn’t hold a crisp crease when pressed. The color I used was called aqua, but I think it is more of a teal.
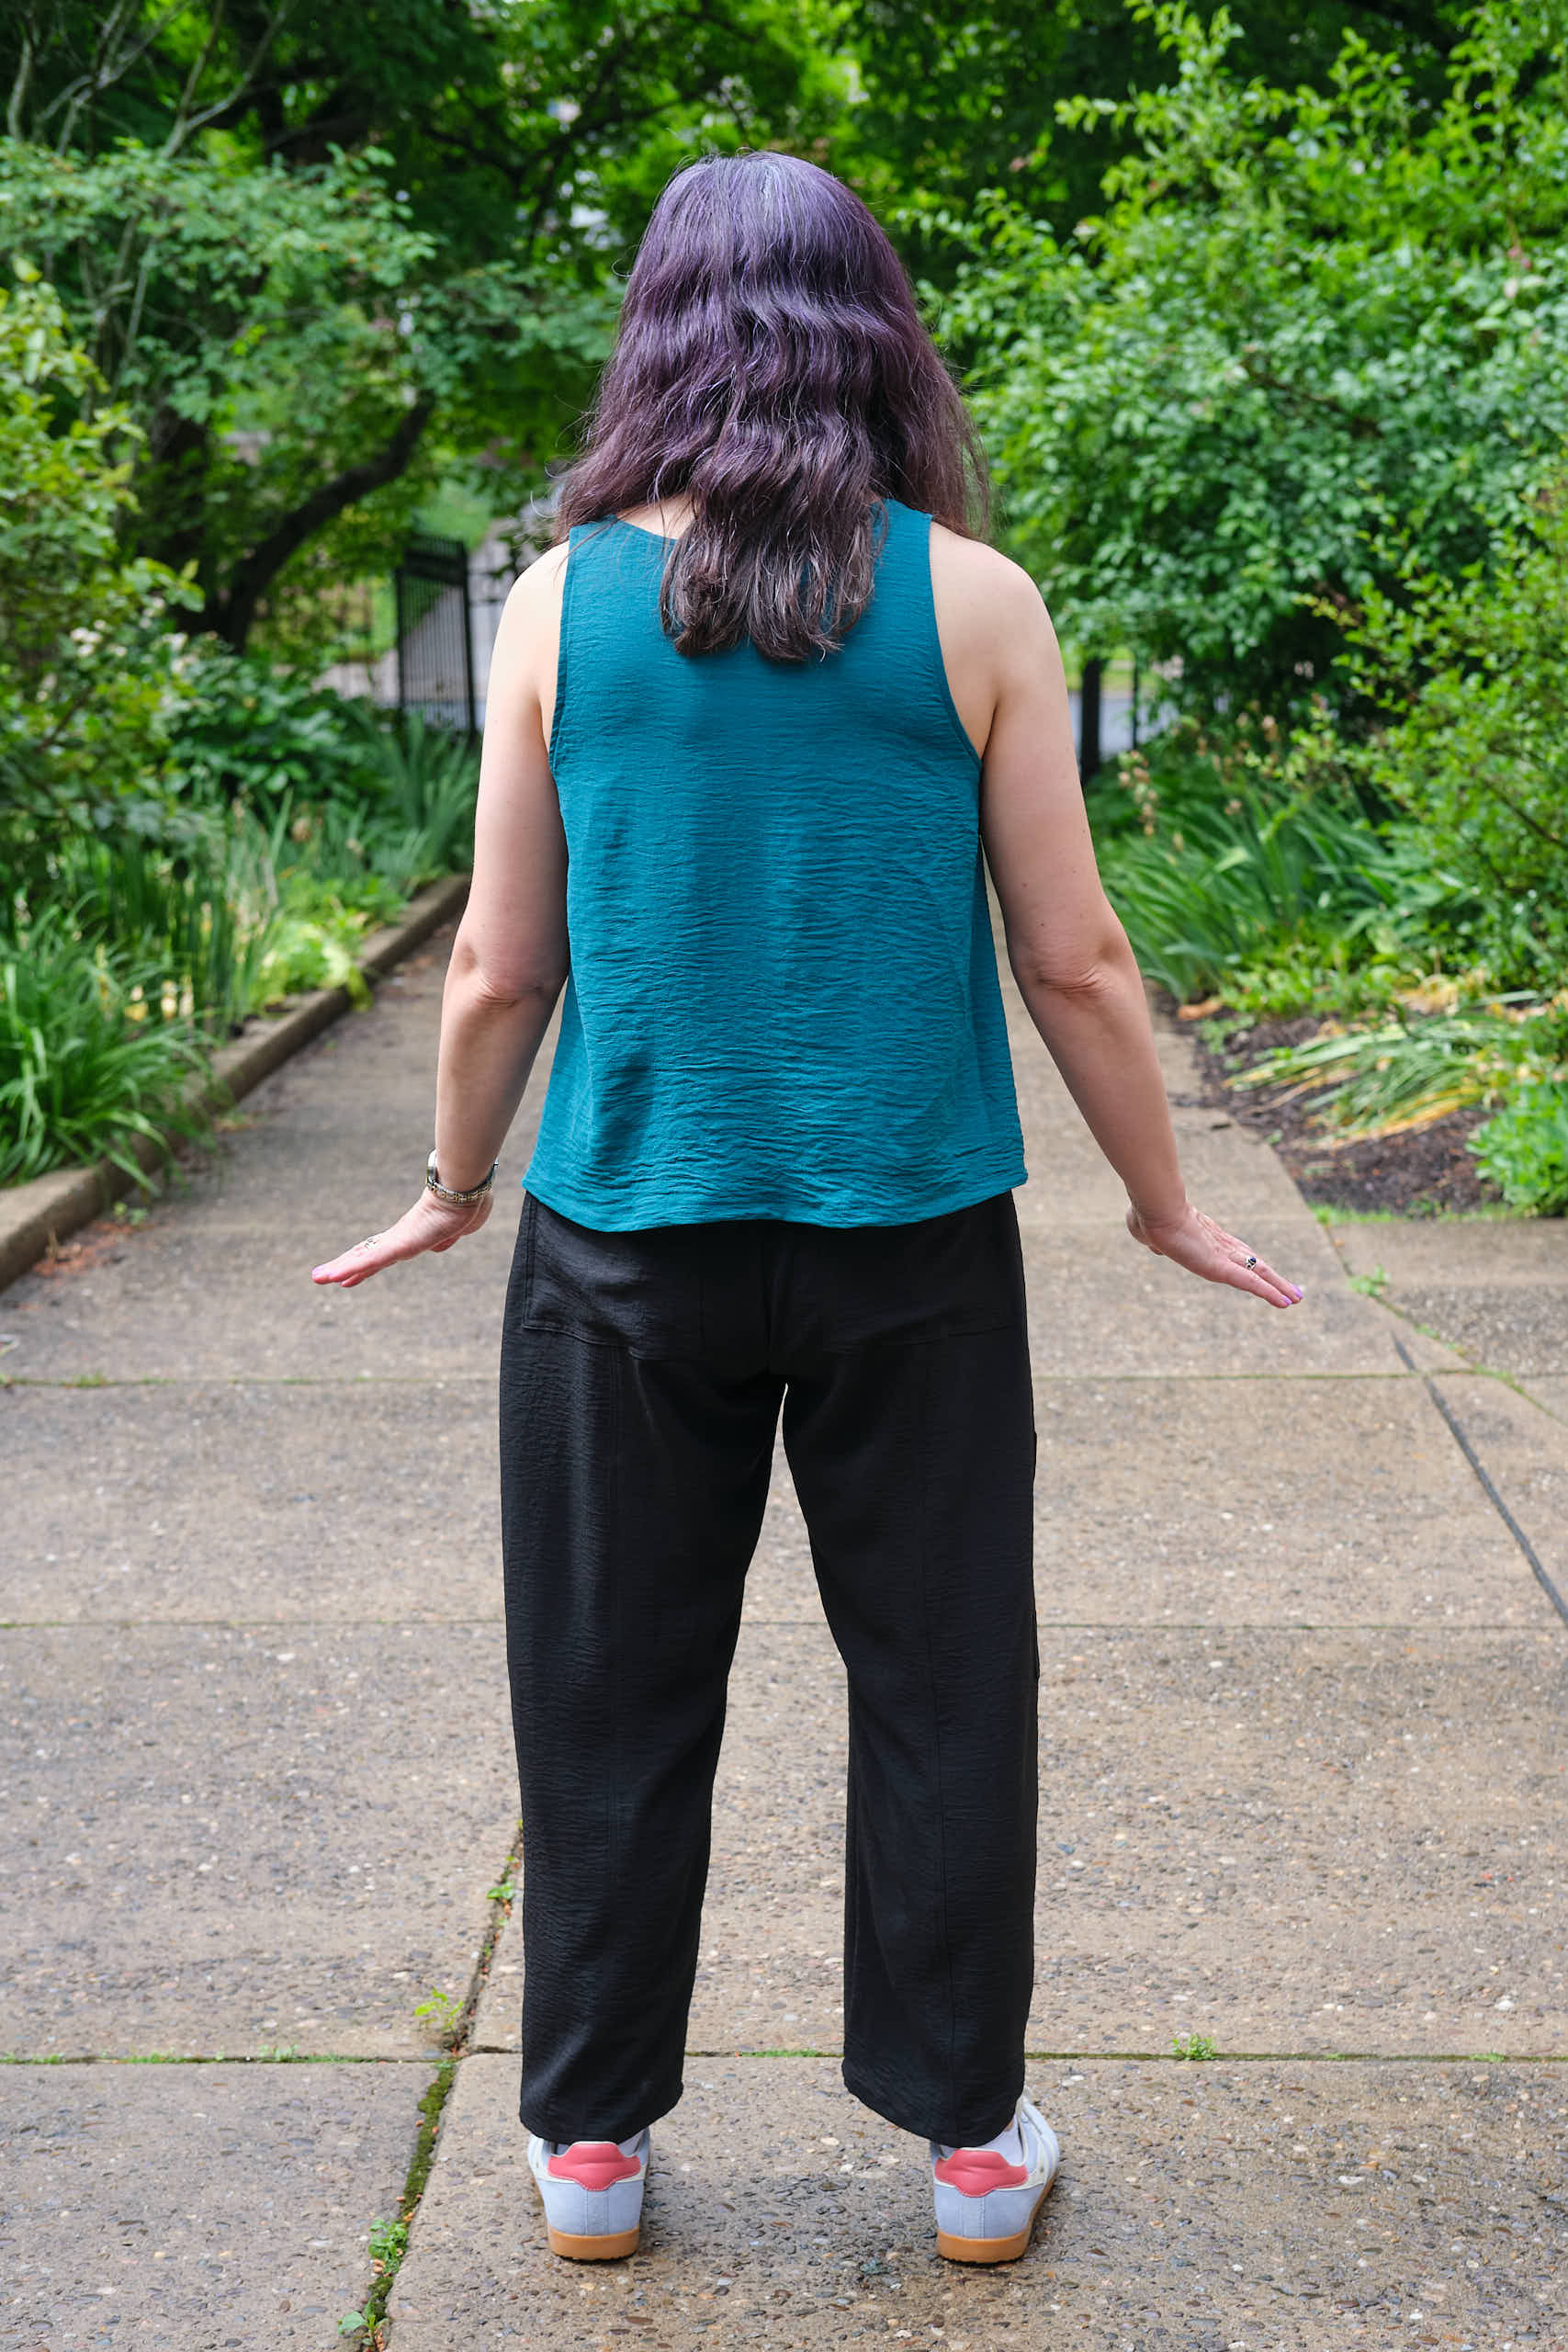
Length 2 is a good length for me to wear untucked. There is also room to tuck it in on high waisted pants, but if I was going to regularly tuck I might make the longer length. Rise & Shine has more of a swing shape than most of the other Pattern Emporium woven tops (Be Mine, About Town, Spill the Tea), which are all built on the same basic bodice and have side seams that do not slope out as much. Rise & Shine is designed to be sleeveless and sleeves cannot be added (although I could see mashing it with Be Mine to have sleeves with the swing shape). The neckline comes with high and mid options, but the mid option is similar to the low option on the Be Mine top. You would have to improvise (or maybe mash with the Meet You There dress mid neckline) to have an in-between option. I made the lower option and it is definitely lower than I usually wear, but I think it works out ok for a summer top.
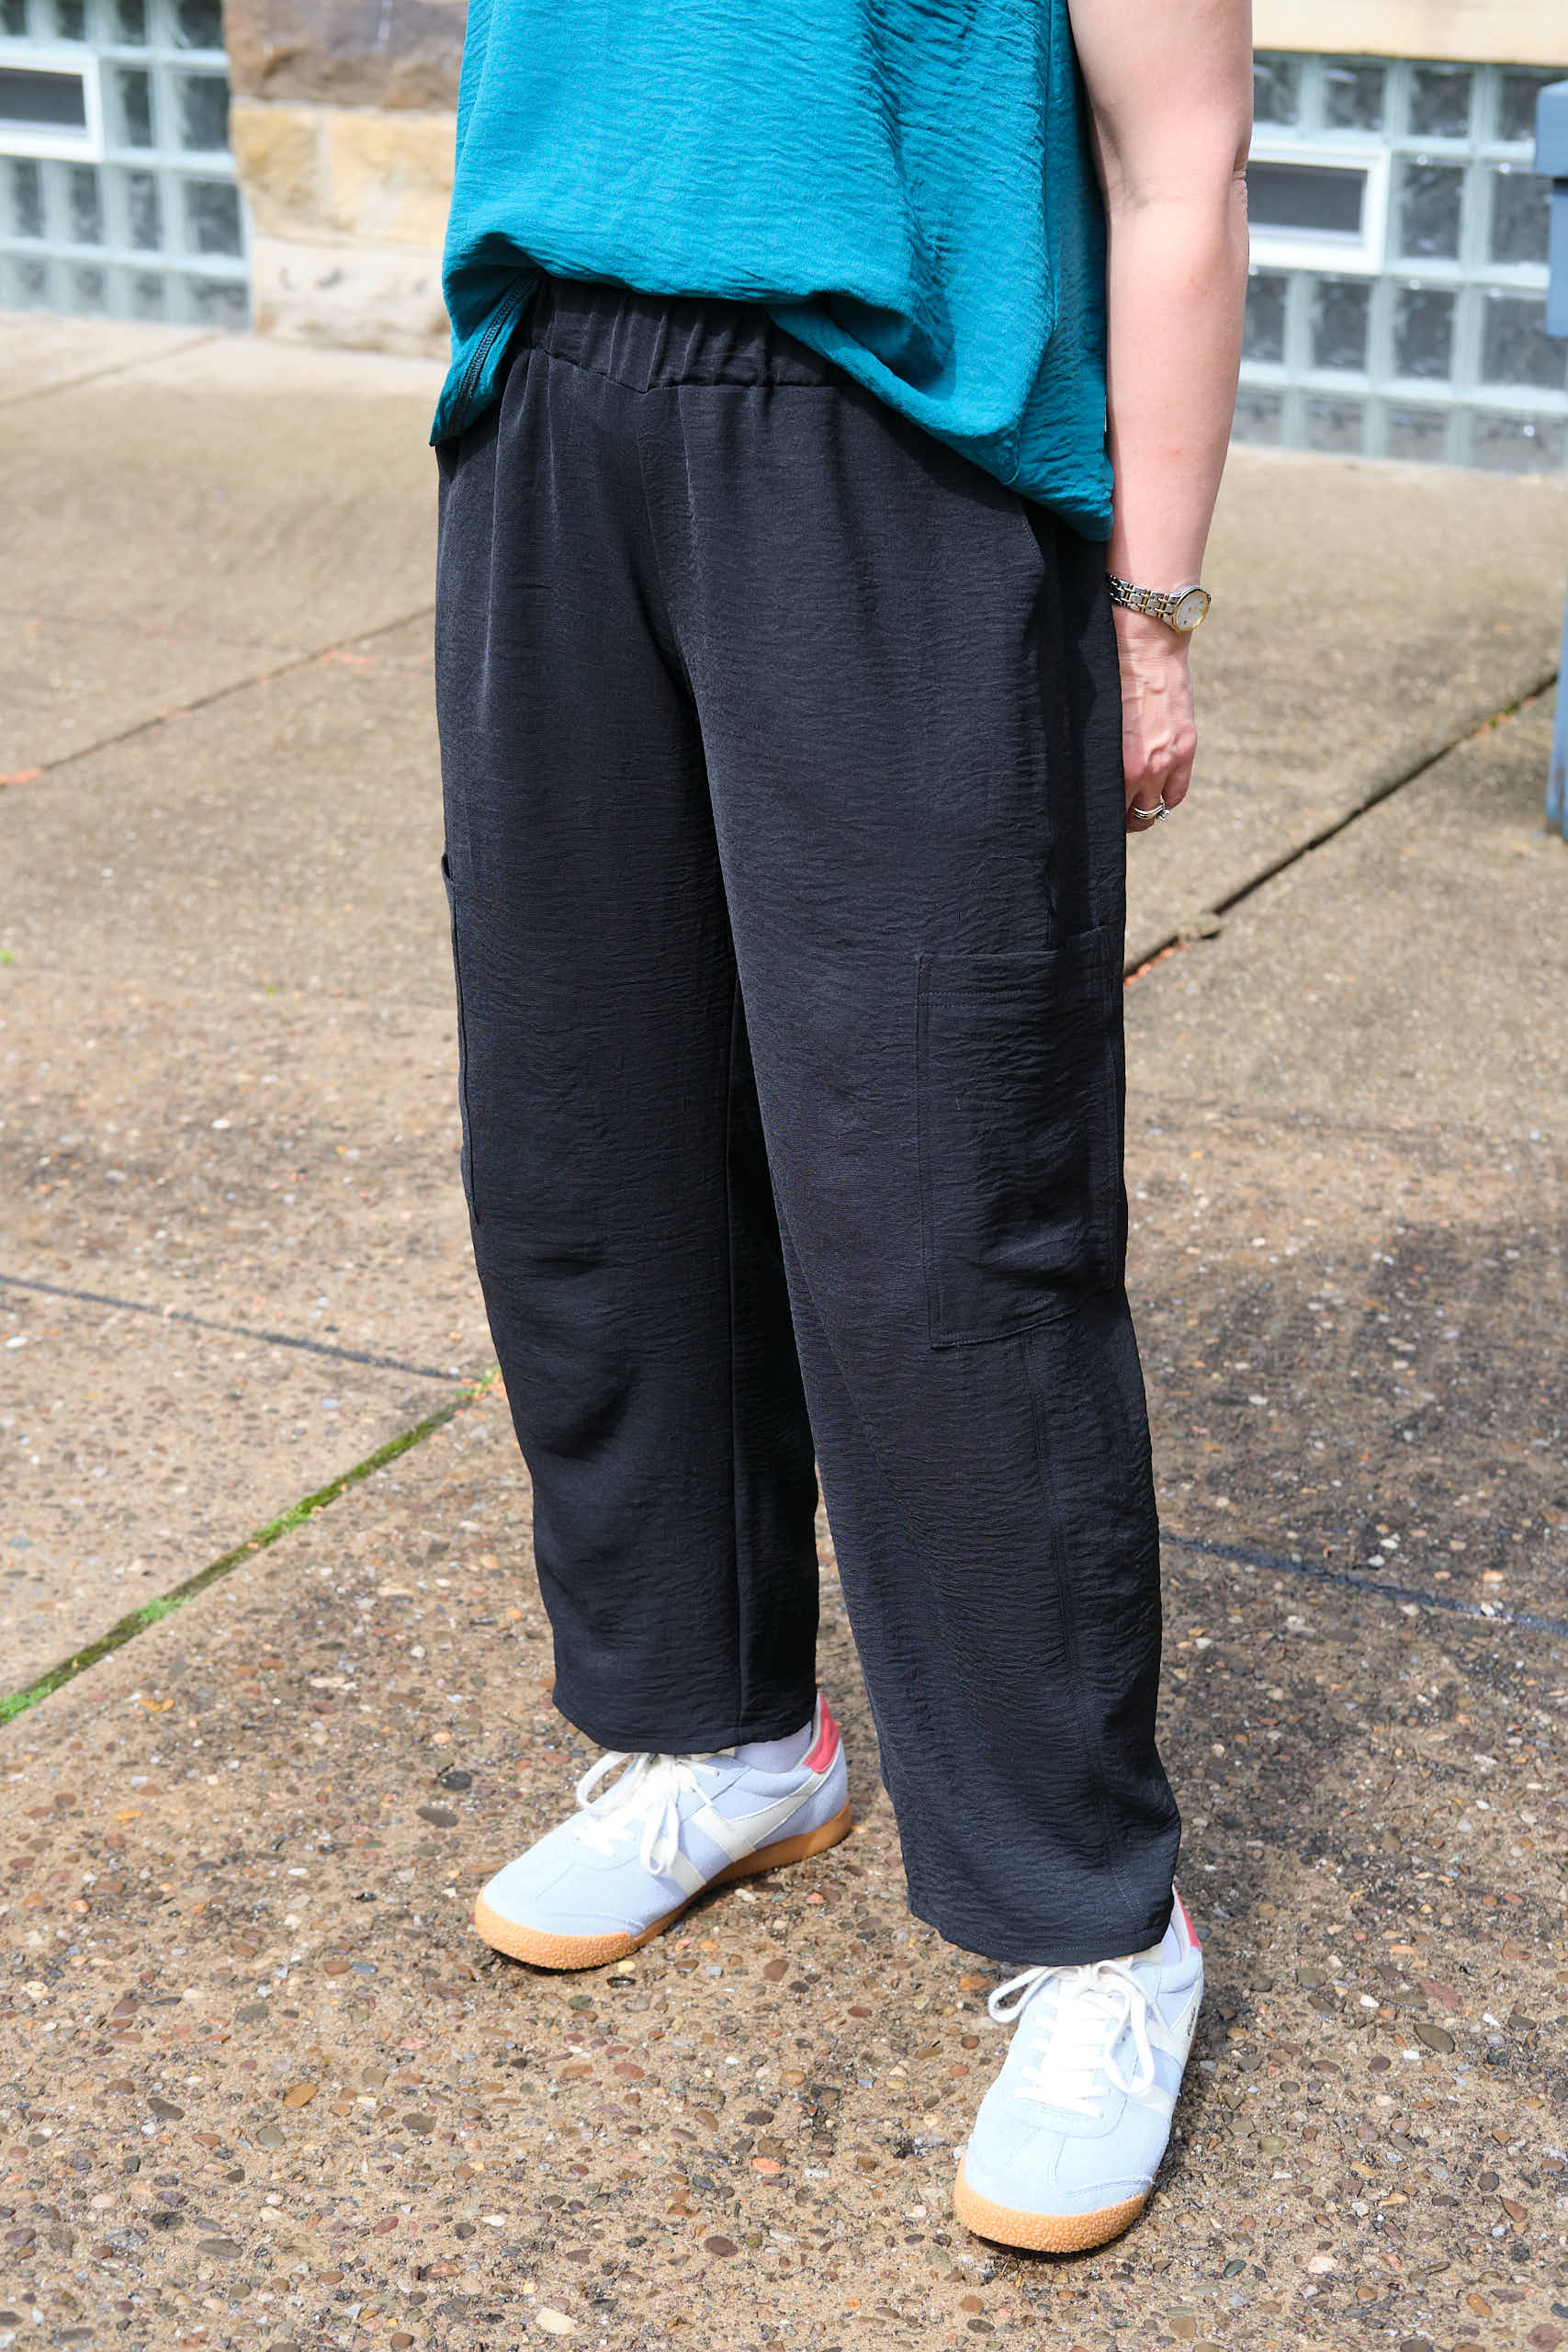
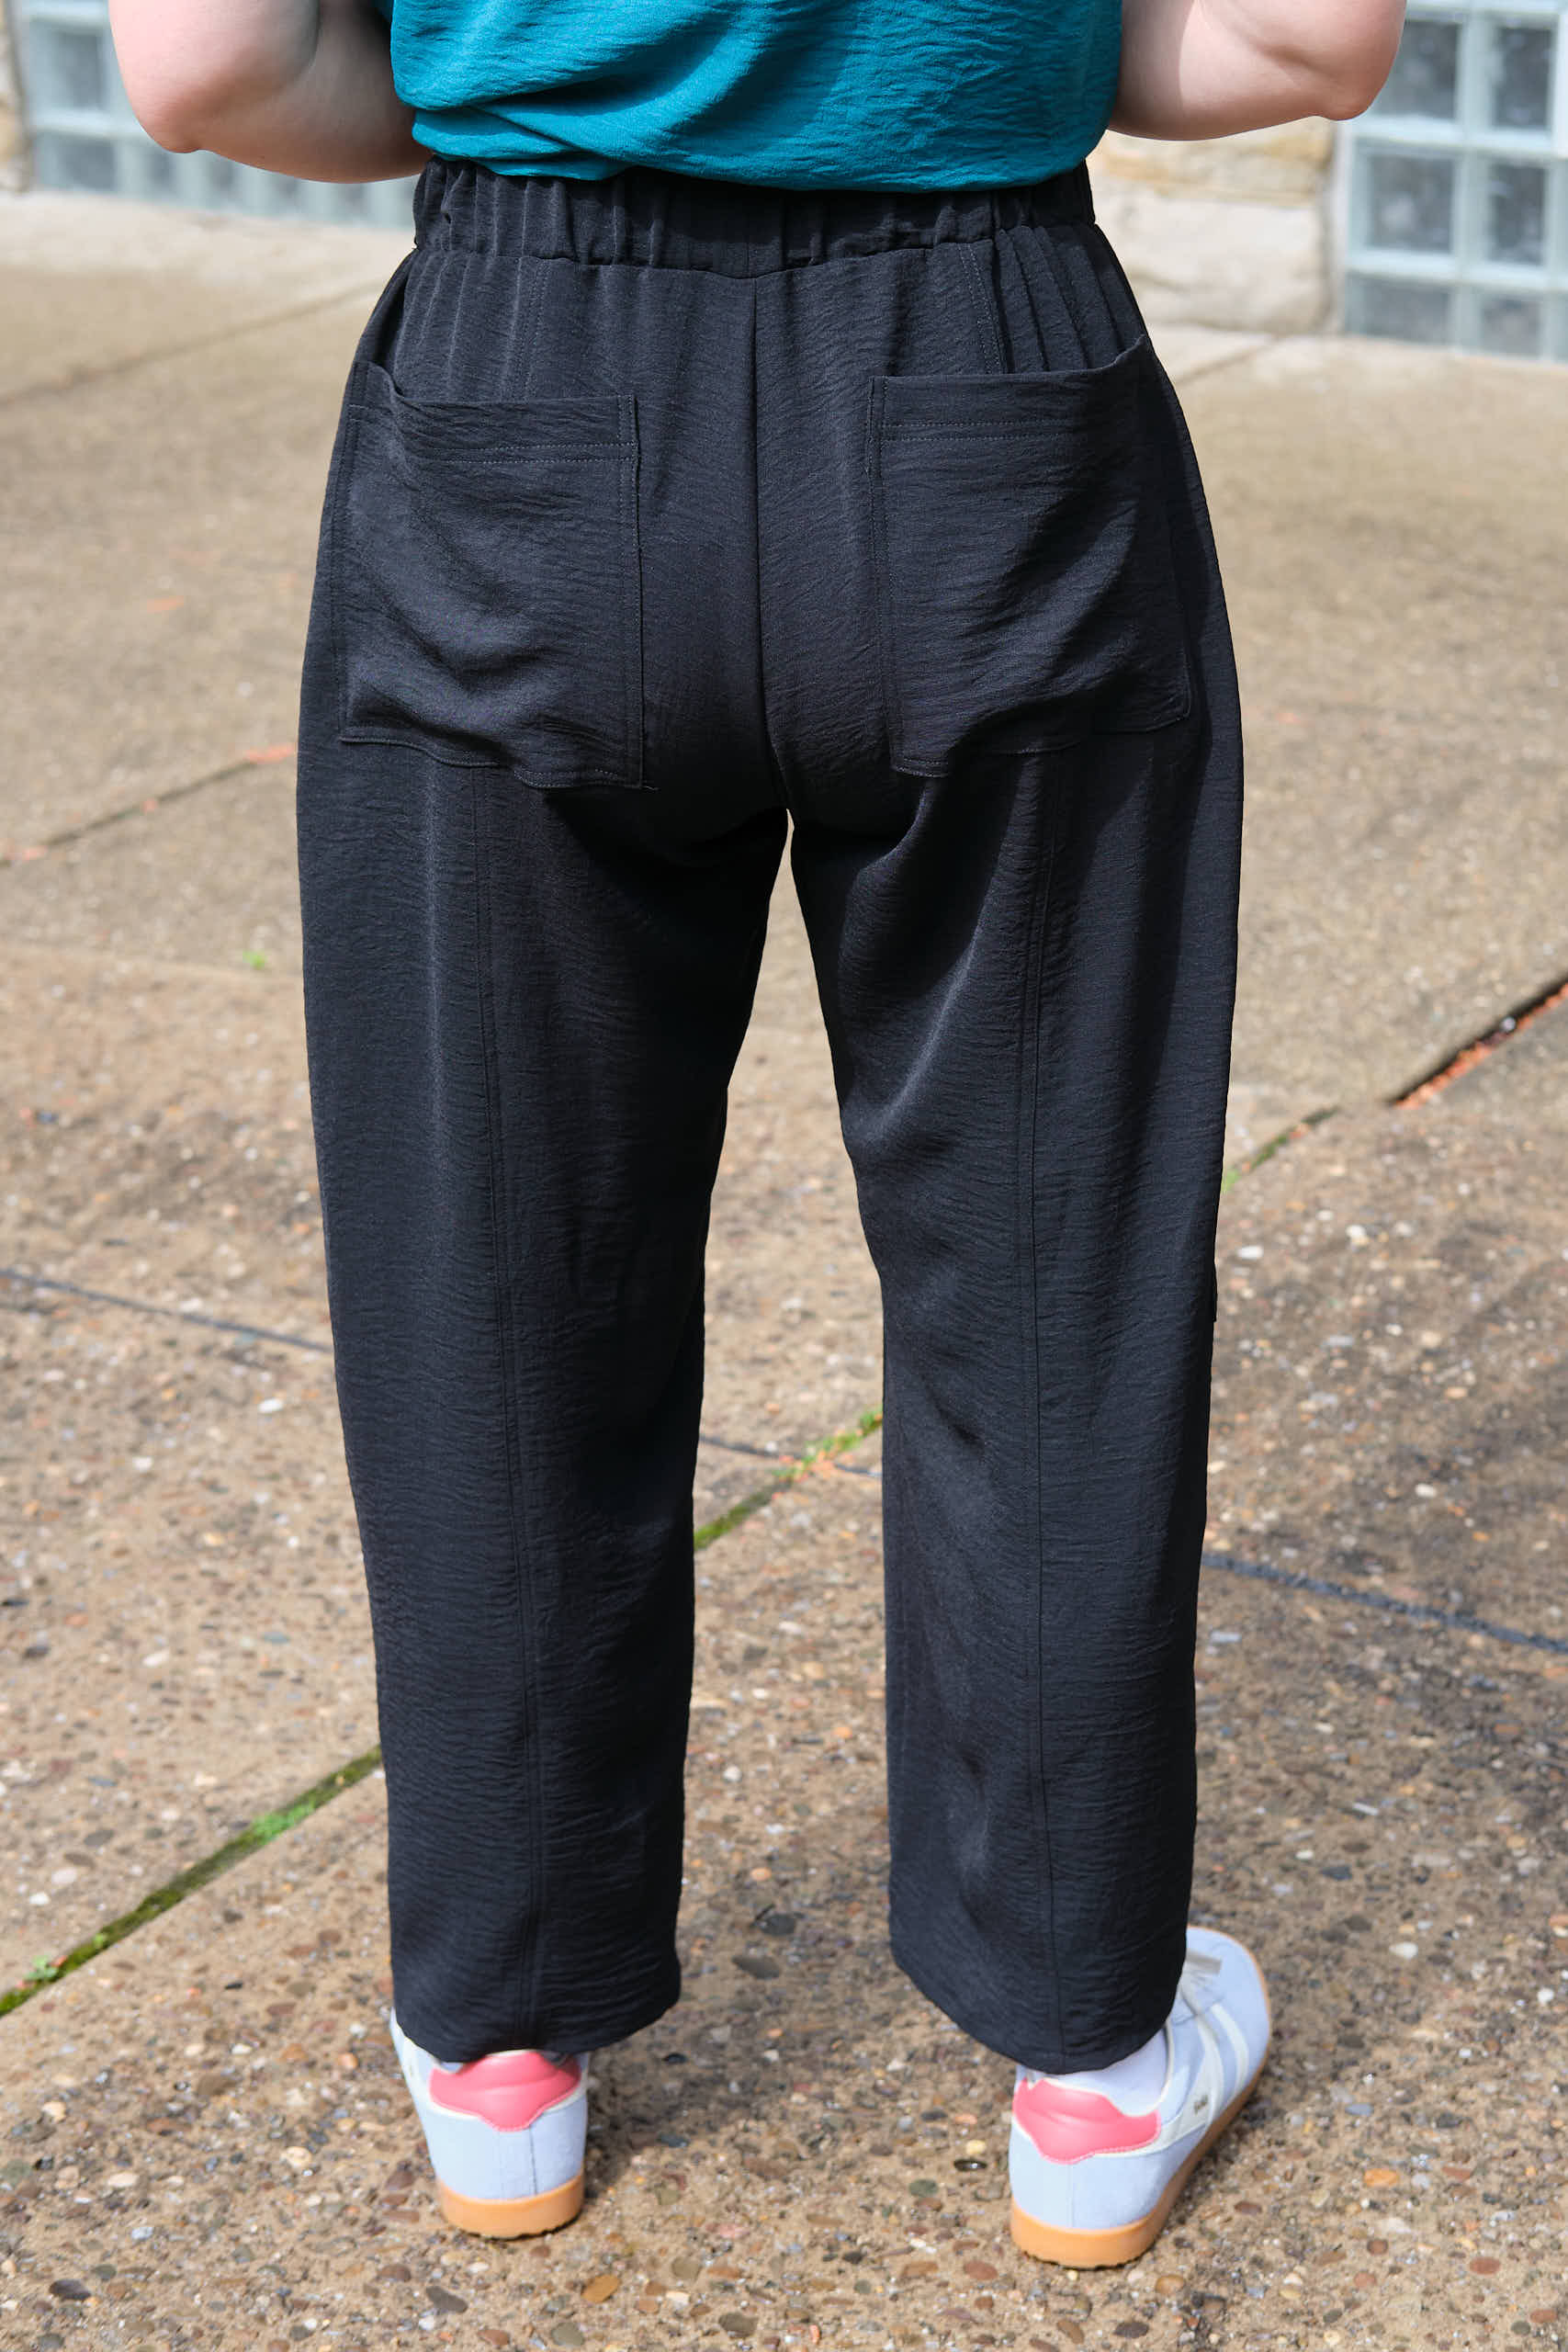
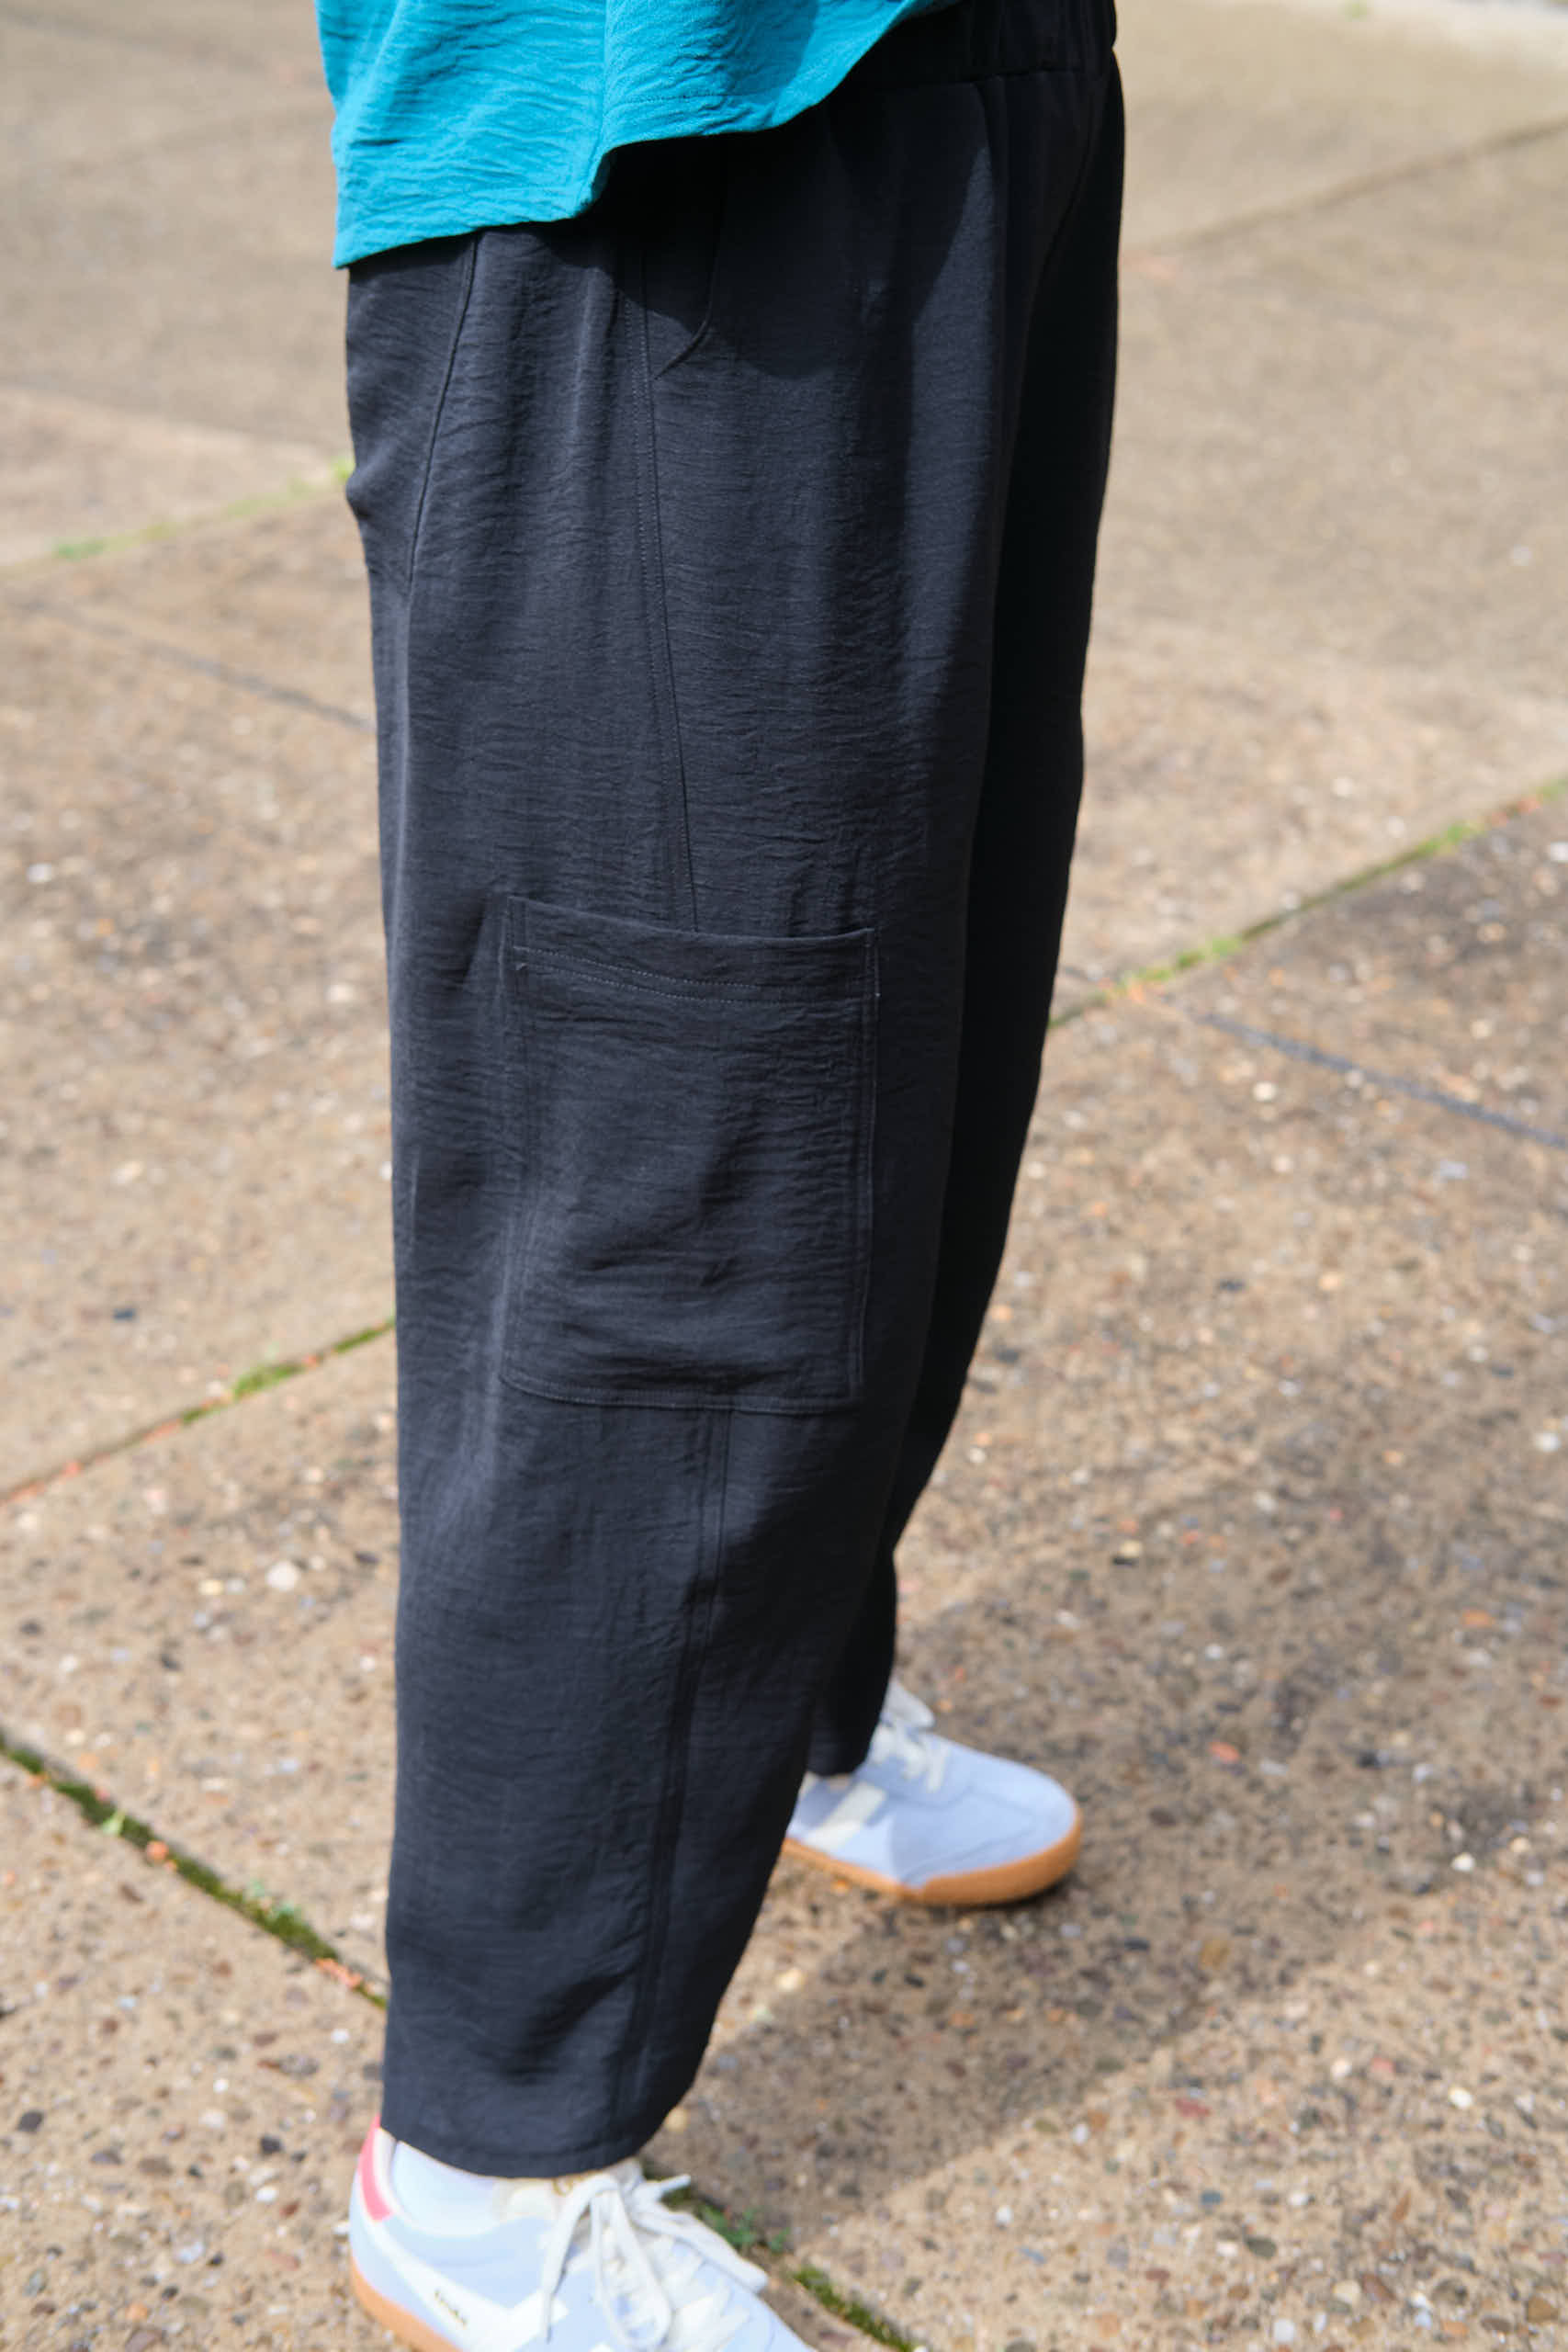
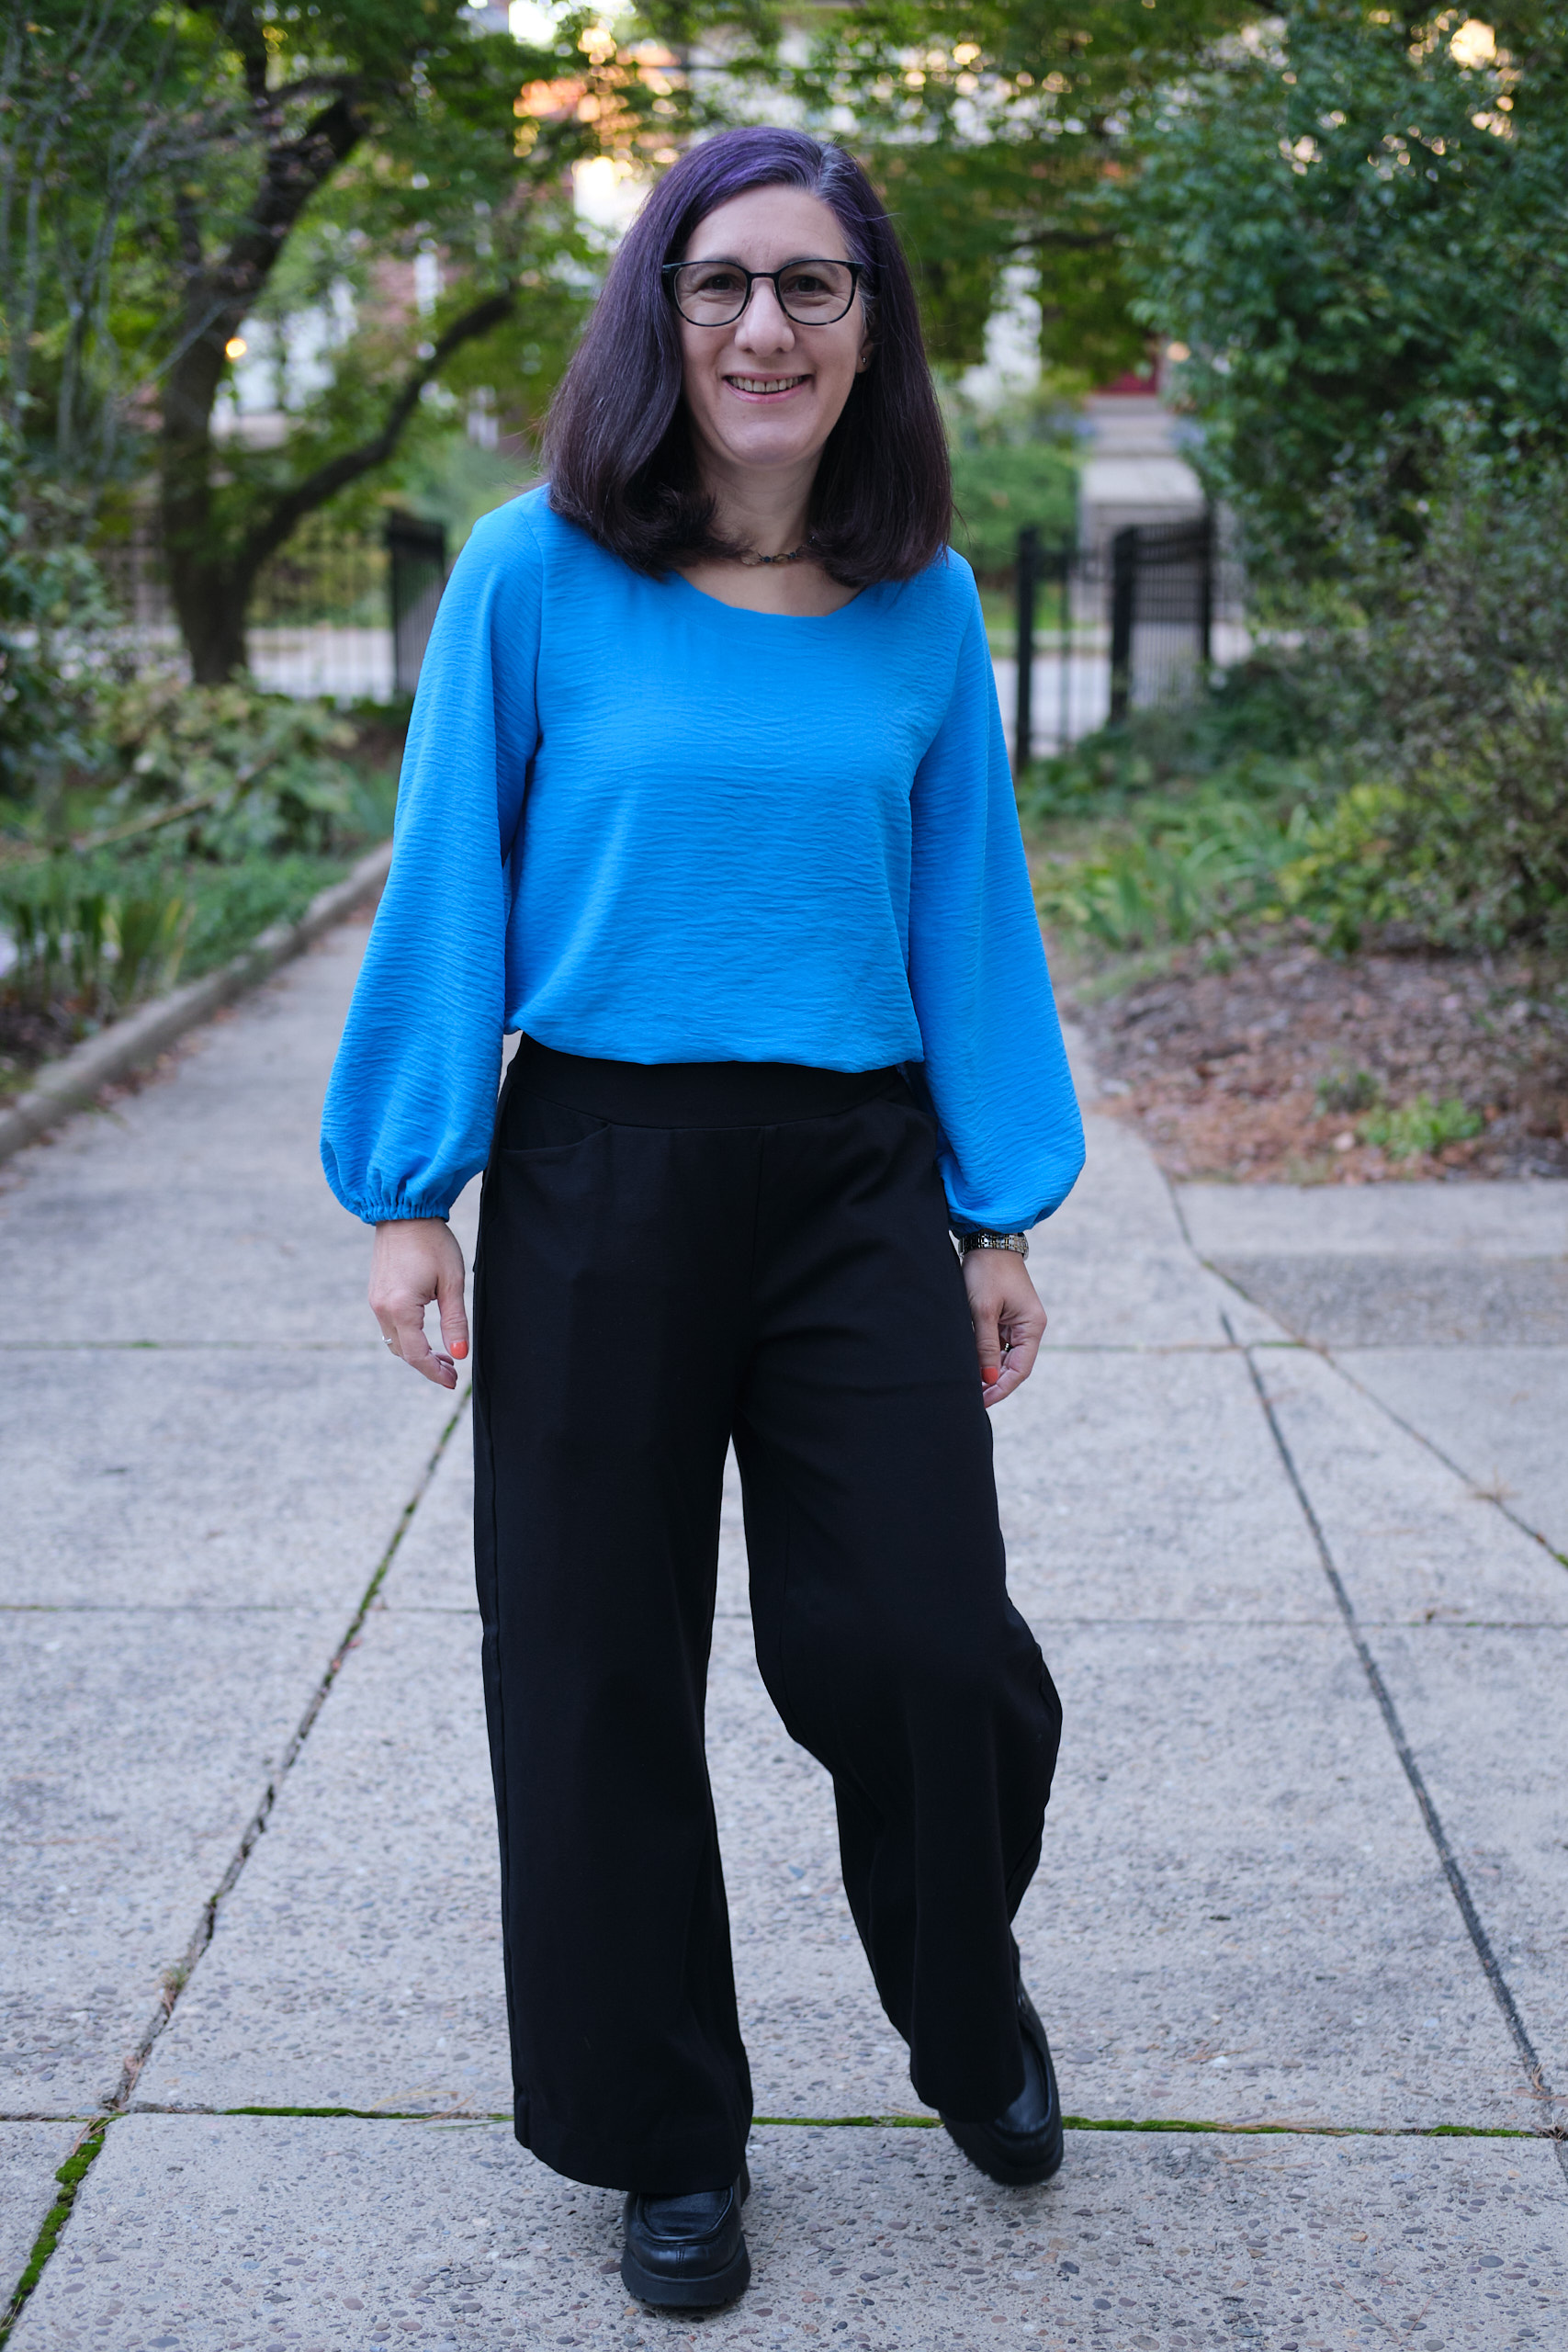
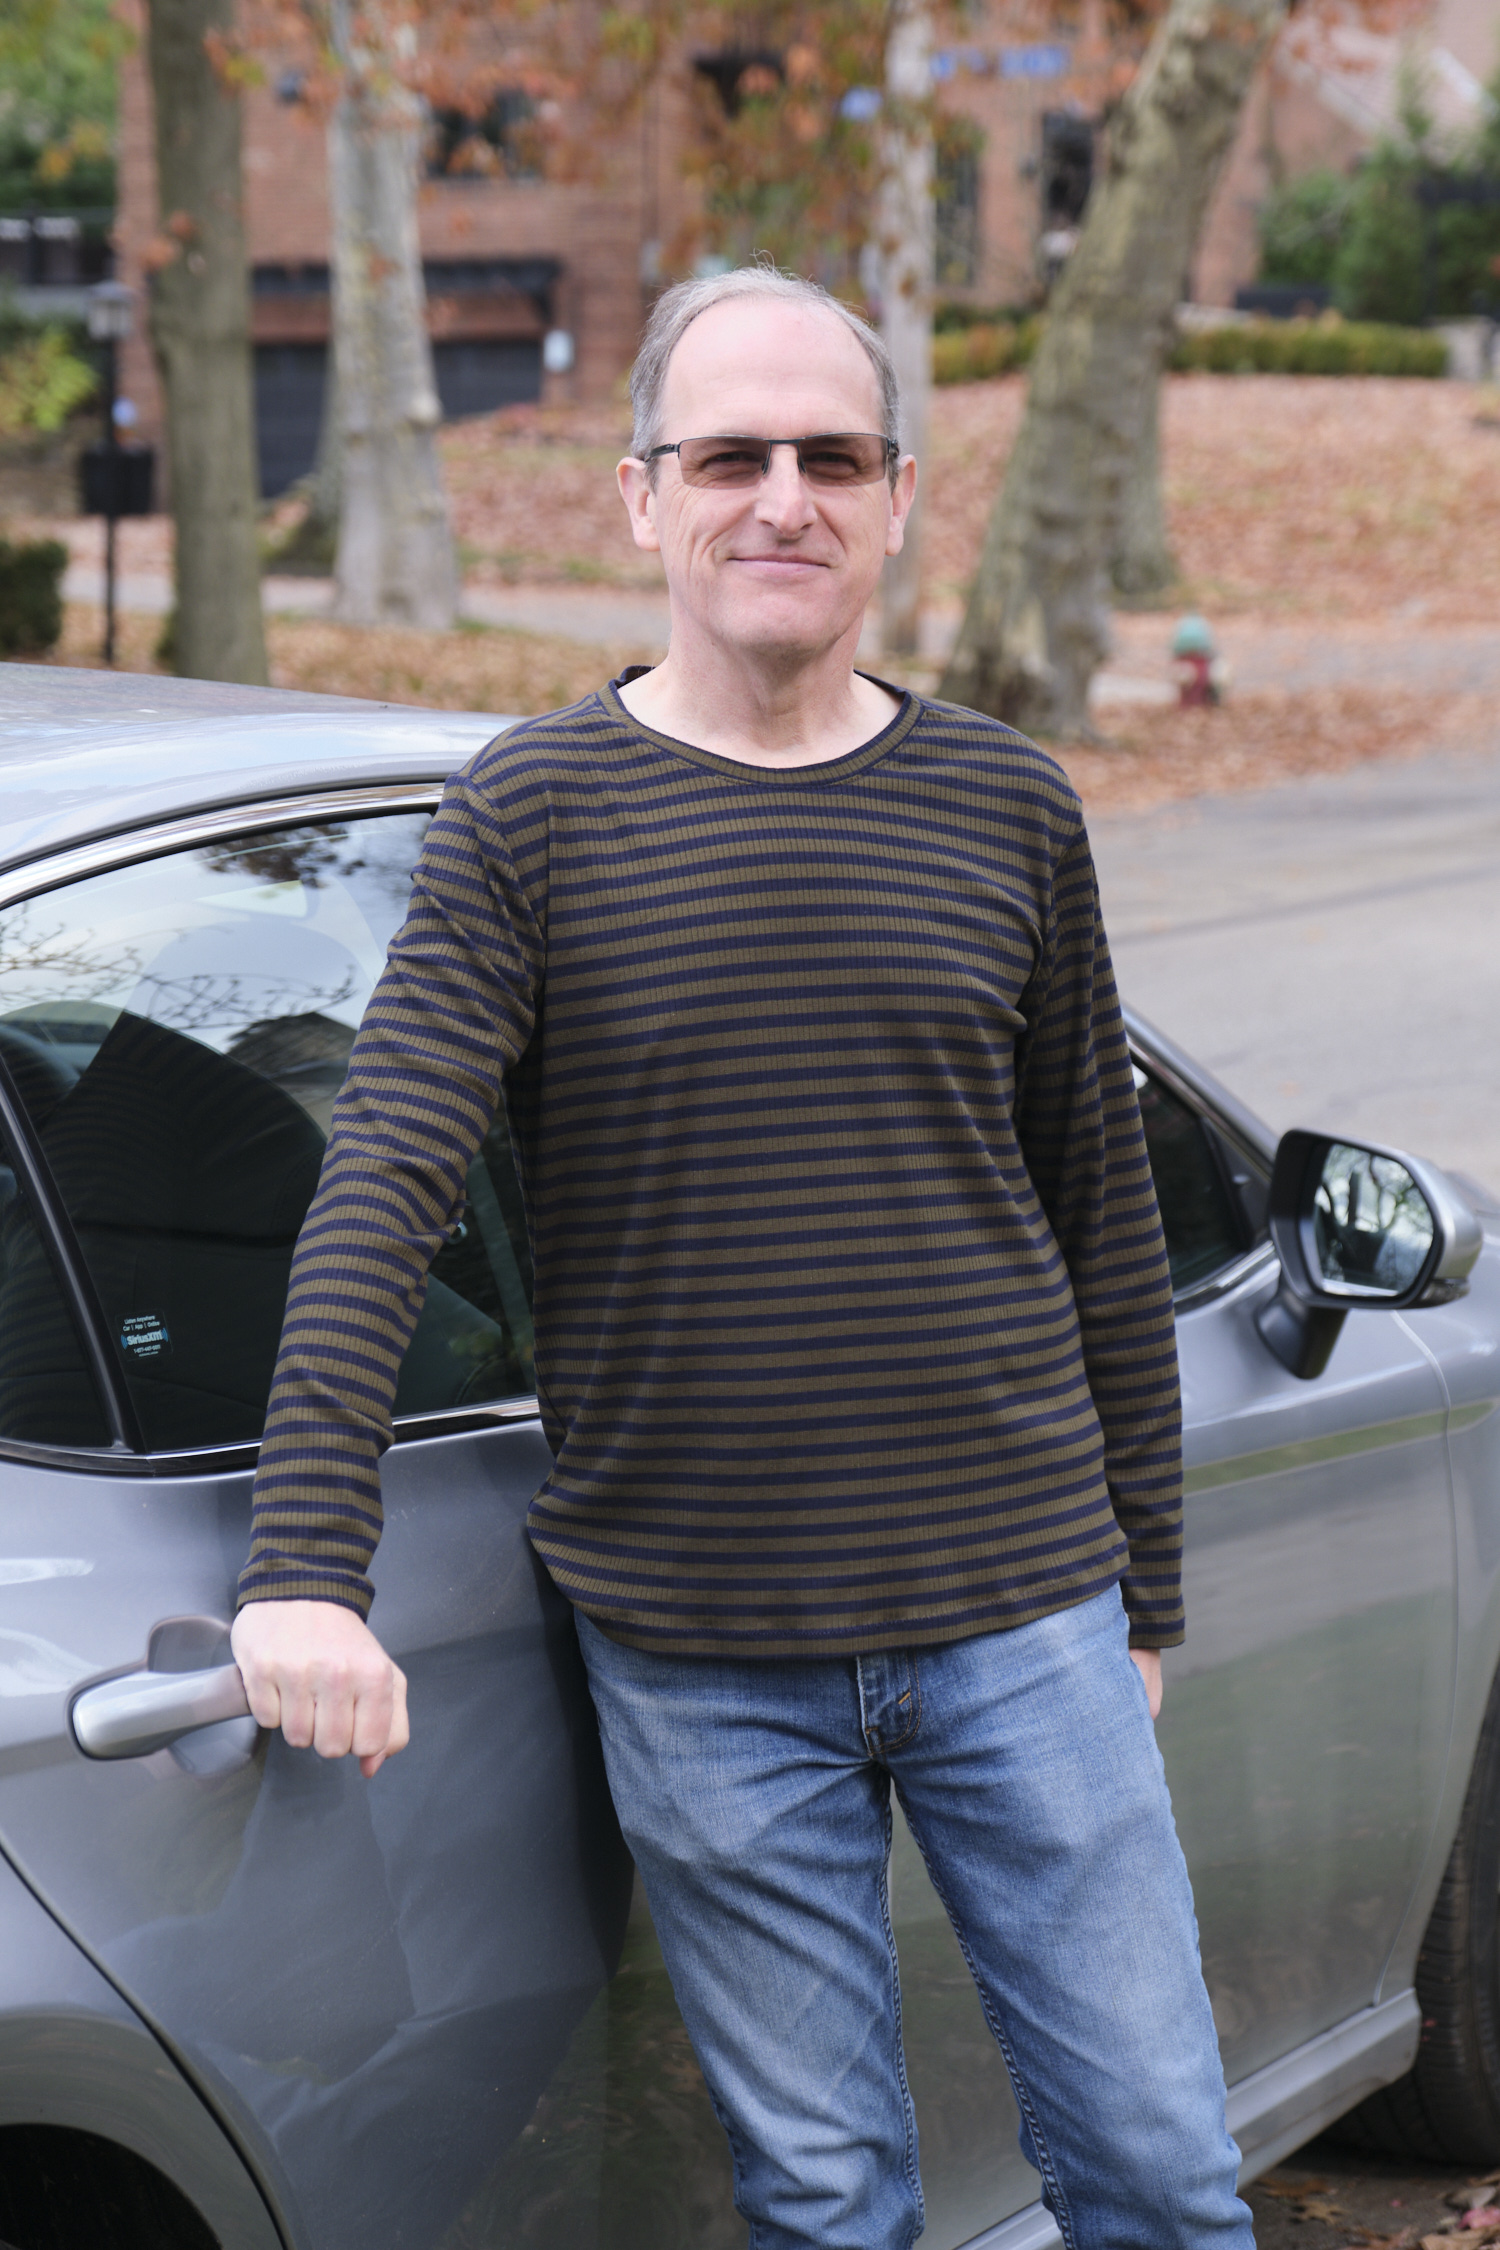
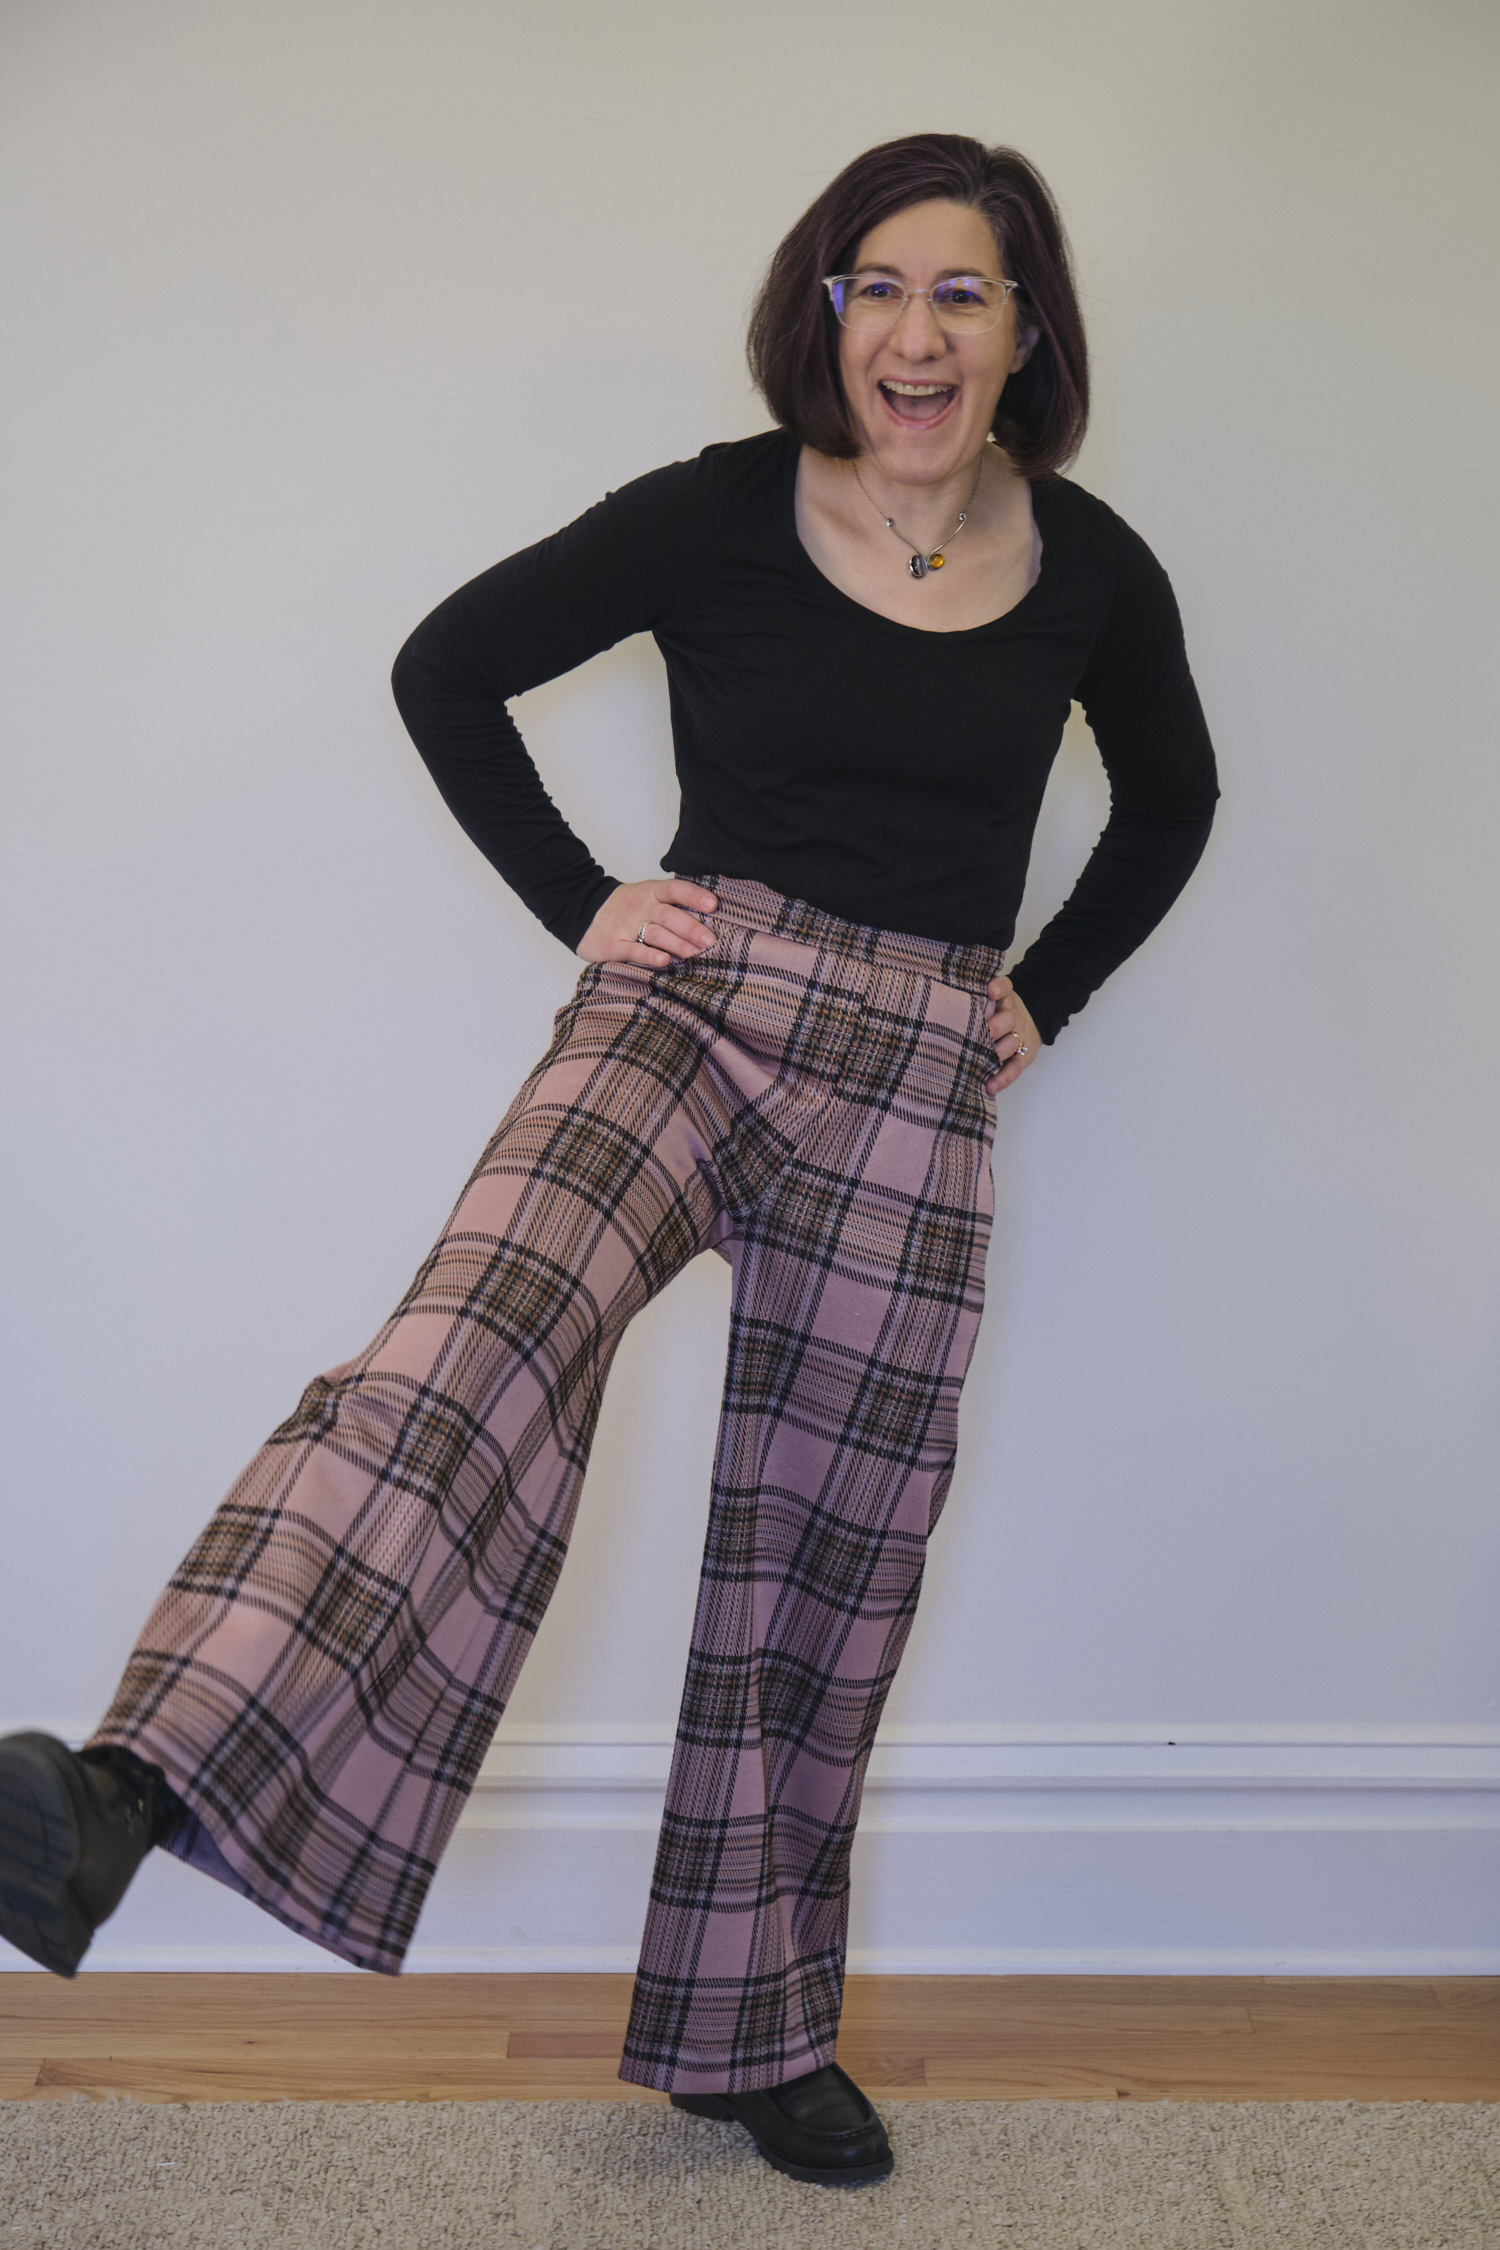
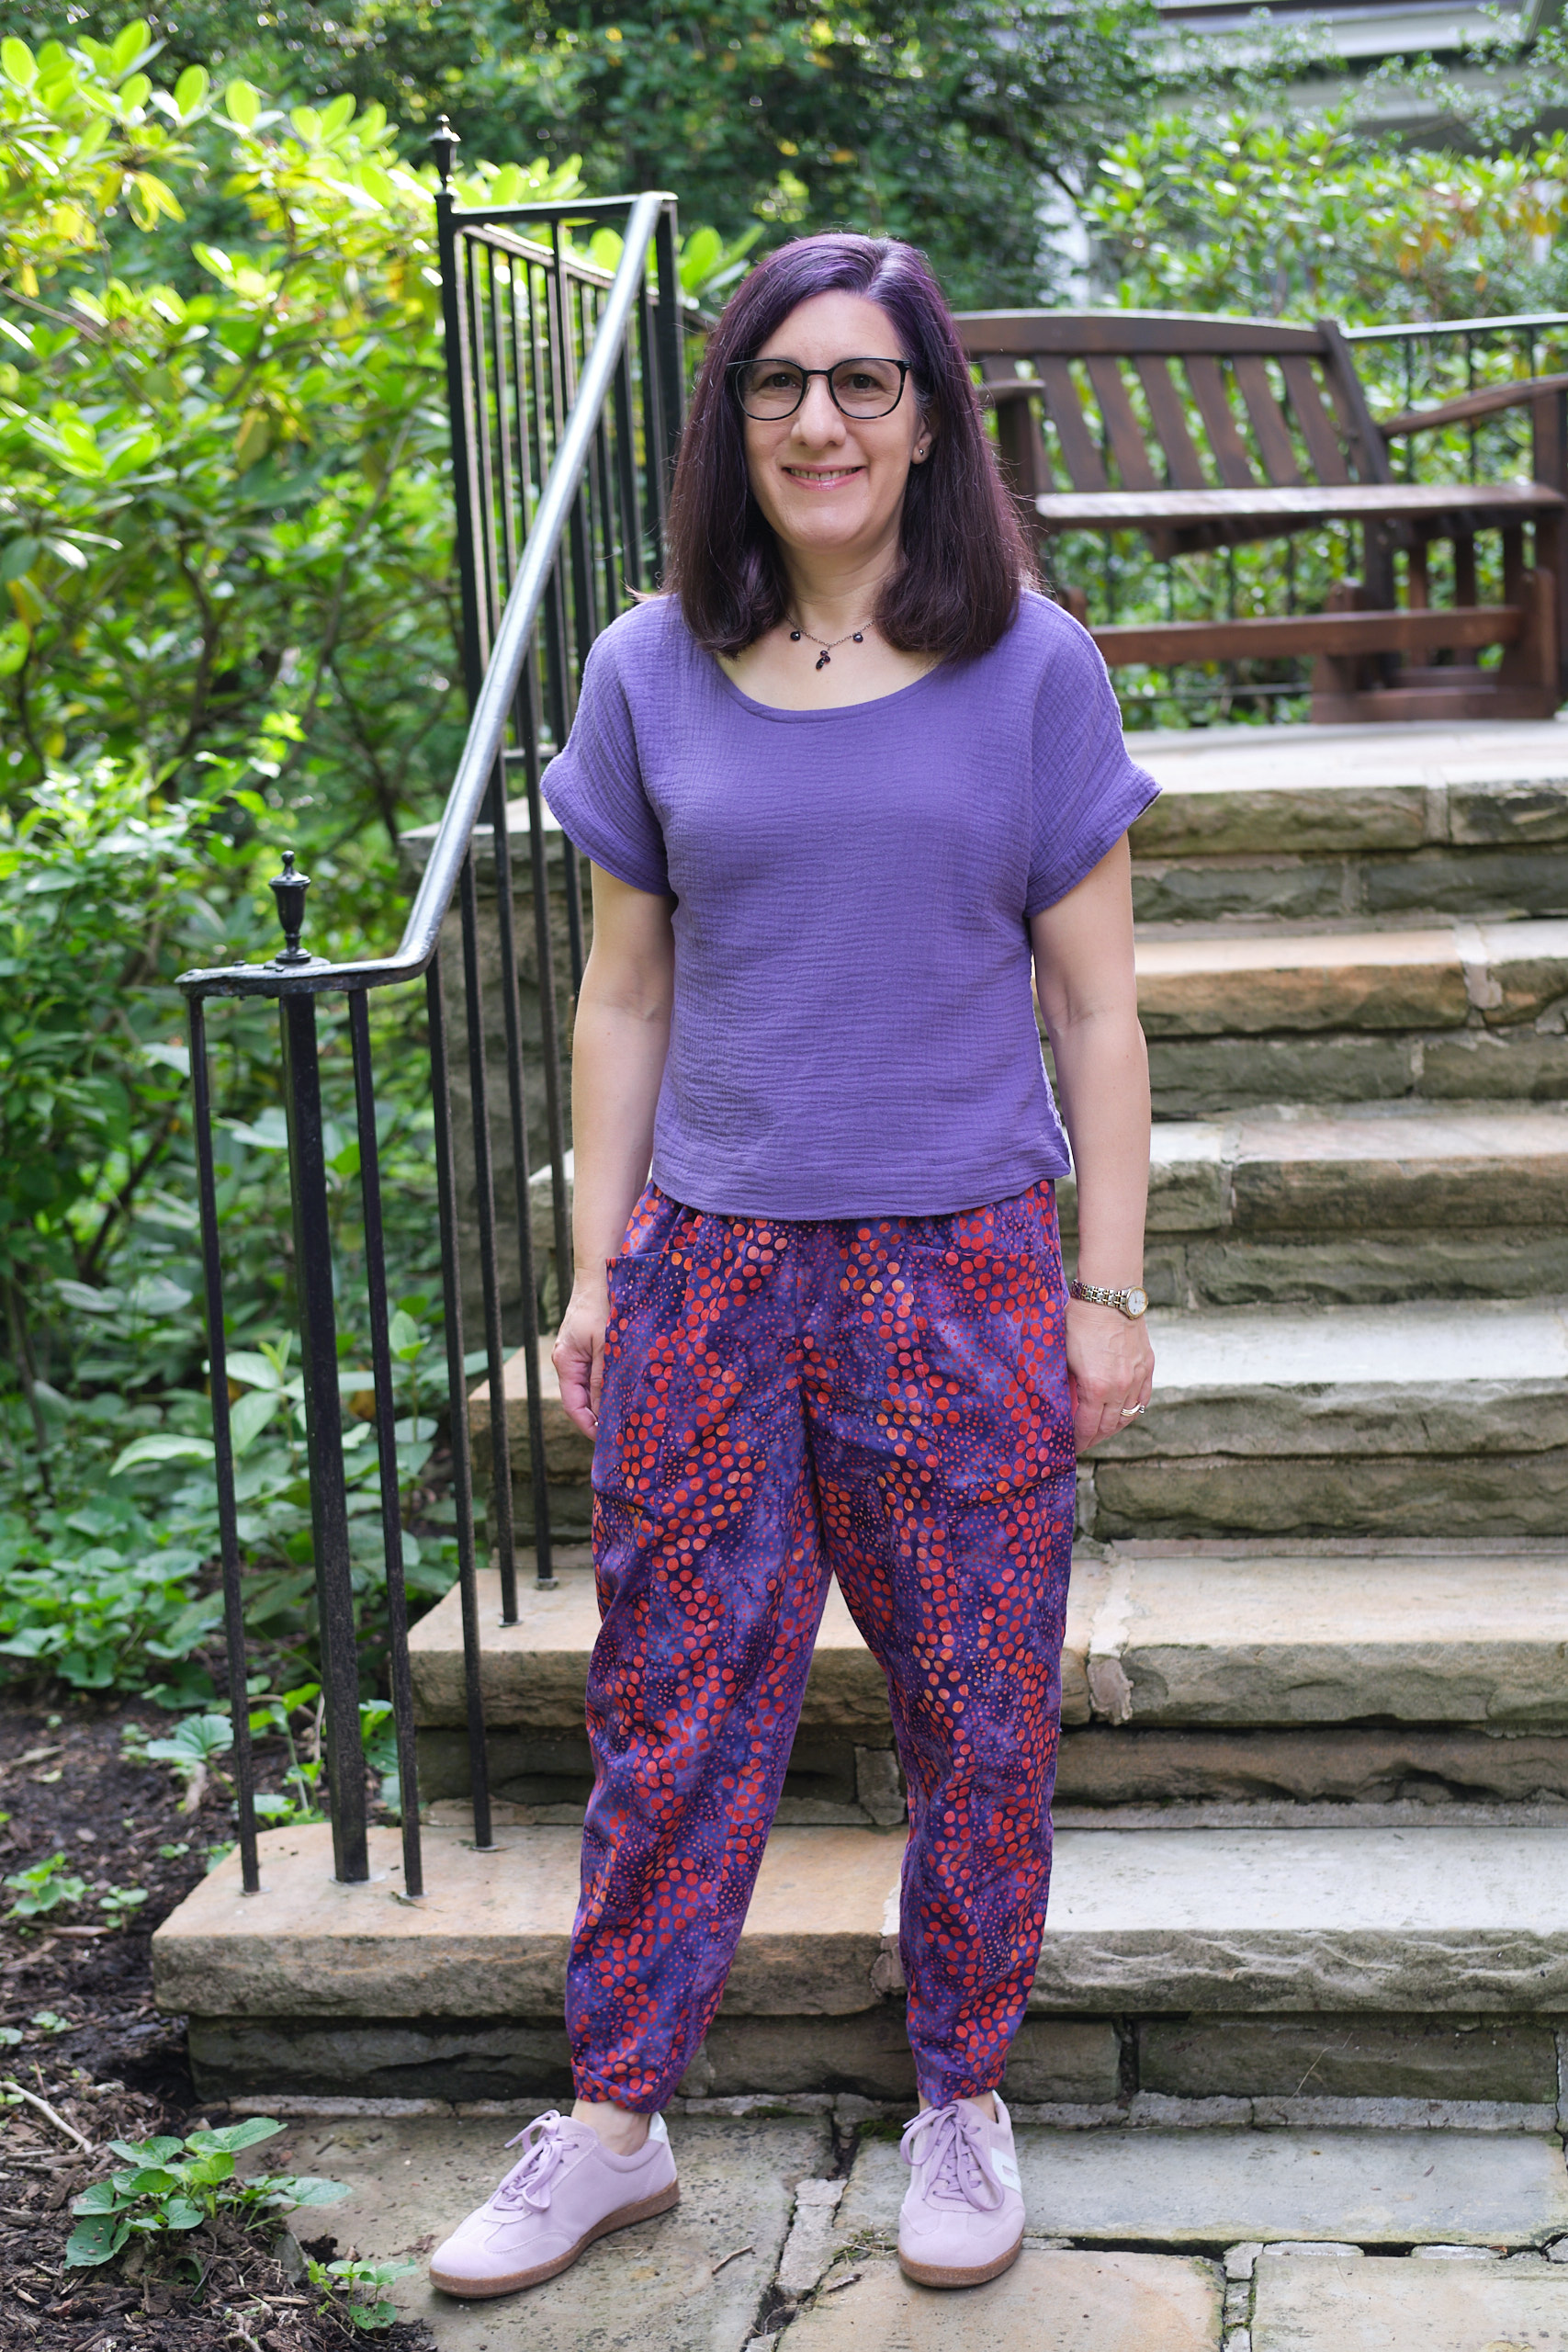
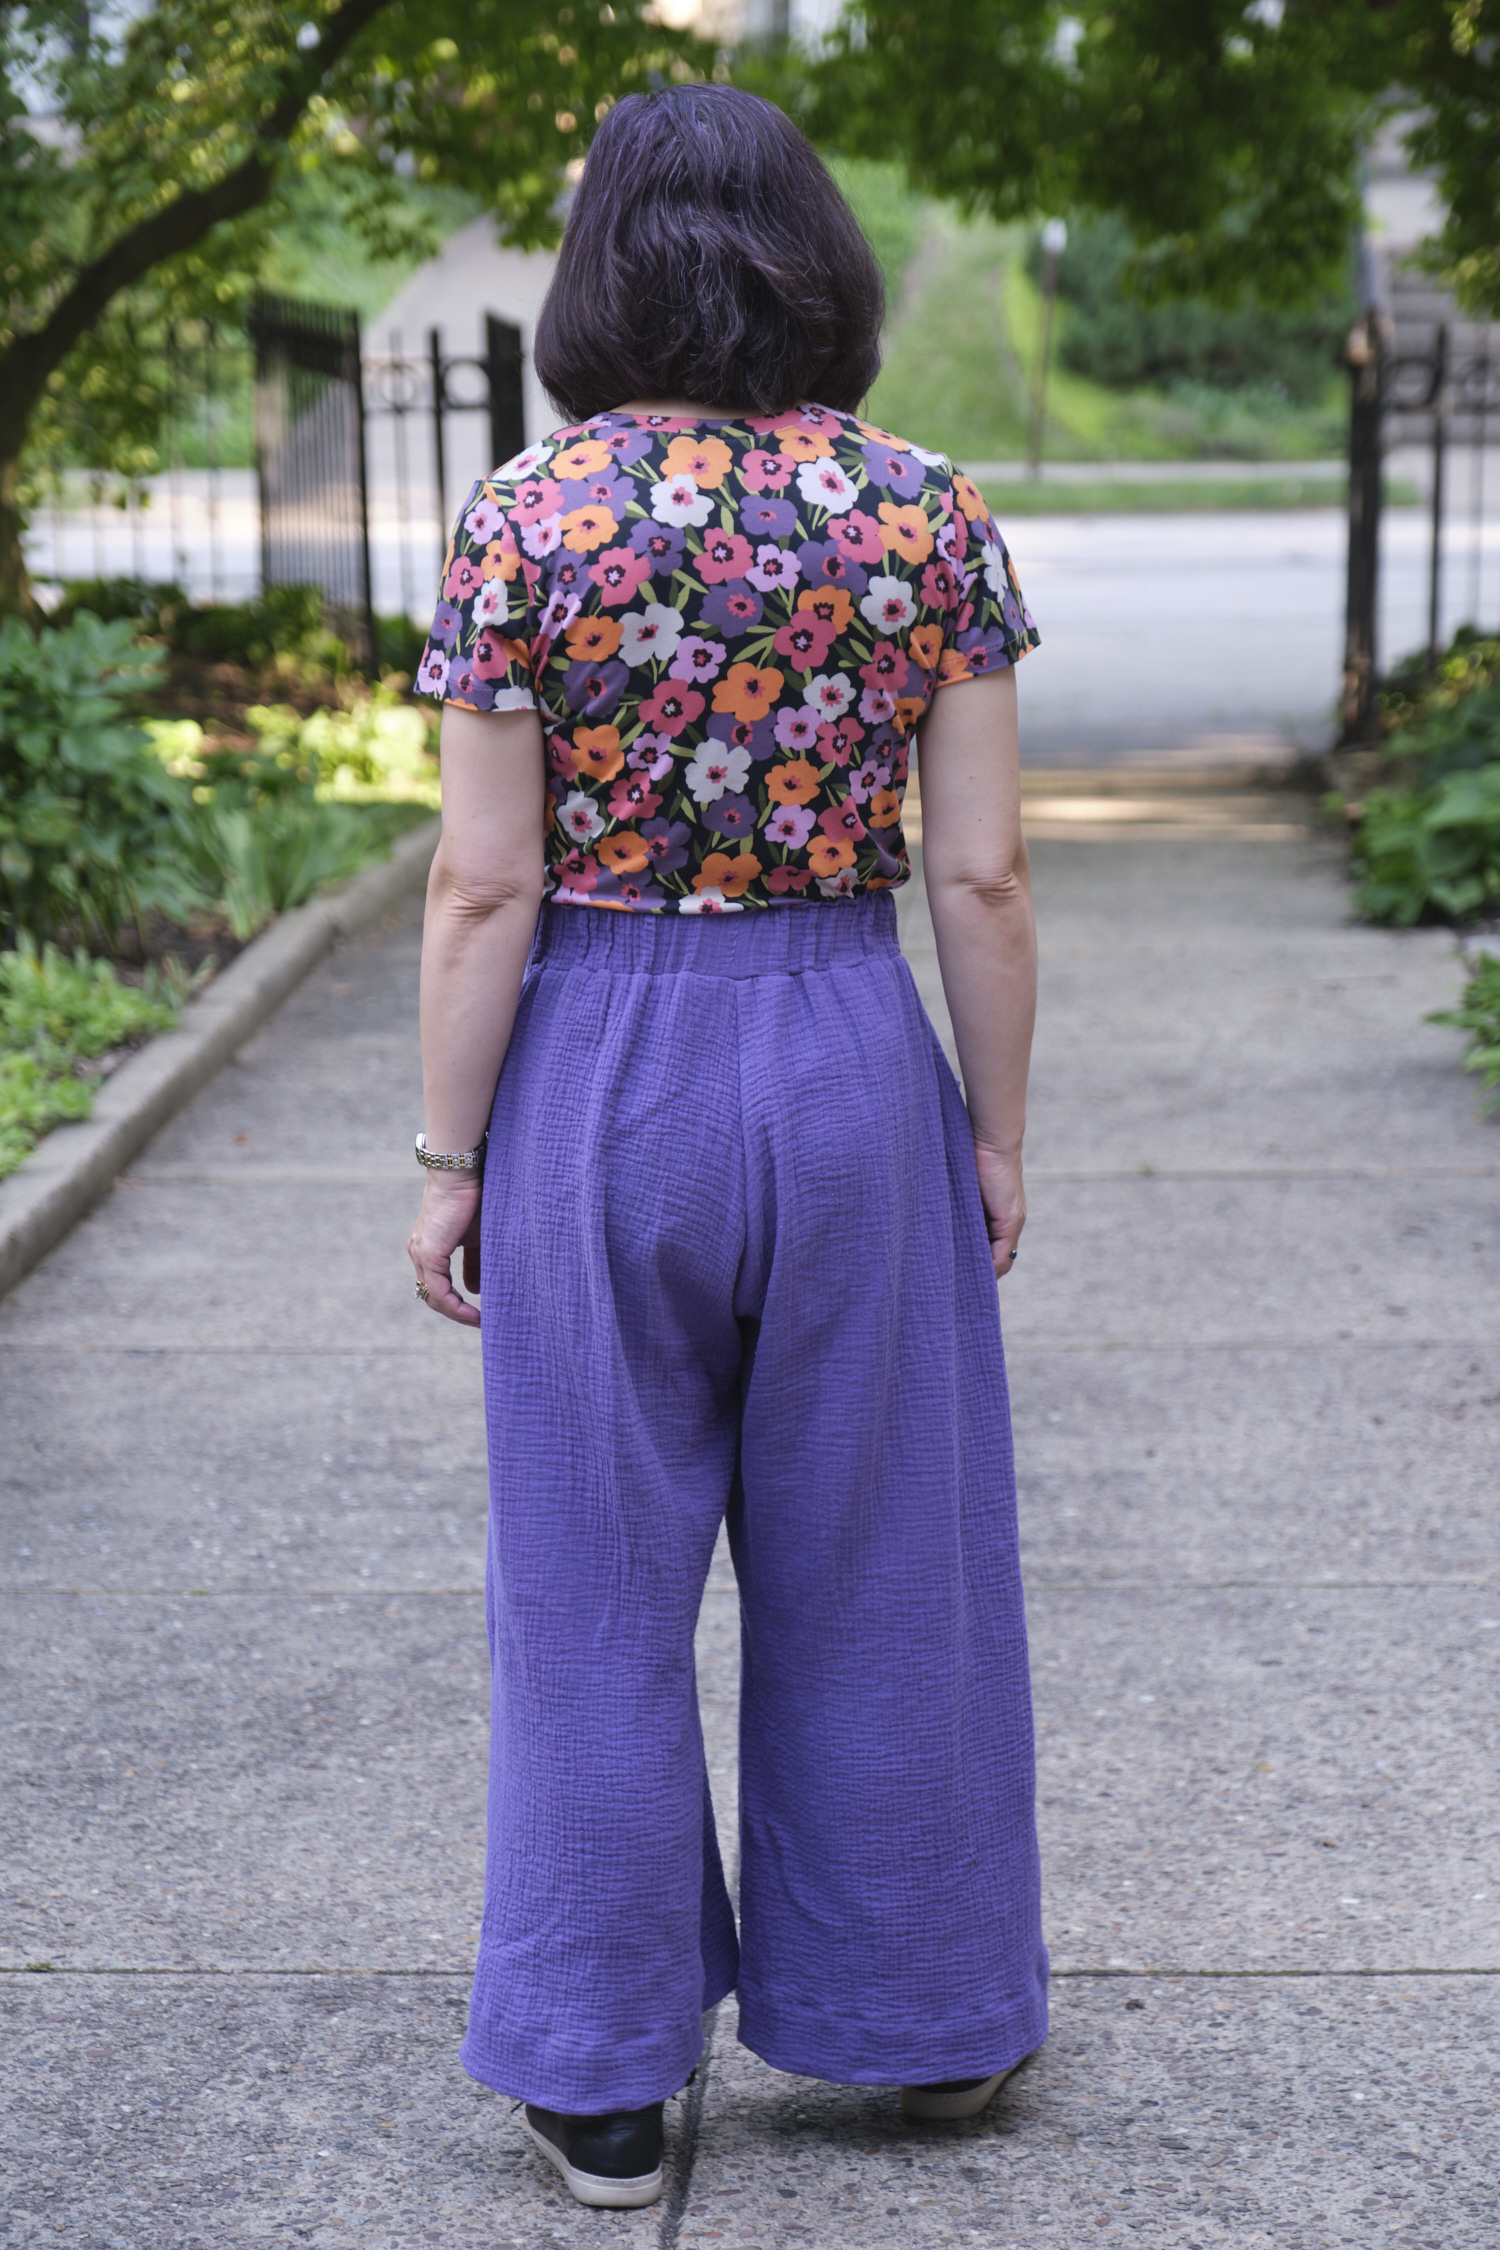
Pattern Emporium Making Moves Subtle Barrel Leg Pants, size AU 10, midrise, short length, 1.5-inch elastic waistband, front, back, and side pockets (with front pocket opening raised 1.5 inches), from 2 yards black polyester airflow.
I’ve been wanting to sew a pair of Pattern Emporium Making Moves Subtle Barrel Leg Pants since the pattern was released earlier this year. I finally got around to sewing them up from about 2 yards of black 100% polyester 175 gsm airflow fabric that I got on sale from Mily Mae Fabrics. The airflow has no spandex and thus, officially no stretch, but it does have a bit of give due to the crinkle texture. It requires no ironing, and is less slippery to sew than a lot of other polyester wovens. However, it doesn’t hold a crisp crease when pressed.
I like high-rise, loose-fitting pants with large pockets, and while I think wide-leg pants generally look best on me, they can have a lot of fabric to potentially trip over or drag through the mud (or across wet bathroom floors). So barrel-leg pants give me a loose fit and room for pockets without the extra fabric. The Making Moves pattern comes in both high-rise and mid-rise. Based on my past experience with Pattern Emporium high-rise pants being too high for me (especially in the back), I opted for the mid-rise. I like the way the mid-rise turned out, but I might add another half inch of rise next time and extend the front and back crotch by half an inch.
The Making Moves pattern offers lots of pocket options, and I decided to exercise all of them! I made a slight modification to the front pockets to prevent my phone from falling out of my pocket: I raised the bottom of the pocket opening by about an inch and a half (basically, I followed the line of the high-rise pocket opening). I also made the back pockets and side pockets, following the pattern instructions. And I used the back-leg-seam option and added all the optional top-stitching.
The pattern is easy to follow, and there’s nothing difficult about the construction, but making these pants with all the options is a lot of work and takes a while. I love how all the features look, but in this thin, drapey fabric, the back and side pockets are not all that useful because the fabric doesn’t really have enough structure to support them if you put anything of any weight in them. The side pockets are unobtrusive, but the back pockets don’t stay flat against my bottom. Unless I were using a much heavier or more rigid fabric (which isn’t recommended) I would probably make only the front pockets next time.
I made the 1.5-inch waistband with Dritz non-roll elastic. I only recently realized there were different kinds of elastics and now I see why non-roll is a good idea for waistbands. The elastic waistband looks ok, but does have a lot of gathers, which is why heavy fabrics aren’t recommended. I’m tempted to try a high-stretch denim and replace the waistband with the one from the Walk Boldly knit pants.
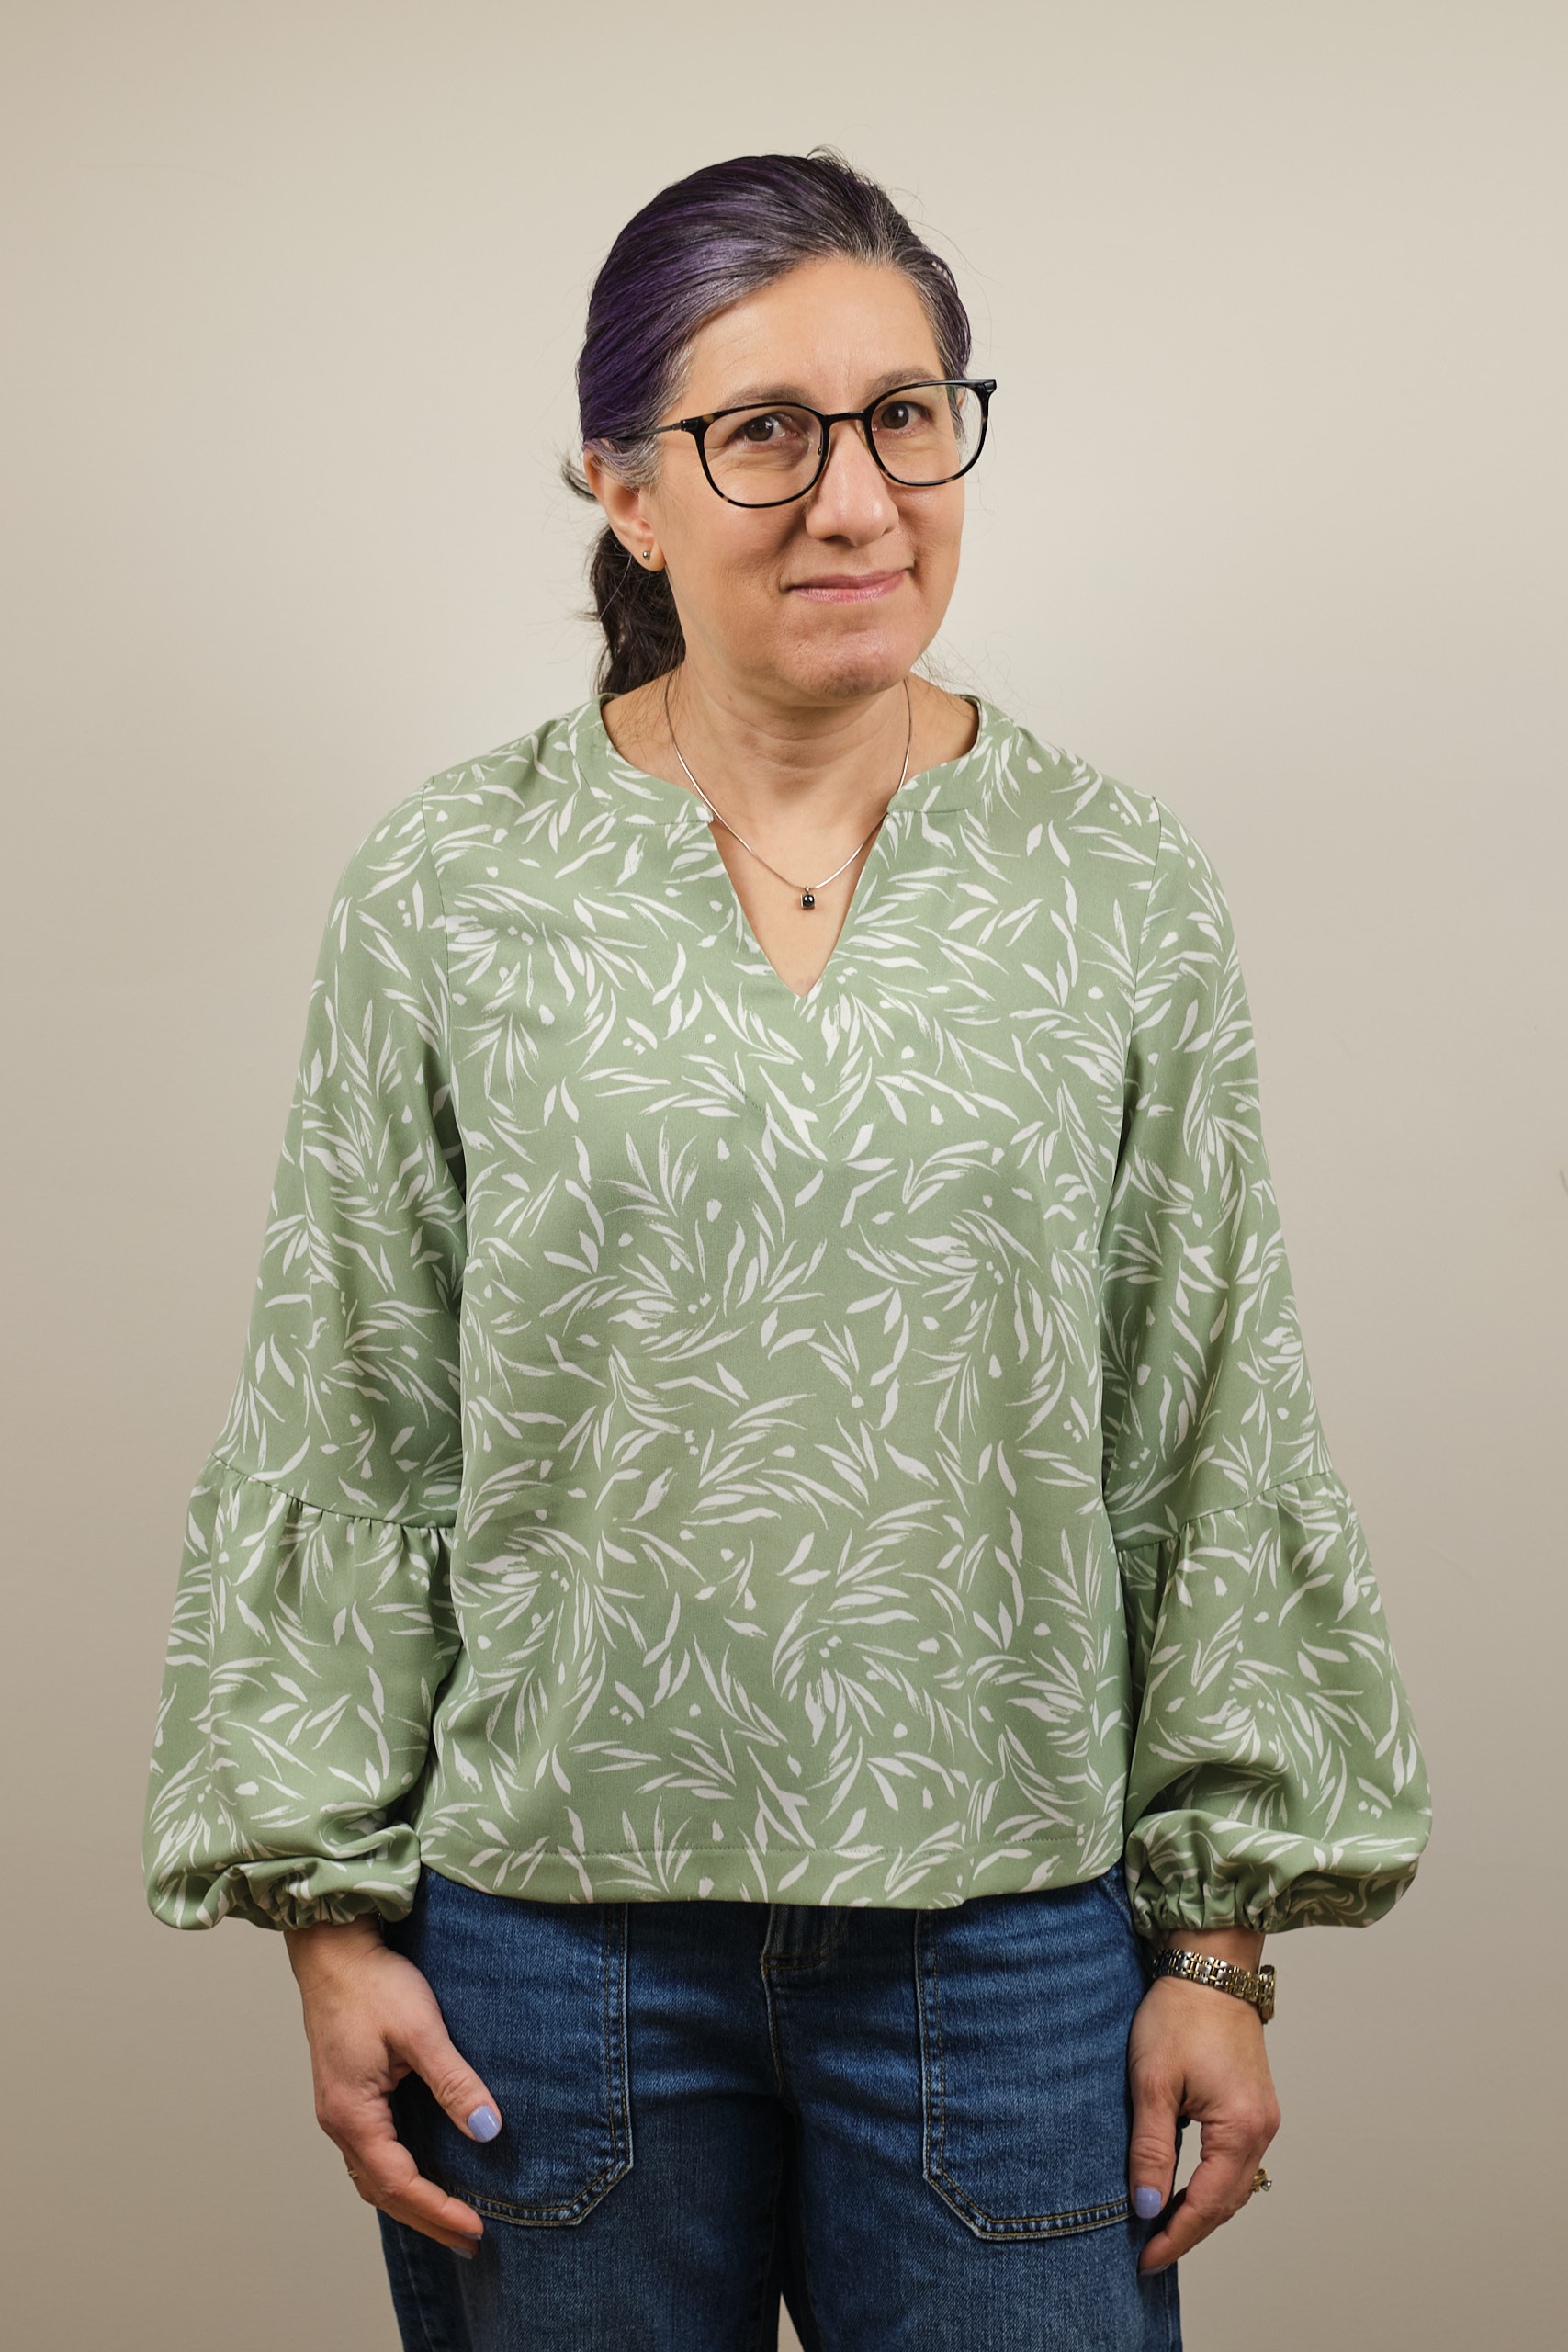
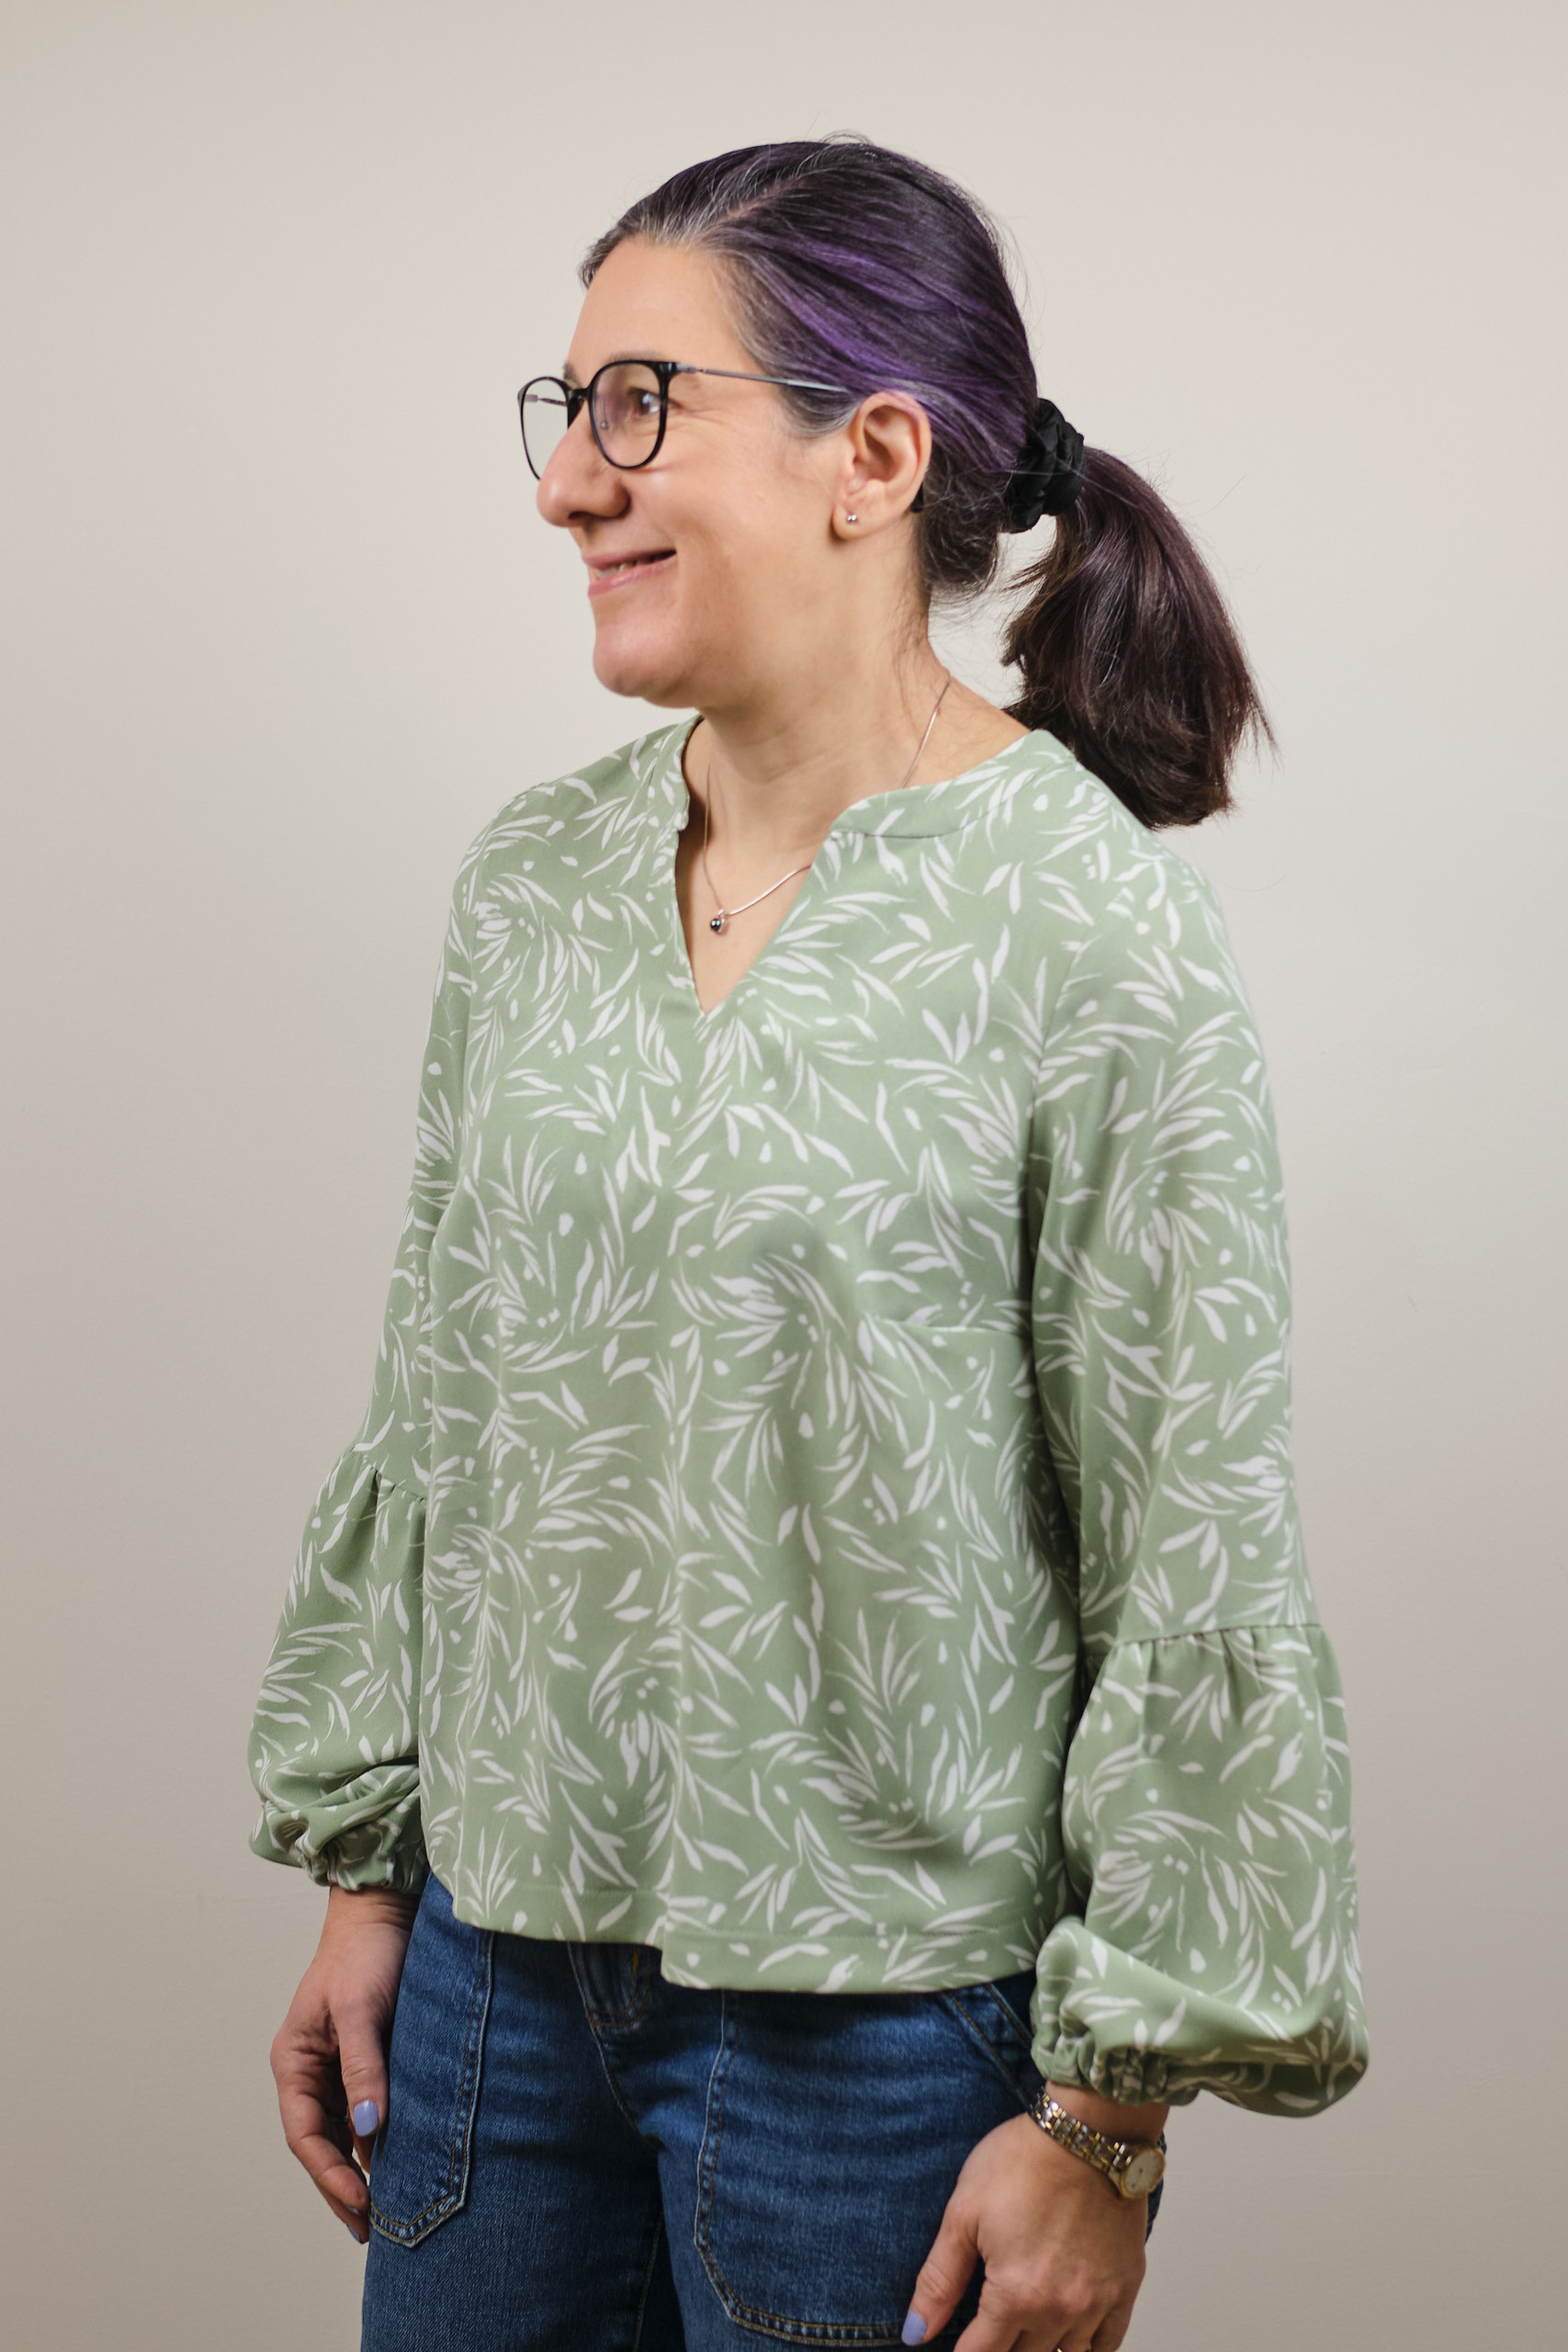
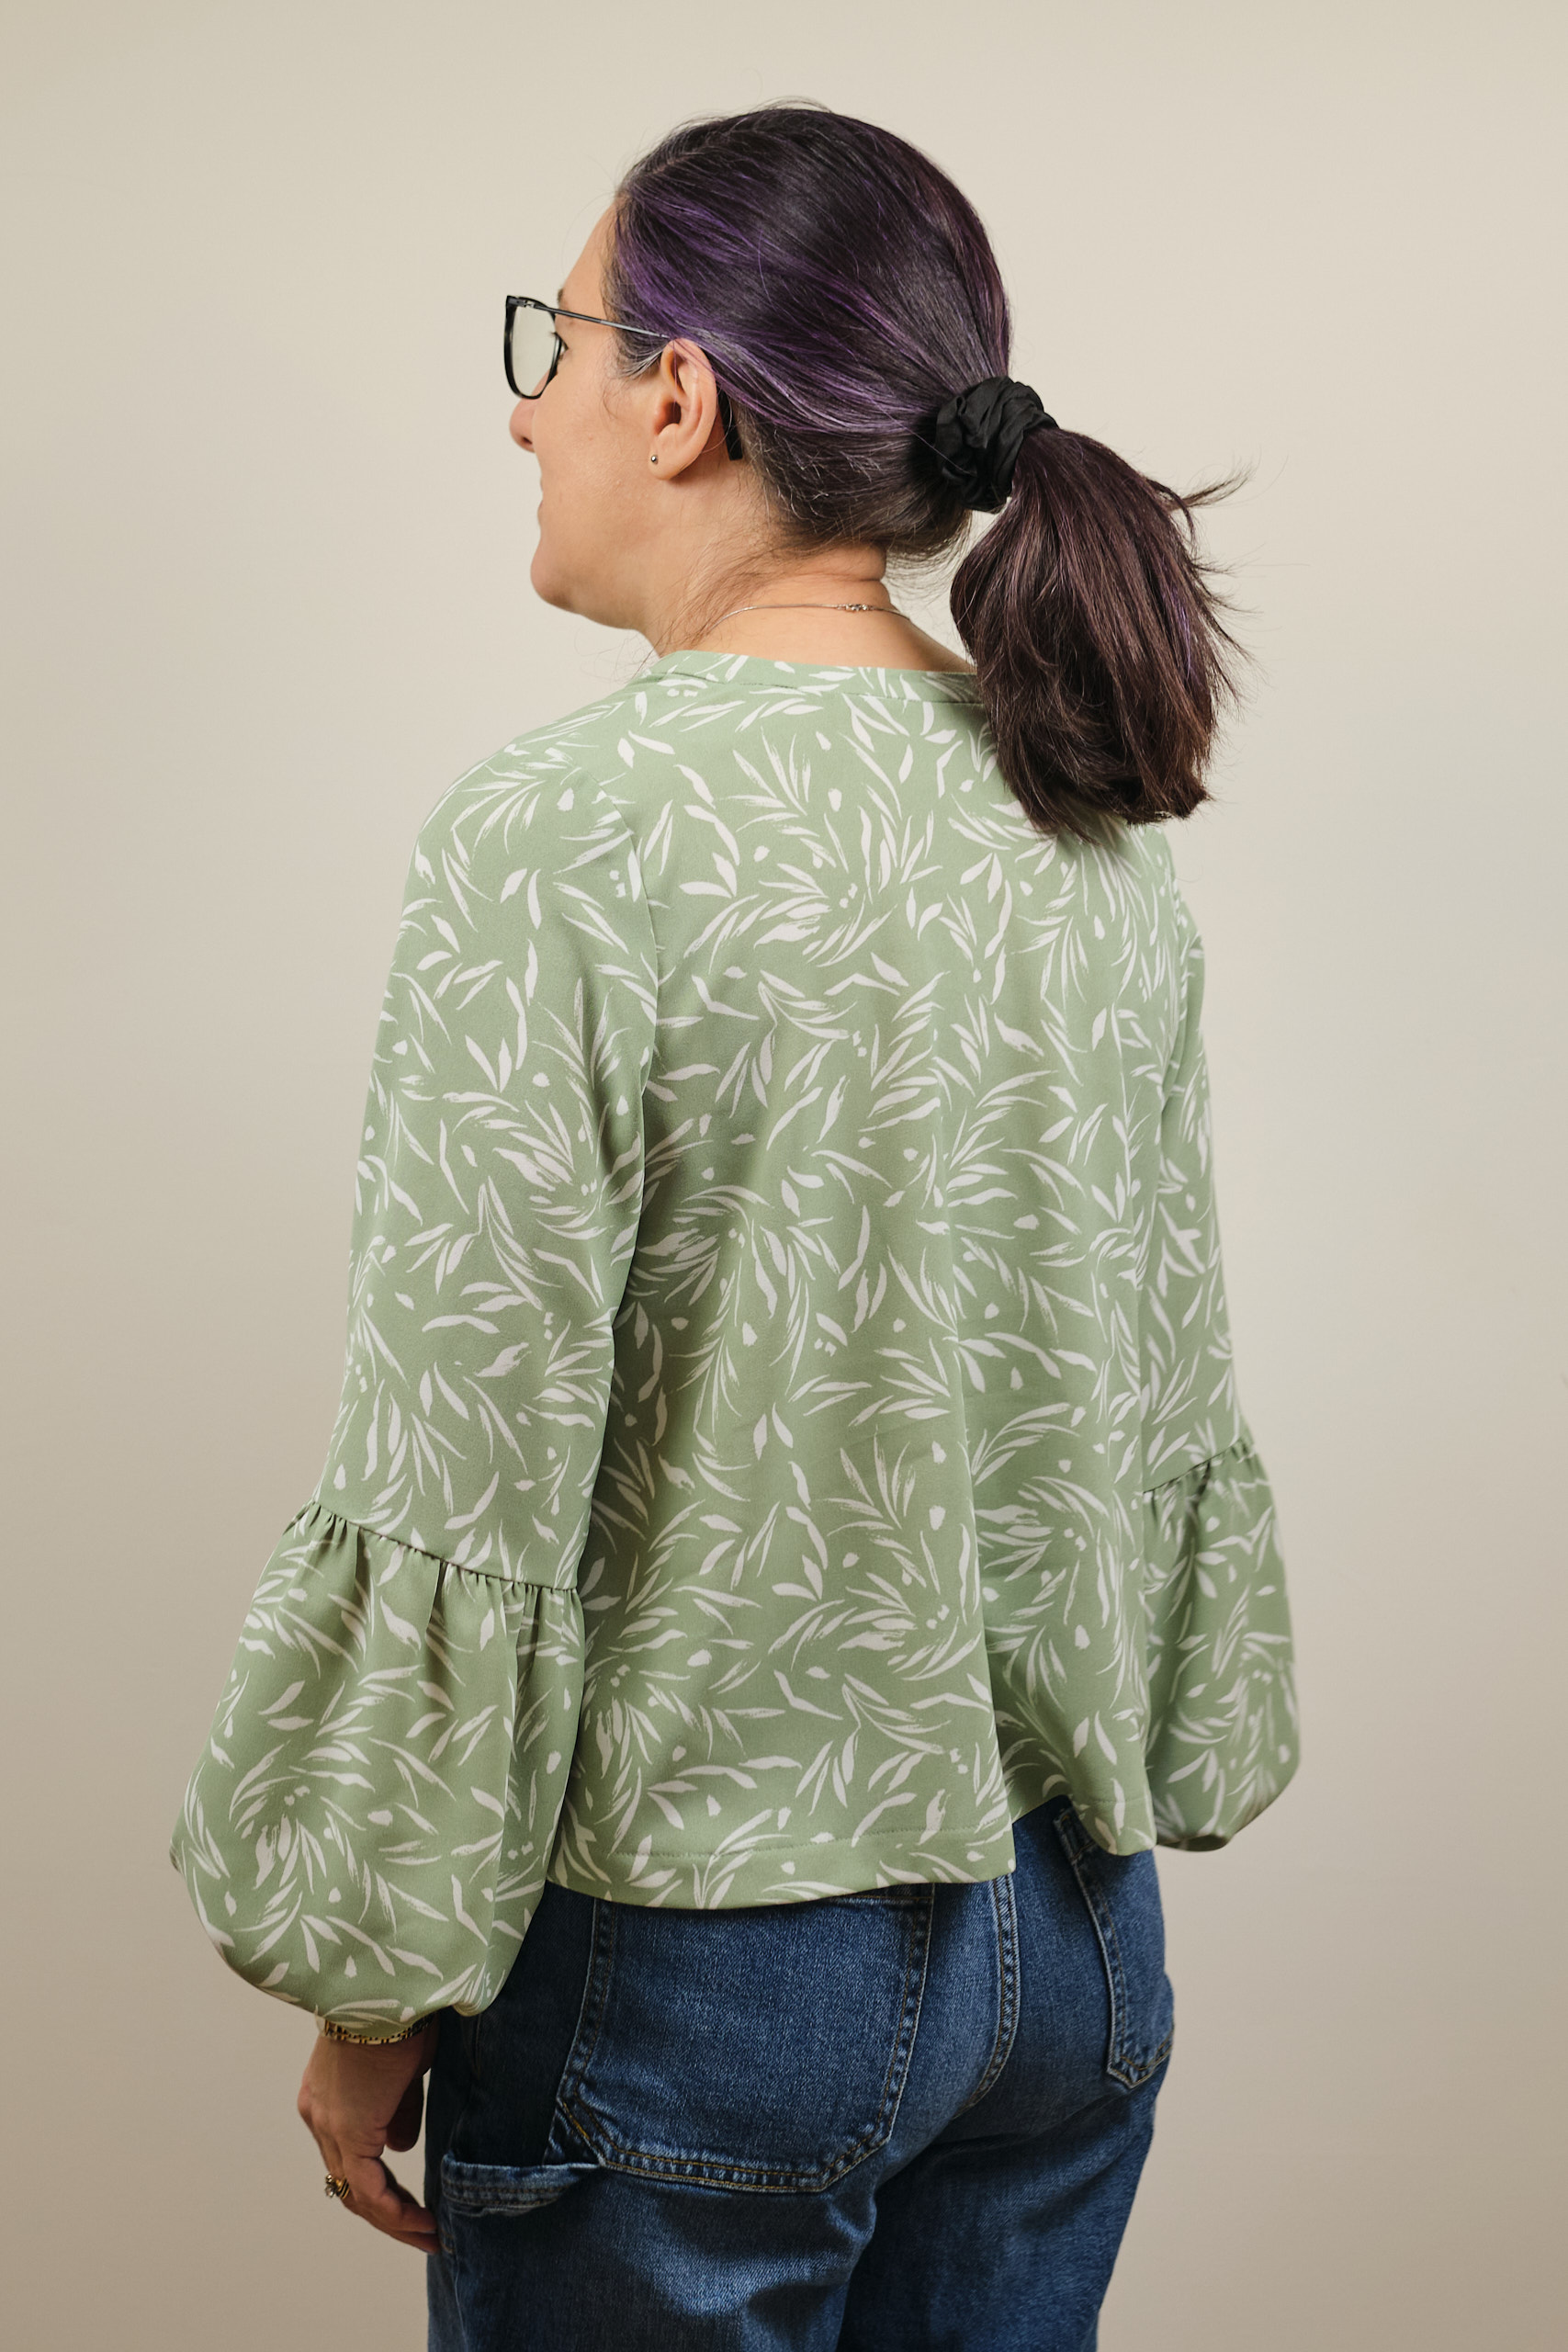
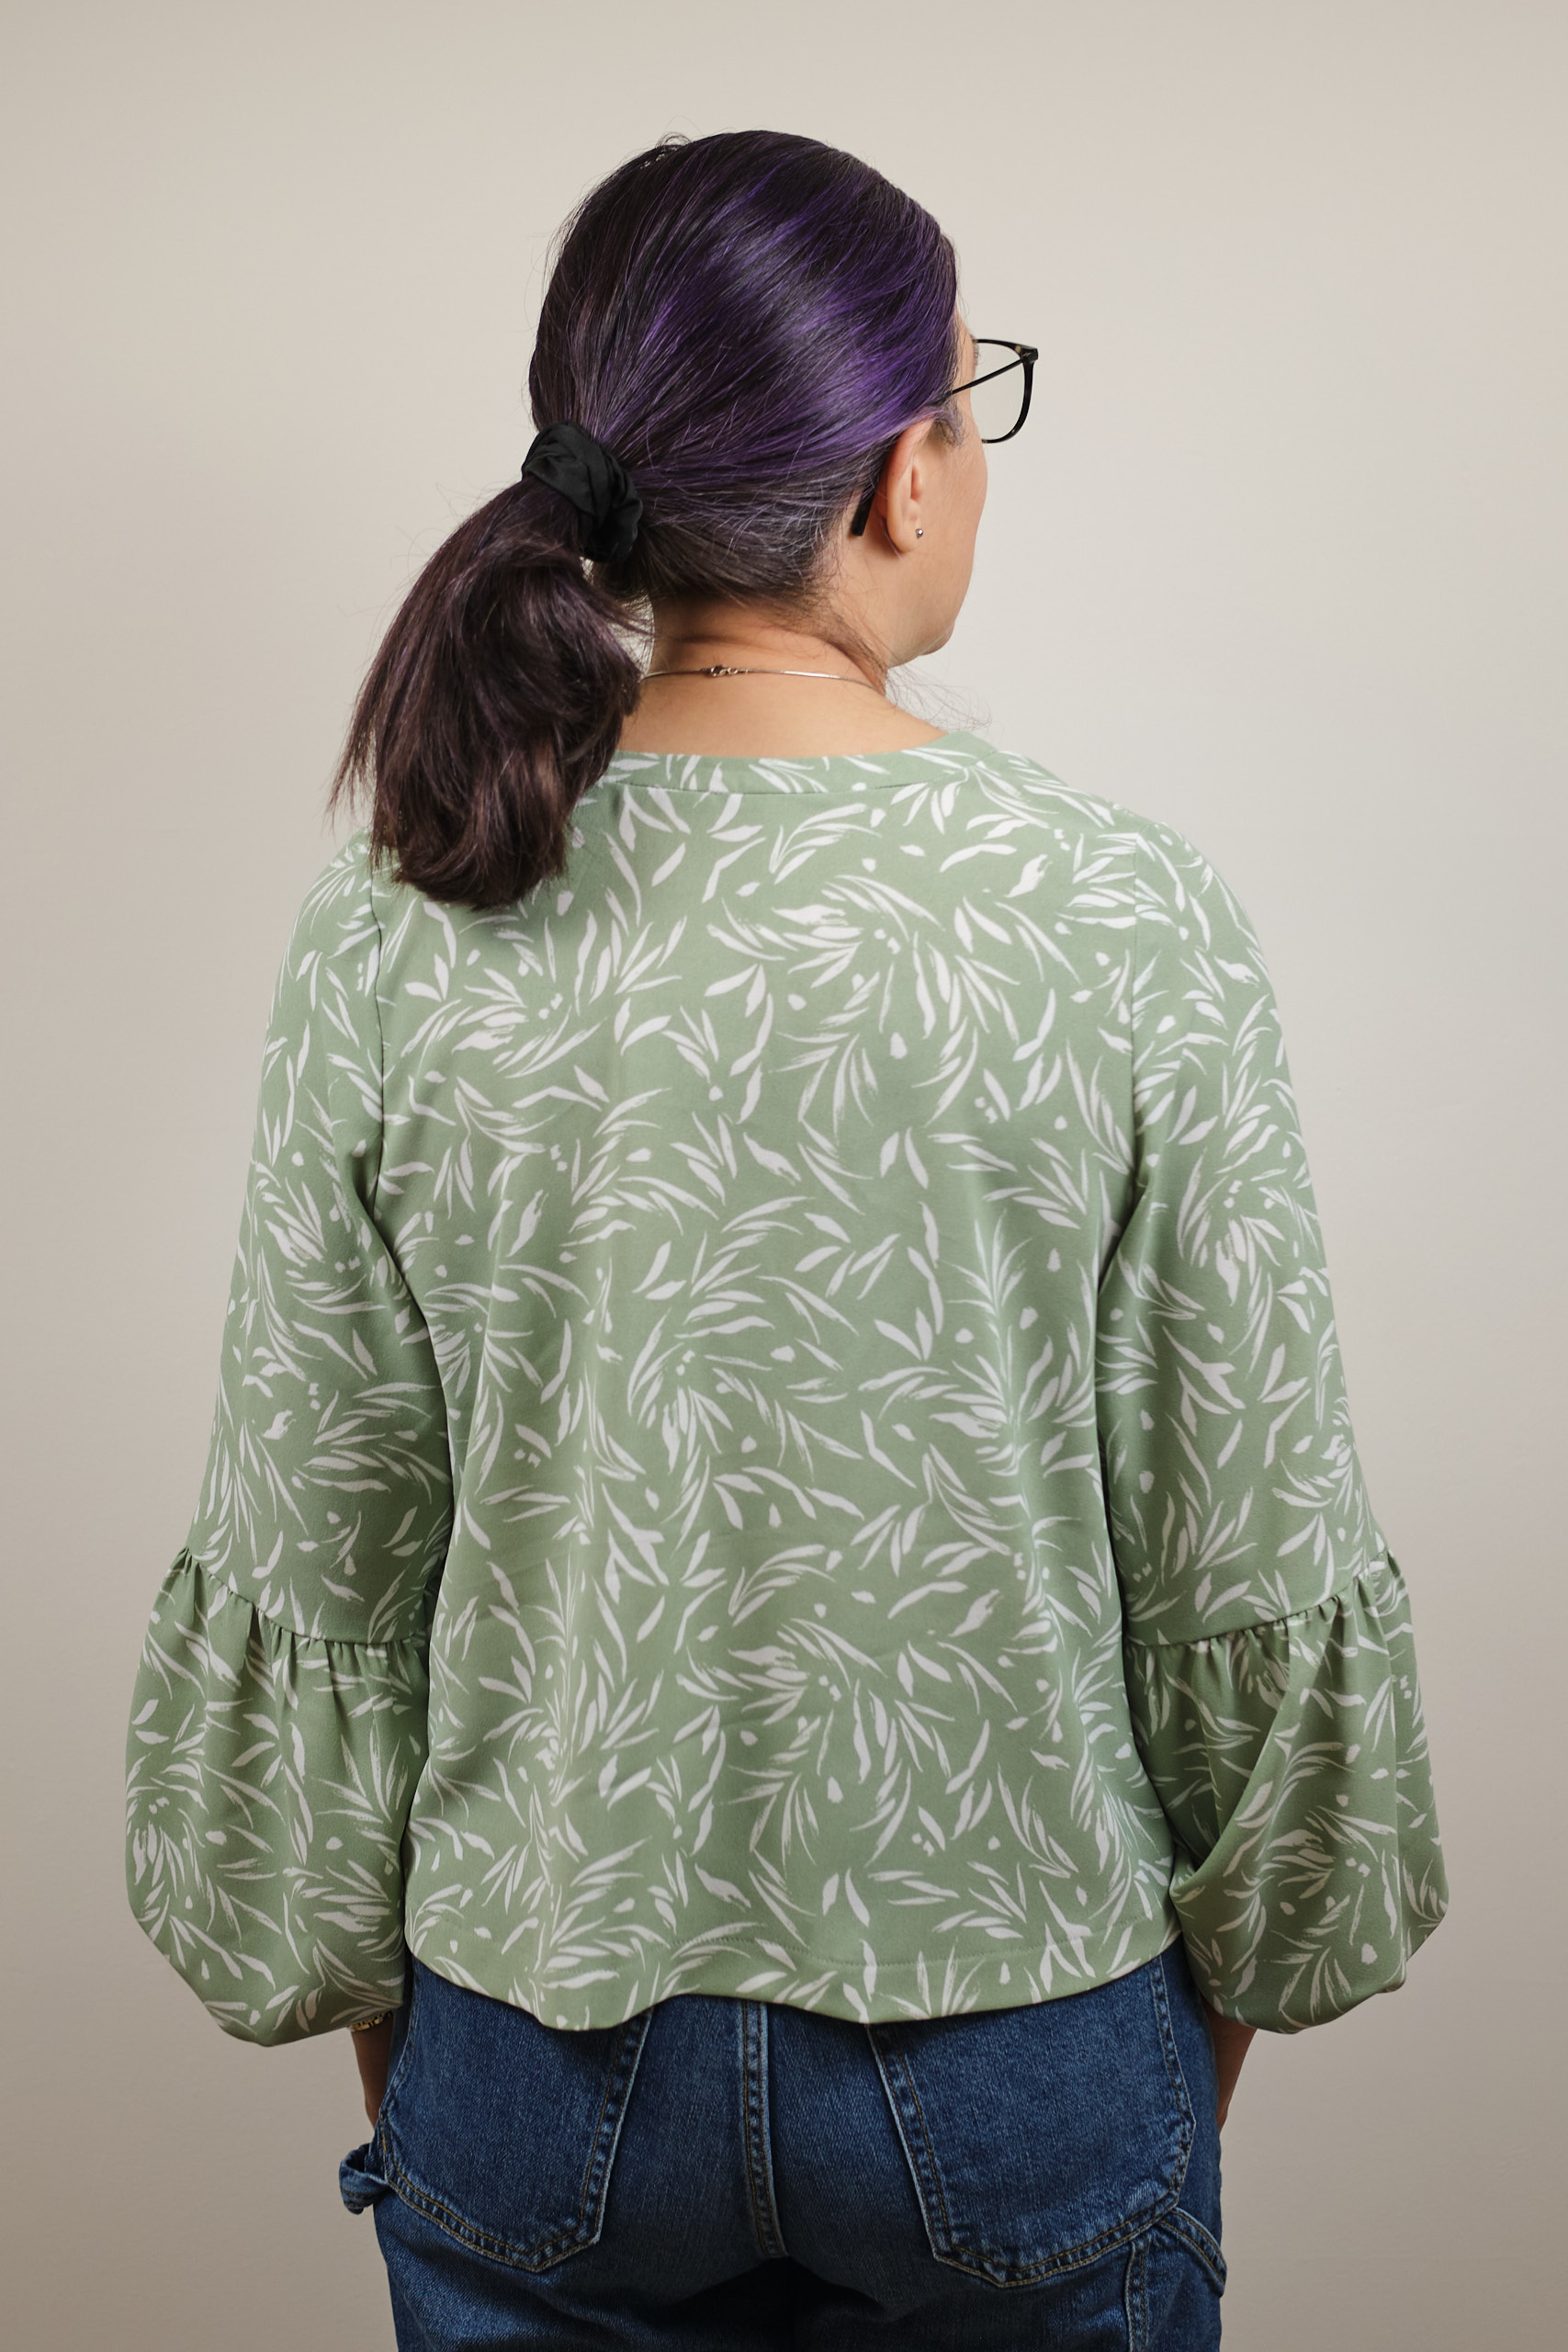
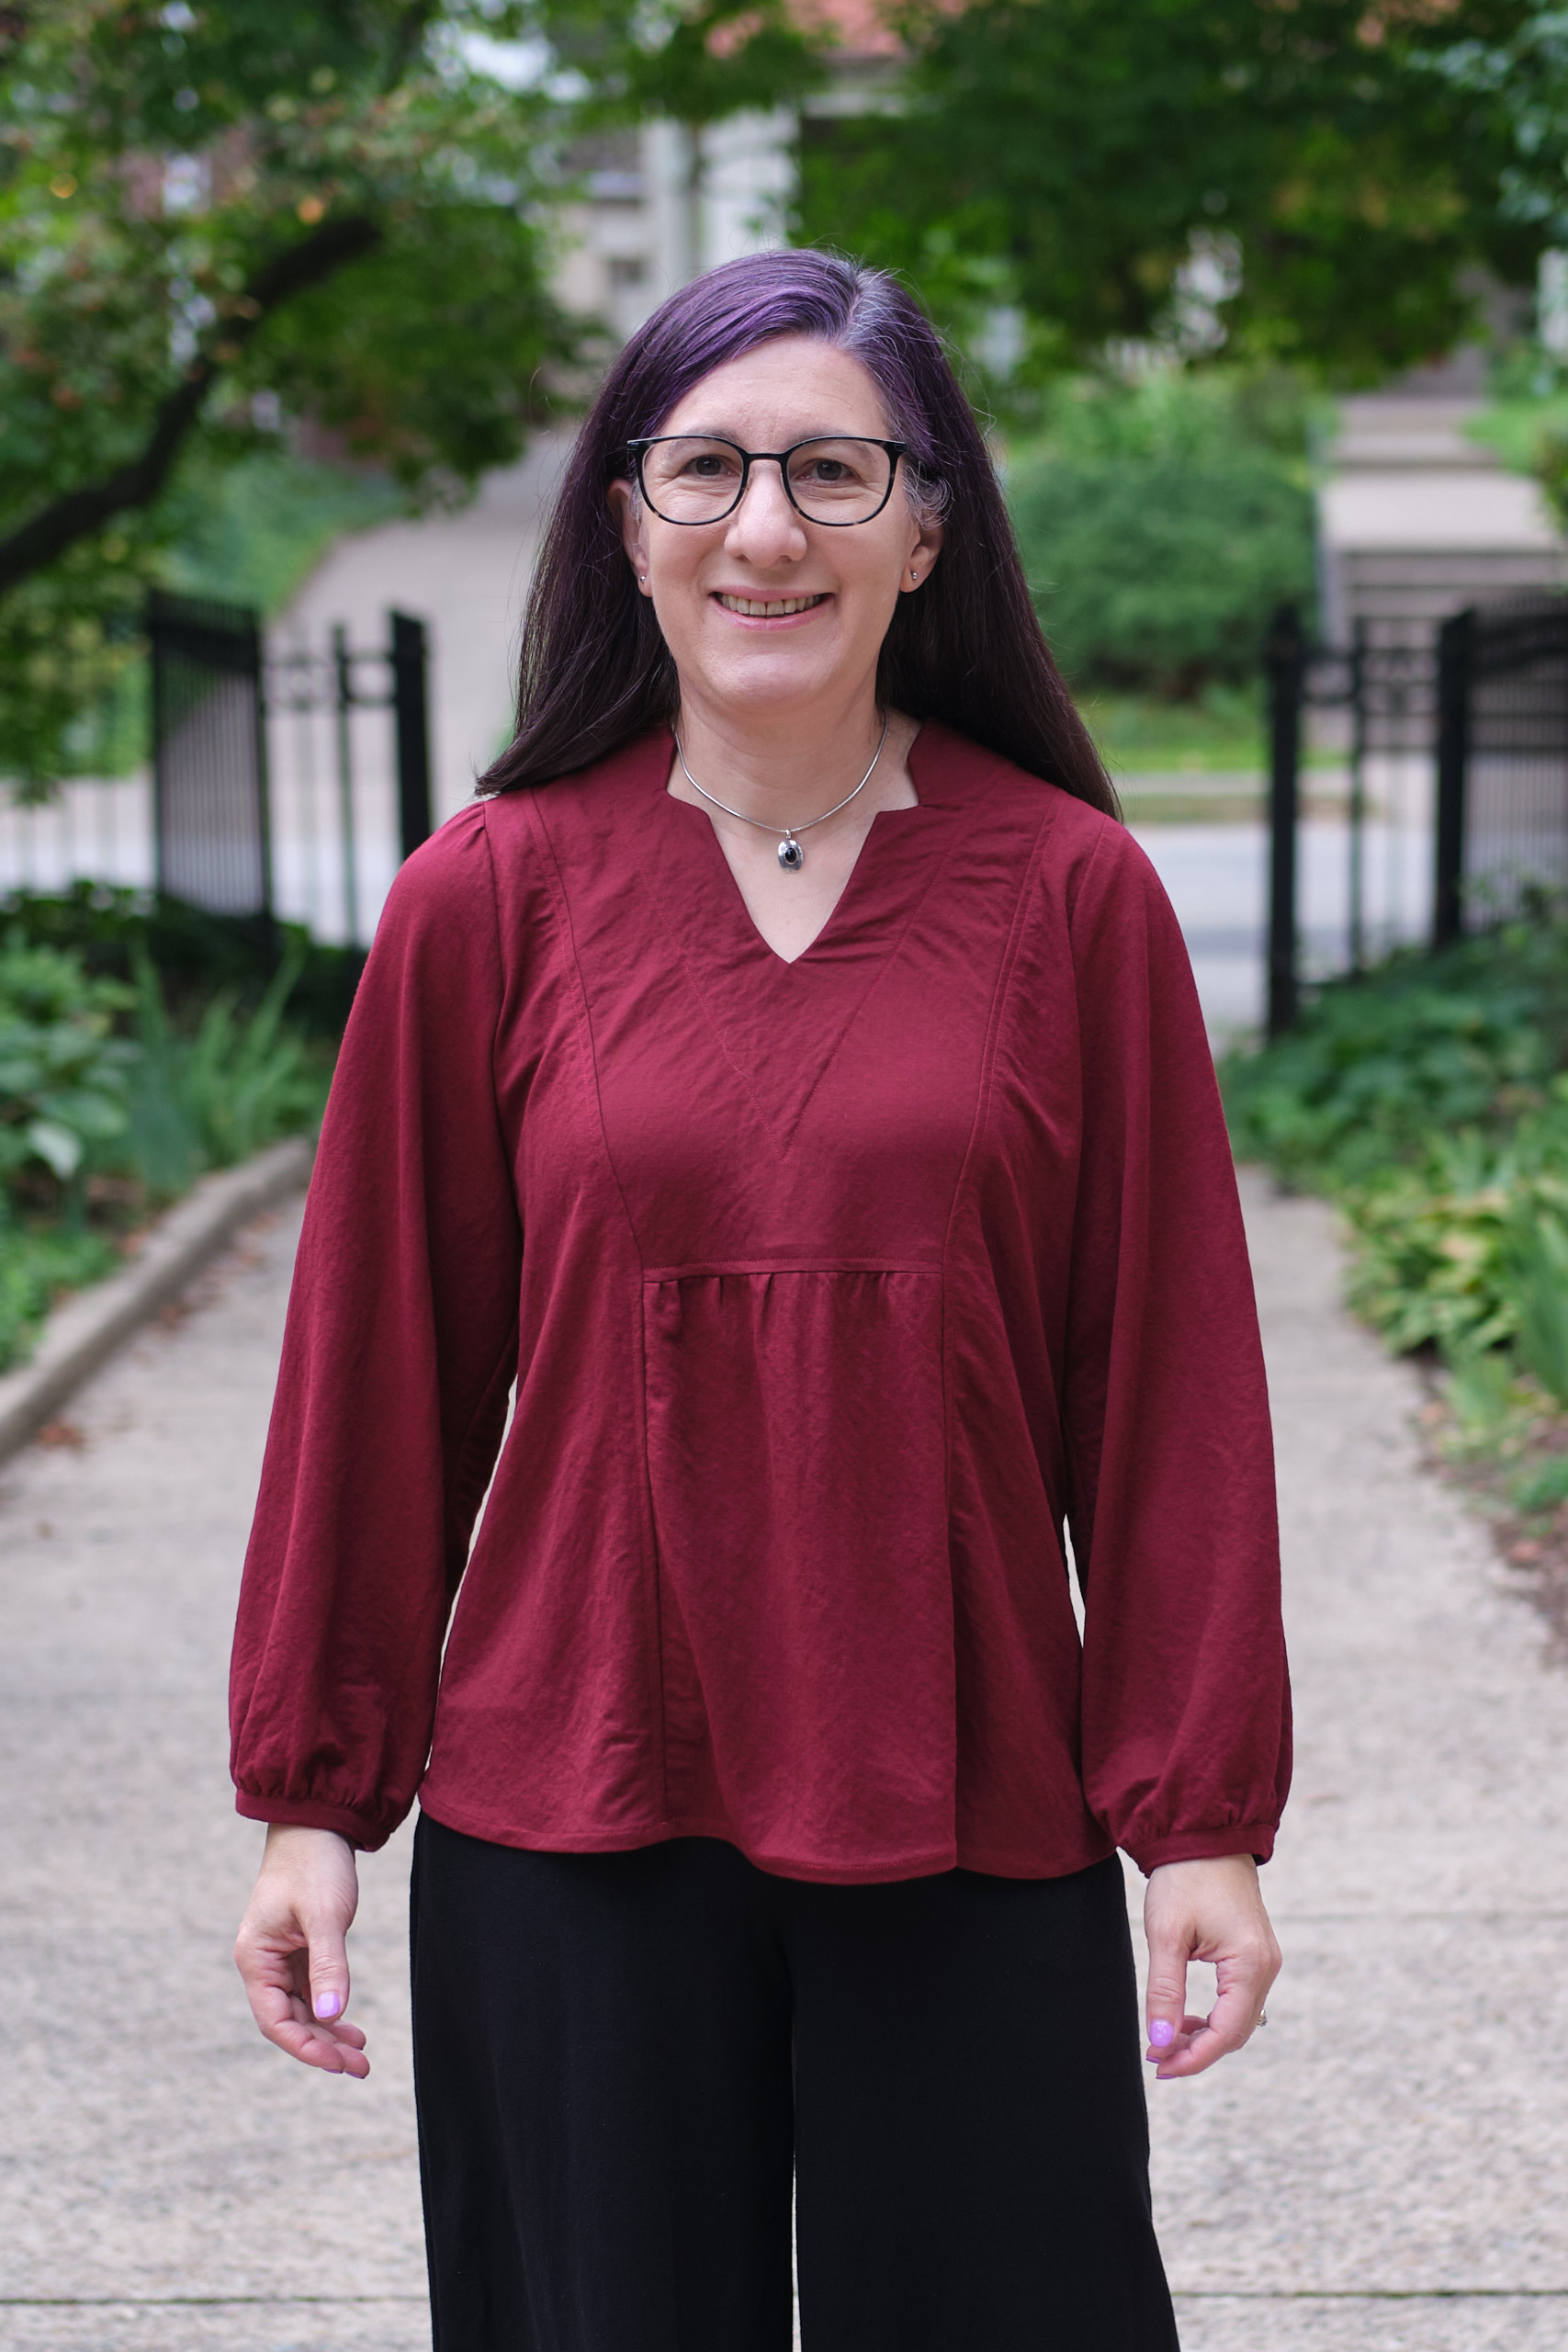
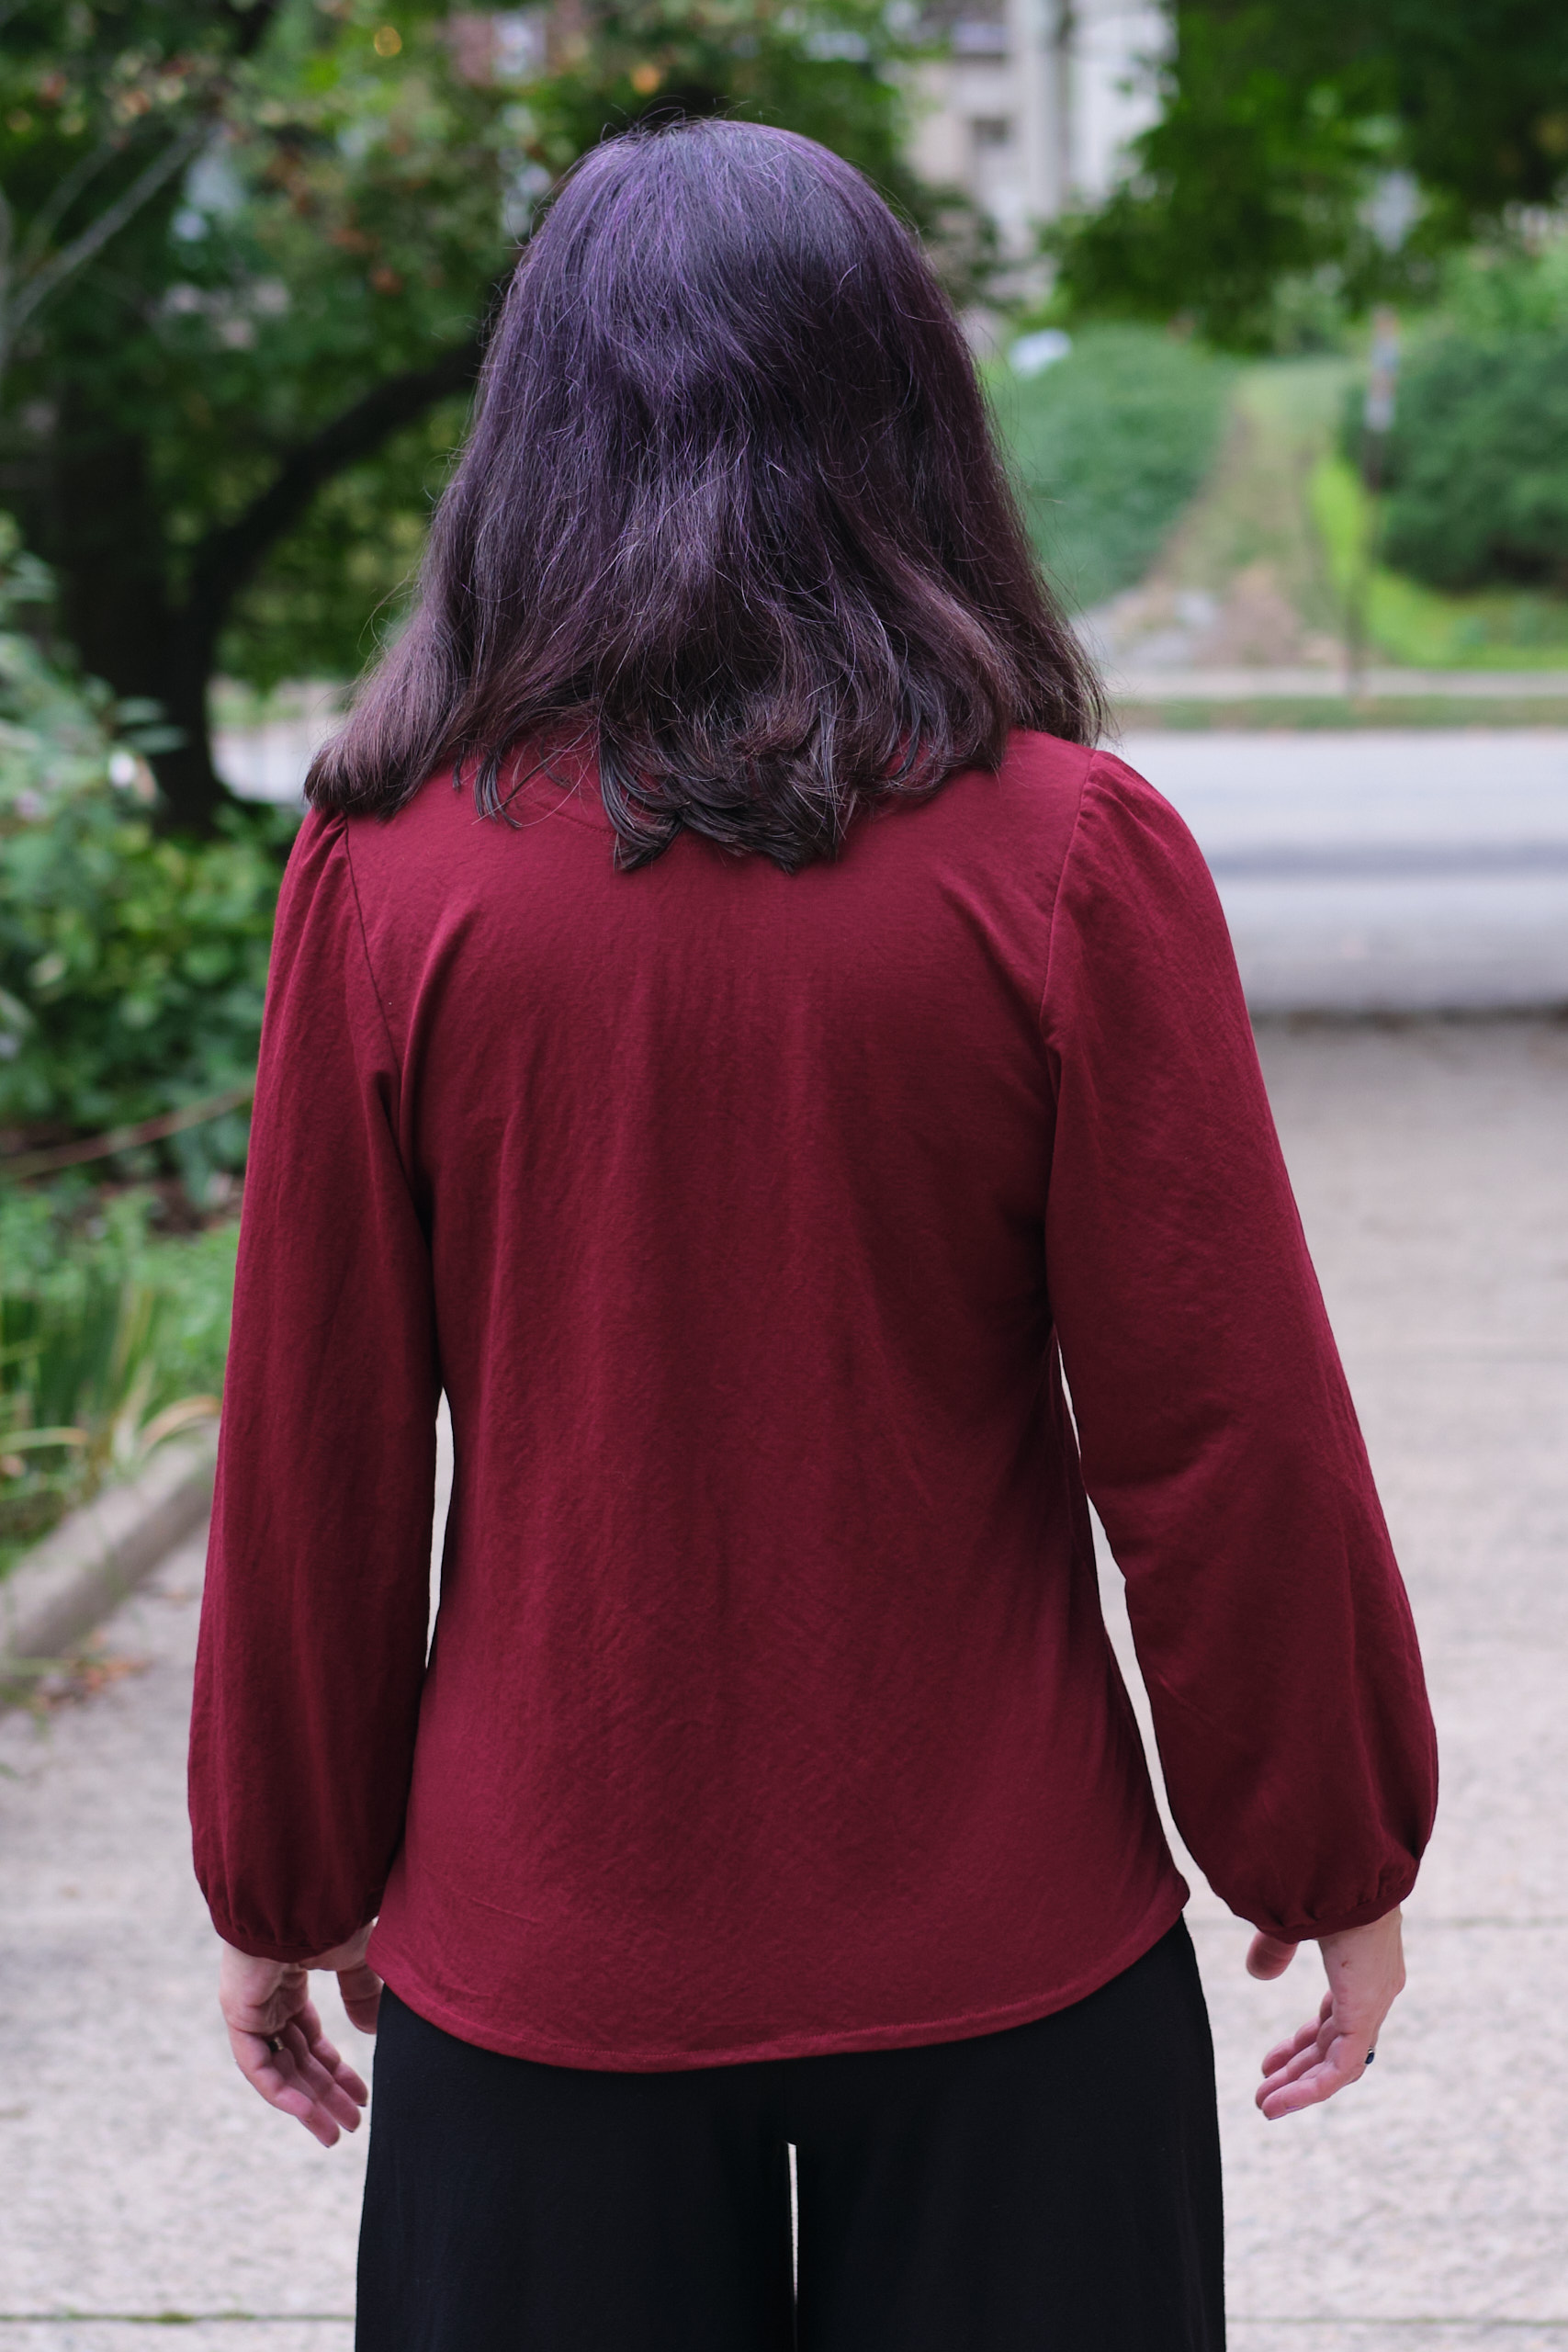
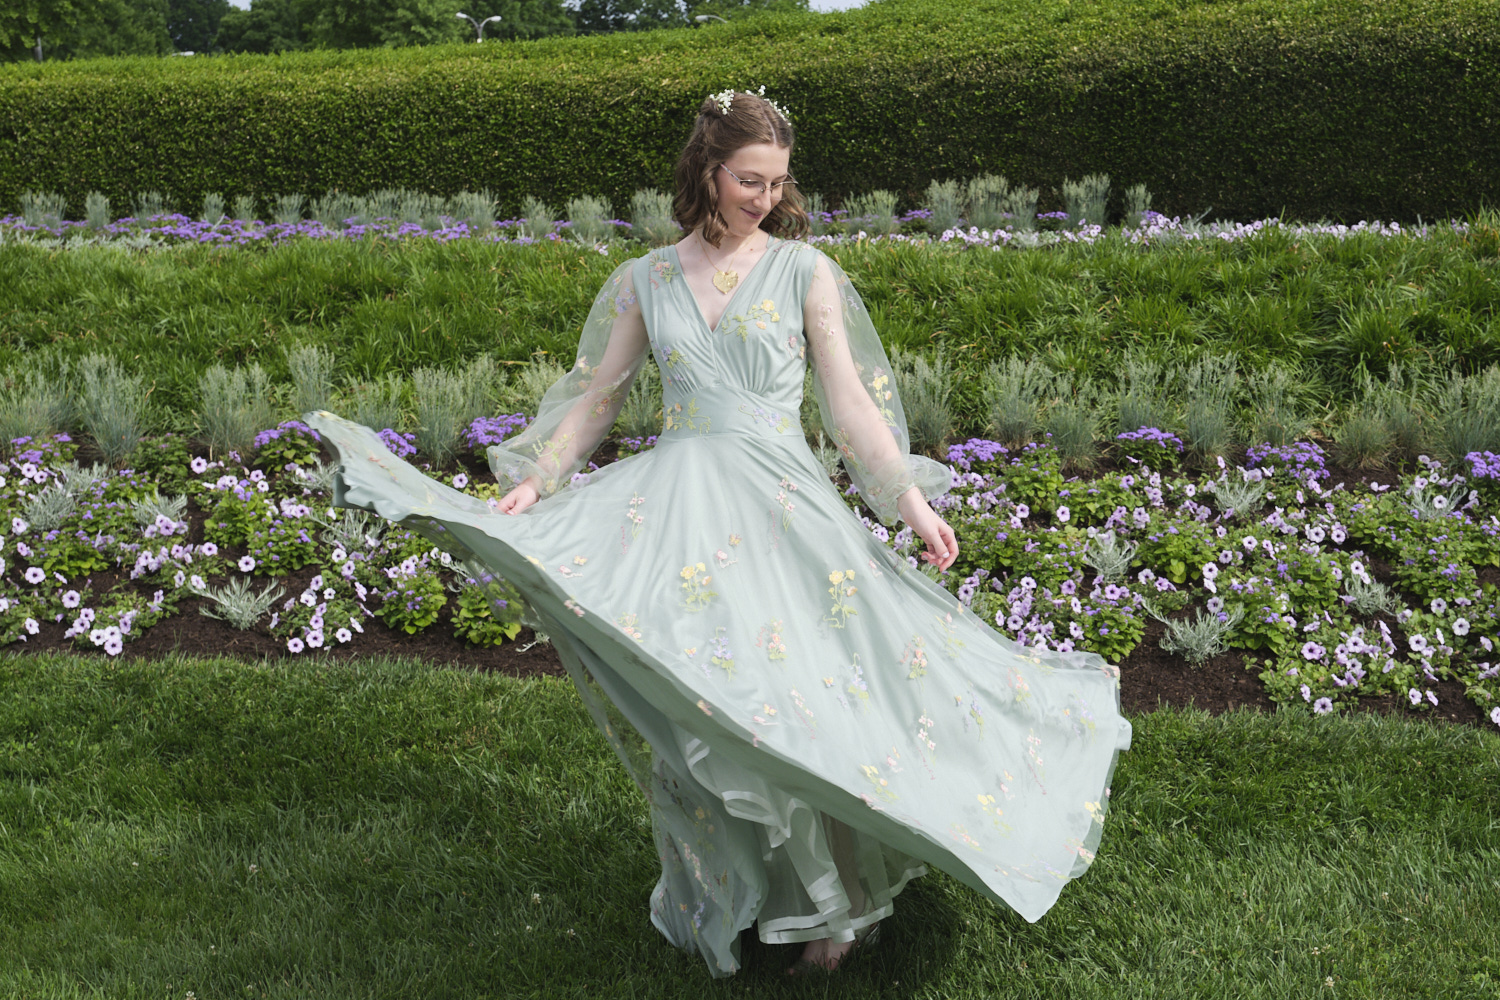
Love Notions Muse blouse, straight bodice, tiered sleeves, size small, shortened bodice and sleeves, from 2 yards or light sage Tess Cey.
In January, I applied to be a pattern tester for Muse, a new top pattern from Love Notions Sewing Patterns. (Here I am in the release video!) I have sewn a few of their patterns, but never tested a pattern for them before. I wasn’t invited to be a part of the main testing group, but was invited to join the later “finals” testers group. This group gets the revised pattern after the first group has already tested it and is assigned a size and features and asked to sew up and photograph the near-final version of the pattern.
Unlike past pattern testing I’ve done that uses a Facebook group for communication, Love Notions uses the Basecamp project management system. There is a section for sharing documents, another for uploading final photos, a to-do list for changes that need to be made to the pattern or instructions, and discussion boards. One of the fun aspects of pattern testing is communicating with and getting feedback and advice from other sewists. It is also nice to see the issues I’ve found with a pattern taken into account as the pattern evolves into the final version.
When I joined the Basecamp group, I could see there had already been a lot of discussion about certain aspects of the pattern and these had been addressed in the revised pattern. I also saw advice about trimming seam allowances and setting in sleeves that was not yet in the pattern instructions but that I could apply immediately.
The new pattern is called “Muse” and it is a woven blouse pattern that can be made with regular short sleeves, balloon sleeves, or tiered sleeves. It can be sewn with a straight bodice or a skirted bodice, optionally with a balloon hem. It is cold and snowy in Pittsburgh, so I asked to sew the long-sleeve version. I’ve also not loved the look of most skirted woven tops on me, so I requested to sew the straight bodice. I was assigned to sew size small, according to my measurements.
This pattern was designed for someone who is 5’5″ (as are most women’s sewing patterns that don’t come in petite sizes). The instructions recommended shortening the bodice by .5 inch for every inch shorter than 5’5″ you are, so I shortened it by 1.5 inch. The instructions didn’t offer advice about shortening the sleeves, but I know from past experience that I usually need to shorten sleeves by about 2 inches on most patterns. I asked in the Basecamp group about how to do this on the tiered sleeve and was advised to remove 1 inch from each part, which seemed to work fine.
I used a light sage polyester woven “cey” fabric called Tess Cey from Mily Mae Fabrics. I bought it when it was on sale for $3.75/yard. (Apparently, CEY is an acronym for continuous environmental yarn and refers to a type of polyester fabric made with sustainable practices that tends to be soft, drapey, and wrinkle-resistant.) This fabric is a little slippery to work with. It is not a stretch fabric, but it does have a little bit of mechanical stretch. It doesn’t tend to wrinkle, but it does hold a crease when pressed with an iron. I used about 2 yards of fabric.
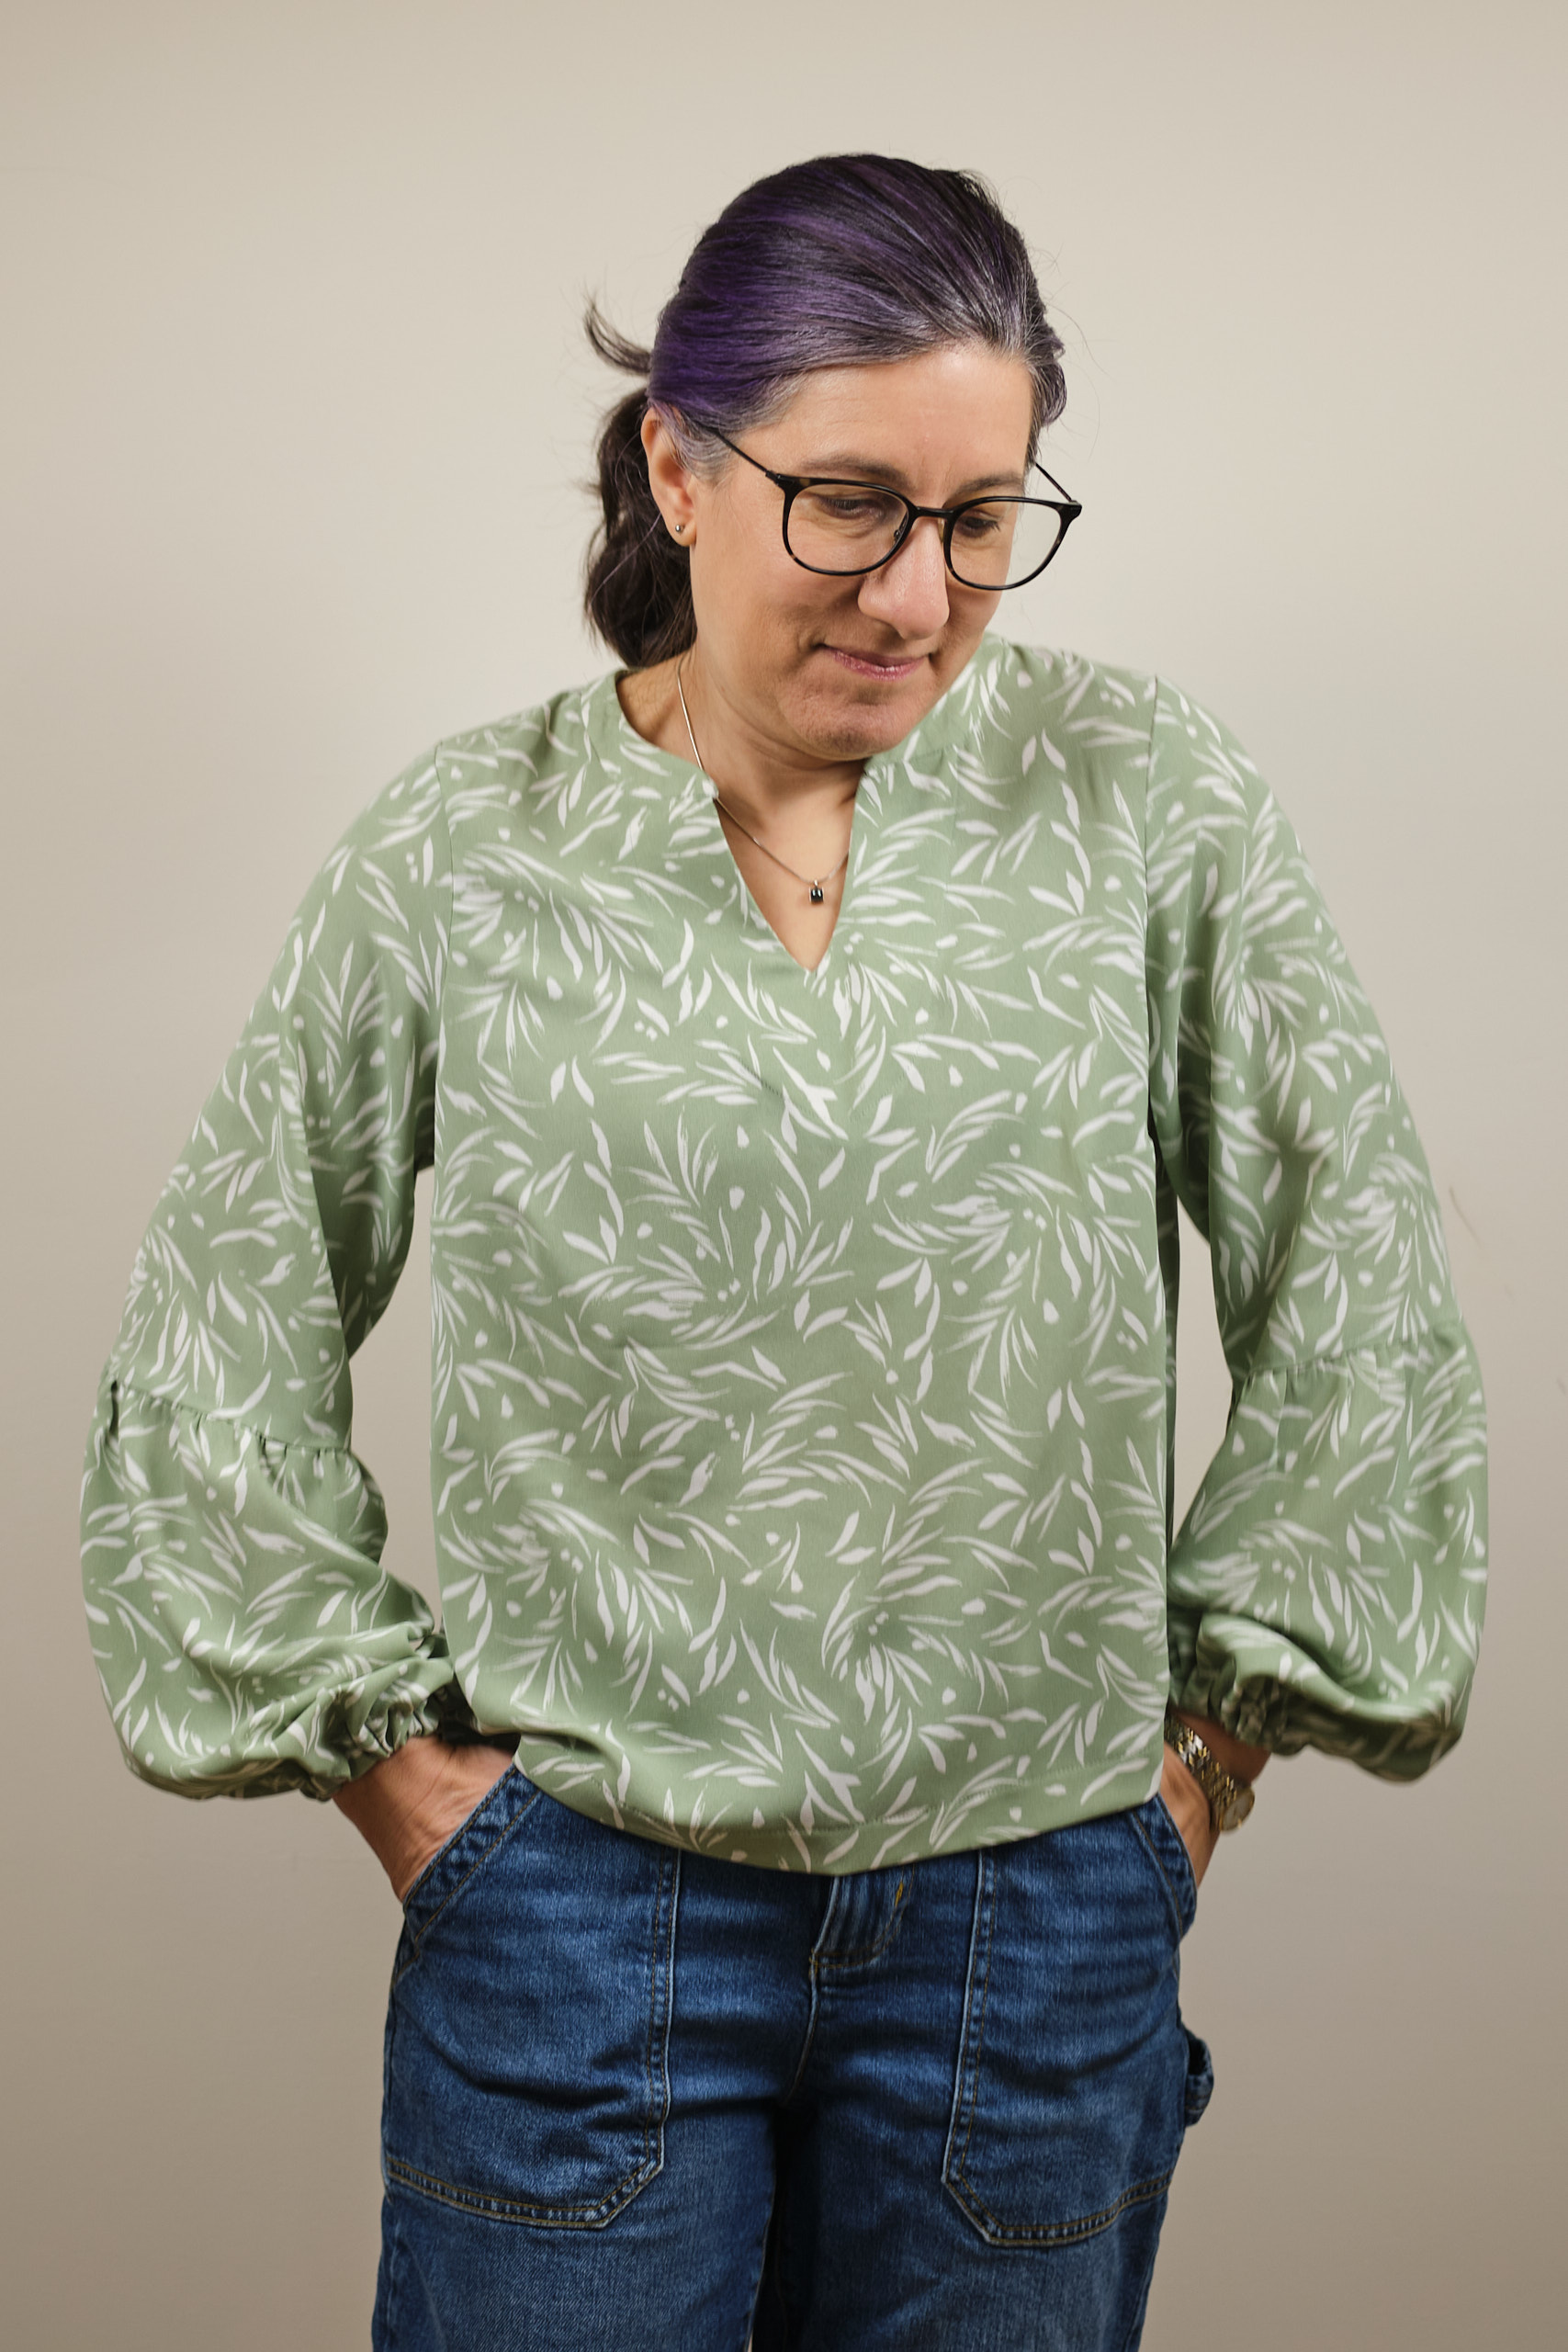
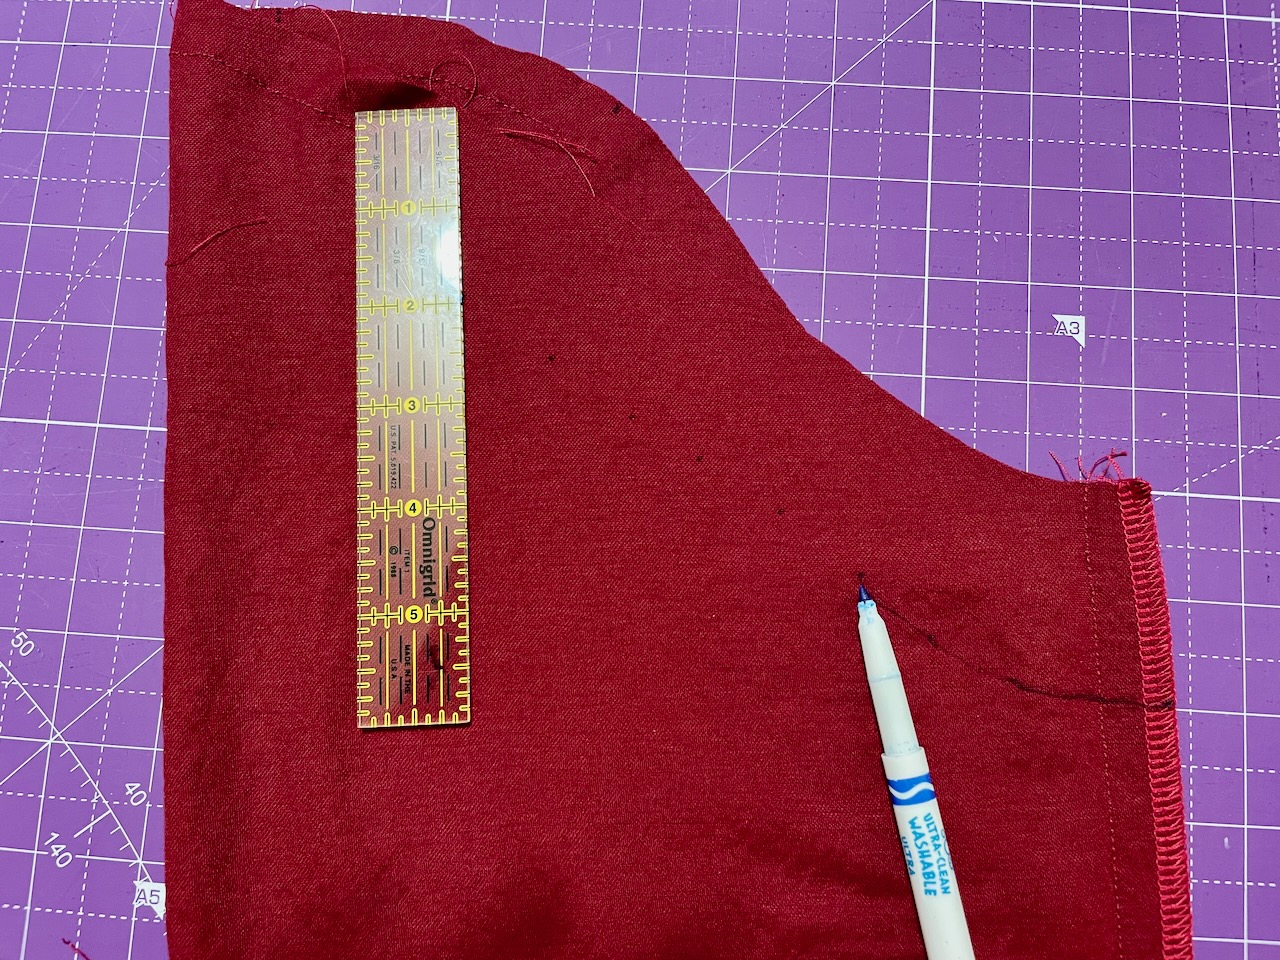
Some testers described this pattern as a “quick sew.” I did not find it quick (and others also disagreed with that description). I think I spent between 5 and 6 hours on it. The main reason it took so long was that the collar construction instructions were confusing and it is a multi-step process. Now that I know how to do it, it would go faster next time, but it will still be an involved process, with inner and outer interfaced layers, top stitching, and stitch-in-the-ditch or hand stitching to finish. Sewing the point of the V is tricky because once you sew past the point in the fabric you no longer can see your 3/8 inch guide on your sewing machine. I ended up marking the stitch lines around the point in pencil so I could see where to stitch. I didn’t cut the facing around the v-neck 100% symmetrically and this was evident when I initially top-stitched the V. I removed the stitching and did it again and it looked a lot better the second time. Next time I will double check the facing before I sew it on. I pinned the collar pieces together backwards and the pieces didn’t fit together right. But I realized my mistake and repinned before sewing. The final version of the pattern instructions are a bit clearer on the process. It still takes soe effort but it is a really nice finish. The final version also now has a ruffled neck option.
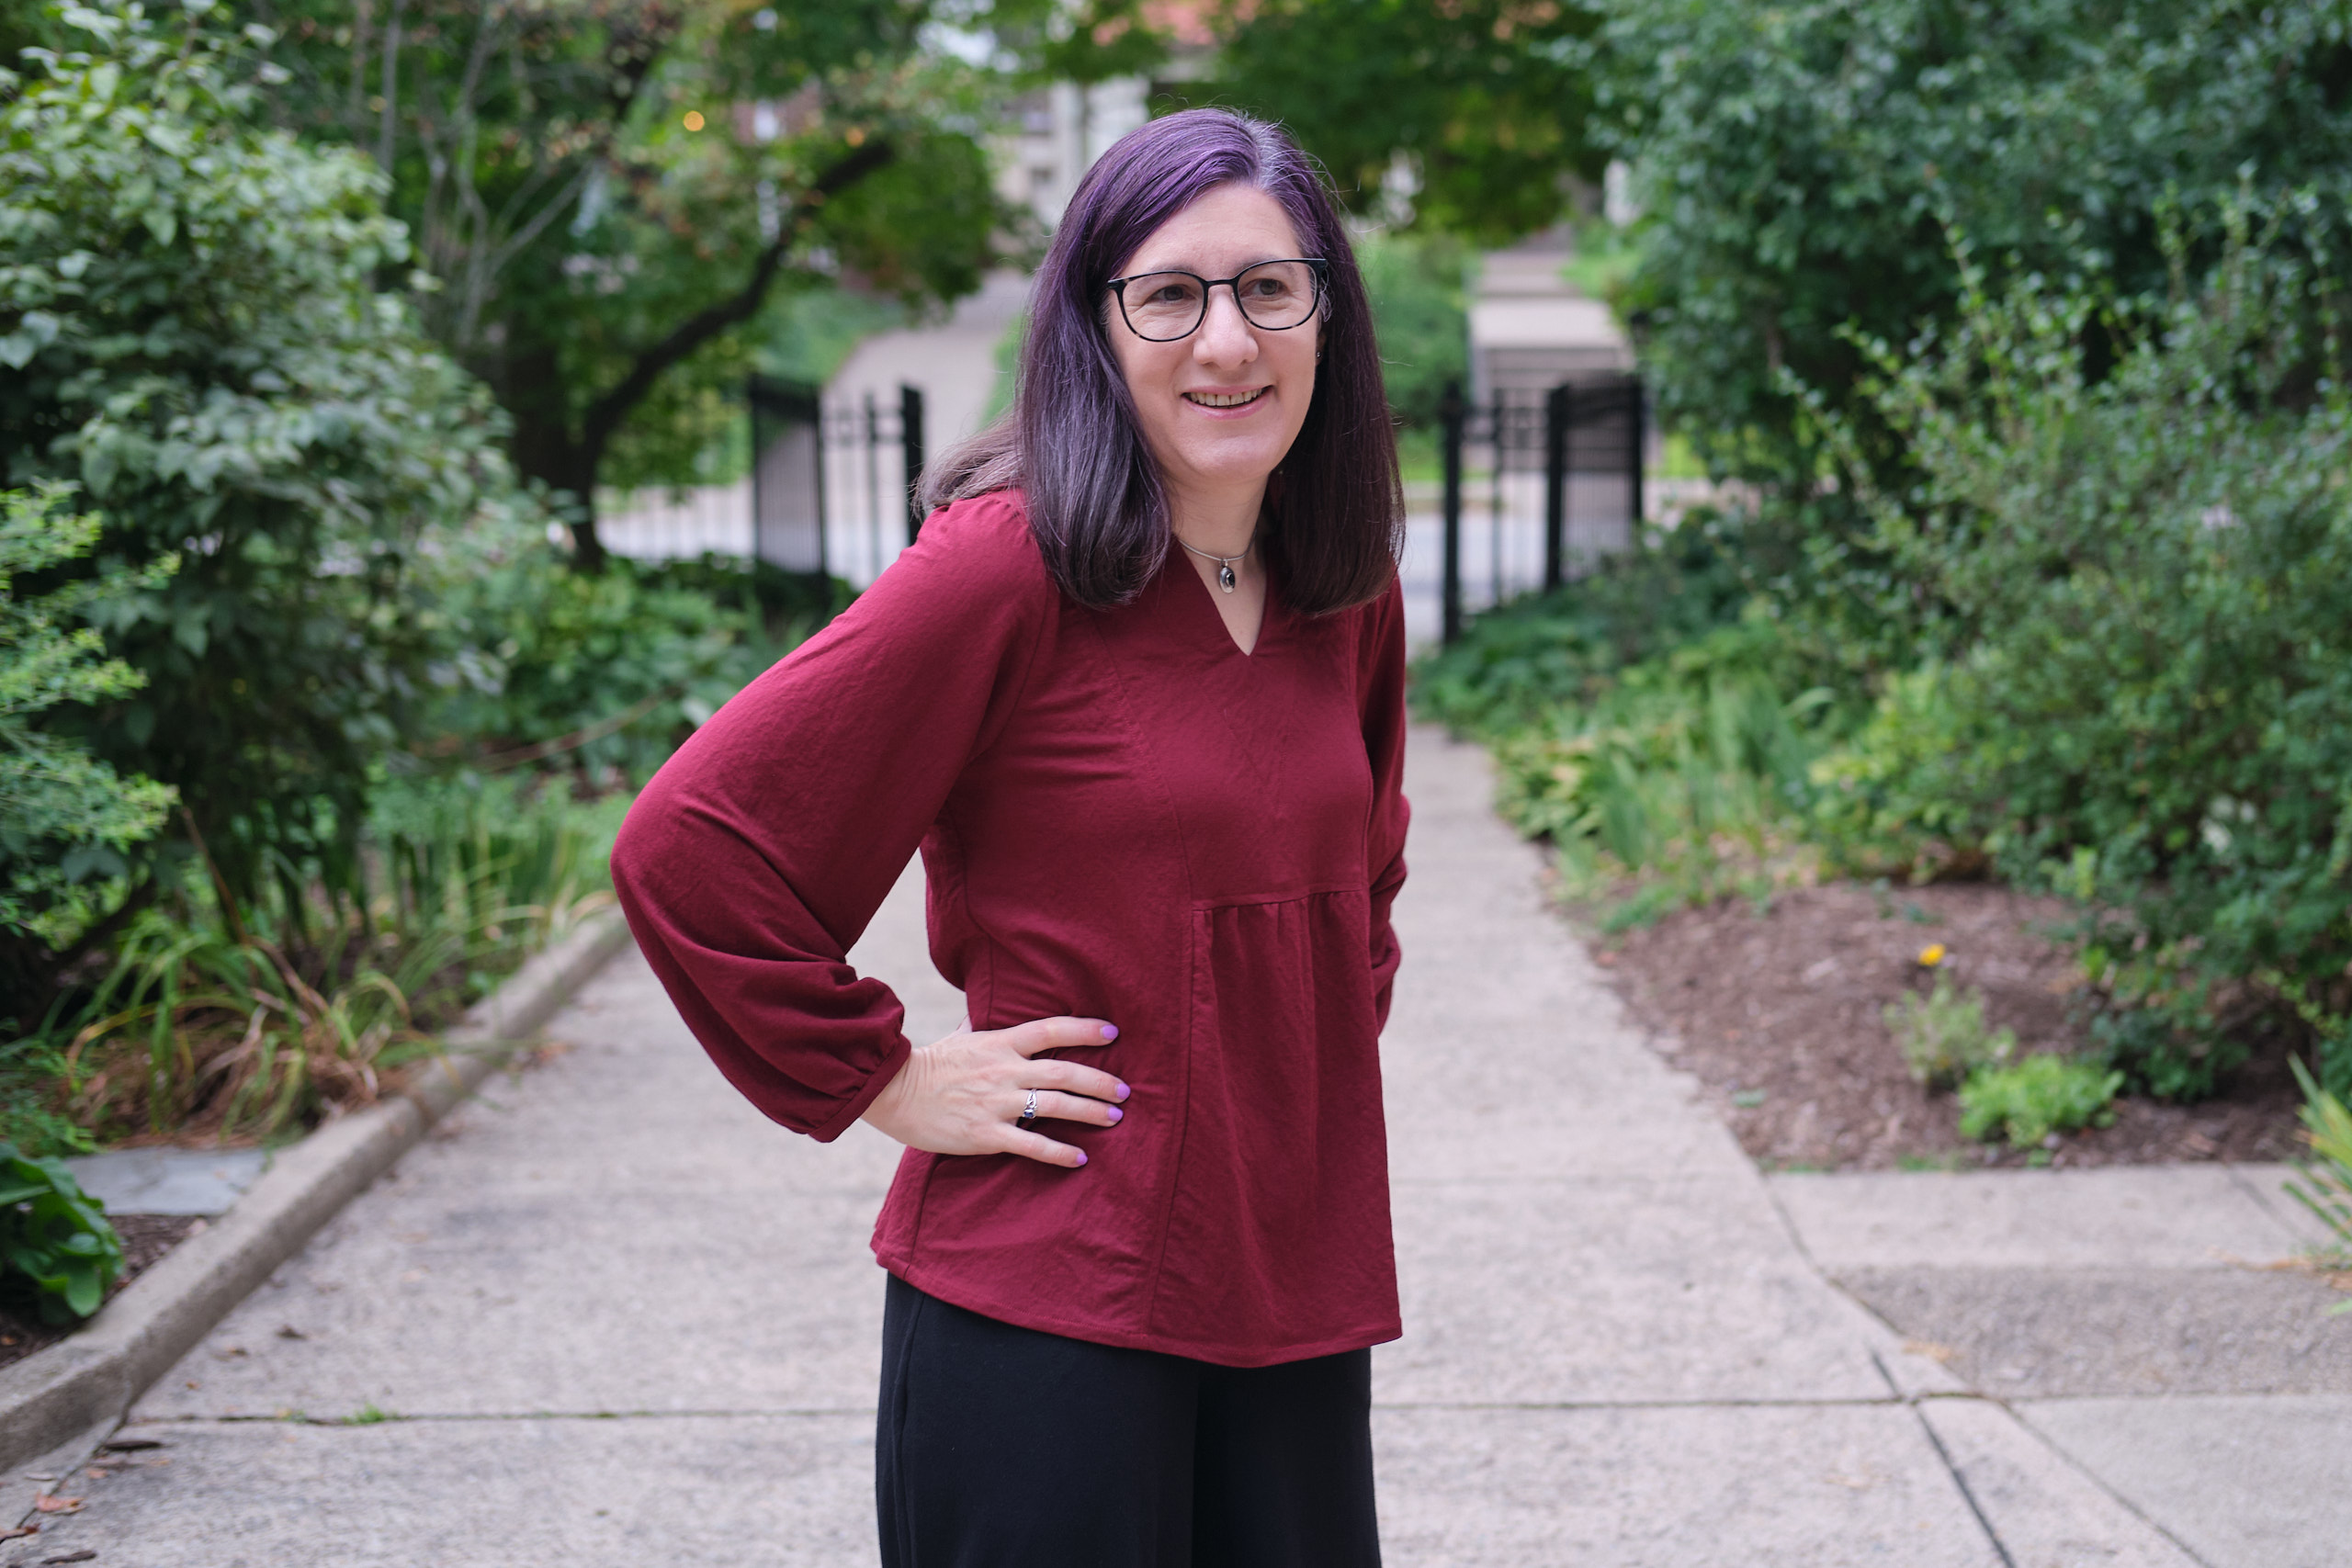
The height and sleeve adjustments worked well for me. The tiered sleeves were pretty easy to construct and look nice. The pattern called for 5.5 inches of elastic at the wrist of each sleeve. I used 7 inches instead for more comfort, and could probably have gone even bigger. The final version of the pattern has adjusted the elastic lengths based on tester feedback, but it’s always a good idea to wrap the elastic around your wrist and adjust as appropriate for you.
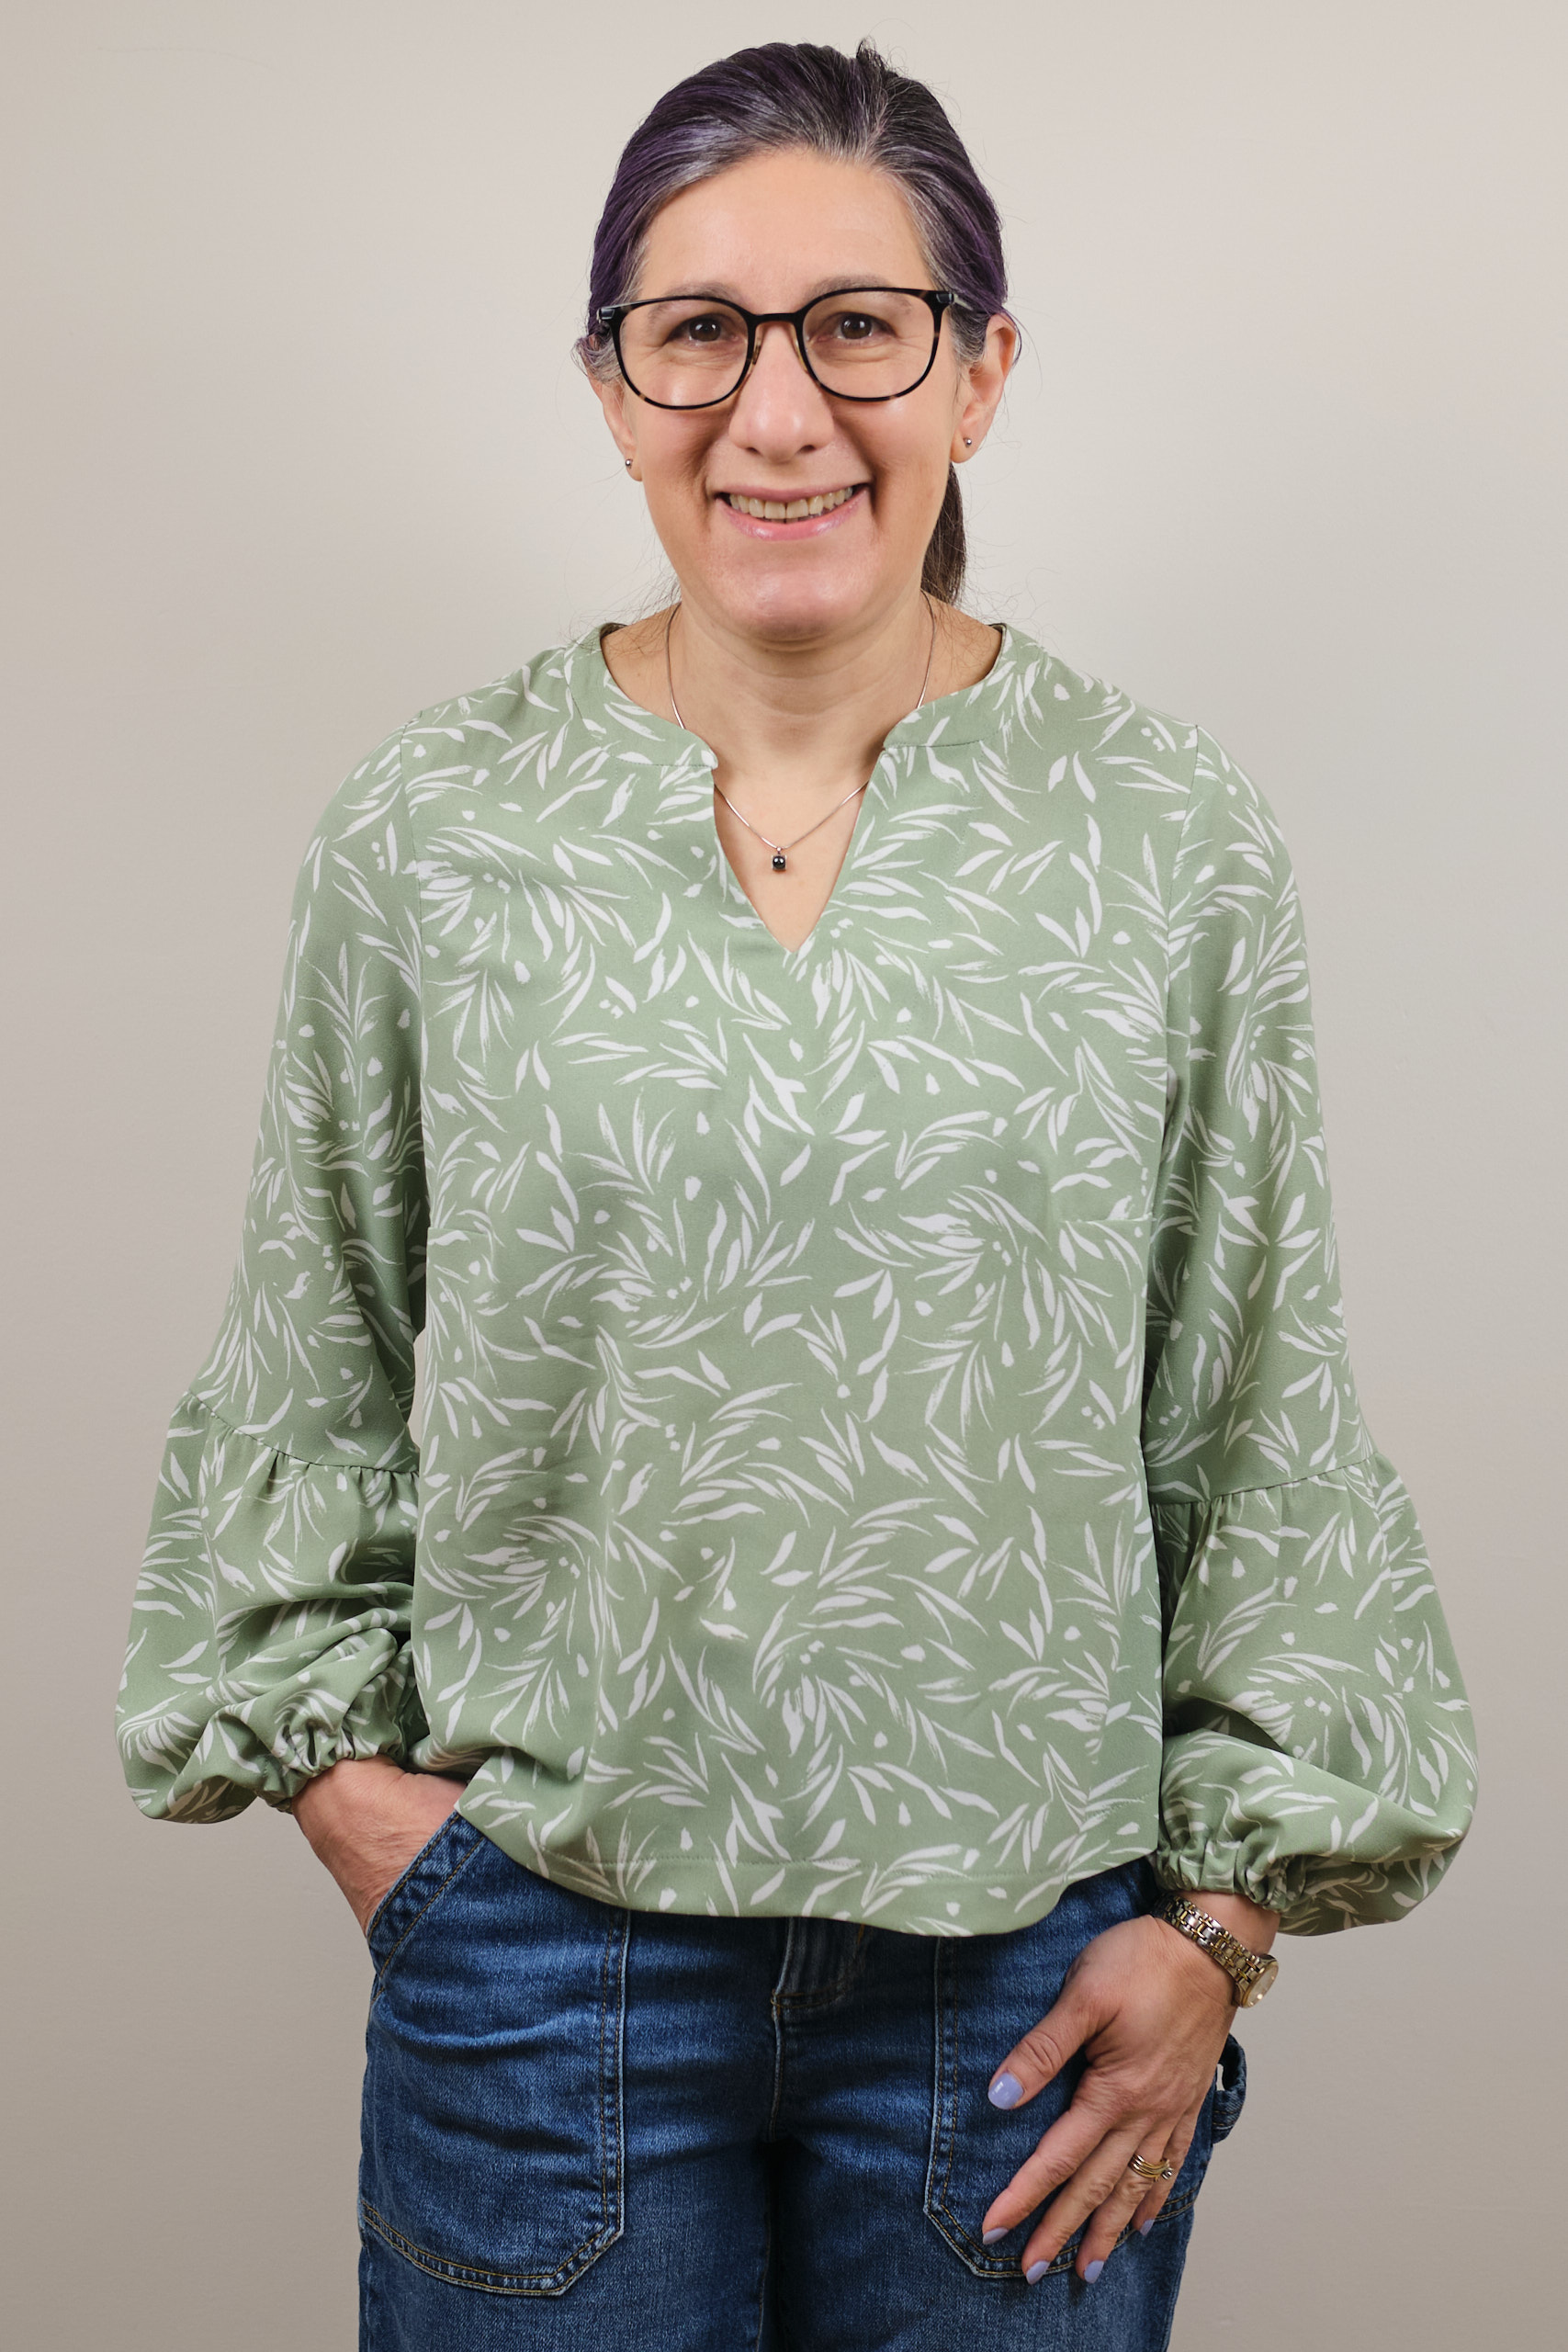
I often do broad and sloped shoulder adjustments on fitted tops. I didn’t do that on this one because it seemed like more of a loose fit, but in hindsight, I should have at least done a broad shoulder adjustment, as the fabric at the shoulders pulls slightly. Other testers mentioned the shoulders were tight so the final version of the pattern has about 3/8 inch more room in the shoulders. I’m not sure about a sloped shoulder adjustment as that would require adjusting the bust dart, which was already set slightly too low for me. I will at least adjust the point of the dart up a bit next time or possibly leave it out altogether.
My complaints above are all minor issues that, especially with a print fabric, most people will probably not notice on the finished garment, which I think looks great! I’m sure I will get a lot of wear out of it and enjoy wearing it once the warm weather returns someday.
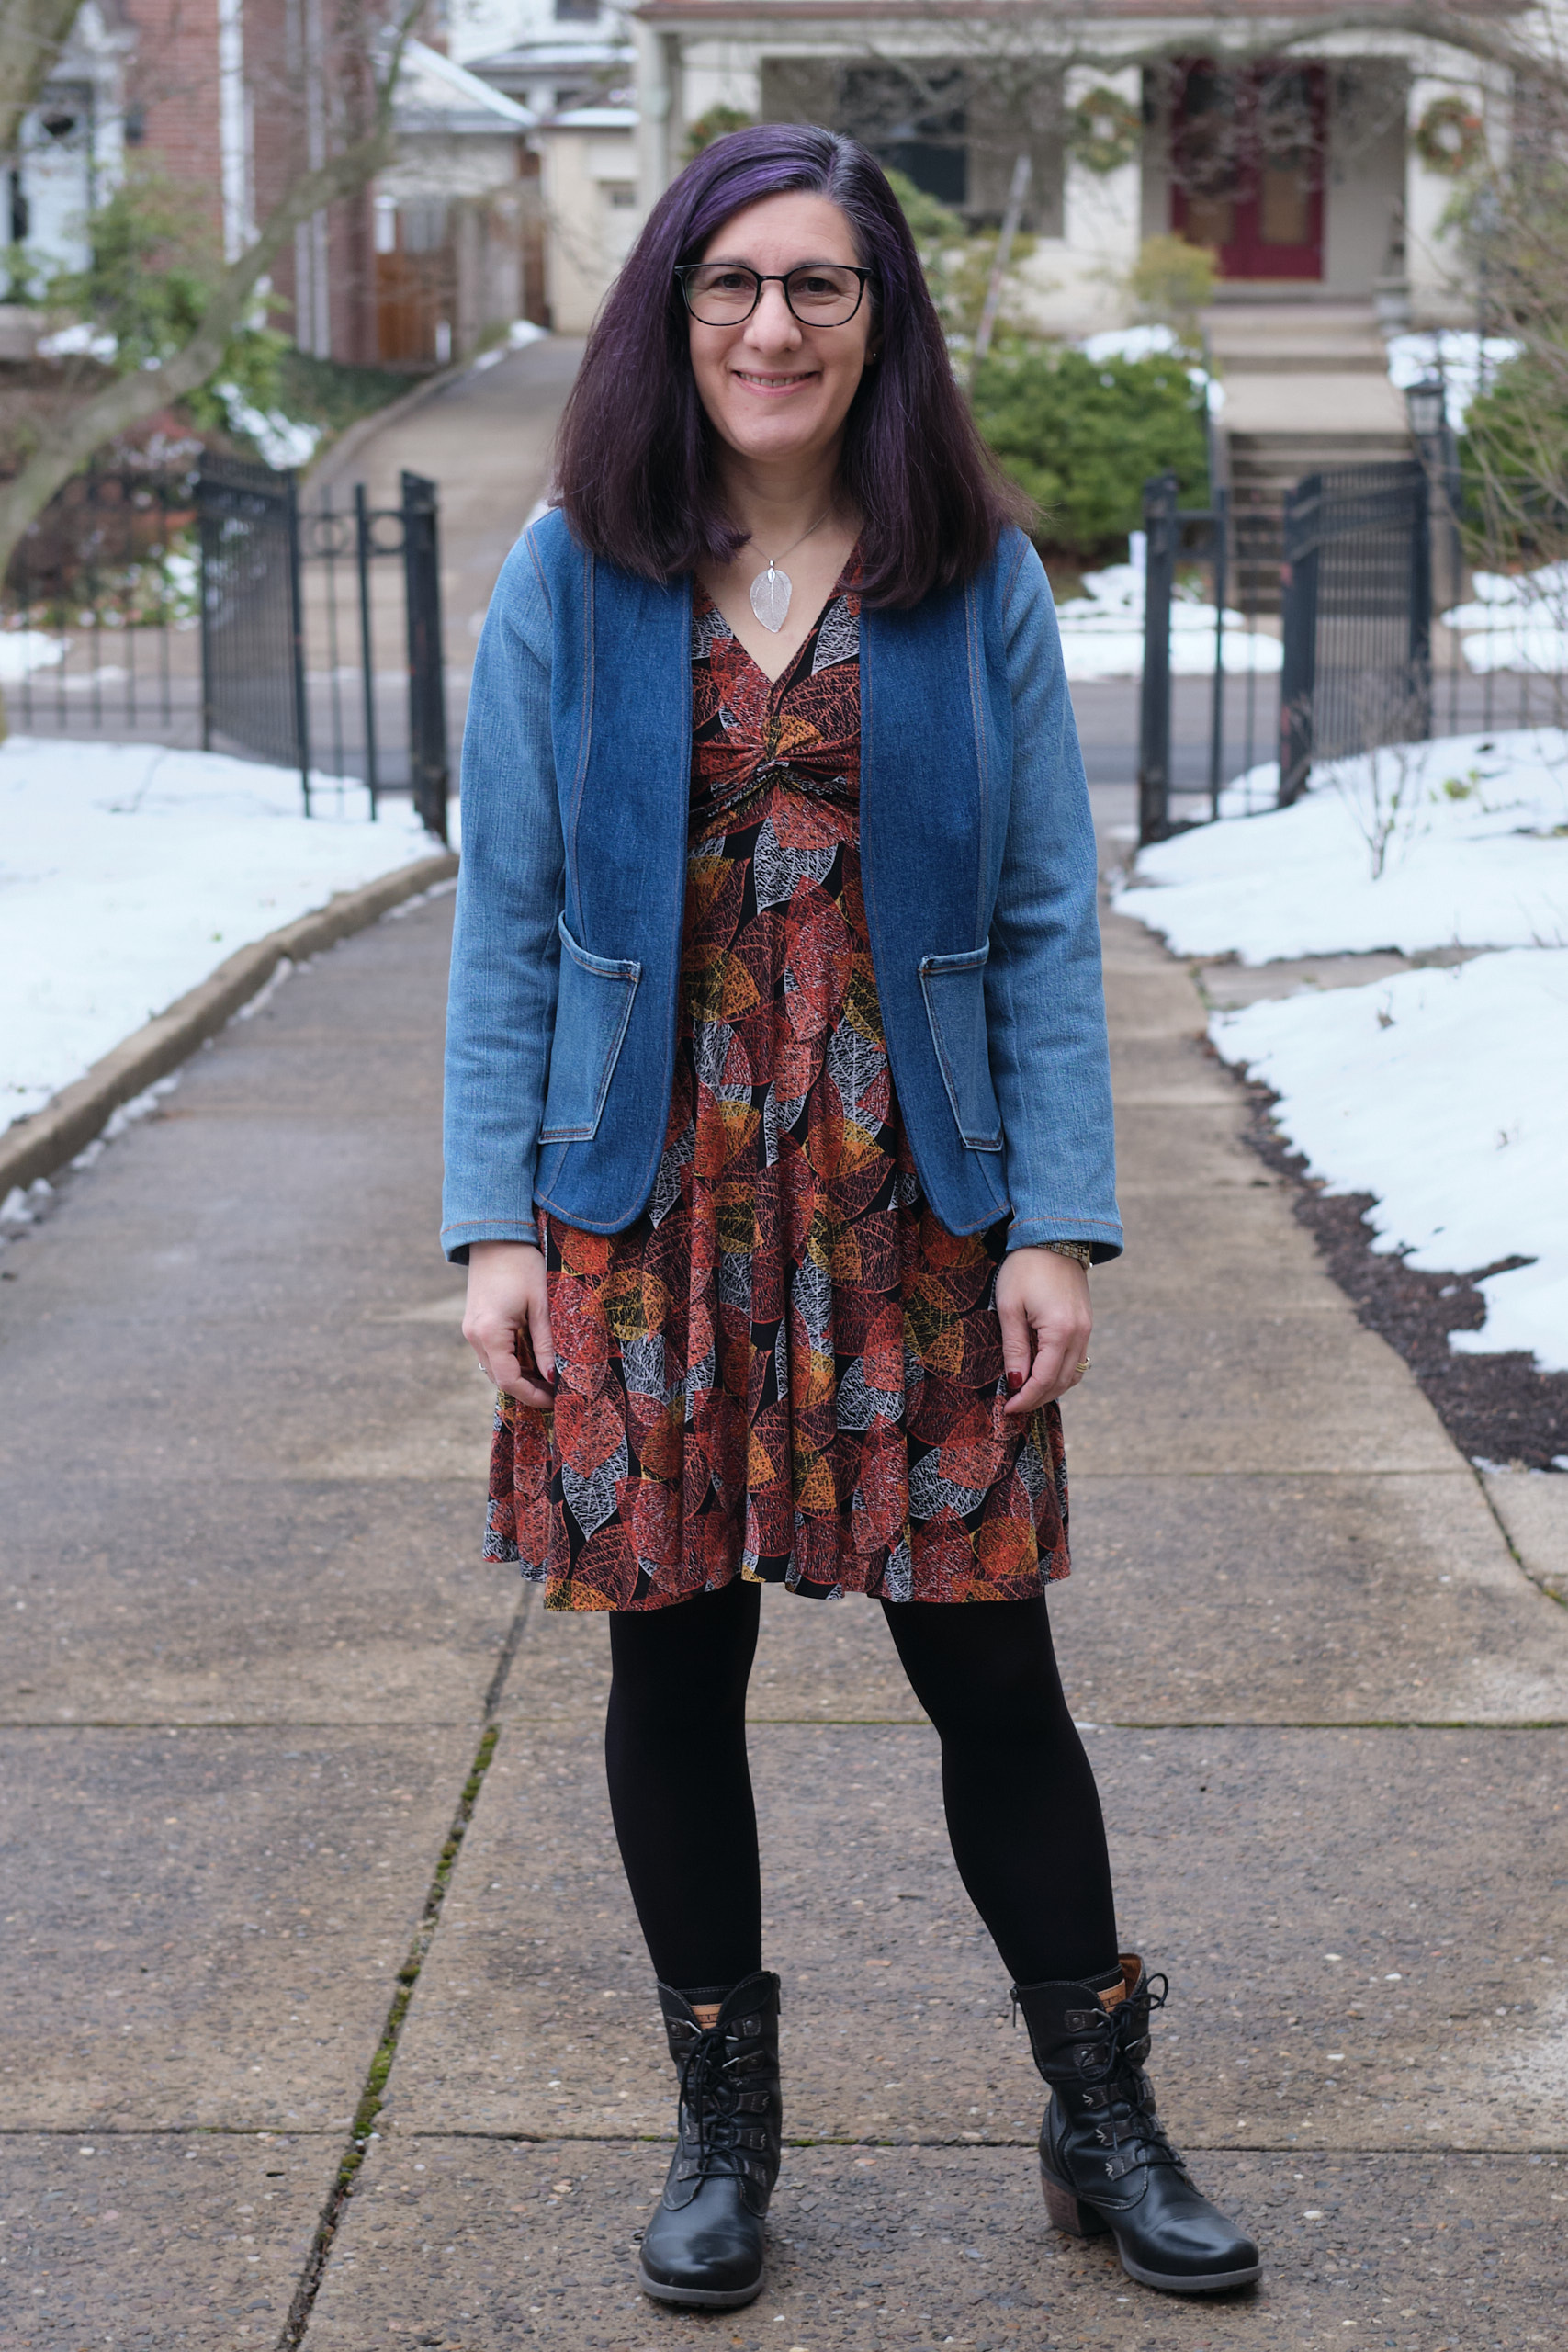
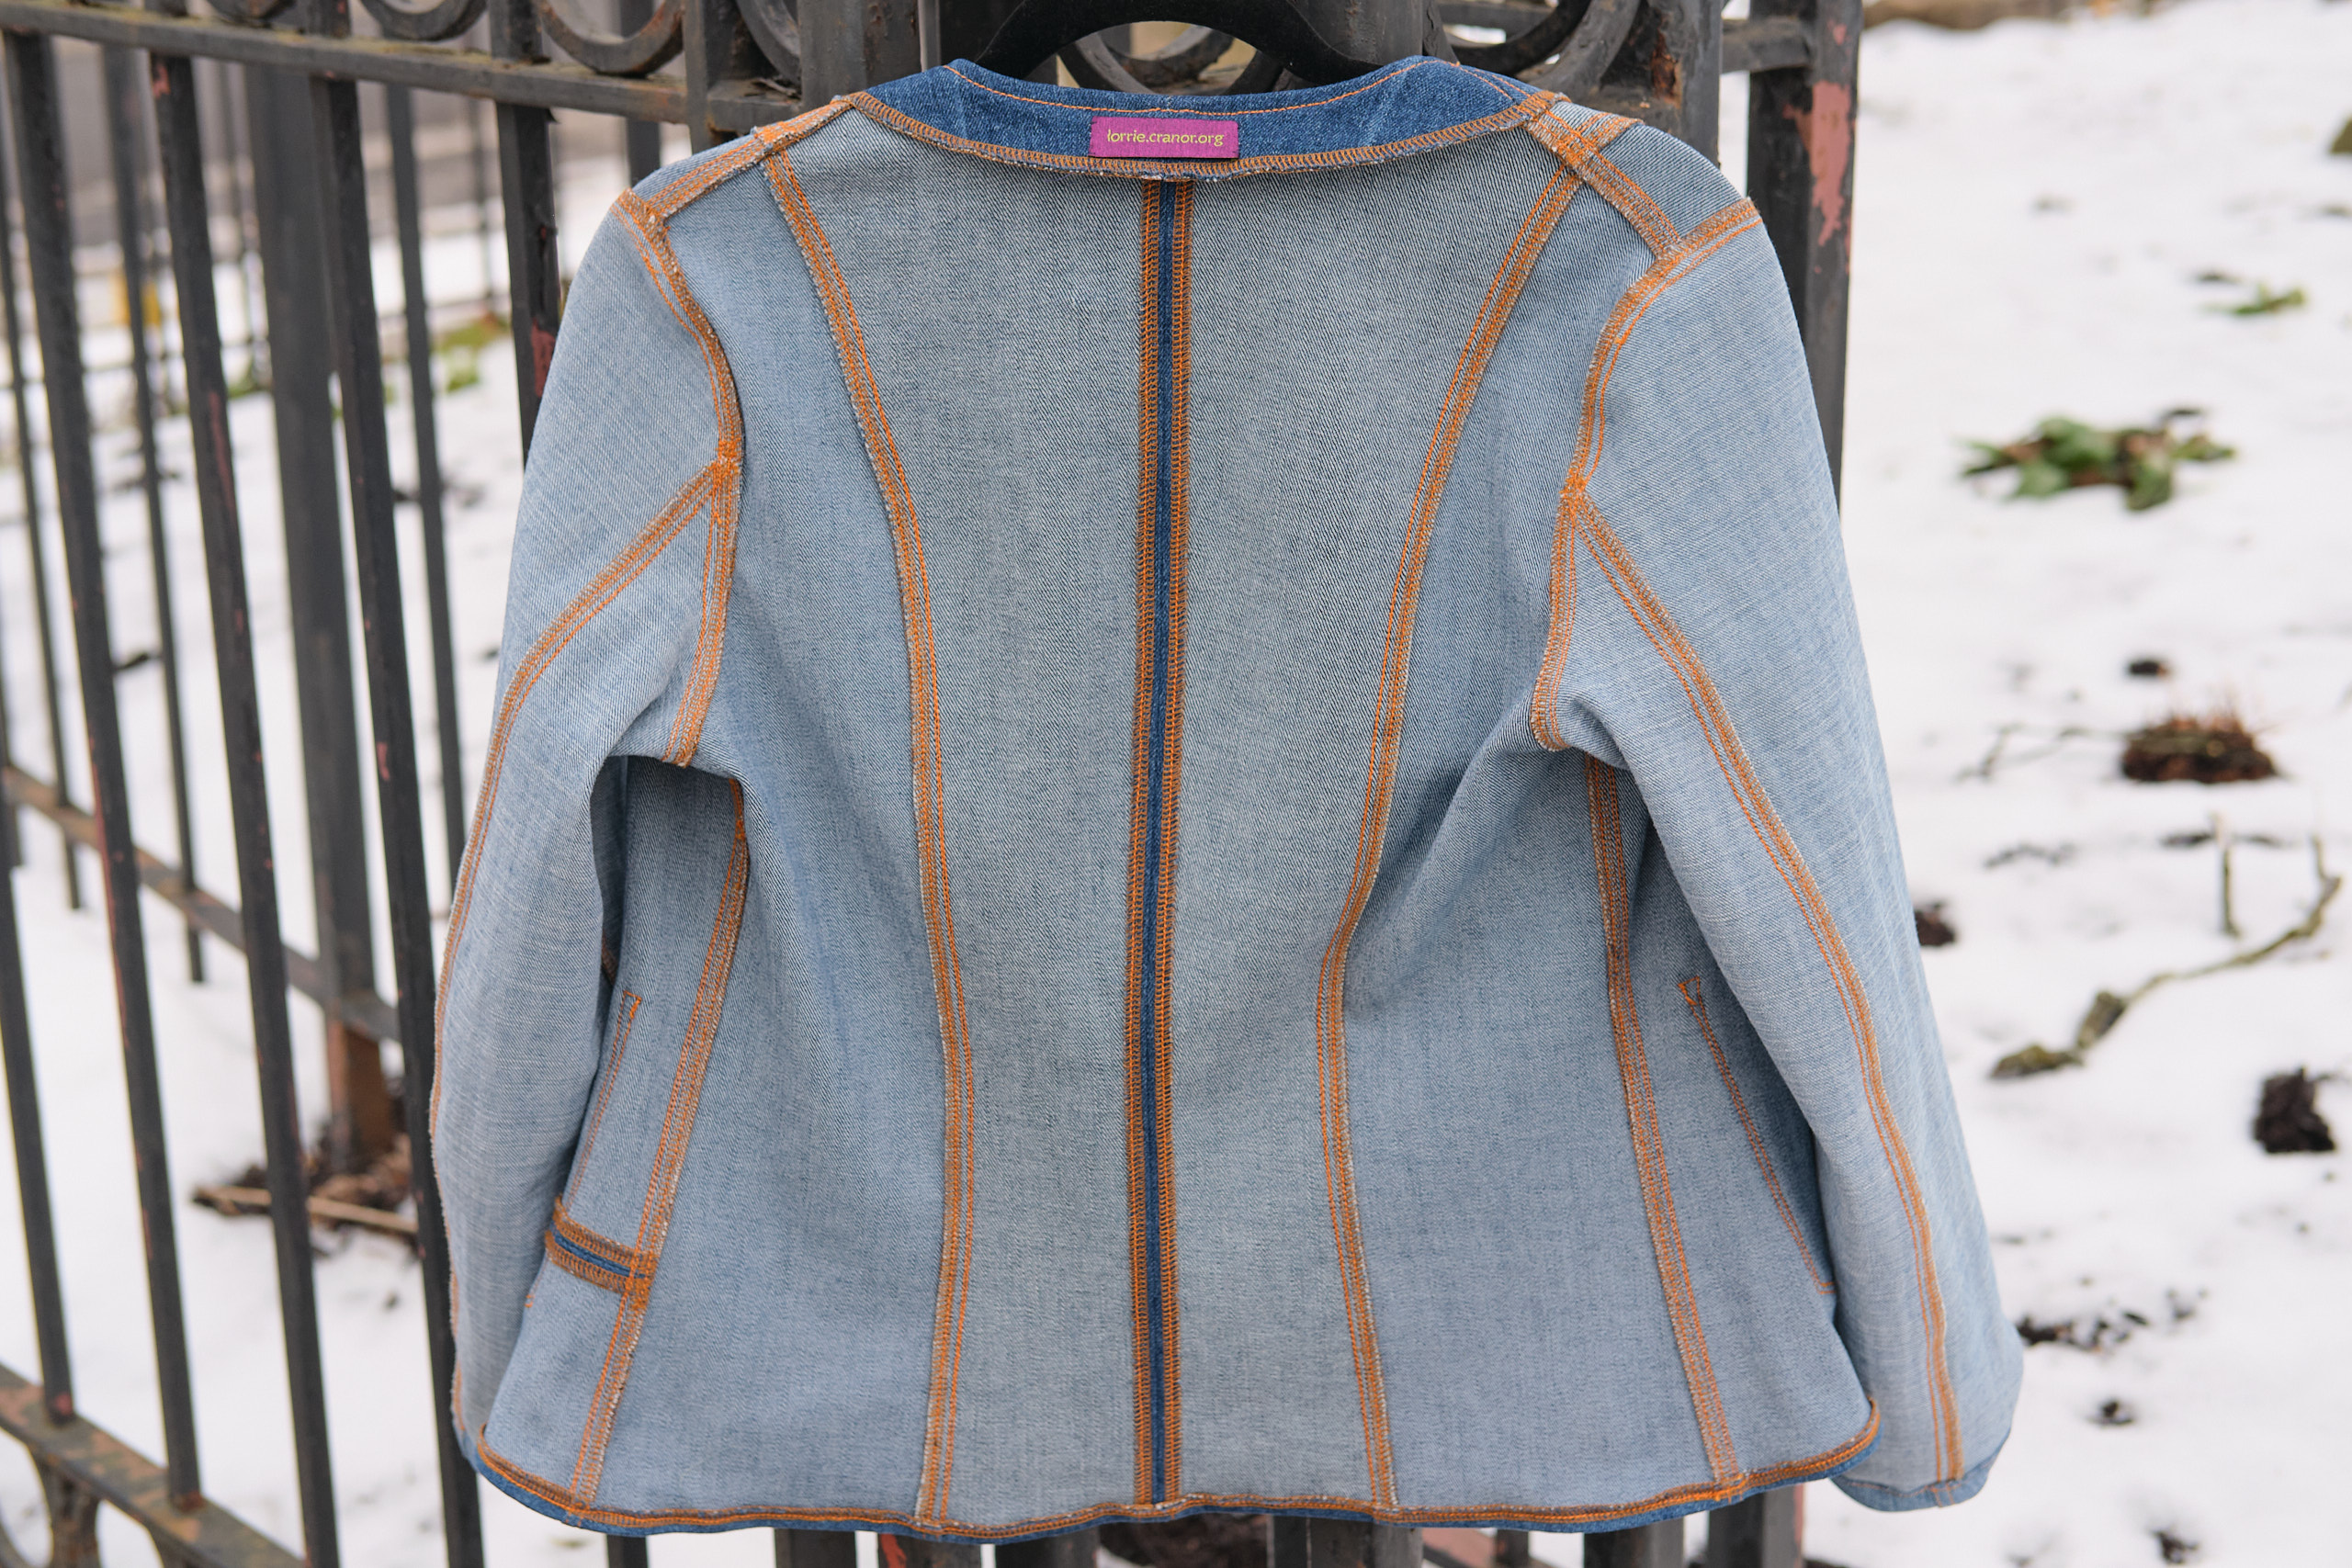
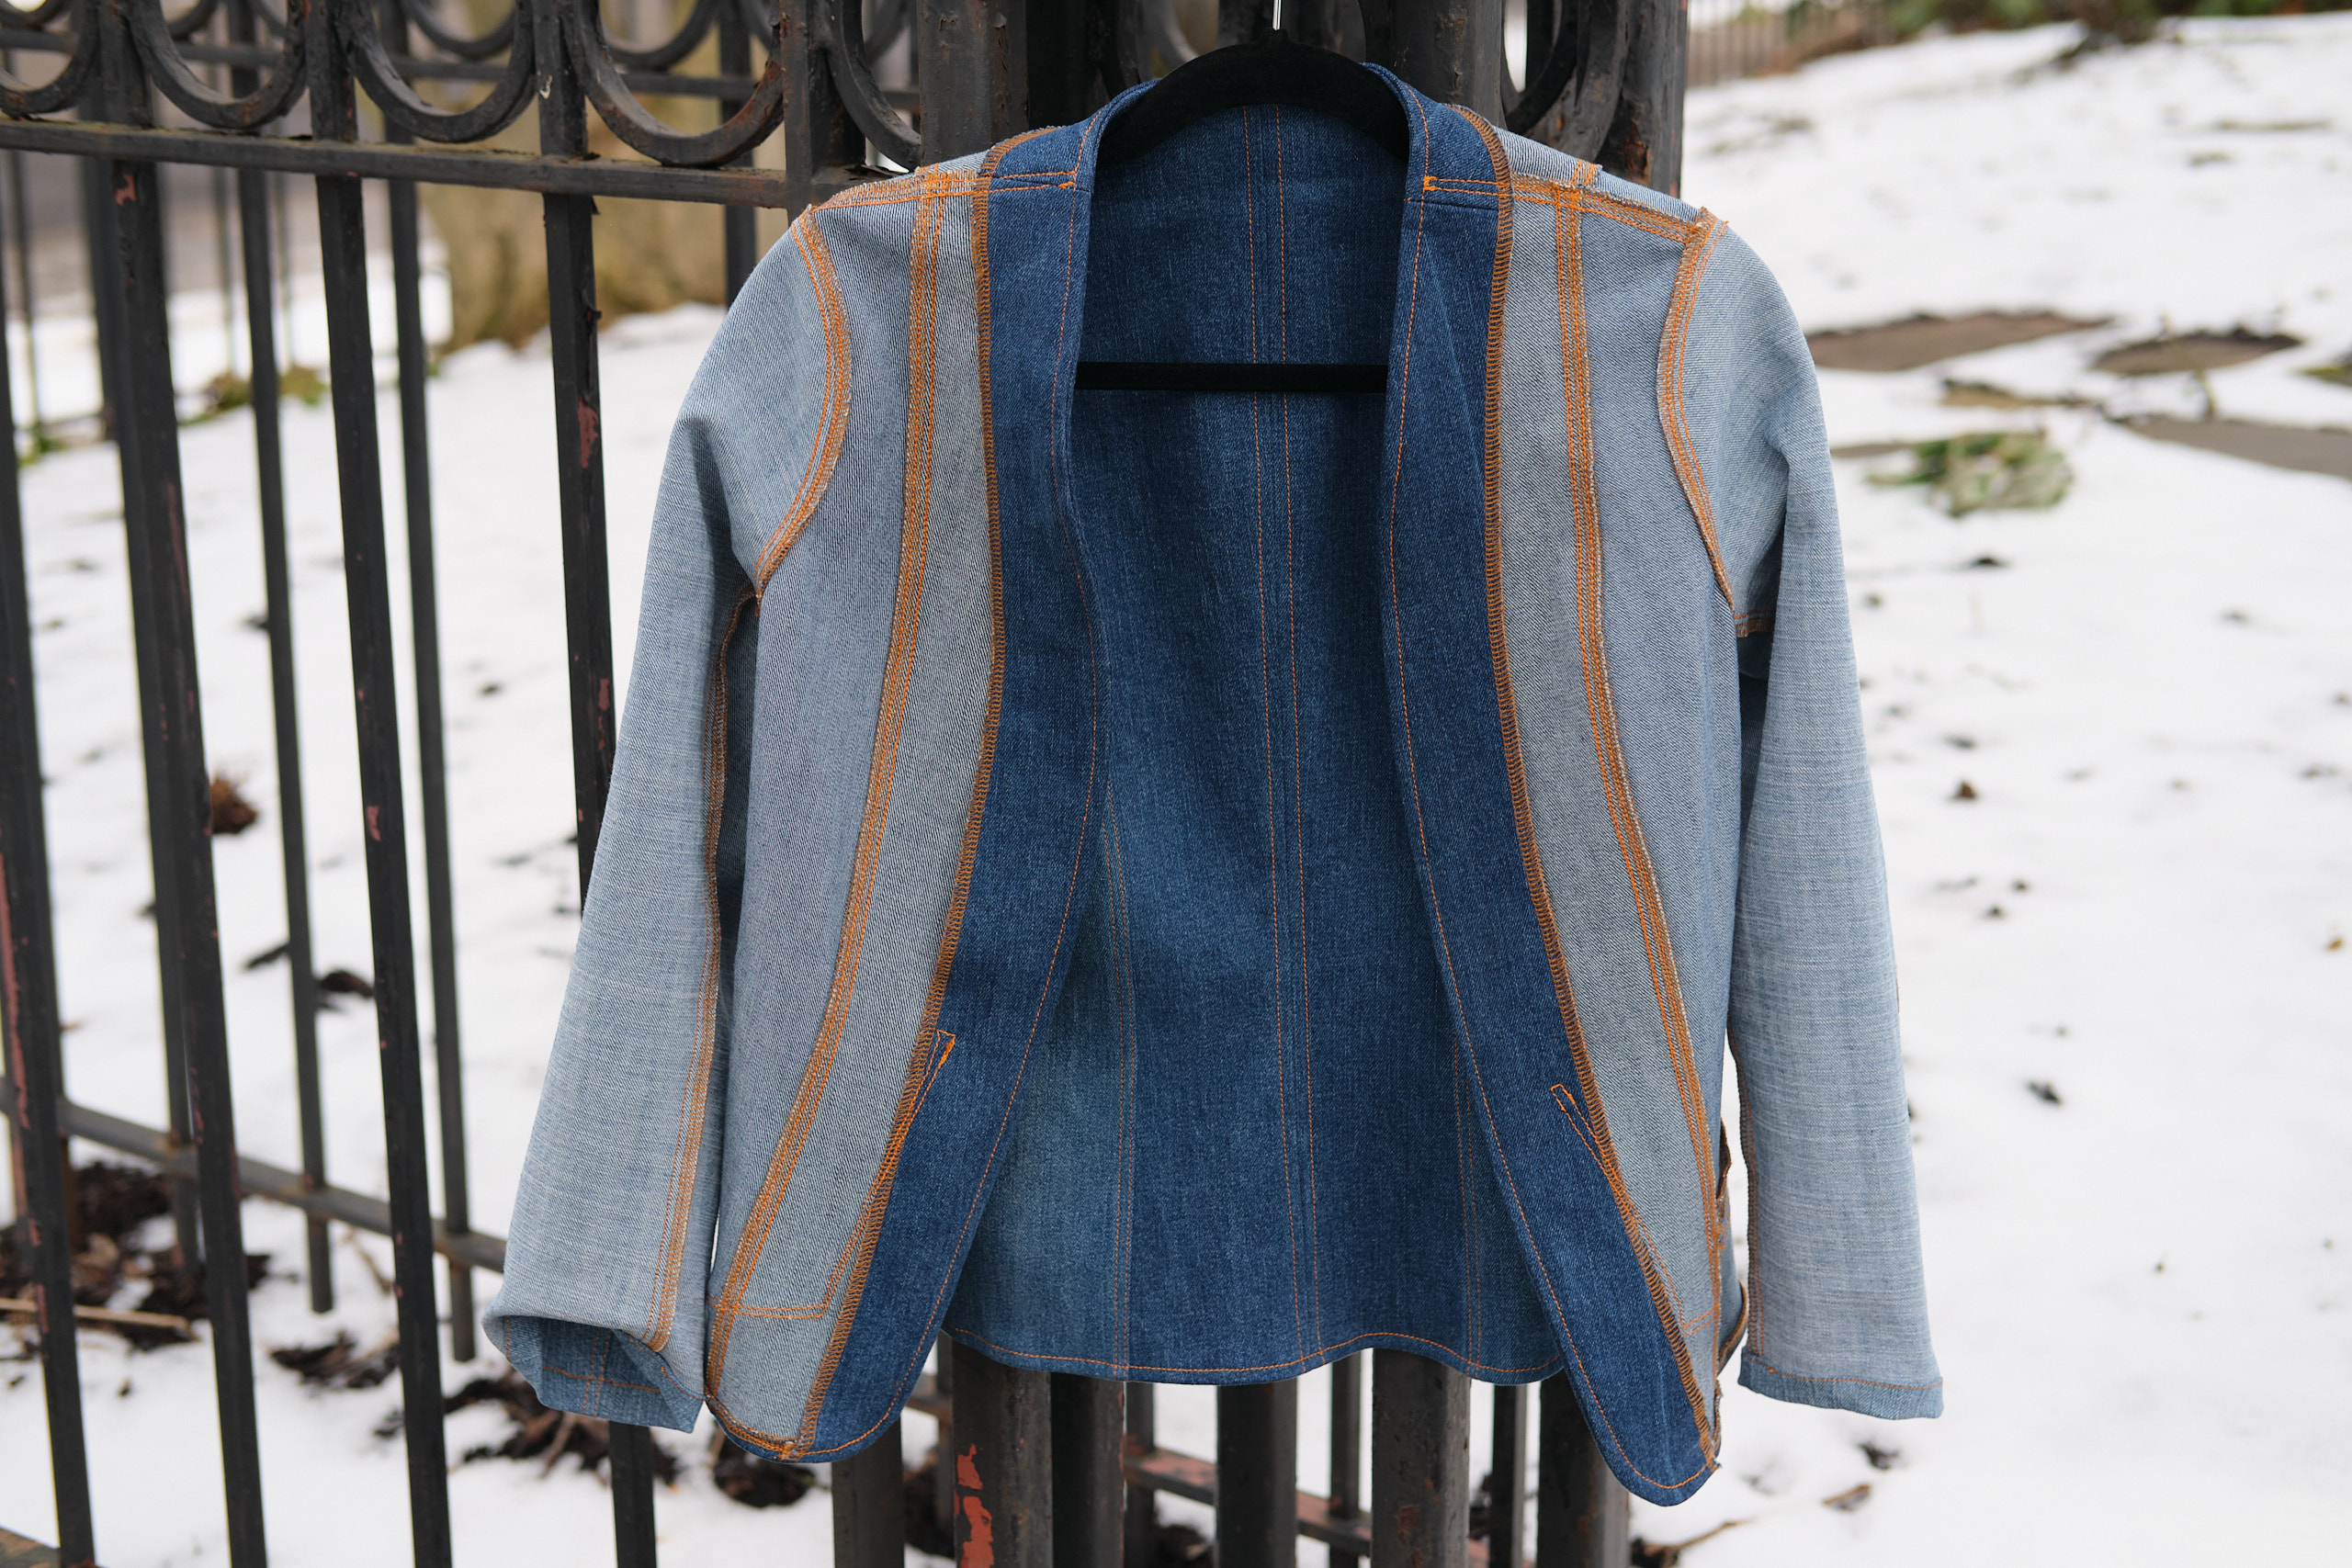
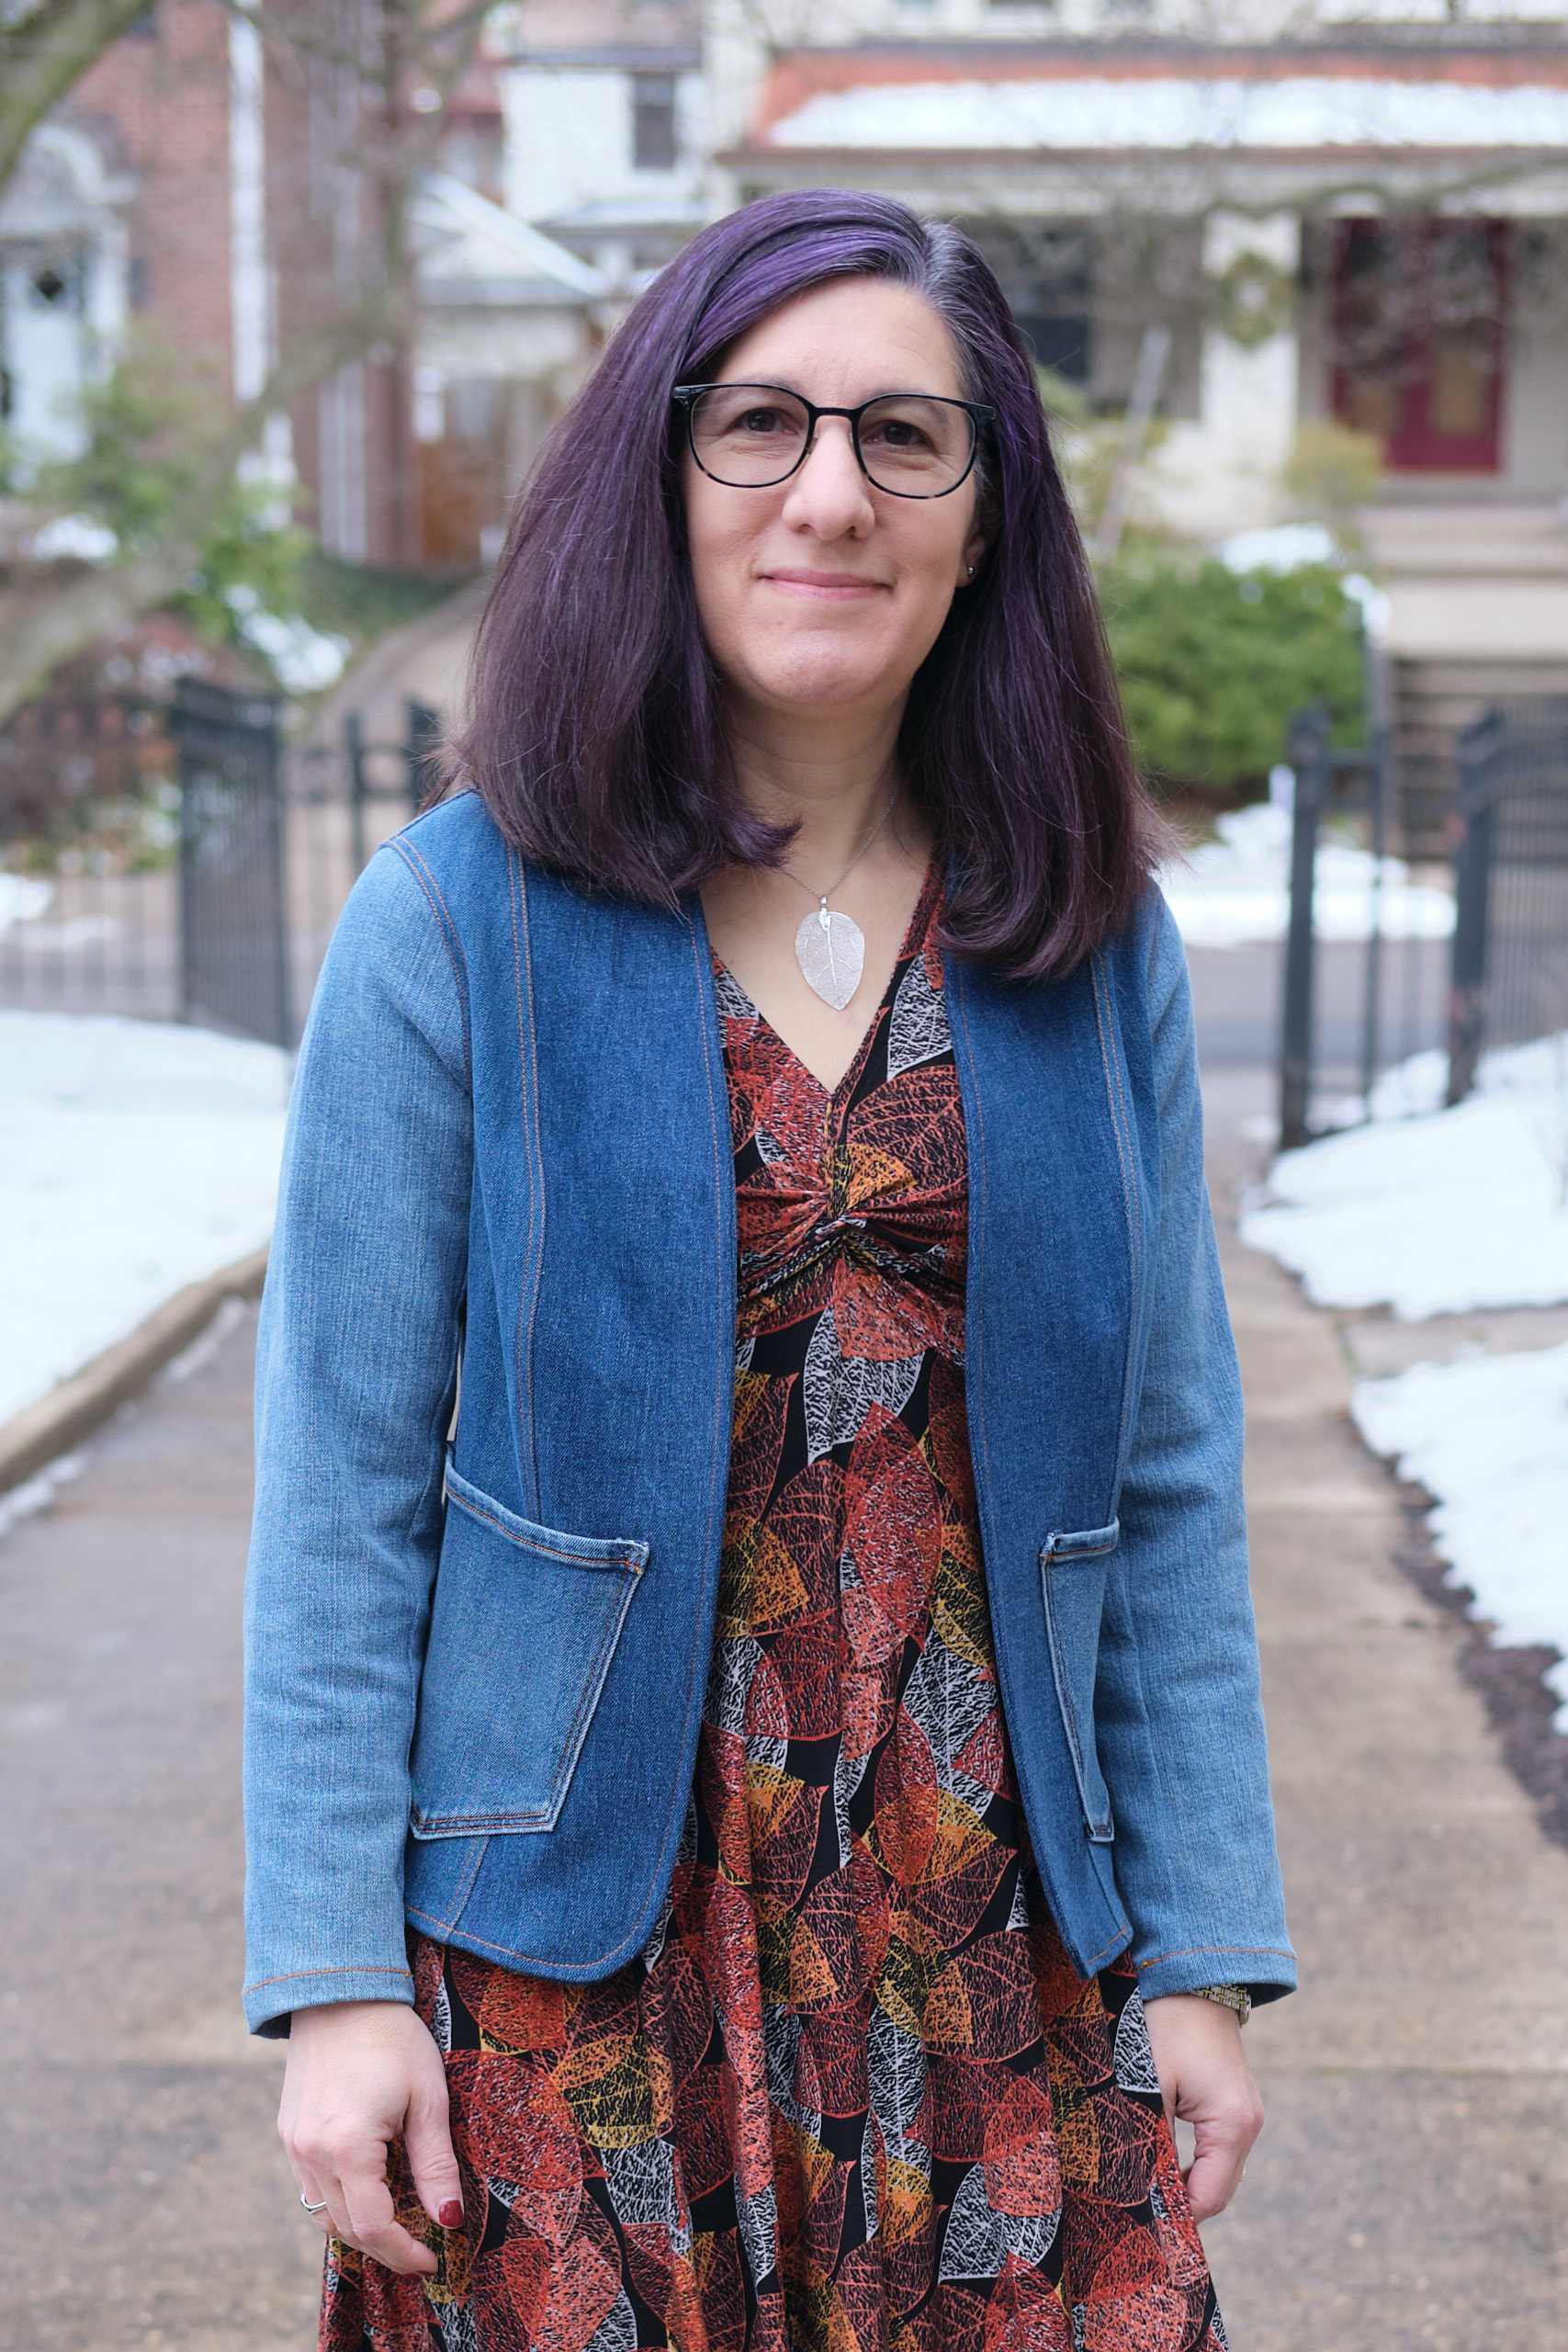
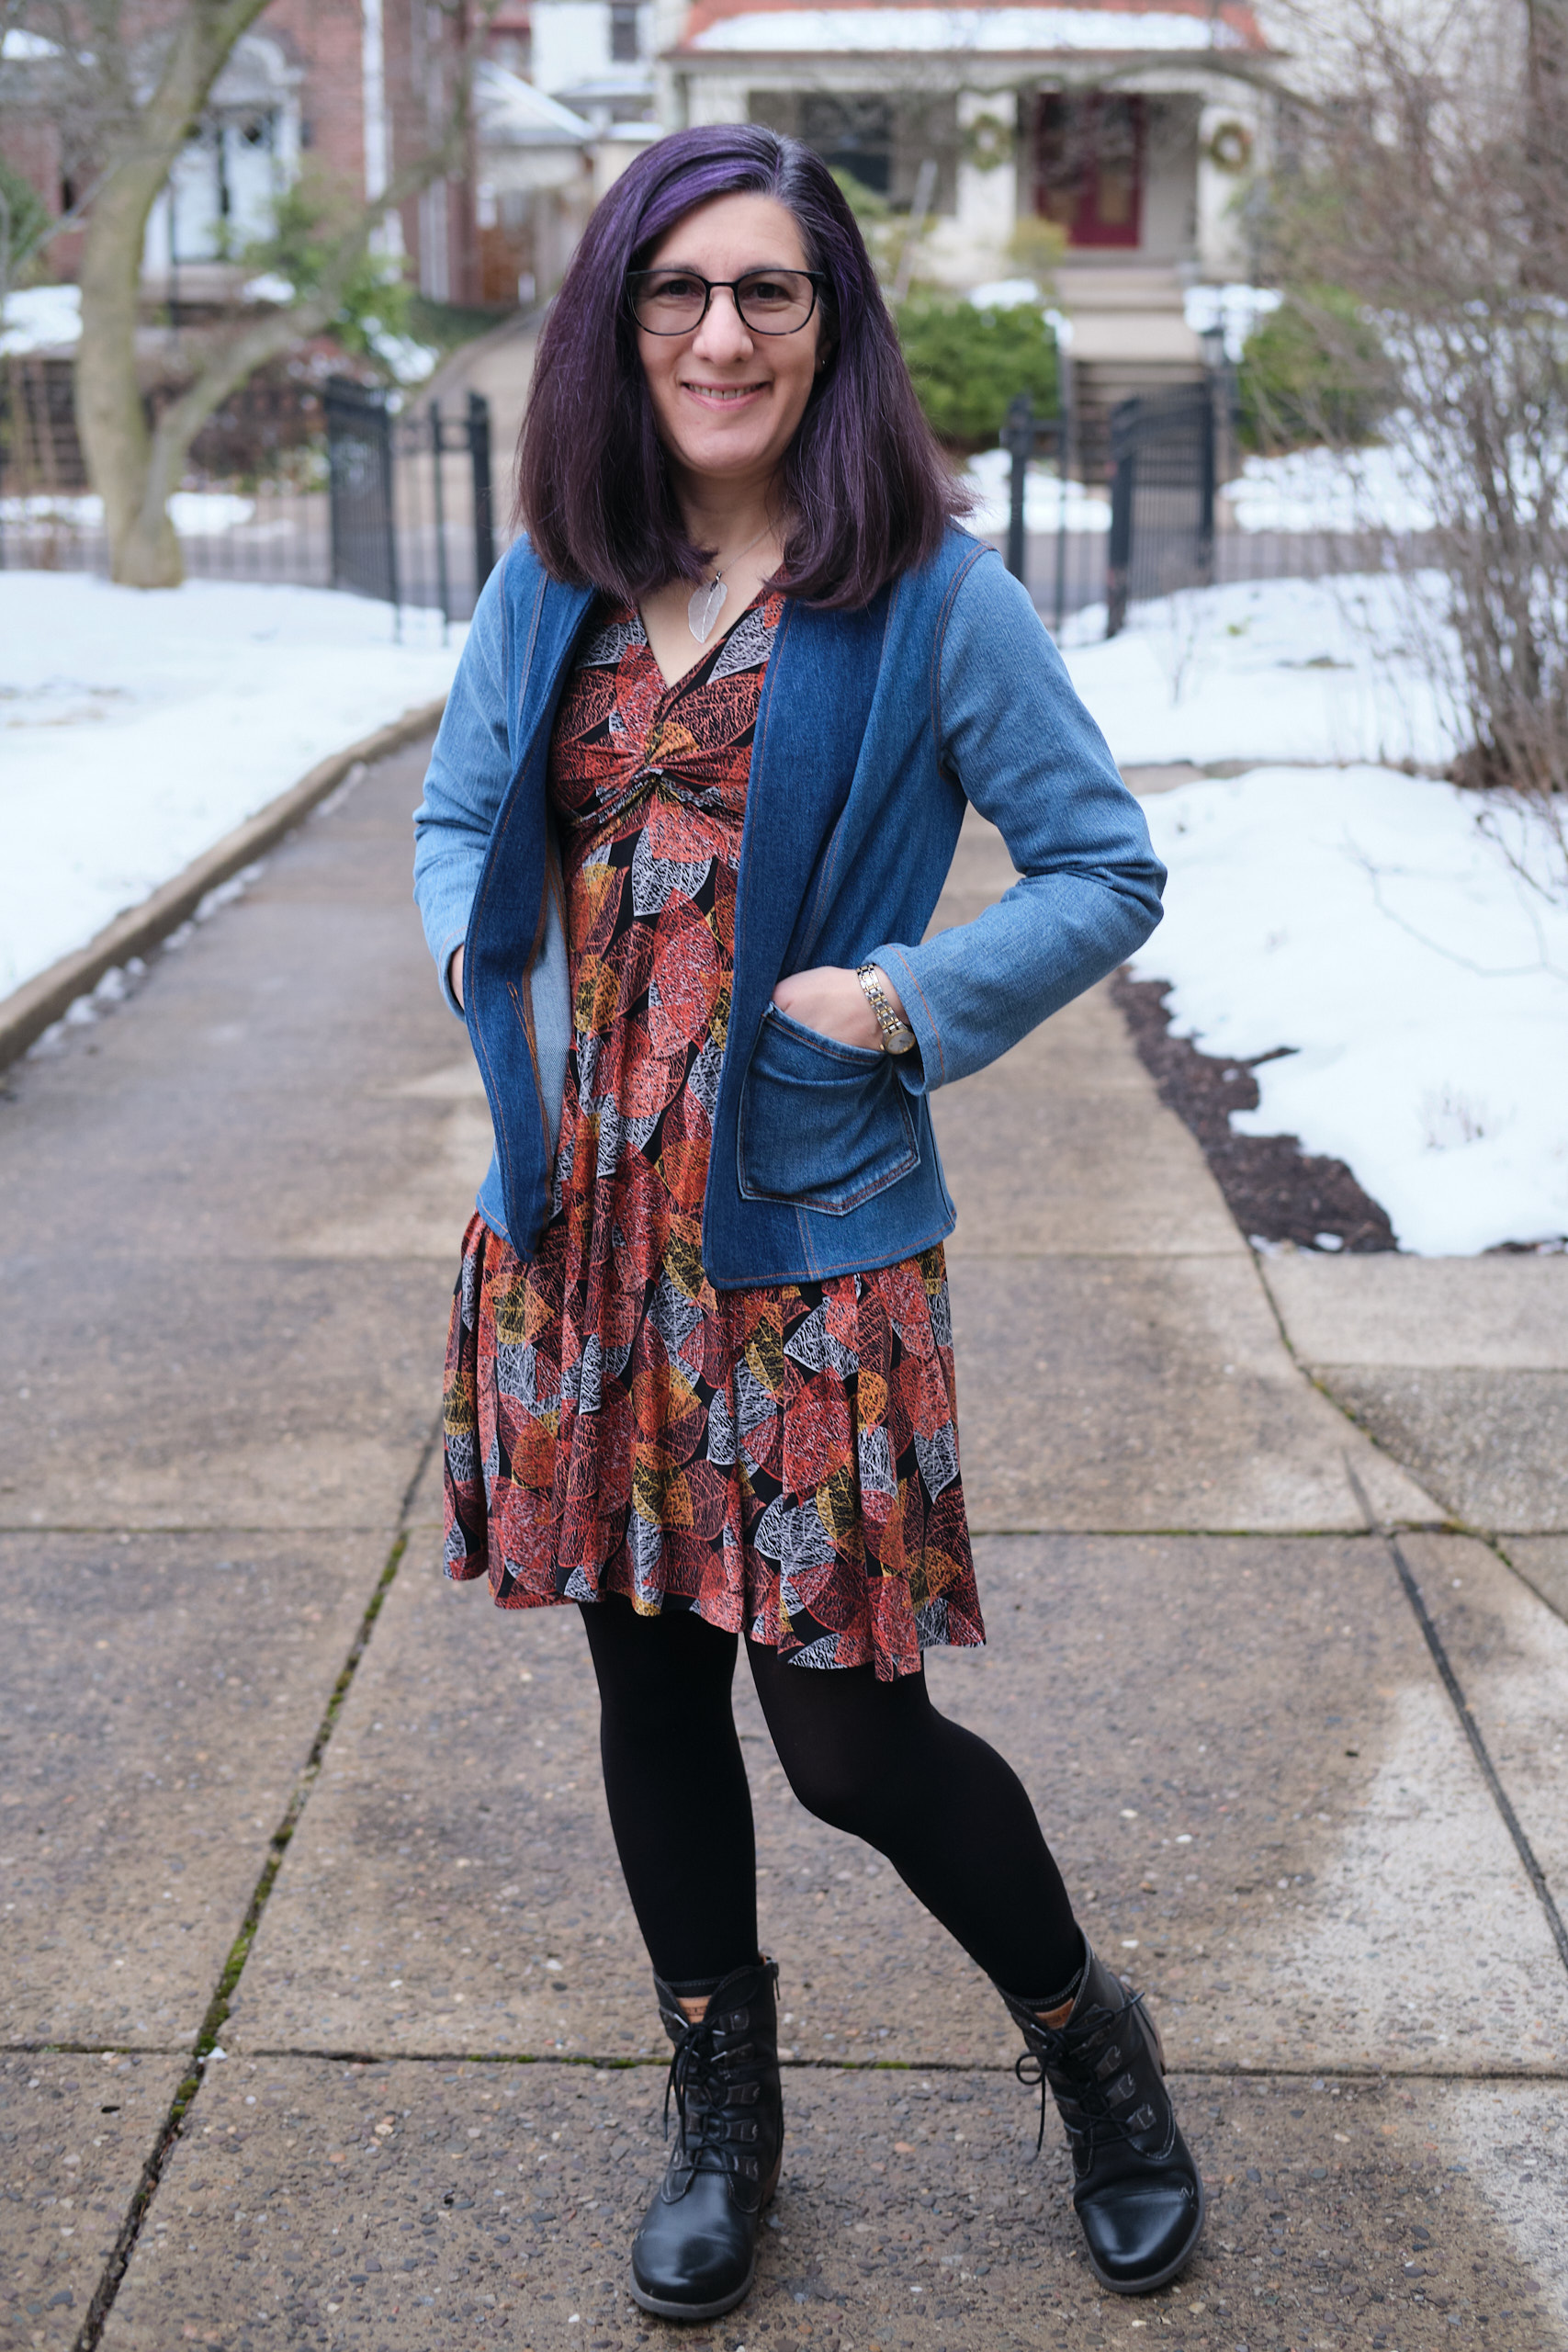
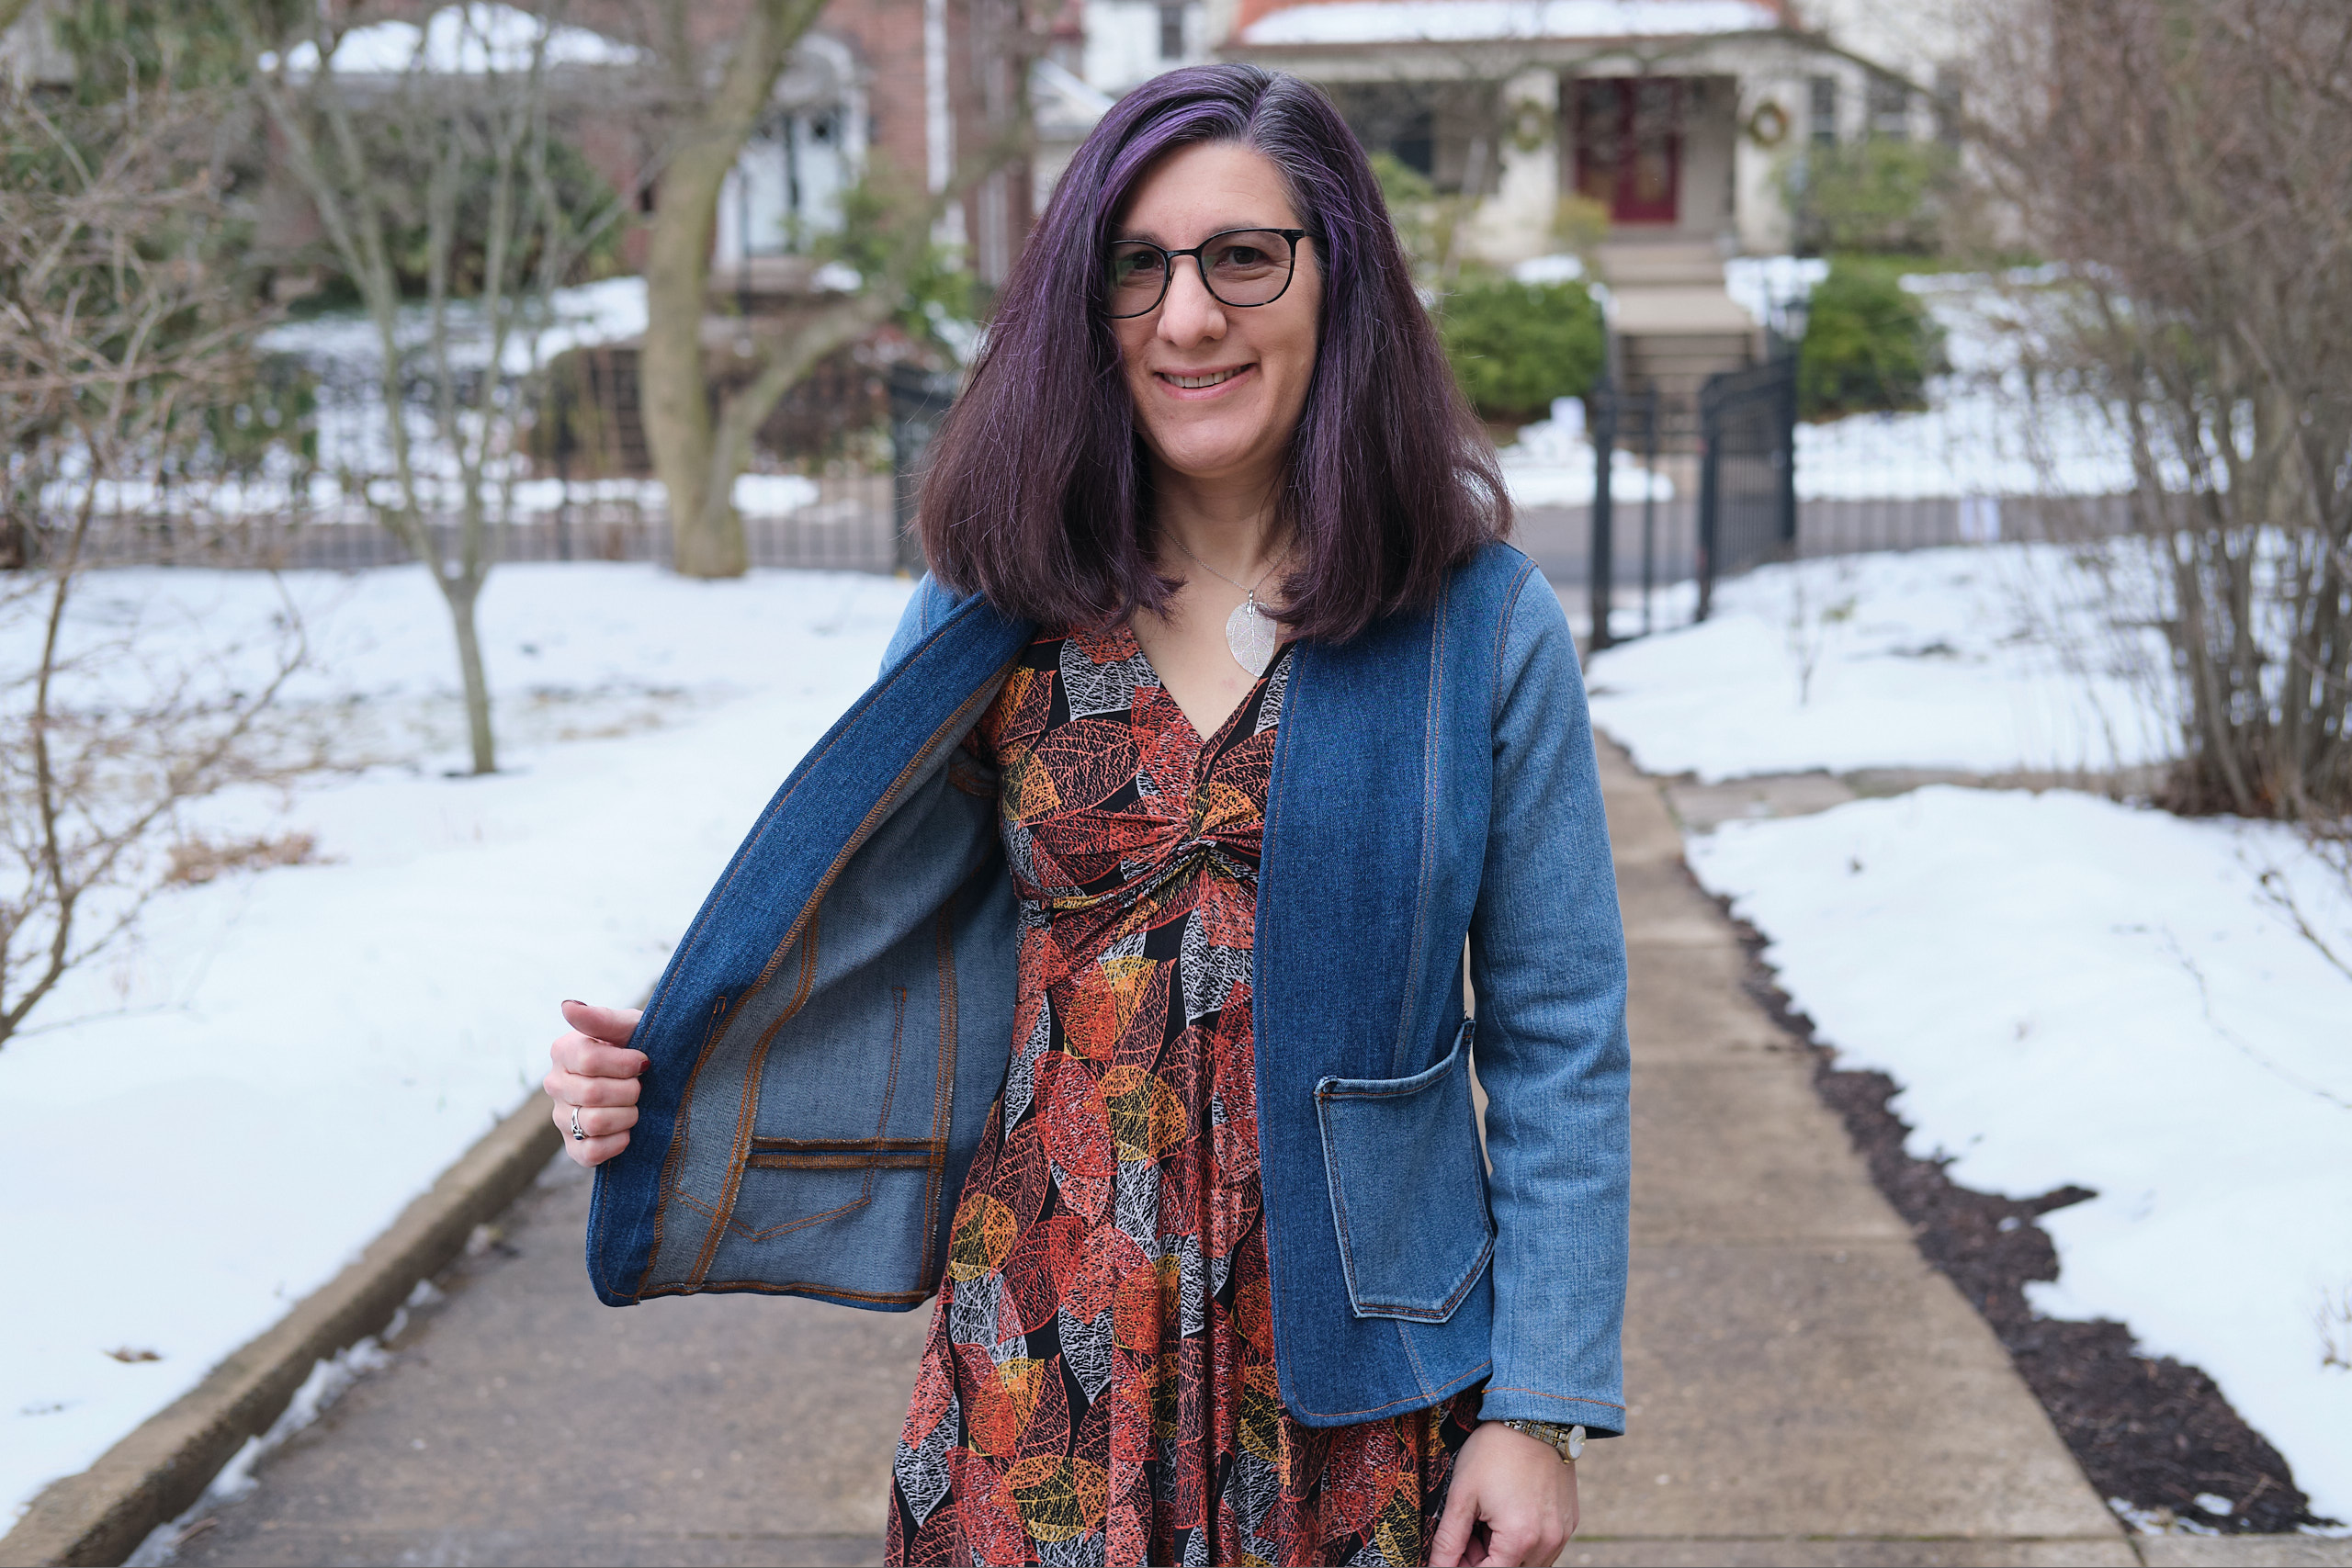
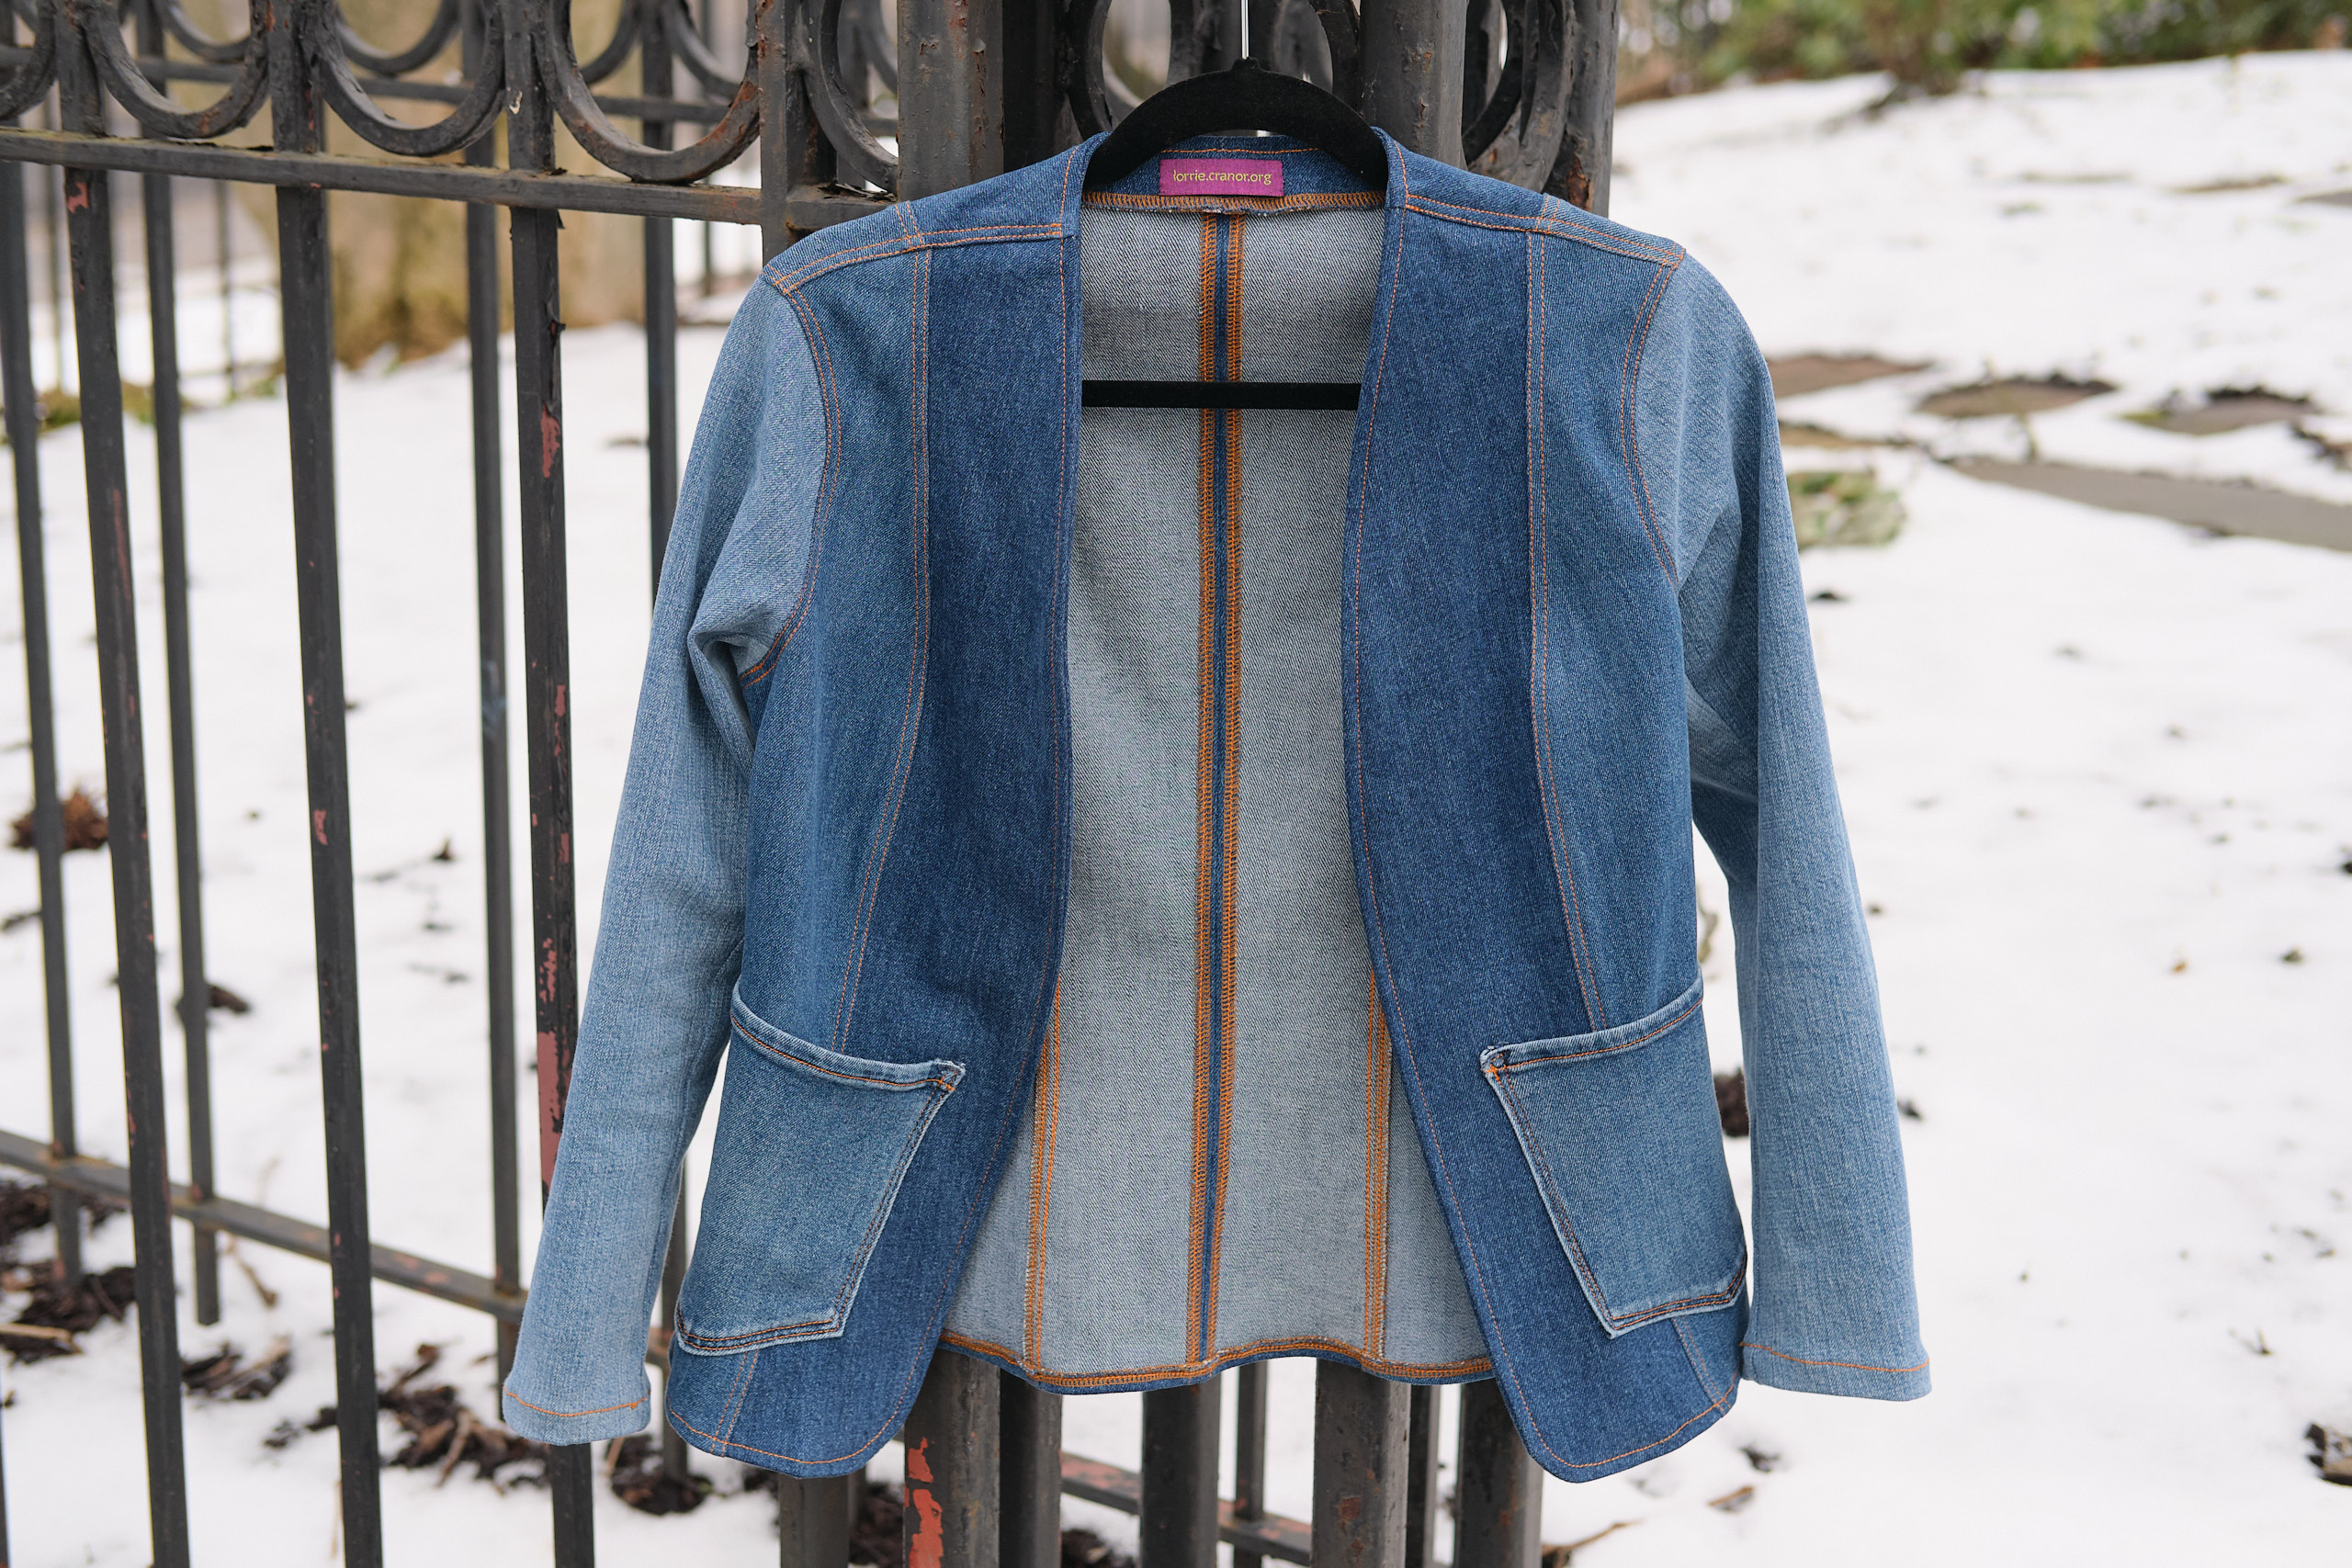
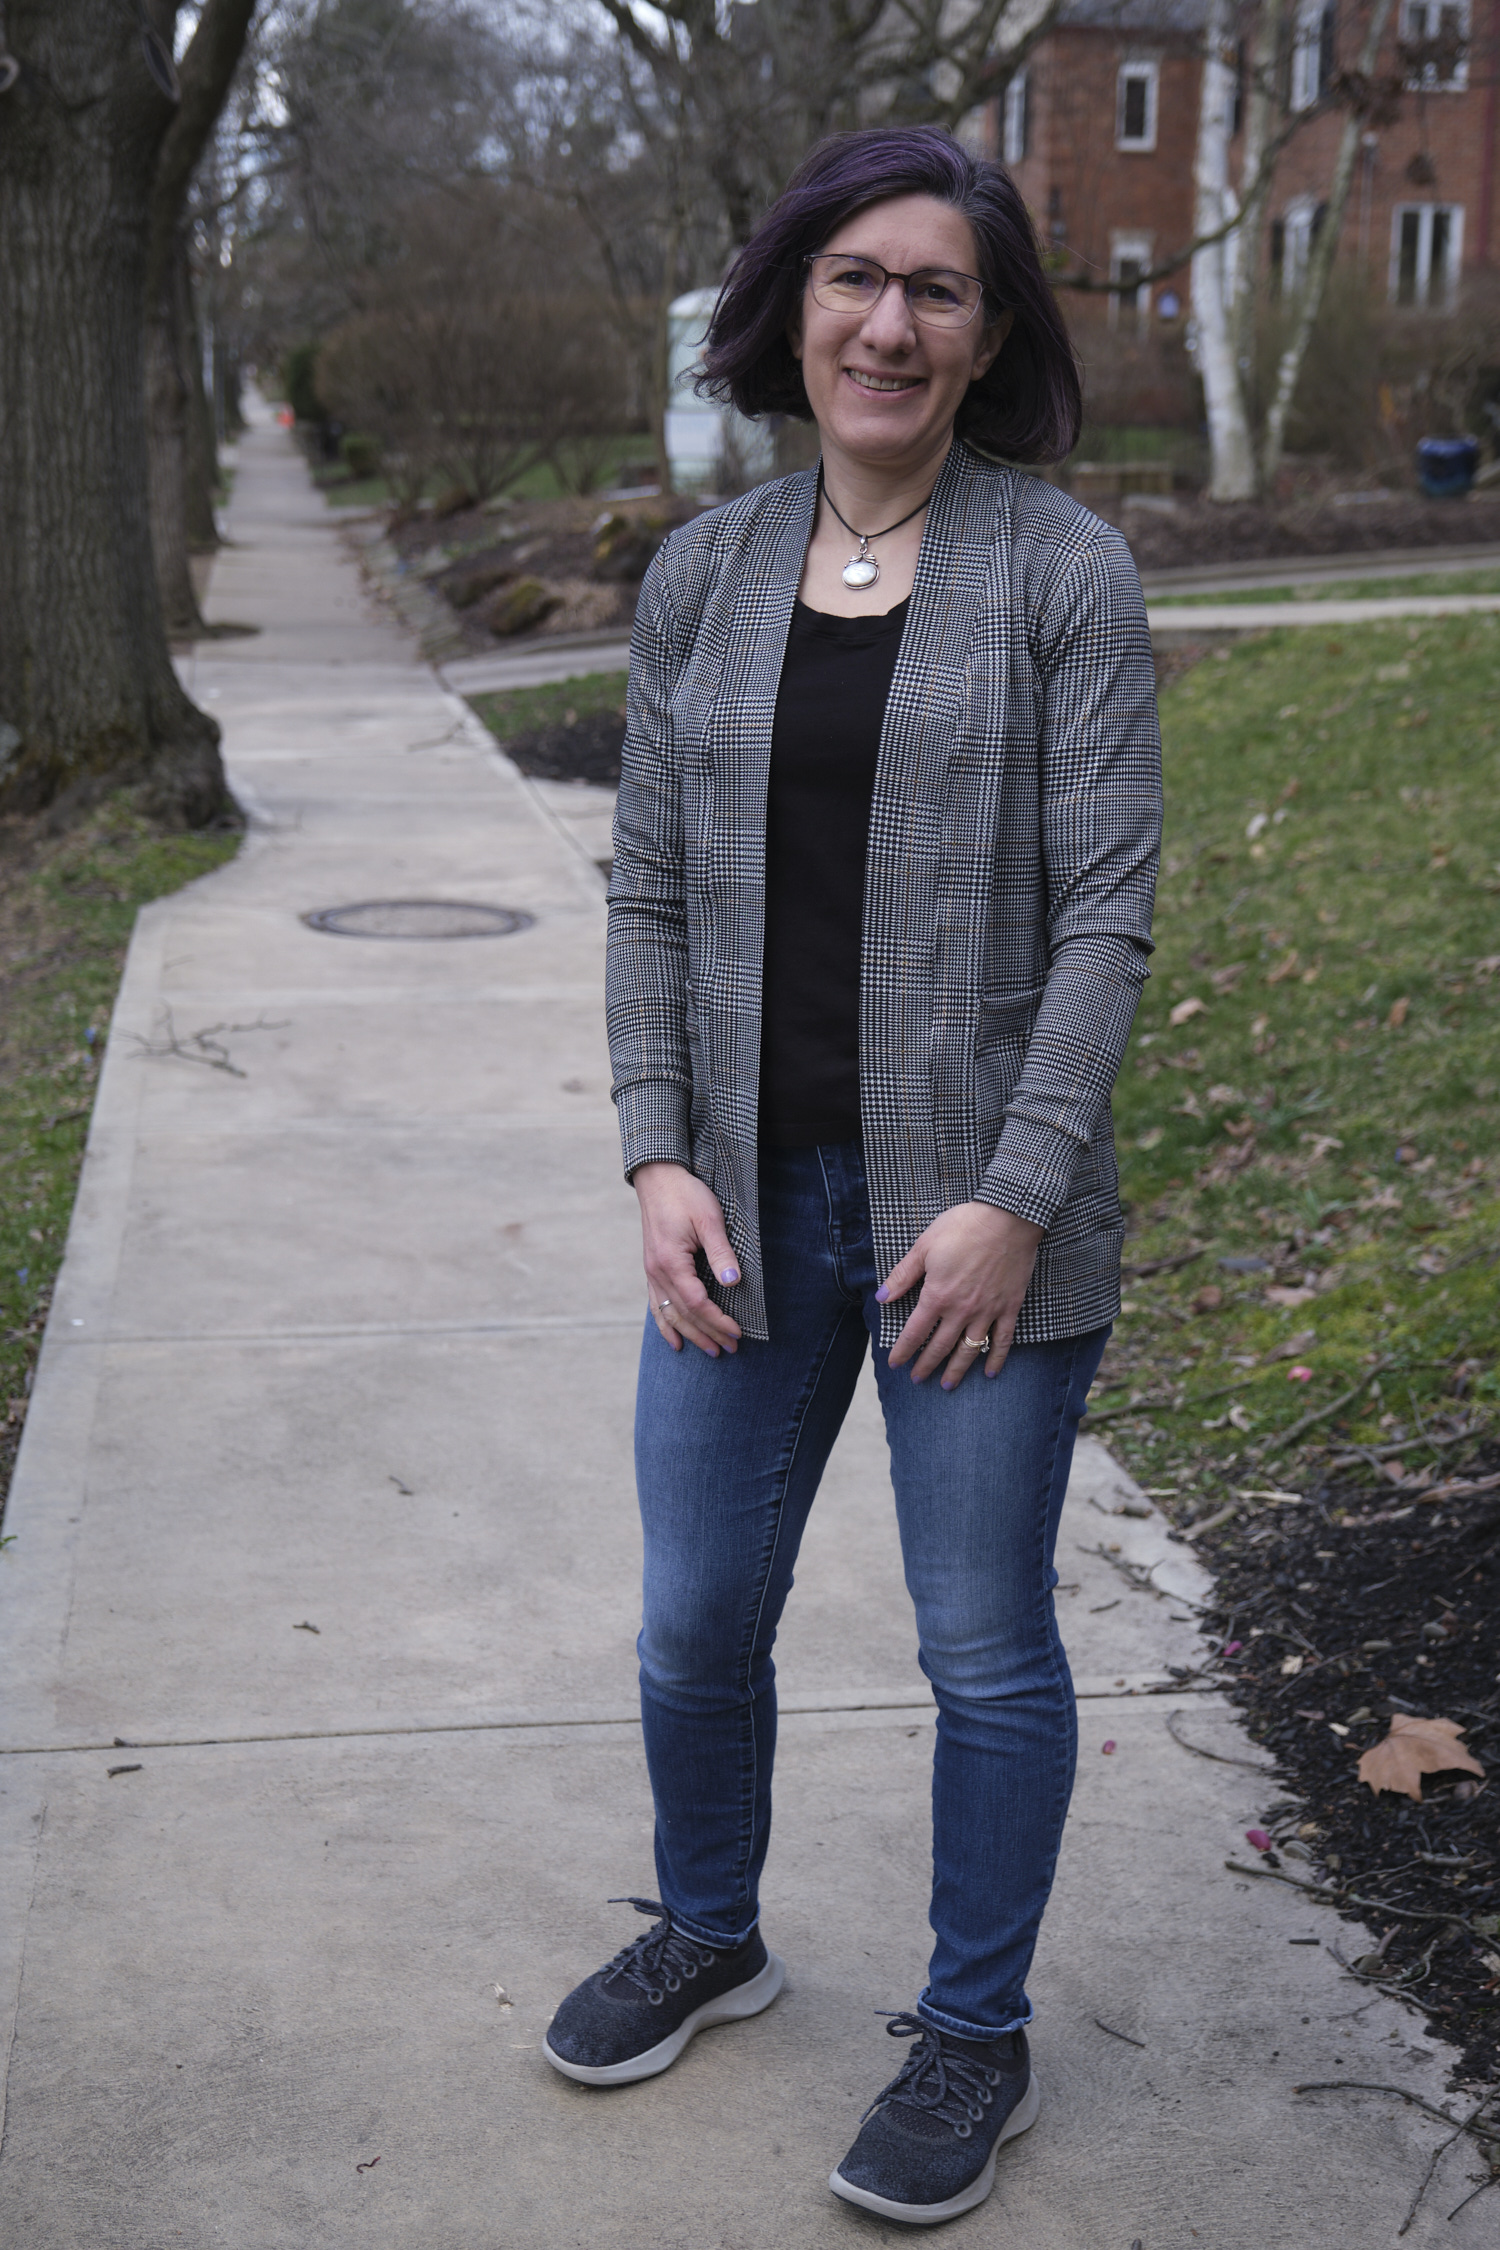
Boo & Lu Onyxblazer, size 4 with small bust adjustment, shortened waist and sleeves, lower back neck facing, repurposed jeans pockets. Made from three pairs of thrifted jeans.
I used to love wearing denim jackets, which seem to go with just about everything, but I’ve found their collars increasingly uncomfortable. So the thought of a collarless denim jacket in a bit dressier blazer style was appealing. Unfortunately, I seem to have already given away most of the discarded jeans in my household and those that I could find were either full of holes and paint spots or ridiculously skinny and thus had very little fabric to work with.
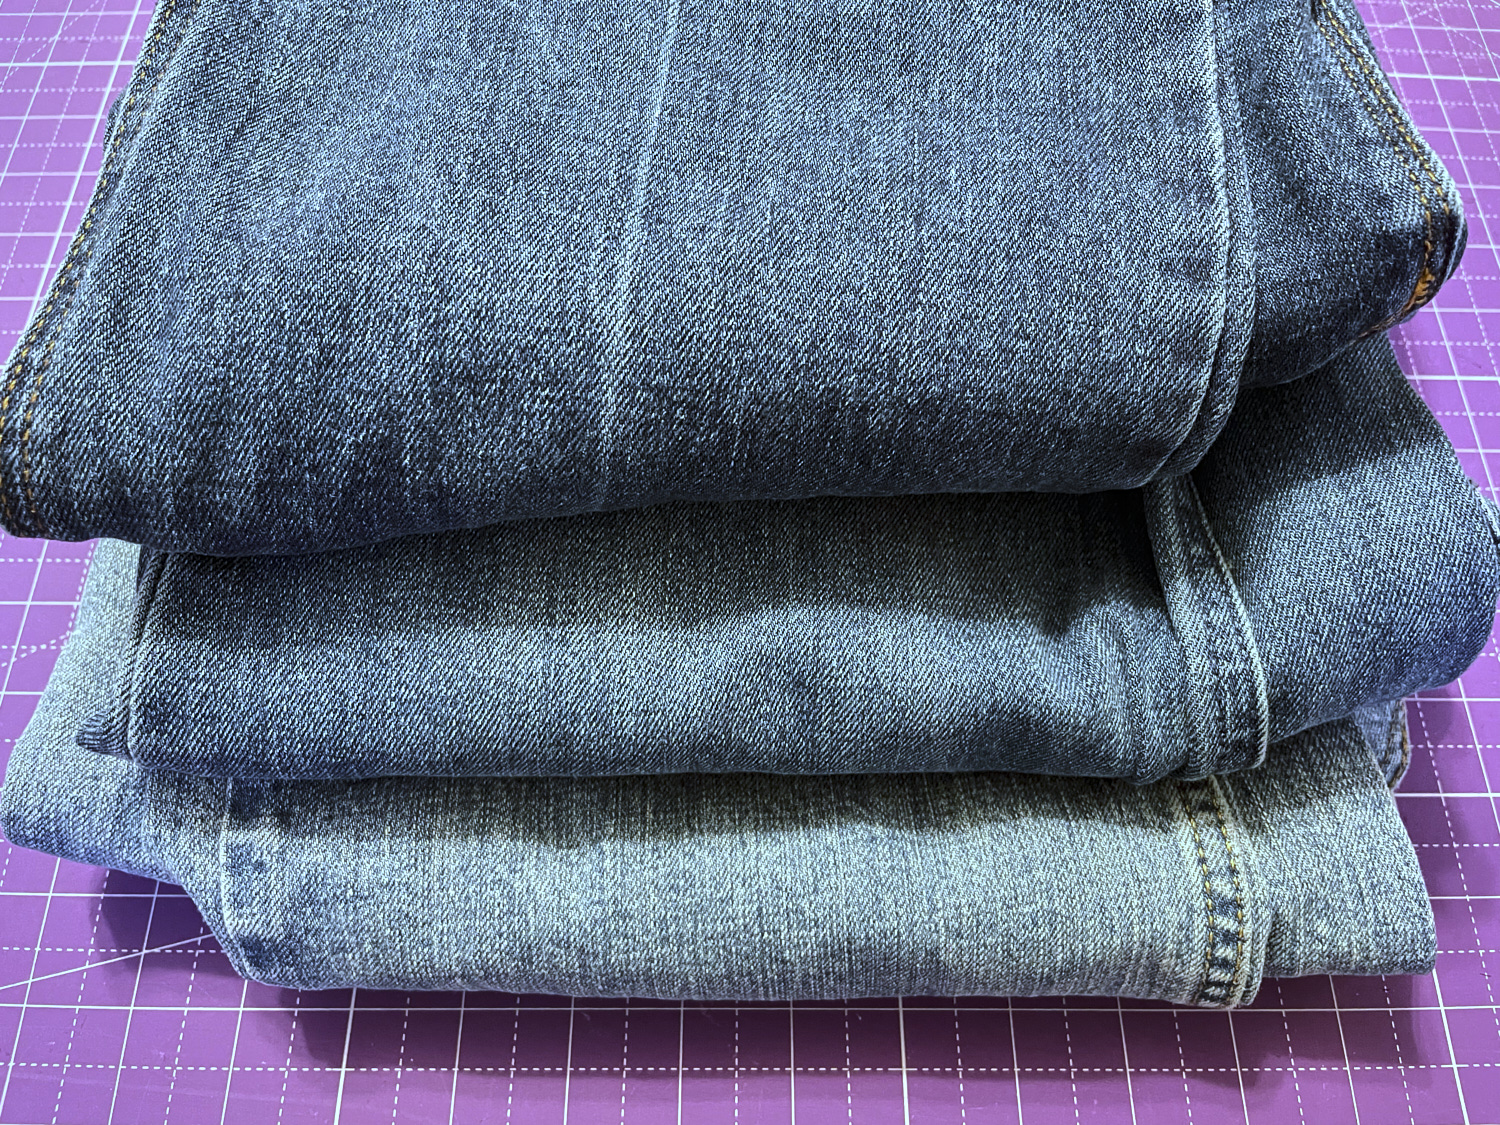
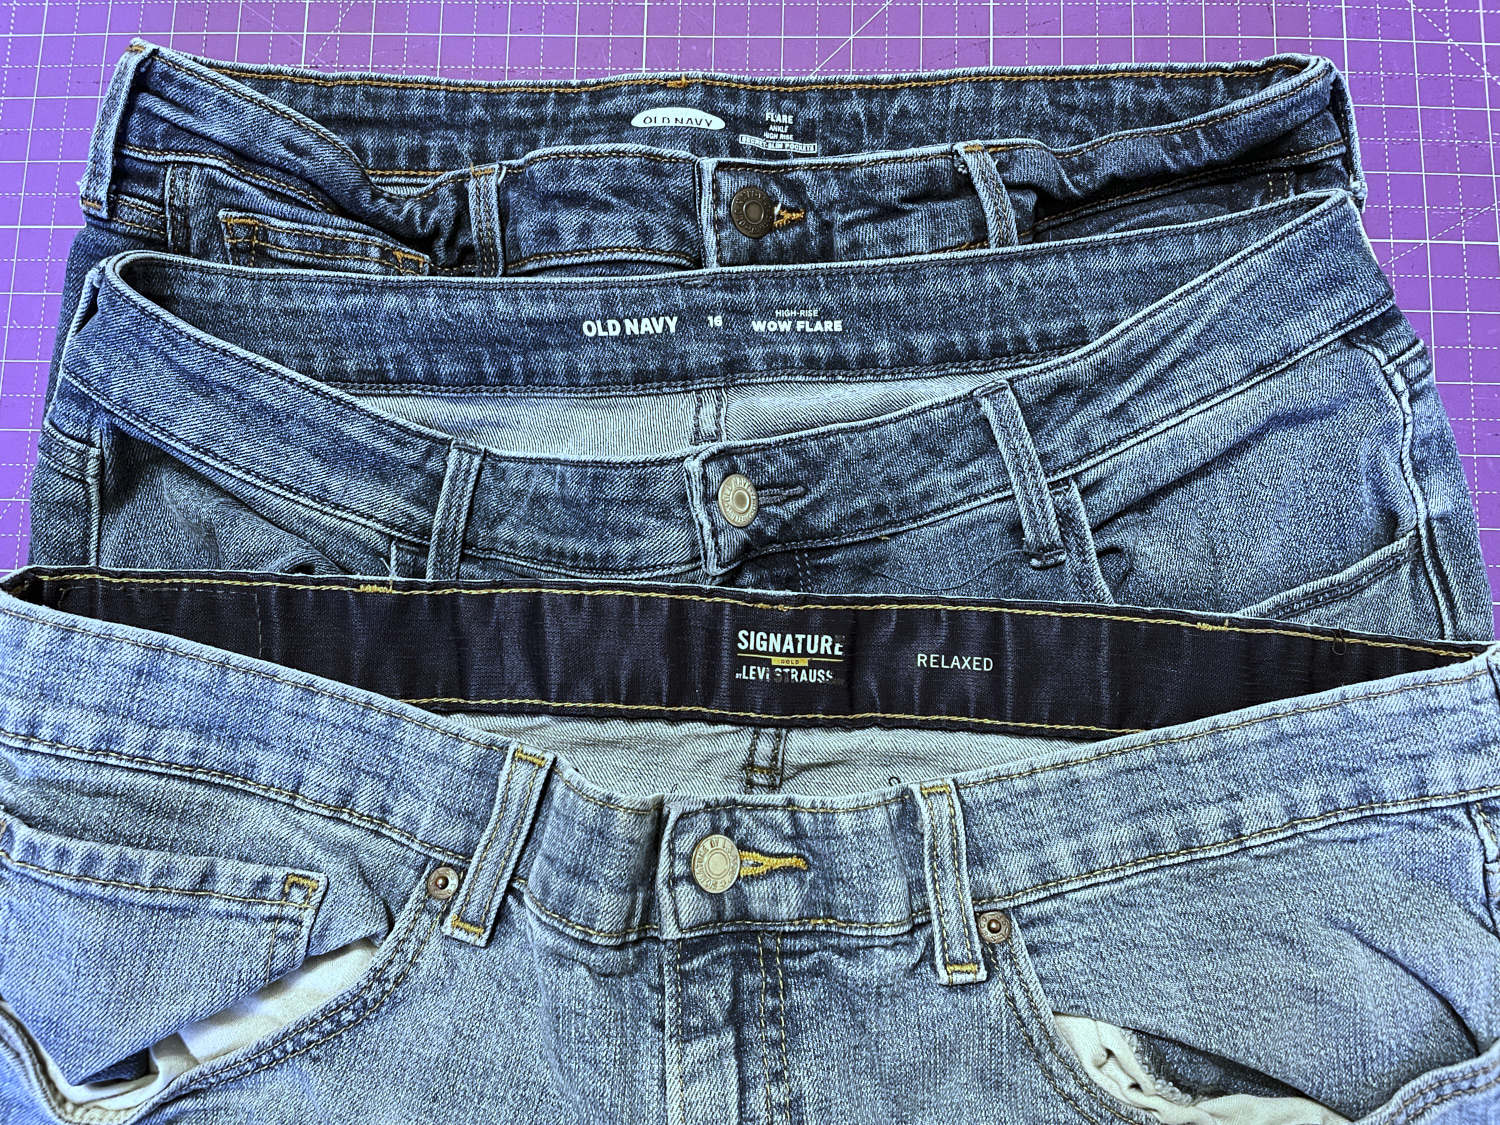
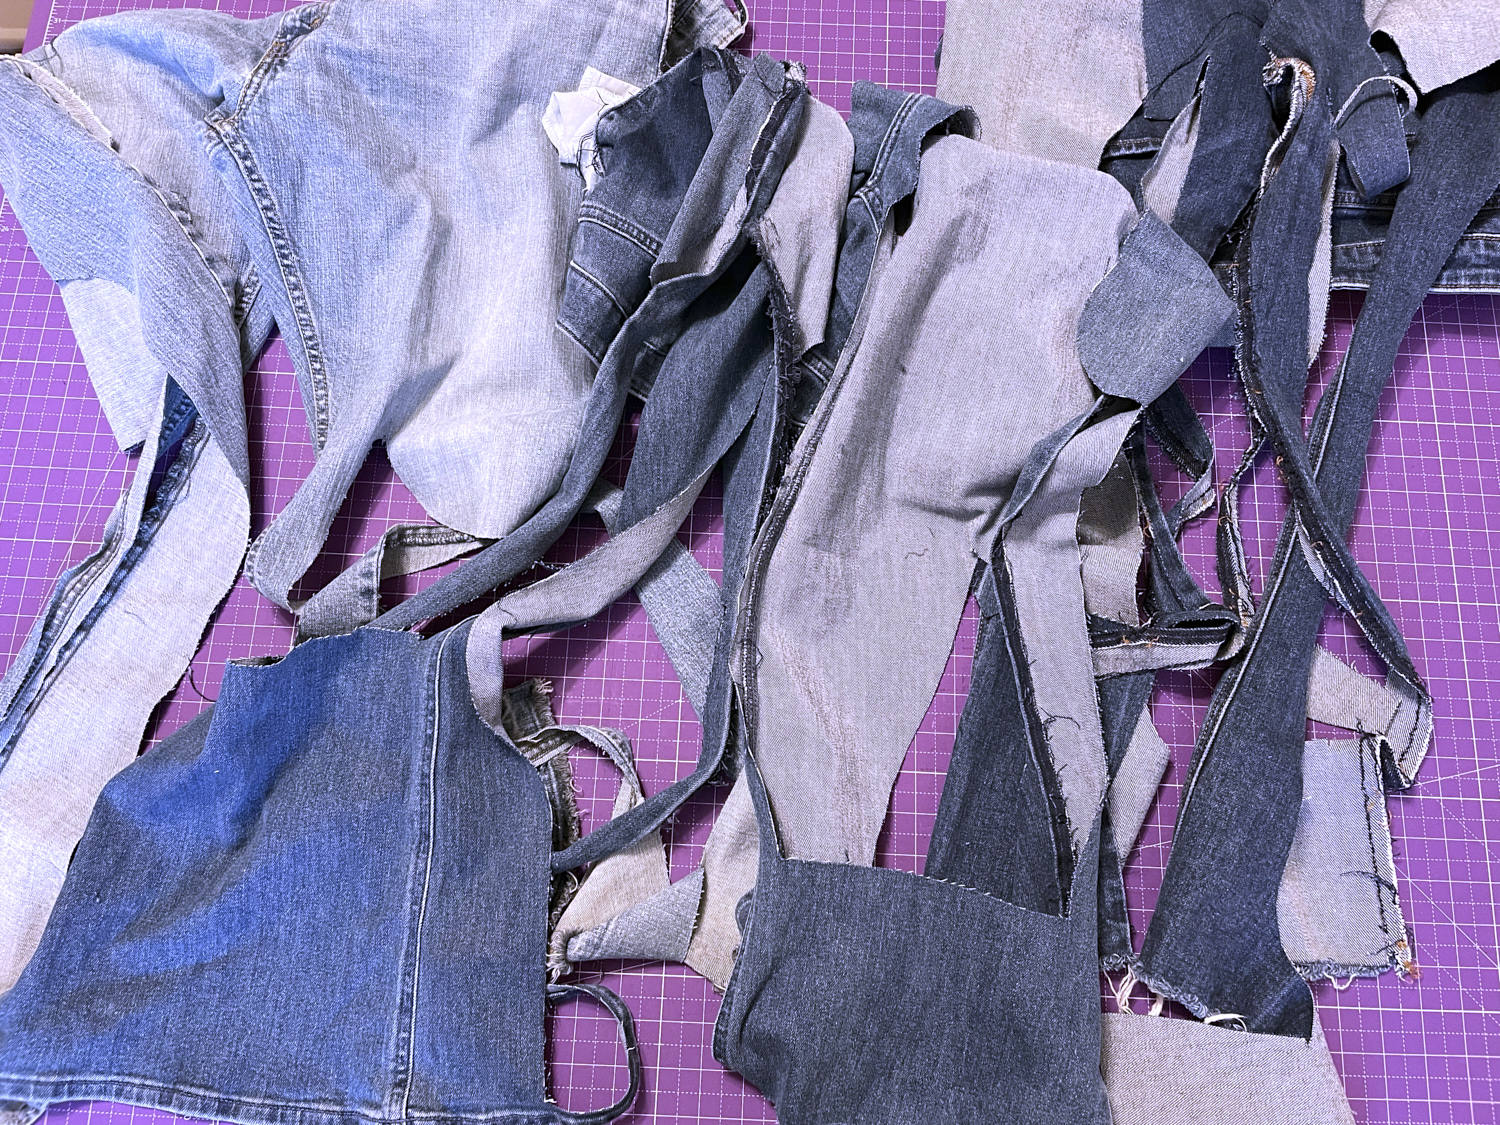
Last fall, when I was visiting my daughters in Boston, we went to a thrift shop and I asked them to help me find three pairs of inexpensive jeans I could cut up. I looked for jeans that were less than $10 a pair, medium-weight, slightly stretchy denim, in large sizes. I collected a pile of jeans that met these criteria and sorted them from lightest to darkest. Then I selected three pairs with distinctly different shades of blue that went well together. They were $6 each and with the $6 coupon I picked up on my way into the store, I paid a total of $12 for all three pairs.
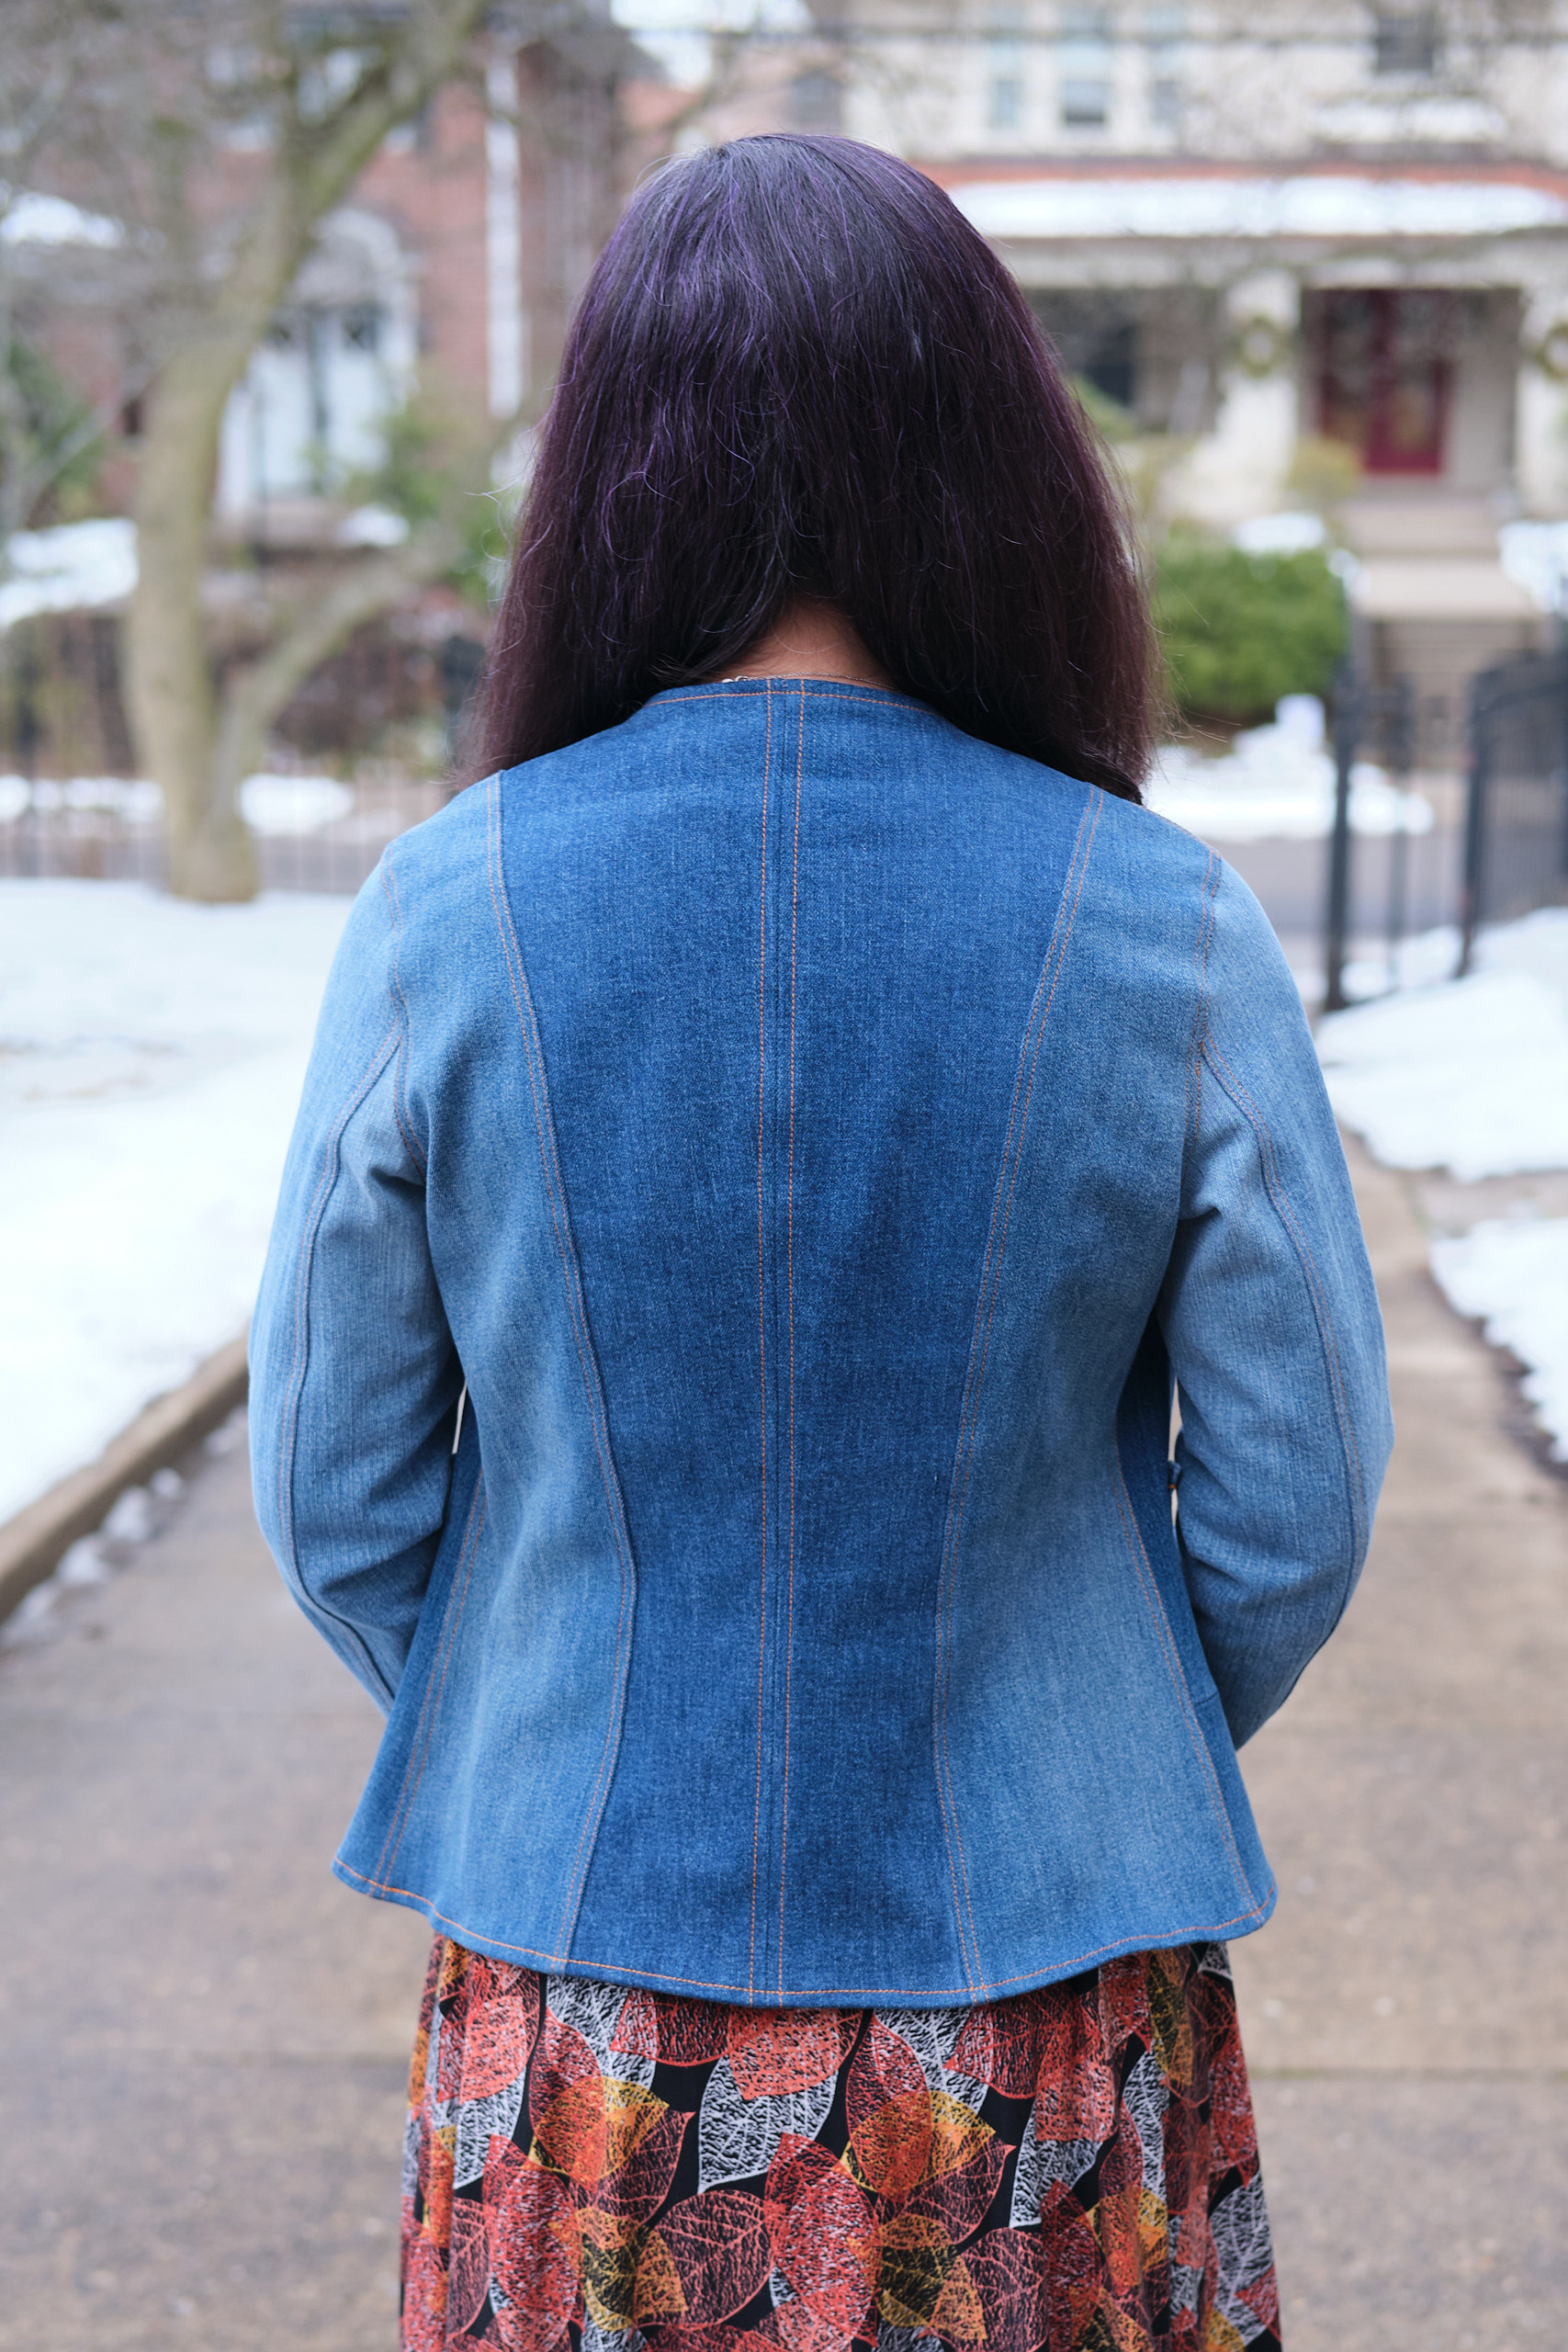
I didn’t get around to working on the jacket project until New Year’s Day. First, I spent a lot of time debating the color placement and where to place each pattern piece. I decided to go with a symmetrical color arrangement and place the pieces from the darkest in the center to the lightest on the sleeves.
I previously spent a lot of time working out adjustments to the size 4 hip length version of the jacket pattern to fit me better. These worked great on my grey and magenta ponte jackets so I used the same pattern file I had already prepared with all of these adjustments: small-bust adjustment (performed by redrawing the inner curve on the side-front pieces to have less of a contour and then shortening the center front pieces to match the length of the new curve), sloped-shoulder adjustment (3/4 inch), round-back adjustments (two 5/8-inch adjustments near top and bottom of arscye), back neckline lowered by about 3/4 inch, bottom hem and sleeves shortened by 2 inches. The only thing I did differently was using the jeans pockets rather than the pattern pocket pieces and using the normal pattern facings rather than the wider facings I used previously. There’s always a risk that a pattern fitted with one type of fabric won’t fit right when cut from a very different type of fabric. Thankfully, my denim version seems to fit pretty much the same way as the ponte.
I carefully cut out all the pieces, making sure to pair pieces from the left and right legs of each pair, cut at approximately the same height on the leg. I accidentally cut one of the front side pieces too short and wasn’t going to be able to cut a piece of a similar color at the full size so I just cut the missing part and spliced them together. I knew most of this seam would be under a pocket and hardly noticeable.
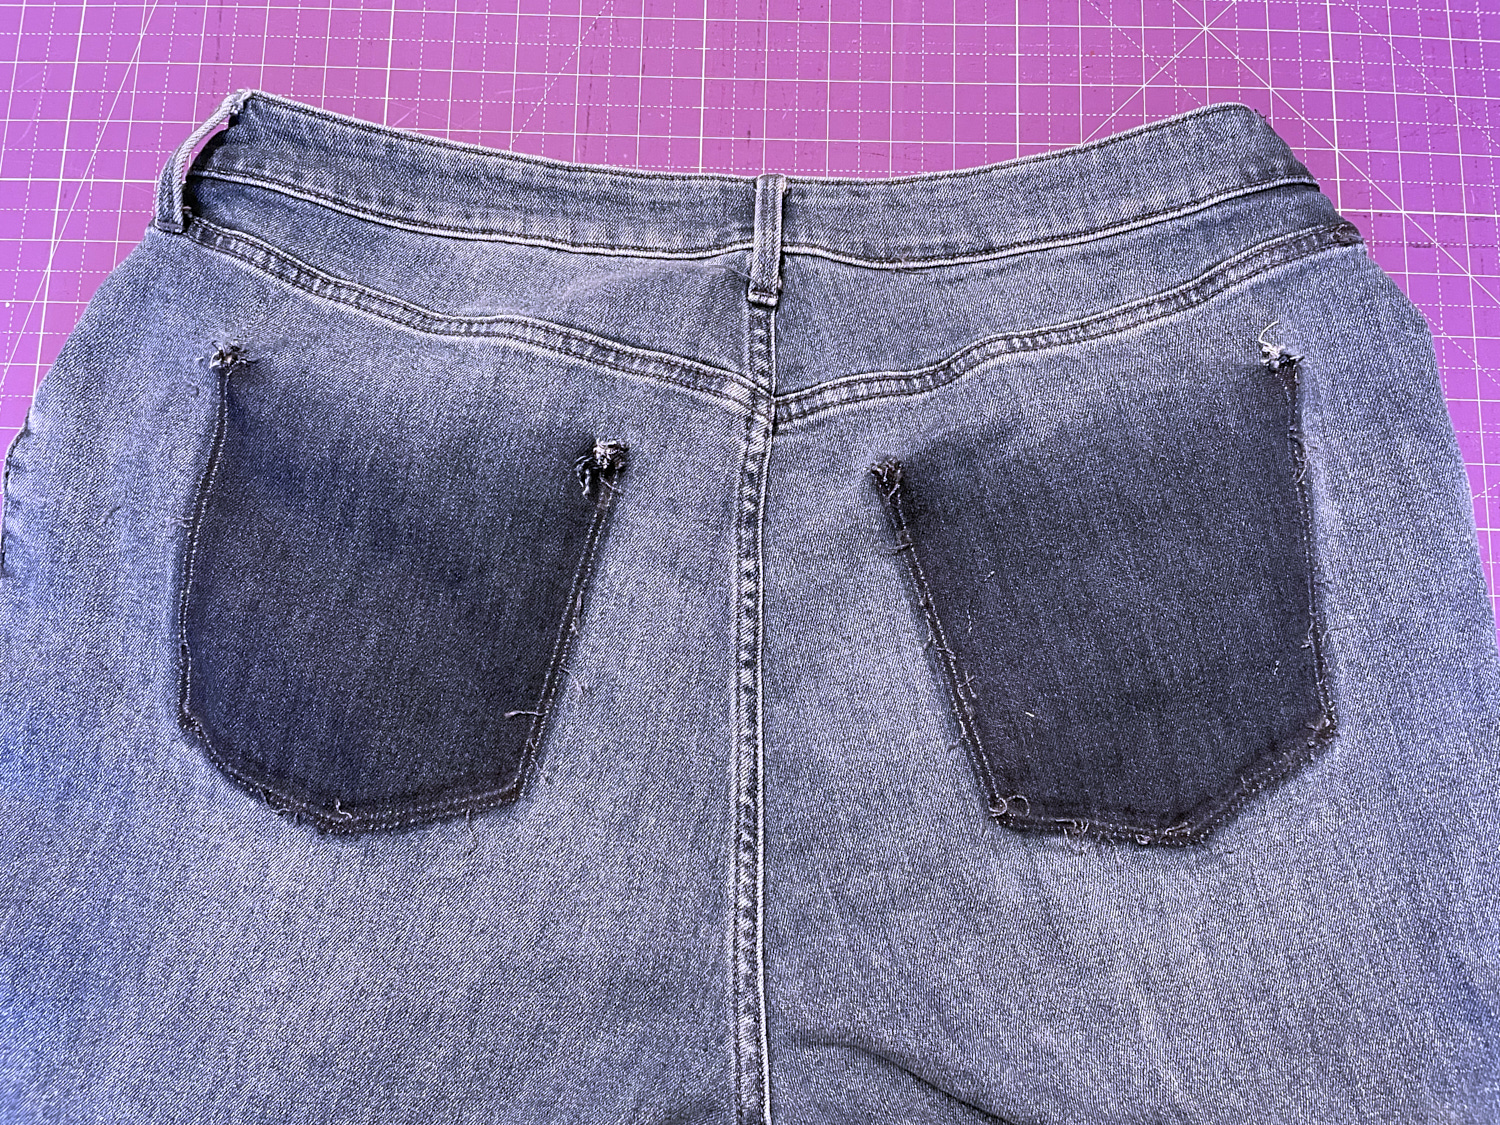
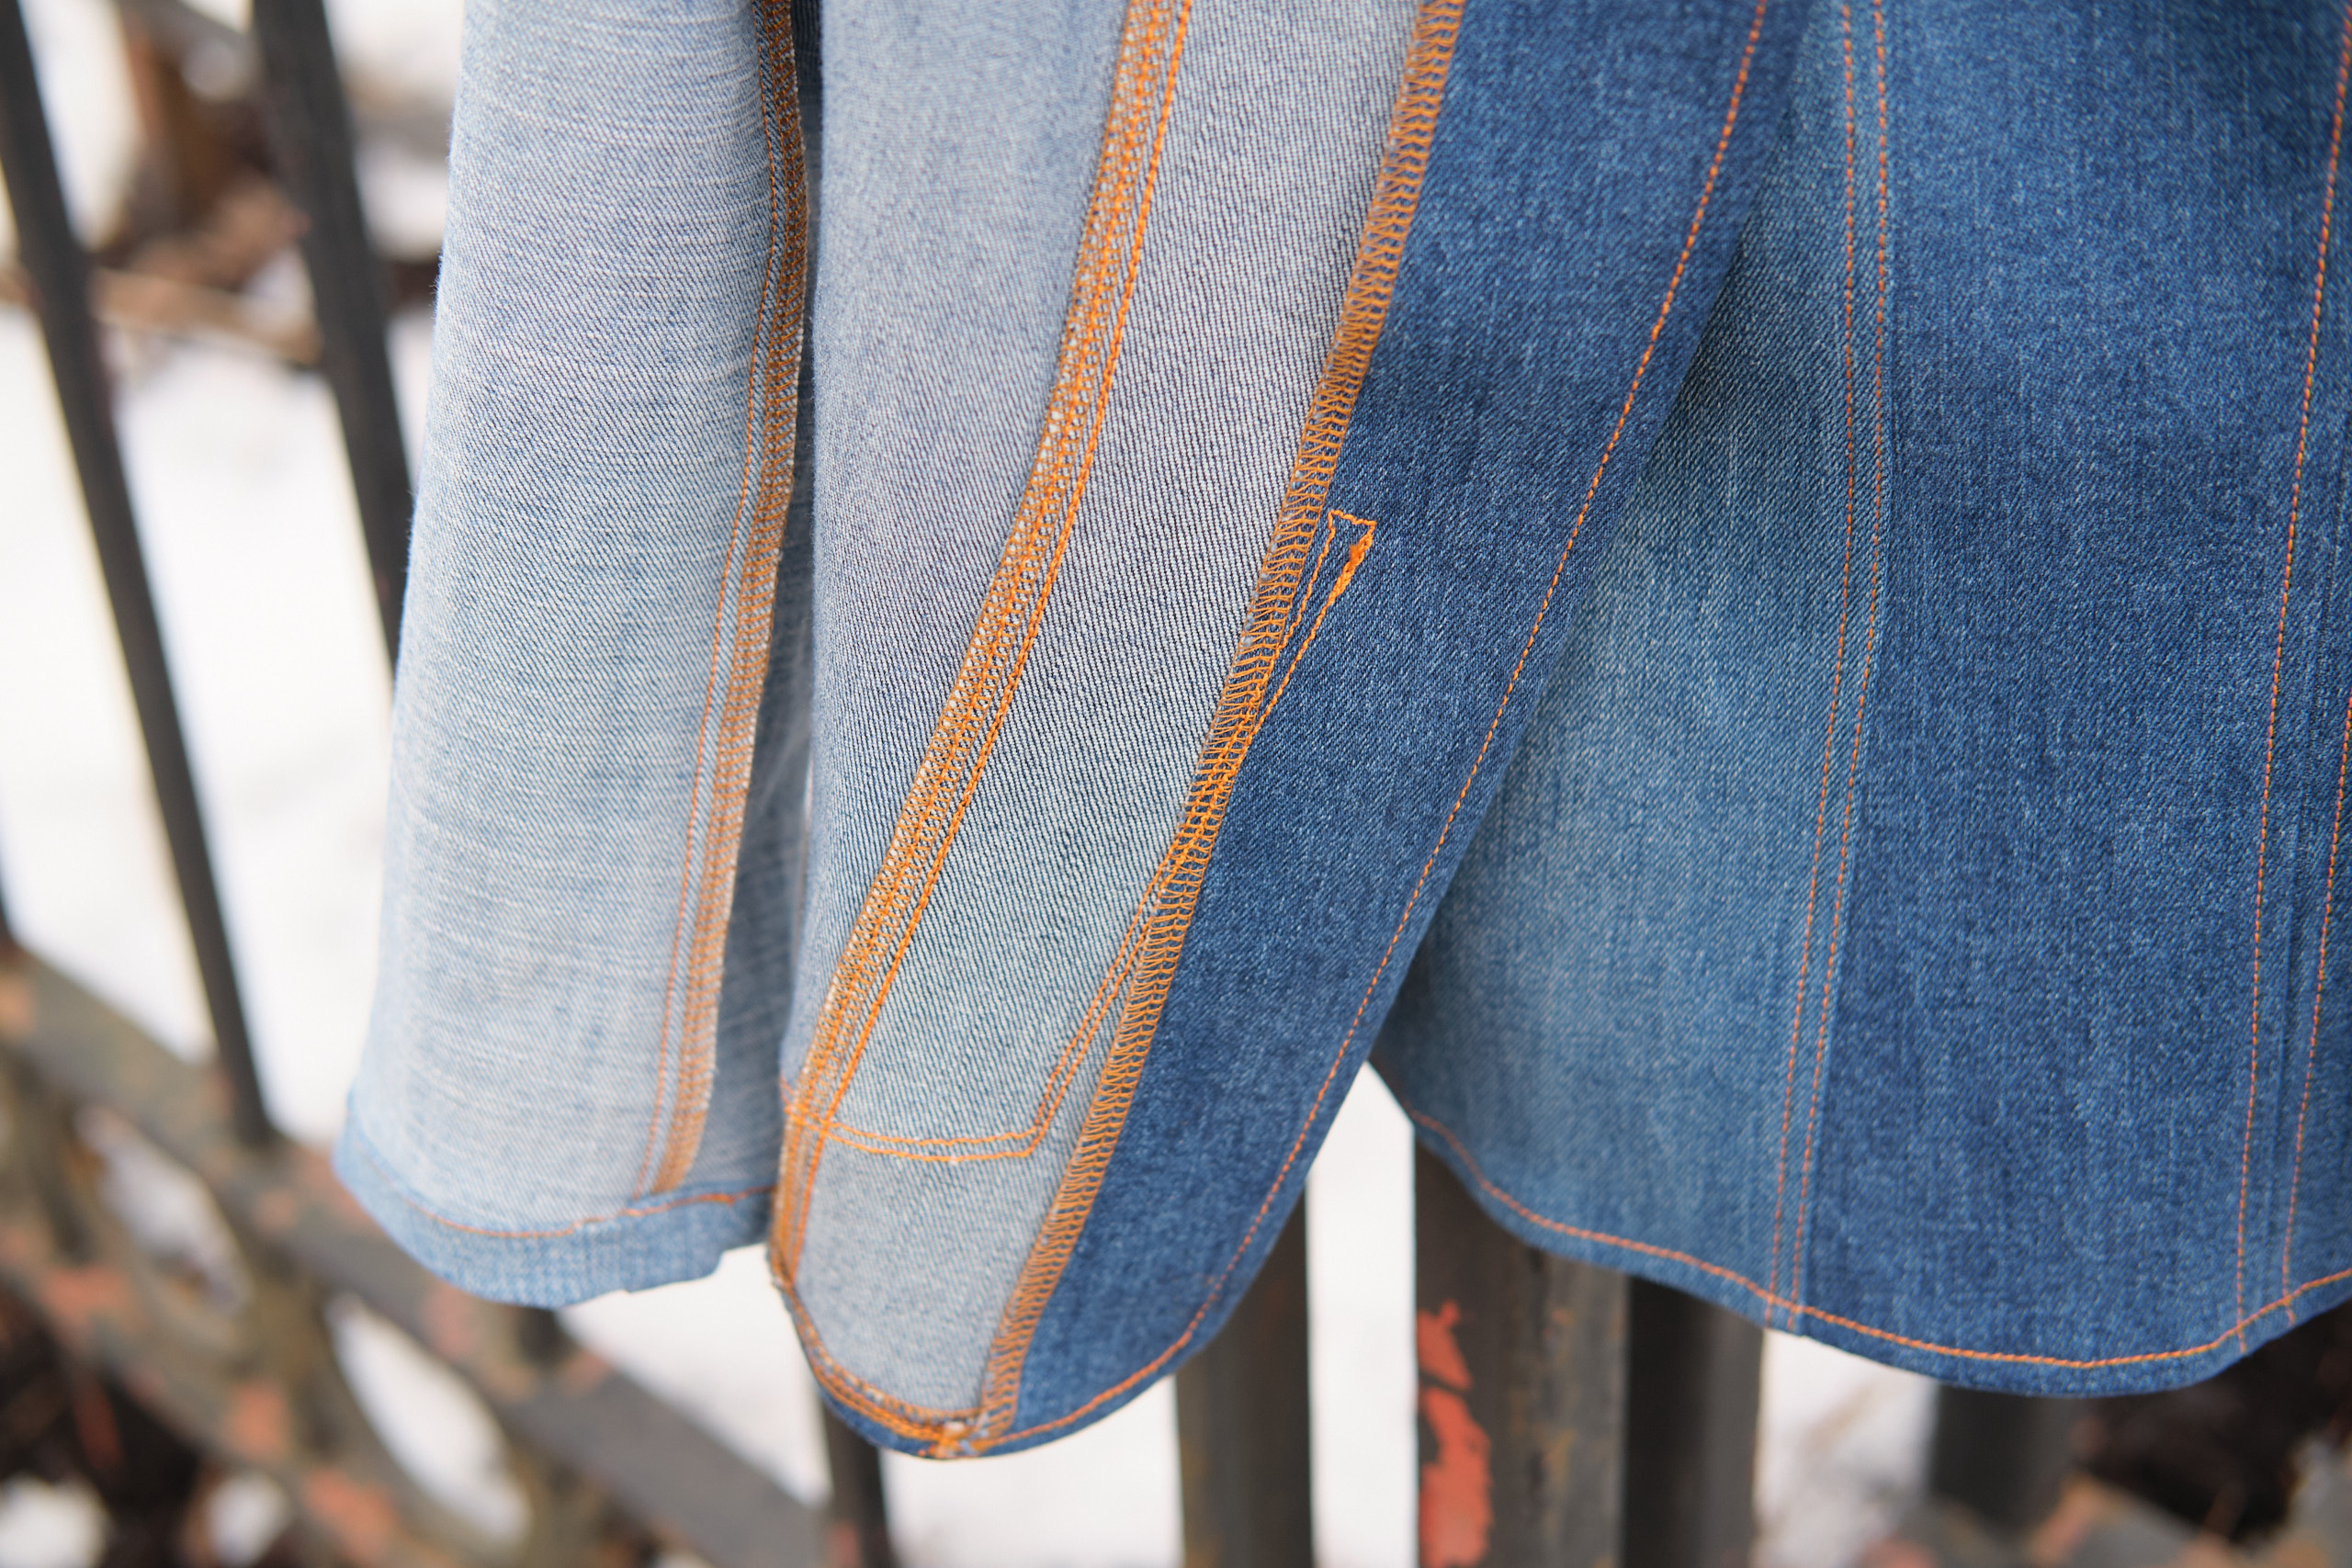
Rather than using the pocket design included in the pattern, I decided to use the rear pockets from one pair of jeans. I carefully unpicked them and removed all the top stitching. Unpicking pockets from jeans is mostly easy as they are attached with a chain stitch that easily unravels – except for the corners, which are thoroughly attached with a bartack and require some effort and a bit of elbow grease to remove. I ended up using most of the legs of all three pairs of jeans. There is still a little bit of leg fabric and seat fabric that might be used for other projects that can use smaller pieces.
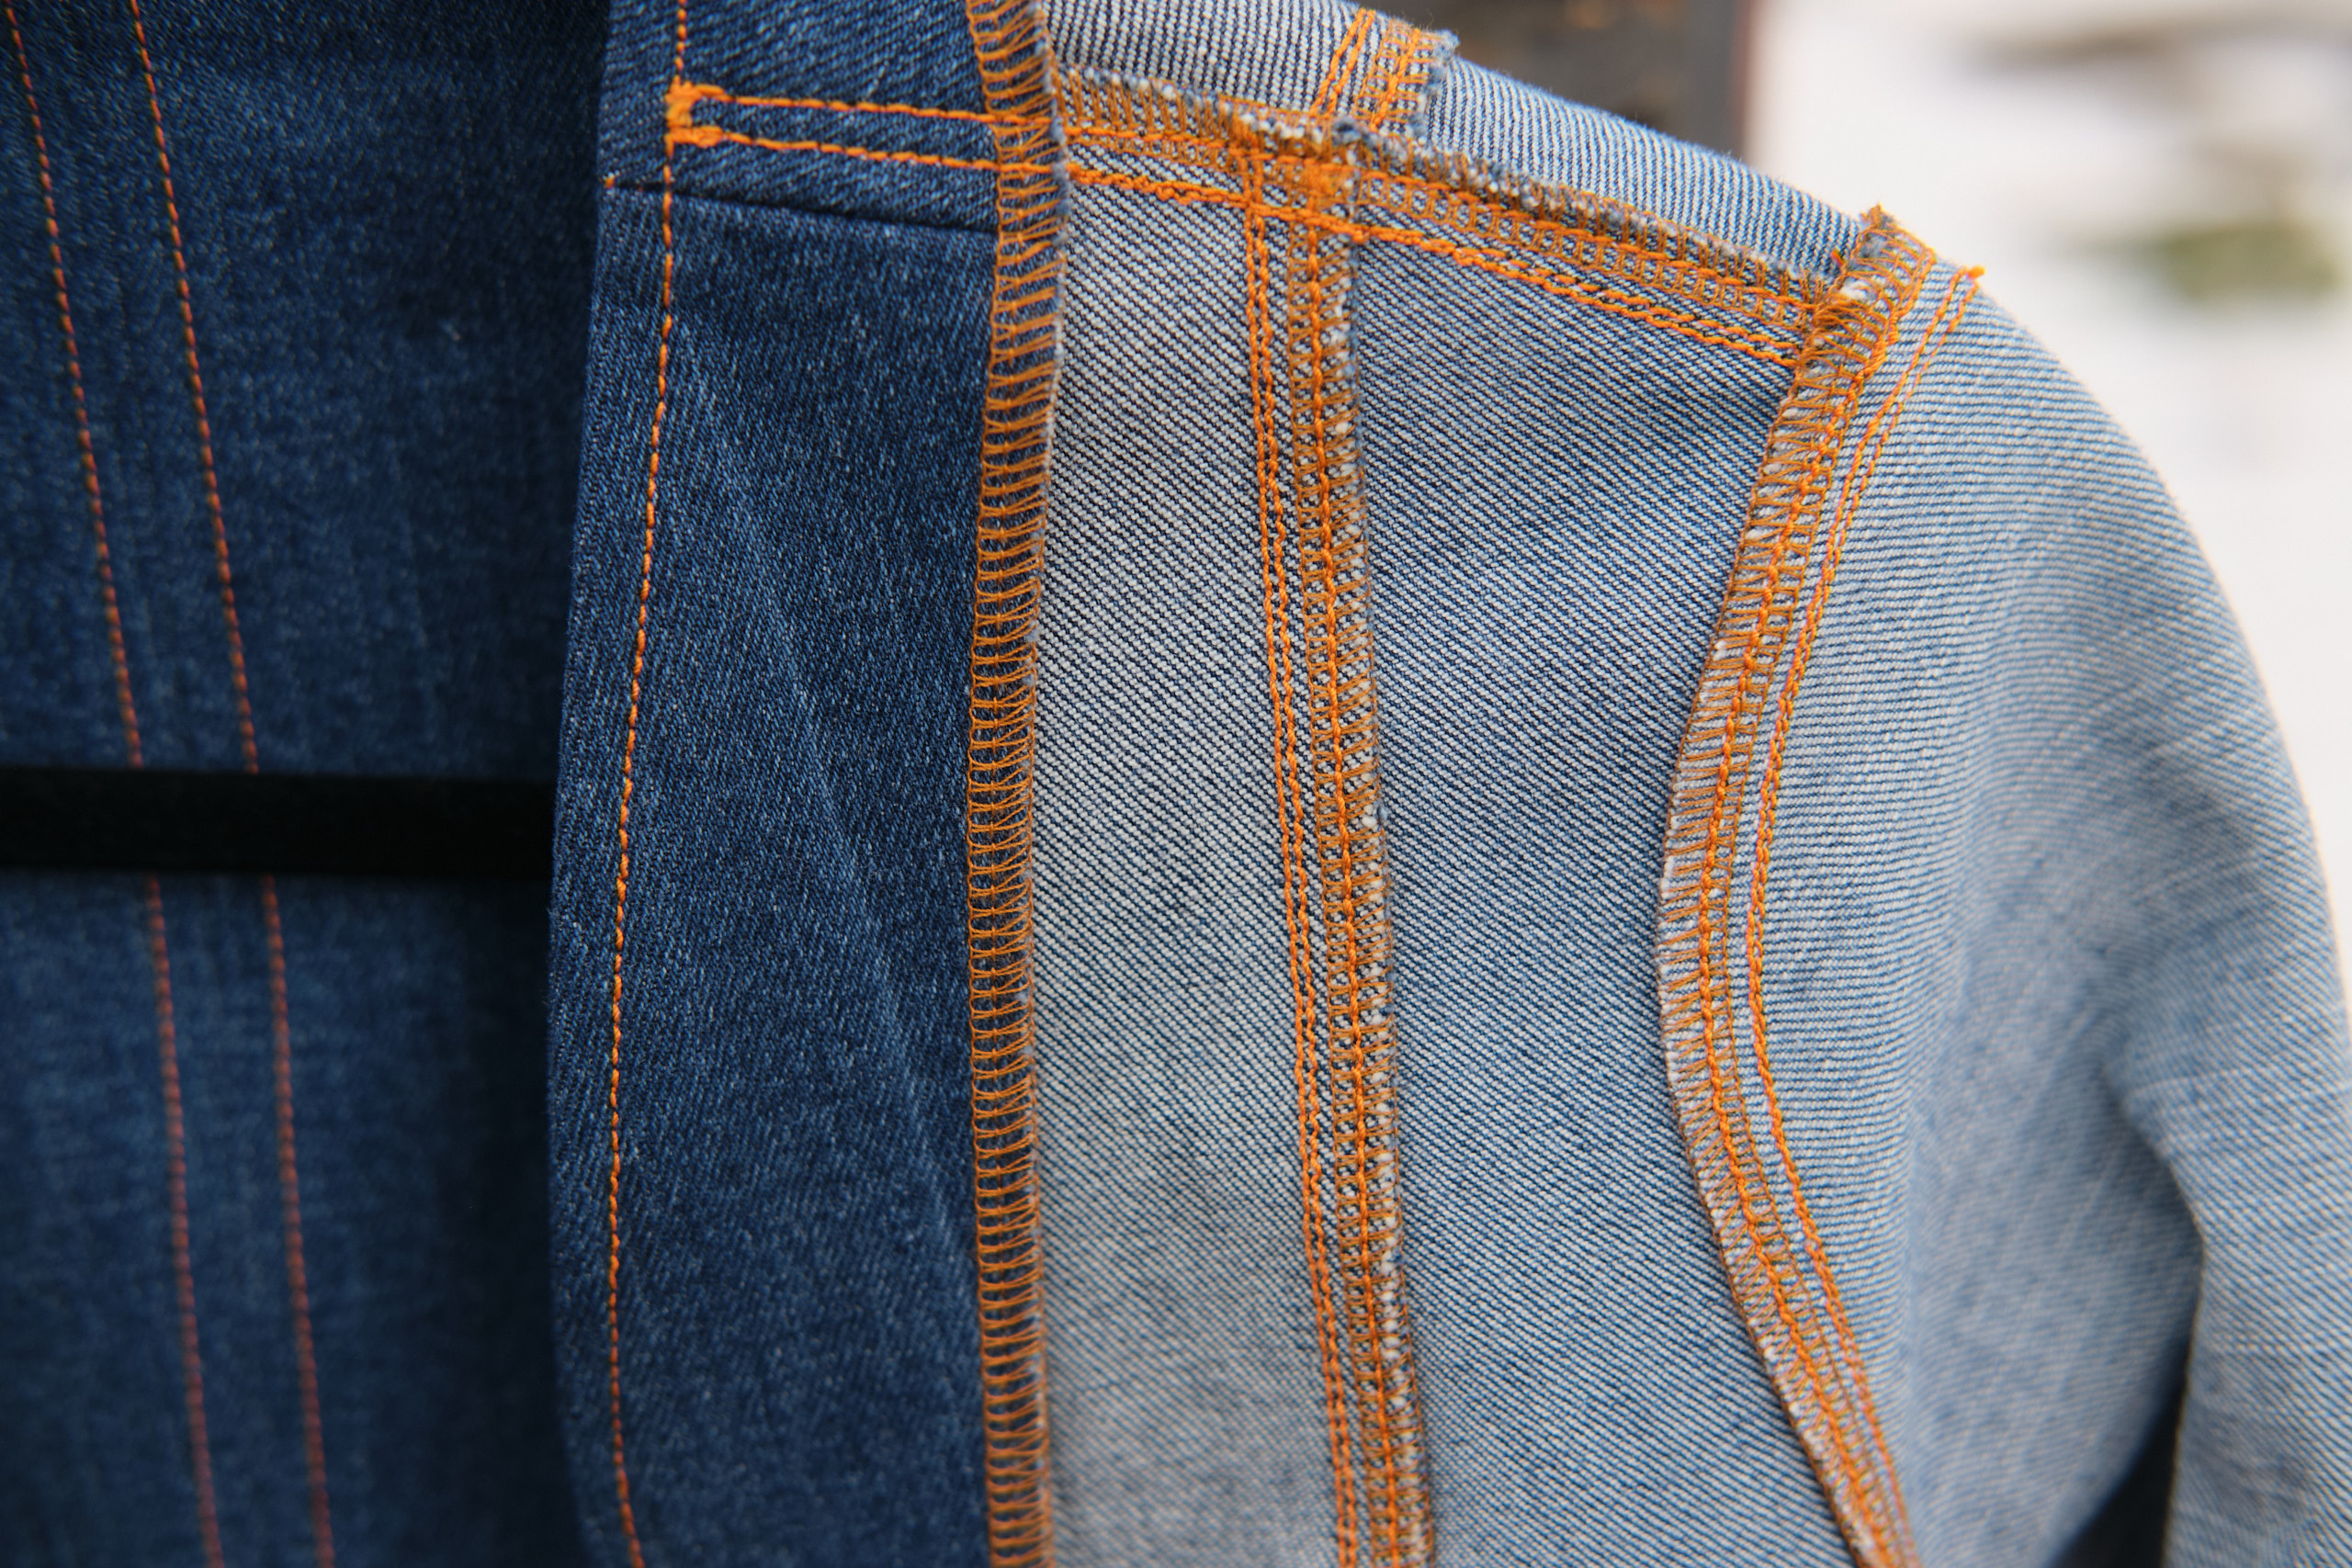
I also spent some time studying the stitching on different brands of jeans and denim jackets to see what color top stitching thread is used and where the top stitching is placed. I also read some blog posts on jeans anatomy. Some jeans match the top stitching to the denim color, others use a light yellow gold, and still others a more orangy gold. I’m sure there are other variations too. I observed that most jeans top stitching is done in two parallel lines, and generally as a chain stitch. Of course, it can’t be done everywhere because once you close both sides of a pant leg or sleeve, it is no longer possible to topstitch. Thus, one side is topstitched while the leg or sleeve is still open and the other side doesn’t get topstitched. I noticed that jackets don’t usually have topstitching on the side seams, but there is no practical reason not to do it so I decided to do it anyway.
I threaded my sewing machine with 30 weight polyester topstitching thread in a golden orange color that I thought would nicely “pop” against the blue denim. After some tests on denim scraps, I decided I would use the topstitching thread for piecing as well so as to avoid lots of thread changes. I set a slightly longer-than-normal stitch length of 3. I did not opt for chain stitching as that would have required lots of resets on my serger. I found I could achieve the parallel topstitching lines by stitching very close to the seam with my edge foot with the needle shifted 3 clicks, and then a quarter inch over using my quarter-inch quilting guide foot. I threaded the serger with four spools of regular polyester overlocking thread in a similar color as the topstitching thread.
The pieces of the jacket were easy to sew together and the topstitching looked awesome. It took a while as I stitched most seams four times: first I joined the fabric with a 3/8-inch seam allowance on my sewing machine, then I cleaned up and overlocked the edges (without trimming fabric, just stray threads) on my serger, then pressed the seam with steam, then I sewed the two parallel lines of topstitching. It was a lot of work, but also somewhat meditative to sew.
The facing pieces were more problematic. I debated whether the fusible interfacing was needed and also whether I should make the facing out of denim or a lighter fabric. I eventually opted for denim with the fusible interfacing, as recommended in the pattern instructions. I cut the facings as the pattern specified and did not make them wider as I had with the last two jackets. I had previously had trouble using non-stretch interfacing with stretchy ponte knit fabric. This time I didn’t think that would be a problem since I was using woven fabric. However, the denim I used has a bit of stretch. I don’t fully understand how it happened, but after fusing the interfacing onto the facings and sewing the three facing pieces together, the facings ended up slightly longer than the jacket front pieces they were supposed to attach to. I decided to sew them on anyway and figured I could trim the bottoms. But I noticed as I was sewing with the interfacing side on the bottom, the jacket was stretching to match the size of the facings. But I could see if I was not careful it would stretch too much. With some careful flipping and a bit of unpicking I was eventually able to get the jack front and facings to match each other. This was a complete trial and error approach and not the ideal way to do it. There are some very thick layers where the interfaced pieces join. I’m still not sure what approach would have been better, but probably not what I did. Nonetheless, it all came together, I was able to iron it all flat, and it looks fine. I top stitched across the shoulder seam, which helped hold the facing in place. The pockets also ended up holding the facing down and so far I haven’t had the problem I had with the ponte jackets where the facing doesn’t lie flat and requires gluing.
I followed the pattern steps a bit out of order and sewed the whole jacket together before I started working on the sleeves. The order really doesn’t matter and I just wanted to be able to try it on without the sleeves and see how it was coming together. The sleeves went together easily. I topstitched the outer sleeve edge. I was also able to easily set the sleeve heads into the armscye without any need for ease stitches. I sewed a 3/8-inch seam on my sewing machine and then overlocked the edges of the armscye. I then topstitched all the way around the armscye. I hemmed the sleeves by folding under 1/4 inch and then again at 3/4 inch and top stitched.
The final step was adding the pockets. First I topstitched the top edge of the pocket where they had been previously topstitched (but I had removed all the thread). I tried on the jacket and pinned the pockets where I wanted them. Then I took off the jacket and measured carefully and repositioned slightly so they would be symmetrical. I followed the dark line from where the previous top stitching had been and top stitched a pair of parallel lines around the pocket edges. Then I pressed everything again and I was done!
The topstitching thread is heavy, and a bobbin doesn’t hold a lot of it. I had to reload my bobbin twice. I also used a lot of steam when pressing my seams. I lost track of how many times I had to refill my iron. I managed to get through the whole project without breaking a needle, which was good because I was using my last topstitching needle.
I’m really happy with how this came out and I know I will wear this jacket a lot! I’m modeling it here with my Boo & Lu Blizzard dress, but it also looks great with pants, and even jeans.
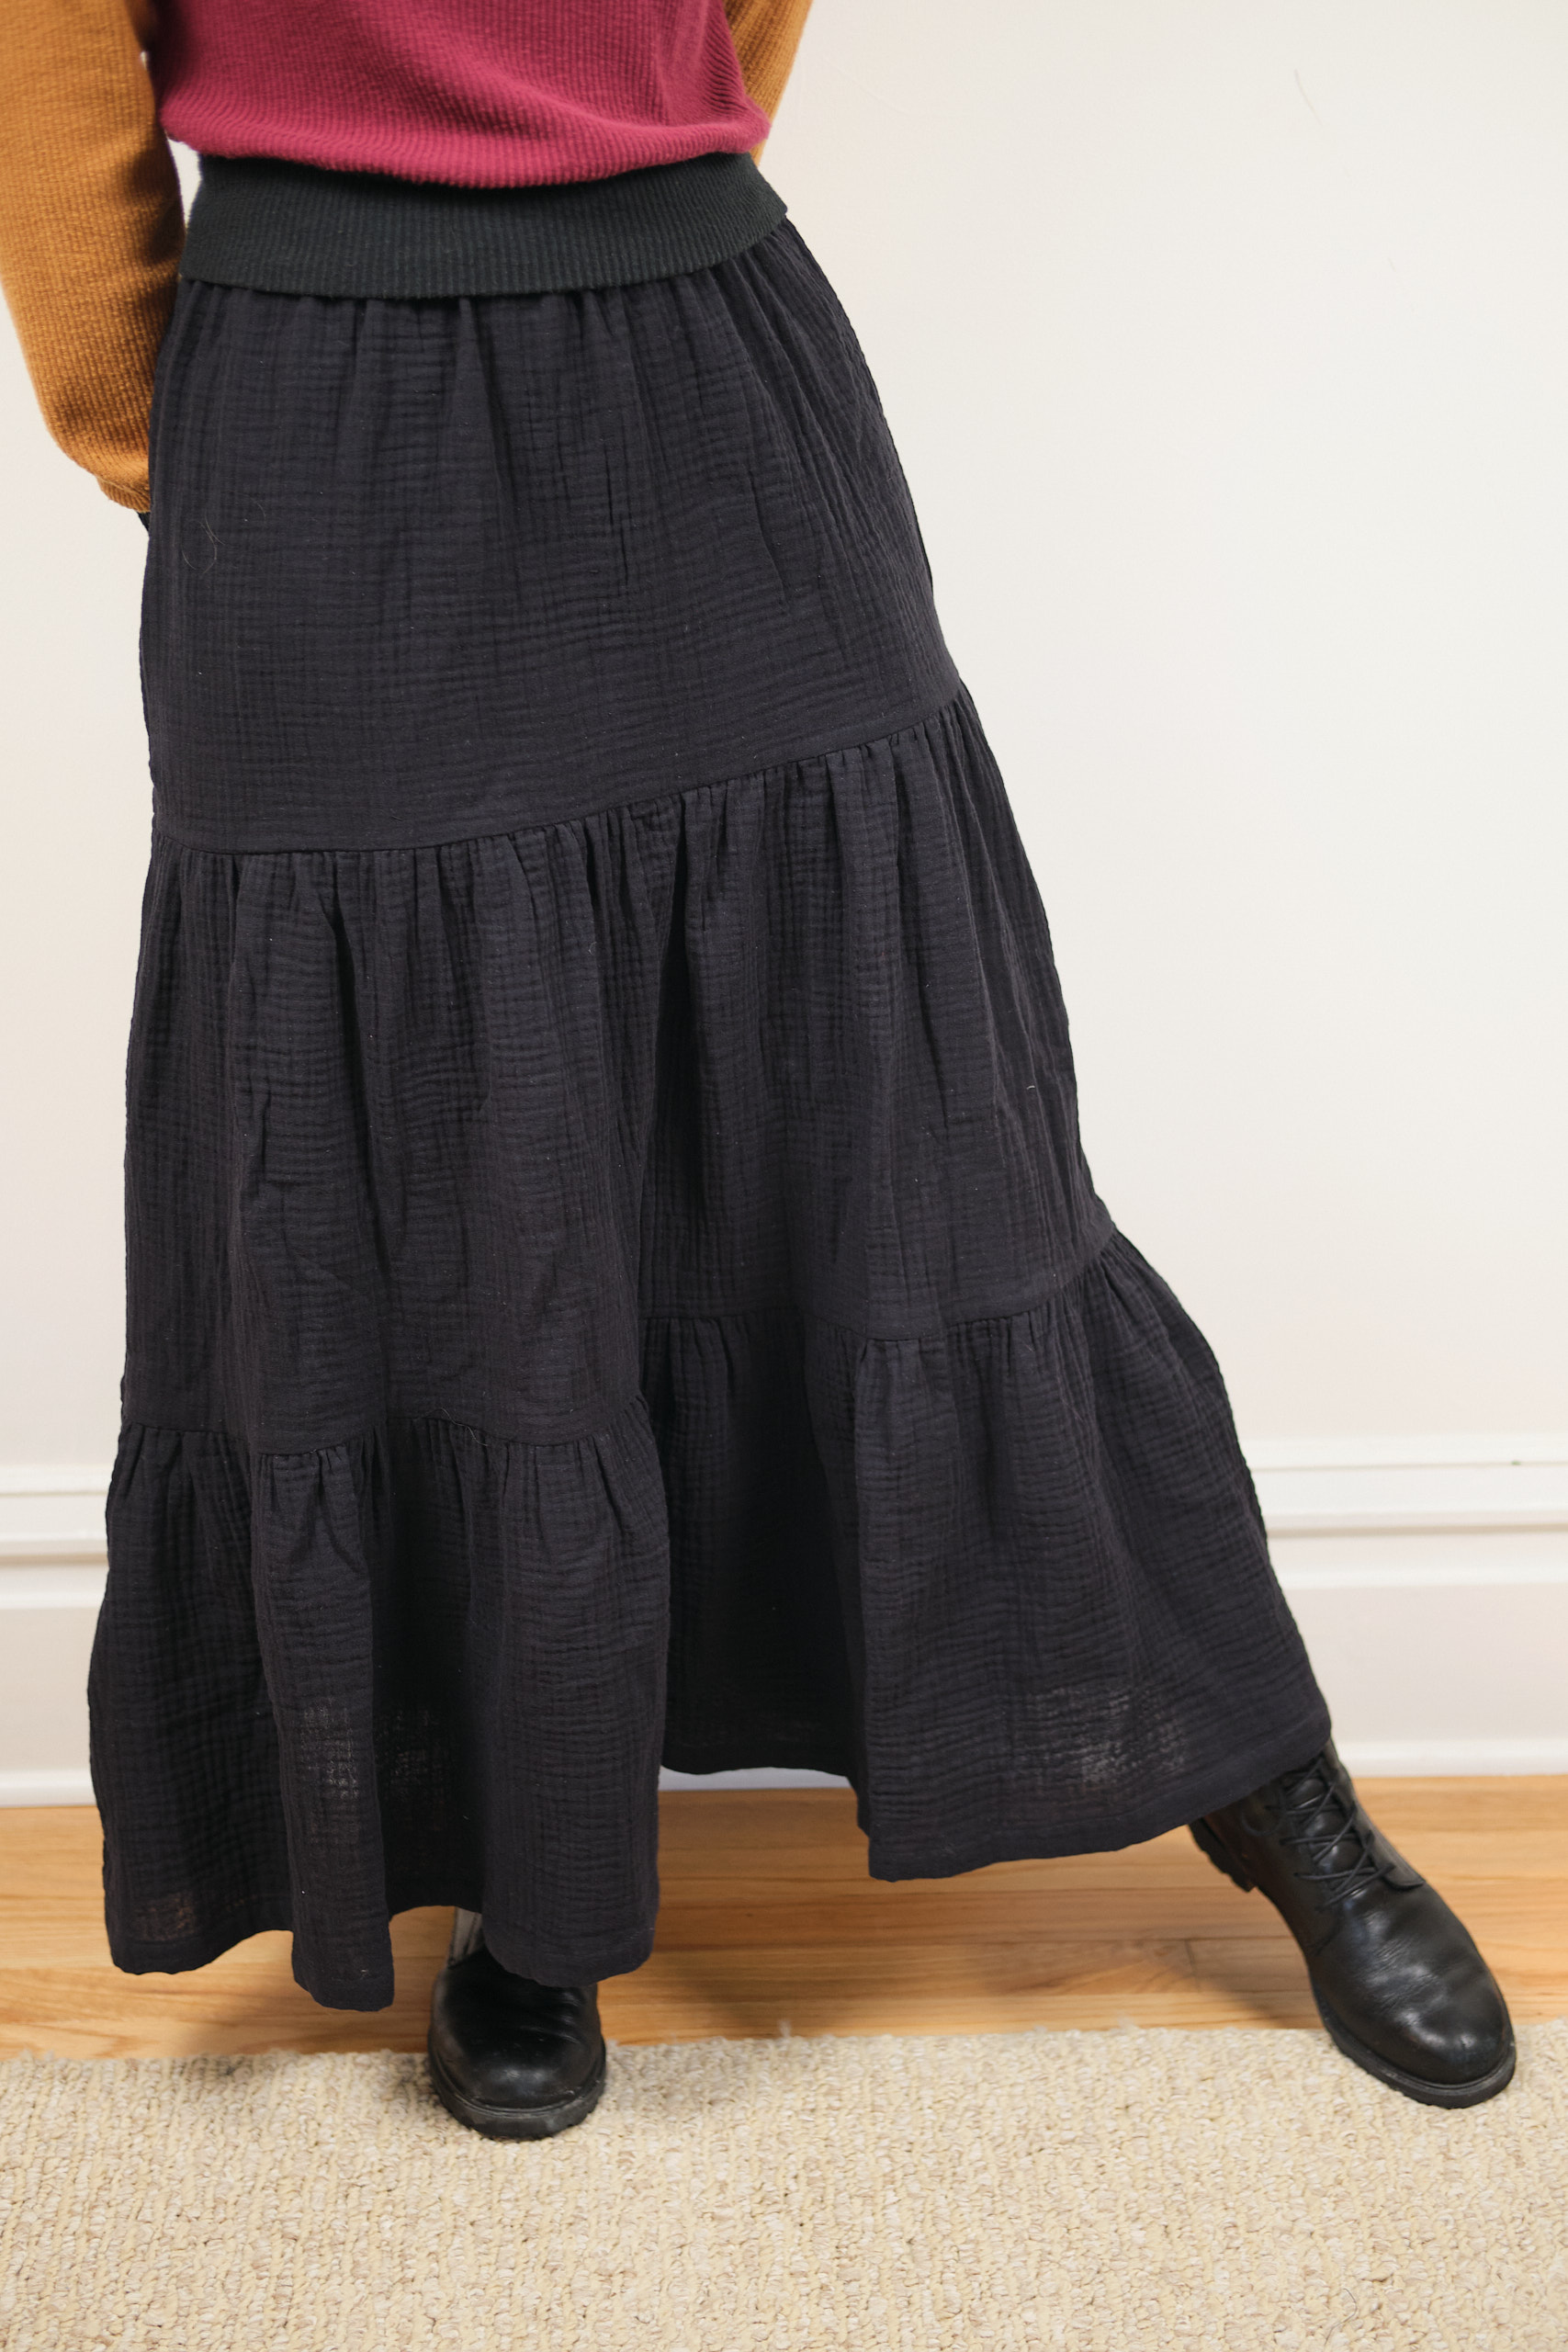
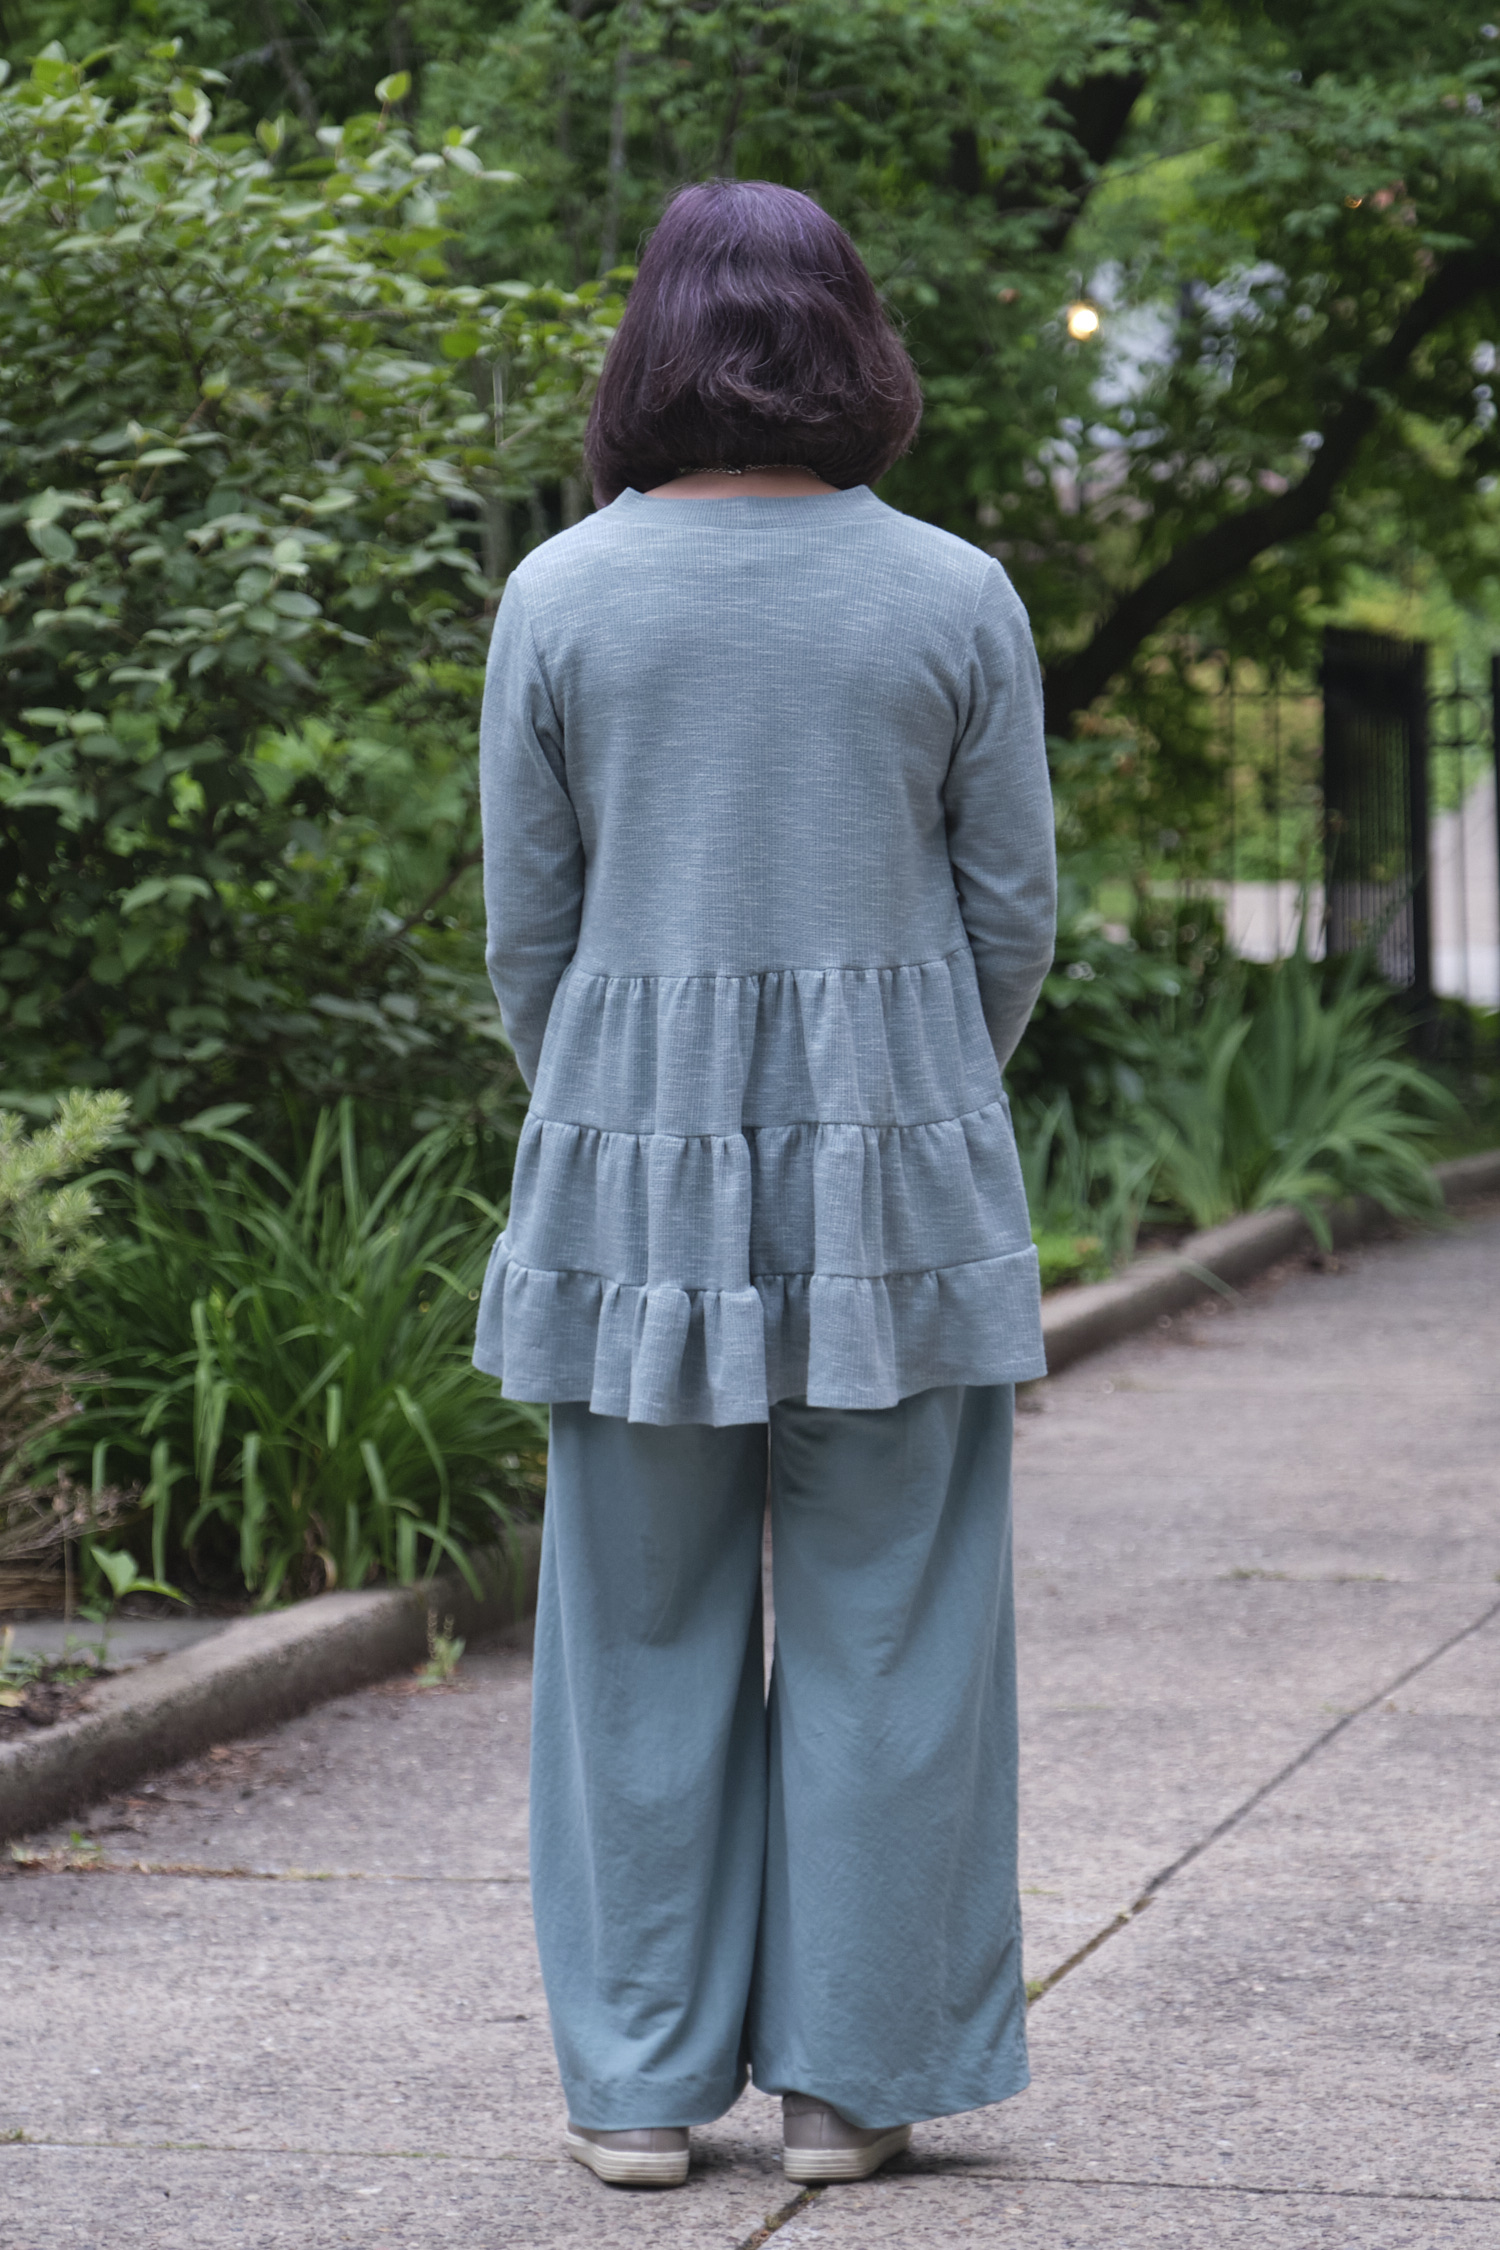
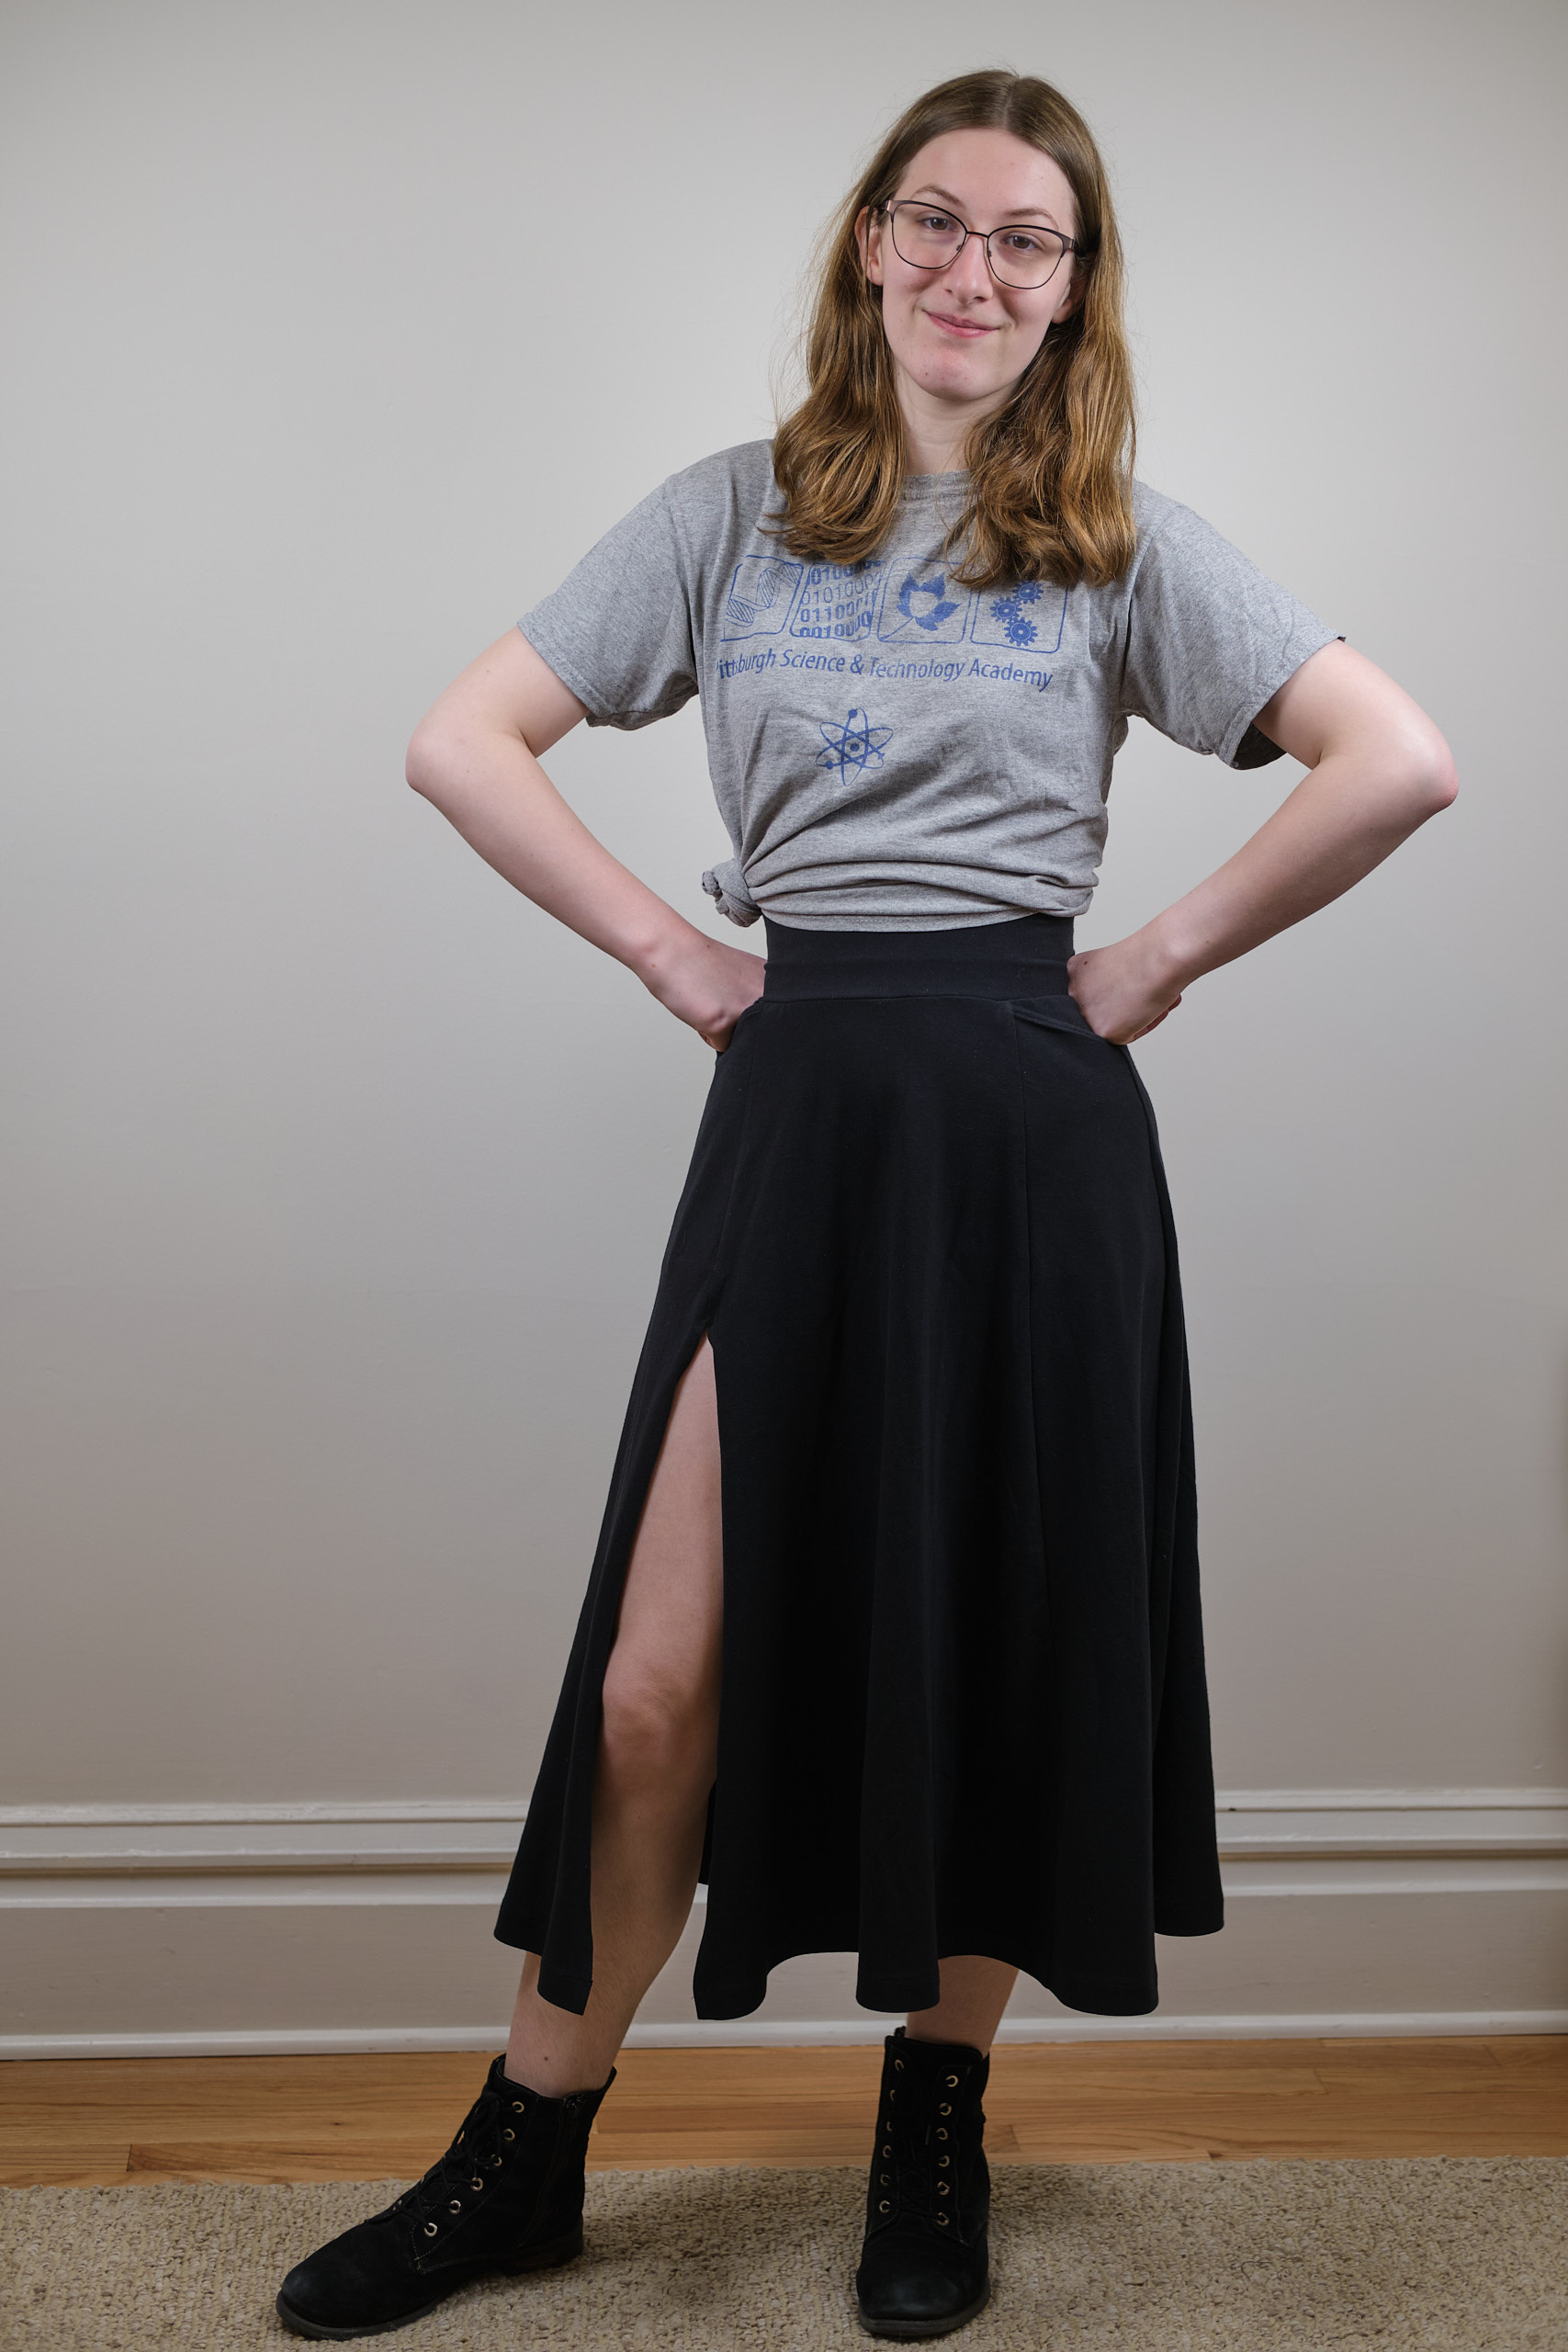
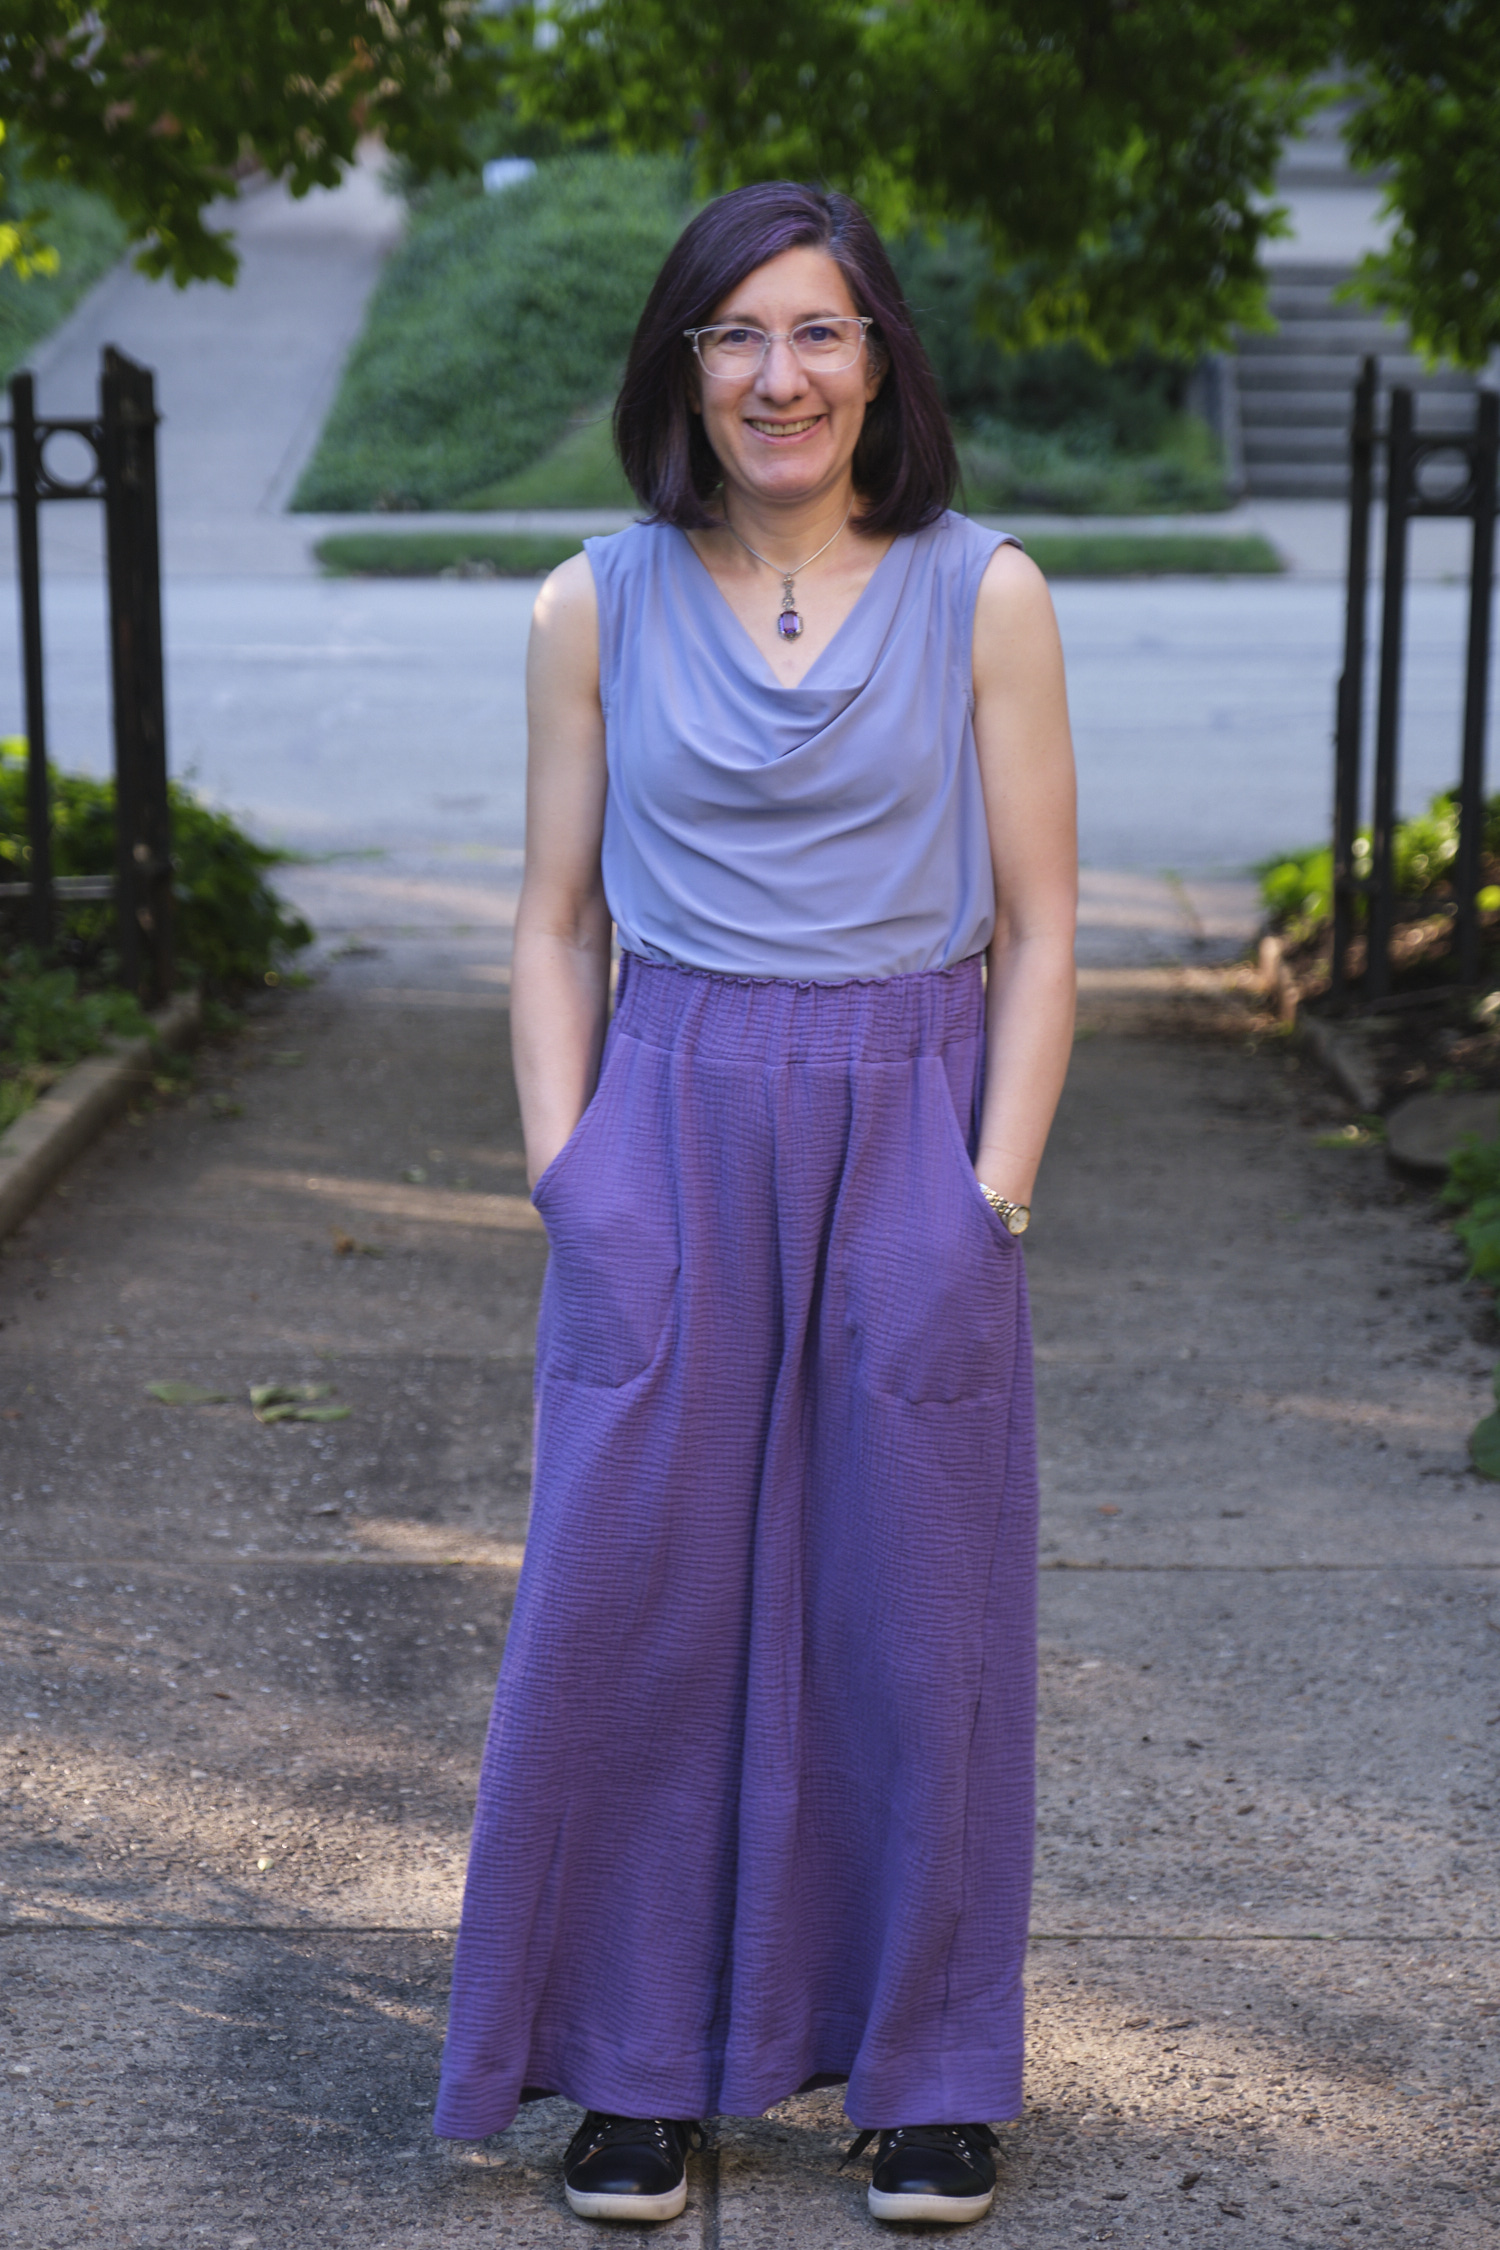
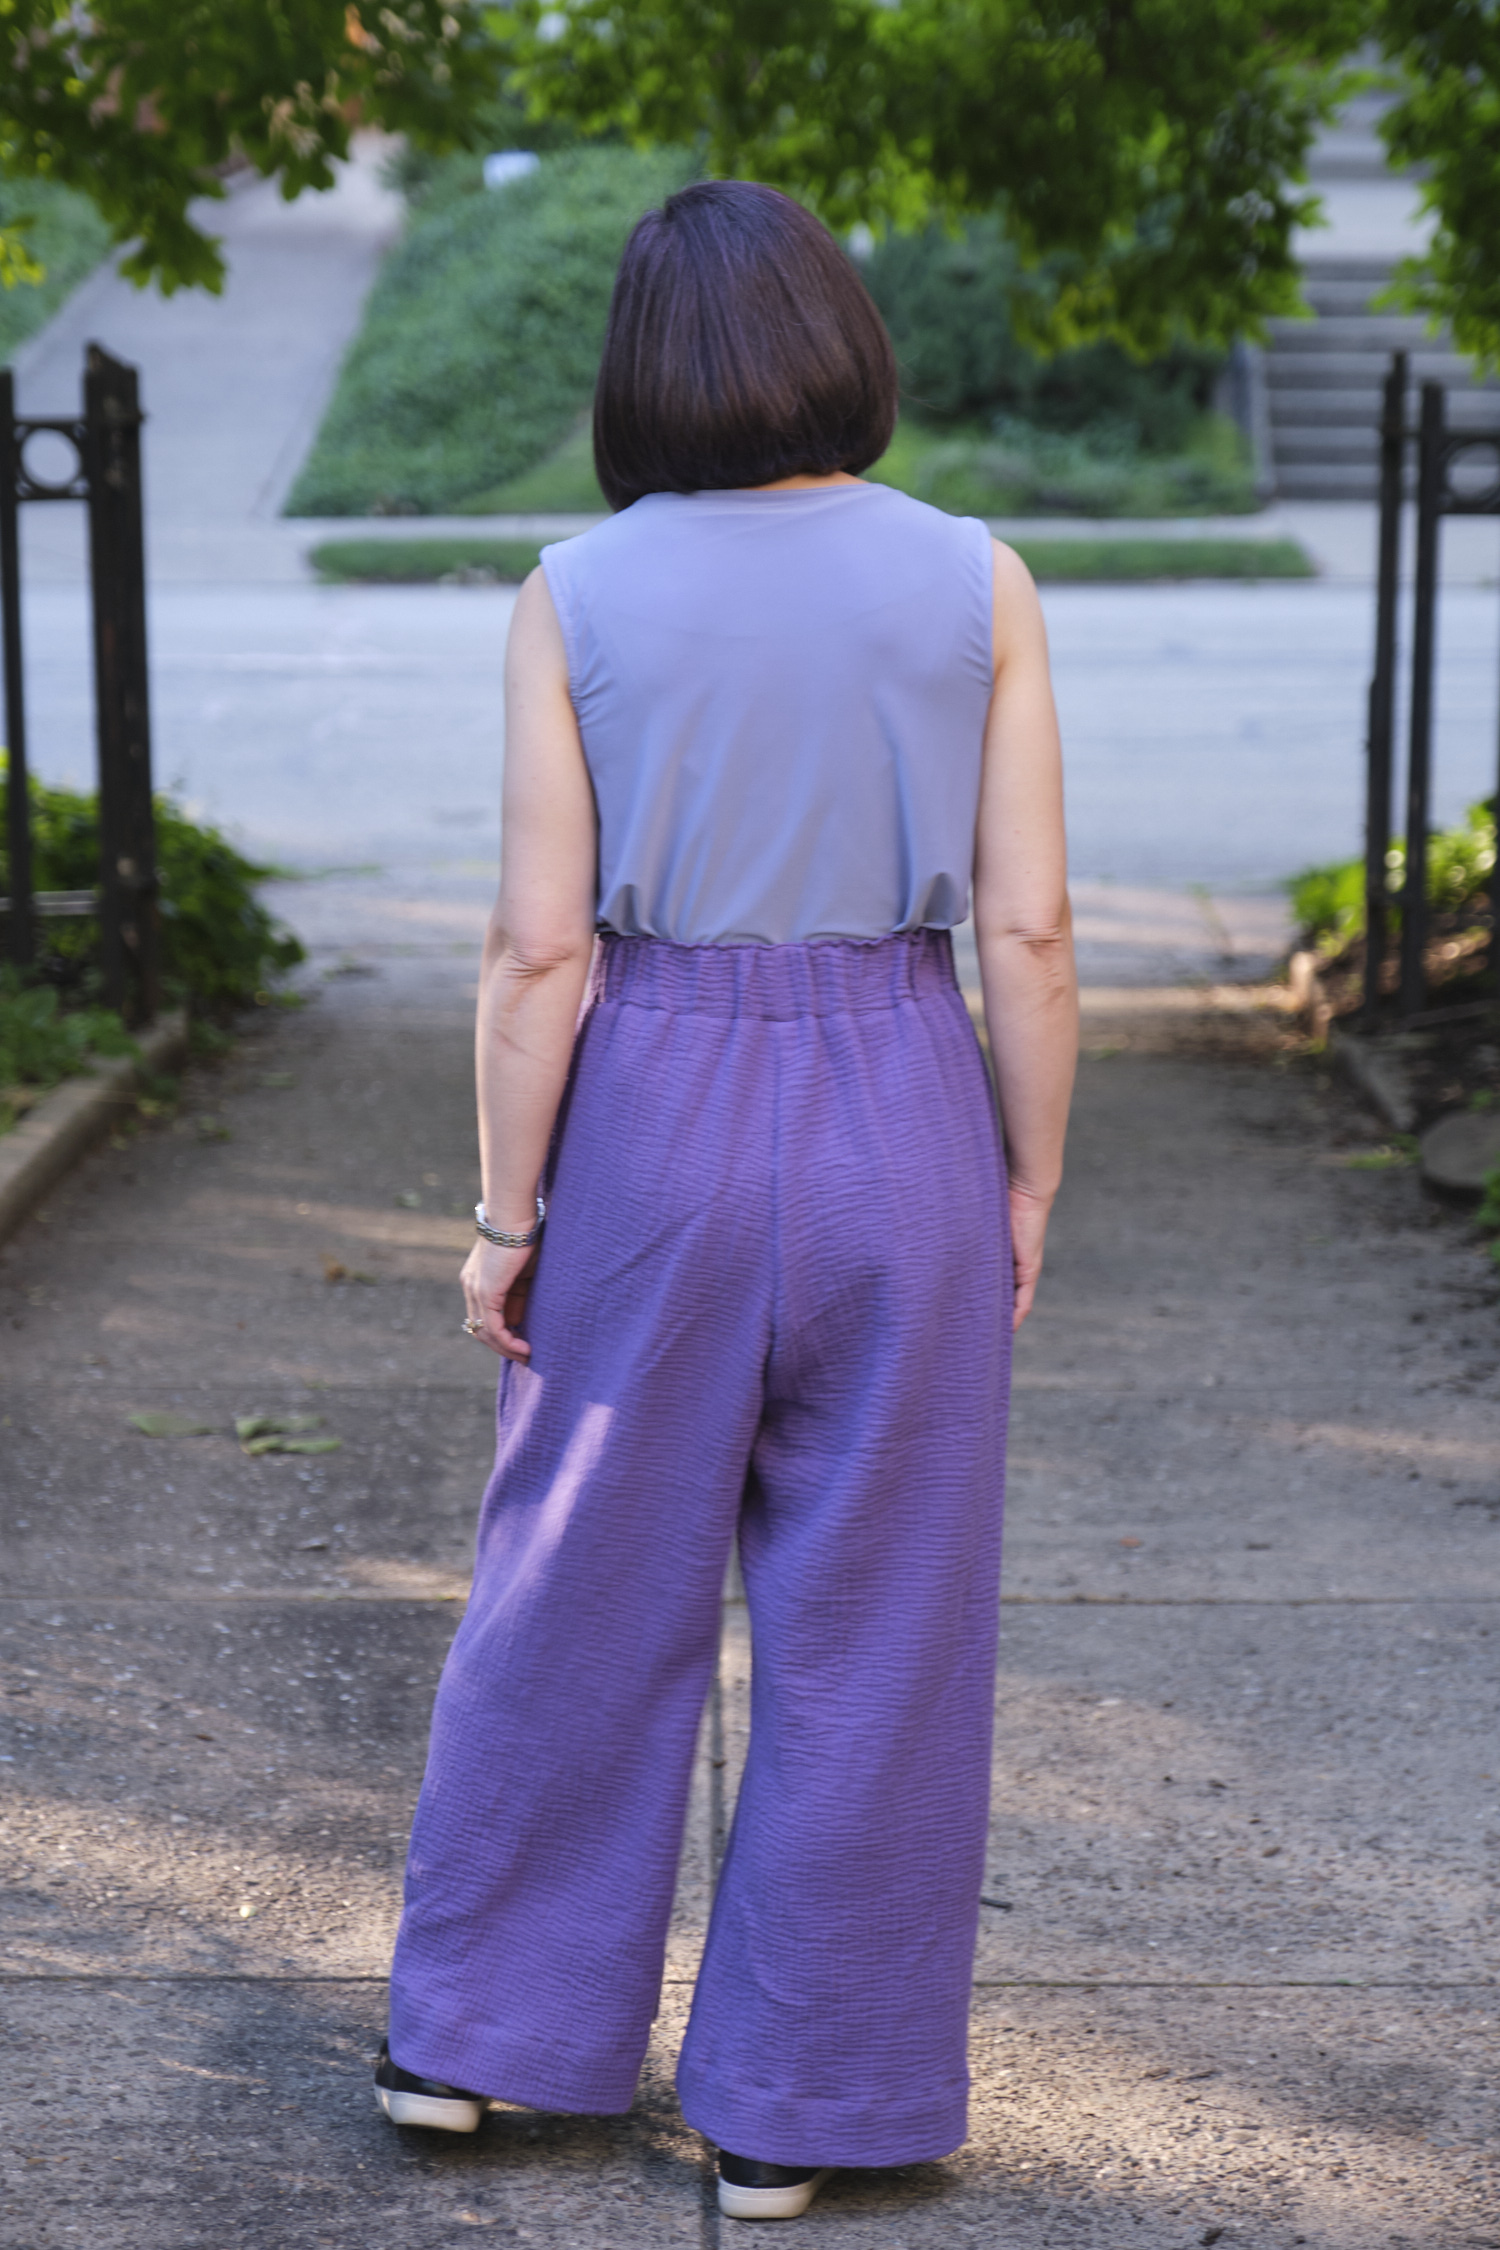
My daughter who now won’t wear any pants I didn’t sew for her, bought herself a cheap woven-polyester, black, tiered maxi skirt on Amazon. It didn’t take long before she inquired whether I could make something like it for her, but not so cheap looking. I asked her to measure the length and circumference of the cheap skirt and take a look at the black fabrics in my stash. She thought the black cotton double gauze would work, which is great because I still have a lot of double gauze I purchased when it was on clearance two years ago.
I have previously made tiered skirts from quilting cotton by sewing together gathered rectangles of fabric. I thought I might actually use a pattern this time. I looked at tiered skirt patterns from my favorite pattern companies and purchased one that I decided not to use because it was based on curved rather than straight skirt pieces. I went back to my rectangle approach and used the pockets and gathering instructions from the Pattern Emporium Meet You There dress. I used this dress last year to make a dress from orange cotton double gauze, and really liked the instructions for gathering the tiers using clear elastic.
Gathering a large length of fabric using the traditional method of sewing long basting stitches, pulling the threads, and trying to distribute the gathers evenly is time consuming. With the elastic method, you cut your elastic just a bit bigger than the tier you want to attach your gathers to, and mark quarters and eighths. Then you mark the quarters and eighths on your big piece of fabric. As you sew you stretch the elastic and match the marks on the elastic with the marks on the fabric. When you let go of the elastic, it contracts and the fabric is perfectly gathered. Buy the pattern for a better explanation of this. I like to have marks every few inches, within what fits on the extended bed of my sewing machine. So for the largest tier I ended up splitting the quarters into thirds, and thus I marked twelfths rather than eighths.
I decide don the size of each rectangle based on the desired length and circumference. I made the bottom tier an inch longer to support a 1-inch hem and I made the top tier an inch longer so I could fold it under 1 inch and insert elastic. Here were the dimensions I used for two rectangles for each tier (6 rectangles total):
top tier: 14×22 middle tier: 13×35 bottom tier: 14×56
Each tier is roughly 1.6 times larger than the one above it. You don’t want a ratio much bigger than that or you will end up with an enormous bottom tier. I could have started with a wider top tier and reduced the ratio, resulting in more gathers at the waist, wider hips, and less gathering below — and still achieved the same bottom circumference.
I gathered and sewed the front and back separately, added the pockets, and then sewed the front to the back. Then I folded under the waistband and threaded in elastic. And finally, I hemmed the bottom.
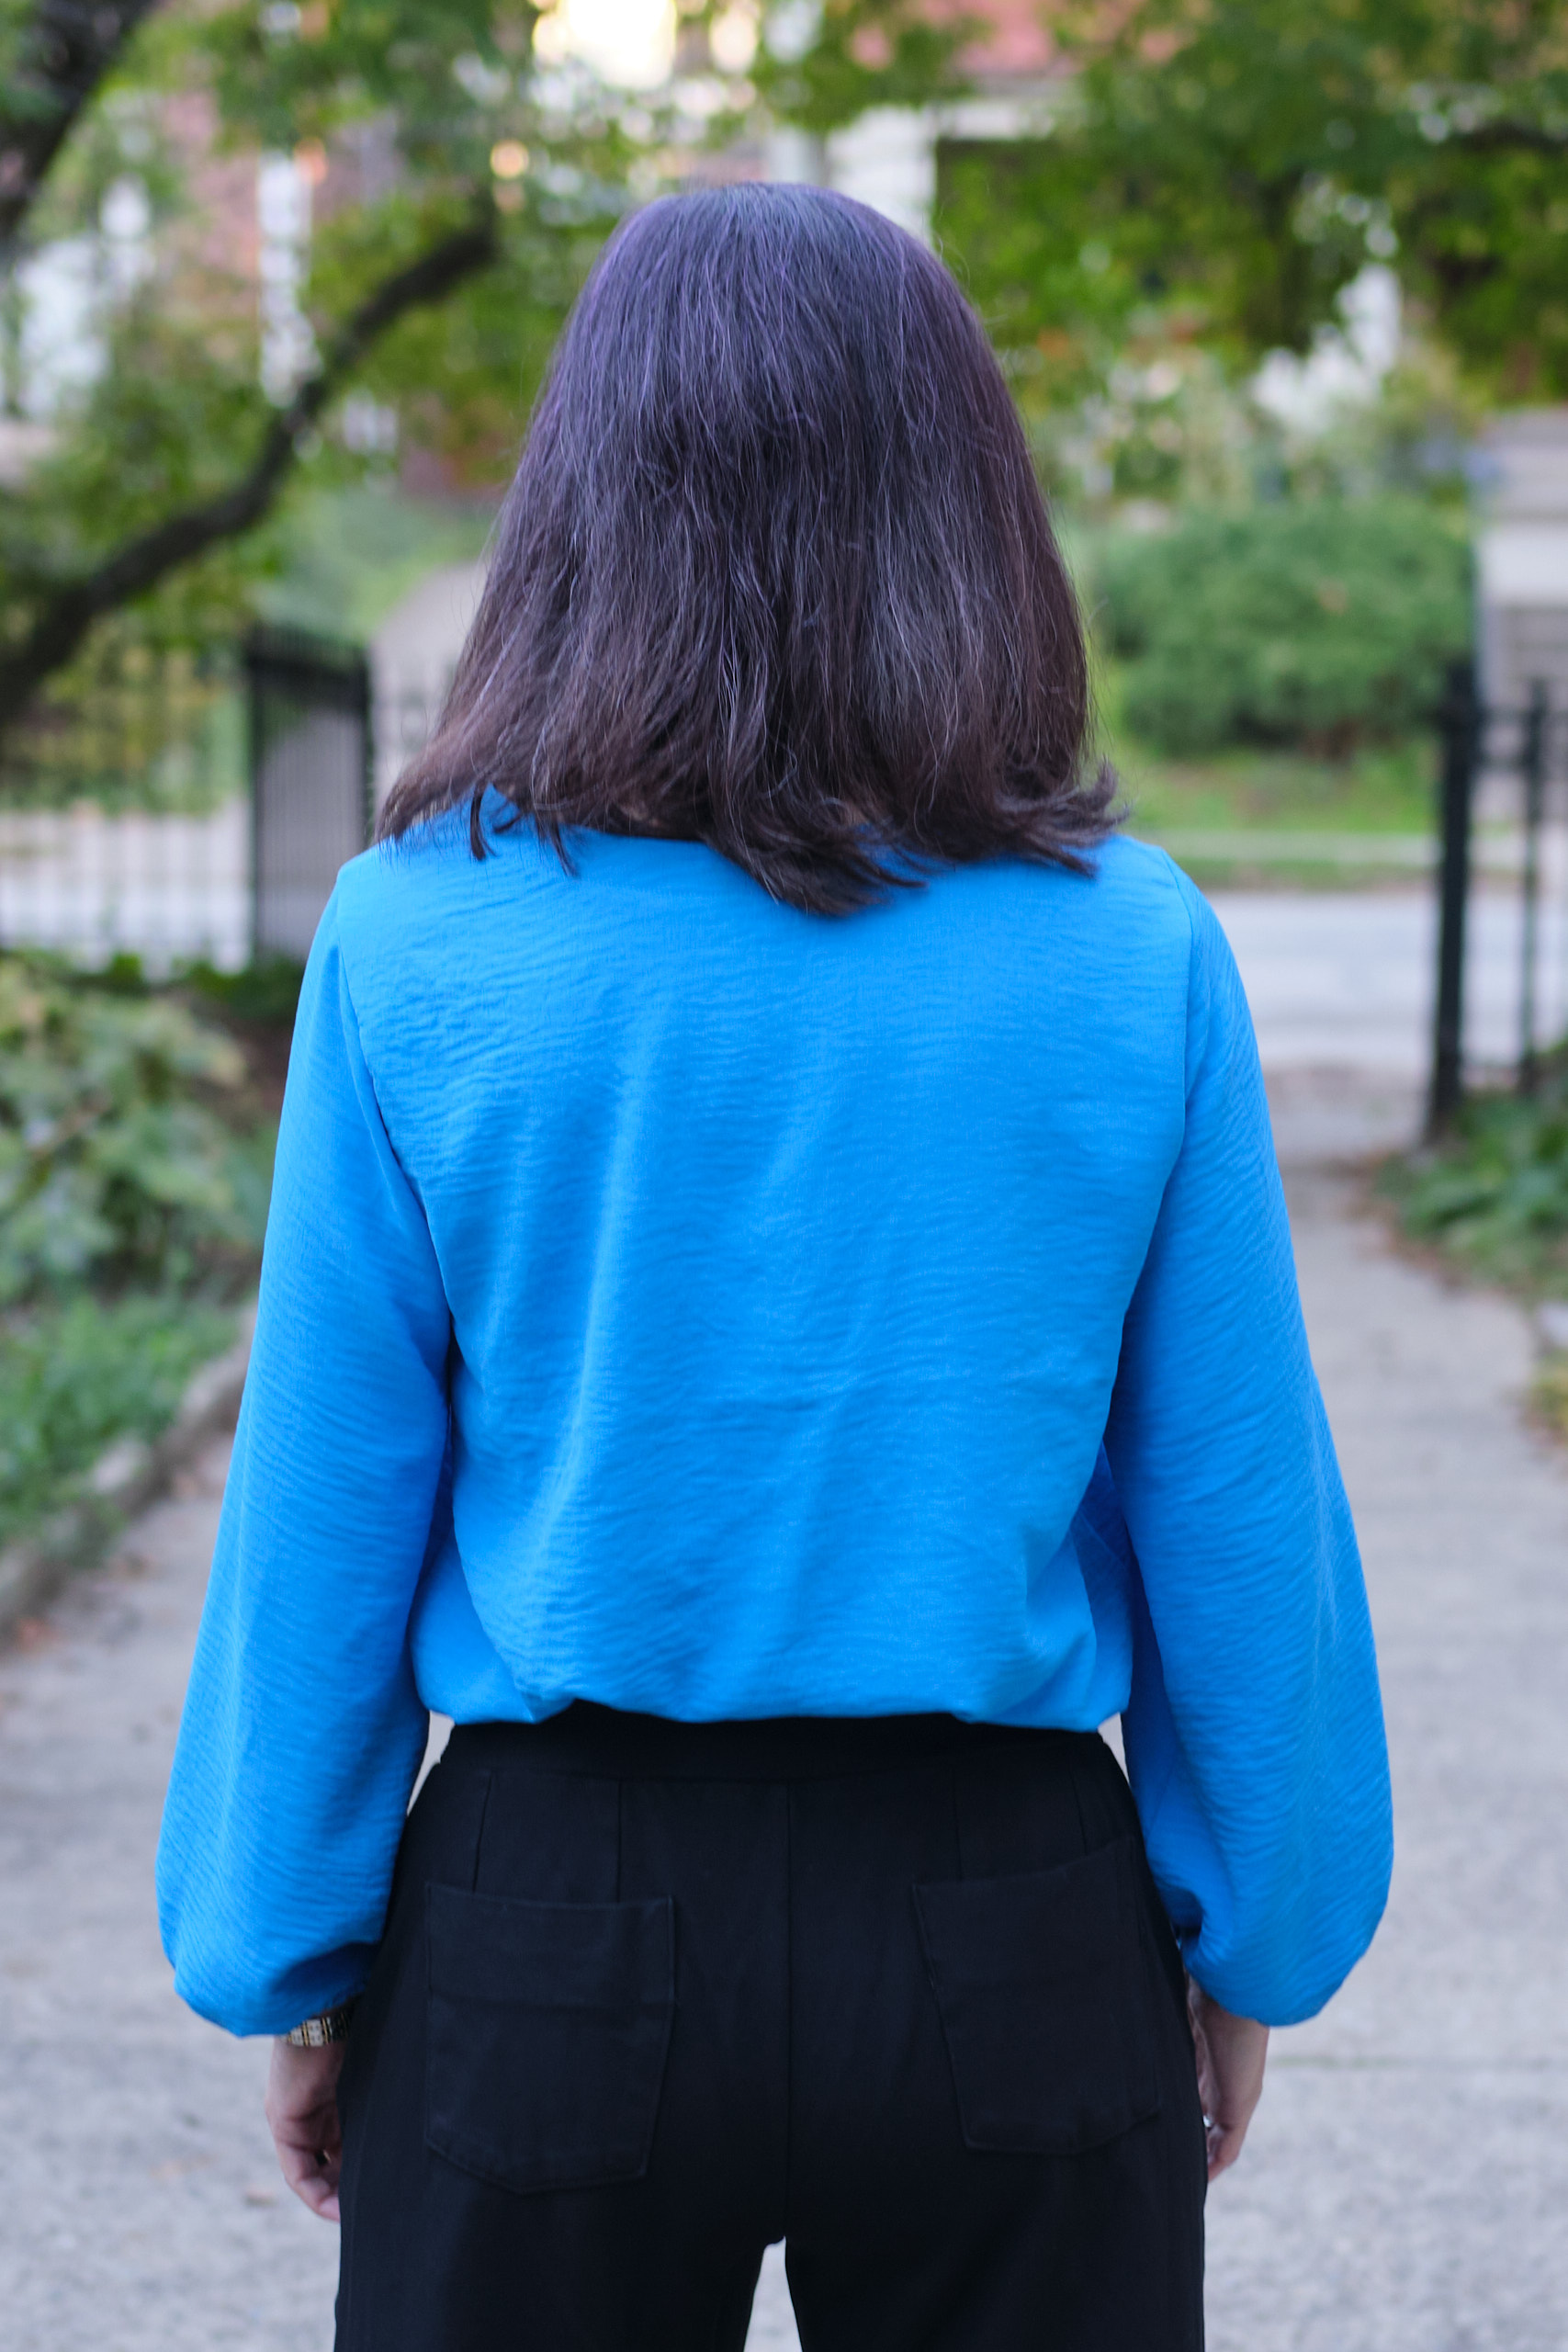
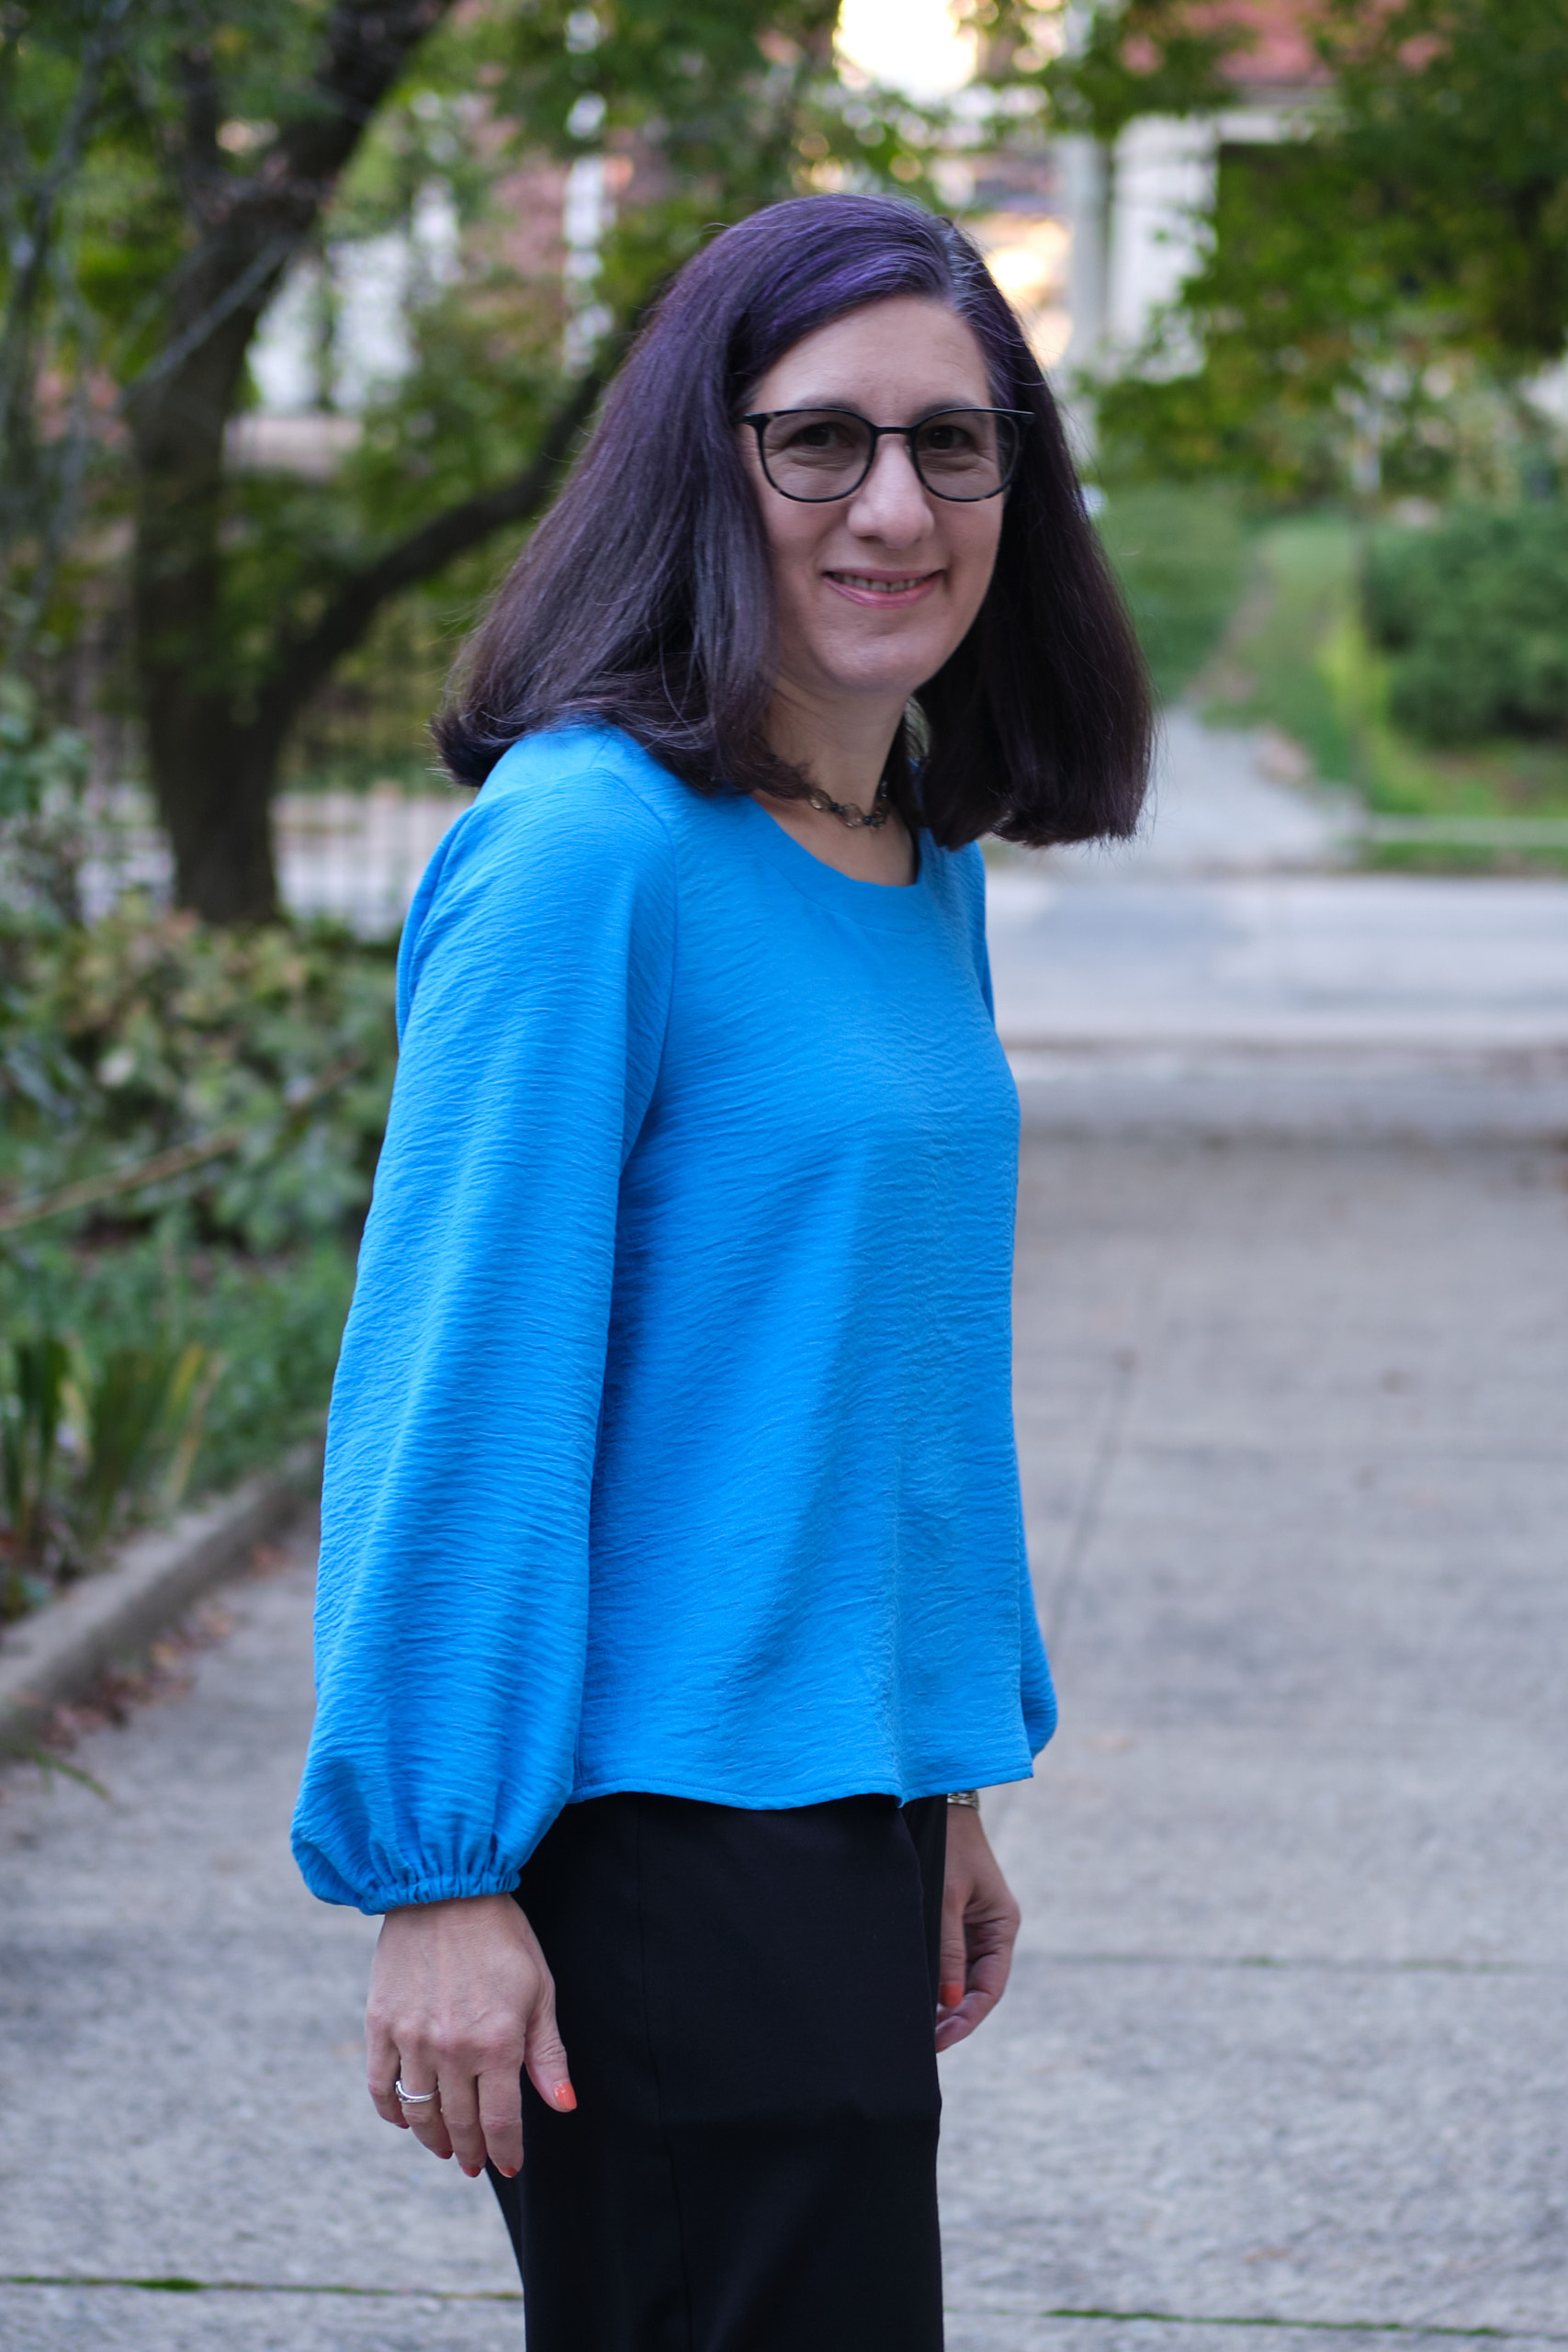
I made my lilac Be Mine and Spill the Tea mashup cap sleeve blouse as a simple, elegant summer top. So I decided to try the mashup again, but this time with the flared long sleeves from the Pattern Emporium Spill the Tea pattern. Although the size chart suggests that I am a size AU10, I sized down for all my Be Mine tops to an AU8, but they still seem a little big, so I decided to try an AU6 this time. I used the Mily Mae cobalt airflow polyester fabric this time – same woven crinkle fabric as the lilac top but a different color.
Once again, I sloped the shoulders and eliminated the front and back seam to keep this super simple. I also skipped the wide hem this time and serged the hem, and then folded it under a quarter inch twice and stitched it down with my quarter-inch edge foot. The flared sleeves were easy to assemble and attach. I shortened them by 1.5 inches before I cut them out, anticipating that I usually need to shorten sleeves unless it is a petite pattern. I sewed the whole thing together in a few hours one evening after dinner.
I like the sized-down fit, and didn’t have any problem getting it on or off. The flared sleeves aren’t as dramatic as the Be Mine balloon sleeves, but they still have plenty of drama, and they are easier to wear under a sweater. The top works both tucked and untucked.
I wanted to make a short-sleeve top to go with my magenta suit. I bought lots of polyester crinkle airflow woven fabric when it was on sale at Mily Mae and I thought the polyester lilac airflow would go well with the magenta. (Note, the airflow is advertised as non-stretch, but because of the crinkle texture, it actually does have a bit of stretch (which could, perhaps, allow sizing down a size). It’s actually fairly similar to the Surge Florence stretch woven that I used recently for a Spill the Tea top; the Florence is just a bit crisper.) I considered making another PE Spill the Tea top, but wanted something without ties. I love the look of the ties, but not futzing with them and having to keep them from getting in the way as I go about my day. I realized that the PE Be Mine Balloon Sleeve top has a very similar bodice to Spill the Tea and that the sleeves are interchangeable. The balloon sleeves are awesome, but don’t play well under jackets and sweaters (and there’s no point wasting a fabulous balloon sleeve under a sweater). So I thought I could get a more practical and layerable top for wearing with jackets and sweaters by putting the Spill the Teas cap sleeves on the Be Mine top bodice.
I cut a size AU 8 Be Mine bodice with a sloped shoulder adjustment and eliminated both the front and back center seam. I cut the regular length with the mid neckline and the wide facing. This was fairly quick to sew together without the center seams and no hemming, bands, or binding needed for the cap sleeves. The part that took the longest was the wide hem, which I think looks really nice on an untucked shirt and adds some weight to this light-weight fabric. But the wide hem is quite the process: it requires stitching, surging, trimming, understitching, folding, top stitching, and pressing between each of these steps. The simple hem option would have been much faster.
I’m pleased with how my top turned out. It looks good tucked or untucked, coming or going!
I tested Cassie V1 but was traveling when the V2 pattern released and didn’t get back until after the testing period was over. So here’s my V2, better late than never.
Cassie is a v-neck pattern for woven fabrics. In the original V1 pattern the neckline crossed over, but too many sewists complained about gaping, so the final V2 was switched to a v-neck without the crossover, but including a pair of cute notches. I decided to try the pattern in PyLos LiKnit, a stable knit fabric made from 55% Rayon/45% Nylon. It has about 25% stretch horizontally, but minimal vertical stretch. I treated it as a woven when I sewed. I think it behaved pretty well for this pattern, although it has a little bit more thickness than a woven and it stretches a bit, so it made it harder to get sharp points in the notches and a crisp V. However, the stretch also made the top more comfortable to wear and easier to get on and off.
I cut out a 4p AB cup top with long sleeves and made no pattern modifications. I top stitched all the optional places where it was suggested. My original attempt at sewing down the neck binding was a bit off and caused the v-neck to be uncentered. Fortunately it was pretty easy to unpick and resew (although looking at the finished product now I realize it still isn’t perfectly centered… oh well).
After I sewed the first sleeve on I tried it on and was disappointed to see the sleeve hanging well past my wrist. I’m used to sleeves that are too long on me, but was surprised the sleeve was too long on a petite pattern. Since this sleeve is gathered and the band added before you sew it to the garment, there is no opportunity to check the sleeve length before it is finished. I went back and looked at photos posted by other sewists and noticed that most opted for the 3/4 length rather than the long sleeve. It looks to me like the long sleeves in this pattern just run long. The sleeve bands took a while to construct and I didn’t want to take them apart. So instead I unpicked the sleeve head and cut two inches off the top of the sleeve head. I was able to mark my cutting line by using a ruler to draw dots every inch or so two inches from the top edge of the sleeve. Then I connected the dots. I cut along the line and reattached the sleeves. This time it worked much better. (Warning for other sewists, unless you have particularly long arms, if you sew the long-sleeve version you will likely need to shorten the sleeves!)
Overall, I’m happy with this top. This is not a style I normally wear, and it may be more difficult to layer than my typical long-sleeve tshirts. But it goes well with both wide and skinny jeans as well as black dress pants, and it should not require ironing. I really like this long-sleeve version (now that I shortened the sleeves) but I also like the sleeveless and 3/4 length versions other sewists made.
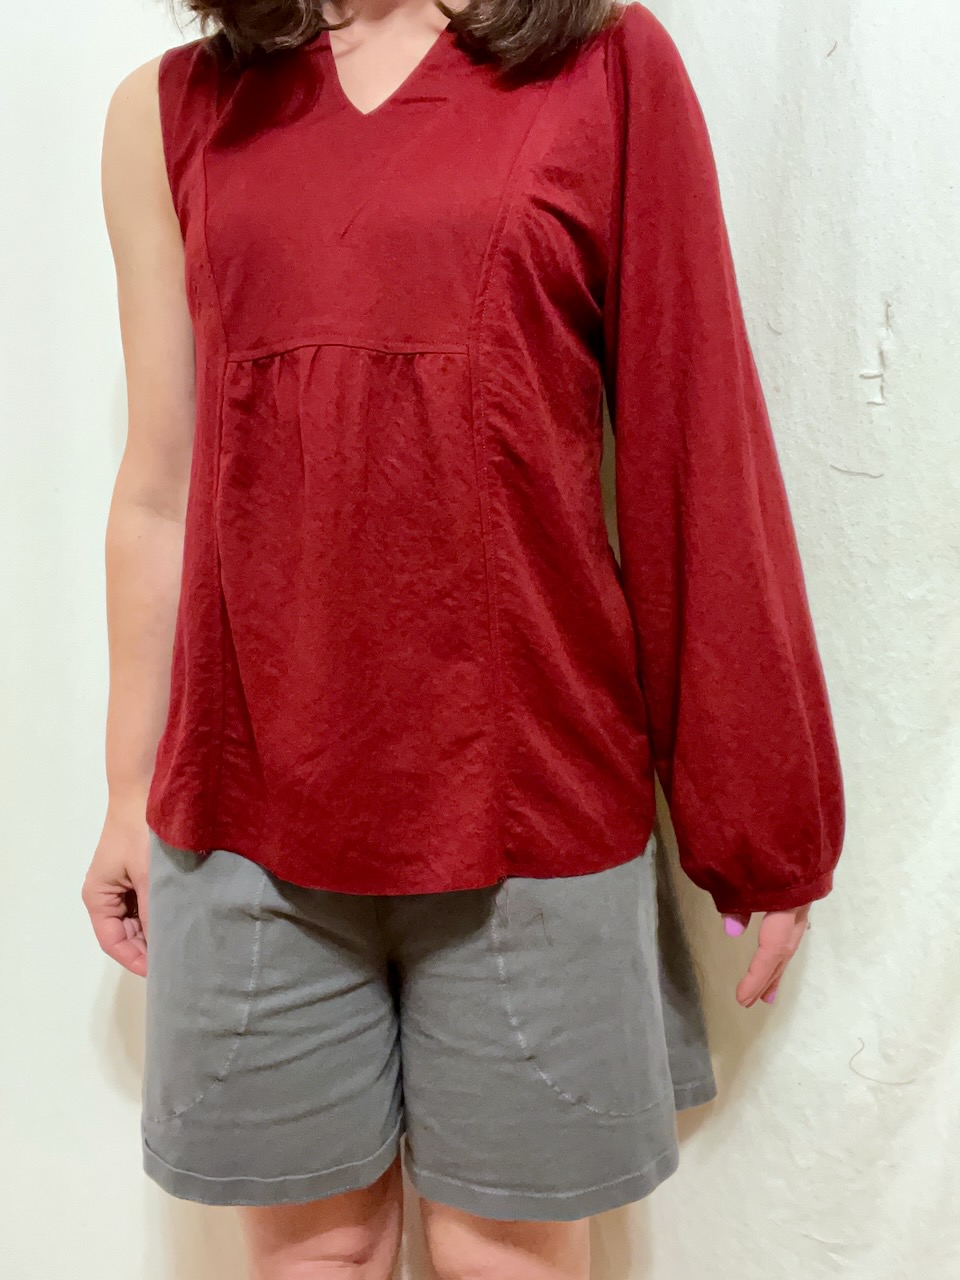
Sinclair Cassie V1 made of 43” of 52” wide dark sage cotton double gauze, size 4p, modified to remove gathers and wrap sleeve bindings.
My first time doing a pattern test for Sinclair I ended up being the pattern cover girl for the Linda pattern. I haven’t had time to sign up for a pattern test since, but when the Cassie top and dress was announced, it appeared I would have time to make it before heading out on a trip.
Cassie is a woven pattern, and I don’t have a lot of woven fabric in my stash besides the 18 yards of cotton double gauze I bought on clearance last year and a lot of quilting cotton. I was worried that the quilting cotton would be too stiff for this pattern, so I went with dark sage double gauze. But I waited for other sewists to post some initial photos of their makes before cutting. I wasn’t sure I would like the fit of the dress, which appeared to be fairly loose, so I made the top version in a size 4P.
I initially tetrised the pattern in Affinity Designer to fit in 1 yard of 58” fabric before realizing that my fabric was actually 52”. At that width it takes more than a yard of fabric, but i made it all fit in 43″.
The pattern was released for testing with only partial instructions, as the pattern designer made some last minute changes. She updated the instructions a couple of times to add the missing information, but never released the full instruction set. As I worked on my top, I periodically checked the Facebook group for the pattern test to see whether new updates had been released.
The top has a crossover V-neck with cute notches. I wasn’t sure from the line drawing that I would like the notches and was tempted to leave them out. But I’m glad I kept them as they are a really nice and unique detail. The instructions for facing the crossover pieces was pretty easy to follow. The double gauze was a bit of a challenge because it is fairly fluffy and thus hard to get nice sharp points, but I made it work. I regretted trimming the facing to 1/8 inch (as instructed), as it made understitching the gauze more difficult — next time I think I would clip the curve but not trim.
Other sewists complained that the V-neck gaps open — this seemed to be a big problem for larger sizes. Besides the gaping problem, people were complaining that the top was too loose, and some who tried adding the optional ties did not like the look. In addition, there were some complaints about the cap sleeve being too pointy. I suggested that the pattern designer offer a sleeveless option to address the cap sleeve problem, a suggestion she adopted. The pattern designer polled testers about some possible changes and a couple days later posted some new line drawings while she worked on revising the pattern.
I could see from the new drawing that I would need to start over to make the revised design. So I decided to go ahead and finish the top I had started in the mean time. I sewed on the “skirt” and was not happy with the look of the gathered front and back, which looked to me like a maternity top. So I took it apart and cut the gathered pieces down so they would fit in place without gathering. I also graded in the waist a bit and trimmed the point off the cap sleeves.
As the top stitching on the neck facing stands out in the double gauze I decided to mirror the look by making a hem of similar width. I serged the bottom of the top, folded it up .25 inch and then another 1.25 inch, and top stitched it from the front.
The last bit to figure out was the sleeve binding. The pattern included narrow bias binding strips, but the instructions did not detail how to attach them. Having done this sort of binding before for double gauze necklines (on my purple Alva top and my orange Meet You There dress) I had a good idea of how to do the binding and I knew it would be difficult with double gauze. Therefore i cut wider bias binding (1.75 inch) and attached it wrapped around the armscye edges.
I finished my Cassie V1 top before leaving town, and even managed to do a photo shoot. It looks great with my matching PE Vacation Vibes pants, but also looks good with other pants and shorts. it was fun to try out a new pattern and be involved in the discussion of what worked well and what needed improvement. I uploaded photos to the Facebook group right before the pattern designer posted the V2 pattern, but making V2 had to wait until I got back into town a week later.
Photos below of my hacked Cassie V1. The final Sinclair Cassie pattern is now available, and as you will see, no longer includes the crossover front or the horizontal seam in the back. But it still has the cute notches on the neckline and now comes with multiple sleeve options. I’ll post the top I created with the final pattern next.
Wow, I’ve sewn a lot of clothes! To make it easier to find my makes, I’ve put together this index page. You can look for garments by type, or by pattern maker. You can also use the search box in the upper right corner of this page to find more specific items.
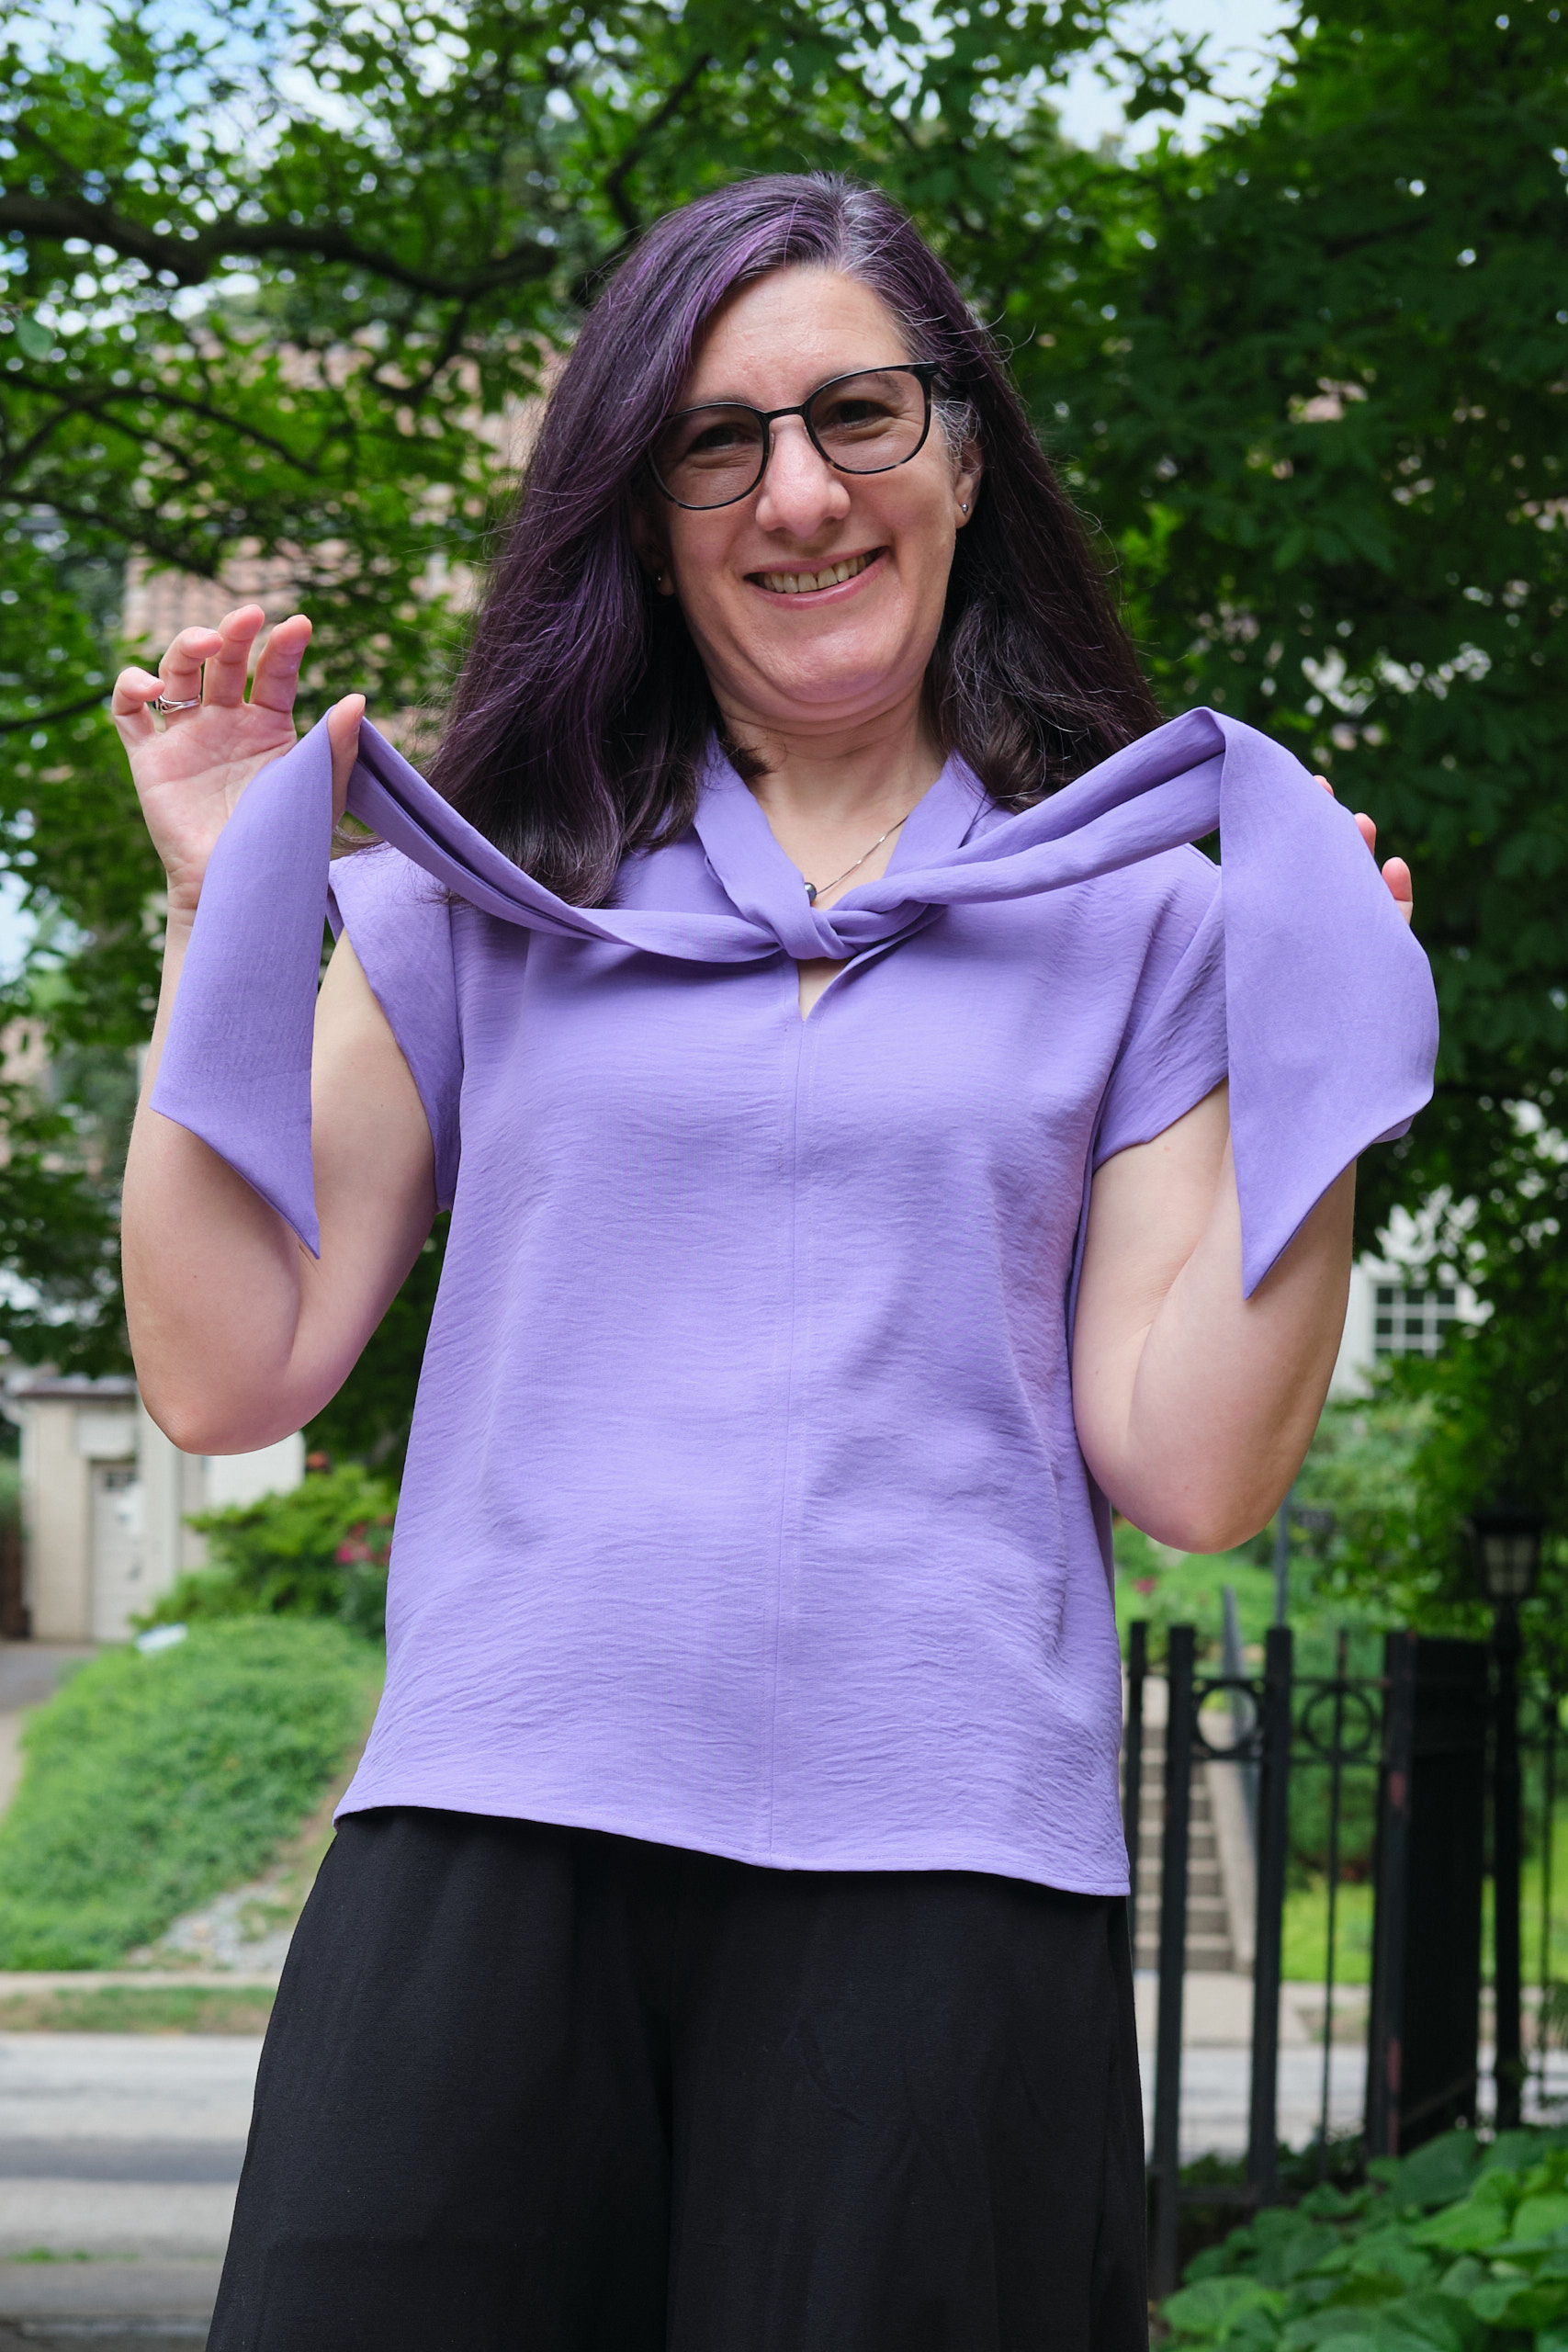
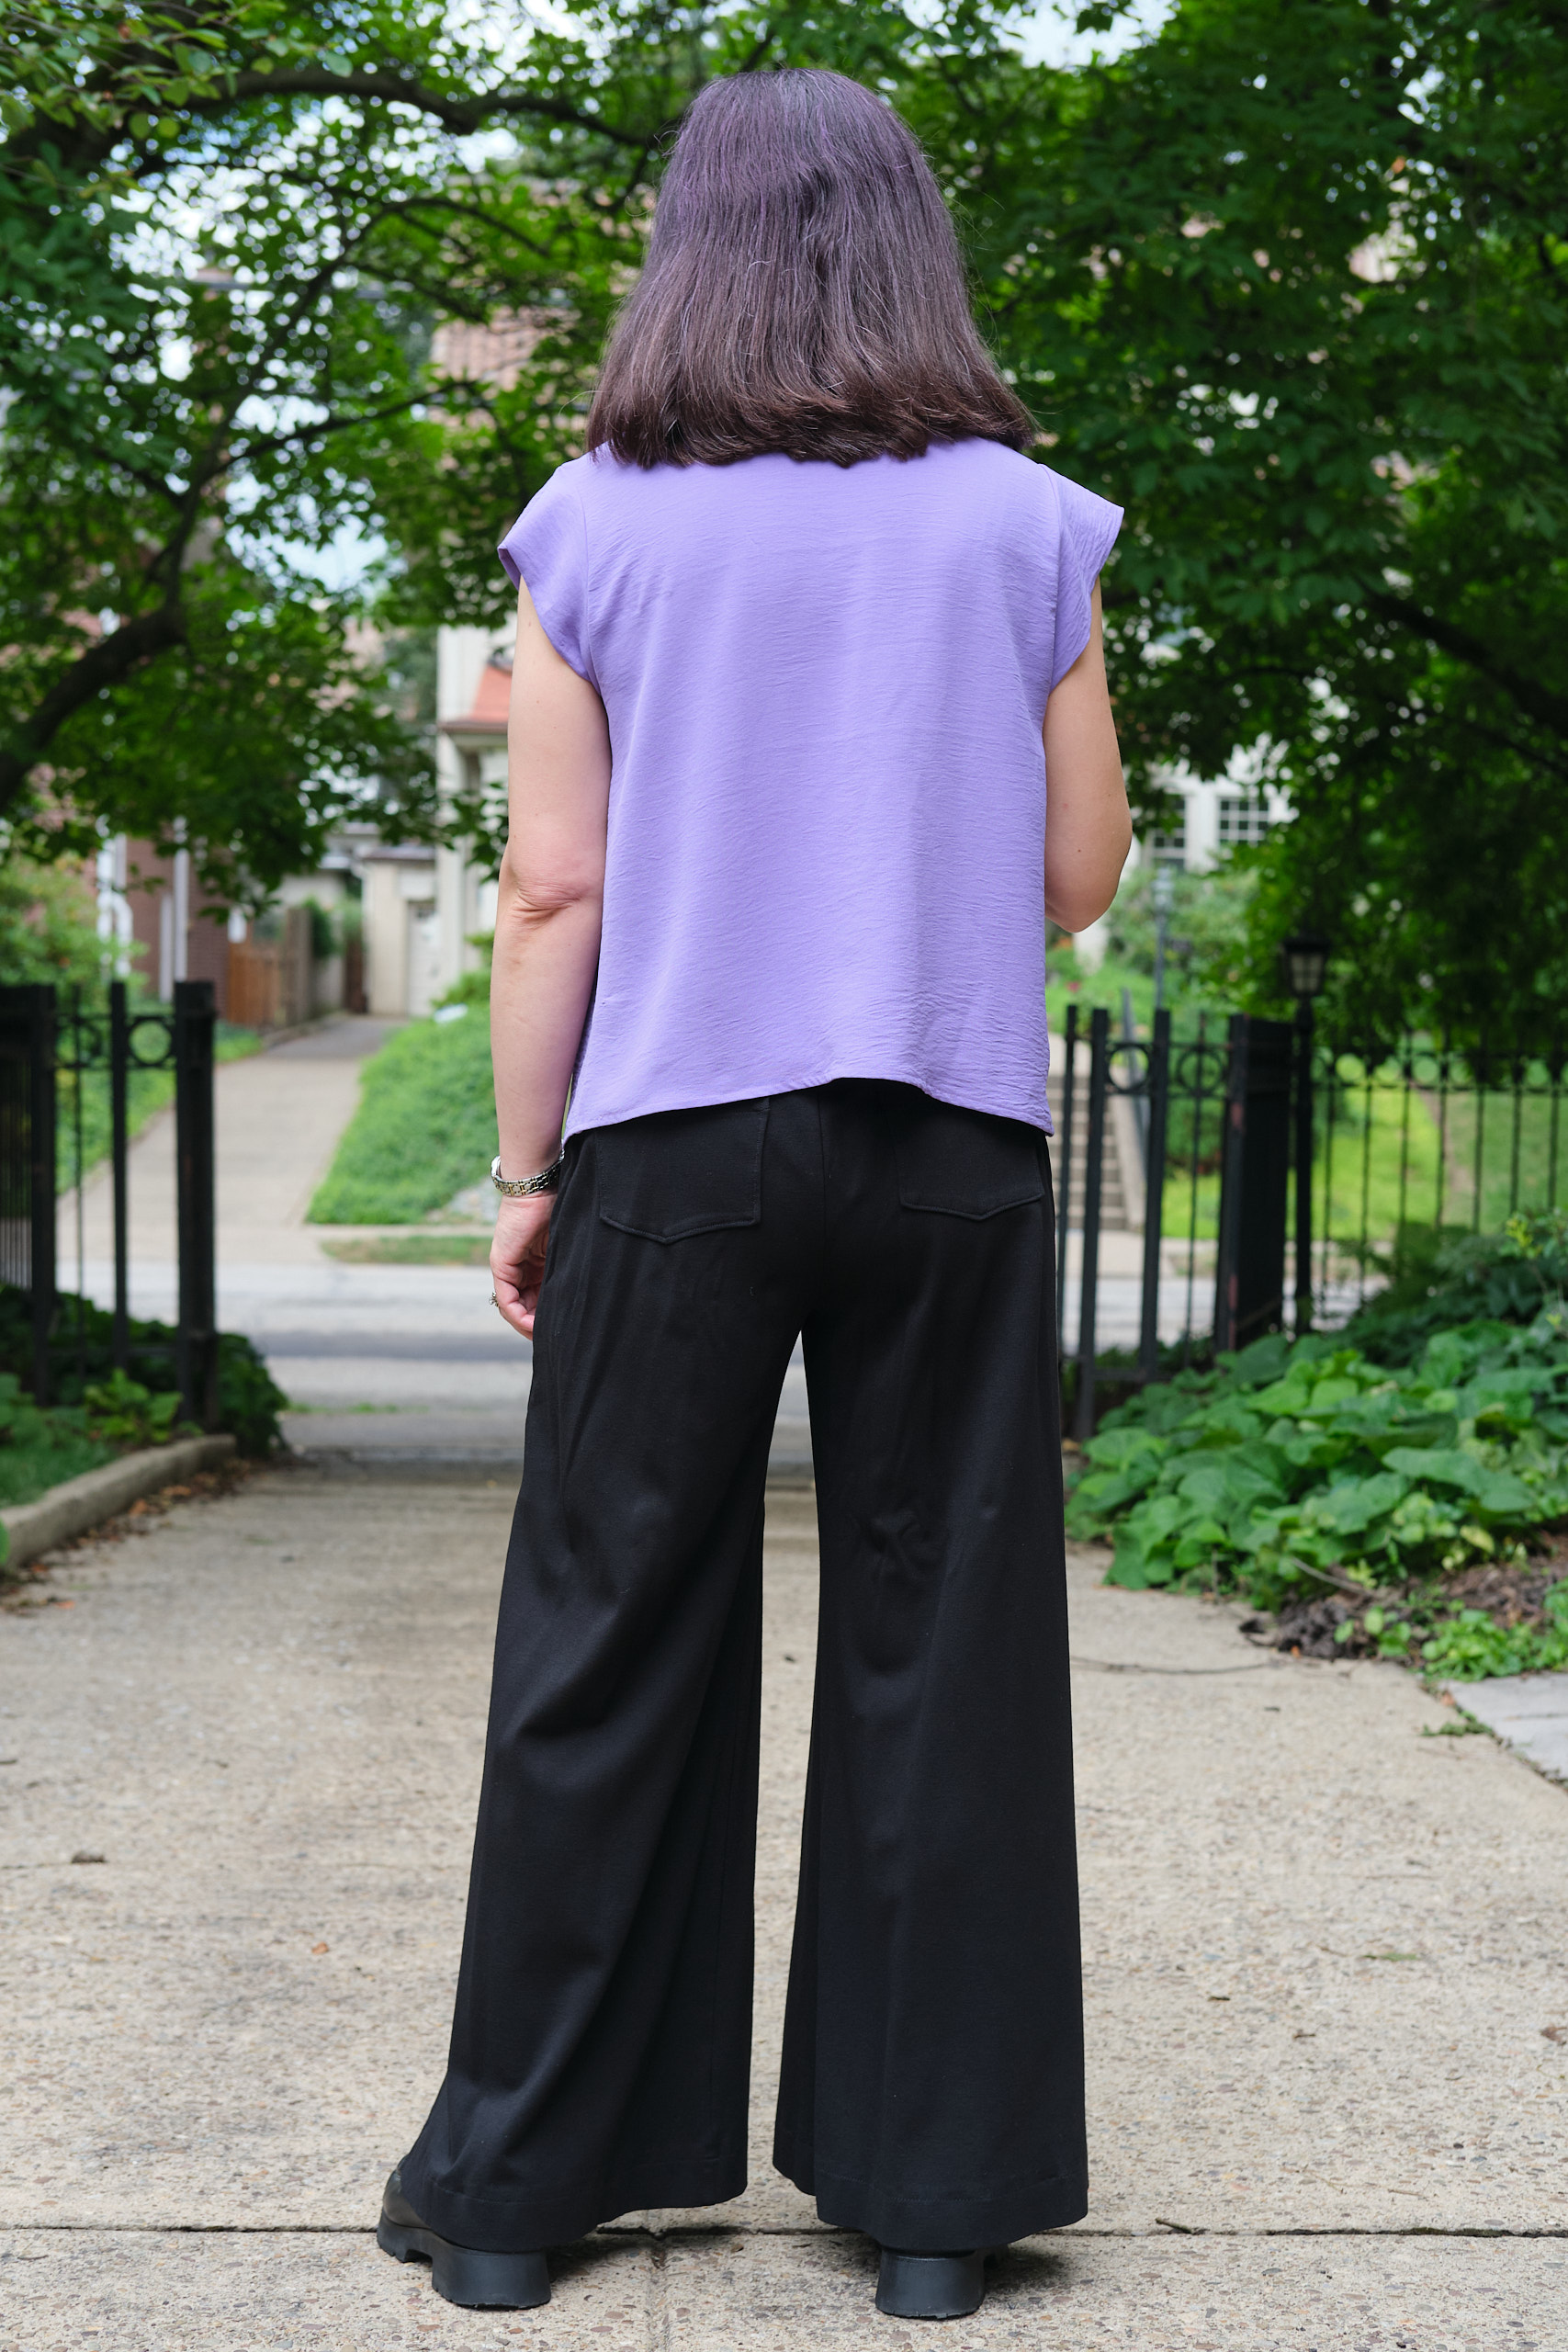
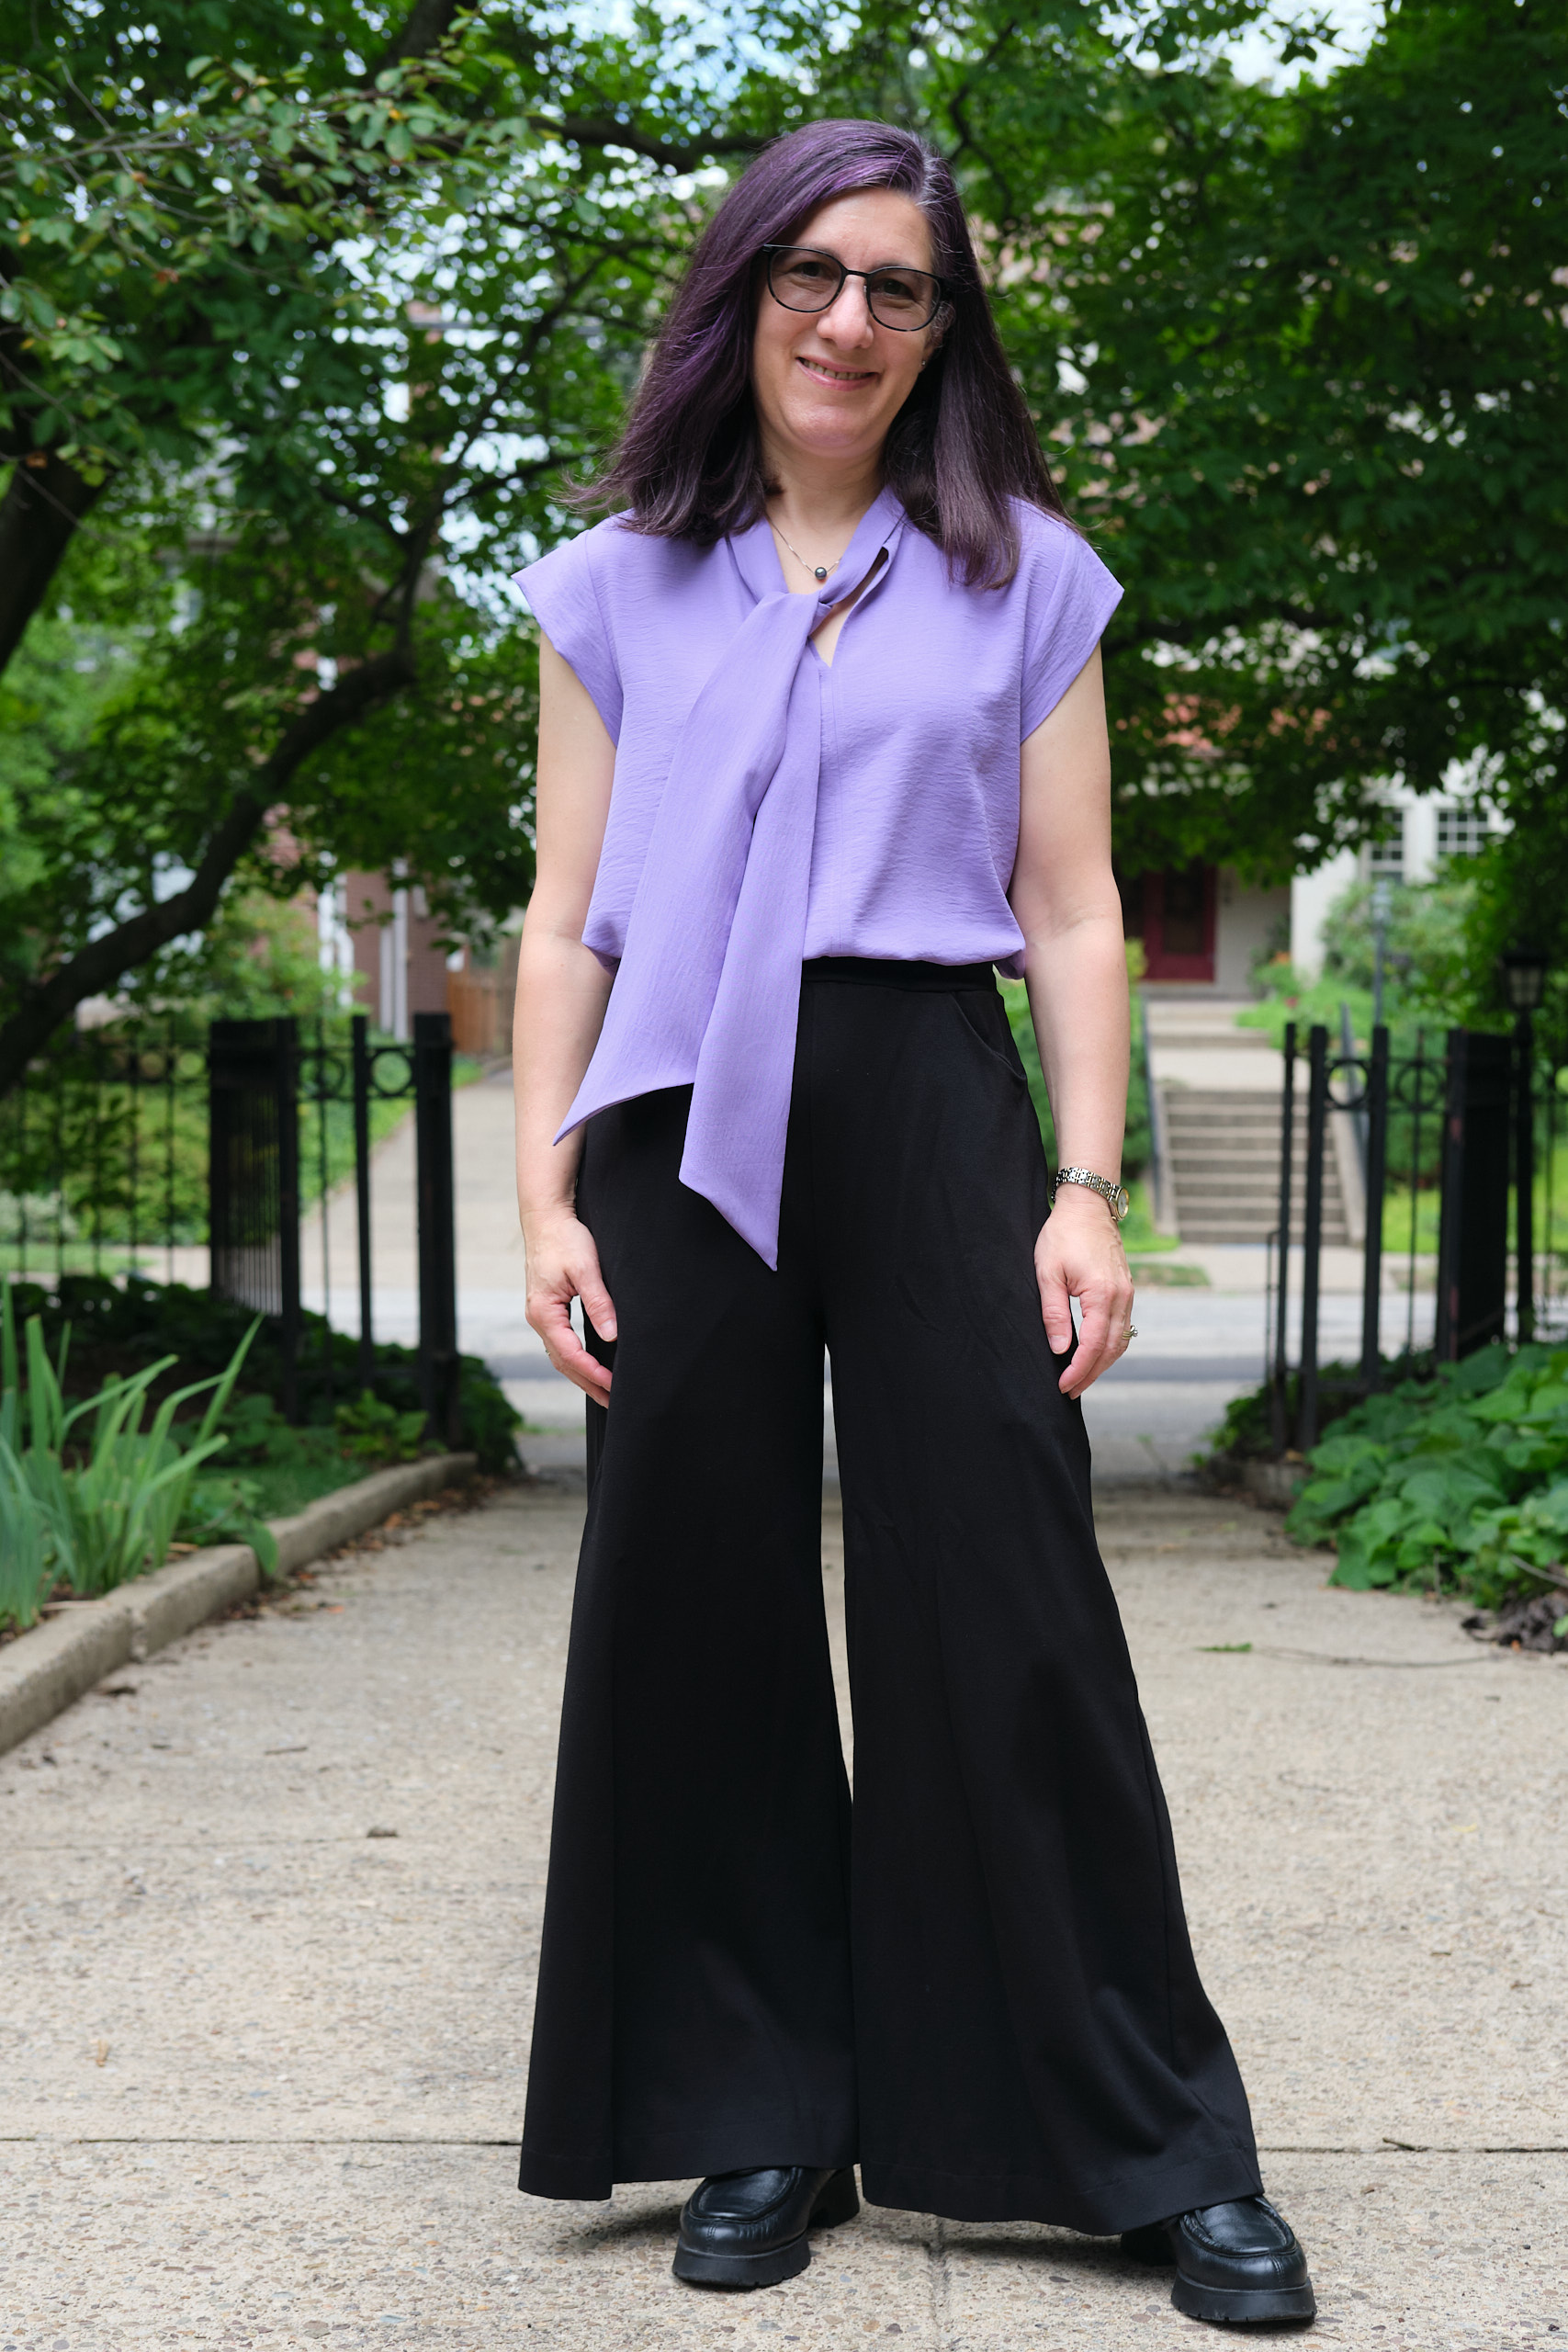
The Pattern Emporium Facebook group is filled with lovely Spill the Tea tie-neck blouses. I don’t own any tie neck blouses or even very many woven blouses, but I was intrigued by this pattern, especially the cute cap sleeve version. I normally shy away from any blouse that needs to be ironed or buttoned and has fussy collars or ties that I find always shift around and look sloppy when I wear them. This pattern doesn’t have buttons but I was a little bit uncertain about the tie.
I don’t have a lot of drapey woven fabric in my stash, but I found a couple of yards of medium weight 100% polyester Florence stretch woven in flourishing lavender than I bought last year from Surge, and decided to give Spill the Tea a try. The Florence fabric has a subtle crinkly texture and has a little bit of body but a very fluid drape. It doesn’t need to be ironed and it stretches a bit. The lavender Florence seemed perfect for this blouse, and it allowed me to get one more make with purple thread before changing the thread in my serger (my previous three makes were an Alva double-gauze purple top, Nori purple batik quilters cotton pants, and Be Mine purple double-gauze jacket).
I selected the regular length with the shorter tie and opted for the cap sleeves. I proactively added a 1/2-inch sloped shoulder adjustment and raised the center front opening by 1 inch (both adjustments that I tend to need). I finished the bottom hem by serging the edge and folding it under 1/4 inch twice and top stitching.
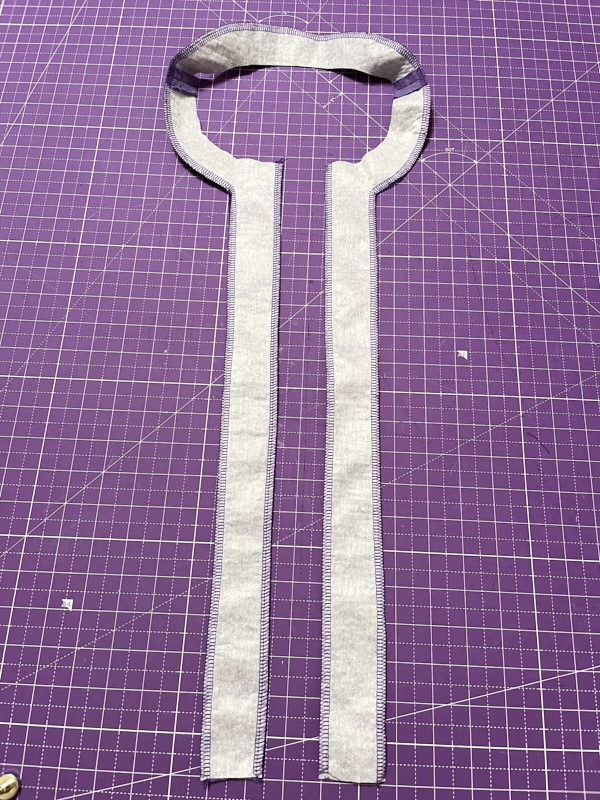
The Florence fabric is a bit slippery and made this pattern more challenging. It does hold a press, but takes some effort. The edges start fraying fairly quickly. I made a number of sewing mistakes that required unpicking and resewing, but in the end everything worked out ok. My good sewing machine is still in the shop so I’m using my backup machine, which adds to the challenge. When I sewed the front center seam, I don’t think I used a full 5/8-inch seam allowance, and thus when I turned under the seams and tried to top-stitch them at 1/4-inch, the turned-under seams were slightly too small. I should have serged those edges before turning them under to make sure the turned-under edge was more than 1/4-inch. I also accidentally sewed one of the cap sleeves on inside out (nobody to blame but me for this). The tie assembly is clever and a little bit tricky, and I managed to sew too far into the burrito and sewed the opening closed. But I recovered from all of these mistakes. I did take the advice to hand baste the cap sleeve edges together, and I was glad I did. I was also glad to have a serger to clean up all the fraying edges. With all those mistakes, the pattern wasn’t as much of a quick sew as it should have been.
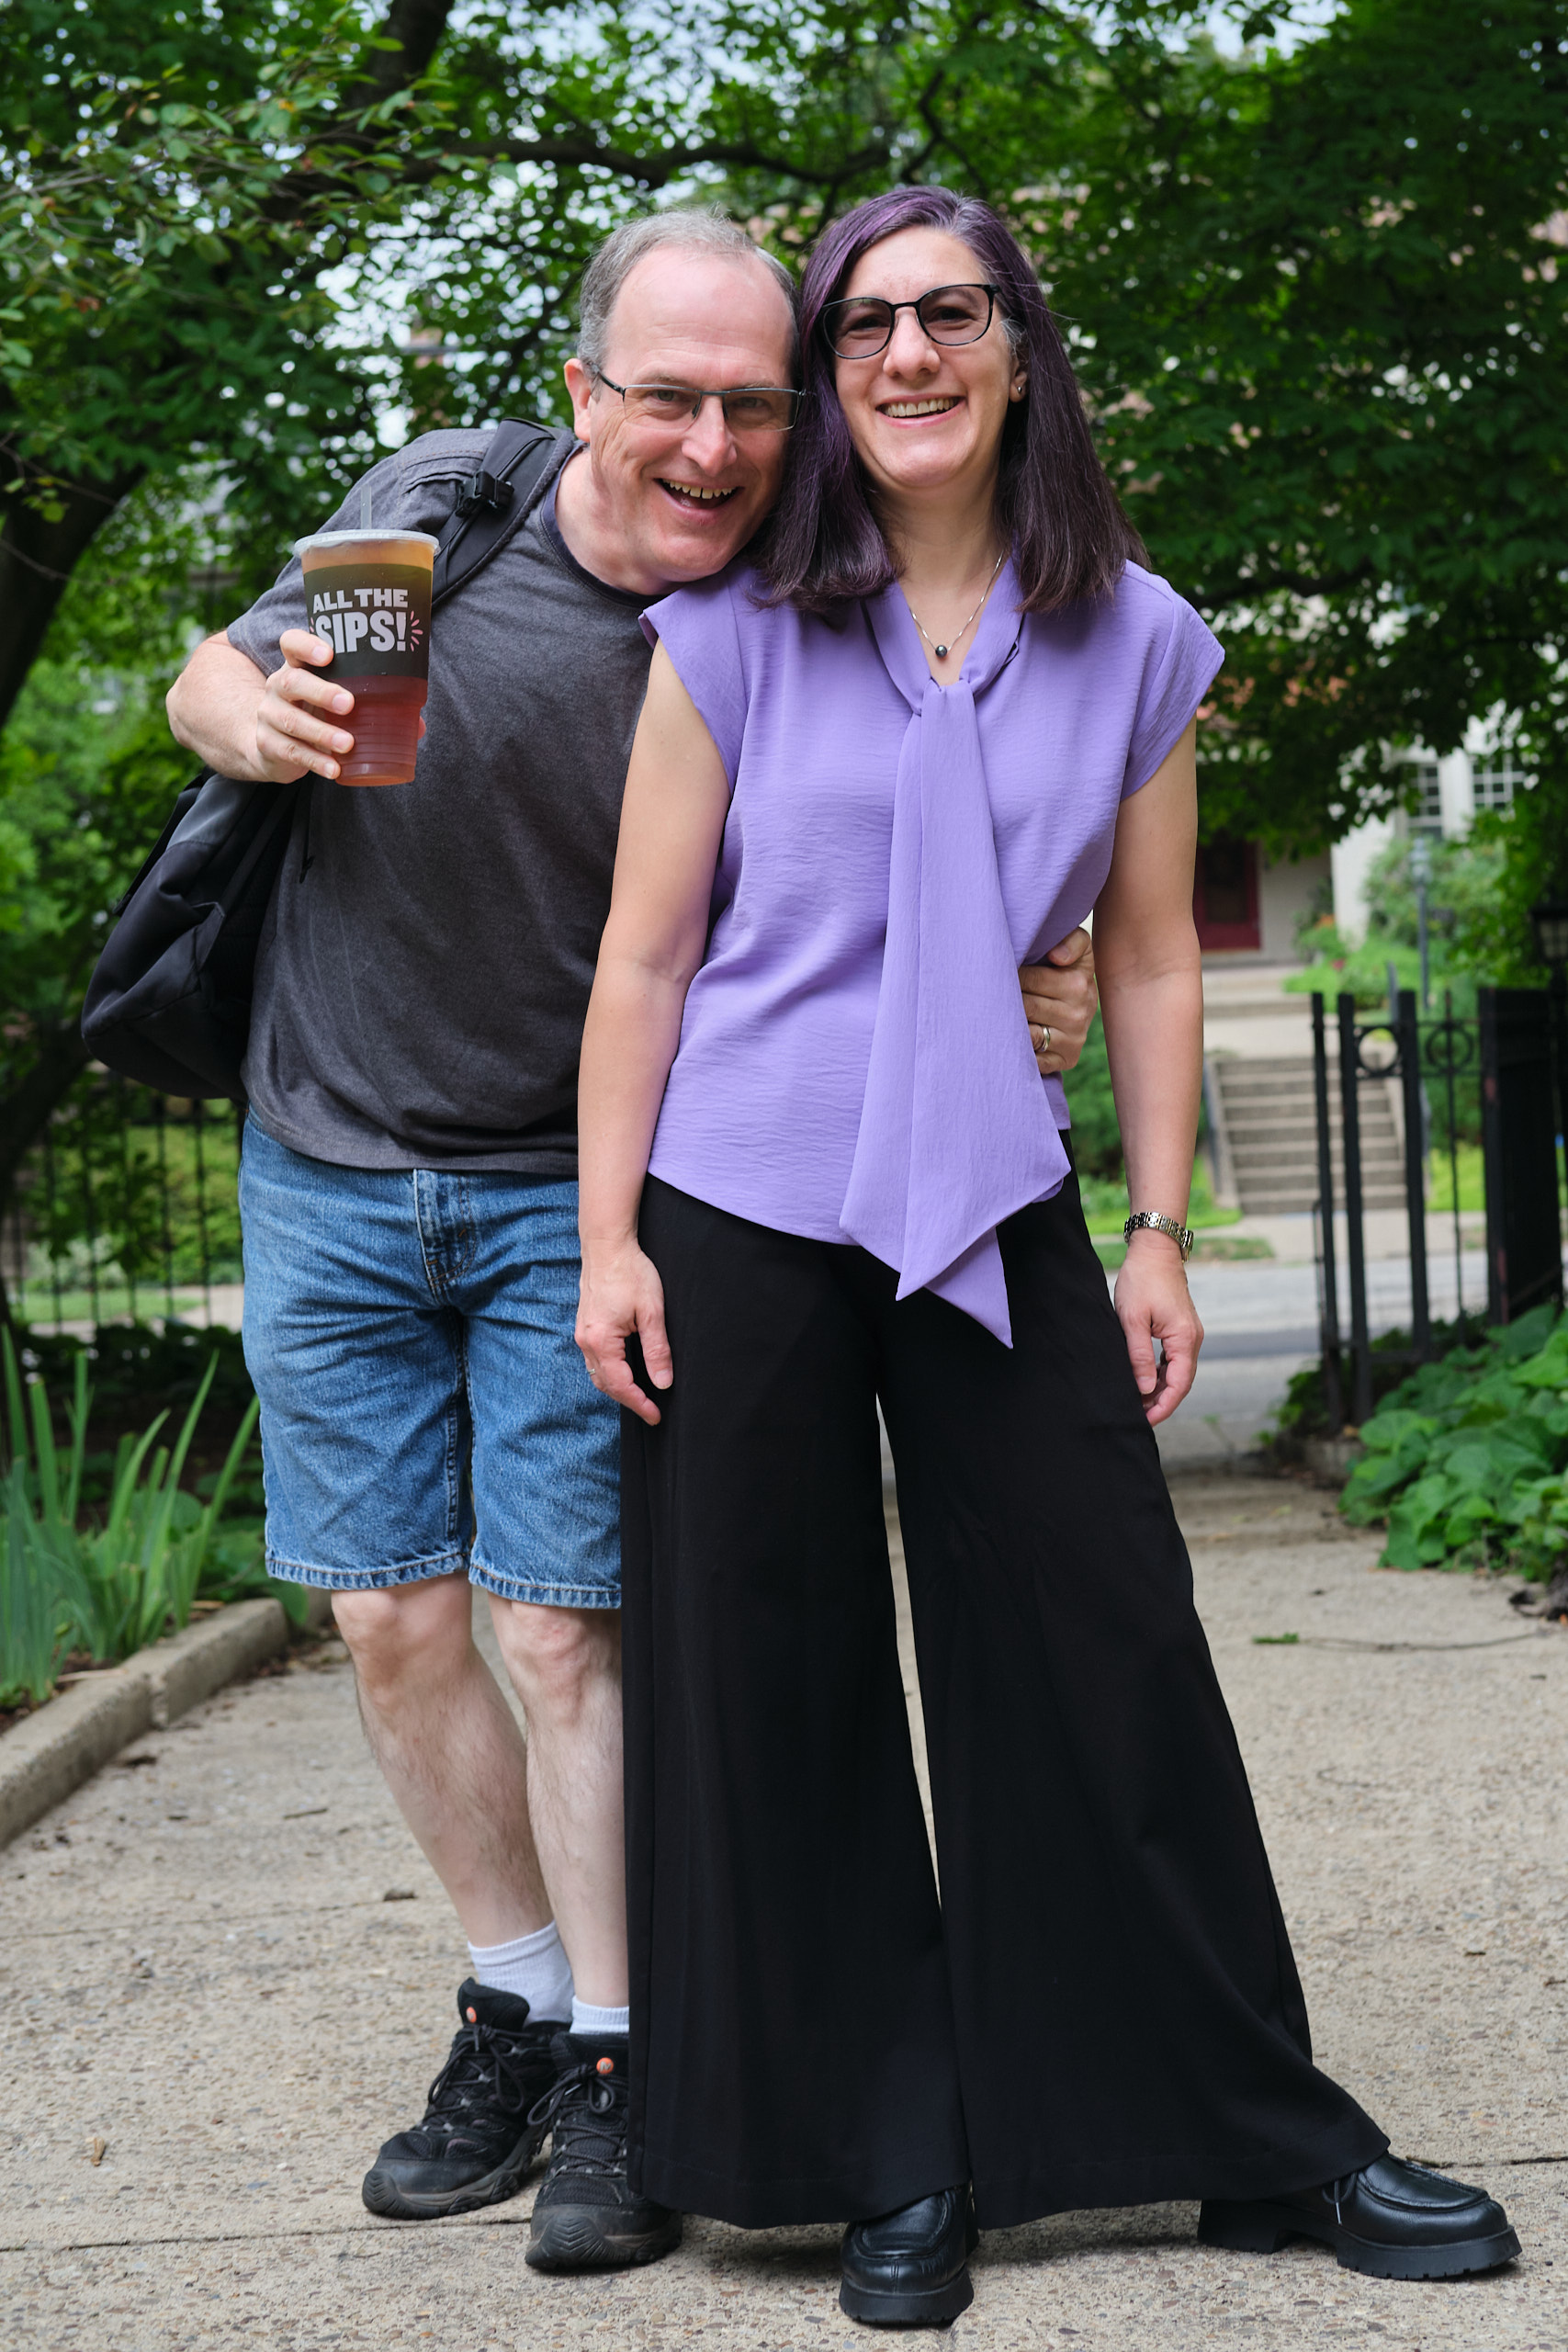
Despite the mistakes, the end result looks great and has a very professional-looking finish. I really like the folded cap sleeves (no hemming required), and may used them on other patterns. It looks good both tucked in and untucked. We’ll see whether I end up liking tie-front blouses or not. I see from photos that people are wearing the tie sloppy, so I guess that’s the thing to do. I found if I folded it in half before tying it was a bit less sloppy. It also looks good untied. I’m unlikely to wear it tied in a bow.
I don’t think I would sew with the Florence fabric without a serger or a pattern in which all the seams were enclosed. But I like this fabric a lot: drapey with body, a little bit of stretch, opaque, washable, and doesn’t require ironing. I will probably buy more and would like to try making some wide-leg pants with it (and possibly other tops or a dress).
Pattern Emporium Be Mine Balloon Sleeve top with jacket hack, size AU8, 1.5 yards cotton double gauze, high neck, regular length, wide facing, no button loop, sloped-shoulder adjustment
I love the Pattern Emporium Be Mine Balloon Sleeve top pattern but find it difficult to wear under a sweater, and even if it fits, a sweater would hide the beautiful sleeves. So when I saw that sewist Livia Jonker-Yamada had hacked Be Mine into a jacket, I was excited to give it a try myself so that I could wear it over a shirt. I waited for Liv’s promised blog post with instructions, but it never came so I figured it out myself.
I started with the size AU8 pattern, which is one size smaller than the size chart recommends but this is an oversized pattern and sizing down worked well for me on my first Be Mine top. I could probably go down one more size for a more fitted top. I used the high neck option so that the neck opening would hit above a scoop-neck t-shirt. I added a half-inch sloped shoulder adjustment as I did on my first Be Mine. I decided to make this jacket from purple cotton double gauze since I still have a lot left even after making PE Vacation Vibes pants and a Sinclair Alva top and I thought it would coordinate with a lot of things in my wardrobe. The double gauze is a good weight for a light summer jacket, it has enough body to help the sleeves balloon, and once you’re done sewing it doesn’t need to be ironed. Having previously experimented with both ironing and not ironing gauze before cutting and sewing, I am firmly on team wash and iron now, despite the fact that ironing the wrinkles out of a couple of yards of double gauze is fairly tedious.
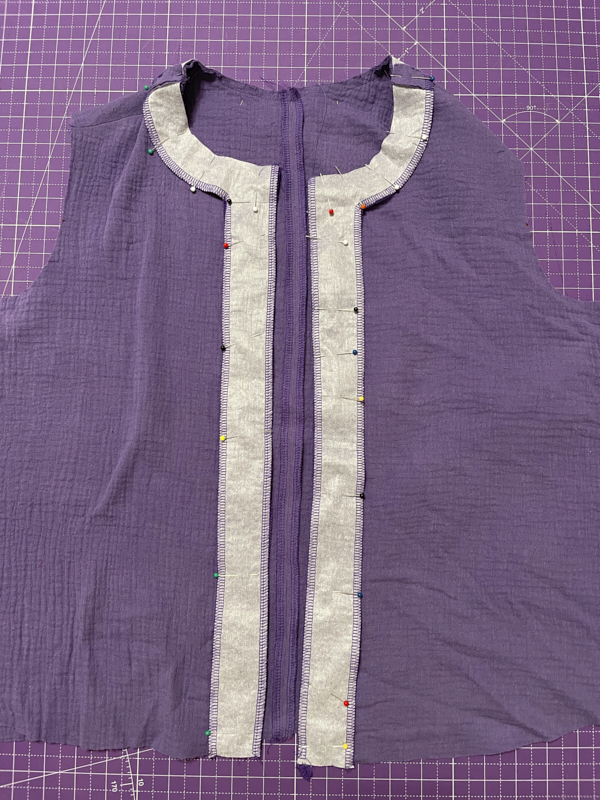
Most of the hack is pretty obvious: you follow the instructions for eliminating the back button, sew the back pieces together, and then you don’t sew together the two front pieces. The tricky part is what to do to have a nice clean finish on the jacket front openings. It looked to me like Liv split the neck facing and added vertical strips to it to face the jacket opening edges. I couldn’t work out exactly what she did where the front edges met the wide hem facing so I improvised a bit.
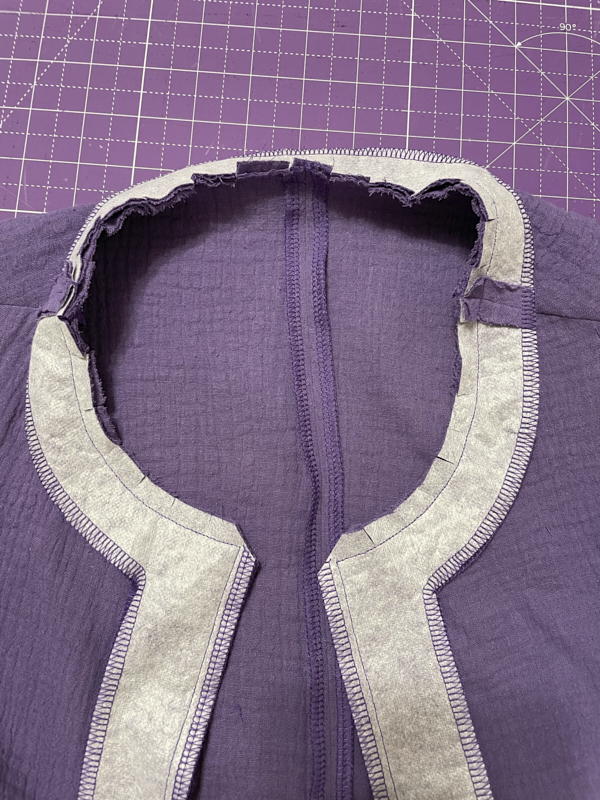
In the photos below you can see the split neck facing sewed to the merged back facing on its owned and pinned to the bodice. When I split the front facing, I made sure to add my 3/8-inch seam allowance to the split on both sides. The vertical facing is 1 3/4 inches wide and runs the length of the top. I decided to cut neck and vertical facing as a single piece to avoid the need for a joining seam. I used Heat n Bond Ultra Lightweight Fusible Interfacing and fused it to a piece of gauze before cutting out the facings. After I sewed the front and back facings together, I serged around the outer edges and also along the inner edge of the vertical pieces. That last bit of inner edge surging probably wasn’t necessary.
After I finished sewing on the neck and vertical facings I clipped the seam allowance around the neck as per pattern instructions and trimmed the corners to make it easier to turn them under. Then I understitched and top stitched according to the pattern instructions. It was impossible to understitch all the way into the corners, as you can see in this photo, but that didn’t seem to be a problem. I did the topstitching all in one go, from the bottom, up one side of the front, around the neck, and back down the other side of the front, pivoting at the corners. I used an edge foot for all the top stitching and under stitching.
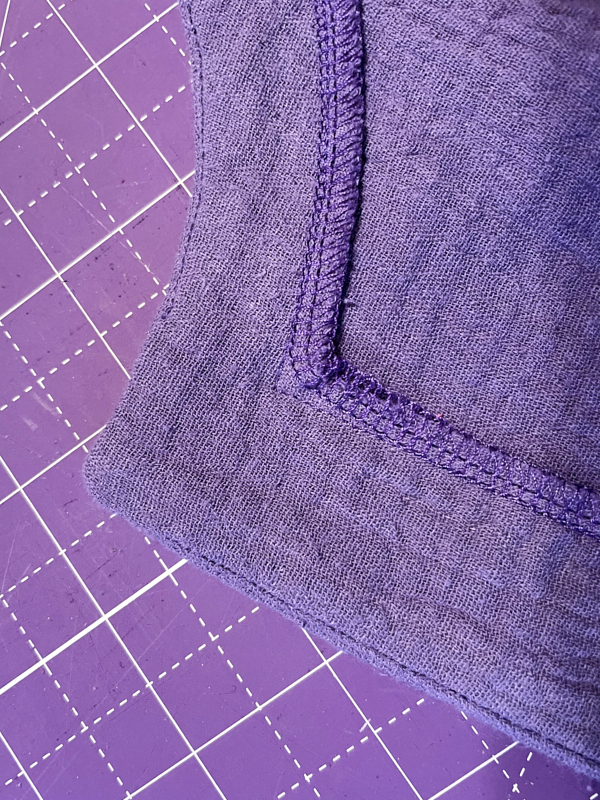
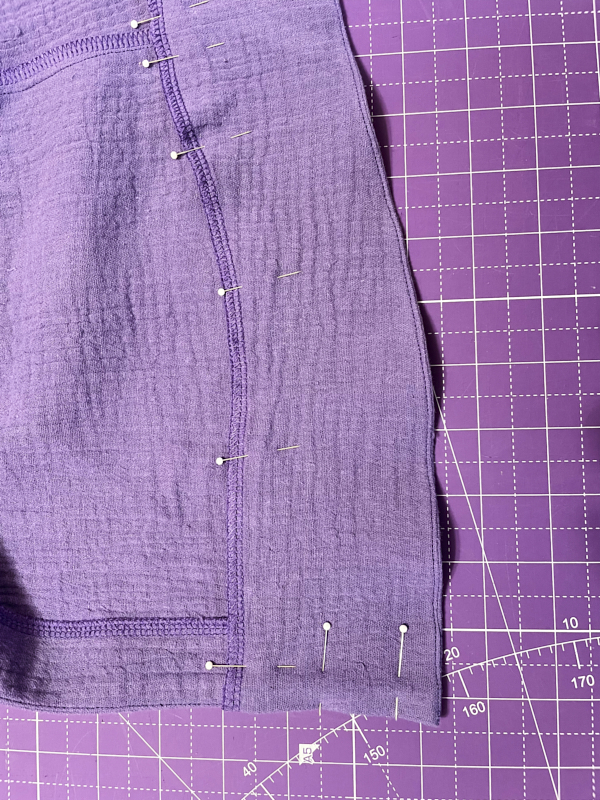
Then I added the sleeves (hand basting the sleeve bindings so the gauze would behave), closed up the sides, and turned to adding the wide bottom hem facing. I split the front hem facing piece in half, adding 3/8 inch seam allowances to the inside edge of each piece. Then I sewed the front hem facing pieces to the back hem facing pieces and serged the top edge. I pinned the facing to the bodice, folding in the seam allowance. I sewed everything together and understitched following pattern instructions. Then I top-stitched just below the serged edge at the top of the hem facing. Finally, I was left with the unsolved problem of what to do with the unstitched 3-inch edges where the hem facing meets the bodice on the jacket opening edges. I decided to whip stitch that closed by hand, which seemed to have worked well.
I decided not to add buttons as I rarely button jackets (and I’m still a bit afraid of button holes). I’ve recently read that tie-front tops are quite fashionable right now, so I thought about adding ties, but decided I was unlikely to actually tie them (or wear them fashionably without a shirt underneath), so I left the jacket with no closures. As a result, it was a little tricky getting the neck openings aligned for the photographs, but they mostly stay in place.
The jacket looked neat and crisp, but since I will never iron it again I threw it in the wash to see how it would look crinkled up. When I took it out it looked great except for the center back seam, which didn’t lie flat because I forgot to top-stitch the seam allowances in place. After a quick trip back to my sewing machine to topstitch, the jacket was complete. That was yesterday, and today I wore my new jacket to work with the PE Heartlight skirt that I sewed last summer. When the outdoor temperature cools down a little I expect I will wear it a lot with wide-leg pants.
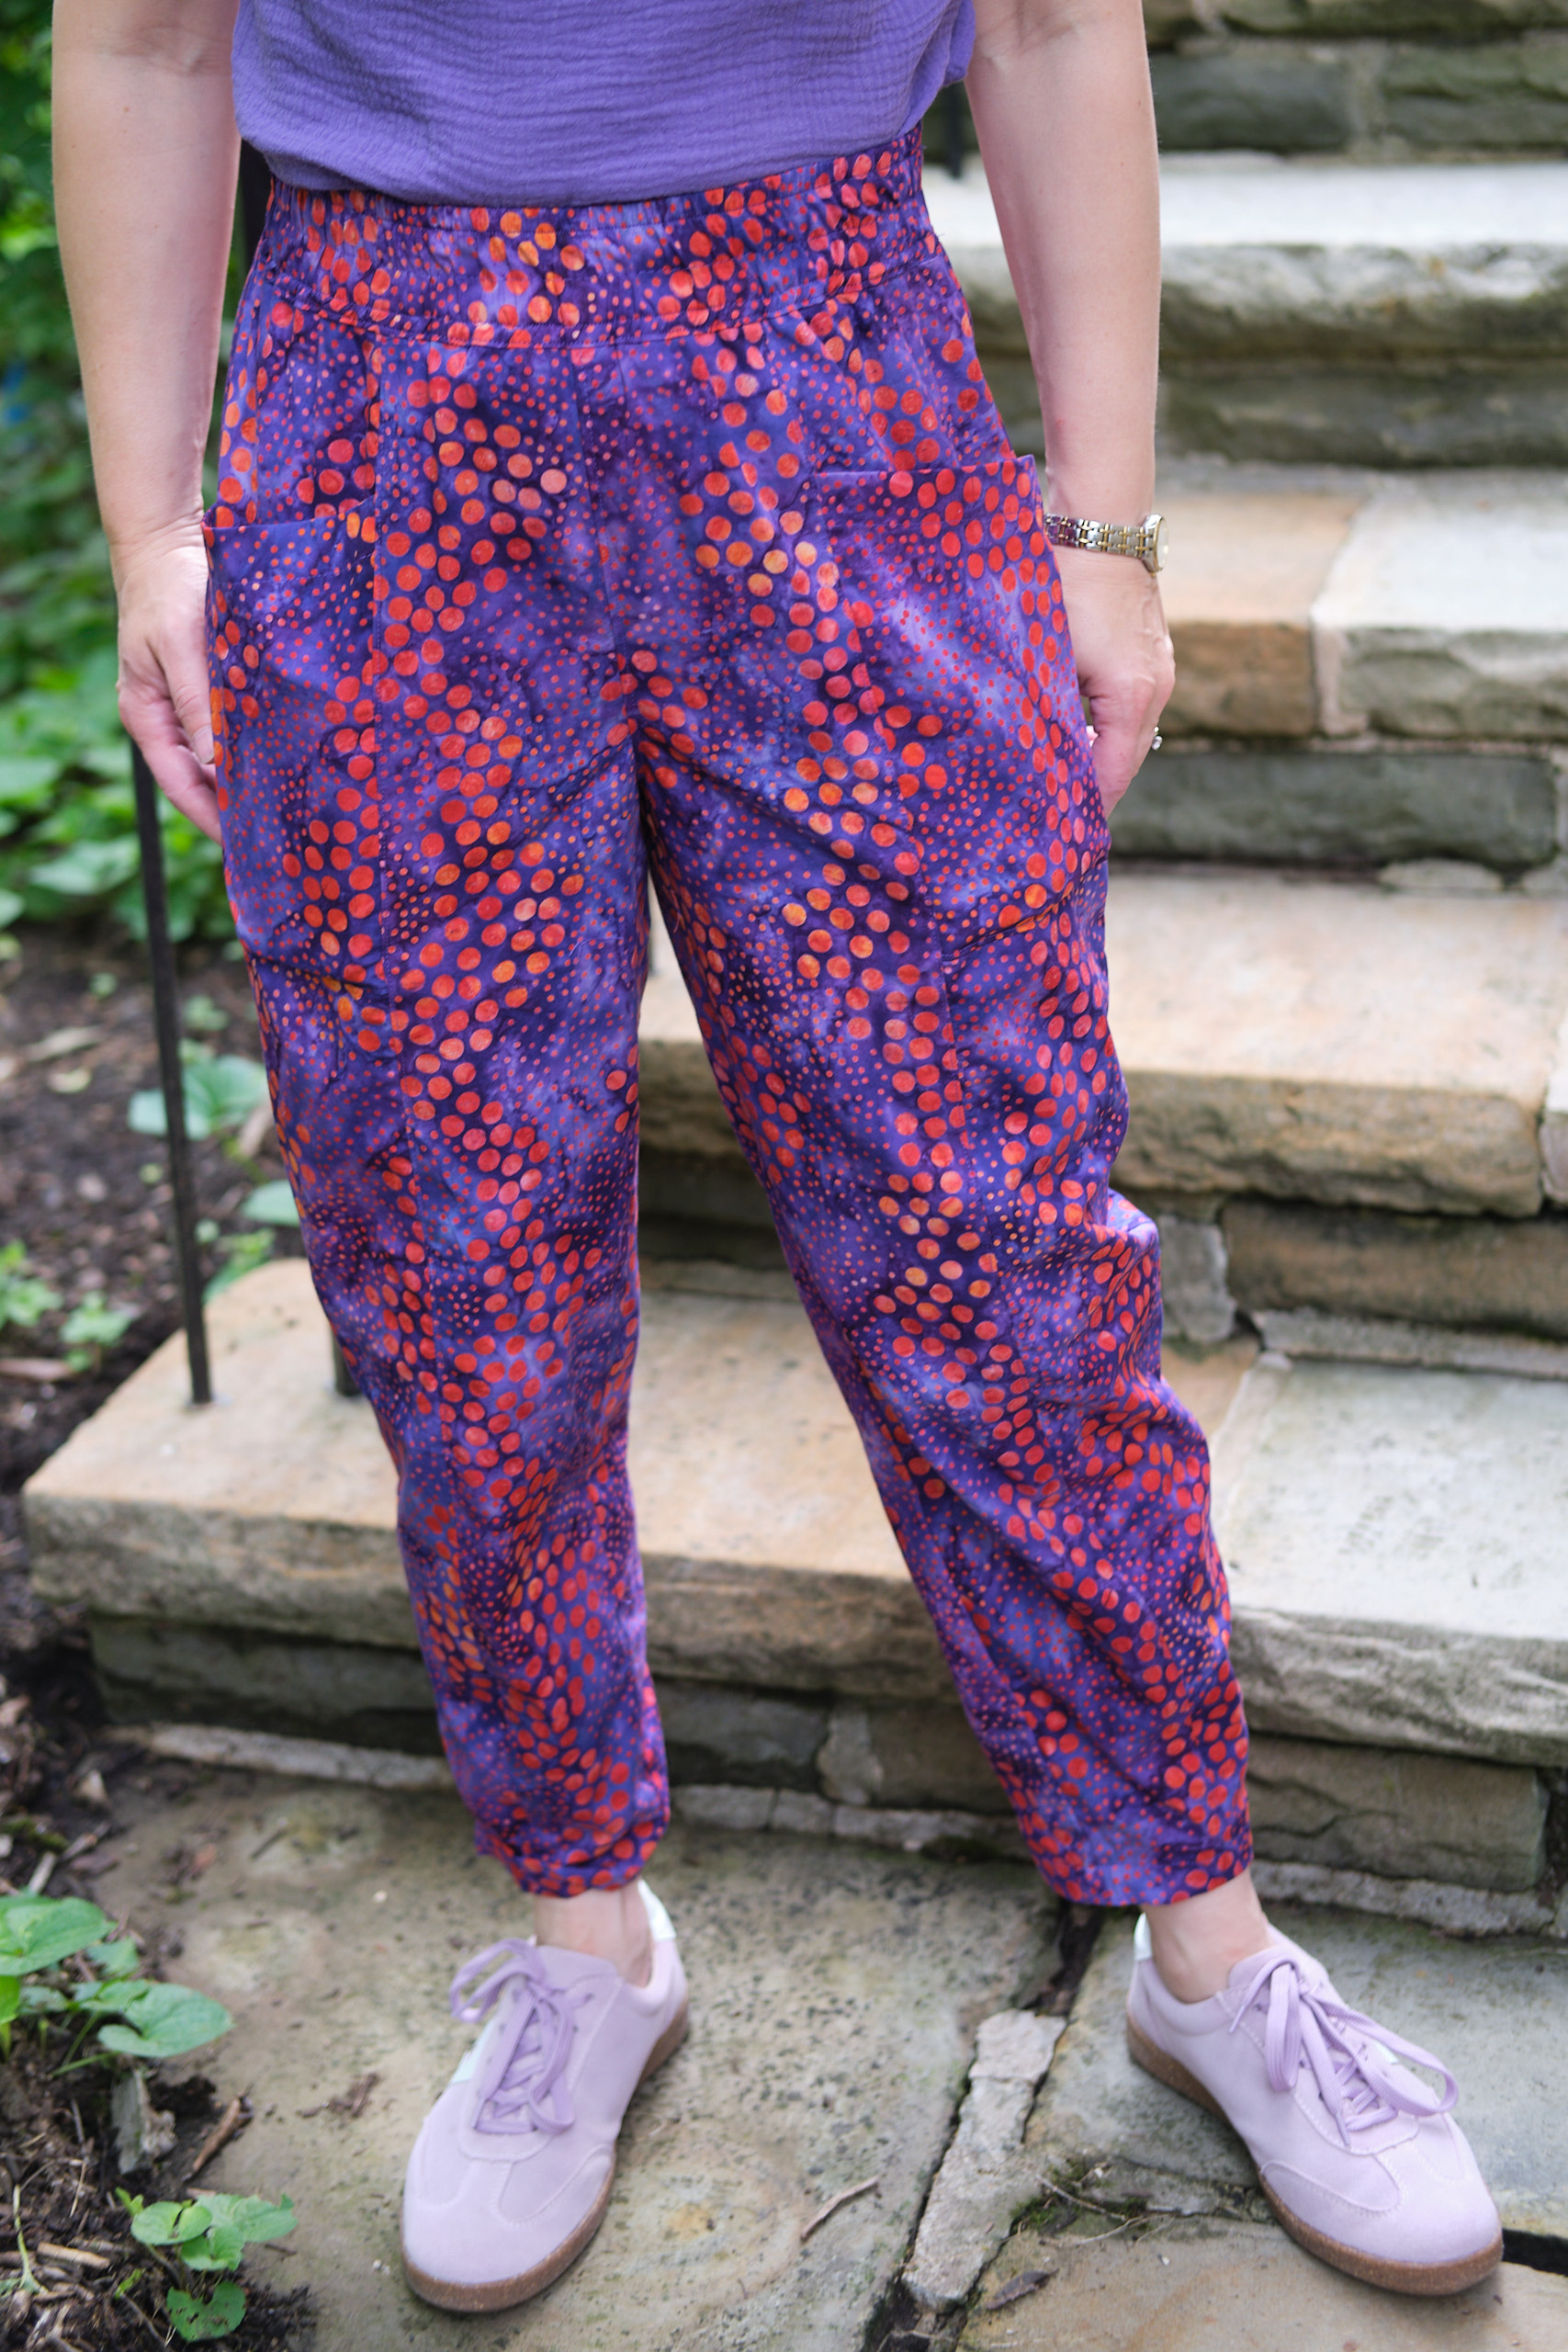
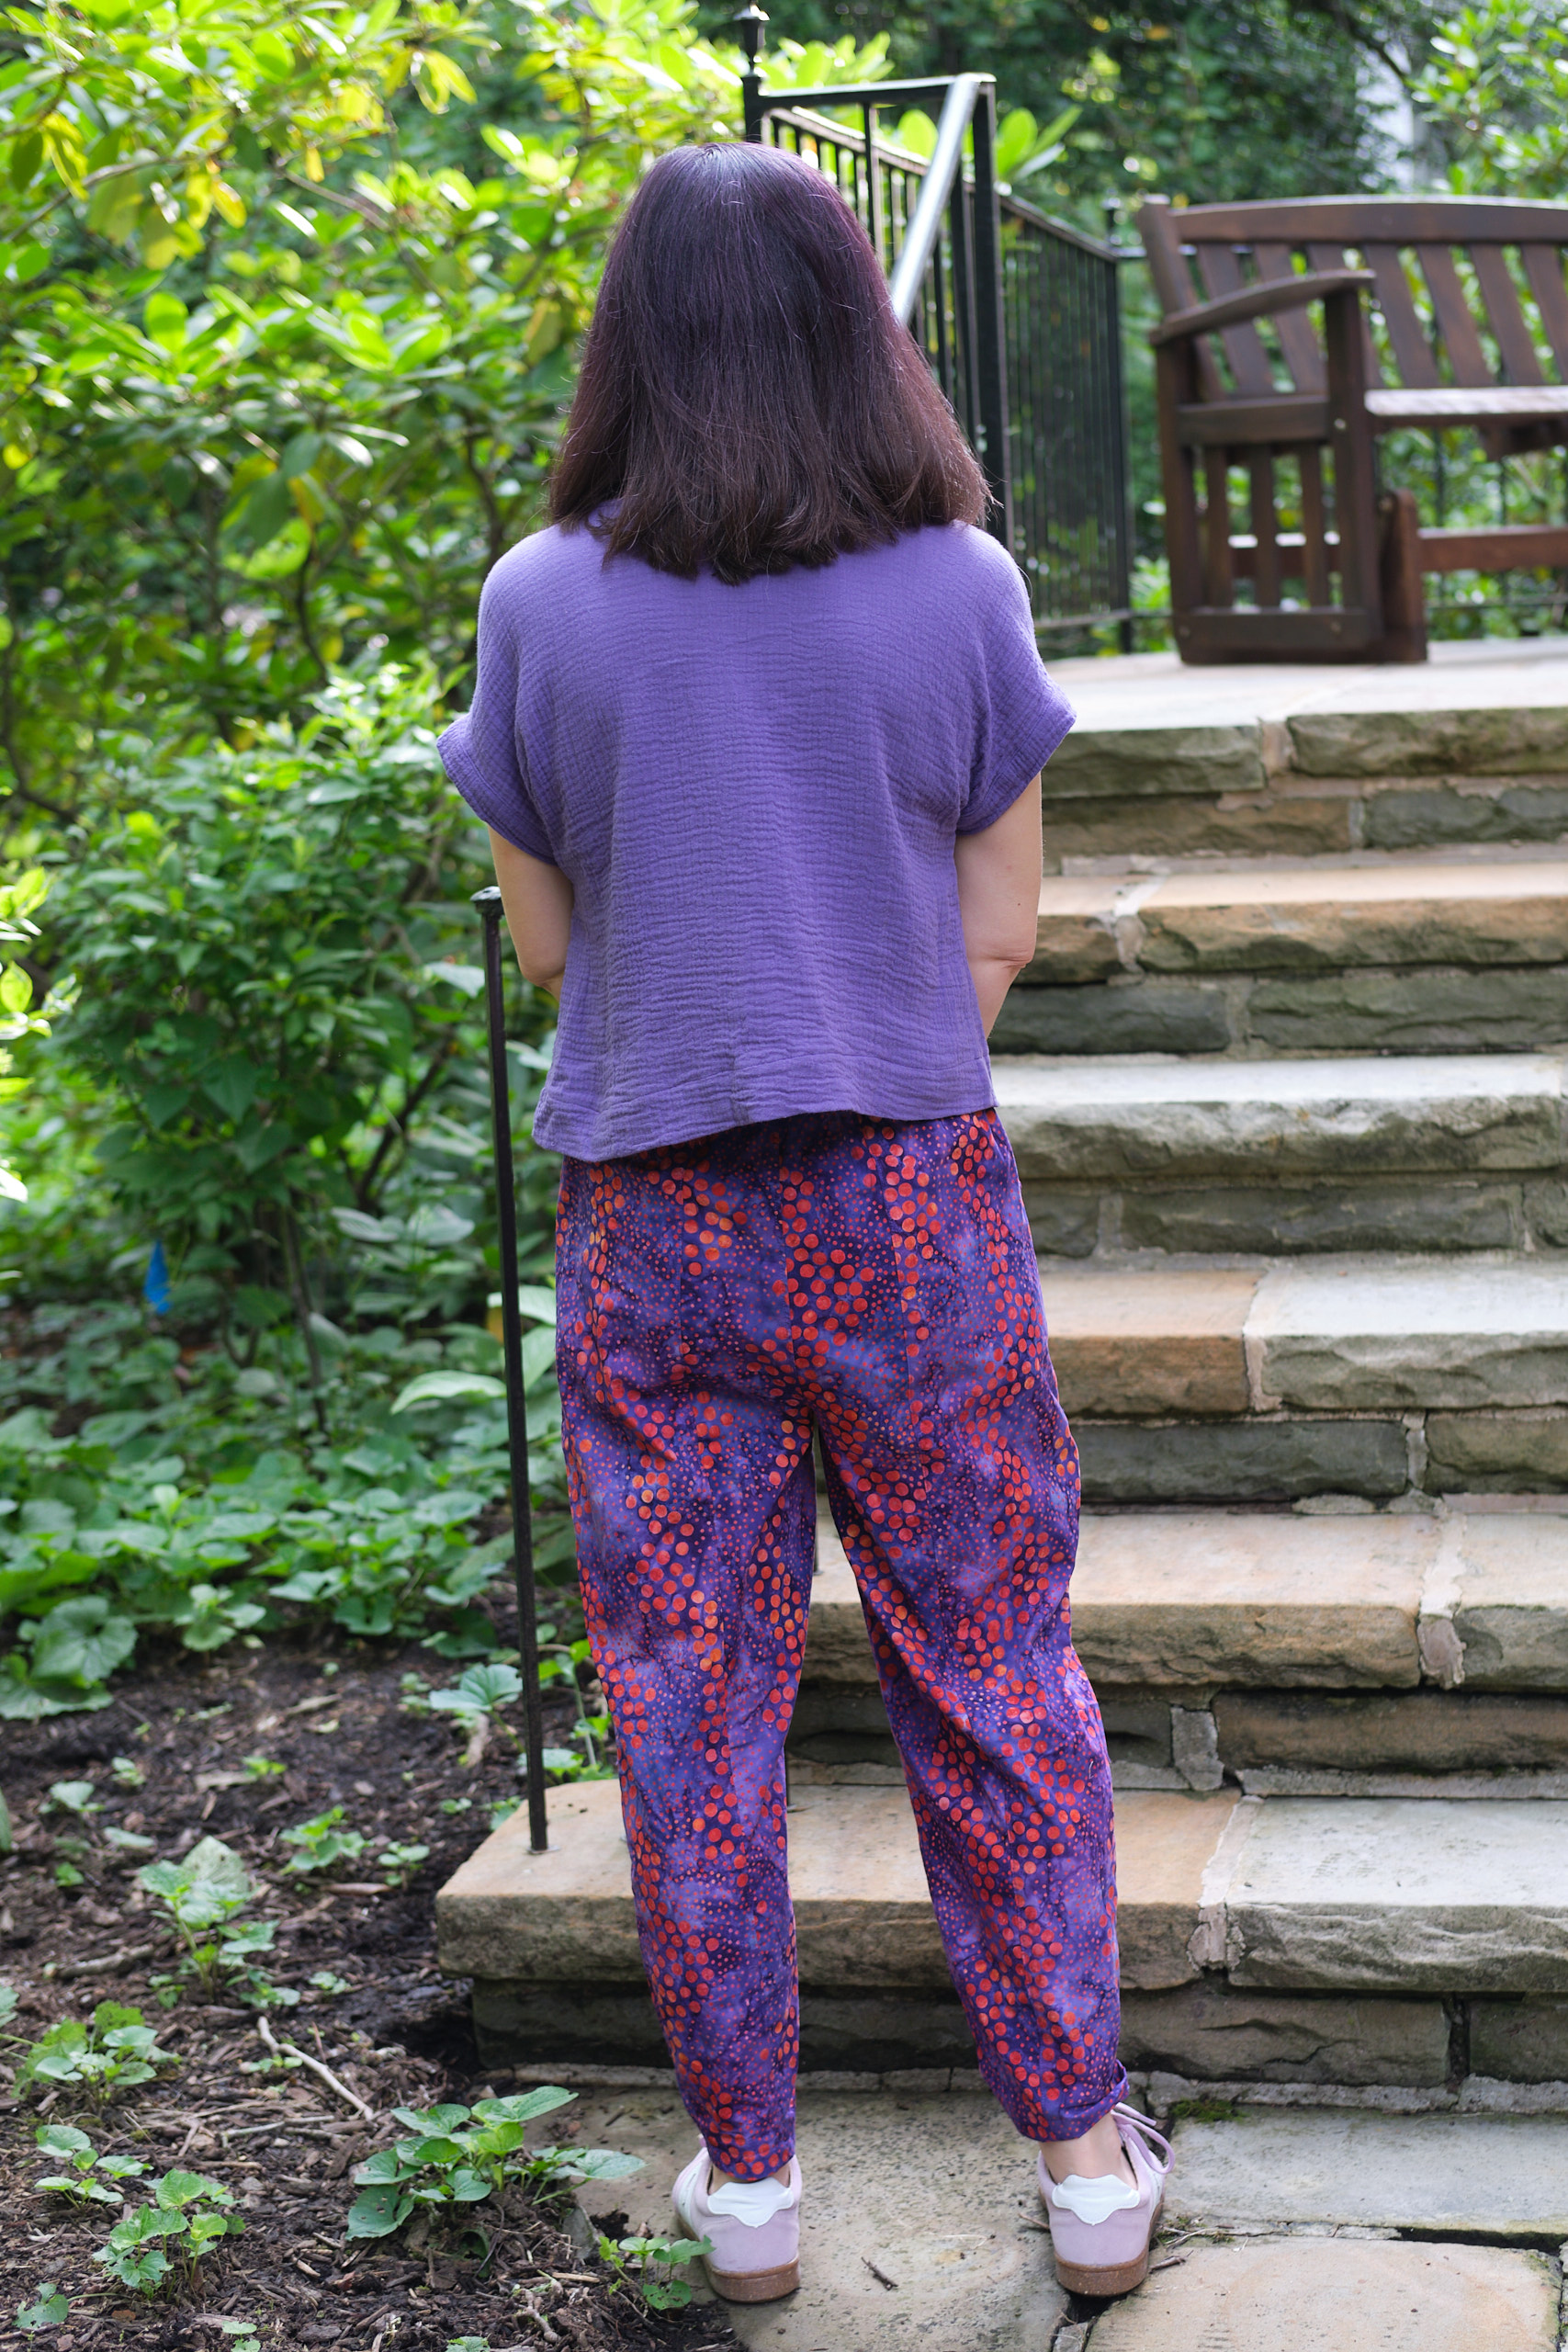
I’ve never sewn pants out of woven fabric, but I liked the peg-leg (almost barrel leg) style and pocket style on the new Sinclair Nori Woven Peg Trousers so I decided to give the pattern a try. I don’t have a lot of woven garment fabric in my stash, but the instructions said it worked with quilting cotton, and I do have a lot of that. I selected a fun batik fabric that I had several yards of, but I ended up needing only about 2 yards of it.
I cut out a size 6P and machine-basted it together to check the fit. I was very happy with the fit, but prefer a higher back rise. I reduced the seam allowance where the center back meets the waistband to increase the rise by almost half an inch (and I marked this on my pattern so that I will cut a higher back rise next time). Then I removed the basting and sewed the pants together according to the pattern instructions. Most seams were sewn on my sewing machine with a 5/8-inch seam allowance, then surged, and then top stitched. This process is much more involved than sewing knits, but it produces a nice finish.
I went with the 2-inch elastic option for the waistband. As there is no stretch in this pattern, the waistband casing is the same size as the top of the pants, and thus become quite gathered after you insert the elastic. To keep everything smooth, the instructions recommended adding three rows of stitching through the waistband. That was a little tricky to do while stretching the elastic and the stitching isn’t as consistent as I would have liked, but I got it done and it looks pretty good. It is also comfortable to wear. Here’s a photo with my shirt tucked in so you can see the waistband.
The pattern offers cuffed or hemmed options. I went with the simple hem.
The pants are very comfortable but don’t look sloppy. And the pockets are plenty big and I love them! I expect I will enjoy wearing these pants and will probably make more in other fabrics. I would like to try these in chambray and perhaps a lightweight stretch woven. It would also be fun to try a colorblocked version of these pants.
My Bernina 440 QE sewing machine has been giving me trouble for a while, and in the middle of this project I got so frustrated with it that I packed it up and got my old Viking 500 out from under the table, wound a bobbin, and used it to finish the project. There’s a reason I’ve kept it all these years. Now I just need to find someone in Pittsburgh who will fix my Bernina.
Next, I decided to make a purple Alva top to go with the pants (and lots of other things in my wardrobe). Recall that I bought 18 yards of cotton double gauze when it was on $3/yard clearance last summer. This top used up less than a yard of it! Before I started cutting I ironed a 3-yard piece of it, so now I need to find something else to make with the rest of the ironed piece.
After reading comments from other sewists on the small end of the size range that the Alva top runs large, I sized down to a P2 (normally I would make a P4 or P6 in Sinclair tops). I cut the A/B cup version with a small dart, but I’m not sure the dart is actually needed for those with small busts and it doesn’t hit me in quite the right place. I will try modifying the pattern to leave it out next time.
I sewed this top entirely on my regular sewing machine without using my serger (which was sad because I had to use my Viking, which is actually a fine machine, but doesn’t have some of the conveniences I have grown accustomed to). This pattern includes instructions for French seams. I’ve never sewn French seams before, but this seemed like an easy pattern to try them on. They are more work than serging the edges, but they do give a nice finish and weren’t that hard to do. I managed to do the collar binding more neatly than I did on my double gauze dress last month, largely because I followed the advice to hand baste the binding in place (that made it much easier).
I decided to use the deep hem option but wasn’t sure whether to go higher or lower. I cut the lower option. When I tried it on before hemming I decided I liked the lower option better so cut off the bottom two inches before hemming. I also debated plain sleeve openings or adding cuffs, and in the end added the cuffs for a more finished look.
Overall I’m happy with the Alva top, and it does go nicely with my Nori pants and the wide leg pants I made out of the same fabric. With this fabric, the Alva doesn’t drape all that well, and it tends to hang away from my body, especially in the back. This might be less of an issue with the longer hem length or a more drapy fabric.
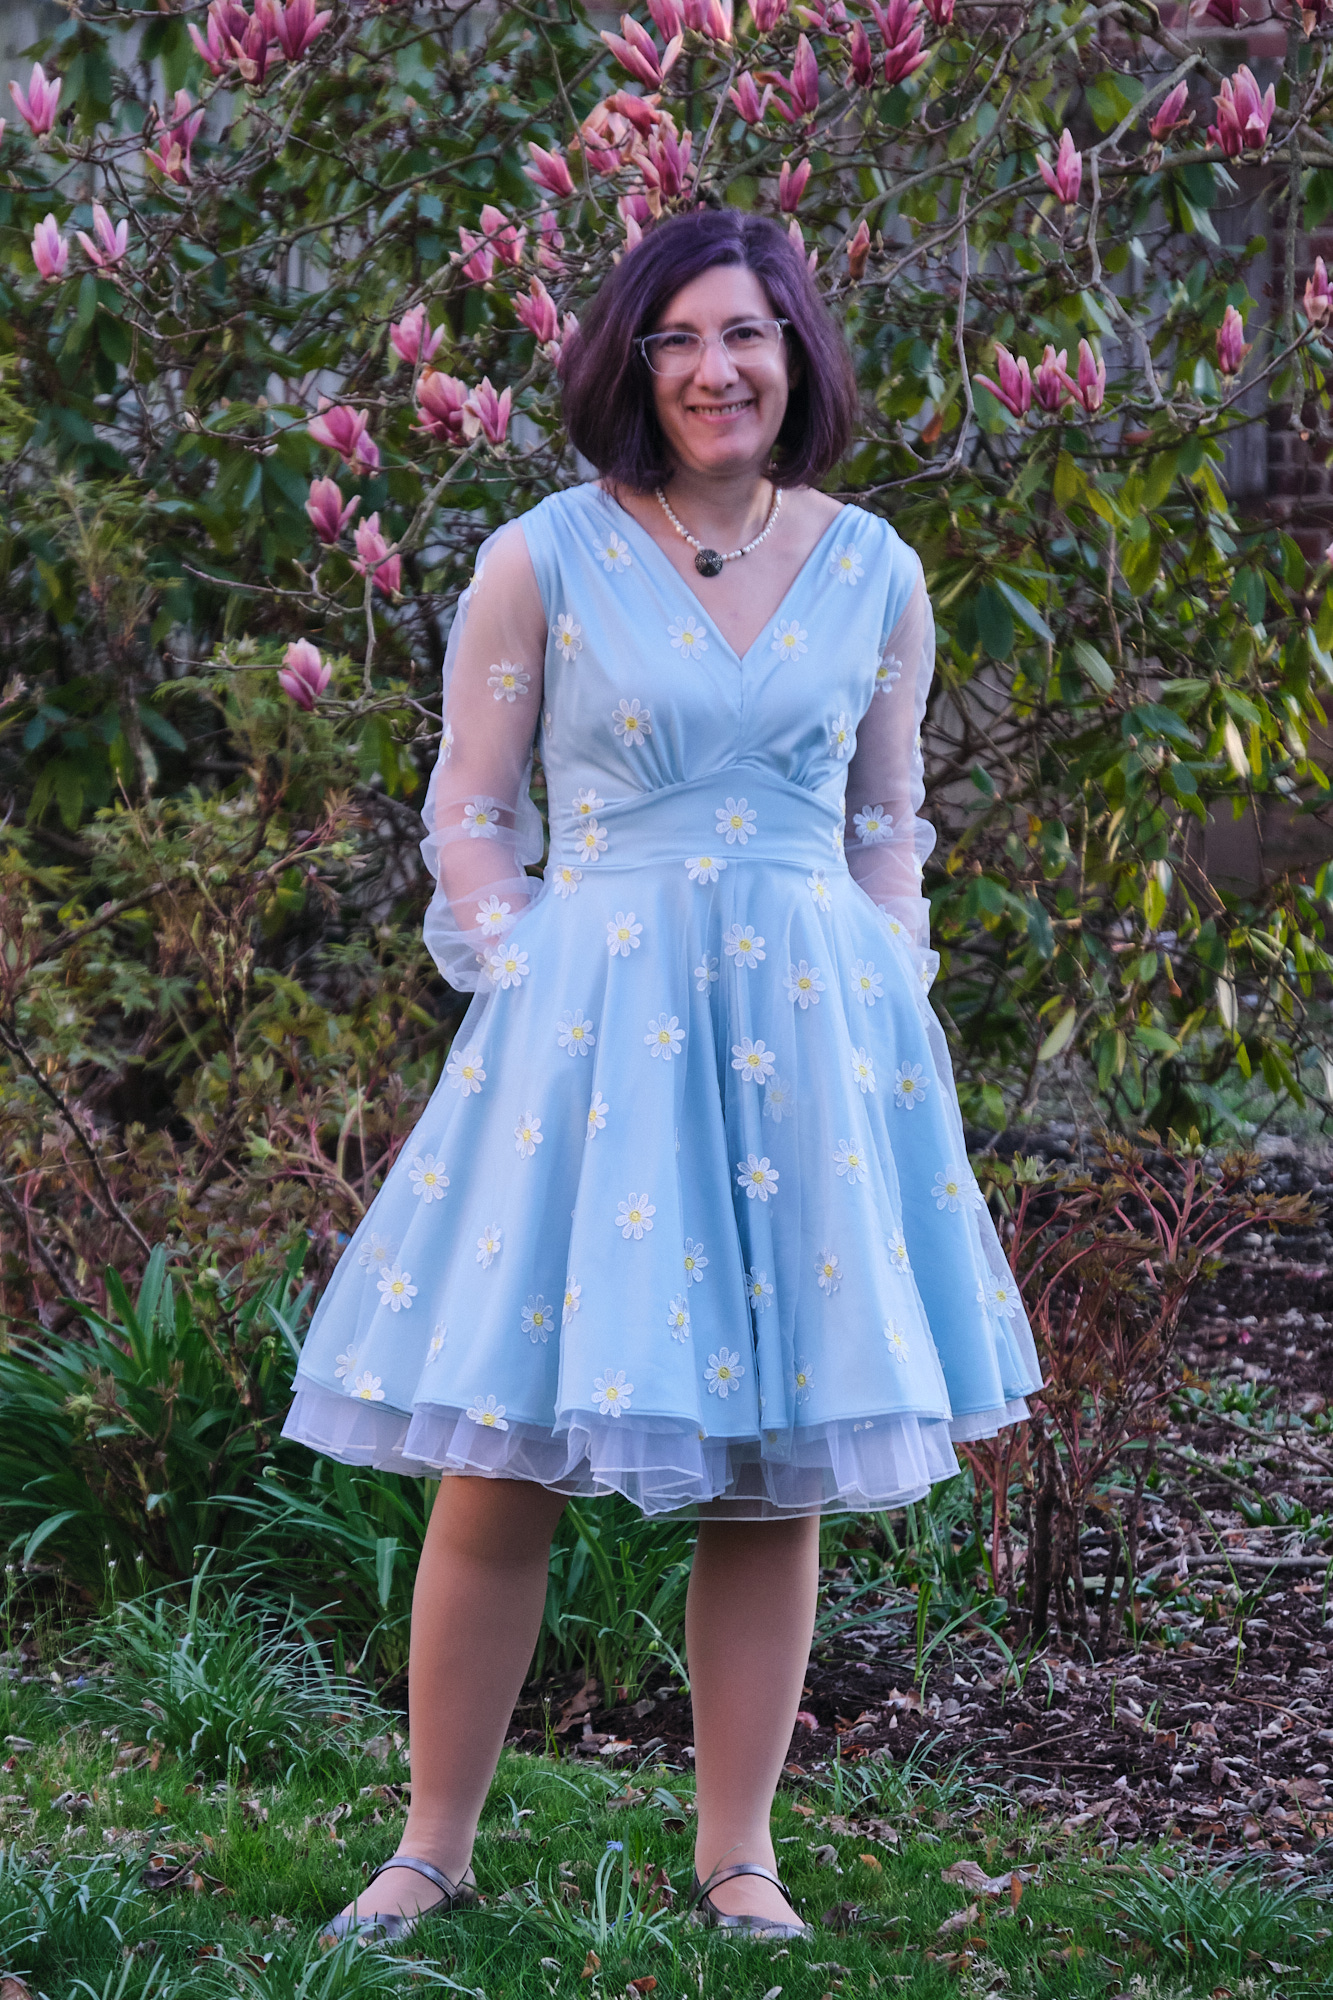
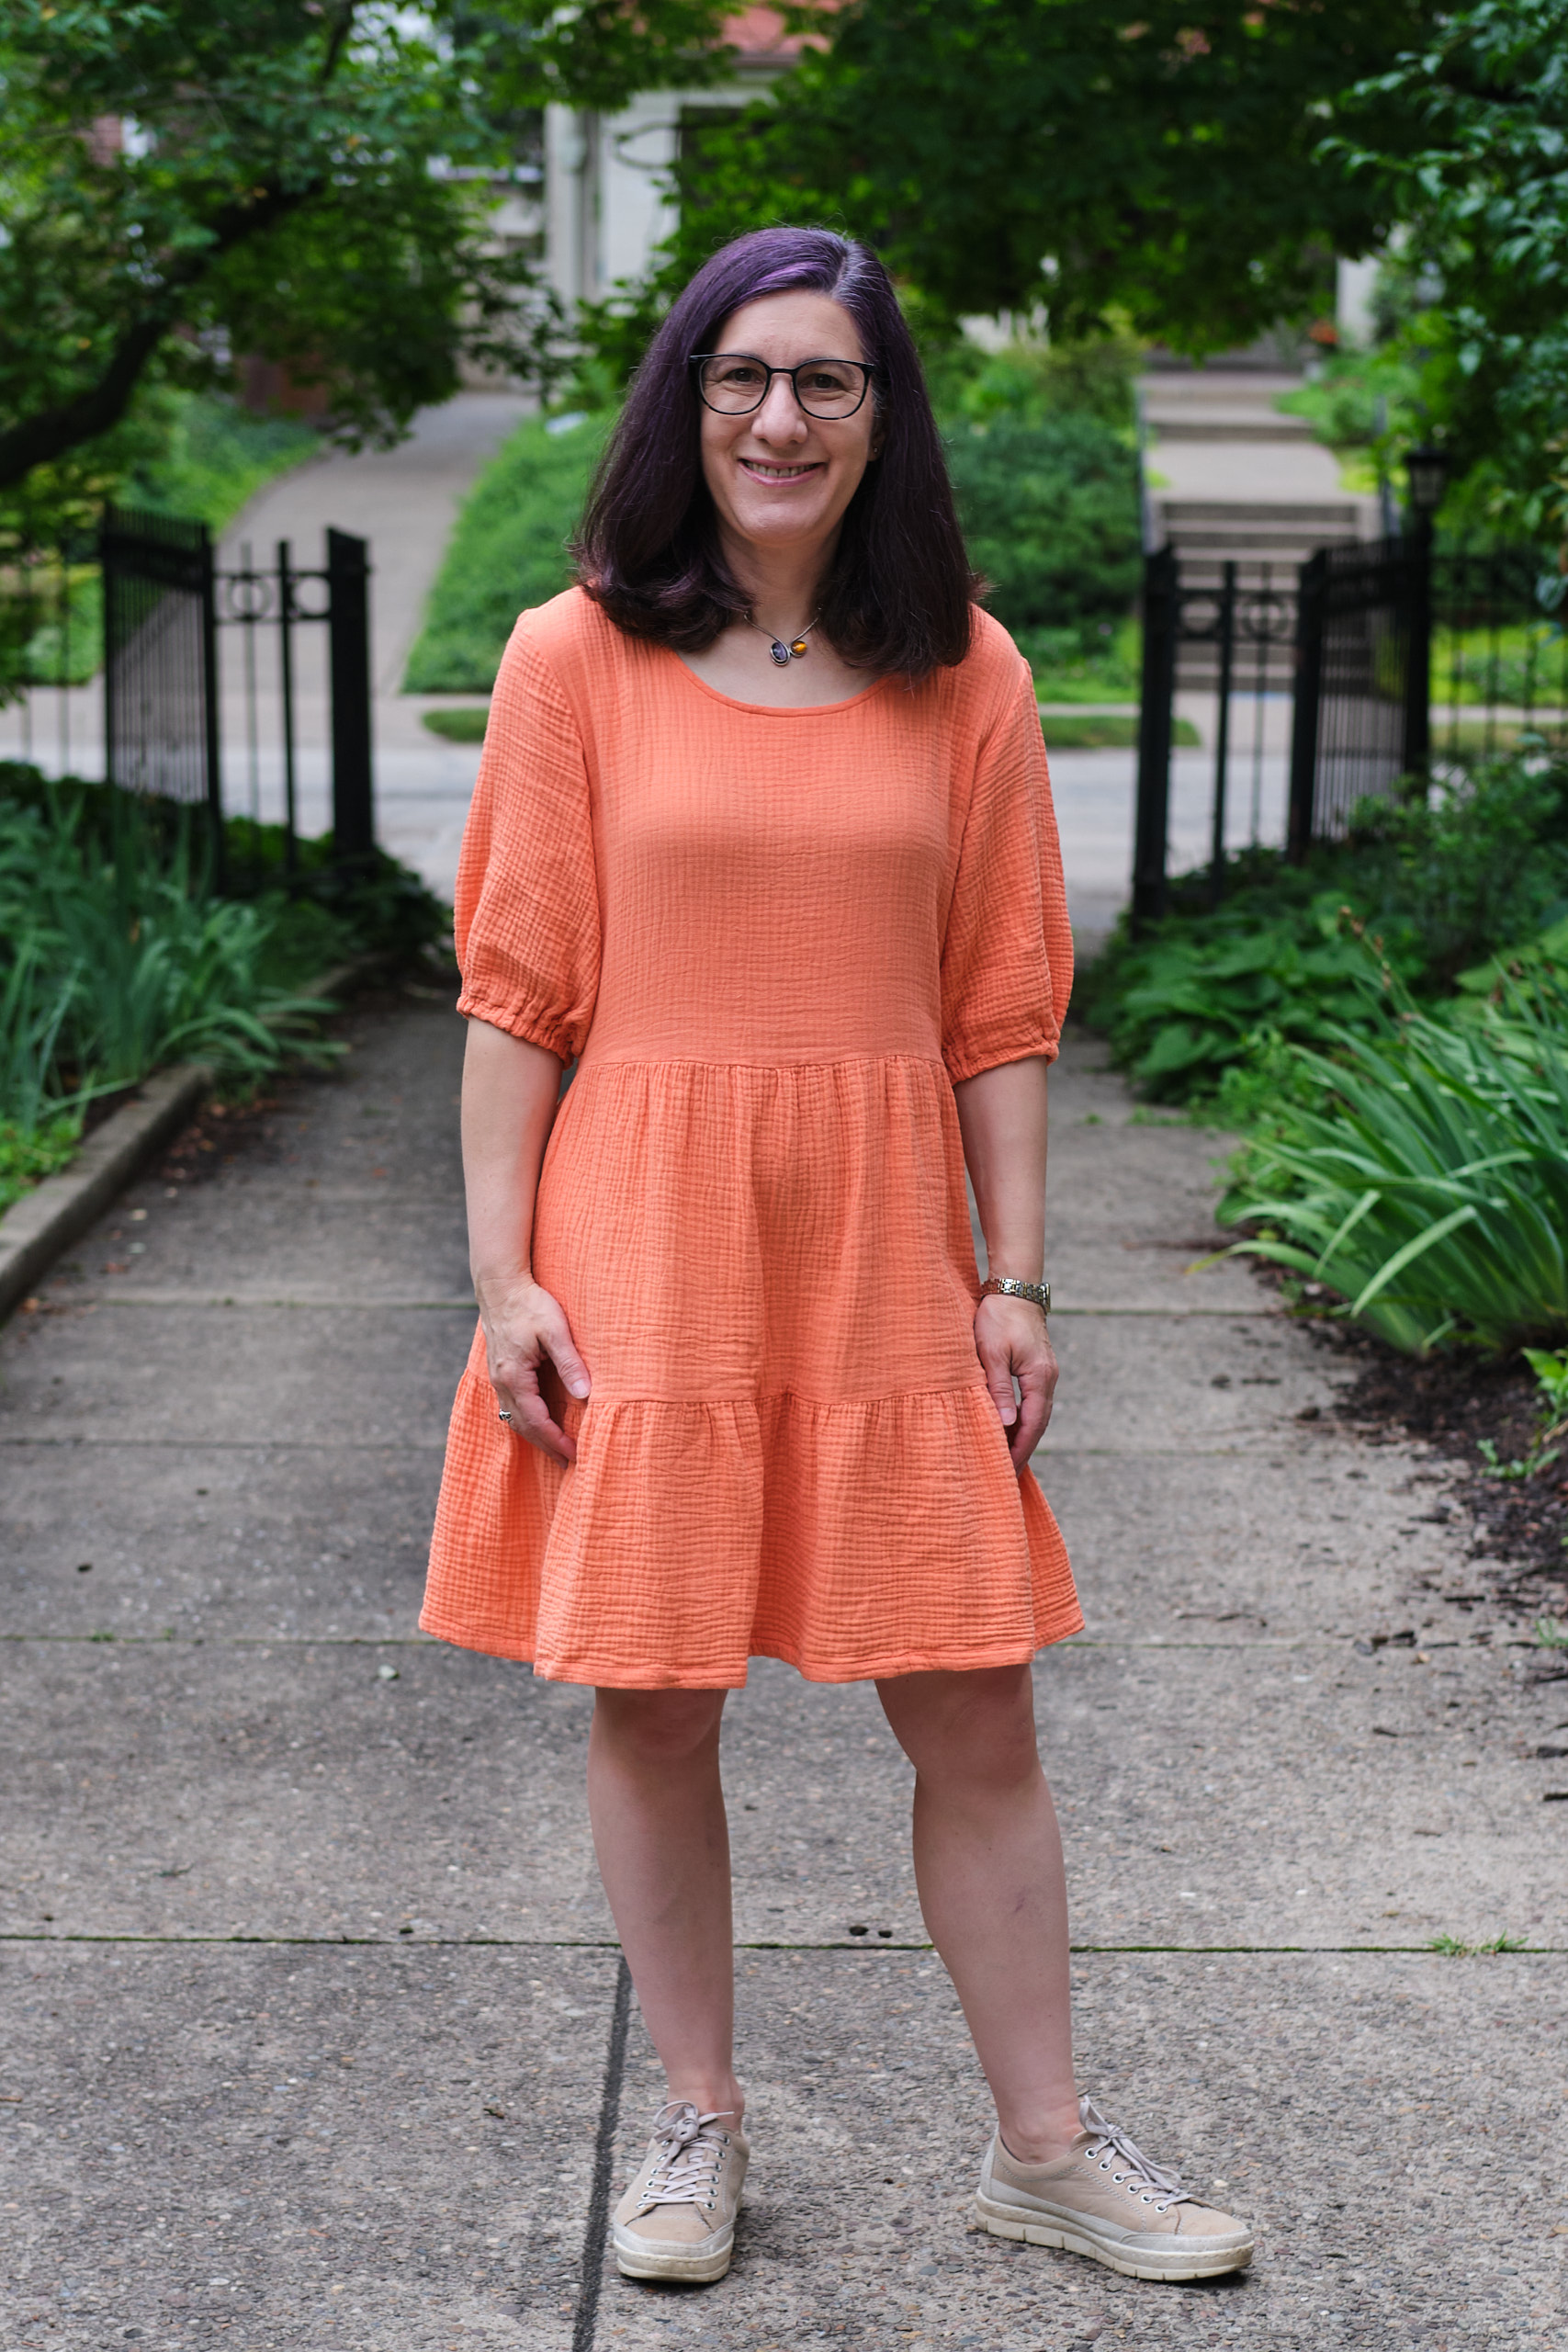
Pattern Emporium Meet You There dress, made of orange cotton double gauze fabric (washed and ironed before cutting), size AU10, knee length (with 2 long tiers, each shortened by 1 inch), mid neck, 1/2 sleeve, back ties, pockets (sewed down bottom of pocket openings)
I may have gone a little overboard when I bought several colors of “fluffy” cotton double gauze, 18 yards total, when it was on clearance at Mily Mae Fabrics for $3/yard last July. But it was really cheap and it is nice summer fabric and it will never go out of style, right?
I saw someone wearing an orange fluffy tiered dress during my travels last summer and it looked very cute and comfortable. I knew I had the orange fabric to make it and thought the PE Meet You There tiered dress pattern would be perfect. But I didn’t get around to actually making it until now.
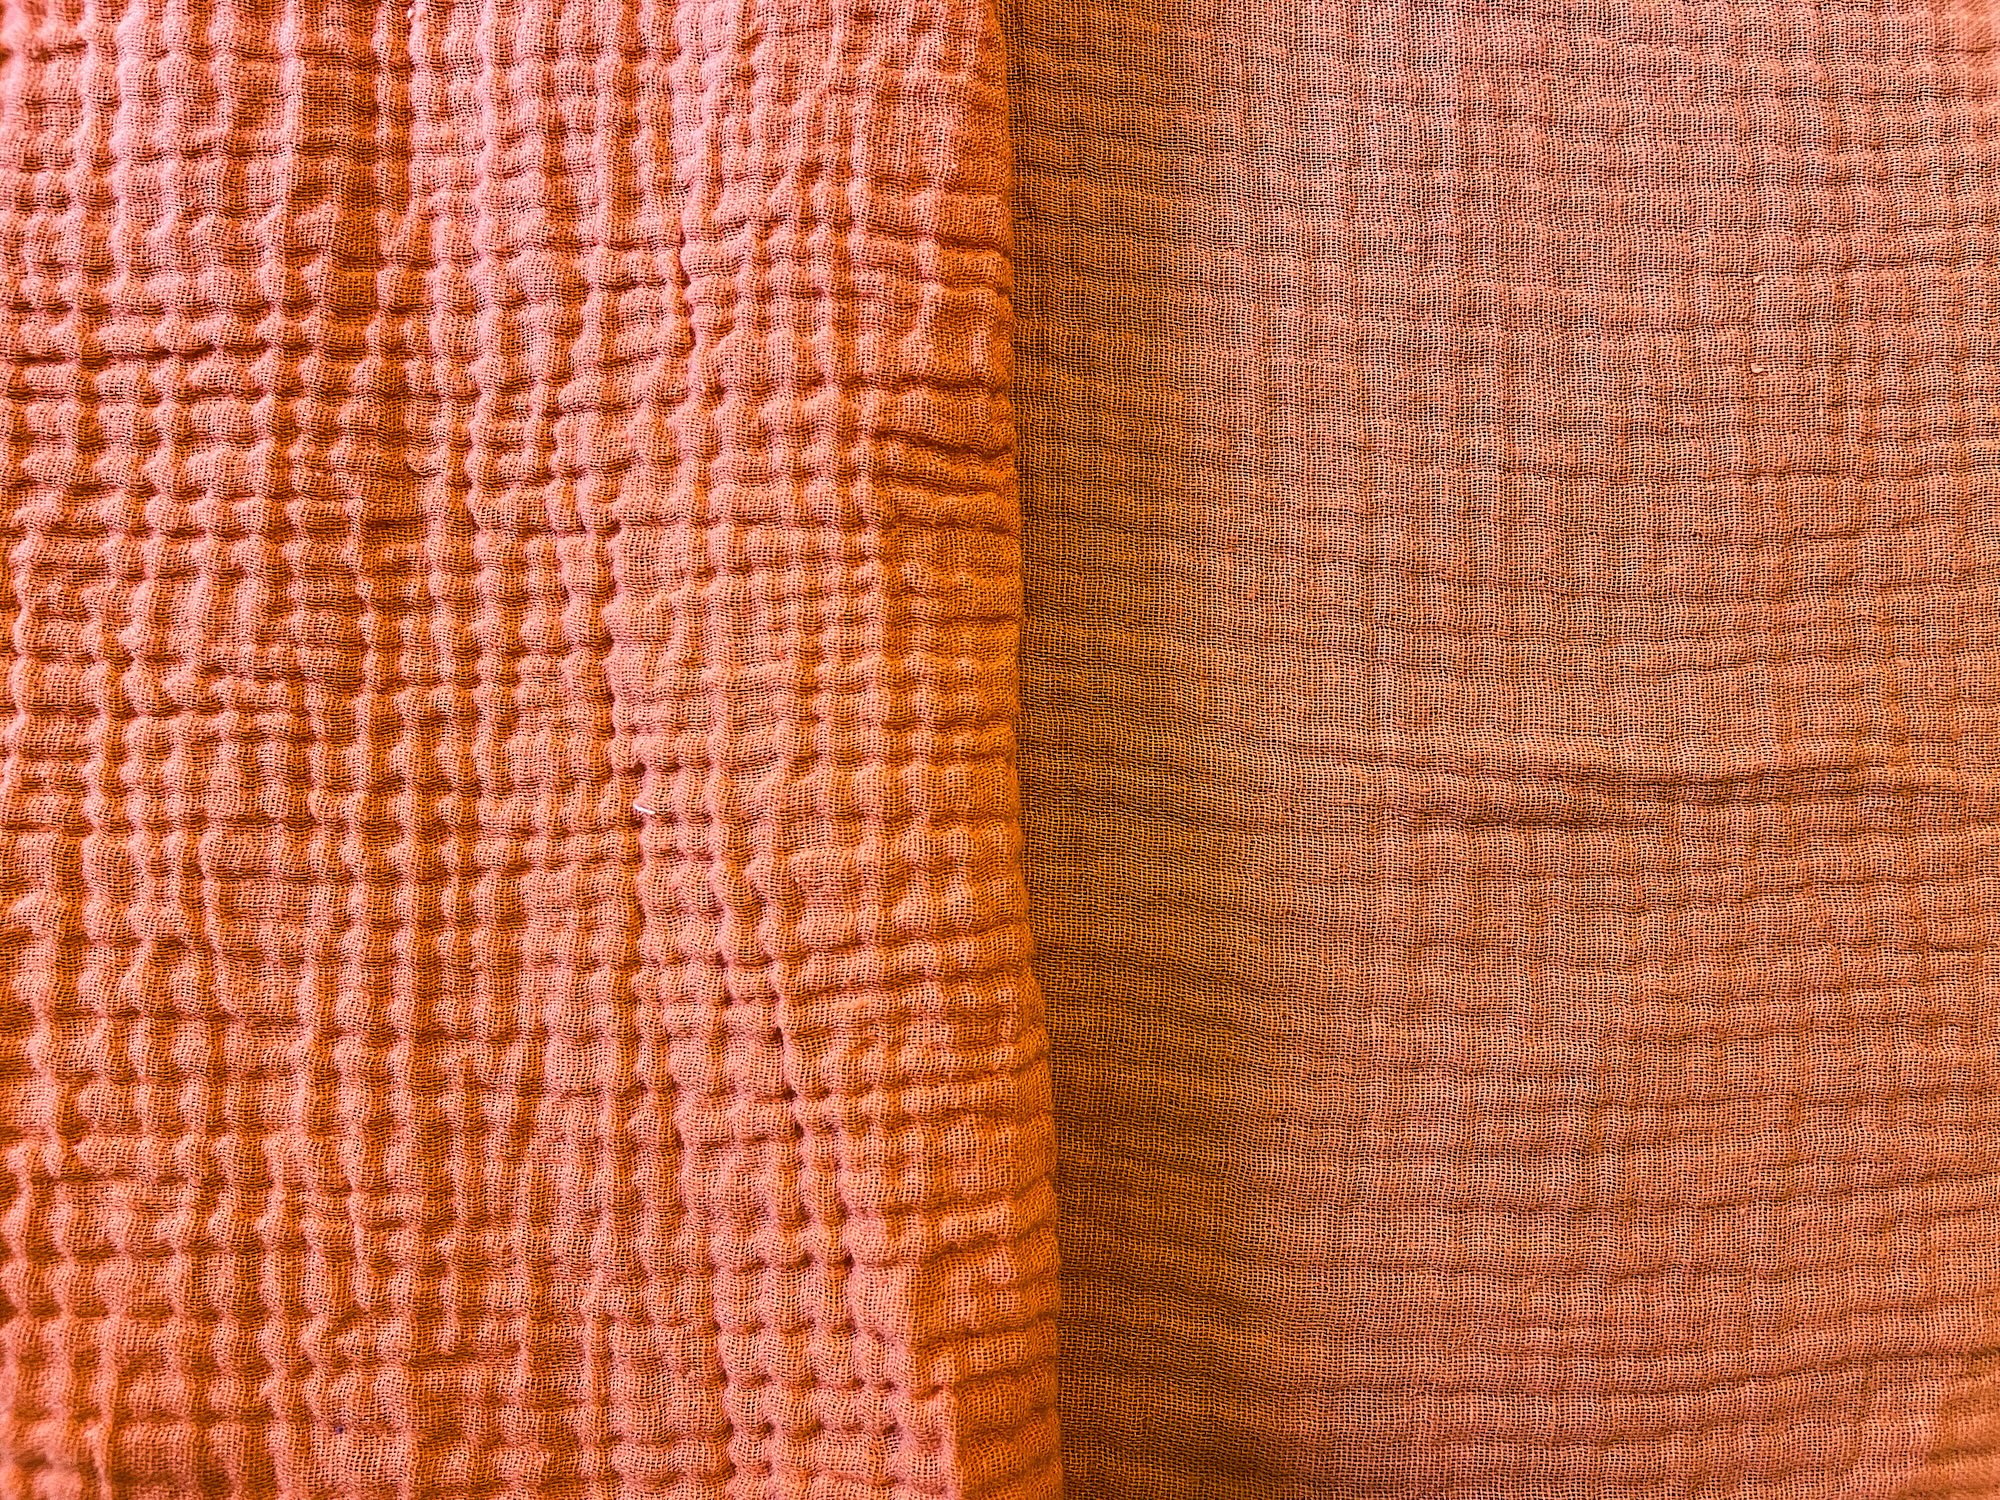
I previously used some of the purple to make a pair of PE Vacation Vibes pants. PE patterns tend to run on the larger side, but these ended up being extra large on me and after I made them I had to cut off the waistband and resew it to remove some of the bulk. Part of the problem was that I didn’t press the fabric before I sewed it. There is a wide range of advice online about how to prepare double gauze for sewing. Everyone seems to agree that you should wash and shrink it, but some argue for pressing and others against. The anti-pressers argue that if you aren’t going to press the garment each time you wear it (and I definitely will not) then you shouldn’t press it before you cut and sew it. As I am definitely an avoid-ironing-at-all-costs sort of person, I decided to go with the no-press approach. But having tried this with the pants, I now see the folly in my ways. This fabric does, in fact, stretch and grow as you wear it, so pressing it before cutting gives you a more accurate size. I decided to go with a light pressing approach, both because I am too lazy to press three yards of fabric until it is perfectly smooth, and because, from what I read, that isn’t actually necessary and could also weaken the fabric. You can see in the photo below my unpressed fabric on the left and my lightly pressed fabric on the right.
The Meet You There dress has lots of options. I decided to cut a size AU 10 regular with the mid neckline, half sleeves, knee length, with pockets and waist ties. The knee-length dress can be achieved with two long tiers, and I shortened each by 1 inch to account for my short stature. That worked out fine, but I think next time I would achieve the same length by shortening the bodice by 1 inch and then shortening only one of the tiers, or perhaps even shortening the bodice by 2 inches and leaving the tiers as is. Because the gauze tends to unravel, I folded the hem under twice for a clean finish (which also shortened it a little bit). I thought the mid-neckline worked well for me. The low would have been too low on me. I think the high would have been fine, but I like the scoop neck styling provided by the mid neckline.
The instructions are great, with lots of nice tips. The instructions for the neck binding were very good, but double gauze is not a great fabric to work with when sewing narrow strips. I should have either been a lot more careful with it or used a tighter woven fabric for the binding (which is on the inside and you never see it so it doesn’t have to match). But I did the best I could, and with the help of my fabric glue stick I mostly got it folded under, but there are some edges sticking out on the inside.
The sneaky sleeve hem tip was fun, and did seem easier than the traditional method of threading elastic into sleeves. But the best tip was using clear elastic to gather the skirt tiers. I followed the instructions and used 1/4-inch light-weight clear elastic and ended up folding and marking it in eighths. I sewed it on using my regular sewing machine foot and a zigzag stitch. I followed the advice to sew everything on a sewing machine with a 3/8-inch seam allowance and then serge the edges to neaten.
I mostly followed the pocket instructions, but found that the pocket opening was too big and I thought my phone might fall out. So I sewed up the bottom two inches of the pocket opening.
I finished it last night and thought it looked pretty good, but wanted to see it in full fluffy crinkle. So I dunked it in the sink and tossed it in the dryer until it was only damp. Then I hung it up and went to bed. In the morning, it dry and beautifully crinkled, so I wore it to work. It held up well to the heat and humidity and was fairly comfortable. I like the way the crinkles give the skirt and sleeves some extra body. The half sleeves hit me just below the elbow. I think they would also be cute shortened by about 3 inches to hit above my elbow.
Now I just have to figure out what to do with my other 14 yards of double-gauze fabric.
June 1016 update: While preparing to make another Meet You There Dress, I decided to try basting the bodice 2-inches shorter and I really liked it. So I went ahead and shortened the bodice by 2 inches and moved the ties up. The dress is, of course, 2 inches shorter now, but the bodice hits properly just above my waist and I like it a lot better this way.
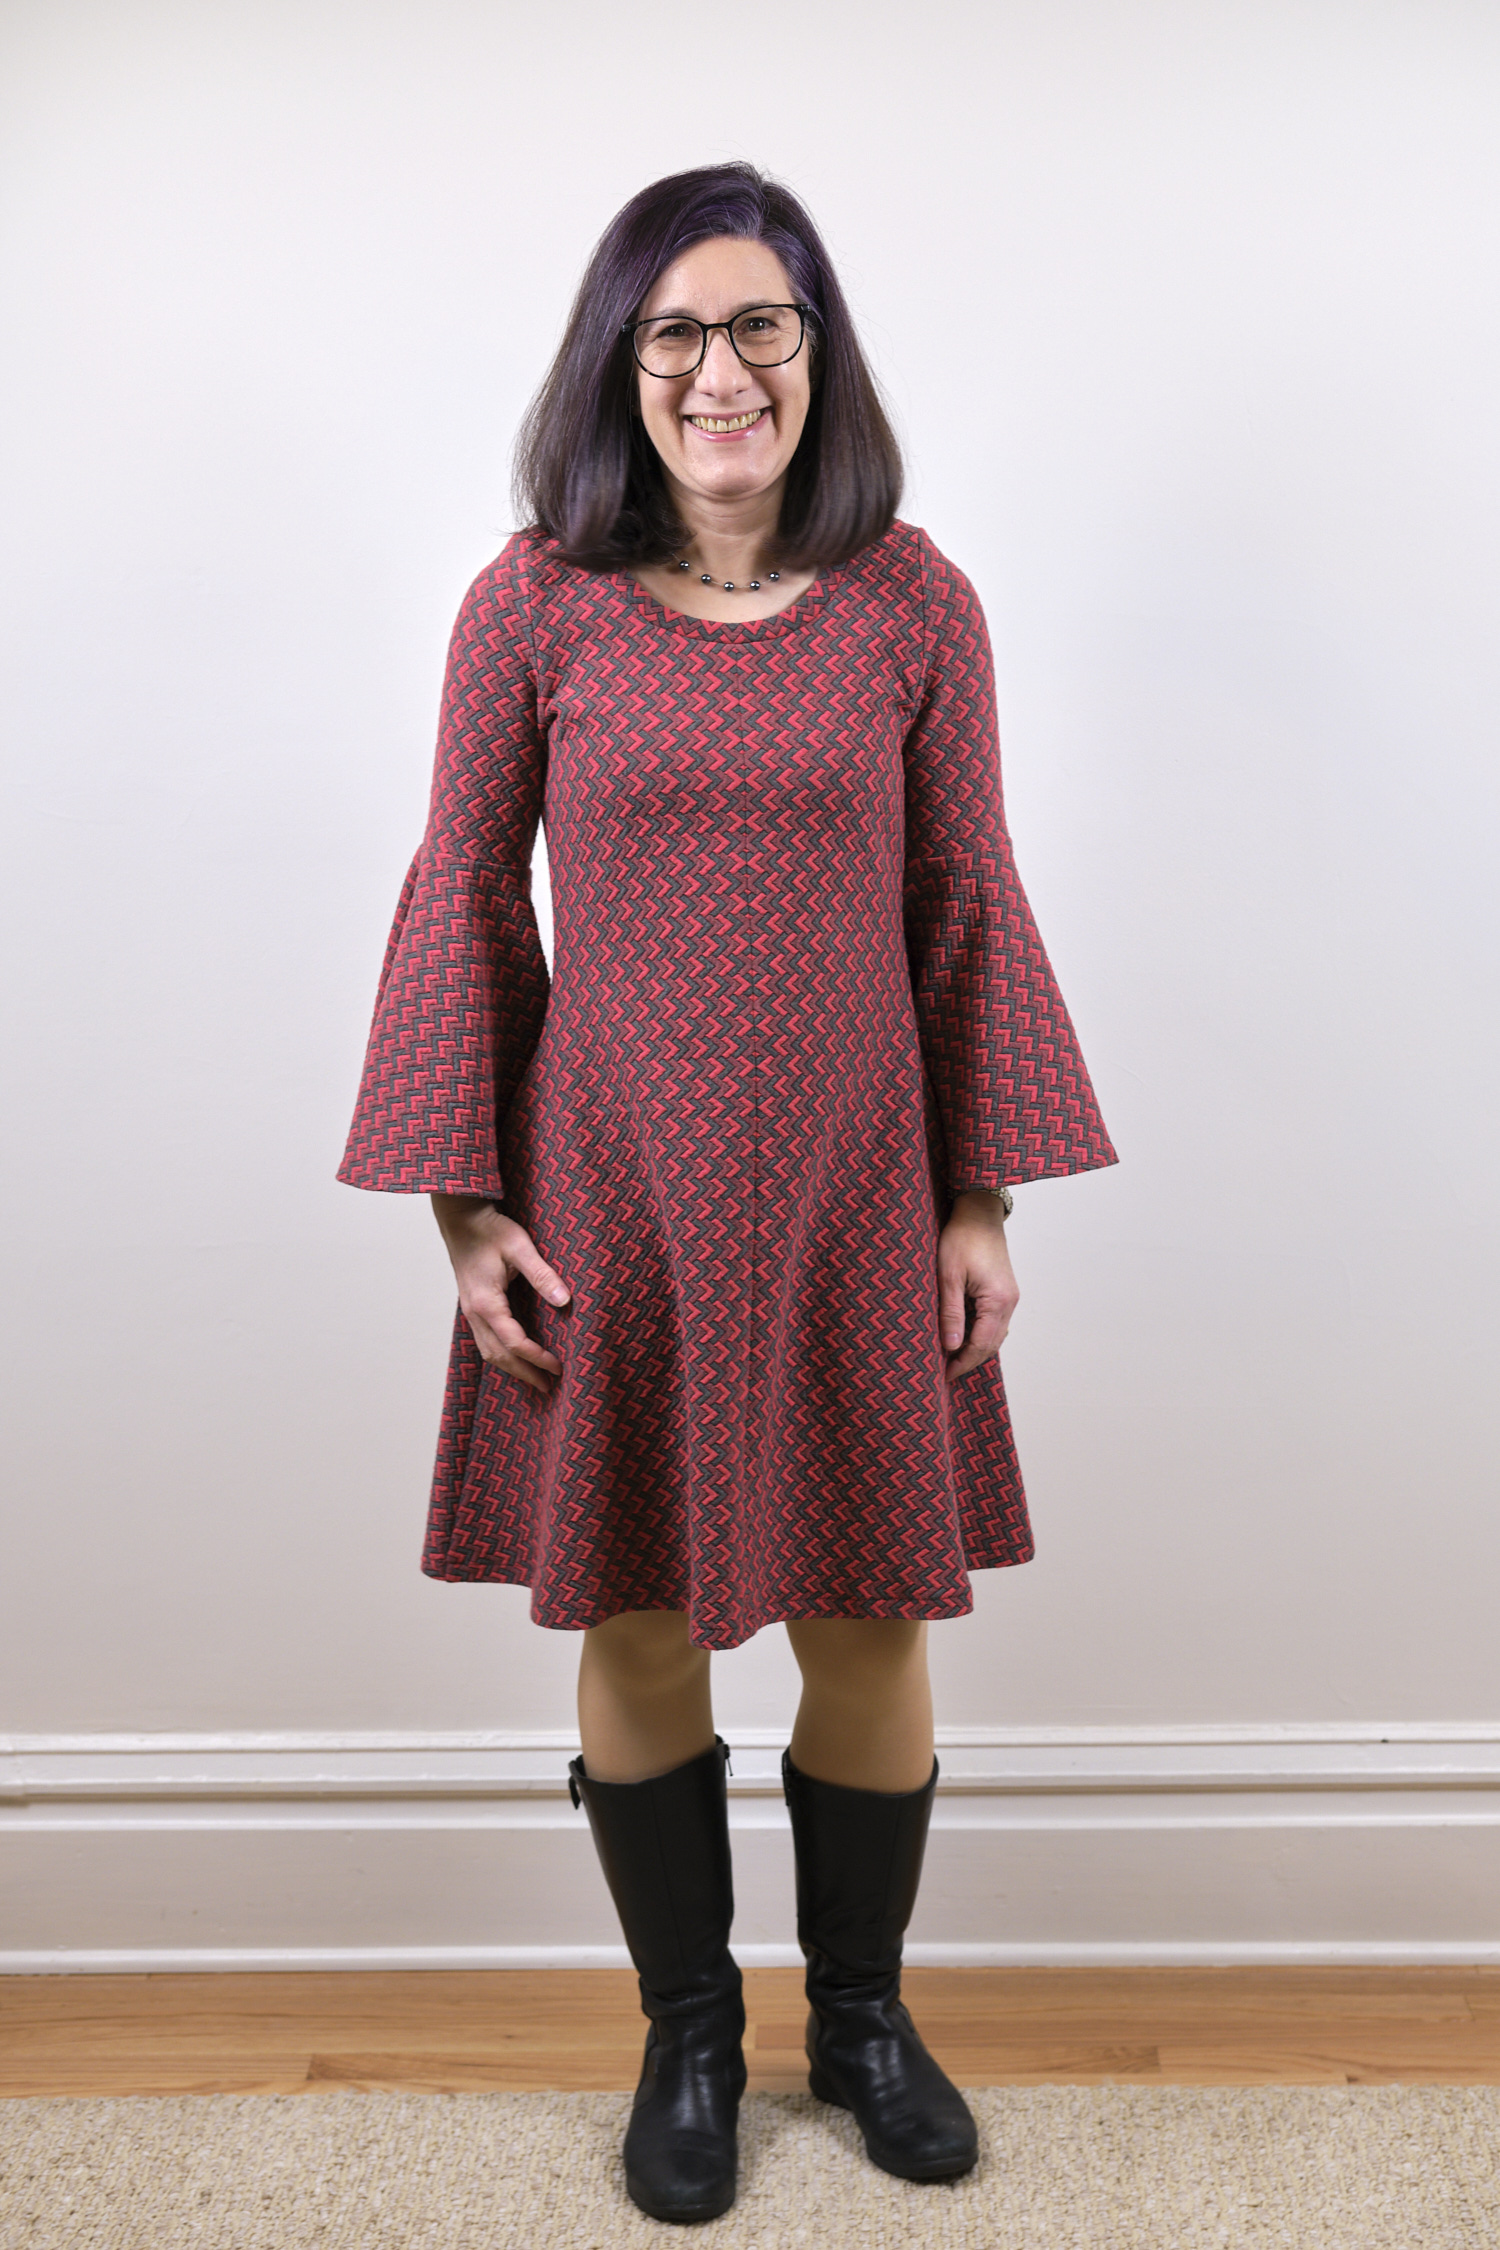
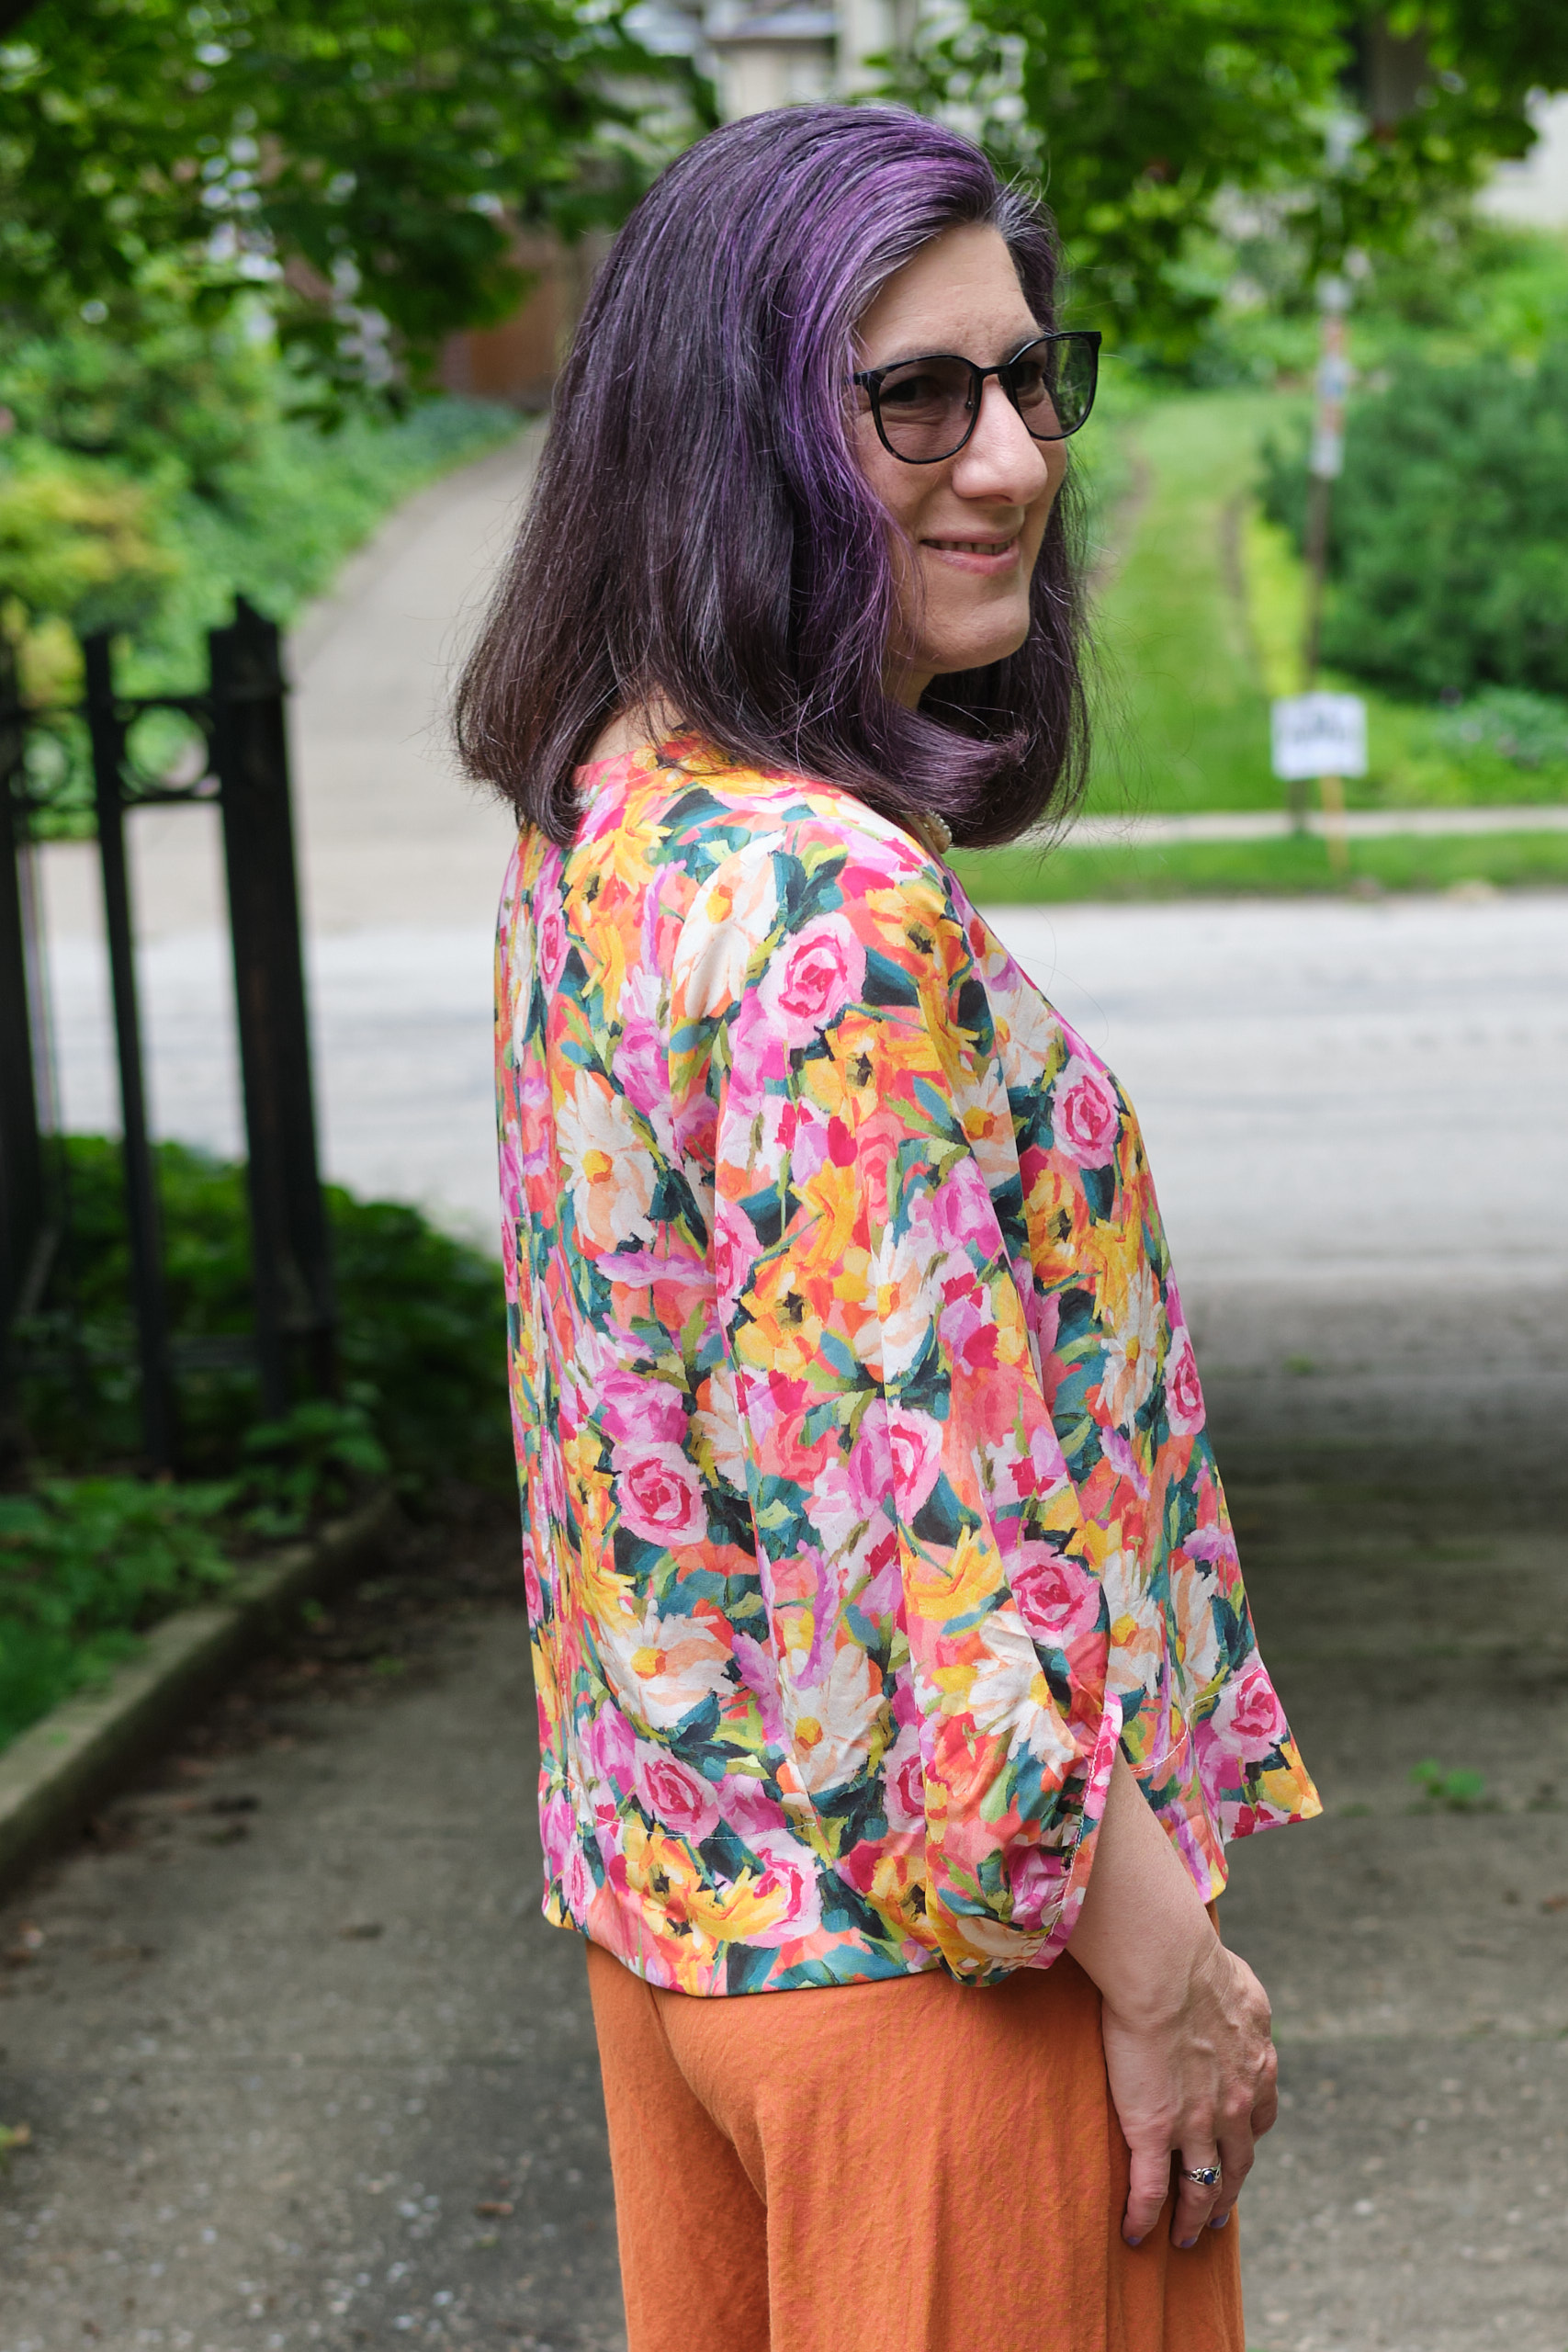
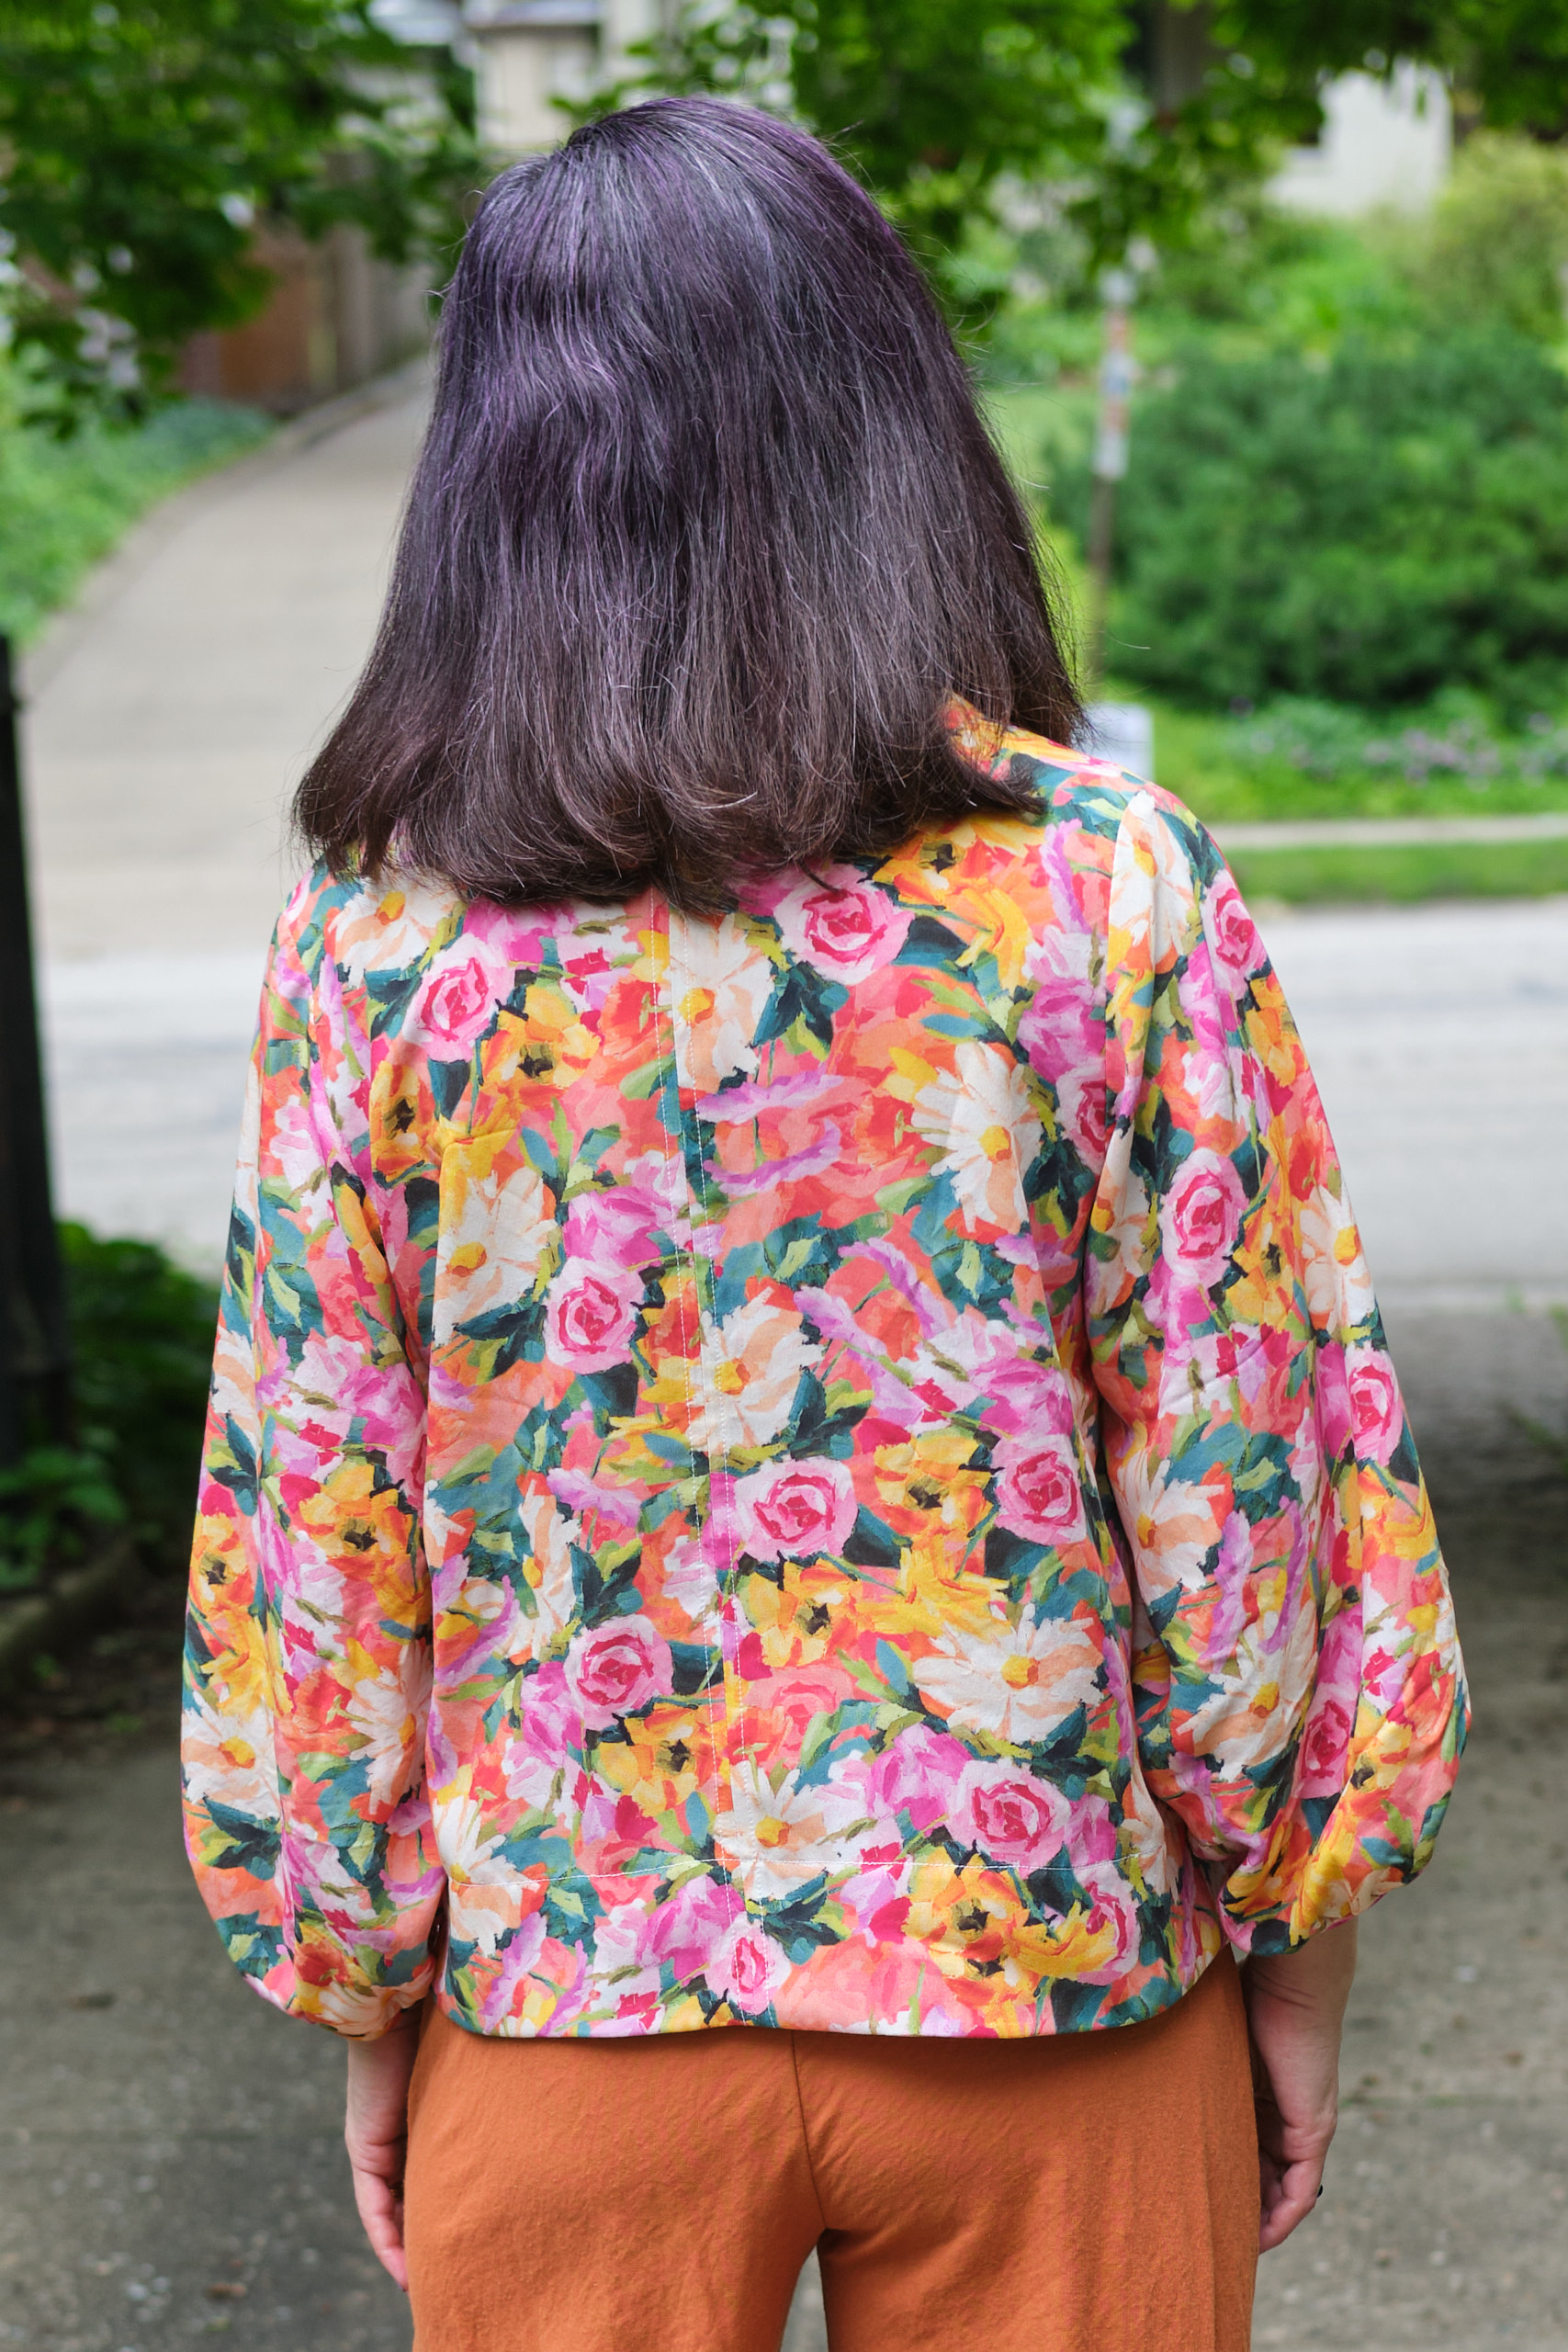
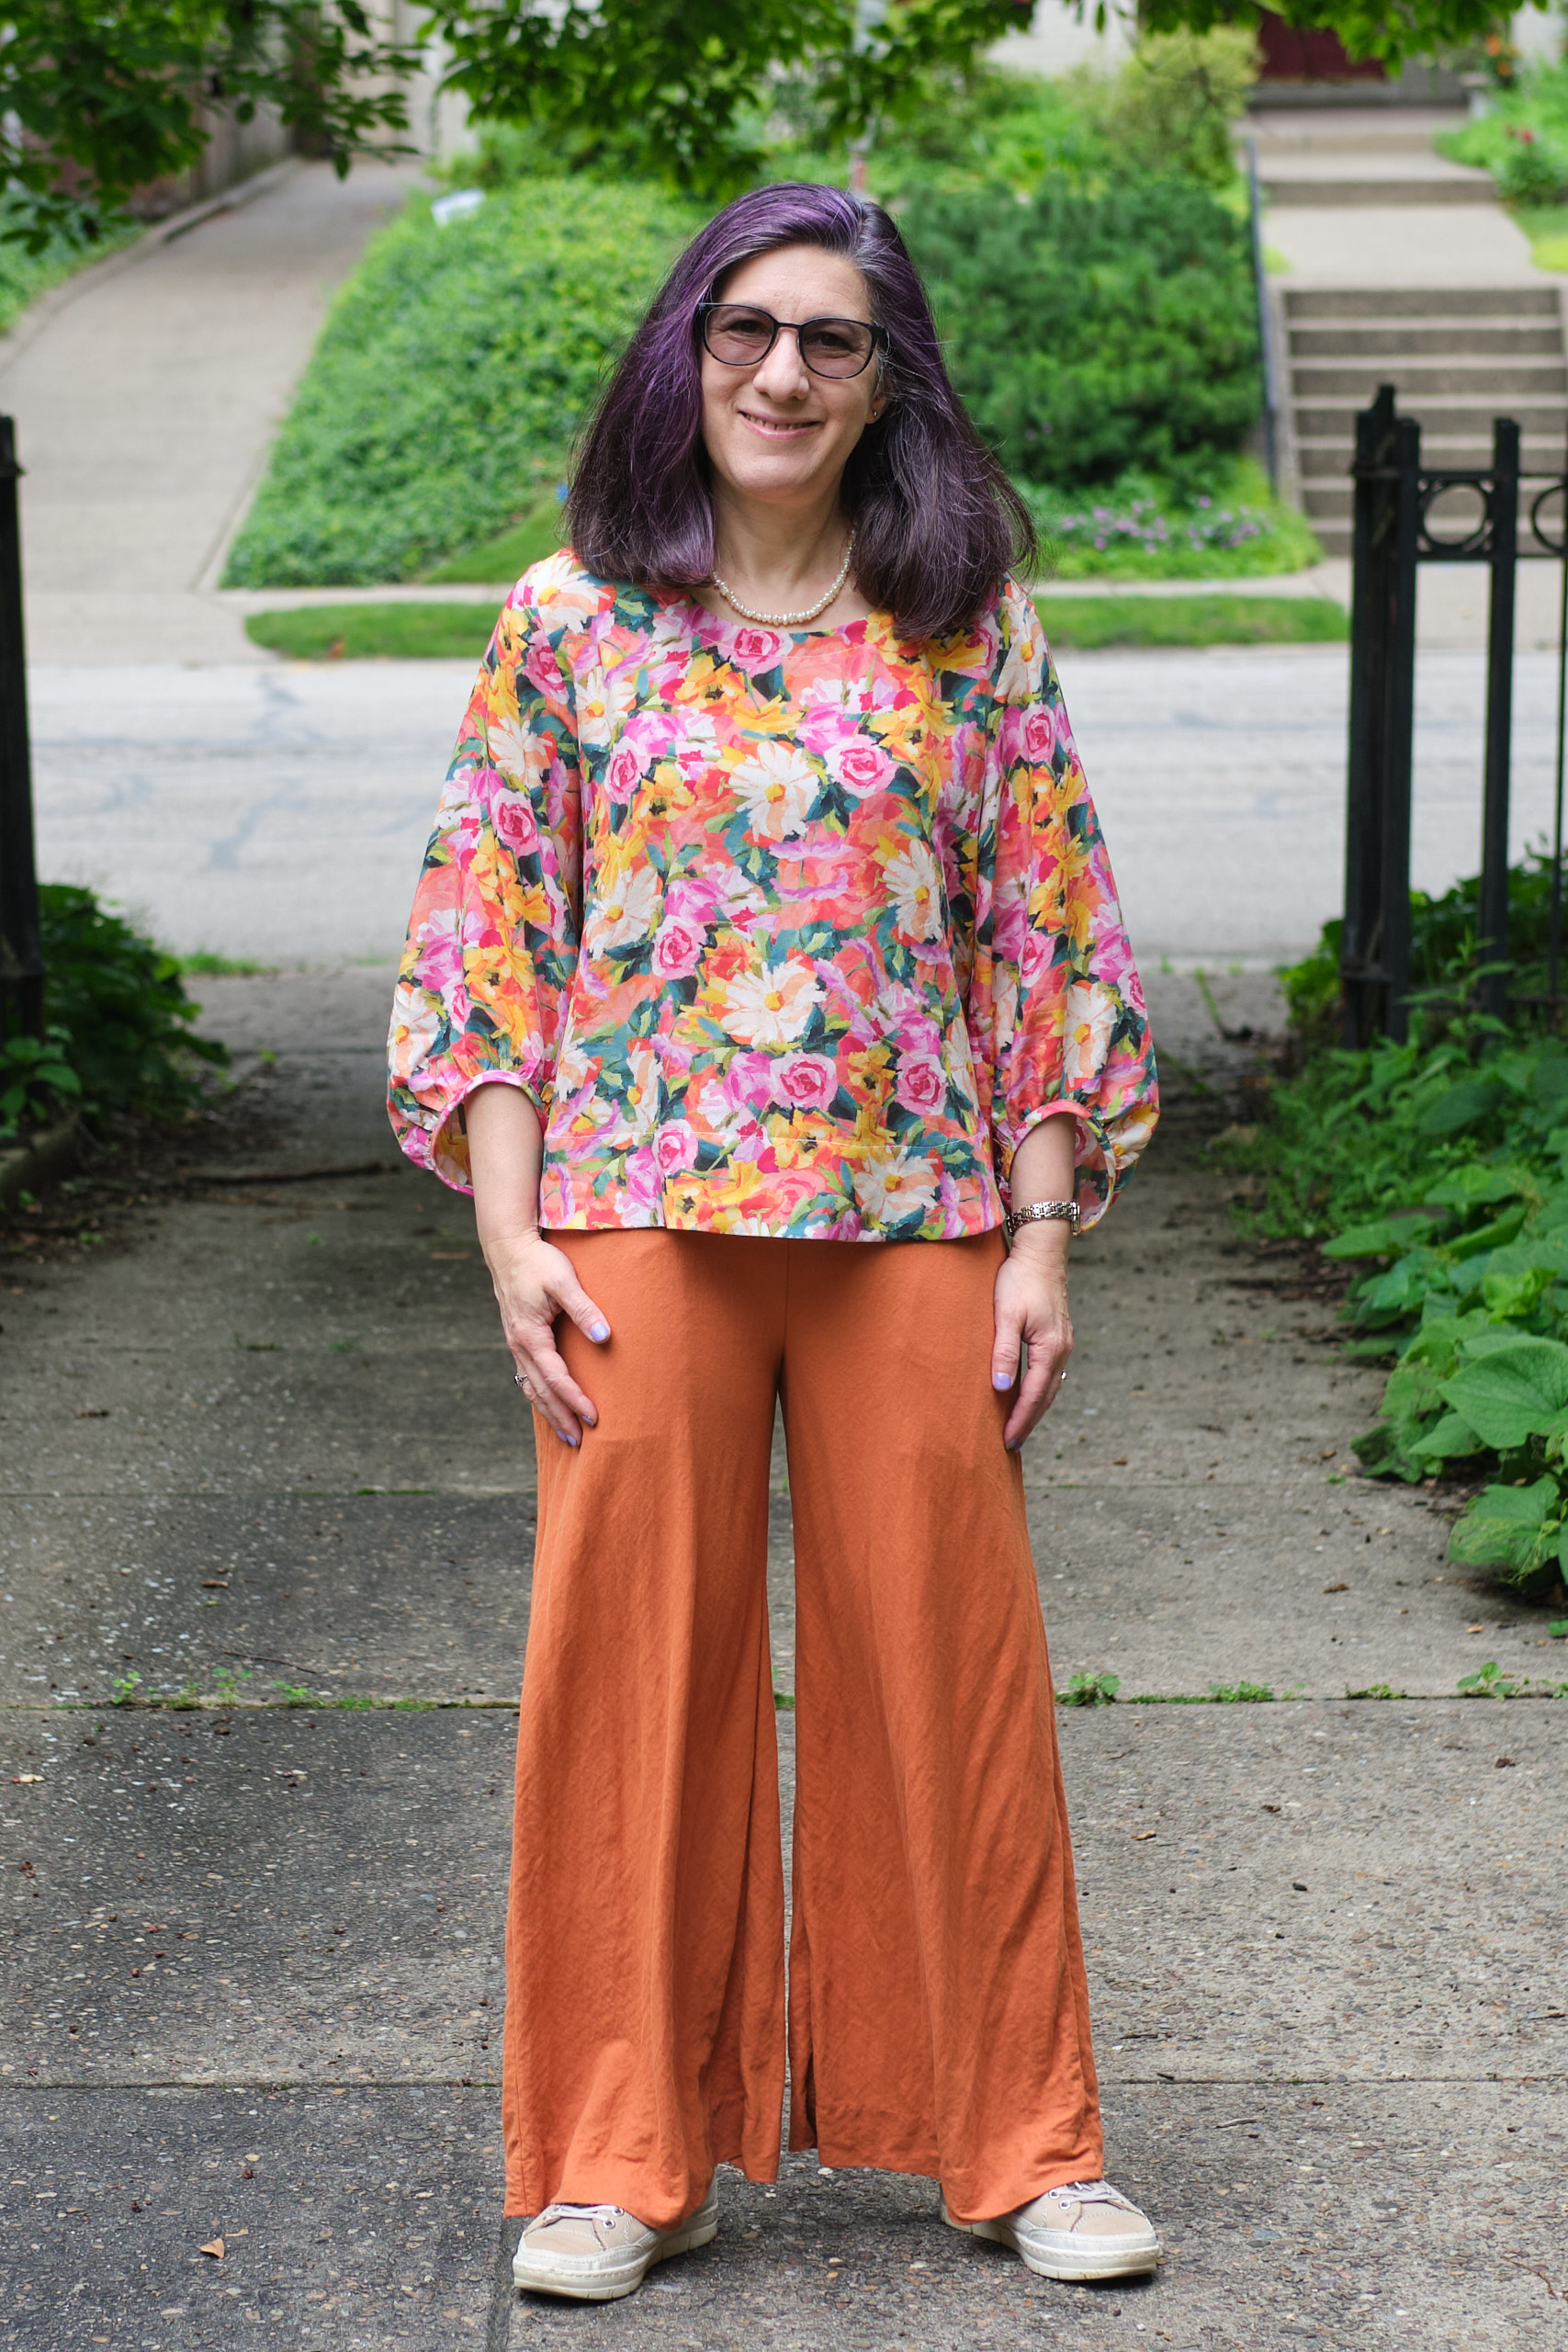
Pattern Emporium Be Mine Balloon Sleeve top, size AU8, 1.5 yards woven rayon, mid neck, regular length, wide facing, no front seam or button loop, sloped shoulder adjustment
Ok, ignore the silly title, but do check out the lovely balloon sleeves I just made. I do adore them! As with many statement sleeves, they don’t play well with most sweaters (better break out the shawl for chilly days and over air-conditioned rooms), but who wants to hide fun sleeves anyway?
I’ve been wanting to make a Pattern Emporium Be Mine Balloon Sleeve top since it first came out a year-and-a-half ago, but didn’t get around to it until now. I even bought the fabric for it a year ago – a light-weight woven rayon floral from knitfabric.com (yes they sell wovens too). I don’t love that you’re not supposed to put it in the dryer (I did wash and dry it before cutting it so that if it does end up in the dryer sometime it has already been shrunk) and that it requires some ironing, but it was nice to work with and it made a lovely top. (Photographed here with my PE Urban Boldly mashup pants in orange LiKnit.)
I made the regular length with the wide facing option and the mid neckline (after much debate and staring at photos from other sewists). I omitted the front seam. I kept the back seam but omitted the button loop (thus the back seam is really not needed but it adds a little detail). I also did all the optional top stitching (there were too many colors in my fabric to pick one that would blend so I used white thread, which provides a little bit of contrast). After reading posts from a number of other women on the smaller end of the size range that they were sizing down because this over-sized top was a bit too big for them, I sized down from an AU10 to an AU8. I also added a 1/2-inch sloped shoulder adjustment, as that seems to usually make tops hang better for me. Otherwise, I sewed the pattern as written.
The top fits me very well in the size 8 (I’m glad I sized down). I’m short so I could potentially shorten the top a bit, but I think it works pretty well at this length. I often have to shorten sleeves, and these certainly come out longer on me than on many other people, but I actually like how the cuffs sit a bit lower on my arms. I’m also really happy with the mid neckline, which comes out as a scoop for me — the low neckline would have been very low on me.
As with all the PE patterns I’ve tried, the instructions for the Be Mine top are quite thorough and easy to follow. I’m not going to lie — the facings and sleeve binding are a lot of work. I used my serger and my sewing machine with three different feet! But if you take the time to do them right they come out beautifully. I didn’t do everything exactly right the first time: I started sewing a sleeve band on the wrong way and started sewing a hem facing upside down. But I recovered from these minor goofs and got back on track and I still got the whole top done in one Saturday afternoon/evening.
Now I need to figure out what fabric to try next (something with easier laundry requirements, maybe a polyester woven or a cotton double gauze). I would also love to try this as a jacket hack so I can wear these gorgeous sleeves in cooler weather.
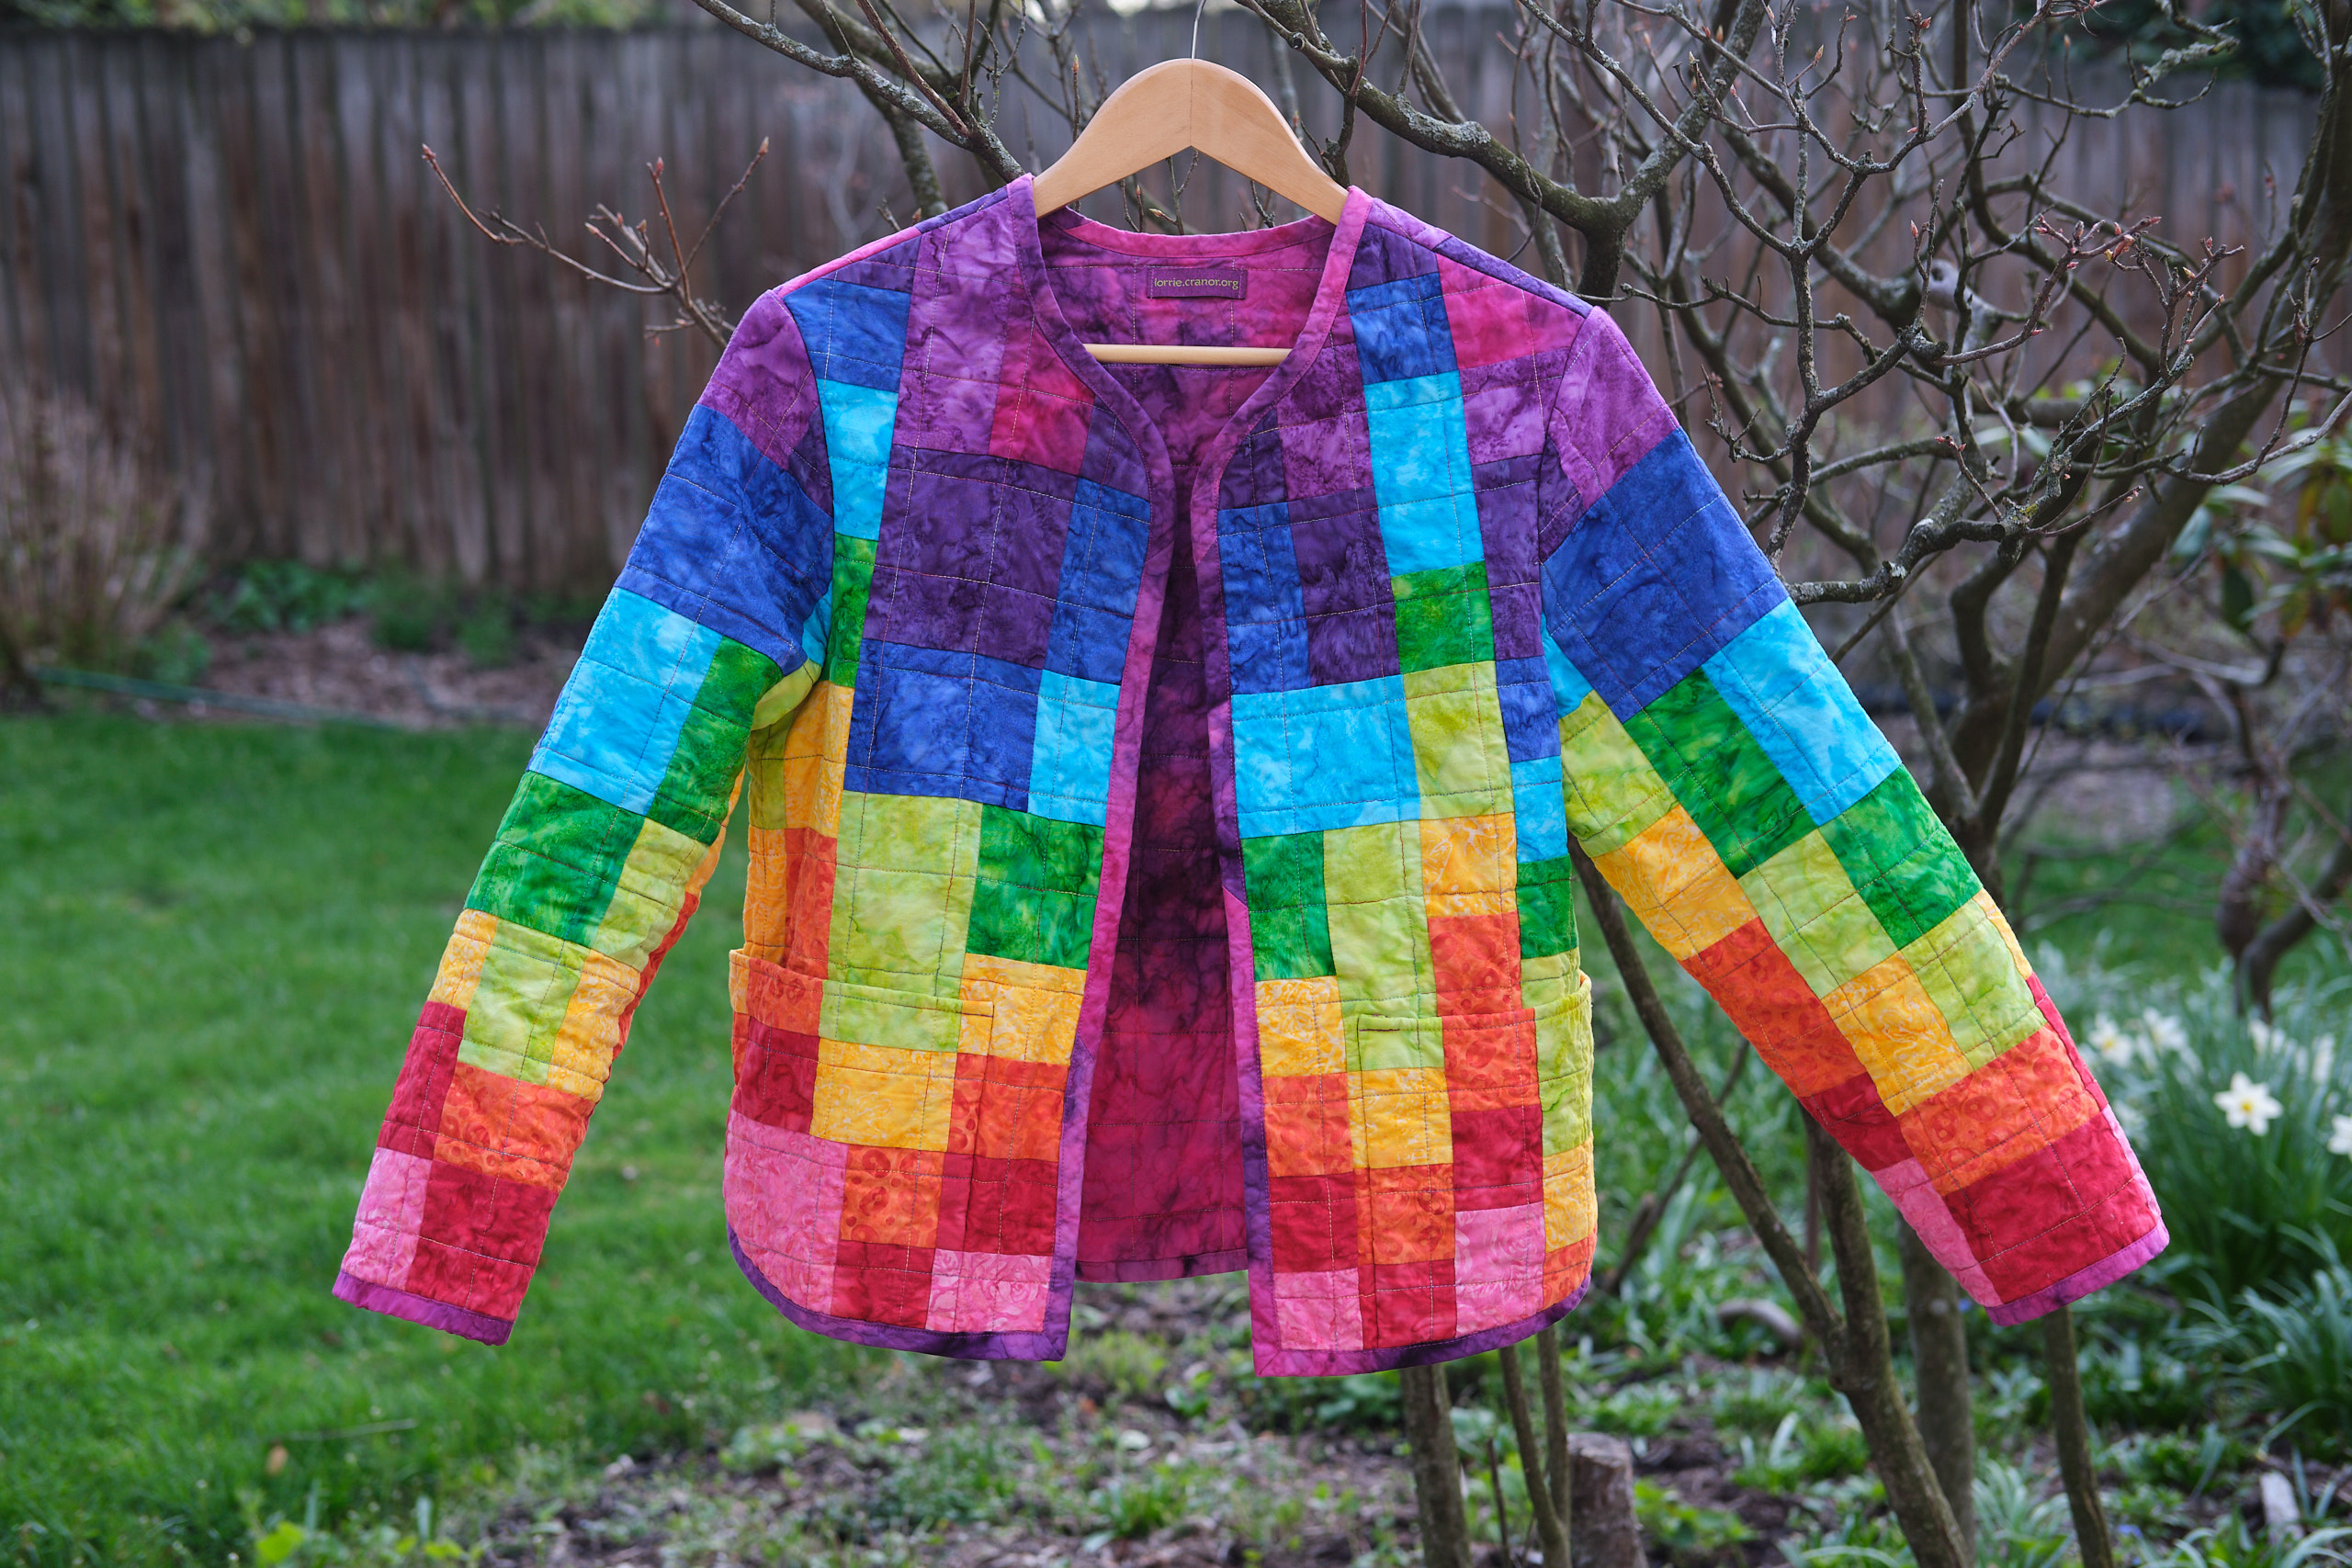
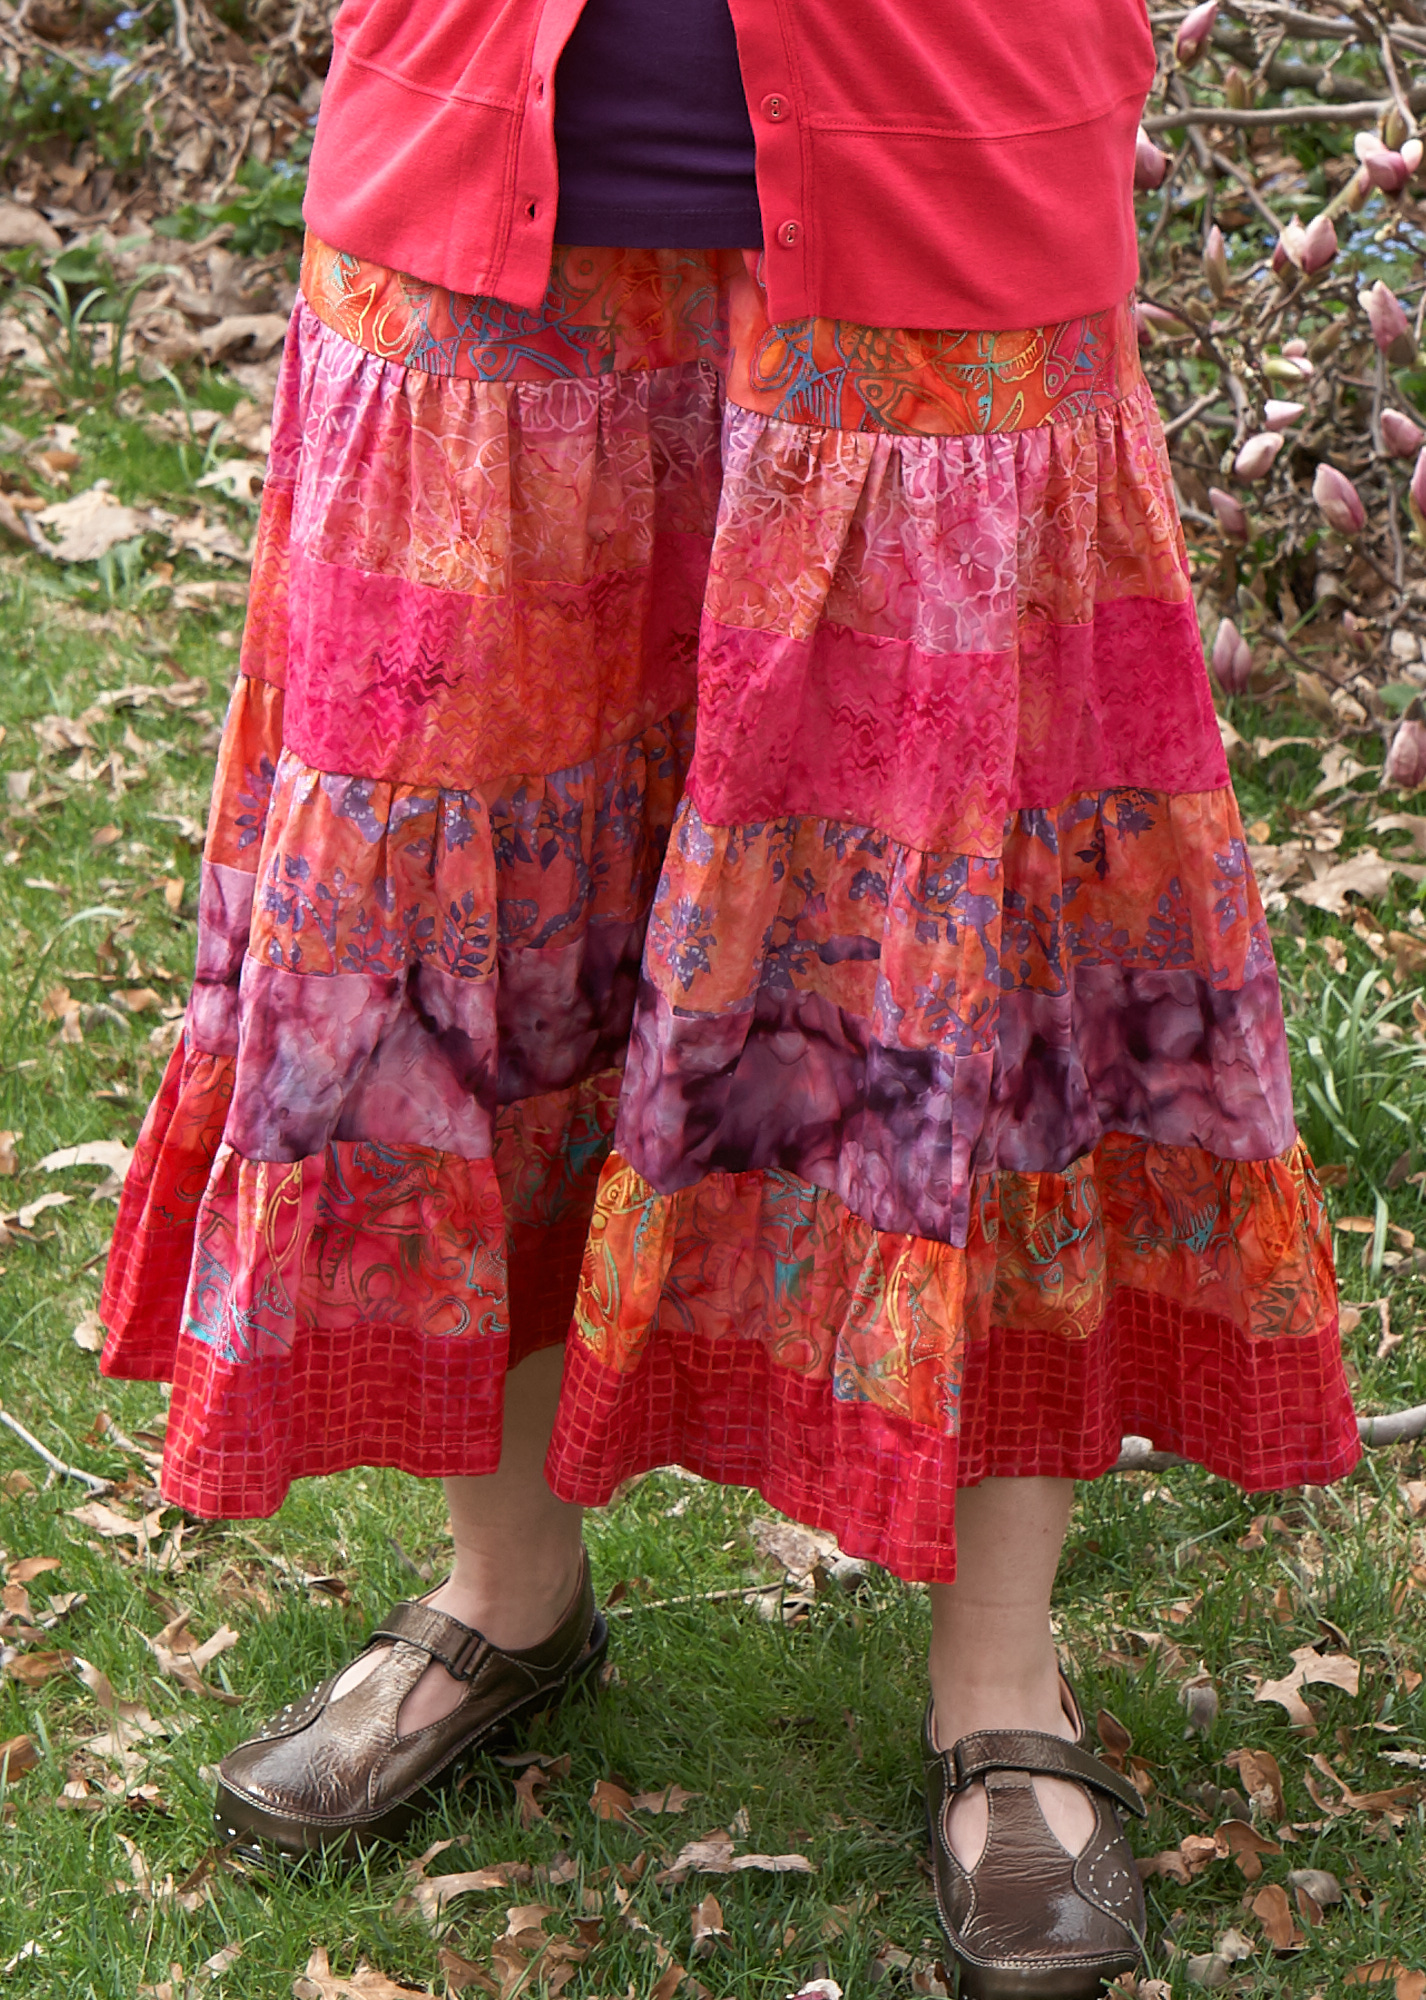
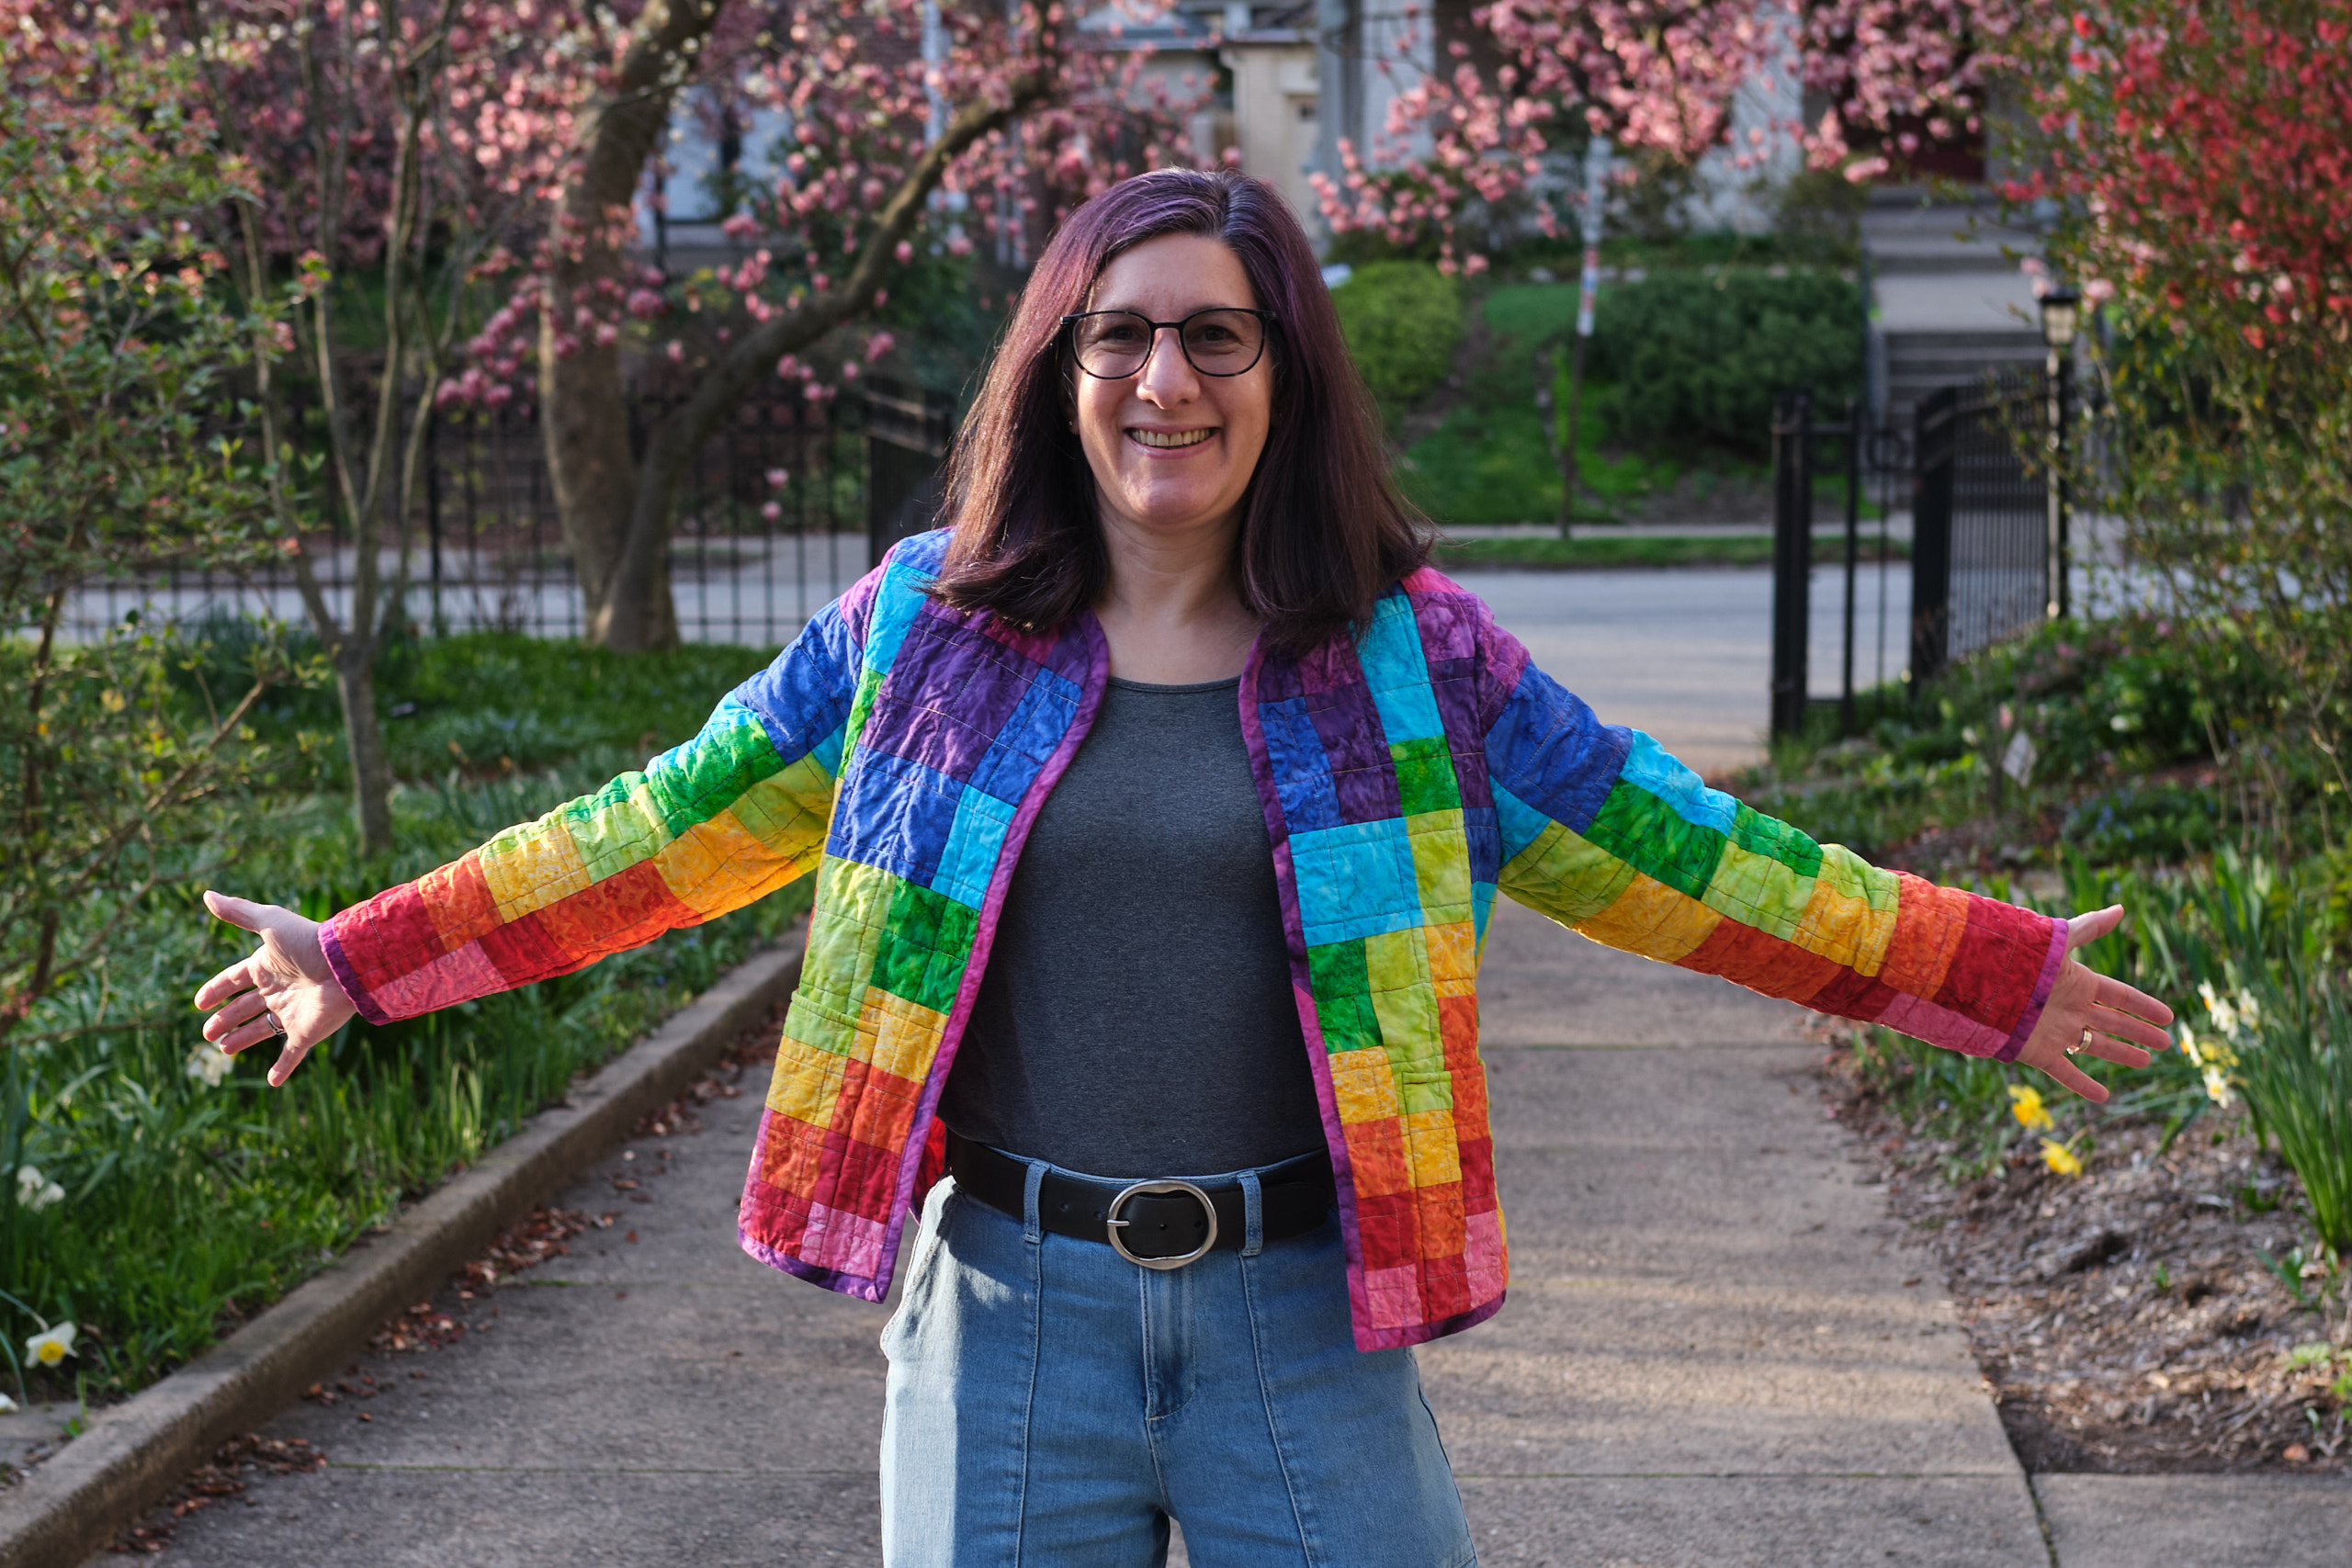
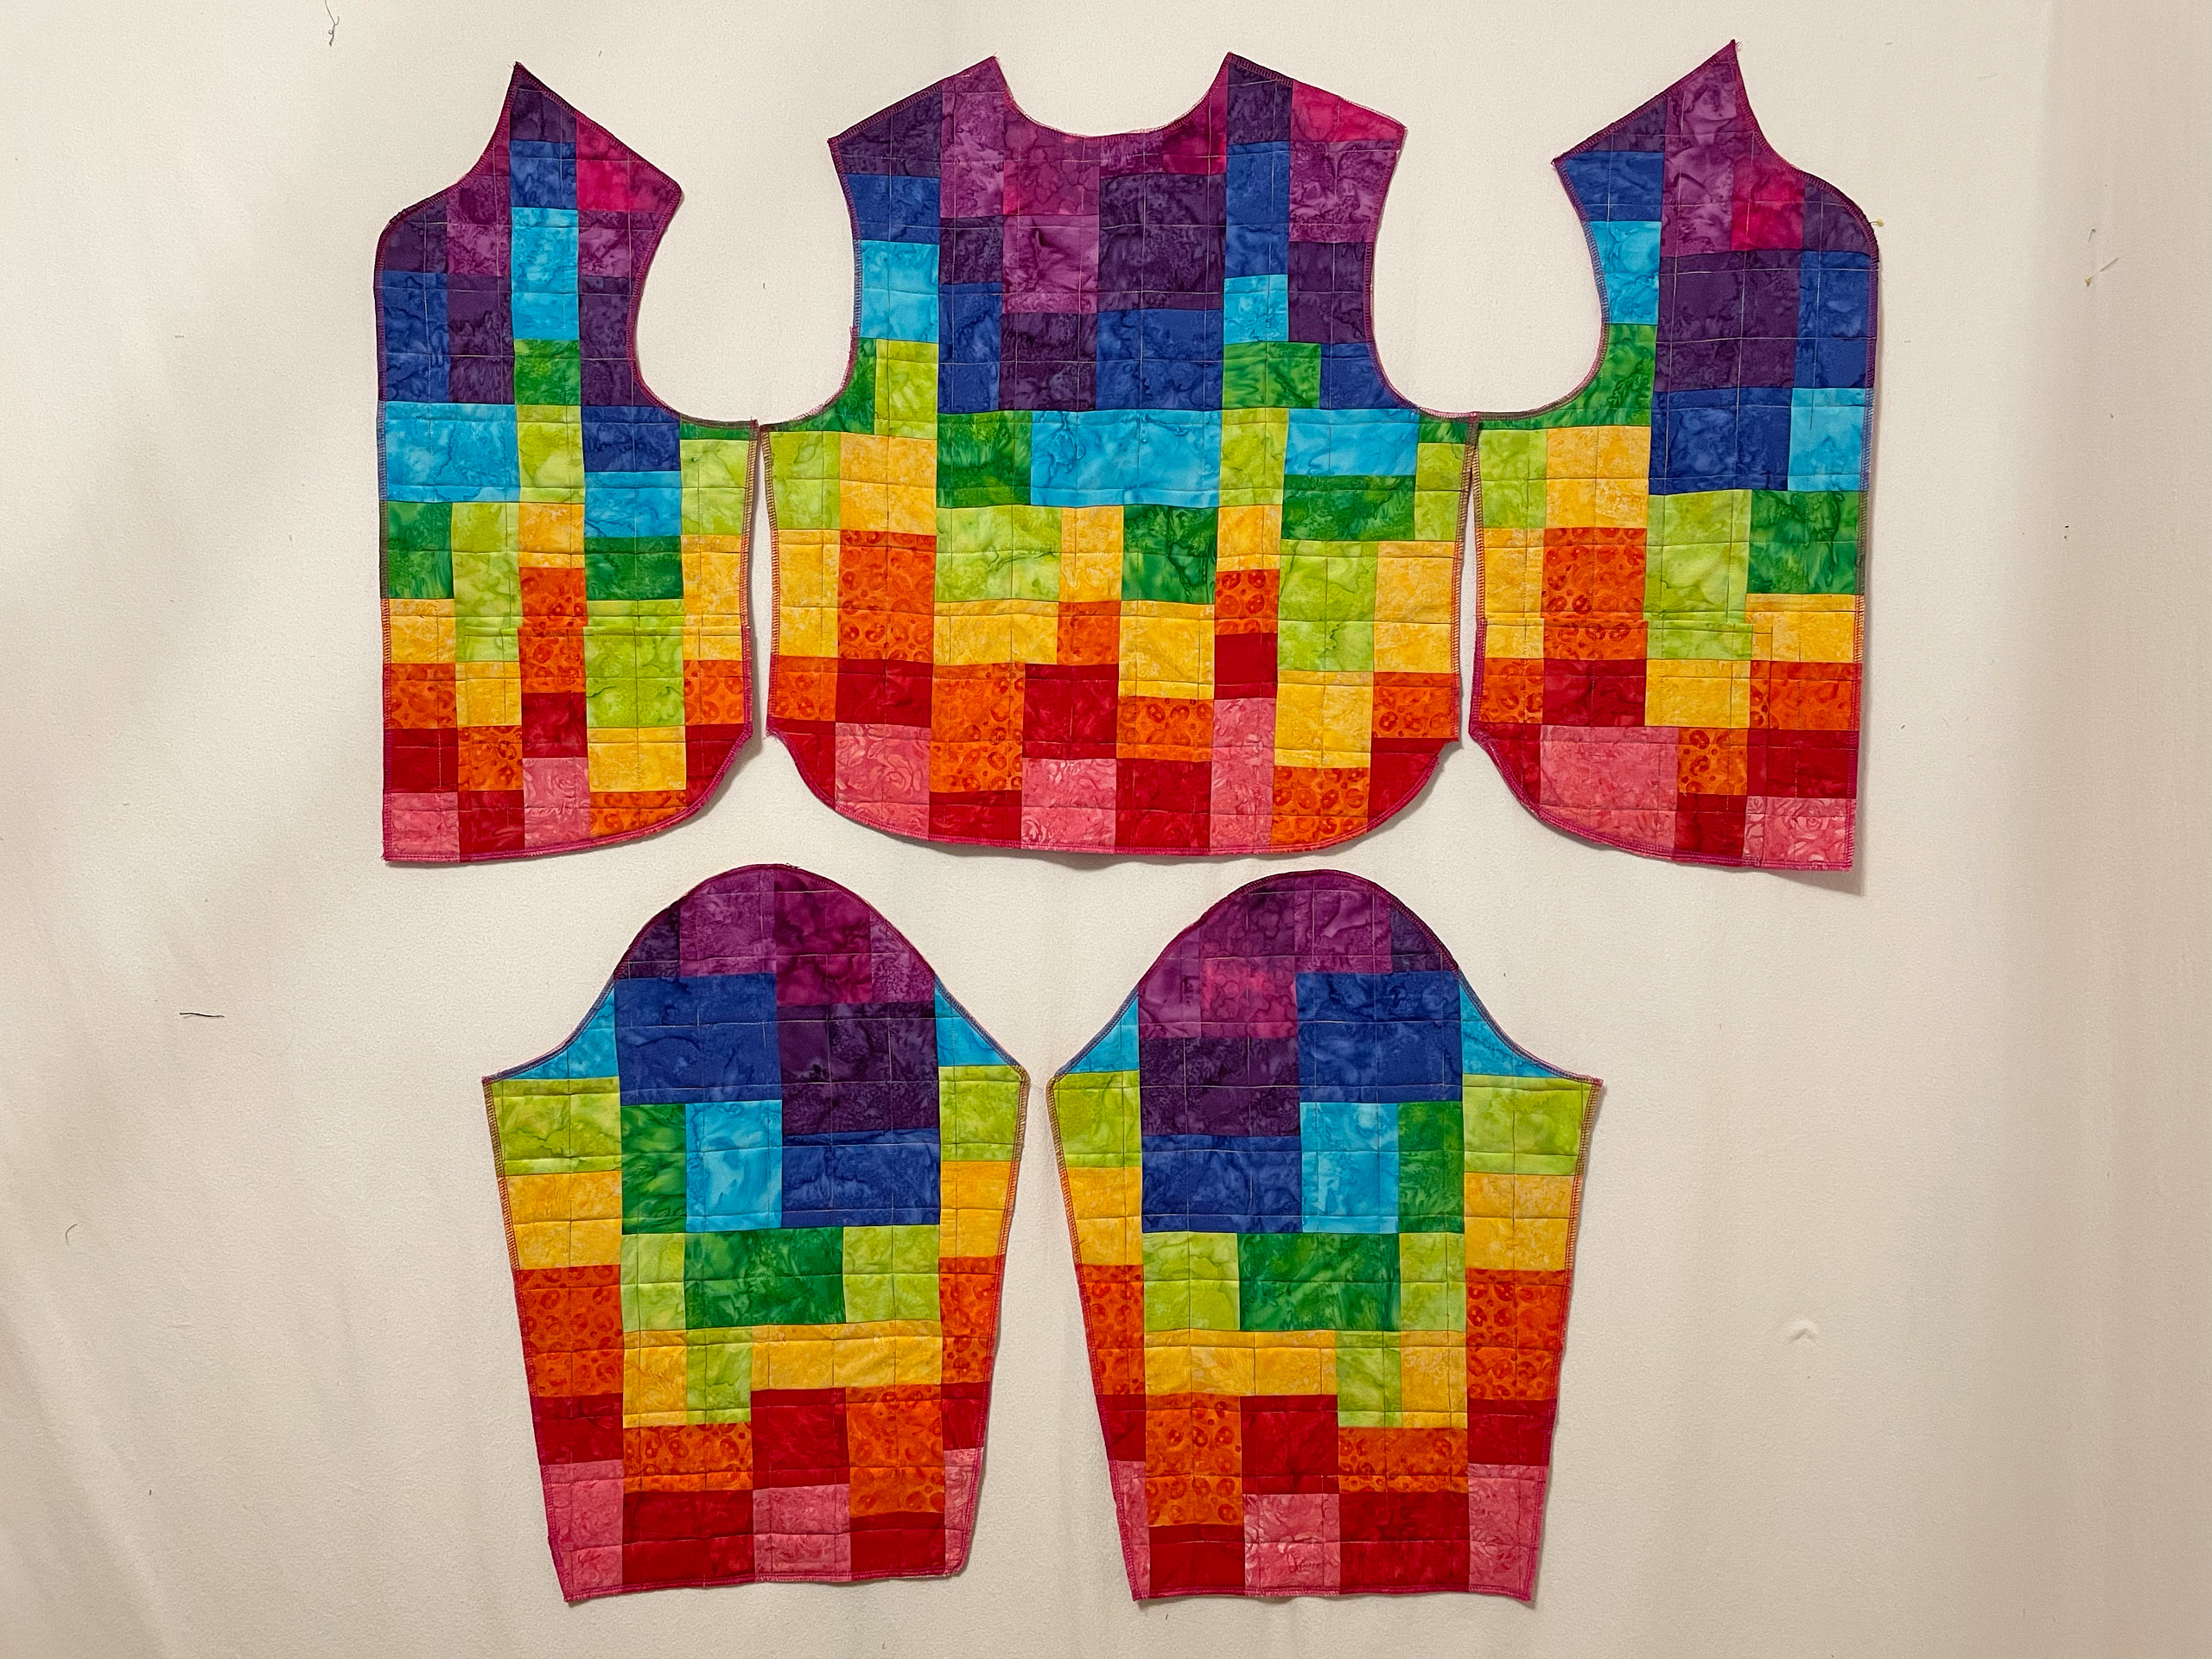
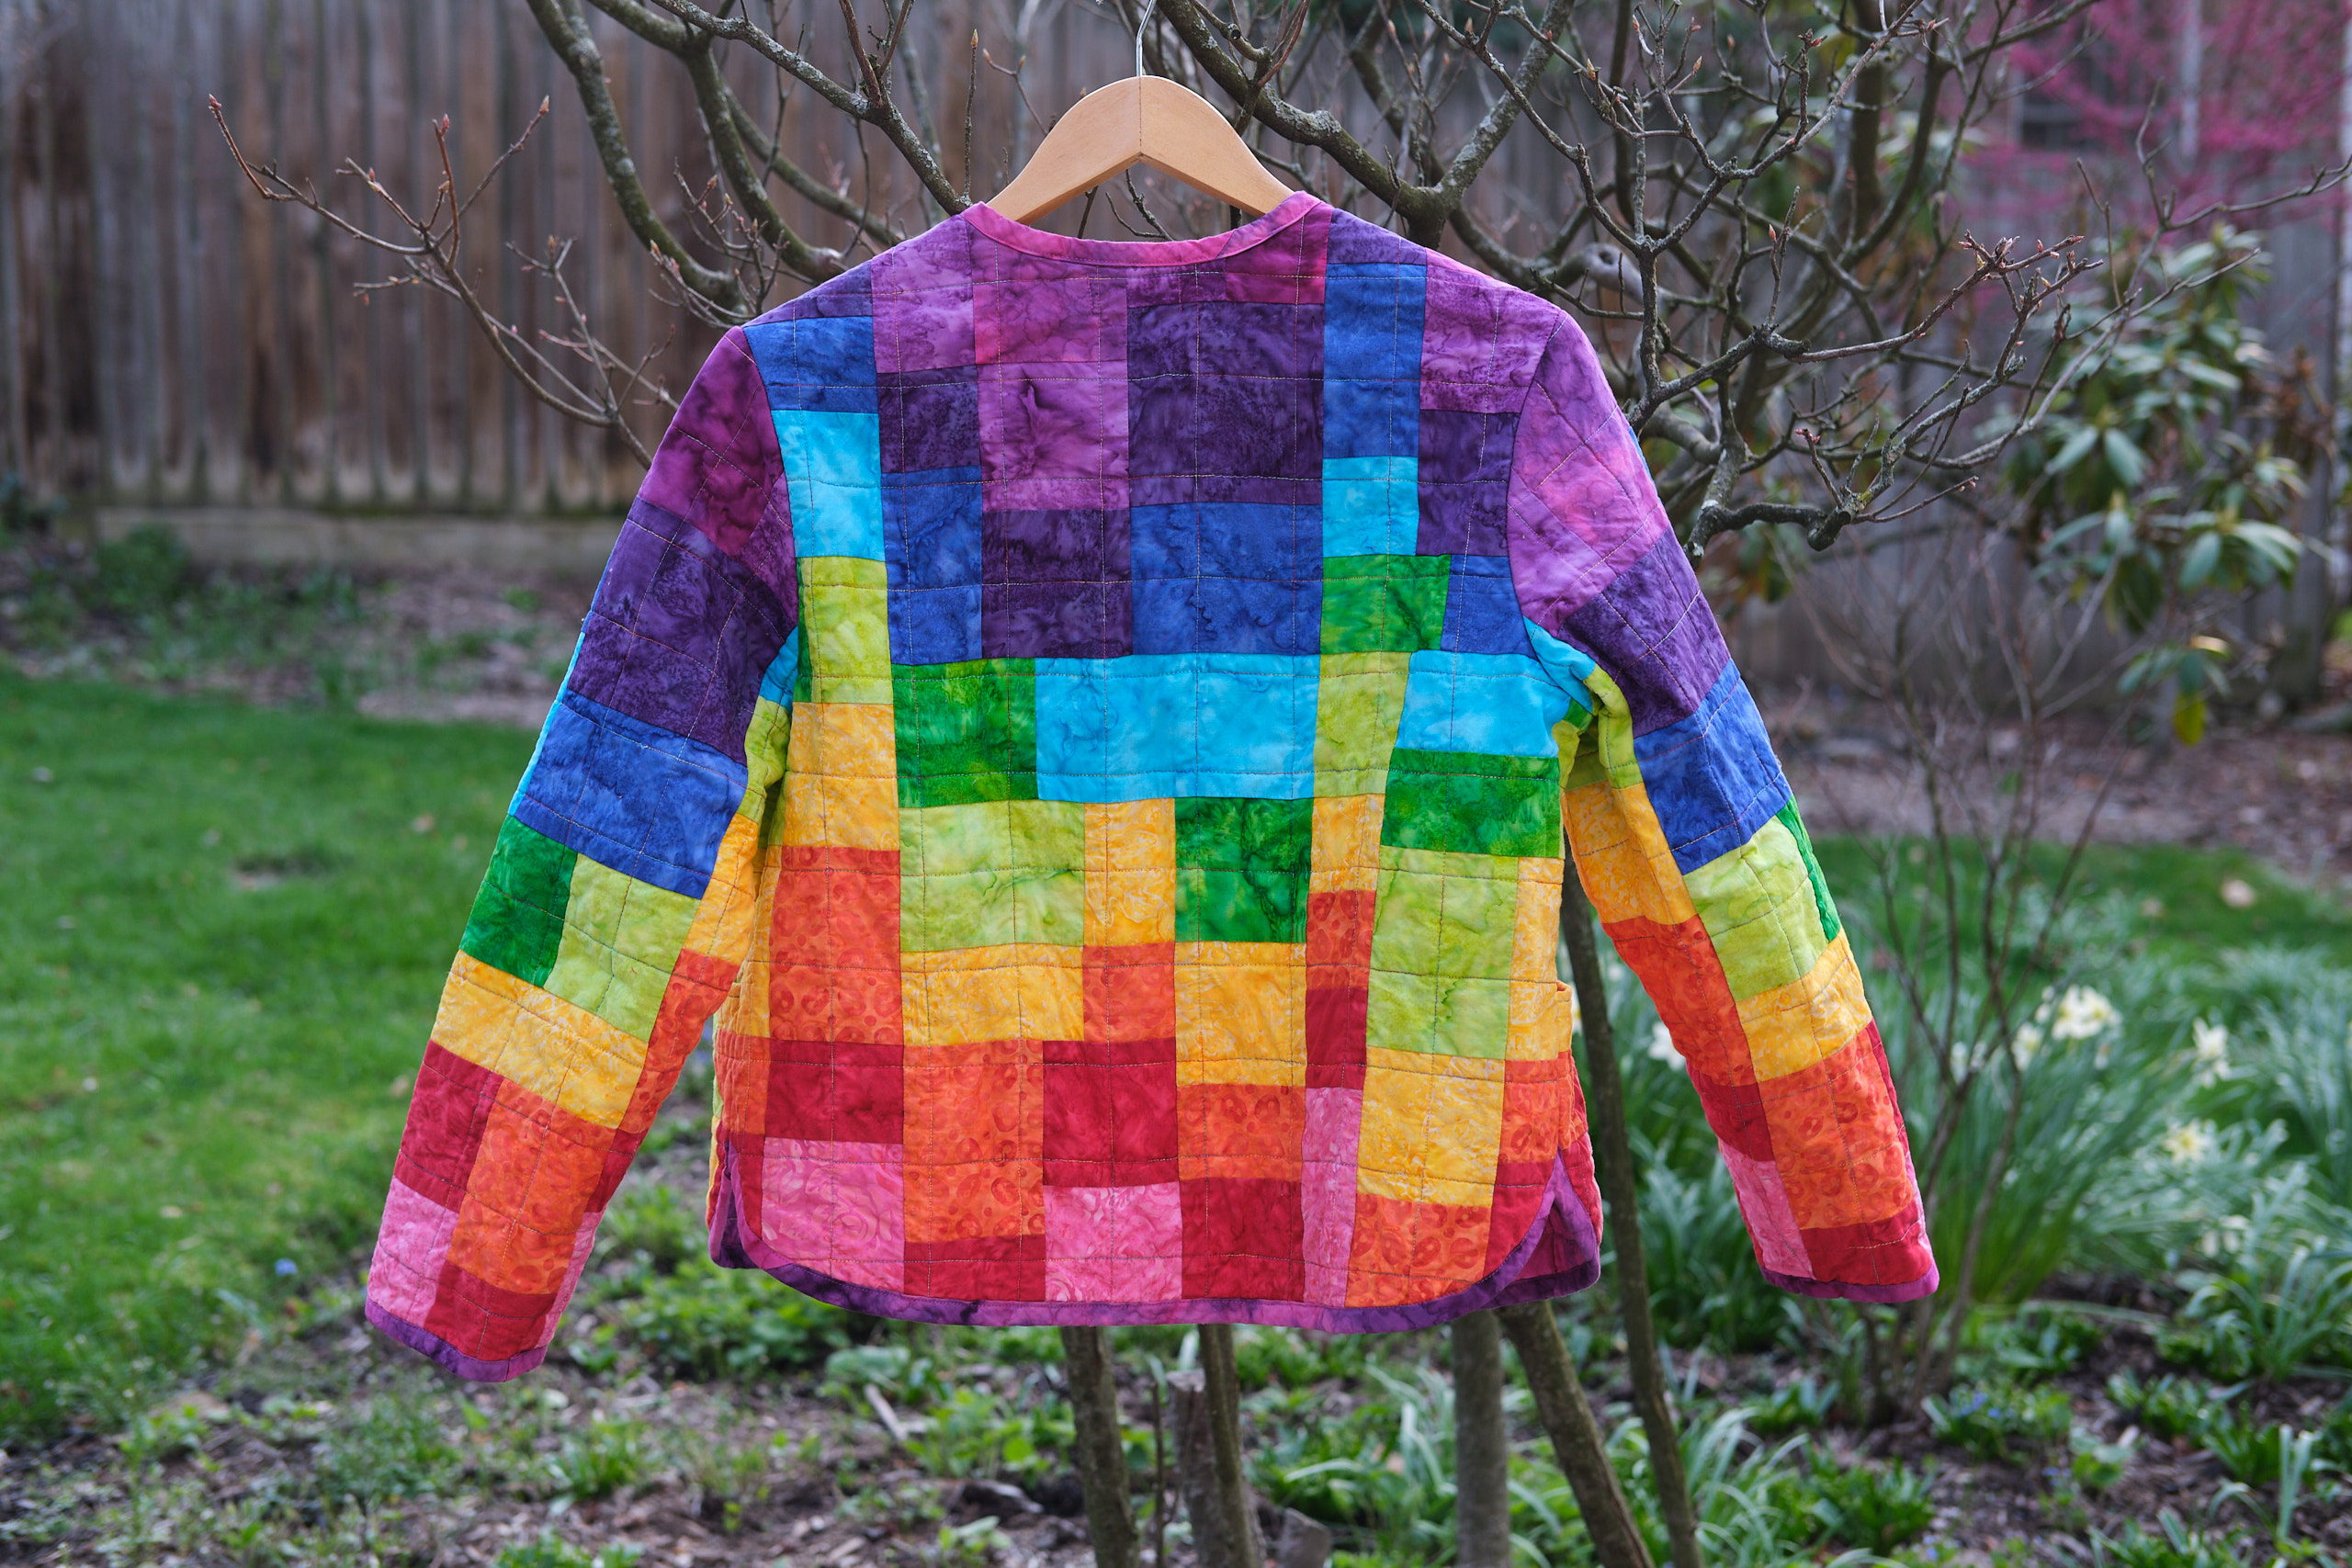
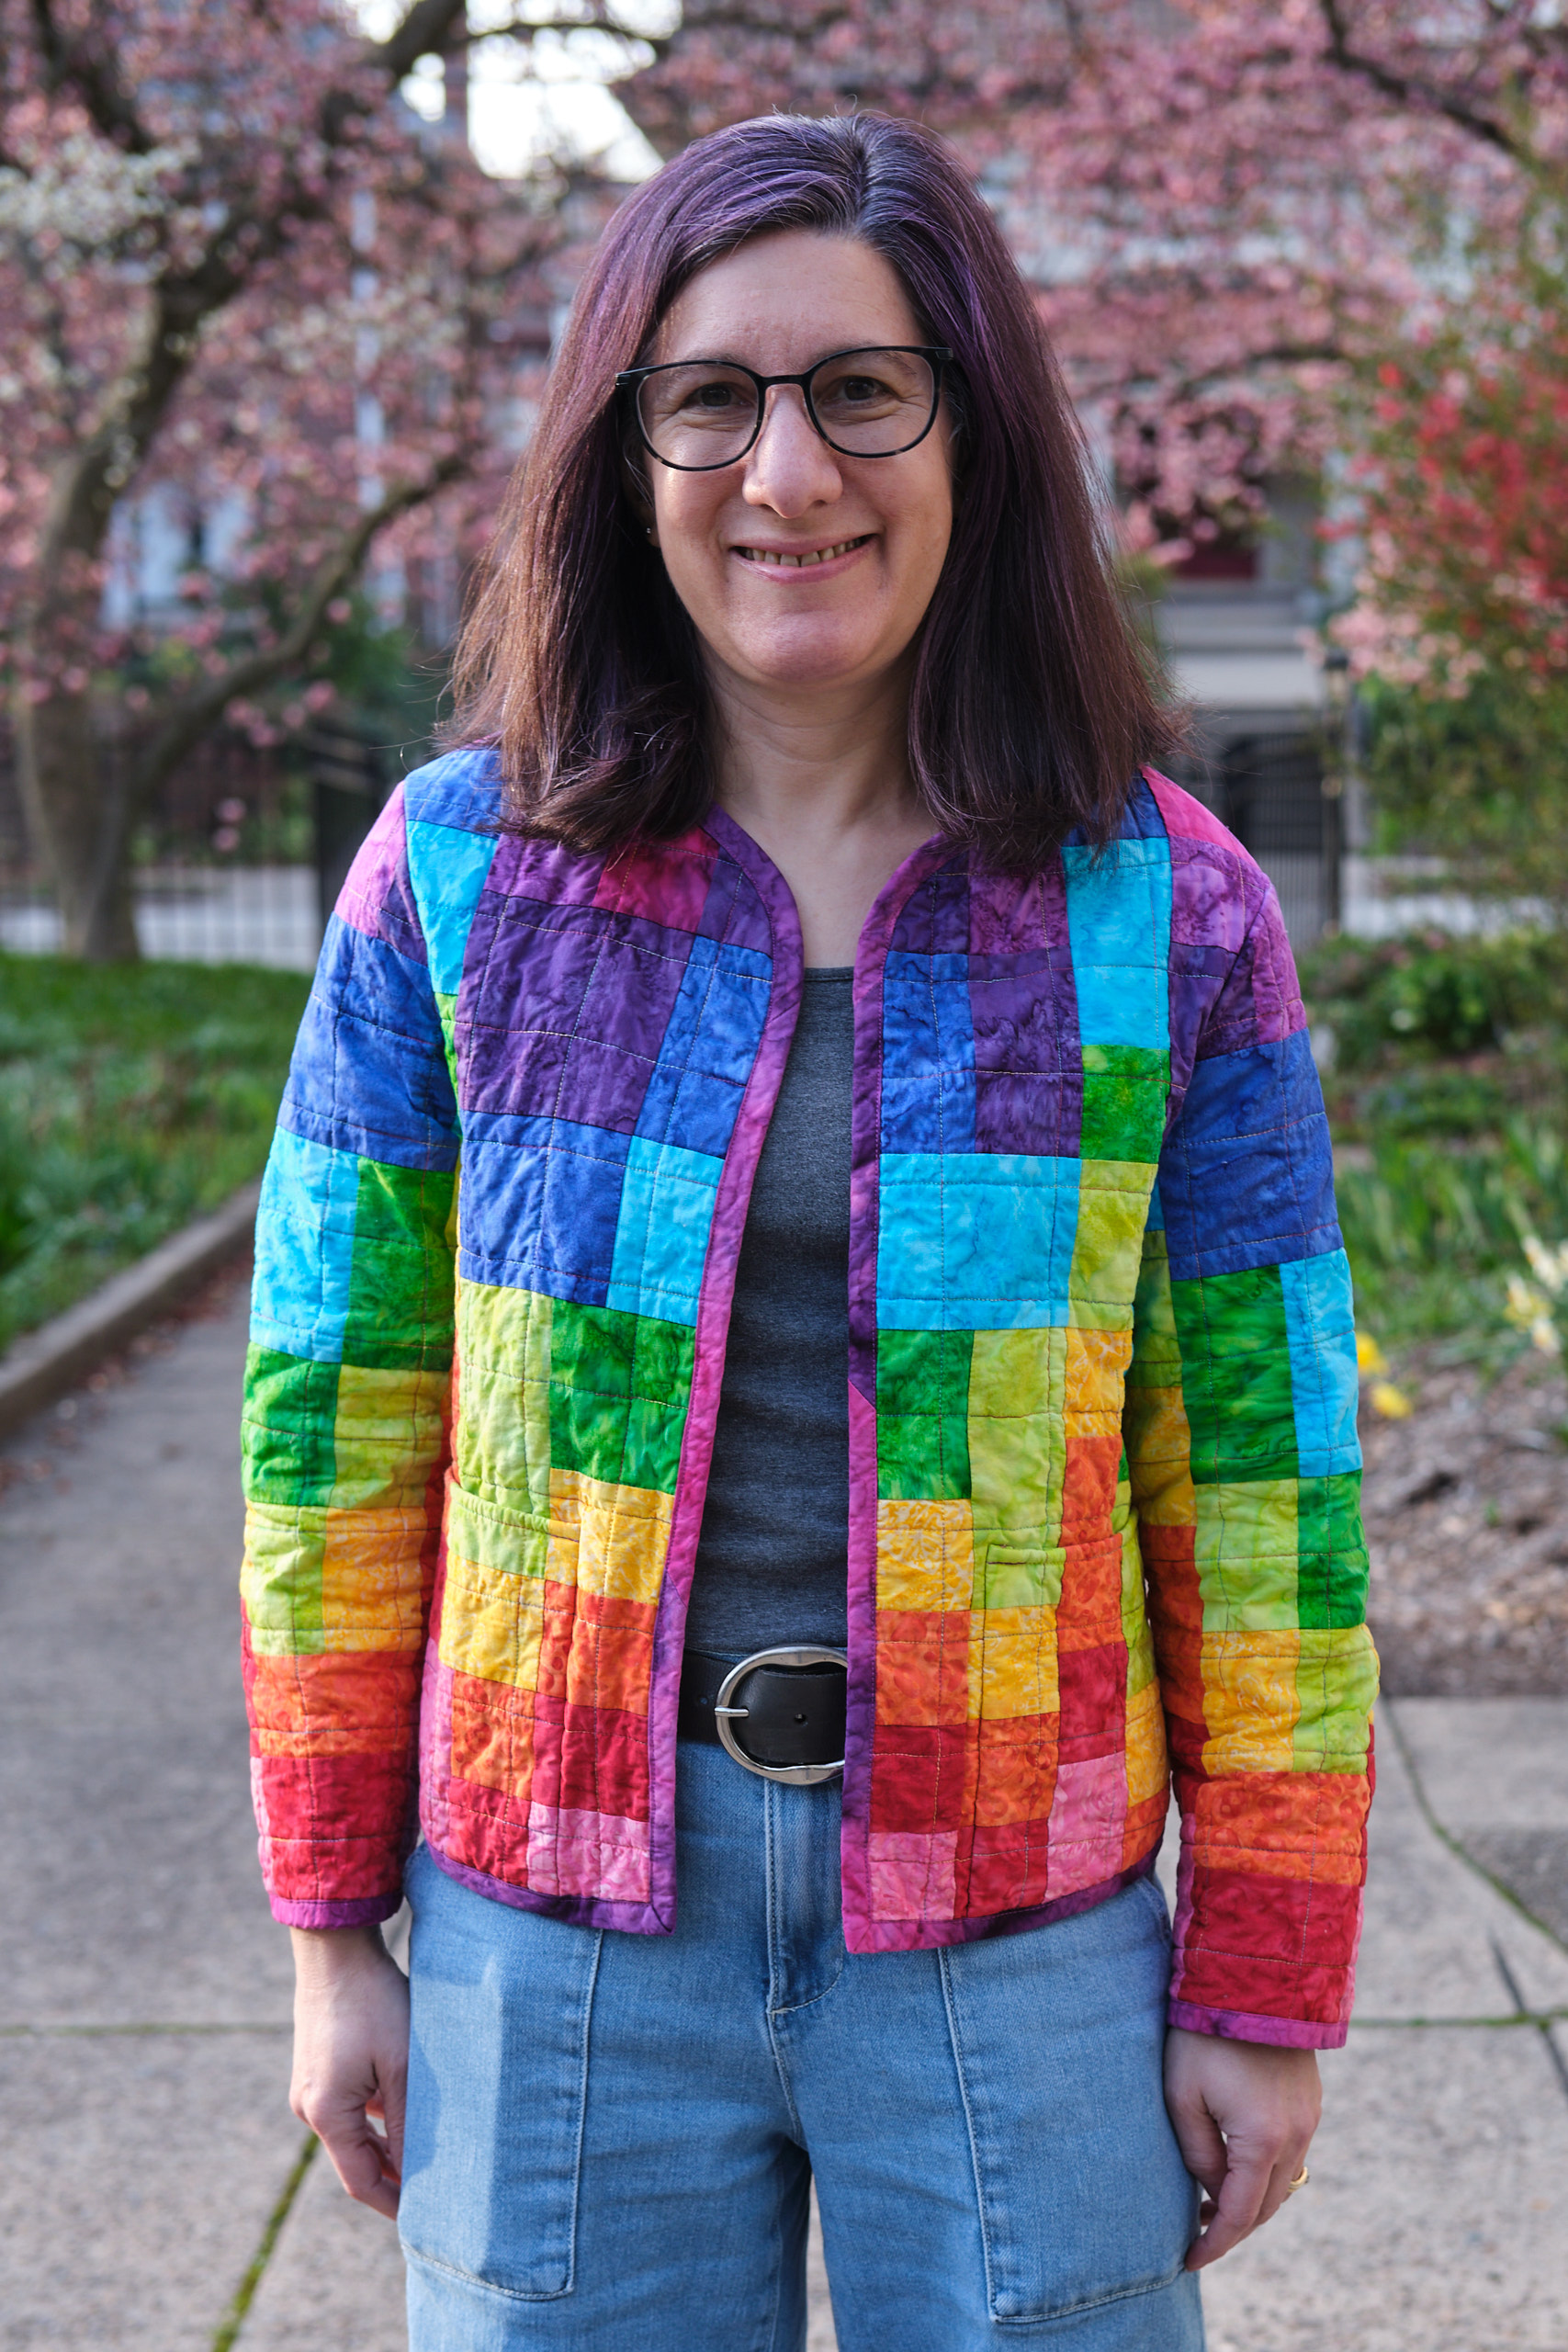
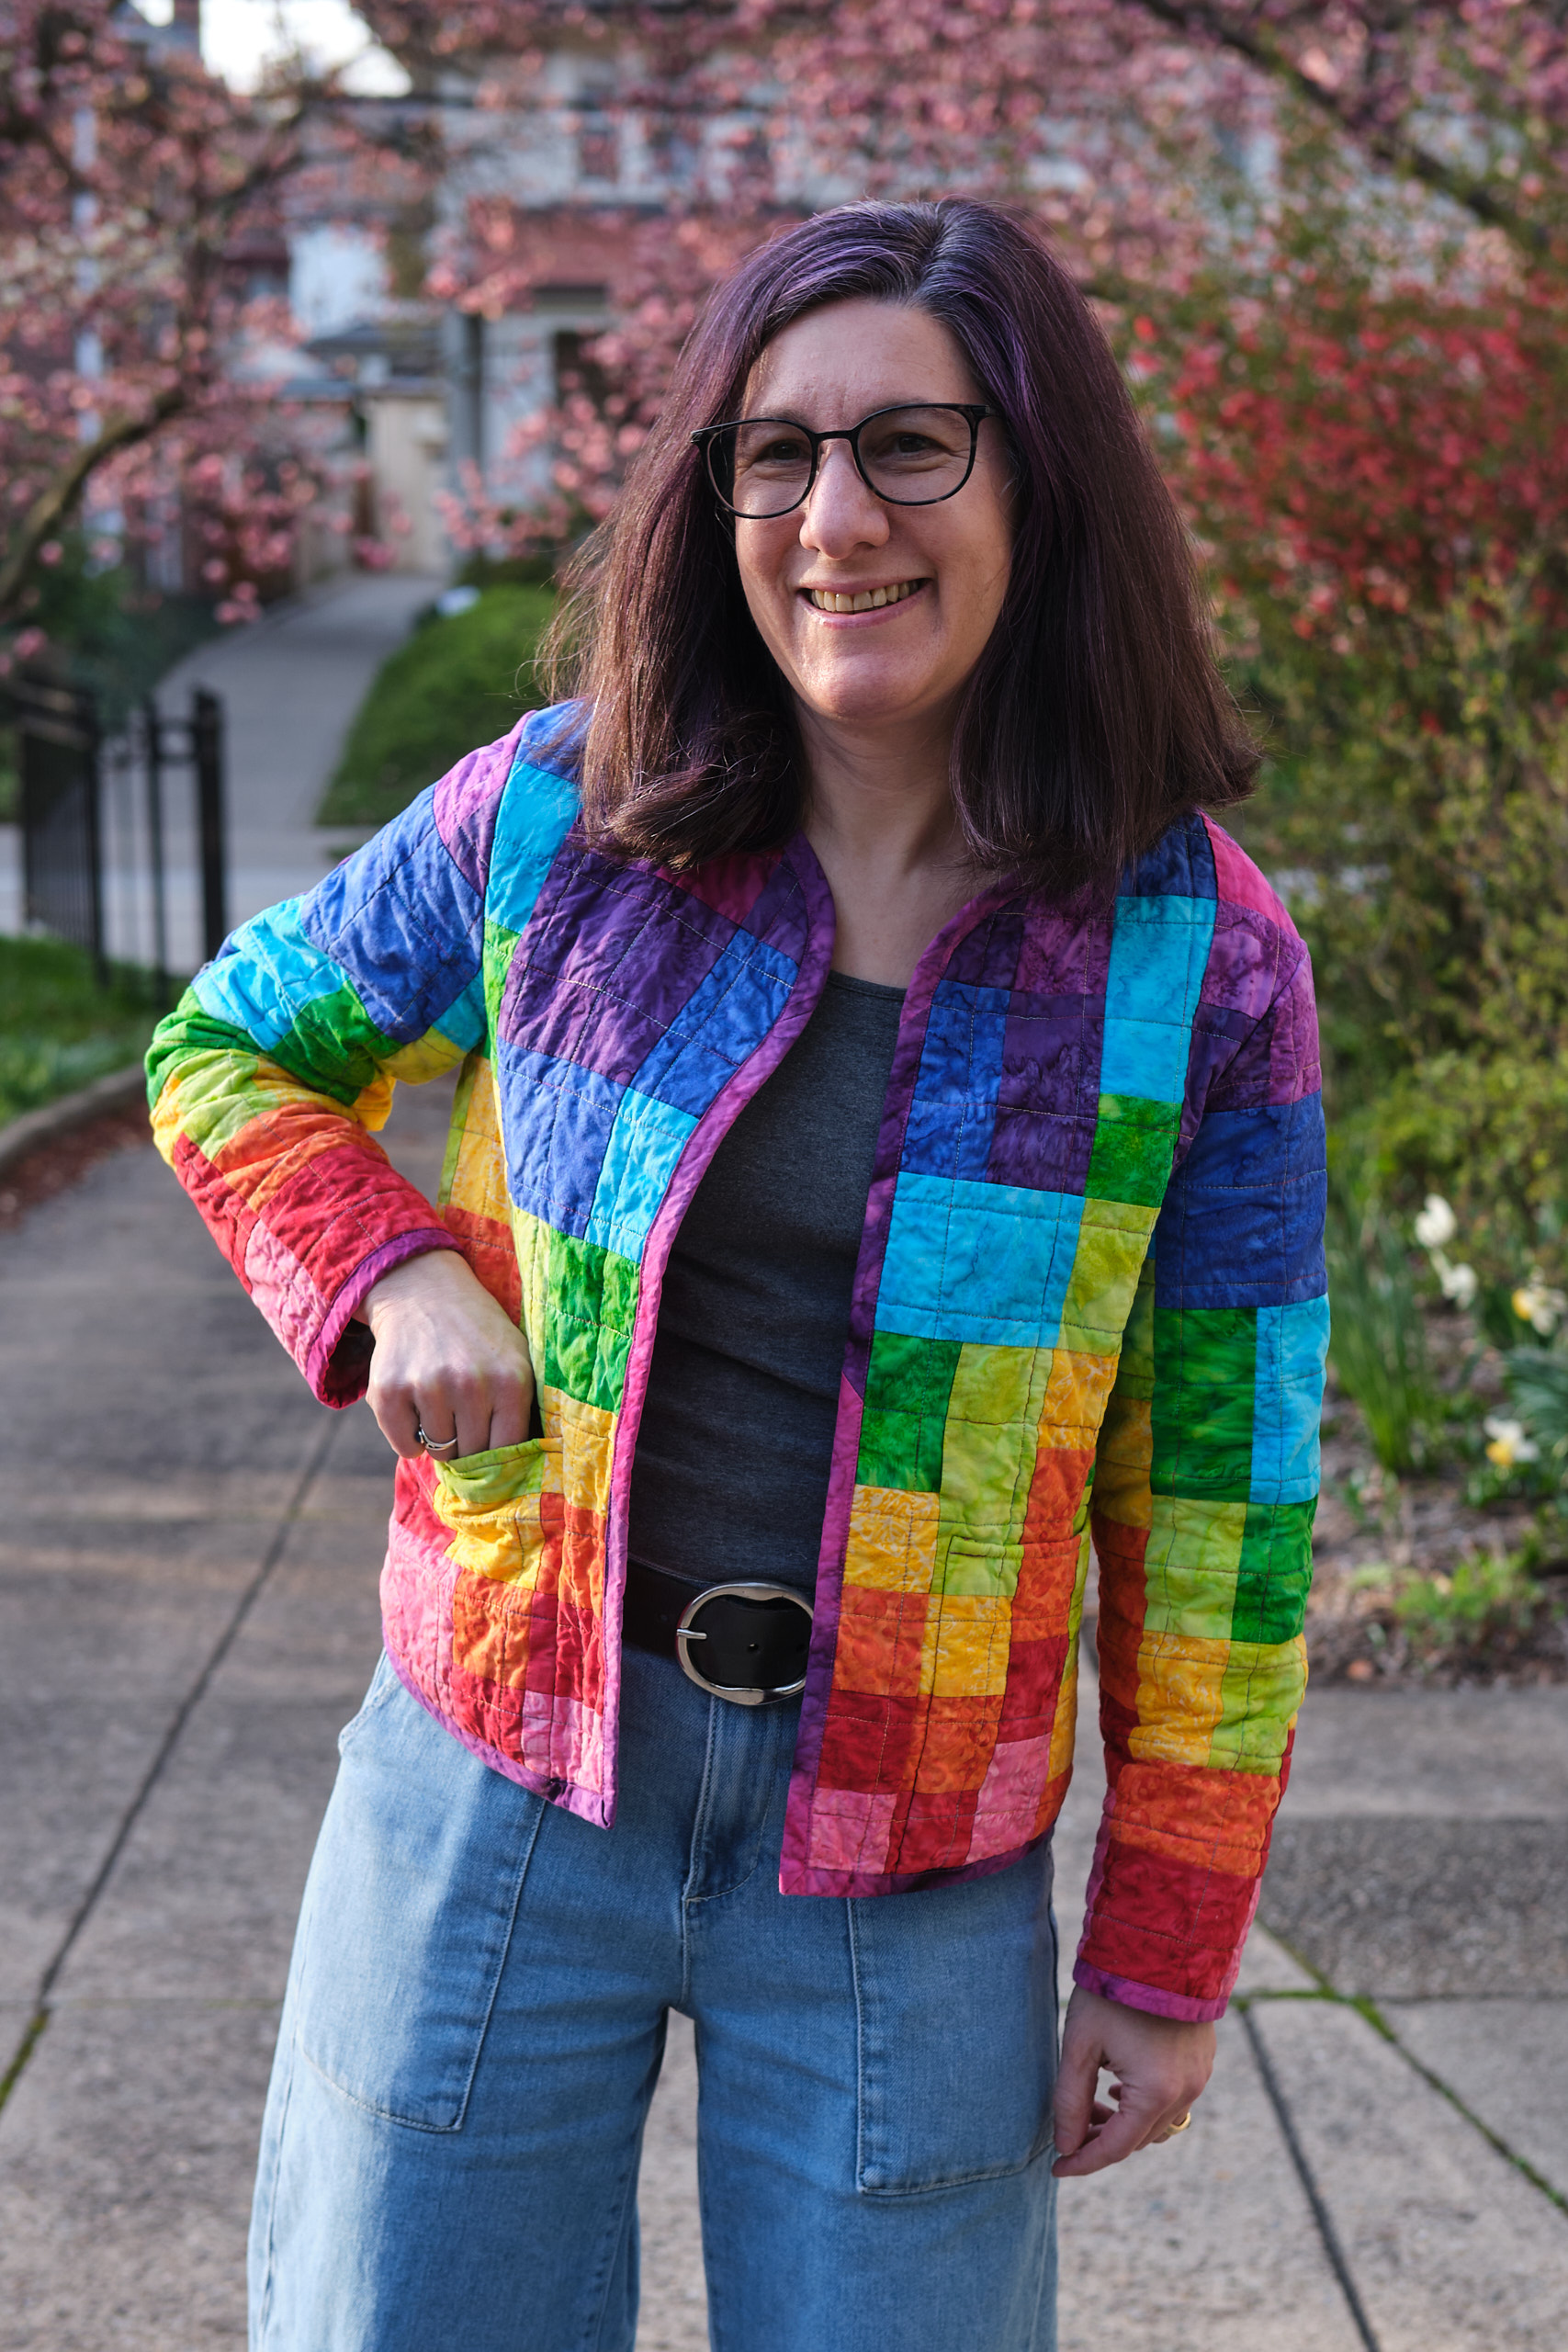
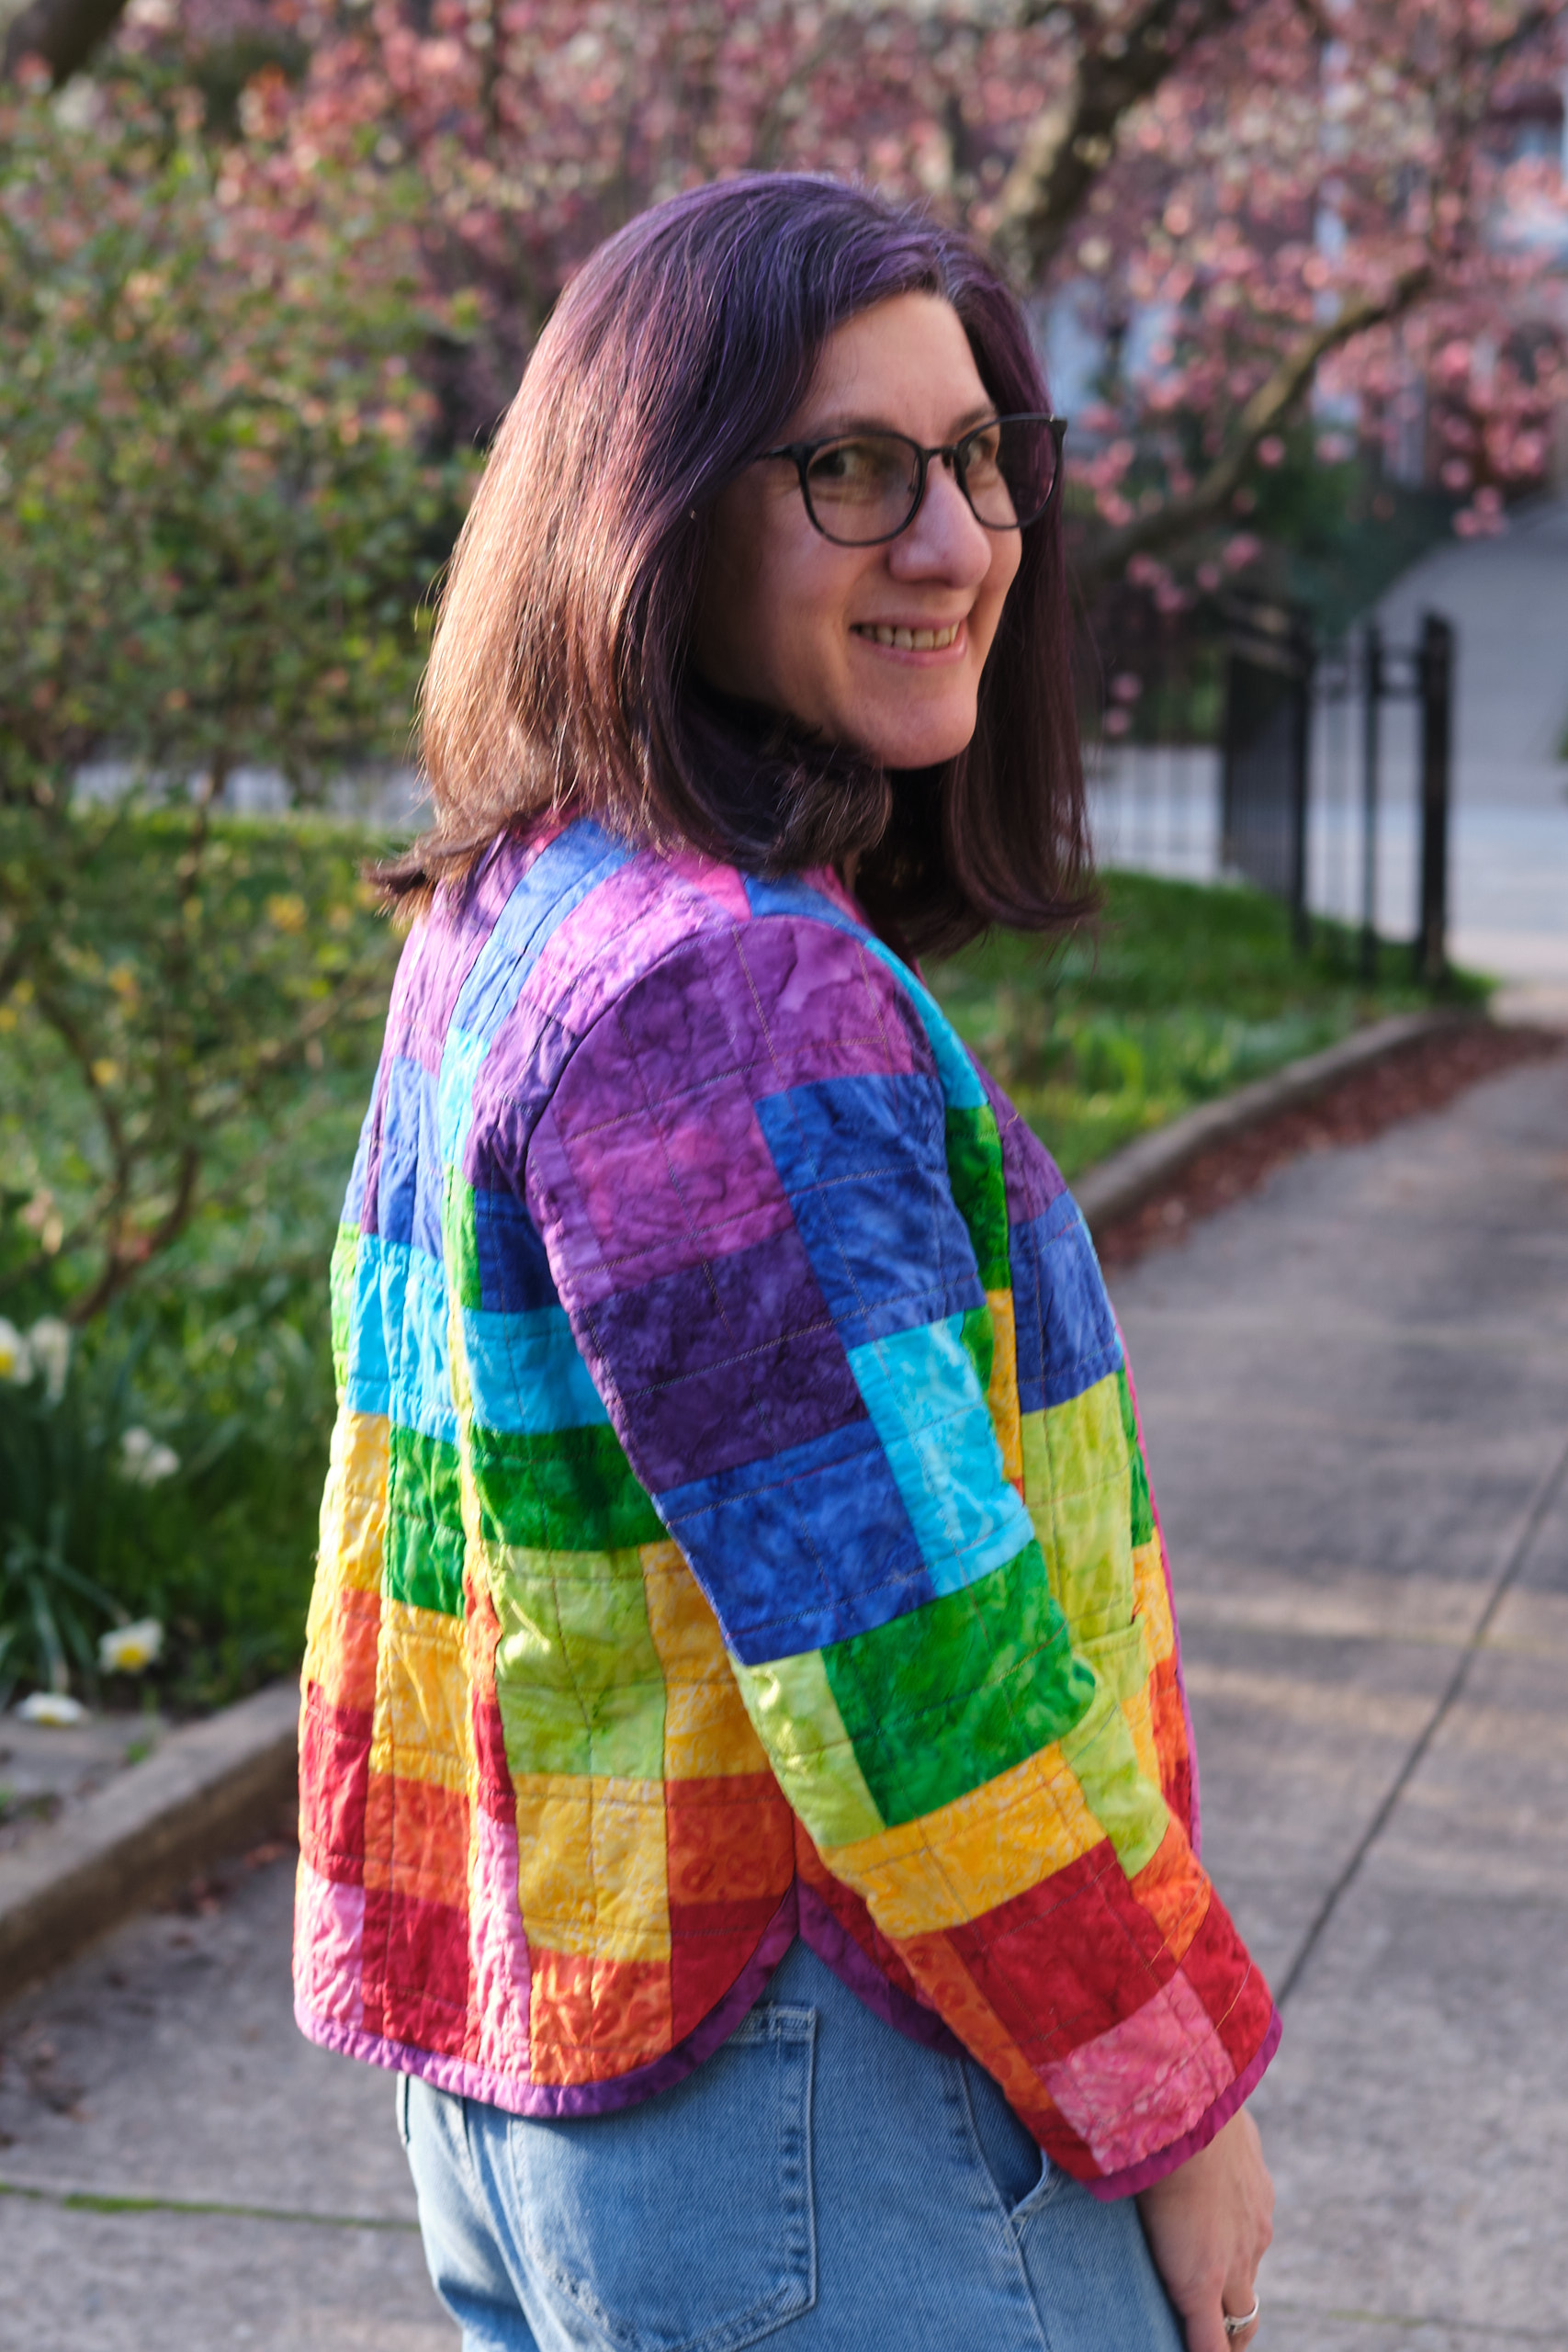
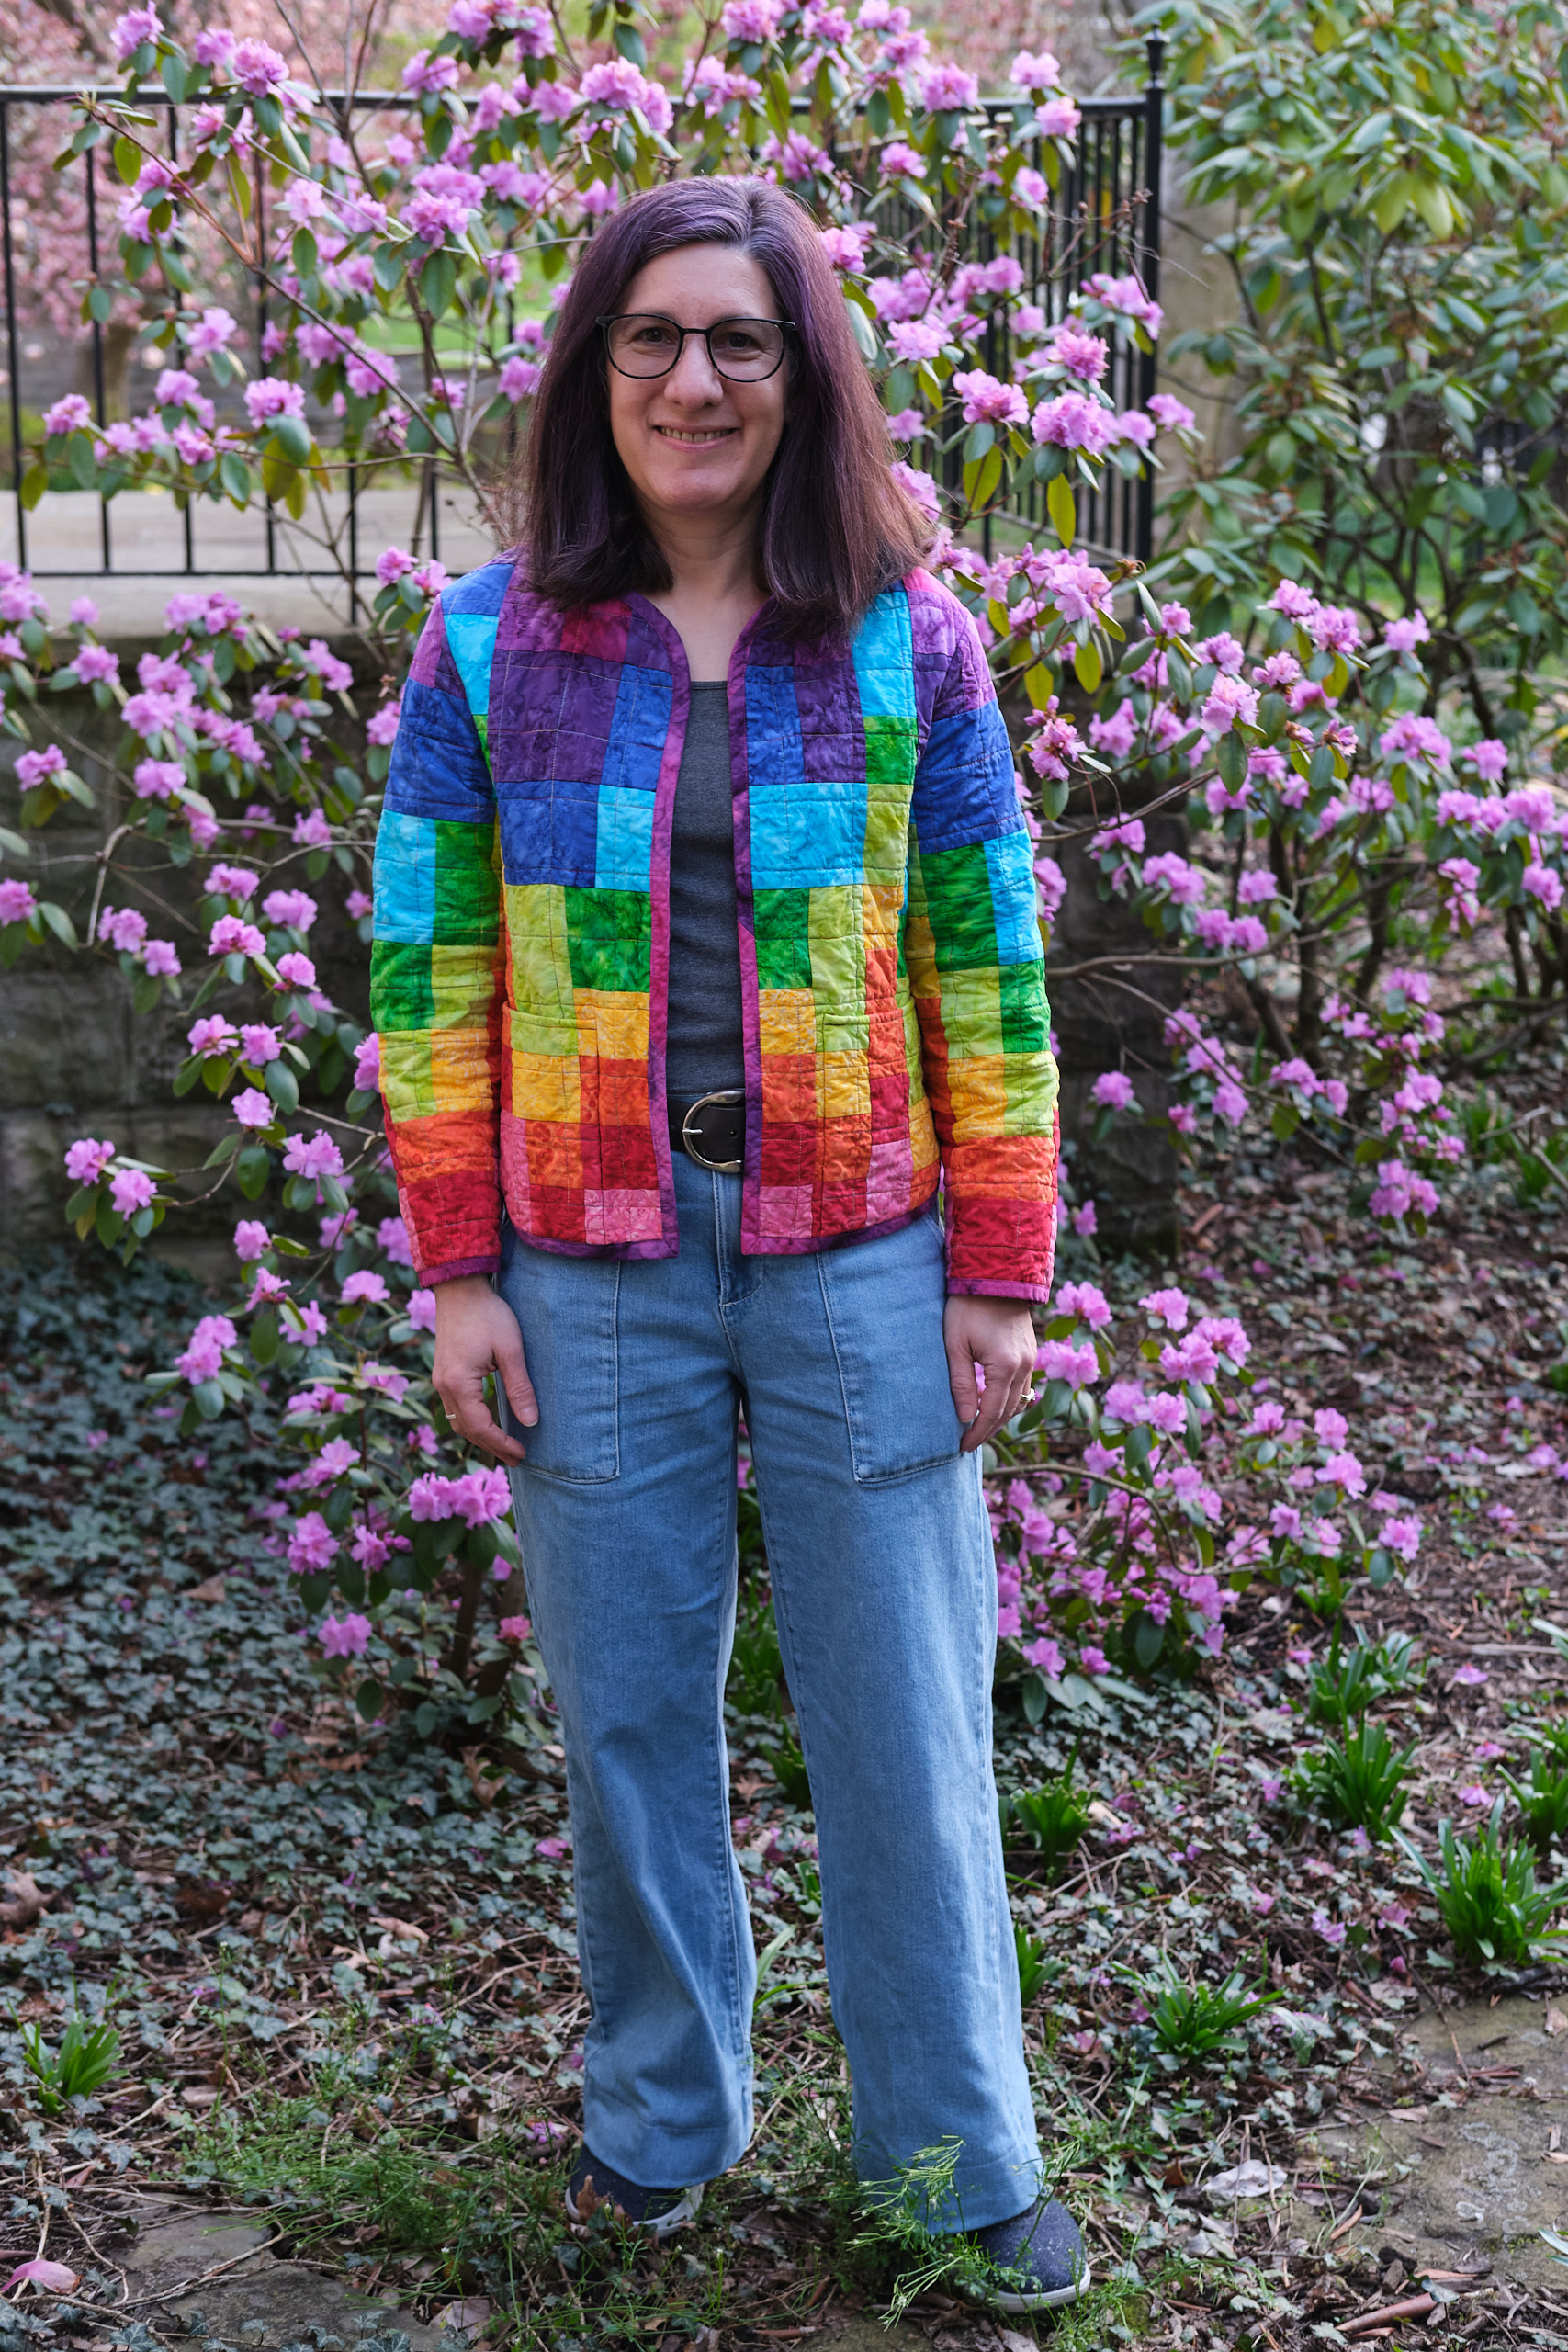
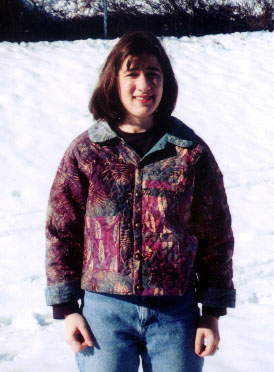
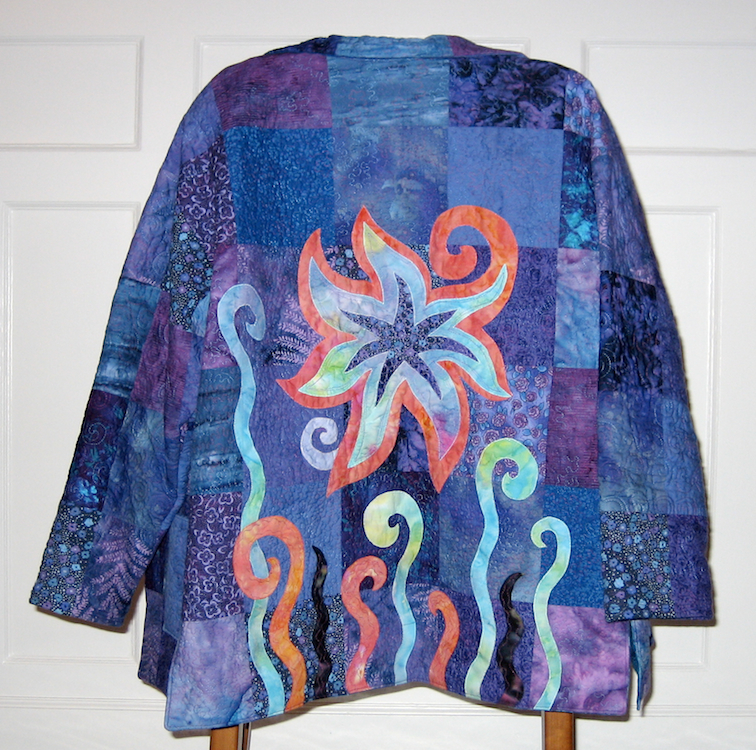
It’s been over 20 years since I last sewed a quilted jacket (see my first quilted jacket, made in 1999 and my second, made in 2003). Quilted jackets seem to be somewhat fashionable this year, and when I saw the Love Notions Coda Quilted Coat pattern I had to give it a try. I saw lots of people using pre-quilted fabric or turning thrifted quilts into Coda coats (some nice examples and tips here), but since I am a quilter, I decided to piece and quilt my own Coda (some nice examples and tips here). I spent hours asking the Internet to show me quilted coats, and finally settled on using a rainbow of bright batik fabric from my stash in a random-looking pattern of squares and rectangles that I designed. I was inspired by several of the quilted coats I saw, including Thread + Sprout‘s rainbow scrappy patchy jacket. Here’s my finished coat – yes it is very colorful and bright, but sometimes I need that! Now let me tell you all about how I made it.
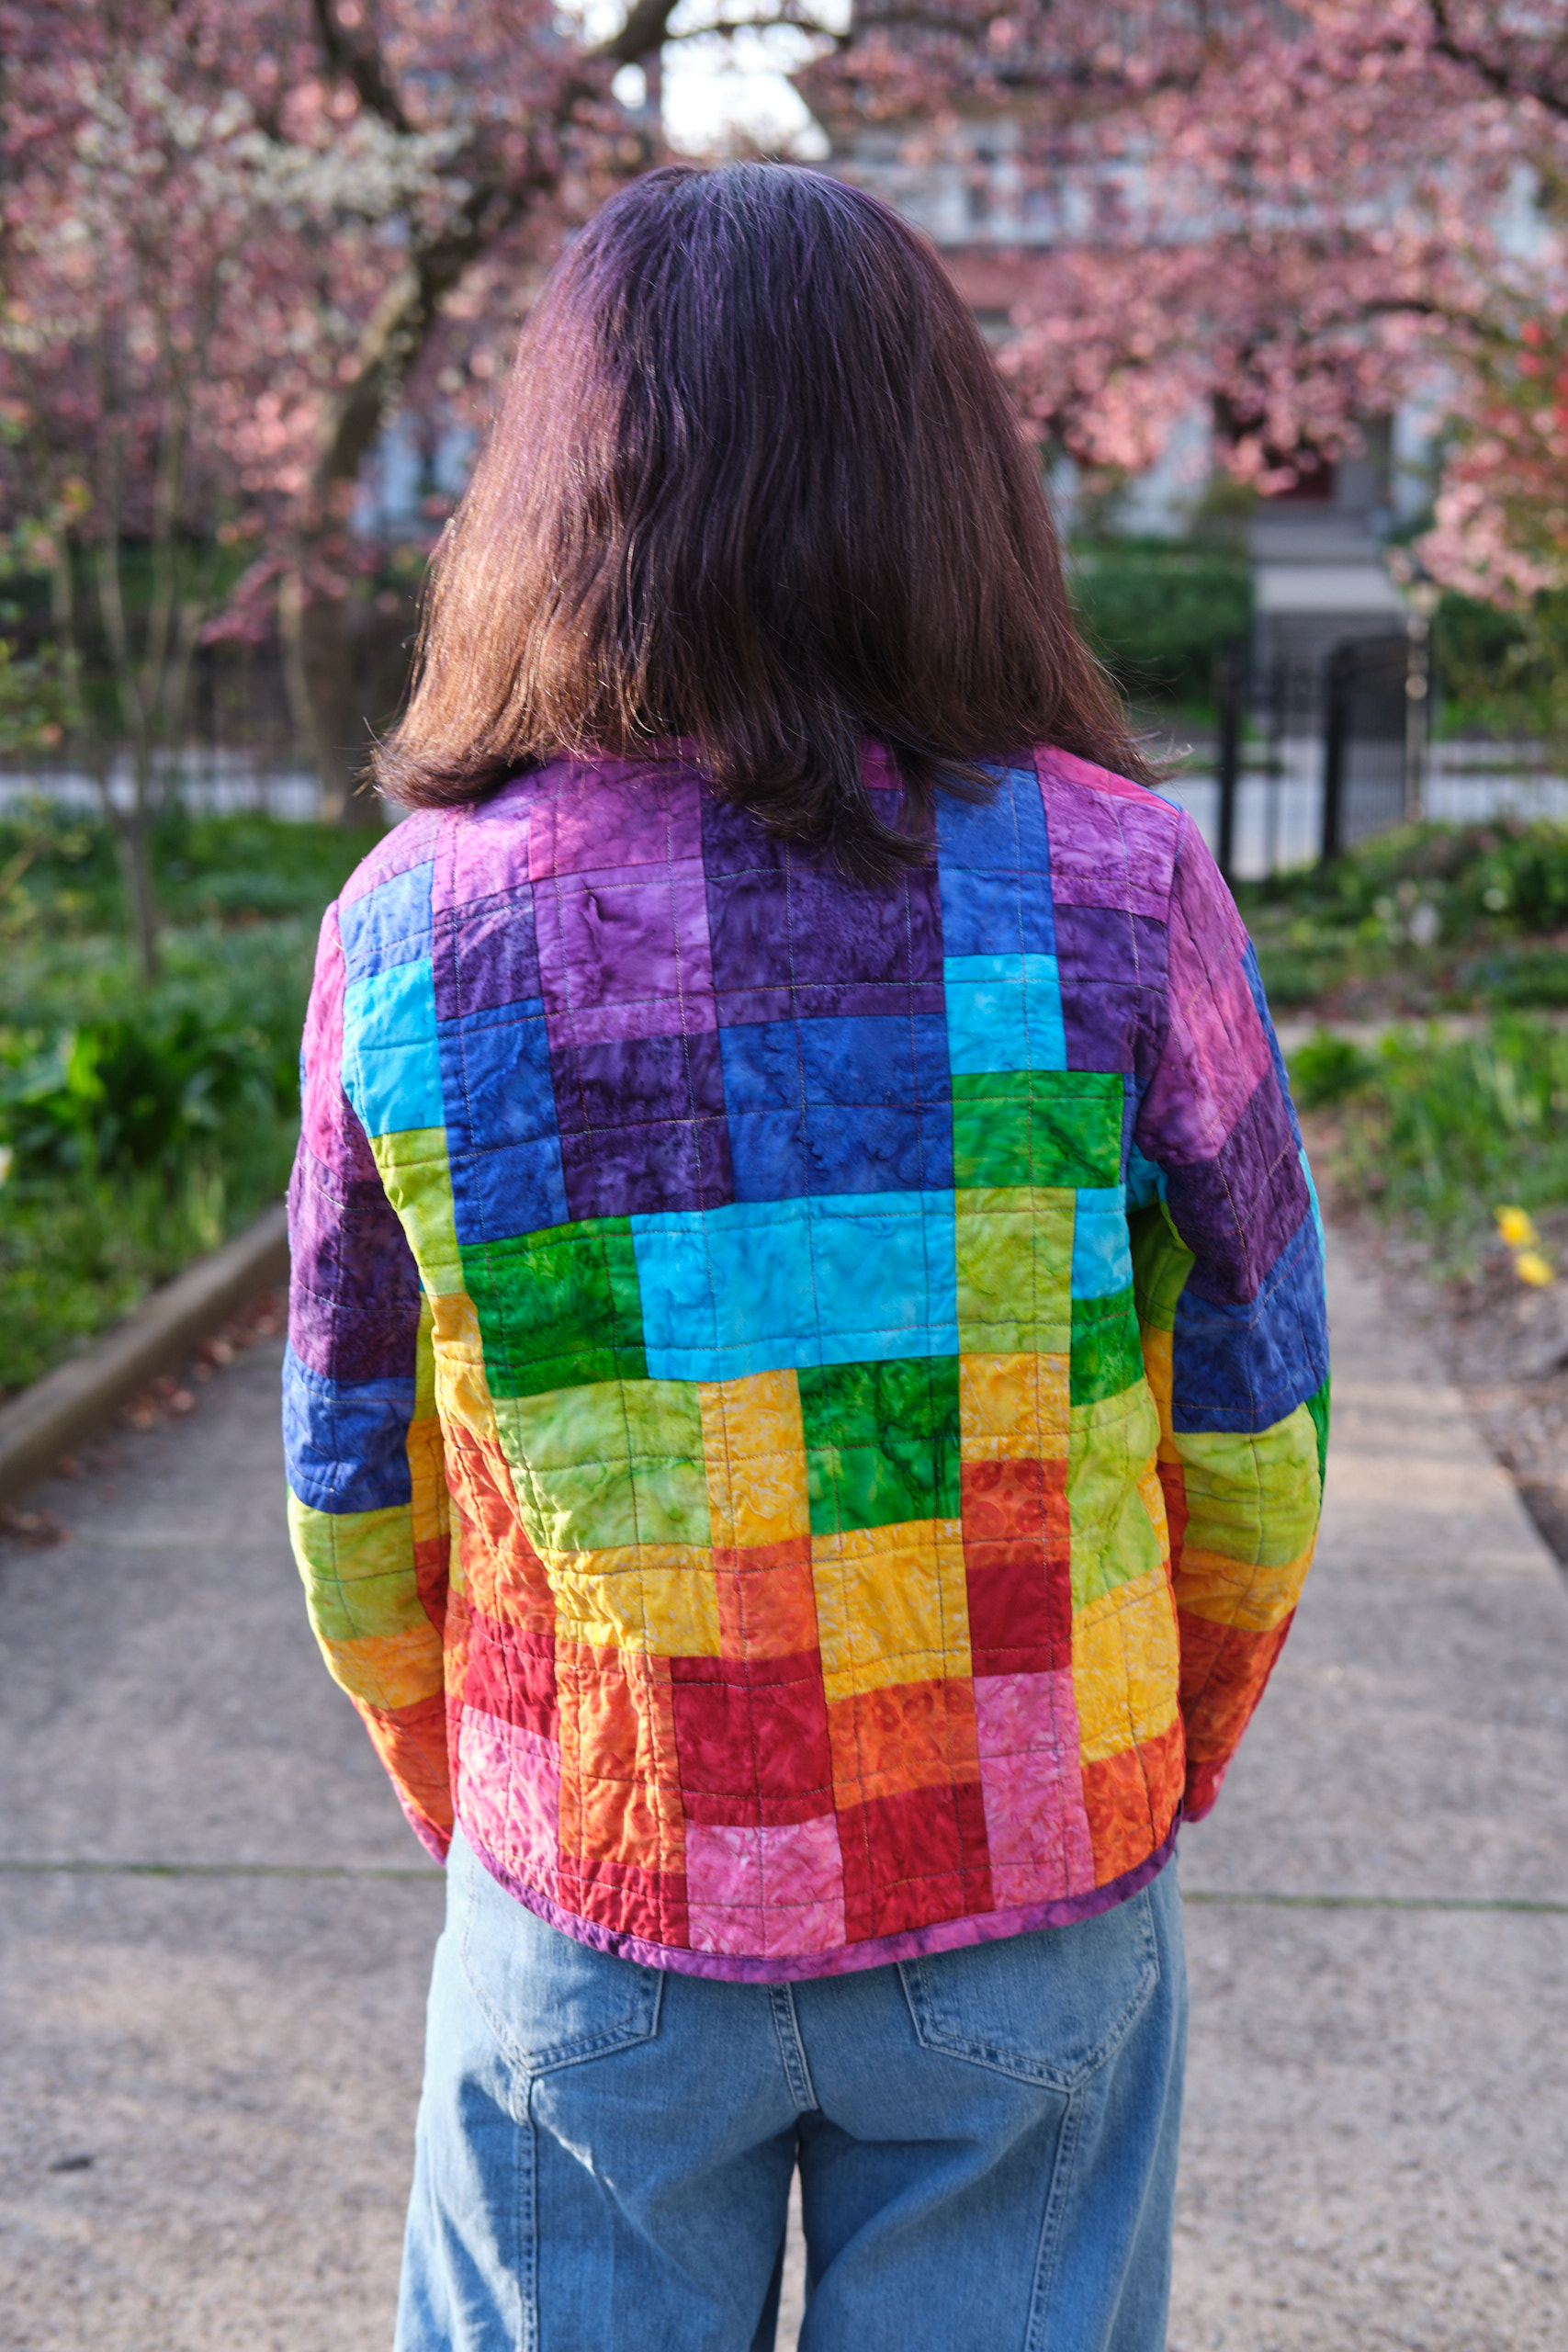
I started with the size small Coda pattern and projected and cut out lining pieces from batik fabric in my stash. I then basted them together to check the fit of the coat. I decided to make a sloped shoulder adjustment, scoop out the back of the neck a bit, and shorten the sleeves by 2.5 inches. I considered shortening the whole coat since I am 5’2″ and it is drafted for someone 5’5″, but I decided I preferred it to be a little longer (and saw that many other sewists were lengthening their Codas). I could have left the sleeves as-is and cuffed them, but figured the quilt would be bulky so decided to shorten so I would not have to cuff.
Next I needed to decide what type of batting to use. I usually use cotton or fusible polyester cotton batting, but was hoping to make a lighter-weight jacket so looked to see what batting people recommended. I noticed that people who wanted a lighter batting often chose silk or bamboo. I ordered both from Battingsupersale.com (first time ordering from them and was quite pleased) and chose their Simply Bamboo batting because it seemed softer and drapier than the silk.
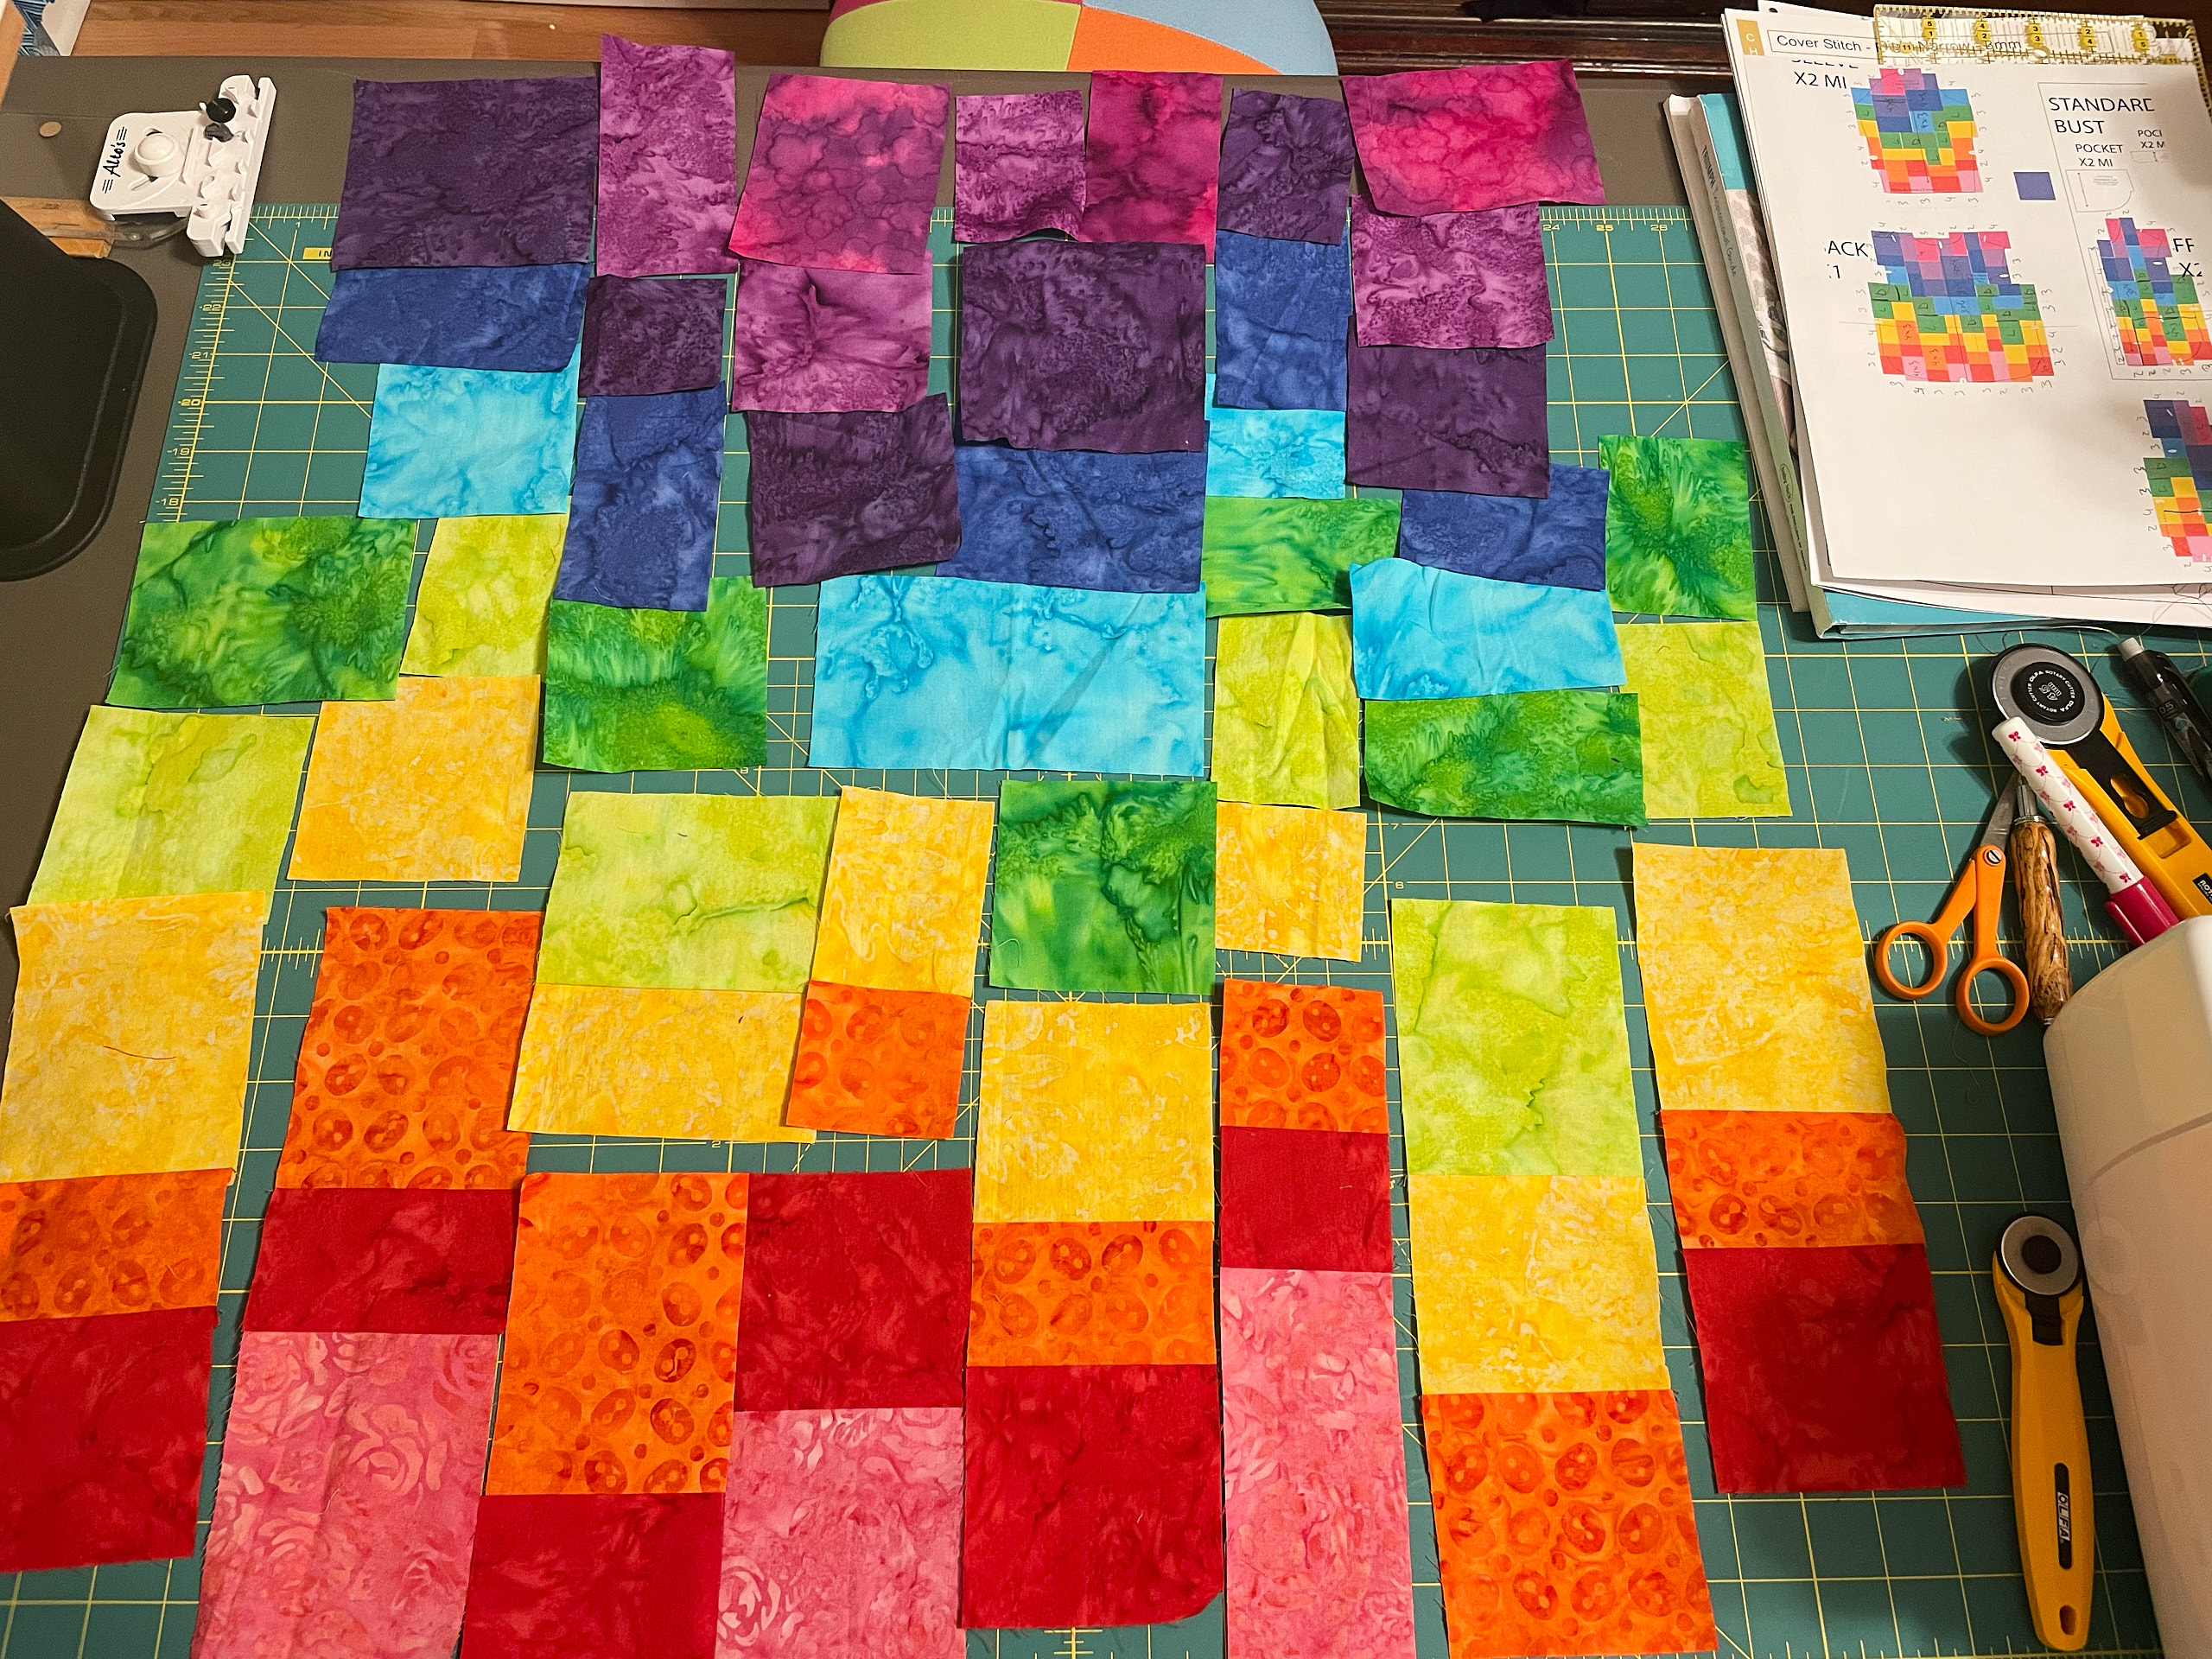
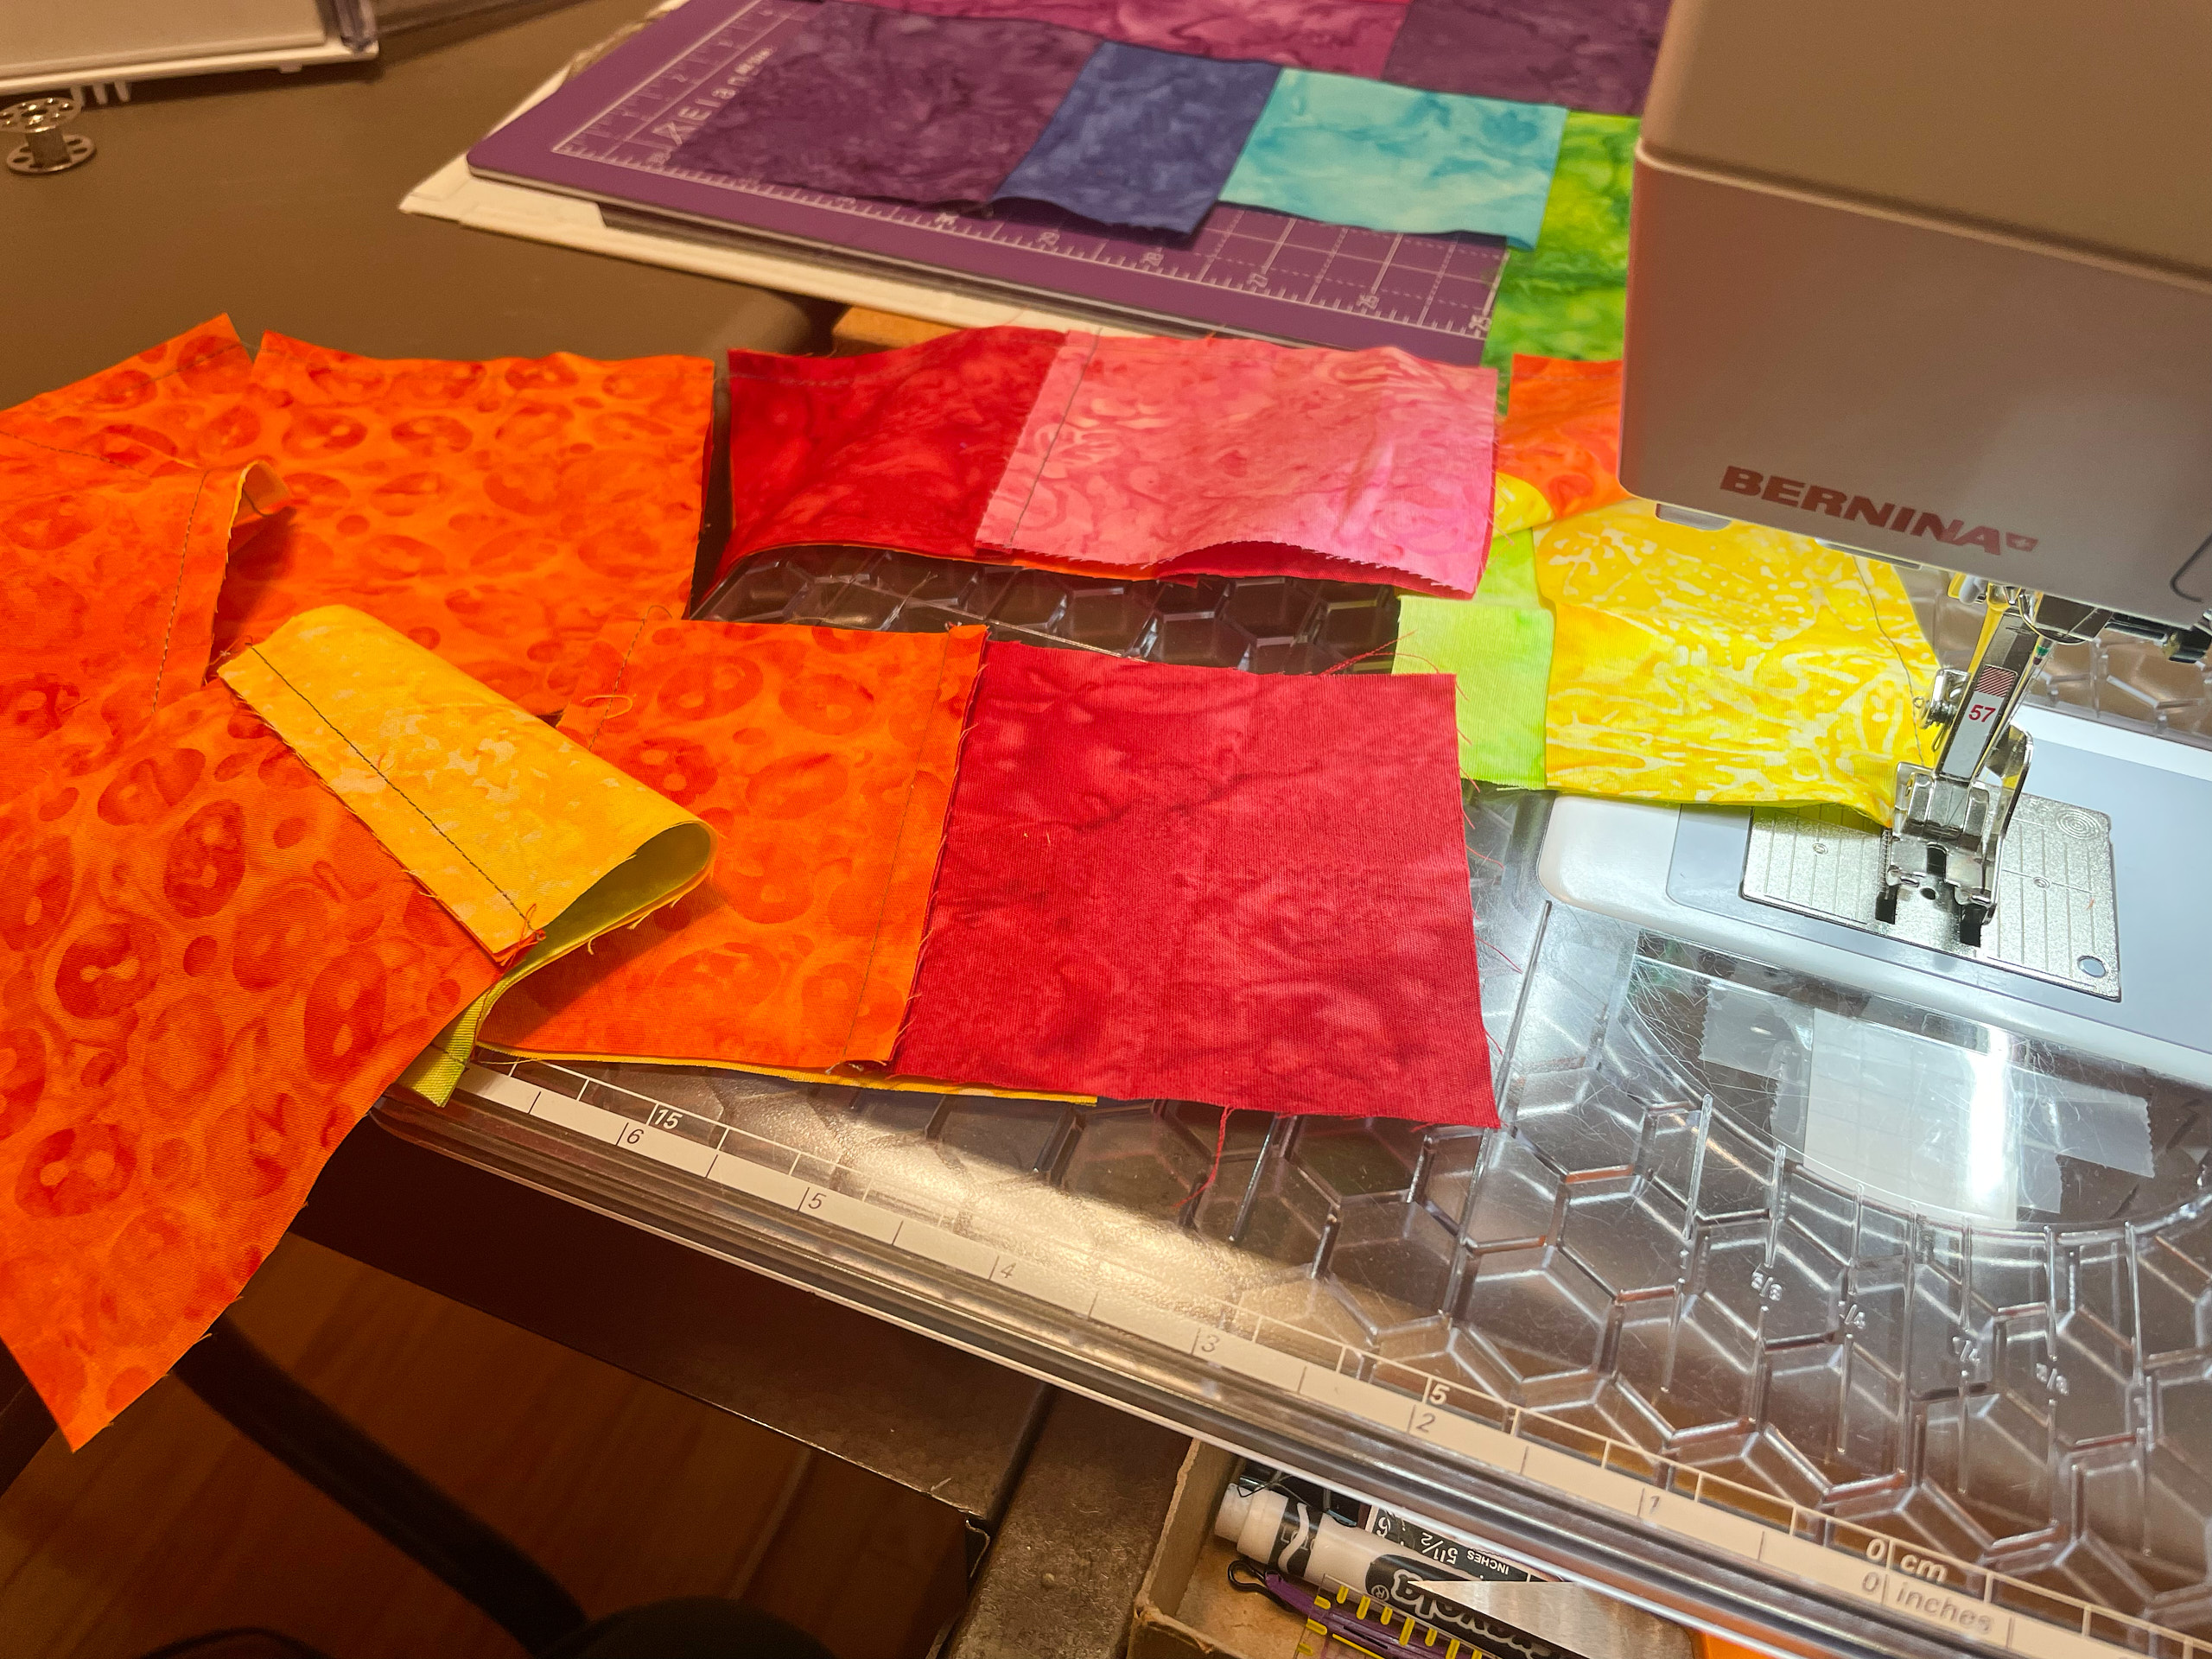
Next I designed my quilt. I drew out my pattern in Affinity Designer and overlayed it on the Coda pattern pieces. Then I started cutting up my fabric and made a stack of the squares and rectangles needed for each section of the jacket. One piece at a time I laid out each section (guided by a print-out of the design), and pieced it with my quarter-inch guide foot. I pressed the seam allowances in opposite directions so they would butt up to each other nicely, and occasionally applied a dab from my fabric glue pen to achieve perfect alignment.
Once I pieced all the sections, it was time to make the quilt sandwiches. I spread out my bamboo batting on the floor and attached the lining pieces with basting spray, which is basically a light-weight repositionable glue (like on a post-it note). This is the first time I used basting spray, and it was a lot easier than I anticipated. It mostly stayed where I sprayed it and did not have a lot of lingering fumes. I then used the lining pieces as templates to cut out the batting. Then I layered the batting/lining pieces on top of my pieced sections, carefully aligned them, and cut them out. I had designed the pattern so that the front and back pieces all aligned so it was important to get everything lined up properly. I did not use spray baste here because I discovered that the bamboo batting was very clingy and stayed in place just fine on its own without any pins or glue.
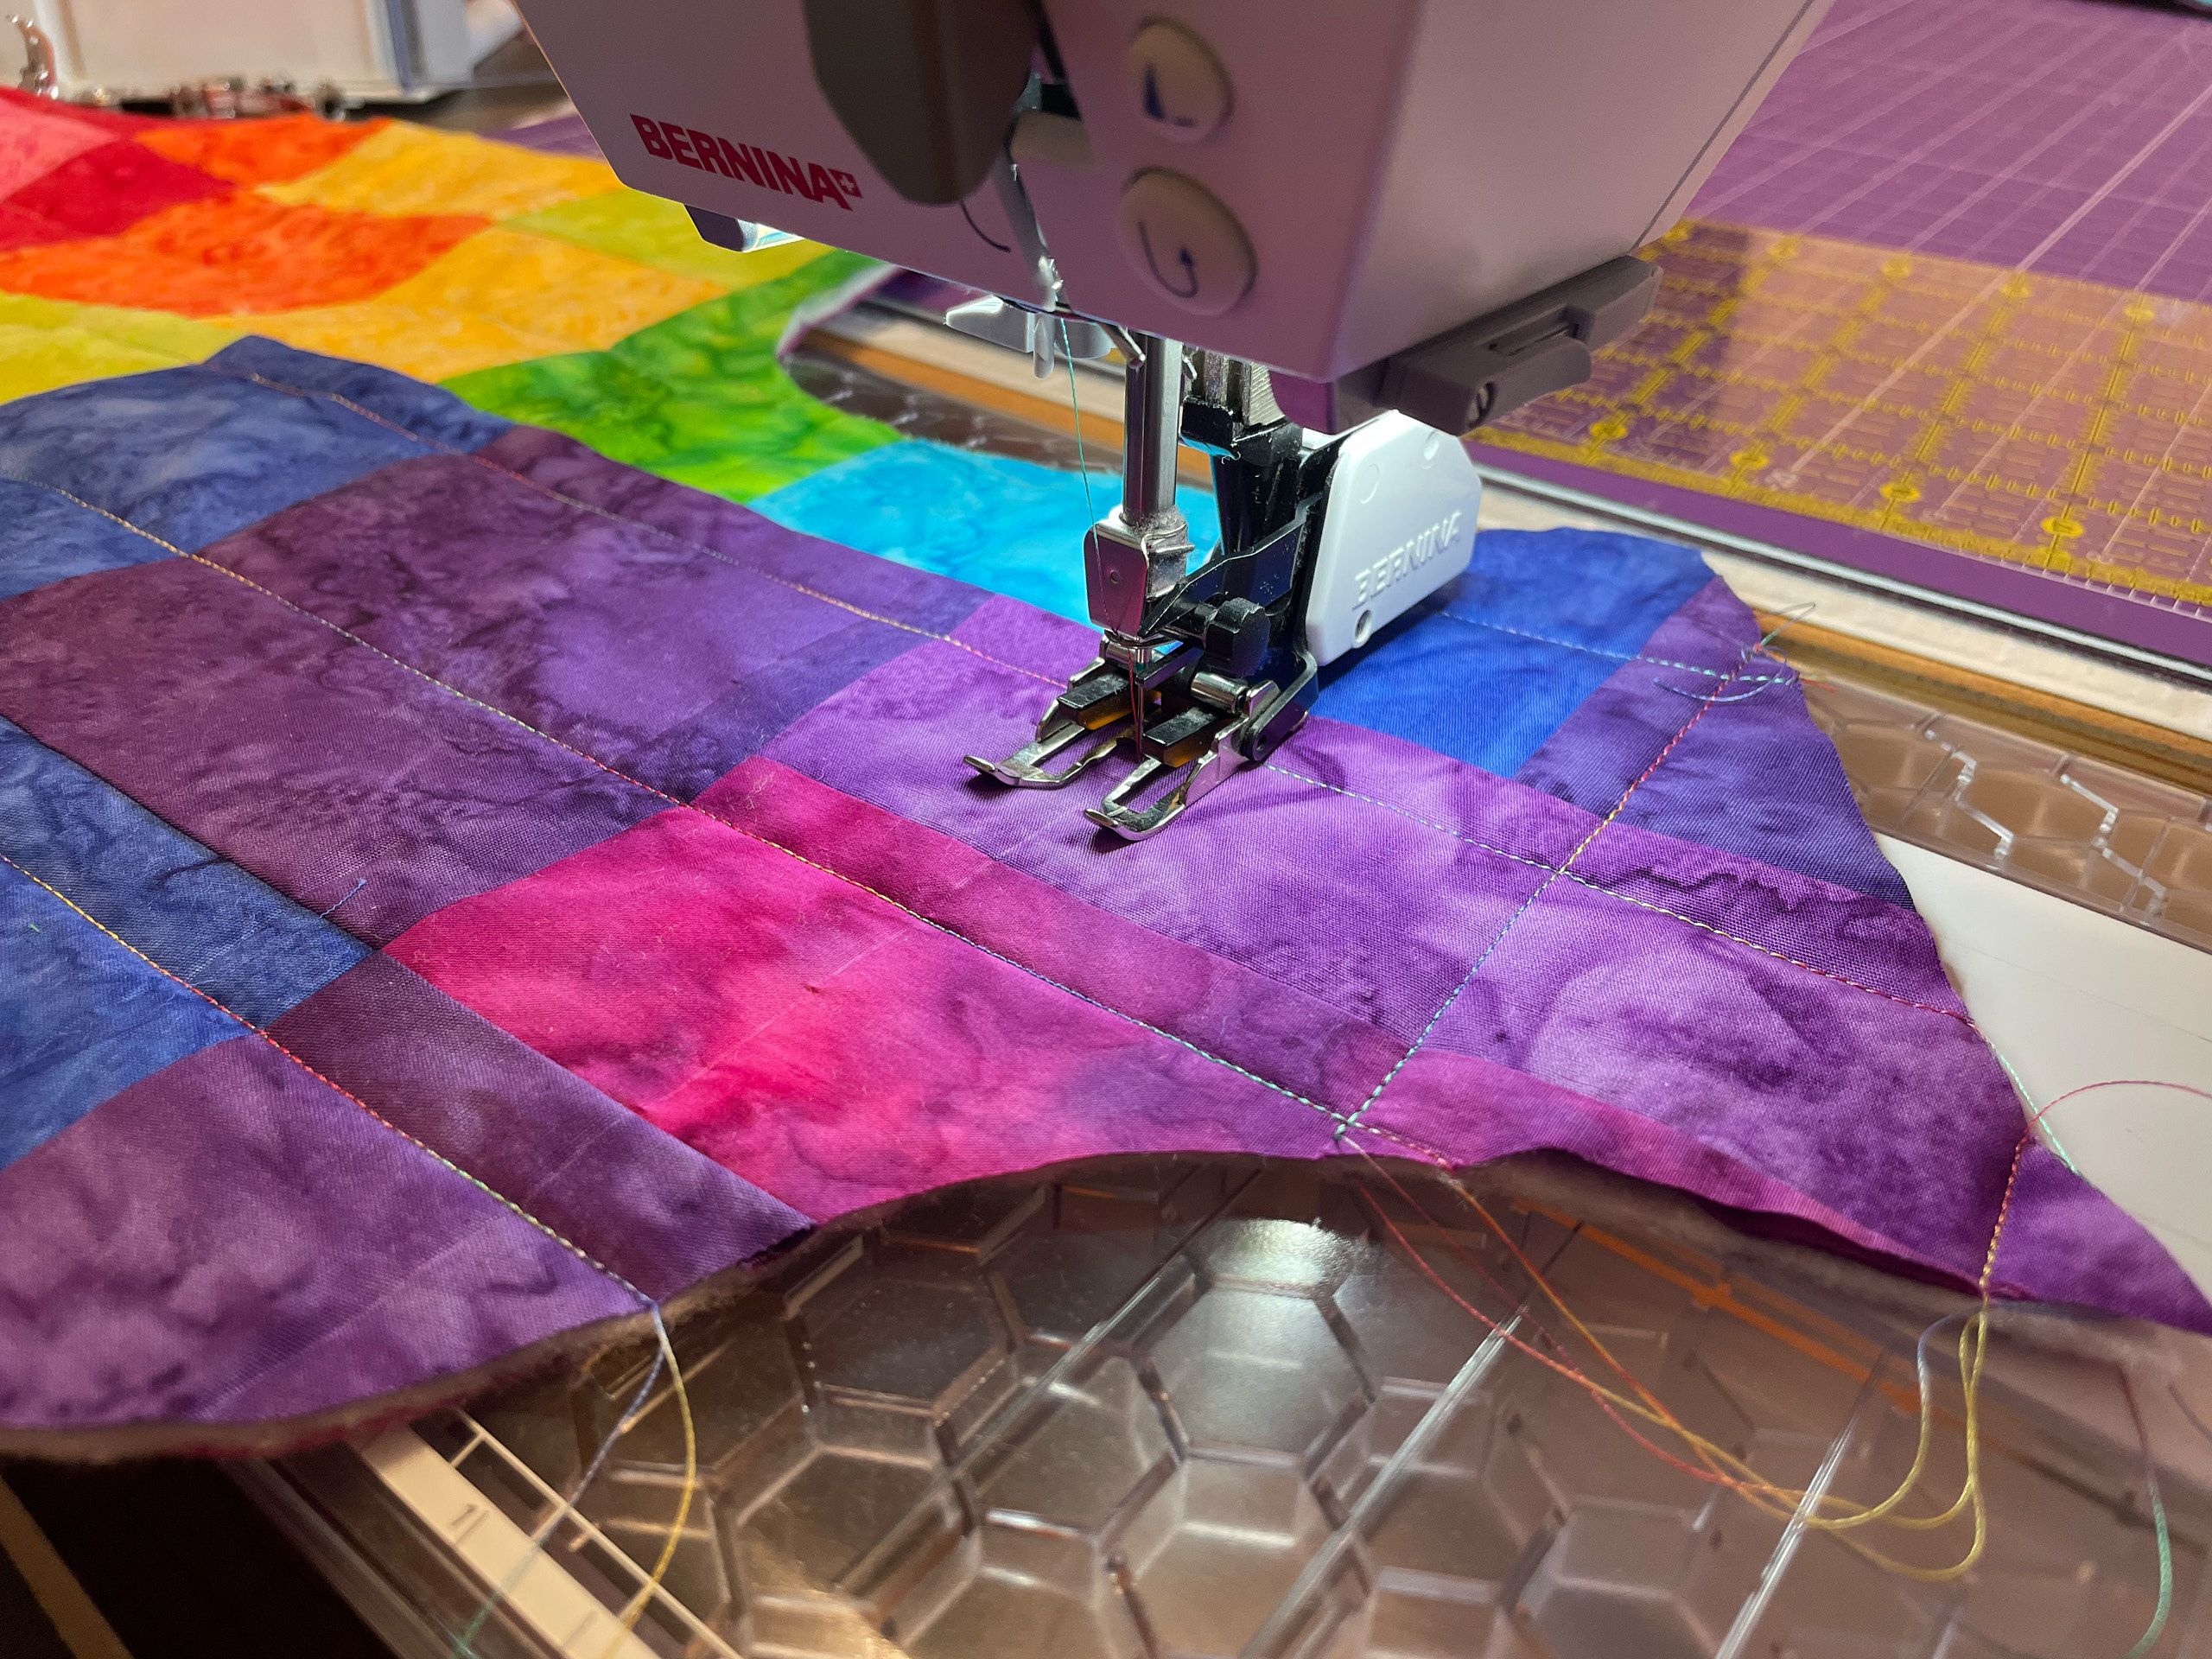
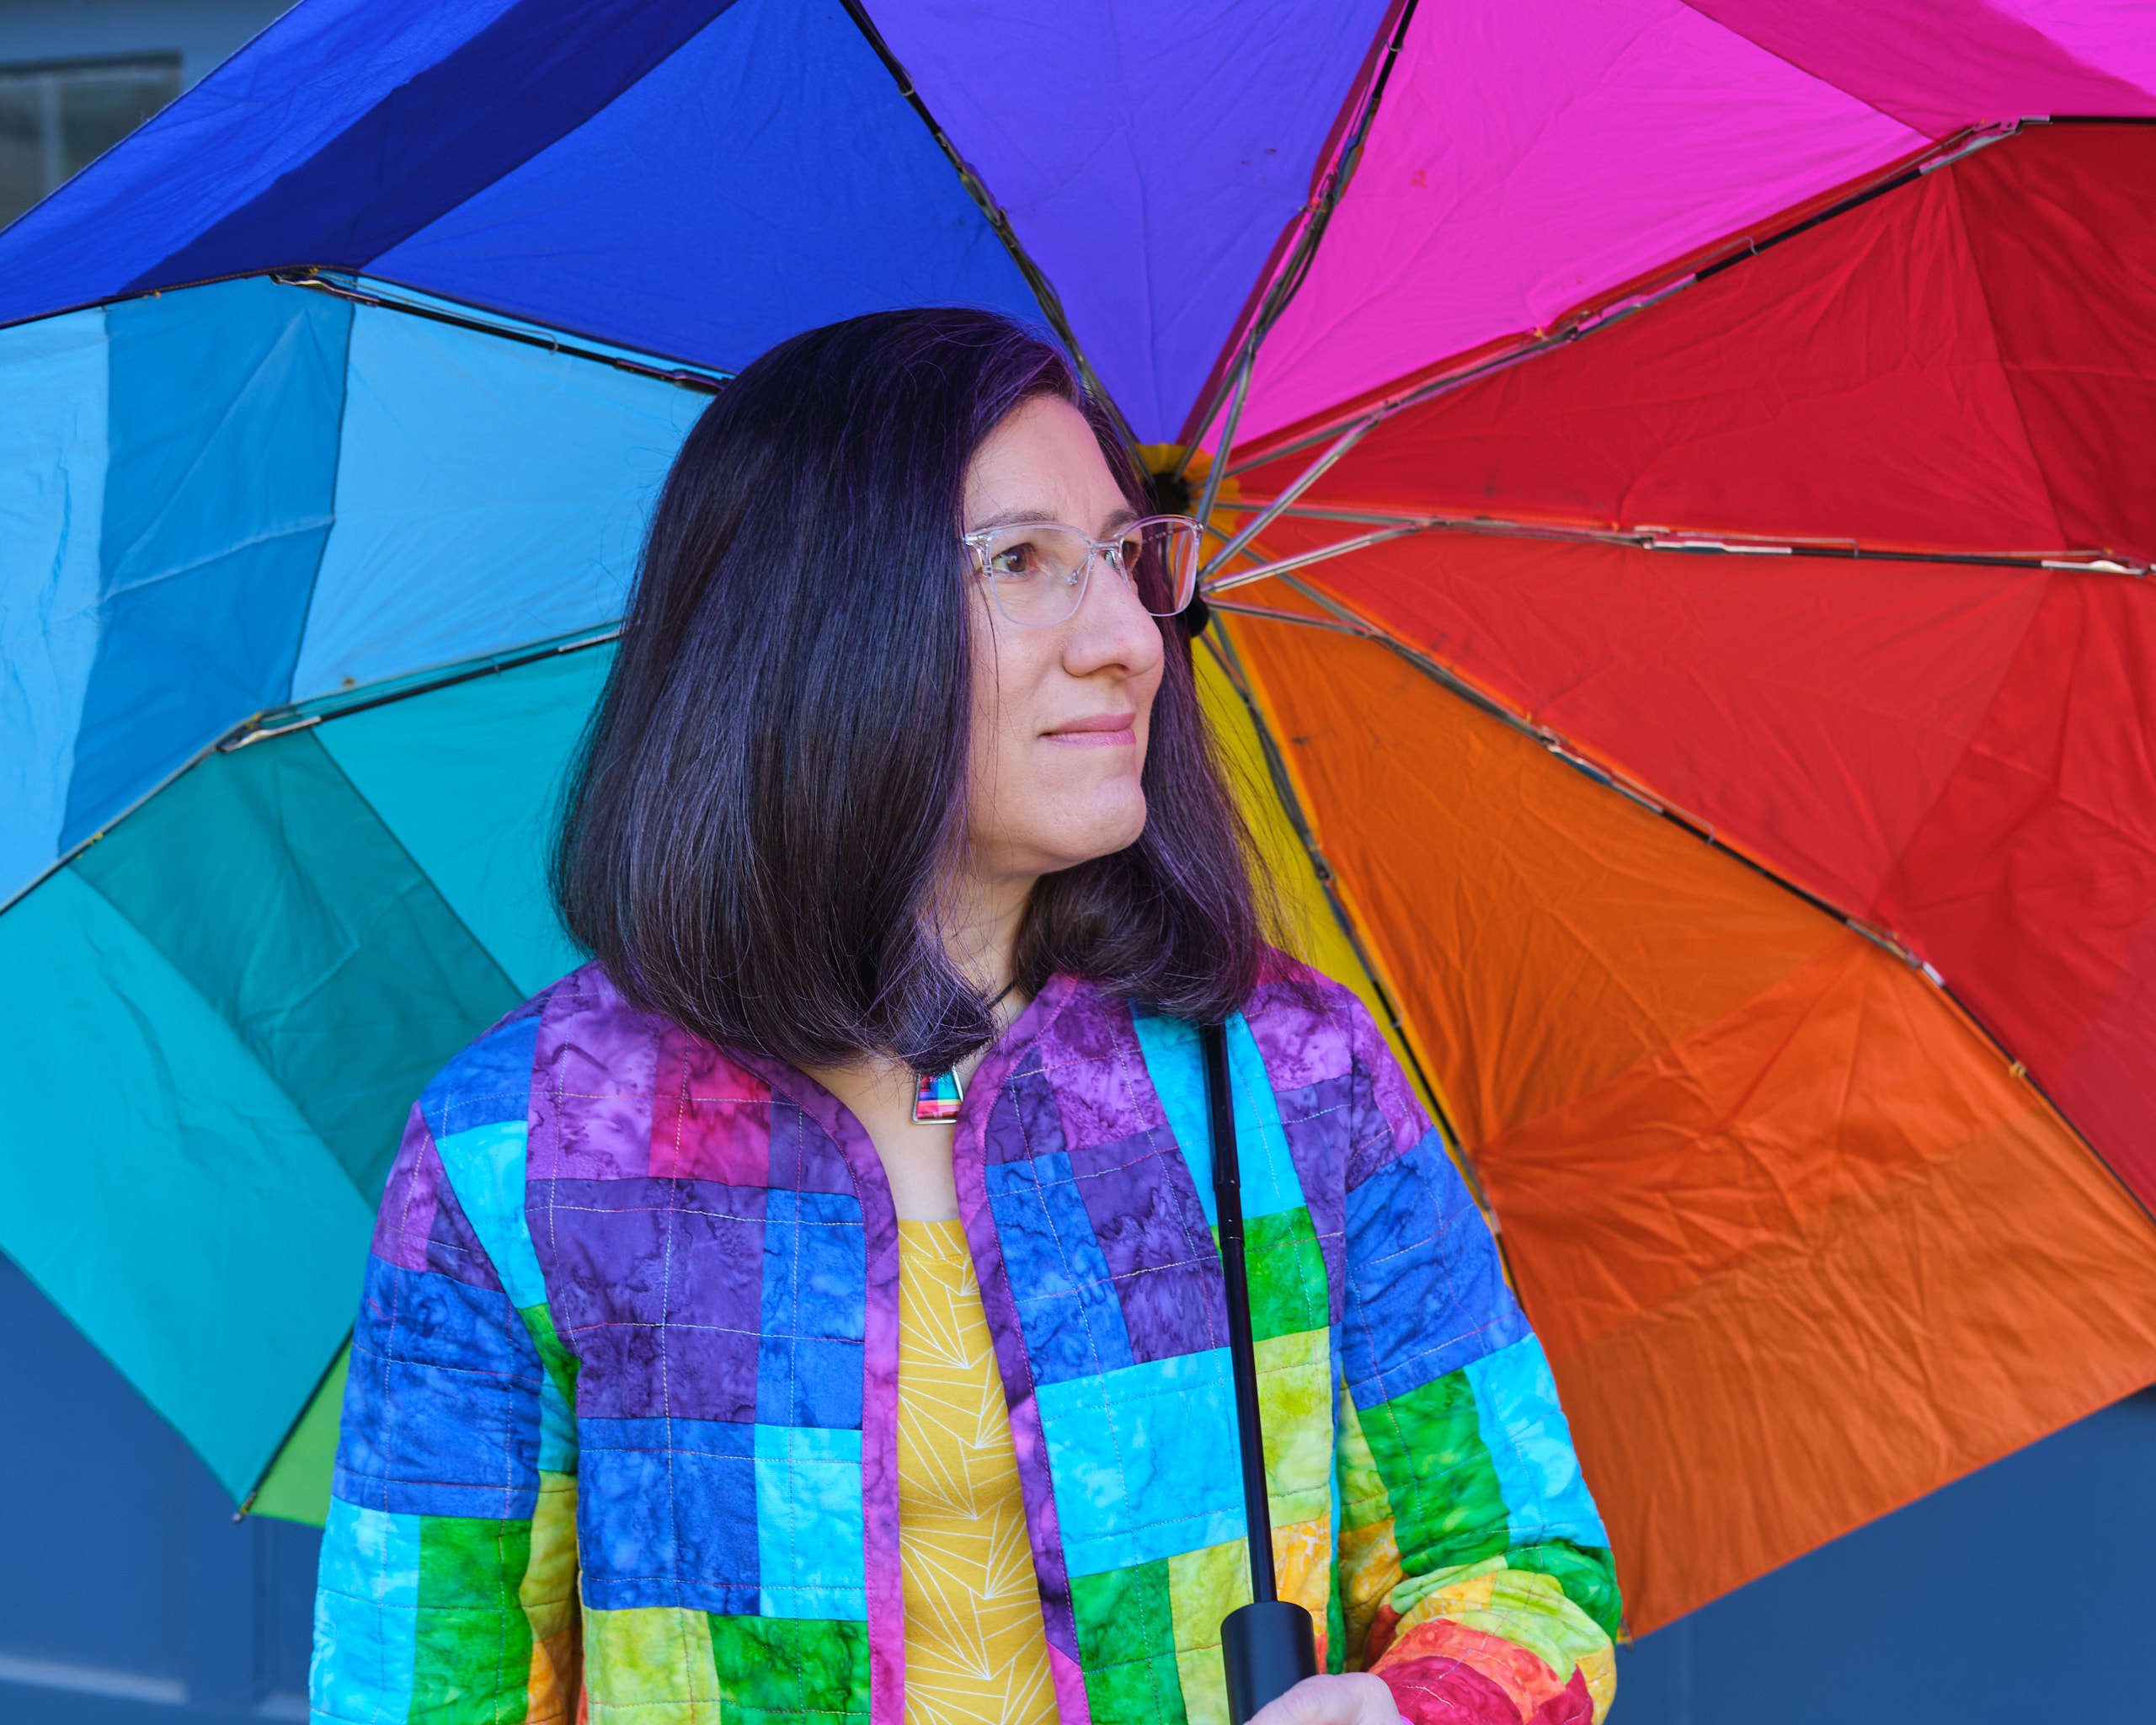
Now it was time to quilt. After weighing many quilting options, I decided to go for a simple two-inch grid, quilted with a variegated rainbow polyester thread (with the same thread in the bobbin). I used a hera marker and a ruler to mark the quilt lines, and I quilted it using my walking foot. It mostly went well, but I’ve been having some issues with the bobbin tension on my sewing machine and the stitches are not as even as I would have liked.
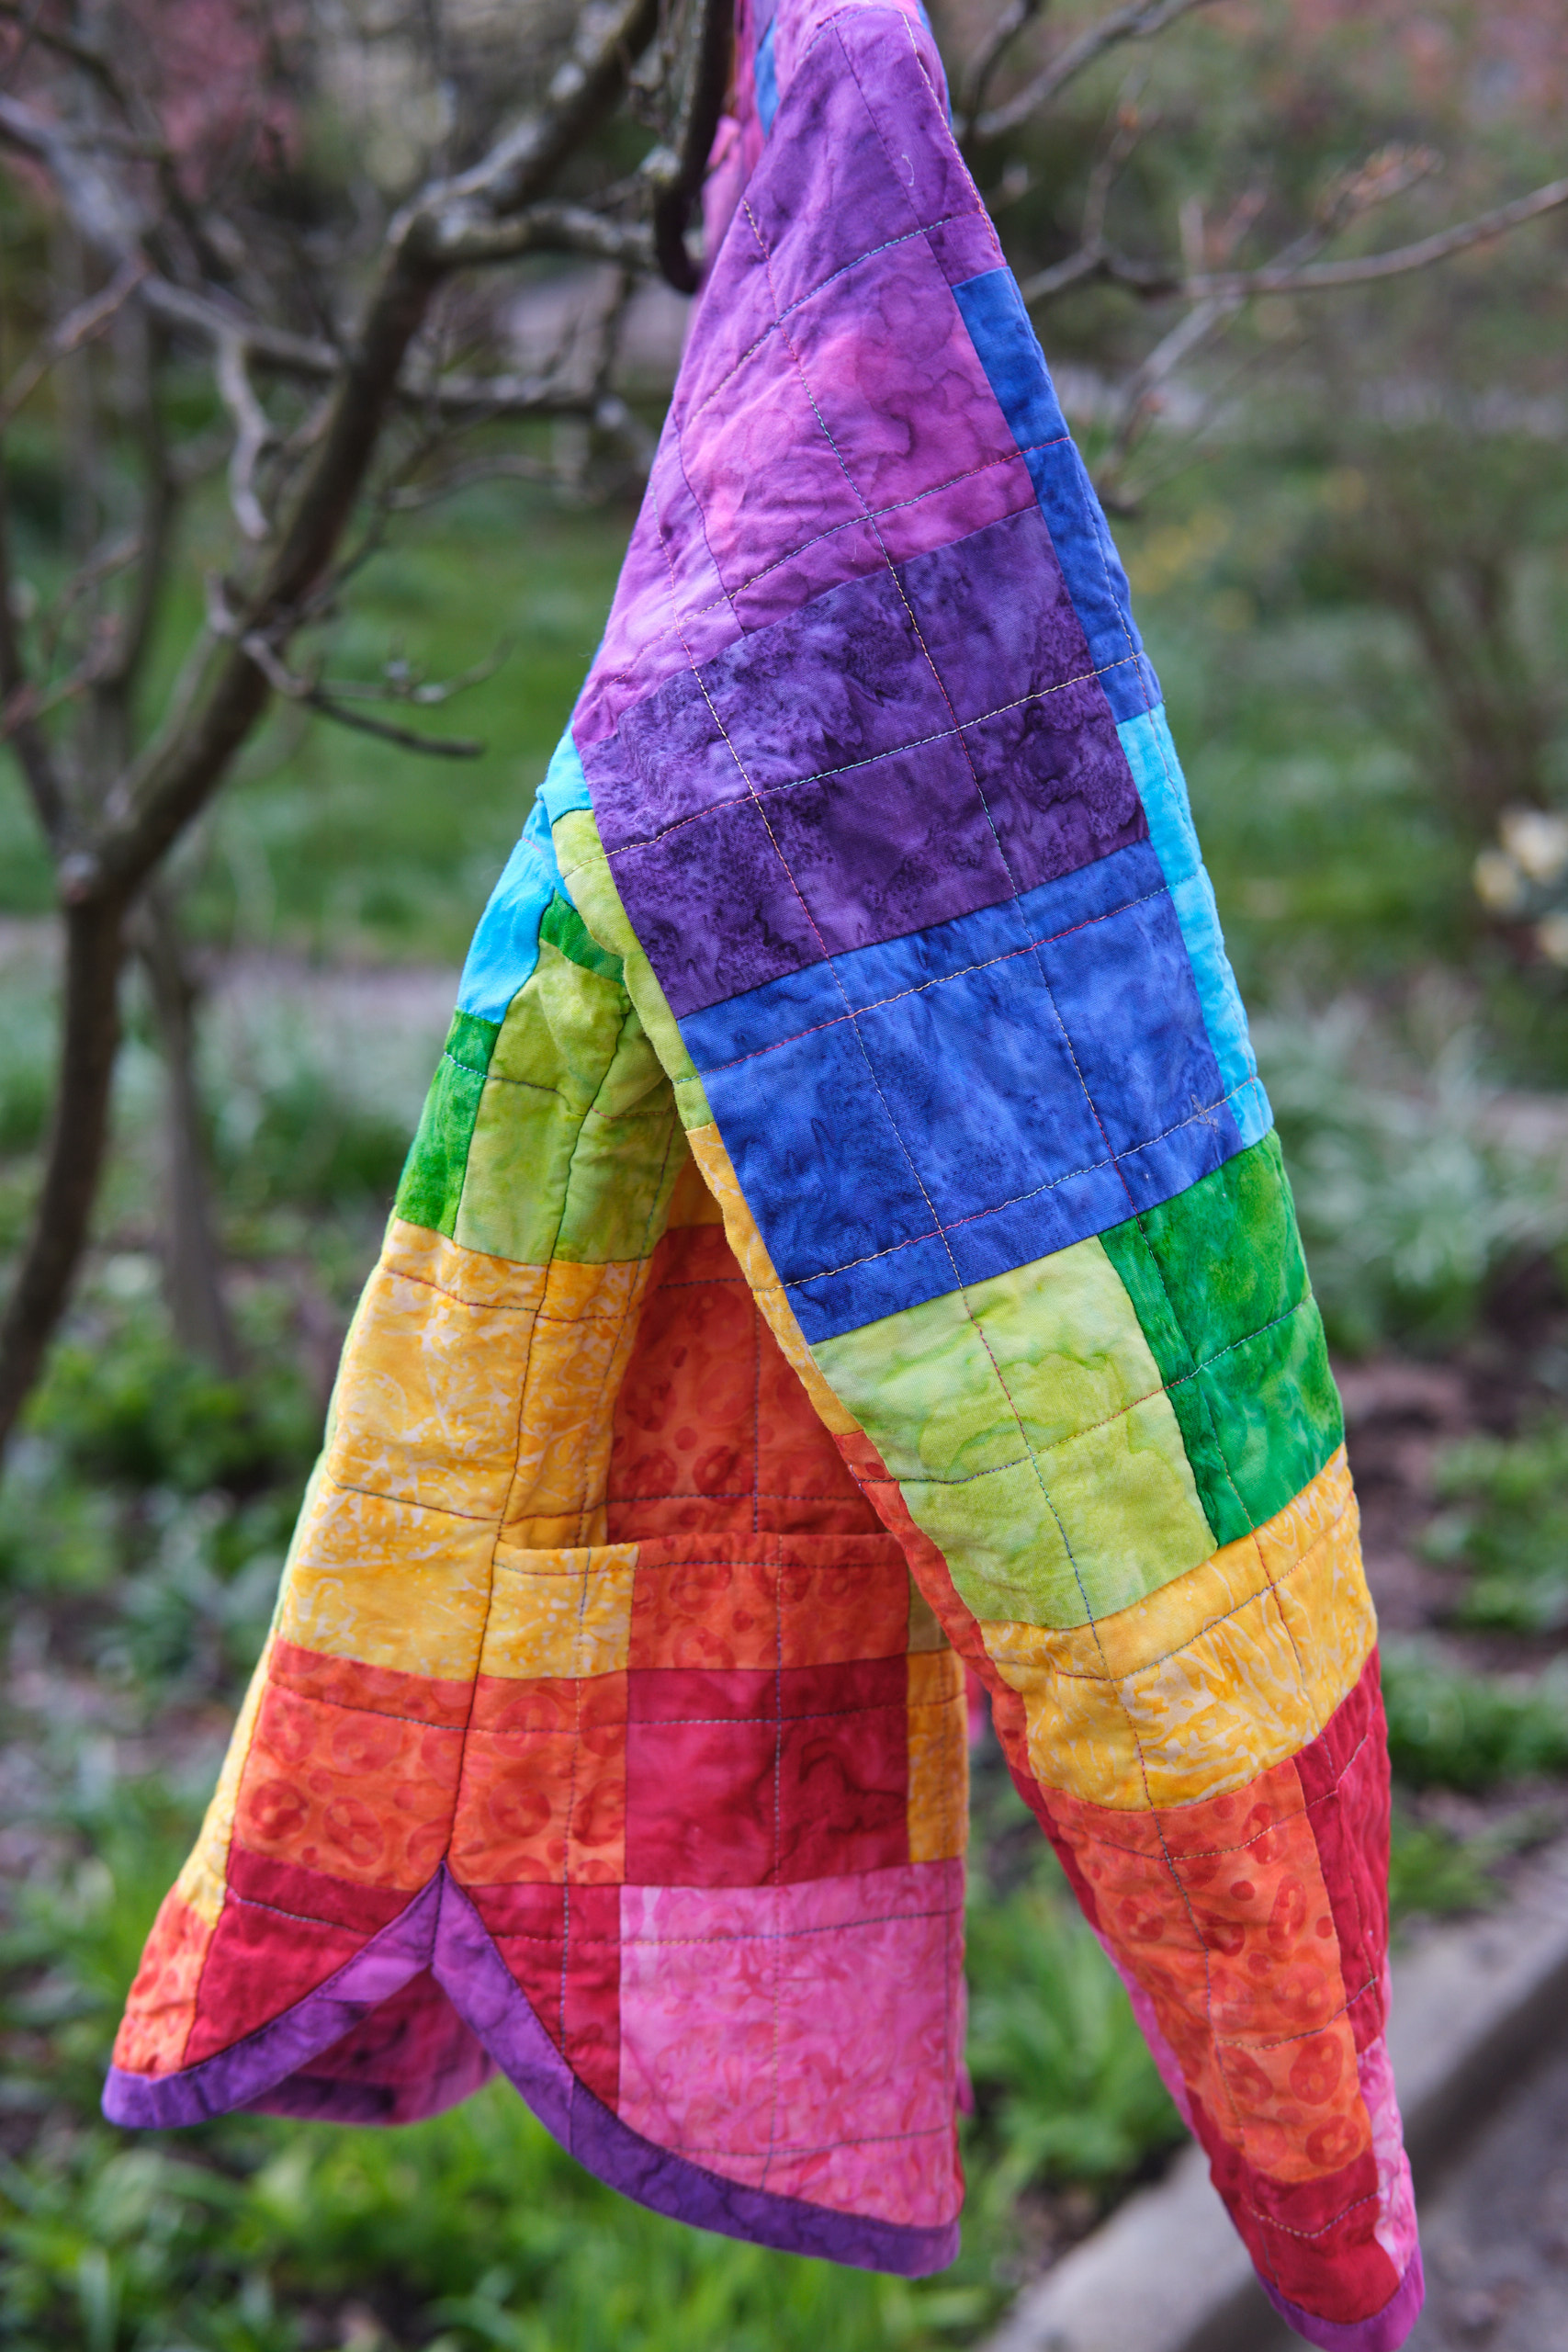
After all the pieces were quilted I lined up and carefully attached the pockets. I decided not to bind the tops of the pockets and just folded them under and topstitched. Without binding, they are almost invisible since I matched the pattern and the quilting pretty well. Then I surged around all the edges with pink thread that sort of matched most of the lining.
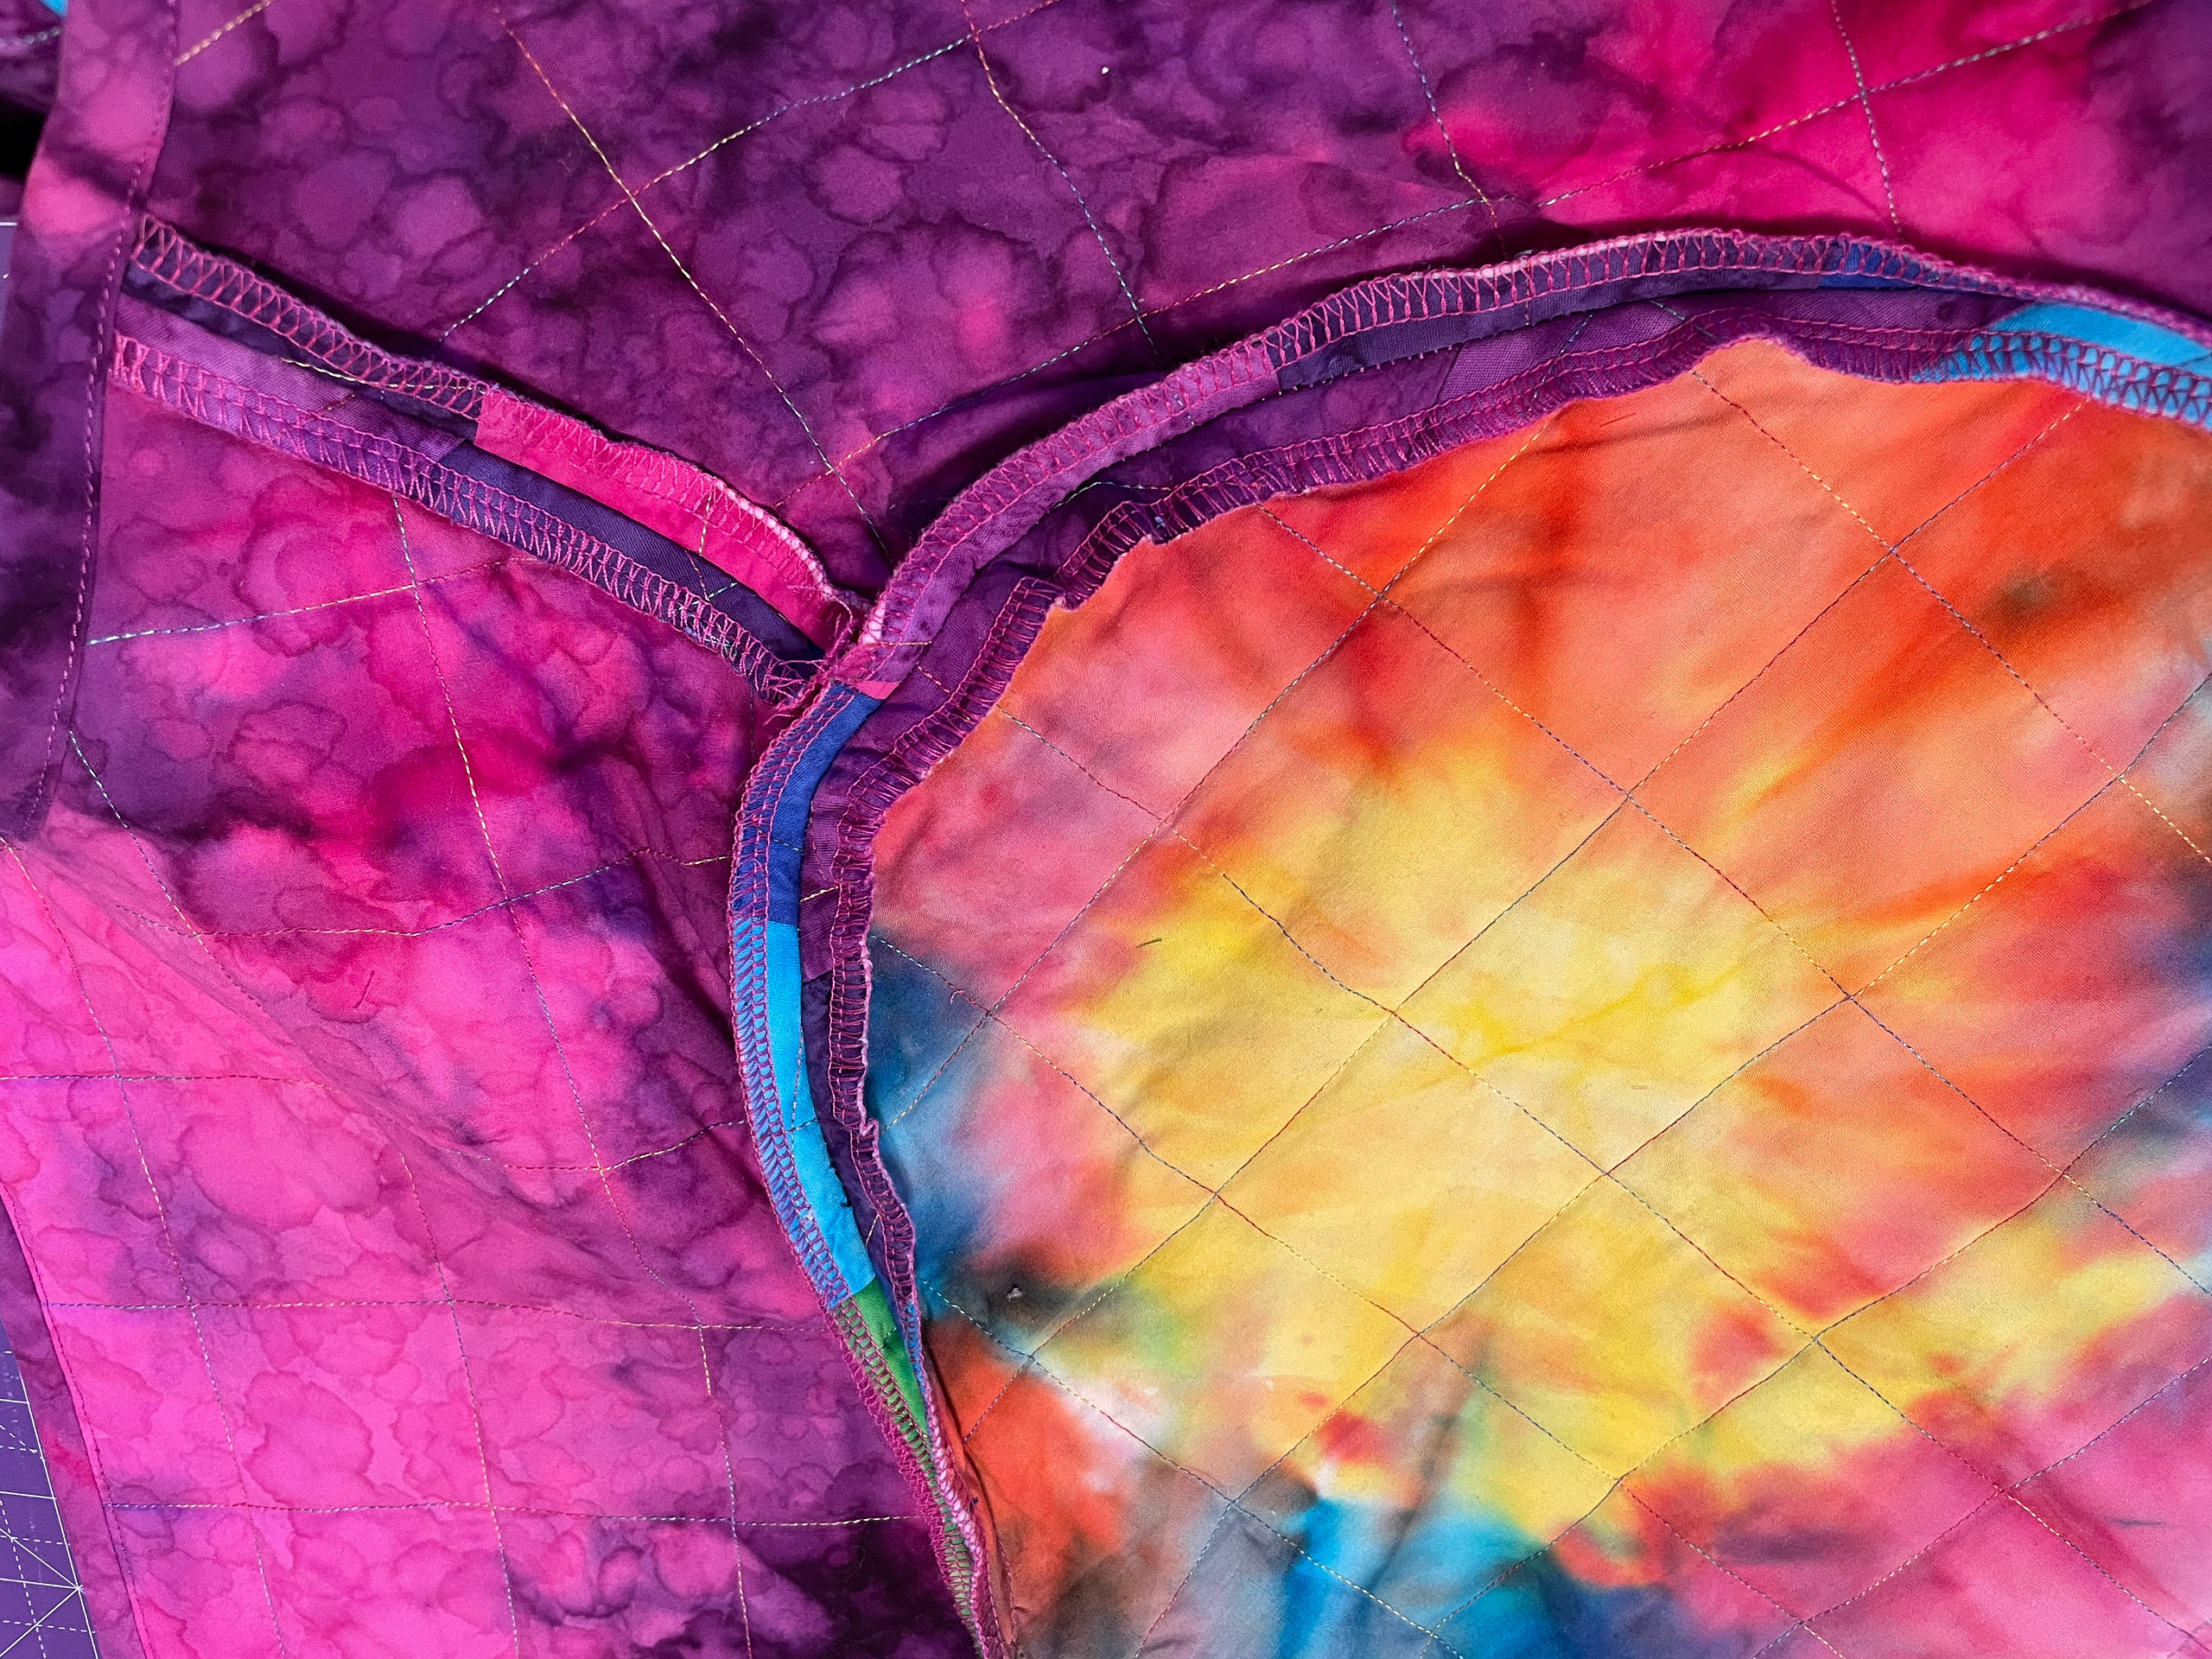
I had previously considered my construction options. Should I quilt the lining with the top and batting or use a separate lining piece? I decided to quilt the lining because I thought it would further minimize bulk. I think its fine, but you do end up with interior seams that you have to treat. I decided to serge the edges, sew with a half-inch seam allowance, and press open. A nicer option would be to bind them, but I didn’t want to bother. Next time (yes there will be more quilted coats) I may just add a separate lining and keep all those pesky seams hidden from view, as some sewists suggest (this tutorial has lots of great tips).
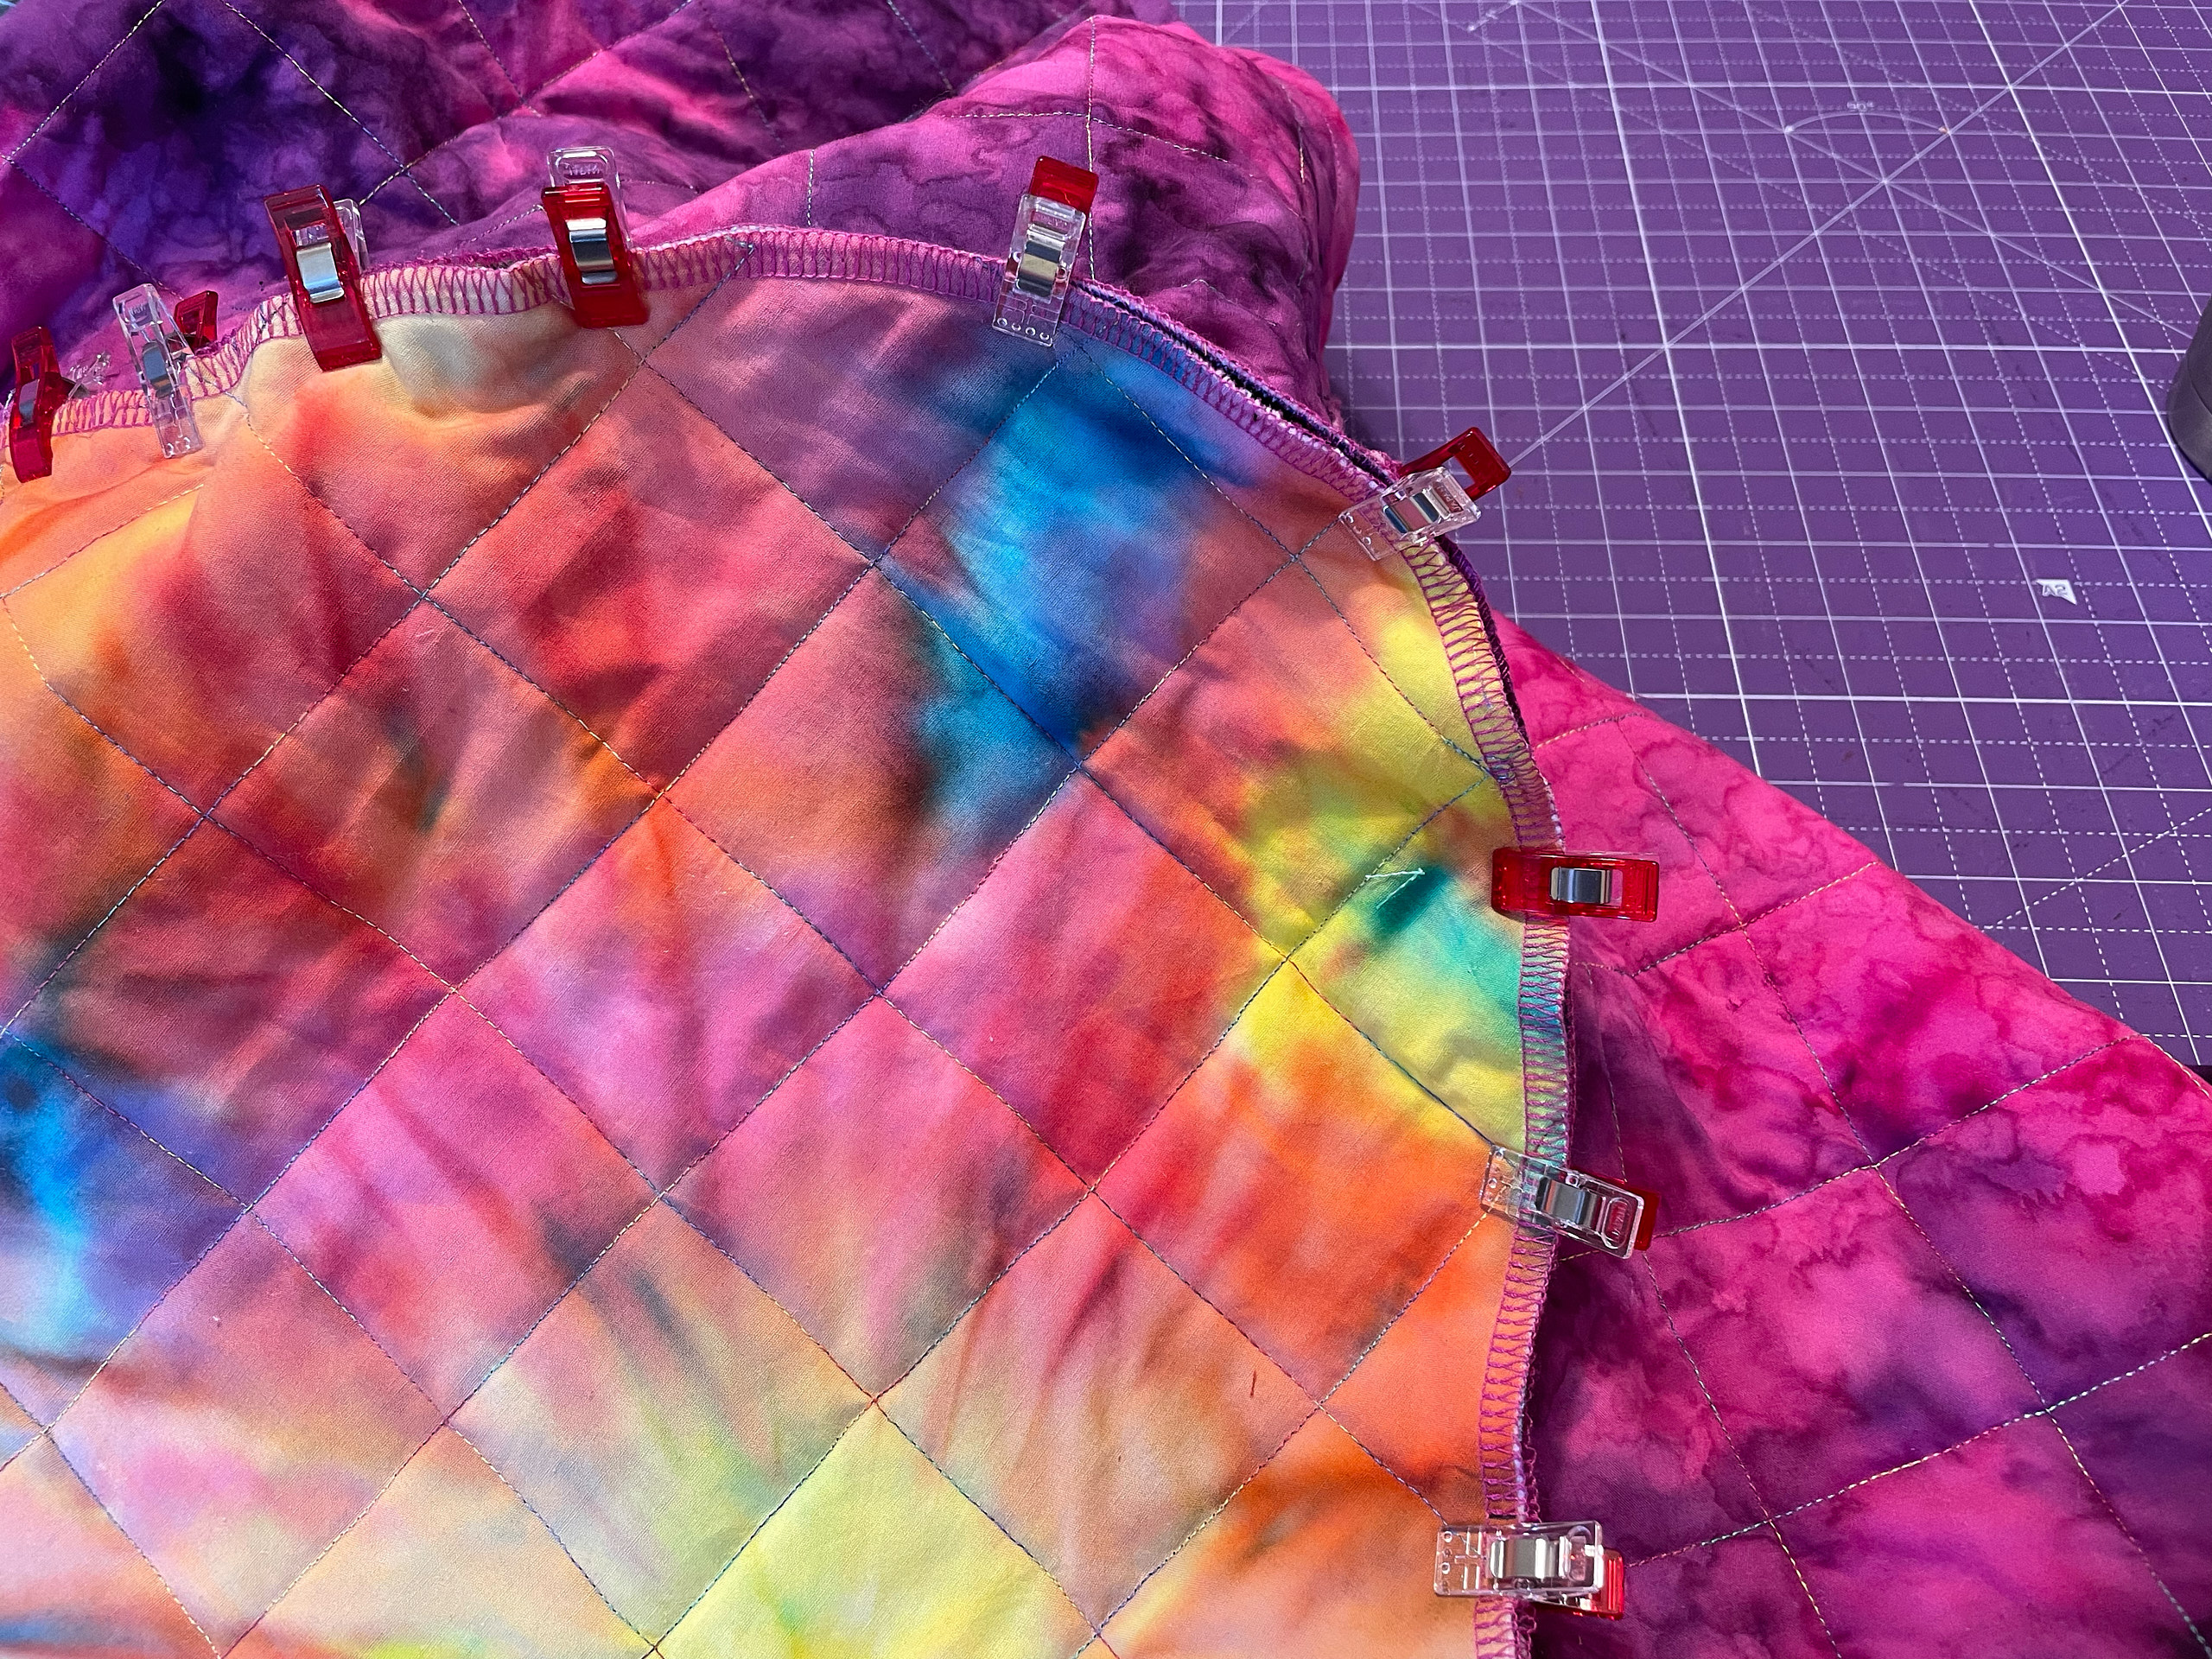
I ended up sewing the shoulder seams and attaching the sleeves, but leaving the side seams unsewn until after I attached the binding so as to avoid having to bind the sharp corner where the front and the back meet.
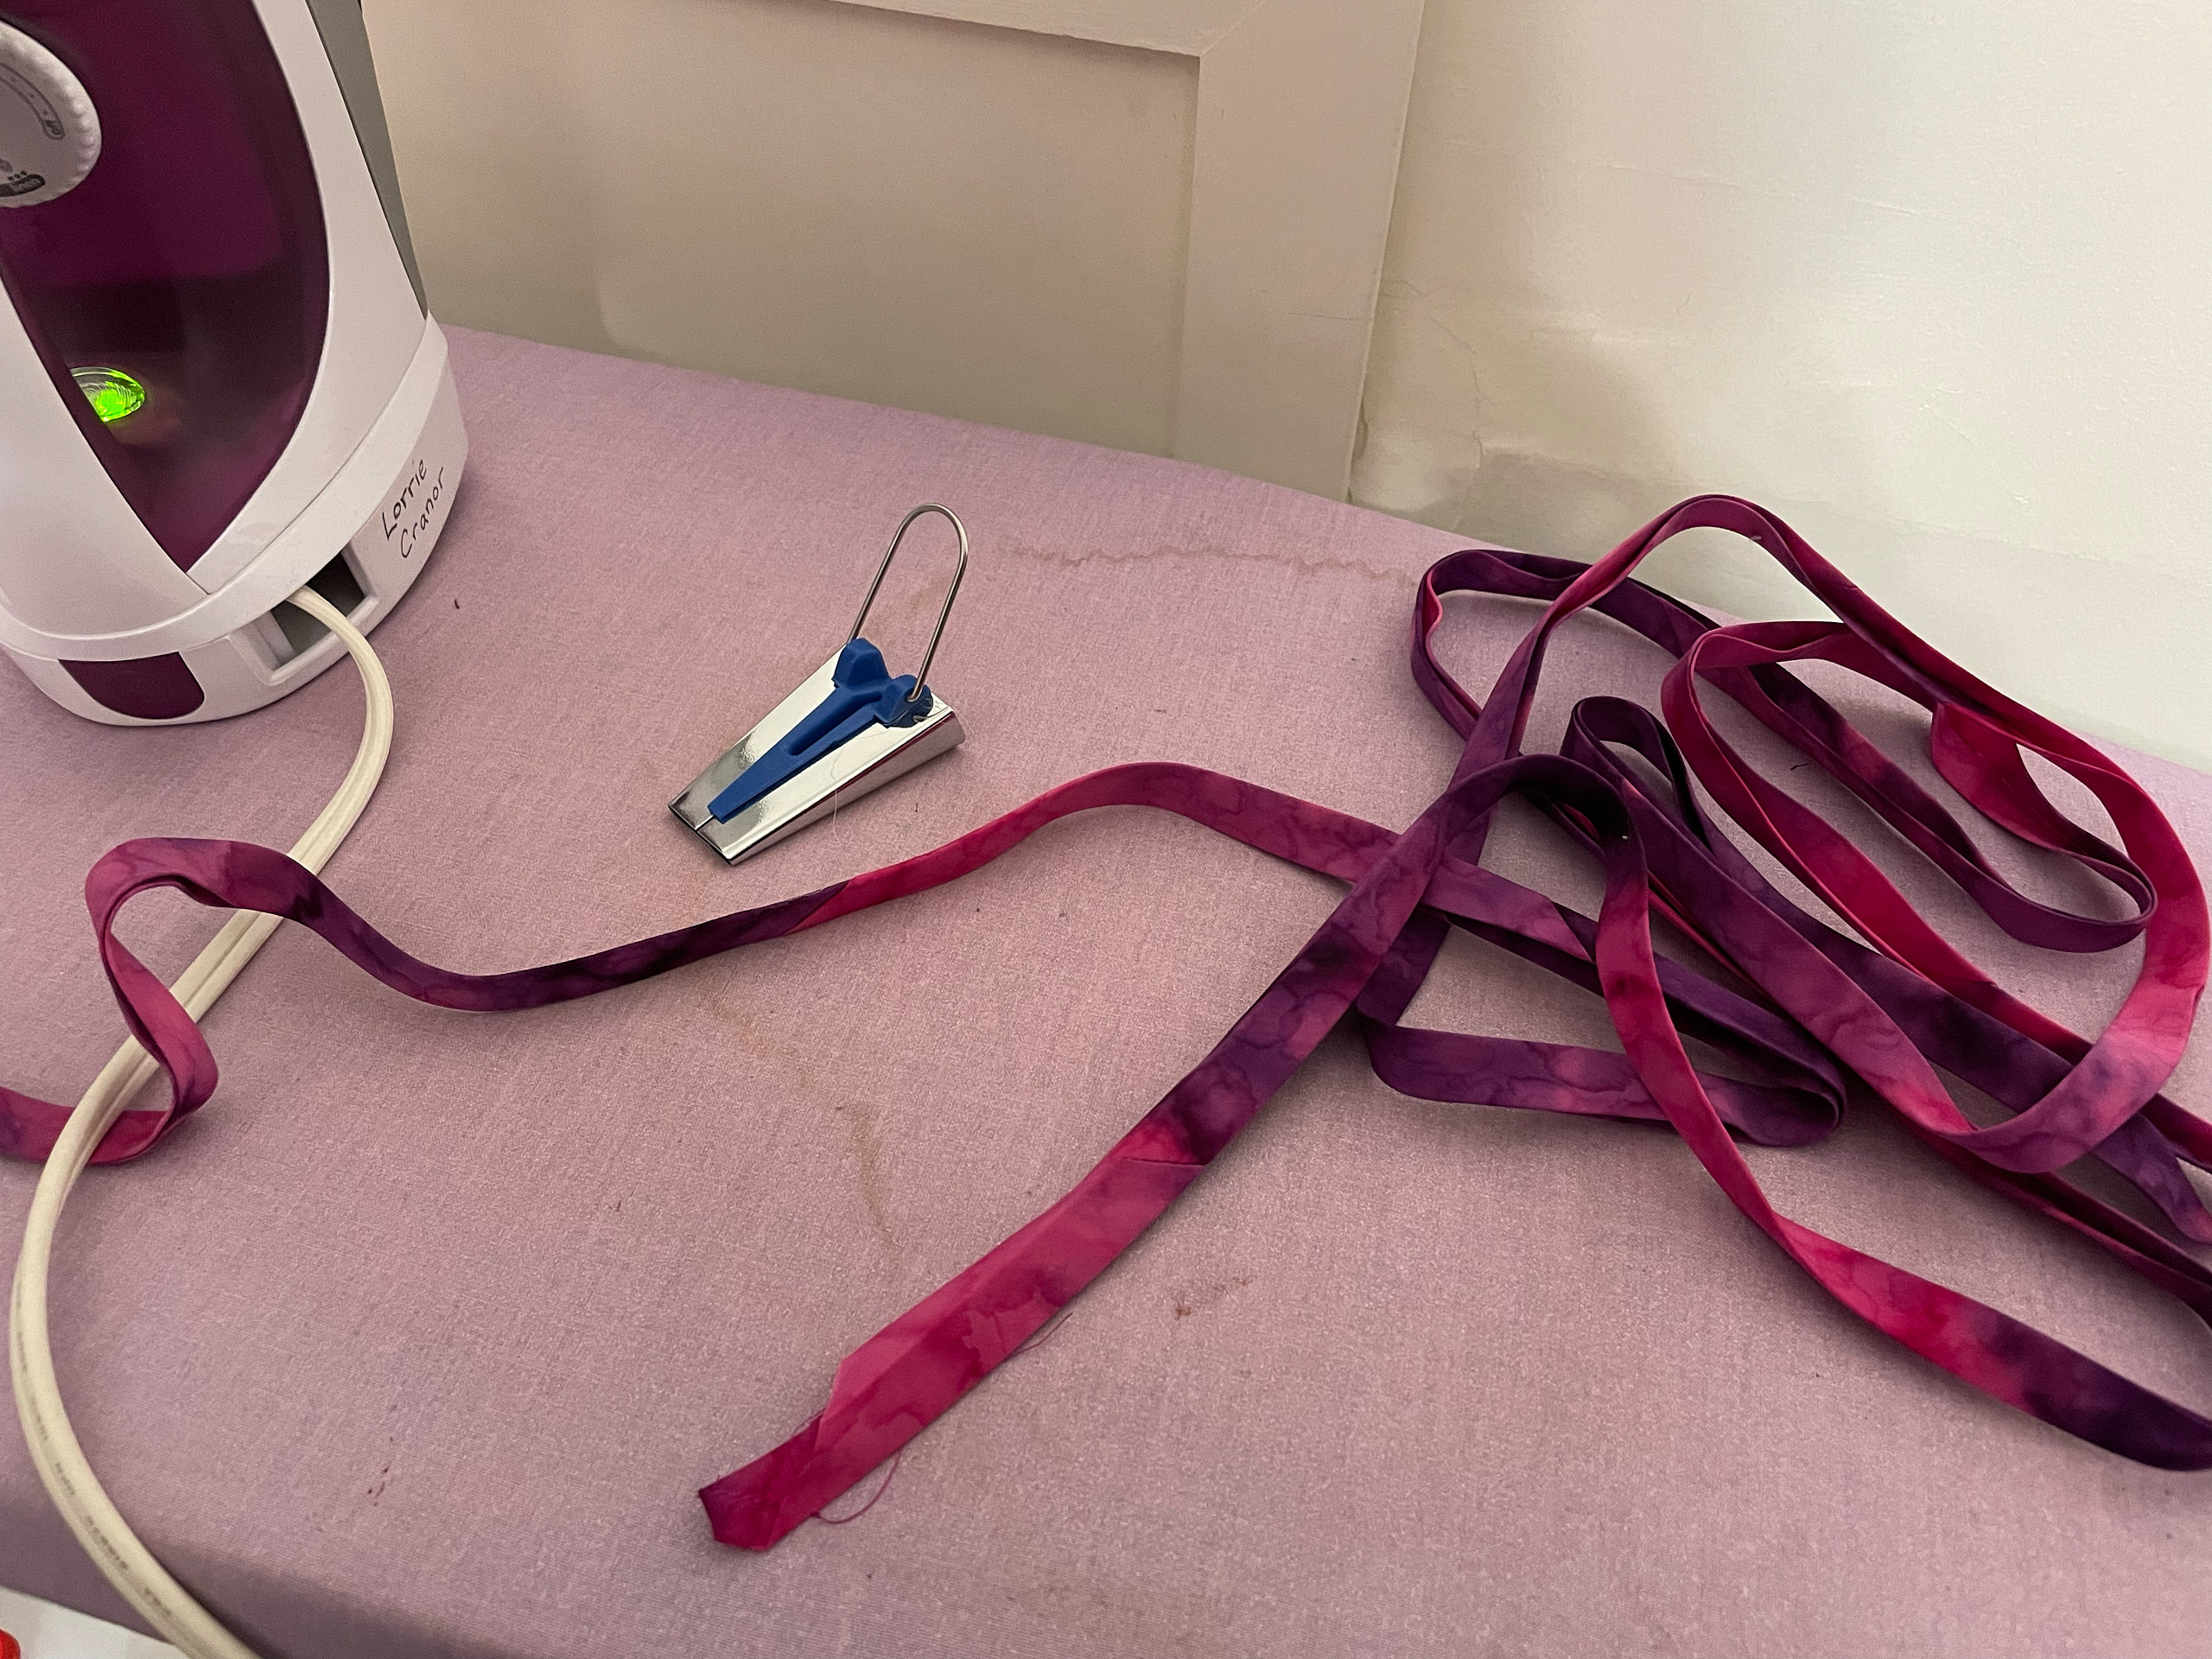
The pattern suggests making your own double-fold bias binding tape, something I had never done (I usually bind with French-fold binding, as is common for quilts). But I read that making double-fold bias binding tape was pretty easy to do, especially with the help of a cheap bias tape tool. Some sewists even find making binding tape quite enjoyable. Having now tried it, they are not wrong. I used this nifty technique where you start with a large square, cut it into two triangles, mark them lines parallel to the hypotenuse, and sew them together in a staggered way so that you can use your scissors to cut one long continuous bias trip. Then you run it through your bias tape tool and iron and you have binding. I followed this process with 2-inch strips to make half-inch bias binding. It worked great except that I miscalculated and started with a 15-inch square, and ended up with slightly less binding than I actually needed, so I had to stop attaching the binding and go make some more. Next time I’ll probably go with an 18-inch or 20-inch square to make sure I have more than enough.
Once I made the binding, I followed the pattern instructions to attach it to the jacket by first unfolding it and sewing it to the inside, then wrapping it around to the front and sewing it in place. Instead of pinning it to the front I held it in place with a thin bead of Elmer’s washable school glue, and then set it with my iron (you can still easily peel it off, even after ironing). Yes, I have really embraced the use of adhesives in sewing – for this project I used basting spray, fabric glue pen, and Elmer’s glue. Once the binding was in place, I stitched it near the edge, sewed up the side seams, added a label, and I was done.
I tried it on and was fairly pleased with the results, but despite my use of bamboo batting, it was still pretty stiff. I decided it needed to go through a round of washing and drying to loosen it up a bit, shrink it slightly, and turn it into its natural puckered shape. If you never wash a quilt you can keep it nice and crisp, but I plan to wear this one enough that it will need to be washed, so I figured I might as well get that over with now and soften it up in the process. I always have a little bit of fear about washing a quilt though. I tossed it in my washer on delicate cycle with Woolite, and then after a quick spin in the dryer it was ready to wear (and much more comfortable now).
This project took a bit longer than most of the clothes I make because first I had to make a quilt and then turn it into a jacket. It would be much faster with pre-quilted fabric or cutting up an old quilt. But I really enjoyed both the process and the very colorful results!
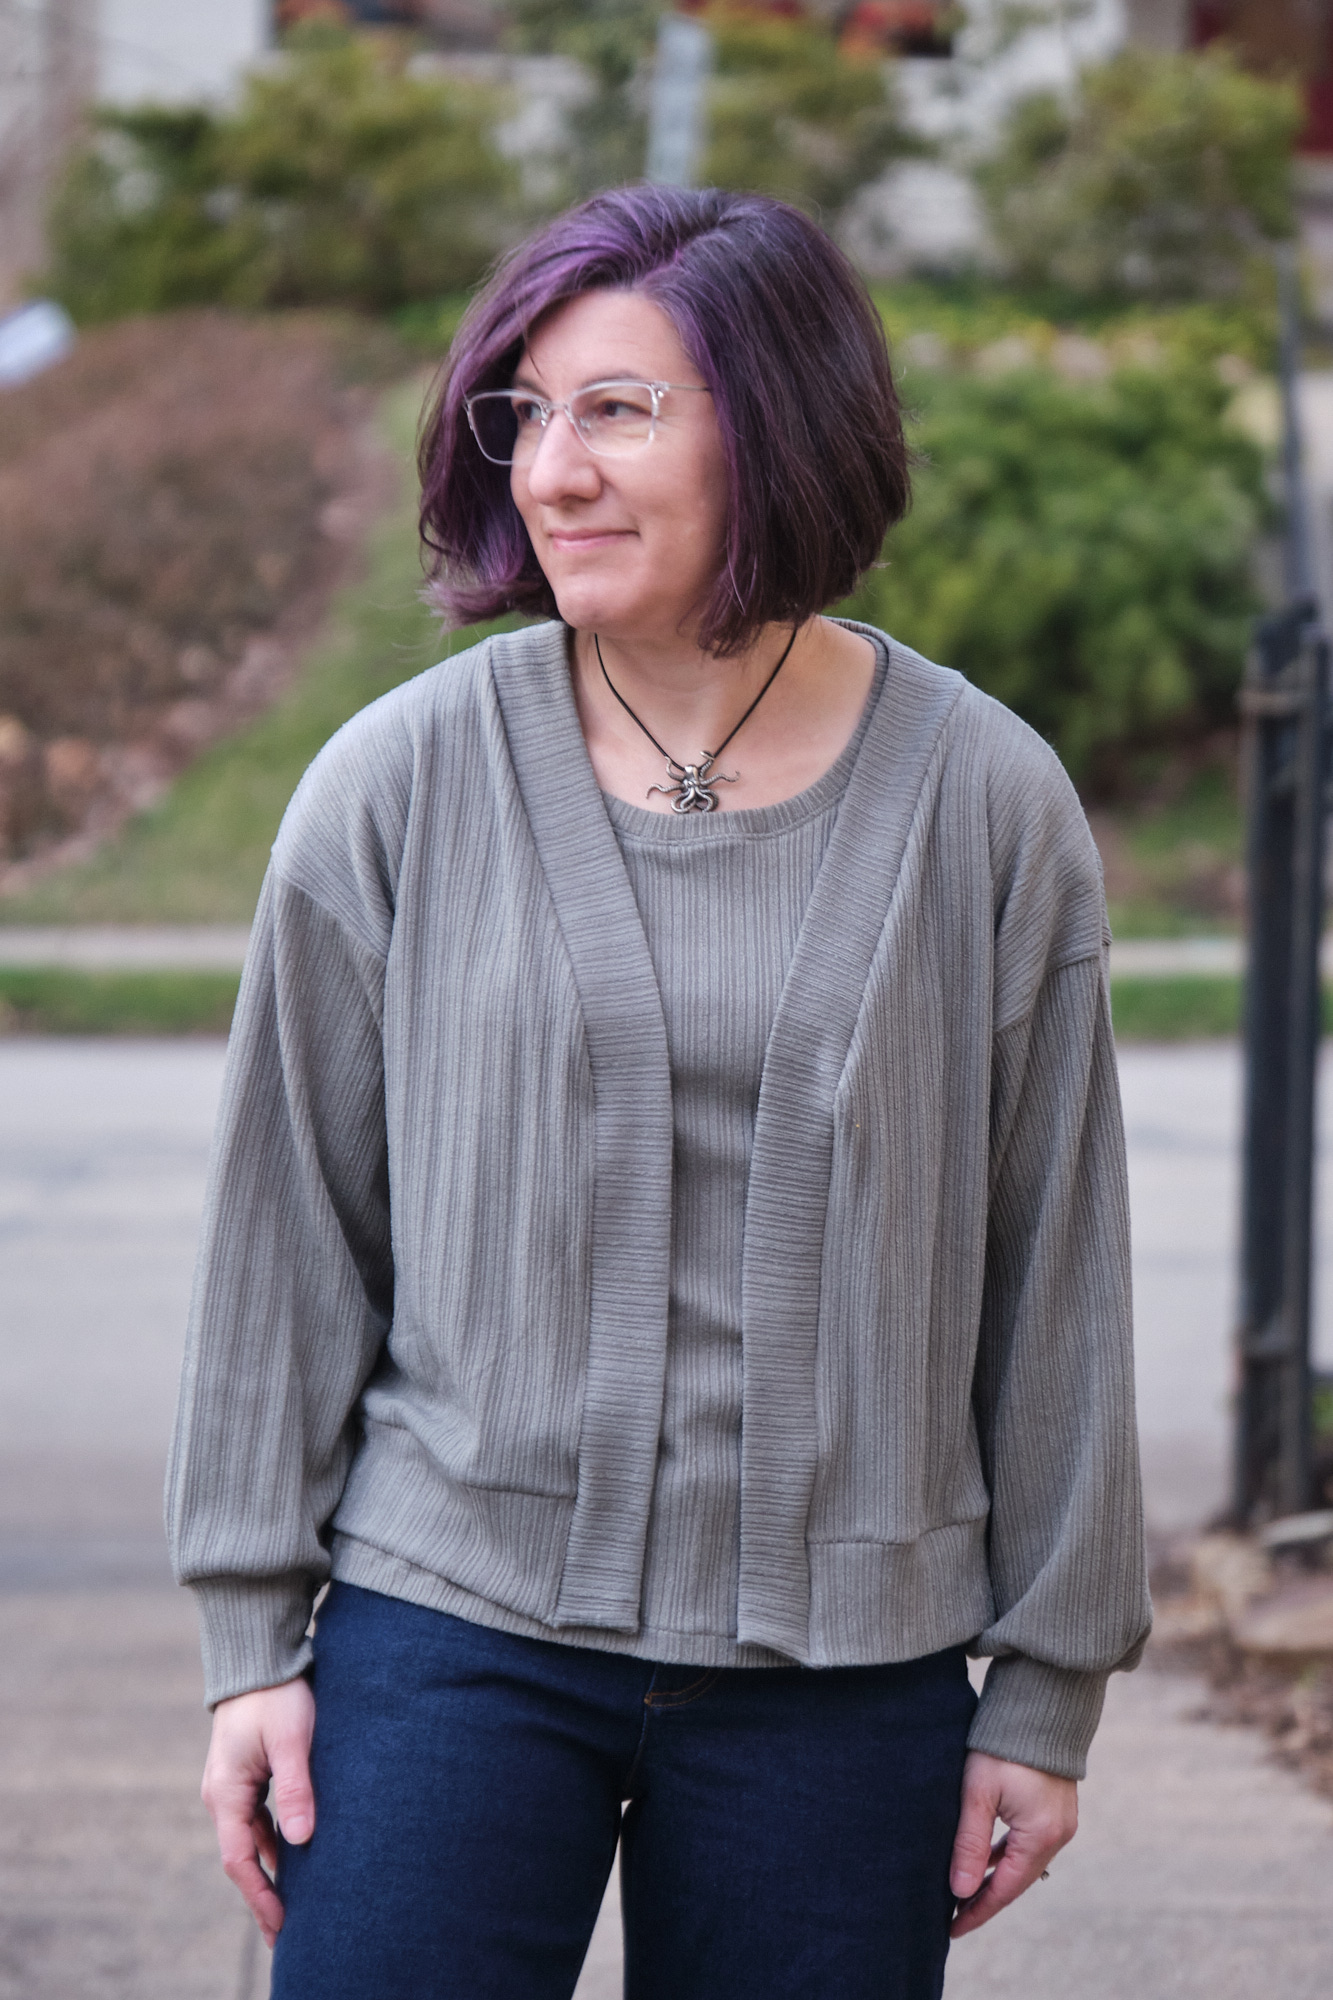
I have made several pairs of pants and a cardigan from PyLos LiKnit fabric and I adore all of them. I made a Sinclair Bondi elbow sleeve top from black LiKnit which is ok, but the LiKnit doesn’t really have enough stretch for this pattern without some adjustments (more ease or maybe adding darts?). Since the LiKnit behaves almost like a woven, I decided to try making a woven top with seafoam LiKnit and I selected the recently-released Sinclair Bloom. I made the sleeveless version at the shortest length with the rounded back neck. I treated the LiKnit fabric exactly as if it were woven, using regular straight stitches for the seams and top stitching.
There is some complexity to this pattern, but as usual, the Sinclair pattern is fairly detailed and pretty easy to follow. The front and back yoke are lined (I used the same LiKnit fabric), and the front yoke is interfaced with fusible woven interfacing. I used a medium weight, which was probably a little heavier than needed–next time I’ll try a lighter weight interfacing. The front and back have some gathers, which I’m afraid I didn’t distribute evenly enough, but they’re mostly ok. The sleeveless version uses the “burrito” method to encase the neck and shoulders, which is a fun technique.
Despite being a knit, the LiKnit fabric worked pretty well with this pattern. I may try one in another color of LiKnit with sleeves. I would also like to try this pattern with cotton double gauze.
I’m overall pretty happy with how this top came out, and it looks great with my seafoam LiKinit Urban Boldly mashup pants! In fact I wore this outfit to a conference last week and got complements from complete strangers. Also it was very light weight and packable, and doesn’t need to be ironed.
I haven’t sewn many garments with woven fabric lately because I don’t like to iron my clothes after I wash them and I would also rather not deal with zippers. I also find knit clothes just tend to be more comfortable to wear. However, “fluffy” cotton double gauze is trendy right now, you don’t have to (and you really should not) iron it if you wear it crinkled, and when you use it for loose fitting summer clothes it is cool and comfortable and does not need a zipper. I bought three yards of purple fluffy from Mily Mae Fabrics and decided to make some woven palazzo pants.
I love the Pattern Emporium Walk Boldly and Urban knit pants patterns so selected their Vacation Vibes pattern for woven palazzo pants. The pattern has both a low-rise and high-rise option, as well as several pocket choices and options for subtle or dramatic flare legs. I love wearing high-rise pants so I went with the high rise waist, subtle flare leg, and foxy pockets. I cut a size AU10 short and made no pattern modifications whatsoever.
I washed and dried my fluffy fabric before use and did not iron it at all to keep it nice and fluffy. I projected the pattern onto the fluffy and cut it with a rotary cutter. It is a little tricky to sew because you want to avoid having it stretch out. I used a walking foot on my sewing machine with a slightly longer stitch length and surged all the seams after I sewed them to tidy up the edges. every time the pattern suggested pressing with an iron I ignored it, and just did some light finger pressing. I made a bias binding for the large foxy pockets (big enough for my phone without any modifications), but it requires several passes through the sewing machine to attach. By the time I got it attached it had stretched out a bit so I moistened the pocket openings with a damp cloth, reblocked them to their proper shape with my hands, and let them dry before I finished attaching the pockets. The pants were very easy to sew, and went together quickly. The waistband was super easy to assemble as there was nothing to stretch: I made a casing and threaded a piece of 2″ elastic through it. I’m 5’2″ and ended up hemming the short length 2.25 inches to wear with flats. The only time I touched my iron was to very lightly press the hems.
Here I am modeling the pants with my new Chorus top. I tucked it in so you could see the waist band but I will probably wear this shirt untucked. I like the subtle leg option, which is plenty wide on me. The dramatic leg could be fun with the right fabric, but may be more pants than I really need.
I thought the pants looked pretty good and were comfy to wear. But the rise was really sky high on me and the crotch was sitting pretty low. I am a big fan of high-rise pants, but as a short person, I sometimes find high-rise too high when there is no petite version. I also find I frequently have to size down and/or grade in the waist on PE patterns, despite choosing sizes that match my measurement. I decided to wear my pants to work all day and see how they did. They were comfortable and looked alright, and the double gauze was just right in both the 75-degree F outdoor weather and indoor air conditioning. but by the end of the day I was convinced that the waist was definitely too high for me. I also noticed that the pants slipped down a bit as I wore them and I kept stepping on the hem. The pockets were kind of droopy and I was concerned my phone could fall out when I sat down.
I cut off the waistband, removed about 2 inches from the top of the pants and graded in the sides from the hip up to the waist. I took about 3 inches out of the waistband circumference and sewed it back on. I think they fit much better now. They sit right at my natural waist rather than above it and there isn’t so much extra fabric around the waist. Next time I make these I think I would cut a size smaller (especially if I use double gauze since it stretches out a bit when you wear it), low rise, and still probably grade in the waist. I would also reshape the pocket opening to attach higher on the leg and hem them a bit higher. I might try a yoga waist band in a coordinating athletic knit (the pattern has instructions for that too!).
New photos show the reconfigured waistband. As an added bonus, since the pants are pulled up more the hems have risen and I no longer trip over them. I made a Sinclair Bondi v-neck tshirt (my first Bondi v-neck) out of a floral DBP in my stash to match the pants. I was going to make a dress from this fabric, but I liked how it paired with the pants so decided to make separates instead. I also like the shirt untucked. Skirt coming soon. I wore this outfit to work, and by the time I walked home it was 92 degrees F. The whole outfit was still comfortable, even in the heat and humidity!
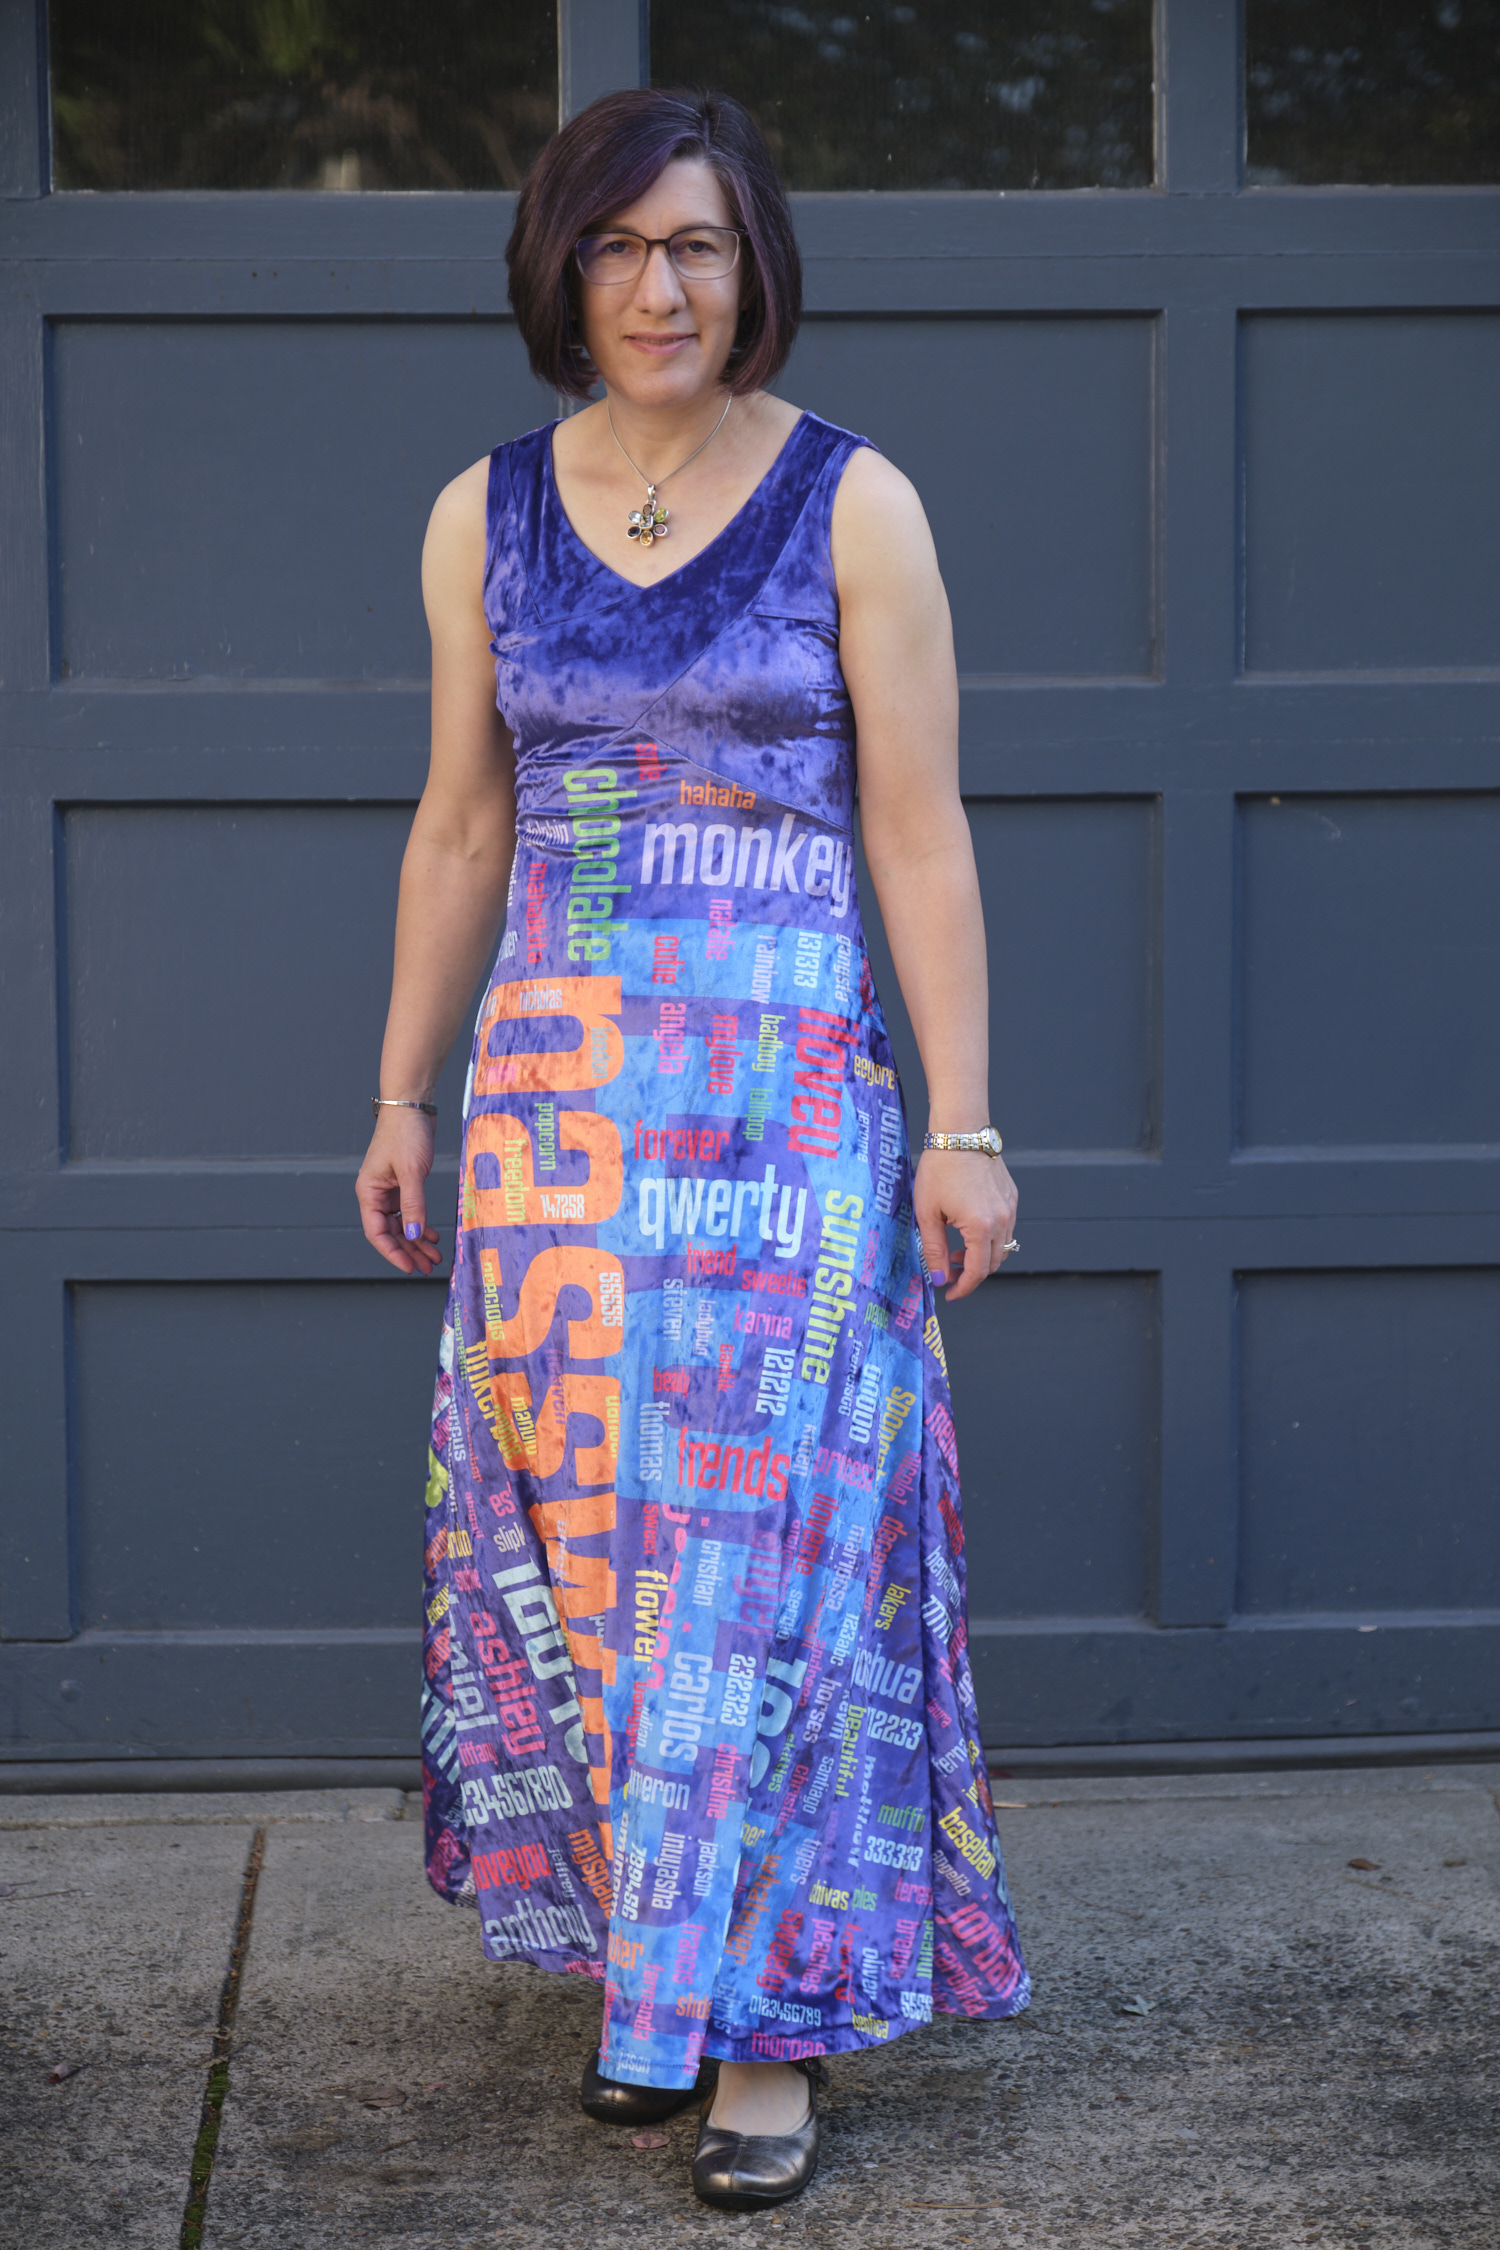
A while ago I made a bunch of ties and never got around to blogging about them. Here they are. Details on pattern below.
I previously had commissioned a tie-seller on Etsy to make some ties out of my bad passwords fabric. But she isn’t on Etsy any more so I decided to try sewing some times myself. There are lots of tie patterns available online, some of them free. Most require a main fabric, interfacing, and lining, and require some hand sewing along the center back seam. So I was excited to find Bryanna’ Free Neck Tie Pattern and Tutorial that was super easy and can be made without any interfacing or hand sewing (except for tacking down the tie keeper ribbon on the back). I tried it and it was great, but when I came back later to find it I saw that Bryanna had taken down her sewing site some time in 2023. Fortunately, you can still view her tutorial using the Wayback Machine. Unfortunately, you cannot view her pattern. But I had previously saved it and hacked it a bit. So I will share my hacked version of it here.
First I merged the multi-page file into a single page, suitable for projector sewing. For those of you who are printing out your patterns on 8.5×11 pages, sorry this may not work for you. You may be able to print it tiled. The pattern calls for cutting the tie in two long strips diagonally (on the bias). The front is much longer than the back and requires a really long piece. This minimizes the number of ties you can get out of a yard of fabric. The long front piece is also too long to easily project. So I took a segment of the tie front and moved it to the tie back. In my hacked pattern you can see the segment and you can put it on the front or the back as you see fit. Just don’t put it in both places or you will end up with an extra long tie. You do end up with a seam where the front and back connect, but in my experience, even in my hacked short front, the seam does not end up in a visible part of the tie when being worn.
The great part about this pattern is you layer your main fabric and your lining, fold them, and sew the whole thing together in one long seam on your sewing machine. You then turn the whole thing inside out in step 7 and you are basically done. The tricky part, is in the turning the whole thing inside out with a safety pin. You have to feed the thick part of the tie through the narrow neck, and that is not all that easy to do. Just take it slowly and you’ll get there eventually.
Bryanna suggests folding the ends of a 3″ tie keeper and hand sewing them in place. Instead I recommend cutting a 4.5″ tie keeper, folding it in half, and sewing it into the main seam of the tie as part of step 6 (just the ends will be sticking out of the seam at the end of step 6). After the tie is turned right side out in step 7, you will have a tie keeper tucked into the seam, with no raw edges. At that point you just need to flatten it out and stitch down the sides. I think it looks a little neater this way.
After I made a few password ties, I found the cookie fabric and decided to make a tie for my student who was presenting our research paper on cookie consent banners at a conference.


