
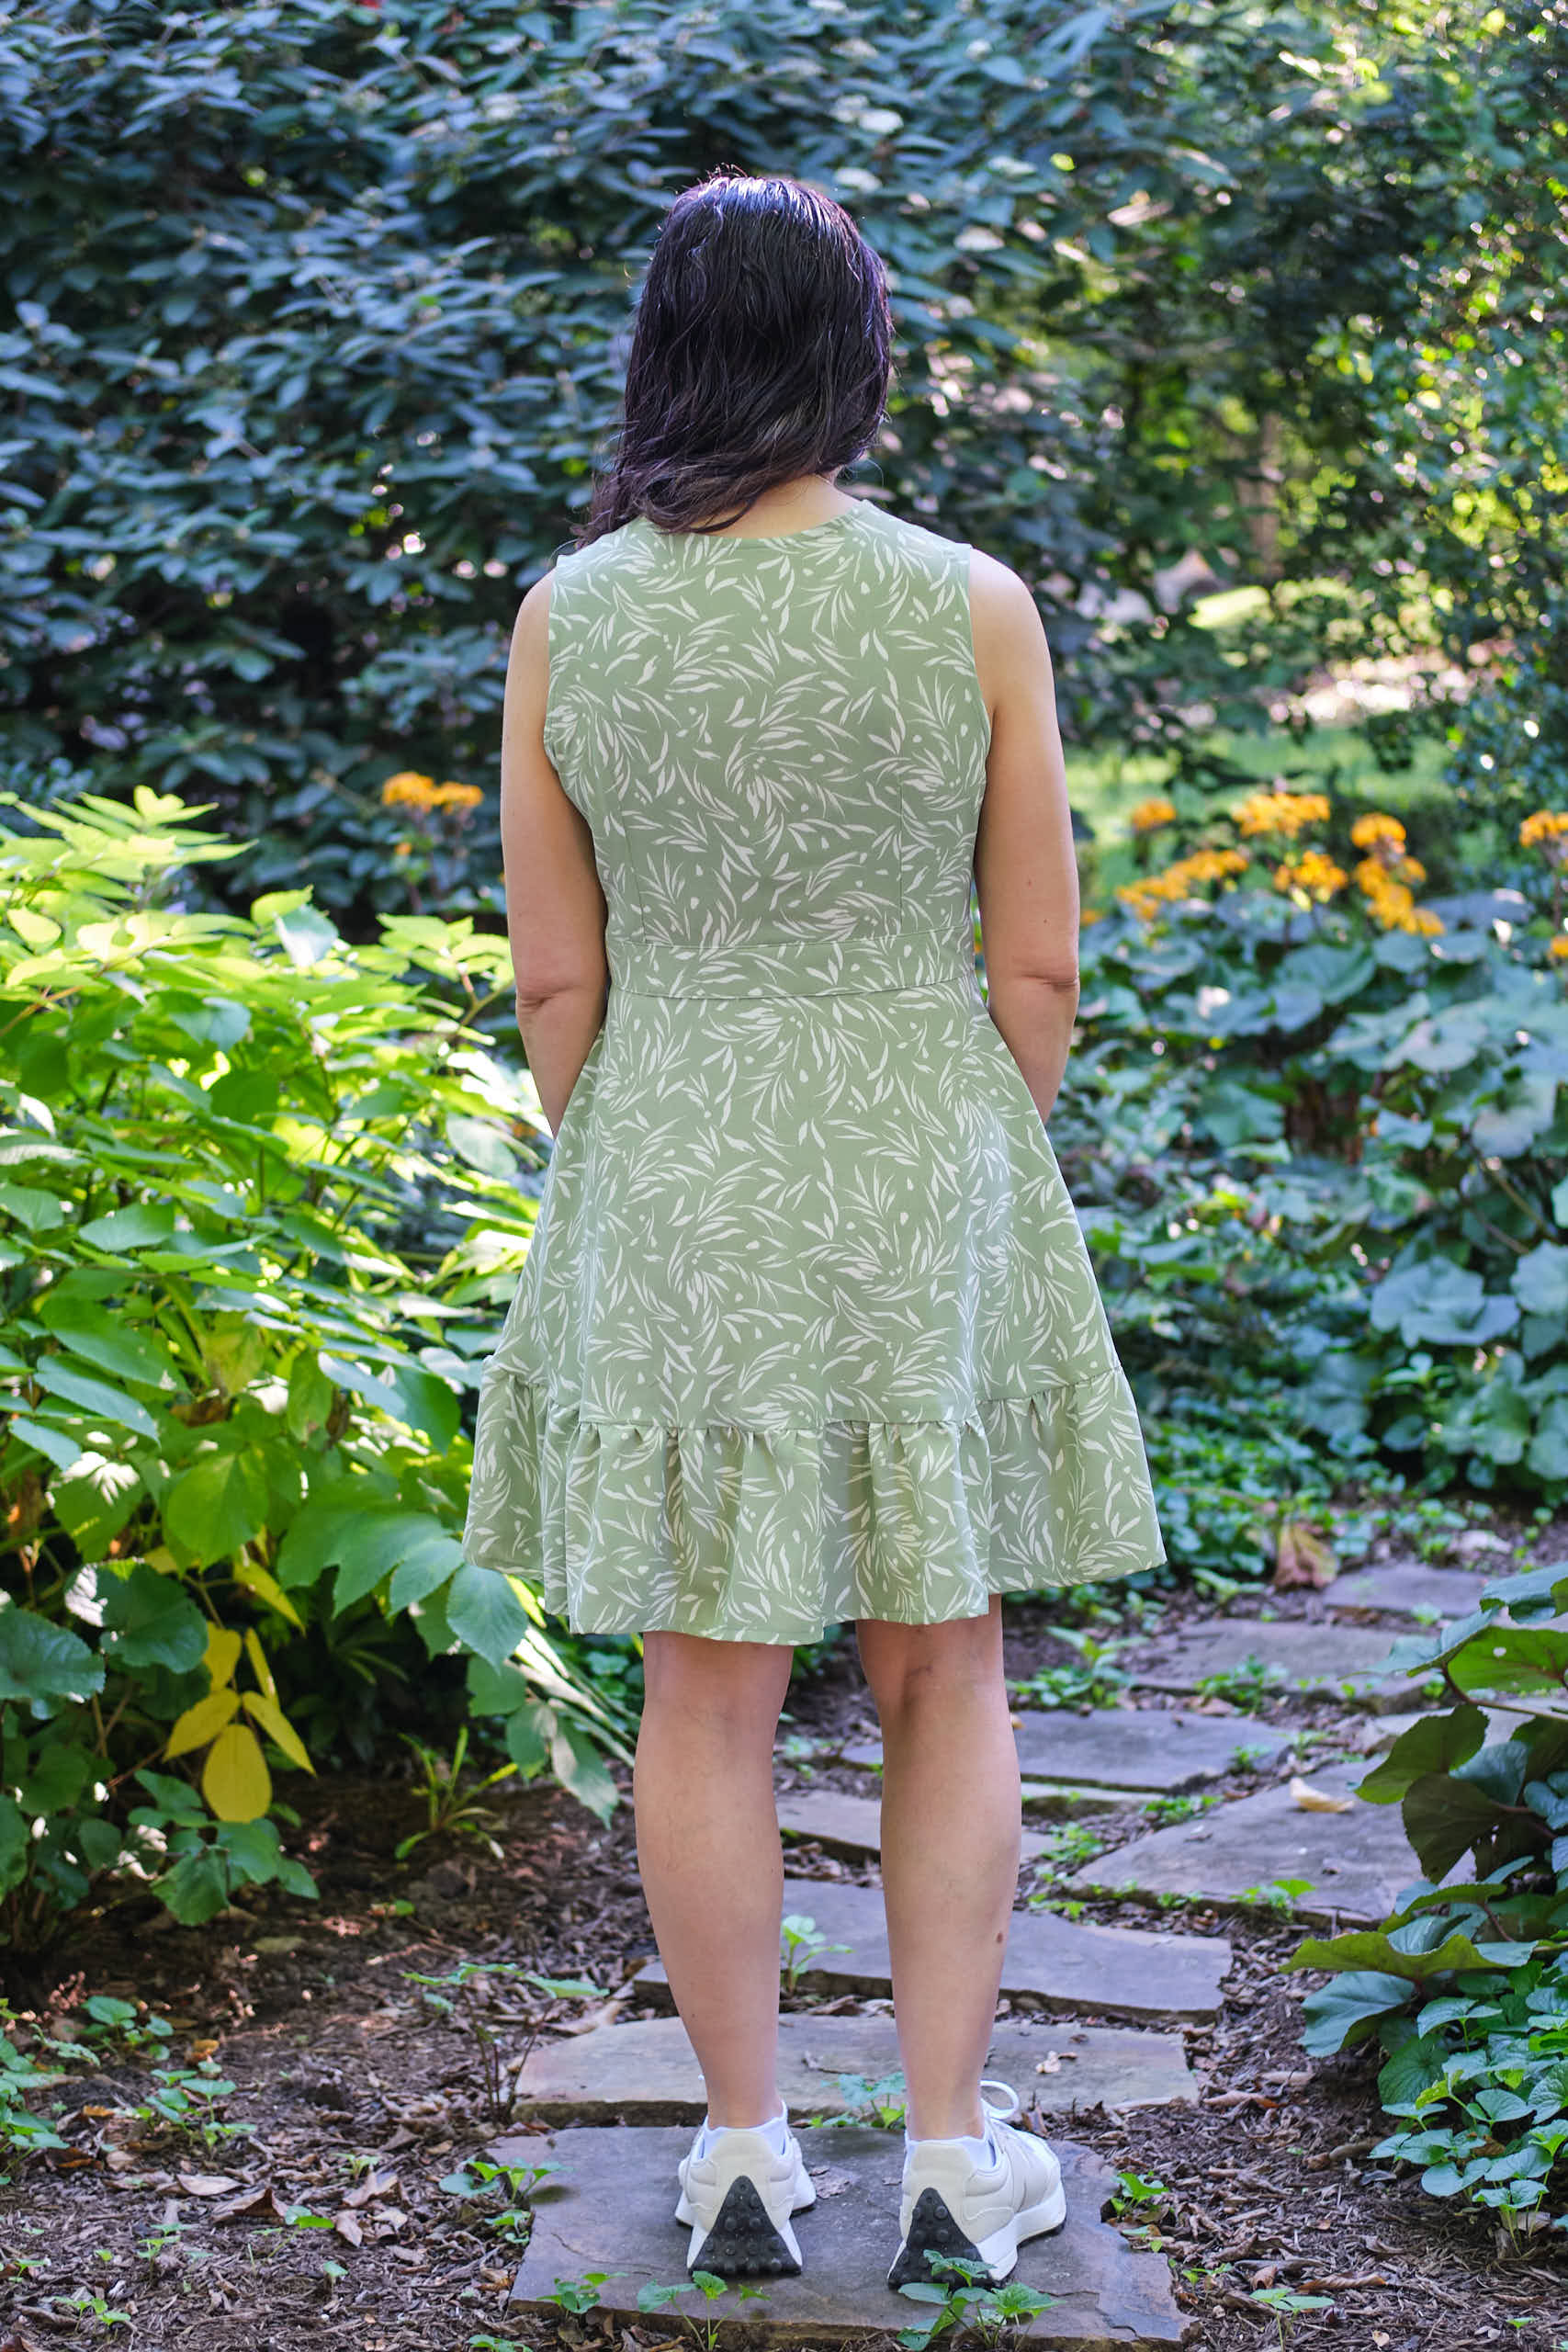
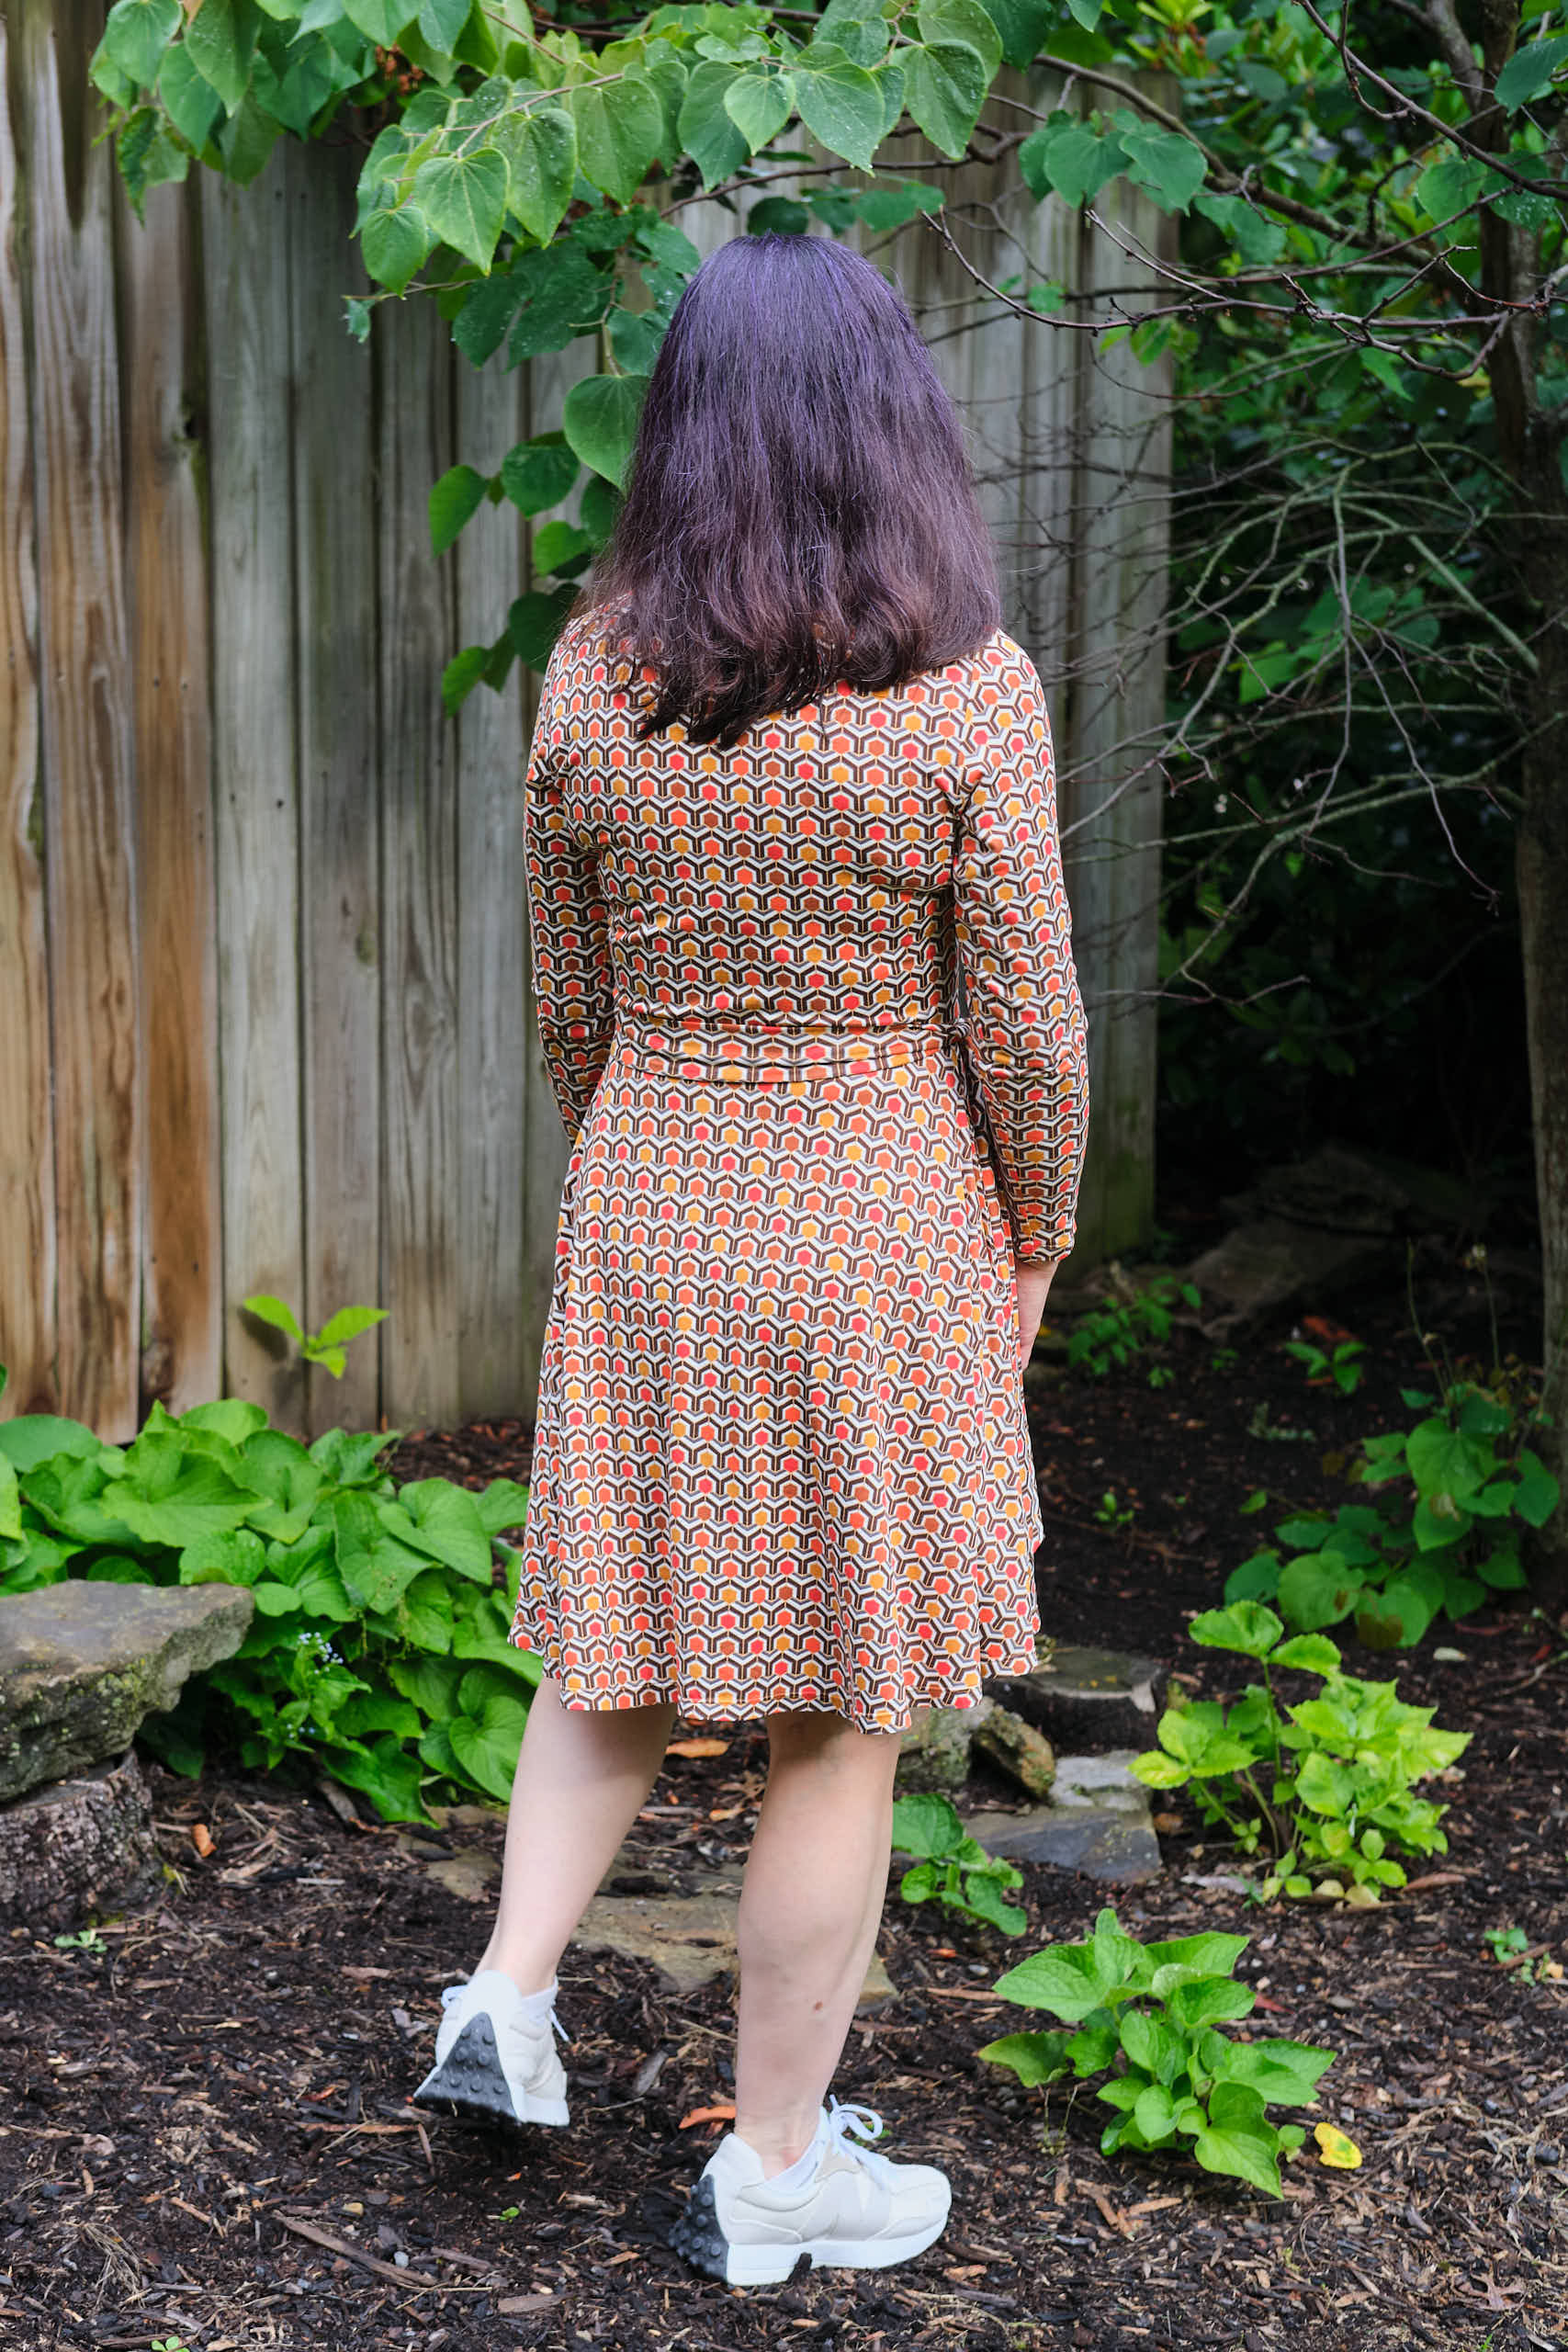
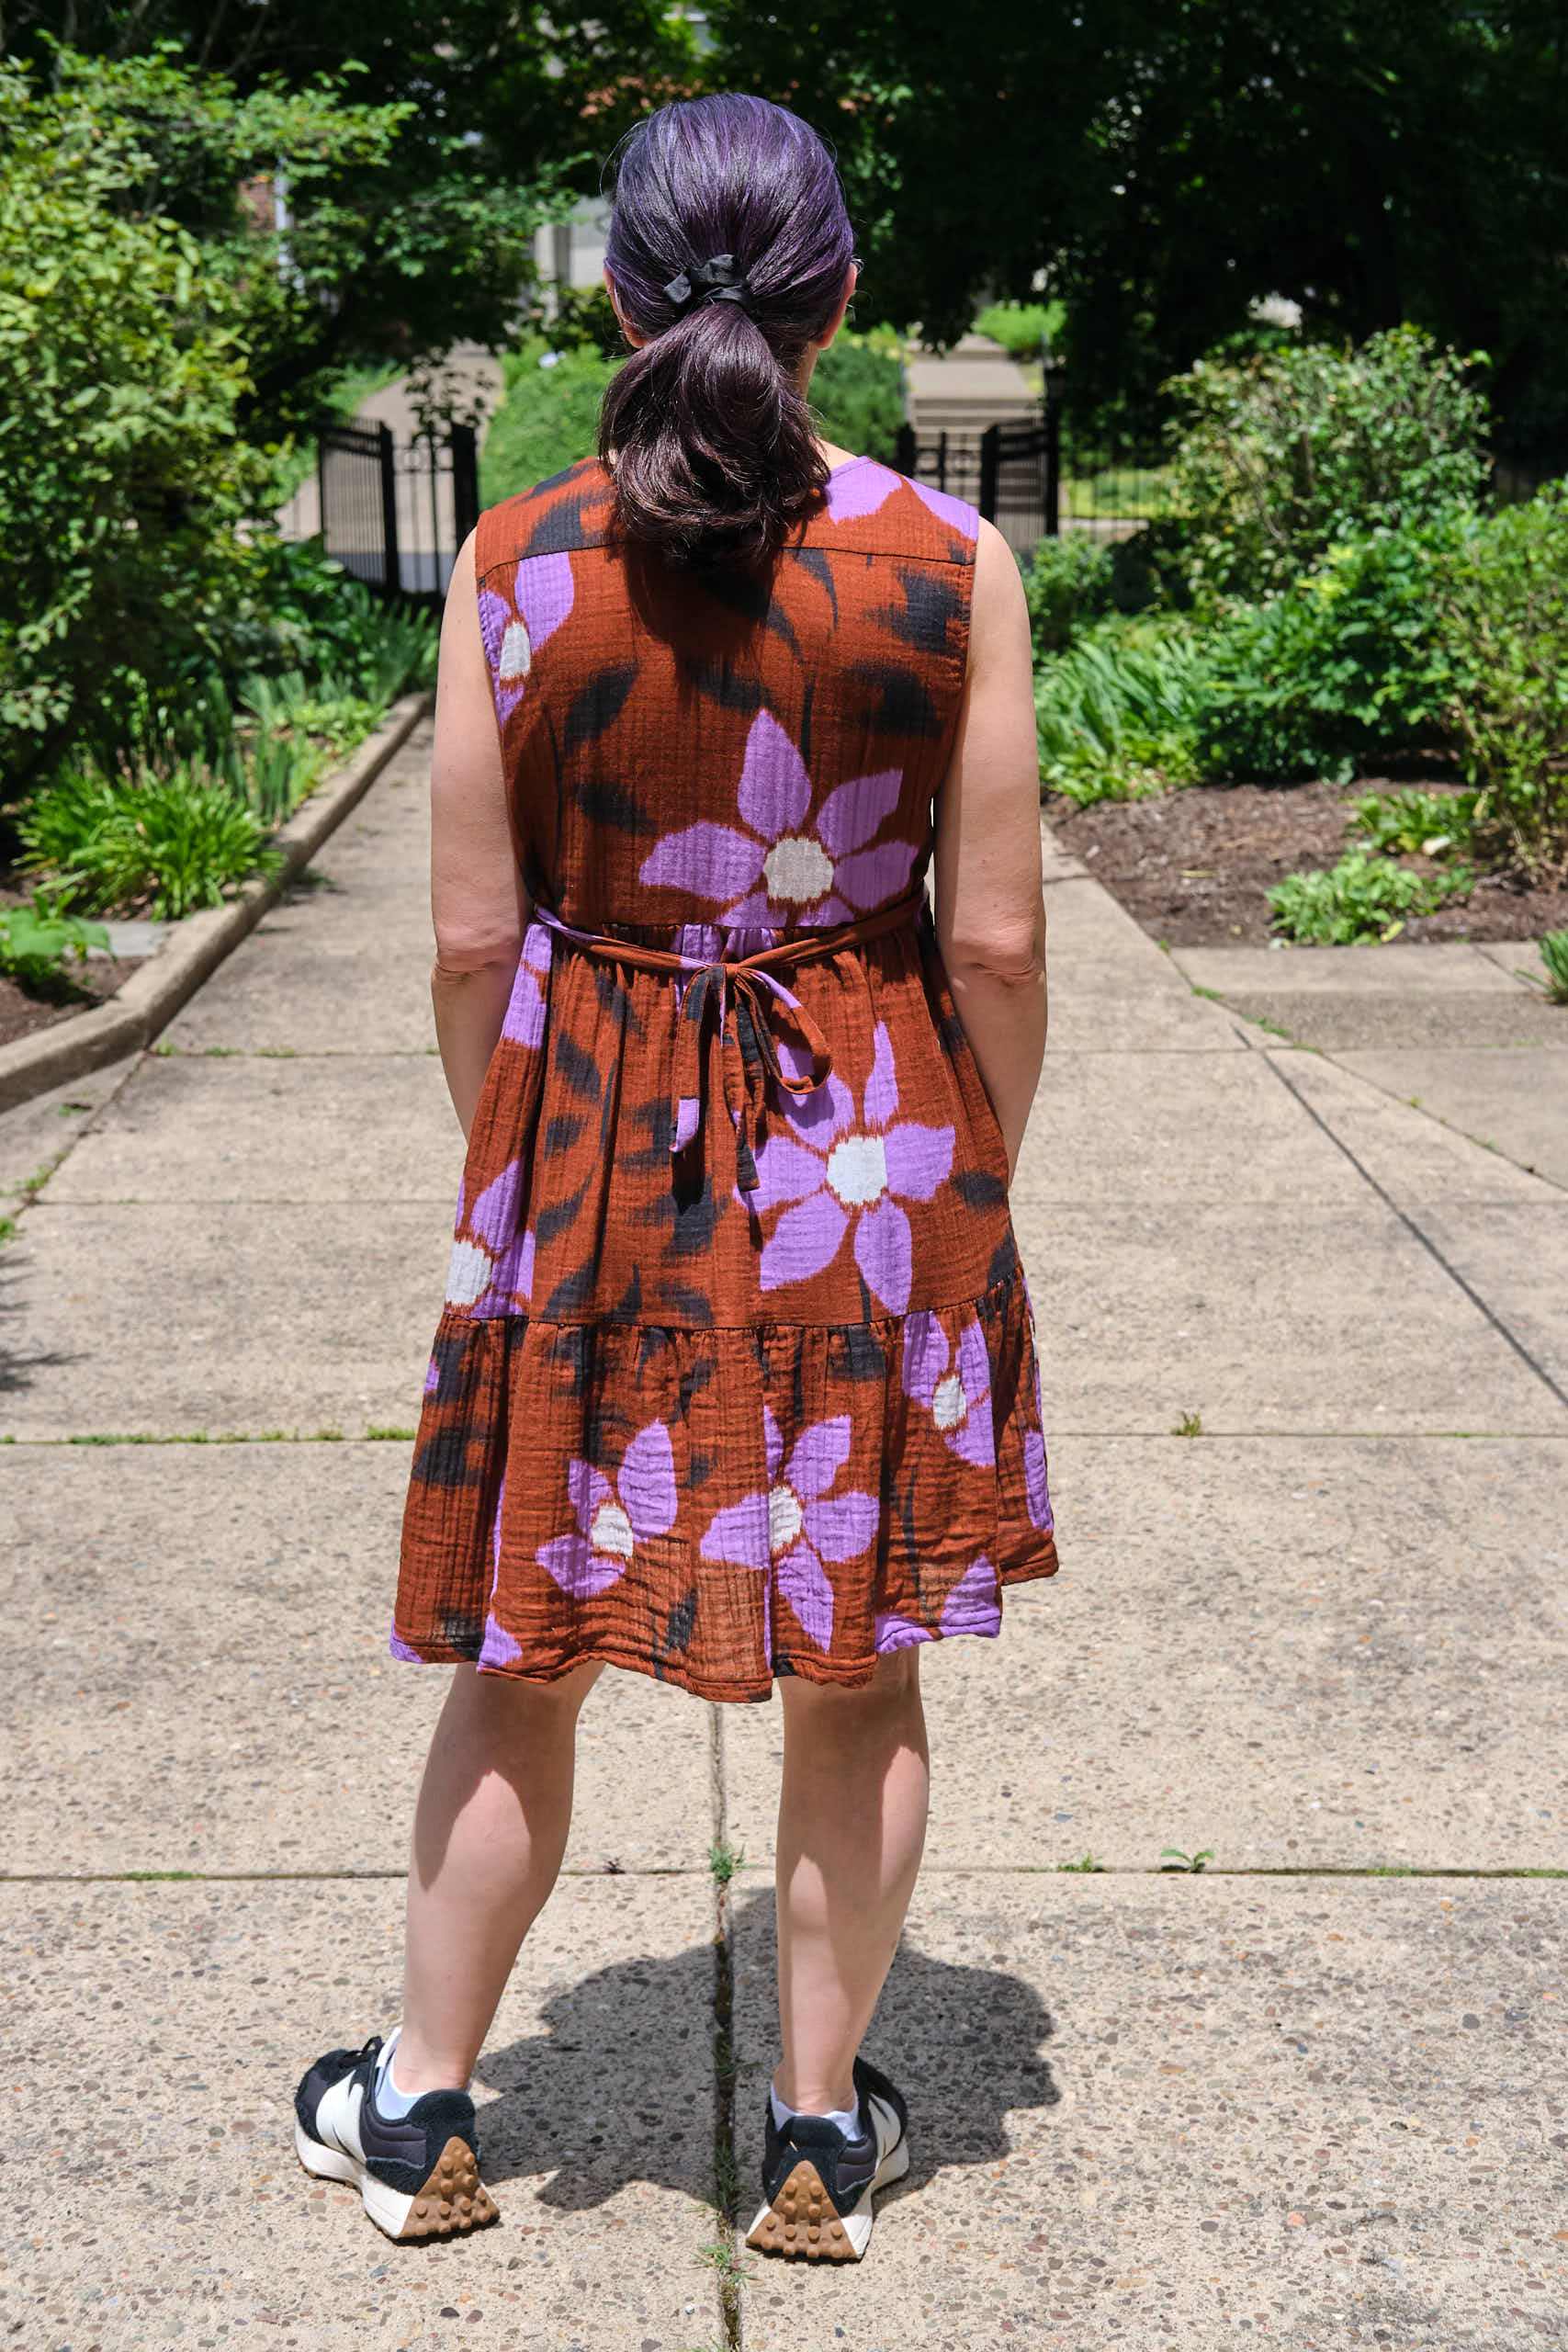
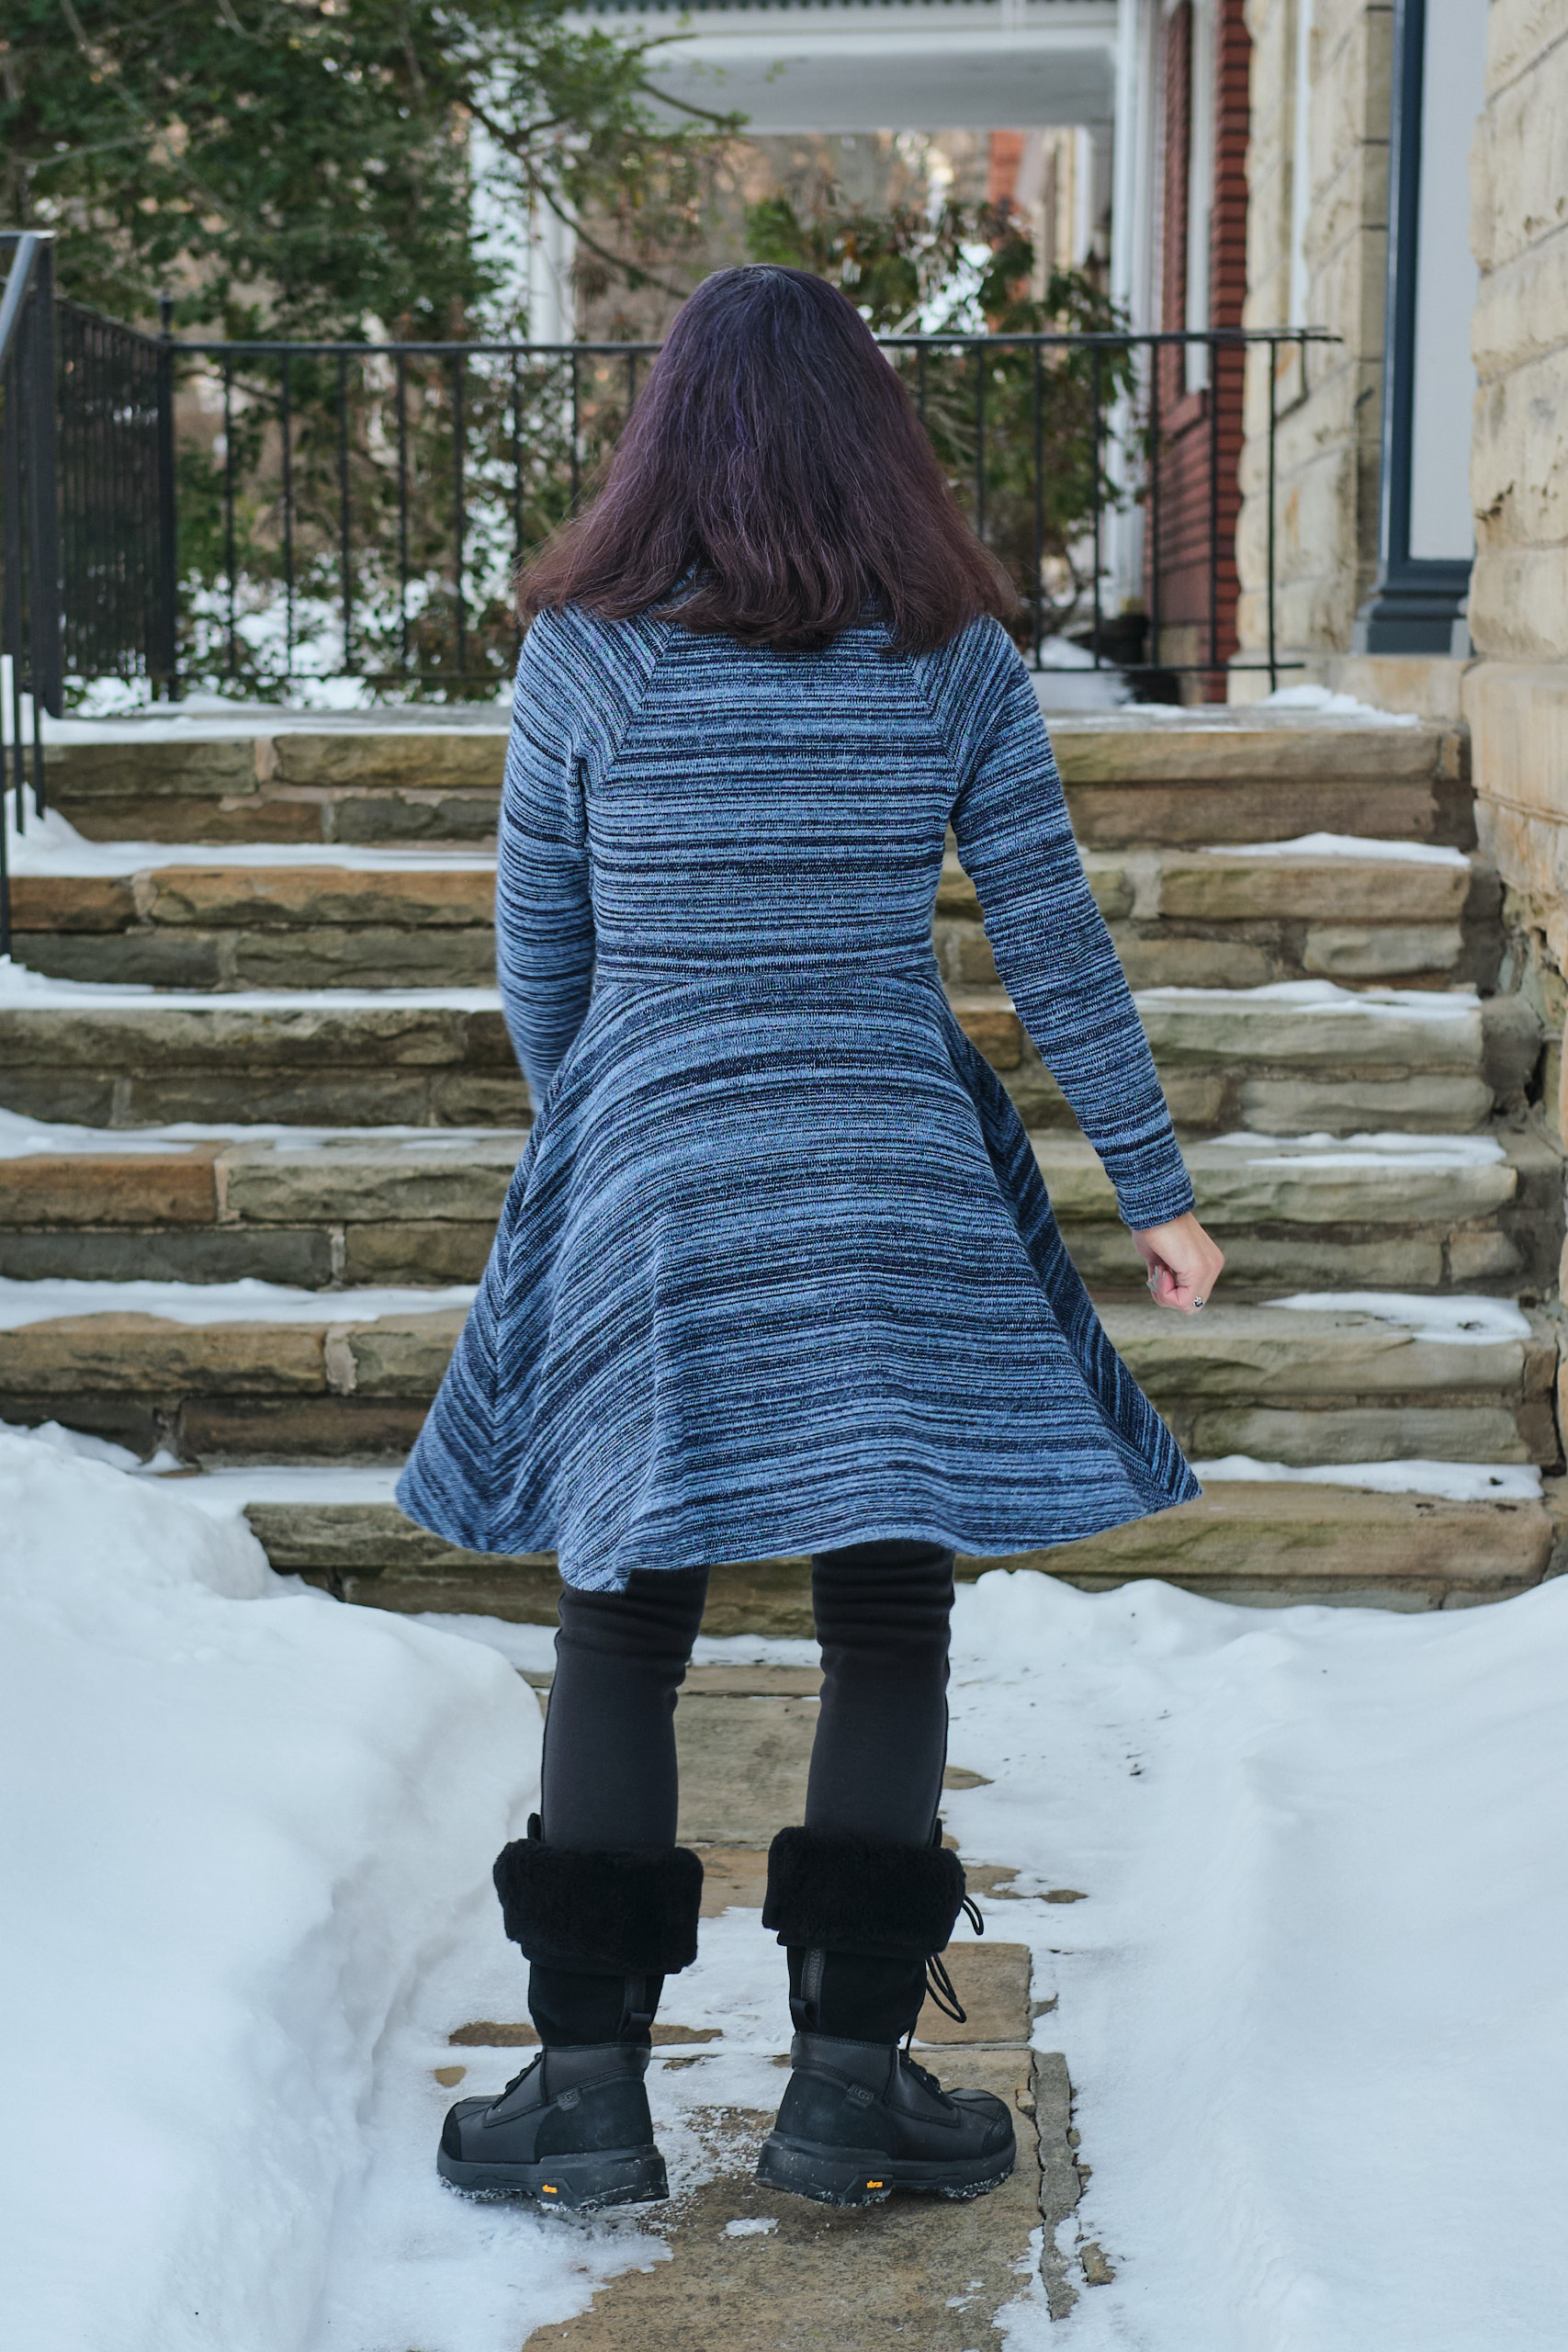
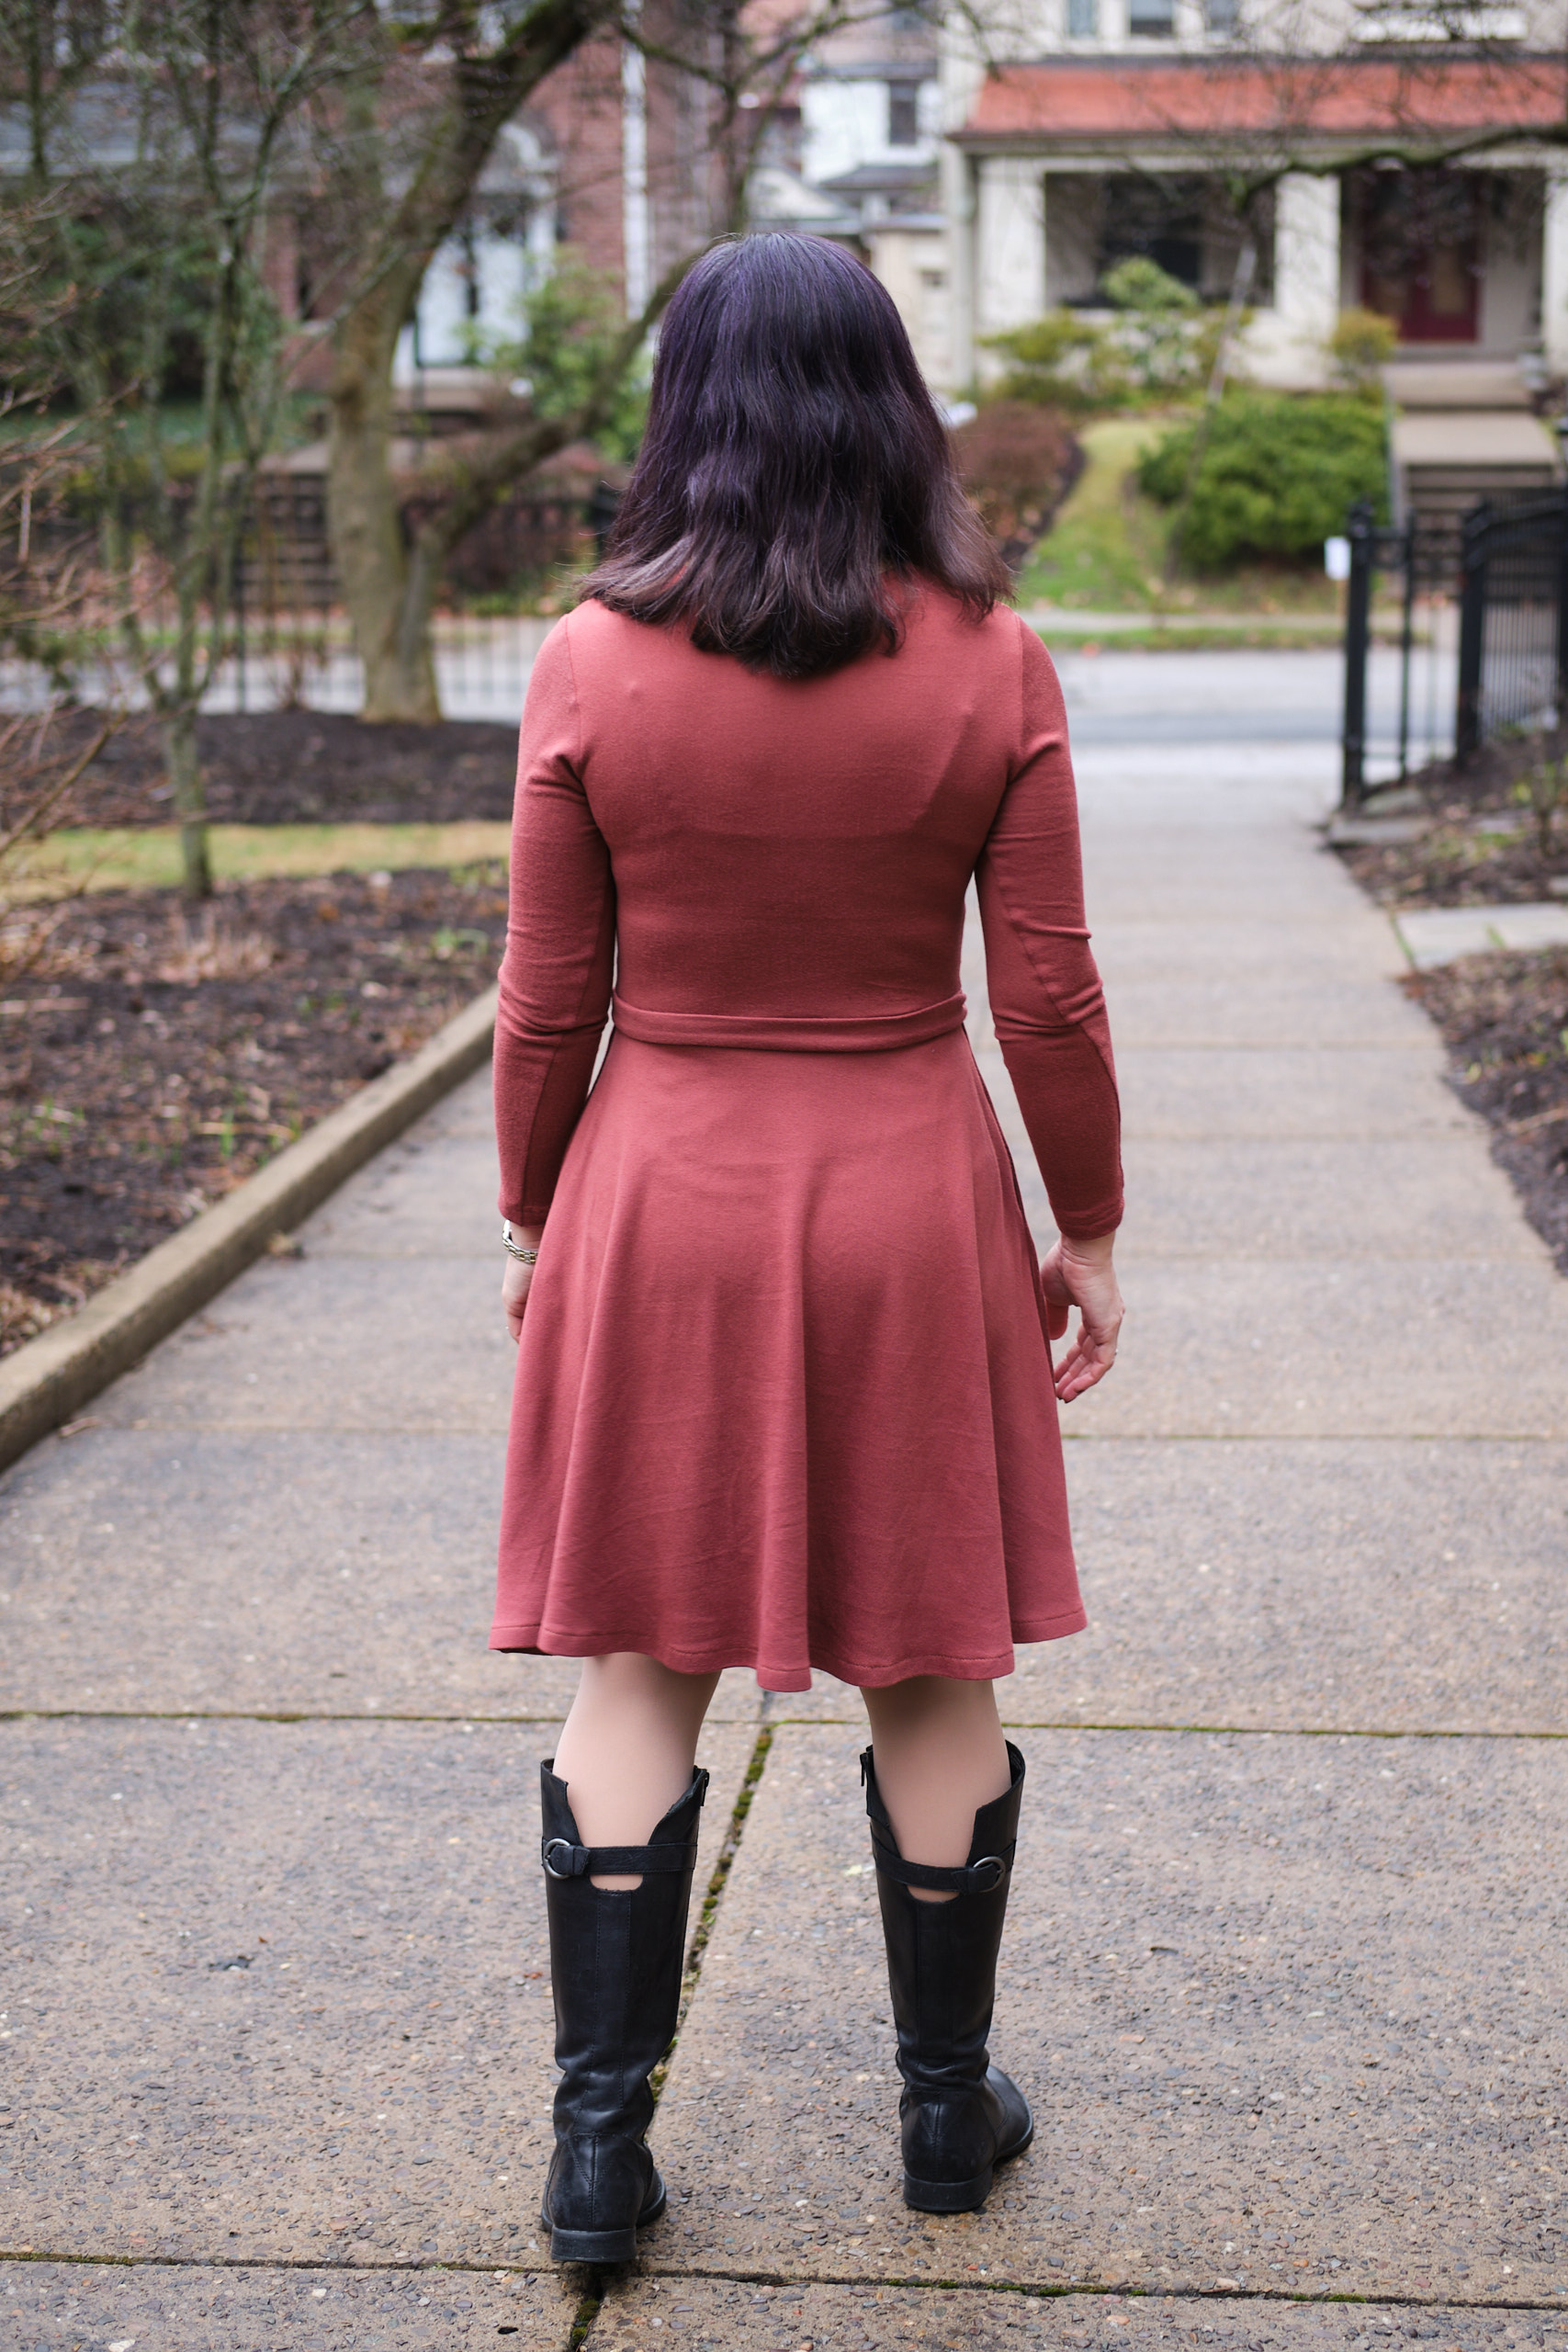
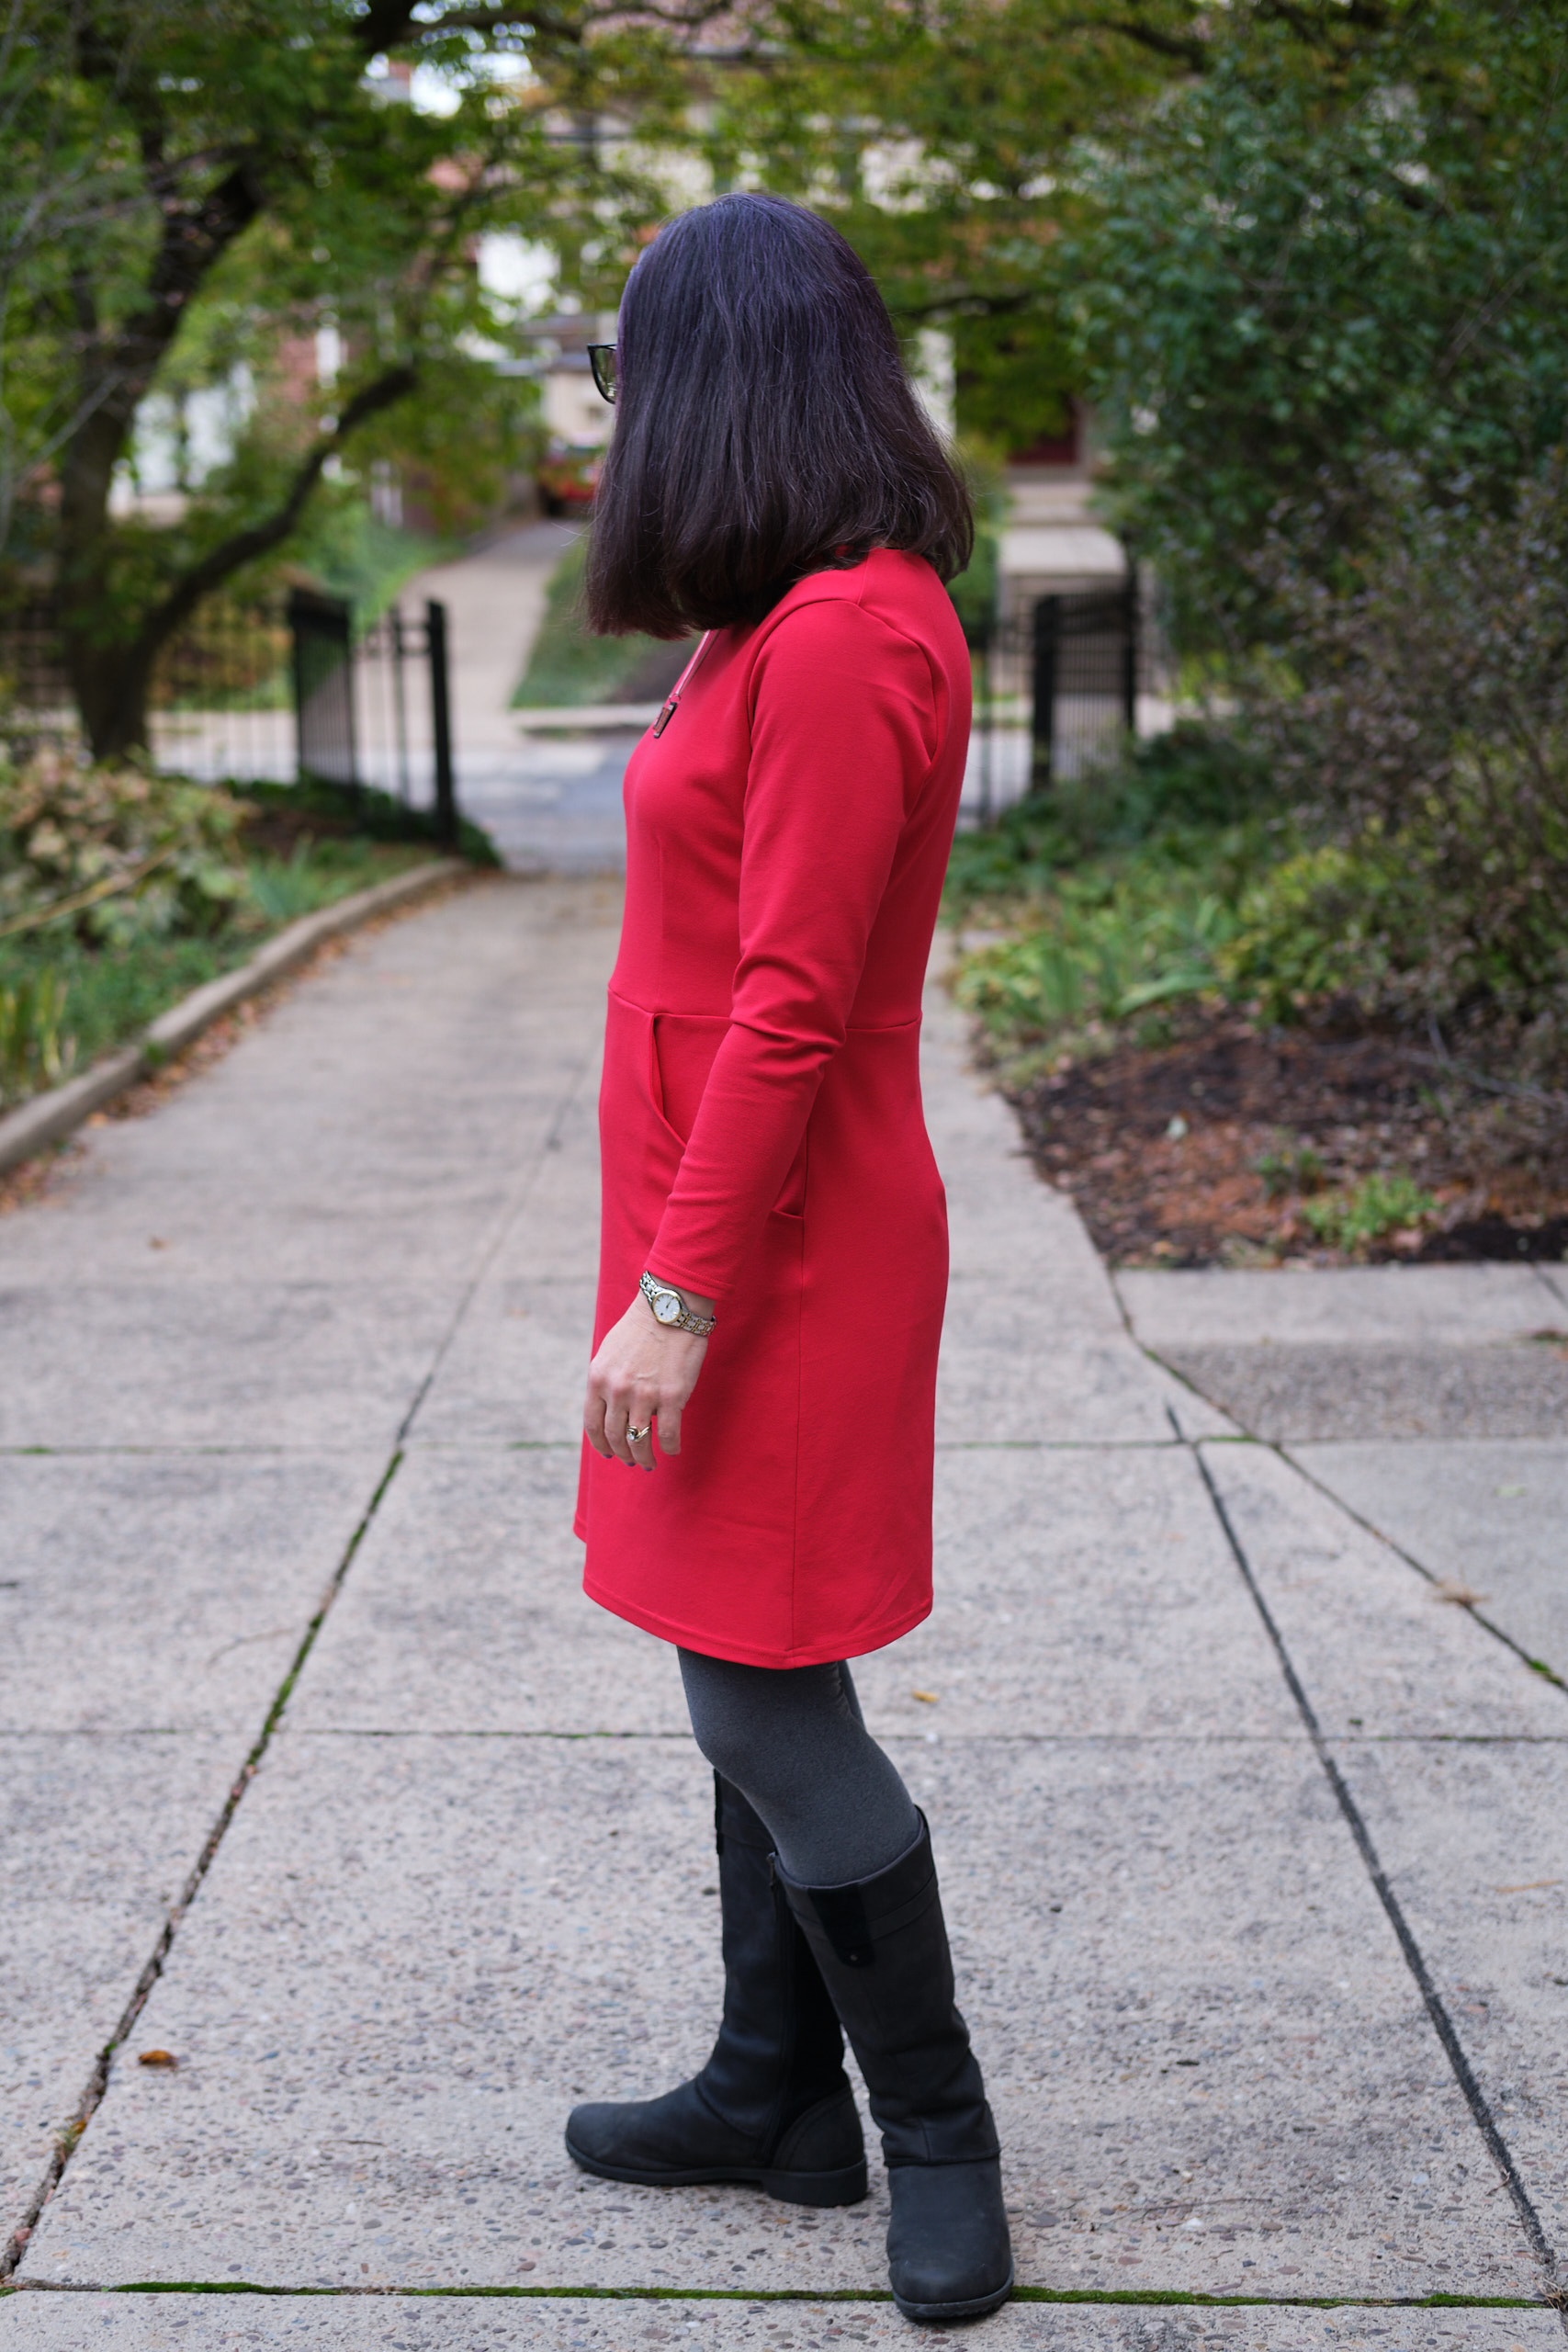
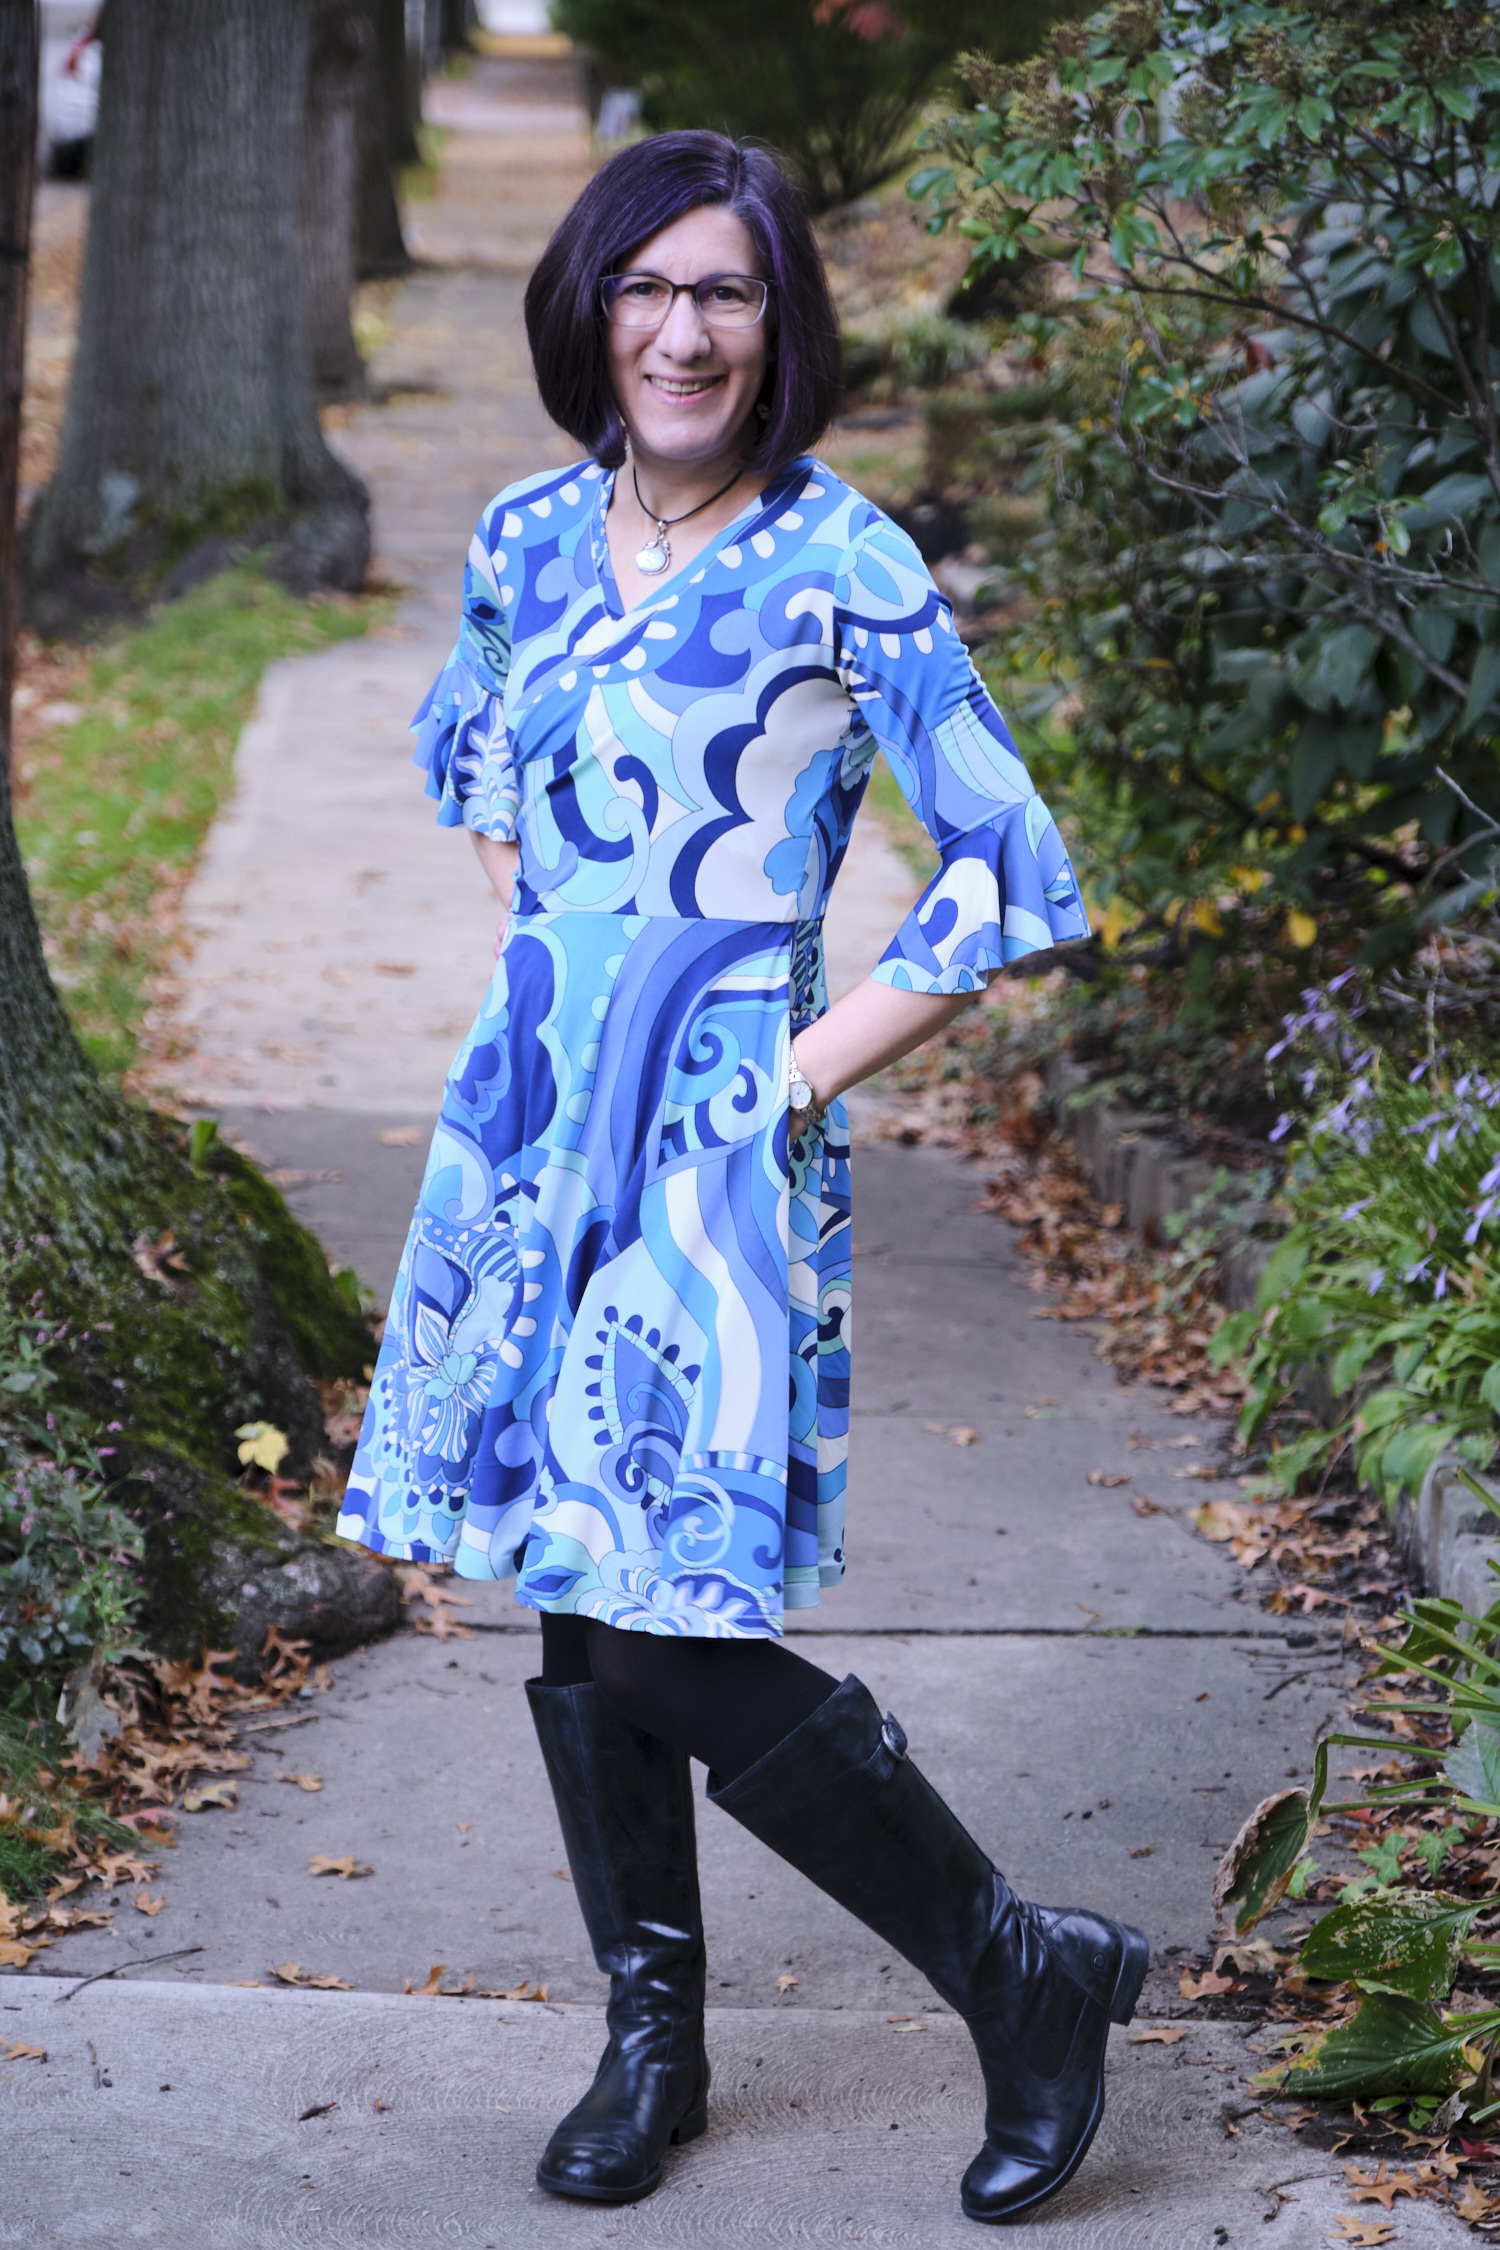
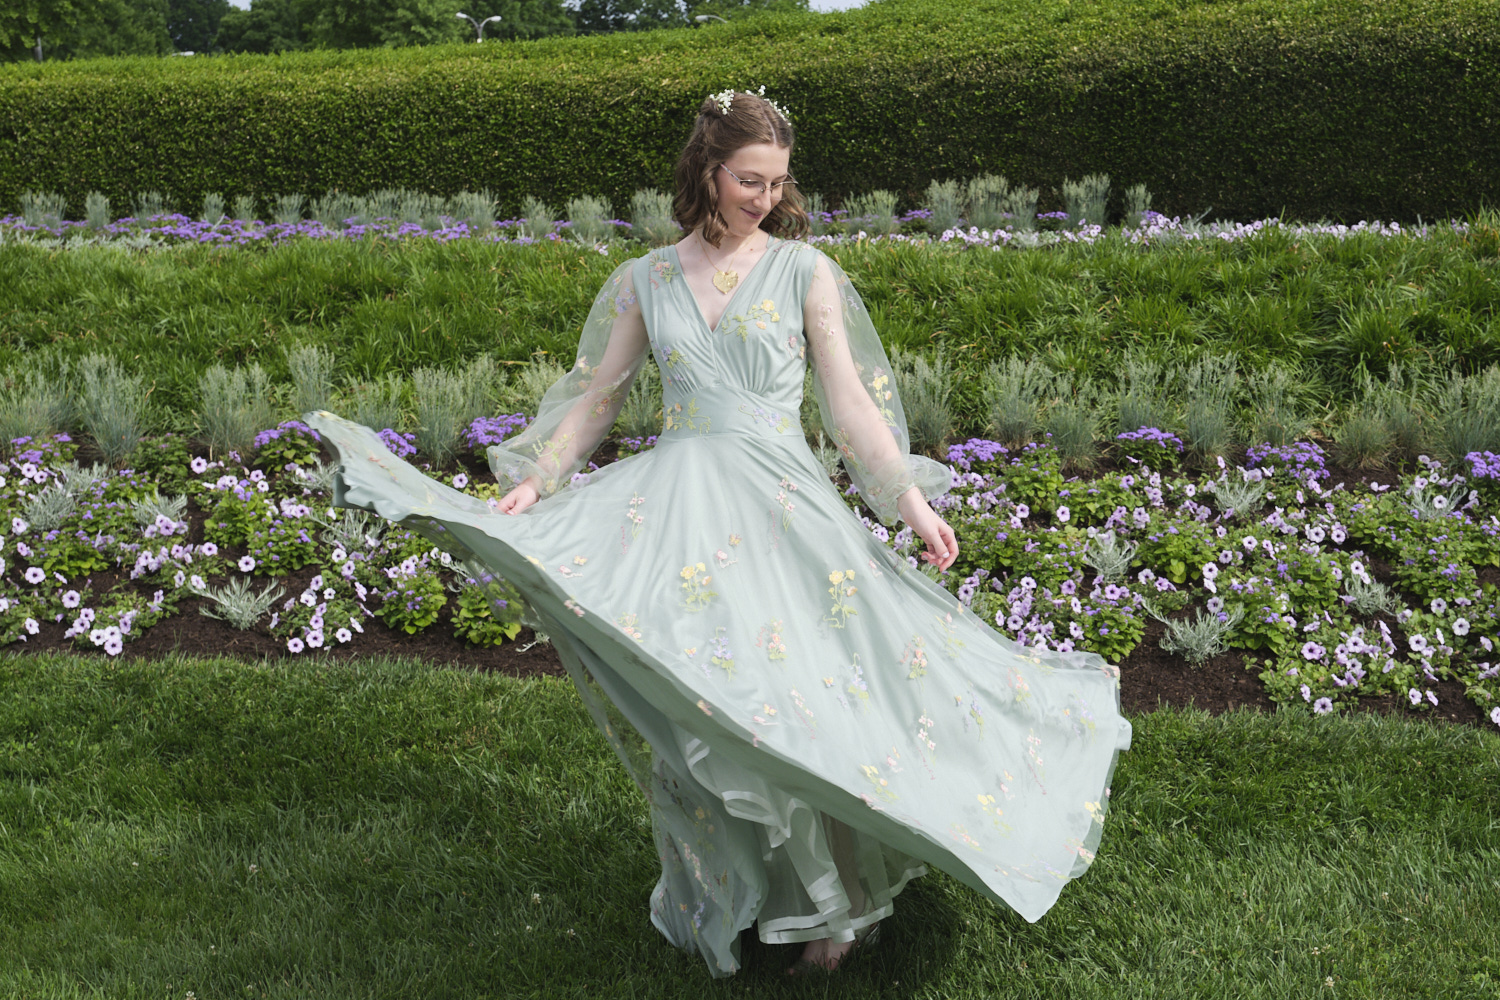
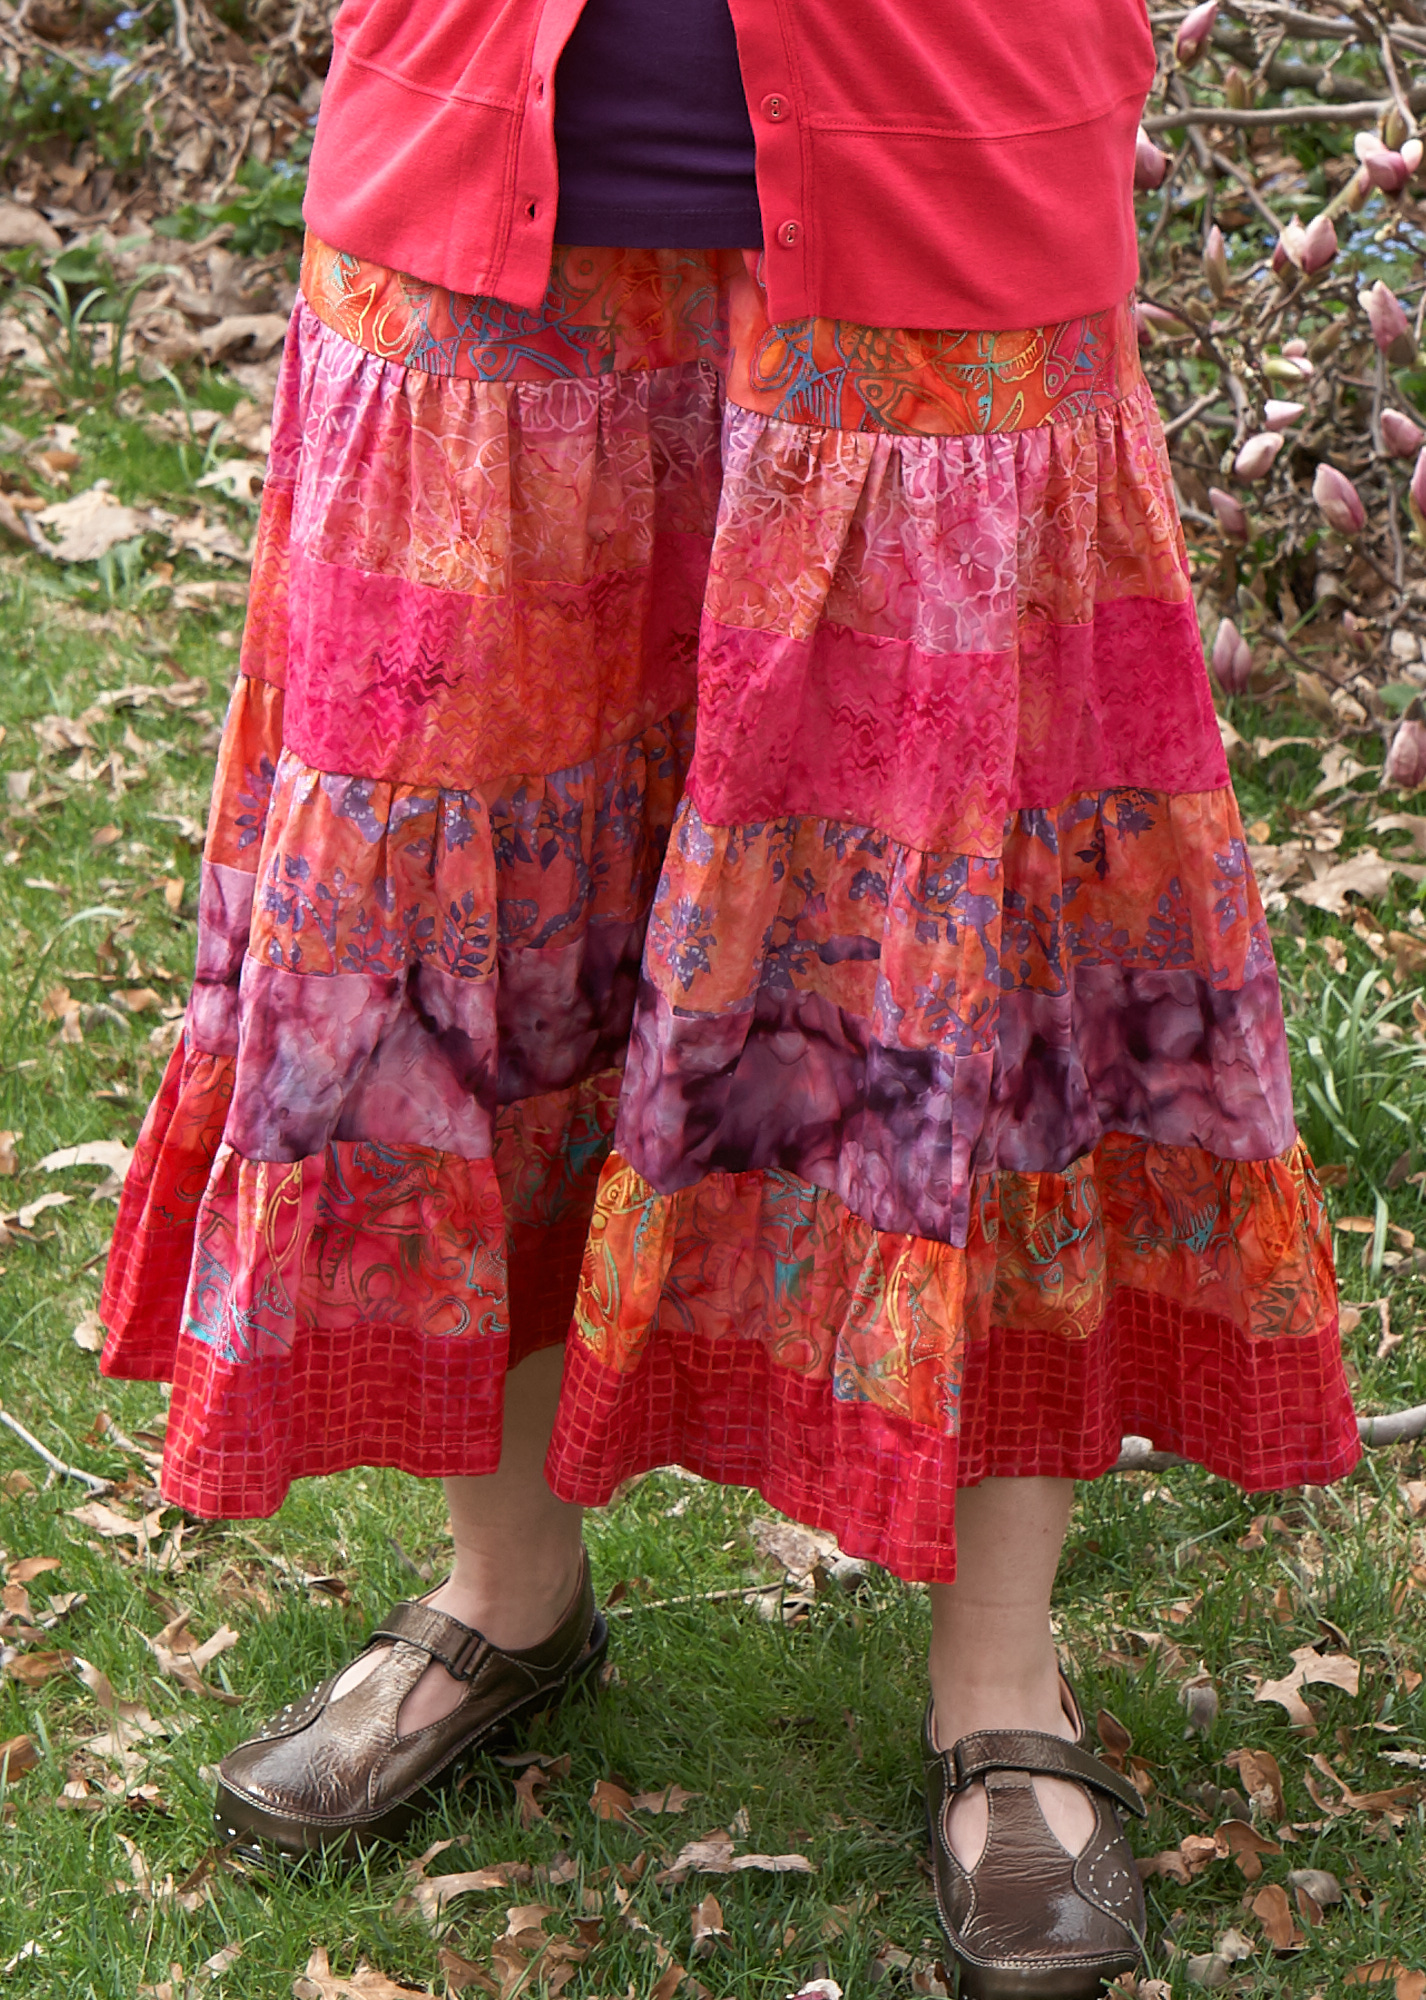
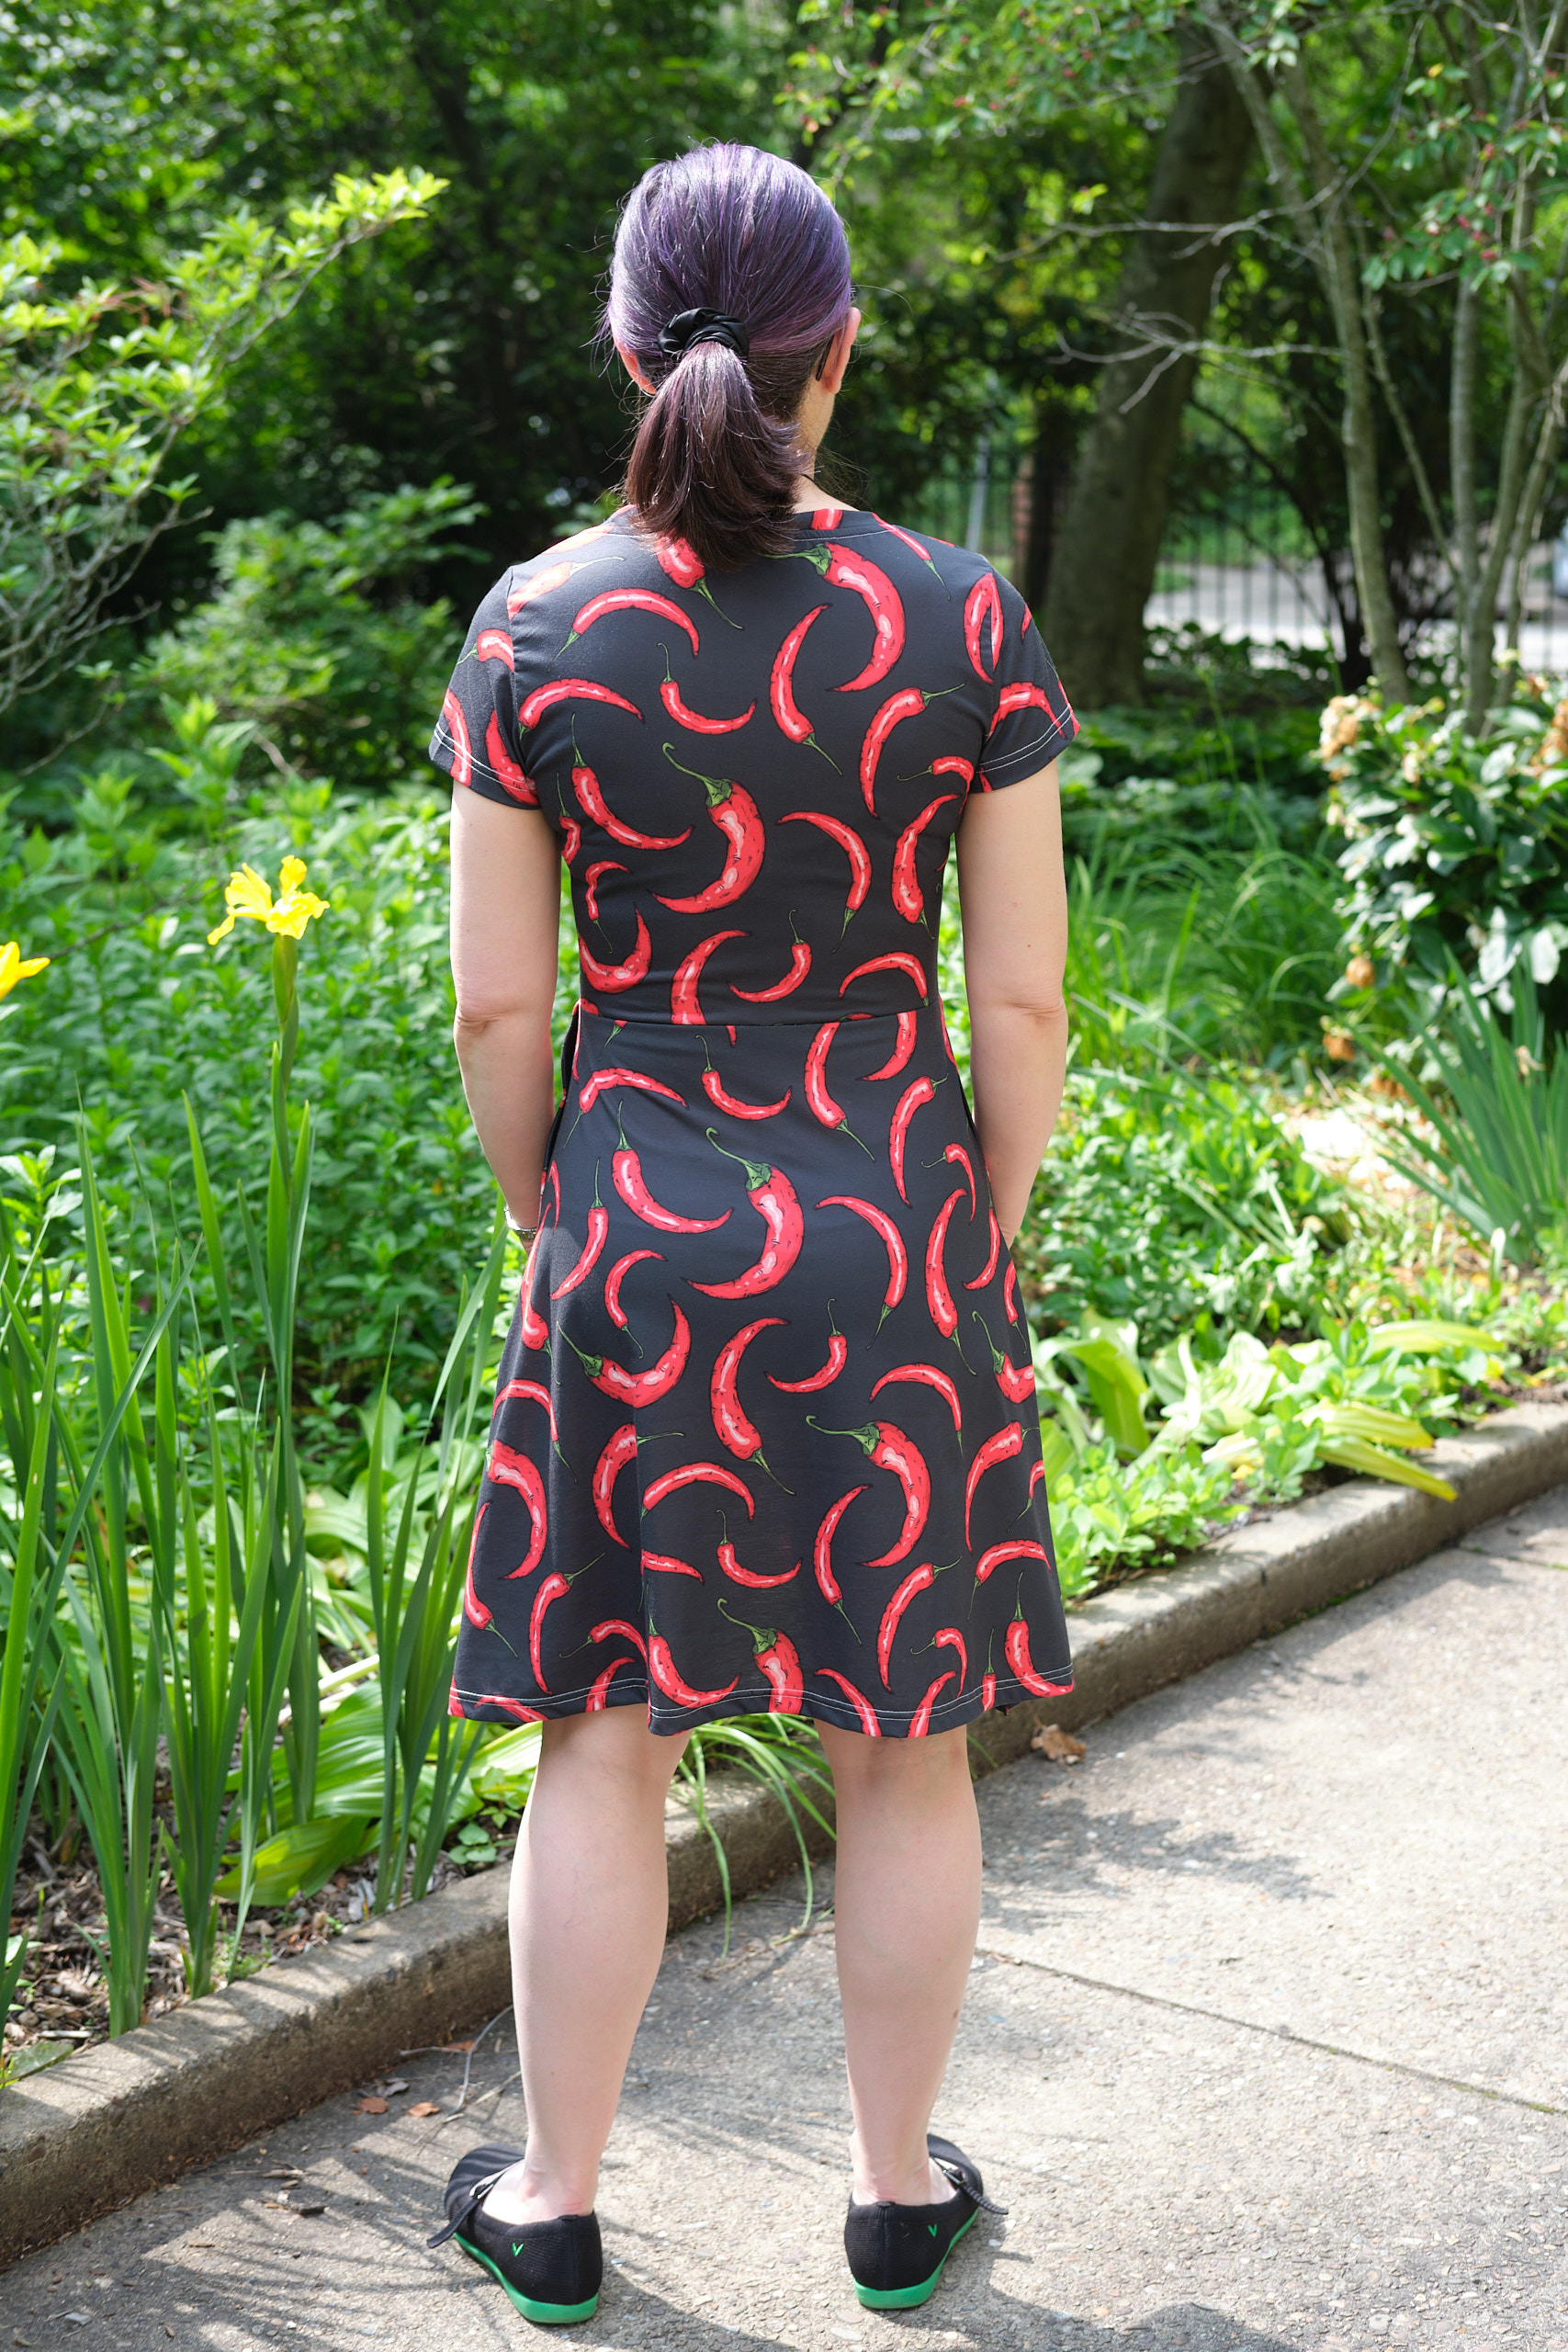
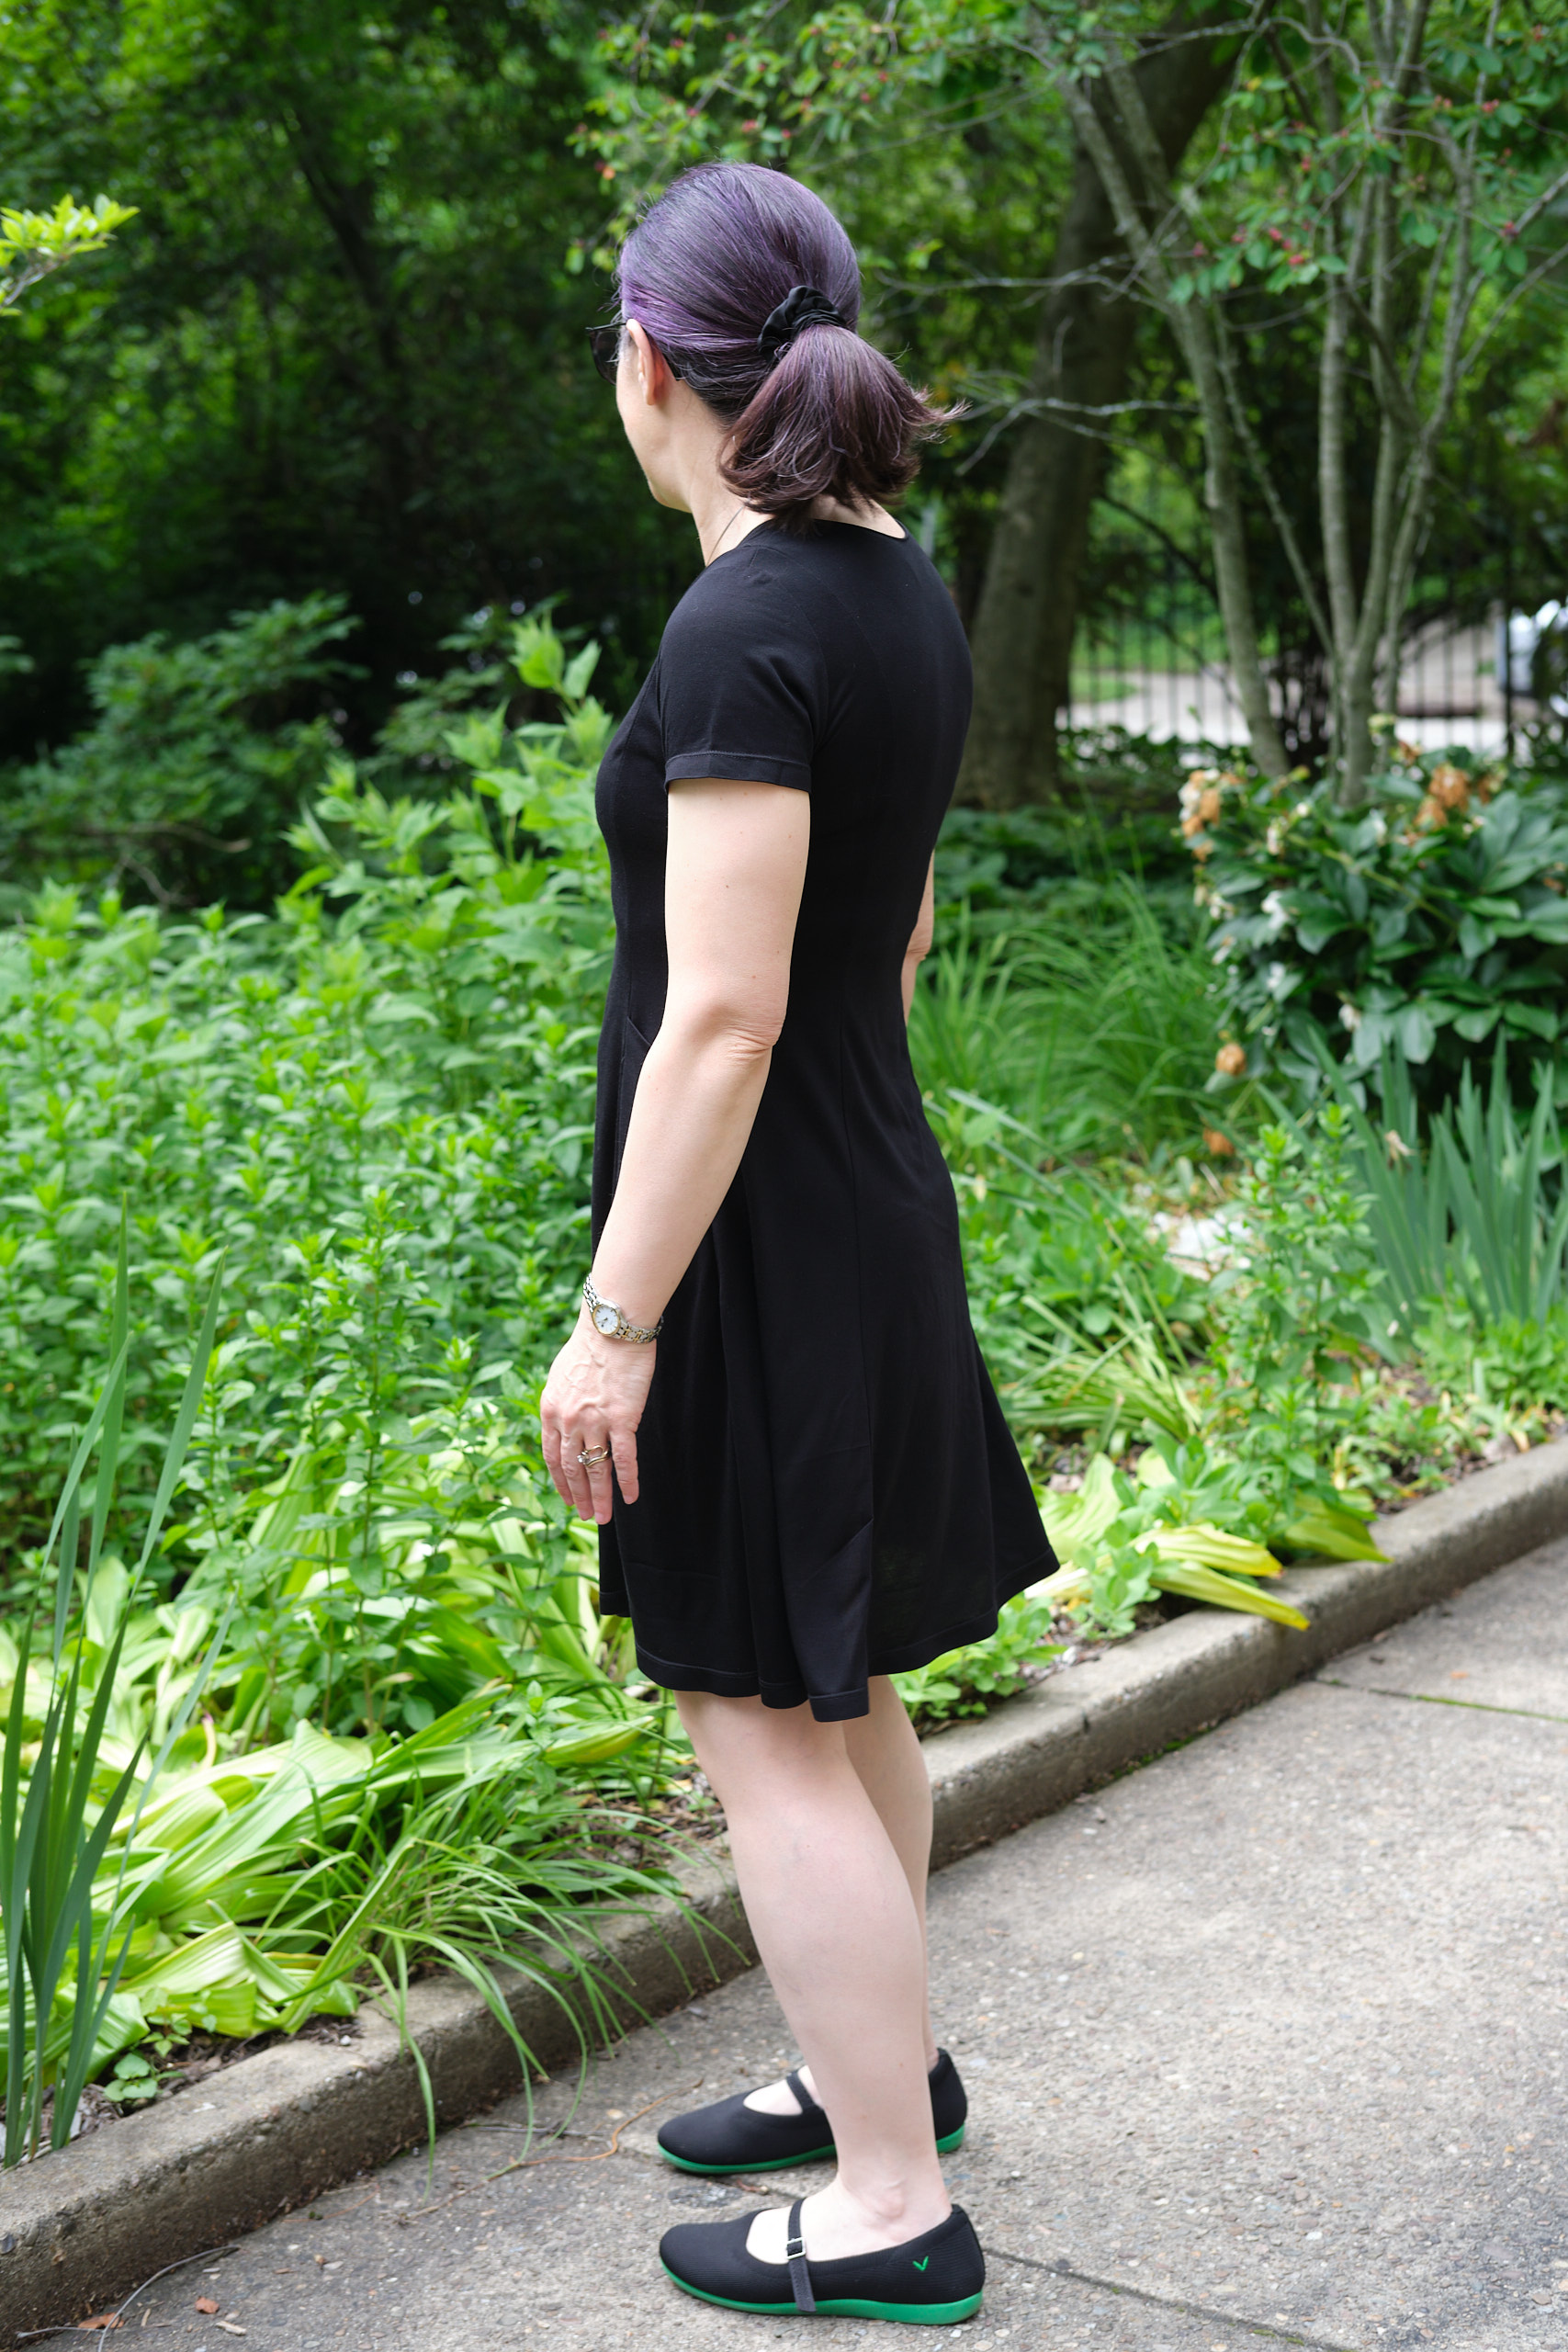
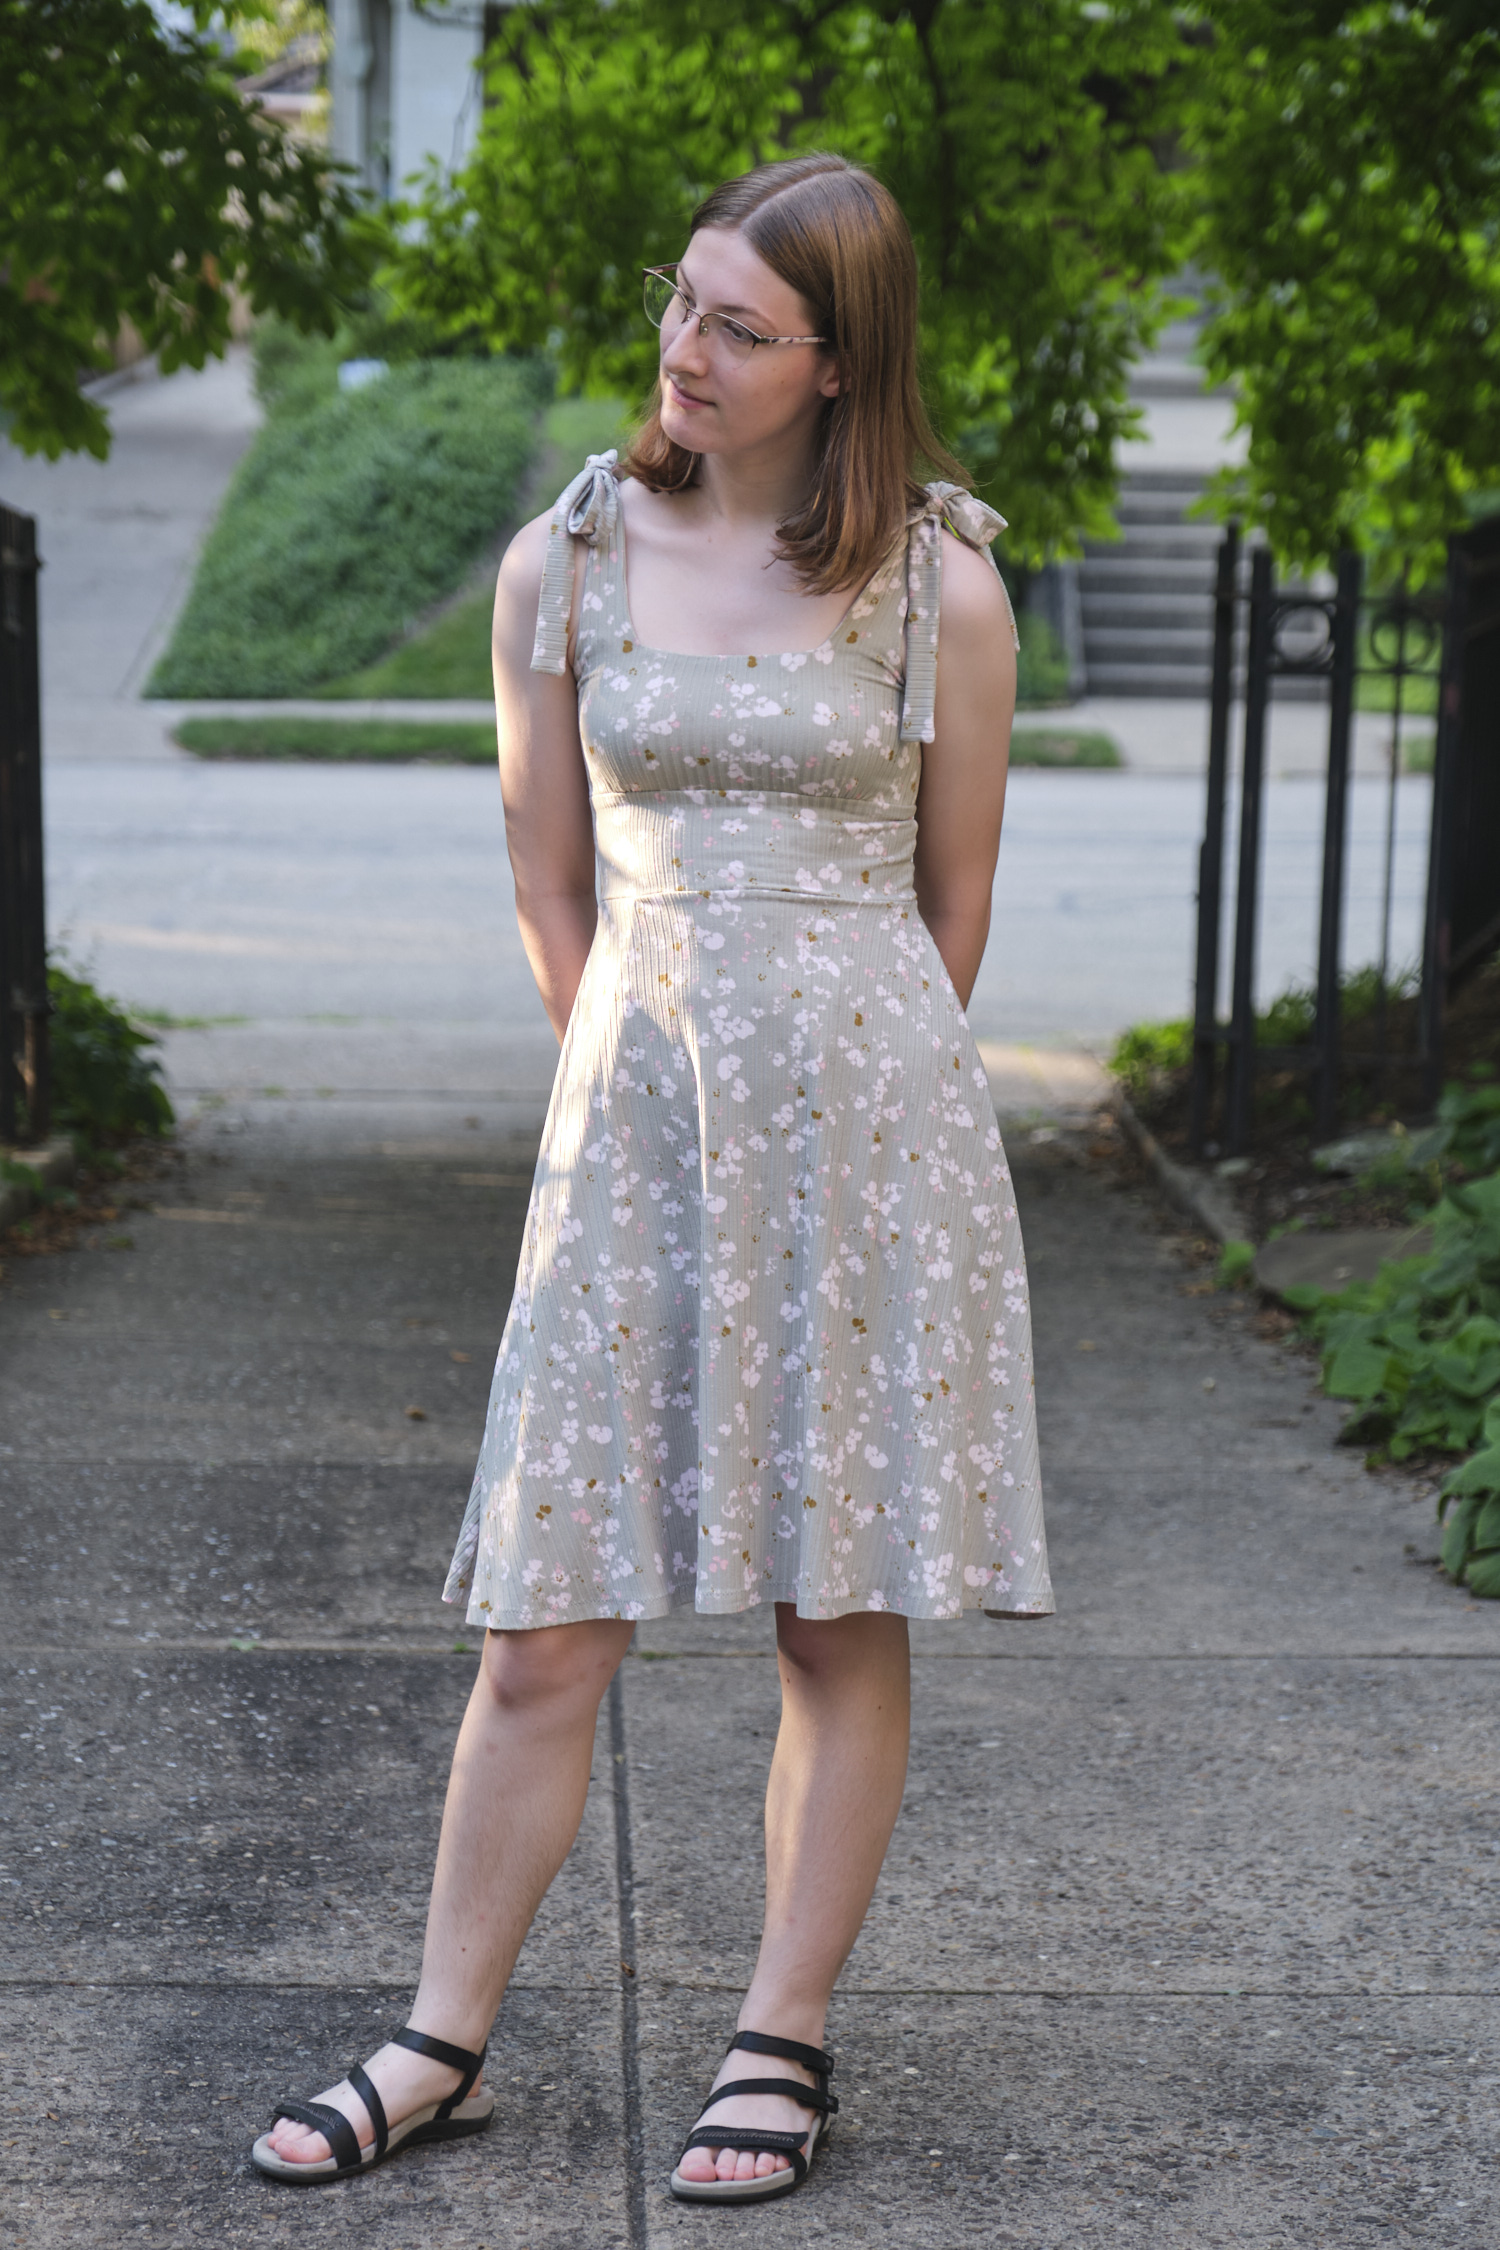
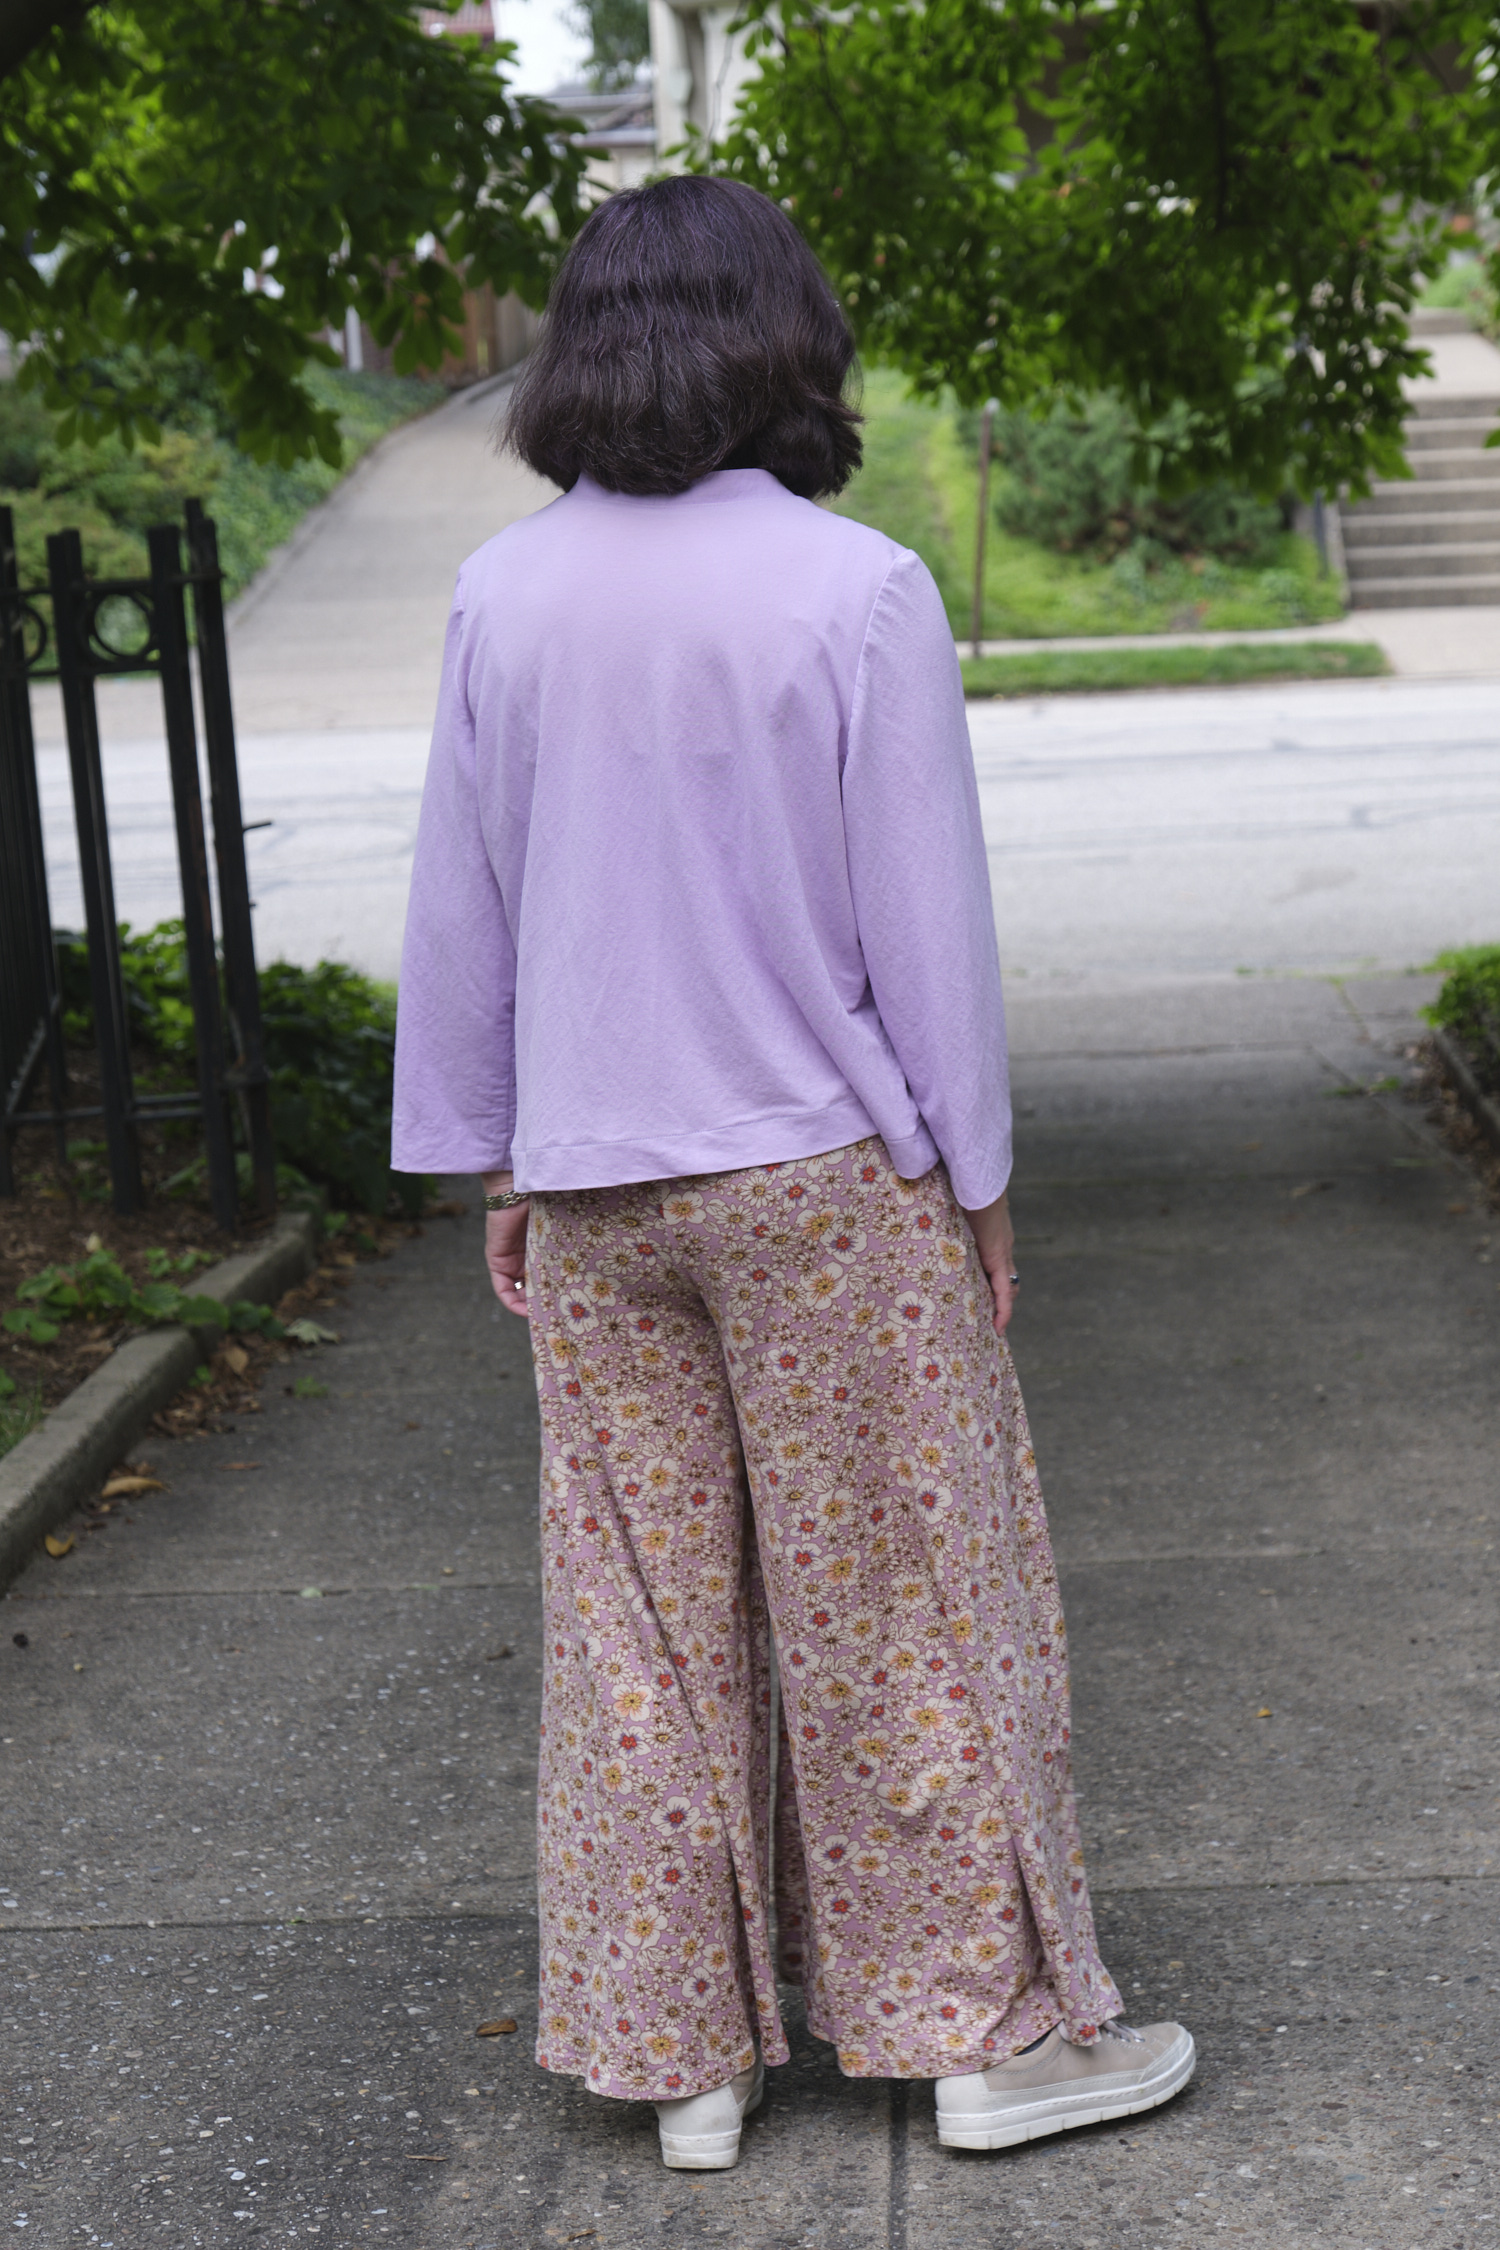
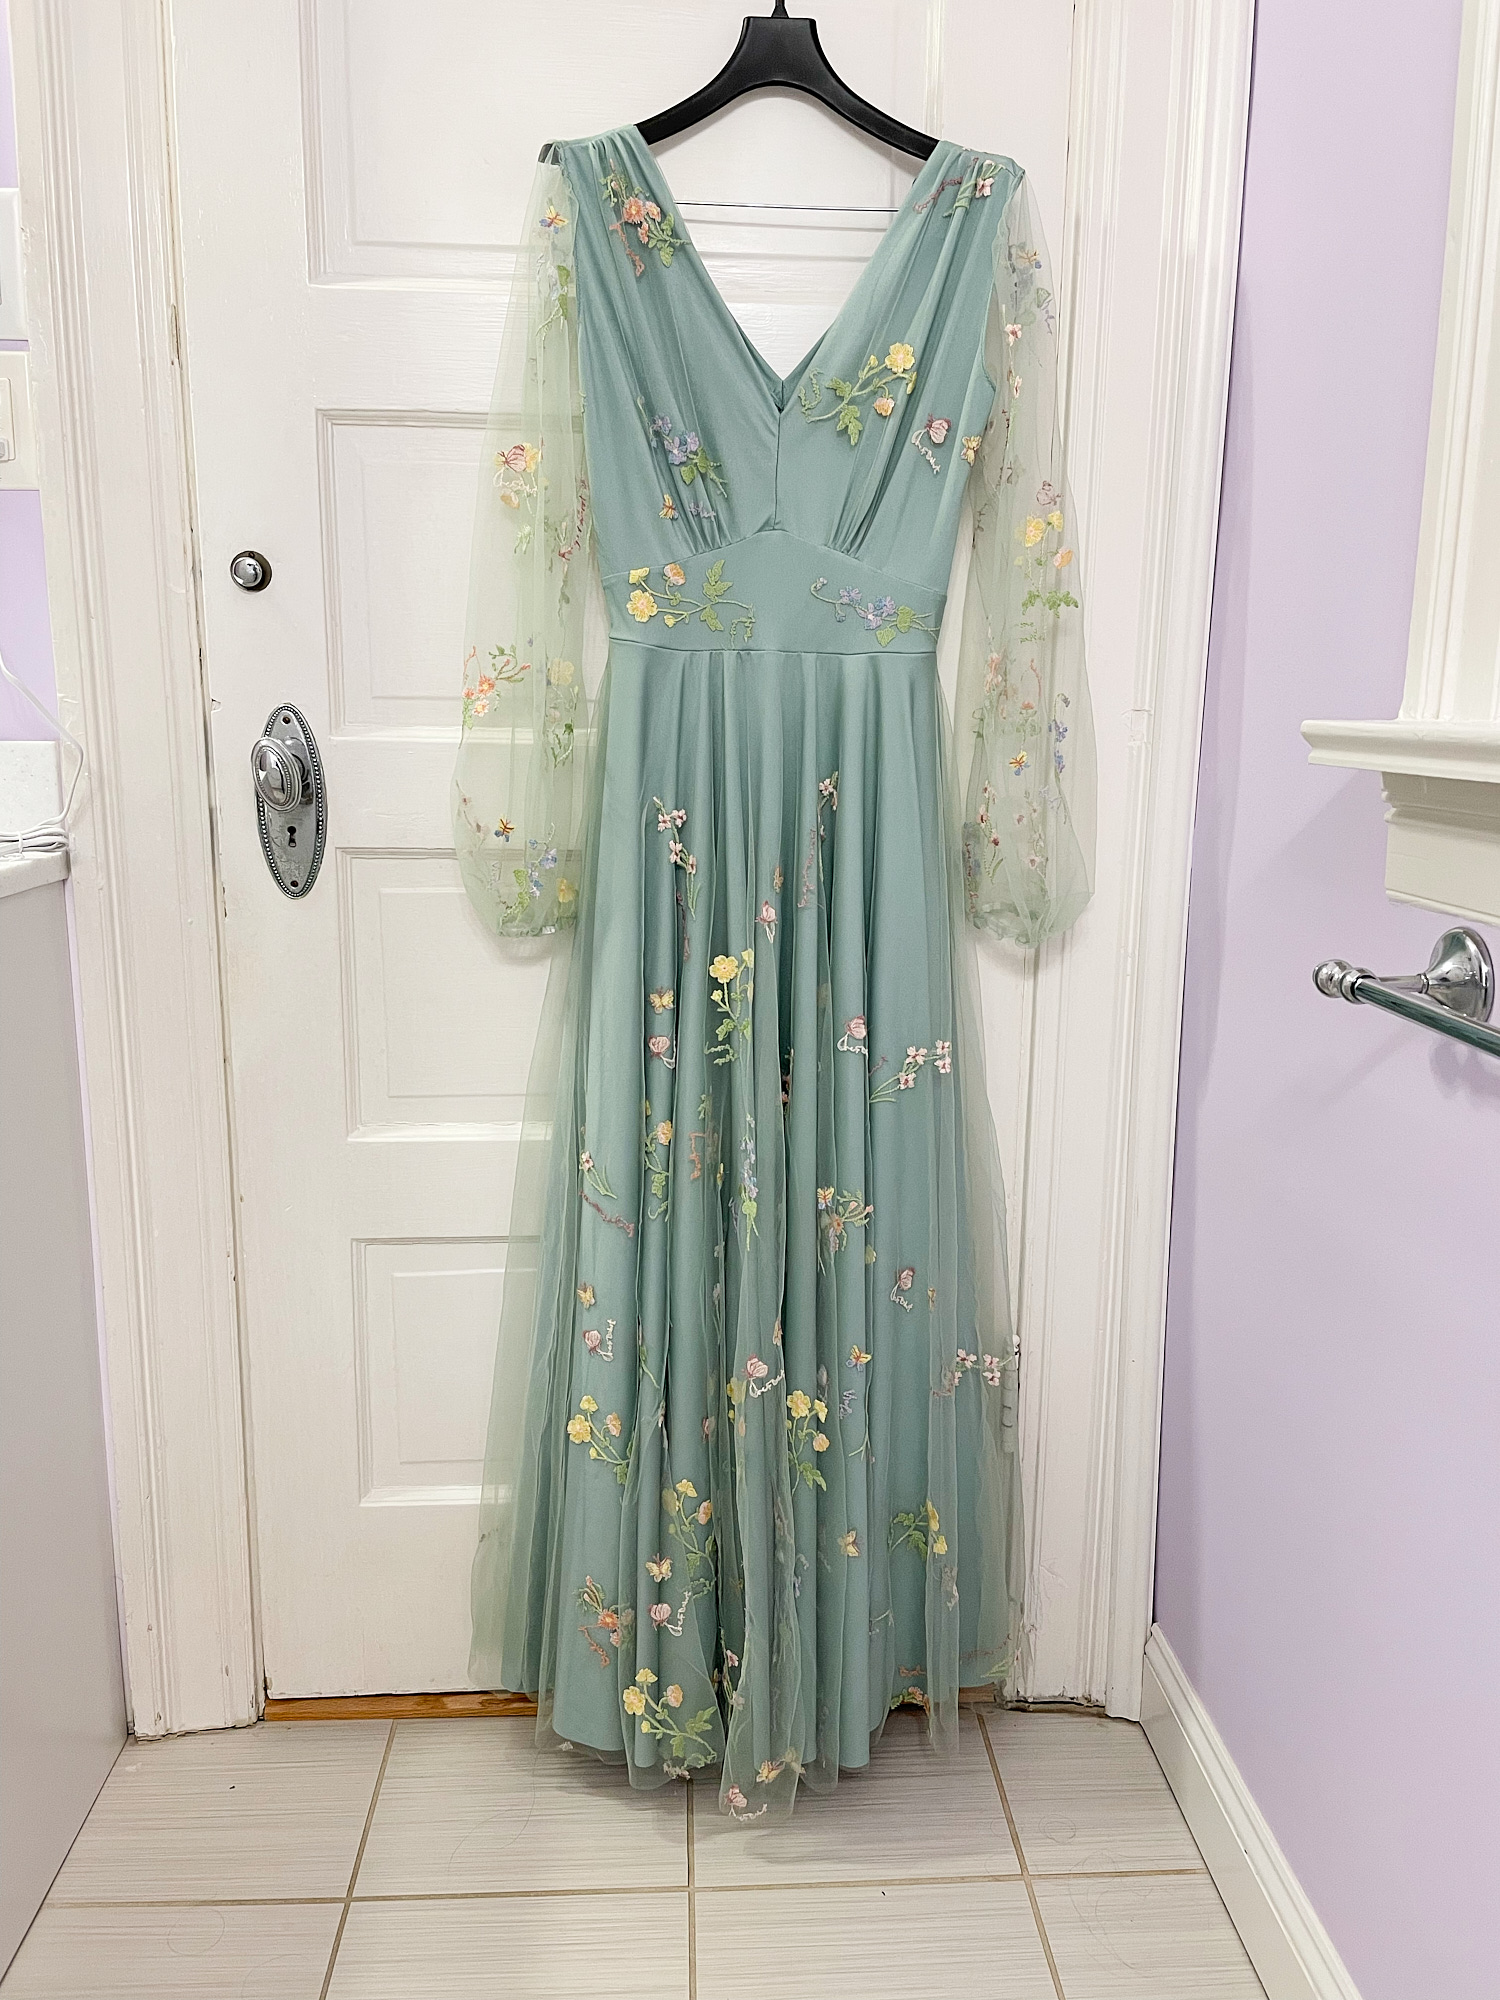
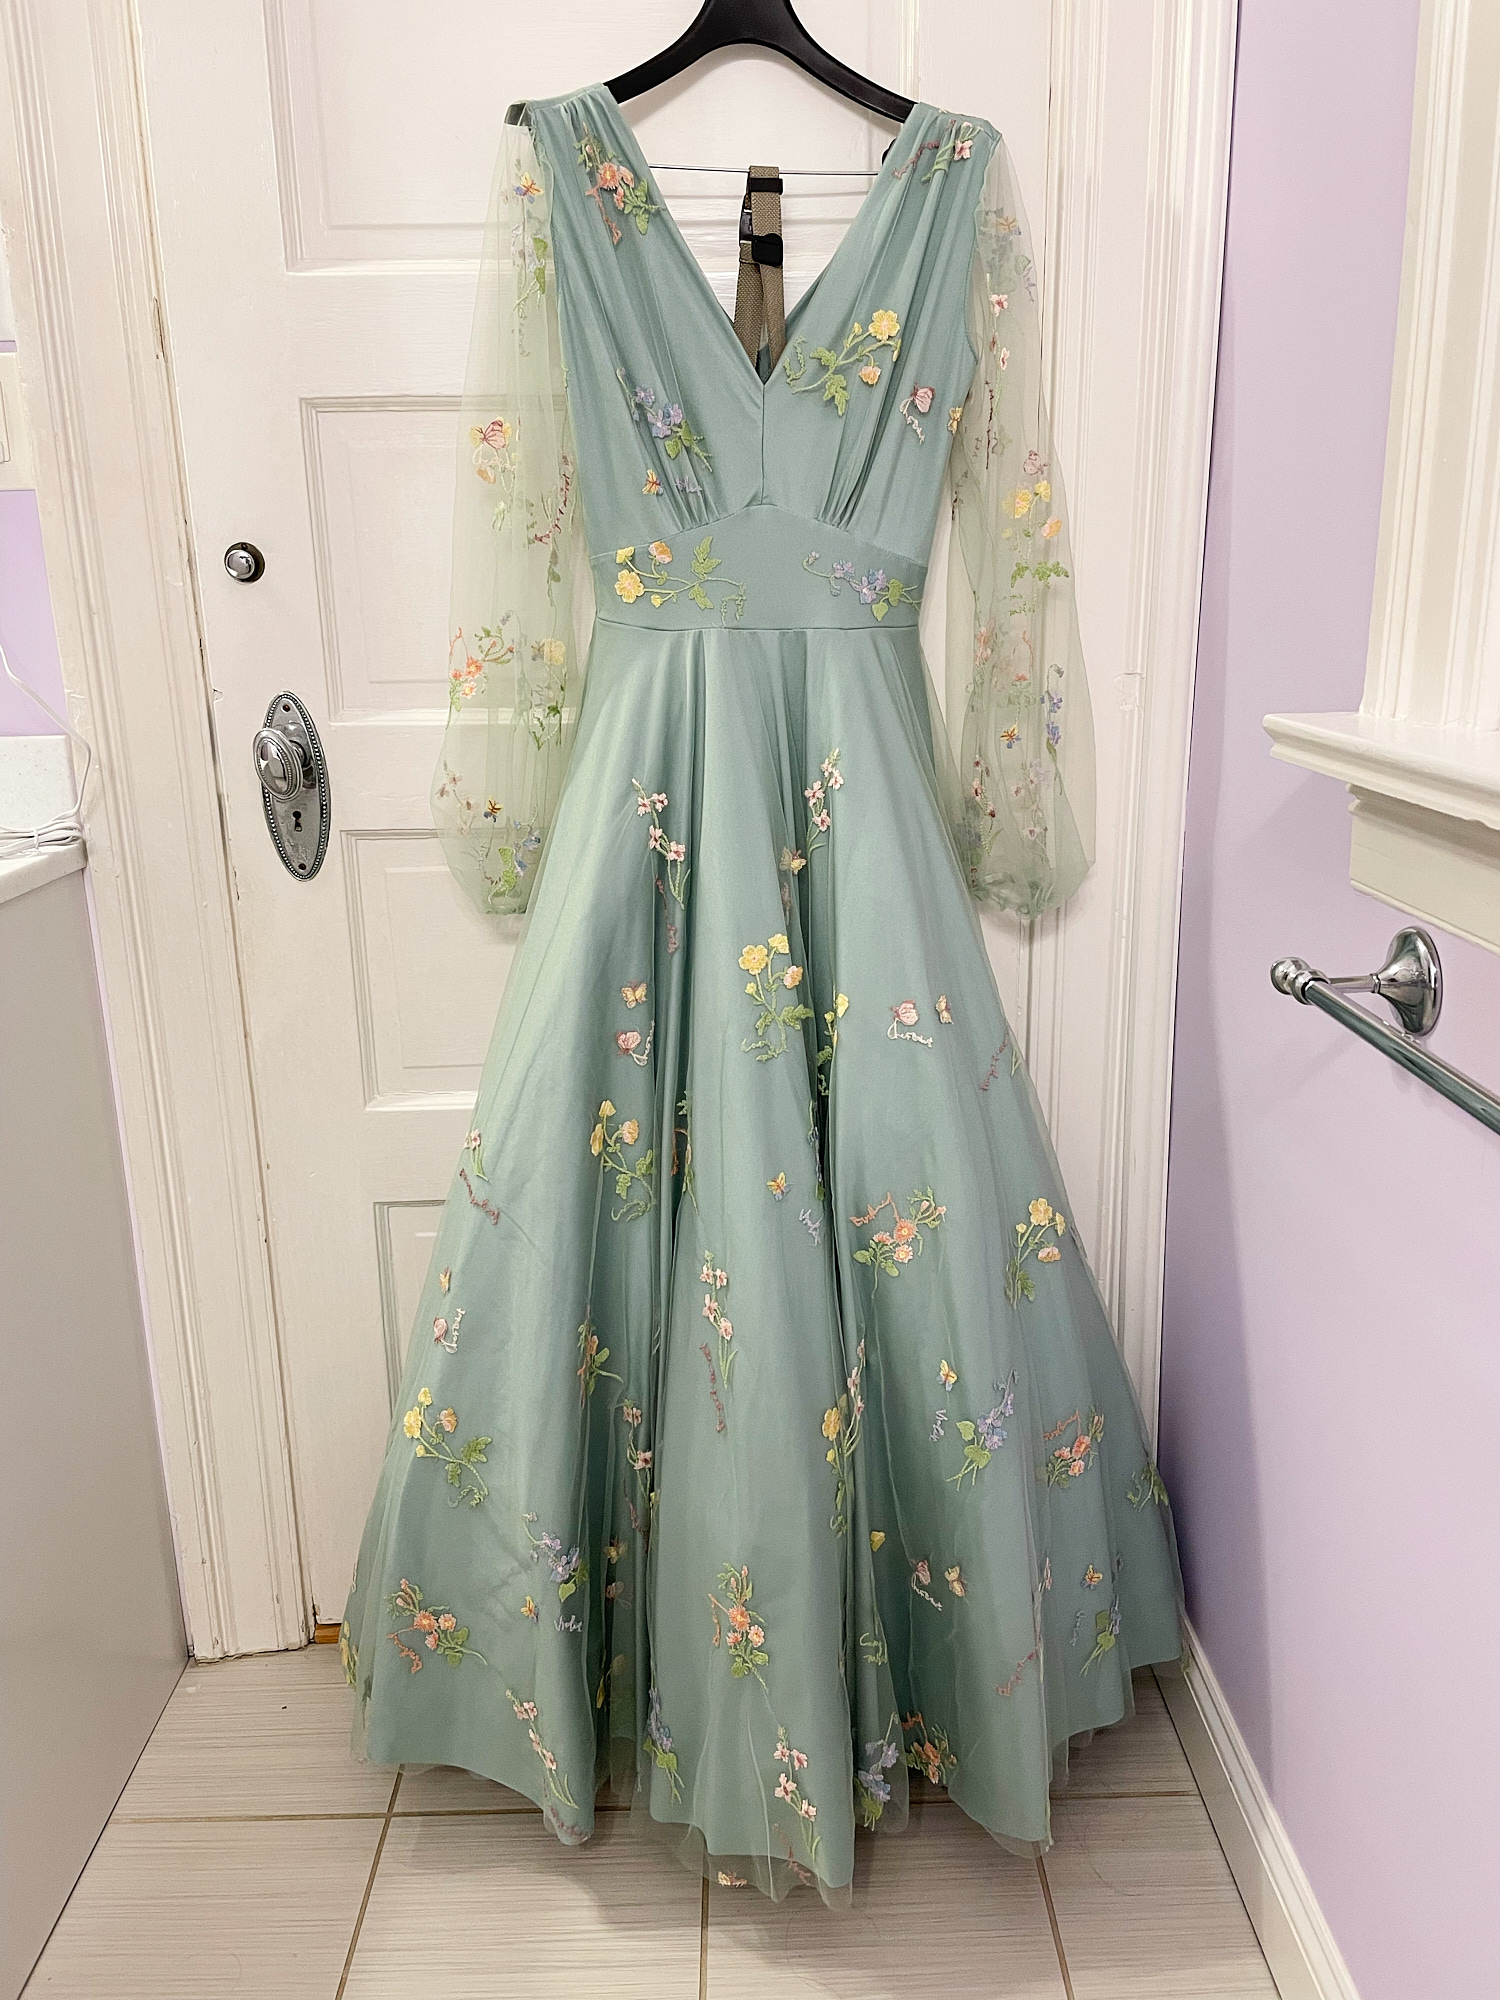
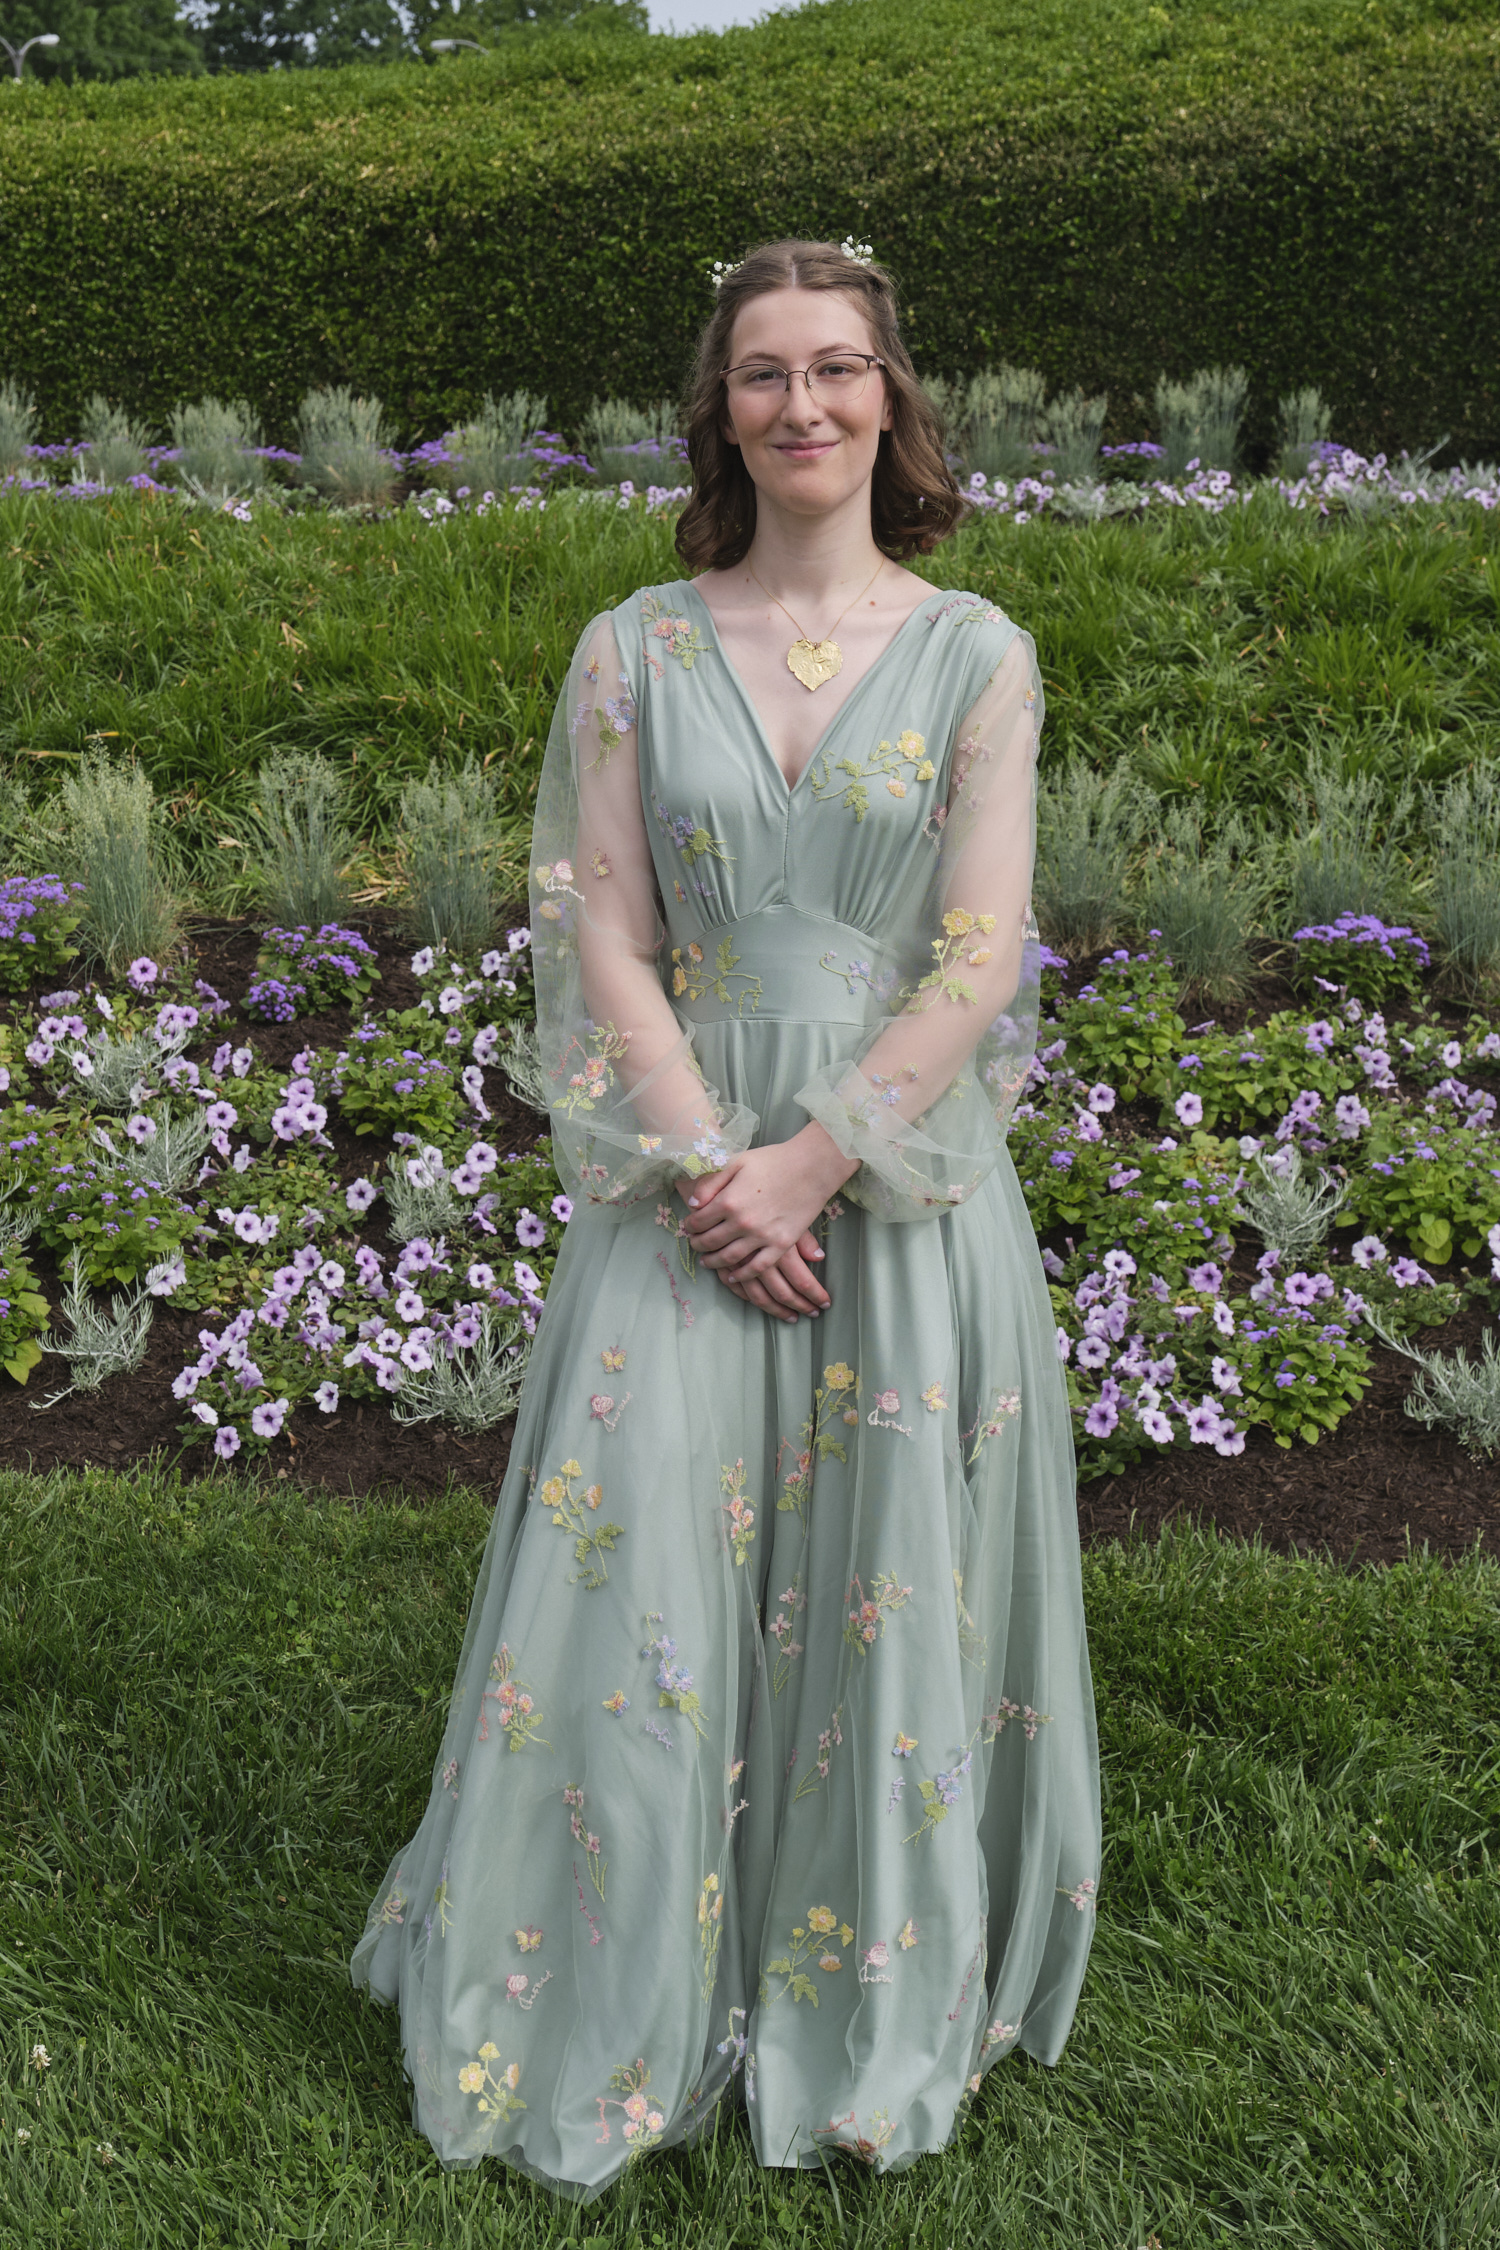
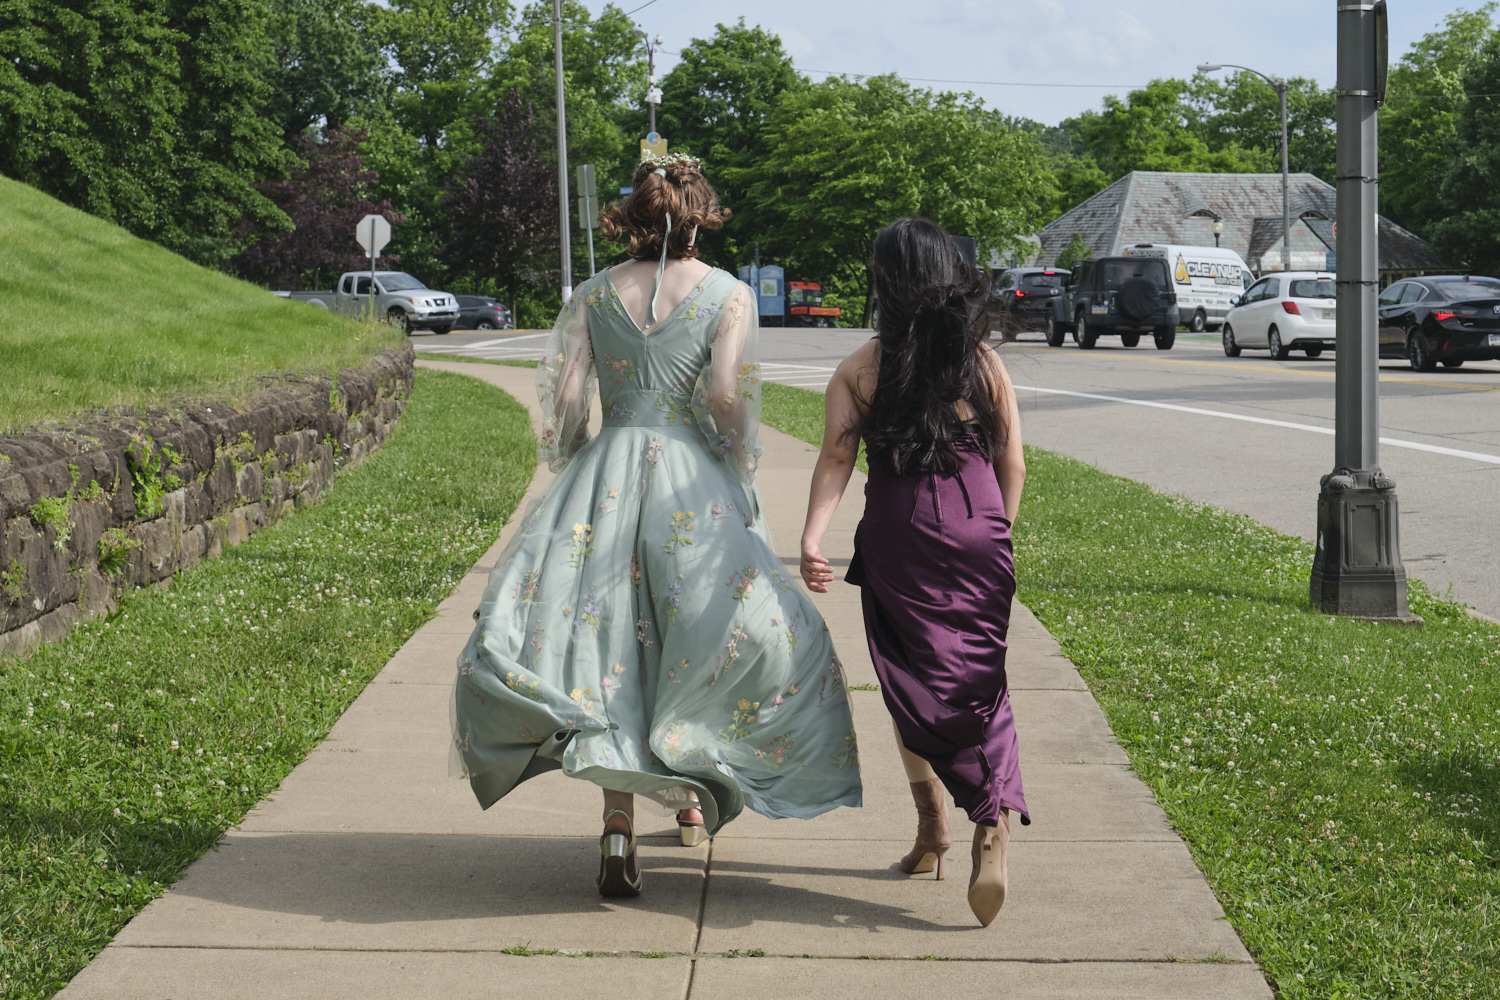
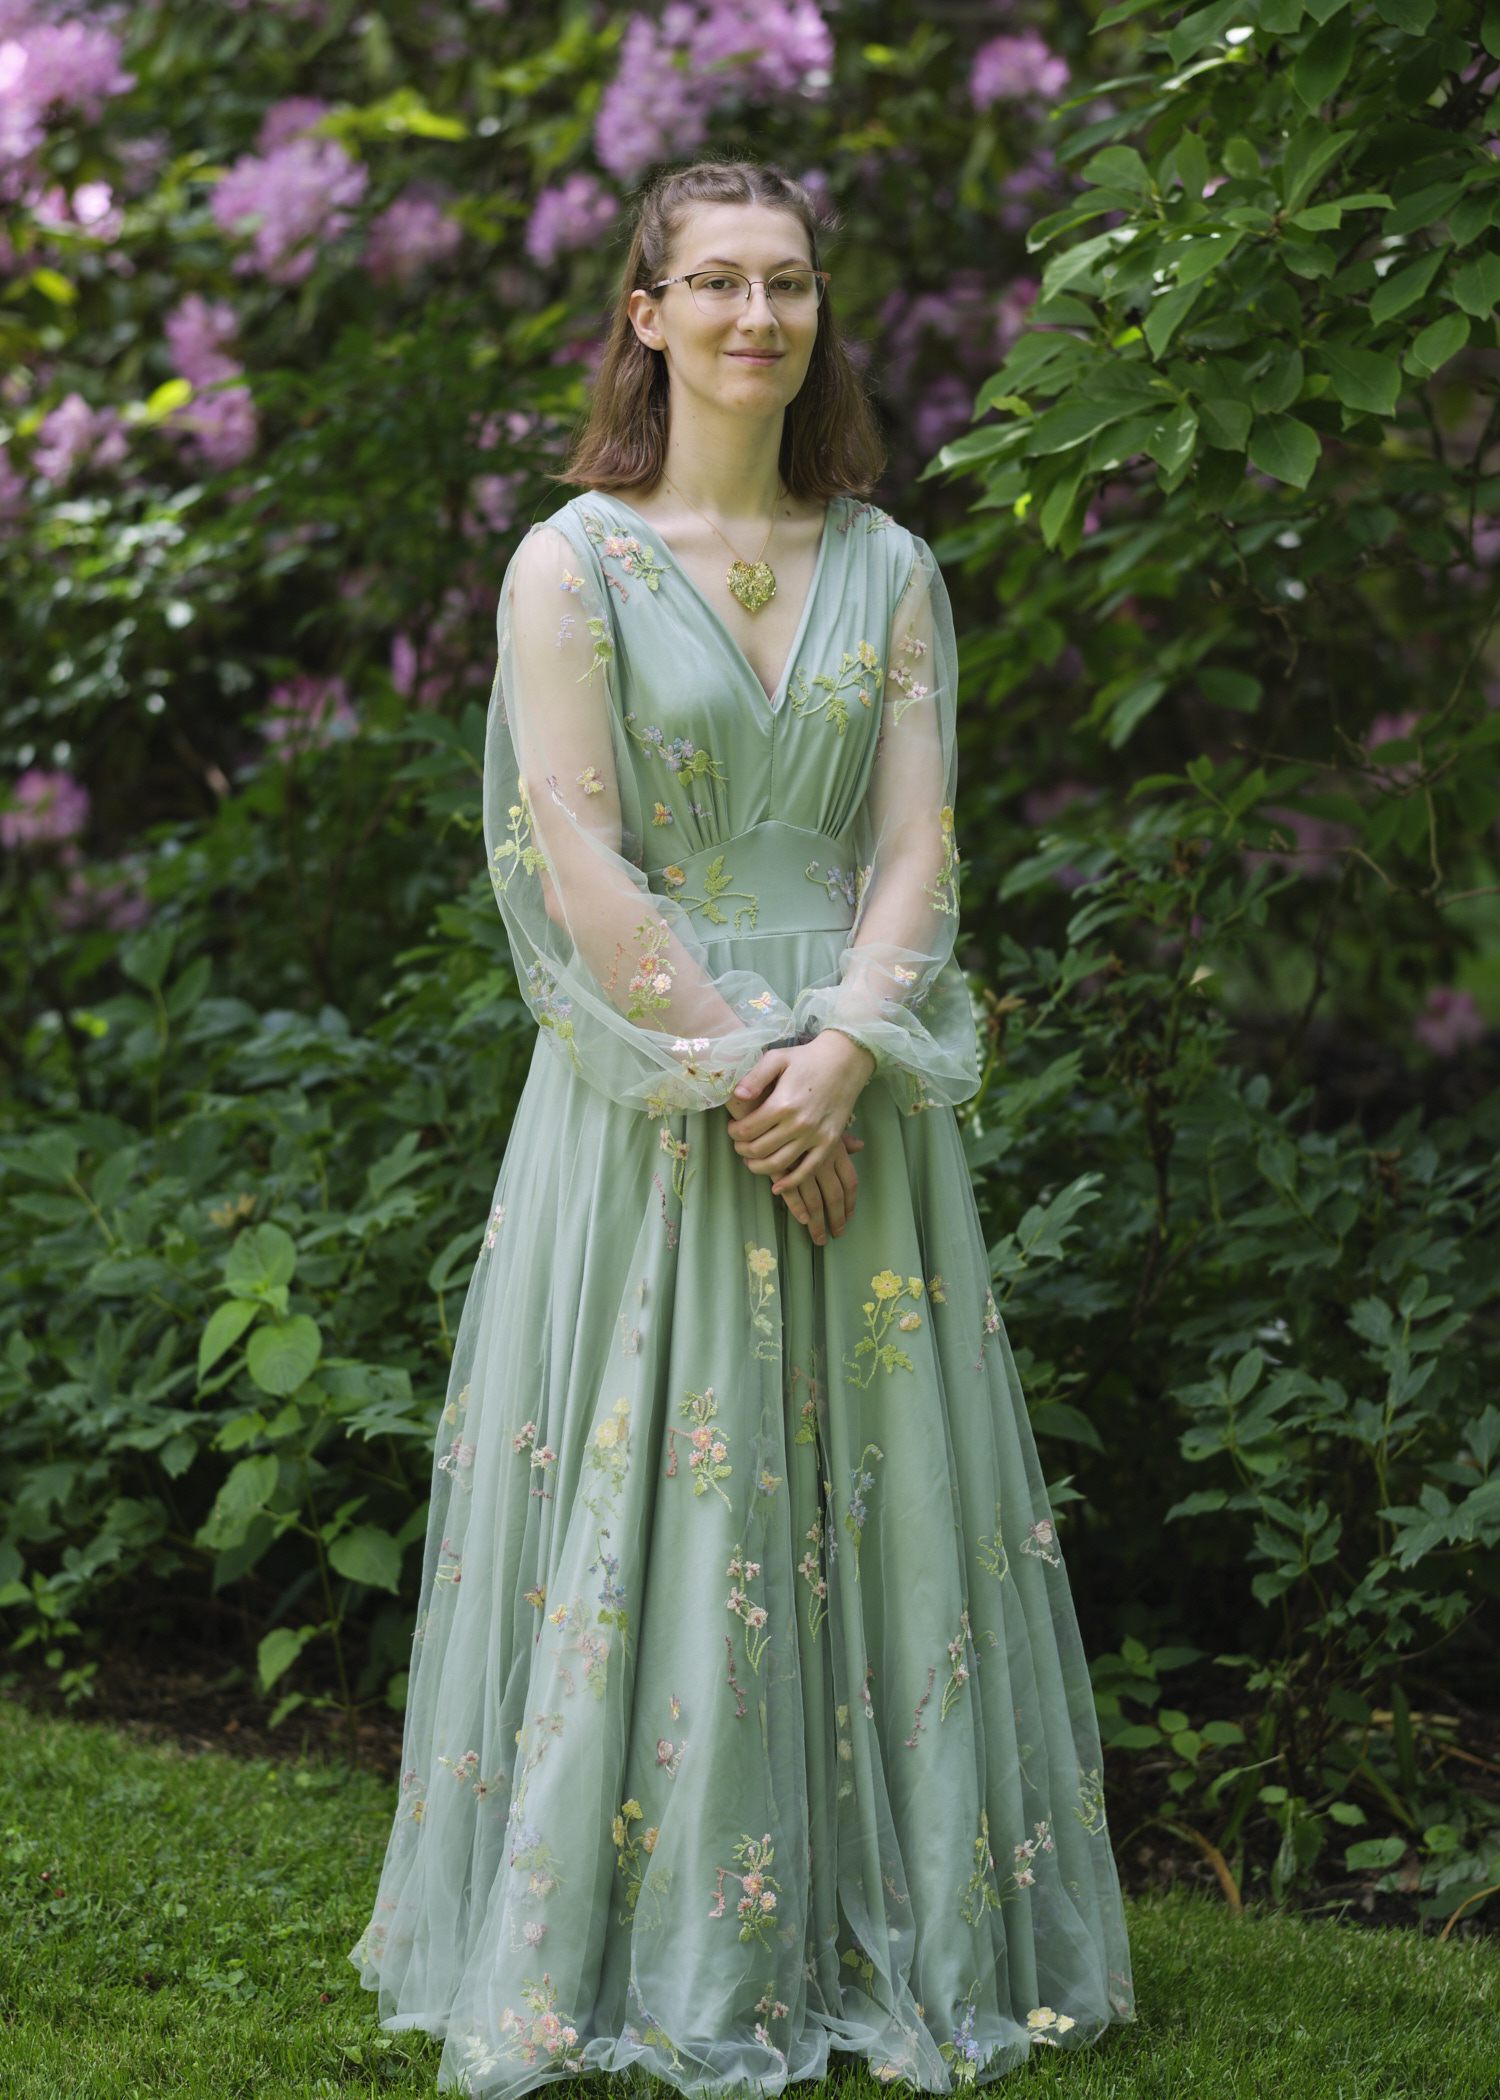
Sinclair Eden true wrap dress and top for woven fabrics. Size 6p, knee-length with ruffle and pockets, sleeveless, from about 2.5 yards of light sage Tess Cey.
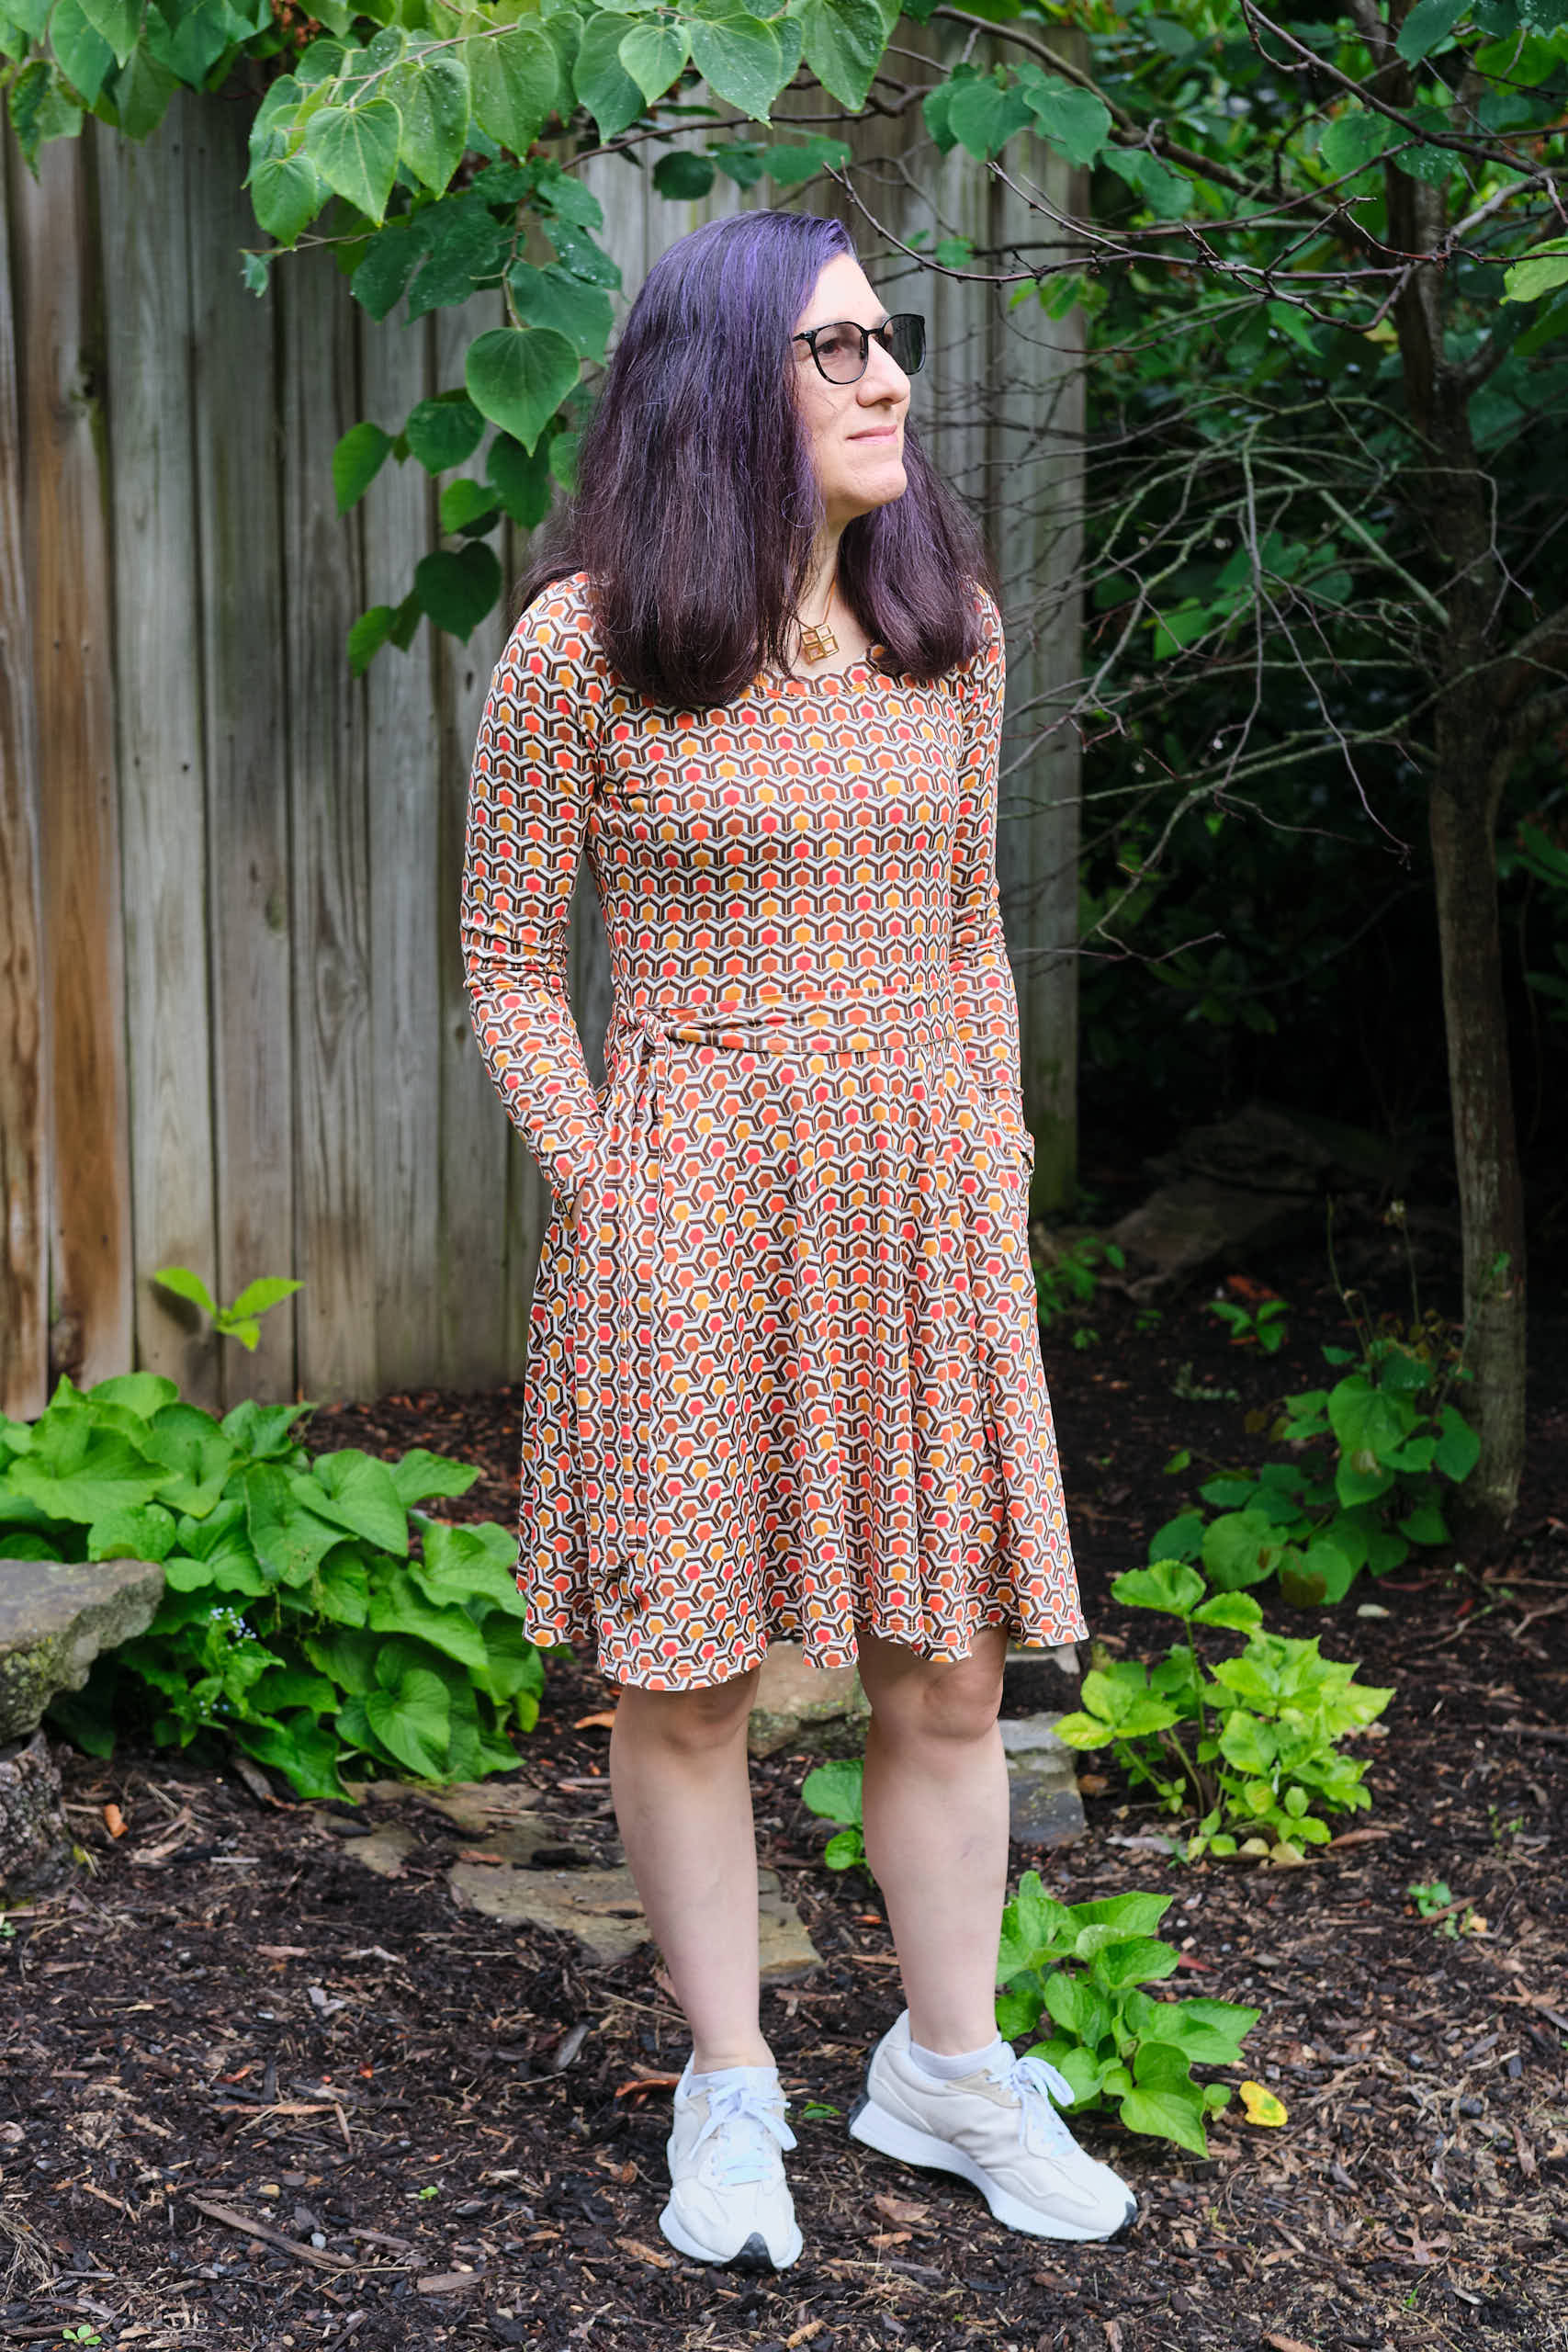
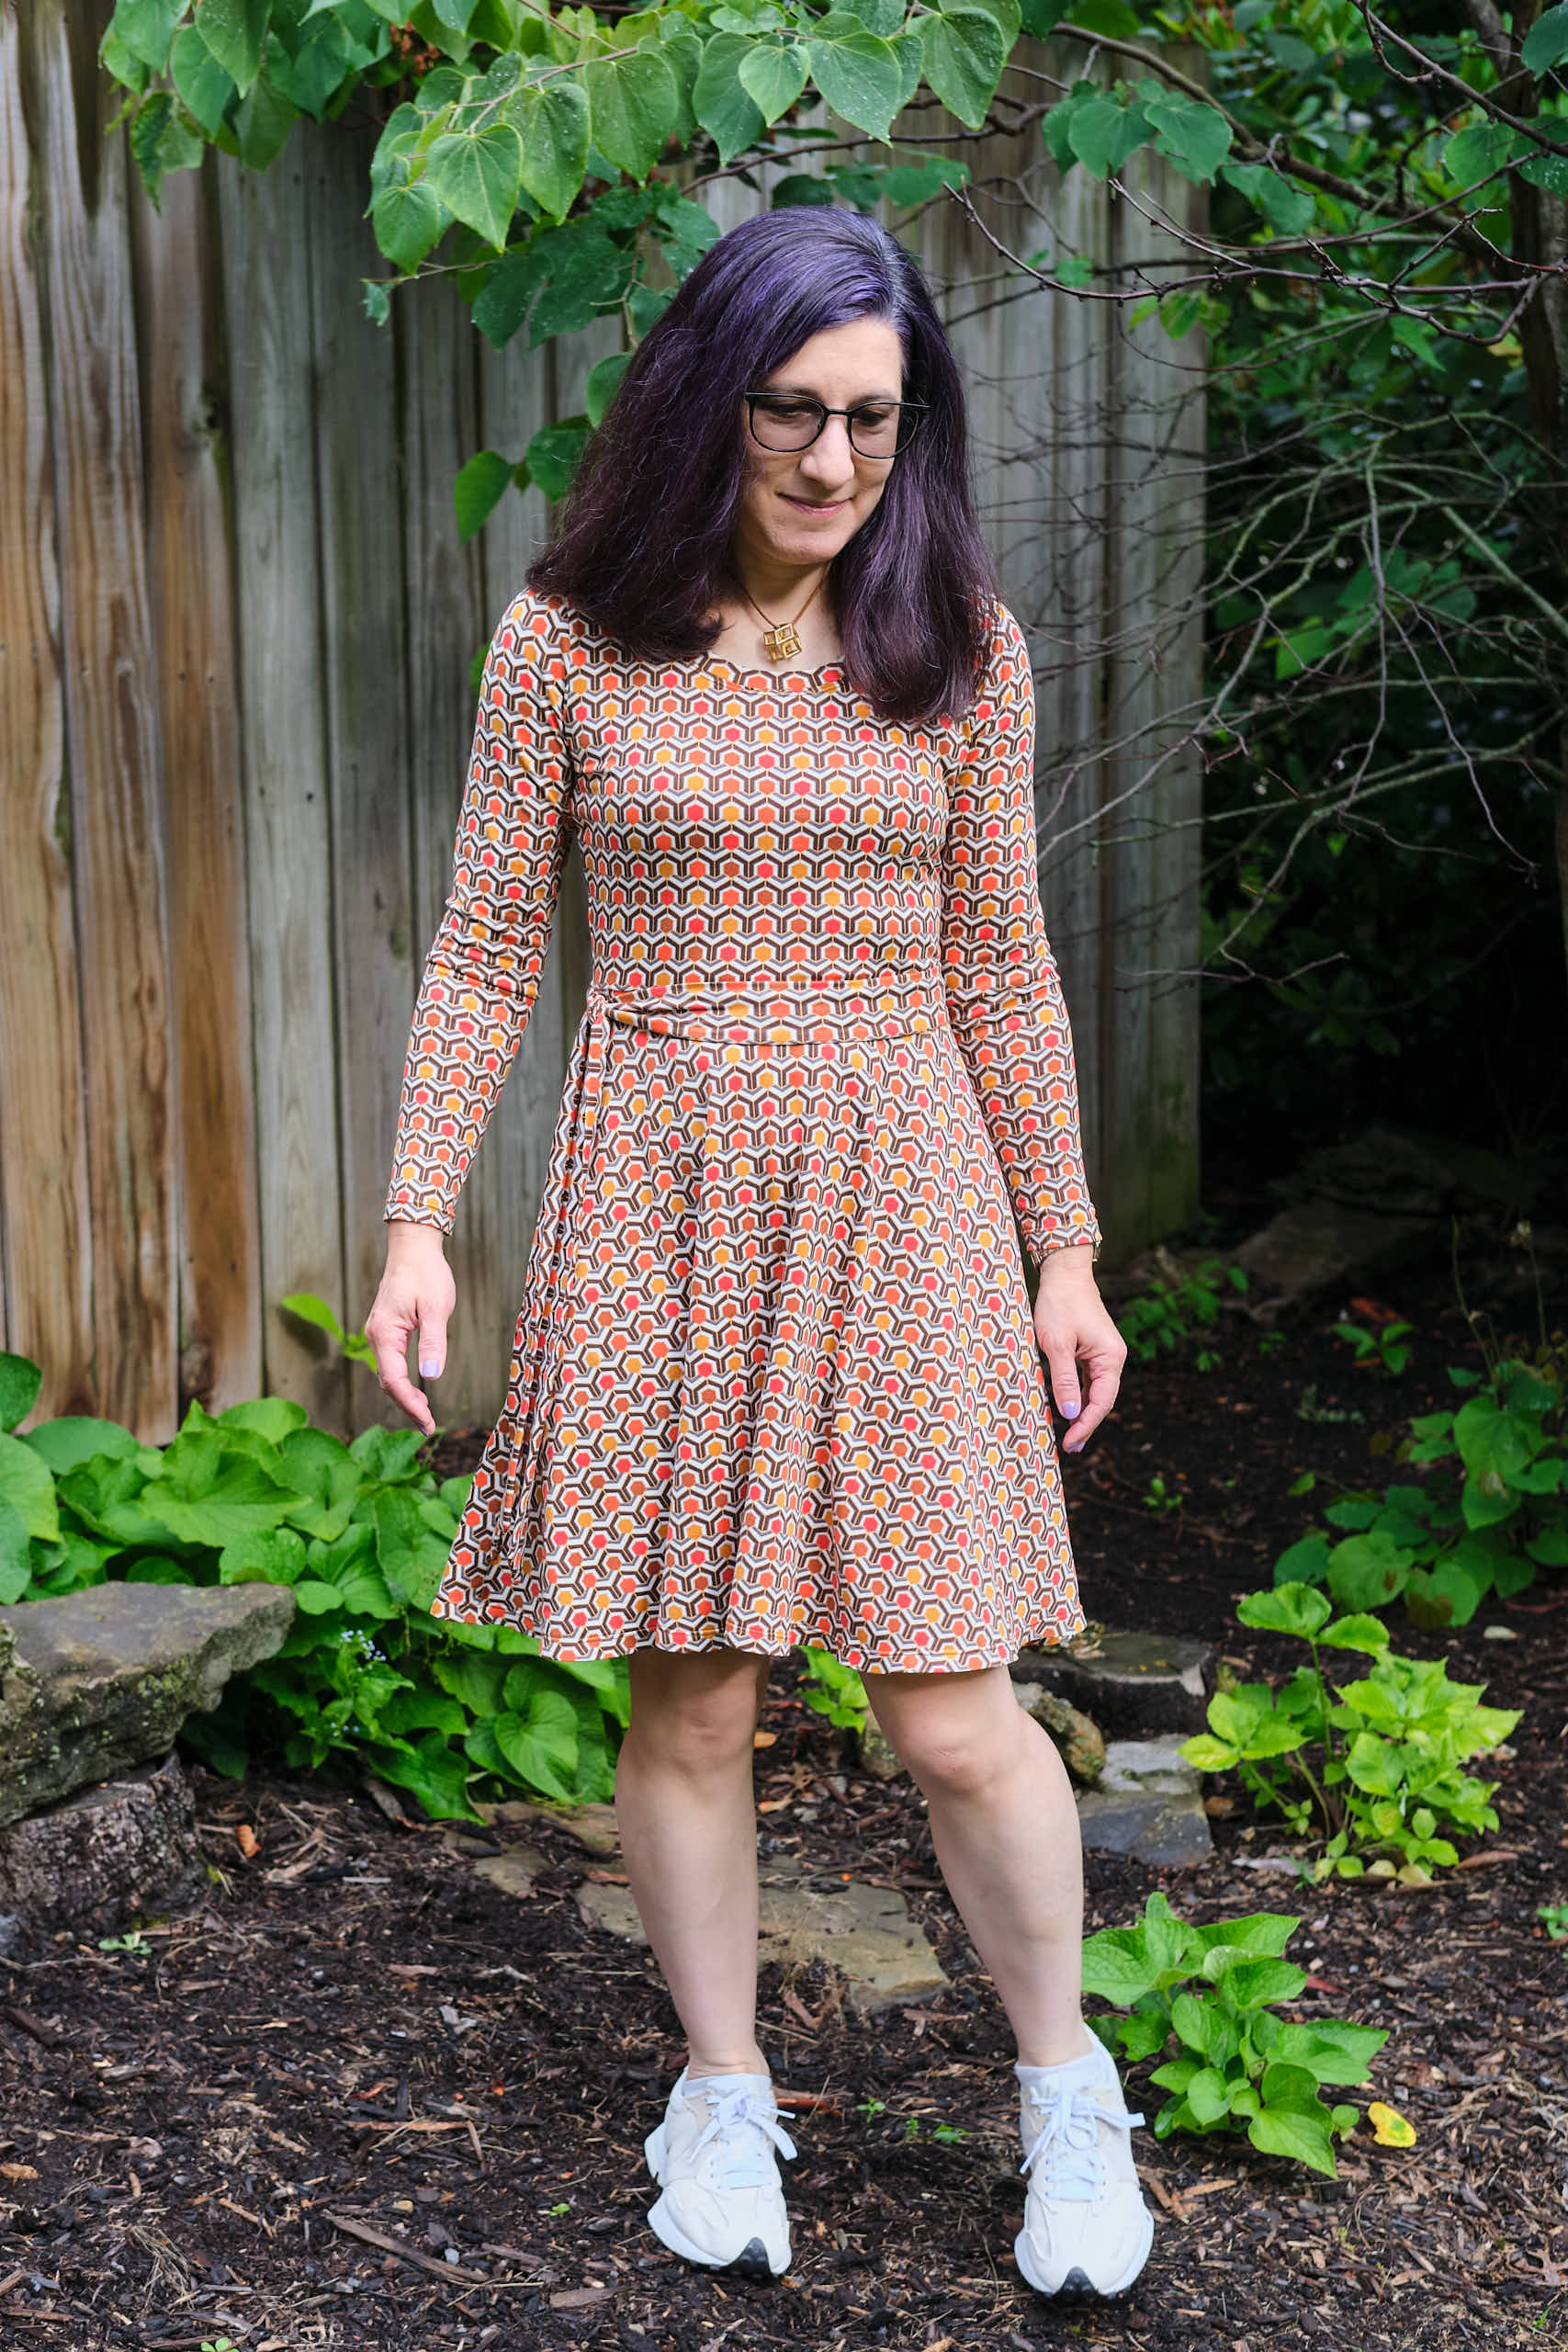
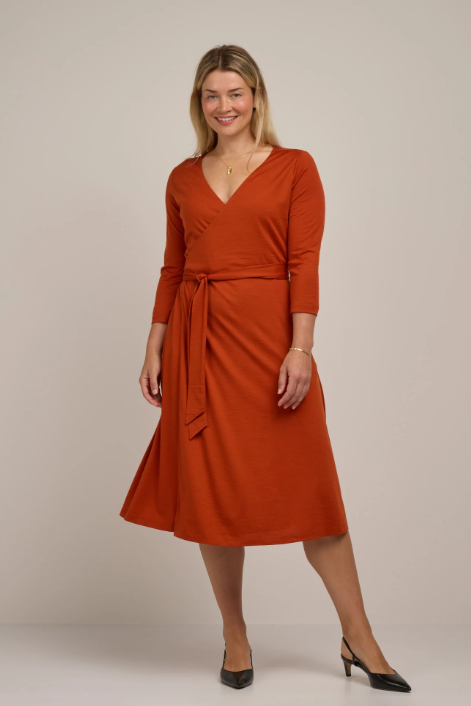
Most of the dresses I sew are with knit fabrics: they’re comfy and pull over my head without the need for zippers or any other fasteners. Woven dresses either have to be very loose (sometimes with a tie to make them less tent-like) or use a zipper or buttons, or elastic shirring, so that you can get them on and off. I’ve made a couple of loose dresses (my favorite is Pattern Emporium Meet You There), and I made a vintage sundress with a zipper for my daughter, and I plan to try some shirring at some point. I was looking to try a different woven dress pattern that didn’t involve zippers, and decided to try the Sinclair Eden true wrap dress for woven fabrics.

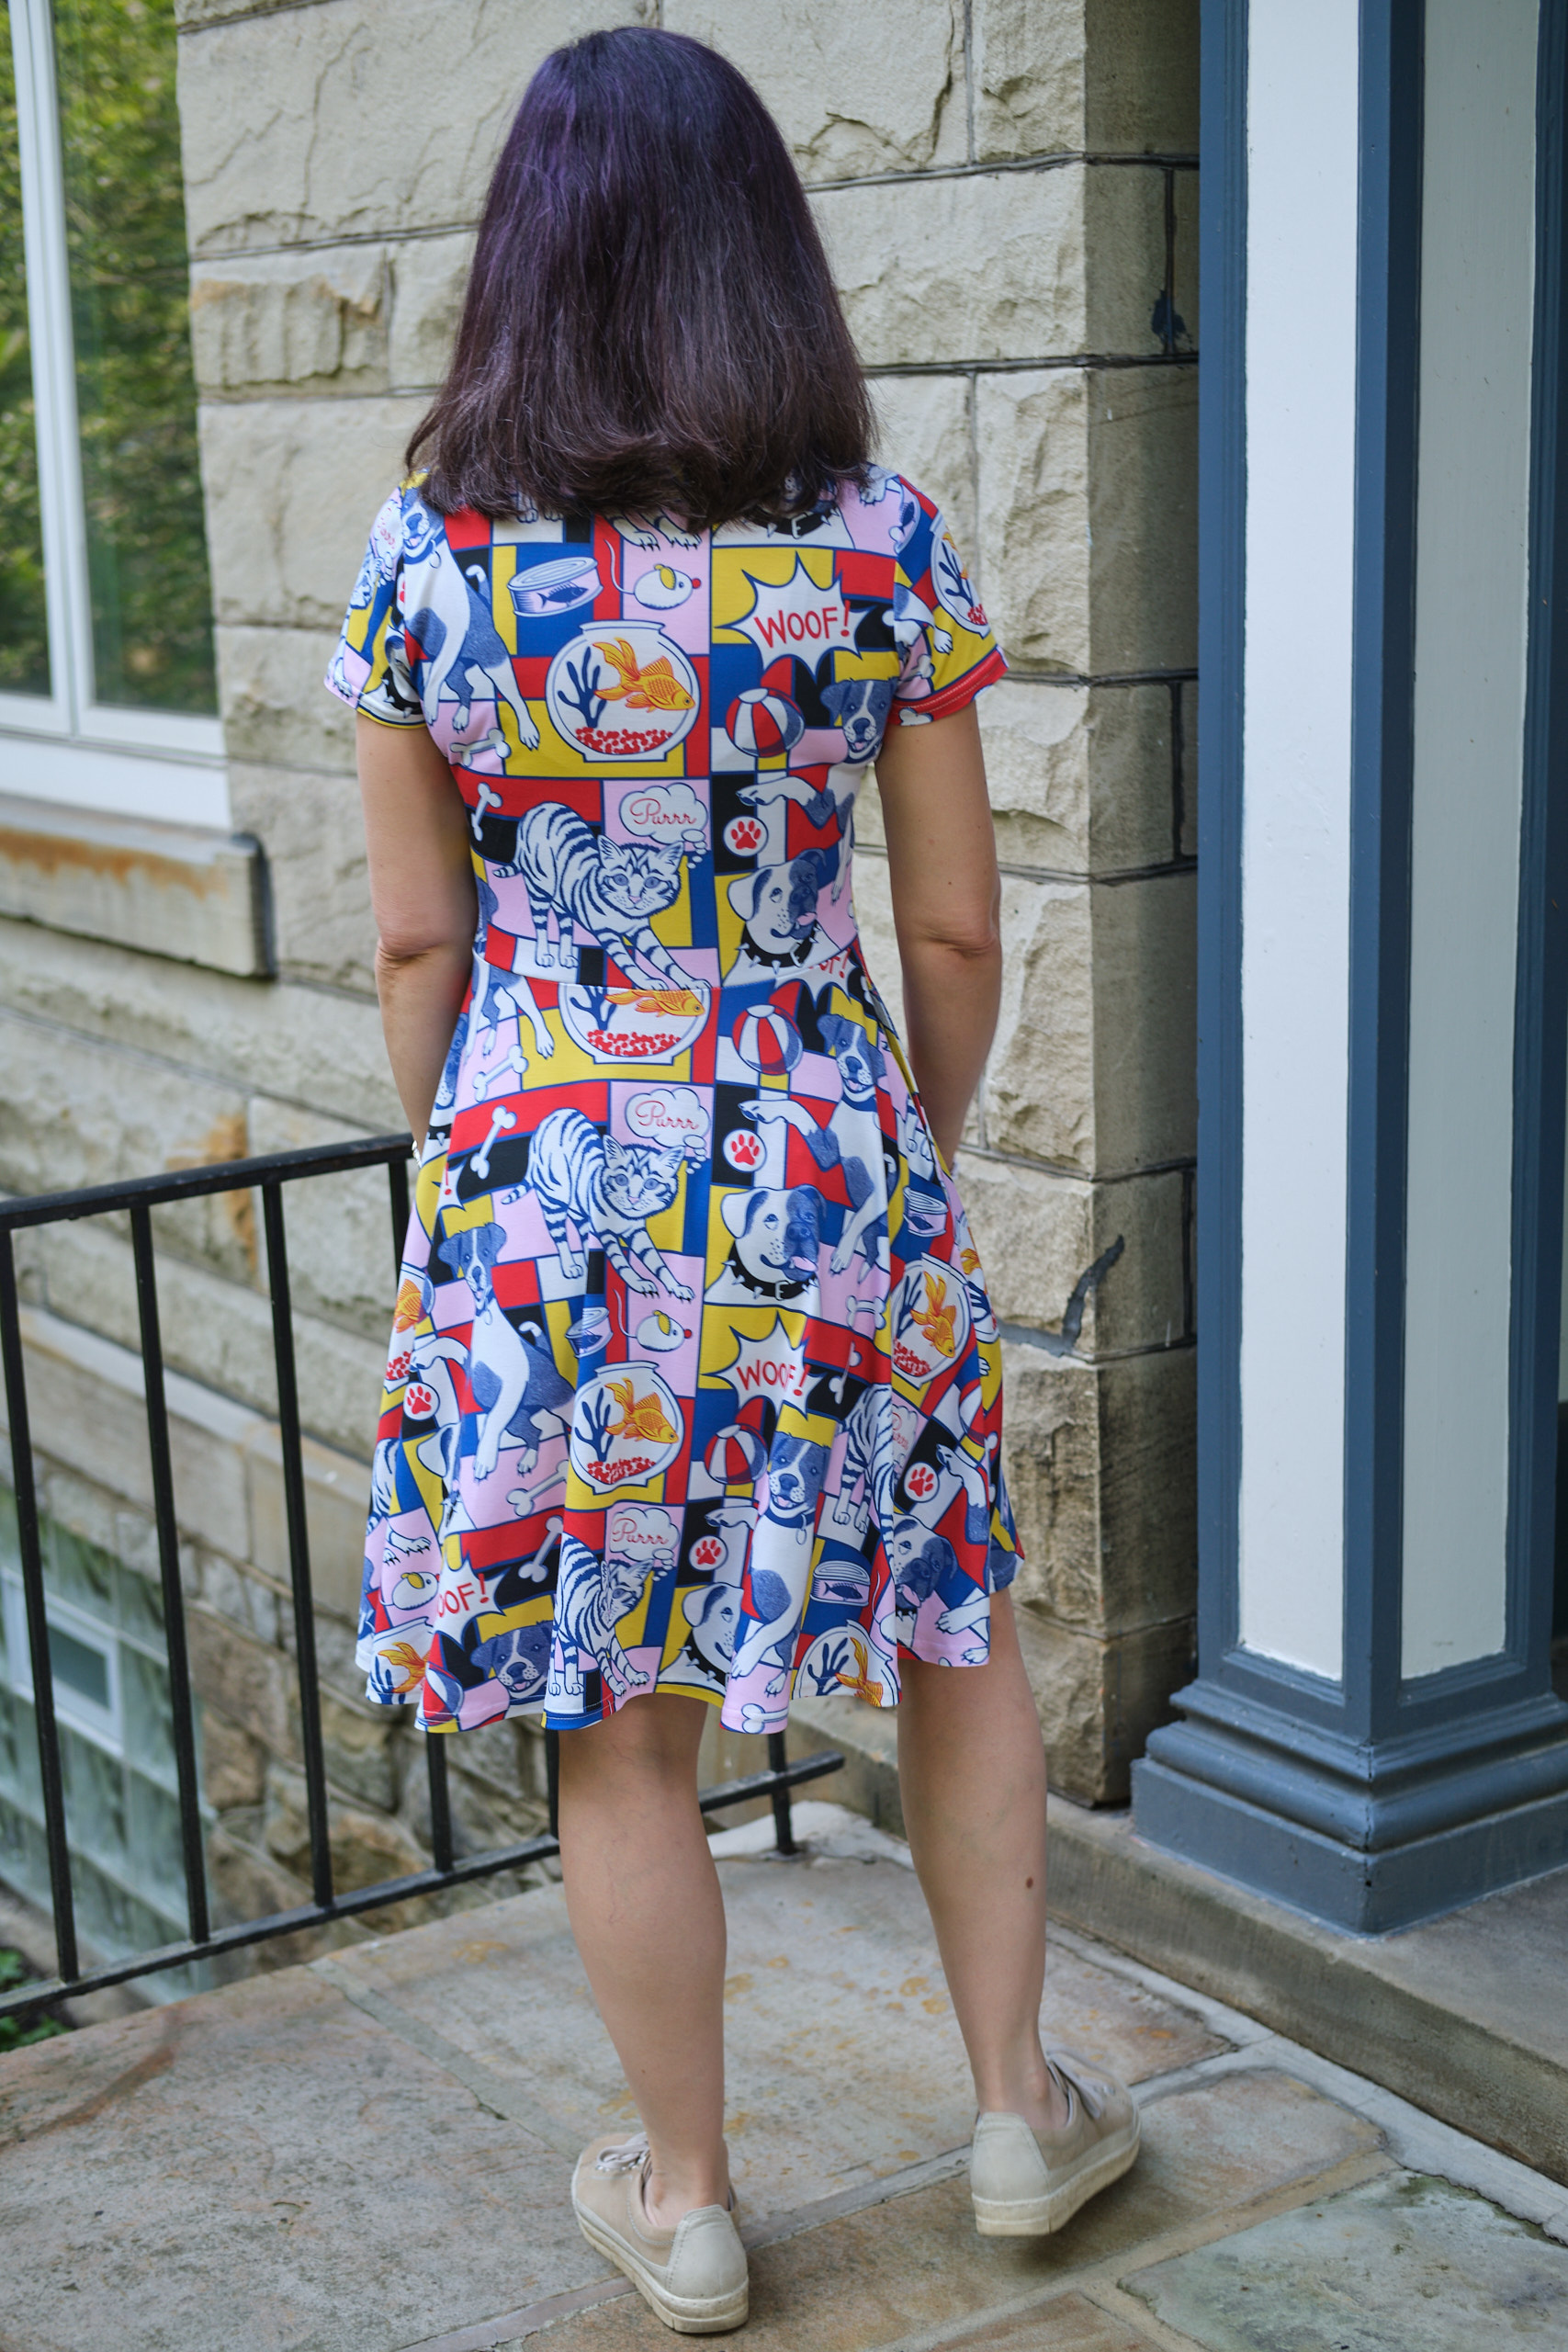
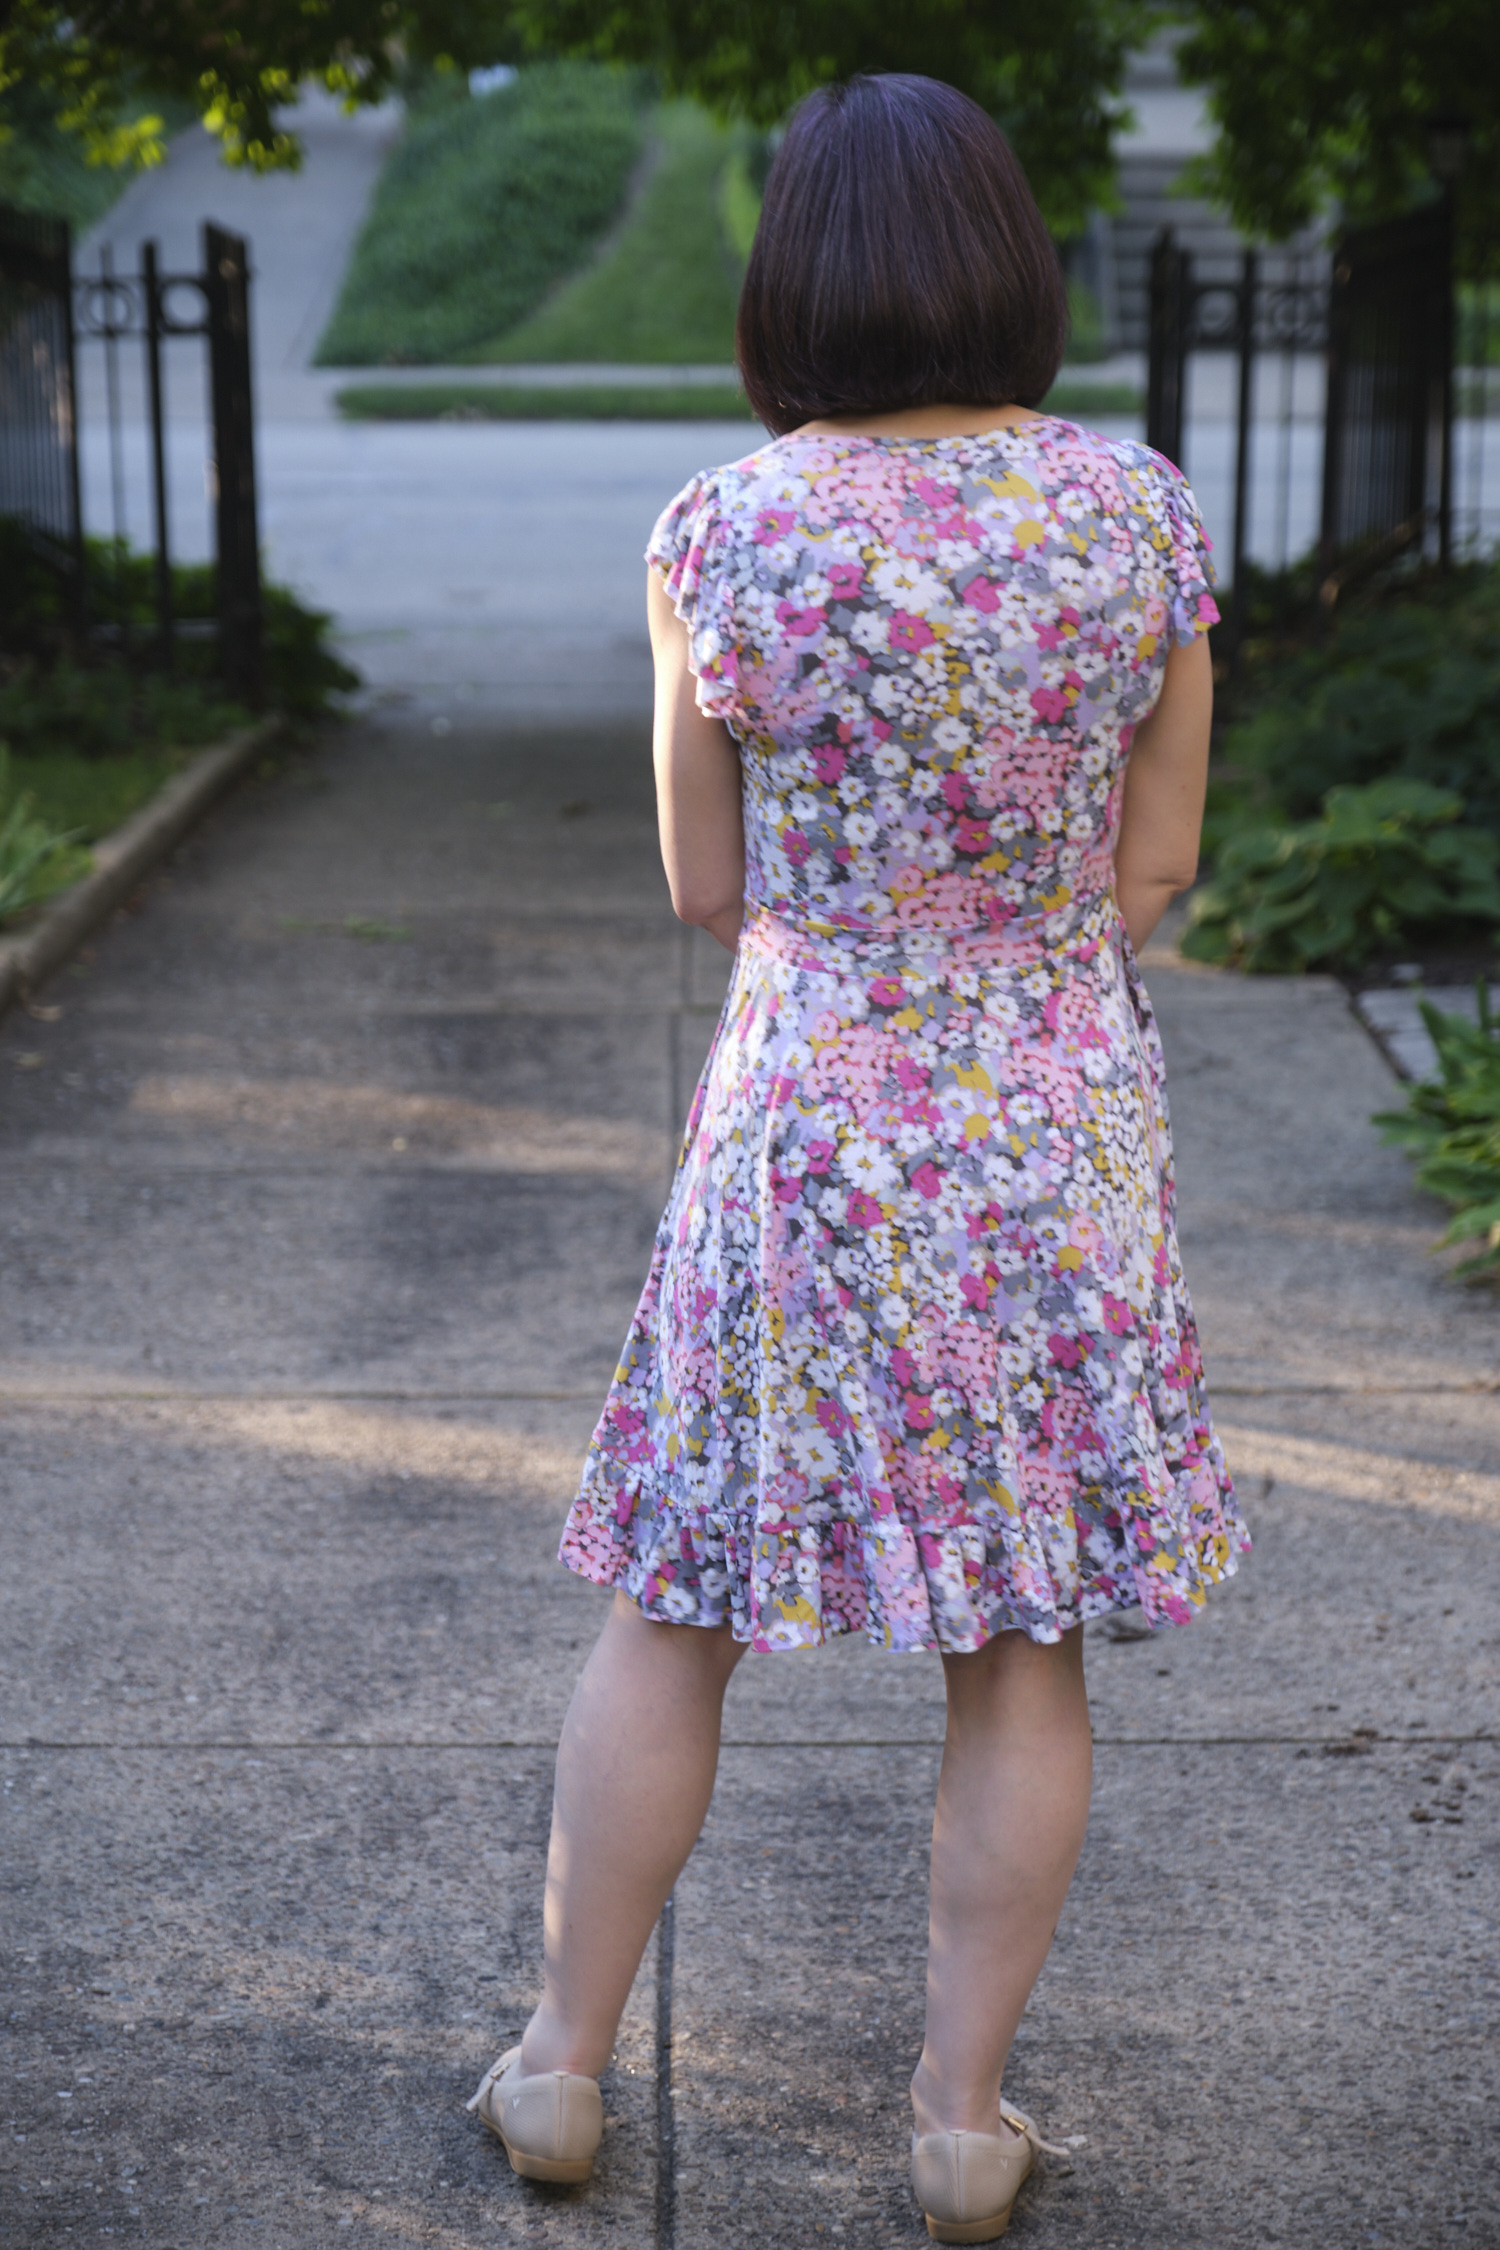
The Eden comes with a few different options, including five types of sleeves or no sleeves, two lengths, and with or without a ruffle. You can also use the pattern to make a top. After looking at photos of Edens made by other sewists, I opted for the above-knee length version with a ruffle and no sleeves. I could have made size 4p based on my bust measurements or 6p based on my waist and hip measurements. Normally, I could have graded between sizes but decided to go with a straight 6p and figured I wouldn’t need to worry about a broad-shoulder adjustment. Besides, the wrap style makes it somewhat adjustable. I think this worked out fine.
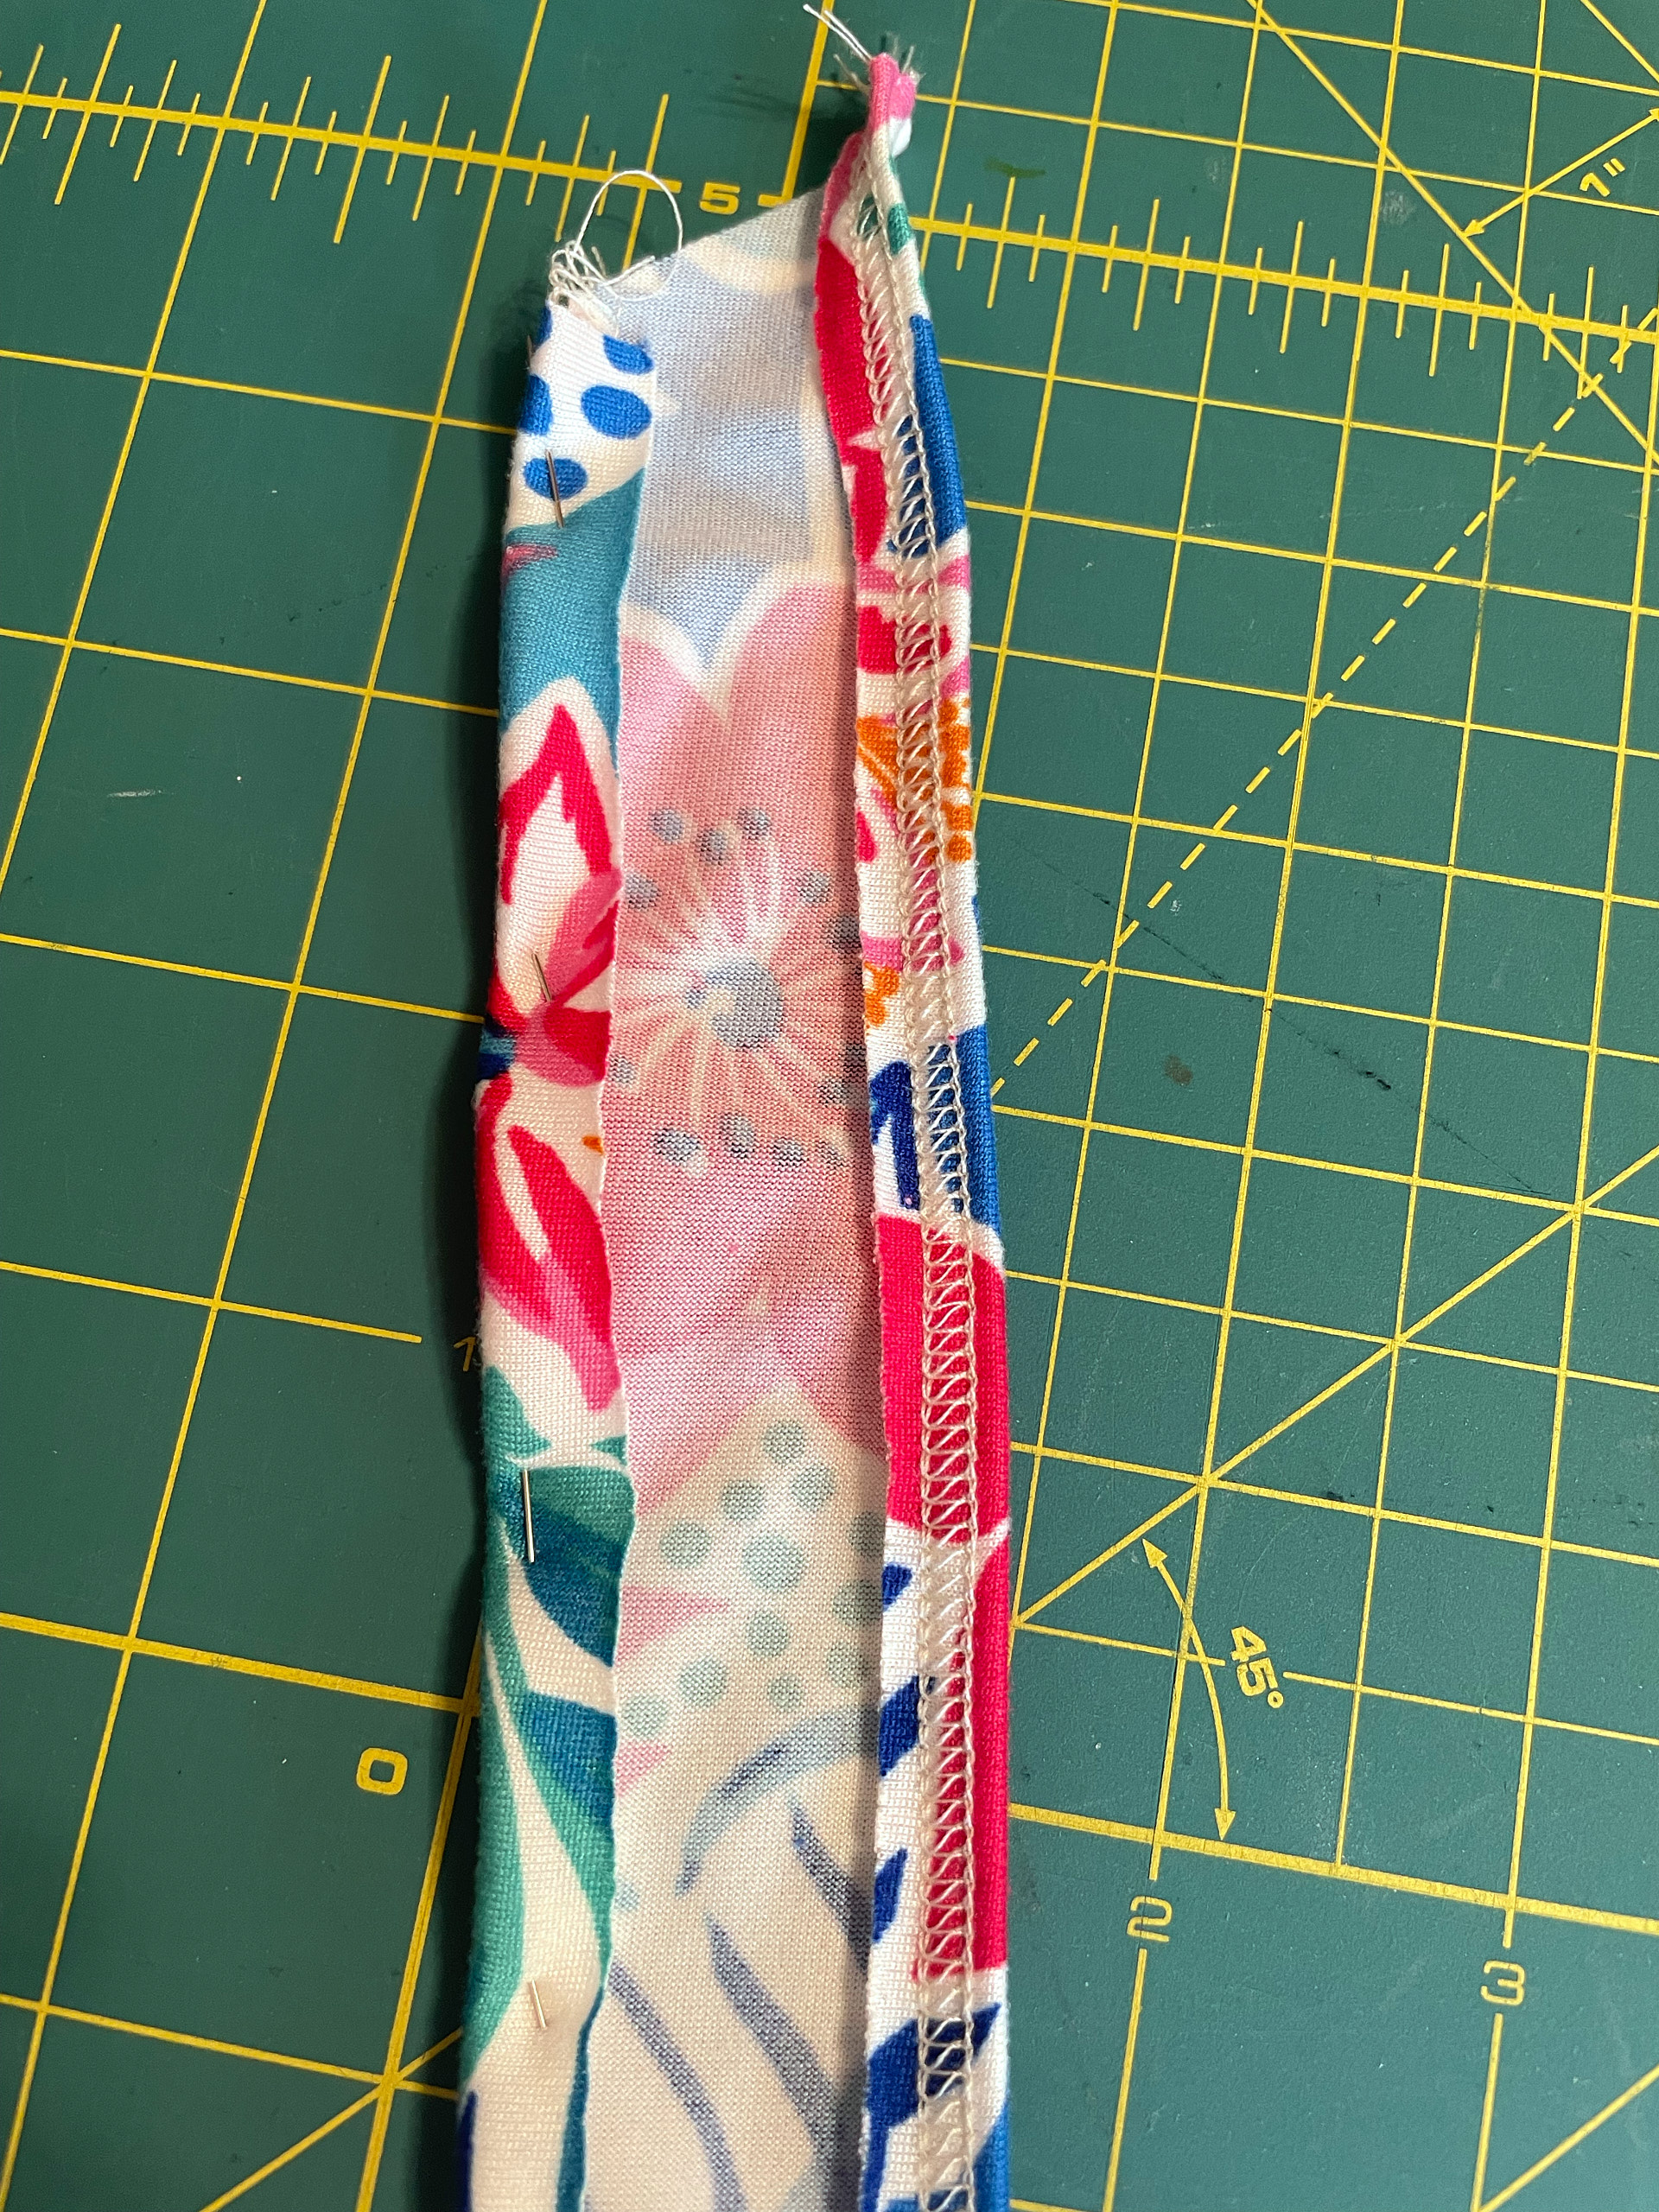
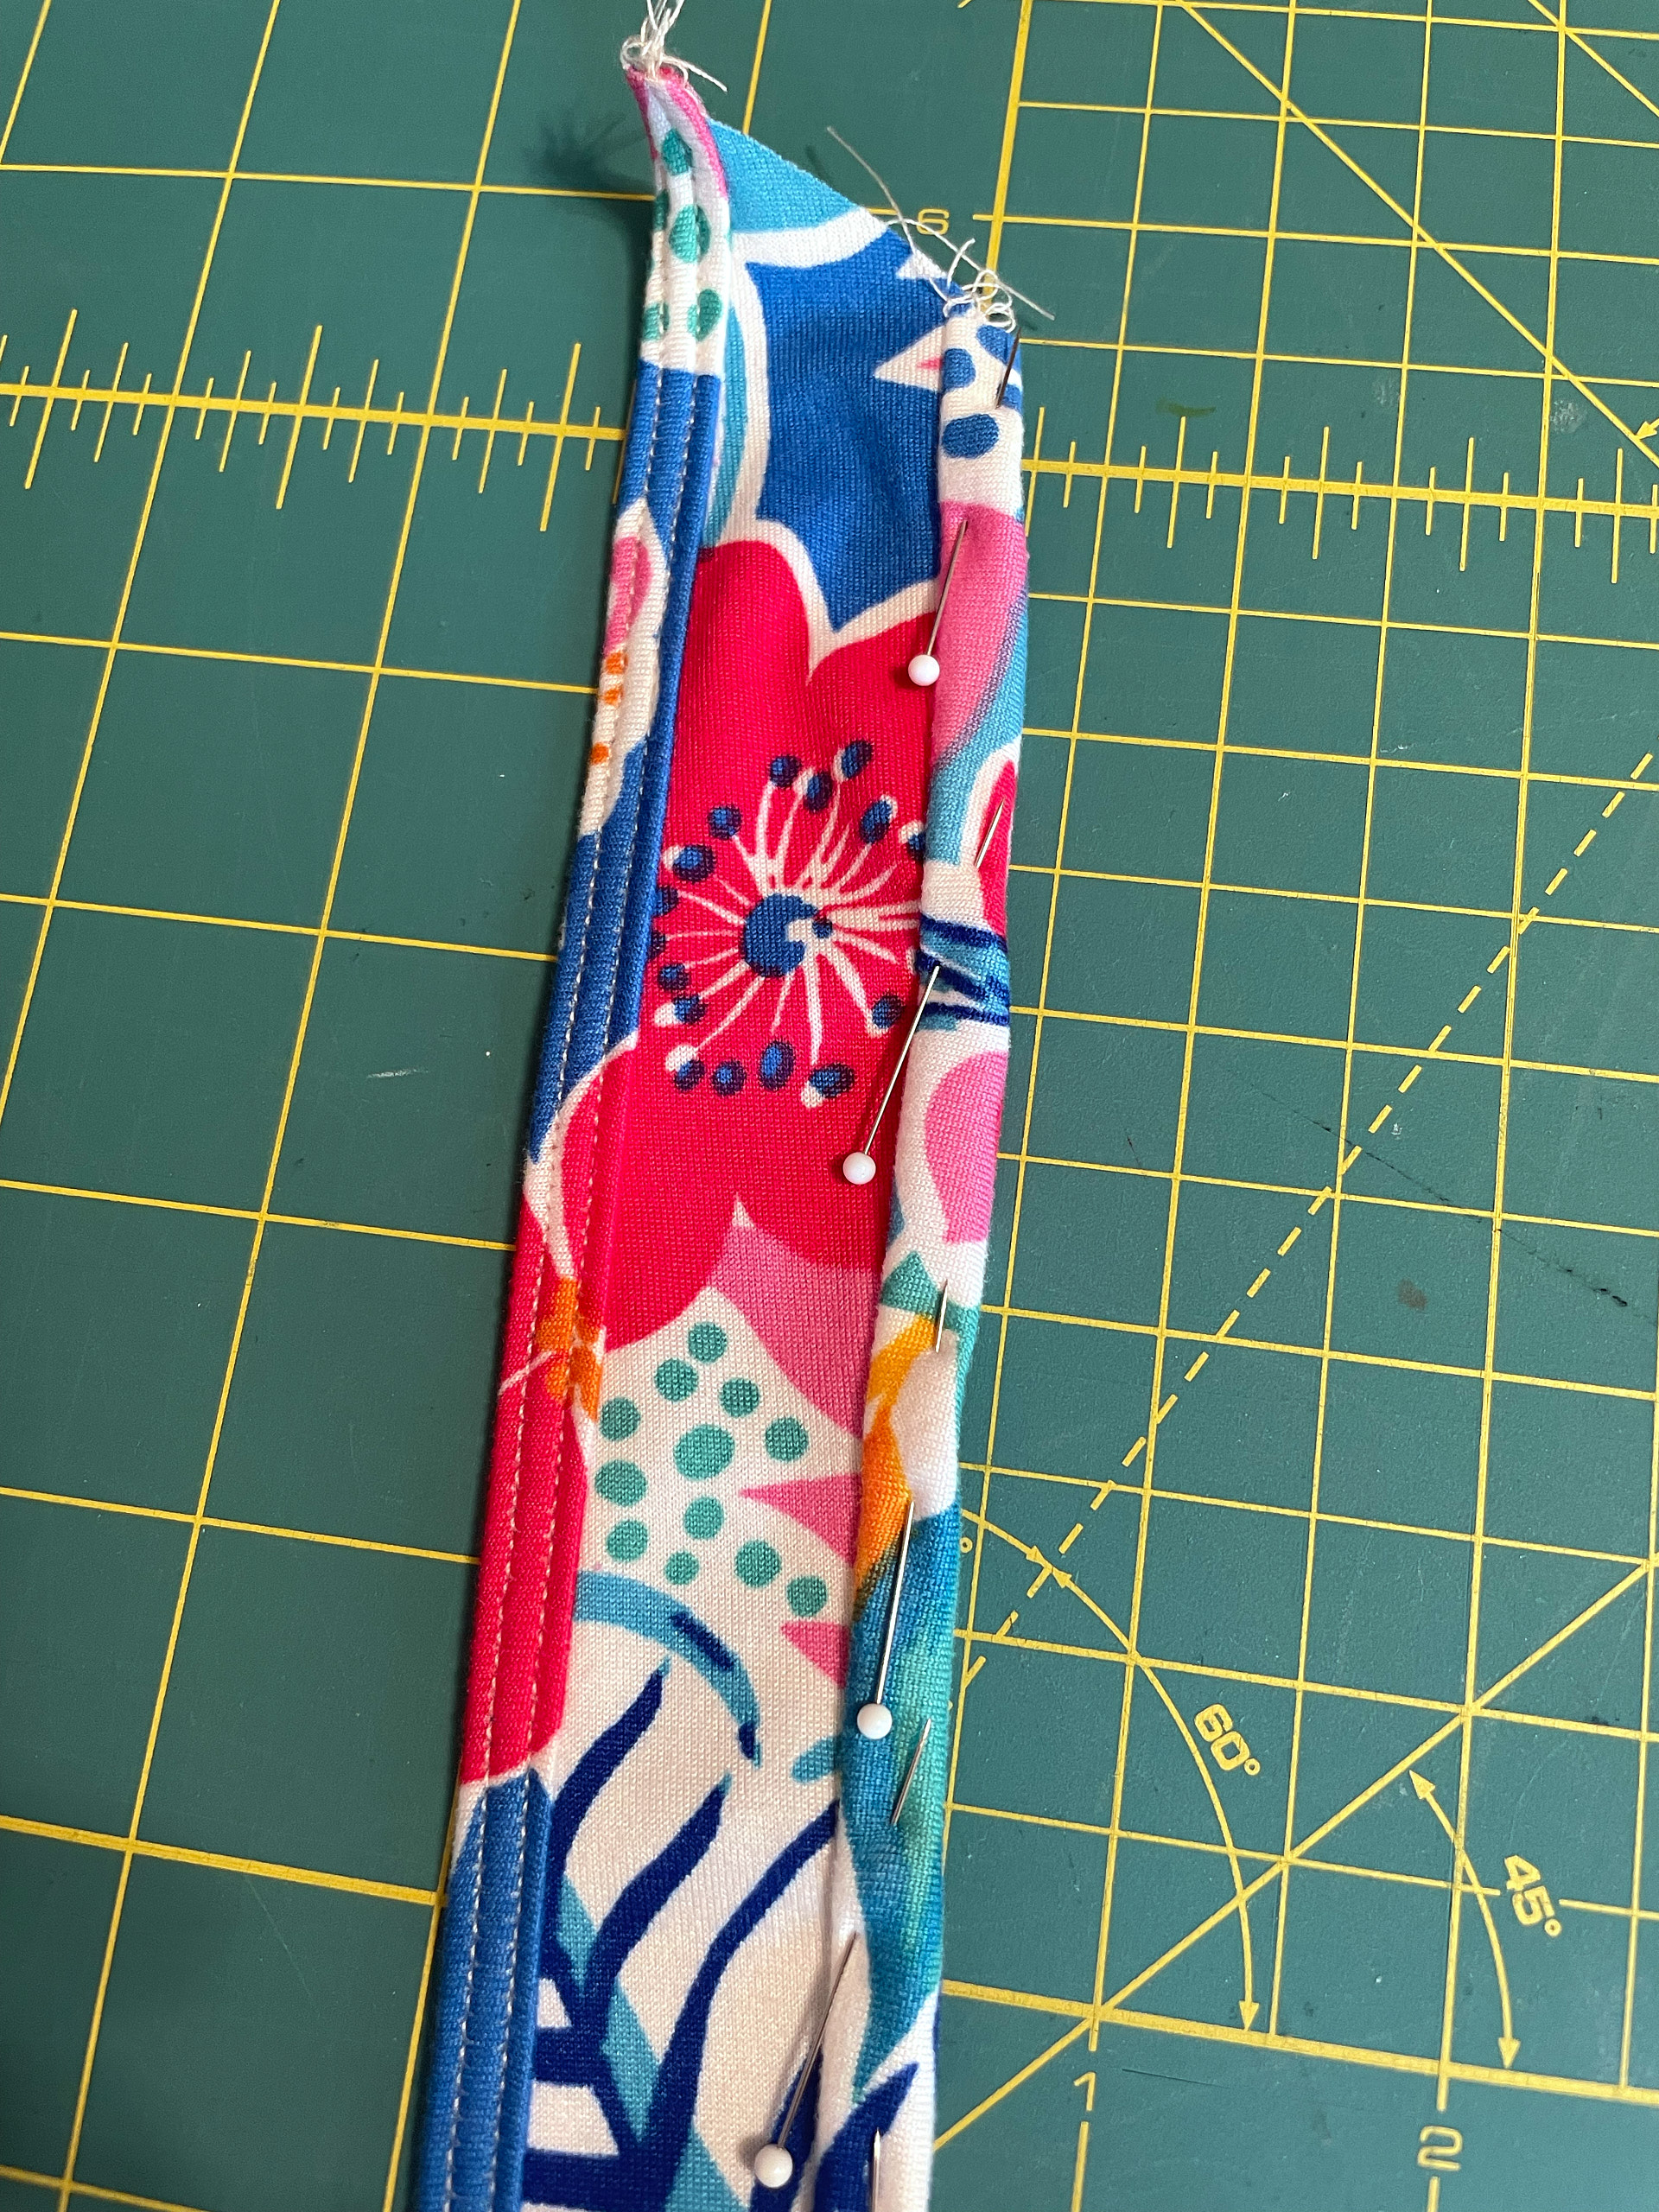
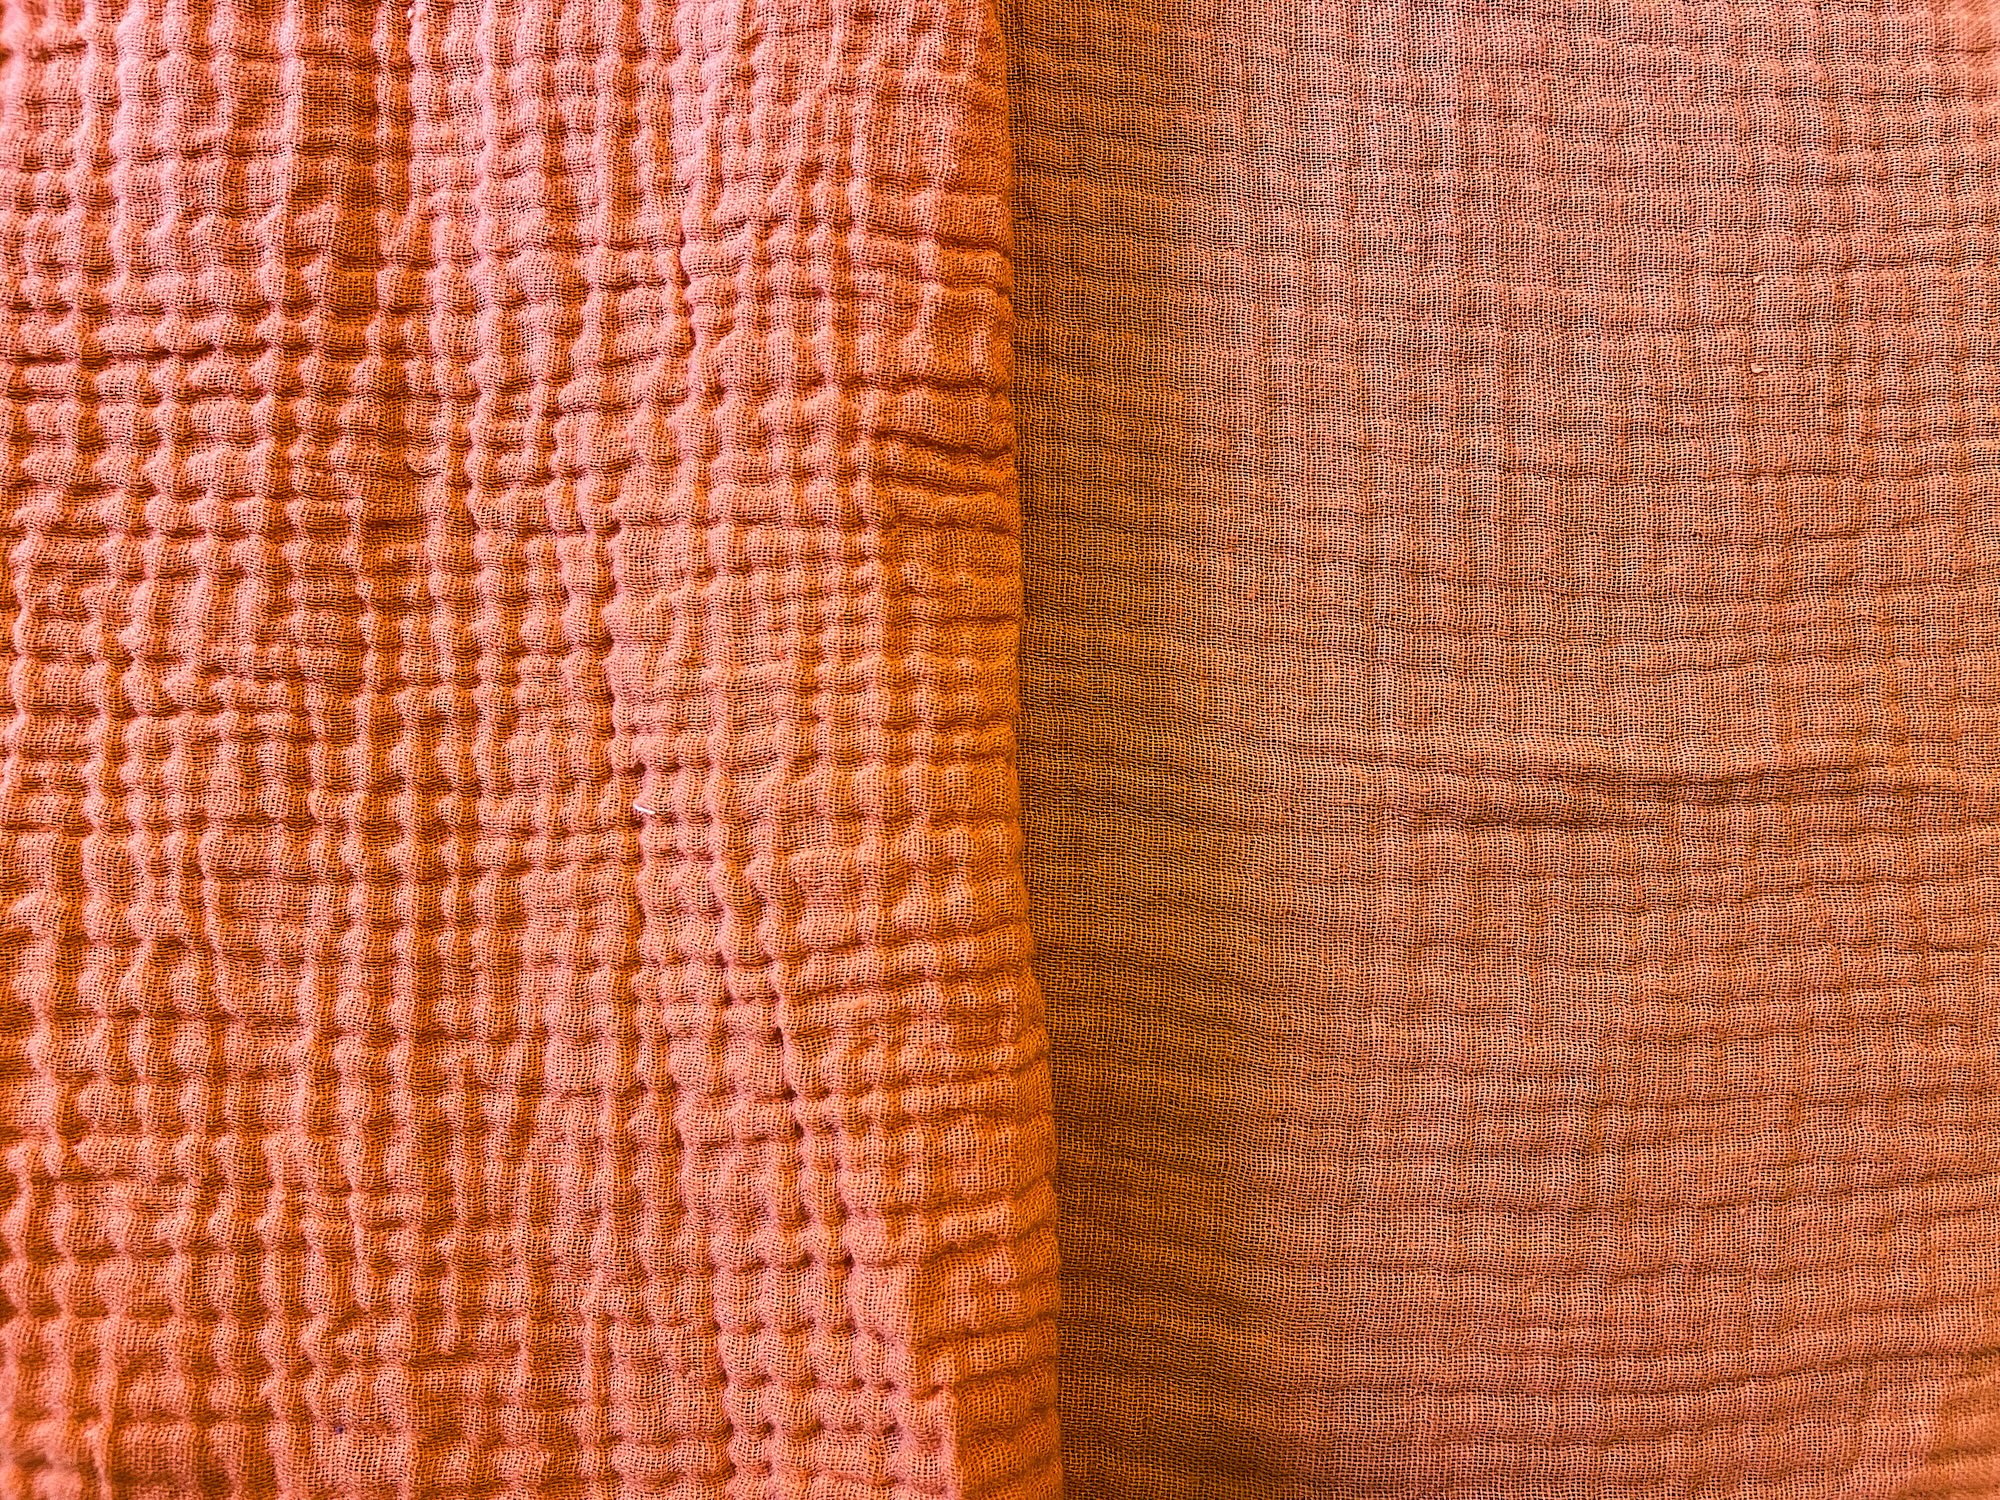
I selected the same 115 gsm light sage Tess Cey fabric that I had used previously for a long-sleeve top. I bought a lot of it when it was on sale from Mily Mae and after making this dress I still have a little bit more. It’s a nice lightweight and drapy woven that doesn’t require ironing and isn’t too slippery to work with. Since I cut some of it from scrap pieces from the top I’m not sure exactly how much fabric I used, but I think about 2.5 yards of 56″-wide fabric. The pattern recommends interfacing the belt, so I used HeatnBond Non-Woven Fusible Light Weight interfacing.
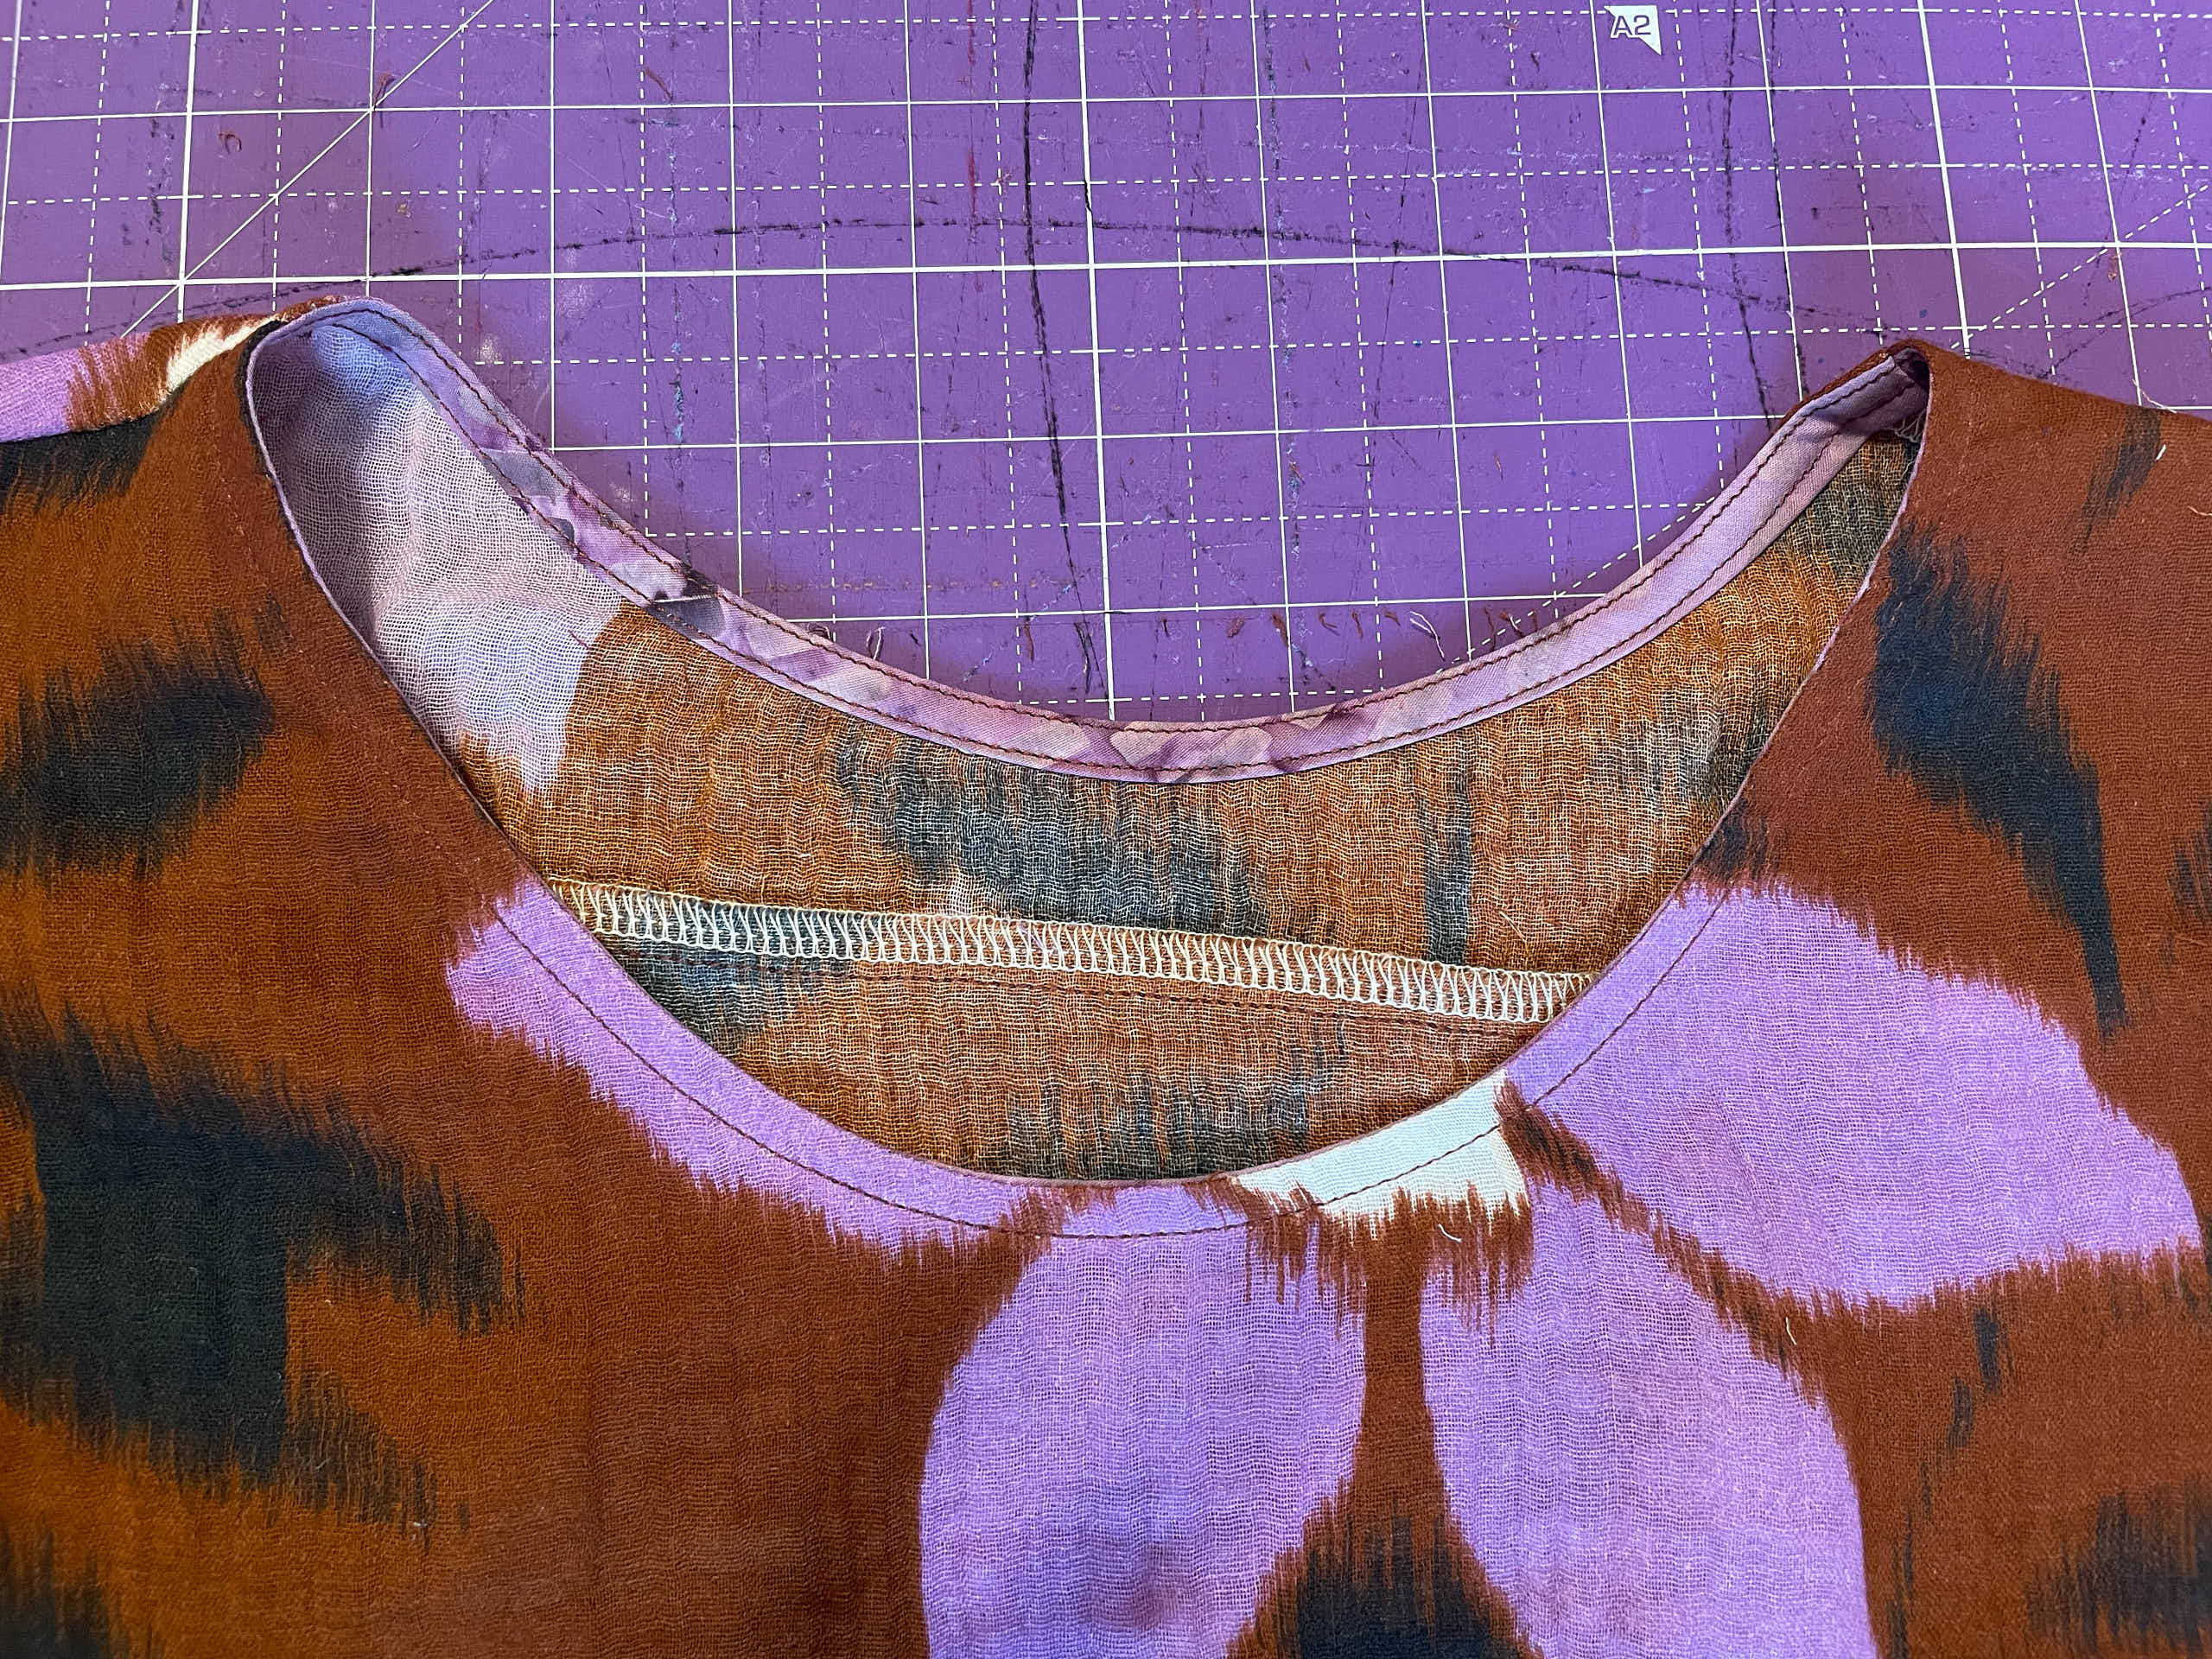
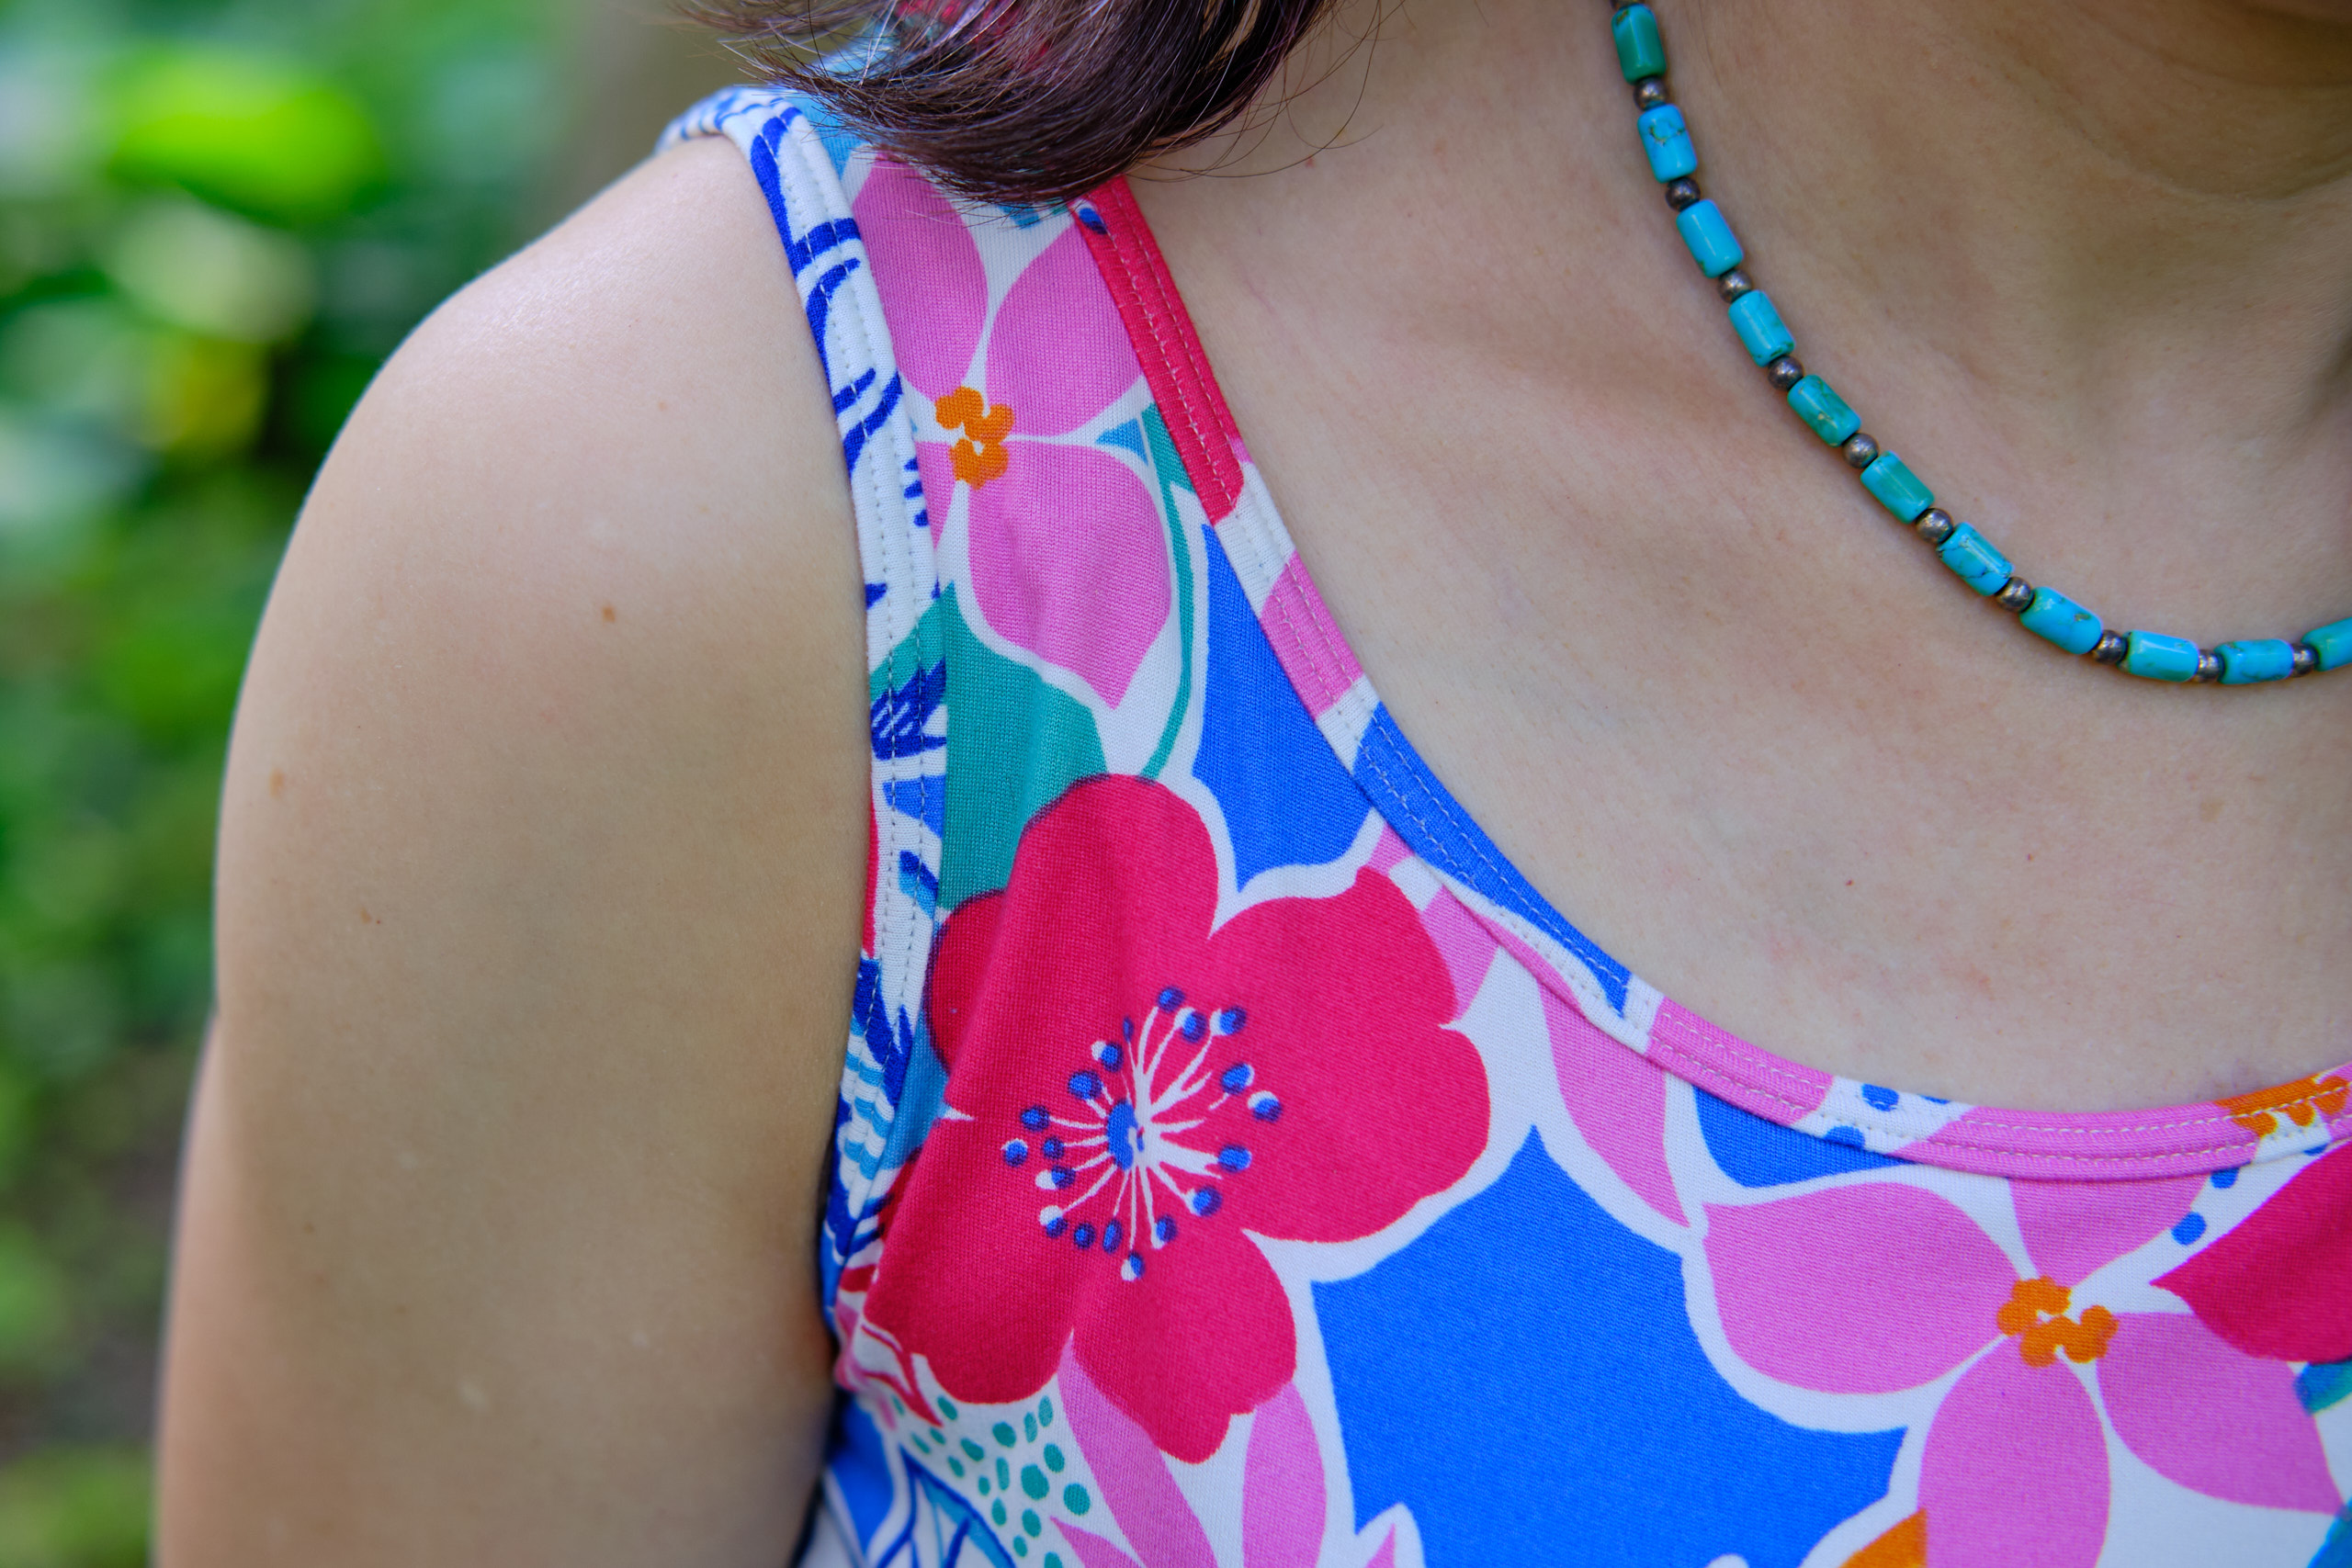
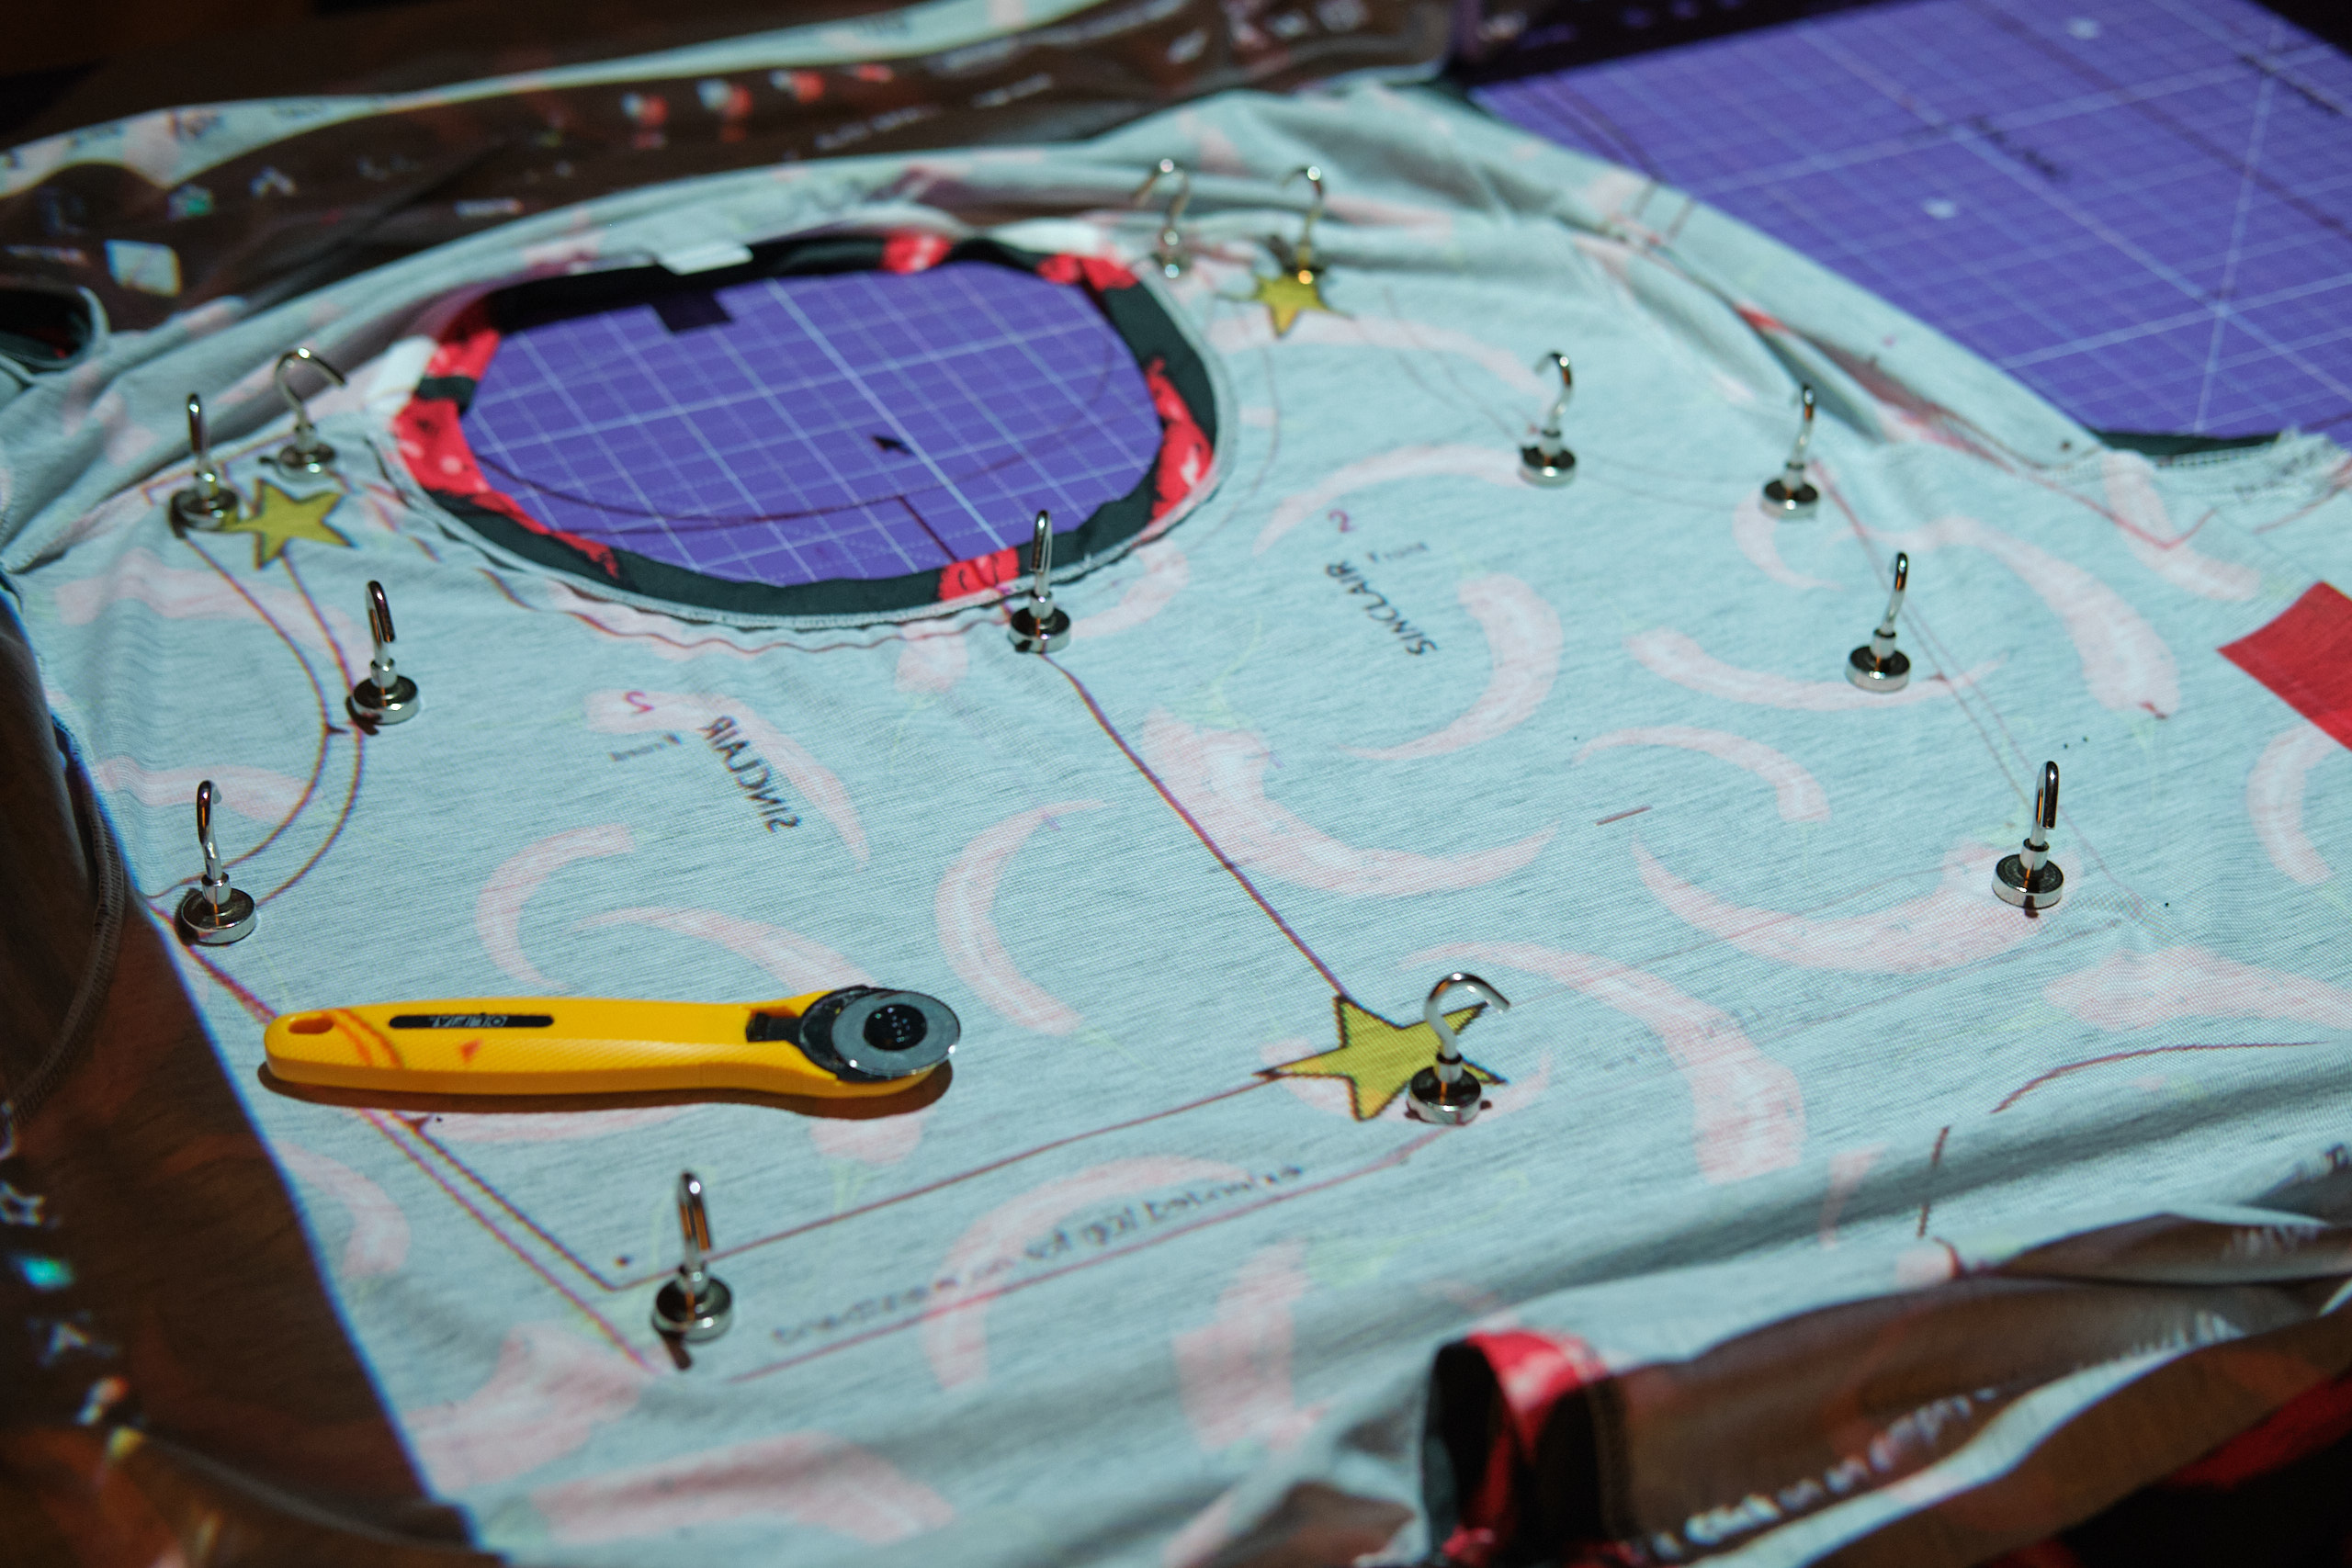
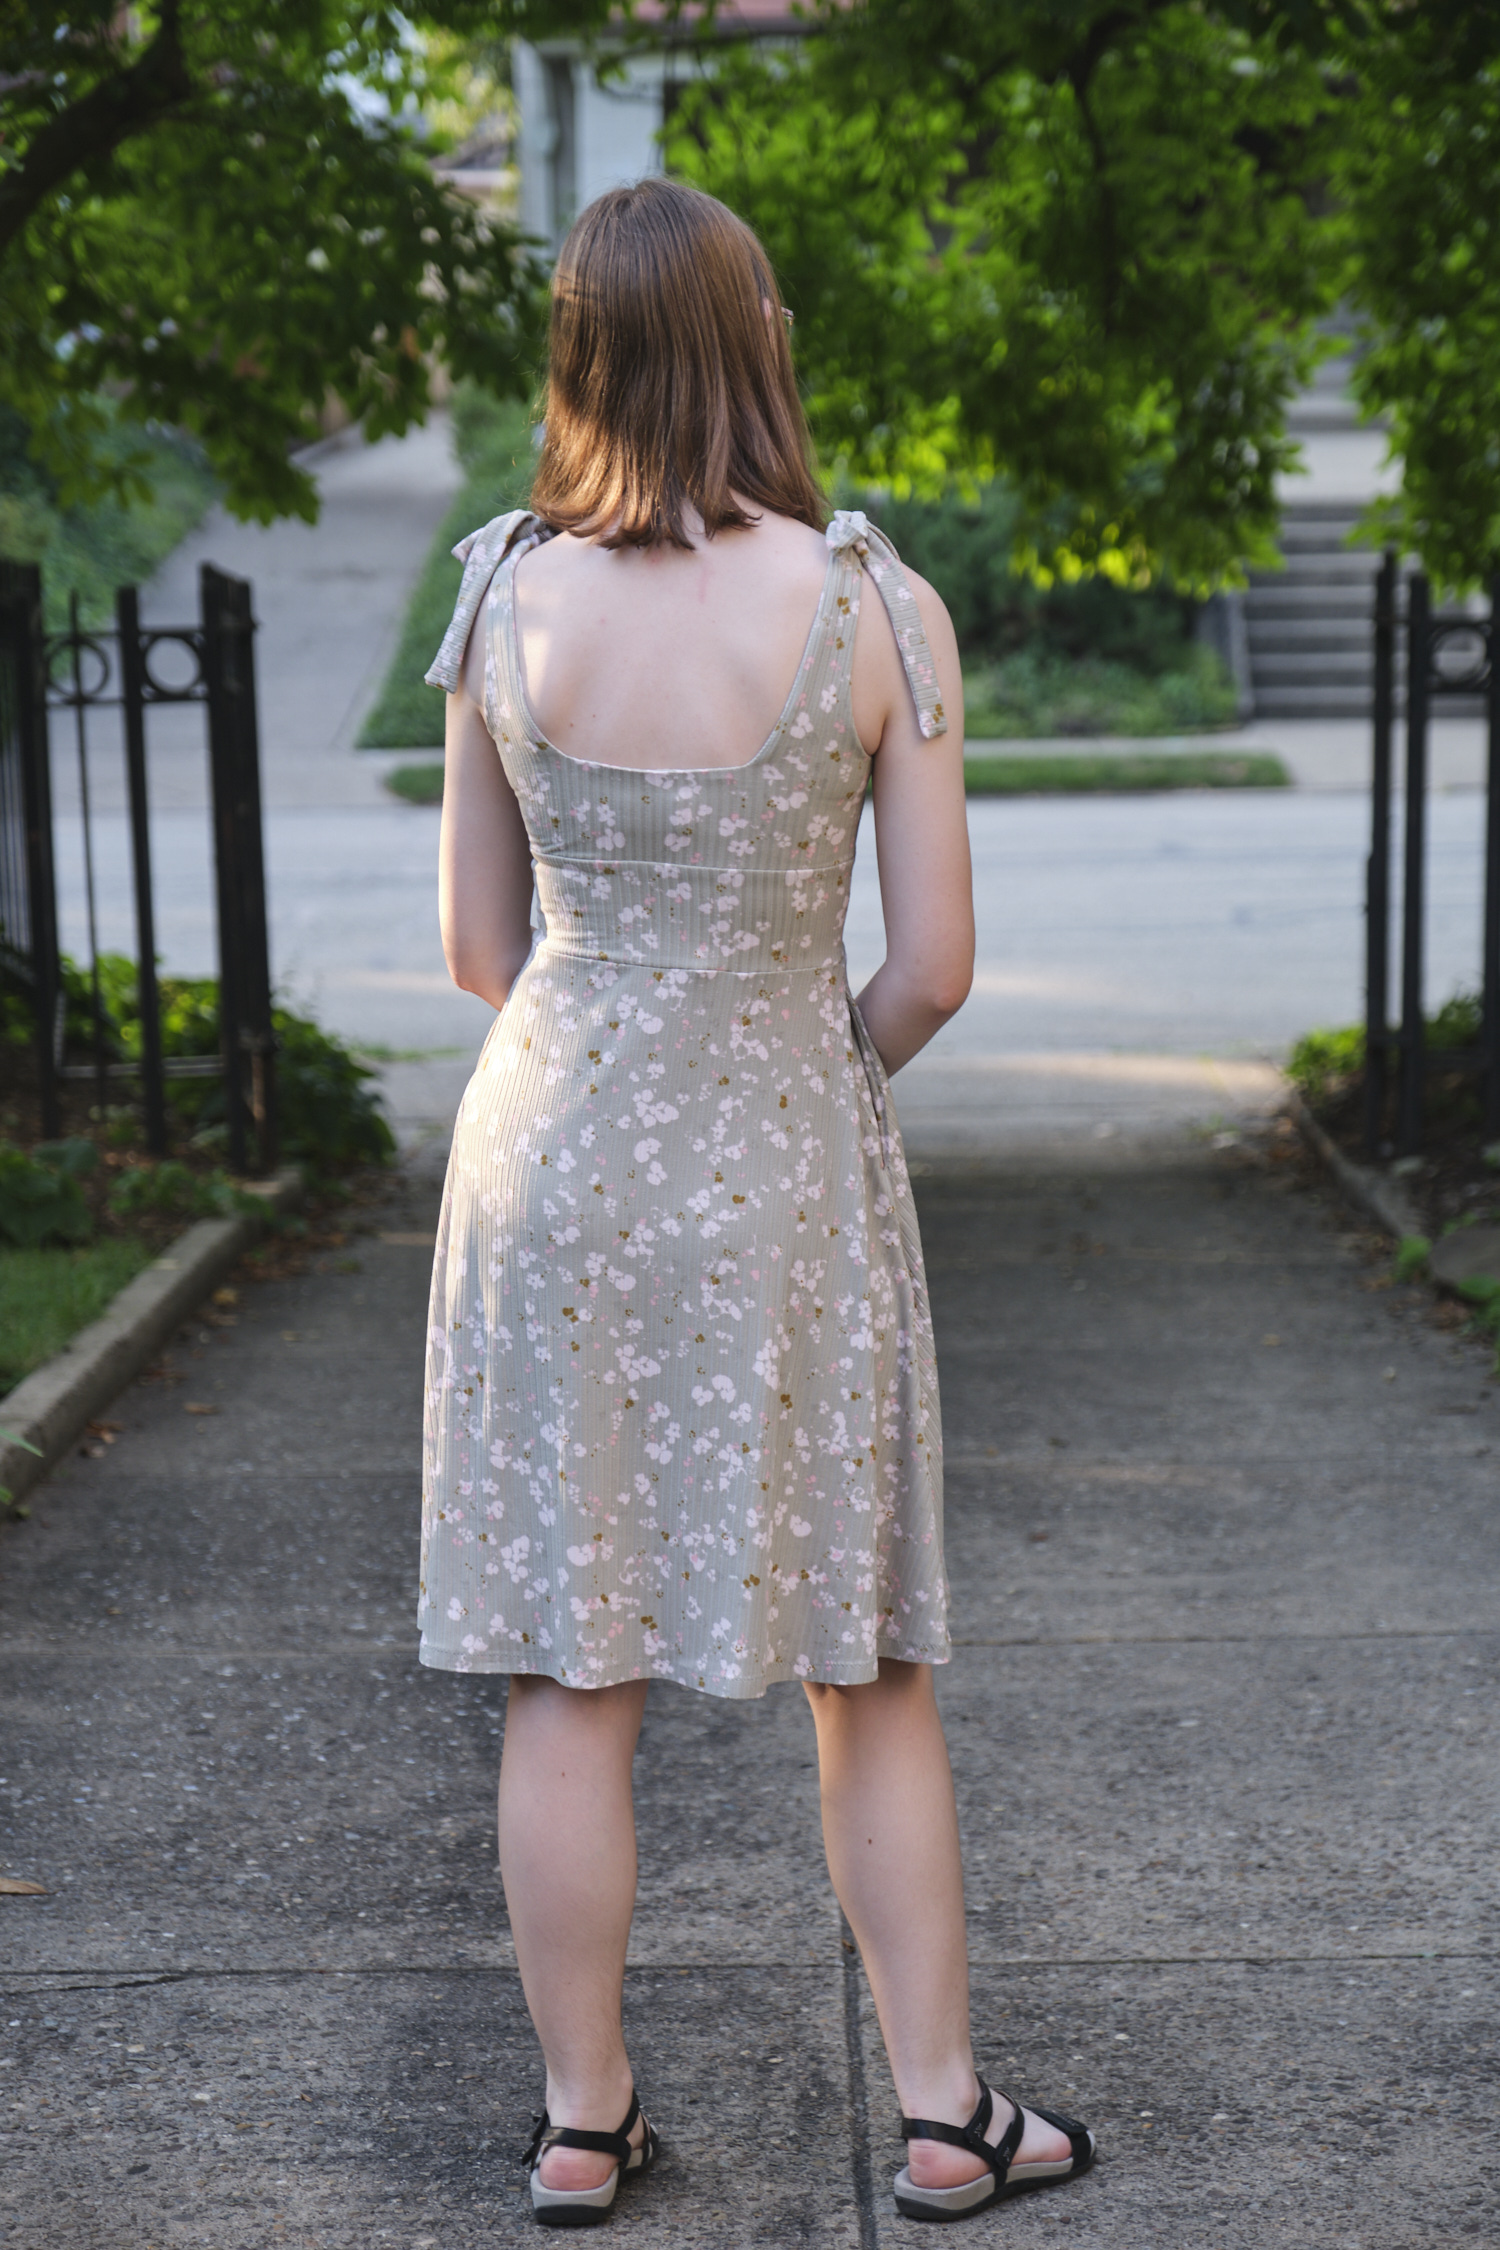
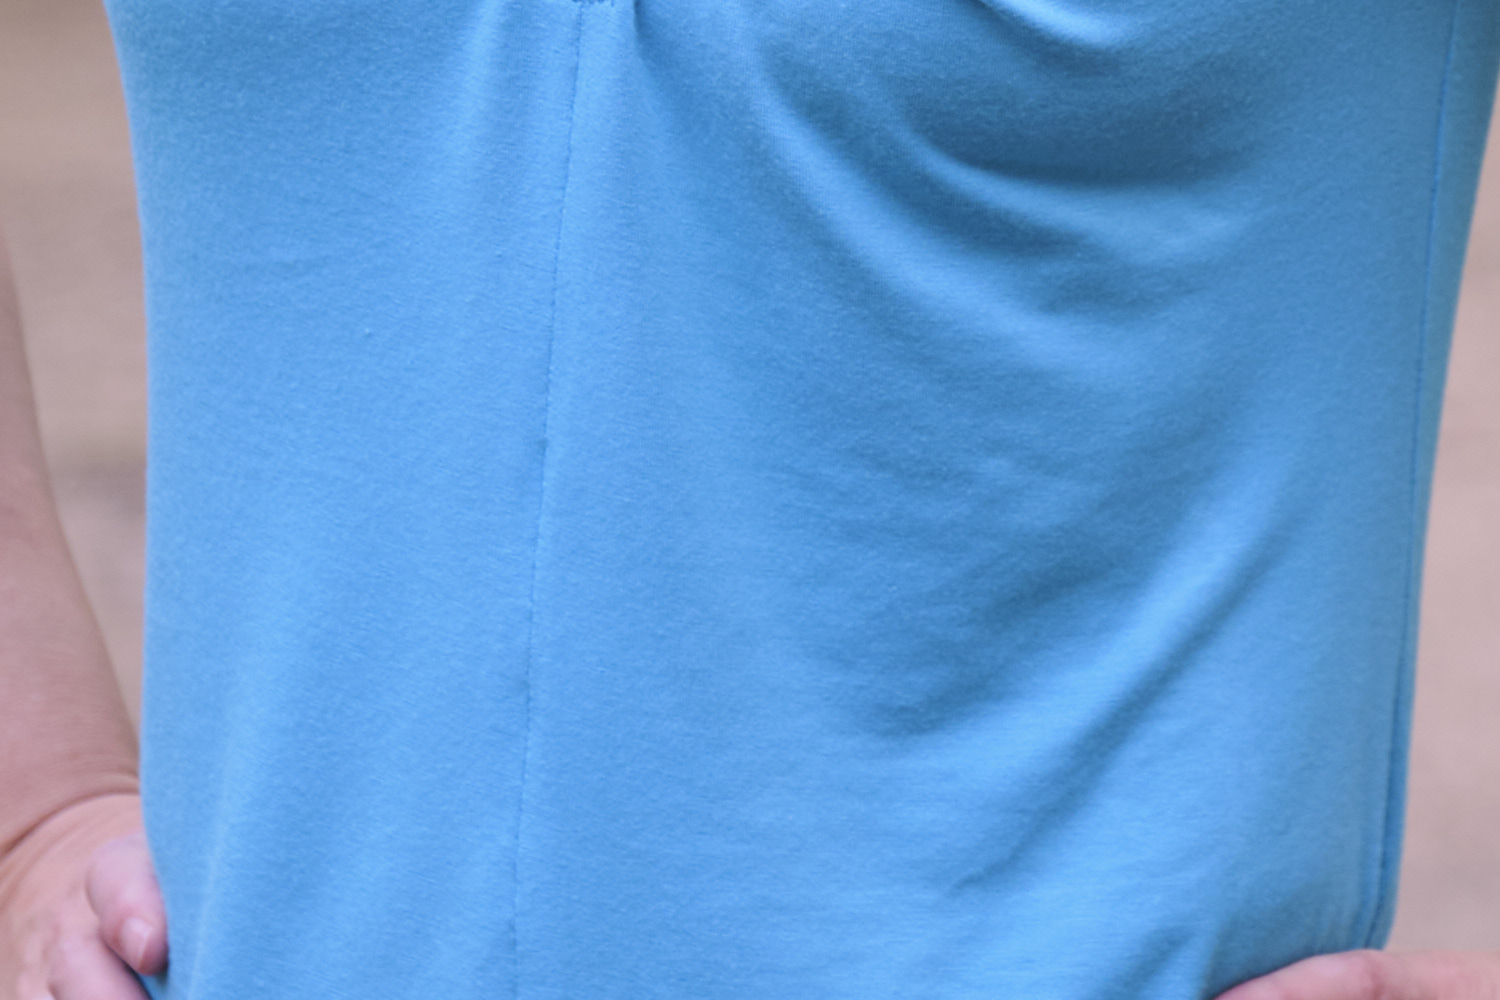
The pattern is not for a complete beginner, but it is not that difficult to sew. It is somewhat time-consuming, and I found a few annoying typos and parts of the pattern that could have been a bit more clear (see the end of this post). Nonetheless, I took the process slowly and enjoyed a fun sew. I sewed most of it with my regular sewing machine, but did a lot of switching between my regular foot, edge foot, and 1/4″ guide foot. I only used my serger for neatening edges on the skirt after I sewed them. The bodice requires darts and some gathering at the shoulders. I used the recommended burrito method for the shoulder detail and French seams for the bodice. The crossover part of the bodice and the armholes use a narrow facing with bias-cut binding, which would have been more intimidating if I hadn’t done that before. The waistband is 3 layers (inner, outer, and interfacing), each sewn from three pieces of fabric.
The pockets were fairly easy to make and they lie very flat even when I put things in them. These pockets really are hidden and they don’t move around when I walk. I always recommend pockets, but I highly recommend these particular pockets!

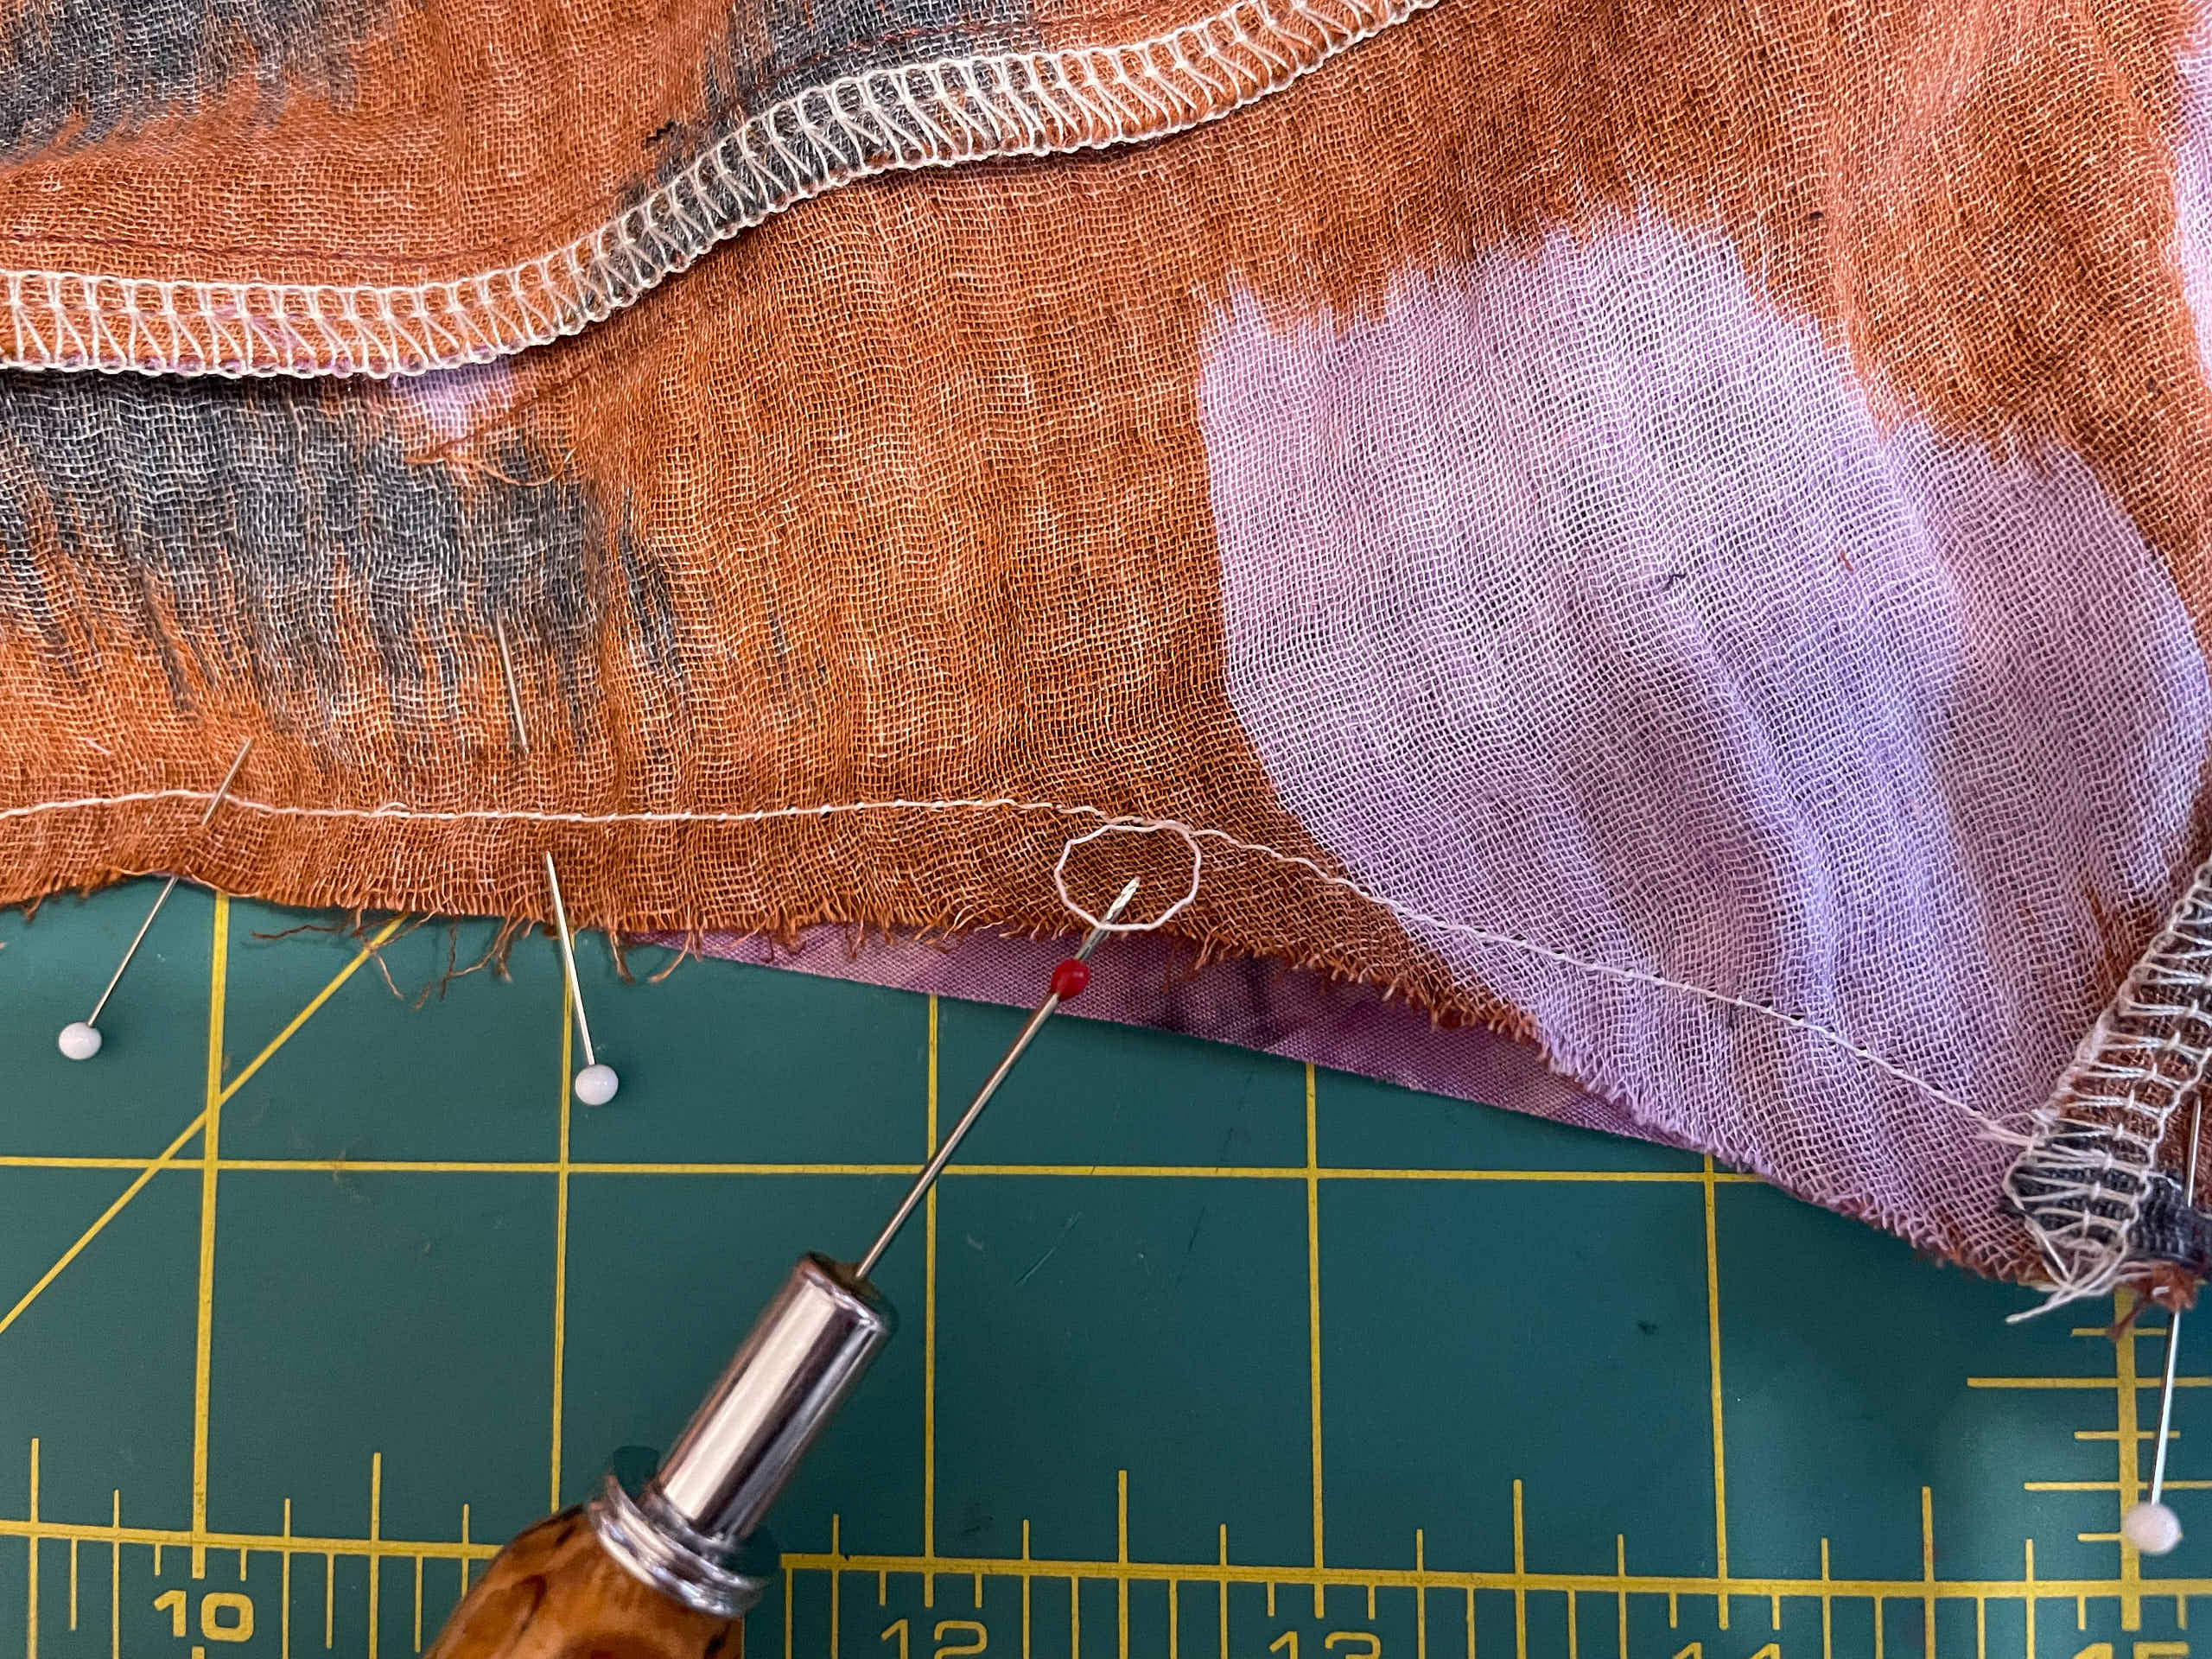
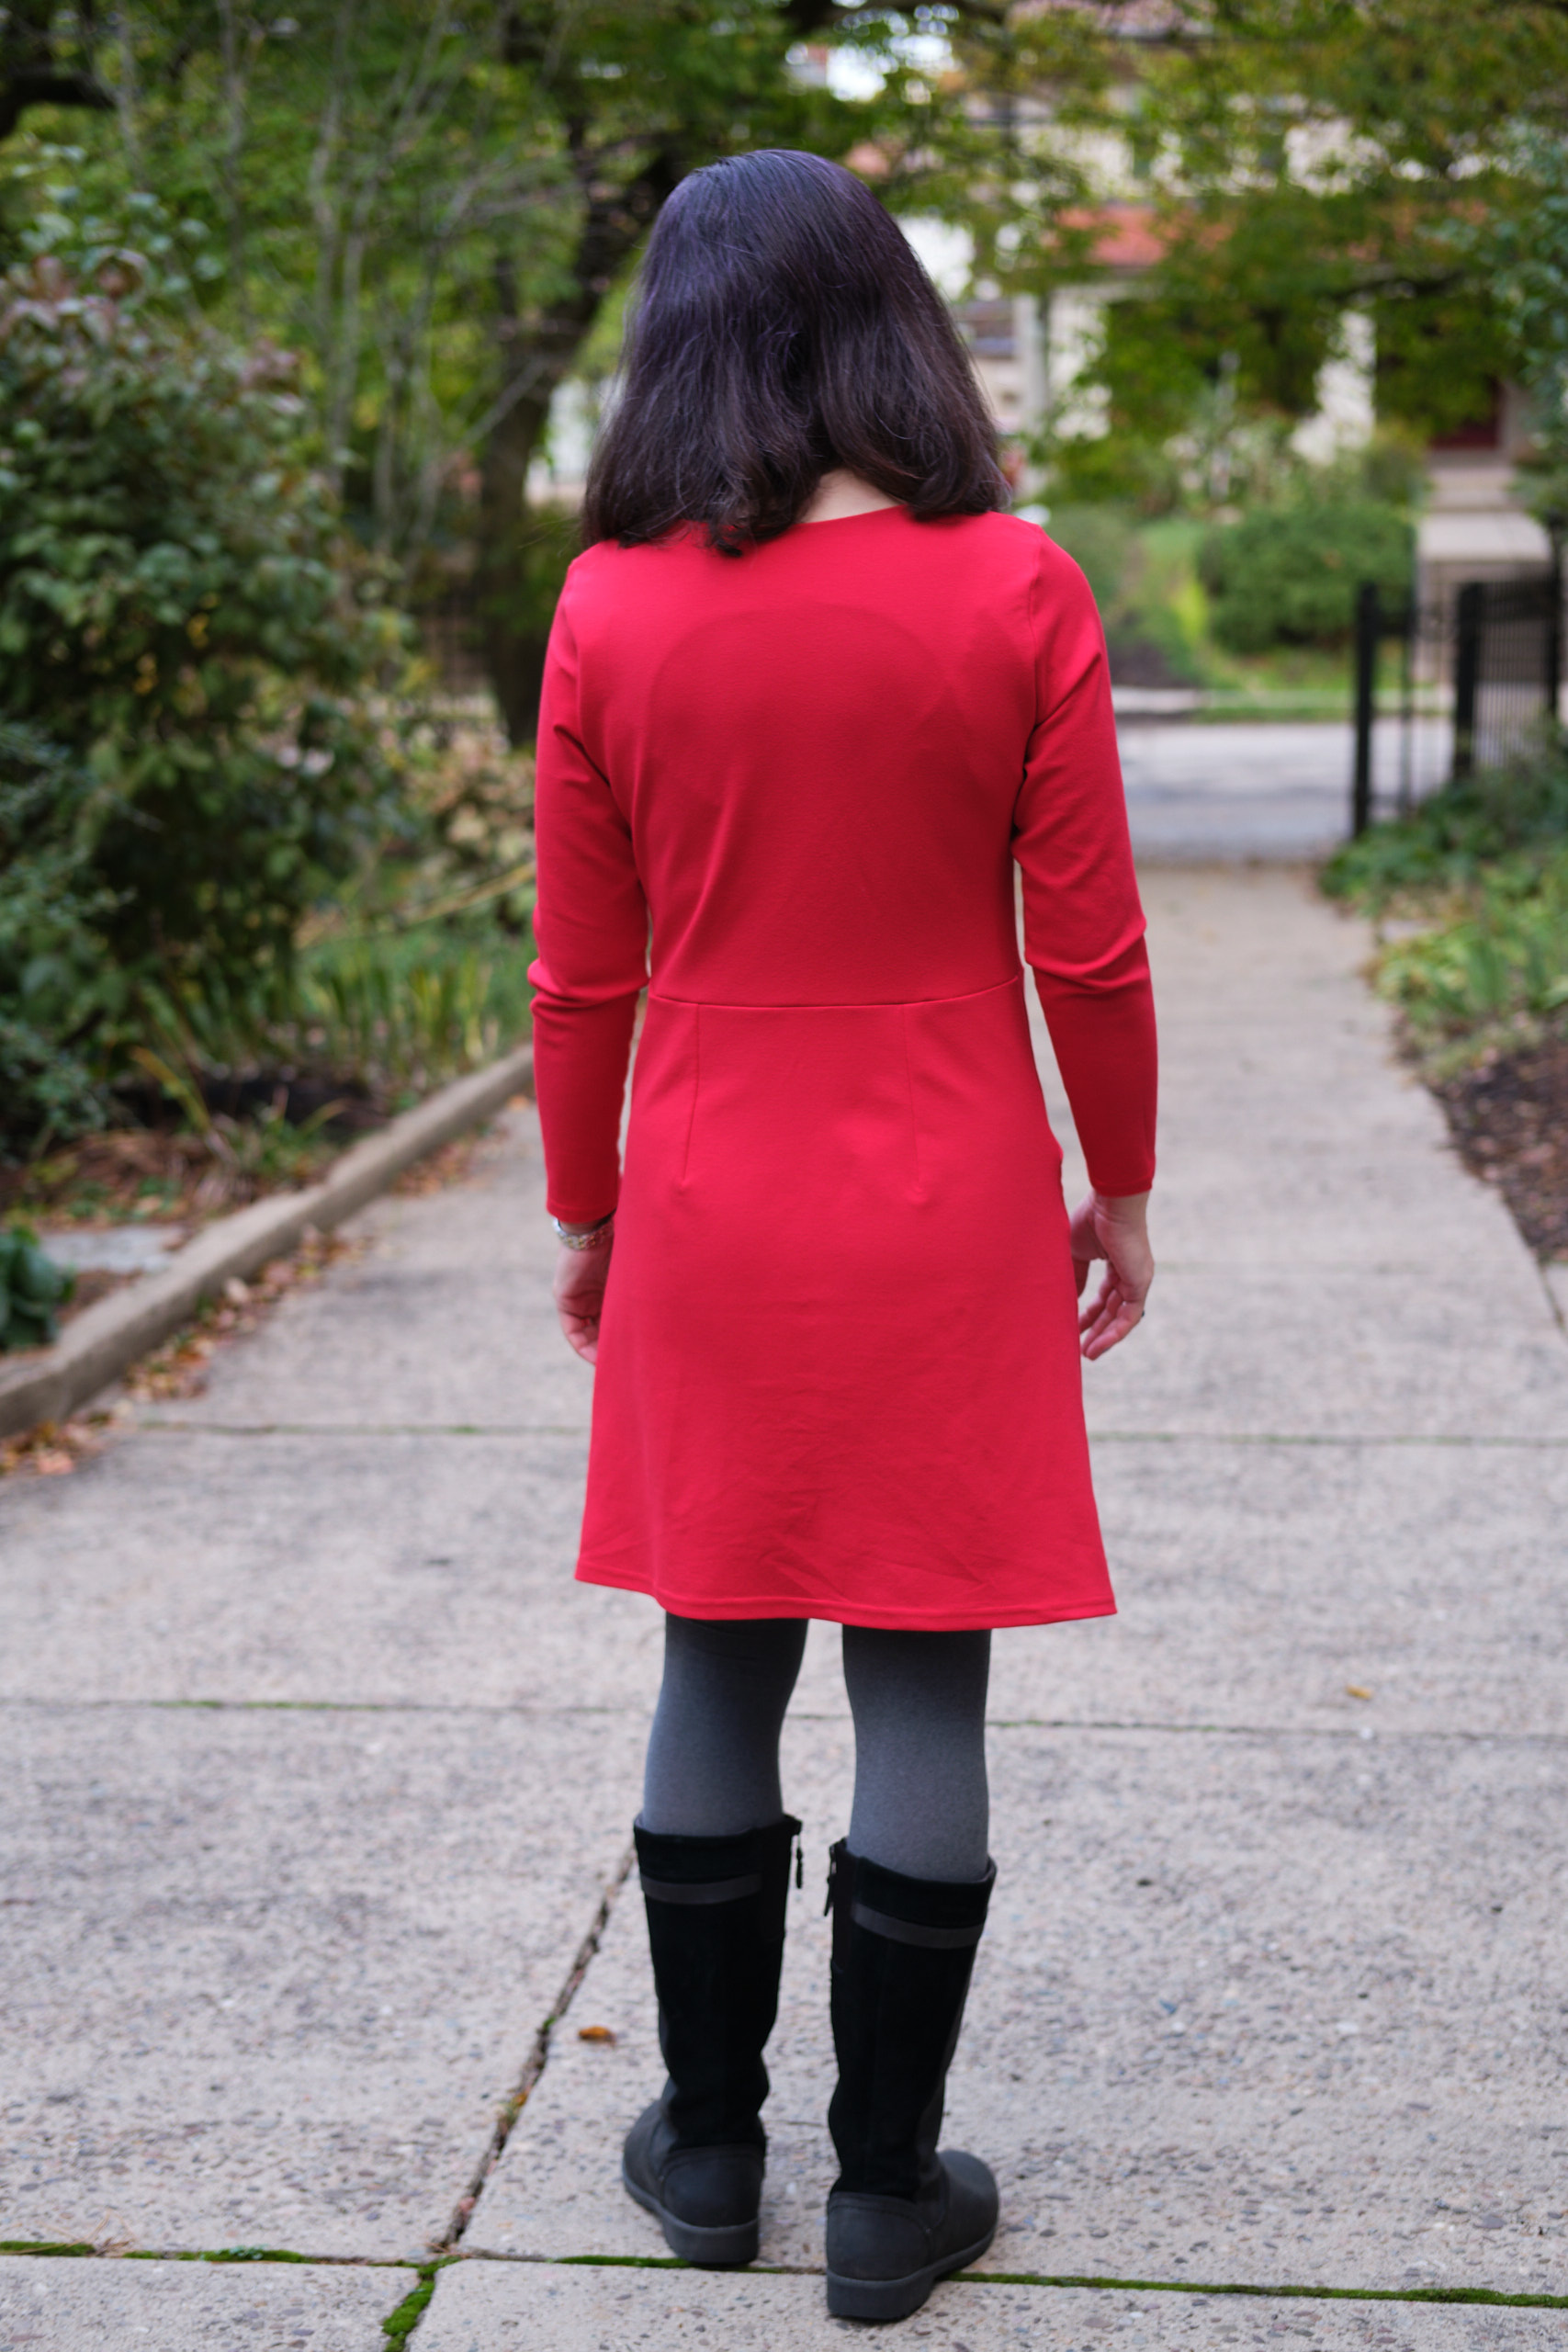
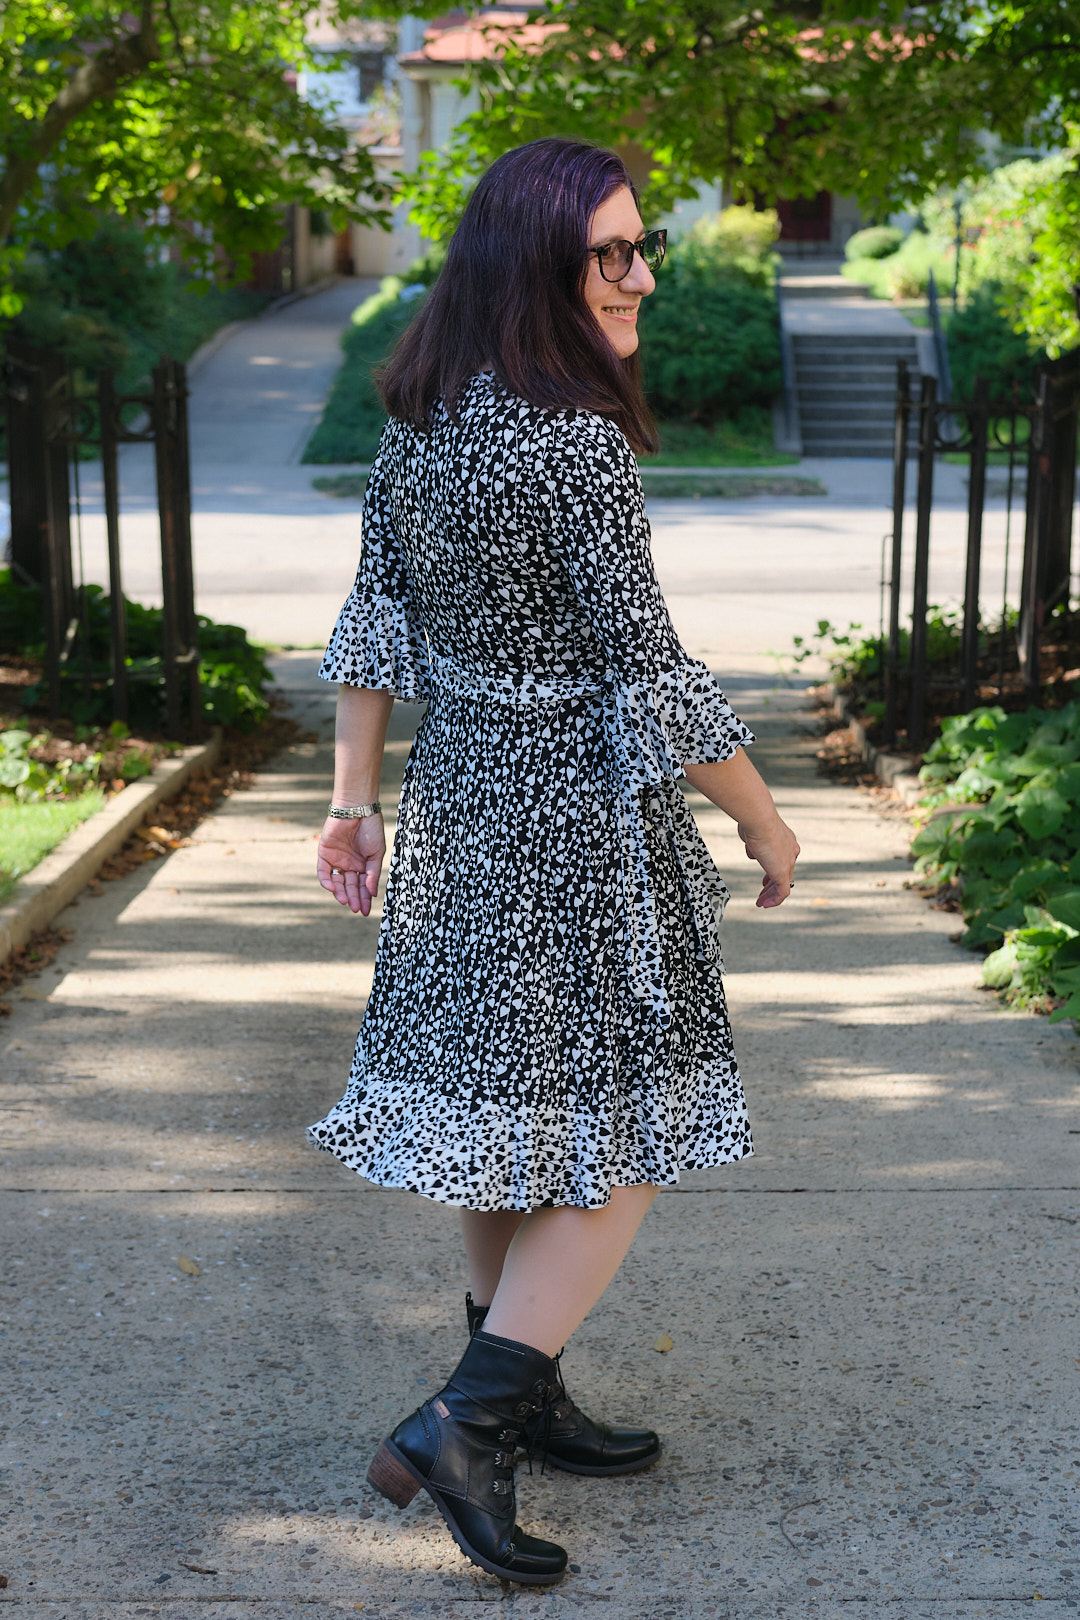
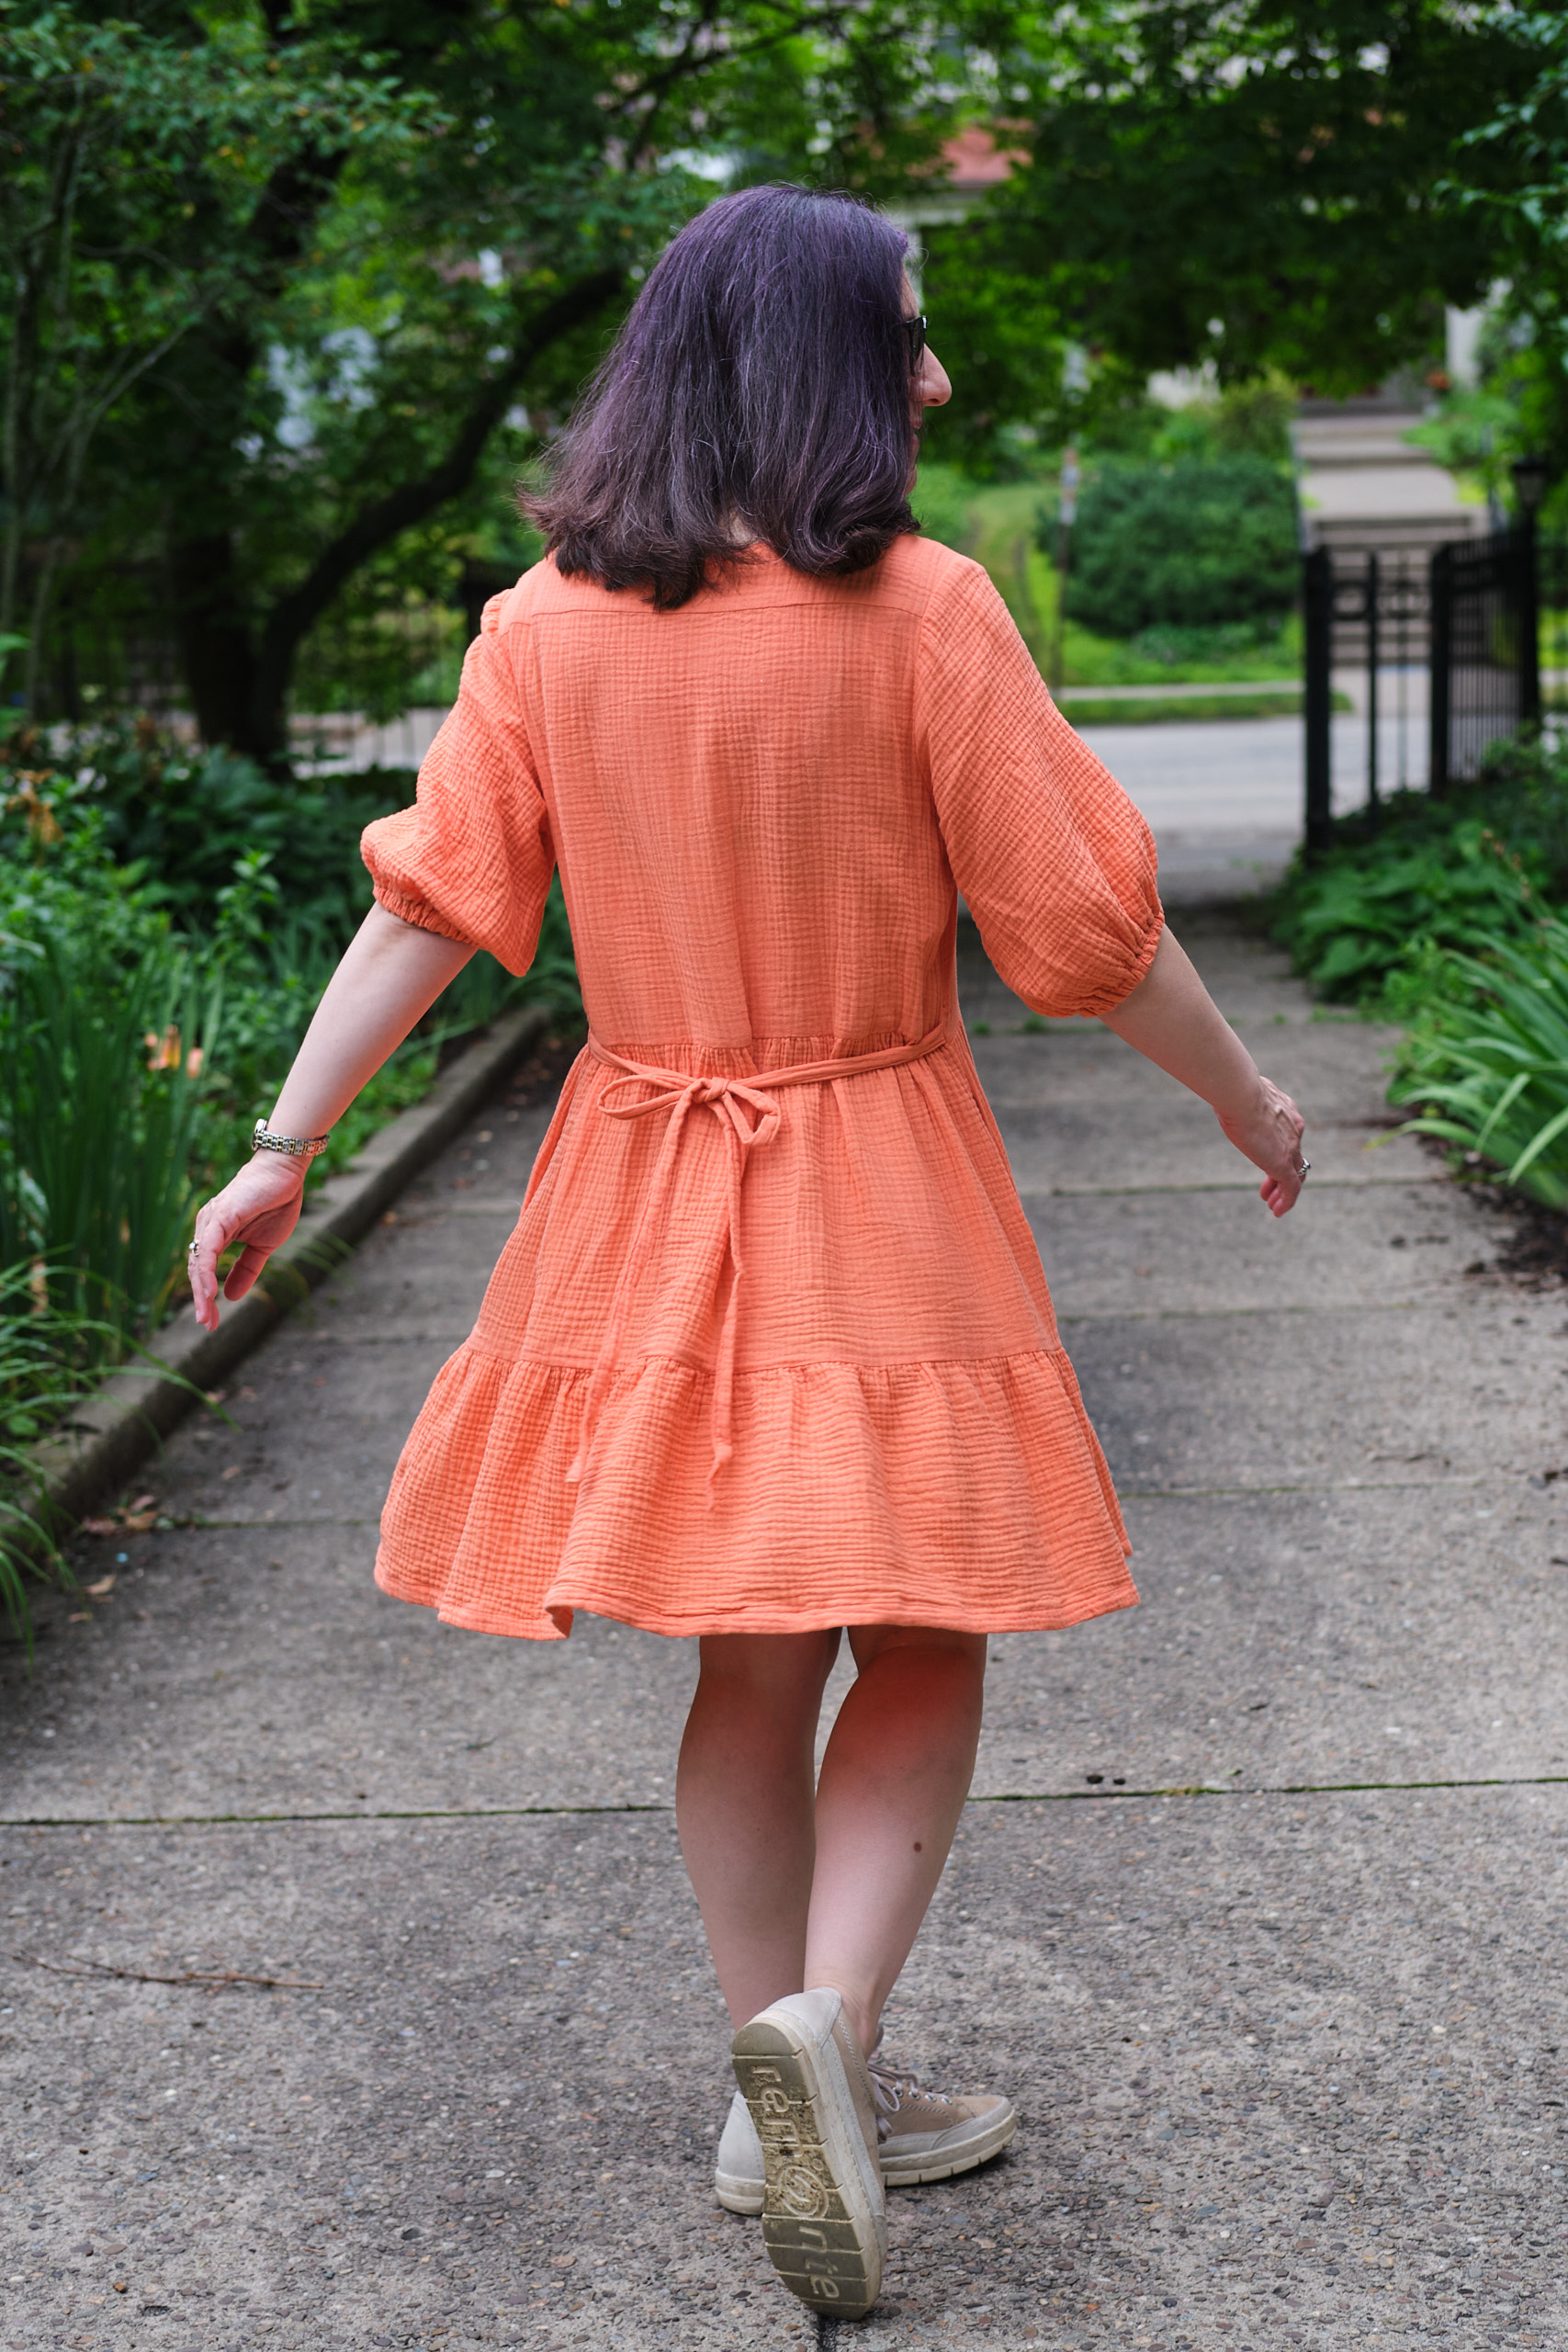
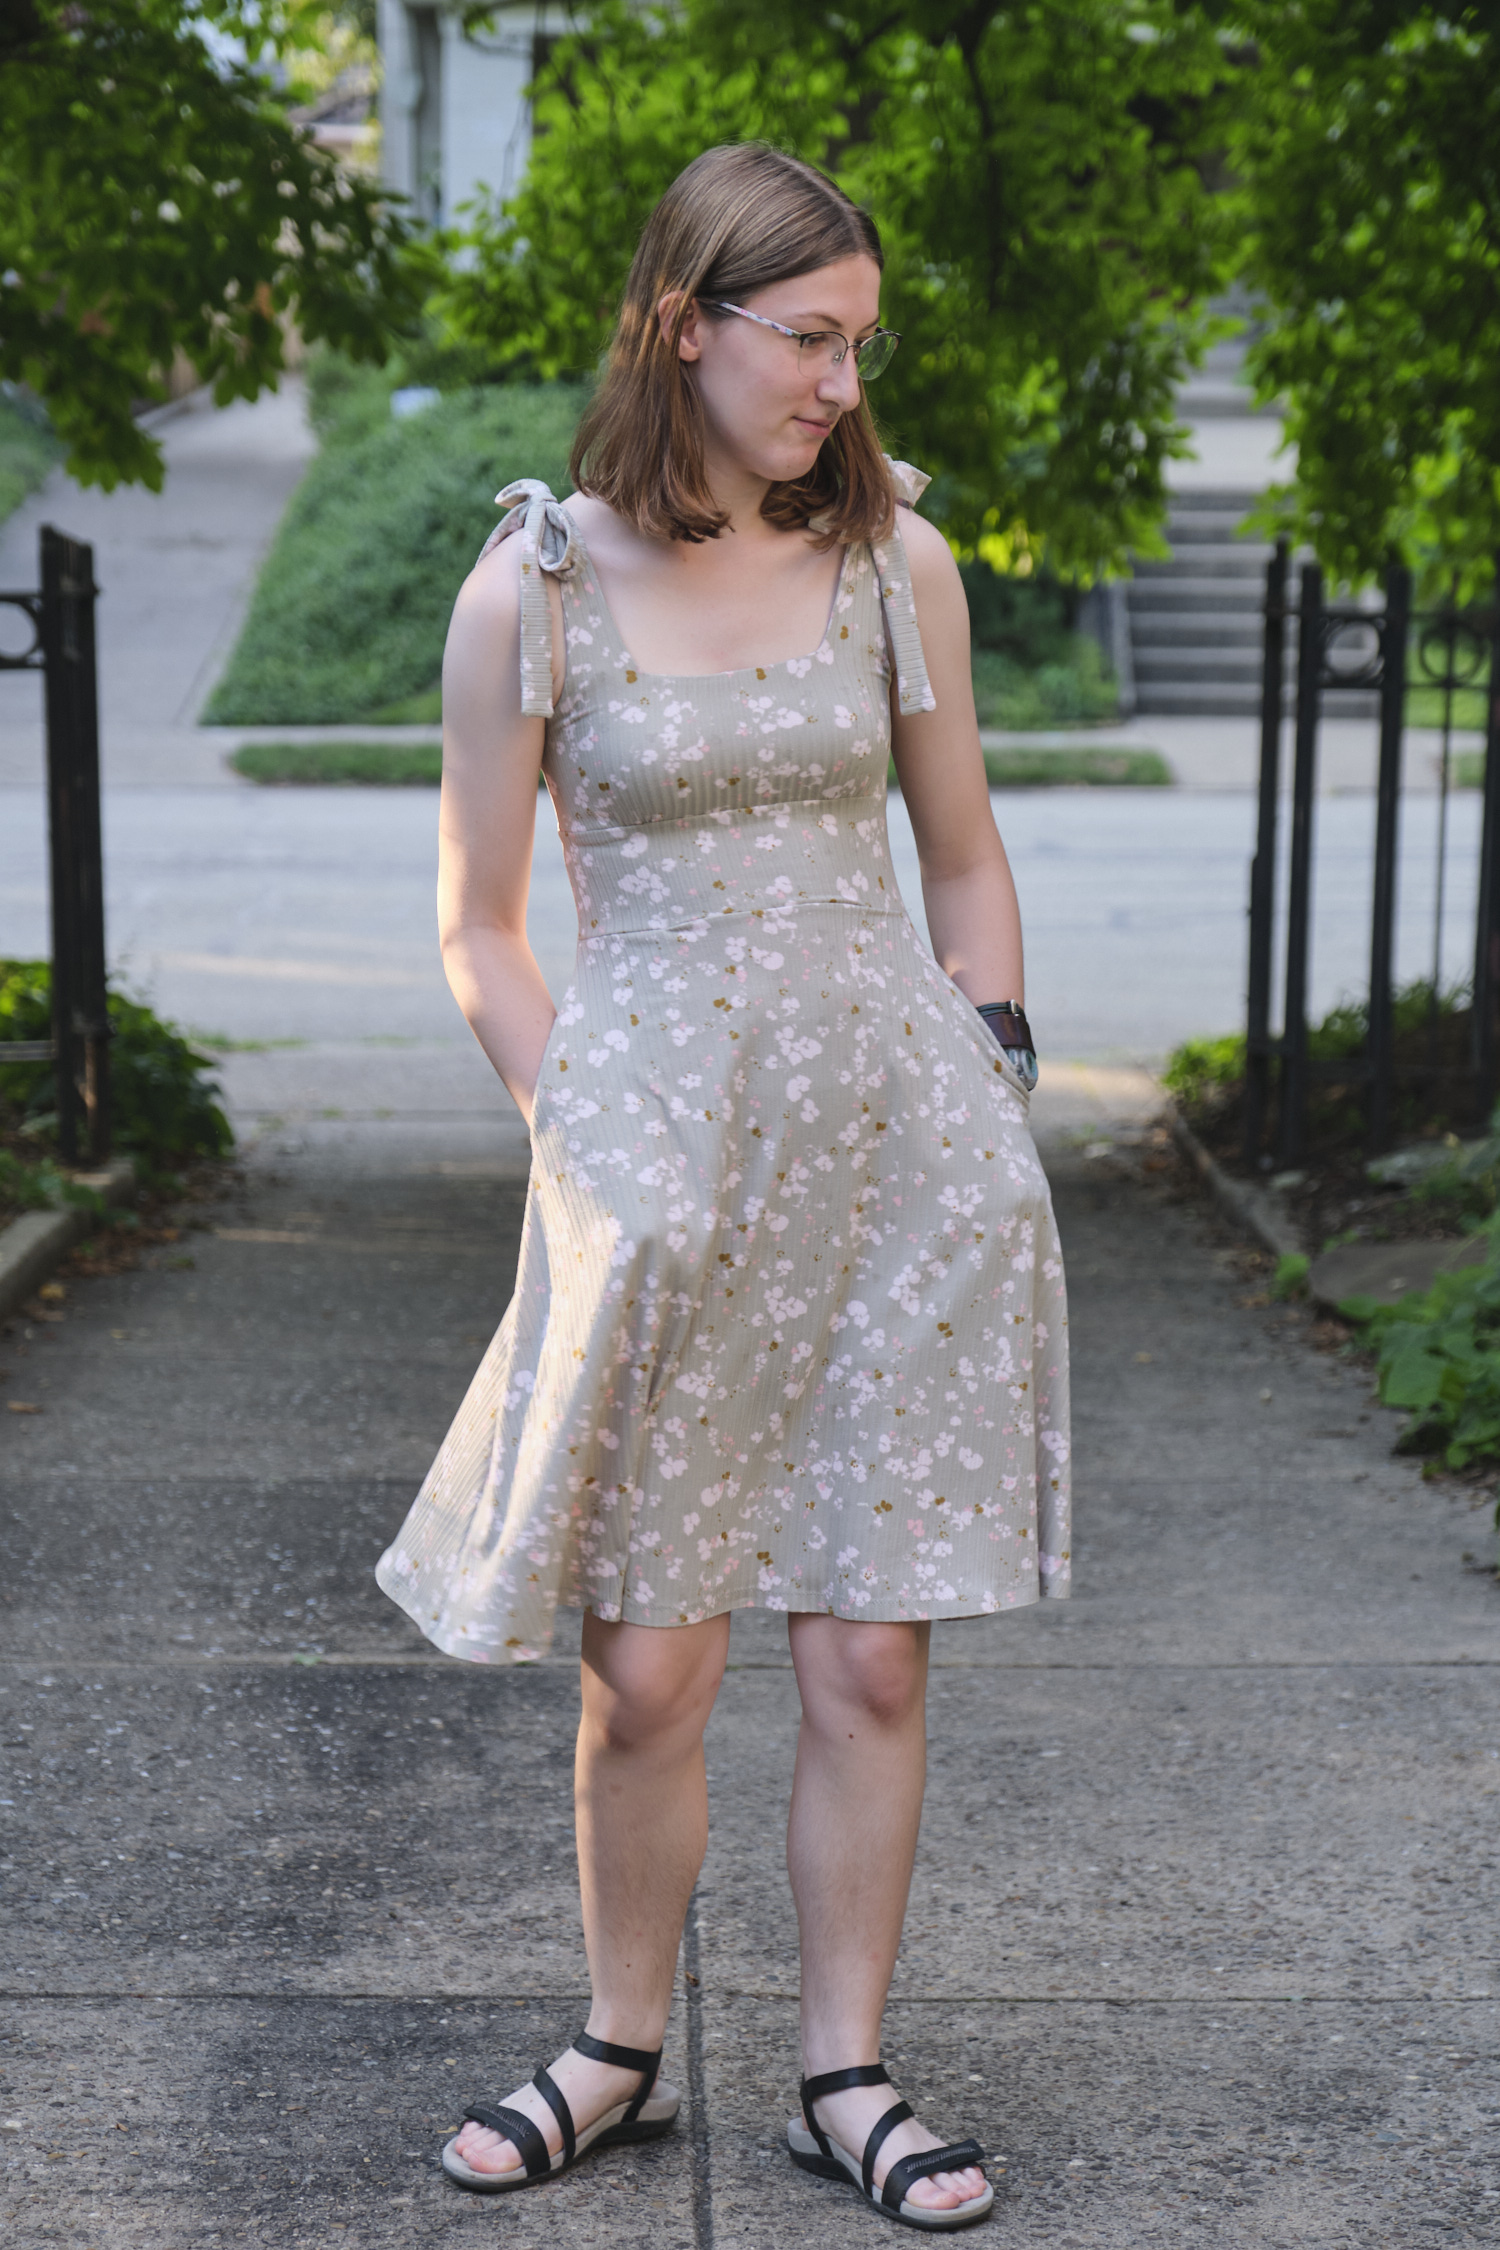
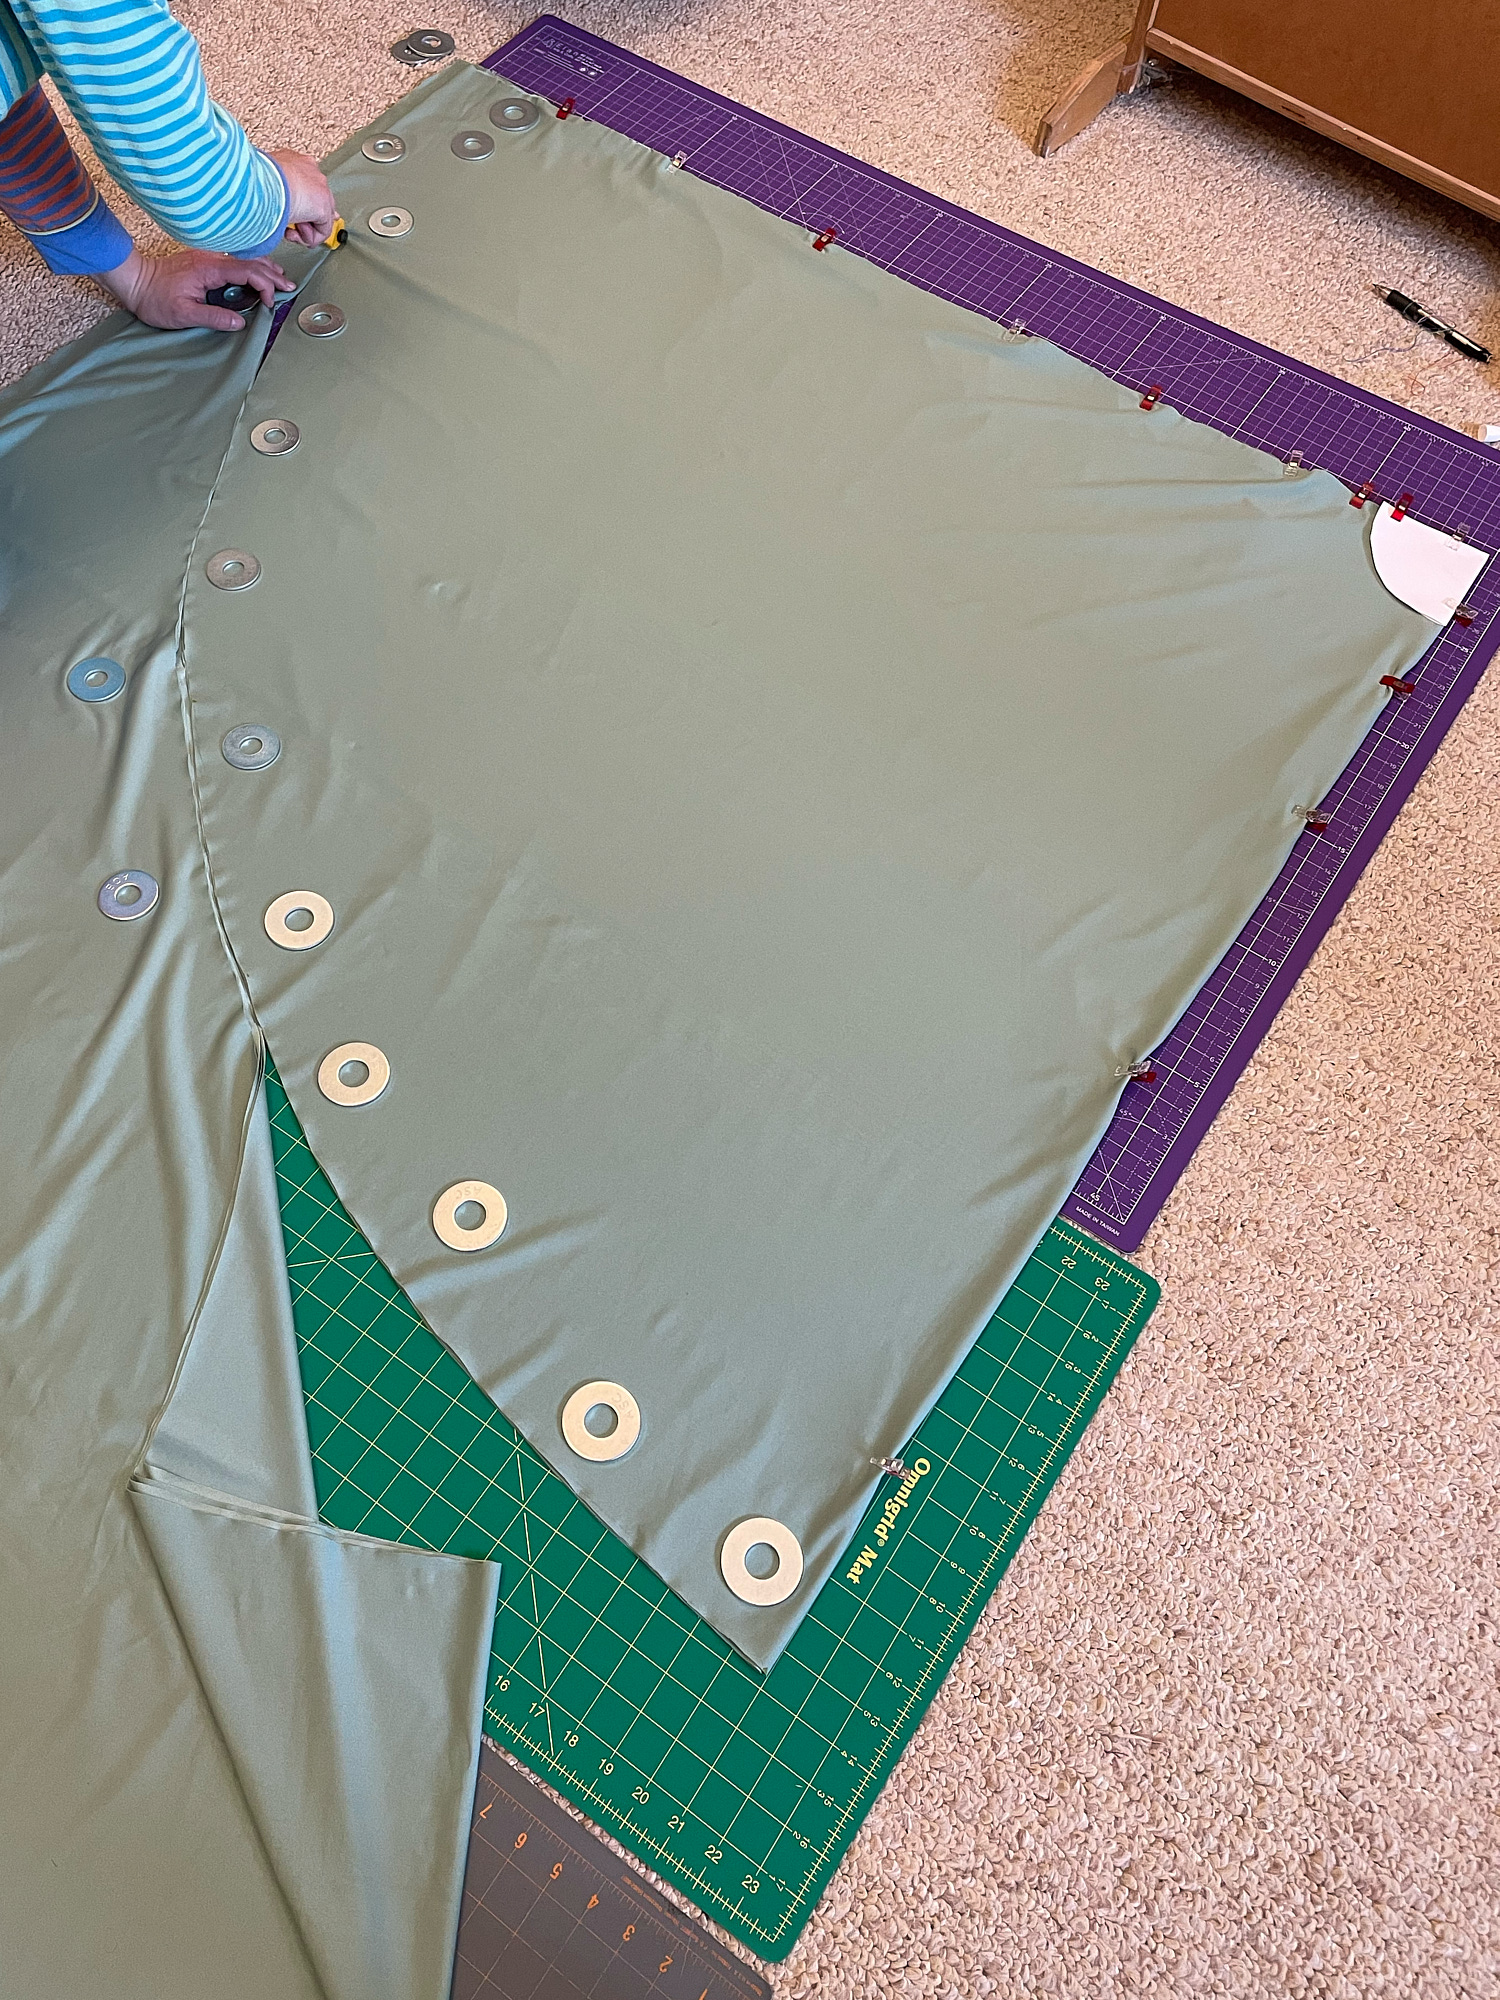
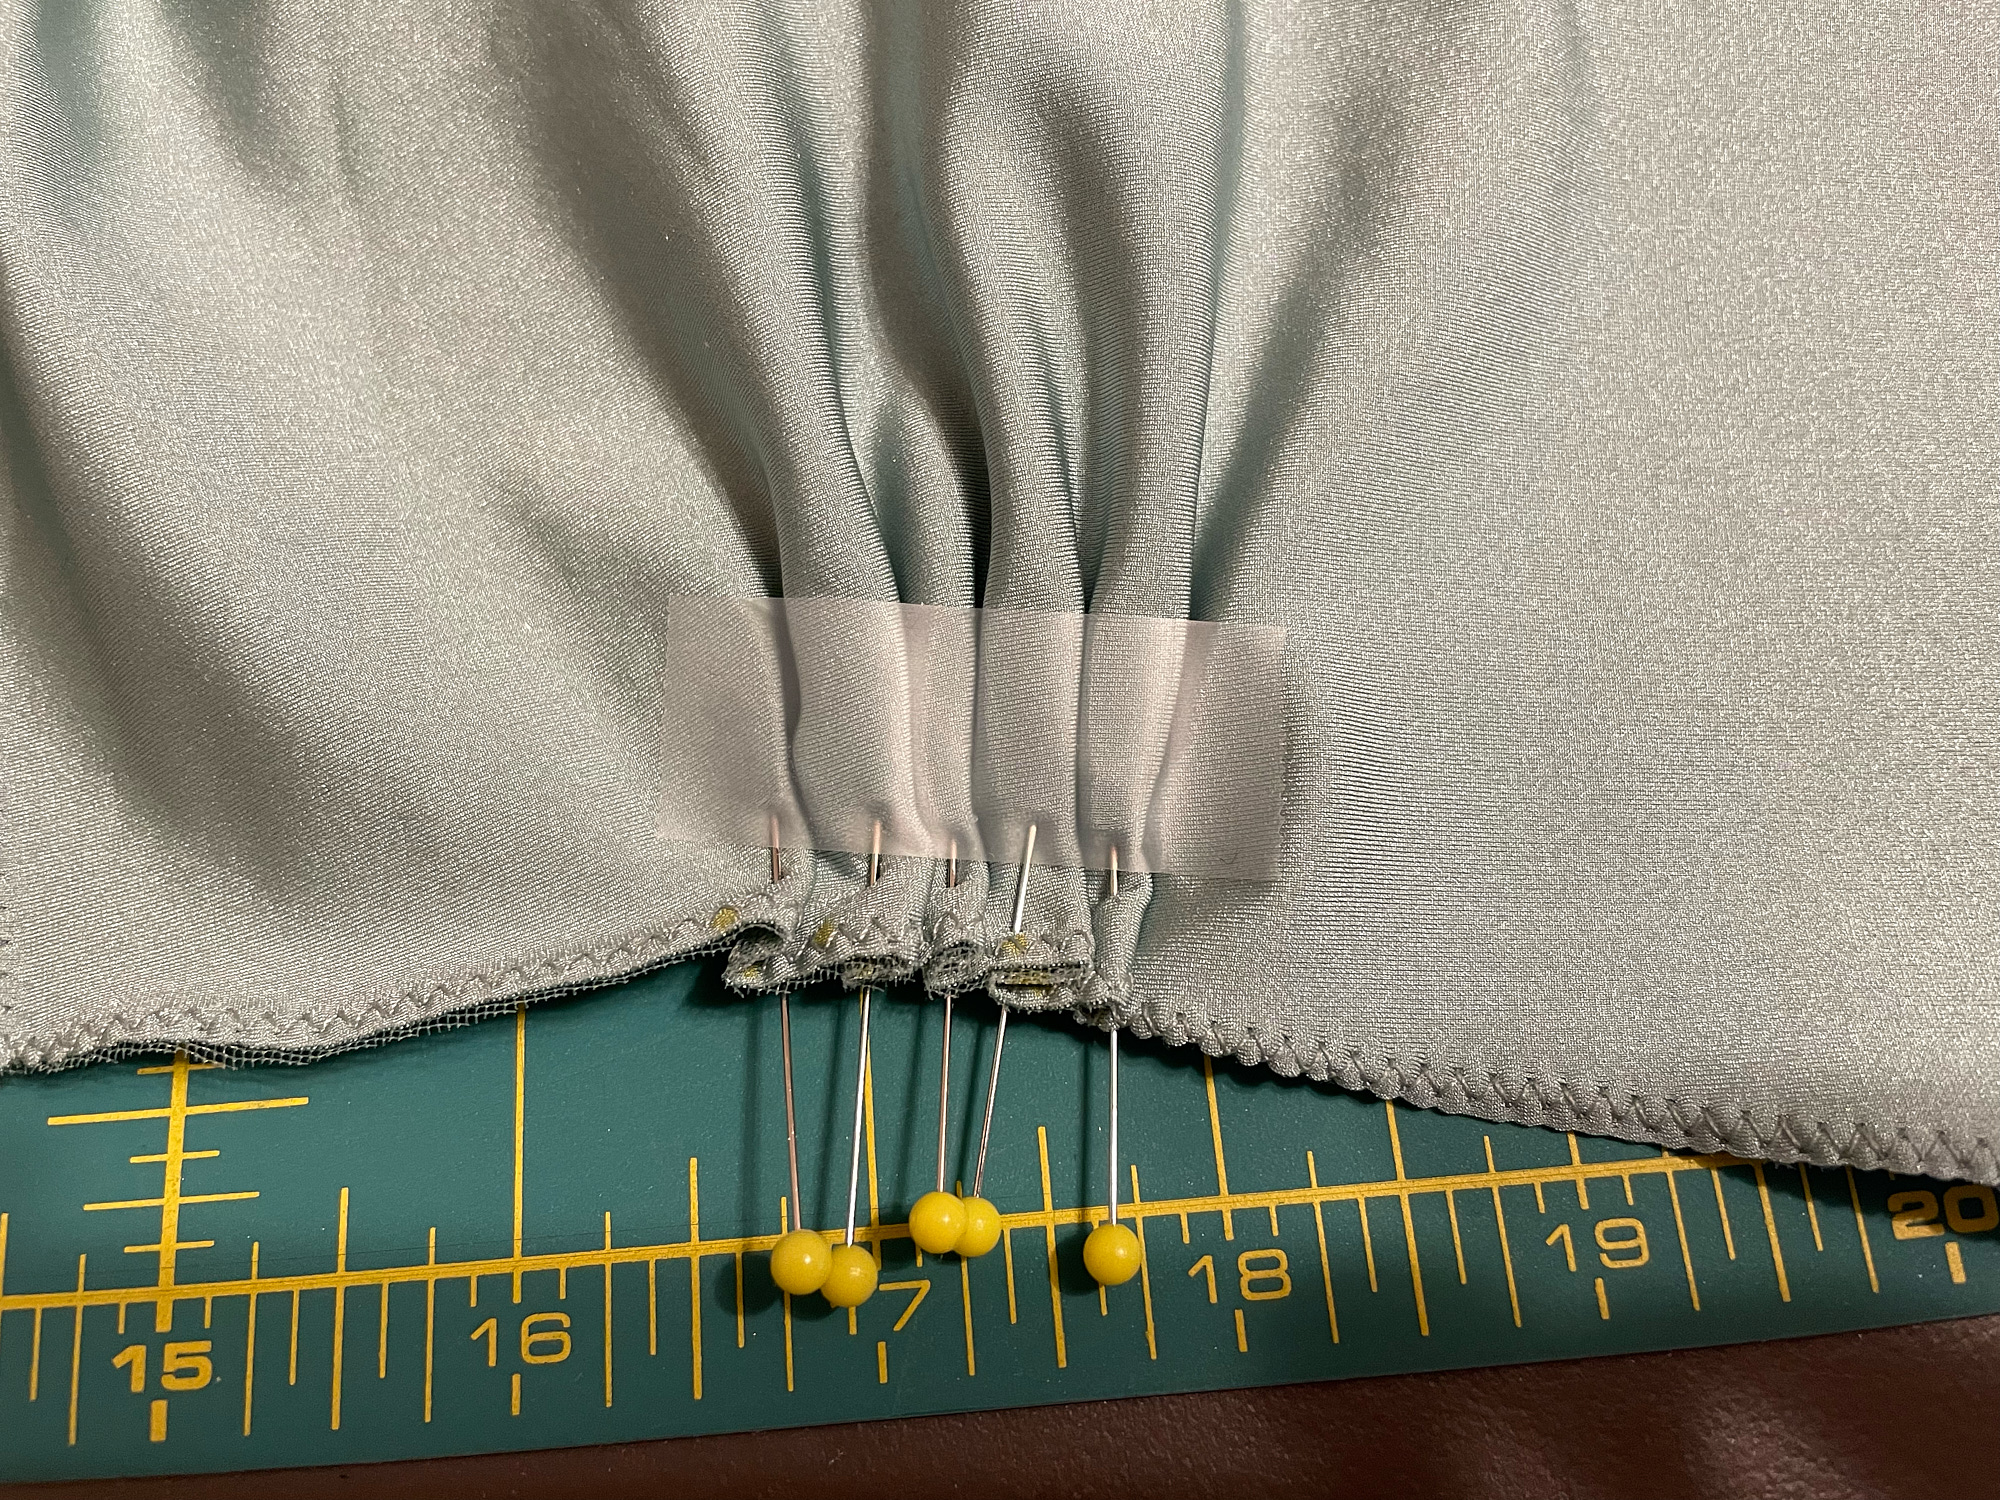
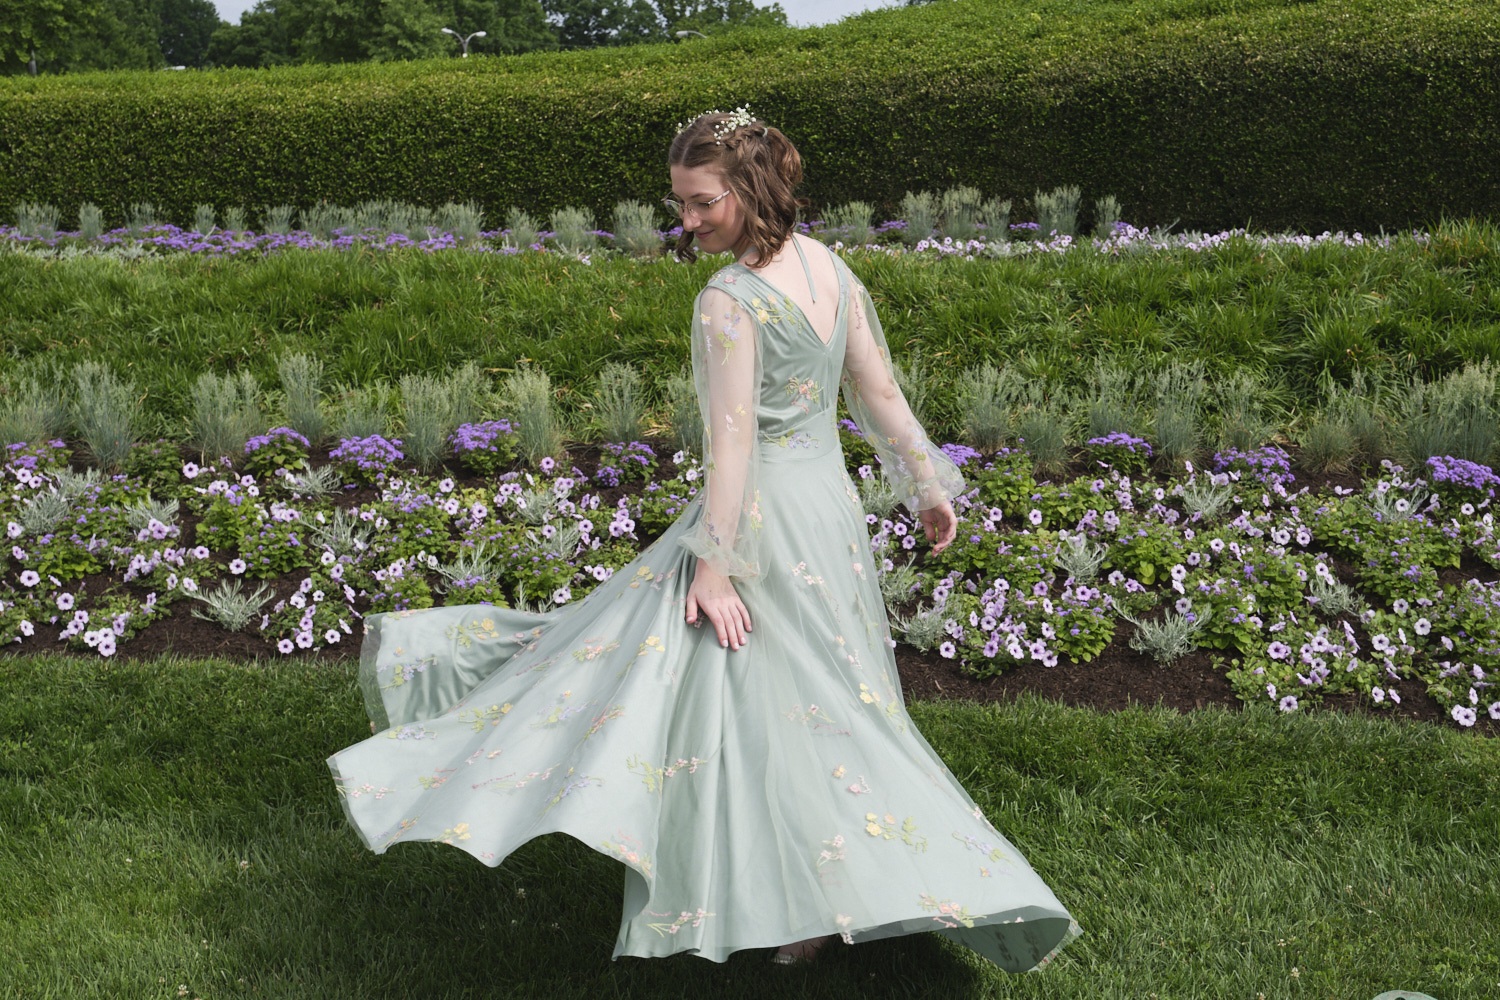
If you make the ruffle, it requires a lot of gathering — in my size it was about 13 feet of ruffle. I followed the pattern instructions to do the gathering in 6 pieces, which wasn’t too bad, but the clear-elastic gathering method might have been quicker and easier. I decided to go ahead and hem the ruffle before I gathered it and attached it to the skirt. This is not what the pattern calls for, but I think it makes hemming a lot easier. I pressed the hem under 5/8″ and then folded the raw edge under 1/4″ as I top-stitched it using my edge foot.
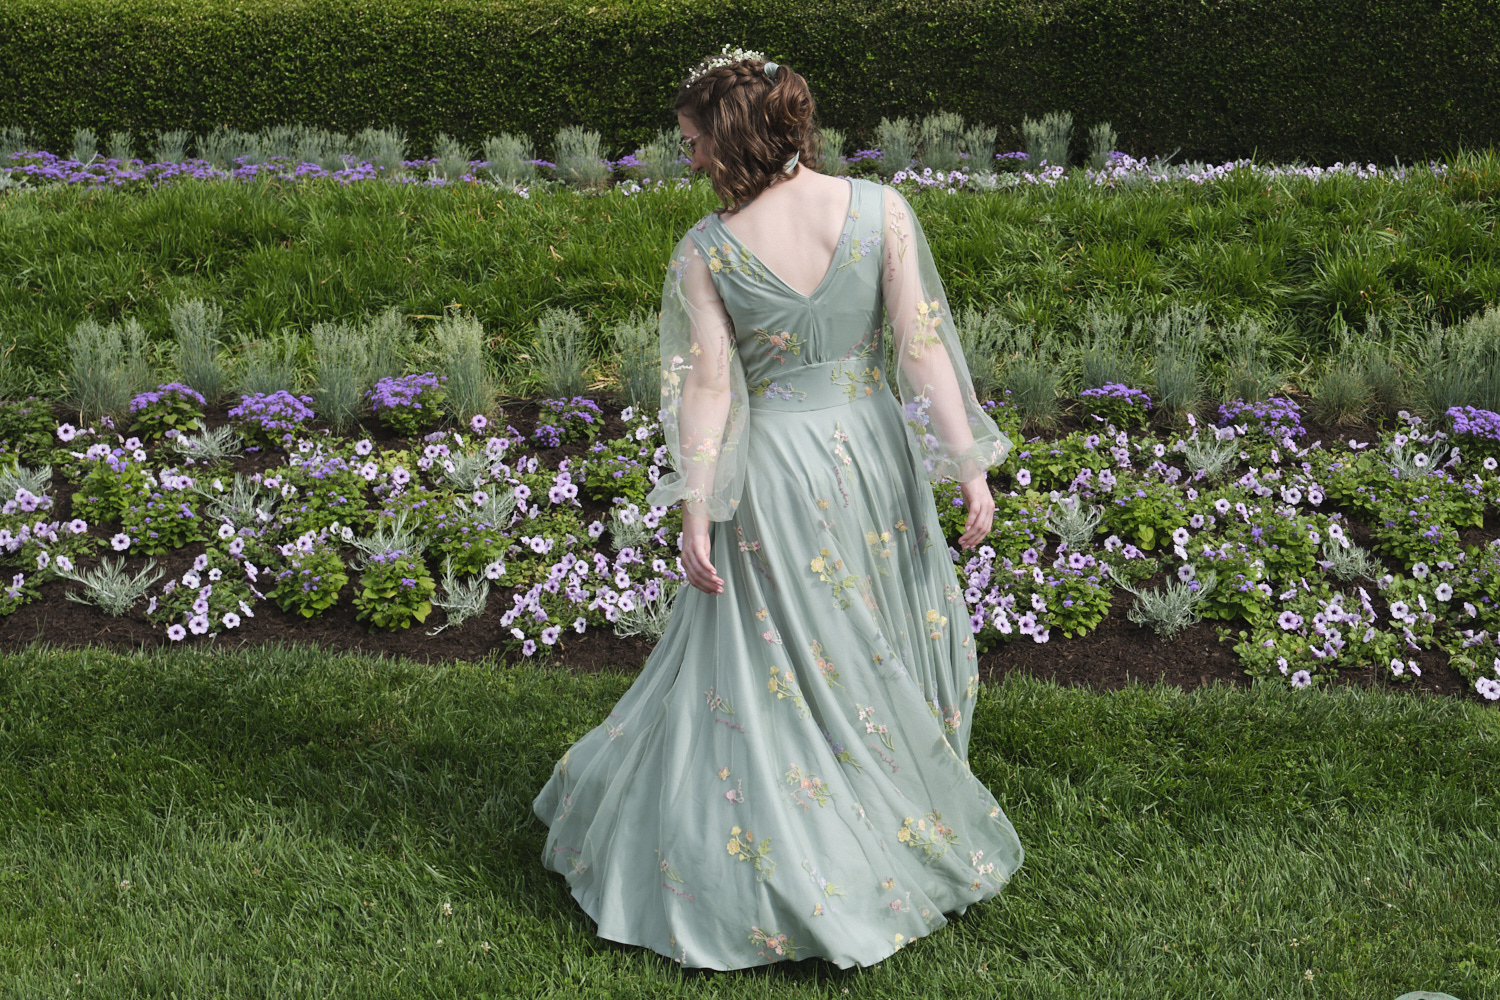
It took me a while to figure out how to tie the belt when I wore the dress (would be nice to have a diagram in the pattern). I first brought the short end of the belt across the front of the dress and threaded it through the hole and then brought the long end around the back of the dress and across the front to meet the short end and tied them. That looks ok, but requires the long part of the belt to be in perfect alignment with the part of the belt that forms the waistband. On the other hand, if I loop the long end around my waist under the dress and then bring it through the hole and bring the short end to meet it, there is no need to line anything up and it looks better. Having never owned a true-wrap dress like this I have no idea if that’s how they all work, but I think that’s how this one is supposed to work. If I’m wrong, someone should let me know.

It took a while, but I’m really happy with how this dress came out. It is pretty comfortable for a fitted woven dress, and I had no problems with it staying wrapped or gaping in the front. The waistband and belt have a nice tailored look, and there was no need for a sway-back adjustment or any other adjustments. The bottom corners of the wrap skirt do hang a little lower than the rest of the skirt. I think this could be corrected by cutting the outer edge of the skirt at an angle that hangs vertically and/or tapering the bottom of the skirt or ruffle on the open edges. I may try that if I make this pattern again, but it doesn’t bother me enough to change it now.
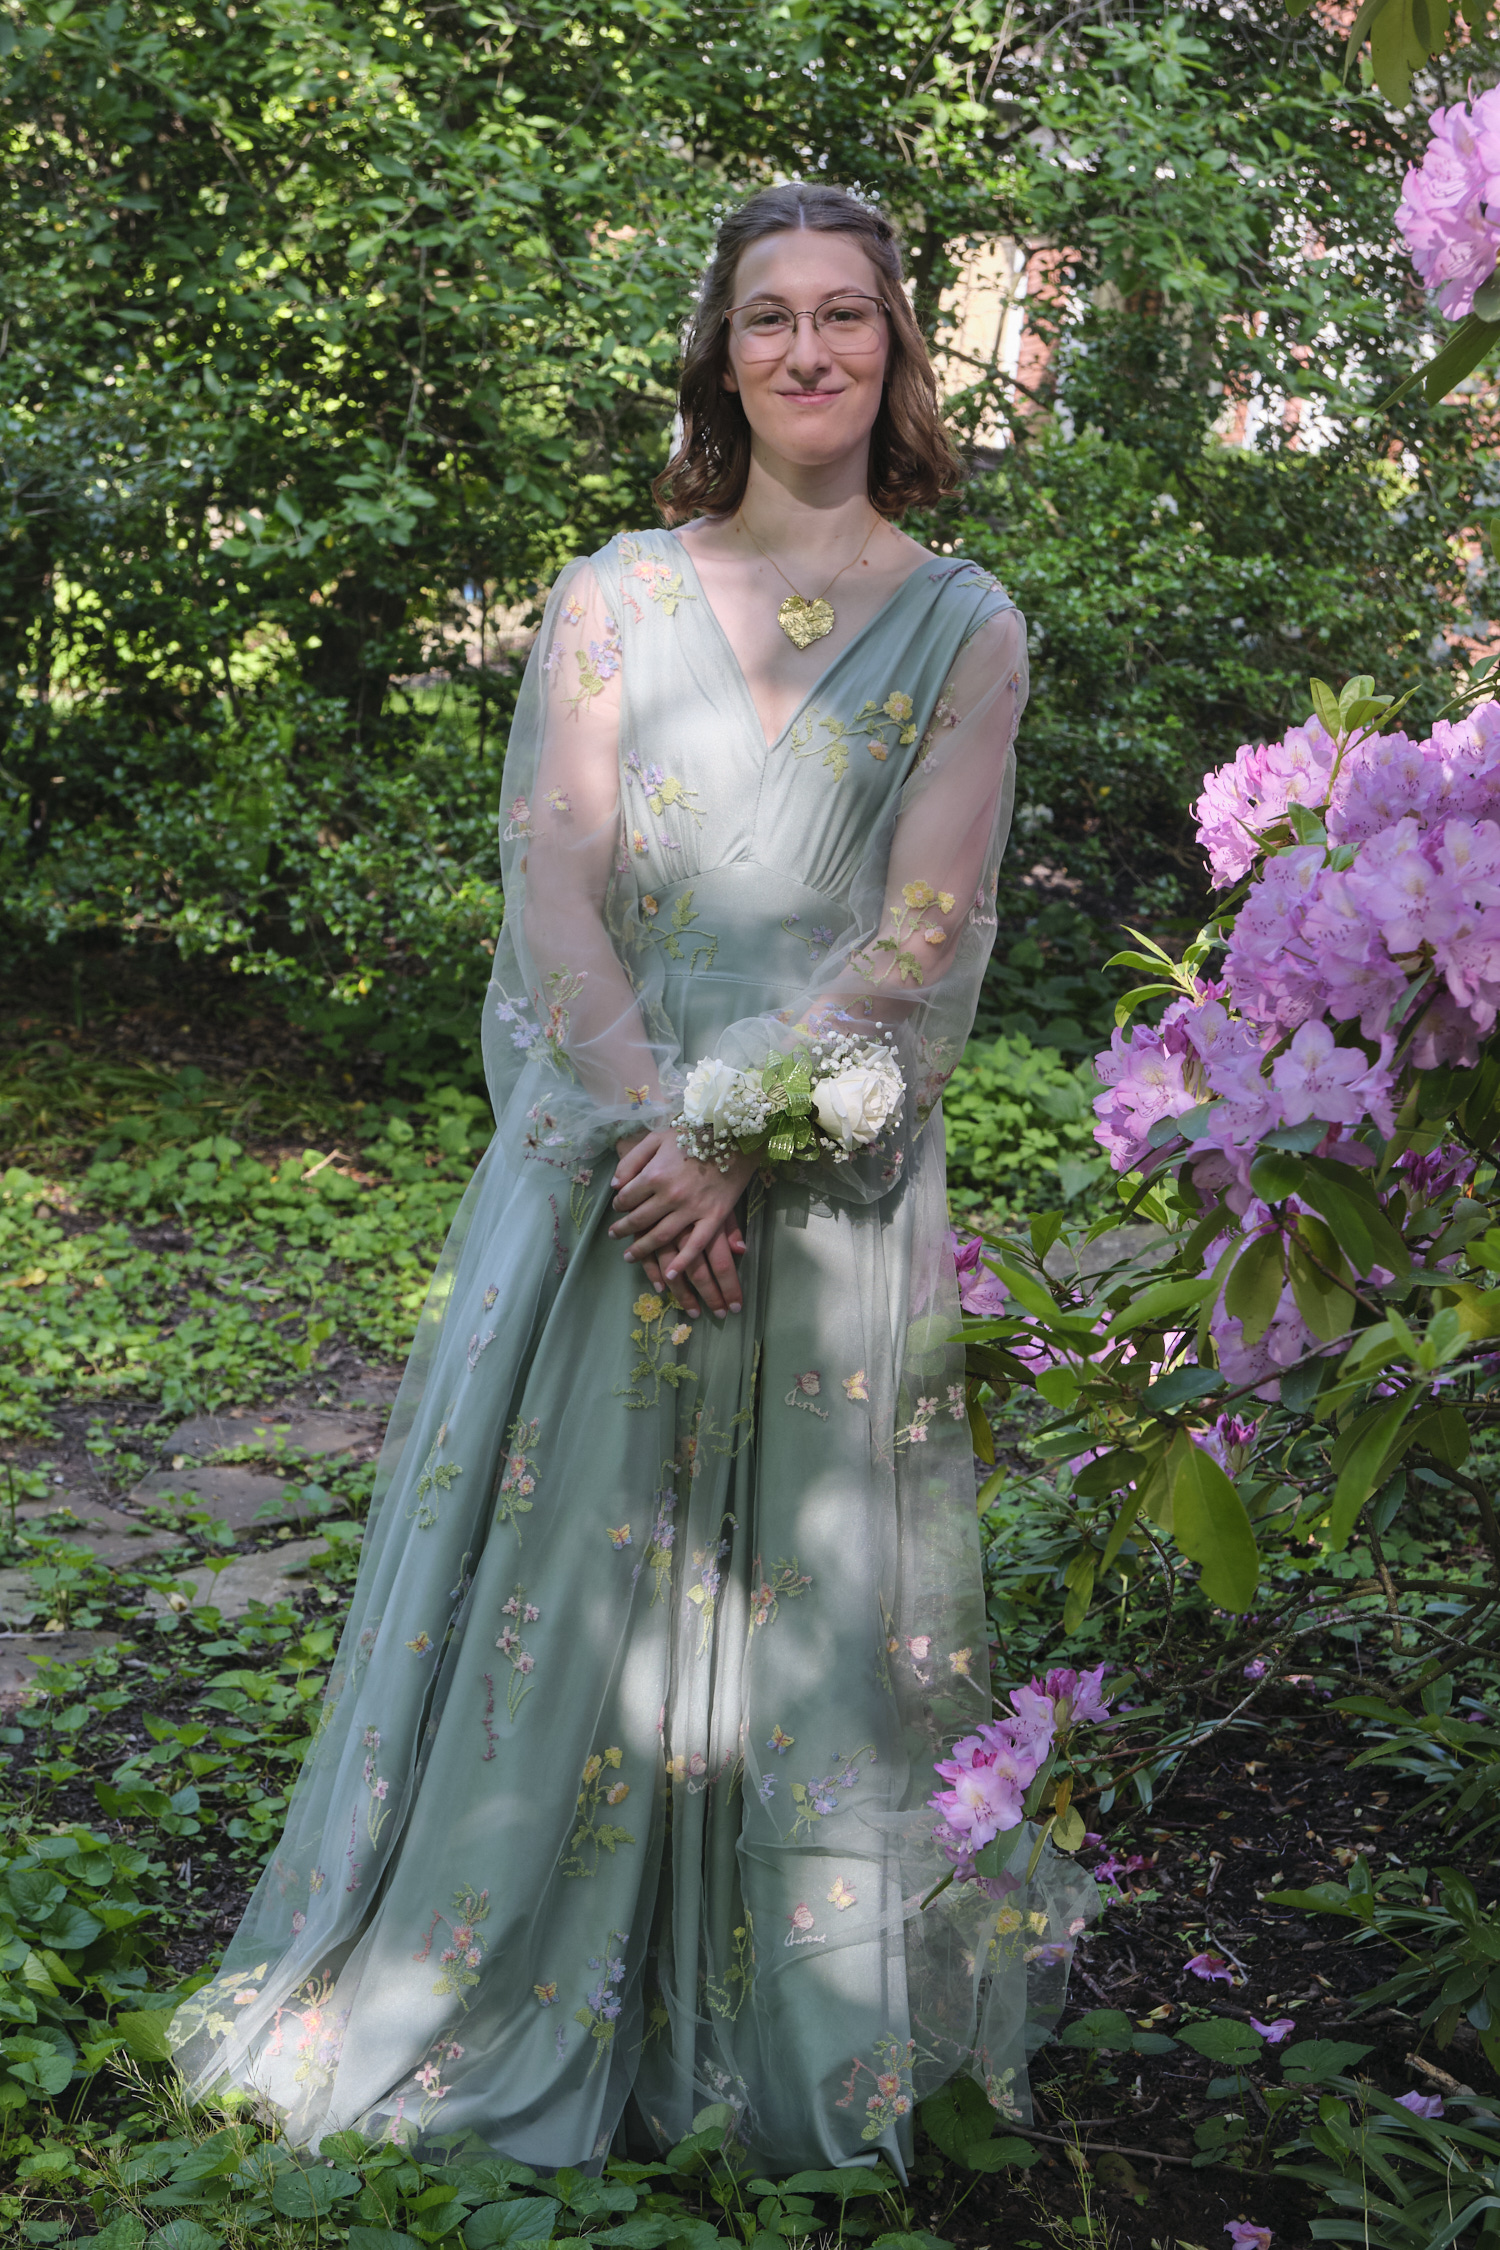
BTW, these photos were all taken by my husband in my front yard shade garden. Note the summer ragwort in full bloom with golden yellow flowers — this is one of the few flowers in my yard that the deer don’t eat.
Here are a few of the typos I saw:
- p. 17, step 8, #4, it says to turn the raw edge of the binding under at 7mm / 1/14 in. I think that should be 1/4 in.
- p. 22, step 13, the diagram of the skirt pieces in #2 doesn’t indicate which side is up for the two skirt front pieces. They should be placed wrong side up.
- p. 22, step13, #4 says to overcast the sides of the skirt but I think the intention is only to overcast the sides that have pockets. Then in step 14 #1it says to overcast the edges together. However if you made the pockets, the two layers have each been individually overcast so there doesn’t seem to be a need to overcast them again.
- p. 22, step 14 #3, the diagram says to place the skirt pieces wrong sides together. These need to be right sides together. This one is a critical error!
- p. 23, step 15 #1 says to stitch the ruffle pieces at 5/8 in or finish with French seams. However, if you don’t finish with French seams I think you need to overcast the edges and that part is missing.
My husband likes the dress too! And as he says, “That’s a wrap!”


