Cleo palazzo pants (and shorts)

In June I decided to try my first knit shorts pattern, Sinclair pattern’s Cleo knit shorts and culottes. These shorts have a comfy yoga-style waistband, optional side-seam pockets, and a full drape. I was intrigued by the comfy lounge shorts people were posting on the Sinclair Facebook group, and even more intrigued by the dressier looking long shorts and culottes. But what convinced me to purchase the pattern was the palazzo pants. This is not actually a pattern for palazzo pants, but I saw multiple sewists (especially Holly Stout and Kristi Käär) who simply took the Cleo culotte pattern, extended the side seams to pants length, and voila, lovely flowy palazzo pants. These sewists also executed and interesting pocket hack to get the pockets off the side seam.

Before cutting into 2 yards of fancy fabric for the pants, I decided to make a basic pair of soft knit shorts first so I could try out the pattern. Eighty percent of the work in making pants is in the top 20% of the pants — once you get past the waist band, pockets and crotch seam, the rest of the pants are a piece of cake.

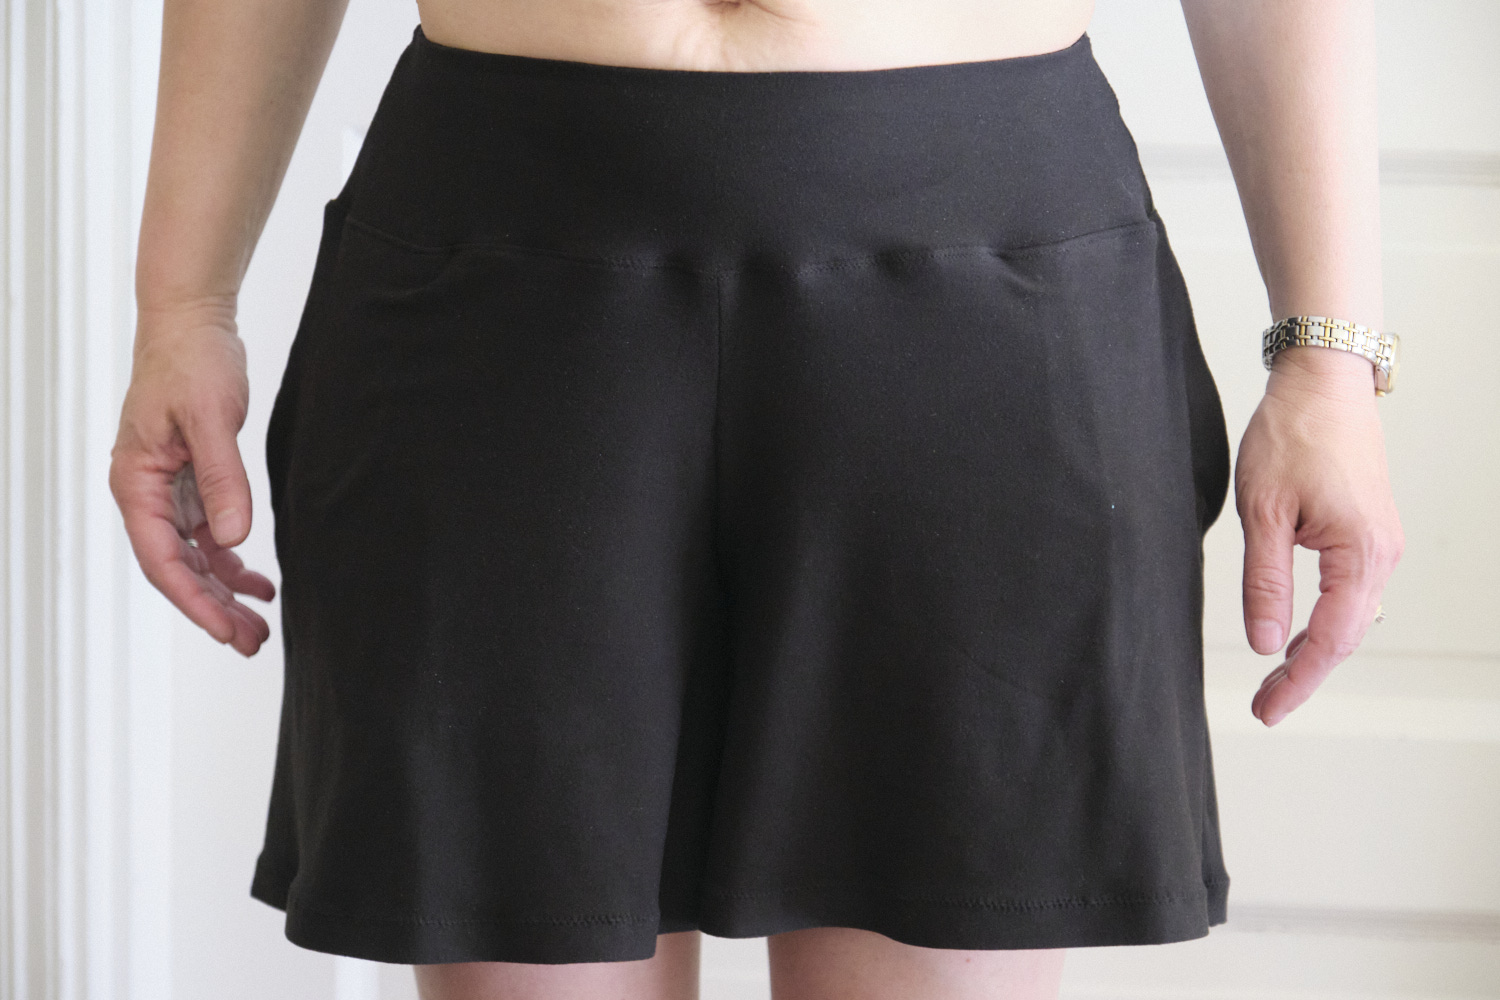
I cut my size 4 petite shorts from one yard of plain black double brushed polyester (DBP) fabric. The DBP is super soft, so soft that I was concerned about keeping the waist band in place if I put my phone in my pocket. As the pattern advised, I sandwiched a piece of stretch mesh between the two DBP layers of the waistband. The waistband also has 1/4 inch elastic at the top, but that doesn’t provide a lot of support. Shorts construction was fairly straightforward, although as predicted most of the effort was in the pockets and waistband. The results look nice and are super comfy (will be great for PJs), but do sag when I load up my pockets. I also personally prefer shorts and pants with more of a high rise.

Here are my comfy black Cleo shorts. You can see how the side-seam pockets gap open a bit. The waist sits about an inch below my navel, and lower when I put my phone in my pocket.

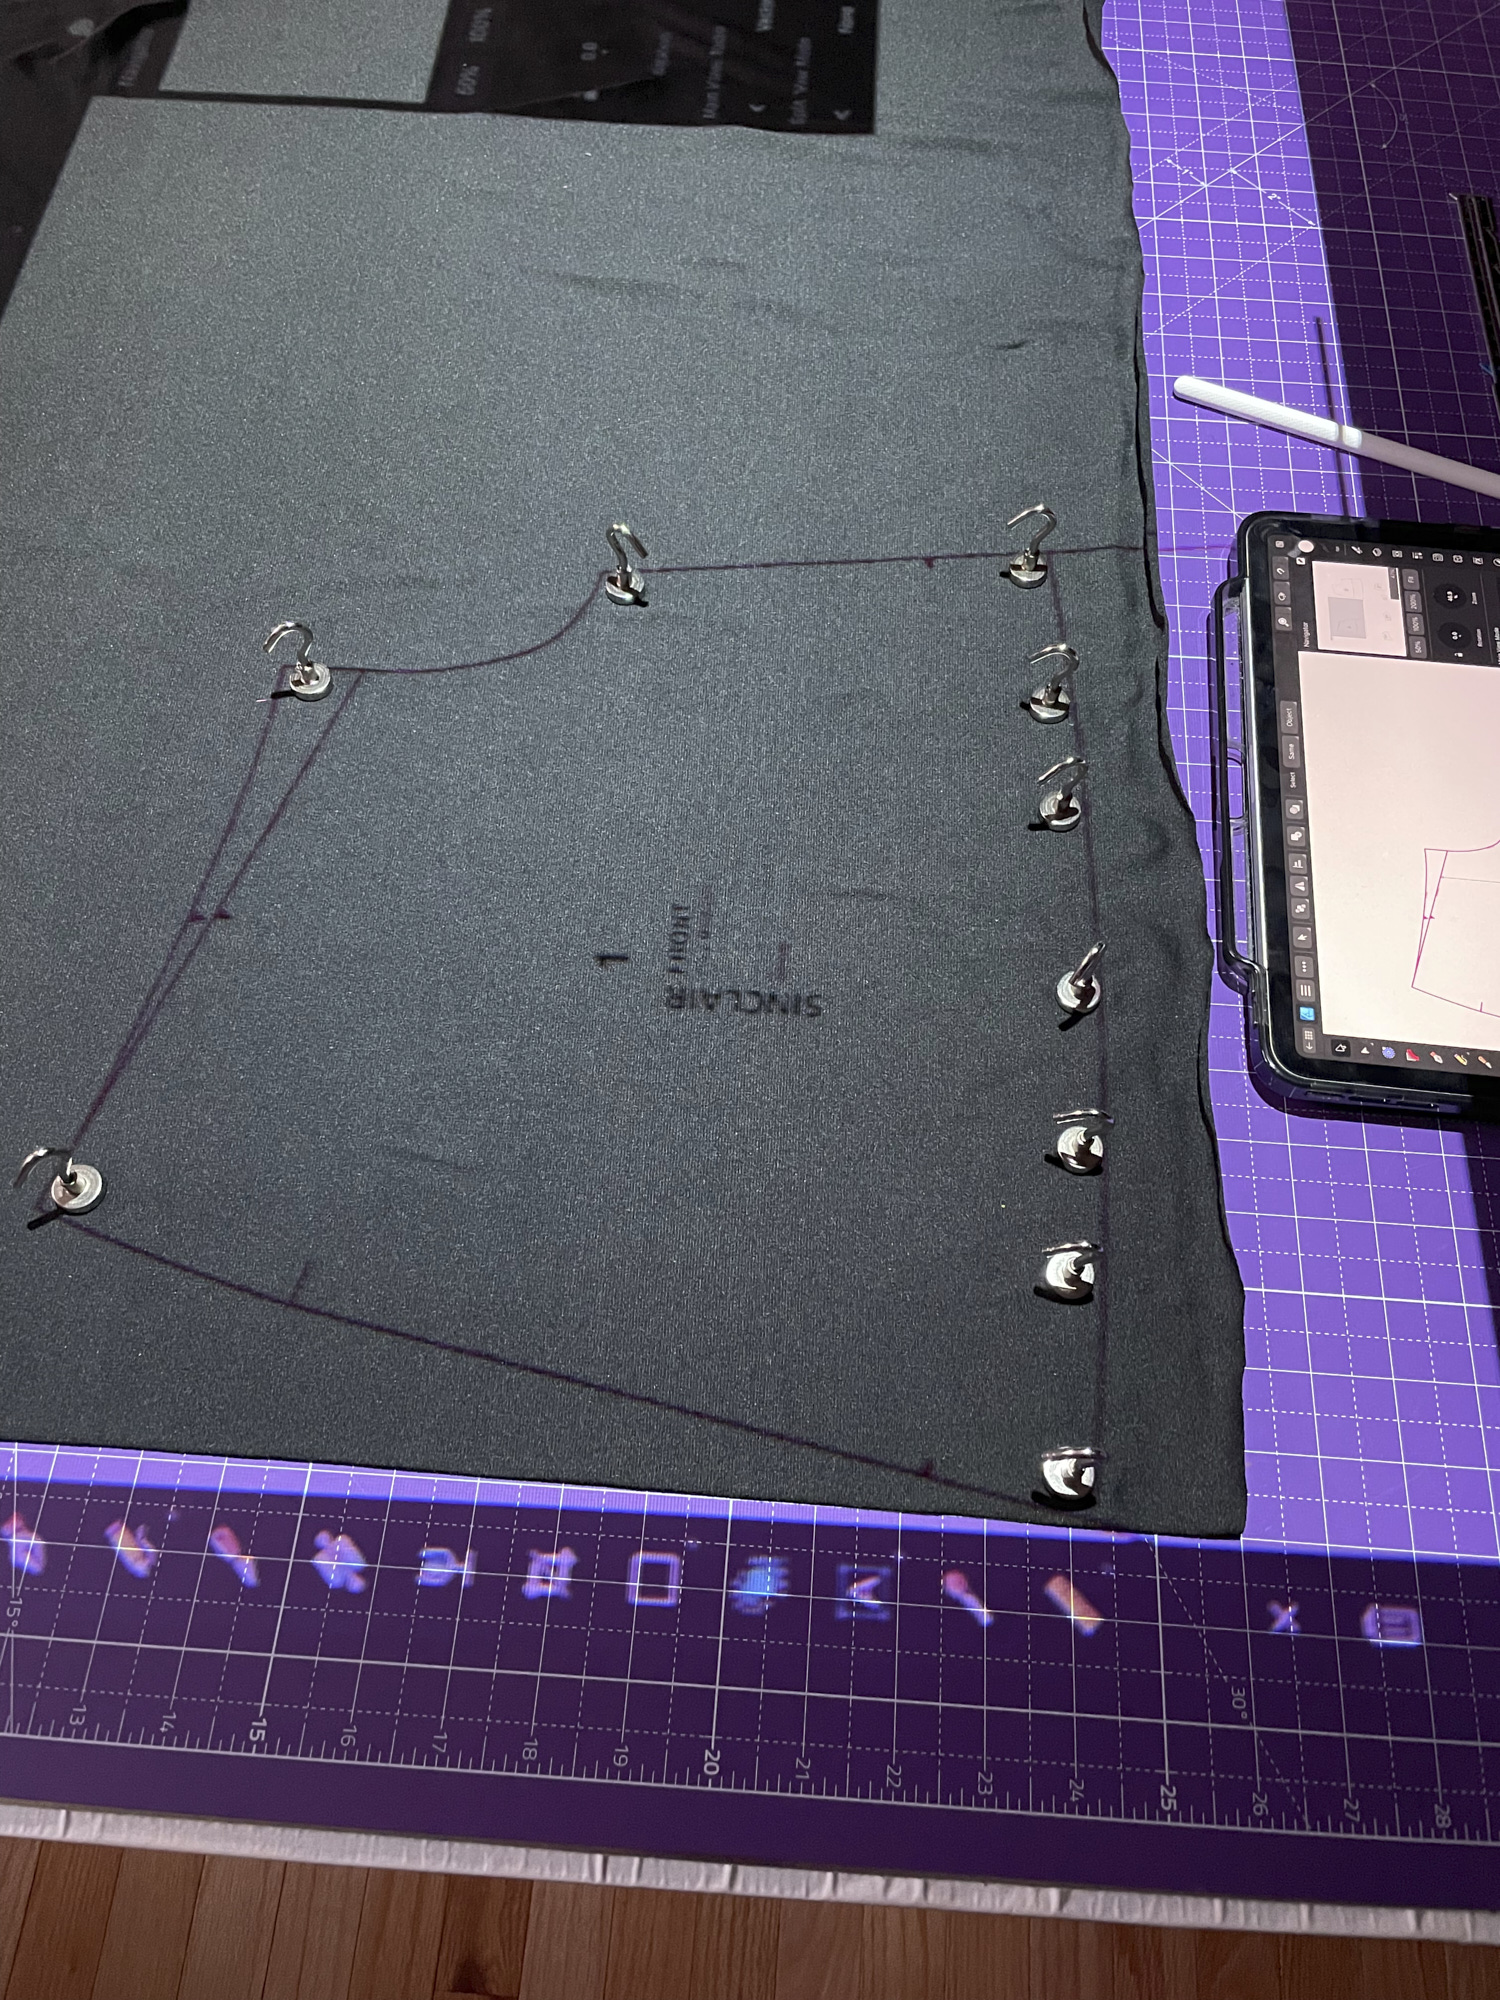
I decided to alter the pattern a bit before attempting pants from a two yards of a lavender DBP floral print. I thought I might be able to get a higher rise by using the regular size pattern rather than the petite, but I checked and the rise was the same. I checked the tall pattern and saw the rise was about 3/4 inch taller. So I used the size 4 tall as my base and then added about half an inch to the top of the front and back leg pieces (drafting the alterations in Affinity Designer).

After debating a variety of solutions to the waistband sag problem, I narrowed the waistband by half an inch on the left and right side of both the front and back (subtracting 2 inches total from the diameter) in order to tighten it up. Instead of sandwiching stretch mesh in the waistband, I used a medium-weight cotton lycra for the waistband lining, providing more support than you get from DBP. I considered using wider elastic but stuck with the recommended 1/4 inch braided elastic. The result is a much more supportive and less saggy waist band than on the shorts. They still sag a little when my pockets are loaded, but not as much. I’m going to look for a more supportive athletic knit or possibly try wider elastic to see if I can make future pants even better.

While Holly and Kristi borrowed their pocket design from other Sinclair patterns that I don’t have (yet), I found an online tutorial on making slash pockets and just drafted my own, with a very slightly sloping slash. I found the slash pockets actually easier to construct than the side-seam pockets because you don’t have to deal with the awkward part where you sew the side seam just up to the pocket opening and stop.

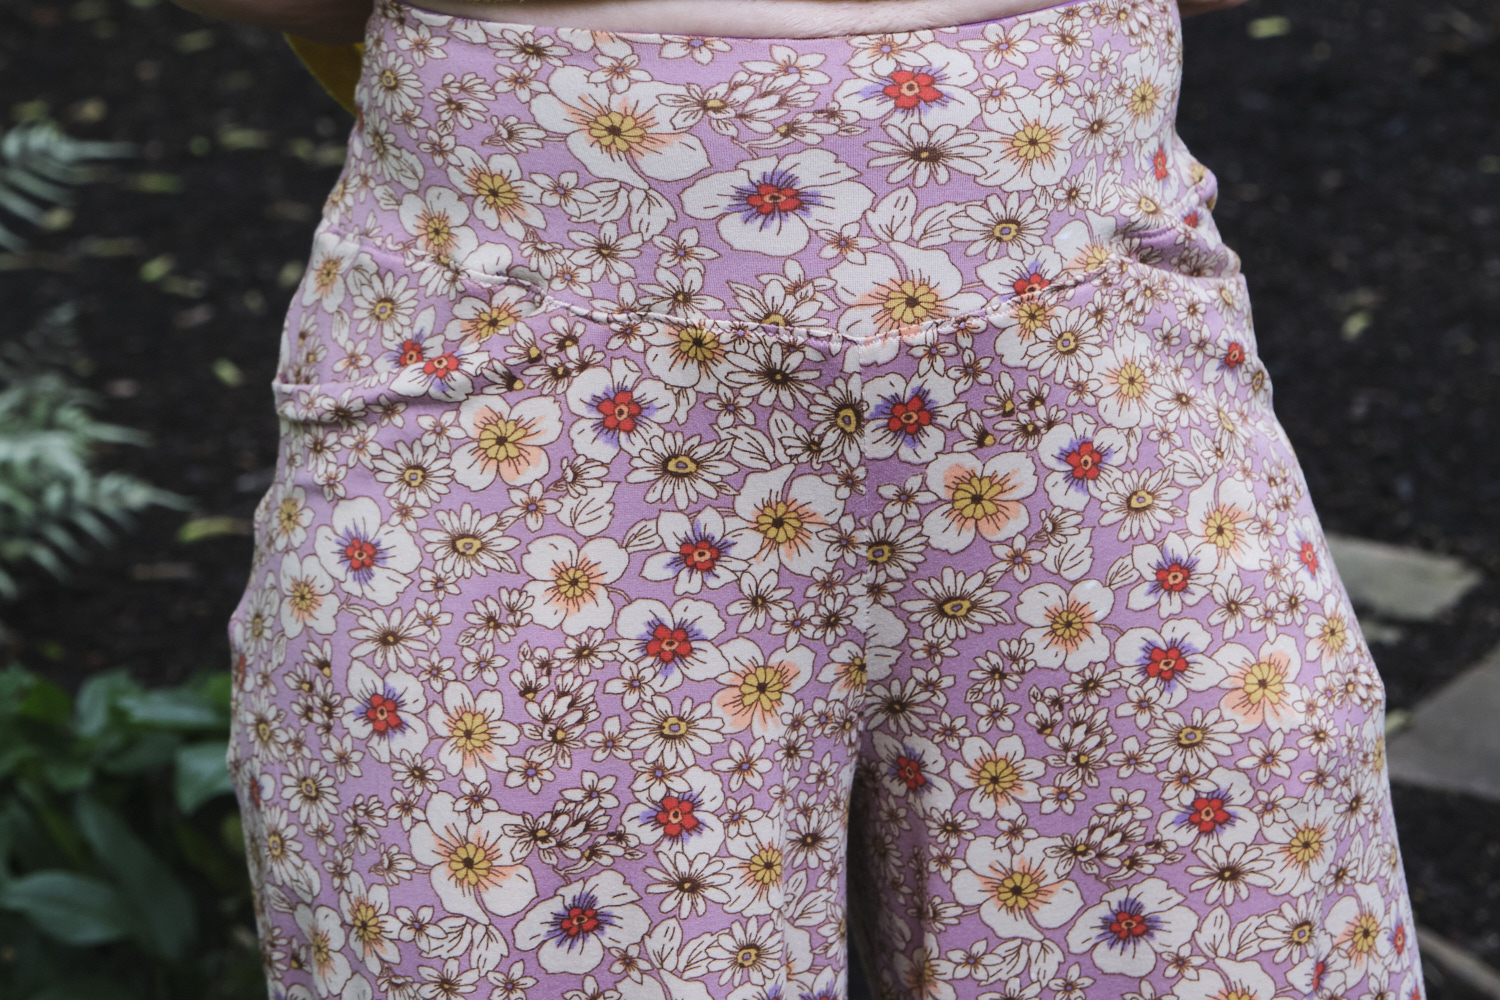
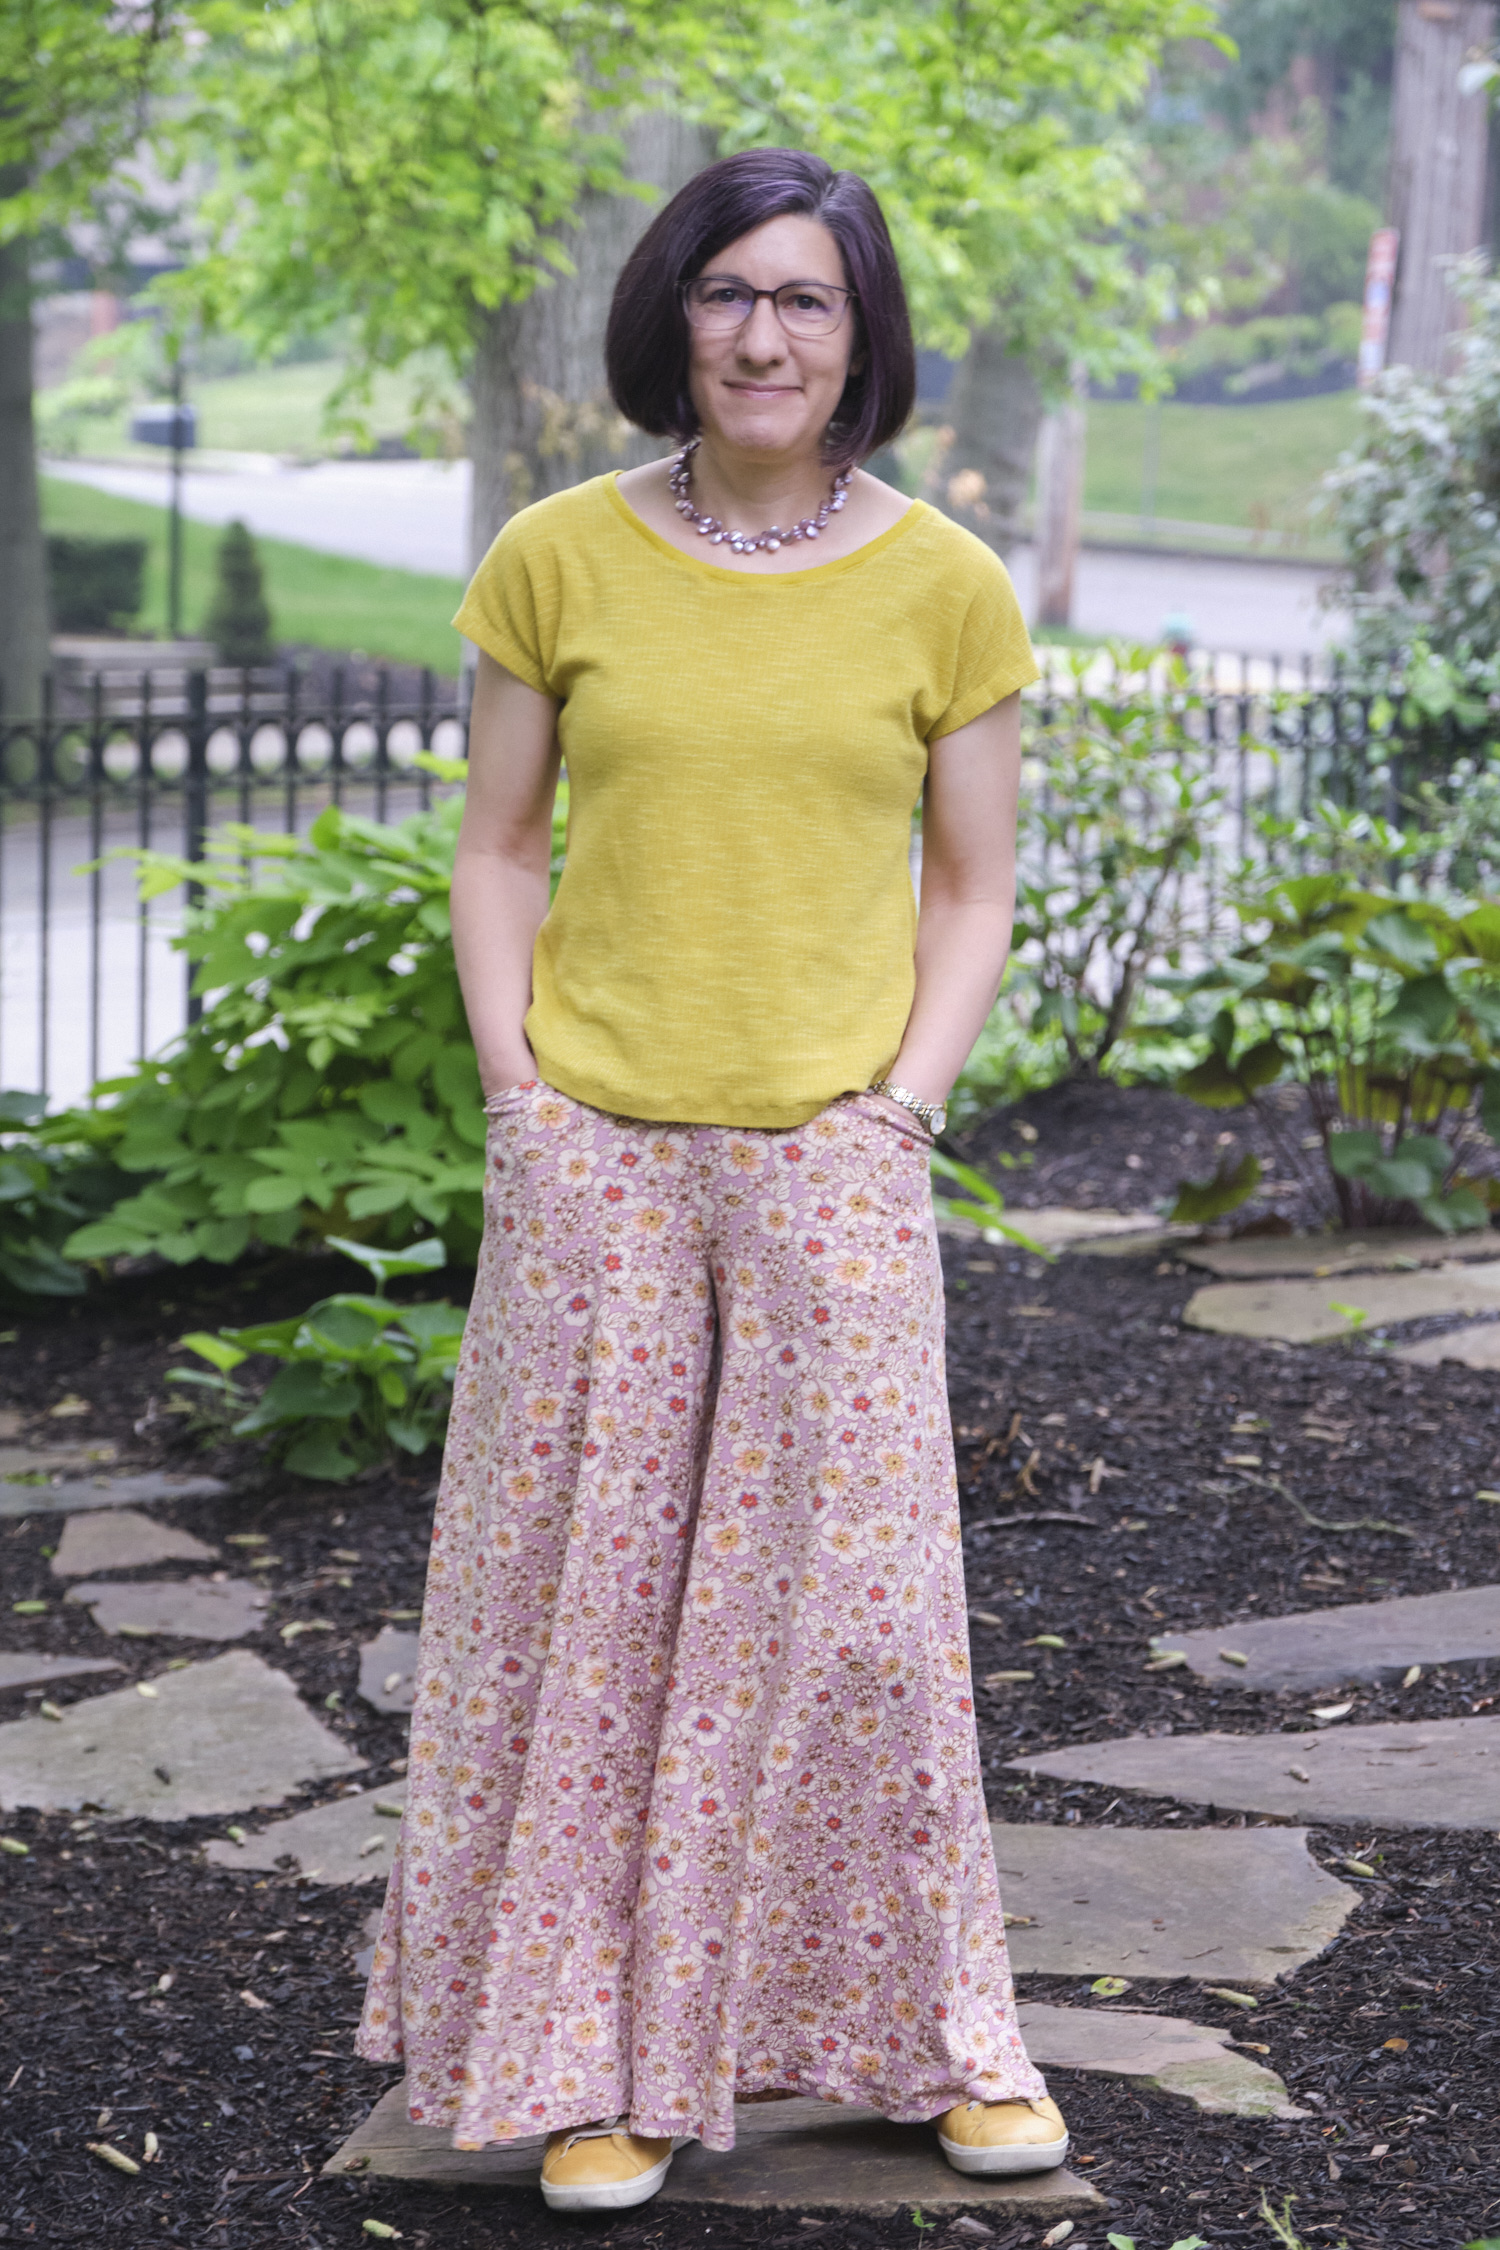
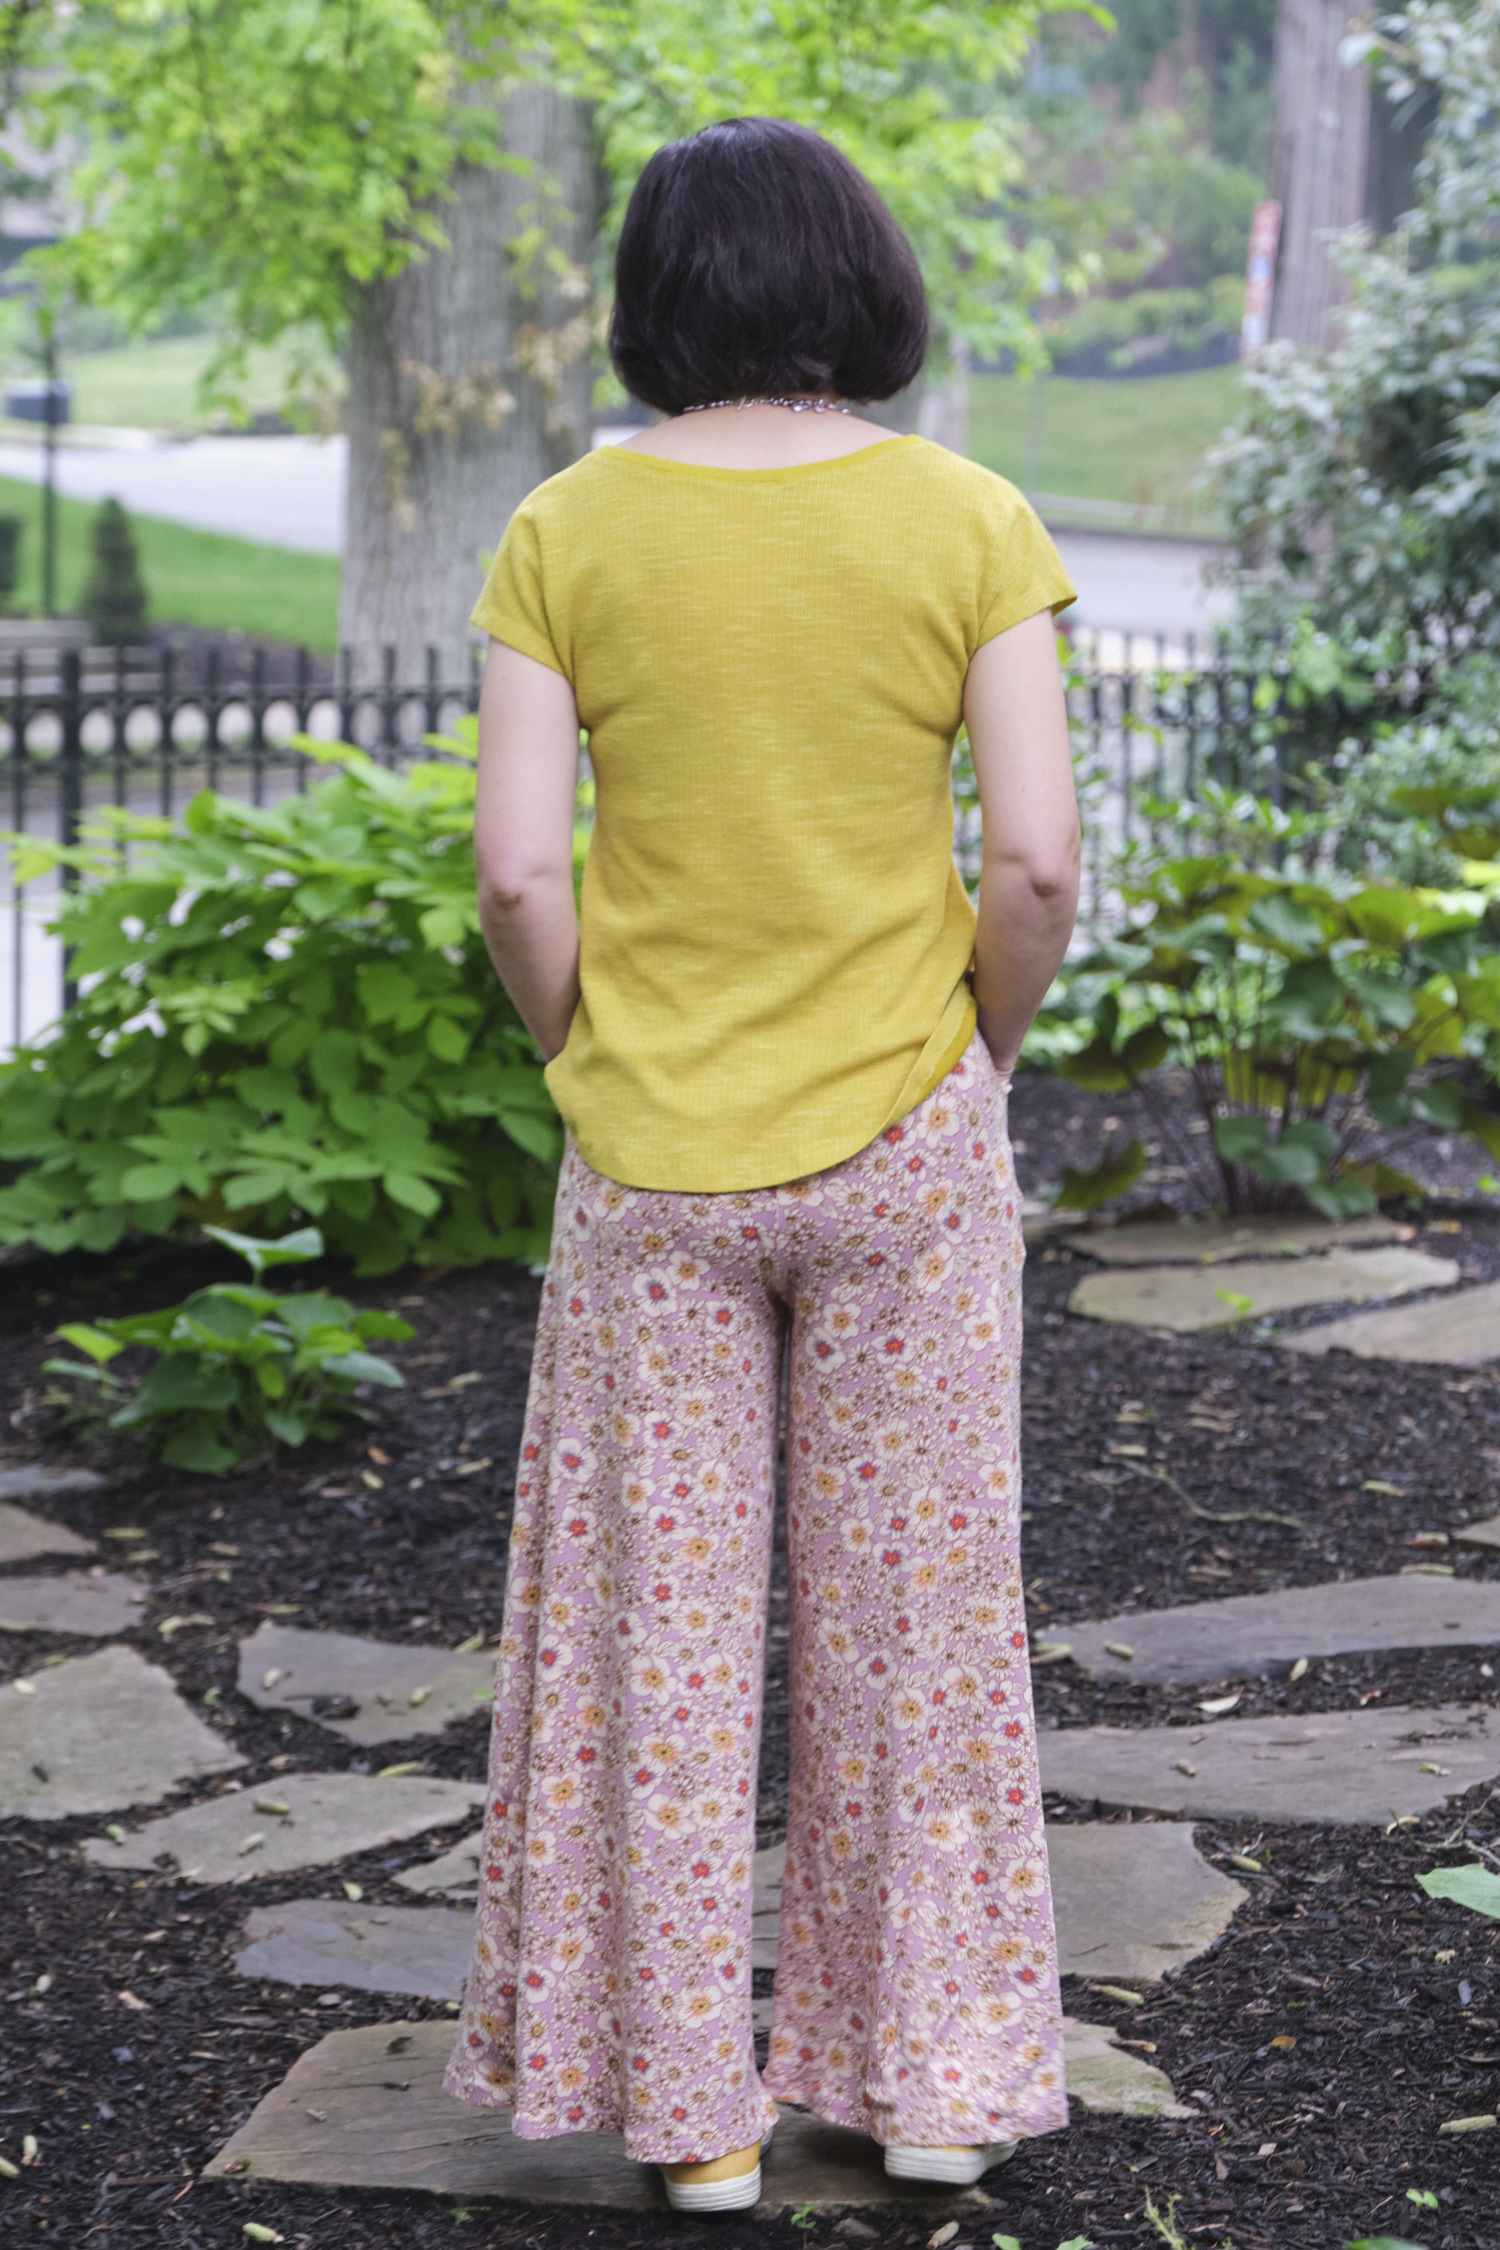
Finally, I extended the inseam and outside seam on the legs to full pants length, keeping the same angles. The width at the bottom hem is about 26″. (I used HeatNBond Soft Stretch on the hem and zigzagged over the edge.) At 5’2″, I can just barely get full length wide-leg pants out of two yards of fabric.

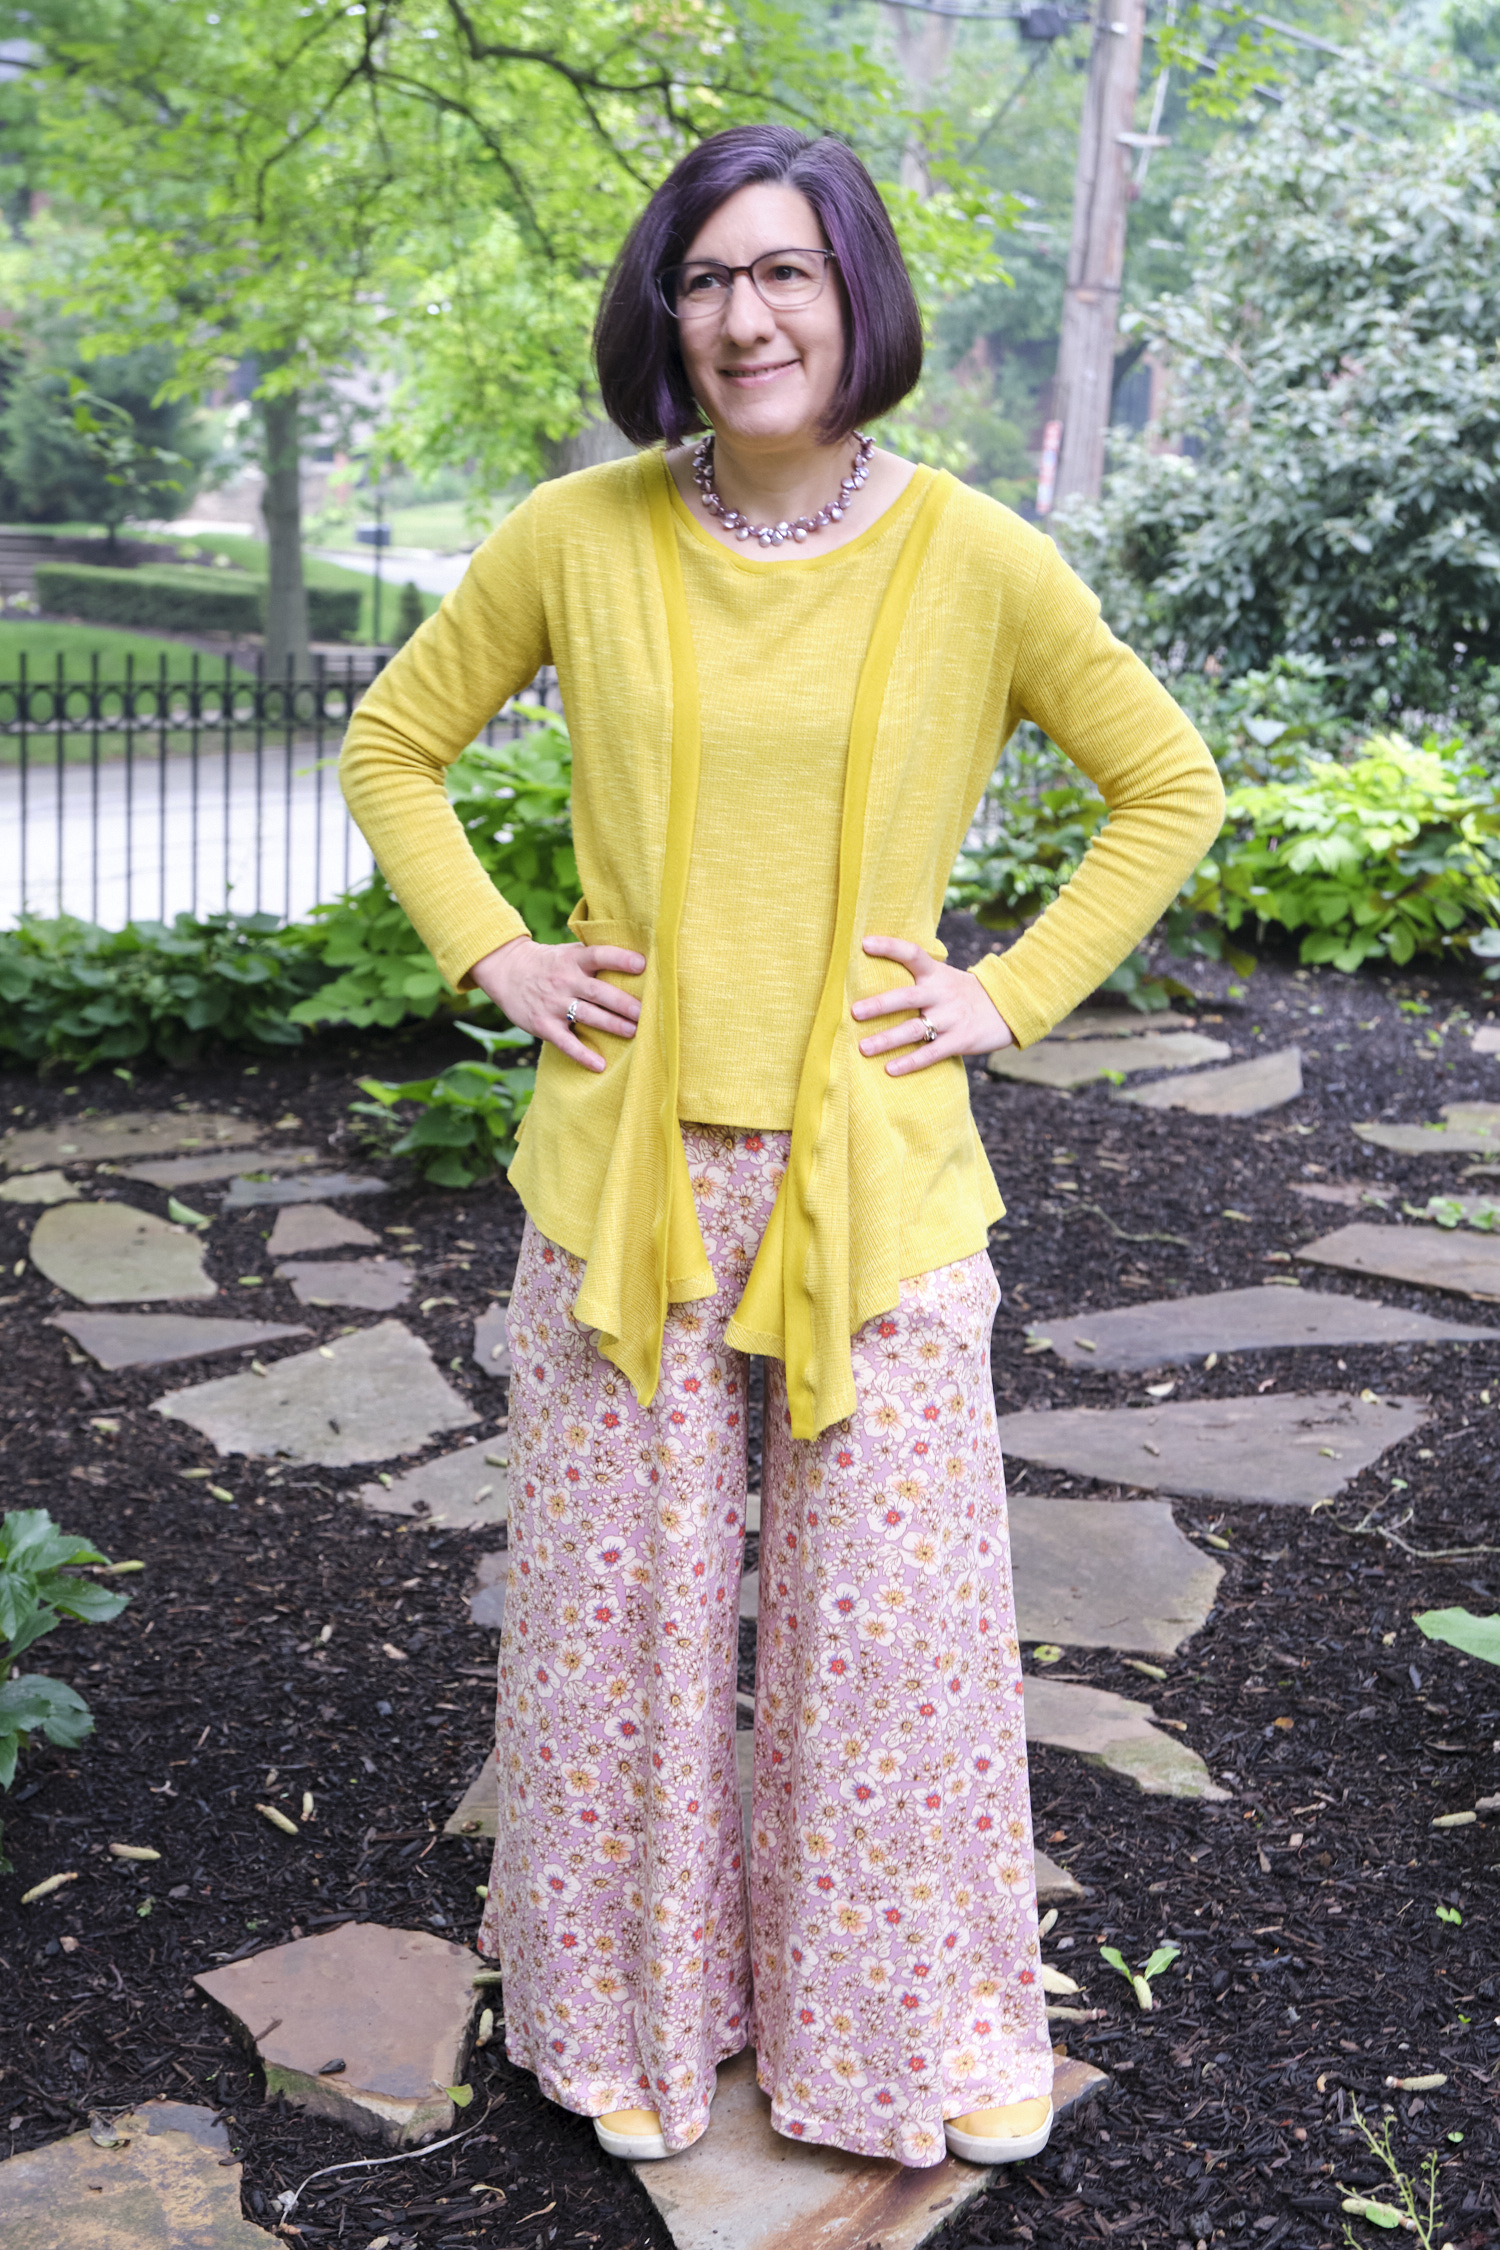
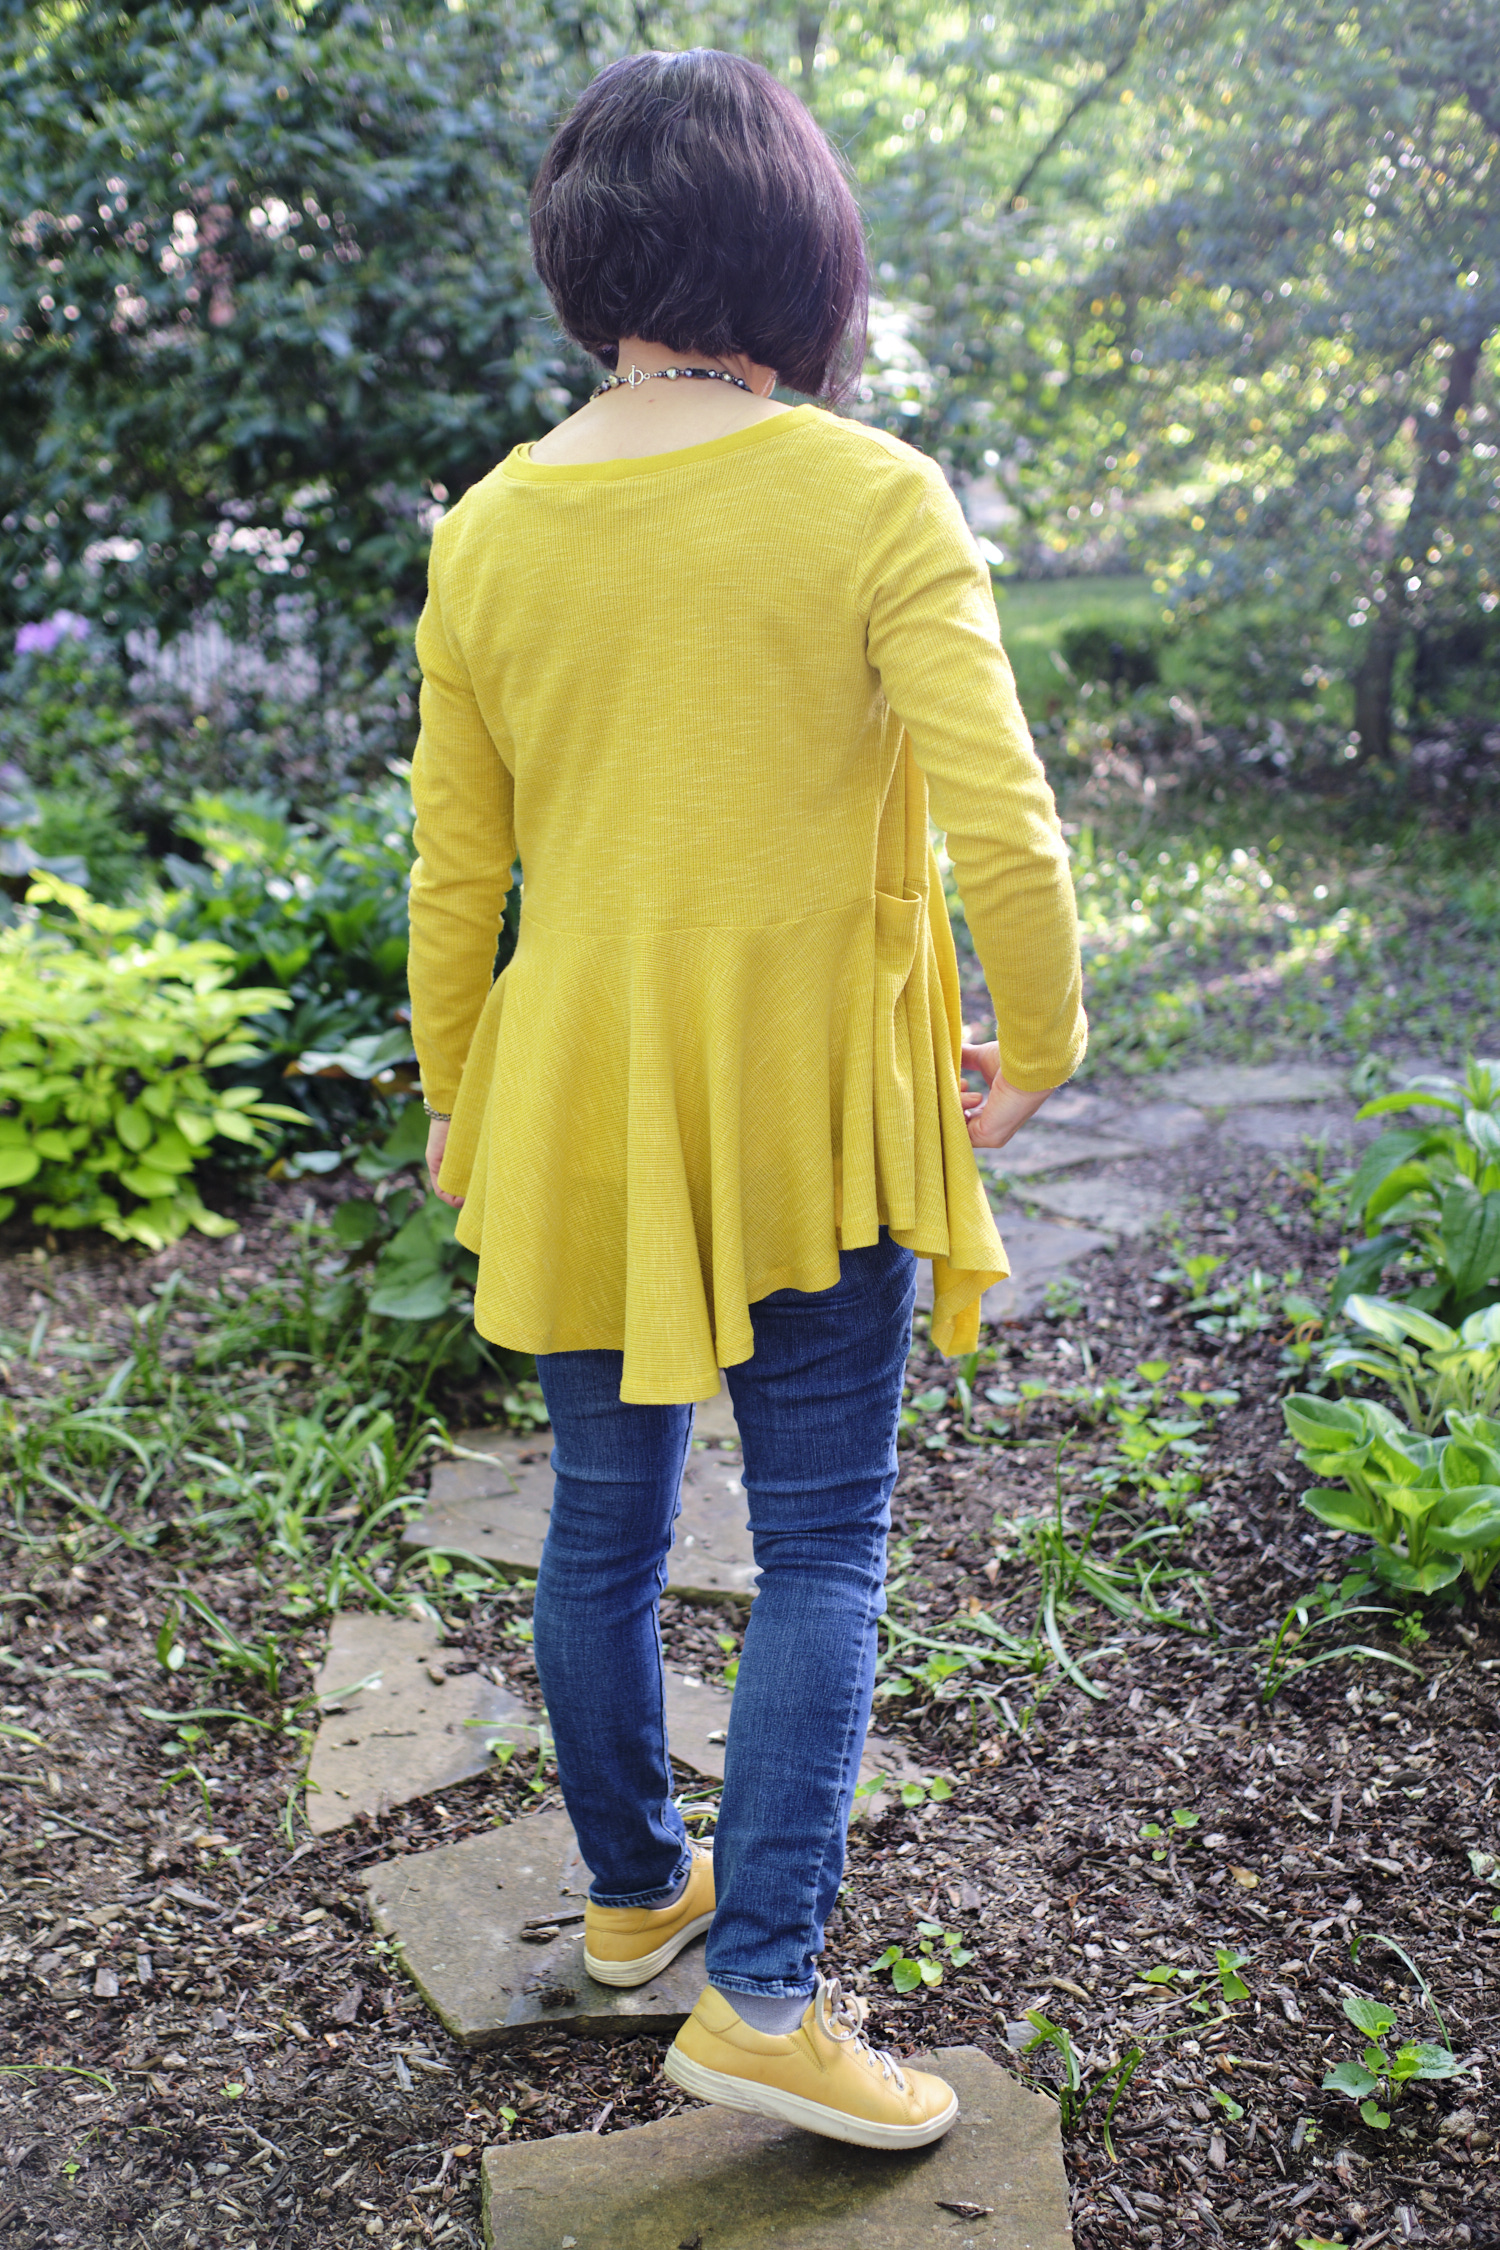
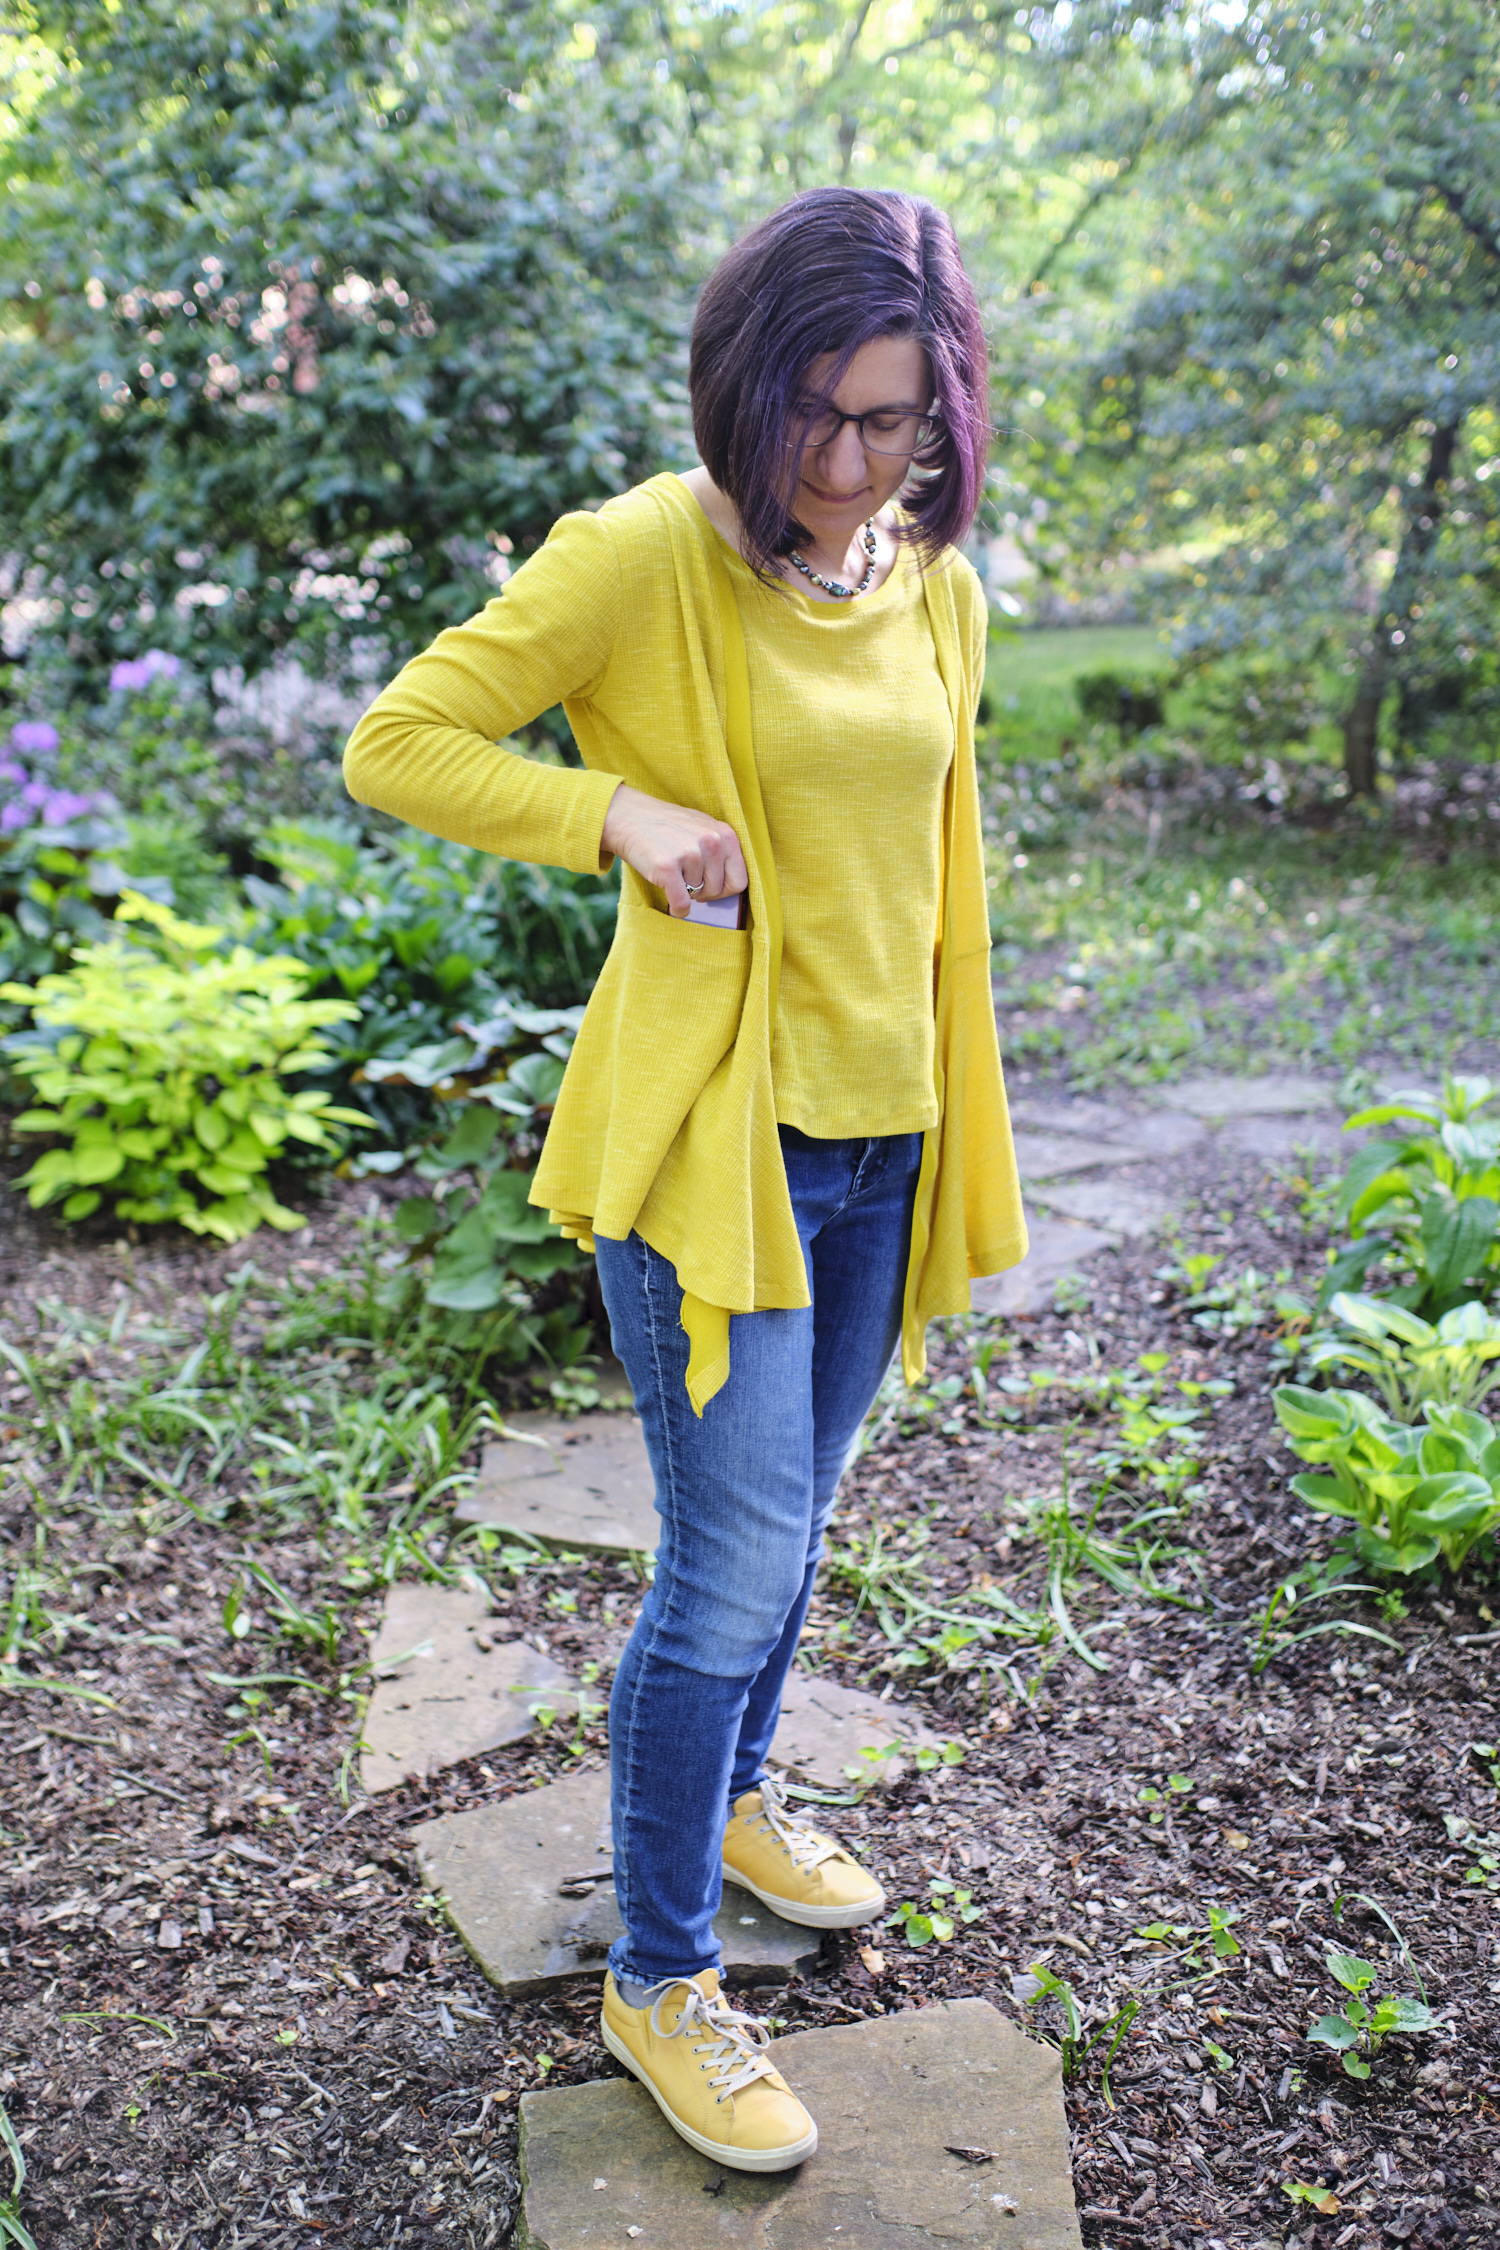
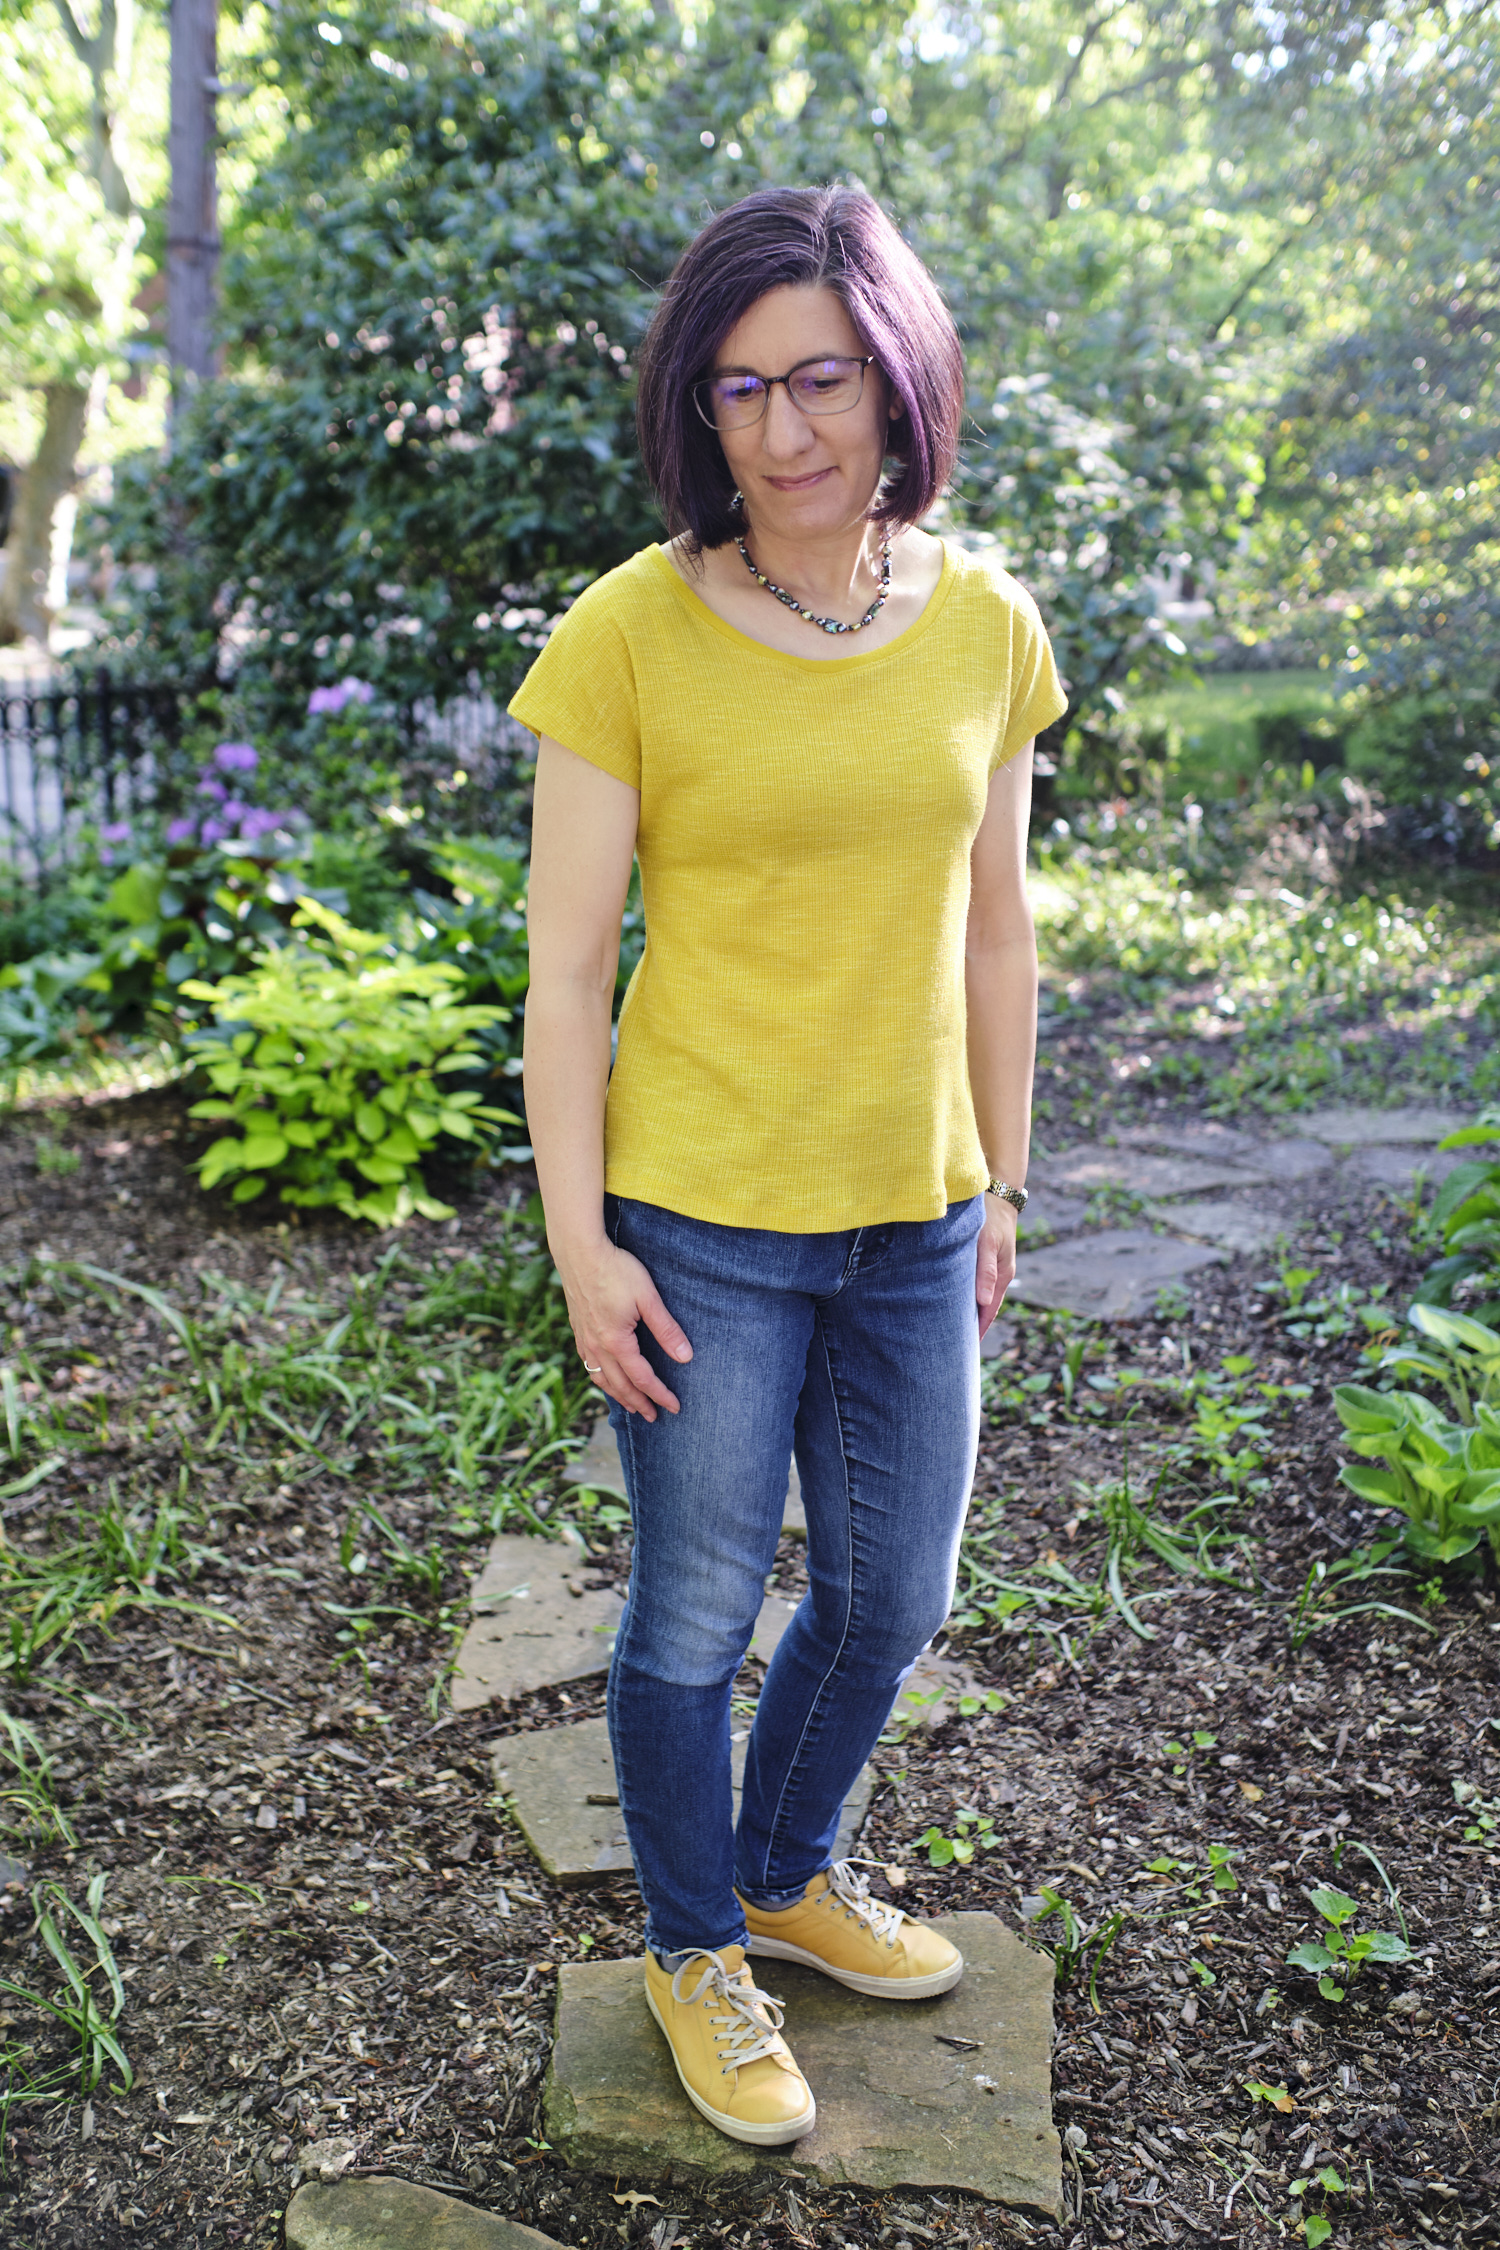
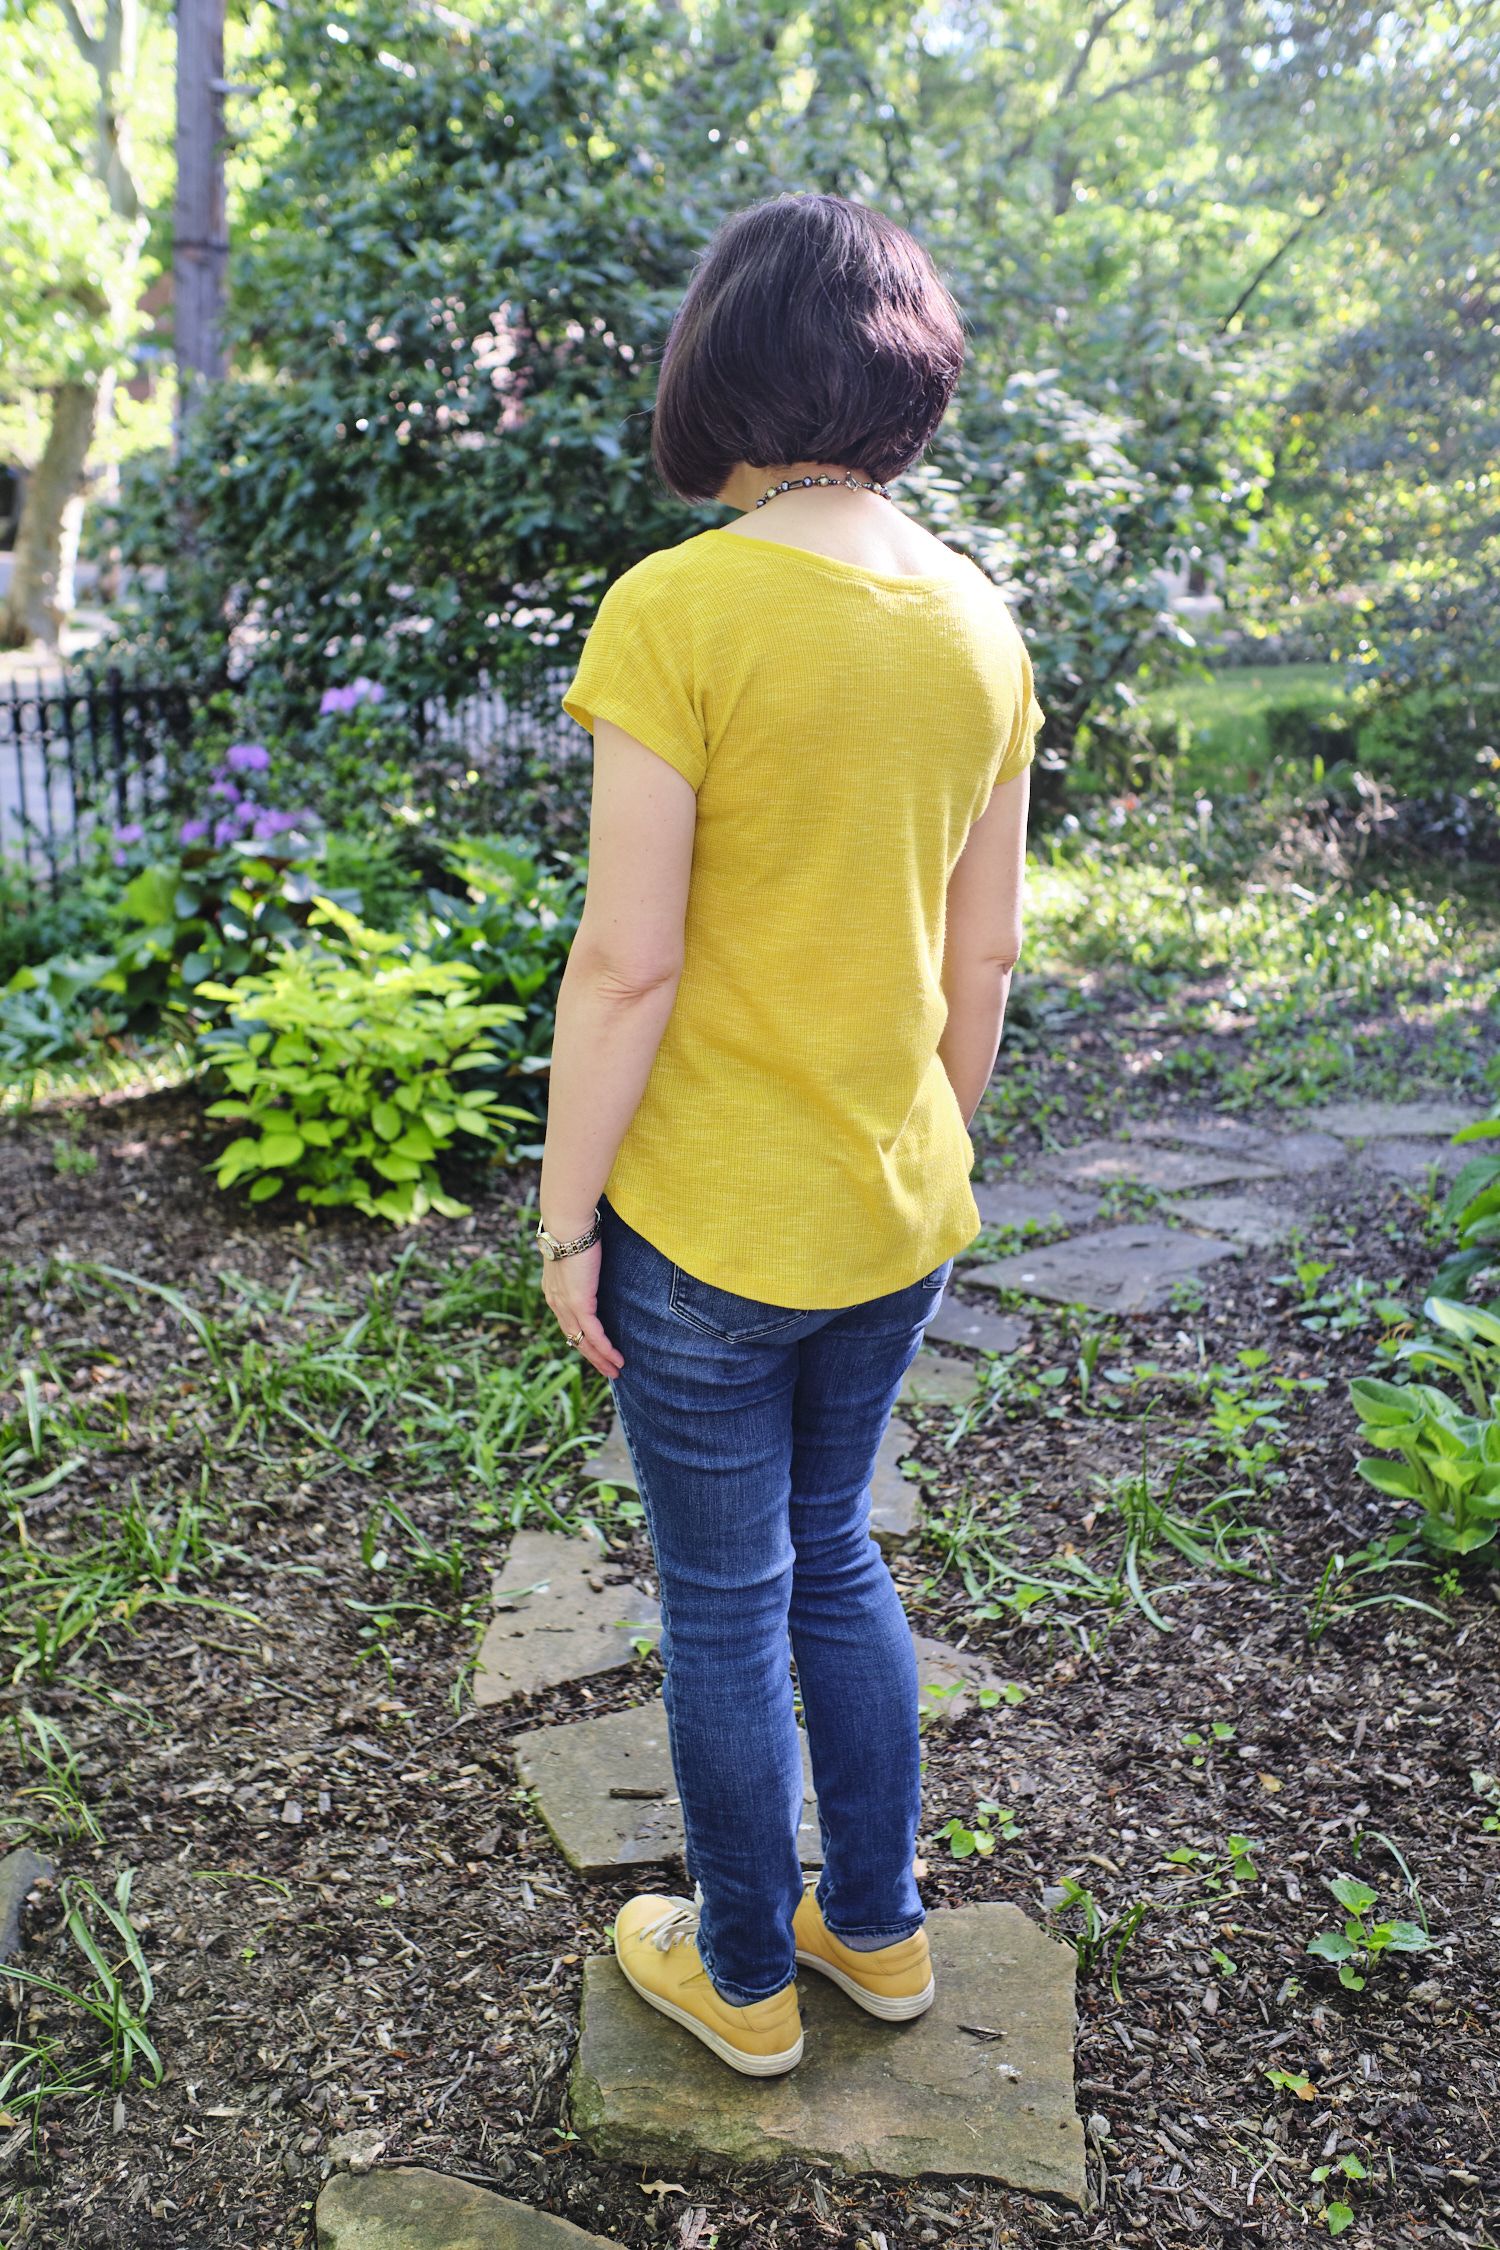
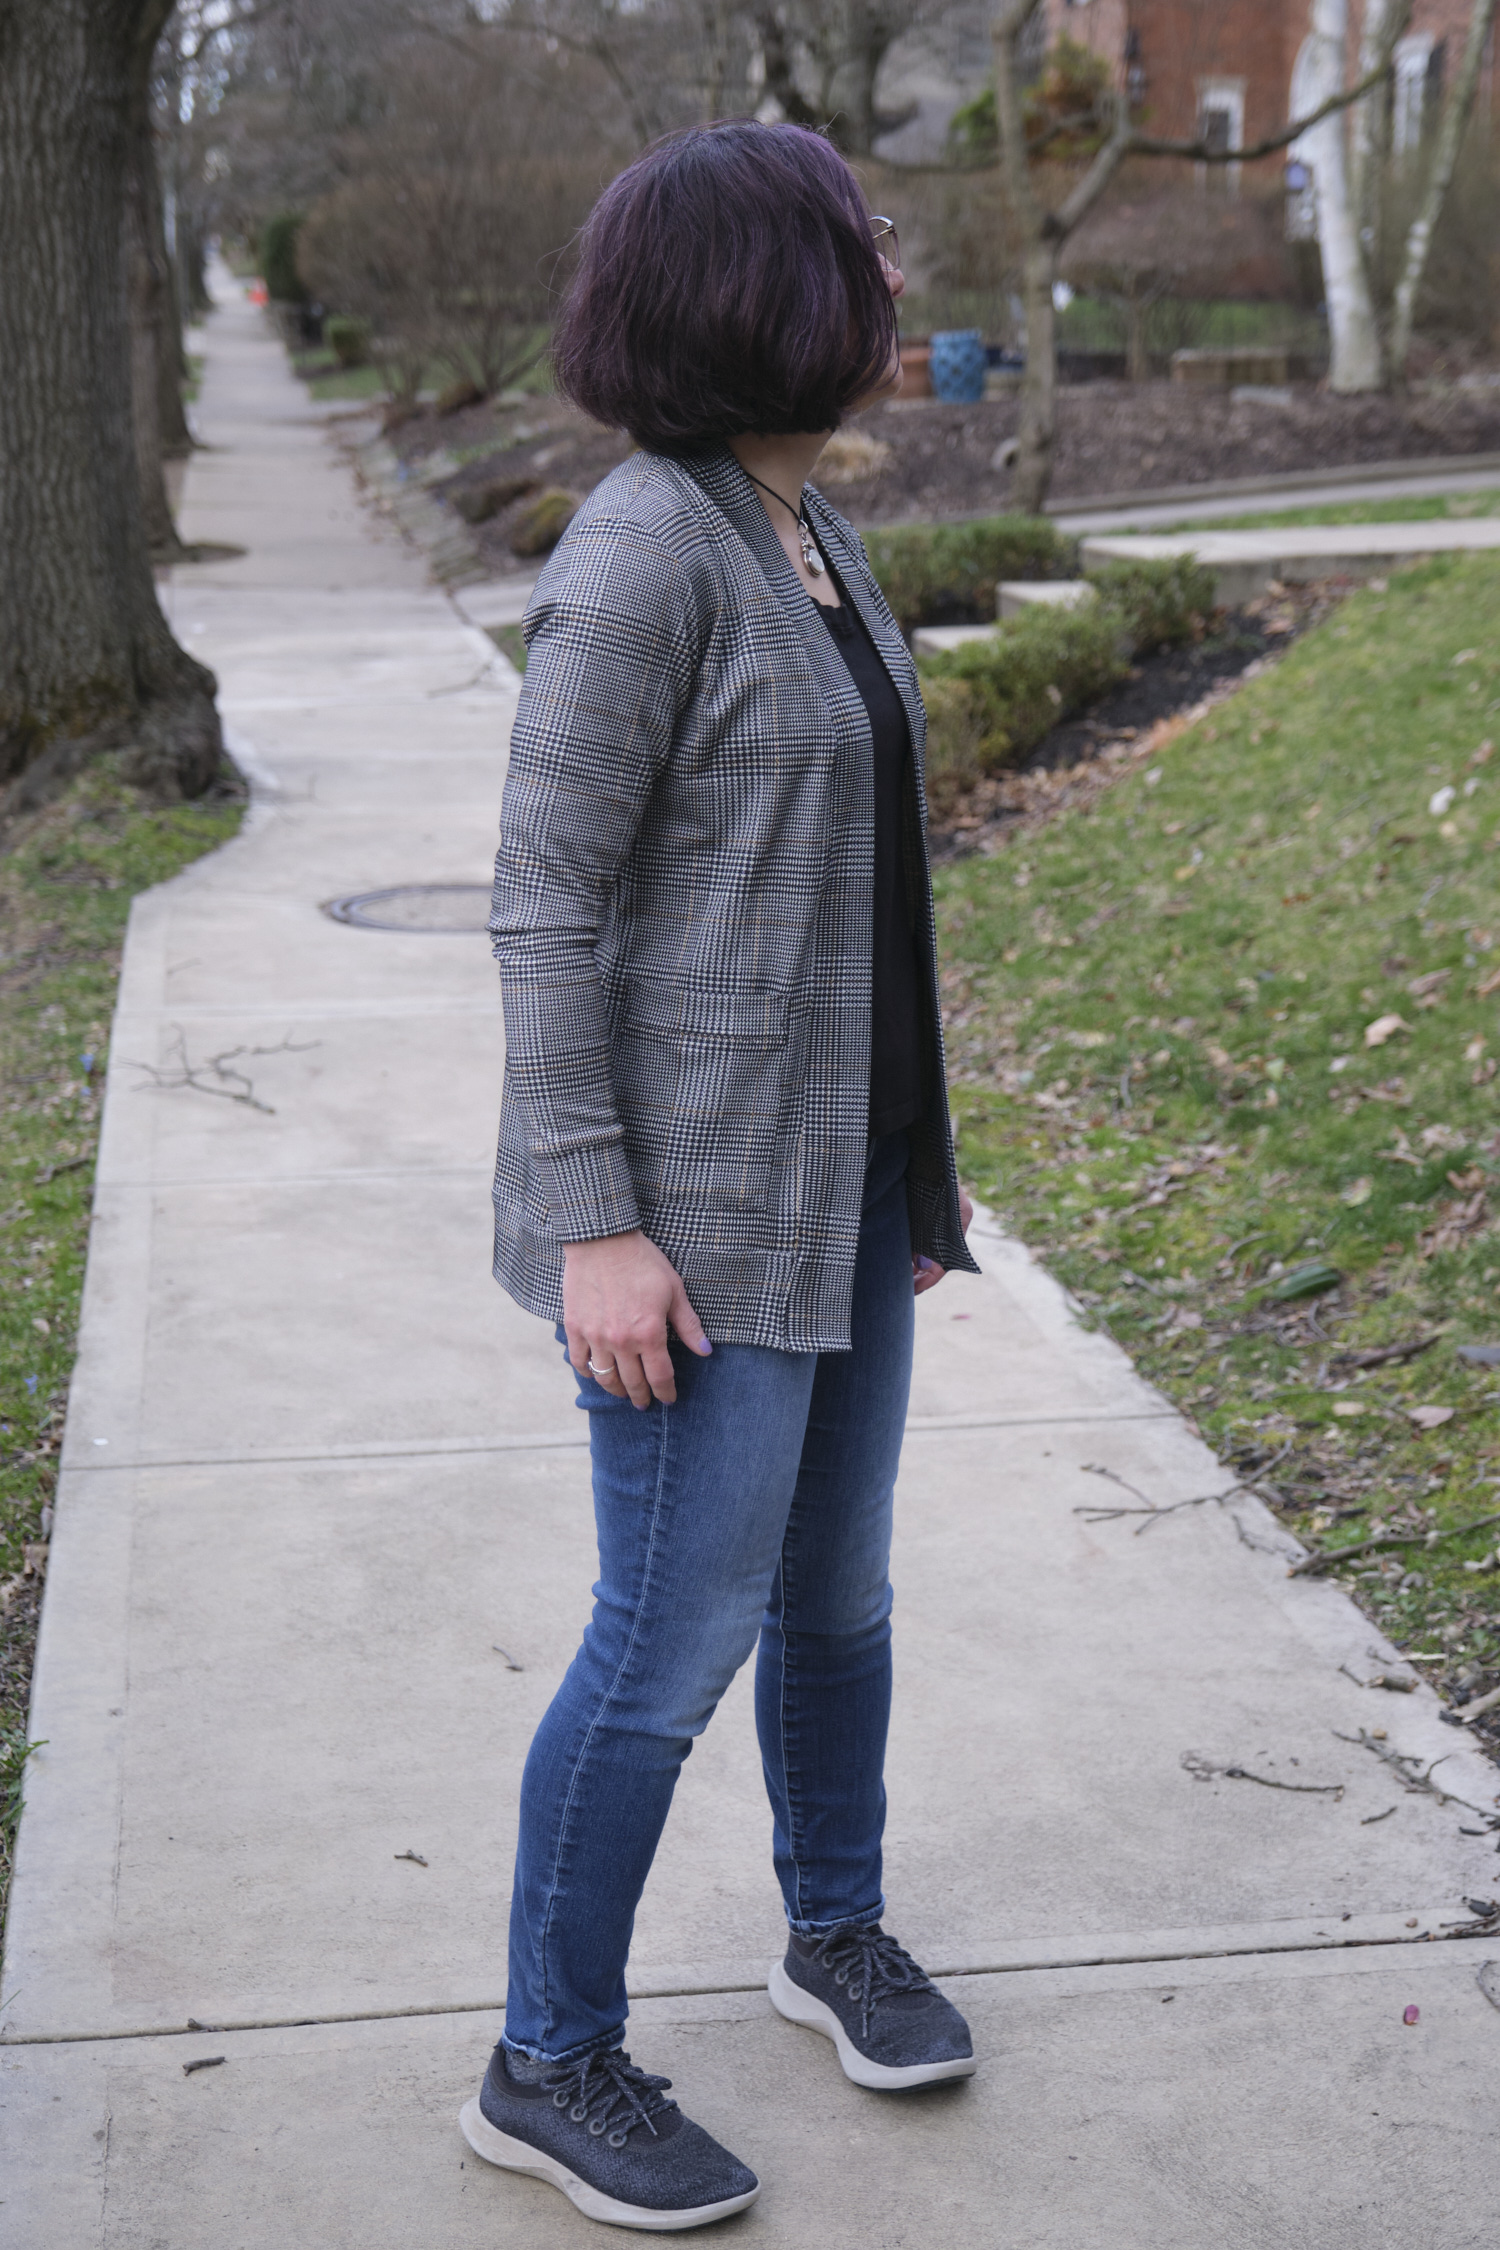
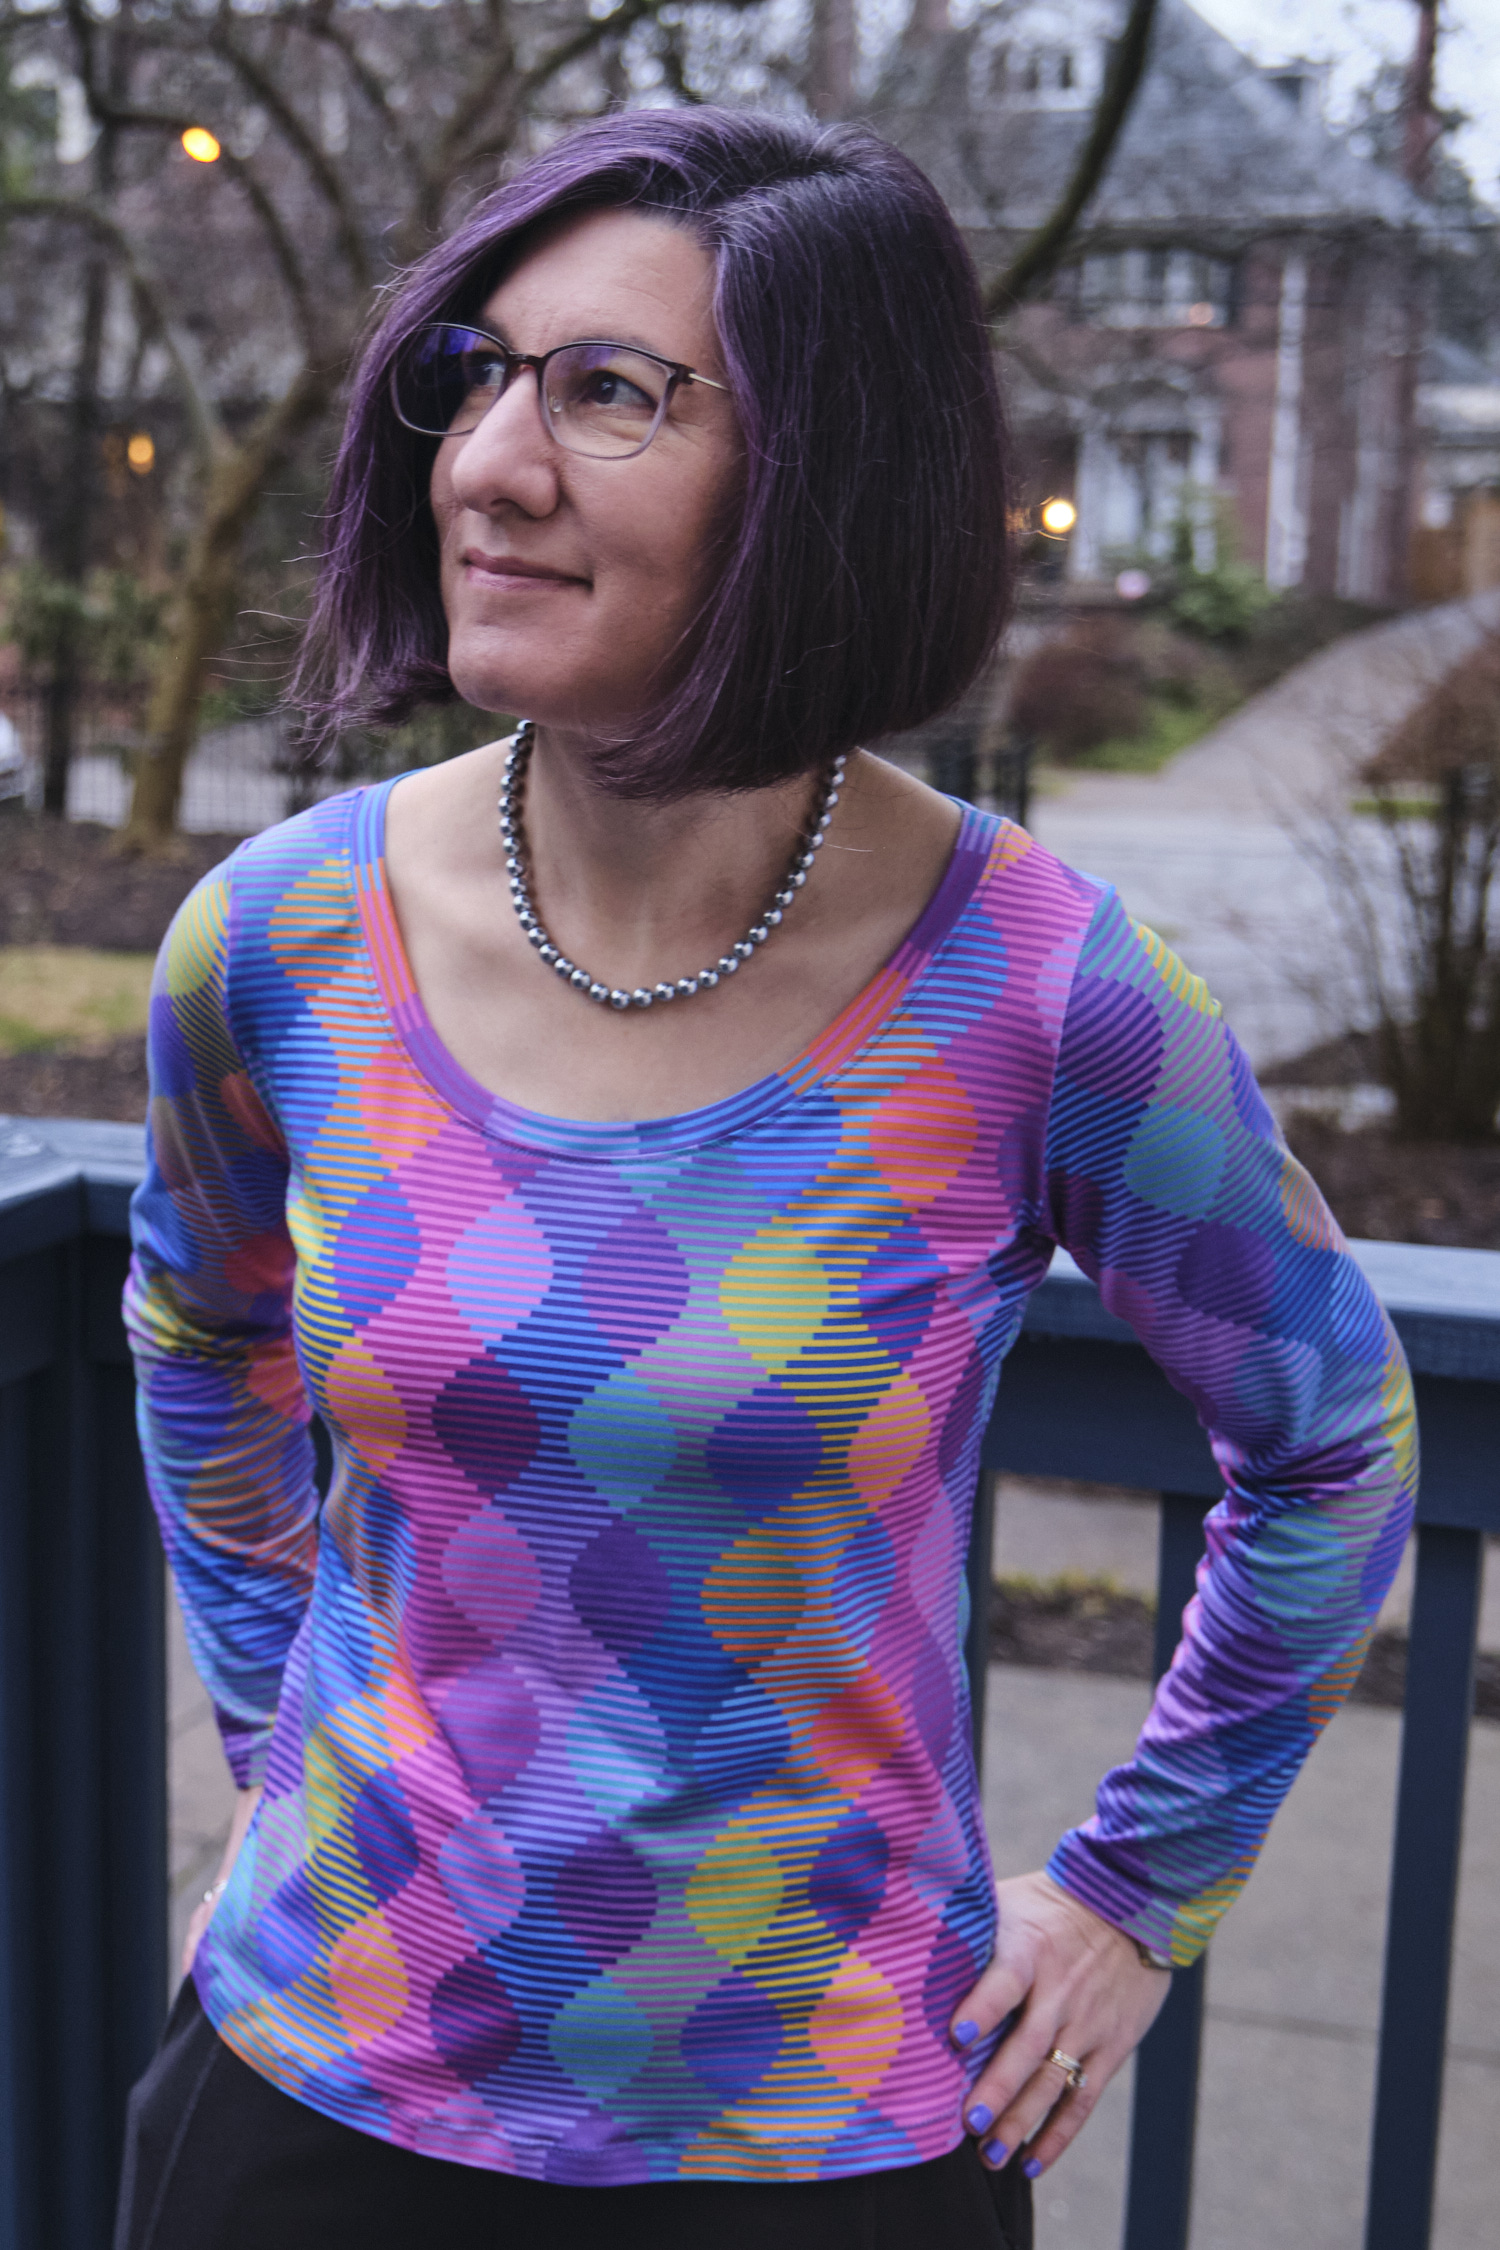
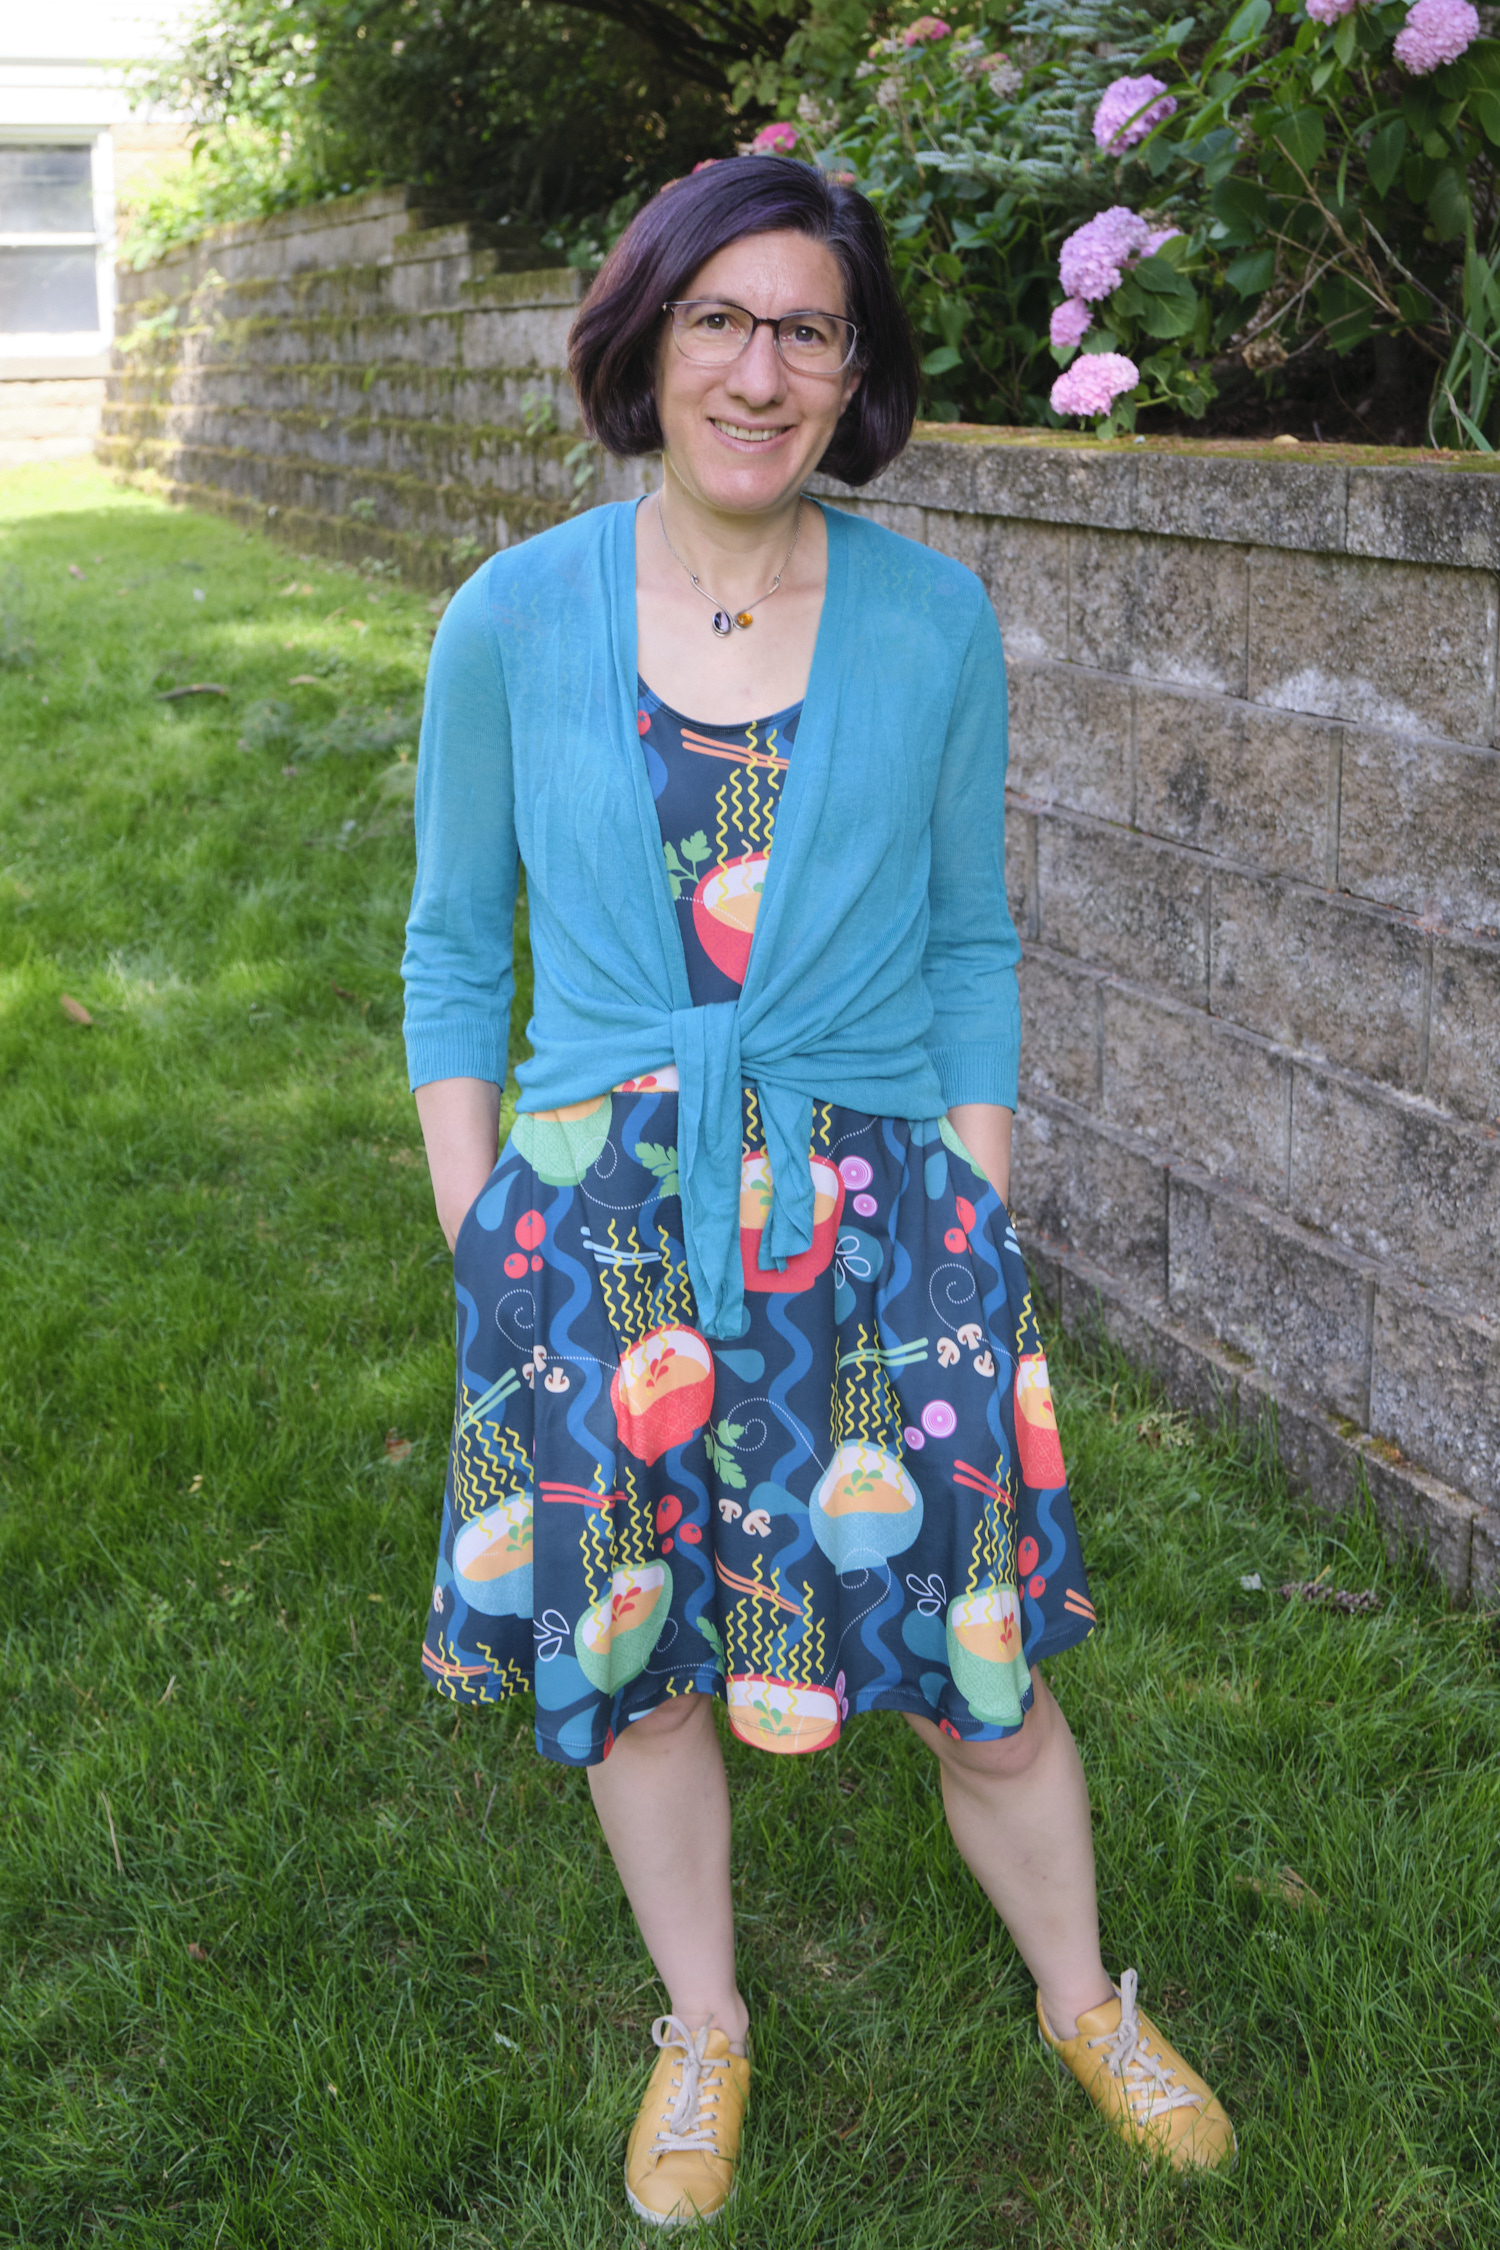
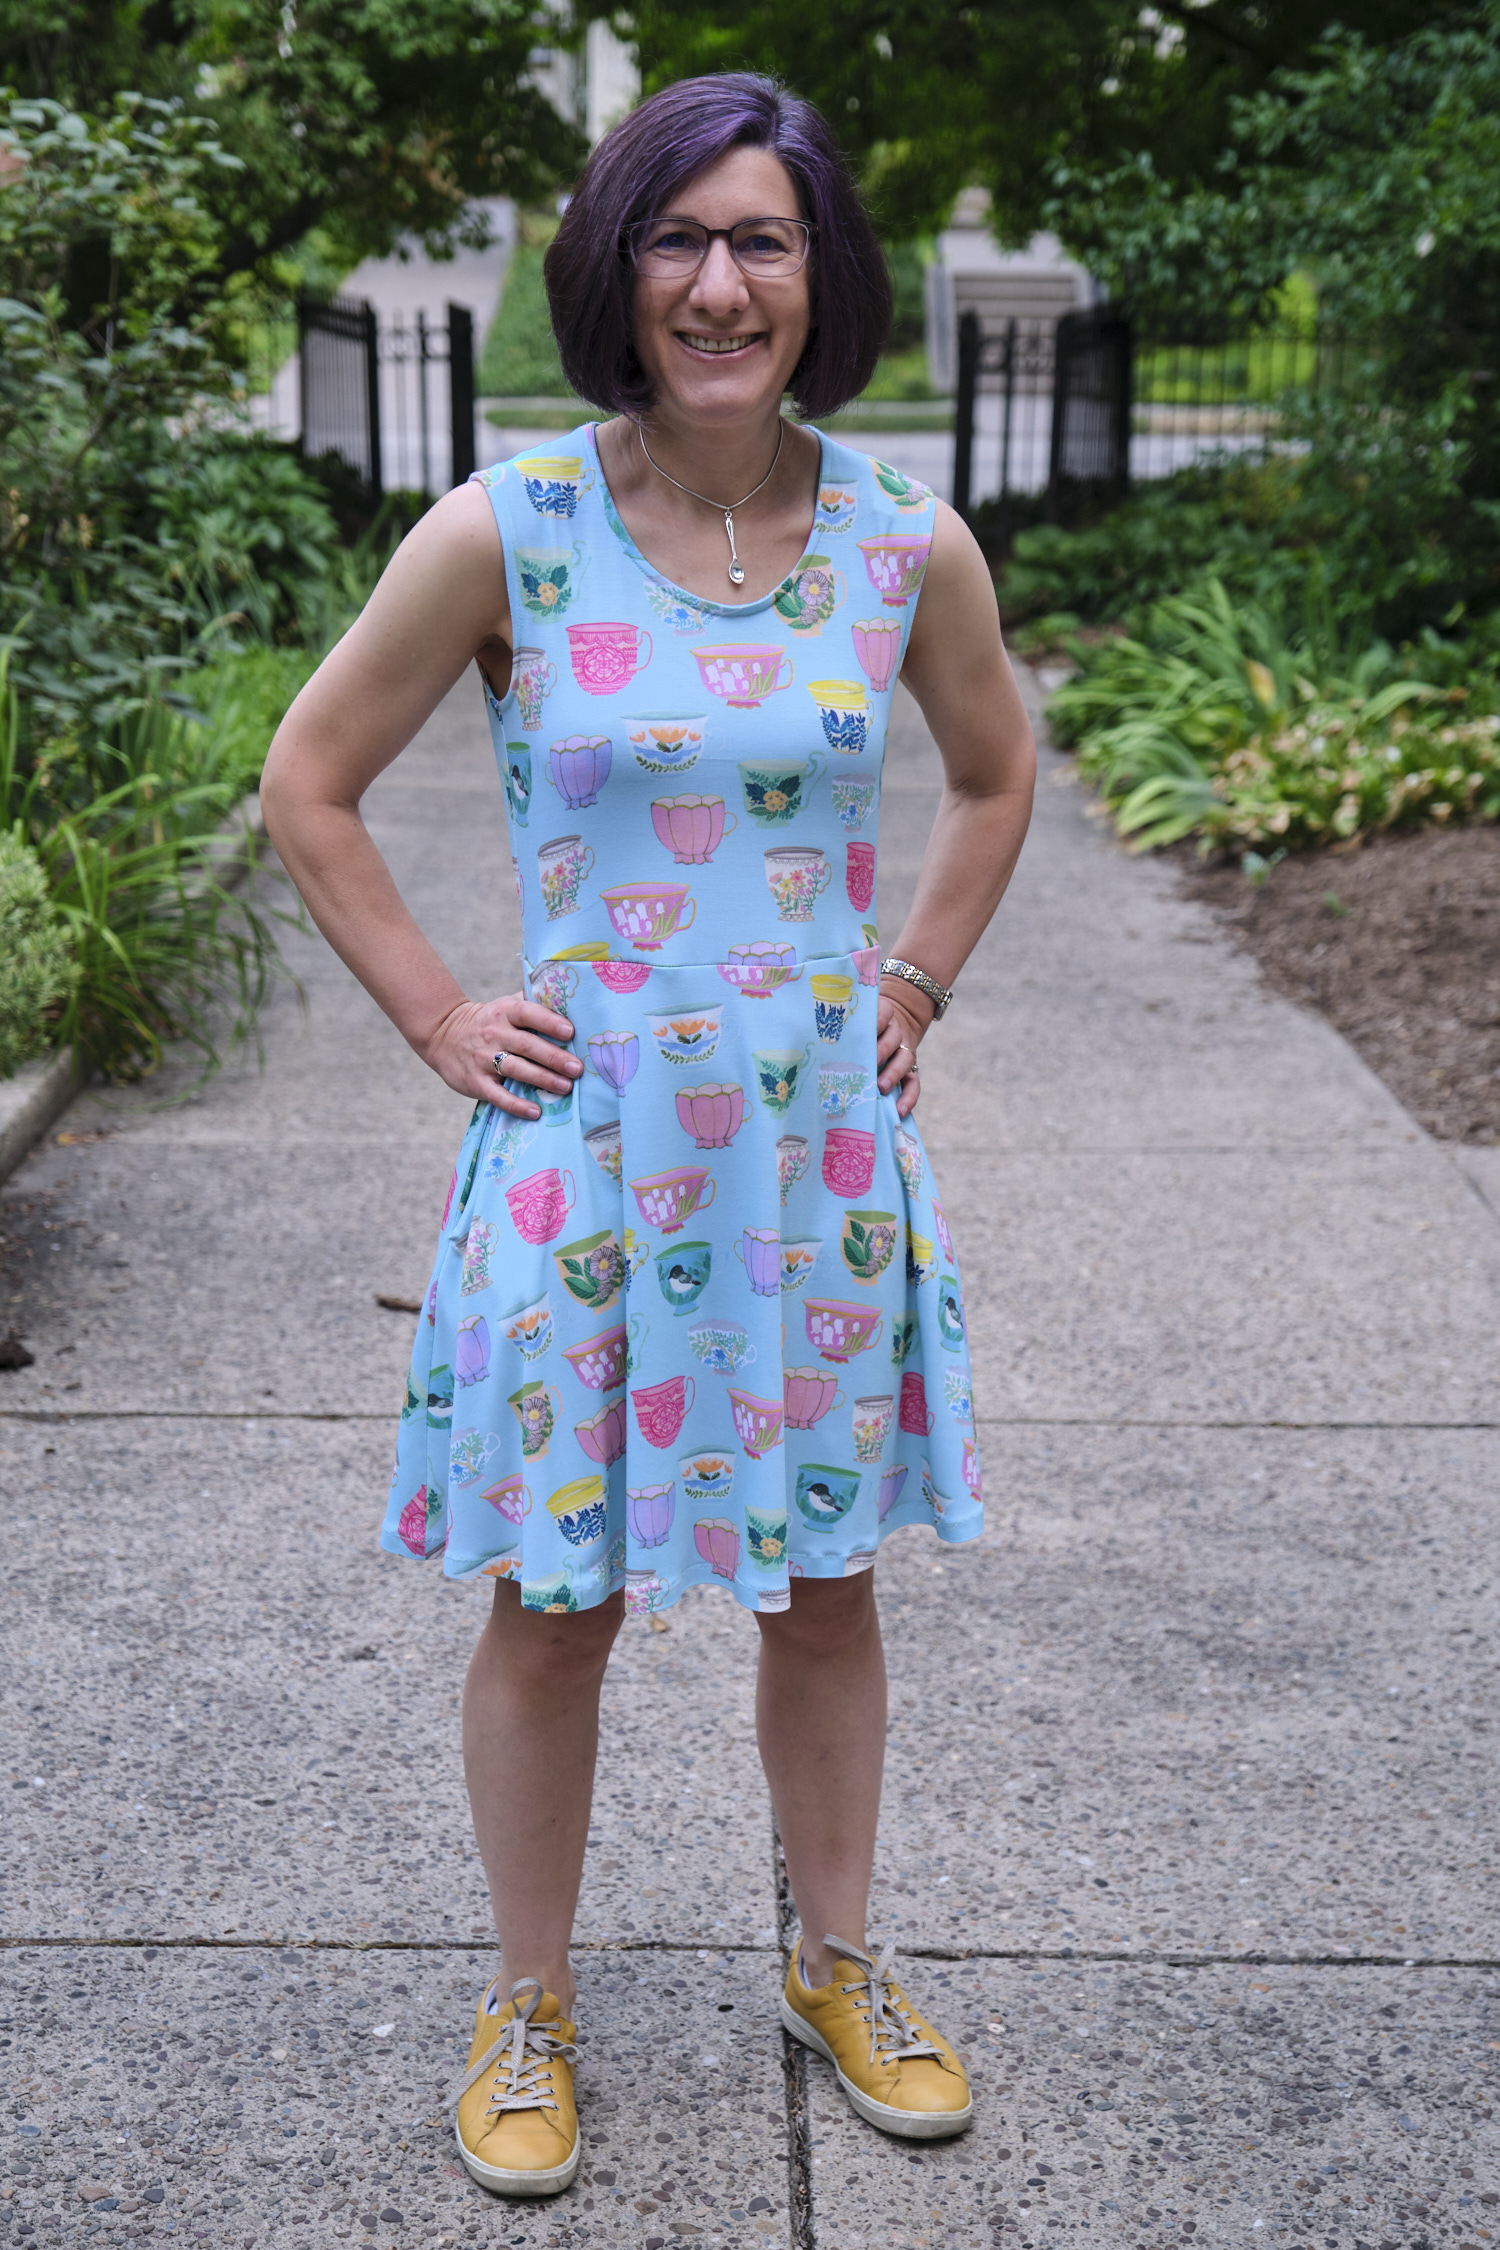
The finished results (see pants modeled blow with my Cachet top and Laura cardigan) are fantastic light-weight swishy pants for summer. They are quite comfortable with pockets that easily accommodate a cell phone and small wallet. I’m eager to make more in other knit fabrics, and also try curving the outside seam at the hips so that the legs are straight and not quite so wide for another look.

Laura + Cachet cardigan twinset

After my success with the relatively simple Harper cardigan, I decided to try the fancier Sinclair Laura relaxed-fit shawl-collar cardigan. Except I don’t like shawl-collar cardigans because I don’t like how they feel on my neck, so I decided to make a shawless shawl-collar cardigan. The reason I selected the Laura cardigan despite the fact that I obviously don’t like its primary feature, is that it has a really cool peplum in the back. Besides looking cool, the peplum is created by cutting the fabric on a tight curve and attaching the inner curve to the bottom of the bodice, creating a sort of flounce effect with no need to gather or pleat. Cool!

I hacked the size 4P Laura cardigan by reducing the shawl color to a 1-inch band. That would have made the front pieces too narrow to meet in the middle, so I used the Harper pattern as a template to draft wider front pieces, except I left the Laura shoulders and blended it together. I also wasn’t a fan of the handkerchief hem, so I rounded the square corners. In hindsight I should have just lopped off the front dangling part completely (which I saw another sewist do in the Sinclair Facebook group), which would also have made for a smoother front line as it avoids the 45 degree turn in the front binding. The cardigan is supposed to be made with a closure at the point that the 45 degree turn in the binding occurs. The closure helps straighten everything out. But I didn’t want a closure so left that out.

The Laura pockets are very cool — they form cute little pocket bags that are big enough for my iPhone, although depending on the fabric you use they may sag if you put an iPhone in them.

I used a poly-rayon impressionist double sweater knit fabric from Surge Fabric shop in the tea leaf color way. This fabric is a loose, fairly light-weight but still somewhat substantial — good for a summer sweater. What is really unique about it is that the reverse side is smooth. So I used the revers for the bands and had smooth, perfectly color matched bands. I was inspired to use the impressionist knit for my cardigan after seeing another sewist used it to for a Harper cardigan hack in the eucalyptus color. I have some of that color as well and may try that hack too.

Since I bought more of the impressionist fabric than I needed, I decided to make a short-sleeve sweater to match my cardigan and turn it into a twinset. I used the Sinclair Cachet t-shirt pattern in size 4P, but used my Bondi screwp neckline hack instead of the Cashet crew neck. I used the reverse side of the impressionist fabric for the neck band. The Cachet is only two pieces plus the neckband, so it is very fast to cut (especially with a projector) and sew. I like the high-low hem that is longer in the back than the front.

The impressionist knit was pretty easy to work with, but almost impossible to remove stitches from if you mess up (well most knits are difficult to unsew, especially if you sew with stretch or zigzag stitches). I used HeatNBond Soft Stretch for all my hems on the top and cardigan and it worked great, producing crisp edges on the curves. The impressionist knit also washes well and goes in the dryer. Since it is a fairly loose knit on the front it does sometimes catch on things and I expect over time to see some loose threads and pilling. I’ve been wearing the twinset to work a lot and the cardigan is a good weight to wear when it is 69 degrees and air conditioned inside and much warmer outside.

Harper cardigan

Sinclair patterns has a free cardigan pattern called Harper that is very nice. I decided to make it in the classic length, size 4P with pockets (of course!) using a glen plaid polyester spandex double knit. I started out very keen on matching my plaids, until I discovered, after much fiddling, that the plaids on the bands and pockets were not going to line up due to the evil plaid having no horizontal repeat plus the fact that you have to stretch the band. I don’t understand why the plaid has no horizontal repeat and it was completely non-obvious to me until I spent a lot of time desperately trying to figure out where the repeat was.

Once I threw in the towel on the plaid matching, I still had to figure out how to turn under the pocket edges and attach the patch pockets to the front of the cardigan. Again, much fiddling ensued as I tried to pin the pockets in place, but it was difficult to get the thick double knit aligned and pinned properly. Then I remembered that I had bought a package of Wonder Tape after having read that it was nothing short of the seventh wonder of the world. I dug out the Wonder Tape and then wondered how to use it for a while as I couldn’t get the tape unstuck from its backing. More fiddling, and I got it and applied the tape to hold the pockets in place. It was indeed wonderful and my non-matched plaid pockets actually look pretty good.

I’m pretty pleased with the jacket and I wear it a lot. It is more comfortable than a blazer but more polished than a sweater, and I can dress it up or wear it with jeans. (OK, usually I wear it with jeans.) Here it is with jeans and my black Bondi t-shirt.

Sinclair Harper jacket in a glen plaid poly spandex stretch designer double knit, worn over a Sinclair Bondi shirt in black cotton lycra

I plan to try it in other lengths and fabrics. I may try it without the cuffs and bottom band, and may try a narrower front/neck band.

Crew-, scoop-, and screwp-neck Bondi tops

For years I have been buying scoop-neck long-sleeve t-shirts in a light-weight cotton blend from Landsend.com. I’m not a big fan of woven button-down blouses. These t-shirts are dressy enough to wear under blazers, the scoop is not too low, and they come in petite sizes so the sleeves aren’t too long. I have bought them in all the colors they come in that I like. But over time they get stained or worn out. This was not a problem until a few years ago when Landsend stopped making them. So when I discovered the Sinclair Bondi classic fitted t-shirt pattern, I decided to try making my own long-sleeve t-shirts.

I made my first Bondi in size 4 petite using a black cotton lycra fabric with a scoop neck and elbow sleeves (because I had only 1 yard of fabric, which isn’t enough for long sleeves). I liked the fit but found the waist a tad shorter than my preference and the scoop a bit narrow. I made my next Bondi with a yellow cotton lycra print, the wide scoop neck, long sleeves, and an extra inch in length and graded in a bit from the waist down. I don’t seem to have taken photos of these two shirts, maybe I’ll do that later.

For my third Bondi, I used a fabric pattern I designed and printed on modern jersey at Spoonflower.com. (The pattern is based on my interleave quilts.) Once again I went with the wide scoop neck, long sleeves, added inch and slight grading. I really like how this one fits but wish the neckline wasn’t quite so low.

Next I collaborated with my 16-year-old daughter to make a crew-neck Bondi for my mother-in-law’s 80th birthday. My daughter designed the fabric and we printed it on modern jersey at spoonflower.com. We used coordinating turquoise DBP for the neck band and sleeves.

I made my next Bondi in red and white polka dot DBP to wear to my daughter’s robotics tournament and cheer on her team, the Girls of Steel, who have a Rosie the Riveter theme.

I wanted to try a neckline in between the crew and the scoop — I call it a screwp. I used the neckline and band for a size 26P crew on a size 4P bodice. If you were starting with a larger size I think you could achieve the same thing by using the scoop neck and band from a much smaller size. The Bondi pattern has nice notches on the neck band with matching notches on the bodice so that you can easily line things up and get the right stretch in your neck band, so it’s nice to have this and not have to guess.

Showing the screwp side-by side with a regular Bondi crew neck and scoop neck.

Having now achieved t-shirt perfection, I have no choice but to make more.

July 2023 update: Ok, not quite perfection. The back of the screwp is a little bit lower than a normal neck in my size due to using the larger size template. I’ve been grafting this neckline onto other tops and dresses and have decided to raise the back about half an inch and shorten the neck band by about an inch. Now we have perfection!

Joanne dress

In October 2022 I ordered some funky paisley ITY fabric I found on Amazon and used it to make a Sinclair Joanne dress. I sewed it according to the pattern as written in size 4p with the knee length option and used clear elastic to stabilize the waist. I used my go-to HeatNBond Soft Stretch for hemming and zigzagged over the edge. I was planning to make it three-quarter sleeves but after looking at some lovely examples of the flounce sleeve on other sewist’s dresses I decided to give flounces a try. I was worried that the flounces would be difficult to implement and would get in the way when wearing. However, the flounces were very straightforward to sew, and I was able to omit hemming the ITY. Positioned at the elbow they don’t tend to get in the way either. And they look awesome with this particular fabric design.

This was my first time sewing ITY and I was worried that it would be slippery and hard to sew, but it actually wasn’t bad at all. I also wondered whether I would need to line it as it has a lot of white areas that are not 100% opaque. It seems fine without linking. Sewing the bodice with the faux wrap looks tricky as it relies on proper stretch for it all to work out. But I found if you follow the instructions it all comes together pretty easily.

One minor complaint is that the clear elastic at the waist can sometimes be uncomfortable since you can end up with plastic elastic rubbing against your skin. I think I might use braided elastic or forgo the elastic in the future.

My biggest complaint was that my phone kept falling out of the pockets, which aren’t deep enough, especially with slippery ITY fabric. I ended up grafting another two inches to the bottom of the pockets after the fact to solve the problem. If I make this dress again (I’m sure I will!) I will definitely make the pockets deeper.

This dress has been great to wear in fall and spring weather, and with a sweater or jacket on chilly days. The print I used is fairly eye catching and regularly brings complements.

Alana dresses

Last September I bought my first Sinclair pattern and sewed an Alana dress. I have since sewn two more (and there will probably be more) and several other Sinclair patterns. I’ve found the Sinclair patterns to be well drafted and pretty straightforward to understand. They can be downloaded as PDFs and printed on a home printer, printed in large format at a copy shop, or projected.

I chose Alana as my first pattern mostly because I liked the pockets. I continue to love the pocket style, where the pockets are anchored by two princess seams. I also liked the neckline that used a facing instead of a binding or band.

I obsessed over what fabric to use, and continuing with my privacy research related theme, I selected fabric with eyes on it — evil eye blue by Laura May. I got the same fabric in the small size for the sleeves. I had both printed on Spooflower modern jersey.

Then I printed out the PDF layer for the size 4 petite pattern on the laser printer at work and spent about an hour taping it together and cutting out all the paper pattern pieces. Then I laid all my cutting mats out on the hallway floor and laid out the fabric as shown in the pattern instructions. I quickly realized that I didn’t have enough fabric for that sort of layout. Puzzled, I looked on the Sinclair website for where to ask questions, and discovered the Sinclair Patterns Group on Facebook. This FB group is a great resource for sewing Sinclair patterns. I found you can easily search for the name of a pattern and find lots of photos of garments other people have made with that pattern, including tips on fabric selection and alterations. You can also post questions or show off your own makes. In any case I soon learned that the layout in the instructions is just a suggestion and may not work depending on the fabric width, garment size, etc. I figured out how to fold the fabric to cut it and get it all in. I also learned from the FB group about a YouTube video tutorial for making the Alana dress.

I used large washers as fabric weights and used my rotary cutter to cut out the fabric. Then I followed the instructions to sew the dress. I selected the regular neckline, long sleeves, and knee-length options. On the advice of the video tutorial I extended the length of the front facing so that it would fall below the bust line. I used a very narrow zigzag stitch for all of the seams and a medium zigzag to finish the seam edges. I finished the sleeve and bottom hems with HeatNBond Soft Stretch and zigzagged over the edges.

When I tried on the dress it looked OK, but the waist is not designed to be fitted, and it looked a little baggy on me. Indeed, the pattern explains that there is about three inches of ease at the waist. So I decided to take the dress in at the sides and the back princess seams to remove most of that ease. The dress looked much better on me without the ease.

I made my second Alana dress in December using a rich purple scuba suede fabric. The fabric is soft, stretchy, washable, and pretty easy to sew. I used a lighter ITY fabric for the front and back facings and extended both of them below the bust. I thought about using a lighter fabric for the inside of the pockets but decided to try the pockets entirely in scuba suede, and they worked out fine. A line of top stitching across the top of the pockets might have been helpful, but it is ok without. I did not bother stitching over the seam edges. Once again I ended up removing the ease. Months later the fabric is holding up pretty well after many wearings and washings, although it is showing some slight signs of pilling.

My third Alana dress was another dress in Spoonflower modern jersey. This time I removed the ease in the pattern when I cut it. Cutting out this one took a while because I obsessed over the fabric placement. This was the third version of my bad passwords dress (there’s a whole story behind it), and this time I wanted to have long sleeves and pockets.

New password dress with sleeves and pockets

And see the original passwords dress below

Lorrie wearing password dress at Privacy@Scale, photo by Adam Mason

CUPS of SOUPS

After sewing mostly quilts for a while, I was inspired to sew a dress again last summer (2022) because I wanted a dress to wear to the Symposium On Usable Privacy and Security (SOUPS) 2022, a conference that I started in 2005 and is still going strong. I thought it would be fun to have a dress that had soup on it. I thought about a soup-can dress channeling Andy Warhol, but eventually settled on a bright noodle soup pattern called grandma’s recipe, designed by Daniela Friedenthal and available at spooflower.com. I had the fabric printed on modern jersey, and then tried to figure out how to sew it.

Sidebar 1: I love Spoonflower modern jersey! It is one of the best polyester jersey’s I have found with a feel similar to cotton, but brighter colors. It is similar to double-brushed polyester (DBP) but has a little bit more body than most of the DPBs I’ve used. The main downside is it is about 4 or 5 times more expensive than DBP and only available for custom printing, not colored solids.

My previous me-made dresses were very simple, sewn from two pieces of fabric with no pockets. This time I wanted a half-circle skater dress with pockets and some better finishing details. I started reading sewing blogs and learned how to sew side-seam pockets and create neck bands and bindings and make smooth knit hems with Soft Stretch hem tape. I reverse engineered some dresses from my closet and drafted a pattern, trying to include enough ease so I wouldn’t need a zipper.

Sidebar 2: I also love Heatnbond Softstretch for knit hems of all sorts. I fuse the tape to the edge of the hem, turn under the hem and press using the paper backing edge as a guide, then peel back the paper and fuse the hem in place, then zigzag over the edge. I’ve used this on dress, shirt, sleeve, and cardigan hems with great results. It even works on curves — you just have to nudge the paper backing around the curve as you press it. I now keep a couple of rolls around at all times so I don’t run out in the middle of a project!

The finished dress worked pretty well. The waist ended up a bit looser than I wanted and the pockets pulled the waist down a bit when I put stuff in them. But a sweater easily hides the imperfections. It is a fairly striking looking dress because of the unique fabric, and I have had total strangers comment on it.

While I wasn’t 100% satisfied with the SOUPS dress, I decided it was good enough that I wasn’t going to remake it. But I wanted to improve my pattern and give it another go. So adjusted the fit of the waist and the pockets a bit and sewed the dress again, this time in soft blue vintage tea cups fabric designed by Cecilia Mok on spoonflower.com. I chose cups because the name of my lab at CMU is the CyLab Usable Privacy and Security (CUPS) Laboratory. I also went on a quest to find a spoon pendant I could wear with both dresses. Most of the spoons I could find online were either too tiny or too big, or were designed for functional use as drug paraphernalia. I eventually bought a 25 pack of spoon charms for less than $10.

The CUPS dress came out considerably better, but in my further reading about sewing skater dresses, I discovered a free PDF skater dress pattern from Sinclair Patterns. Then I discovered Sinclair’s other patterns and one thing led to another. Watch for future blog posts….

Projector sewing – this is a game changer!

When I started sewing clothes again last summer I read lots of sewing blogs and joined some sewing-related Facebook groups. I bought some PDF patterns (and downloaded some free ones) and printed them out and taped them together. It took a while to tape them all together and get ready to sew, but it was still more convenient than having to go to a store to buy a physical pattern or wait to have it shipped. But I noticed that some of these patterns came with “projector files” and people in the Facebook groups were talking about projecting their patterns. Intrigued, I started reading up on projector sewing and found a great projector sewing website with lots of good information about how choosing a projector, mounting it, calibrating it, etc.

For my birthday last February, I decided to get an inexpensive projector and asked my husband to figure out how to mount it. I selected an inexpensive Alvar mini-projector, which weighs less than 4 pounds, and has wifi and bluetooth. It was on sale for $87. My husband didn’t want to drill holes in the ceiling, so he bought me a 15-pound microphone boom stand to mount the projector on. It was difficult to level the projector that way. So we added a tripod ball head so we could easily adjust the projector to be level with the tabletop. With this setup, my projector is suspended about 61 inches above my tabletop.

I put my cutting mat on the table, connected my laptop to the projector via bluetooth, and projected a pattern and started cutting it out with a rotary cutter. I discovered that the projected image kept freezing periodically, which got kind of annoying. After some trial and error and reading advice on the Projectors for Sewing Facebook group, I switched to projecting from my iPad instead, which solved the freezing problem. I bought Affinity Designer (AD) for my iPad to use for editing and projecting patterns. Calibration was a bit tricky, but I used the calibration tool and followed the instructions on the projector sewing website. It has been three months since I calibrated and the calibration seems to be holding fine. Another problem I ran into was my table wobbled a bit, especially when I leaned on it while cutting. I tightened up all the bolts in the table legs and now my table doesn’t wobble.

sewing projector setup

Initially I used a set of large washers I bought at a hardware store to hold my fabric in place while cutting. But I noticed some of the projector sewing folks talking about magnets. It had never occurred to me that you could put metal under a cutting mat and magnets would stick to it. I went to Home Depot and bought two of the least expensive 24×36 galvanized steel sheets I could find (about $15 each). I duct taped them together and added tape around the sharp edges so I wouldn’t cut myself. Then I slid them under my cutting mat. I bought a box of 25-lb rare earth magnetic hooks to hold down fabric. The magnets are strong enough to hold multiple layers of fabric. And the hooks are nice for easily grabbing and lifting the magnets.

galvanized steel for sewing table
galvanized steel for sewing table duct taped together

I use Crayola washable markers or white pencil (for dark fabric) to mark notches, darts, etc. on fabric, traced off the projected image.

Some of the PDF patterns I wanted to use were not designed for projecting. But I discovered PDFStitcher, which is free software, developed by a sewist, that stitches the pages of PDF files together. It also has some extra features such as allowing you to thicken and change the colors of lines, or select only the size layers you need. It works great!

Projector sewing is definitely a game changer! Now that I have this setup I don’t want to go back to paper patterns. For patterns that don’t require any alterations, I can quickly project, cut, and sew. For those that I want to modify, I’ve gotten fairly proficient at adding annotations to patterns on my iPad with AD and can use this approach to quickly lengthen, shorten, grade, change the neckline, etc. without having to cut and tape pattern pieces. I can even create pattern mashups, cutting and pasting elements from one pattern to another. This works even with dark fabric. The projector is usually bright enough, even without covering the window in my sewing room, although I do usually turn off the overhead light when using it. For cutting pieces that are larger than the projection area, I cut part of the pattern and then slide the image and cut the rest of it. You can add an alignment mark to the PDF and mark it on the fabric to make this easier.

Another projector trick is to draw or alter pattern pieces by placing a physical object (e.g. a pocket) on the table where the image is projected and drawing it on the iPad. You can see the projected drawing on top of the real object and adjust the lines of the drawing until they align with the real object. This is a good way to copy elements of exiting clothes or to add adjustments previously made on paper patterns to the PDF patterns.

Modern approach to sewing a vintage sundress

I asked my 17-year-old daughter what she would like me to sew for her. After perusing some patterns I suggested she told me what she really wanted was a vintage sundress in a woven fabric with a full-circle poofy, twirly skirt, perhaps like the one she had recently seen worn as a costume in Carnegie Mellon’s student production of Godspell. (See photo below of said costume on display at the CMU carnival.)

So I visited all my favorite PDF pattern websites and found some candidate patterns, but none were quite what she was looking for. I searched the Internet for vintage sundress patters with circle skirts and found a number of patterns from the 1950s that were available from resellers as classic paper patterns. And then I stumbled upon McCall’s M7599, which has been reissued as a PDF pattern. I found some reviews of the pattern, and even a how-to video (and I found another video after I finished sewing that might have been useful to watch too). My daughter examined M7599 and decided that view A was almost perfect. Except she wanted it without the contrast band, above knee length, and, of course, with pockets. These seemed like doable modifications, so I bought the pattern and downloaded the PDF.

The PDF pattern came with a fairly terse set of instructions and was basically a scan of the original pattern with all the layers on one sheet, tiled into 8.5×11 pages, not a convenient modern PDF layered pattern. I was able to assemble the pages into one giant PDF using PDFStitcher, an awesome free tool developed by a sewist. Then I loaded the resulting PDF into Affinity Designer (AD) on my iPad and traced the pattern pieces I was going to use in the correct sizes with a nice thick red line that would show up well when projected onto fabric (see photo below of skirt gores projected on fabric, held in place with magnets, ready for cutting with rotary cutter).

The sizing of vintage patterns is strange. My daughter normally wears a 2 or 4 dress size but according to the size chart she needed a 12. Ultimately after making a muslin and futzing with the pattern I ended up making a size 10 with parts graded to a size 8.

Inspired by the Godspell costume, my daughter searched online for fabric with pages of text, and ultimately settled on the Filigree Zen Chic Newsprint Text and Words fabric from Moda Fabrics in the white colorway. It is a lovely quilter’s cotton fabric, but it occurred to me that it is quite directional and the circle skirt would result in some of the design being upside down. To compensate I divided the full circle into six gores so that I could cut them each right-side up. I drafted the gores directly on the PDF pattern in AD. Of course, this increased the amount of fabric I would need — I ended up using six yards!

Removing the band from the bodice was straightforward — I basically just sewed the pattern as written but without attaching a band. I decided to also leave off the petticoat so that my daughter would have the option of wearing the dress either with or without a petticoat (she can wear a separate petticoat). Since I wasn’t attaching a petticoat I decided the yoke under the petticoat wasn’t needed either so I left that out as well.

I made a muslin of just the bodice so I could adjust the fit. I reduced the size of the bust darts, and brought the straps in a bit. It was also a good opportunity to practice using my zipper foot, which I haven’t used in many years (and zippers kind of scare me). It turned out to be a nice enough crop top that my daughter decided to wear the muslin outside in public. In fact she even wore it to perform with her rock band. She requested thinner straps for the dress and I decided to continue futzing with the bust darts, and ultimately just removed them altogether for the dress.

Figuring out how to implement side-seam pockets was another challenge, as the pattern includes a side zipper, which means the zipper has to attach to the pocket. Fortunately I have a RTW dress with pockets sewn this way so I used it as a model. I drafted pockets in AD and then reverse engineered how to sew it all together. (There are actually instructions online for sewing a pocket in a zipper and a nice video that I will probably watch if I ever attempt something like this again.) This isn’t the most beautiful invisible zipper job, but it doesn’t look terrible, and both the zipper and the pockets are fully functional so I consider it a win.

The penultimate step in the pattern involved slip stitching the bodice lining to the zipper and then to the skirt. Until I reached that step I didn’t fully comprehend how that final finishing would be done or realize how much hand sewing was involved, but I got through it and it turned out fine. The final step was the hem. I knew my daughter wanted the skirt quite a bit shorter than the pattern called for so I had cut it shorter in anticipation. But I hadn’t cut it short enough and it would have required a 2.5 inch hem, which was going to be hard to sew on a circle. So I folded the skirt into quarters and carefully lopped off 1.5 inches with my rotary cutter. Then I sewed a line .5 inch from the edge of the circle all the way round. This allowed me to easily fold the skirt on the stitch line and then fold it again and press to form a 1-inch hem. I stitched the hem down with a straight stitch about 1/8 inch from the edge of the hem. All this was reasonably straight forward but I would like to point out that the circumference of this skirt was about 12 feet, which means that each step (stitching, folding, folding, pressing, stitching again) has to be done over a distance of 12 feet, so it takes a while.

Other than figuring out the bodice fit adjustments, sewing the zipper pocket, and all that hemming, the dress actually came together pretty quickly and wasn’t that difficult to make. And the results are pretty nice. Here it is modeled without a petticoat. (And below that, while performing at her music recital.)

And here it is with petticoat, in full 1950s glory!