Serena dress

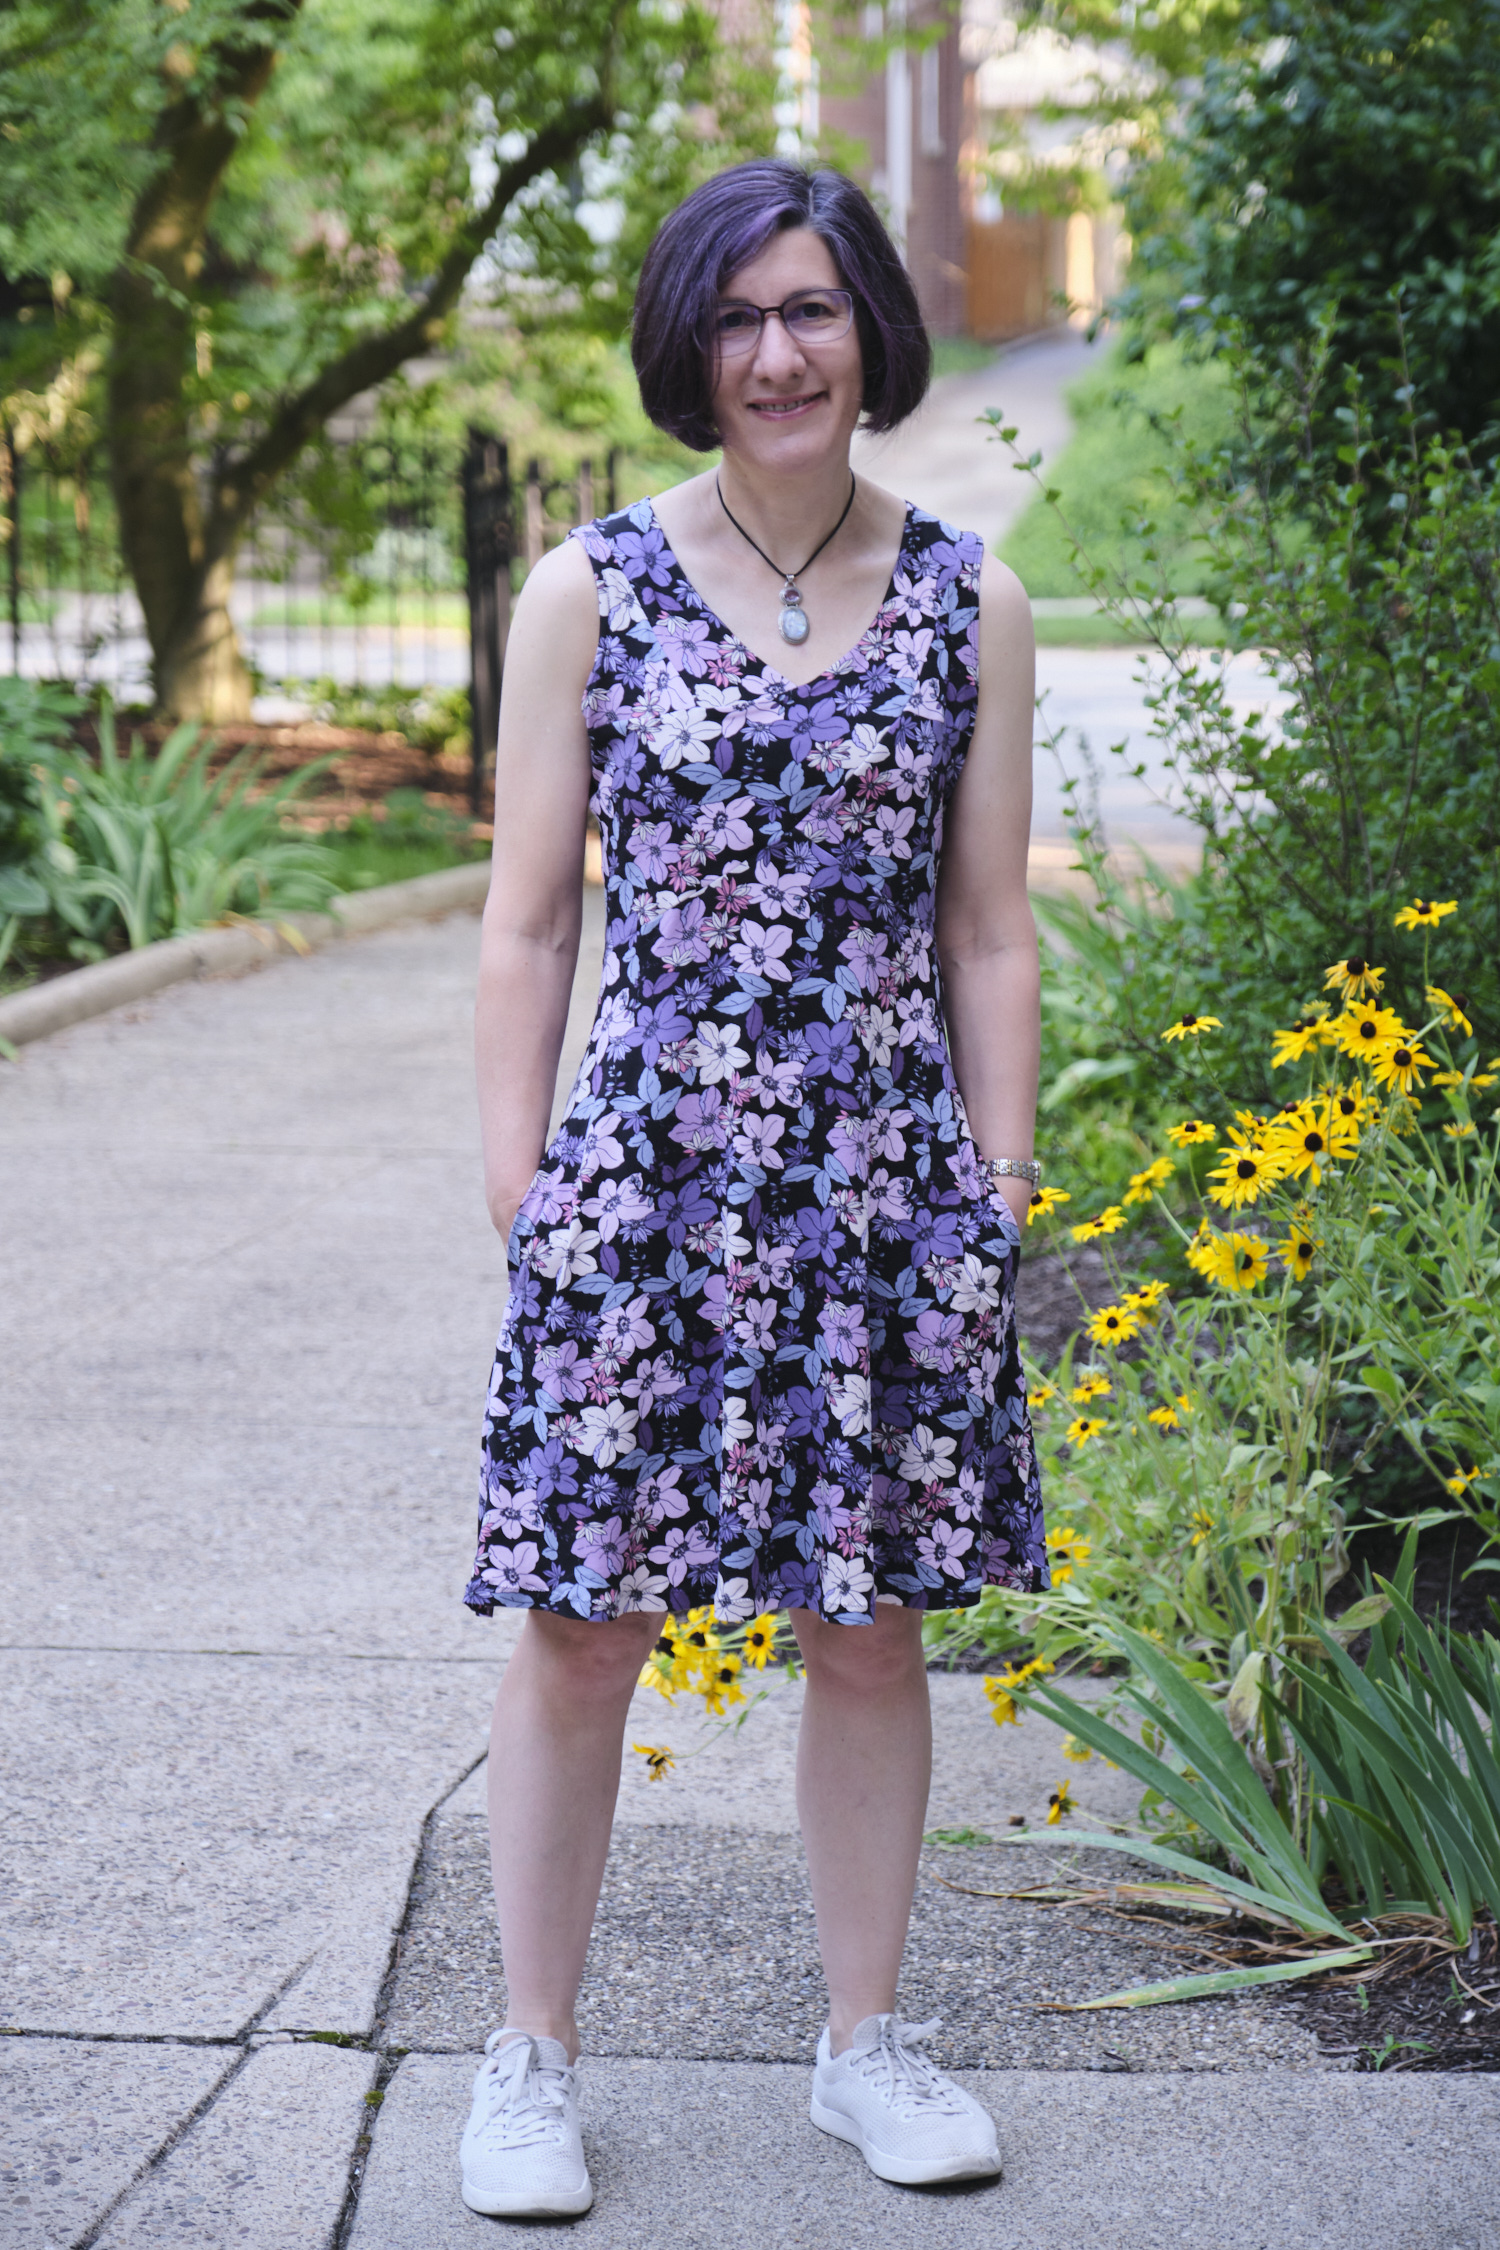
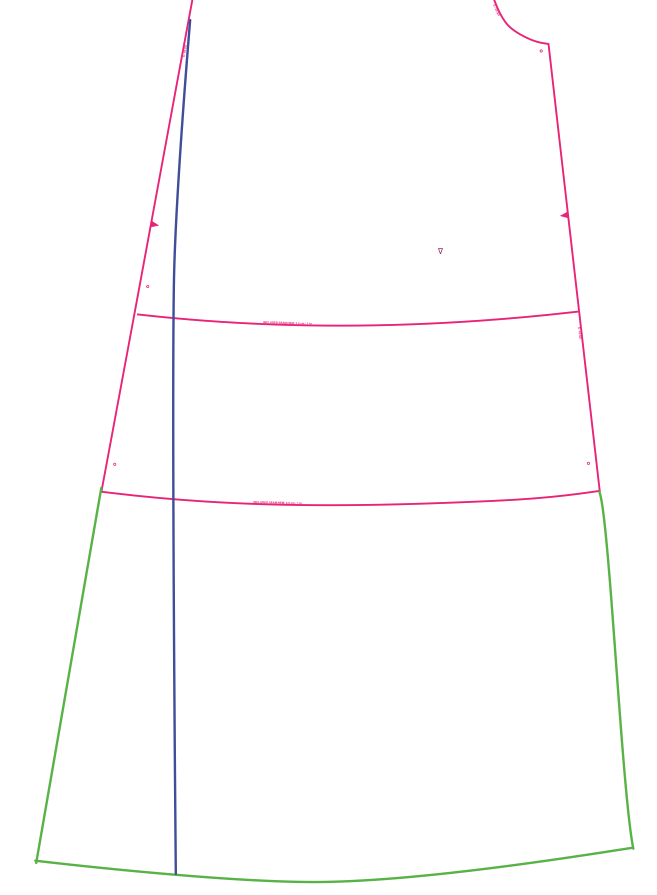
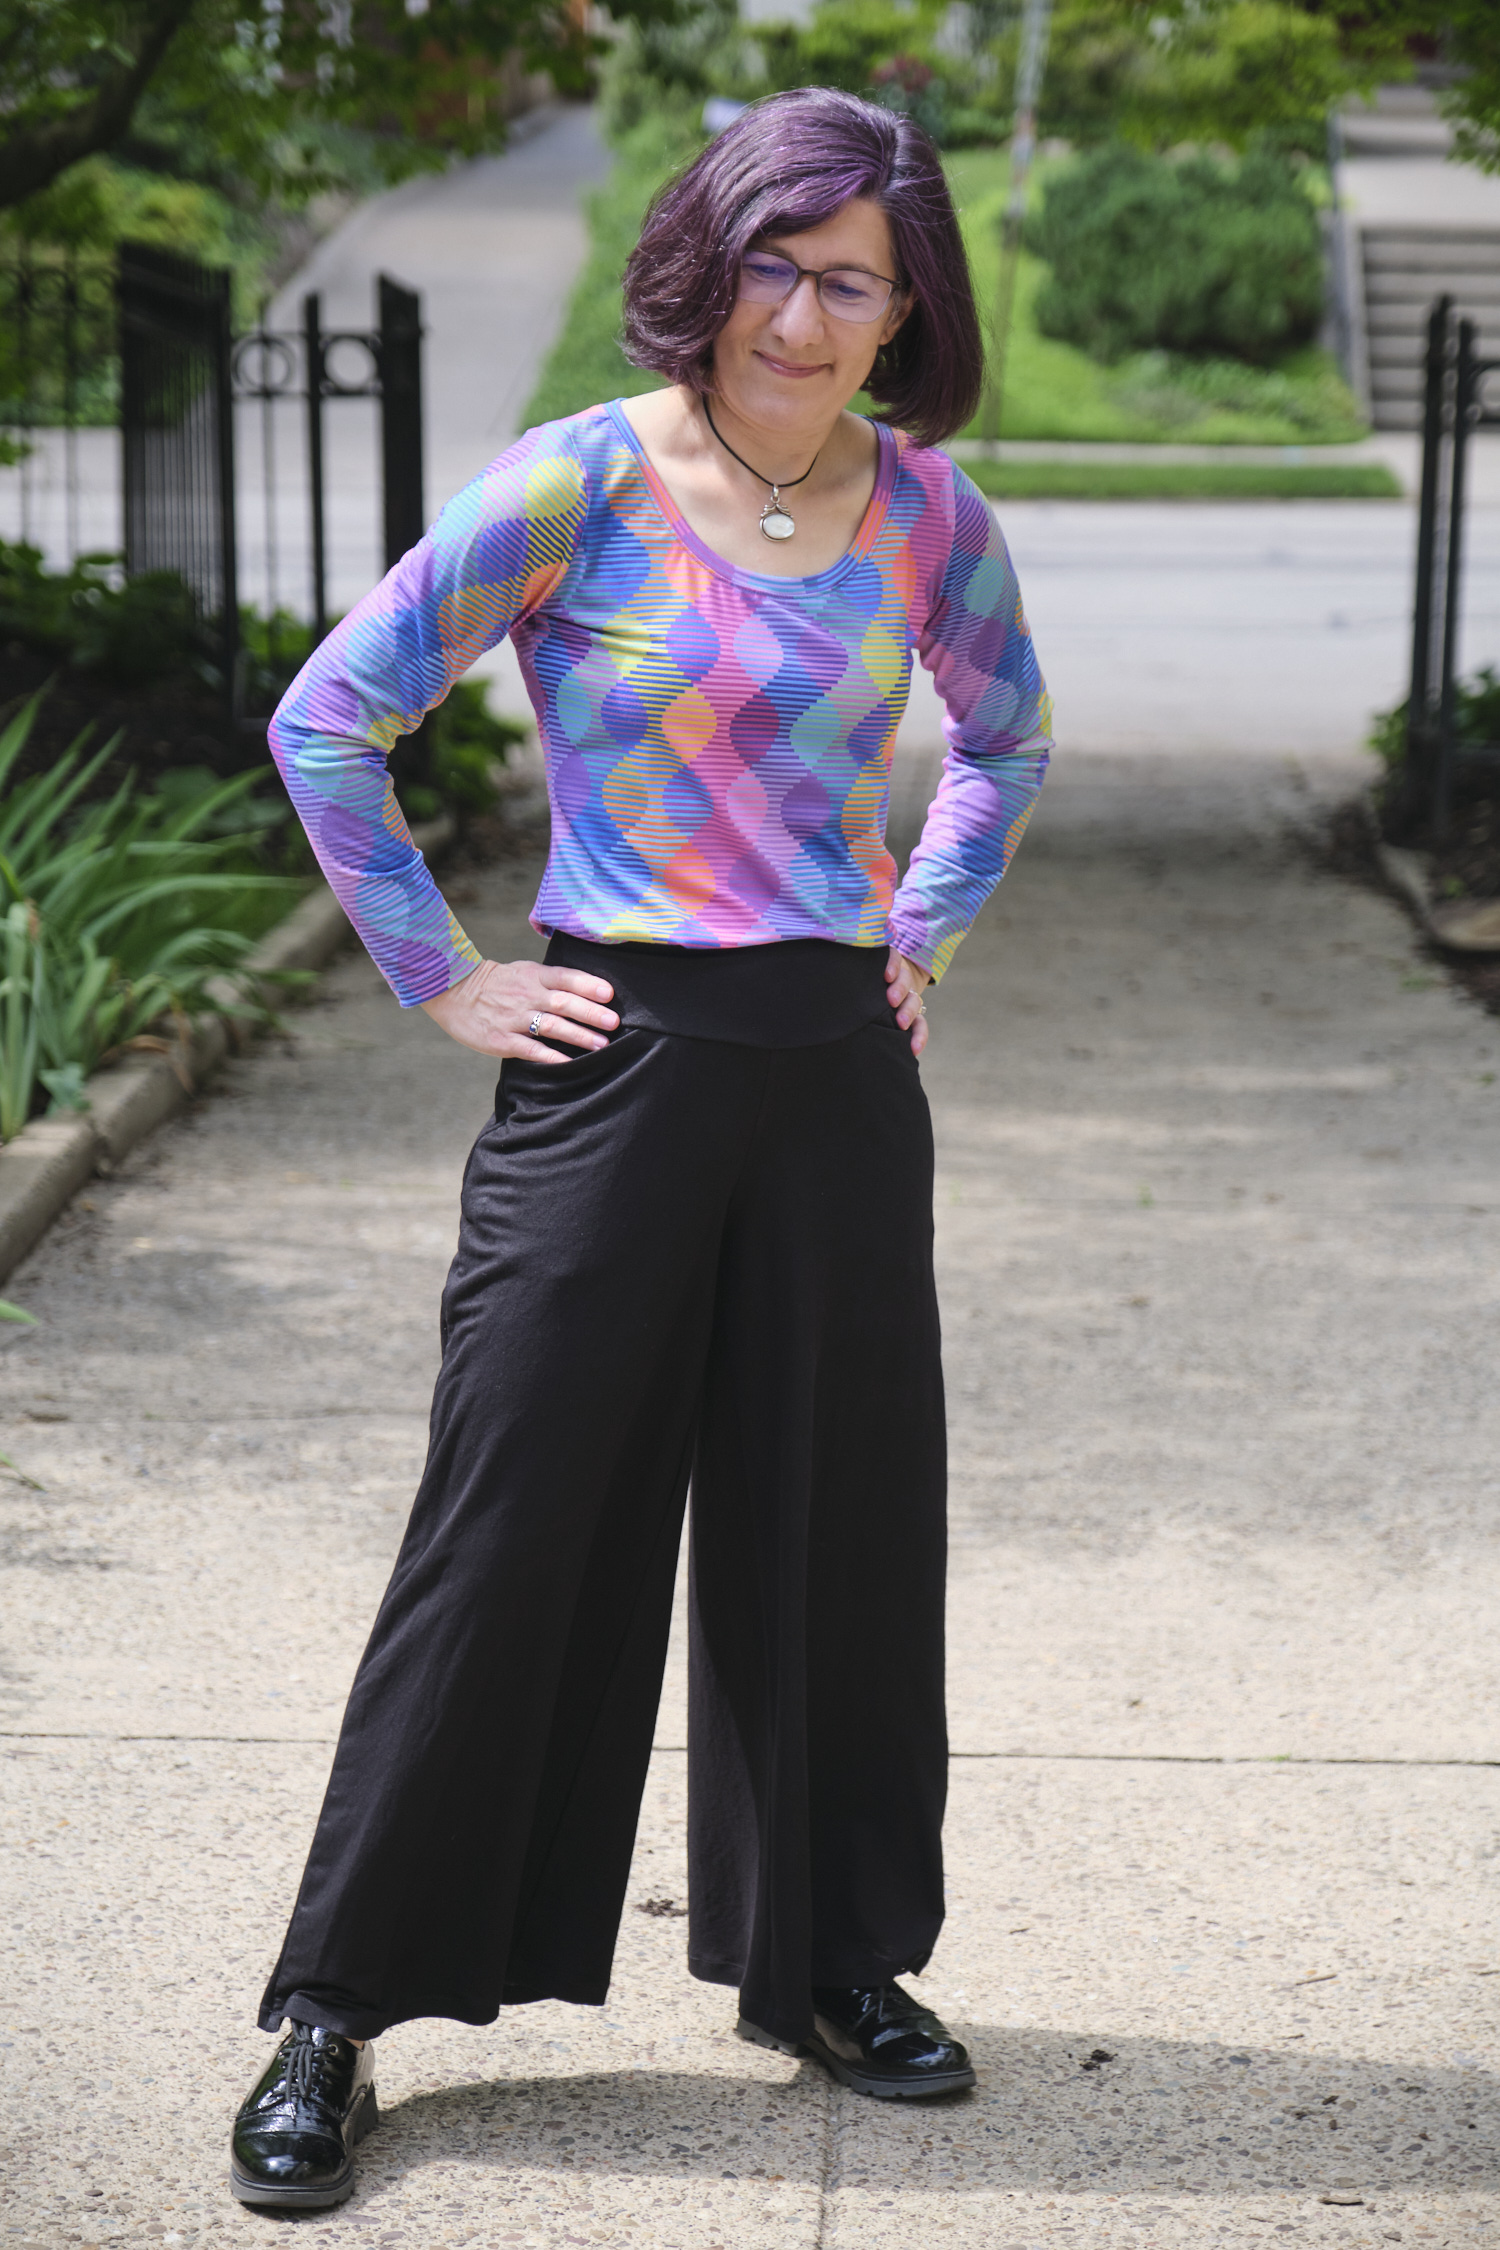
I saw the Sinclair Serena crossover knit dress pattern a while ago and was a bit intimidated about sewing the crossover part, which is a bit of a jigsaw puzzle. But I recently was looking for a knit dress pattern that would look great in a full length formal gown, and Serena looked like it could be adapted for this purpose. The gown project will be another story for later, but in the mean time I thought it prudent to sew a short version of this dress with inexpensive fabric to make sure this was going to work. So earlier this month I projected, cut, and sewed Serena in one weekend. Serena is an old pattern without projector files, but I was able to create projector files with pdfstitcher. [Correction: There are projector files, I just some how missed them!]

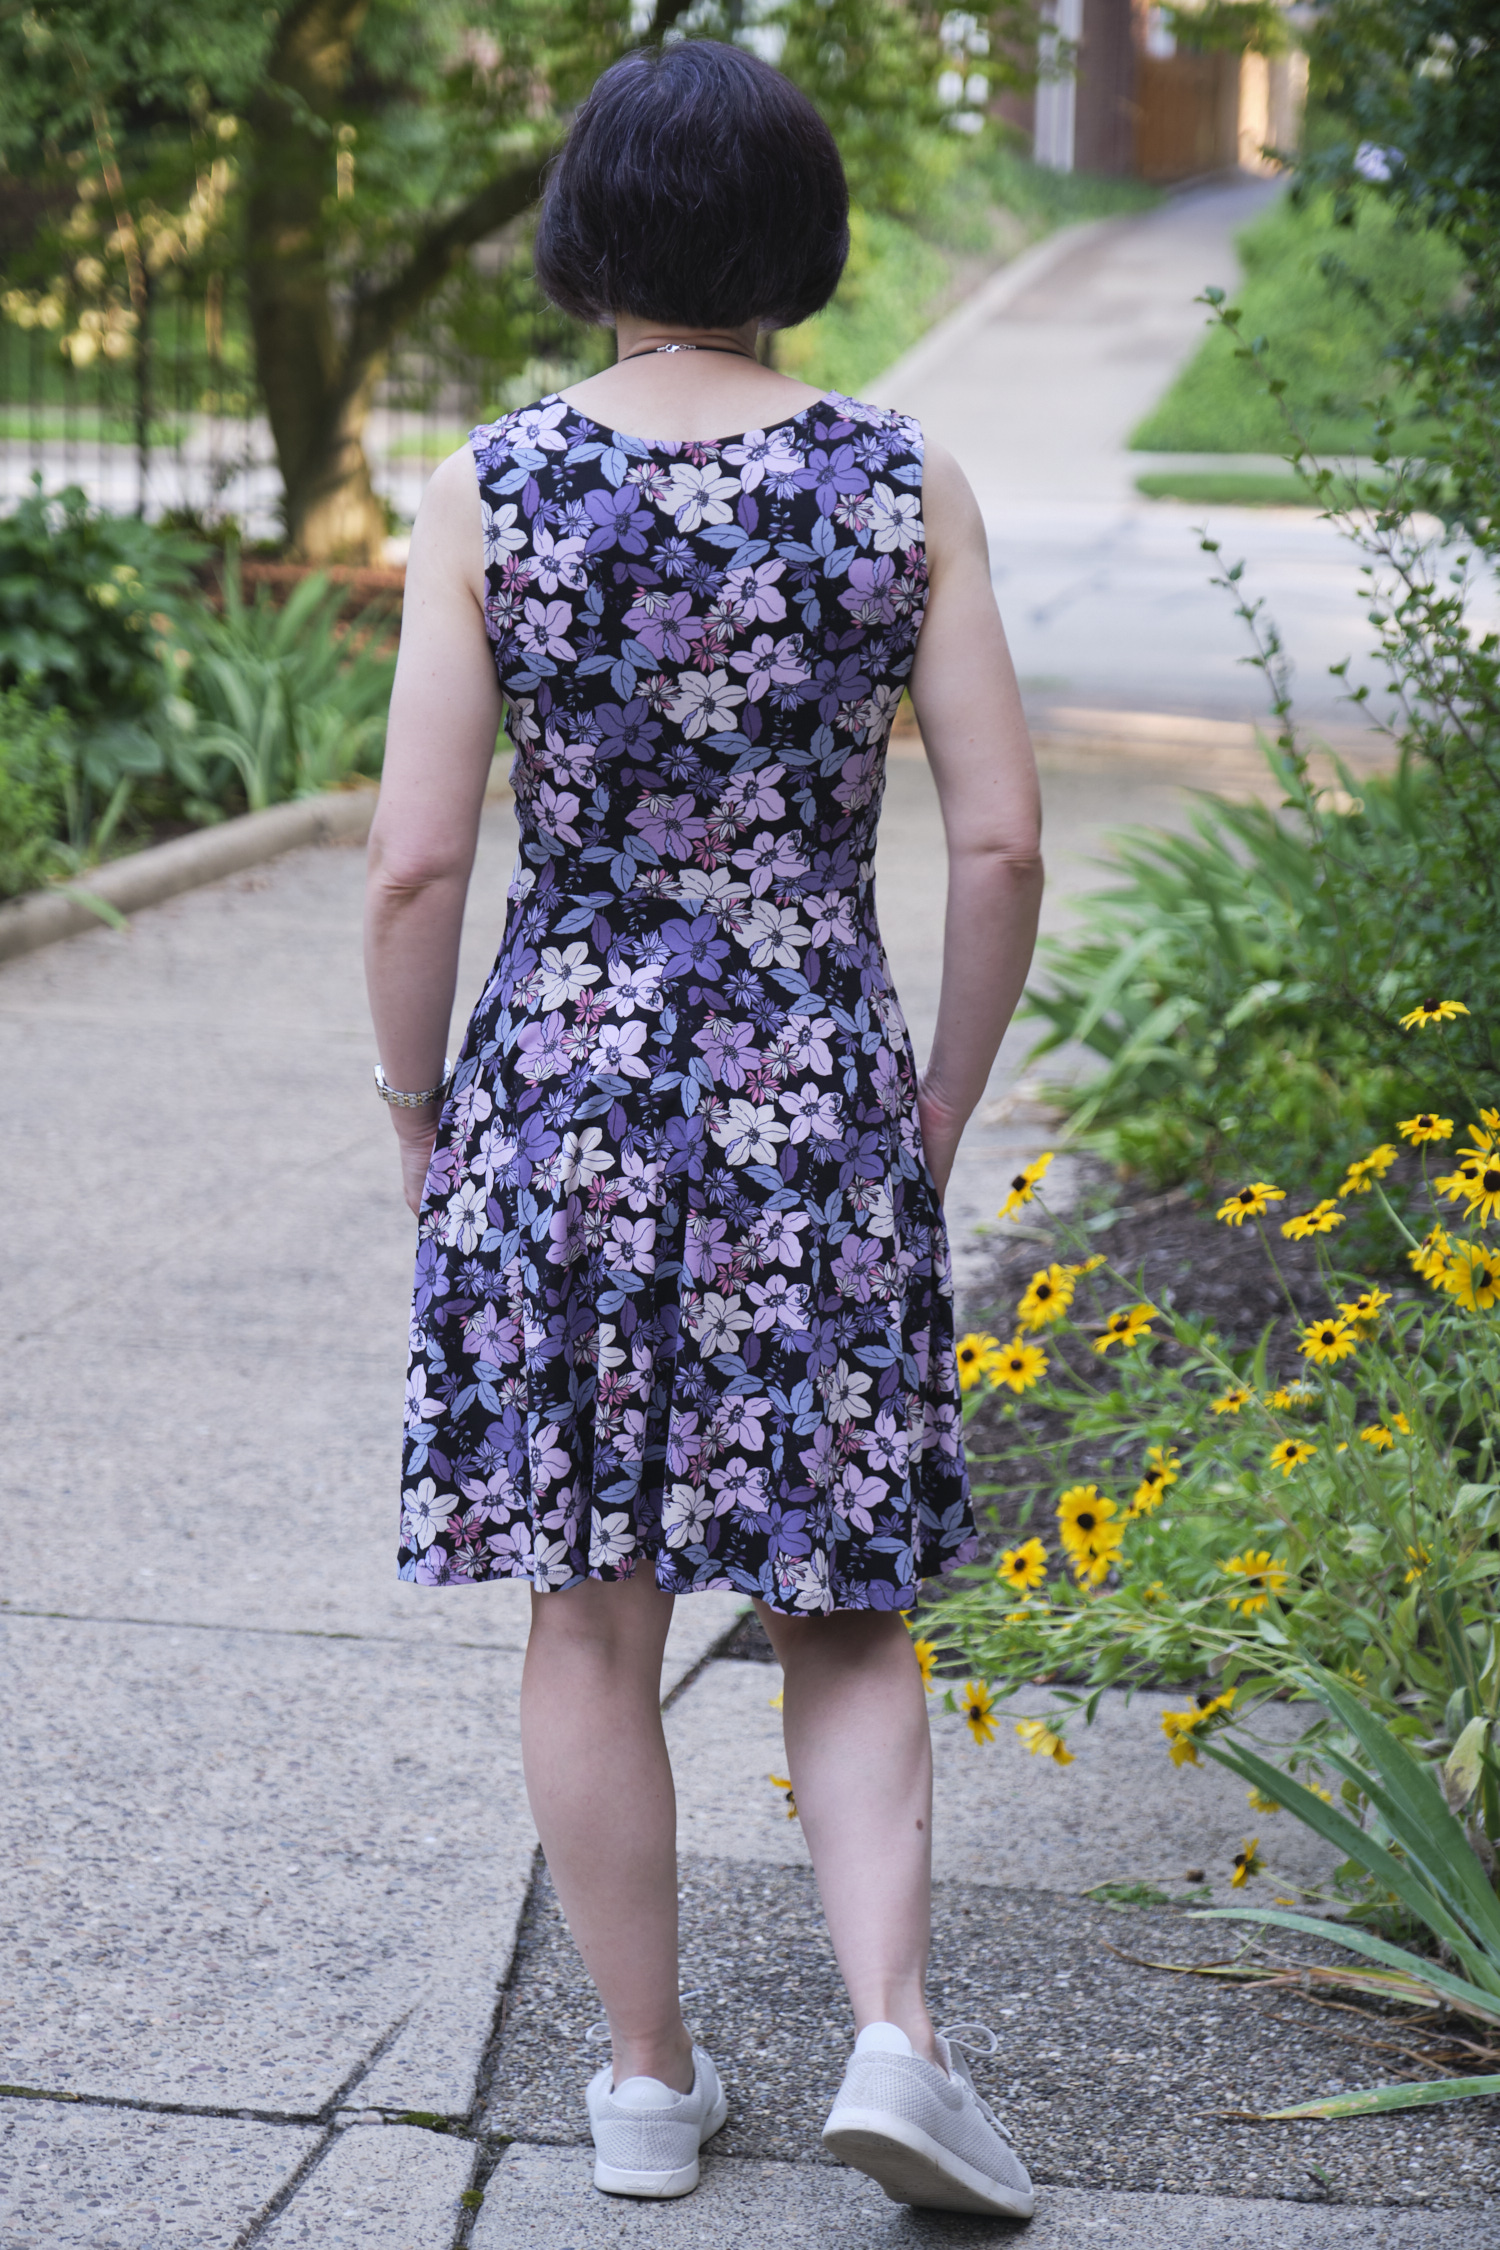
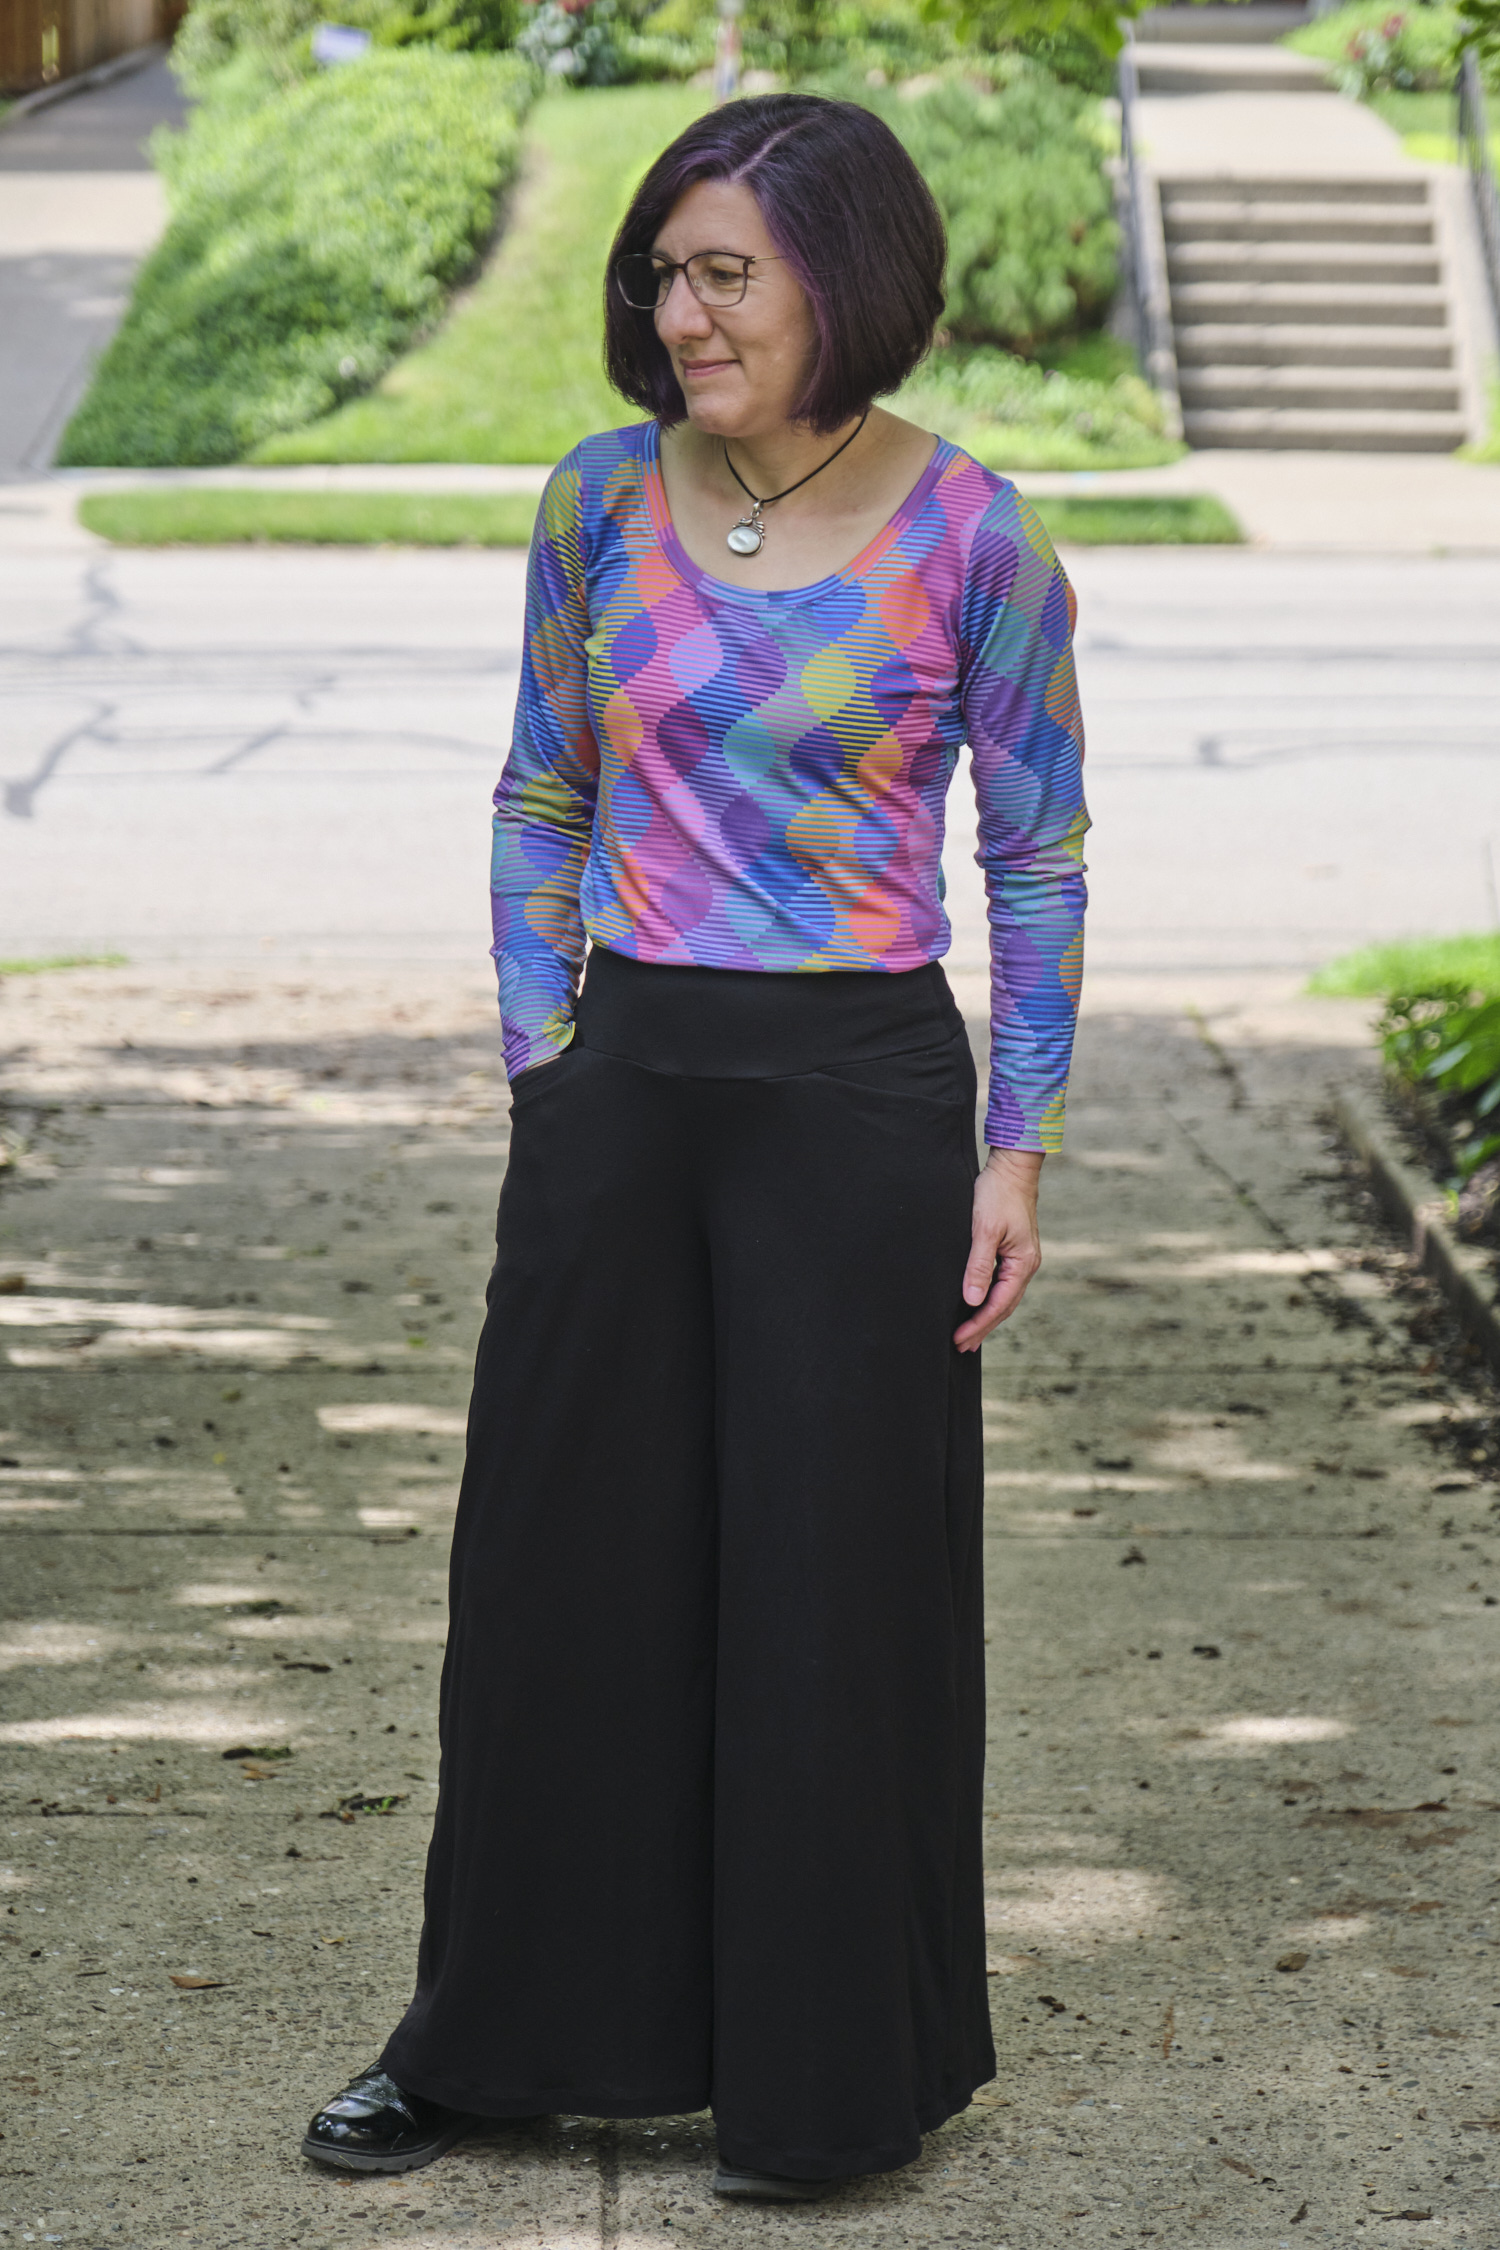
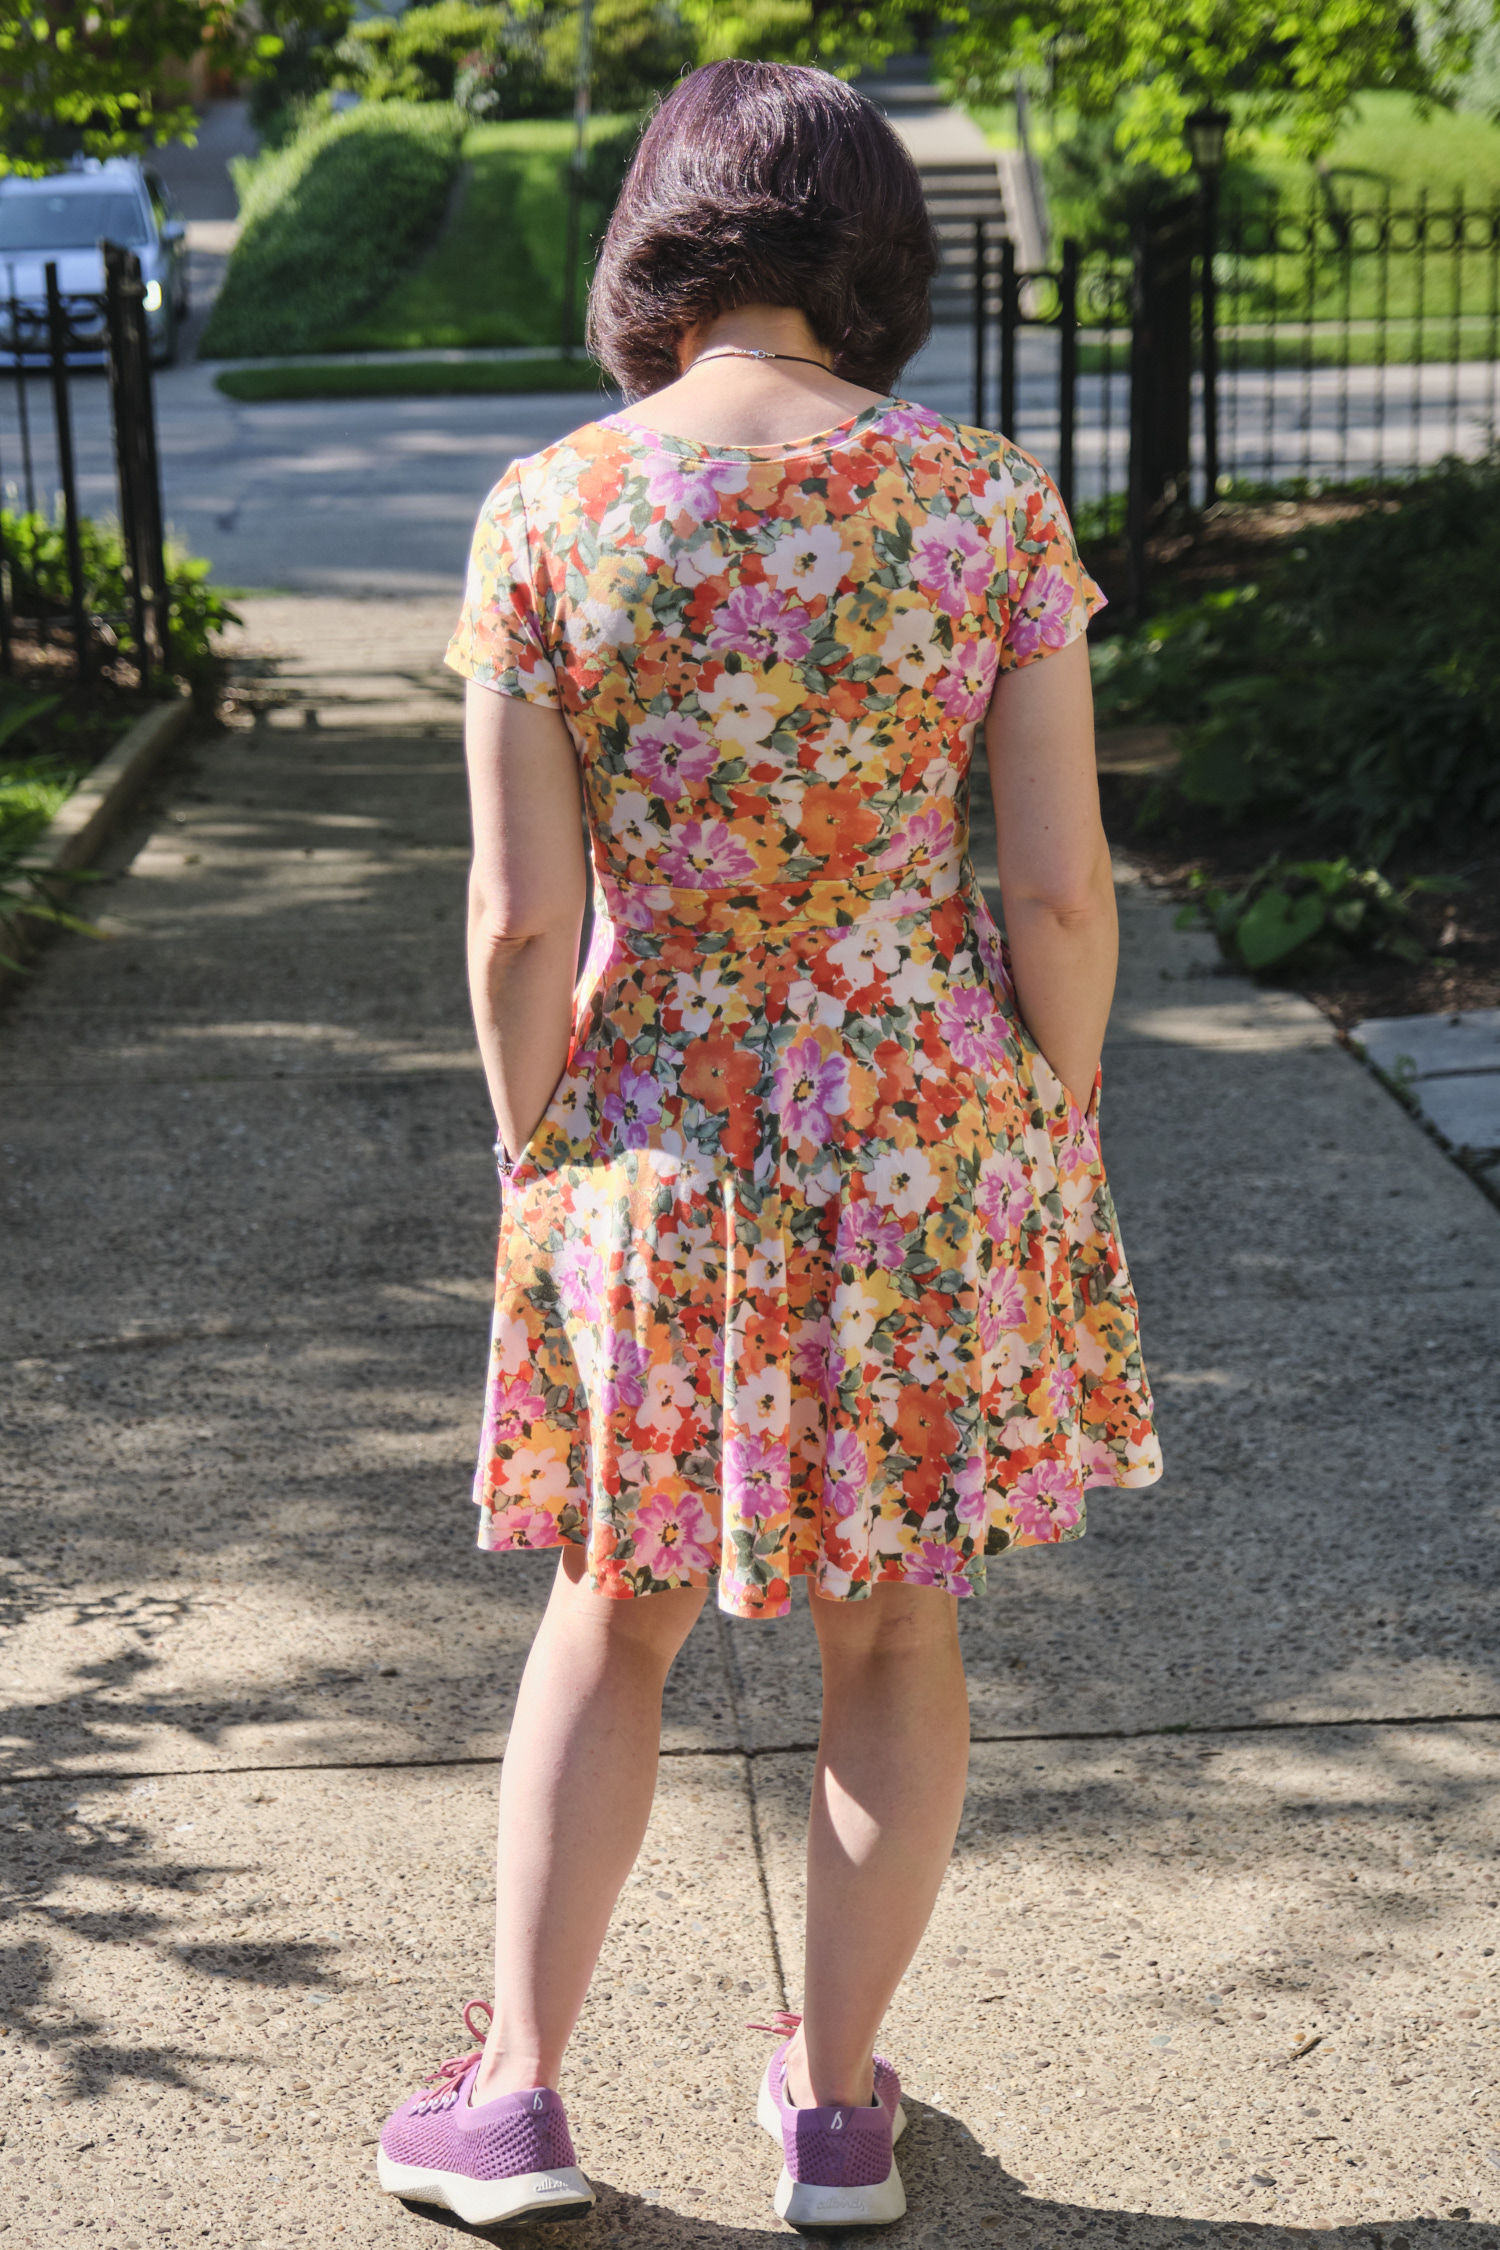
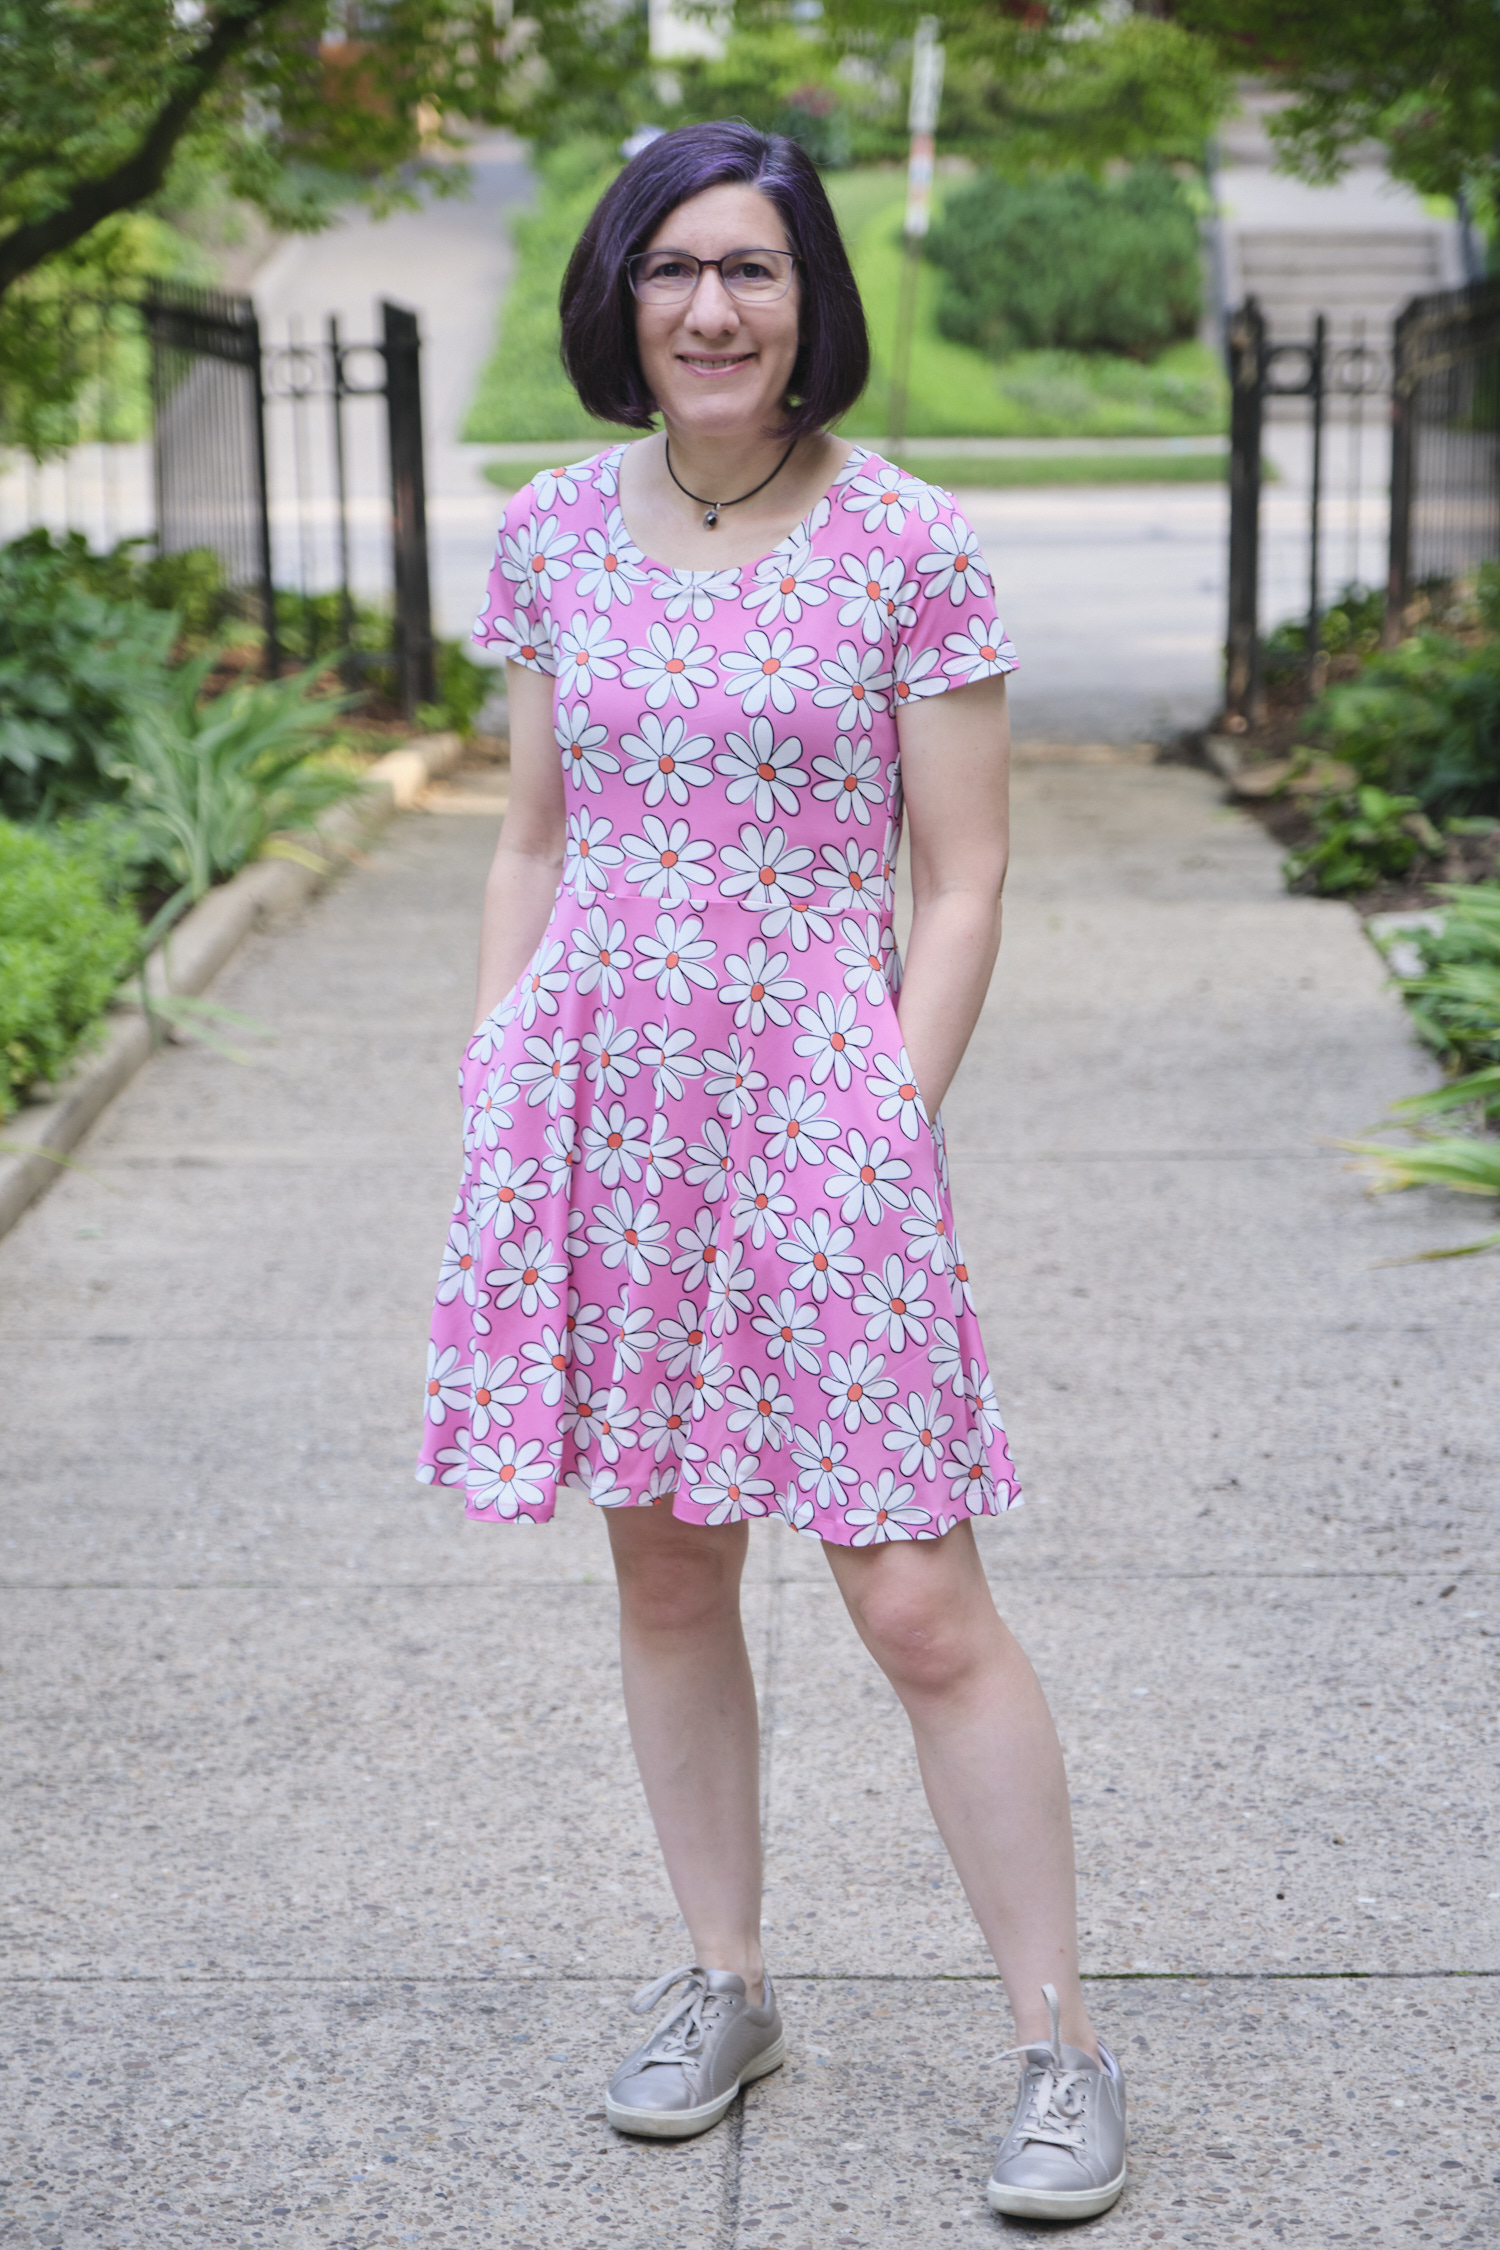
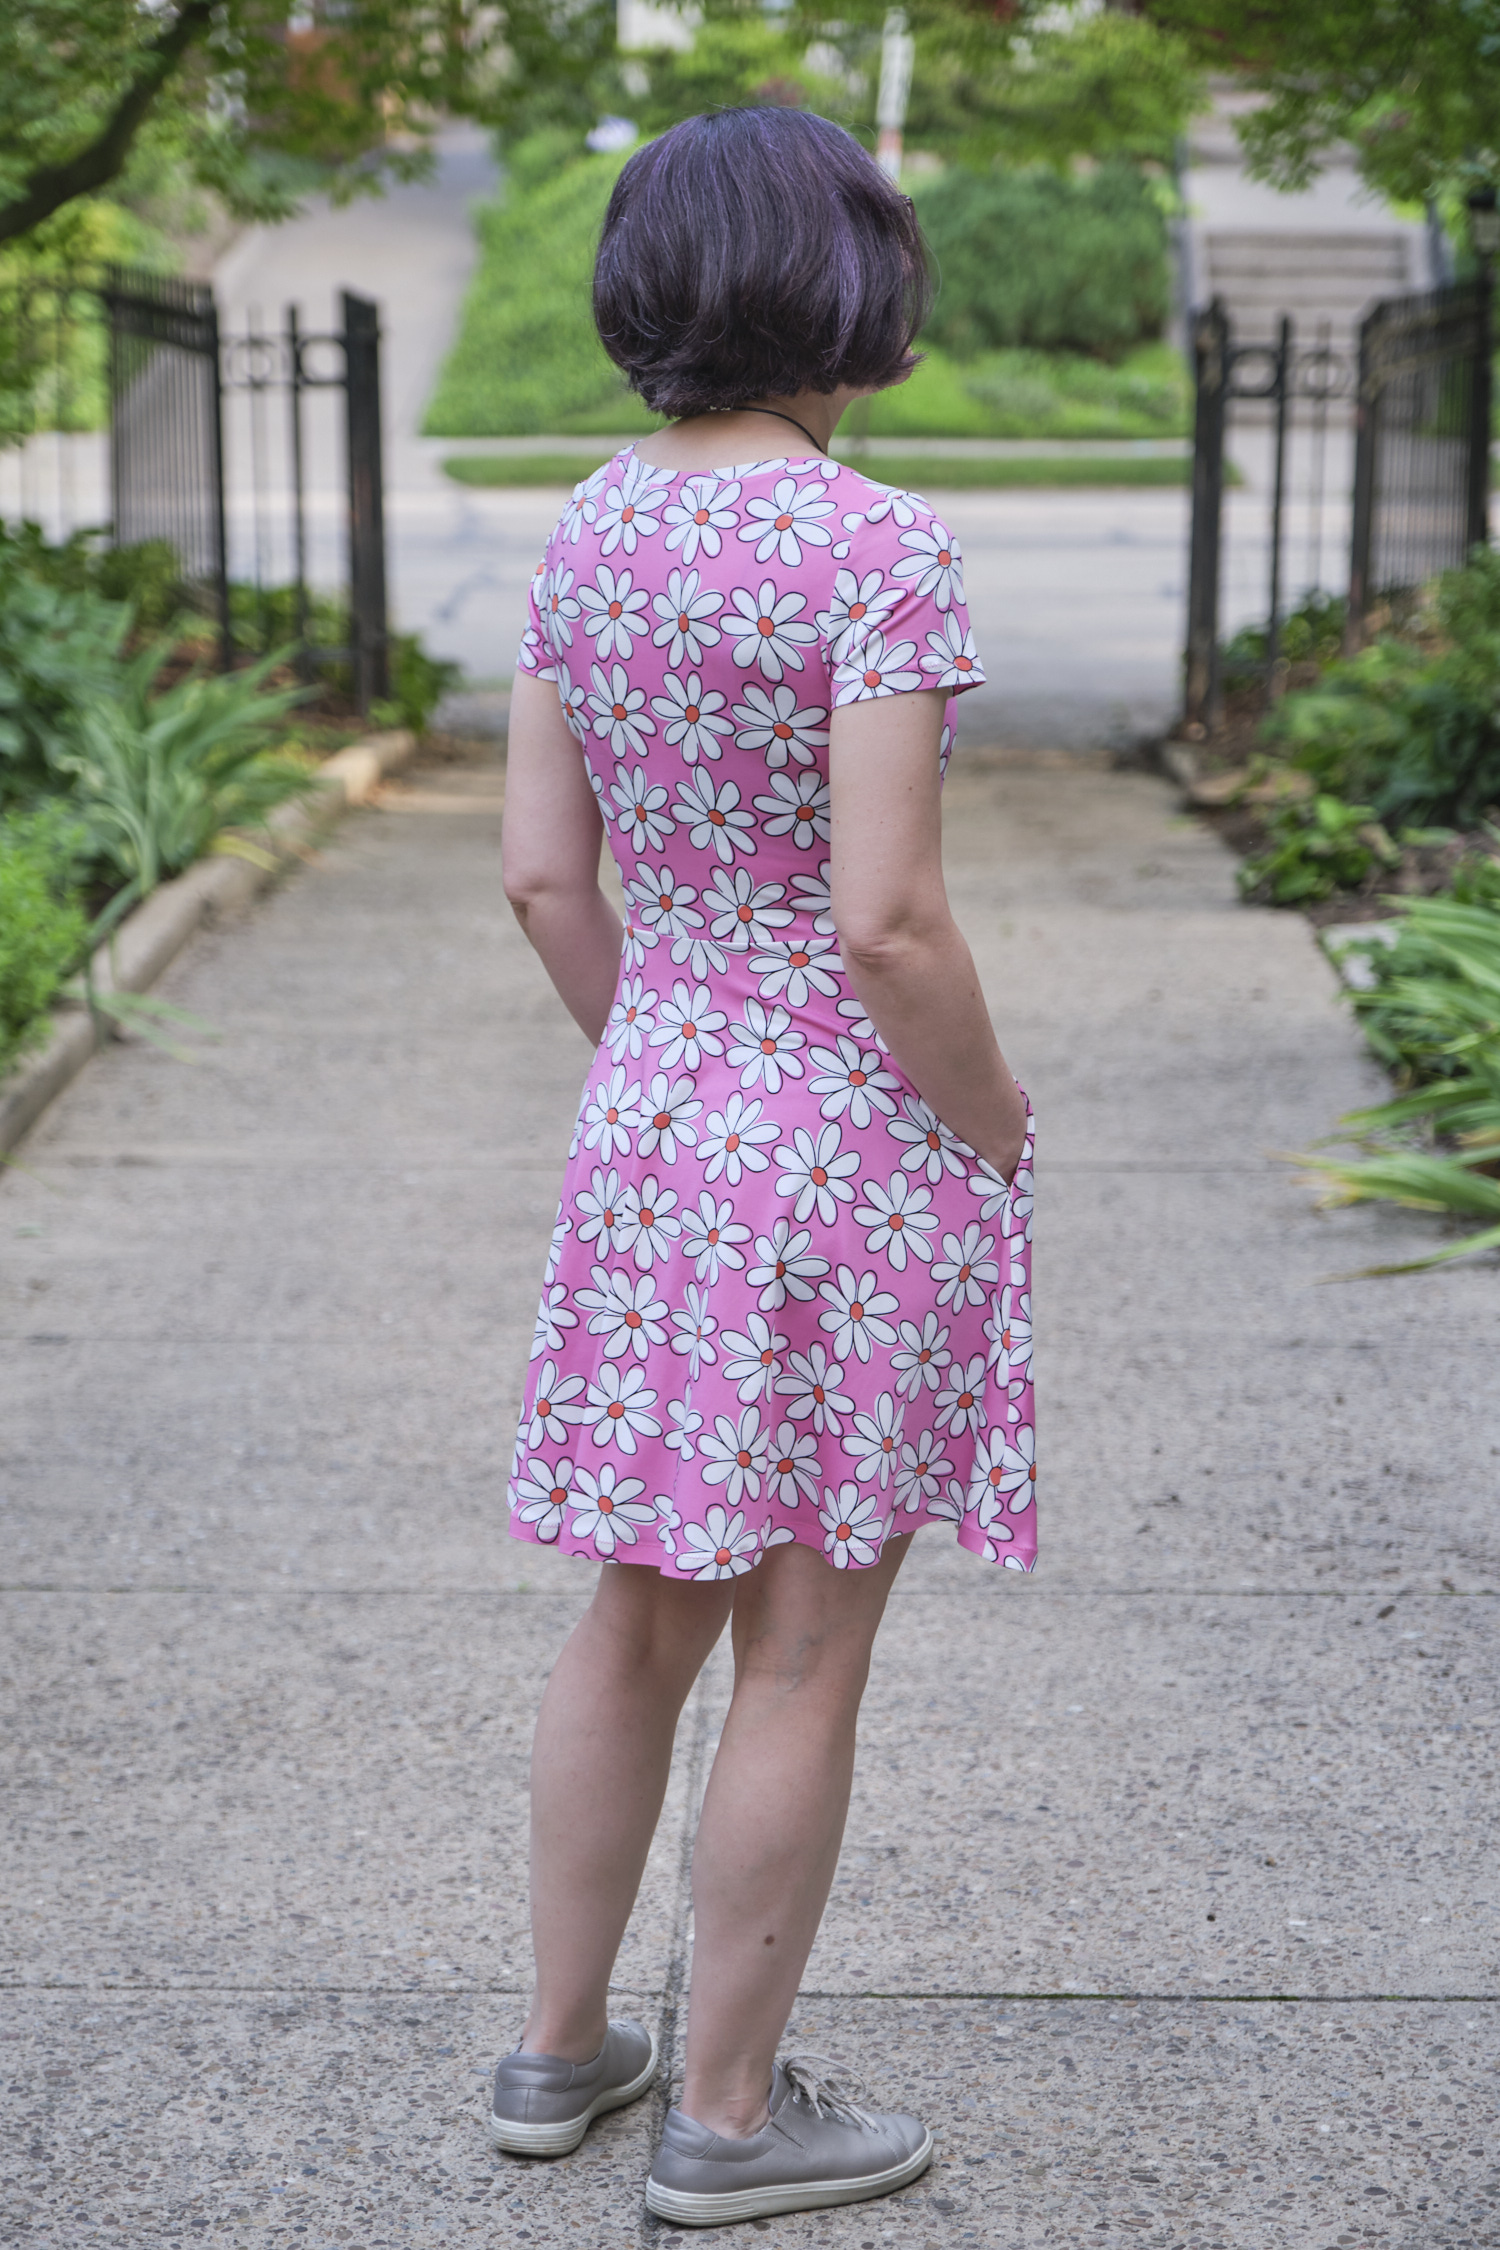
I used the 4 petite pattern and cut the skirt 1 inch below the above-the-knee length, making it sit exactly at the knee on me. I selected a floral double-brushed polyester for this dress. This is a light-weight, stretchy, and inexpensive fabric that’s very comfortable to wear. I looked at photos from others who have made Serena and saw some interesting approaches to color blocking this dress that really highlight the crossover (and/or the bust) and the jigsaw puzzling involved, but my favorites were all made from a single fabric print without any color blocking. Without the color blocking, you an hardly see the crossover, but you still get a lovely fitted top with a skirt that hangs from a point that I think will work really well for a gown.

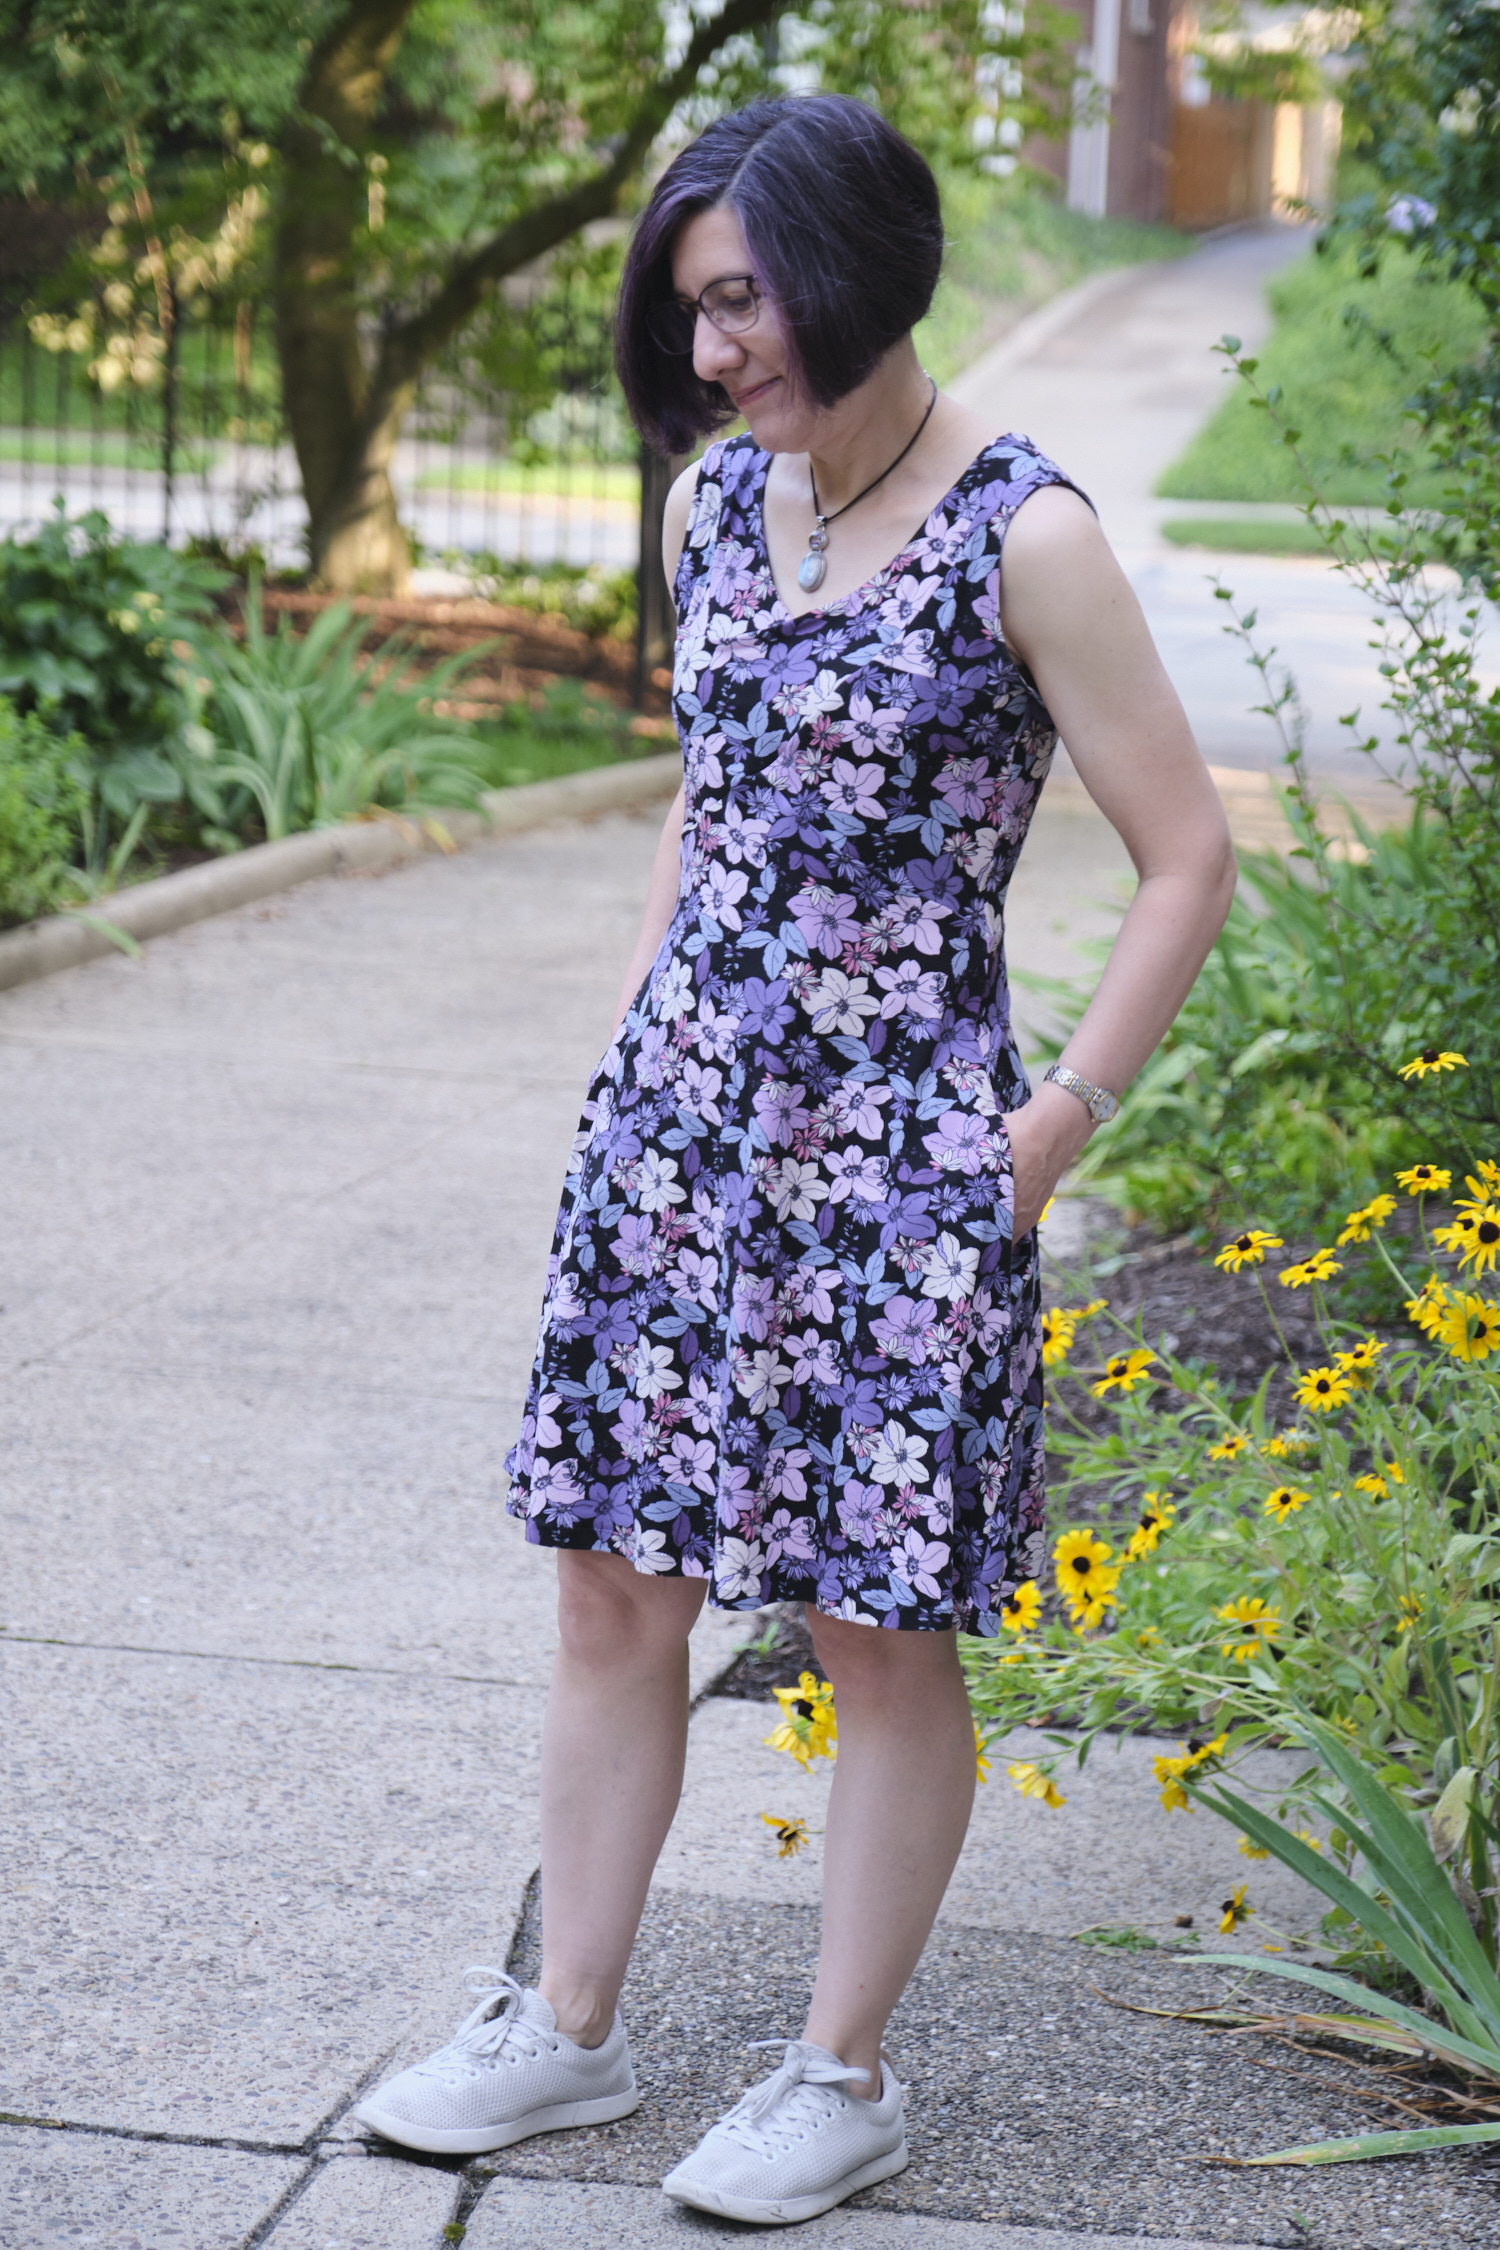
Of course I made it with the pocket option (and added about an inch to the bottom of the pocket bags to make sure my phone doesn’t fall out of my pockets)! The pockets are great, but I think the openings sit a little low so in the next dress I will probably raise them about 2 inches higher. The pockets flop around when filled since they aren’t attached to anything except the side seams since there is no waistband to attach them too (and even if there was I probably wouldn’t attach them because I don’t like it when pockets distort the waist band), but I think they would flop less if they were attached higher. My favorite dress pockets are still the Alana dress pockets — no flopping or distorting — but that style of pocket only works with princess seams, alas.

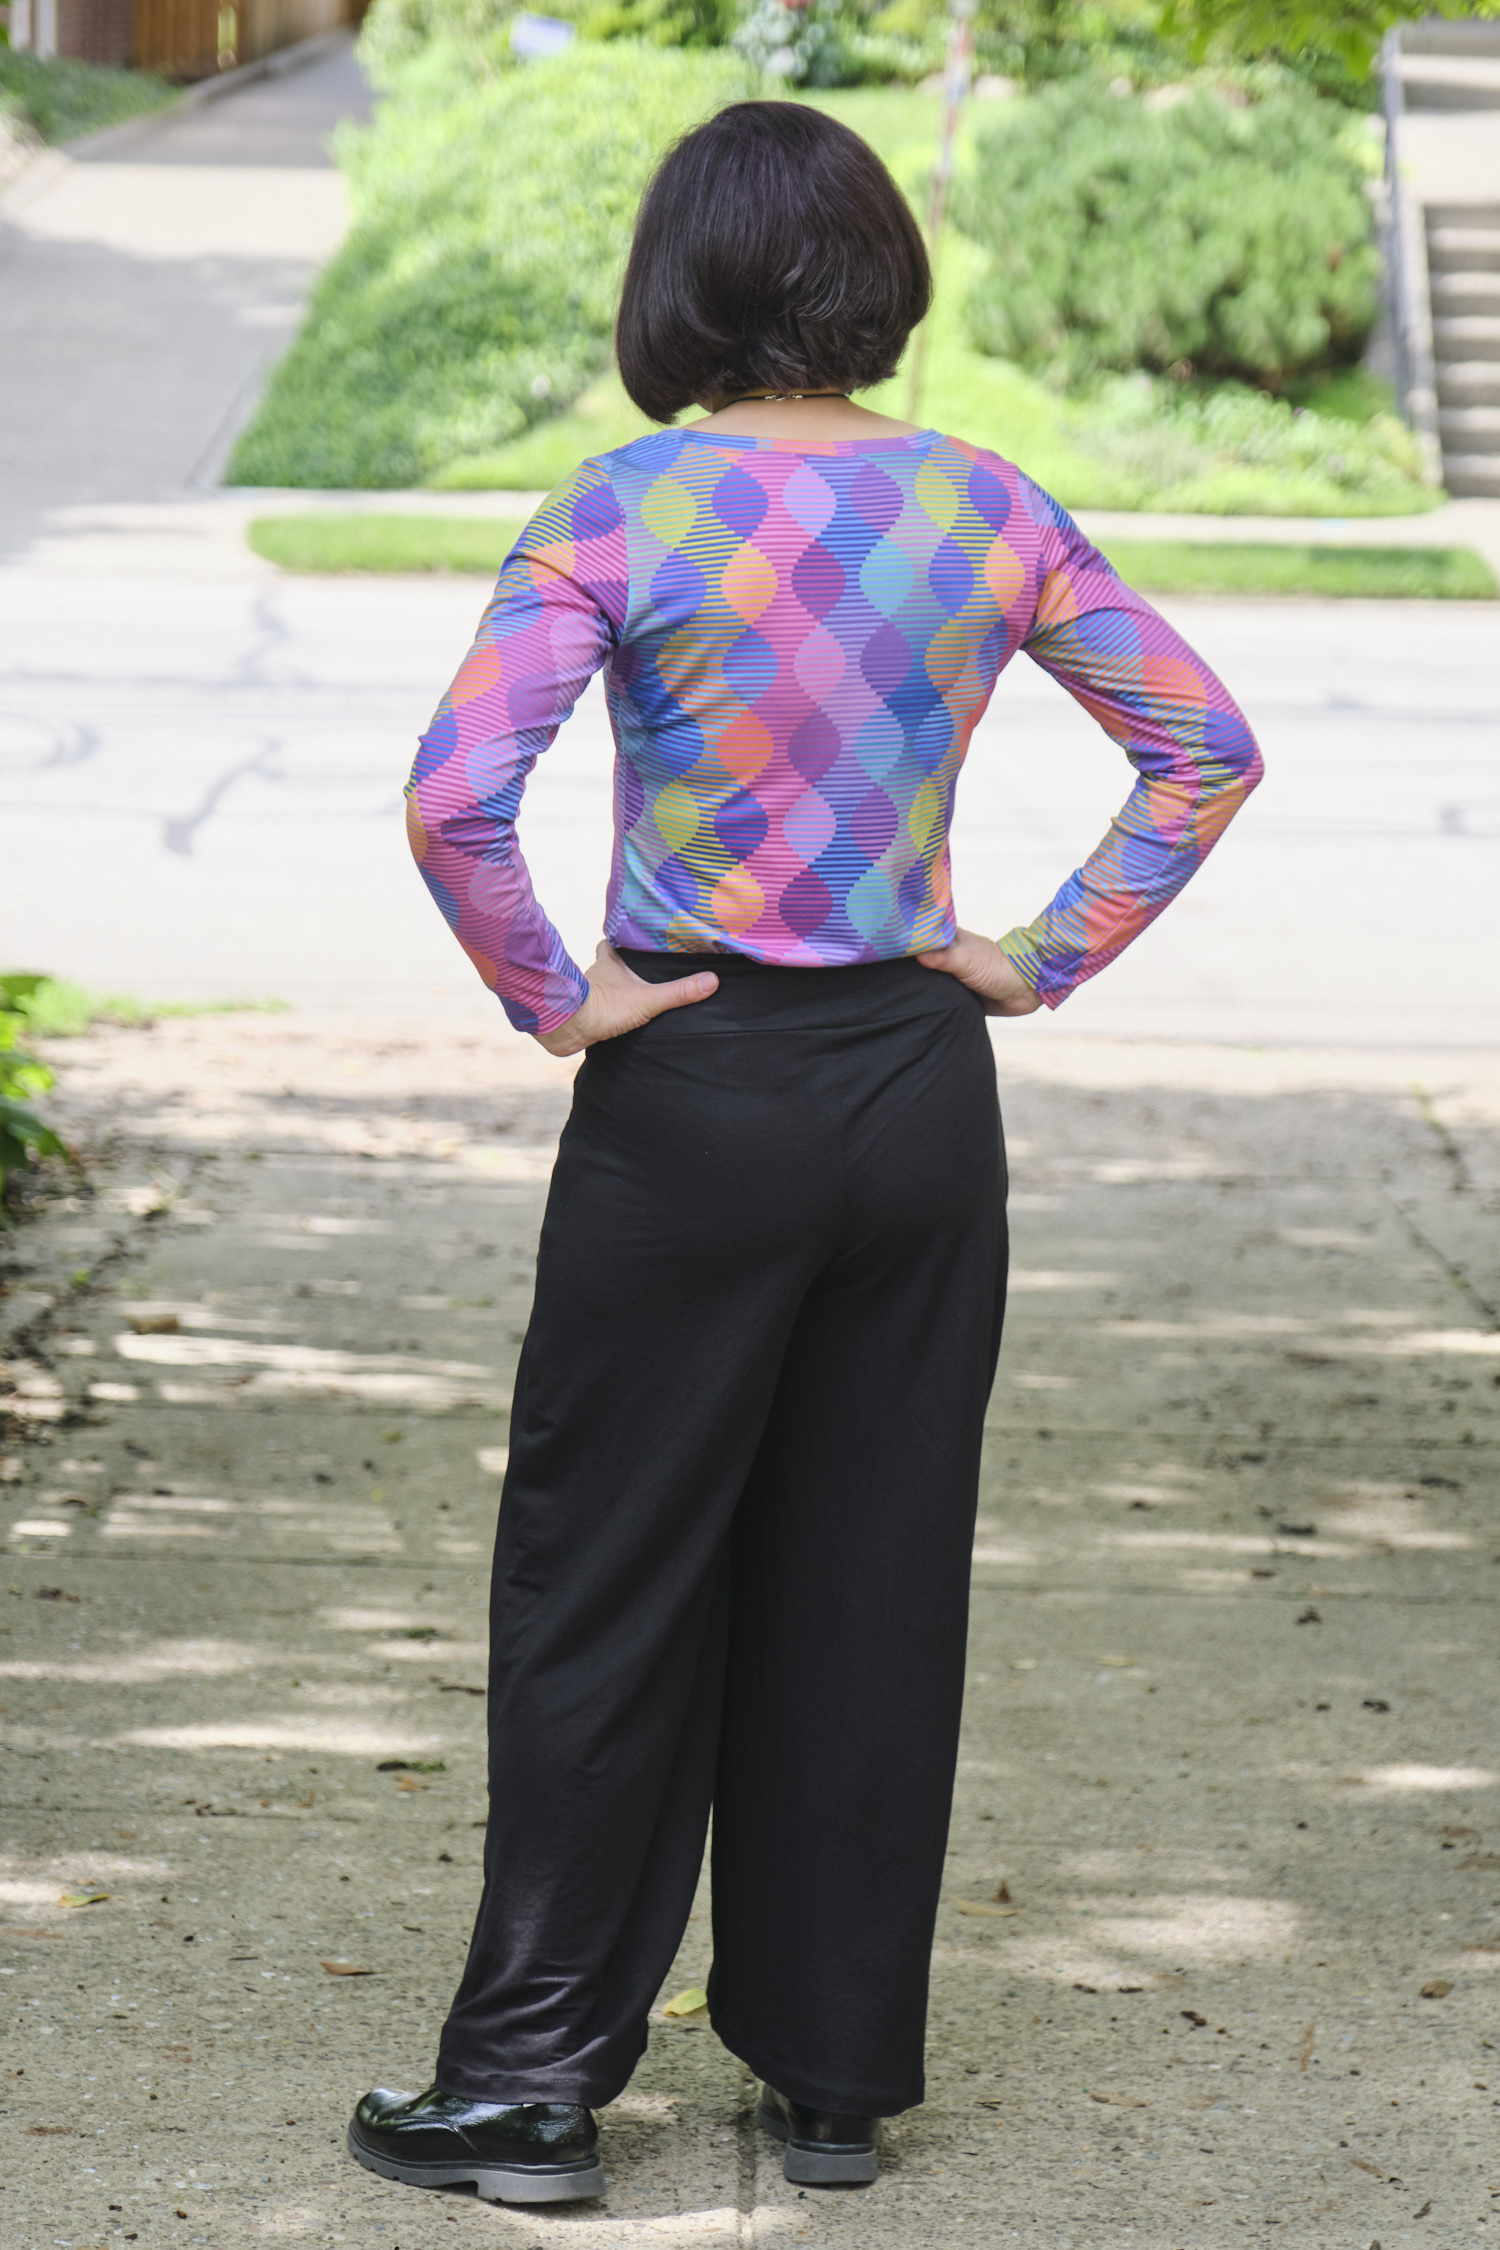
The jigsaw puzzle was not actually too difficult to solve, although I do recommend reading the pattern tutorial very carefully and watching that you don’t try to assemble any of the pieces upside down or backwards (I had a couple of close calls). The pattern suggests optionally adding some elastic to the top edge of the v-neck if it doesn’t recover well from a stretch. I tested the recovery as suggested and it seemed fine, so I did not add the elastic. I have a very slight droop in the top layer of the crossover that might have benefited from adding the elastic, or at least a bit of fusible knit interfacing (maybe next time!), but it is subtle. (Later I realized that I actually ended the seam that holds the crossover down too early. Had I brought the same all the way to the center of the crossover it might not have drooped.) There is also optional top stitching that I opted out of, with no regrets. The arm holes are finished with a binding that I didn’t do a great job of attaching, especially on the left side, so the bottom of the armhole flops out a tad. Next time I will need to take more care with positioning and stretching the band. Most of these are issues that probably nobody would notice except me.

Anyway, I’m quite pleased with Serena, and am already planning to make another one soon.

Cleo pants in Pylos LiKnit

I’ve always liked the idea of linen pants, but have never actually liked wearing and maintaining linen pants. They are cool and breathable, until they become a wrinkly mess and you have to iron them. Some have a texture that isn’t that soft against your skin. This spring I ordered several pairs of linen pants online from a popular retailer and ended up returning all of them because I wasn’t crazy about the fit and I could see they were going to need a lot of ironing. So when I saw a new fabric from Surge Fabrics described as a “faux linen knit,” I was intrigued. The fabric is called Pylos LiKnit, which is kind of a weird name that I struggled to pronounce until I realized the K is silent. I’m not sure if other fabric stores offer it under a different name; this one seems to be unique to Surge. It is 55% rayon and 45% nylon, with 50% 2-way stretch (it stretches side-to-side but not up and down). It comes in lots of colors, although some seem to be selling out. This fabric does not contain any linen. It is not a linen knit; it is a rayon/nylon (viscose) knit that looks and feels somewhat similar to a woven linen, but with stretch.

I decided to use black Pylos LiKnit for my second pair of Cleo palazzo pants. I used the same approach as last time to hack the Sinclair Cleo shorts and culottes pattern into palazzo pants with self-drafted slash pockets, with a couple of modifications. First, I wanted to reduce the fullness at the bottom of the legs a bit, so instead of extending the outside seam straight to the bottom of the leg, I curved it in starting at the notch below the hips and the sent it straight down parallel to the inseam. This reduced the circumference of the pants legs from 40 inches to 32 inches. Second, because this fabric is a lot less stretchy than double-brushed polyester, I did not narrow the waistband. I used a stretchy athletic knit (Surge’s black quad performance jersey knit) for the waistband lining. This 300 gsm fabric is 88% polyester and 12% spandex, with 75% 4-way stretch. This gives the pants a waistband that feels just like a pair of leggings or yoga pants, and that doesn’t slip down when I put my phone in my pocket.

The pants were a pretty fast sew. The PyLos is cool and comfortable to wear and the quad performance jersey knit keeps the waistband in place. I love the results of putting performance knit in the waistband lining, and will try that with other patterns too. The reduced leg fullness makes them look more like normal pants. But I wasn’t entirely happy with the drape of the leg.

After finishing the pants one evening, I decided to work on the drape again the next day. I basted a new outside seam, starting the curve on the front pant leg about even with the bottom of the crotch, but ending up at the same place at the bottom. This seemed better so I sewed it in place. You can see on the image below part of the original front piece of the shorts/culottes pattern outlined in red. The green line is the full palazzo extension that I used for my first pair of Cleo pants. The blue line is the final narrower palazzo extension that I ended up with this time after a bit of trial and error (I started with a line that curved in from the notch, but ultimately ended up with the blue line you see here).

Even after getting the side seam the way I wanted it, I still wasn’t completely happy with the drape and realized that it looked a lot better when I hitched the sides of the pants up a bit. It seems in my effort to raise the rise to be more of a high-rise fit, I added too much fabric to the outside of the waist. The adjustment to the center of the rise was good, but the outside of the waist did not need that much adjustment. The right thing to do at this point would probably have been to remove the waistband, cut off the extra fabric, and sew it back together. However, the idea of picking out all those zigzag stitches was not appealing. So I basted a new seam connecting the pants to the waistband, taking the sides up about three-quarters of an inch and grading towards the center. That seemed to do the trick, so I sewed a zigzag along the basting line and pressed it in place. While the inside is not beautiful, the outside of these pants looks much better with this adjustment. I’ve marked my pattern so I can just cut it this way to begin with next time I make this pattern. I’m learning a lot about fitting pants and clearly I have more to learn.

After wearing the pants with the phone in my pocket I realized that the phone tends to tilt outward and cause a bulge to the side. I added a zigzag seam to the pocket bag from the bottom up about 4 inches, placed about an inch in from the outer edge of each pocket. This is completely invisible on the outside of the pants but it keeps my phone more vertical. I went back and added this to my palazo pants too. Here’s the self-drafted pattern I used for the front part of my slash pocket bag with the extra vertical seam (the back part of the pocket bag is cut straight across the top without the slash).

In any case, the final product looks and feels great. I took these pants on a business trip and they were very comfortable and did not wrinkle in my suitcase. I wore them for three days and the waistband did not stretch out. They were comfortable in the outdoor heat and kept my legs warm in the over air-conditioned meeting rooms. Here are the photos, modeled with a Bondi top I made last Fall. At the bottom I have a close up of the waistband, including the slash pockets.

Valley skater dress, three ways

I first found the Sinclair Patterns company because I was looking for a skater dress pattern. I ran across their free valley skater dress pattern, but the skirt wasn’t exactly what I was looking for, so I went down the whole rabbit hole of drafting my own. But I saw their Alana dress pattern and after sewing a couple of Alana dresses, went back to the skater dress and found the add-on skirt pack. I liked the half-circle skirt option and bought the pattern. I’ve since made three valley skater dresses out of three different types of fabric and have a fourth planned.

On all my Valley dresses I’ve used the half-circle option, above-knee length, with pockets (lengthened about an inch to make sure my phone doesn’t fall out), and have replaced the neckline with a screwp neck. All are comfy and fit well. All are size 4P with no size alterations. The add-on skirt pack has lots of other nice skirt options and some day I may make those too… but for now, they are all half-circle skirts.

I made my first Valley Skater dress with a medium-weight, very soft and cozy cotton lycra (CL) fabric. I thought this would be a nice dress for cooler weather. Unfortunately, this lovely, cozy fabric does not have good recovery and I ignored the warning on the pattern about using fabric with good recovery. What does this mean exactly? Well it means the fabric stretches out as you work with it and it does not completely return to its unstretched length. As a result, my long sleeves ended up dangling around my fingertips, the above-knee length hits closer to at-knee length, and no matter how much I press it, I cannot get the waves out of the waistband. The sleeves were easy to address… I just lopped off two inches before I hemmed them. I left the length as-is. I tried futzing with the waistband a bit, and gave up and decided it is a casual dress that I will usually wear with a jacket or sweater, so I would just deal with a wavy waistband. Not my best effort but it is still comfy.

A couple of months later, I used a soft double-brushed polyester (DBP) floral print for my second Valley Skater dress and sewed the short-sleeved version. This time I altered the pockets so that they attach only to the sides and do not connect to the waistband. I’ve found that when I put my phone in my pocket, it pulls down on the waistband if the pocket is connected and the fabric is stretchy (I have this problem in me-made as well as ready-to-wear dresses). So I figured I would give side pockets with no waistband connection a try. Because DPB is so stretchy I decided to line the waistband with a medium-weight cotton lycra (not the green CL with poor recovery!) to give the waistband more stability. I don’t know if the CL lining was necessary, but it doesn’t hurt.

I’m very happy with how this dress turned out. The dress fits perfectly and looks great from the front and the back, even when I fill the pockets! I love the swishy half-circle skirt, which is very flattering and has some nice movement, but is not too prone to Marilyn Monroe moments. I’ve had random people on the street stop me to complement me on this dress. And it looks good with dress shoes or sneakers (admittedly, I will almost always wear it with sneakers).

I made my third Valley Skater dress just a couple of days after finishing the second one. This time I used a smooth polyester interlock twist yarn (ITY) fabric. I decided to omit the waistband and followed the instructions to lengthen the bodice about 1.25 inches. I used the same pocket alterations as I used for the second dress. This time I raised the back of the screwp neck a tad and shrunk the neckband accordingly. I had a bit of an issue with the waist stretching and seams popping when I take the dress off, so I had to reinforce the waist seam with wide zigzag stitches (I normally sew all my knit seams with a very narrow zigzag stitch).

The dress without the waistband is also great and ITY is a nice fabric choice for this pattern as well!

Stay tuned for the fourth dress, currently in planning. I have some heavier-weight fabric in mind for it and am thinking long sleeves and a knee-length full-circle skirt. But it’s 85 degrees outside right now so this may not happen for a little while.