Sinclair women’s Crew pullover, hip length with banded bottom and tall cuffs – two in size 6P and one in 6T plus 4T cropped version, brushed cashmere rib
Sinclair men’s Crew pulloverhip length with banded bottom in size 38 short, 38 regular, and 34 short, brushed cashmere rib
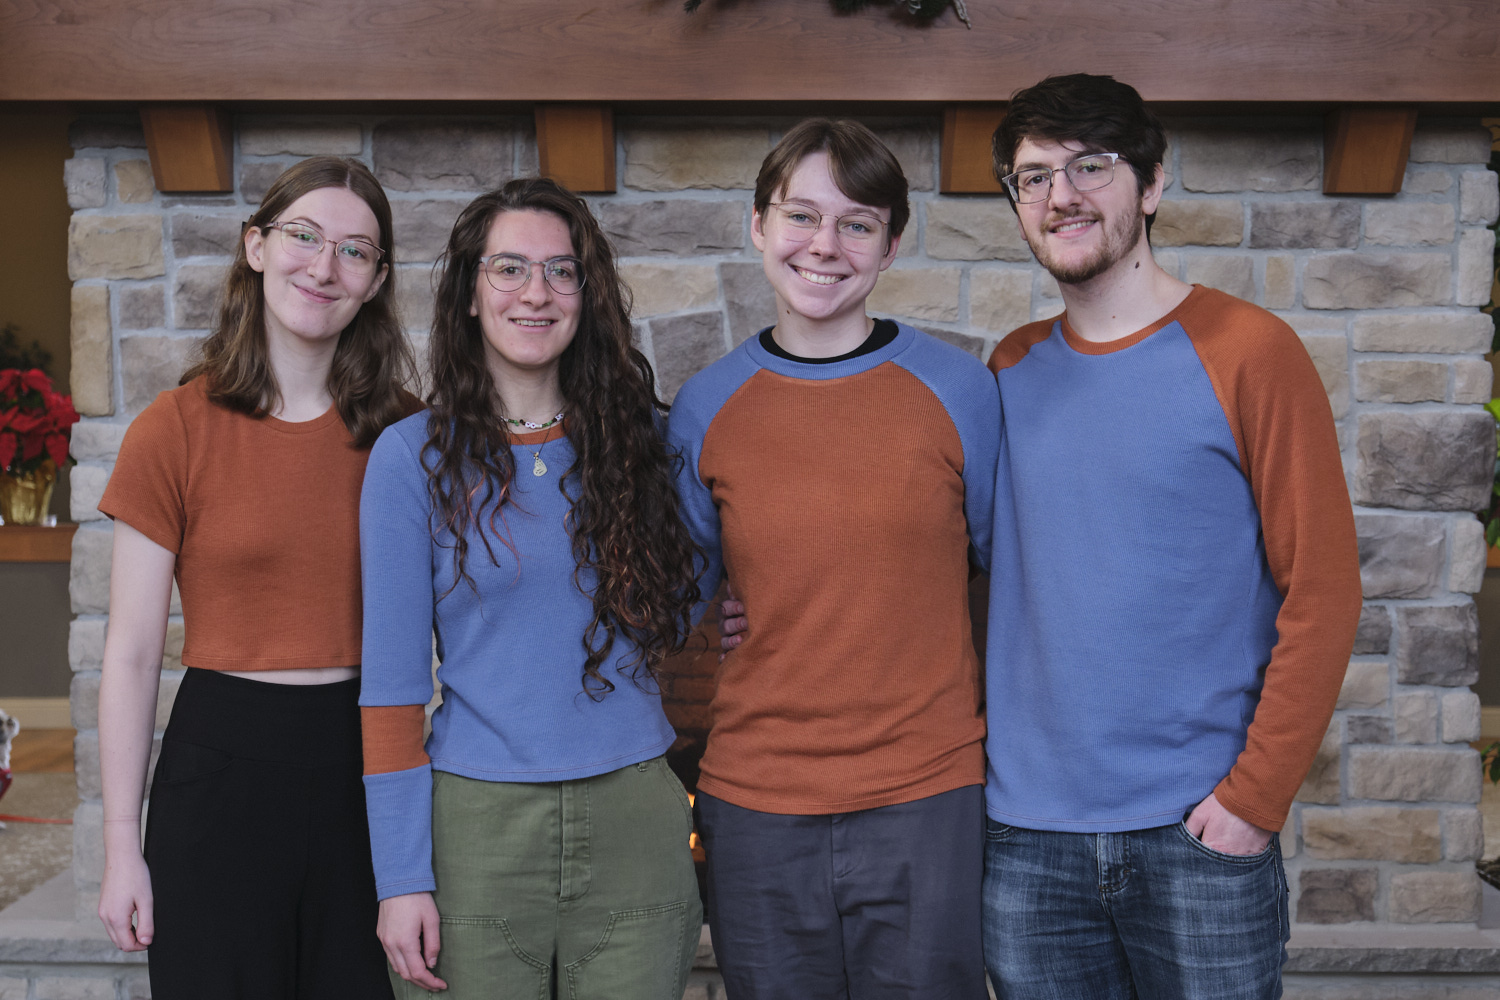
Last year I made my son and his partner a pair of matching raglan shirts in two colors of Monaco rib knit from Mily Mae Fabrics using the Sinclair Demi and Tao patterns, and I had left over fabric so I made my daughters Sinclair Bondi shirts to match. It made for a nice family photo.
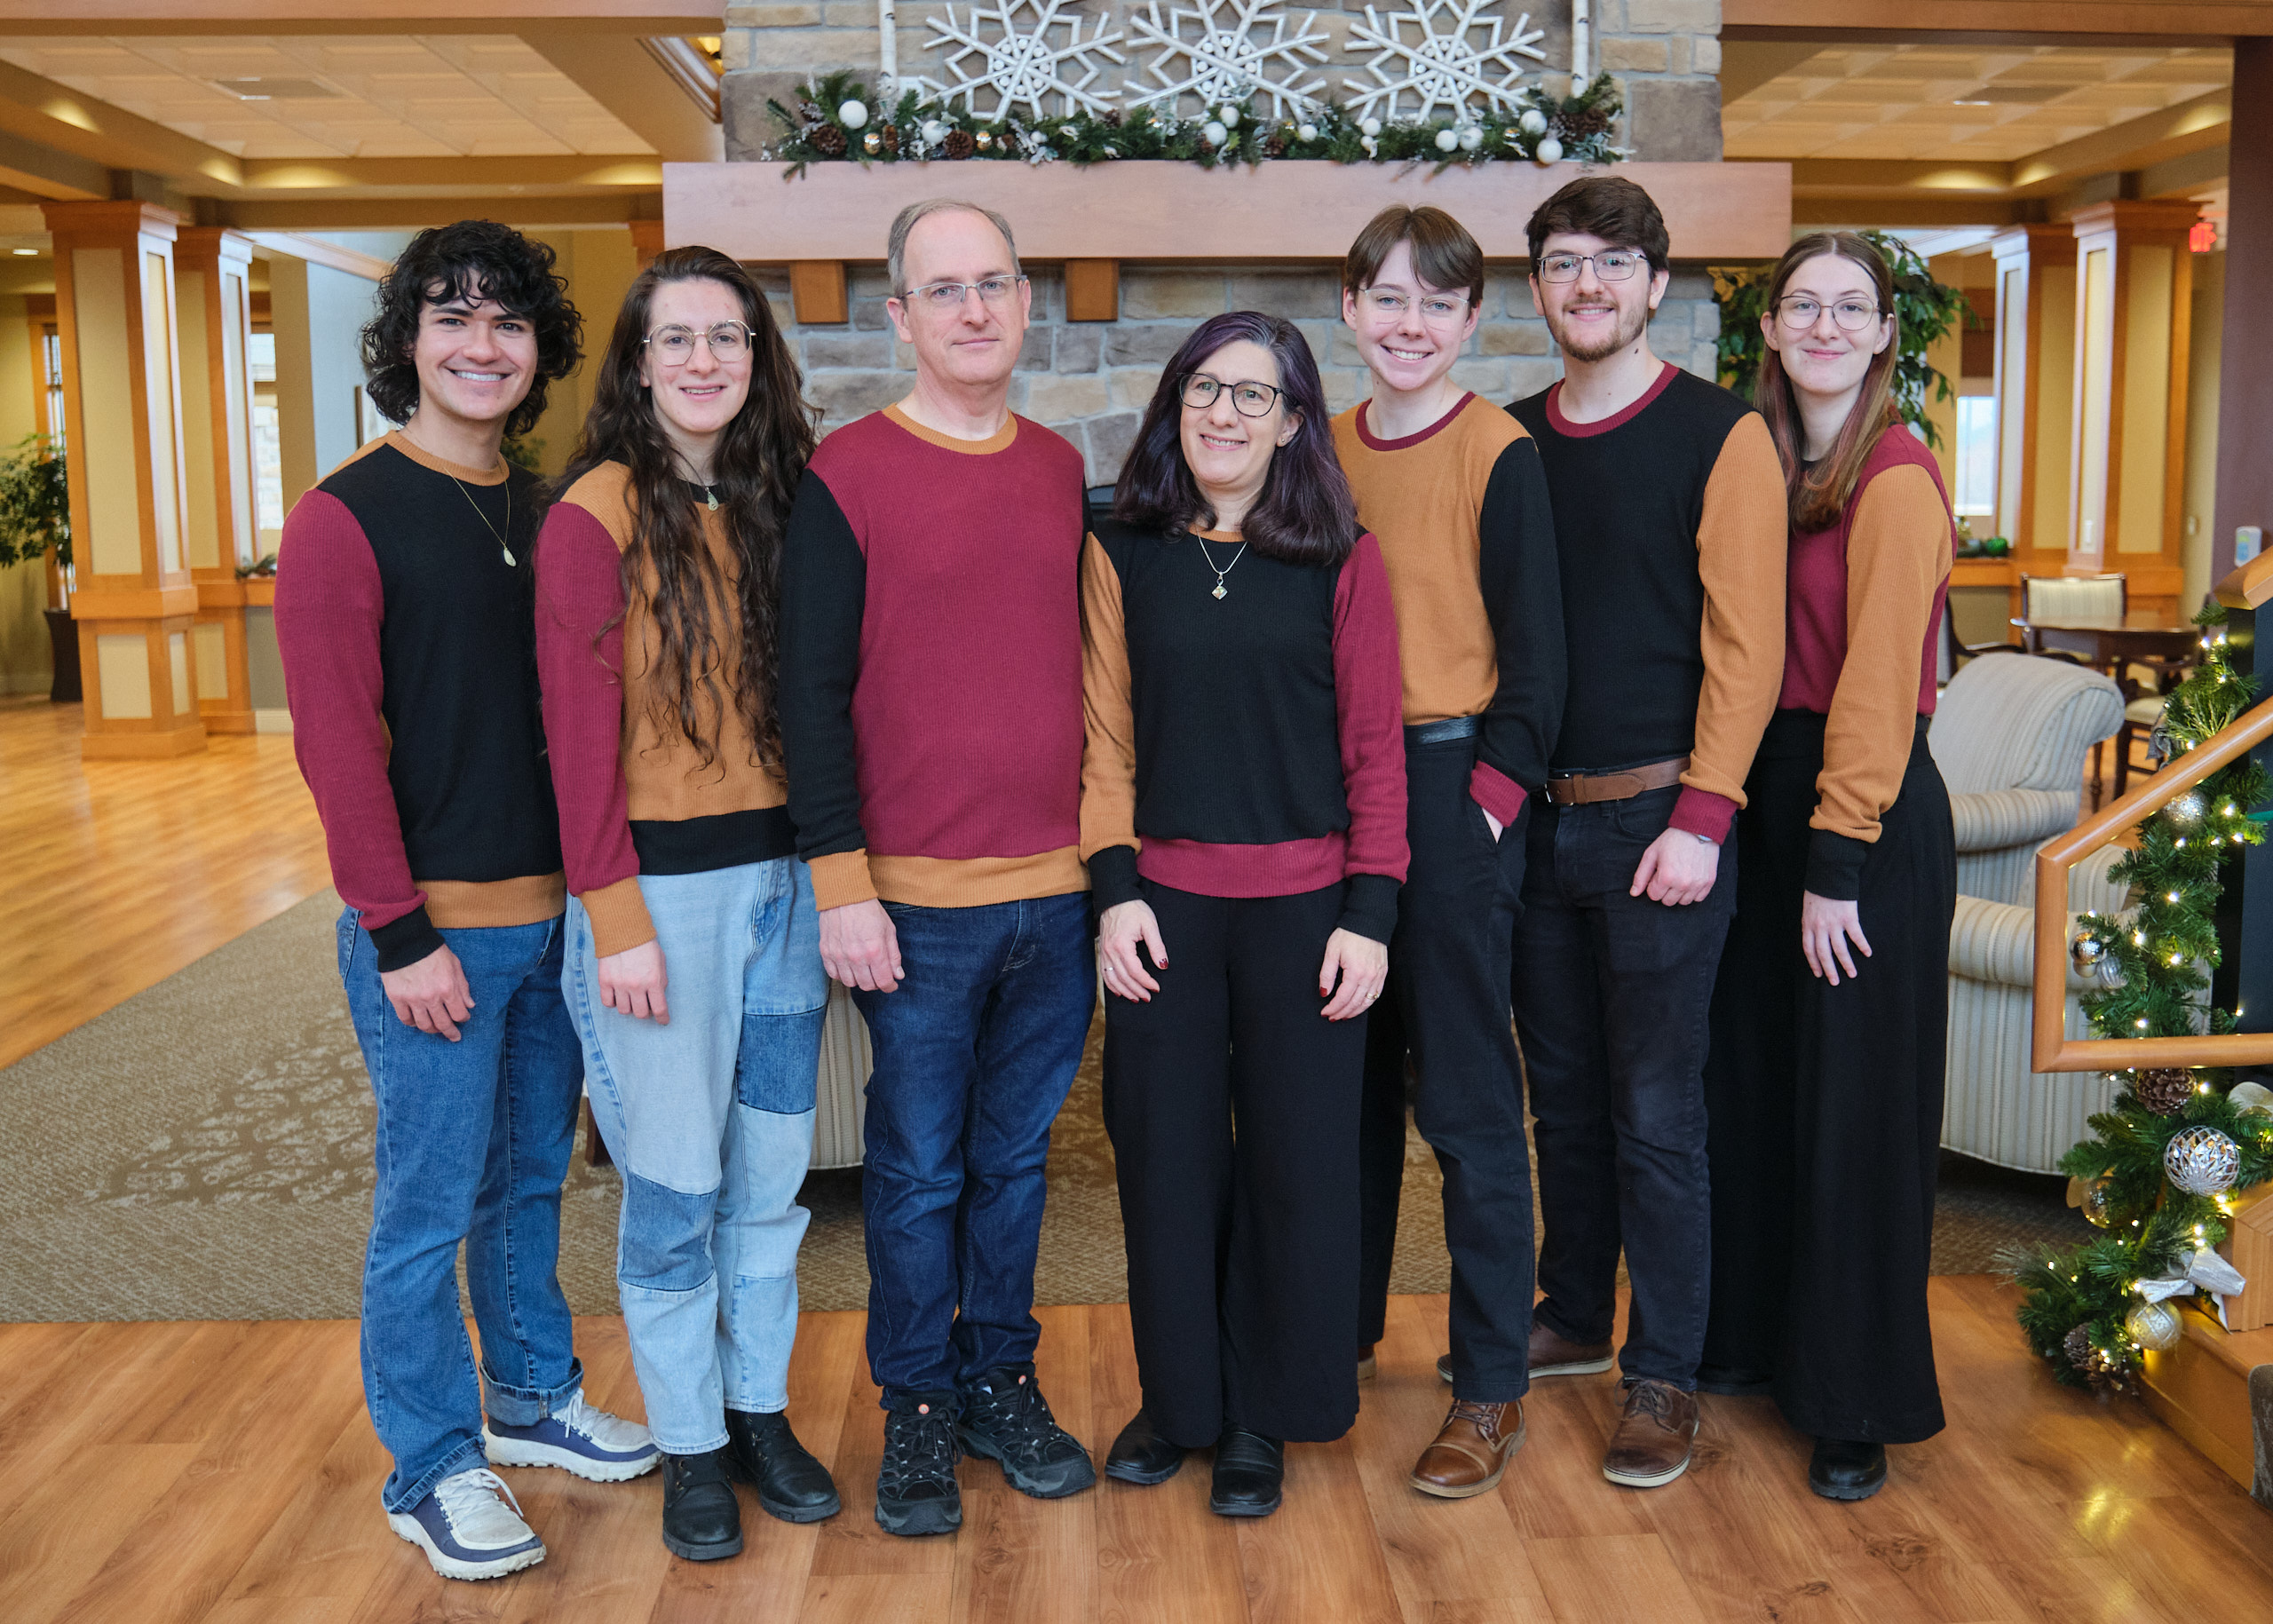
This year I planned in advance to make matching color block sweaters for the whole family. I bought 14 yards of brushed cashmere rib (220 GSM 68% Poly/28% Rayon/4% Spandex) from Mily Mae Fabrics when it was on sale for about $4 per yard. As it turns out, 8 yards would have probably been sufficient for the seven sweaters I made, but I didn’t know what color combinations I would use and you never know.
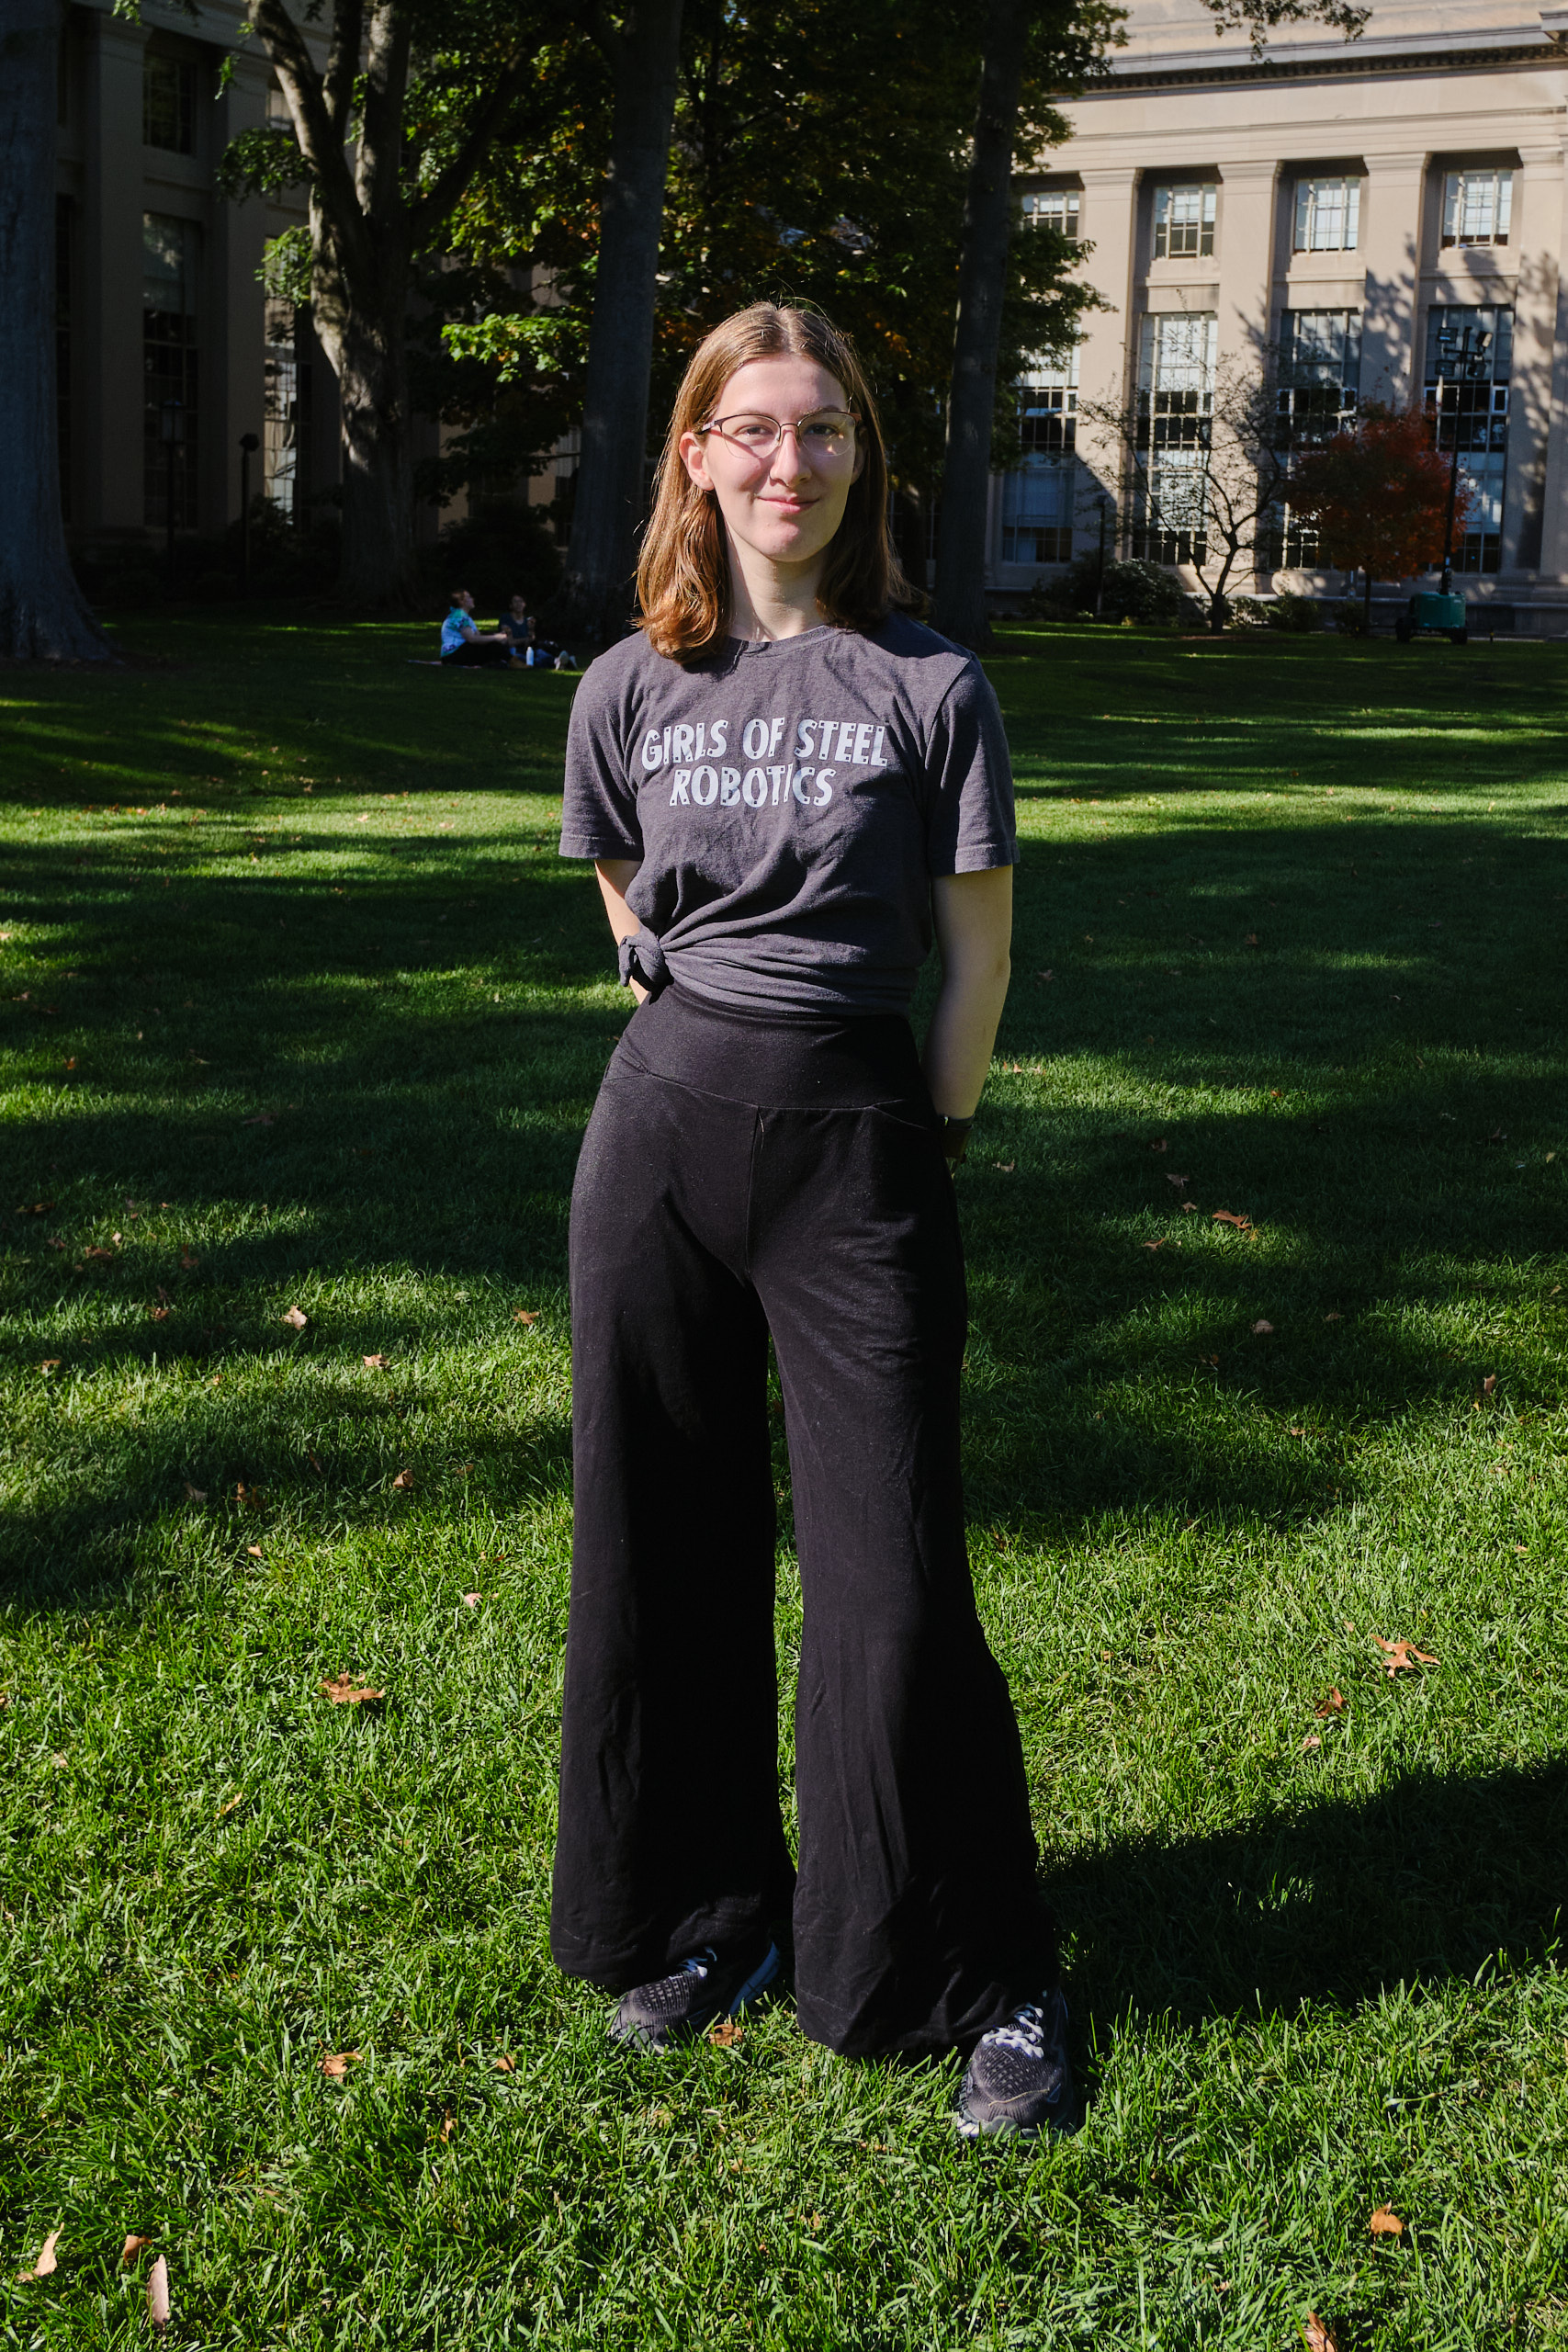
I selected the Sinclair Crew pullover top this year, which comes in both men’s and women’s cuts. I made one of each for myself and my husband and then went into assembly line production mode, cutting out several at a time and sewing each step on the whole bunch before I went on to the next step.
I made the Sinclair women’s Crew pullover, hip length with banded bottom and tall cuffs – two in size 6P and one in 6T. I also improvised a size 4T cropped version that was 4 inches shorter than hip length and graded to size 0 at the waist (for my college-student daughter who only wears cropped tops). I also made the Sinclair men’s Crew pullover hip length with banded bottom in size 38 short, 38 regular, and 34 short. I did not make any modifications to the pattern except for the cropped version.
This is a pretty easy pattern to sew, and with all the bands there was no hemming involved. These bands stretch gently to fit the fabric they attach to, no gathering needed. The fabric I used was also pretty easy to work with and I was able to sew everything together without any basting.
I made each sweater with a different color combination, and I also played with different approaches to color blocking. Mine has each sleeve a different color. I like them all, but I think my favorites are the ones with different color fronts and backs with the third color for the sleeves.
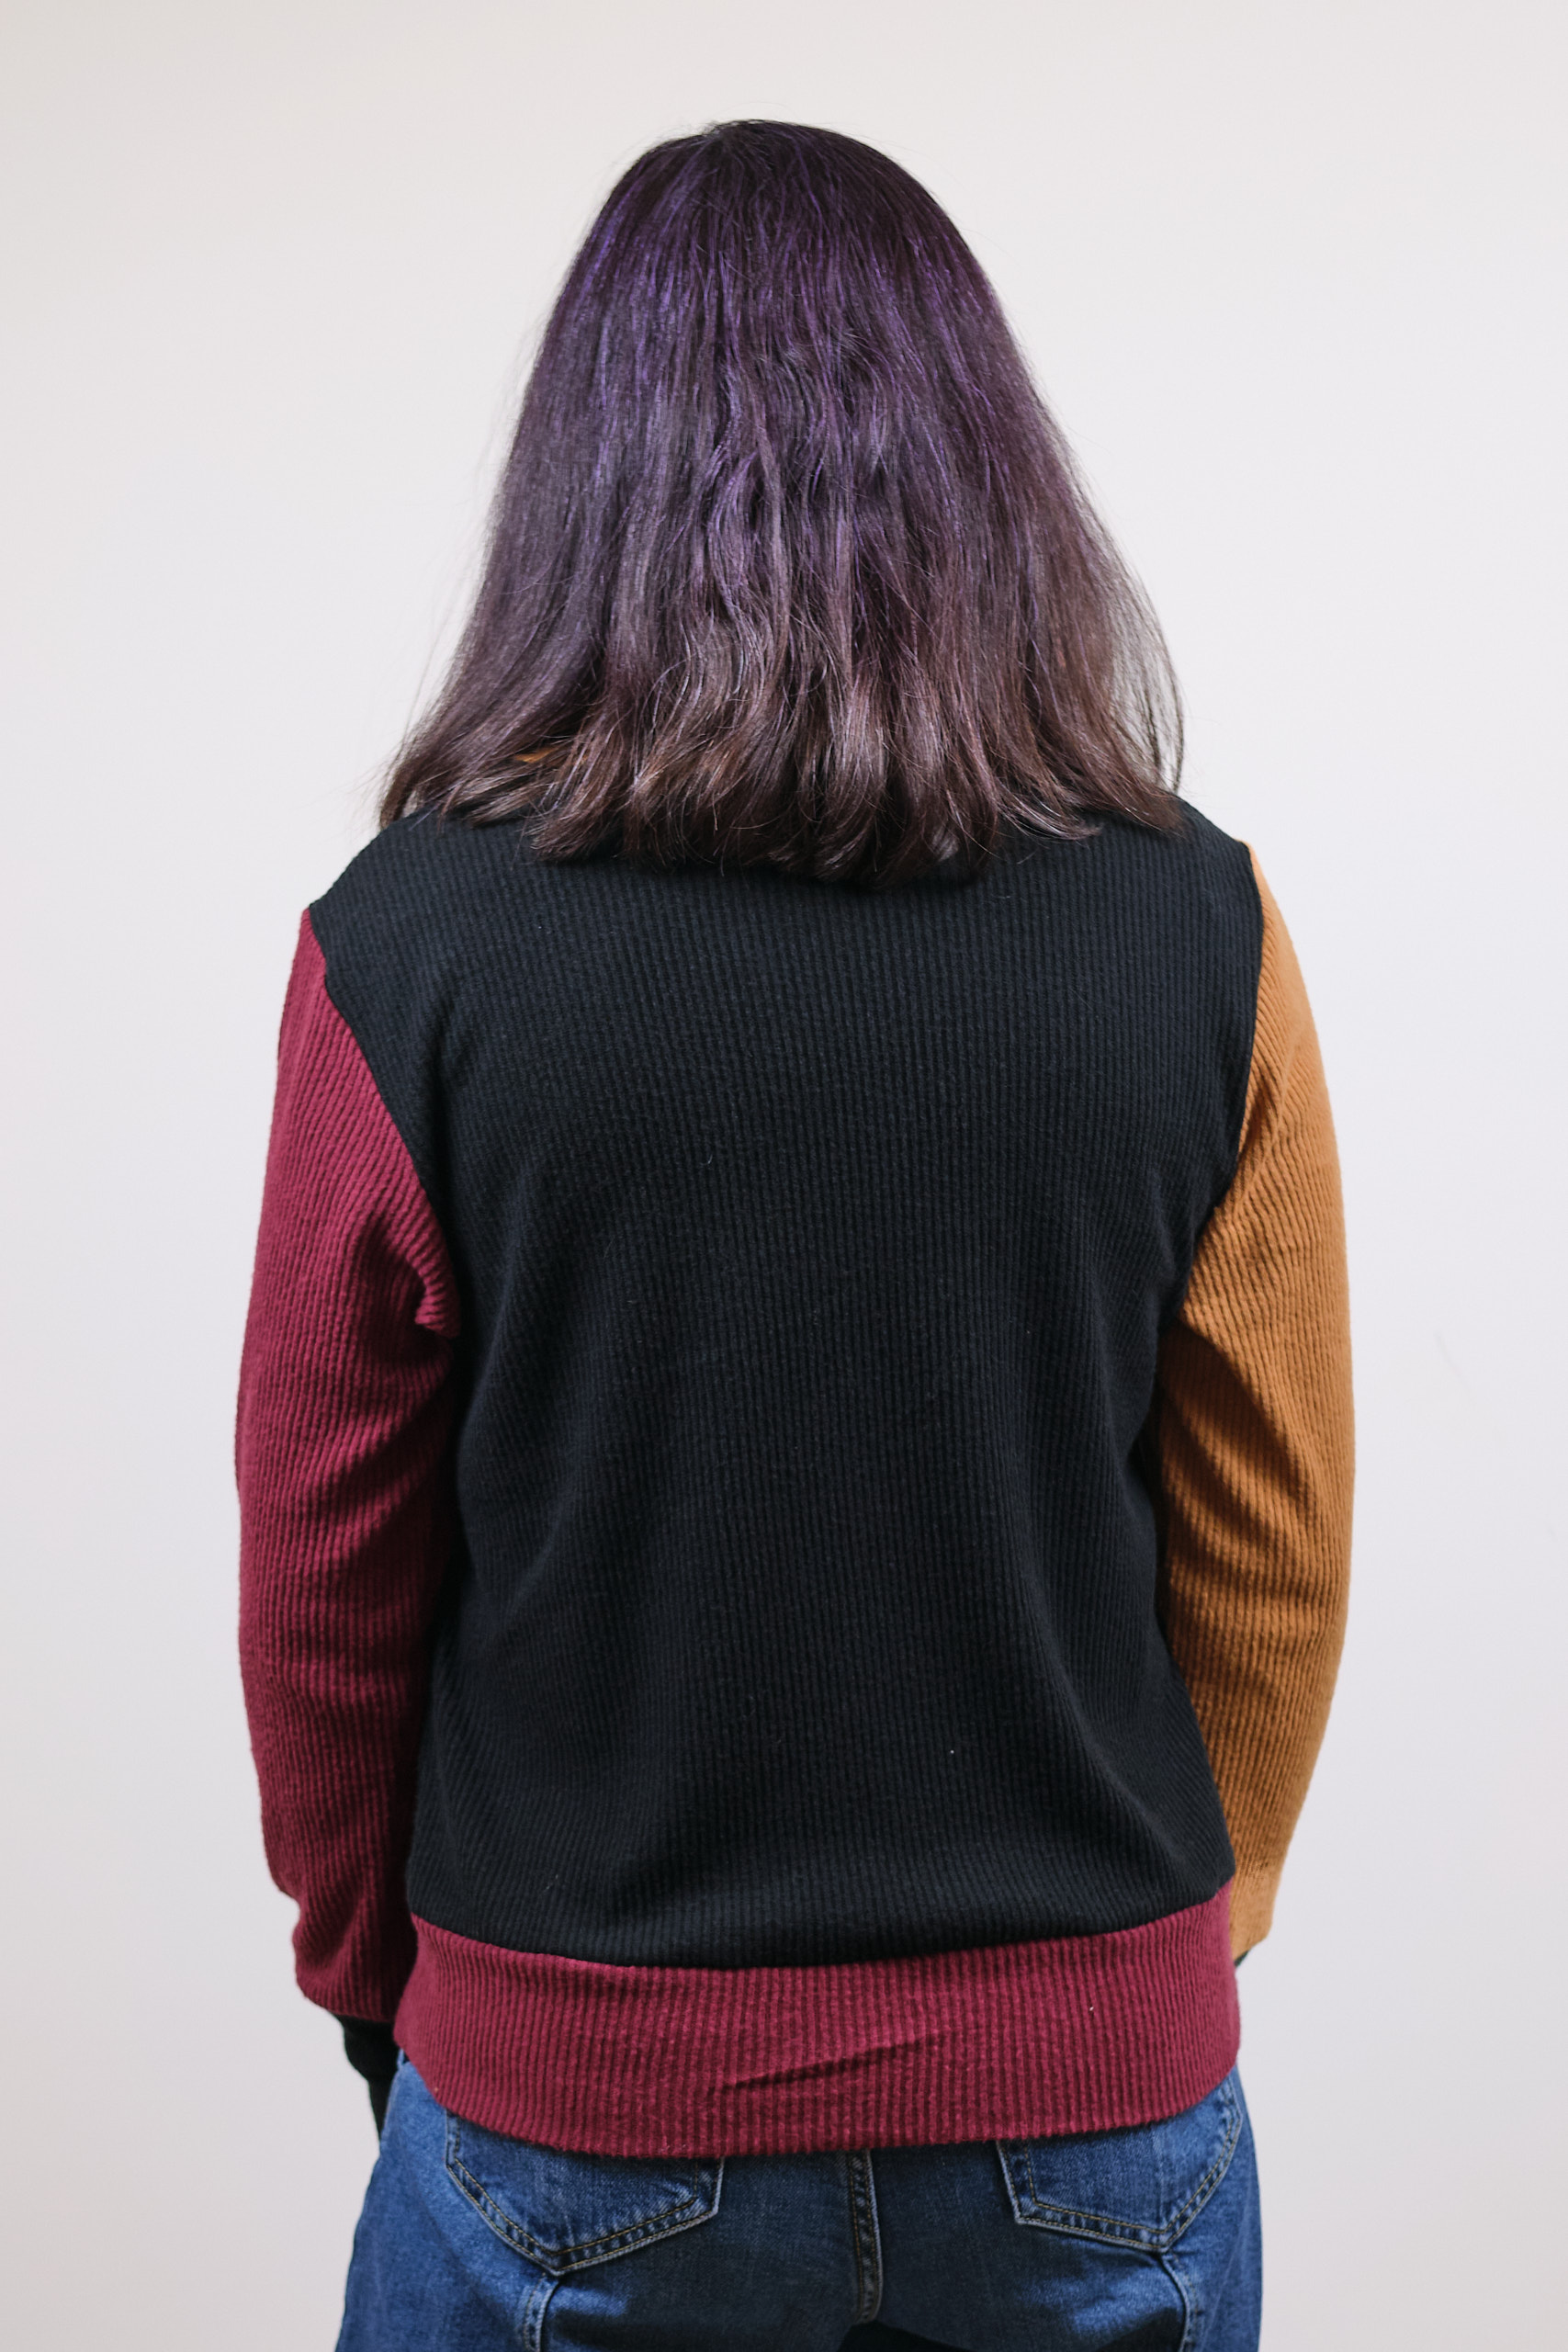
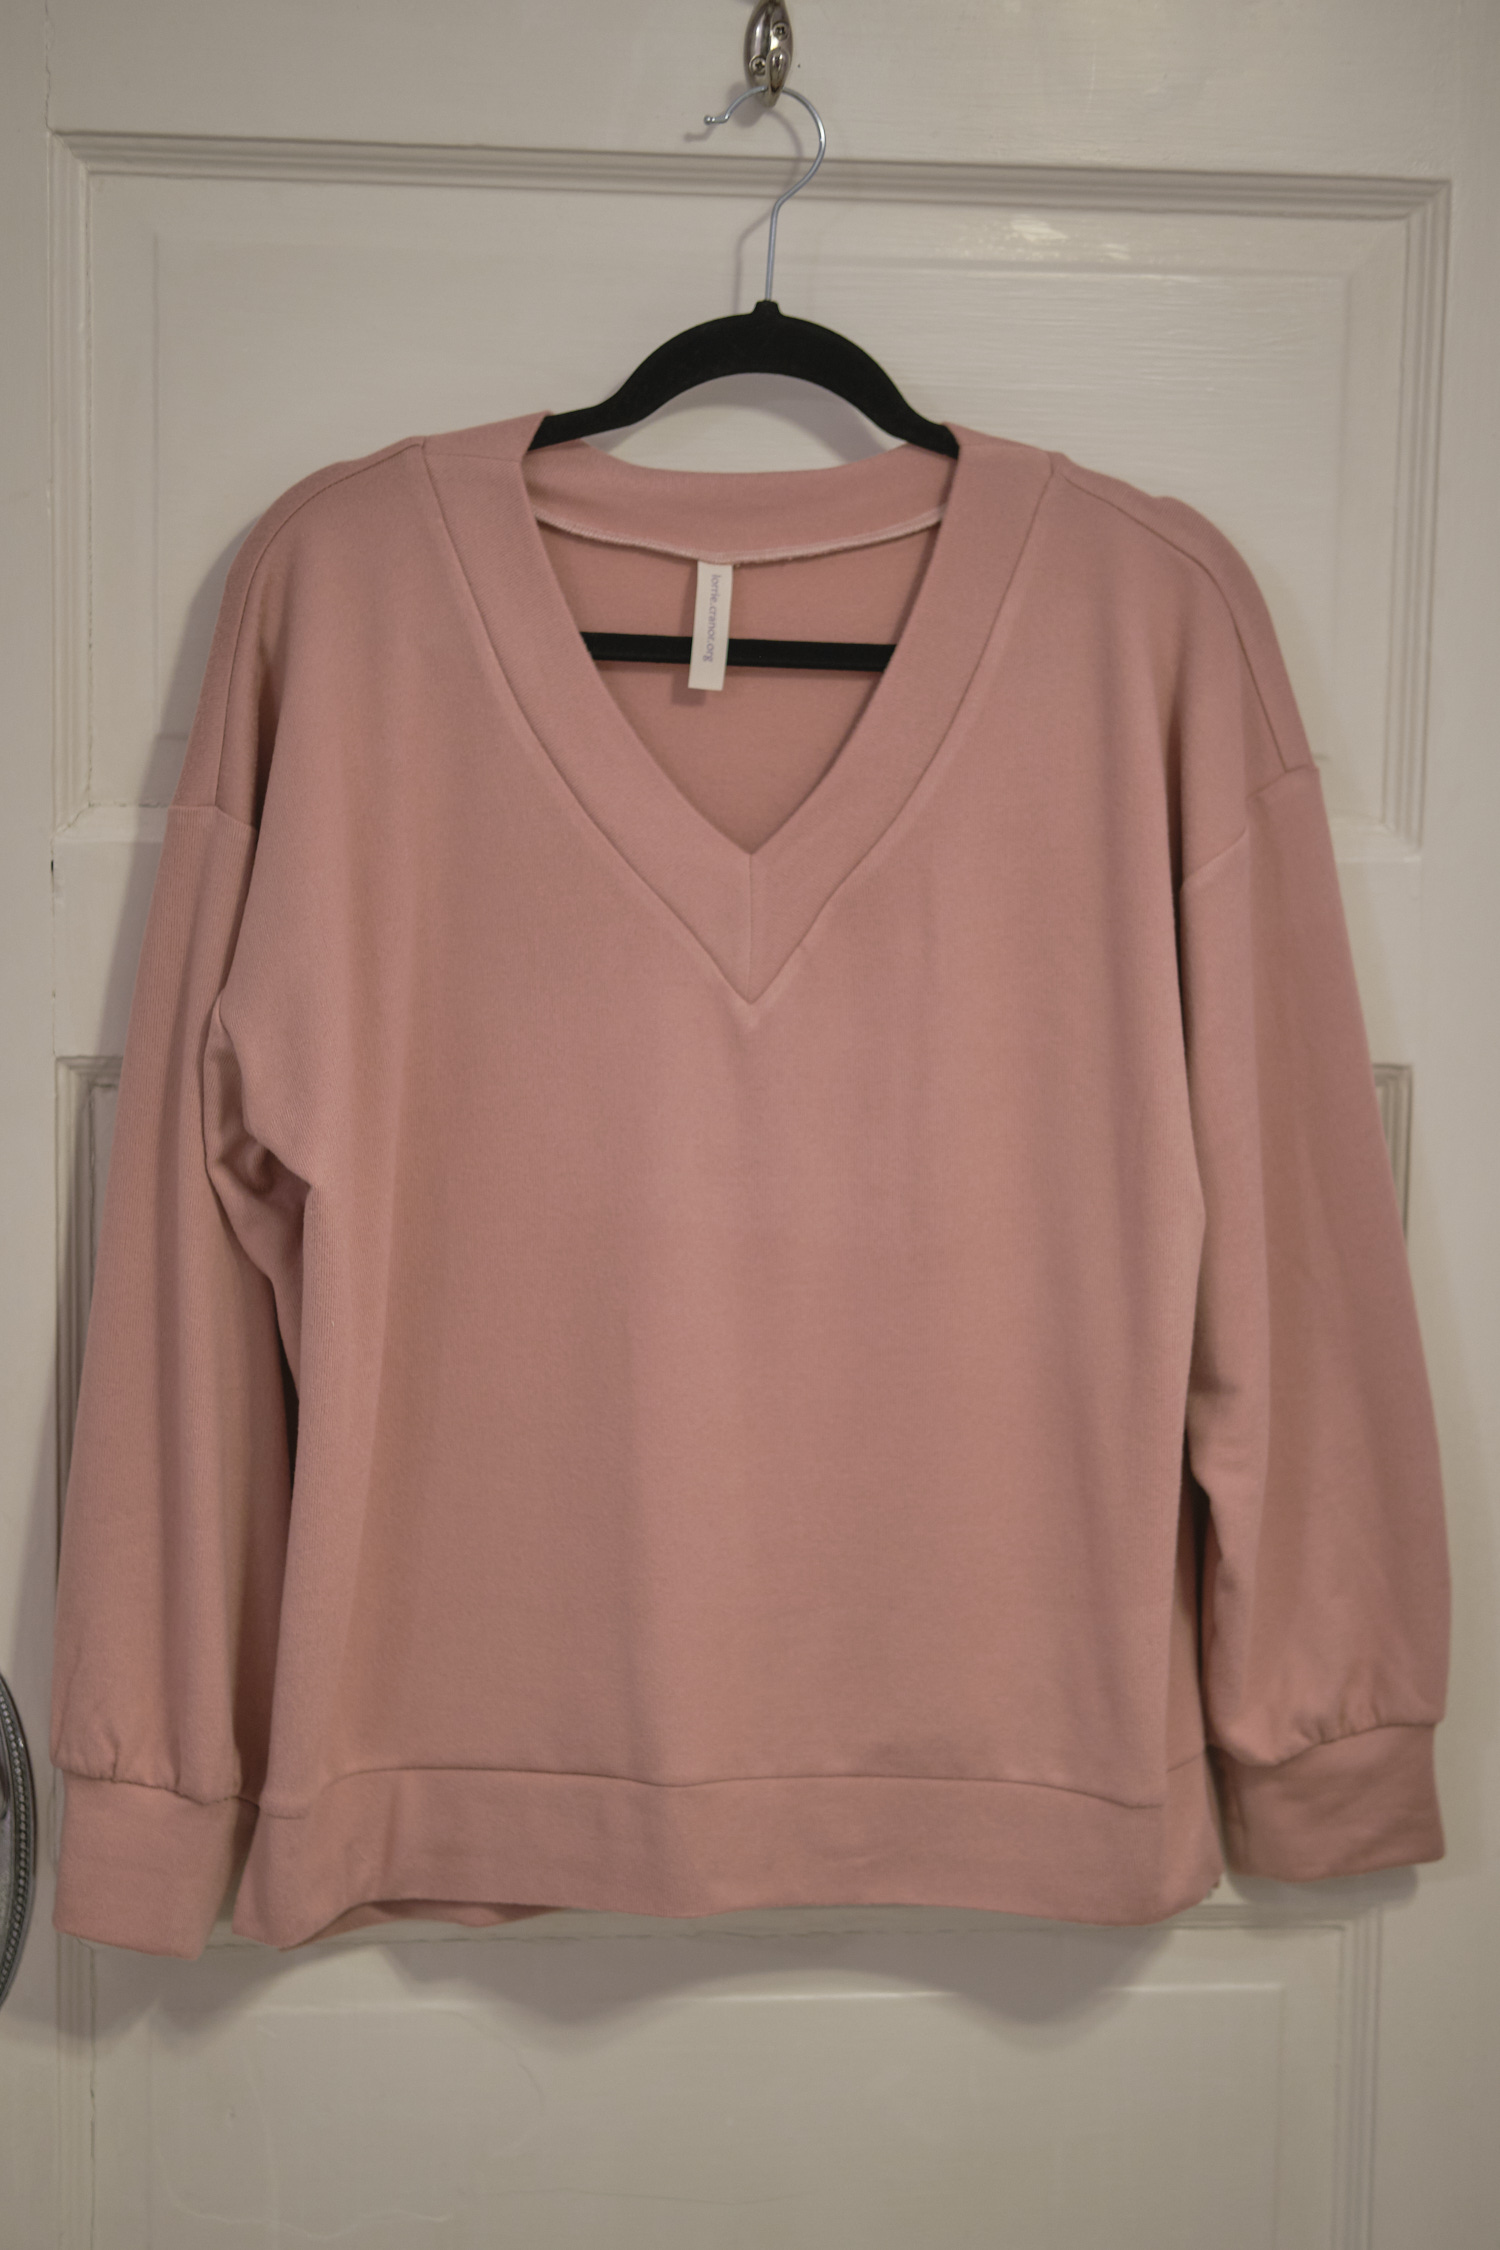
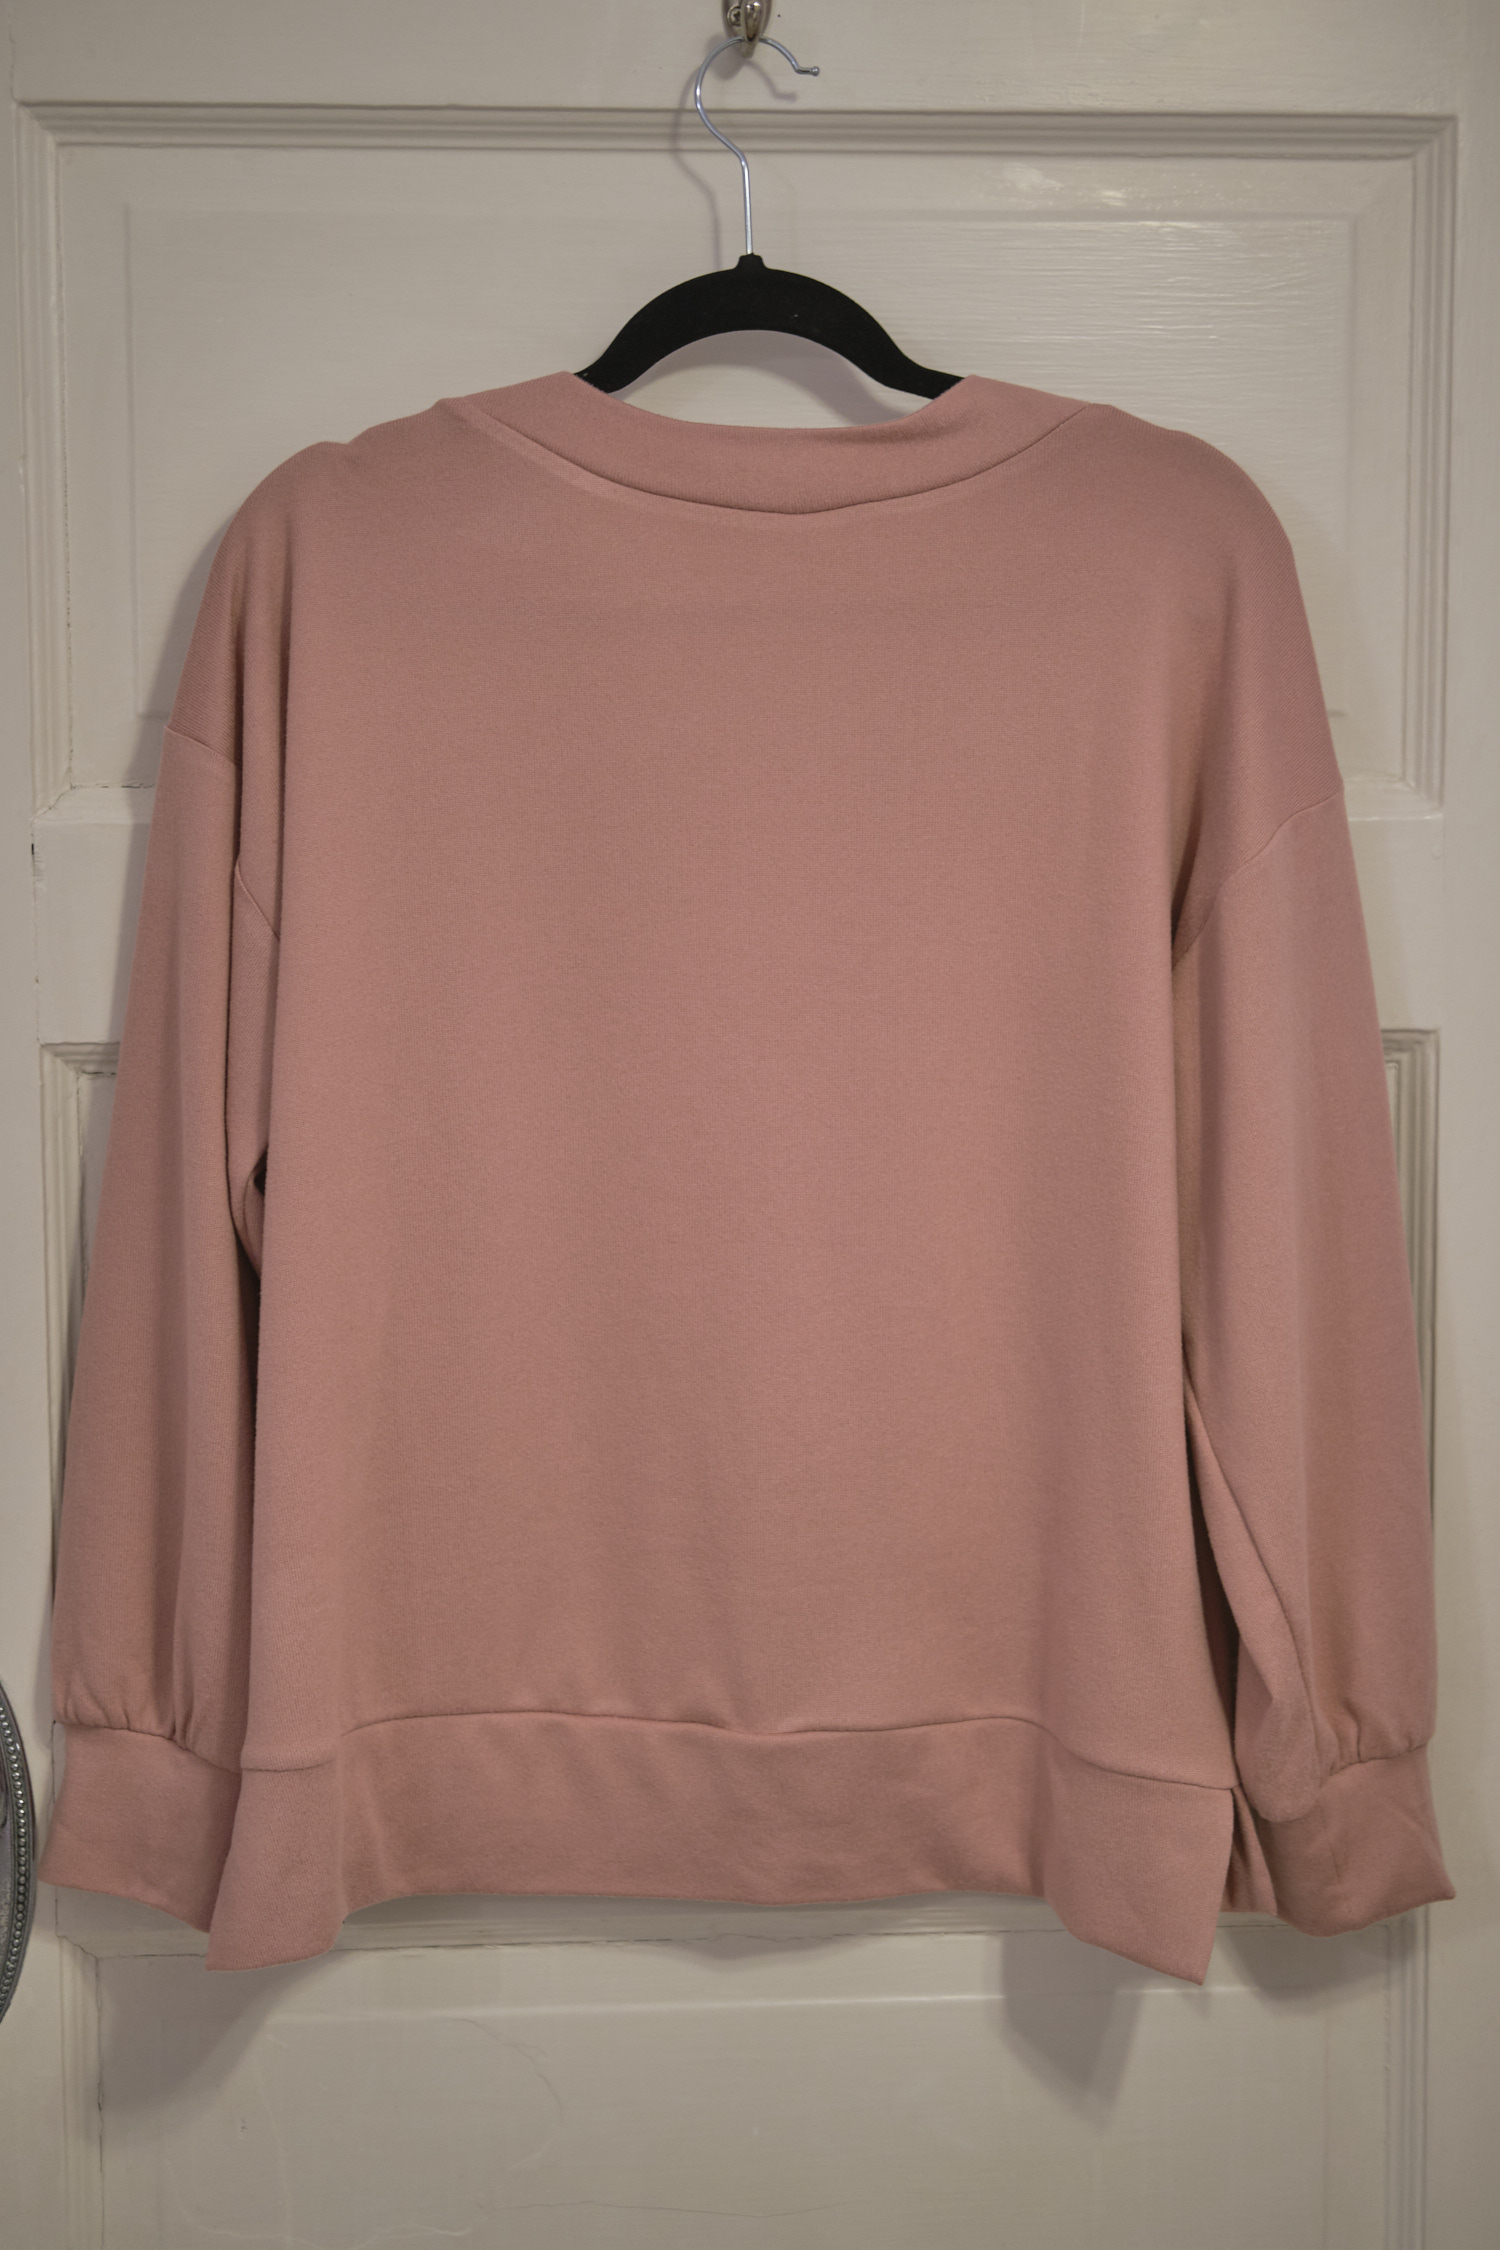
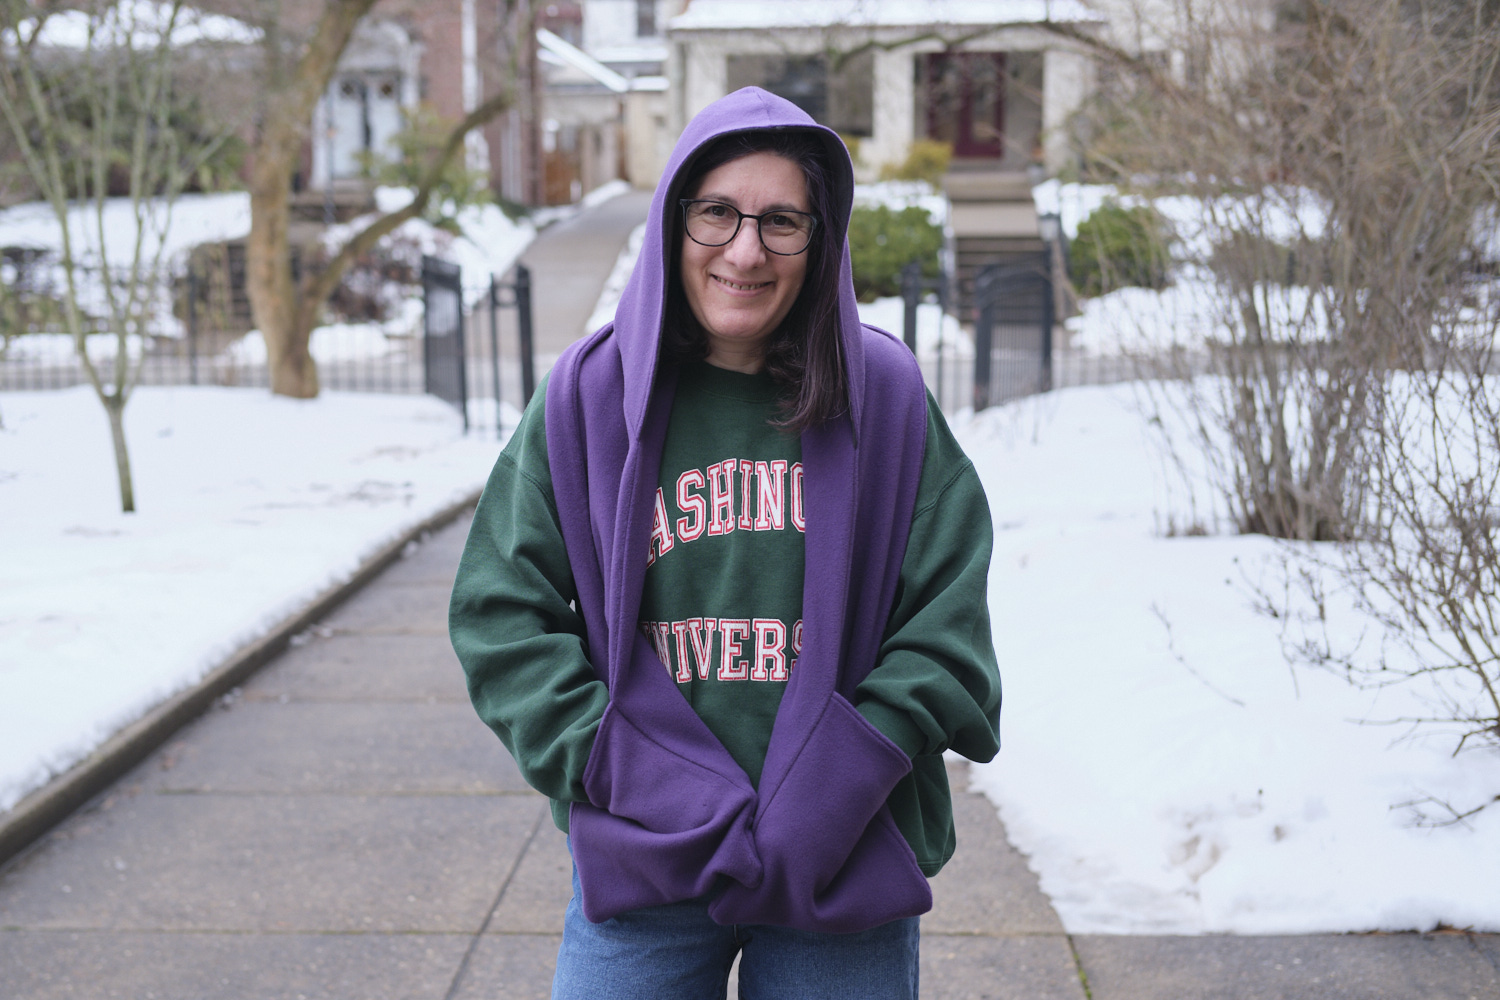
We did a crafty Christmas gift exchange at work, where we were each randomly assigned a colleague to make a gift for. I couldn’t ask my gift recipient for her size, as that would spoil the surprise. She is a lot taller than me, but my guess is she is otherwise a similar size. I decided I couldn’t make her anything too fitted without knowing her actual size, so I selected the Pattern Emporium Sweet Cheeks Roomy Sweater. This is a very oversized pattern. My correct size according to my measurements is AU 10. I made an AU 10 sweater in a heavy fabric, and it is a super comfy oversized sweater that would probably be fine sized down a size or two. I also made one sized down to a size AU 4 in the cropped length in a lighter weight brushed hacci sweater knit, and it fits just fine. I decided to size down only to an AU 8 for my friend and make the hip length. I also shorten the sleeves for me but I made the full length sleeves for my tall friend.
I love the Versailles brushed hacci sweater knit because it is brushed on the inside and feels very cozy. I bought more yardage in several colors last Fall when it was on sale for about $5 per yard. I decided to use the rosey mauve color (basically a pale pink) for my friend’s sweater.
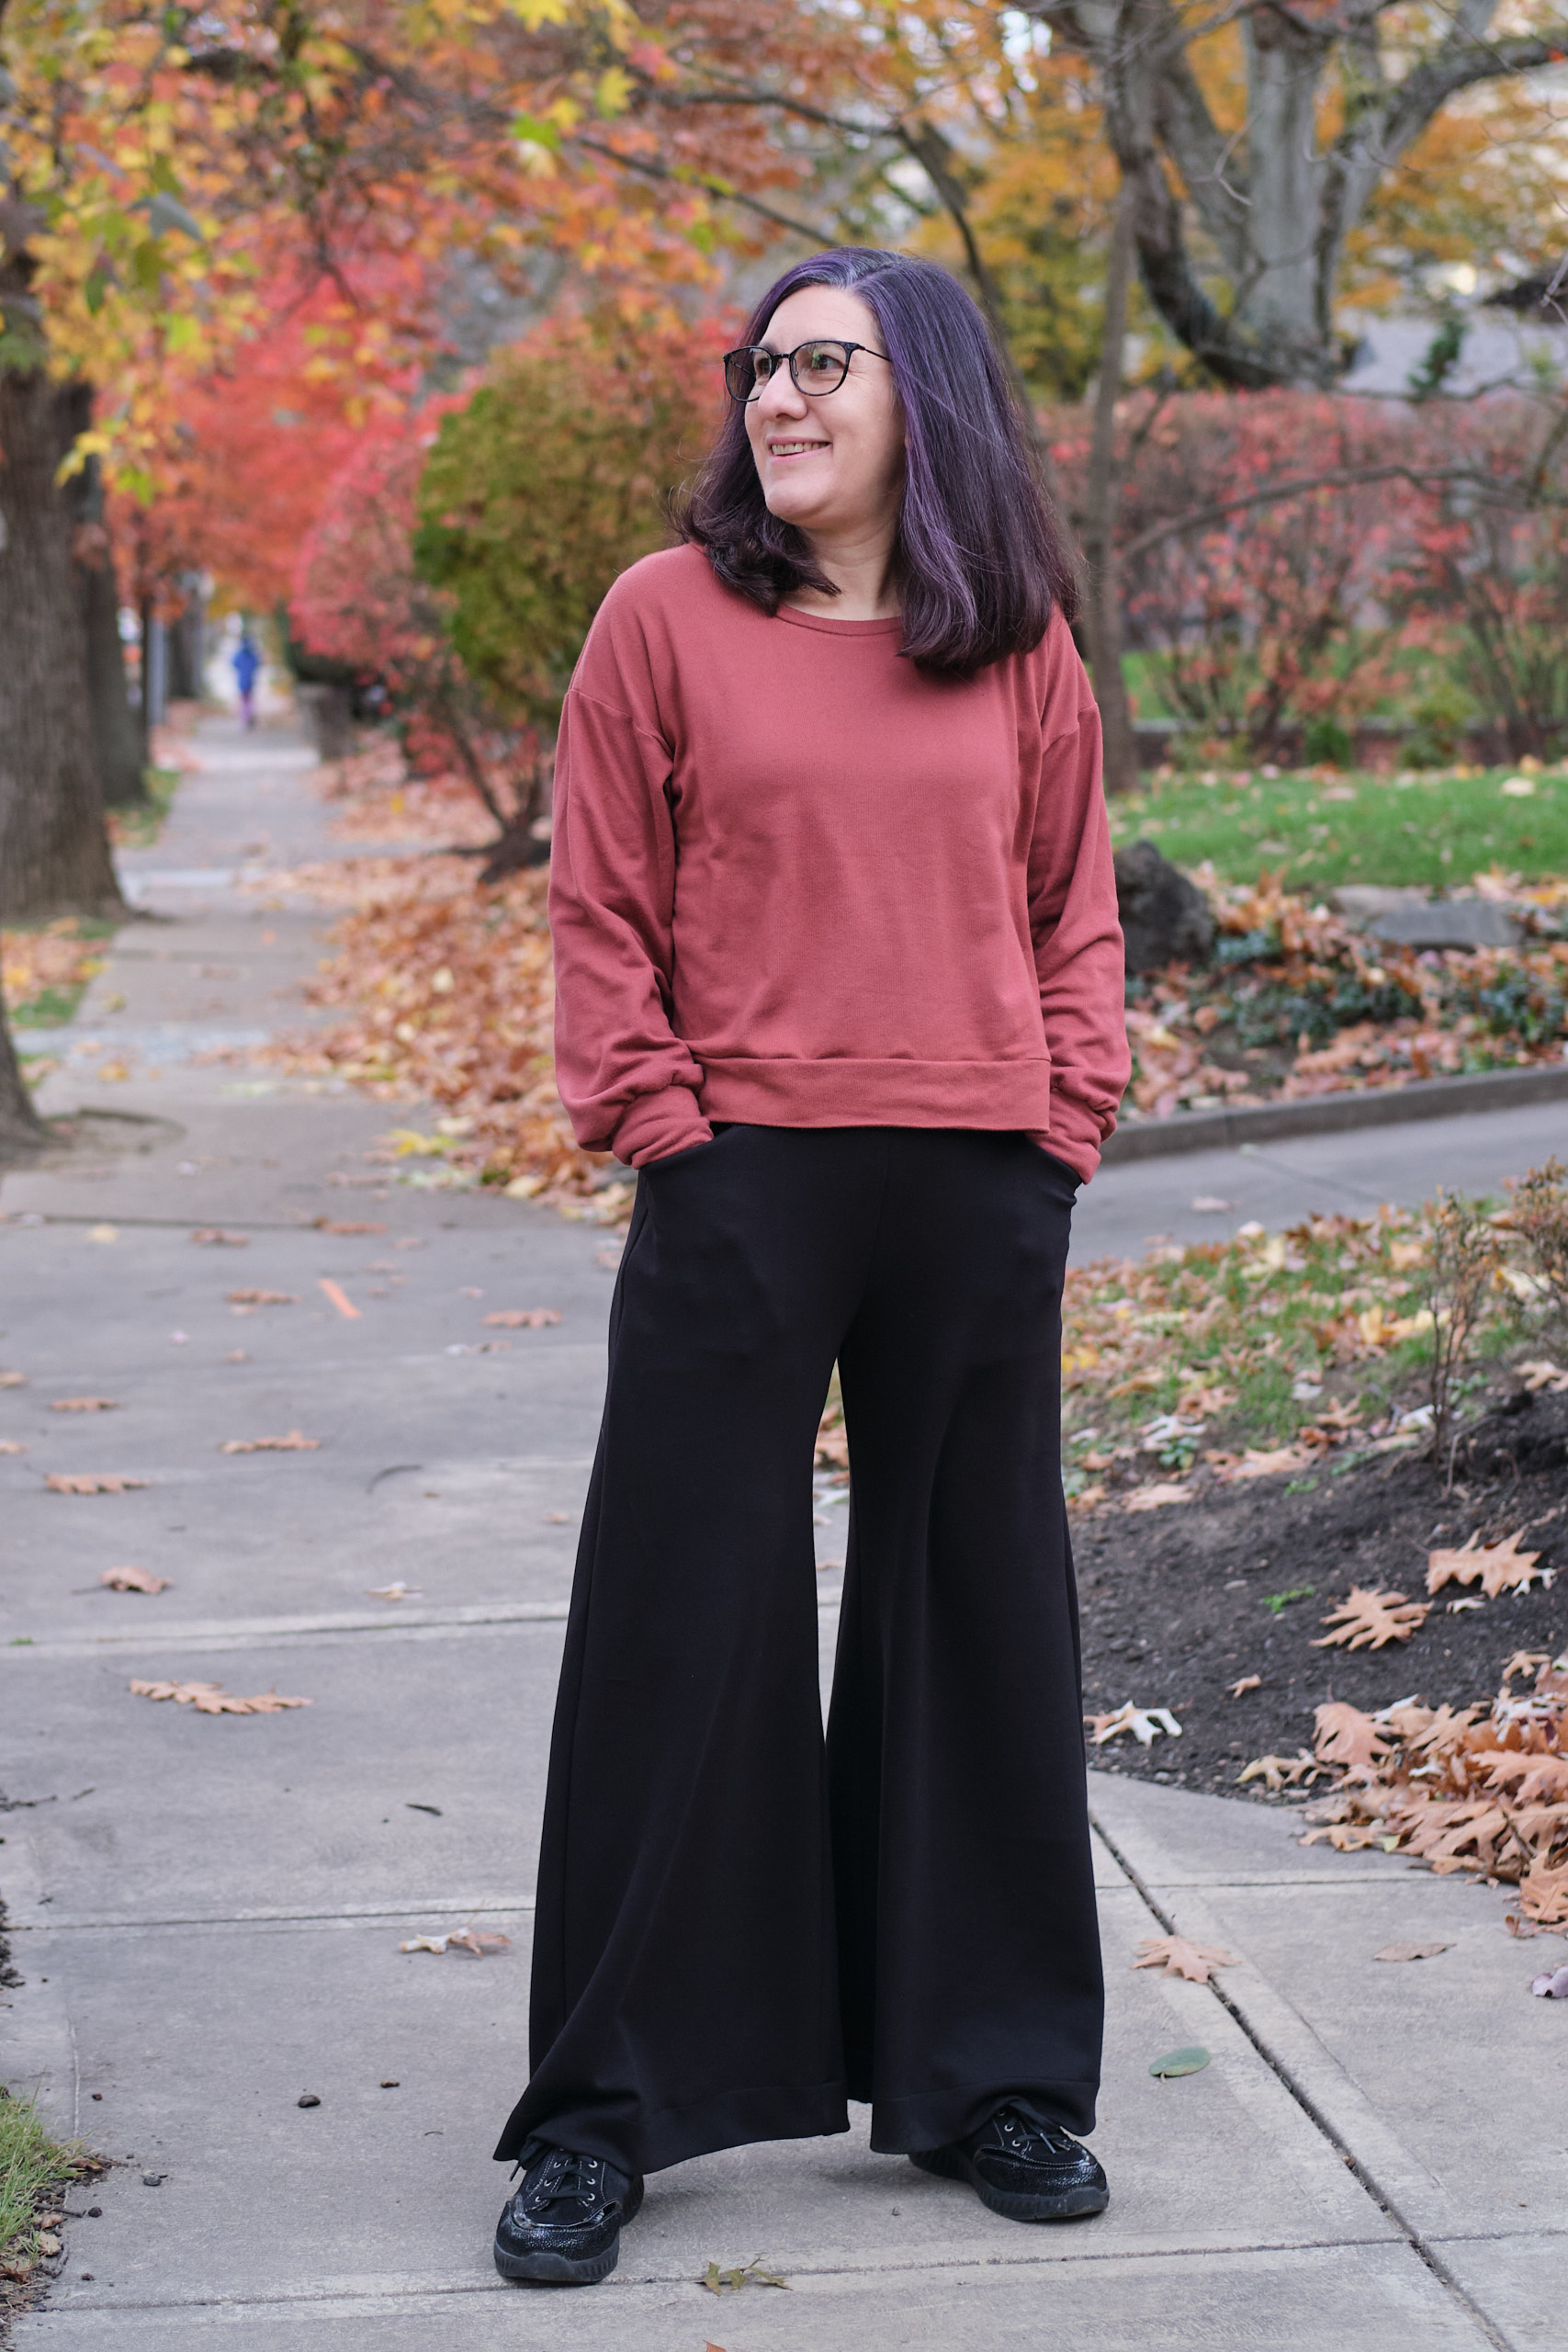
My friend was surprised that I made something that fit her without measuring her, and especially that the sleeves were long enough. My friend is wearing it in the photo above. Here you can see it on a hanger and me trying it on.
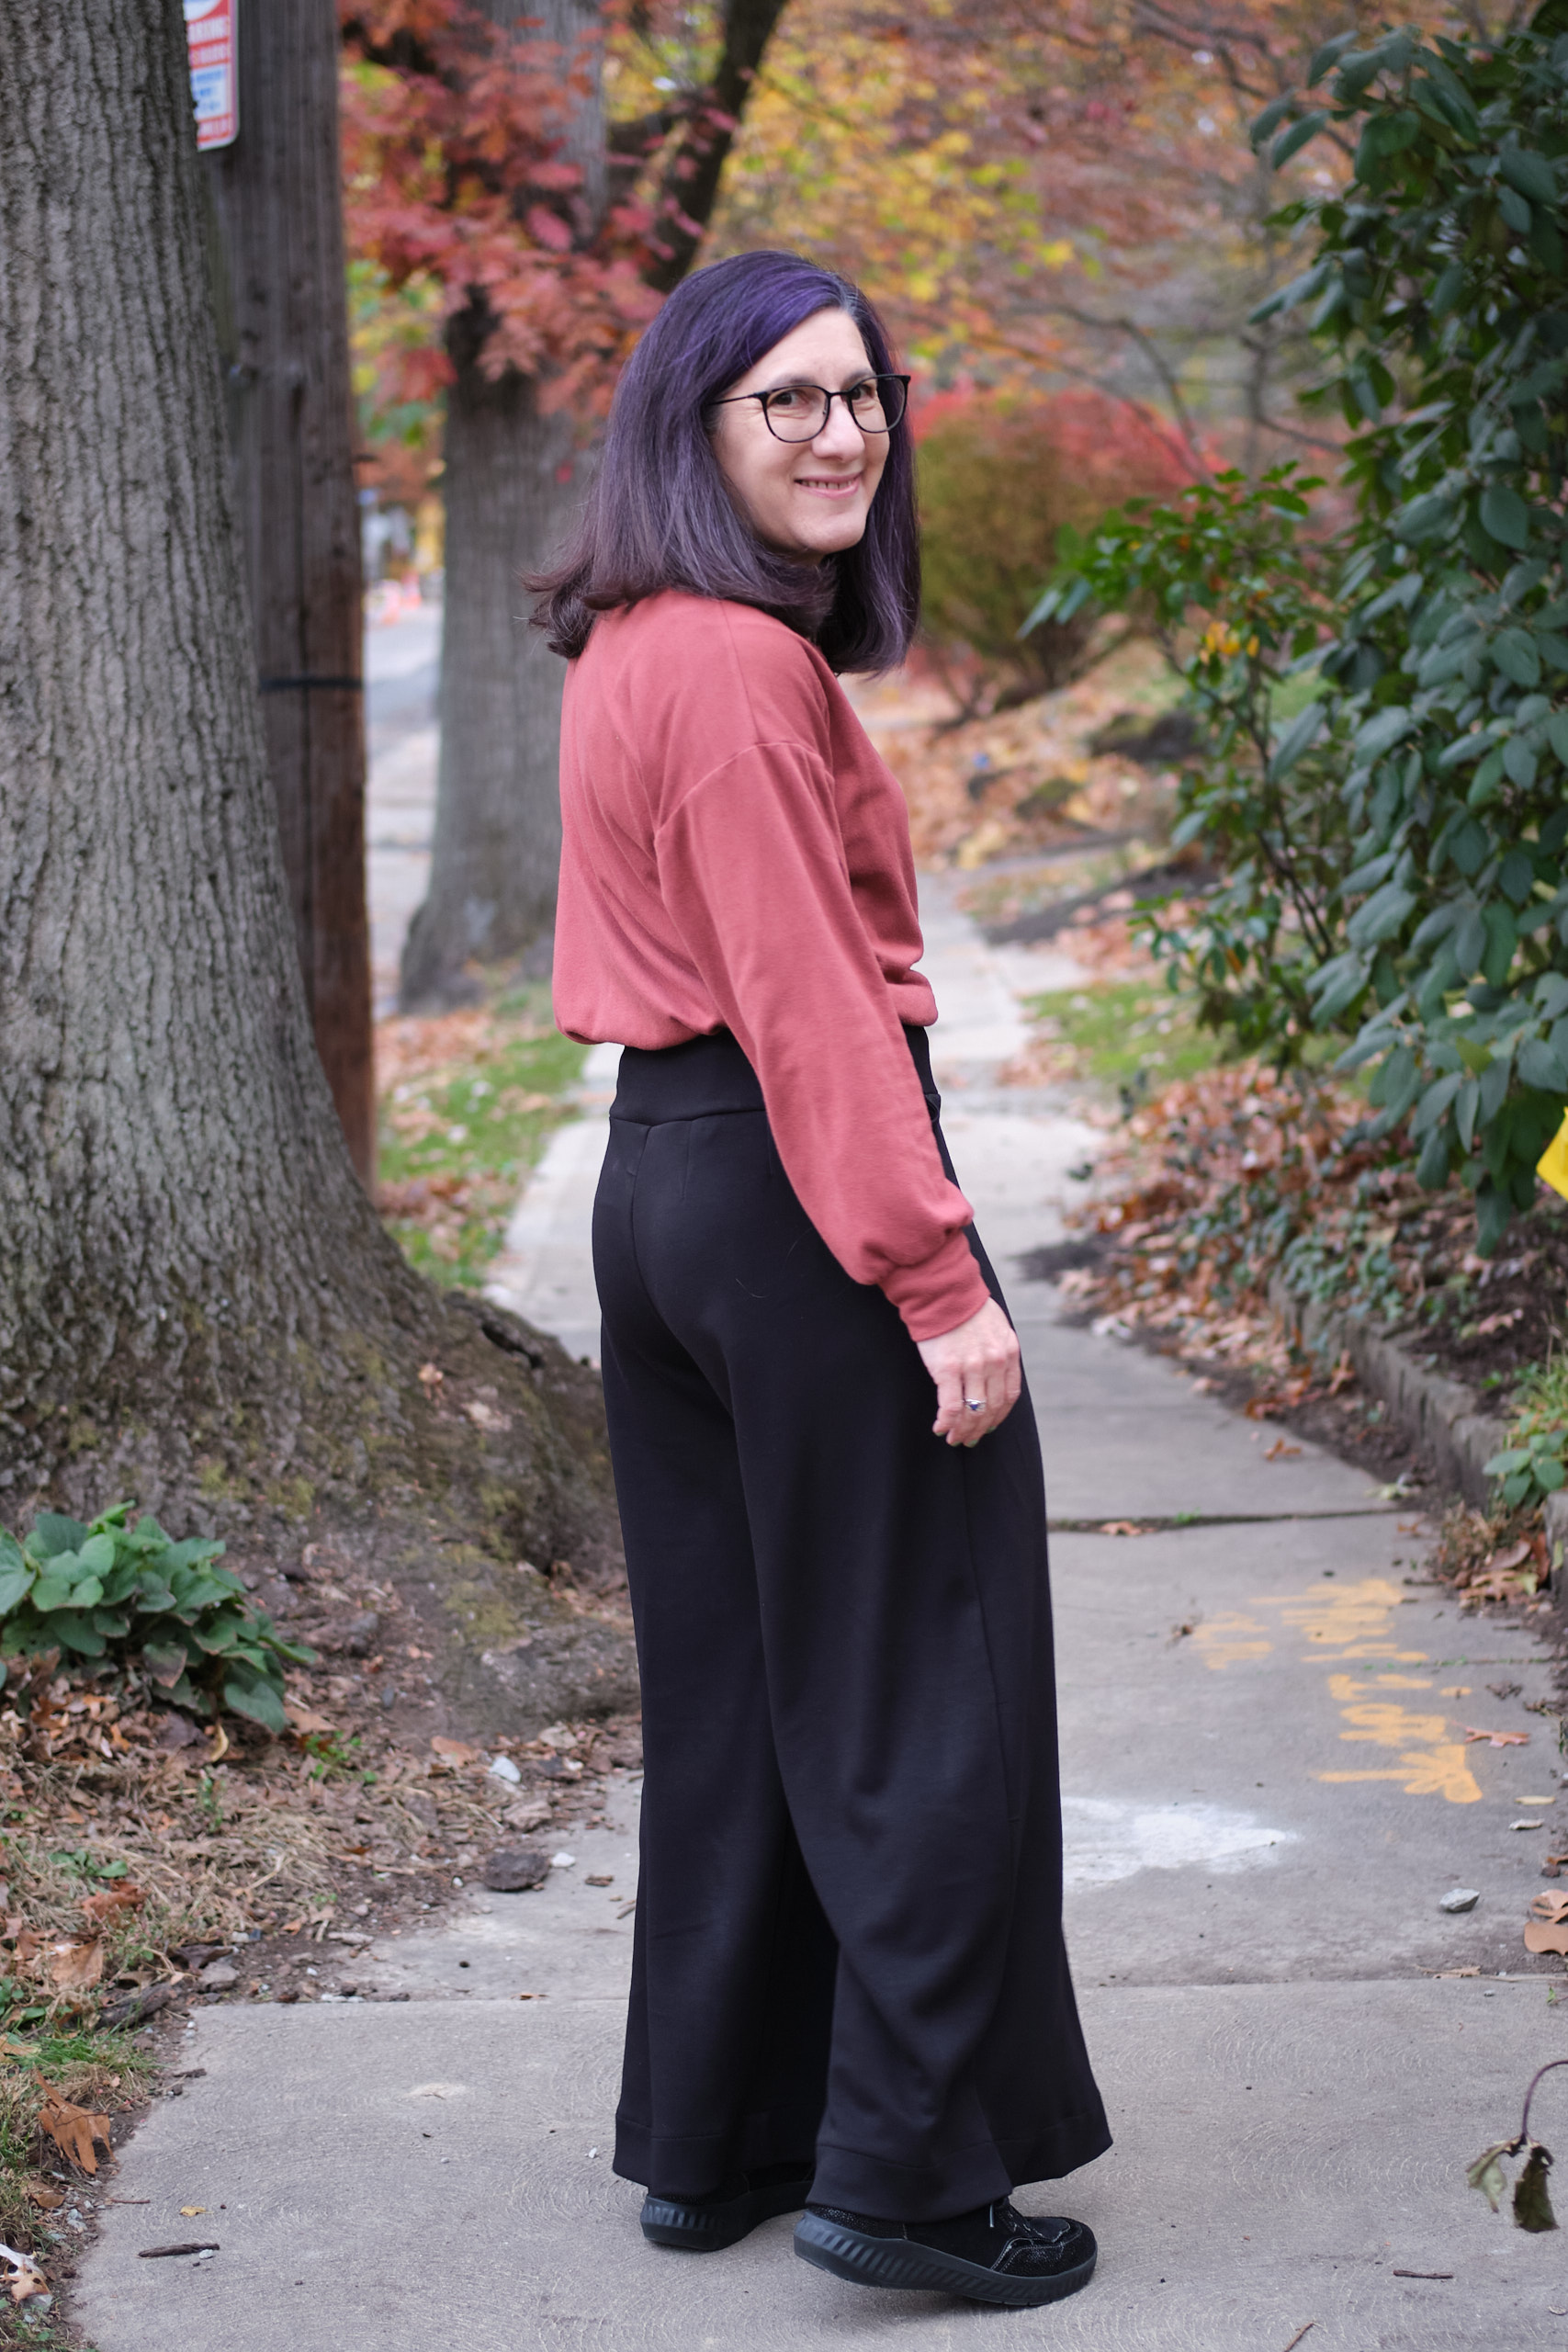
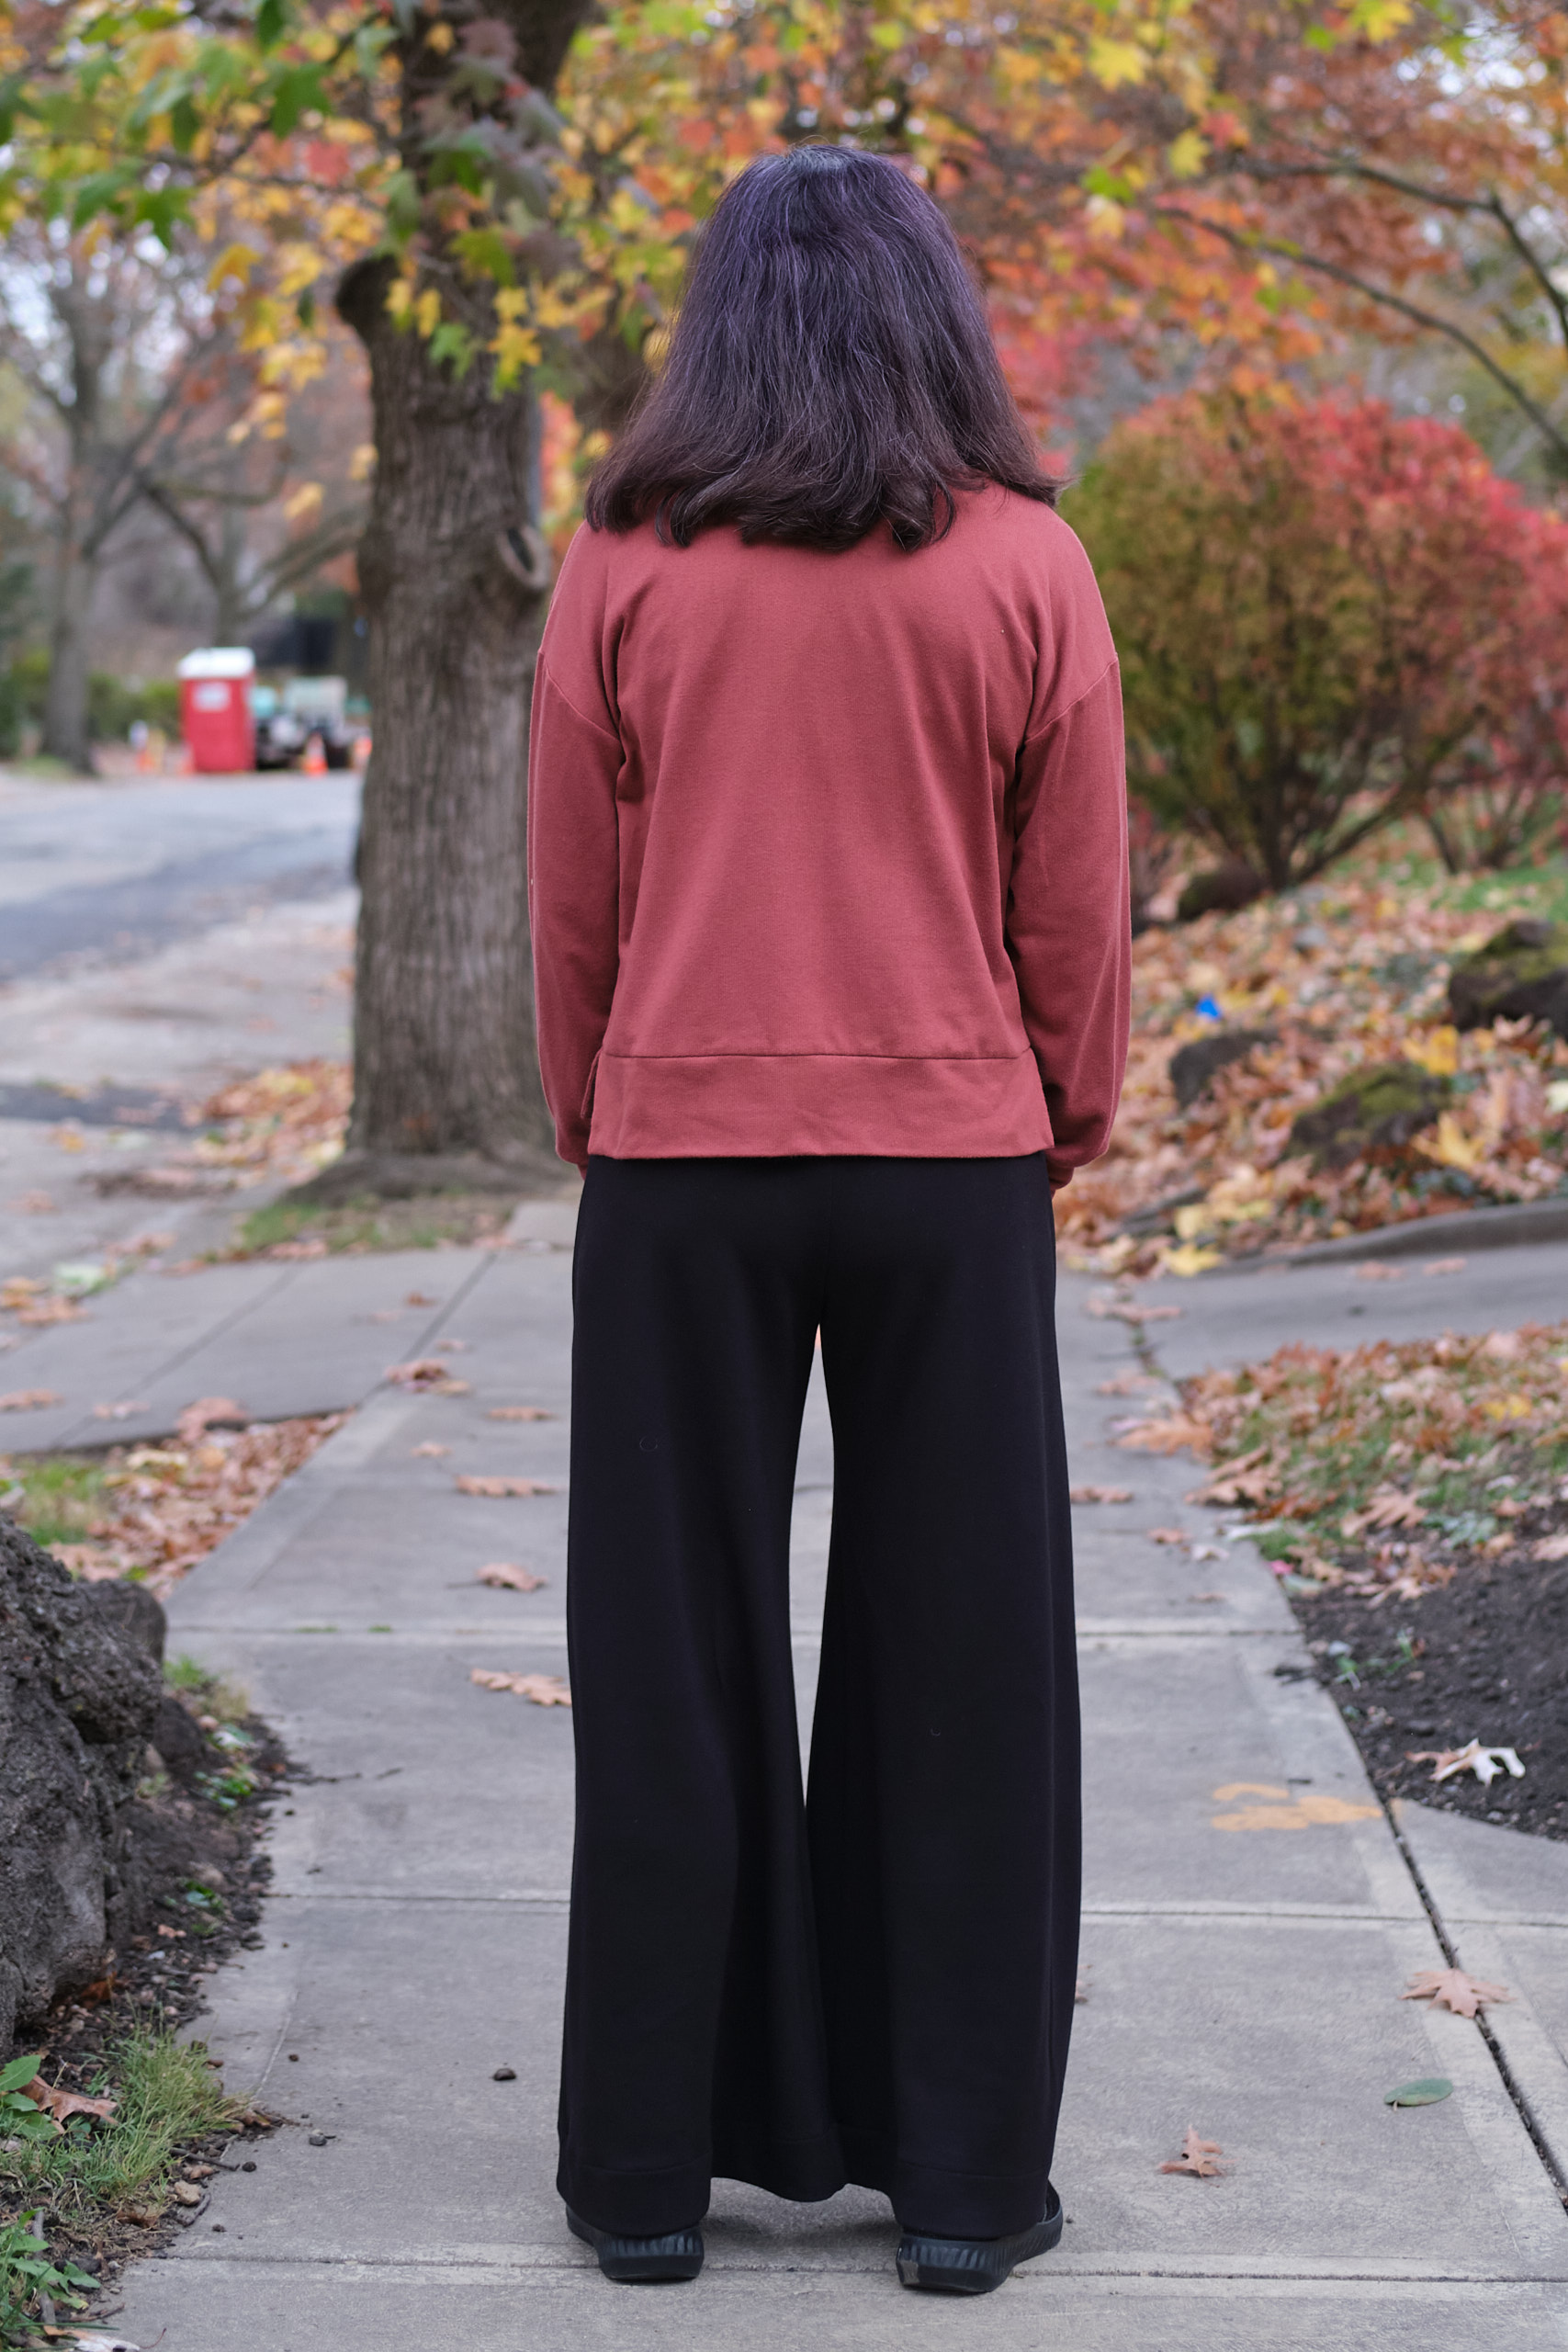
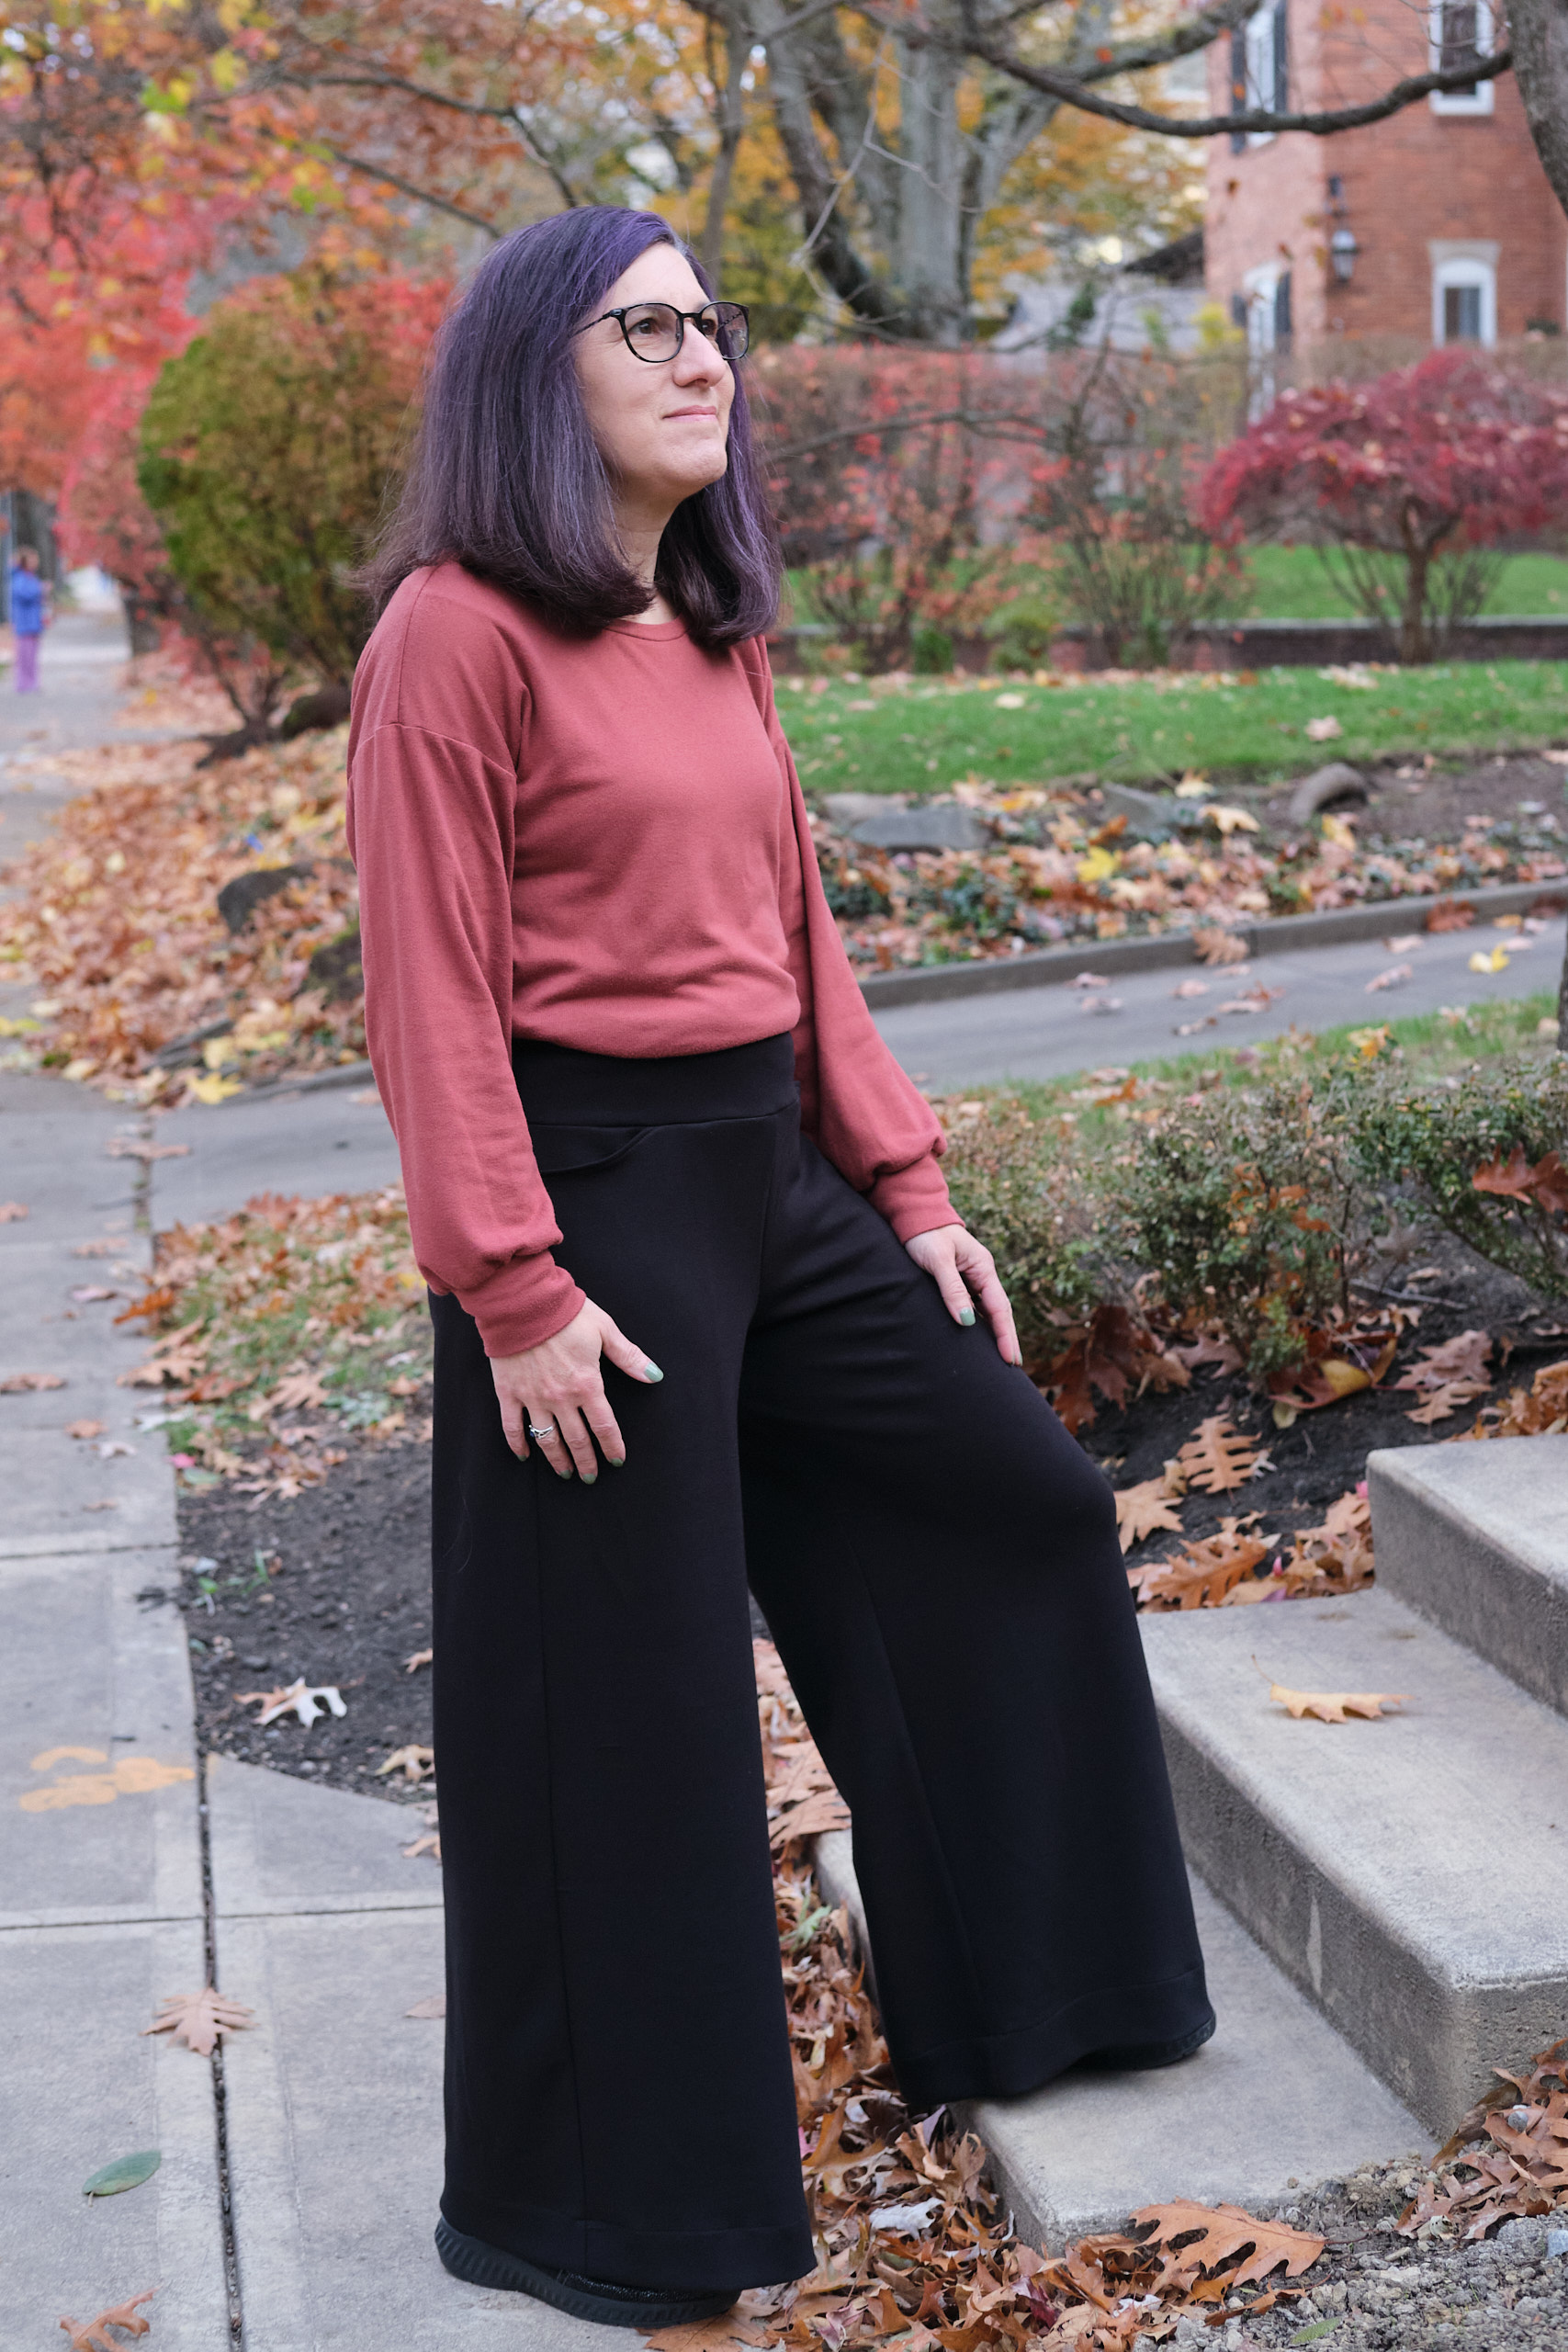
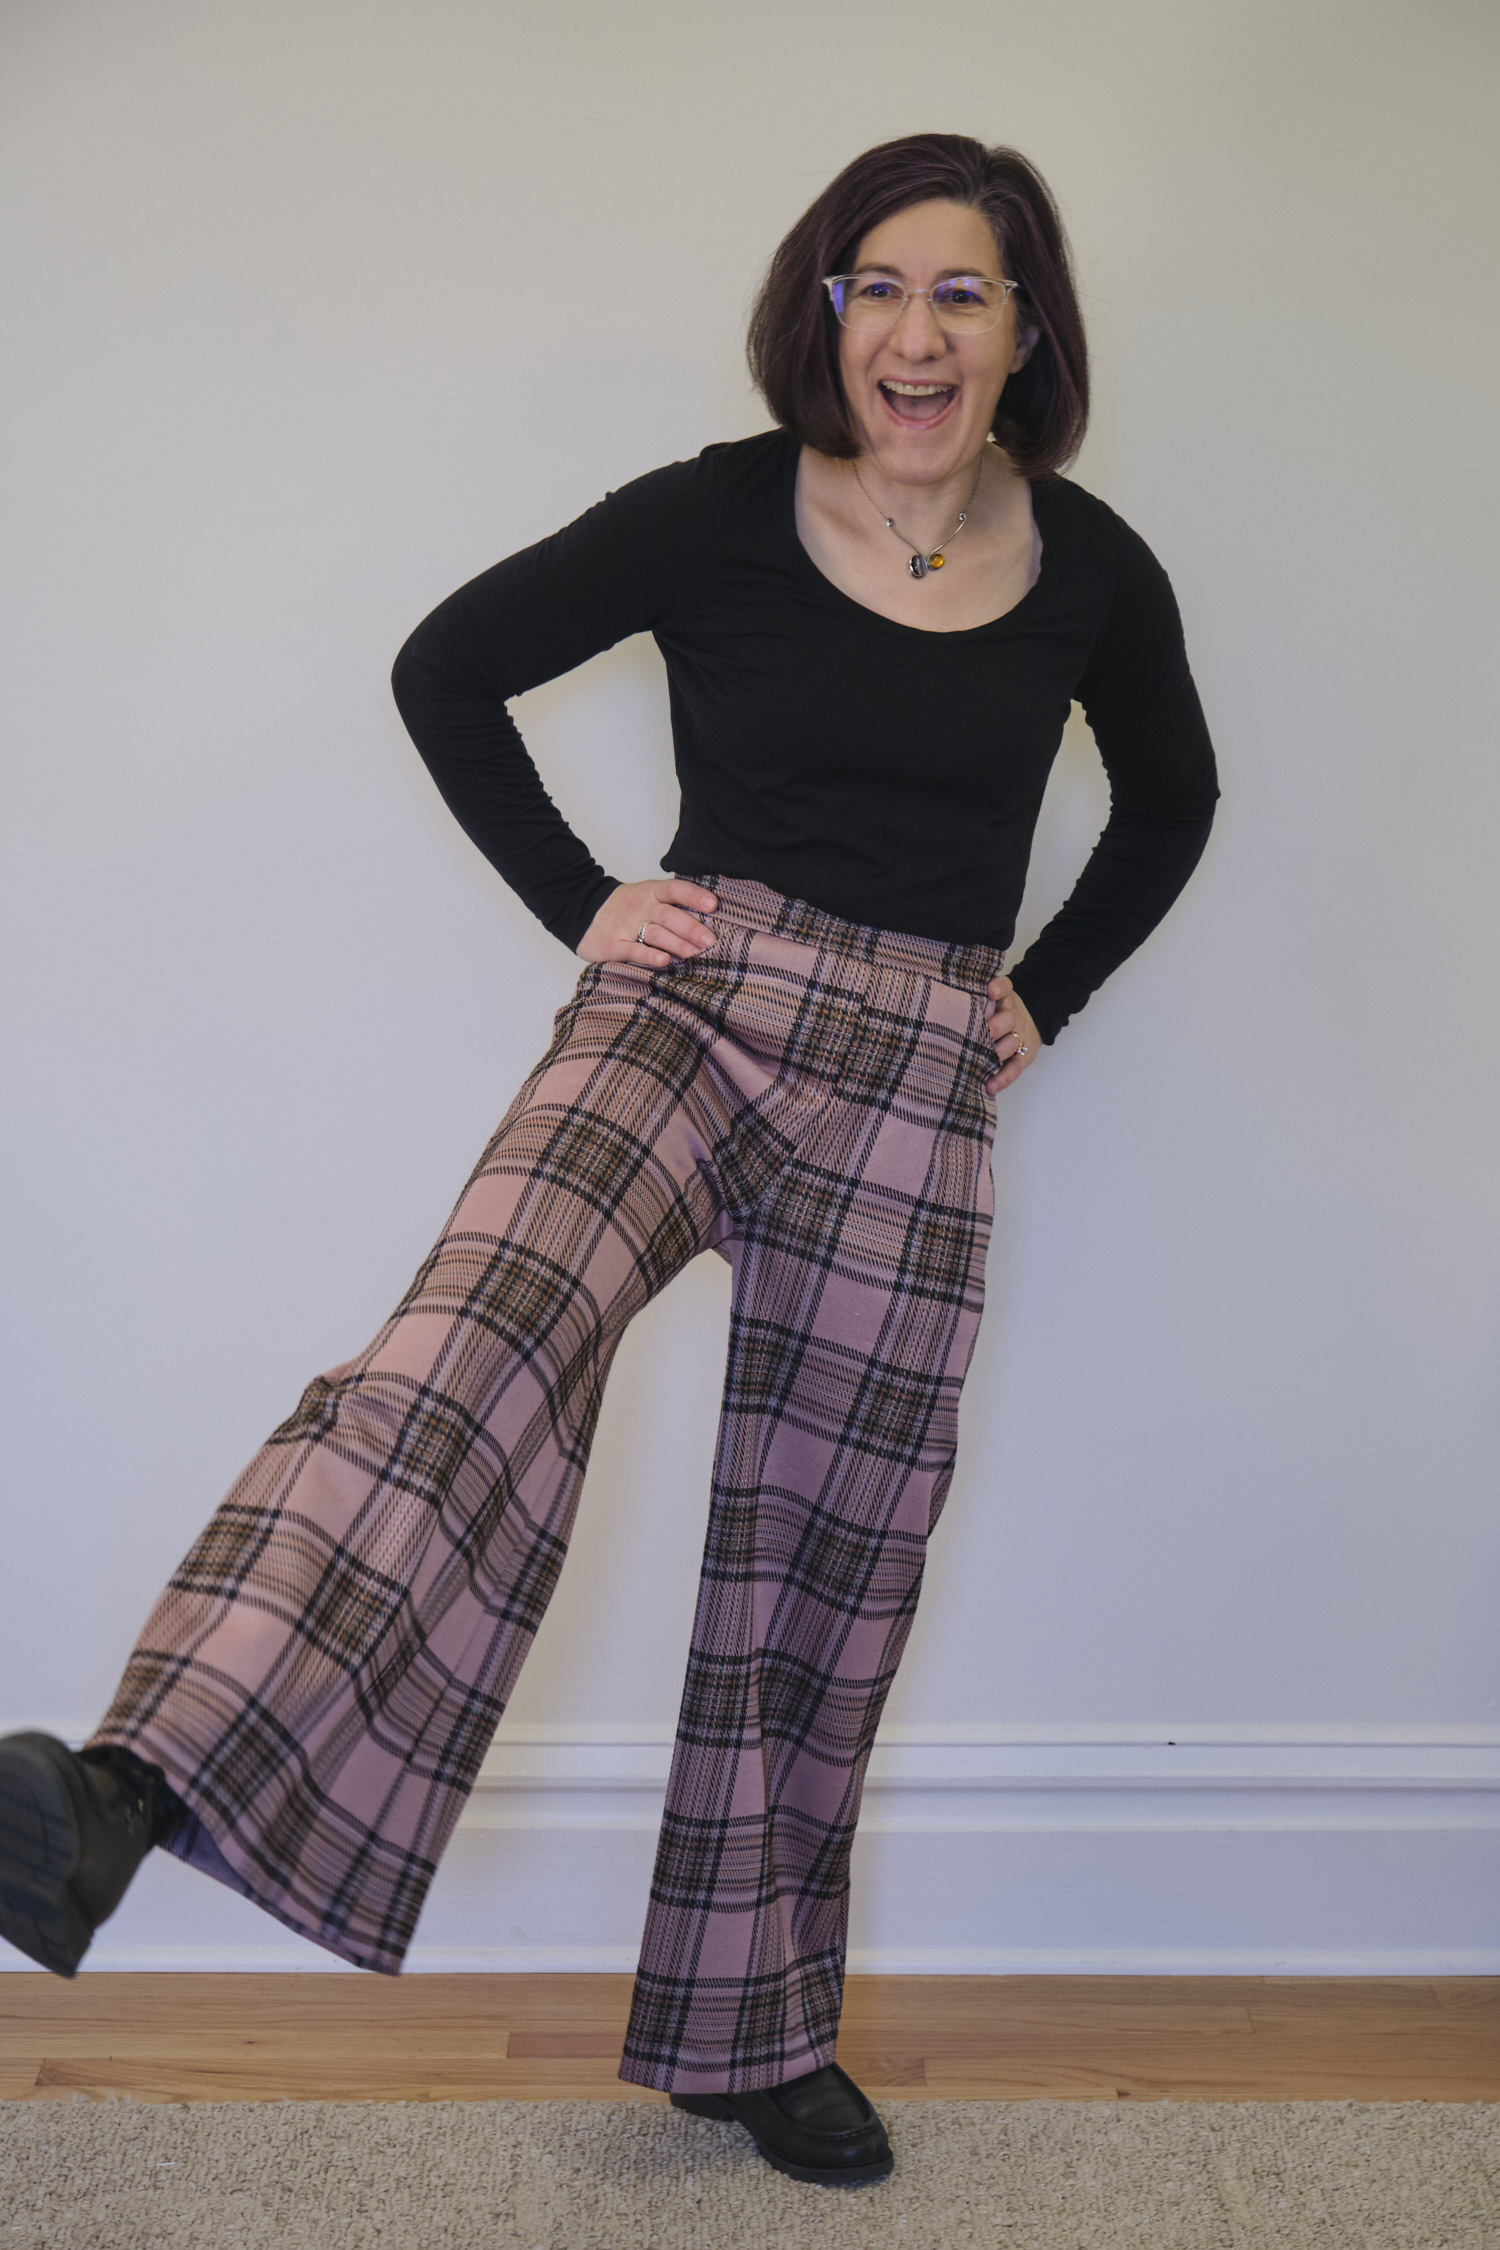
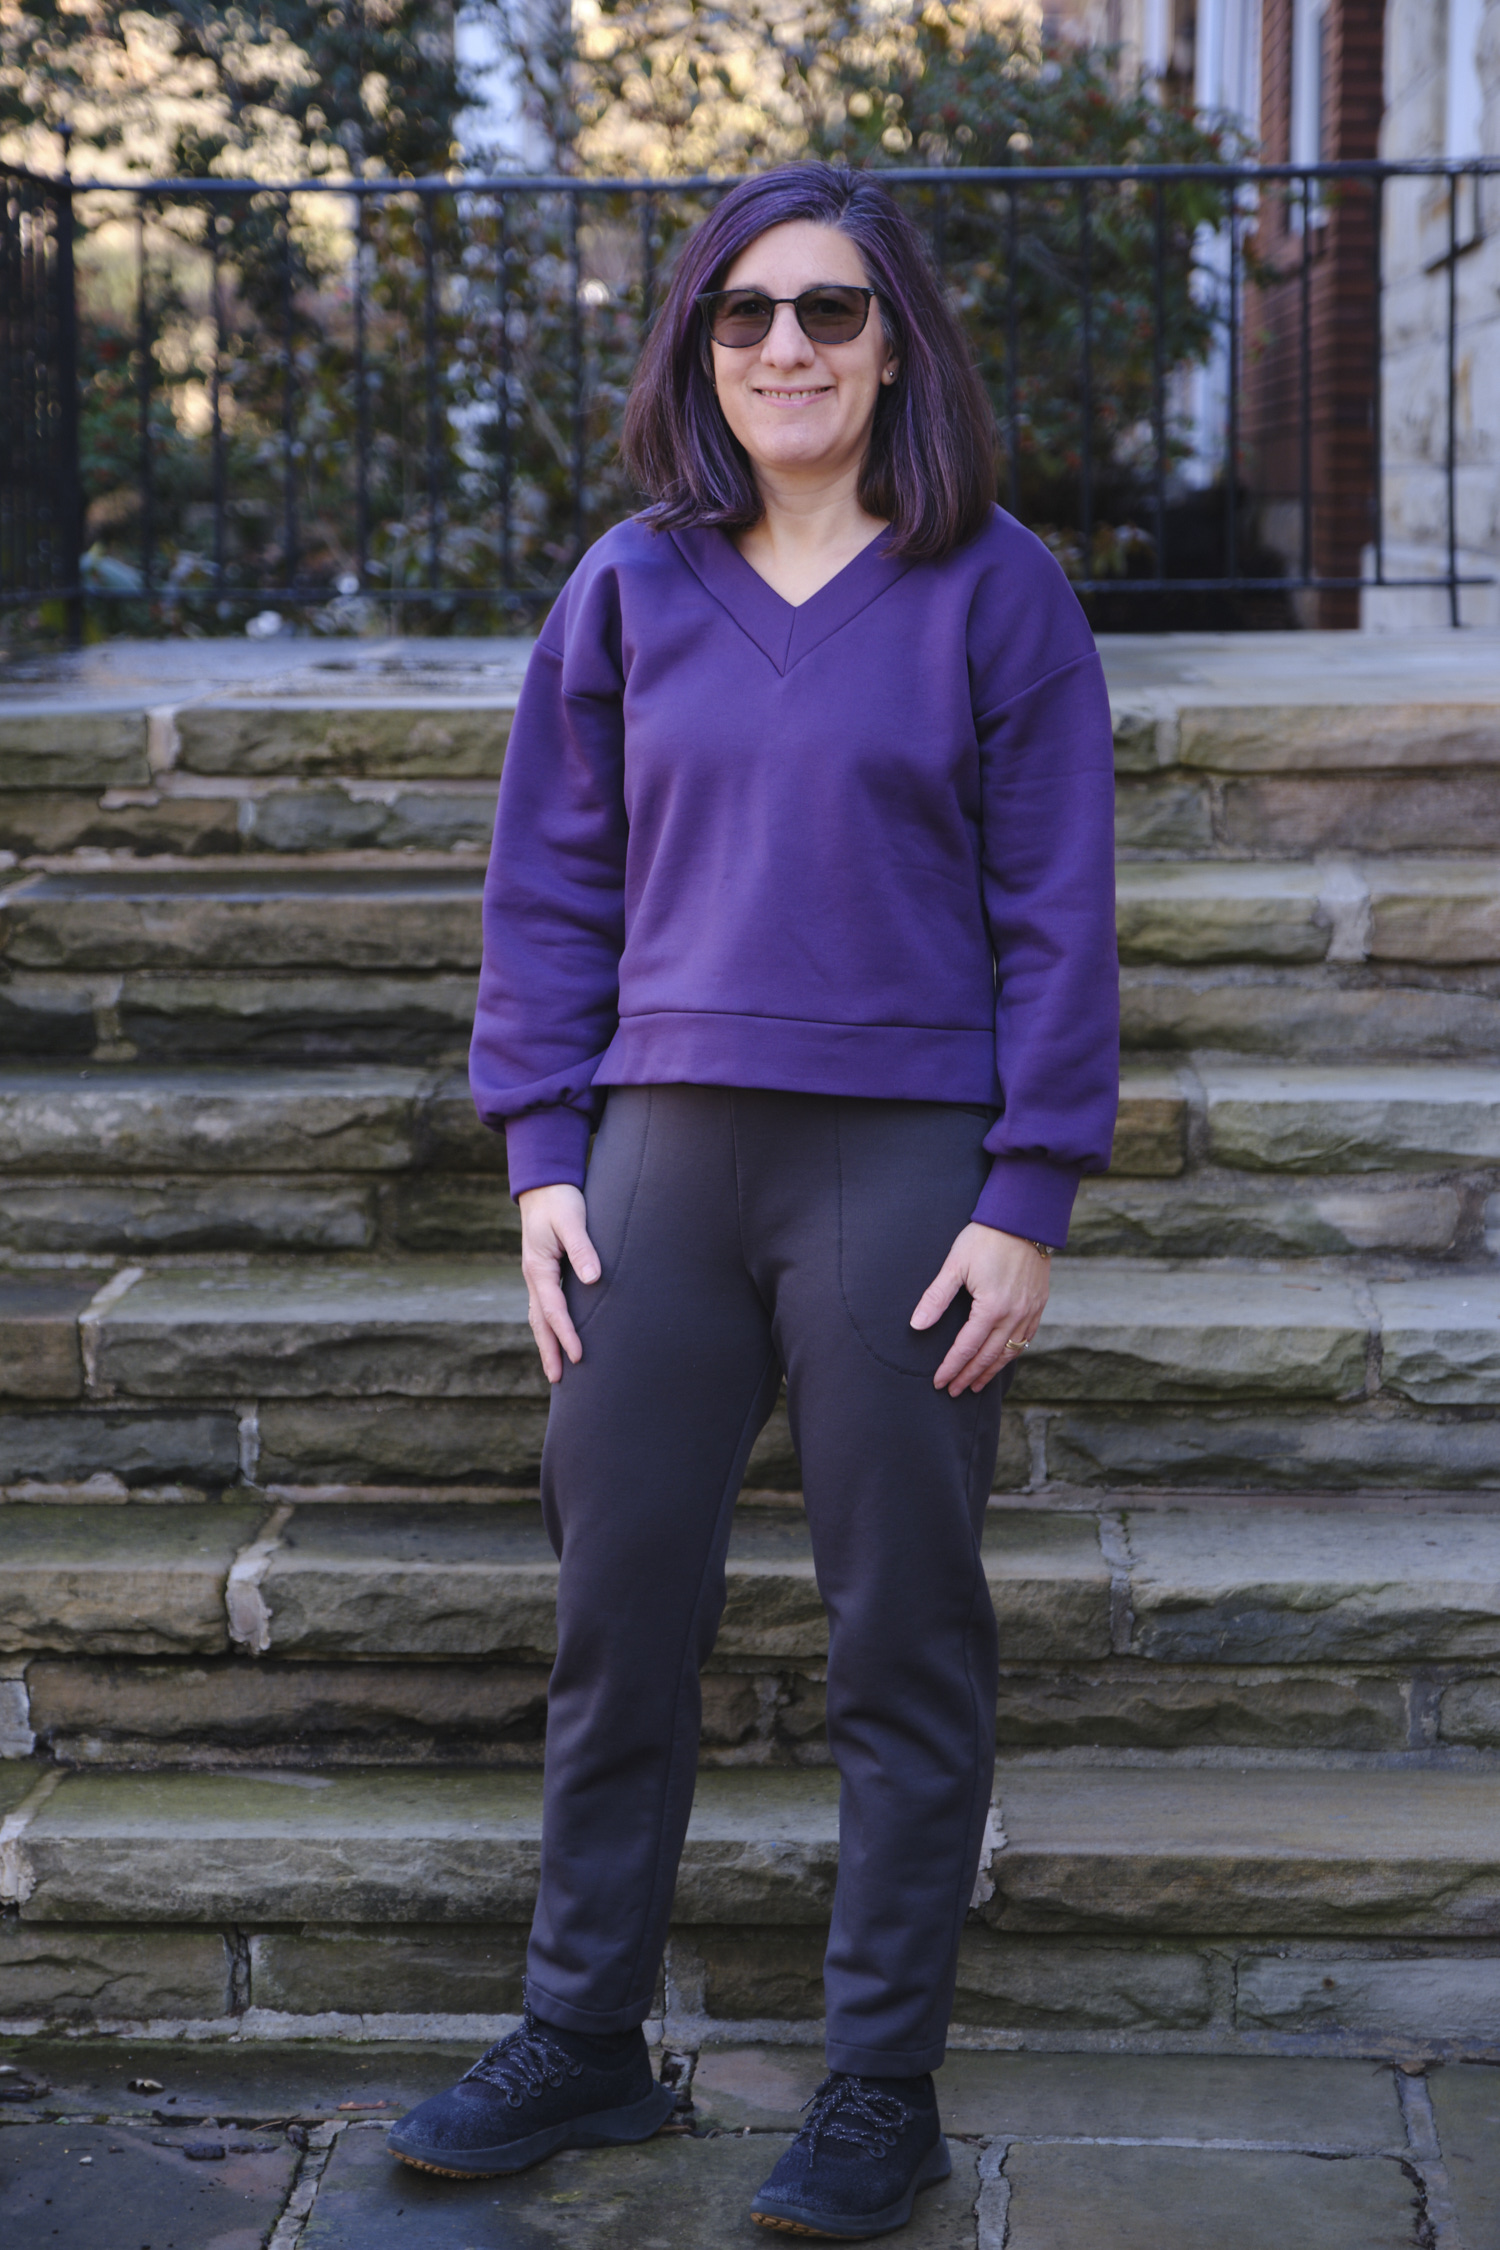
Pattern Emporium Walk Boldly pants with low rise and modified yoga waistband from PE Urban pants and jeans pockets with a straight diagonal opening from 2 yards black butter scuba, AU10, shortened 2 inches
I’ve made several pairs of mashed up Pattern Emporium Walk Boldly pants with modified yoga waistband from PE Urban pants, mostly for summer in light-weight LiKnit. When I heard about Mily Mae Fabric’s butter scuba I wanted to use if for some wide leg pants, but I didn’t manage to order any before it sold out. so when they restocked I grabbed some black butter scuba (and other colors too). The fabric is 50% Rayon/42% Poly/8% spandex with a decent amount of 4-way stretch. The right side of this fabric is brushed and has a soft, buttery feel. The wrong slide is smooth and a bit shiny.
When I cut out the fabric with my rotary cutter, it skipped in a few places and when I pulled the pieces apart, it created small runs. They’re hard to see but I know where they are, and next time I will be more careful and probably use a fresh rotary cutter blade. The runs did make me a bit concerned that the fabric could have a tendency to snag or pill, but I’ve washed it and worn the pants twice and so far so good.
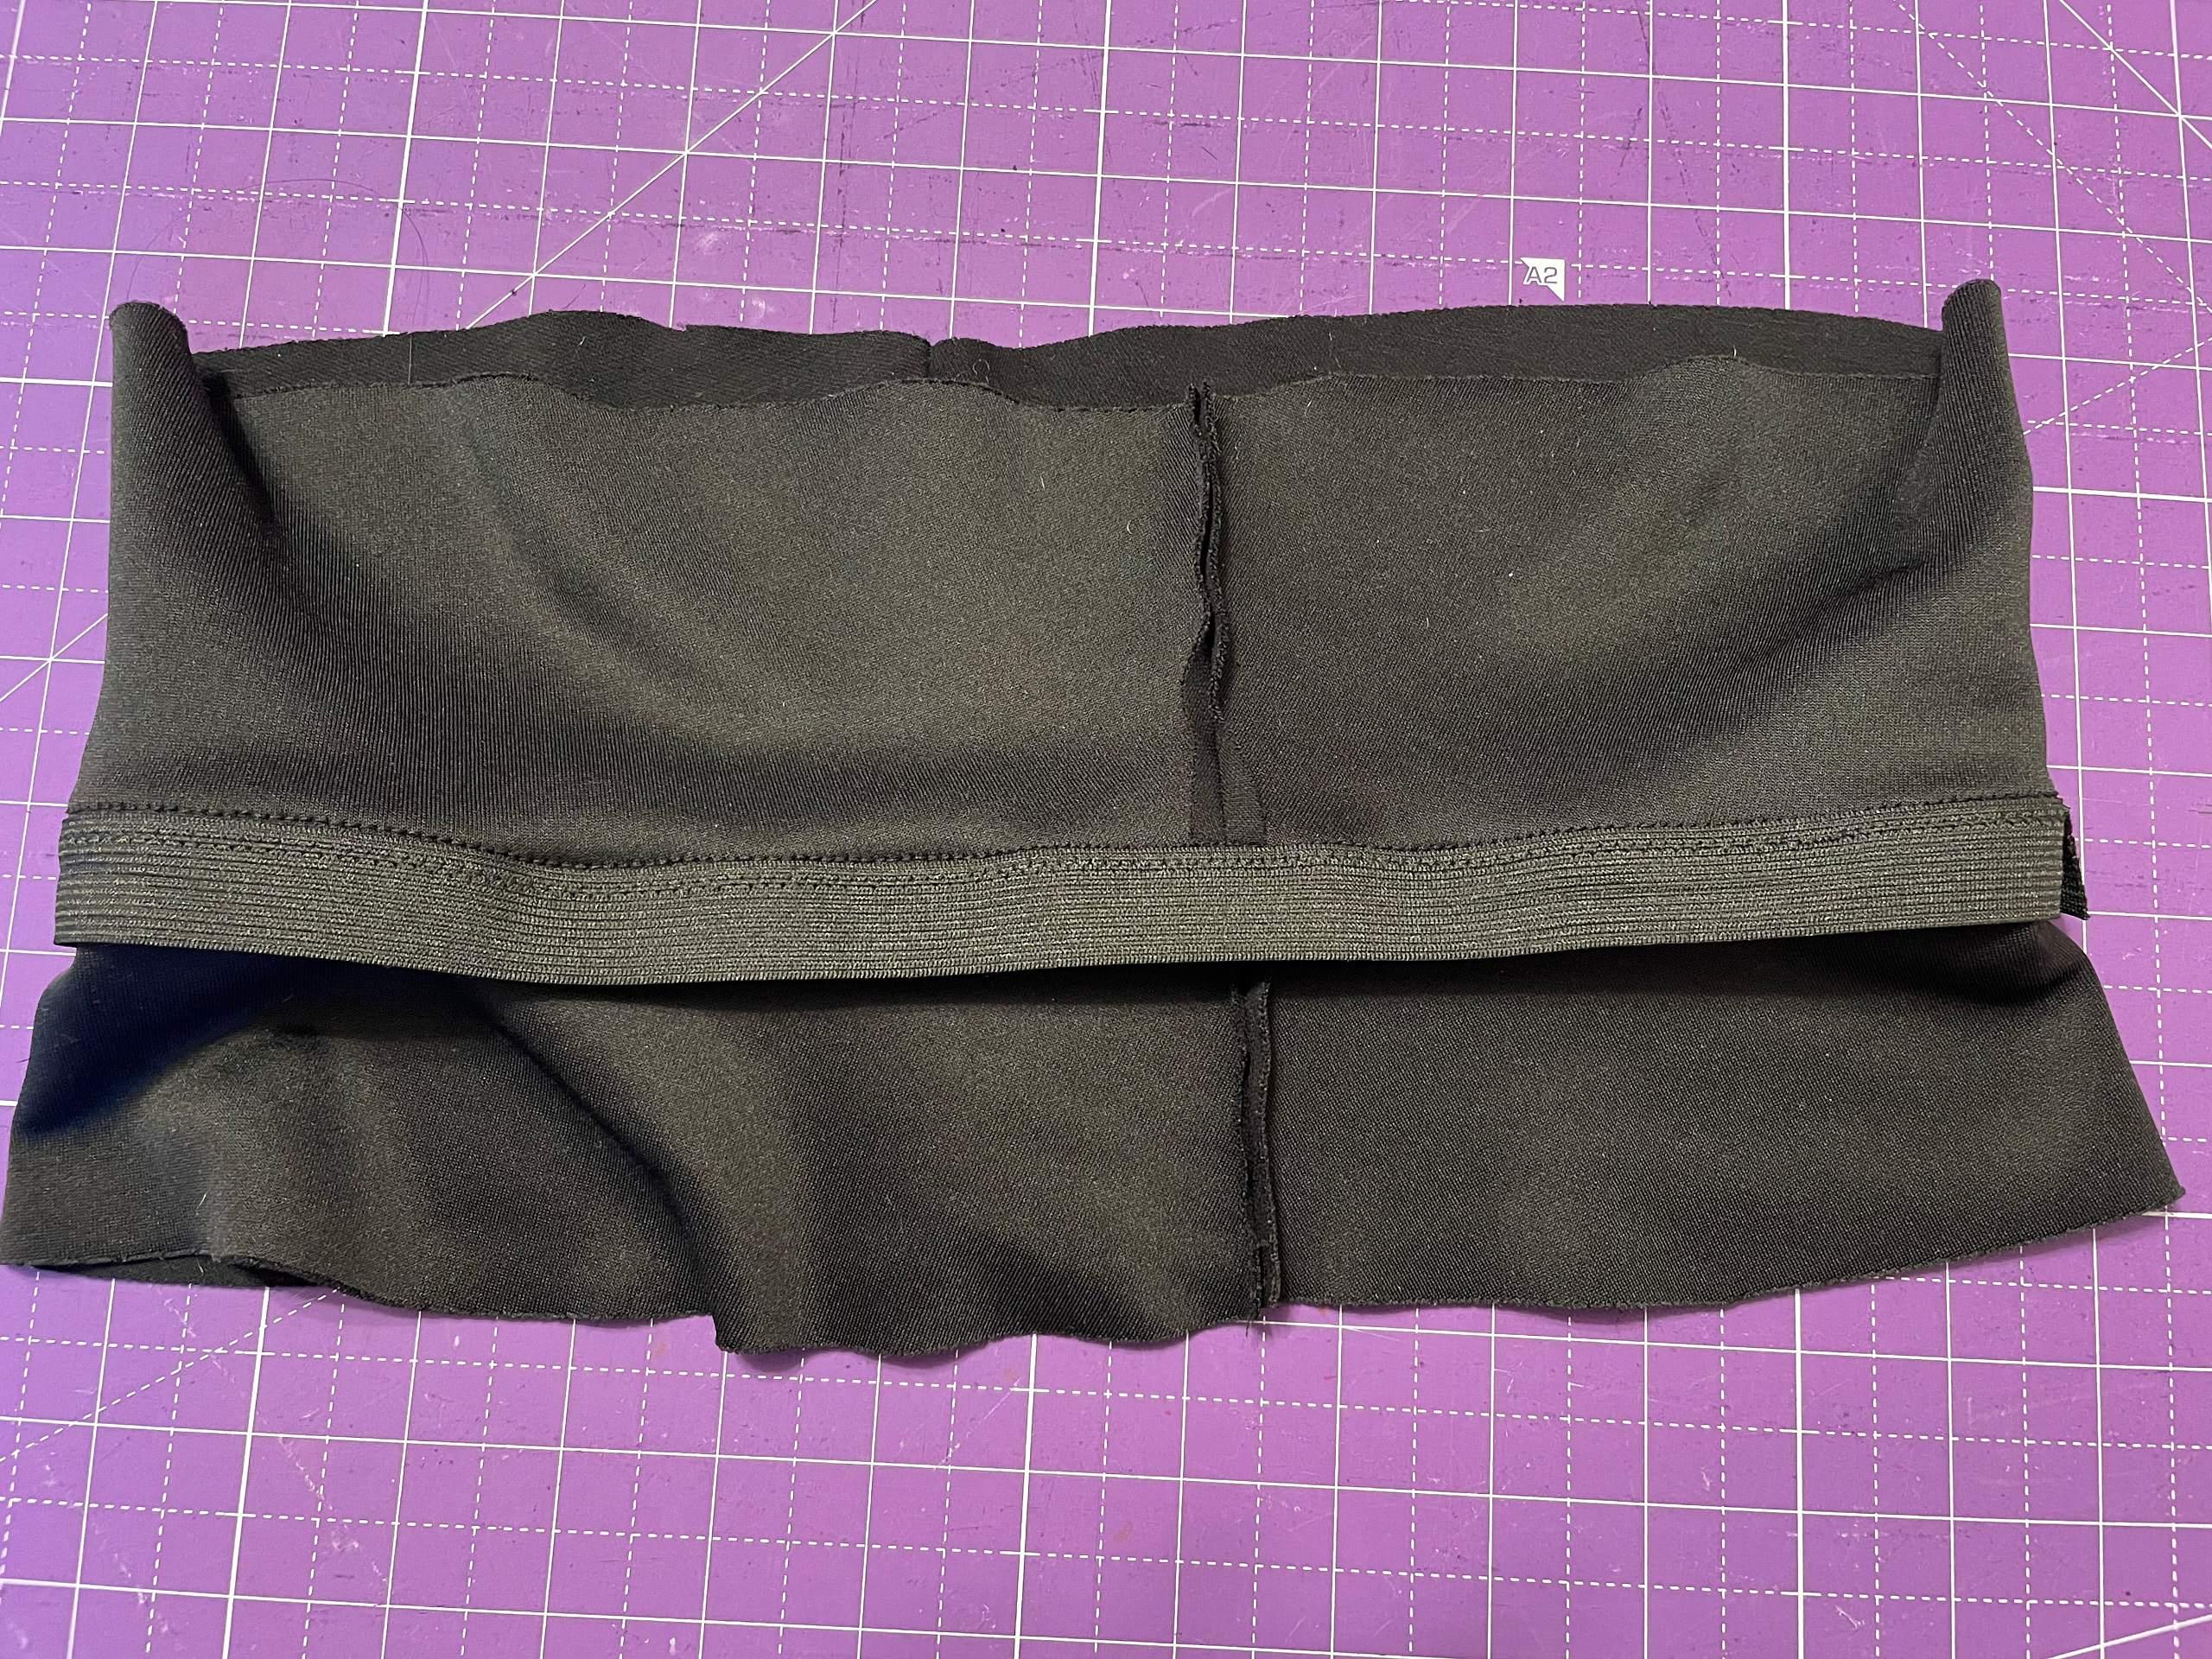
I cut a size AU 10 with the waist graded in and shortened by 2 inches (and then hemmed 2 inches). I also lengthened the front and back crotch a tad. I added jeans-style pockets but instead of a curved pocket opening I cut the opening straight on a slight diagonal. The pocket openings sag a bit. I probably should have fused some interfacing to the top.
I cut the low-rise and made a contoured yoga-style waistband, effectively turning them into high-rise pants. I sewed 3/4-inch elastic at the top of the waistband between the layers and understitched it down. I used the scuba for both the inner and outer pieces. It is nice and soft with good recovery, but would not have been firm enough without the elastic (since I put stuff in my pockets and that tends to drag the waistband down). I might use a firmer athletic knit for the inner waistband in the future (as I have done on other pants).
These pants are very comfy to wear and have a nice drape: really nice dressy secret pajamas! They have a good weight to them without being overly warm or heavy, but warm enough to wear comfortably in ~40 degree F weather this week. I’m modeling them here with a PE Sweet Cheeks sweater in Versailles hacci sweater knit. I think they look good both tucked and untucked, and I’ve already worn them to work both ways.
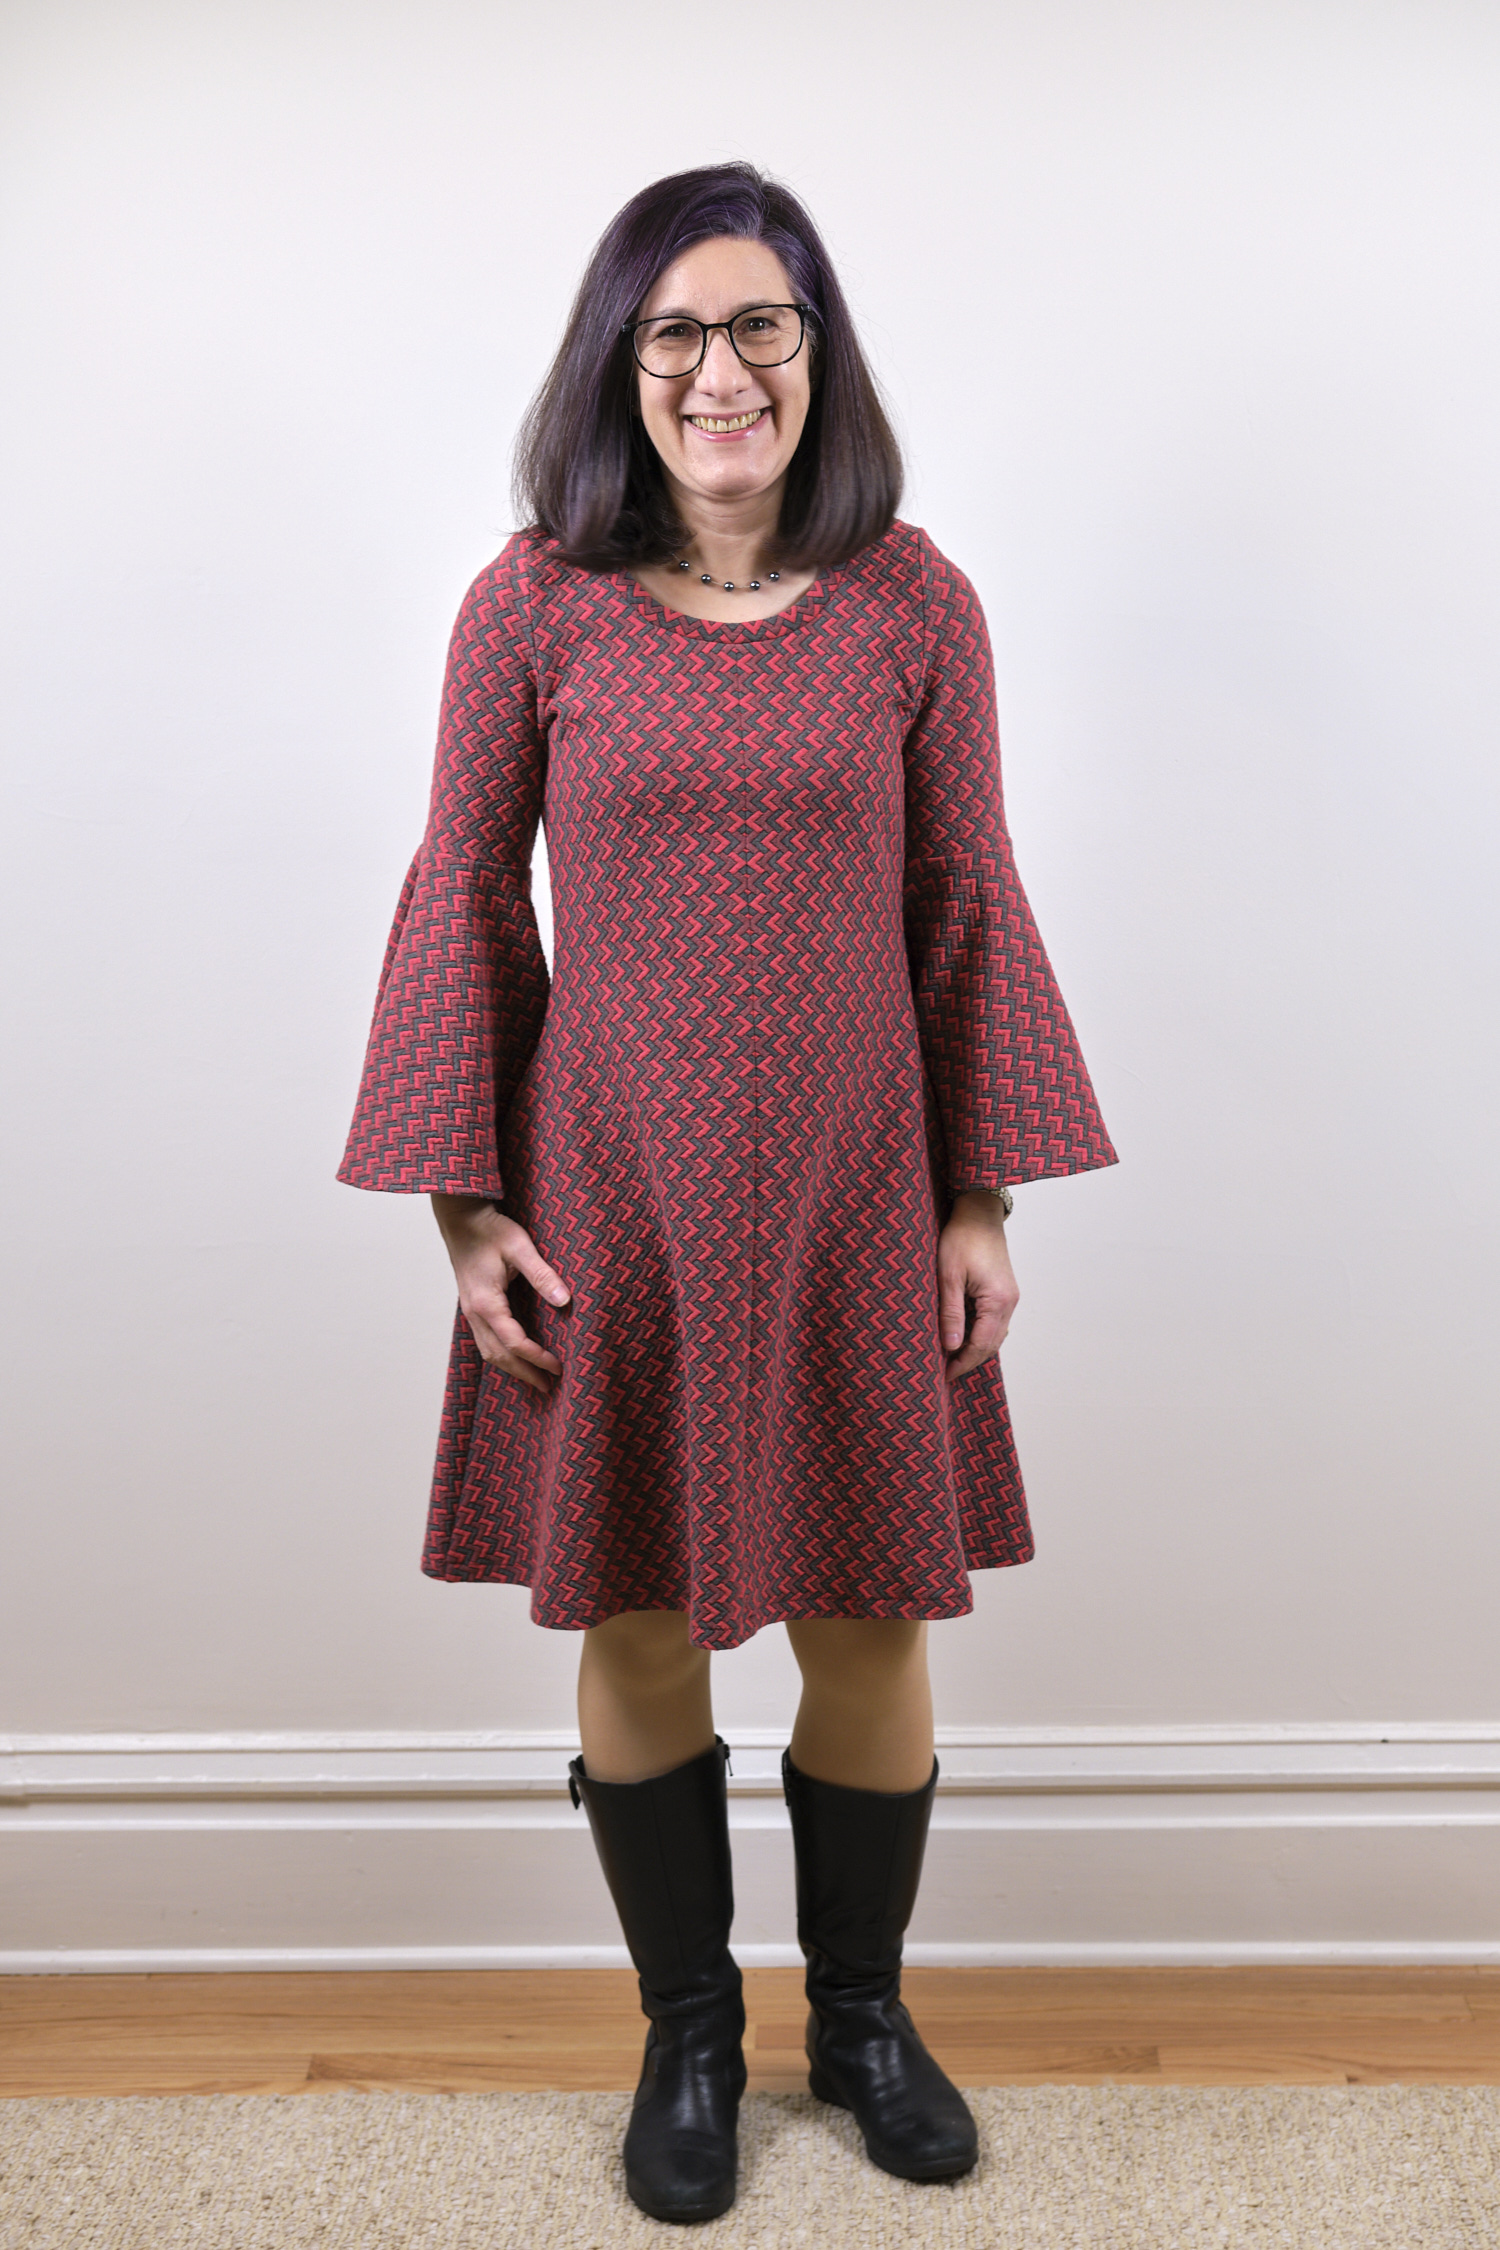
Pattern Emporium Allure Bell Sleeve Top with plain sleeves size AU10, Wanderlust high scoop neck, hem shortened 3.5 inches, sleeves shortened 1 inch, 1.5 yard of 43″-wide ginger-red wool jersey knit.
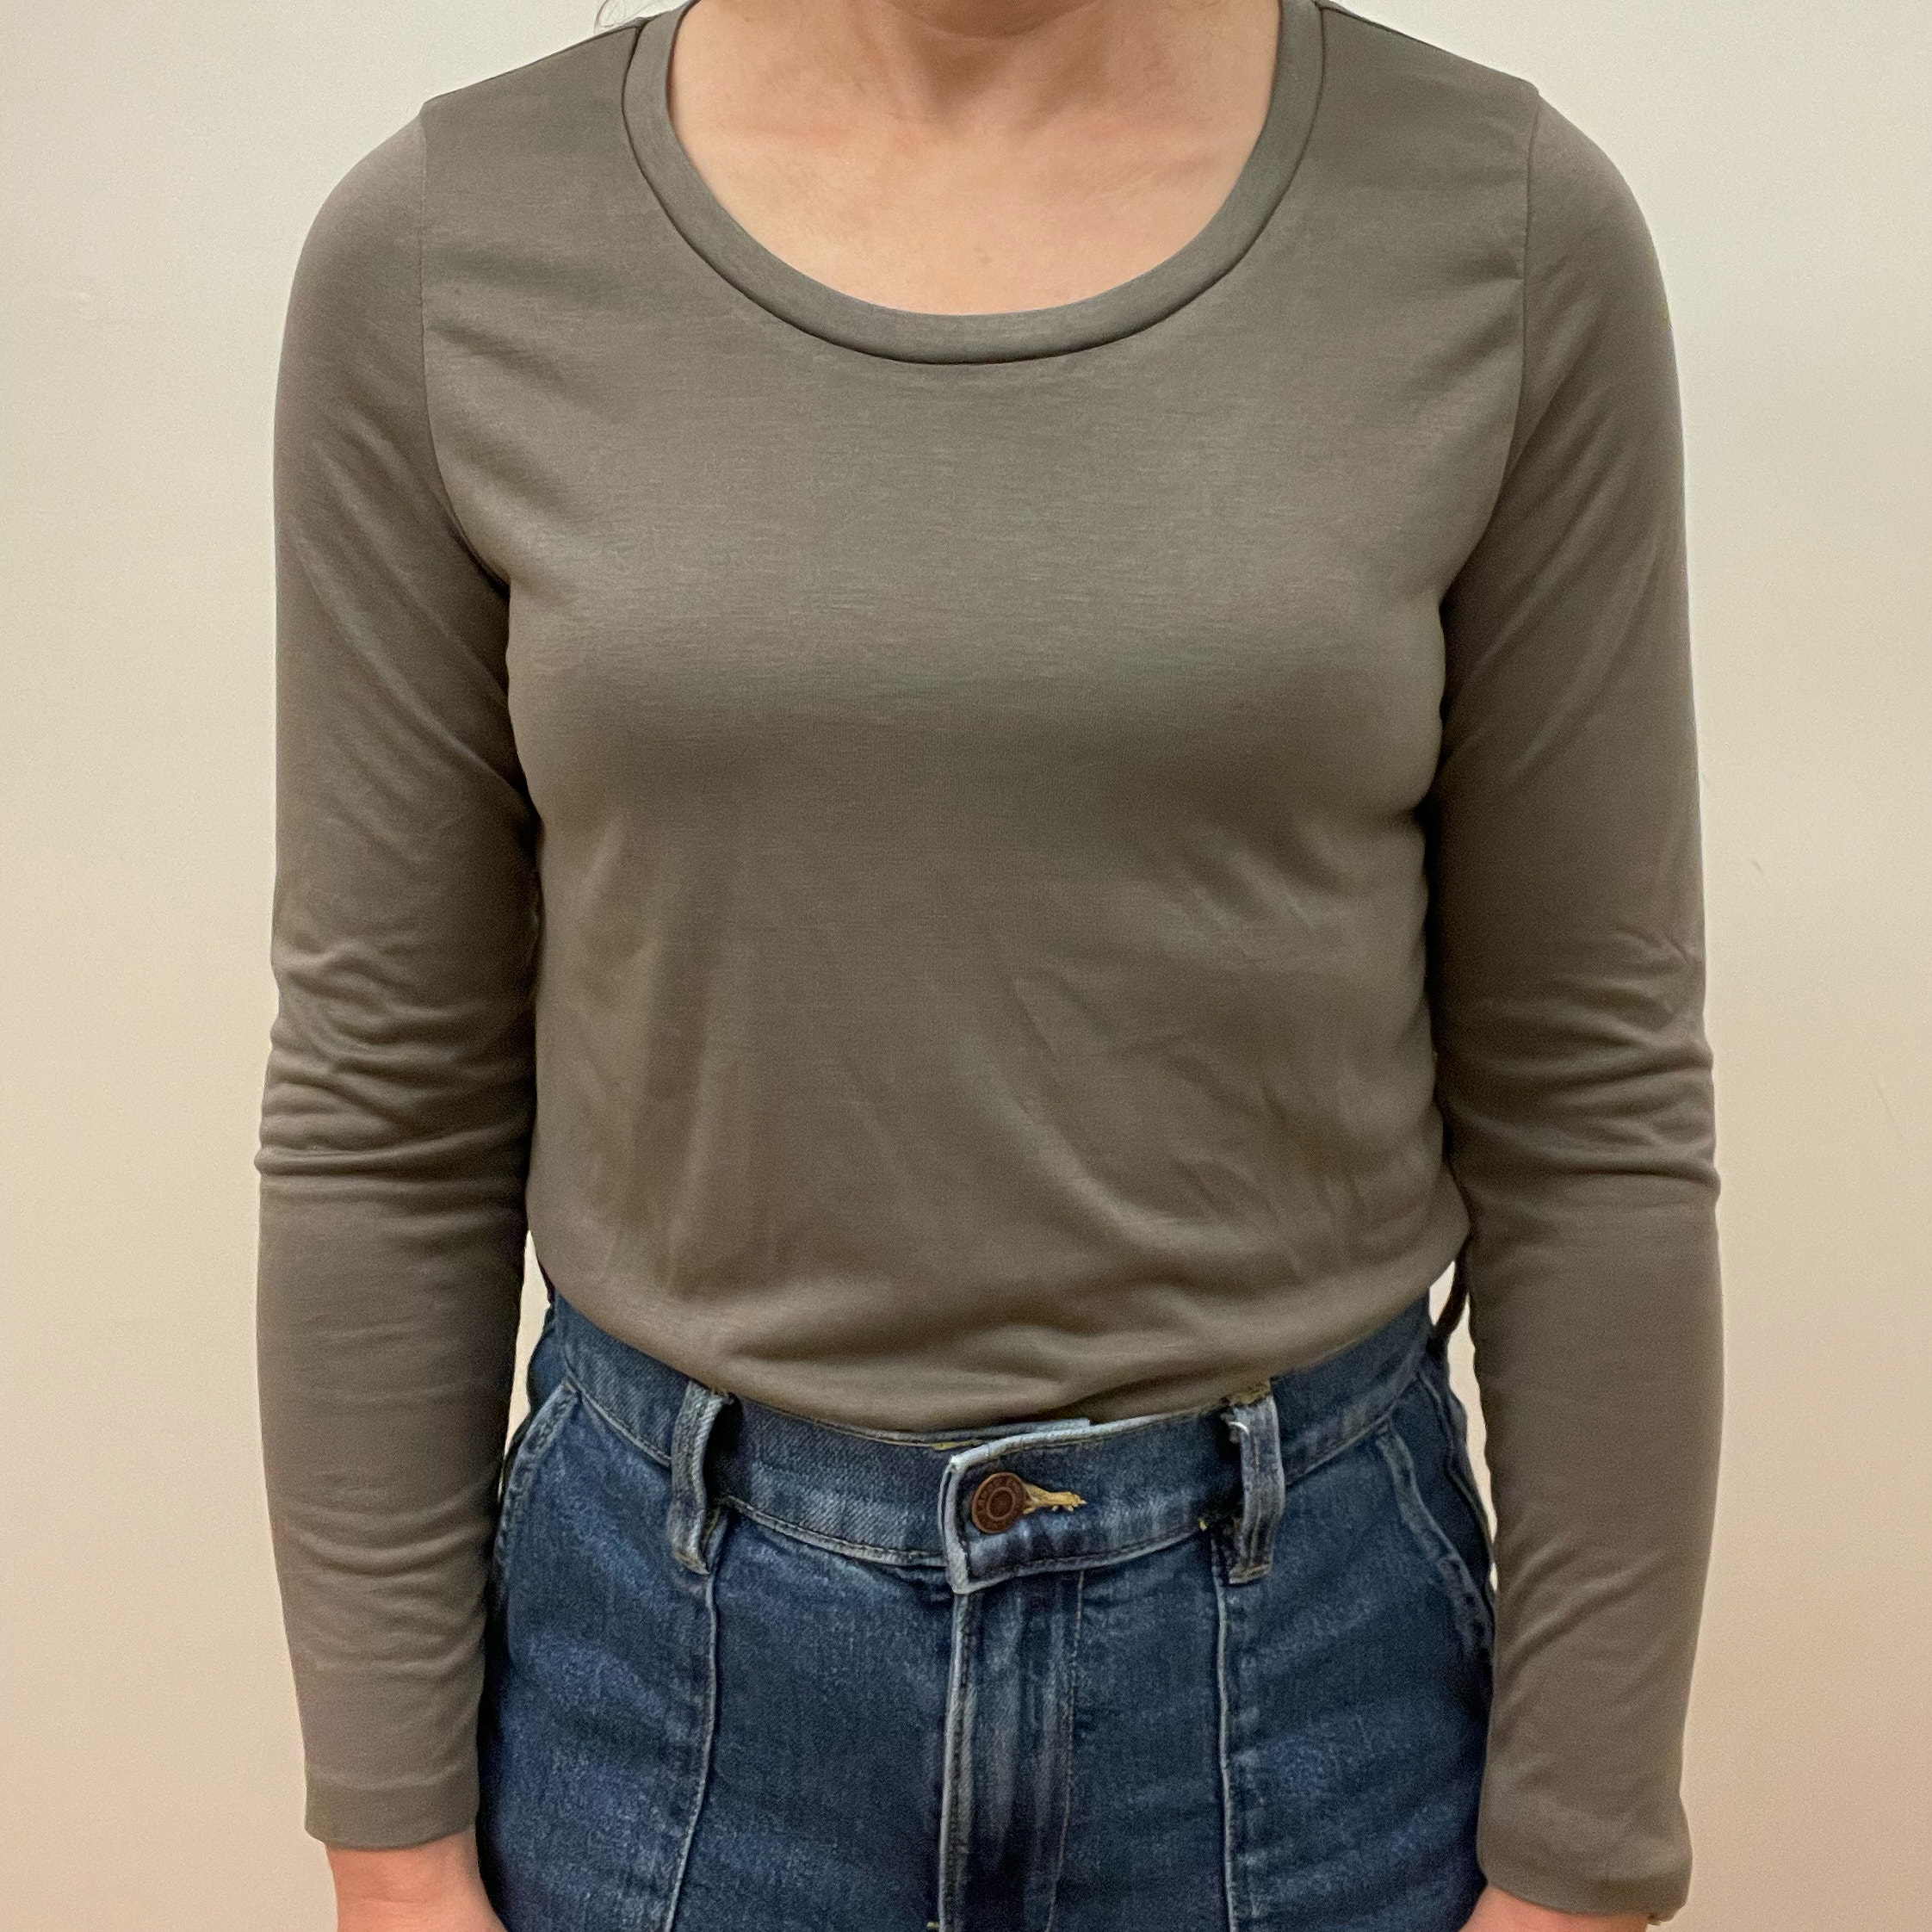
Size AU 10, screwp neck, sloped shoulder adjustment, hem shortened 3.5 inches, short sleeves, <1 yard dusty olive cupro jersey.
Size AU 12, screwp neck, broad and sloped shoulder adjustment, hem shortened 3.5 inches, sleeves shortened 1 inch, <1 yard dusty olive cupro jersey.
I was quite pleased with my double-bell-sleeve Pattern Emporium Allure top, but wanted to try it with simple sleeves. The pattern comes with bonus plain sleeves that are slightly shaped for elbow curvature.
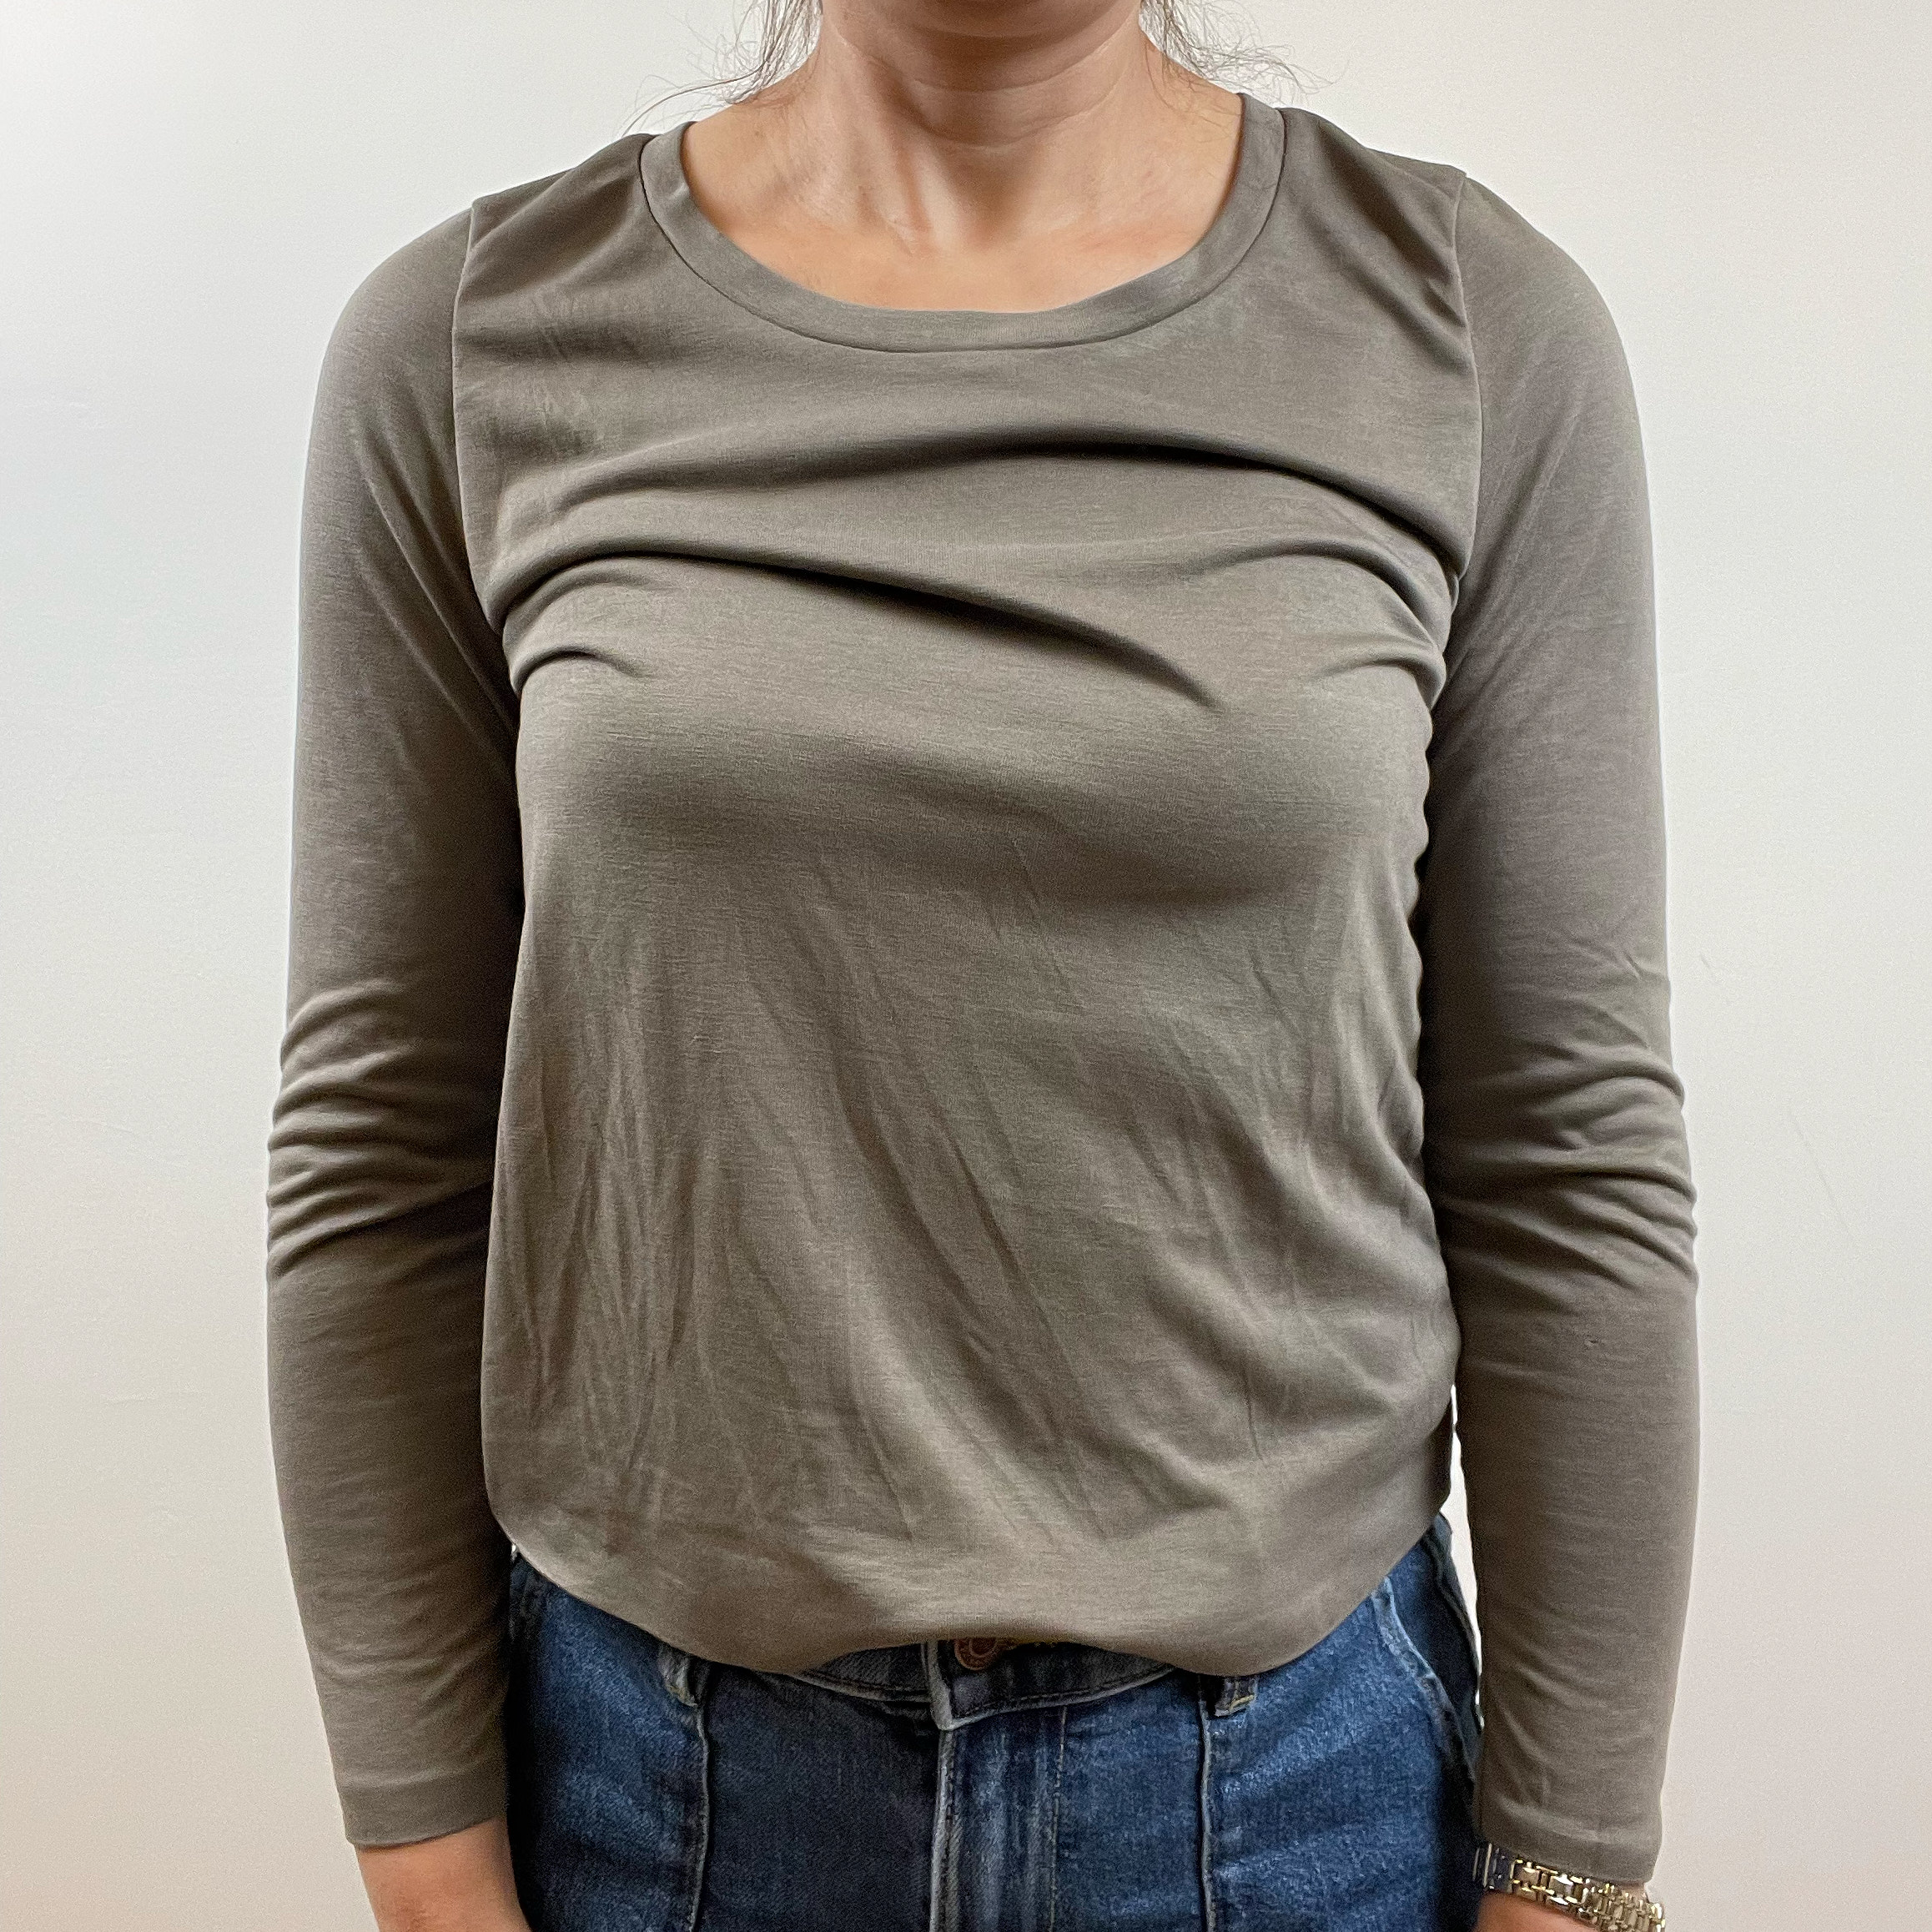
I have previously made quite a few long-sleeve knit shirts using the Sinclair Bondi pattern, which I like quite a bit and I think fits me really well (especially after I made a few minor adjustments). However, it is fairly fitted and I don’t think it works as well for fabric that doesn’t have a lot of 4-way stretch (although that hasn’t stopped me from using it with less stretchy fabrics, sizing up a size). For example, I noticed a lot of drag lines in the back when I used it with a low-stretch light-weight wool. Allure is semi-fitted, slightly less fitted than Bondi, so I thought it might work better for low-stretch jersey fabrics. When I put the two patterns on top of each other I could see that the Bondi size 6 and the Allure size AU10 are about equivalent. The Bondi is more fitted in the waist, flares out more at the hem, and is wider across the bust in the front. I normally make Bondi in size 4P, but size up to a 6P when using low-stretch fabric.
First, I made a plain-sleeve Allure in size AU10 from a lightweight 150 gsm, ginger-red hand-washable wool jersey knit fabric from Knitfabric.com. The fabric was advertised as having 25% stretch in each direction, but it seems to me it has more like 50% horizontal stretch and <25% vertical stretch. I used about a yard-and-a-half of 43″-wide fabric. I cut the hem about 3.5 inches shorter than the regular length, which is a good length on me for wearing a shirt untucked (which is mostly what I do), but long enough that I can tuck it in if I want to. I also did a sloped shoulder adjustment and shortened the sleeves by 1inch. I wanted a scoop neck, but knew from my previous Allure that I wanted it a little higher. So I used the front neck line from the Wanderlust dress high scoop neck and adjusted the size of the neckband accordingly. I hemmed the bottom and sleeves with a shallow zig zag stitch on my sewing machine after first folding and pressing it with knit stay tape.
I mostly liked the way this came out, but found the neckline still a little too low and wide in the front and too low in back for my taste. so for my next top, made from dusty olive cupro jersey from Surge Fabrics, I raised the front neckline about .75 inch and brought the sides in about .5 inch. I also brought the back neckline in about .5 inch and raised it to the same height as the back of the crewneck — similar to the “screwp neck” that I like with the Bondi pattern. I used less than a yard of 58″-wide fabric. This jersey cupro is 180gsm and advertised as having about 50% horizontal and 25% vertical stretch. The vertical stretch seems to me less than that. The fabric color is almost grey — the olive is very dusty. None of my green threads were a good match for this fabric so I ended up using steel grey. The curpo fabric is 65% modal and 35% poly and does not require any special care. It has a very silky feel. I coverstitched the hem, sleeves, and neckline with the steel grey thread.
The neckline came out exactly the way I wanted it on this one after I futzed with the length of the band (I basted it on, decided it was too tight, removed it and cut another one 1.5 inches bigger). But overall the top was too tight. I learned from past experience with a cupro jersey dress that it doesn’t stretch much and fits tight. The sleeves were uncomfortably tight on me. But I thought it would still work in this semi-fitted pattern. But it was too tight and had lots of drag lines. And when I raised my arms and put them back down the shirt stayed bunched up around the bust. It took less than a yard of fabric and I had started with two yards, so I decided to give this one to my daugter and try again.
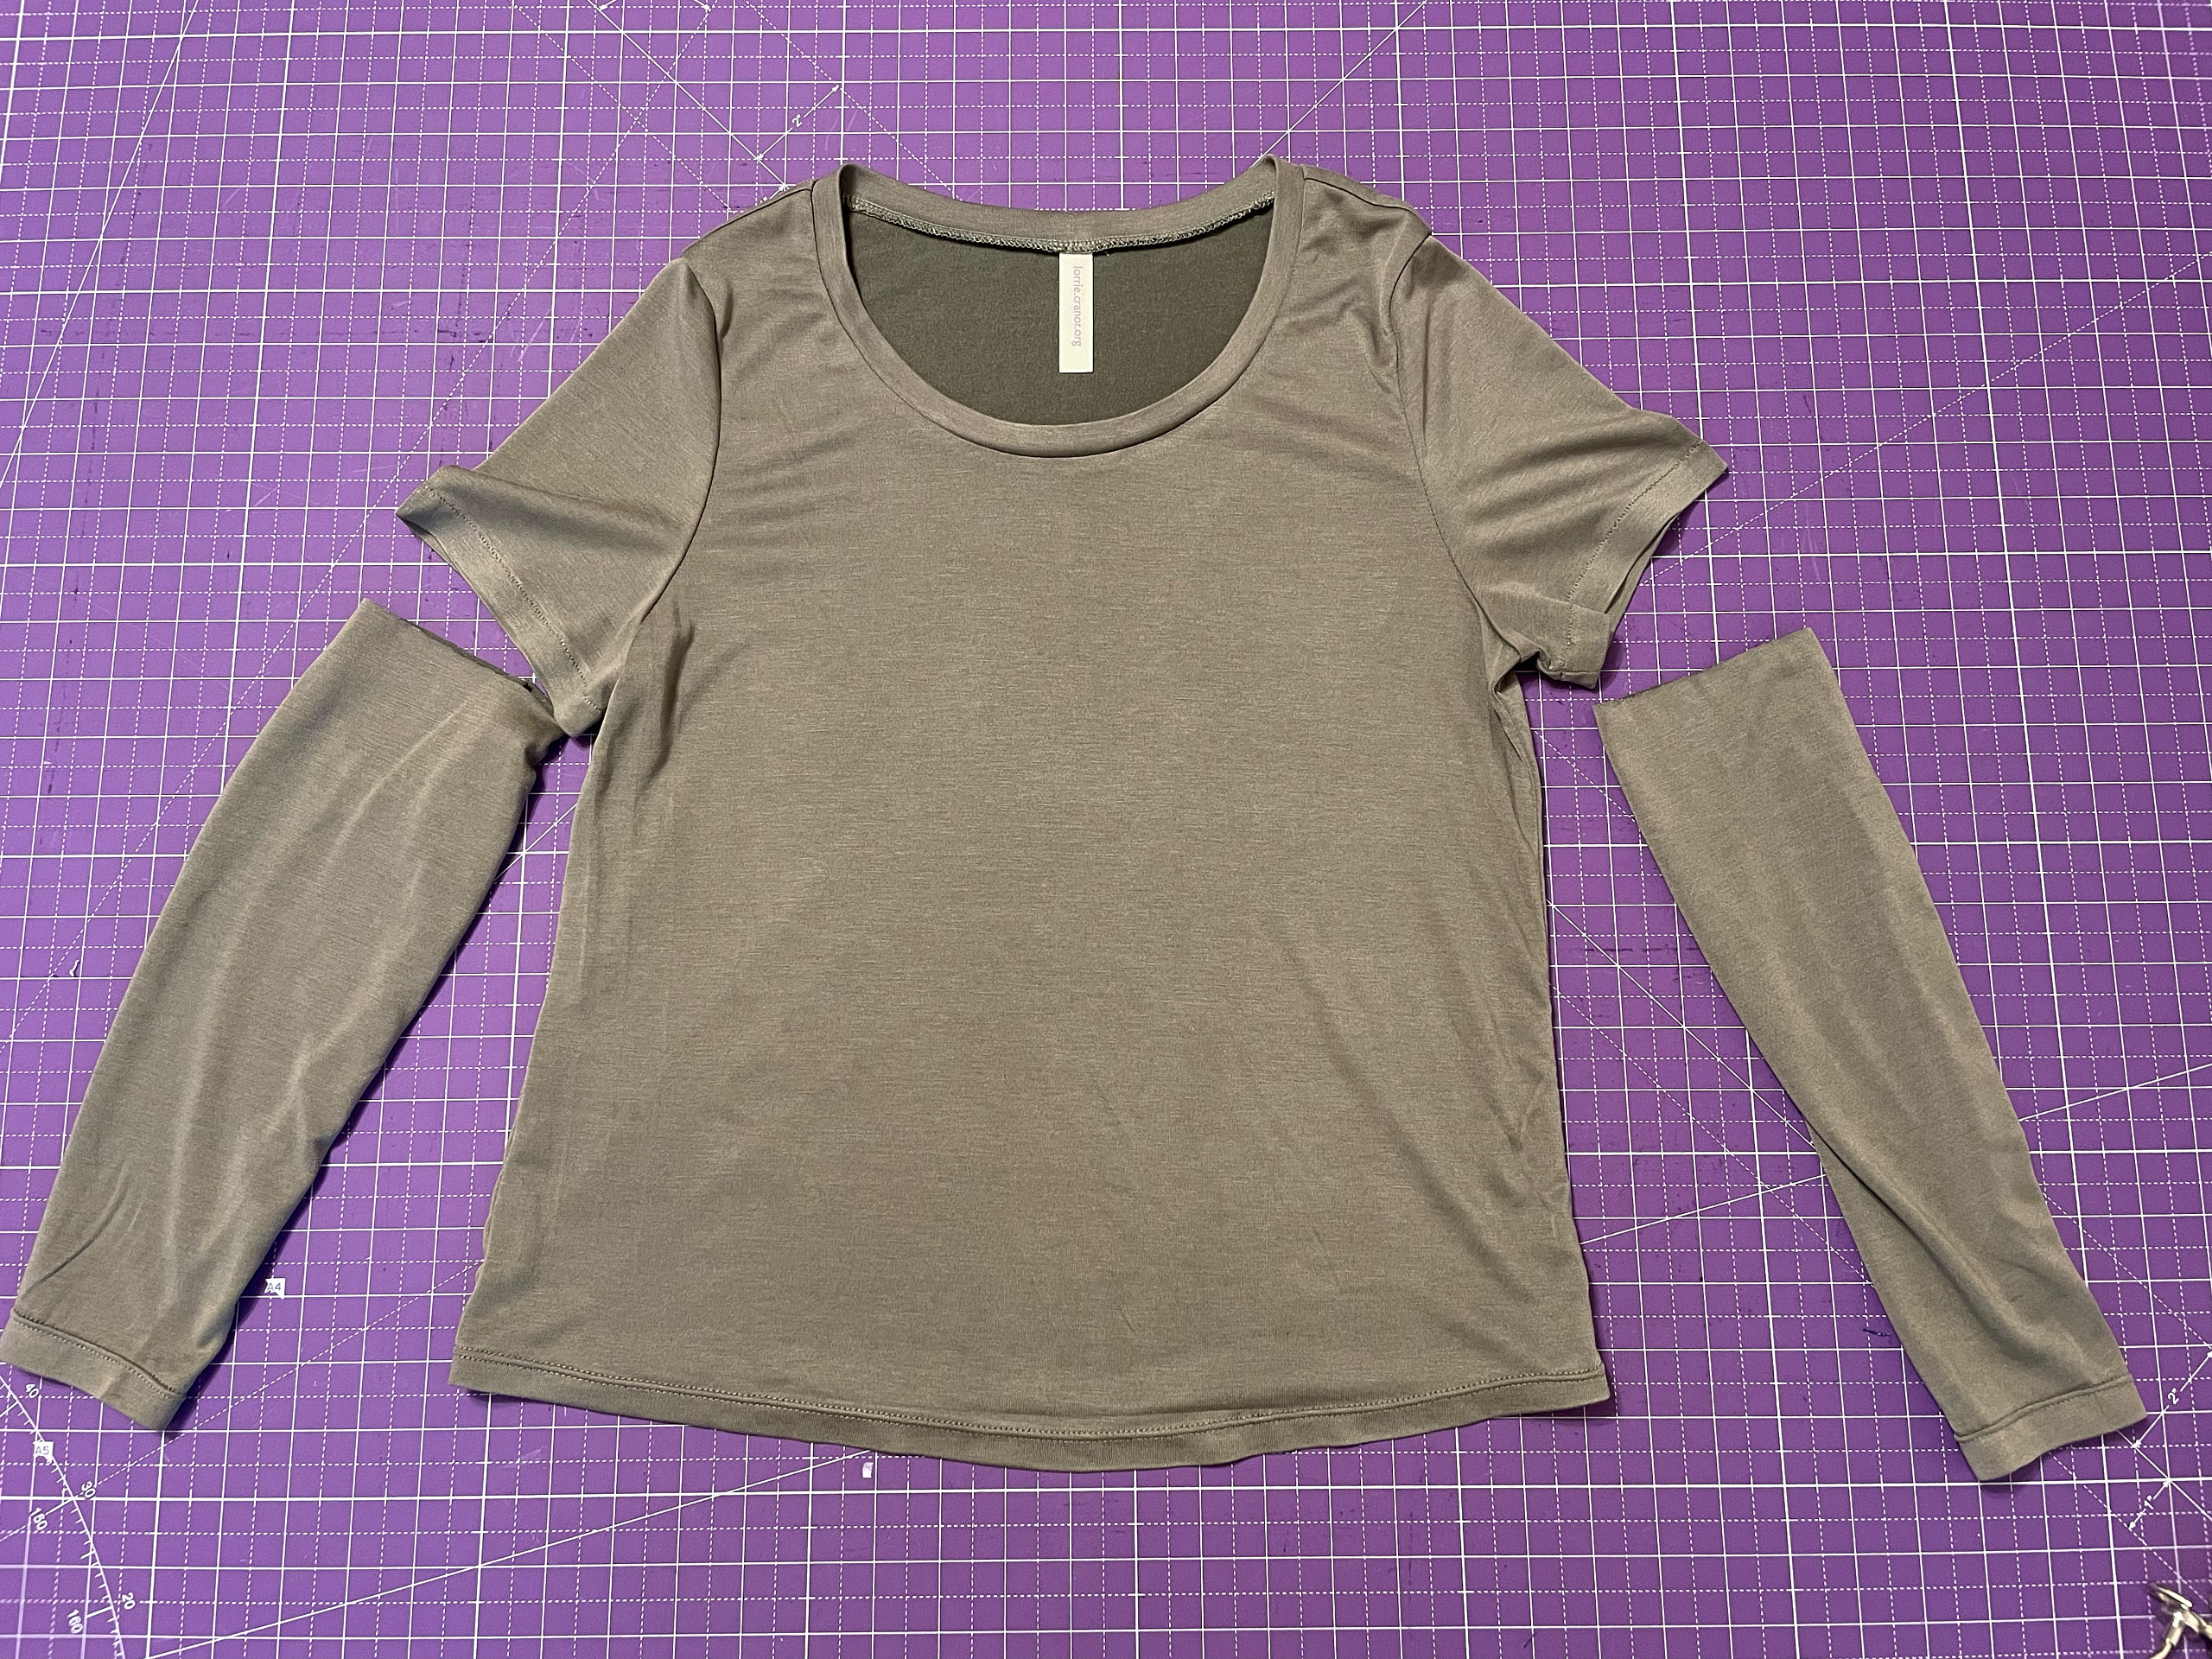
It fit my daughter fine but the sleeves were too tight on her and not quite long enough (she is taller than me) so I turned them into short sleeves.
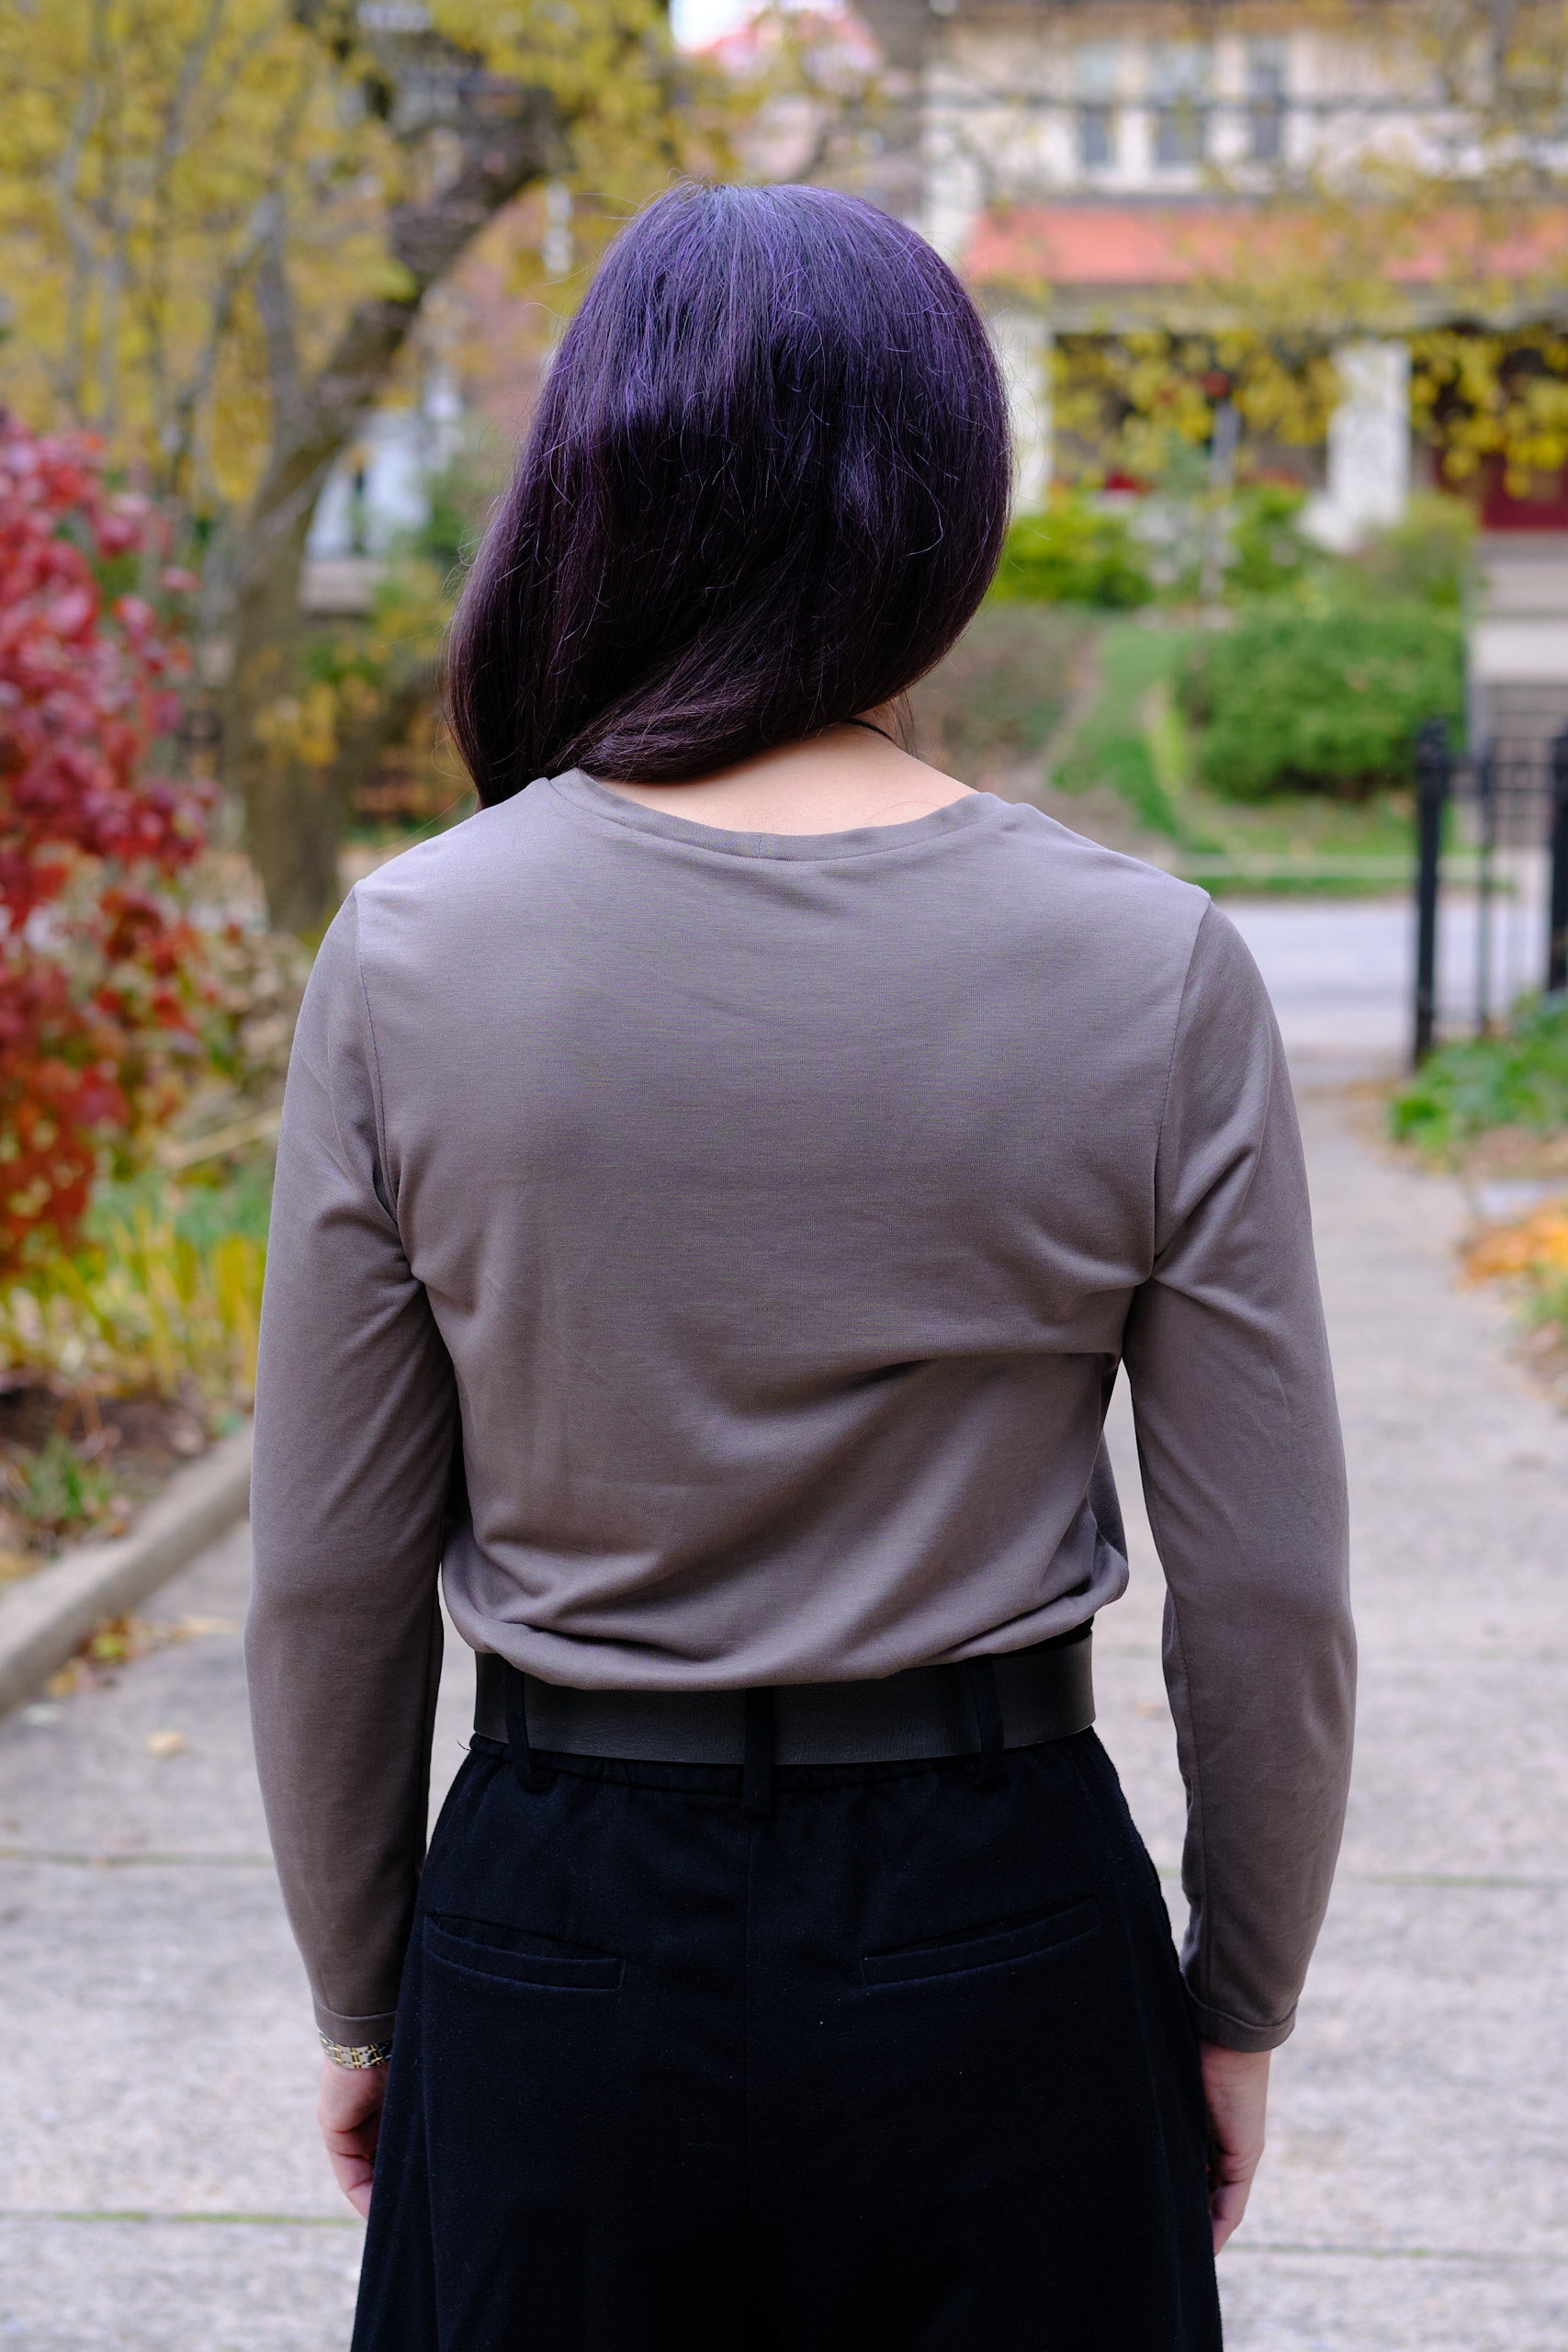
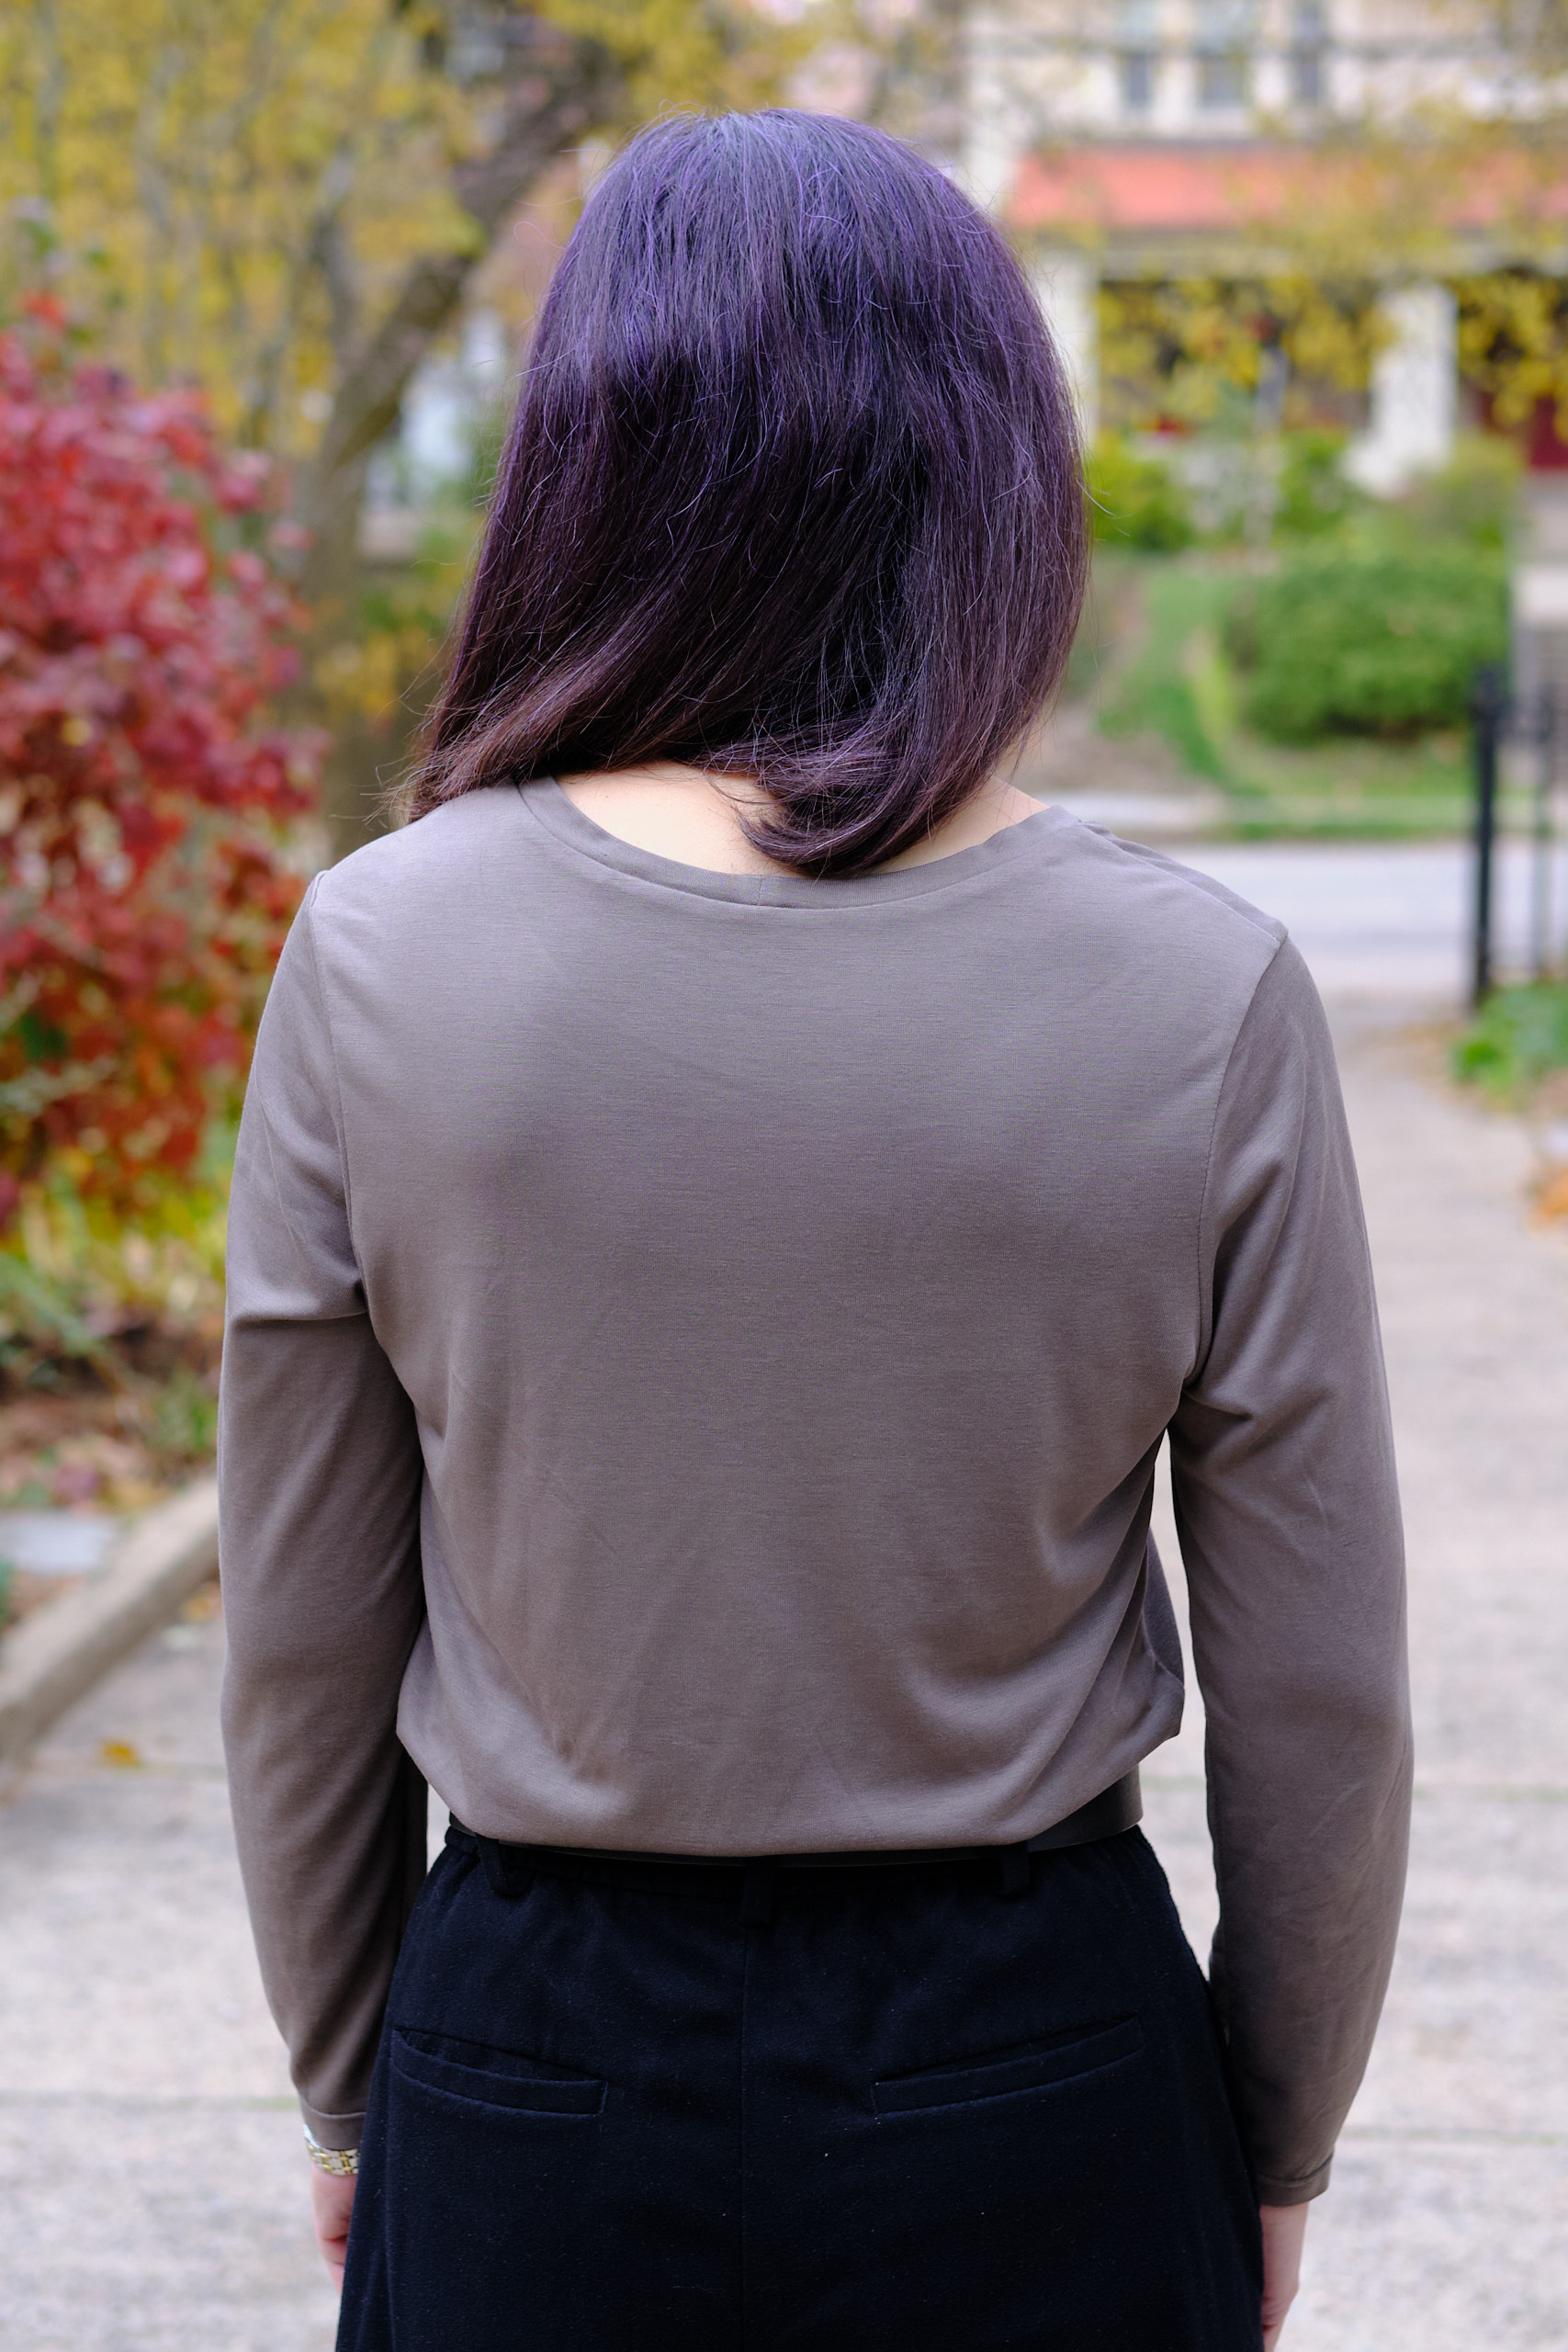
I made another Allure from the dusty olive cupro, this time size 12. I also added a .75-inch broad shoulder adjustment, in addition to the sloped shoulder adjustment — an adjustment I usually make with Bondi too. I used the screwp neck, shortened the hem by 3.5″ and shortened the sleeves by 1 inch.
This time the fit was very good. However, you can still see some drag lines at the shoulder, I think due to the lack of vertical stretch. I will definitely size up if I use this fabric again.The cupro fabric is an easy-care soft and silky fabric and has a nice drape, but it also seems to stick to itself and doesn’t smooth itself out without help, as you can see in these photos. We got the last photo below after a lot of smoothing. I think this is lovely fabric, but it doesn’t seem to work that well for a semi-fitted t-shirt. I think it works better in a dress because there is weight pulling it down. I think it would also work better with princess seams, in an oversized style, or even with a woven pattern. This one will be fine as a layering piece under a sweater or jacket.
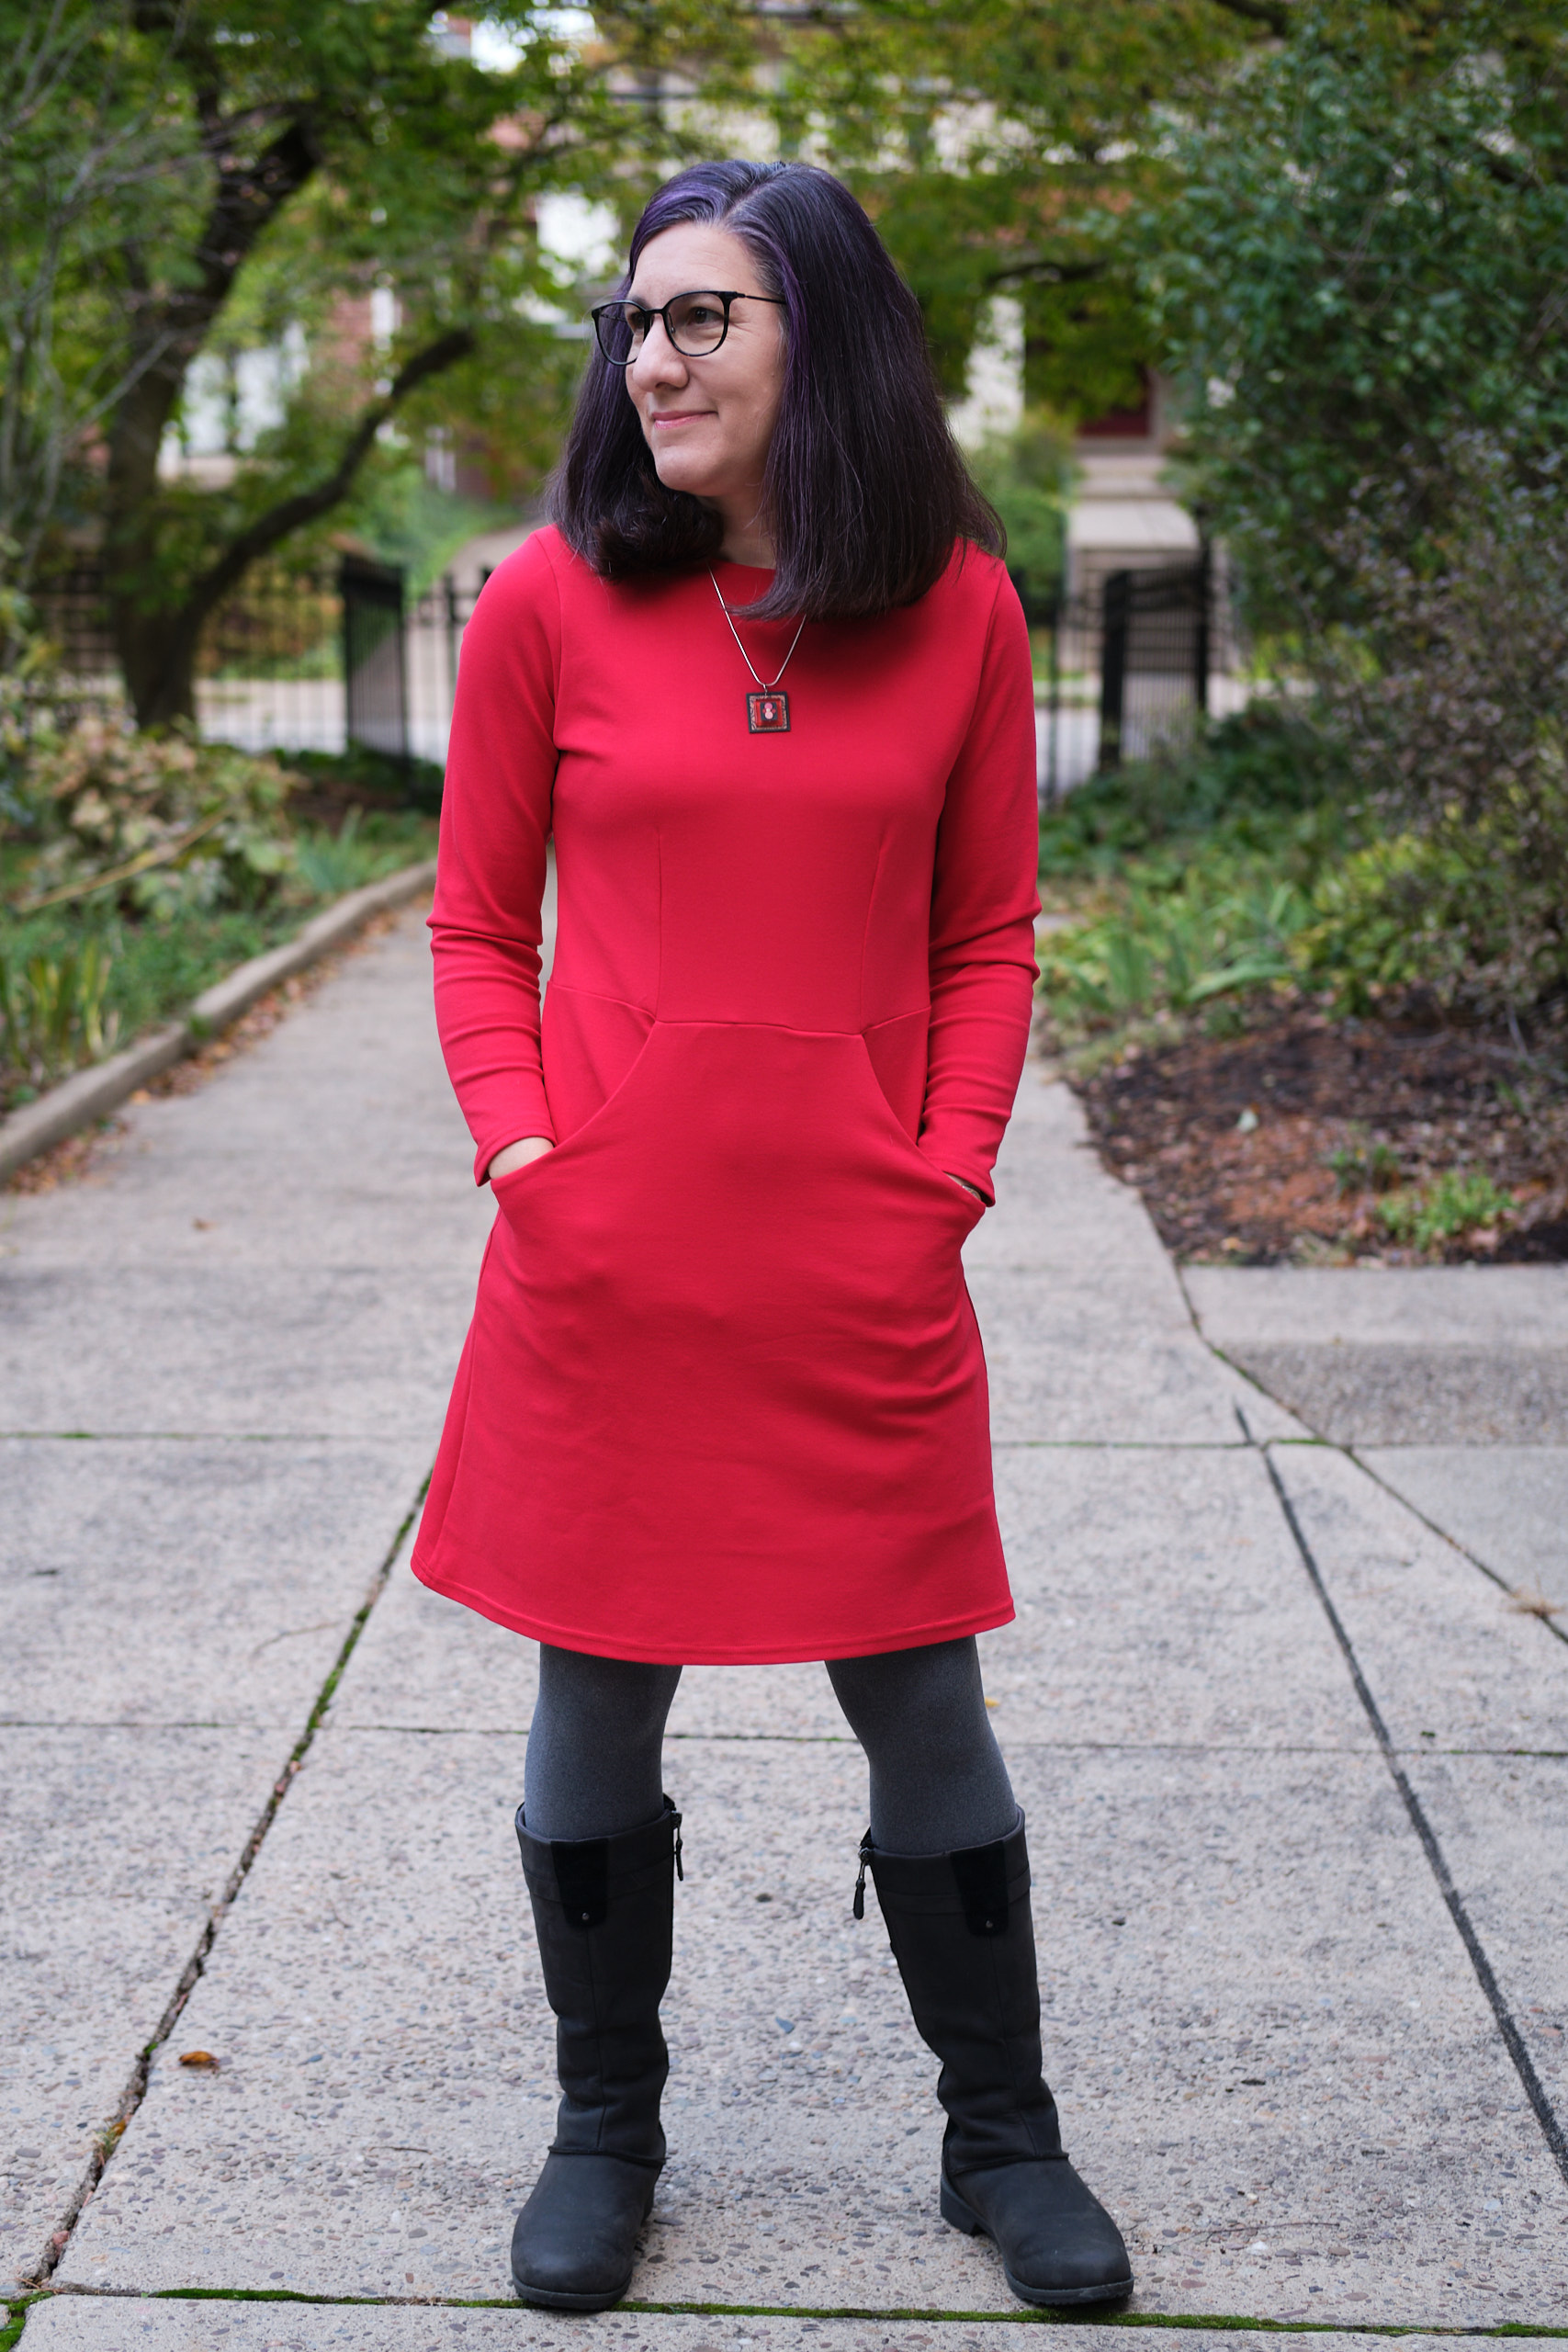
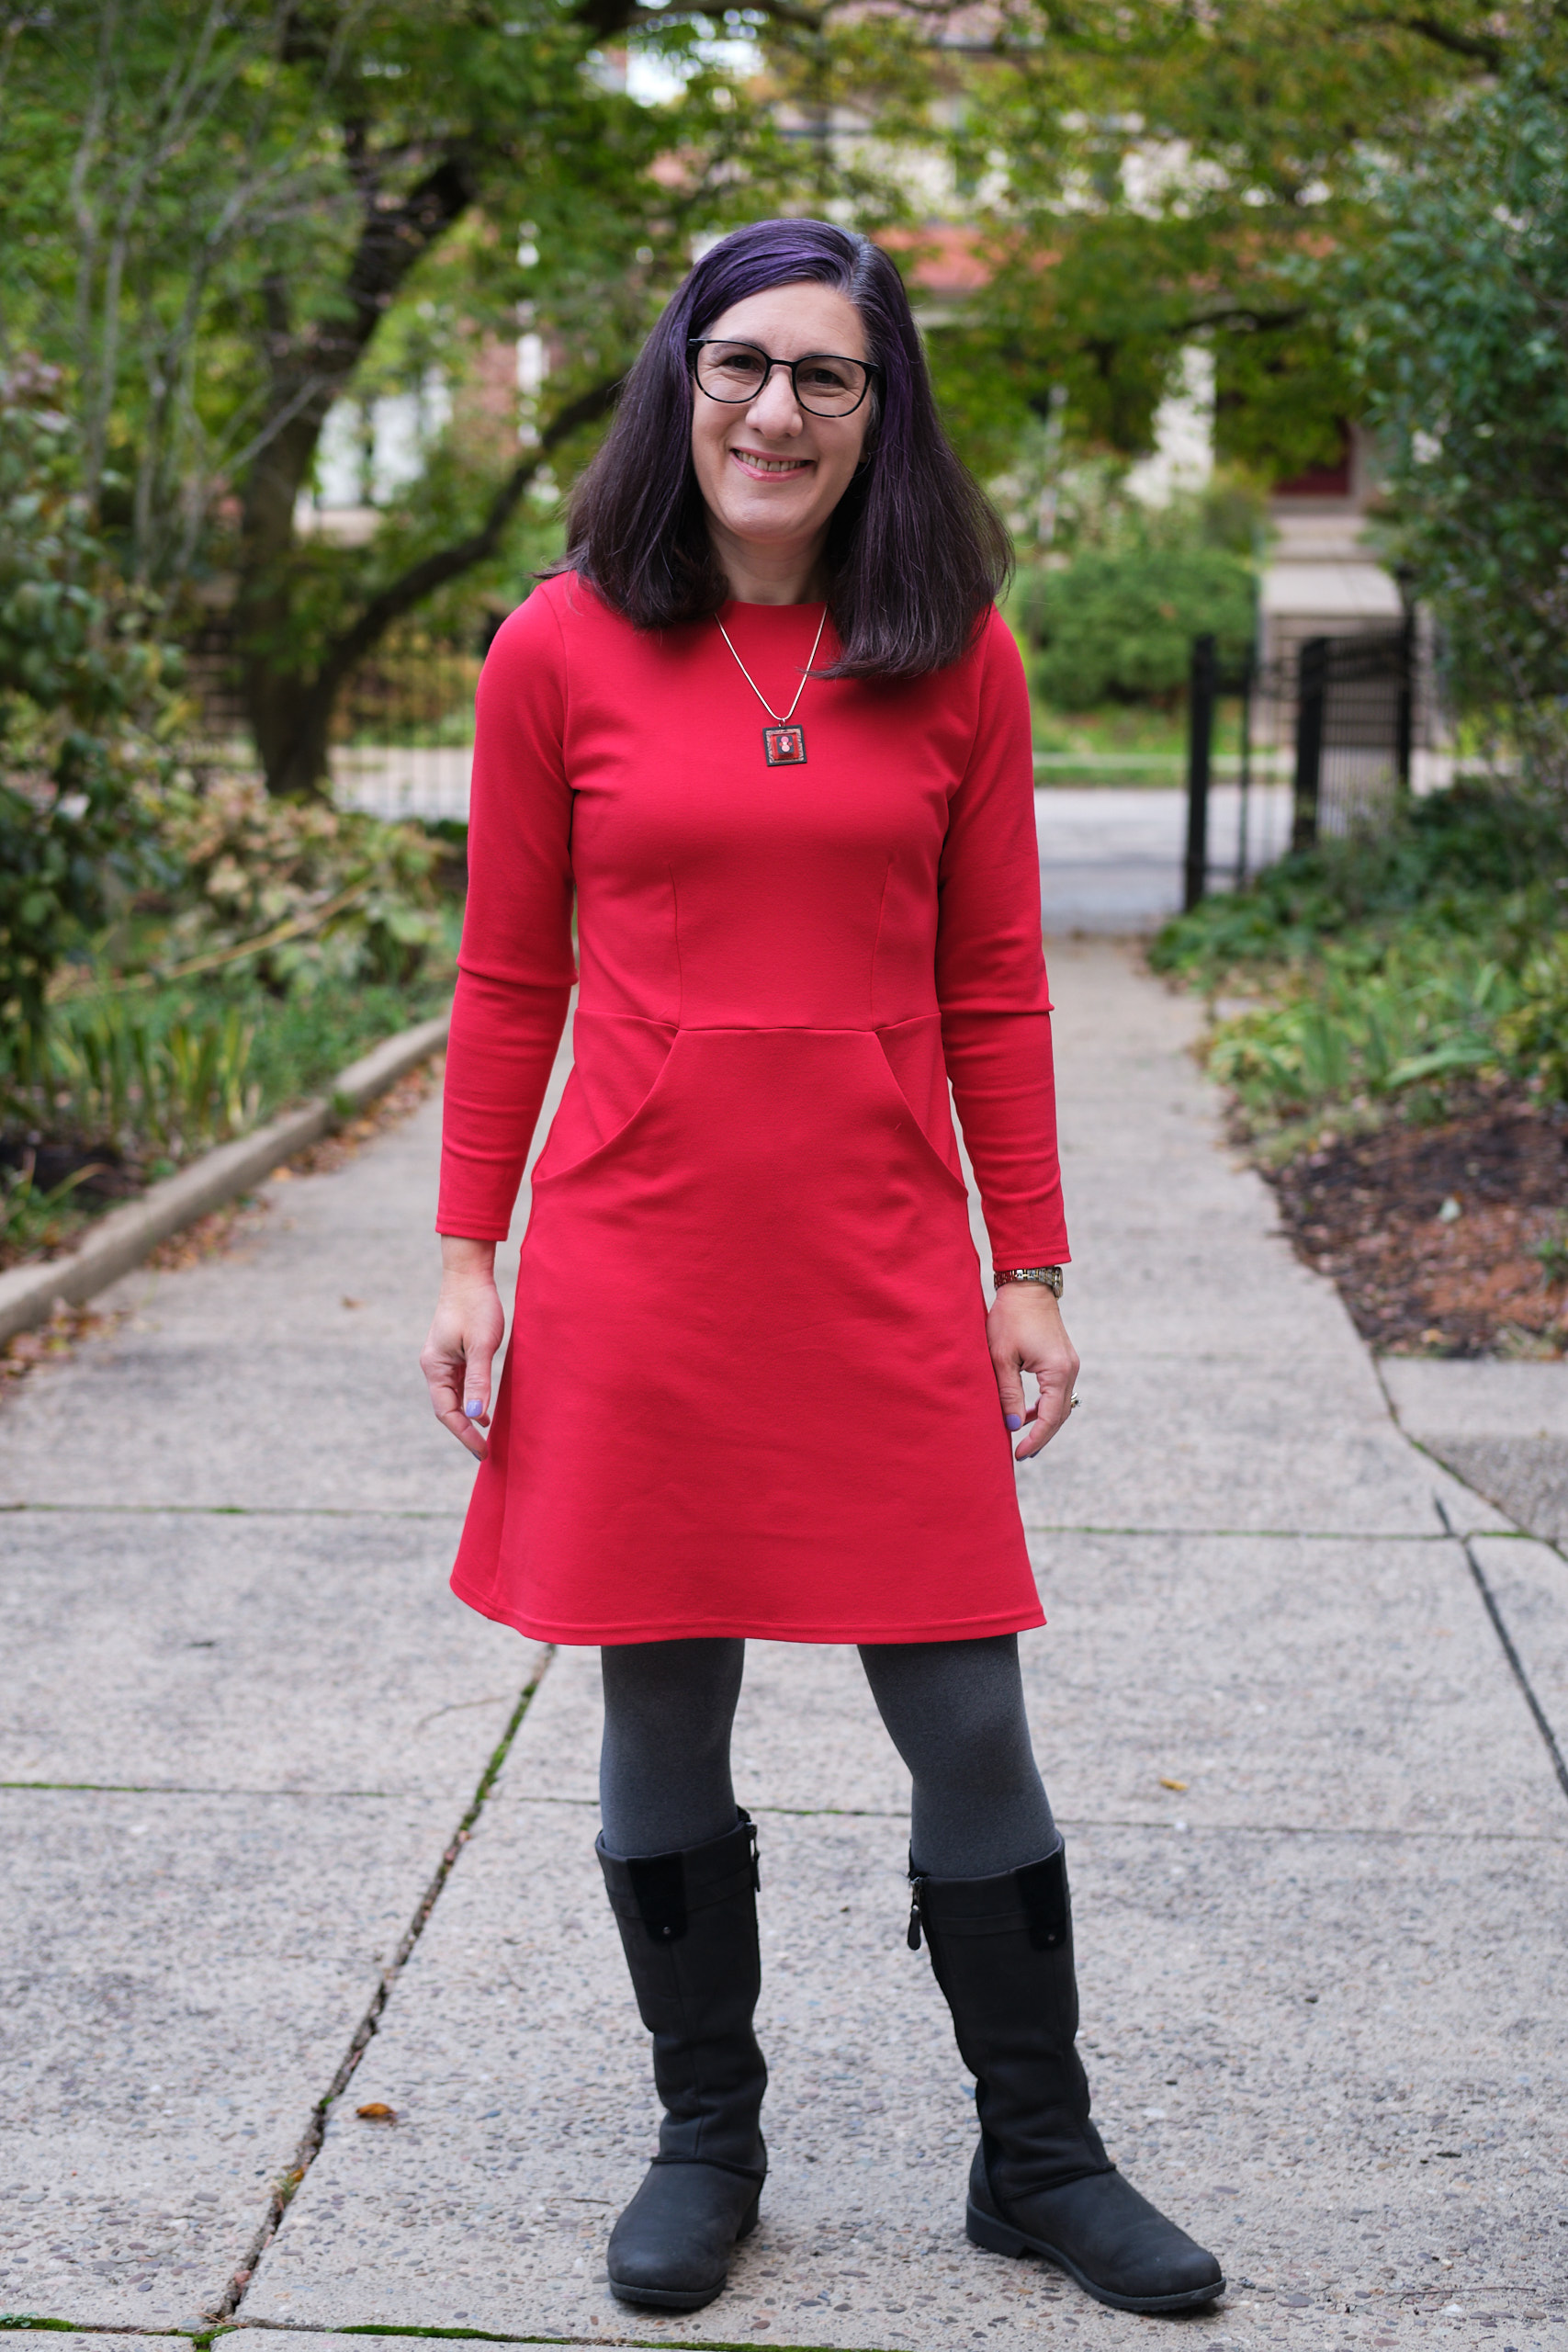
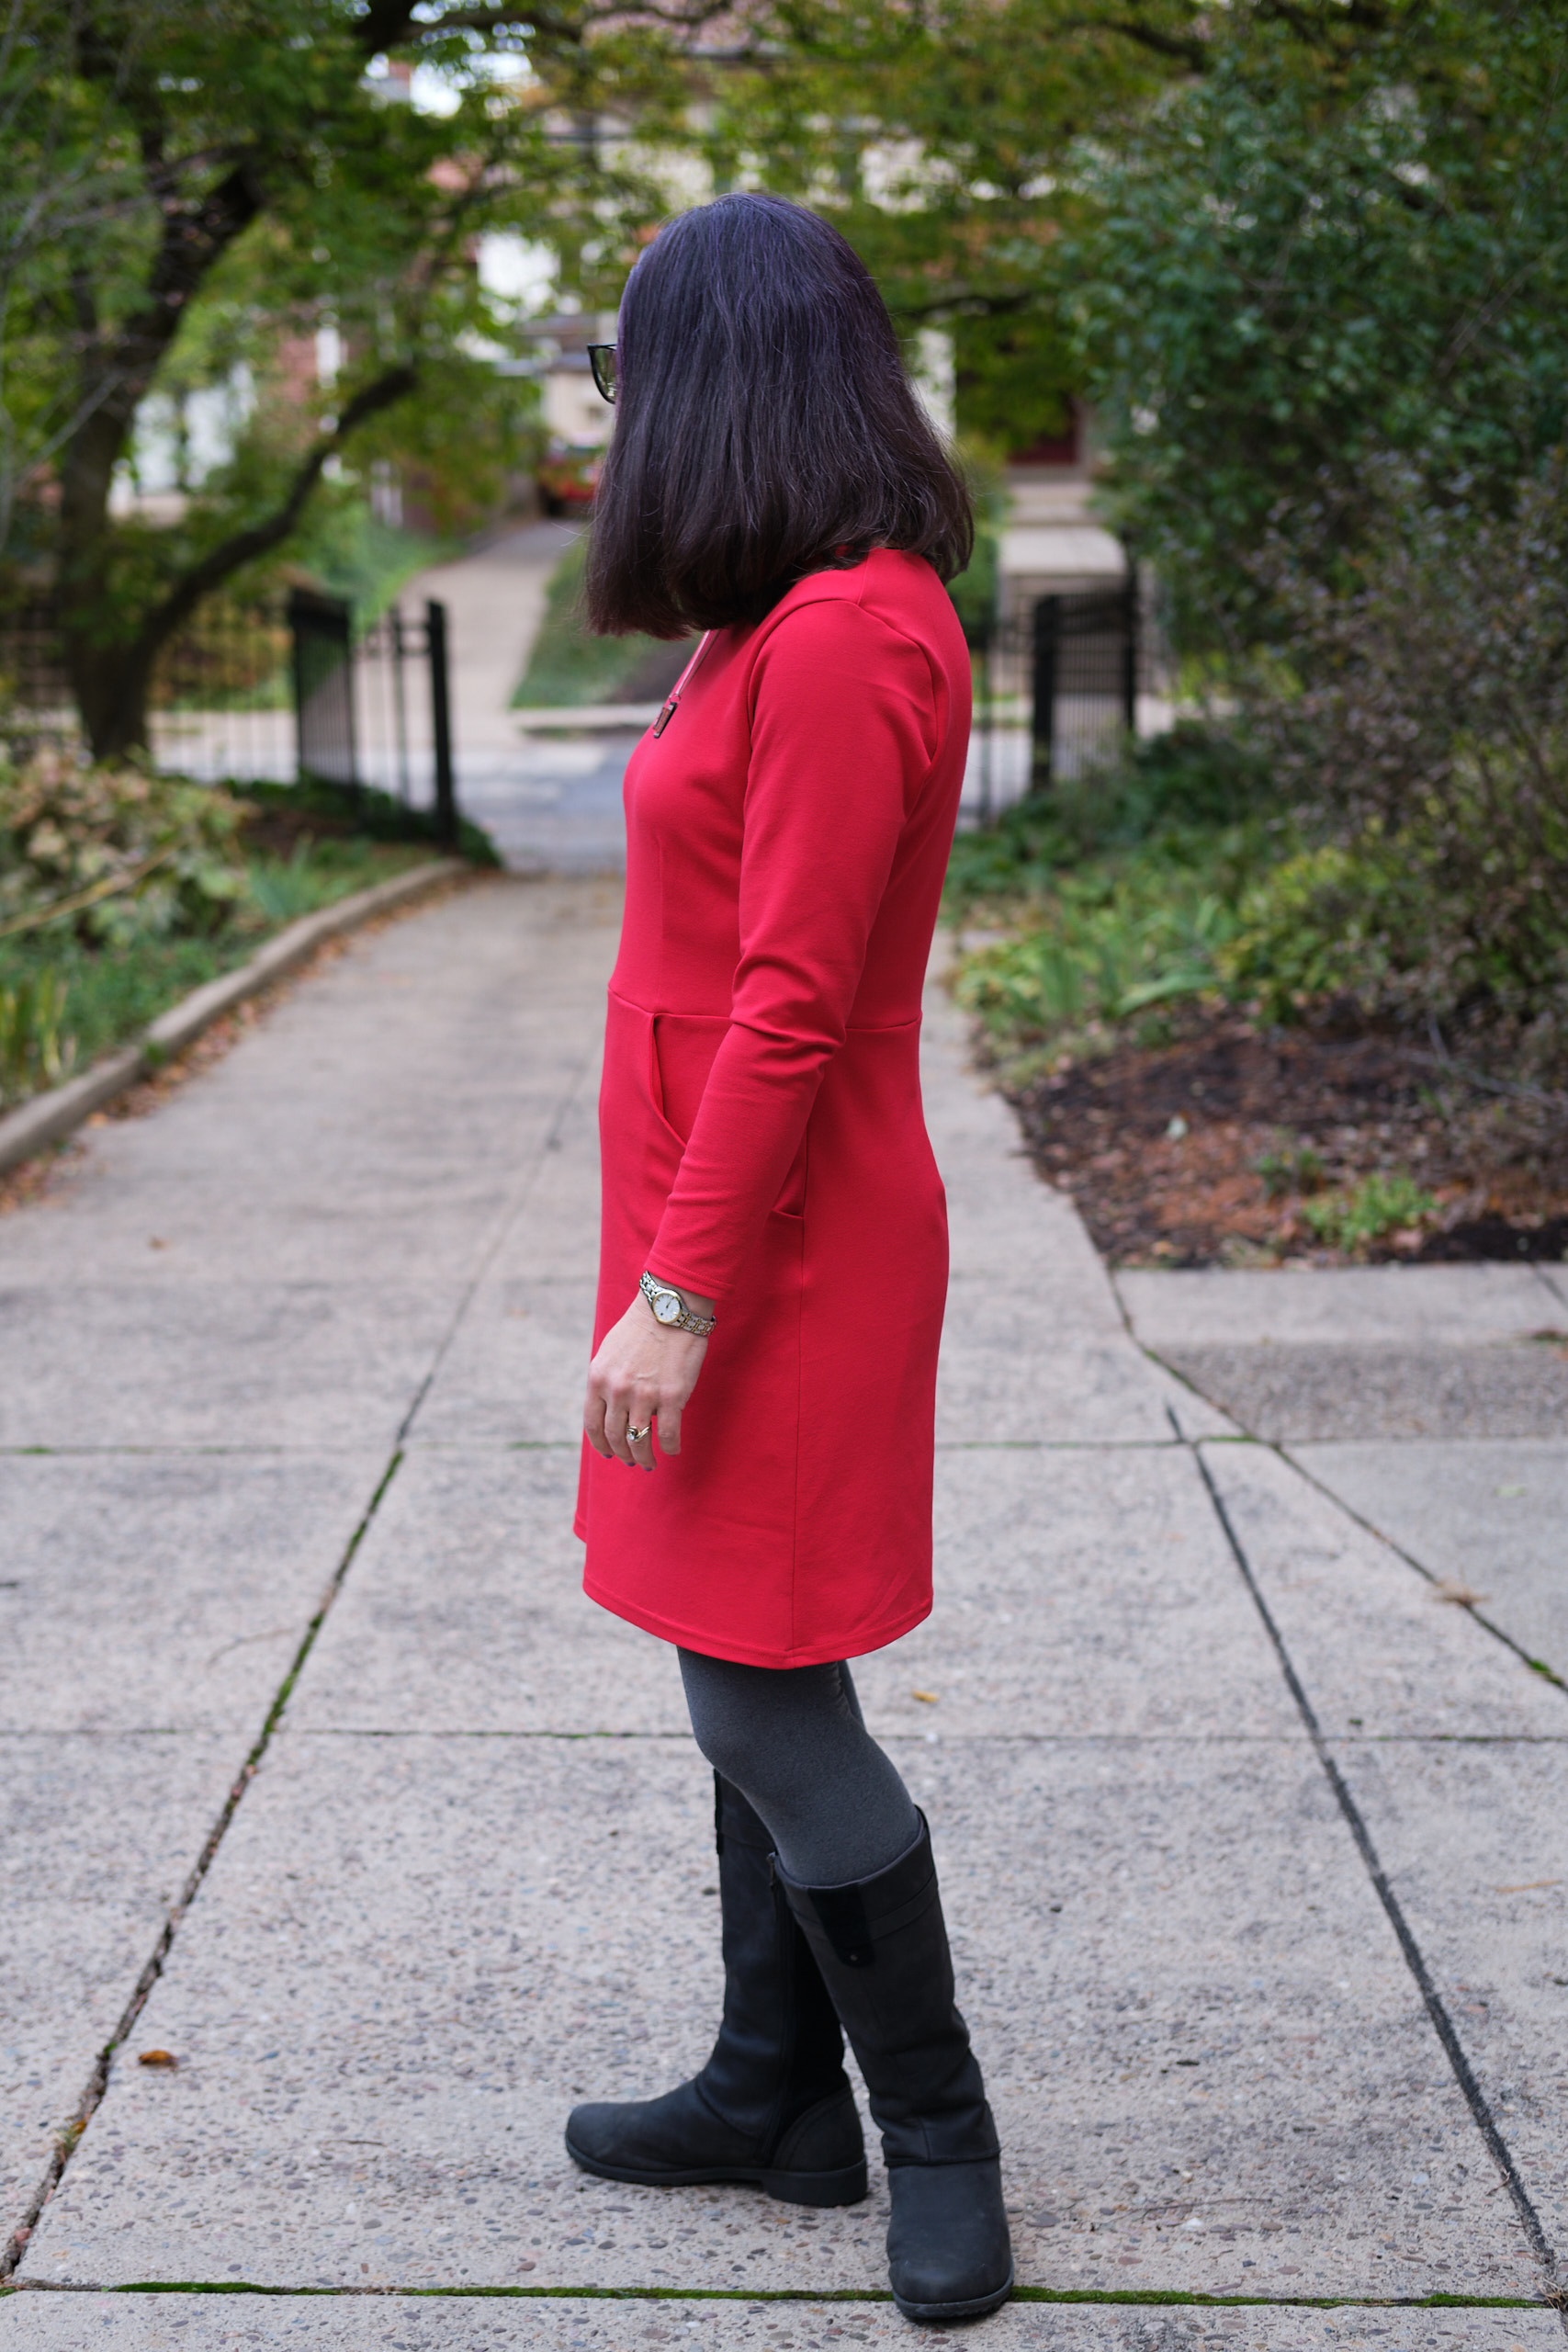
Styla Vail Dress with long sleeves, size 6, sloped shoulder and swayback adjustment, knee length, sleeves and hem shortened by 2 inches, 2 yards of ponte.
The pockets and the darts were what drew me to the Styla Vail Dress, which has a higher neckline and a more fitted skirt than I usually wear. I thought about hacking the neckline or adding more swing to the skirt but decided to try the pattern as intended before making major changes. After looking at photos of the dress on the pattern company website and Facebook group, I decided I preferred the versions made from more substantial fabric so I made the dress out of about 2 yards of a red 58″-wide rayon/nylon/spandex ponte fabric that has a bit of body and weight to it. I did a half-inch sloped shoulder adjustment when I cut out the fabric. After basting it together, I added a half-inch sway back adjustment and shortened the sleeves and knee-length hem by 2 inches before hemming with a wide cover stitch.
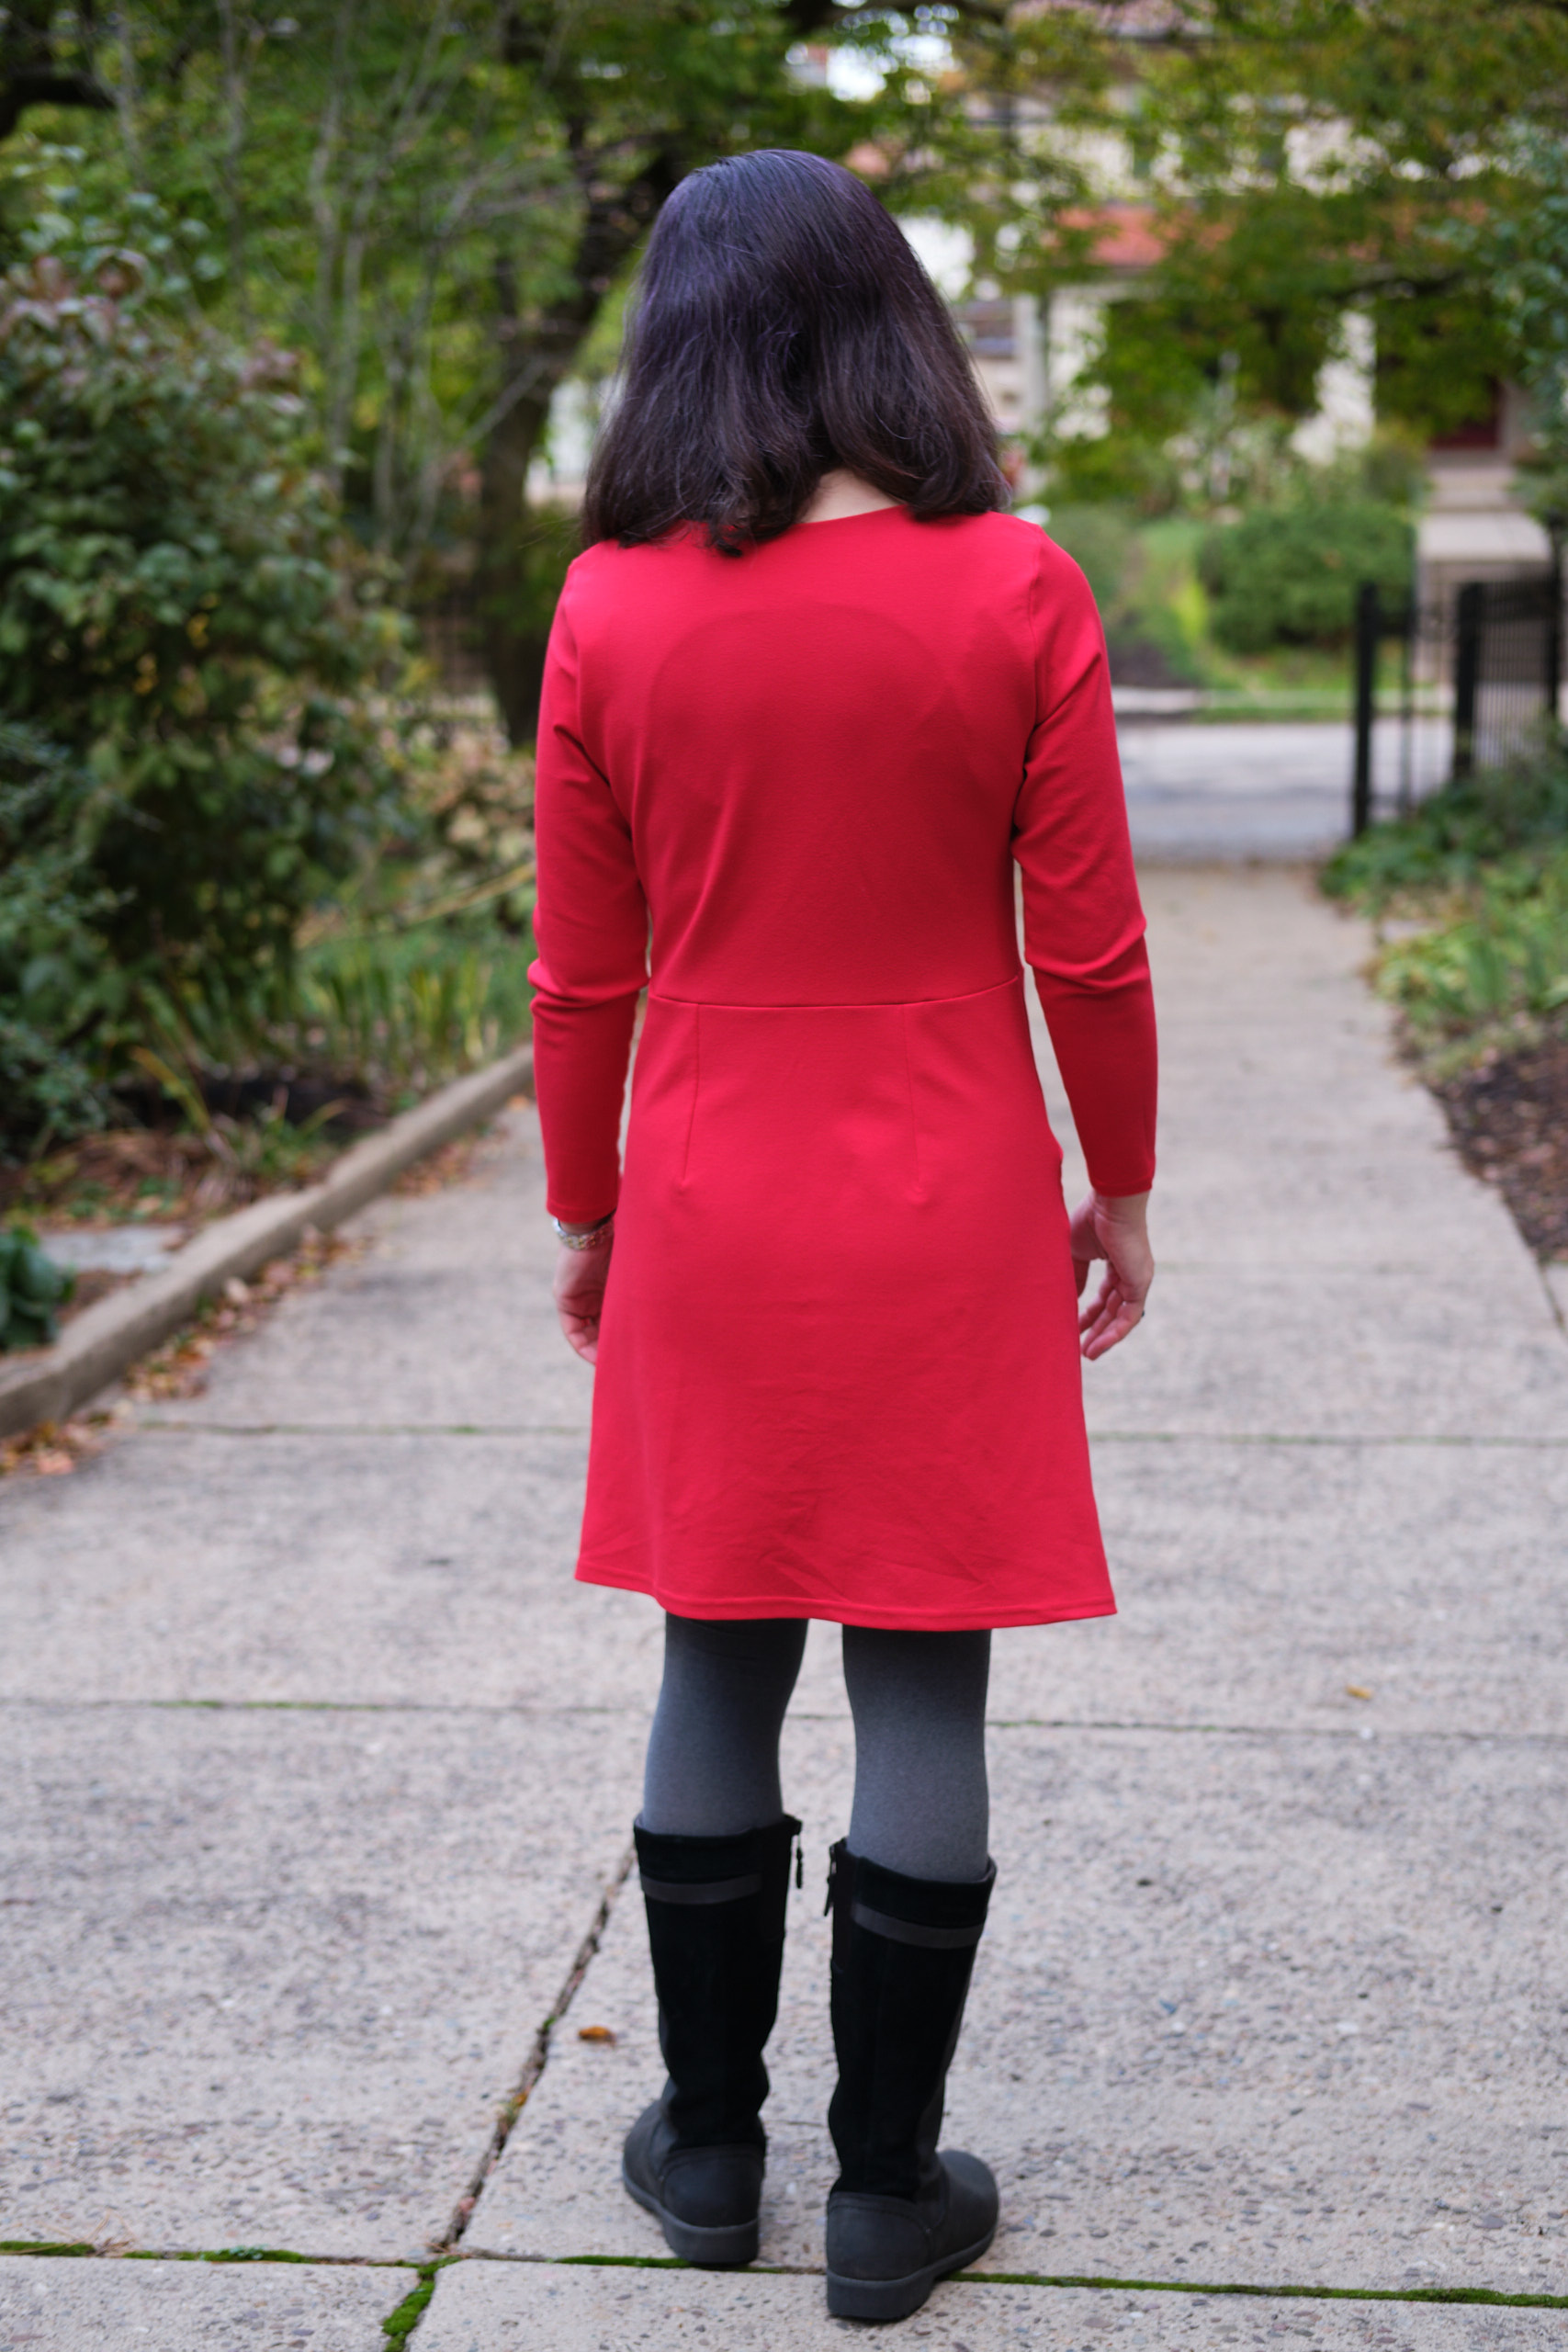
Everything seemed to go pretty well until I started constructing the pockets. After attaching and understitching the pocket bags, I realized that the the pocket bags were not going to lie completely flat. I’m not sure exactly why, but I’m guessing the ponte stretched a bit as I was sewing the curved pocket openings. I tried steaming and pressing but never did get it completely flat. This became a problem again when I attached the bodice to the skirt. I basted and re-basted multiple times until it was close to smooth, and finally sewed it together with my serger and pressed it again. It’s not quite as perfect as I would like, but now they I look more closely at the Facebook photos I realize most of these dresses have minor pocket issues. When I tried the dress on I also noticed that the back facing is quite visible on me — there aren’t enough back photos on the website or Facebook group for me to see whether this is a common problem or not. I think this would be less noticeable with a print fabric or a lighter weight fabric, and perhaps I should have lined it with a lighter fabric rather than the ponte.
I’m still not completely happy with the pockets, and they only get worse when I load them up with my phone and wallet. Still, it is a comfortable dress to wear and I think it looks good on, despite my complaints. I might make this dress again, but if I do I would use a lighter facing, maybe extend the back facing to the waist, and try something different with the pockets. I think they might sit better if they were cut on a diagonal rather than a curve, and perhaps set the pocket openings at a less steep angle so the top of the pocket opening hits higher on the side of the dress. I would also consider splitting the front skirt piece into three and anchoring the pockets between the two seams, as I did with the modified Pattern Emporium Heartlight skirt I made for my daughter. I would align the seams with the front darts, which might look pretty good.
The best part about this dress is that if I wear it with a blazer, it looks almost like a suit. To play this up I might even make a matching blazer if I have enough red ponte left. The blazer also hides the pockets if it is long enough. Here I’m wearing my Boo & Lu Onyx pocket blazer in charcoal grey ponte.
Update: After wearing and washing the dress, I decided to go back and add topstitching around the neckline and on the pocket openings to keep the facings from shifting and having to be ironed every time I wash the dress. I used a shallow zigzag stitch on my sewing machine.
Pattern Emporium Allure Bell Sleeve Top with modern bell sleeves in short and long lengths, size AU10, less than a yard of ITY, scoop neck, shortened 5 inches.
I had some fabric leftover black and white ITY fabric from my double-faux wrap dress and decided to use it to make a double-bell sleeve top for my daughter for her birthday last month. I used the Pattern Emporium Allure Bell Sleeve Top pattern, a pattern I had previously used only to add bell sleeves to the Wanderlust dress. Allure comes with a wide range of sleeve options. I decided to use the modern bell style in short and long lengths and attach them to short sleeves. I cut size AU 10 with a wide scoop neck. The pattern falls at hip length, so for me I would make it 2-3 inches shorter to account for my short height. My daughter prefers shorter tops and she is only an inch taller than me, so I shortened it by 5 inches.
The pattern came together pretty quickly and I’m really happy with the results. I’m sure I’ll be making more Allure tops. For me I will shorten it less next time, use the sloped shoulder adjustment I used on the Wanderlust dress, and probably also uses the Wanderlust neck band, which is slightly less scooped. Here you can see me modeling it before I sent it to my daughter.
And here’s my daughter modeling it when I visited her last week. I wore it untucked, she preferred to tuck it in.
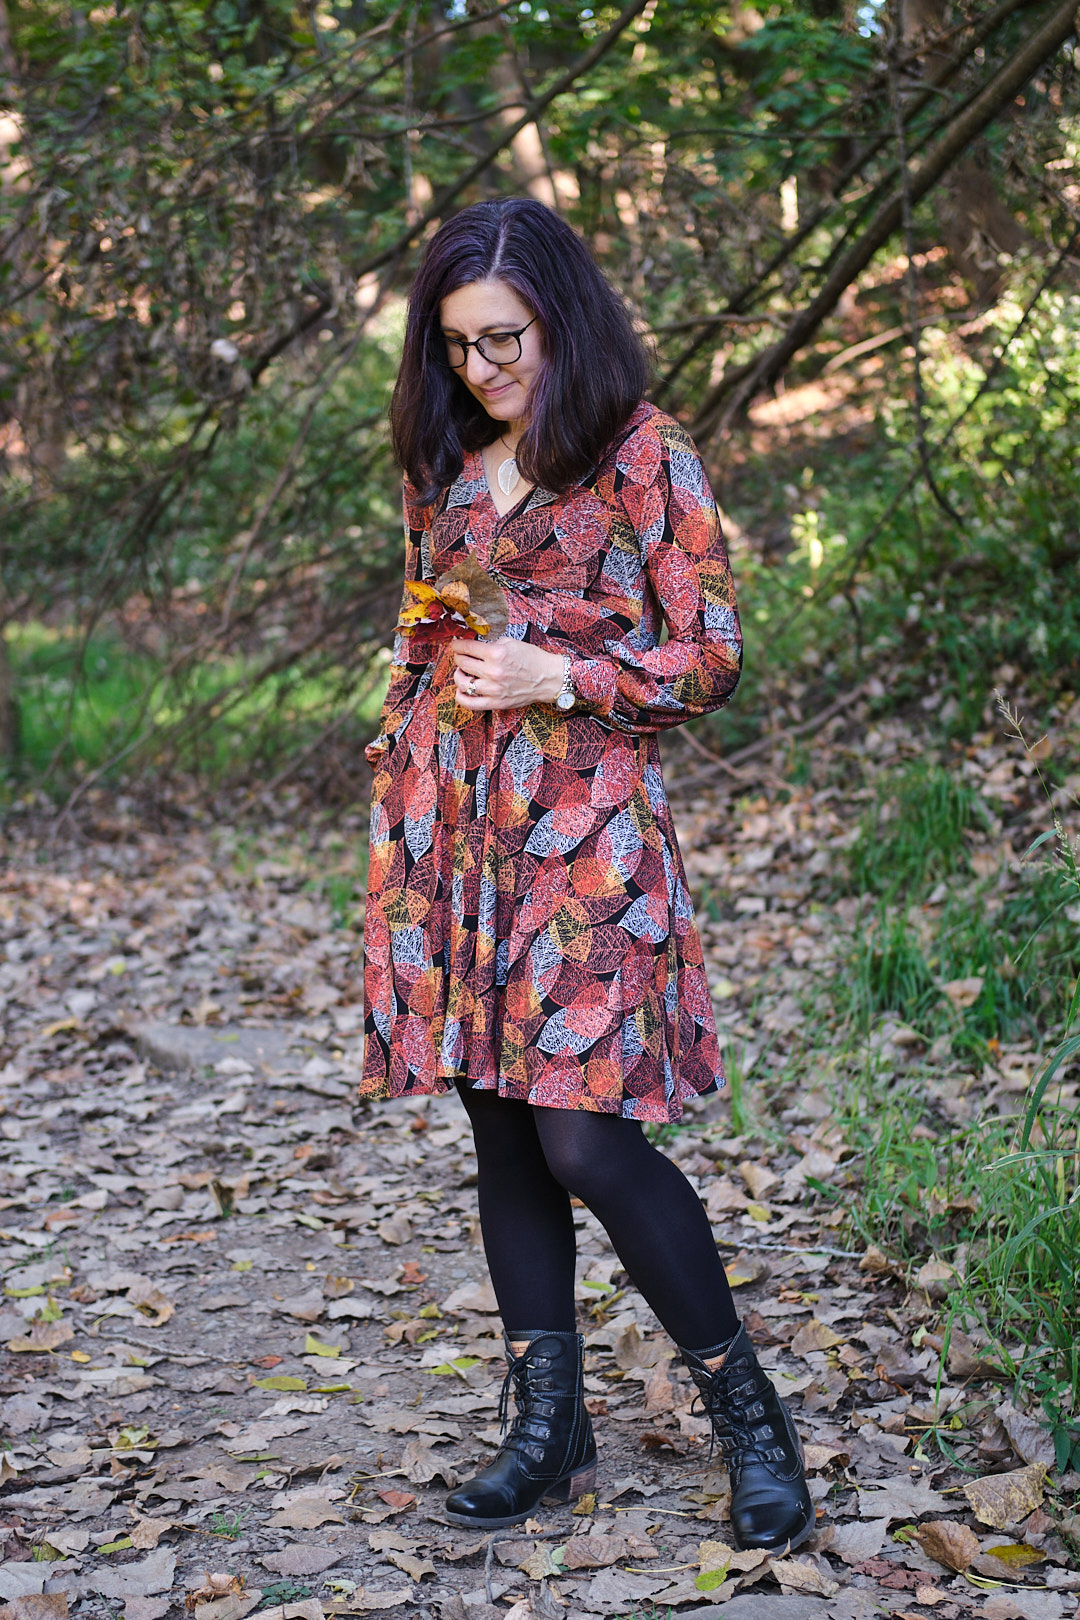
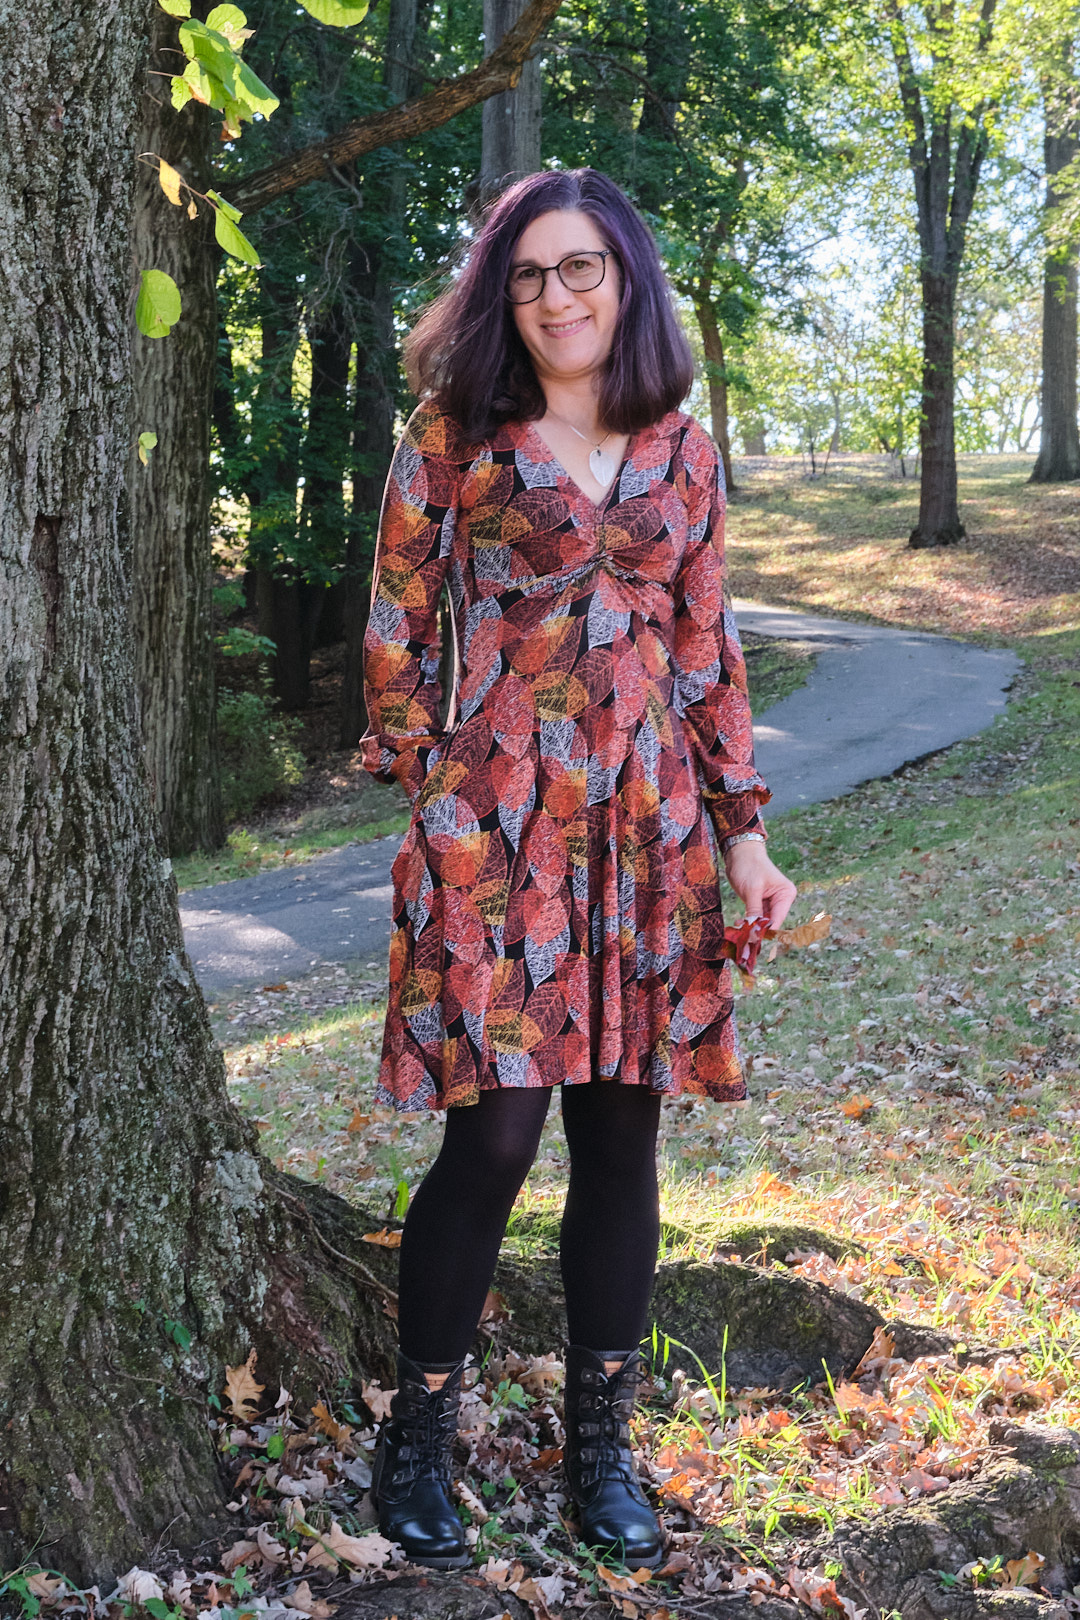
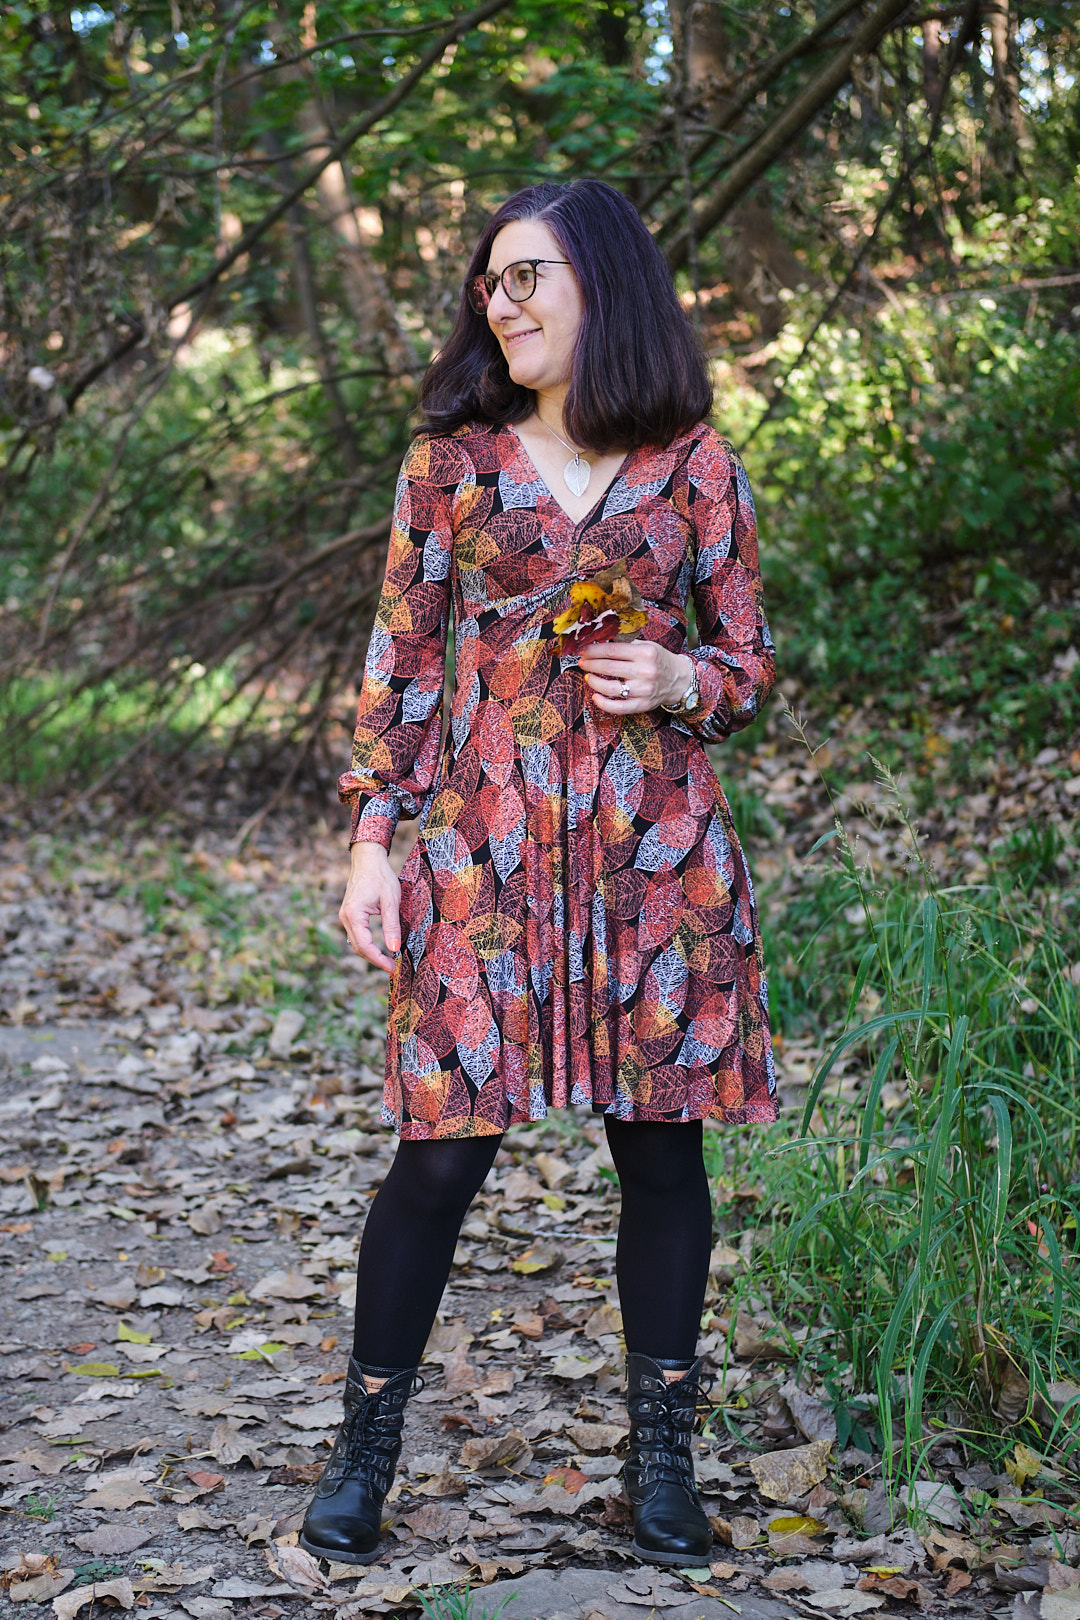
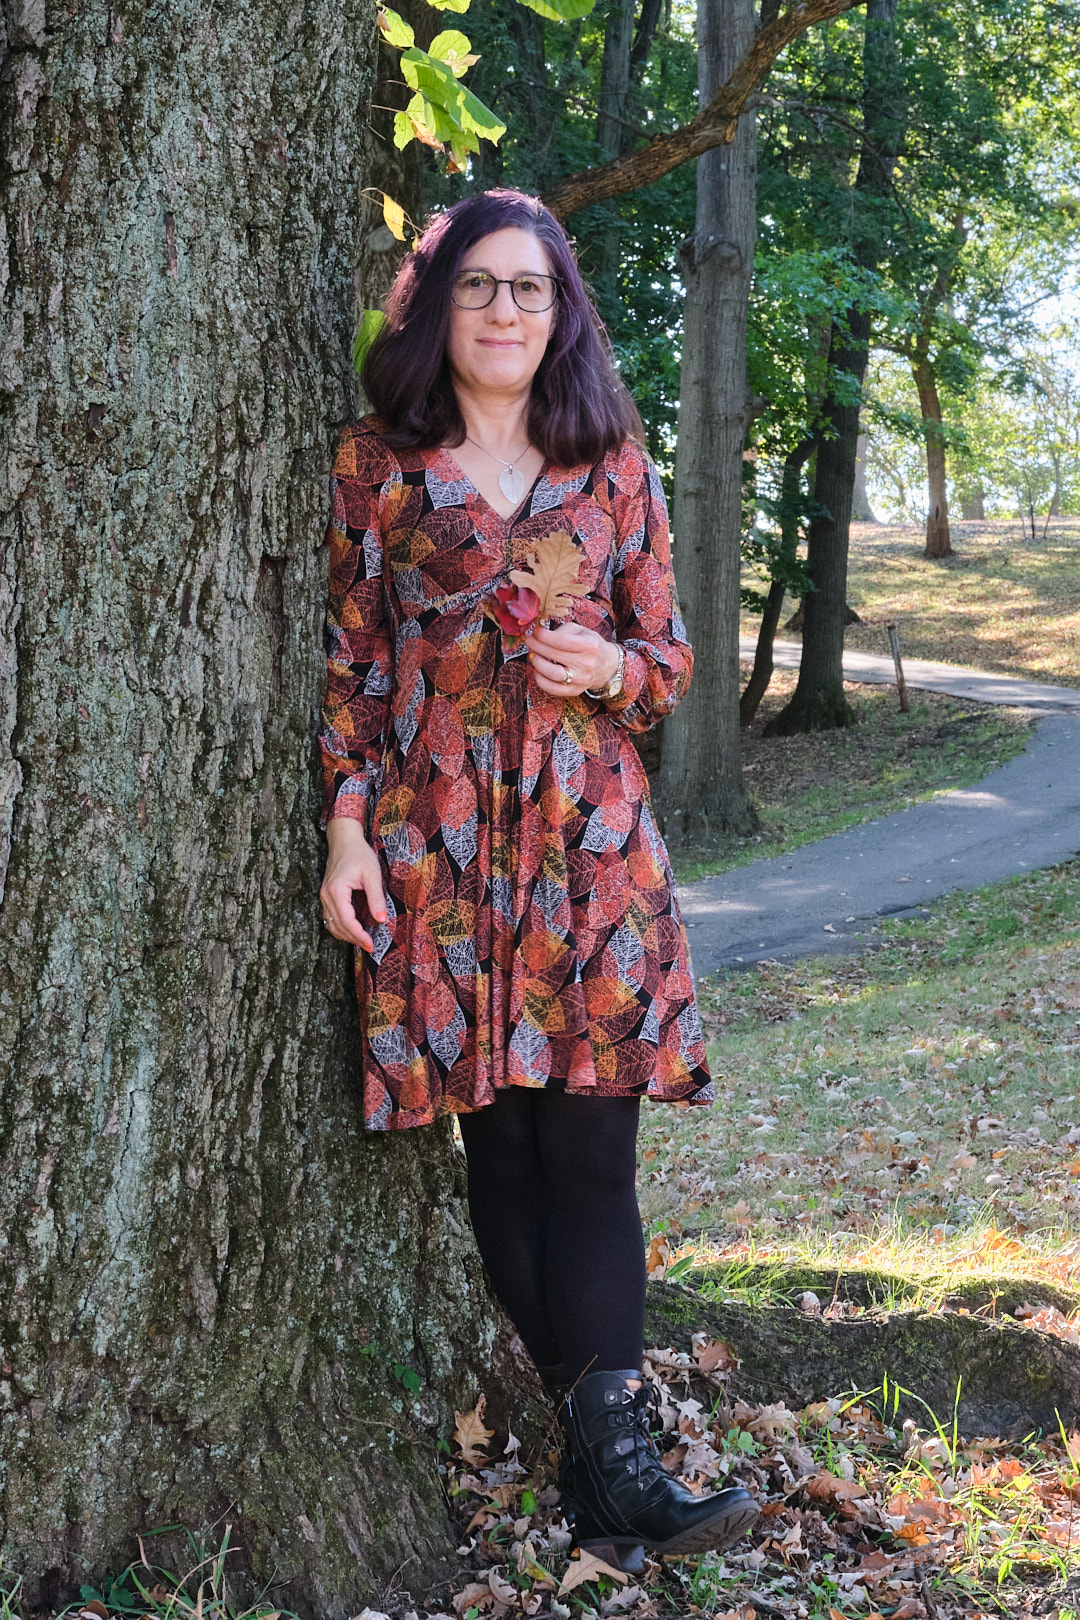
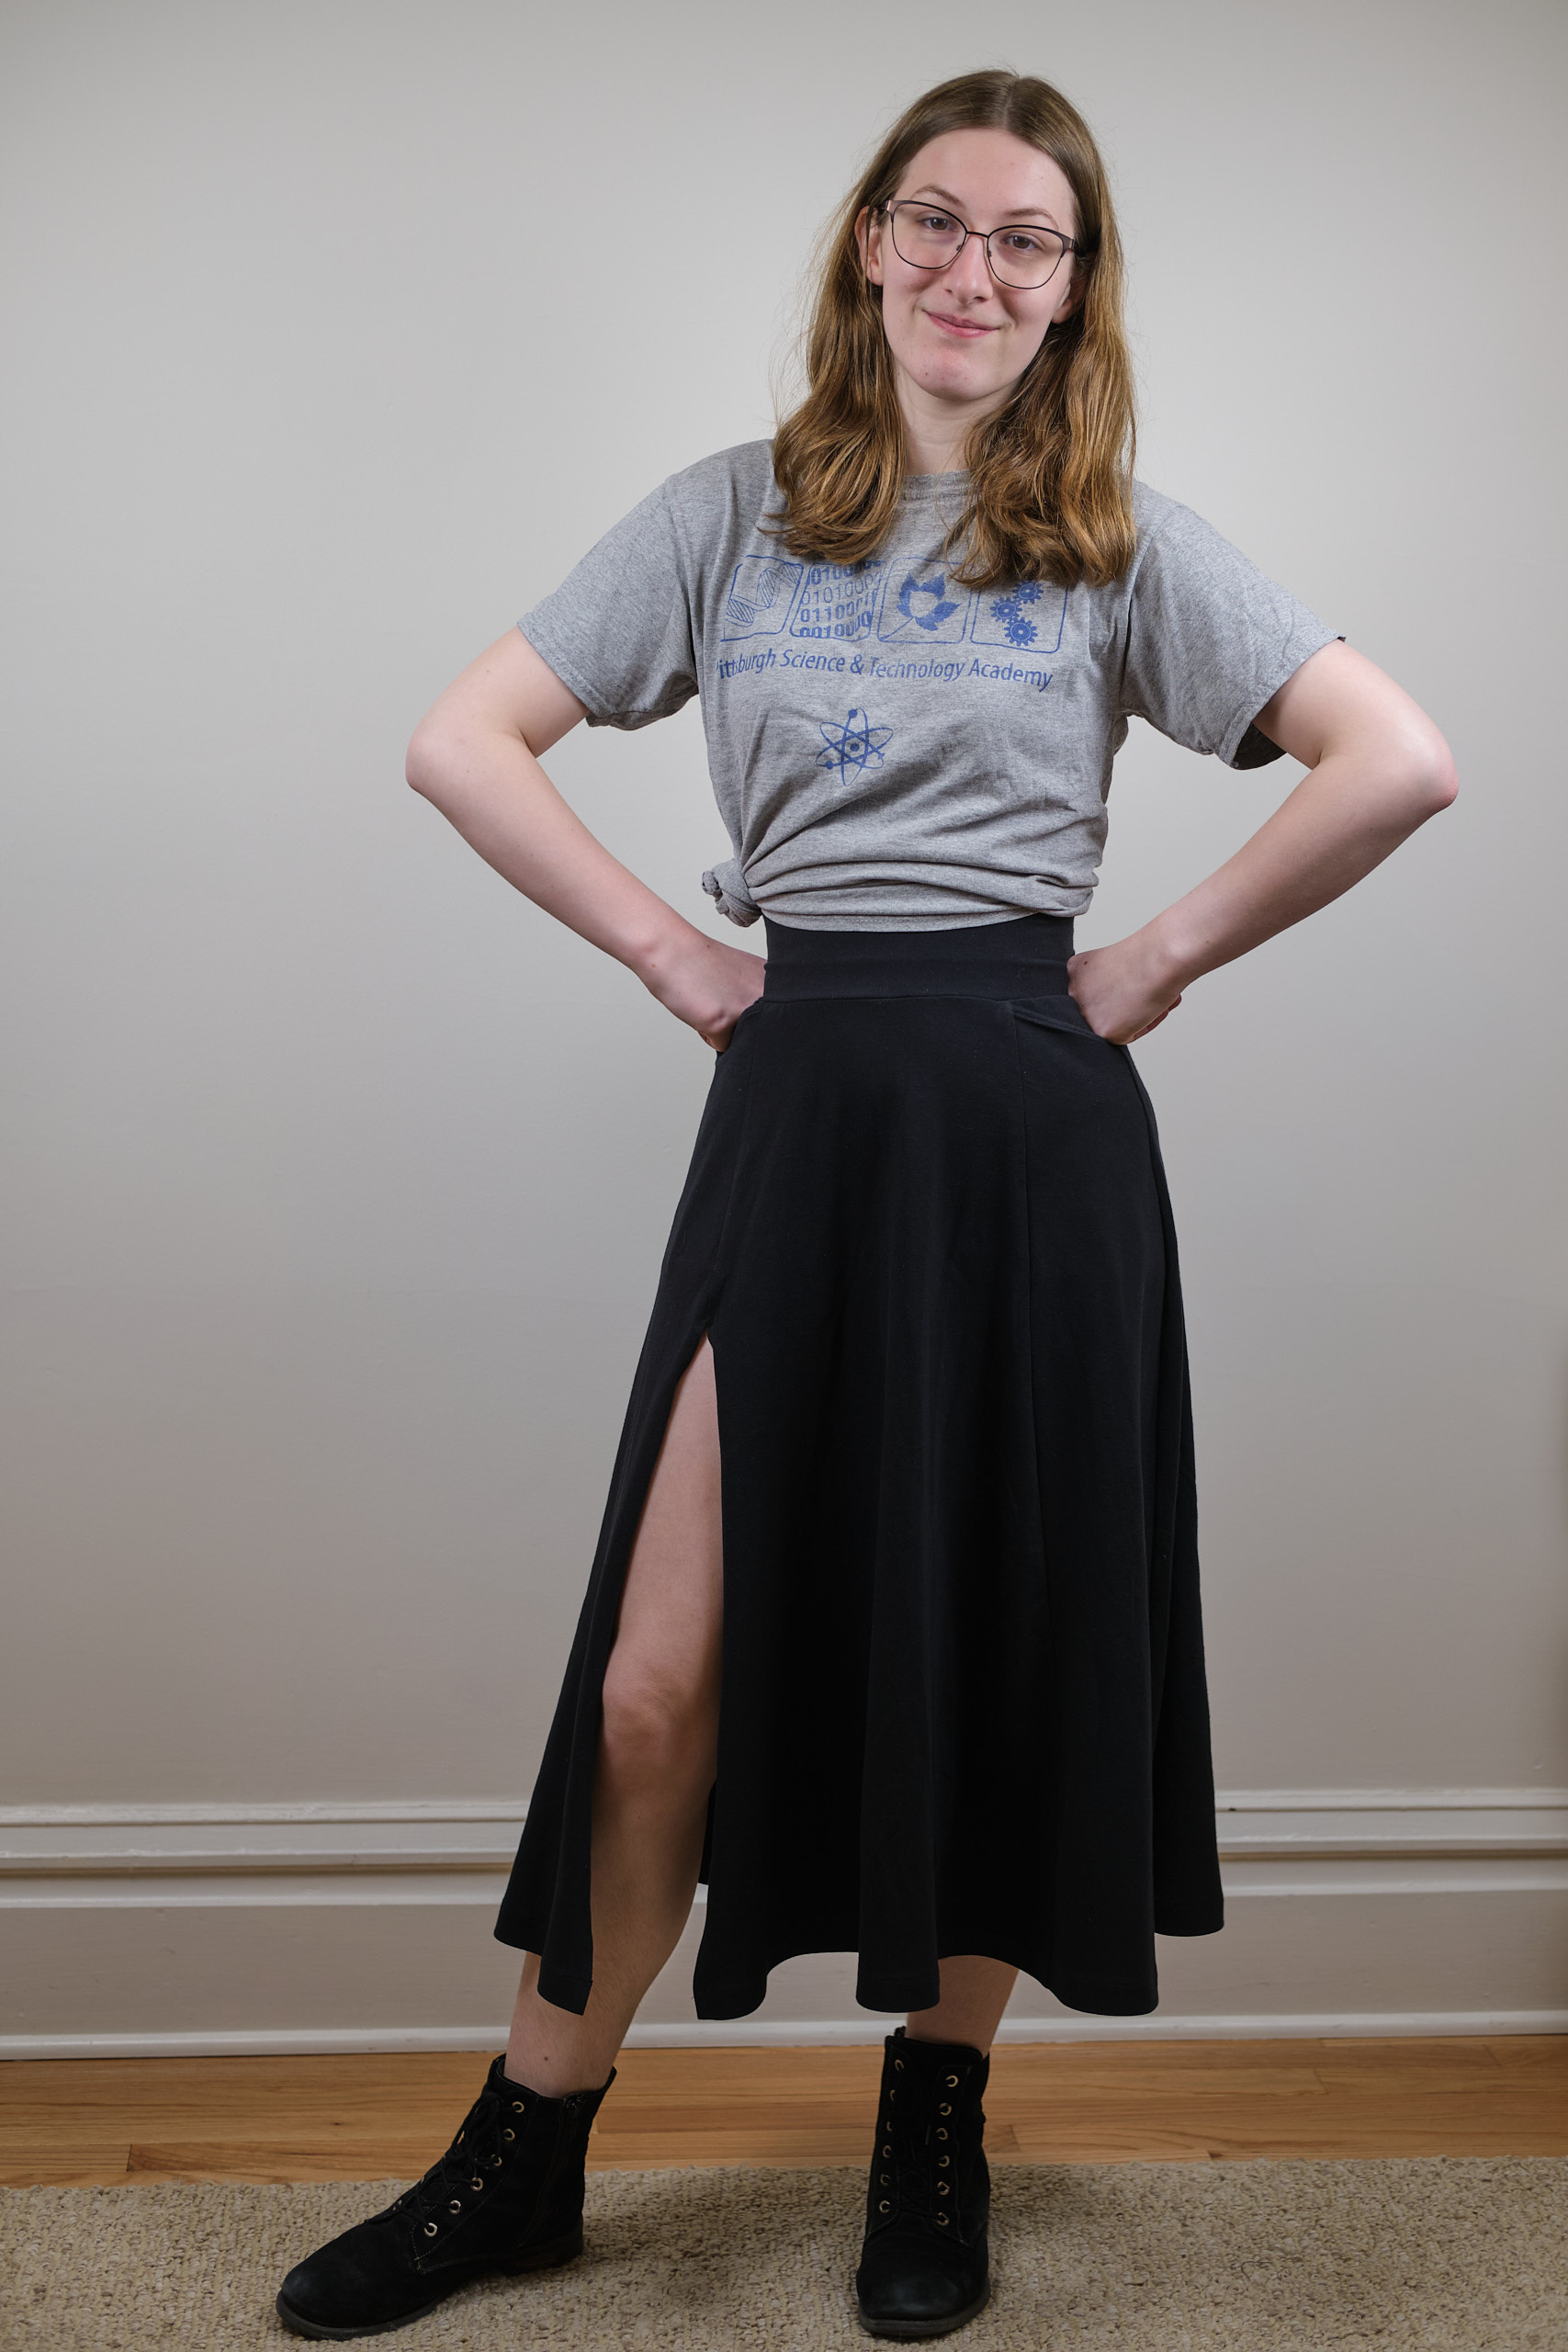
Boo & Lu Blizzard dress with half-circle skirt and raised V-neck instead of modesty panel, size 4, 2 yards ITY, bishop sleeves shortened 1.5 inch
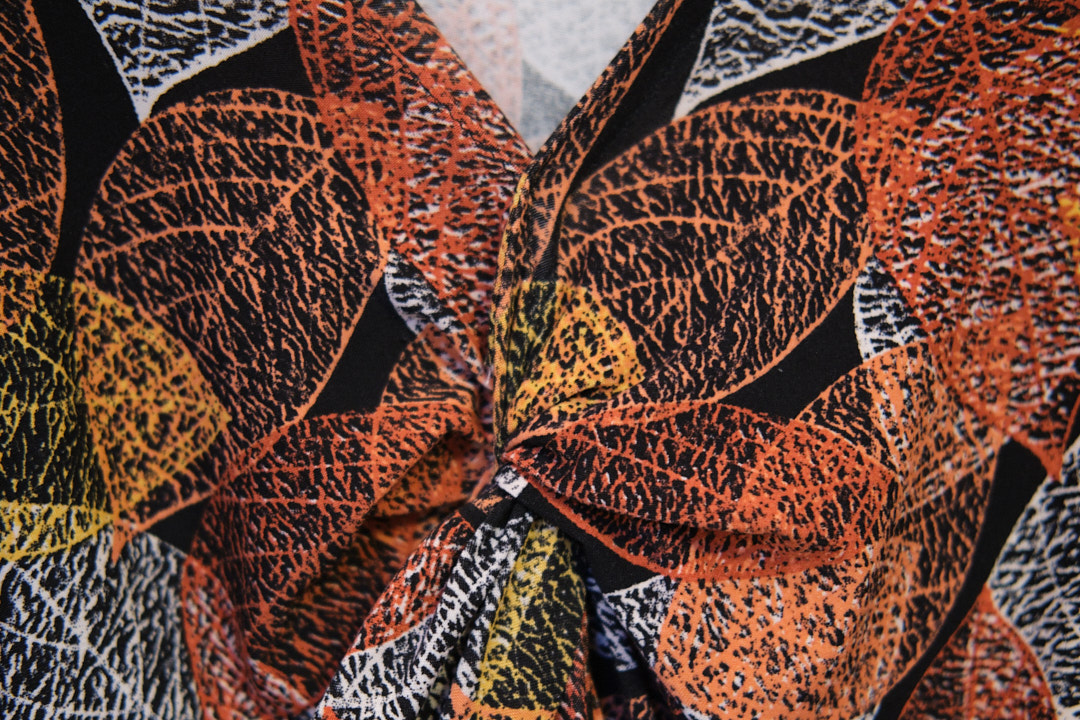
No, it didn’t snow in Pittsburgh. Actually, the weather has been delightful and more like Summer than Fall. Nonetheless, it’s starting to feel a little bit like Fall. In anticipation of more Fall weather coming this week, I made a Boo & Lu Blizzard dress from the most Fall-like fabric in my stash, a lightweight leaf-print ITY fabric. This cracked leaves fabric from Surge Fabrics is more light and drapey than a typical ITY, and appears to be slightly brushed on the front of the fabric and smooth and silky on the back. Unlike most other ITYs I’ve worked with, the edges on this one tend to roll a bit.
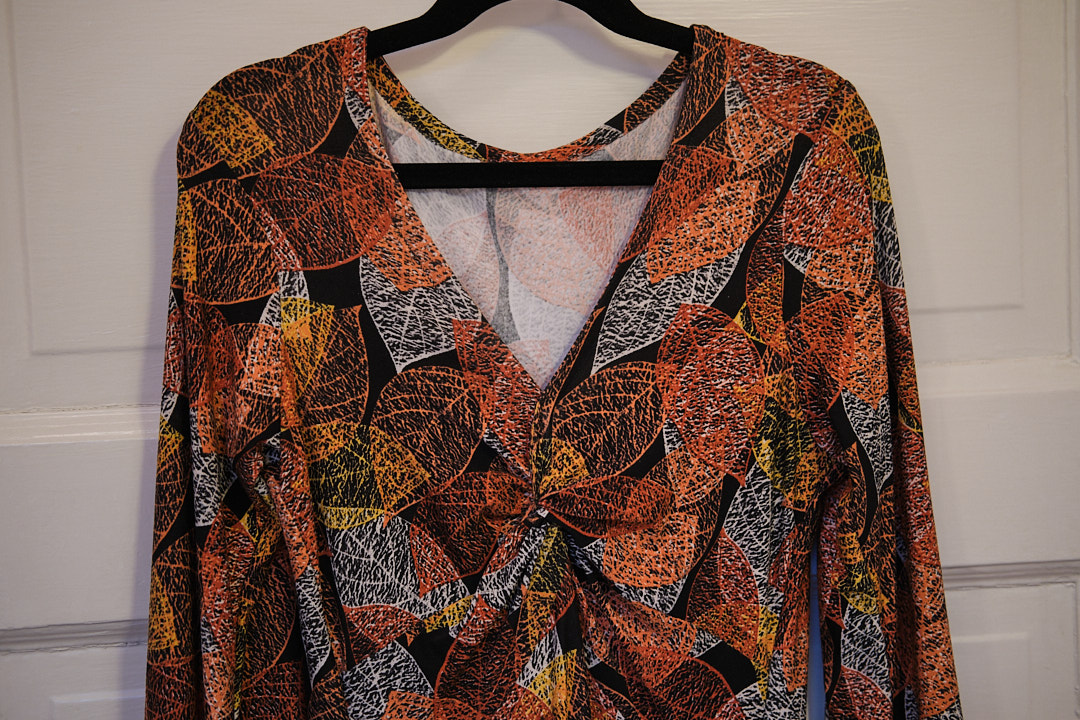
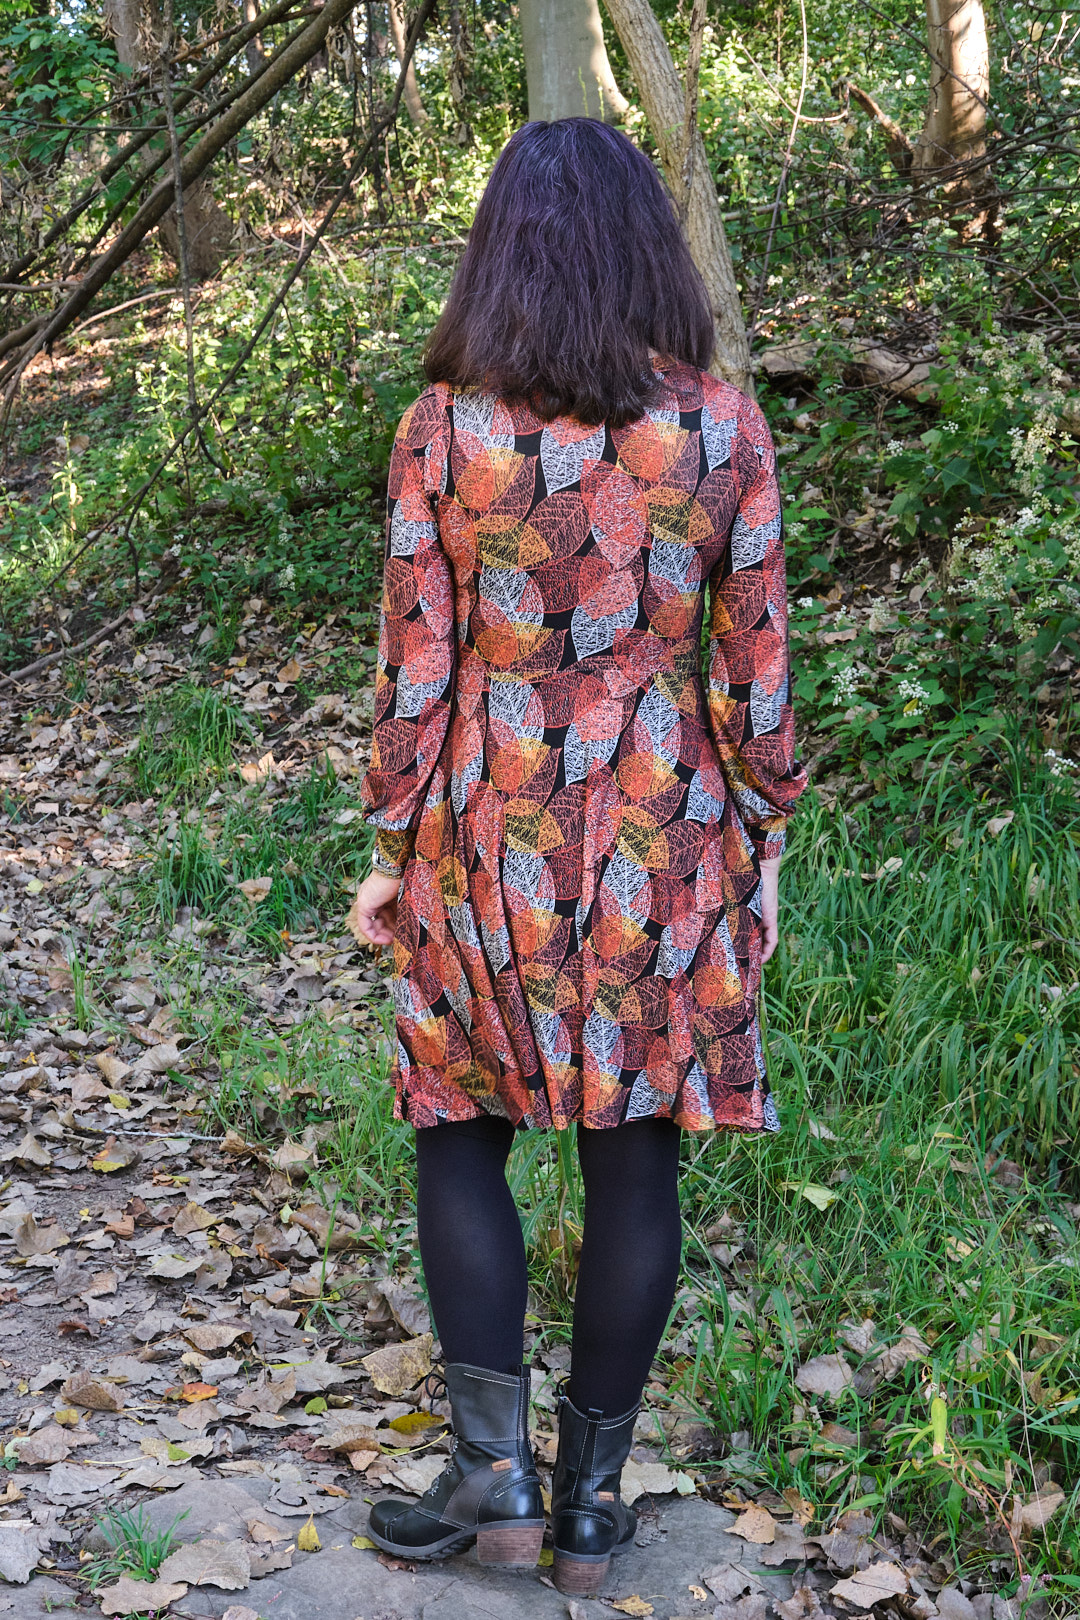
When the Blizzard adult top and dress pattern was released last year, I really liked the knot-front detail, but was less excited about the modesty panel (to cover the plunging V) and the squared hem on the skirt. I decided to buy the pattern anyway, with the plan to alter it to suit my preferences. I cut a size 4 without the modesty panel and I cut the hem of the skirt using a regular half-circle skirt pattern (size 4P from the Sinclair Valley Skater skirt add-on pack, cut 1 inch longer than above-knee length). I used the bishop sleeves but shortened them by 1.5 inch at the lengthen/shorten line. I also added pockets using a self-drafted inseam pocket bag I’ve used on other skirts without waistbands (or if I don’t want to attach it to the waistband).
The knot detail looks complicated and it was a bit confusing to figure out. I was disappointed not to find a video demonstration. But I followed the instructions and photos in the pattern, and once I understood what I needed to do, it went together very quickly.
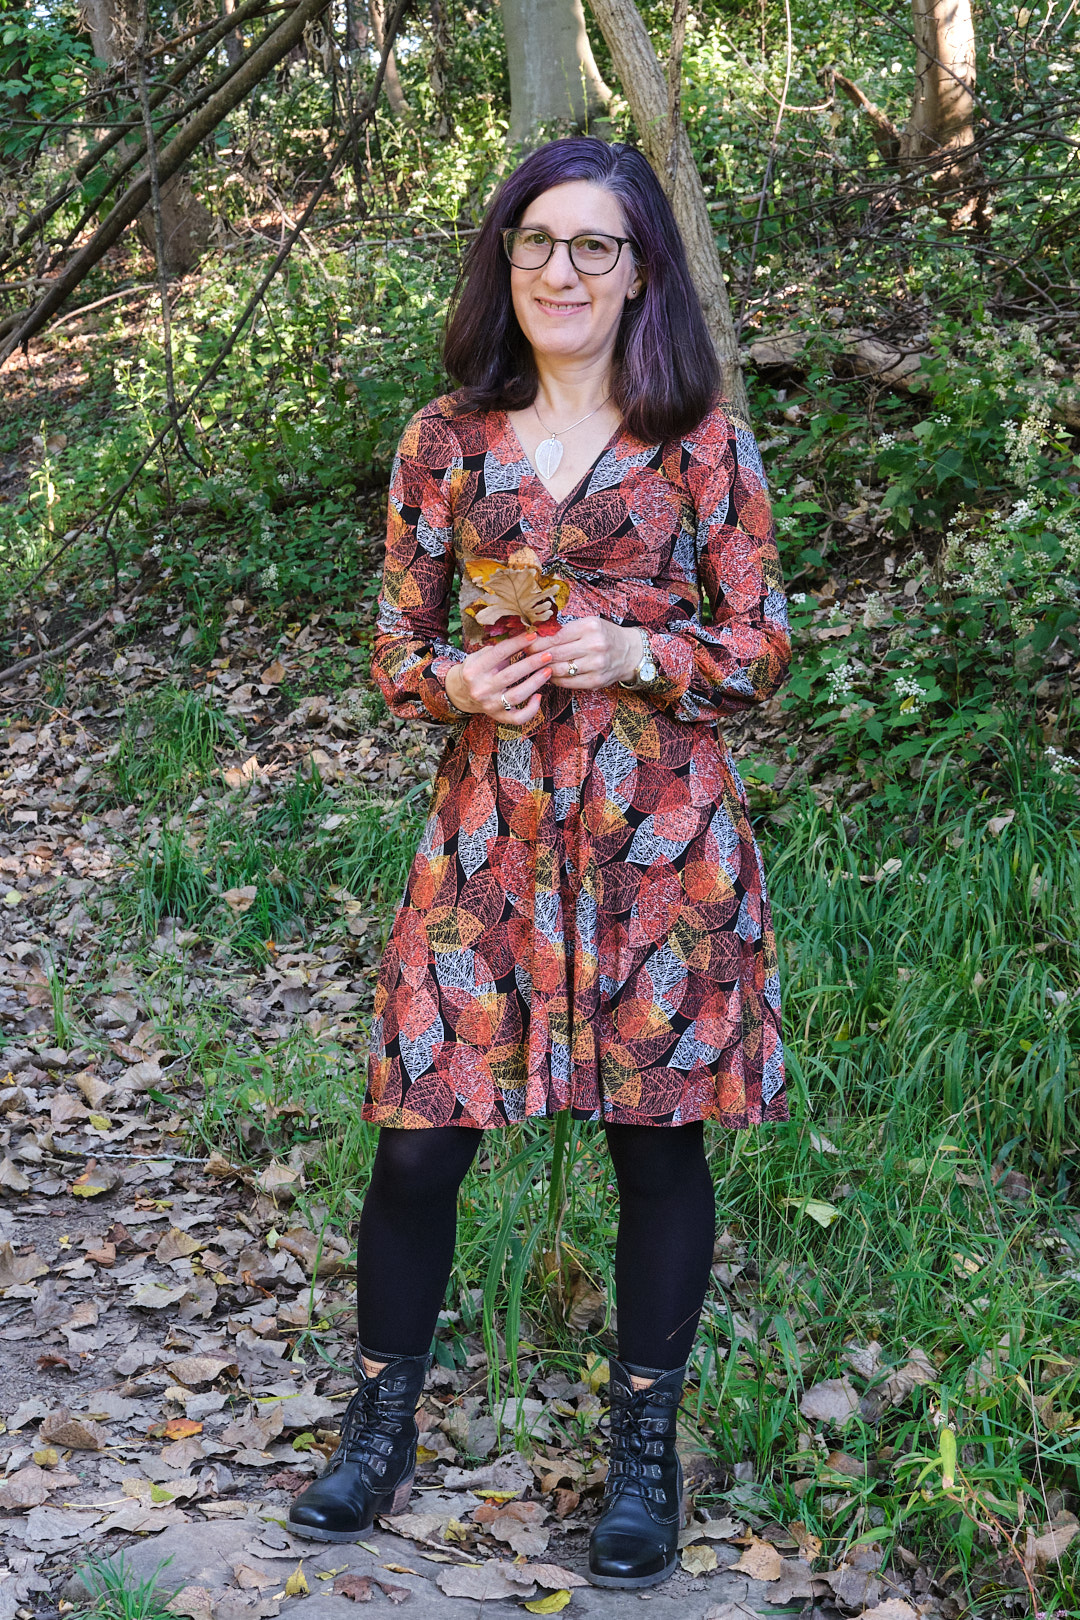
I assembled the dress and then tried it on before hemming to see whether I could wear it without the modesty panel. It was definitely wearable, but the knot hit a bit lower than I really wanted for a dress I planned to wear to work. I thought about sewing in a smaller modesty panel, but any modesty panel would break up the V-neck line. I realized if I pinched together the V about 1.5 inches above the knot I could raise the neckline and still have a V-neck. So I pinned it in place and then sewed it down. since my fabric was a fairly busy print, I just zigzagged it in place with black thread that you can hardly see on the finished dress. Had I not had fabric that would camouflage the seam so easily, I would probably have hand sewn it in place from the back.
Most knit patterns I sew have 1/4-inch seam allowances, which means you can sew them with a serger without the need to trim the edges. This pattern has 3/8-inch seam allowances, which is sometimes used when you are supposed to serge the edges and then sew the seam with your sewing machine. But that is not what is suggested in the instructions so I just trimed 1/8-inch as I serged a 1/4-inch seam. It’s not a big deal, but not my preferred approach.
The bishop sleeves include a band at the wrist so no need to hem them. I used fusible seam tape to tack down a 5/8-inch hem seam and then zigzagged the hem on my sewing machine. Again, the fabric hides the zigzag so well that I didn’t bother cover stitching.
The dress bodice fits like a glove, which works well for this light, stretchy fabric. If I were sewing a heavier or less stretchy fabric, I would probably size up. I have a top I bought many years ago with a similar knot front design, but it is looser and has a center front seam. I’m pondering how to adjust this pattern to reproduce that look as well.
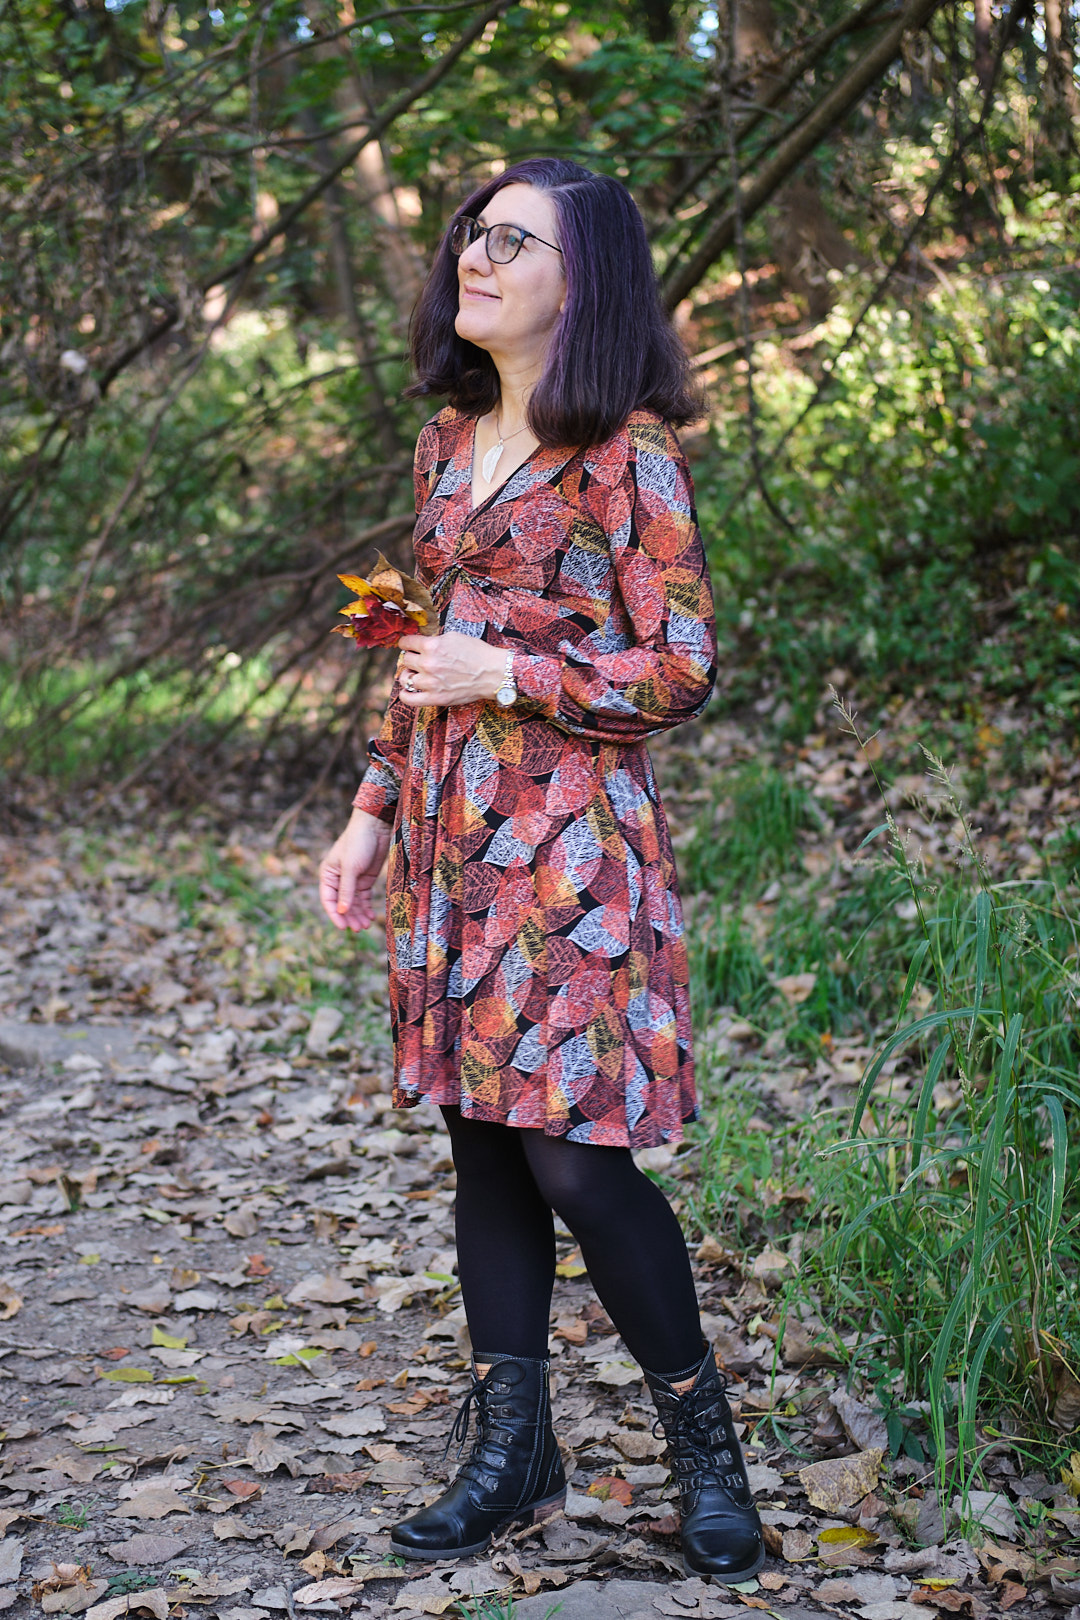
The dress looks great with tights and ankle boots. I’ll probably wear it with a black tie-front sweater when it gets cooler. I accessorized with an inexpensive leaf pendant that matches the fabric perfectly.
We had beautiful weather this weekend, and my photographer was willing to follow me around in search of leafy backdrops for a photoshoot, so I have lots of photos to share. We aren’t anywhere near peak leaf color here, but we still found some nice Fall backdrops.
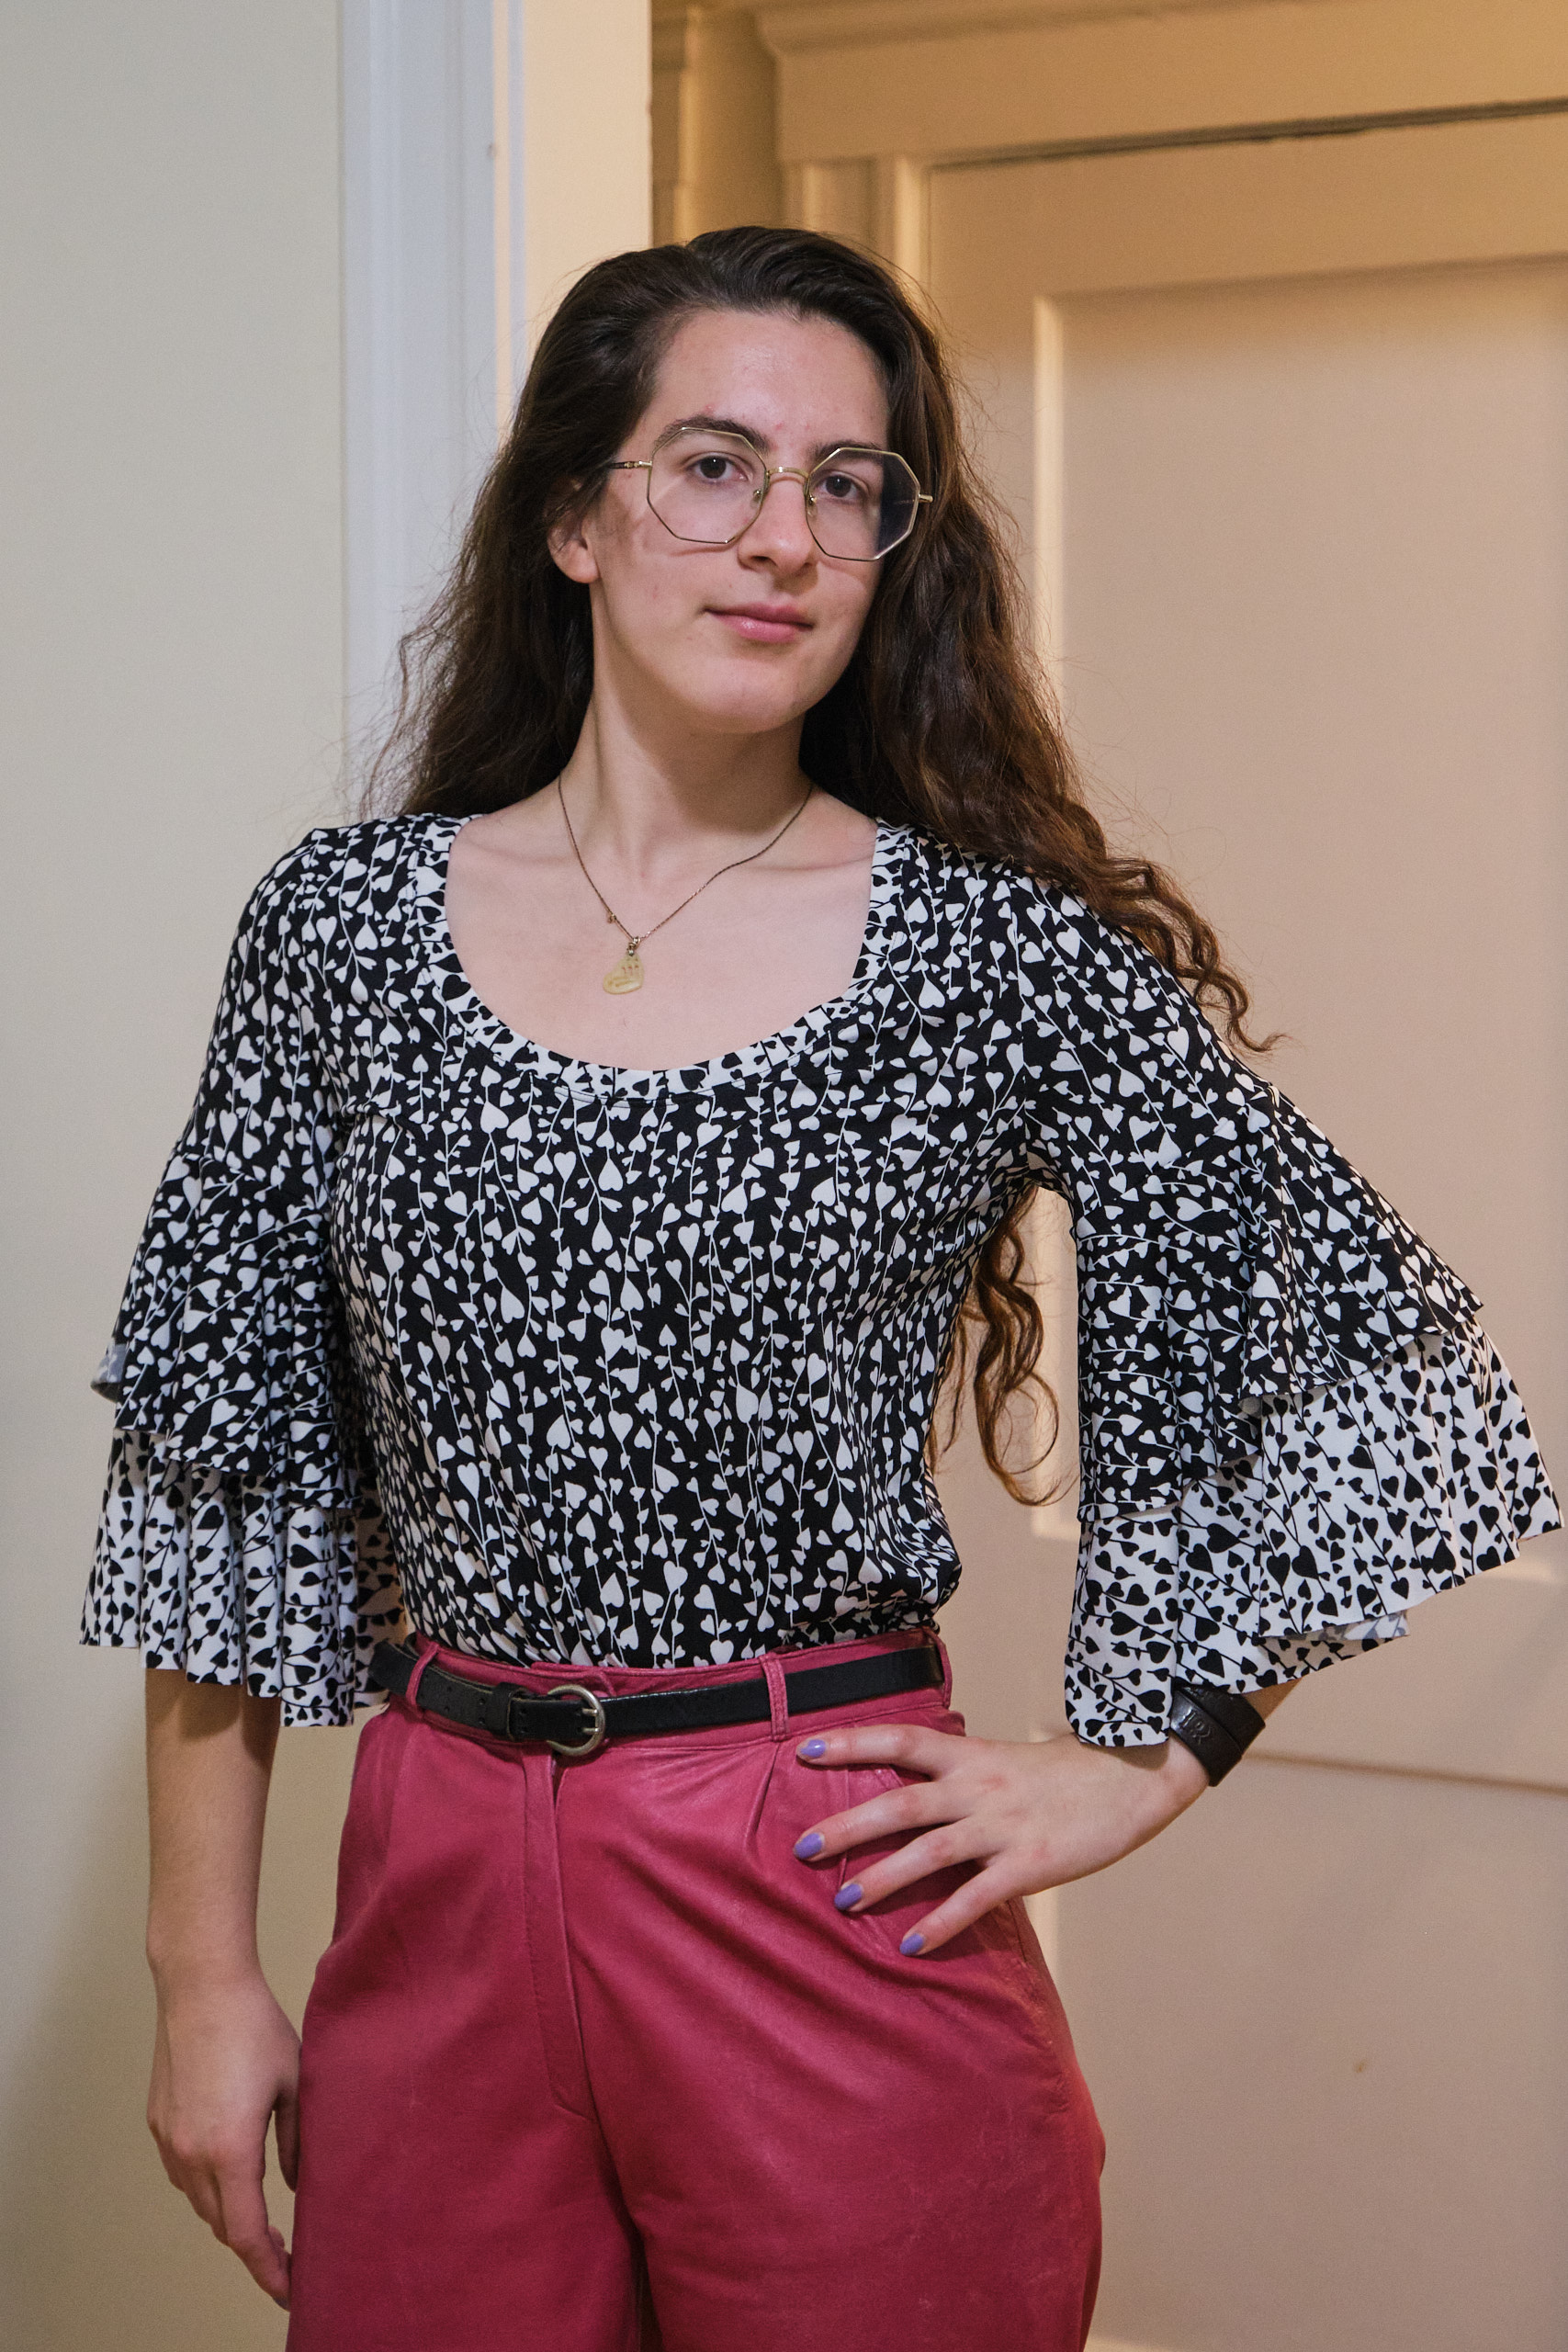
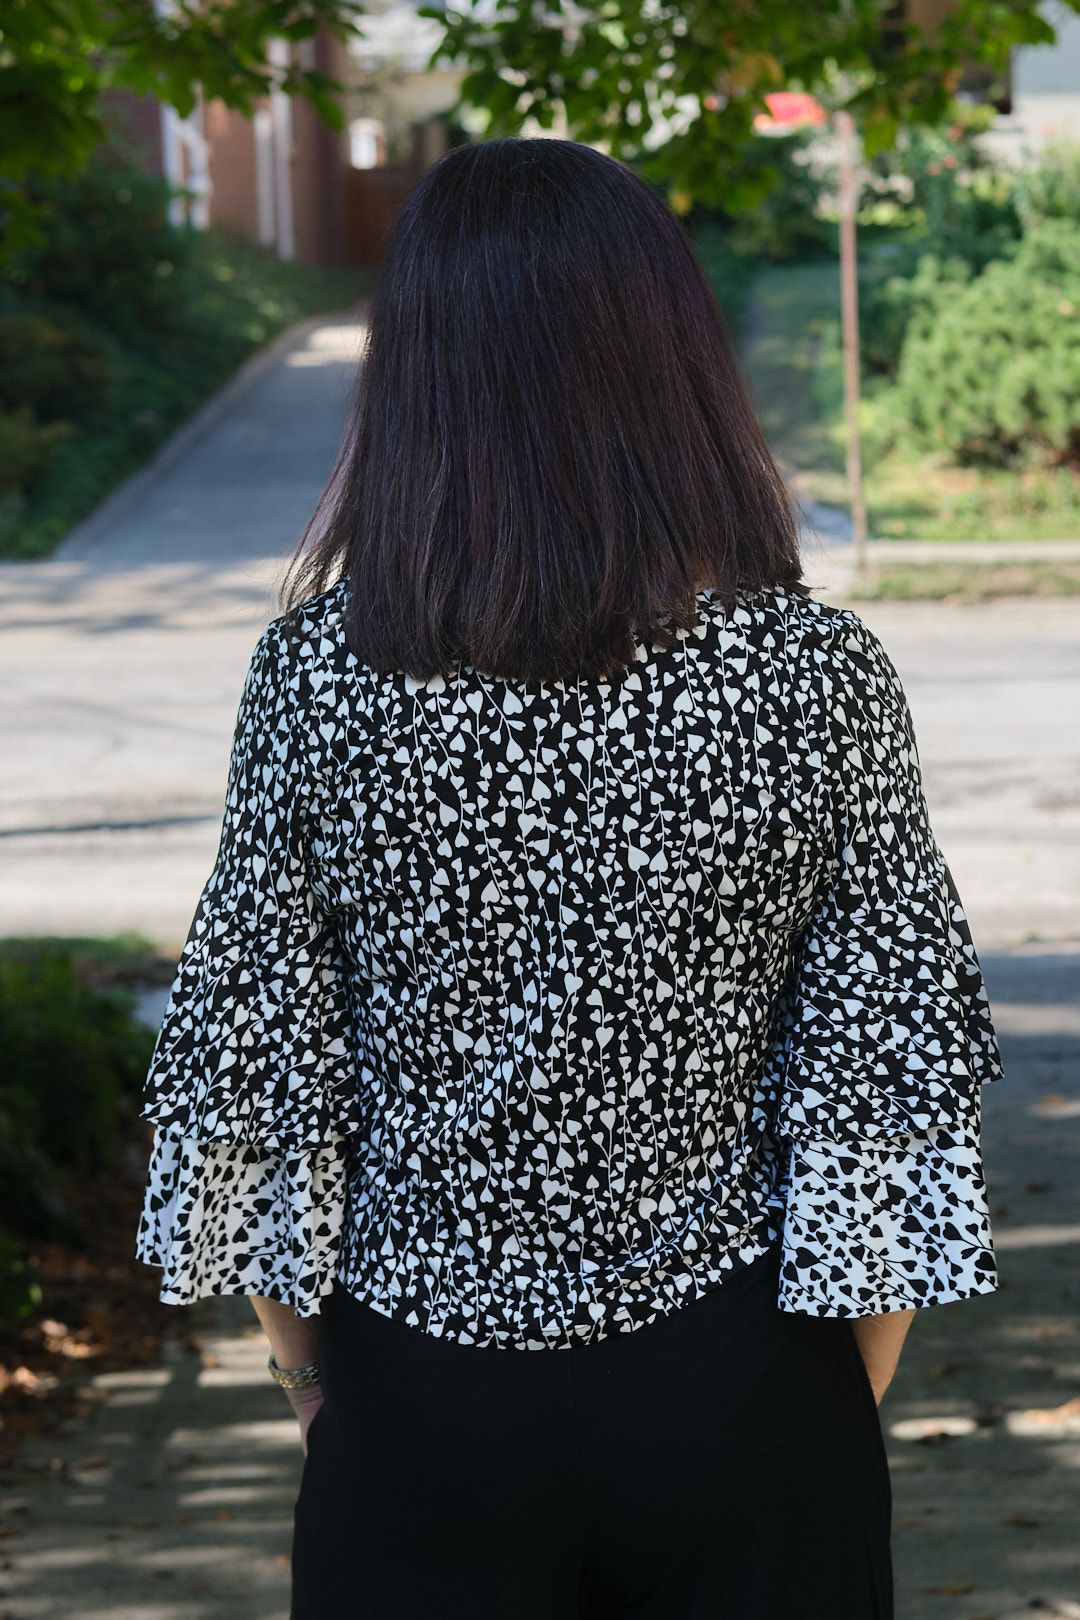
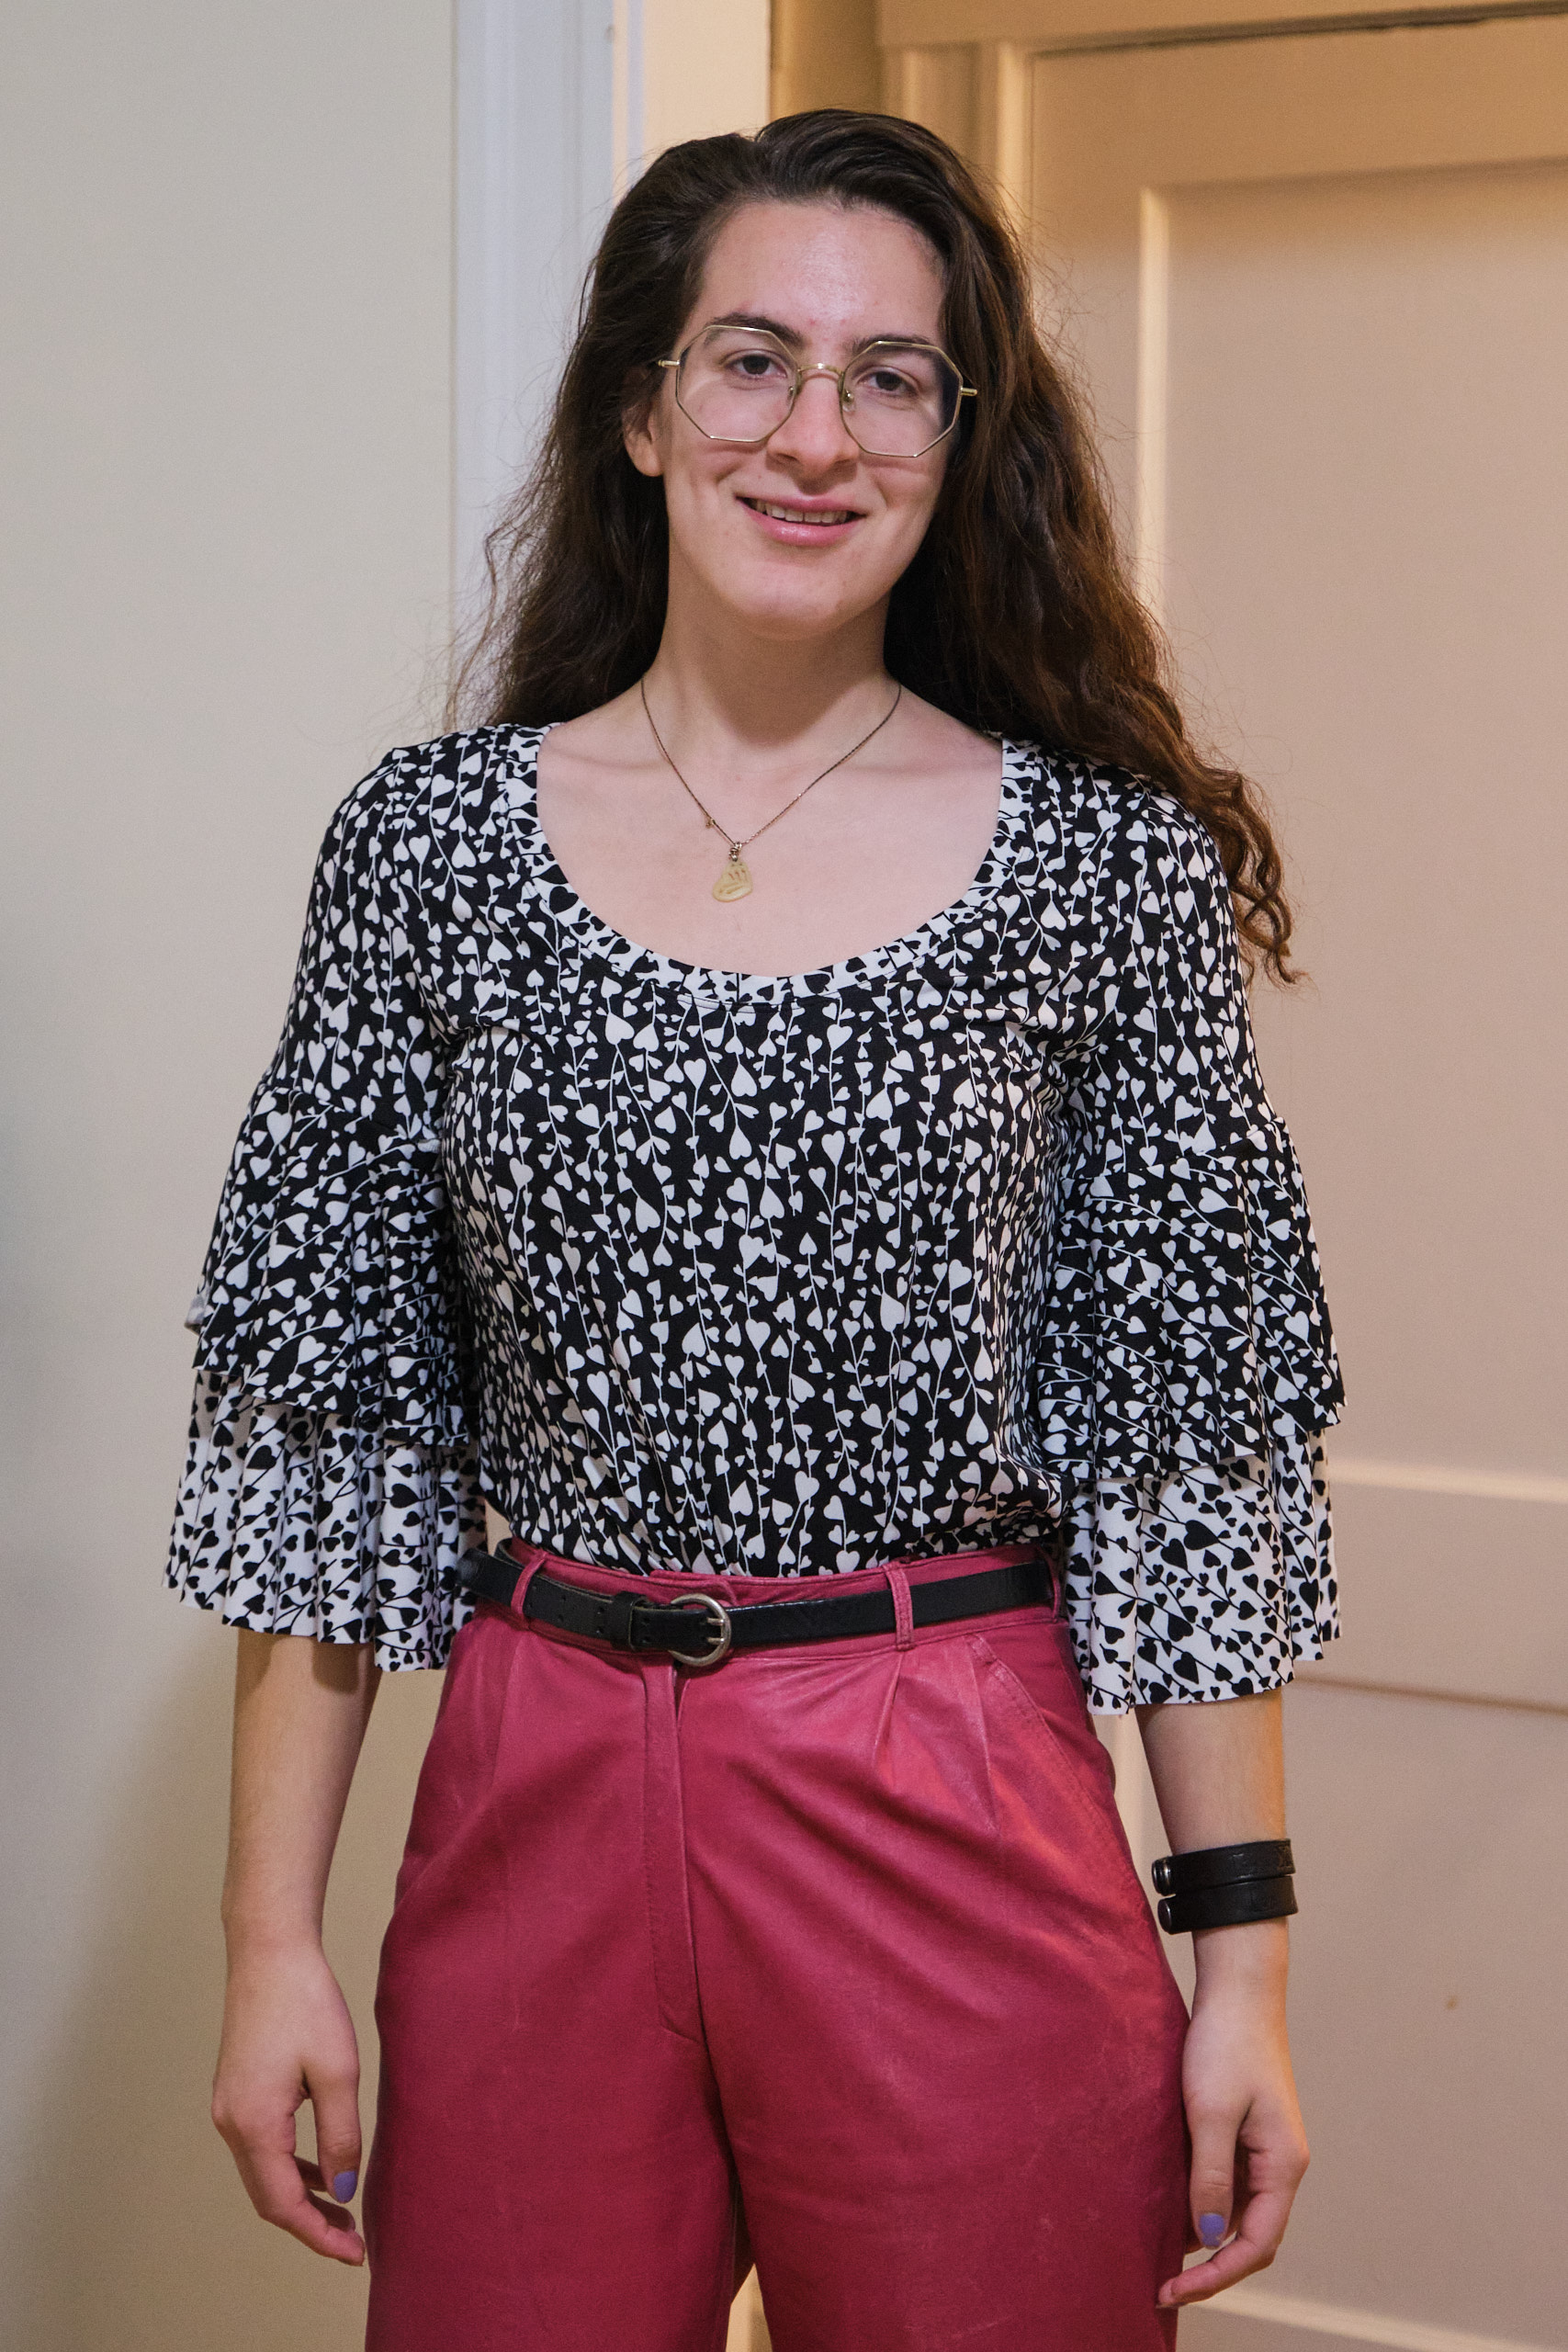
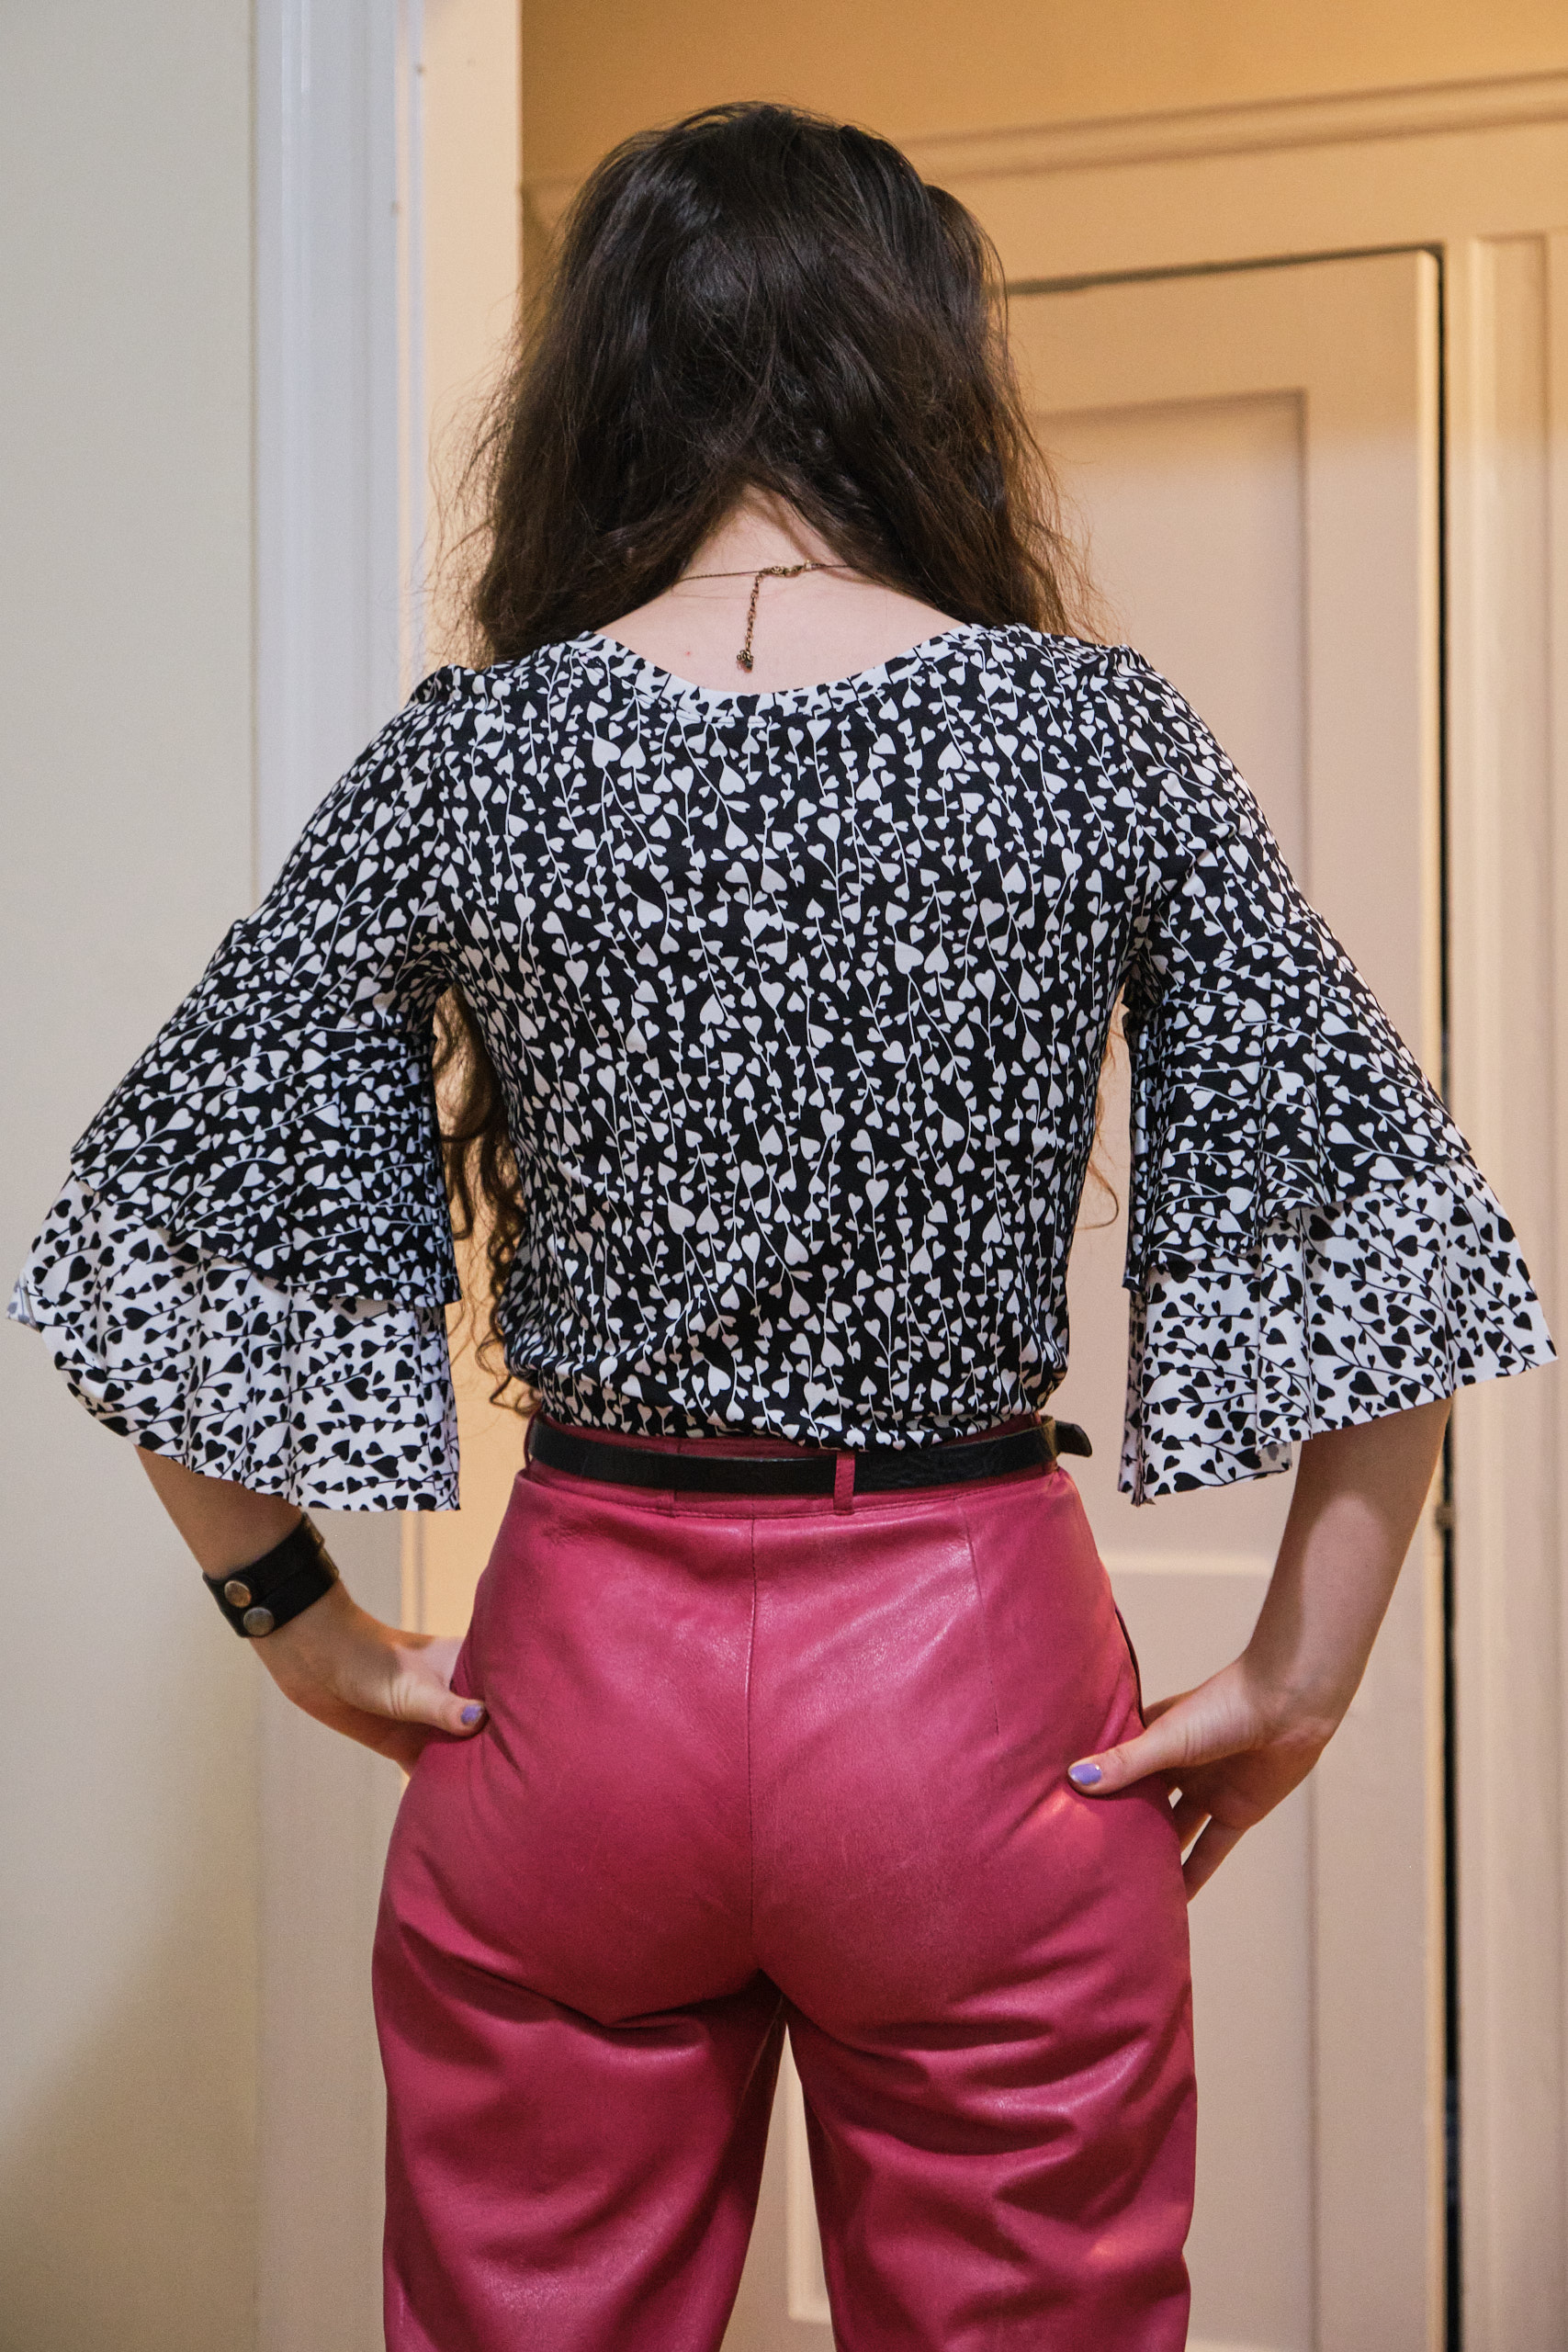
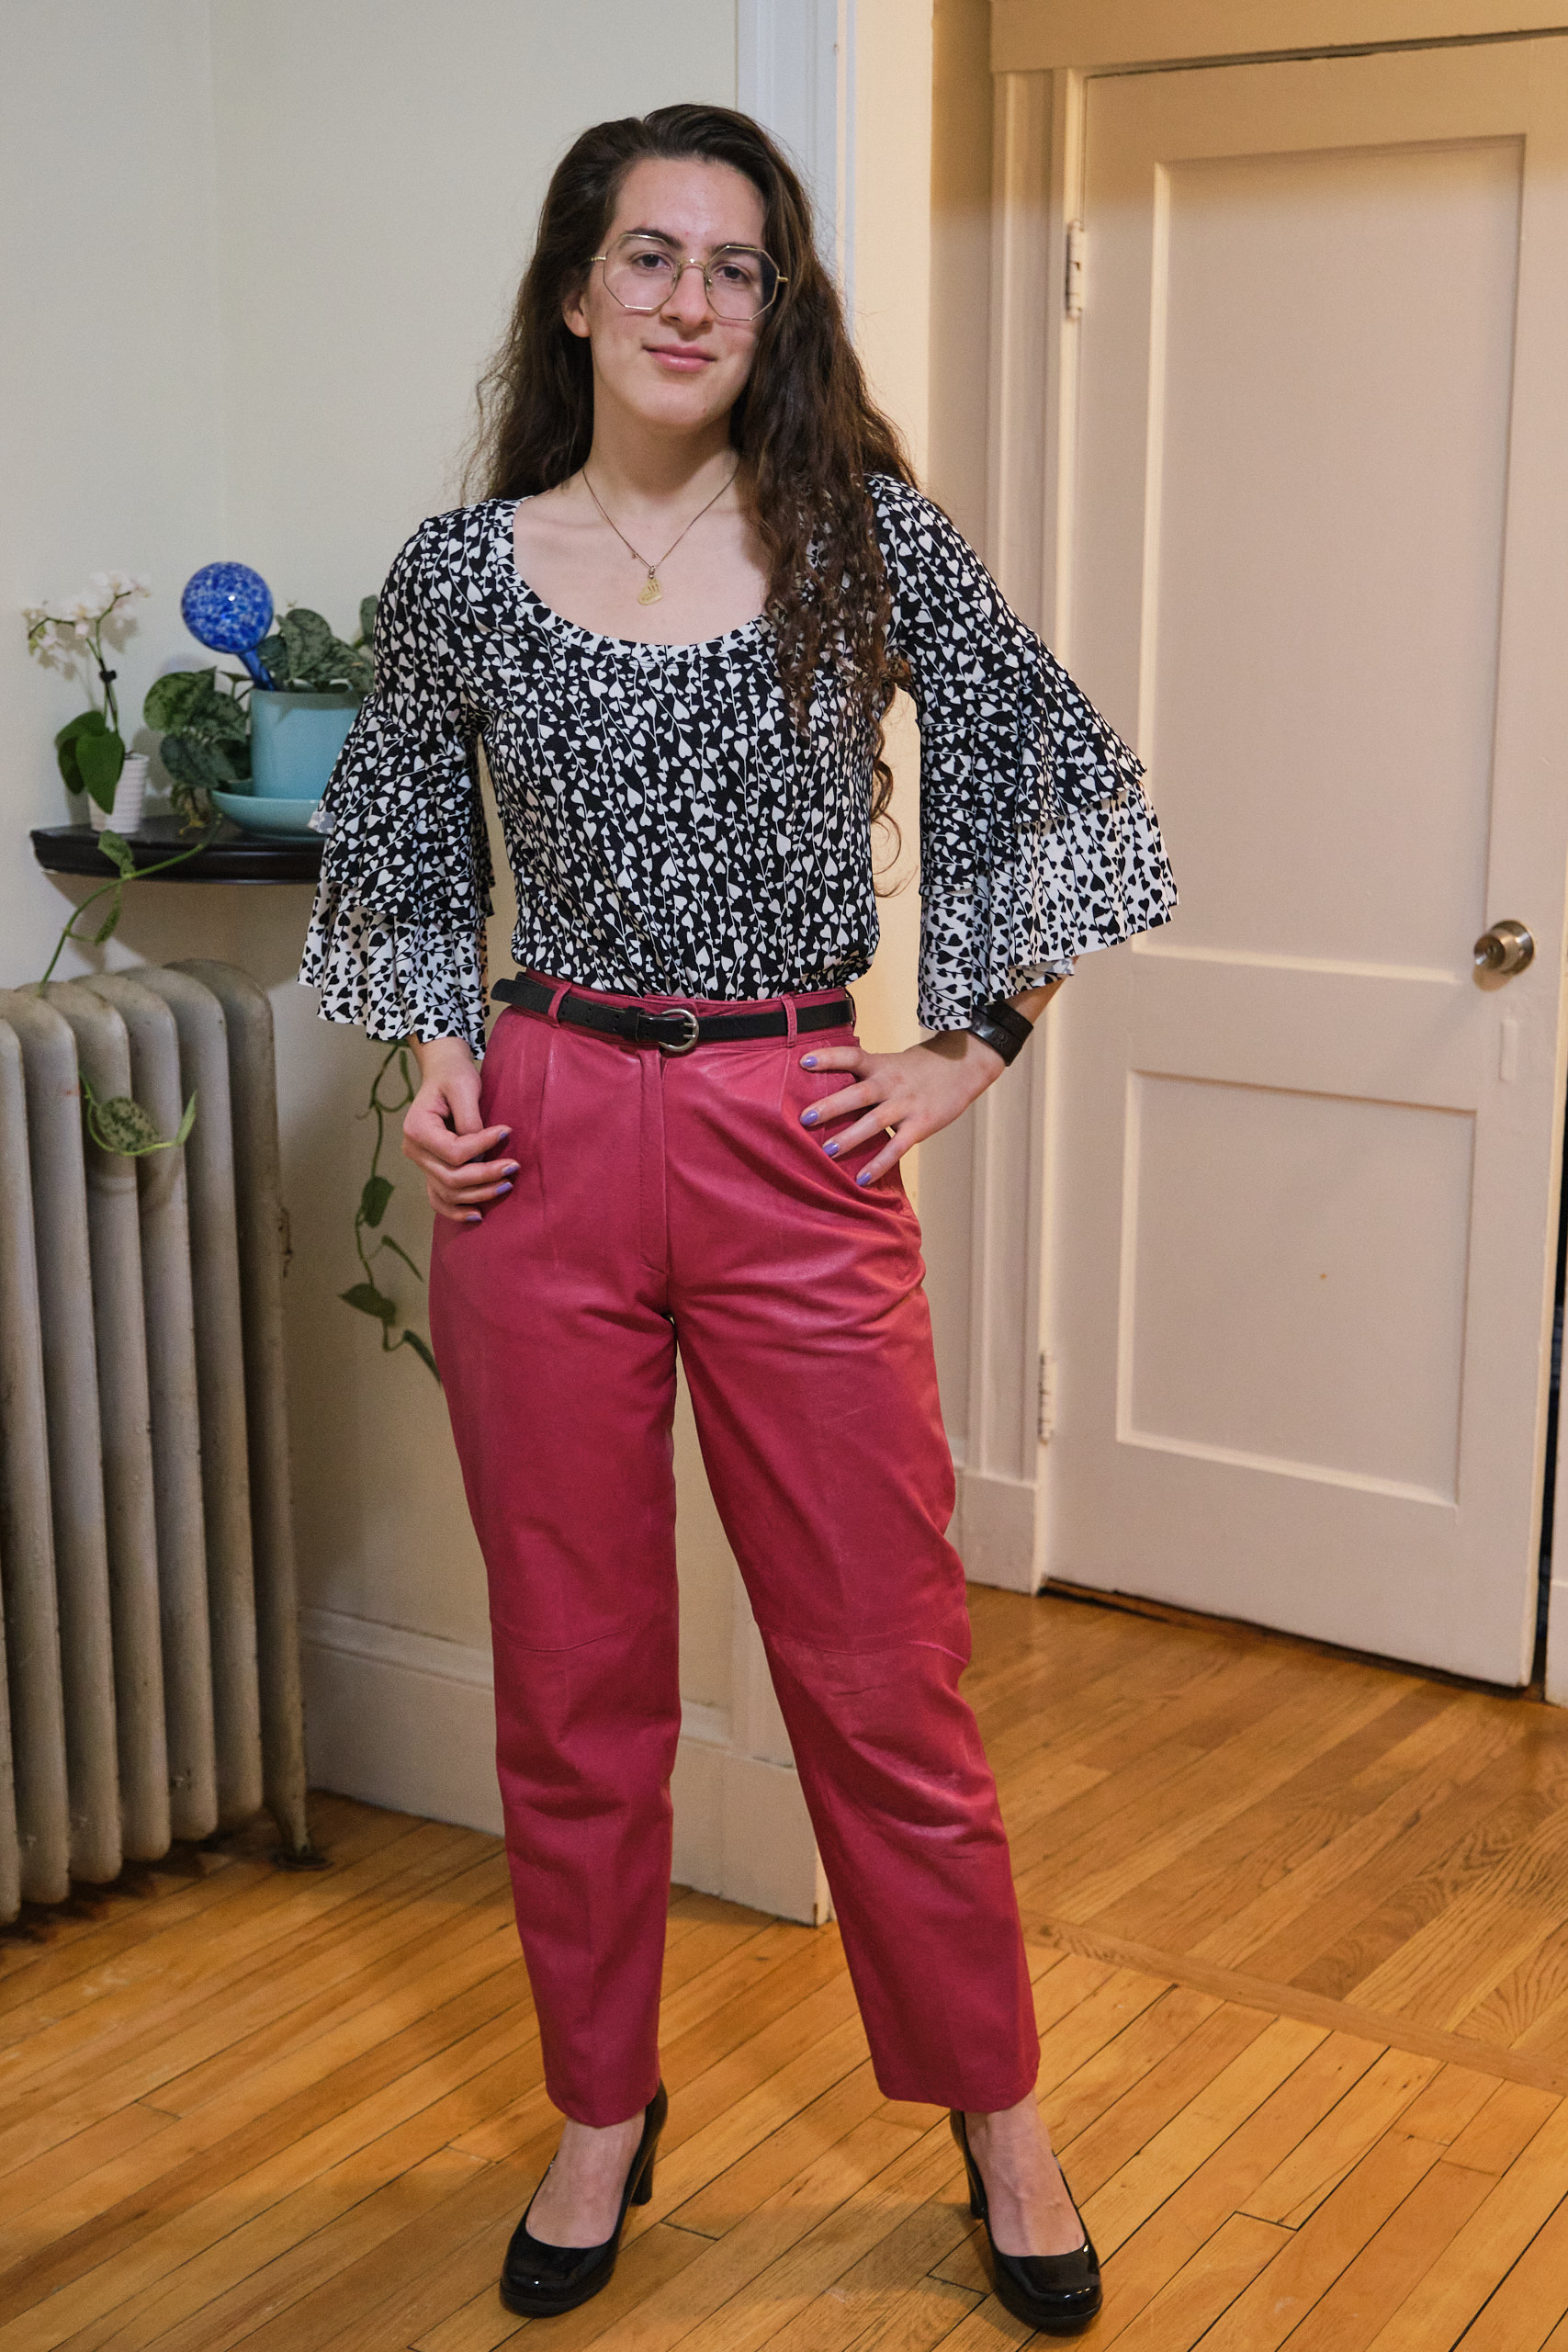
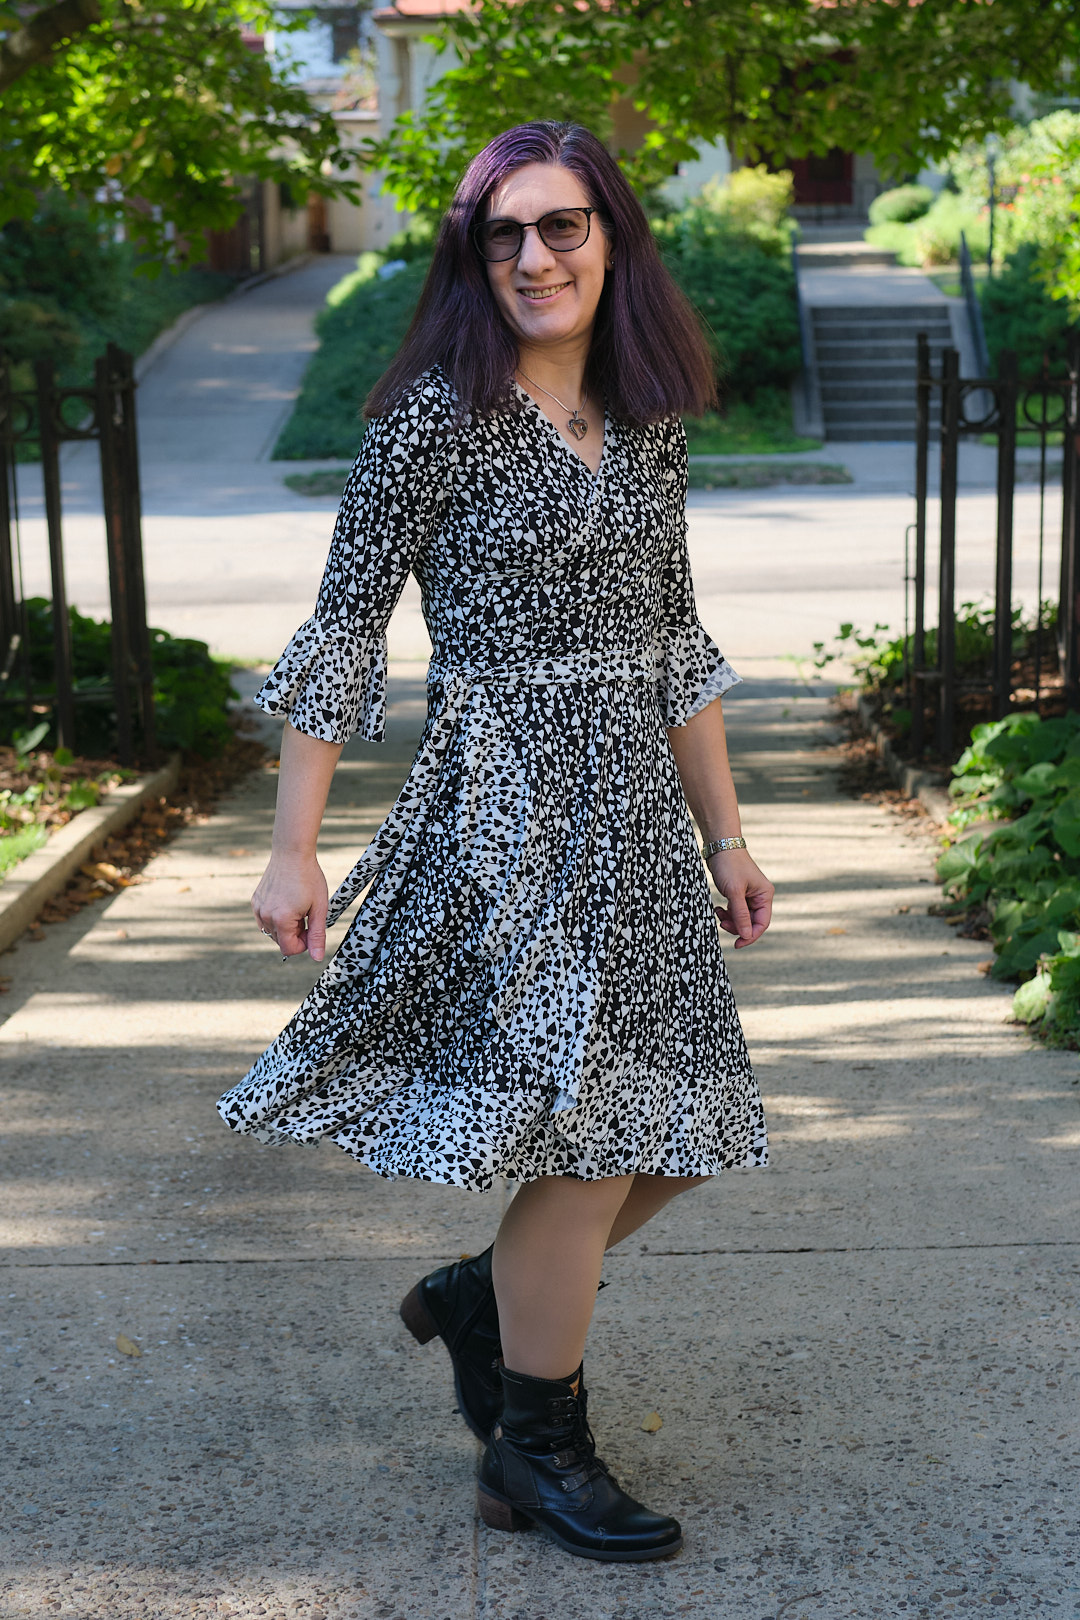
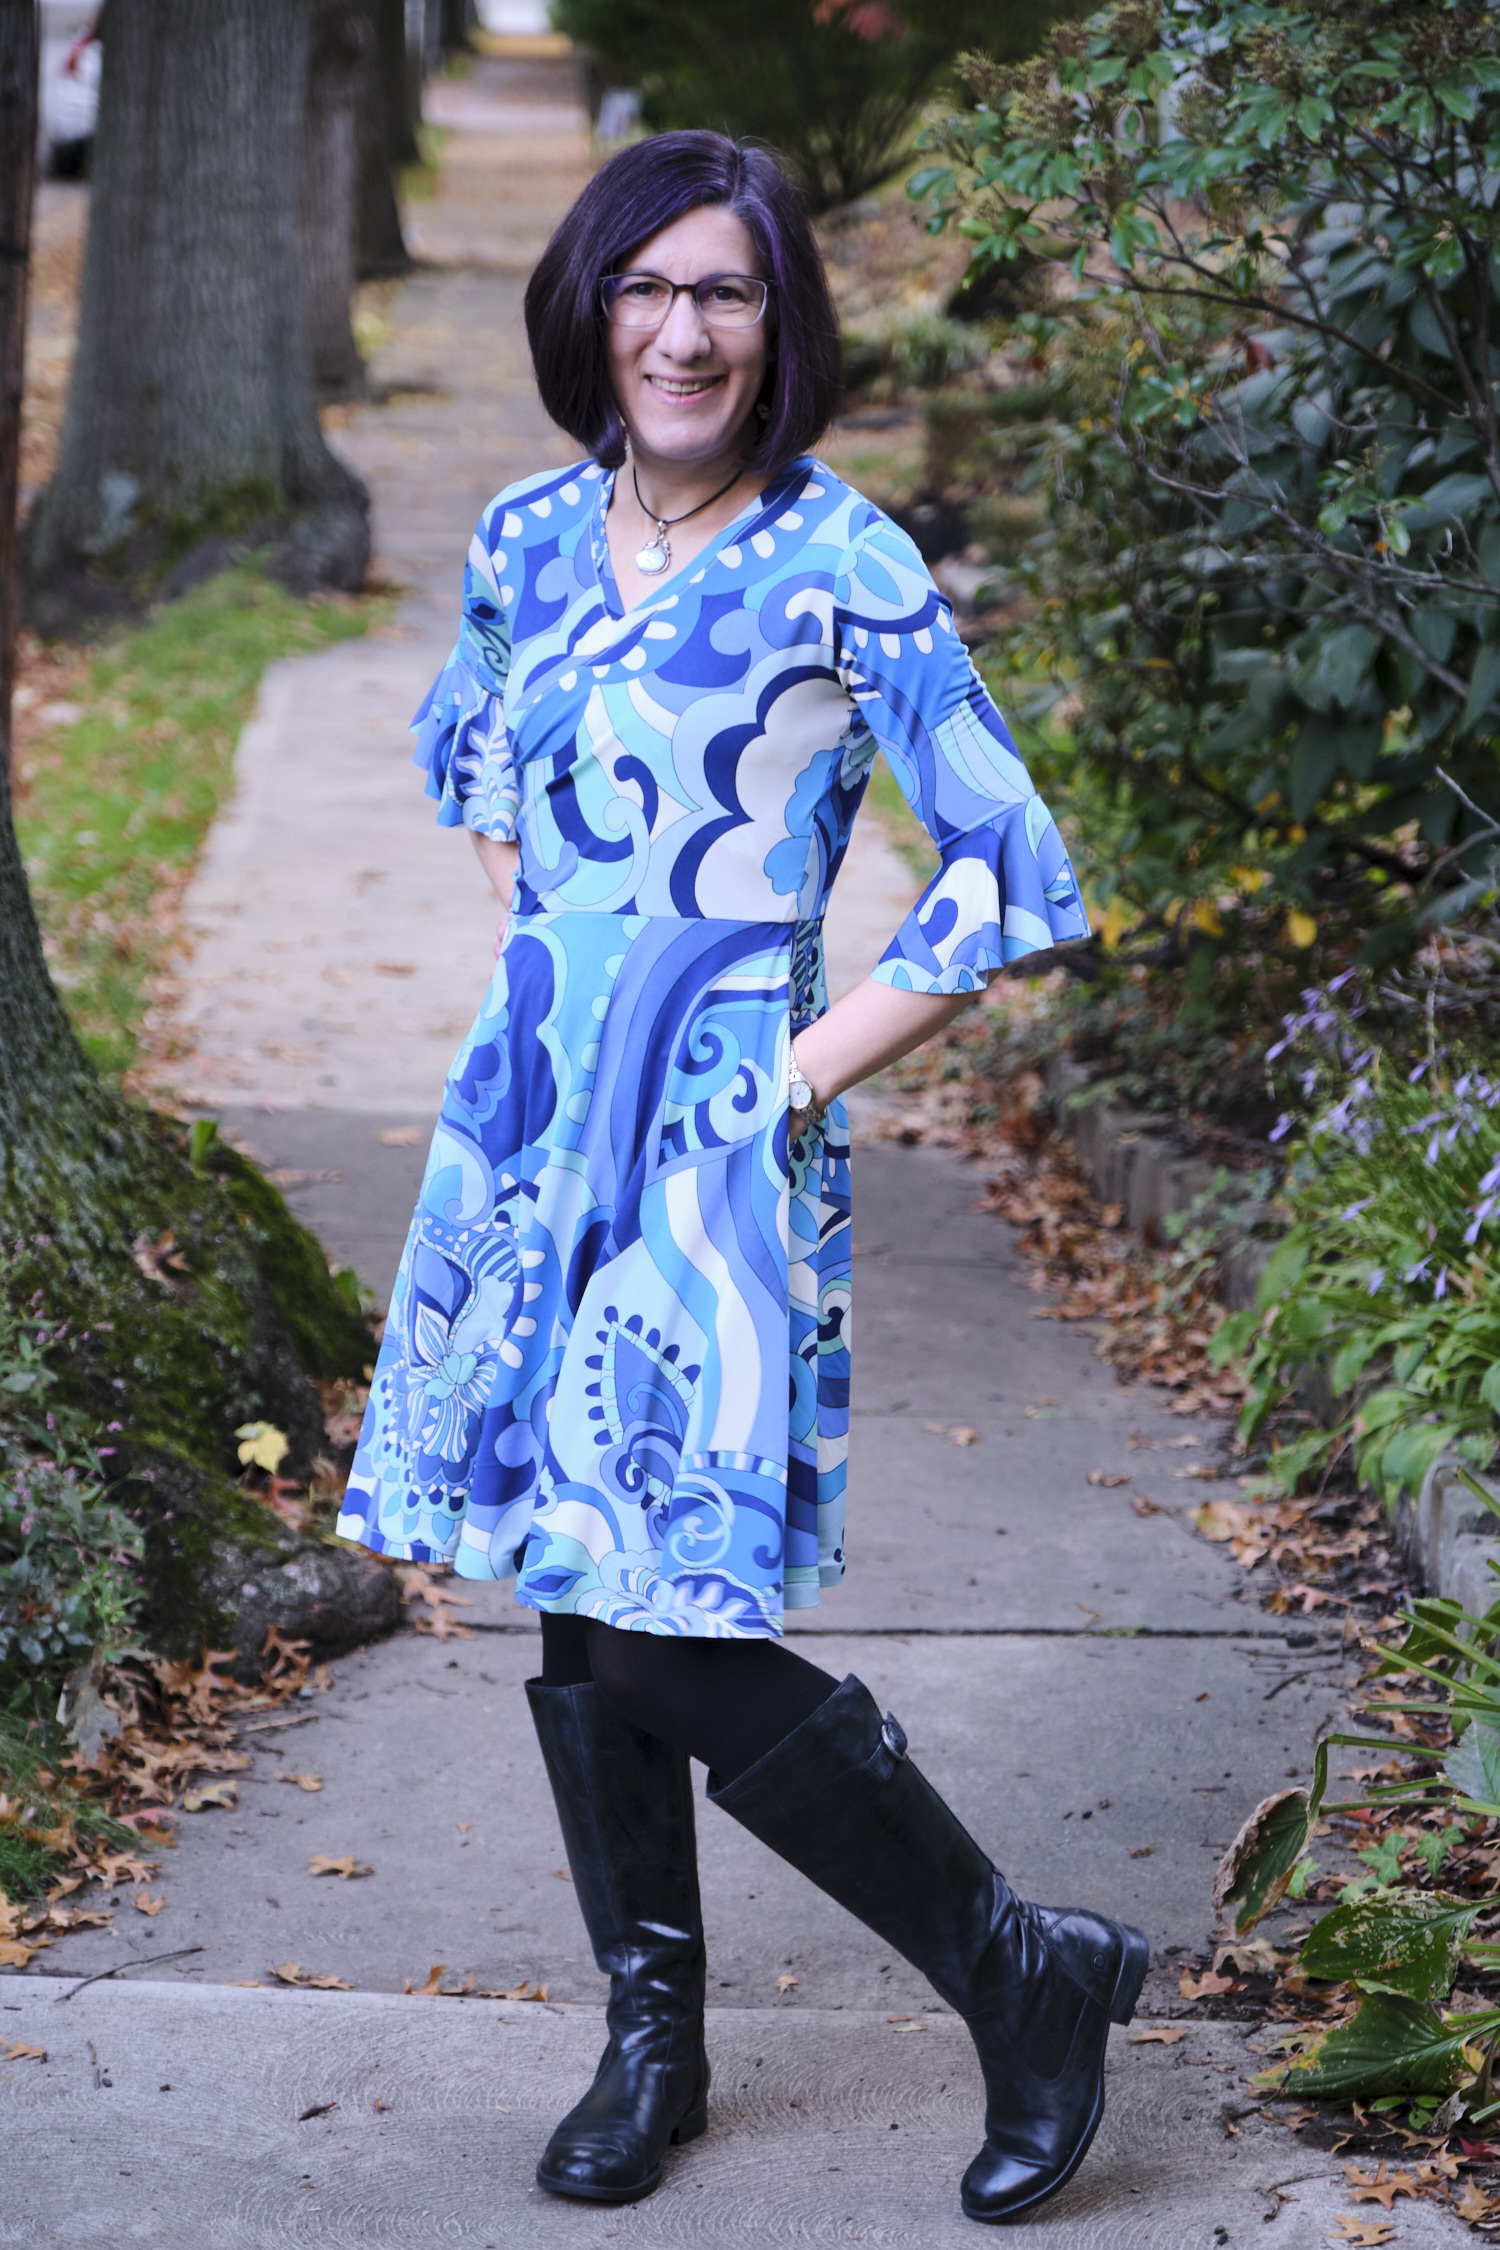
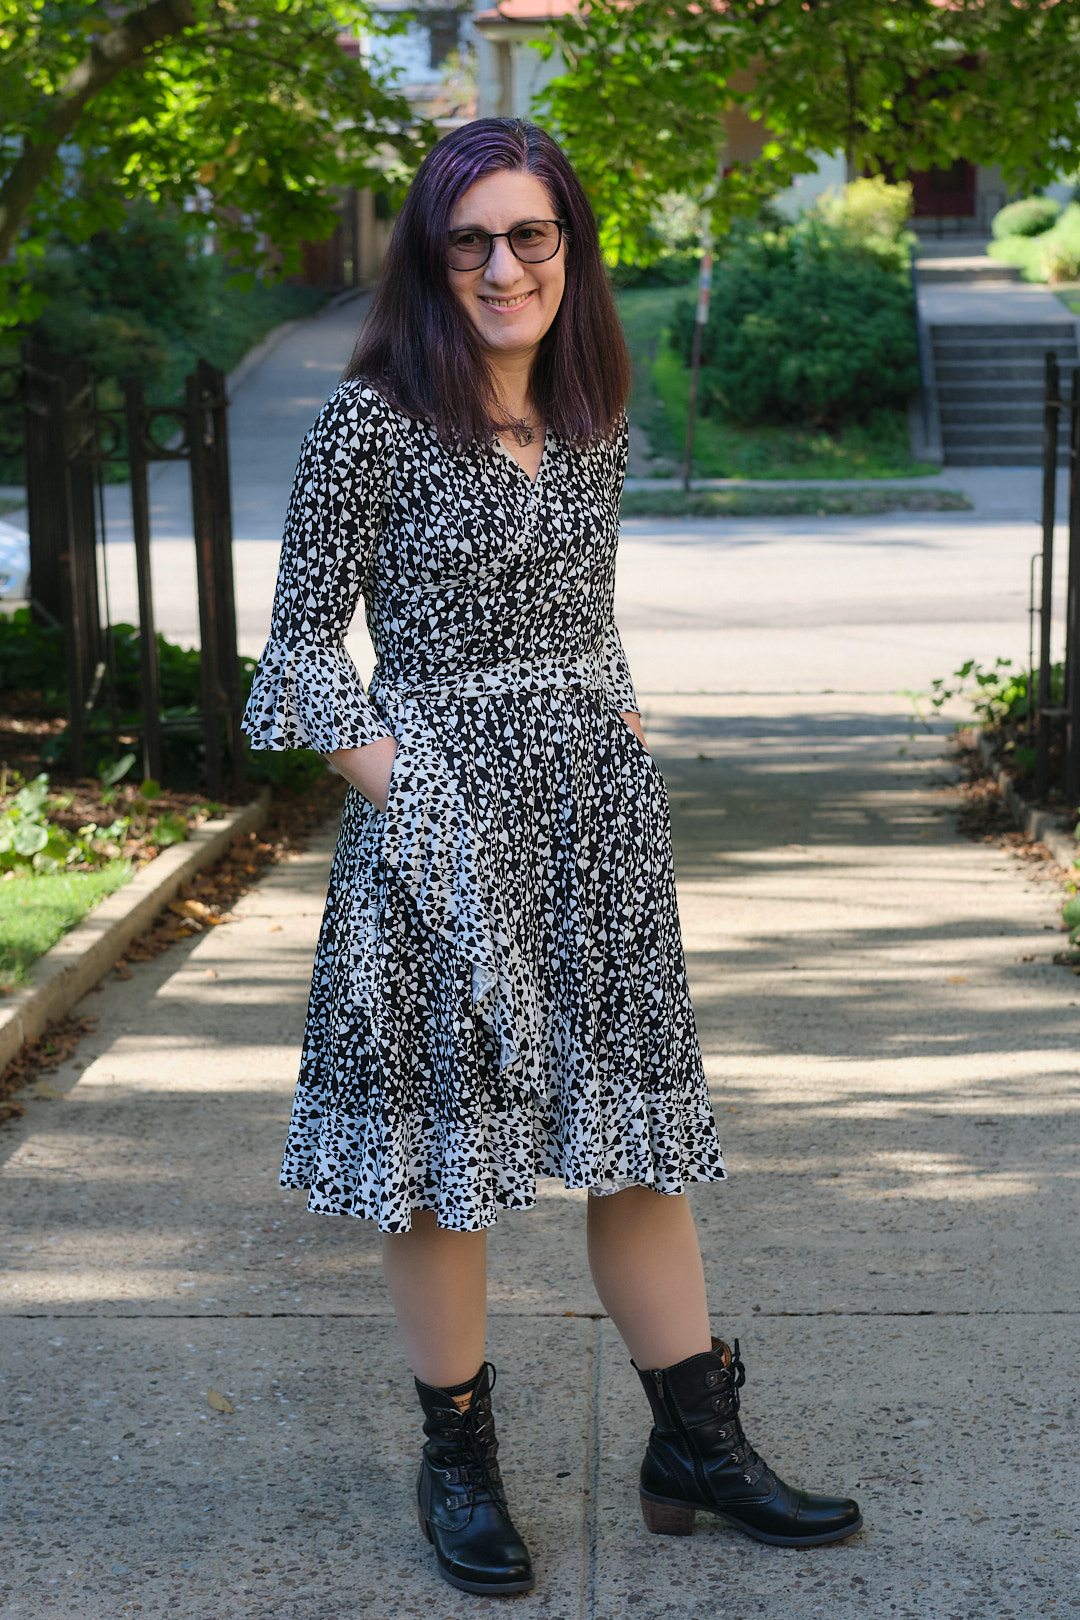
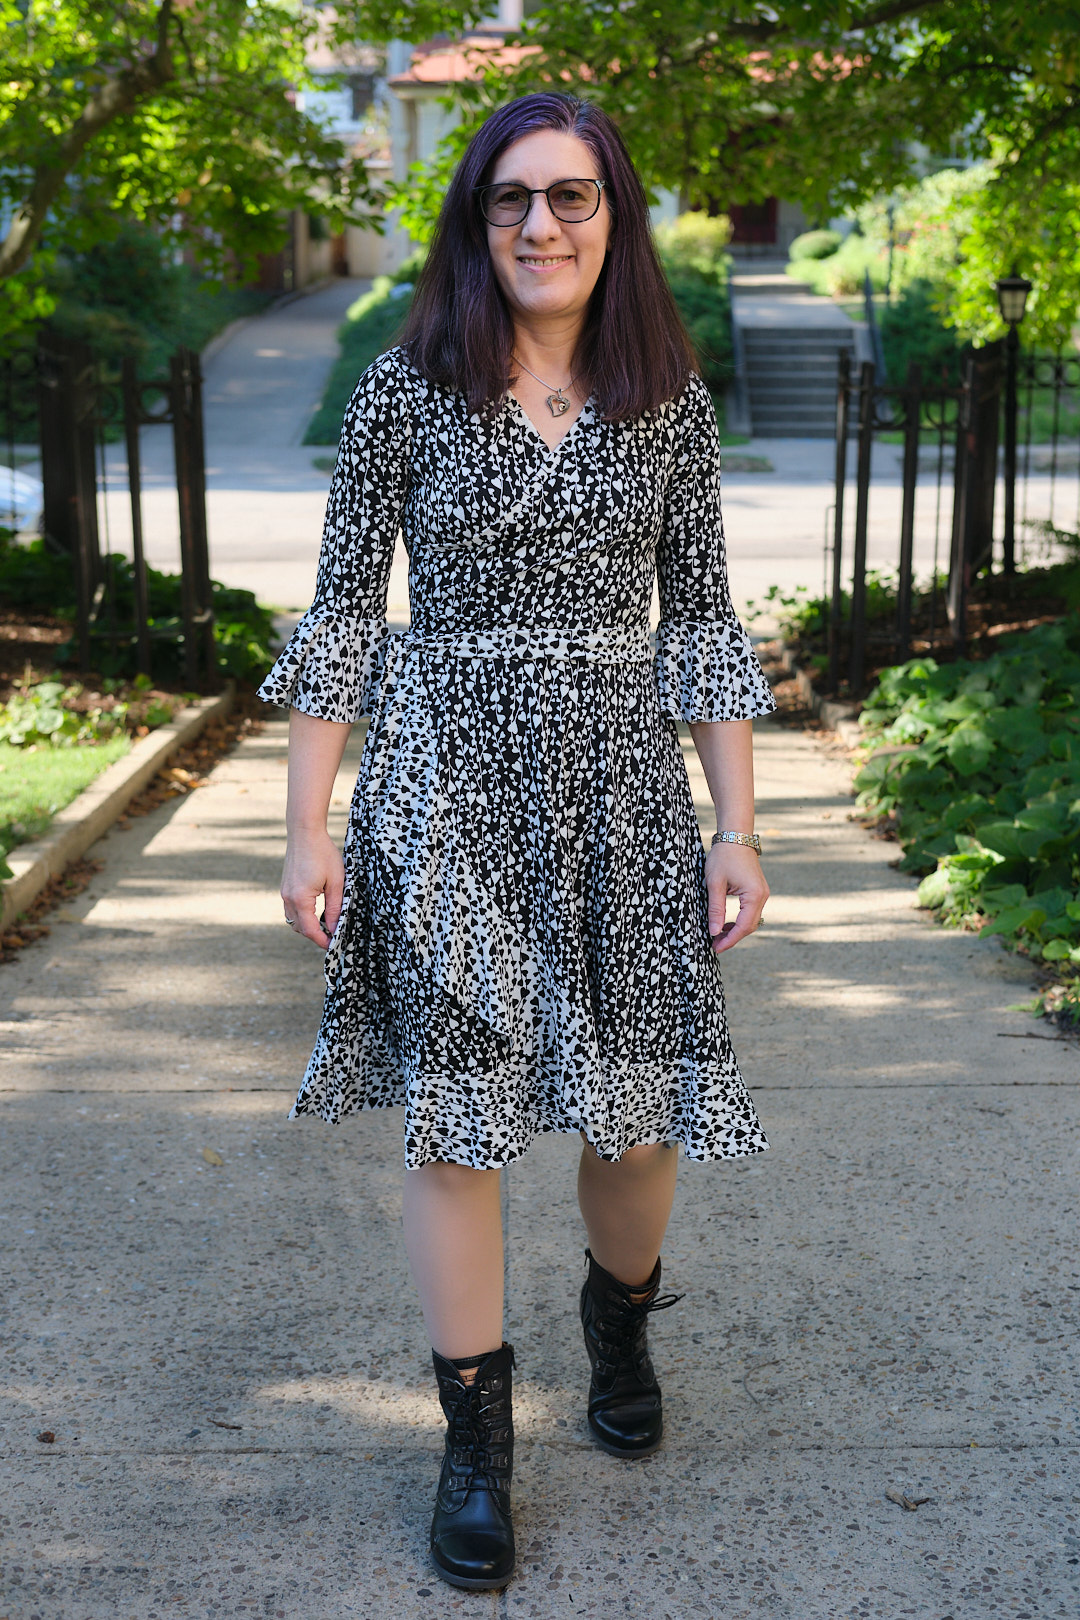
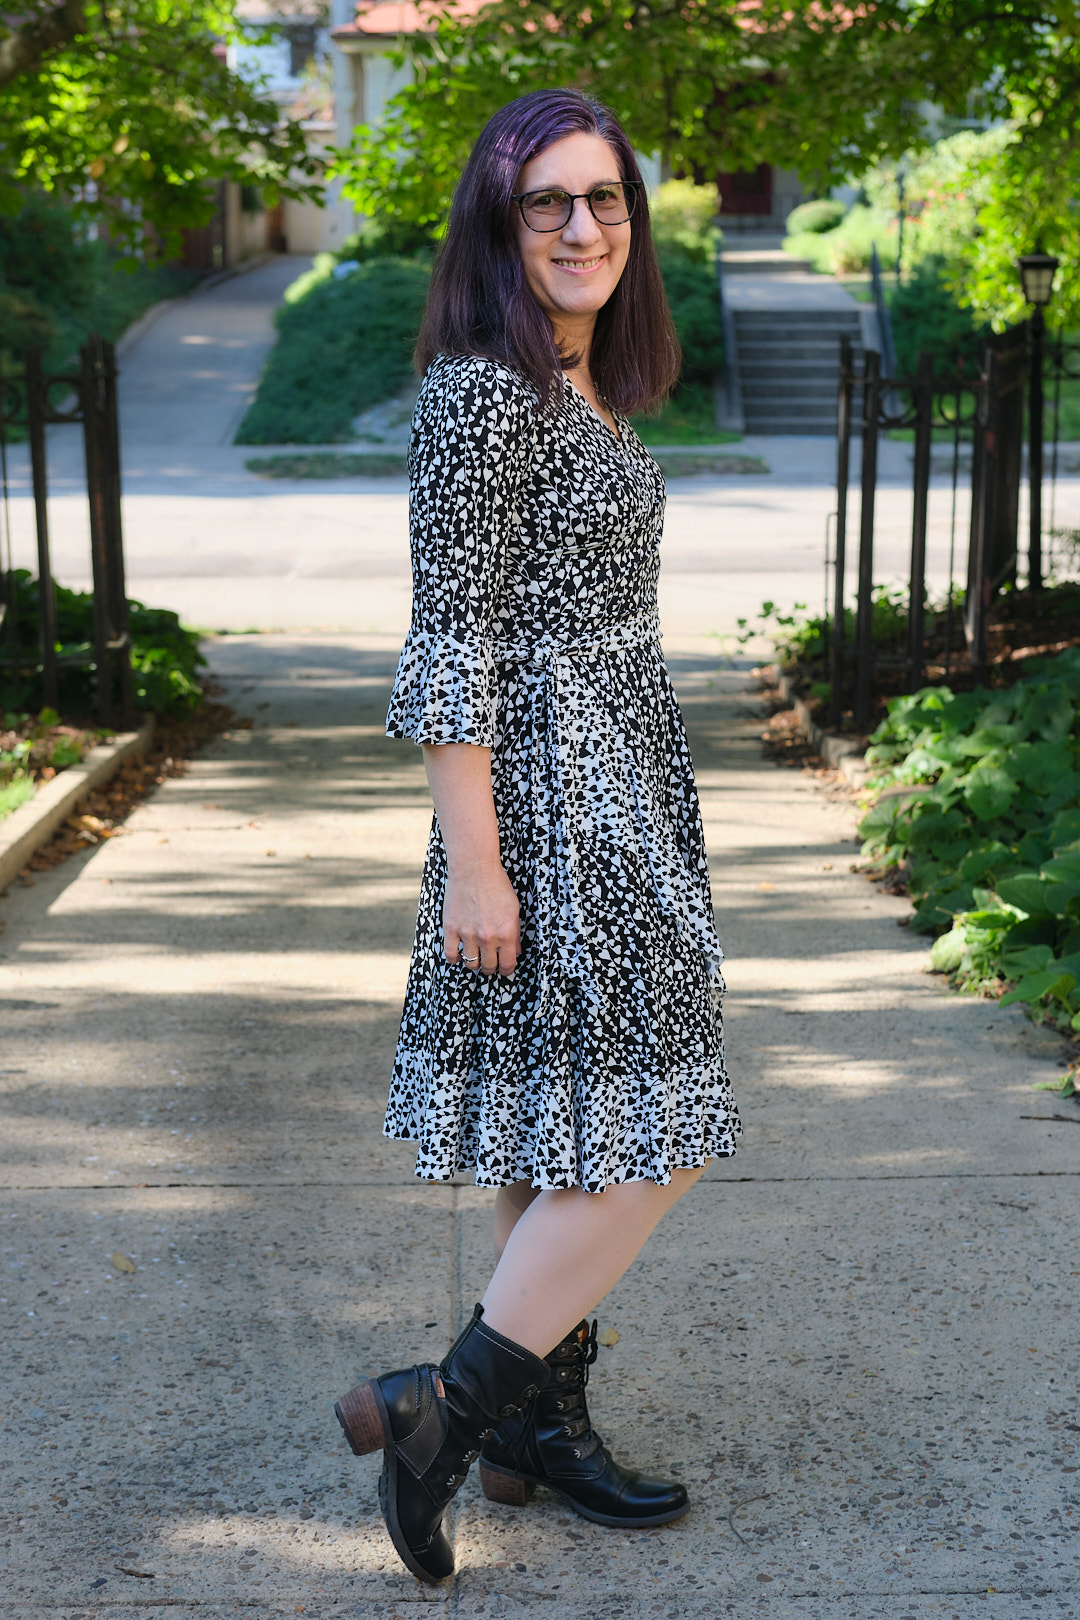
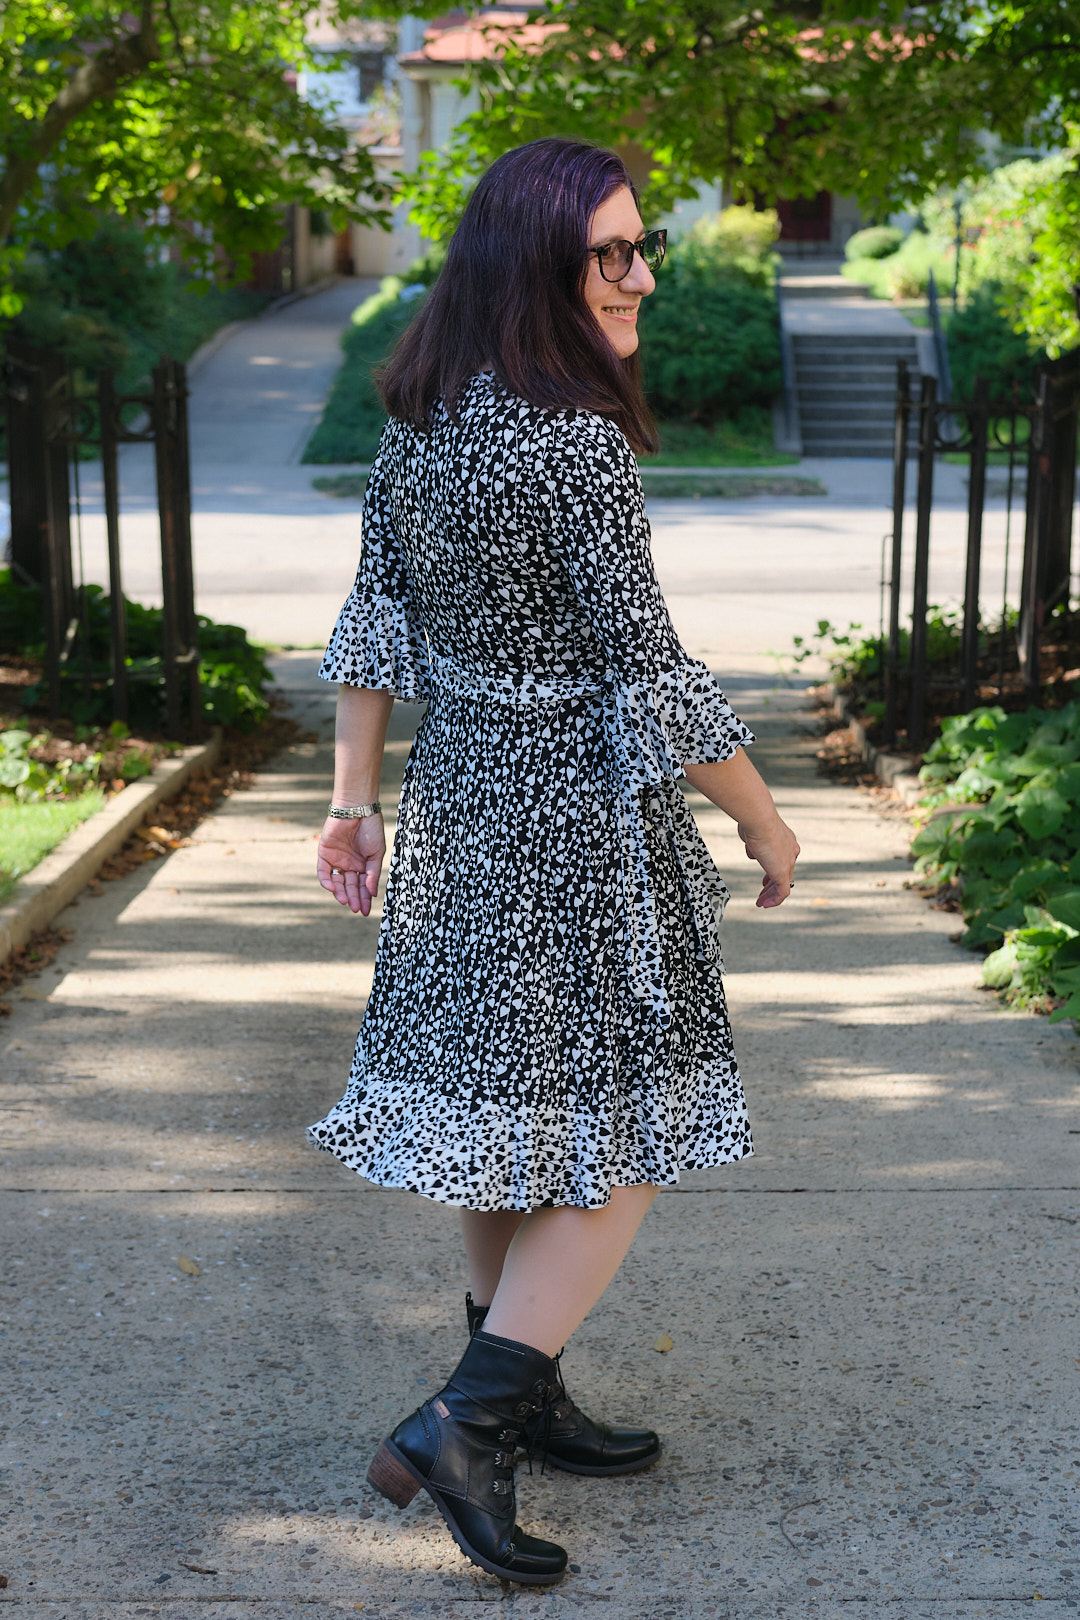
Joanne faux wrap knit dress with flounce sleeves, faux wrap flounce skirt from Flared skirts ADD-ON, size P4, pockets modified so as not to attach to waist, made from 3 yards of 60-inch-wide ITY (2 yards black, 1 yard white).
I recently made the Sinclair faux wrap flounce skirt for the Valley Skater dress and liked the results. I have long wondered about combining this skirt with the Sinclair Joanne dress, which has a faux wrap top. I figured if I had the the top and the skirt faux wrap meet at the waist it would look close to a real wrap dress.
I made my first Joanne dress over two years ago, before I had a serger or a projector. It is an old Sinclair PDF pattern but it doesn’t actually have projector files. Fortunately, the A0 copyshop files work just fine as projector files. I copied the pieces for the flounce-sleeve top and the pieces for the add-on faux wrap flounce skirt into an Affinity Designer File and was ready to project and cut.
I had a vision for using a pair of coordinating fabrics for this dress that would highlight all the flounces. I selected coordinating black-on-white and white-on-black “heartstrings” print ITY from Surge Fabrics, which seemed perfect for the project.
I accidentally copied the wrong size Joanne top and didn’t realize it until it was mostly sewn together and I wondered why it was so big. So I took it apart and cut the pieces down to the correct 4P size. Other than that little mistake, the dress came together pretty easily. I took the time, as usual to add pockets. I modified them so they attach only to the side seams and not the waist and made them a little deeper and sewed the openings up a bit so nothing falls out.
Since I used ITY fabric that doesn’t curl or fray I was able to leave all the flounces unhemmed.
These two patterns pair well. I decided to add a 2-inch wide belt to help “sell” the wrap idea and make it look less faux. The pattern includes a narrow belt, but I made a wider belt by cutting two 2.5-inch wide strips across the width of my fabric and serging them right sides together with a small gap, turning right side out, and hand sewing the gap closed.
Overall, I’m pleased with the results. However, I’m a little disappointed that my coordinating fabrics actually blend together and the flounces are much subtler than expected. I still like it, but I hope to find coordinating fabrics with higher contrast and make another dress like this some day. Another fabric shopping opportunity!
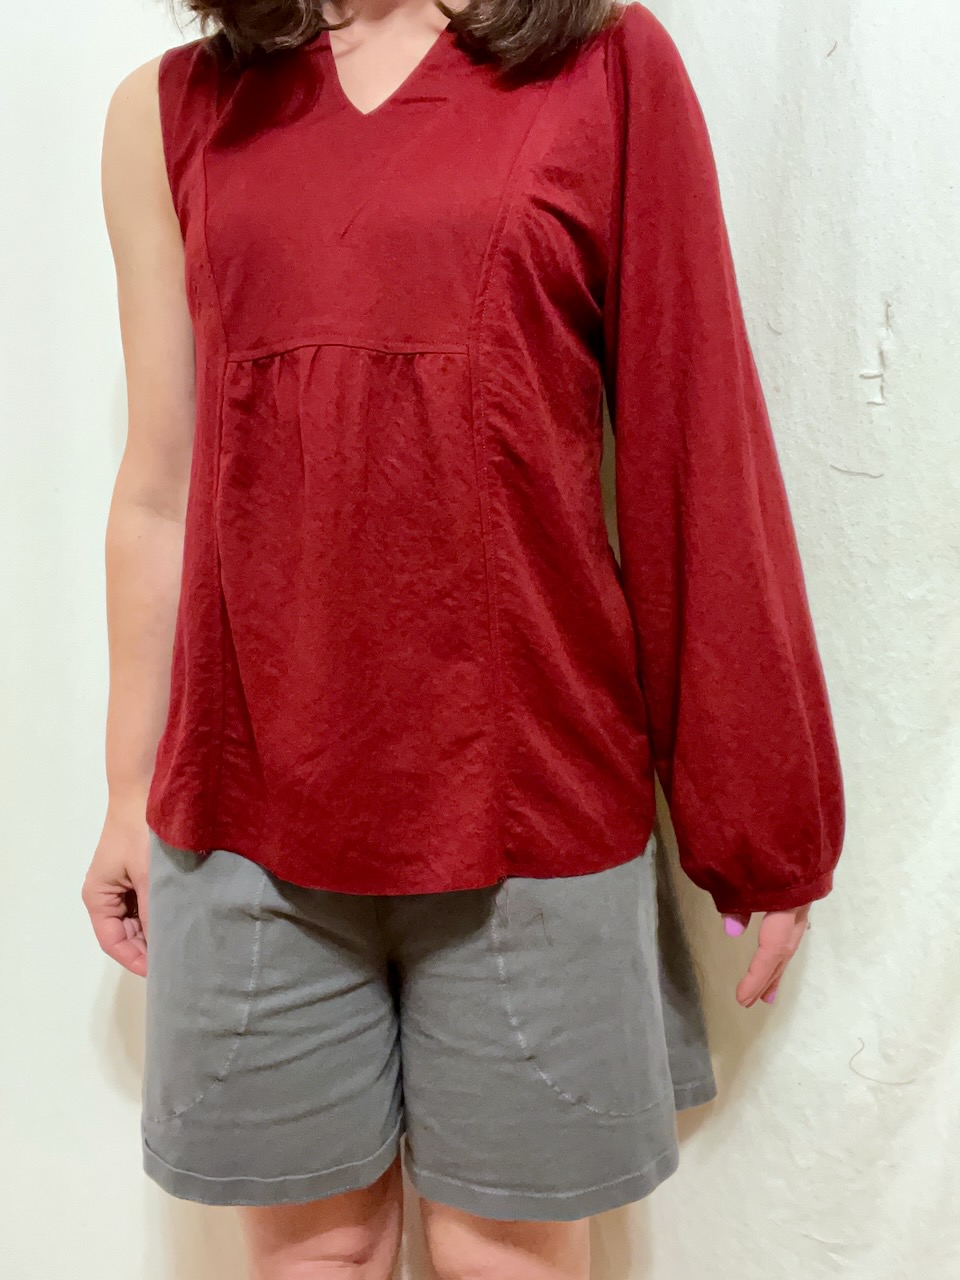
I tested Cassie V1 but was traveling when the V2 pattern released and didn’t get back until after the testing period was over. So here’s my V2, better late than never.
Cassie is a v-neck pattern for woven fabrics. In the original V1 pattern the neckline crossed over, but too many sewists complained about gaping, so the final V2 was switched to a v-neck without the crossover, but including a pair of cute notches. I decided to try the pattern in PyLos LiKnit, a stable knit fabric made from 55% Rayon/45% Nylon. It has about 25% stretch horizontally, but minimal vertical stretch. I treated it as a woven when I sewed. I think it behaved pretty well for this pattern, although it has a little bit more thickness than a woven and it stretches a bit, so it made it harder to get sharp points in the notches and a crisp V. However, the stretch also made the top more comfortable to wear and easier to get on and off.
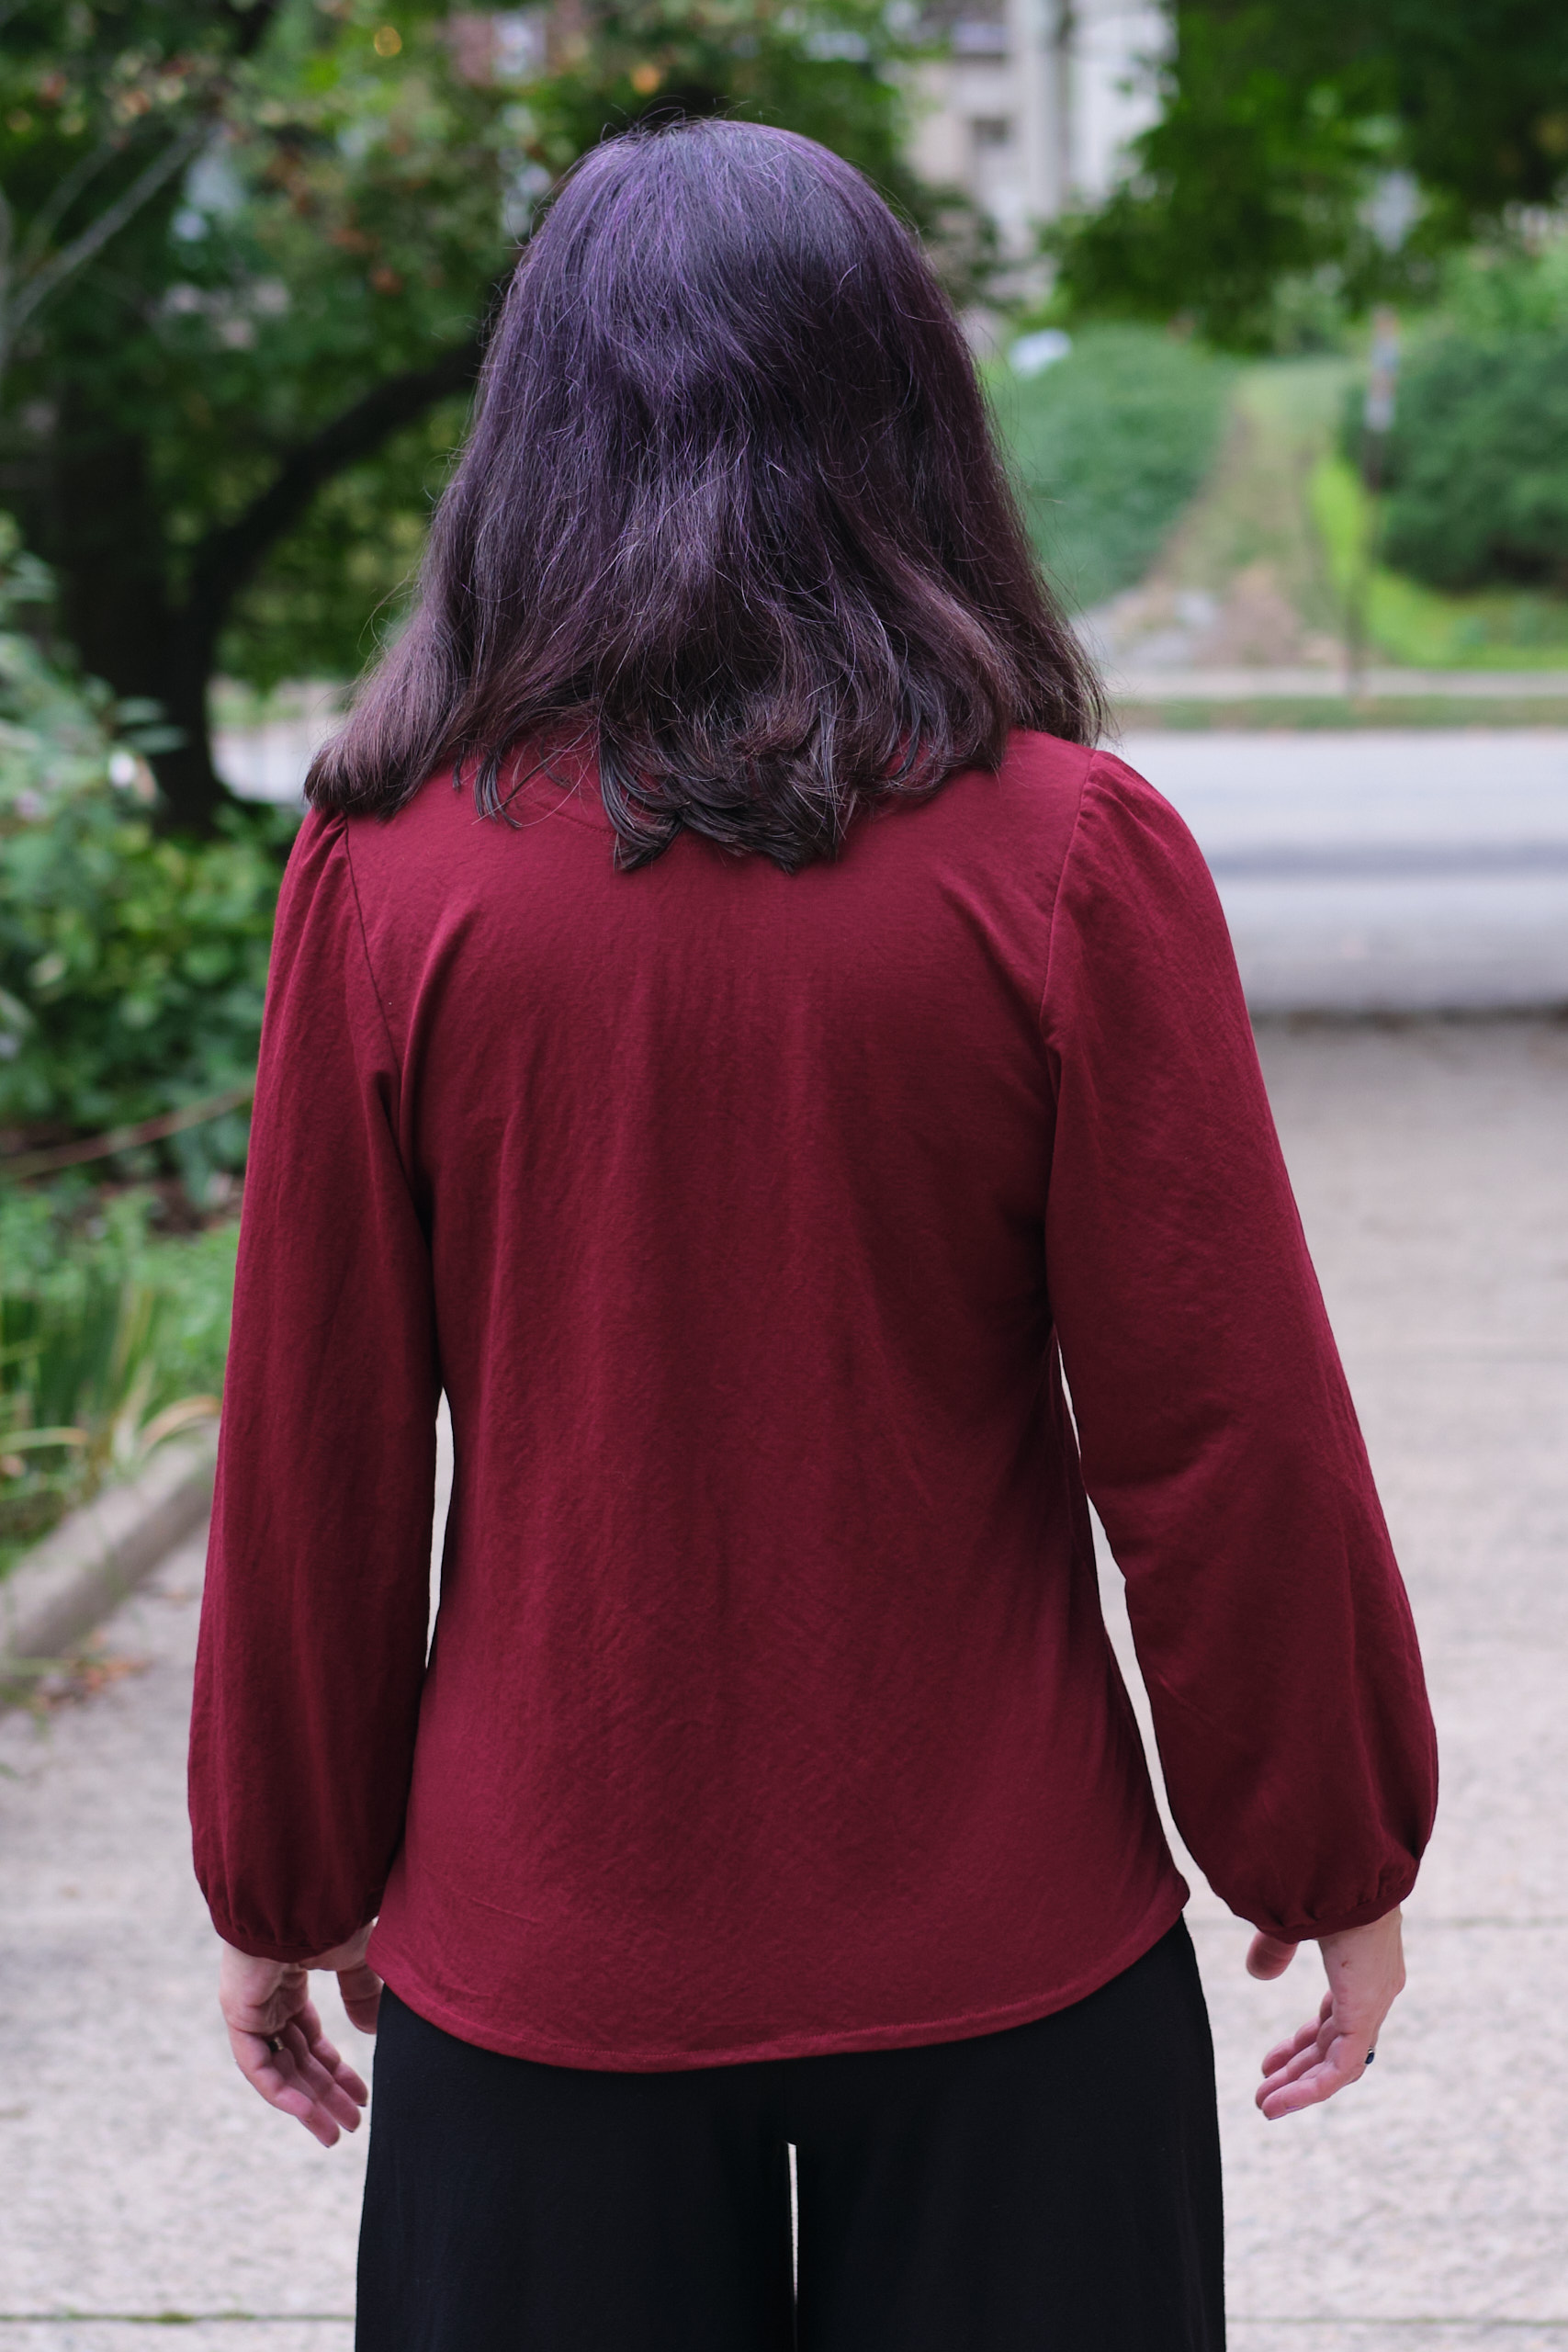
I cut out a 4p AB cup top with long sleeves and made no pattern modifications. I top stitched all the optional places where it was suggested. My original attempt at sewing down the neck binding was a bit off and caused the v-neck to be uncentered. Fortunately it was pretty easy to unpick and resew (although looking at the finished product now I realize it still isn’t perfectly centered… oh well).
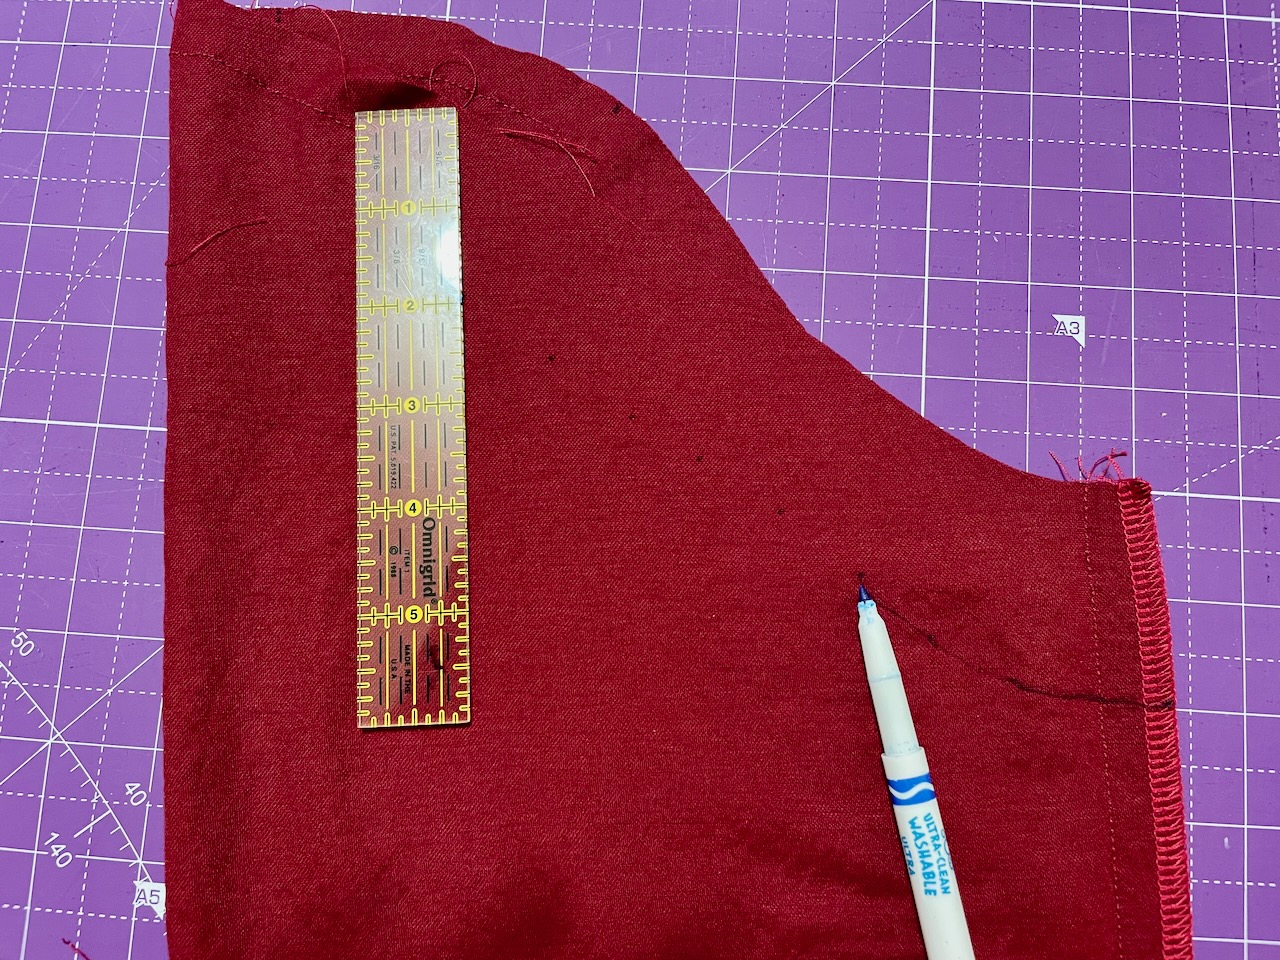
After I sewed the first sleeve on I tried it on and was disappointed to see the sleeve hanging well past my wrist. I’m used to sleeves that are too long on me, but was surprised the sleeve was too long on a petite pattern. Since this sleeve is gathered and the band added before you sew it to the garment, there is no opportunity to check the sleeve length before it is finished. I went back and looked at photos posted by other sewists and noticed that most opted for the 3/4 length rather than the long sleeve. It looks to me like the long sleeves in this pattern just run long. The sleeve bands took a while to construct and I didn’t want to take them apart. So instead I unpicked the sleeve head and cut two inches off the top of the sleeve head. I was able to mark my cutting line by using a ruler to draw dots every inch or so two inches from the top edge of the sleeve. Then I connected the dots. I cut along the line and reattached the sleeves. This time it worked much better. (Warning for other sewists, unless you have particularly long arms, if you sew the long-sleeve version you will likely need to shorten the sleeves!)
Overall, I’m happy with this top. This is not a style I normally wear, and it may be more difficult to layer than my typical long-sleeve tshirts. But it goes well with both wide and skinny jeans as well as black dress pants, and it should not require ironing. I really like this long-sleeve version (now that I shortened the sleeves) but I also like the sleeveless and 3/4 length versions other sewists made.
Wow, I’ve sewn a lot of clothes! To make it easier to find my makes, I’ve put together this index page. You can look for garments by type, or by pattern maker. You can also use the search box in the upper right corner of this page to find more specific items.
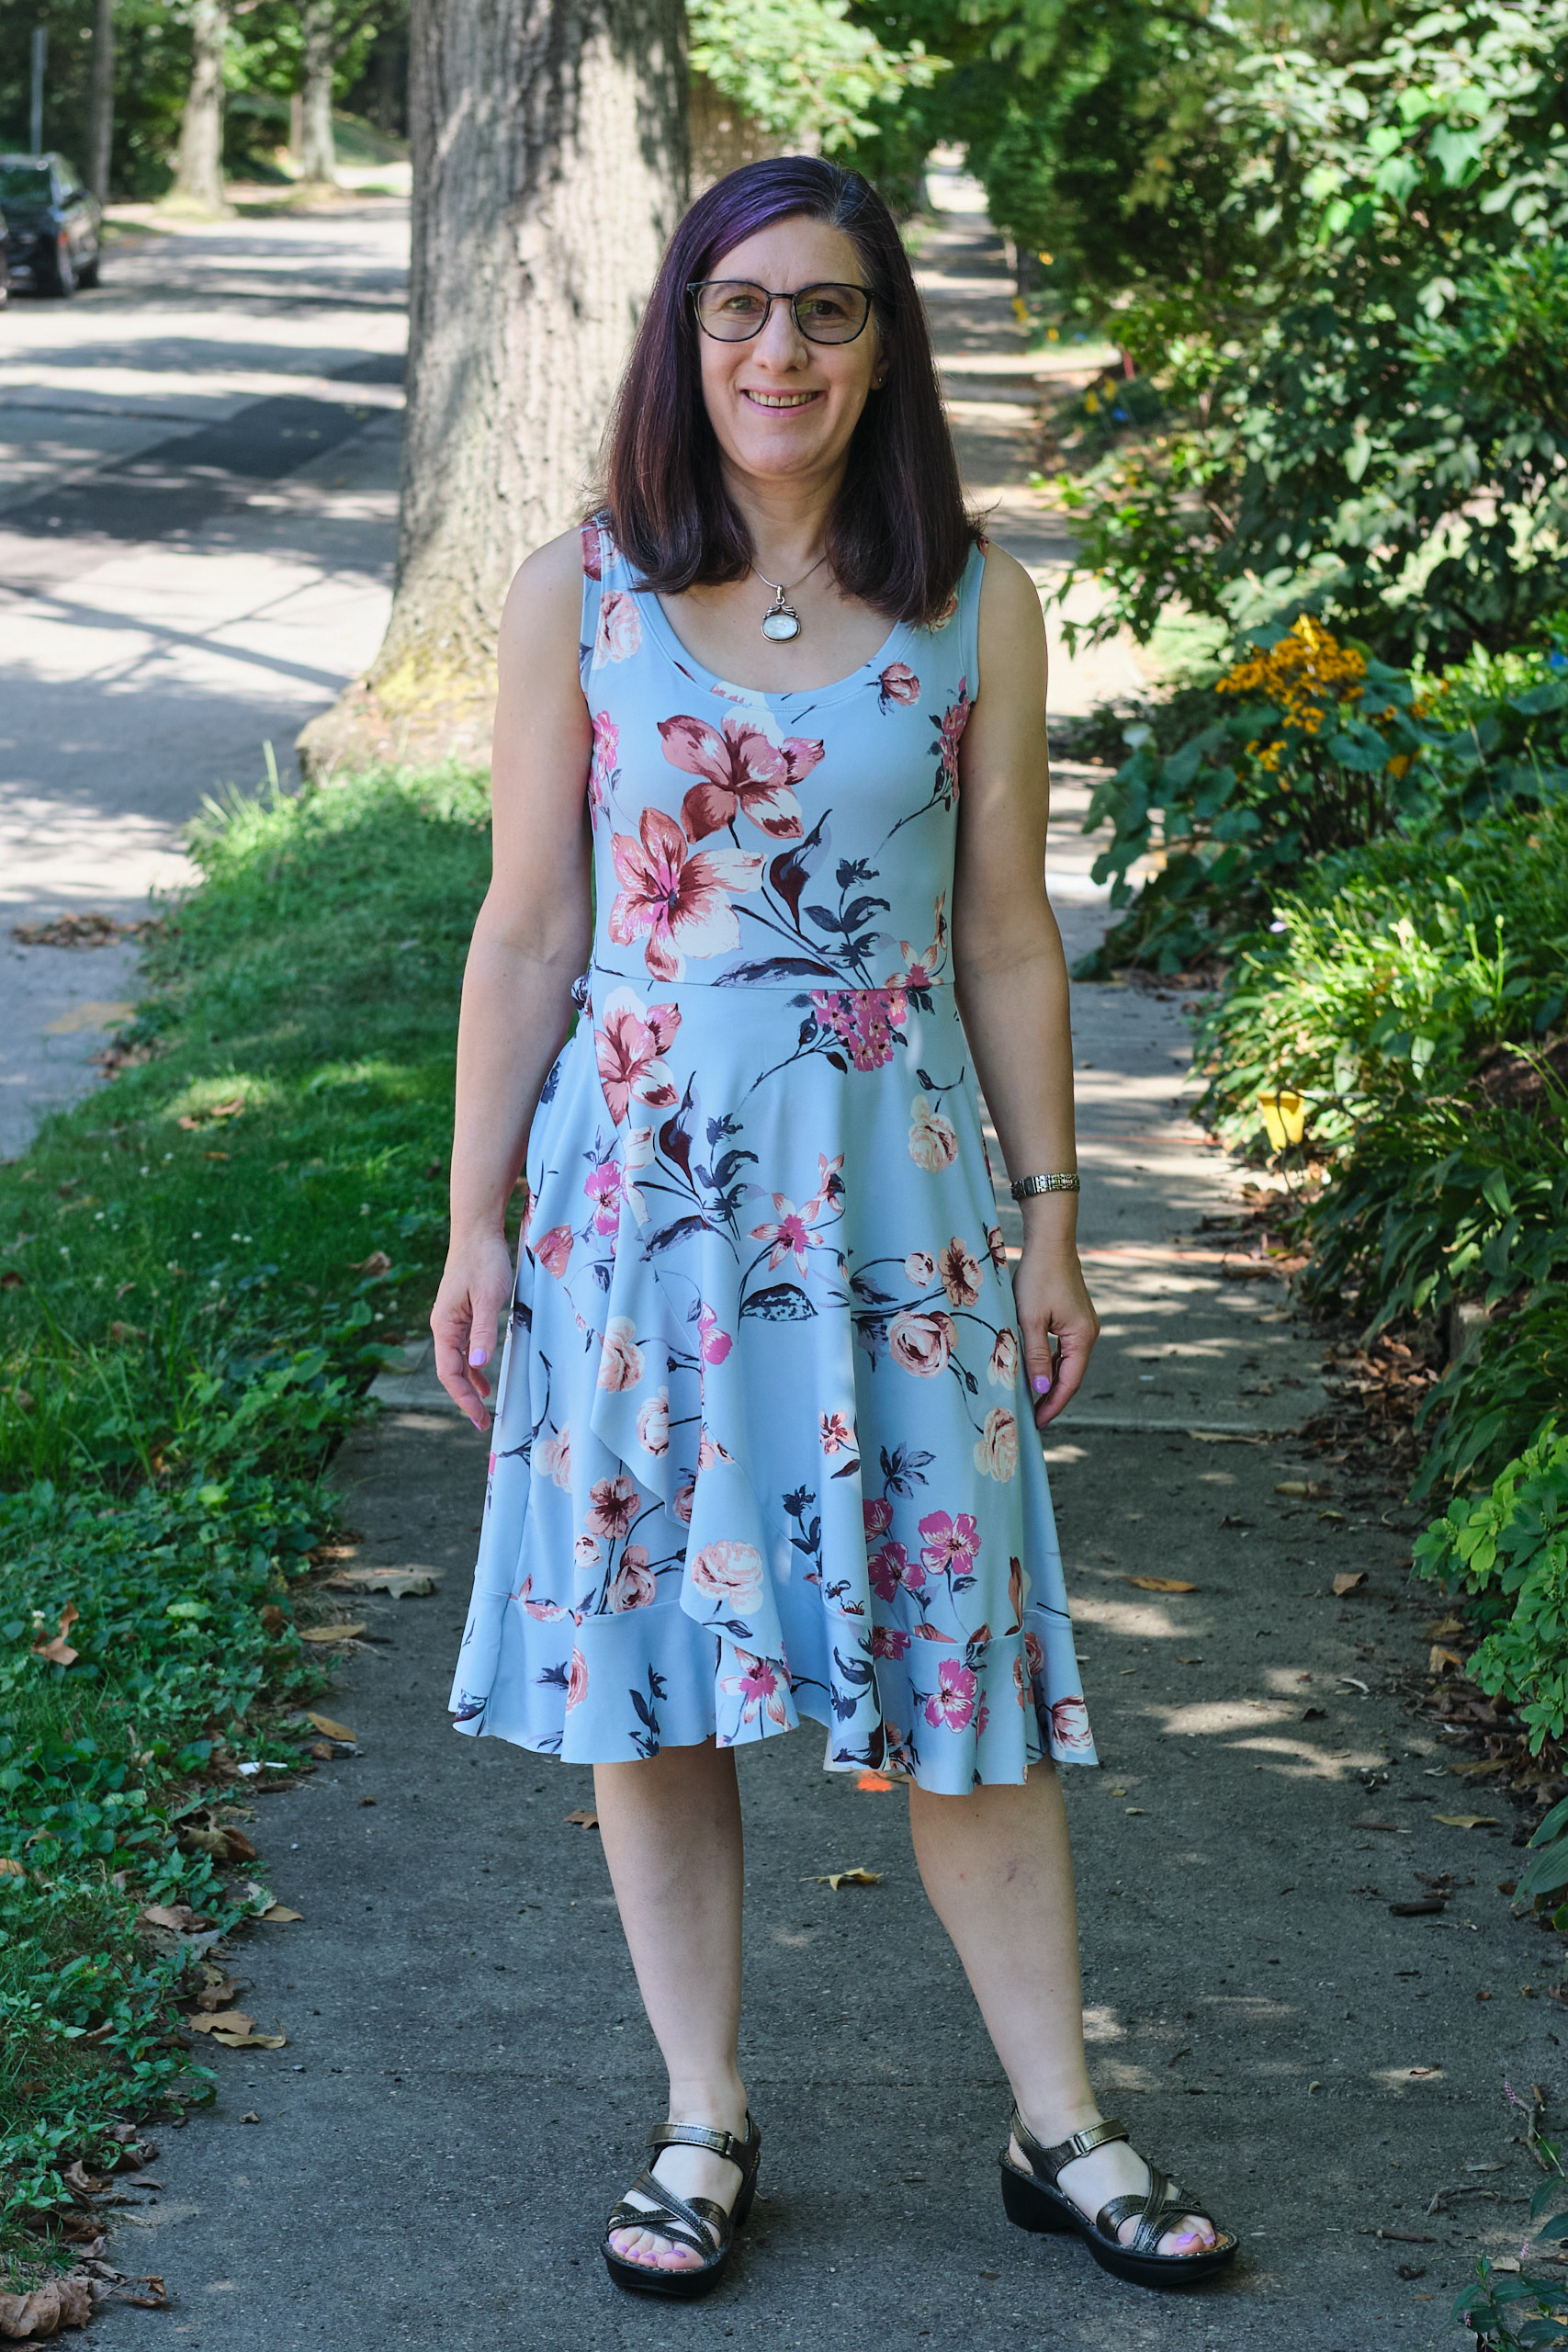
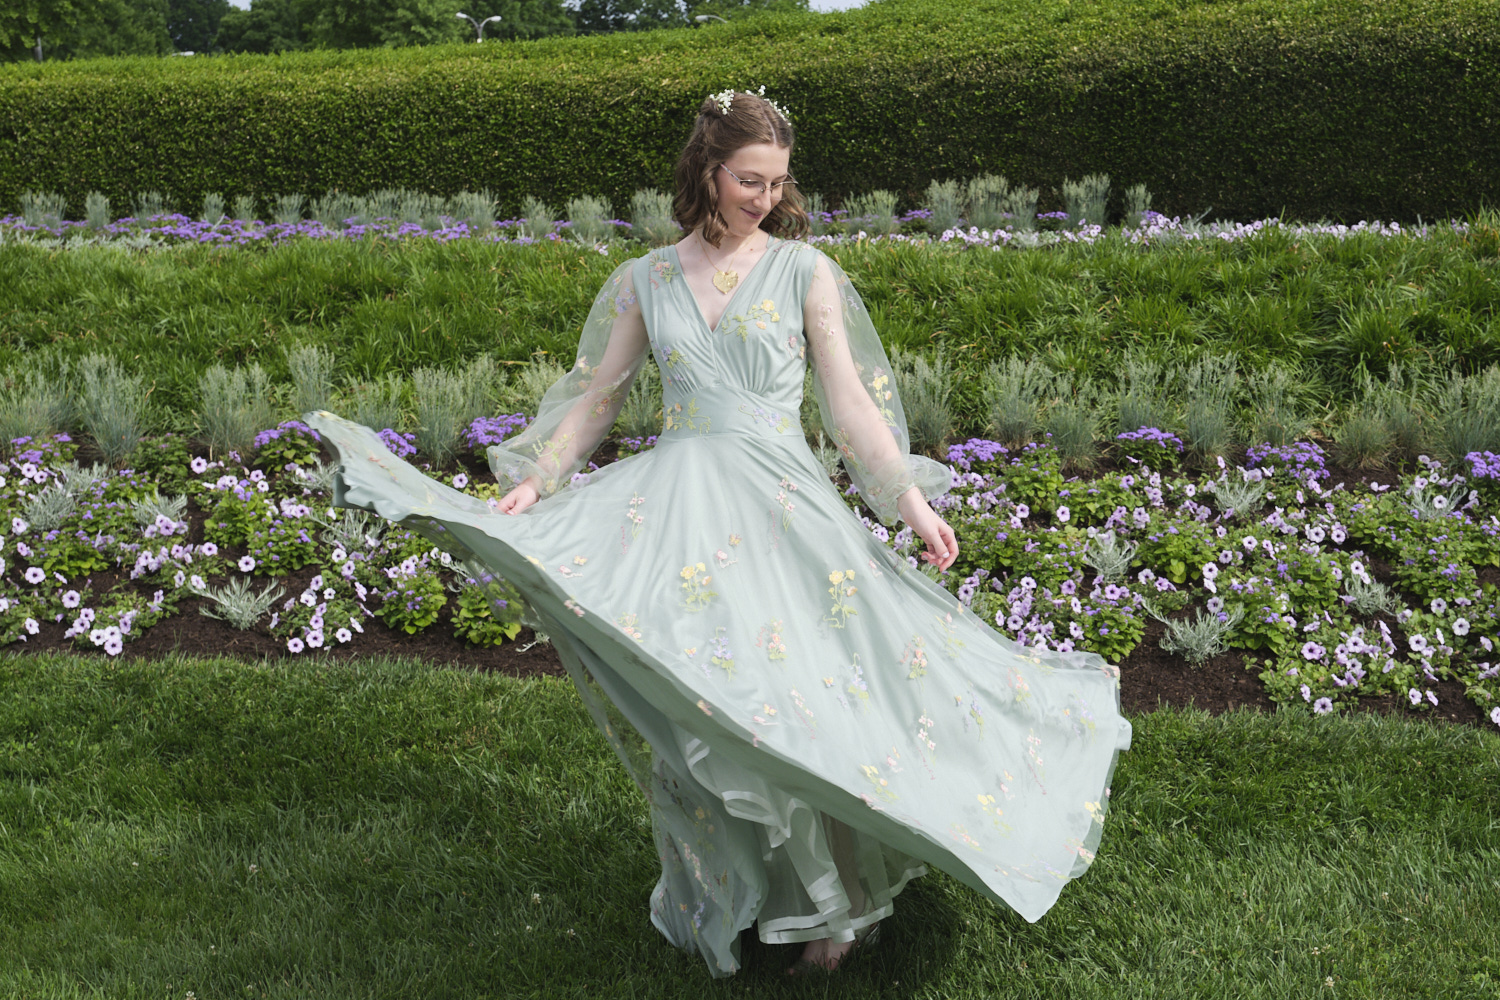
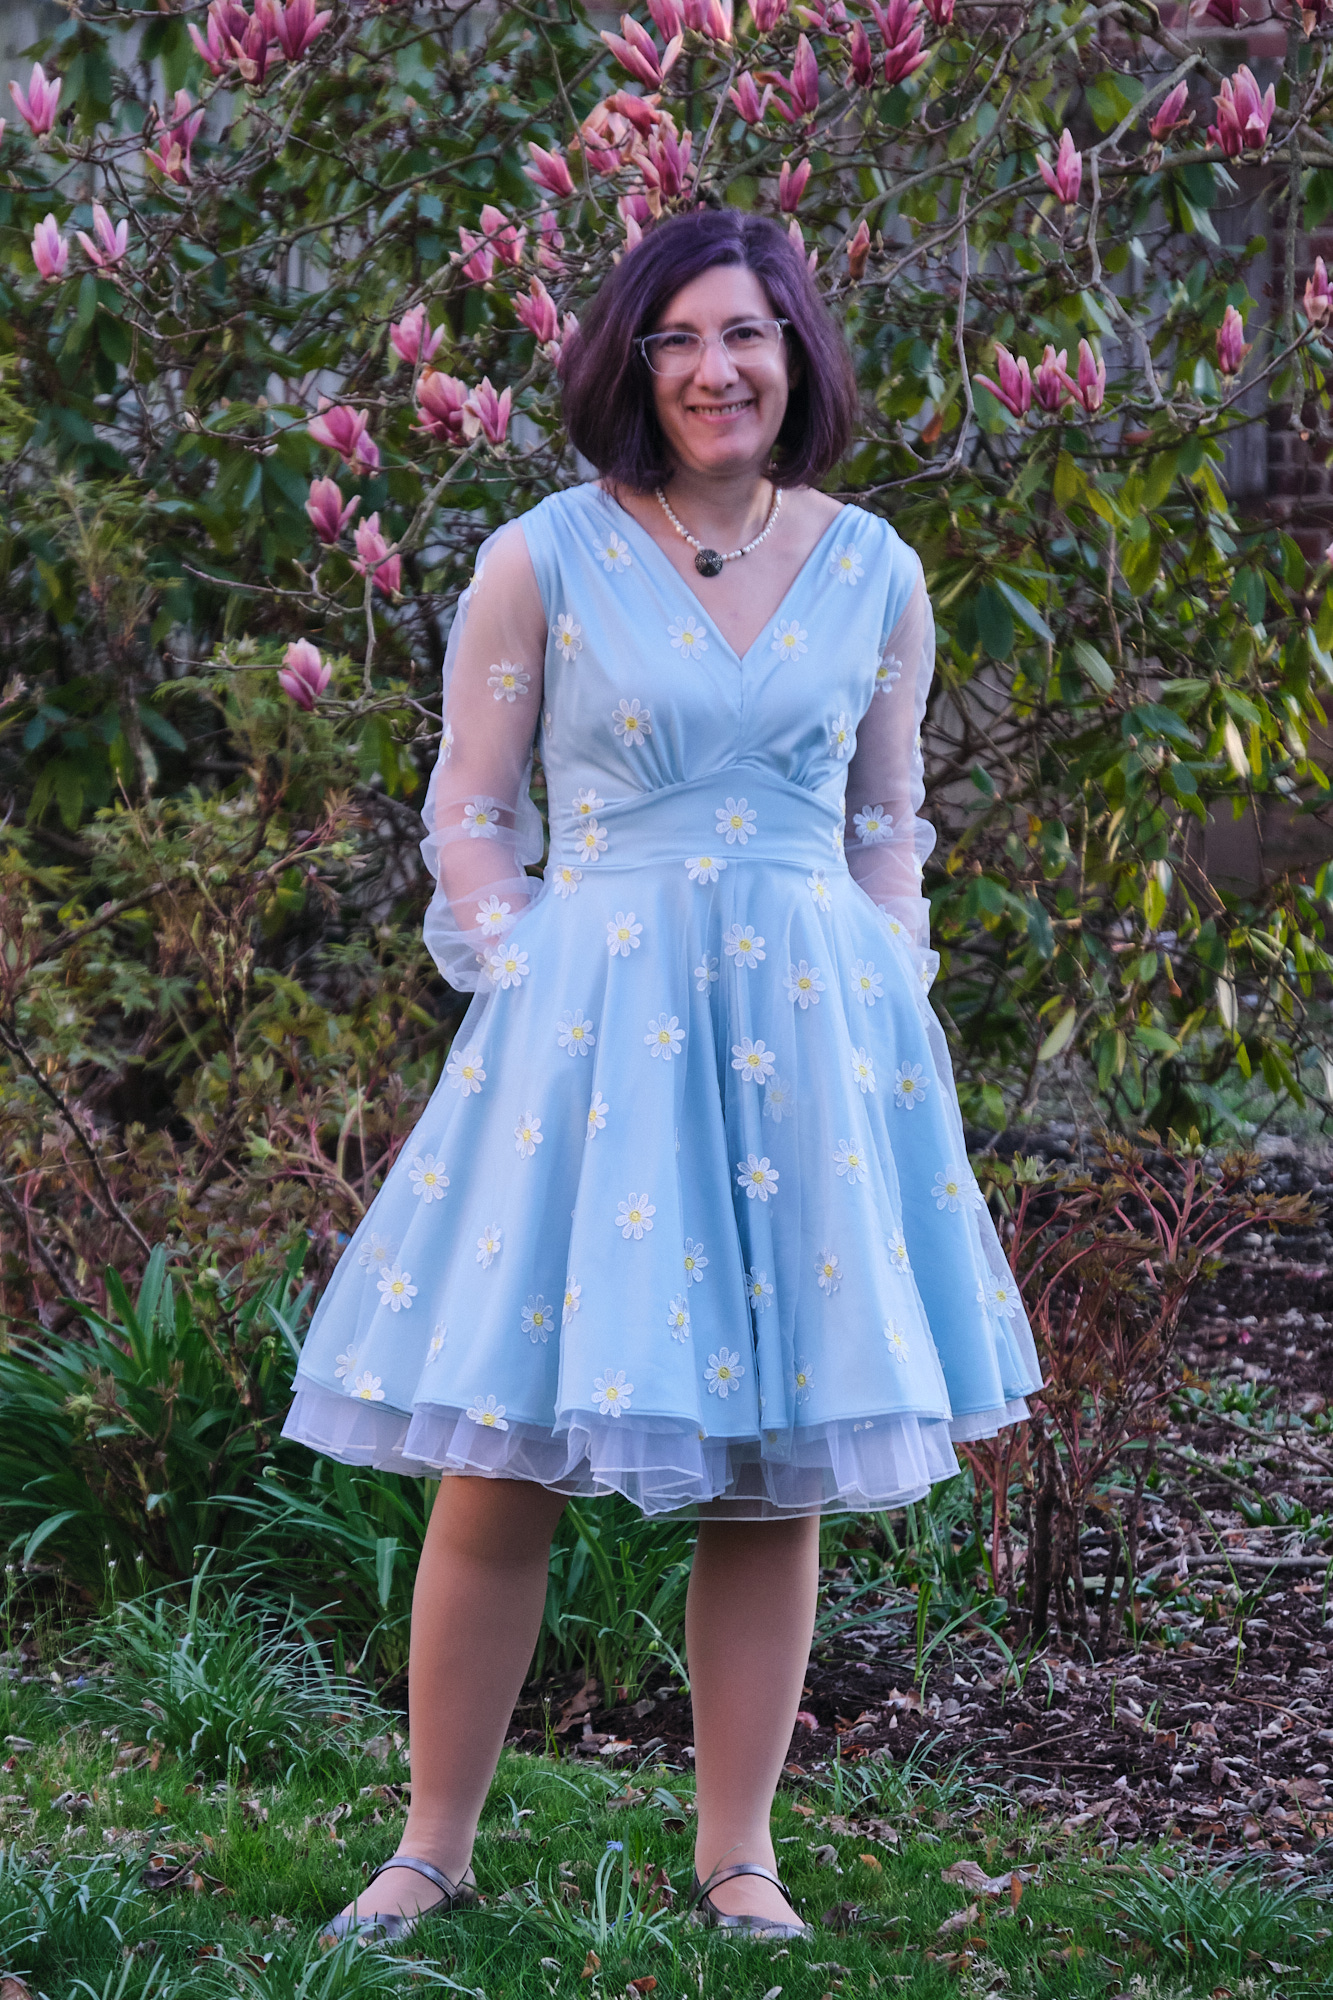
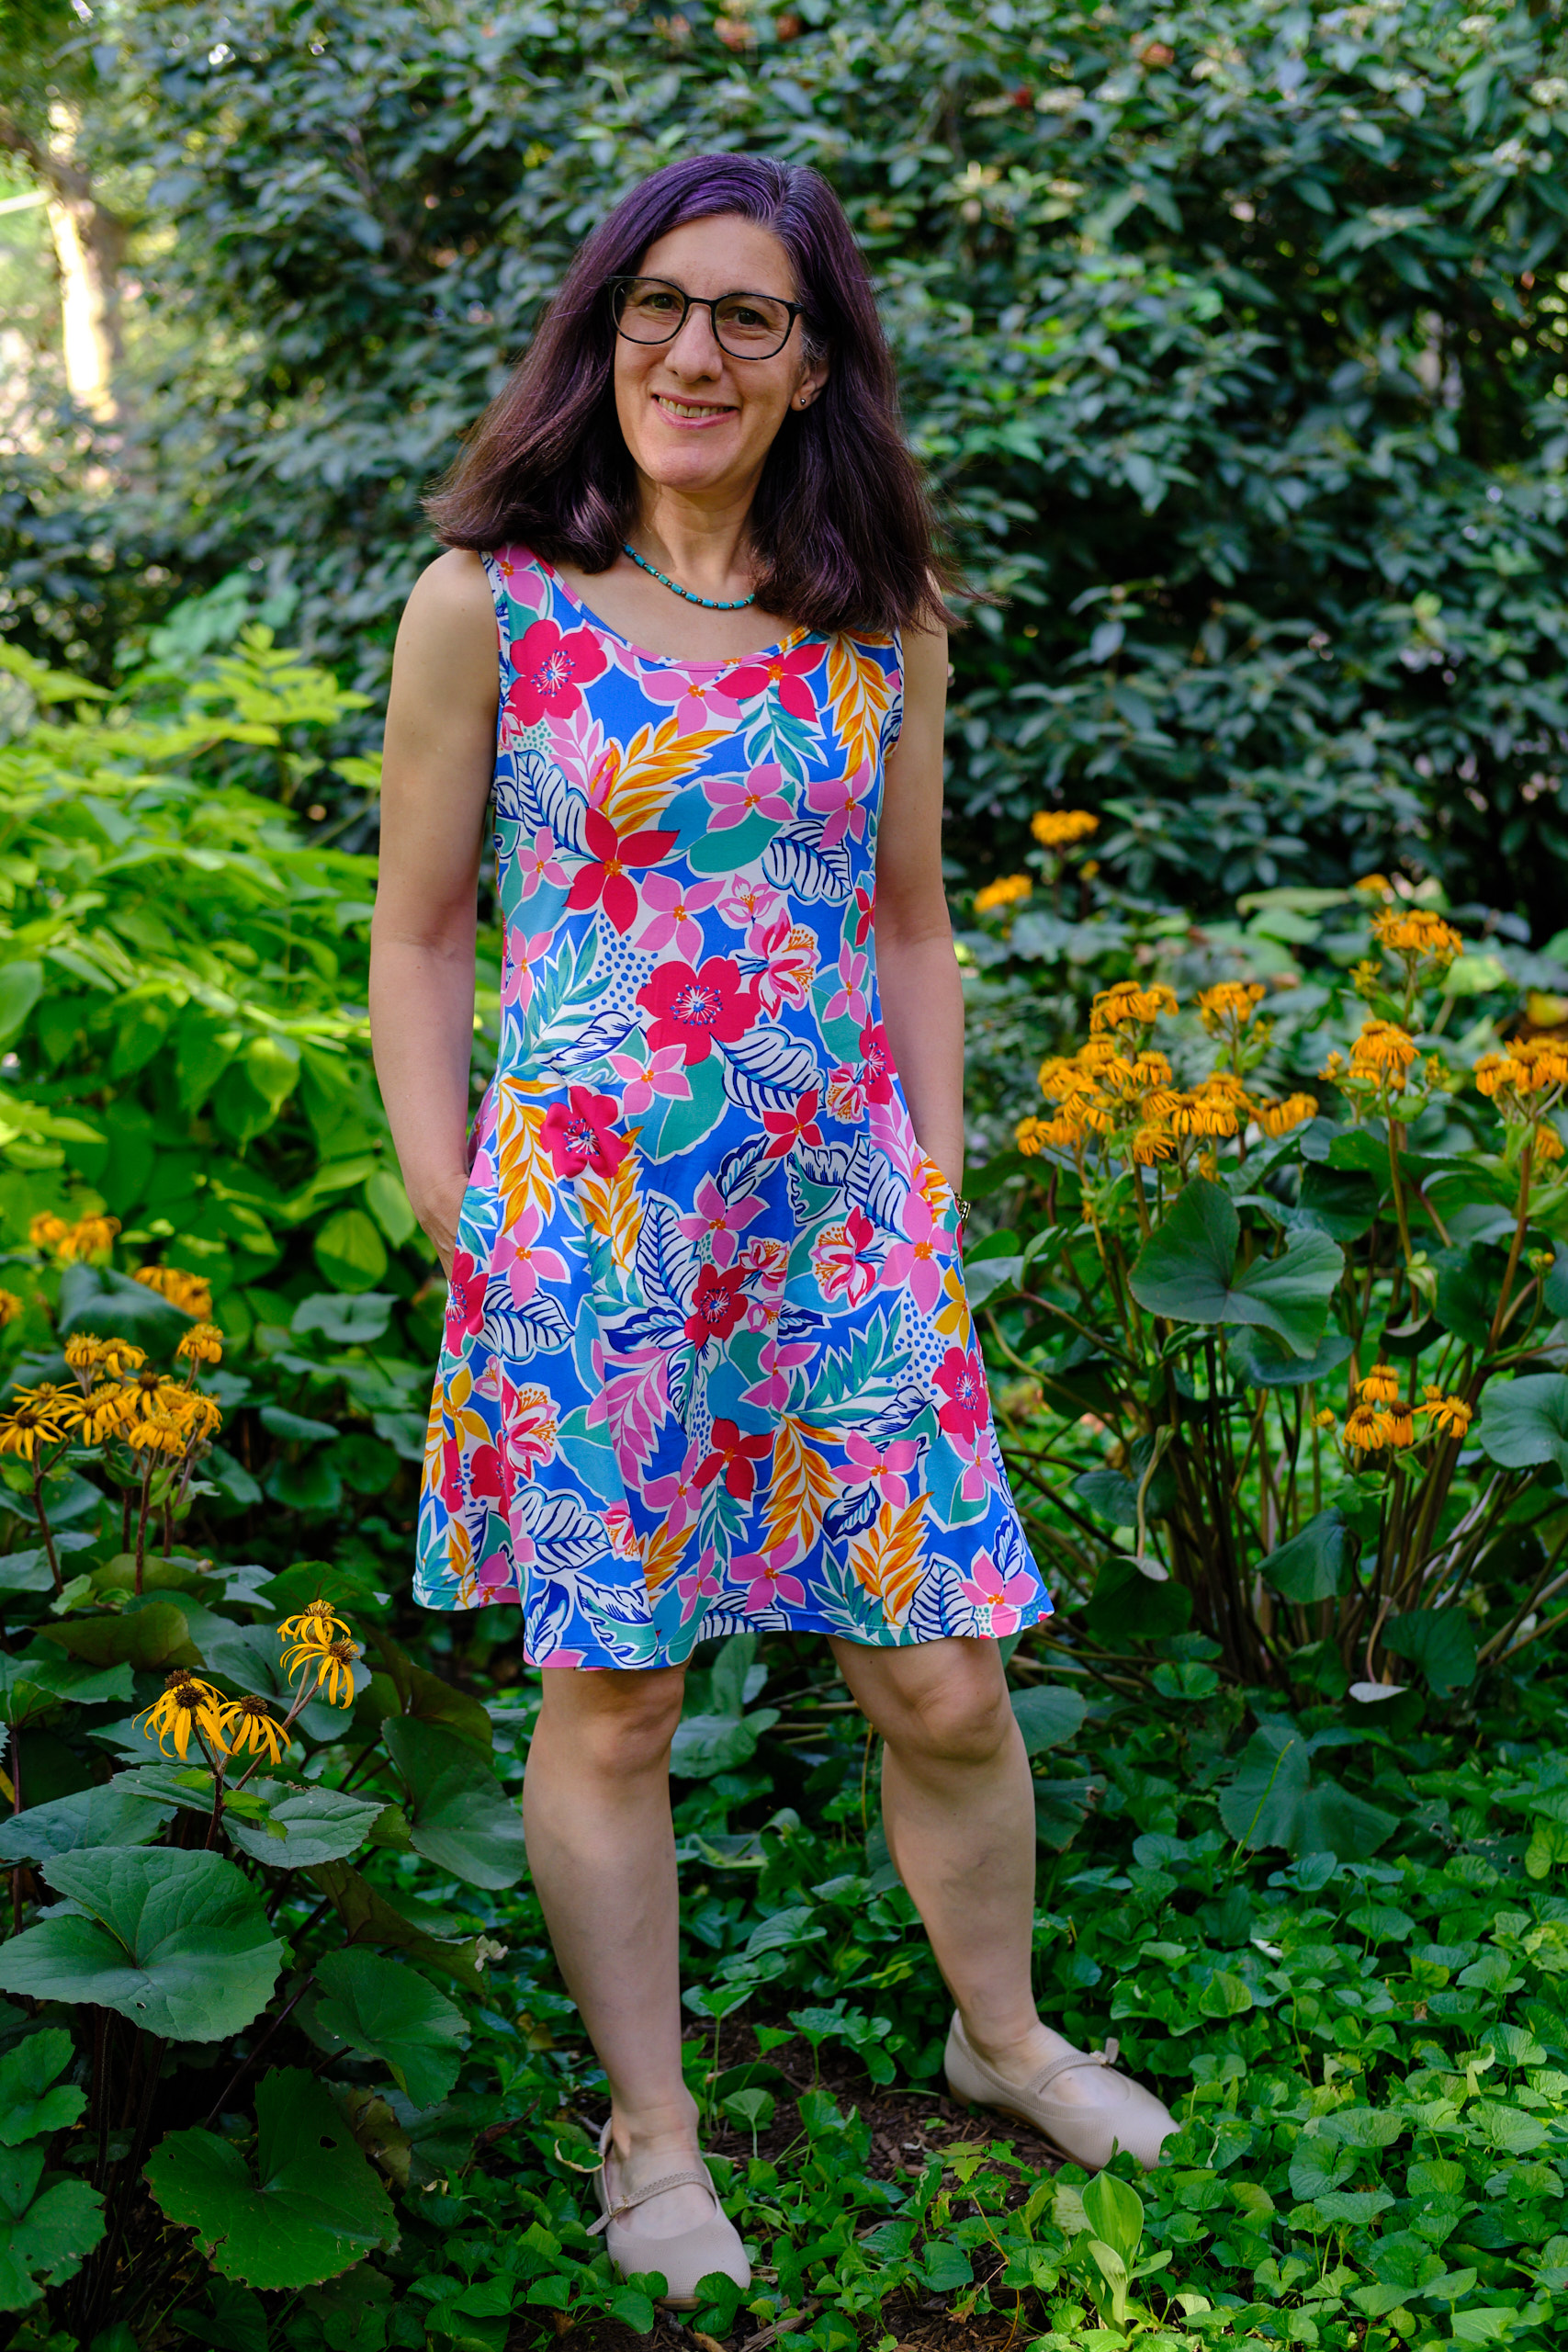
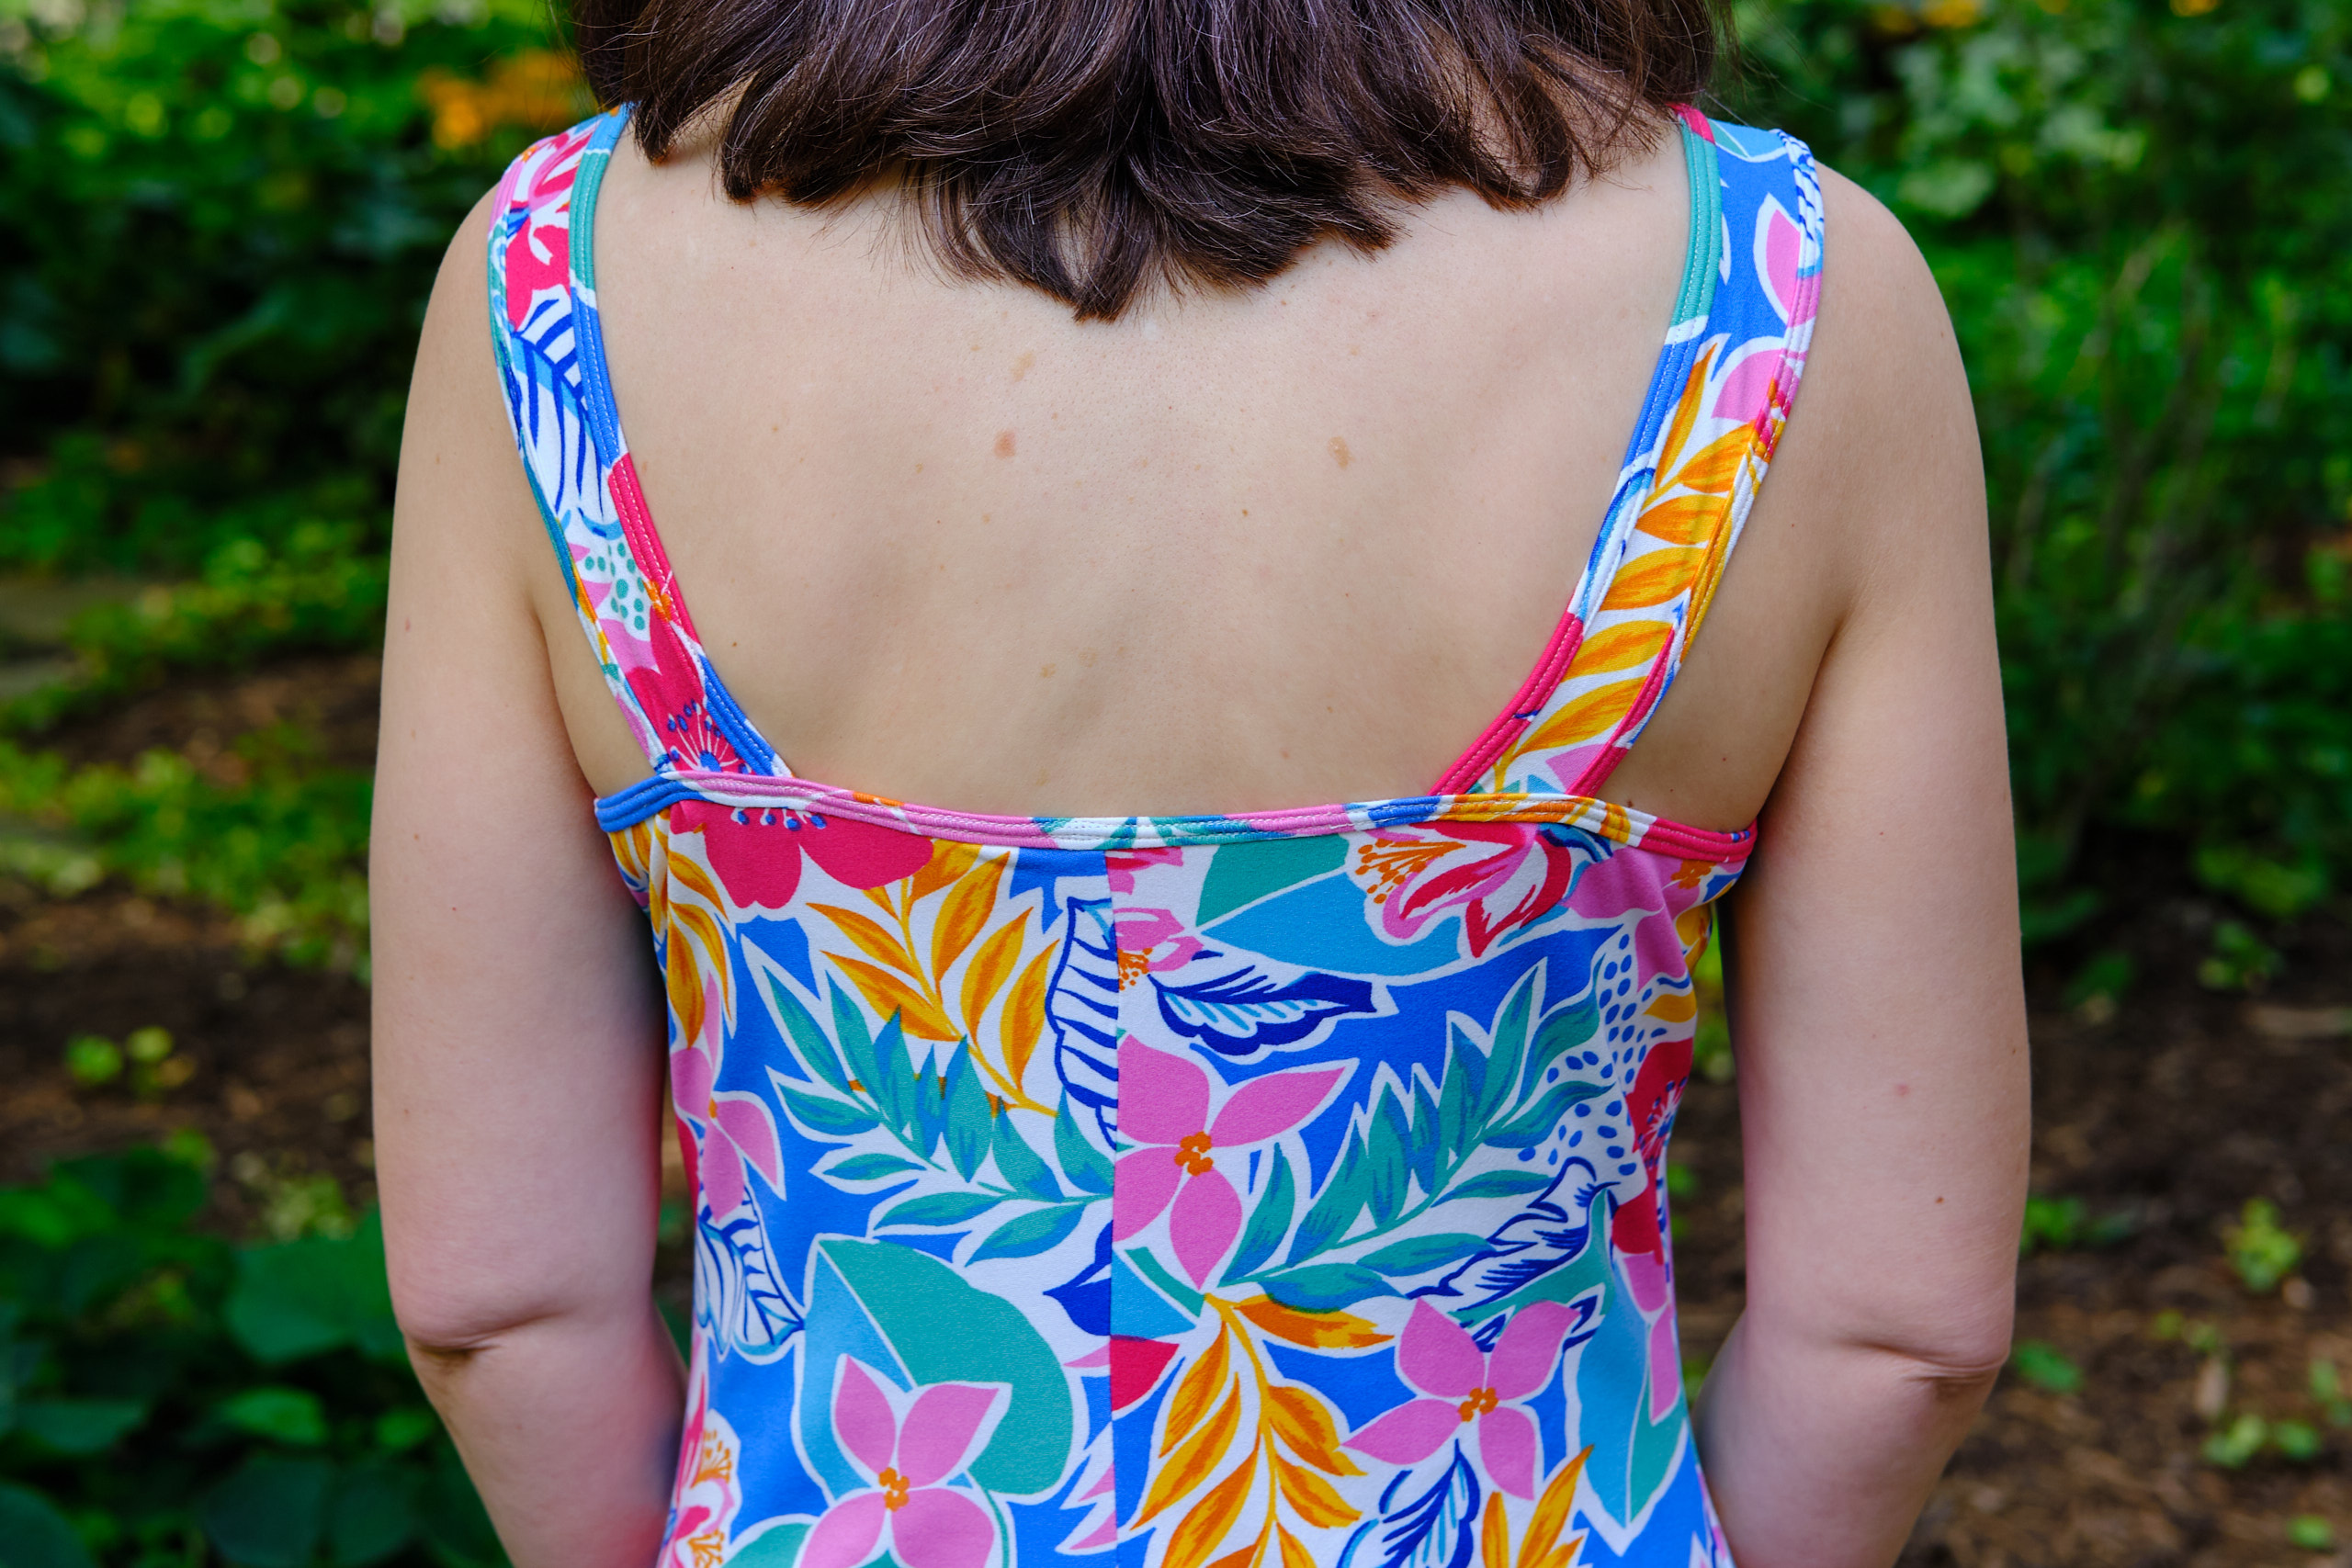
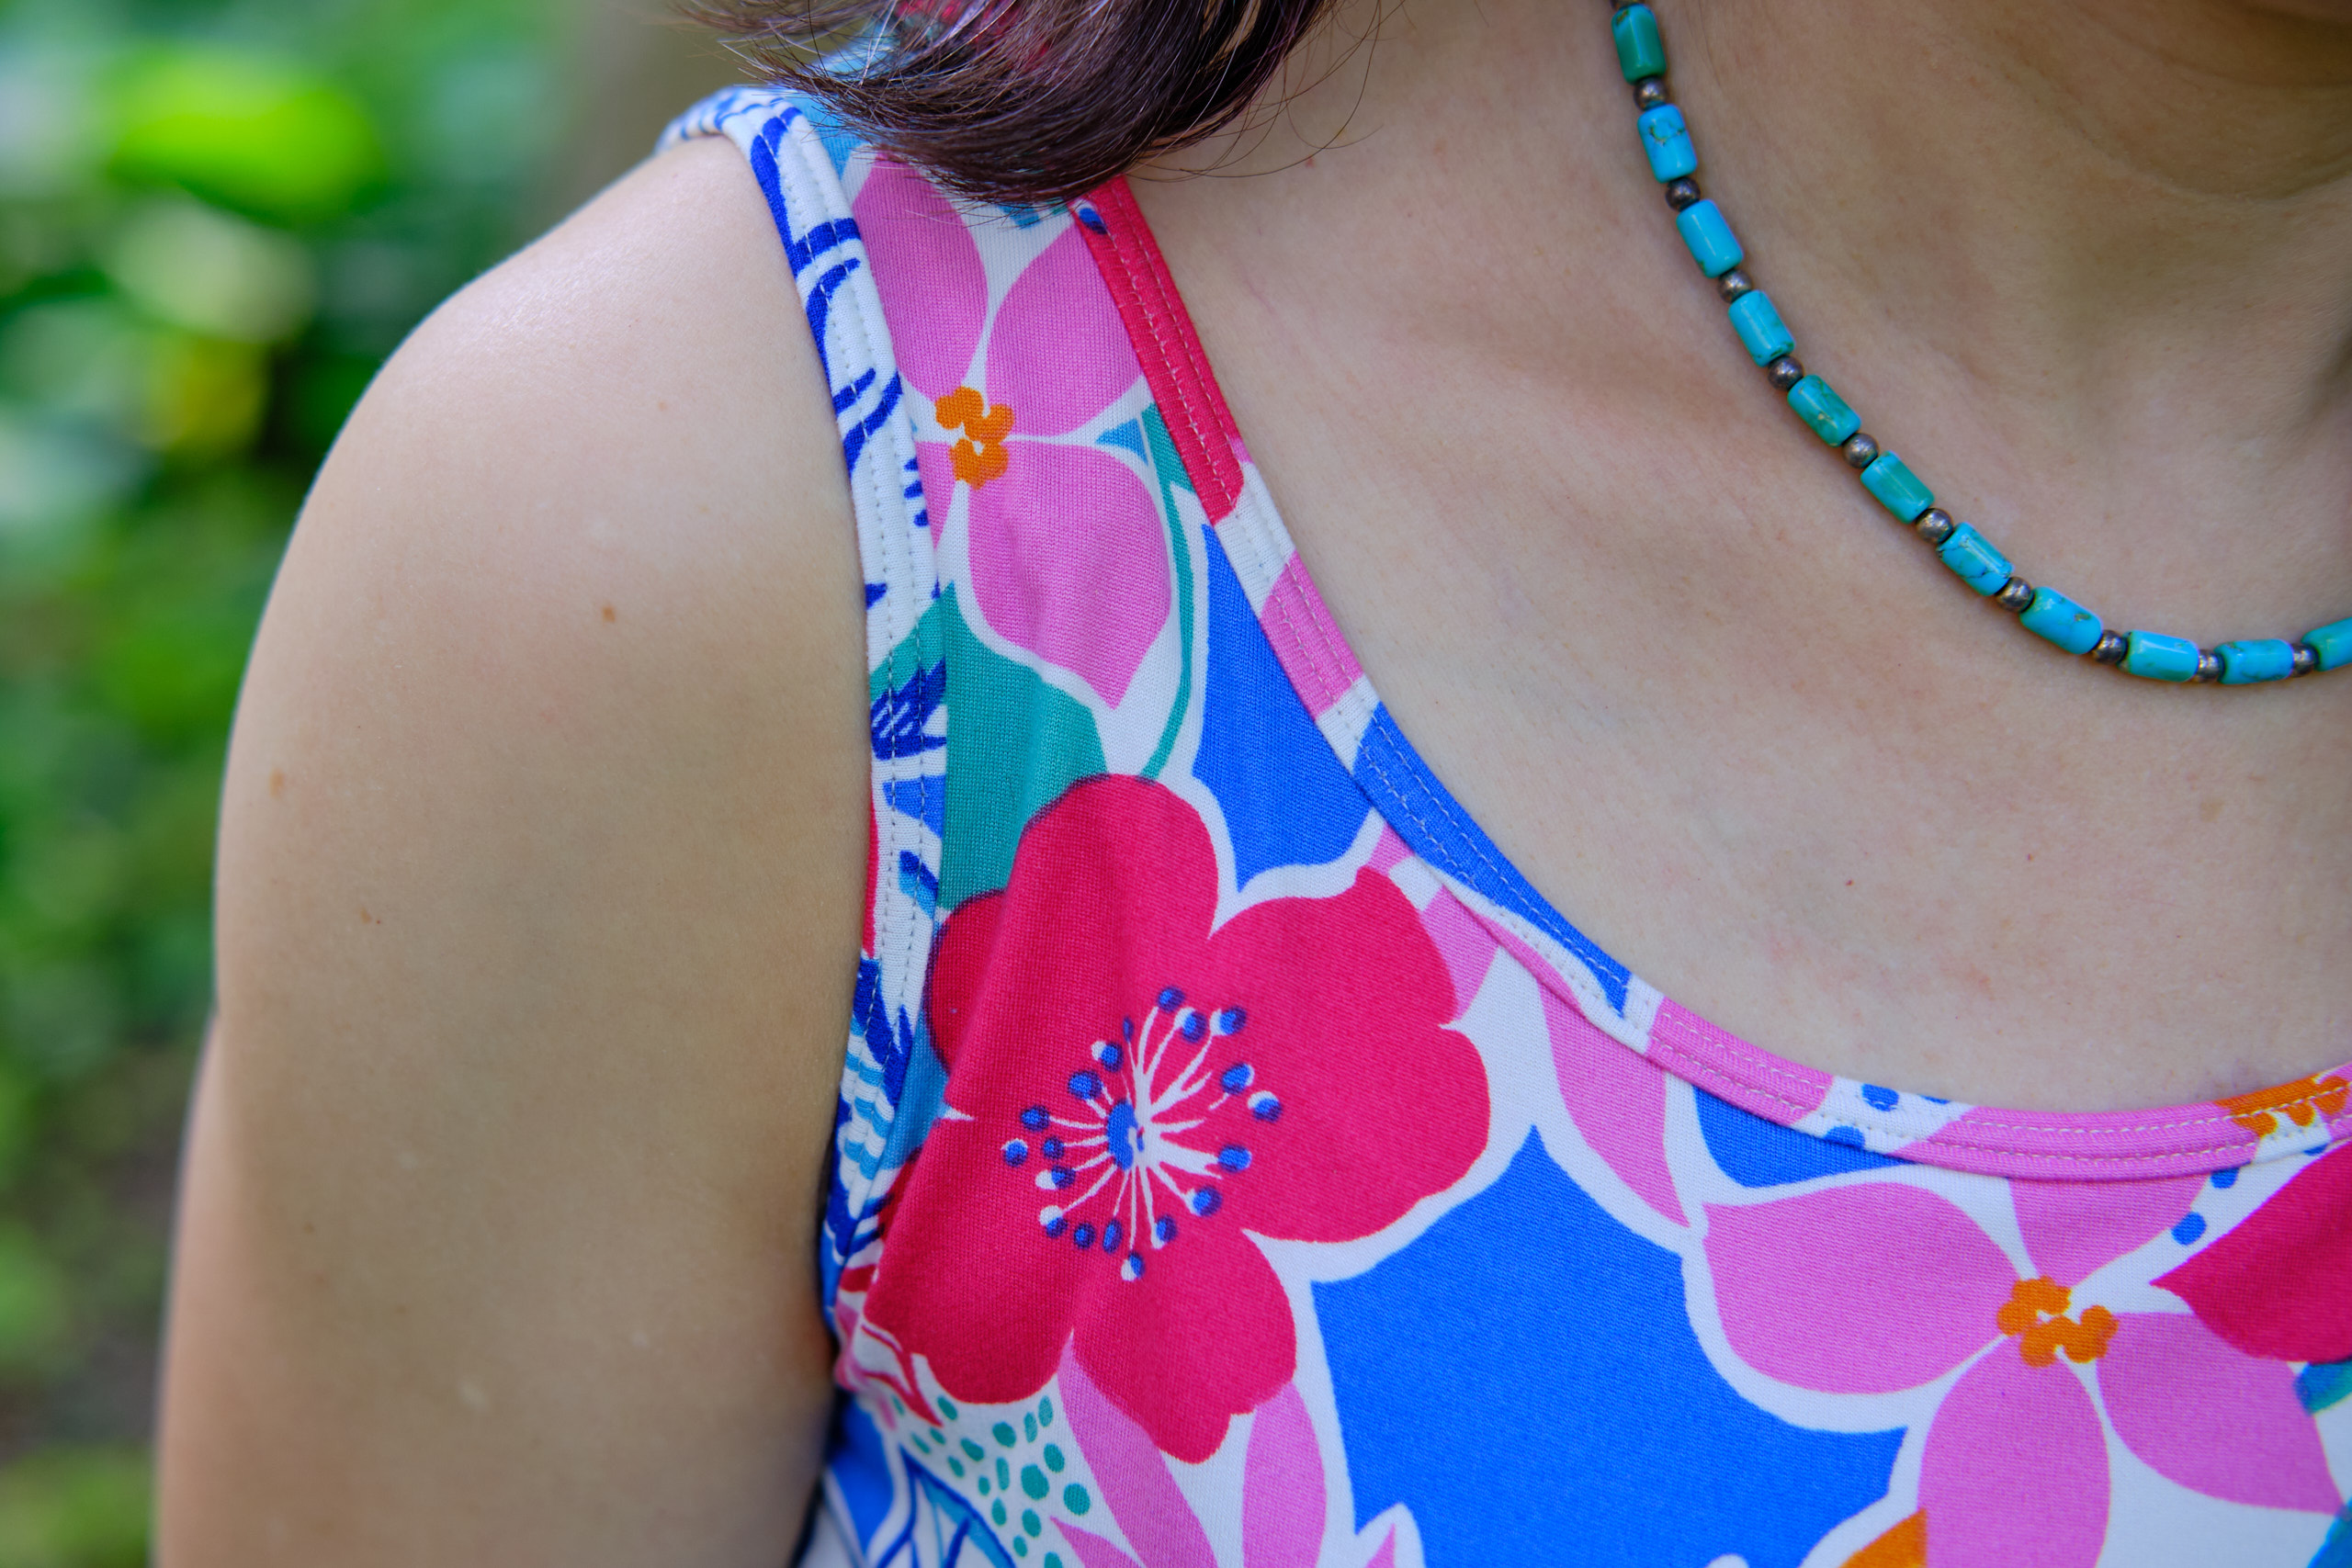
No, I’m not going on vacation, but I made a Pattern Emporium Going Places dress in a tropical print, and with some of the warm weather we’ve had lately in Pittsburgh, when I stand next to the flowers in my front yard I feel somewhat tropical.
I picked up this pattern a few weeks ago when it was on sale (it originally came out in 2019). This dress has both a fitted and flt & flare option and several different necklines (including a low cut “babe” option). But what is distinctive about this dress is that regardless of which option you choose, you have cute sundress straps in back that are designed to cover bra straps. I chose the ballet neck and flit & flare options, cut to knee length, with side seam pockets added (not part of the pattern). I used a soft and lightweight double-brushed polyester print that I bought on clearance last year from Milly Mae.
The fit & flare version of this dress is basically the same dress as the PE Wanderlust dress but with straps instead of sleeves and binding instead of a neck band. Having previously made and adjusted three Wanderlust dresses, I knew I would need a sway back adjustment, so I went ahead and copied the adjustment I already worked out for the Wanderlust pattern. I also had already worked out how to add pockets to this pattern. I decided to use the AU 8 for the bodice and then graded the waist and skirt to an AU 10. After sewing it together I decided it was too long and shortened it by 2 inches (I should have anticipated needing to shorten it as I usually shorten PE patterns by 2 inches). I turned under the hem 5/8 inch and cover stitched with off-white thread.
The dress is a pretty fast sew, but it took me a bit longer due to adding the pockets and sewing neck binding with my cover stitch machine for the first time. I had never does this binding technique so I practiced on scrap fabric, but once I figured it out it was pretty easy, although does take some (and a lot of pins) to pin in place before sewing. I opened up my Triumph suitcase and got out my cover stitch foot and used it for the first time.
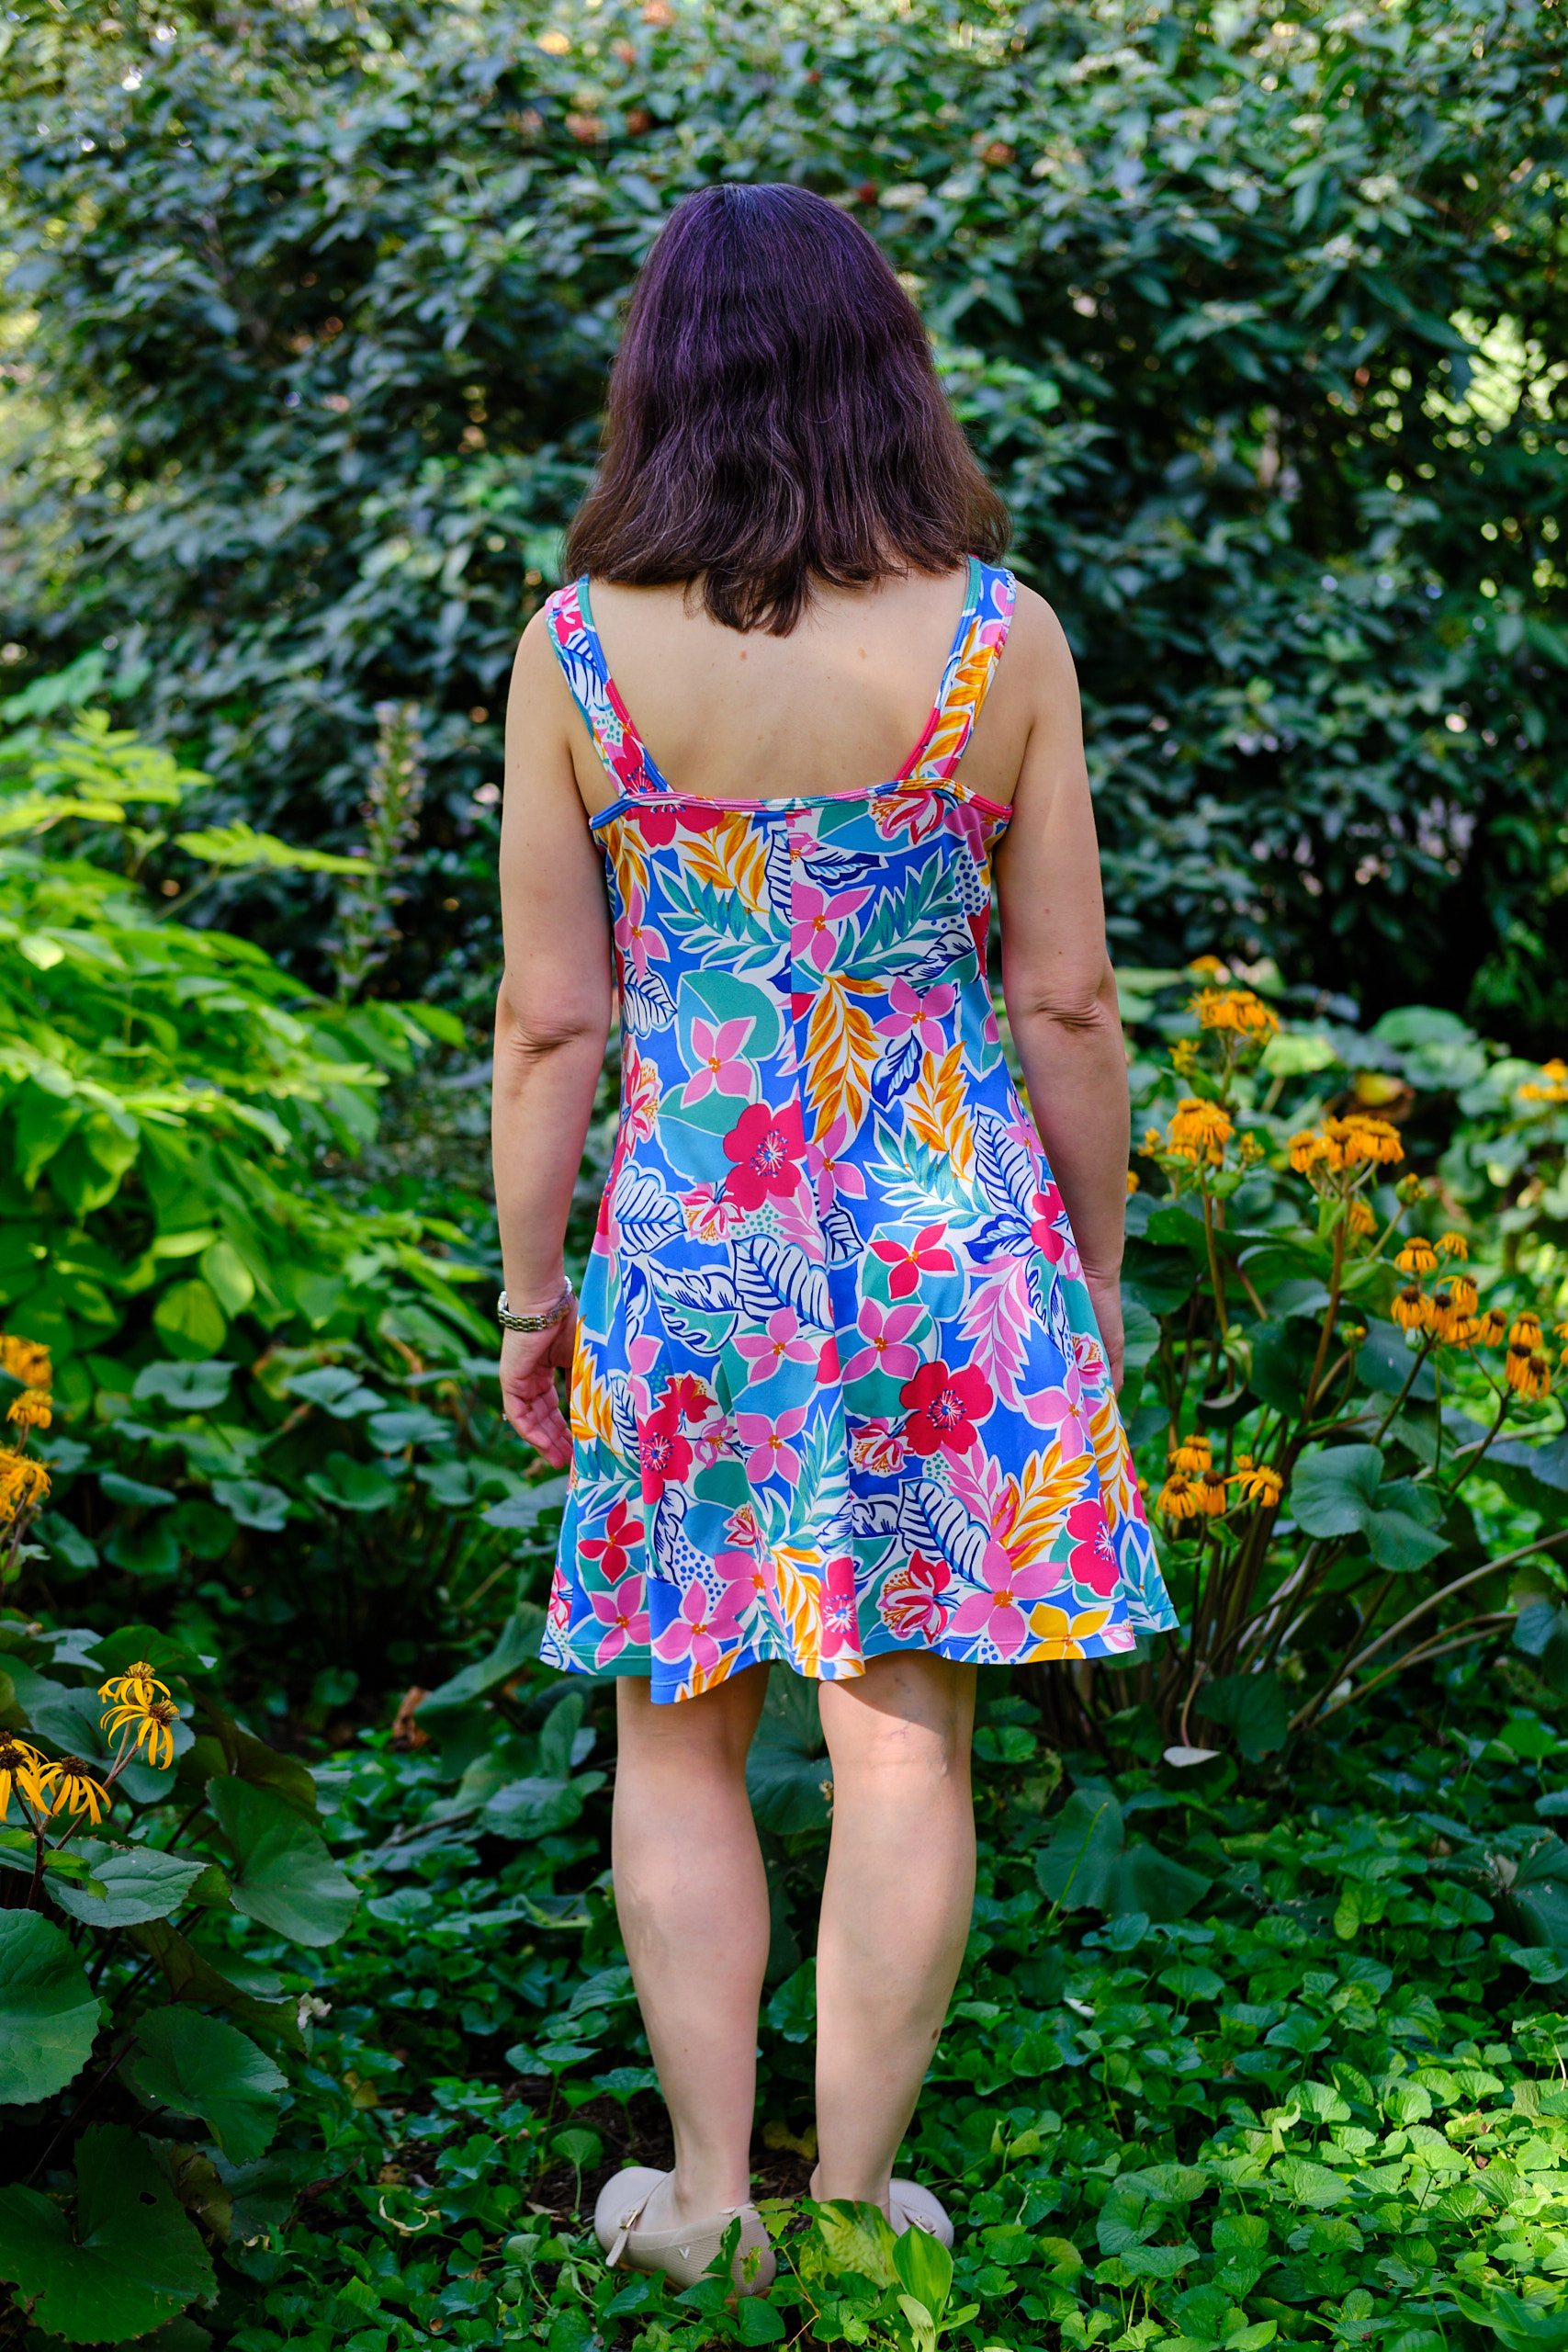
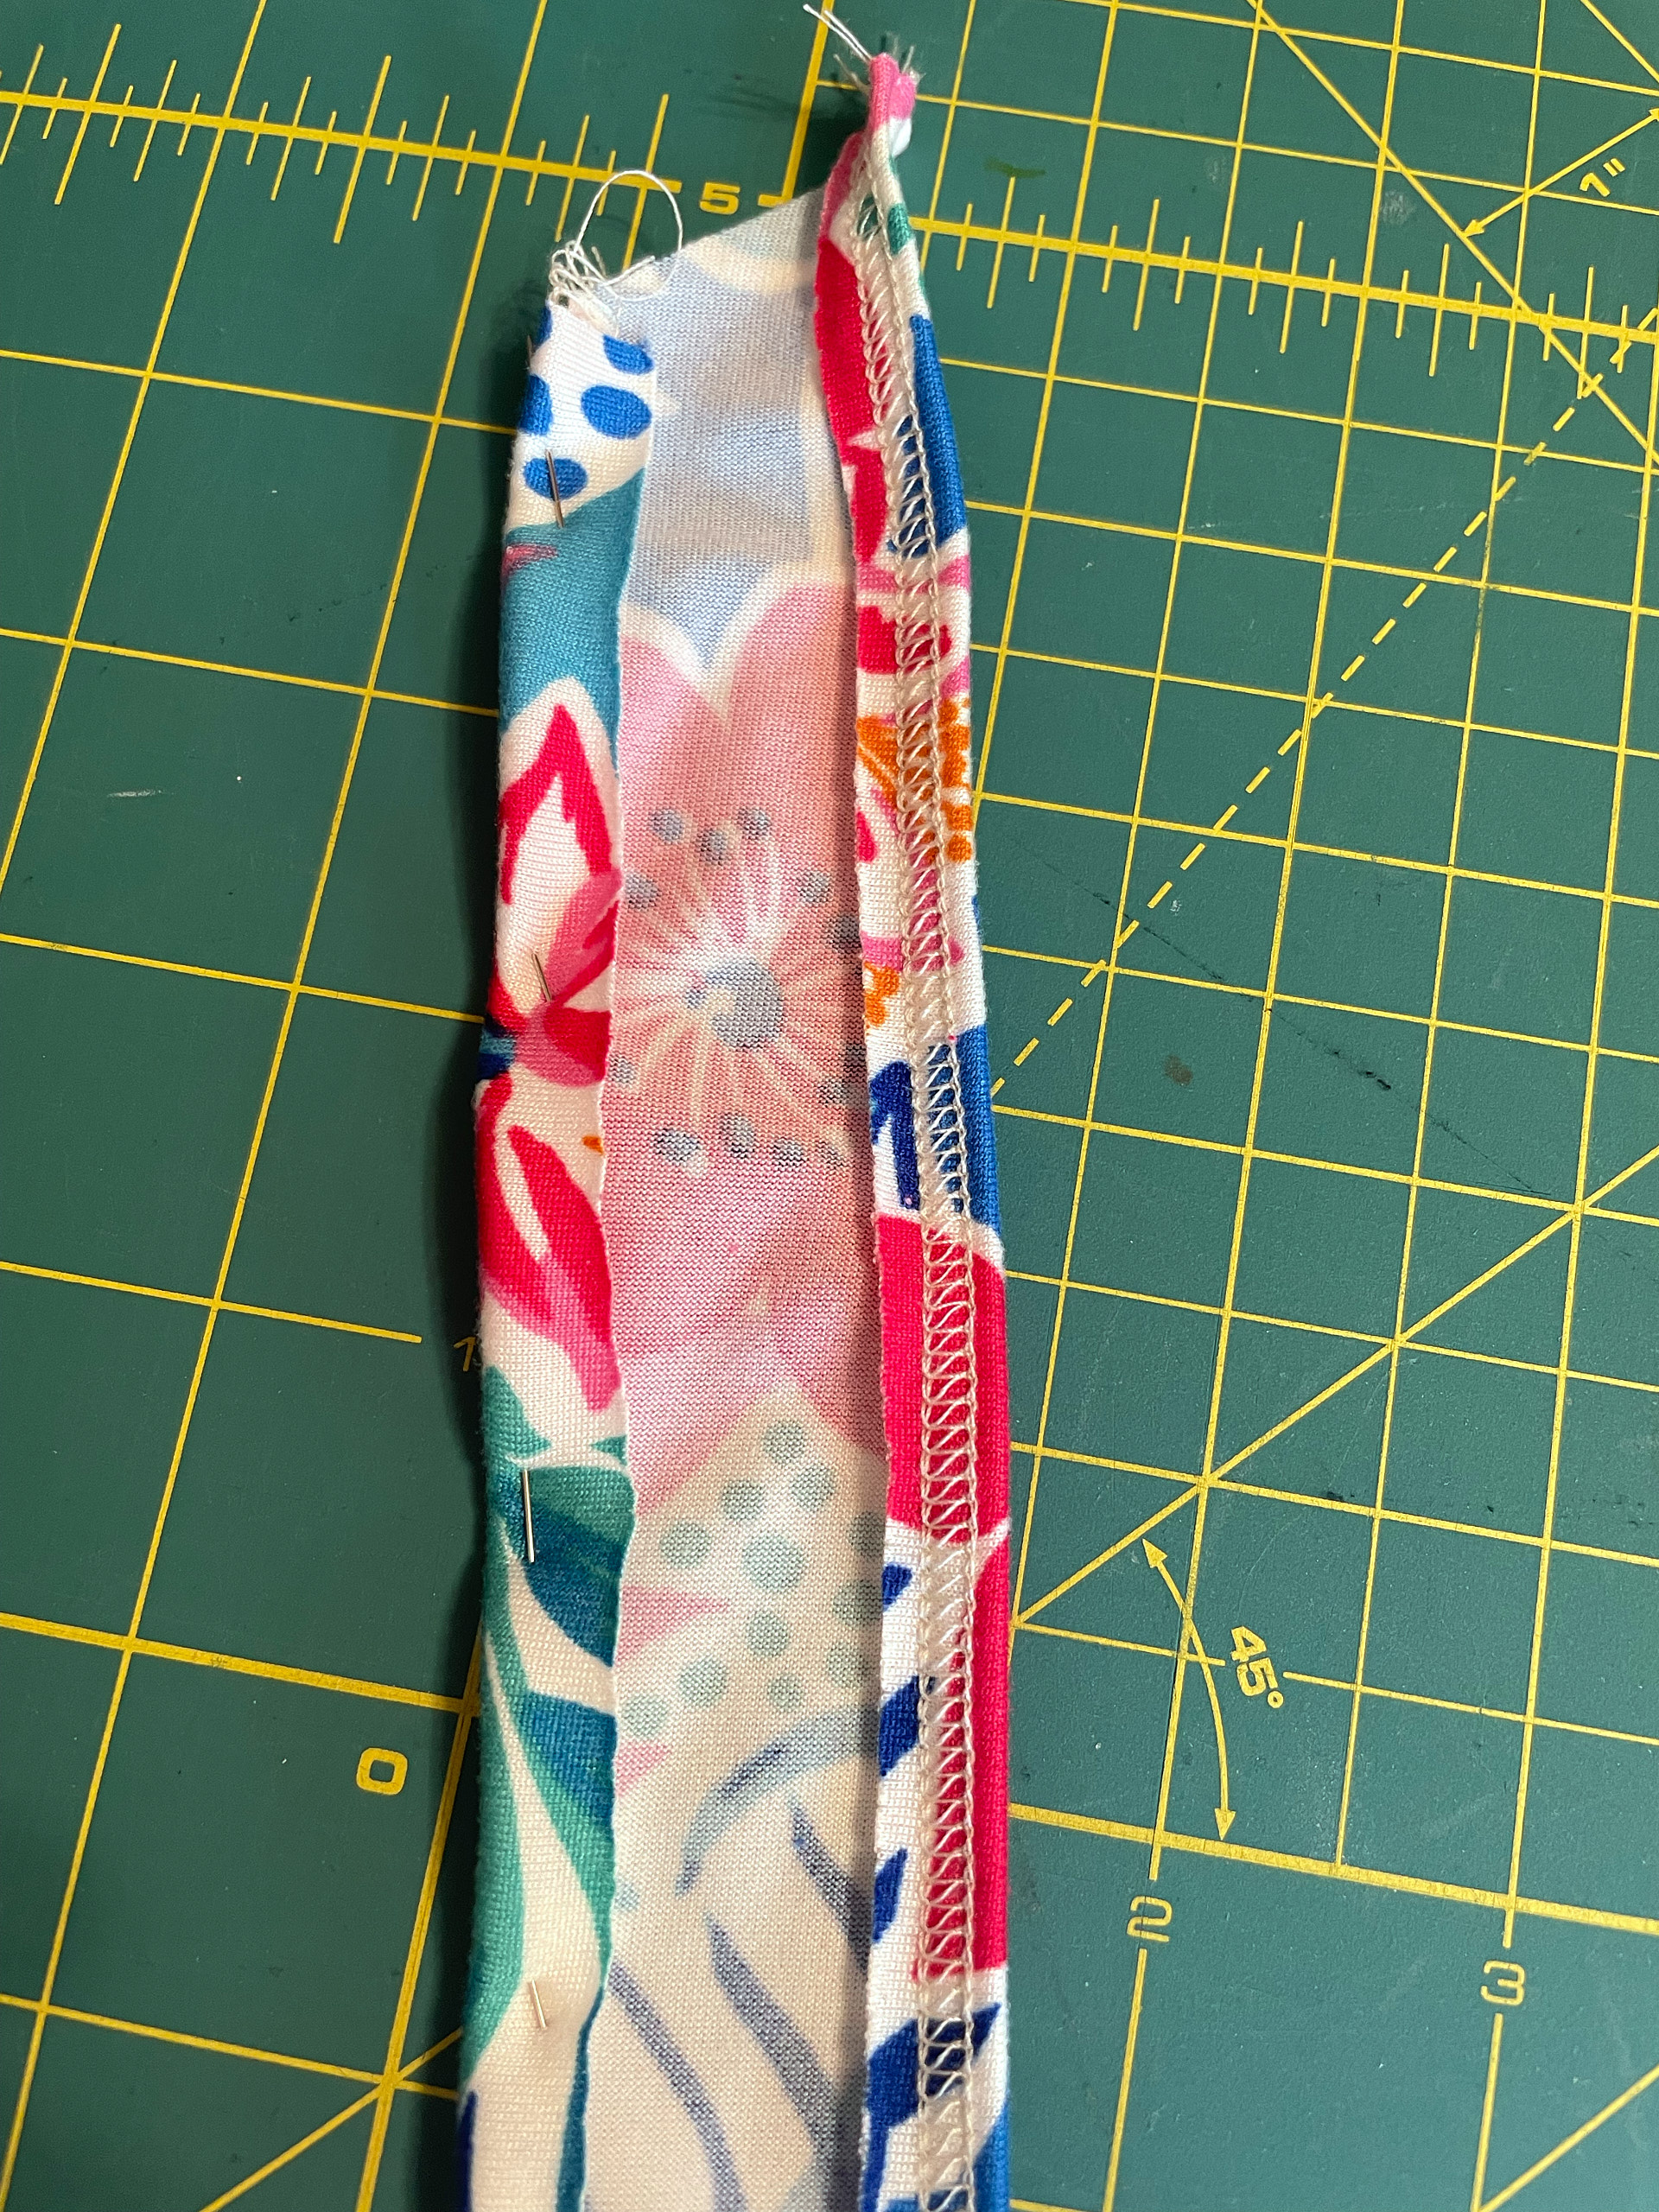
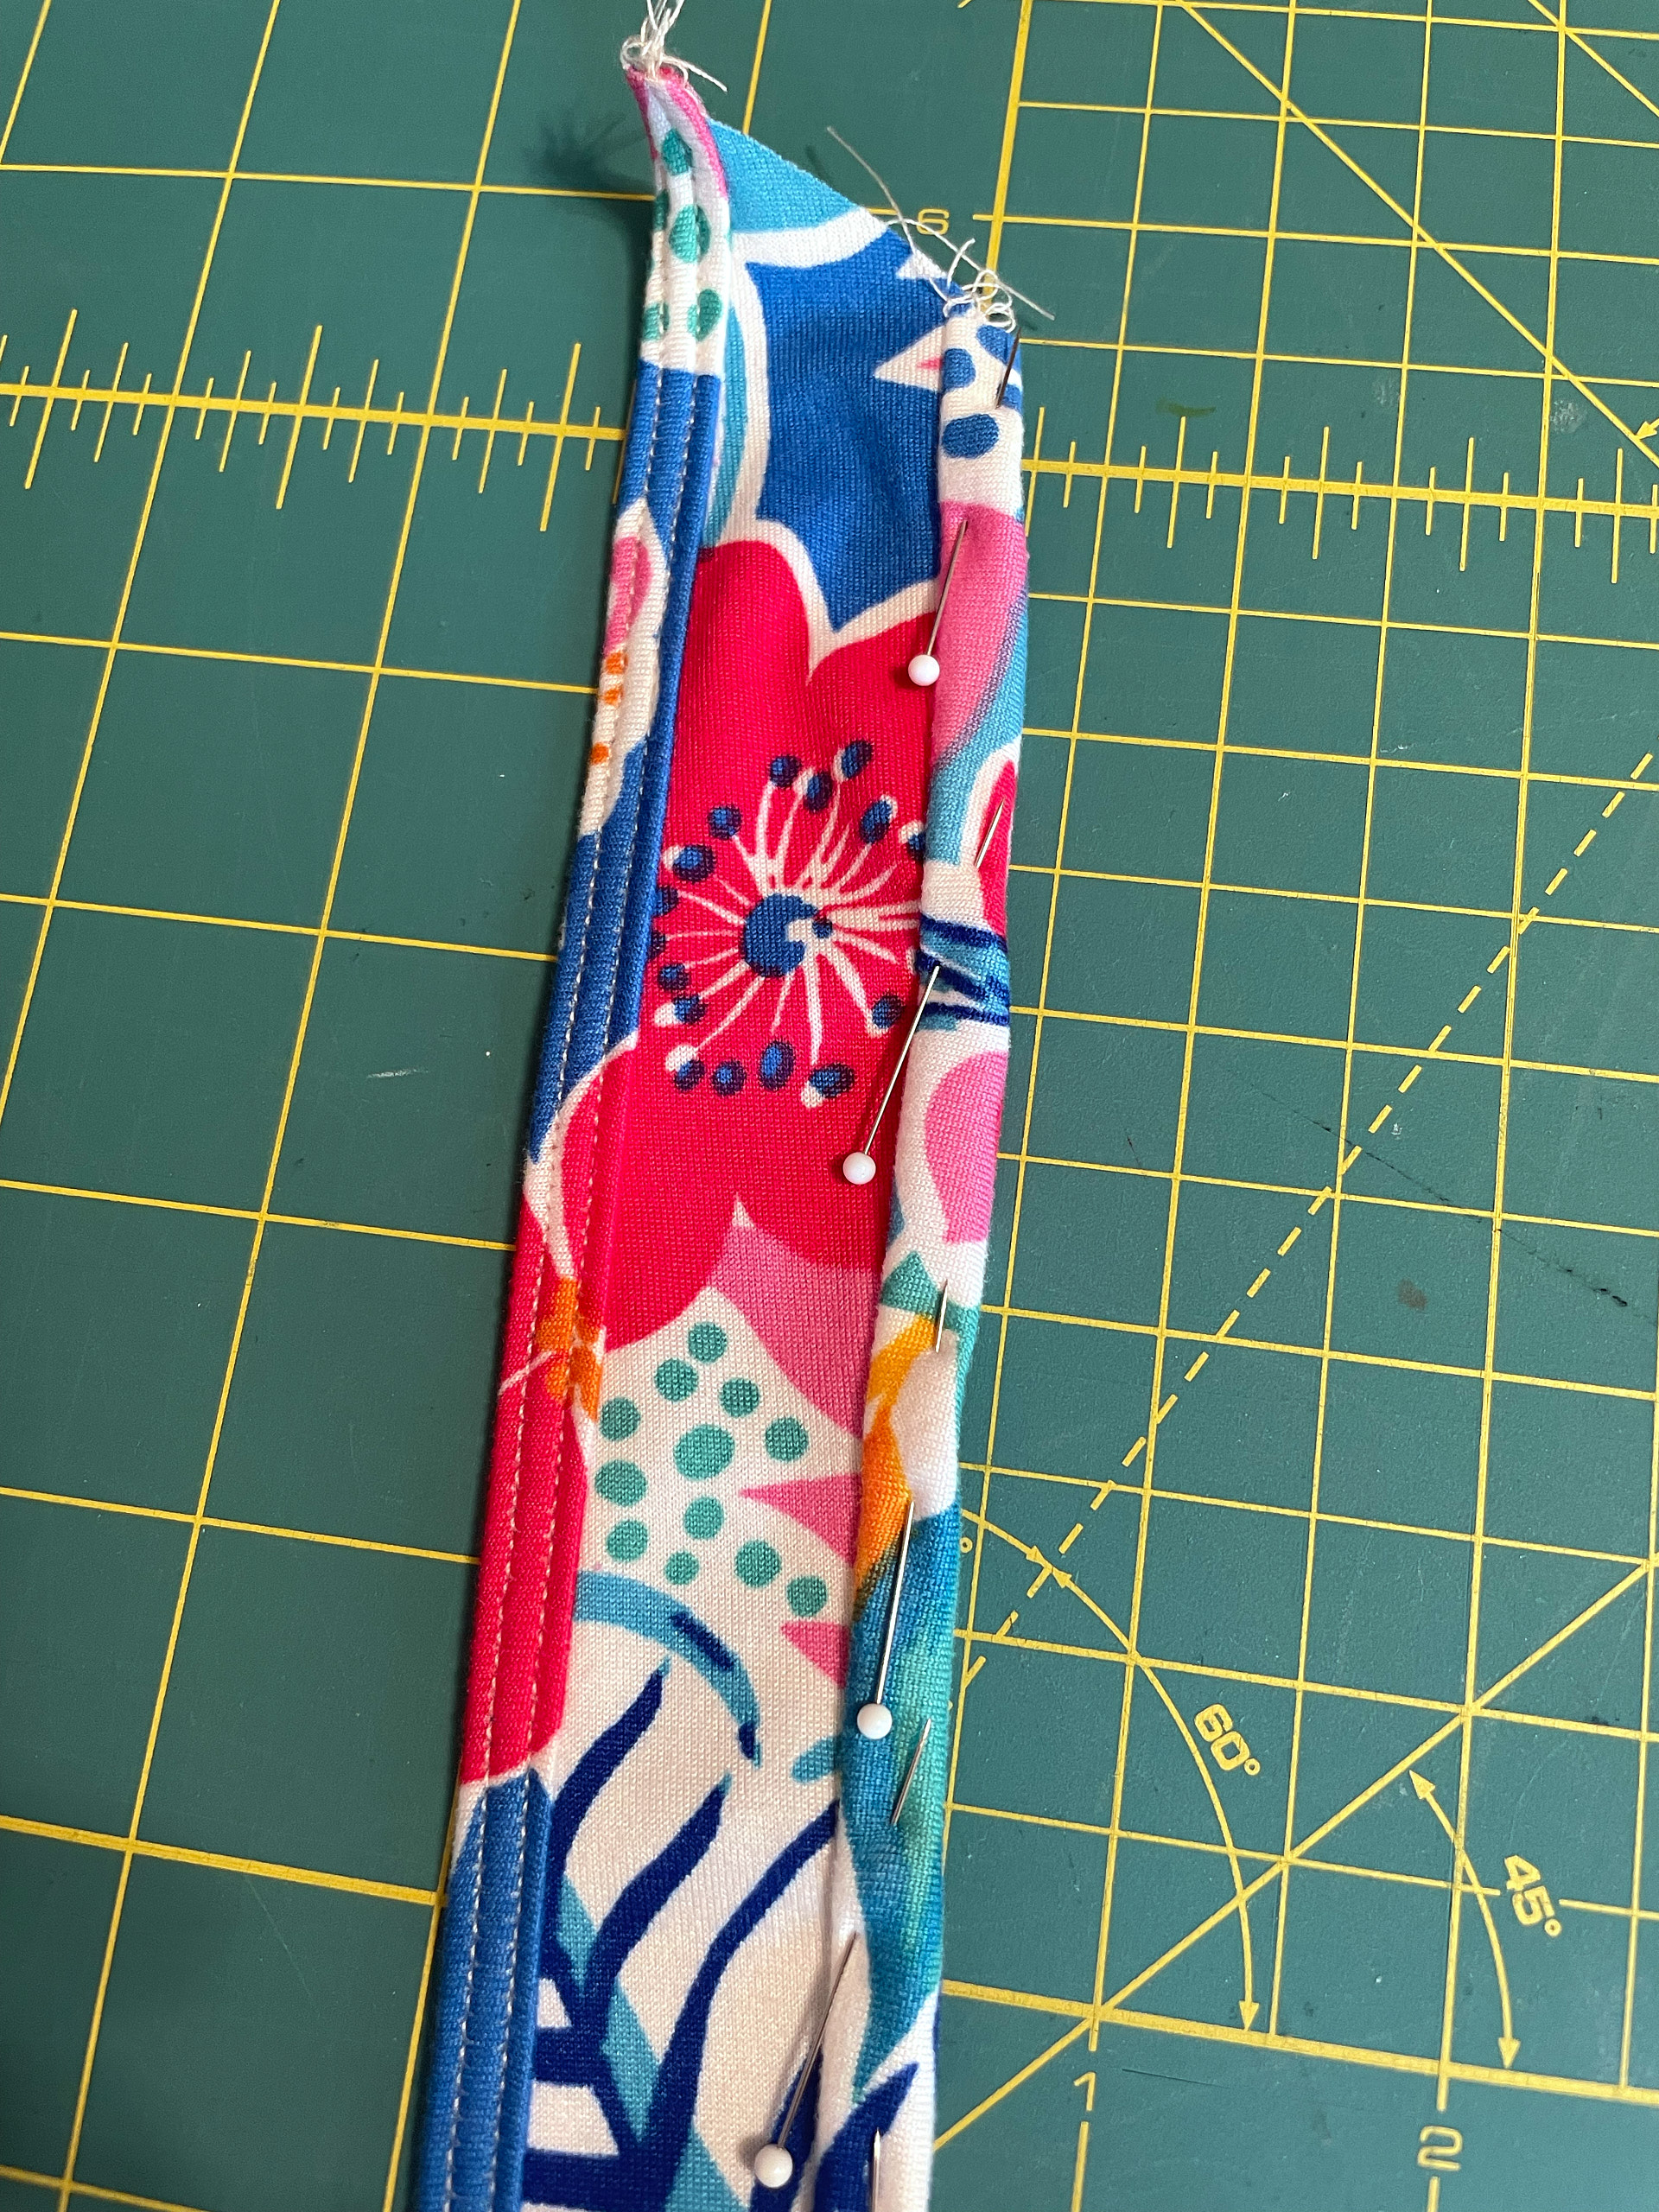
The bra-strap covering straps are great, but they do take some work to position properly. The pattern instructions suggest where to pin the straps in place as a starting point, but they were set too wide and too long for me. I had to repeatedly shift them and try the dress on again, and I finally enlisted the help of an assistant who could more easily see my back. Once I was happy with the positioning I sewed them in place with my cover stitching on top of the cover stitching on the binding. The binding is a nice polished finish in both the front and back.
I’m very happy with this dress and my husband really likes it too. I like the fact that I can wear a sweater or jacket with it and wear it to work too. I’m looking forward to trying other neck options, and maybe a maxi version in some fancy fabric. The pattern can also be truncated to make a tank top, which I may try as well.
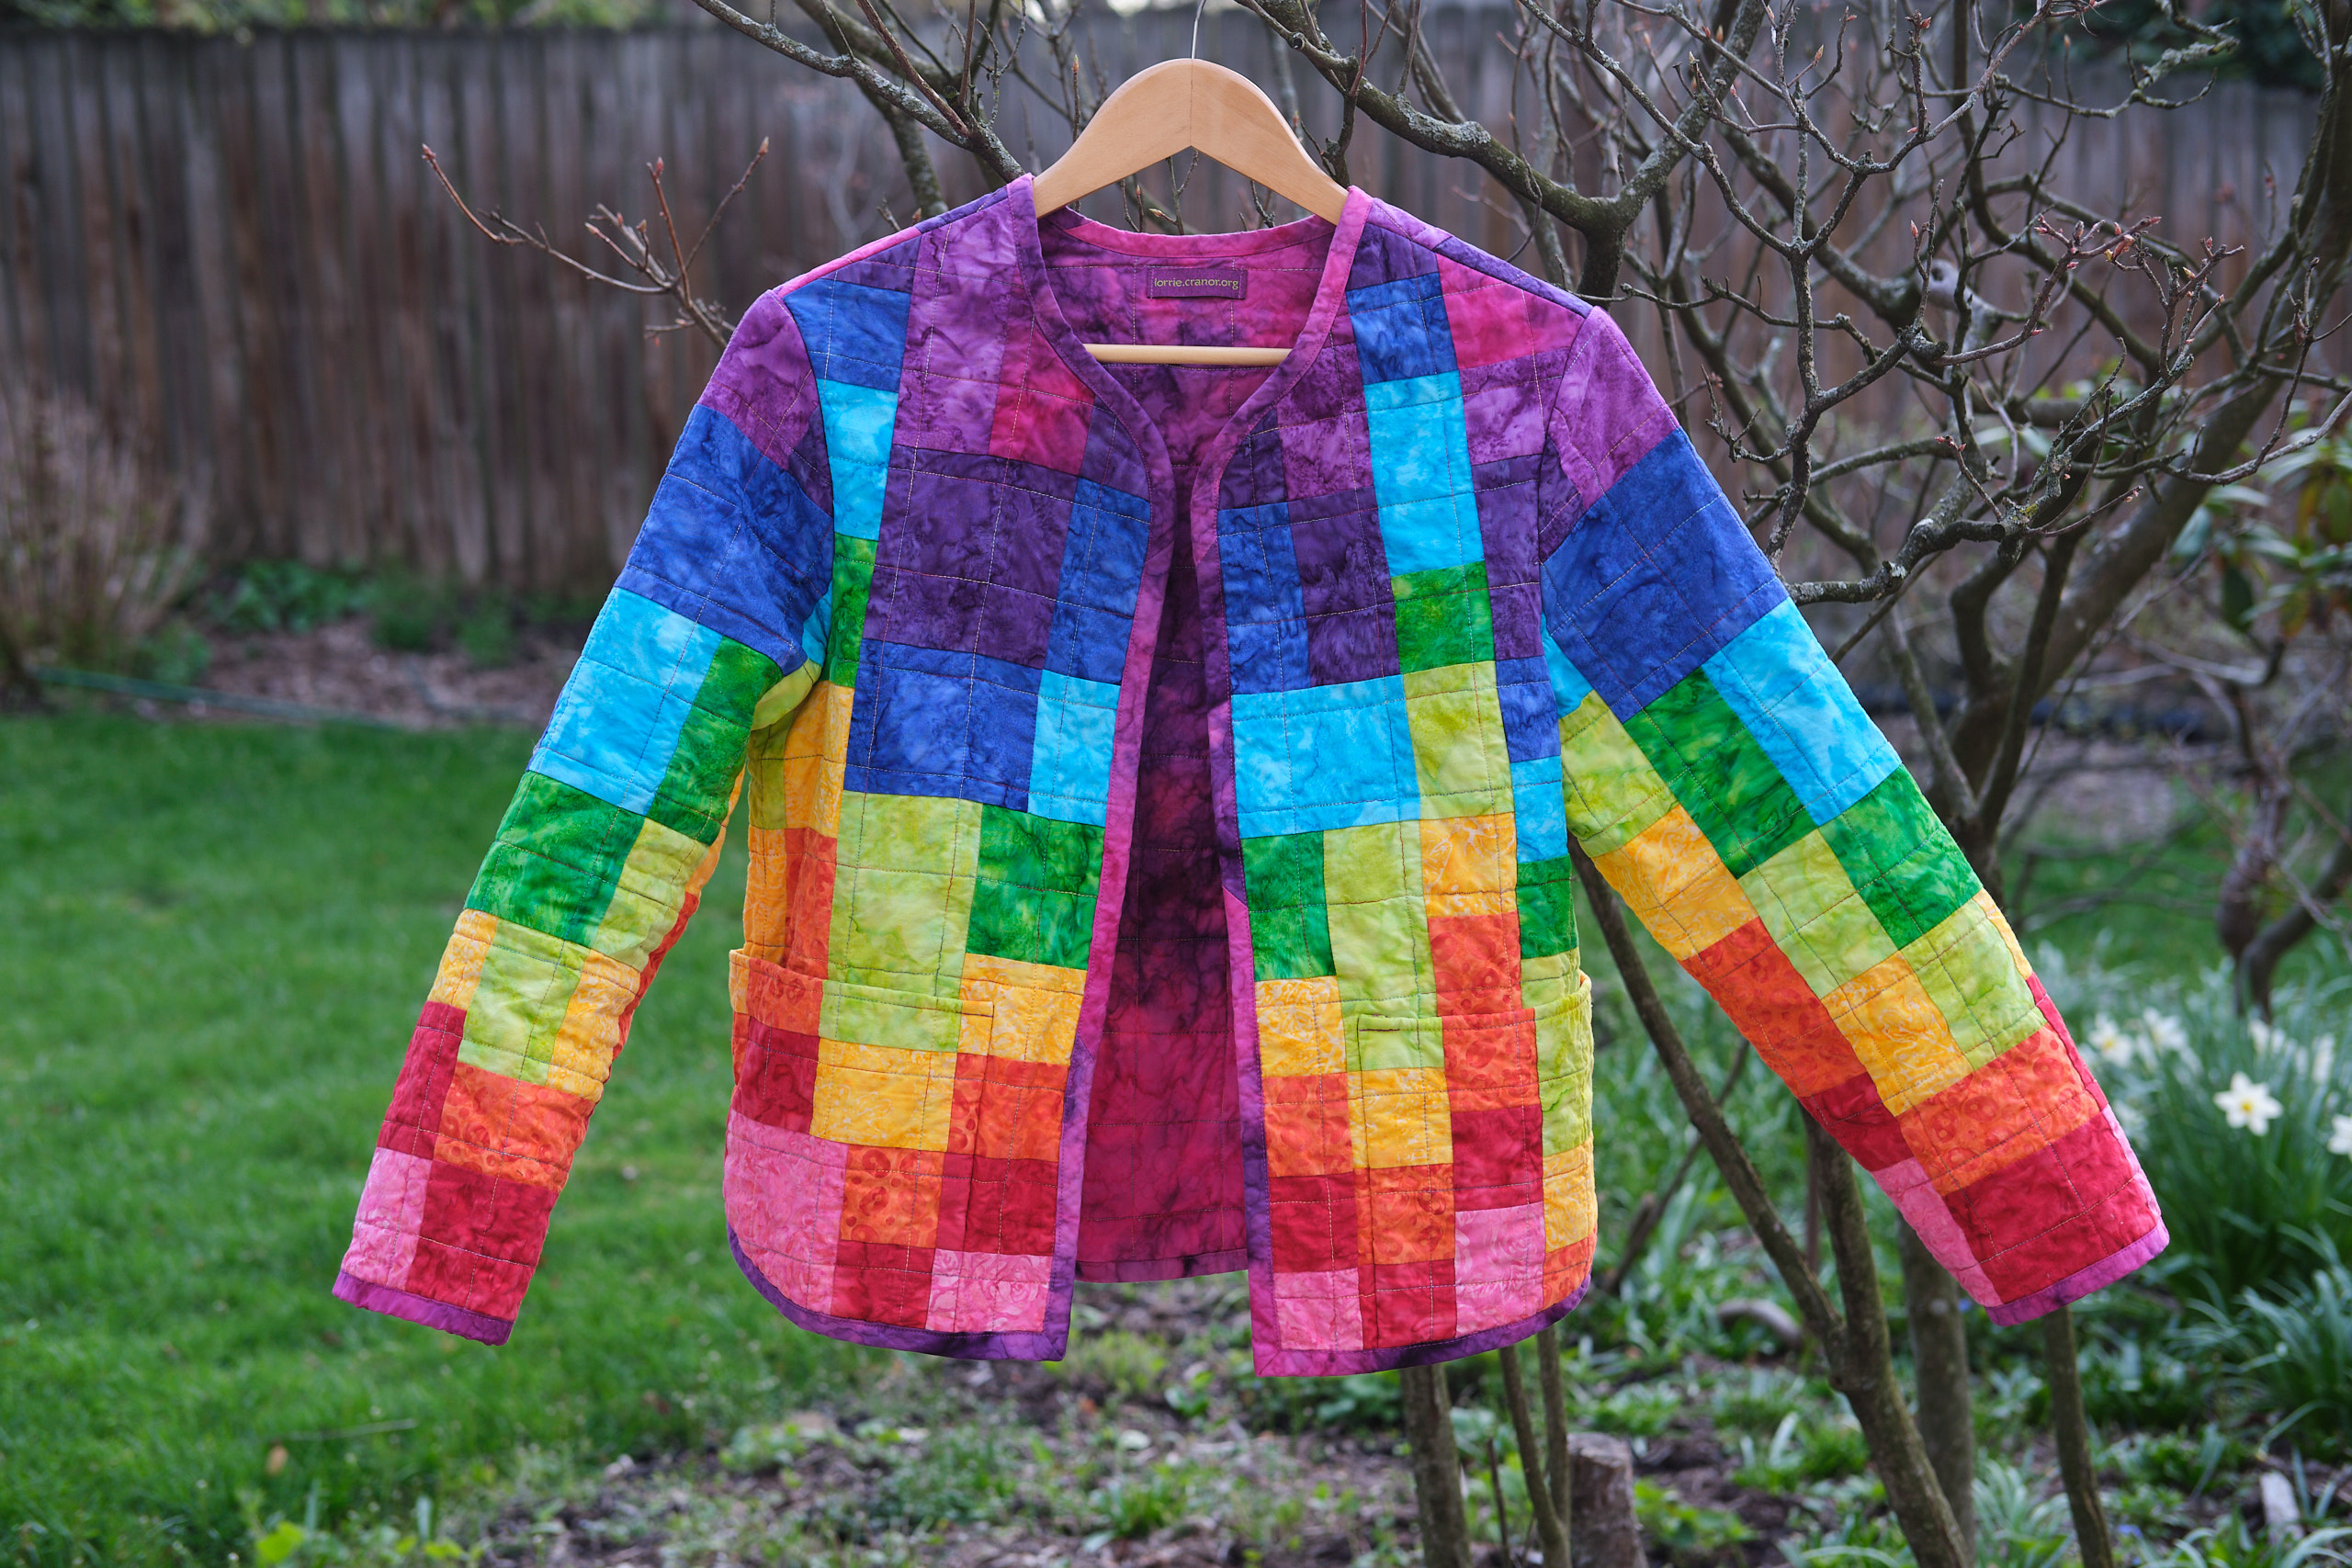
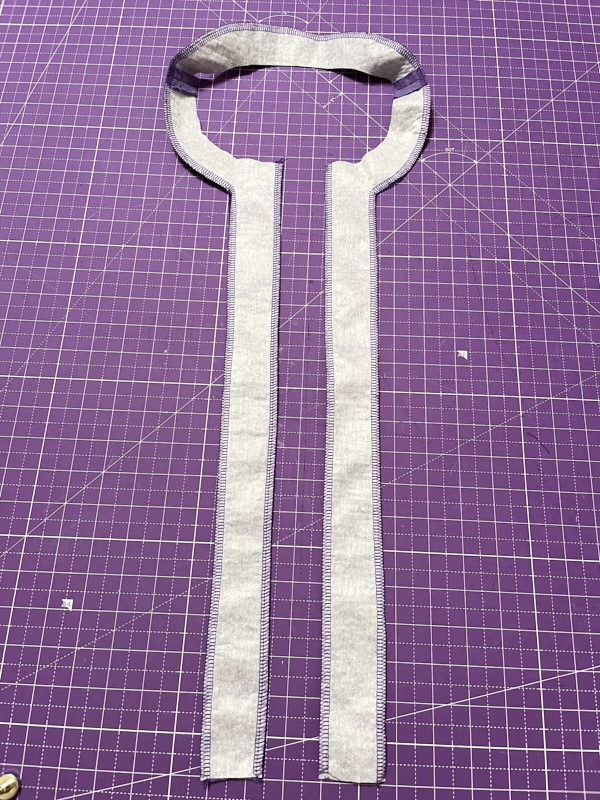
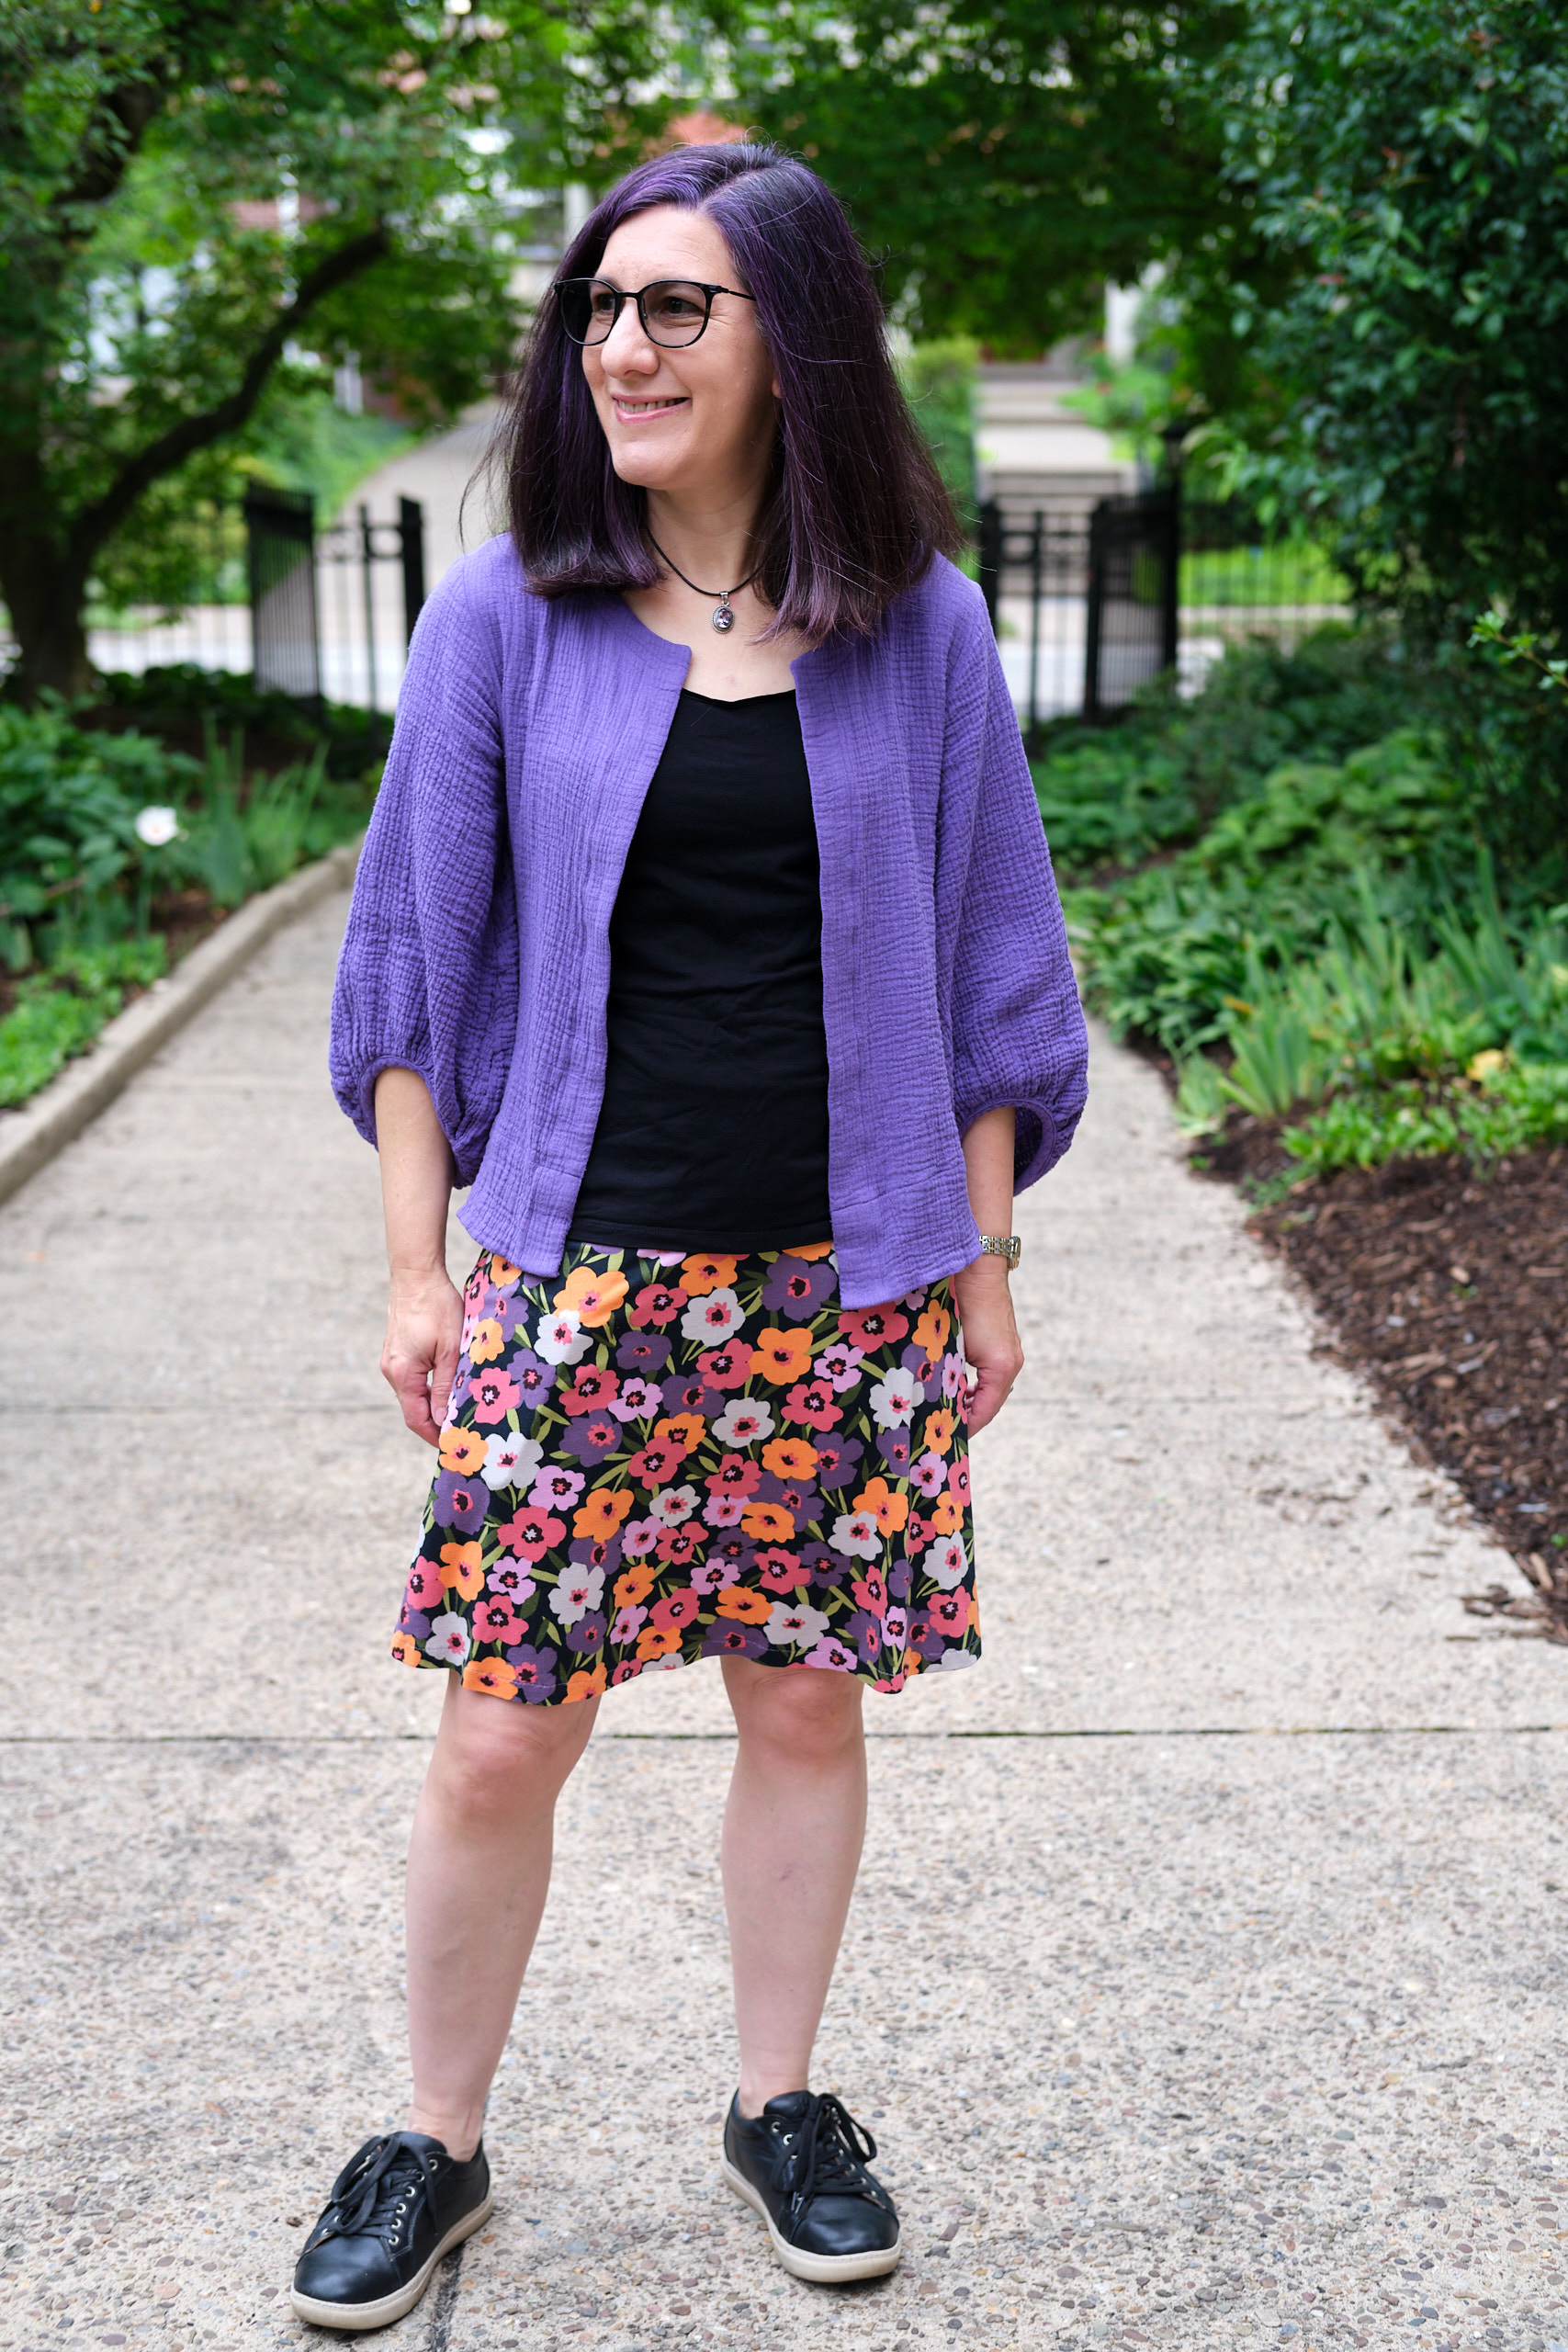
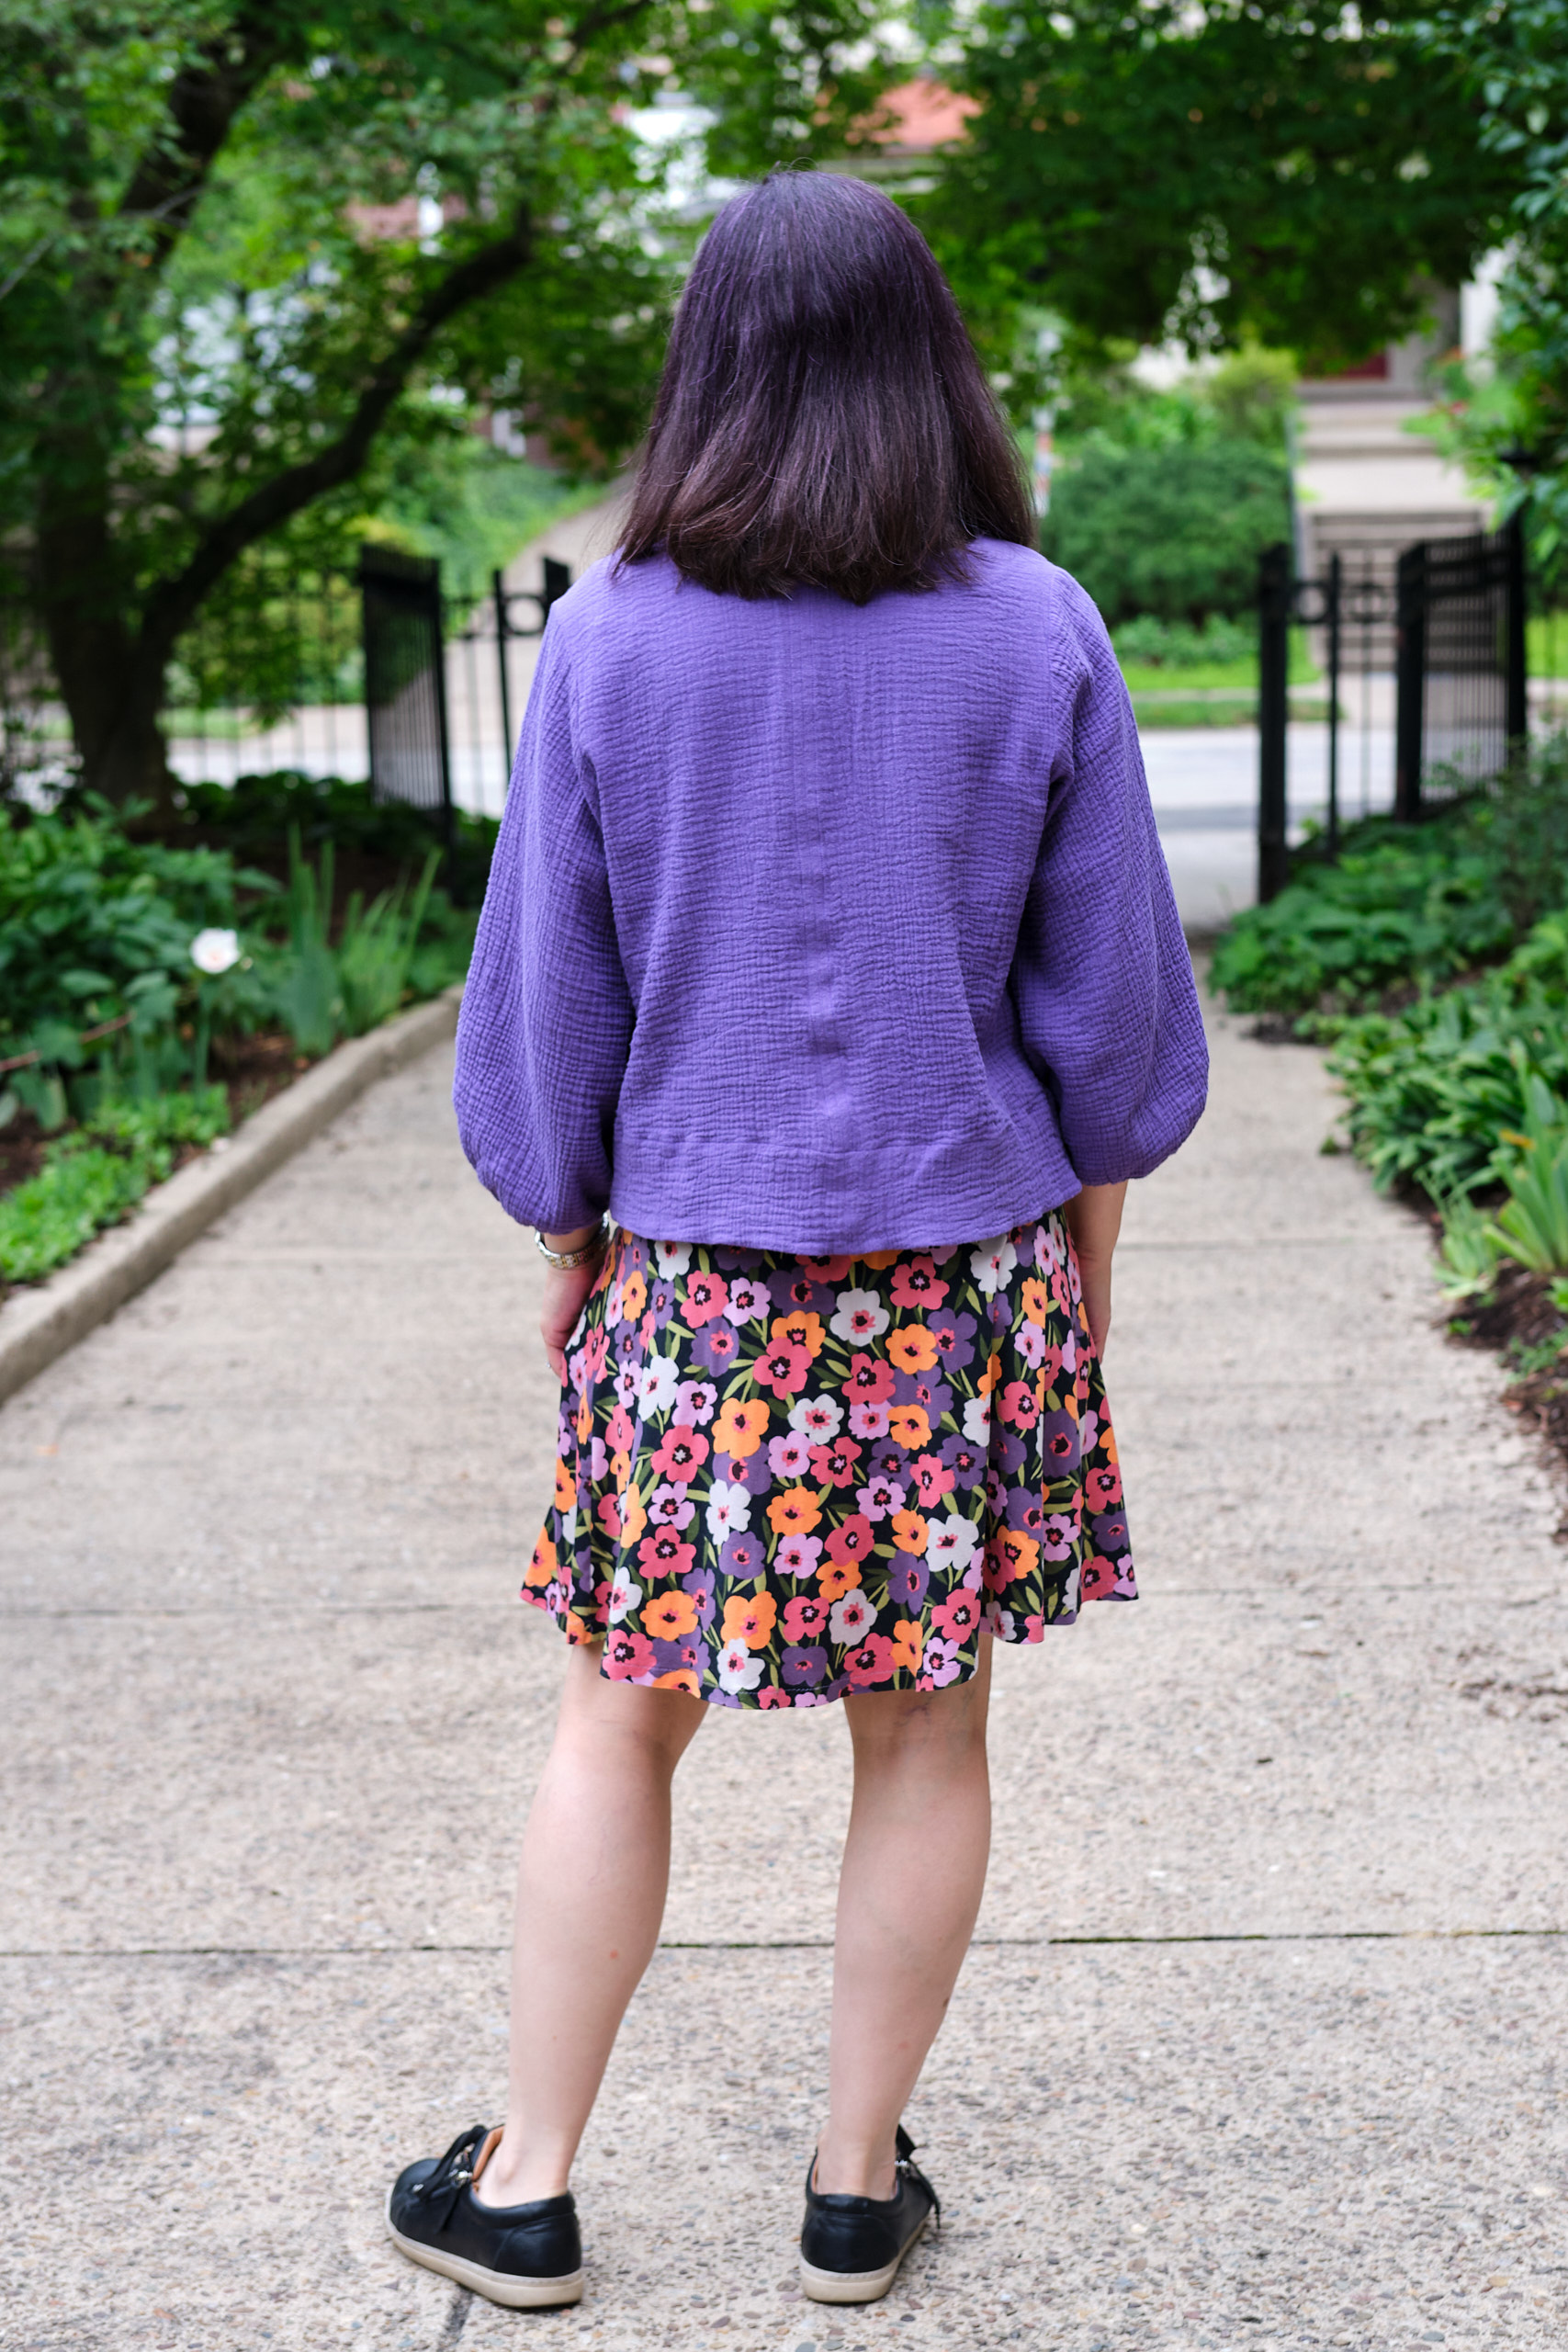
Pattern Emporium Be Mine Balloon Sleeve top with jacket hack, size AU8, 1.5 yards cotton double gauze, high neck, regular length, wide facing, no button loop, sloped-shoulder adjustment
I love the Pattern Emporium Be Mine Balloon Sleeve top pattern but find it difficult to wear under a sweater, and even if it fits, a sweater would hide the beautiful sleeves. So when I saw that sewist Livia Jonker-Yamada had hacked Be Mine into a jacket, I was excited to give it a try myself so that I could wear it over a shirt. I waited for Liv’s promised blog post with instructions, but it never came so I figured it out myself.
I started with the size AU8 pattern, which is one size smaller than the size chart recommends but this is an oversized pattern and sizing down worked well for me on my first Be Mine top. I could probably go down one more size for a more fitted top. I used the high neck option so that the neck opening would hit above a scoop-neck t-shirt. I added a half-inch sloped shoulder adjustment as I did on my first Be Mine. I decided to make this jacket from purple cotton double gauze since I still have a lot left even after making PE Vacation Vibes pants and a Sinclair Alva top and I thought it would coordinate with a lot of things in my wardrobe. The double gauze is a good weight for a light summer jacket, it has enough body to help the sleeves balloon, and once you’re done sewing it doesn’t need to be ironed. Having previously experimented with both ironing and not ironing gauze before cutting and sewing, I am firmly on team wash and iron now, despite the fact that ironing the wrinkles out of a couple of yards of double gauze is fairly tedious.
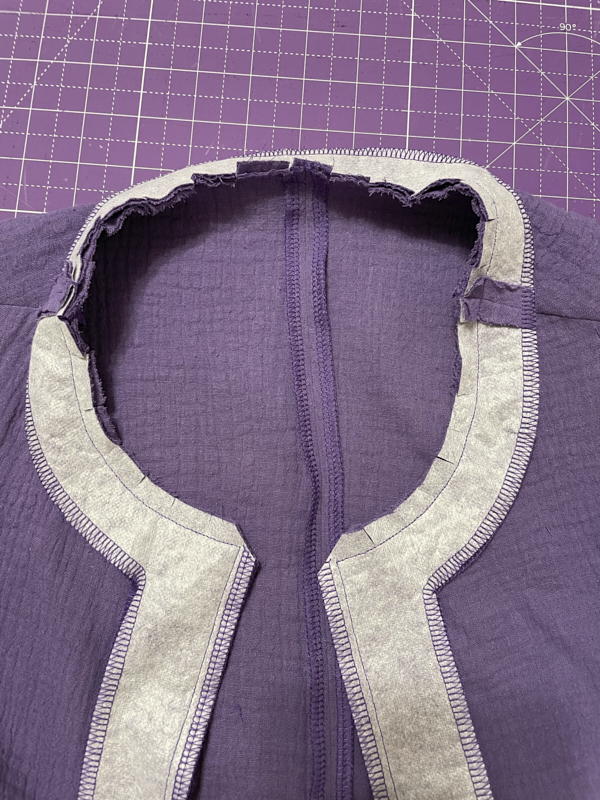
Most of the hack is pretty obvious: you follow the instructions for eliminating the back button, sew the back pieces together, and then you don’t sew together the two front pieces. The tricky part is what to do to have a nice clean finish on the jacket front openings. It looked to me like Liv split the neck facing and added vertical strips to it to face the jacket opening edges. I couldn’t work out exactly what she did where the front edges met the wide hem facing so I improvised a bit.
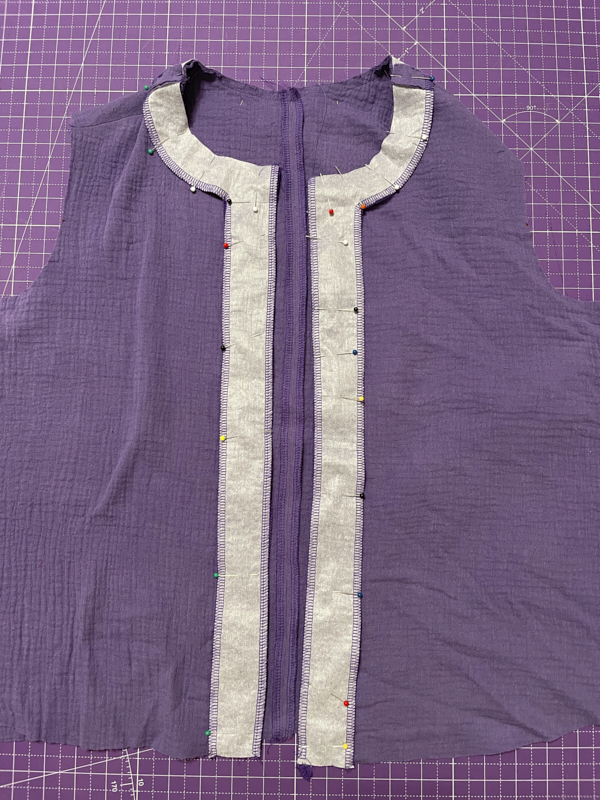
In the photos below you can see the split neck facing sewed to the merged back facing on its owned and pinned to the bodice. When I split the front facing, I made sure to add my 3/8-inch seam allowance to the split on both sides. The vertical facing is 1 3/4 inches wide and runs the length of the top. I decided to cut neck and vertical facing as a single piece to avoid the need for a joining seam. I used Heat n Bond Ultra Lightweight Fusible Interfacing and fused it to a piece of gauze before cutting out the facings. After I sewed the front and back facings together, I serged around the outer edges and also along the inner edge of the vertical pieces. That last bit of inner edge surging probably wasn’t necessary.
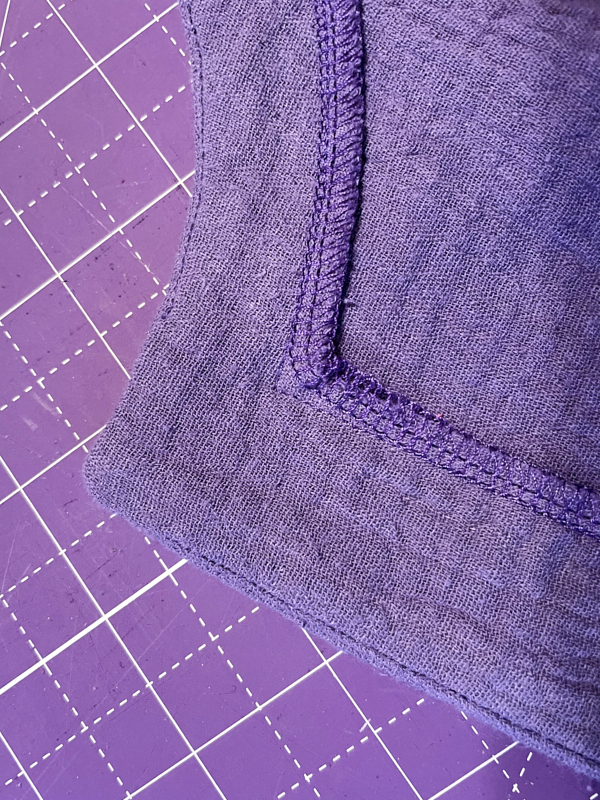
After I finished sewing on the neck and vertical facings I clipped the seam allowance around the neck as per pattern instructions and trimmed the corners to make it easier to turn them under. Then I understitched and top stitched according to the pattern instructions. It was impossible to understitch all the way into the corners, as you can see in this photo, but that didn’t seem to be a problem. I did the topstitching all in one go, from the bottom, up one side of the front, around the neck, and back down the other side of the front, pivoting at the corners. I used an edge foot for all the top stitching and under stitching.
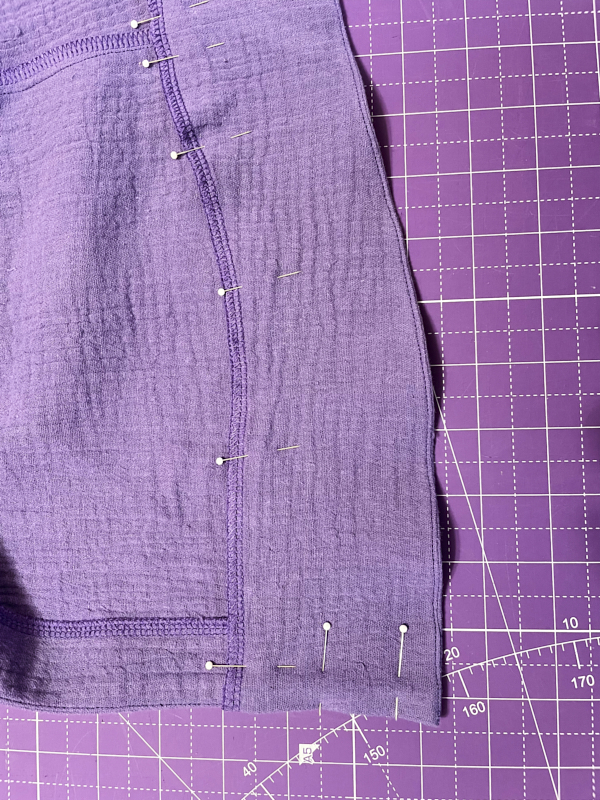
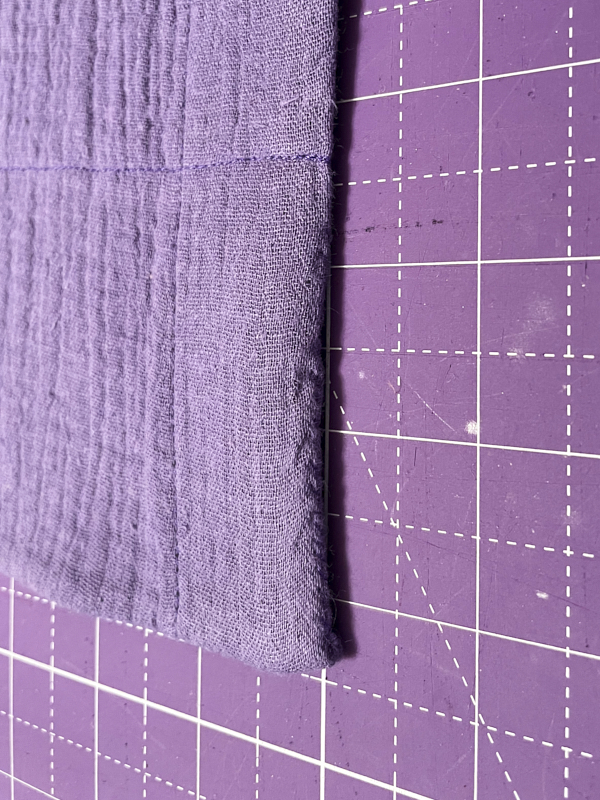
Then I added the sleeves (hand basting the sleeve bindings so the gauze would behave), closed up the sides, and turned to adding the wide bottom hem facing. I split the front hem facing piece in half, adding 3/8 inch seam allowances to the inside edge of each piece. Then I sewed the front hem facing pieces to the back hem facing pieces and serged the top edge. I pinned the facing to the bodice, folding in the seam allowance. I sewed everything together and understitched following pattern instructions. Then I top-stitched just below the serged edge at the top of the hem facing. Finally, I was left with the unsolved problem of what to do with the unstitched 3-inch edges where the hem facing meets the bodice on the jacket opening edges. I decided to whip stitch that closed by hand, which seemed to have worked well.
I decided not to add buttons as I rarely button jackets (and I’m still a bit afraid of button holes). I’ve recently read that tie-front tops are quite fashionable right now, so I thought about adding ties, but decided I was unlikely to actually tie them (or wear them fashionably without a shirt underneath), so I left the jacket with no closures. As a result, it was a little tricky getting the neck openings aligned for the photographs, but they mostly stay in place.
The jacket looked neat and crisp, but since I will never iron it again I threw it in the wash to see how it would look crinkled up. When I took it out it looked great except for the center back seam, which didn’t lie flat because I forgot to top-stitch the seam allowances in place. After a quick trip back to my sewing machine to topstitch, the jacket was complete. That was yesterday, and today I wore my new jacket to work with the PE Heartlight skirt that I sewed last summer. When the outdoor temperature cools down a little I expect I will wear it a lot with wide-leg pants.
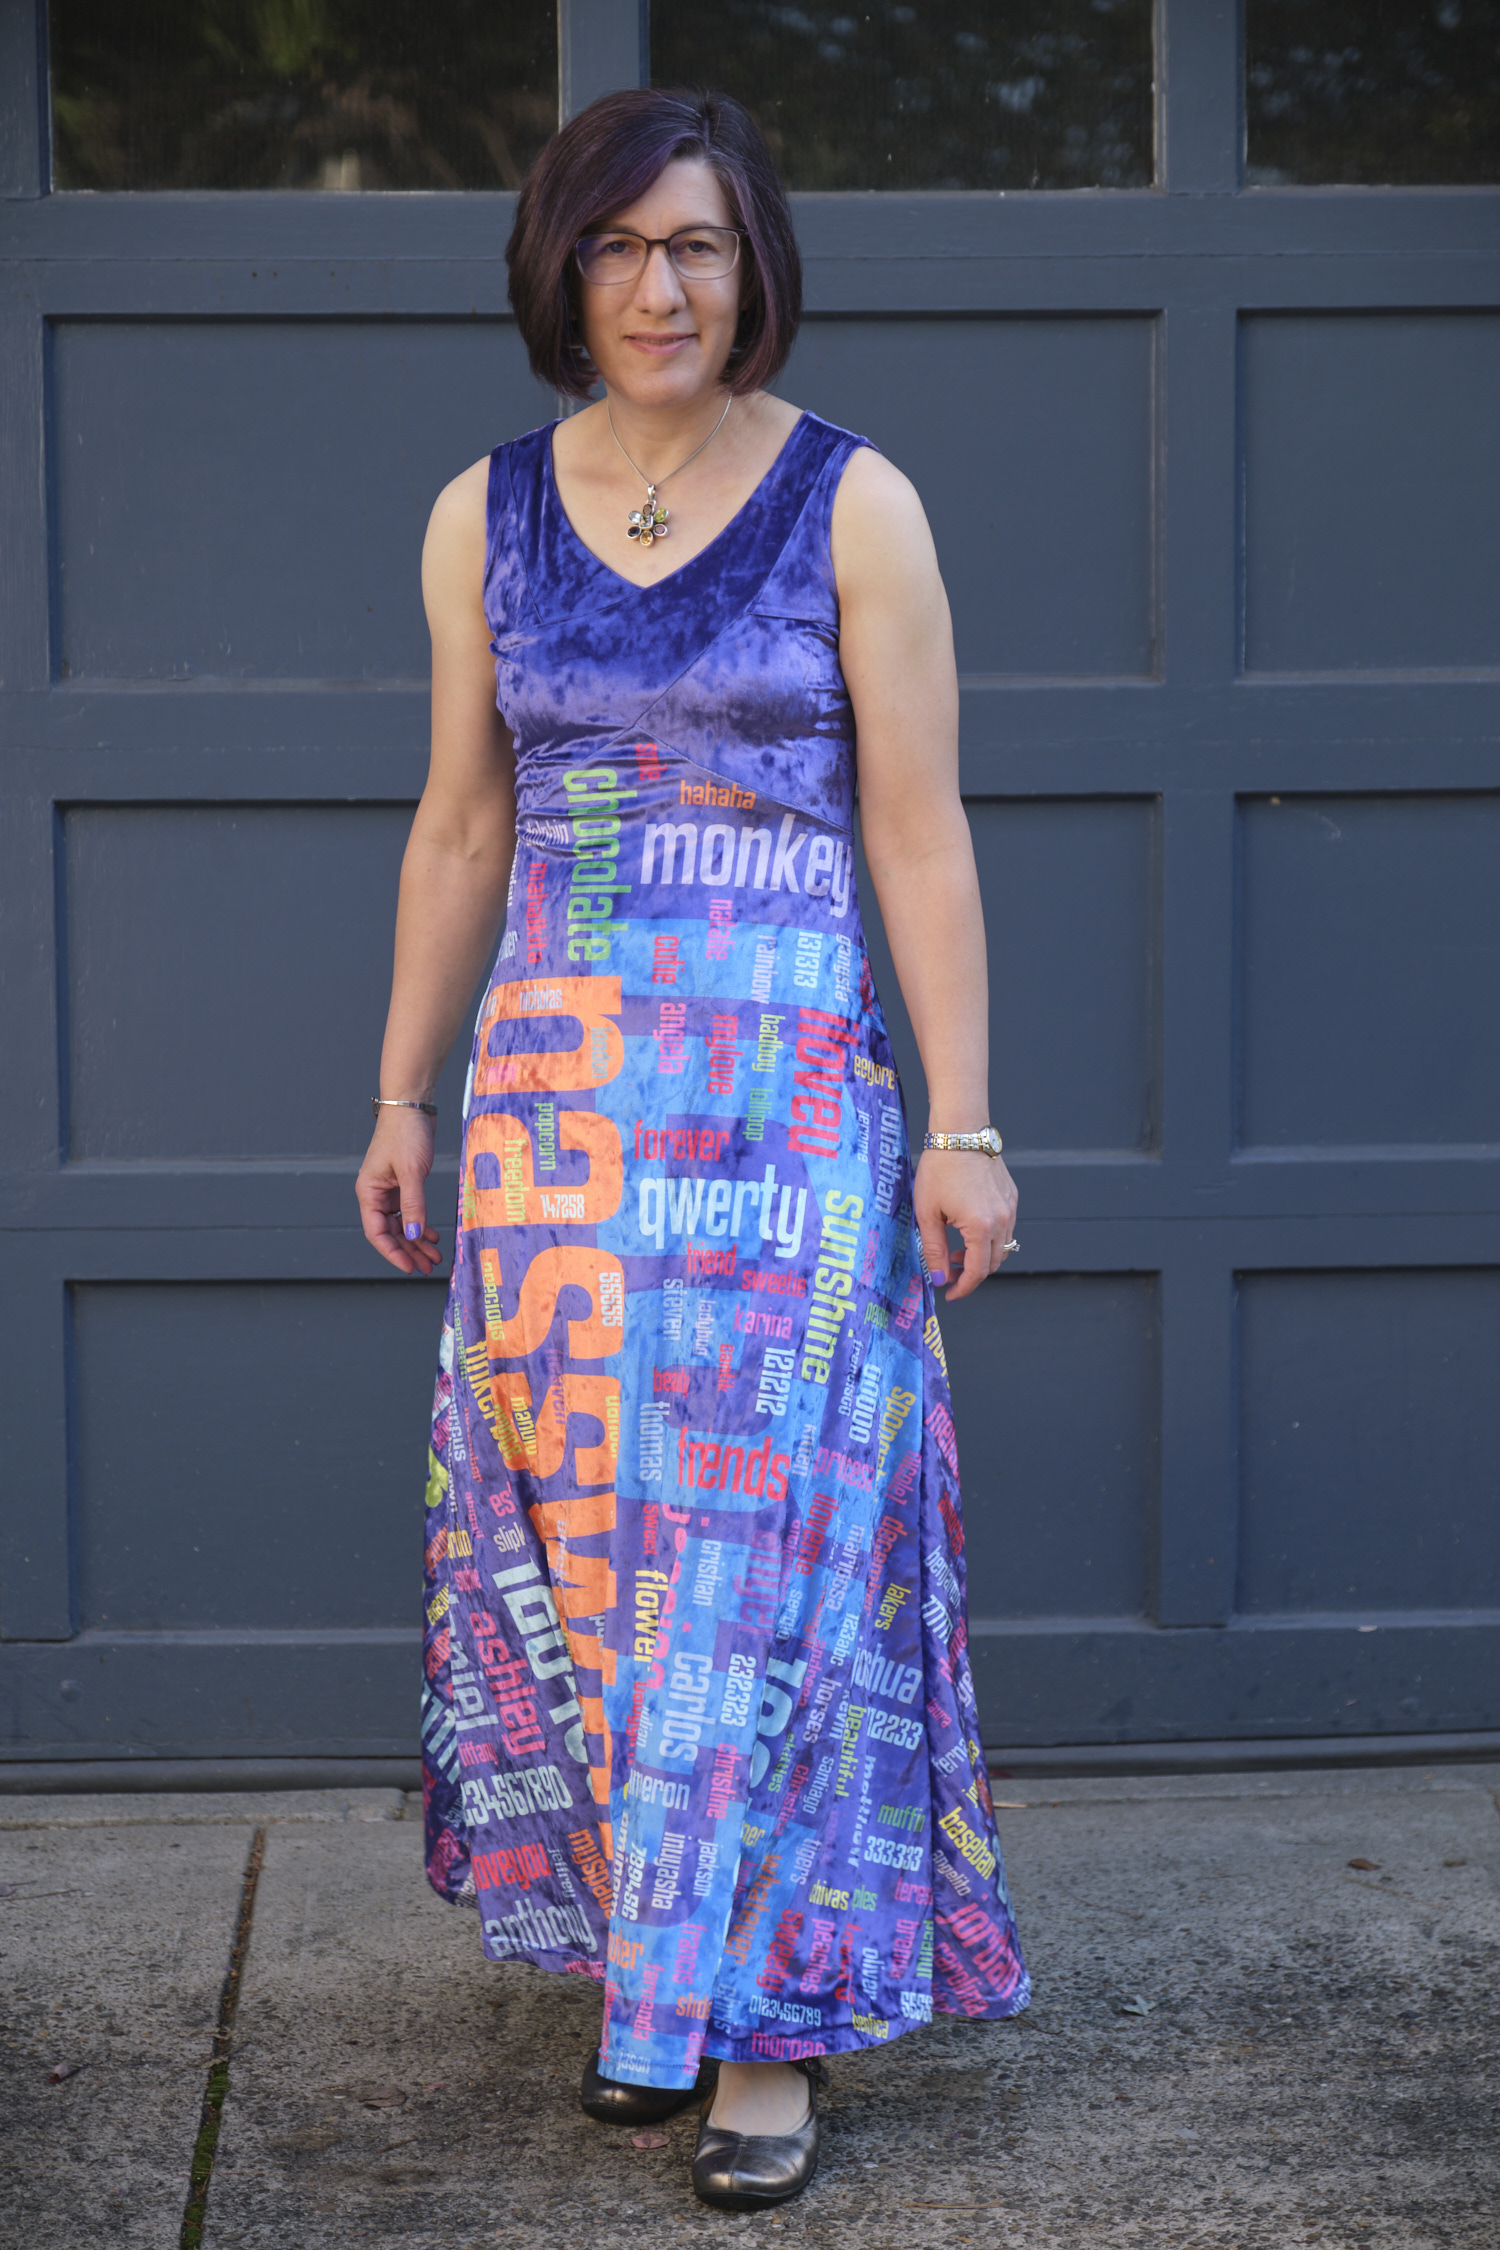
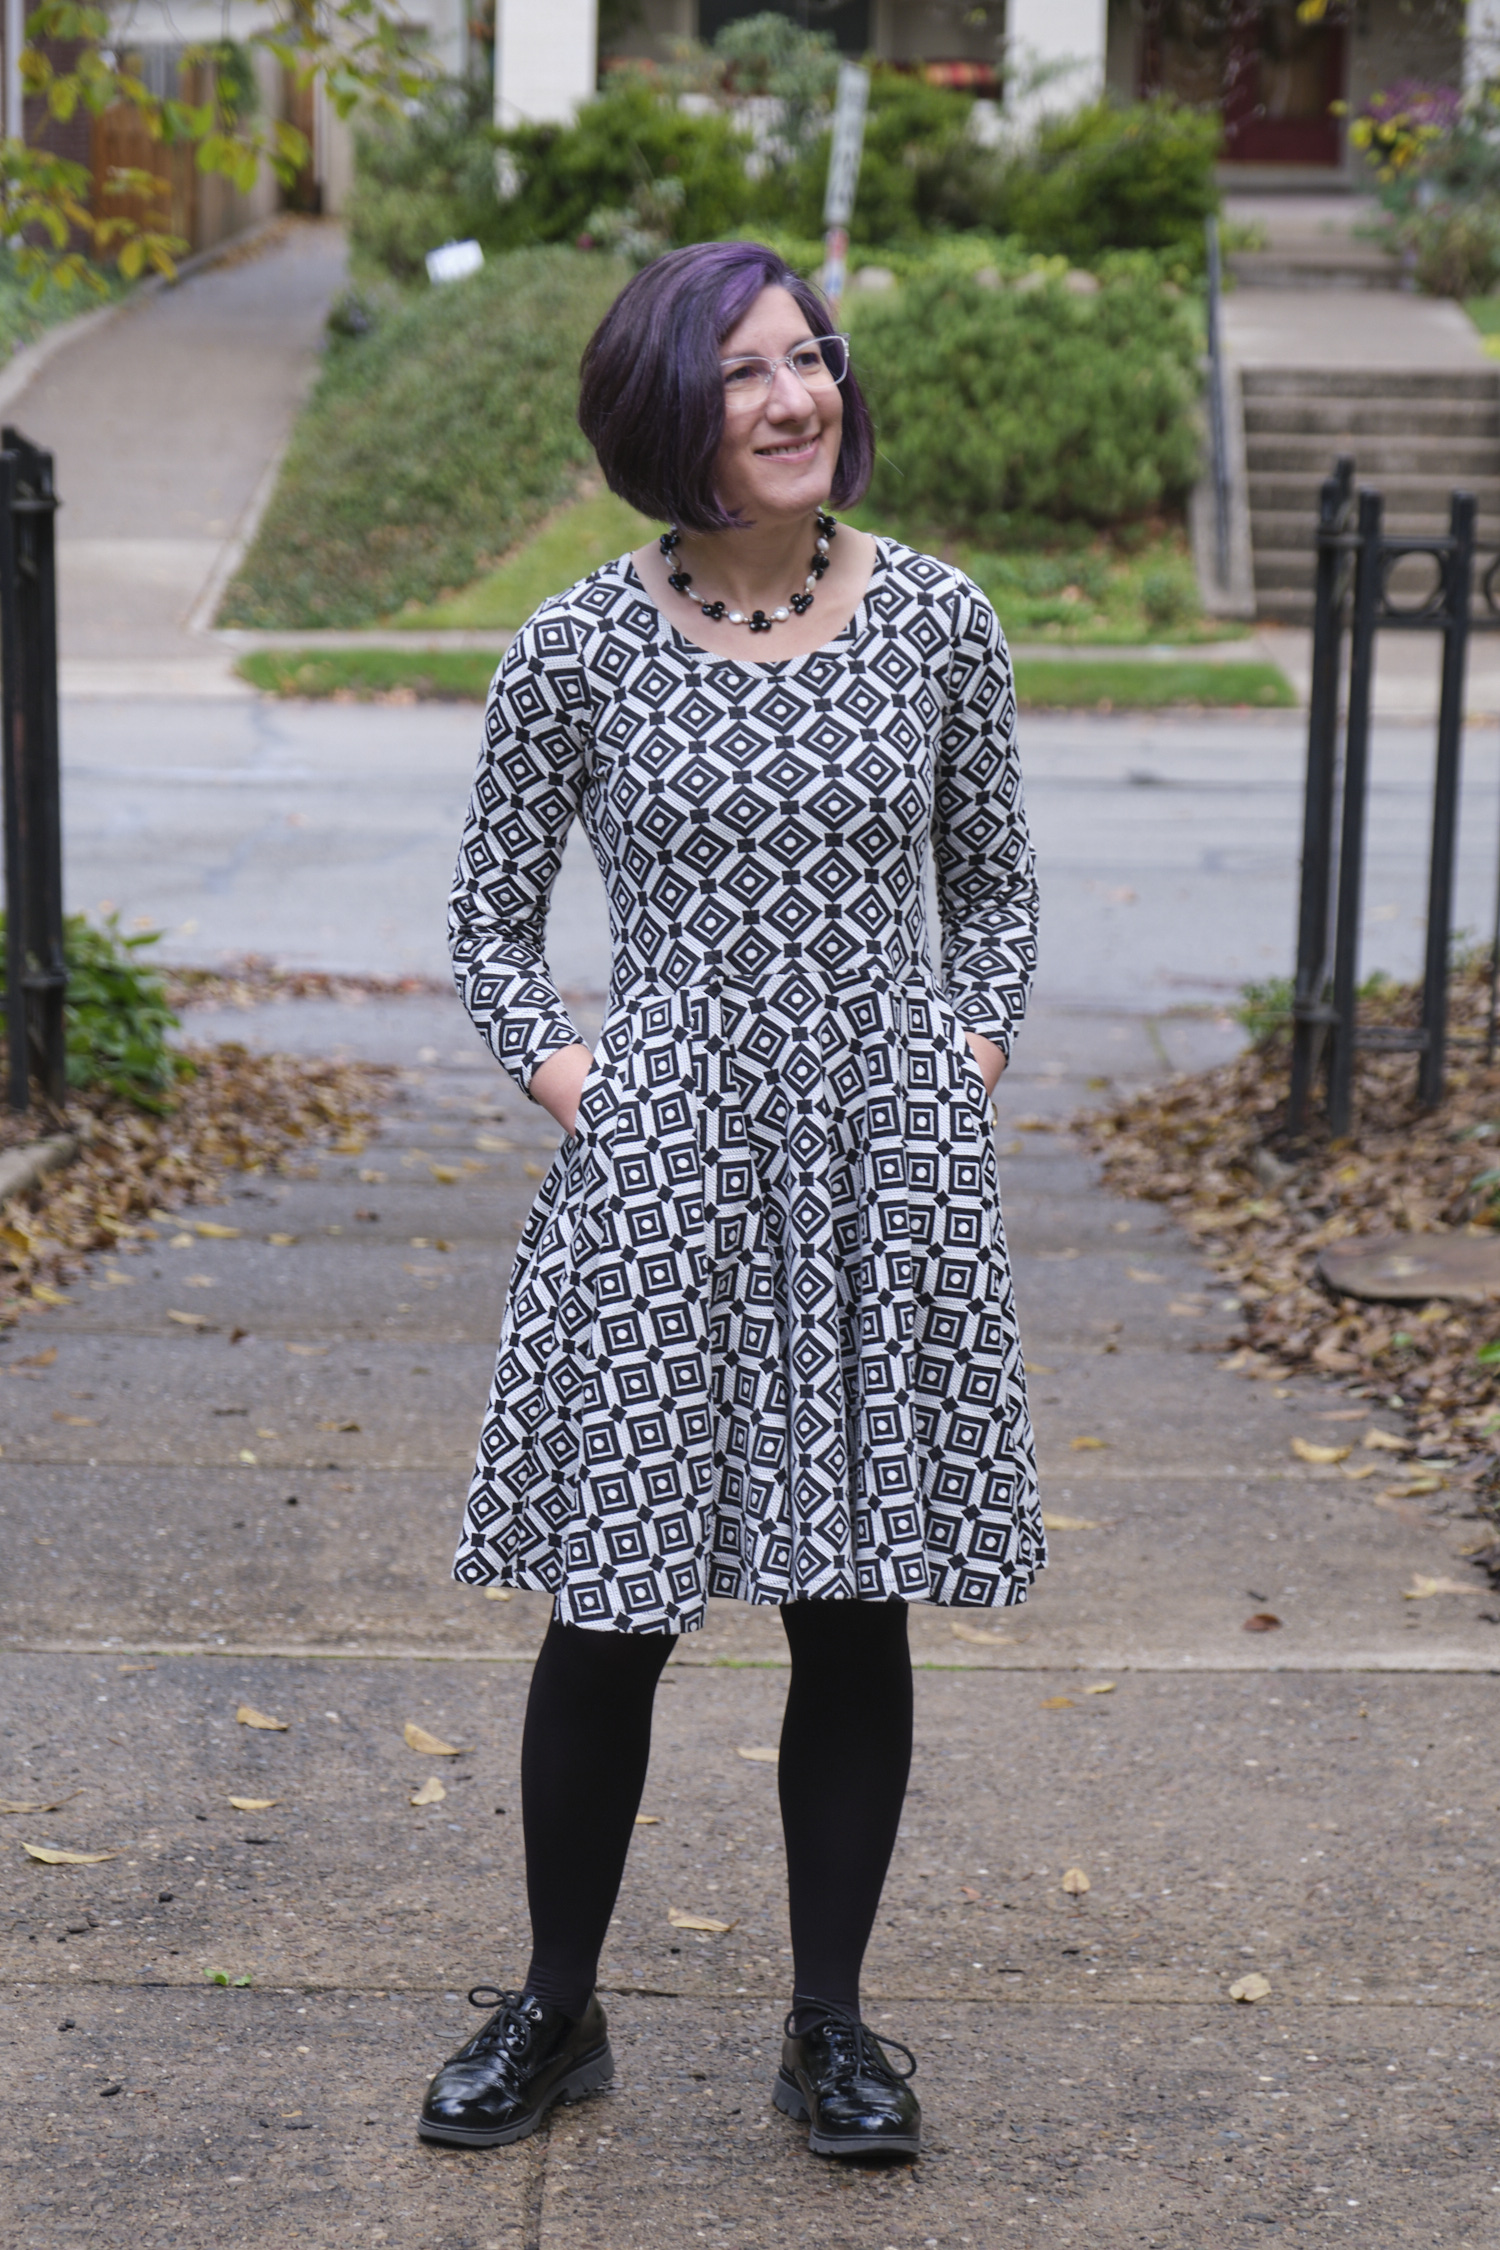
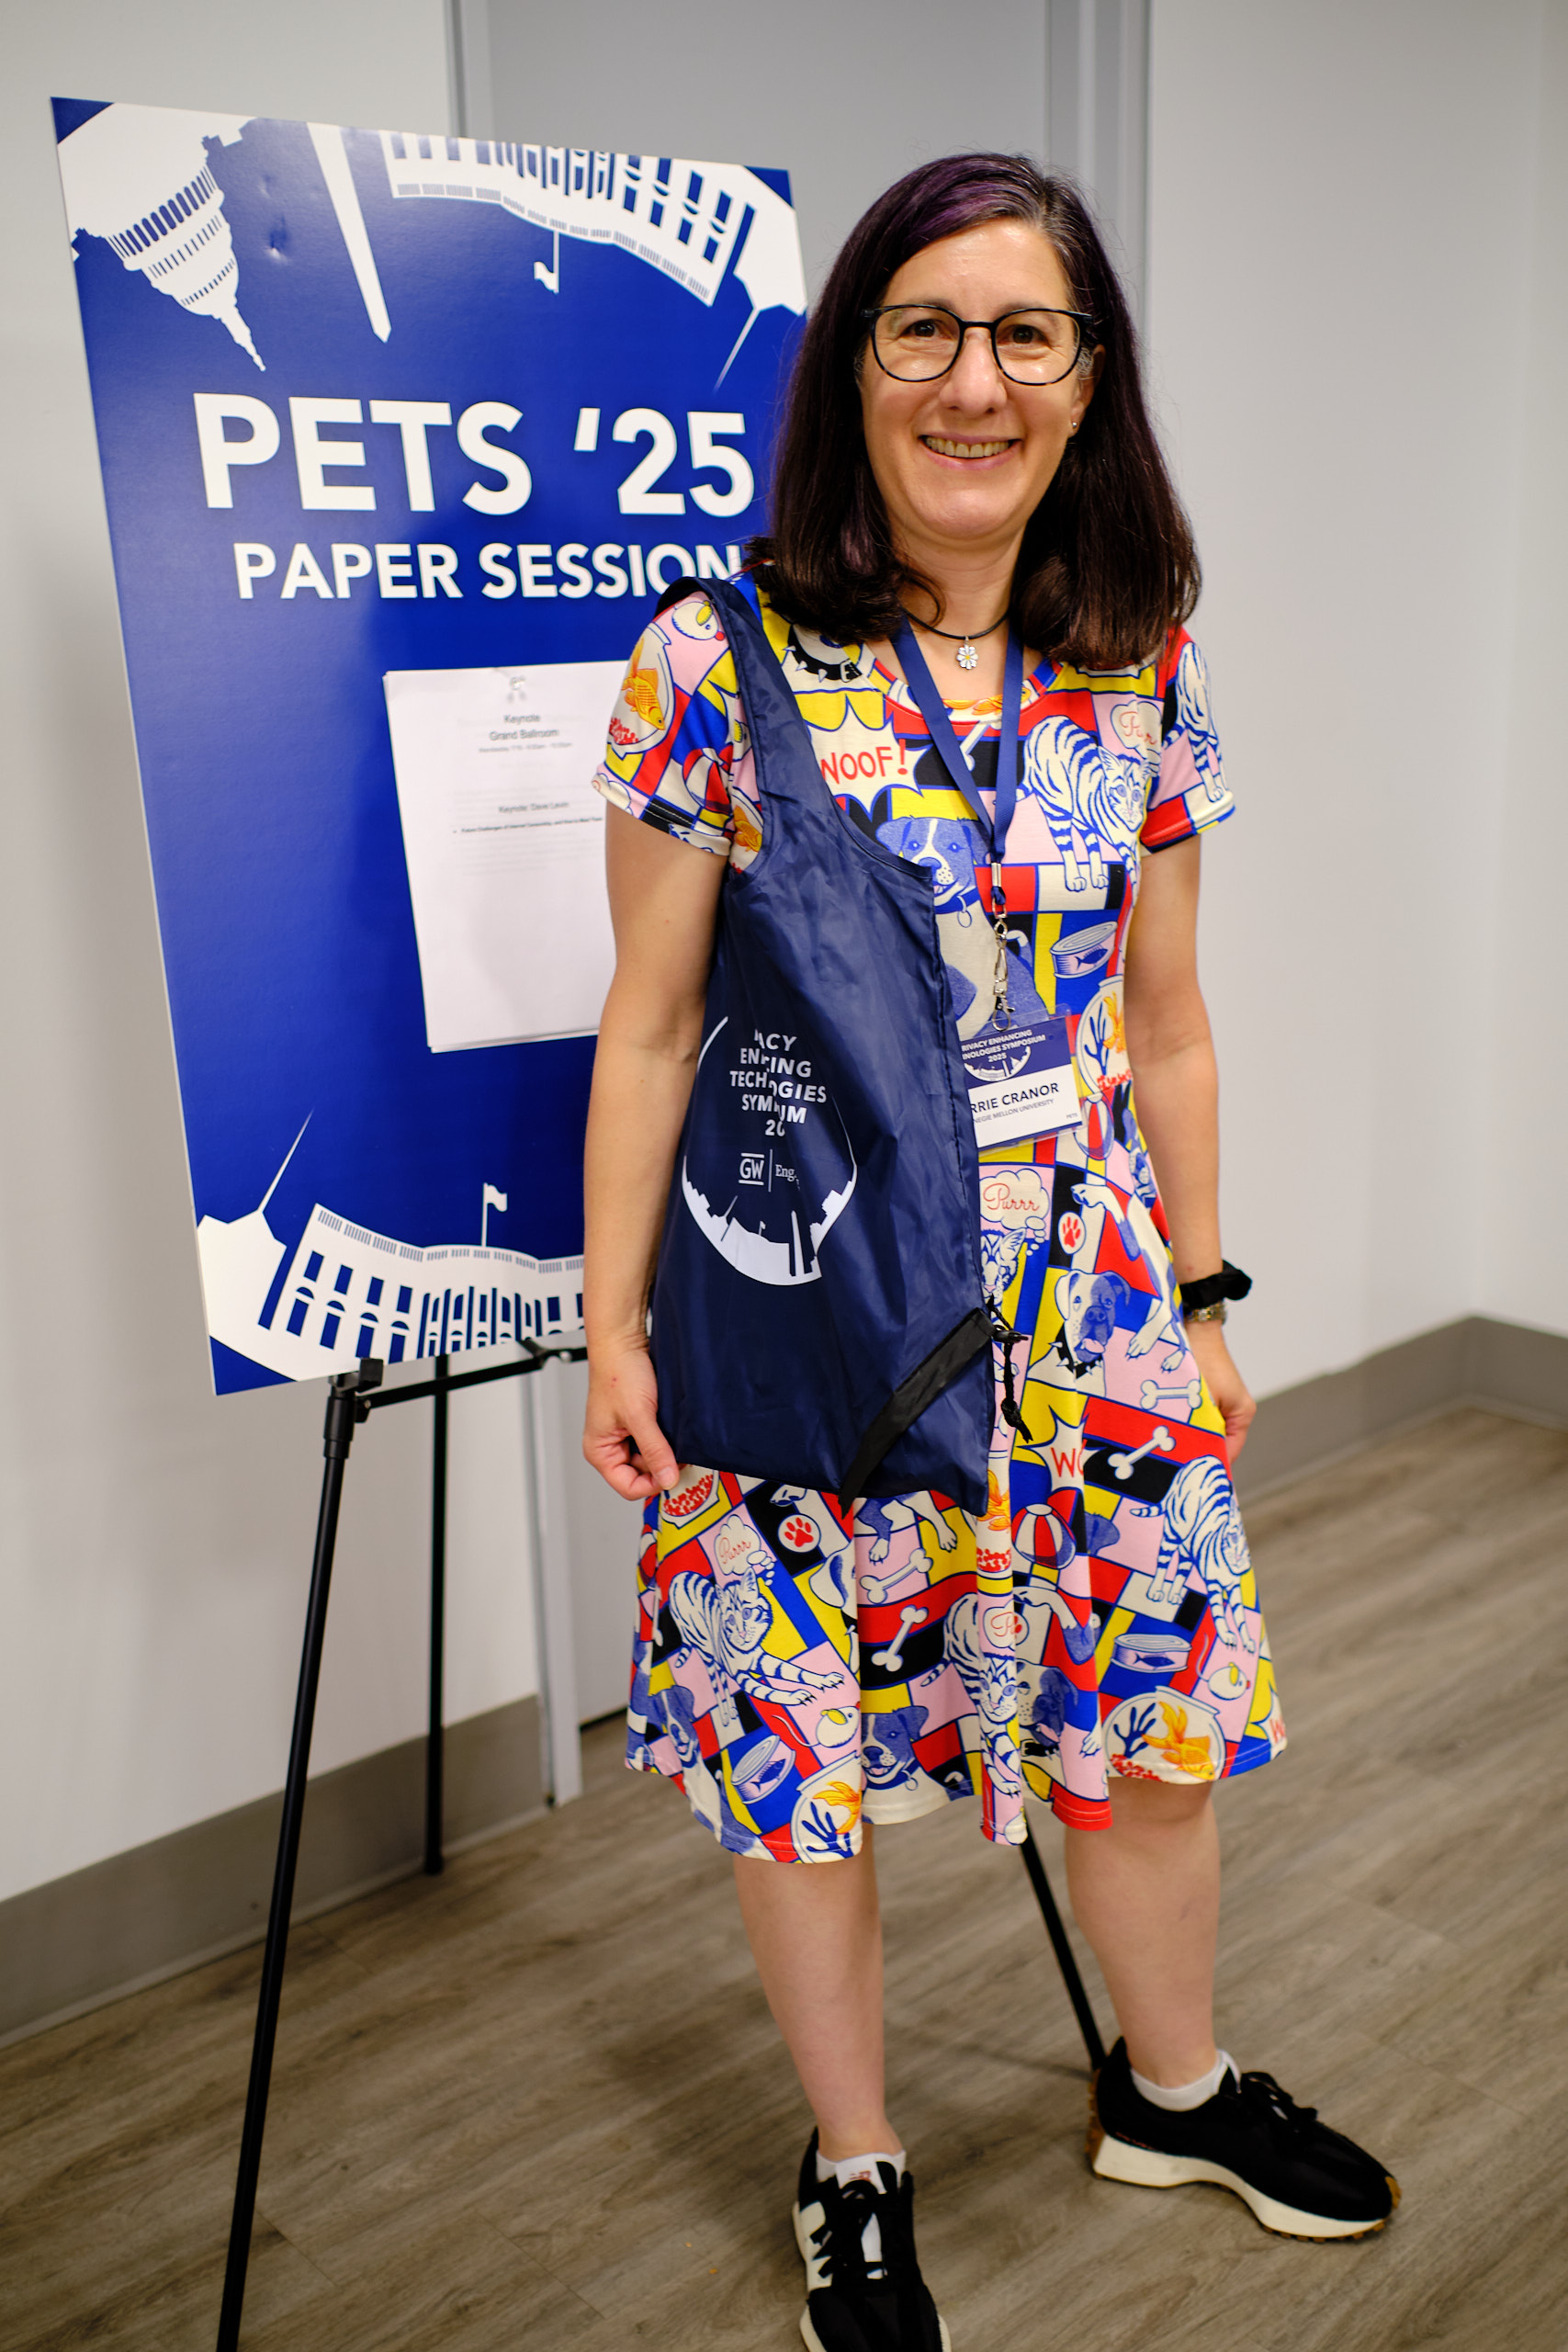
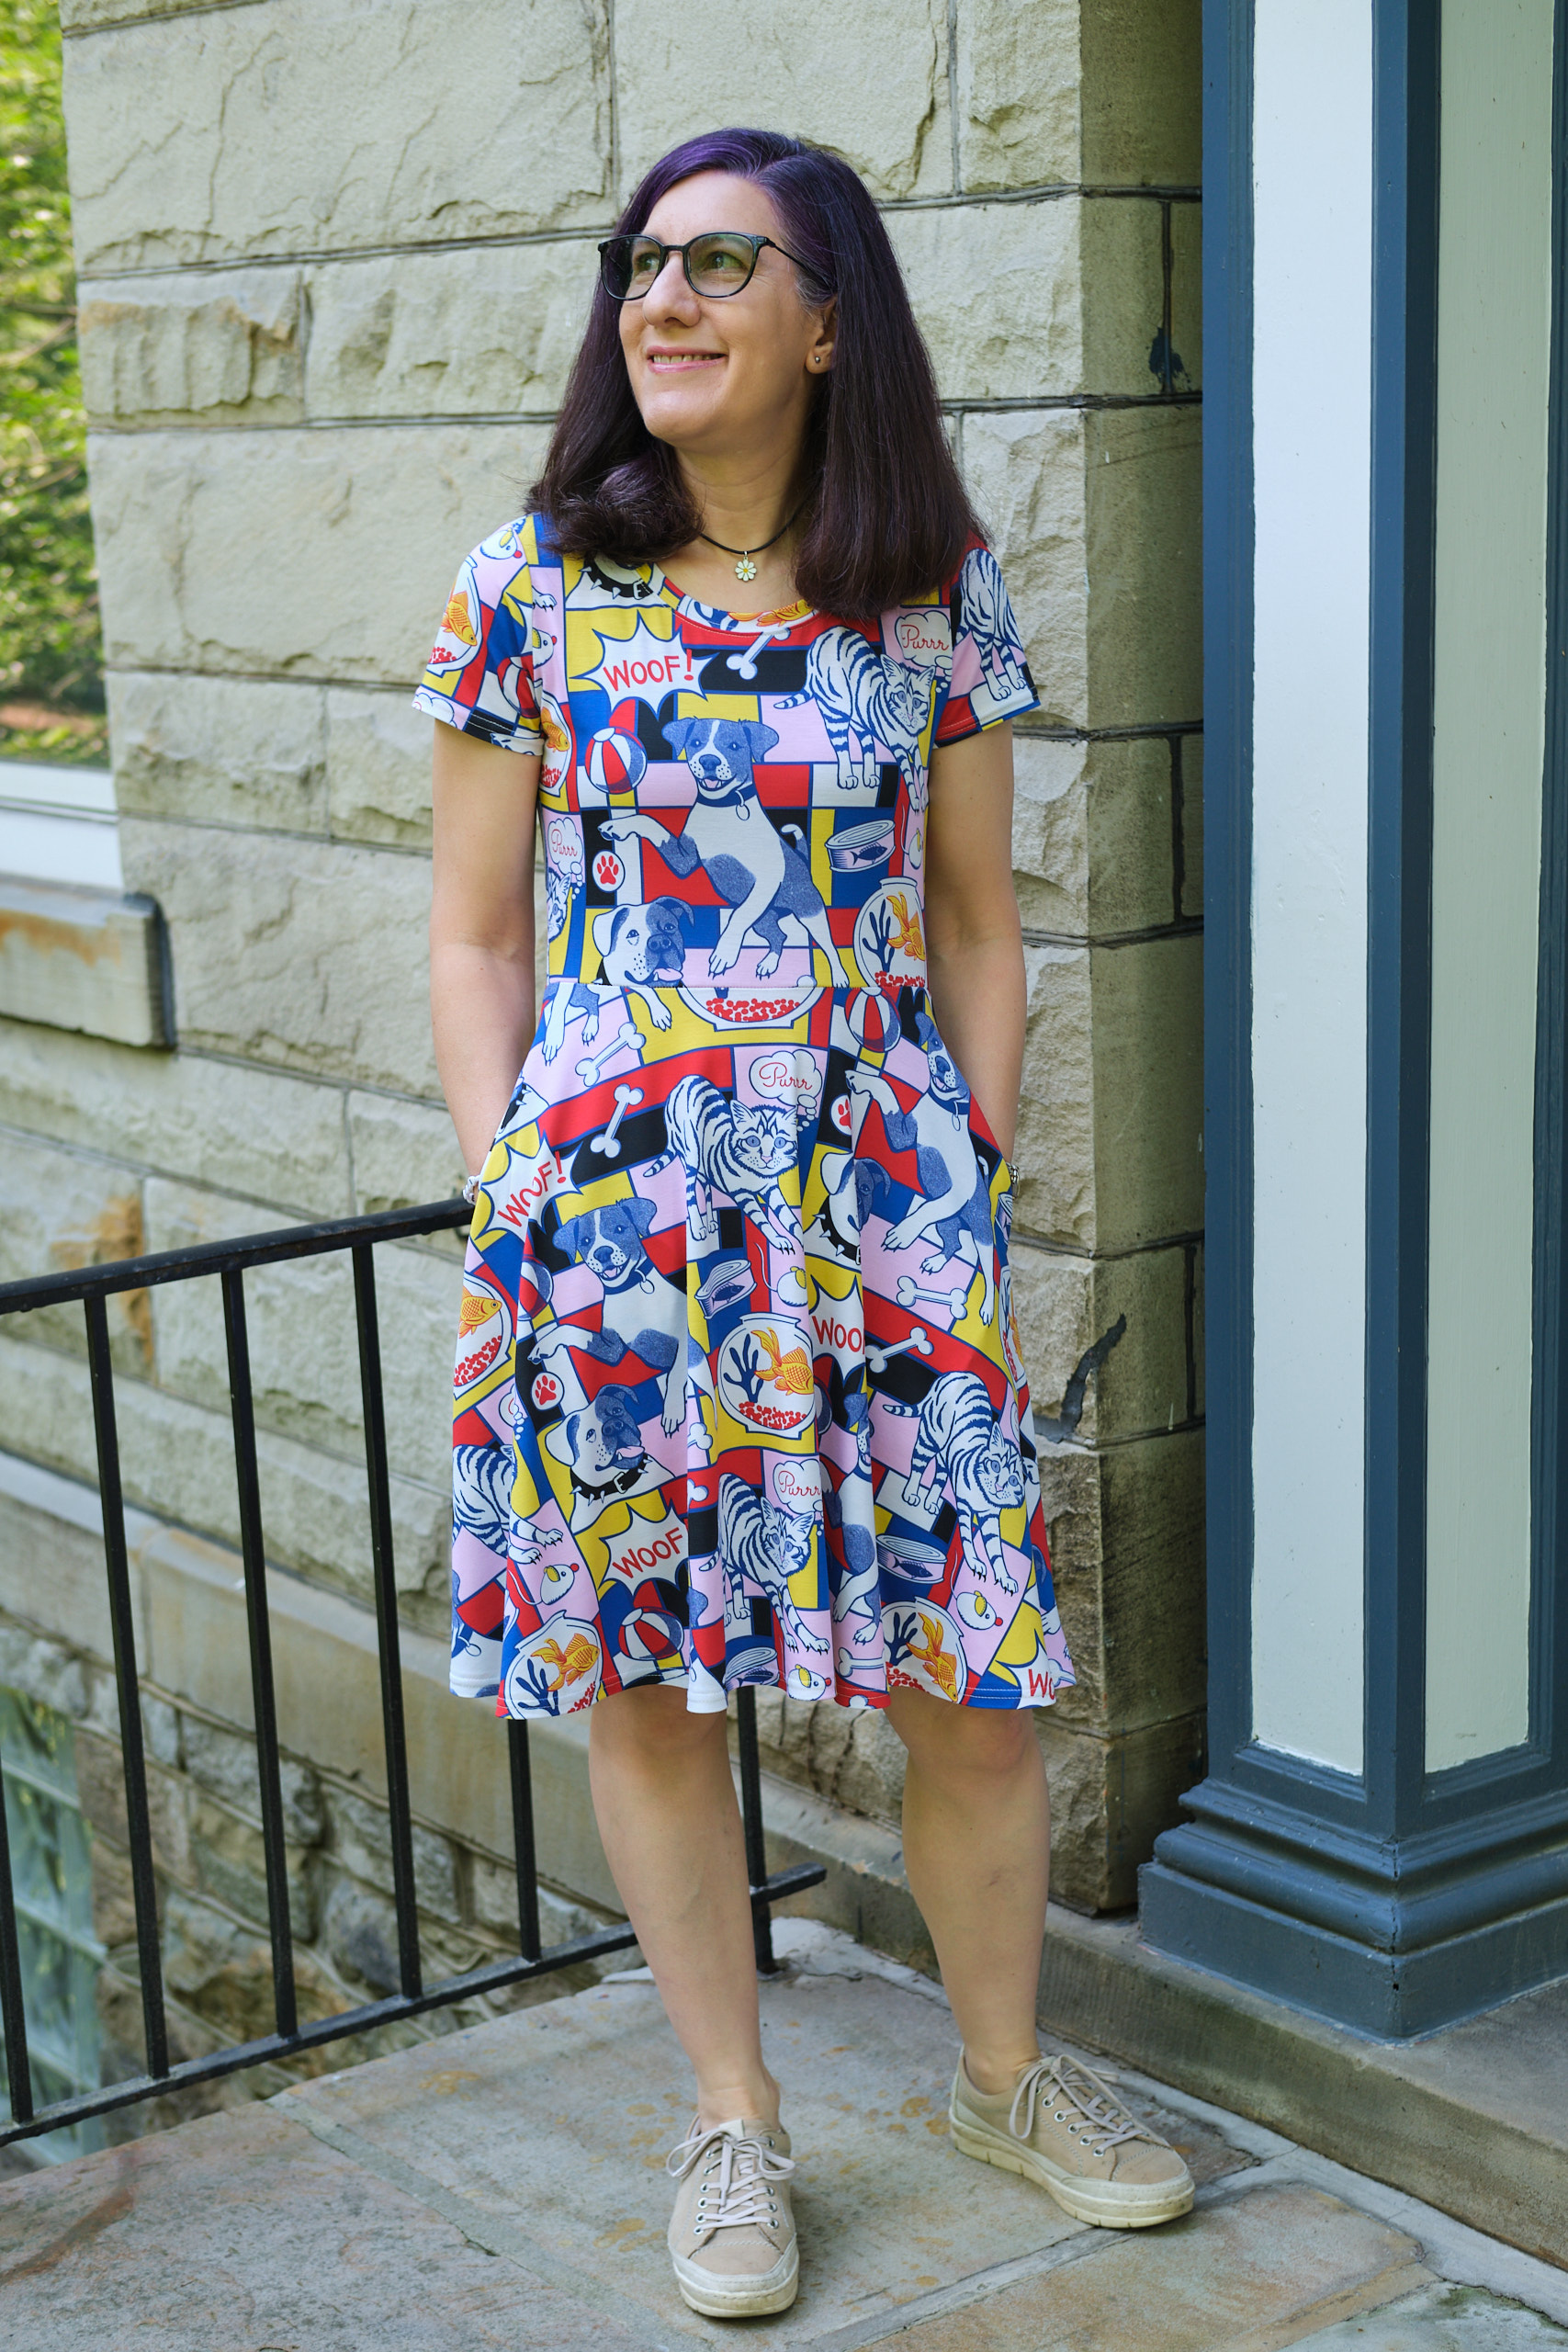
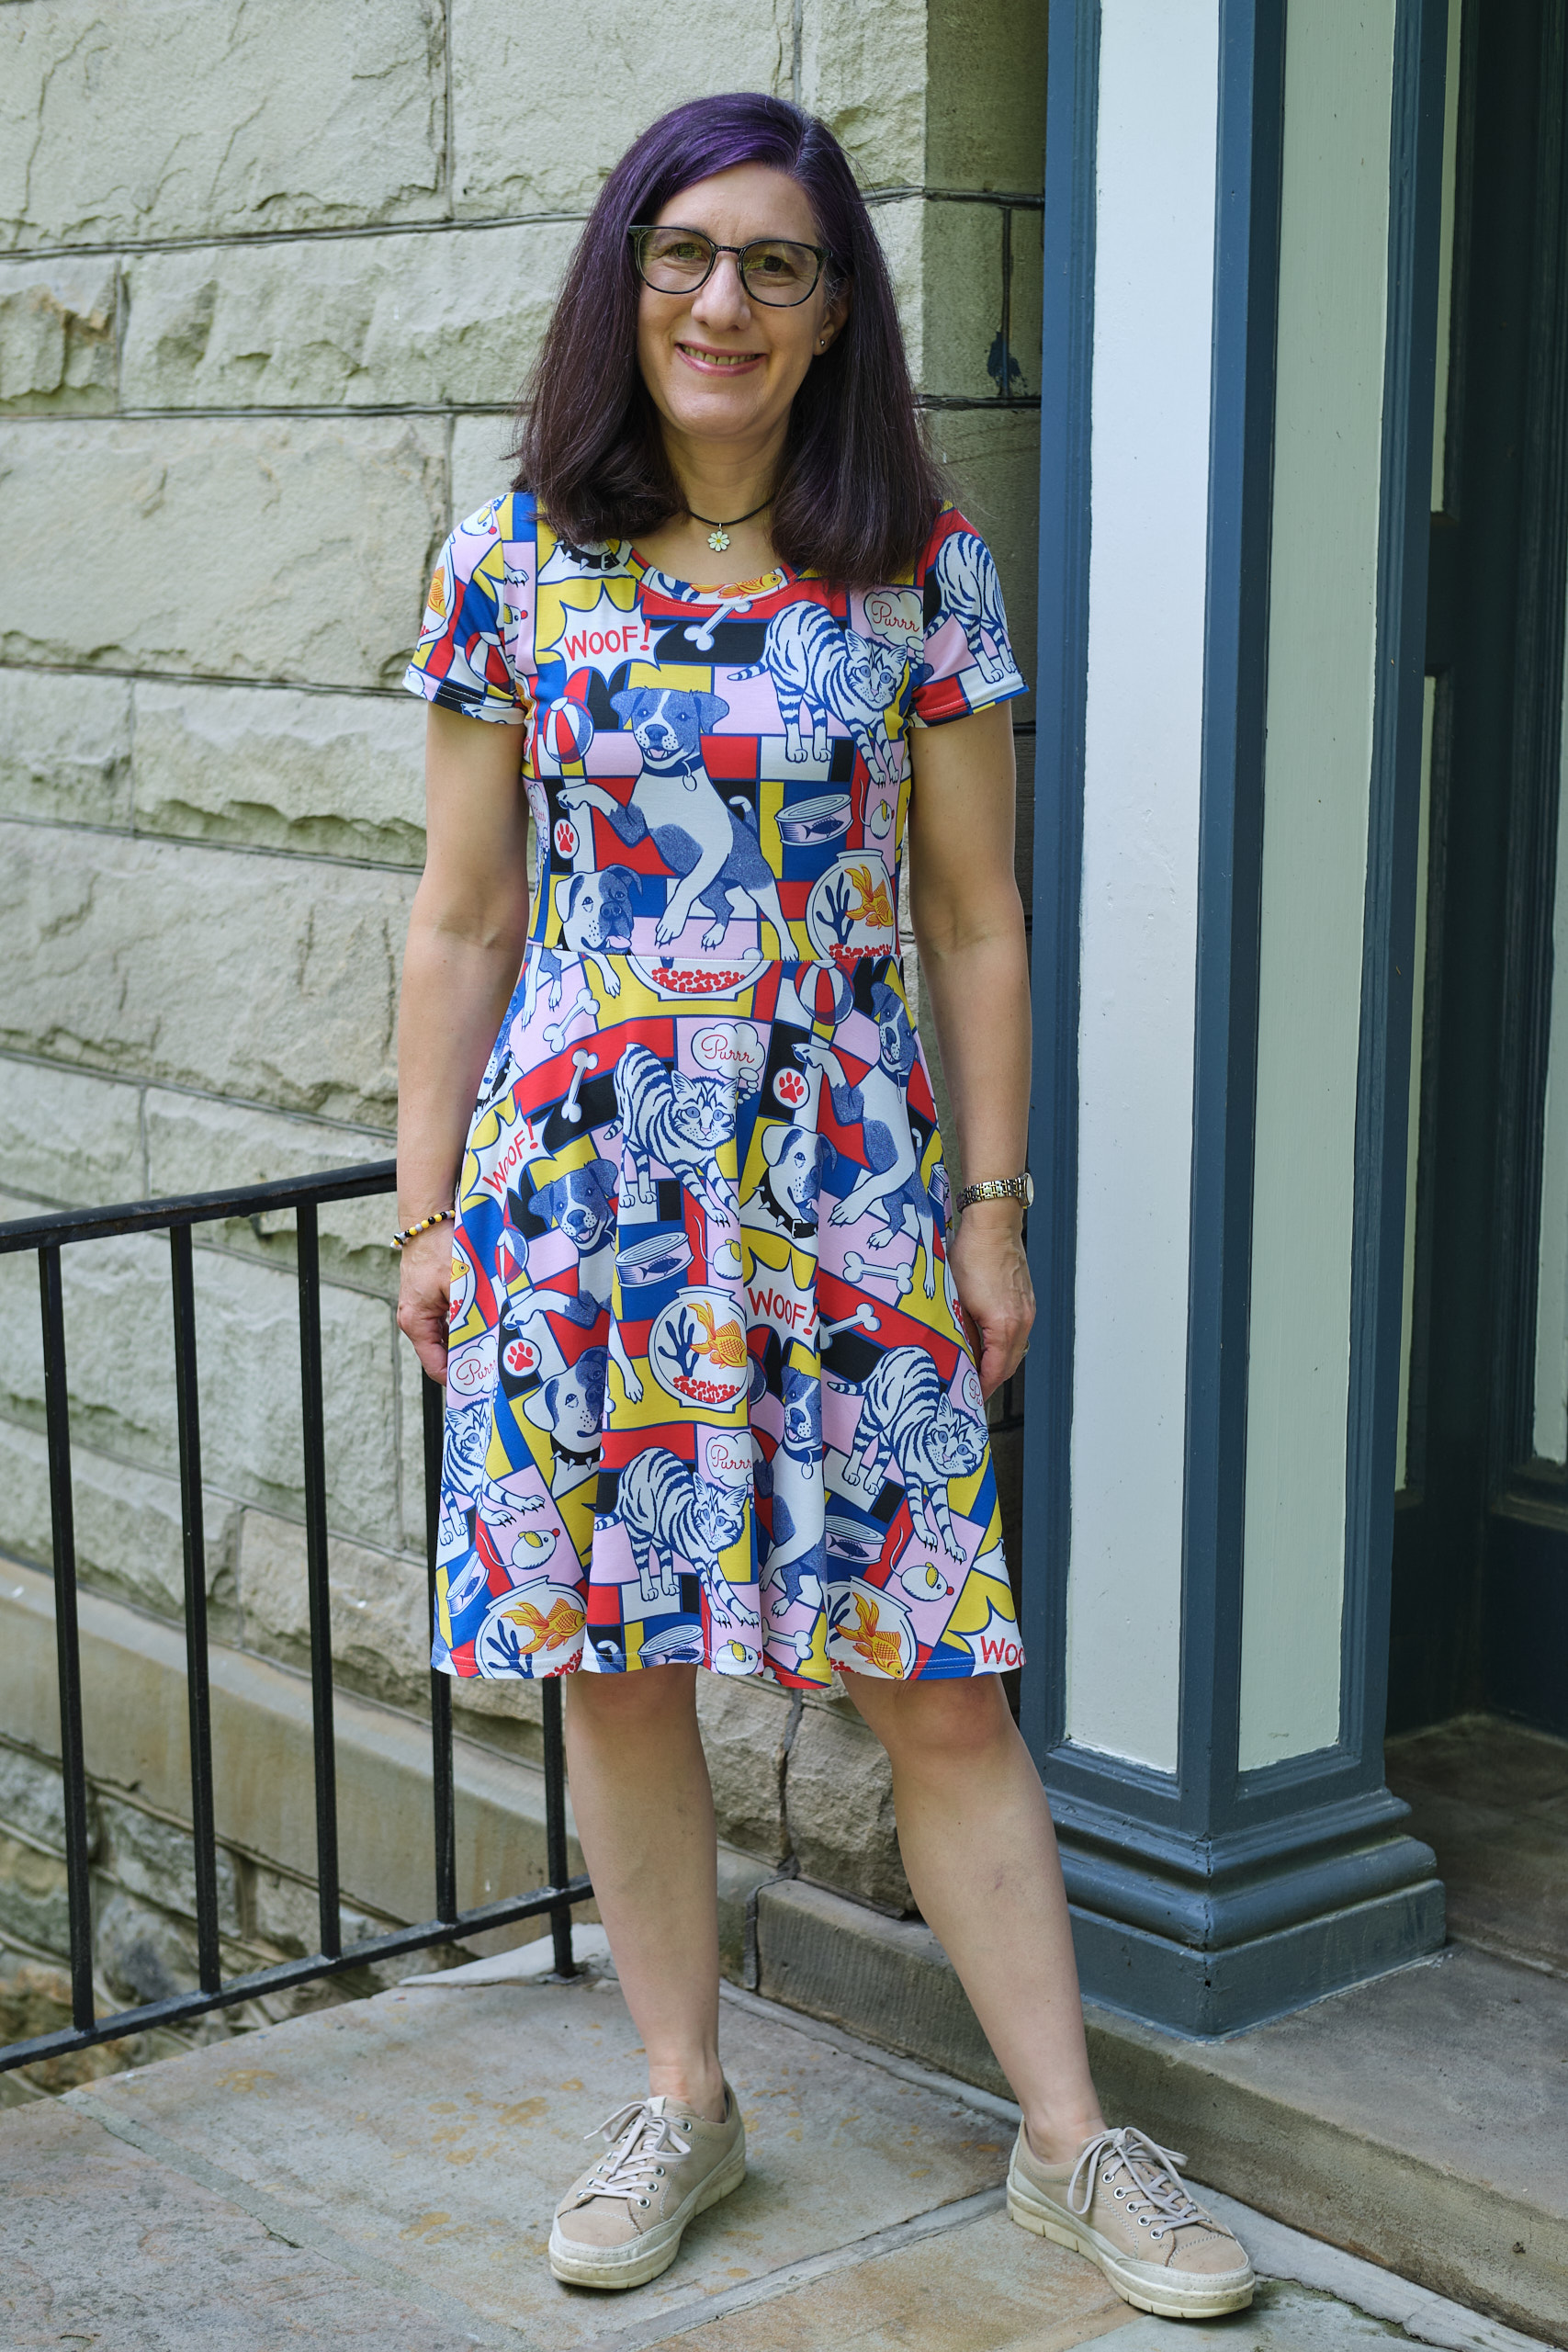
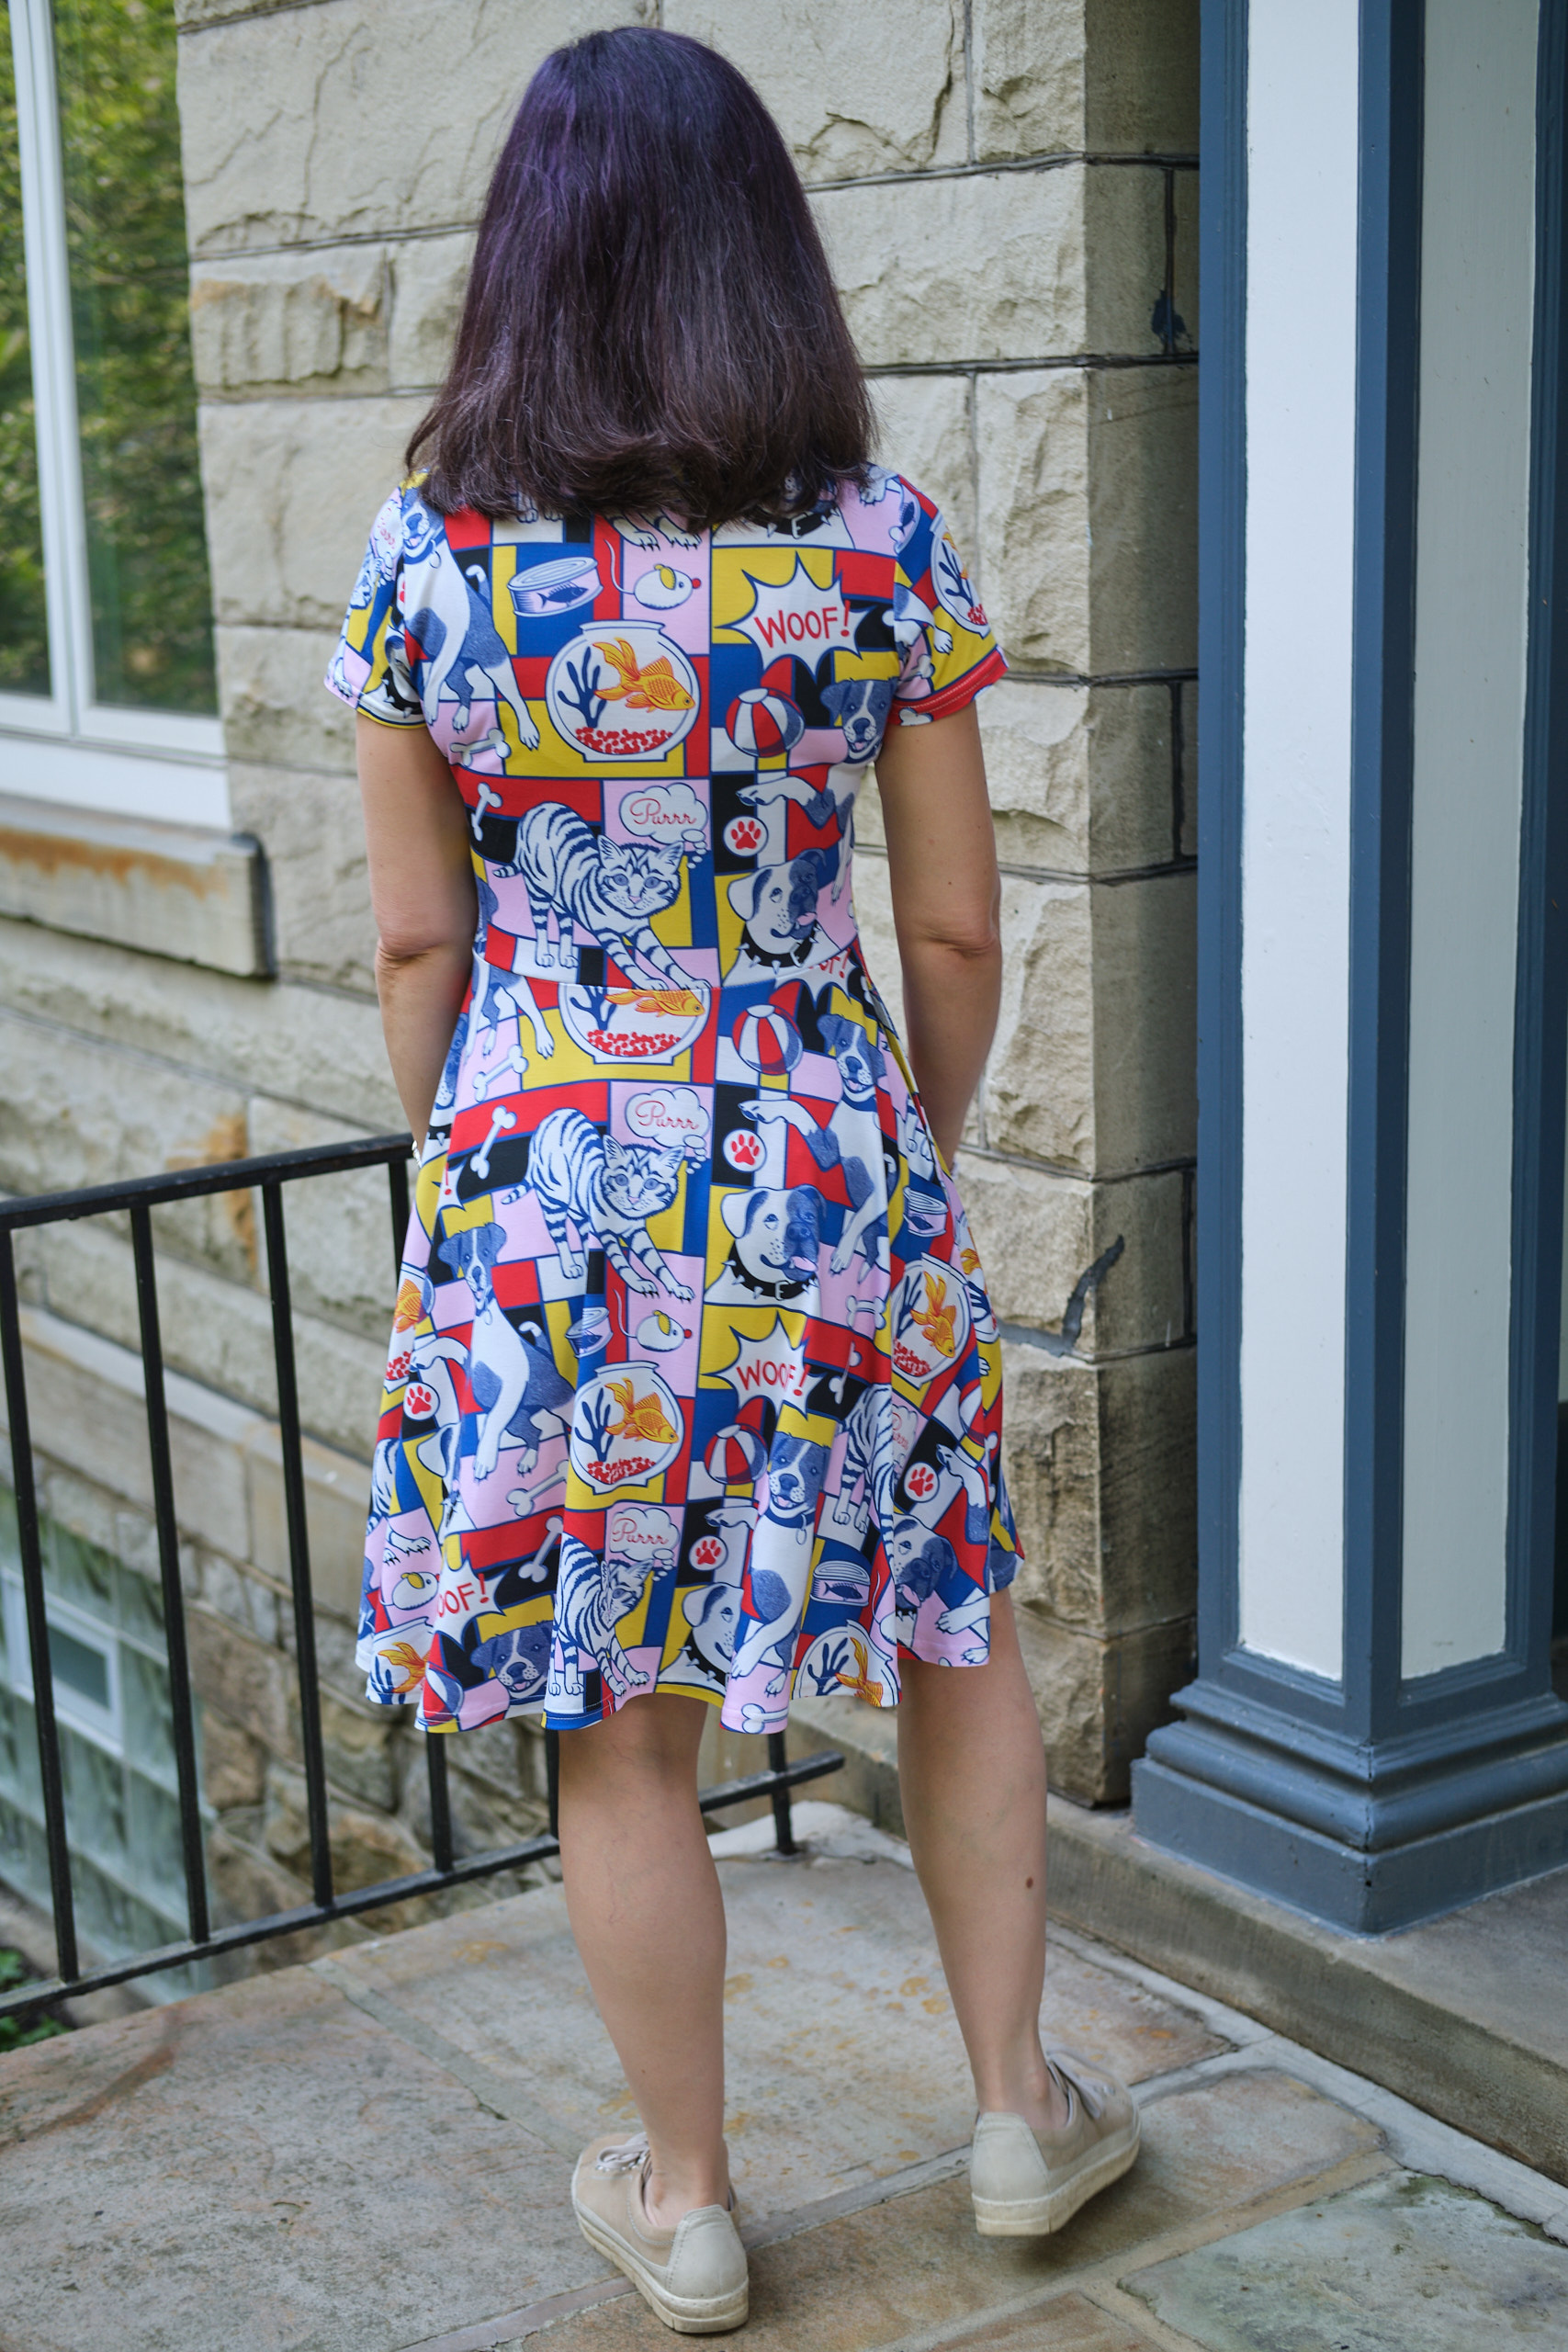
Sinclair Valley Knit Skater Dress with half-circle skirt from Flared skirts ADD-ON, size P6, 2 yards Spoonflower modern jersey, short-sleeve, above knee length plus one inch, bodice extended 1.3 inch and no waistband, pockets modified so as not to attach to waist, “screwp neck” with cover stitching
Spooflower.com had some nice custom options with multiple pets, but most were too cute for the look I was going for — a nice pattern for baby clothes but not the vibe I wanted. I found “Pop Art Pets” designed by Susan Faiola and showed it to my husband and he thought it was great, so I ordered two yards in Modern Jersey, my favorite Spoonflower fabric. It’s 95% polyester, 5% spandex, feels like cotton with a nice drape and takes color well. It has a bit more than 25% horizontal stretch and less vertical stretch. I have been less impressed with Spoonflower’s cotton spandex jersey, as I find it feels almost rubbery when you print it with dark colors and they fade over time. When the fabric arrived in the mail I was quite happy with it. My husband pointed out that the dog in the fabric looked a lot like a dog we know named Daisy, so after I finished the dress I borrowed Daisy to take some photos.
I chose the Sinclair Valley Knit Skater Dress with half-circle skirt from Flared skirts add-on, a pattern I have made several times. The pattern is pretty fast and easy, and fits well without much modification. It actually fits like a glove, and as this fabric has less stretch than fabrics I’ve used in the past, I decided to size up from my usual P4 to a P6. Since I omitted the waistband I extended the length of the bodice by 1.3 inch. As I have done in the past, I modified the pockets so they do not attach to the waist to prevent the waist from being distorted when I put my phone in my pocket. I also found from past experience that I prefer a neckline in between crew and scoop, so I used my usual “screwp neck” modification. The fit of the dress is just about perfect!
I sewed almost everything on my serger and then fused and cover stitched the hems with a wide cover stitch. I used the same wide cover stitch on the neck band. This is the first time I’ve ever tried to cover stitch a neck band. I took it very slowly and it came out really well. I used my regular serger foot and it was a bit tricky to see the stitches; next time I need to try one of the feet designed for cover stitching that provides more visibility (I’m sure I have multiple options in my 29-foot accessory kit, I just need to figure out which one to use).
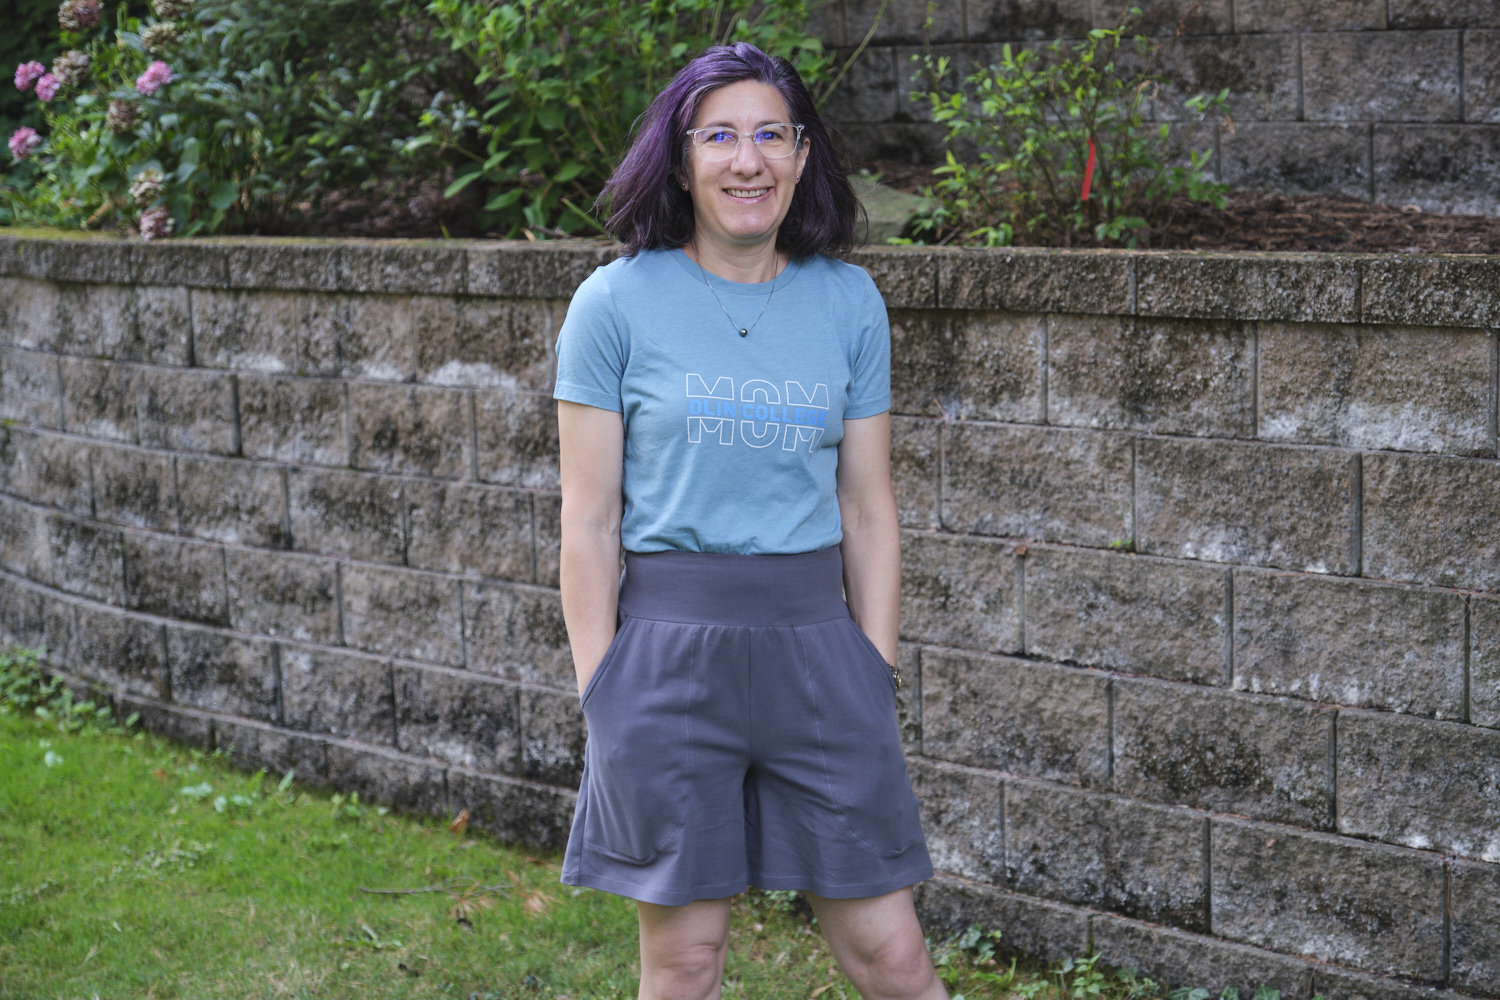
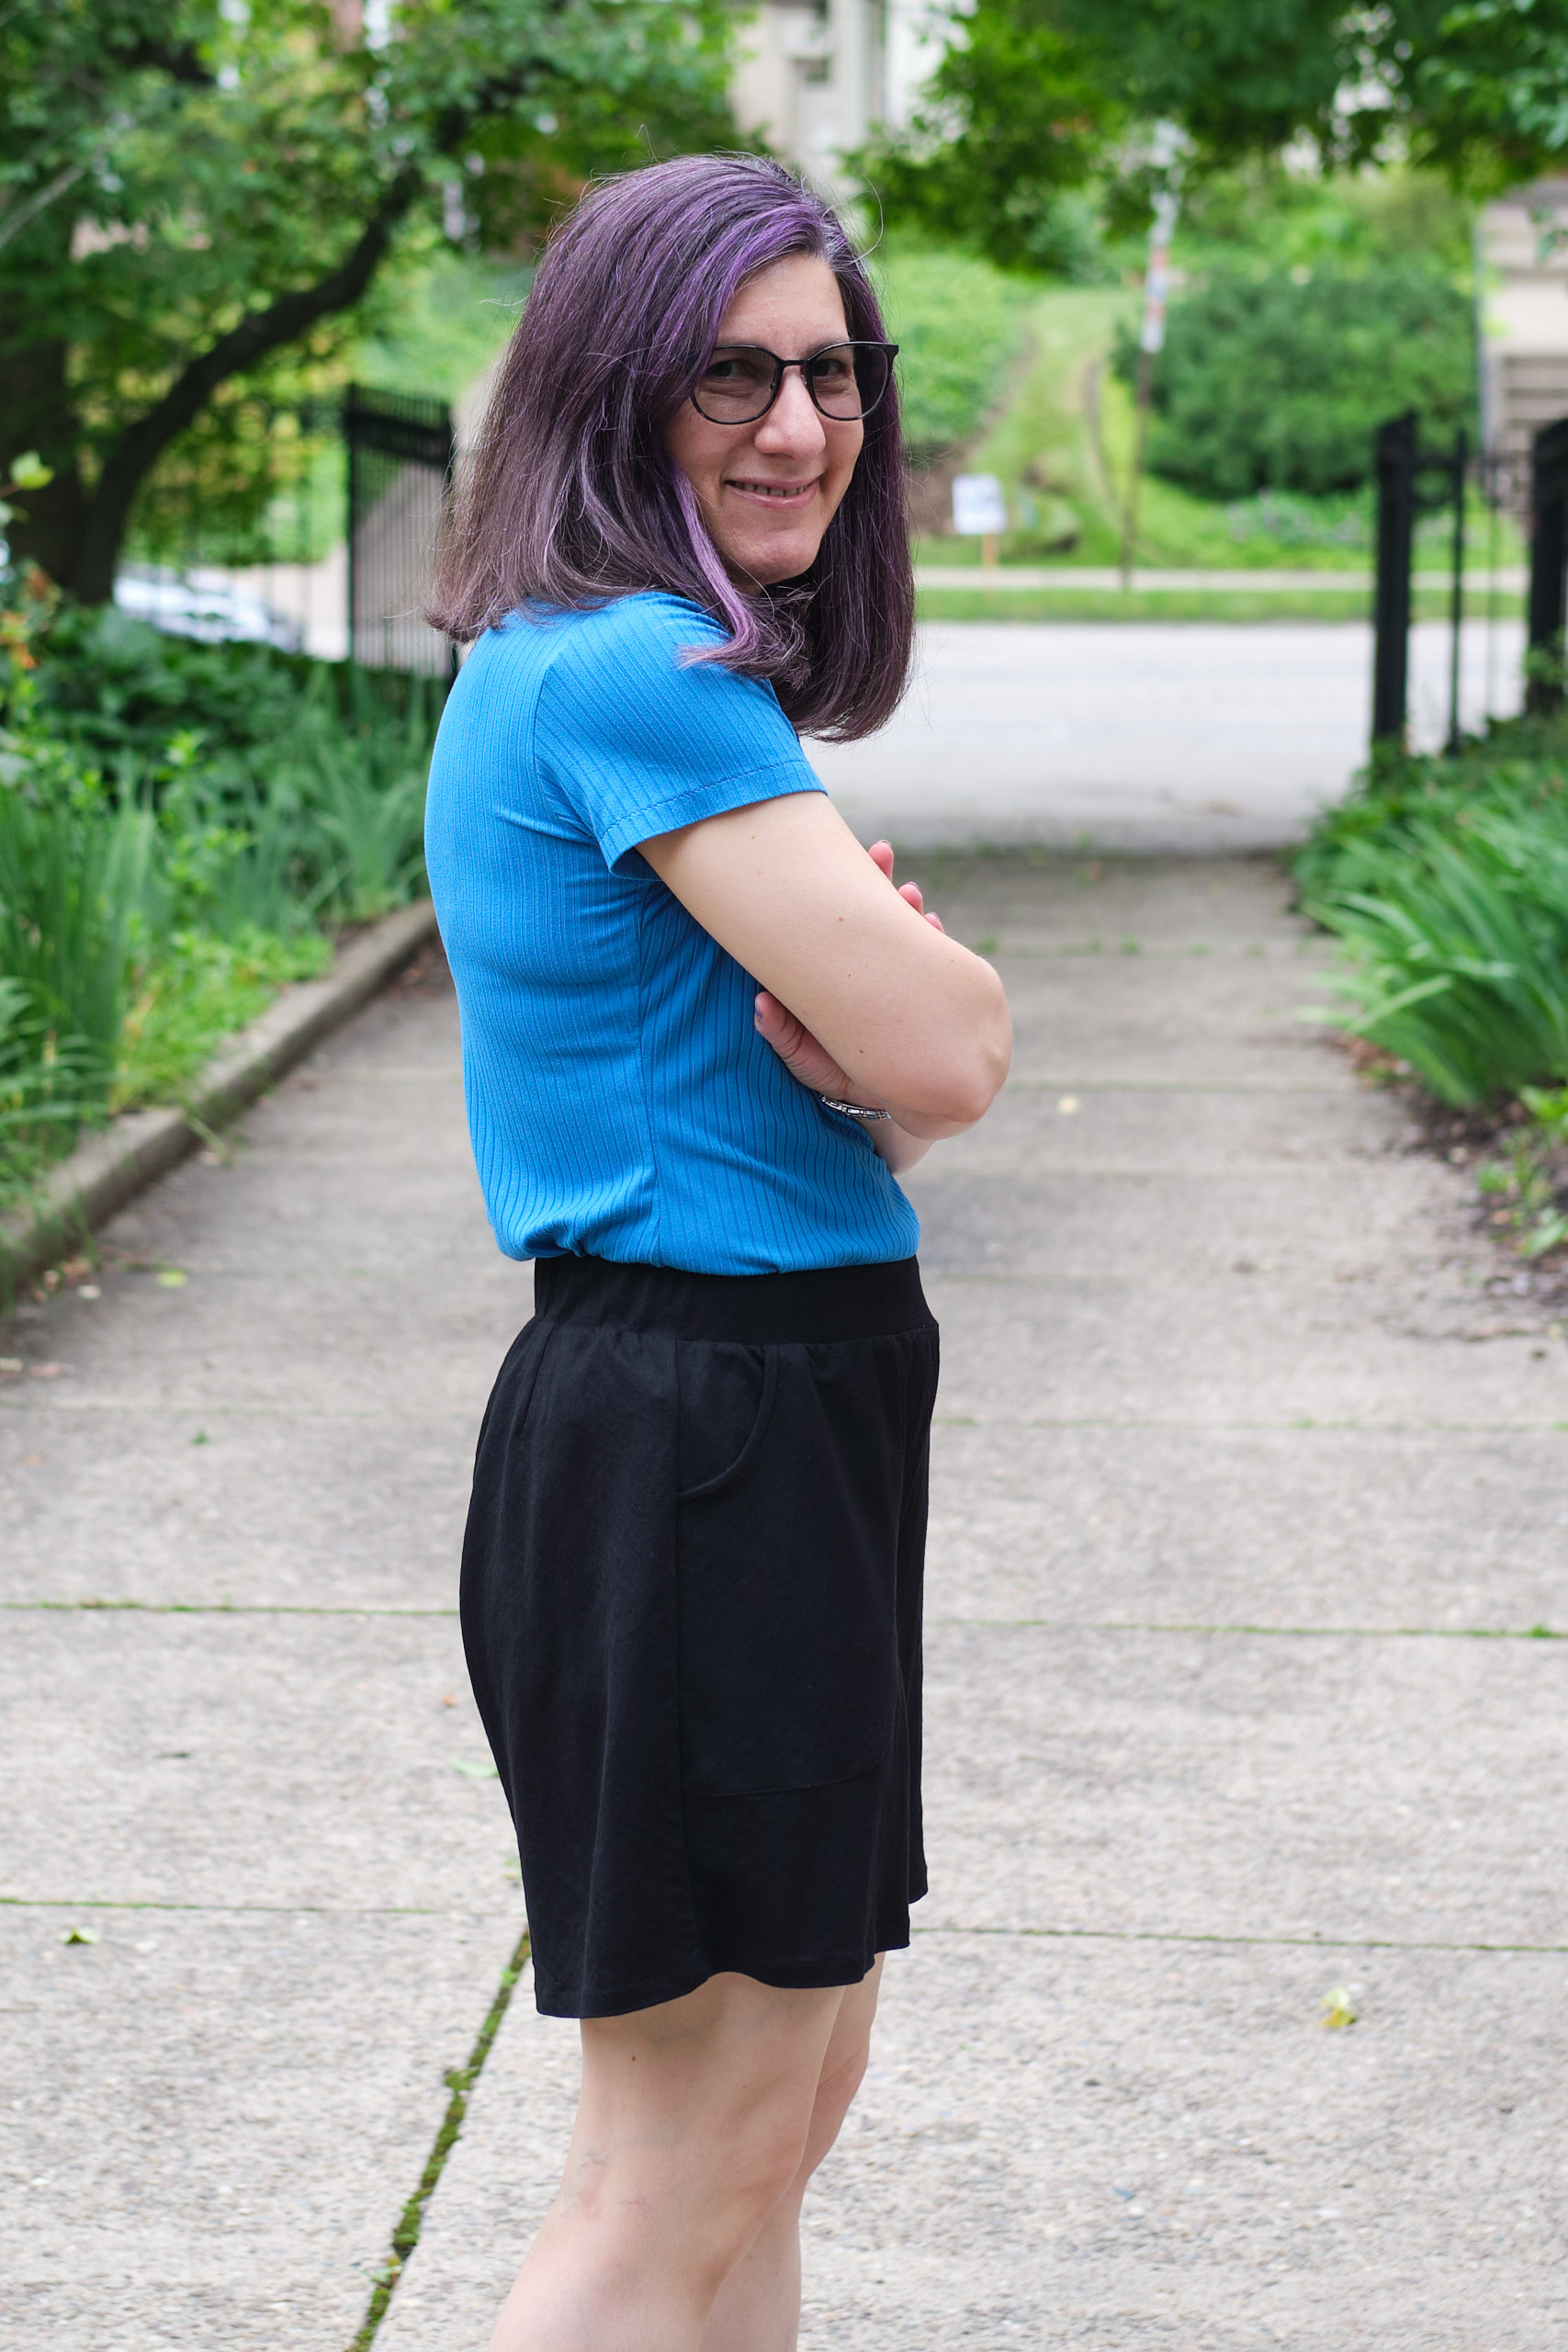
Summer is here and I reached for a pair of shorts to wear out of the house and couldn’t find any I liked. They were all either shorts I wear for playing soccer, shorts I wear for sleeping, shorts that don’t sit where I want them to at my waist, shorts that I find uncomfortable to sit in, or shorts with inadequate pockets. Clearly I need to sew myself some new shorts.
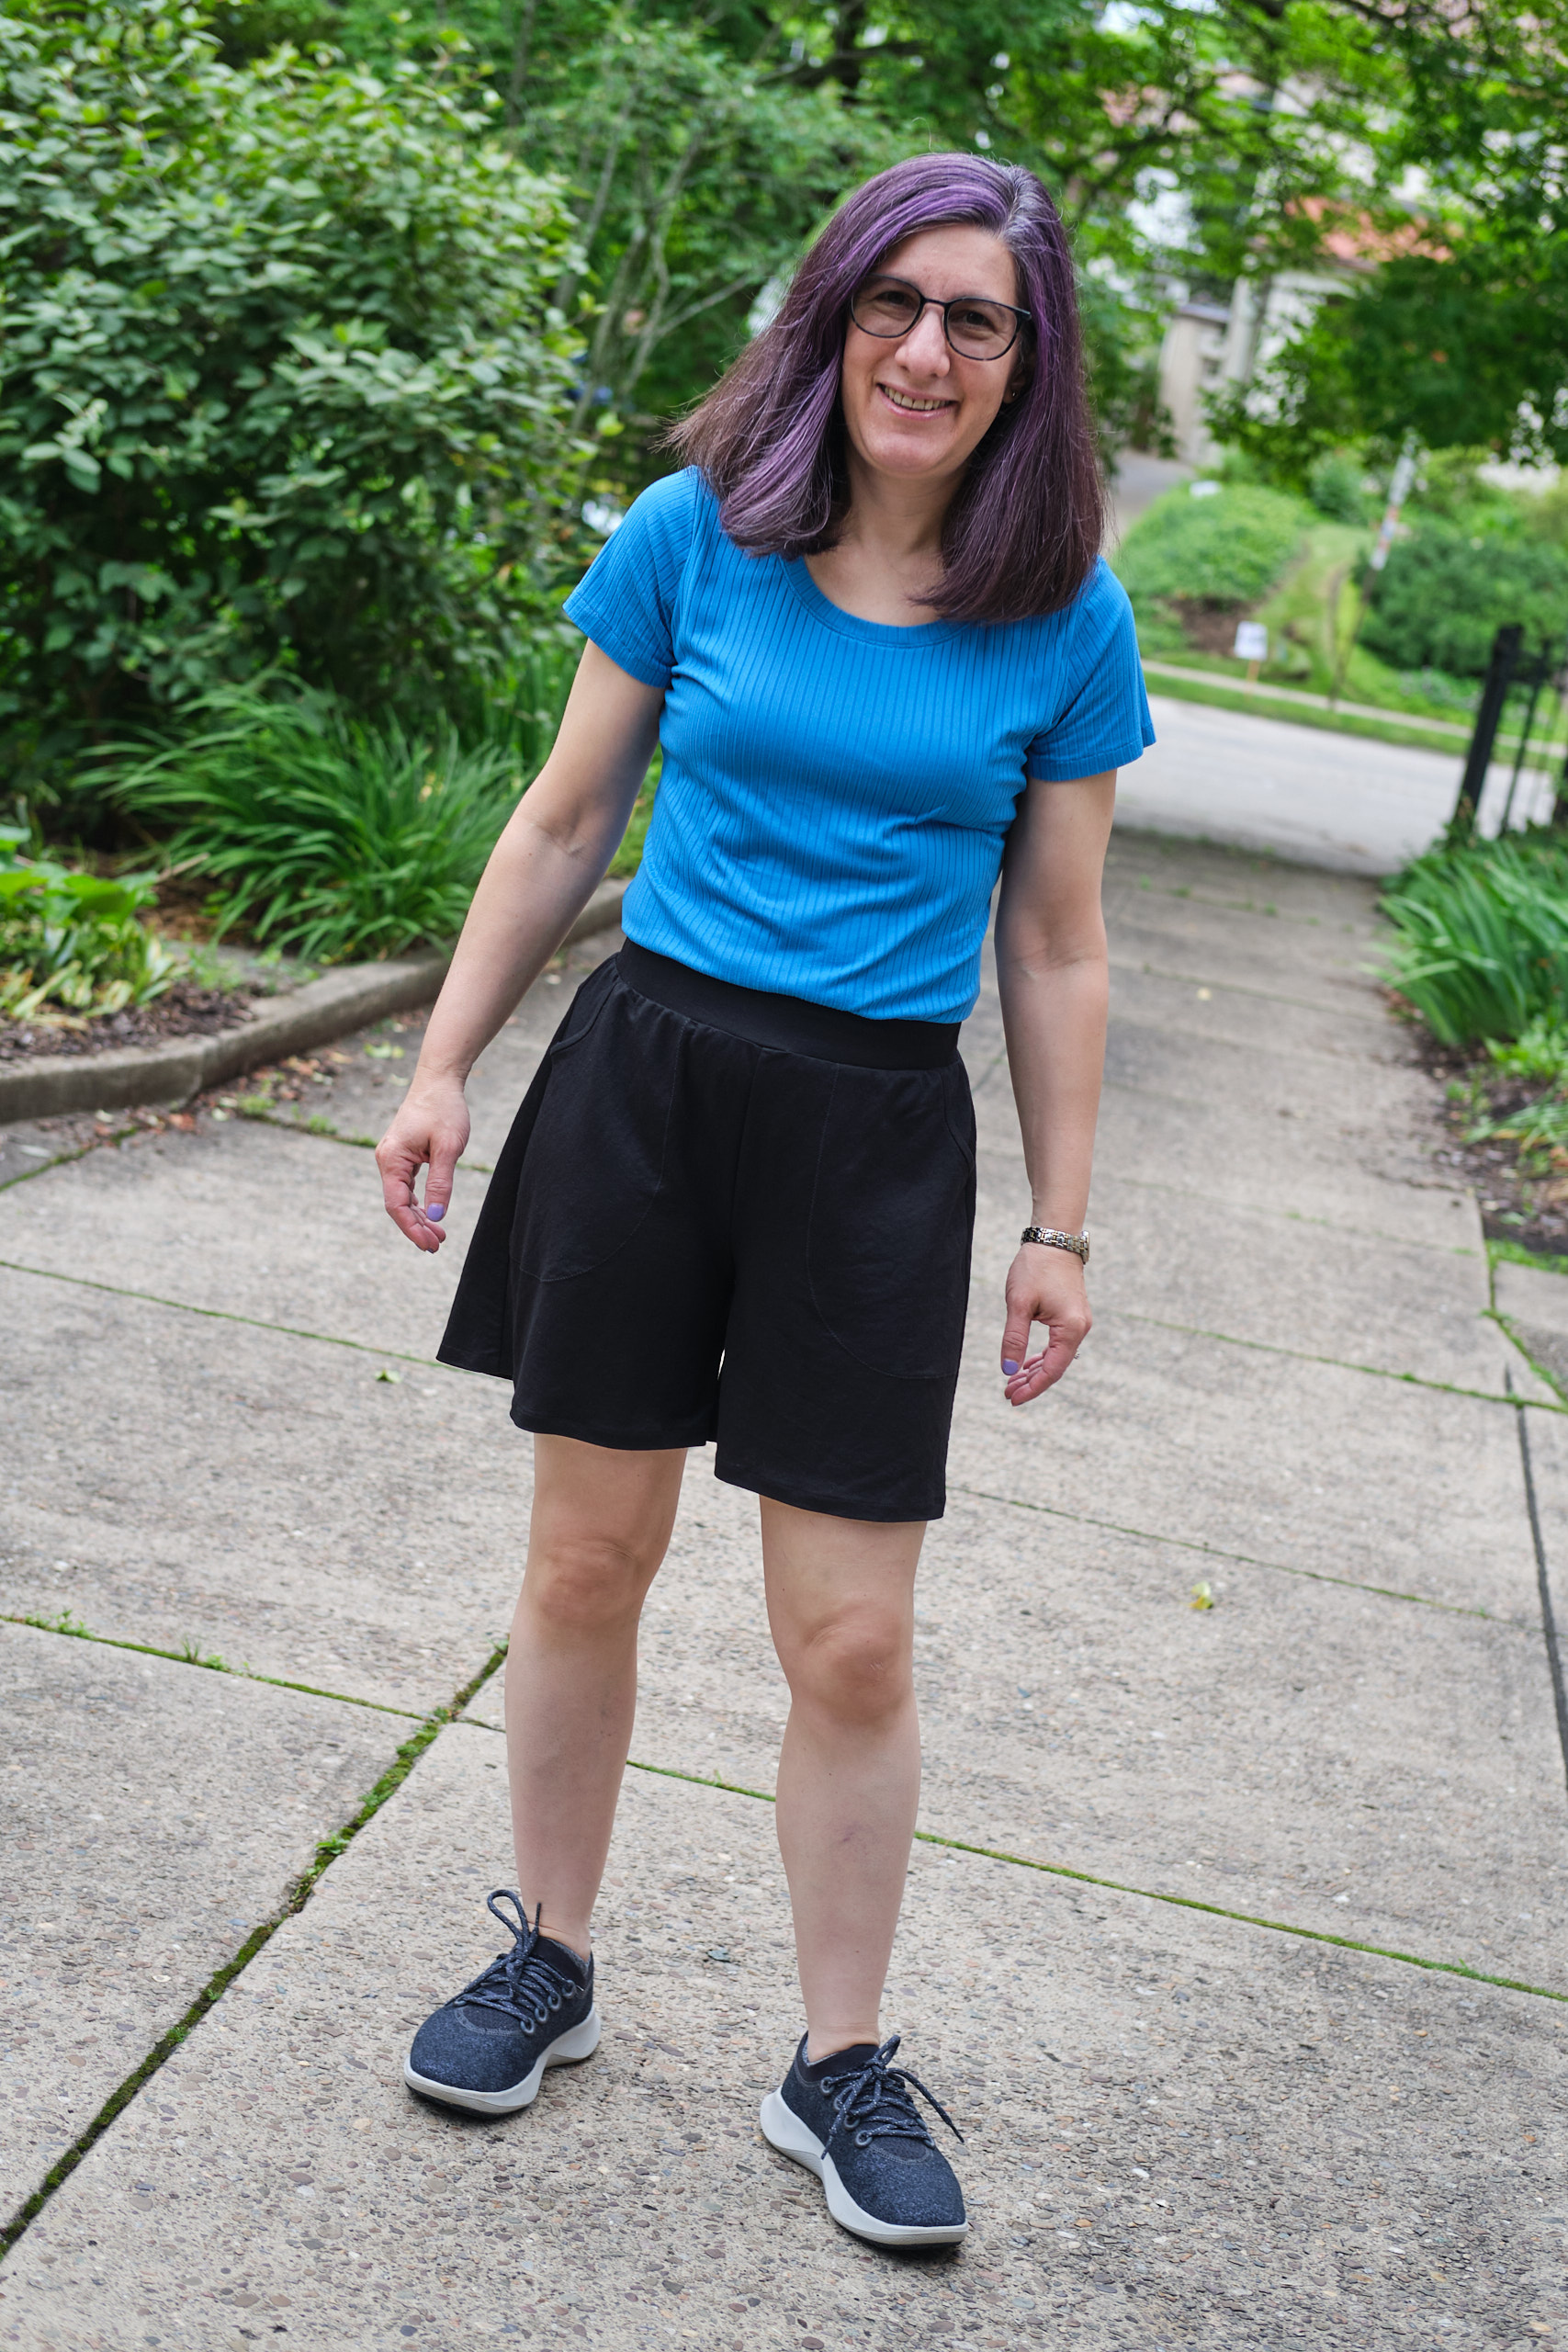
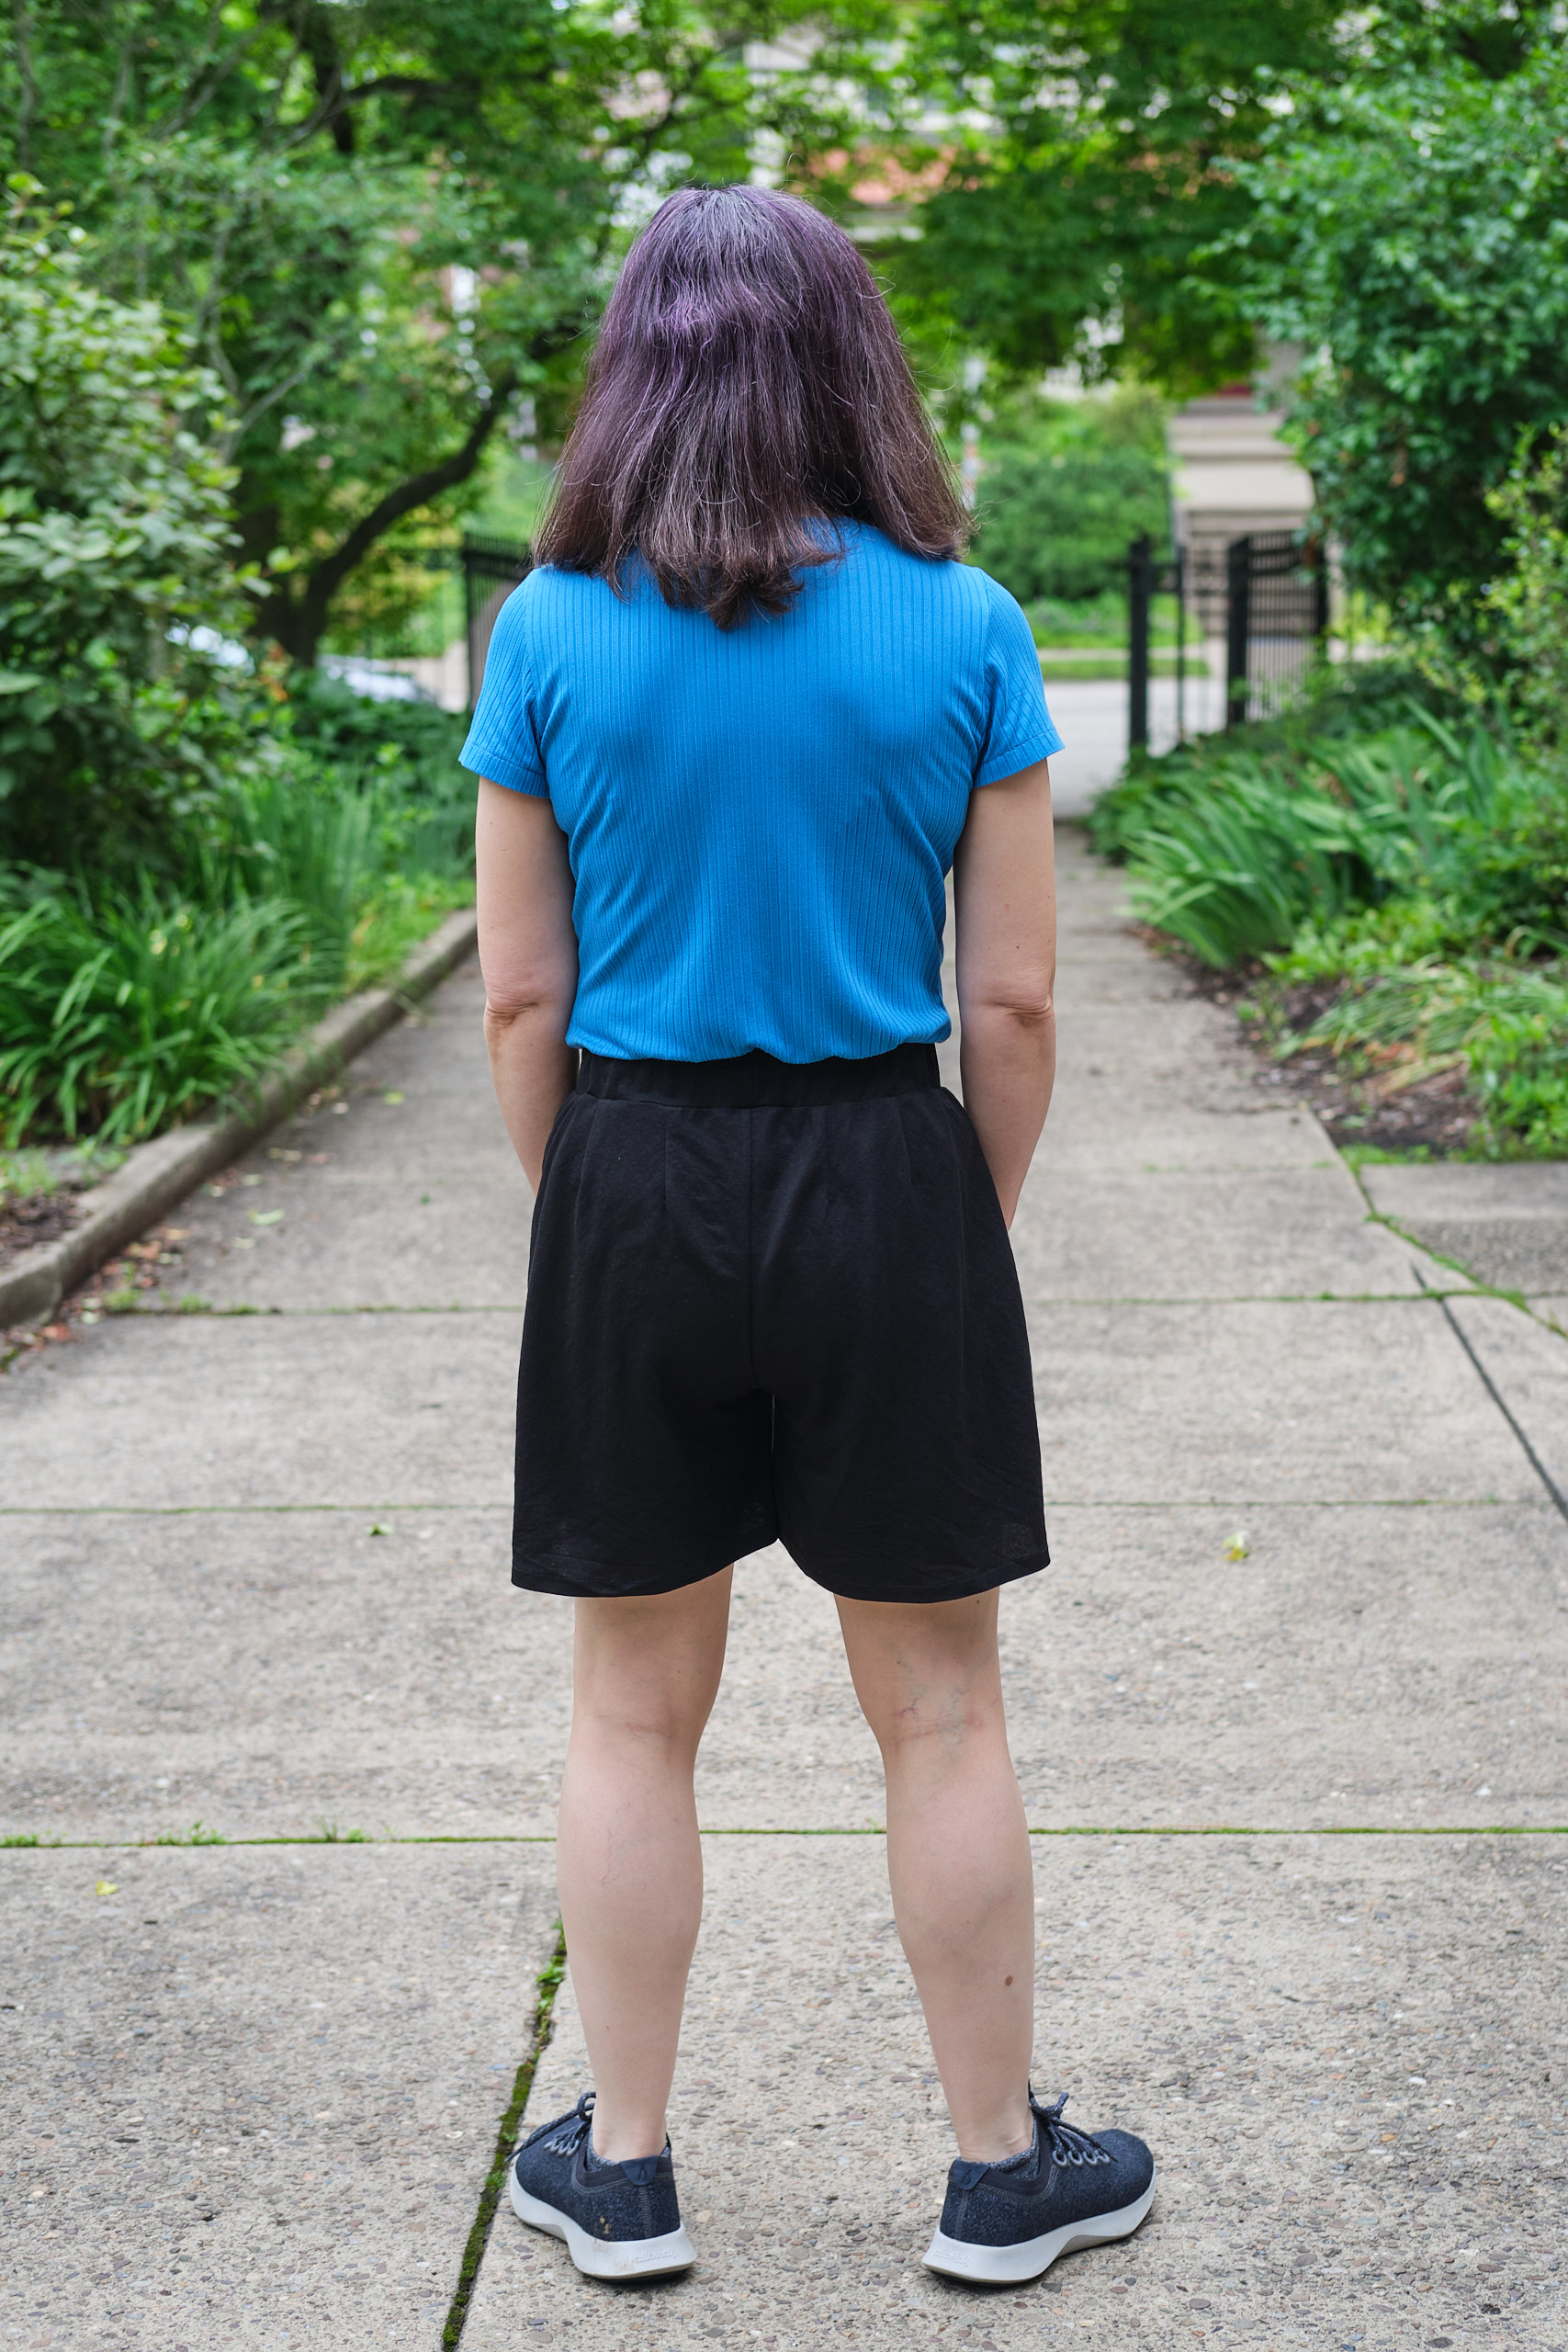
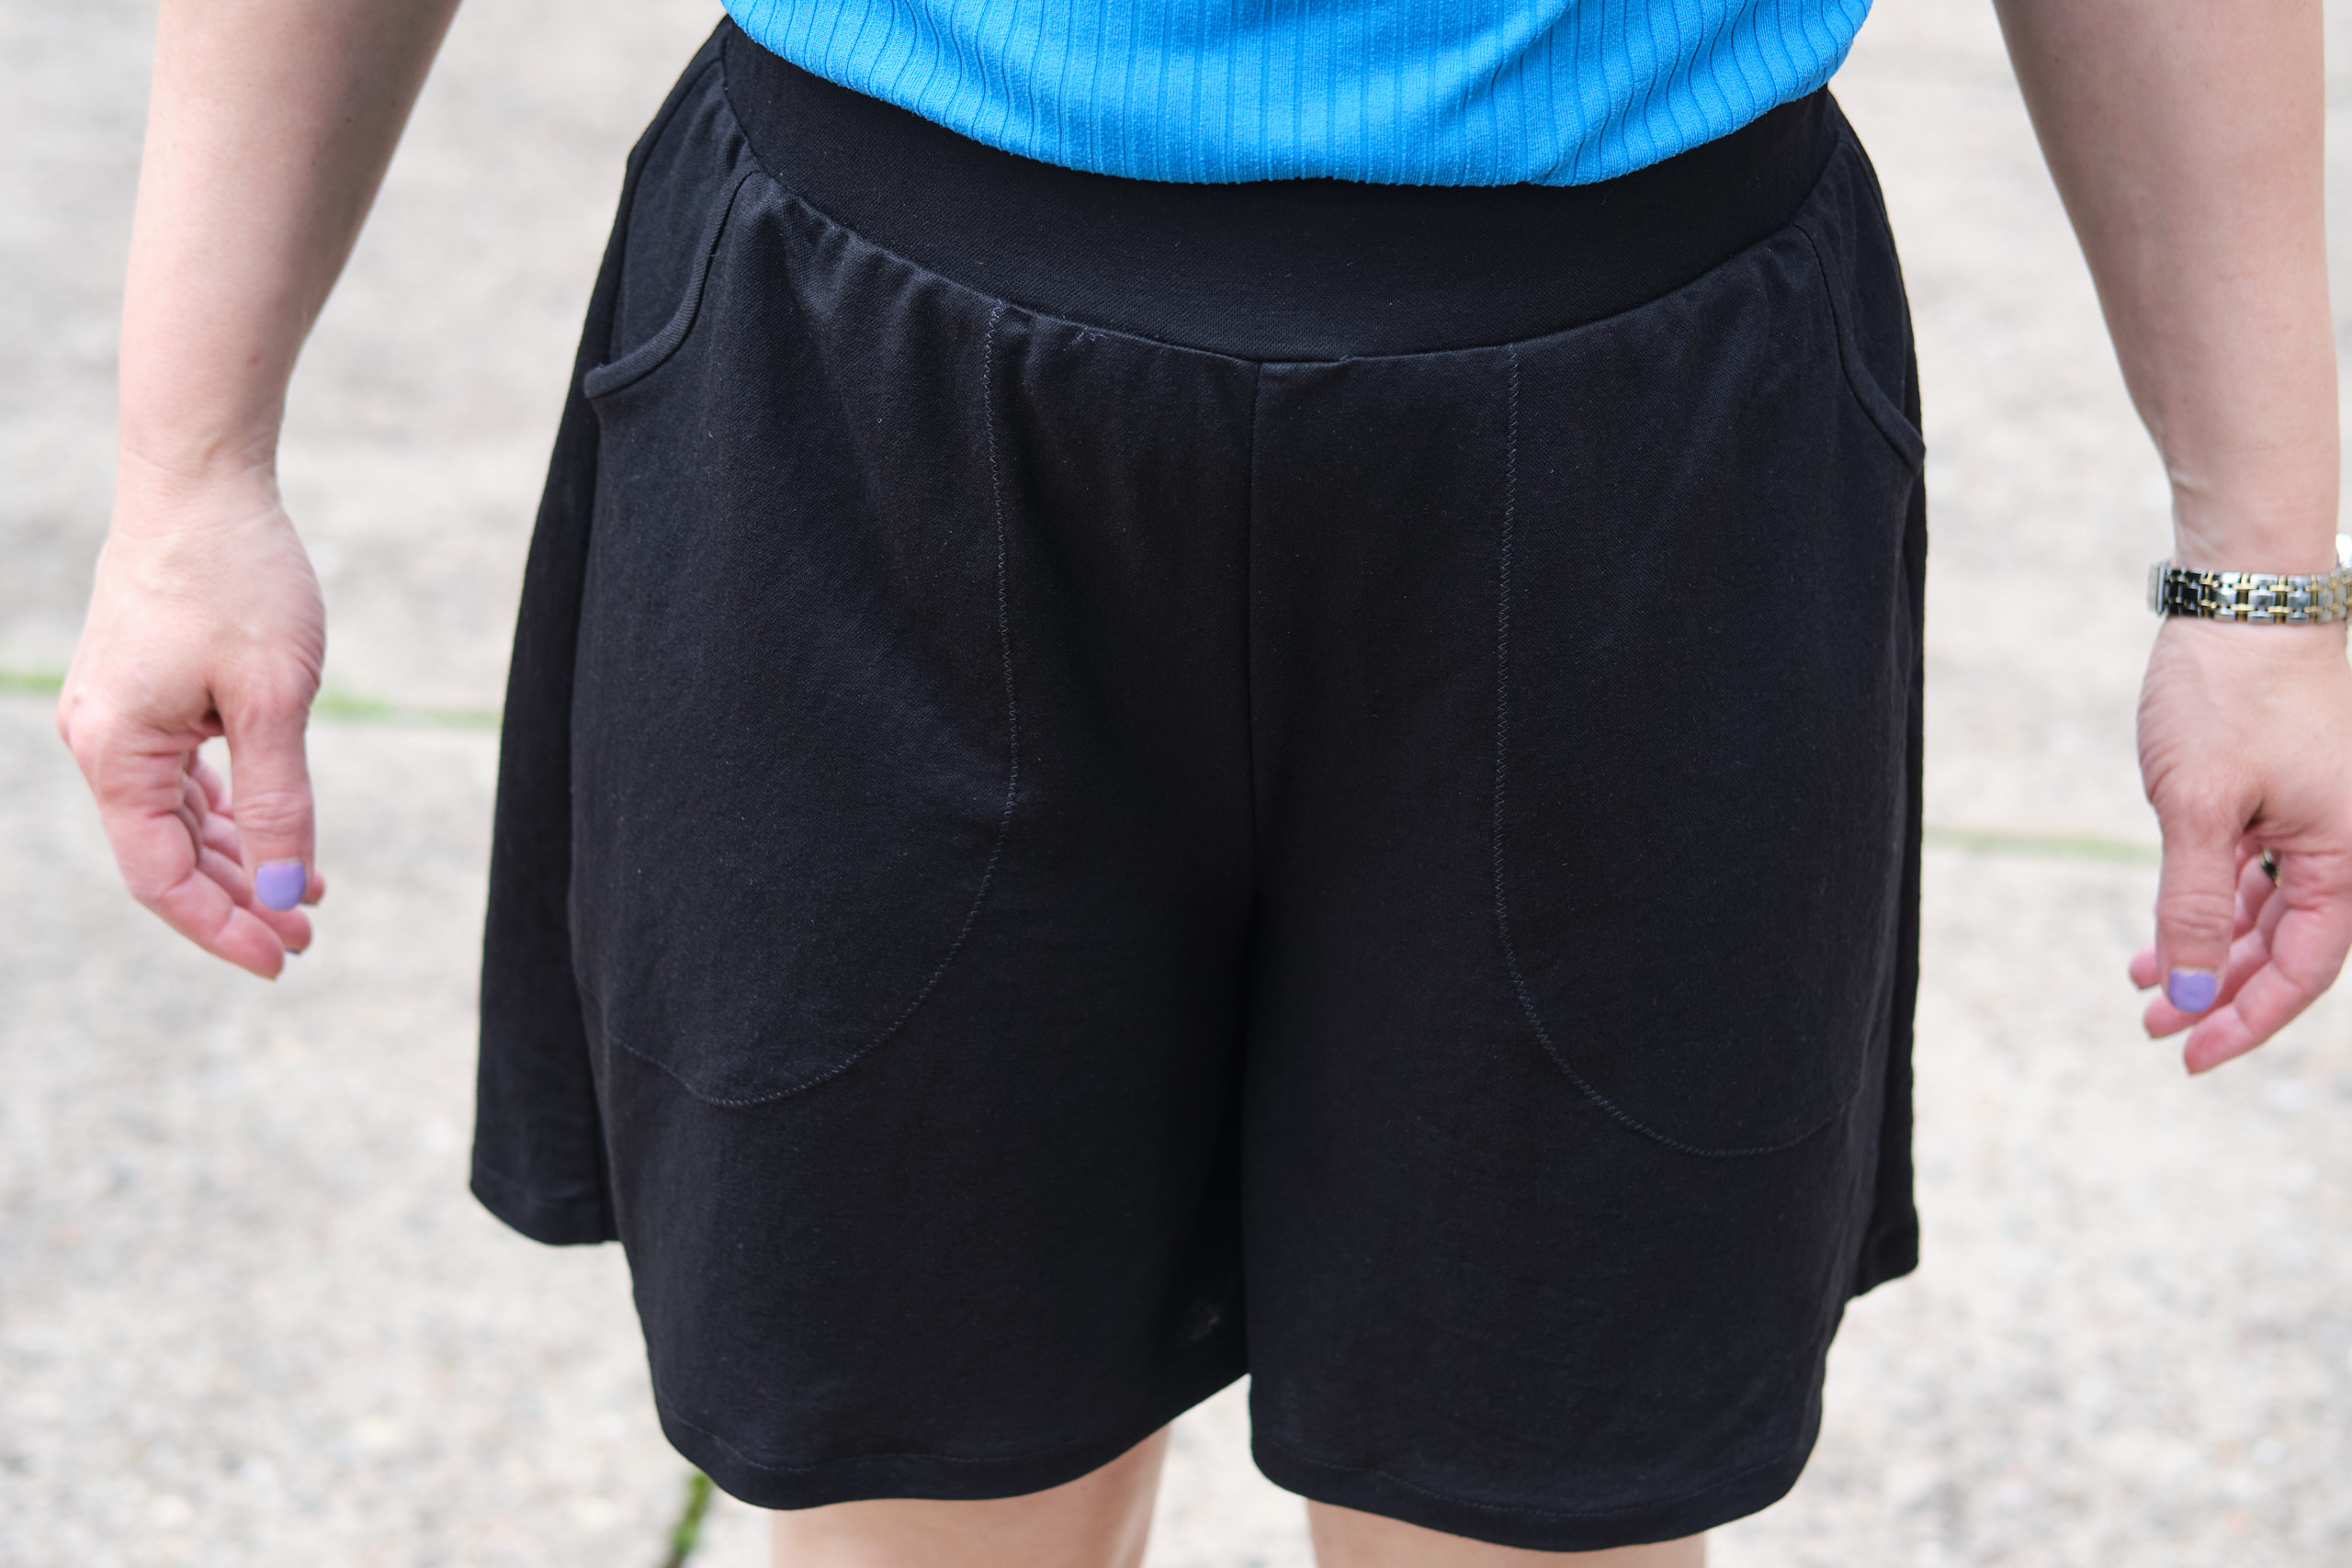
I used the Pattern Emporium Just Peachy stretch shorts pattern to sew up some black PyLos LiKnit shorts. I used this pattern once before to make grey cotton Lycra shorts that I mostly wear for PJs (the yoga waistband is super comfy but doesn’t stay put as well as I would like when I put my phone in my pocket. This time I used the mid rise with the elastic waistband option. I went with length 3, stitched pockets, and back darts. I adjusted the pocket opening to be higher (basically used the bottom of the high-waist pocket opening) — this makes it less likely for things to fall out of my pockets without the need to increase the length of the pocket bags. I stitched the pockets with a zigzag stitch. Next time I will try to cover stitch. I do love the way the look of the binding over the pocket opening edge.
I used the AU10 pattern with the AU8 waistband. I should probably have graded the waist of the leg pieces to match the waistband too — next time.
The rayon/nylon knit LiKnit fabric is very light and these are super lightweight shorts to wear and pack for travel. They look almost like linen shorts but are much softer and easy to care for. They also dry quickly when you get caught in a rainstorm (ask me how I know).
The shorts are modeled here with a short-sleeve 4p screwp neck Sinclair Bondi t-shirt in aqua wide lush poly spandex from Mily Mae Fabrics (which I made last year and may not have blogged). Normally I will wear the shirt untucked but leaving it tucked in here so you can see the shorts waistband and pocket details better.
Overall, I’m happy with these shorts and I have already worn them several times in the hot weather, including on a trip (they travel well!). They fit well but I personally would like them to sit a little higher at my waist, especially in front. Next time I make this pattern I would add a bit of rise, perhaps somewhere between the low-rise and high-rise line, and narrow the pocket bags so my phone will stay vertical.
Sinclair Kai men’s t-shirt, size 38 with waist graded to 42, 1.5 inch shorter than regular length, 1.5 yards cotton Lycra
My husband loves to wear striped t-shirts shirts but finding good striped t-shirt fabric in anything other than alternating white/color stripes is difficult. I bought this yellow striped cotton Lycra fabric when I saw it about a year ago and finally got around to sewing it up last week. I used the Sinclair Kai men’s t-shirt pattern, which I used to make him a sage green short-sleeve striped shirt last summer and two long-sleeve shirts (plus the striped shirt I made him for our family photo shoot last December). He wore the sage shirt a few days ago and one of his friends was surprised to learn I made it and said it looked just like a shirt from the Gap. I used the size 38 short, graded from the waist up to a 42 width to give him a little more ease, and used the regular length hem shortened by 1.5 inches because he never tucks his shirt in.
I gave him his new yellow shirt as part of his birthday present. He seems to like it. It was also the right color for wearing to the Riveters game yesterday.
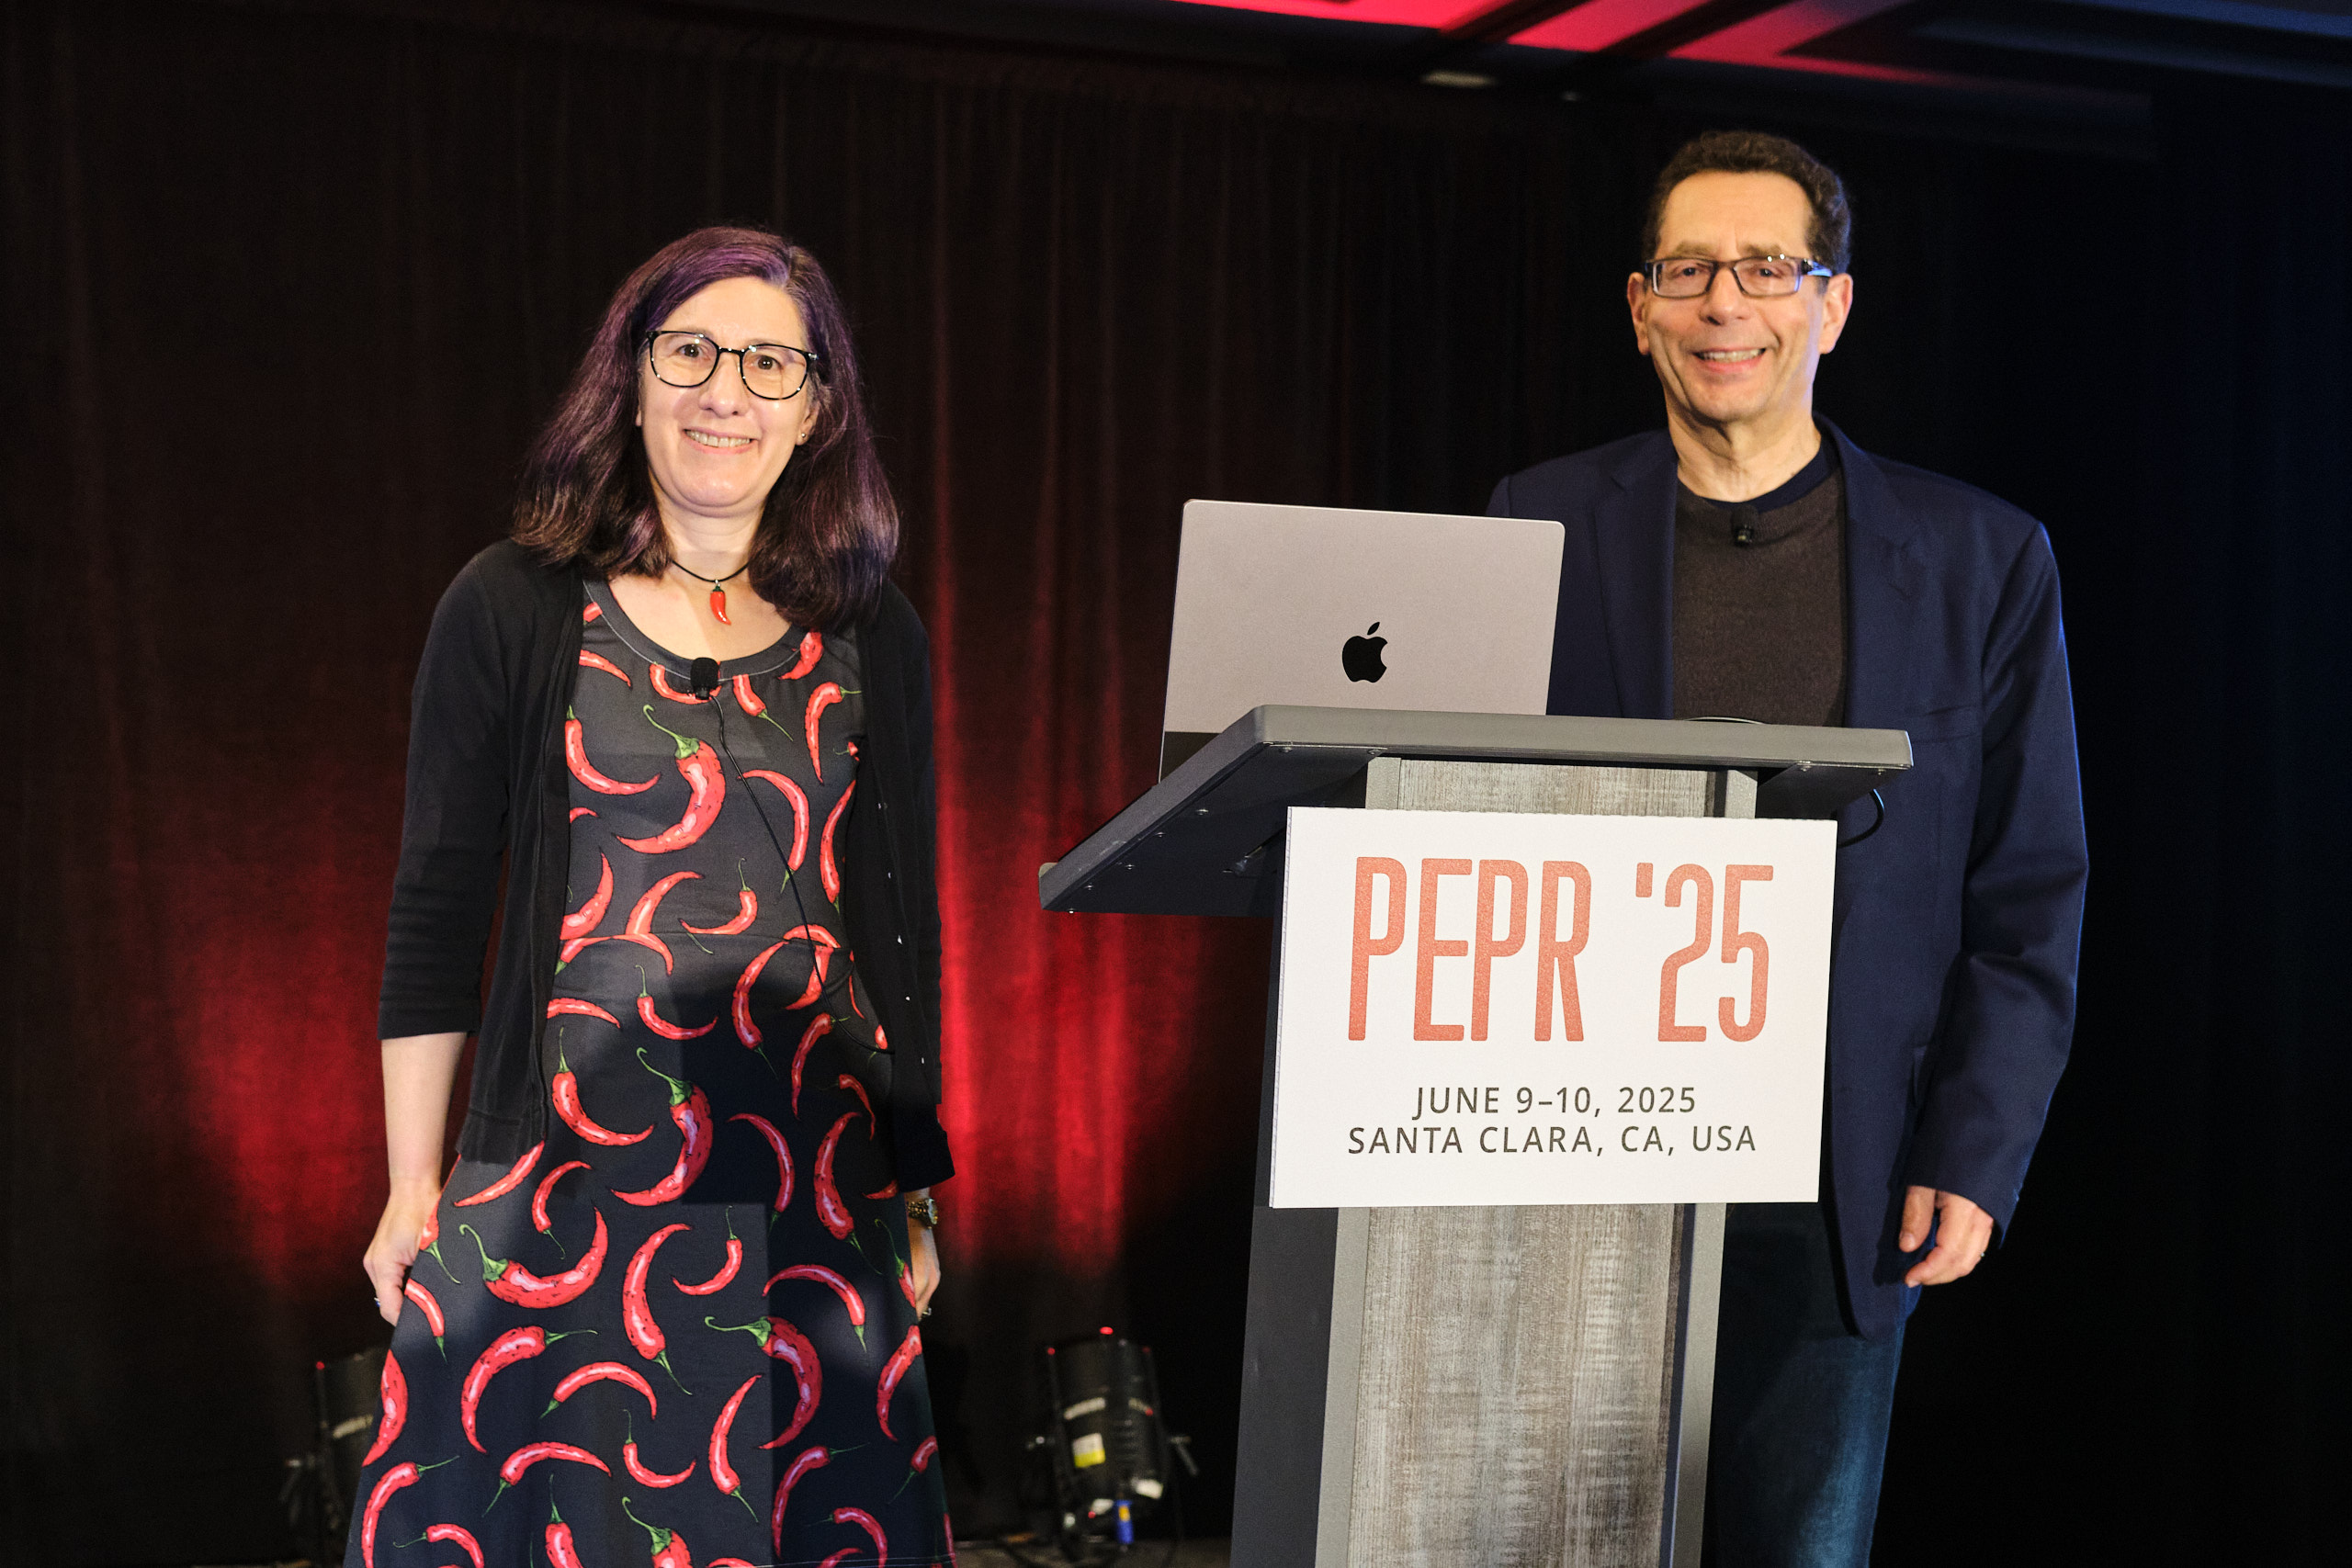
Back in 2018 Lea Kissner and I talked about the need for a new privacy conference over dinner. Lea noted that there wasn’t a conference where privacy engineering practitioners could meet and talk about the solutions they implement in practice. Most existing privacy conferences were targeted more at privacy researchers or privacy lawyers. Lea had worked as a privacy engineer in industry for many years and I had co-founded a privacy engineering masters program and also had experience starting and running conferences. So Lea convinced me that we should work together to start a new conference. In August 2019 we met in Santa Clara, CA for the first USENIX Conference on Privacy Engineering Practice and Respect.
PEPR 2019 went well and we had planned to continue PEPR as an annual event in the Bay Area, as that seemed to be where most of the privacy engineers are. COVID derailed this plan and PEPR 2020 was held entirely online. The USENIX Association (and every other organization that runs events) struggled through the pandemic and decided they could not afford to run PEPR 2021 online as well. So, the Future of Privacy Forum and Carnegie Mellon University CyLab stepped in to co-host an online PEPR 2021 event and I presented my talk “Illustrating Priavcy Engineering Concepts with Potty Talk” from my third-floor bathroom. USENIX ran PEPR 2022 as a hybrid event (I remotely presented a talk on the design of cookie consent interfaces from my kitchen) and then returned to fully in person in 2023 and has been running PEPR in person ever since, but unfortunately I was not able to attend in 2023 or 2024.
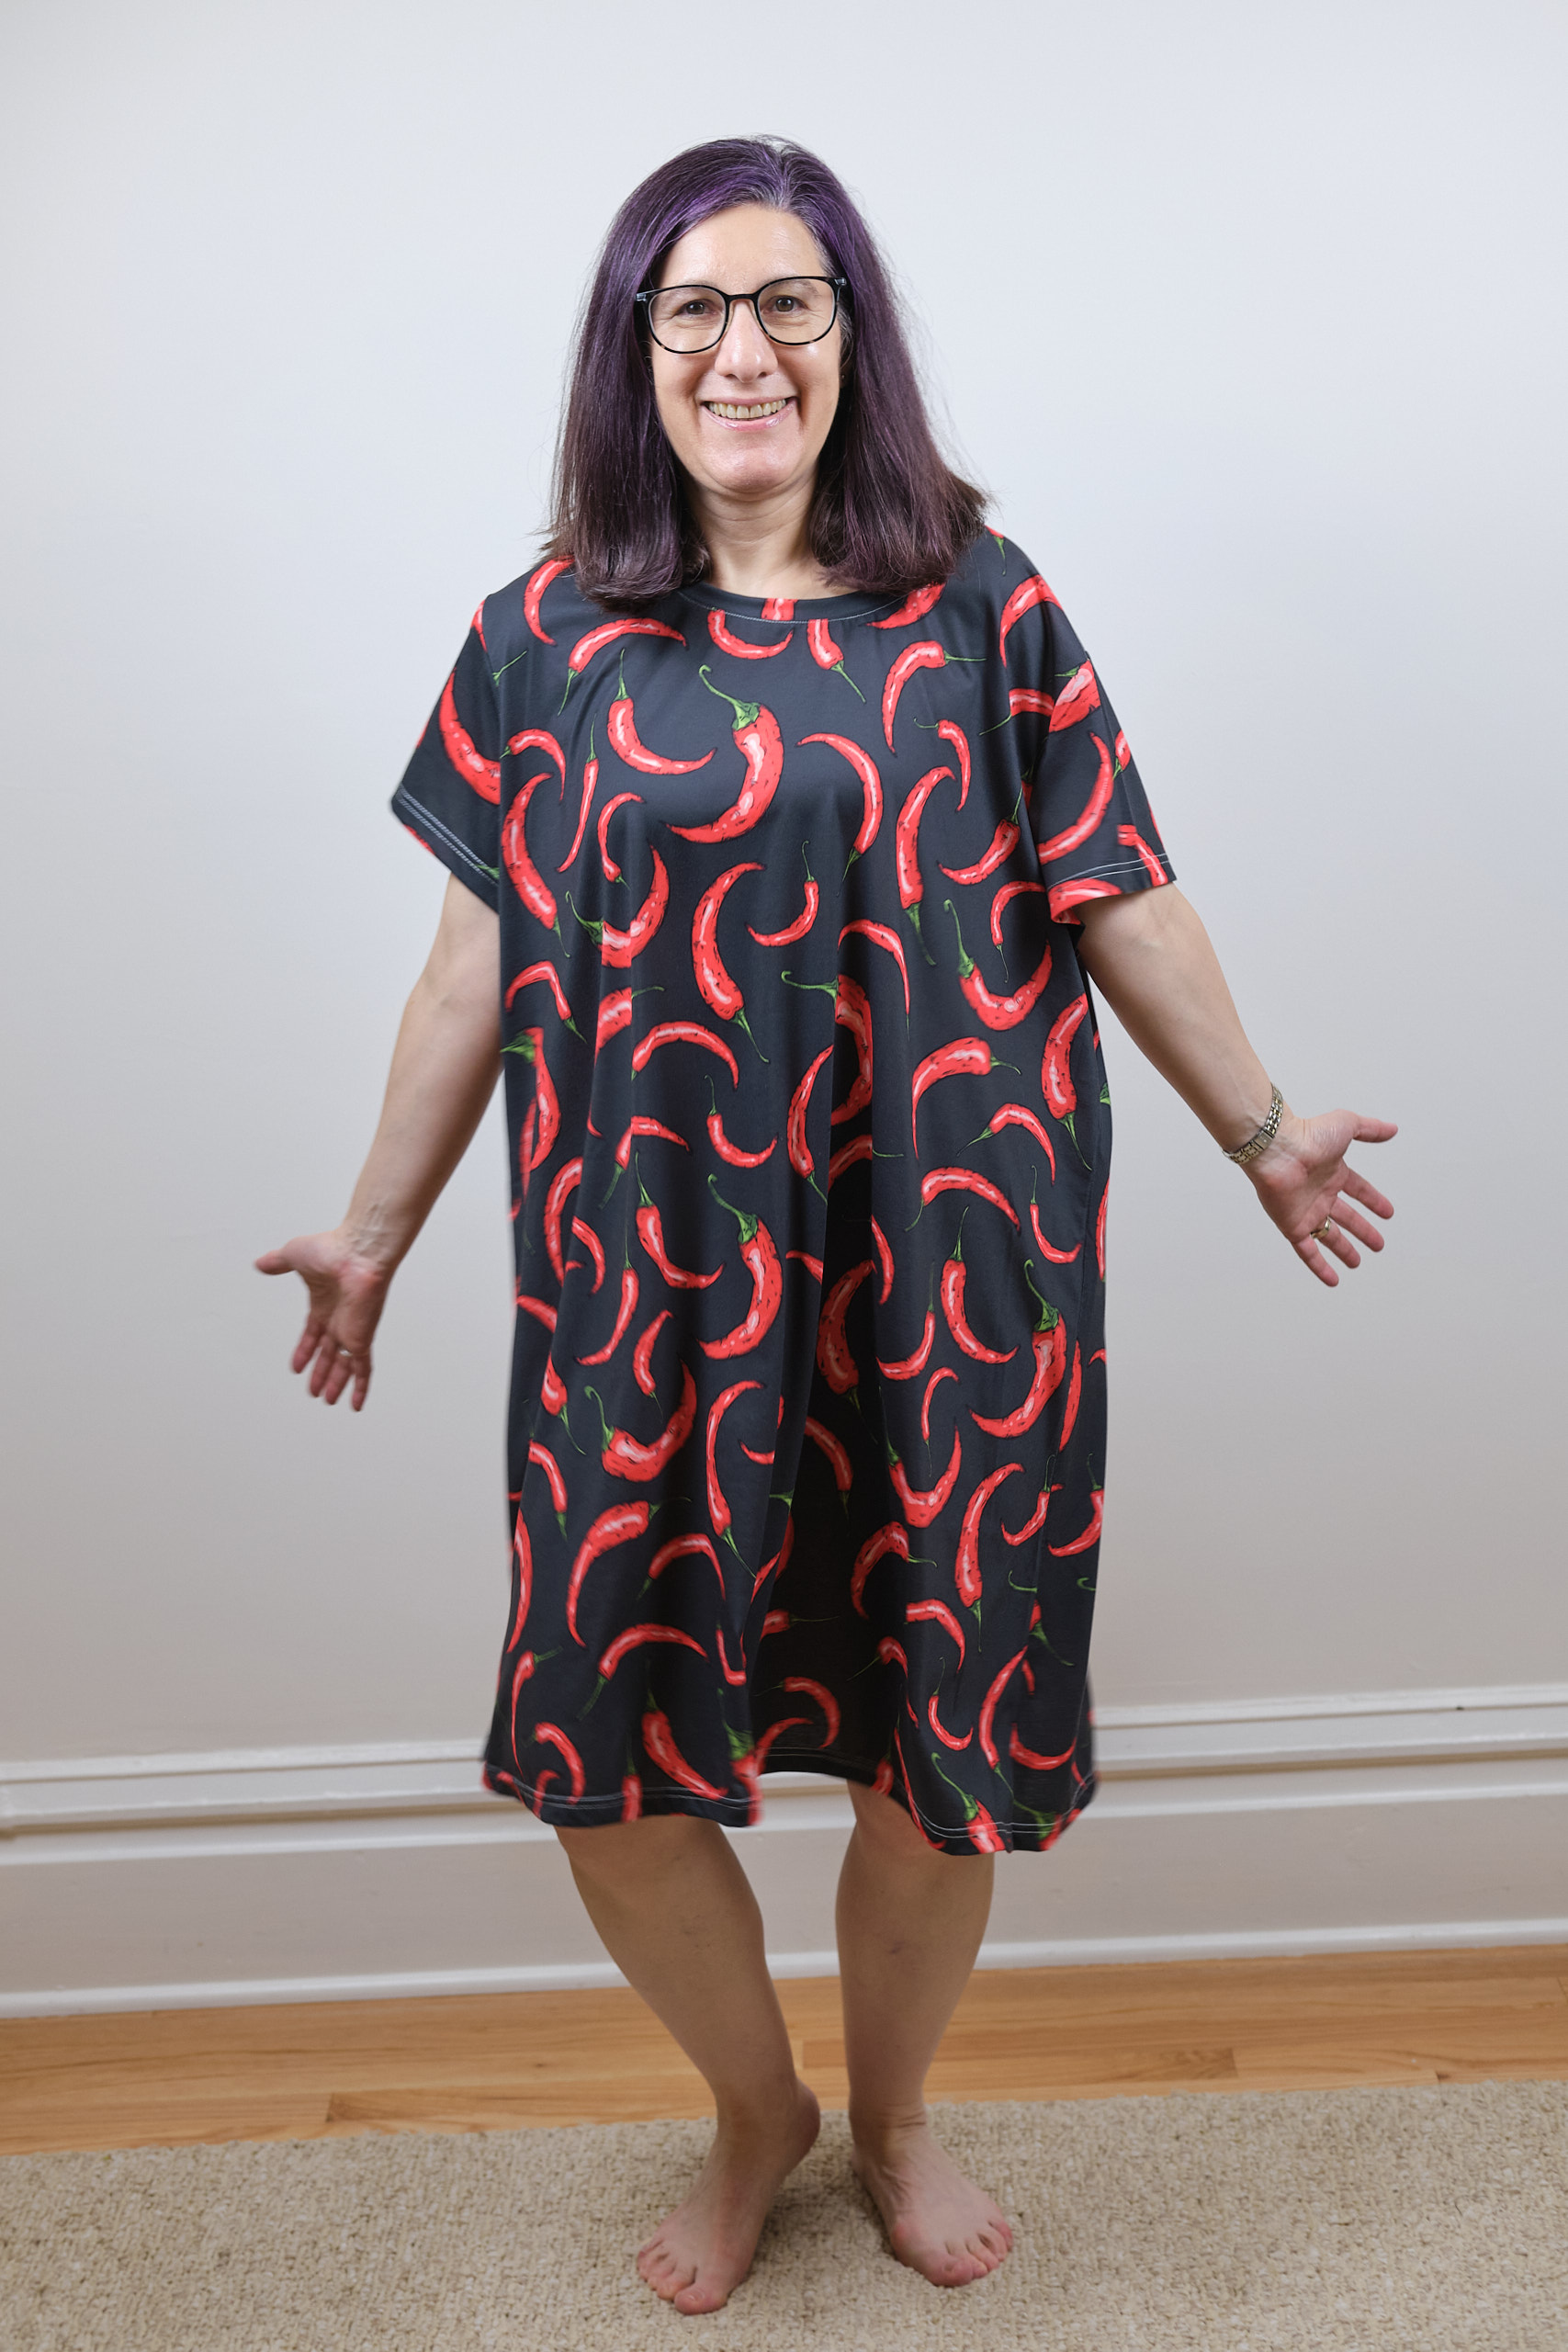
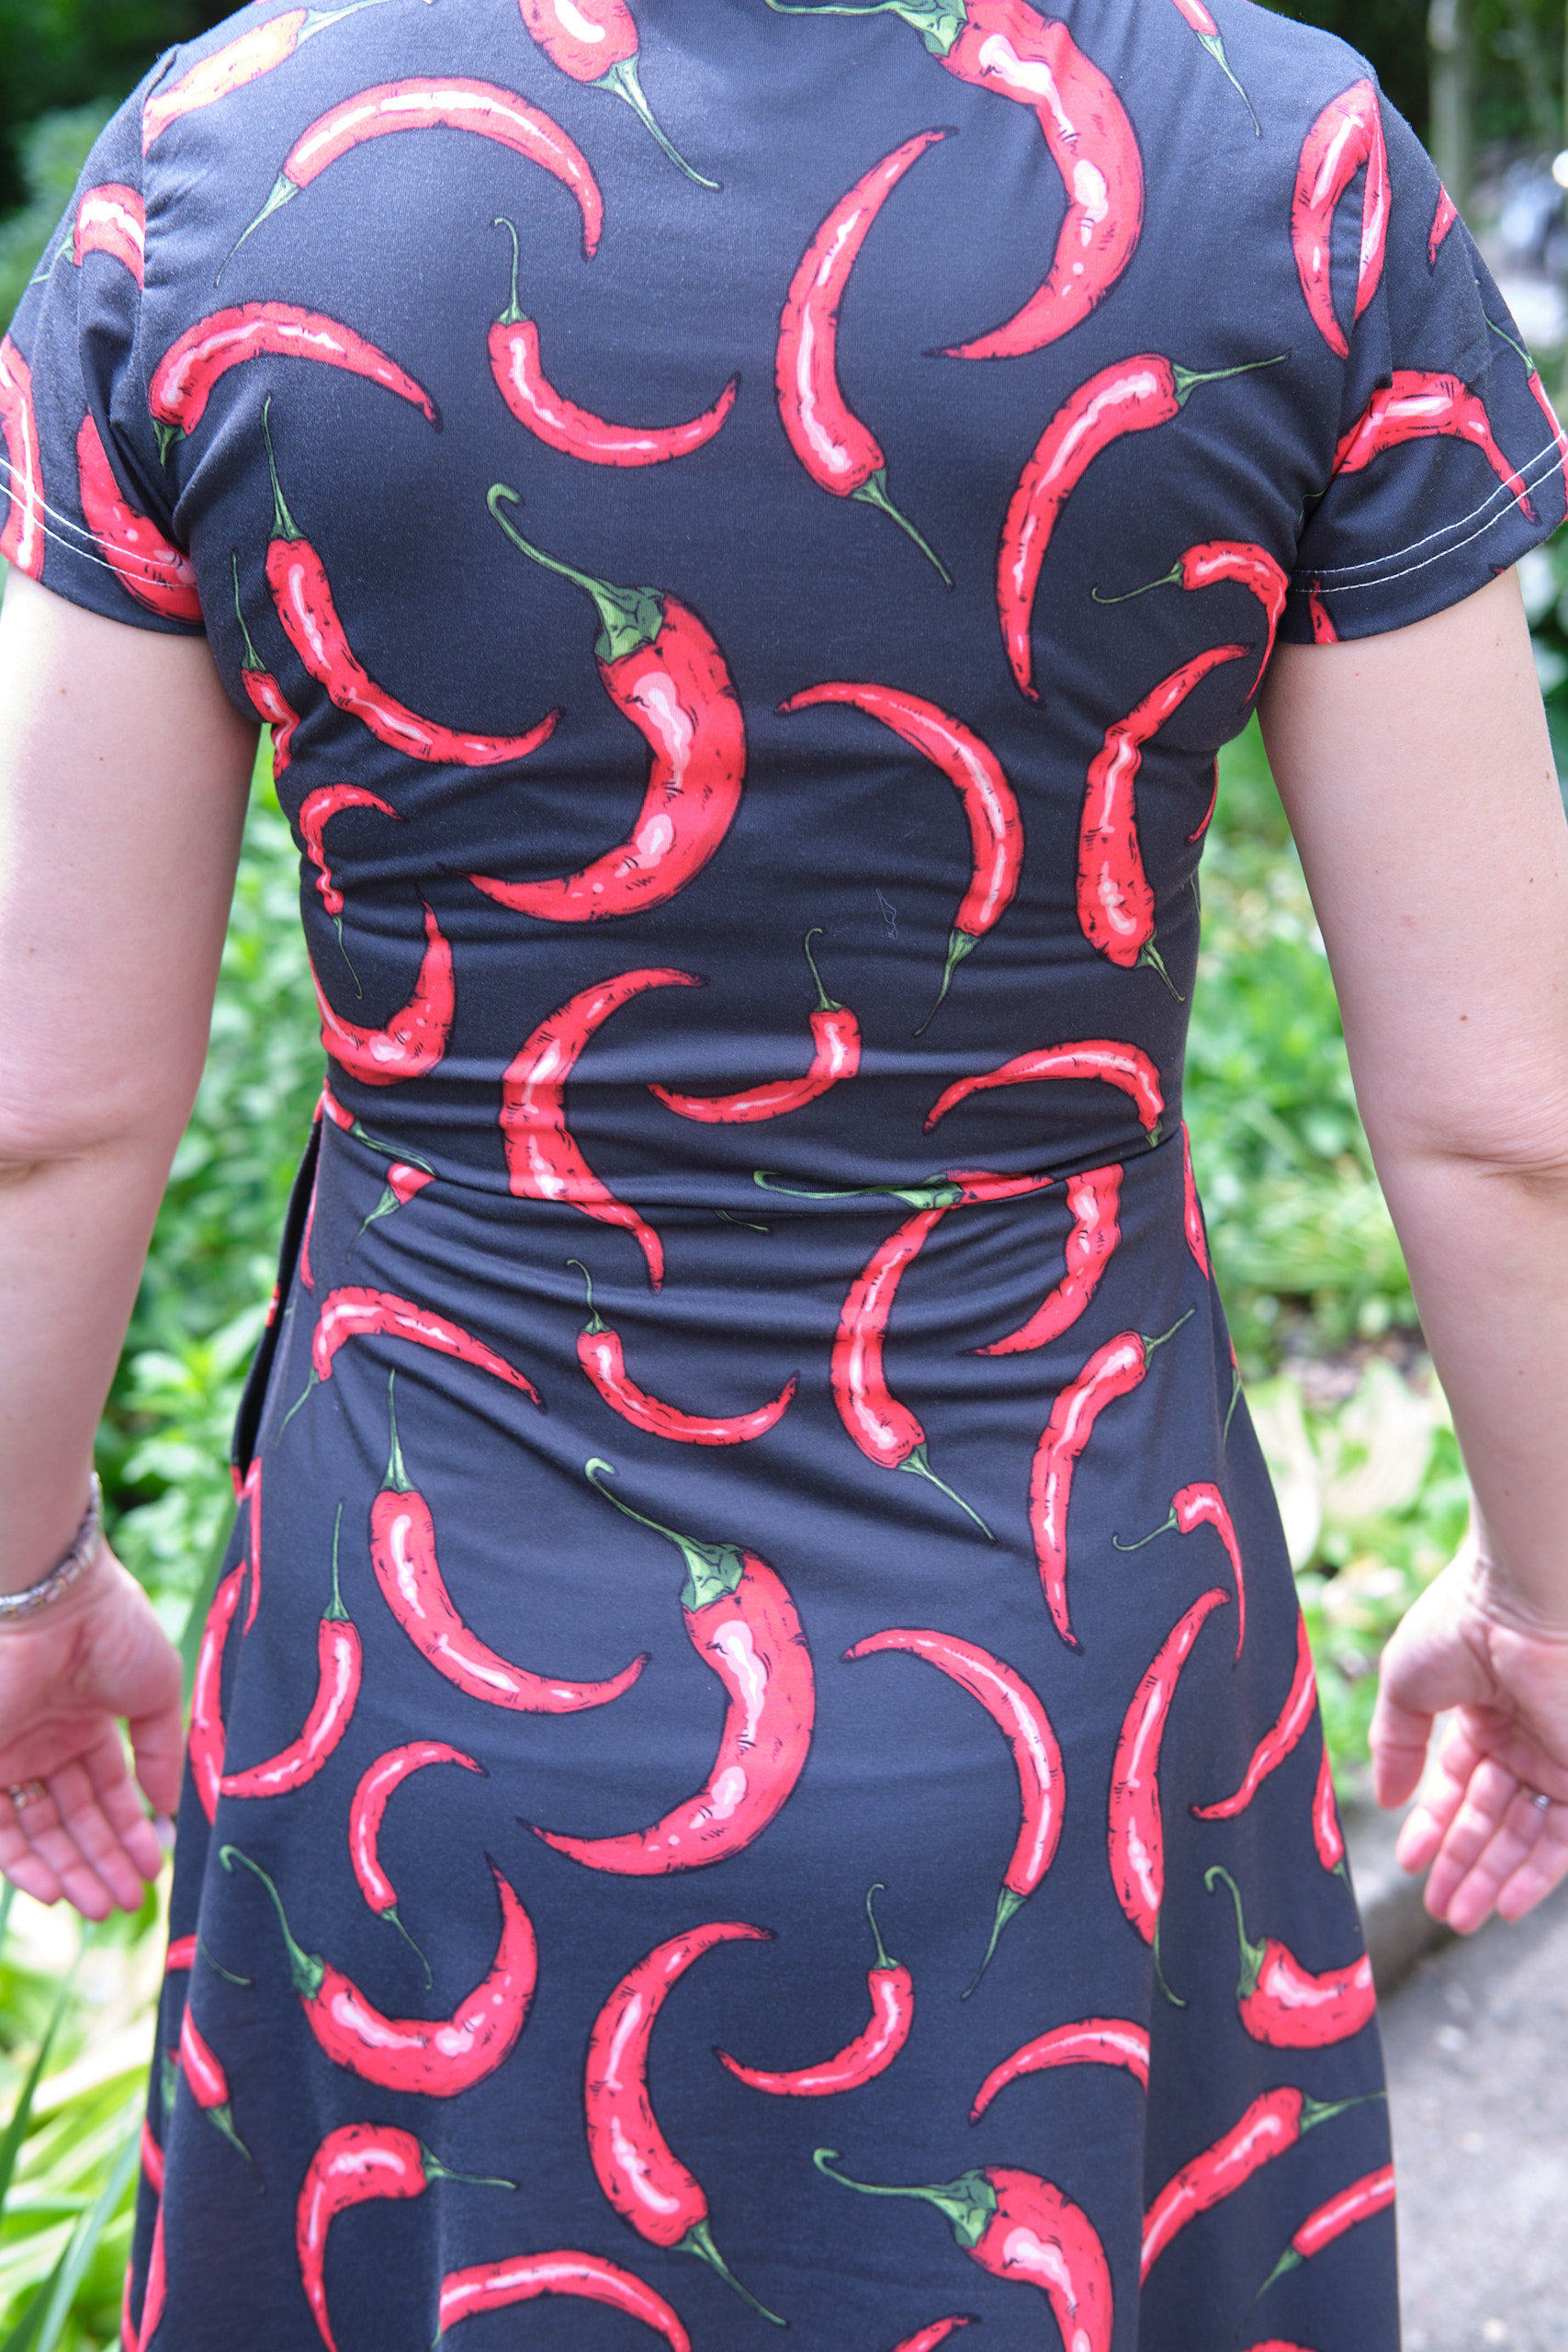
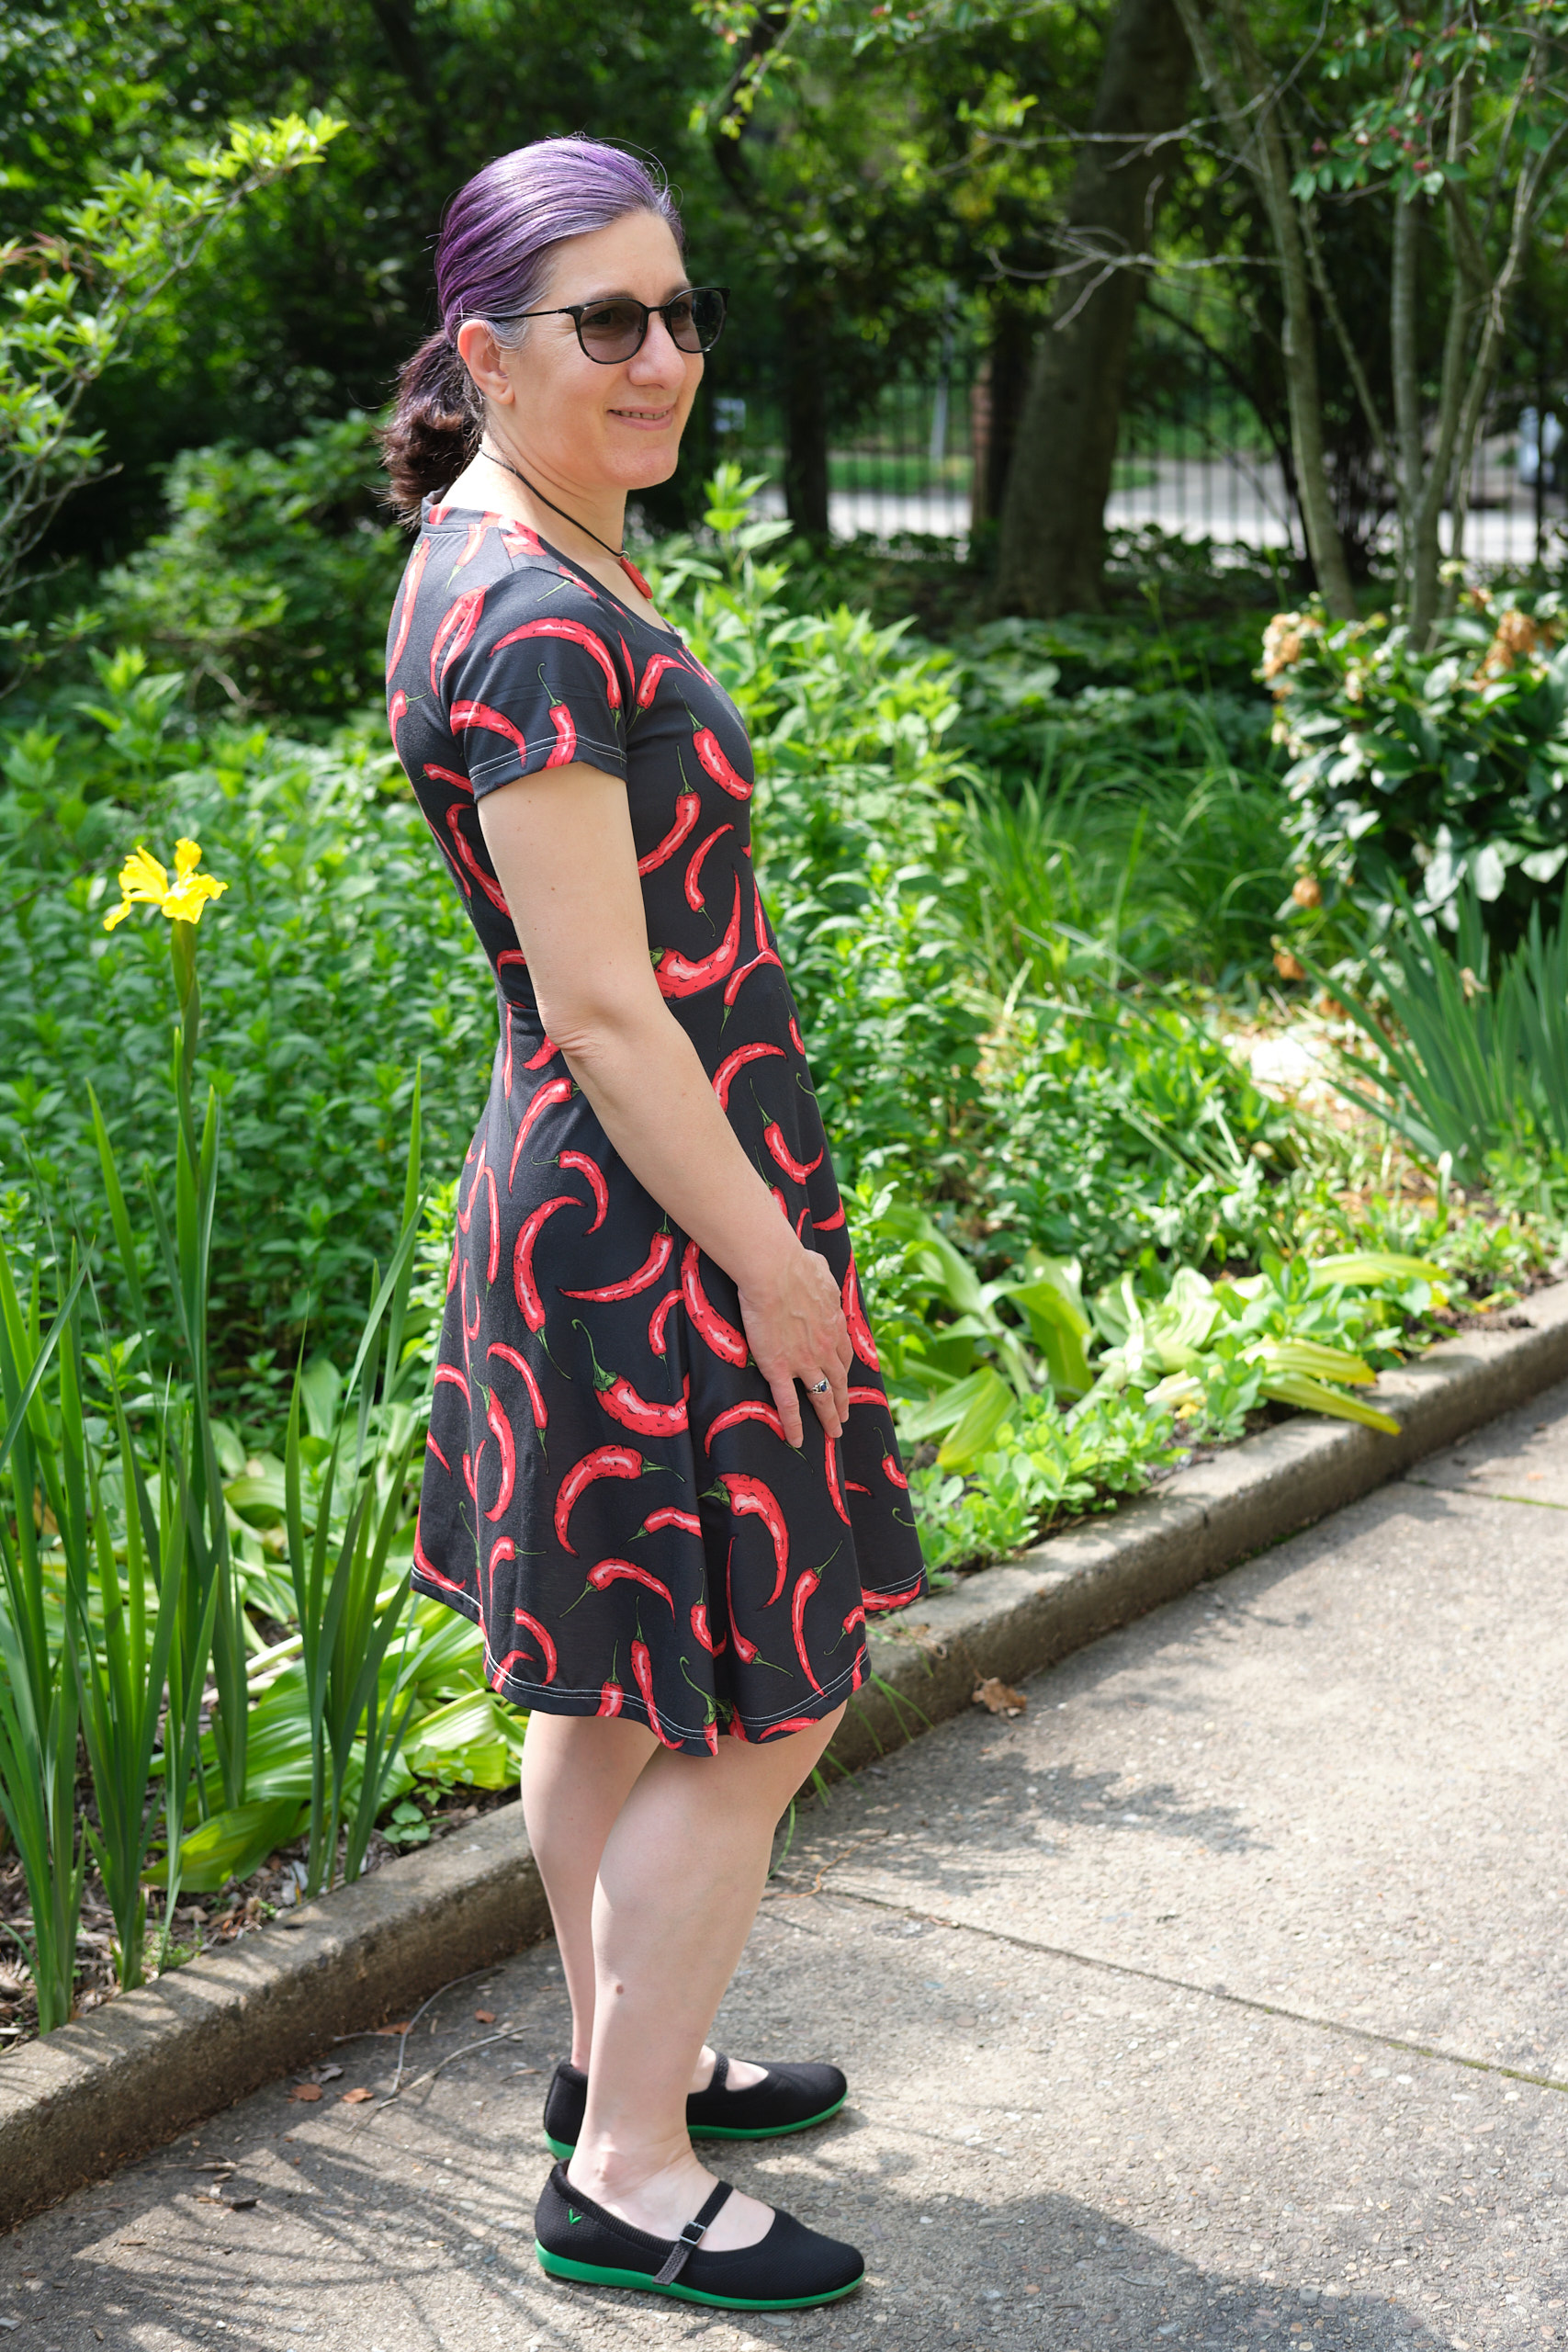
I decided that I needed a pepper dress to wear the next time I attended PEPR in person. Most of the pepper fabric I could find was quilting cotton. I could not find any knit pepper fabric that I liked. I thought about custom printing some pepper fabric, but never found a design I really liked. A week before PEPR 2025 I decided I really needed a pepper dress and scoured the internet for suitable fabric that I could get delivered to my home quickly. Again, I mostly found quilting cotton.
I noticed that pepper PJs in knit fabrics were readily available. So I decided to order a size XXL pepper nightgown and try to cut it up and turn it into a dress. Two days later, the nightgown arrived and I got to work figuring out what to do with it. The website claimed it was 95% polyester 5% spandex knit, but the garment tag said it was 100% cotton. It feels more like polyester to me and a drop of water beads on the top. It only has about 30% stretch so I’m not sure about its spandex content. The fabric features bright red peppers on a dark grey background with black outlines.
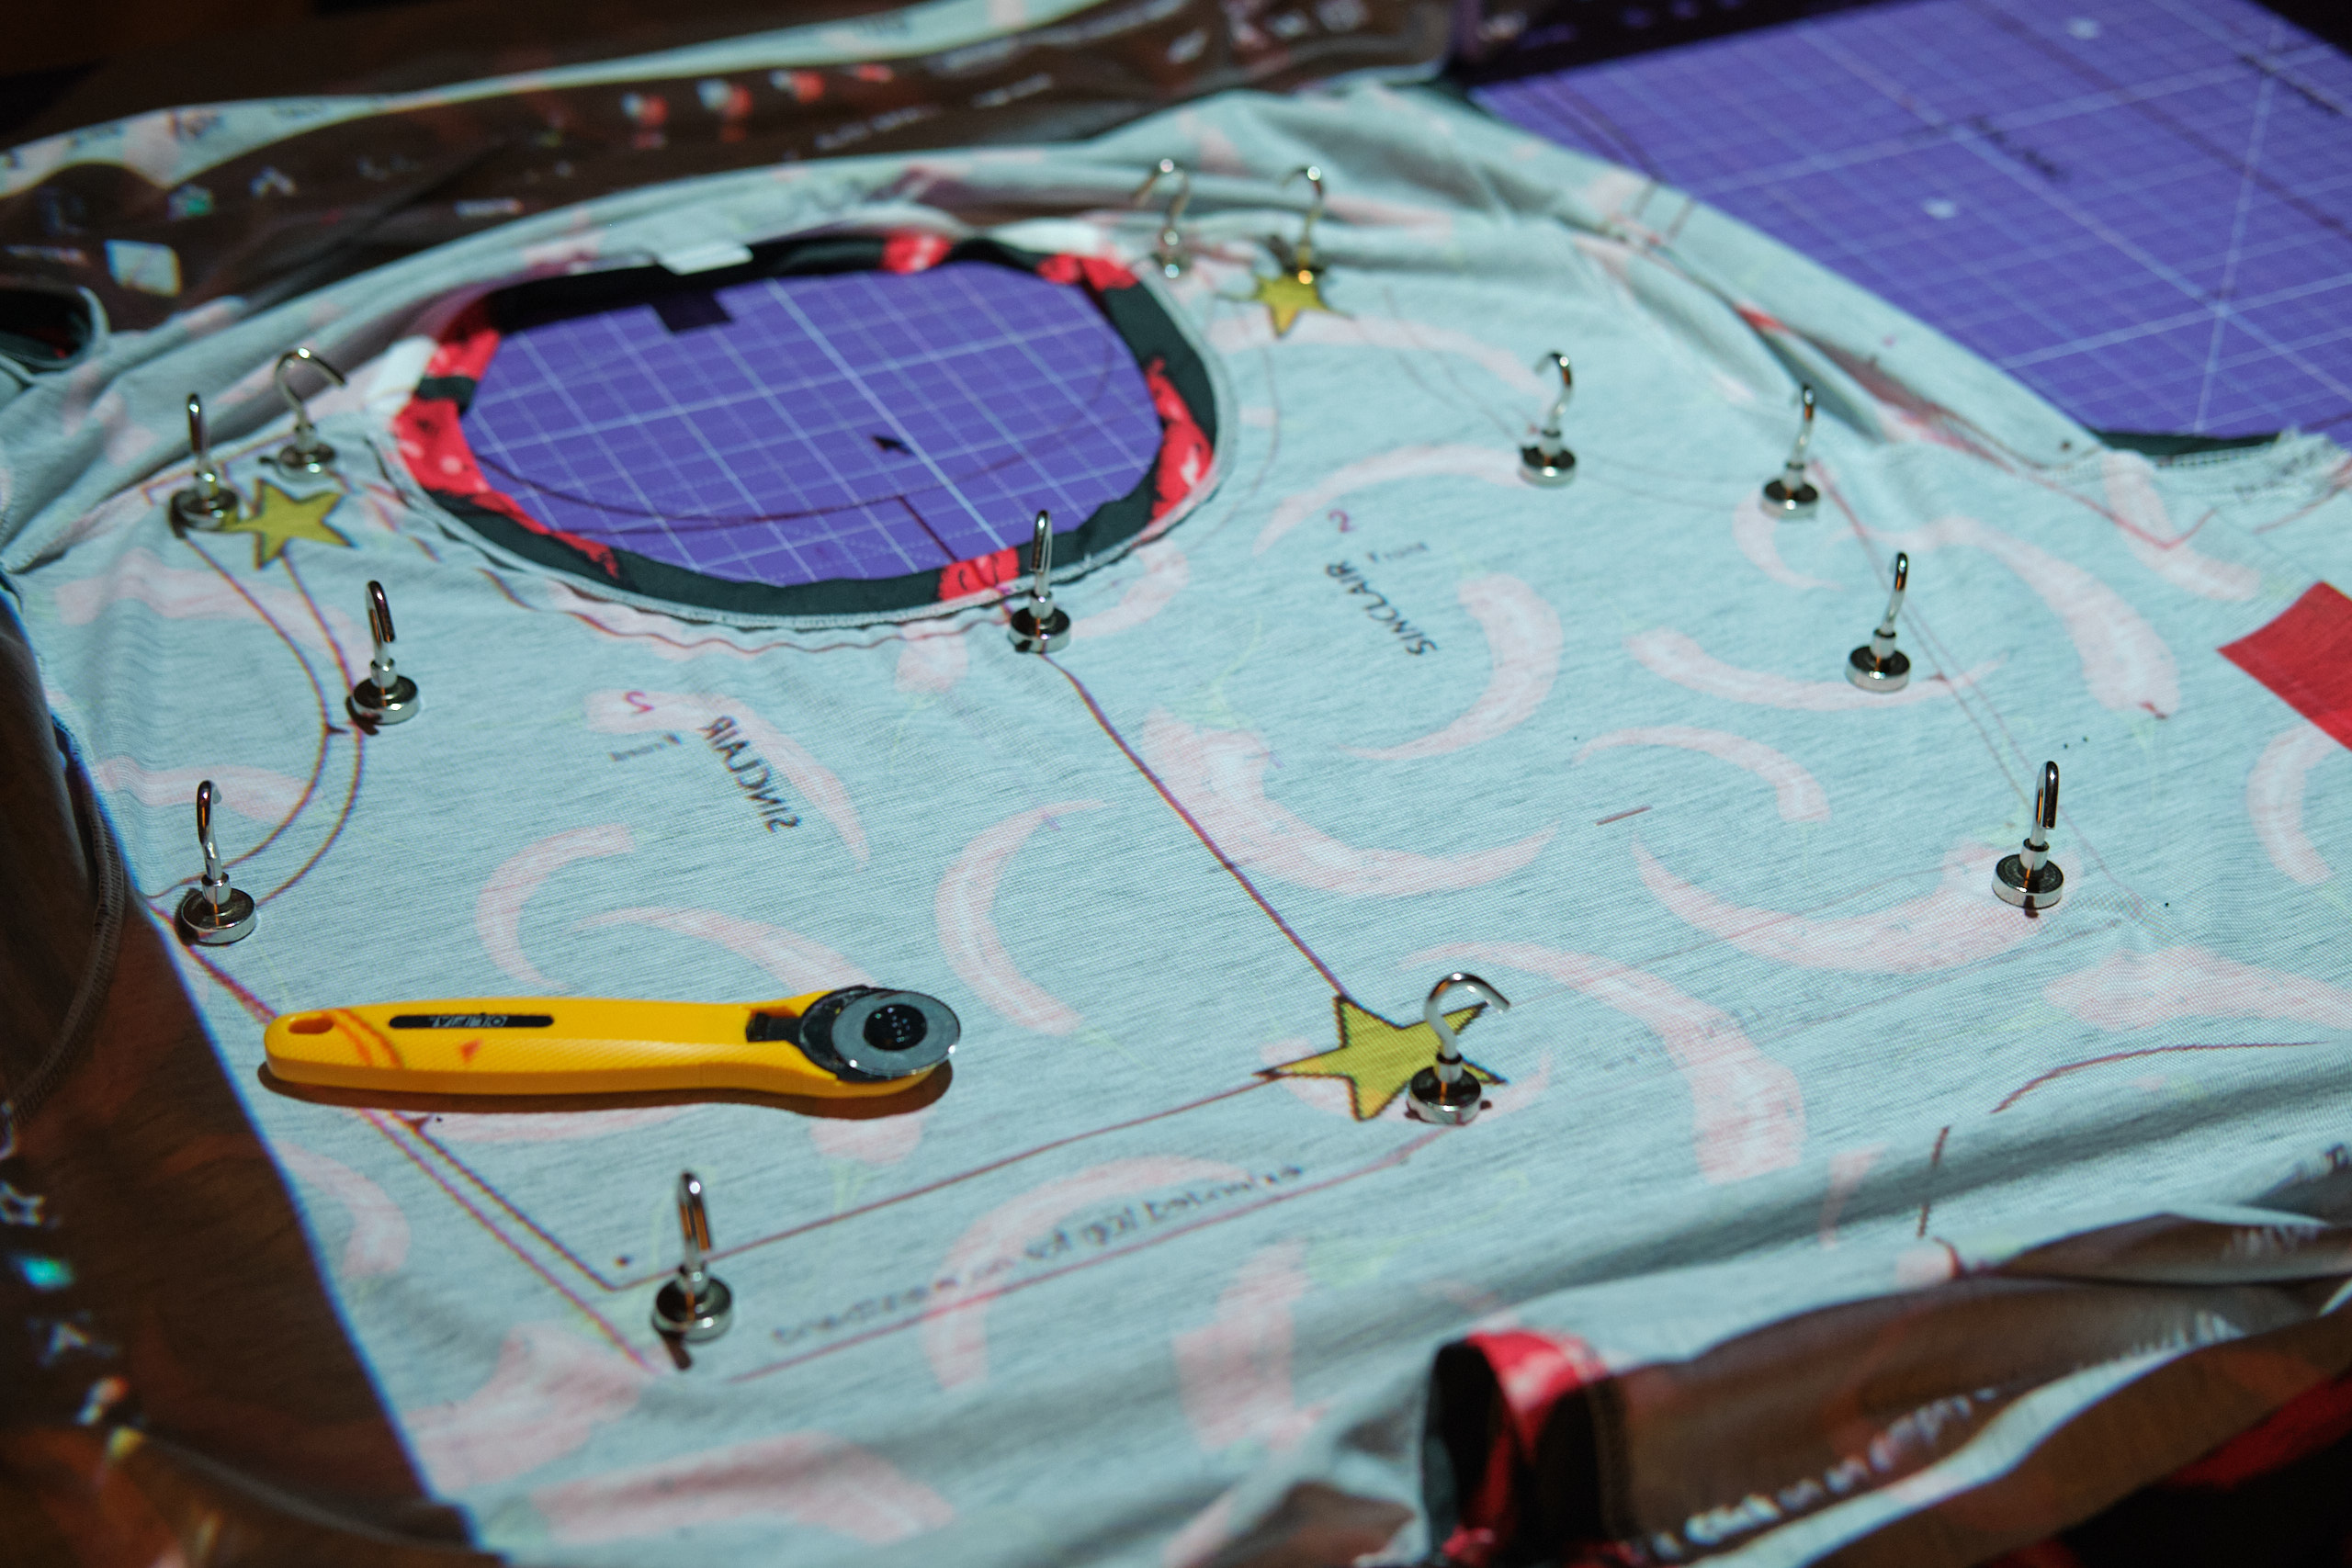
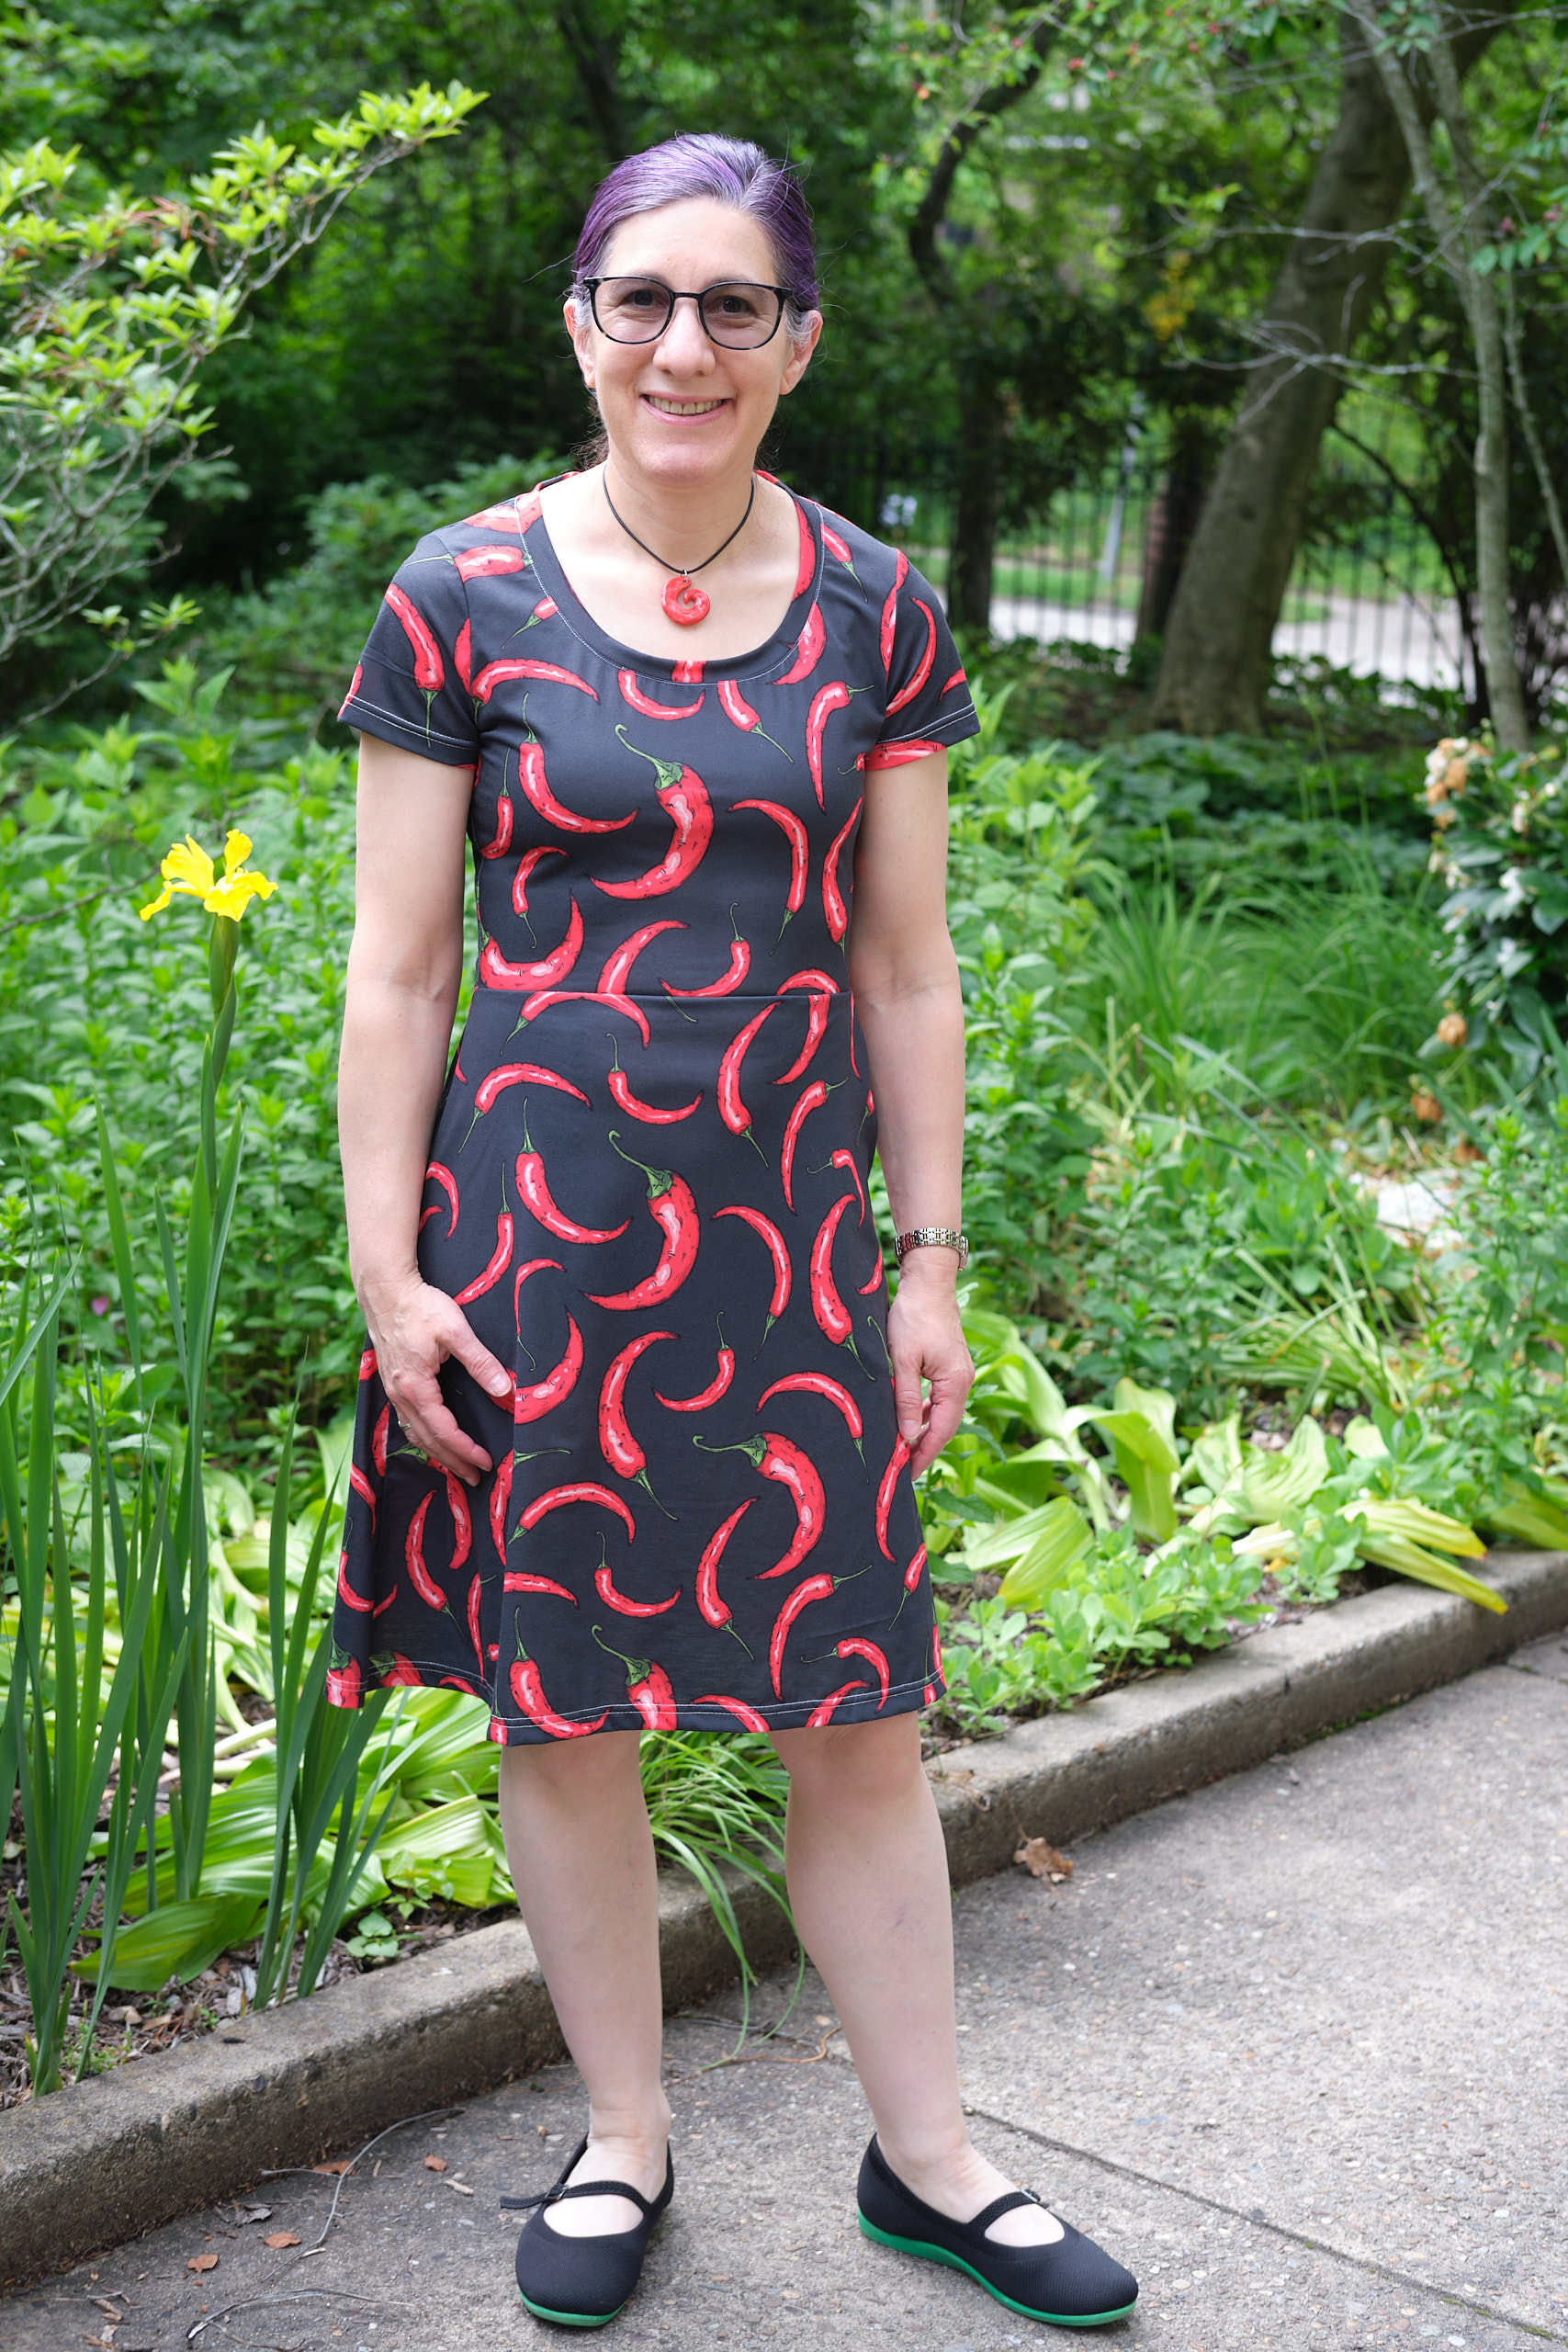
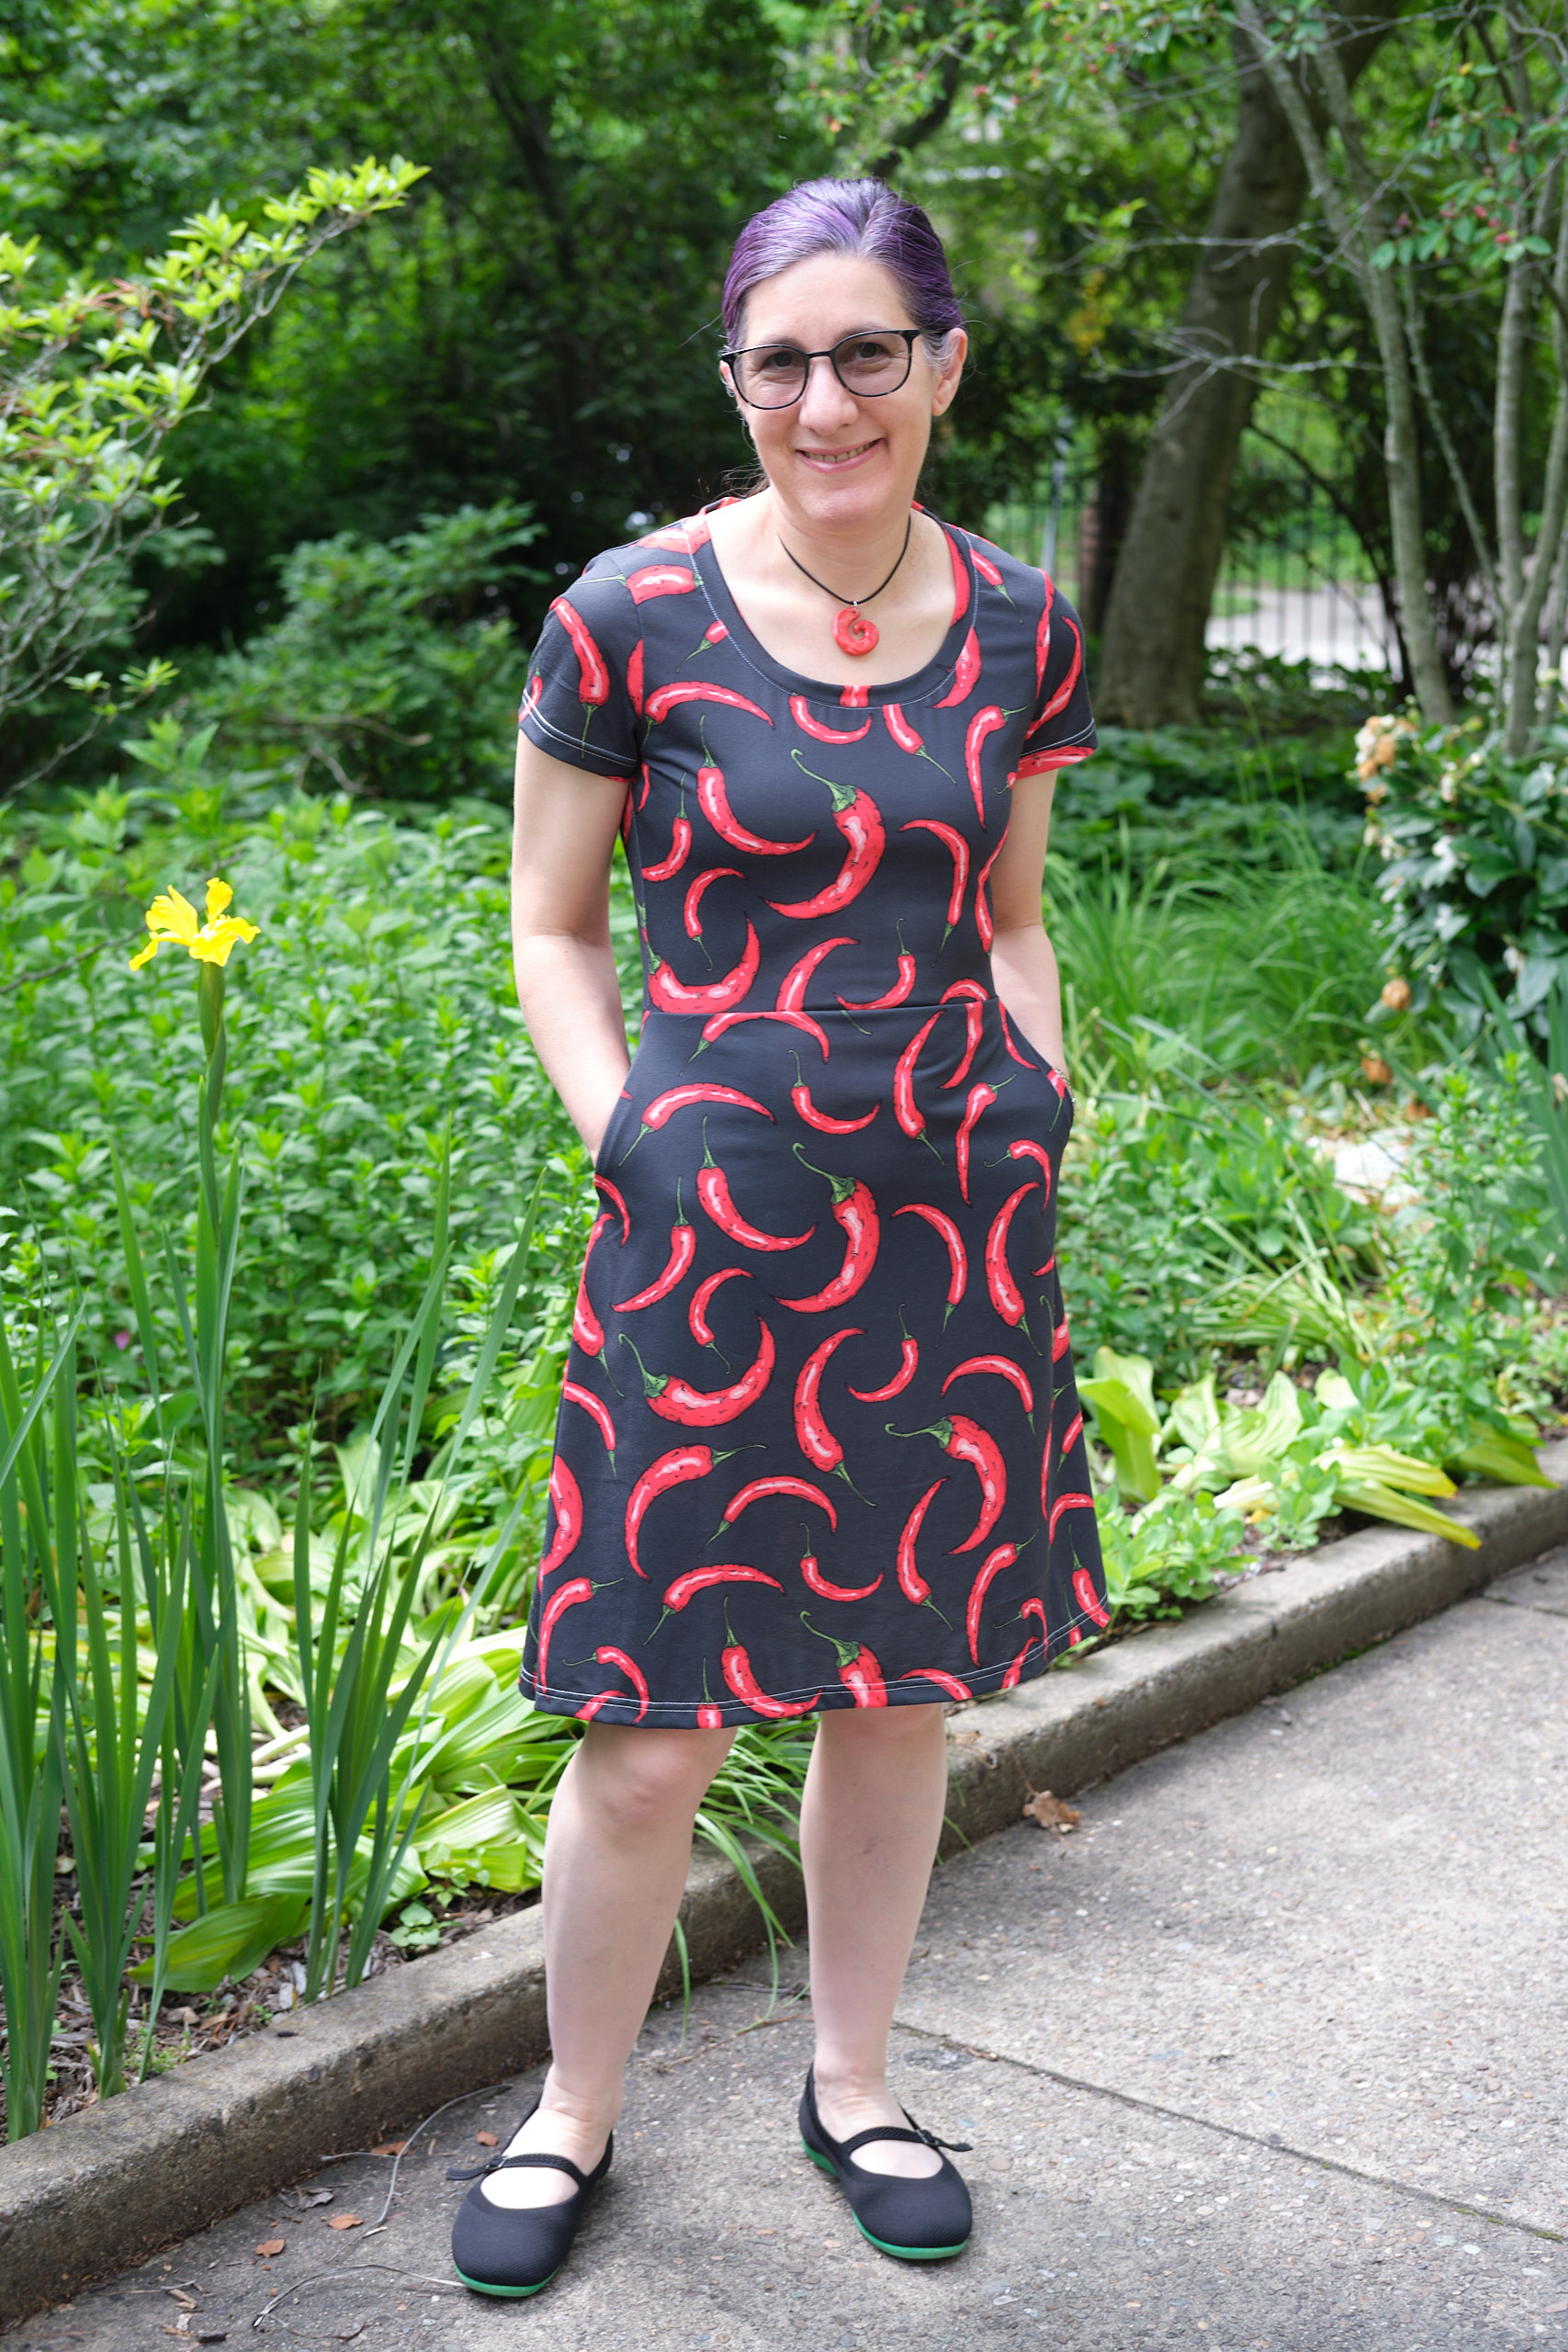
I decided to use the Sinclair (free) Valley Skater Dress pattern with a half-circle skirt from the add-on pack. I have made this pattern previously and it was pretty easy and I thought I could adapt it for this project. Because the mystery fabric did not have a lot of stretch and I know the bodice is very fitted, I decided to size up to a 6p rather than using the 4p size I had used previously. I extended the bodice by about an inch and a half as suggested when making the dress without a waistband. I cut the nightgown open at the side seams and projected the two bodice pieces onto it and cut them out, leaving the neckband and shoulder seams from the nightgown in tact.
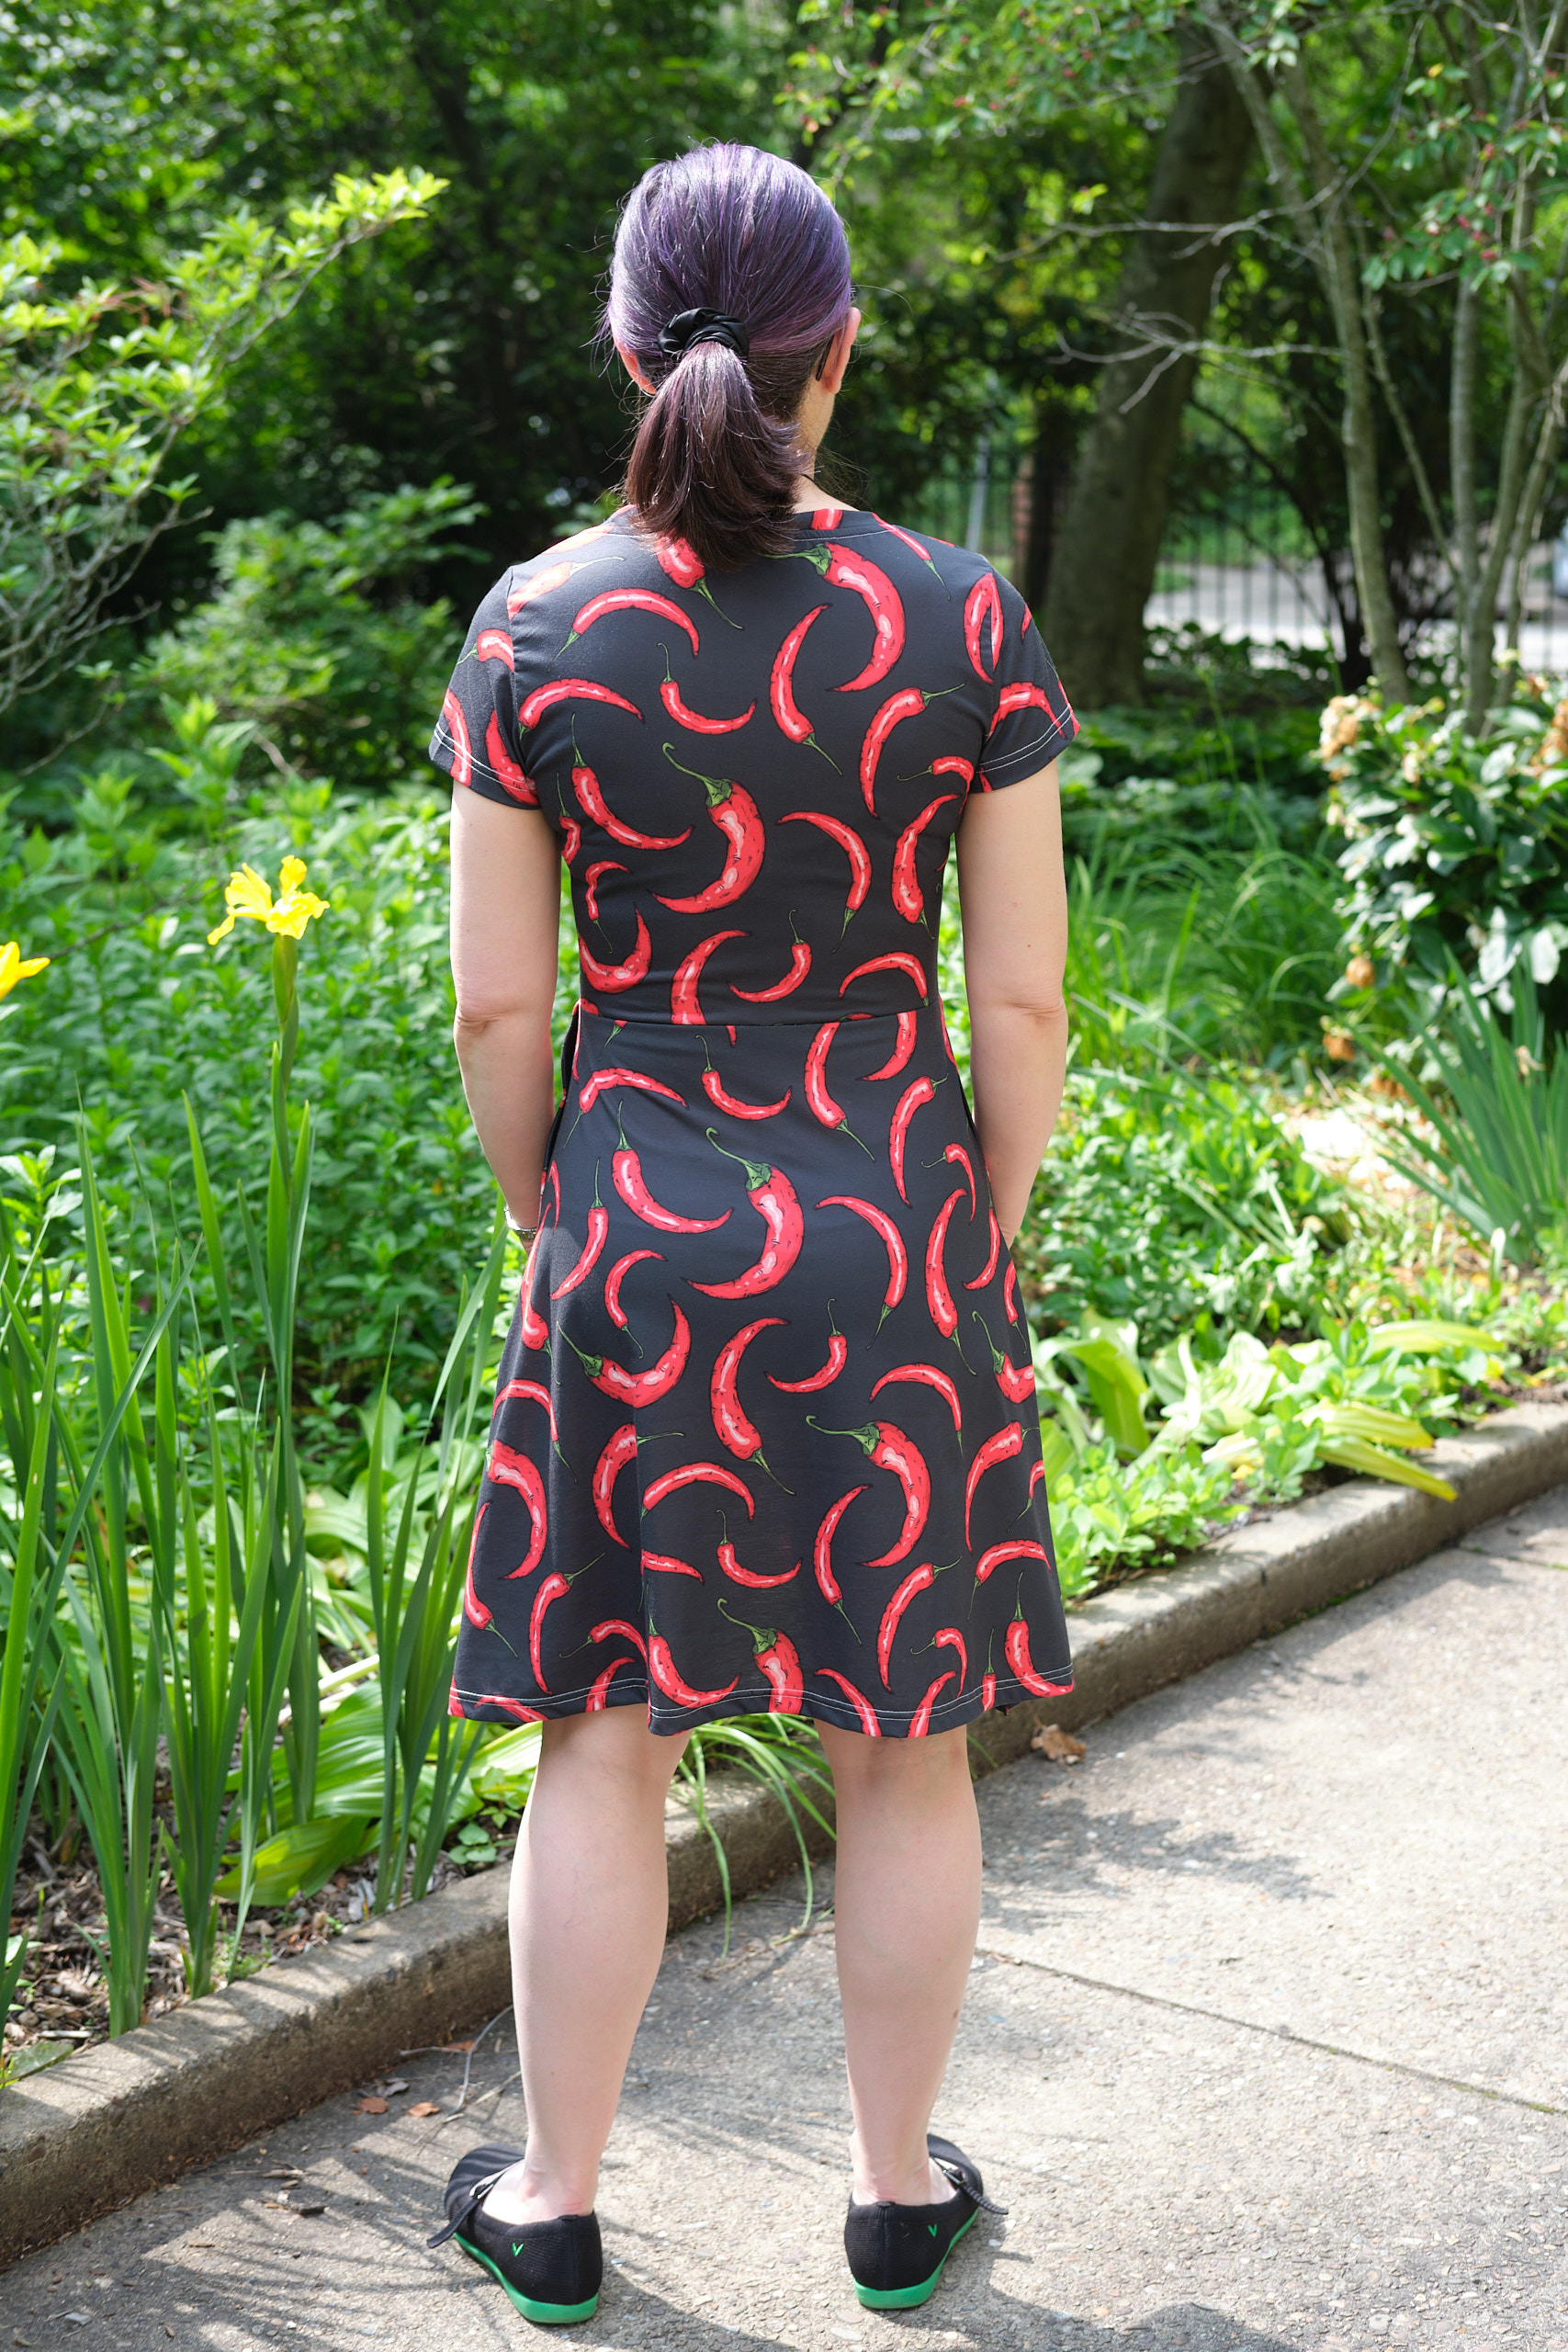
Then I projected the sleeves onto the fabric from the nightgown sleeves and cut them out with the hem in tact so that I would not need to hem the sleeves. Finally, I had to figure out what to do about the skirt. The nightgown was not quite wide enough to cut out the pieces for the half-circle skirt. I decided to improvise and pivoted the sides of the skirt pieces in until the fit the fabric I had. I left the bottom hem in tact (and thus, not quite as rounded as the pattern called for) and I reduced the rounding on the waist and made sure it would fit the bottom of the bodice. I ended up with something closer to a one-third circle skirt than a half circle skirt.
I really wanted to add pockets to the dress but didn’t have enough nightgown fabric left for deep pockets. I decided to use scraps of cupro jersey from another recent dress project to make the pockets. This is a super lightweight and not very stretchy knit and it worked really well (although it would have been slightly better if it were dark grey to match to dress fabric) — now I want to use it for all my knit pockets. I followed the pattern for inseam pockets but extended the pocket bag a bit to make them slightly deeper. The pocket construction took as long as making the rest of the dress — reminding me of how much I hate assembling inseam pockets. The part I really struggle with is stitching the top and bottom of the pocket openings without catching any of the pocket bag on the outside of the pocket. After trying and failing on the first pocket I unpicked it and used my trusty glue stick to line up the pockets and then sewed them with my edge foot. It still took way too long!
After I assembled the pockets it was easy to attach the skirt to the waistband. Since everything was already hemmed, I added a label and I was done… until I looked at the back and noticed a lot of bunching at the waist.
And then it was time to accessorize! I ordered a bag of plastic pepper charms and added jump rings to turn them into pendants.
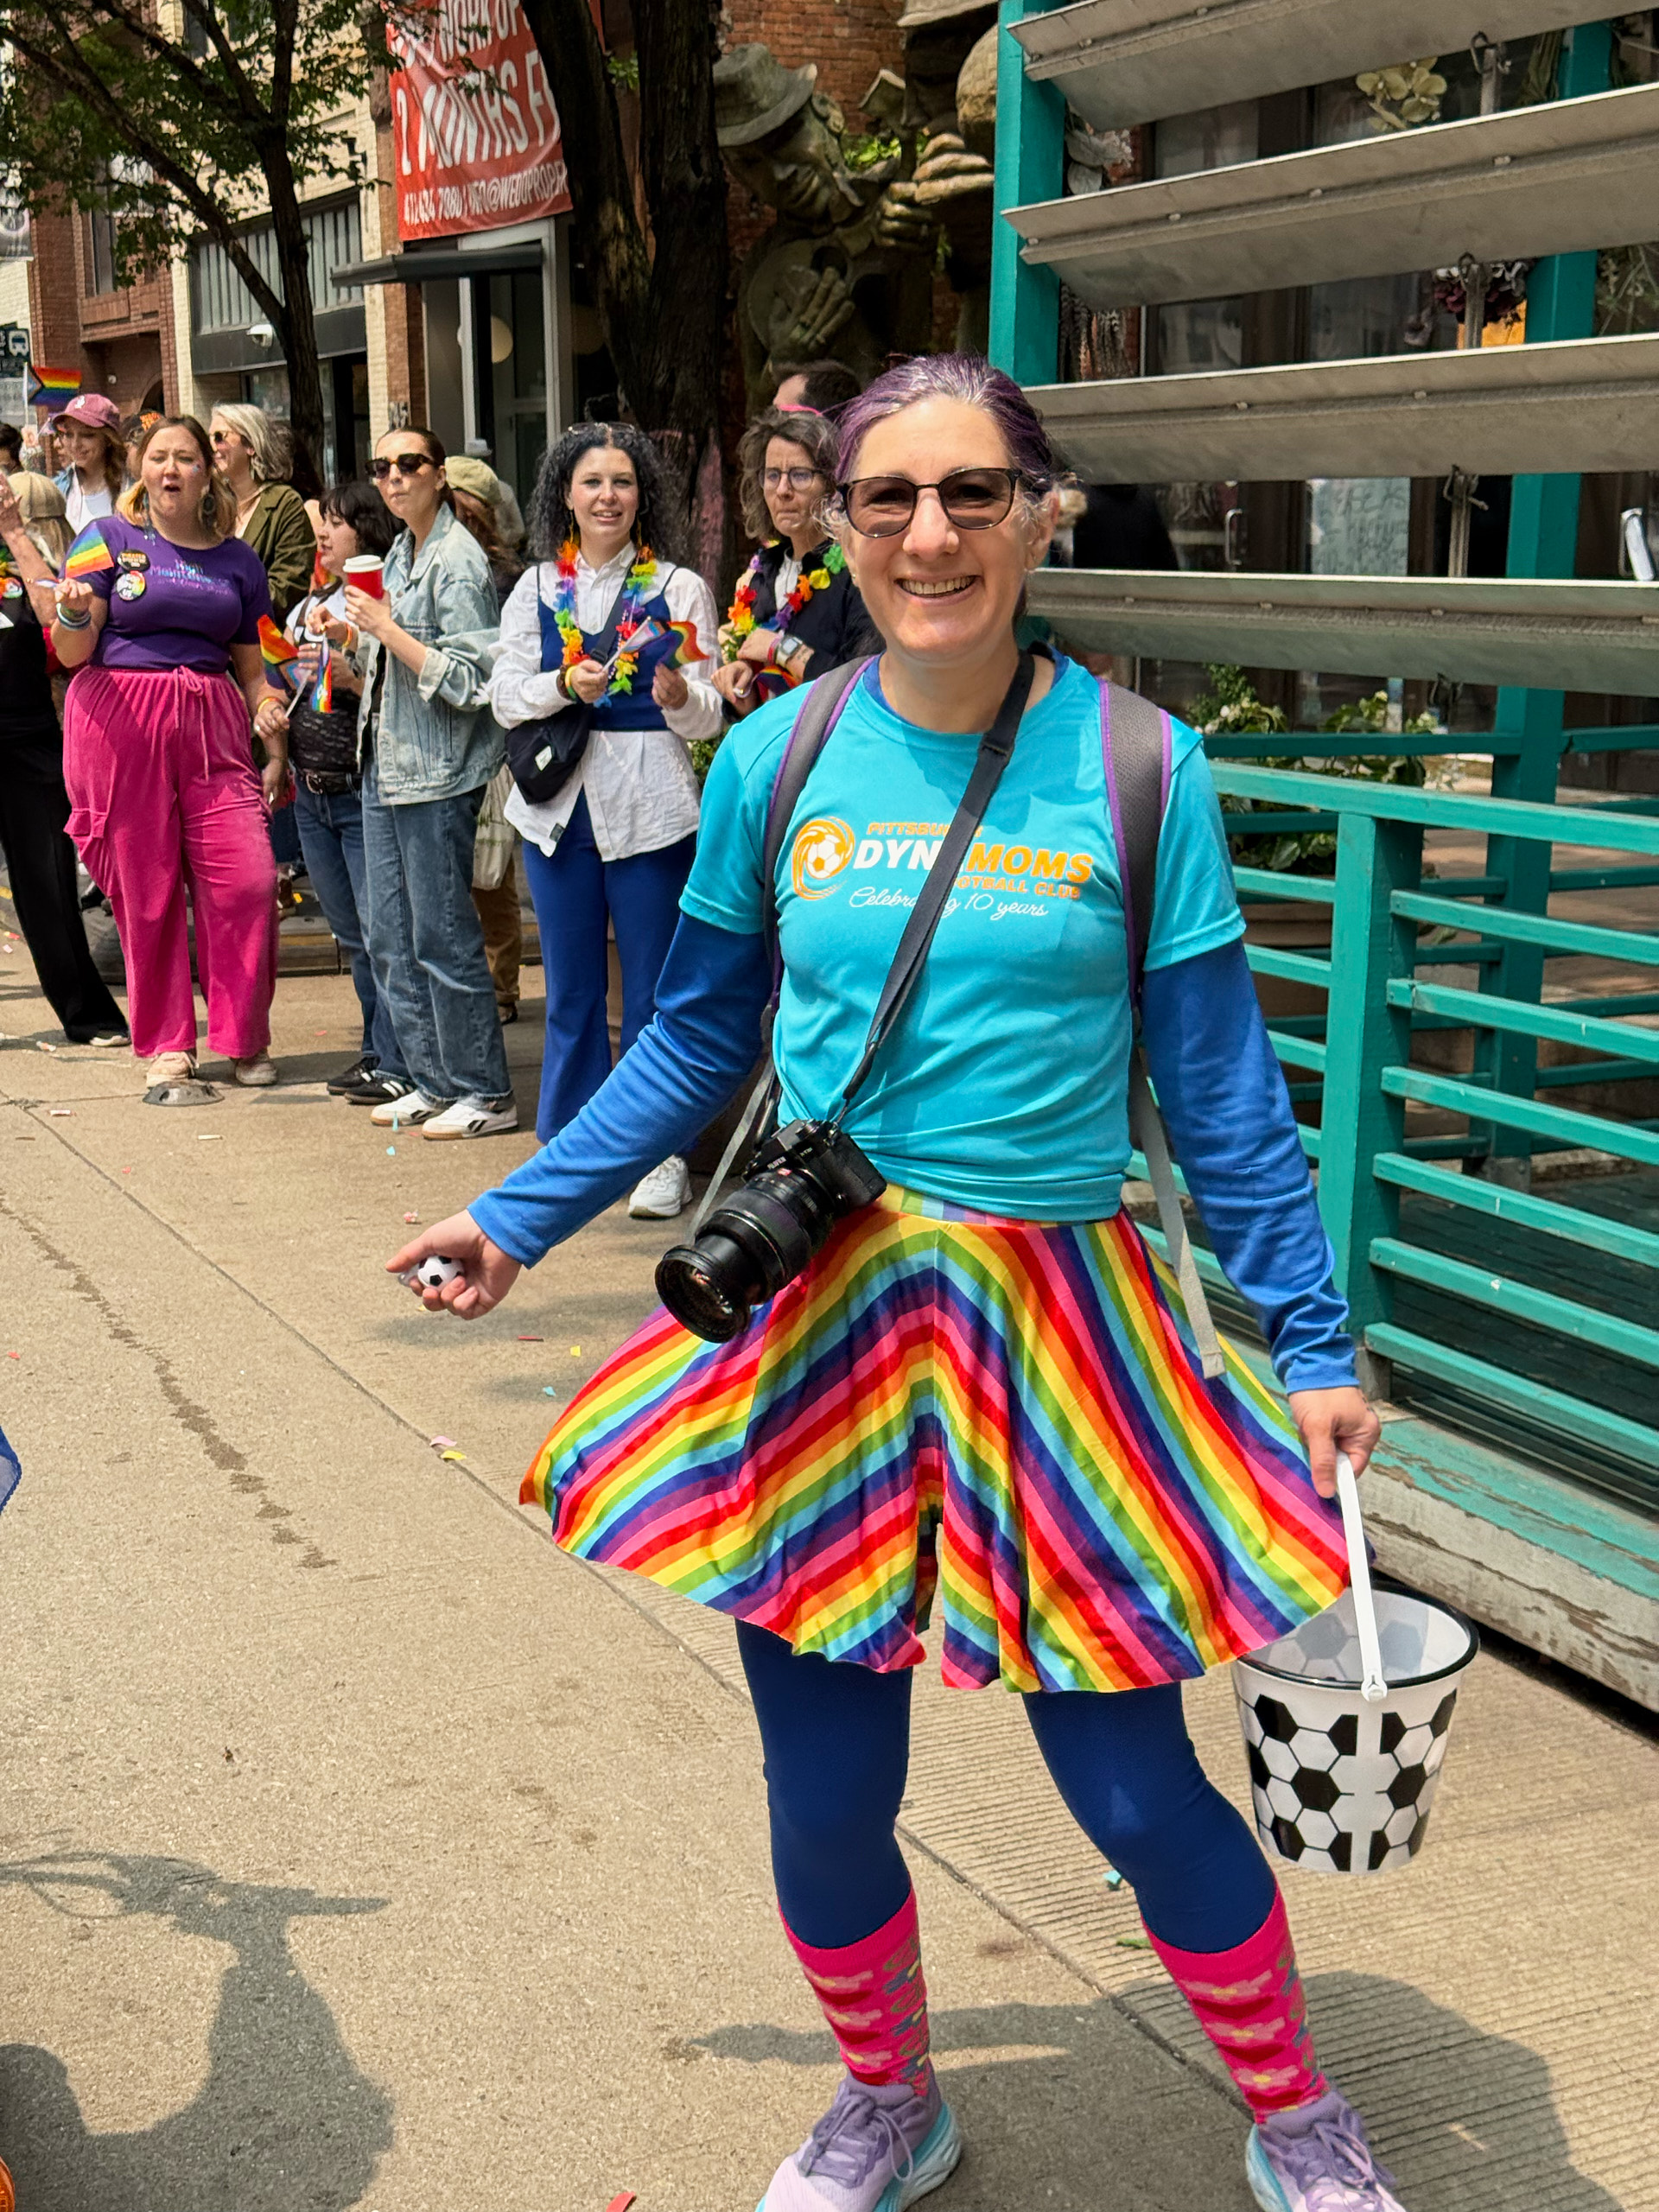
This morning we presented our UsersFirst framework at the PEPR conference. As you can see I was fully on theme with pepper dress, necklace and socks. And the pockets came in handy for the microphone pack.
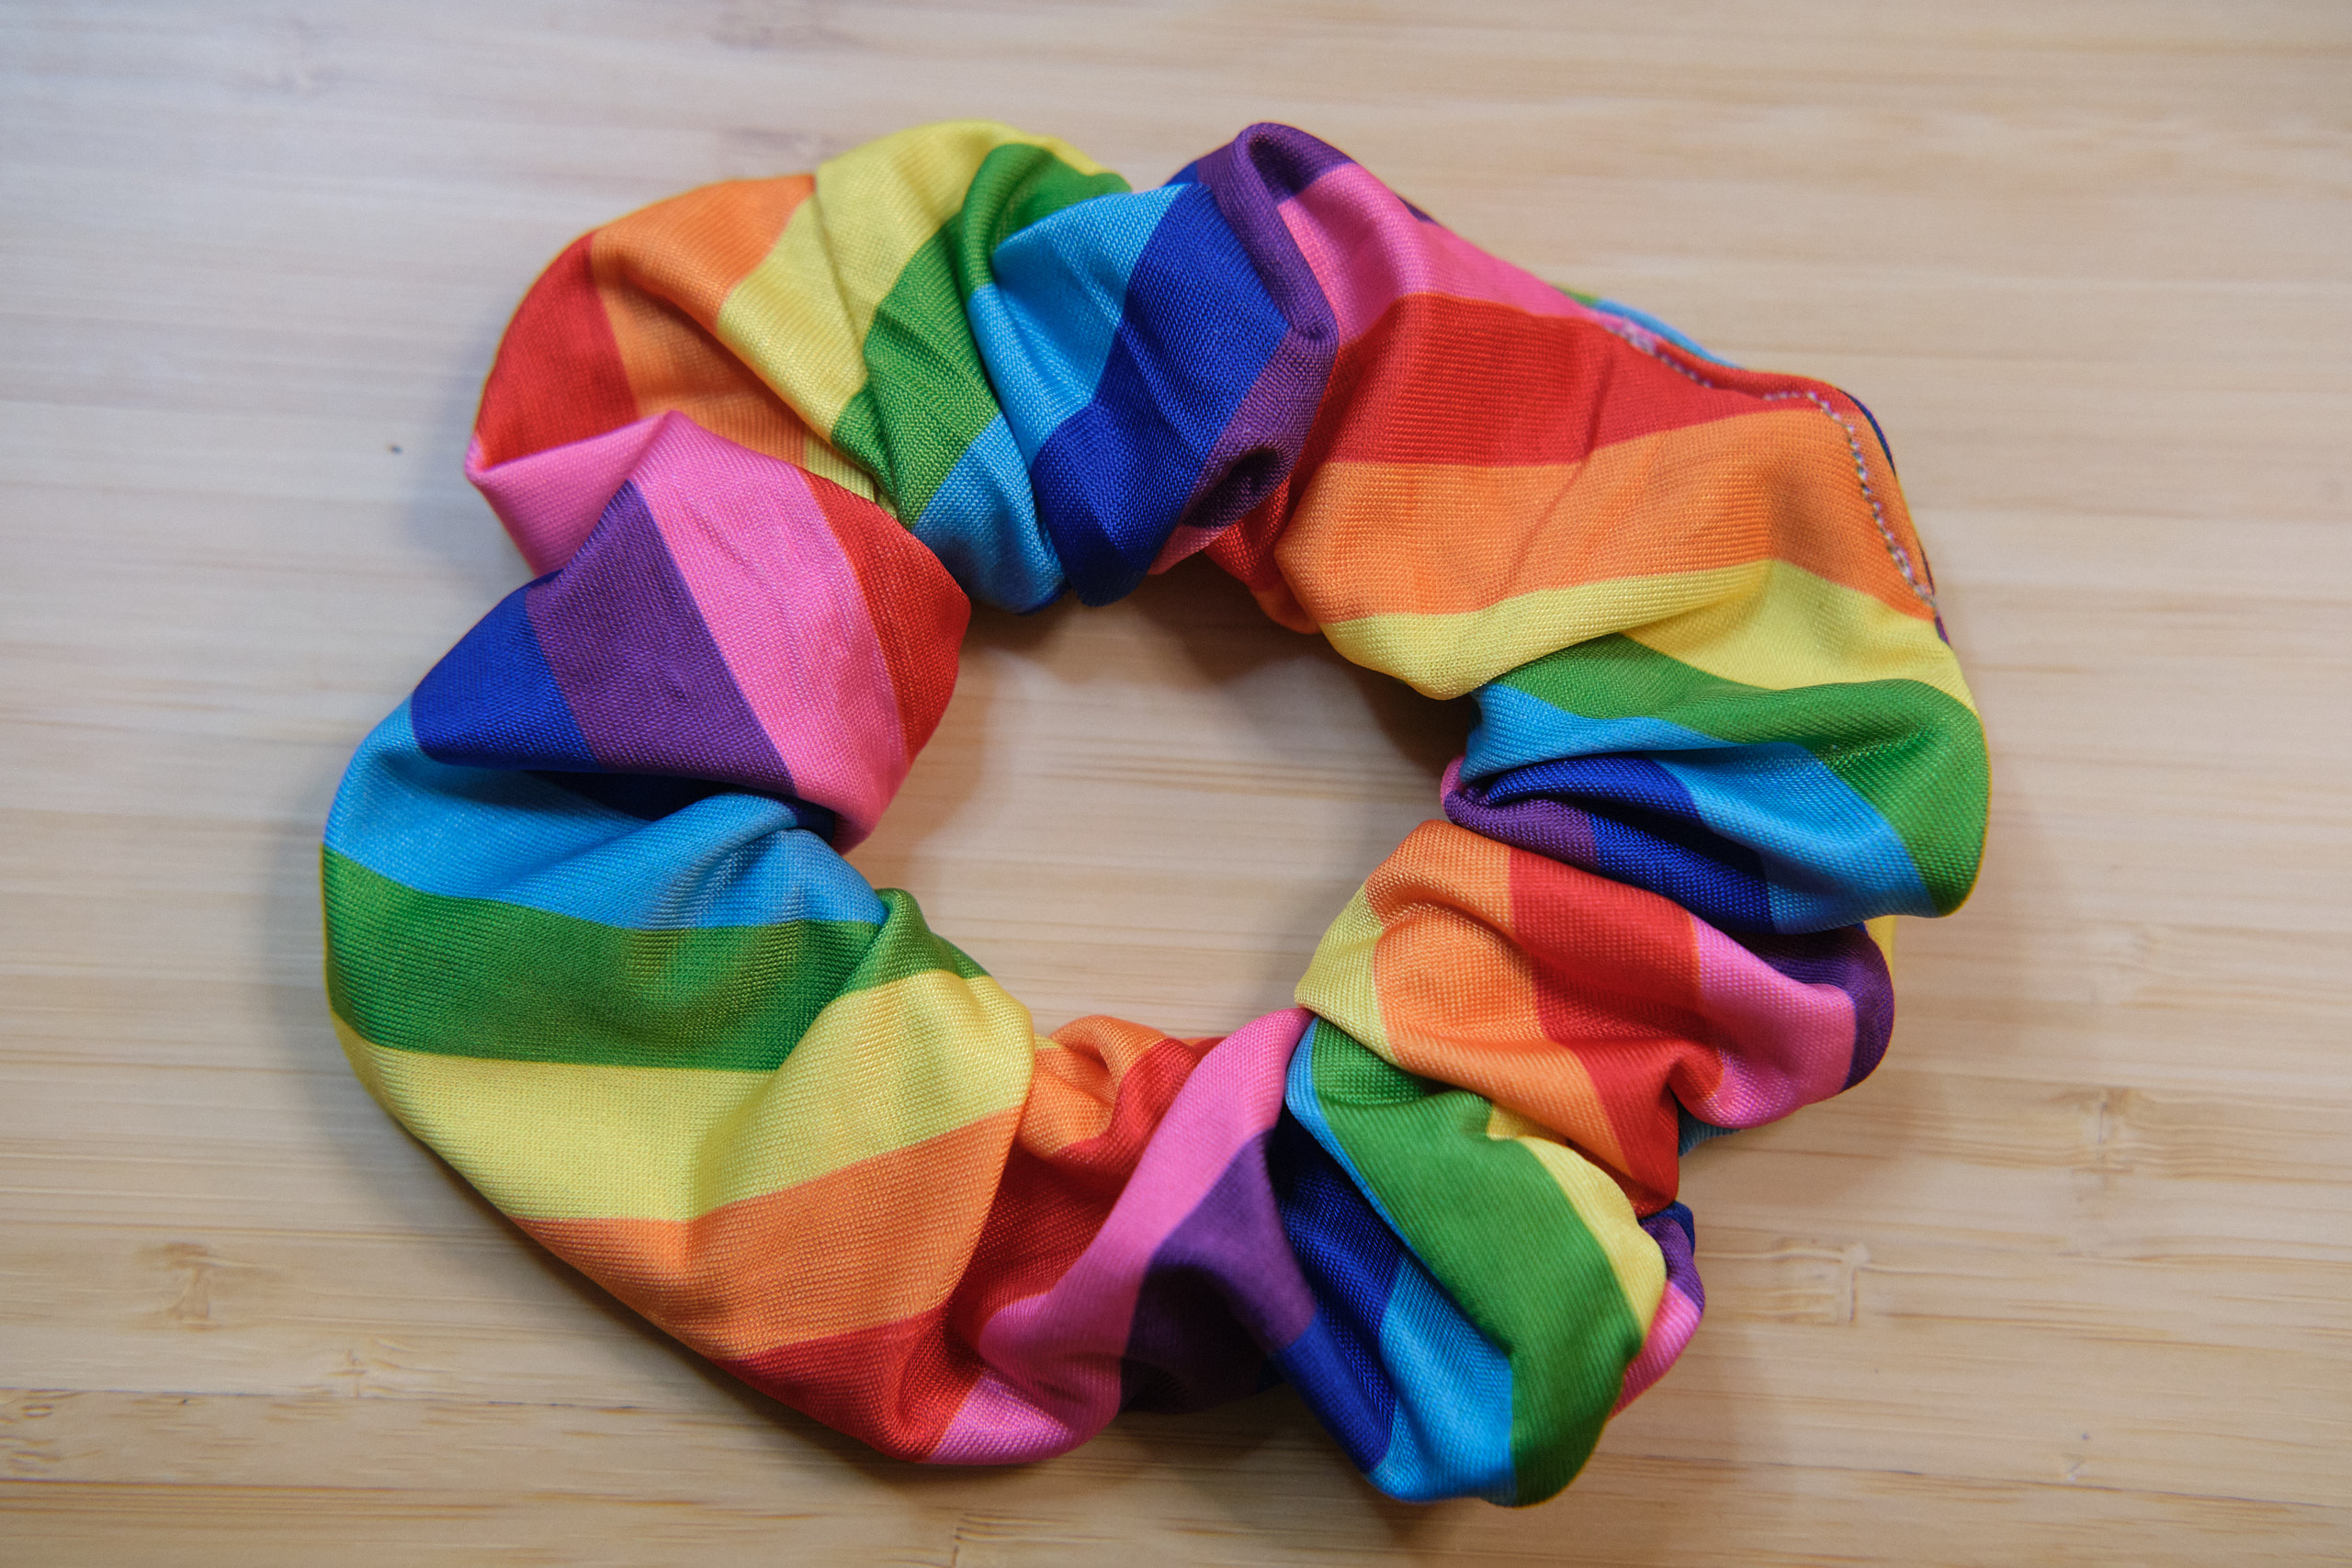
I had a bit of leftover rainbow fabric from the skort and decided to make some matching scrunchies. I have never sewn scrunchies before, so I searched for instructions online. There are lots of instructions available and I found two that looked reasonable and gave them a try. The first one involved sewing the long end, threading in the elastic, and then layering the shorts together and sewing the loop closed with a sewing machine. This resulted in an ugly and not quite aligned seam, especially with the slippery stretch fabric I was using. The second technique called for hand sewing the end, which worked, but took more time.
I decided to look further and found a video and instructions for the burrito method, which allows you to make scrunchies with perfectly aligned seams and no hand stitching. This involves a bit of a geometry trick, as you need to make a donut and then turn it inside out. In the burrito method you cut your rectangle (I used a piece 4″ by 23″) and sew the short ends together to form a loop. You fold your loop in half, right sides together, folding in parallel to the seam. Then you fold the top layer in on itself and bring the bottom layer sides up around the folded in part and carefully stitch the long edge without catching the top layer. As you go you pull the top layer through until you have stitched almost all the way around the (inside-out) donut. You leave a small gap and then turn the whole thing rightside out. Then you thread the elastic in (I used 8 inches of .5″ elastic), sew it into a loop, and then close the hole in the seam. I did all the stitching on my serger except the final hole closing. I didn’t press or pin anything and it was super fast to make!
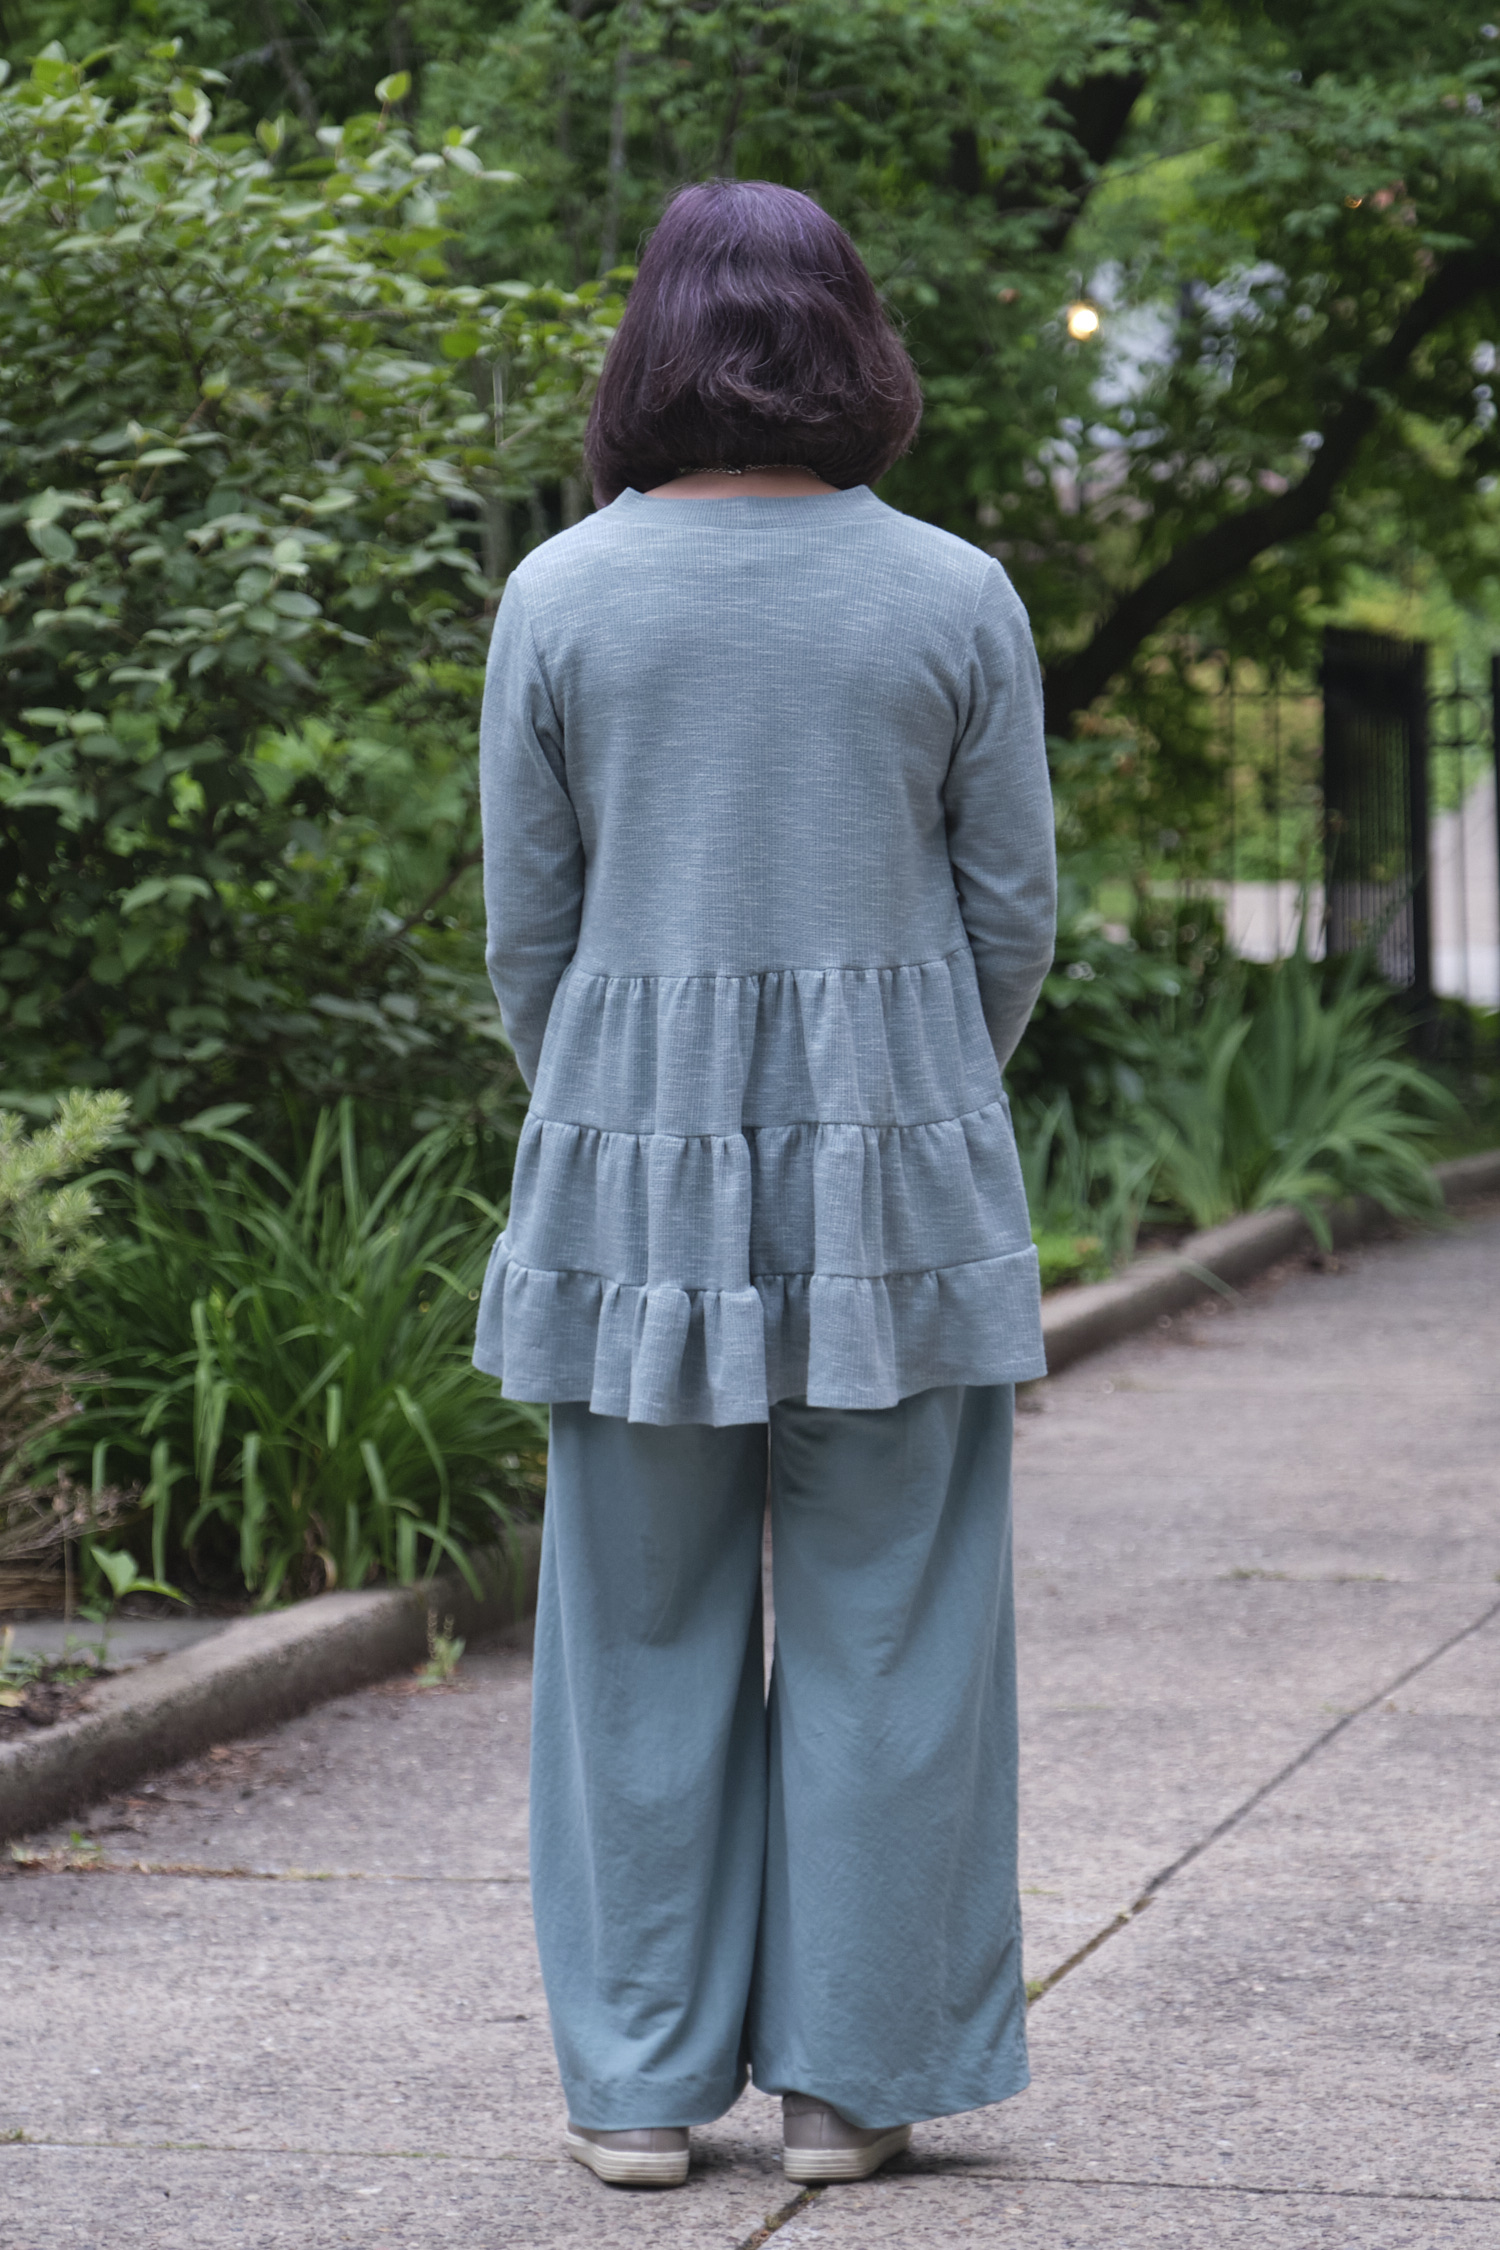
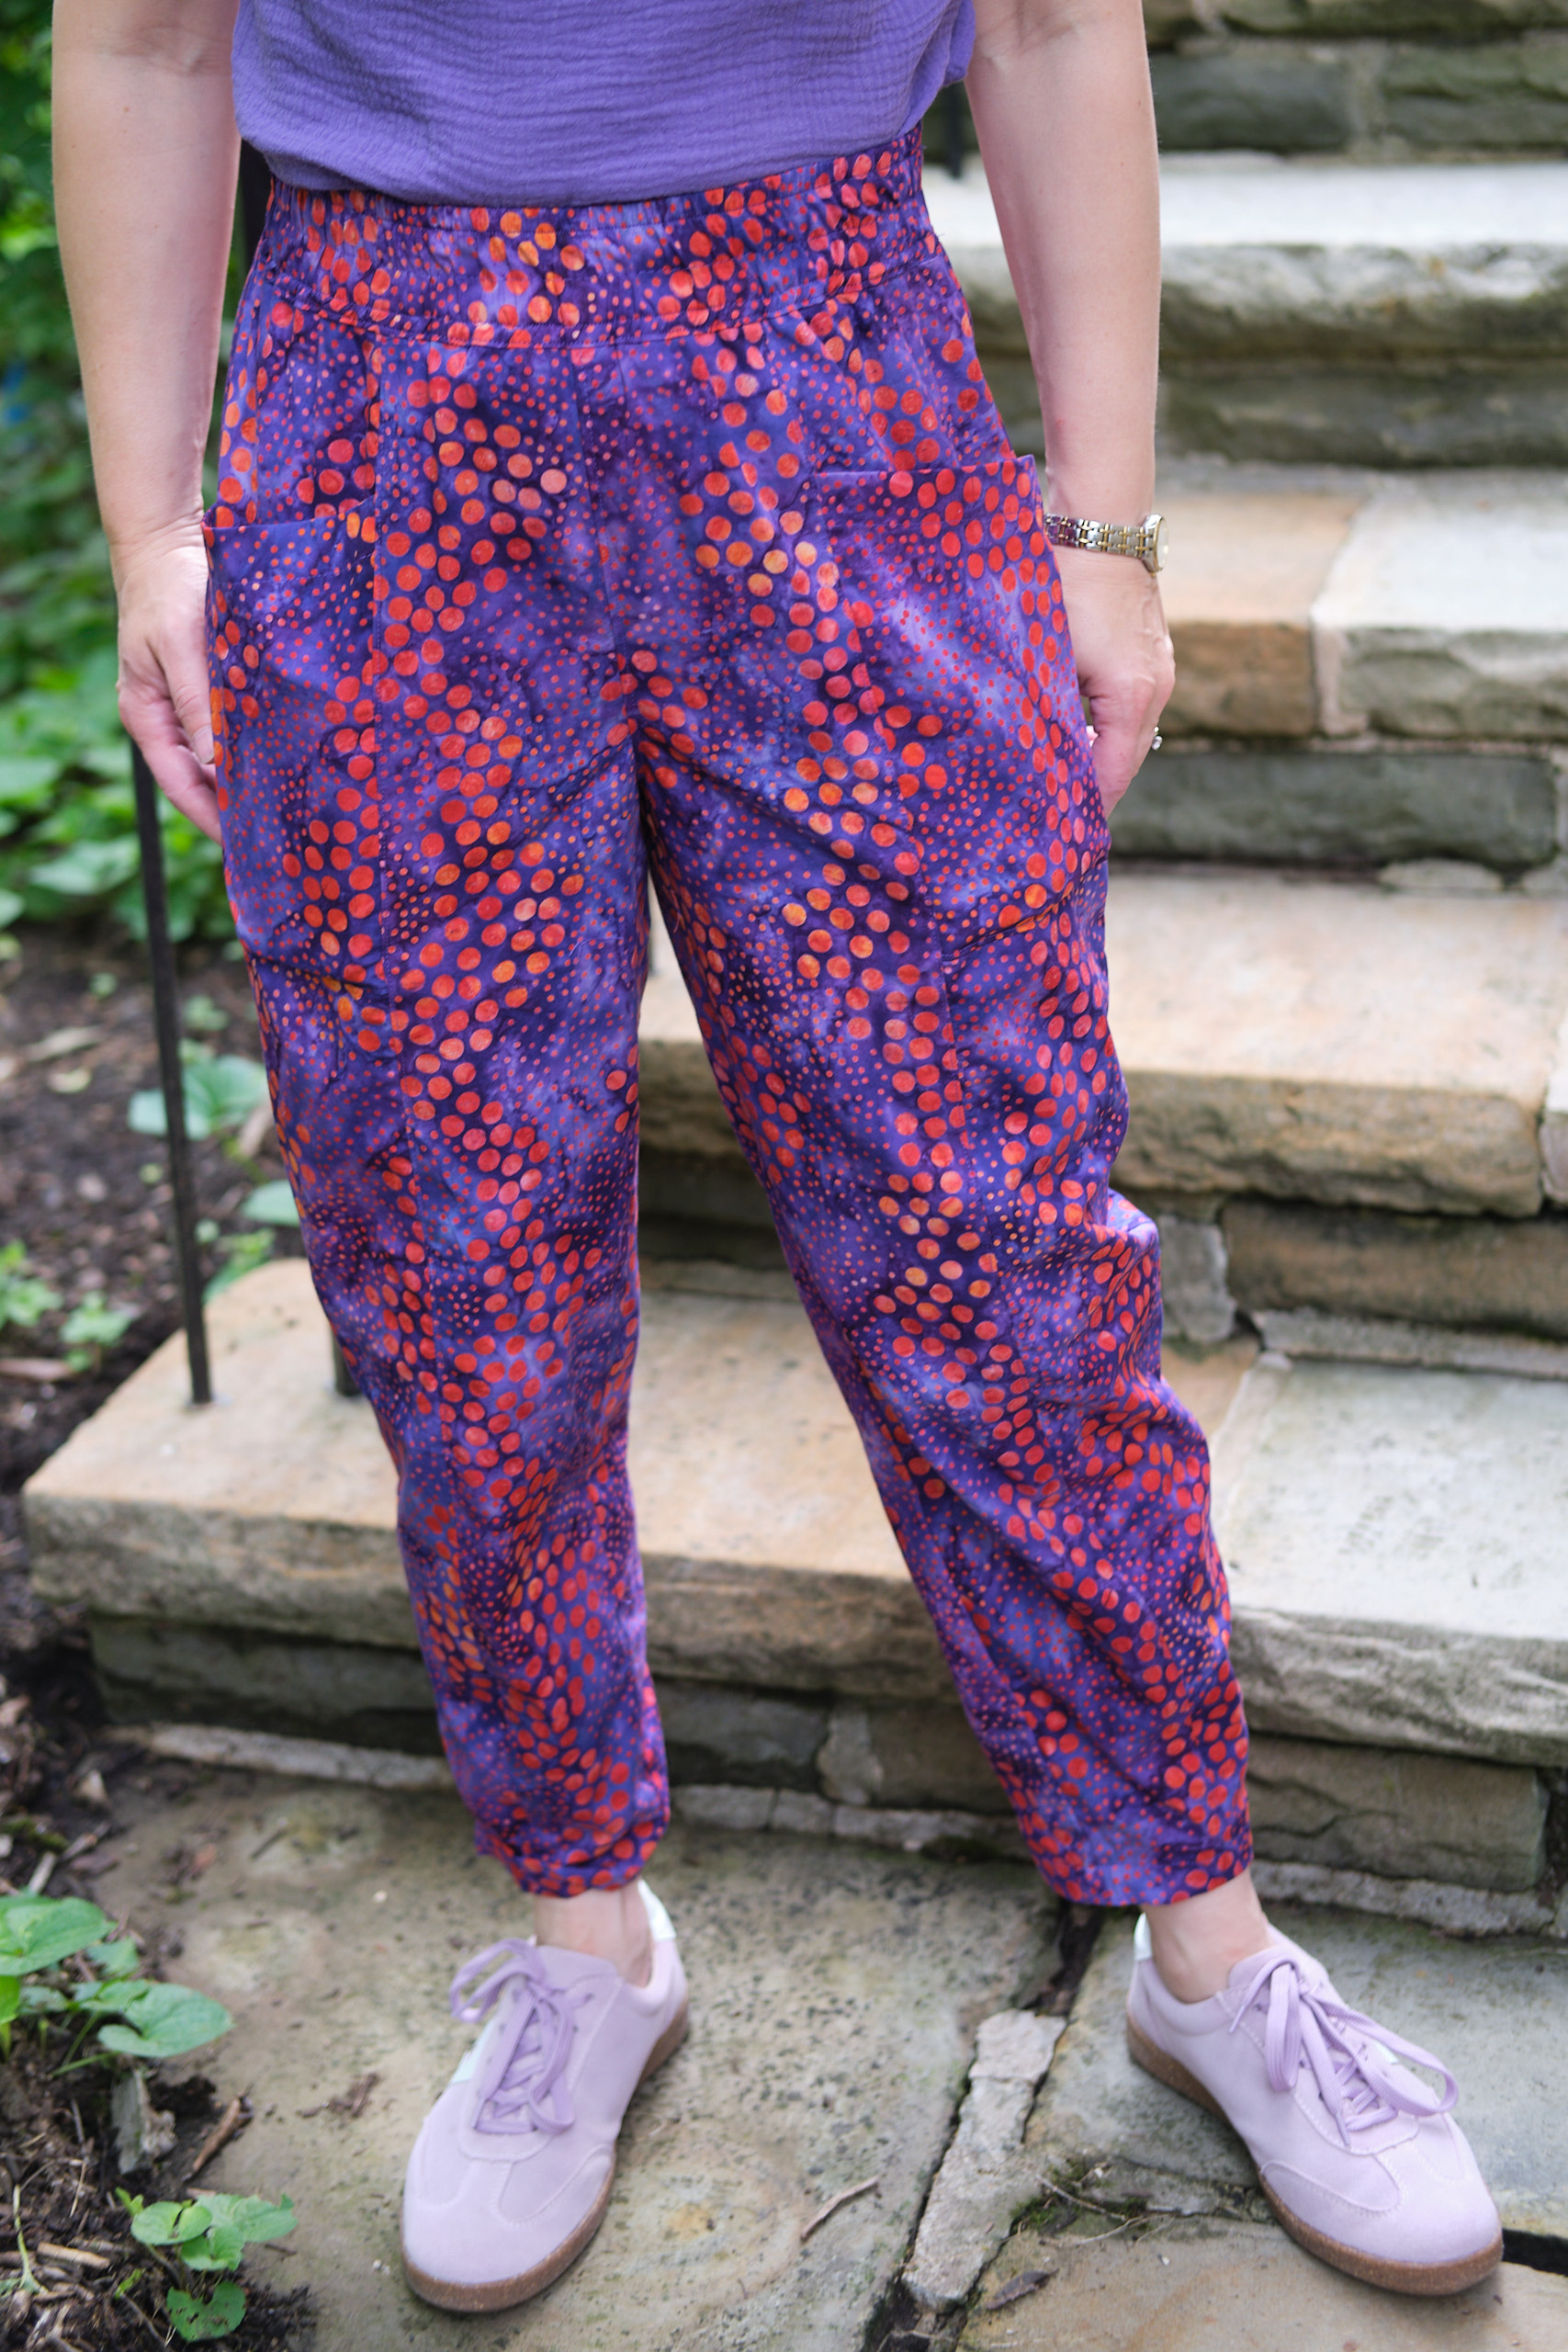
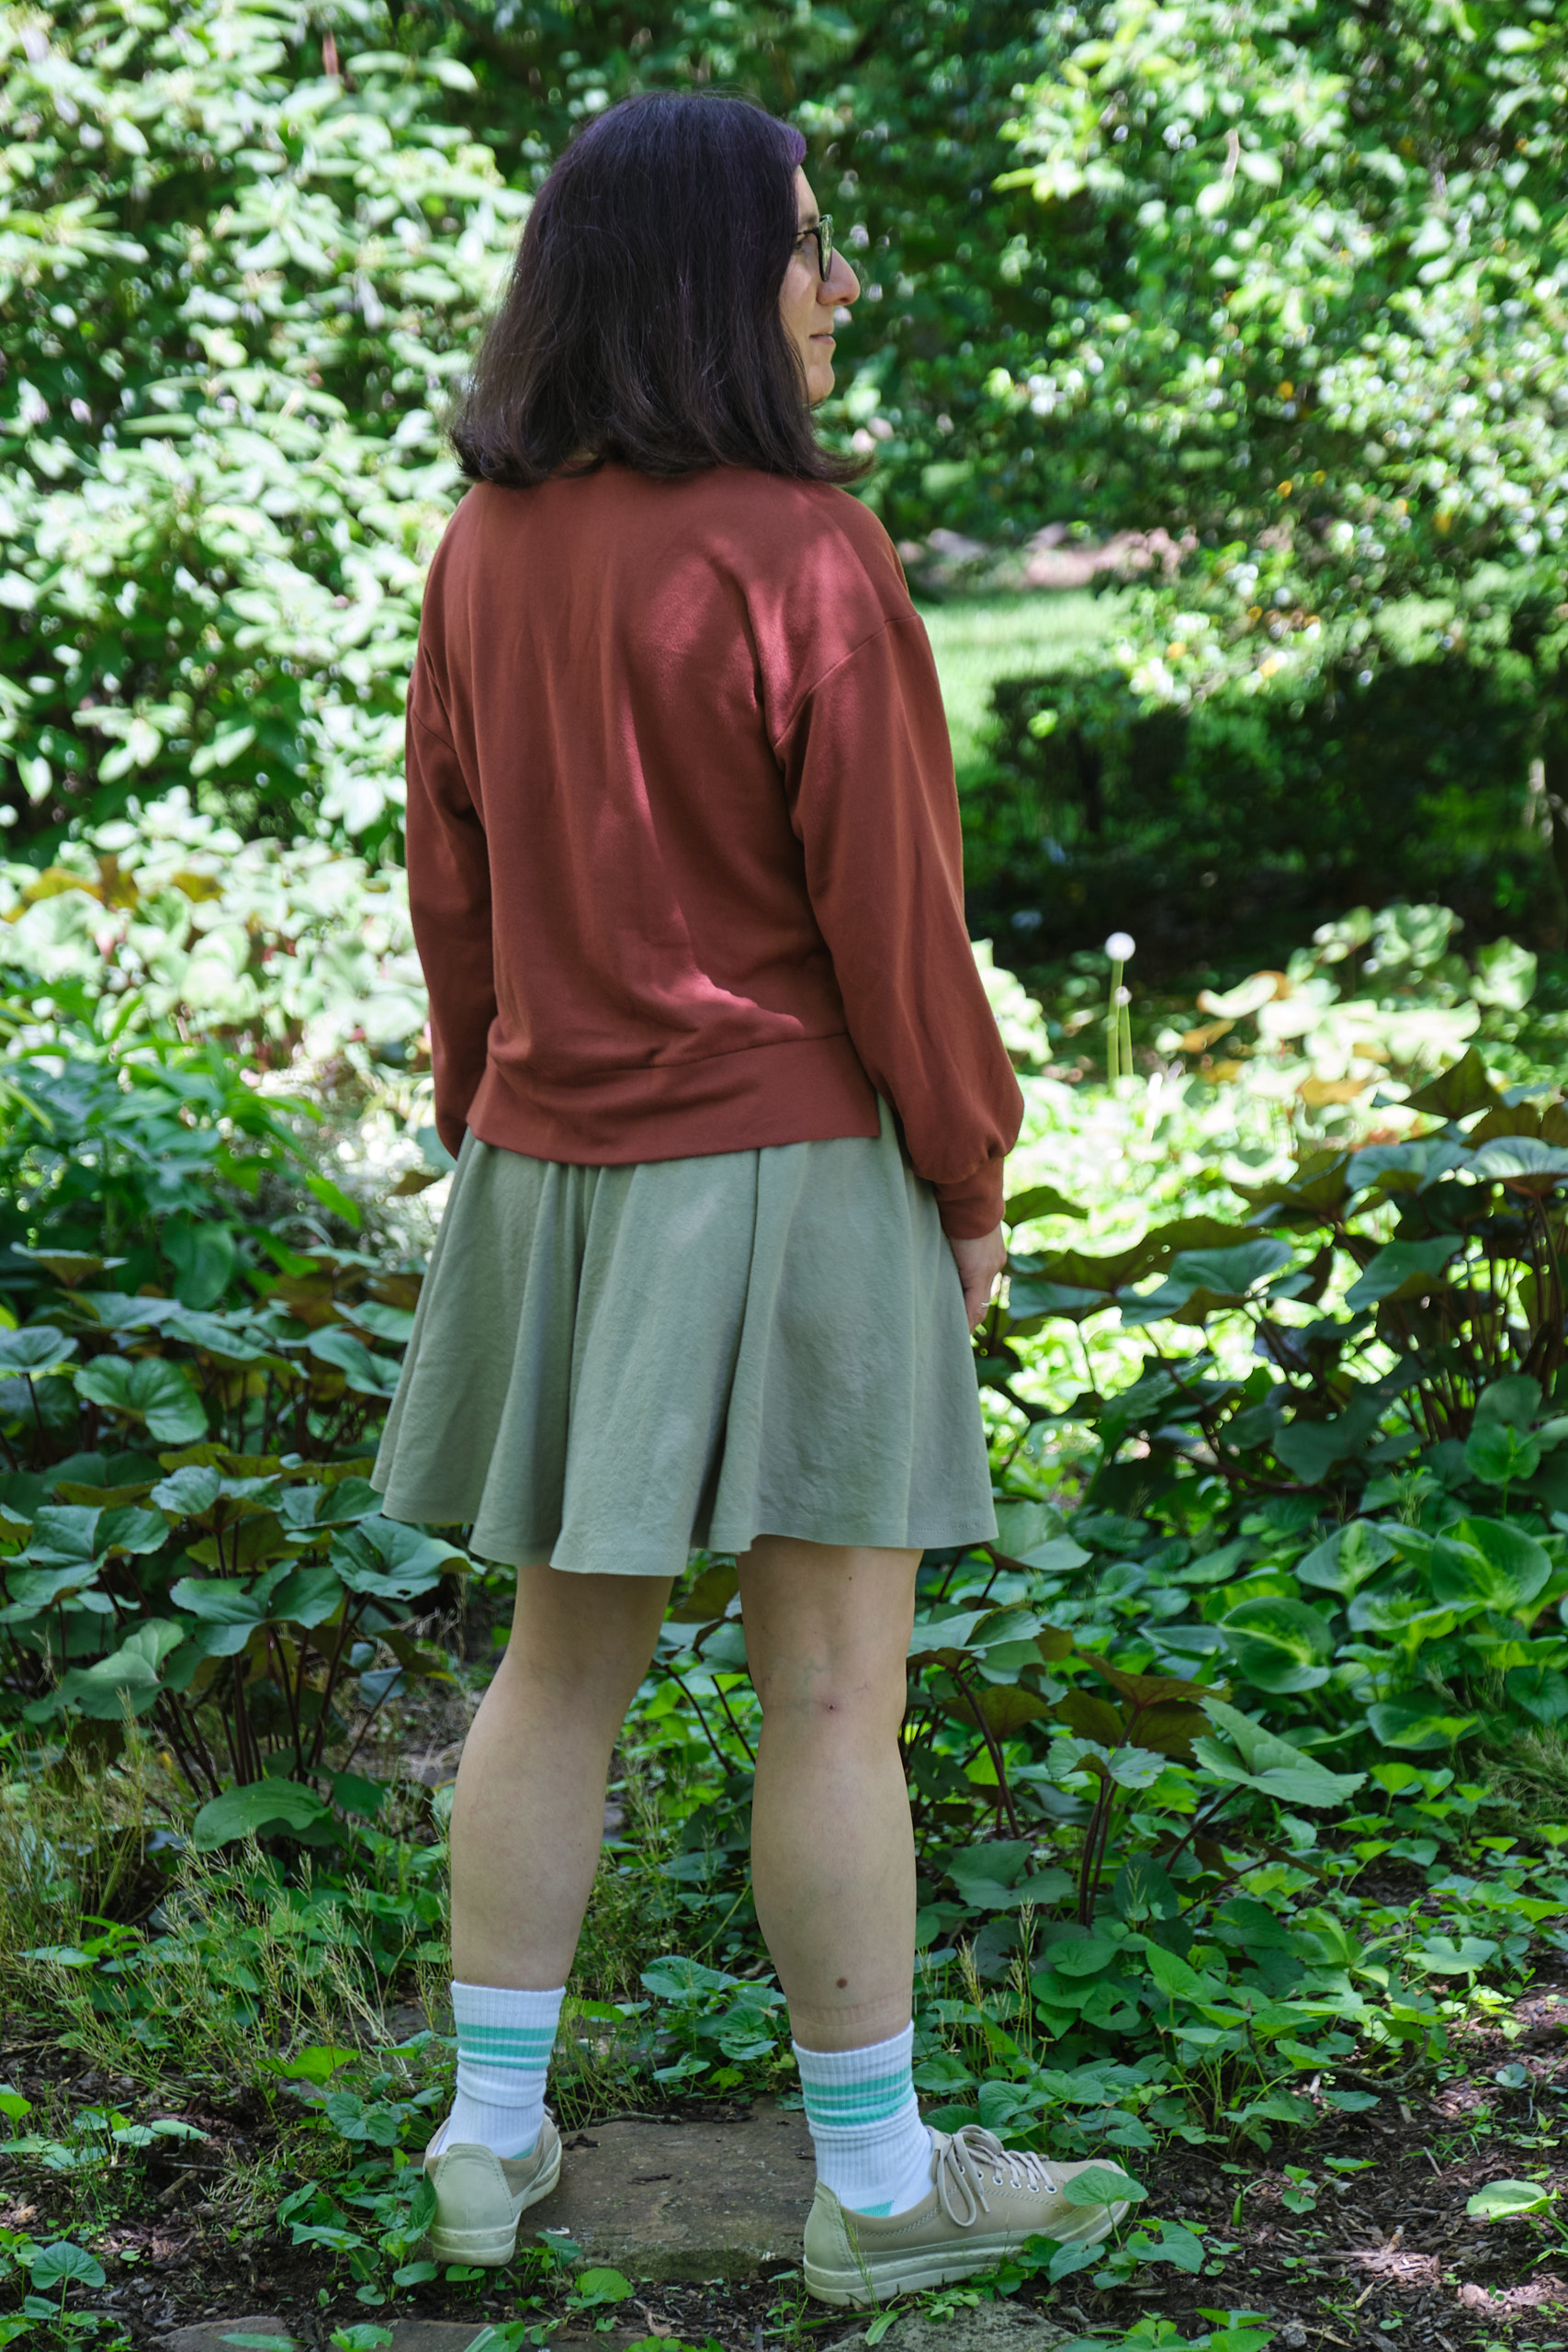
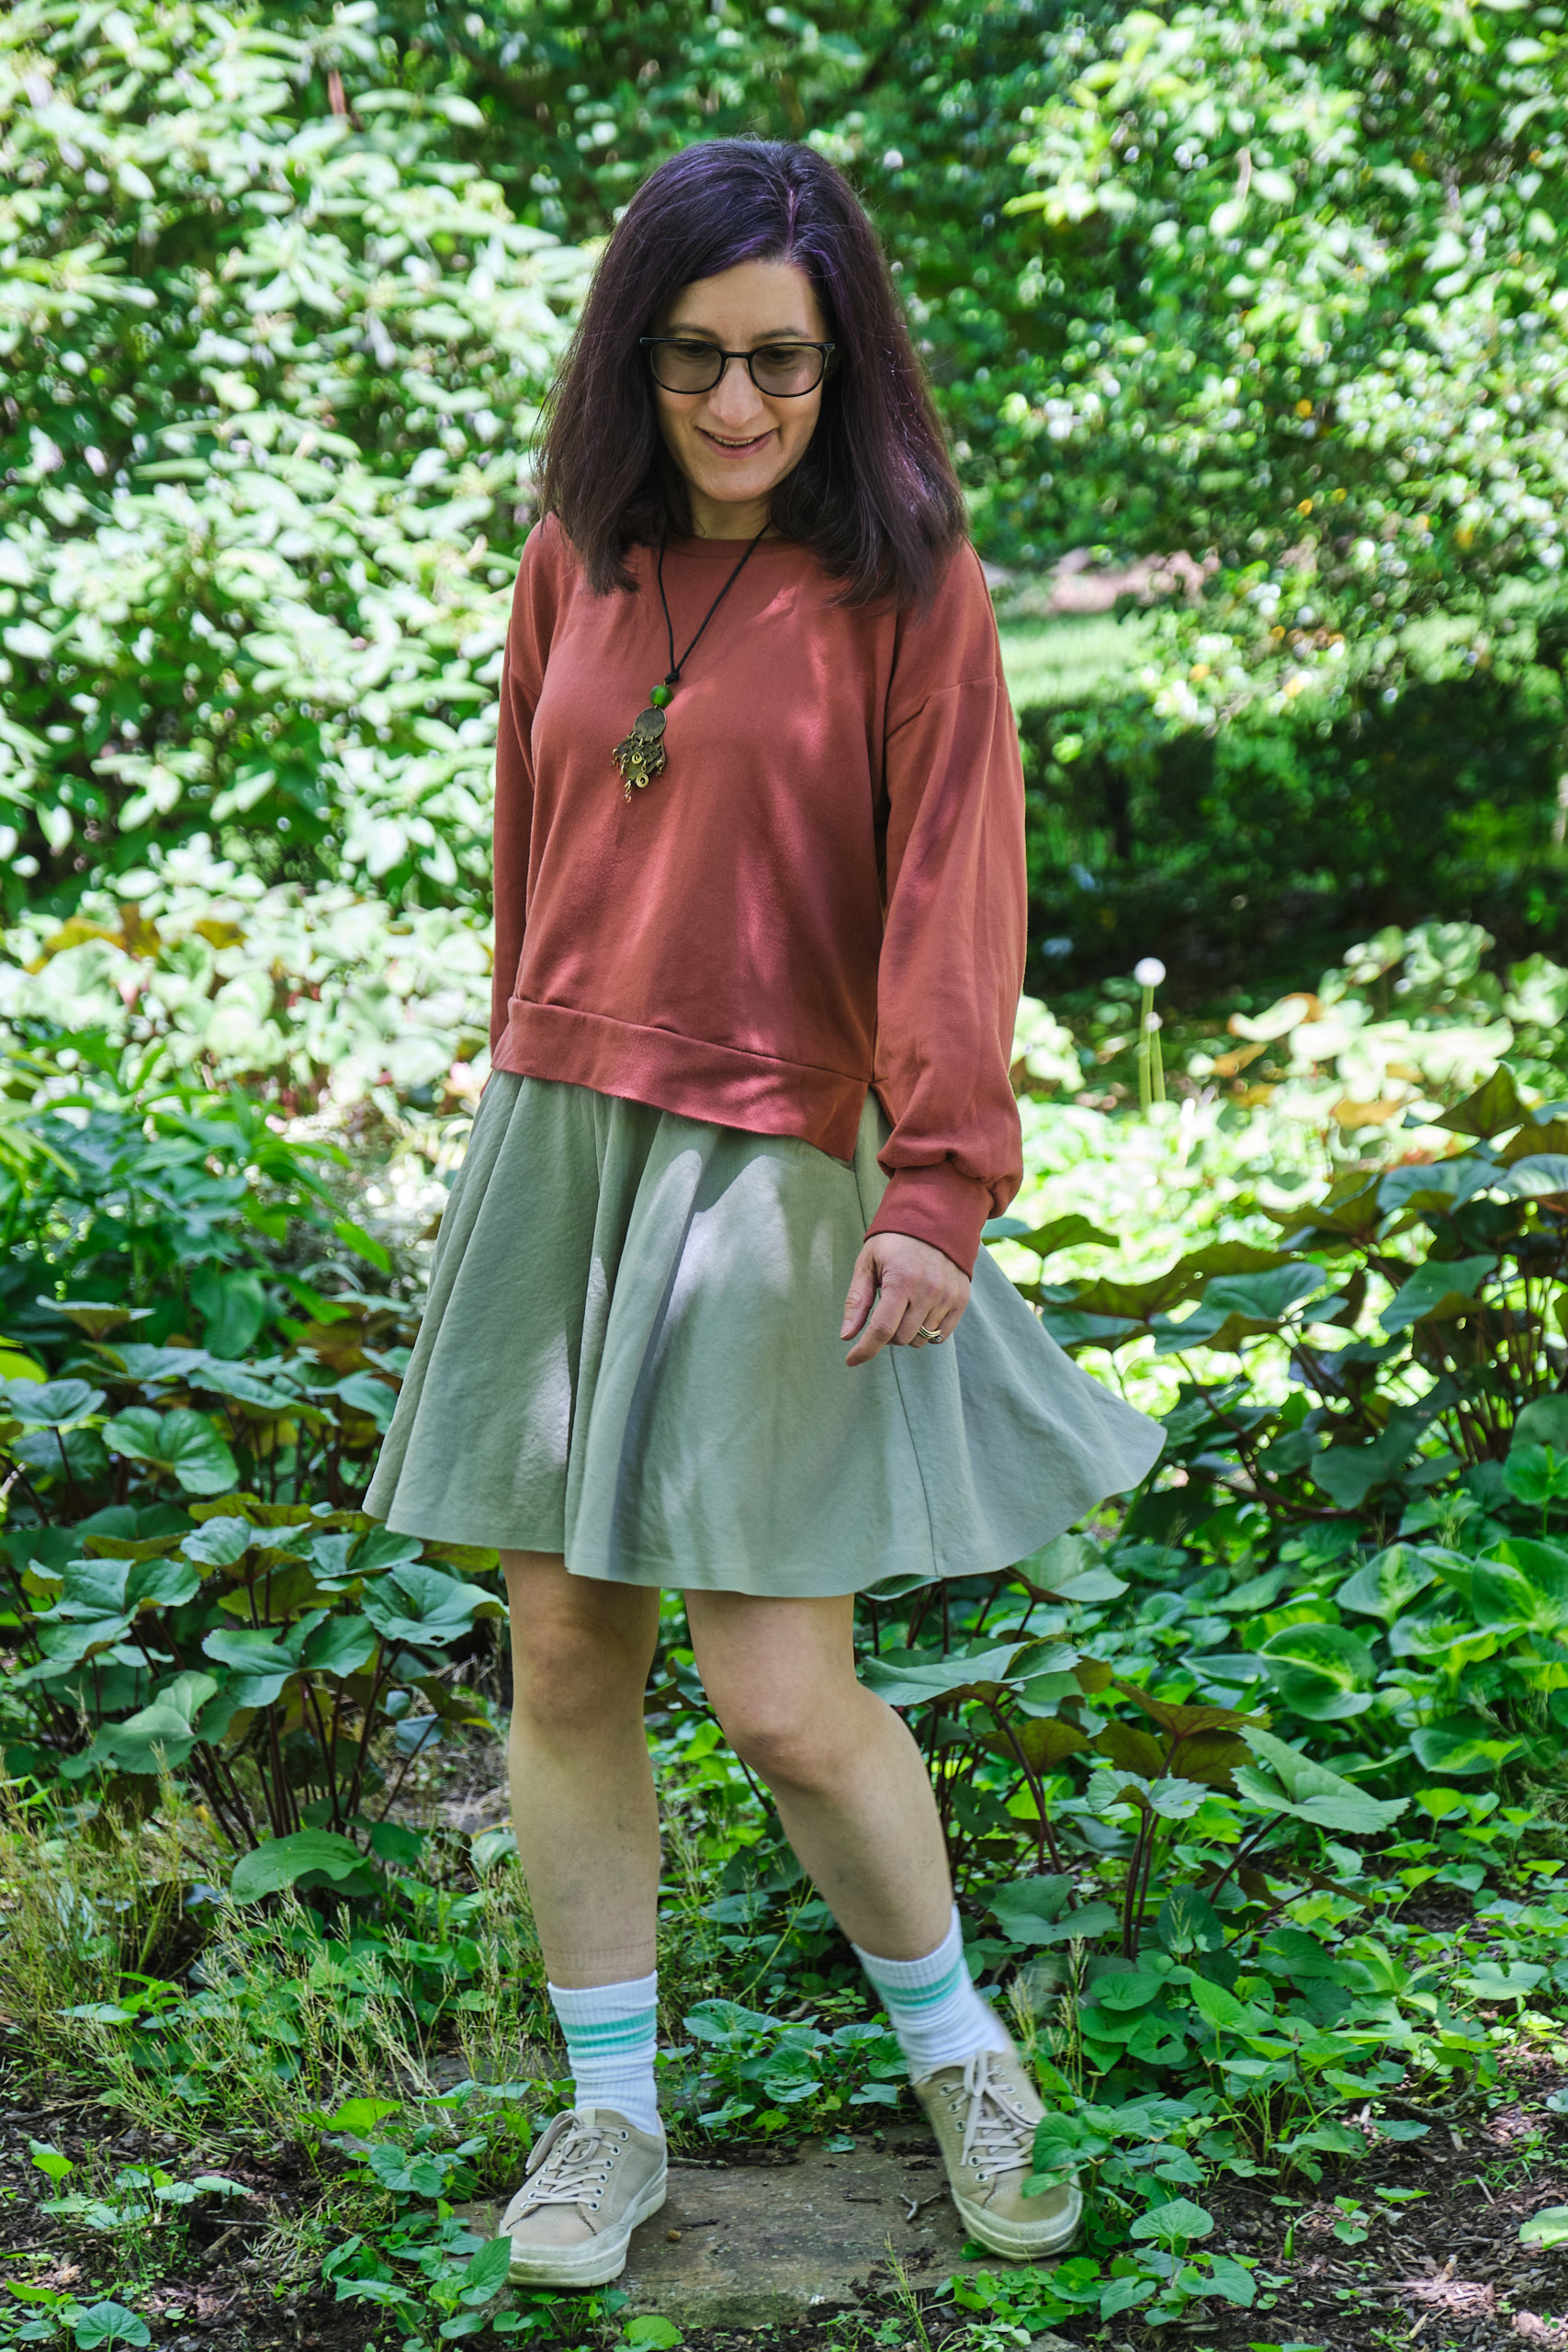
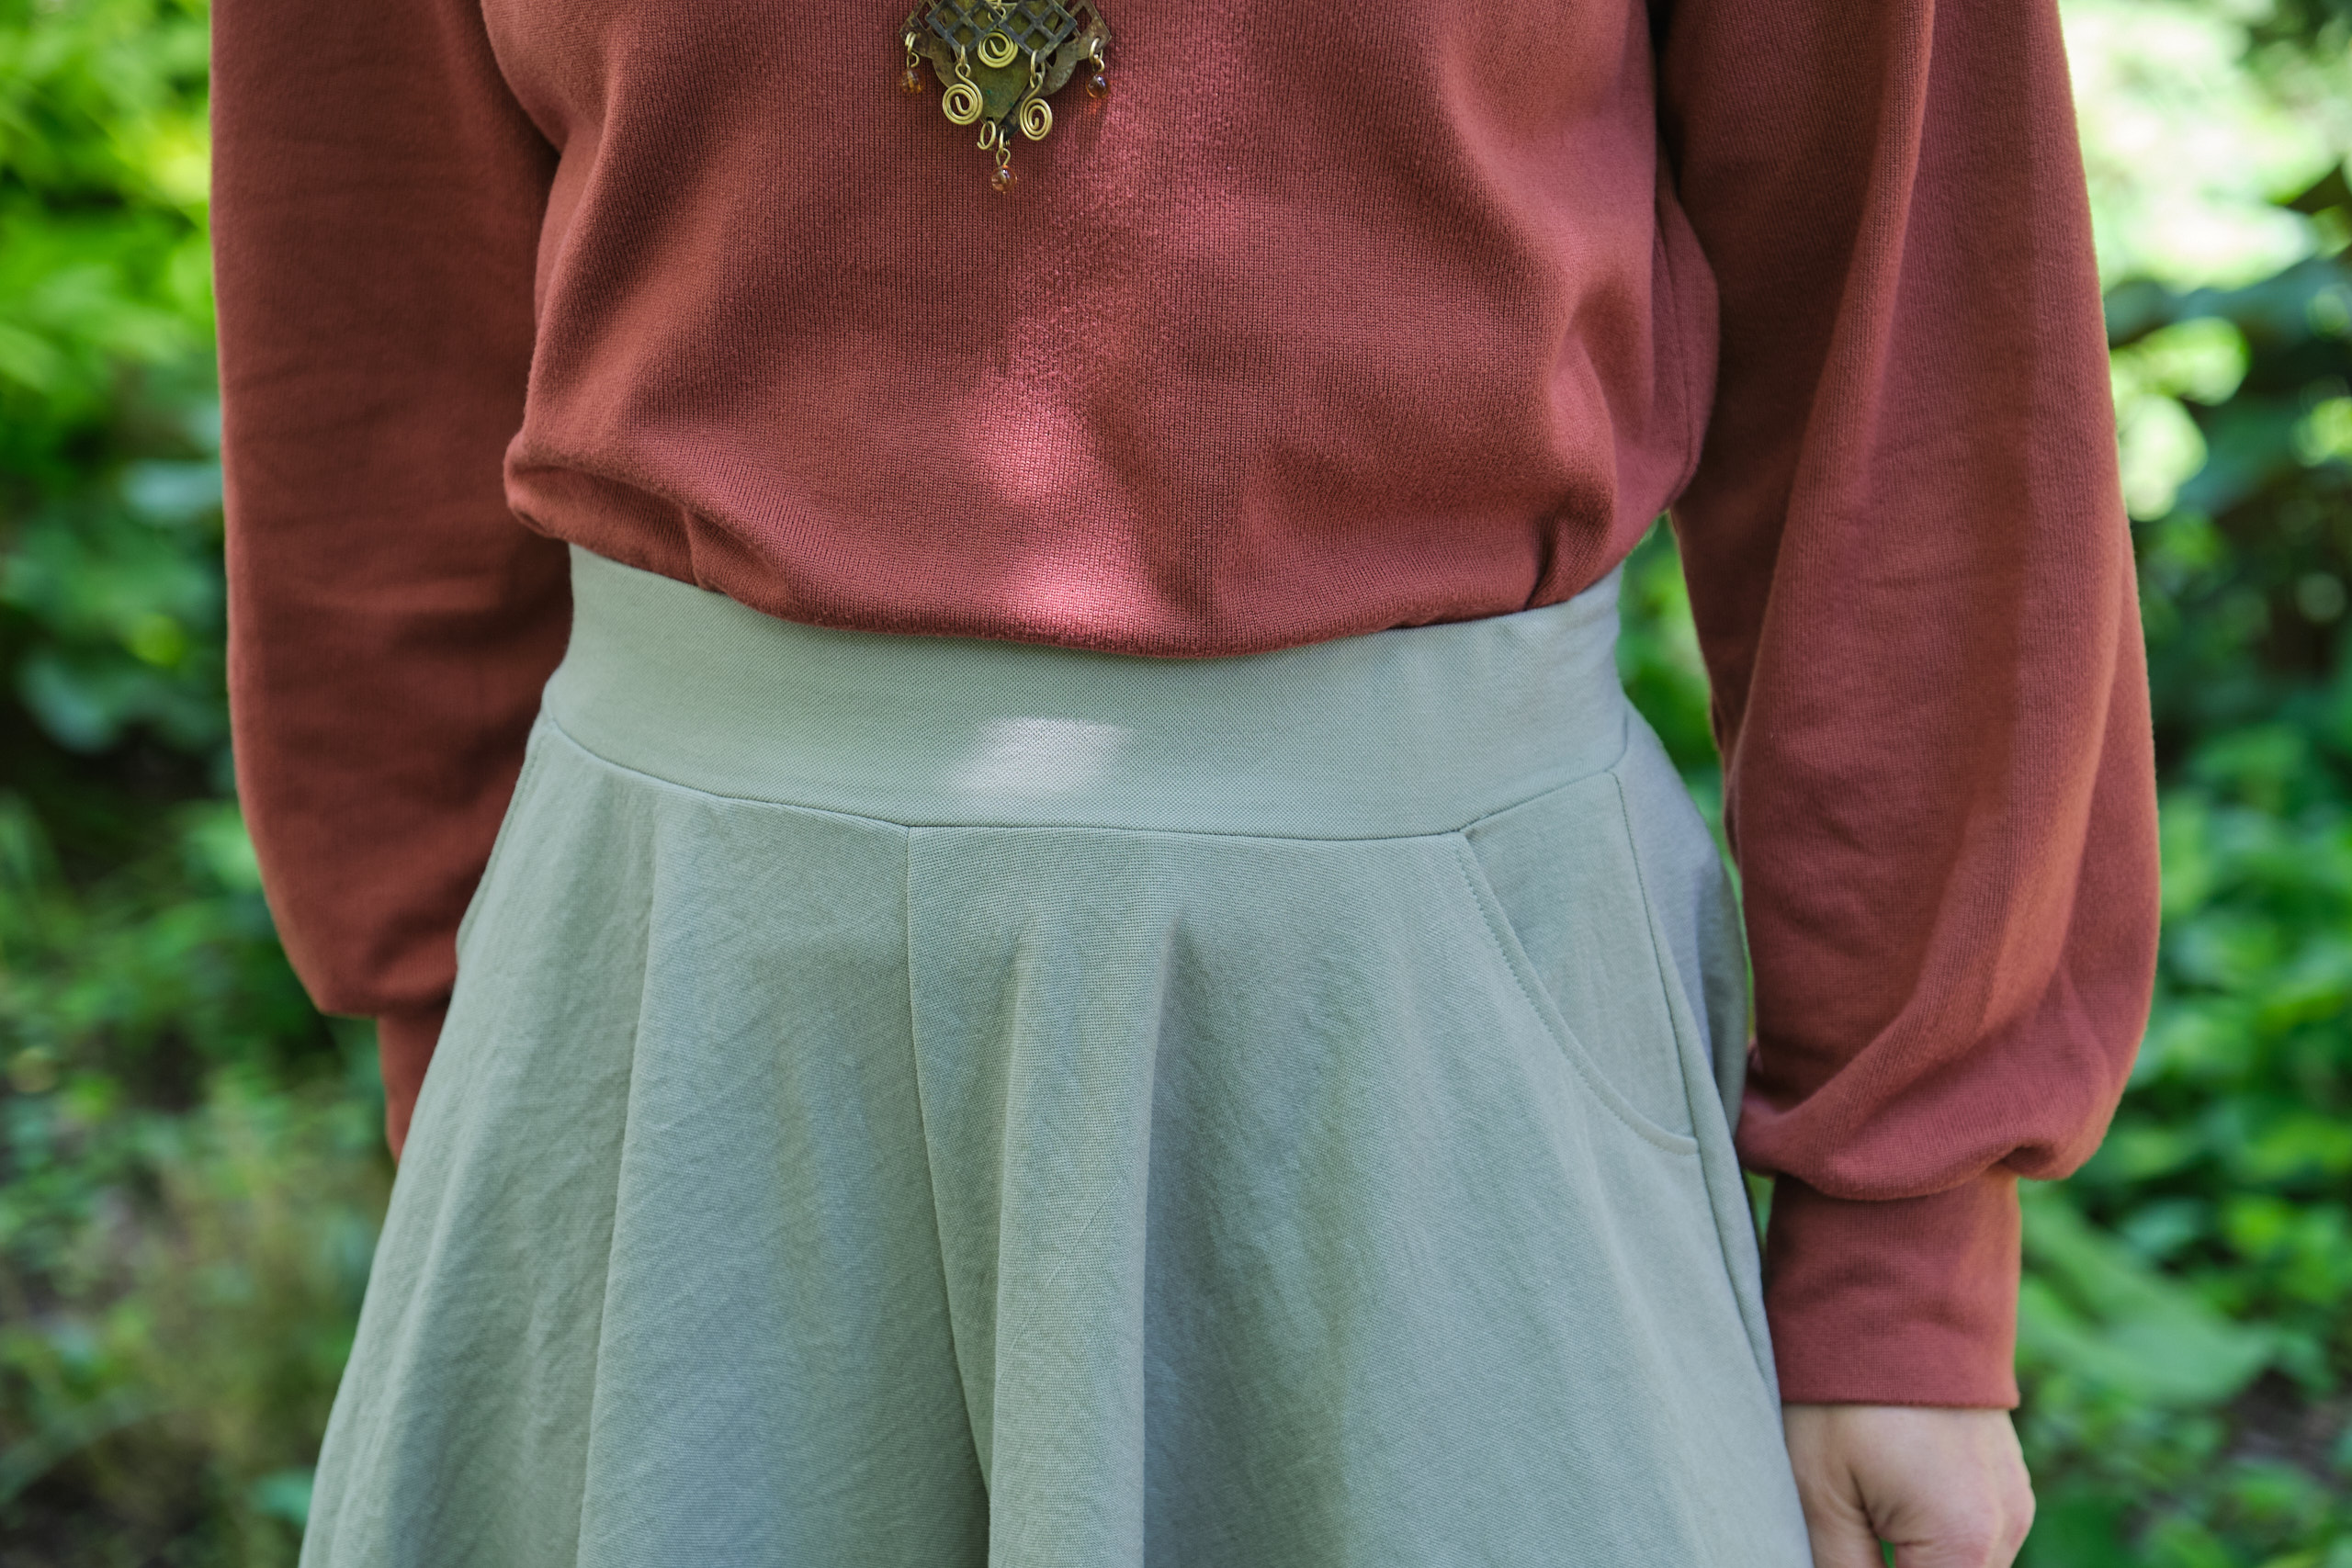
After seeing how easy it was to make the Pattern Emporium Sashay Stretch Flared Shorts for my rainbow Pride outfit, I decided to make another pair, this time in dusty sage Pylos Liknit, in the longer length, and with pockets. I followed the pattern instructions to add jeans-style pockets, but I decided not to add the extra quarter-inch for seam allowance (as I felt it was plenty roomy) and I adjusted the pocket opening so it would not dip so low. I used the AU10 pattern with the full skirt option and a 1.5″ elastic covered waistband. This one also went together quickly, but the addition of the pockets and hemming probably doubled the construction time. I used 1 1/4 yards of 58″ fabric.
I love the way the LiKnit fabric works for this skort: it is lightweight and swishy. This is a pattern for knits and the LiKnit is a two-way stretch knit, but it looks a lot like a woven. It also has enough stability that the pockets work well. This should be cool to wear on hot summer days, but this week I wore it to work with the sweater pictured above (Pattern Emporium Sweet Cheeks sweater in versailles brushed hacci sweater knit), tights, and rain boots.
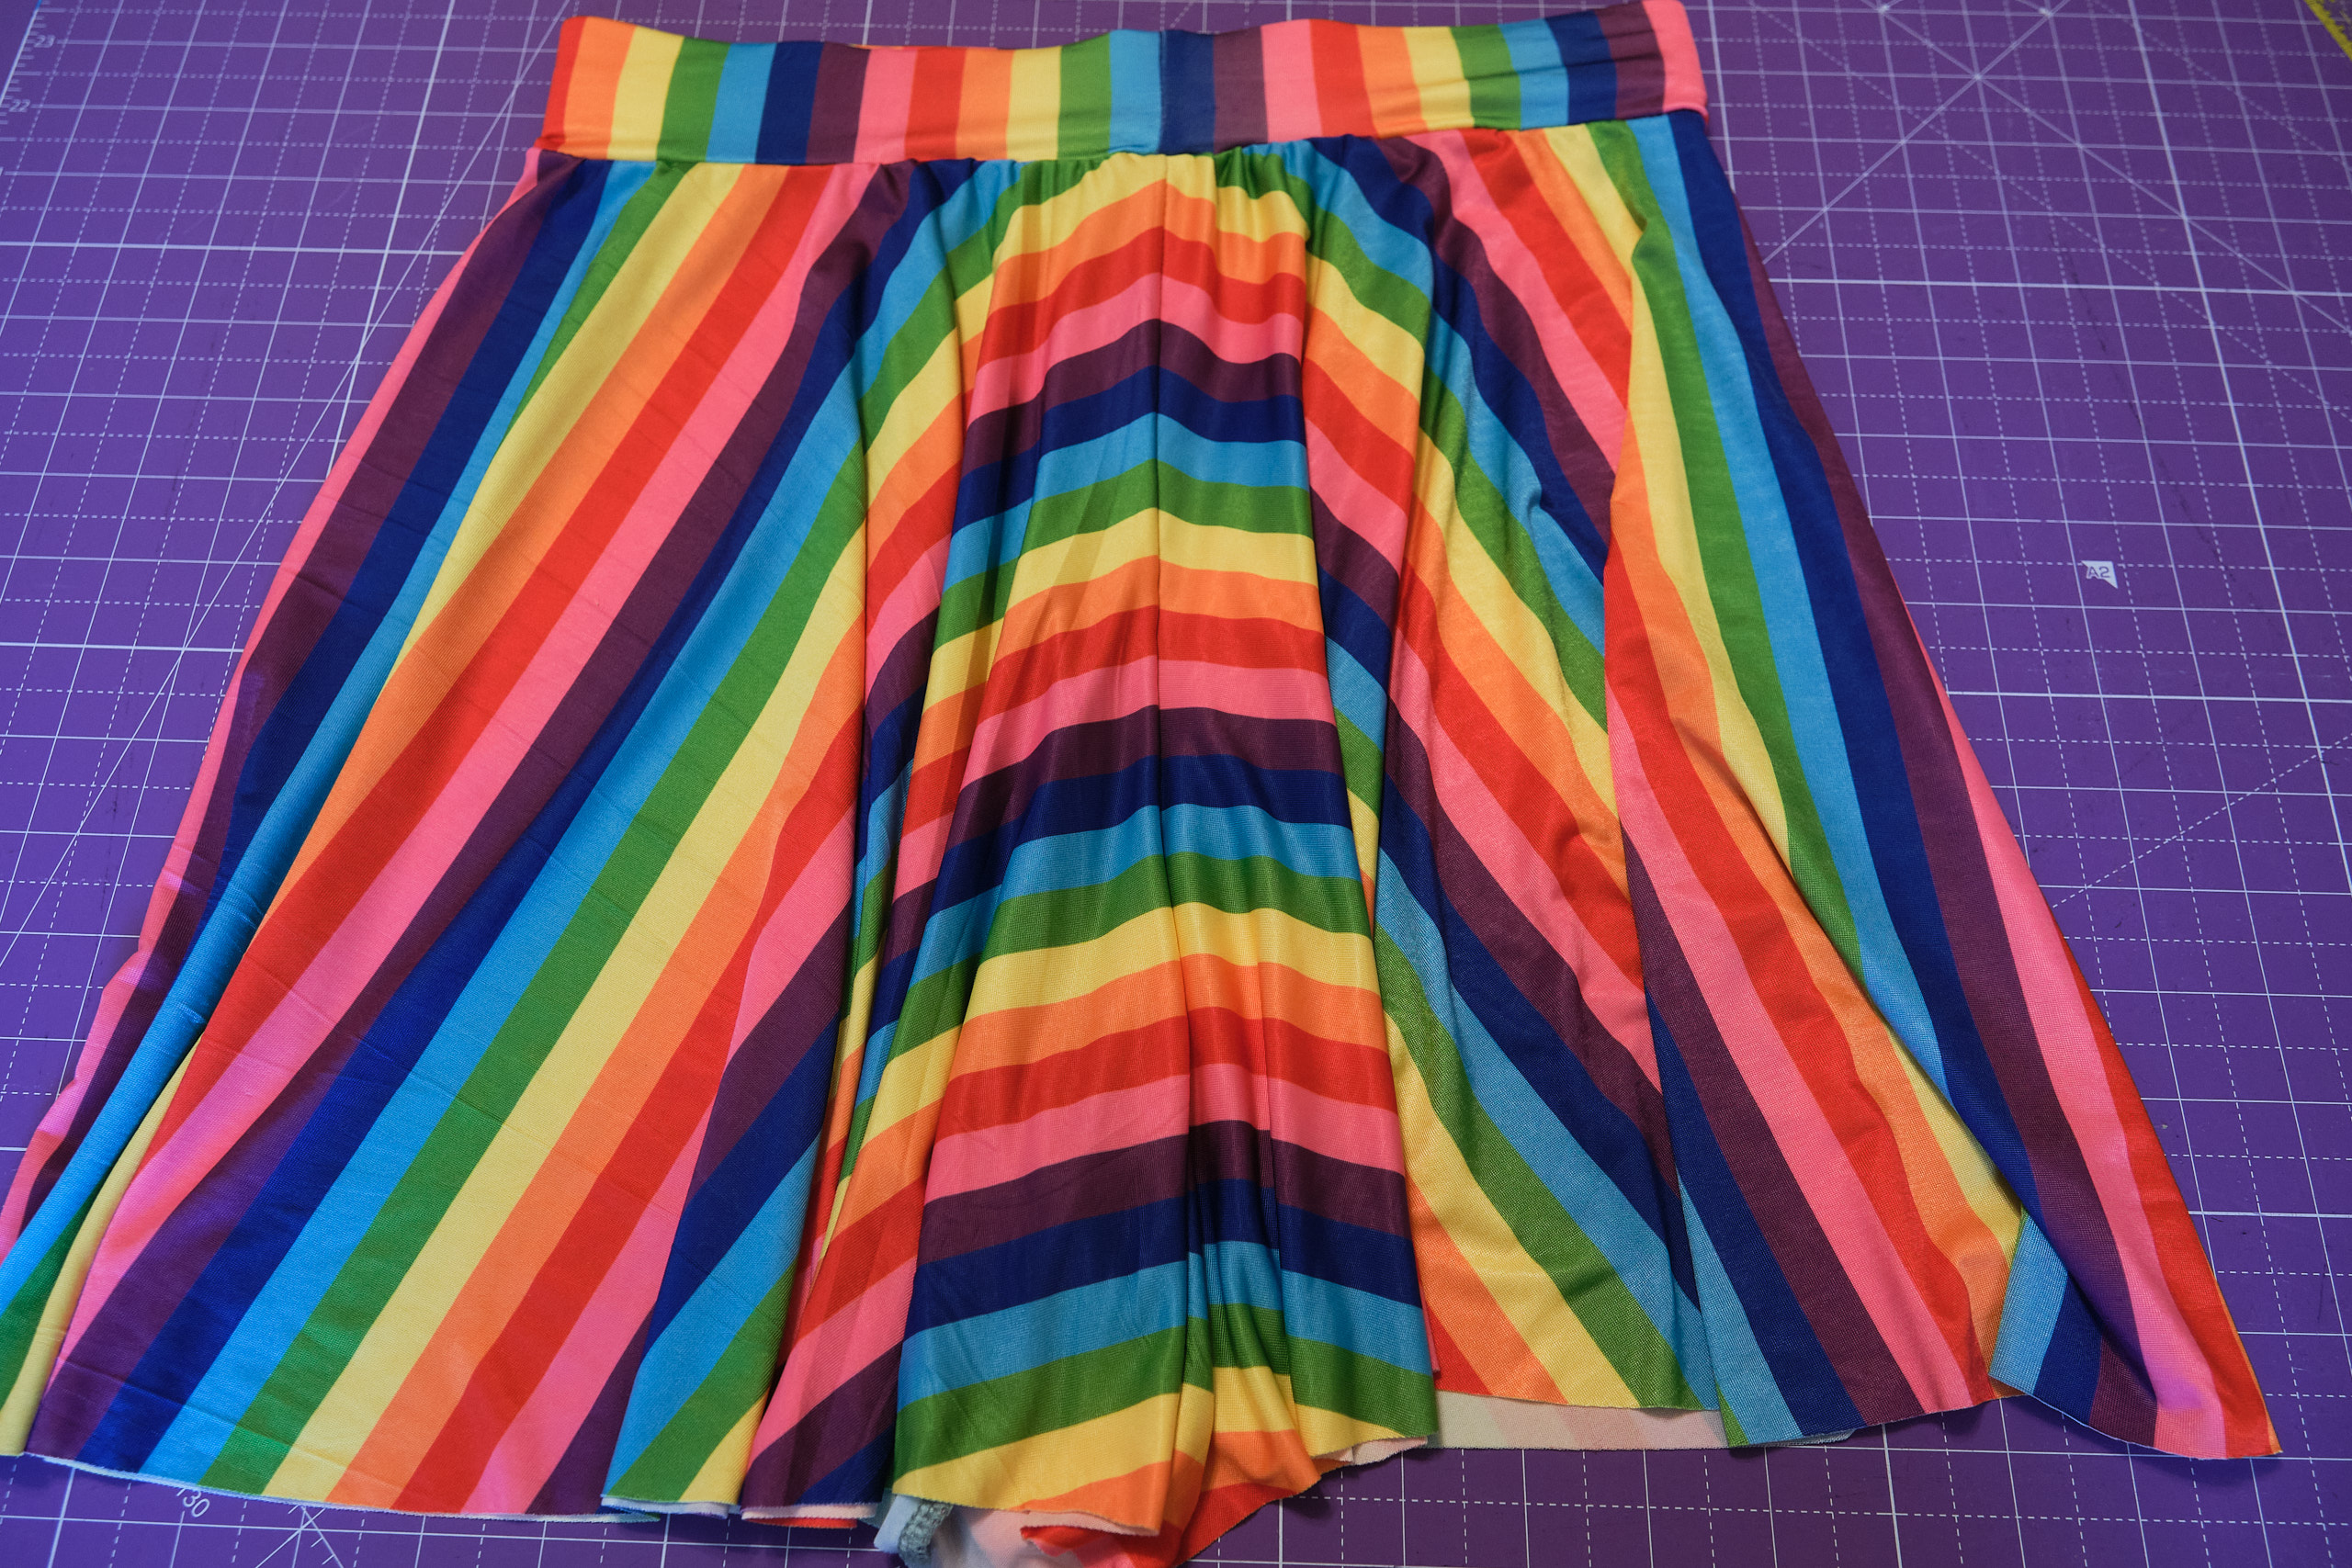
Last summer when I visited Mood Fabrics in New York City I bought a yard of slinky rainbow polyester fabric with the intention of making a skirt to wear at the Pittsburgh Pride parade this year. A couple of weeks before Pride I realized I had not gotten around to making the skirt. I flipped through my pattern collection and decided that the Pattern Emporium Sashay Stretch Flared Shorts would be even better than a skirt. They come in subtle, medium, and full variations, with multiple lengths and waistband options. The subtle version is a slightly flared pair of shorts, but the full version is a skort that looks a lot like a skirt — but offers a little more modesty. I decided to use the full version with a 1.5-inch covered elastic waistband. I was going to add pockets, but after reading the pocket warning in the pattern instructions, I was concerned that if I put anything in them they would stretch out too much with the fabric I was using. So I decided to forgo pockets and plan to wear pocket bike shorts or leggings with pockets underneath.
I cut out the size AU 10 full version at the short length. The shorts are cut with just two pieces (one for each leg) and a waistband. I was just barely able to get these pieces out of a single yard of fabric (and it was clear that the long length would require more fabric). Because I was using striped fabric and I wanted the rainbow to line up where the legs meet at the crotch, I cut out one leg and then flipped it over and laid it down on the fabric, perfectly aligned. I traced around the first leg and cut out the second leg. I used my fabric glue stick to glue the crotch pieces in place before surging them together so that the stripe alignment would not slip.
The pattern instructions said that swim fabric did not need to be hemmed and this slinky fabric is similar to swim and also won’t unravel so I did not bother to hem it. I basted the waistband on three times before I was able to distribute the shorts fabric evenly, but eventually I got it and surged the waistband on. And that was it… easy peasy! Without pockets or hemming, this is a very quick sew!
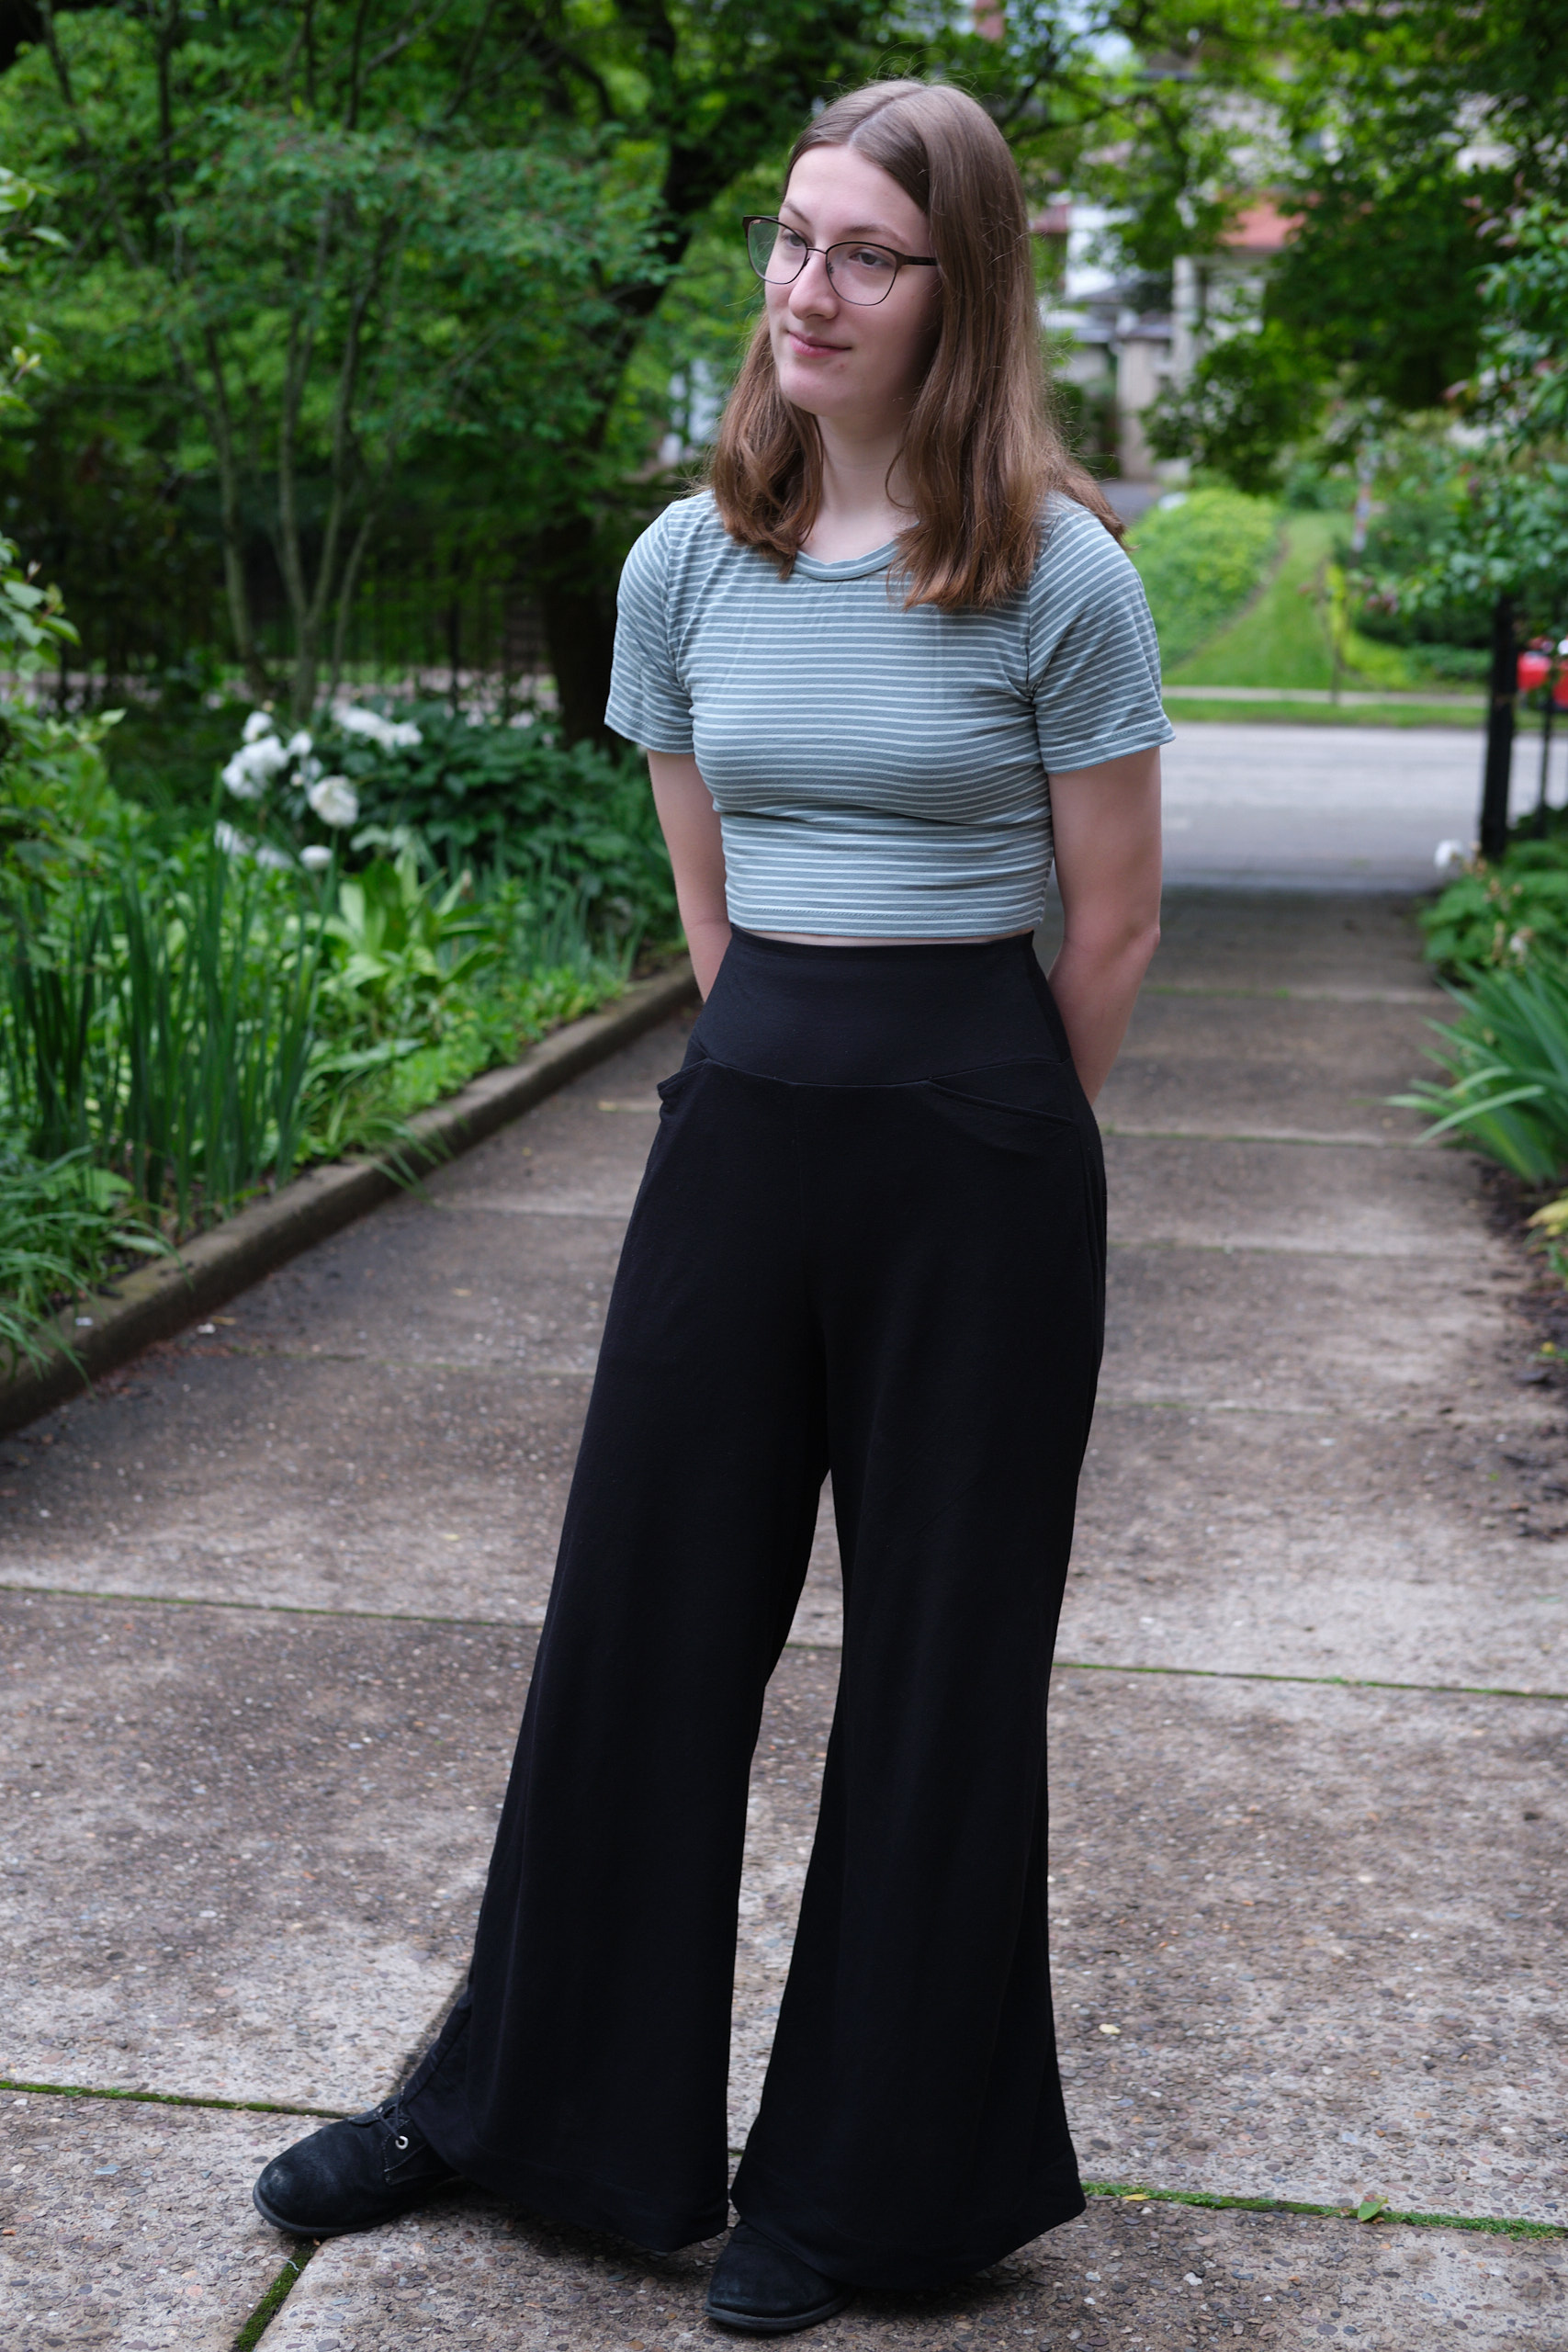
I asked my college student what she wanted for her nineteenth birthday and she asked me to make her another pair of her favorite black LiKnit “flowy” pants (PE Urban Boldly pants similar to mine, but adjusted for her taller height).
While I was at it I made her another cropped Bondi (size 4R but graded the waist to a size 0 and then graded the back waist even more, bottom cut at the horizontal waist line shown on the pattern) out of leftover cotton lycra fabric from a shirt I made my husband.
I made her a pair of pants just like this when she went to college, and another pair with the same pattern but in black ponte. I don’t think I have a photo of the ponte pair. She has apparently been wearing these two pairs of pants and the Cleo palazzo pants I made her on repeat all year. In fact I had to rehem two pairs of pants with frayed hems from dragging on the ground and reinforce some threadbare spots.


