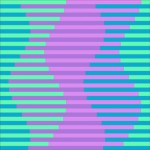
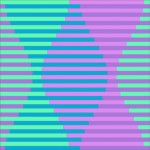
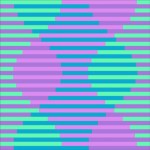
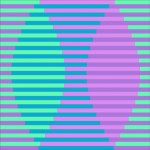
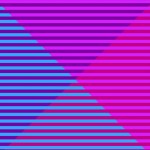
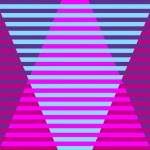
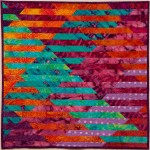
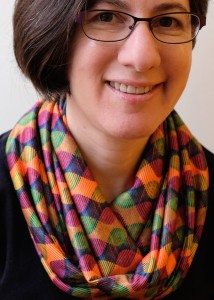
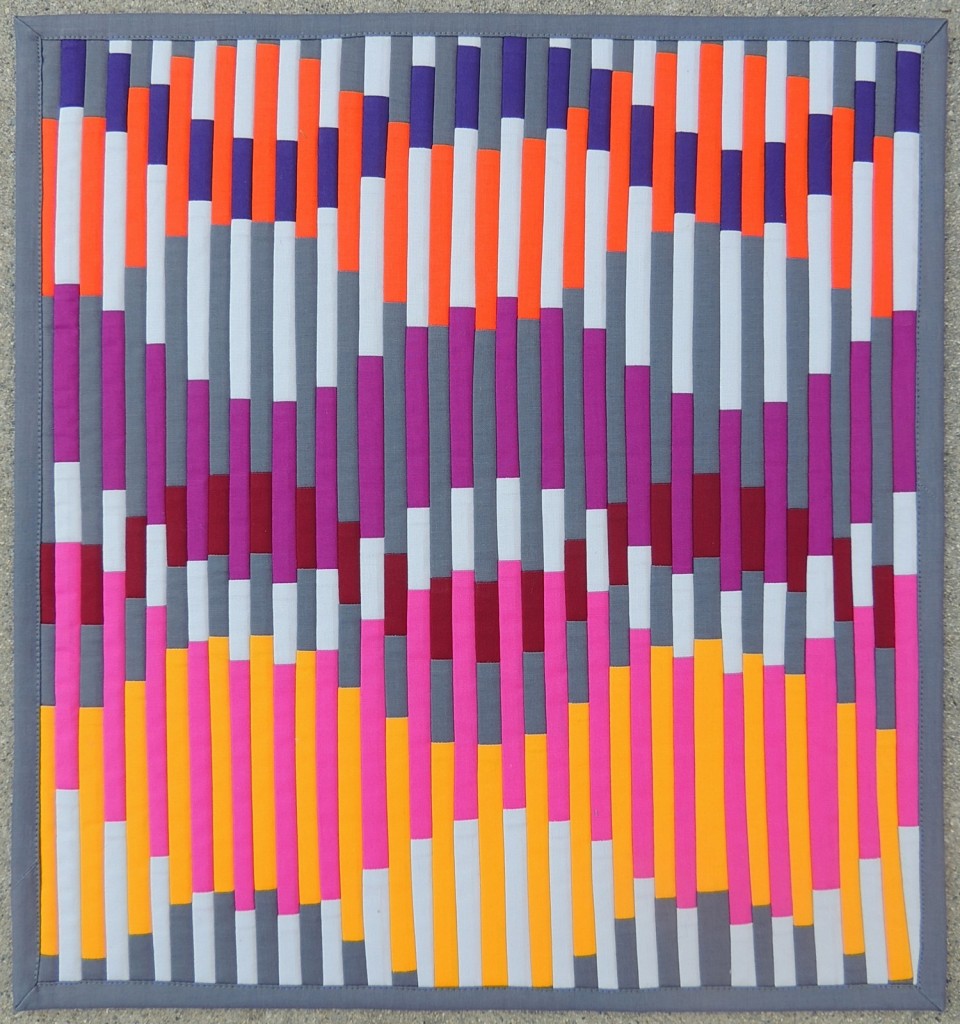
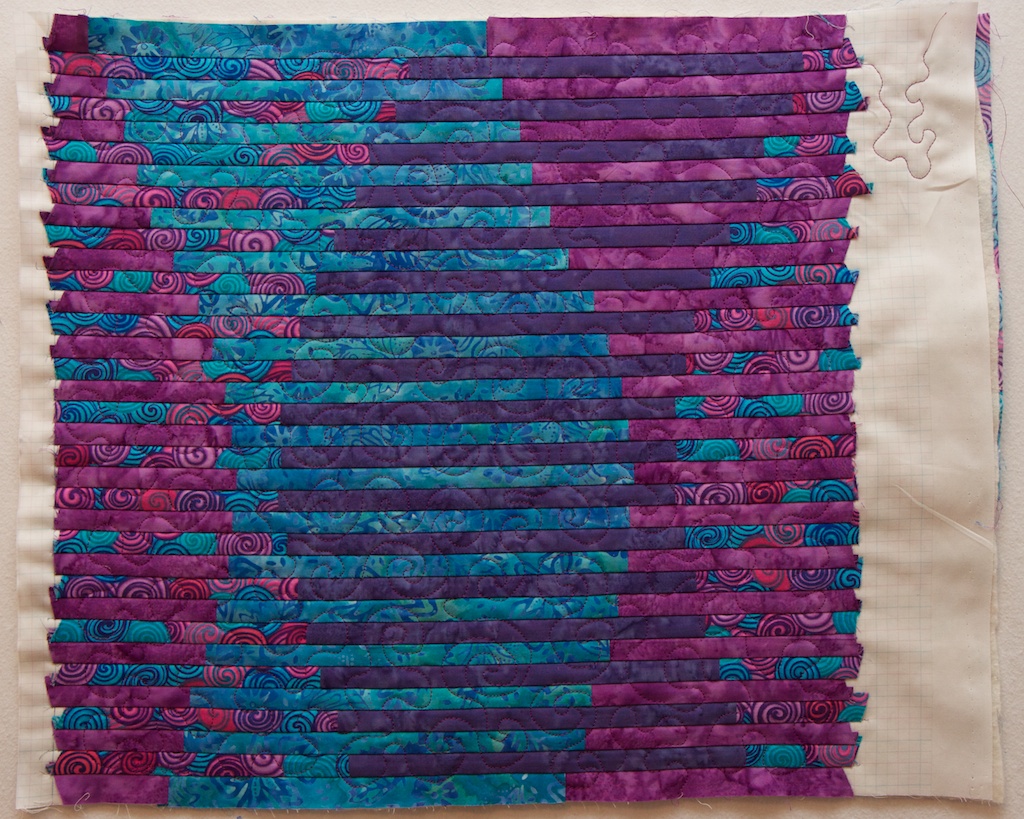
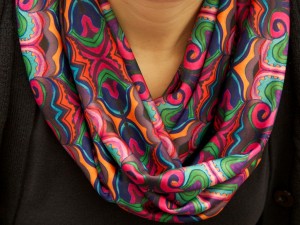
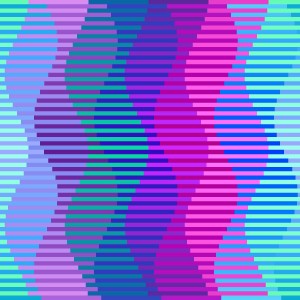
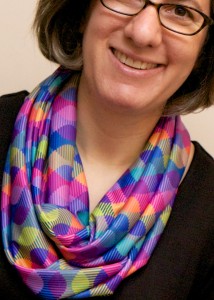
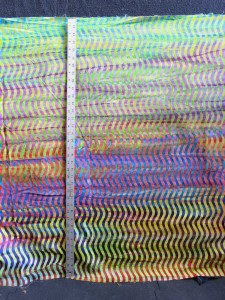
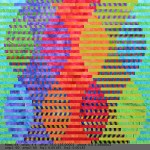
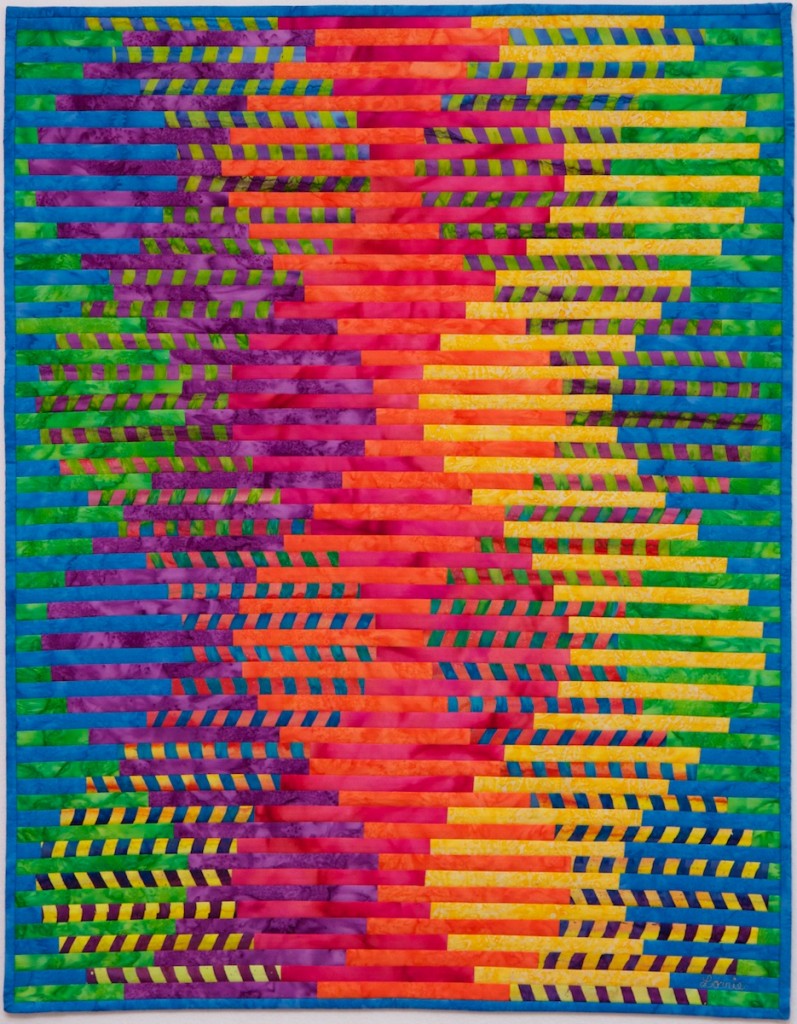
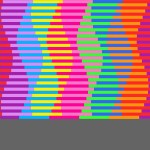
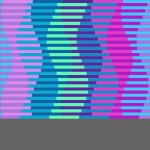
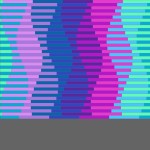
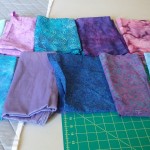
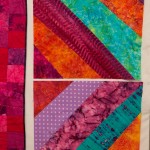
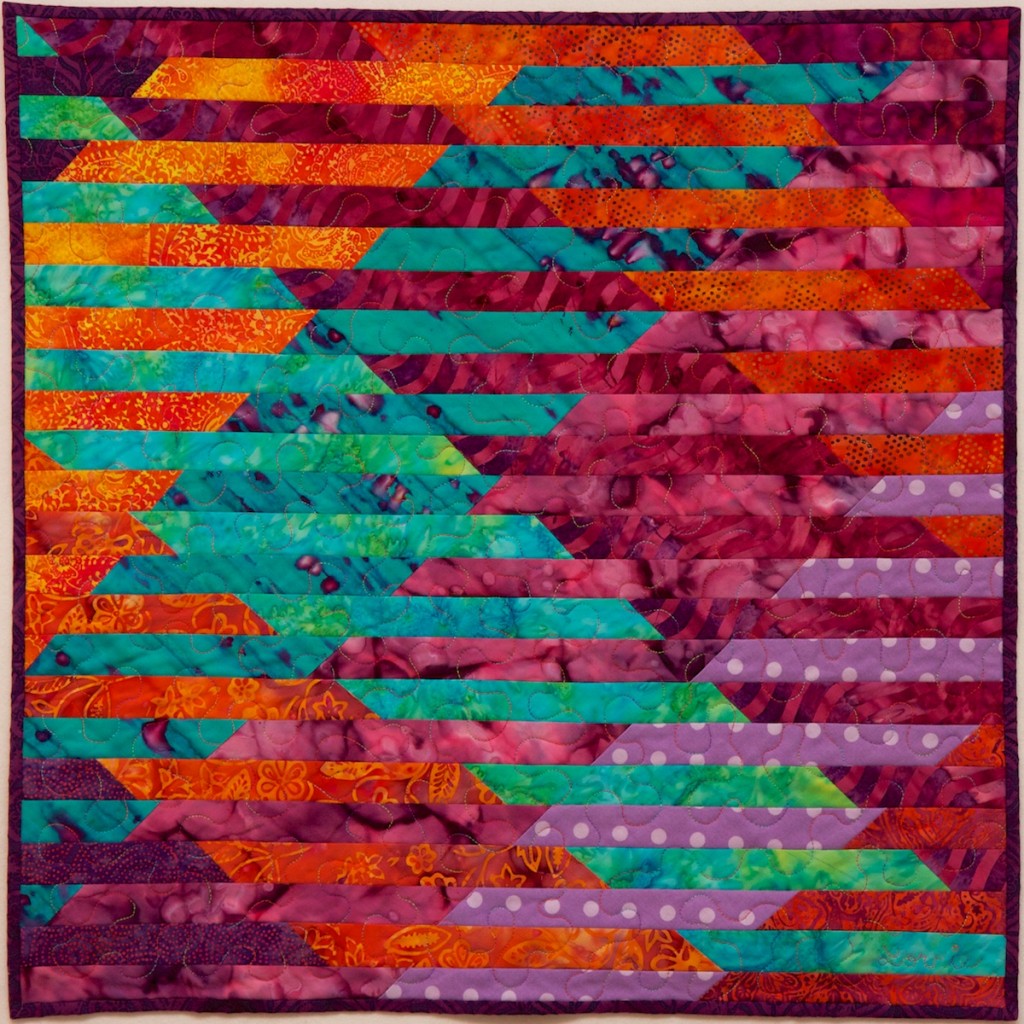
Tartan Tango, now in scarf form

Lorrie modeling Tartan Tango infinity scarf

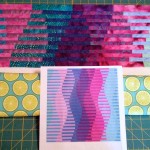
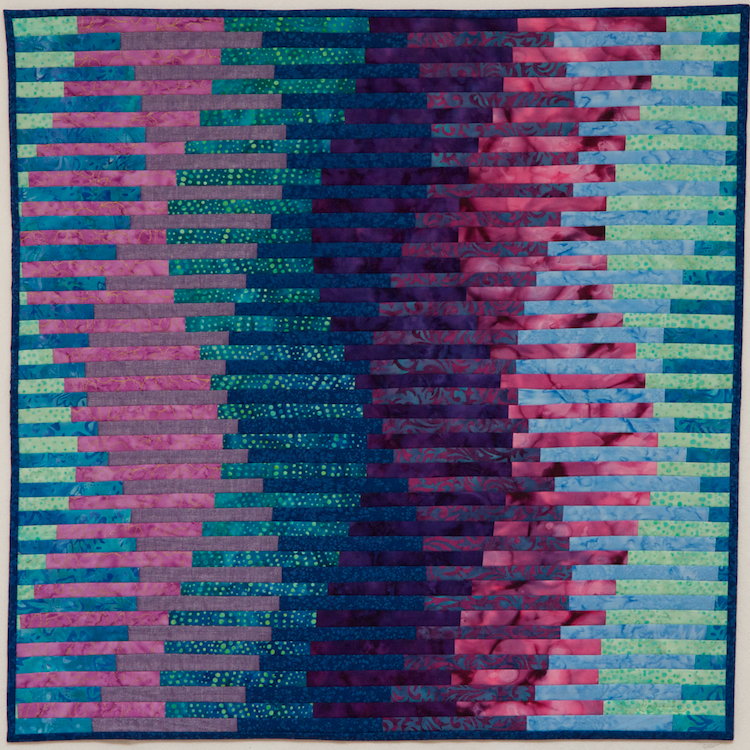
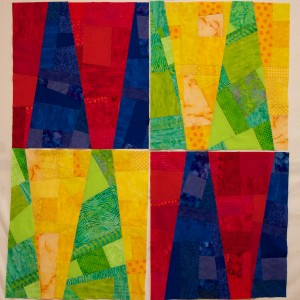
A few months ago I got a request from the powers that be at CMU to design a scarf based on my Tartan Tango quilt design that they had commissioned when I was on sabbatical back in 2013. I was happy to oblige. I dusted off my Interleave quilt design software and produced a fabric design based on the quilt. After experimenting with the design in both a large and small size, we settled on the smaller version.

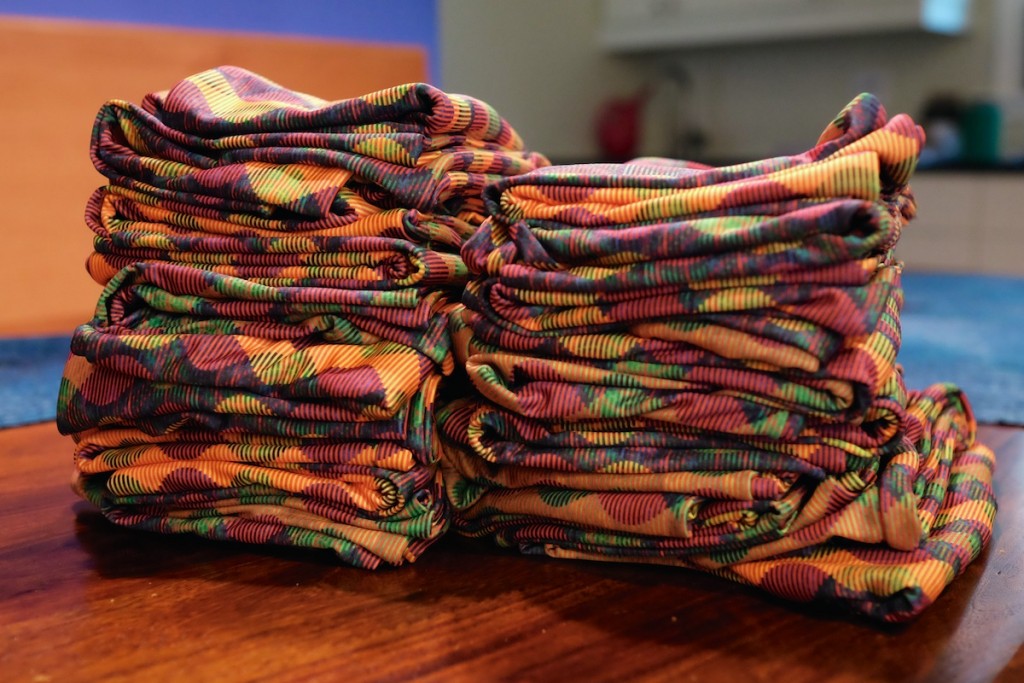
But they wanted 50 of them ASAP, which is well beyond what I could possibly sew in a week (or even a year given my current schedule). So I ordered a huge bolt of fabric from Spoonflower and subcontracted the sewing to Jen Primack of Upcycled Designs.  Jen cut the fabric and sewed it on her serger, and was able to deliver the first half of the order within a few days, and the second half not long after.

I also learned a bit about scarf packaging, and acquired suitable glossy white boxes and gold “stretch loops” for a finishing touch (yes, that is the proper term for those gold elastic cords, tied in a bow, that decorate small packages… I just learned that).

I have another slightly smaller project in the works that Jen is helping me with, and will sew a few more scarves myself with fabric I designed from Grandma Glady’s paintings.

25 Tartan Tango infinity scarves

25 Tartan Tango infinity scarves on my kitchen table

Interleave quilts from all around

I haven’t had time to quilt in way too long, but I have been enjoying the photos of other people’s interleave quilts, based on my instructions.

First Monica emailed me to tell me she was experimenting with interleave quilts. She made some small ones that were lovely. Then she made a gorgeous interleave bed quilt using tartan fabric as a gift for her daughter, who graduated from CMU in May. She even taught a class on interleave quilts for a local quilt store.

Monika’s interleave bed quilt

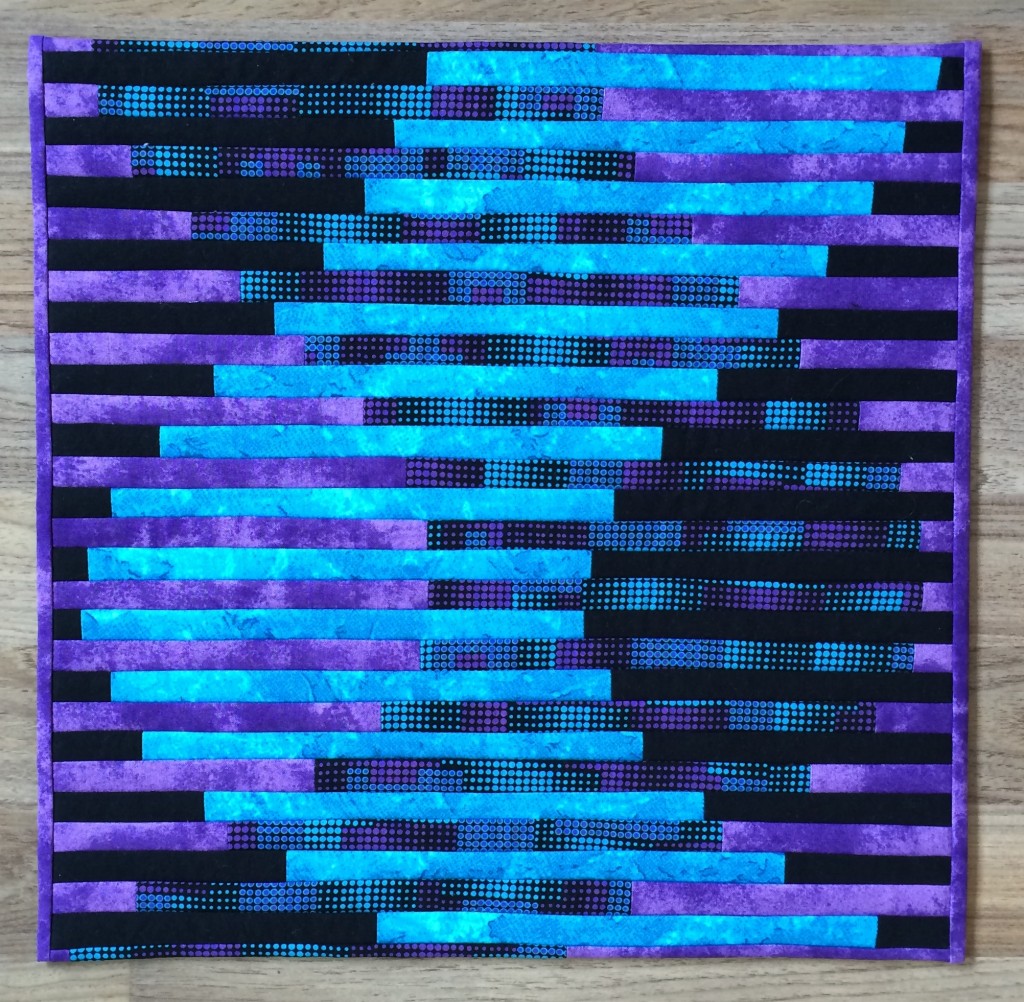
Then Melissa emailed me a pointer to photos of her beautiful quilts including an interleave quilt in blue, black, and purple. Melissa says, “I decided to use stabilizer to draw the lines on. It worked really well and I didn’t find it took long at all.”

Melissa's interleave quilt

Melissa’s interleave quilt

I wish I had more time to make more quilts myself. But the next best thing is looking at other peoples’ wonderful quilts! Thanks for sharing!

July 2015 update: Julie from South Australia emailed me, “A huge thankyou for your online tutorial on making an interleave quilt. I found your page today, and produced this small quilt, even finishing the binding!”

Interleave Quilt by Julie

Julie’s interleave quilt

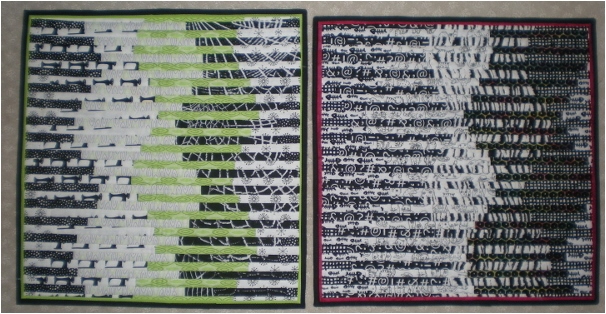
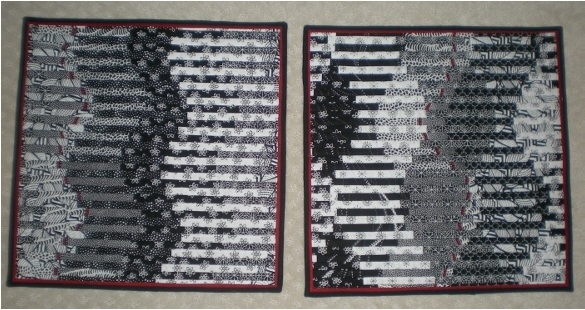
August 2015 update: Sandie emailed me: “I recently took a class on interleaves and got hooked experimenting in black and white with a slight touch of color.  It’s been interesting.” Sadie said she took the class from Mel Beach in a group with the Santa Clara Valley Quilt Association (check out the link above for lots of other quilts from this class).

3 & 4 crop 1&2 crop


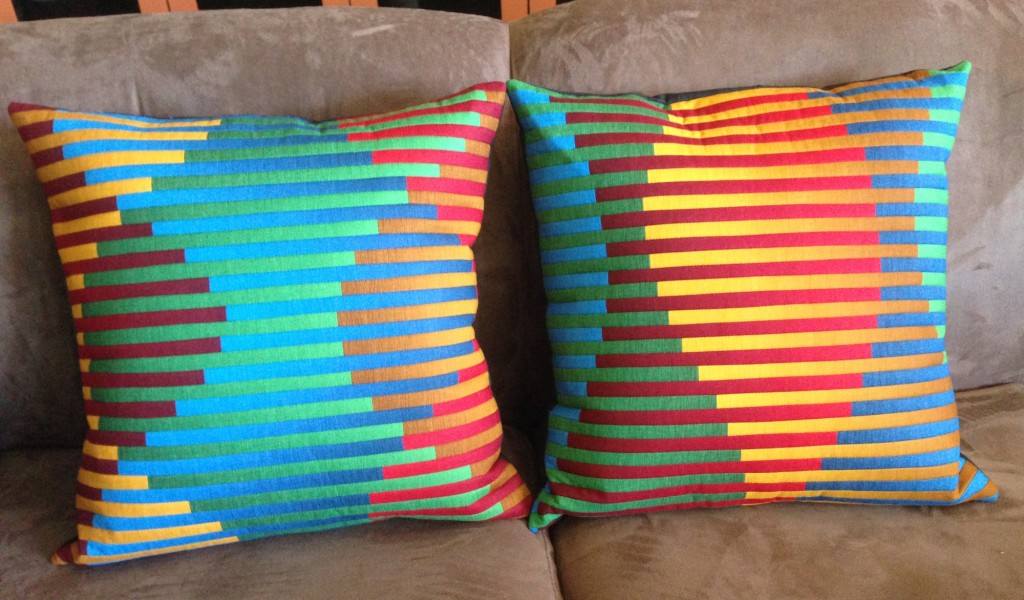
November 2016 update: Rosemarie Waiand from Houston, Texas emailed me: “I have now made several cushion sets, and am thoroughly enamored with this technique.In fact, my samples were quite the hit at my Houston Modern Quilt Guild meeting this weekend! I am especially fond of the ombre fabrics, as the gradation seems to impart an extra set of colors to the mix.”

IMG_3861


December 2016 update: This was posted in July but I just came across it. Mel Beach, who lives in San Jose, CA, made lots of “Intriguing Interleaves” including this one below.

MBeach_Moroccan+Inspired+Mandala


September 2017 update: Just saw this blog post from the Diablo Valley Quilters who made lots of cool interleave quilts for their 2015 show.


How to make an Interleave quilt

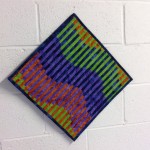
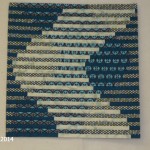
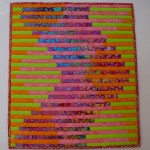
My Interleave quilts are pieced using a quilt-as-you-go technique in which thin strips of fabric are sewn to batting and backing. The interleave design results from cutting these strips from two panels of fabric and piecing alternate strips from each panel. In my quilts, some of the panels are pieced and some are photos printed on fabric. For added interest, I often shift my strips in a wave pattern. The result of this process is a complex-looking quilt that can be pieced quickly from thin strips sewn in straight lines.

Here is a quick tutorial on how I make a small Interleave quilt. I put this together for a 1-day workshop. We will be making a roughly 18 inch square interleave quilt with .5-inch stripes that can be used as a wall hanging, placemat, or pillow top. You can make a smaller sample if you prefer, but I would not suggest going any larger for the class project.

Materials

  • 5 fat quarters (or larger) of cotton quilting fabric – Select 4 fabrics that go well together for the top, and 1 backing fabric that can be whatever you want. There should be some contrast between the 4 top fabrics – if they all blend together too much the interleave design won’t stand out. You should have enough left over from the top fabric fat quarters to make a binding. But you are welcome to provide extra fabric for a binding or to turn the finished quilt into a pillow. You will probably be doing the binding at home after the workshop.
  • Gridded cutting mat, at least 18 inches long
  • Ruler, at least 18 inches long (you need a ruler that will allow you to easily cut 18-in long and 1-in wide strips)
  • Rotary cutter
  • Scissors
  • Iron
  • Ironing pad or towel
  • Sewing machine and needles with a ¼ in. foot (if you have a ¼ in foot with a guide, even better!)
  • Neutral cotton piecing thread (I recommend Aurifil 50/2 in grey, but whatever you like to piece with is fine)
  • Pencil and pen
  • Pins
  • Fat quarter of cotton/polyester fusible batting
  • Fat quarter of quarter-inch grid cotton fabric —  available at http://www.spoonflower.com/fabric/2046219
  • Instructions and templates

Instructions

Select four fat quarters of four fabrics for the quilt top. They should be fabrics that go well together, but have some contrast between them.
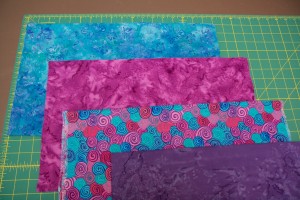
Select four fat quarters of four fabrics for the quilt top. They should be fabrics that go well together, but have some contrast between them.

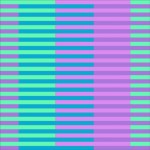
Interleave - straight

Next elect the style of interleave you want to try. The most basic shape would be straight, with no shifting. If you follow the instructions below and do not shift your fabrics, the result will be something like what you see here to the right. If you want to try this, just join your pairs of fabric on one edge rather than making tubes and skip the part about templates and cutting open the tube.
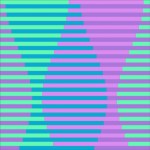
Interleave - vaseIn the instructions below I used a vase shape (shown here on the left) to shift my interleave design, but there are lots of other designs you might choose.

Below are example of the following shapes: sine wave, mirrored sine wave, skewed sine wave, hour glass, helix, and marquise. These shapes are all based on sine waves of differing frequencies and amplitudes. I generated them all using a computer program that I wrote. But once you have a feel for how this process works you can adapt these designs yourself without the aid of a computer.
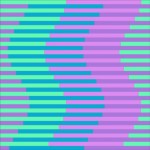
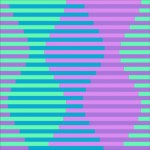
Interleave - sine wavesInterleave - mirrored sine wavesInterleave - DNA Interleave - hourglass Interleave - DNA Interleave - marquise

Once you select the shape you want to use, you will need to create a paper template. I have prepared templates for the designs you see here. You can enlarge, reduce, or adapt them to suit your needs. This template is a PDF file designed to print on 11×17 paper.

The next step is to prepare the foundation for your quilt. Since this is a quilt-as-you-go technique, we will be layering the batting with a backing and a foundation. I like to use a fusible batt so I don’t have to baste it. I also find it makes things easier if you mark your foundation fabric with parallel lines. After marking several foundations by hand with pencil, I designed a grid fabric and had it printed at spoonflower.com on basic combed cotton. I know it is a little pricey for fabric you will never see in the finished piece, but it does save a lot of time and effort. If you would prefer, you can use any white or light-colored fabric and mark it with parallel lines, .5-inch apart.
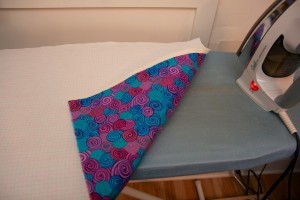
Layer backing, fusible batting, and grid fabric and fuse together.

Layer backing, fusible batting, and grid fabric and fuse together.

After your foundation is prepared, follow the instructions below to cut your fabric and assemble your quilt.
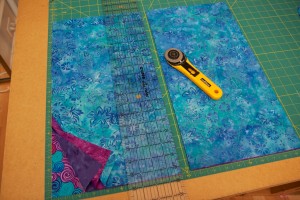
Cut a 18x9.5 inch strip from each fat quarter.

Cut a 18×9.5 inch strip from each fat quarter.
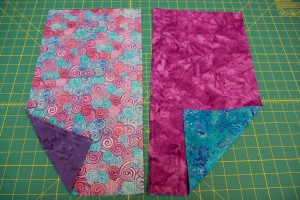
Decide how to pair your strips; I suggest pairing them so the strips with highest contrast are paired together. Place a pair of strips right sides together, and sew along both long edges with a 1/4-inch seam allowance to form a tube (leave the short edges open). Repeat for the other pair of strips.
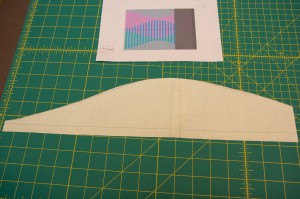
Decide how to pair your strips; I suggest pairing them so the strips with highest contrast are paired together. Place a pair of strips right sides together, and sew along both long edges with a 1/4-inch seam allowance to form a tube (leave the short edges open). Repeat for the other pair of strips.

Cut out a paper template with shape you will use to shift your strips.
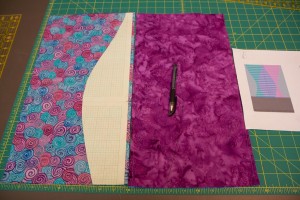
Cut out a paper template with shape you will use to shift your strips.

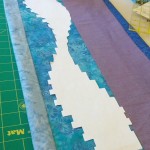
Lay the paper template on one of the fabric tubes and trace along the edge with a dark pen. Flip the template over and repeat on the other tube.
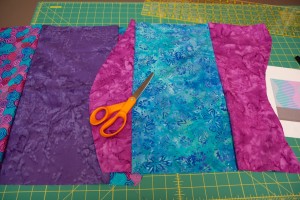
Lay the paper template on one of the fabric tubes and trace along the edge with a dark pen. Flip the template over and repeat on the other tube.

Cut both tubes open along the lines you just traced.
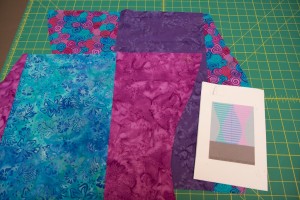
Cut both tubes open along the lines you just traced.

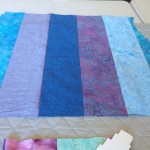
Press all the seams to one side. You should now have two panels that are cut to match the curves in your design. To make it easier to keep track of your panels, place a piece of tape on each panel and label them "1" and "2."

Press all the seams to one side. You should now have two panels that are cut to match the curves in your design. To make it easier to keep track of your panels, place a piece of tape on each panel and label them “1” and “2.”
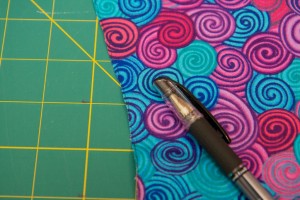
Using your dark pen, draw a line down the left edge of the front side of each panel. Remember "the Line is on the Left" so that you know how to orient your panels and strips when you sew them together.

Using your dark pen, draw a line down the left edge of the front side of each panel. Remember “the Line is on the Left” so that you know how to orient your panels and strips when you sew them together.
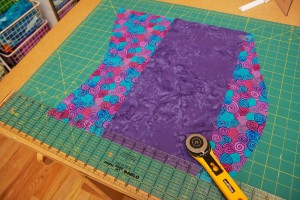
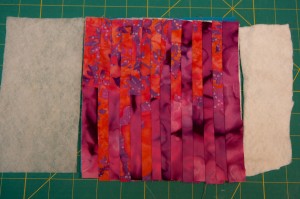
Starting at the bottom of each panel, use your ruler and rotary cutter to slice a 1-inch strip. You may want to slice several strips at a time, but if you do, I suggest numbering them along the edge so you can keep track of what order they are in.
Starting at the bottom of each panel, use your ruler and rotary cutter to slice a 1-inch strip. You may want to slice several strips at a time, but if you do, I suggest numbering them along the edge so you can keep track of what order they are in.

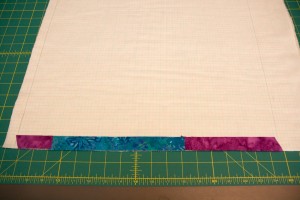
Line up the bottom strip from panel 2 on the bottom edge of your grid fabric, aligning with the line 1-inch from the bottom edge. The strip should be face up with the edge where you marked the line on the left side. Since the edges of the strip are not perpendicular the alignment with the left and right edges will be approximate.
Line up the bottom strip from panel 2 on the bottom edge of your grid fabric, aligning with the line 1-inch from the bottom edge. The strip should be face up with the edge where you marked the line on the left side. Since the edges of the strip are not perpendicular the alignment with the left and right edges will be approximate.

Line up the bottom strip from panel 1 face down on top of the strip from panel 2. Pin in place.
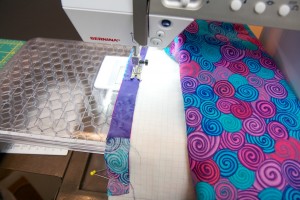
Line up the bottom strip from panel 1 face down on top of the strip from panel 2. Pin in place.

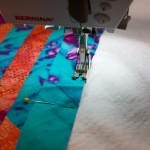
Using a 1/4-in foot sew along the top edge of your strips. A foot with a 1/4-in guide can make this easier. You may prefer to use a walking foot,
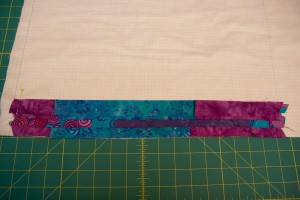
Using a 1/4-in foot sew along the top edge of your strips. A foot with a 1/4-in guide can make this easier. You may prefer to use a walking foot,

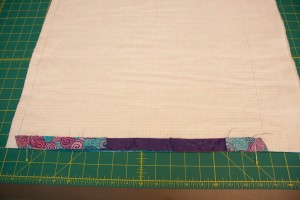
Press open your strips. Then cut another strip from the bottom of panel 2 and layer it face down on top of the previous strip you sewed. Sew the next strip in place.
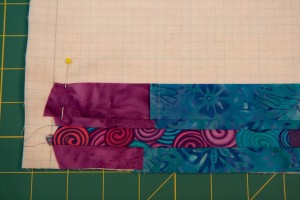
Press open your strips. Then cut another strip from the bottom of panel 2 and layer it face down on top of the previous strip you sewed. Sew the next strip in place.

If your strips are not precisely 1-inch thick, don't worry. You should line up the top of each new strip with the next grid line, even if the previous strip falls a little short of that line. In the even you have a strip that goes over the line, you may want to trim it so you can see the line or use a ruler to help with alignment. You can use pins to hold the strips in place, but you may find that after some practice they are not necessary.
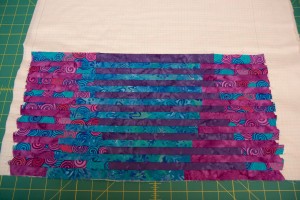
If your strips are not precisely 1-inch thick, don’t worry. You should line up the top of each new strip with the next grid line, even if the previous strip falls a little short of that line. In the even you have a strip that goes over the line, you may want to trim it so you can see the line or use a ruler to help with alignment. You can use pins to hold the strips in place, but you may find that after some practice they are not necessary.

Continue alternating between panel 1 and panel 2 strips until you cover the grid. You may have a couple extra strips left over. (To avoid leftover strips, your grid fabric should be at least .5-inch taller than your fabric tubes.)
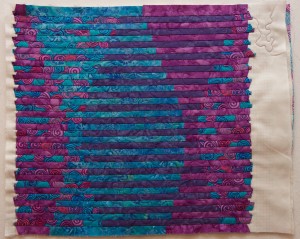
Continue alternating between panel 1 and panel 2 strips until you cover the grid. You may have a couple extra strips left over. (To avoid leftover strips, your grid fabric should be at least .5-inch taller than your fabric tubes.)

Once all your strips have been sewn down, your quilt is not only pieced, but also quilted.
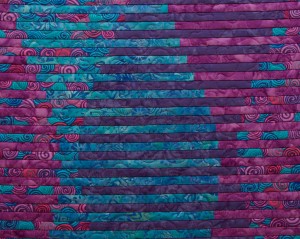
Once all your strips have been sewn down, your quilt is not only pieced, but also quilted.

For a little extra pizzaz you may want to do some free motion quilting  or other embellishments.

For a little extra pizzazz you may want to do some free motion quilting or other embellishments.

Variations

You can achieve some interesting effects by starting with fabric panels that include interesting shapes. For example, you might cut your fabric into right triangles instead of strips, and interleave them without shifting.
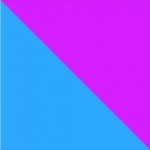
Right triangles Right trianglesInterleaved right triangles

You could use the same panels shown above, form them into tubes, cut them open on a curve, and produce one of the designs below, depending on the shape of the curve you use.

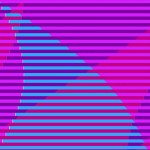
Interleaved and shifted right triangles Interleaved and shifted right triangles

You might also start with panels that have three or more shapes and interleave them as shown on the right below.


side triangles side trianglesinterleaved side triangles

I used this approach to make Interleave #1.
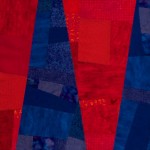
four colored panels, sliced and sewn back together four colored panels, sliced and sewn back togetherIMG_2531

For Interleave #2 I assembled five diagonal strips on each panel. Instead of cutting 1-inch strips for interleaving, I used 1.5-inch strips so that they would end up 1-inch after accounting for seam allowances. In order to keep everything lined up nicely with proper spacing, I had to cut a .5-inch strip after cutting every 1.5-inch strip. These narrow strips are not actually used in the quilt, but they do make for some colorful ribbons. This approach requires more cutting, but a lot less sewing, so the quilt assembly goes faster.
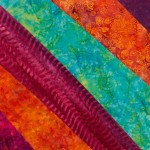
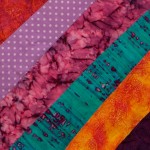
Panels ready to interleave for Interleave#2: Sunset over water Panels ready to interleave for Interleave#2: Sunset over water  Interleave#2: Sunset over water, 24x24" machine pieced and quilted

Finally, interleaving large prints or photos printed on fabric, results in all sorts of interesting possibilities. Below are examples of using wavy striped fabric in Interleave #4, plaid fabric in Interleave #5,  and photos printed on fabric in Interleave #6.
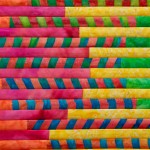
IMG_3421IMG_3527 IMG_4313

Have fun, and let me know how you use this technique!

February 17, 2014 Update!

I’ve been so excited to see the quilts created by some of my workshop participants as well as by a quilter in the San Francisco area, Monica Tong, who found my blog post and followed the instructions to make two quilts. Monica adapted the instructions to use three fabrics in each panel instead of two — which is exactly the idea.


Quilt lecture and Interleave workshop

I will be giving a lecture and teaching a workshop for the Pittsburgh-area “Quilt Company East Guild” later this month. If you are interested in attending either of these events, please contact Sally Janis <SallyJanisQCE@verizon.net>.

Info on both events below from the QCE newsletter.

QCE Guild Meeting 
Monday, January 20, at 7:00 pm, Beulah Presbyterian Church
Lorrie Faith Cranor 
Engineering with Fabric

Question: What happens when you combine the mind of an engineer with the soul of an artist and turn them loose on fabric?

Answer: Magic!

Quilt artist Lorrie Faith Cranor has been exploring design, form, and color since she taught herself quilting as a distraction from her engineering and policy graduate studies in the mid-1990s. Her work is a treat for both the eye and the brain.

She is an Associate Professor of Computer Science and of Engineering and Public Policy at Carnegie Mellon University where she is director of the CyLab Usable Privacy and Security Laboratory (CUPS). During the 2012-2013 academic year she spent her sabbatical as a fellow in the Frank-Ratchye STUDIO for Creative Inquiry at Carnegie Mellon University where she worked on fiber arts projects that combined her interests in privacy and security, quilting, computers, and technology.

Lorrie has won a number of awards in local and national quilt competitions. Several of her quilts have been featured on the covers of books and journals. She had a solo exhibit at the Pittsburgh Children’s Museum in the Summer of 2013.

Interleave#2: Sunset over water, 24x24" machine pieced and quiltedInterleave#2: Sunset over water - detail

January Workshop 
Interleave Technique
Tuesday, January 21, 9:30—2:00, First Baptist Church in Monroeville 

Here’s a chance to learn Lorrie Cranor’s original Interleave technique. Lorrie’s Interleave quilts are pieced using a quilt-as-you-go technique in which thin strips of fabric are sewn to batting and backing. The images above show one of her finished quilts (left) as well as a close-up (right). The interleave design results from cutting these strips from two panels of fabric and piecing alternate strips from each panel. In Lorrie’s quilts, some of the panels are pieced and some are photos printed on fabric. For added interest, Lorrie shifts her strips in a wave pattern. The result of this process is a complex-looking quilt that can be pieced quickly from thin strips sewn in straight lines. In this workshop, Lorrie will break down her process into easy steps. Participants will create their own unique interleave wall hanging.

Non-member Workshop fee is $30 payable to QCE. There is also a $12 materials fee.

class-sample

Here is a sample of a project for the Interleave workshop

For more information on Interleave quilts see the blog posts on Interleave 1, 2, 3, 4, 5, 6, and 7.

To infinity… and beyond!

While I often imagine myself making homemade gifts for everyone on my list, that doesn’t actually ever happen. This year I got a fun idea for one special gift, and liked it so much that I decided to make several more on a similar theme. This year was the year of the infinity scarf (a scarf with the ends sewn together in a loop). But not just any old infinity scarf…. this year I designed three original fabrics, had them digitally printed at spoonflower.com, and turned them into infinity scarves.

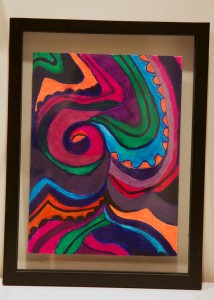
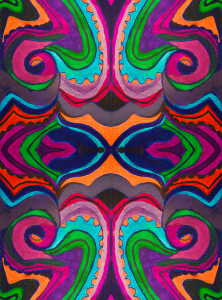
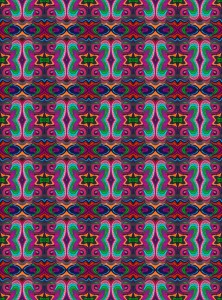
The first scarf was inspired by a colorful painting that my grandmother made earlier this year in her art class. The painting is framed and on display on a shelf in my kitchen. I love the bright-colored swirls and spirals, reminiscent of my own doodles, and thought it would look lovely on a scarf. I took a digital photo of the painting and loaded it into Photoshop. I played with it a bit and realized that all I needed to do was tile it in a mirror-image pattern to create an absolutely stunning design. The shapes in the painting combined with their mirror images to form new shapes and an intriguing pattern.

Painting by Gladys Lipton 2013   gladys-668x900    gladys-tile1


I uploaded the design to spoonflower and ordered two yards of performance knit fabric, a washable polyester knit. Then I waited about a week for my custom fabric to arrive in the mail (the worst part of using spoonflower is the wait!).

IMG_5589

Two yards is enough fabric to make three infinity scarves using the free pattern from Sewn Studio’s Jersey Infinity Scarf Tutorial. The tutorial was super easy to follow. The hardest part is cutting two yards of this slippery fabric into three 24-inch pieces. I made my first scarf in less than an hour and was quite pleased with the results. The scarf can be worn long, or looped around twice. It can also be knotted in various ways for a different sort of look – although one of the great features of infinity scarves is that you don’t have to mess around with tying them. I made three scarves – one for Grandma Gladys, one for my mother, and one I kept for myself.

output_19_45_15

I decided to try my hand at some more fabric design. I went back to the Processing computer program I had used to design my Interleave quilts and adapt it for fabric design. My first design is based on my Interleave #3 quilt. I used the same pattern and color scheme, but added gradients so each bar is a lightly different color. The addition of the gradients adds dimension to an otherwise flat design, and makes it almost appear to glow.

My second design was based on my Interleave #4 quilt. Here I completely changed the colors and used gradients to not only add dimension, but also to introduce more colors. I love the way the colored stripes mix to produce the illusion of additional colors. Here you can see the fabric pattern, as well as the scarf being modeled by me as well as by my mother-in-law.

output_20_22_17  Lorrie with interleave infinity scarf 

The infinity scarves were big hits. Here you can see them modeled by my grandmothers and by my mother. Grandma Gladys, second from the left below, made the painting that is featured on the fabric. (Did you guess that we all like purple?)

Gertie, Gladys, Judy, and Lorrie

These fabrics are all available for sale from my shop at spoonflower. You can have them printed on your choice of fabrics (or even wallpaper or gift wrap).


Inspired!

I’m excited to finally reveal Interleave #6: Porto, which was presented to Ed Frank and Sarah Ratchye at a reception before the Grand Finale dinner of the Carnegie Mellon Inspire Innovation! fundraising campaign last night. I was commissioned to make this quilt to thank Ed for serving as chair of the Inspire Innovation! campaign. (The campaign was incredibly successful, raising well over the $1 billion goal. As a faculty member at a terrific university that has a much smaller endowment than most of our peer institutions, I really appreciate how this infusion of funds will benefit the university.)

I felt truly honored to be asked to make this gift, and somewhat nervous about whether I could produce something that would live up to expectations. Ed and Sarah are art collectors, and Sarah is herself an accomplished artist. The folks who approached me about making the gift were hoping for a piece that would represent the interplay of art and technology, consistent with the mission of the STUDIO. Having spent a good part of the past year working in the STUDIO, I am personally grateful to Ed and Sarah for their financial support of the STUDIO as well.

I did not have a lot of time to produce this quilt, and it involved a number of new techniques I hasn’t tried before. It all came together fairly well until the end. Last weekend I finished the binding, and when I put it up on my design wall for a photograph I realized the corners were not square. Really not square. It was a lovely rhomboid parallelogram. Because I have different prescriptions in each lens of my glasses, when I take my glasses off the world looks a bit un-square (which drives my OCD side nuts). But my glasses were on.  I checked the quilt corners against the grid on my cutting mat, and there was no denying it. The quilt was not square. This was the widest Interleave quilt in the series and I realized that the longer the strips, the more room there is for the fabric to stretch as I sew – and I hadn’t noticed until that point that there was actually quite a bit of skew. I pondered the problem over night and the next day ended up removing the binding and vertical borders so I could square it up. Fortunately, I had used Aurifil 50 weight thread for piecing, which made the un-piecing a snap (my new favorite (un)piecing thread – really nice thin thread with low lint that doesn’t break while sewing but so easy to rip out without tearing your fabric when the situation calls for it). I reattached the borders and the binding and finally could declare it finished.

I already wrote up a little artist’s statement, which the CMU advancement folks had a designer incorporate into a little booklet to accompany the quilt. I will just include the statement here for those of you who want to learn more about the quilt. I’ve also included some bonus images  so you can see how it was made.

Artist’s Statement

At first glance the Frank-Ratchye STUDIO for Creative Inquiry at Carnegie Mellon University appears like a good place for a computer science professor, but an odd place for a quilter. I am both a quilter and a CMU computer science and engineering professor who is spending my sabbatical as a fellow at the STUDIO.

While other faculty and students in the STUDIO spend the day creating new concepts from behind computer screens, I set up shop with an old sewing machine, an ironing blanket, a cutting mat and a huge pile of colorful fabric.  At the beginning of my fellowship, I smiled politely every time someone suggested ways of attaching the old sewing machine to a robotic arm, and spent days with needle and thread hand quilting colorful lines.

Hand quilting is a process that offers one a lot of time to think, and I did spend a lot of time thinking about the art and craft of quilting, and how I might use technology in my work. For most of my piecing and quilting, I use a sewing machine, which was fairly sophisticated technology when it was invented about 200 years ago. My most recently purchased sewing machine is actually called a “sewing computer” by its manufacturer, and it has some innovative features such as a sensor that can detect the speed at which the operator is moving a piece of fabric so that the machine can automatically adjust the speed at which the needle goes up and down.

I appreciate the added value that technology can bring to my art, enabling me to create in ways that would be difficult or impossible for me unassisted. But it is not my goal to use technology to eliminate the need for me to participate in the fabrication process. Part of my attraction to quilting and fiber arts is the tactile nature of the medium. For me, part of the fun is manipulating fabric and thread with my hands. I want to use technology to enhance my skills – let me sew straighter, faster, better – or, better yet, to let me create in ways I otherwise could not.

STUDIO director Golan Levin suggested the use of digital technology that was necessary for me to create this quilt. When I started my Interleave series of quilts, I sketched the quilt designs in pencil and did some design experimentation with scissors and paper. As I started to design the third quilt in the series, I began using Microsoft PowerPoint to sketch out some ideas involving sine waves. It was a tedious process as PowerPoint was really not the right tool for the job.

Golan saw what I was doing and suggested I write a program using an arts engineering toolkit called Processing to draw my design. As a computer scientist, I wasn’t previously familiar with Processing, which was developed by artists, for artists, and is taught in CMU’s undergraduate art classes. The program I wrote allowed me to generate the sorts of designs I had been struggling with, and it included sliders to allow me to experiment with sine waves of different frequencies and amplitudes. Using this program, I was able to rapidly iterate through large numbers of design possibilities before selecting one to actually fabricate. I did some engineering to figure out how to actually construct the quilt I designed, and then adapted my program to produce full-scale templates that I could print on paper and use to cut out my fabric.

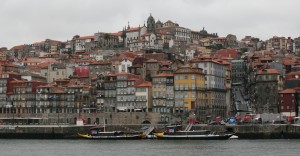
Each quilt in the Interleave series uses a variation on the technique I described, but each includes a new twist on the approach. For Interleave #6, the new twist was the inclusion of a photograph digitally printed on fabric. After considering a variety of photo ideas, I chose a photo I took in Porto, Portugal in 2009 while on a short trip with some of my colleagues to attend a meeting for the Carnegie Mellon Portugal program. Although I was there for less than three days, I managed to meet the Prime Minister José Sócrates as well as experience the city’s São João festival. Walking around the city, I took lots of pictures with my DSLR camera.

Porto is a wonderfully photogenic city, full of hundreds-of-years-old apartments with bright red-orange roofs. The city also has amazing staircases, some of which appear on maps as roads. The Duoro River runs through the city, with tall bridges stretching across it. The view of the Ribeira district from across the river is particularly spectacular, and affords a view of layer upon layer of buildings built into the steep hillside. It is a photo of this view that I selected for the Interleave #6 quilt.

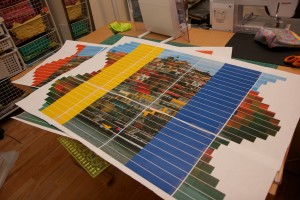
Full-scale paper prototype to check that everything was in order before printing the fabric.

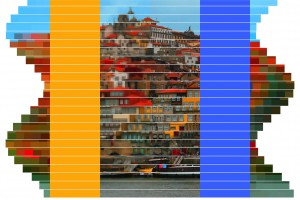
Before printing the photo on fabric, I manipulated it in several ways, including increasing the color vibrancy and saturation. Additionally, I created three versions of the photo at varying degrees of pixilation. Then I used my Processing program to interleave the three versions in a sine wave formation and to leave space for splicing in batik fabrics. Next, I adjusted the end result so it could be printed on fabric complete with guides for cutting and splicing. Since I wasn’t entirely sure I had calculated everything properly, before having the fabric printed at spoonflower.com, I did a trial run with paper to reassure myself that it would work as I envisioned. When the fabric finally arrived in the mail I cut it up and sewed it back together, layered with a foundation grid, batting and backing fabric. The final touch was some hand embroidery for added texture and emphasis.

This was one of the two fabric panels I had printed to make this quilt. I removed the wide yellow and blue stripes and replaced them with batik fabric before making one-inch slices along the white lines.

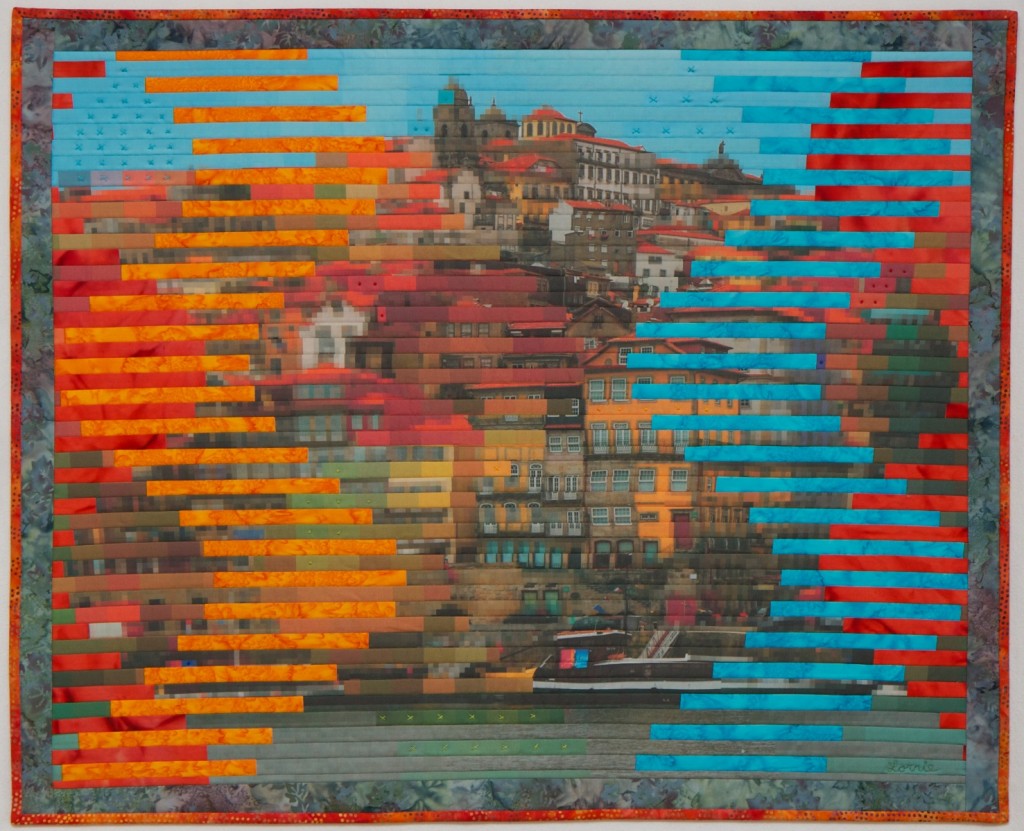
The quilt is designed to show a view of Porto at various levels of focus, granularity, and abstraction. If you look at the quilt up close the pixelated sections appear mostly as abstract regions of color. On the other hand, you can see the un-pixelated sections most clearly, although they are rippled, as if reflected off water. The ripples are both a design choice, and an artifact of the medium – fabric stretches as it is sewn, so perfect alignment is difficult to achieve.

Step back from the quilt until you are too far away to see the un-pixelated sections clearly, and now the pixelated sections start coming into focus. Step back further and the larger pixelated sections convey meaning. The batik fabric sections appear as regions of color taken from the scene: the most abstract representation, color without meaningful shape. I began playing with pixelated images in my earlier quilts as I explored visual representations of privacy, and have continued to use this technique, even when privacy is not the main focus of a piece.

Interleave #6: Porto
25.5″x31.5″ digitally printed cotton and commercial batik fabric, machine pieced and quilted, hand embroidered with pearl cotton


Sine of Spring

I was so pleased with the results of Interleave #3, that I decided to continue the series and see what else I could do to facilitate my quilt design with Processing. This time I started with some of the fabrics I wanted to use — a wonderful, colorful wavy batik fabric seemed perfect for a sine wave quilt. I matched the colors in this fabric with other fabrics in my collection, and not finding exactly the right shades, it was a good excuse to go fabric shopping.  I worked on the quilt design in Processing, but couldn’t figure out how to represent the multi-colored wavy fabric in a single hue. So I enhanced my Processing program so that I could input digital images and use them to create my interleaved designs. I took digital photographs of a bunch of my fabrics with a ruler next to them (for scale). I then experimented with using these digital images in my computer-generated designs.

The addition of digital images of fabric made my computer-generated interleave designs much more vibrant, and also allowed me to visualize the placement of fabric patterns. I had lots of fun playing with different designs.

I eventually selected a design and began the process of rendering it in fabric. I used a very similar approach as I used in Interleave #3, except this time I drew 64 pencil lines spaced a half-inch apart on a piece of white fabric and layered that foundation fabric over the batting. I then sewed the colored strips to the sandwich of white fabric, batting, and backing, aligning each strip to a pencil line. I was able to use just one pin as I positioned each strip. Not having to line up each strip with a ruler and pin it in place along the whole length of the strip saved a lot of time. By the time I finished this quilt I was able to position, piece, and press each strip within about four minutes. I did run into a few problems with some of my pencil lines that were not completely straight — the fabric stretches a bit when you draw on it with a pencil if you are not careful, causing some of the lines to curve. This inspired a not-yet-successful mission to find a commercial cotton fabric with precise half-inch or quarter-inch stripes that I could use as the foundation.

I enjoyed watching the pattern unfold as I worked on this quilt, and I love these colors, which remind me of spring flowers. This quilt celebrates Spring, which after several false starts, seems finally to have come to Pittsburgh.

Interleave #4: Sine of Spring
24″x31″ machine pieced and quilted commercial batik cotton fabric

Computational thinking

I’ve been sitting in the STUDIO for Creative Inquiry for months as the only artist not using a computer to create art. I’ve deflected the numerous suggestions from the STUDIO folks to add computer power to my art by attaching my old mechanical sewing machine to a robotic arm. I also haven’t laser cut any fabric or created any Arduino-controlled blinky quilts. I still might do some of those things, but I’ve been having too much fun just spending time making quilts. The truth is also that although I am a computer science professor, computer programming is not actually a great love of mine. I can program, but I would rather supervise student programmers than do it myself.

I’ve also been doing a lot of improvisational work this year, trying to be more spontaneous in my art. Rather than pre-planning an entire quilt up front, I’ve been trying to design as I go. However, when I started working on the Interleave series I realized that some planning was going to be needed in order to develop quilts in which a third design emerges from interleaving two separate panels.

For Interleave #1 I did some paper prototyping with tape and scissors. For Interleave #3 I decided I wanted to play with creating curves from straight lines. I grabbed an image of a sine wave and pasted it into a powerpoint file and started drafting quilt designs from dozens of thin rectangular strips. Each design variation involved a tedious process. Golan Levin noticed what I was doing and suggested that I create the designs in a programming language called Processing. I mumbled something about not knowing Processing, and Golan offered to get me started. In about 10 minutes he had written a simple Processing program that drew sine waves filled with color that could be adjusted by dragging the mouse. He emailed me his code, expecting me to finish what he started.

It took me, the computer science professor, another five hours to finish what Golan, the art professor, had started. Golan is actually a much better programmer than I will ever be. But by the time I had finished I was hooked on Processing and could see the utility of writing code to produce a quilt design, even if I was ultimately going to use a traditional quilting process to make the quilt. I added lots of parameters to the program and implemented slider bars to control them — frequency, amplitude, offset, number of colors, etc. By fiddling with the slider bars I could try lots of design variants in a matter of minutes, and save copies of the designs I liked the best (annotated with the parameter values so they could be reproduced).
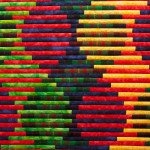
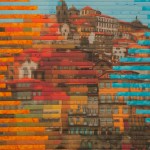
I started out with nice symmetrical intertwining sine waves forming footballs, slender vases, and squat snake pots where the sine waves overlap. Then I discovered new shapes that could be created by offsetting the sine waves in each panel different amounts. These asymmetrical shapes, like flames in the wind, were even more intriguing and dynamic than the snake pots. So I experimented with asymmetric design variants and eventually settled on a design to render in fabric.

Next came fabric selection. I chose nine commercial batik fabrics and one shiny woven fabric from my stash. The visual texture of the batiks provides an added dimension beyond the flat solid-color image in the computer-generated design.

The next problem was figuring out how to construct this quilt. With two previous Interleave quilts under my belt, I was starting to get a feel for what techniques are most effective. However, this is the first quilt where I attempted interleaved curves. I considered piecing two panels with sine waves and slicing them — basically the process I used for the previous two Interleave quilts, but without any curves. But curved piecing can be tricky, and it occurred to me that this quilt could be created entirely from straight lines. My approach was to cut strips of fabric a little bigger than the width of the colored bands, and a little taller than the height of the quilt. I sewed them together into two tubes with five bands each. I then created a full-scale paper template for the sine waves and used it to cut open the tubes in a stair-step sine wave pattern. Then the tubes were ready for slicing into one-inch strips and sewing to the quilt batting and backing. This time I prepared the backing with half-inch marks, carefully aligned, to make it easier to align and sew the strips. I used Fairfield Soft Touch Cotton Batting as I had in Interleave #2.

With the backing properly marked, the sewing went fairly quickly. It was exciting to watch the design emerge one row at a time.

I think the end result is quite striking. My first foray into writing code to aid my design process was successful. I don’t think I will use this approach for every quilt from now on, but I am eager to try it with some other ideas on the Interleave theme.

Interleave #3: Waveforms, 2013
24.5″x24.5″ machine pieced and quilted cotton fabric


Auction Quilt

For the past several years I’ve donated a small quilt for the fundraising auction at the local public elementary school that my kids attend. I’ve just finished this year’s auction quilt, a small 24-inch square wall quilt called “Interleave #2: Sunset over water.” This is the second in my series of Interleave art quilts, and it seems likely there will be more. (See my last post for Interleave #1’s story.)  The quilt will be auctioned off on February 16. Contact me for details if you are interested in bidding.

Interleave #1 had a lot going on, with primary-colored improv-pieced panels spliced together before being sliced into 24 pieces and sewn back together again. For Interleave #2 I made the panels out of only six pieces of fabric each, and I sliced them into only 12 pieces. But there is still a lot of texture here, as most of the fabrics I used are multi-colored commercial batiks. I cut the slices 1.5-inches wide so that they would end up 1-inch after accounting for seam allowances. In order to keep everything lined up nicely with proper spacing, I had to cut a .5-inch strip after cutting every 1.5-inch strip. These narrow strips are not actually used in the quilt, but they do make for some colorful ribbons that are too nice to throw away.

This time I used Fairfield Soft Touch Cotton Batting. I found it made the quilt-as-you-go quilting a little bit easier than the Thermore I used last time because the fibers don’t puff up as much. I also marked the ends of each row directly on the batting with a fabric marker and used my new 36″ clear plastic ruler to make it easier to keep everything lined up. Unfortunately, I made a mistake while marking that I didn’t notice until I was almost done, so gave myself a bit of an extra challenge and wondered why I had to keep correcting things that weren’t lining up. The fact that the strips were cut on the bias (and thus fairly stretchy) added to the challenge of keeping everything lined up.

This quilt is finished with some meandering free motion machine quilting in a colorful variegated thread. I debated whether or not to add the quilting to this one. I think it looked fine without it, but the quilting pulls the whole thing together nicely.

Interleave#2: Sunset over water, 24×24″ machine pieced and quilted

Winter break projects

In between family activities I worked on some artsy activities over winter break. My mother taught me how to crochet (but I haven’t made anything other than practice pieces), and I worked on some Spoonflower fabric for a couple of future projects (stay tuned!).  I spent most of my time on a small wall quilt that involved cutting fabric into lots of small pieces, sewing those pieces together, cutting them up, and sewing them back together again.

My inspiration came from some images of quilts by Kent Williams in the January 2013 issue of American Quilter. I like the way Kent creates the illusion of shape by sewing together thin strips of fabric and I wanted to try the technique. But thin strips of fabric are hard to sew precisely. I also recently read an article in the December 2012 Quilting Arts Magazine by Ann Brauer in which she explained her quilt-as-you-go approach for making quilts out of thin strips of fabric. It occurred to me that Ann’s method might simplify the construction of the quilt I envisioned. (I’m actually not entirely sure about Kent’s method. I’ve only found tiny photos of his quilts – not enough detail to reverse engineer his process. I did observe that the short edges of his strips are all butted up against the next strip at 90 degree angles, suggesting his technique for cutting the strips is different than the one I describe below.) I worked out that with 1/4 inch seam allowances, if I cut the fabric into 1-inch strips, half of each strip would be lost to seam allowances. Thus 1-inch strips from two panels of fabric could be interleaved, allowing the designs from the two panels to be superimposed without distortion. I decided to add improvisational piecing to the mix to add an extra layer of interest to the design, and because improv piecing is fun.

This quilt was a lot of fun to make but it required some courage to keep cutting up what looked like a perfectly good composition with the expectation that when I sewed it back together according to a vision I had in my mind, the result would be even better.

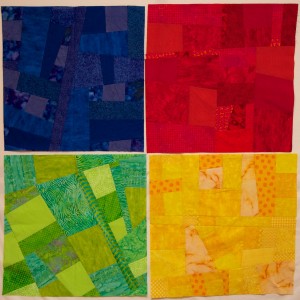
The first step was to make four 26-inch single-color square panels, each improvisationally pieced from about a half-dozen fabrics. The panels were each beautiful on their own, and lovely when placed together. I hesitated to cut them up.

I did some paper prototyping to convince myself that my slicing plan was going to work, and also to experiment with some of the details. I cut up photos of the single-color panels and reassembled them into red/blue and yellow/green panels. Then I tried positioning the red/blue panel perpendicular to the yellow/green panel, and sliced them both into 24 strips. I wasn’t entirely pleased with the results – the red/blue panel didn’t show strongly because the lines separating the colors got lost between the slices (left image). I cut up another red/blue paper panel, this time rotated 90 degrees. I liked the result (center image), but now the shapes in the two panels were superimposed and didn’t interact in interesting ways. In my third attempt (right image) I shifted the red/blue strips until they created an interesting overlapping pattern (and indeed this is the effect I love in Kent Williams’ quilts).


My next challenge was figuring out exactly where to slice the single-color panels to make the red/blue and yellow/green panels. Originally I was going to slice them at somewhat random angles, but my paper prototyping convinced me that I would get better results if I selected the angles purposefully and made the panels mirror images of each other. I figured out the ratios I wanted and actually did a bit of algebra to work out exactly where to make the cuts. I did the slicing and reassembly and had four striking bi-color panels. This time I was really hesitant to slice them up again, but I sauntered on and prepared to begin cutting up two of the bi-color panels.

But before I started slicing, I needed one more prototype to test out the quilt-as-you go technique. I grabbed some scrap fabric and sliced it into one-inch strips. But what kind of batting to use? I decided I wanted a fairly light batting, and nothing fusible (lately I’ve been enjoying the convenience of Hobbs Heirloom Fusible Cotton/Poly Batting). I had some pieces of Fairfield Soft Touch Cotton Batting and Thermore Ultra Thin Polyester Batting, which both seemed like reasonable choices for the project. I cut a small sample of each and tried both. The results were fine either way. The Thermore (on the left of the above sample) resulted in a lighter weight quilt that felt less stiff than the cotton (on the right). But both looked about the same once they were inside the quilt.

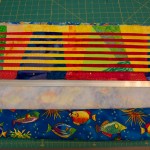
I decided to use the Thermore in my quilt, mostly because I had a piece already cut that was about the right size. I cut out some backing fabric for my quilt (blue fabric with primary-colored fish that I bought years ago to make baby quilts) a little bit larger than the batting and layered the batting on top of it. I had been planning to use the edge of each previous fabric strip sewed as a guide for sewing the next strip, but my prototype revealed that would likely lead to skewed  lines after a few strips. So I used a fabric pen to mark guide lines along the left and right edges of the backing fabric every half inch.

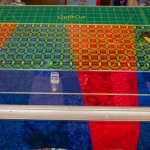
Then I setup an assembly line. I layered a red/blue panel over a yellow-green panel on my gridded cutting mat and made a one-inch slice. I then placed one fabric slice on the batting, used a straight edge to align the slice with the guide lines, and pinned it in place. For the first strip only, I did not immediately sew it, but placed the second strip in place and sewed them together. I pressed open the second strip, cut more strips, aligned the next strip, sewed, and repeated over and over again. I waited in suspense until I had sewn enough strips that the pattern started to emerge, and I could see the quilt in my mind take form in fabric. But it wasn’t until many, many hours later after all 48 strips were cut and sewn in place that I had confidence that this quilt was going to “work.”

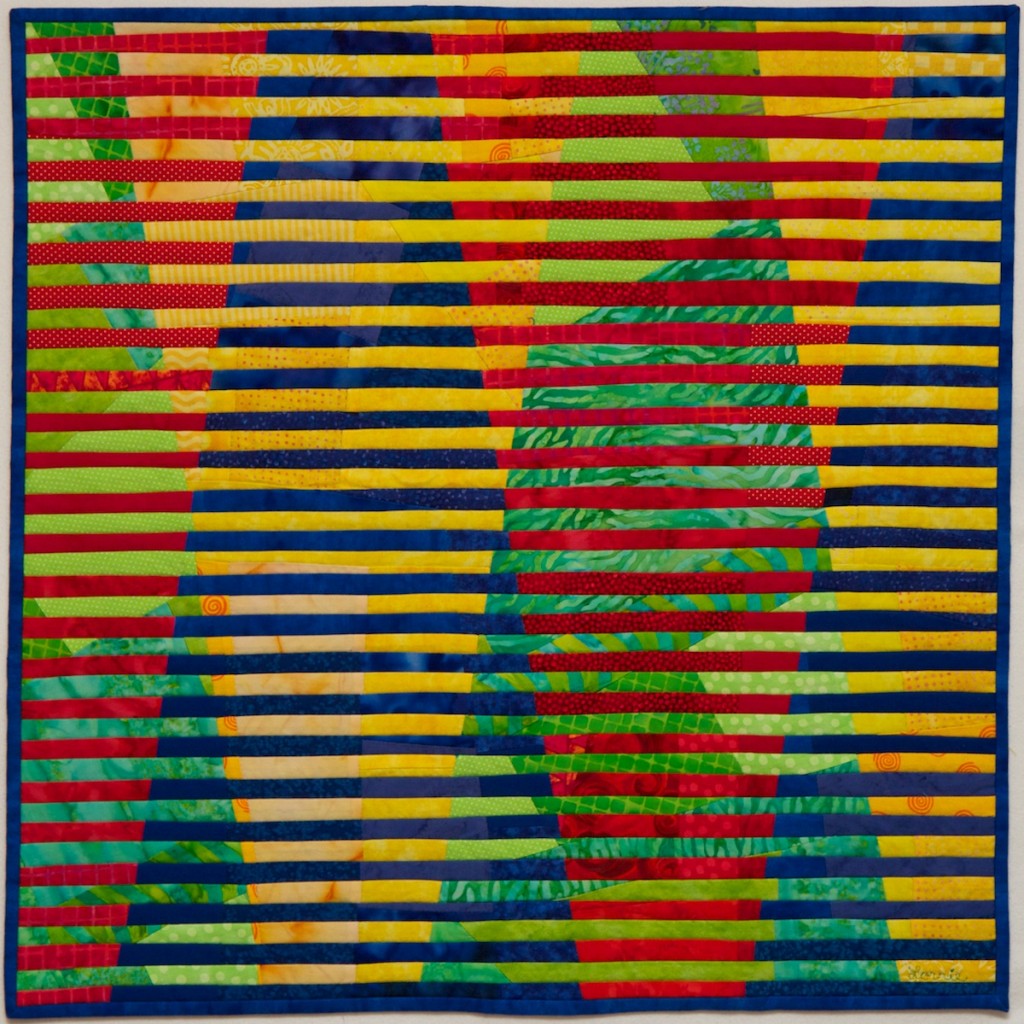
Now, the quilt is finished and bound. Overall I’m pleased with the result. I like the interweaving images. I like the third layer of images from the improv piecing. I like the fact that it looks like you are looking through Venetian blinds. Sometimes when I look at it I think the contrast between the adjacent interleaved strips is too much and creates some visual dissonance. I would like to try this technique again with lower-contrast fabrics. I wish I had cut and sewn some of the strips straighter. Would a bigger rotary cutter, longer ruler, or different batting help? I wonder how it would look with fatter strips. What if they were cut diagonally? I’m contemplating a more purposeful placement of fabrics in the single-color panels. I’m pondering doing this with curves and with photos printed on fabric. So many ideas…. But first I have to decide what to do with the other two bi-colored panels.

Interleave #1: Venetian Lines – 23.75″x23.75″ Machine pieced and quilted cotton fabric.