Security Blanket

As I’ve been thinking about quilt ideas related to security and privacy during my staybatical at the STUDIO for Creative Inquiry all year, the title for this quilt was obvious: Security Blanket. Less obvious was the design of a quilt that would fit this title. Ultimately, I took inspiration from the research on the security and usability of text passwords that I’ve been working on with my students and colleagues. While this quilt started out as an art project inspired by my research, what I learned from creating it will likely influence my future password research.

Security Blanket, machine quilted, digitally printed cotton fabric, 63.5″x39″

Our research group has collected tens of thousands of passwords created under controlled conditions as part of our research. Among other things, we have compared these passwords with the archives of stolen passwords that have been made public over the past few years. Perhaps the largest such archive consists of 32 million passwords stolen from social gaming website RockYou and made public in December 2009. These passwords are notably weak, having been created without the requirement to include digits or symbols or even avoid dictionary words. Security firm Imperva published an analysis of these passwords. More recent analyses of stolen passwords have found that passwords stolen in 2012 are pretty similar to those stolen in 2009.

The media had fun publishing the most common passwords from the RockYou breach. As with other breaches, password and 123456 figured prominently. But after you get past the obvious lazy choices, I find it fascinating to see what else people choose as passwords. These stolen passwords, personal secrets, offer glimpses into the collective consciousness of Internet users.
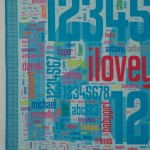
I asked my students to extract the 1000 most popular passwords from the RockYou data set and provide a list to me with frequency counts.  I then went through the list and sorted them into a number of thematic groups. I assigned a color to each group and entered the passwords with weights and colors into the Wordle online word cloud generator. I then saved the output as a PDF and edited it in Adobe Illustrator to rearrange them in a shape that I liked, with some pairs of words purposefully place in close proximity. I designed a border, and had the whole thing printed on one large sheet of fabric by Spoonflower. When the fabric arrived, I layered it with batting and quilted it. I bound it with matching fabric from Spoonflower that I designed.
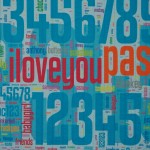
Sorting 1000 passwords into thematic categories took a while. While a number of themes quickly emerged, many passwords could plausibly fall into multiple categories. I tried to put myself in the mindset of a RockYou user and imagine why they selected a password. Is justin the name of the user? Their significant other? Their son? Or are they a Justin Bieber fan? Is princess a nickname for their spouse or daughter? The name of their cat? Their dog? (It shows up frequently on lists of popular pet names and a recent surveyfound that the most common way of selecting a passord is using the name of a pet.) Is sexygirl self referential? What about daddysgirl? dreamergenius?

When I didn’t recognize a password I Googled it. Most of these unknown passwords turned out to be ways to express your love in different languages. For example, I learned that mahalkita means I love you in Tagalong. Love was a strong theme in any language; there seems to be something about creating a password that inspires people to declare their love.

Not surprisingly, the top 1000 passwords list includes a fair share of swear words, insults, and adult language. However, impolite passwords are much less prevalent than the more tender love-related words, appropriate for all audiences.

There are a couple dozen food-related words in the top 1000 passwords. The most popular is chocolate and most of the others are also sweets (and potentially nicknames for a significant other), but a few fruits and vegetables, and even chicken make their way to the top as well. Among fruits, banana appears in both singular and plural.

Animals are also popular. While felines appear on the password list in a number of forms and languages, monkey is by far the most popular animal, and the fourteenth most popular password. I can’t quite figure out why, and I don’t know whether or not this is related to the popularity of “banana.”
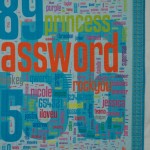
Fictional characters are also popular, especially cartoon characters. The twenty-fifth most popular password is tigger (which might also be on the list because it is a popular name for a cat). A number of super heroes and Disney princesses also make the list, as well as another cartoon cat, hellokitty. Real life celebrities also make the list, including several actors and singers. While at first I thought booboo might refer to the reality TV star Honey Boo Boo, I realized that the date of the password breach predates the launch of that TV show.

A number of passwords relate to the names of sports, sports teams, or athletes. Soccer-related passwords are particularly popular. There are several cities on the list that I’m guessing were selected as passwords because of their sports teams, especially soccer teams.

Besides the obvious lazy password password, and also PASSWORD, password1, and password2, some more clever (but nonetheless unoriginal) variations included secret and letmein. And I love that the 84th most popular password is whatever.

Some passwords puzzled me. Why would anyone select “lipgloss” as their password. Why not “lipstick” or “mascara”? Perhaps it refers to a 2007 song by Lil Mamma?  Why “moomoo”? Why “freedom”?

Even more popular than the word password were the numbers 123456, 12345, 123456789. Other numbers and keyboard patterns also appear frequently. When I laid out the 1000 passwords on the quilt, I scaled them all according to their popularity. The most popular number sequence was chosen by more than three times as many people as the next most common password and was so large that I decided to place it in the background behind the other passwords so that it wouldn’t overwhelm the composition.

I made a few mistakes when designing the quilt that I didn’t notice until I was quilting it (quilting this quilt provided an opportunity to reflect on all the passwords yet again as I stitched past them). One problem was that when I transferred the top 1000 password list to Microsoft Excel while categorizing the passwords, the spreadsheet program removed all the zeros at the beginning of passwords. As a result there are three passwords that are actually strings of zeros (5, 6, and 8 zeros) that are printed simply as 0. In addition there are three number strings that start with a 0 followed by other digits are printed without the leading 0. Another problem was that the color I selected for jesus, christian, angel, and a number of other religious words blended in with the background numbers when printed on fabric, making those words almost invisible (even though they showed up fine on my computer screen). I had carefully checked most of the colors I used against a Spoonflower color guide printed on fabric, but had inadvertently forgotten to check this particular color. I reprinted about half a dozen of these words in a darker color and sewed them onto the quilt like patches that one might add to repair a well-worn spot.

There are also some passwords that I colored according to one category, and upon further reflection I am convinced more likely were selected for a different reason and should be in a different category, but we’ll never know for sure. I invite viewers to discover the common themes represented by my color-coded categories and to speculate themselves about what users were thinking when they created these passwords. Zoom in on the thumbnail images above to see all of the smaller passwords in detail.

The colors, size, and format of this quilt were designed to be reminiscent of a baby quilt, which I imagine might become a security blanket. Like the passwords included in this piece, a security blanket offers comfort, but ultimately no real security.

Inspired!

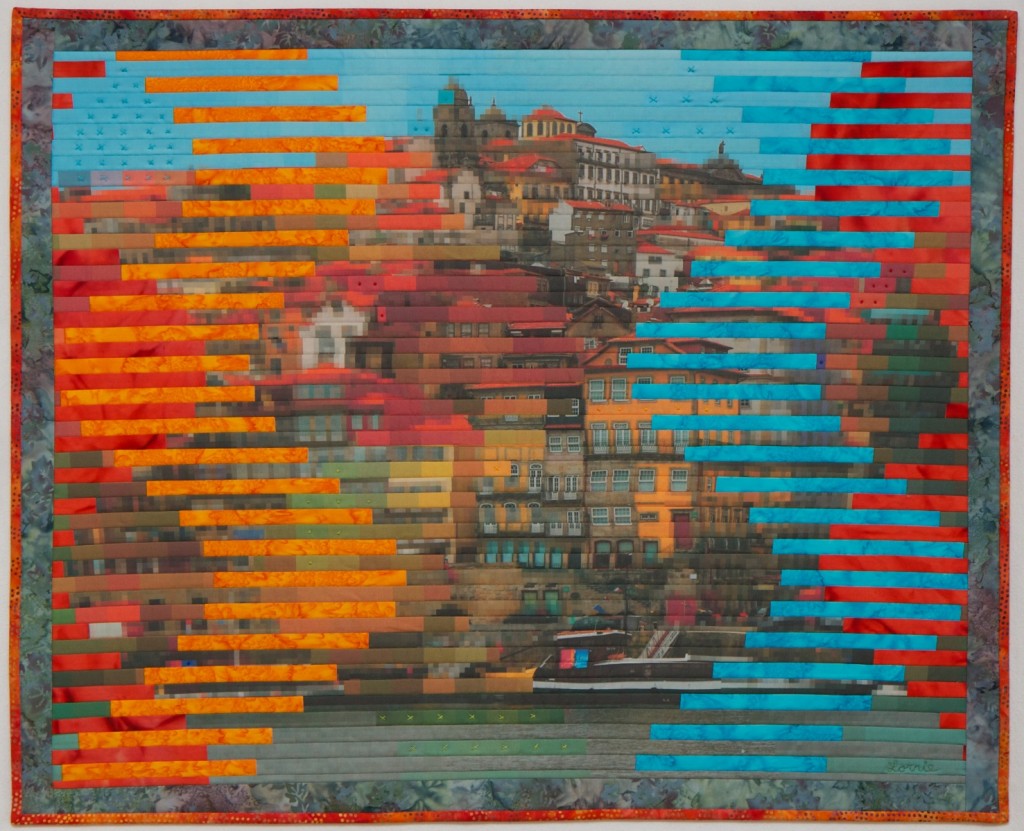
I’m excited to finally reveal Interleave #6: Porto, which was presented to Ed Frank and Sarah Ratchye at a reception before the Grand Finale dinner of the Carnegie Mellon Inspire Innovation! fundraising campaign last night. I was commissioned to make this quilt to thank Ed for serving as chair of the Inspire Innovation! campaign. (The campaign was incredibly successful, raising well over the $1 billion goal. As a faculty member at a terrific university that has a much smaller endowment than most of our peer institutions, I really appreciate how this infusion of funds will benefit the university.)

I felt truly honored to be asked to make this gift, and somewhat nervous about whether I could produce something that would live up to expectations. Ed and Sarah are art collectors, and Sarah is herself an accomplished artist. The folks who approached me about making the gift were hoping for a piece that would represent the interplay of art and technology, consistent with the mission of the STUDIO. Having spent a good part of the past year working in the STUDIO, I am personally grateful to Ed and Sarah for their financial support of the STUDIO as well.

I did not have a lot of time to produce this quilt, and it involved a number of new techniques I hasn’t tried before. It all came together fairly well until the end. Last weekend I finished the binding, and when I put it up on my design wall for a photograph I realized the corners were not square. Really not square. It was a lovely rhomboid parallelogram. Because I have different prescriptions in each lens of my glasses, when I take my glasses off the world looks a bit un-square (which drives my OCD side nuts). But my glasses were on.  I checked the quilt corners against the grid on my cutting mat, and there was no denying it. The quilt was not square. This was the widest Interleave quilt in the series and I realized that the longer the strips, the more room there is for the fabric to stretch as I sew – and I hadn’t noticed until that point that there was actually quite a bit of skew. I pondered the problem over night and the next day ended up removing the binding and vertical borders so I could square it up. Fortunately, I had used Aurifil 50 weight thread for piecing, which made the un-piecing a snap (my new favorite (un)piecing thread – really nice thin thread with low lint that doesn’t break while sewing but so easy to rip out without tearing your fabric when the situation calls for it). I reattached the borders and the binding and finally could declare it finished.

I already wrote up a little artist’s statement, which the CMU advancement folks had a designer incorporate into a little booklet to accompany the quilt. I will just include the statement here for those of you who want to learn more about the quilt. I’ve also included some bonus images  so you can see how it was made.

Artist’s Statement

At first glance the Frank-Ratchye STUDIO for Creative Inquiry at Carnegie Mellon University appears like a good place for a computer science professor, but an odd place for a quilter. I am both a quilter and a CMU computer science and engineering professor who is spending my sabbatical as a fellow at the STUDIO.

While other faculty and students in the STUDIO spend the day creating new concepts from behind computer screens, I set up shop with an old sewing machine, an ironing blanket, a cutting mat and a huge pile of colorful fabric.  At the beginning of my fellowship, I smiled politely every time someone suggested ways of attaching the old sewing machine to a robotic arm, and spent days with needle and thread hand quilting colorful lines.

Hand quilting is a process that offers one a lot of time to think, and I did spend a lot of time thinking about the art and craft of quilting, and how I might use technology in my work. For most of my piecing and quilting, I use a sewing machine, which was fairly sophisticated technology when it was invented about 200 years ago. My most recently purchased sewing machine is actually called a “sewing computer” by its manufacturer, and it has some innovative features such as a sensor that can detect the speed at which the operator is moving a piece of fabric so that the machine can automatically adjust the speed at which the needle goes up and down.

I appreciate the added value that technology can bring to my art, enabling me to create in ways that would be difficult or impossible for me unassisted. But it is not my goal to use technology to eliminate the need for me to participate in the fabrication process. Part of my attraction to quilting and fiber arts is the tactile nature of the medium. For me, part of the fun is manipulating fabric and thread with my hands. I want to use technology to enhance my skills – let me sew straighter, faster, better – or, better yet, to let me create in ways I otherwise could not.

STUDIO director Golan Levin suggested the use of digital technology that was necessary for me to create this quilt. When I started my Interleave series of quilts, I sketched the quilt designs in pencil and did some design experimentation with scissors and paper. As I started to design the third quilt in the series, I began using Microsoft PowerPoint to sketch out some ideas involving sine waves. It was a tedious process as PowerPoint was really not the right tool for the job.

Golan saw what I was doing and suggested I write a program using an arts engineering toolkit called Processing to draw my design. As a computer scientist, I wasn’t previously familiar with Processing, which was developed by artists, for artists, and is taught in CMU’s undergraduate art classes. The program I wrote allowed me to generate the sorts of designs I had been struggling with, and it included sliders to allow me to experiment with sine waves of different frequencies and amplitudes. Using this program, I was able to rapidly iterate through large numbers of design possibilities before selecting one to actually fabricate. I did some engineering to figure out how to actually construct the quilt I designed, and then adapted my program to produce full-scale templates that I could print on paper and use to cut out my fabric.

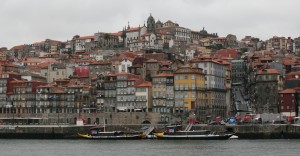
Each quilt in the Interleave series uses a variation on the technique I described, but each includes a new twist on the approach. For Interleave #6, the new twist was the inclusion of a photograph digitally printed on fabric. After considering a variety of photo ideas, I chose a photo I took in Porto, Portugal in 2009 while on a short trip with some of my colleagues to attend a meeting for the Carnegie Mellon Portugal program. Although I was there for less than three days, I managed to meet the Prime Minister José Sócrates as well as experience the city’s São João festival. Walking around the city, I took lots of pictures with my DSLR camera.

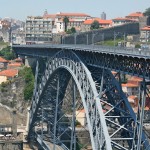
Porto is a wonderfully photogenic city, full of hundreds-of-years-old apartments with bright red-orange roofs. The city also has amazing staircases, some of which appear on maps as roads. The Duoro River runs through the city, with tall bridges stretching across it. The view of the Ribeira district from across the river is particularly spectacular, and affords a view of layer upon layer of buildings built into the steep hillside. It is a photo of this view that I selected for the Interleave #6 quilt.

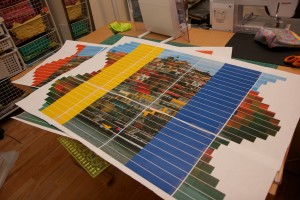
Full-scale paper prototype to check that everything was in order before printing the fabric.

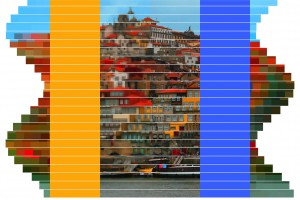
Before printing the photo on fabric, I manipulated it in several ways, including increasing the color vibrancy and saturation. Additionally, I created three versions of the photo at varying degrees of pixilation. Then I used my Processing program to interleave the three versions in a sine wave formation and to leave space for splicing in batik fabrics. Next, I adjusted the end result so it could be printed on fabric complete with guides for cutting and splicing. Since I wasn’t entirely sure I had calculated everything properly, before having the fabric printed at spoonflower.com, I did a trial run with paper to reassure myself that it would work as I envisioned. When the fabric finally arrived in the mail I cut it up and sewed it back together, layered with a foundation grid, batting and backing fabric. The final touch was some hand embroidery for added texture and emphasis.

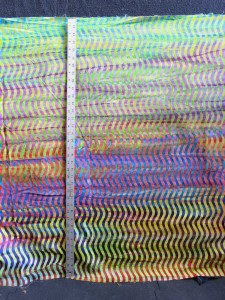
This was one of the two fabric panels I had printed to make this quilt. I removed the wide yellow and blue stripes and replaced them with batik fabric before making one-inch slices along the white lines.

The quilt is designed to show a view of Porto at various levels of focus, granularity, and abstraction. If you look at the quilt up close the pixelated sections appear mostly as abstract regions of color. On the other hand, you can see the un-pixelated sections most clearly, although they are rippled, as if reflected off water. The ripples are both a design choice, and an artifact of the medium – fabric stretches as it is sewn, so perfect alignment is difficult to achieve.

Step back from the quilt until you are too far away to see the un-pixelated sections clearly, and now the pixelated sections start coming into focus. Step back further and the larger pixelated sections convey meaning. The batik fabric sections appear as regions of color taken from the scene: the most abstract representation, color without meaningful shape. I began playing with pixelated images in my earlier quilts as I explored visual representations of privacy, and have continued to use this technique, even when privacy is not the main focus of a piece.

Interleave #6: Porto
25.5″x31.5″ digitally printed cotton and commercial batik fabric, machine pieced and quilted, hand embroidered with pearl cotton


Sine of Spring

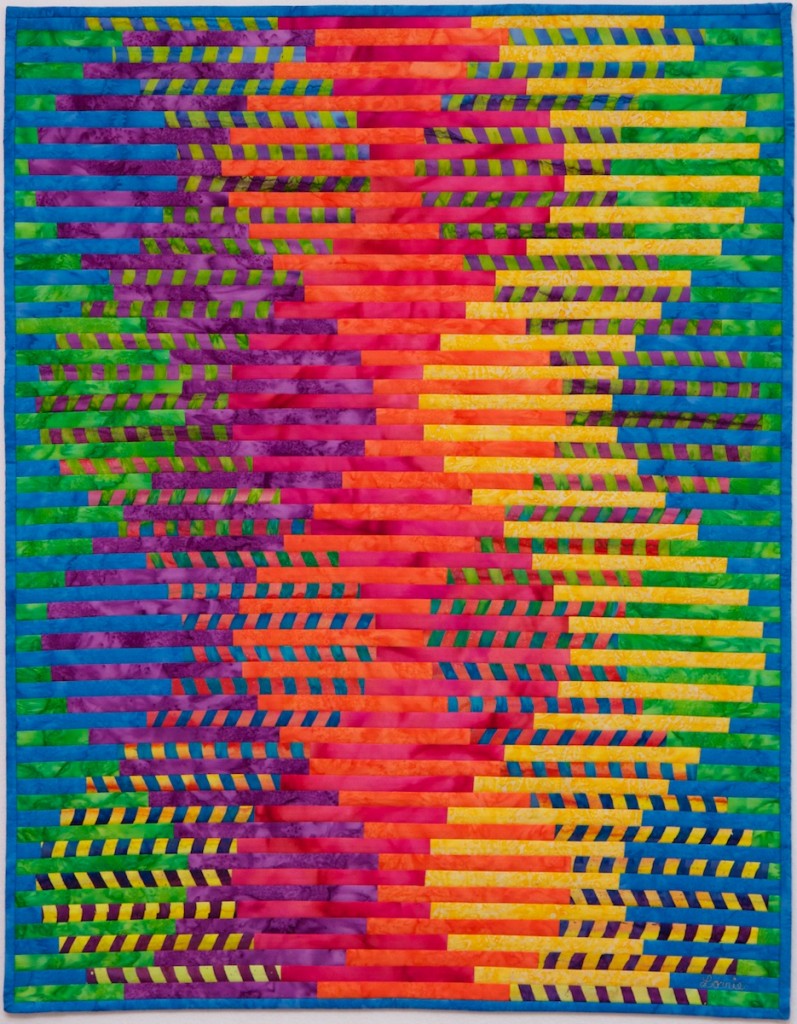
I was so pleased with the results of Interleave #3, that I decided to continue the series and see what else I could do to facilitate my quilt design with Processing. This time I started with some of the fabrics I wanted to use — a wonderful, colorful wavy batik fabric seemed perfect for a sine wave quilt. I matched the colors in this fabric with other fabrics in my collection, and not finding exactly the right shades, it was a good excuse to go fabric shopping.  I worked on the quilt design in Processing, but couldn’t figure out how to represent the multi-colored wavy fabric in a single hue. So I enhanced my Processing program so that I could input digital images and use them to create my interleaved designs. I took digital photographs of a bunch of my fabrics with a ruler next to them (for scale). I then experimented with using these digital images in my computer-generated designs.

The addition of digital images of fabric made my computer-generated interleave designs much more vibrant, and also allowed me to visualize the placement of fabric patterns. I had lots of fun playing with different designs.

I eventually selected a design and began the process of rendering it in fabric. I used a very similar approach as I used in Interleave #3, except this time I drew 64 pencil lines spaced a half-inch apart on a piece of white fabric and layered that foundation fabric over the batting. I then sewed the colored strips to the sandwich of white fabric, batting, and backing, aligning each strip to a pencil line. I was able to use just one pin as I positioned each strip. Not having to line up each strip with a ruler and pin it in place along the whole length of the strip saved a lot of time. By the time I finished this quilt I was able to position, piece, and press each strip within about four minutes. I did run into a few problems with some of my pencil lines that were not completely straight — the fabric stretches a bit when you draw on it with a pencil if you are not careful, causing some of the lines to curve. This inspired a not-yet-successful mission to find a commercial cotton fabric with precise half-inch or quarter-inch stripes that I could use as the foundation.

I enjoyed watching the pattern unfold as I worked on this quilt, and I love these colors, which remind me of spring flowers. This quilt celebrates Spring, which after several false starts, seems finally to have come to Pittsburgh.

Interleave #4: Sine of Spring
24″x31″ machine pieced and quilted commercial batik cotton fabric

Self Portrait

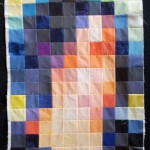
As part of my sabbatical project, I  have been continuing to contemplate ways to visualize privacy. My De-identificaiton quilt featured digitally-printed photos de-identified by their extreme magnification and by splicing them together with other fabric. Another approach to visual de-identification is pixelation. To pixelate an image, we superimpose a grid on the image and replace each cell with a color representing the average of all the pixels in that grid cell. Although pixelation has been shown to be highly vulnerable to automated re-identification, it is a widely used method of obscuring images to make them more difficult for humans to recognize.

I have long been intrigued by the Salvador Dali paintings, Lincoln in Dalivision (1977) and Gala Contemplating the Mediterranean Sea which at Twenty Meters Becomes the Portrait of Abraham Lincoln (Homage to Rothko) (1976), which in turn were inspired by Leon Harmon’s grey photomoasic of Abraham Lincoln (1973).

Recently, Ray J released the single “I Hit it First” with a pixelated photo on the album cover. The photo was quickly recognized as a 2010 photo of bikini-clad Kim Kardashian.

Original portrait

While working on my Big Bright Pixels quilt, people kept asking me whether there was a hidden picture or message. There wasn’t. But that did get me thinking about doing a pixel quilt with a hidden image. But what image should I pixelate? I had recently used a pixelated face in the logo I designed for the Privacy Engineering masters program, and a face seemed a natural choice given that faces are commonly pixelated to protect privacy in news photos. (Other body parts are also frequently pixelated, and I love the censorship towel, but I digress.) I settled on pixelating a face, and briefly considered using a face of a famous person before deciding to use my own face. I selected a blue-haired portrait, photographed by Chuck Cranor.

Pixelated portrait

Pixelated portrait

Pixelation can be done trivially with a computer using standard image processing software packages or by rolling your own. I started working on my pixelated quilt before I started programing in Processing, so I used Photoshop to pixelate a headshot of myself. The initial pixelation was nice, but I wanted something more colorful and also higher contrast so that the differences between colors would show up better when printed on fabric (digital printing on fabric tends to dull colors). I experimented with adjusting the contrast, brightness, and color settings in Photoshop until I came up with a brighter and more colorful pixelated image. This was the image I sent to Spoonflower for digital printing.

Pixelated portrait with high contrast and color manipulation

Pixelated portrait with high contrast and color manipulation

By the time the fabric arrived I had gotten busy with other quilts, and I was also a little disappointed in how the printed fabric looked, so I left the fabric sitting out on my table in the STUDIO for a while. I decided that the dulled digital print needed some more punch, so periodically I cut a fabric square to match a pixel in the fabric and pinned it in place. I cut some of these squares from translucent polyester organza, adding some vibrancy and shimmer to the pixels over which I layered them. I cut other squares from lace, commercial batiks, and printed fabrics that were more intense versions of the hues in the digital print. I ended up covering about 20% of the pixels with other fabric.

Back of quilt top with vertical lines sewed

Back of quilt top with vertical lines sewed

After a few months of staring at the pixels I finally decided to sew the quilt together. I used a shortcut technique to sew the quilt together without actually cutting apart the squares in the digital print. I folded the fabric along one of the vertical lines, catching the pinned squares in the fold, and stitched along the line with a quarter-inch seam allowance. I repeated this approach to sew all the vertical lines and pressed all the seam allowances to the side. Then I folded the fabric along one of the horizontal lines and repeated this process. The end result was a pieced quilt top that appeared to have been pieced out of 130 2.25″ squares (2.75″ with seam allowances). Theoretically this approach should have resulted in precisely pieced seams; however, some of the lines are actually slightly off and the rows and columns did not come out quite as square as I had hoped they would.

Pieced quilt top

Pieced quilt top

I layered the quilt top over batting and backing and used a spiral free-motion machine quilting pattern to quilt the whole thing free hand. I did the quilting in several sessions as I had time, doodling spirals until my hands got tired. I used several different thread colors to roughly match the color of the thread with the pixels I was quilting. I decided not to bind this quilt, and instead made an envelope and quilted all the way to the edge. There is a little bit of stippled hand quilting done with perl cotton surrounding my signature in the lower right corner.

So now the quilt is done and I’m pretty happy with this self portrait. Most people who have seen it do not recognize it as a self portrait, which is ok, and sort of the point. On the other hand, Golan said the blue and purple hair was a dead give away for him. I had not actually started out with the intention to make a self portrait, but ultimately I think the piece works better for me as a self portrait than any more accurate likeness would.


Self Portrait, machine pieced and quilted 23×30.75″


Computational thinking

I’ve been sitting in the STUDIO for Creative Inquiry for months as the only artist not using a computer to create art. I’ve deflected the numerous suggestions from the STUDIO folks to add computer power to my art by attaching my old mechanical sewing machine to a robotic arm. I also haven’t laser cut any fabric or created any Arduino-controlled blinky quilts. I still might do some of those things, but I’ve been having too much fun just spending time making quilts. The truth is also that although I am a computer science professor, computer programming is not actually a great love of mine. I can program, but I would rather supervise student programmers than do it myself.

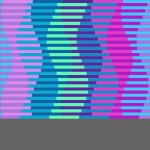
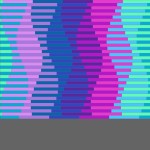
I’ve also been doing a lot of improvisational work this year, trying to be more spontaneous in my art. Rather than pre-planning an entire quilt up front, I’ve been trying to design as I go. However, when I started working on the Interleave series I realized that some planning was going to be needed in order to develop quilts in which a third design emerges from interleaving two separate panels.

For Interleave #1 I did some paper prototyping with tape and scissors. For Interleave #3 I decided I wanted to play with creating curves from straight lines. I grabbed an image of a sine wave and pasted it into a powerpoint file and started drafting quilt designs from dozens of thin rectangular strips. Each design variation involved a tedious process. Golan Levin noticed what I was doing and suggested that I create the designs in a programming language called Processing. I mumbled something about not knowing Processing, and Golan offered to get me started. In about 10 minutes he had written a simple Processing program that drew sine waves filled with color that could be adjusted by dragging the mouse. He emailed me his code, expecting me to finish what he started.

It took me, the computer science professor, another five hours to finish what Golan, the art professor, had started. Golan is actually a much better programmer than I will ever be. But by the time I had finished I was hooked on Processing and could see the utility of writing code to produce a quilt design, even if I was ultimately going to use a traditional quilting process to make the quilt. I added lots of parameters to the program and implemented slider bars to control them — frequency, amplitude, offset, number of colors, etc. By fiddling with the slider bars I could try lots of design variants in a matter of minutes, and save copies of the designs I liked the best (annotated with the parameter values so they could be reproduced).

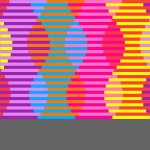
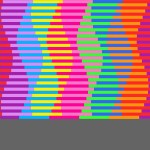
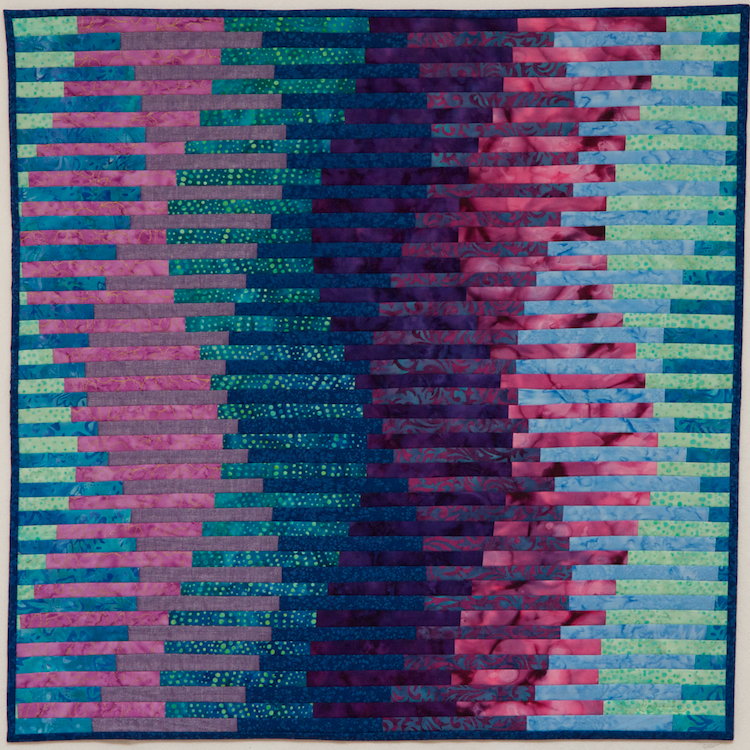
I started out with nice symmetrical intertwining sine waves forming footballs, slender vases, and squat snake pots where the sine waves overlap. Then I discovered new shapes that could be created by offsetting the sine waves in each panel different amounts. These asymmetrical shapes, like flames in the wind, were even more intriguing and dynamic than the snake pots. So I experimented with asymmetric design variants and eventually settled on a design to render in fabric.

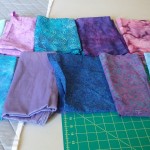
Next came fabric selection. I chose nine commercial batik fabrics and one shiny woven fabric from my stash. The visual texture of the batiks provides an added dimension beyond the flat solid-color image in the computer-generated design.

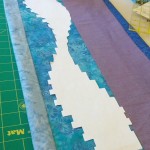
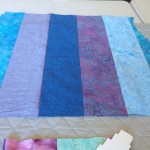
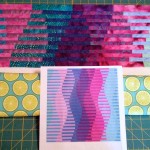
The next problem was figuring out how to construct this quilt. With two previous Interleave quilts under my belt, I was starting to get a feel for what techniques are most effective. However, this is the first quilt where I attempted interleaved curves. I considered piecing two panels with sine waves and slicing them — basically the process I used for the previous two Interleave quilts, but without any curves. But curved piecing can be tricky, and it occurred to me that this quilt could be created entirely from straight lines. My approach was to cut strips of fabric a little bigger than the width of the colored bands, and a little taller than the height of the quilt. I sewed them together into two tubes with five bands each. I then created a full-scale paper template for the sine waves and used it to cut open the tubes in a stair-step sine wave pattern. Then the tubes were ready for slicing into one-inch strips and sewing to the quilt batting and backing. This time I prepared the backing with half-inch marks, carefully aligned, to make it easier to align and sew the strips. I used Fairfield Soft Touch Cotton Batting as I had in Interleave #2.

With the backing properly marked, the sewing went fairly quickly. It was exciting to watch the design emerge one row at a time.

I think the end result is quite striking. My first foray into writing code to aid my design process was successful. I don’t think I will use this approach for every quilt from now on, but I am eager to try it with some other ideas on the Interleave theme.

Interleave #3: Waveforms, 2013
24.5″x24.5″ machine pieced and quilted cotton fabric