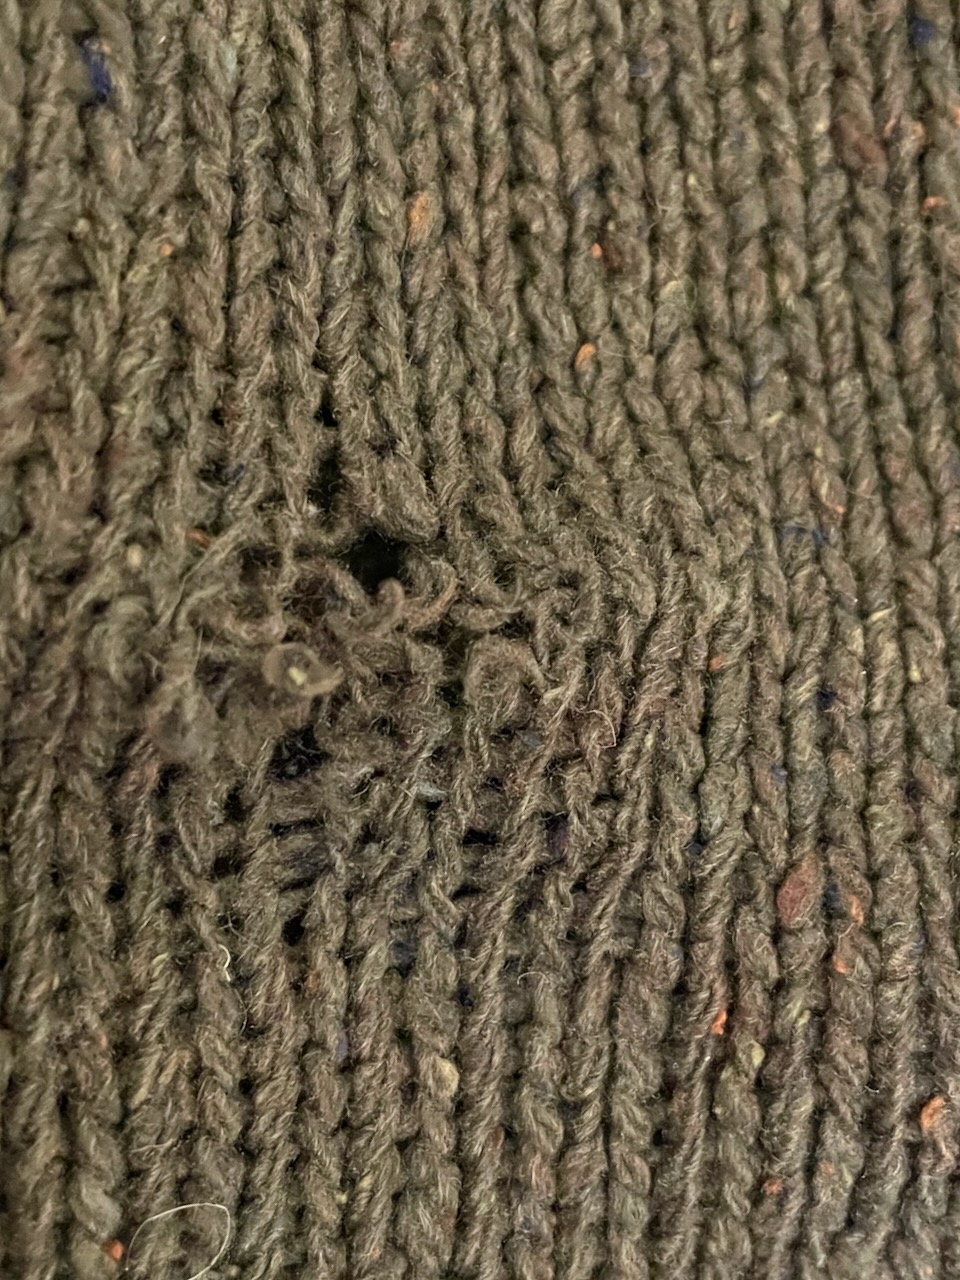
My daughter came home with a hole in the elbow of her favorite wool thrifted sweater and asked me to fix it. I wasn’t very successful with my first and only knitting project back in high school and haven’t tried knitting anything since, but I understand the basic principles involved. I’ve also never darned anything before. The easy thing would have been to just use my sewing skills and sew the hole closed, leaving a bit of a “scar.” I didn’t know a darn thing about darning, but gosh darn it, how hard could it be?
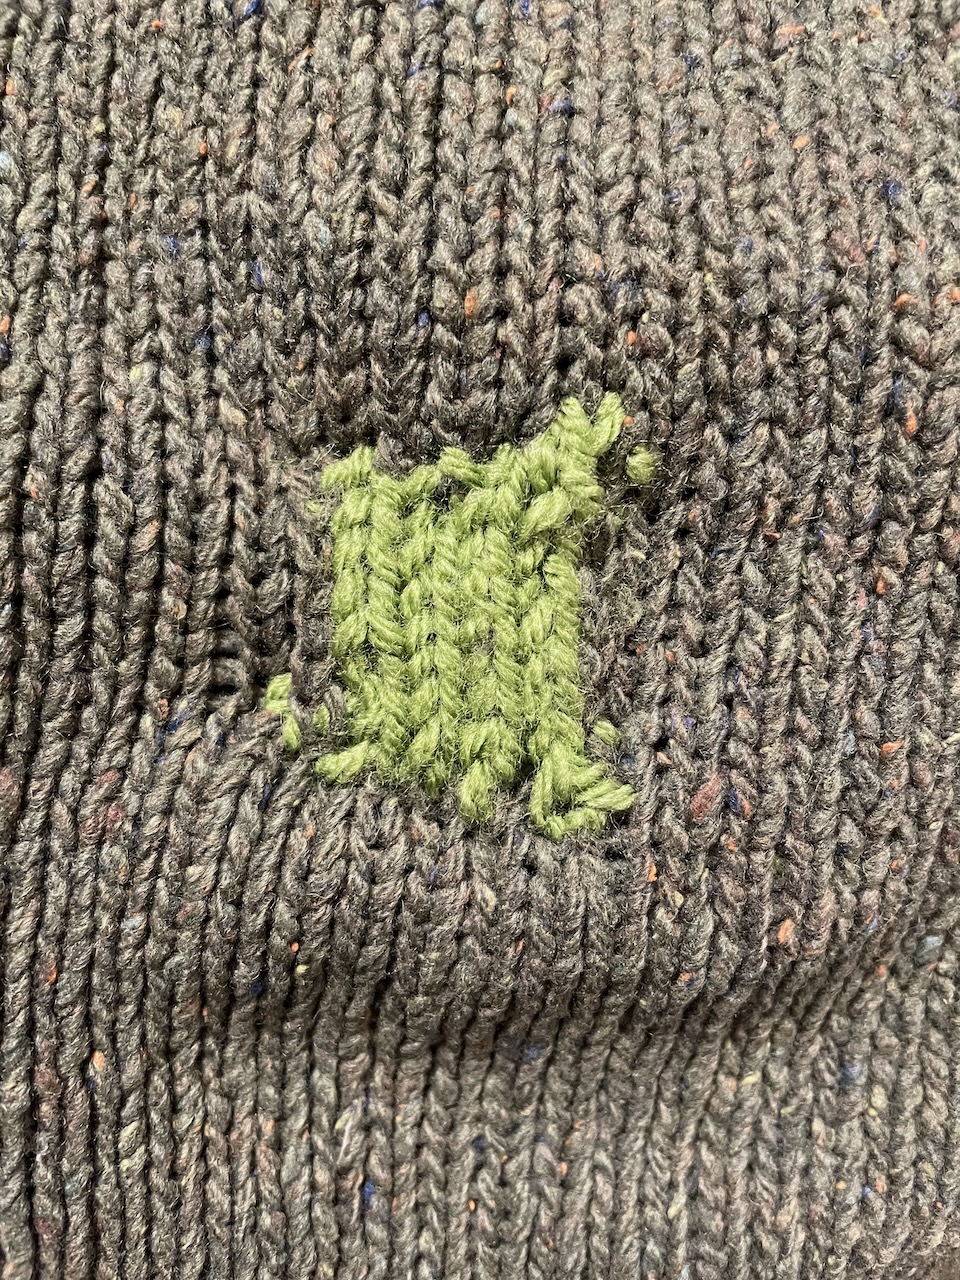
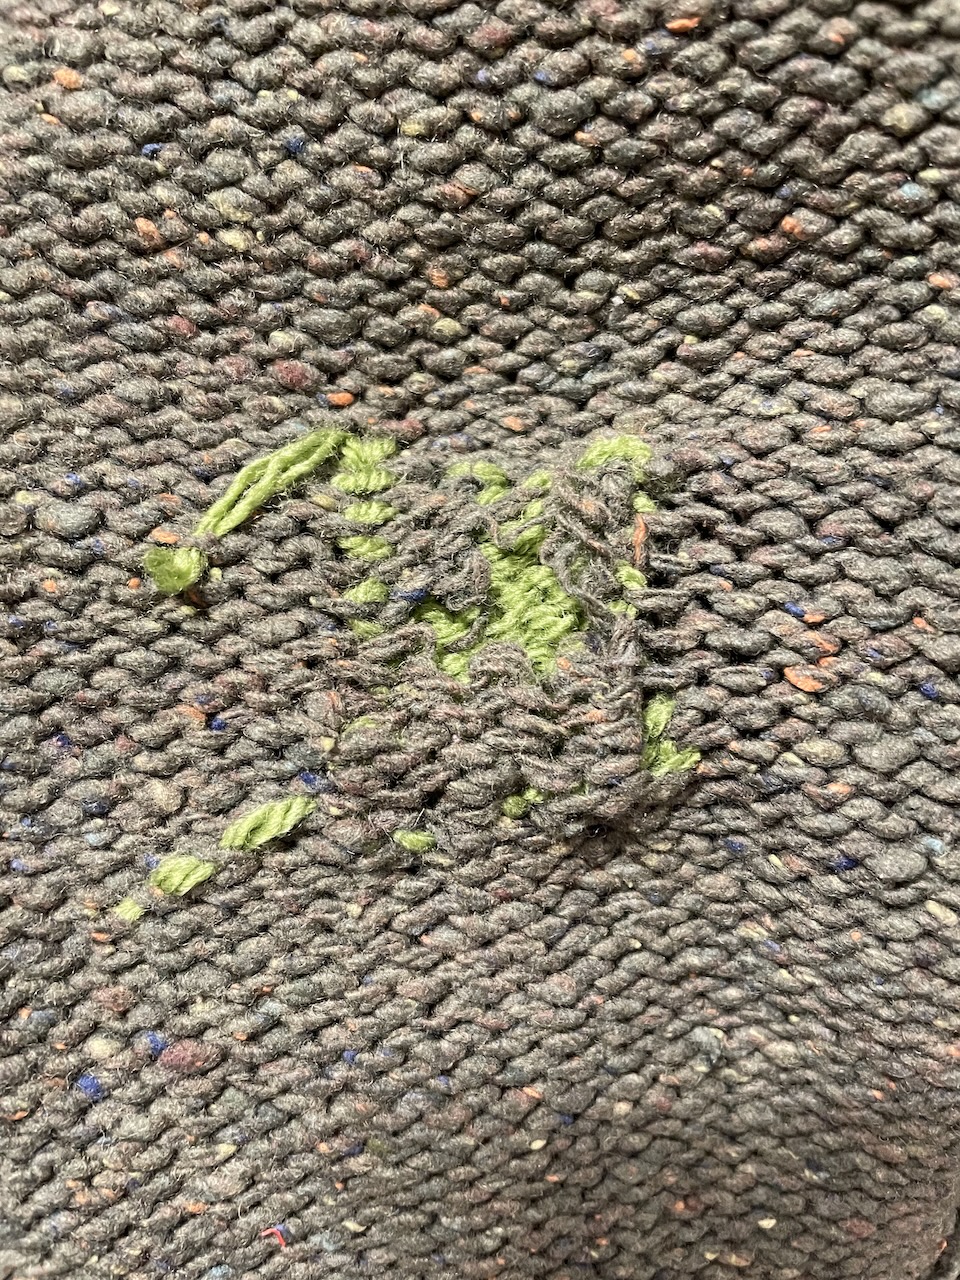
I only had blue, pink, and purple yarn on hand so I “borrowed” some green yarn from a friend. I didn’t really match but my daughter deemed it close enough.
I checked with the Internet and discovered that the technique I should use is called “Swiss darning” for repair, which replicates the damaged knitting stitches. An alternative approach is to fill in the missing stitches with weaving, but Swiss darning looks much nicer. I found some online tutorials that showed how to do this using thread to provide a vertical scaffolding for the stitches. And then I found this video that offered an alternative approach that looked completely magical: https://www.reddit.com/r/oddlysatisfying/comments/17gmbmd/mending_a_sweater/ (watch the 1 minute 25 second video it is amazing!) I decided to try it. It took me closer to half an hour and I did rewatch the video several times. I didn’t have exactly the right colored thread, but with a latch hook and a yarn needle I achieved something I am darn proud of on my first try! My daughter was pretty happy with it too.
I’ve collected a few Boo & Lu PDF sewing patterns but had not gotten around to sewing any of them until now. I’ve been thinking about sewing up the Onyx blazer since it came out because it has princess seams for nice shaping, can be made in either knit or woven fabrics, and it is collarless. I have a closet full of blazers with collars, but over the past few years have found that blazer collars are increasingly uncomfortable on the back of my neck so I’m looking to expand my collection of collarless blazers, which it seems are harder to find (both ready made and in patterns). The Onyx also has several options, including a hip-length version with optional pockets, a peplum version, a tulip-bottom version, and a cropped version. I may eventually try them all. The pattern also includes options for bows on the back of the blazer. While they are cute, I am less likely to add them to a blazer for me to wear. There is a kid’s version of this pattern and I think the bows would be super cute on a blazer for a child.
I started with the tulip version since it looked like a style I would likely wear a lot and it looked like I had enough leftover black ponte fabric from a pair of pants to make it. It has a lot of pieces, but they are all fairly small, so I was able to make good use of some of the scraps. This version requires only a little bit more than a yard of fabric (assuming ~58 inch width) in my size. I made a size 6, with a 1/2-inch small bust adjustment and sleeves shortened by 2 inches. (And it matches the pants — PE Walk Boldly — so now I have a suit!)
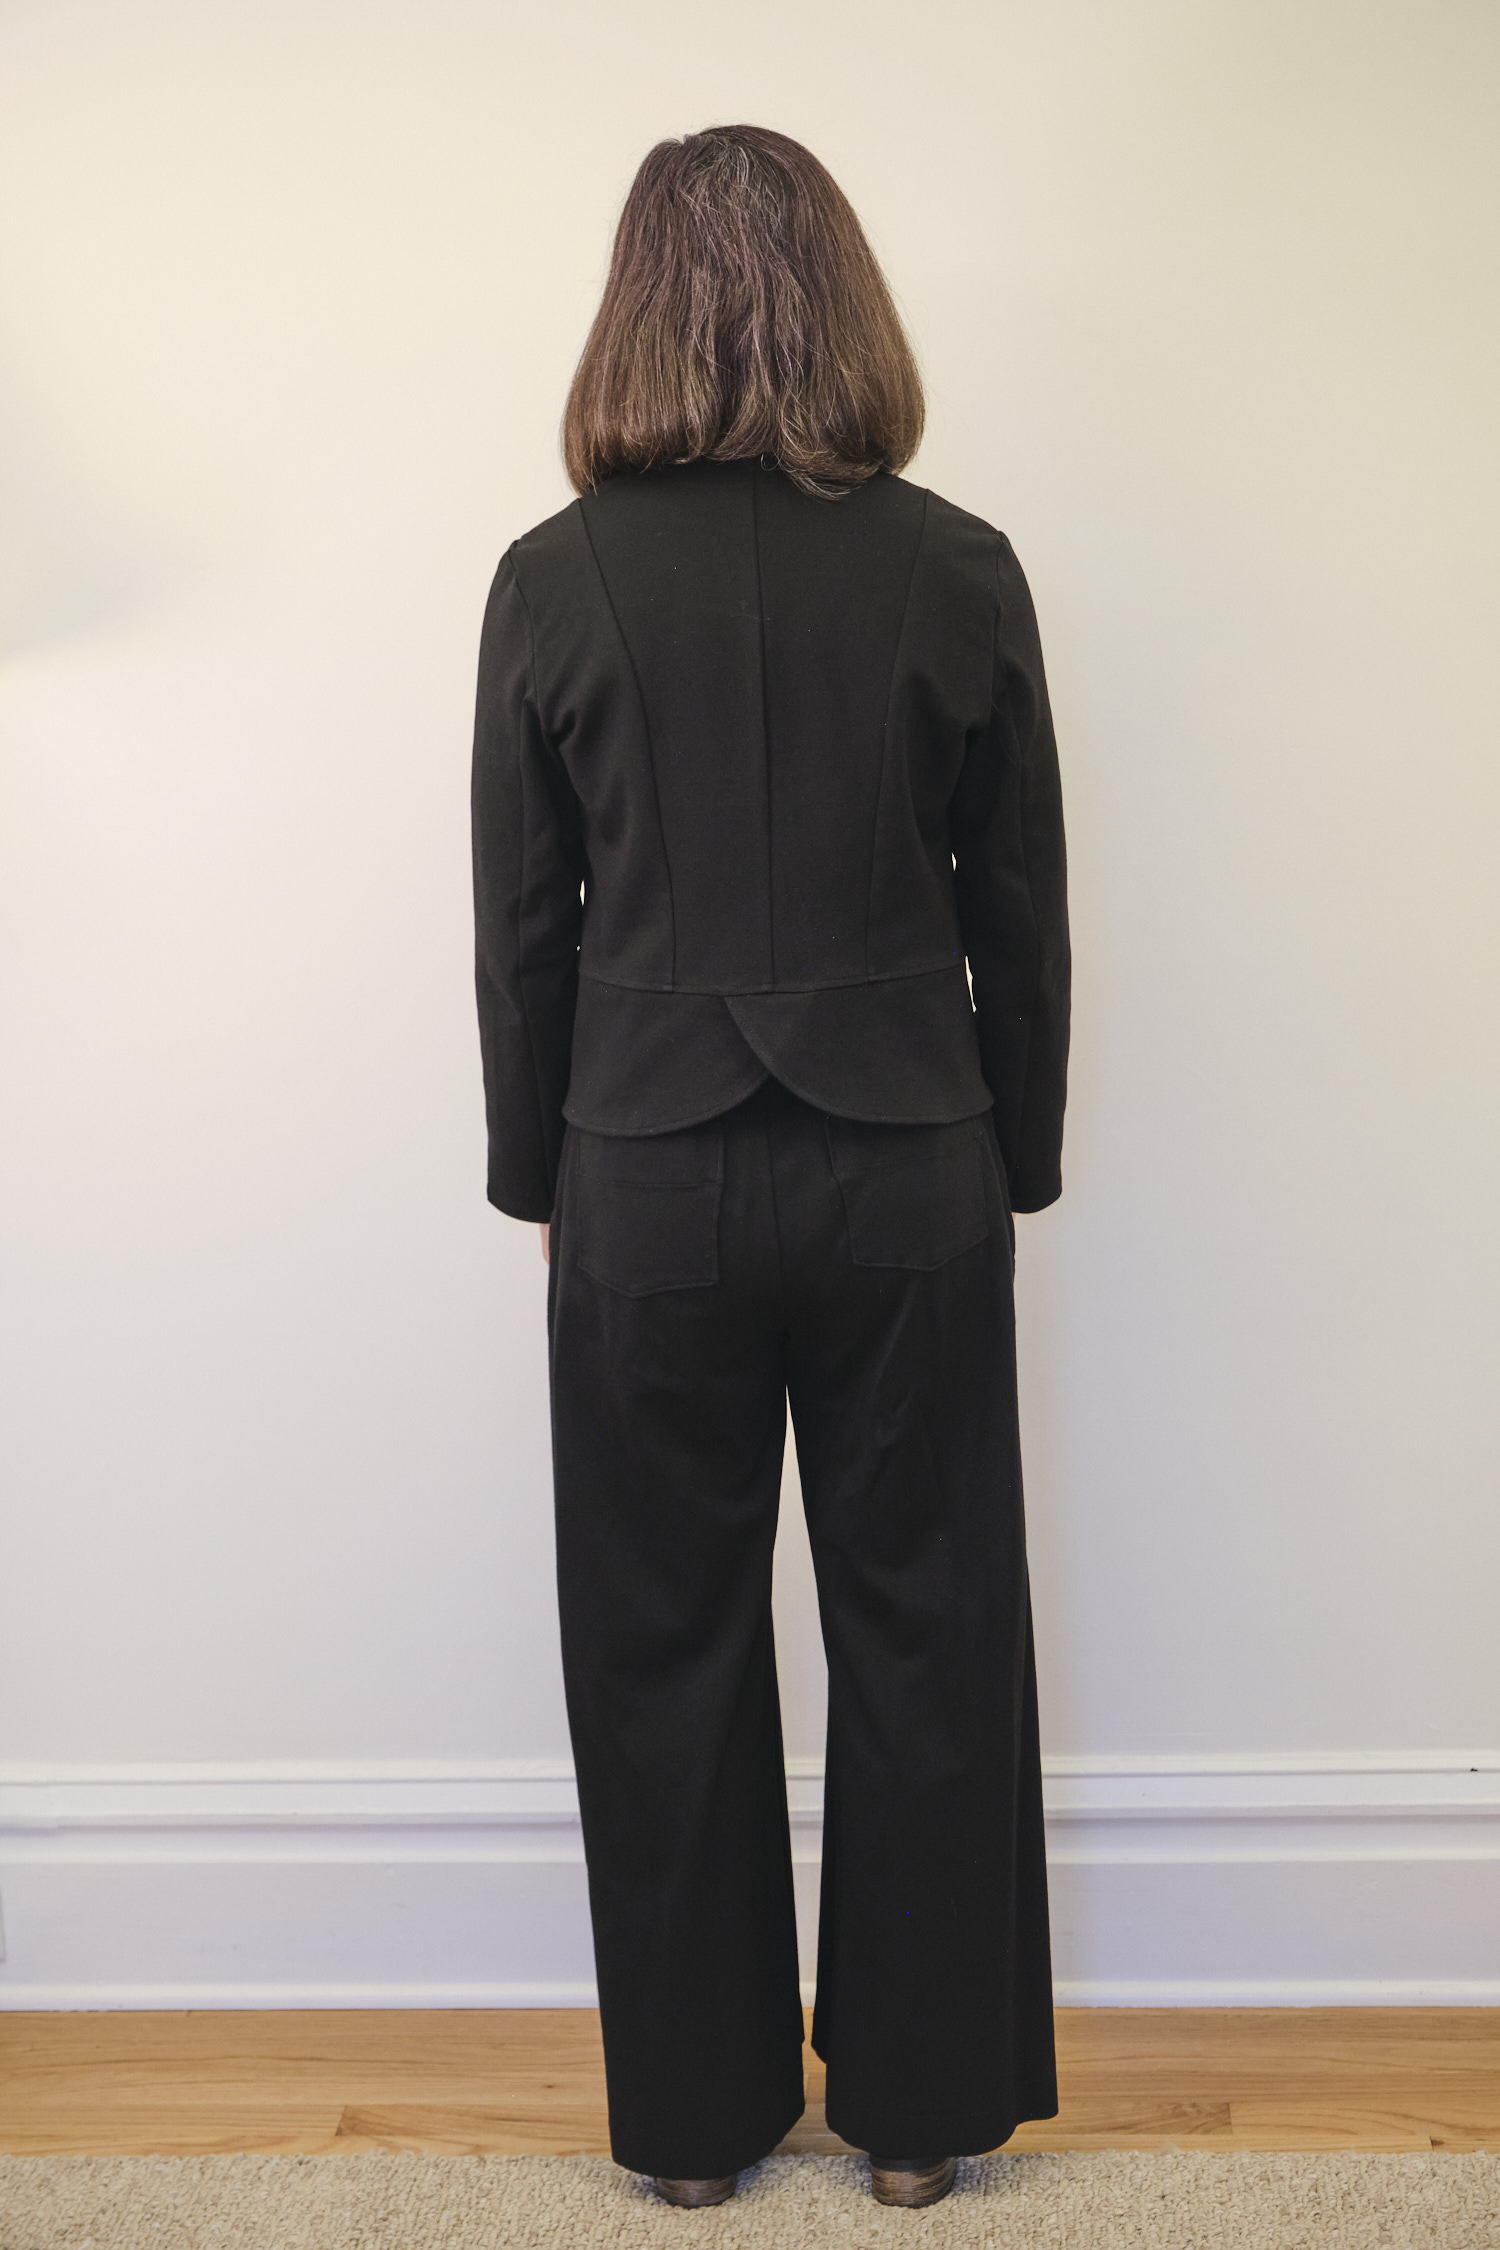
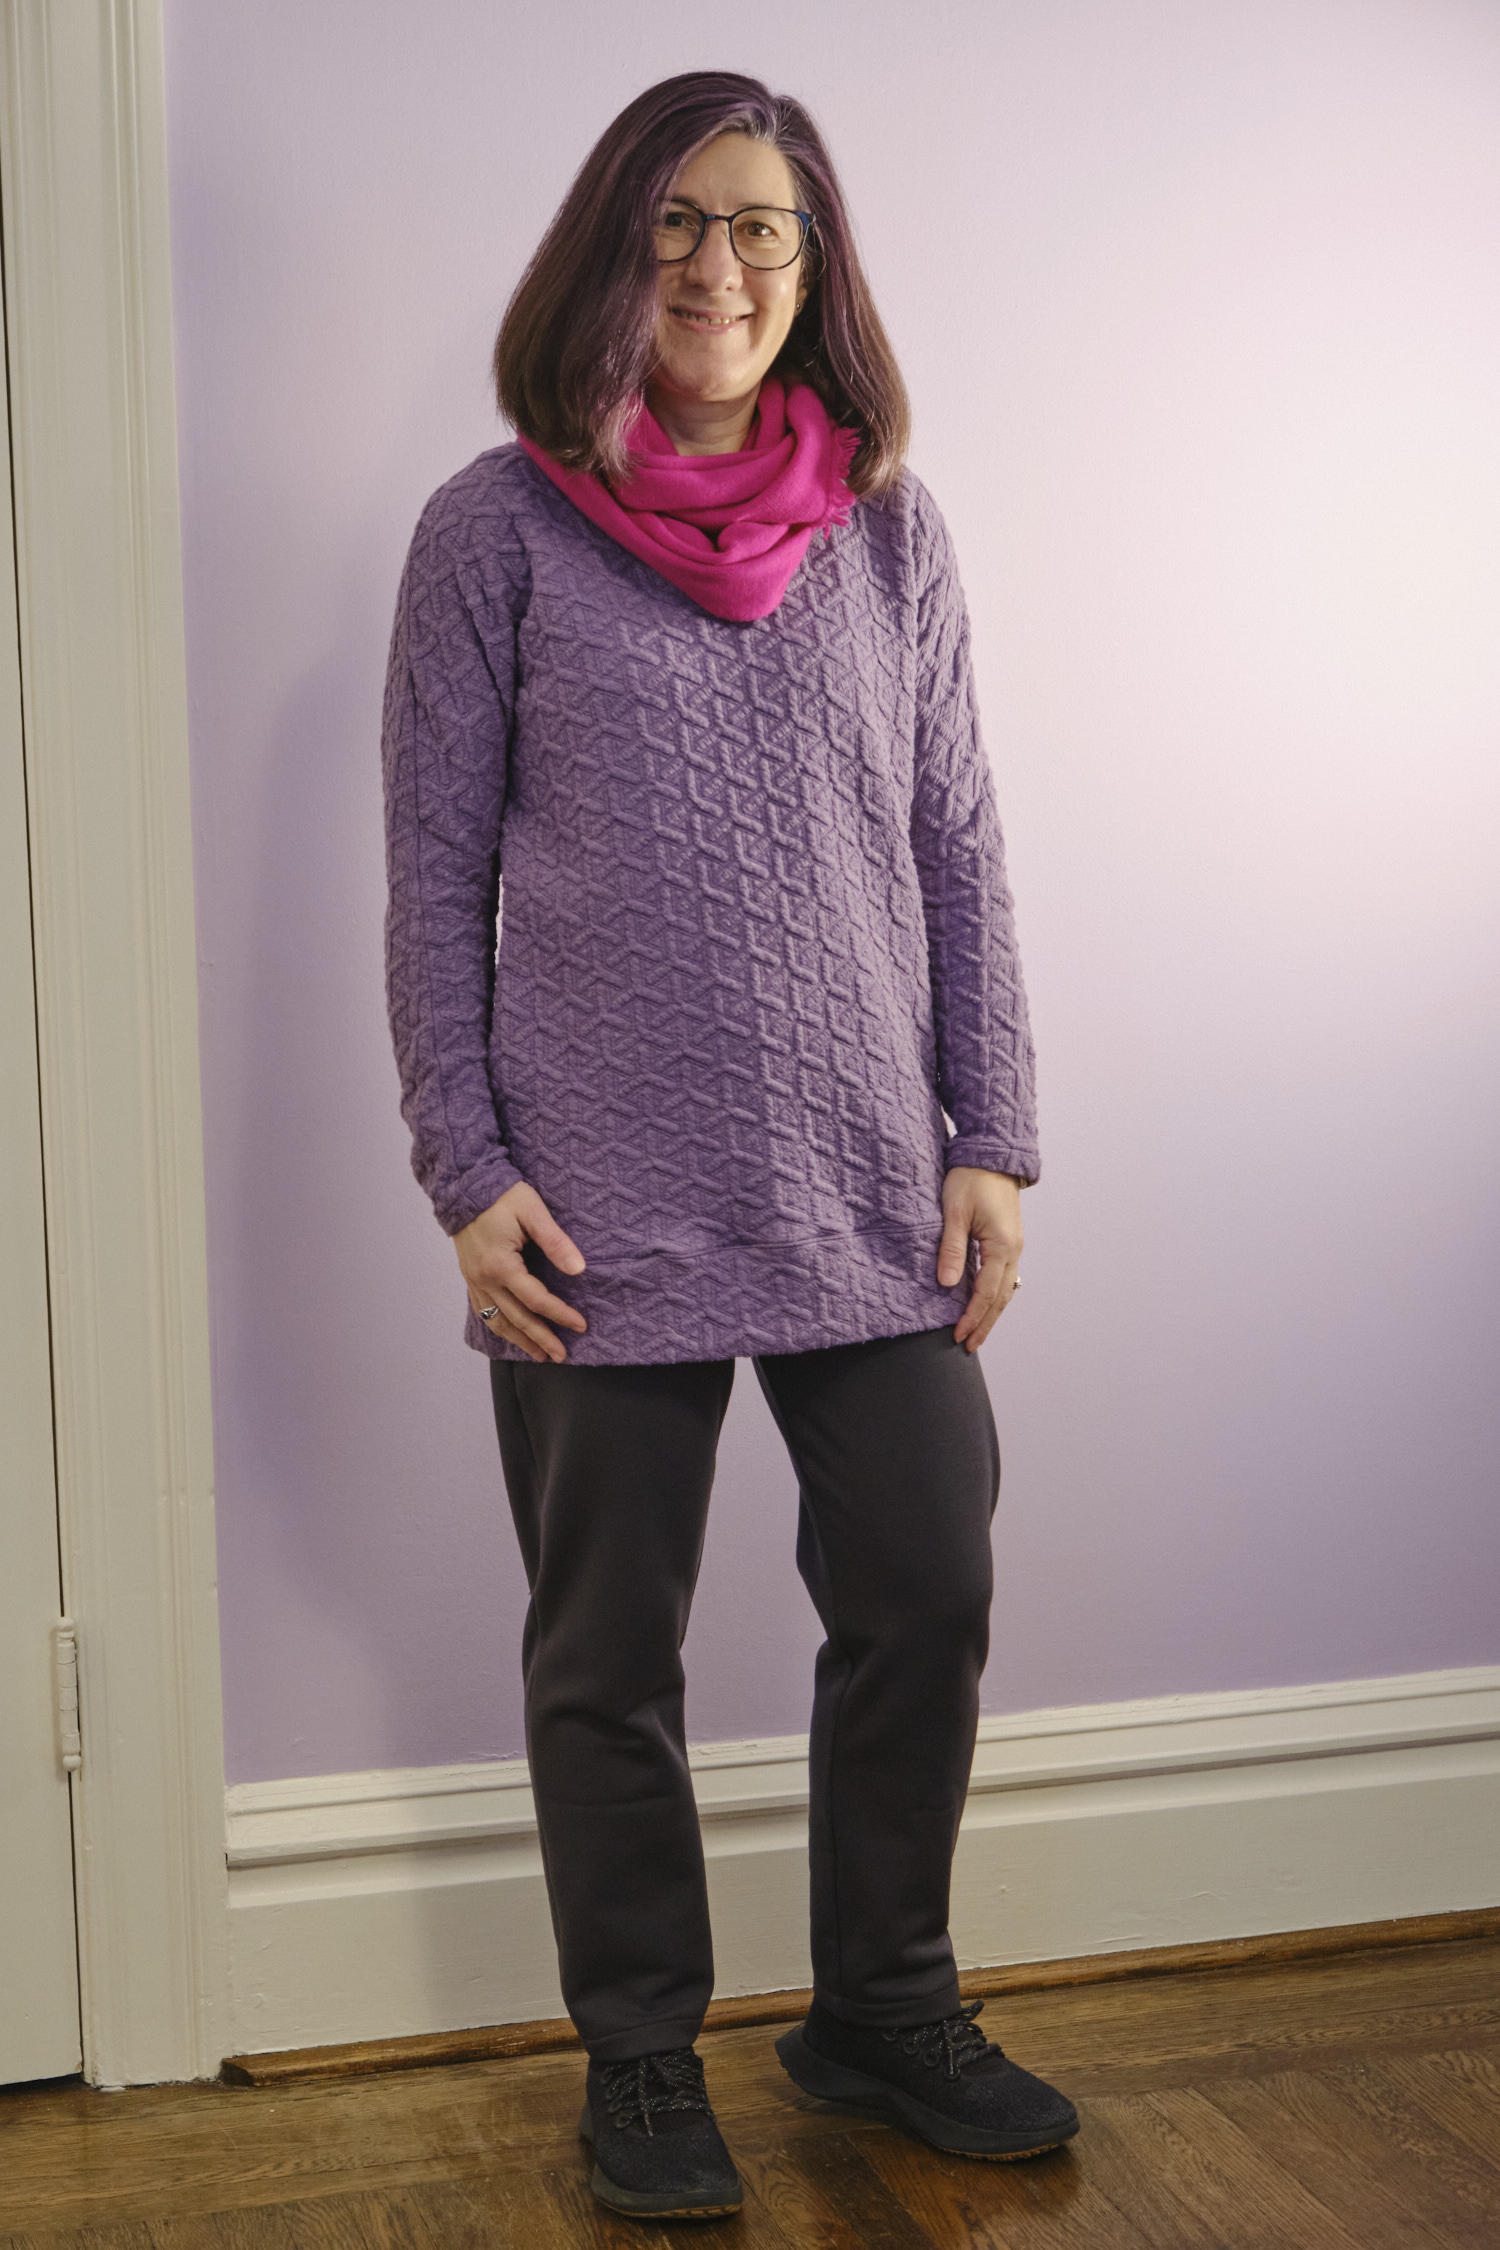
Boo & Lu Onyx blazer, size 6 with tulip bottom in black ponte, modelled with Sinclair Bondi top and PE Walk Boldly pants
The pattern includes a lot of instructions and notes, including suggestions for a full bust adjustment and small bust adjustment. In my case, I needed a small bust adjustment, something I had never attempted previously. The pattern has step-by-step instructions for the full bust adjustment, and then suggests doing the opposite for a small-bust adjustment. Most online tutorials take a similar approach. Bust adjustments are somewhat complicated as they involve making adjustments to a flat pattern piece designed to fit a round part of the body. Generally, you take paper pattern pieces and cut them apart and tape them back together. Since I am working with projected PDF files, I figured I should be able to do this electronically in Affinity Designer. I found an AD tutorial that explained how to do full bust adjustments. After watching the tutorial I attempted to follow the steps on my own, except the opposite. I realized that my AD skills are still fairly poor, but I learned quite a few things about using AD in the process — I should really watch more AD tutorials when I get a chance! I had trouble getting my head around how to execute this adjustment in the opposite direction, but after a lot of puzzling, I eventually figured it out and completed an adjustment that seems to have worked out ok.
I projected my pattern pieces with the adjustment and cut out the Onyx tulip pattern with no other adjustments. I knew the sleeves would be too long (they always are unless the pattern comes in petite sizes) but decided to cut the full length and adjust the sleeves on the finished garment after I tried it on.
The pattern has 3/8-inch seam allowances and offers five options for finishing the seam allowances. I chose the easiest, which was to just surge all the seams with a 1/4 seam allowance, trimming off 1/8-inch as I went. Since ponte is a knit, this works well and with all black fabric and black thread, it looks fairly neat too, although of course not nearly as nice as a bound seam allowance. The main downside is that ponte is fairly thick fabric and it would have been nice to be able to press some of the seams open rather than having them pressed together to one side. I think if I make another Onyx in ponte or other heavy fabric I might take the time to serge all the edges (without trimming) that will be seamed and then sew the 3/8-inch seam allowance on my sewing machine. But I am somewhat of a lazy sewist, so then again I might not!
For the most part, the blazer went together fairly easily, but I struggled a bit with attaching the sleeves. The pattern has great instructions and everything is nicely marked, but I still somehow clipped everything together backward, but realized something was off before sewing. I eventually figured it out, clipped everything together properly, and basted it with my sewing machine. Then I serged it together, but made the mistake of starting and stopping at the shoulder, which made it more difficult to smooth out the shoulder line. Next time I will start and stop in the armpit — or maybe just do this on my sewing machine and skip the serging.
Another problem I ran into was one of the front princess seams not lying as smoothly as I wanted. At first I thought it was a pressing issue, but after pressing again I realized one of my seams actually had an unwanted dip in it — it was only off by about an eighth of an inch, but it was enough to cause a noticeable bump in the princess seam right in the middle of the bust line. I resewed about 3 inches of seam on the correct seam line and that fixed the problem.
The instructions noted that the facings might not stay smoothly in place, and indeed mine did not. I tried their suggestion of fusing them in place with a few small pieces of fusible hem tape, and that did the trick. The interfacing I used on my facings was some leftovers from another project that I grabbed, and it was more of a medium weight than a lightweight interfacing. Next time I might try a lighter-weight interfacing.
Attaching the tulip pieces was fairly straightforward except for lining the corner of the tulip up with the front facing. Perhaps due to my heavy fabric and interfacing, I could not get the tulip corner aligned perfectly. I did try unpicking a few stitches at the bottom of the facing and clipping the corner, but it is not aligned as well as I would have liked. This is one downside of the tulip version that should not be an issue in the cropped or hip-length version of this pattern.
I made good use of several feet on my Bernina sewing machine. The patchwork foot with guide made the quarter-inch top stitching around the edges very easy. I also used my darning foot to stitch in the ditch to hold the facings down and my edgestitch foot for the sleeve hems.
Overall, I liked the instructions in the pattern and found the suggestions and photos helpful. I did find a couple of things that are probably errors. On page 11 the finished measurements for the four variations appear to be mislabelled. The crop version has the longest length, but clearly it should be the shortest. Even accounting for that, my finished garment was about an inch shorter than the measurements would suggest. The other error is on page 71 where dark lines are drawn on a photo of the facing to show the raw edges finished with a serger. I believe the lines on the top of the neck facing should be on the bottom of the neck facing.
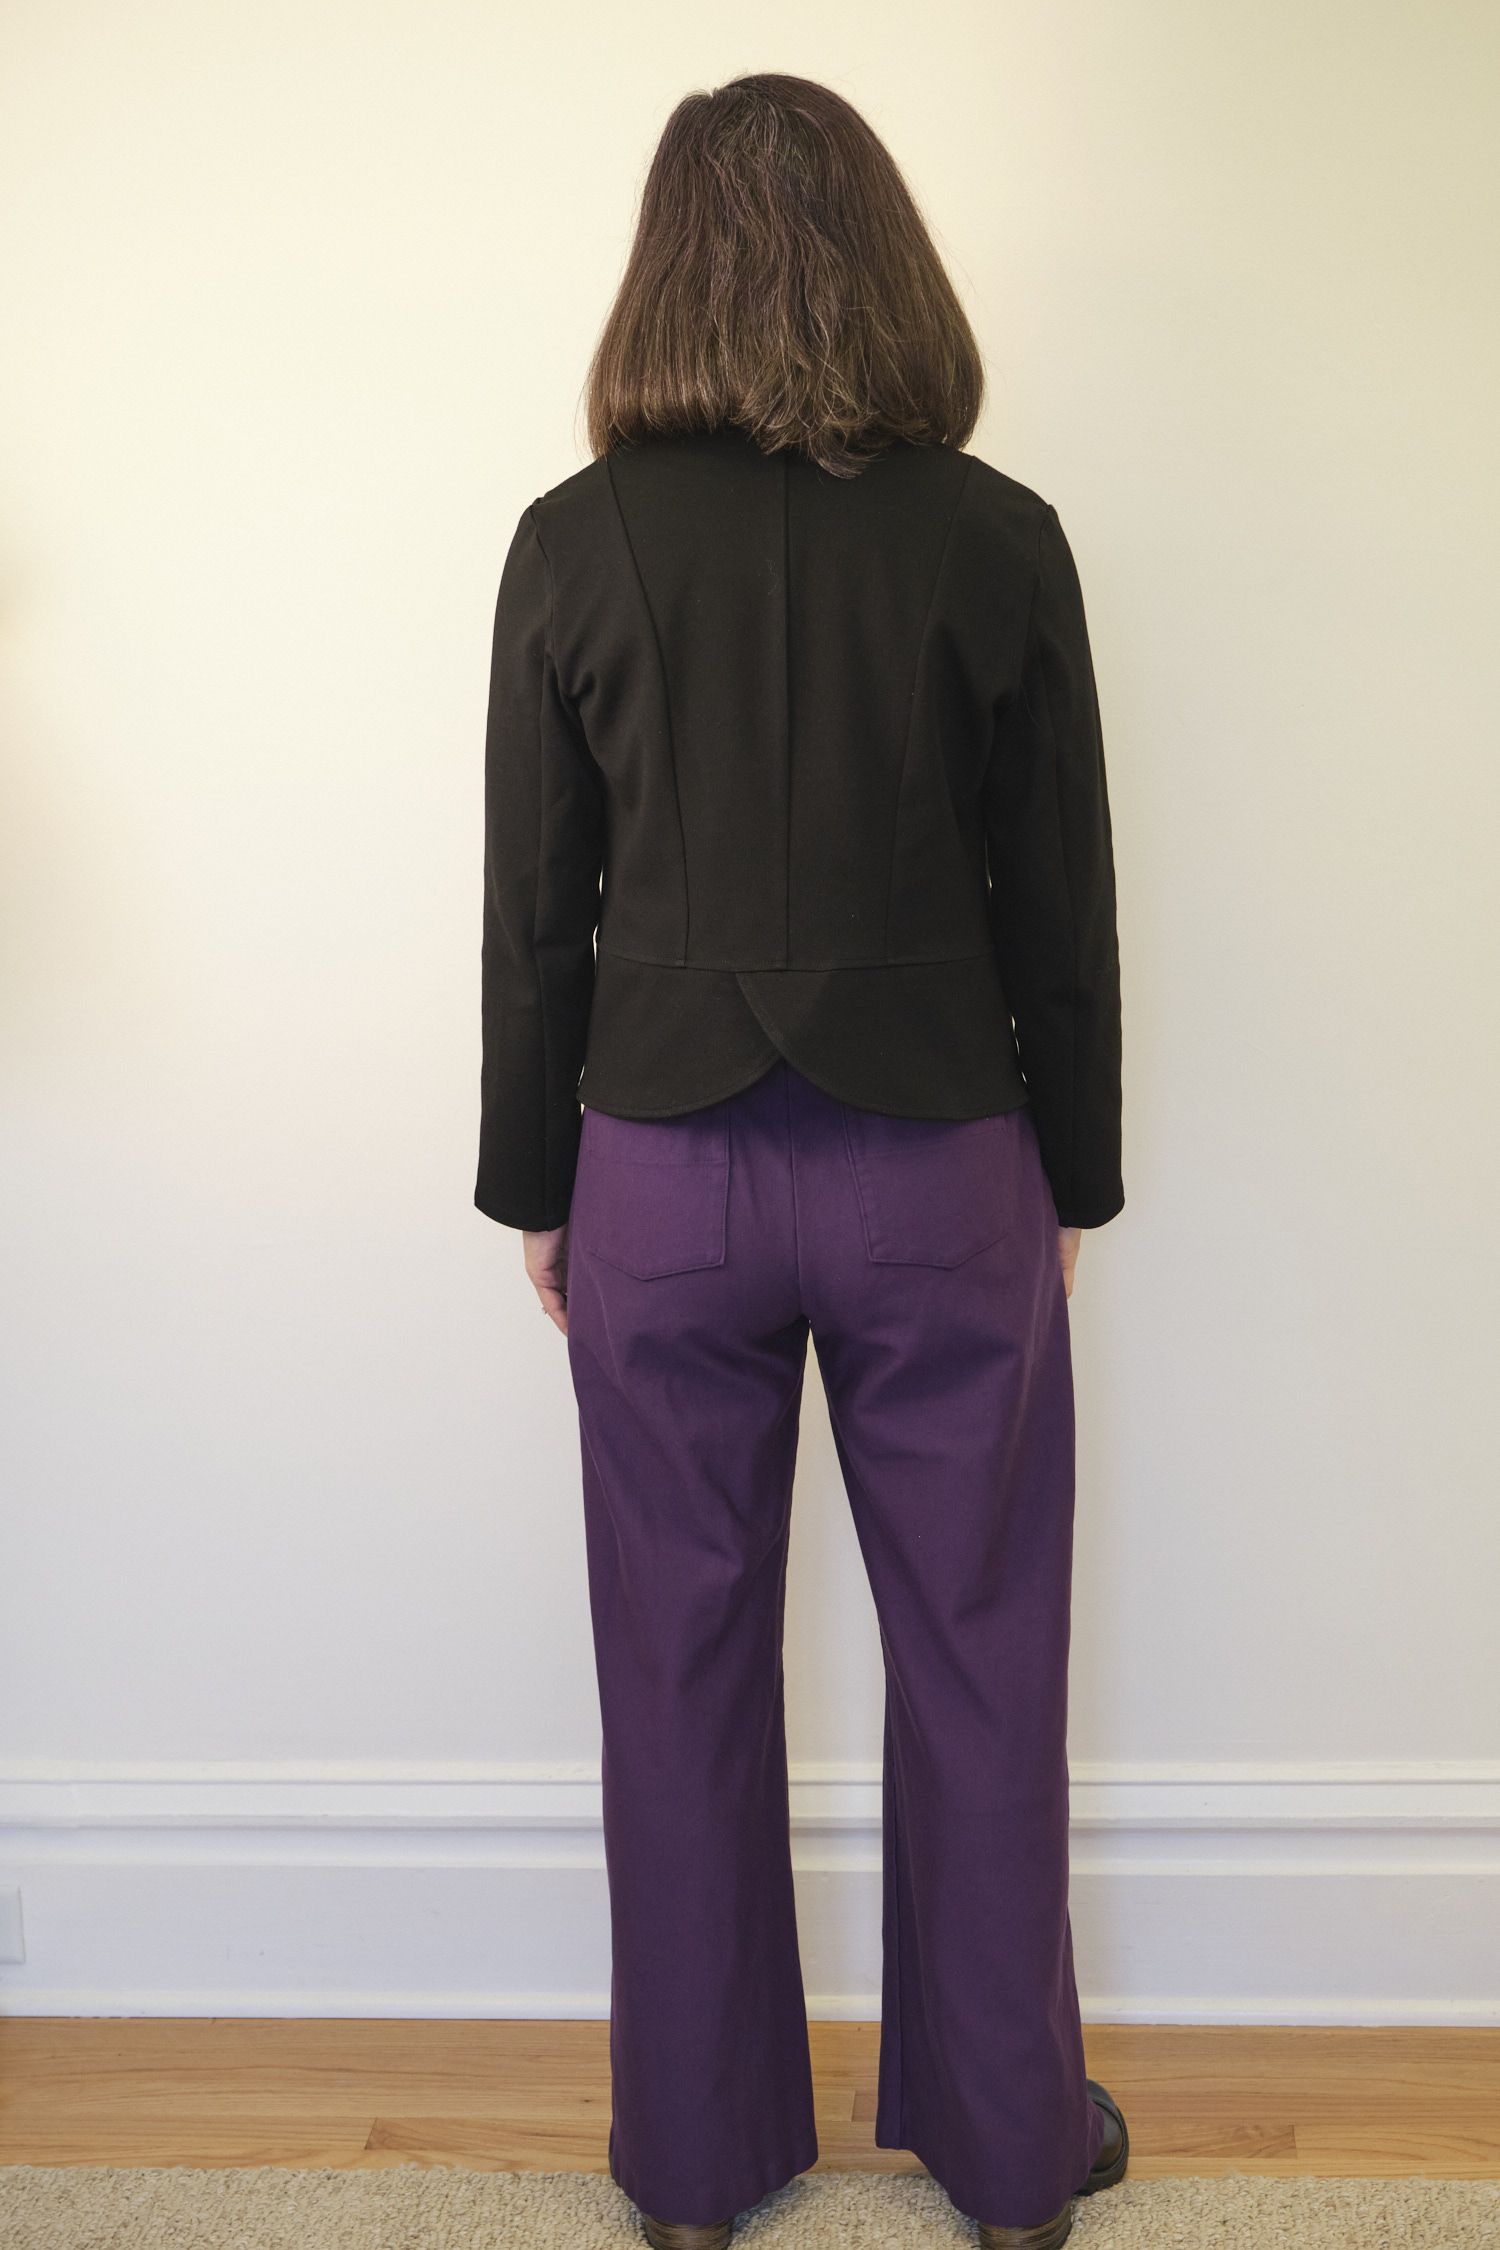
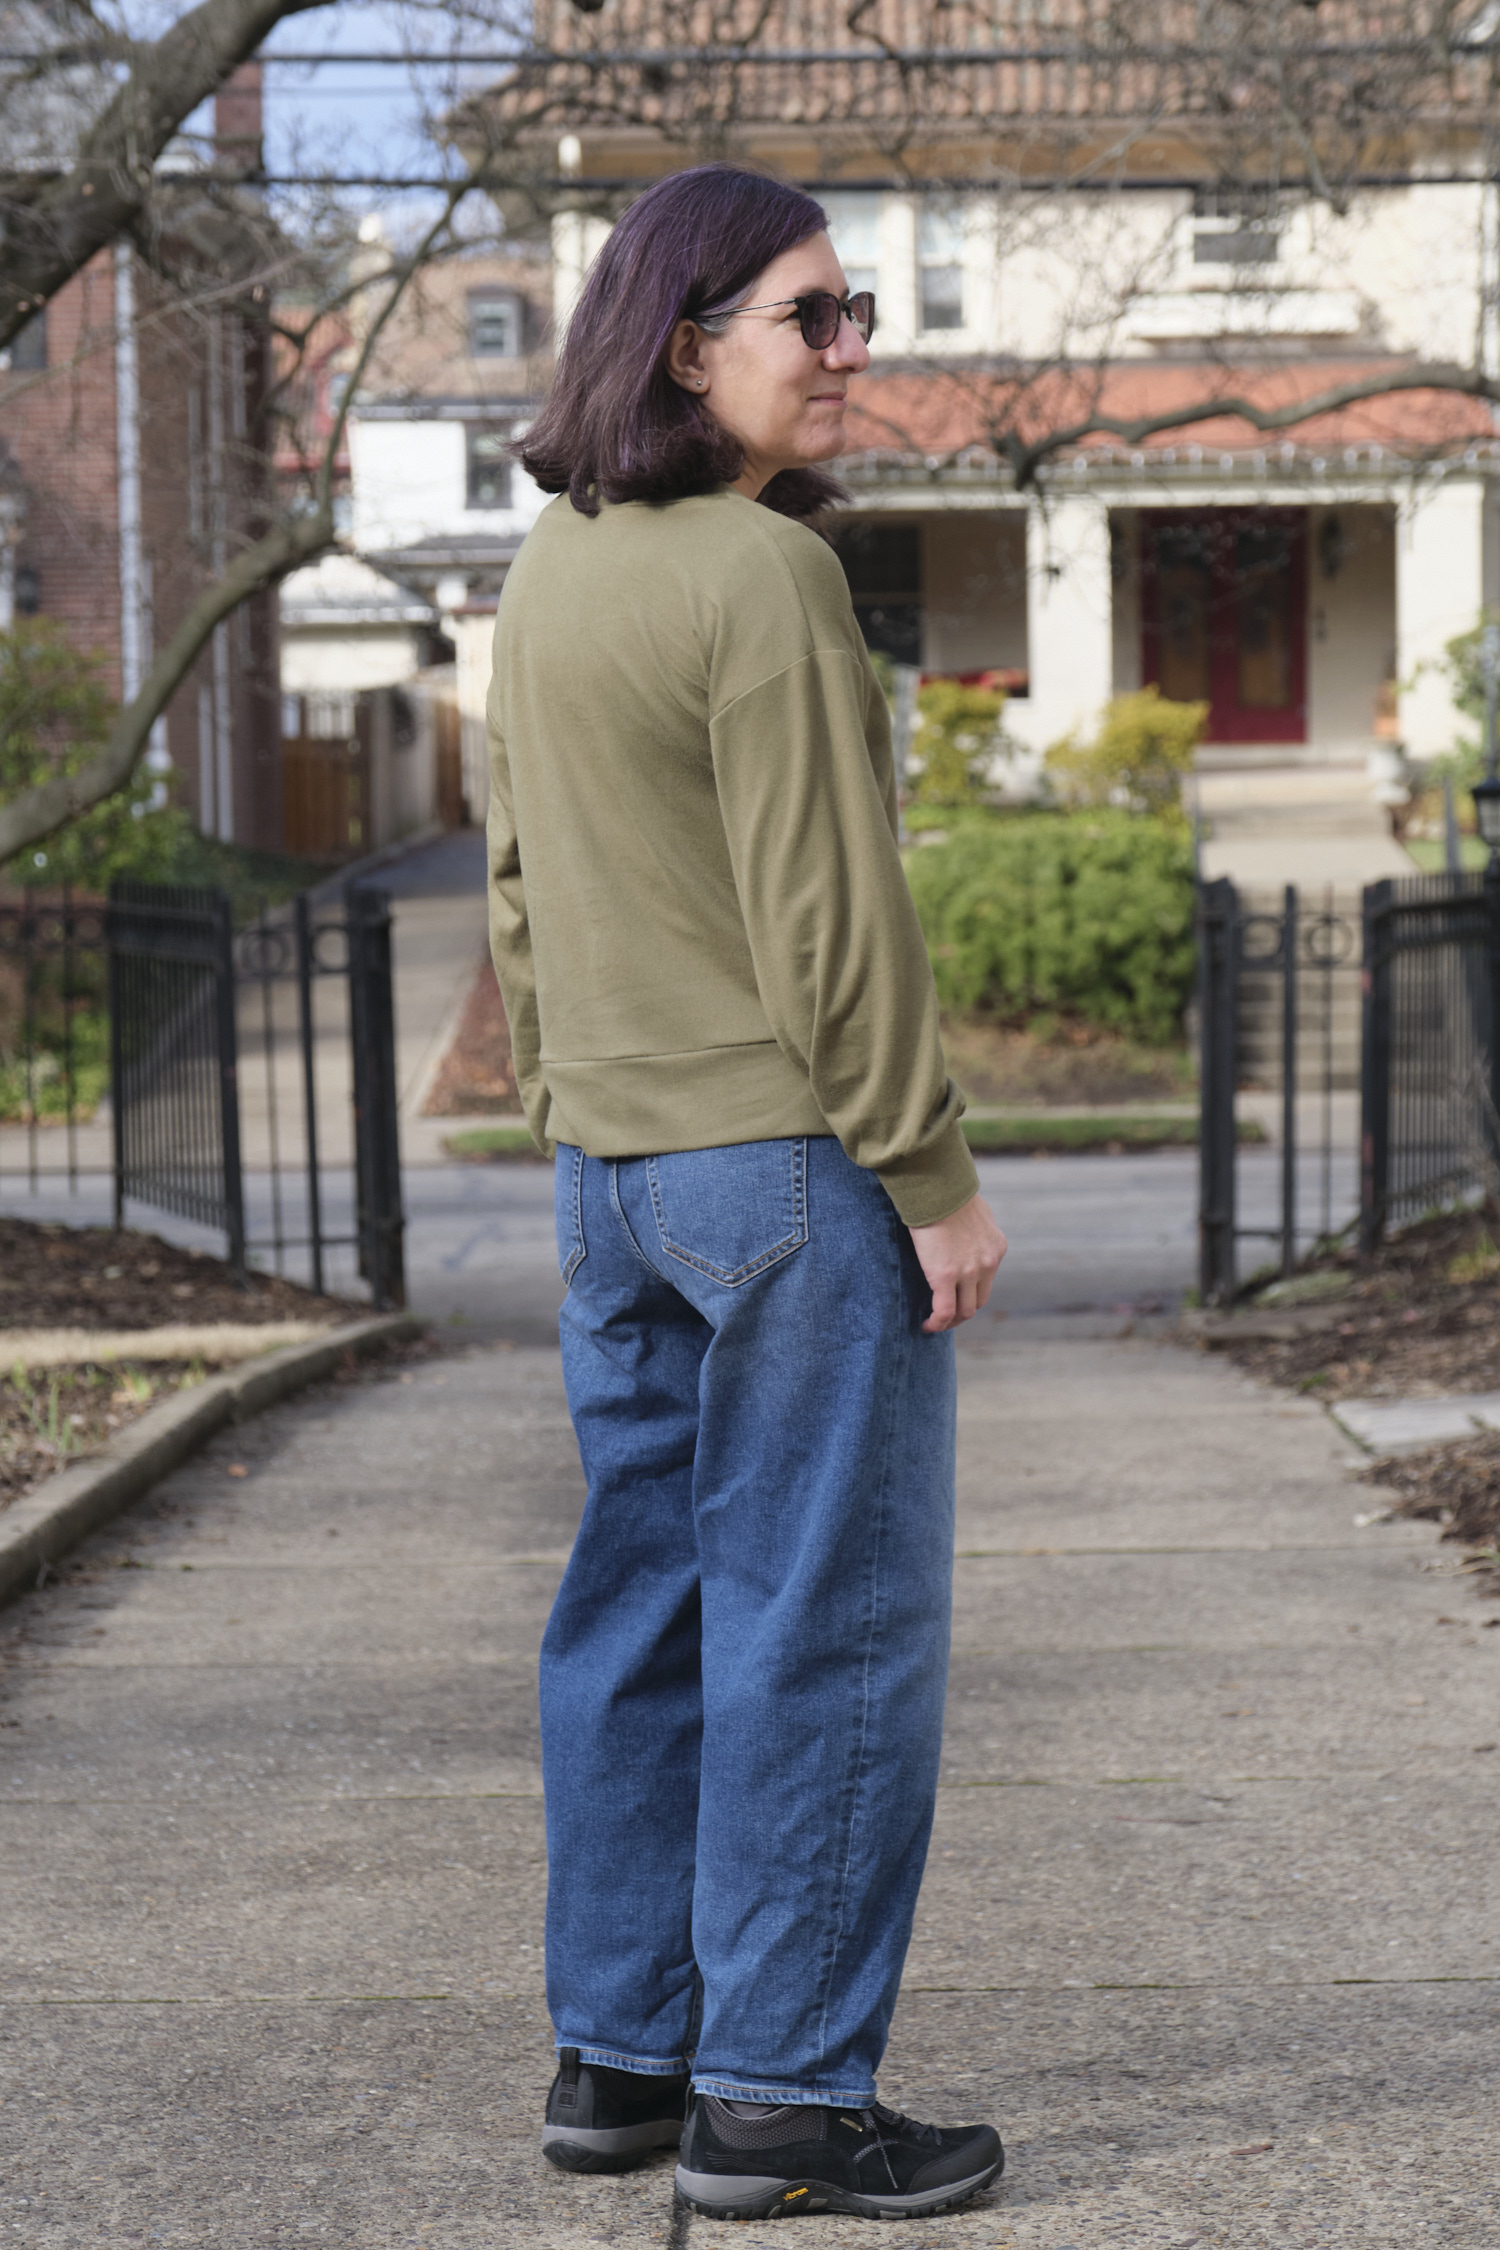
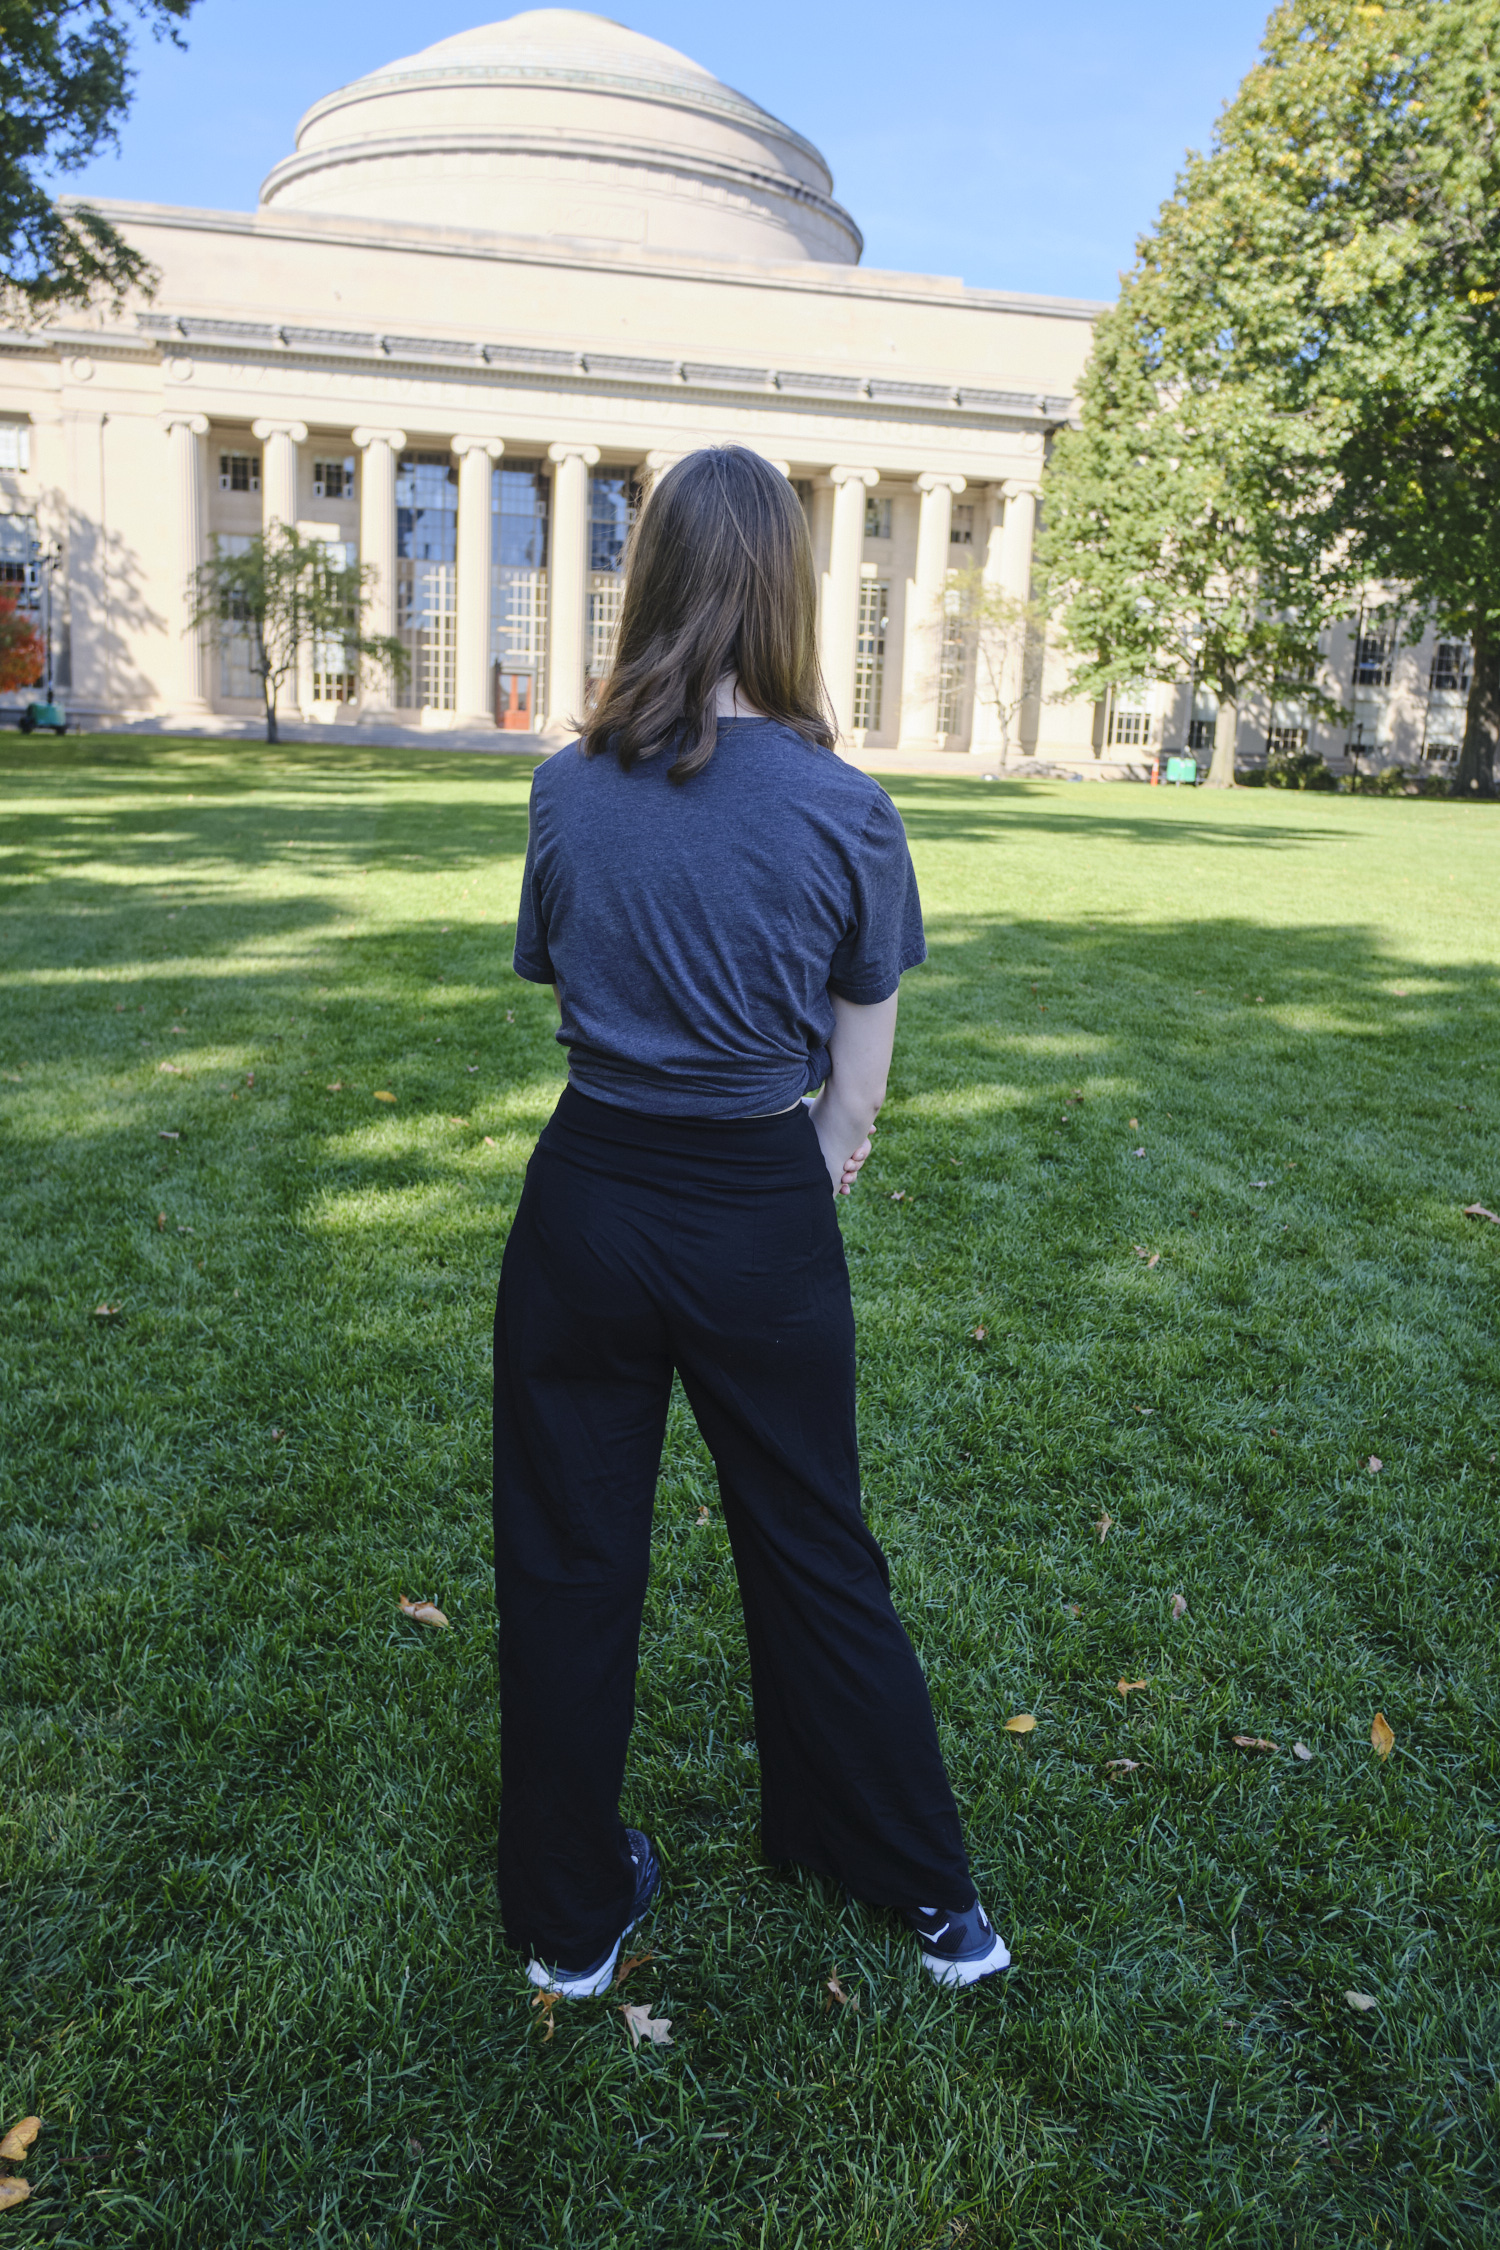
The blazer fits me well and goes well with both pants and dresses. It has a really nice tailored look, but is less work than a fully lined tailored blazer. I expect I will wear it a lot. When I took photos of the back (see below with PE Walk Boldly pants in black and PE Urban Wide Leg pants in purple, Sinclair Bondi top) I did notice some drag lines beneath the back shoulders. After pondering the cause, I believe it is likely a shoulder slope issue so I plan to try a muslin with a sloped shoulder adjustment and see if it helps before I make another one.
I’m looking forward to making more Onyx blazers. I’m planning out a ponte suit in a bright color with matching wide-leg pants. I’ve already worked out how to cut the blazer and the pants out together from 3 yards of fabric. I love the length on the tulip version, but would also like to try the hip-length with pockets (I will certainly have to shorten it though). The cropped length is fairly short, but I might make it specifically to wear with a dress, and I might round the front corner more similar to the tulip version. The peplum version is also cute, although wonder if it will be too poofy around my waist. I could also see lengthening the cropped version to be the same length as the tulip version…. so many options!
(It’s too cold outside for outdoor photos now so will have to make due with indoor fashion shoots. I’ll try to improve the lighting though.)
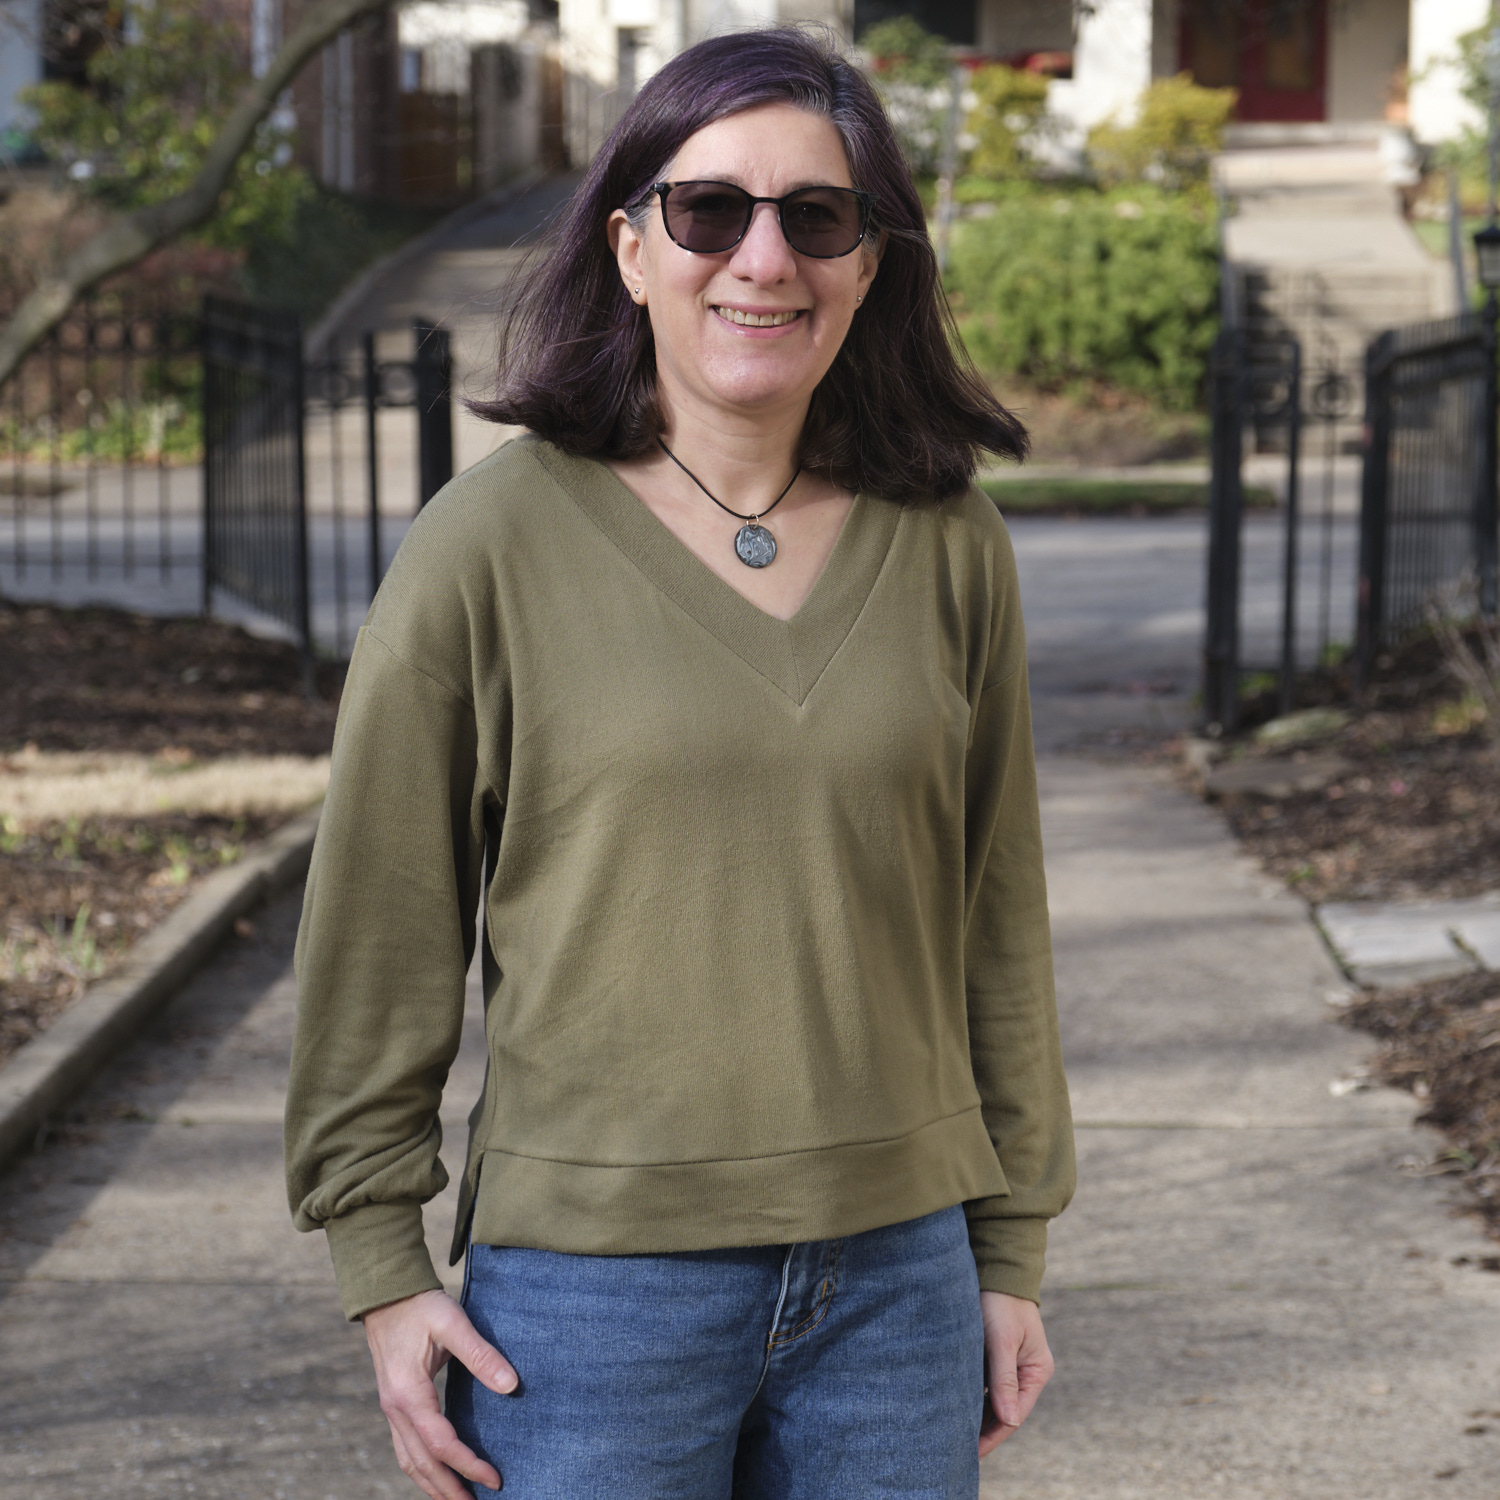
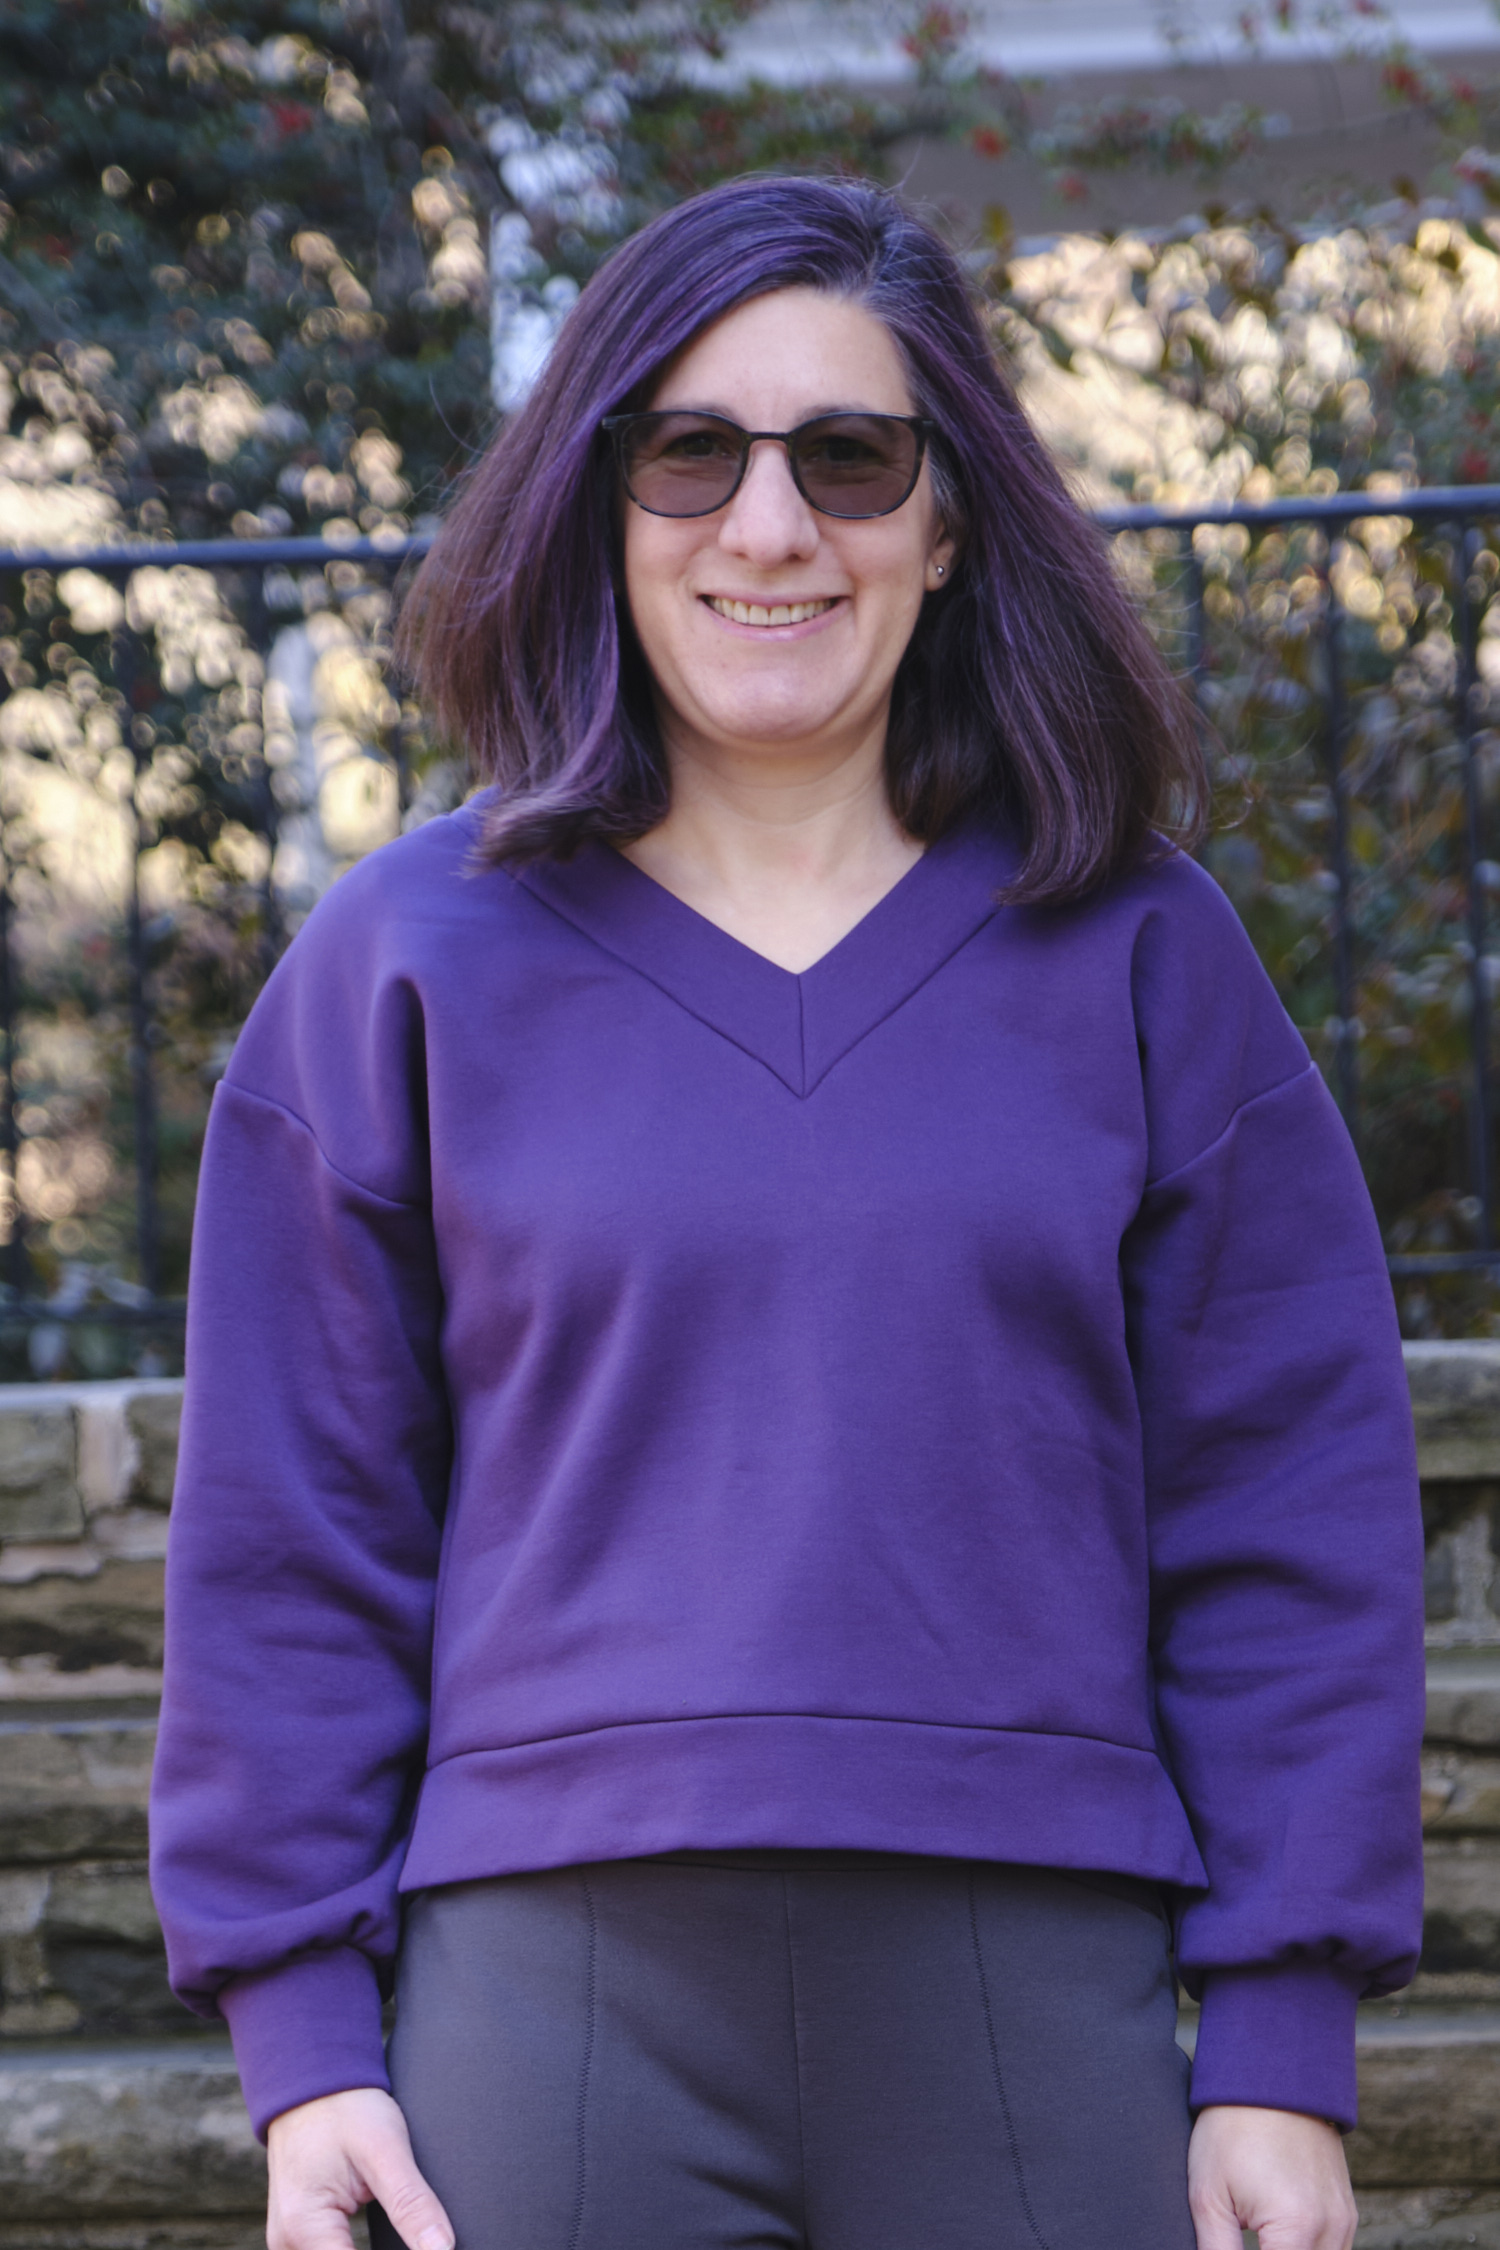
I was so pleased with my Pattern Emporium Sweet Cheeks cropped v-neck sweater in sweatshirt fleece that I decided to make another one in brushed hacci. This time I used the peat moss color of the versailles brushed hacci sweater knit from Surge Fabrics. This is the same polyester/spandex fabric I used previously for the scoop neck version in a different color. It is brushed on the inside so it is super soft and cuddly. Once again I sized down from an AU8 to an AU4 so it would be less oversized.
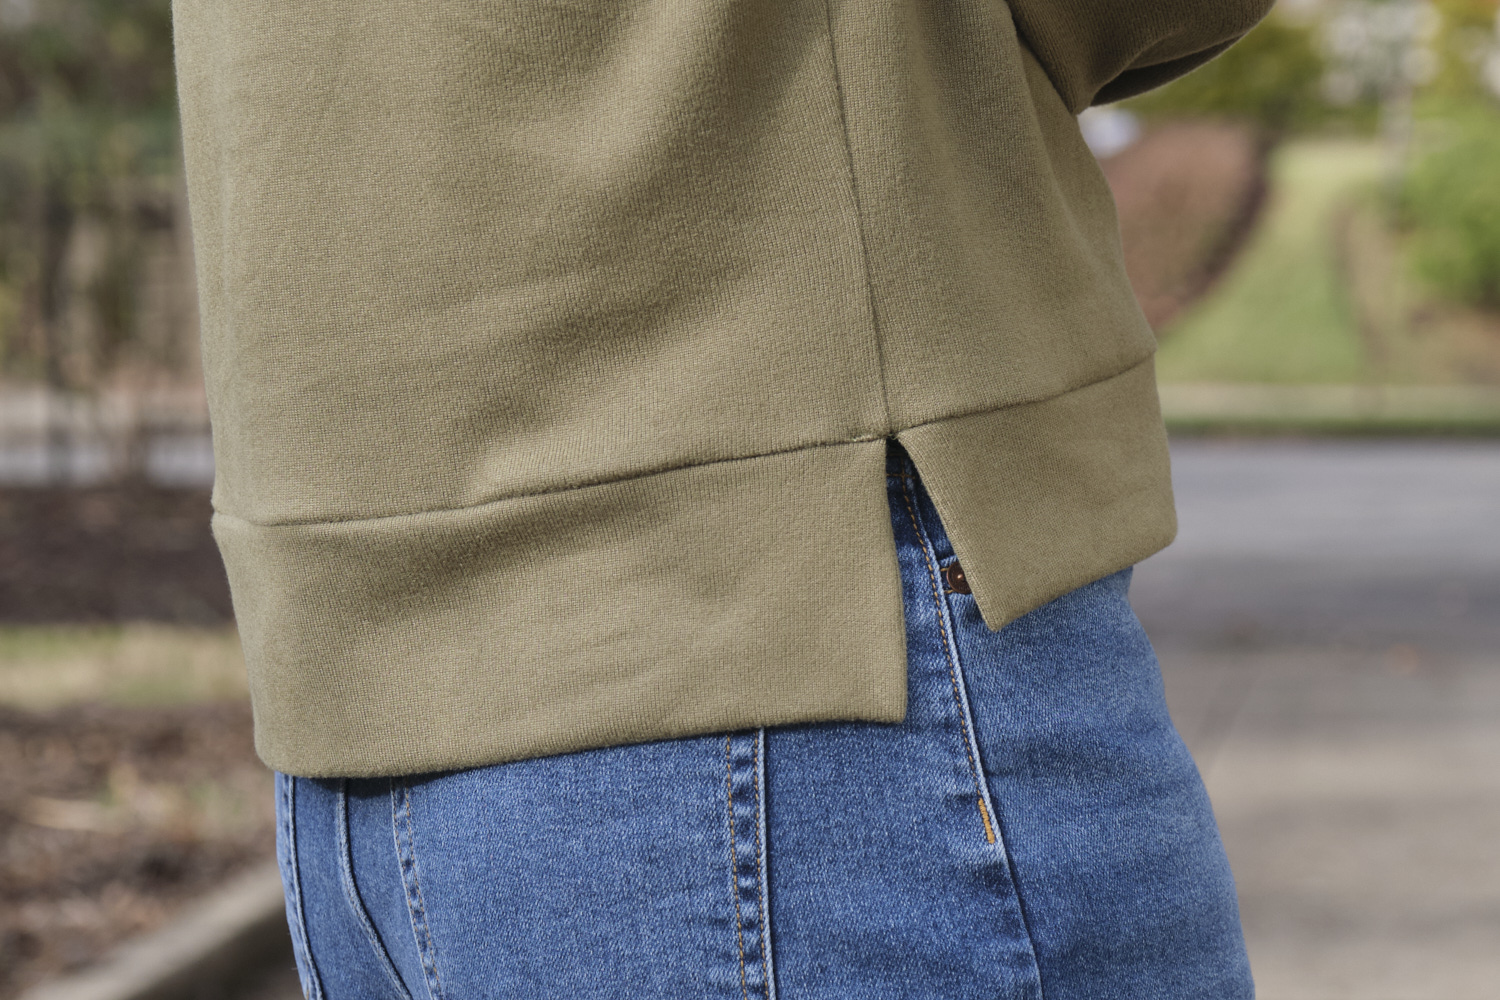
It was still a lot of work. I love the split hem band detail, but it takes some effort for proper alignment. The v-neck and the arm bands also take some time. That said, I did finish it all in one day yesterday (even with only limited use of my right hand after surgery) so it didn’t take that long and the instructions are very good.
One thing I like to do that isn’t in the instructions is to zigzag over the raw edges of the bands with a wide and shallow stitch before attaching them to keep the layers of fabric aligned and prevent them from curling under. It takes a little bit of time but saves having to unpick and redo when a layer slips out of place (which has happened to me multiple times on other projects). I’ve seen fabric glue recommended to do the same thing and I’ve tried it and found it doesn’t work as well for me as you have to wait for the glue to dry and on some fabrics it doesn’t seem to hold well.
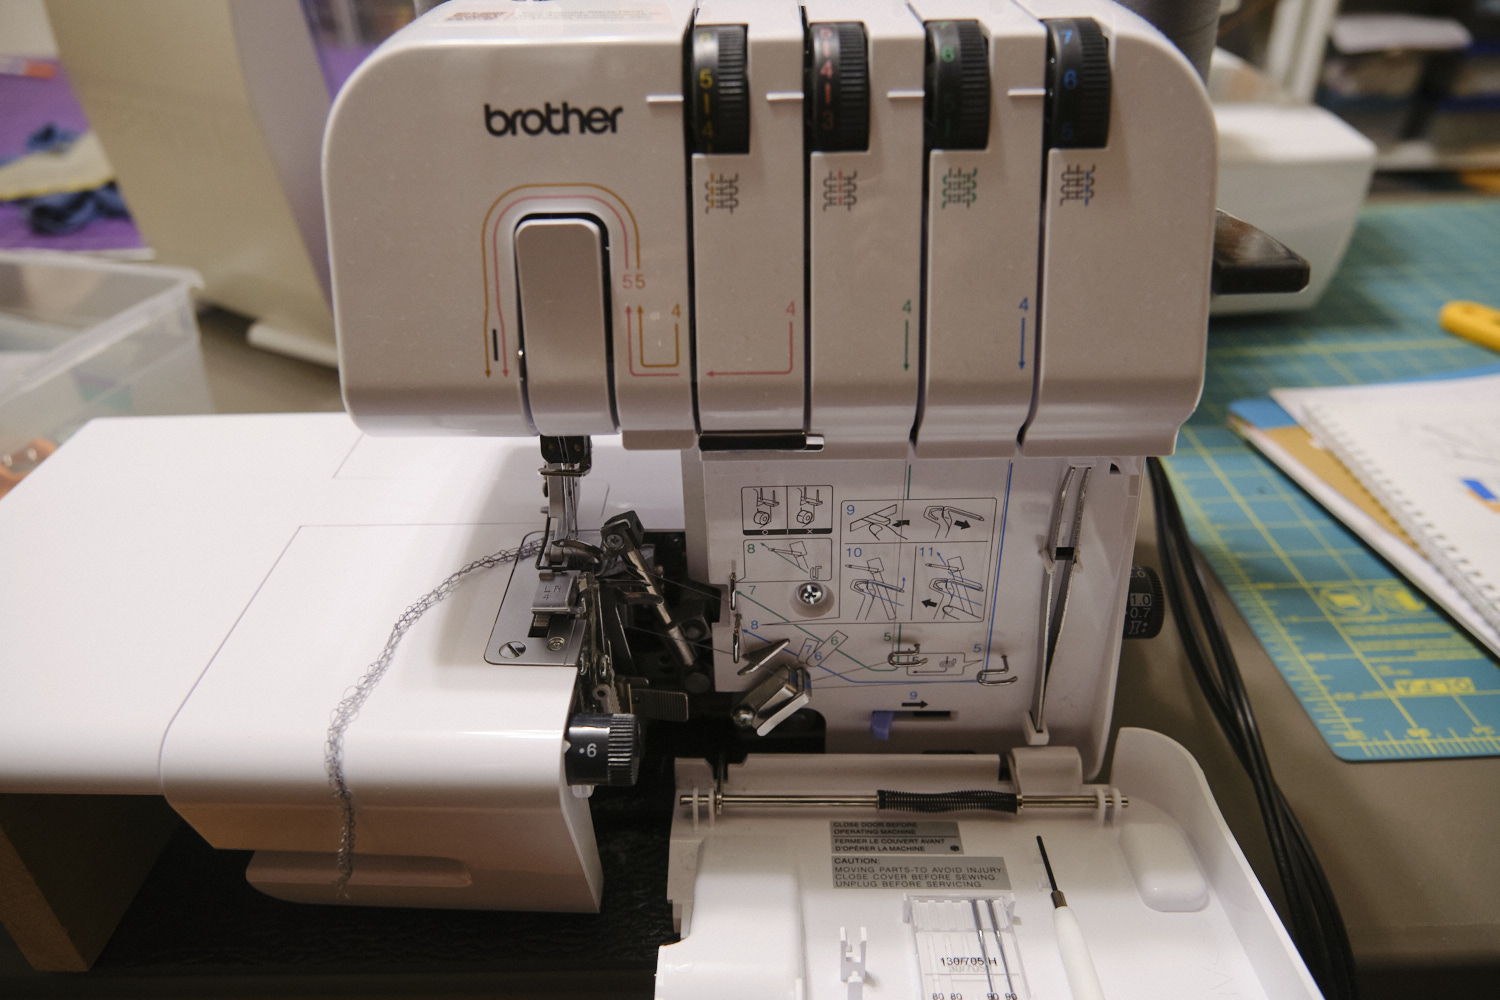
In August 2023 I bought my first serger, a Brother ST4031HD that I bought on Amazon for $379.99. I paid a $100 premium for this “heavy duty” version rather than the very popular Brother 1034D, which is a very similar machine but known to struggle with serging fleece and heavy fabrics. Even so, it is still on the low end of serger pricing but offers pretty good bang for the buck as far as being a perfectly functional serger at a very reasonable price point, that is not too difficult to thread because it comes labeled with a color-coded threading system.
Even with the color coding, there was definitely a learning curve to figure out how to thread it and I did have to watch the YouTube video multiple times and use the tweezers it comes with. And sometimes I had to fiddle with the four tension adjustment knobs. And I did try to just use grey thread for as long as possible so I wouldn’t have to rethread the machine very often. And the machine sure does make a racket. Even so, I would probably have been content with this starter machine for quite some time, except that about a year after I bought it, I did something I shouldn’t have and broke it. I’m not actually entirely sure what I did, but in the process of disengaging and re-engaging the knife blade, I managed to swing the knife around into a position that it should not be possible to get it into and the only way I could figure out to get it out was to unscrew the blade, take it off, and put it back on again. I did that, but the knife would not cut any more. I took it off and put it back on again multiple times and then brought in my husband to try. He could not get it to work either. We inspected the blade and saw no signs that it was broken, and yet, it would not cut. I tried to order a replacement blade and found that the official replacement blades for this machine are very difficult to get and cost over $100.
So I took the machine to a sewing machine repair shop and asked them what to do. They refused to accept my “disposable” serger for repair, telling me that their minimum price for putting it on their repair bench would not be worth it for such a cheap machine. I did get the repair technician to take a peak without putting it on his repair bench, and he couldn’t find anything obviously wrong with it but thought it couldn’t hurt to try changing the blade. The repair place also sold sergers so I took a look at a couple of Baby Lock sergers they had on display and was intrigued.
When I got home I went back to searching for blades and found that inexpensive blades that fit other Brother models, such as this one, reportedly worked with the ST4031HD even though they were not advertised for that machine. So I ordered a new blade for $13.98 and then browsed the Baby Lock website. (We eventually fixed the Brother serger after my husband realized that the knife holder had been upside down when we screwed in the knife — it had appeared symmetrical but he finally noticed that it wasn’t. We rotated it 180 degrees and everything worked fine. But by that point I had already ordered a new serger.)
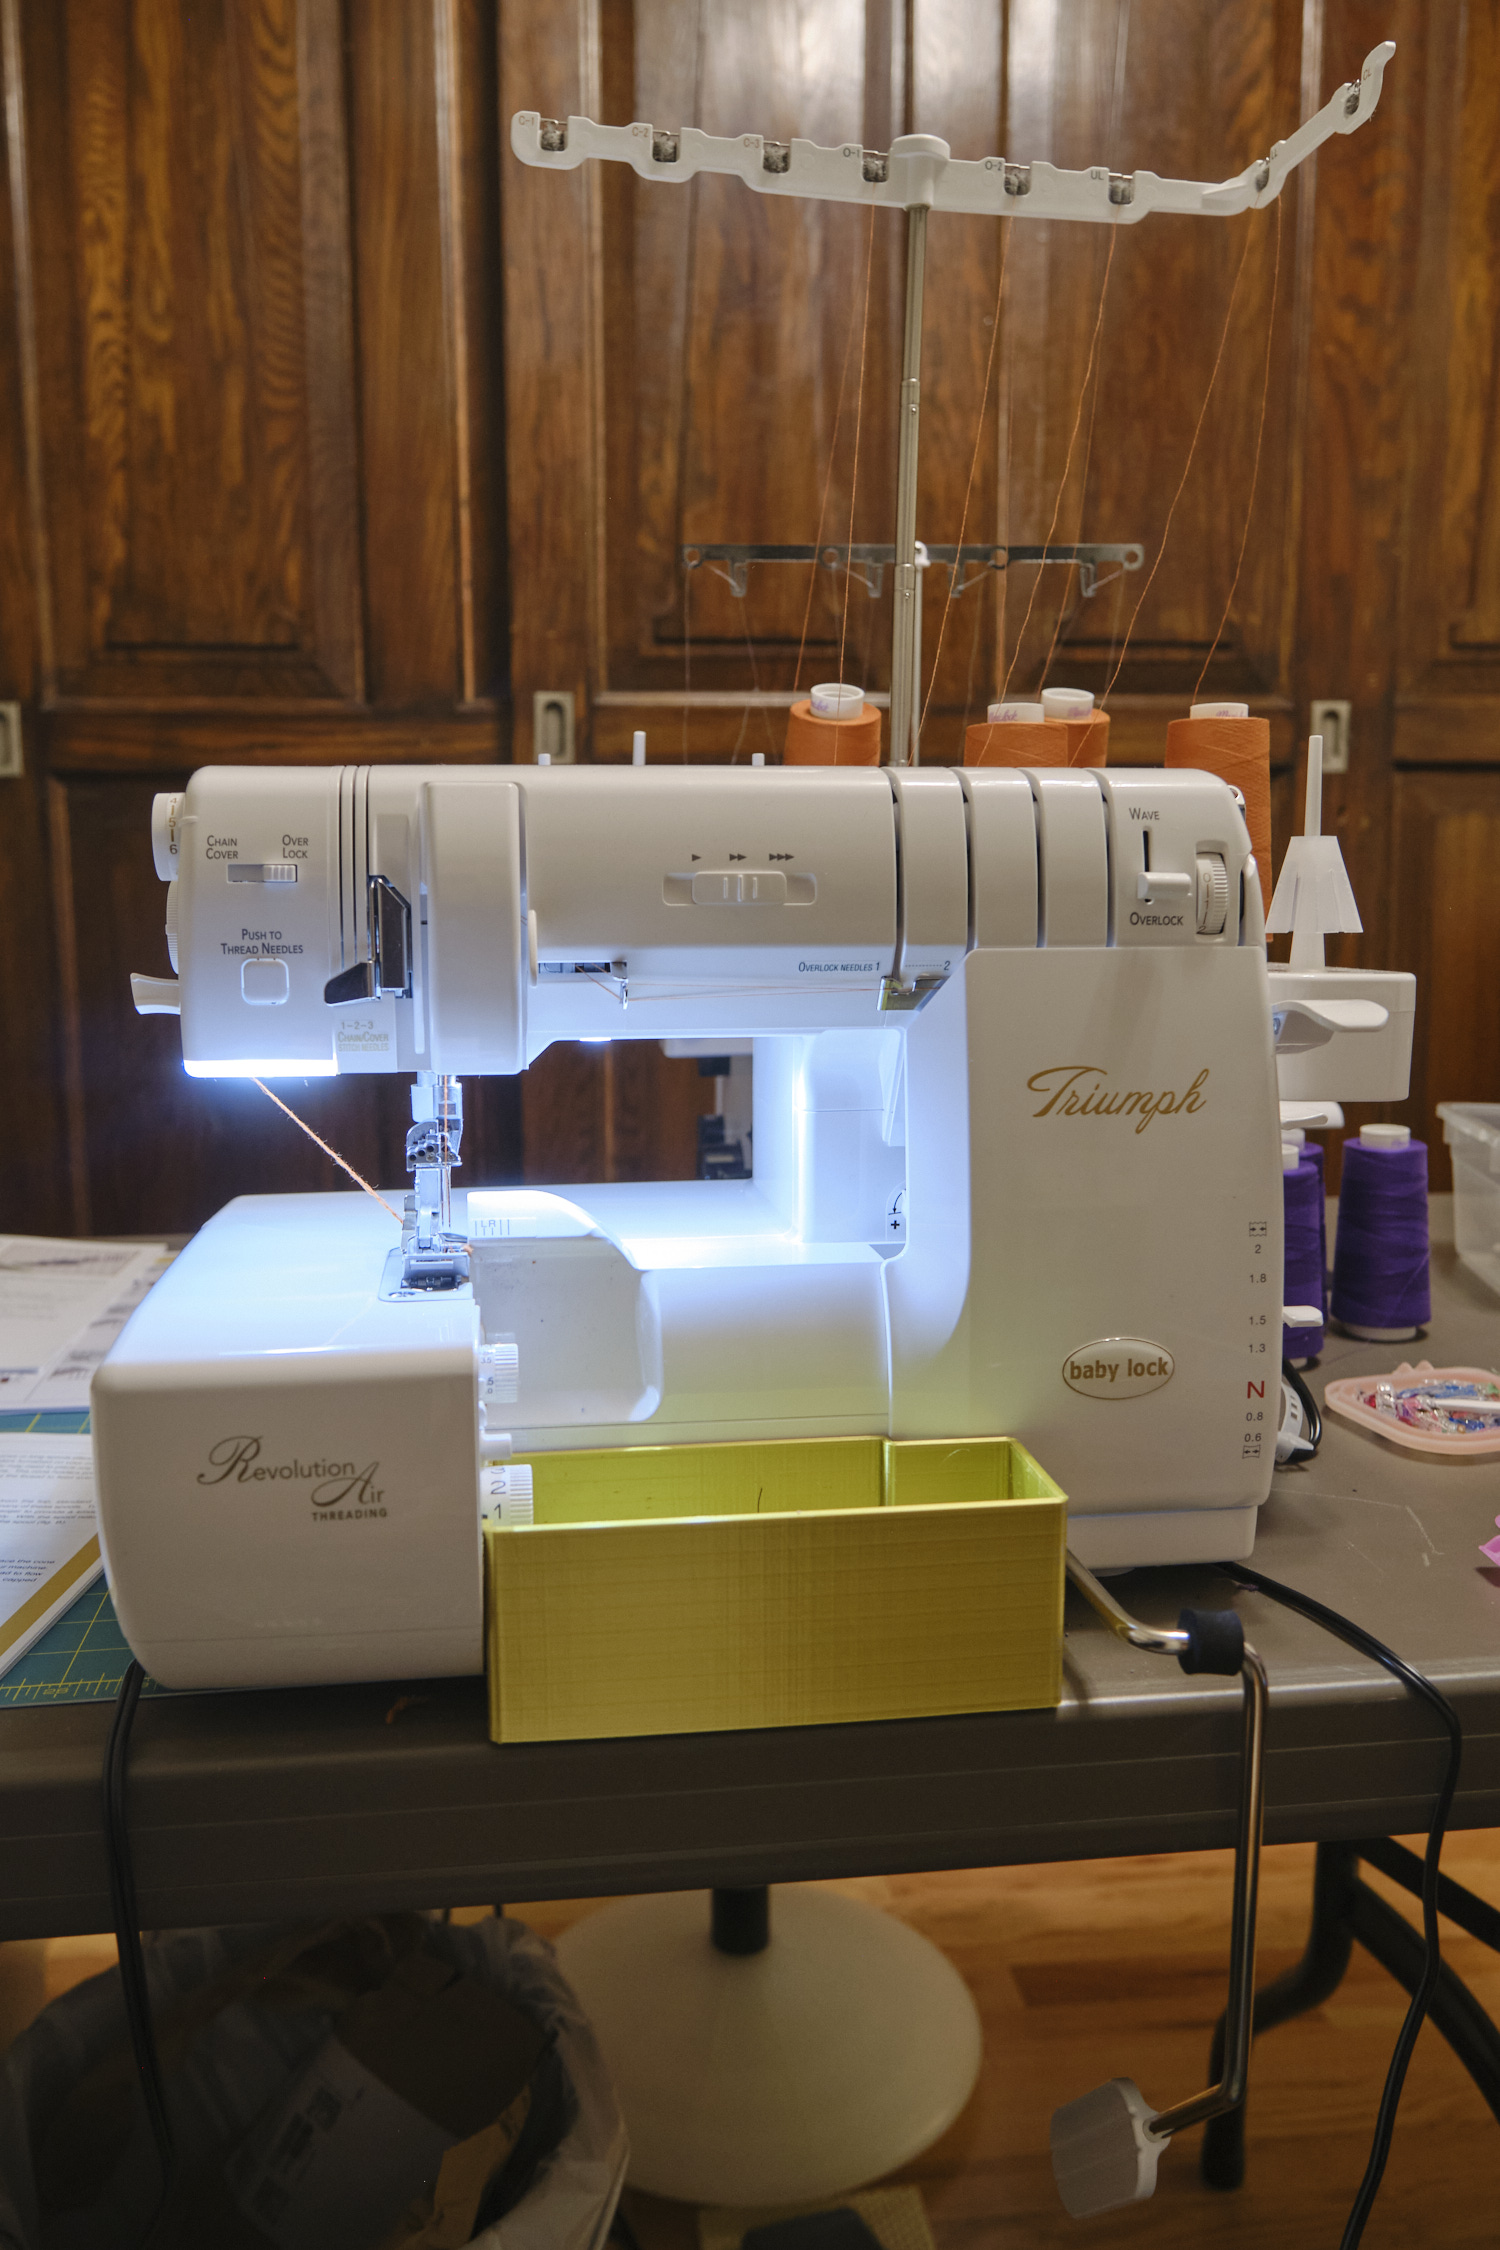
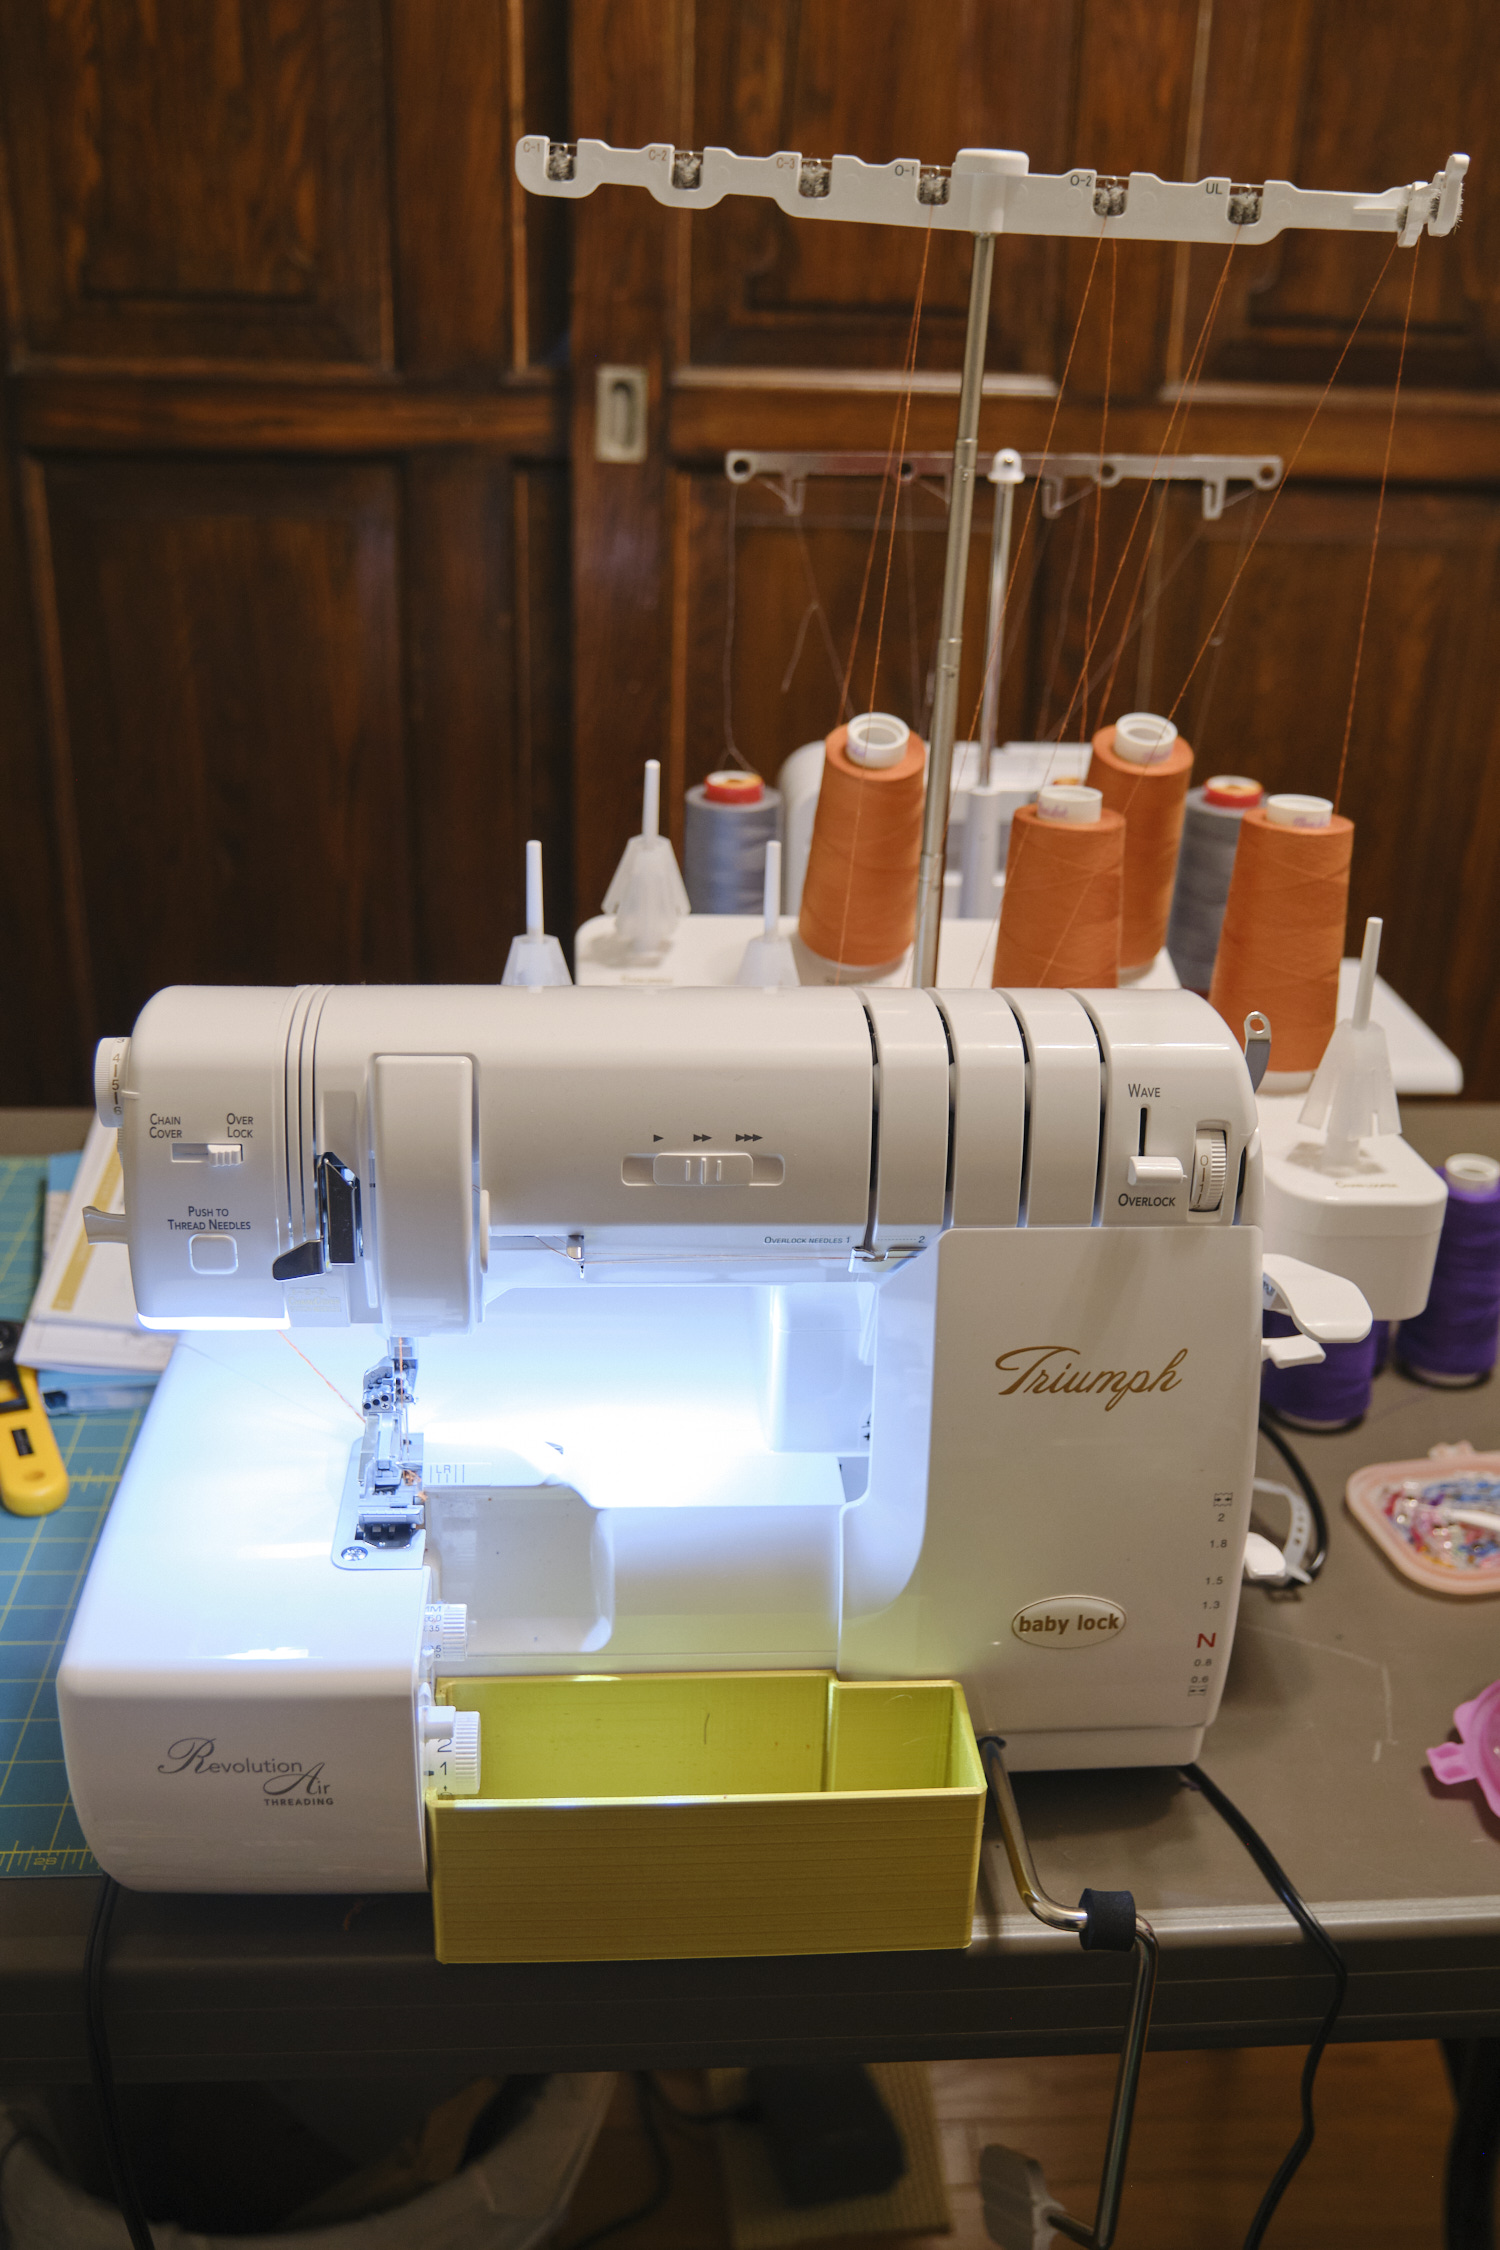
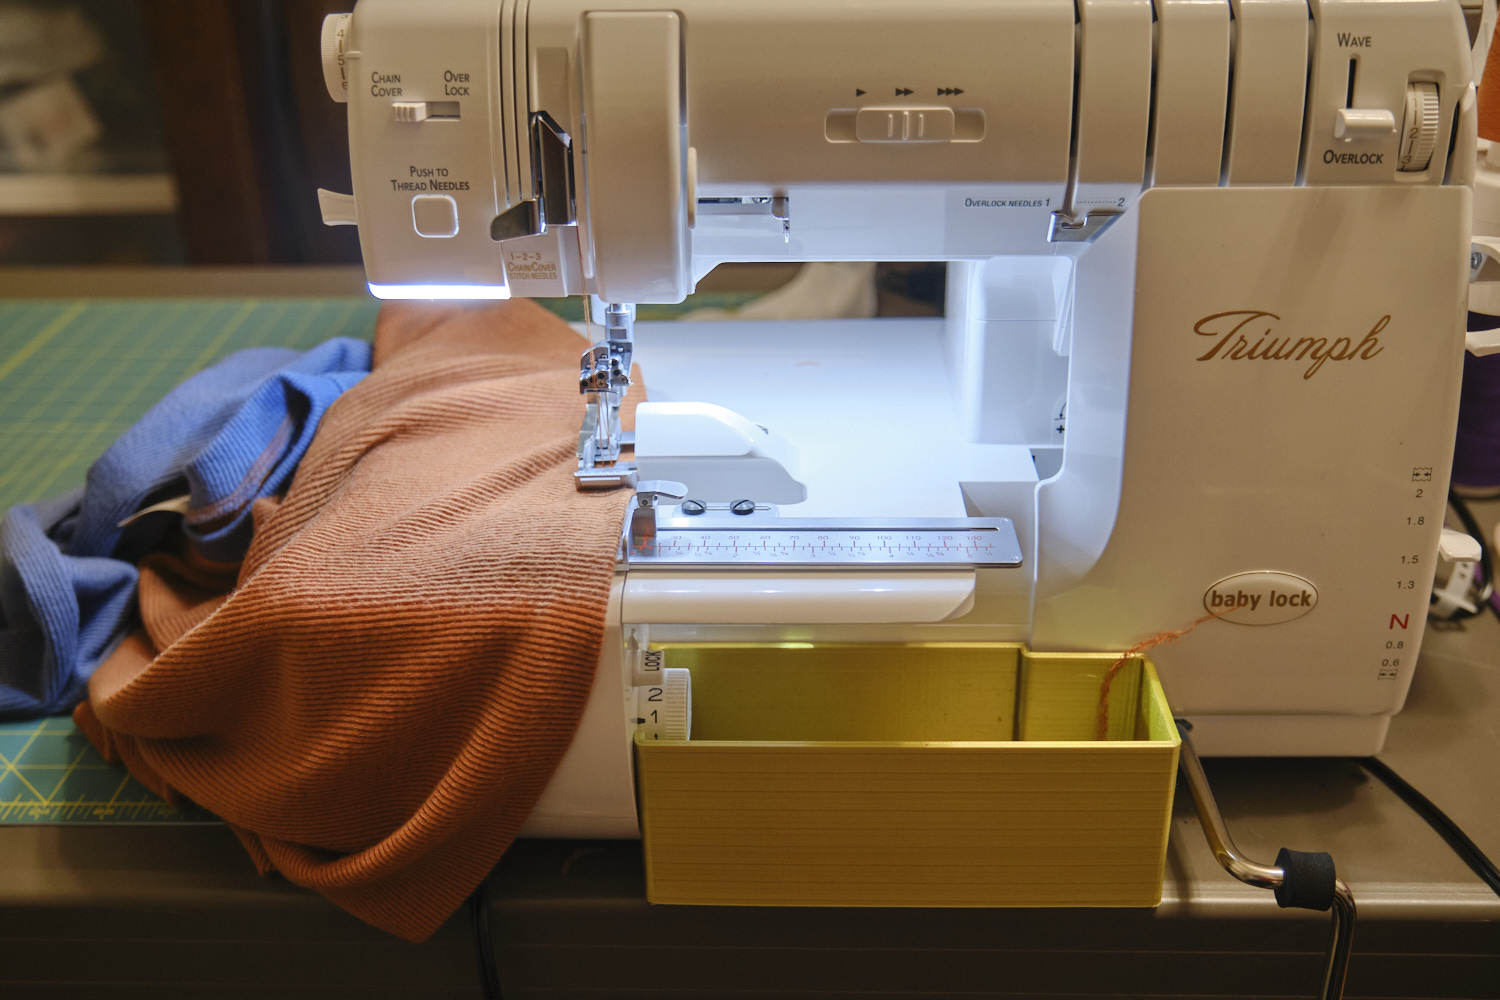
I started reading about Baby Lock sergers — they all have really positive sounding names. I started with the inexpensive Baby Lock sergers and worked my way up. Each machine had more features and I wanted all of them. Air threading, YES. No tension adjustments, sign me up. If I’m going to buy a new machine I want one that doesn’t require tweezers to thread or tension fiddling for every different kind of fabric. I was ready to buy a Baby Lock Victory (list price $1,649) but then I realized that it’s threading was only partially automatic. The Acclaim (list price ($2,749) had a more advanced threading and tension adjustment system. But then I realized if I went up a step to the Accolade (list price $3,849) I could also get cover stitch features. I had considered previously whether to get a serger or a combo serger/cover stitch machine, and settled on just a serger because the reviews of most of the combo machines complained that it was too much of a hassle to switch machines between serging and cover stitch mode. But, if the machine could thread itself automatically, maybe it wouldn’t be so bad. Maybe I do want a combo machine. I kept reading the web site and finally got to the ultimate Baby Lock serger: the Triumph (when they inevitably come out with a new model that is better than this one, what will they call it?). It is a combo machine with all the features of the Accolade, and a few extras, but most importantly, it has a knee lift. My Bernina sewing machine has a knee lift that I absolutely adore. It let’s me raise and lower the presser foot with my knee, without having to take my hands off the fabric. Since I use the same leg to run the peddle, I never accidentally start sewing without lowering the presser foot. In contrast, my Brother serger does not have a knee lift and I regularly forget to lower the presser foot, start sewing, and end up with a nasty thread nest. The knee lift sold me on the Triumph, but I was taken aback by the $5,499 price tag (typically available for about $500 less at sewing machine stores) — and the fact that buying all the accessories I might want for it would cost even more (another $1,500 or so).
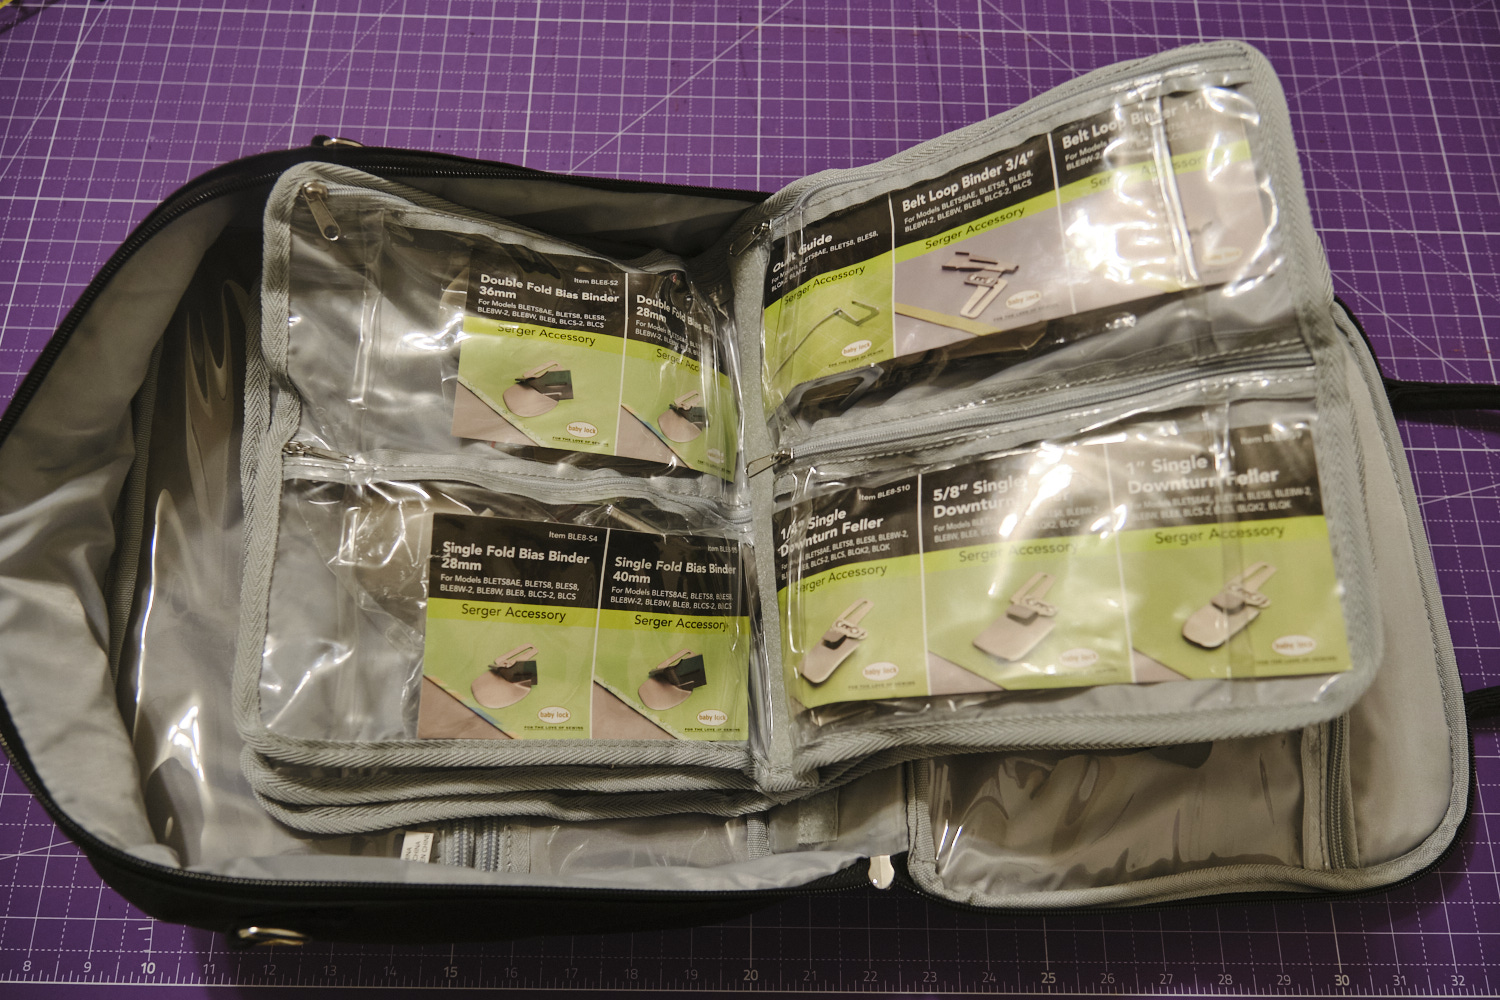
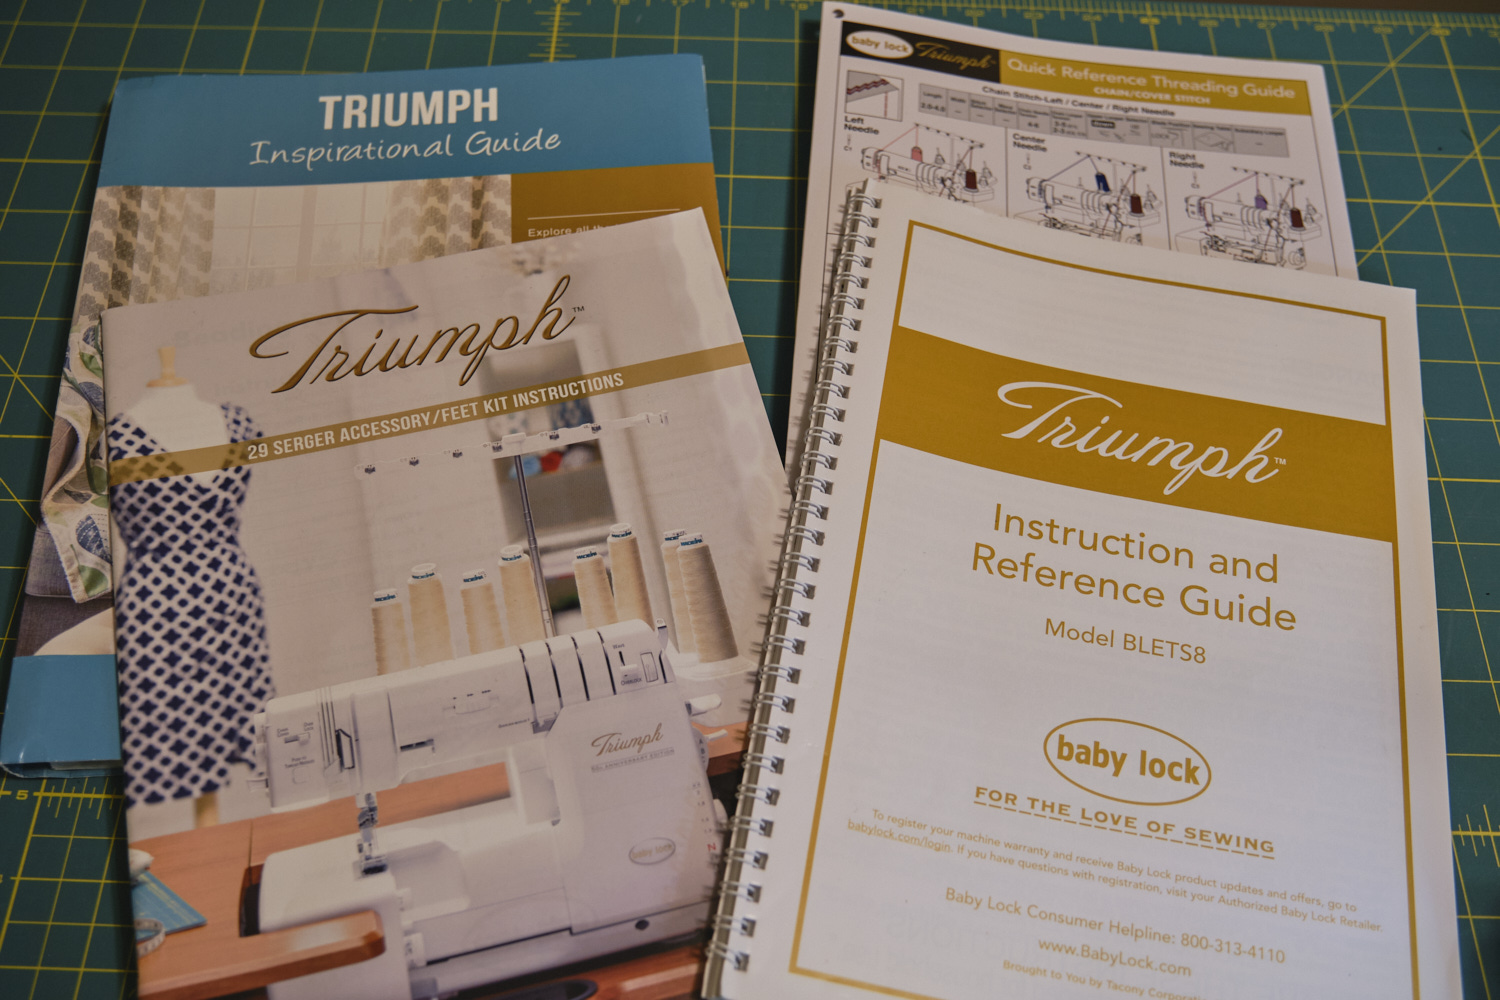
I decided to read some reviews of Baby Lock sergers and watch some videos to see how easy or difficult they looked to use. I stumbled upon a review titled “Was it Worth it? Why I bought Babylock Accolade Serger Coverstich Machine” by Jessica Capalbo. I don’t know if Jessica gets a commission from Baby Lock, but by the time I got through her 6-minute video, I was completely sold. Besides her account of how much easier it was to sew with a high-end serger, her justification to spend the money on a serger if your hobby is sewing since other people spend money on ski vacations, completely resonated with me. I would have bought an Accolade right then and there, but I really wanted that knee lift, which required stepping up to the top-of-the line Triumph. In some of the Facebook sewing groups, people had mentioned getting good deals on refurbished Baby Lock machines so I checked out eBay, and sure enough found several Triumphs for sale. I found one in excellent condition that came with all the books and almost every extra foot (in a handy carrying case) and accessory that Baby Lock makes for this machine (not including a trolley — it is huge and if you want to take it anywhere you really do need a trolley with wheels) plus a DIY 3D printed thread bin that someone had made as the machine doesn’t come with a thread bin, all for $4,128.95. I decided to buy it, and a few days later it arrived on my doorstep.
(Incidentally, I briefly also considered the Bernina L-890, which is a similar high-end combo machine that also has a knee lift. People seem to really like the fact that a lot of the control is through a touchscreen with good instructions. But it’s list price is $7,999 and it’s fairly new and so it doesn’t have much of a used market.)
The first time I threaded the Triumph, I followed the instructions in the manual very carefully. It took some time to fully understand some of the diagrams, but once I understood what I needed to do I succeeded in threading it properly with four spools of black serger thread on my first try! With just a few adjustments to stitch height and width, I produced nicely balanced 4-thread serging stitches. I immediately noticed that the Triumph was much quieter than my Brother serger and sewed much more smoothly. I had two pairs of black pants cut out so my first project was to sew them.
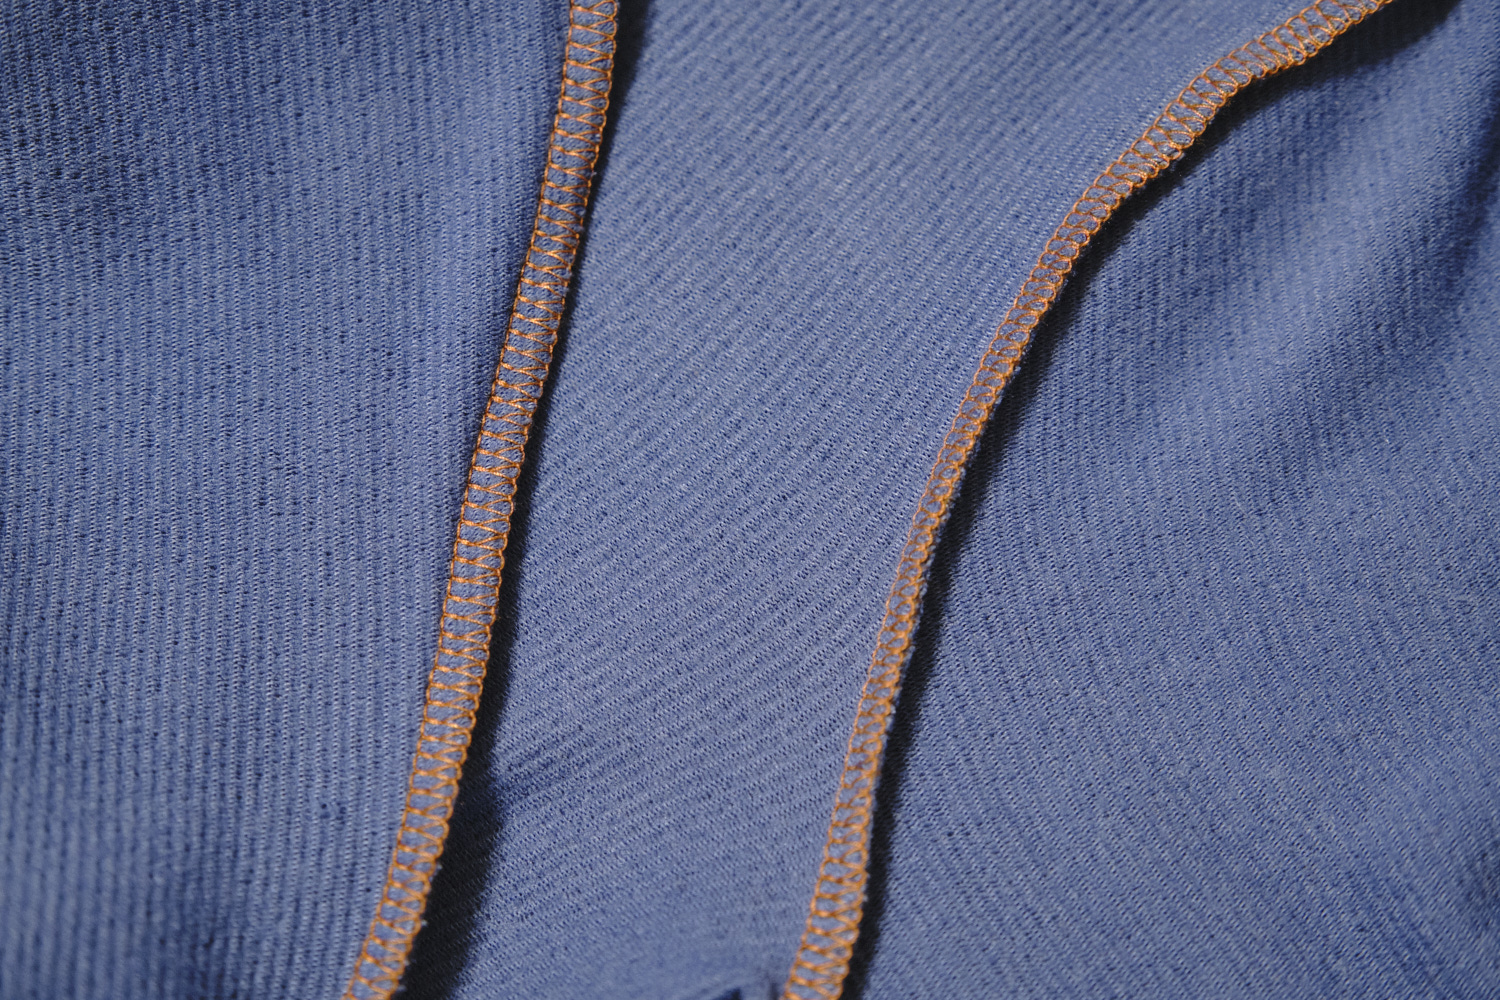
After my triumphant first projects, I was traveling and busy for a couple of weeks. My next project was to serge the unraveling edges of a green shawl that a friend brought me. I showed her my Triumph, unthreaded the black thread, and started trying to thread the green thread. Only this time I didn’t read the manual carefully enough and inadvertently skipped some essential steps. I had to unthread and rethread a couple of times and learn how to change the needles after I broke one. But eventually I got it sorted out and produced a beautiful serged edge. After my friend went home I unthreaded and rethreaded the Triumph twice to make sure I could do it. I would say it is still not completely trivial and I could still easily forget a step, but threading a serger completely without the use of tweezers and having it sew perfectly without any tension adjustments is really awesome.
I read through the accessory book and watched a video on using the overlock table and fabric guide accessories and gave them a try. The table has a slot for the serger knife and gives you a bigger surface for serging and allows you to use accessories that normally would not work in overlock mode. The fabric guide makes it easier to sew a straight and consistent distance from the edge of the fabric. It will be quite some time before I figure out how to use all the other feet and accessories, and even though in theory you can sew with 8 threads at the same time, I probably won’t try it any time soon.
I finally worked up the courage to try cover stitching. This requires getting the included small screwdriver out of the convenient side compartment, unscrewing and removing the two needles, moving the needles over into cover stitching position and screwing them back in. While I was at first taken aback by the need to use a screwdriver and move the needles to switch back and forth between serging and cover stitching, it was actually pretty easy to do. It is easy to align the needles and see whether they are properly in place before screwing them in, and if you accidentally drop one while screwing it in there is a convenient drawer with a magnet to catch the needles that slides out from the bottom of the machine so you can retrieve the dropped needle without having to open or lift the machine. I selected the wide cover stitch and followed the instructions to setup three spools of thread. I sewed some practice cover stitches on some heavy sweatshirt fleece and admired the results. Then I tried a stretchy rib knit and was not as happy. After adjusting a few settings I decided that this stretchy fabric would be better off with a narrow cover stitch. I moved one of the needles and rethreaded it and tried again, and was pleased with the results. When I was done cover stitching I moved the needles and threads back to serging position without too much difficulty. I can see why a lot of sewists prefer to have a separate cover stitch machine as it would be annoying to have to switch back and forth multiple times during a project. However, I think as long as I’m doing most of my cover stitching together at the end of a project, switching is not too bad.
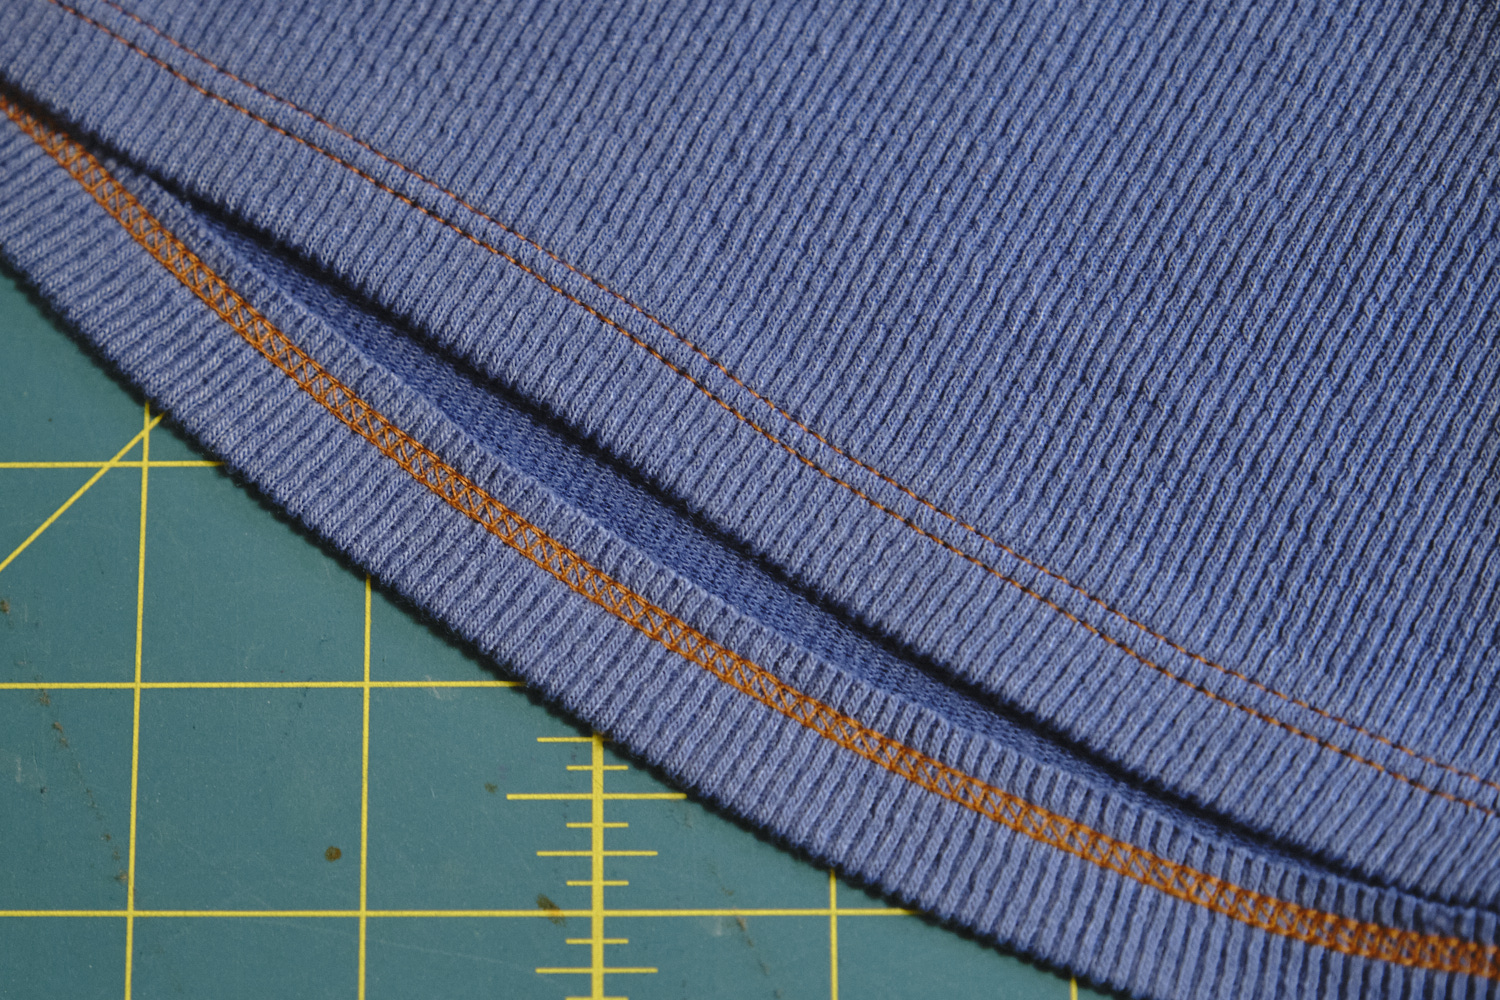
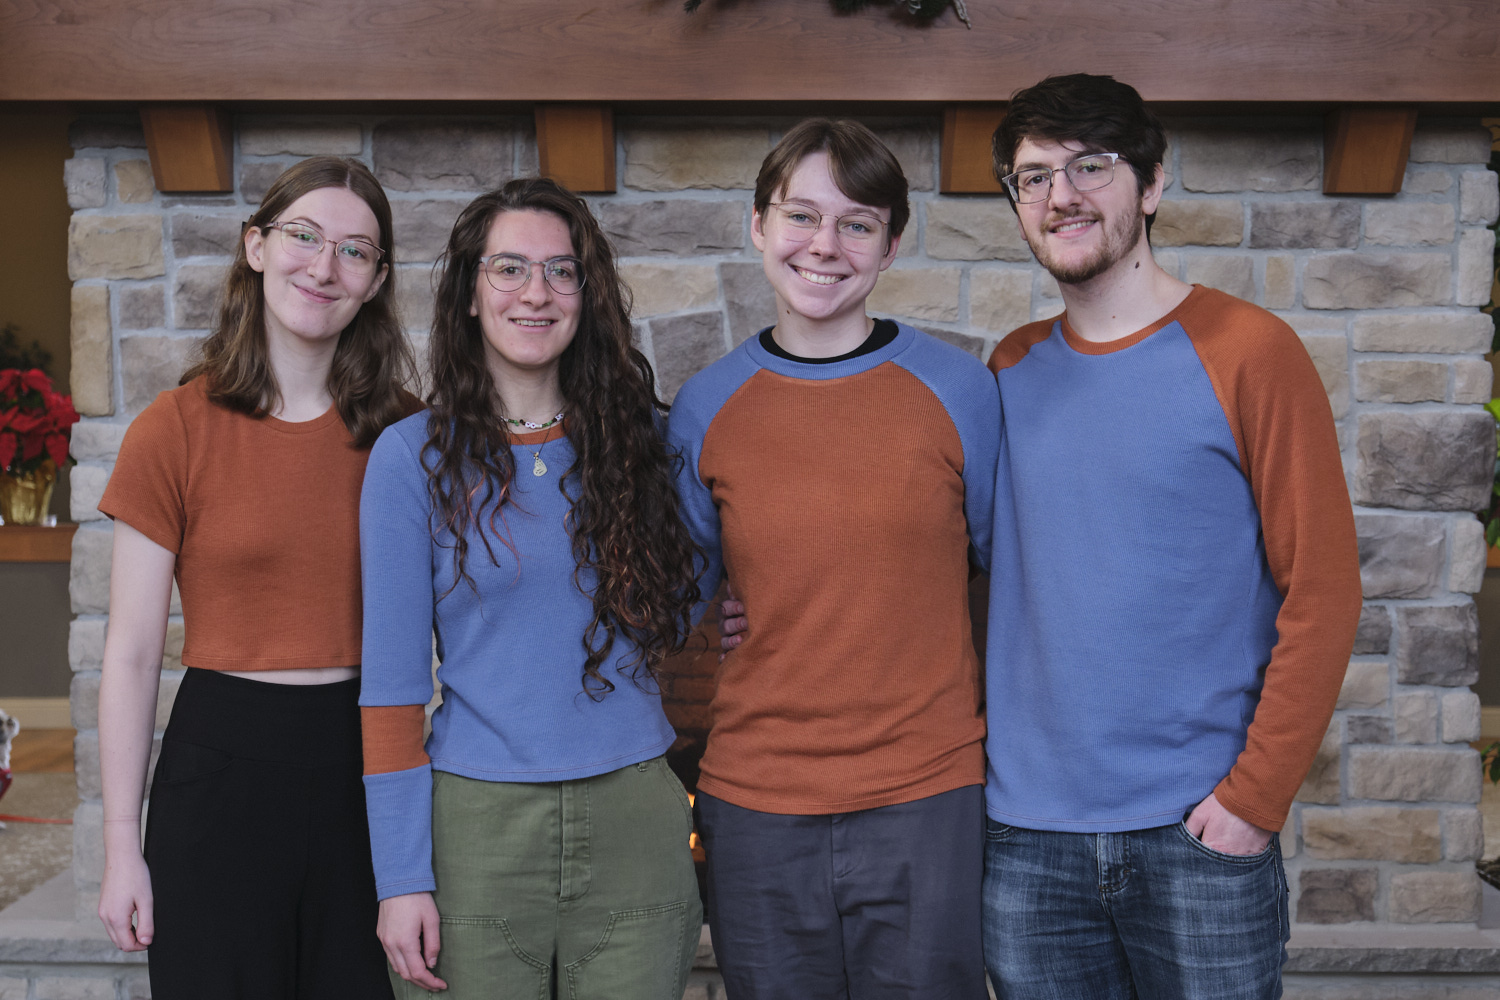
For my first big combo project I ended up serging four shirts and then cover stitching the bottom hems and sleeve hems of all of them at once. The shirts are made from a soft rayon/nylon/spandex Monaco rib knit from Mily Mae Fabrics. I used the Sinclair Demi and Tao patterns for the raglan shirts and the Sinclair Bondi pattern, cropped to the waist line for the short-sleeve shirt. I also used Bondi and color blocked the sleeves for the last shirt.
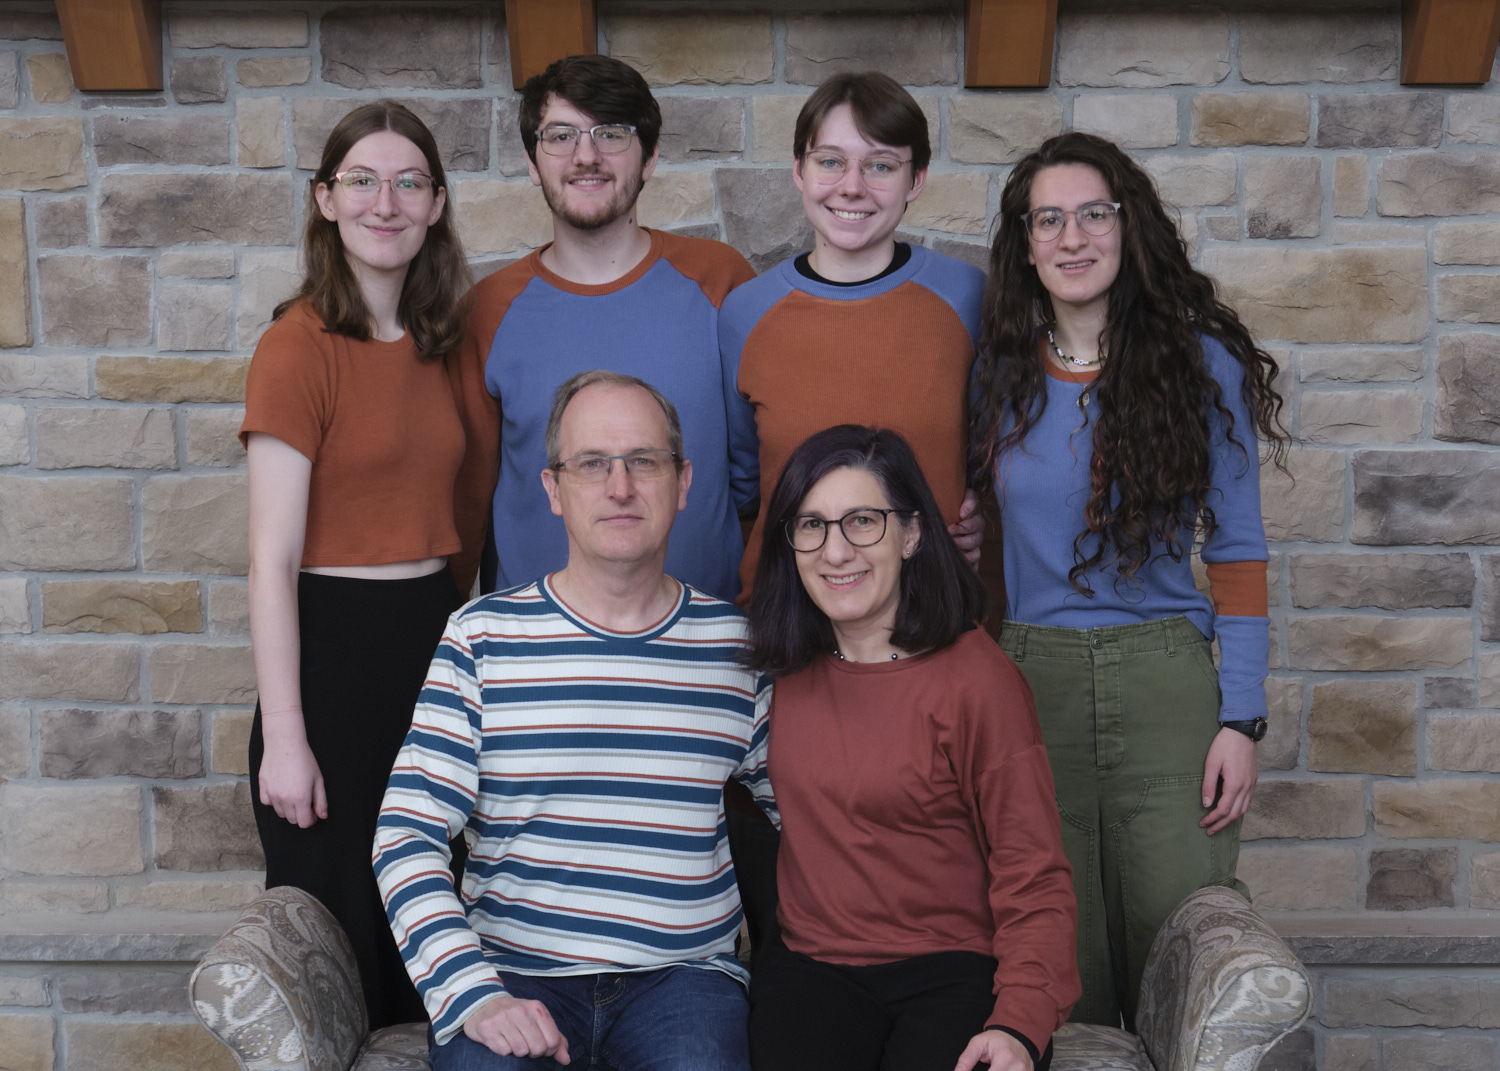
And I made a Sinclair Kai for my husband from a cotton lycra yarn-dyed rib knit in colors that coordinated with the kids’ shirts. (I’m wearing a Pattern Emporium Sweet Cheeks sweater in this photo that I made last winter in a cuddly brushed hacci sweater knit.) I was able to switch the serger back to serging mode and switch to off-white thread pretty quickly. But I was pressed for time and a bit lazy so I just zigzagged the hem on my sewing machine rather than switching it back to cover stitch mode again.
I’m looking forward to a lot more triumphant sewing yet to come!
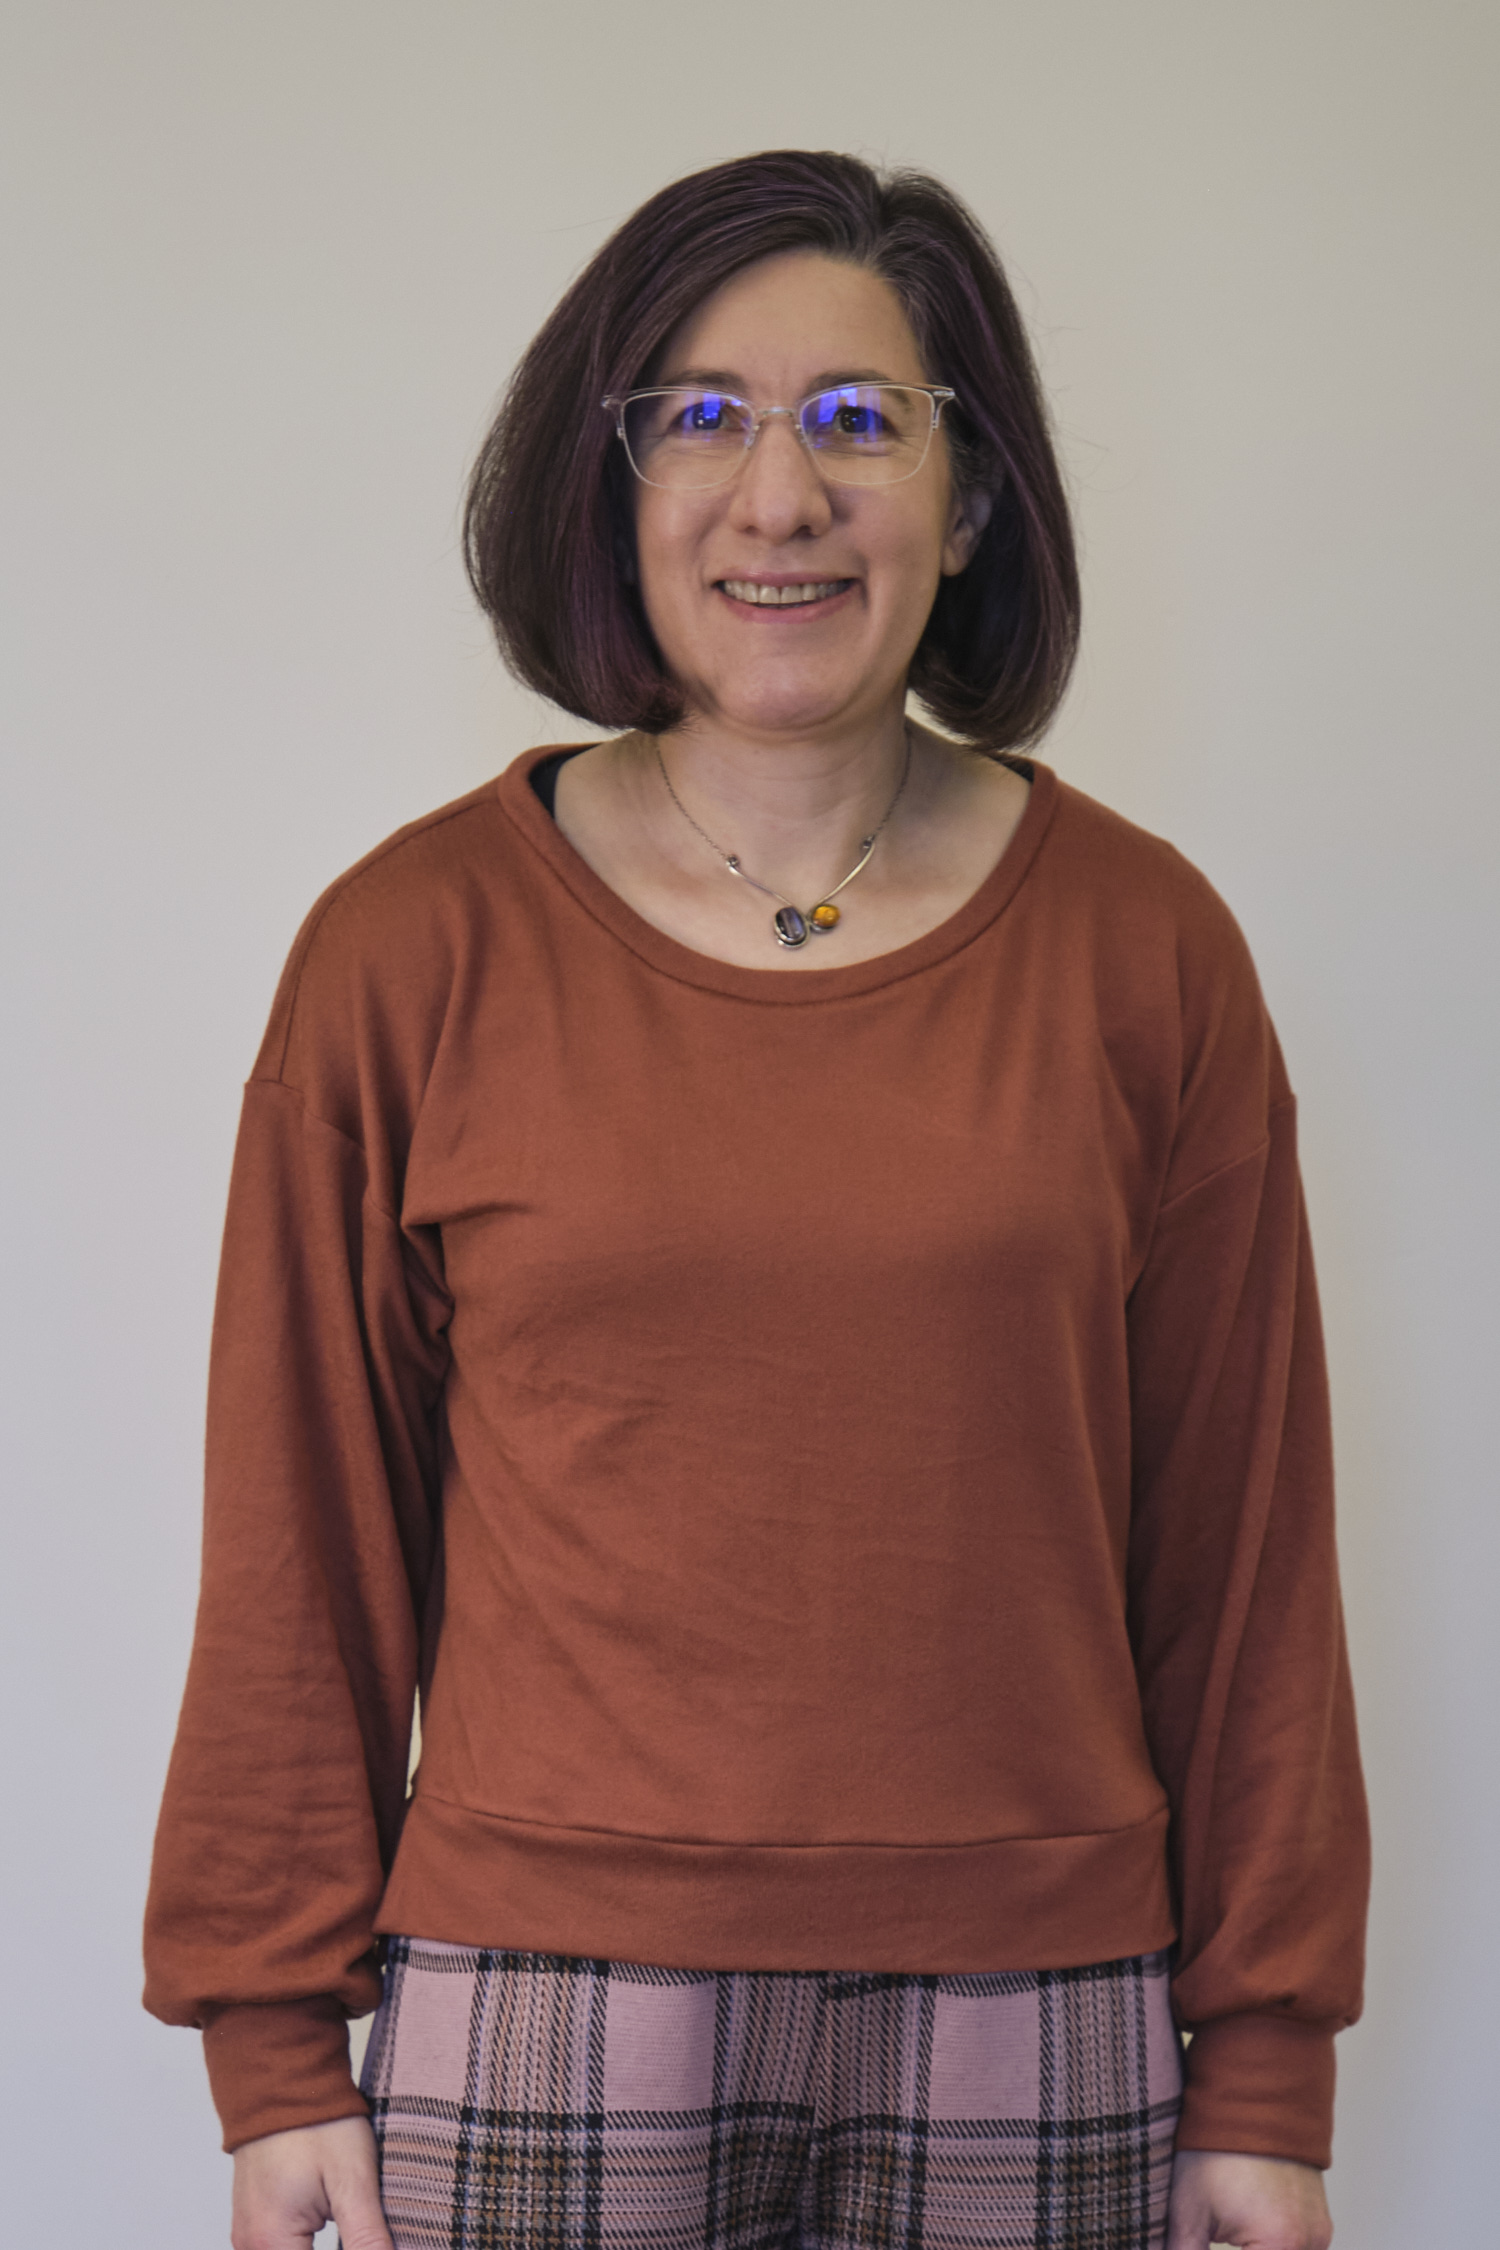
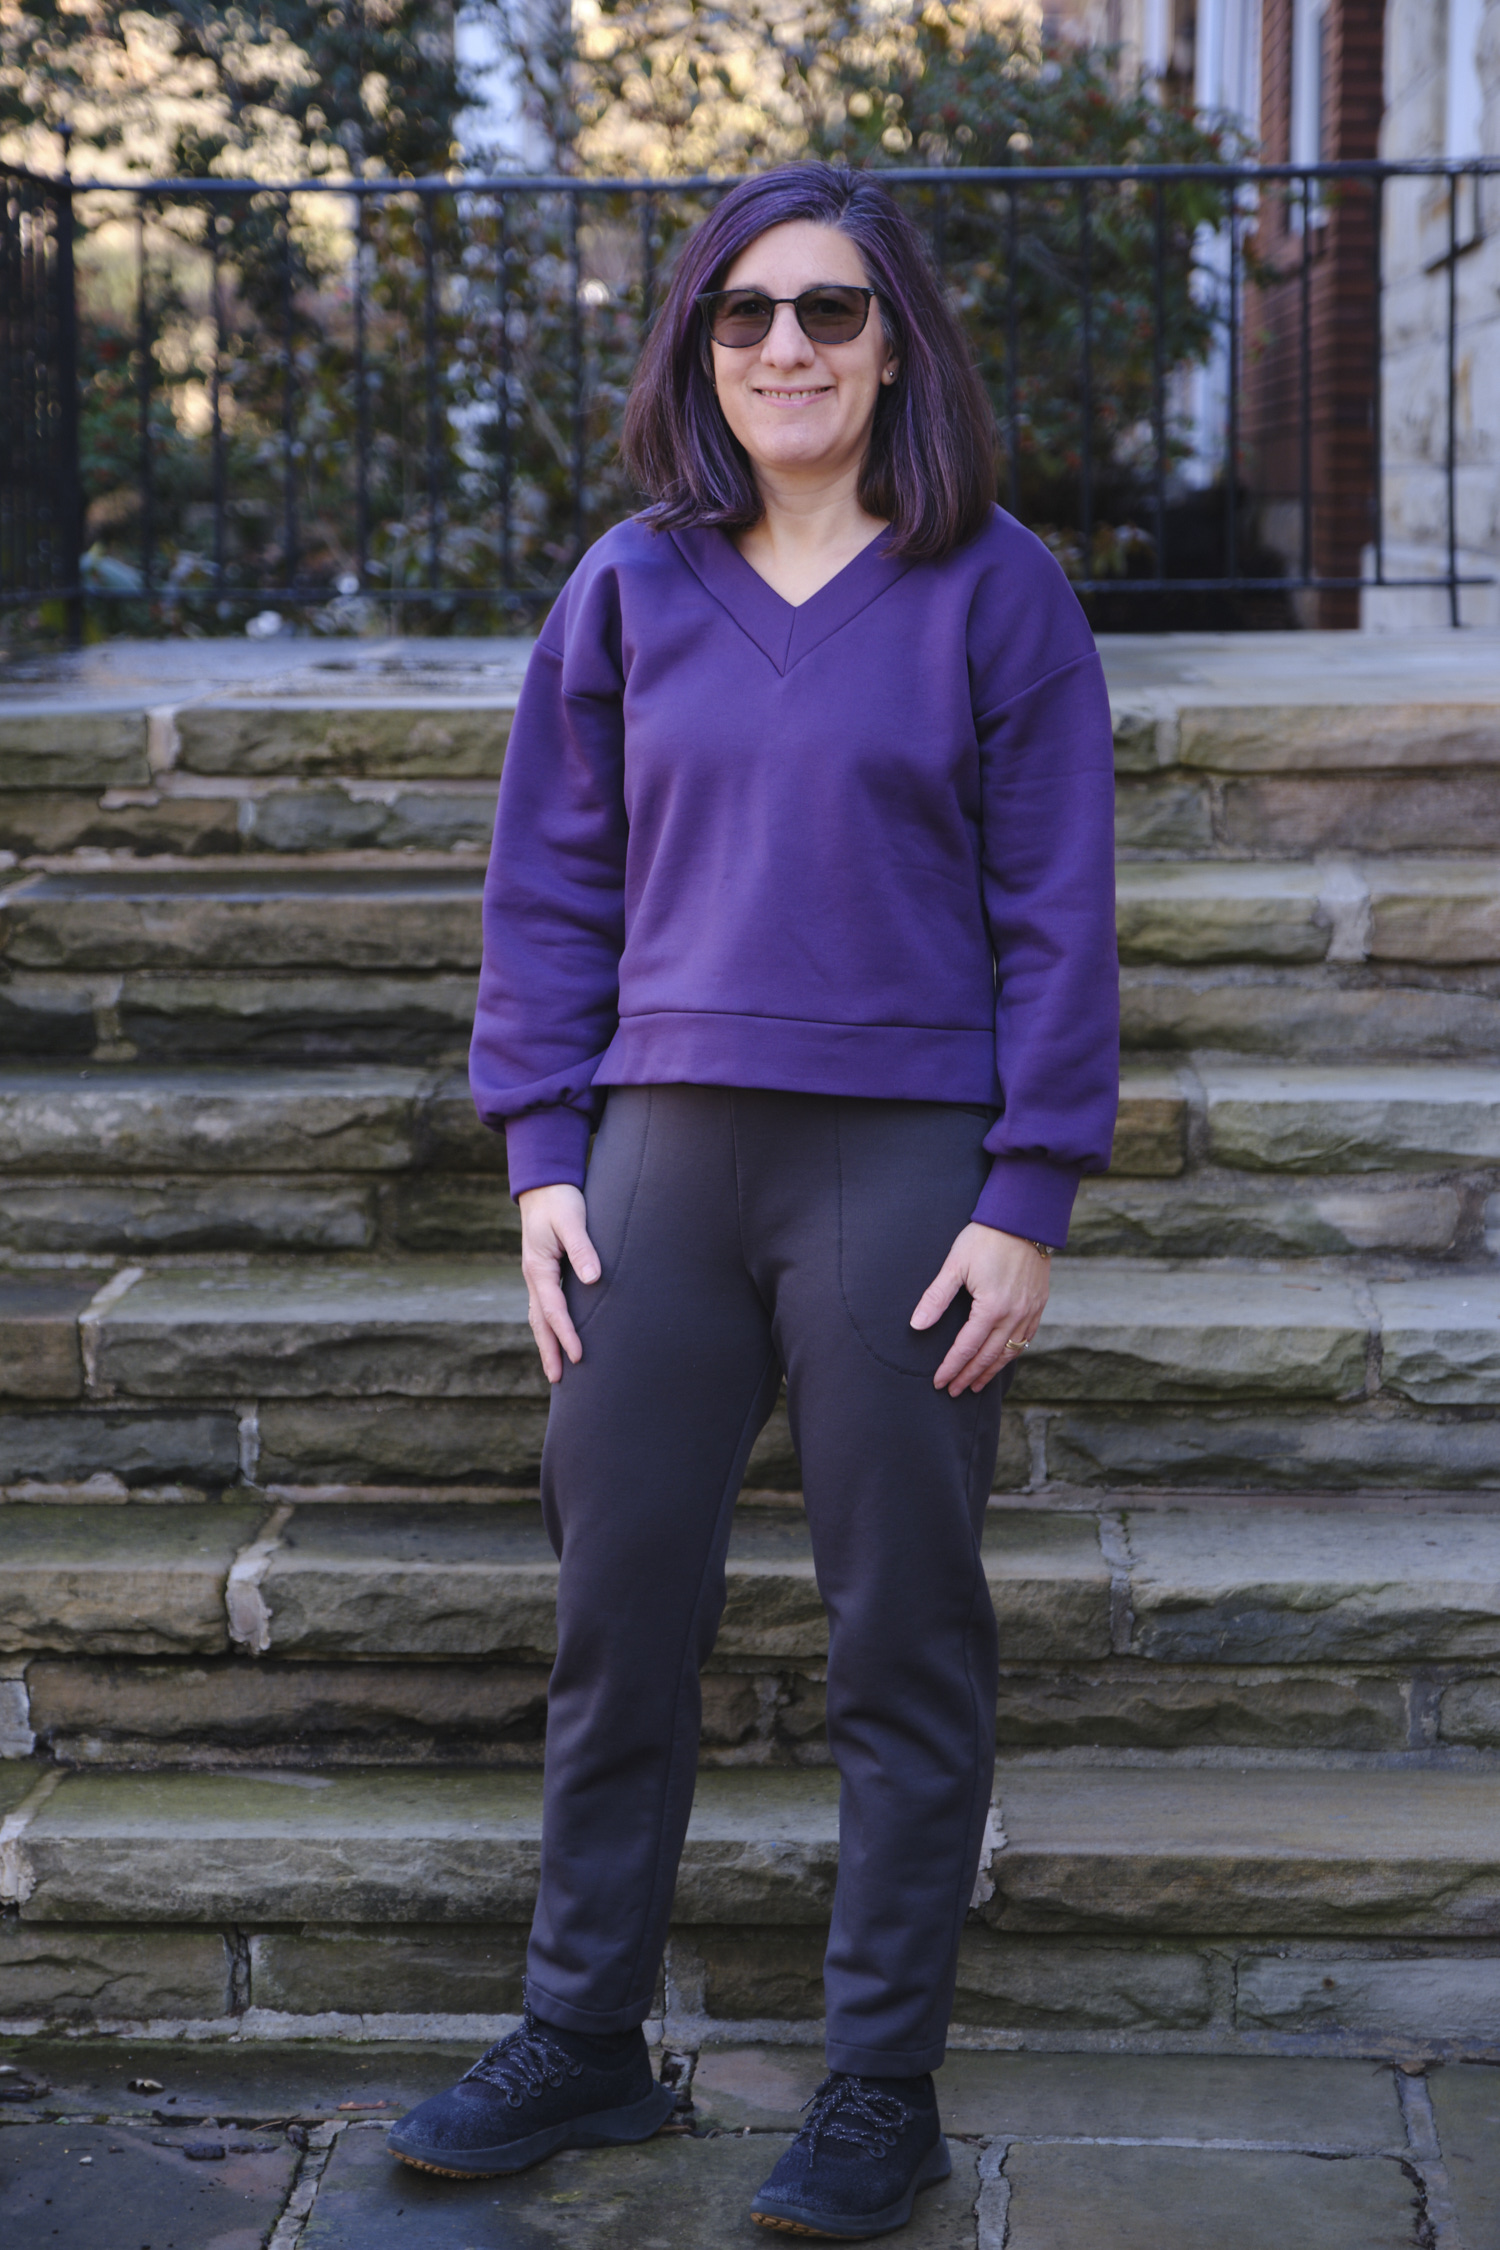
This is my second Sweet Cheeks Sweater. I previously made one in a lighter weight brown brushed hacci sweater knit to go with my pink plaid Walk Boldy pants (but actually I wear it with all sorts of things). Last time I made the mid-neck cropped length, and sized down from an AU8 to an AU 4 so it wouldn’t be so oversized. This time I did the same combo but switched up the neck to a V-neck. I really like the V-neck but it was more work to assemble. The sweater has more structure with the sweatshirt fleece than the hacci, which gives it a somewhat different look and causes the cropped length to sit a bit higher (more cropped). I like it both ways!
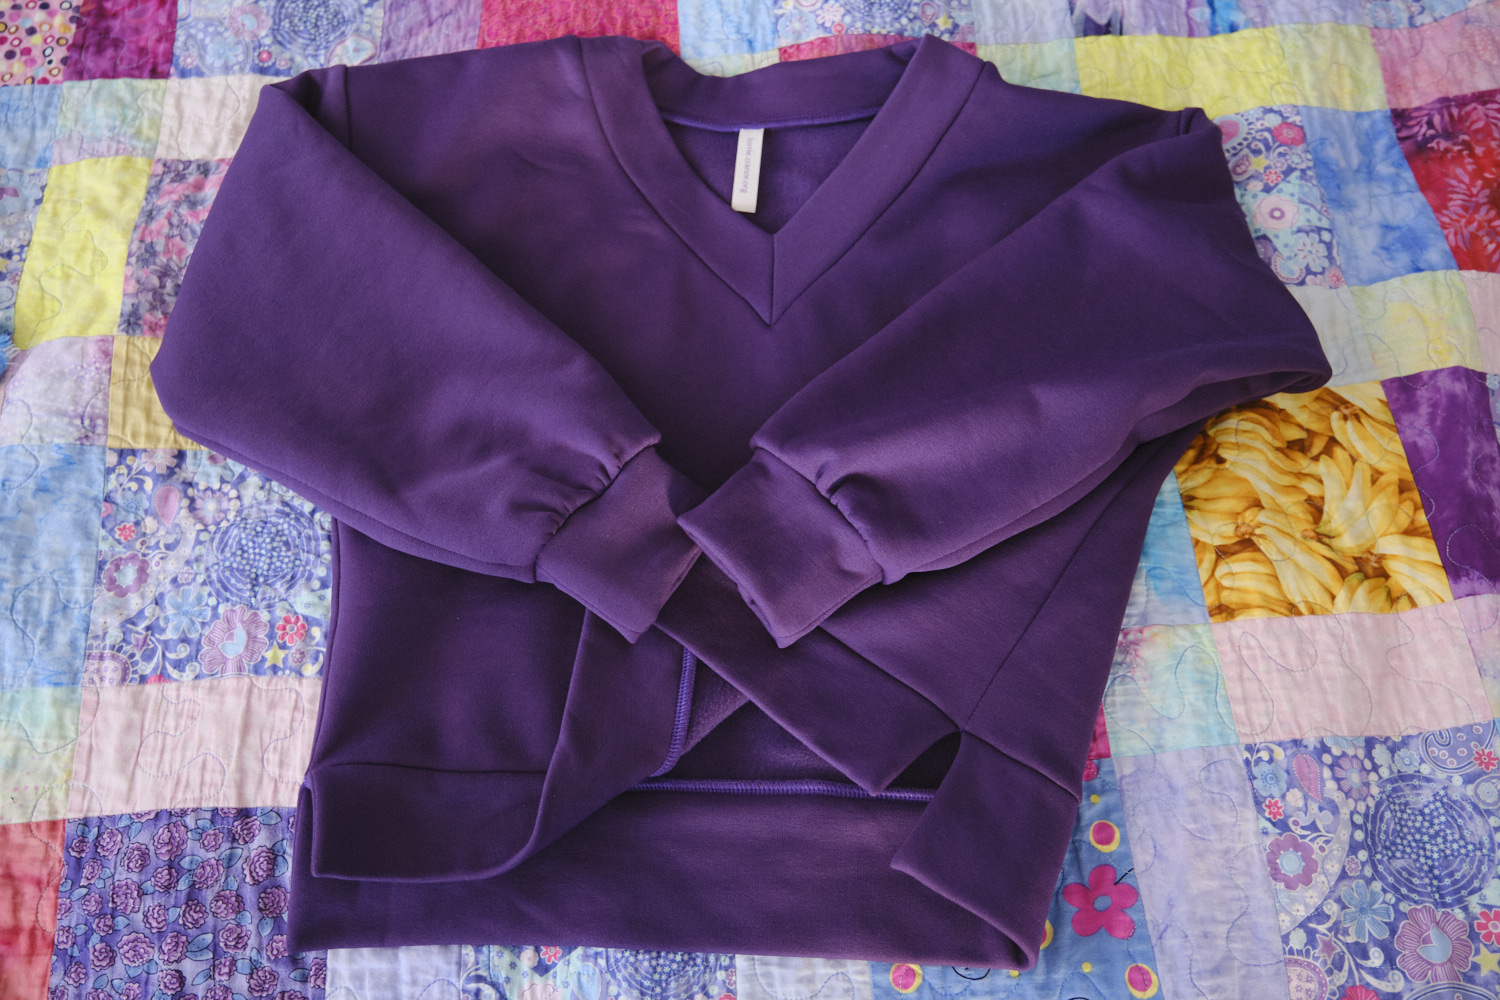
I’m really happy with the sweater, but note that it includes several components that require an extra step or two in order to get good results. The V-neck and bottom bands (see photo below for all these sharp details and a peak at my Triumphant surging) require some extra basting and alignment and the sleeve cuffs must be gathered and basted too. The pattern comes with terrific instructions and tips for how to do this, and I’m pretty pleased with my results. All of these features add too a really nice looking garment. Still, these steps take time and effort. I think the sweatshirt fleece was a little less forgiving than the hacci I used previously, which caused me to go even slower to prevent any mishaps. Nonetheless, I already have plans to make this pattern again! At some point I would like to try the hip length version and maybe also a t-shirt version without the sleeves.
Over Thanksgiving weekend I made my fourth Alana dress. It was my first Sinclair pattern and still one of my favorites. It’s supposed to fit somewhat loosely at the waist, but I’ve altered the size 4p pattern a bit to remove most of the ease at the waist to get exactly the fit I want. After initially making it according to the pattern and then experimenting with shaving a bit off all the princess seams, I now have my alterations marked on my PDF pattern and I was able to cut my modified version from the start. (Also, having recently tweaked my projector setup I can project each pattern piece onto my cutting table in its entirety without the need to shift.) The only other alteration I make is extending both the front and back facings to below my bra line, as I have done before. This time I made the above-the-knee-length option, so it is a couple of inches shorter than my other Alanas.
And, of course, I make the version with pockets! I love how the pockets fit between the front princess seams and don’t require the addition of side seam pocket bags.
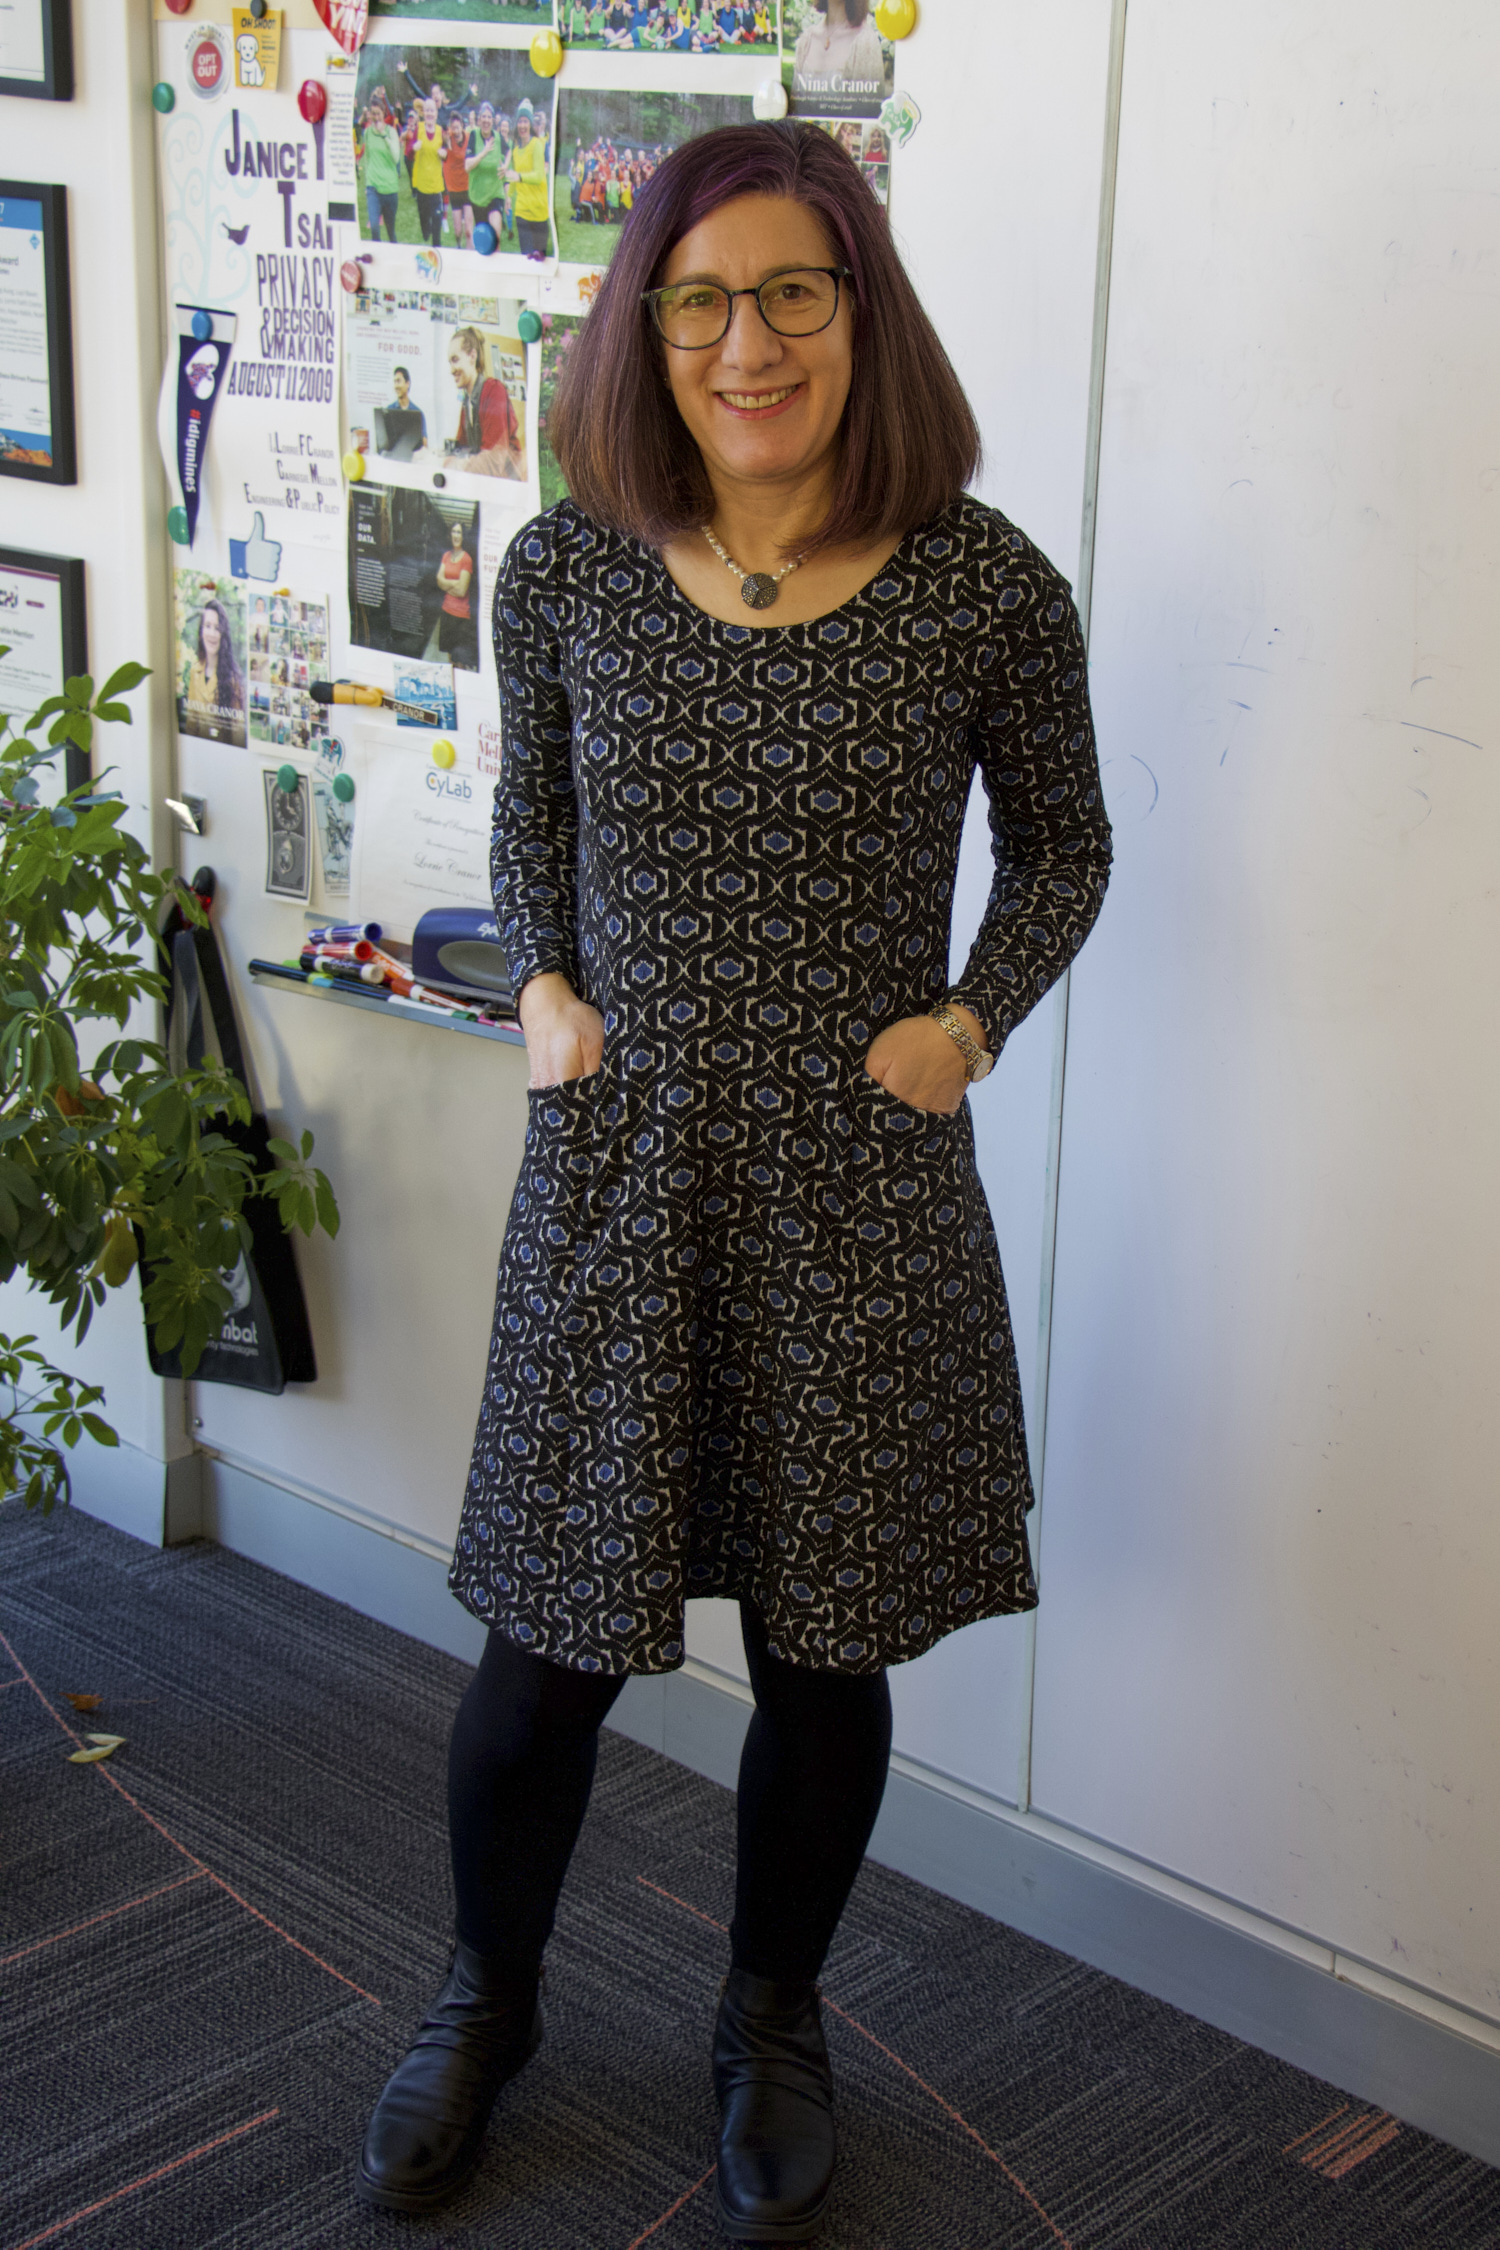
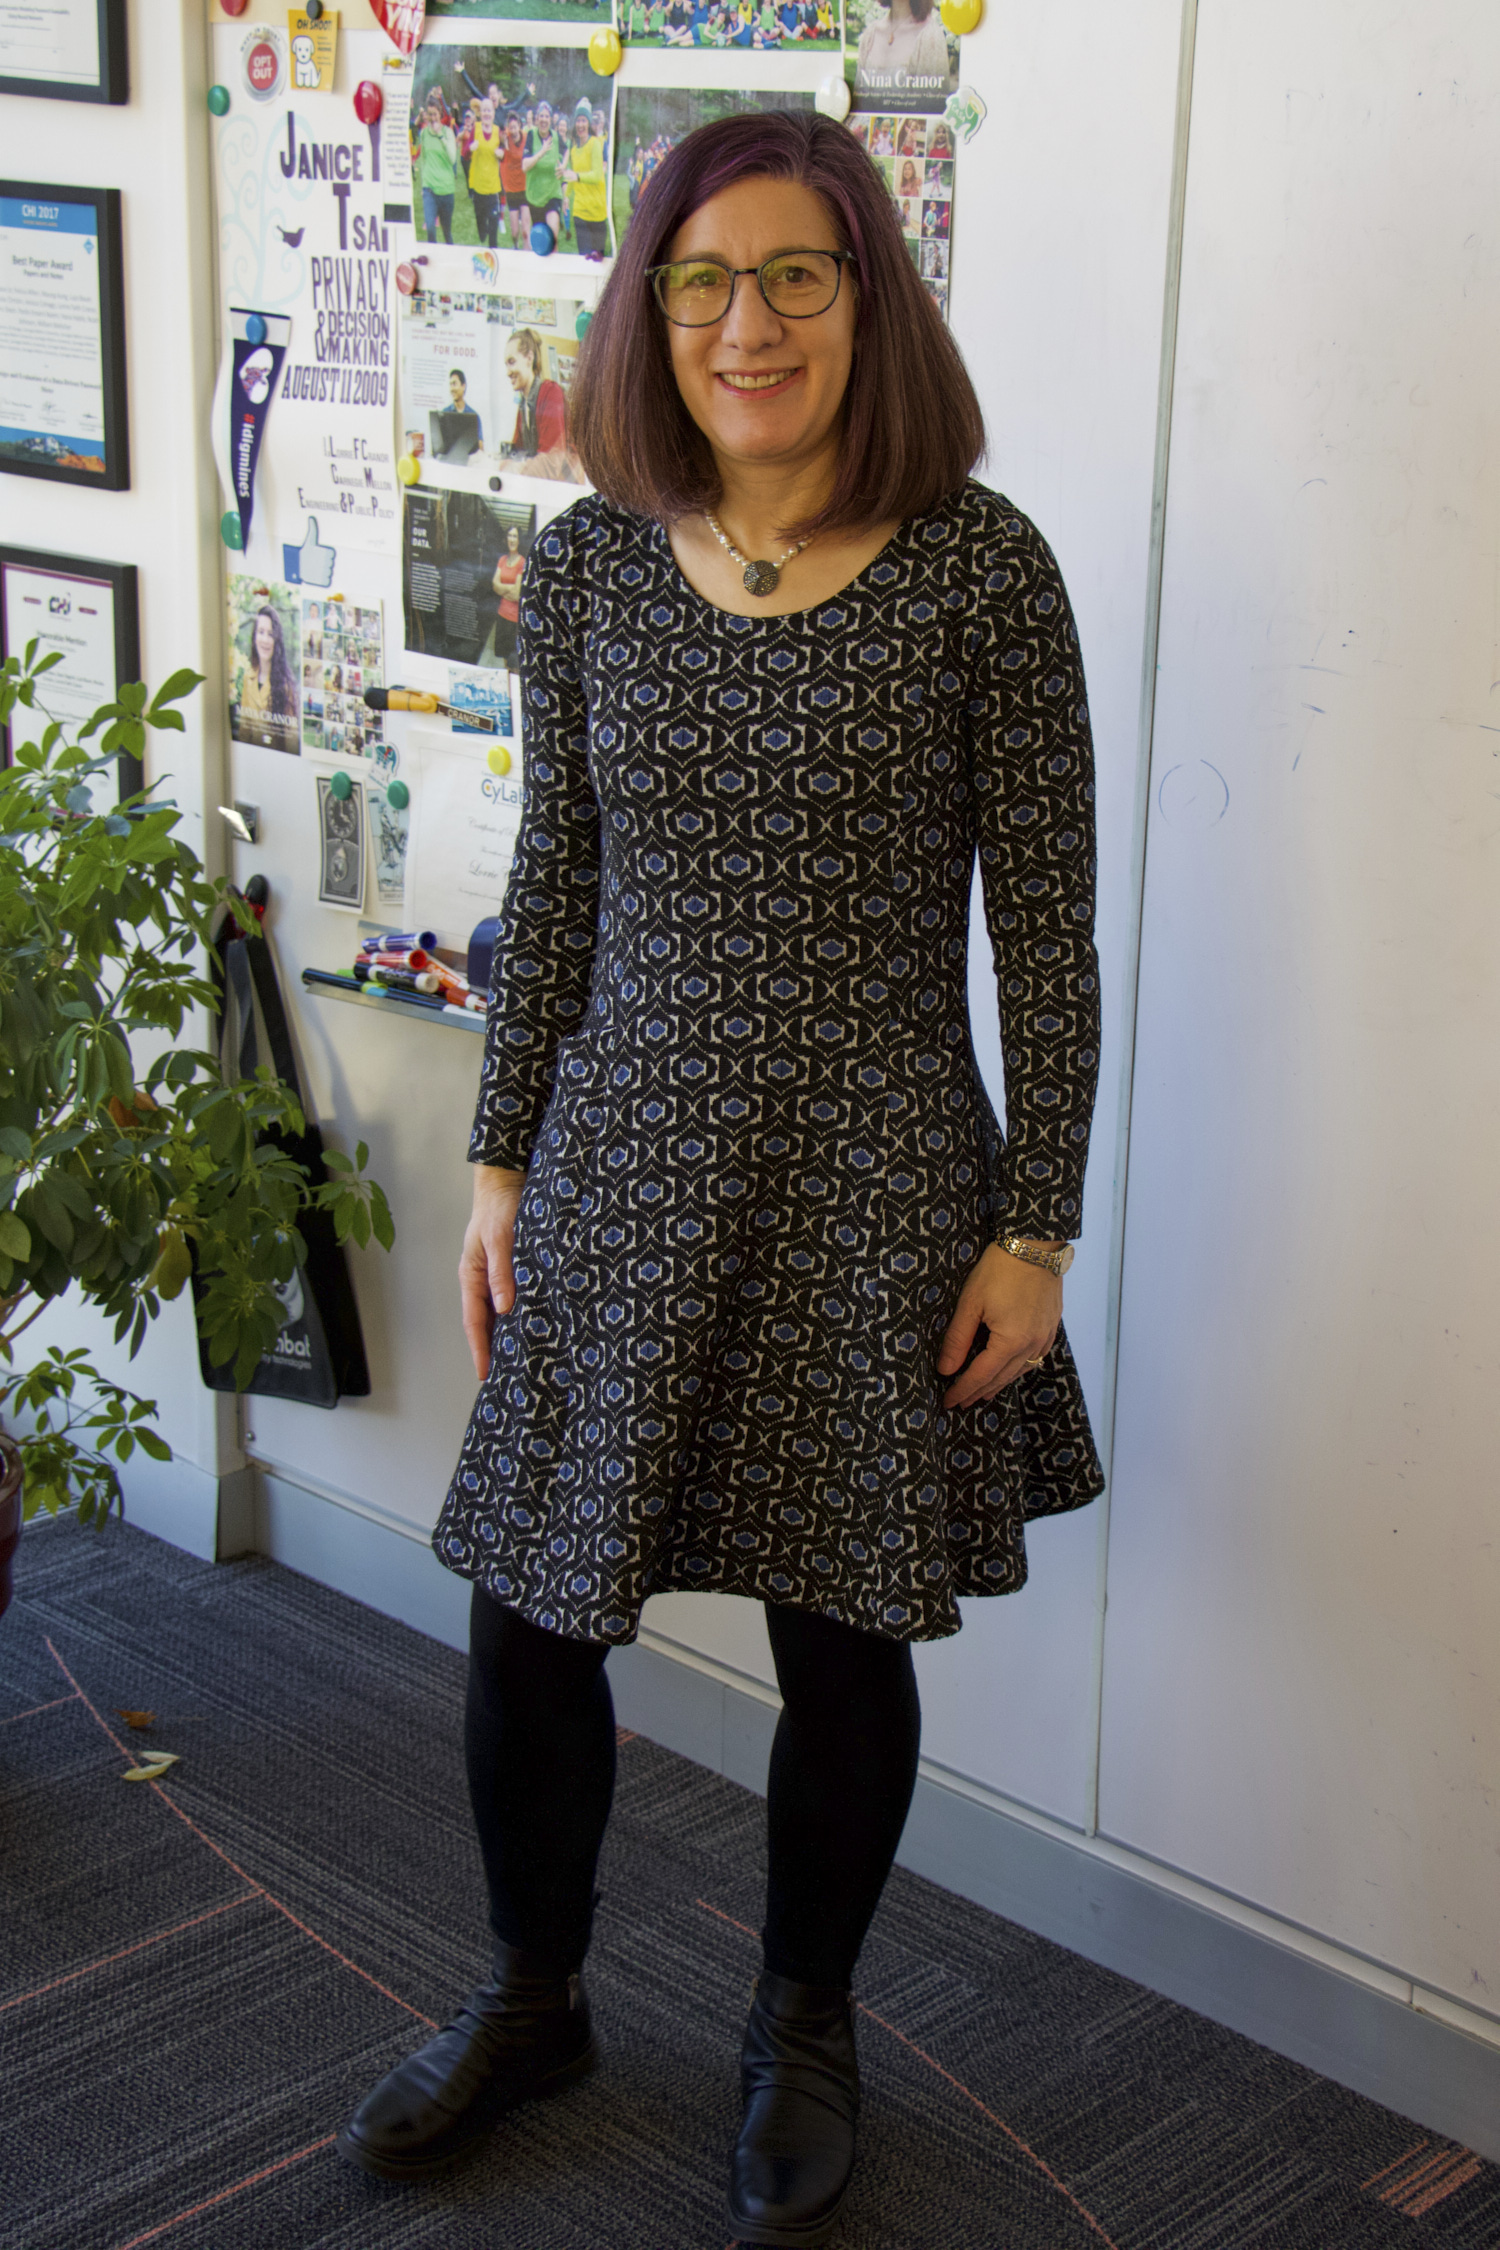
For this version I selected a black, blue, and white geometric textured poly/rayon/spandex double knit that I bought from Cali Fabrics last spring. It’s a midweight, almost heavy knit with four-way stretch. It stretches well over the bodice, but also has enough body to give a nice fit and flare shape to the skirt. It is a comfortable cold-weather dress that will never need to be ironed.
I projected and cut this dress out on one day and sewed the whole thing together on another. There is a lot of princess seaming but it comes together pretty quickly, especially with a serger. There is no gathering, easing, or tricky seams to line up so it is a pretty straightforward pattern to sew.
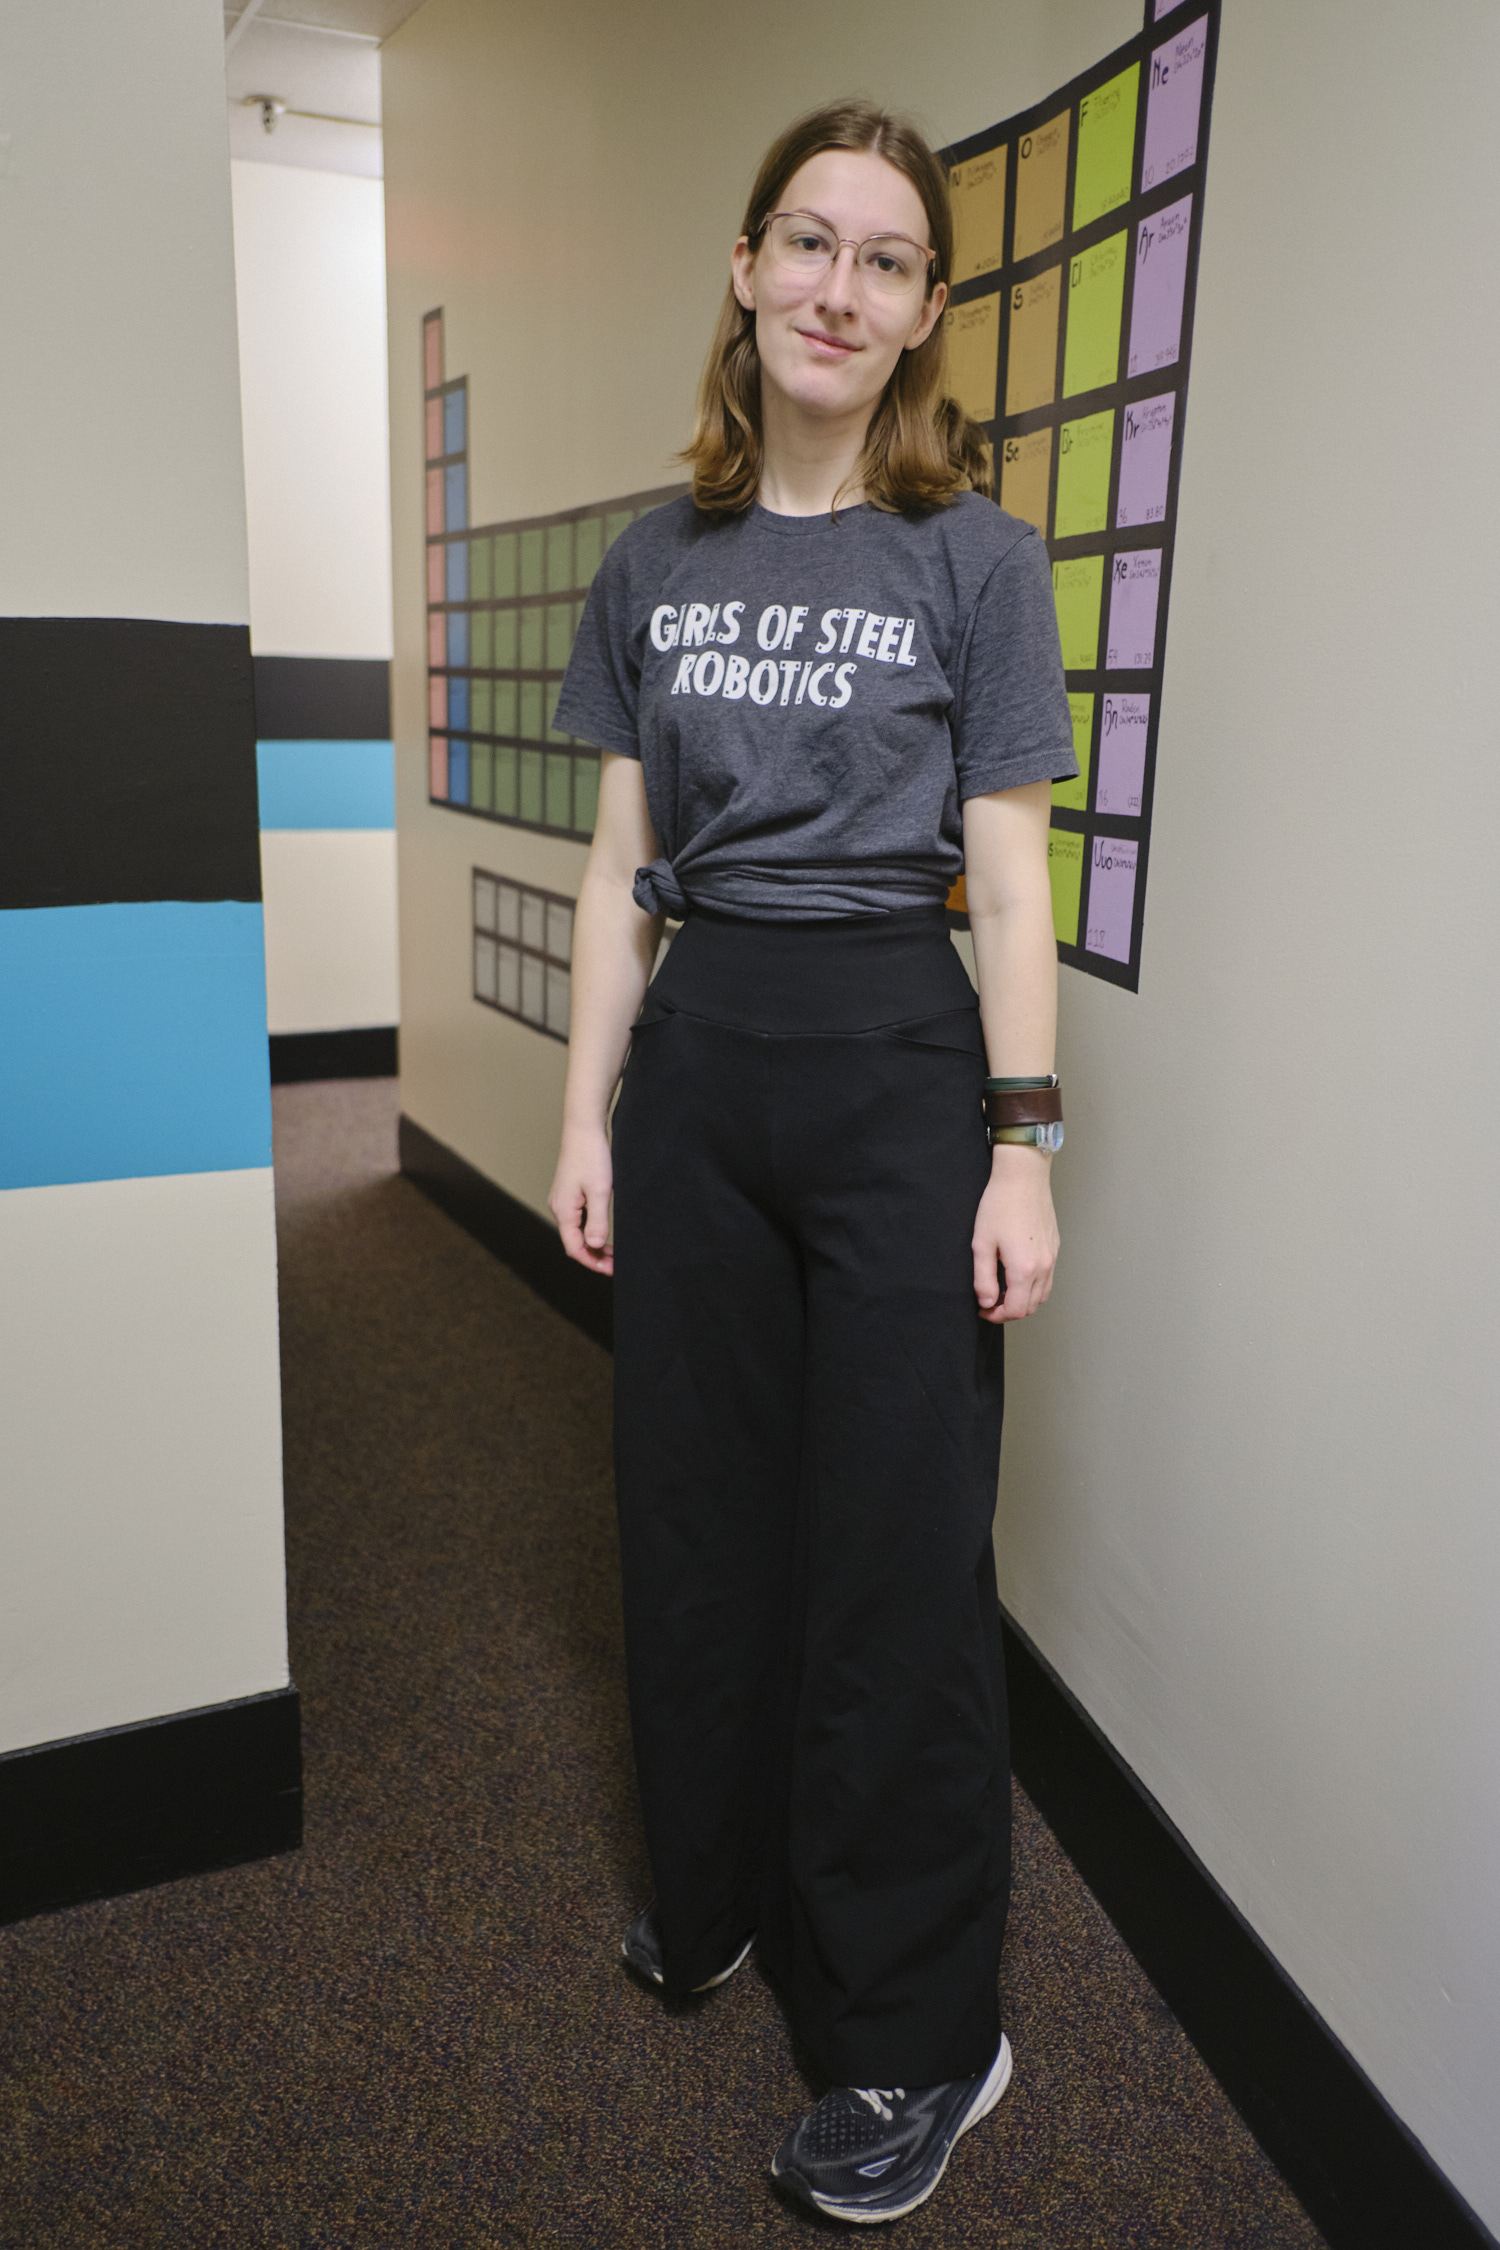
I was so excited about my new dress that I wore it to work today and took some photos in my office!
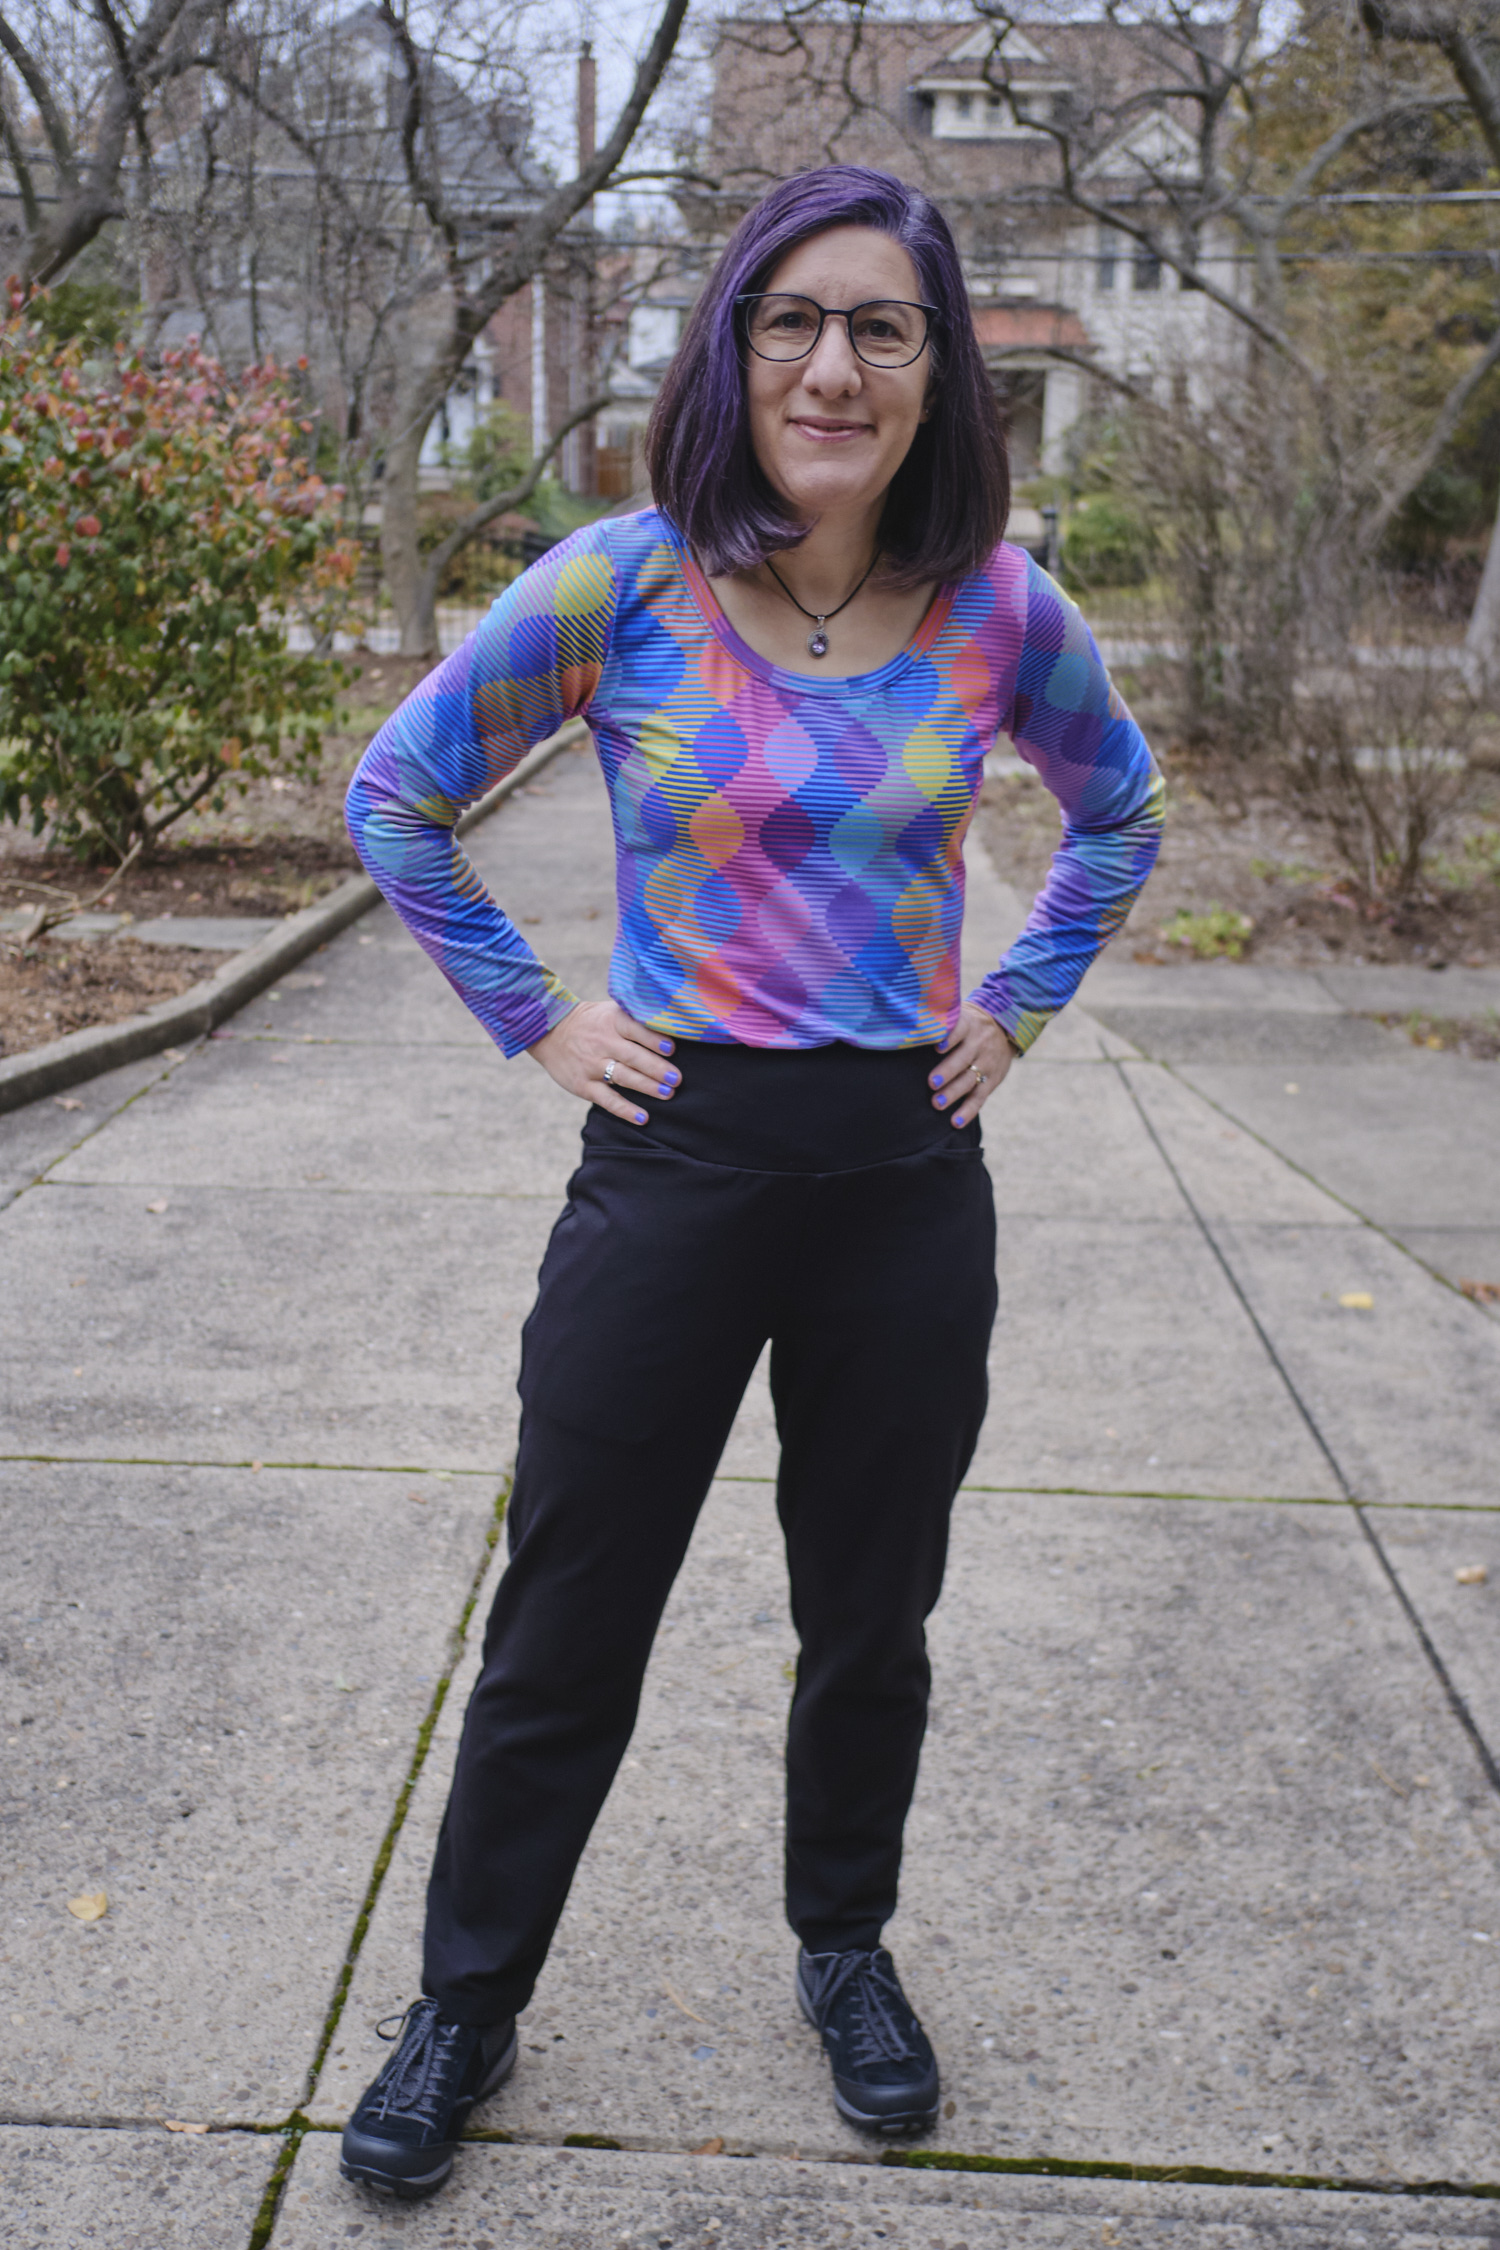
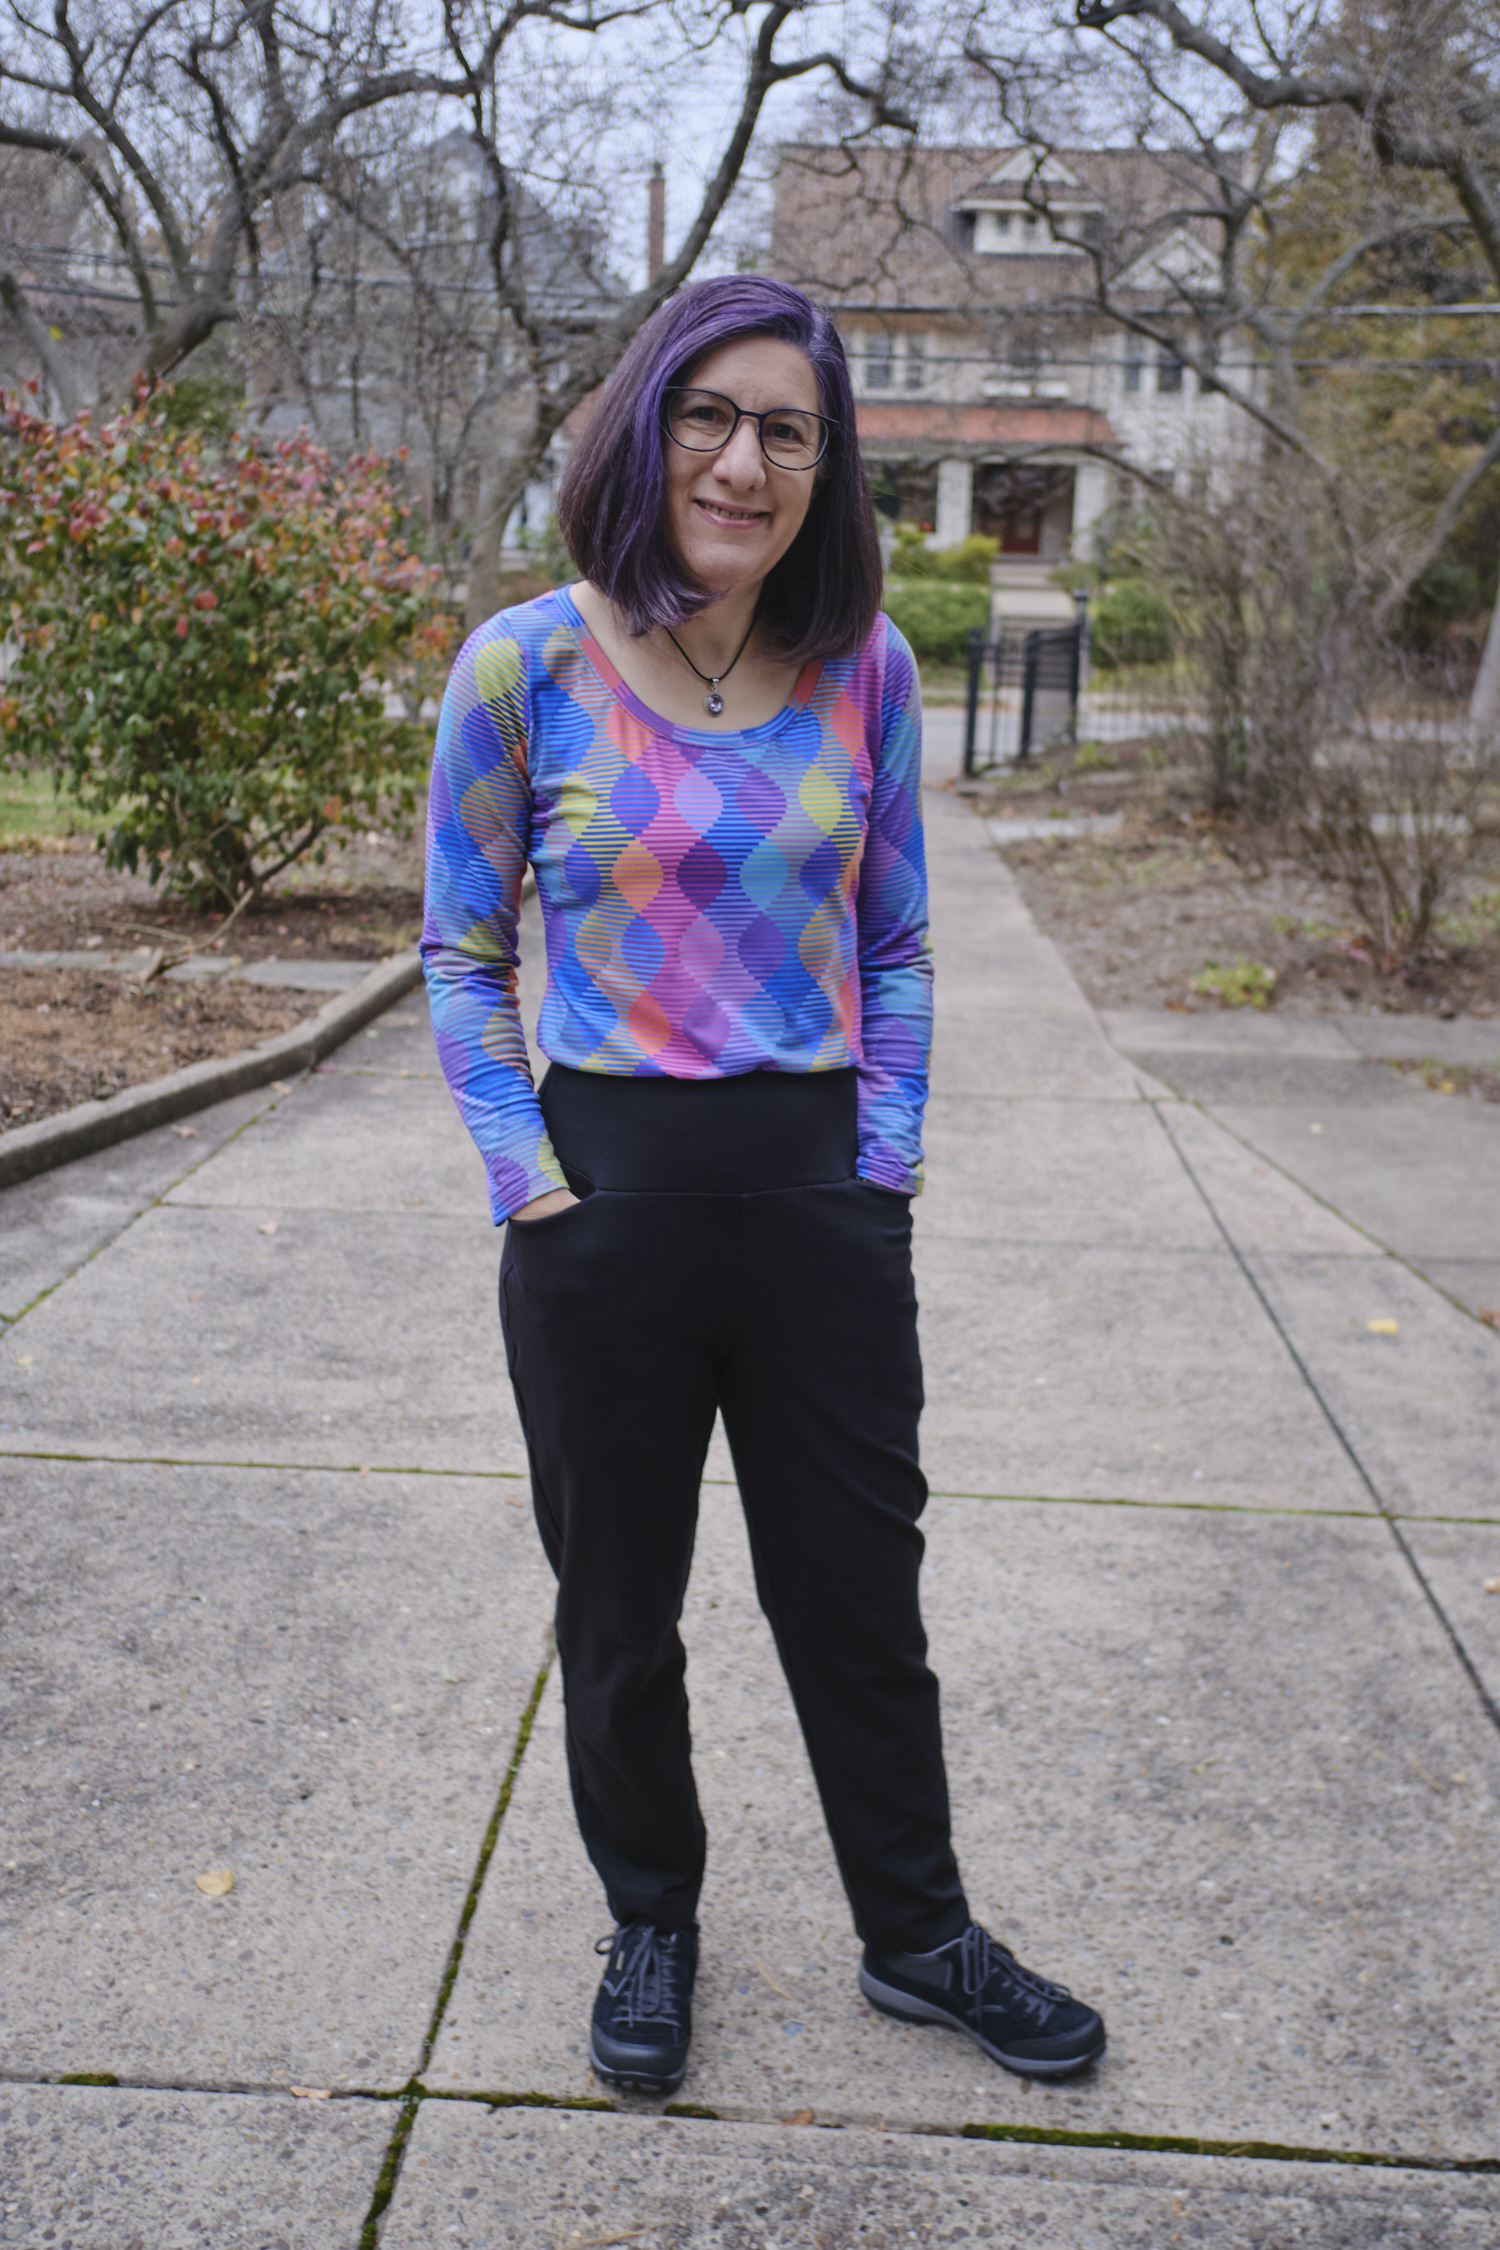
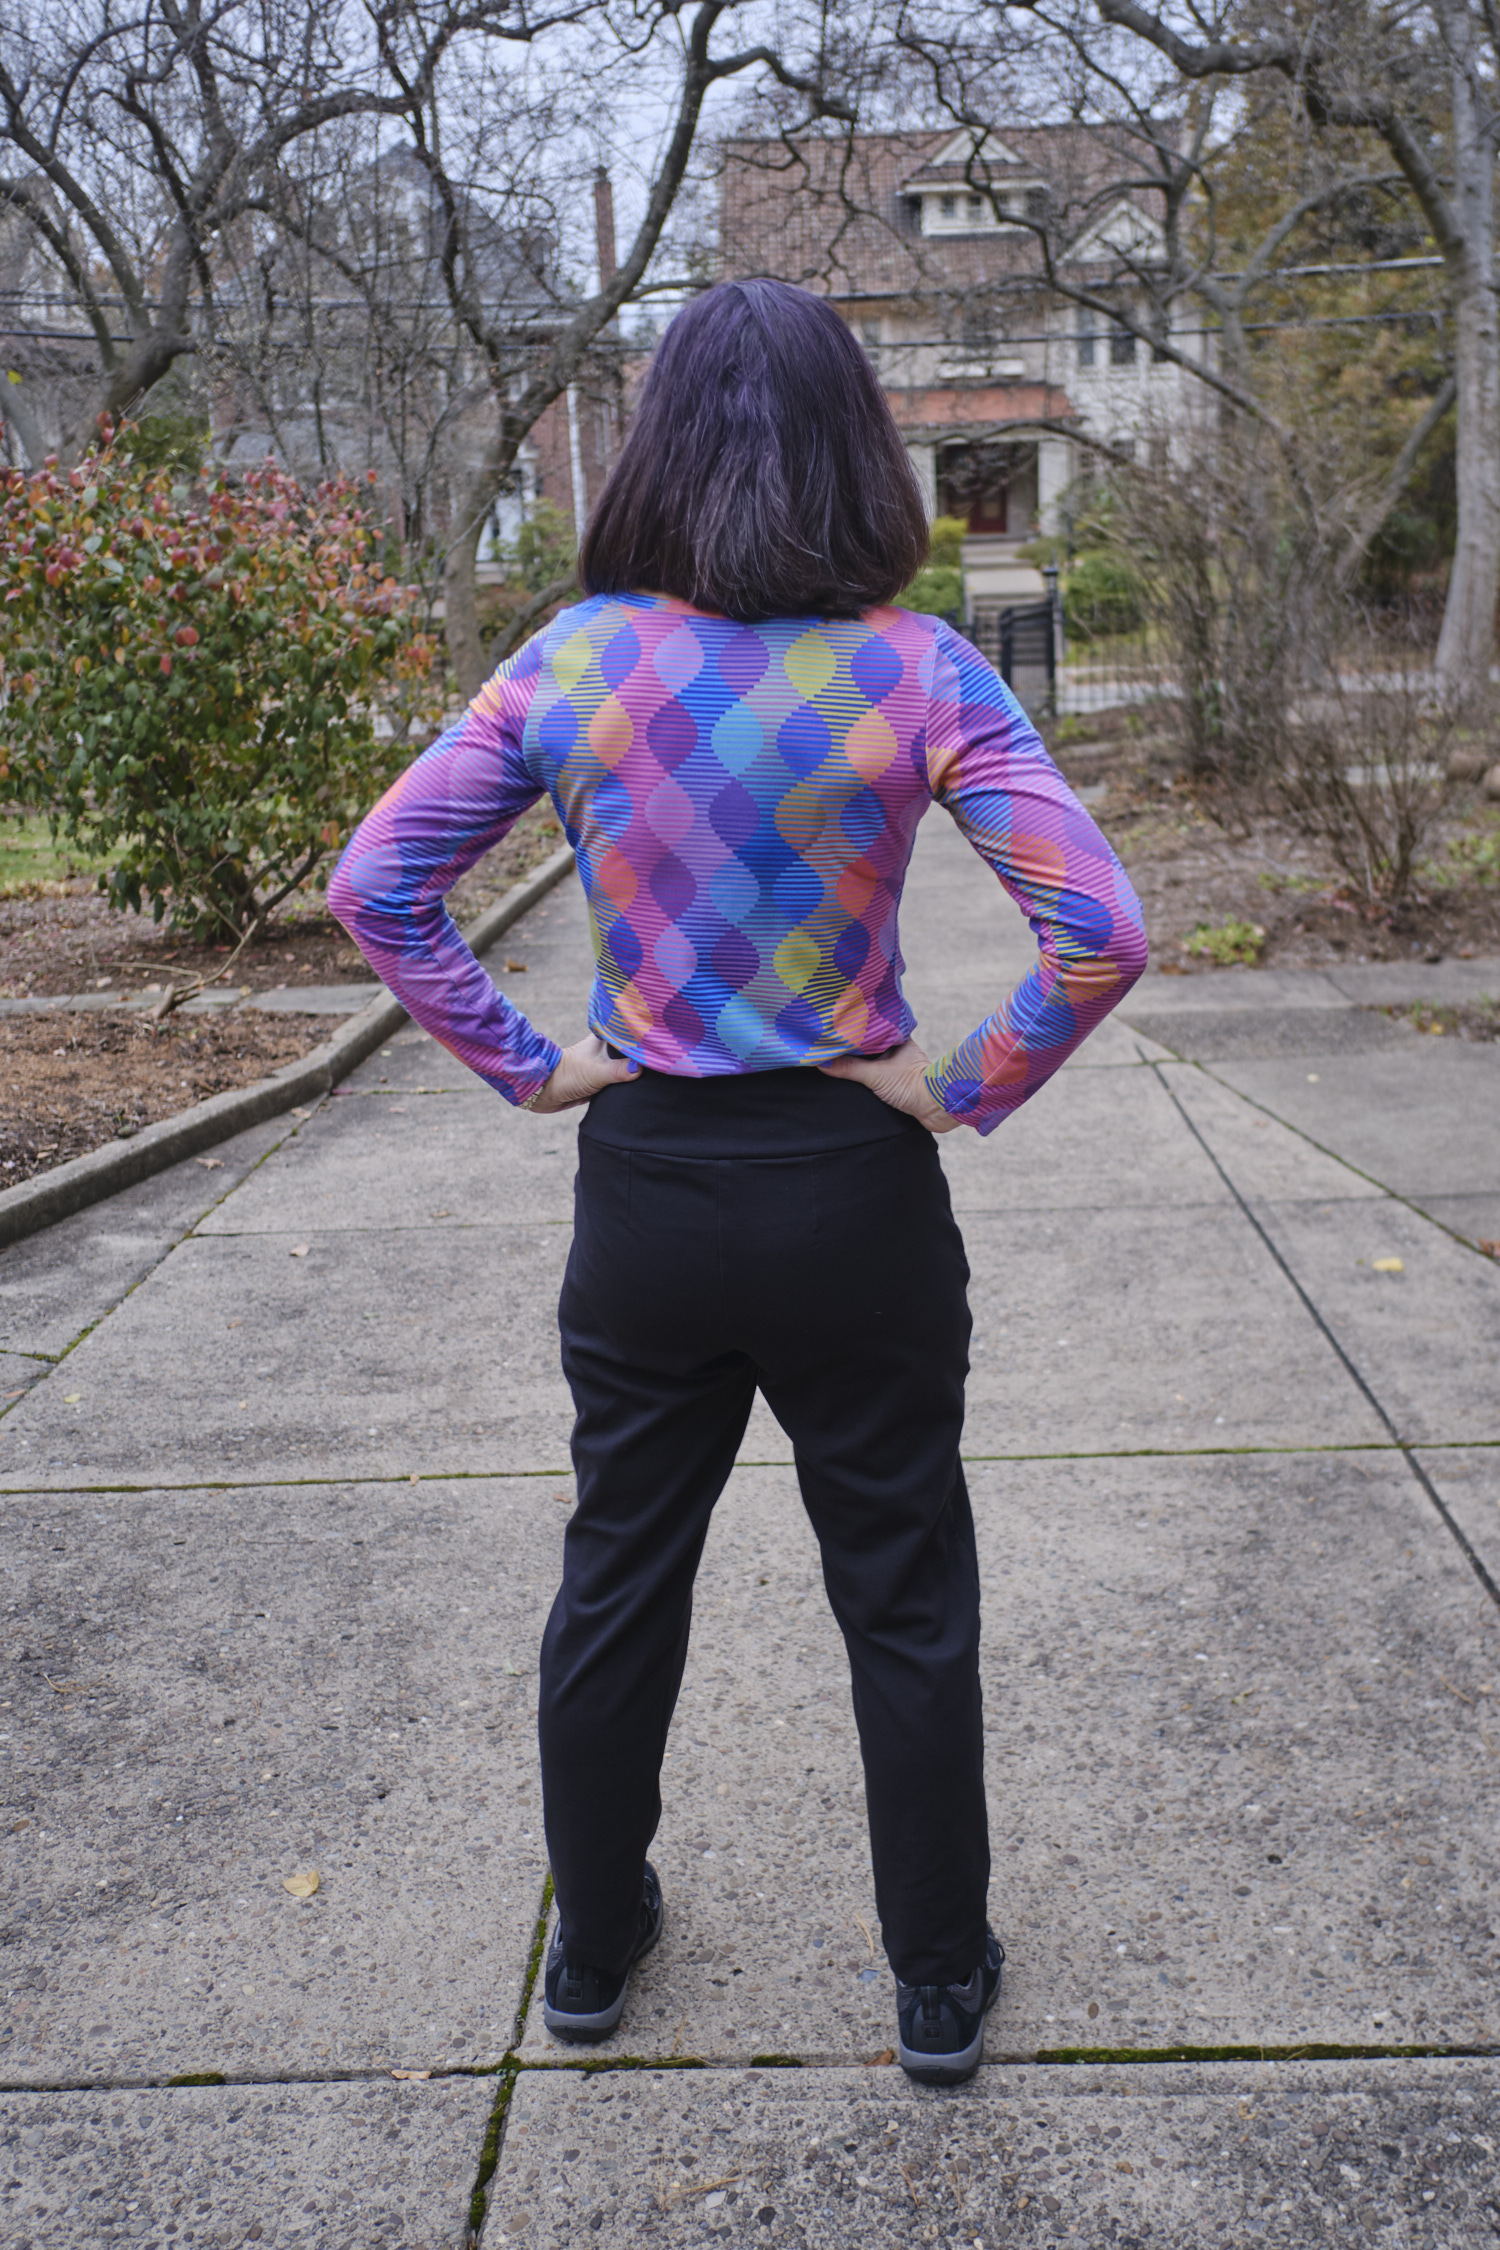
I made a pair of Pattern Emporium Urban tapered pants last winter out of some grey cotton Lycra fabric. They fit ok, but the fabric gave them somewhat of an athletic look. I’ve worn them a lot for casual wear, and I’ve used the wide-leg version of the same pattern to make a couple of pairs of pants in a ponte fabric, with a dressier look. I decided to try the tapered version again, this time with black ponte fabric and some additional modifications. It’s easier to get a good fit with wide-leg pants, but I’m getting the hang of tapered pants too.
I started with the size 10 tapered pattern with the low-rise waist, and graded down from the hips to the waist and altered the pockets to have a deeper pocket bag and straight opening as I had done in one of the wide-leg Urban pants I made. Then I added an extra-high contoured waistband lined in athletic knit and reinforced with half-inch elastic as I had done in my orange Urban boldly pants. I also extended the bottom of the crotch seam about half an inch in both the front and back. When I initially basted on the waistband and tried on the pants they seemed too wide in the thigh so I extended the grading on the outer leg seam down to the knee and resewed the side seam, using my serger to trim off the excess as I sewed.
The pants fit well and are super comfortable to wear. They have a slim fit but they are not skinny pants. Except for the waist, they have plenty of ease. However, even in the ponte fabric, I think the look is still somewhat casual, maybe a bit baggy — the wide-leg versions look dressier to me, perhaps because they fall in a straight line down the leg without folds. For a dressier look, I may try a pattern for slimmer fitting pants.
For a casual look, the Urban tapered pants are great, and they are awesome for travel — comfy and plenty of room in the pockets (especially after I cut the pocket bags a little bigger to make sure my phone would fit below my hip crease for maximum comfort). While wide-leg pants are cool and breezy in the summer, a cool breeze up your legs is not optimal in the winter. For travel, less fabric to trip over or pool around your feet can be advantageous. I have already taken these black tapered pants on two trips and wore them for two days straight each time, including wearing them overnight on a red-eye flight (if I have to take an overnight flight I definitely want comfortable pants!).
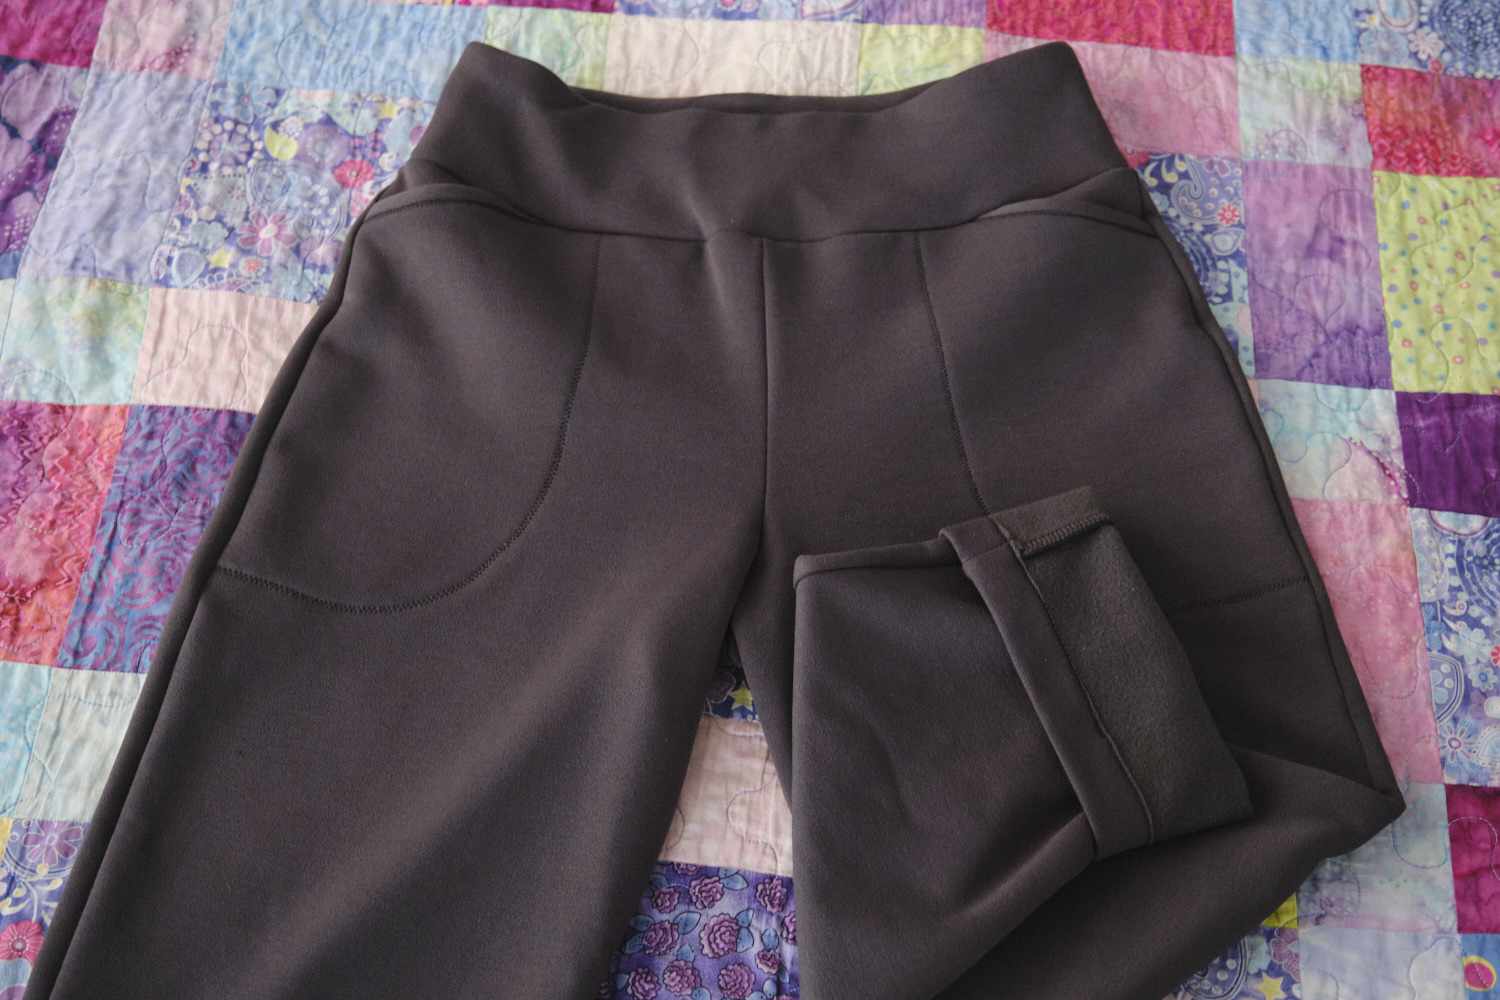
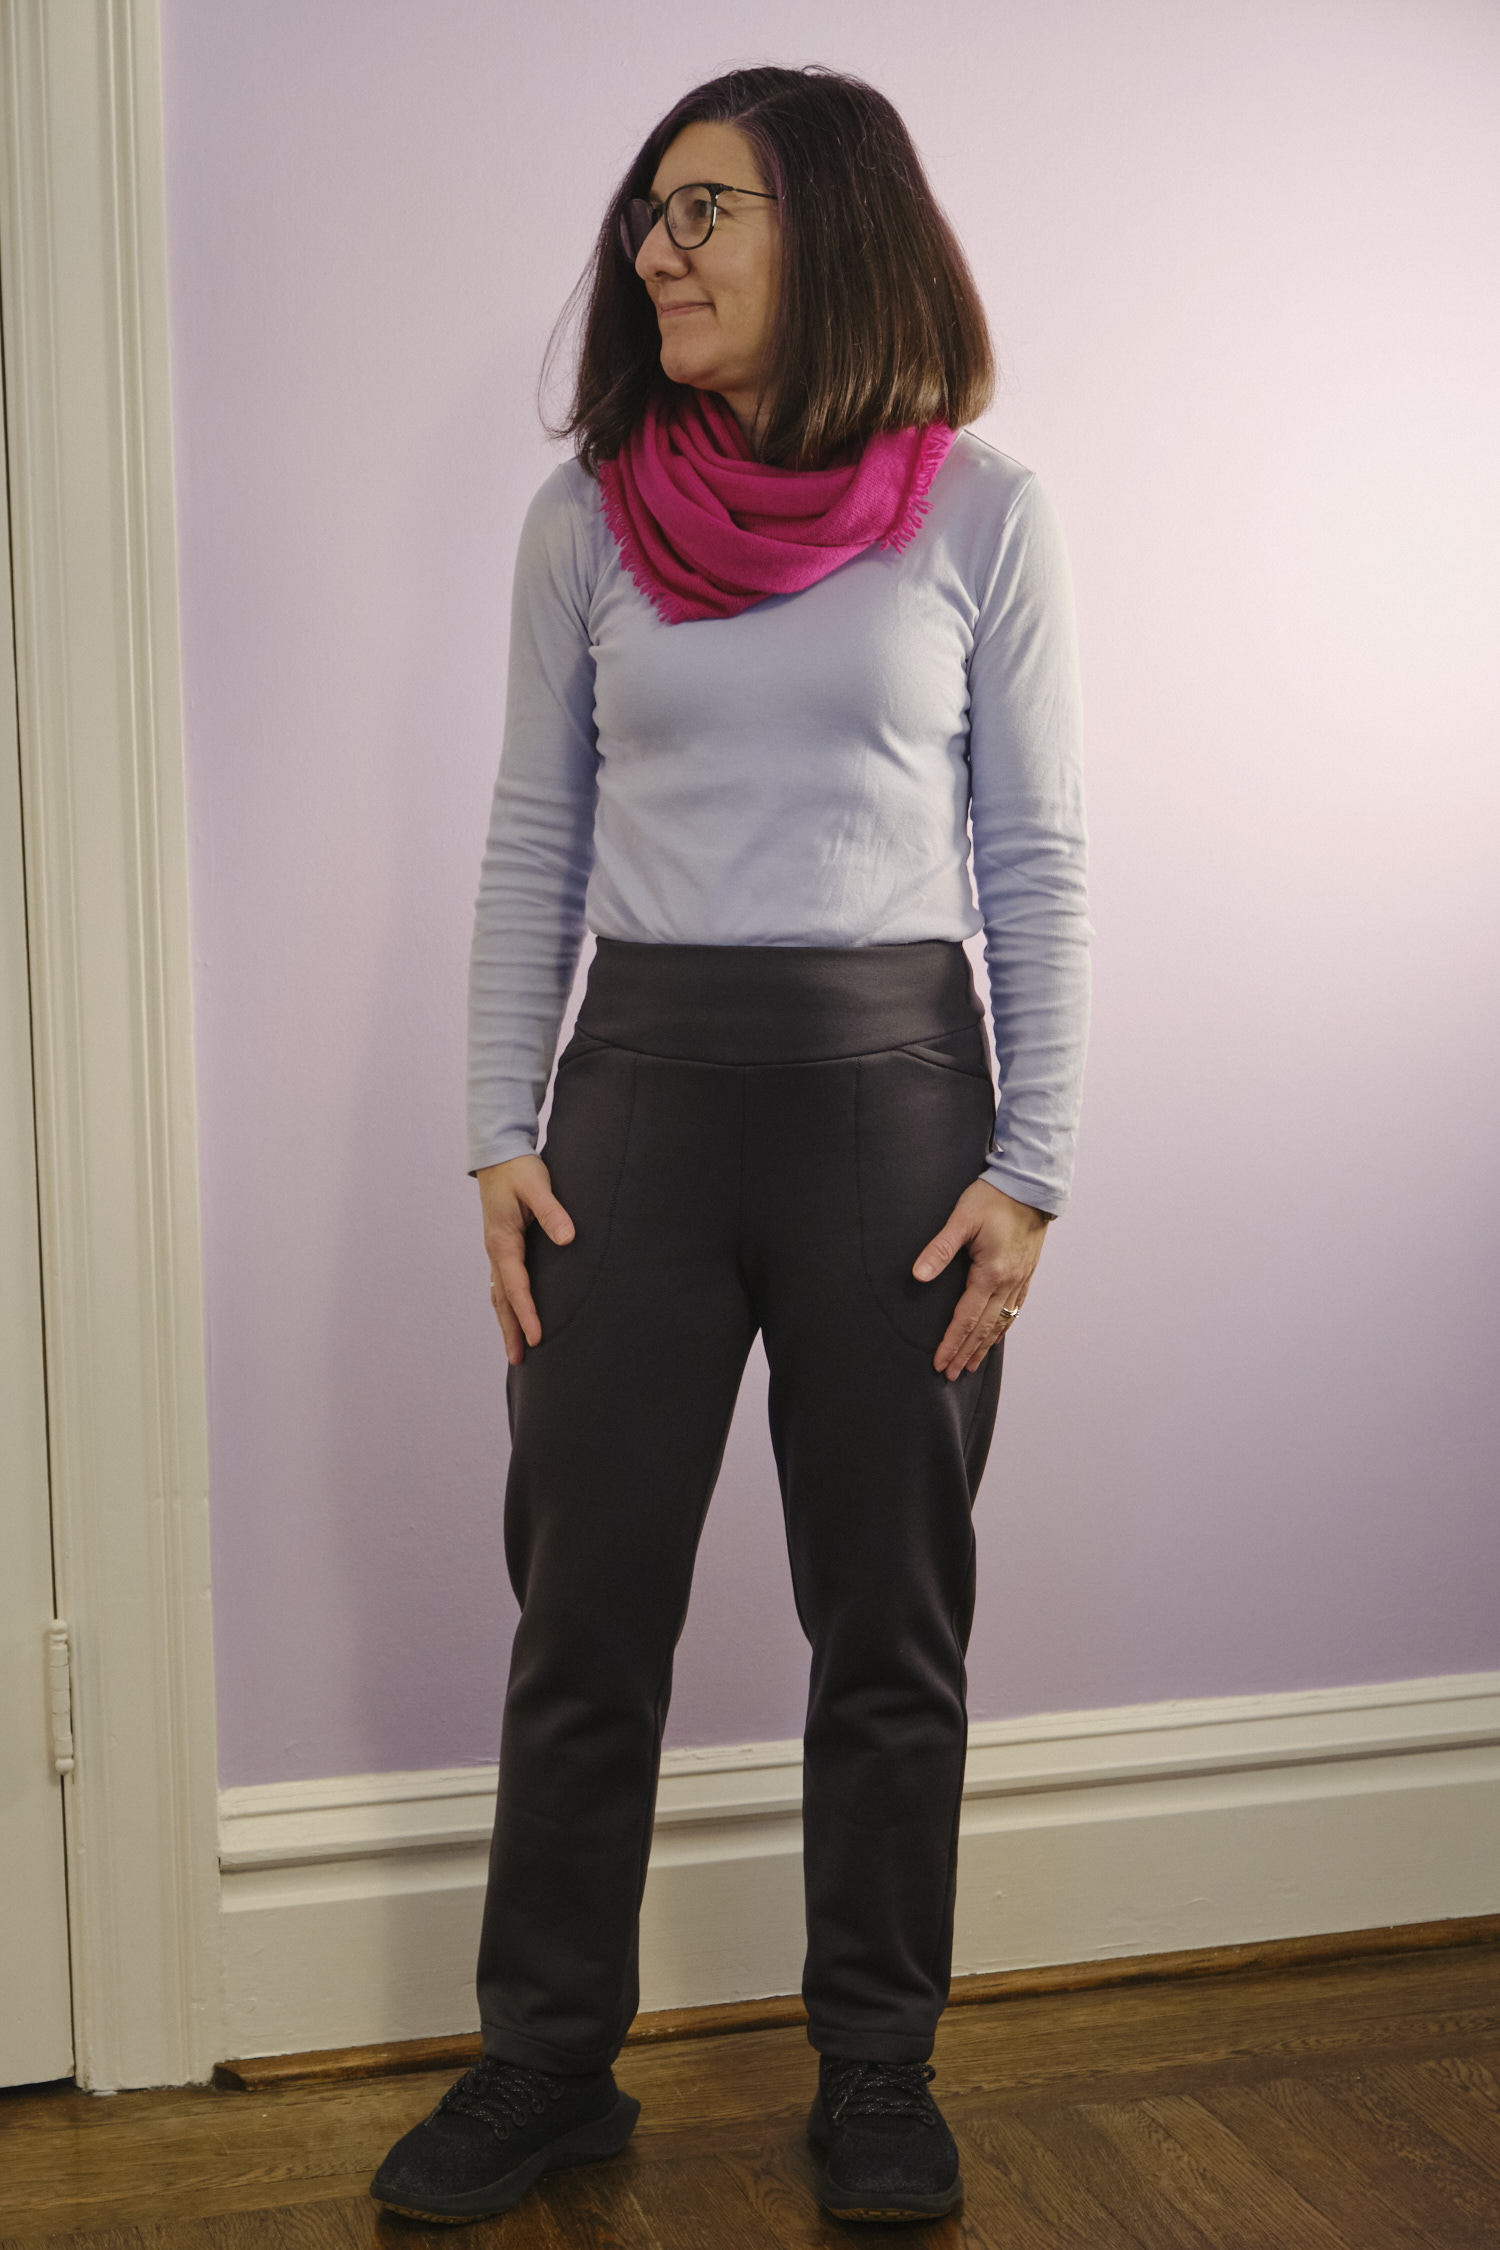
I decided to go ahead and make another pair out of Urban tapered pants, this time with the intention of using them for comfy athletic pants. I used a charcoal grey super cozy 250 gsm Polartech stretch sweatshirt fleece made from 51% Polyester/38% Nylon/11% Spandex. The fabric is smooth on the outside and fluffy on the inside. I made these with the same modifications I used for the black pants, except I made both the inner and outer contour waistband from the fleece, I made the waistband a half an inch shorter, and I used stitched pockets (borrowing from the PE Just Peachy Shorts pattern but with a straight pocket opening) instead of pocket bags to reduce bulk from the fleece. I especially love the way the pockets came out!
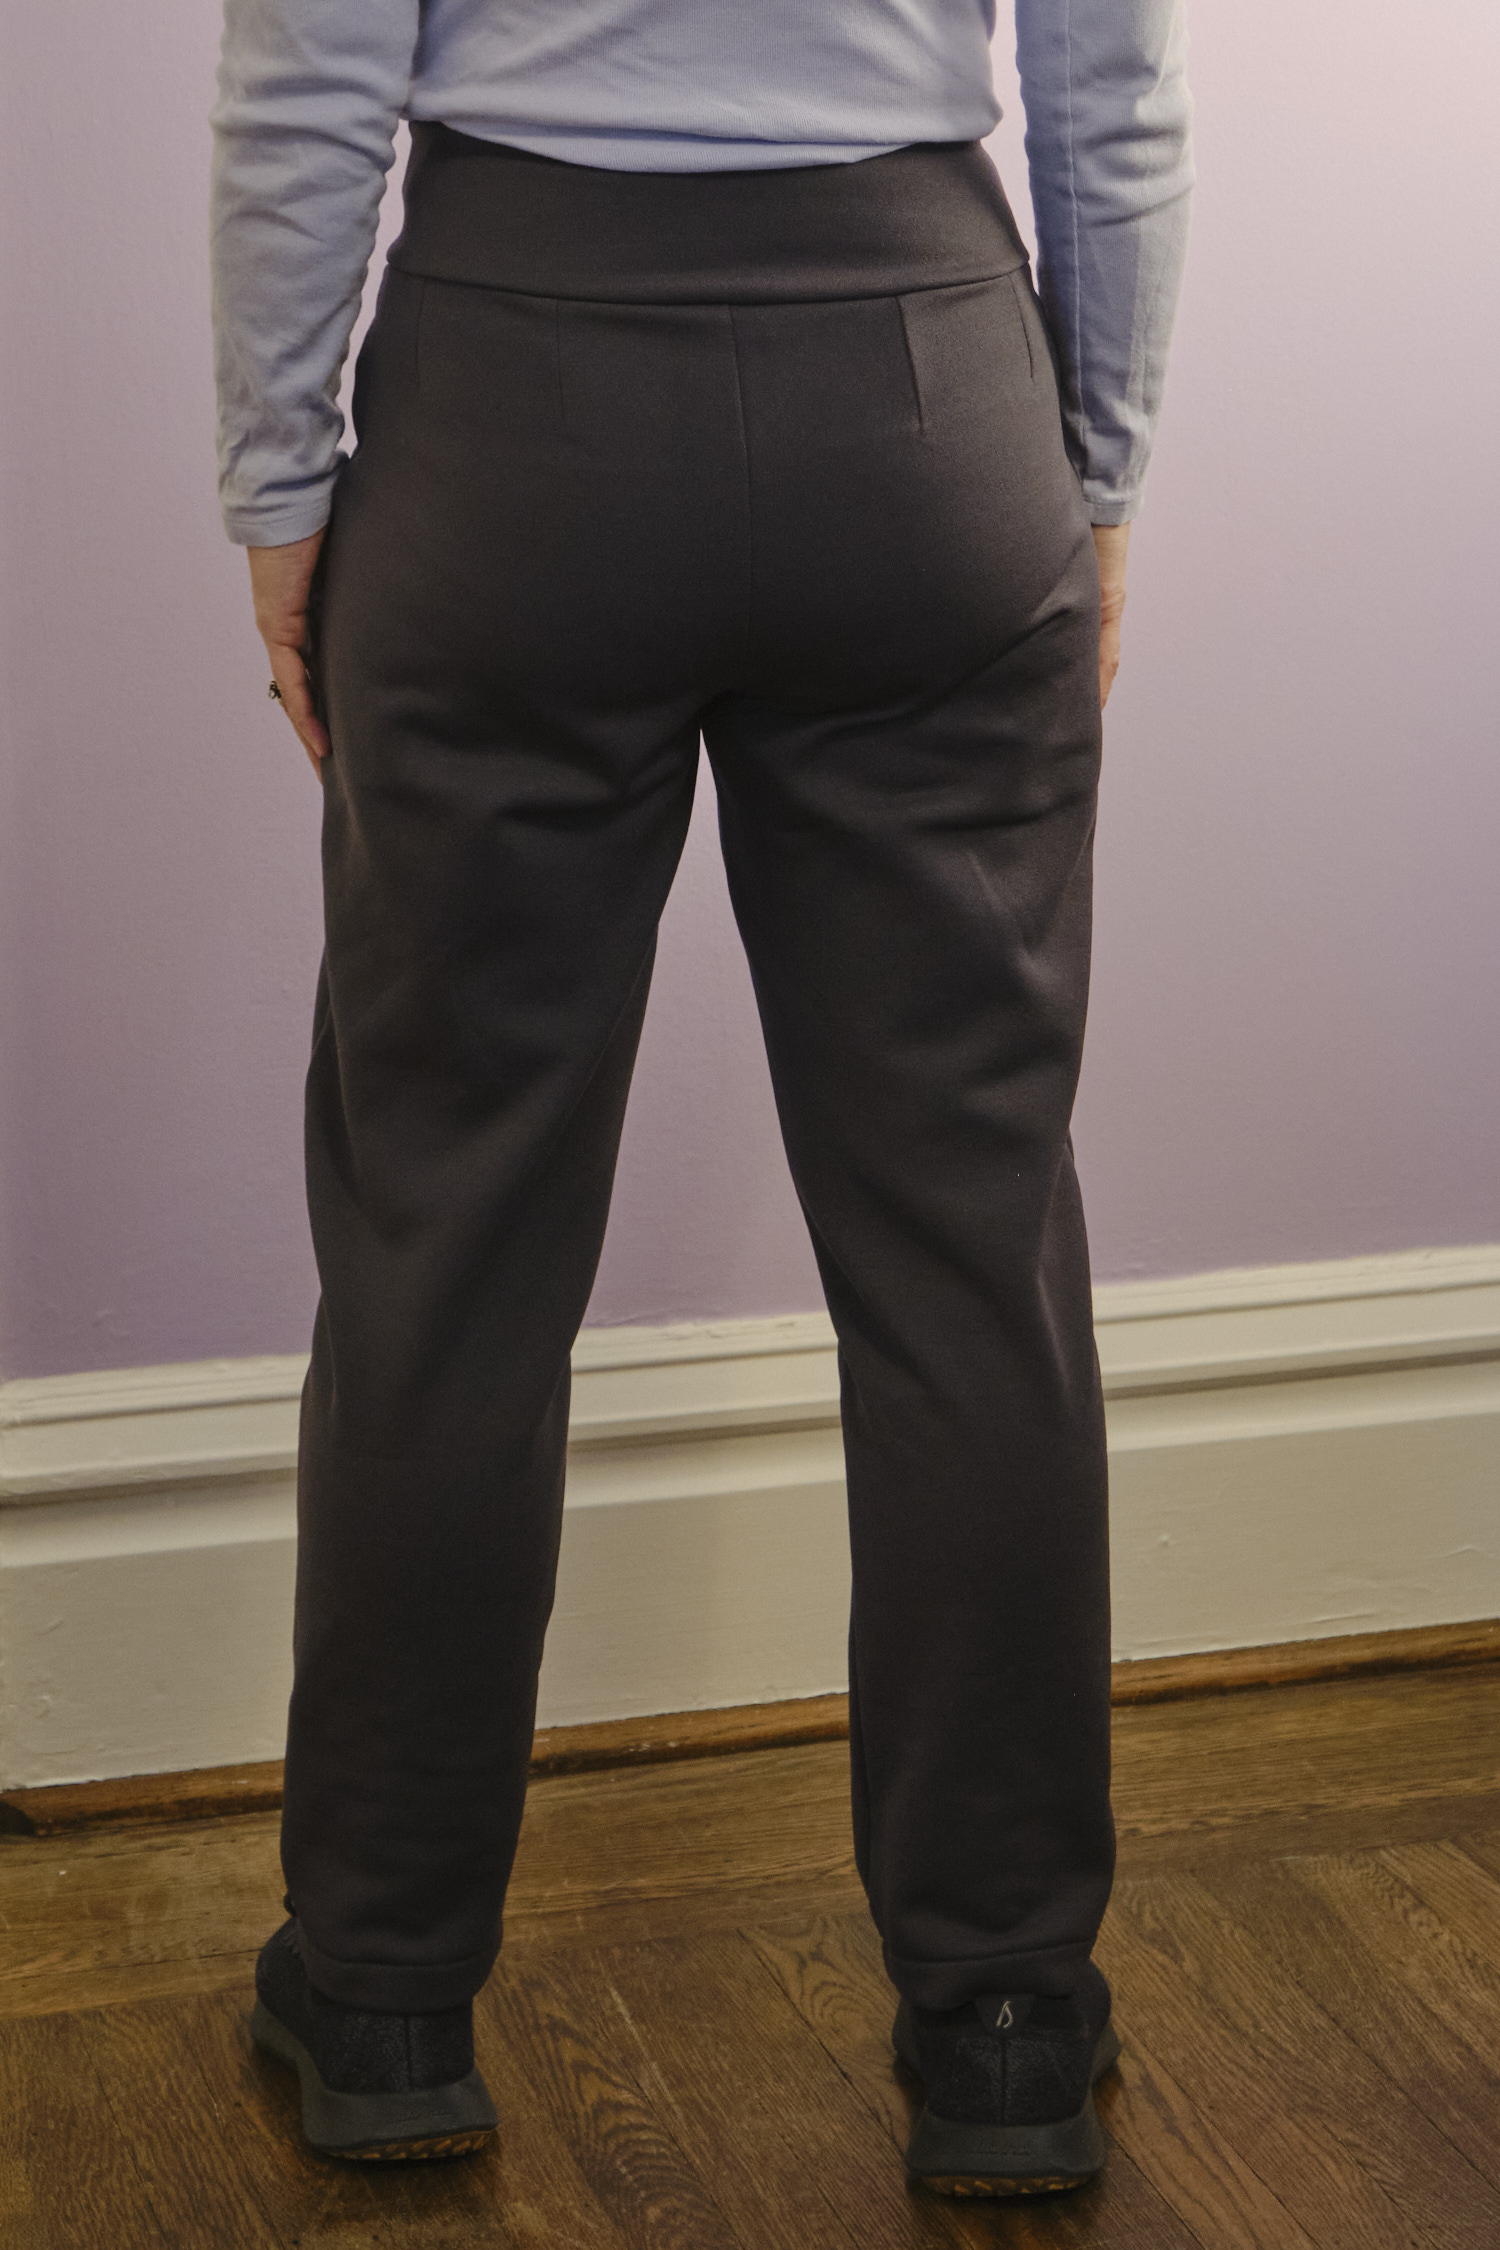
These pants are also super comfy and the contour yoga waistband feels great. The back darts really add to the waist and rear shaping and in combination with a graded-in waist and contoured waistband mean that there is no extra fabric gathered beneath the waistband.
These are very comfy and warm — they will be great winter pants to wear with a warm sweater all winter (pictured here with my Sinclair Soho cozy quilted tunic). In fact, this is what I wore this evening (with a coat) when I ventured out into the 26 degree chill and I can confirm that they kept my legs pretty warm.
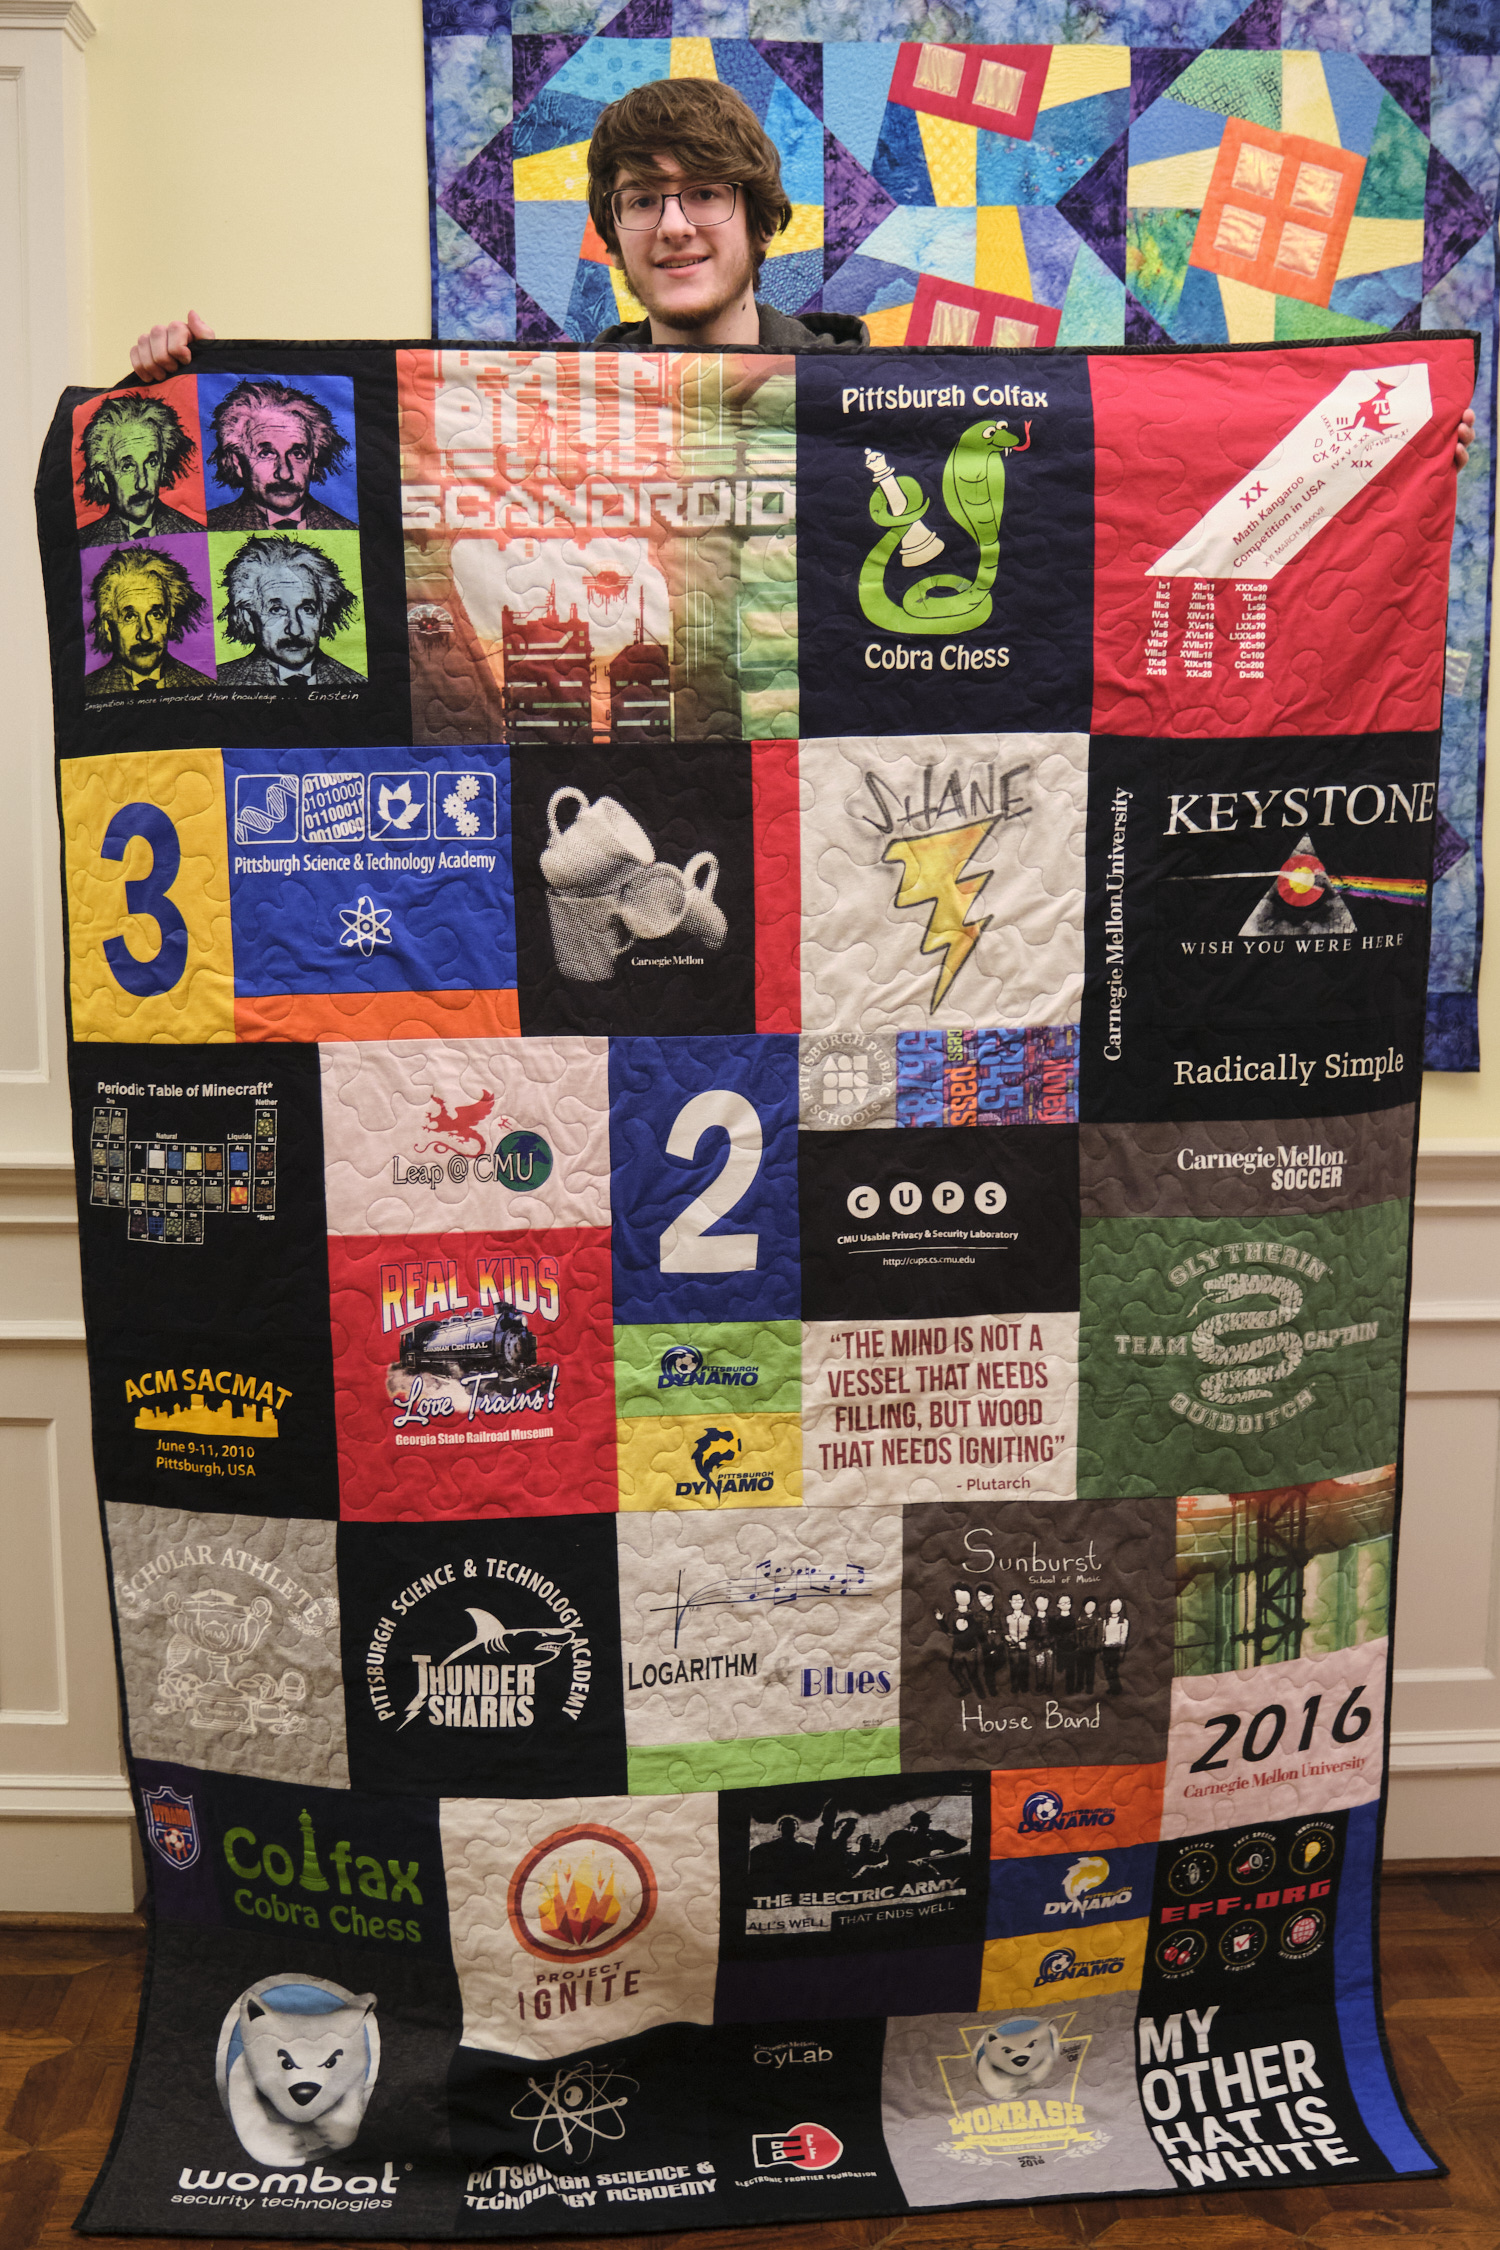
I had gathered up my son’s old t-shirts, designed the quilt, but hadn’t even finished cutting up the shirts when my son went off to college. I continued working on it while he was away but didn’t manage to finish it before he finished his freshman year at home due to COVID. I got distracted by all the turmoil of COVID and spent my sewing time sewing masks so I didn’t make any more progress on the quilt until after my son went back to school for his sophomore year. I managed to successfully finish the quilt by the time he came home for Thanksgiving but the quilt remains on his bed at home and never made it to school with him.
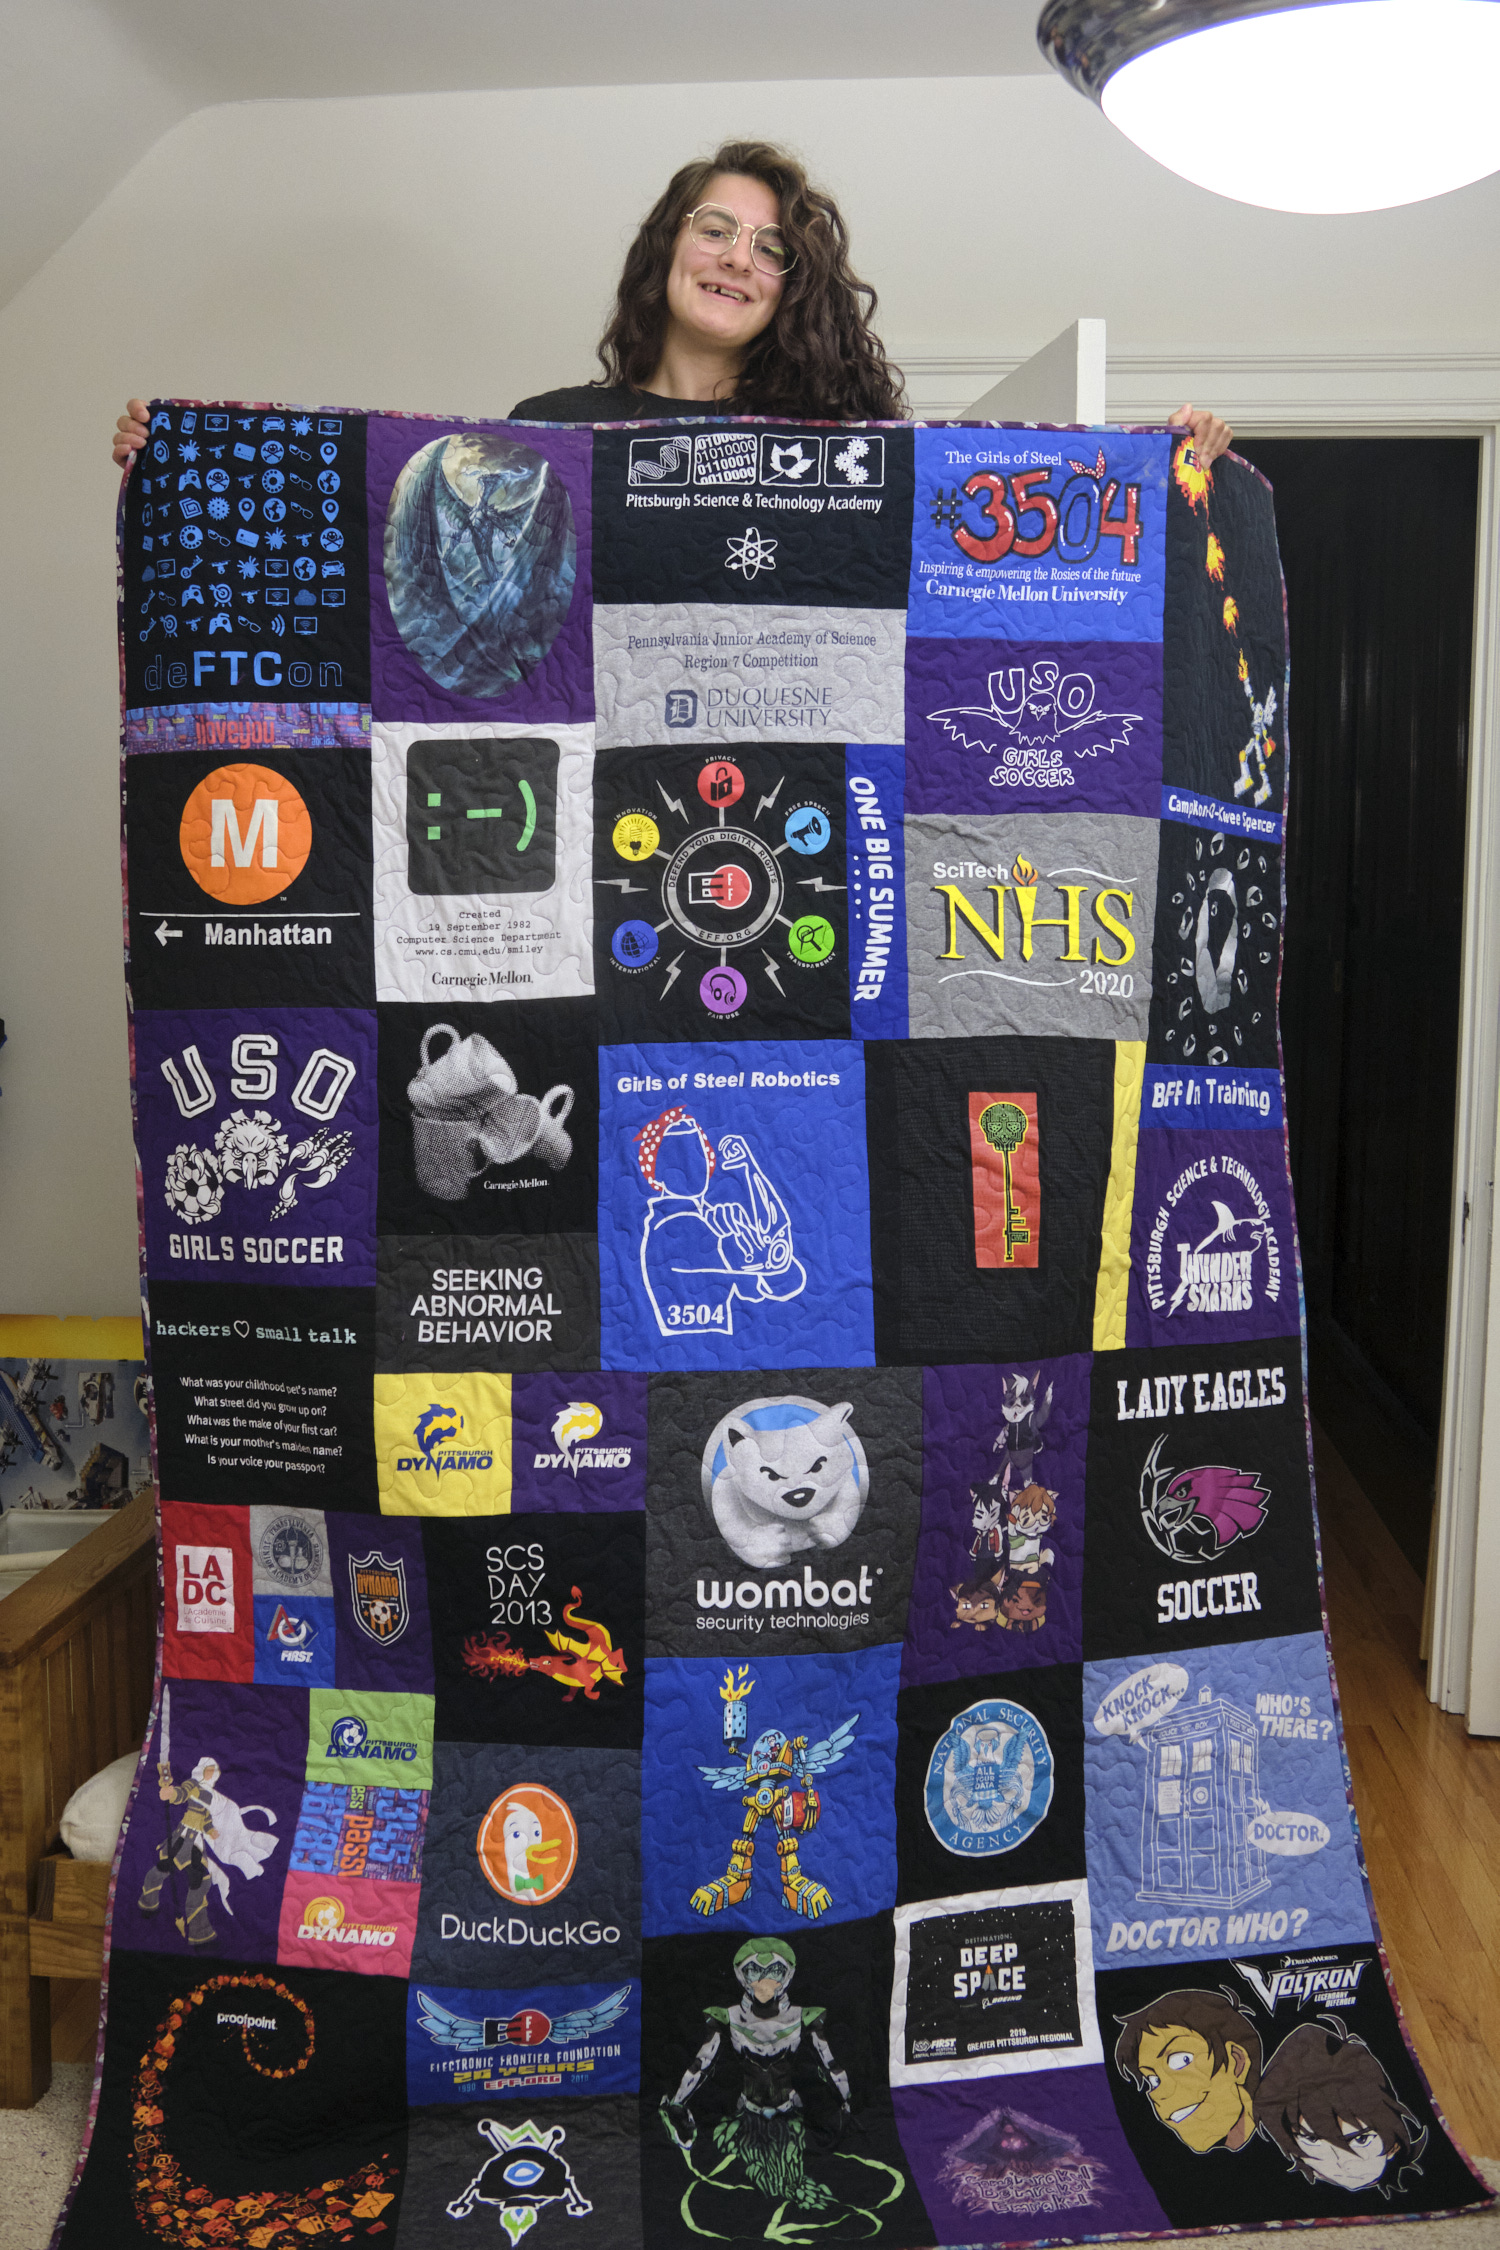
Shortly after I finished my son’s quilt, I started working on a t-shirt quilt for my middle child, who was then a high school senior. I managed to finish her quilt on time, and she brought it to college with her. It seems to be holding up well to daily use and a trip through the washing machine, and has even traveled with her to summer internships.
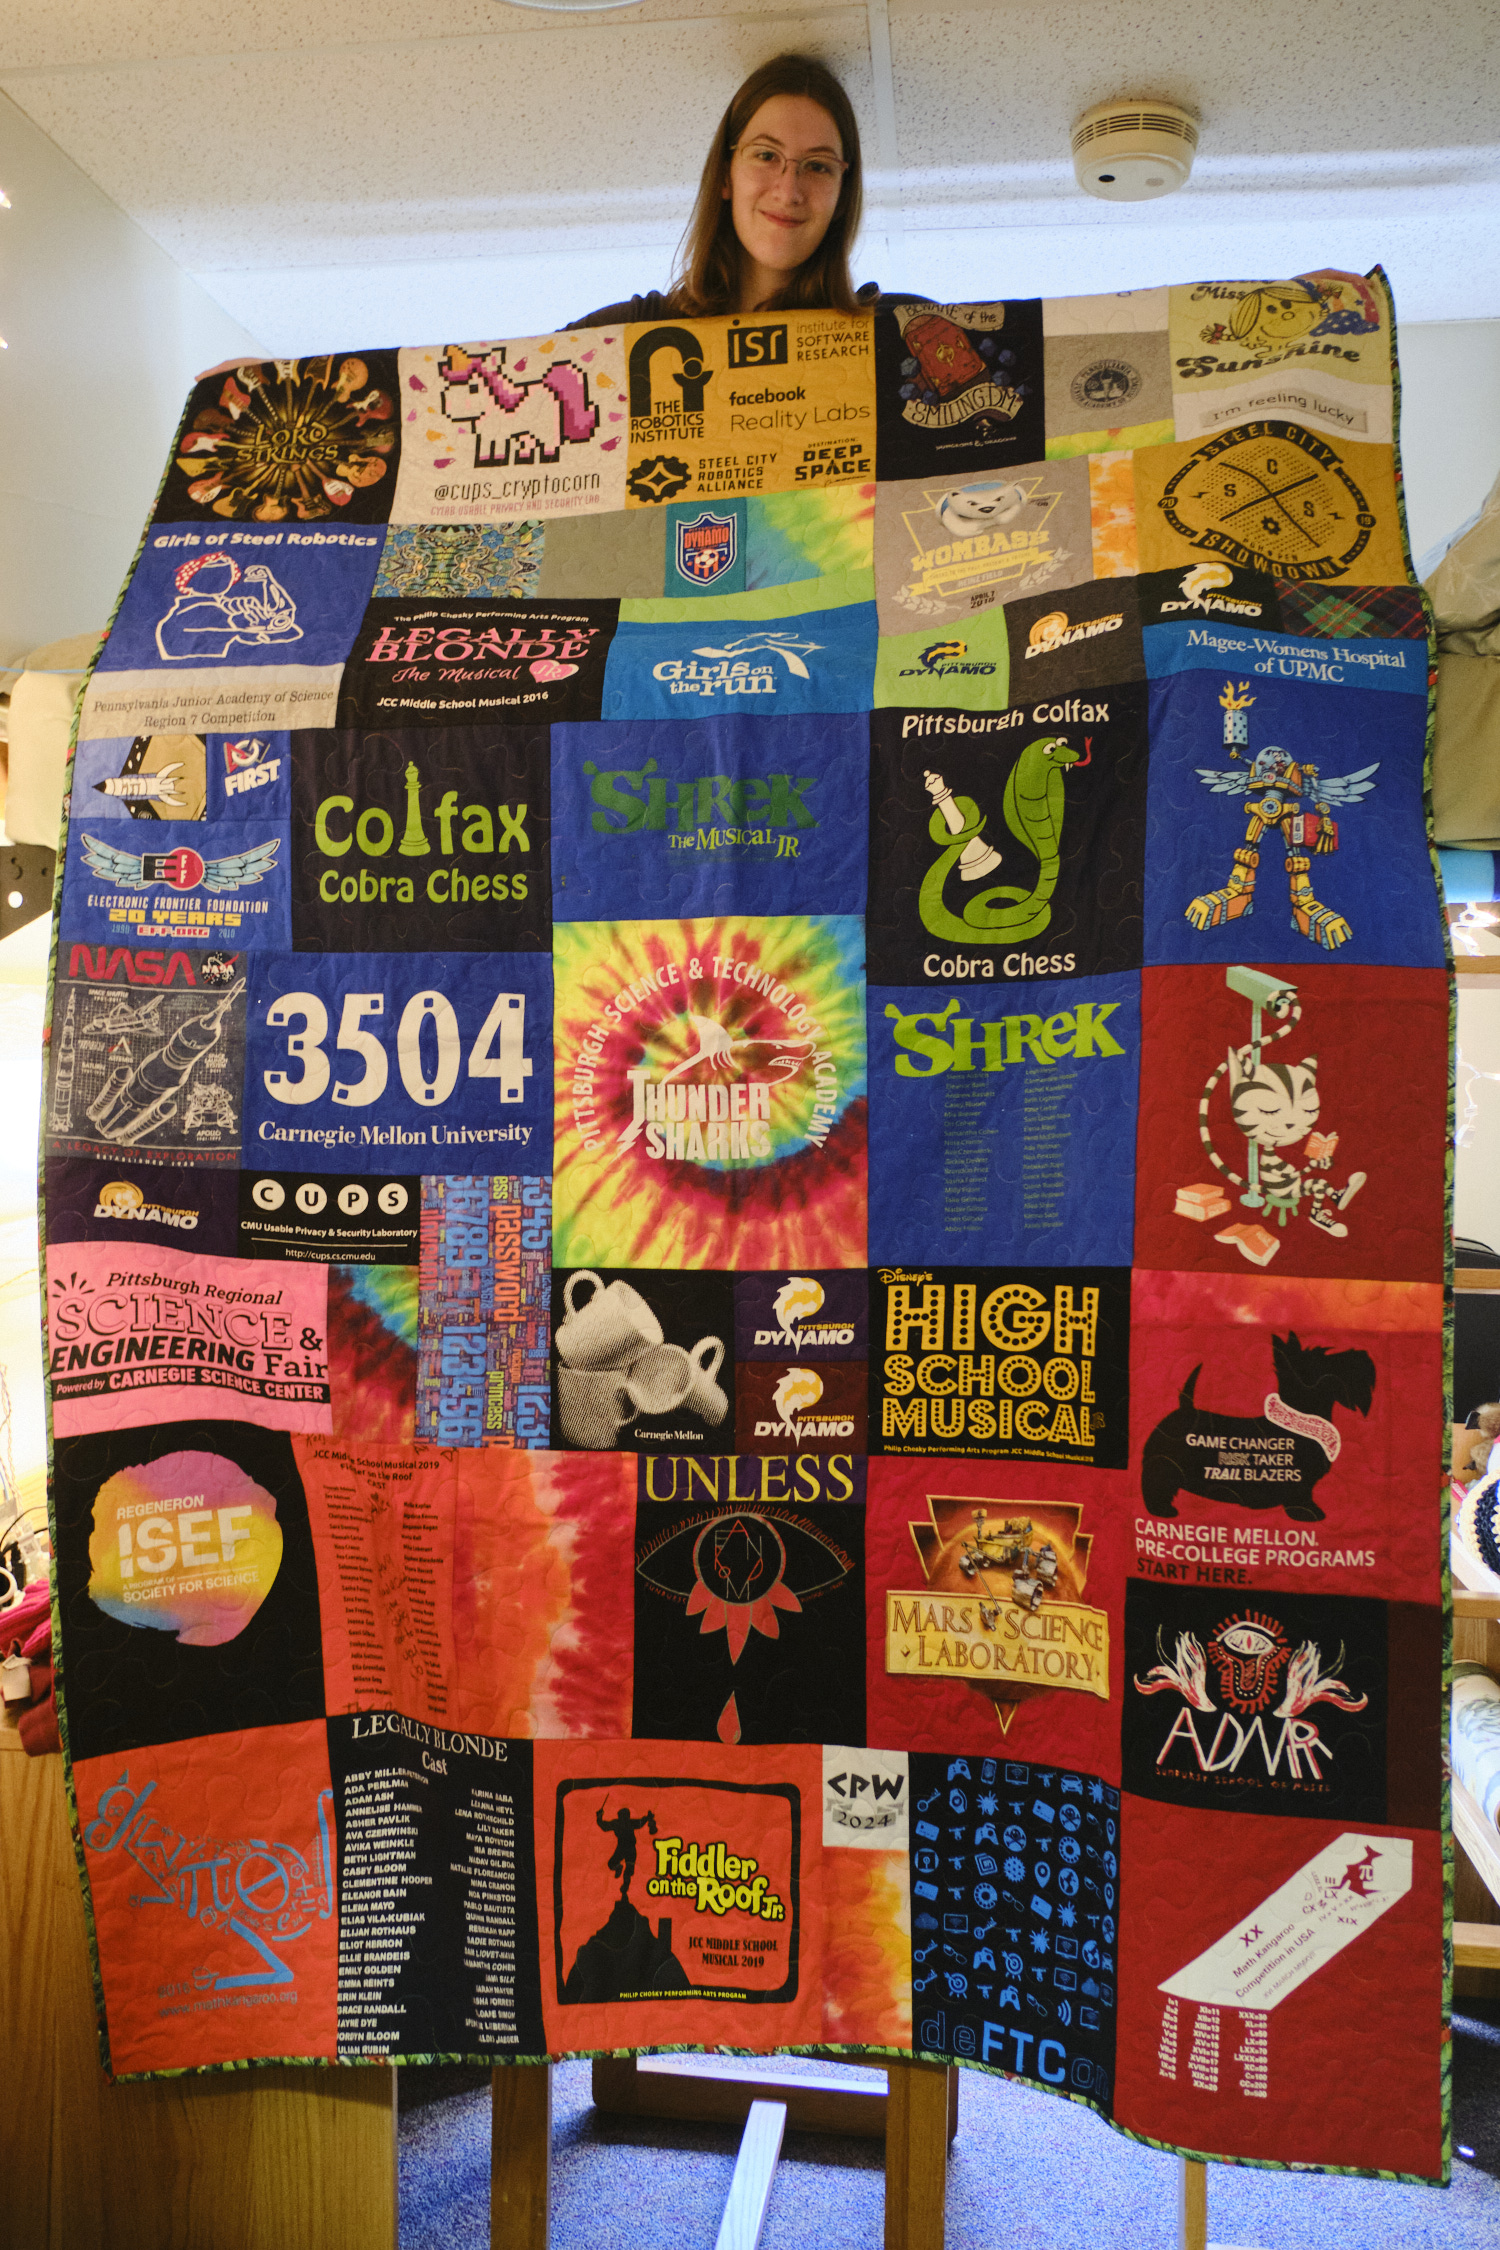
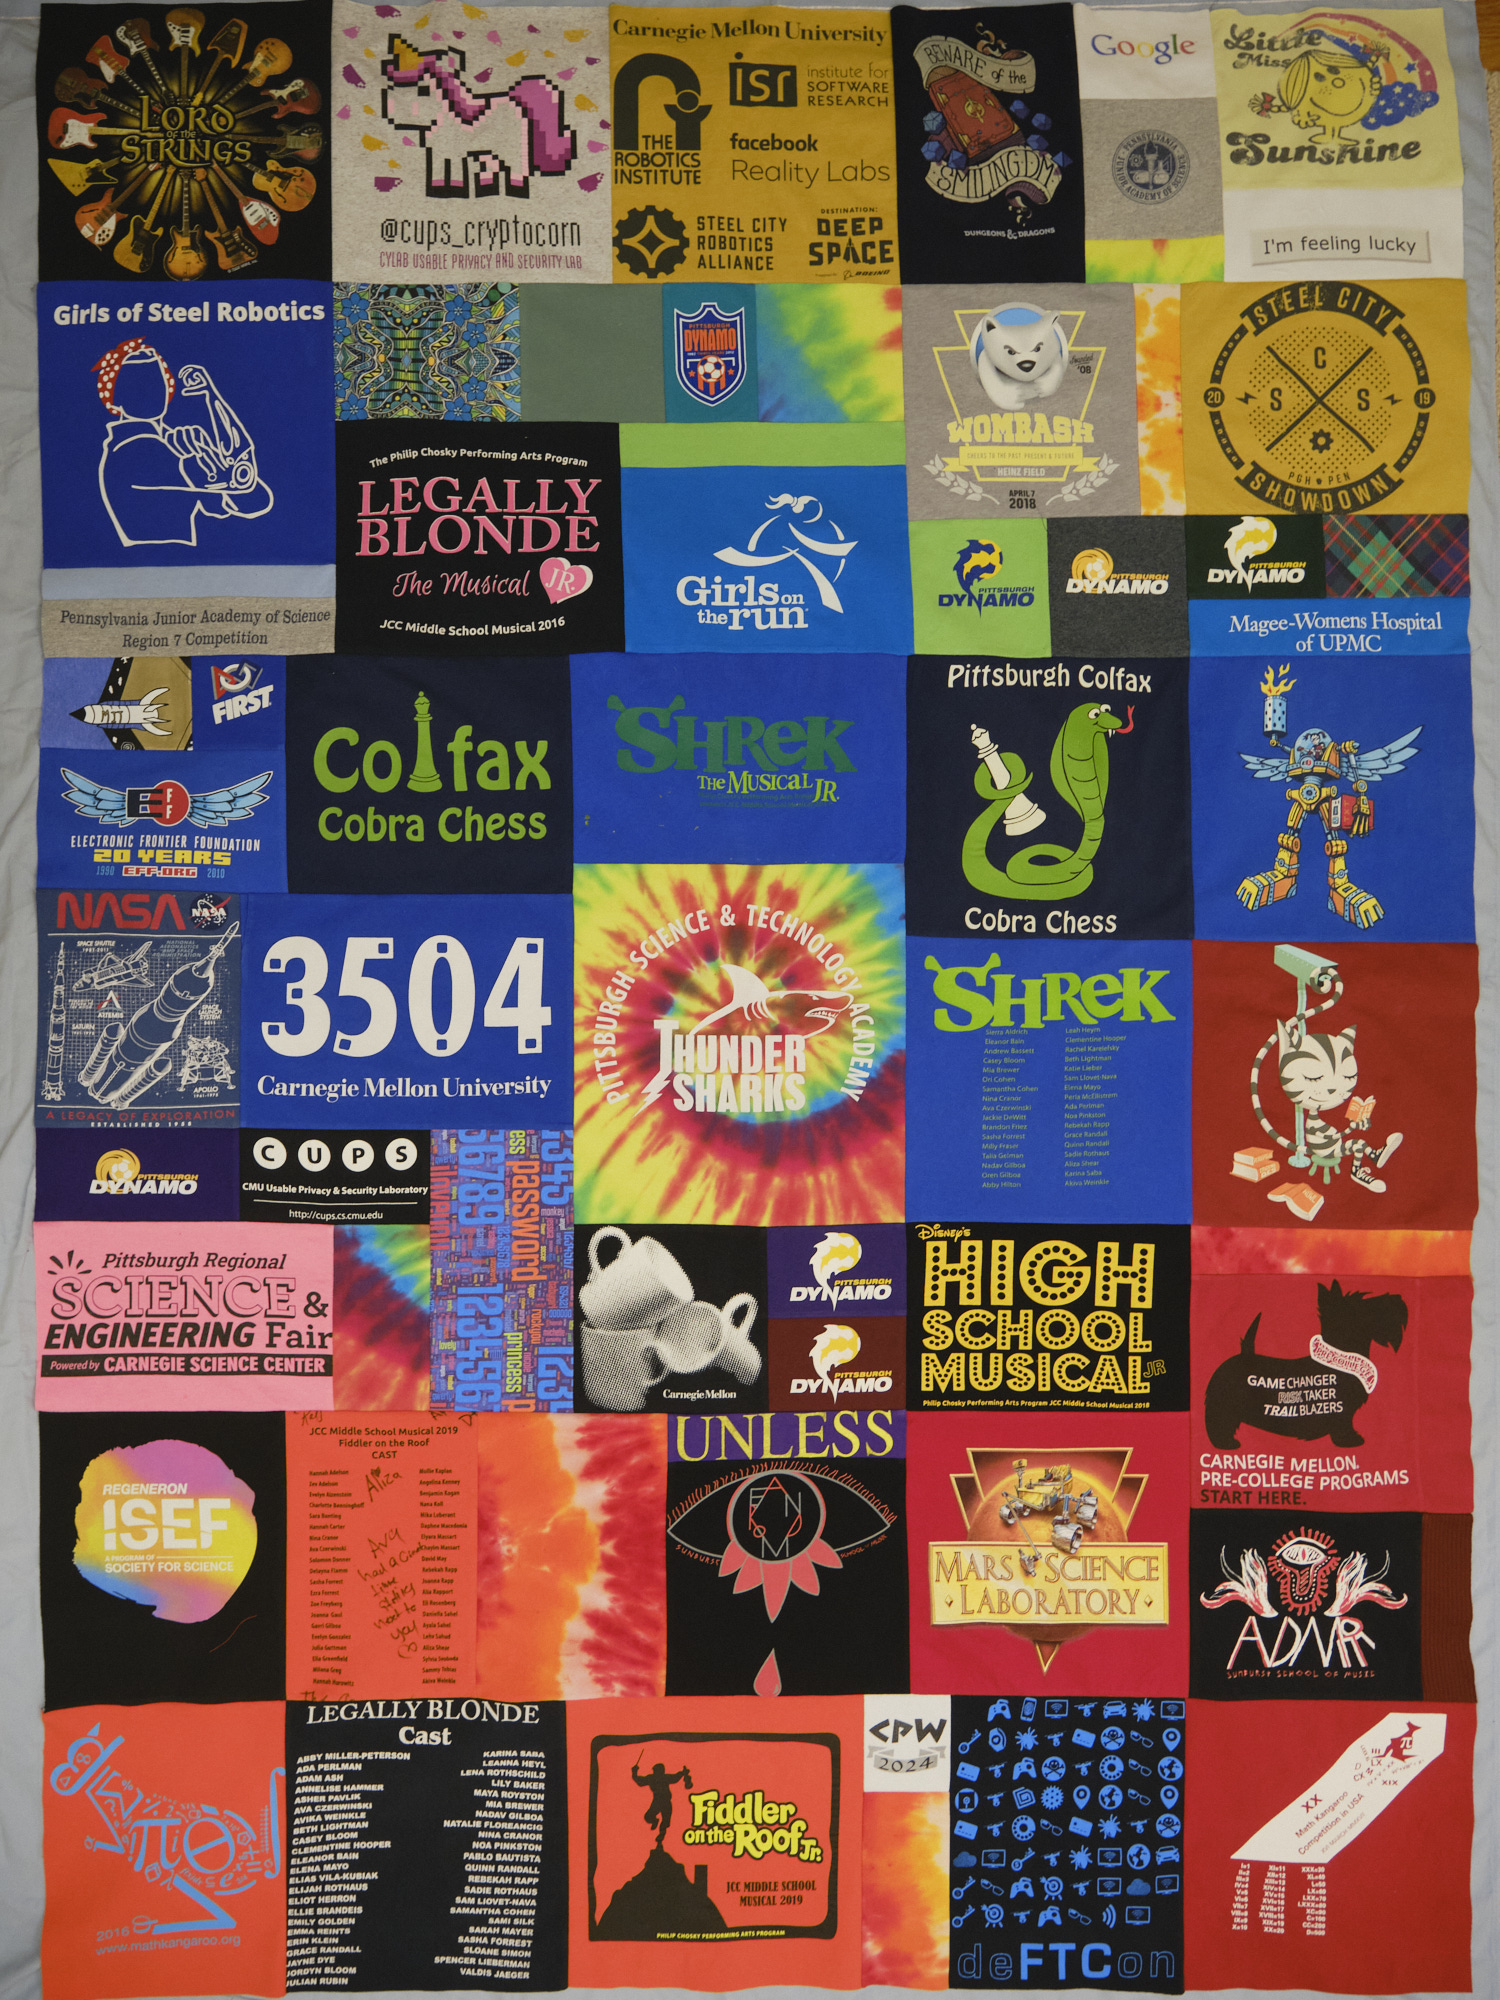
I intended to start my third child’s quilt a year in advance, and I did get her to select the shirts she wanted me to use almost on schedule. But between the second and third quilt I sewed a lot of garments and kept putting off the tedious step of fusing all the t-shirts to fusible interfacing. Plus child #3 requested that I sew her prom dress, and over the summer a sun dress, a cropped shirt, and a couple of pairs of pants. I finished most of the garments before she left for college, but just barely started the quilt. I decided to finish the quilt before sewing any more clothes, and also decided it was time to get my sewing machine tuned up after 15 years of not having it serviced. So after dropping my daughter off at school and spending a week in Switzerland, I came home and got to work. Five weeks later I finished the t-shirt quilt, just in time to personally deliver it to my daughter in Boston while I was in town for a business trip. We’ll start with photos of the finished quilt and happy recipient, and then for those interested in the process, I’ll detail how it was made.
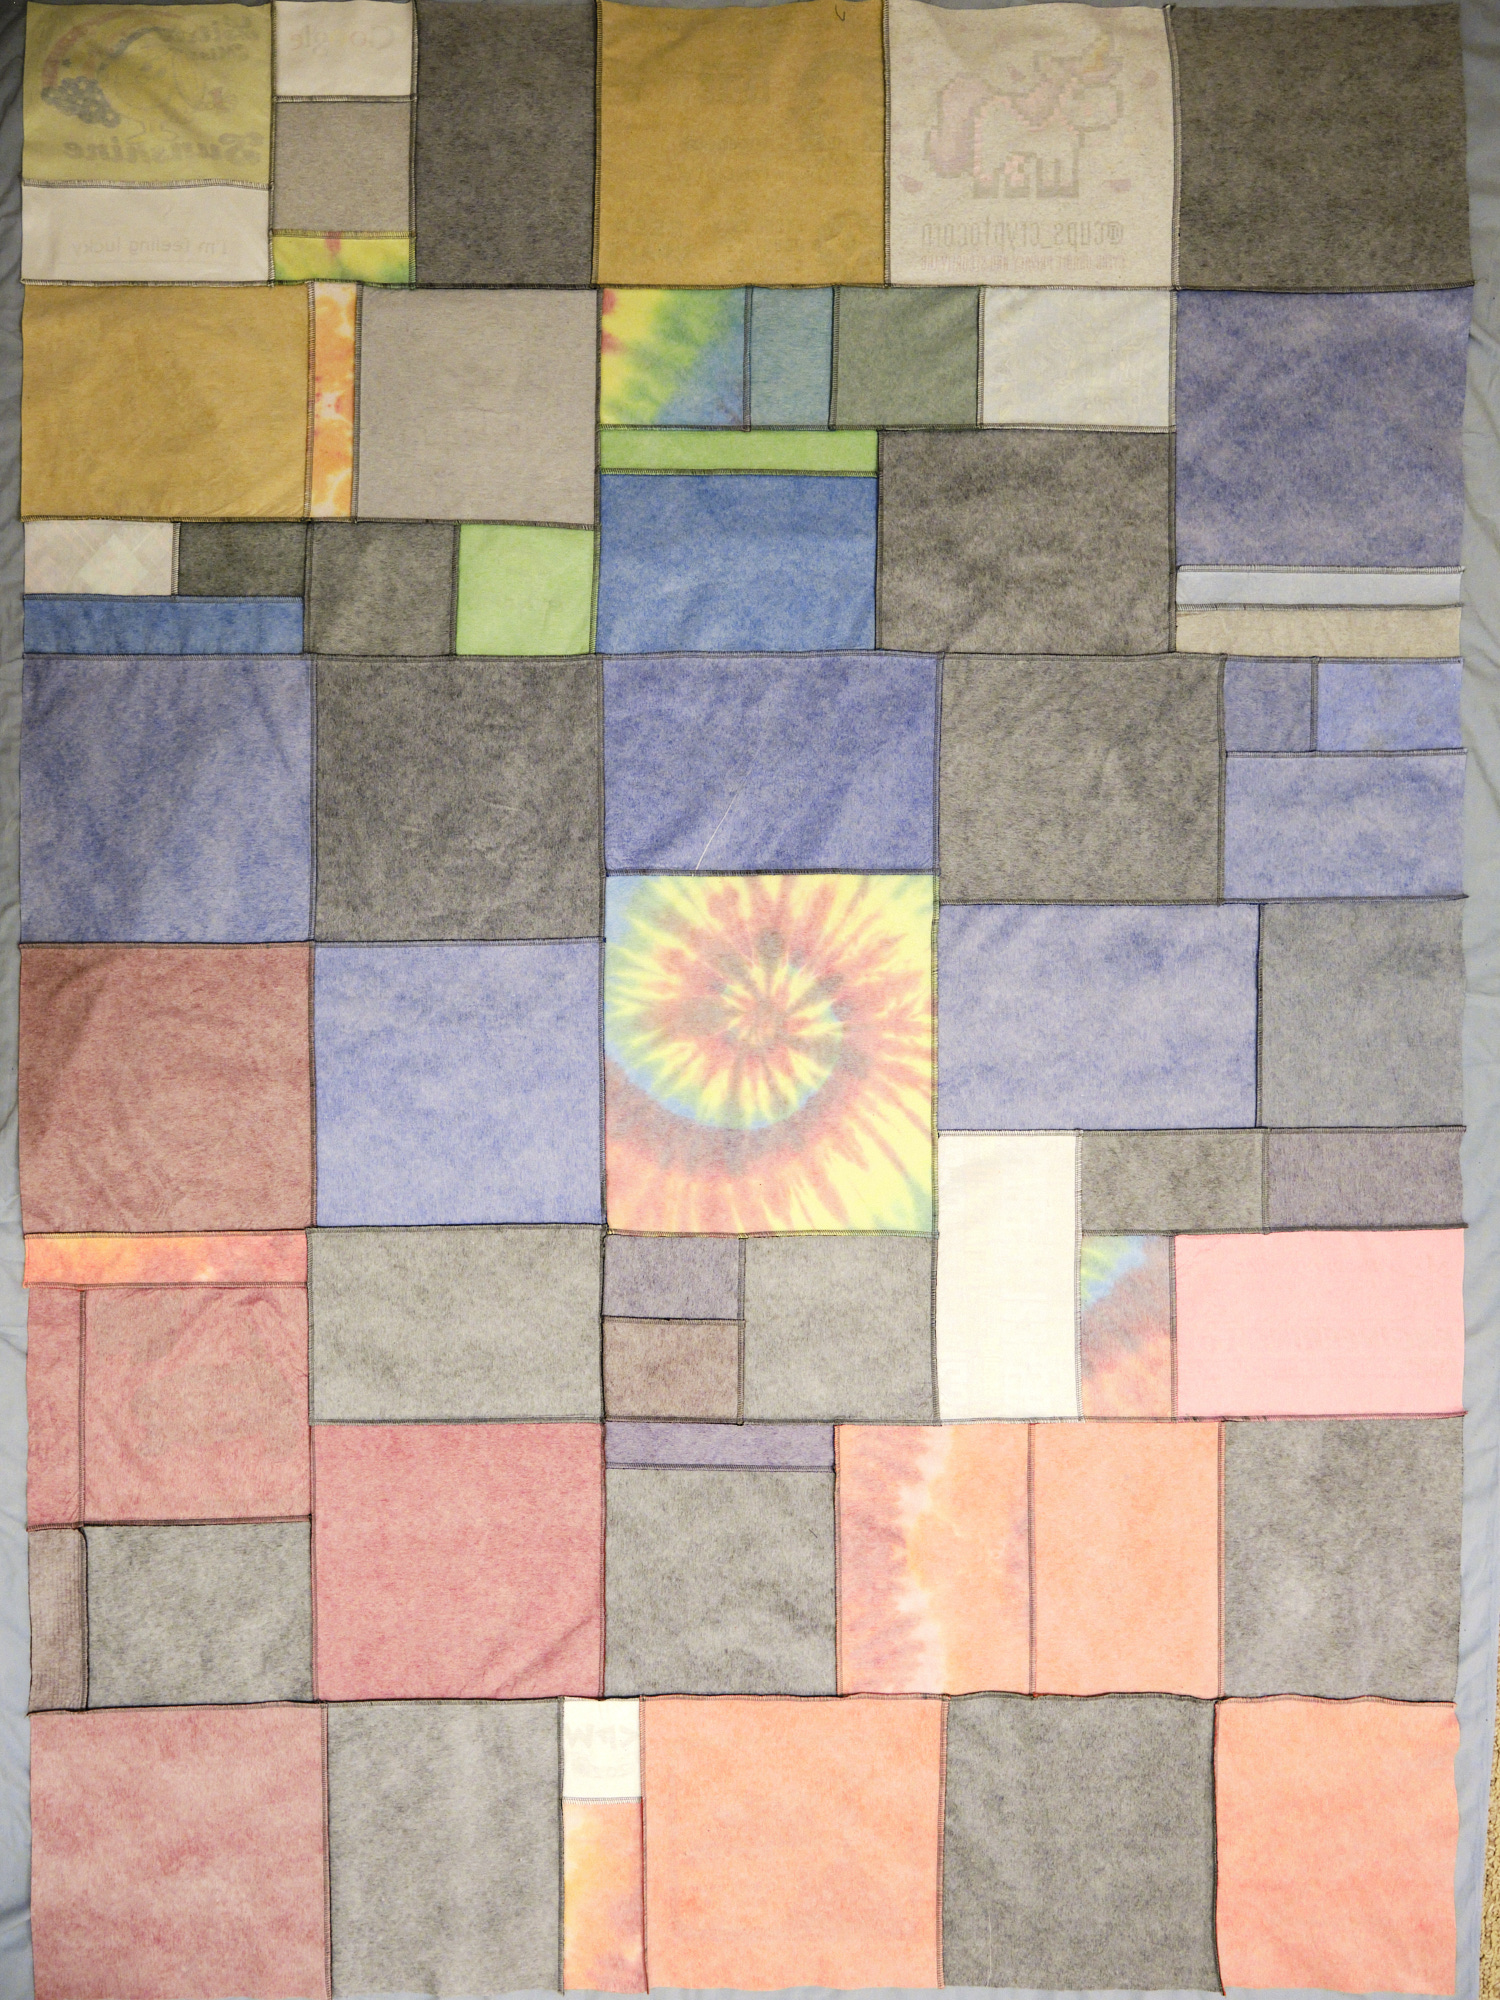
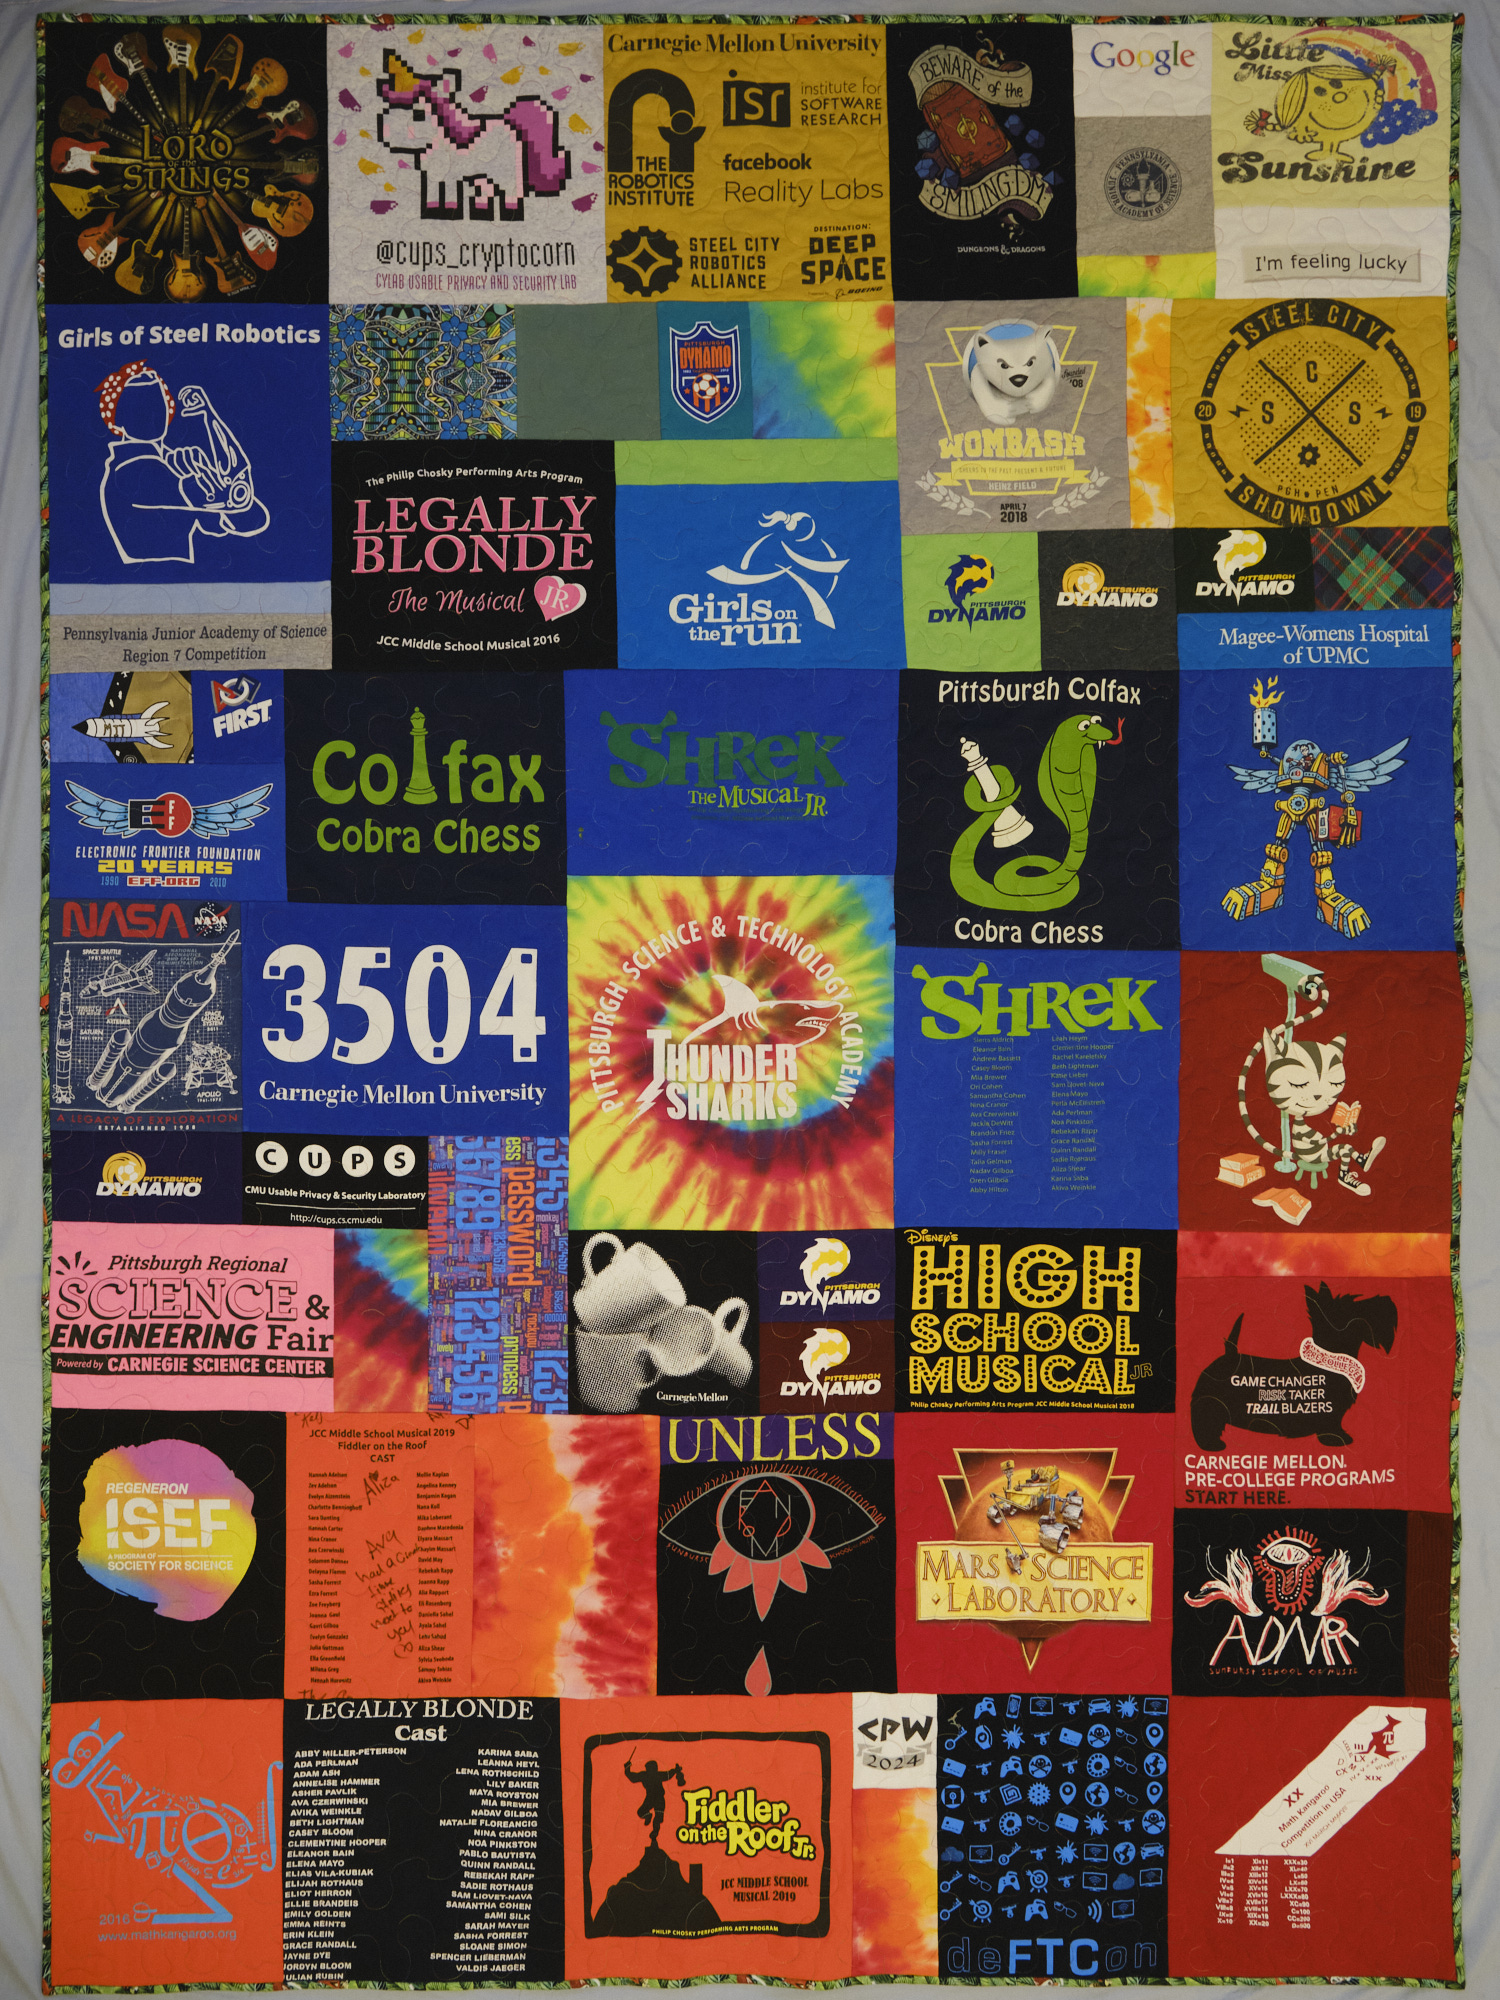
The first step in my process is to select my t-shirts. For the past 10 years or so I’ve been trying to save any t-shirt that someone in my house is discarding if there is any sentimental value or there is any reason I think it might make its way into a t-shirt quilt. So for each of my kids I sorted through my bags of old t-shirts to retrieve those they wanted to include in their quilt. Then I sent them back to their rooms to find any additional shirts they wanted to donate to the cause. We talked about colors and themes and activities they wanted to make sure were included and sometimes we went back to the t-shirt pile to retrieve a few more shirts. My kids all played Dynamo soccer and we have Dynamo shirts in just about every color so I used a lot of Dynamo shirts as filler and to find pieces of a particular color. For my third t-shirt quilt, my daughter had some tie-dyed shirts and wanted a rainbow theme with the shirts arranged in a spectrum. We were short on some colors so I dug through the pile to fill in. I also added some fabric scraps from garments I recently sewed.
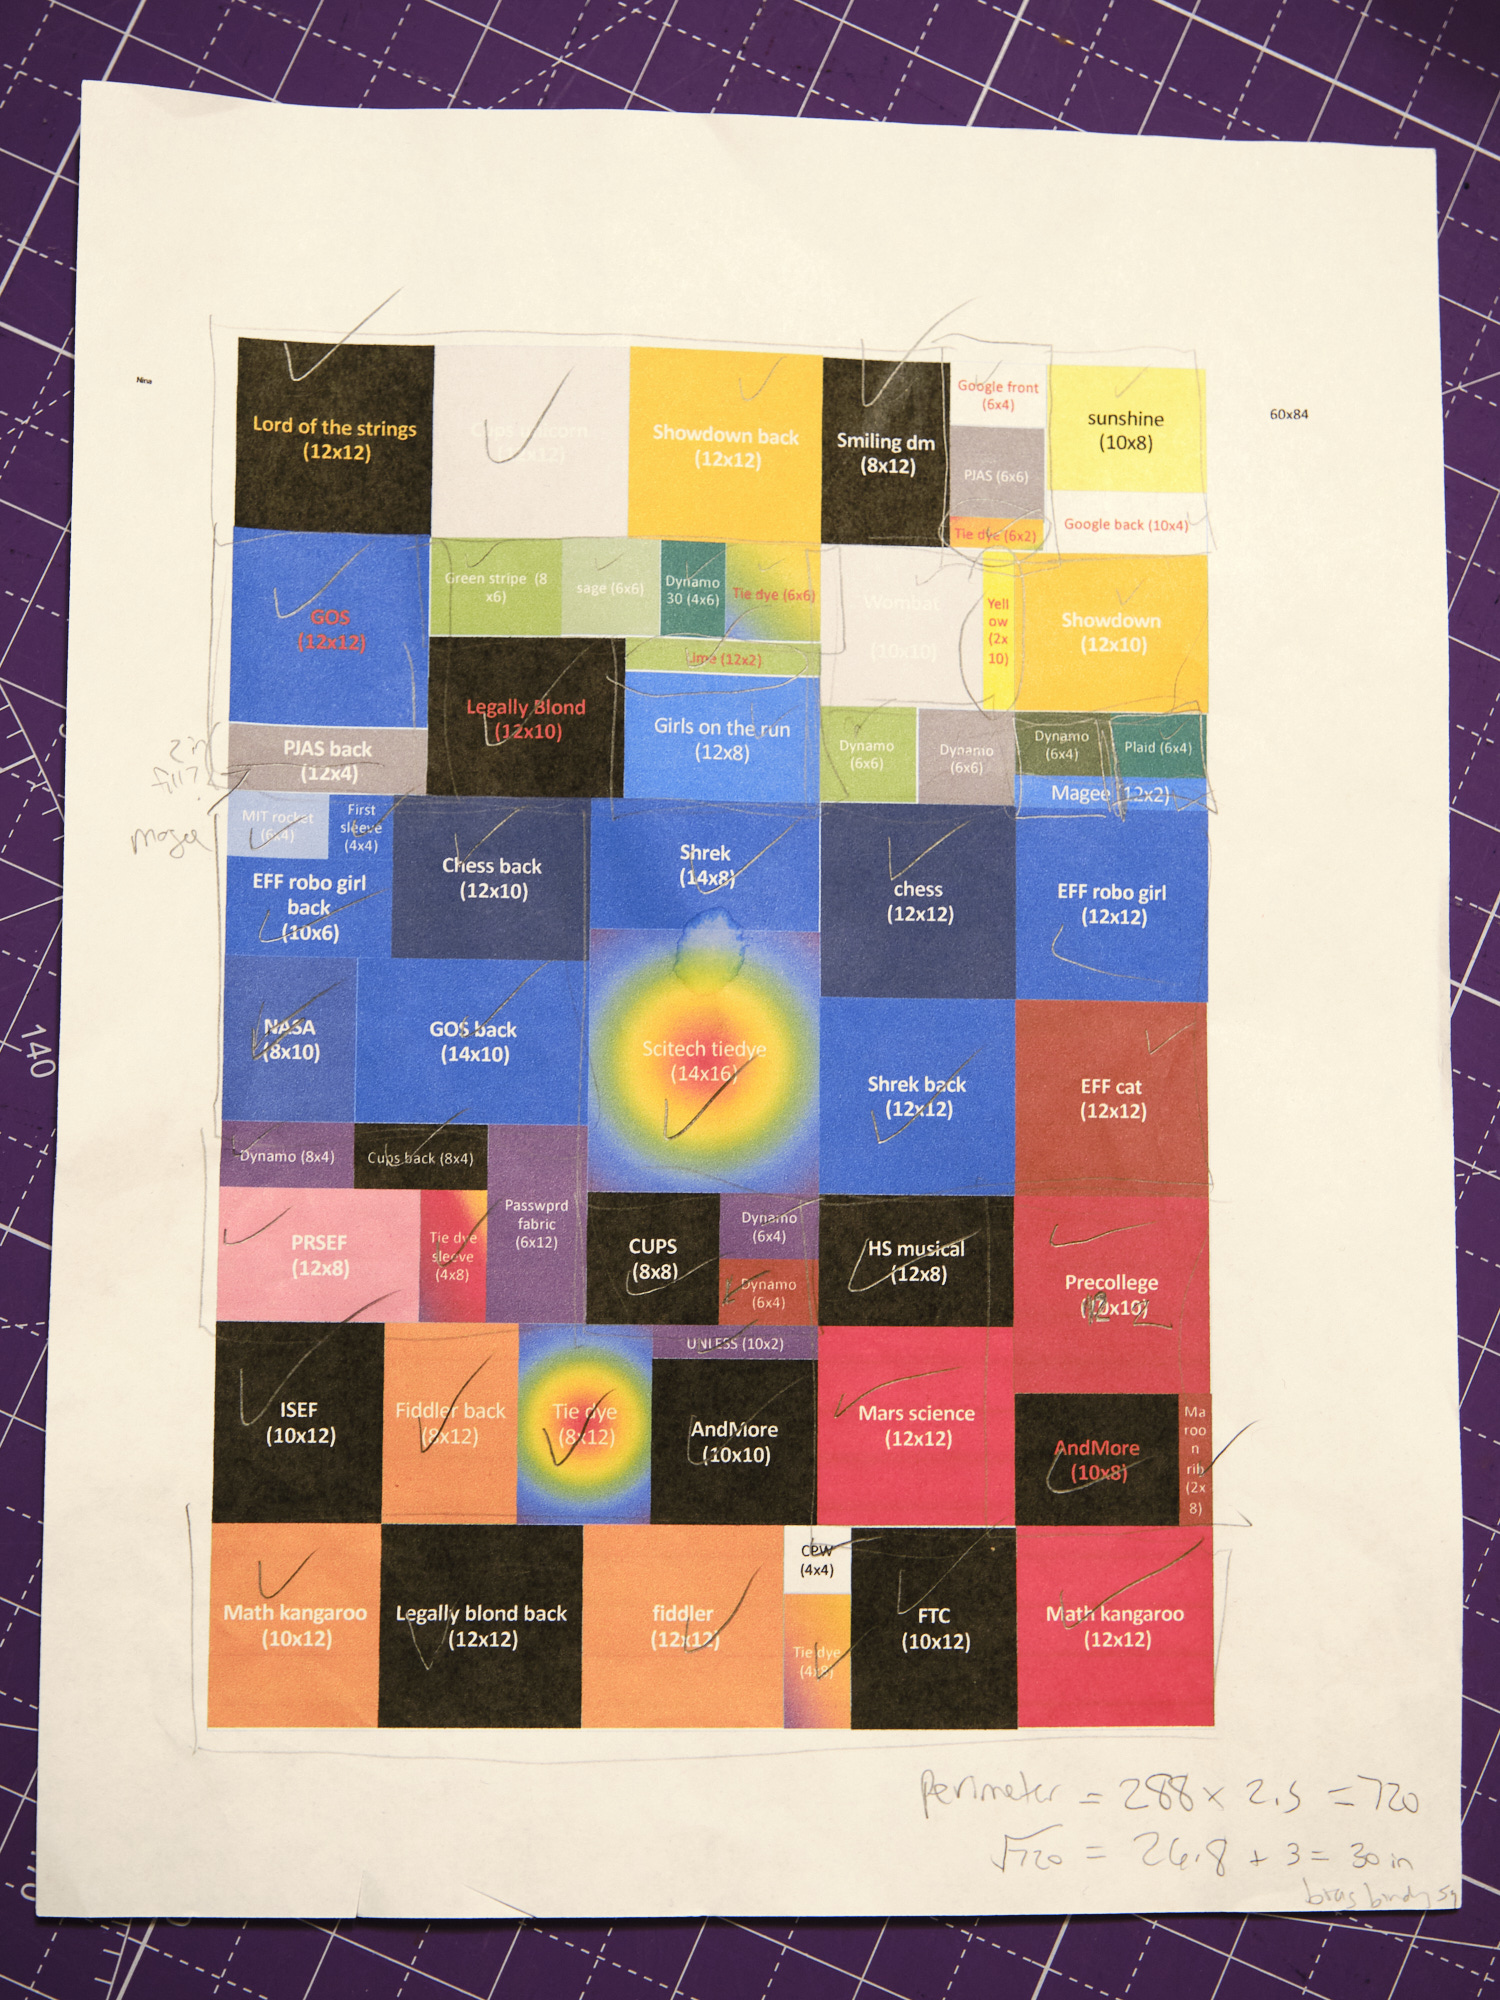
Once I finish selecting shirts I measure them all and make a spreadsheet including a description of the shirt, color, and smallest and largest size block that could be made from the shirt and look good on a quilt. Then I use PowerPoint to make a scale drawing of my quilt (I made all of them 60″ x 84″ to fit a twin bed) and start creating and moving around blocks of the appropriate size and color. I tend to pick a size for the block in the middle of the range to start with and then adjust as the design comes together. My third quilt has more shirts than the other two so I used smaller block sizes for most of the blocks and cropped them closer to the printed images. In the end, I had 67 blocks. Sometimes I decide to leave out a few shirts that weren’t that important to the quilt recipient and that don’t fit well in the design and sometimes I add more shirts. I add the size of each block to the PowerPoint design and then I print it out and keep it handy as a guide for cutting and sewing. Sometimes I make additional changes as I go to correct mistakes.
The next step is to wash all the t-shirts I’m going to use and rough cut them. I use a big scissors to cut them to a size bigger than I anticipate using without precisely measuring them. I save all the t-shirt scraps in case I need a piece to fill in a spot later (generally because I made a mistake). Now my big t-shirt pile is a little smaller and I have a big bag of t-shirt scraps.
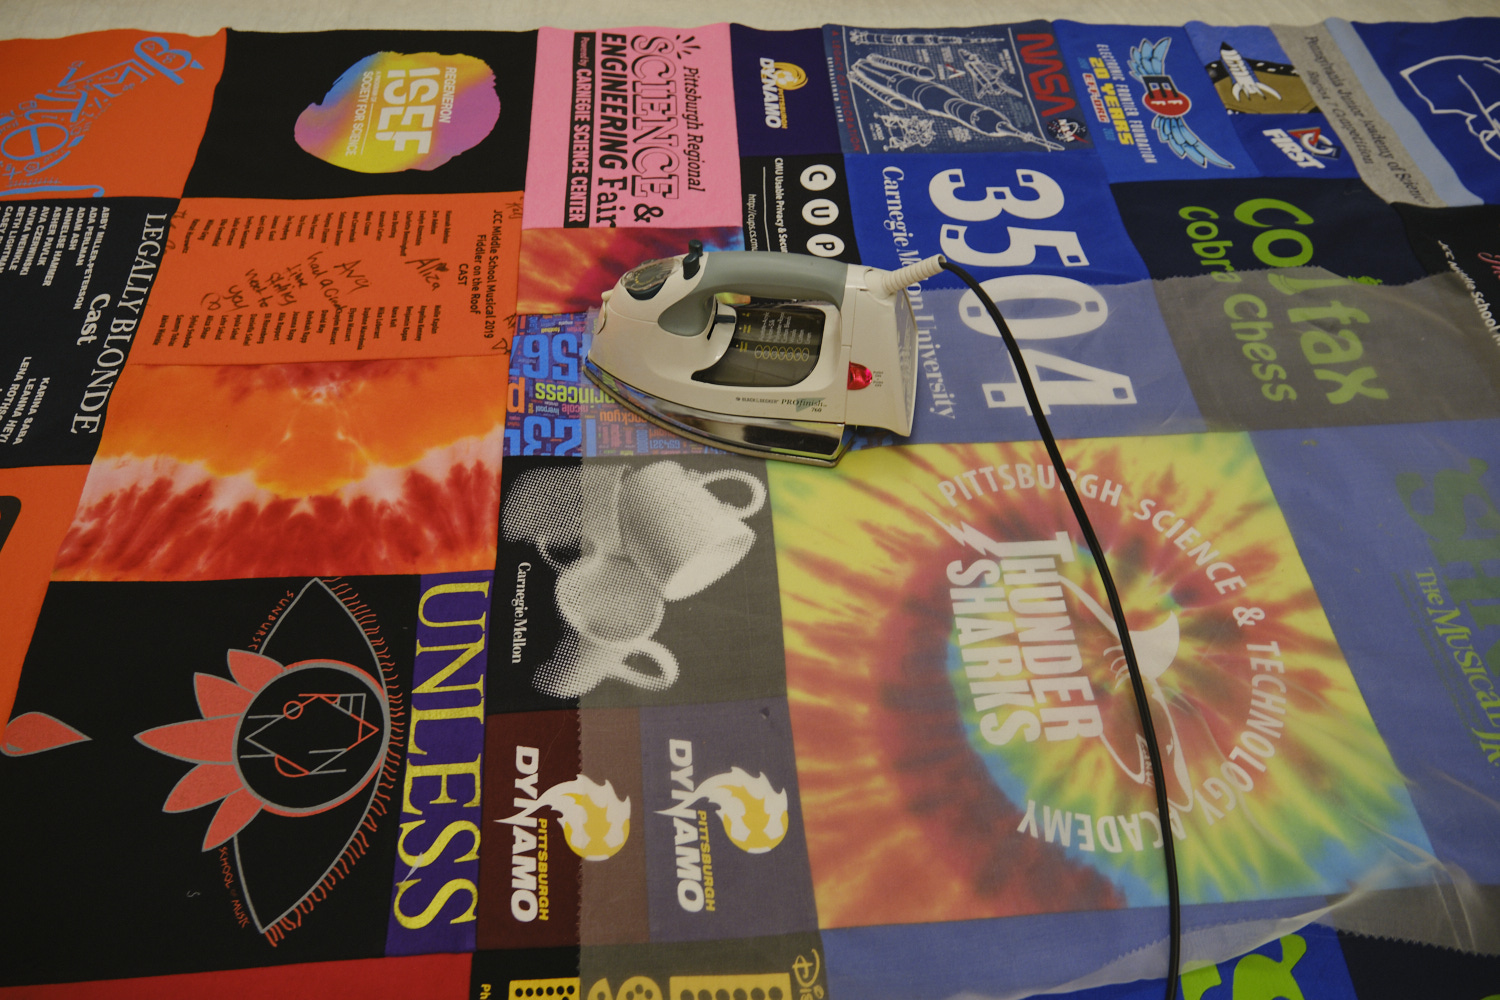
Next comes the tedious step of fusing all the t-shirt pieces I plan to use onto lightweight interfacing to stabilize them. One of the blogs I read recommended Pellon 906F fusible sheerweight non-woven polyester interfacing. I buy this product by the bolt. I do my fusing on a big rectangular ironing pad. Following a suggestion from a blogger, I put a Teflon sheet on the ironing pad to keep the fusible interfacing and the t-shirt ink from sticking to my ironing pad. I put one t-shirt piece, ink-side down, on the Teflon sheet. Then I put a piece of interfacing larger than the shirt on top, fusible side down. Sometimes I do several smaller shirt pieces together and fuse them to a larger interfacing piece. I keep a bowl of water next to my ironing pad and I dip a piece of quilting cotton fabric into the bowl, wring it out, and cover the interfacing piece. Then I set my iron on the wool setting on the wet fabric and press. I hold the iron in place for about 10 seconds and then move it over and press the next section. A big t-shirt piece will take a few minutes to press using this process. I try to have something to watch or listen to while fusing as this process is fairly boring.
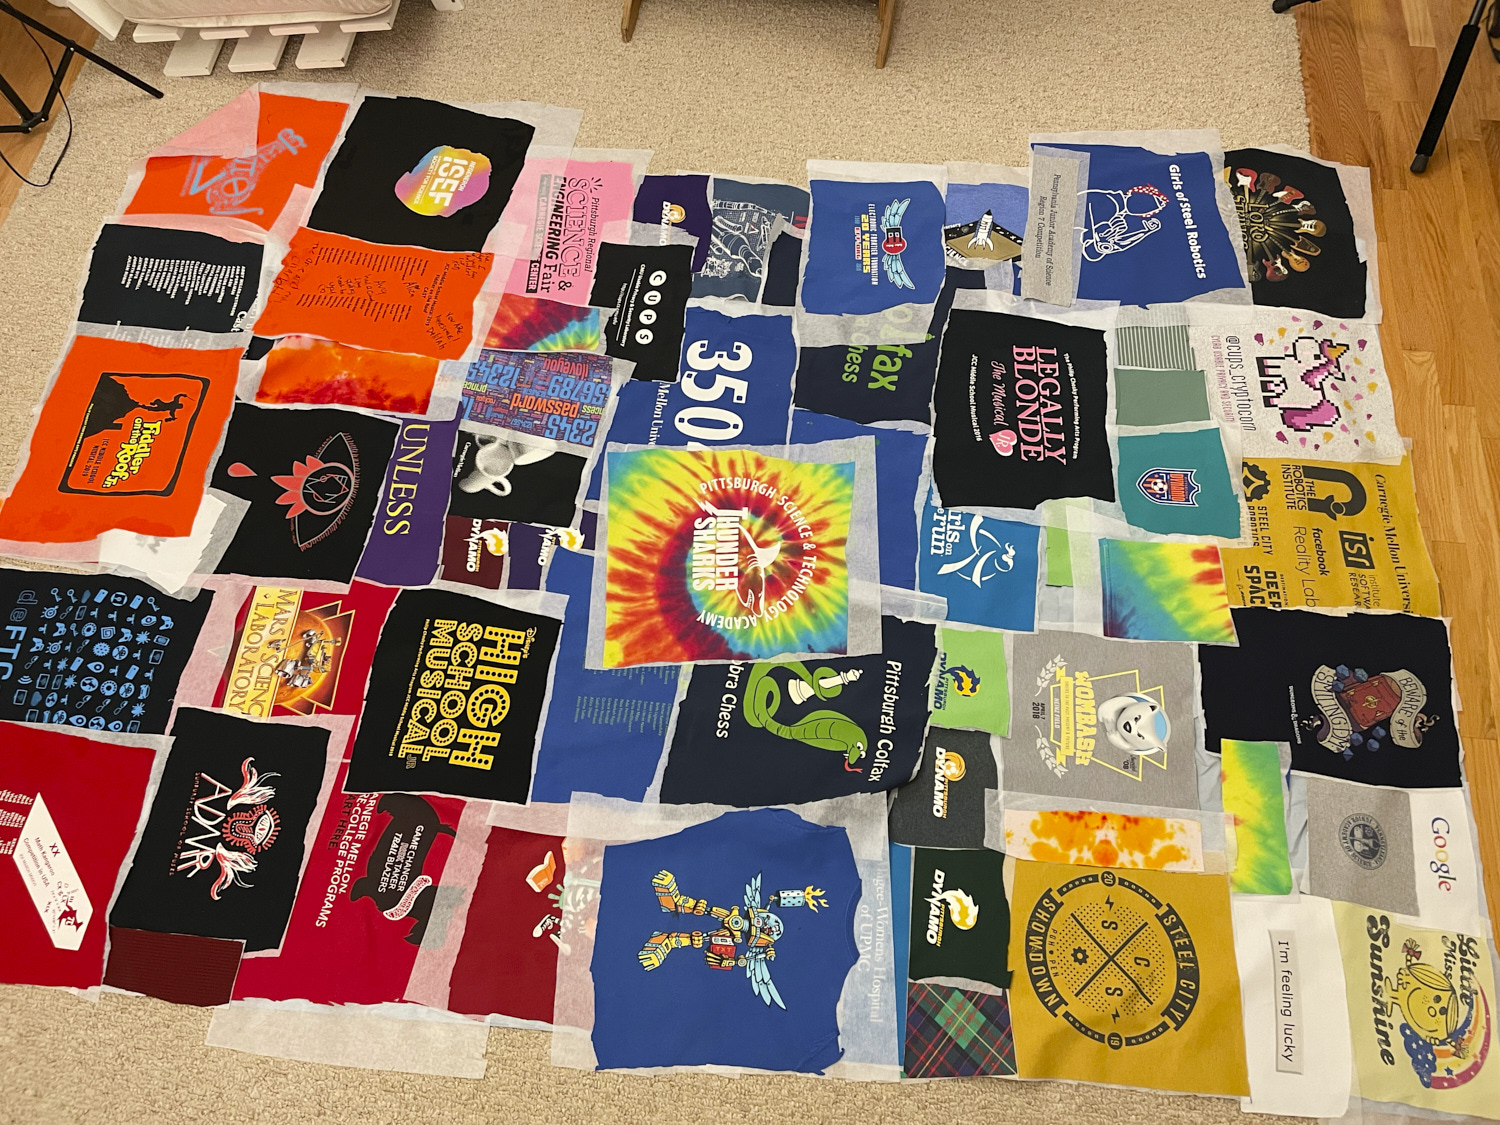
Once the t-shirts are fused, I lay them out on the floor according to my diagram. They are still only rough cut at this point. Then I collect them one section at a time and start working on trimming and sewing.
I refer back to my diagram and trim each piece exactly to the specified size plus half an inch for the quarter-inch seam allowance on all sides. Occasionally I realize at this point that I rough cut a piece too small or not adequately centered and this requires splicing in another piece.
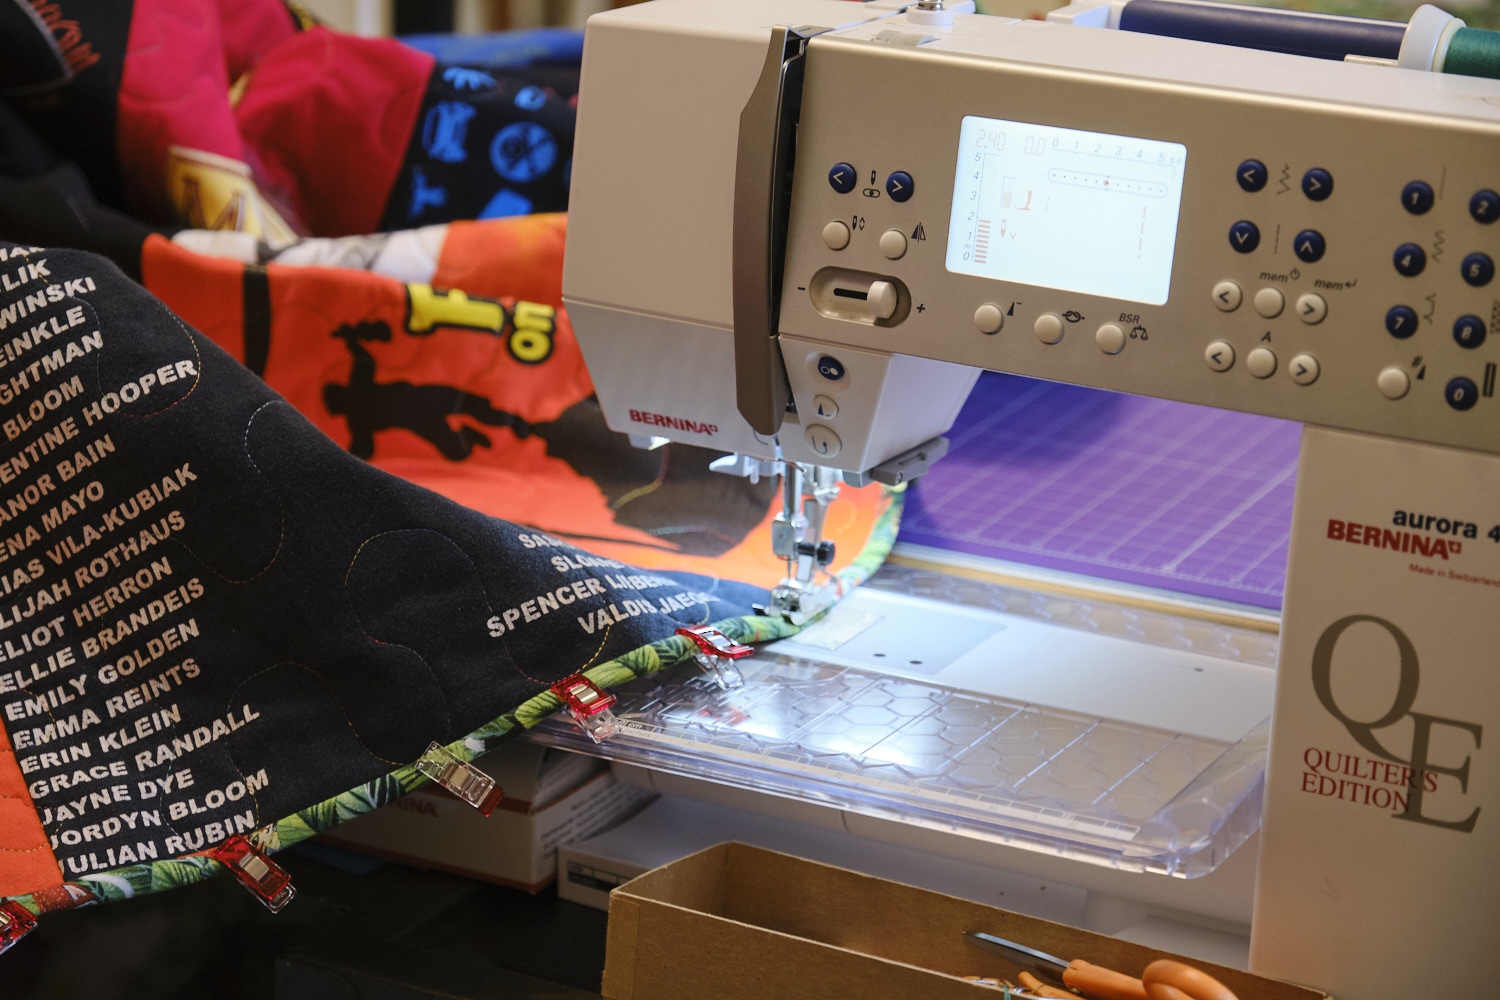
For my first two quilts, I sewed the trimmed pieces together on my regular sewing machine (a Bernina Aurora 440 QE, which has been quite a workhorse for me). However, my Bernina was getting its first ever tune-up when I was ready to start sewing so I pieced this entire quilt with my Brother ST4031HD serger. The serger knife had stopped cutting and I had not yet figured out why, so I kept the knife lowered and serged without trimming. I used grey thread and adjusted the stitch width to be just under a quarter inch as I realized that the thickness of the fabric added to the seam allowance. This technique worked really well and seemed quicker than piecing with a sewing machine. I think this will result in stronger seams, which is nice for a heavy quilt that will likely get a lot of use. I pressed all of the seams in the direction that they seem to naturally want to fall (the top fabric stays straight and folds towards the bottom fabric).
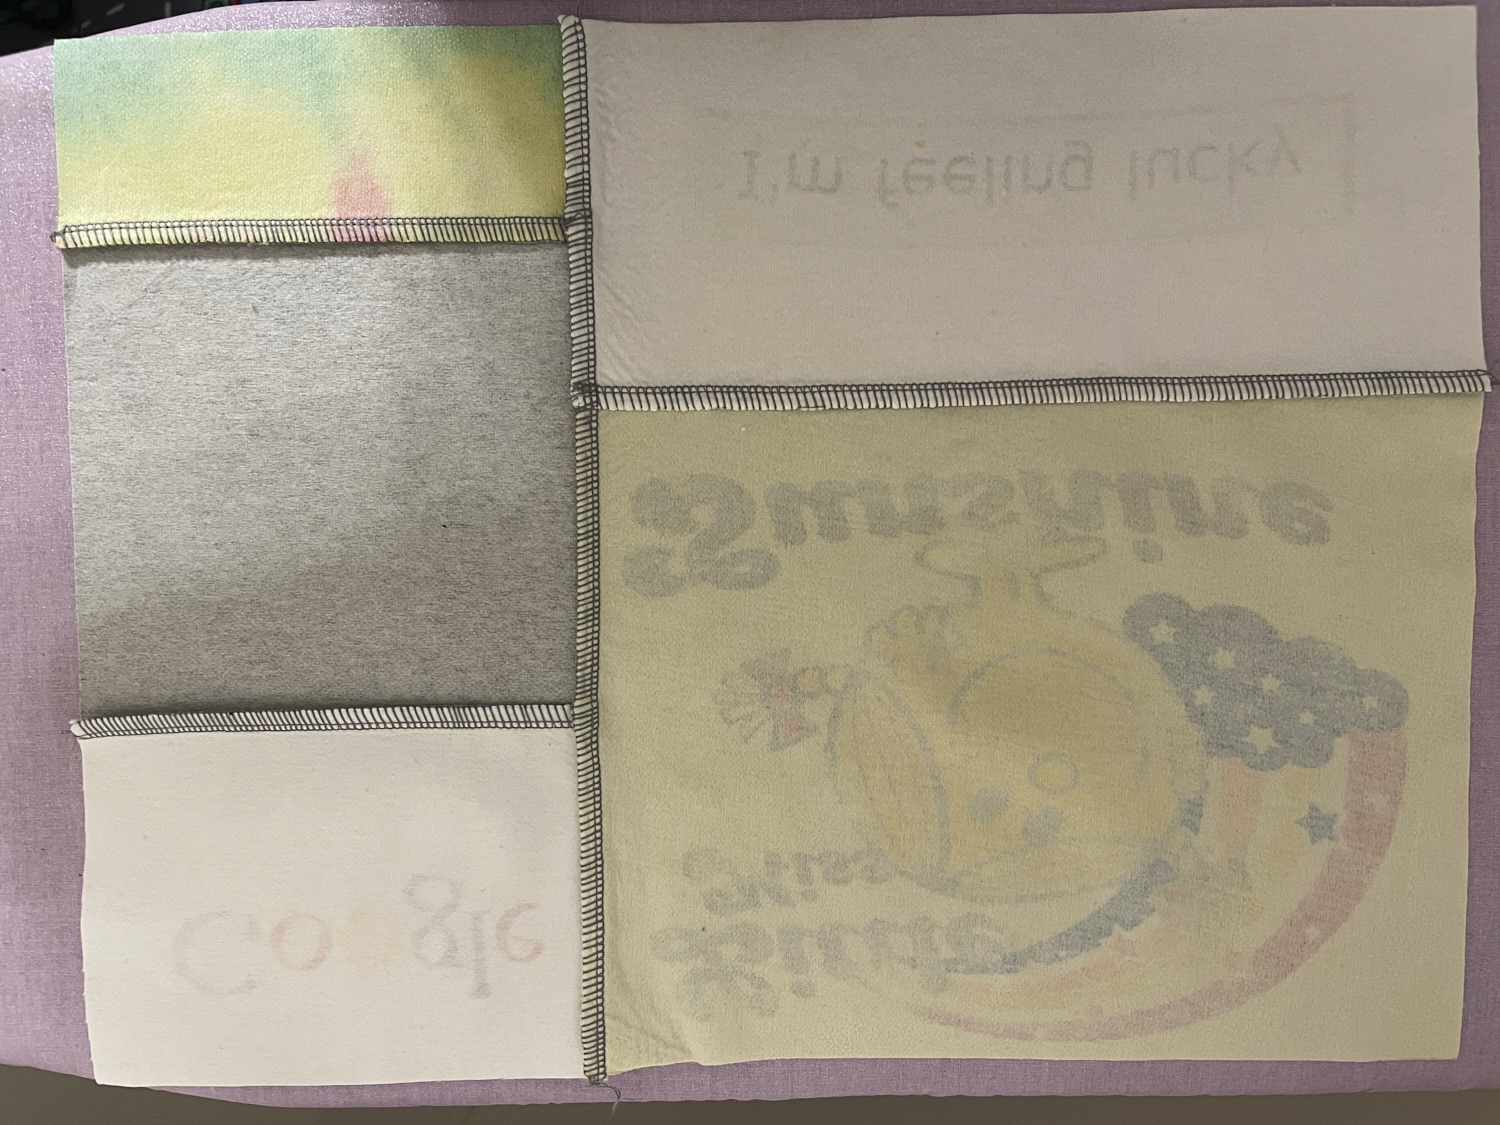
I continued trimming and serging blocks together into units and then serging units together. I made a few mistakes along the way, including discovering too late that I had trimmed a block to the size on my diagram, but that size was typed incorrectly. I corrected it by adding extra strips of fabric. I try to create units that will all be able to be sewn together without having to sew partial seams or sew around corners. I made a mistake that required one partial seam to correct. In the end all the blocks fit together fairly well except in one spot, which required unsewing one seam, trimming off about a quarter inch, and resewing. The trimming and sewing part is probably my favorite part of the t-shirt quilt process. I like watching the quilt come together and all the blocks come out nice and crisp with the interfacing as backing. Here you can see the front and the back side of all the blocks sewn together.
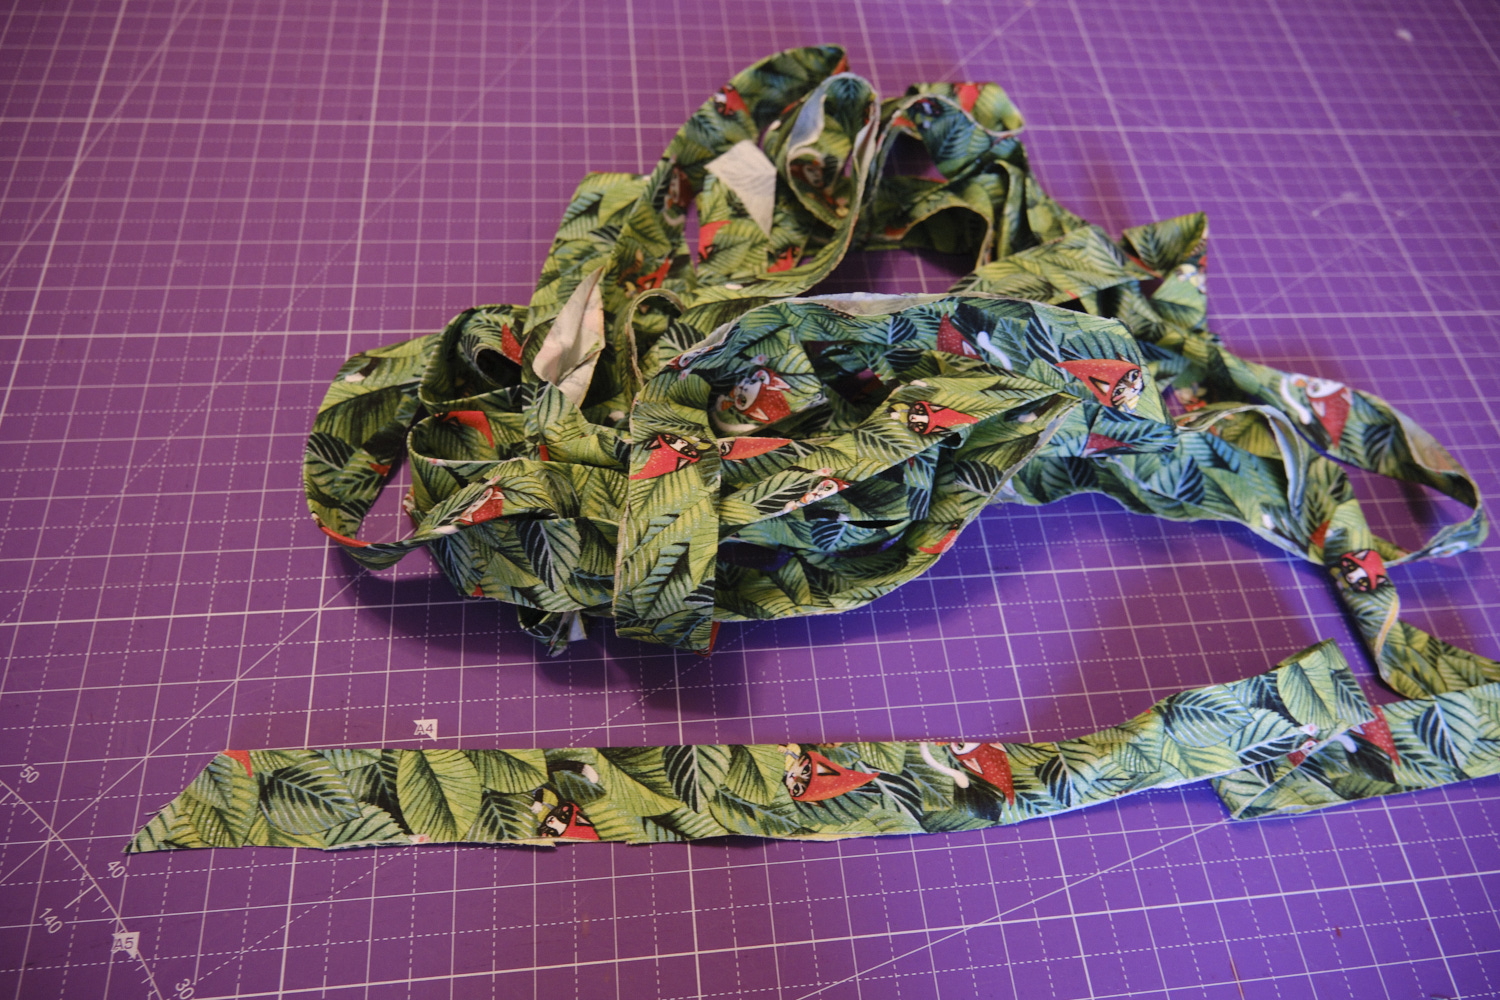
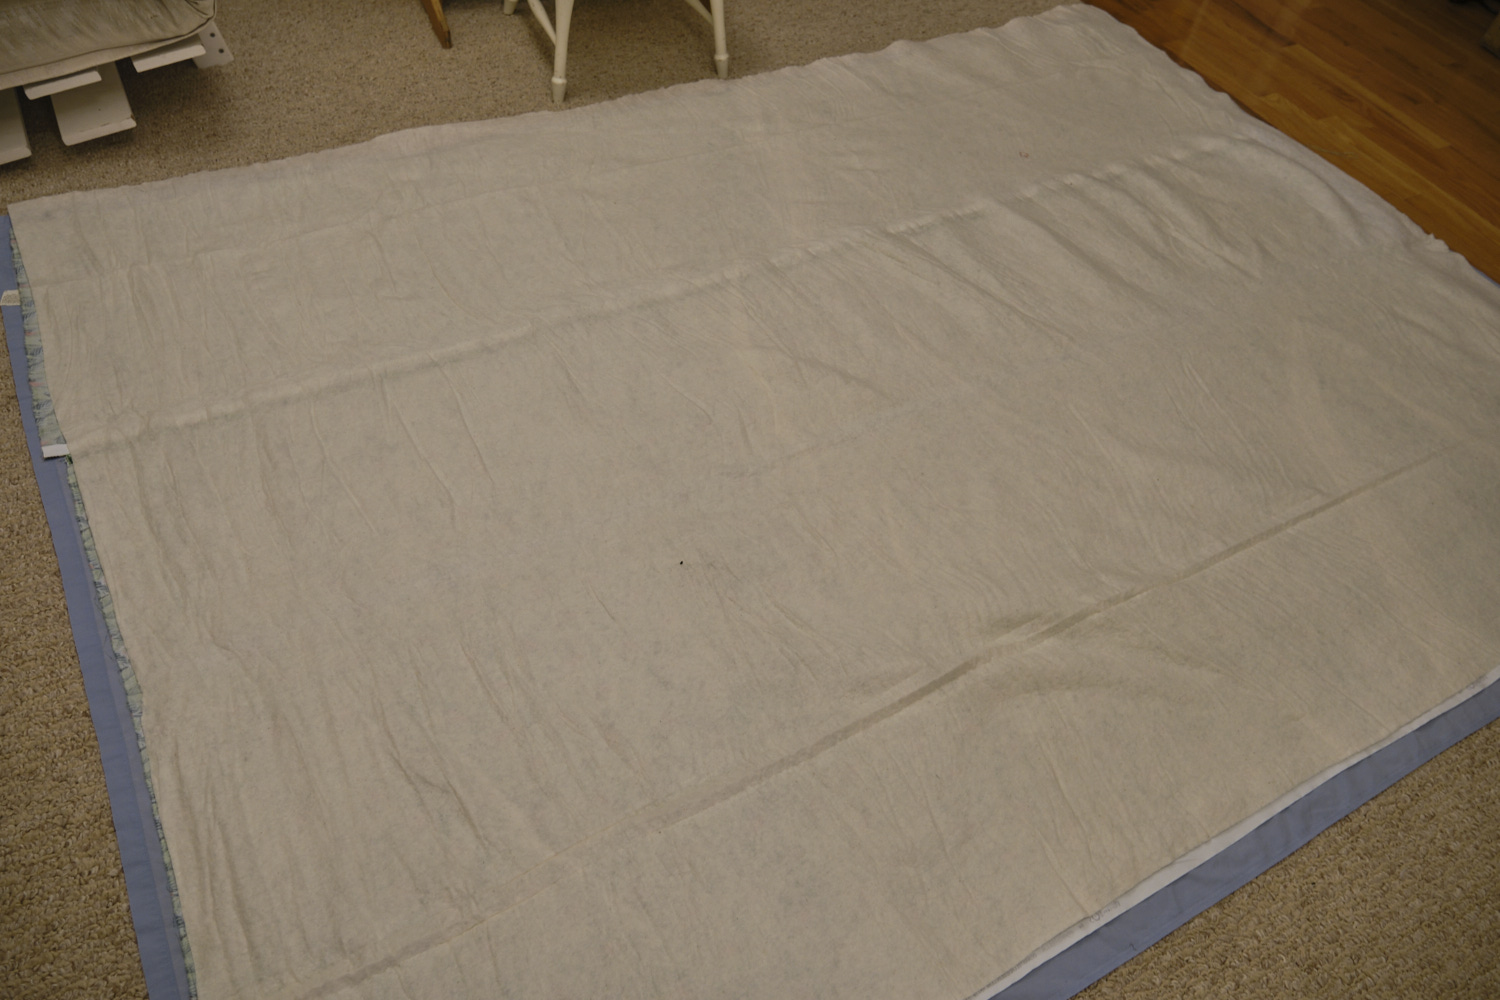
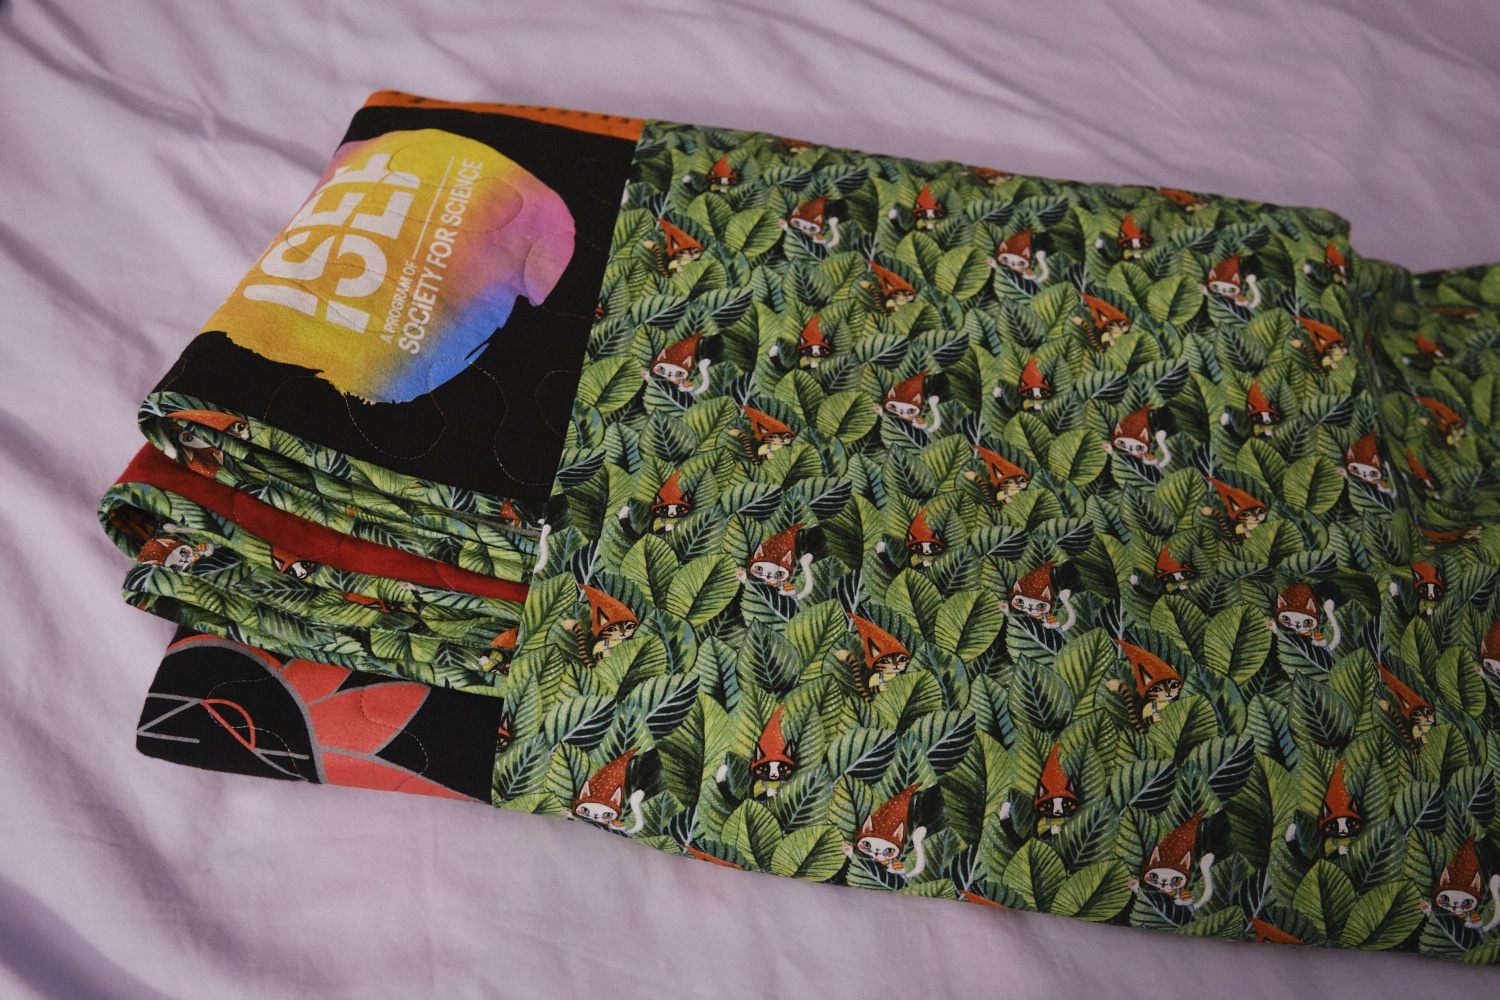
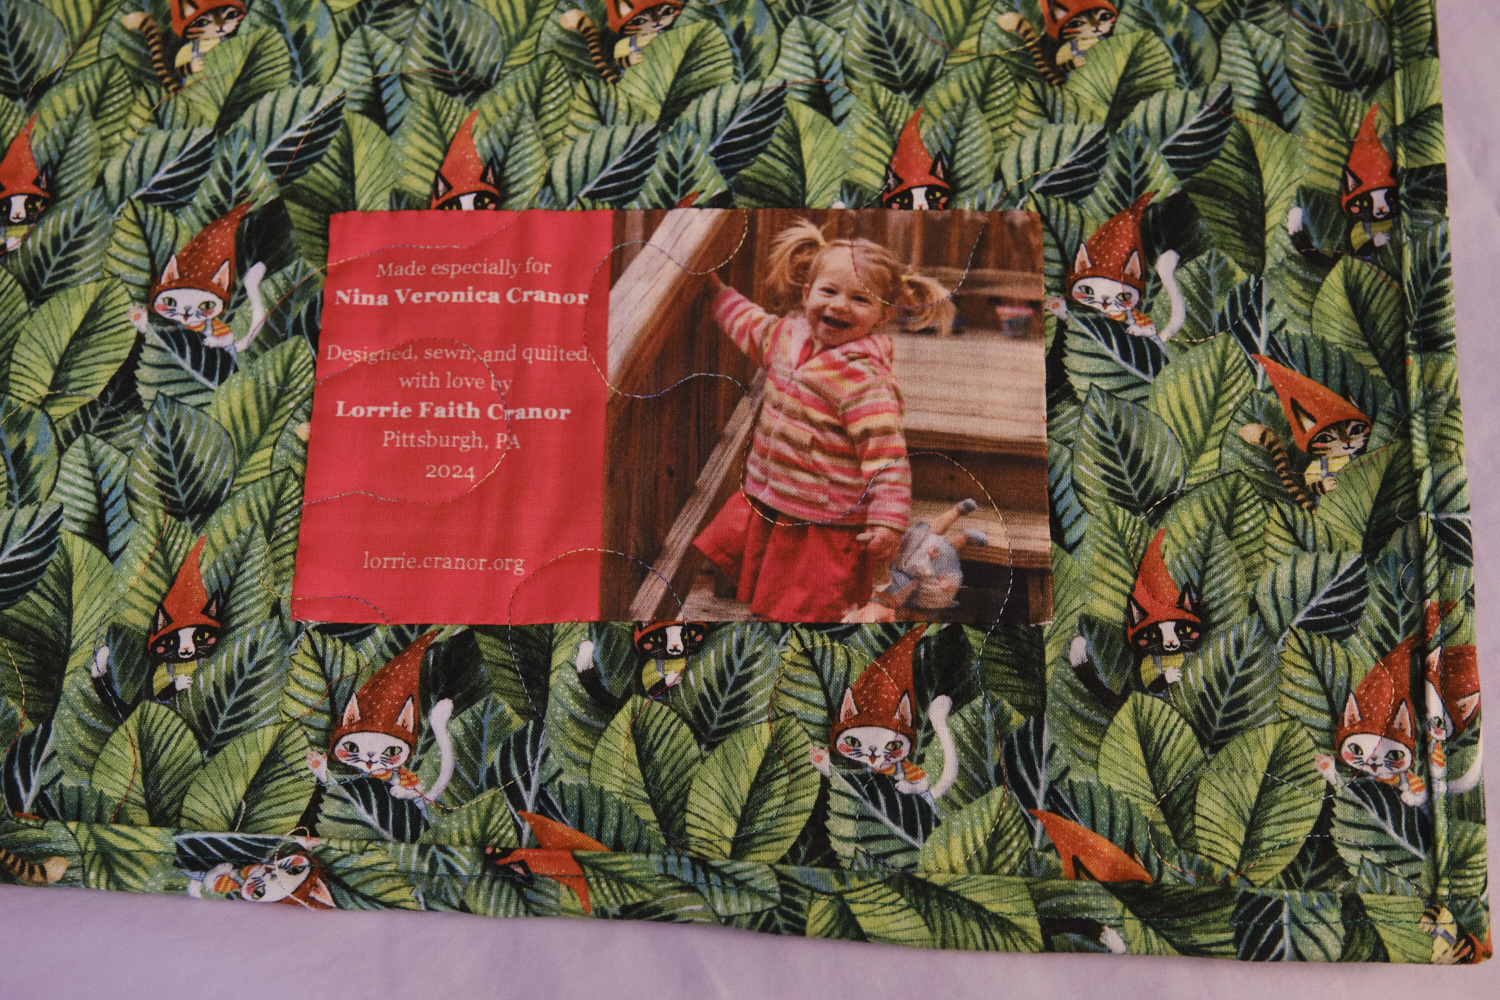
The next step is to prepare the three Bs: backing, batting, and binding. My daughter selected a green cat gnome quilting cotton print for the backing and binding. It wasn’t wide enough for the quilt back so I sewed two pieces together. I also fused a custom-printed quilt label on the bottom right corner and later hand stitched it in place to keep all the corners down. I made 1.5-inch continuous bias binding from a square of the extra backing fabric. I think this is a particularly cool technique for making bias binding although it does require some careful measuring and a lot of cutting. I bought a queen-sized Hobbs HF90 heirloom fusible cotton blend batt so I had to cut that down to the size I need. This batt is a fairly lightweight 80% cotton and 20% polyester, which works well for t-shirt quilts without adding substantially to the weight of an already heavy quilt.
Because the batting is fusible you can put the backing on the floor (I put a large top sheet on top of the carpet first and build my quilt sandwich on top of the sheet), layer on the batting, and layer on the quilt top and then press with an iron to fuse everything in place. I bring my iron down to the floor, lie on the quilt, and do all the fusing. I start in the center and work my way out, using an organza pressing cloth to keep the t-shirt ink from melting onto my iron. After fusing the font I turn the whole thing over and check the back for wrinkles. I did a pretty good job this time and only had to peel back a little bit of the backing to remove a wrinkle. I fused that spot again after straightening it out.
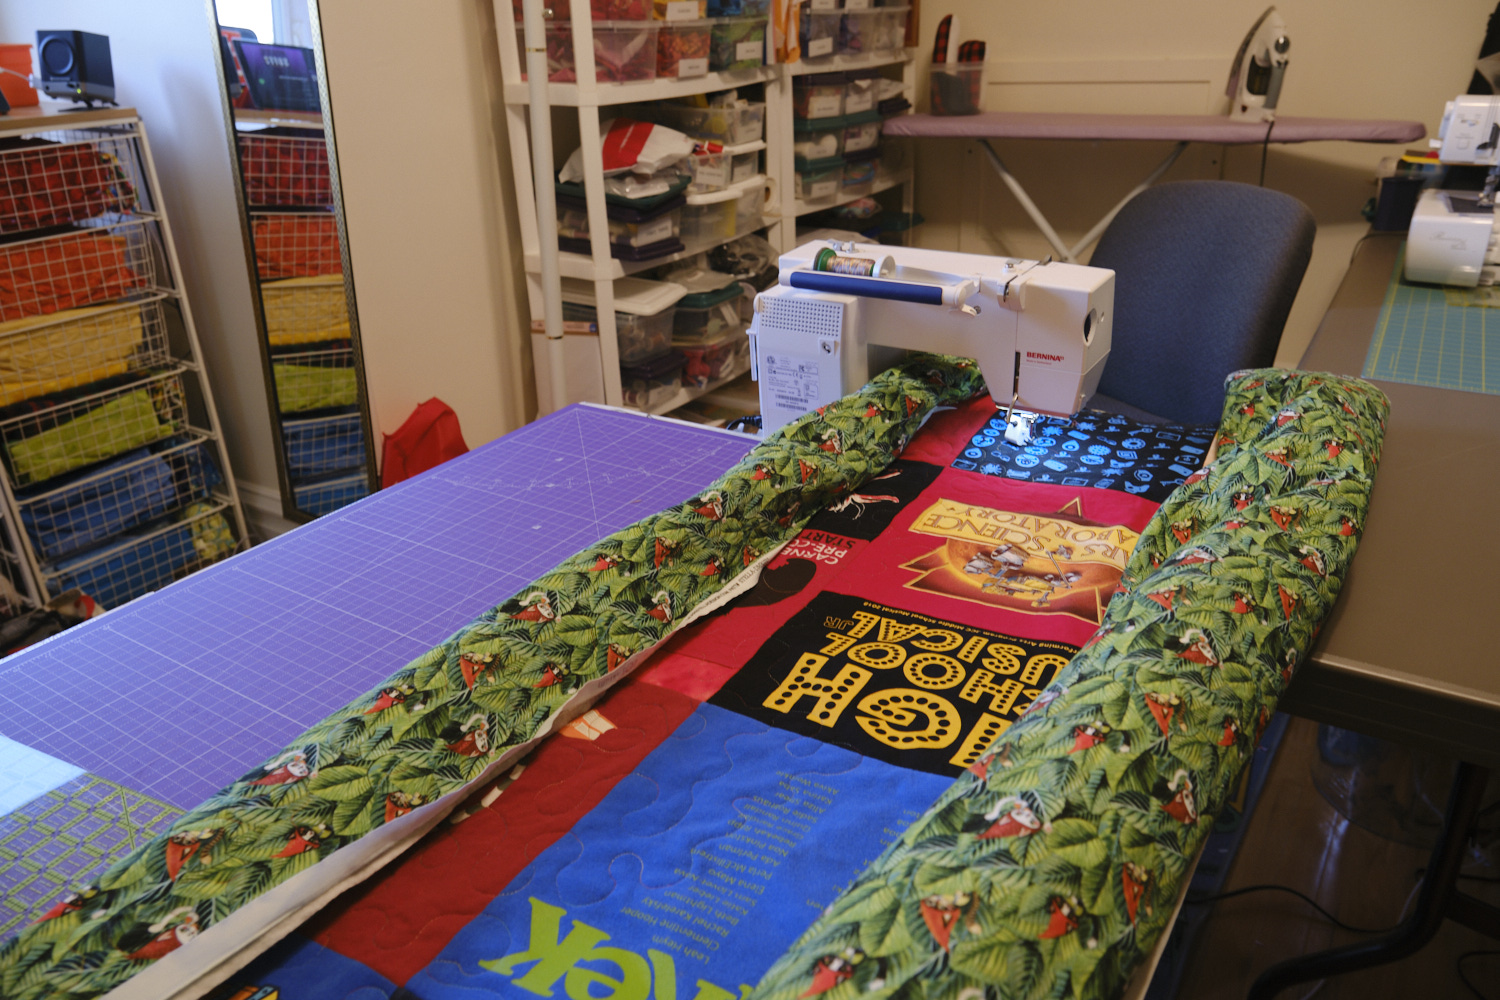
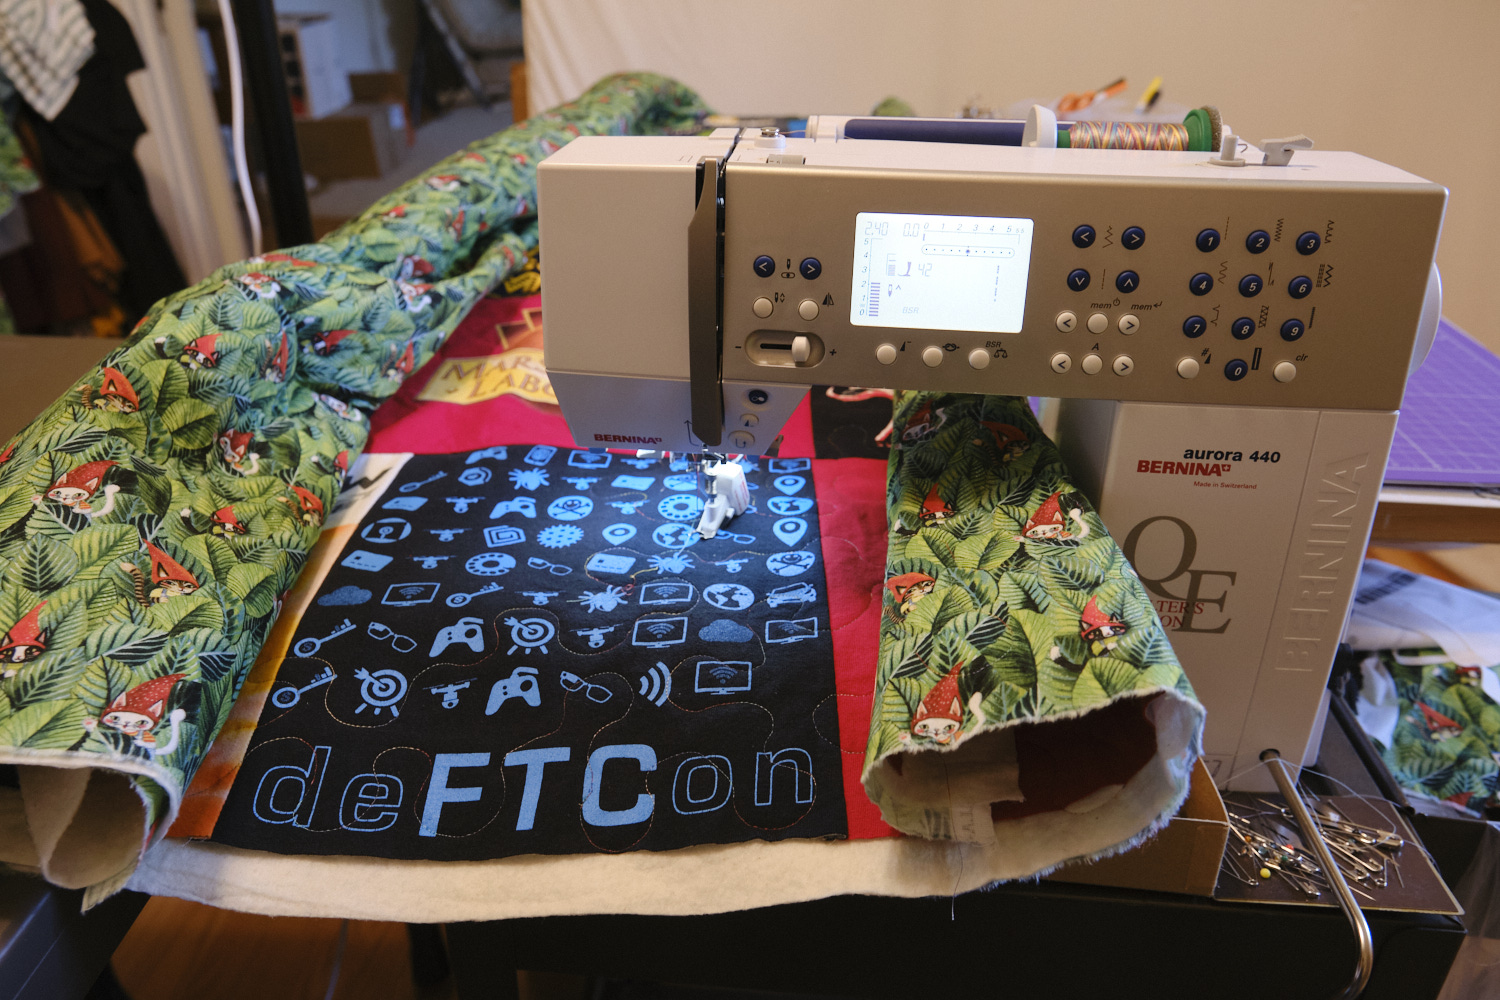
Now the quilt sandwich is ready to sew! Fortunately, my Bernina was back in tip top shape so I used that for quilting with my Bernina stitch regulator (BSR) foot. I selected a spool of Isacord rainbow multicolor polyester embroidery thread that I had bought years ago and never used. I thought it went well with the rainbow theme and it kind of blends into the backing. I could have used just about any color given the range of colors in this quilt. A solid red or medium green would also have worked, and a green might have been better for the backing. I did find the Isacord kind of slippery to work with and I had some problems with skipping, especially over some of the denser ink areas. I used 50 wt cotton thread for my other t-shirt quilts and I liked working with that thread better on a heavy quilt with large-scale quilting rather than small details.
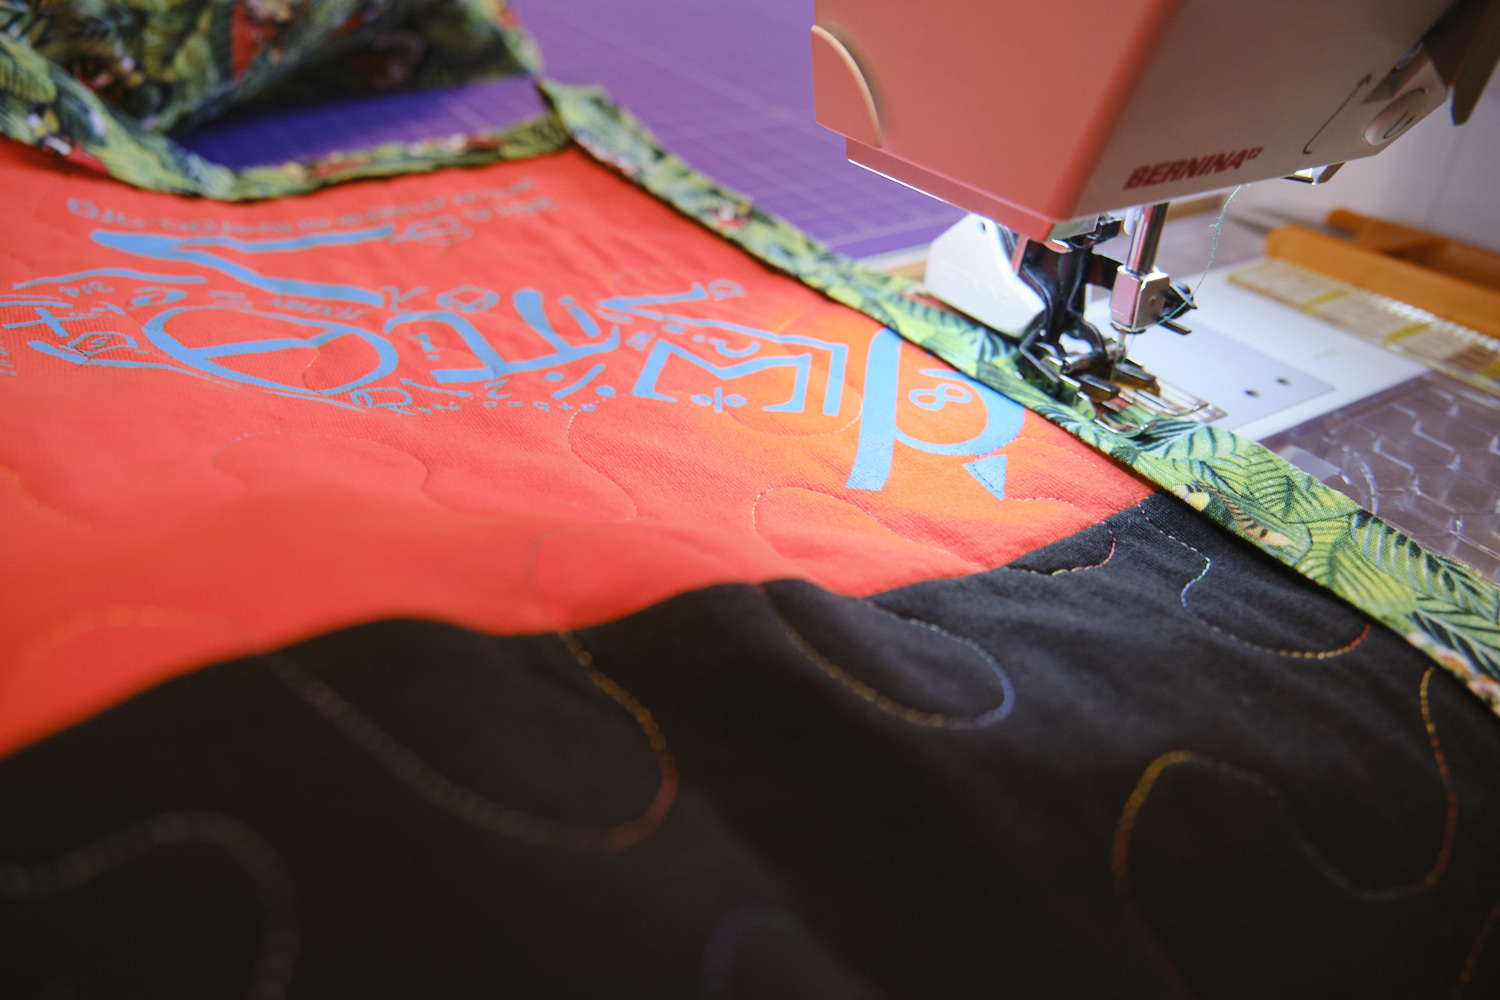
Quilting a bed quilt with a home sewing machine is challenging because you have to roll up the quilt and stuff it under the sewing machine arm, and also drag around a big heavy quilt. As t-shirt quilts are extra heavy, this was quite a challenge. Someday maybe I’ll get a long-arm quilting machine, but for now I do the best I can with the Bernina. I worked up a sweat and some shoulder pain from sliding the quilt around. I quilted this quilt entirely freehand with big meandering stipples. It’s basically doodling with a sewing machine. My stipples came out mostly smooth and round, but there are definitely a number of sharp angles and glitches too: don’t look too closely and you won’t see them!
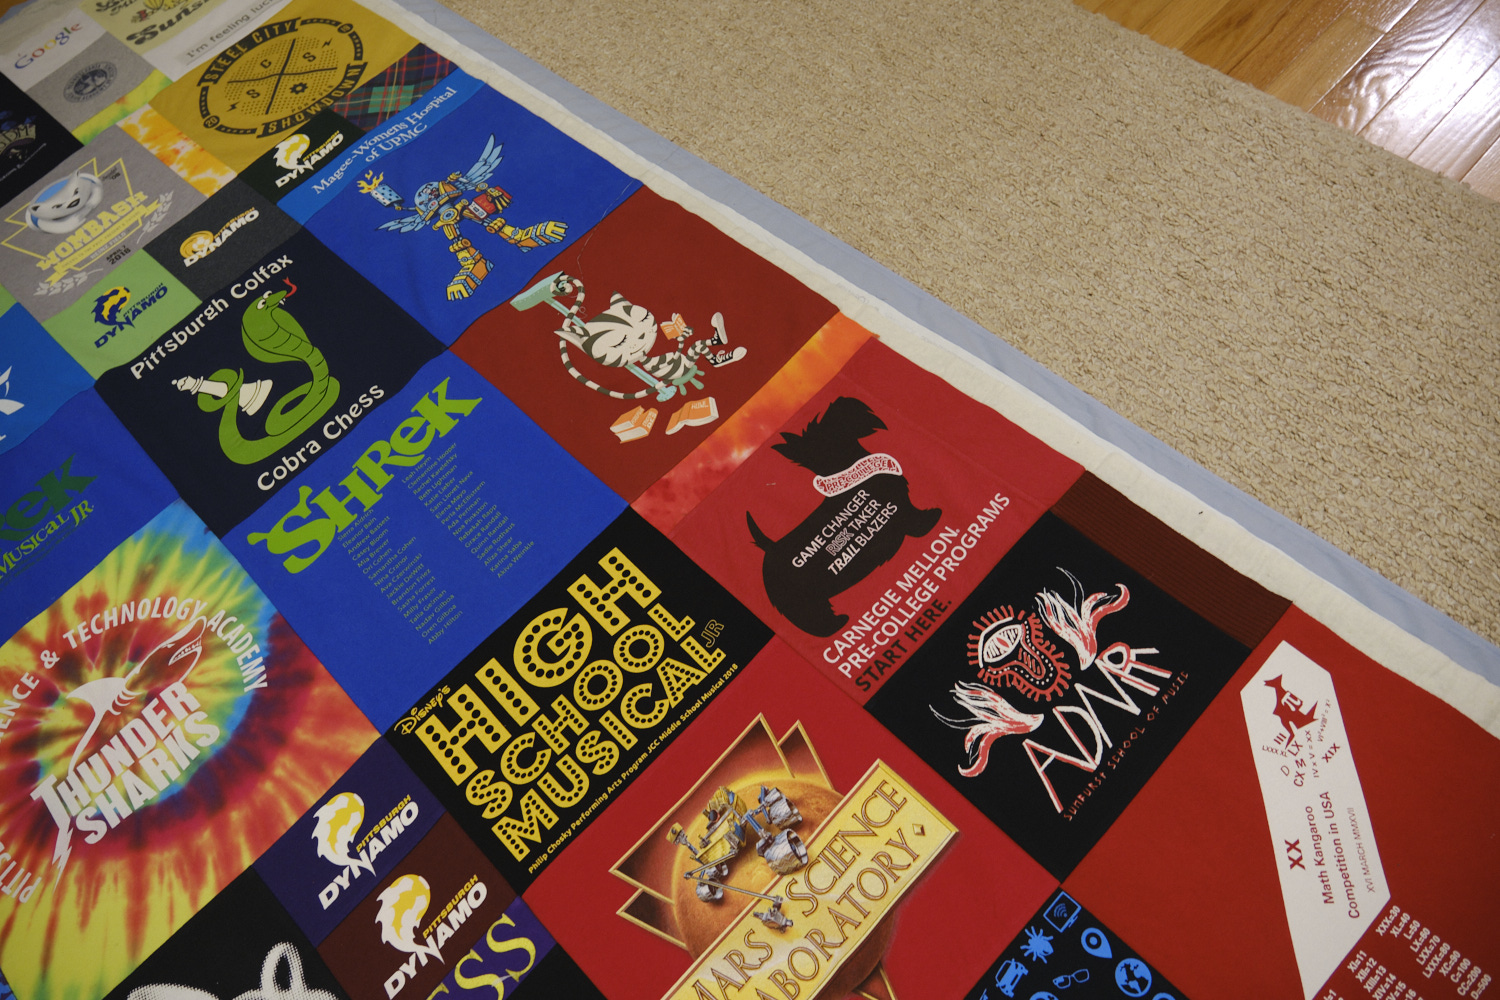
The last step is to trim the edges of the quilt and attach the binding. I fused the french-fold binding technique, which is how I bind most of my quilts. I sewed the binding along the edge of the quilt with a quarter-inch seam allowance using my Bernina walking foot. There’s a little extra jig required at each corner for nice mitered corners, and then there’s a bit of work needed to join the beginning and end of the binding into a giant rubber band. Attaching the first side of the binding to the front of the quilt was fairly painless (especially compared to quilting the quilt). The classic french-fold binding technique requires hand stitching the binding to the back of the quilt with a slip stitch. This is a very pretty finish, but it would probably take me at least 6 hours for a quilt of this size so I have finished the binding of all my t-shirt quilts by machine. I folded over the binding, used clips to hold it in place, and used the edge foot on my sewing machine to stitch in the ditch. It took me about an hour to go all the way around the quilt.
And then I was done! I took some photos and celebrated! I also sewed up a cute pillowcase with extra backing fabric. I will use it as a bag when I deliver the quilt, and then it can be used with a standard bed pillow.
I still have a lot of t-shirts left, including a lot of shirts that used to be mine. Some day I’ll have to make a t-shirt quilt for me!
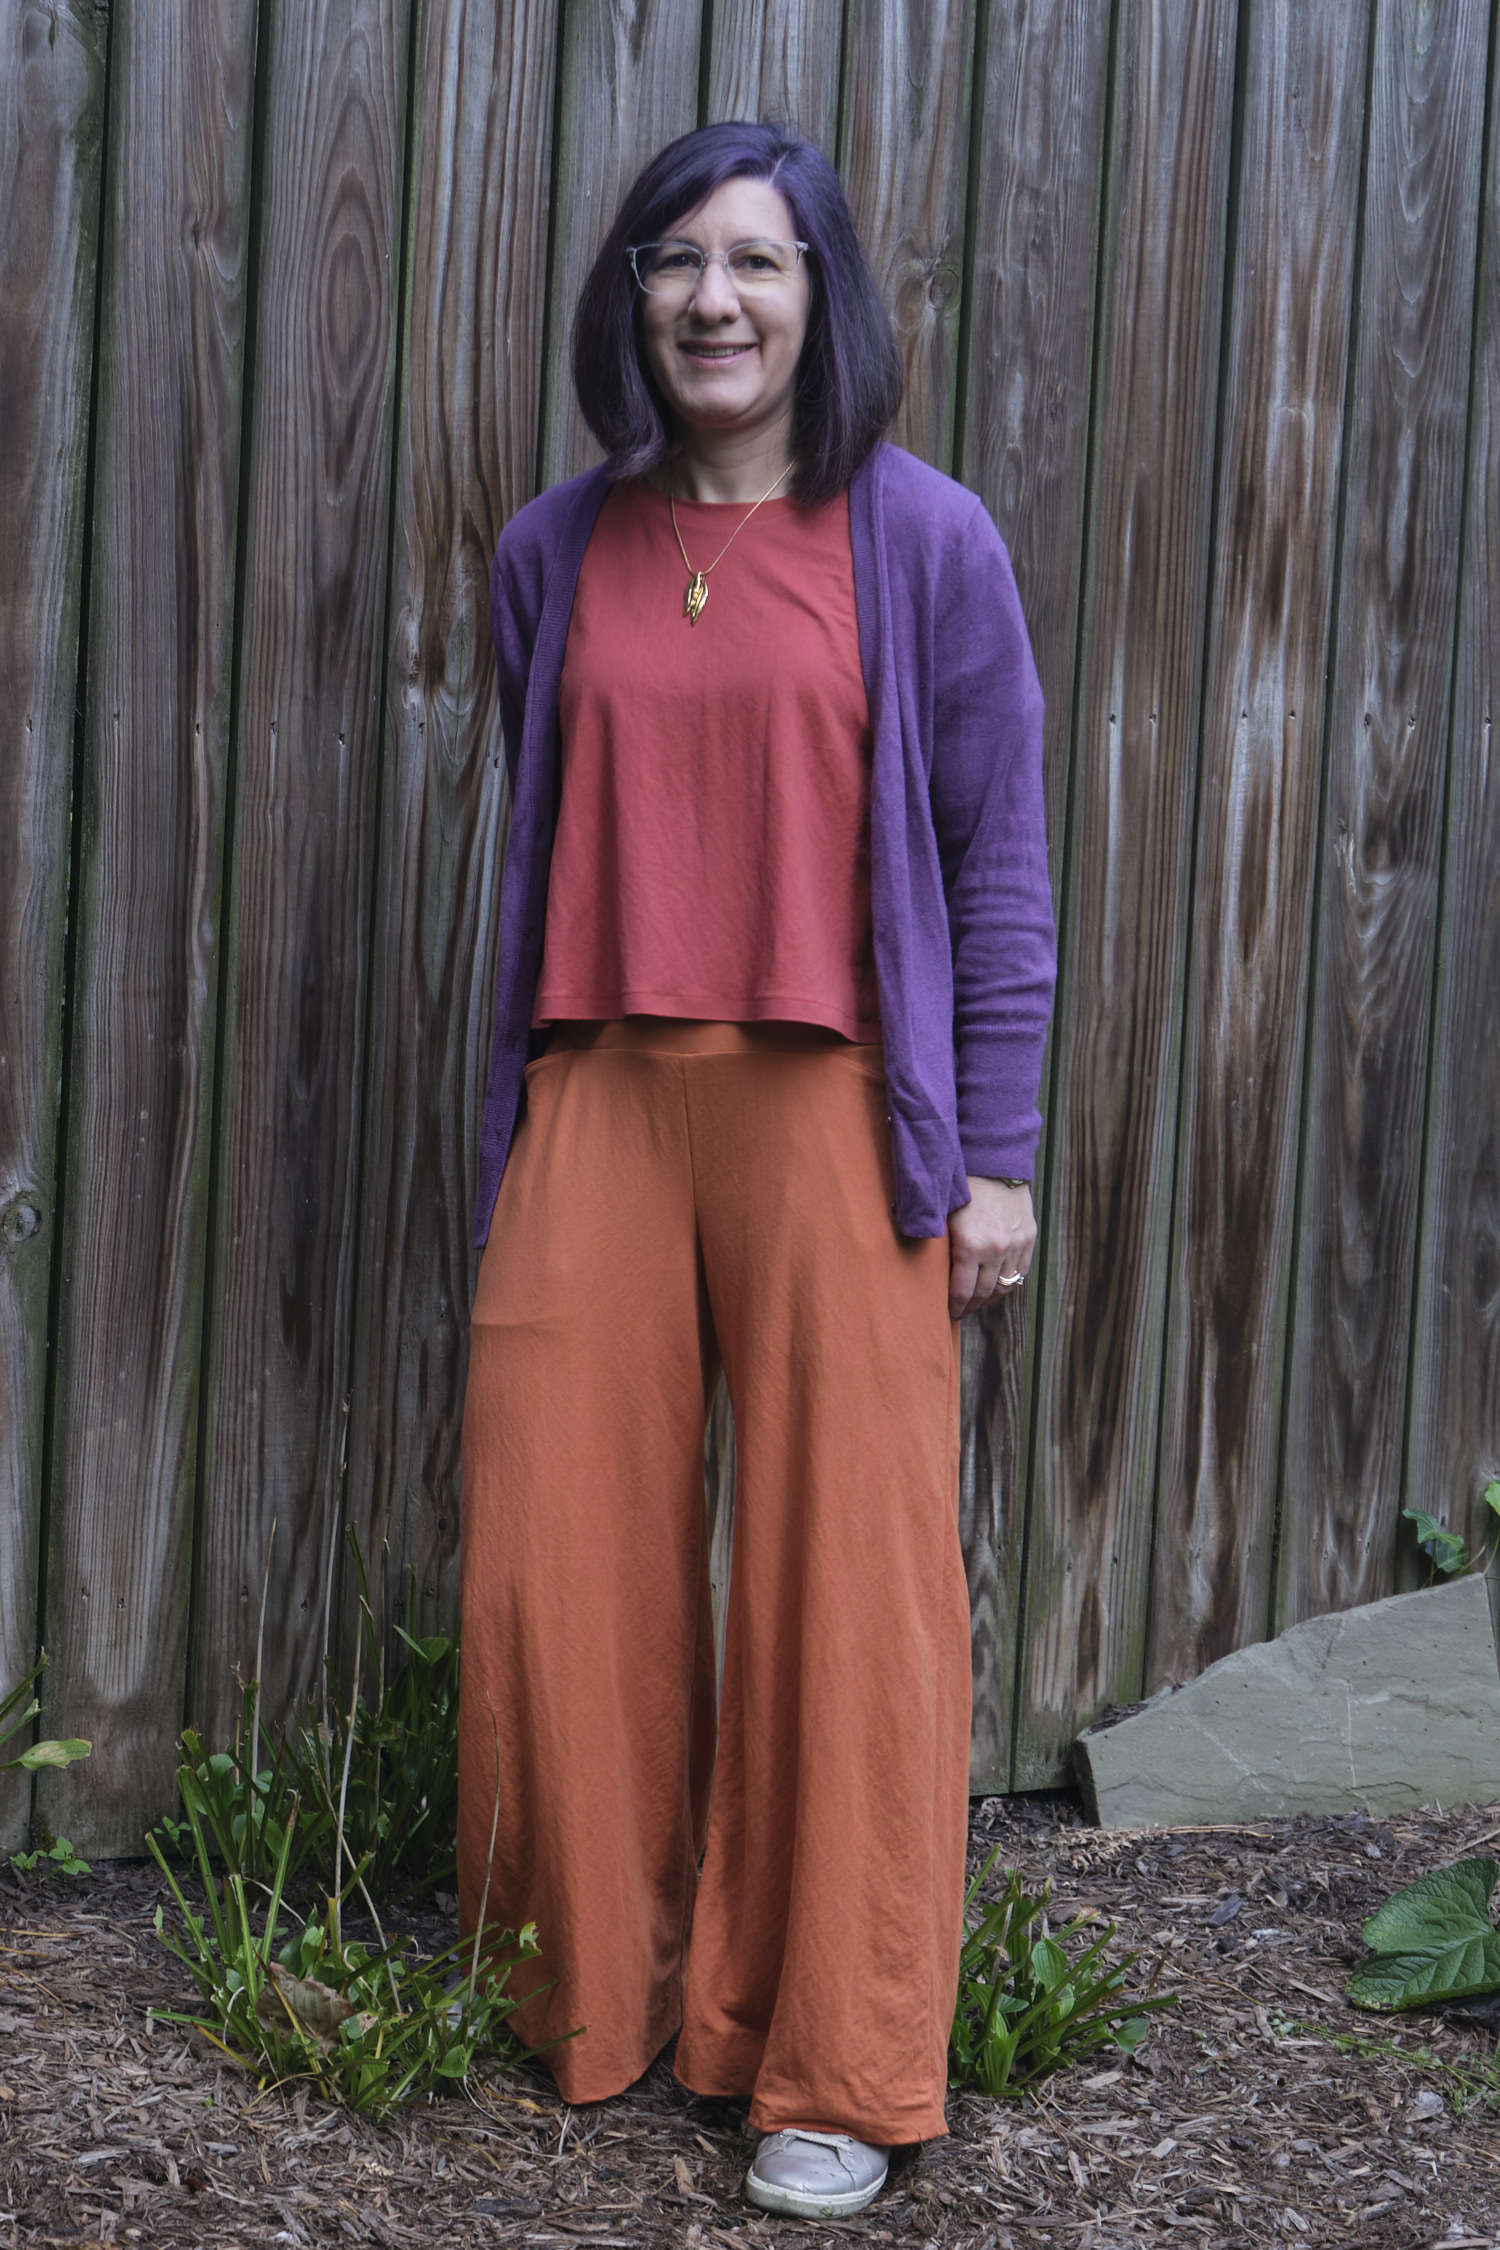
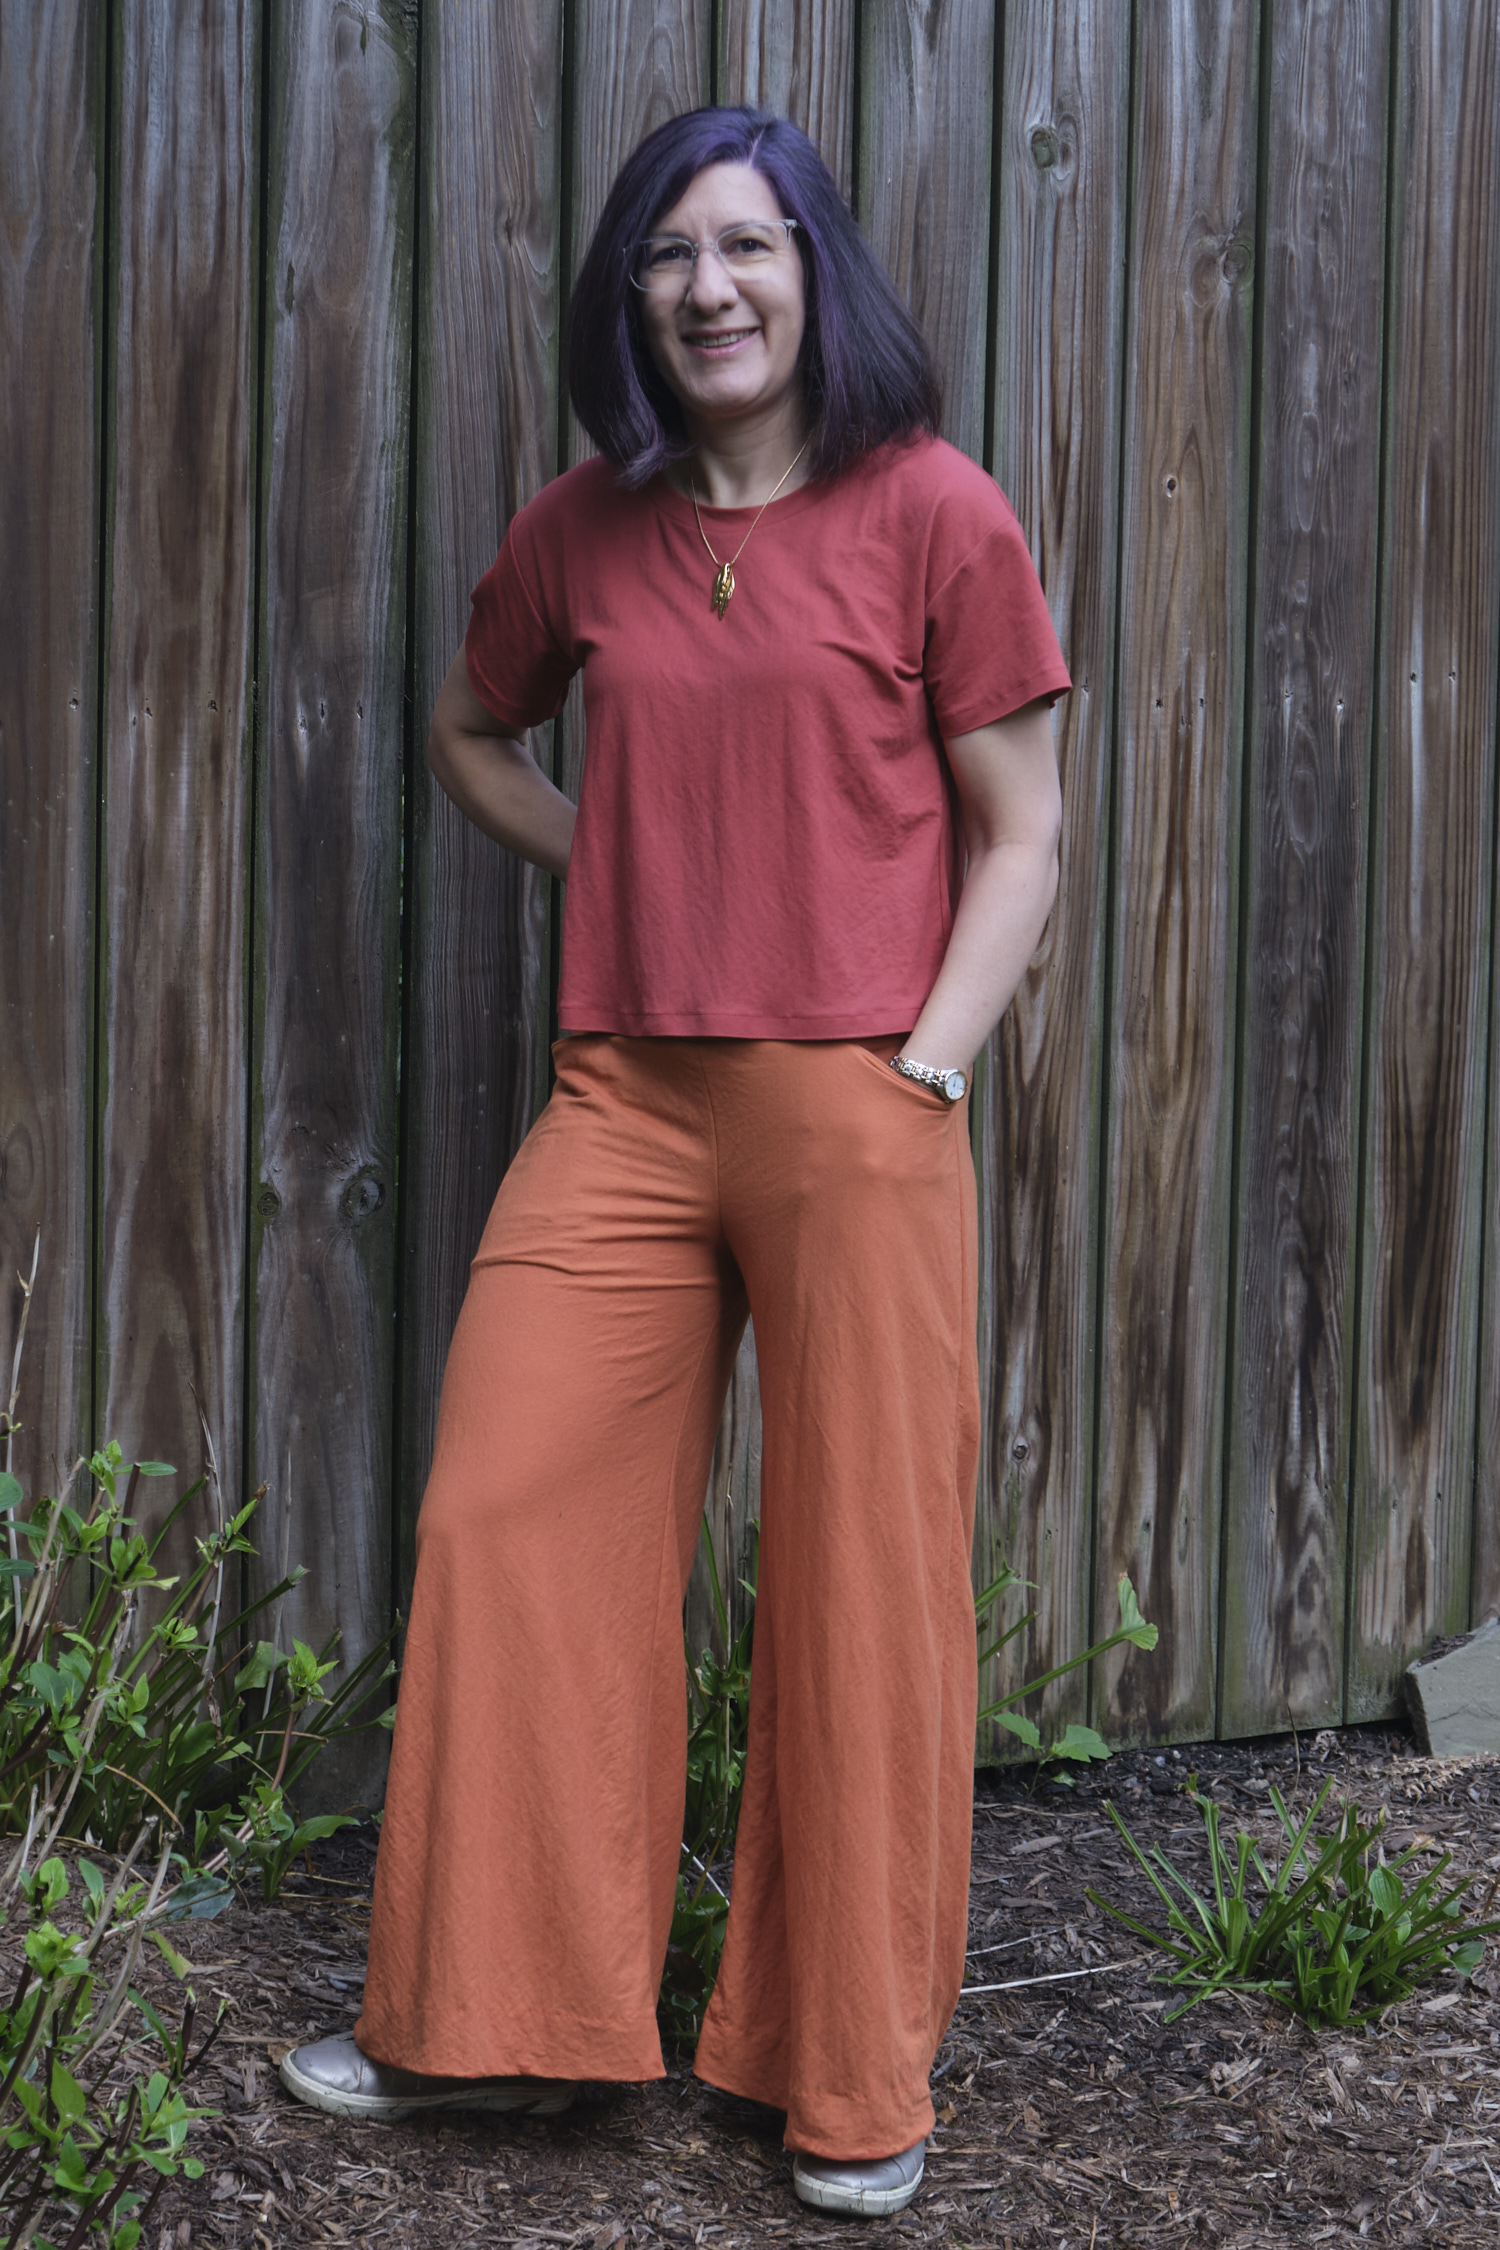
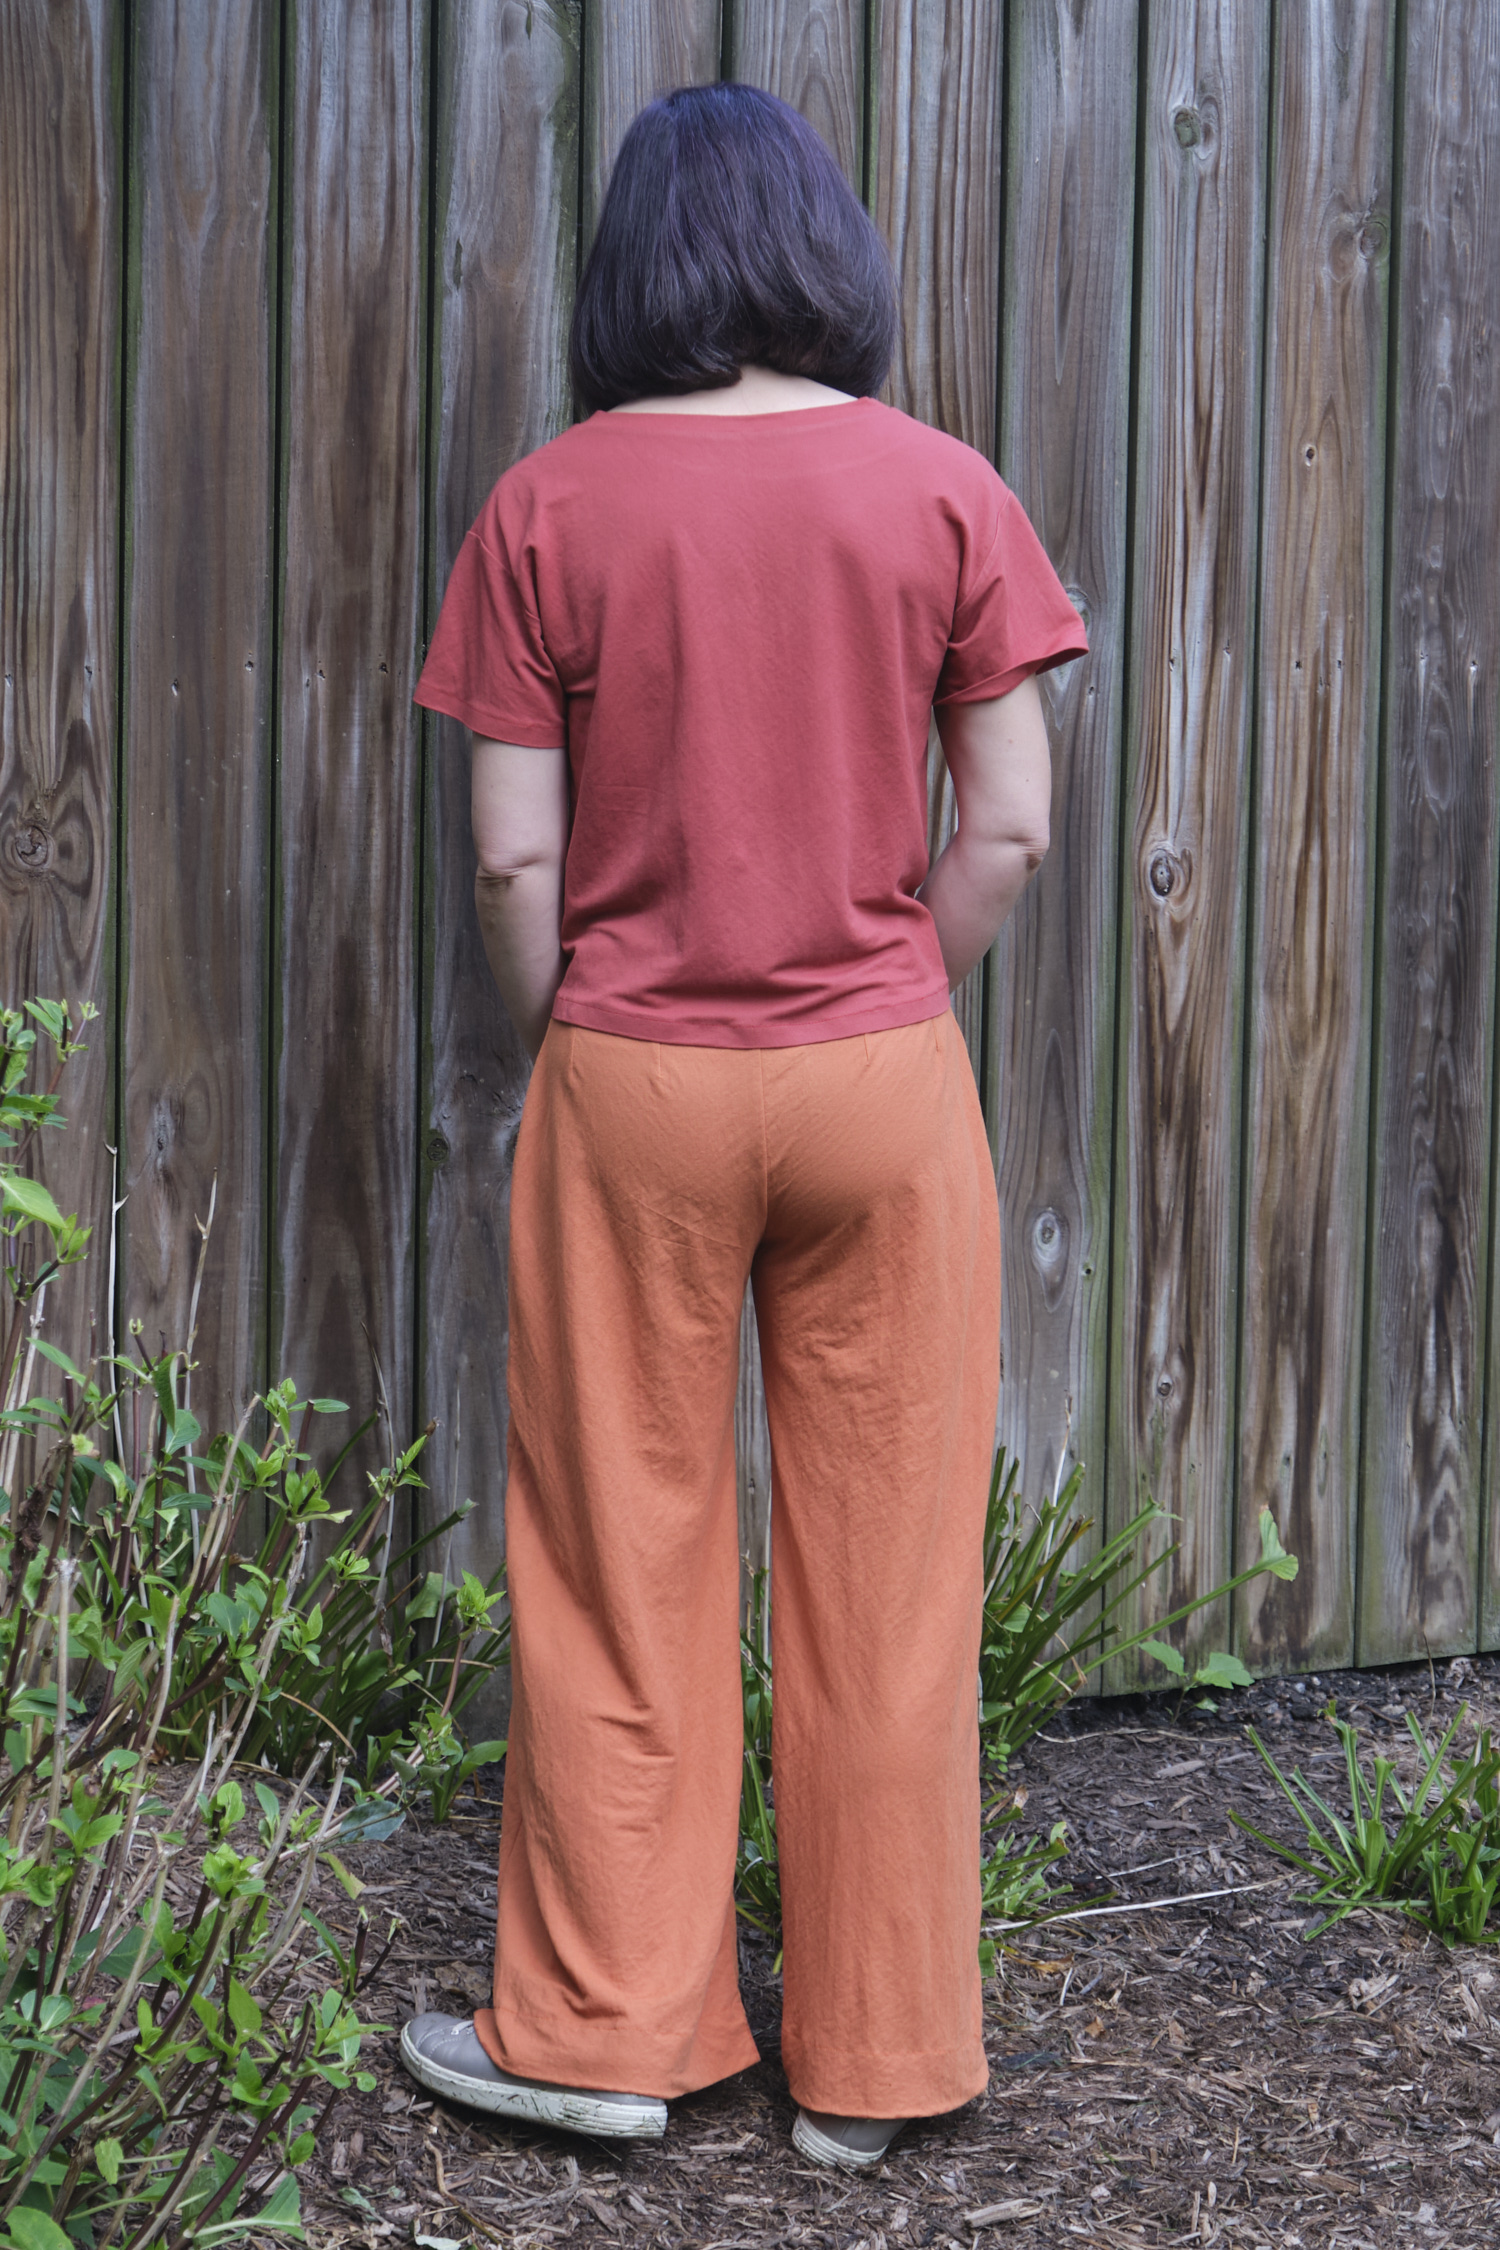
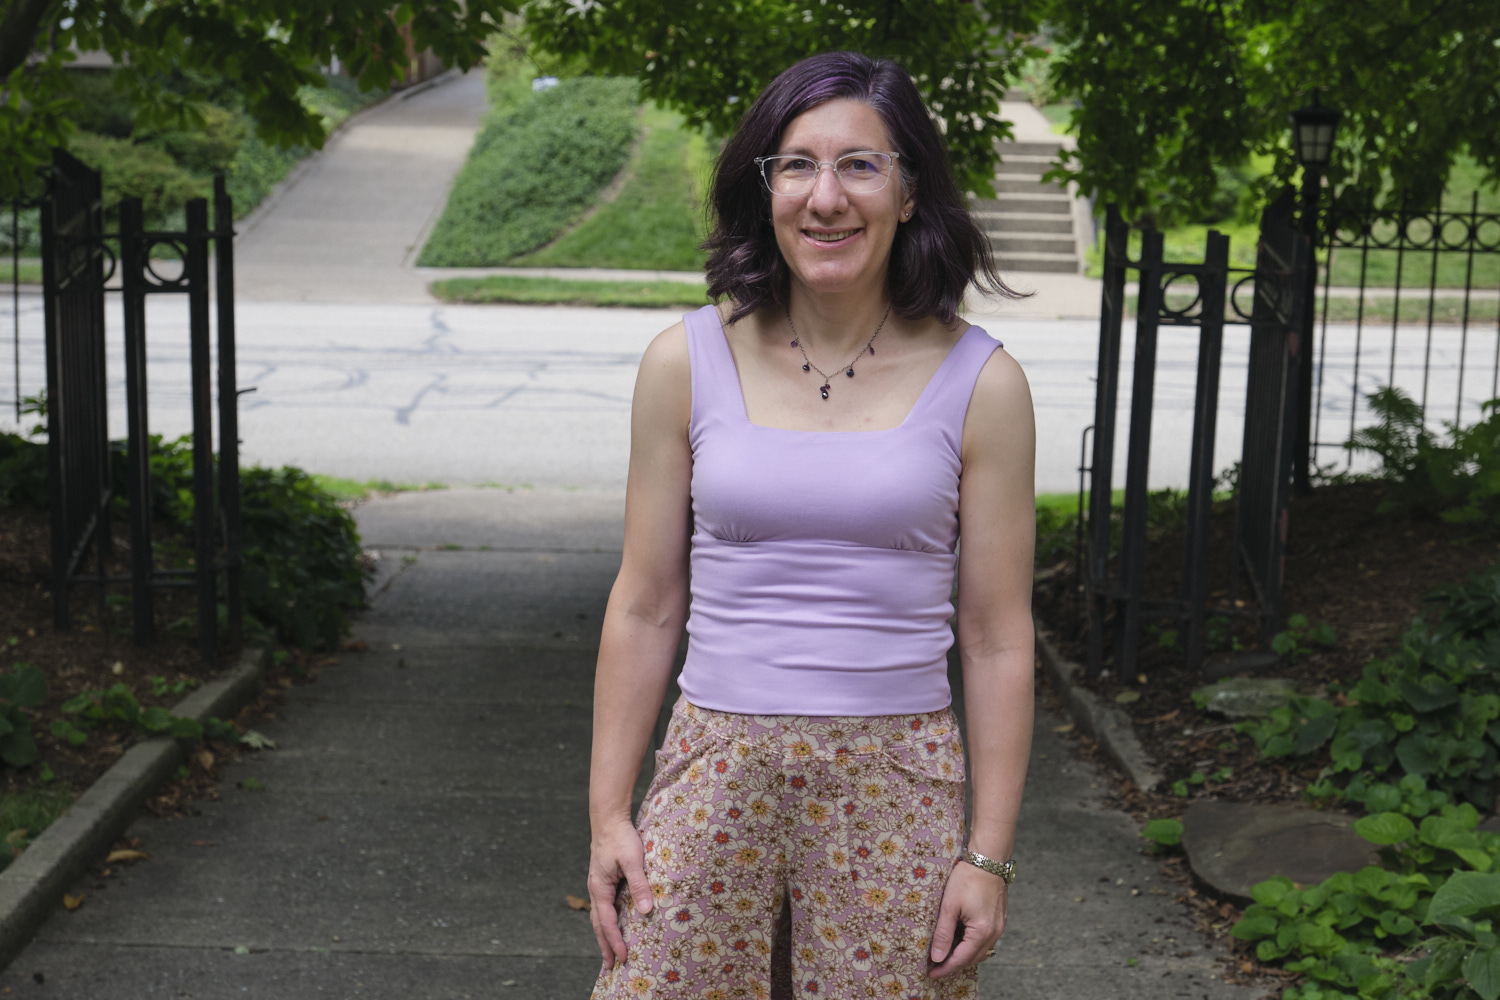
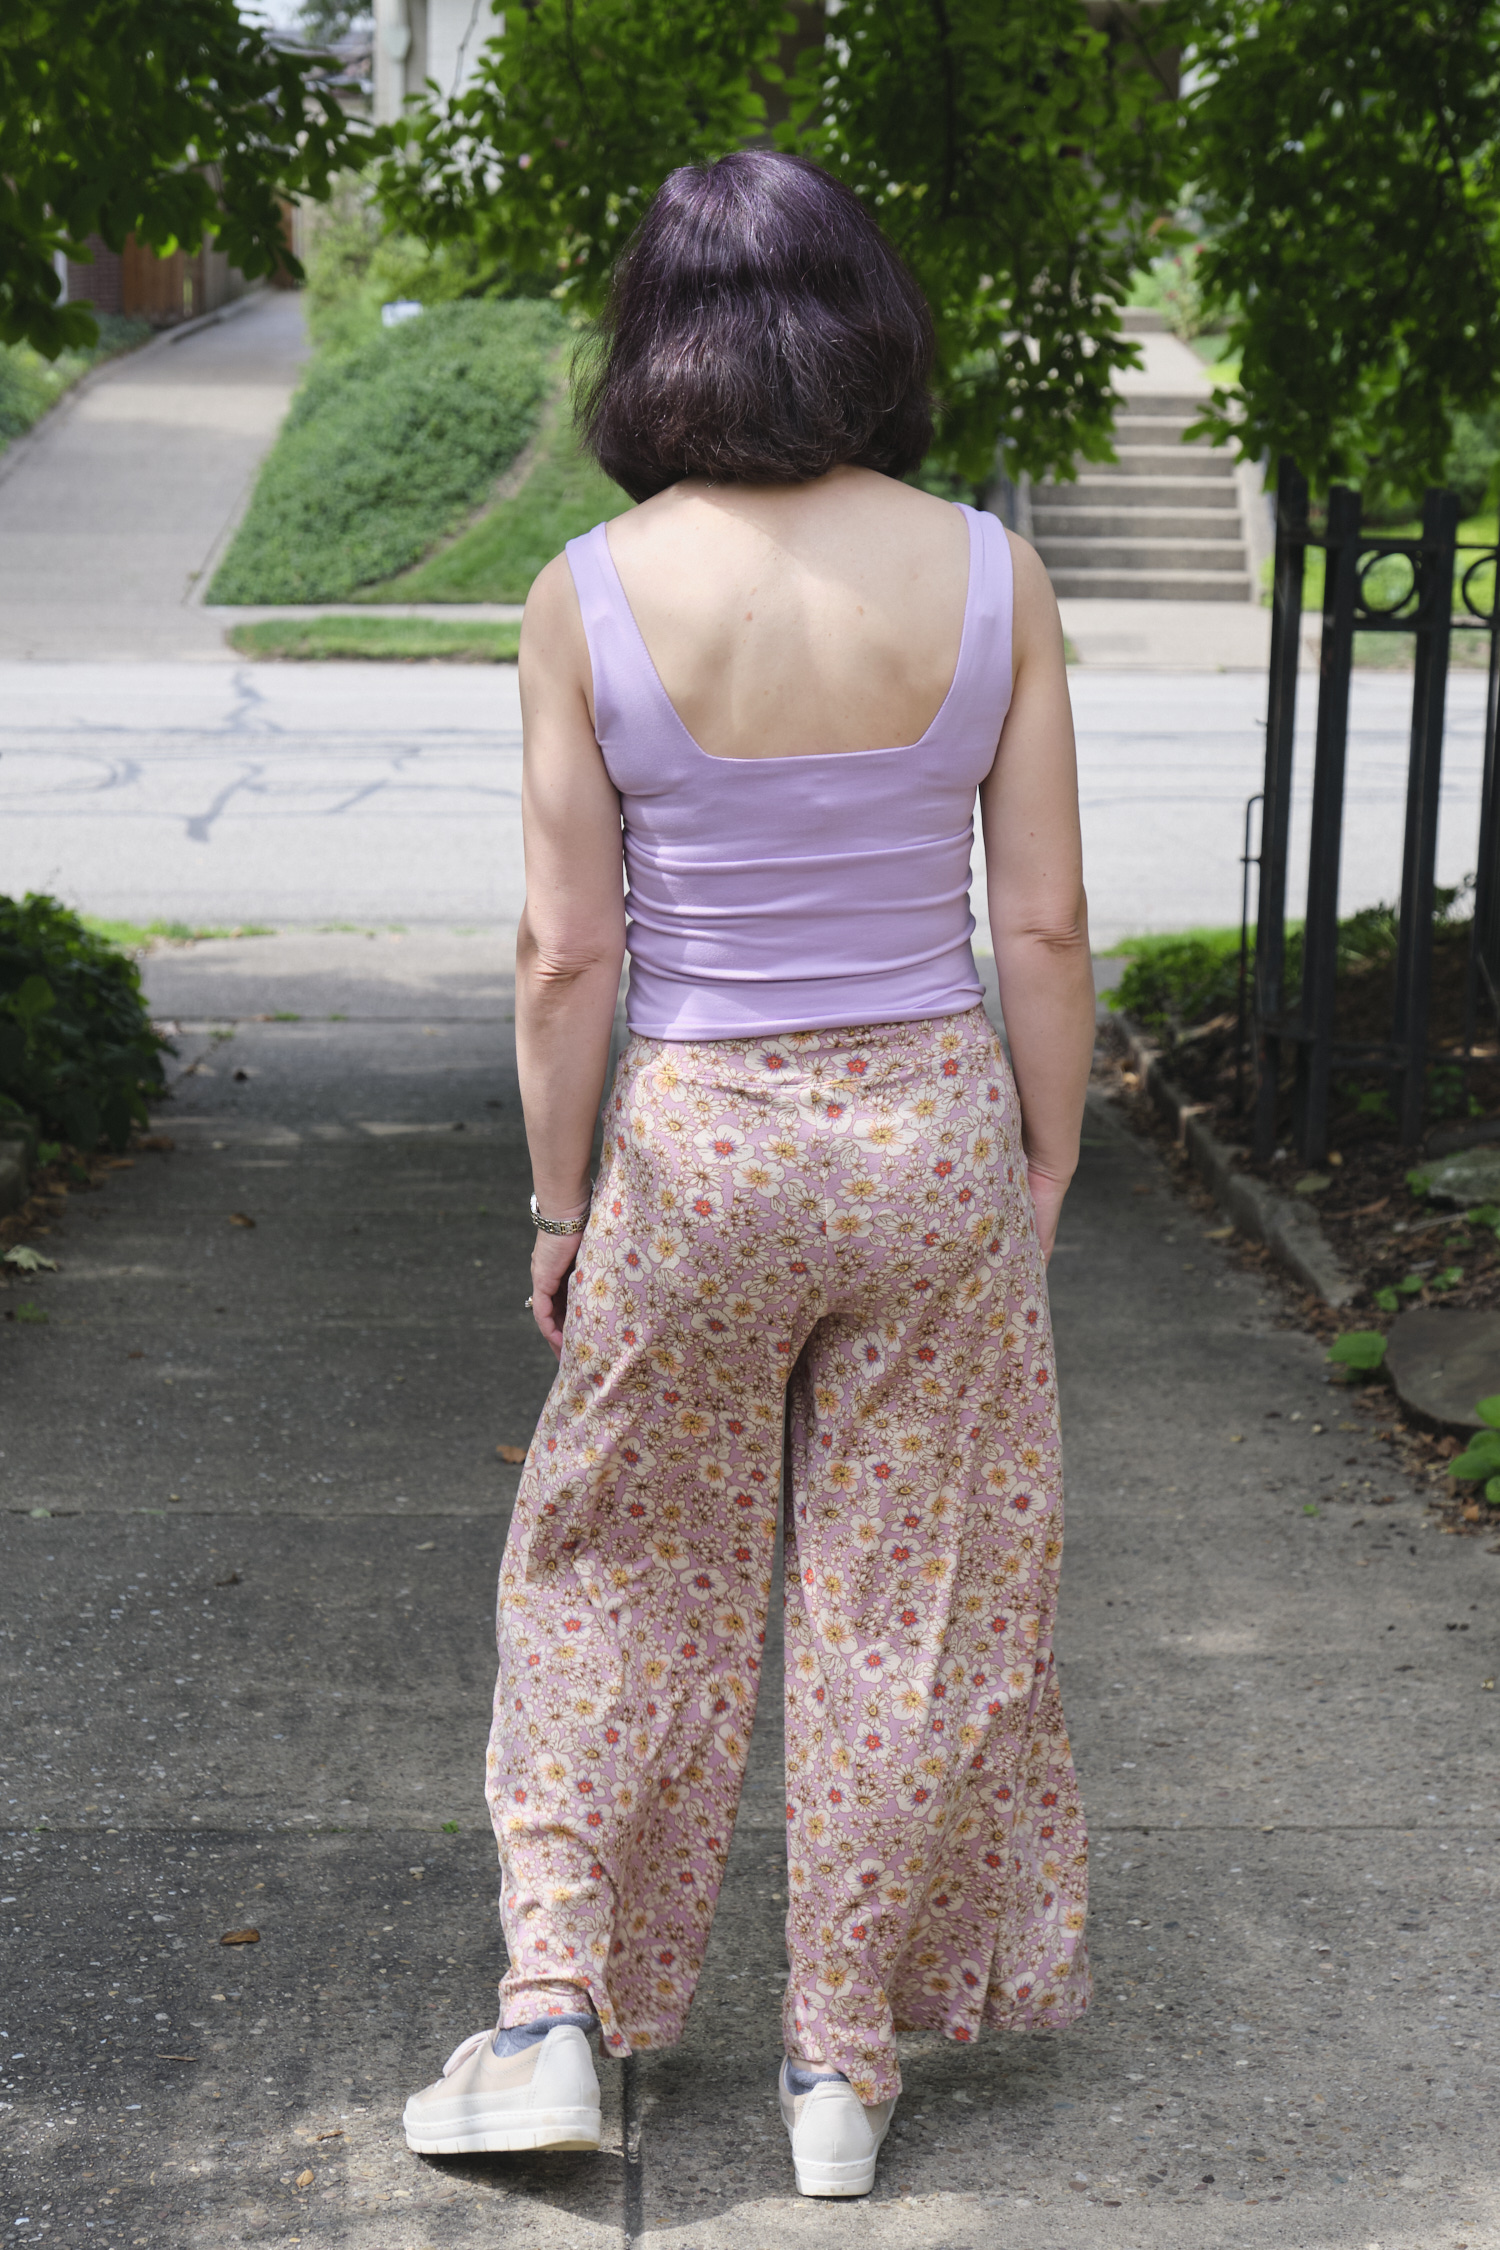
A while ago I bought a couple of yards of PyLos LiKnit in almost every color. I’ve previously used the black, seafoam, lavender, and linen colors. There are also several lovely warm Fall colors that I have been contemplating using in coordinating garments for months.
I started with a pair of orange pants (LiKnit “metal rust” color), very similar to my previous Pattern Emporium Urban Boldly mashup pants with the low rise size AU 10 Urban pants mashed with the Walk Boldly wide leg and a high contour waistband lined in athletic knit. This time I tweaked the contour waistband a bit from my last mashup and sewed half-inch elastic into the waistband.
I wanted a LiKnit top to go with the pants. I previously had made a black Sinclair Bondi LiKnit top, but I find the LiKnit doesn’t quite stretch enough around the bust and has drag lines, even though I sized up. I decided either darts or a boxier cut was probably needed for a LiKnit top so I went with the Sinclair Loop drop shoulder knit top pattern, which I had previously used to make a sweater. I made this one in Marsala LiKnit with the scoop neck, cropped length, simple hemmed bottom. I think this pattern works well with the LiKnit fabric. The LiKnit stretches surprisingly well for the neck band. I would like to try this pattern with a narrower neck band too. I think the split hem might also work well with this fabric.
I actually finished the top and pants back in August and took them on my Switzerland trip. I didn’t post these photos earlier because I have plans to complete my me-made Fall ensemble with a jacket made from light mustard LiKnit. But I’ve been super busy with other things, my sewing machine is in the shop, and I need to finish a quilt and some pants for my daughter before I sew any more clothes for myself. So the mustard jacket may not materialize for a while. In the mean time, I’ve been wearing the outfit with a store-bought purple sweater. I also have a surprising number of other tops and jackets in my wardrobe that go with orange pants… who knew?
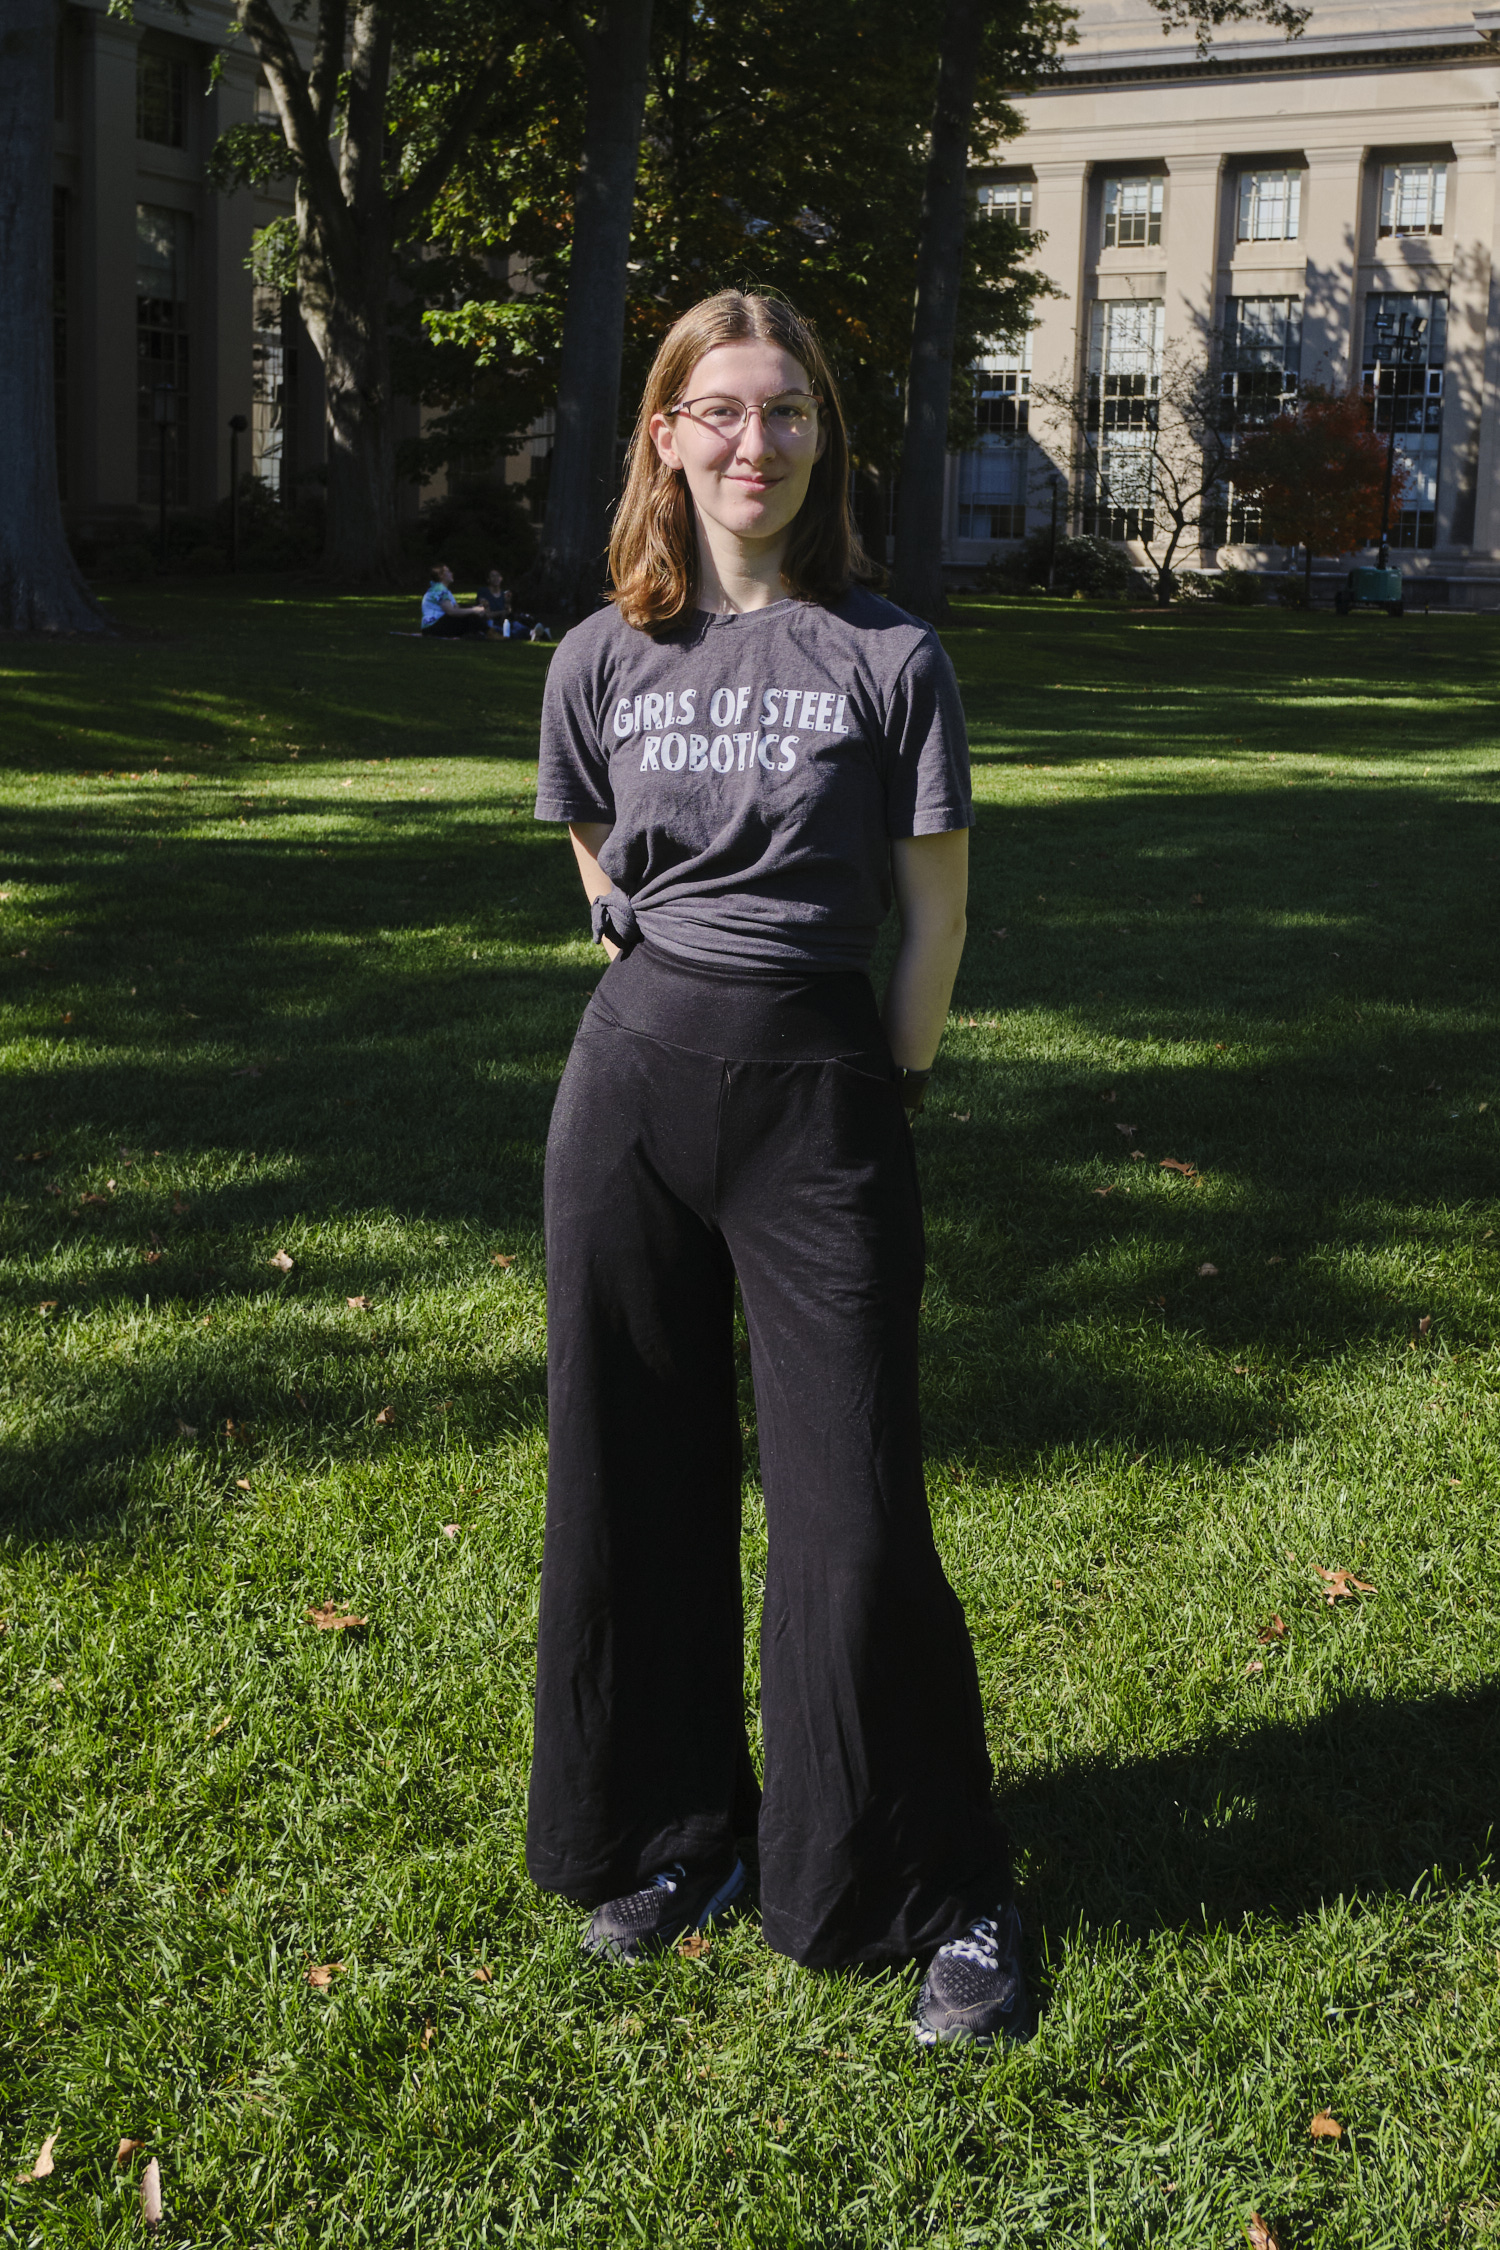
Before I took my youngest daughter to college in August, she insisted that I make her some more black “flowy pants.” She has a pair of black LiKnit pants I made using the Sinclair Cleo pattern extended into palazzo pants that she wears pretty much non-stop. They have held up really well through lots of wear and wash and dry cycles. They are not stretched out and have no pilling. Unfortunately, they did come in contact with a spot of bleach, so there is a light spot that my daughter periodically colors in with a black sharpie. Anyway, she asked for another pair of black LiKnit flowy pants, as well as black ponte pants for cooler weather. She is about the same size as me but taller and a little slimmer so I used the same Pattern Emporium Urban Boldly mashup approach with the same base size as I used for my orange pants, but added 1.5 inch to the waist height (basically the high-rise version plus an extra half inch) and didn’t shorten the leg before hemming. The pants fit her very well and she loves them, but I didn’t manage to get a photo before she packed them up to take to college. She asked me to make another pair just like them in black ponte and send them to her.
October update: Ponte pants finished and delivered. She was wearing the LiKnit pants when I saw her so I got photos of the LiKnit pants (outside) and the ponte pants (inside).
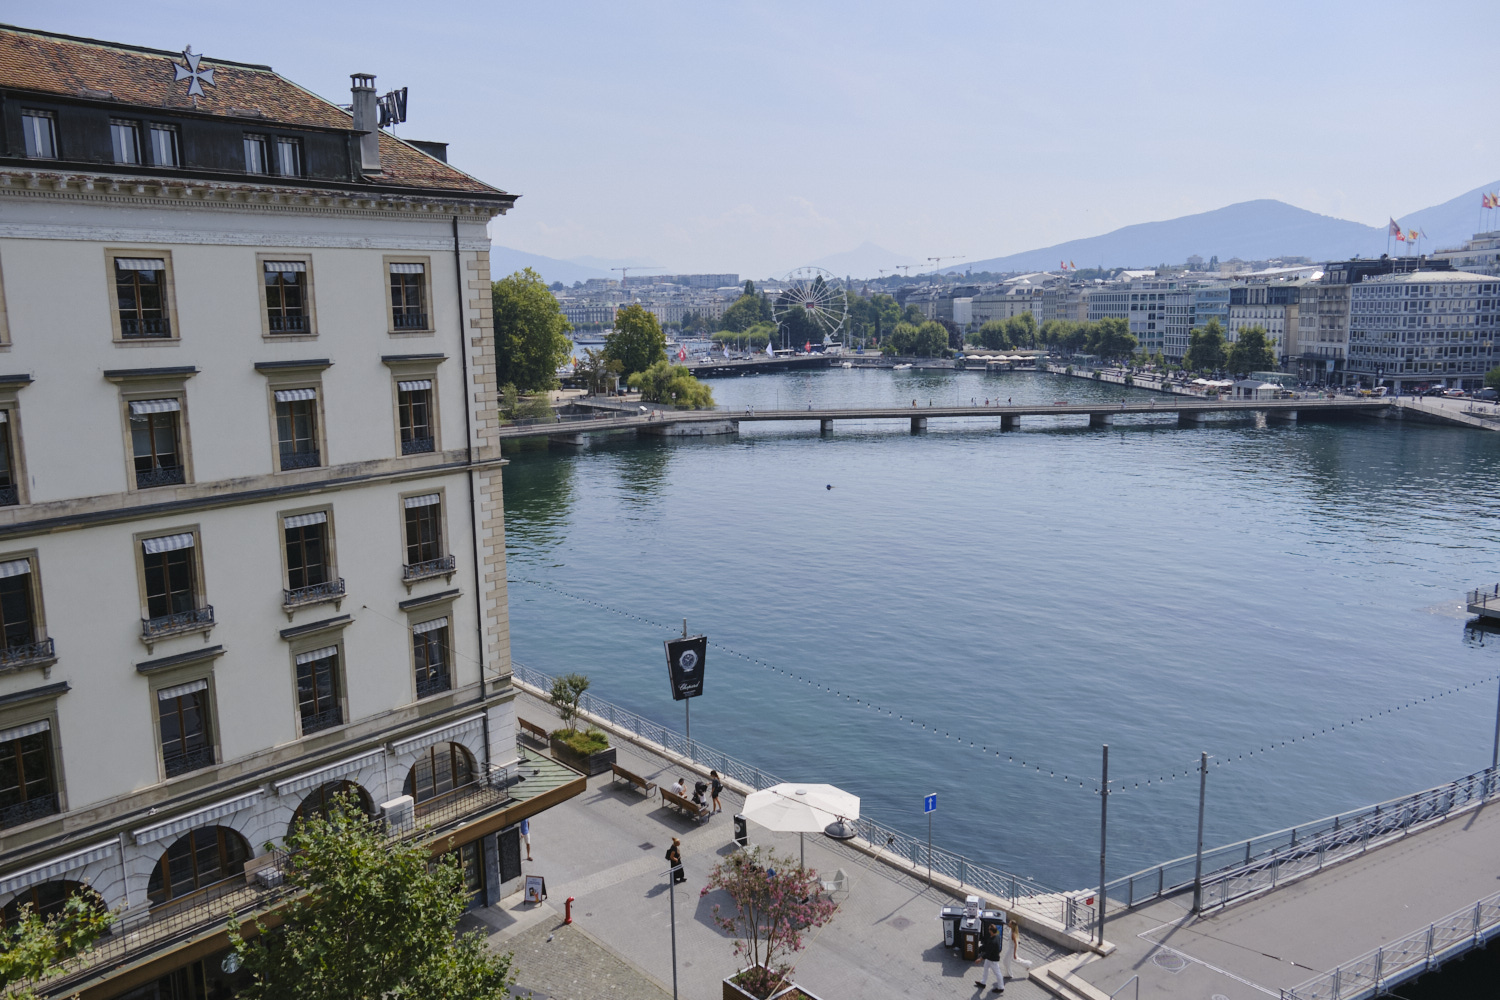
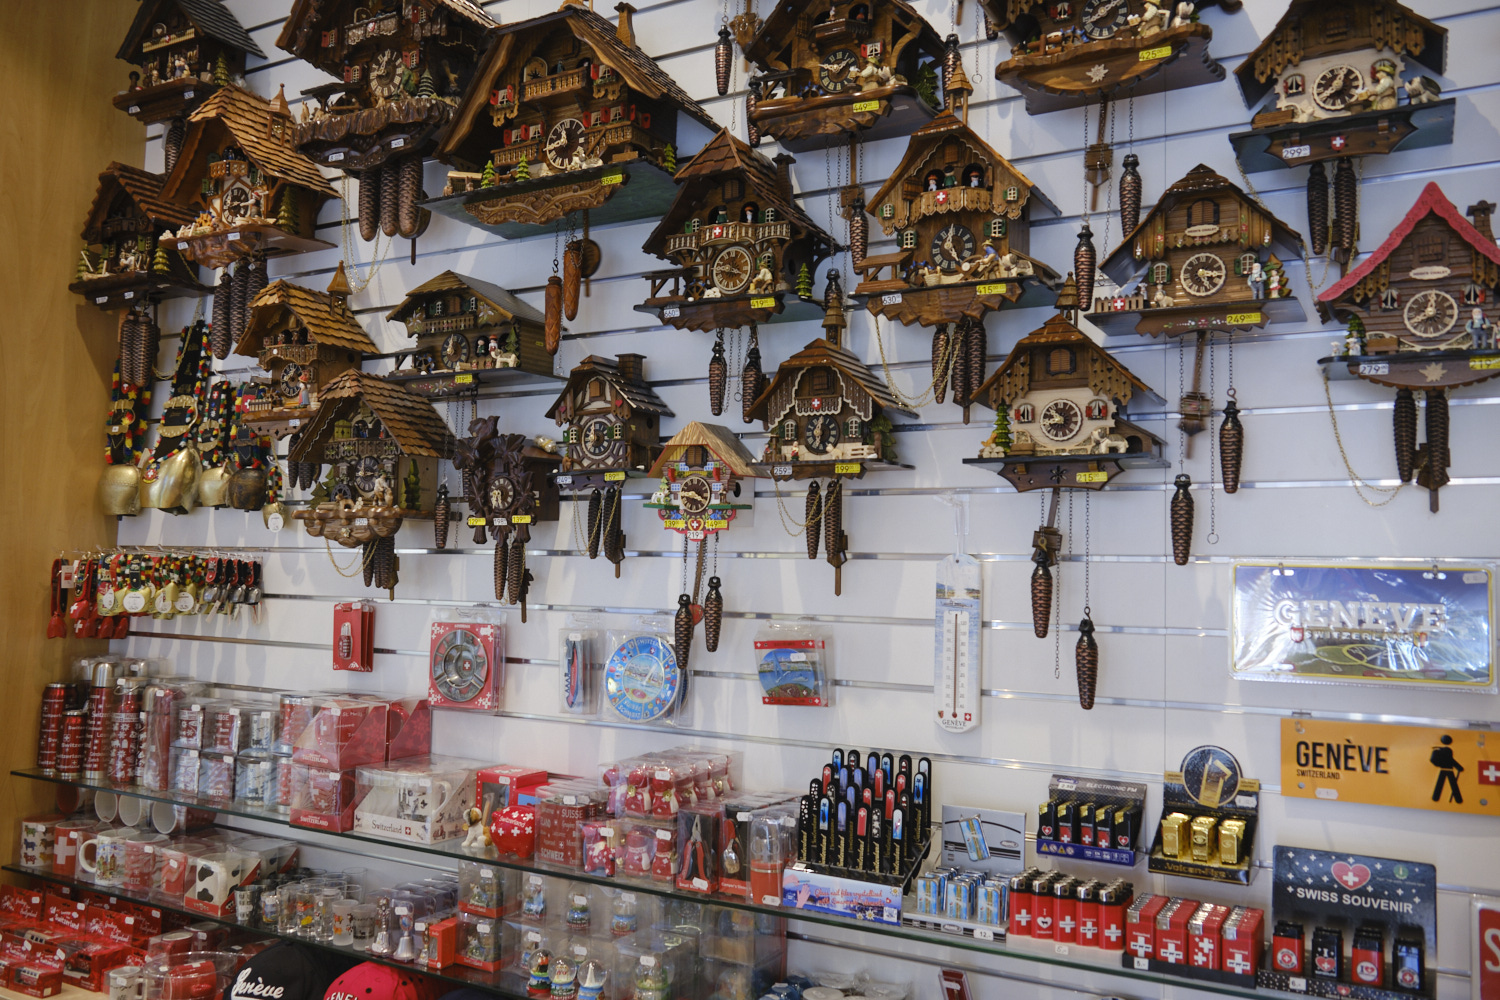
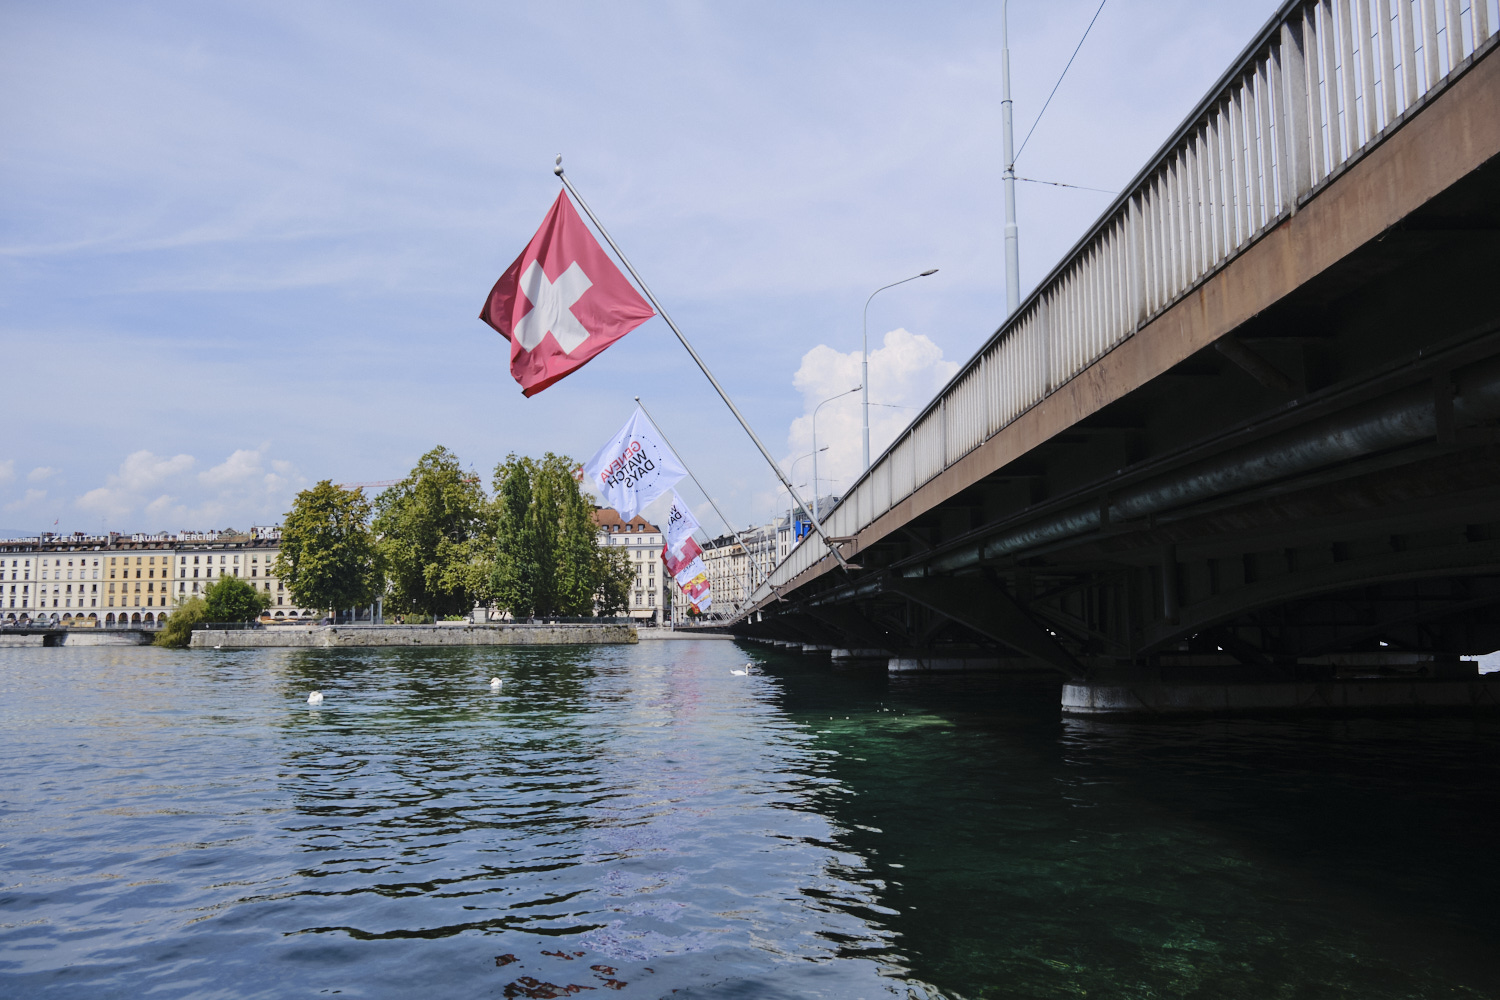
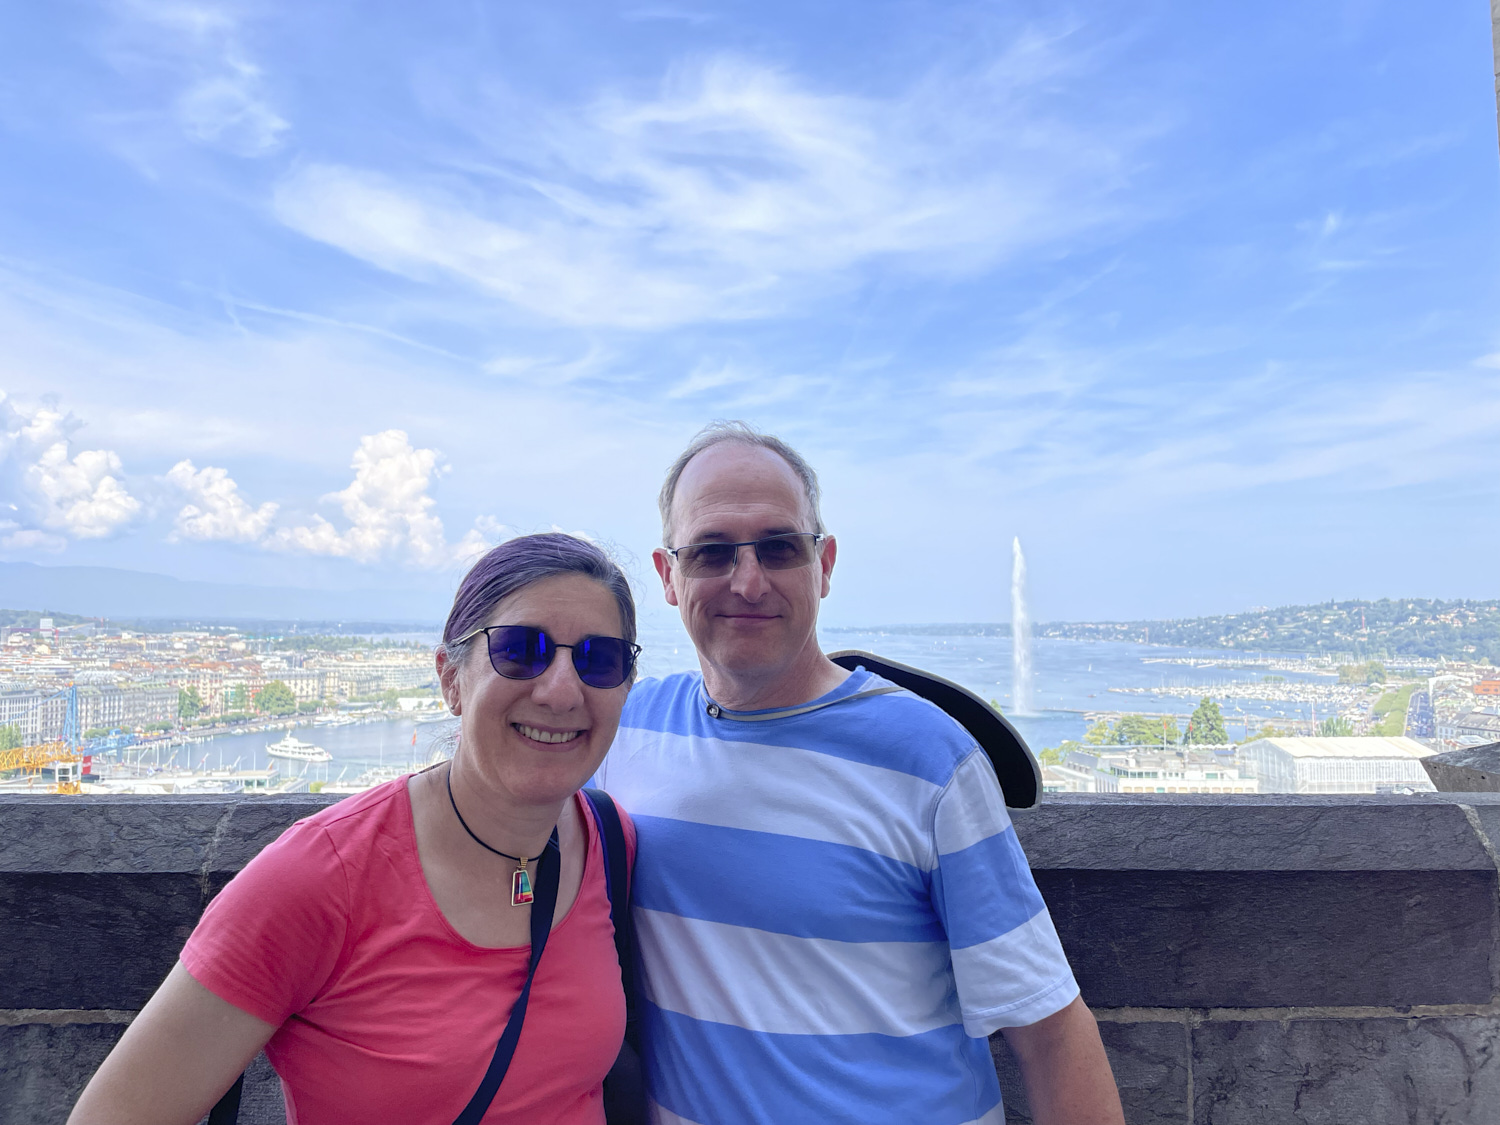
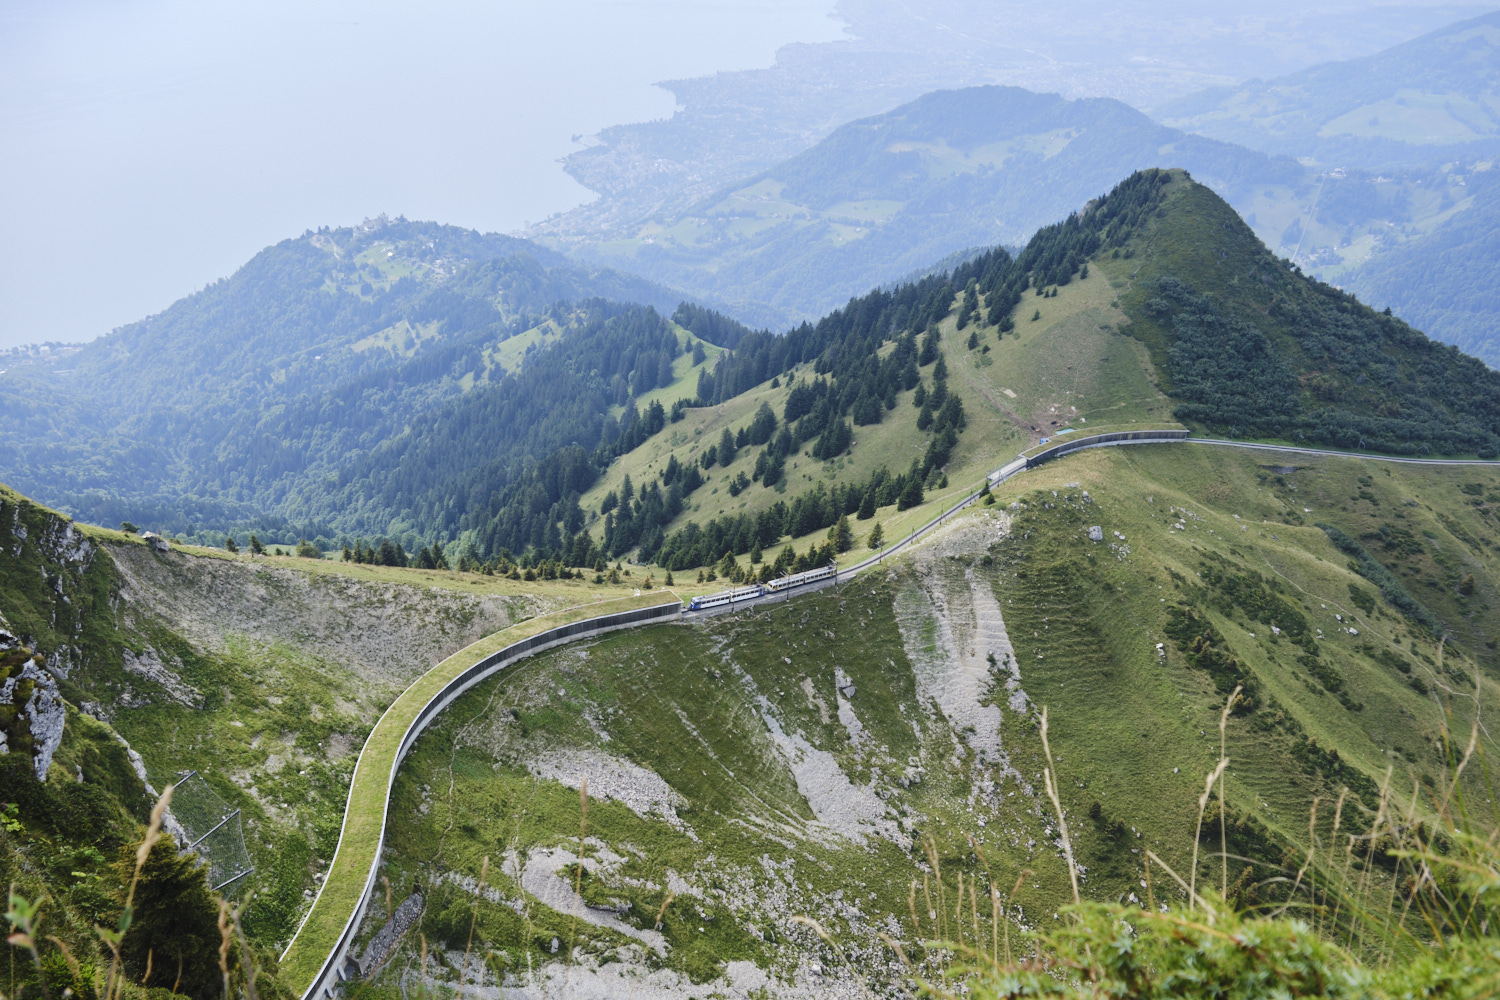
On our last full day of our trip we took the cog train down the mountain from Glion to Montreaux and then took a train to Geneva and walked to our hotel from the train station. We took a walk to see the Jet d’Eau (an enormous fountain in Lake Geneva) and the flower clock. After hearing so many cow bells all week I felt compelled to buy my own.
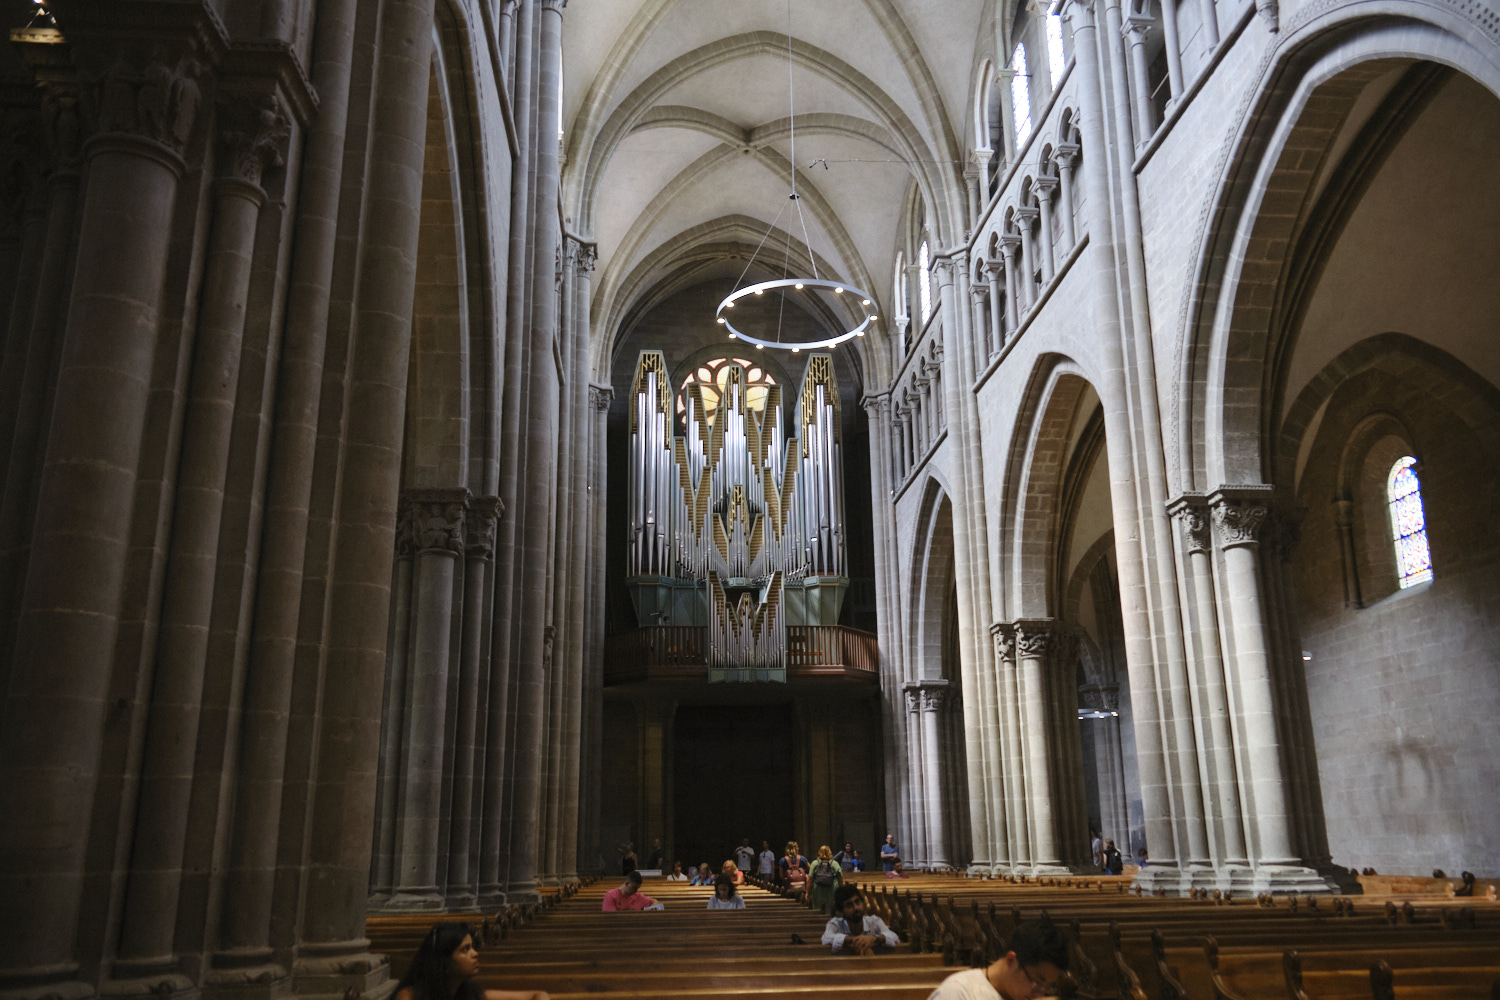
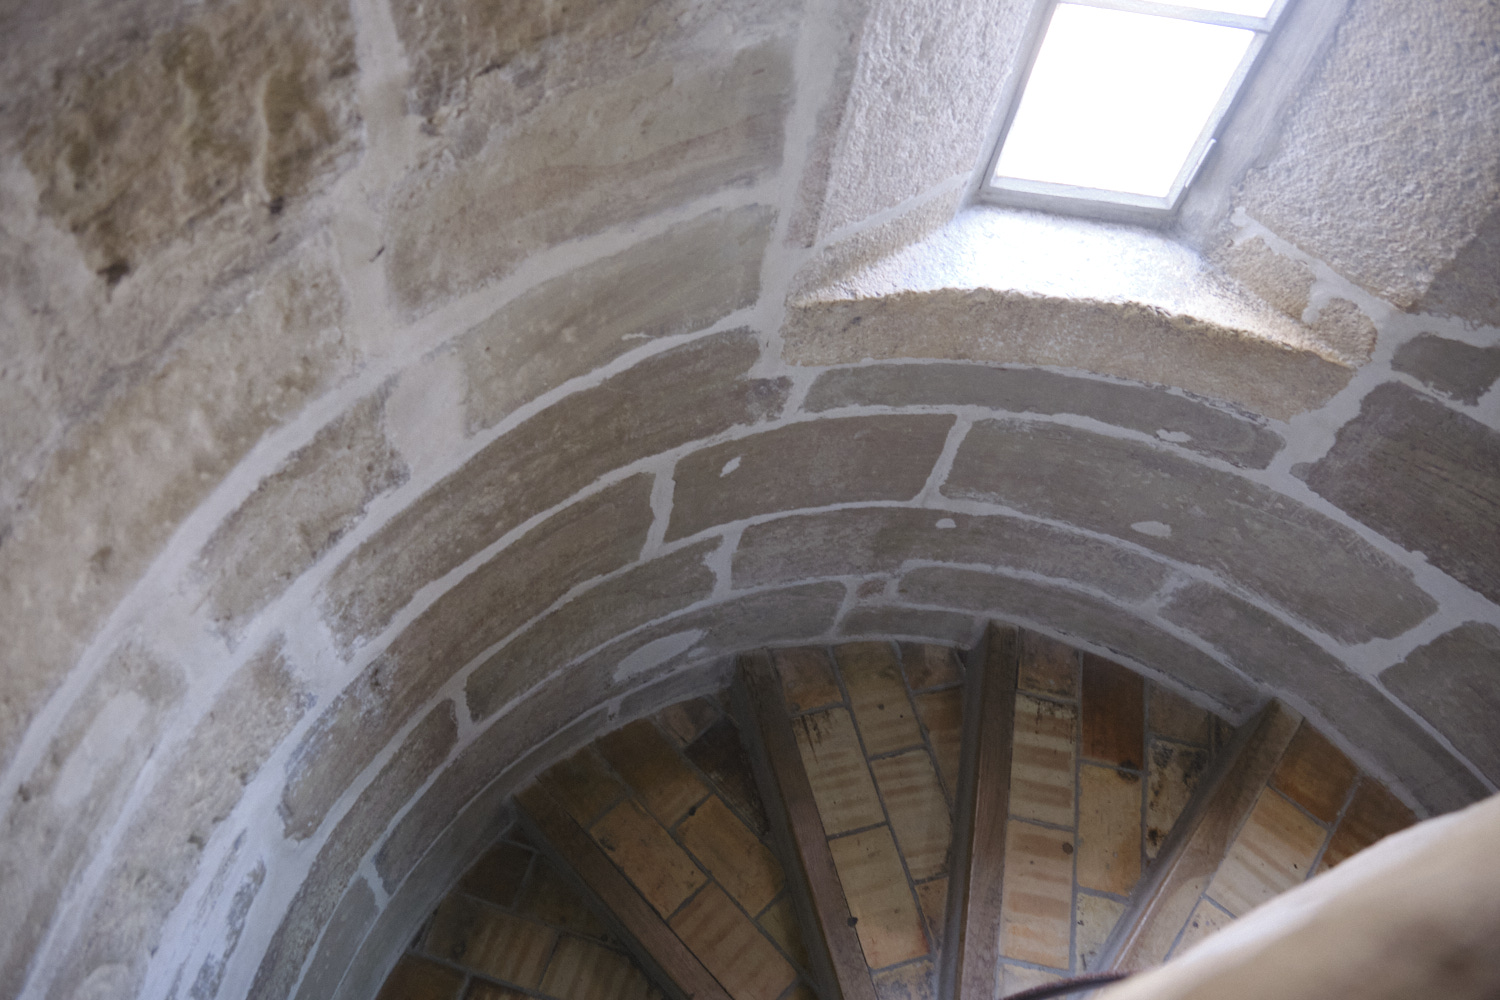
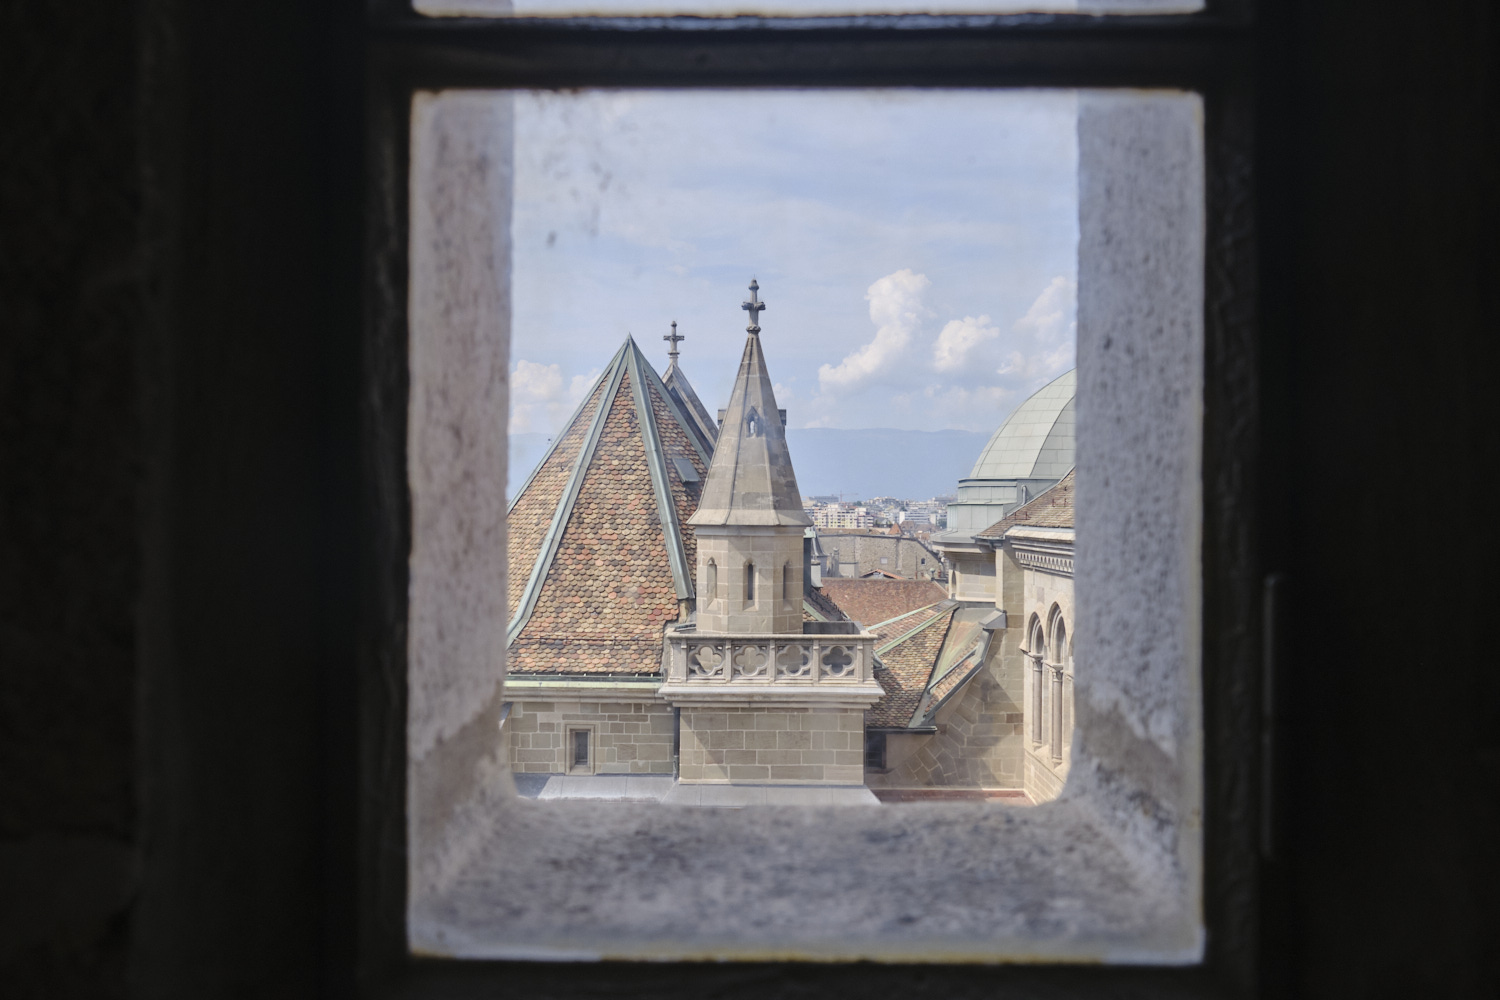
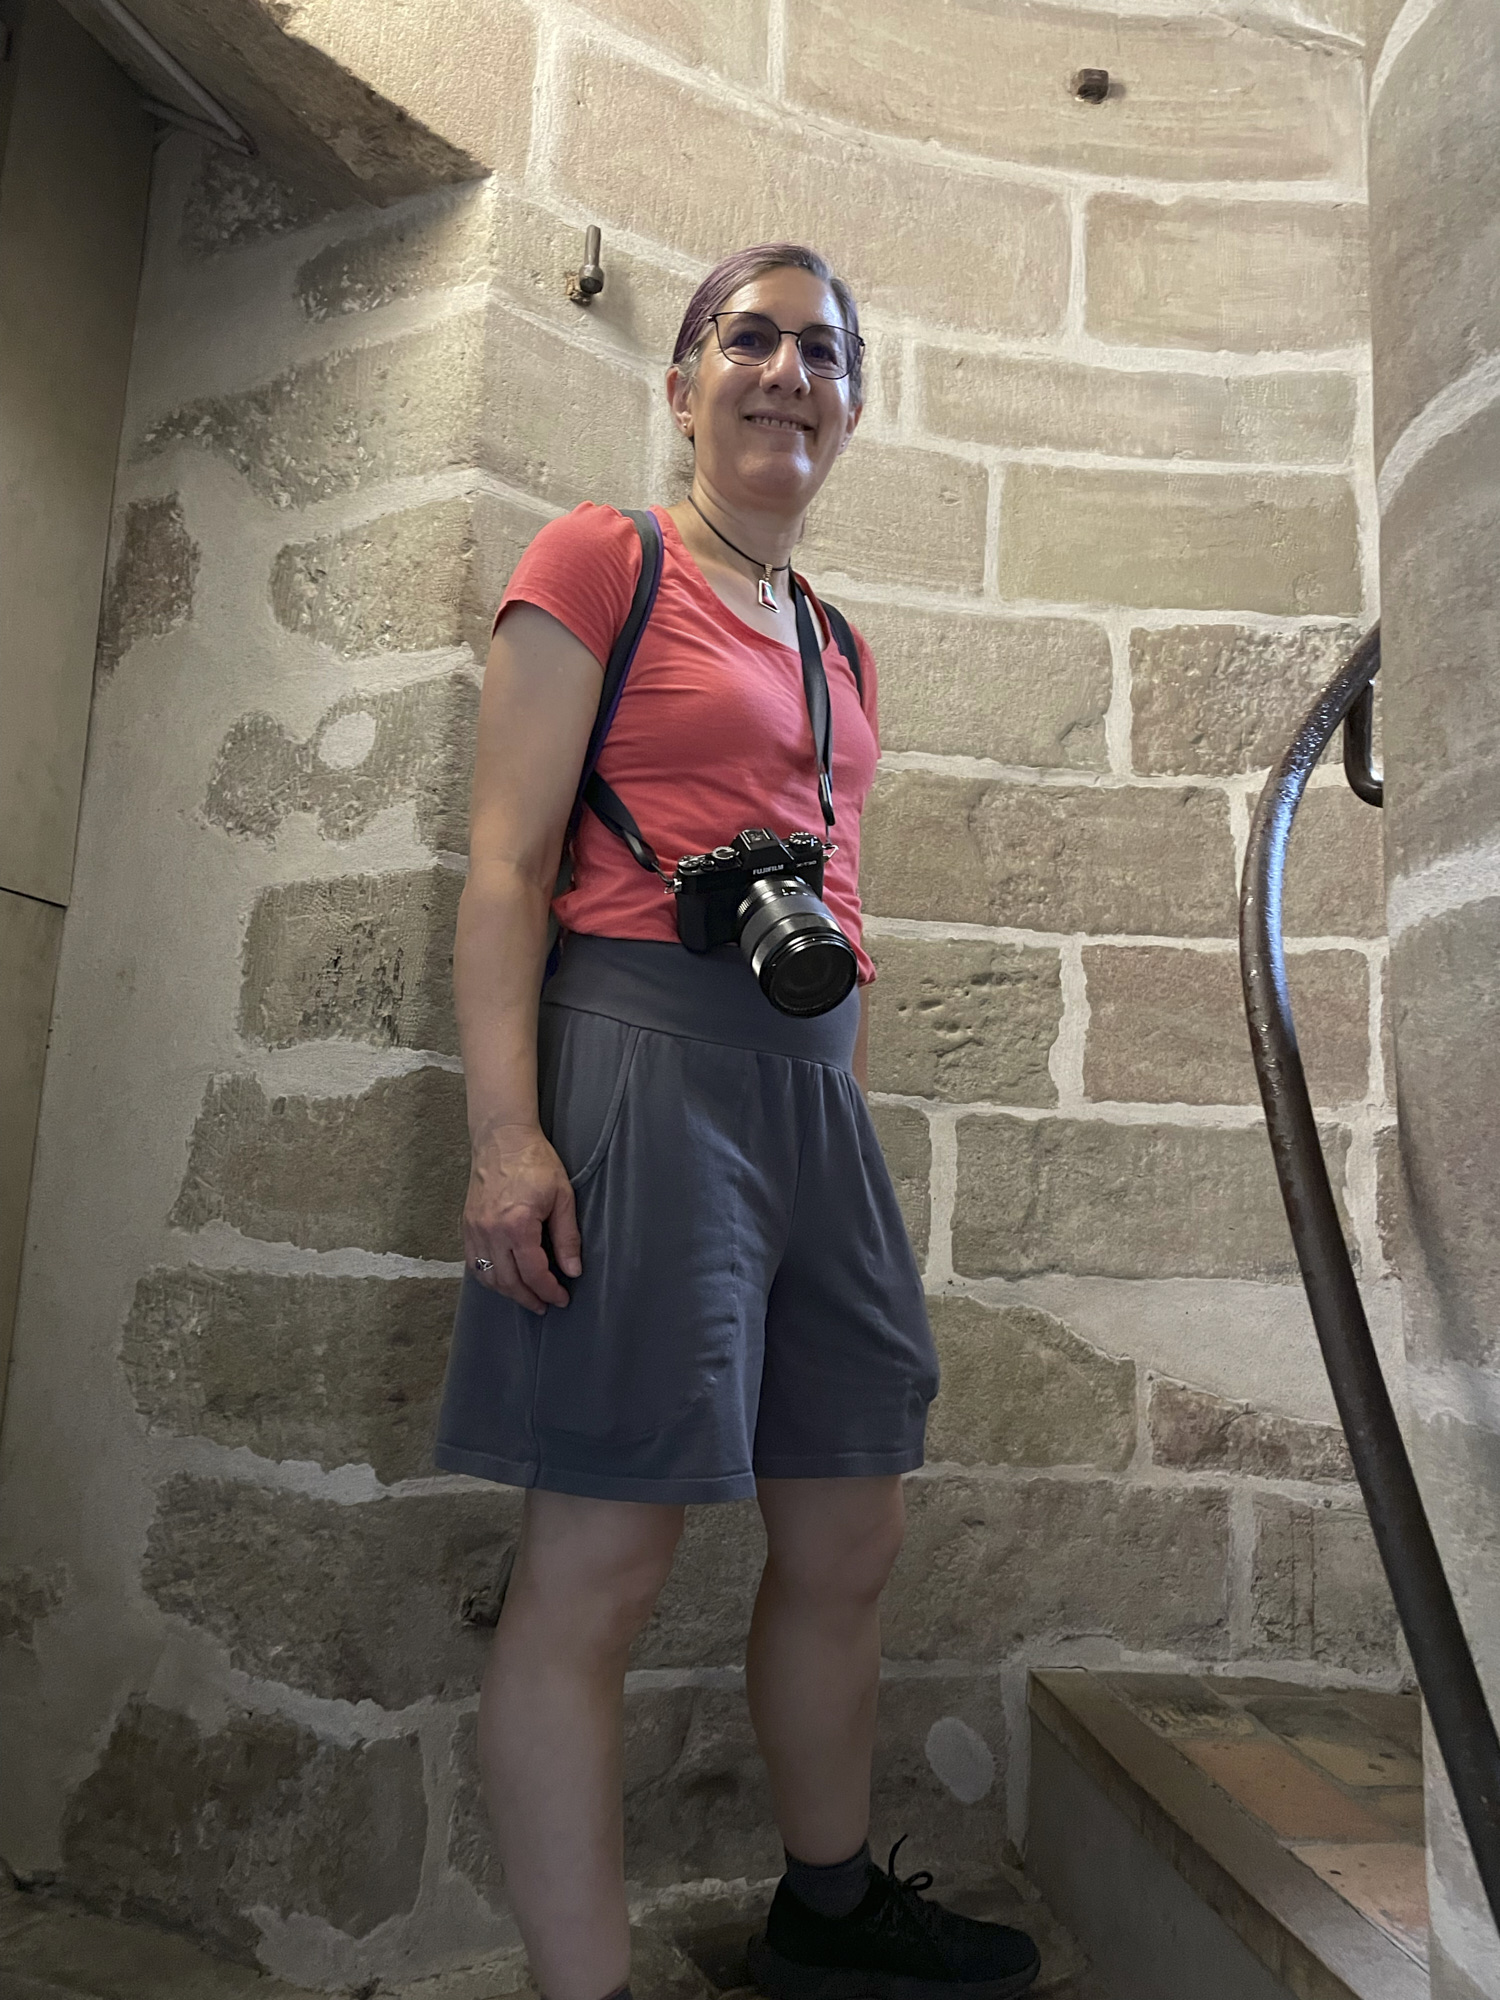
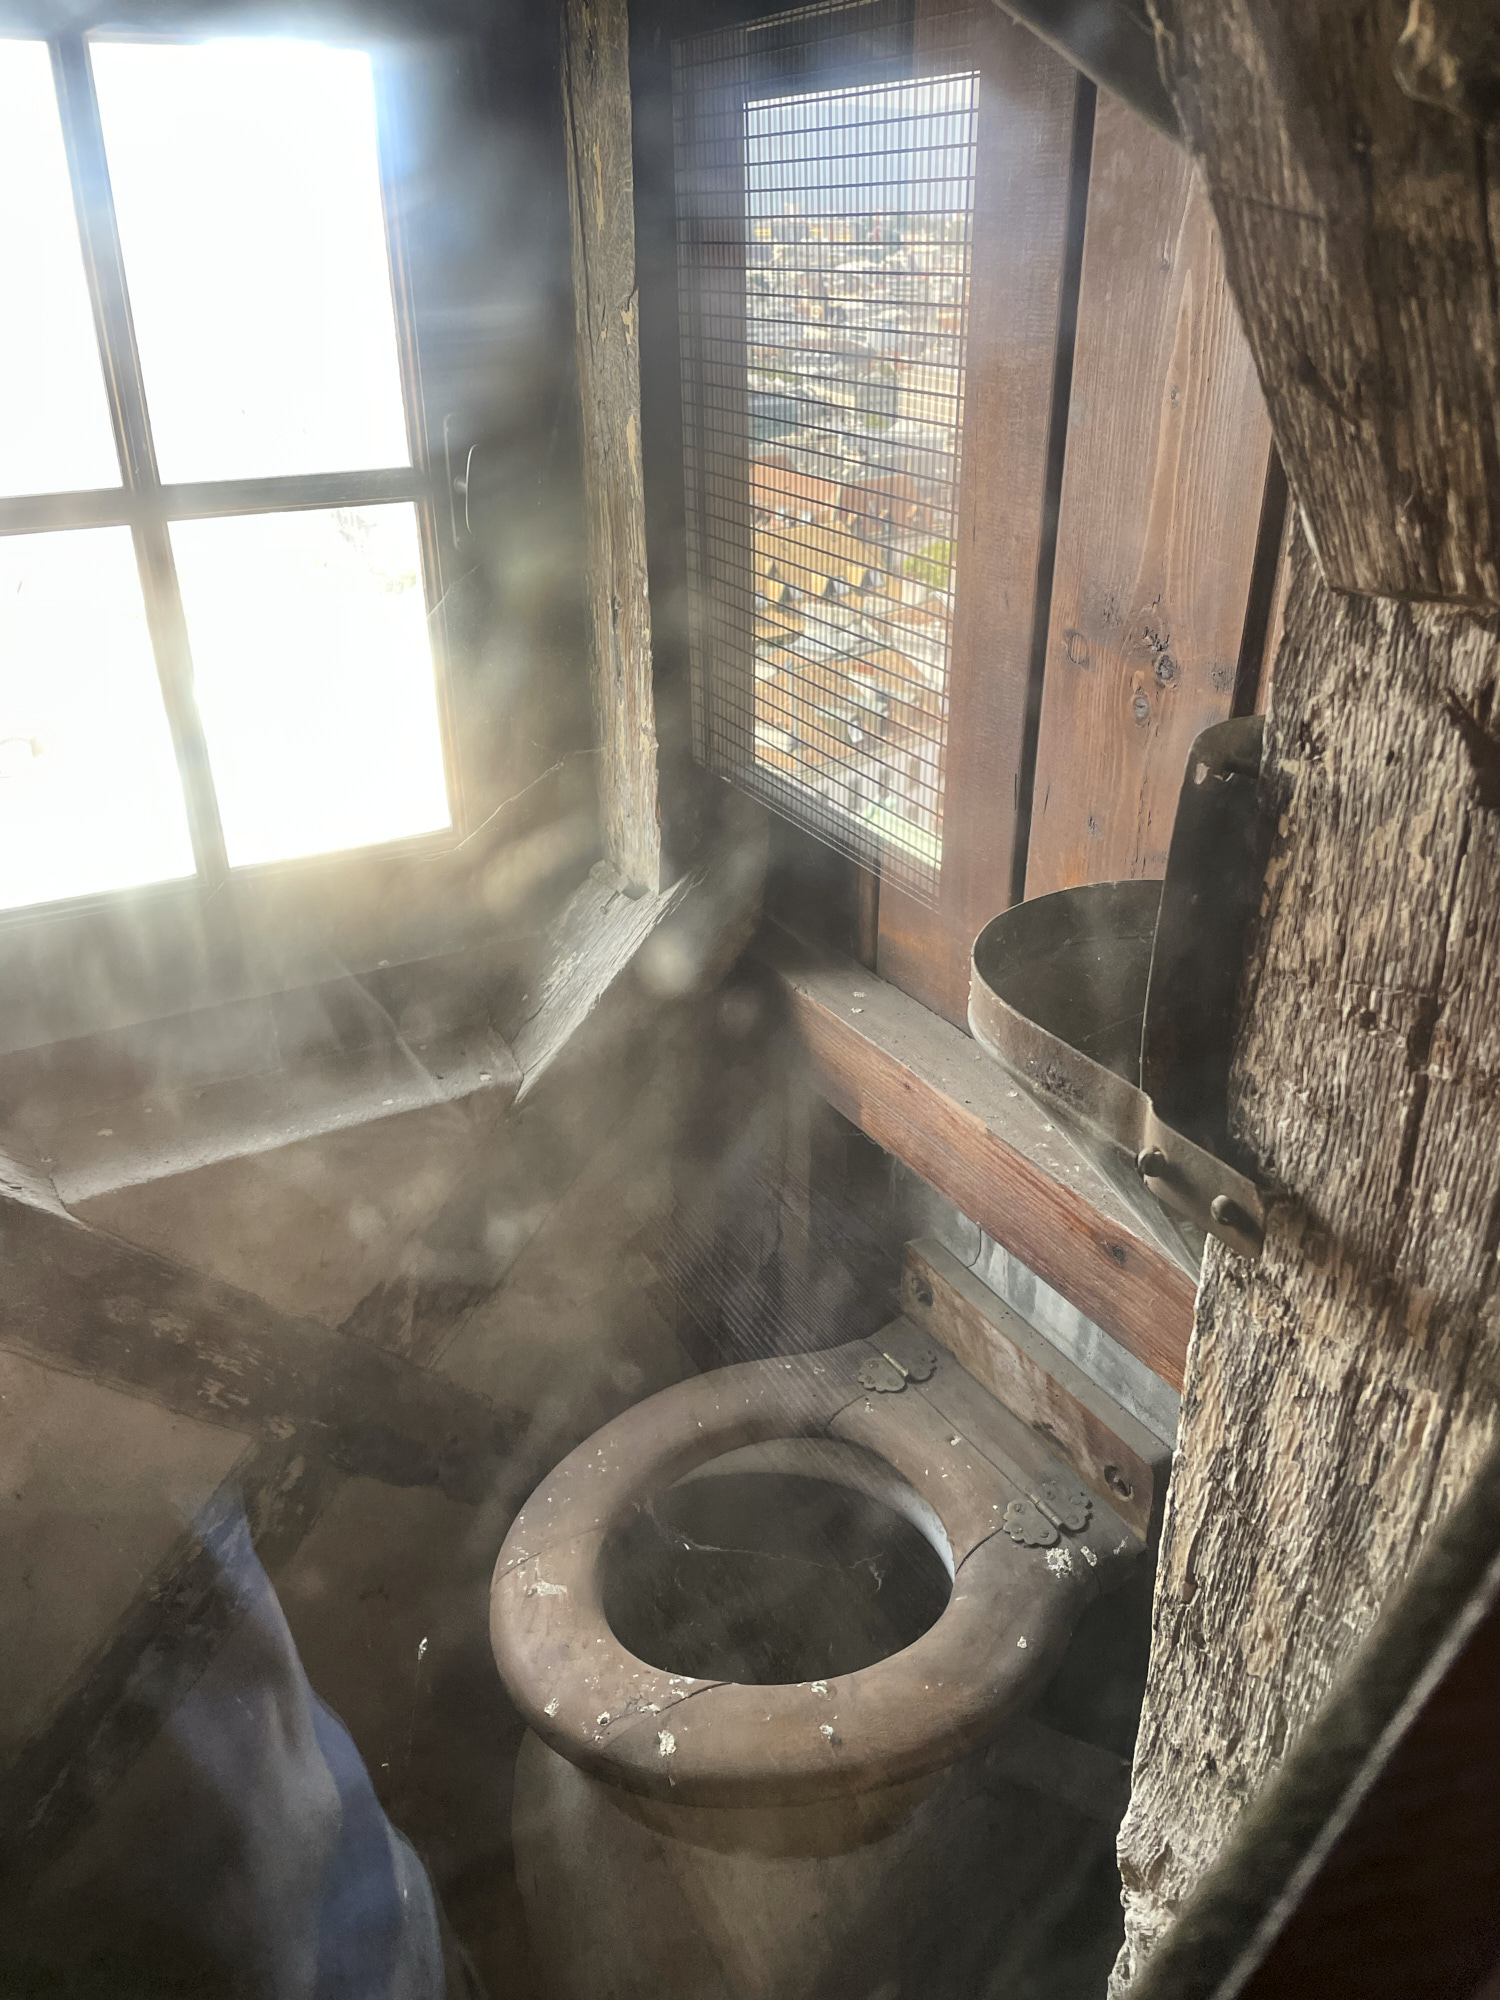
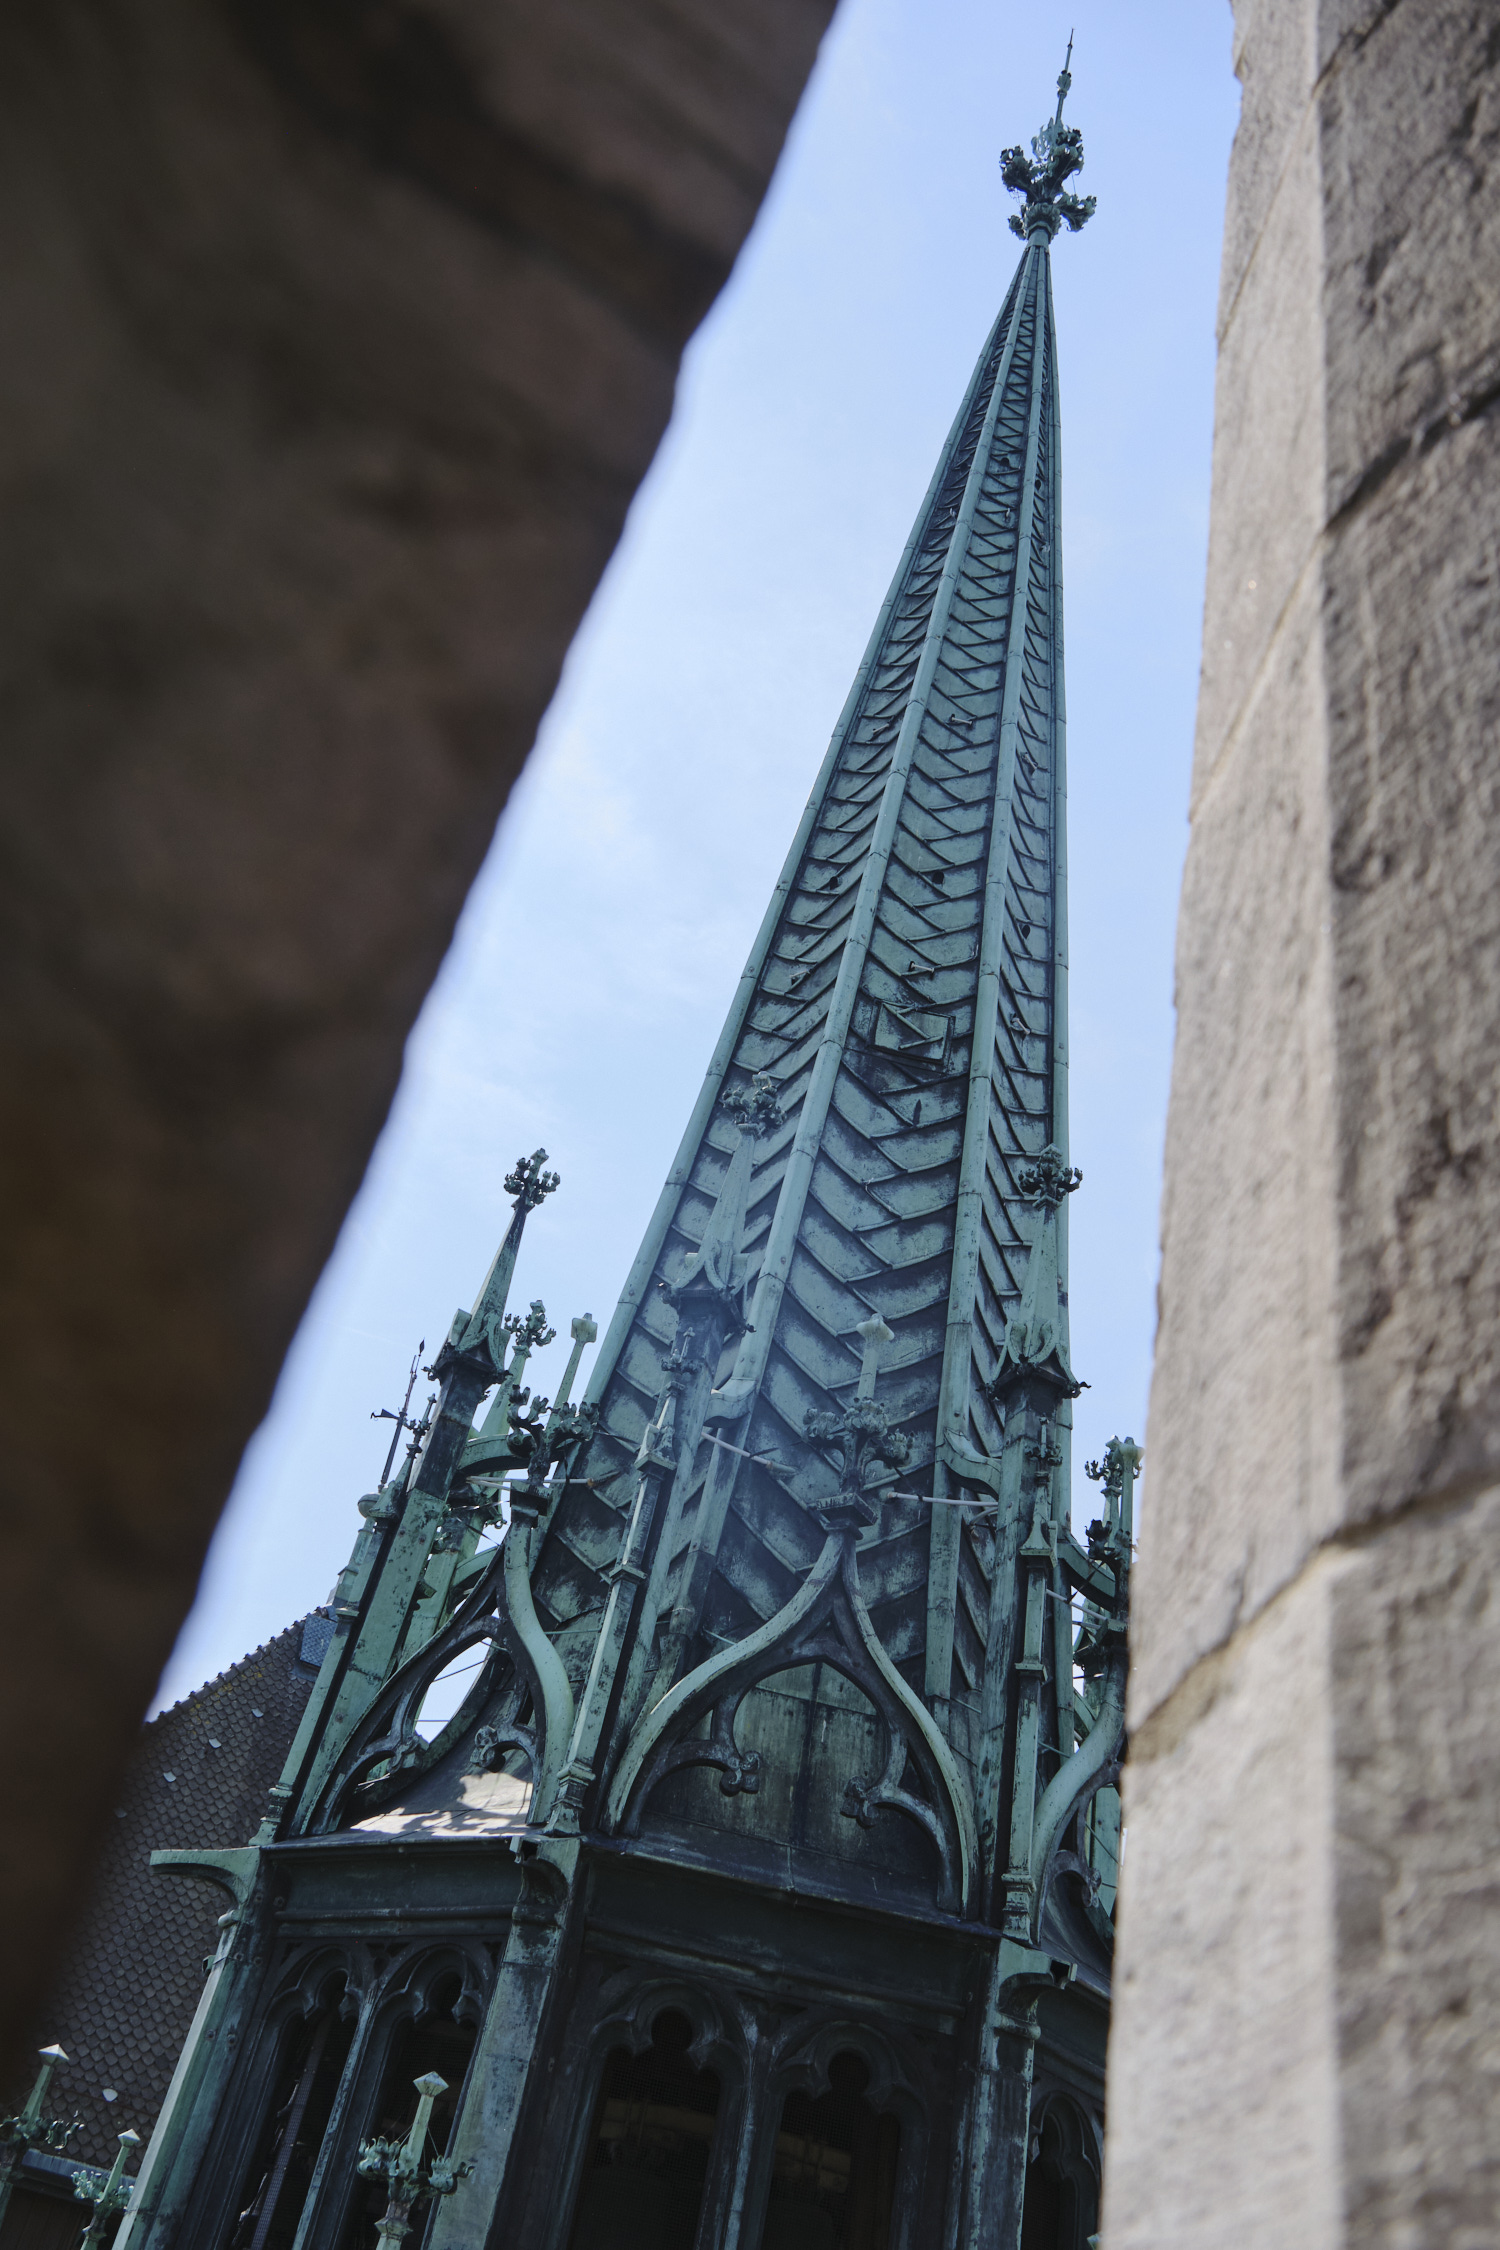
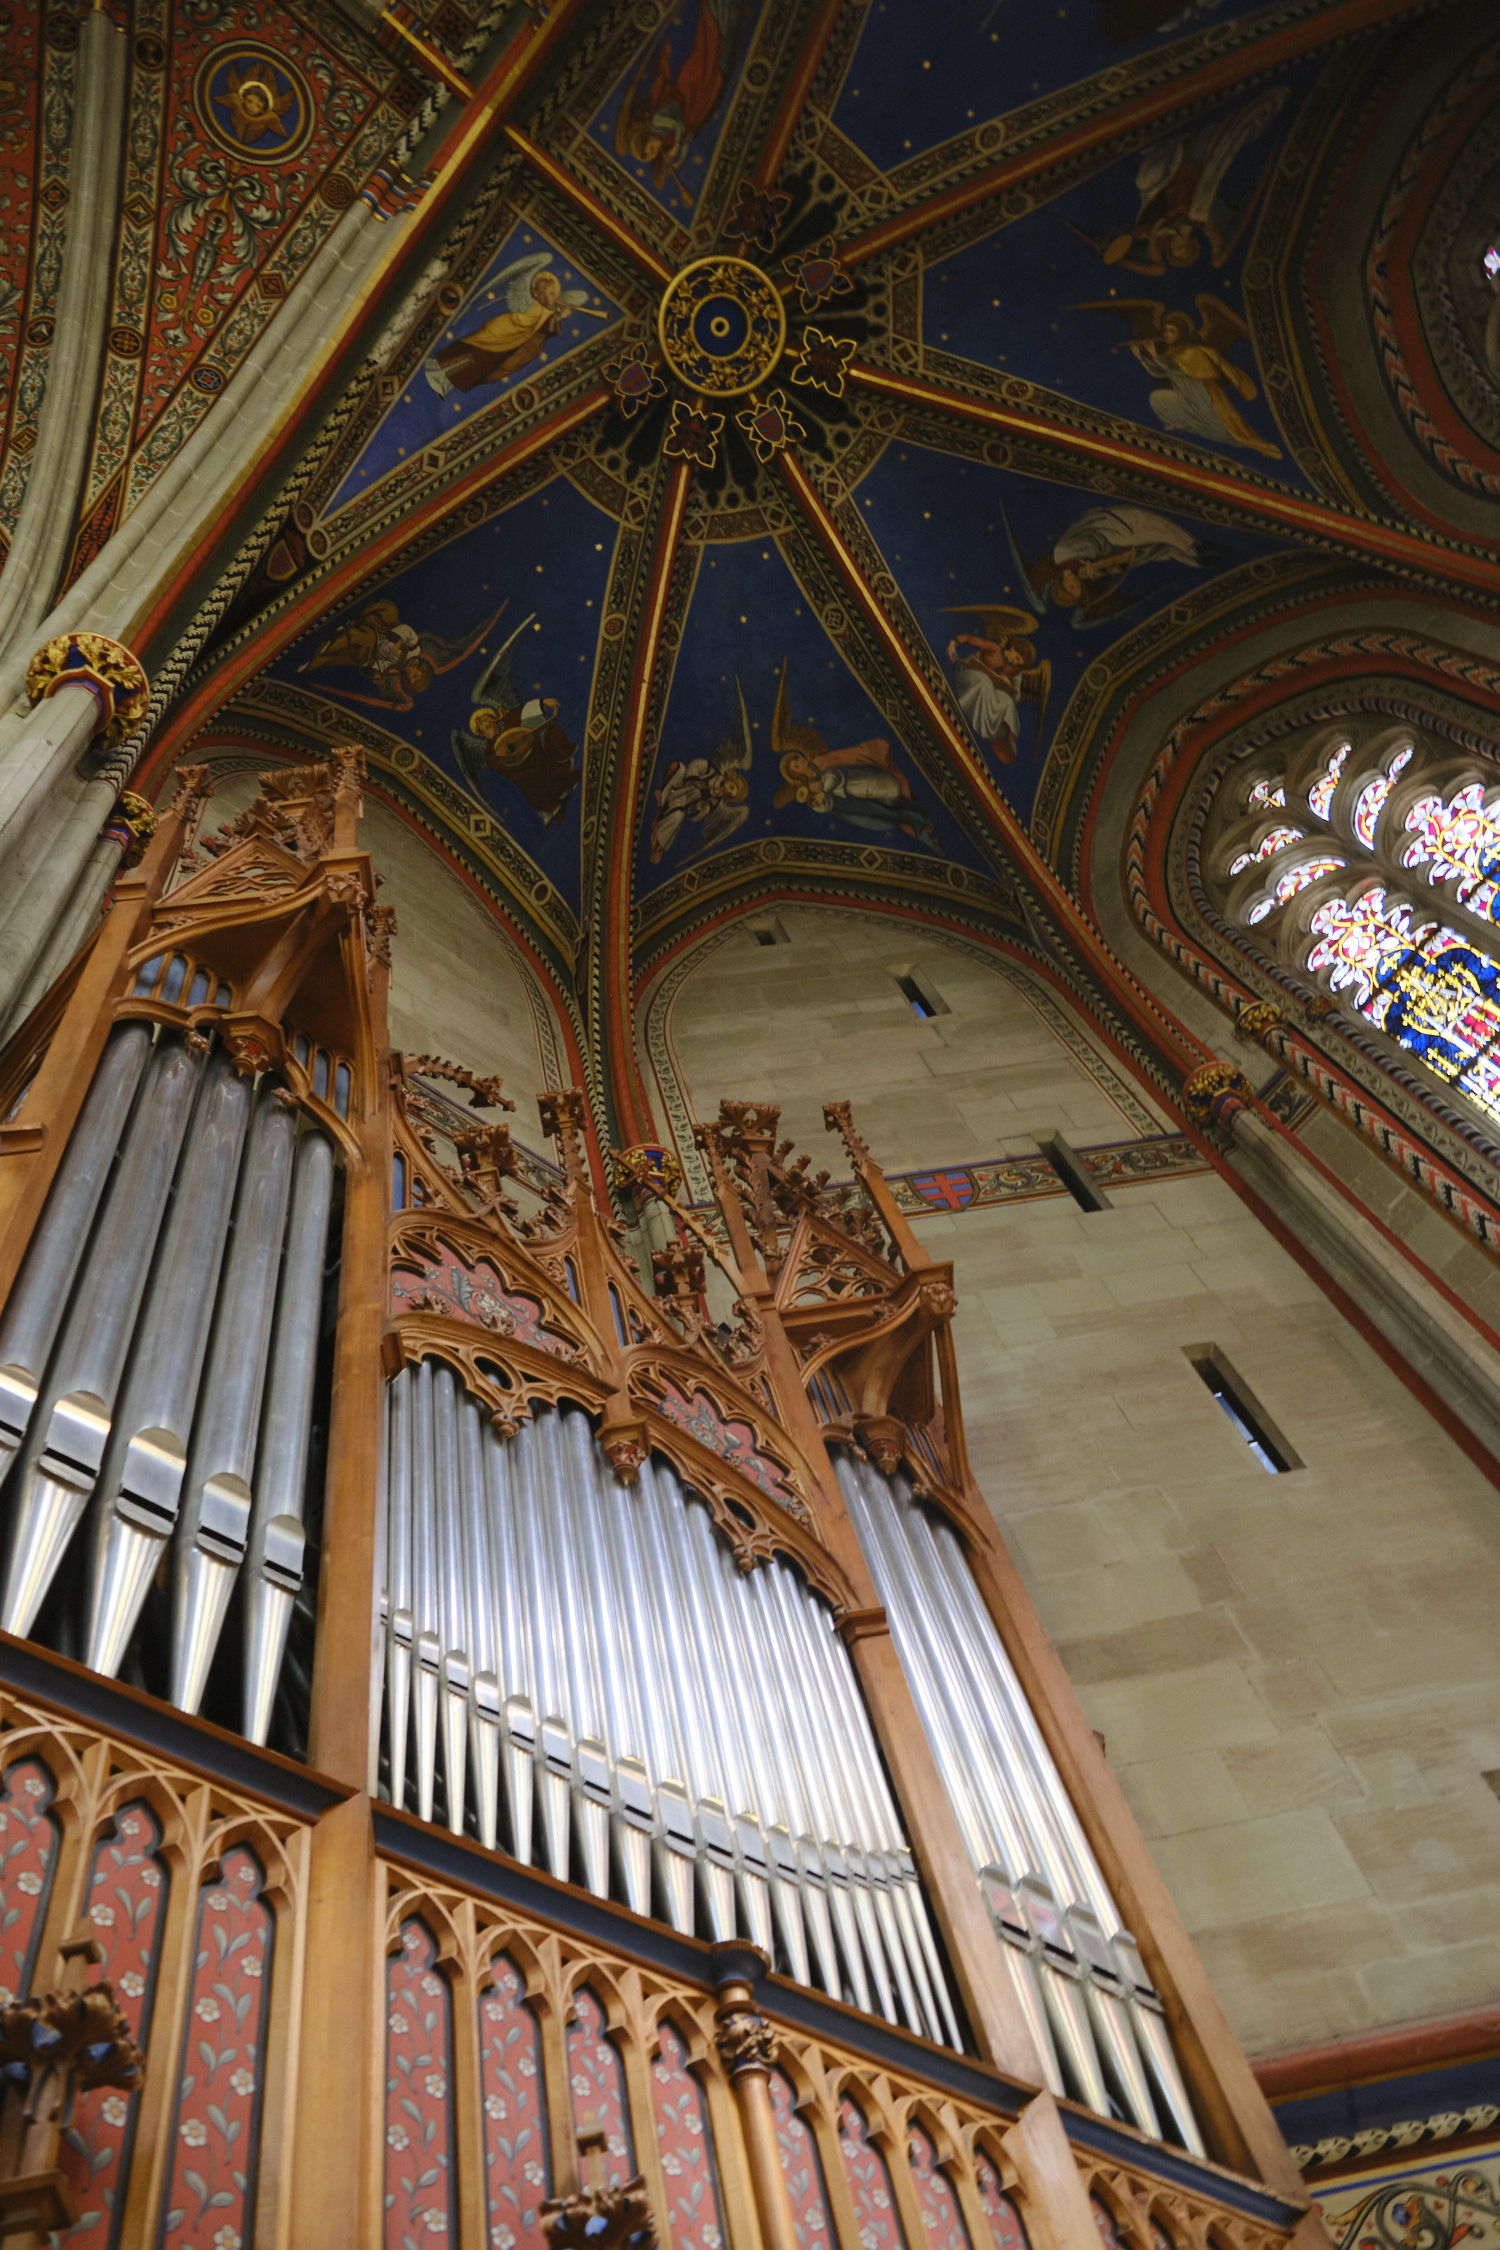
We walked to the higher elevation part of town to St. Pierre Cathedral. We climbed up the circular stair case to the towers and enjoyed the views. We were surprised (and delighted) to see an old toilet in the room at the top of one of the church towers.
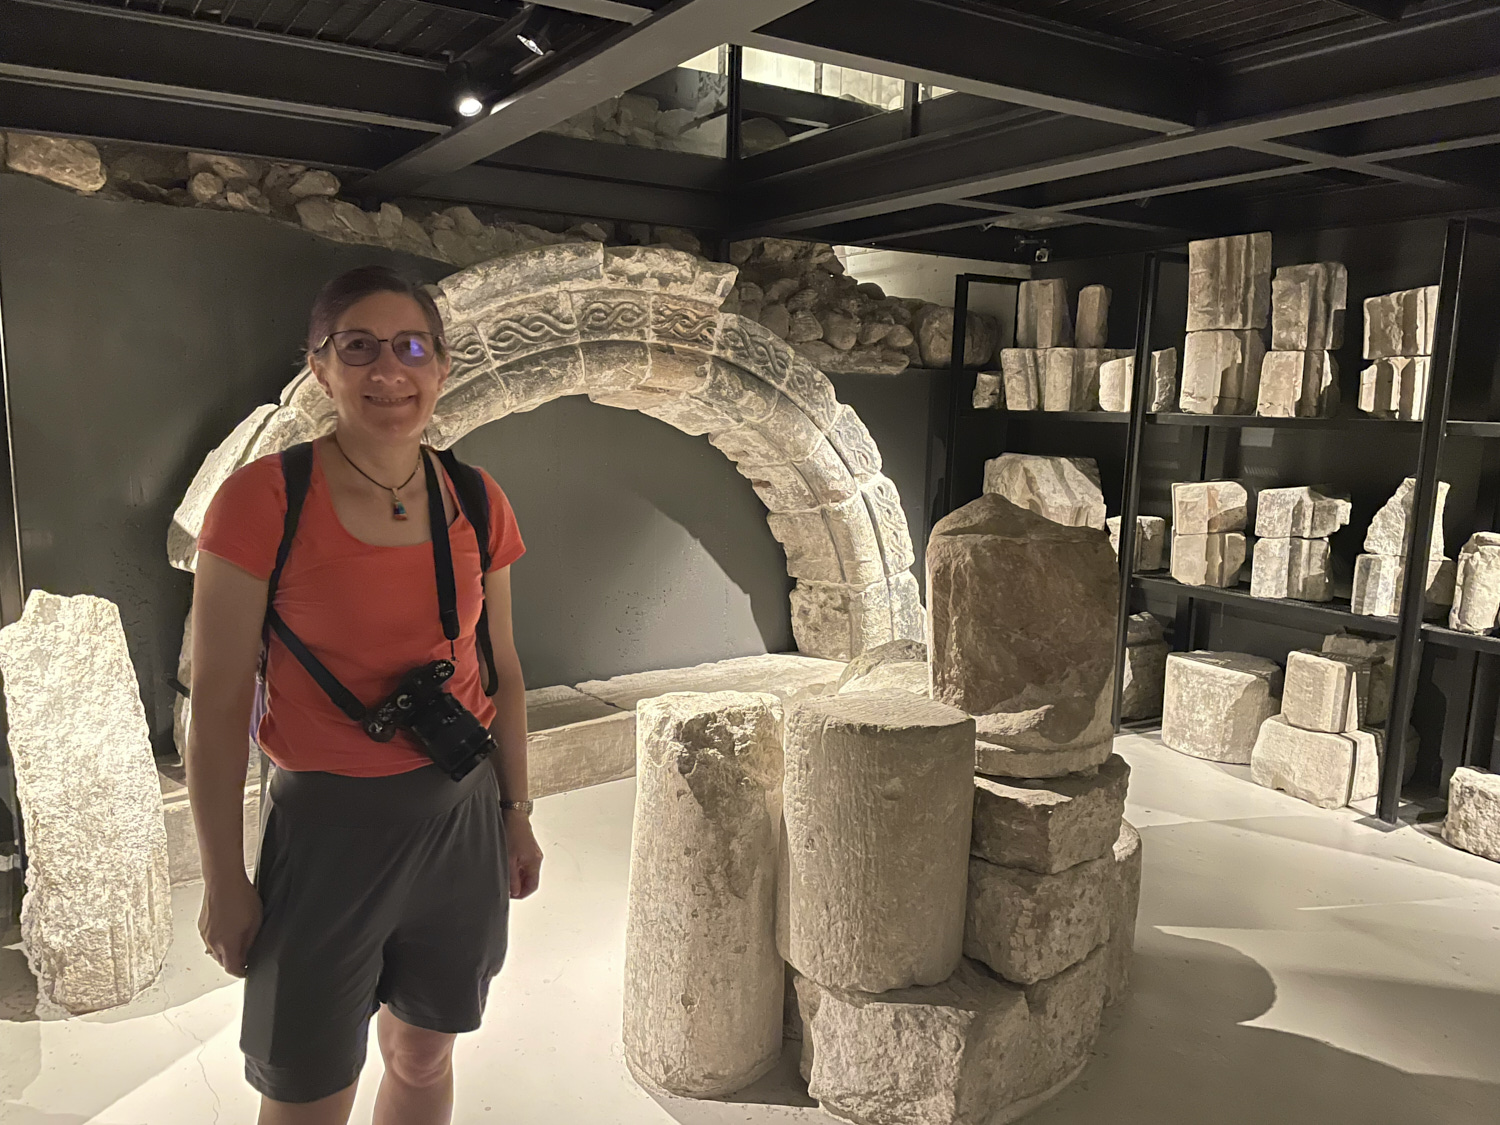
After touring the inside of the church we went around back and toured the archeological site under the church.
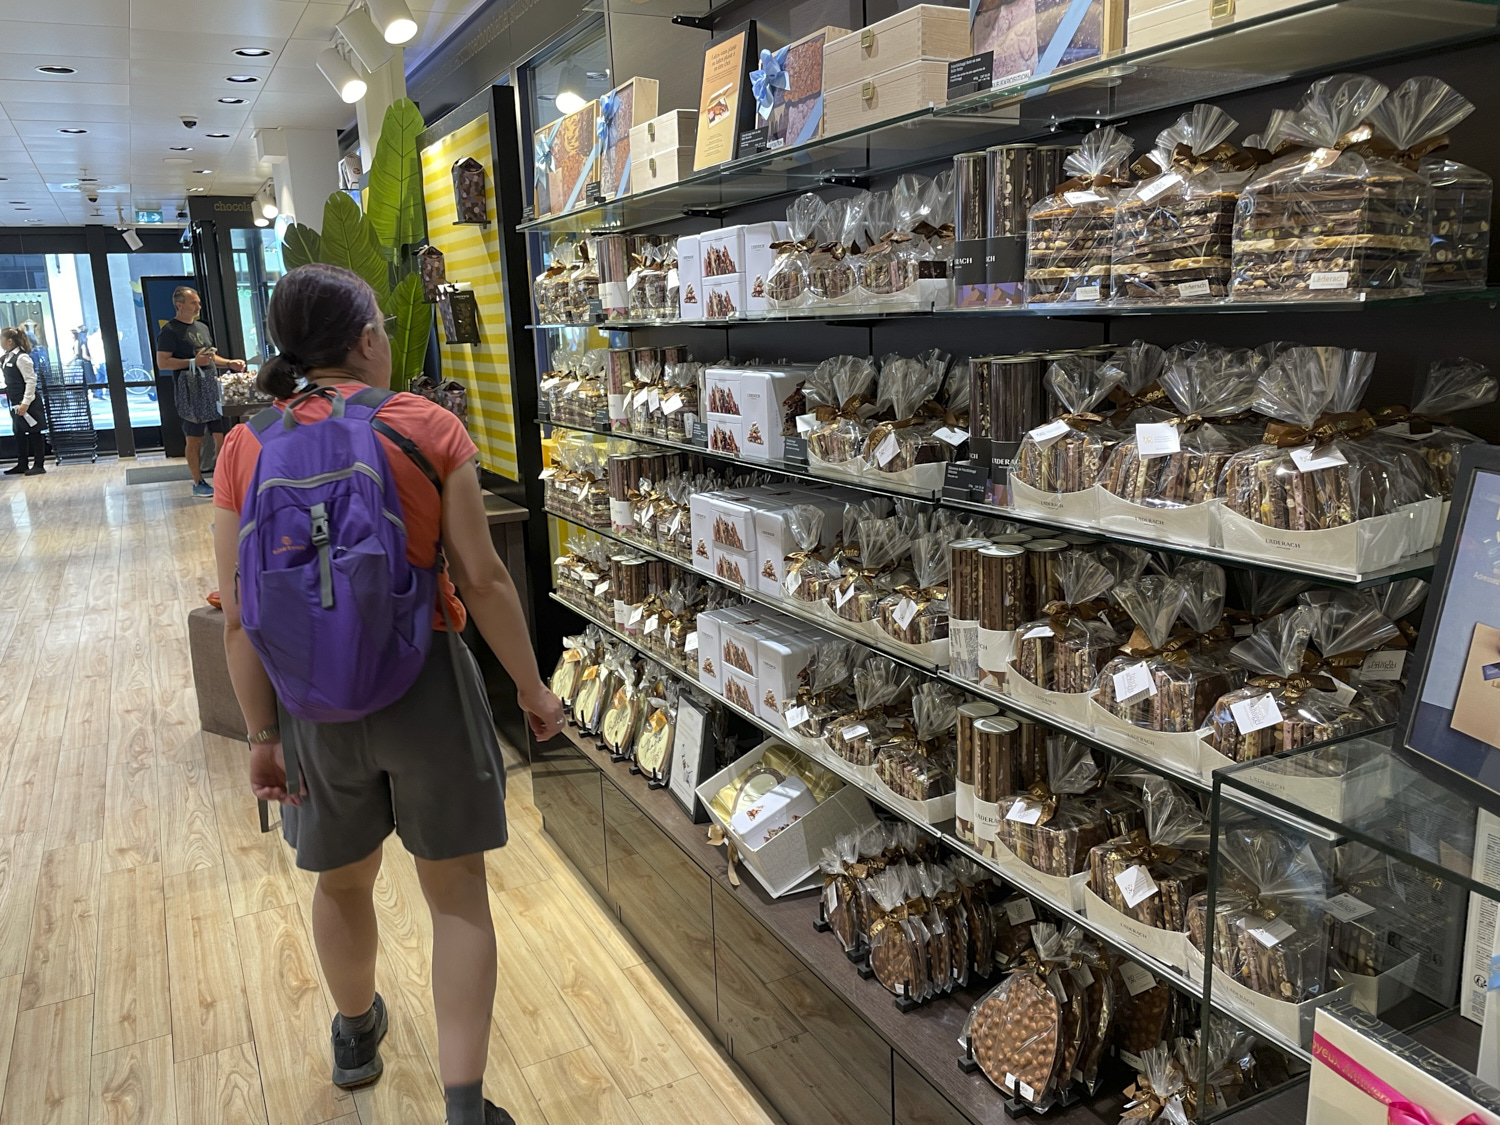
On the way back to our hotel we stopped to buy some chocolate to bring home. We enjoyed dinner at a Swiss restaurant and then took a walk past the Lake Geneva sites lit up at night. The next day we took a quick train to the Geneva airport and flew home.
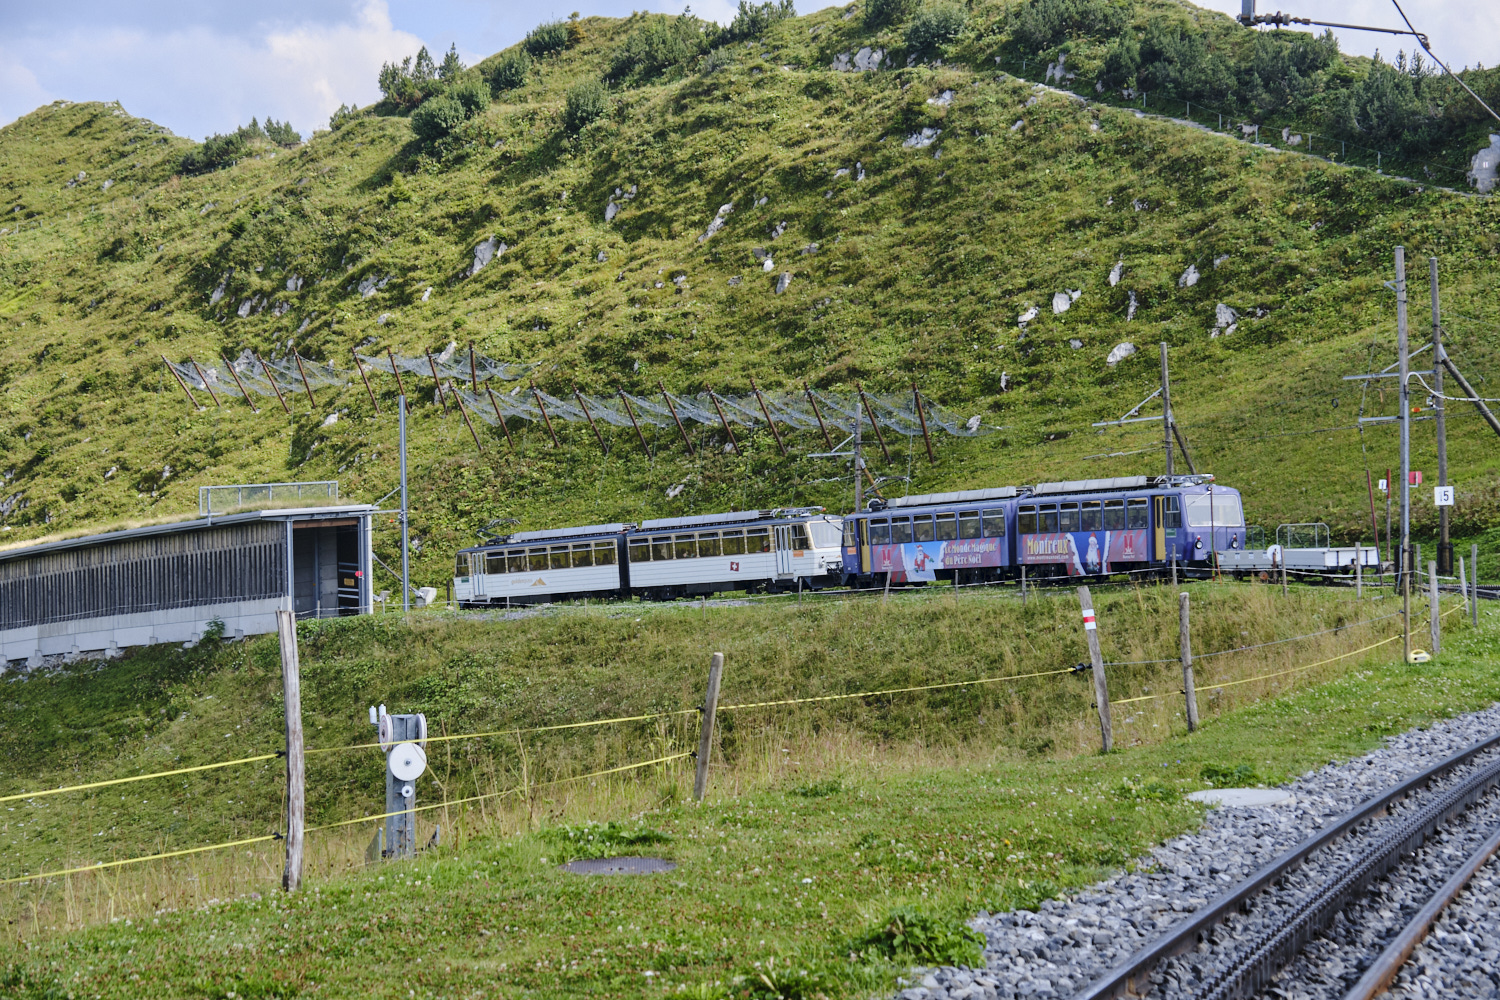
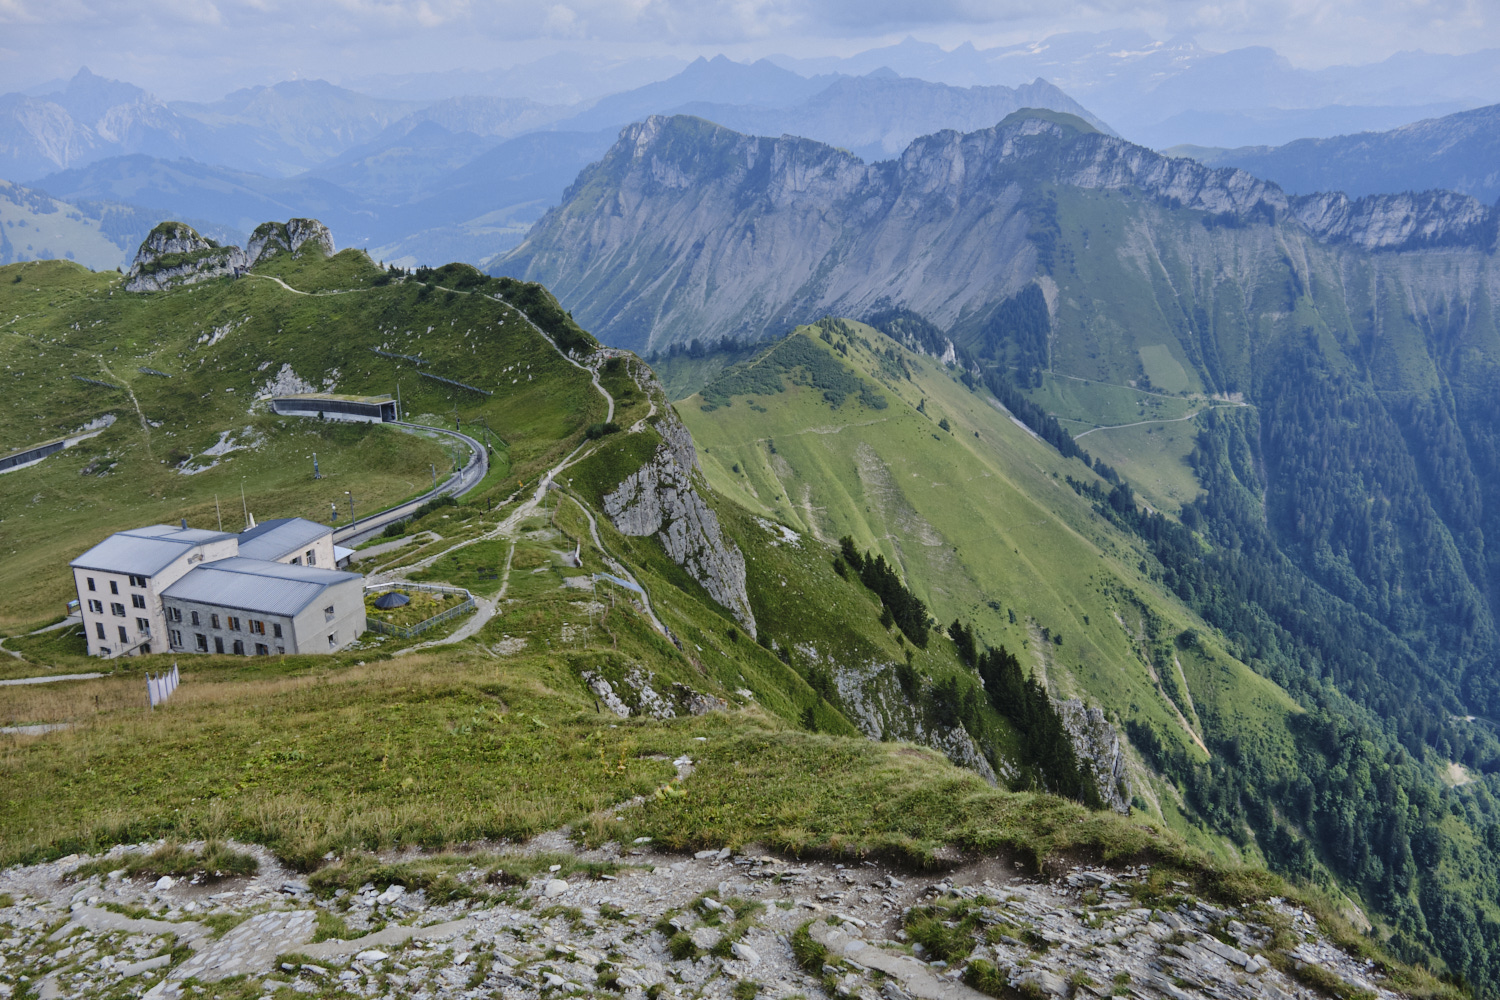
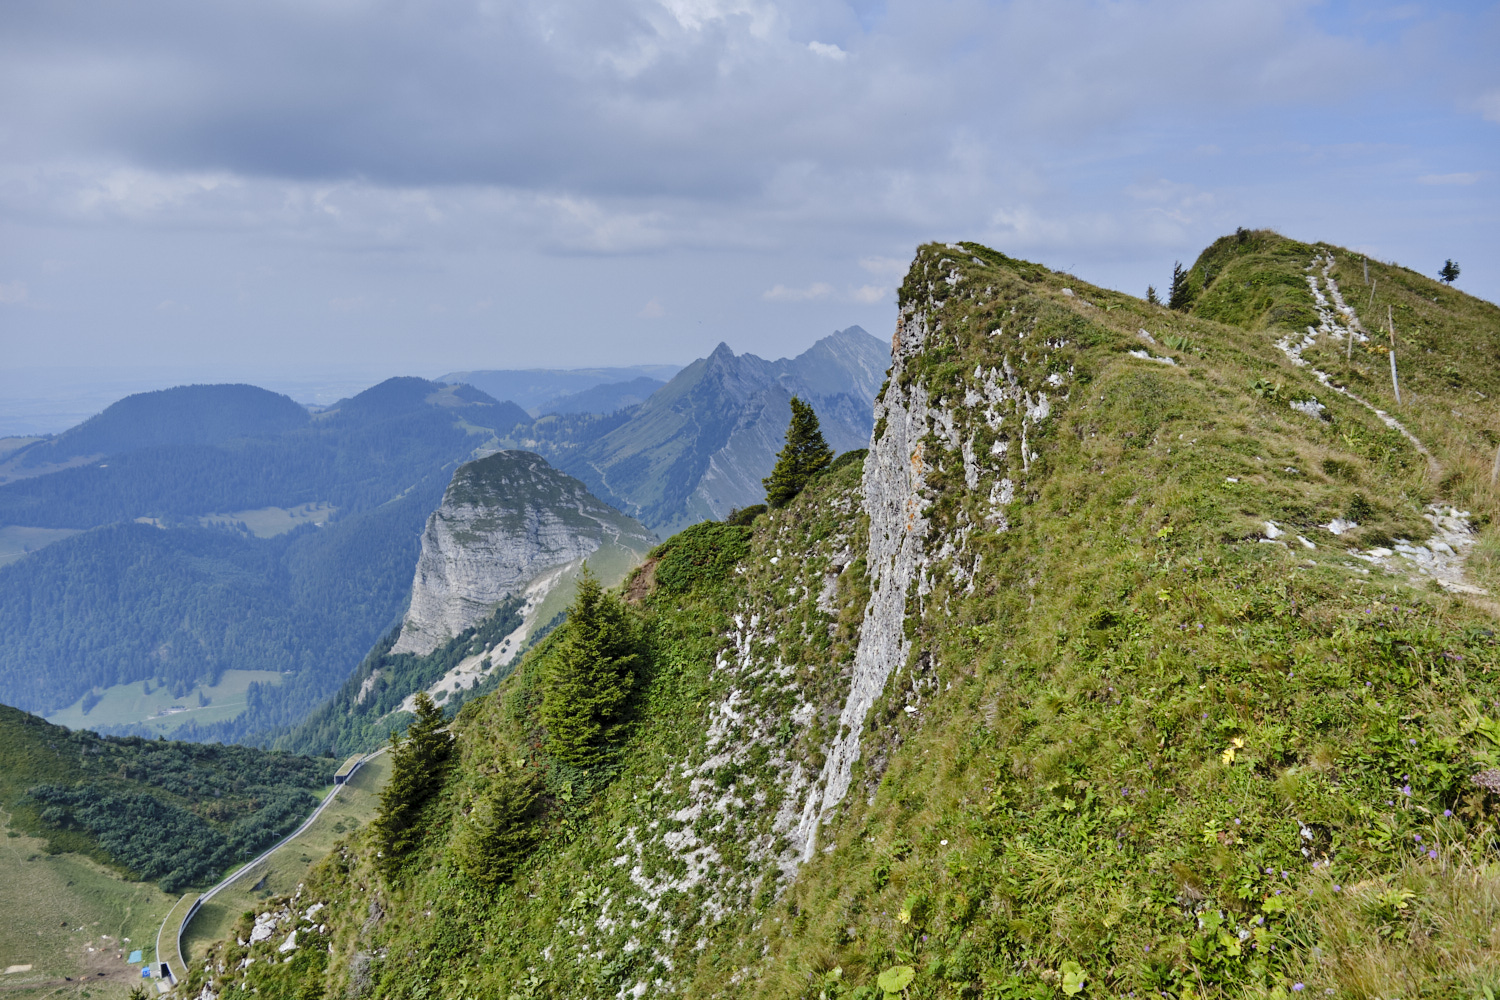
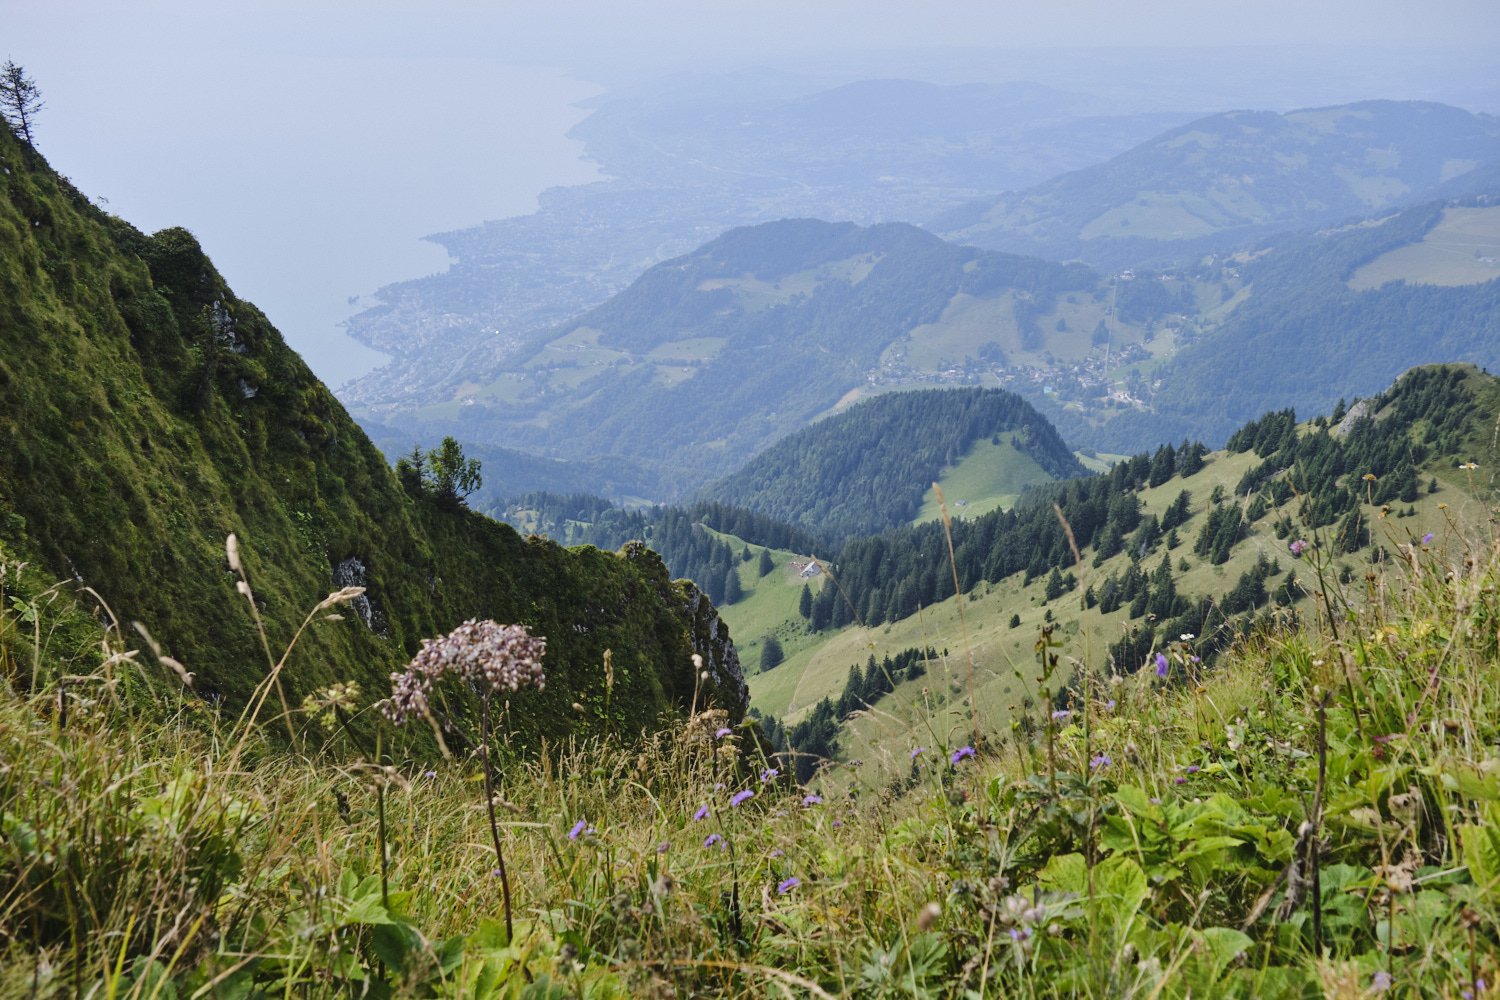
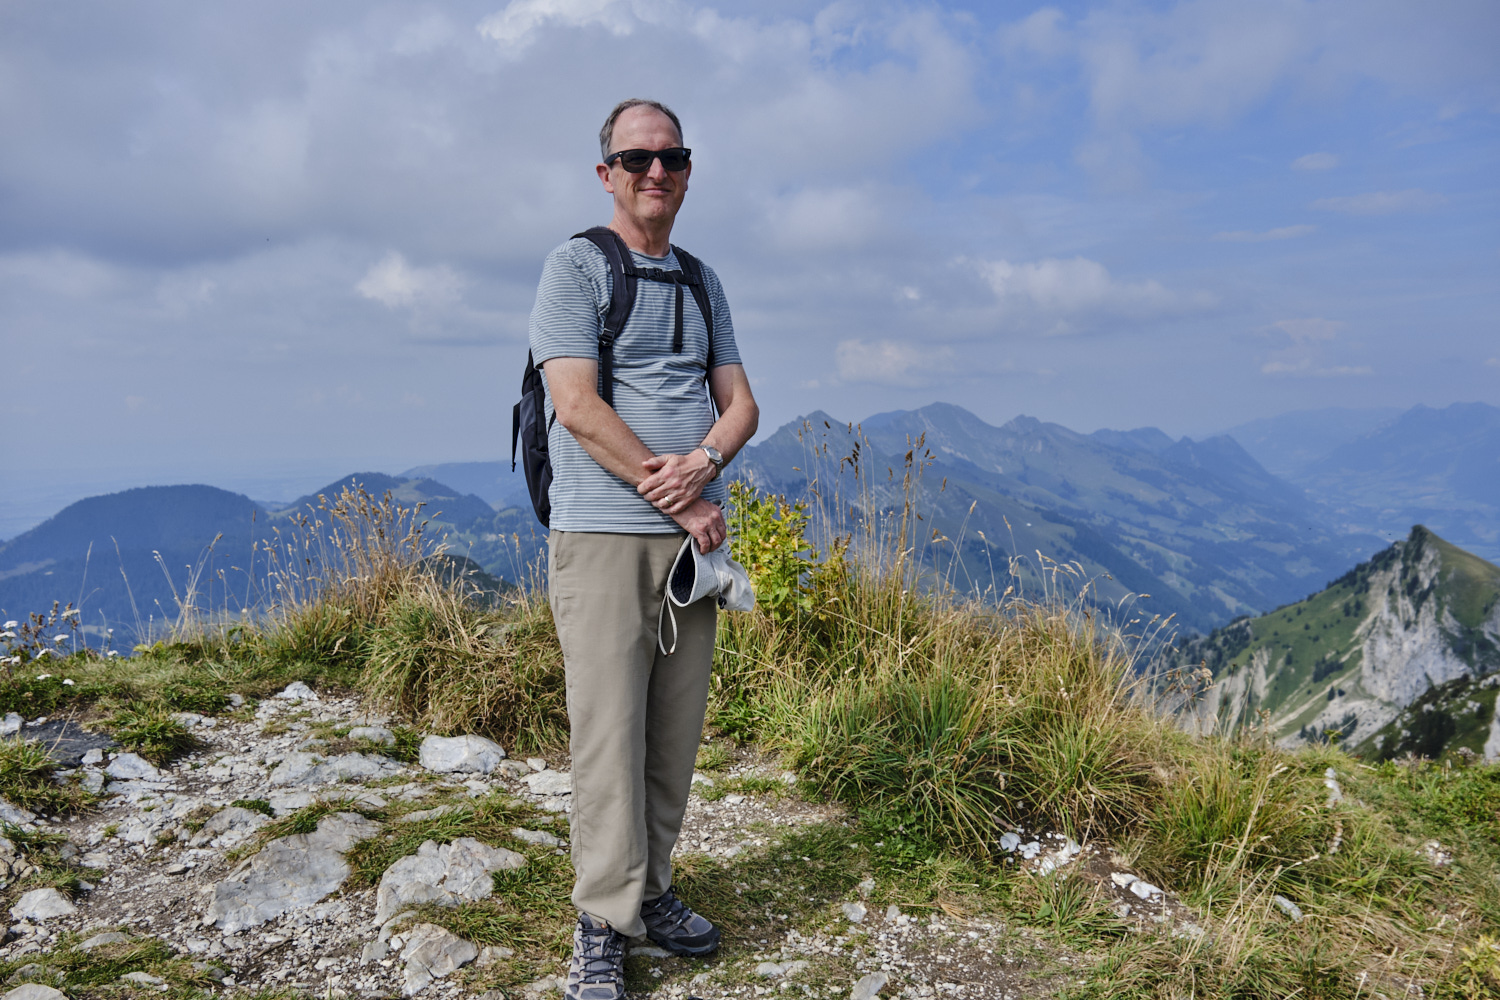
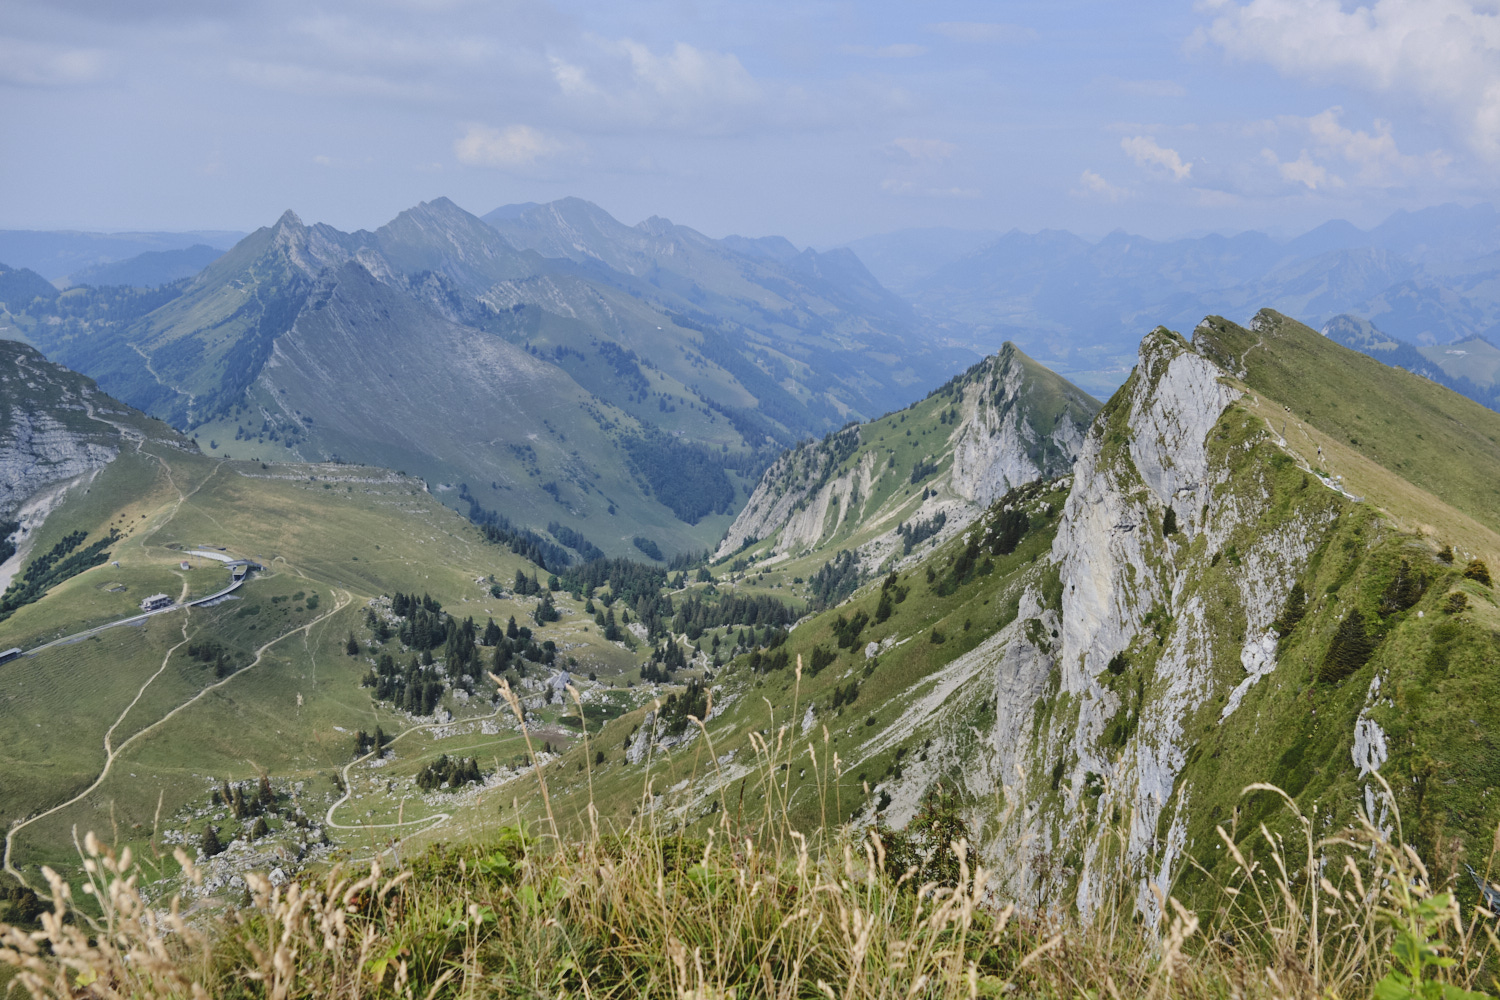
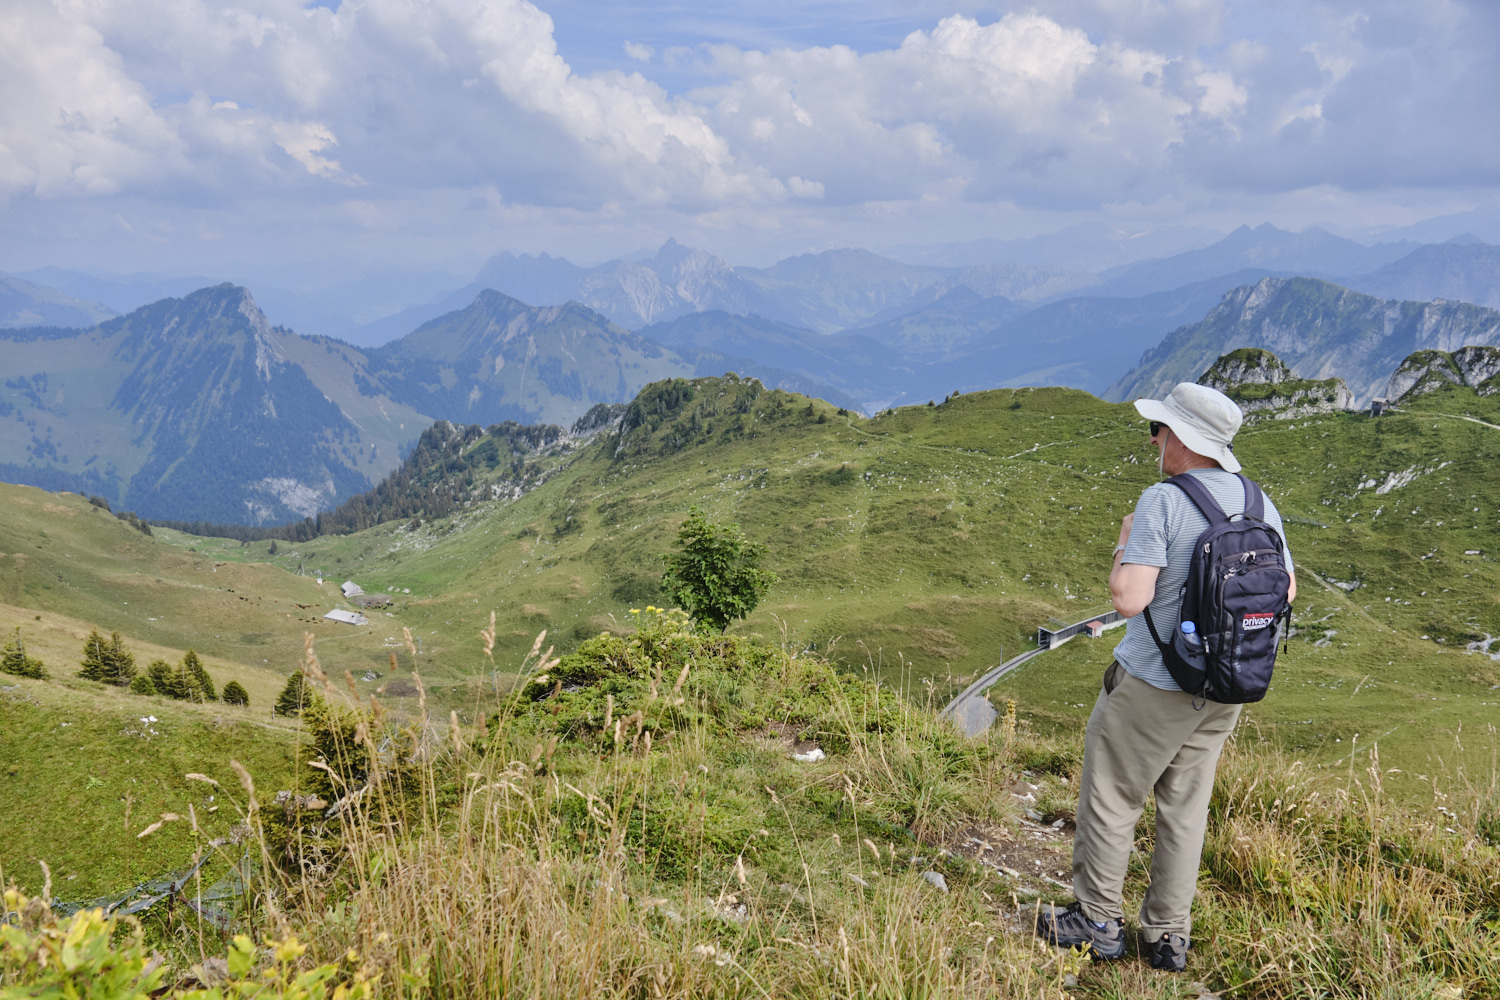
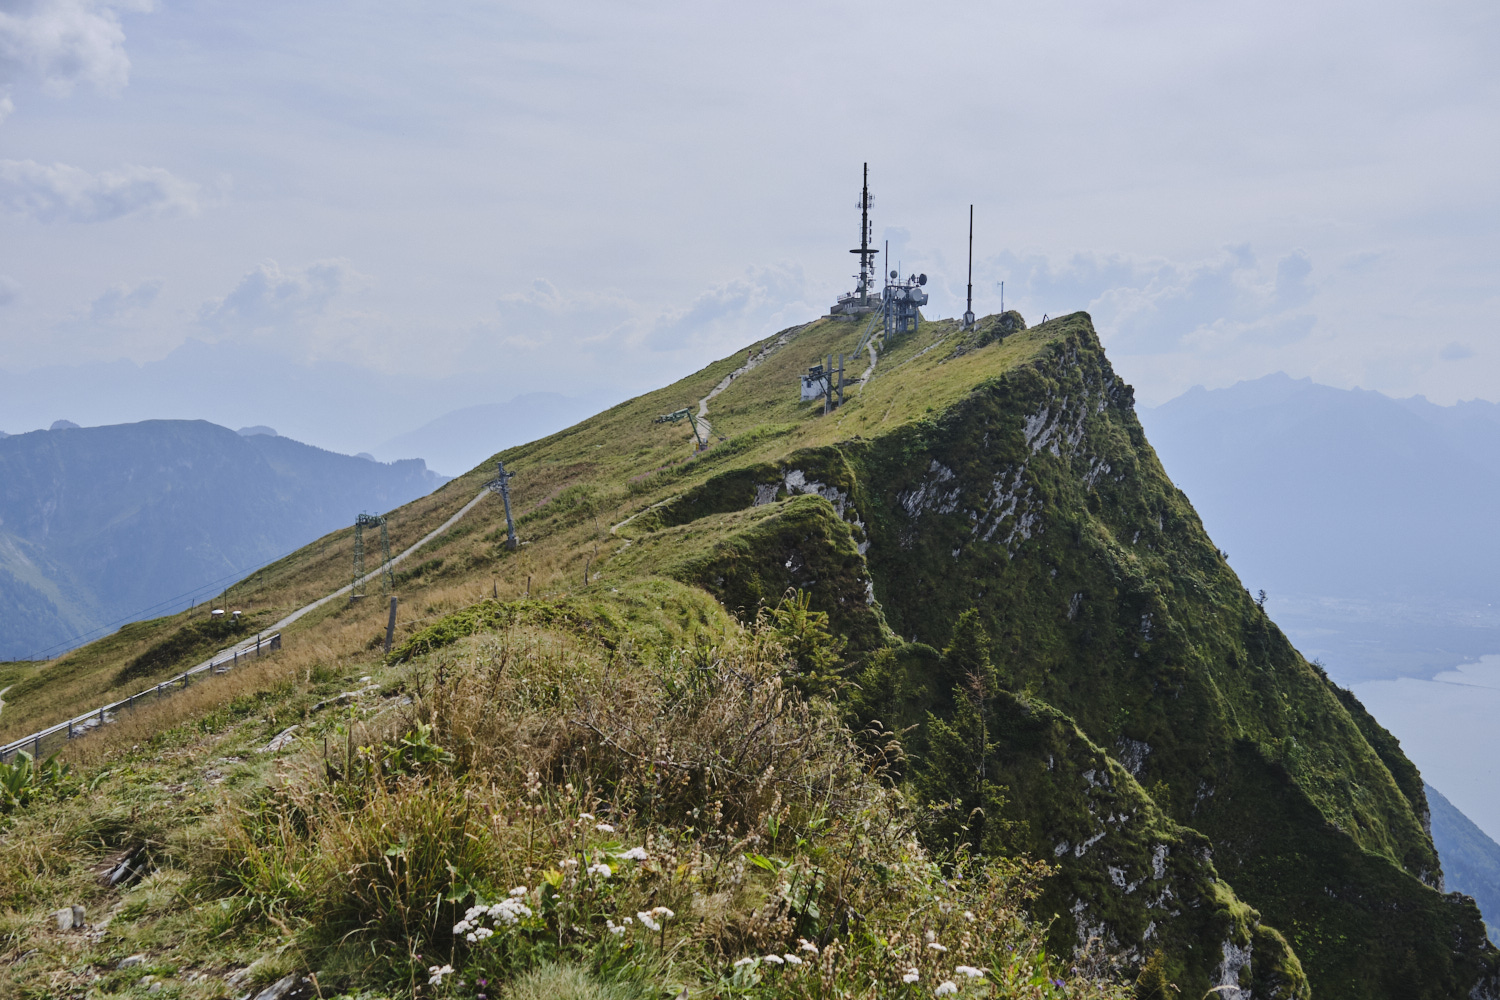
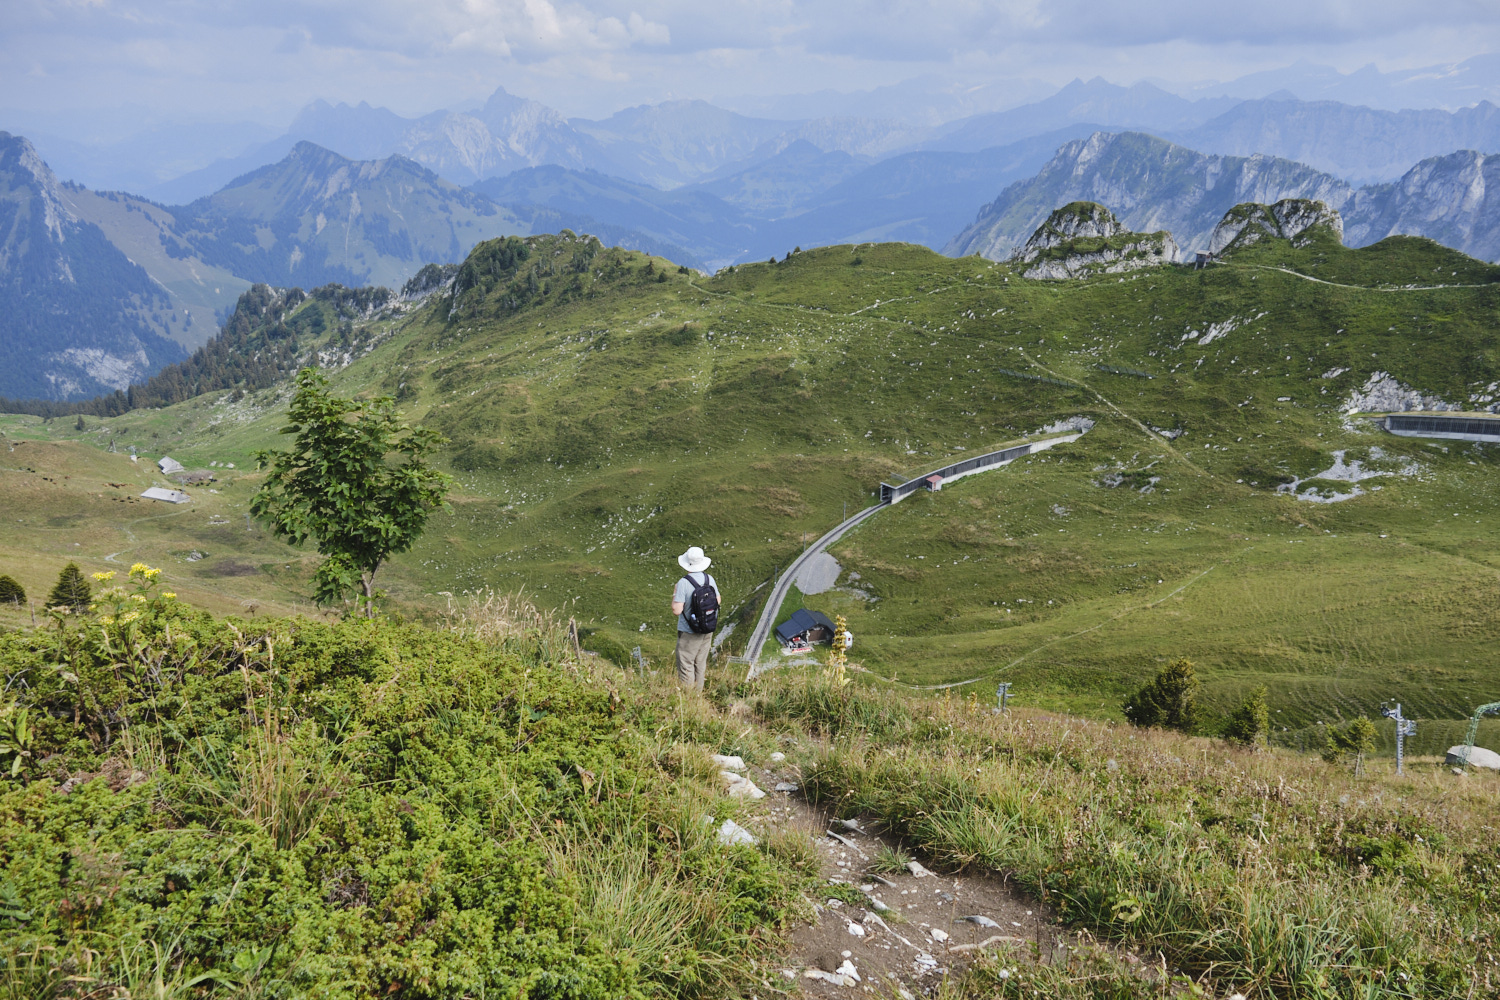
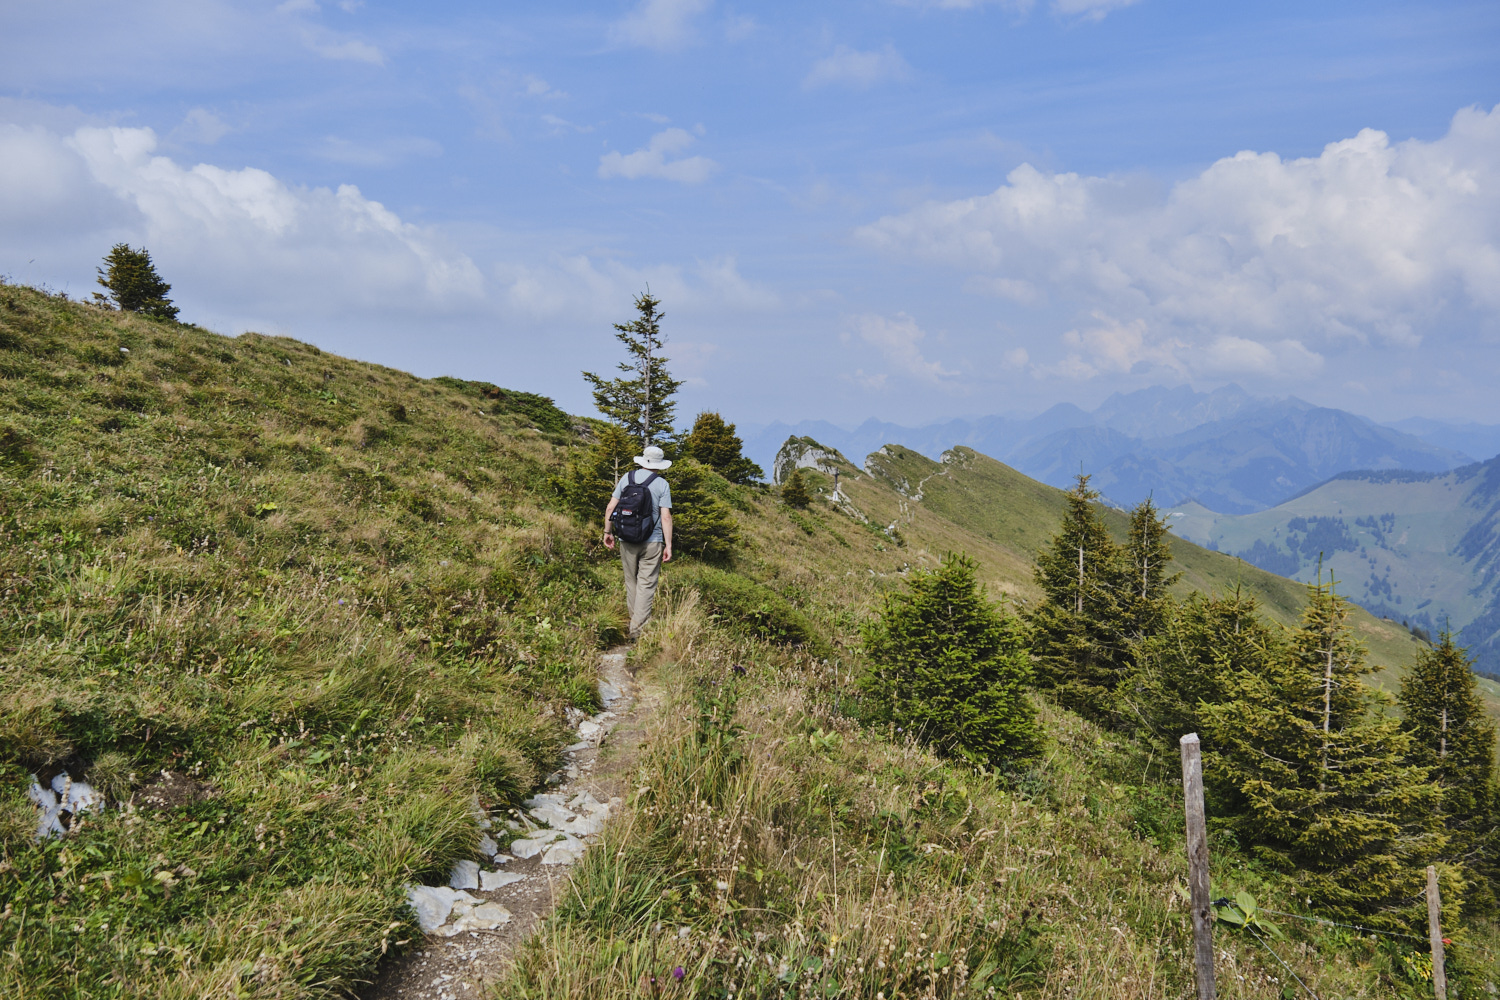
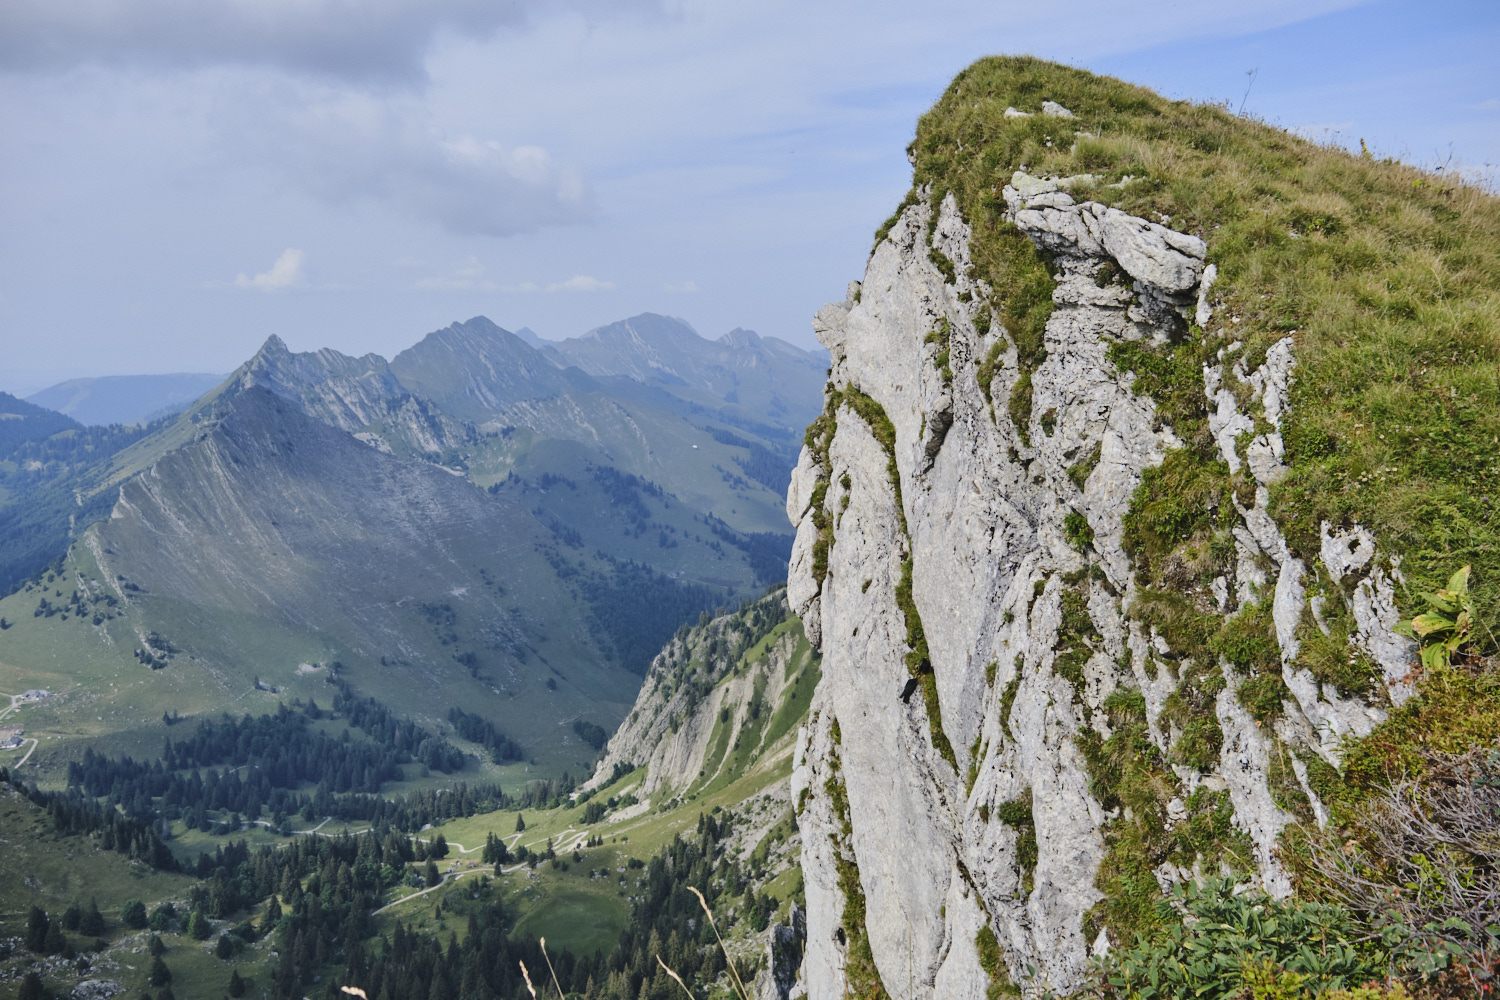
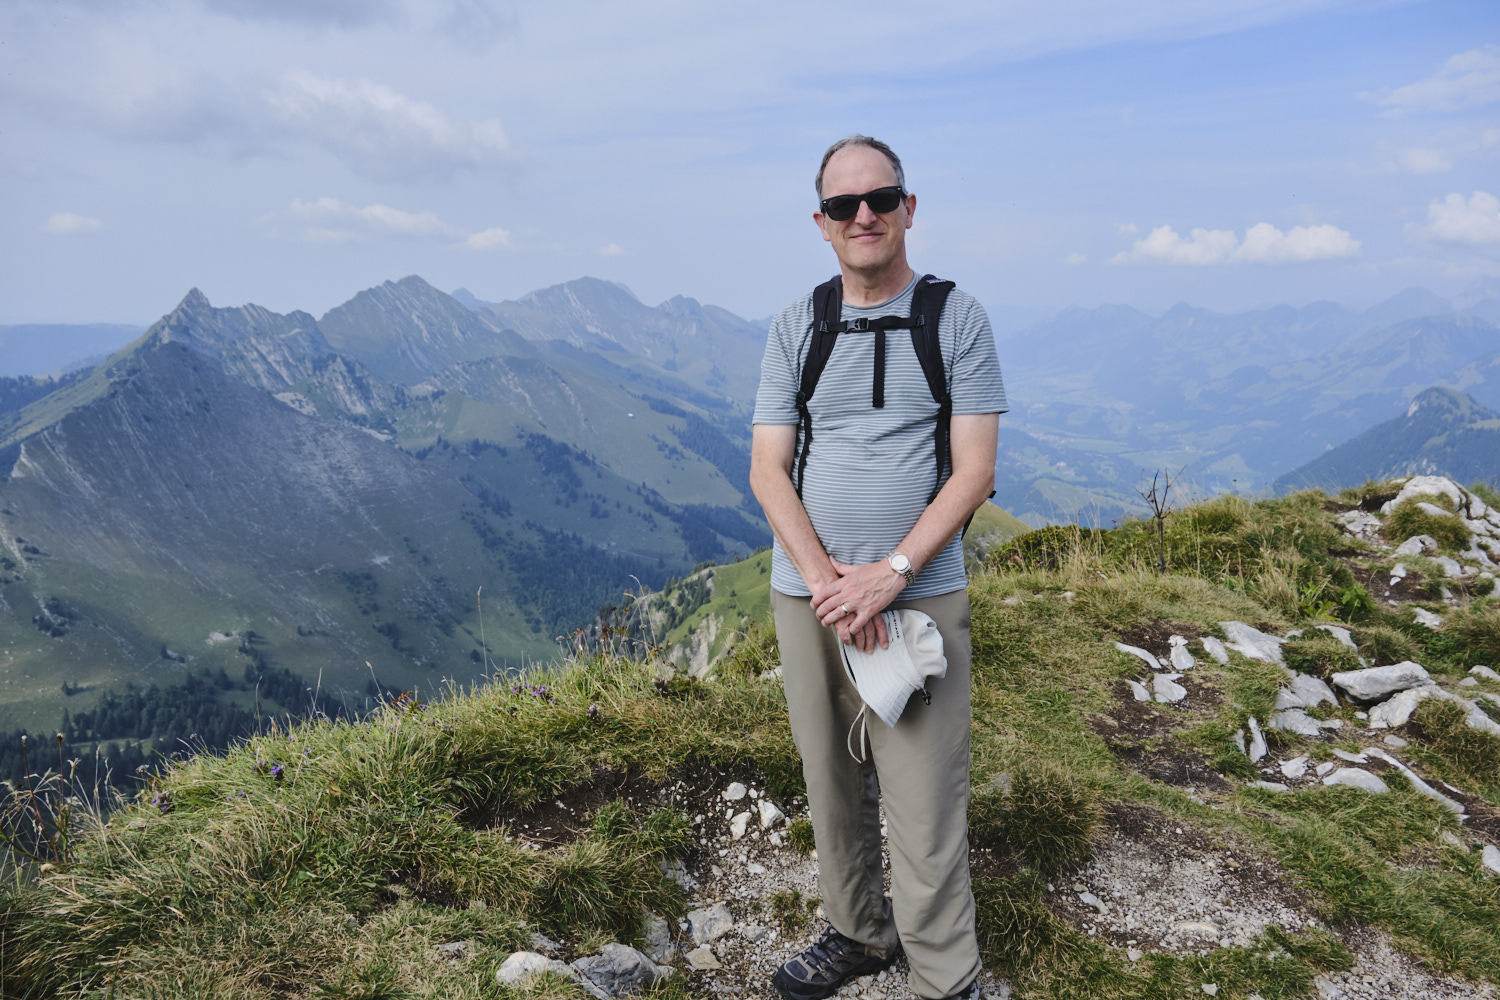
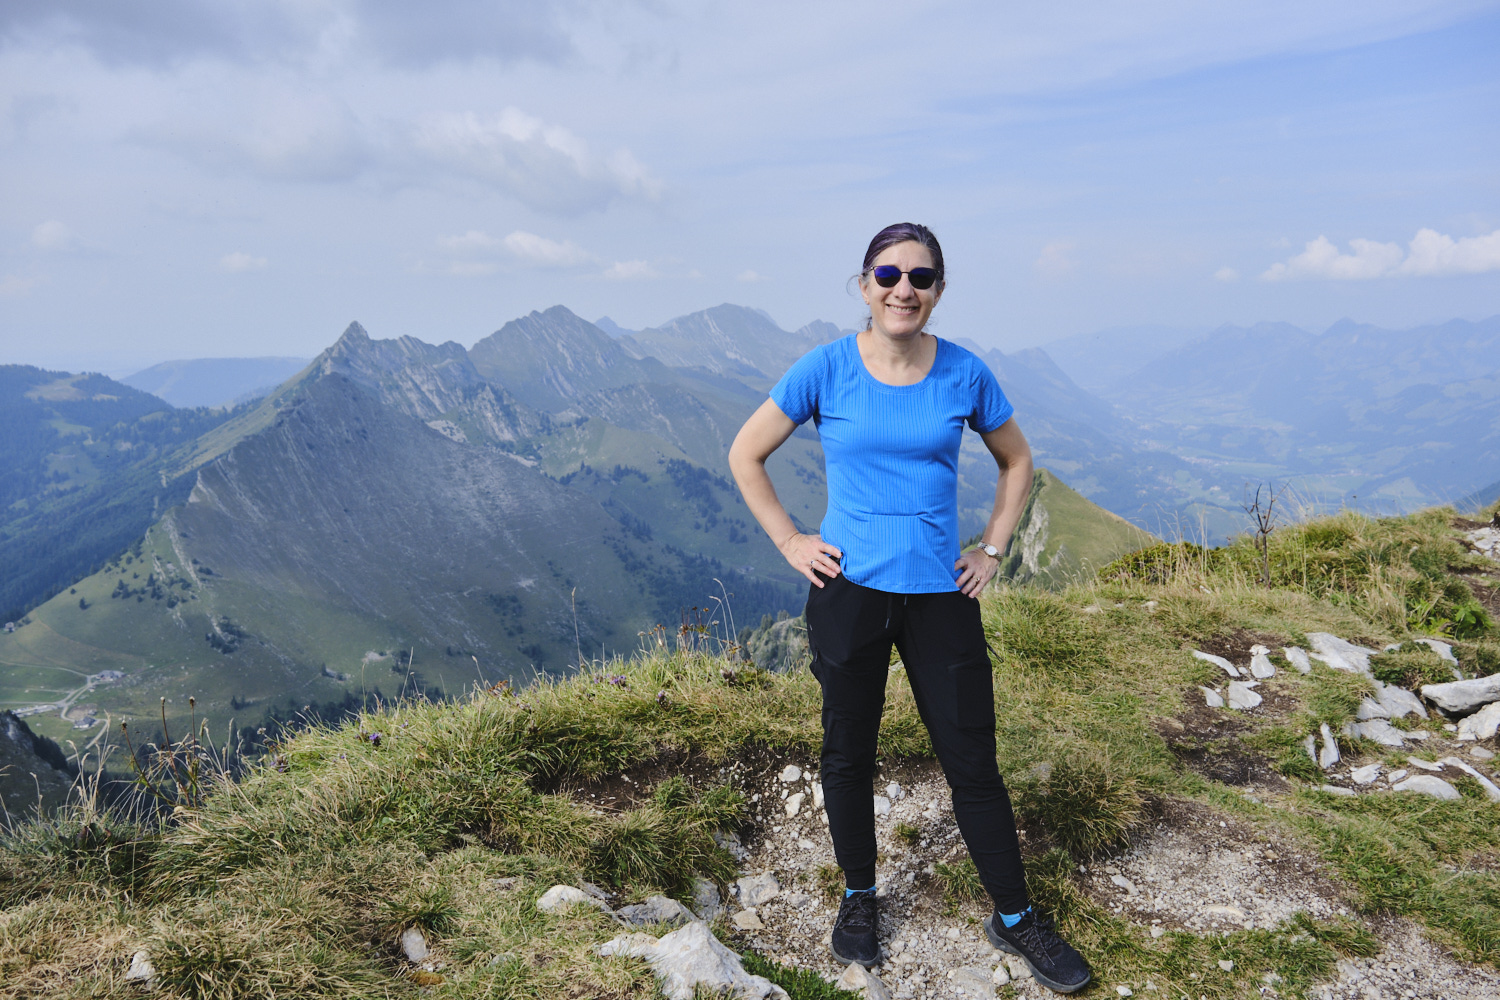
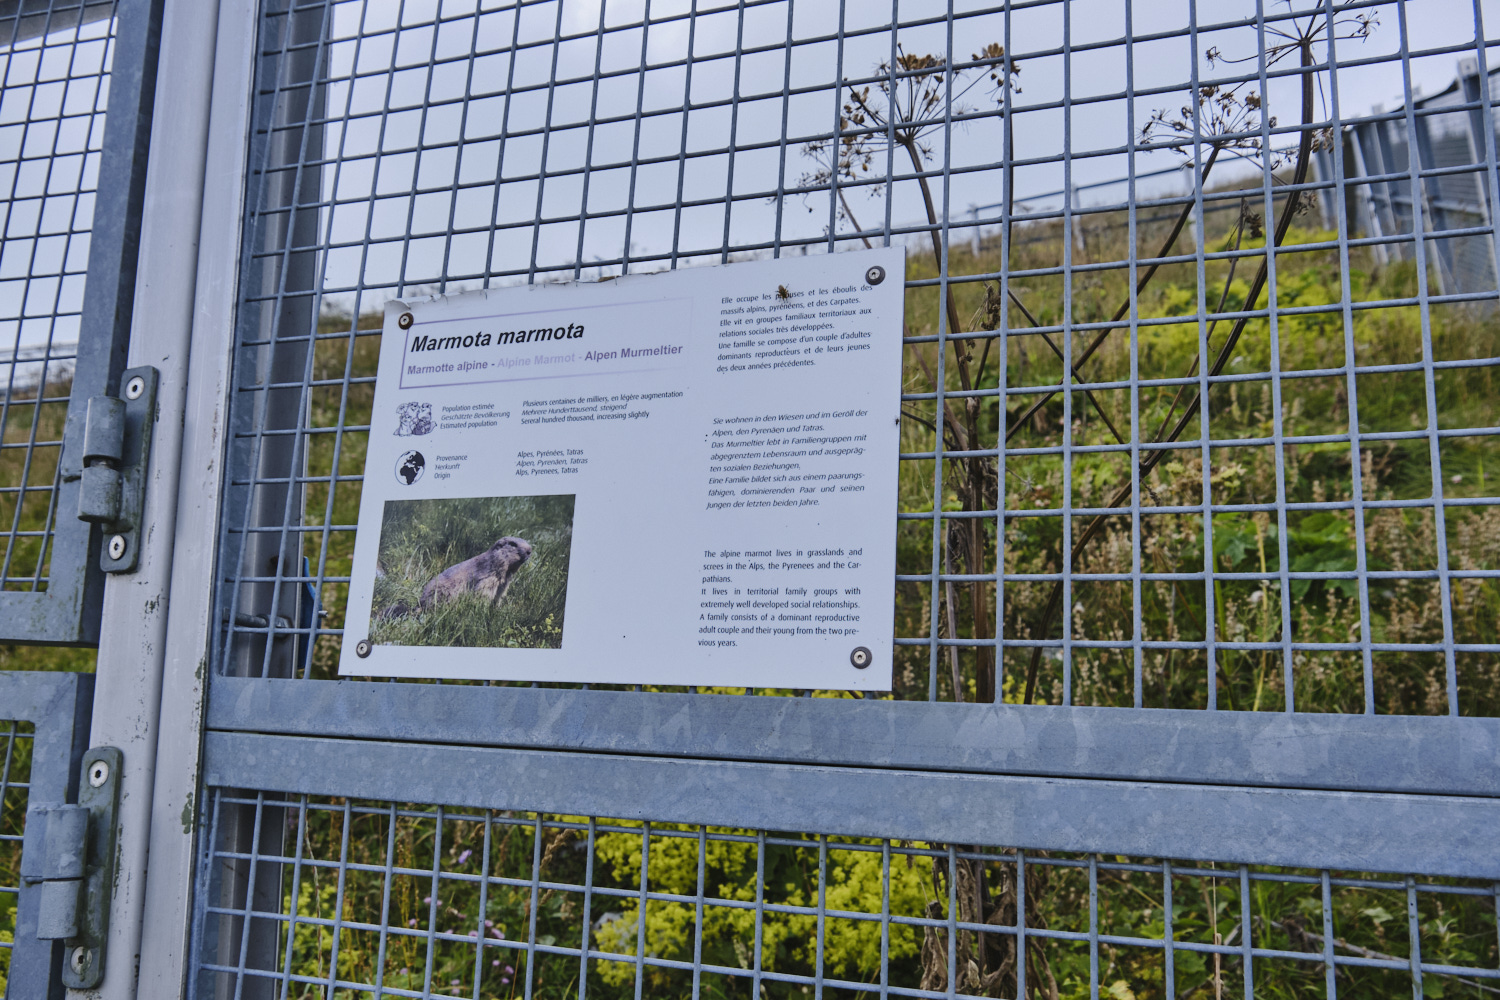
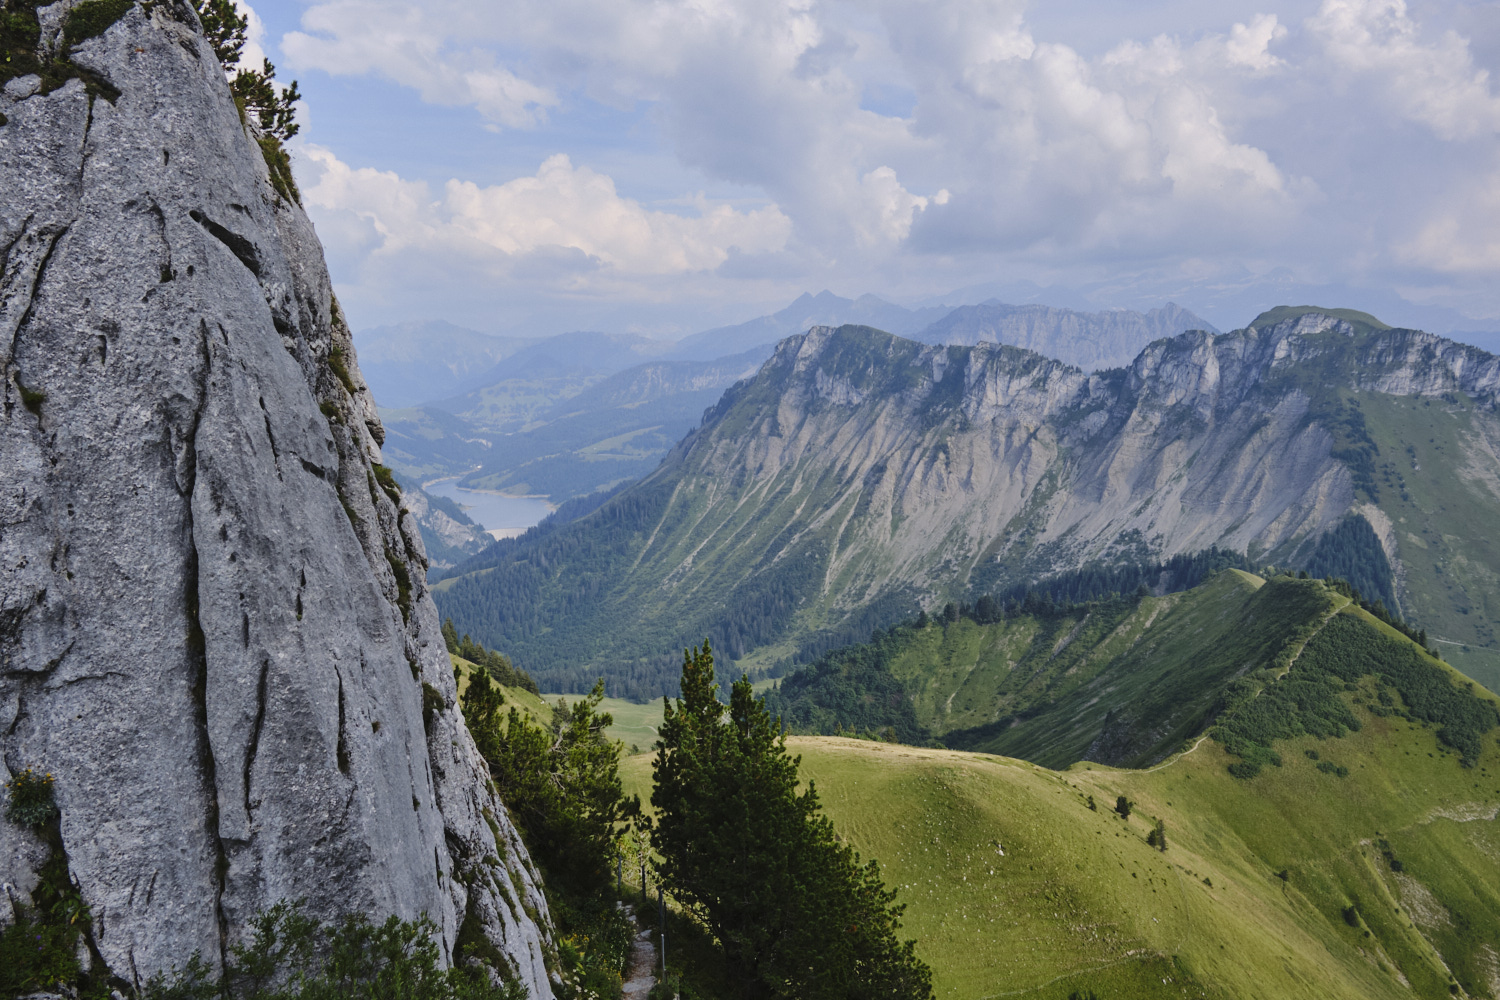
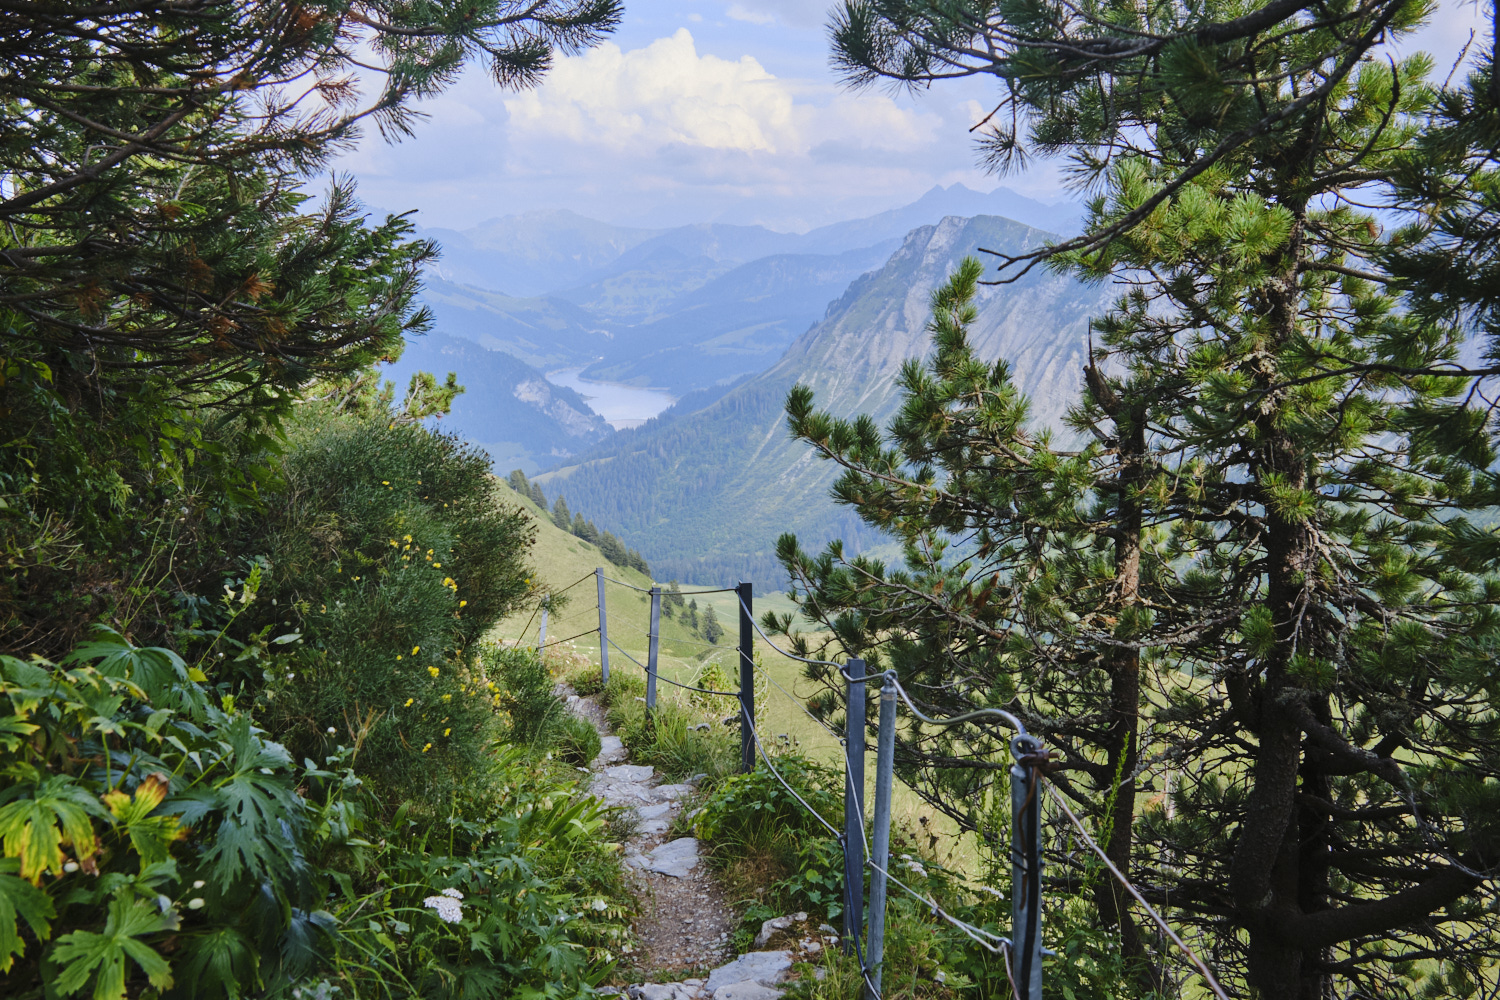
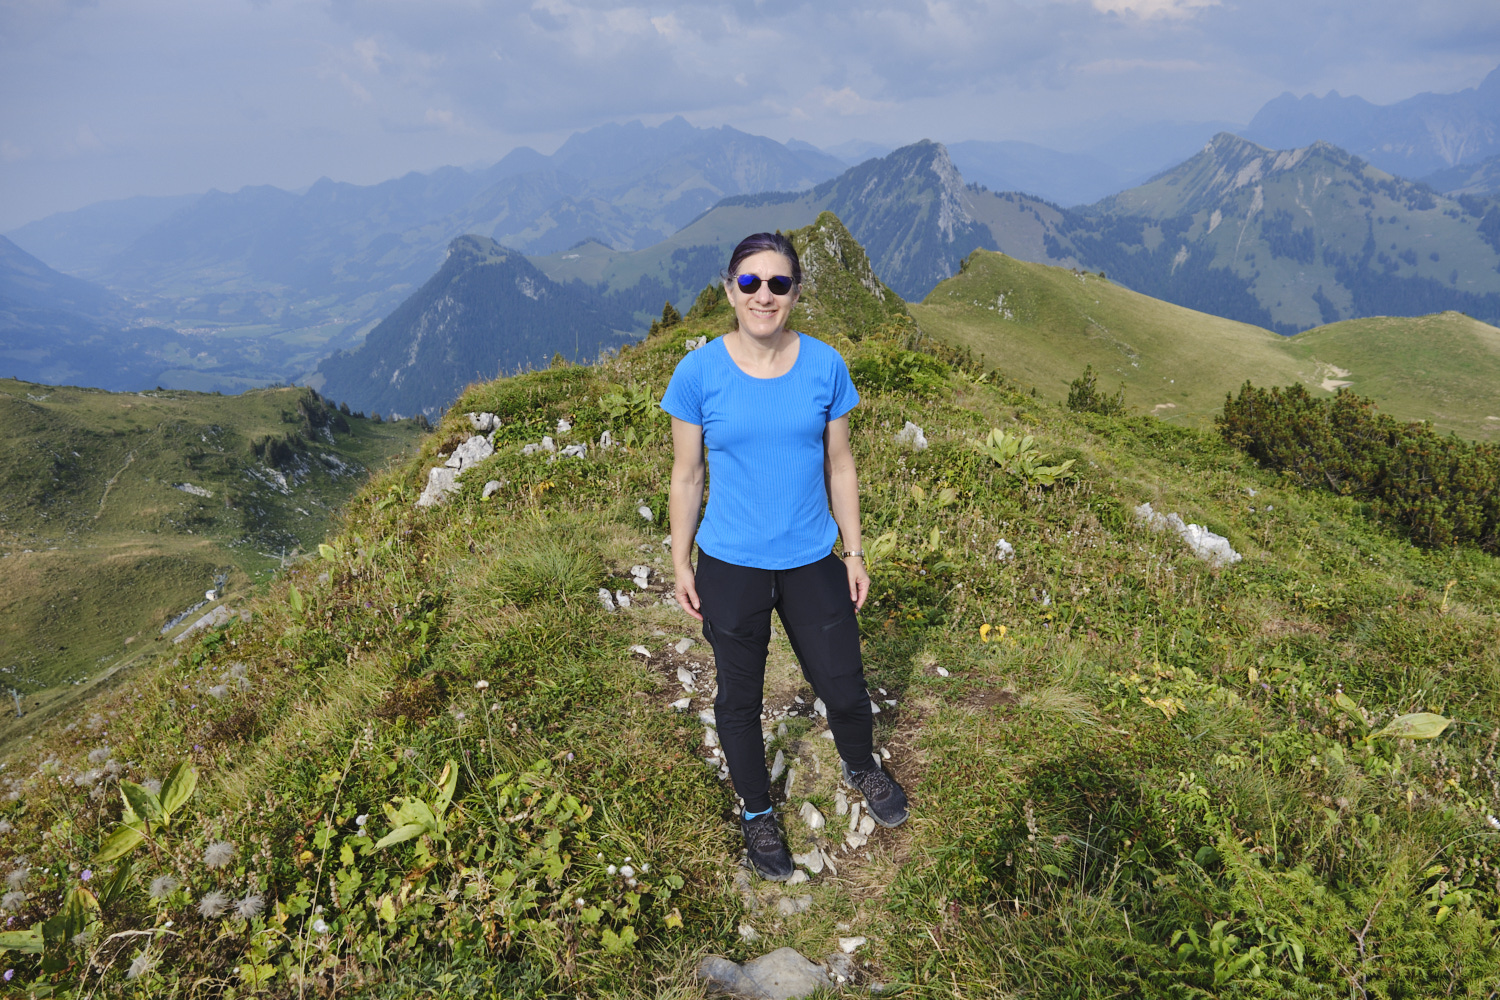
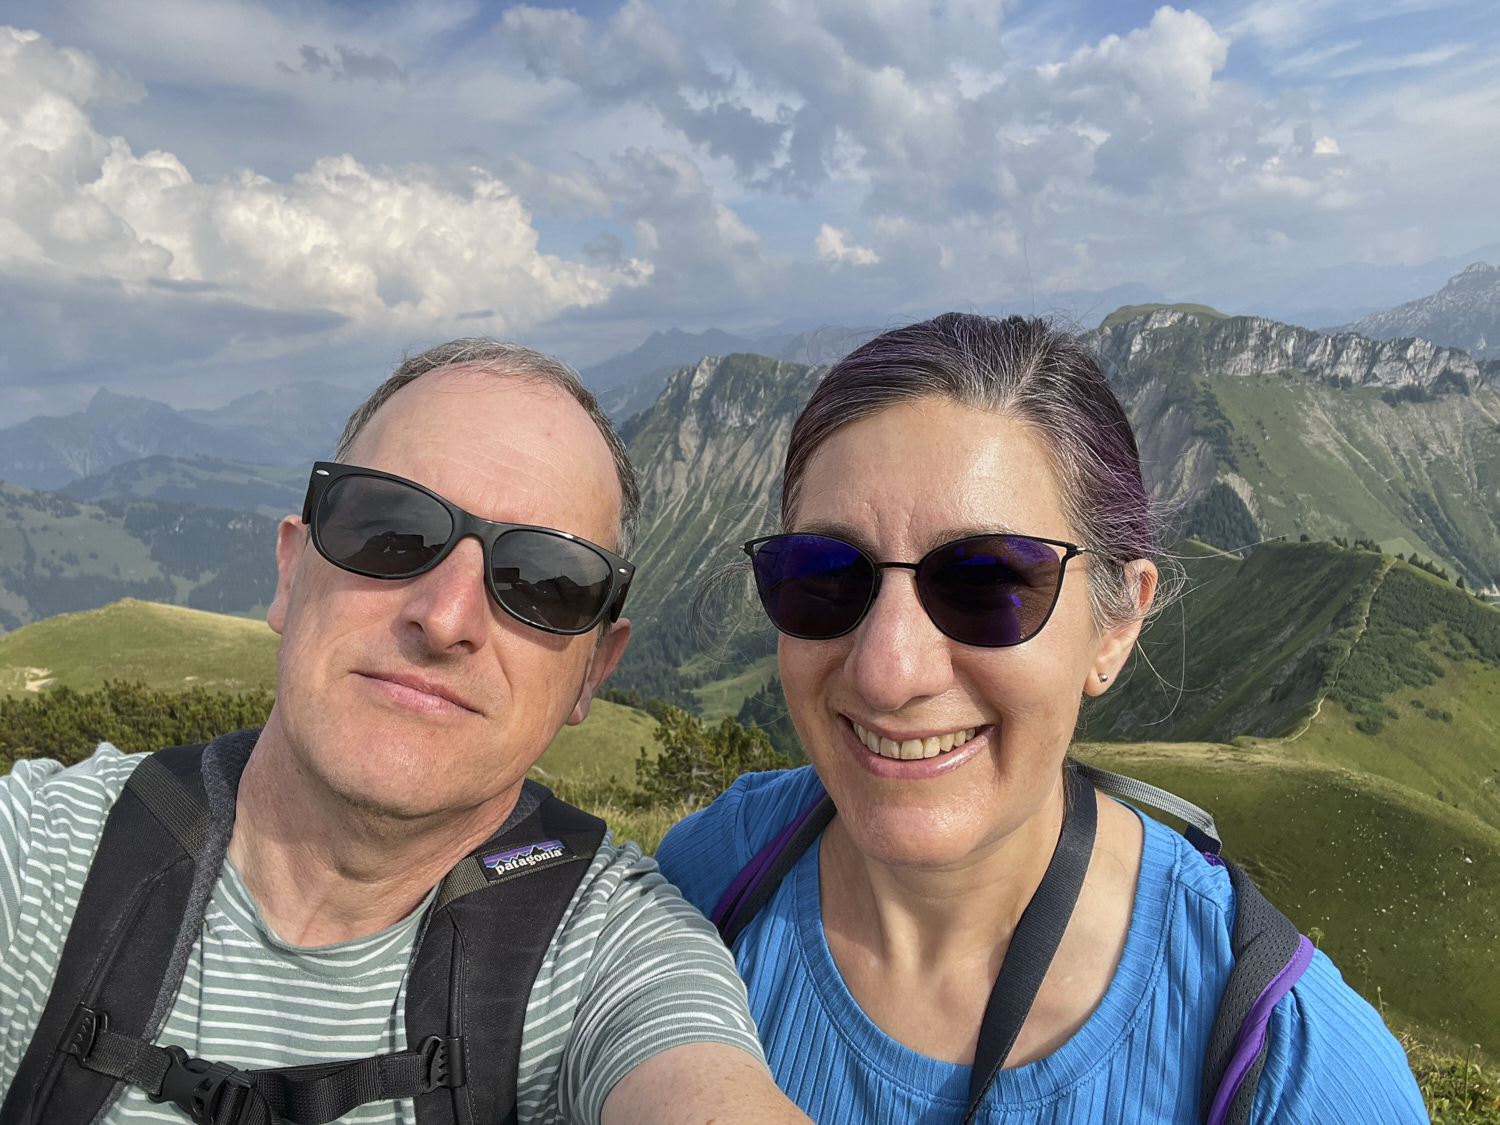
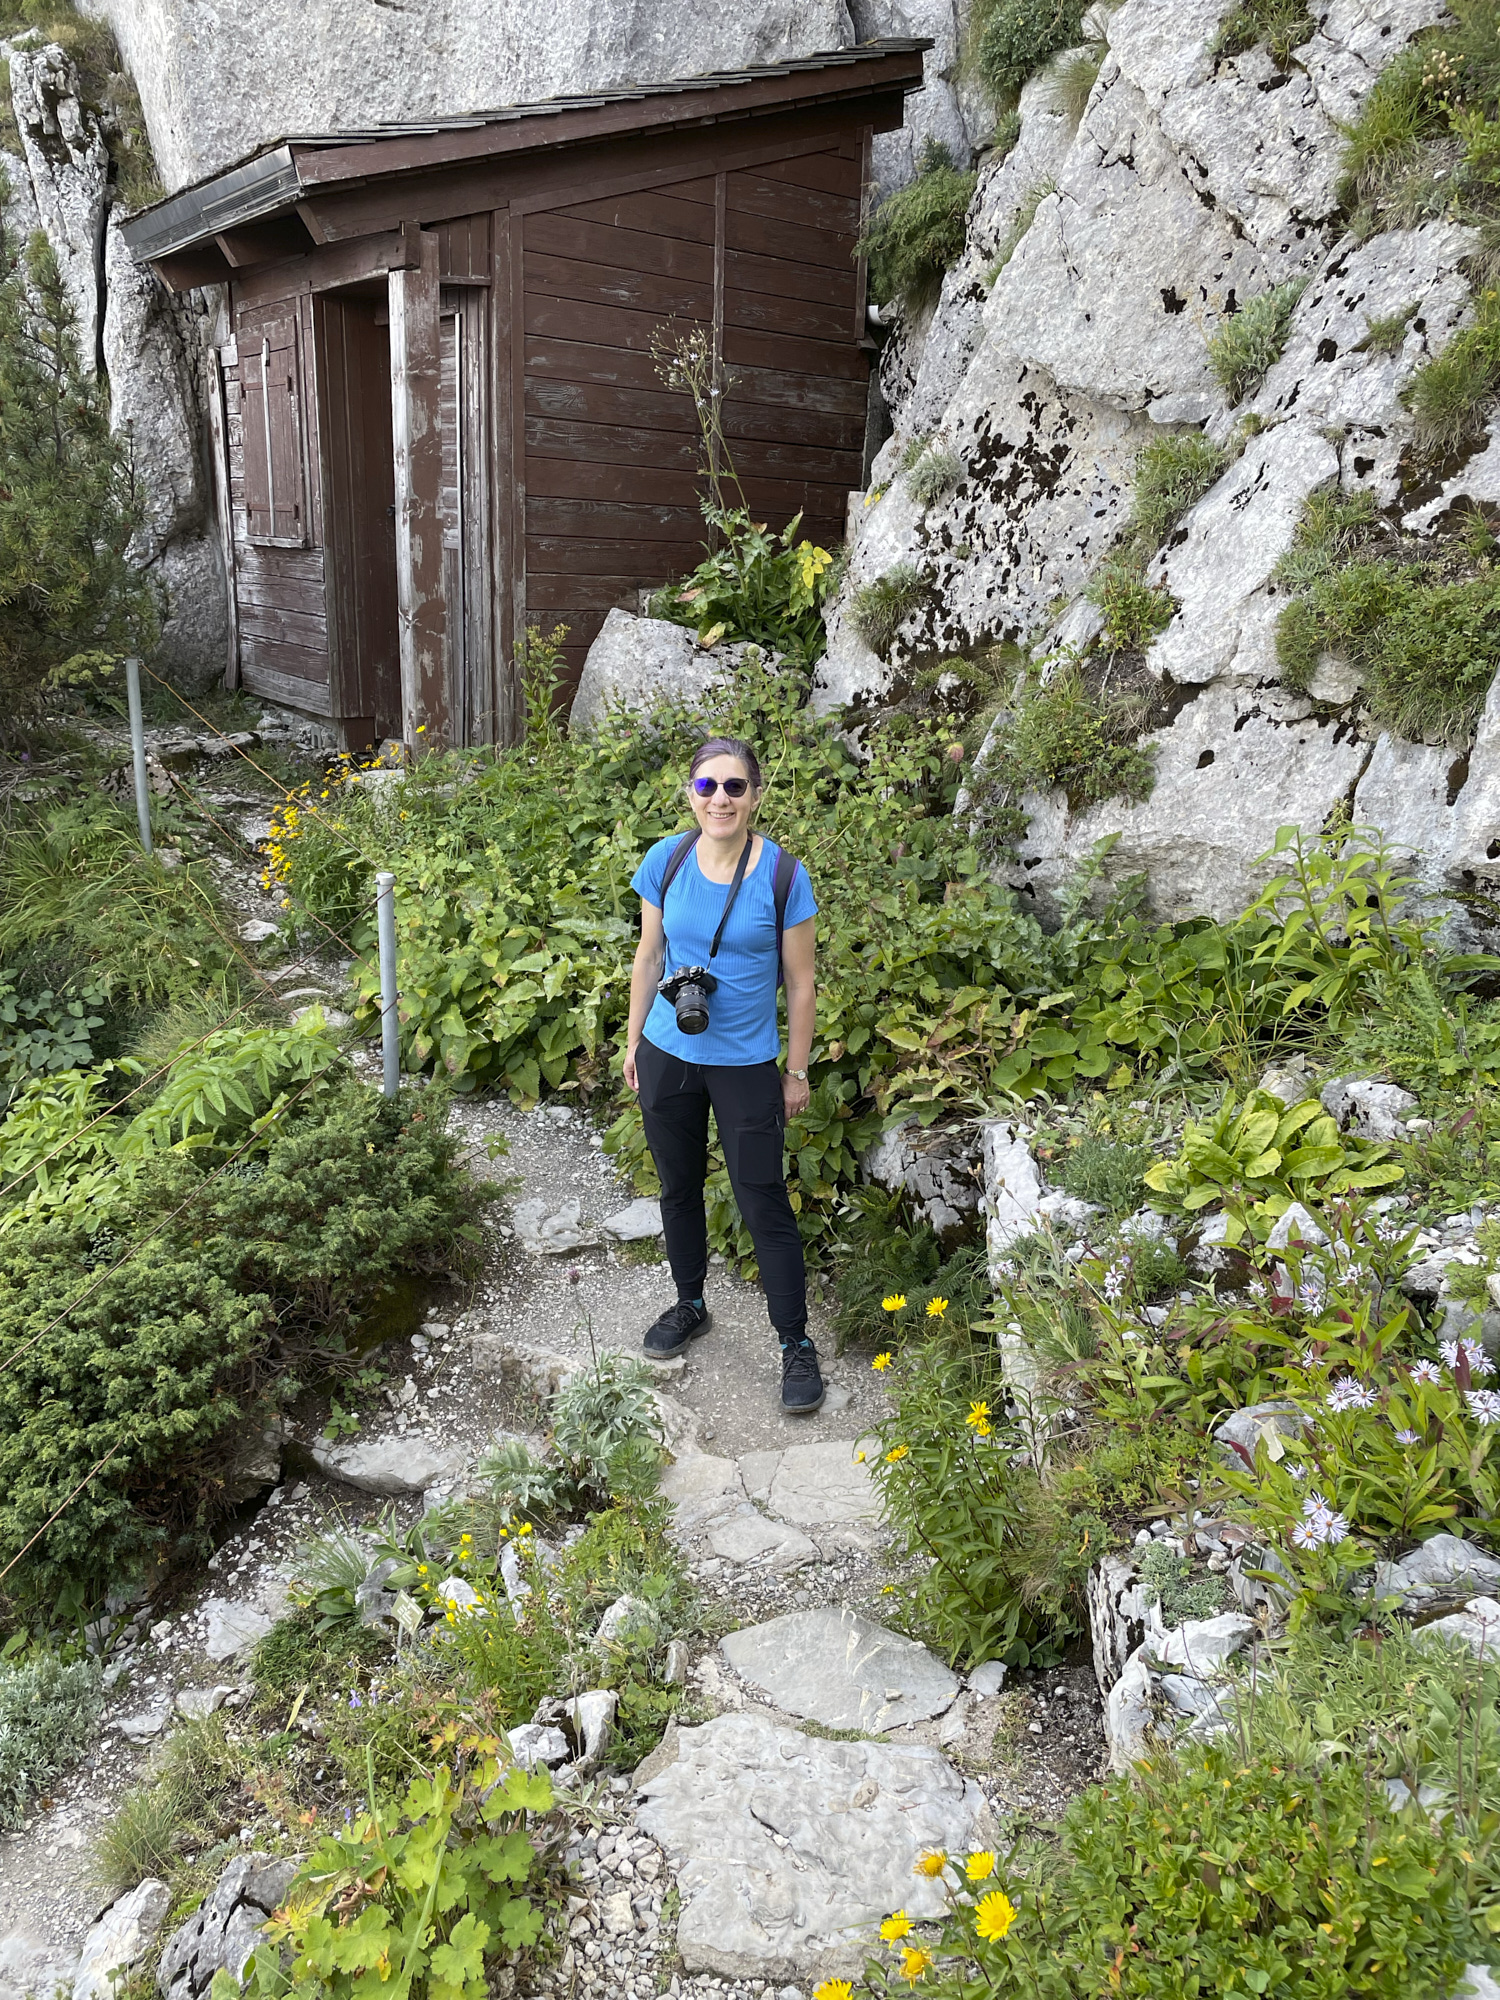
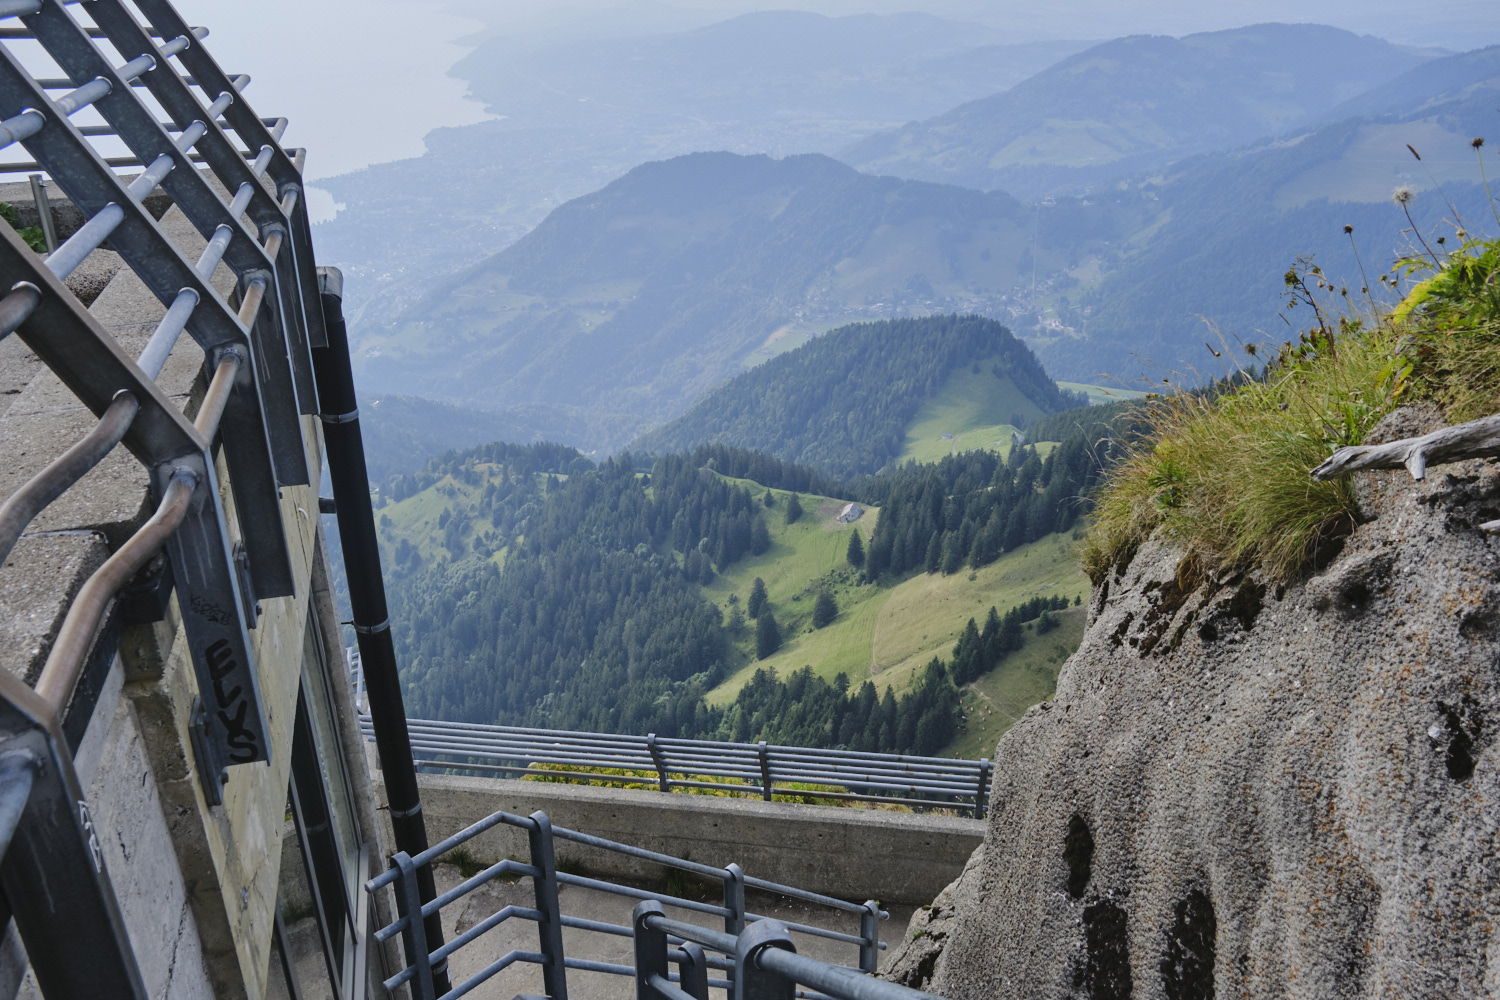
The last day of the Summit wrapped up after lunch so we had plenty of time for an afternoon hike. We took the cog train to Rochers-de-Naye, at the top of the mountain. We hiked around the ridge line for some great views. There is a protected area for marmots in Rochers-de-Naye, but we did not see any marmots.
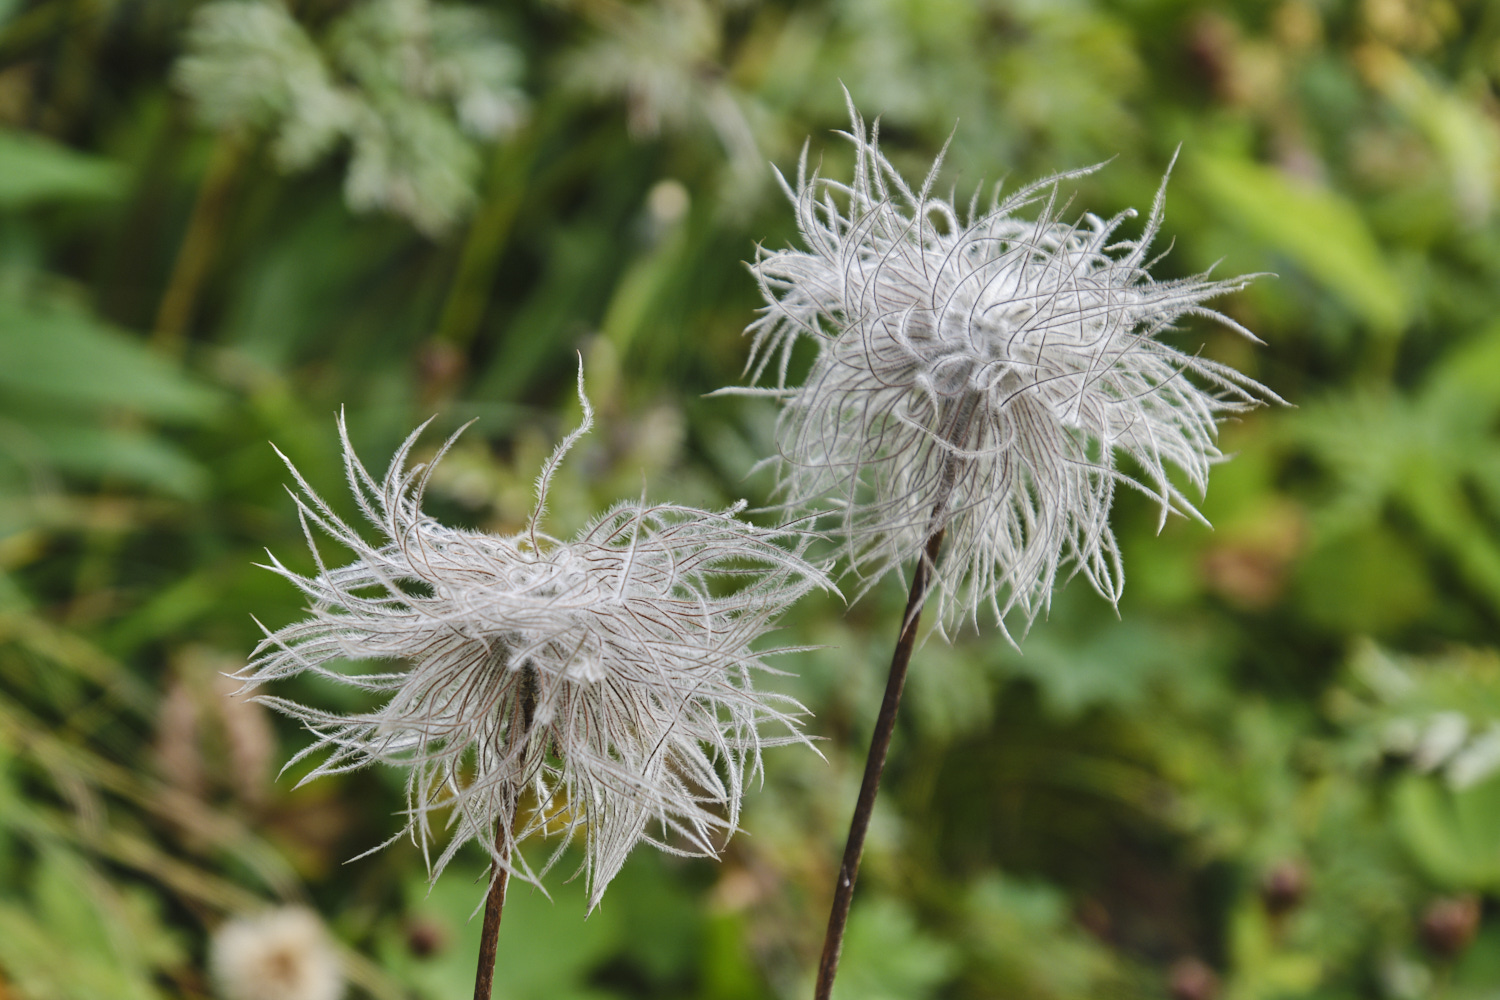
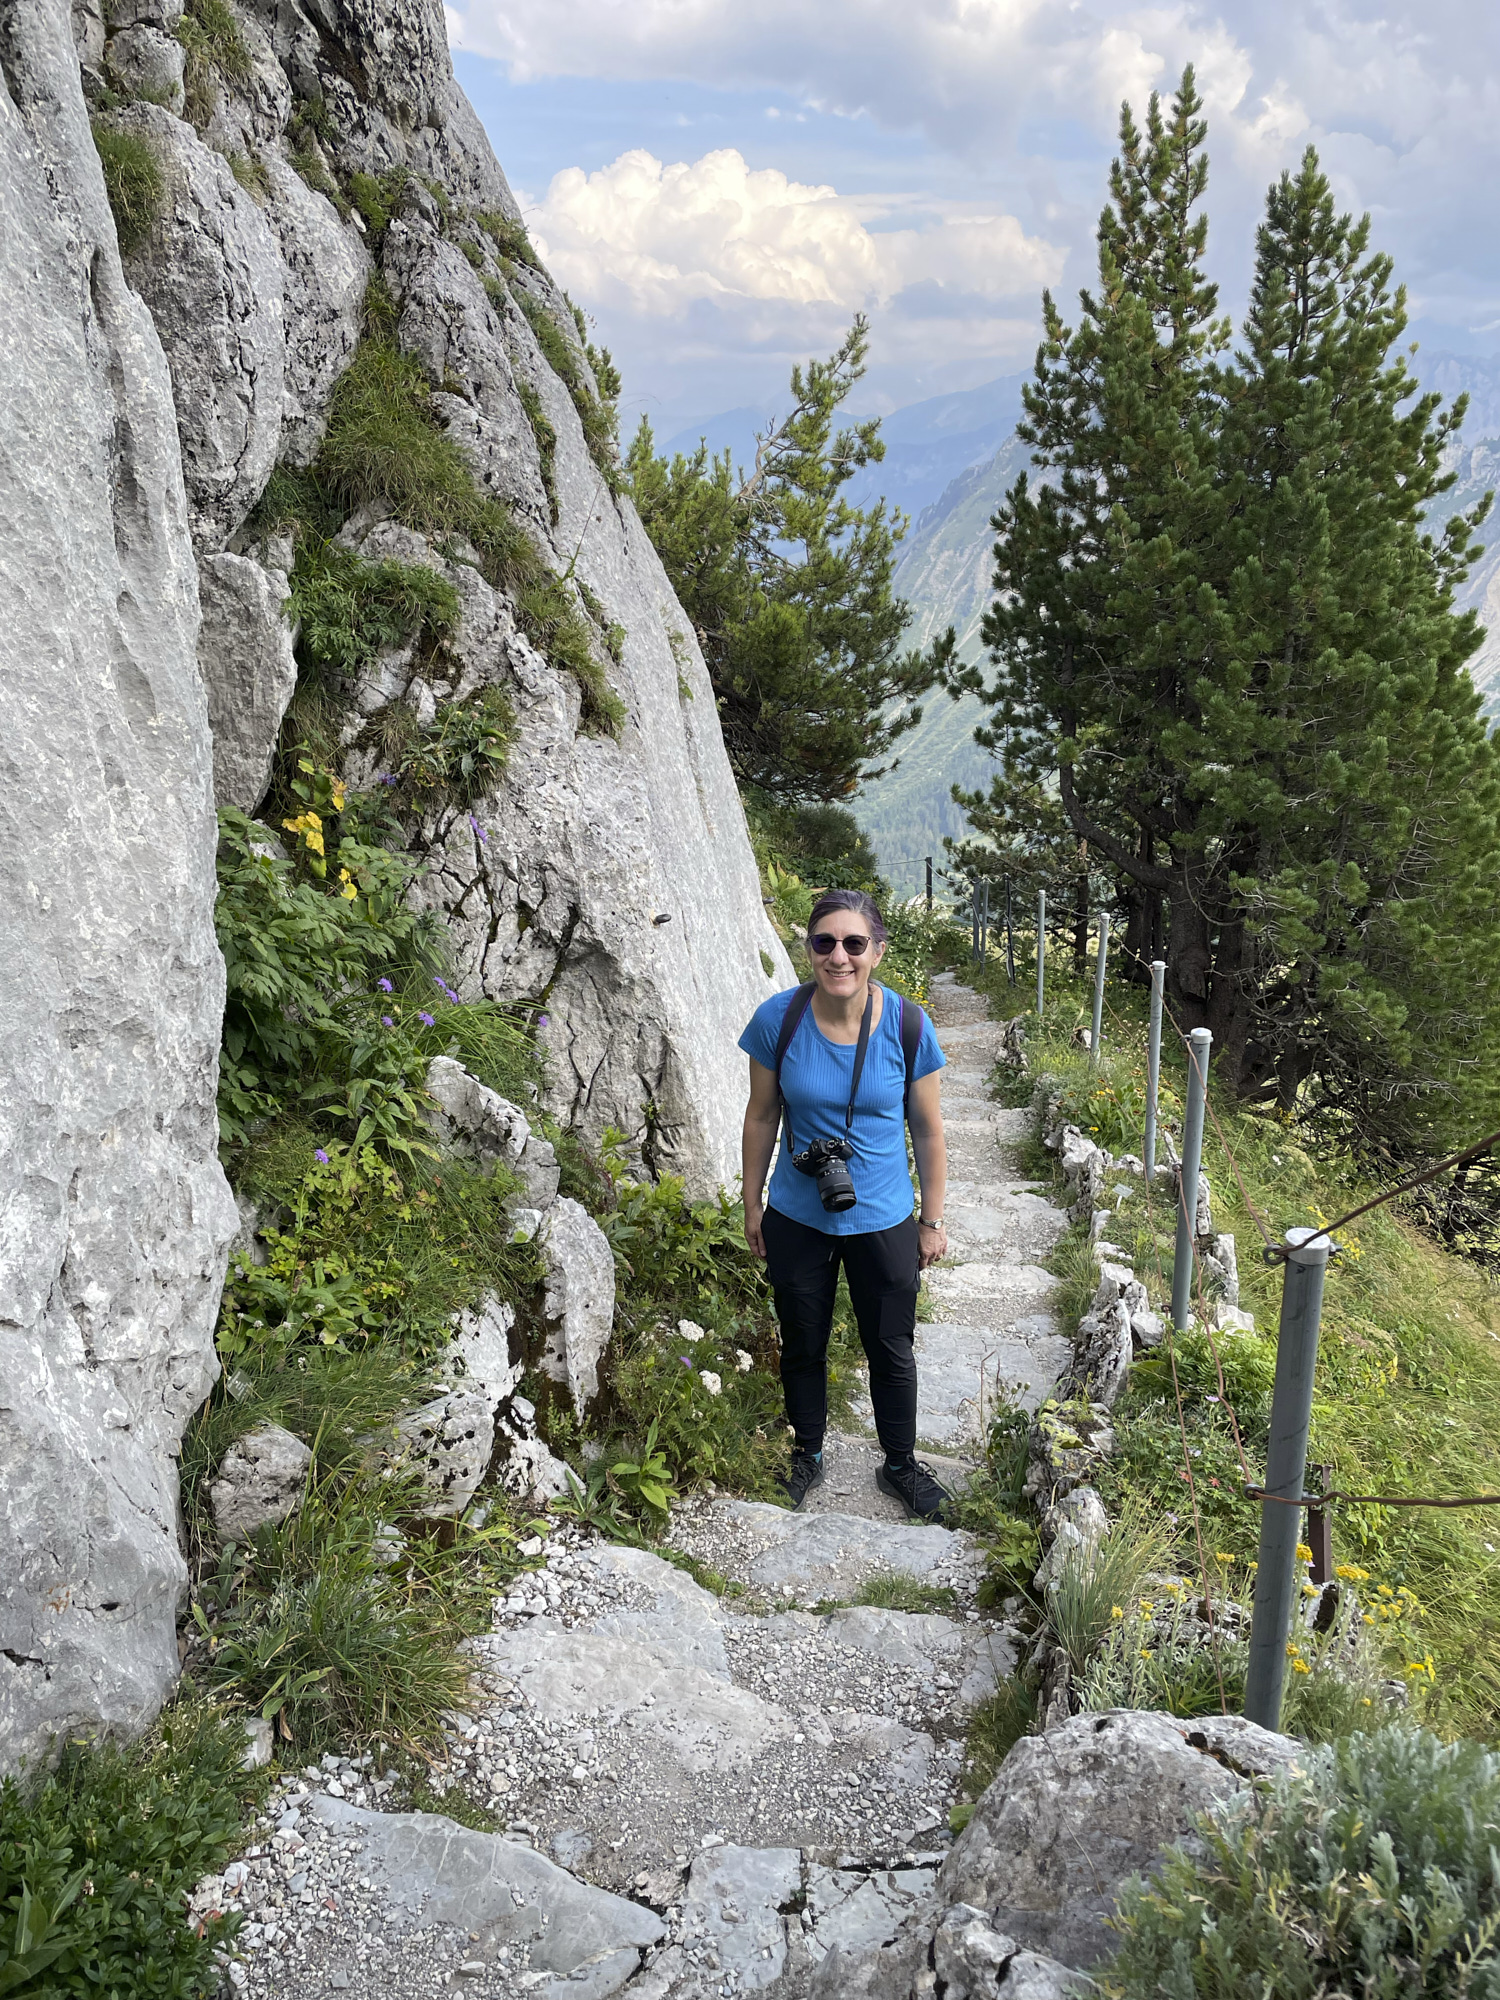
There is also an alpine garden and a hiking trail that loops around the back of one of the small peaks. There were lots of cool flowers, including Pulsatilla alpina (which reminds me of Dr. Seuss’ truffula trees) and Alpine Sea Holly.
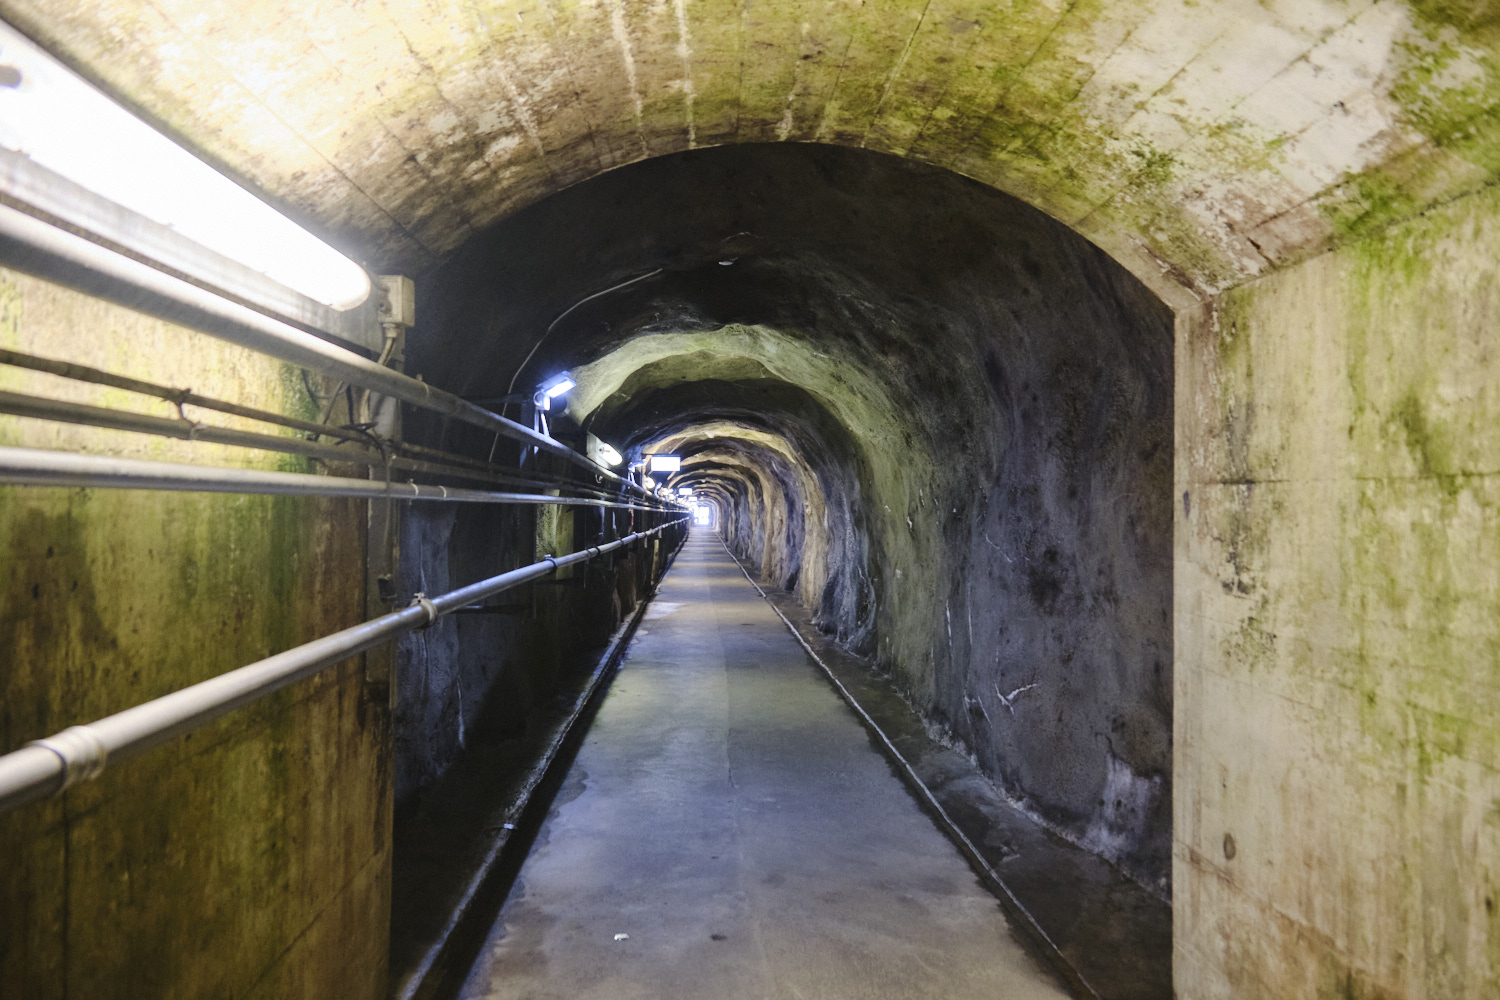
There is also a long tunnel through the mountain that comes out at a restaurant with a scenic overlook.
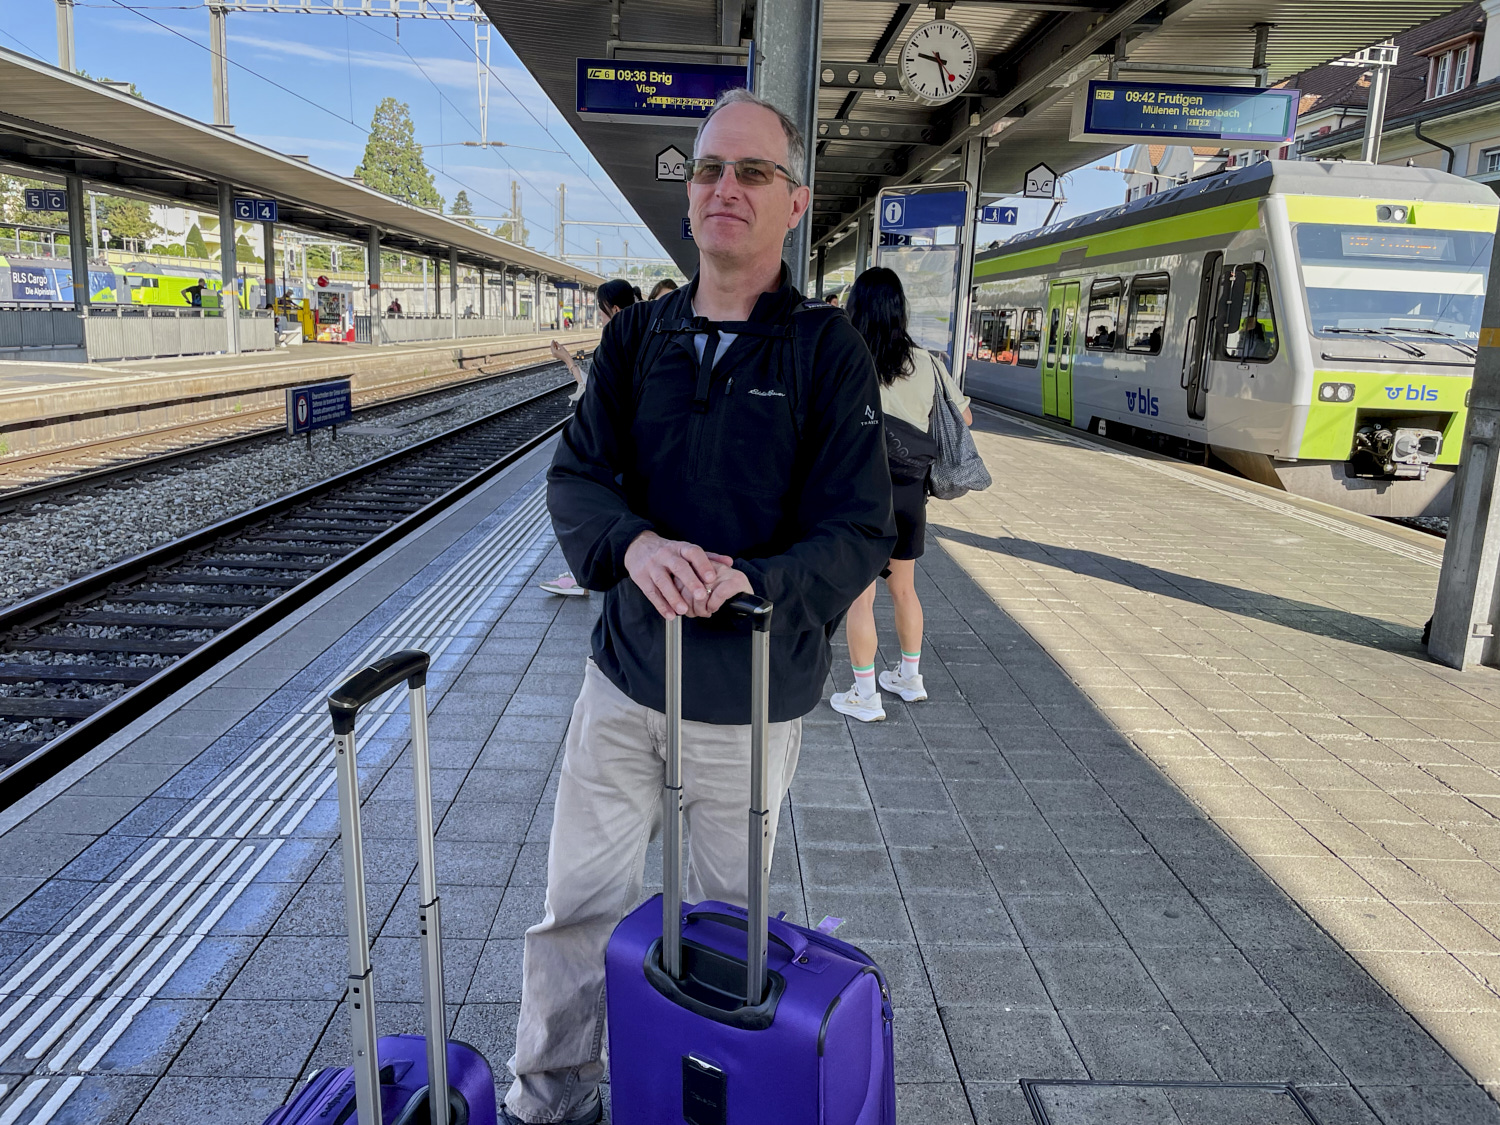
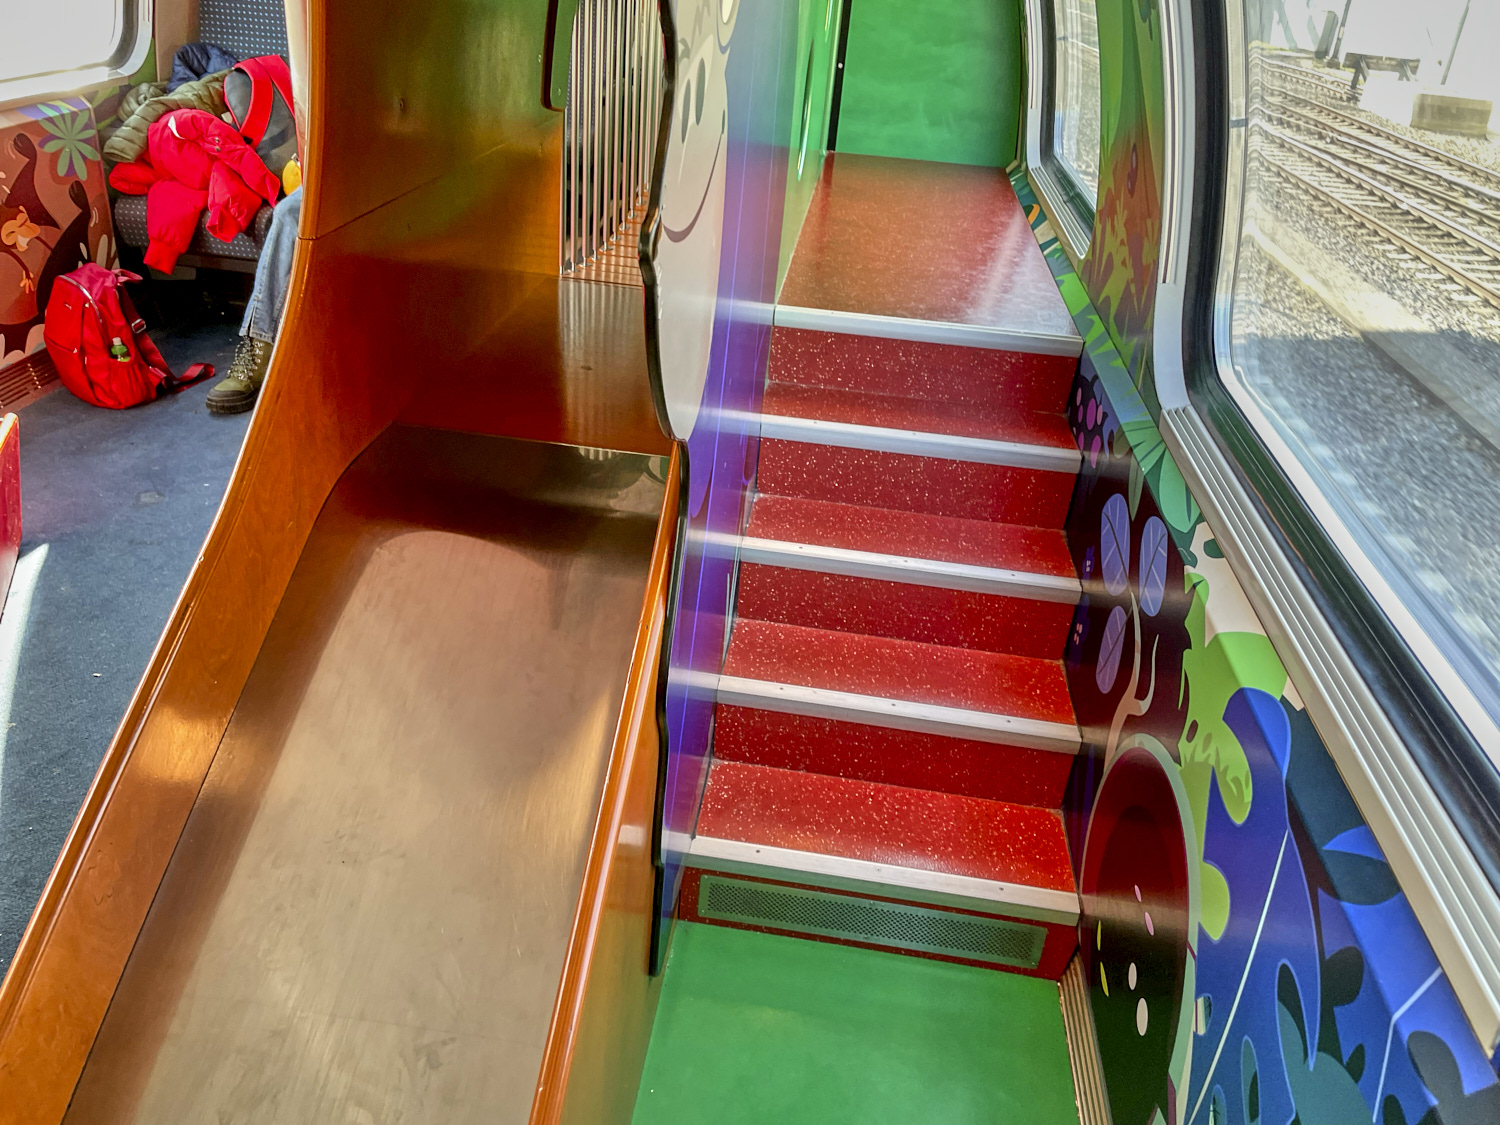
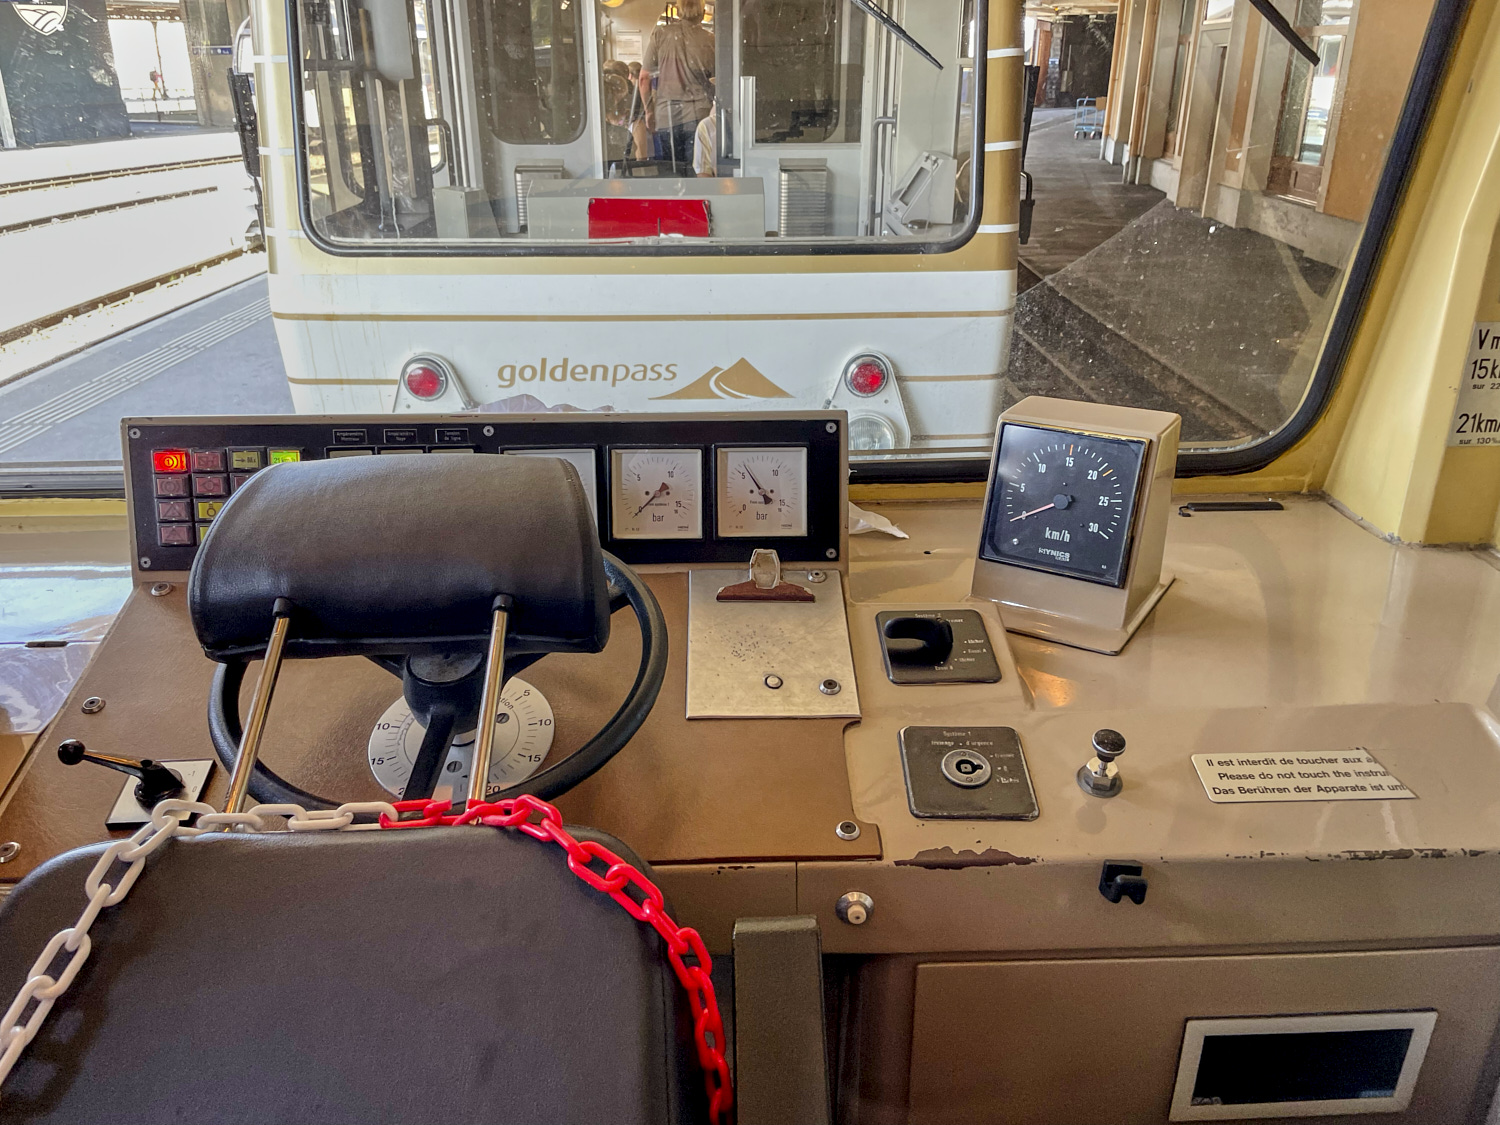
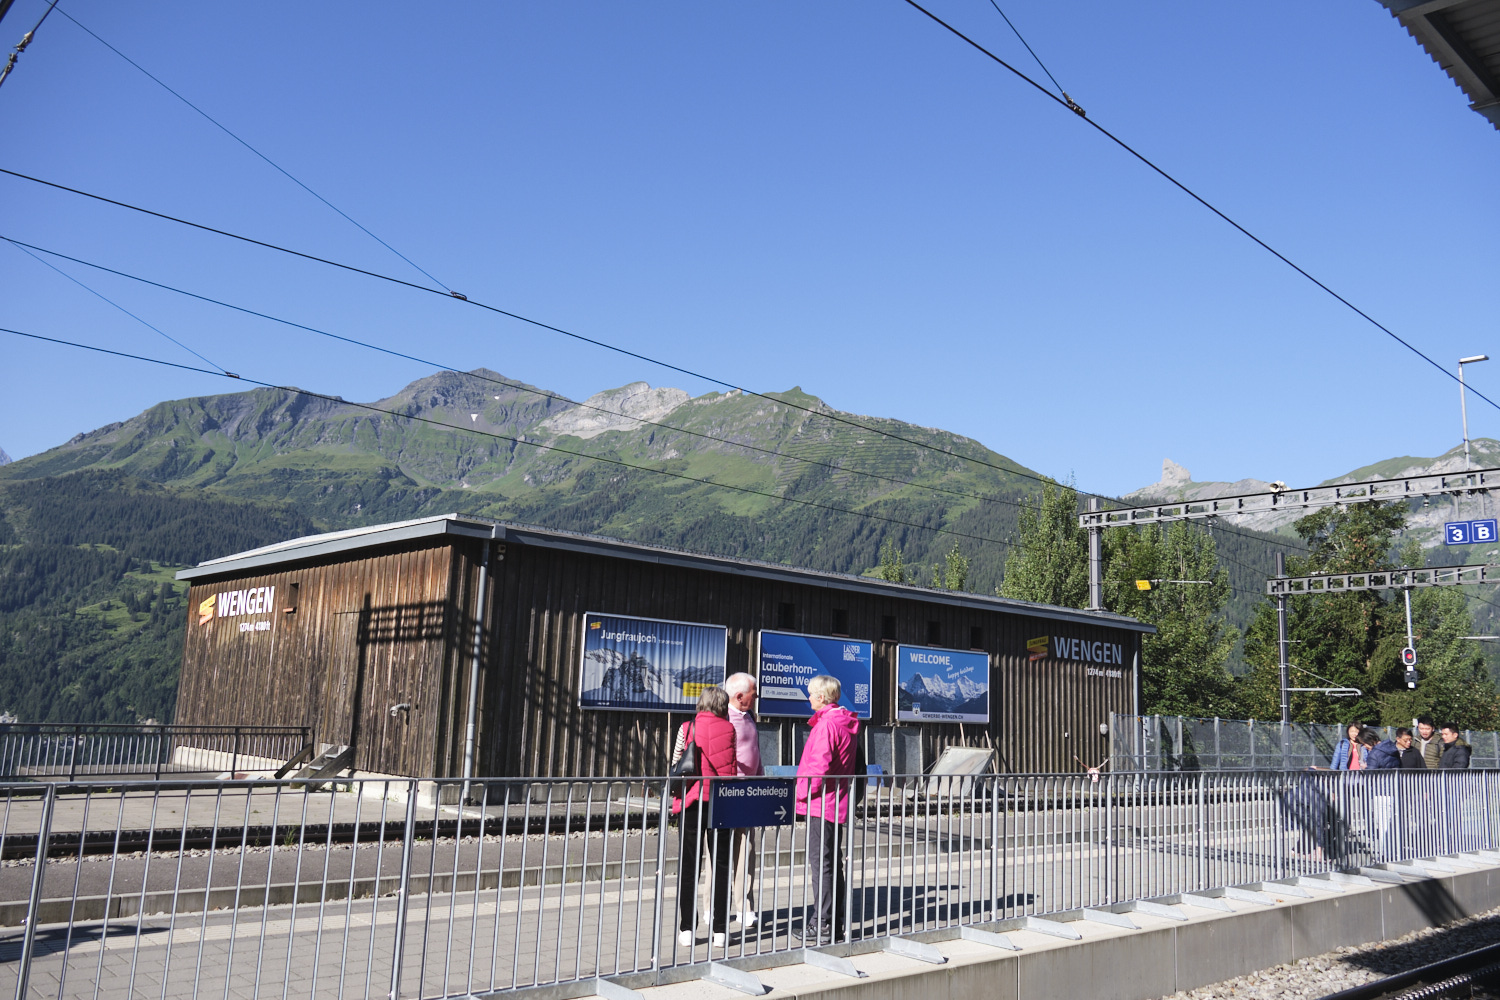
The next day we used the mobile app to plot our 5-hop journey from Wengen to Glion. We travelled from Wengen to Lauterbrunn, then to Interlaken Ost, then to Visp, then Montreux, and finally a cog rail train to Glion-Alpes. Some of the trains had playgrounds on them, complete with small slides and climbing areas. The cog train was much noisier than the previous trains we rode. The whole excursion took less than 3 hours and all the connections worked perfectly.
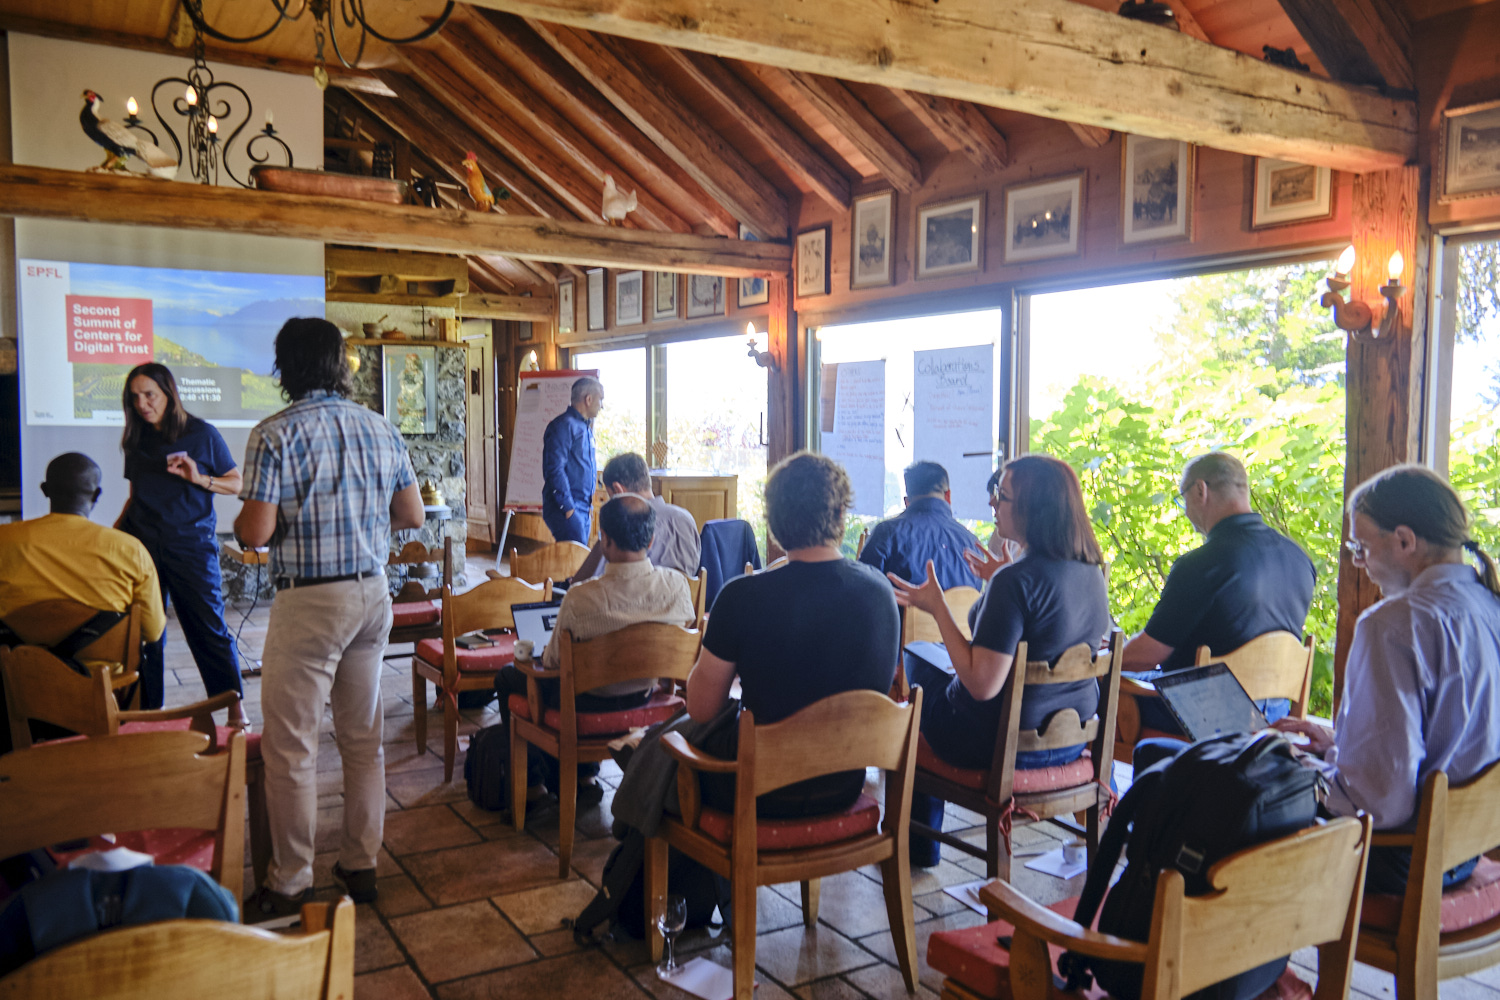
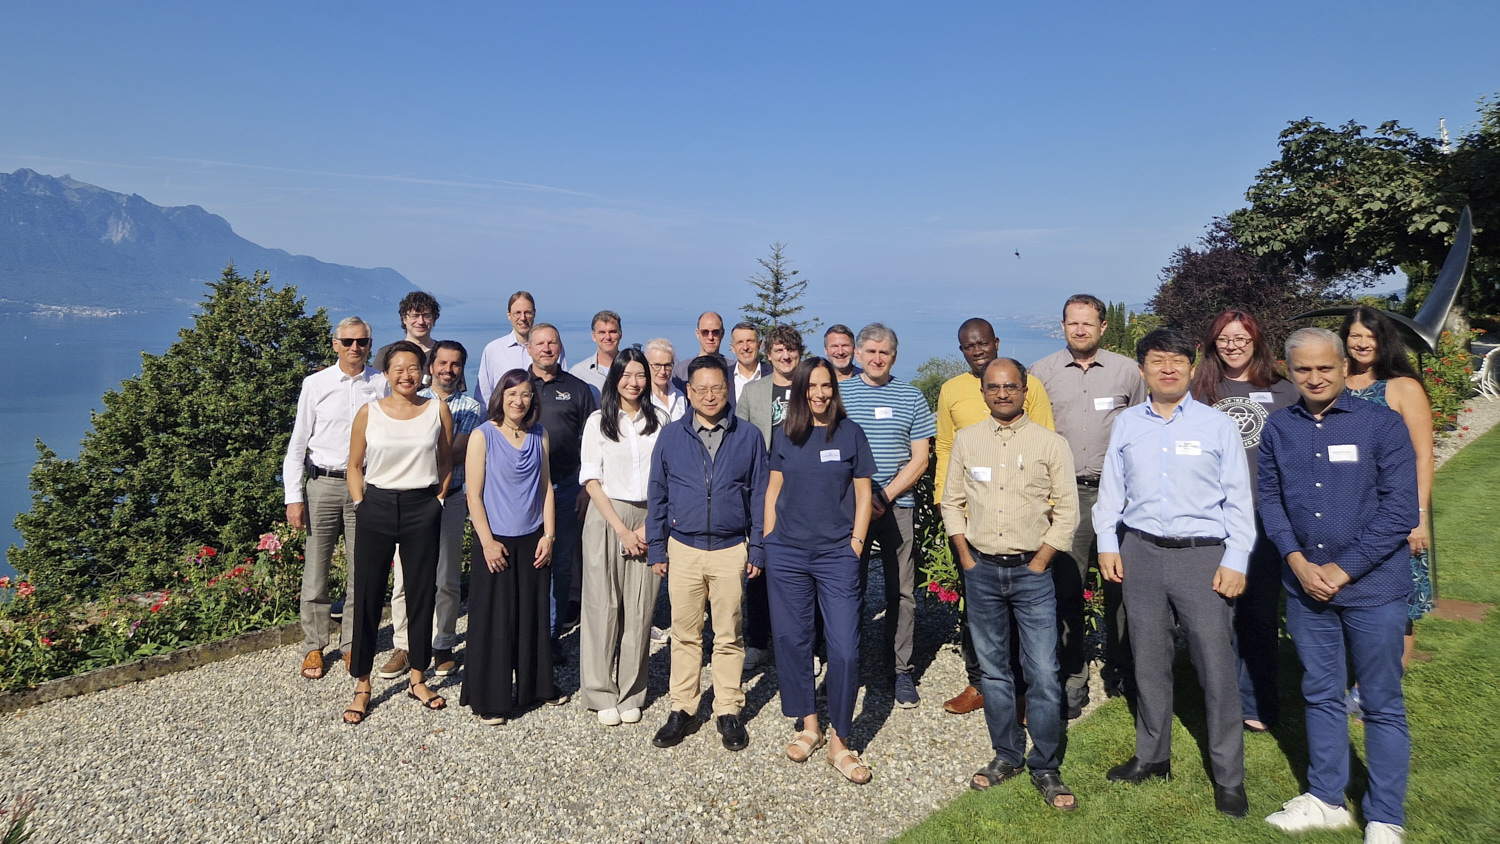
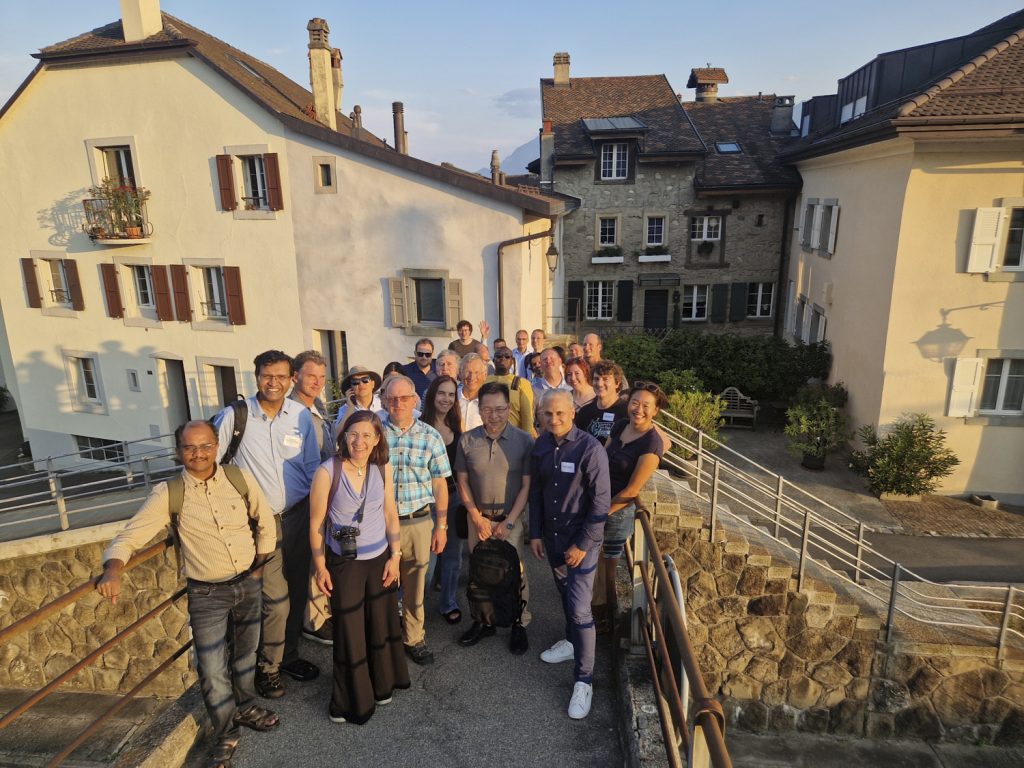
I went to Glion for the Second Annual Summit of Centers for Digital Trust, which was organized by the Center for Digital Trust at EPFL and held at the lovely Hotel Victoria. It was fun to meet center directors from around the world and compare notes.
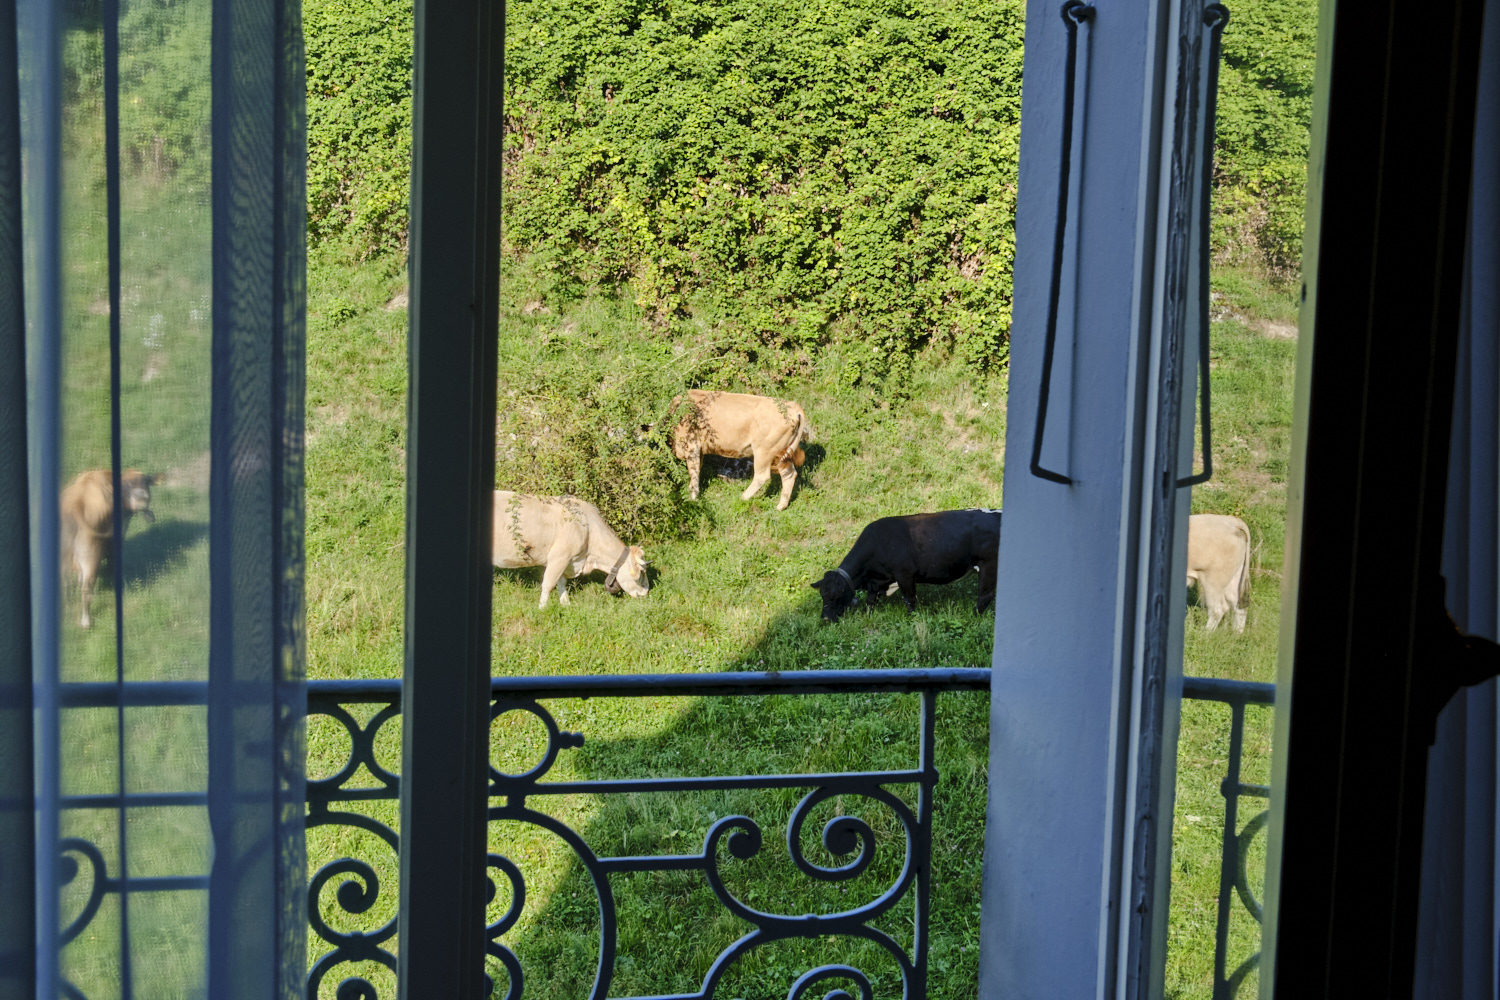
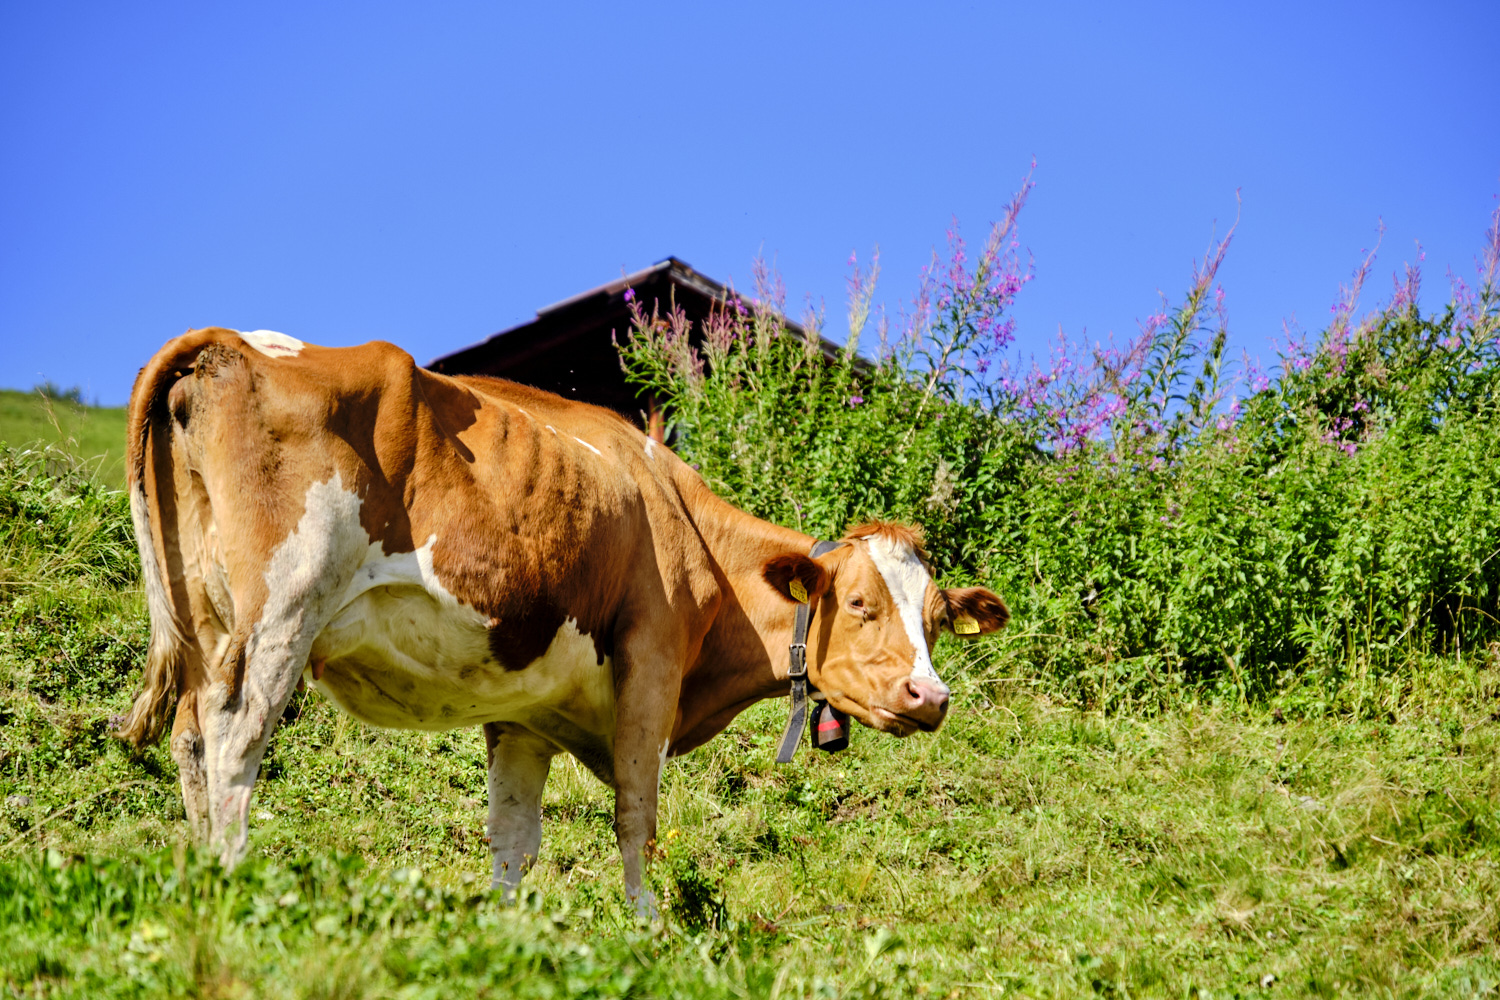
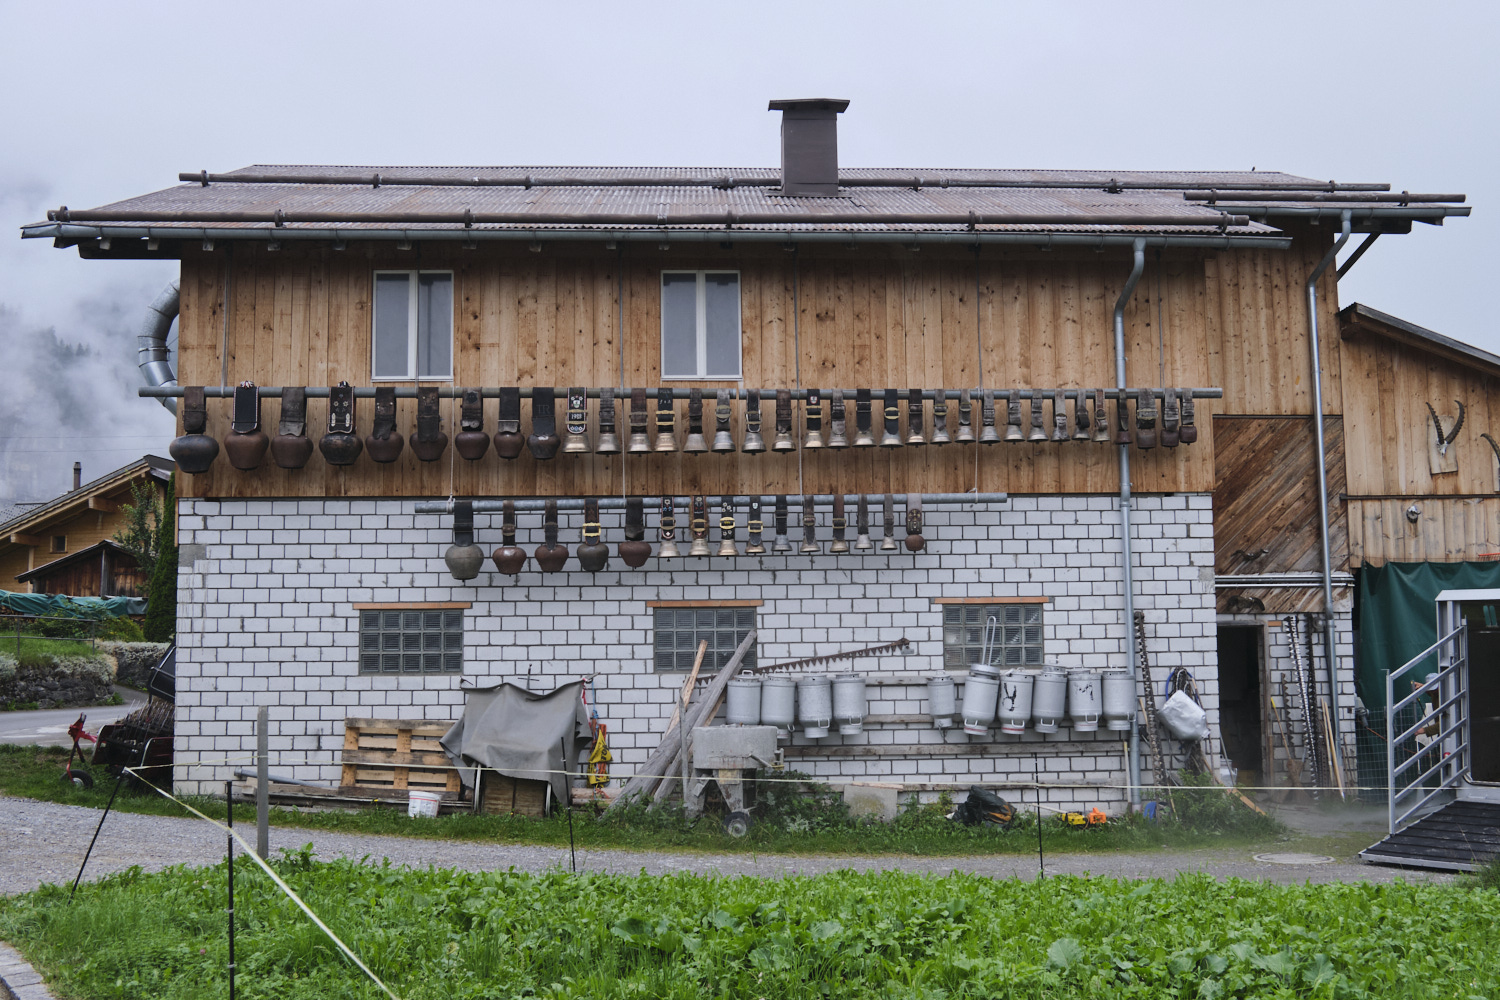
I returned to my hotel room the first day and found a small herd of cows right outside my window. That evening I discovered that cows do not actually go to sleep when it gets dark, and even when they do finally lie down, their cow bells never stop ringing (and yes, every cow in Switzerland wears a huge bell around its neck). Watch (and listen to) this very short video clip of cows outside my window! Later in the week the cows even stopped by our meeting.
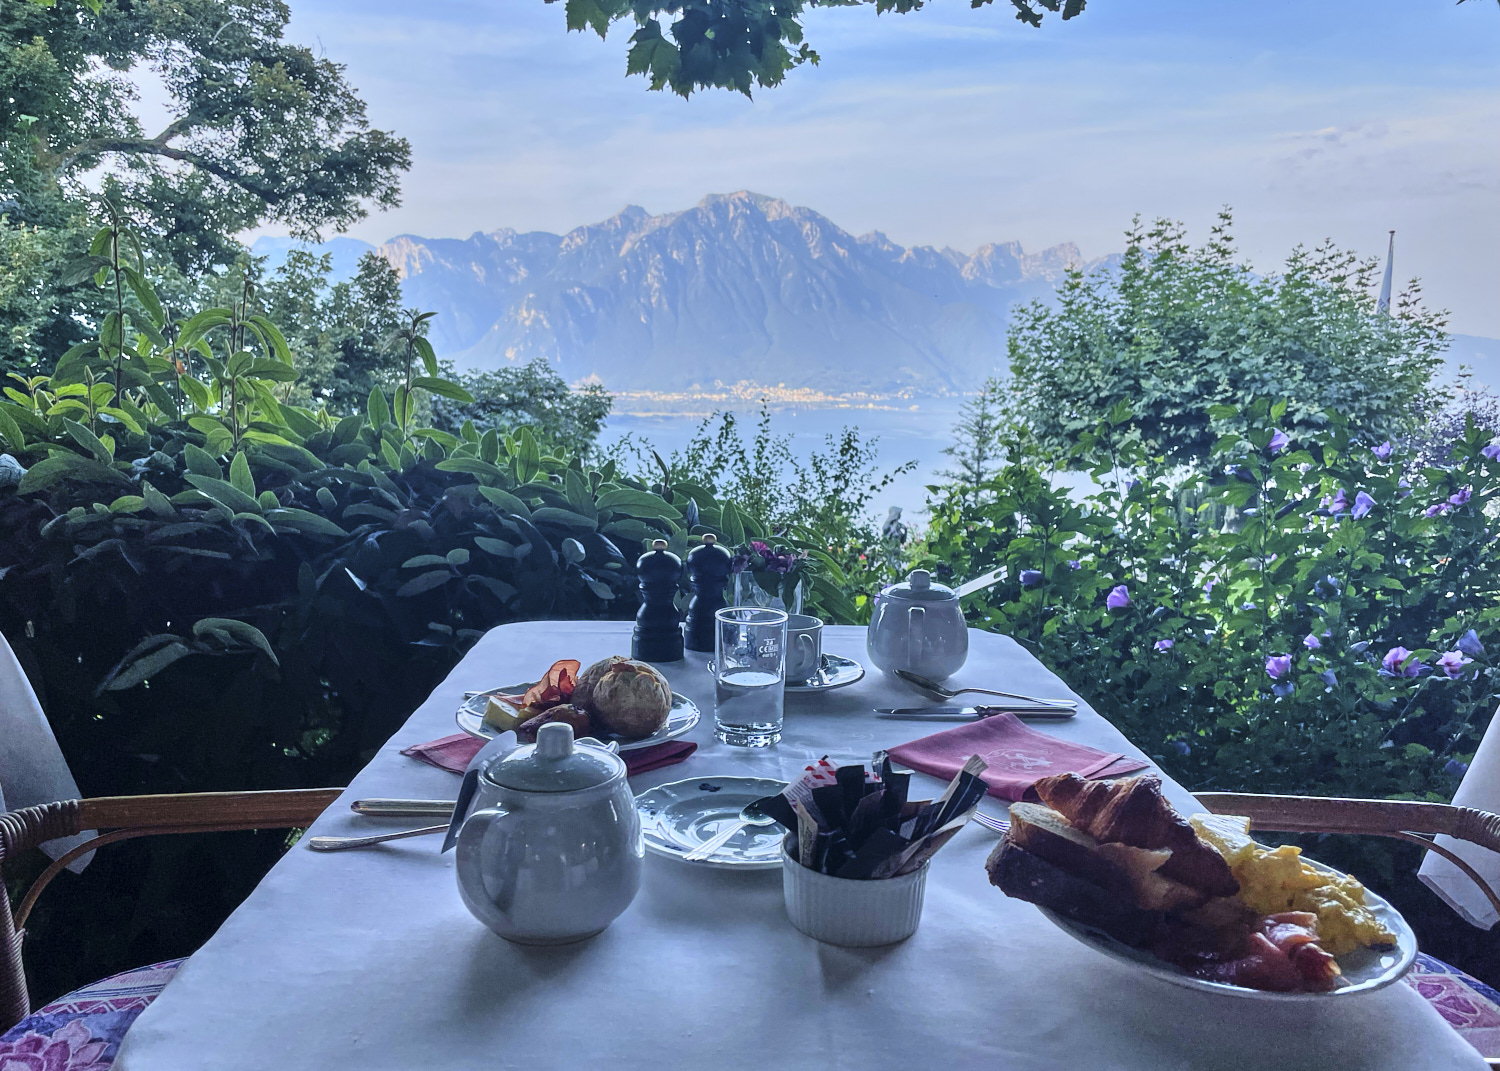
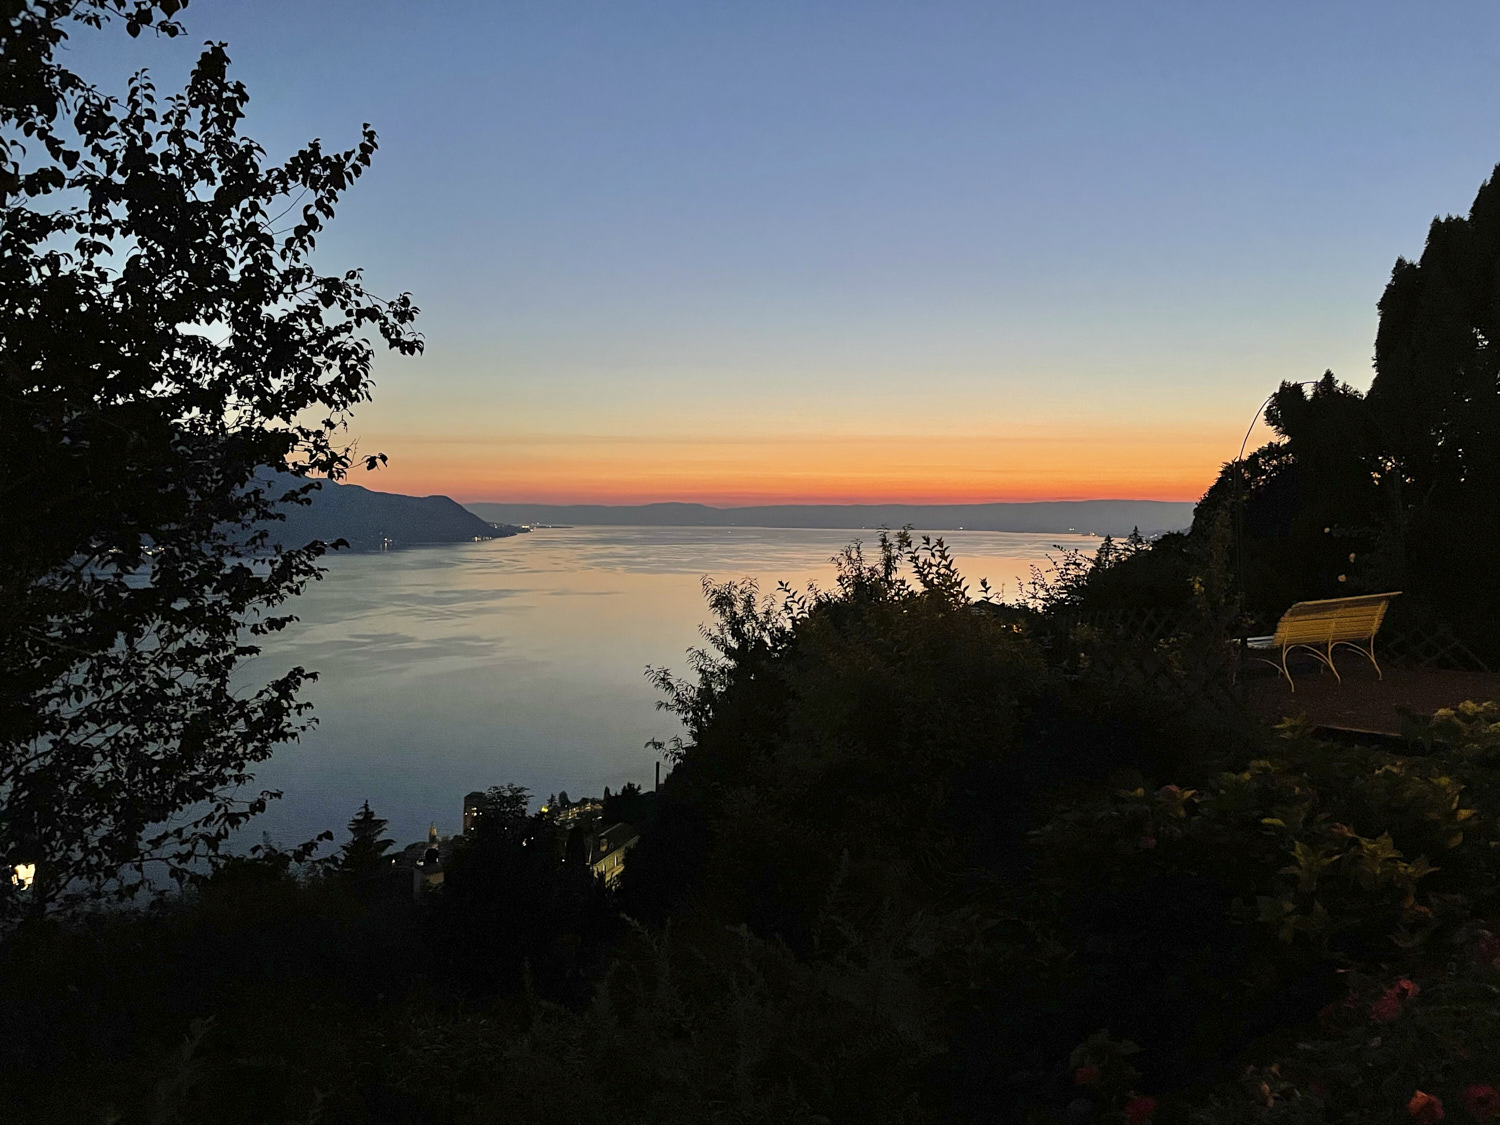
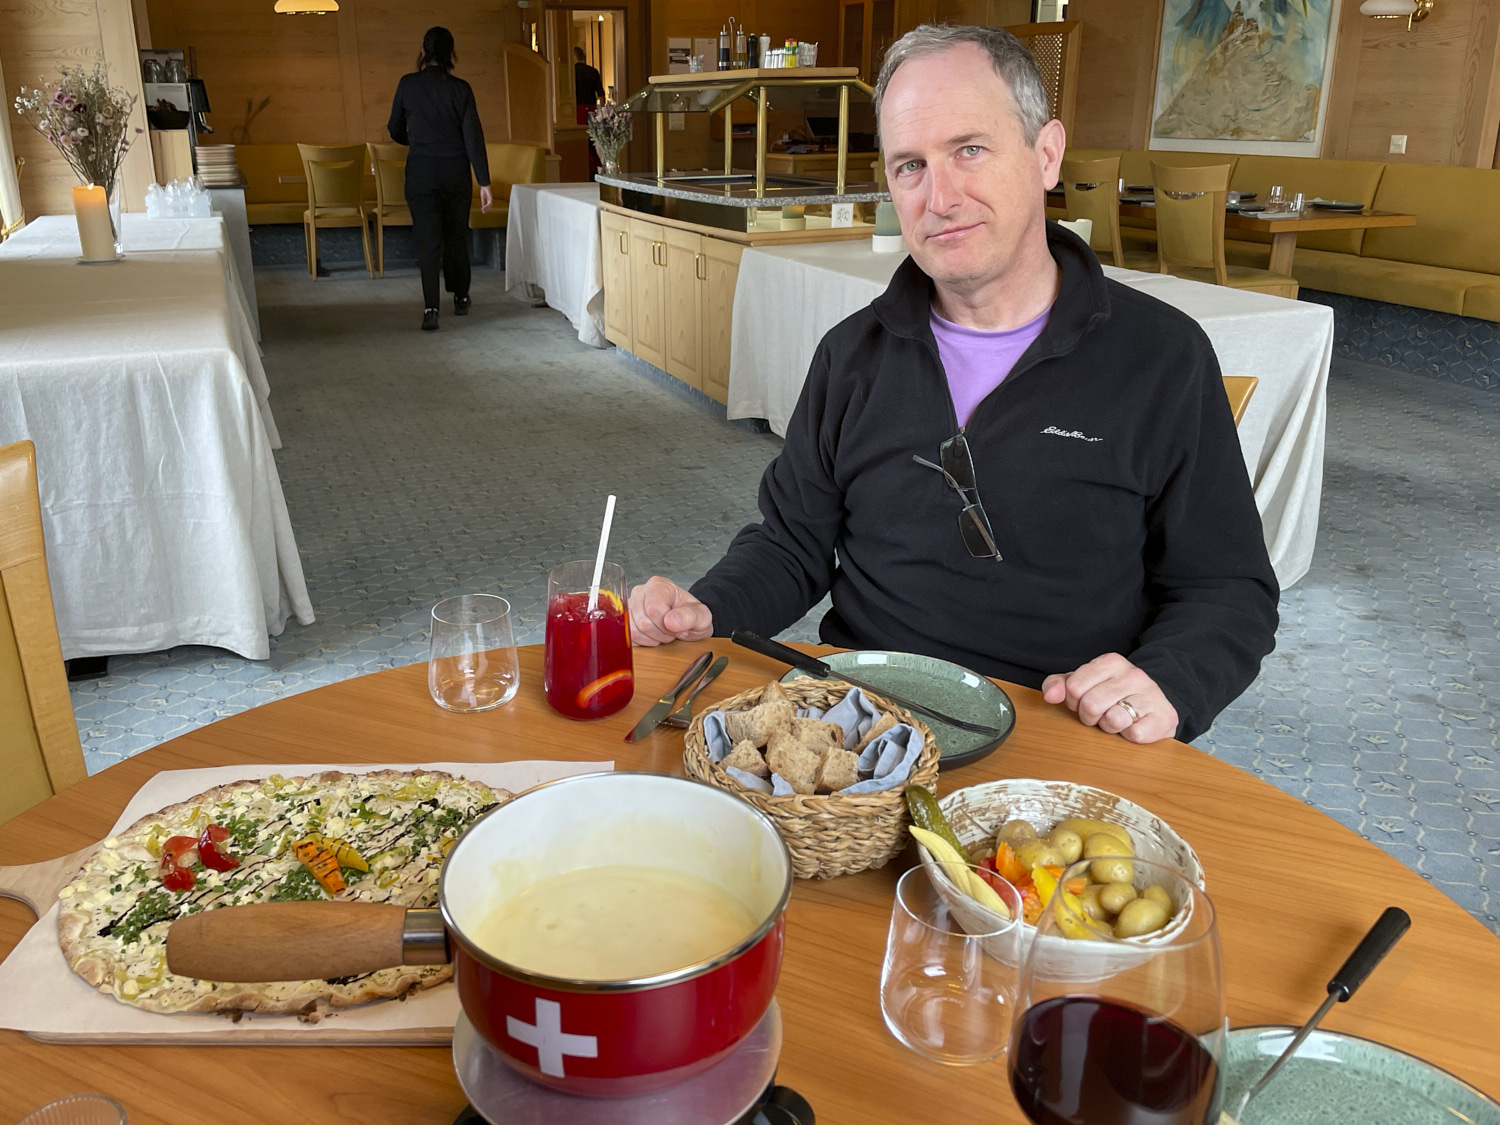
The views from Hotel Victoria were beautiful day and night and the chalet where we held most of our discussions was quite charming. The weather was perfect and we had all of our meals on the hotel’s covered patio. The food was great and lunch was served in three courses, with wine.
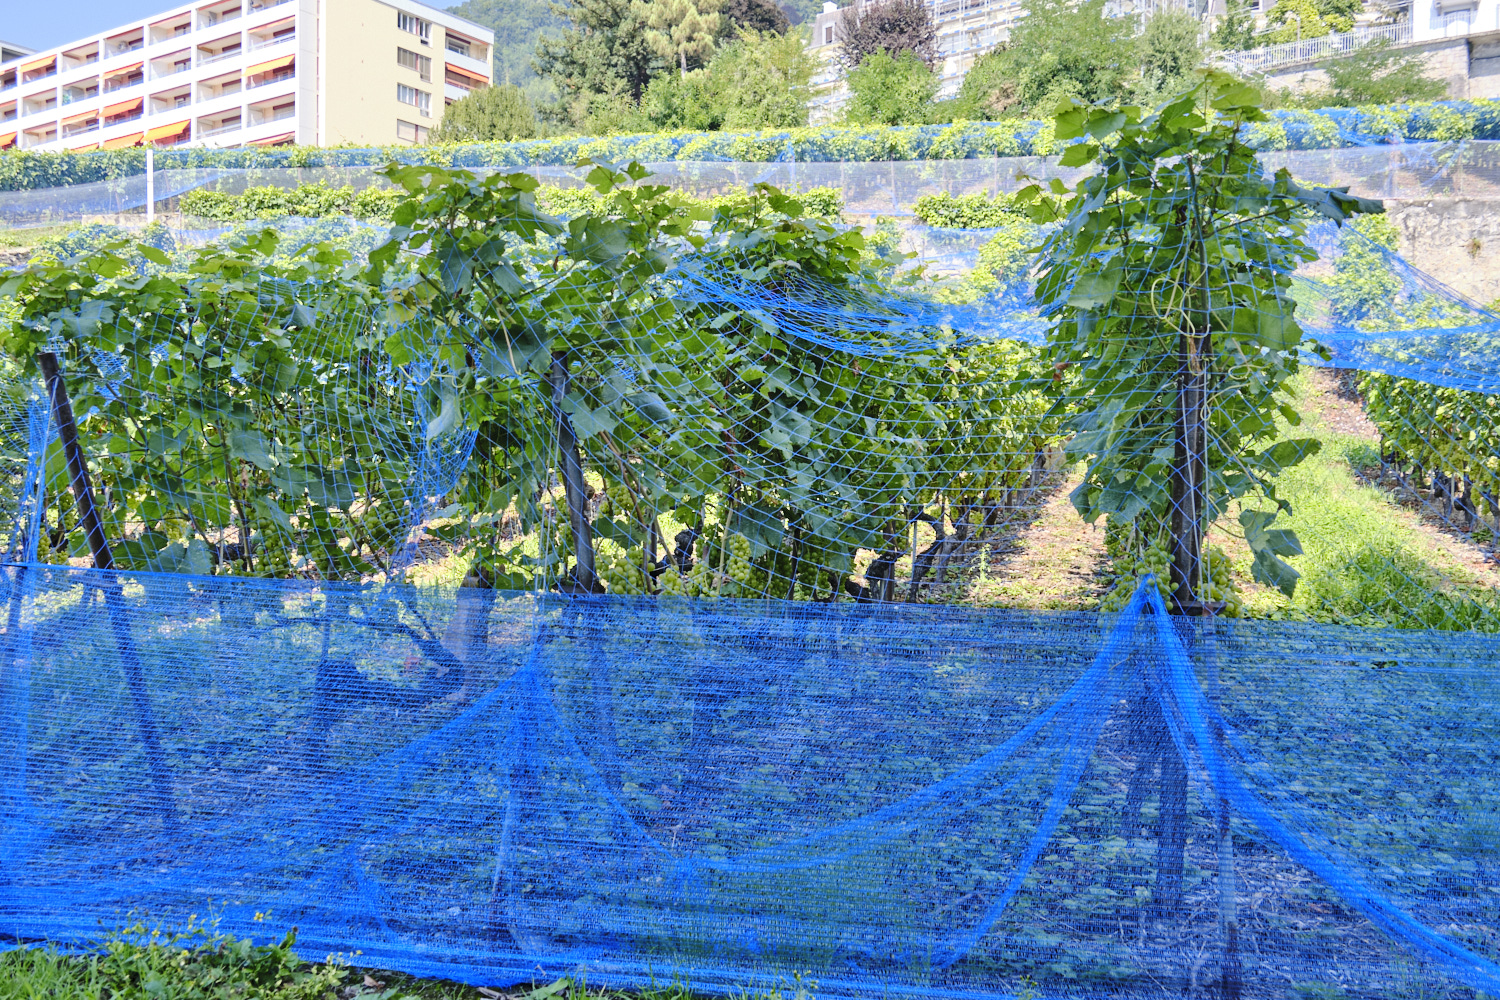
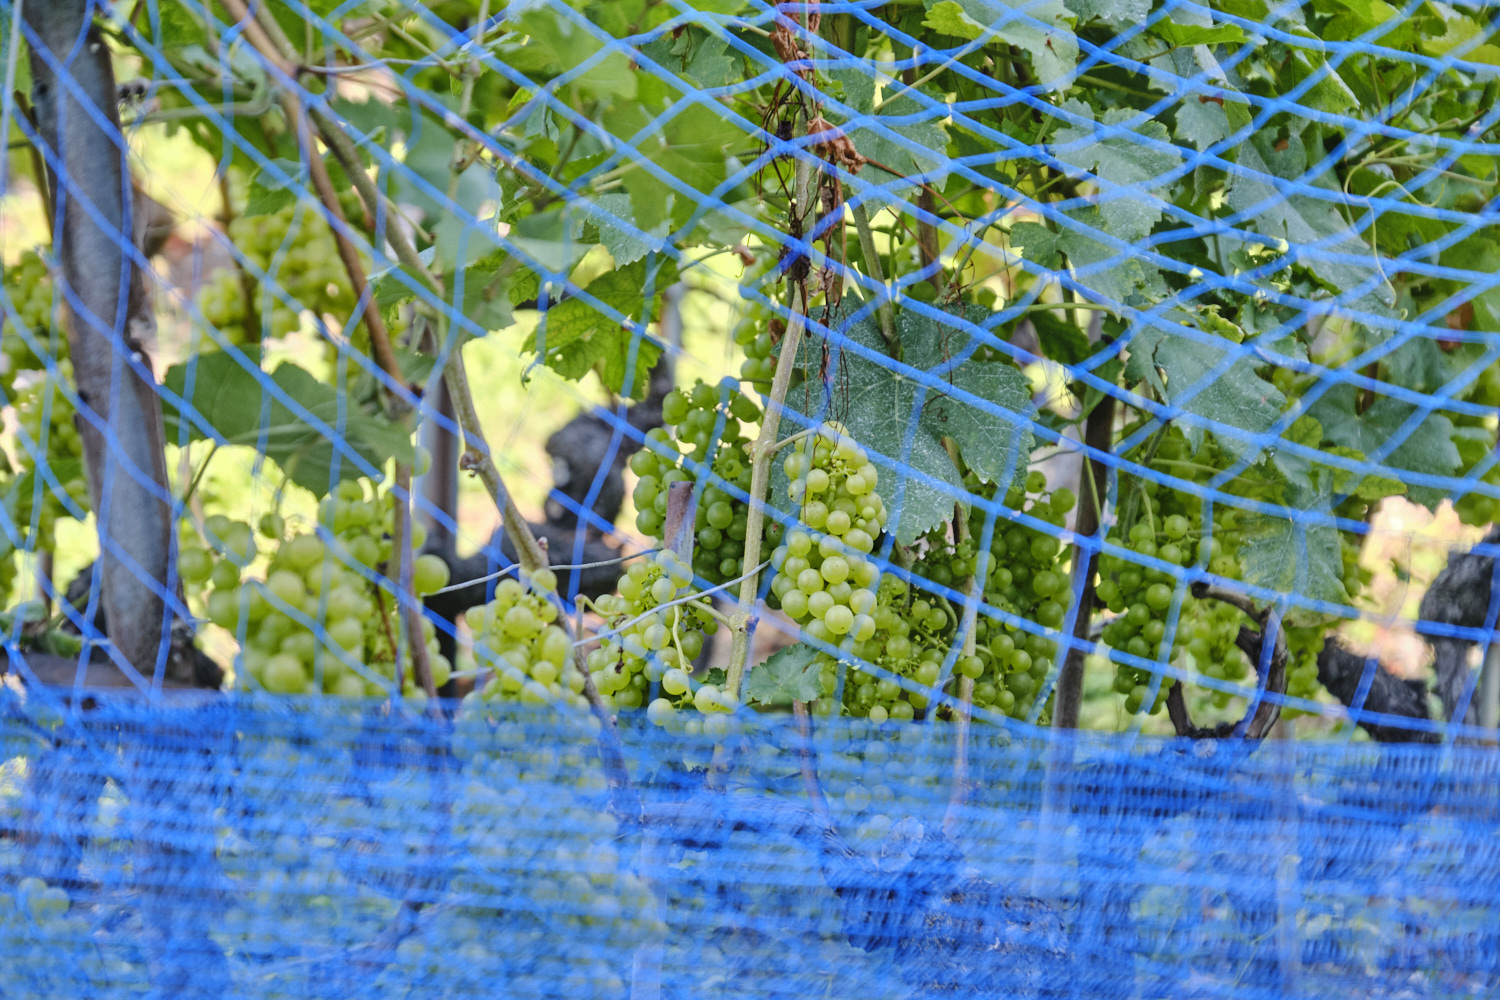
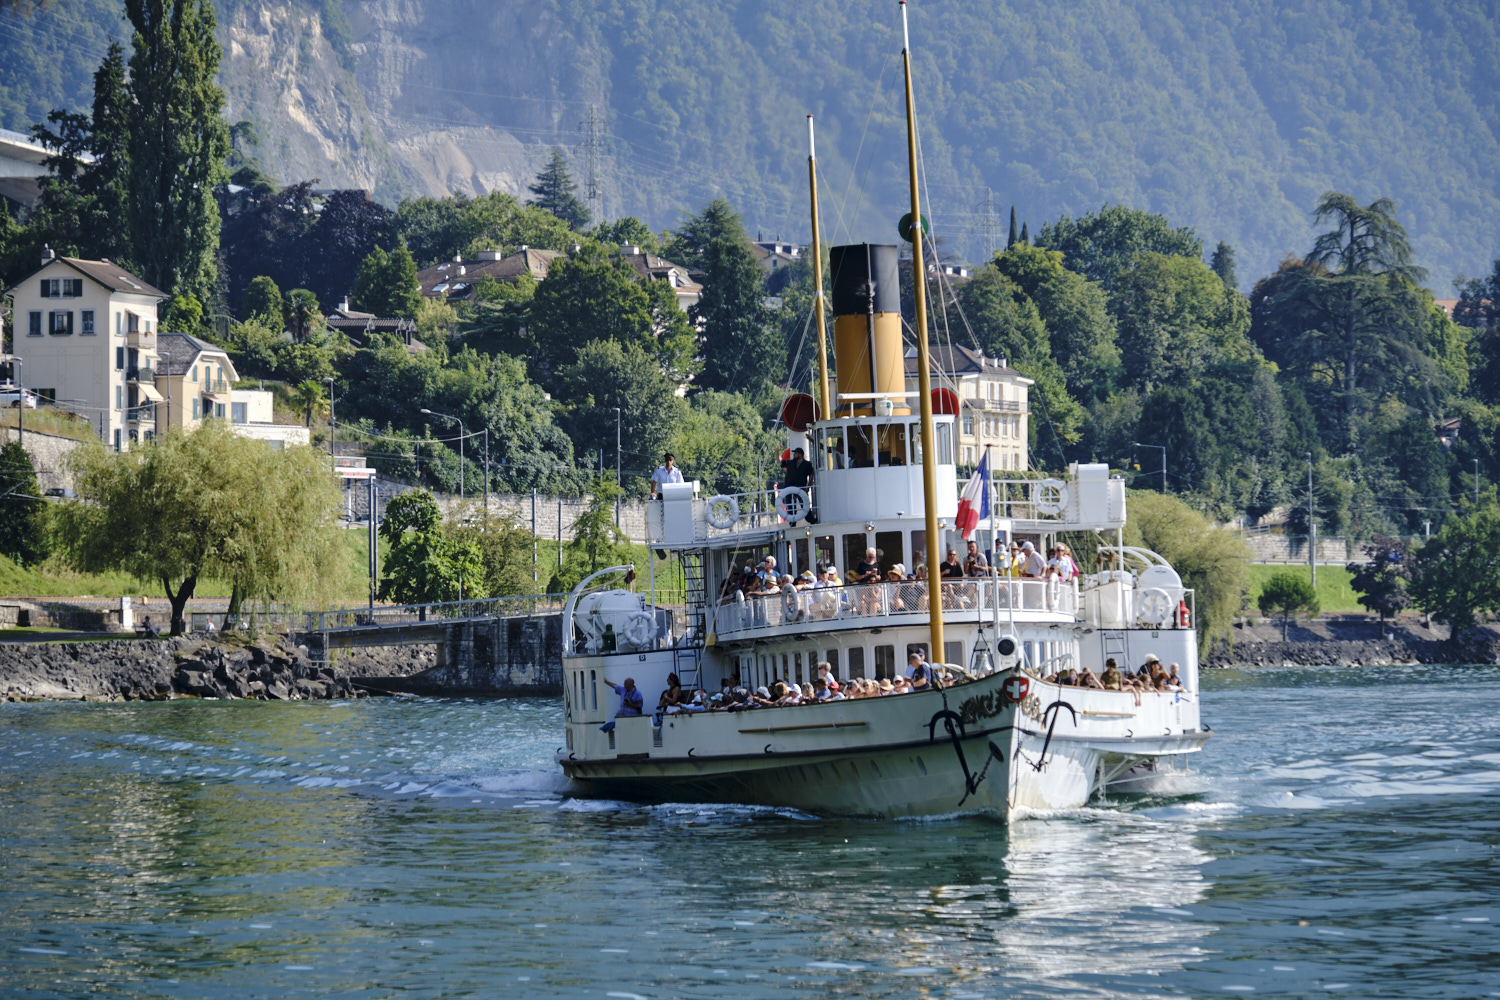
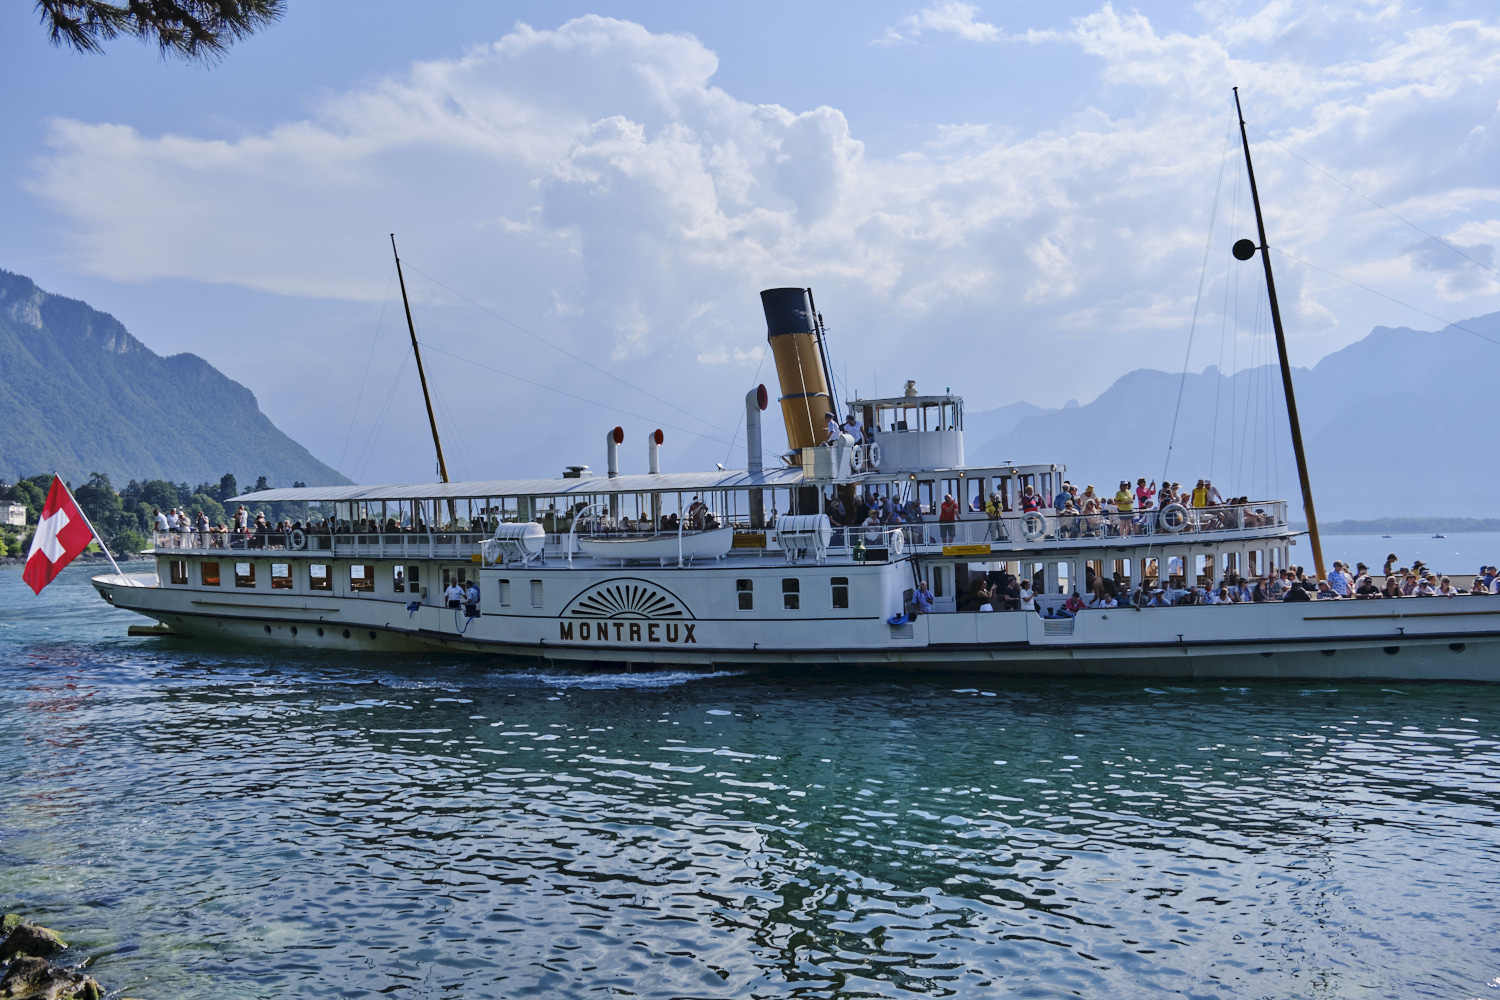
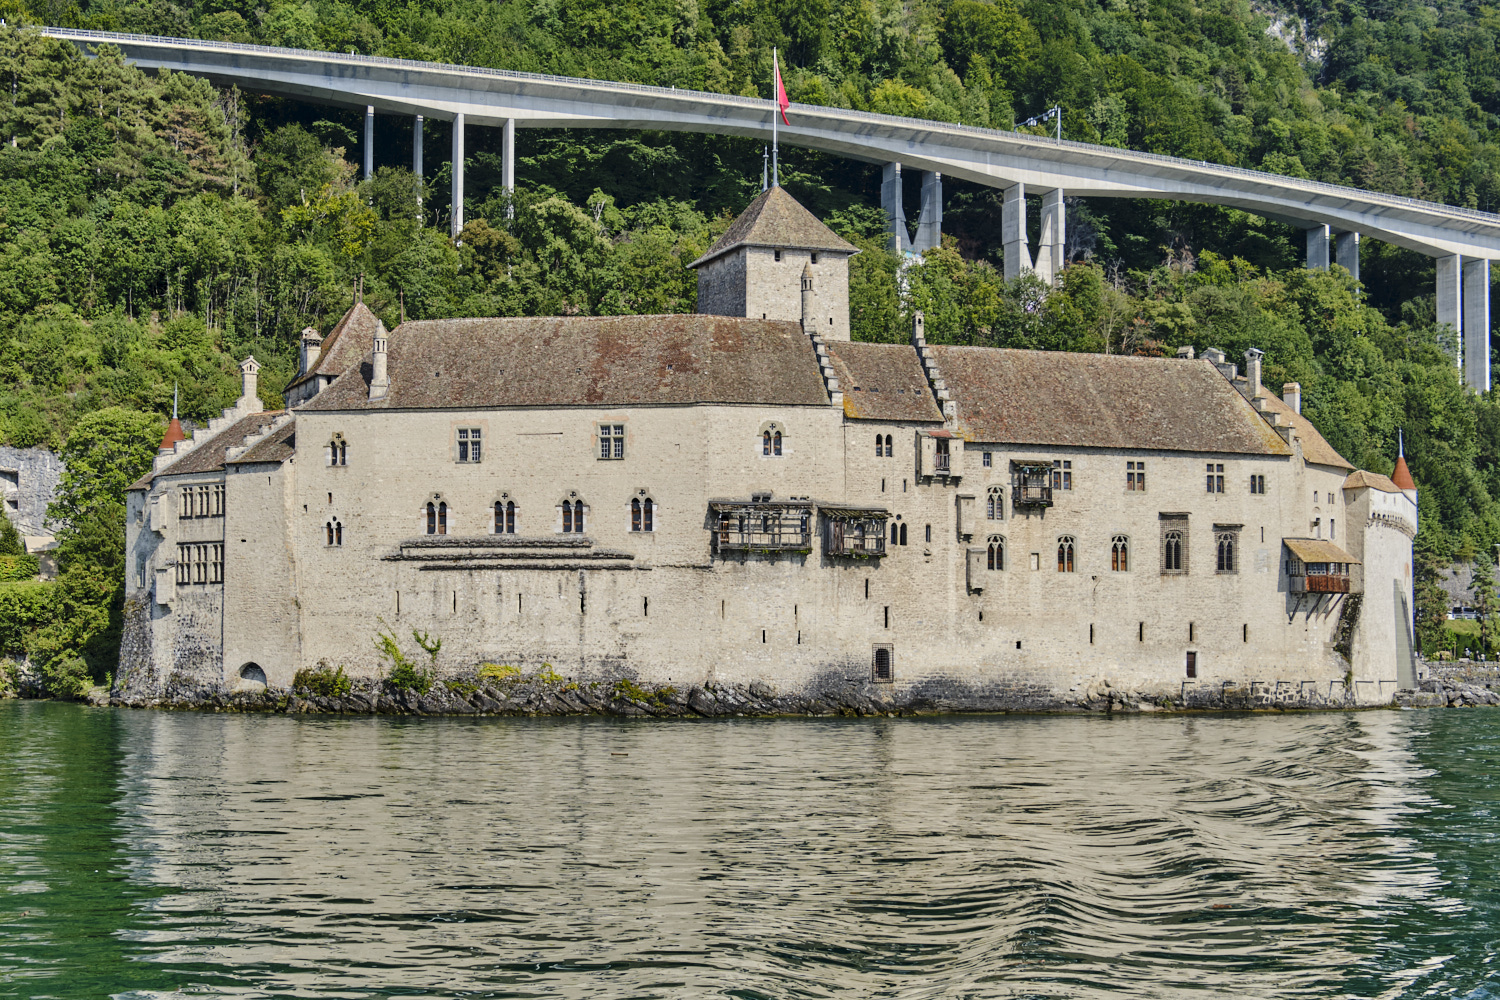
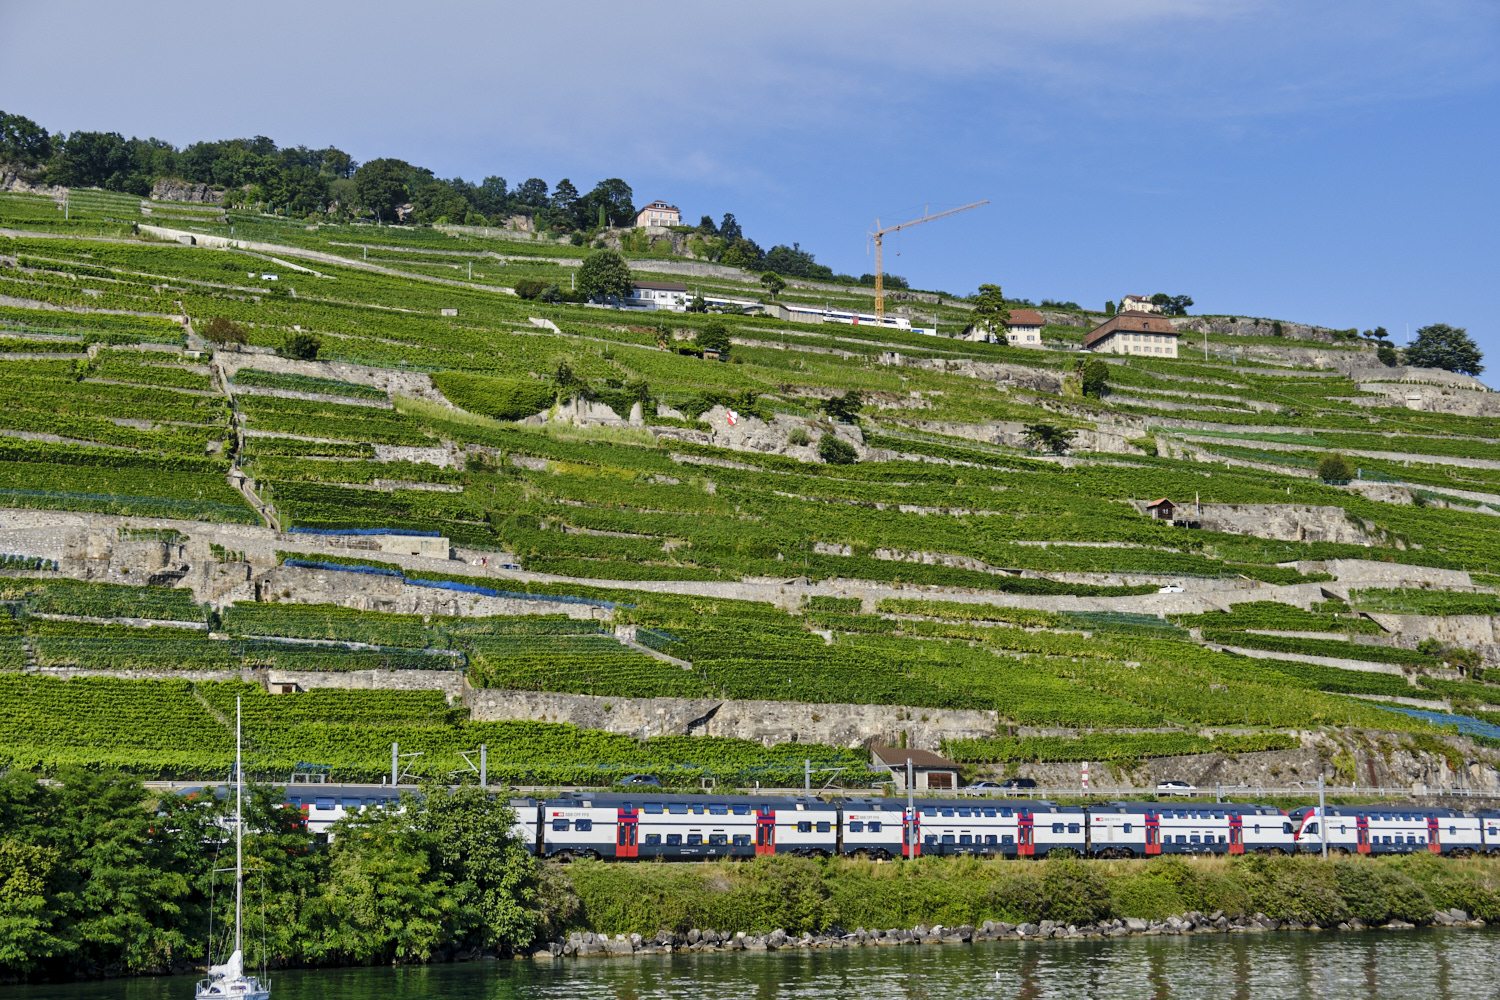
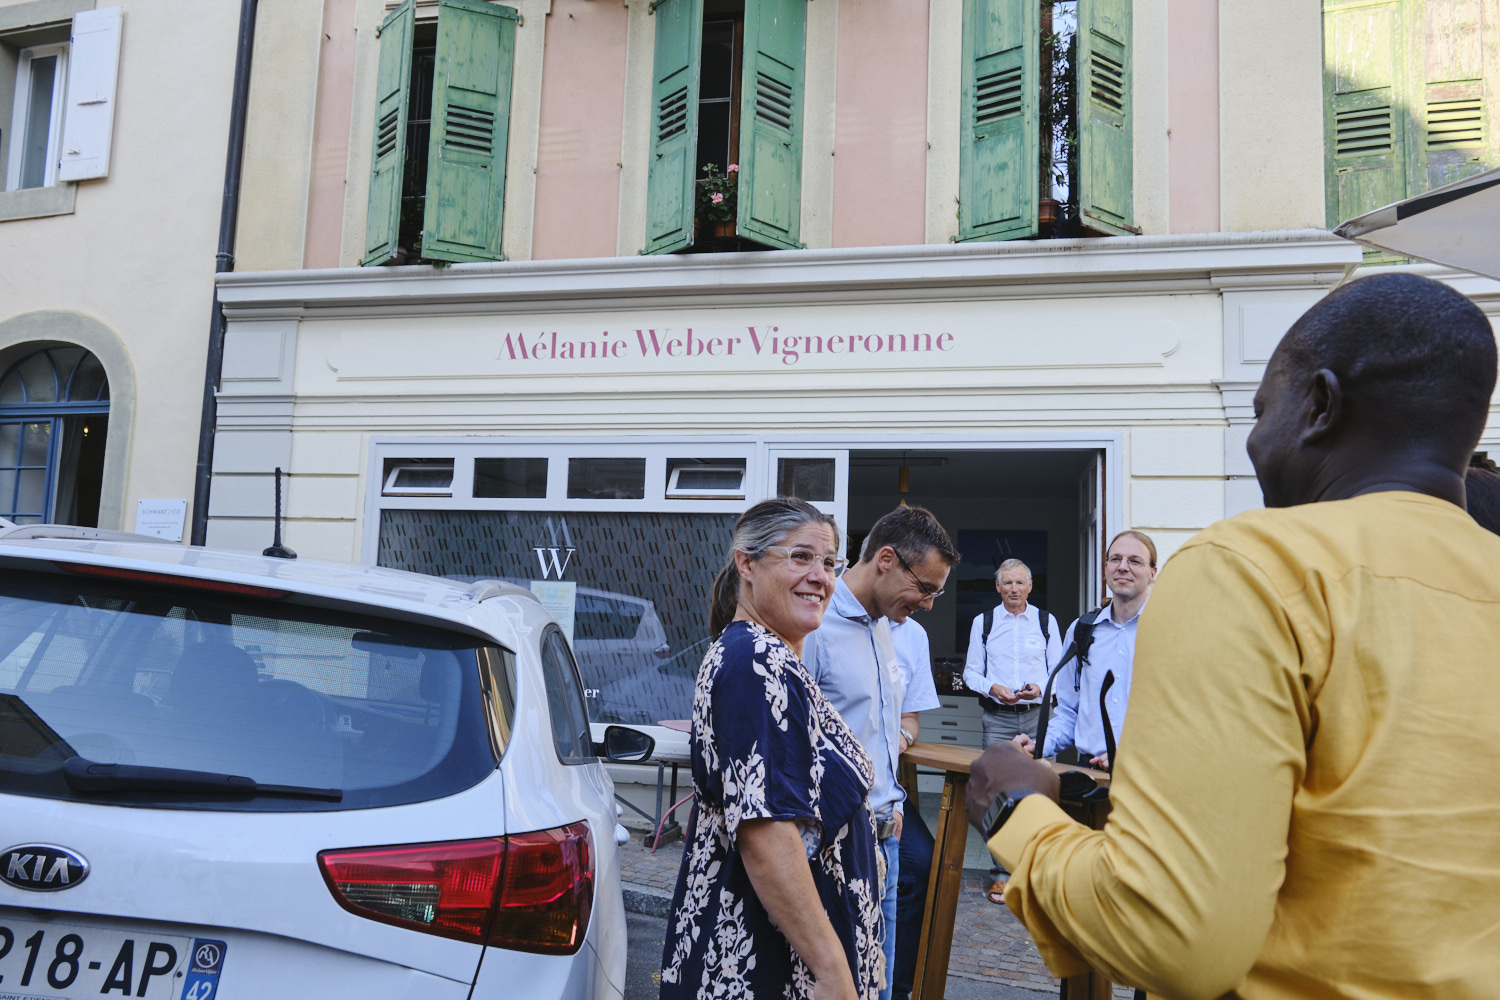
The Summit’s main social event was a trip via funicular and boat ride from Montreaux to Cully, where we visited a woman-owned winery and had dinner at a wonderful restaurant by the train station. This (and many other wineries in the area) uses grapes grown on the mountainside lining Lake Geneva. Our boat left from a port near Chillon Castle, a medieval castle.
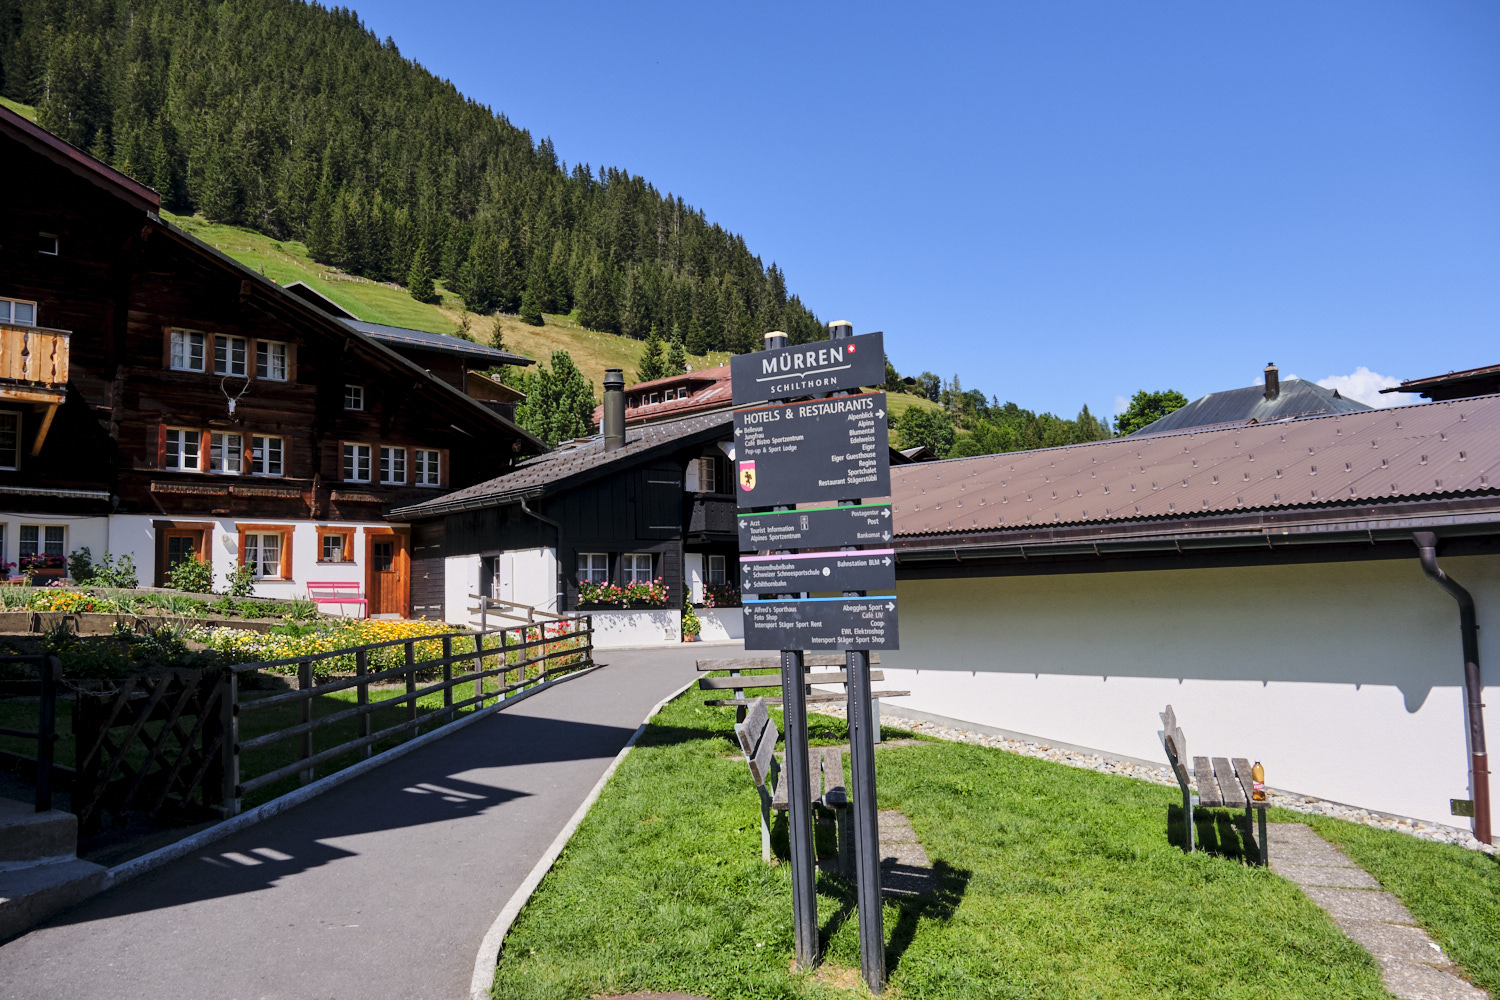
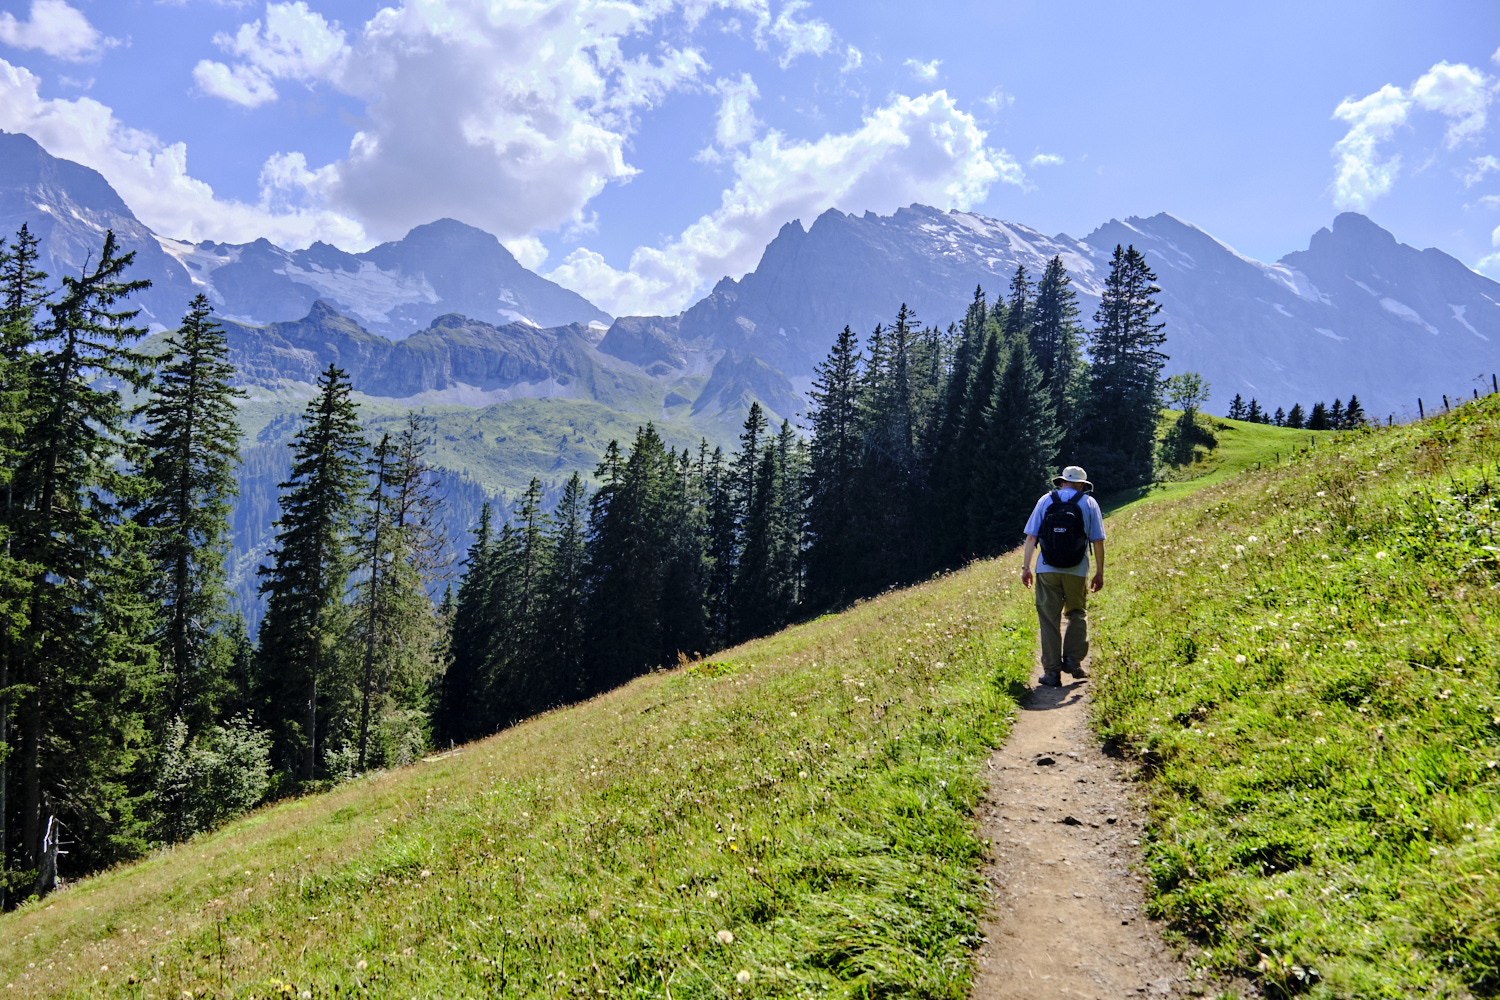
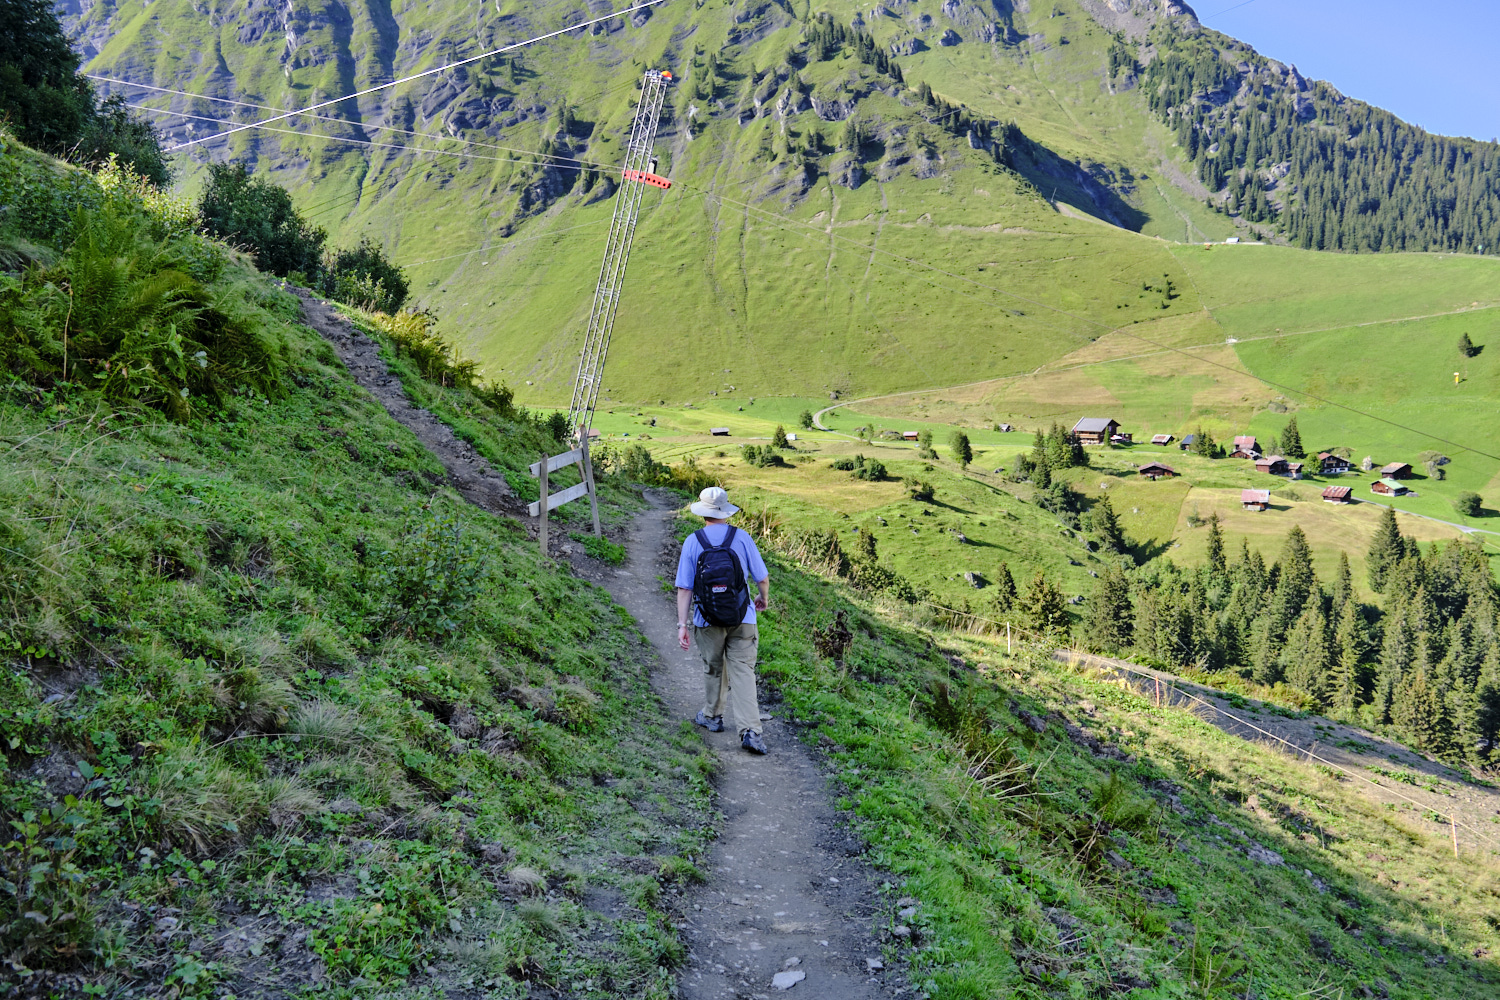
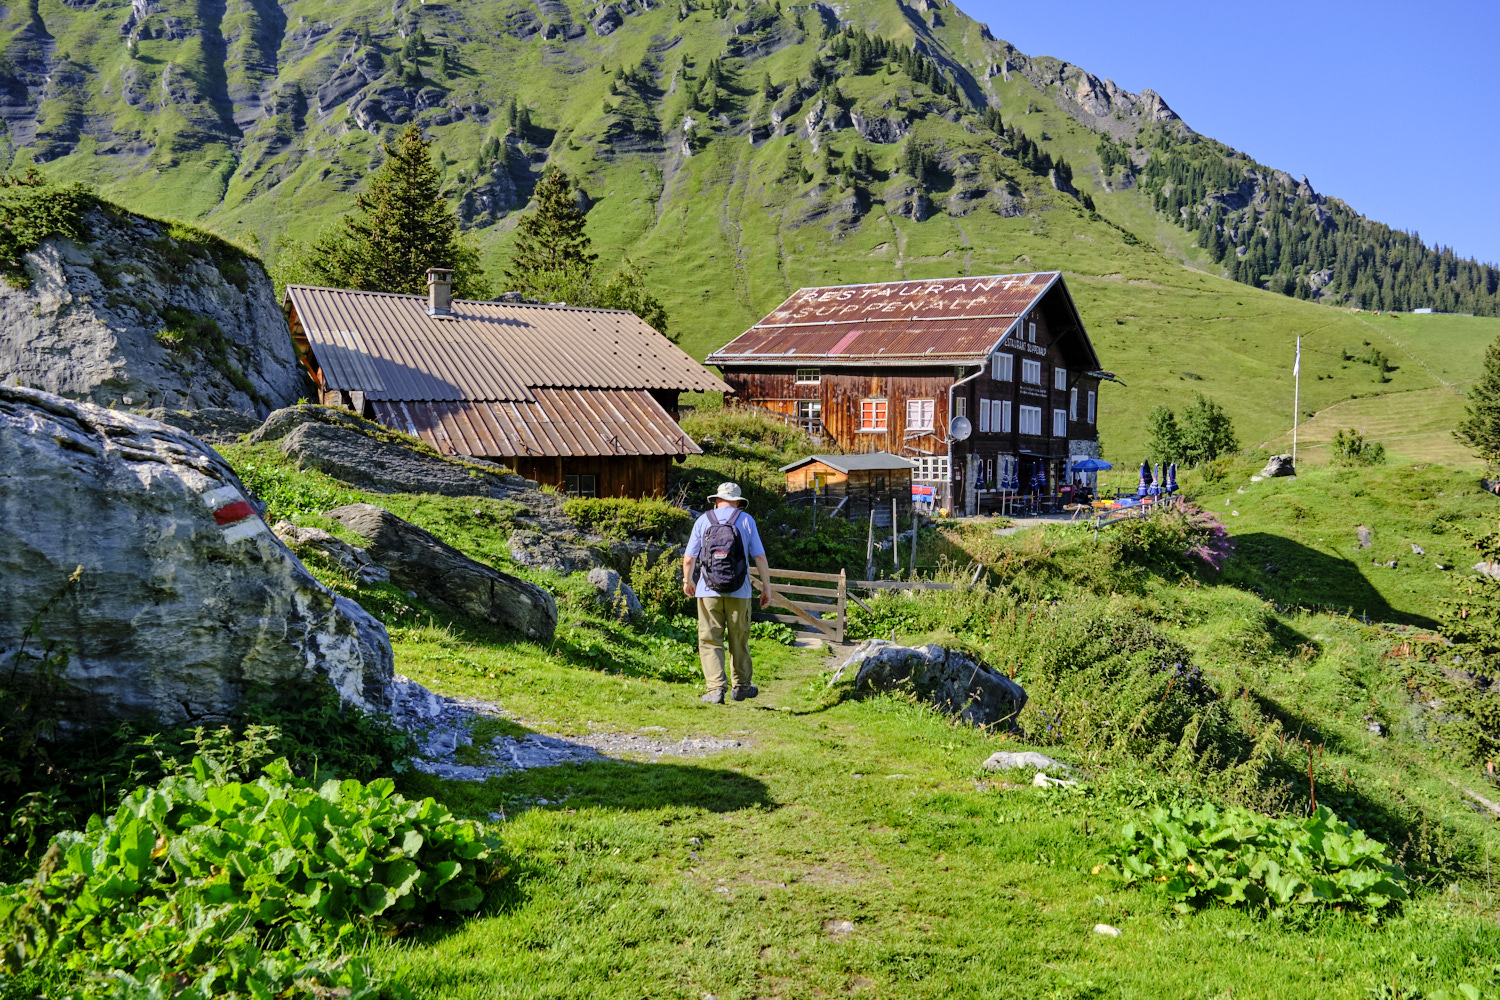
After arriving in Mürren, we walked around the town before heading out on the “Northface trail,” an easy loop hike that was supposed to take about 2.5 hours. Earth Trekkers recommended the clockwise direction and closing the loop with a ride on the Allmendhubel funicular to avoid a final steep decent.
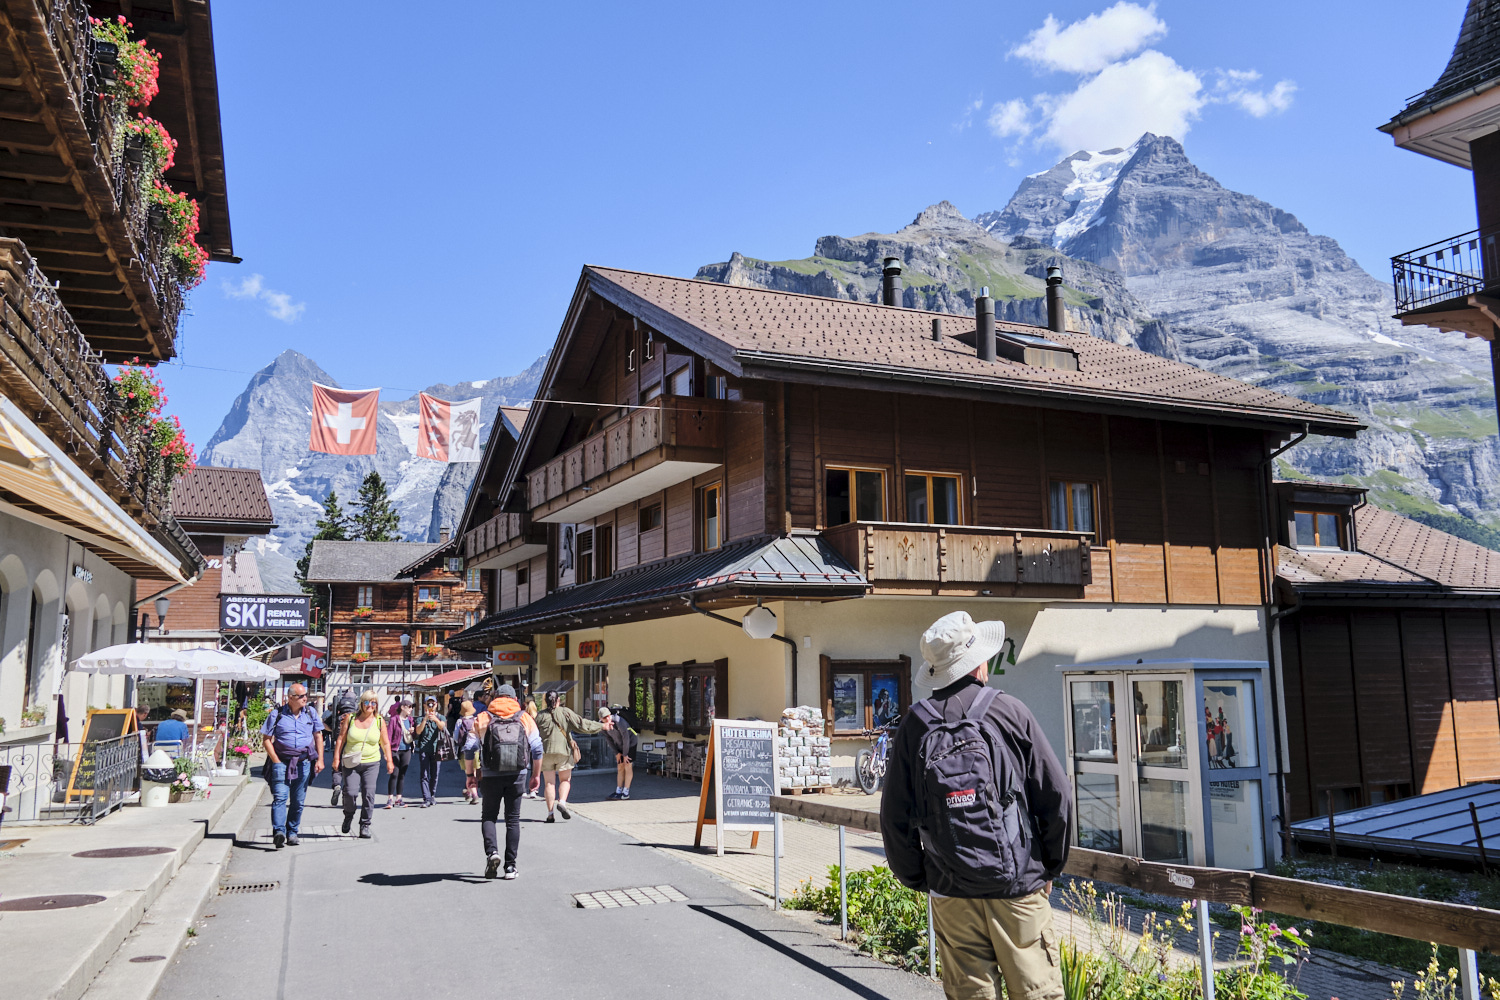
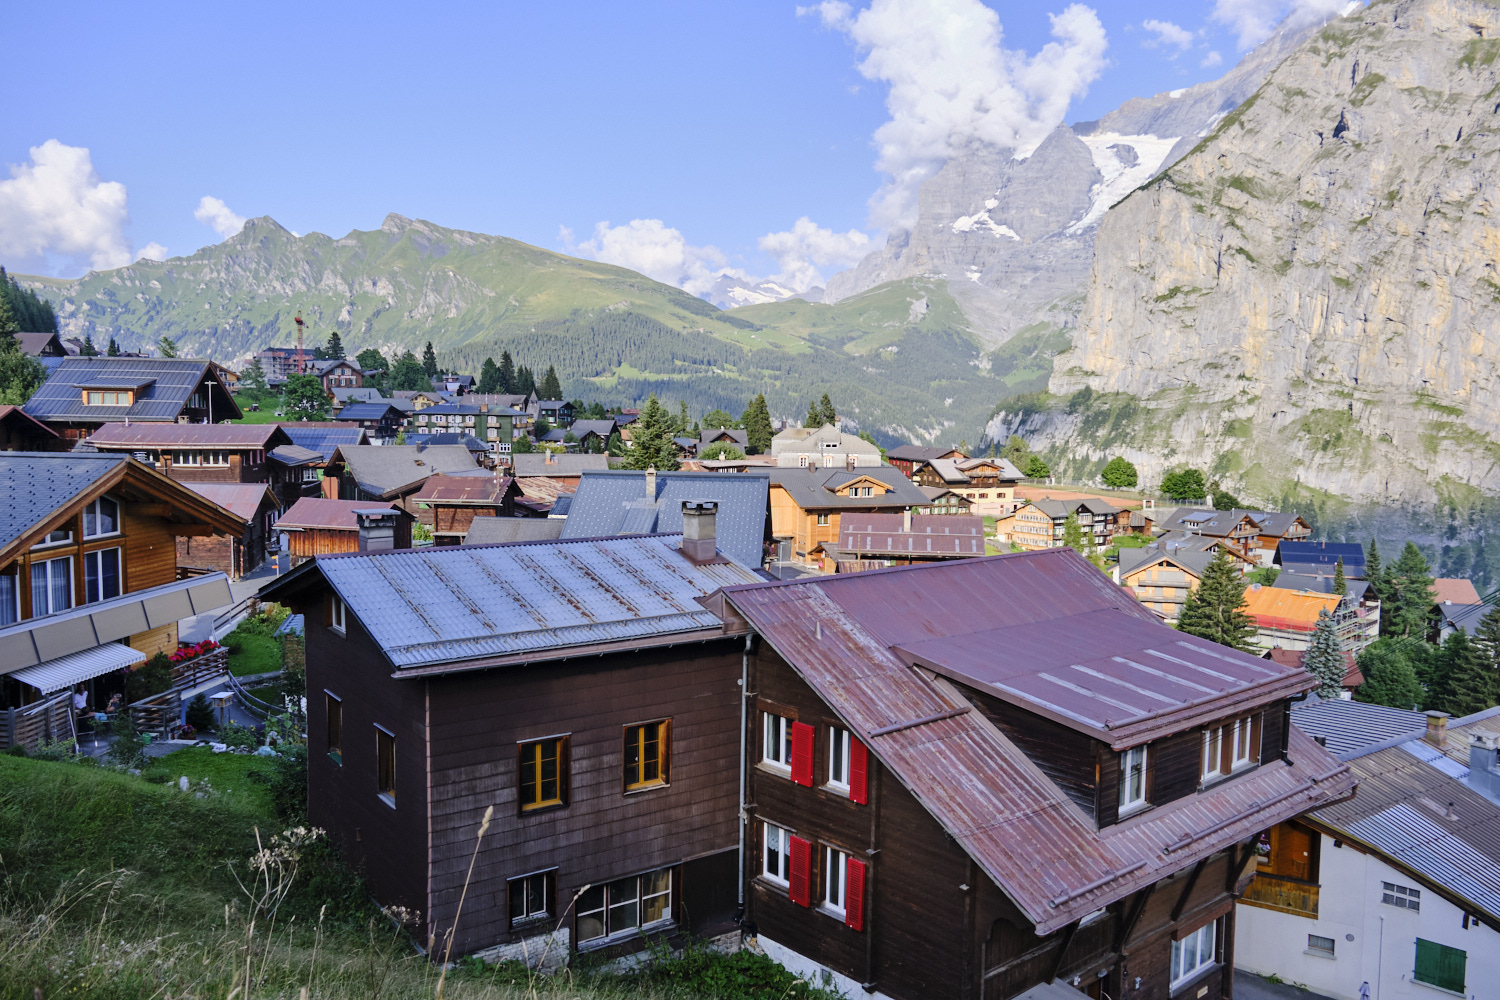
Mürren is a cute, but touristy, town with good views of the mountains everywhere. (The umlaut on the u in Mürren made searching for it on the transit app with my US keyboard difficult until I cut and pasted the word from a website and then had it in my list of recent searches.)
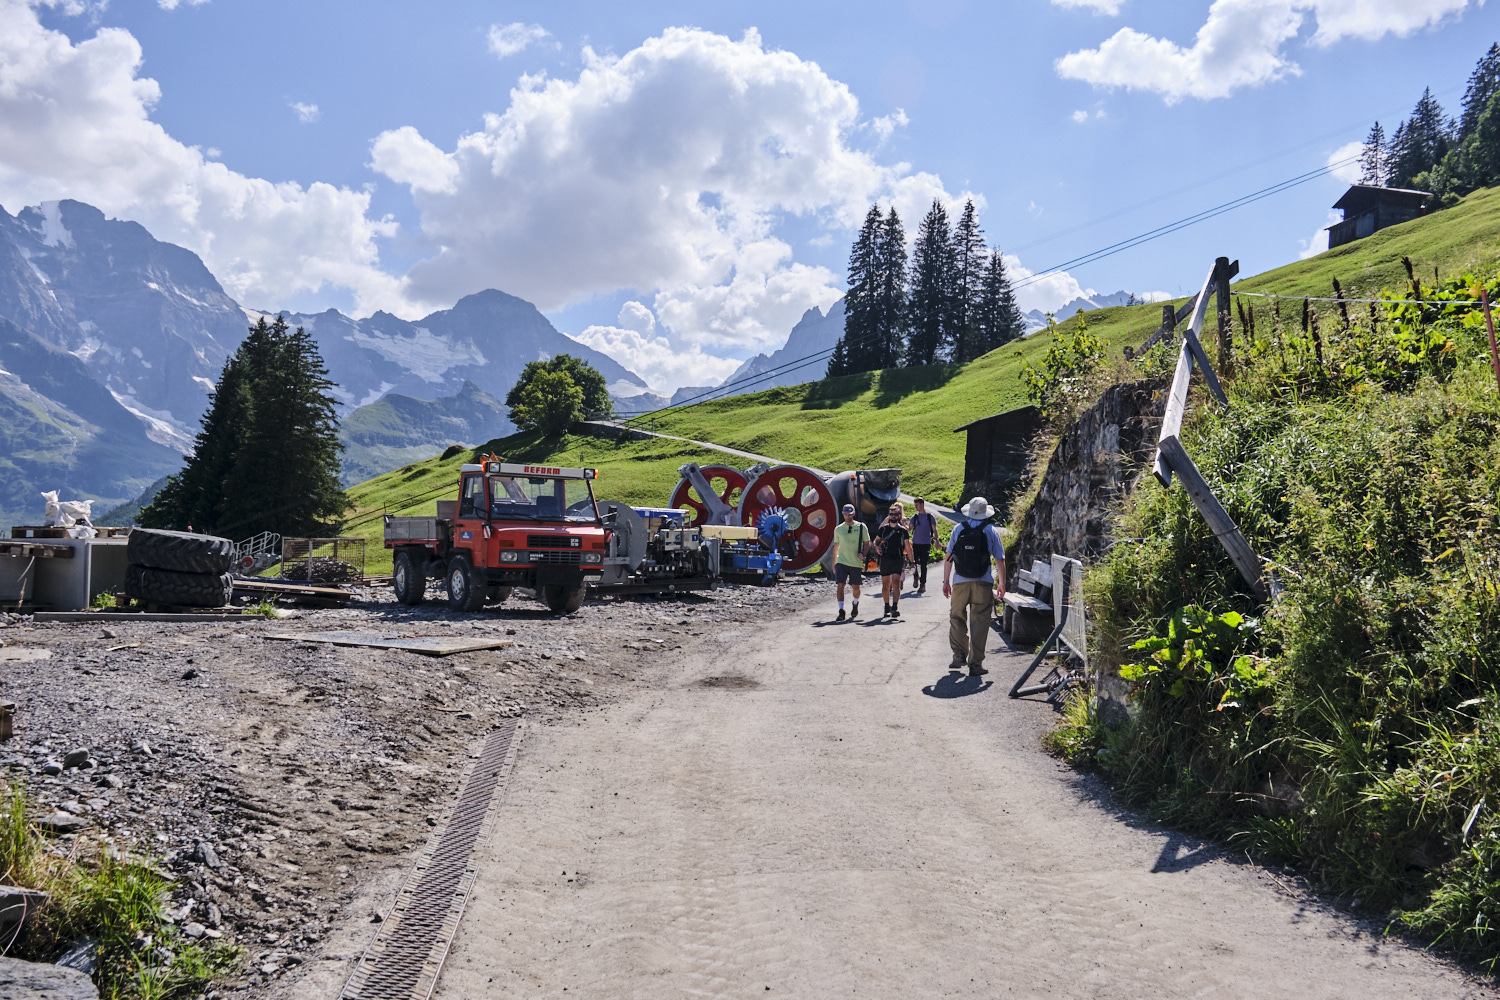
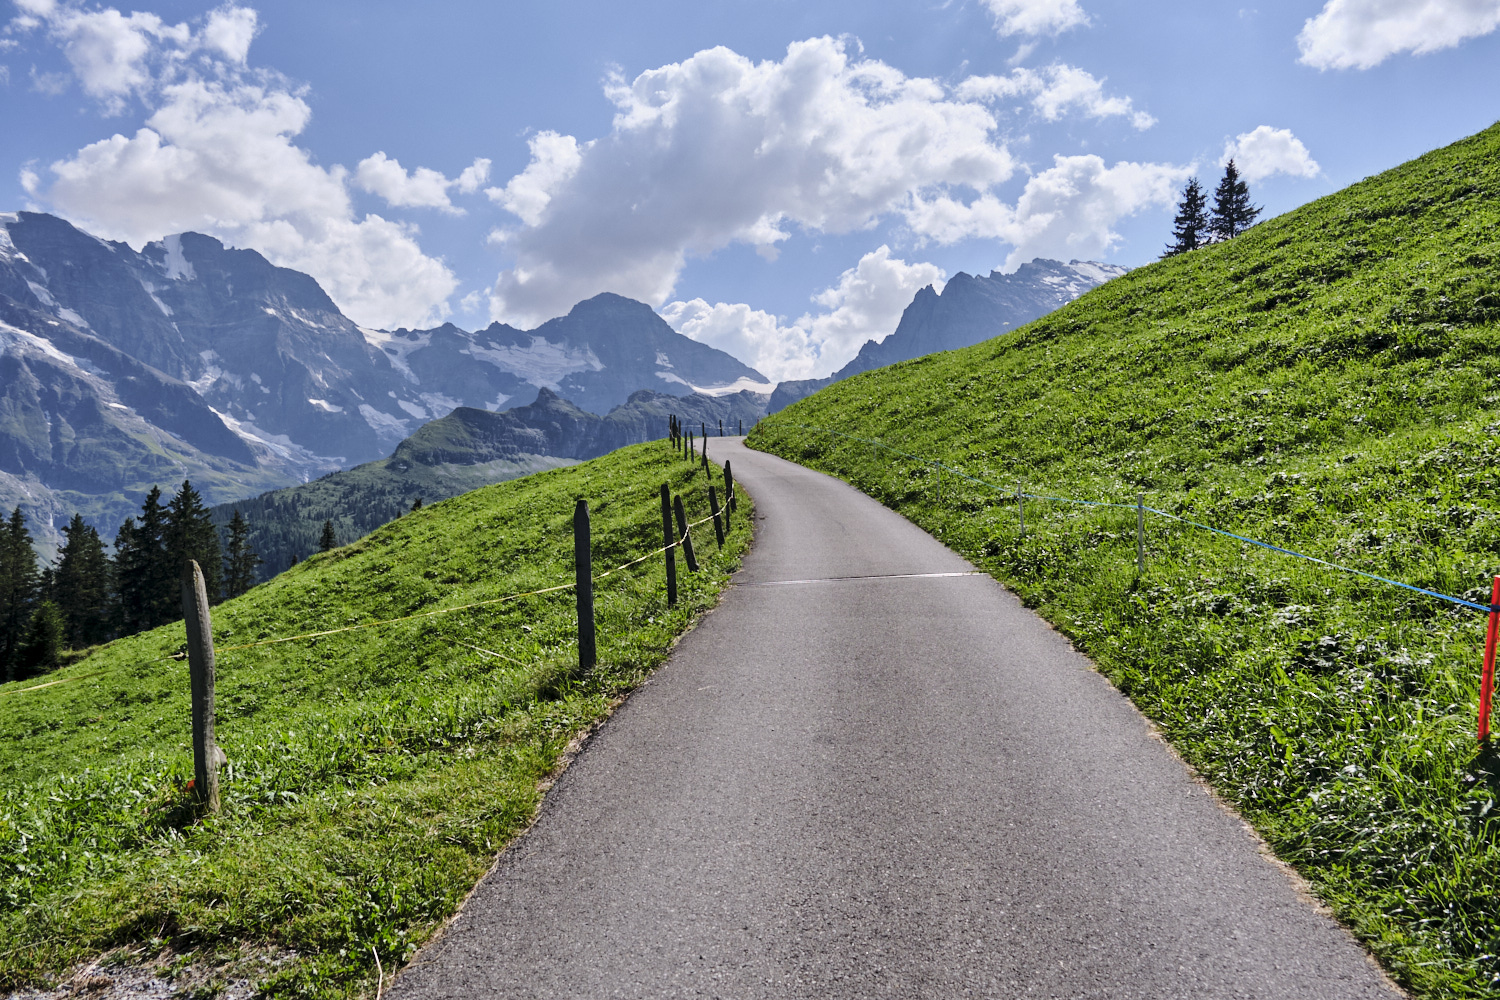
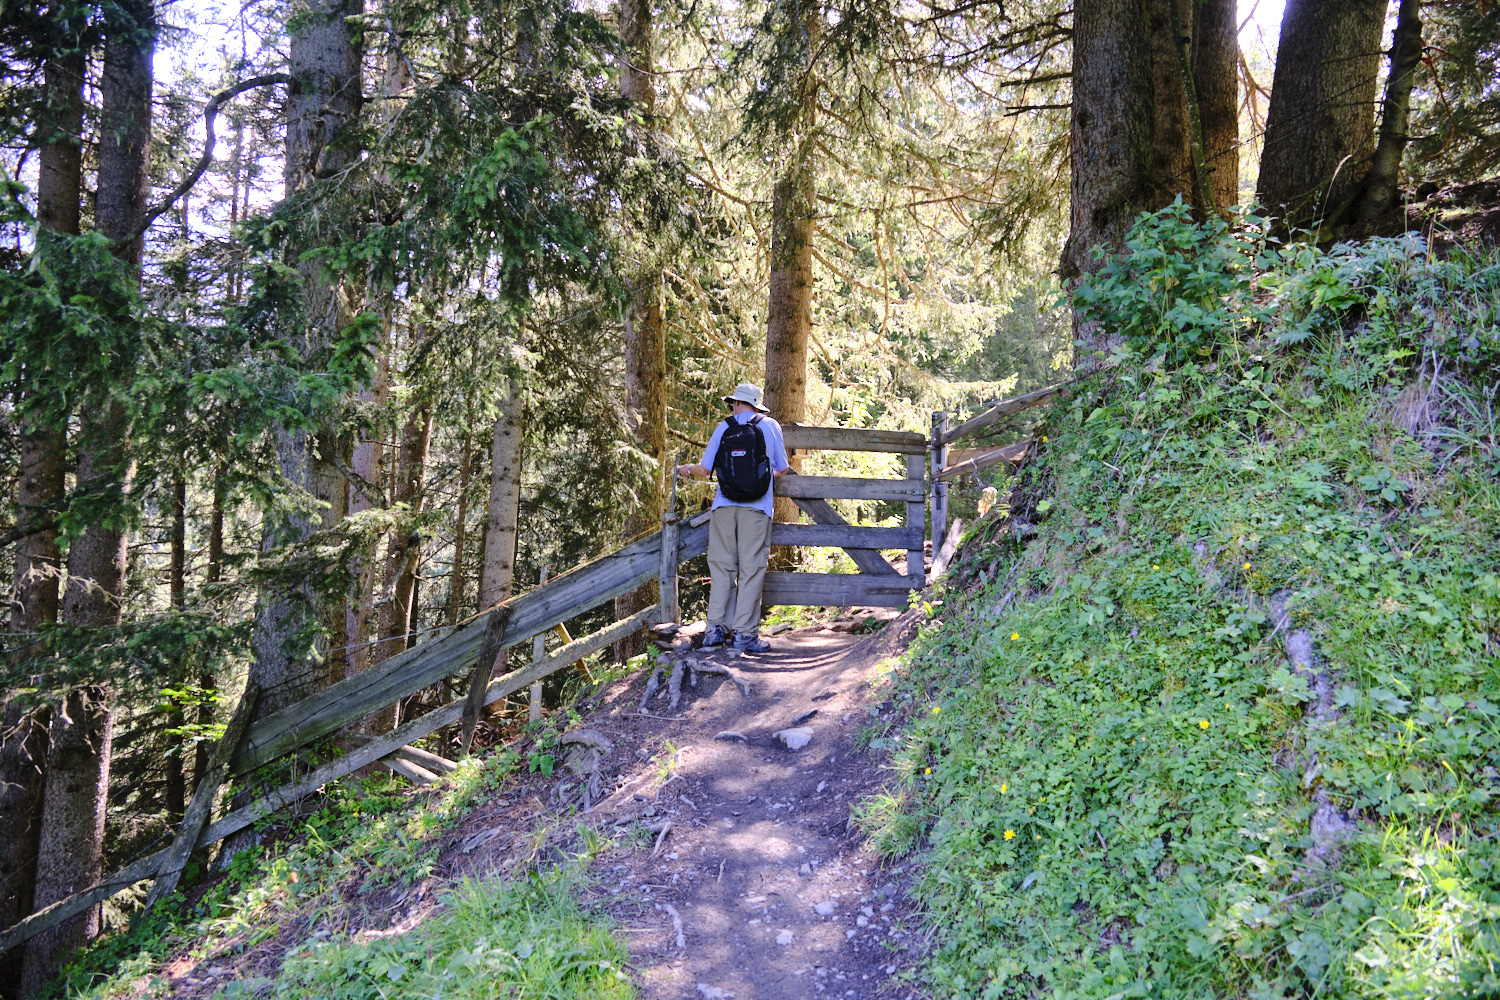
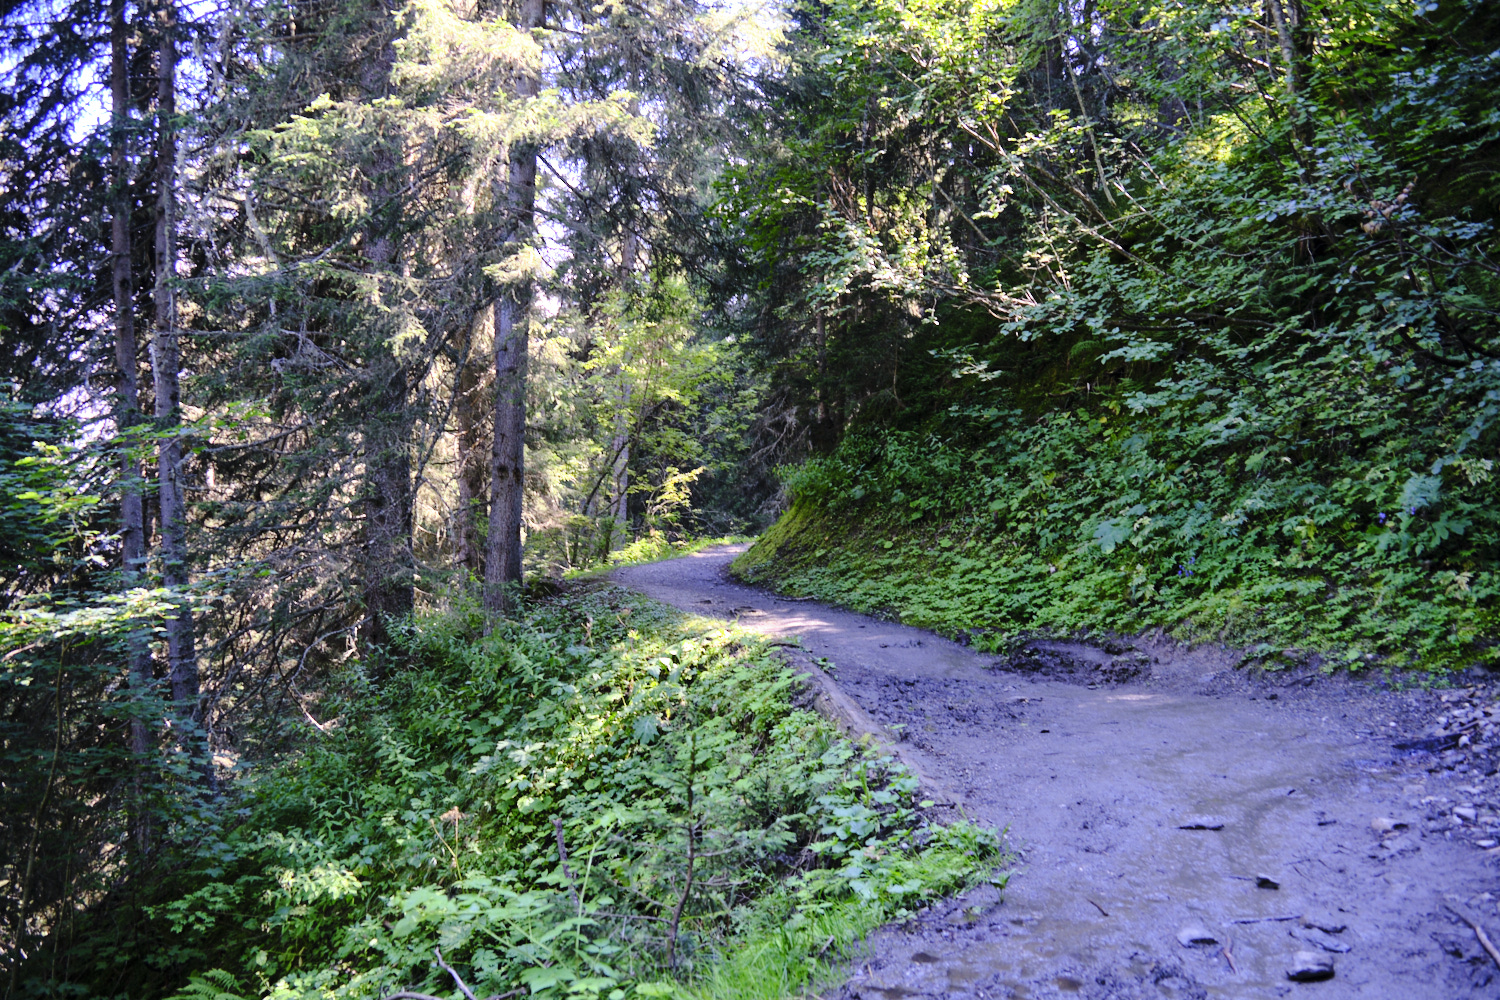
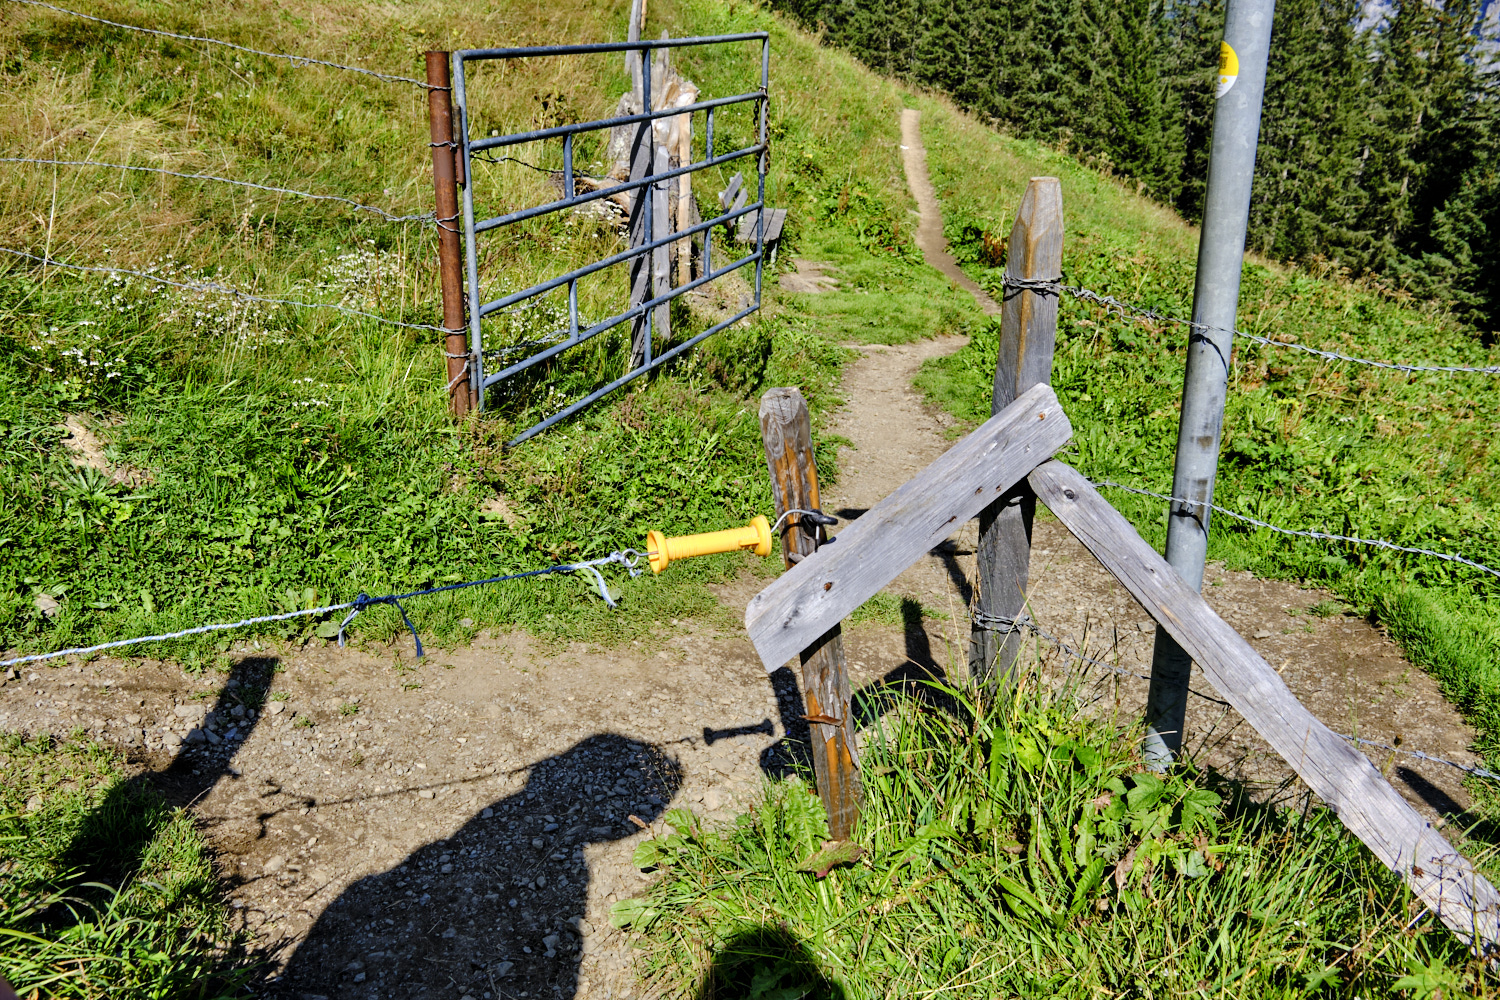
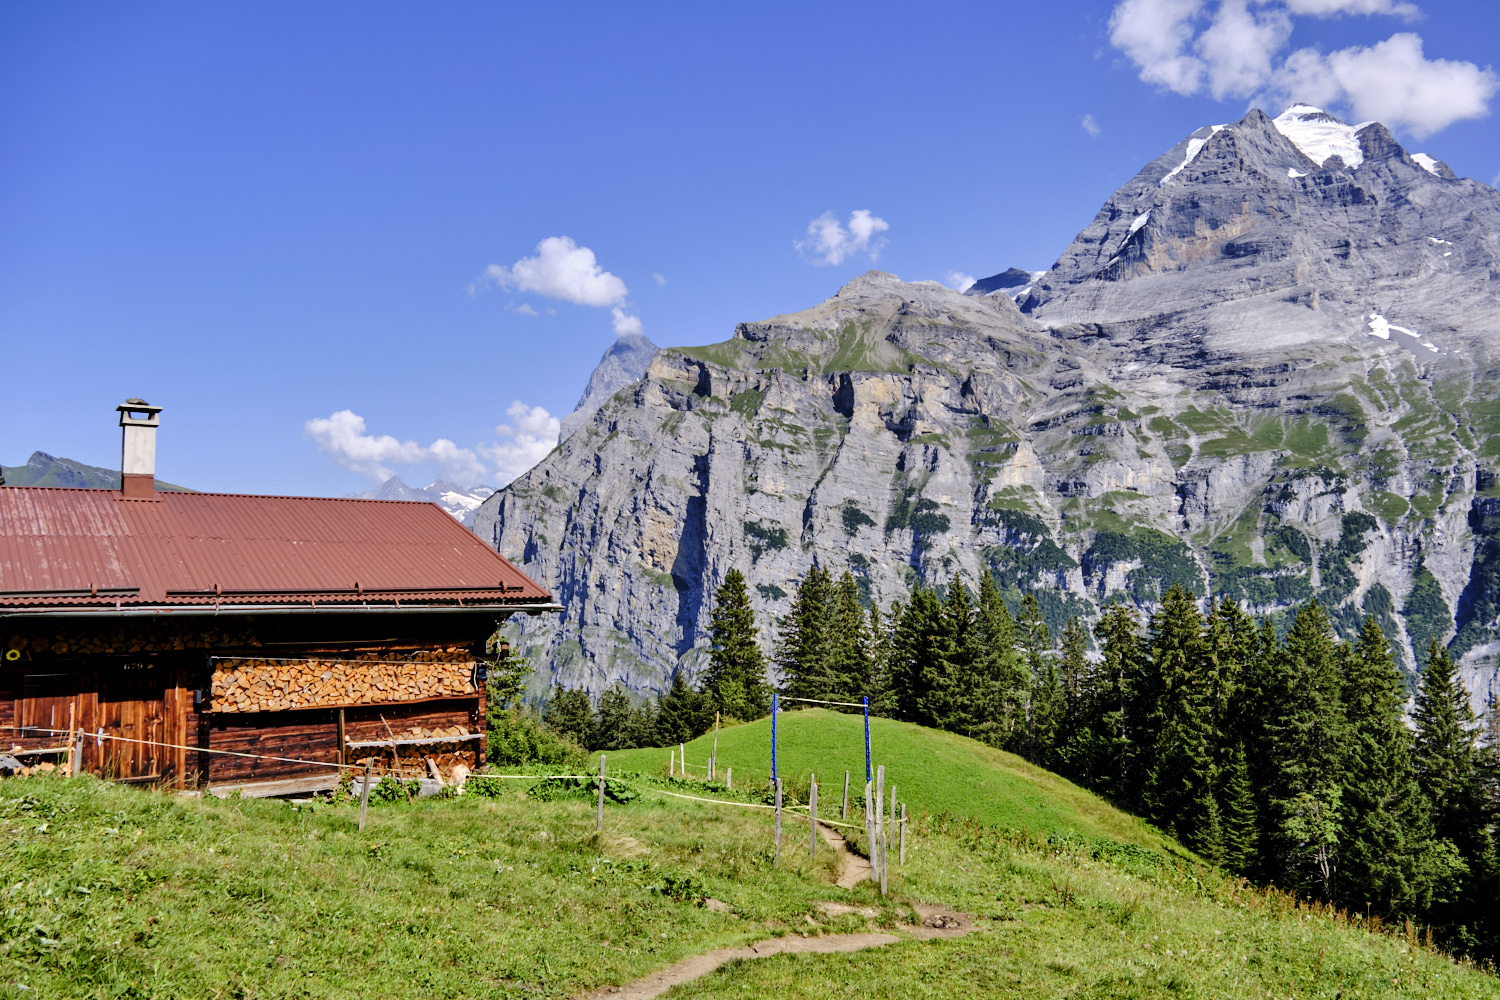
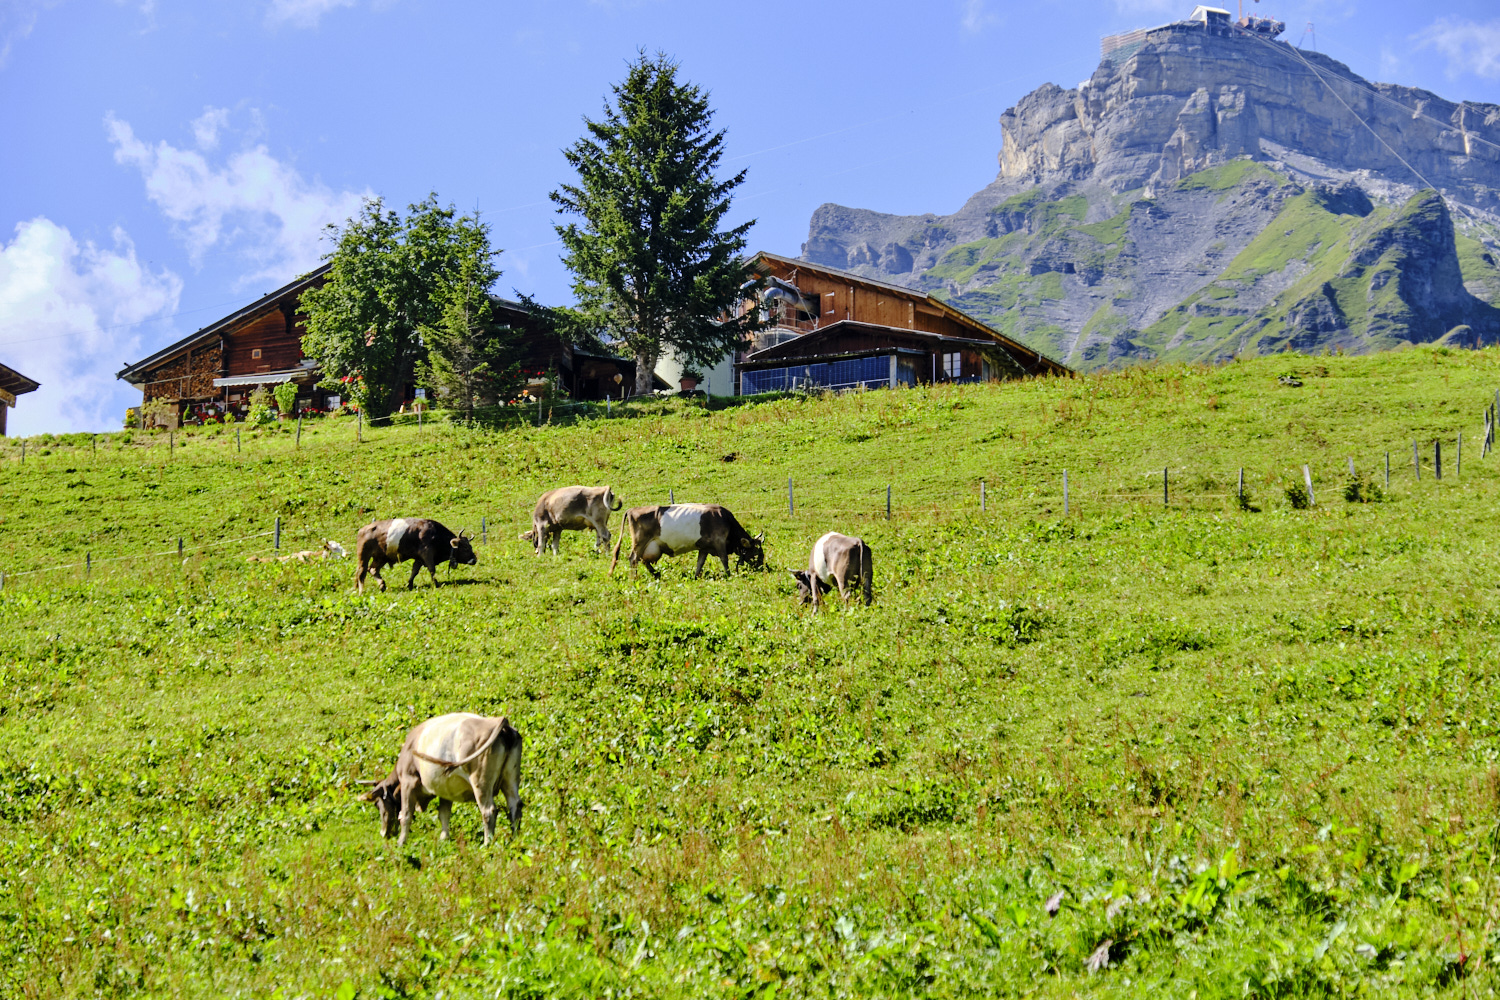
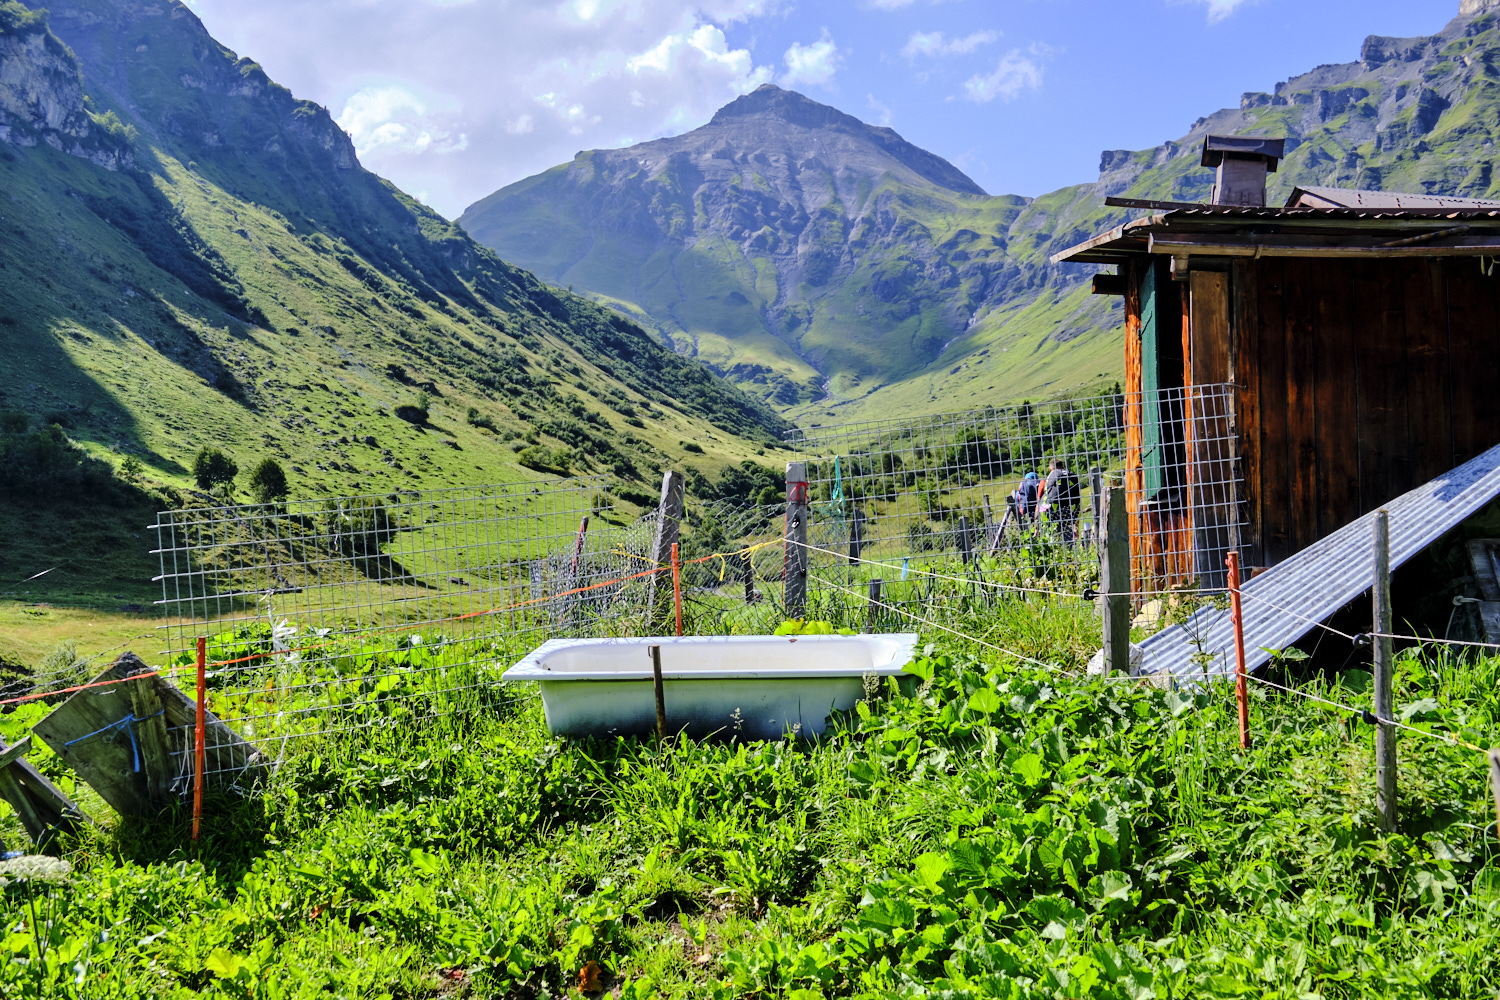
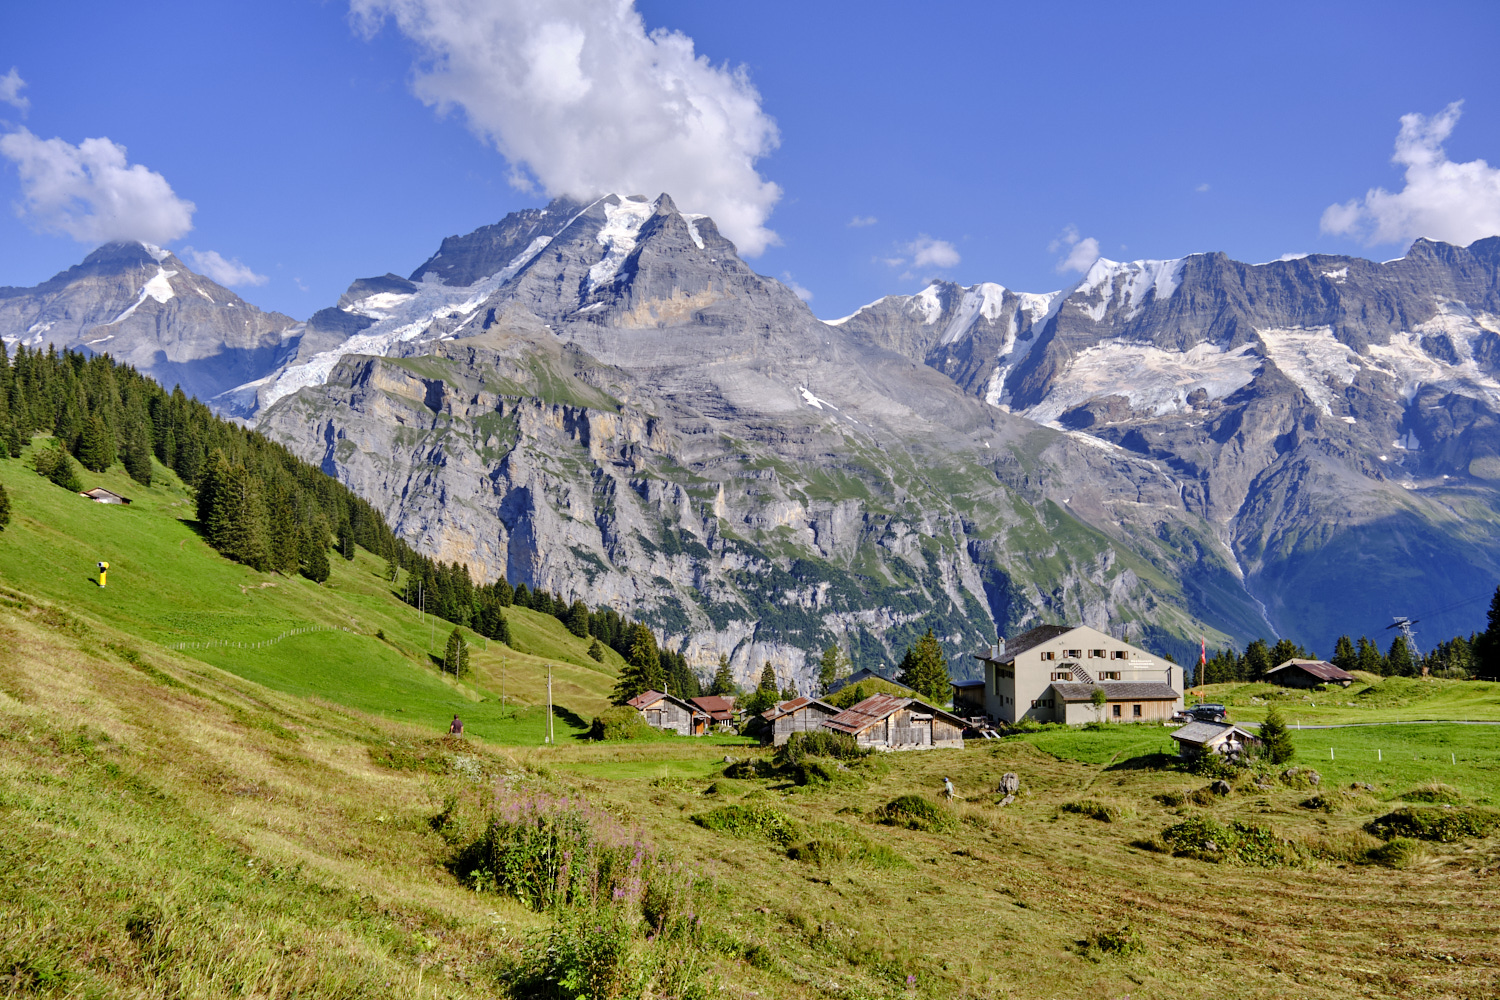
The Northface trail starts off on a dirt road, but most of the hike is on narrow dirt paths through farms. At the beginning we could look back and get a nice view of the town of Mürren, but quickly we were surrounded by gorgeous views of mountains with a few short treks through wooded areas and some encounters with cows. The cows are fenced in with electric fences, which visitors are warned not to touch. From time to time we had to open and close a gate to stay on the trail.
After about 2.5 hours of hiking the road to the Allmendhubel funicular was in sight and we were ready for our ride down the mountain. We hiked to the funicular and were disappointed to discover it had already closed for the day. At that point we had no choice but to turn around and retrace our steps back to the trail and continue on down the hill. Ideally, the last leg would be done with hiking polls, but we managed without them. When we reached the bottom we could see the funicular track on the hill. We walked to the train station and took a cog train to a cable car back to Lauterbrunnen.
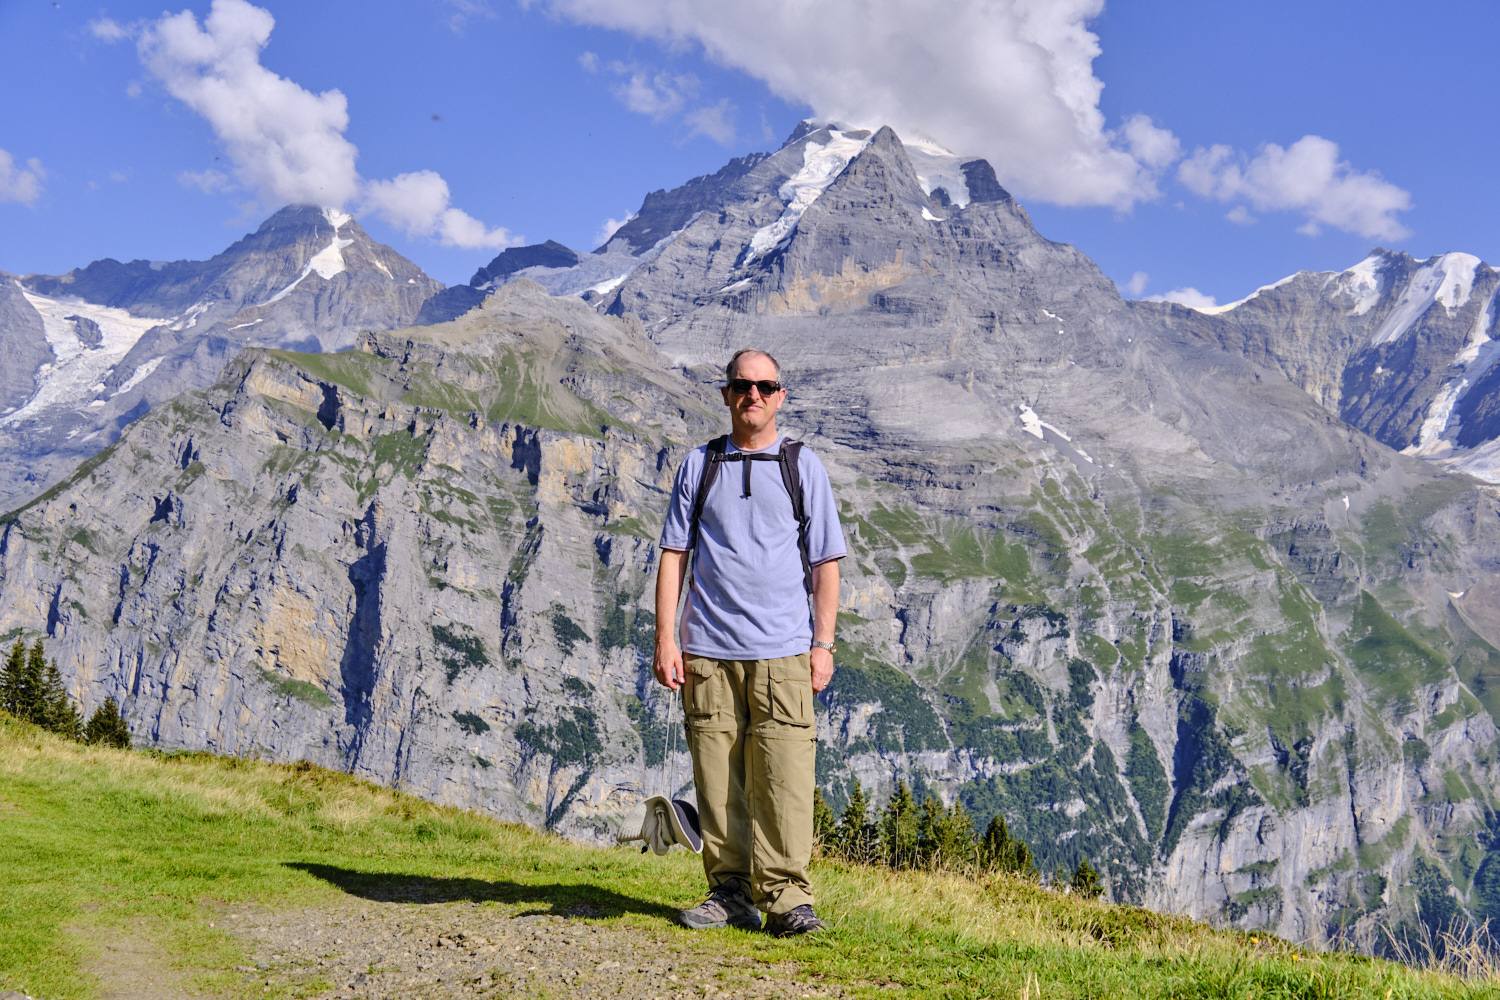
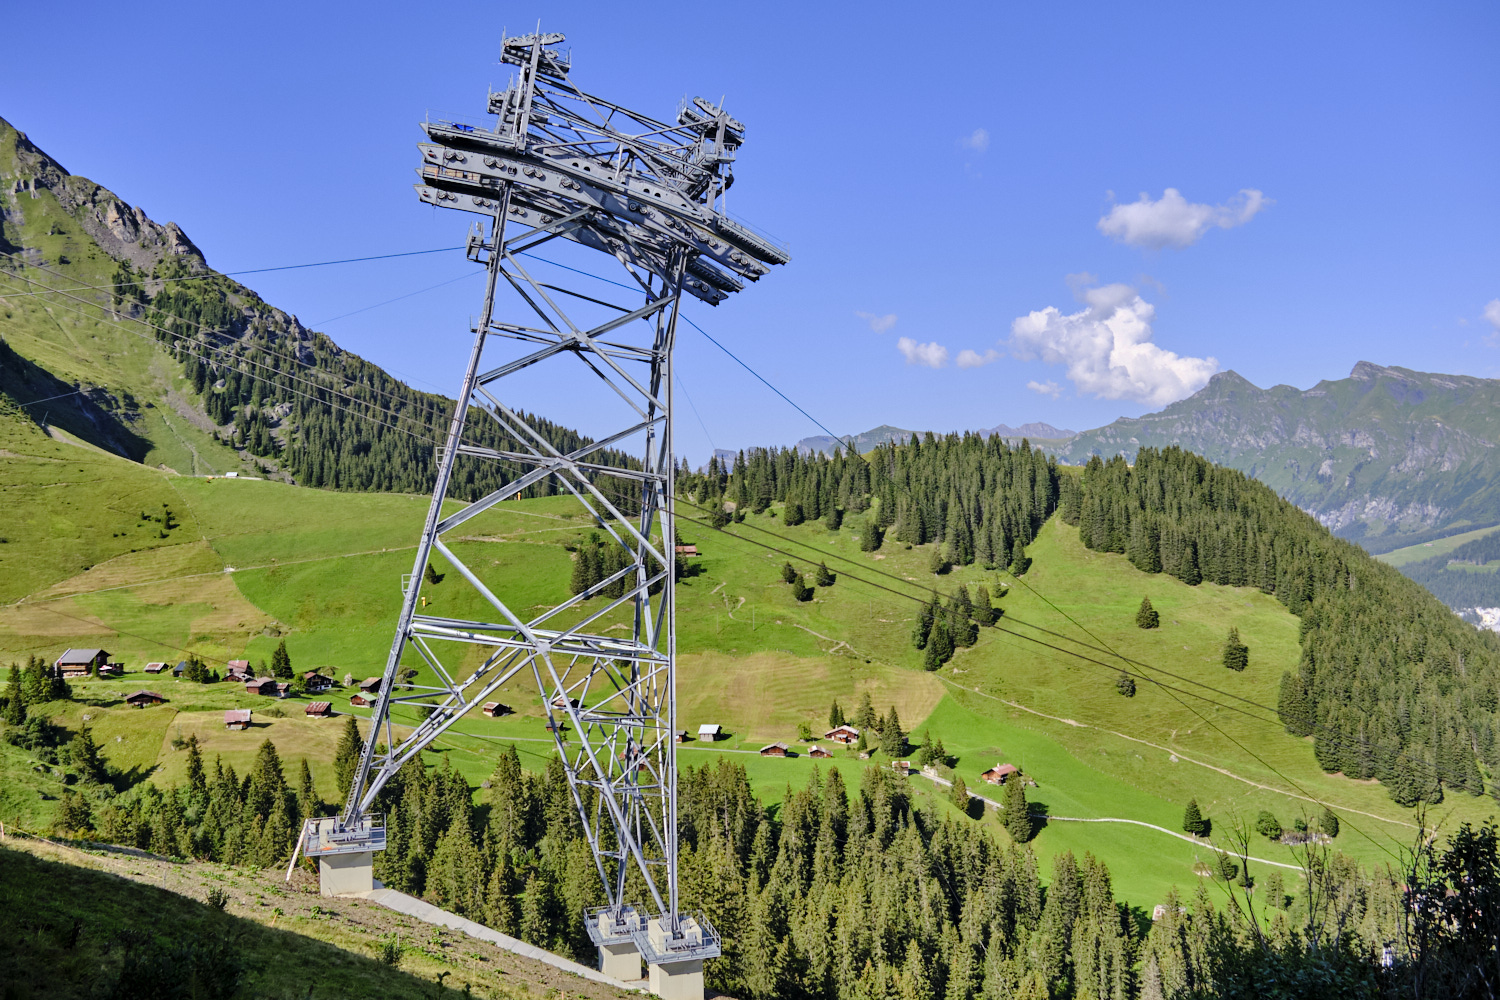
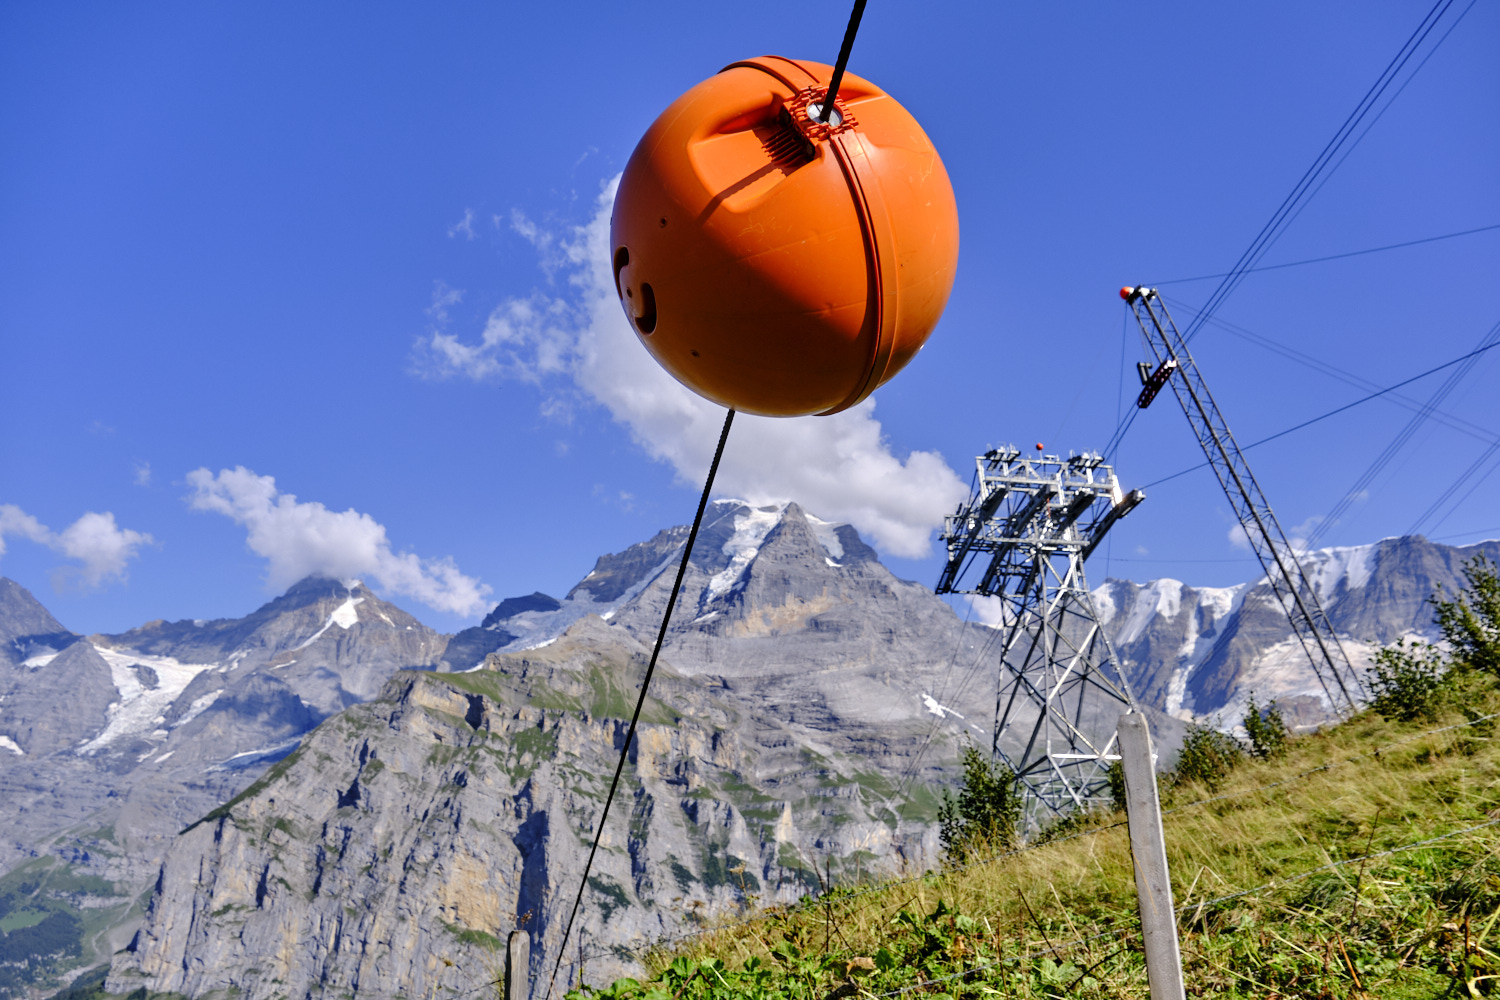
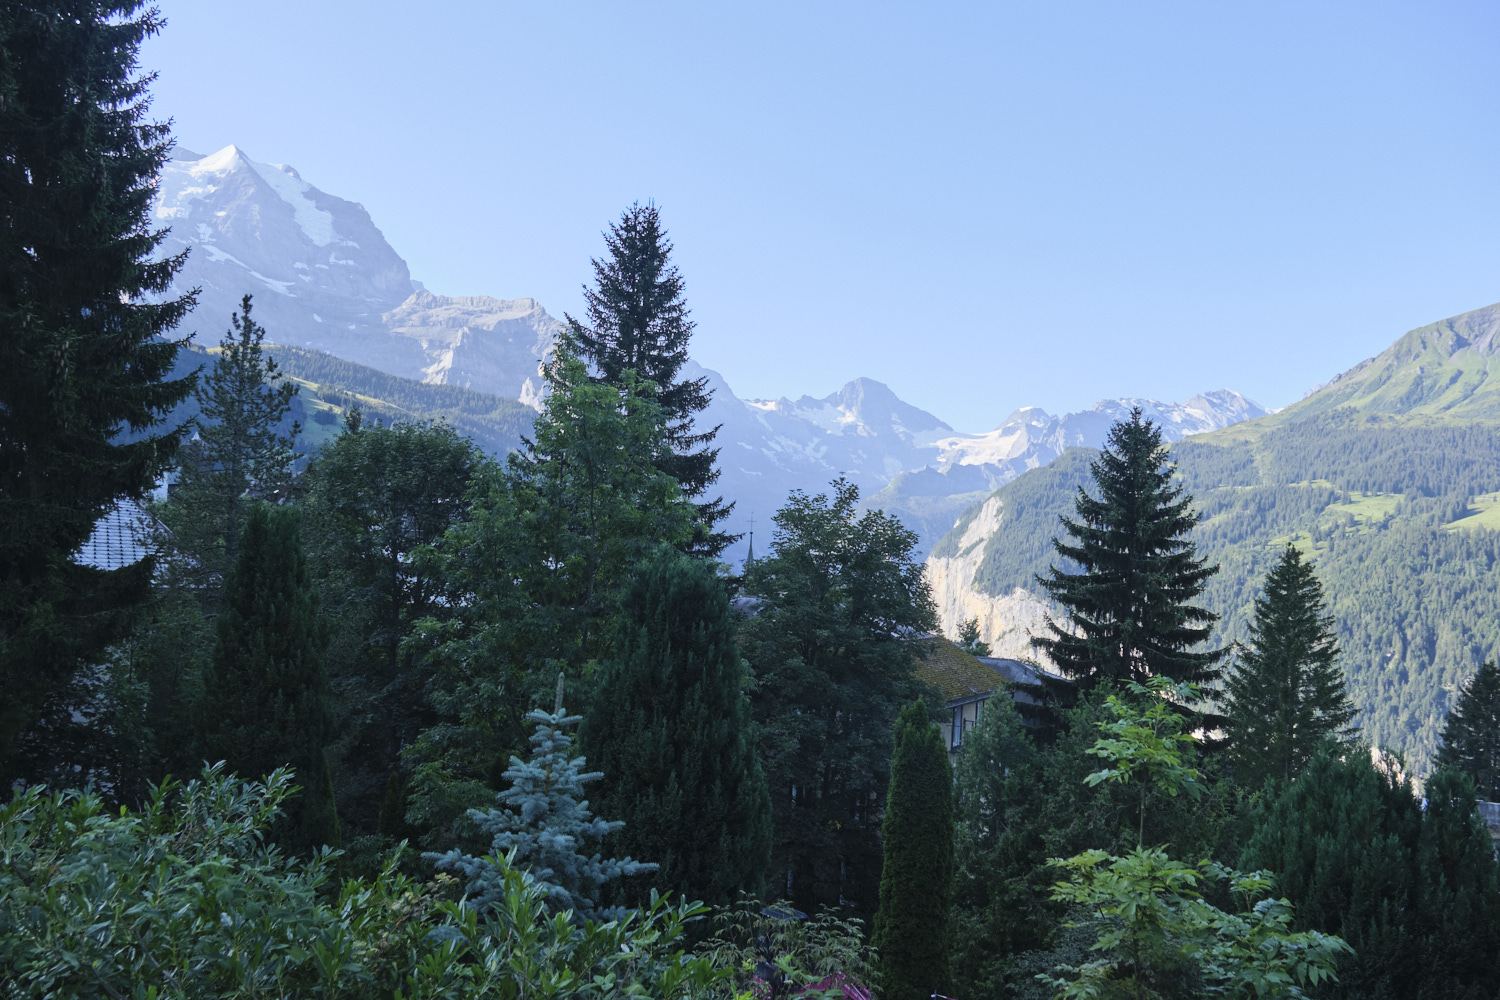
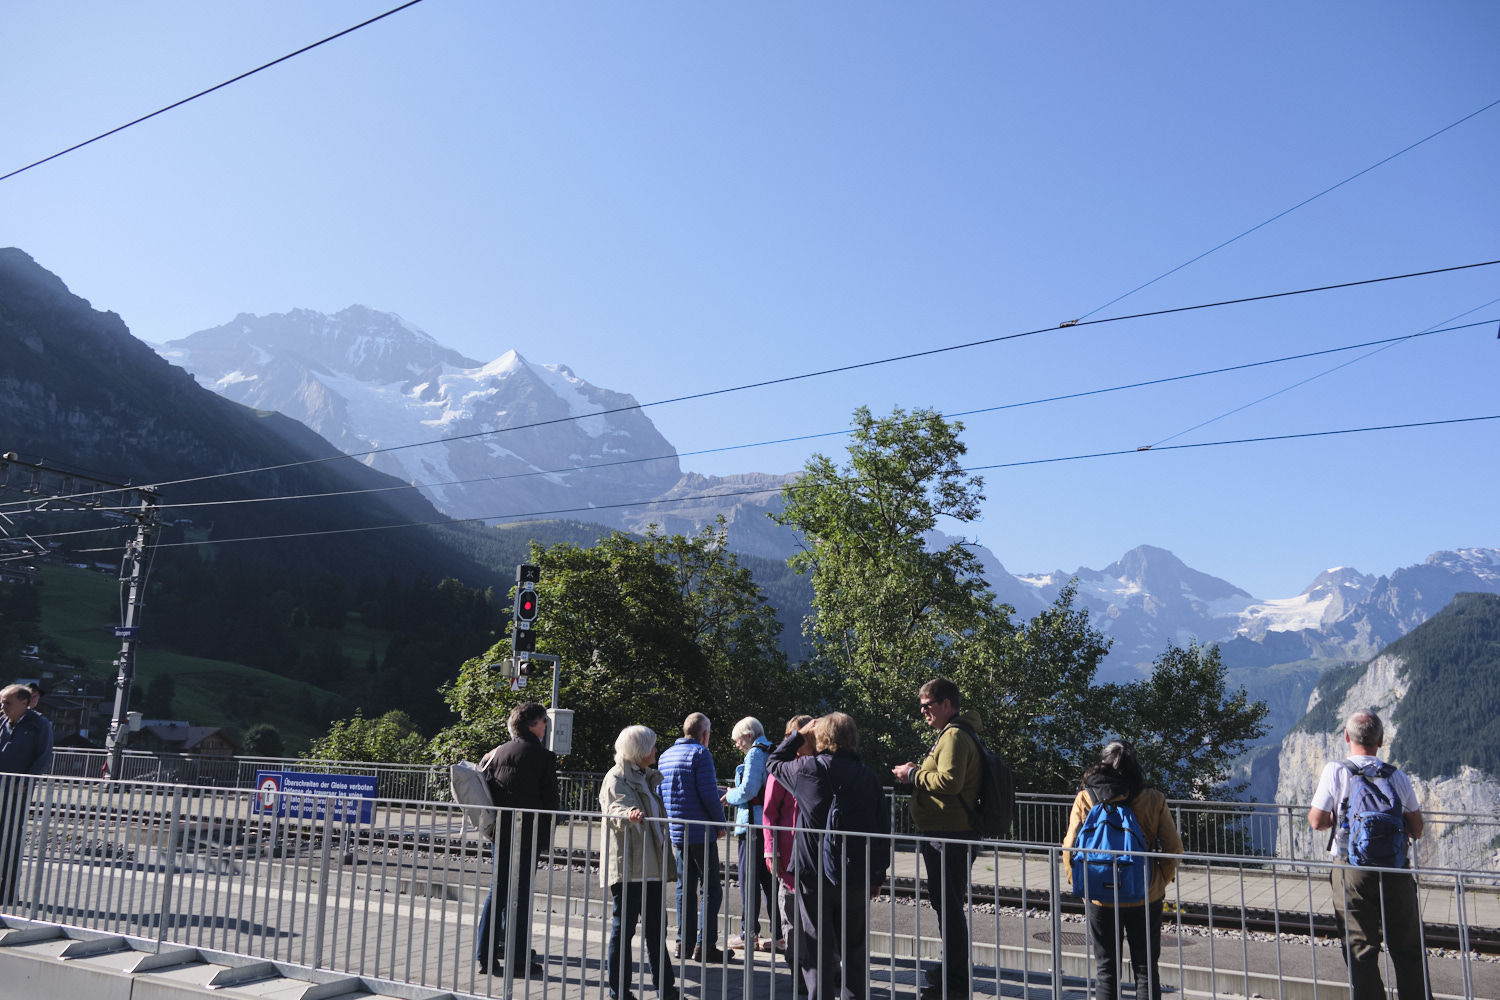
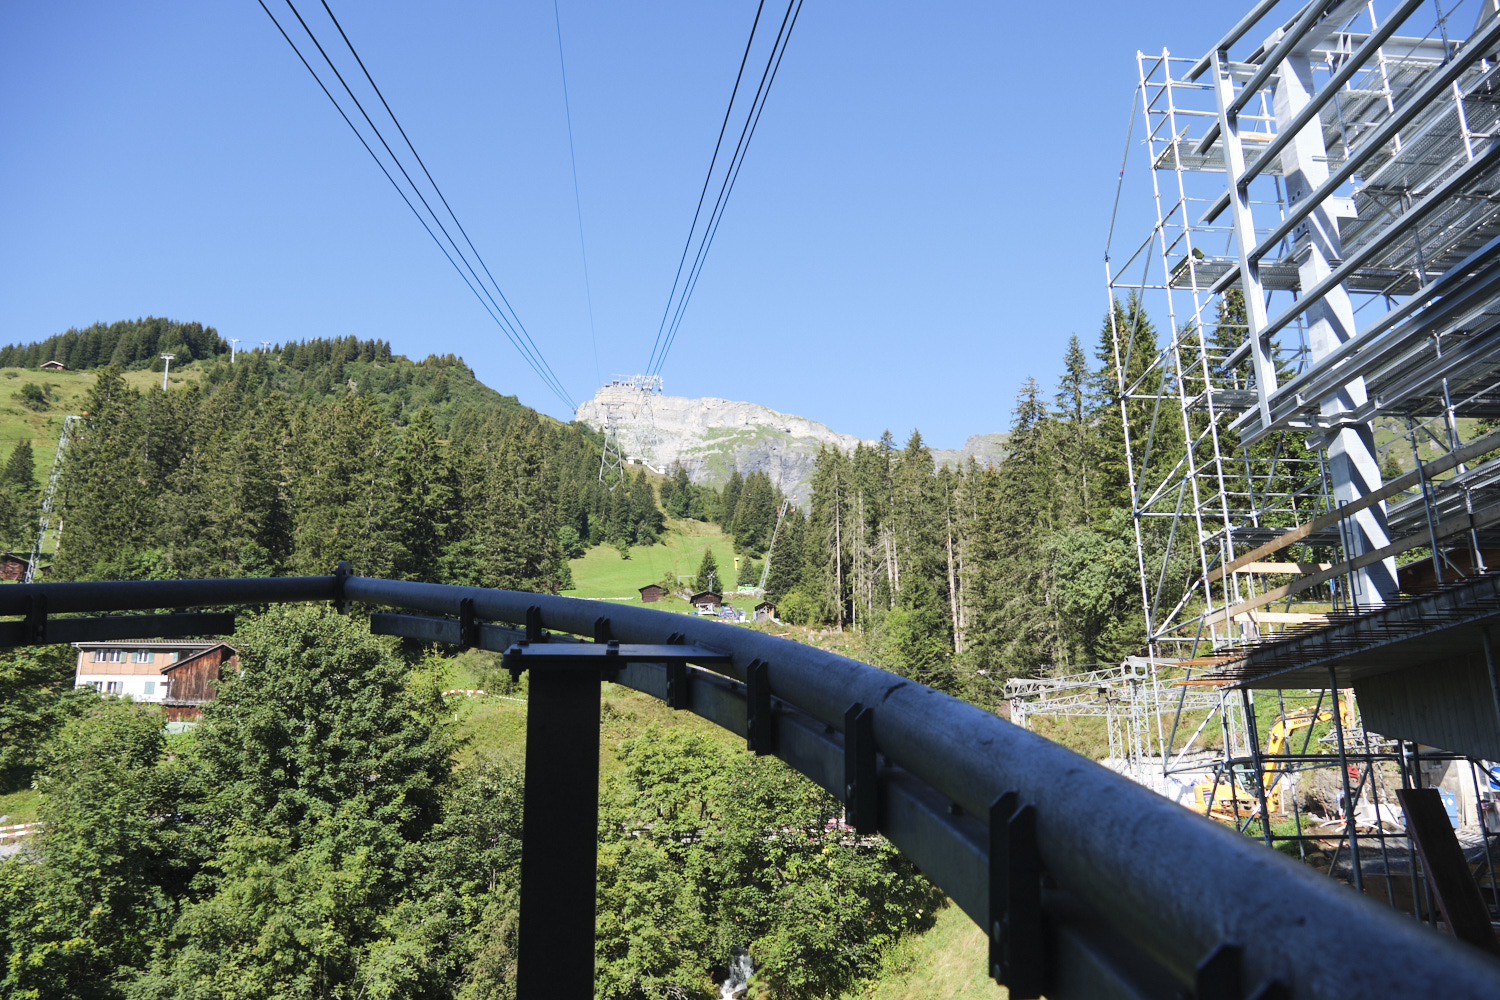
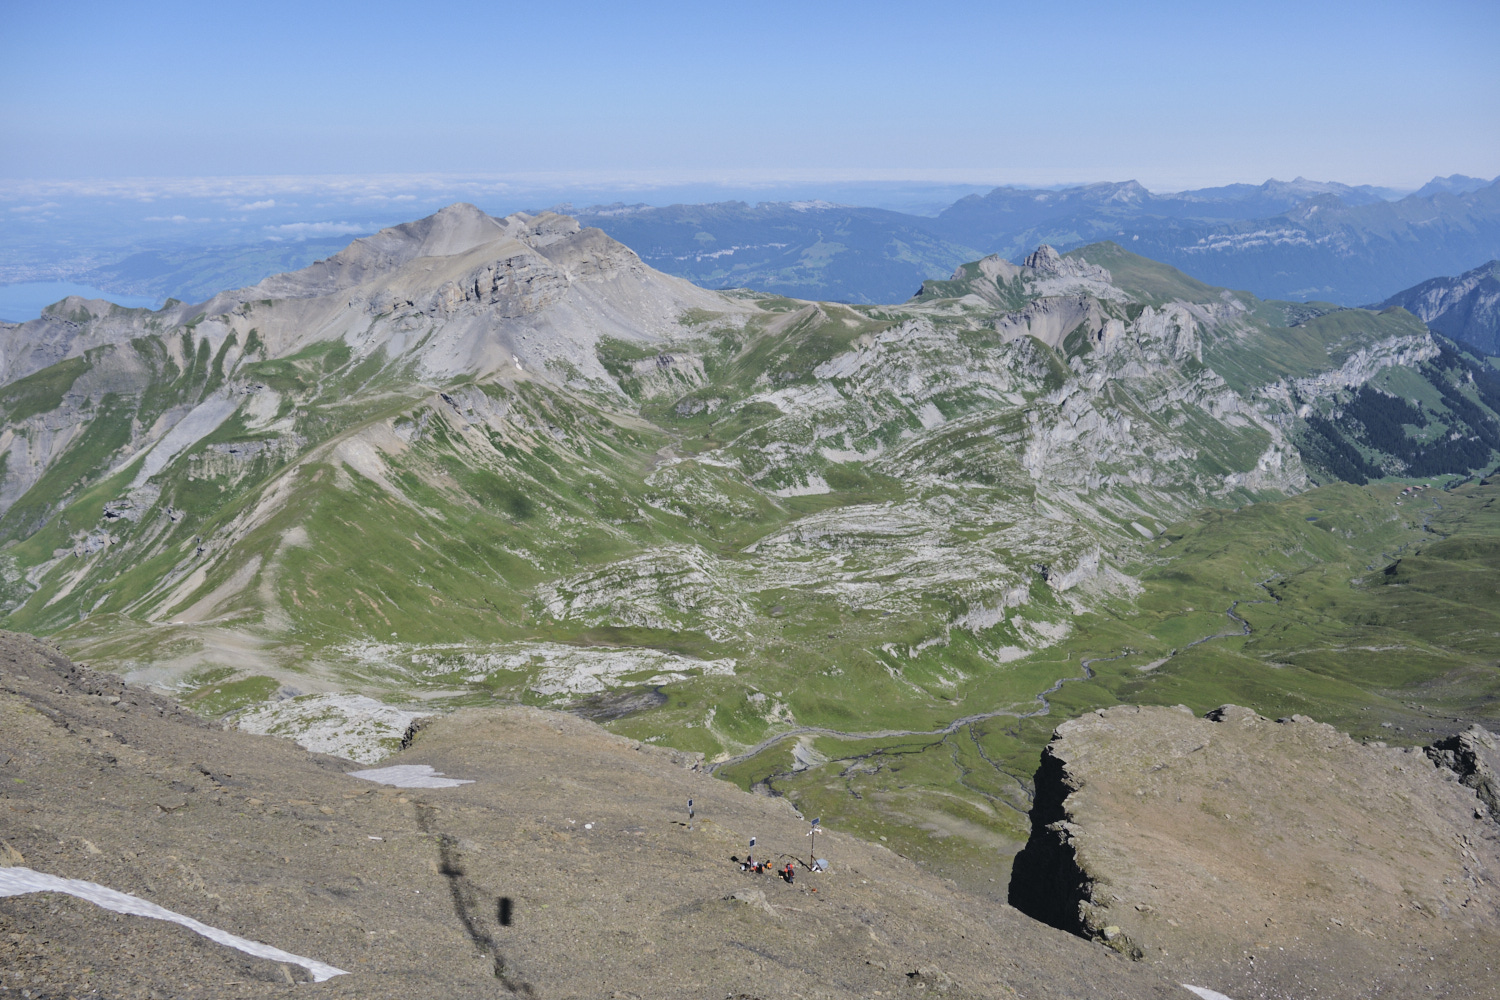
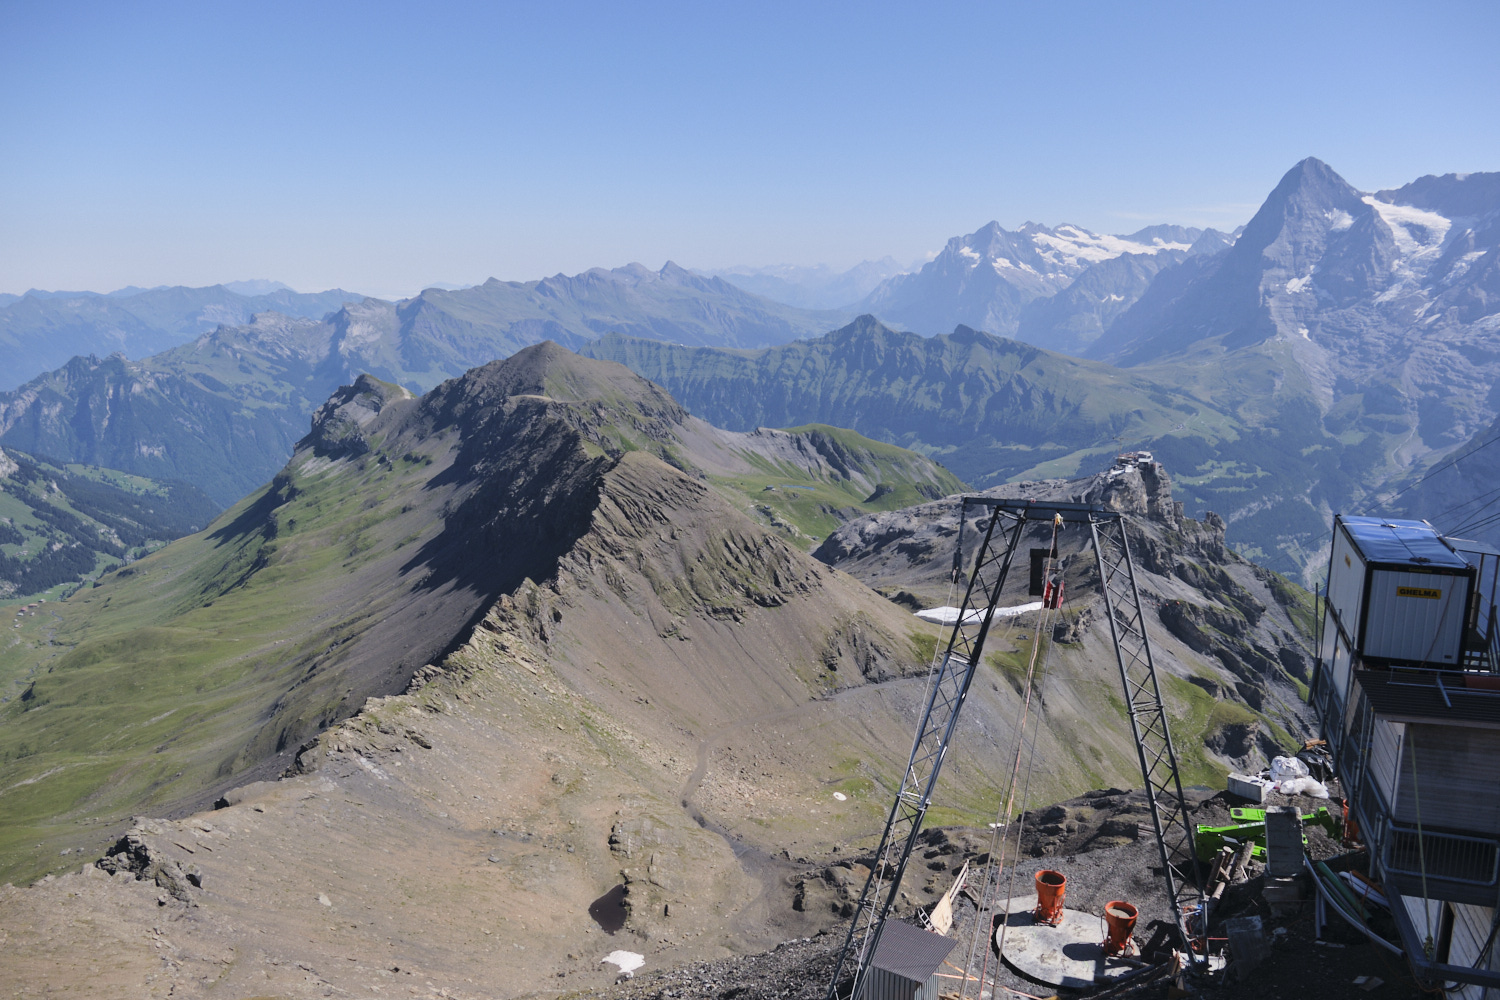
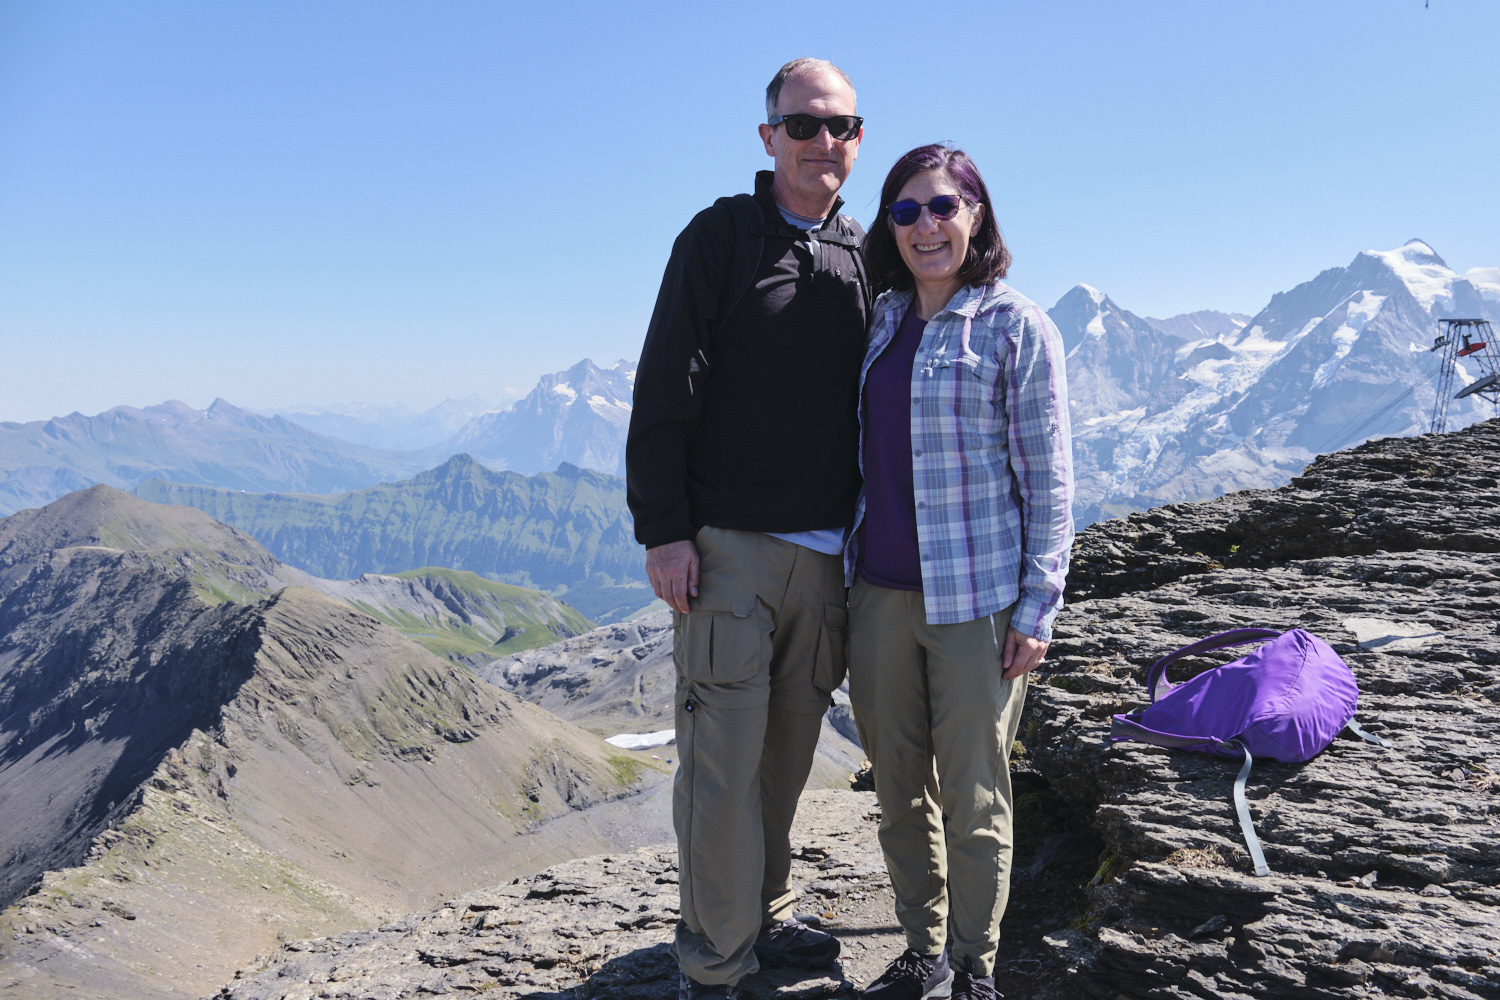
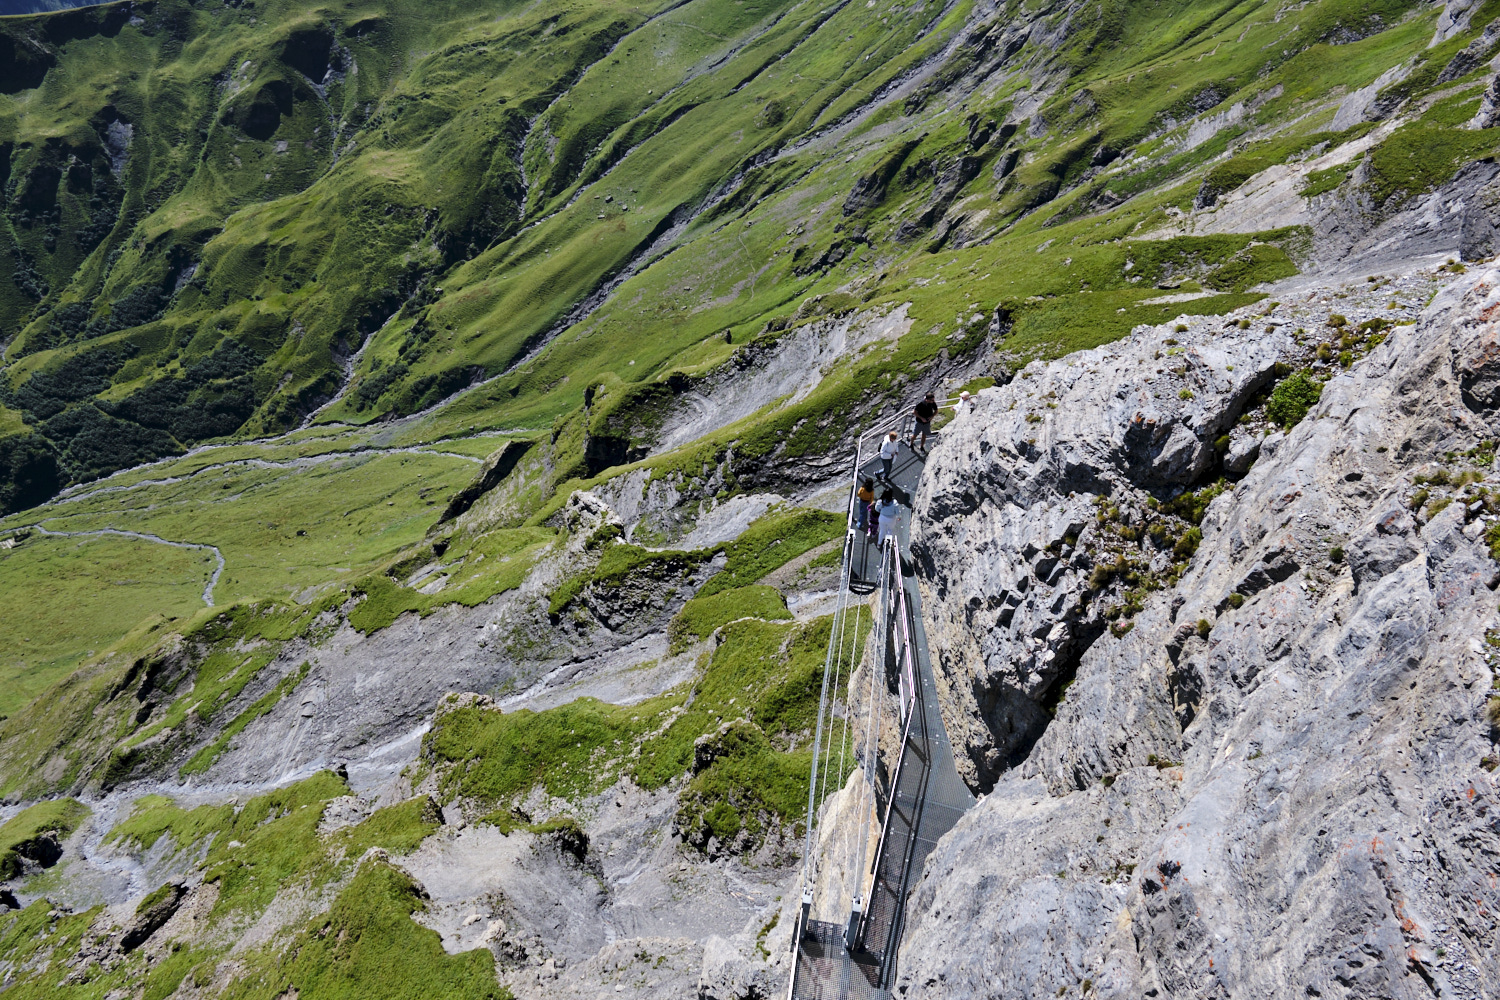
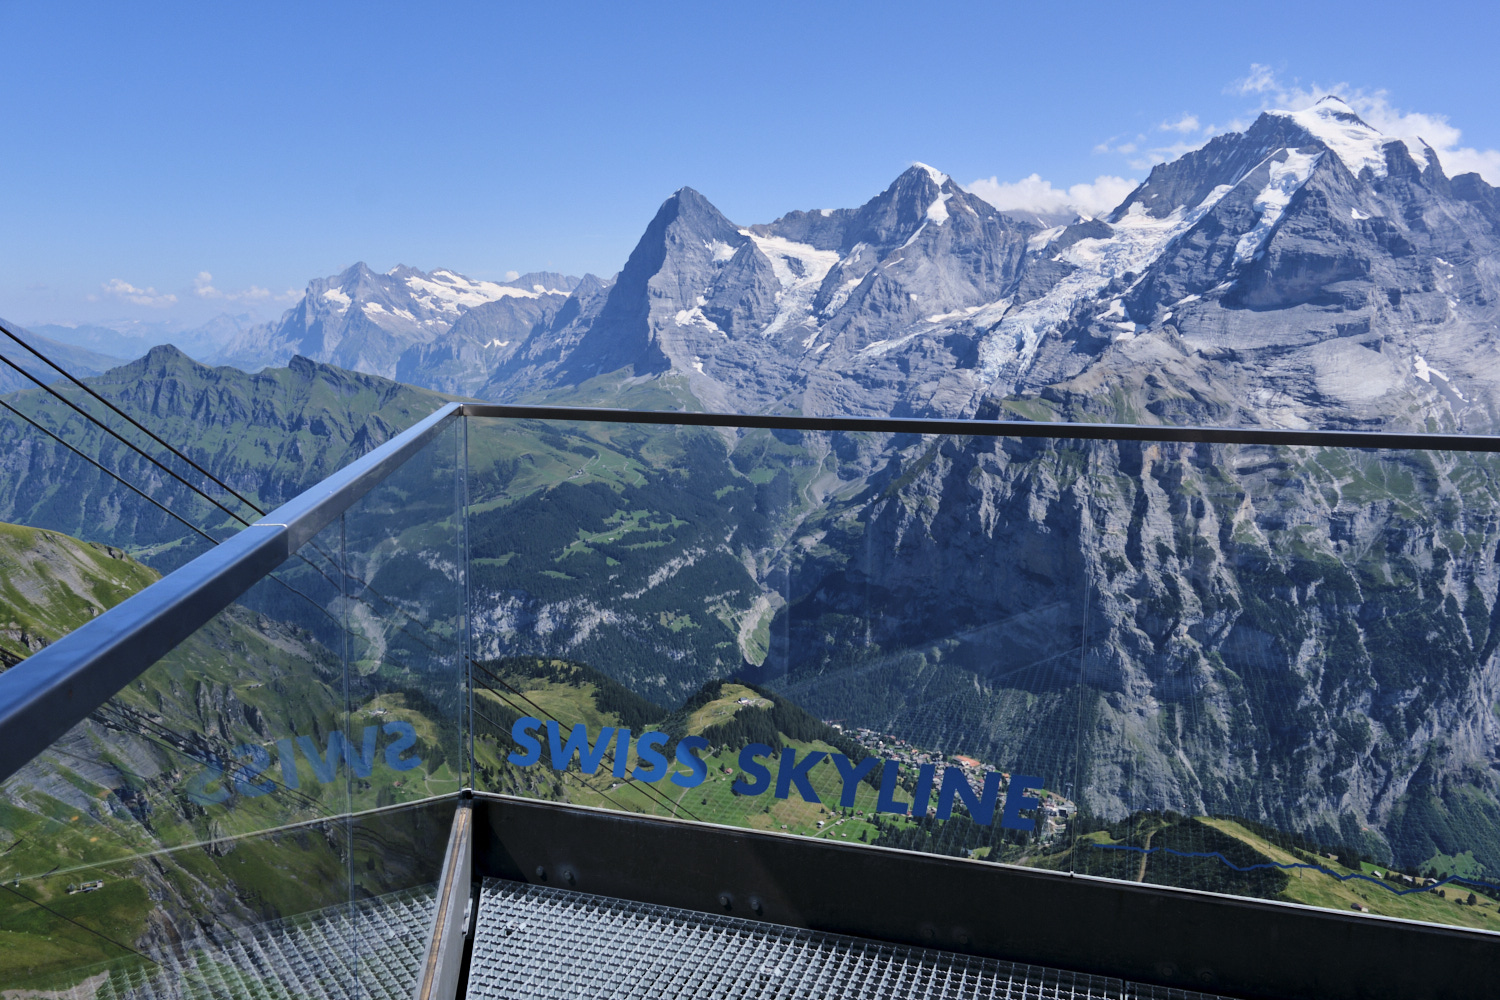
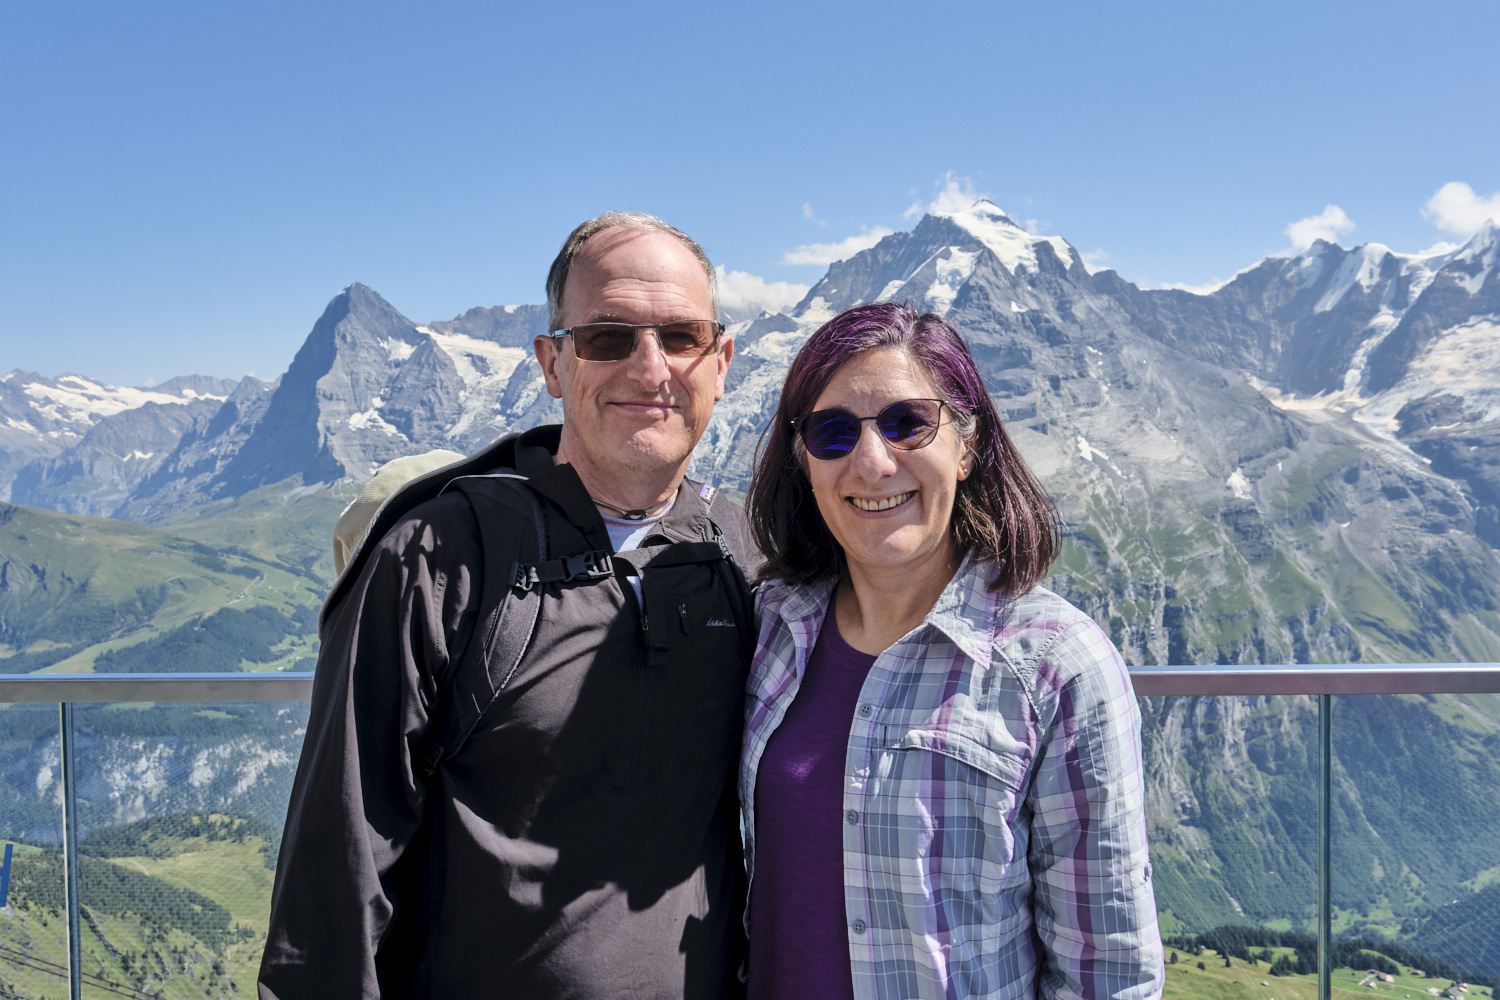
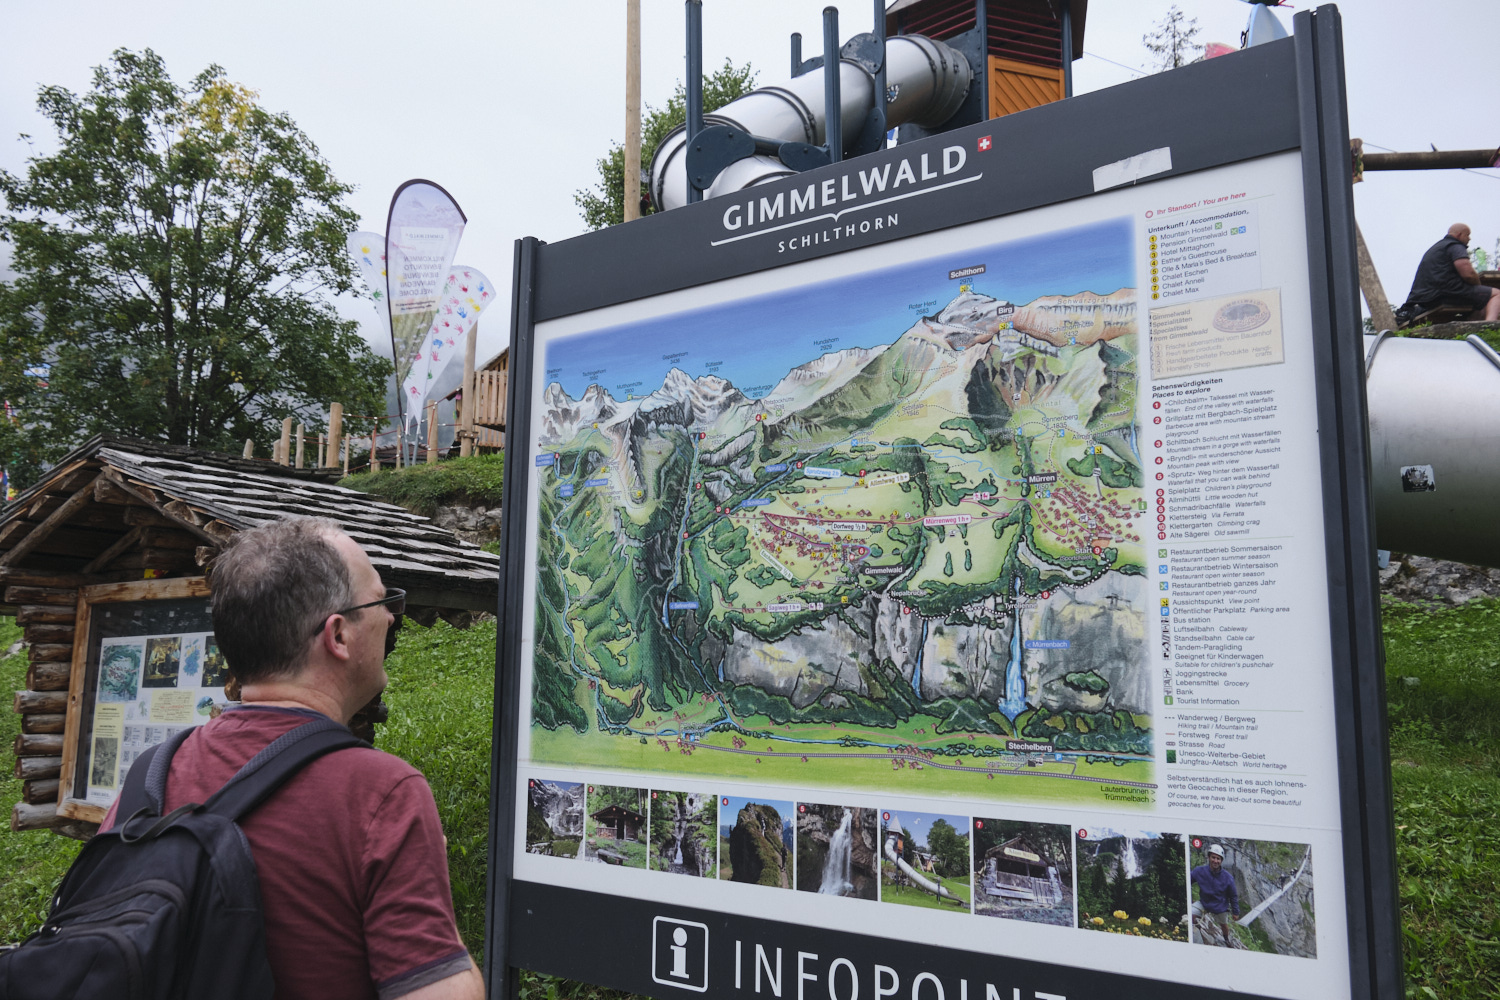
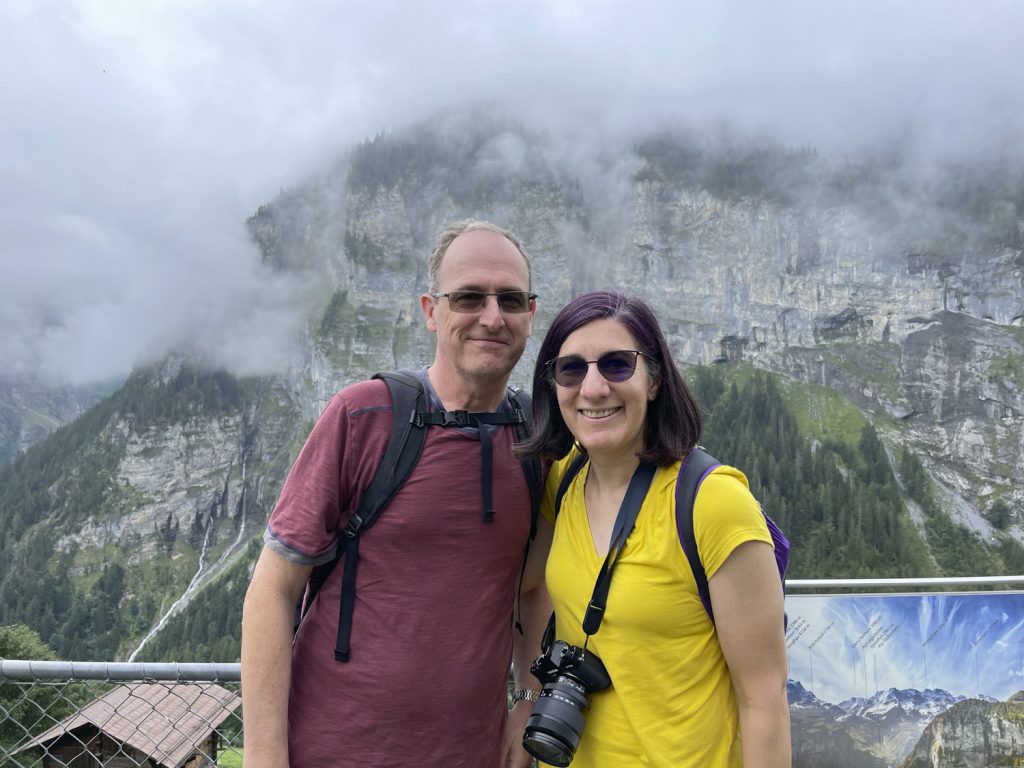
The next day the sun came out and we could see the mountain tops from Wengen! We debated which high summit to go to and settled on Schilthorn rather than the super popular Jungfraujoch (covered in snow and known as the “top of Europe”) to avoid some of the crowds and the need for advance reservations and winter boots. We didn’t have time to do both and the cable cars to the peaks are fairly expensive. We took the train down the mountain to Lauterbrunnen again, and this time took the bus to Stechelberg and then (very crowded) cable cars to Gimmelwald, Mürren, Birg, and finally Schilthorn. We went directly from cable car to cable car on the way up to reach the summit before there was danger of afternoon clouds, although it ended up being sunny all day.
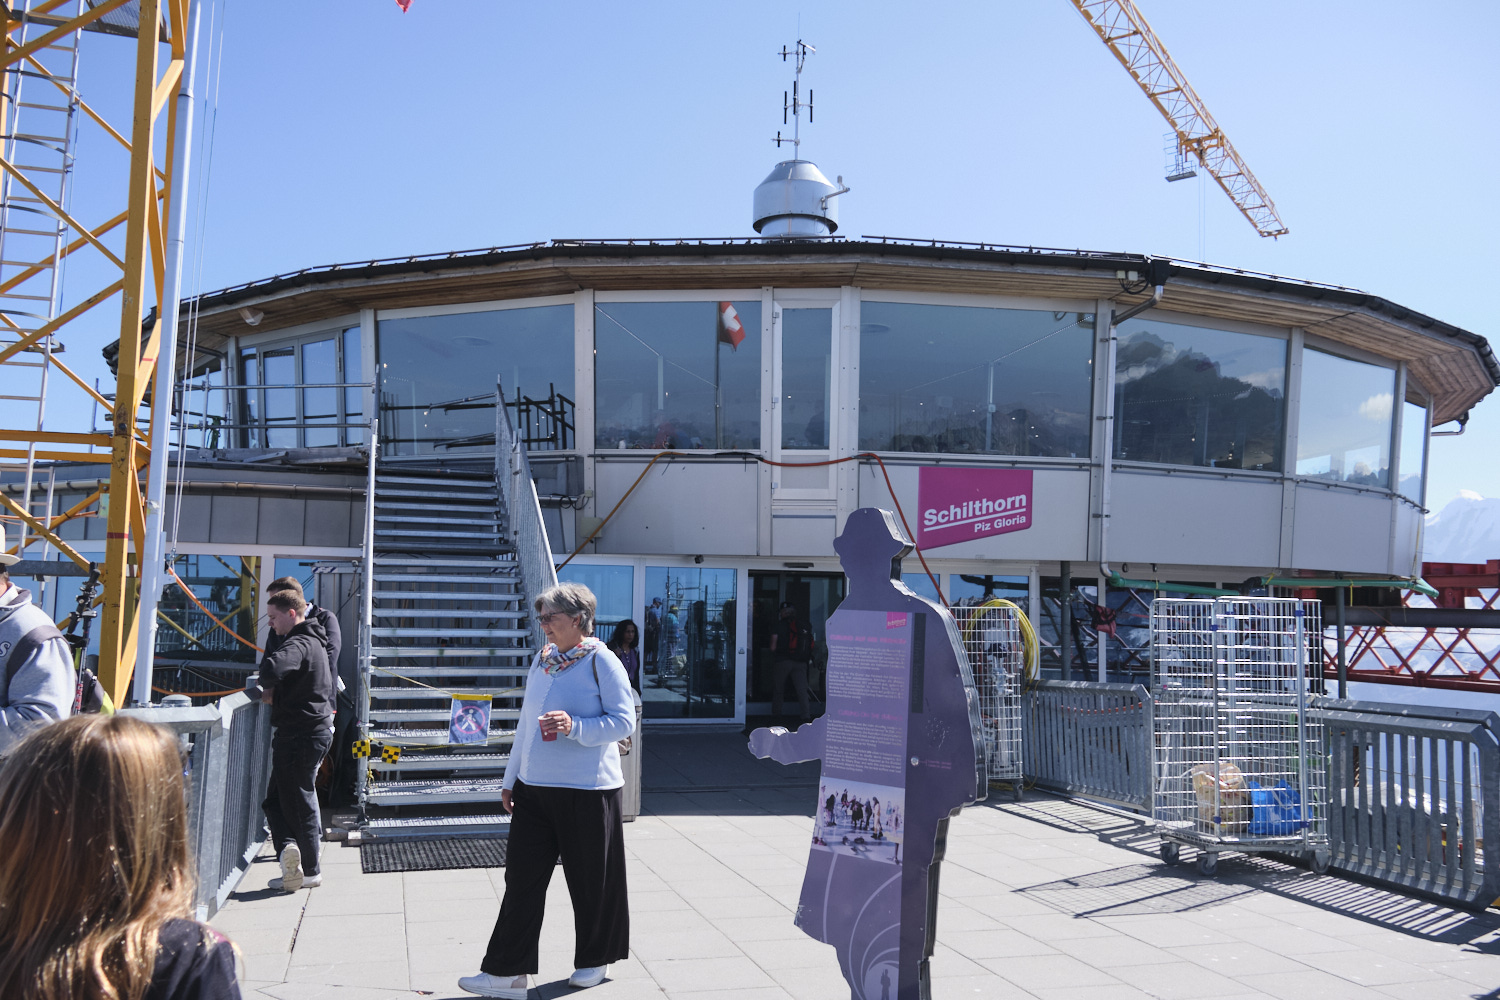
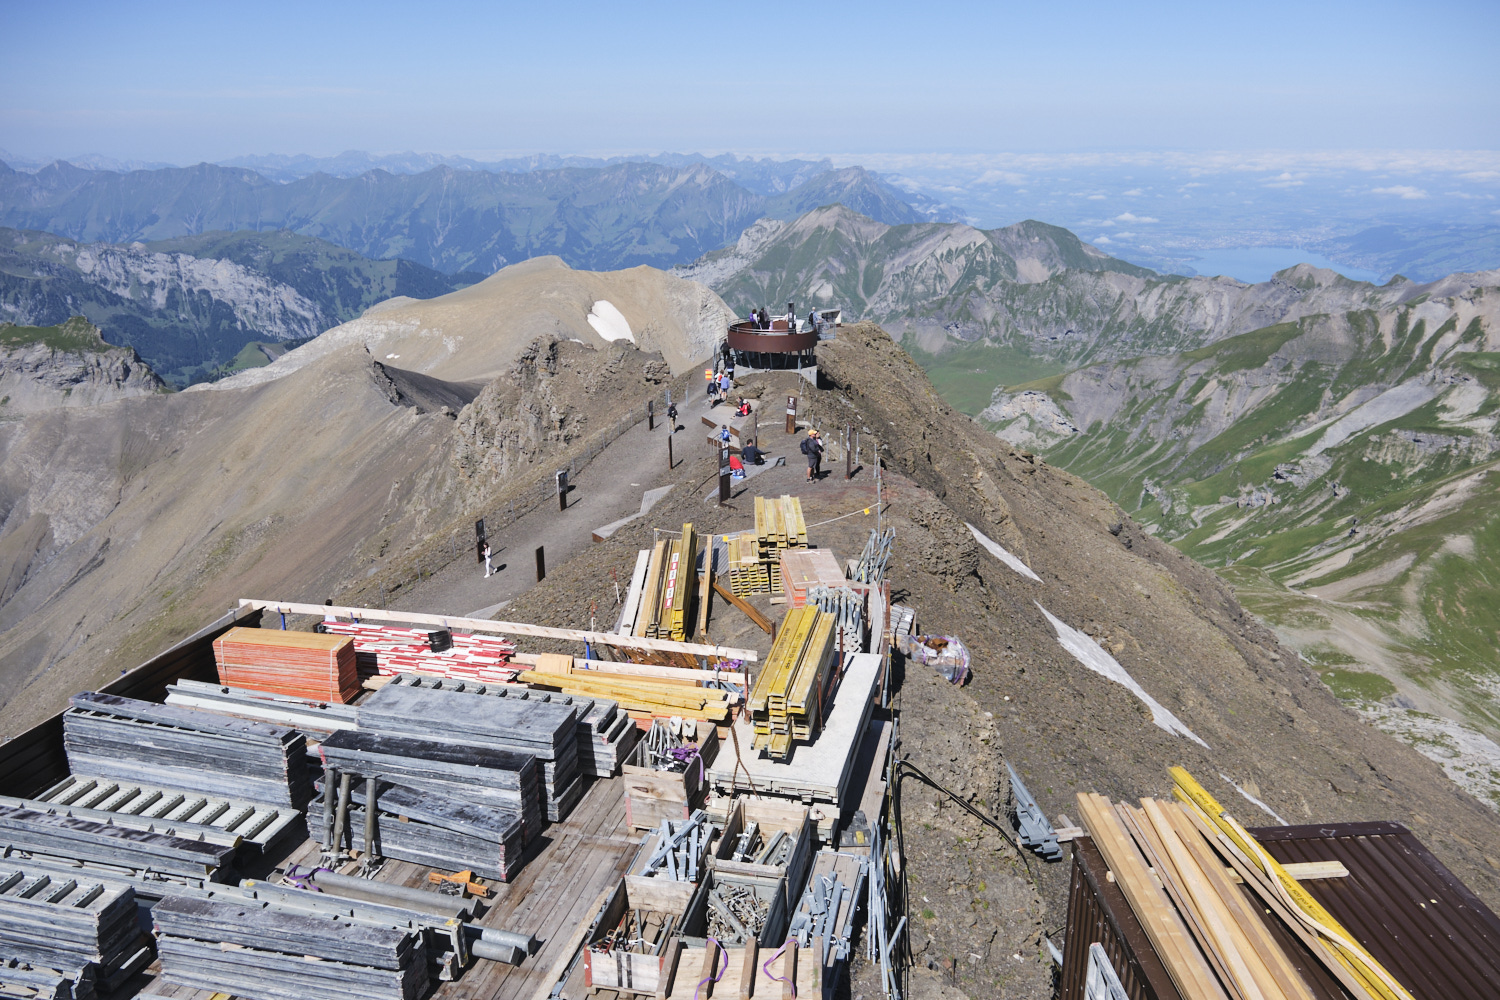
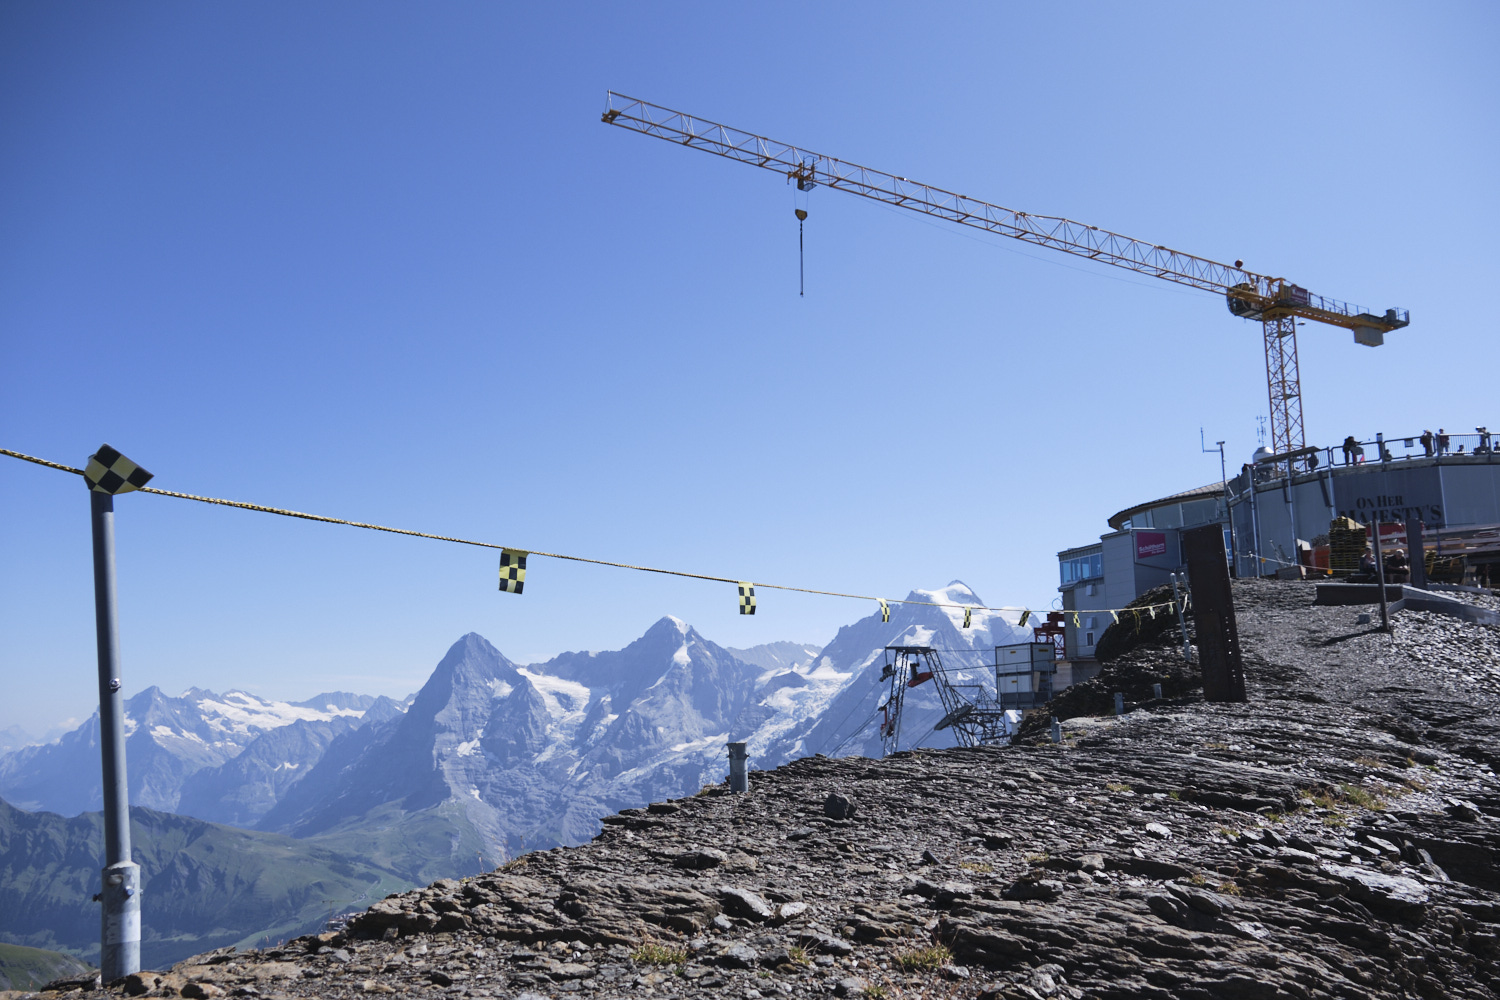
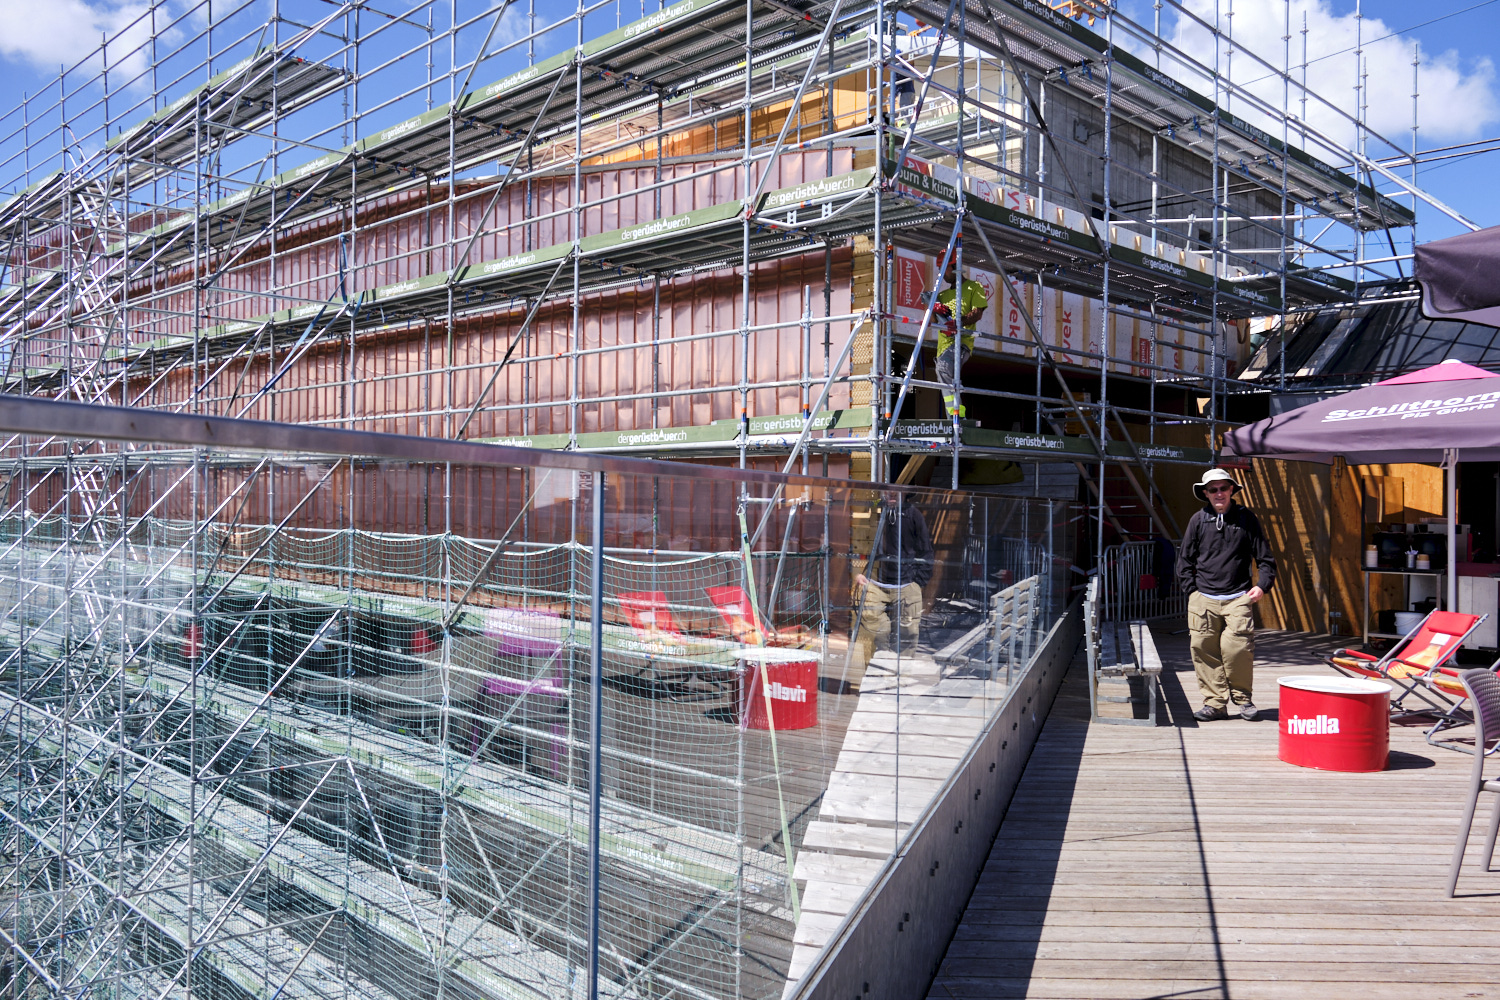
Schilthorn’s summit is at 9,744 feet, the highest we went on our trip. The cable car system is currently under construction as they build bigger, faster cable cars to transport more people in coming years.
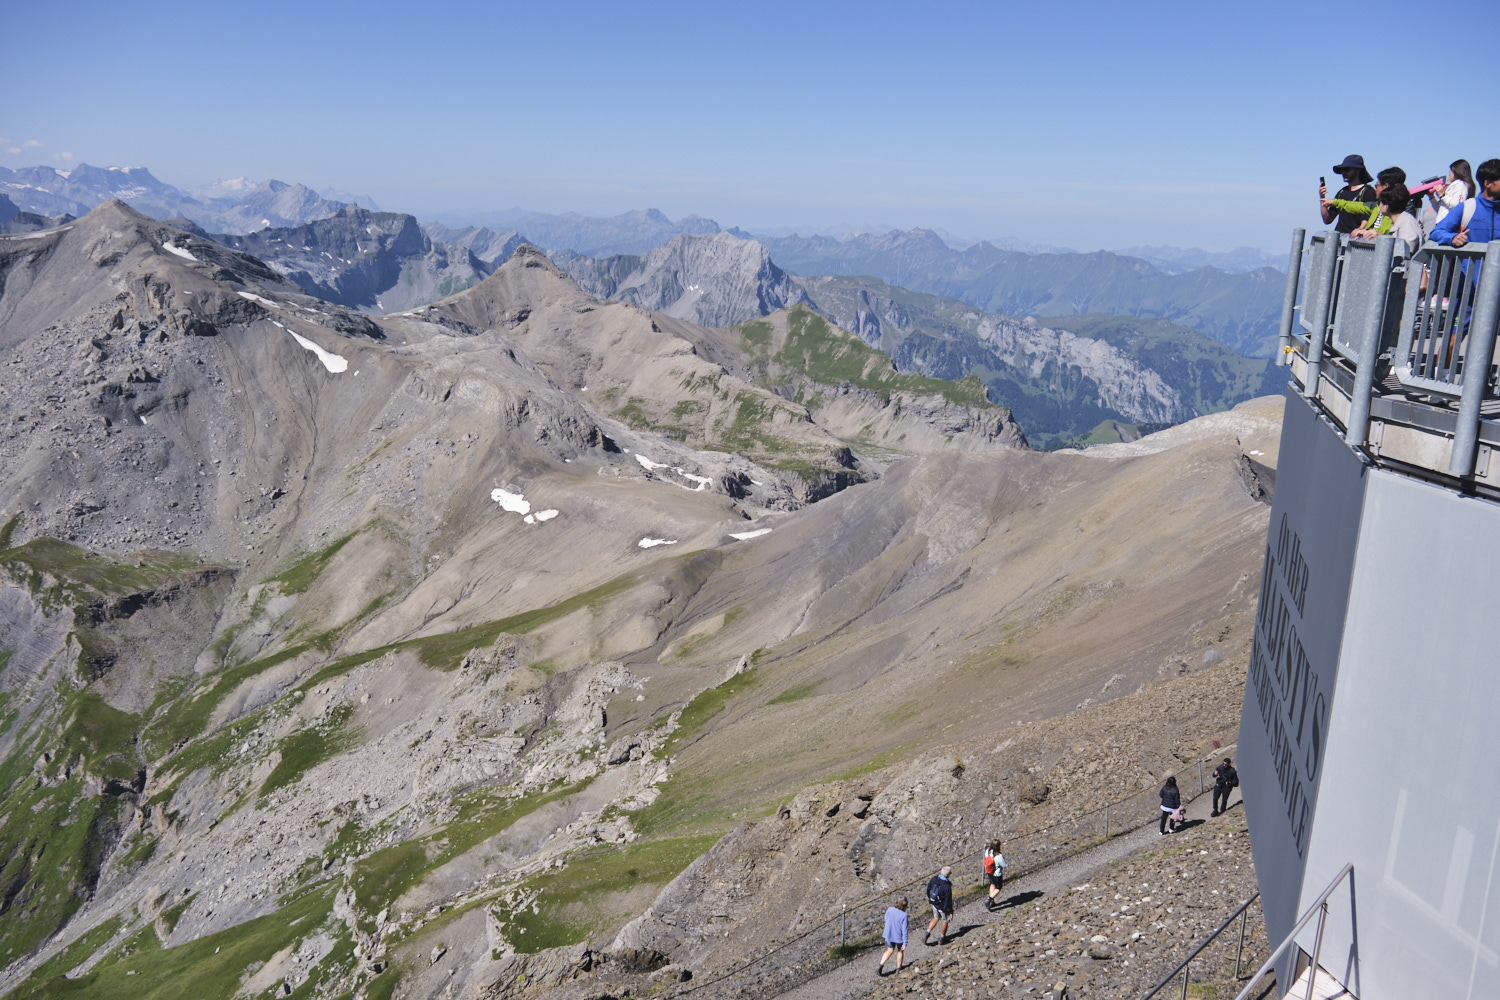
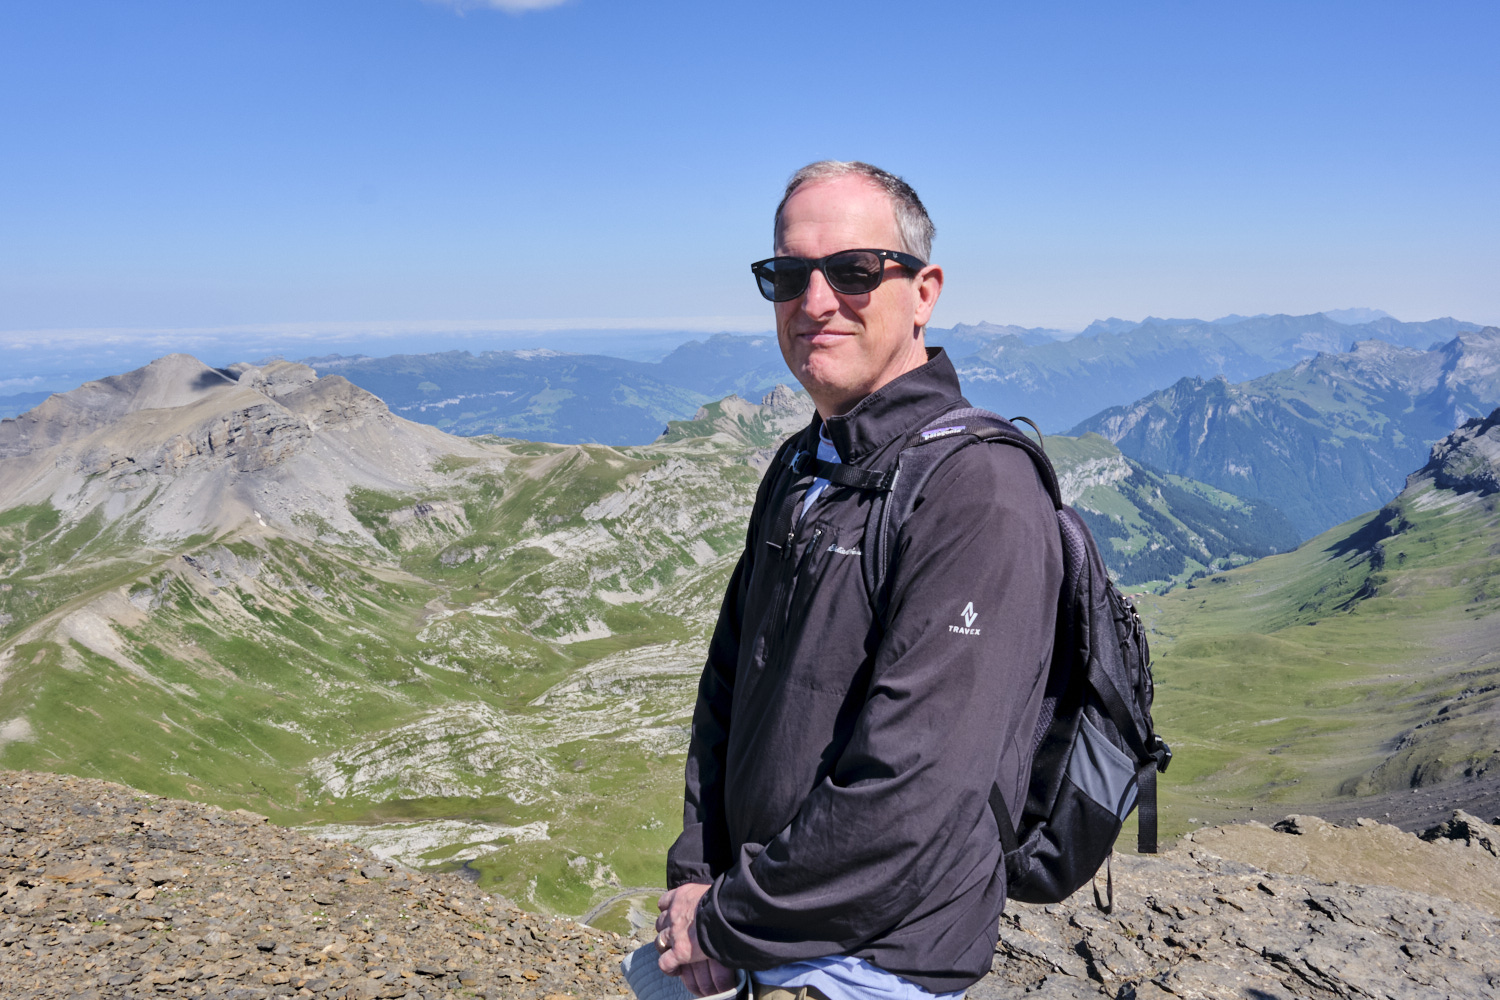
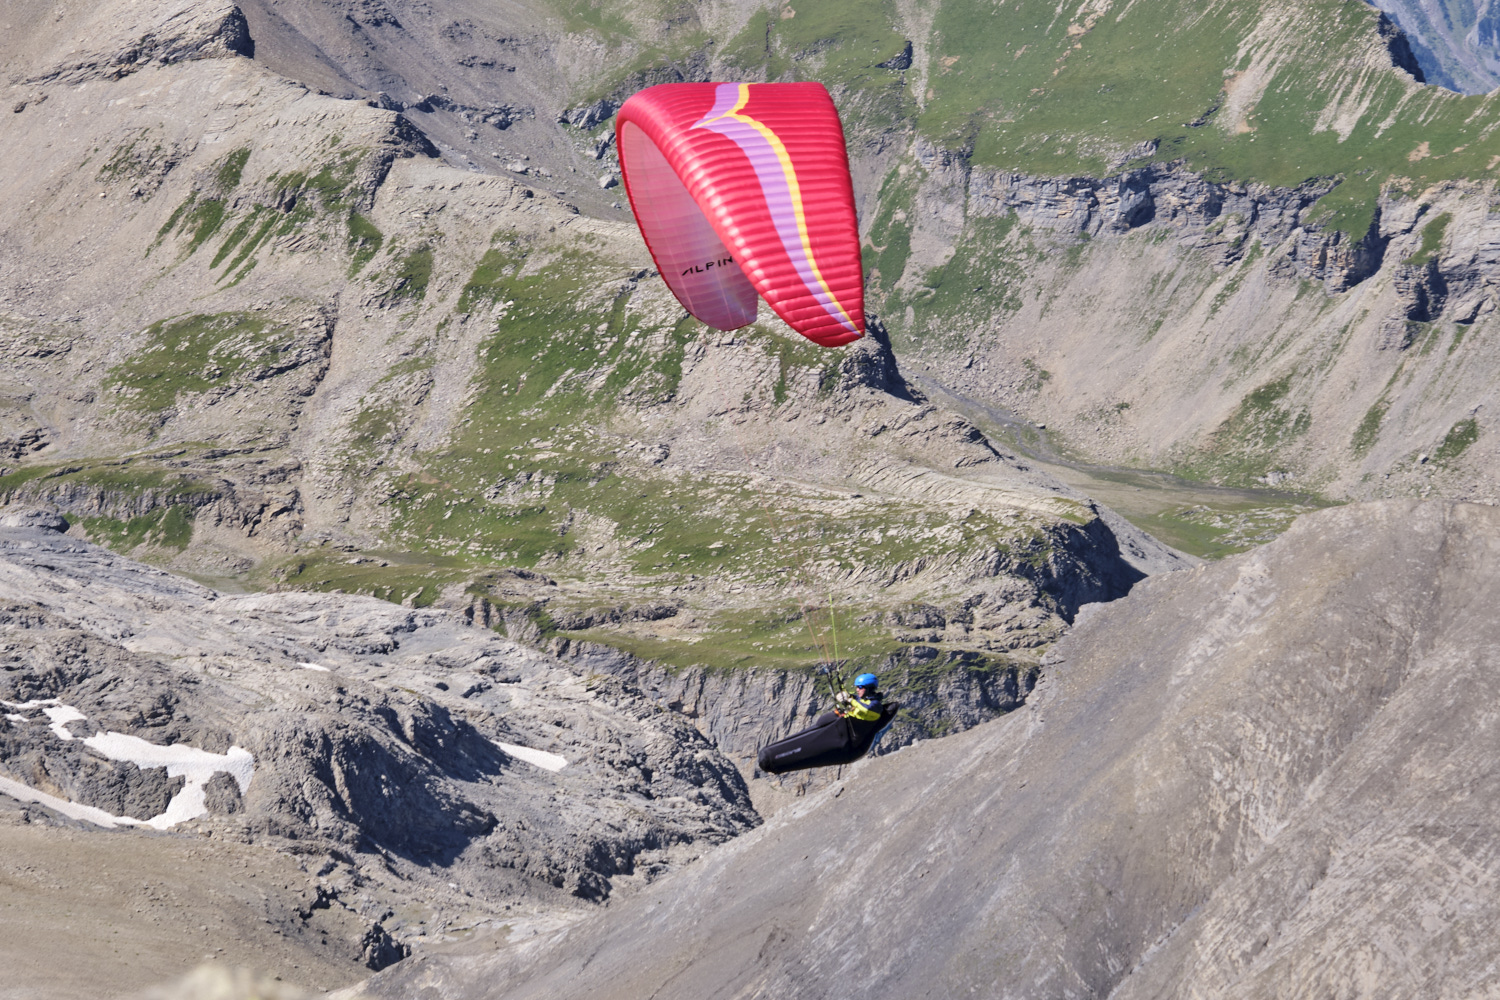
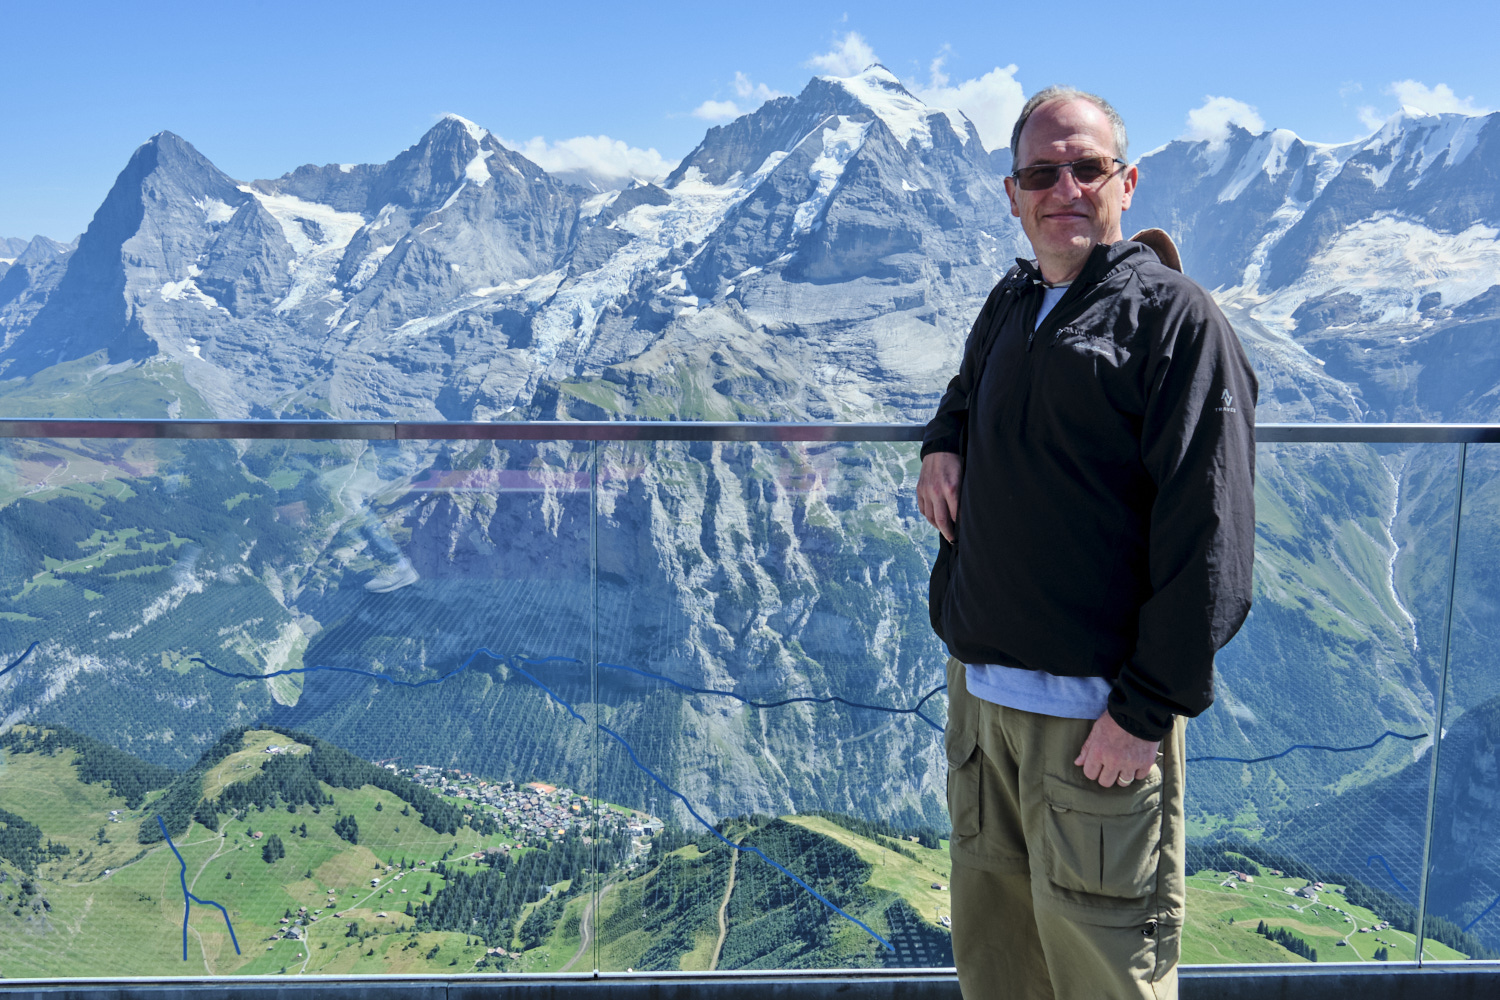
There are beautiful views at the top, as well as a revolving restaurant (Plz Gloria) and a small James Bond museum commemorating the 1969 movie On Her Majesty’s Secret Service, that was filmed on this peak and in the revolving restaurant. We ate our picnic lunch at the summit and watched people paragliding — a sport that seems both wonderful and absolutely terrifying.
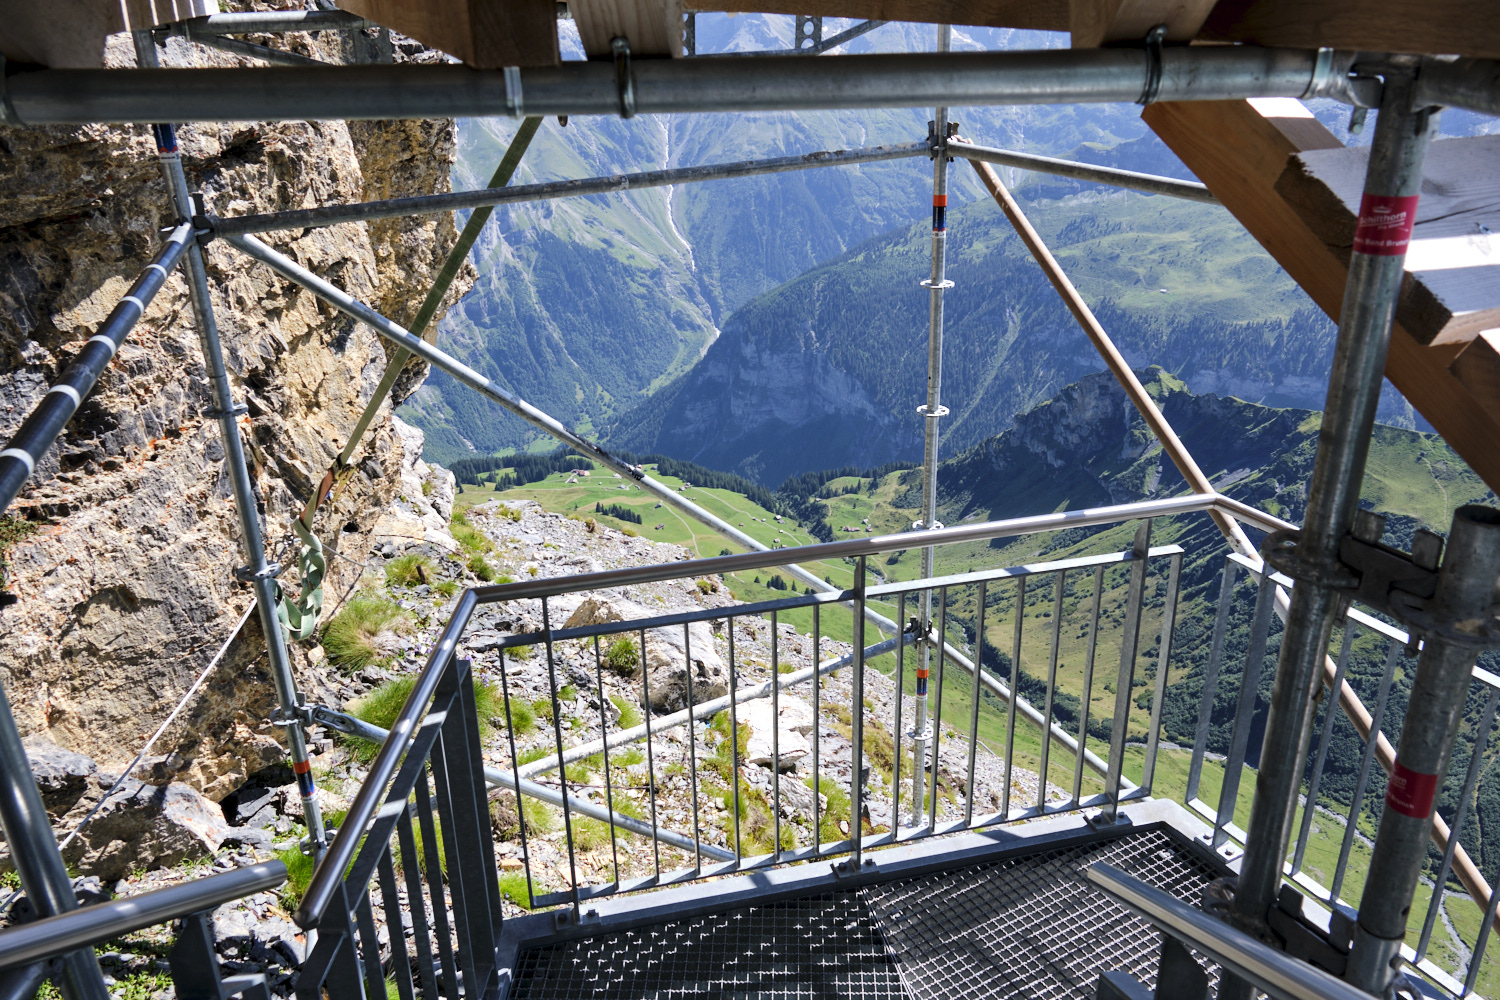
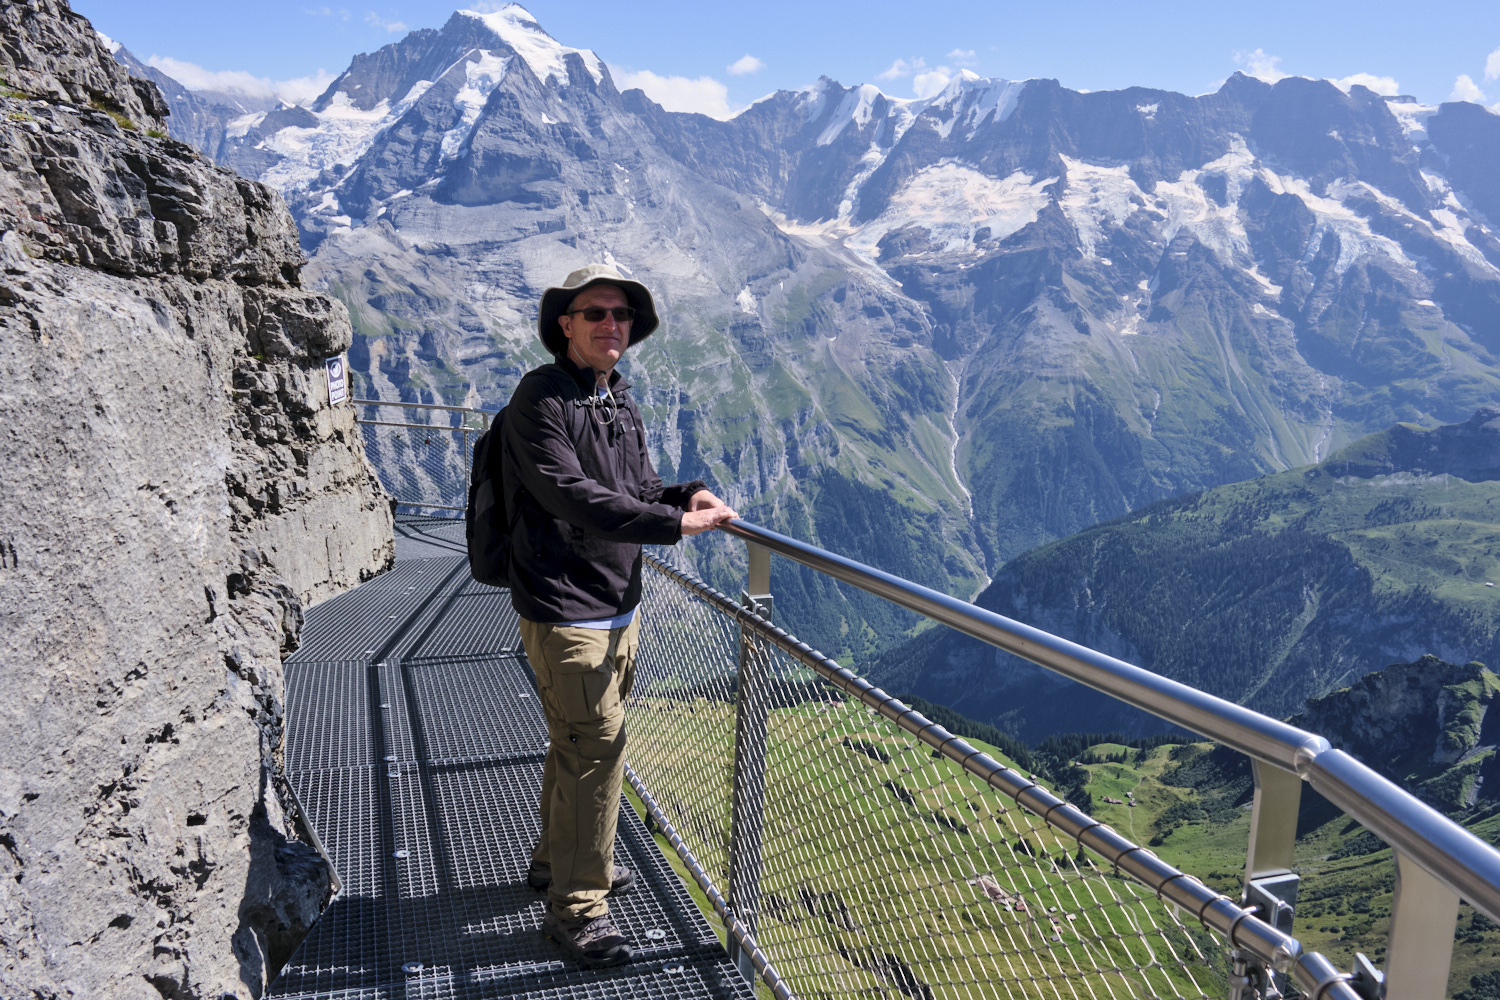
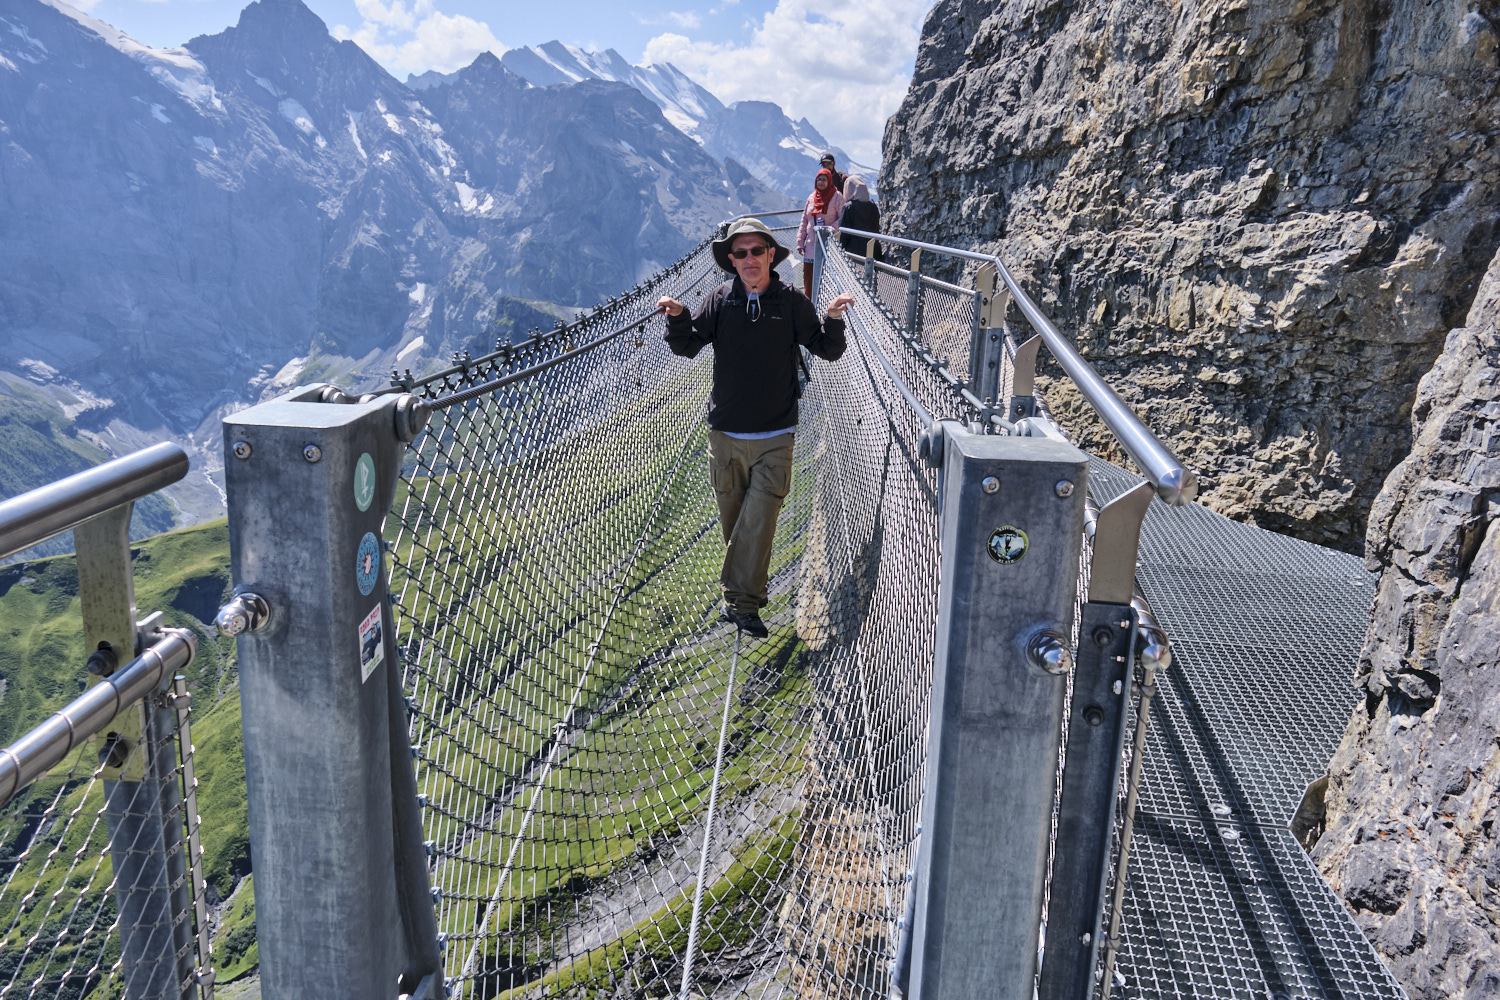
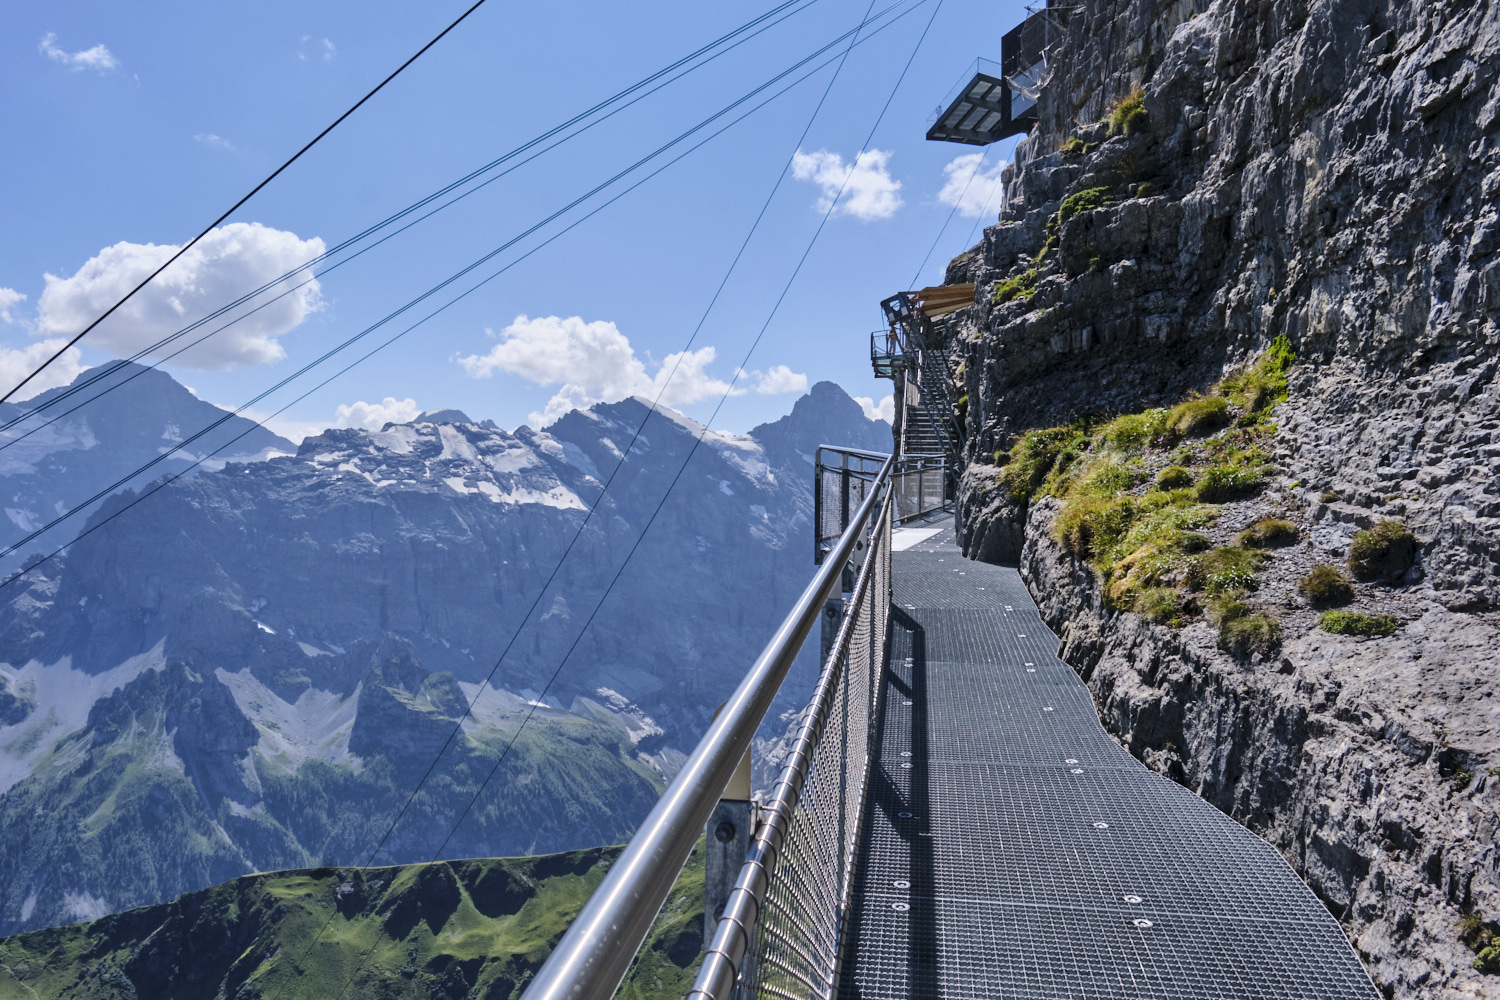
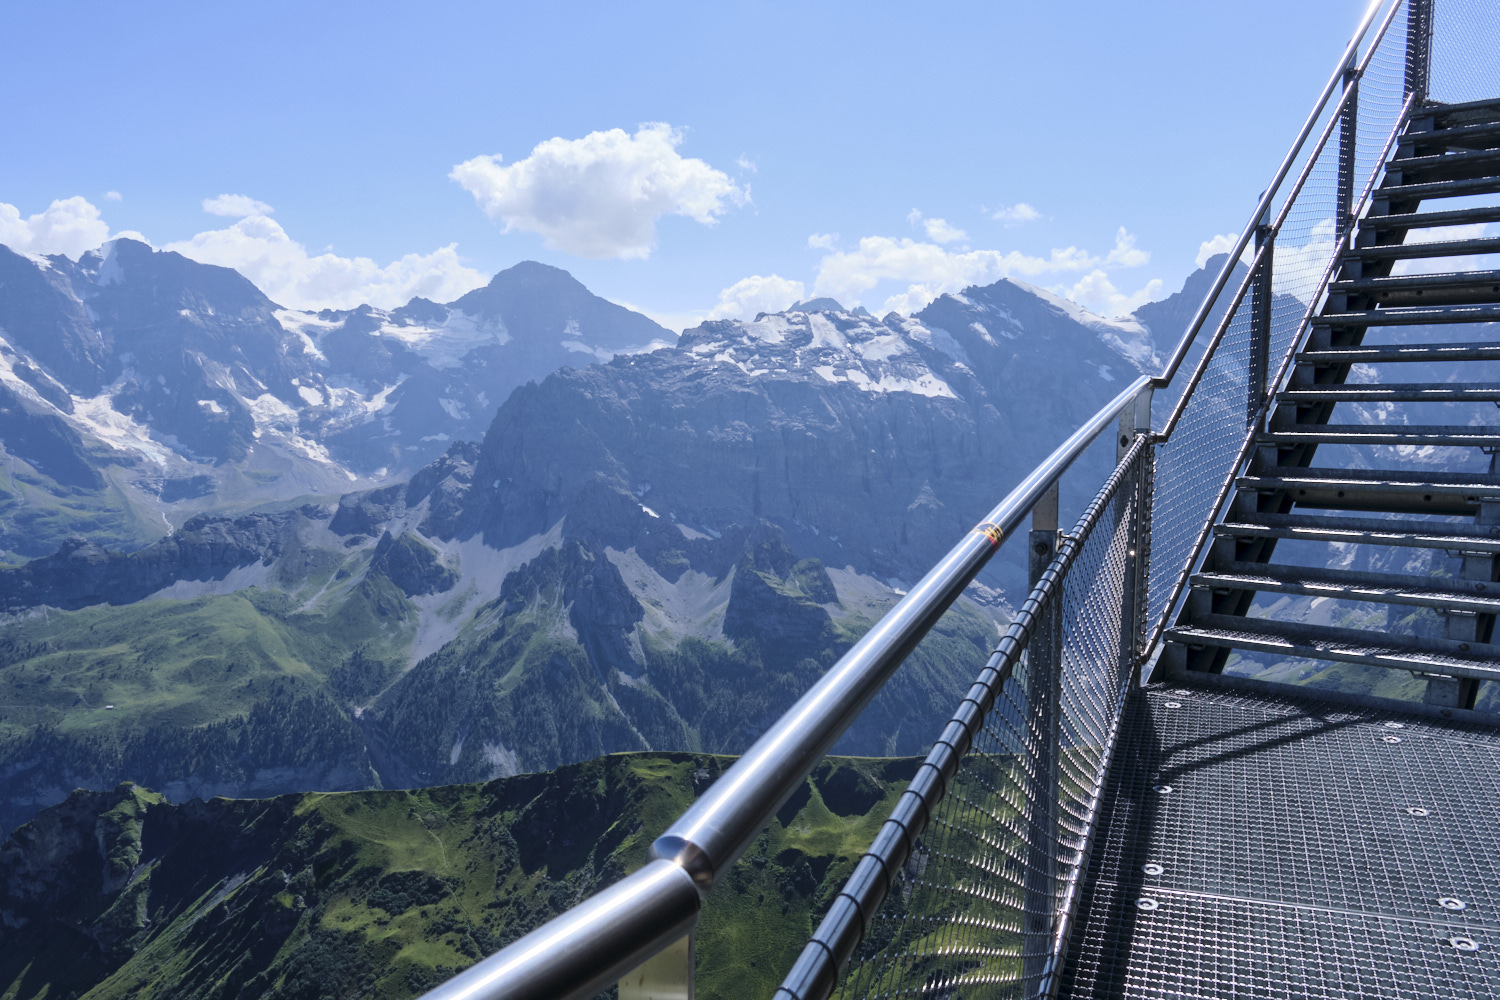
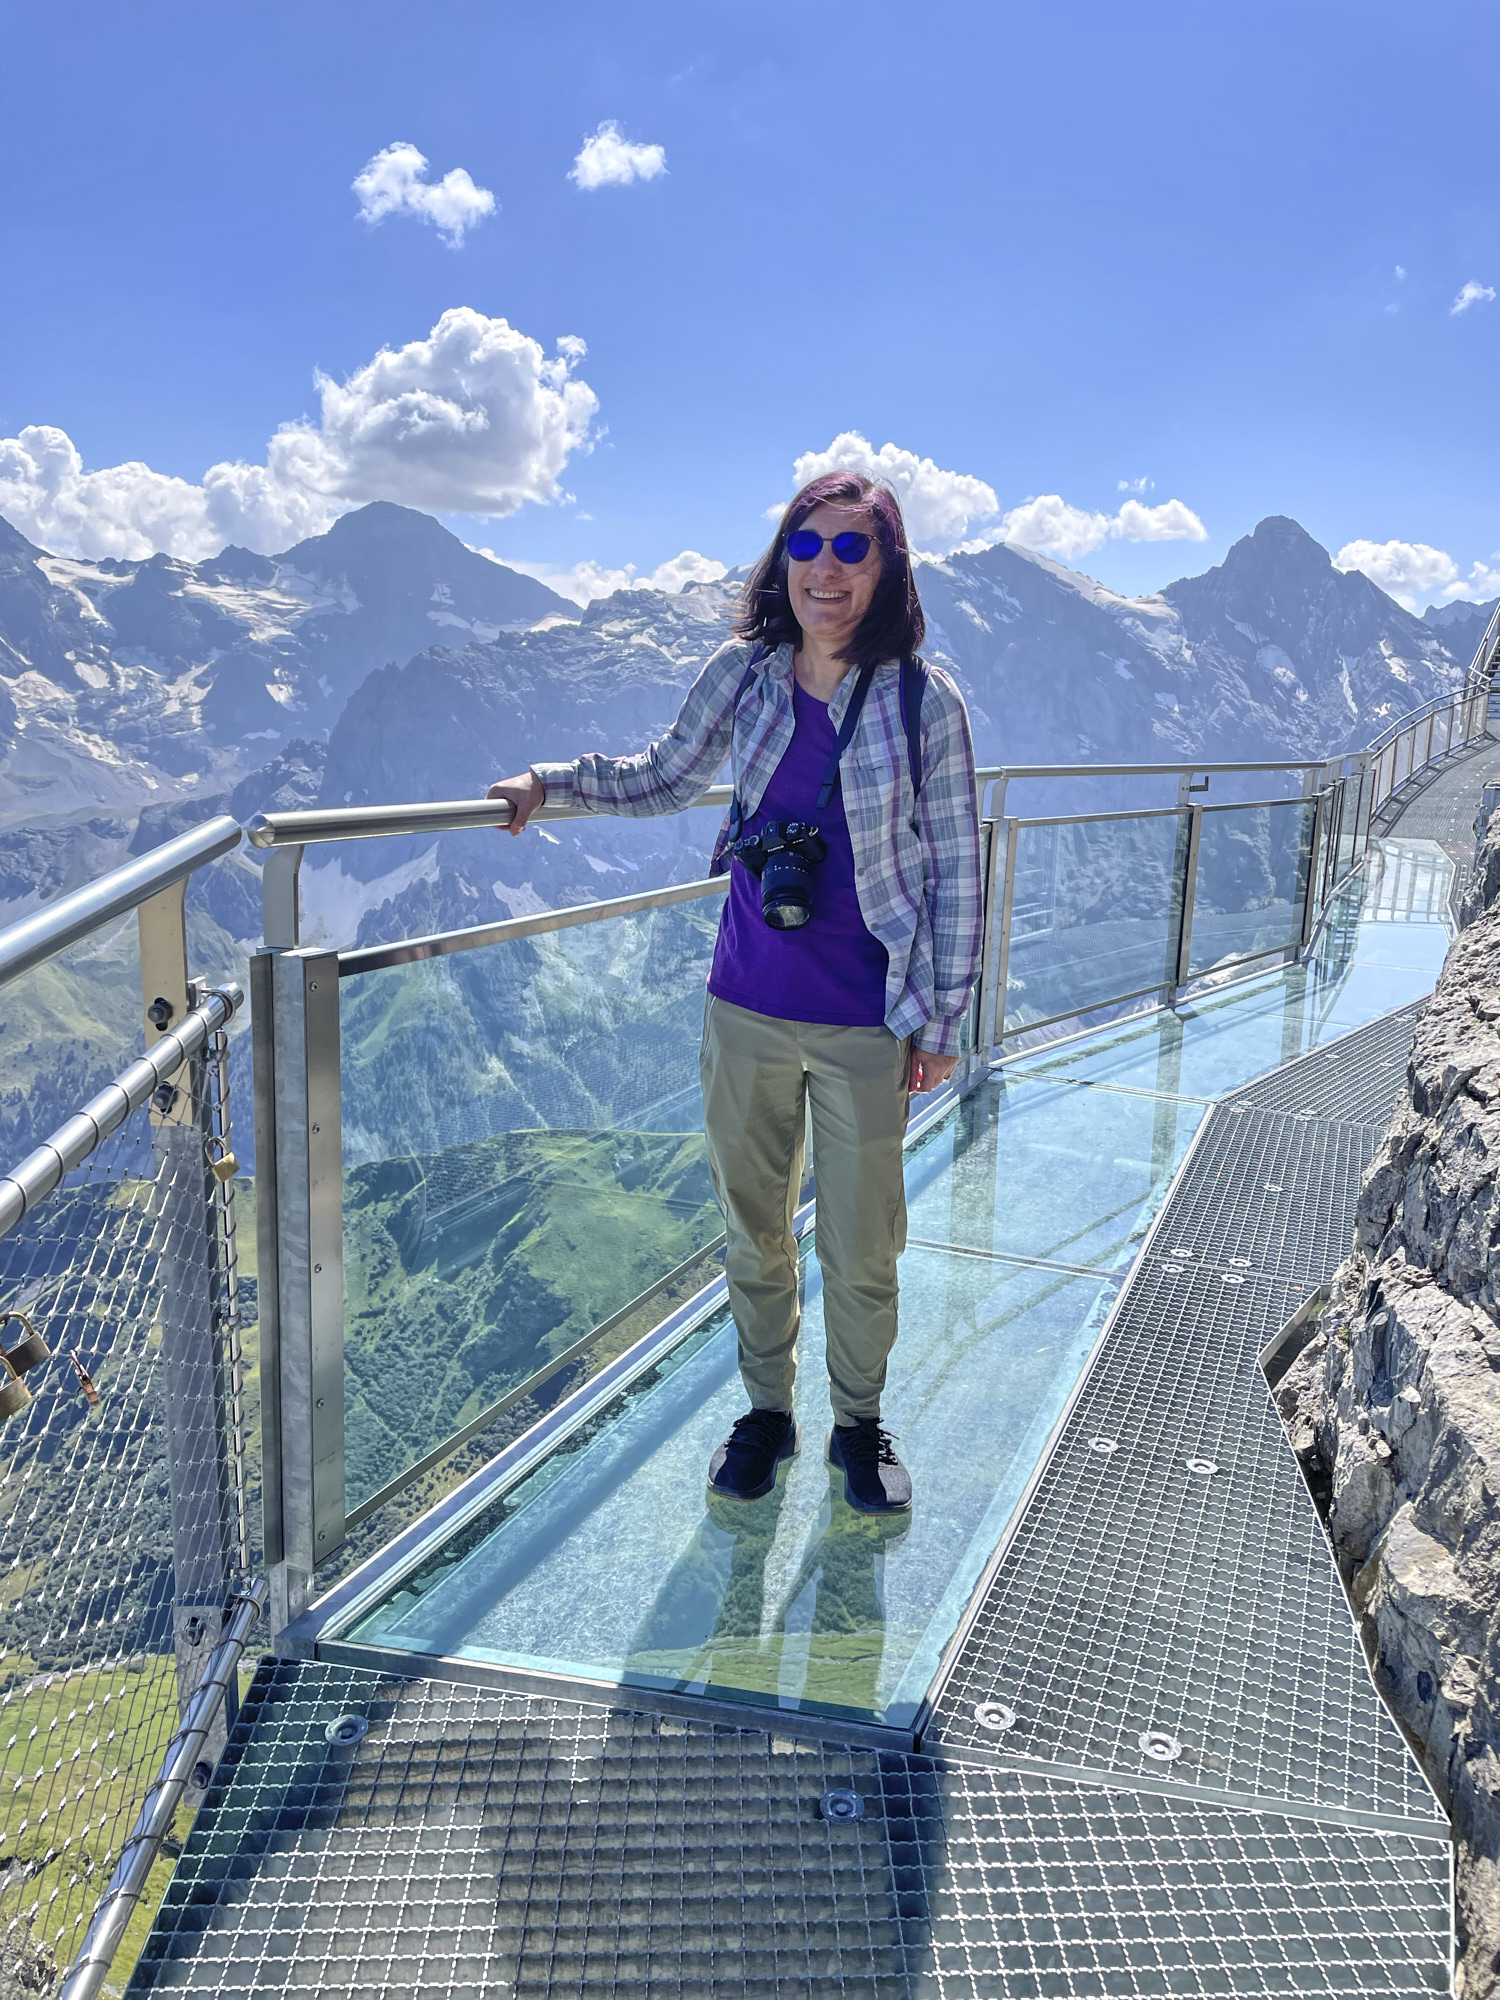
After we had our fill of Schilthorn we took the cable car back down to Birg (summit at 8,806 feet) and enjoyed more views and a “thrill walk.” Yes, I walked on the glass platform but I didn’t let go of the handrail and I tried not to look down!
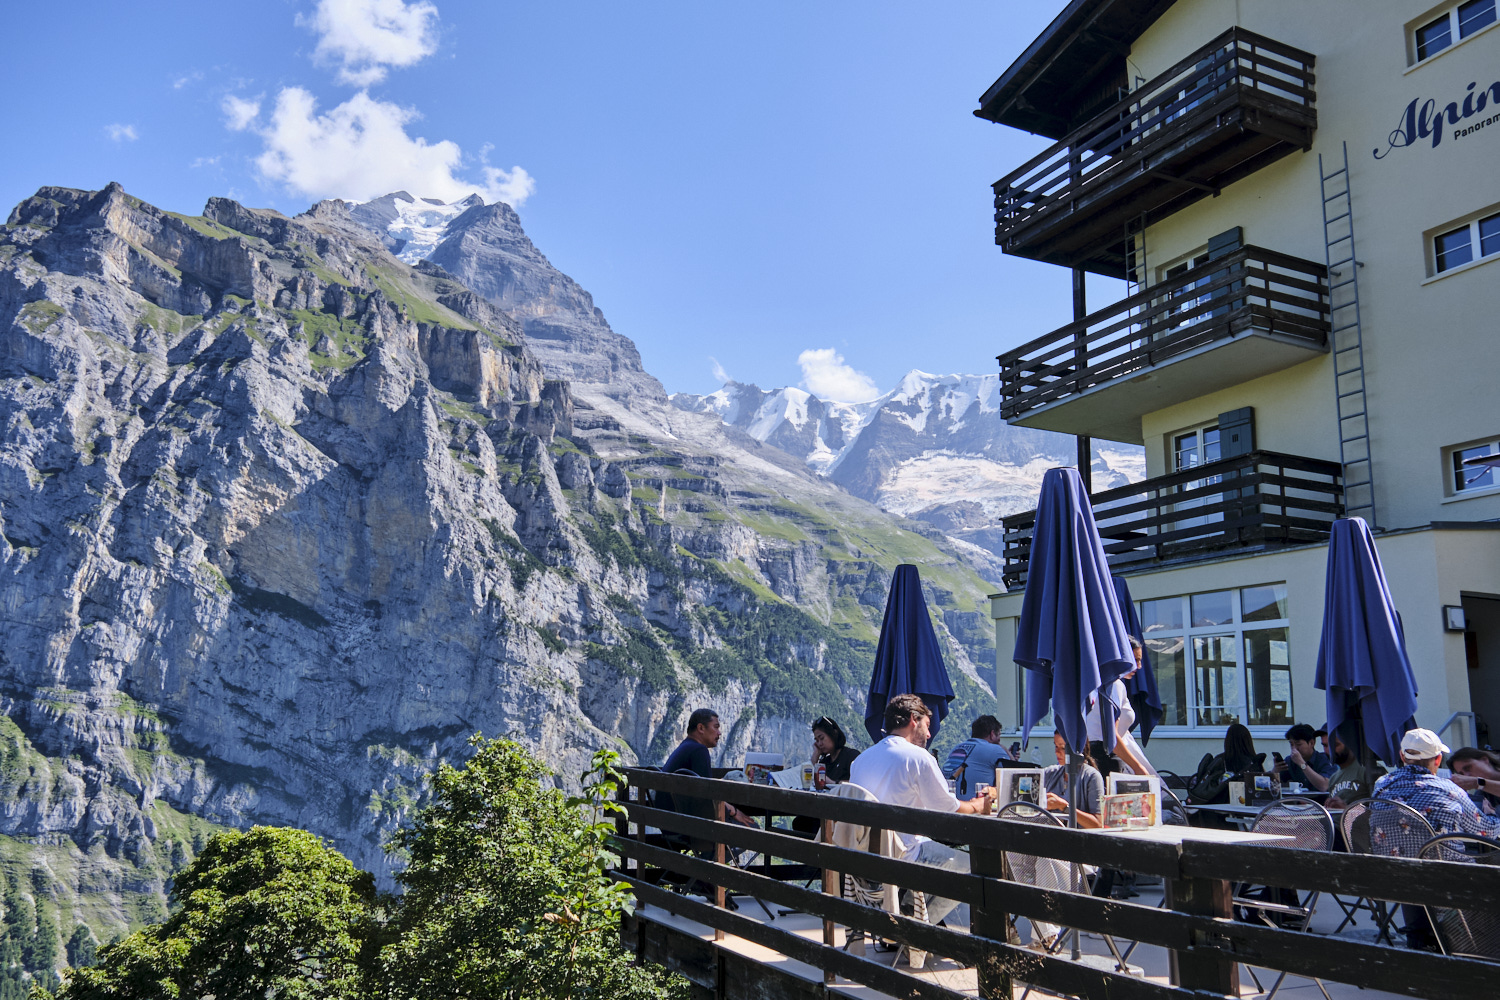
After all the views and thrills we took the cable car down to Mürren (5,374 ft) for an afternoon hike.
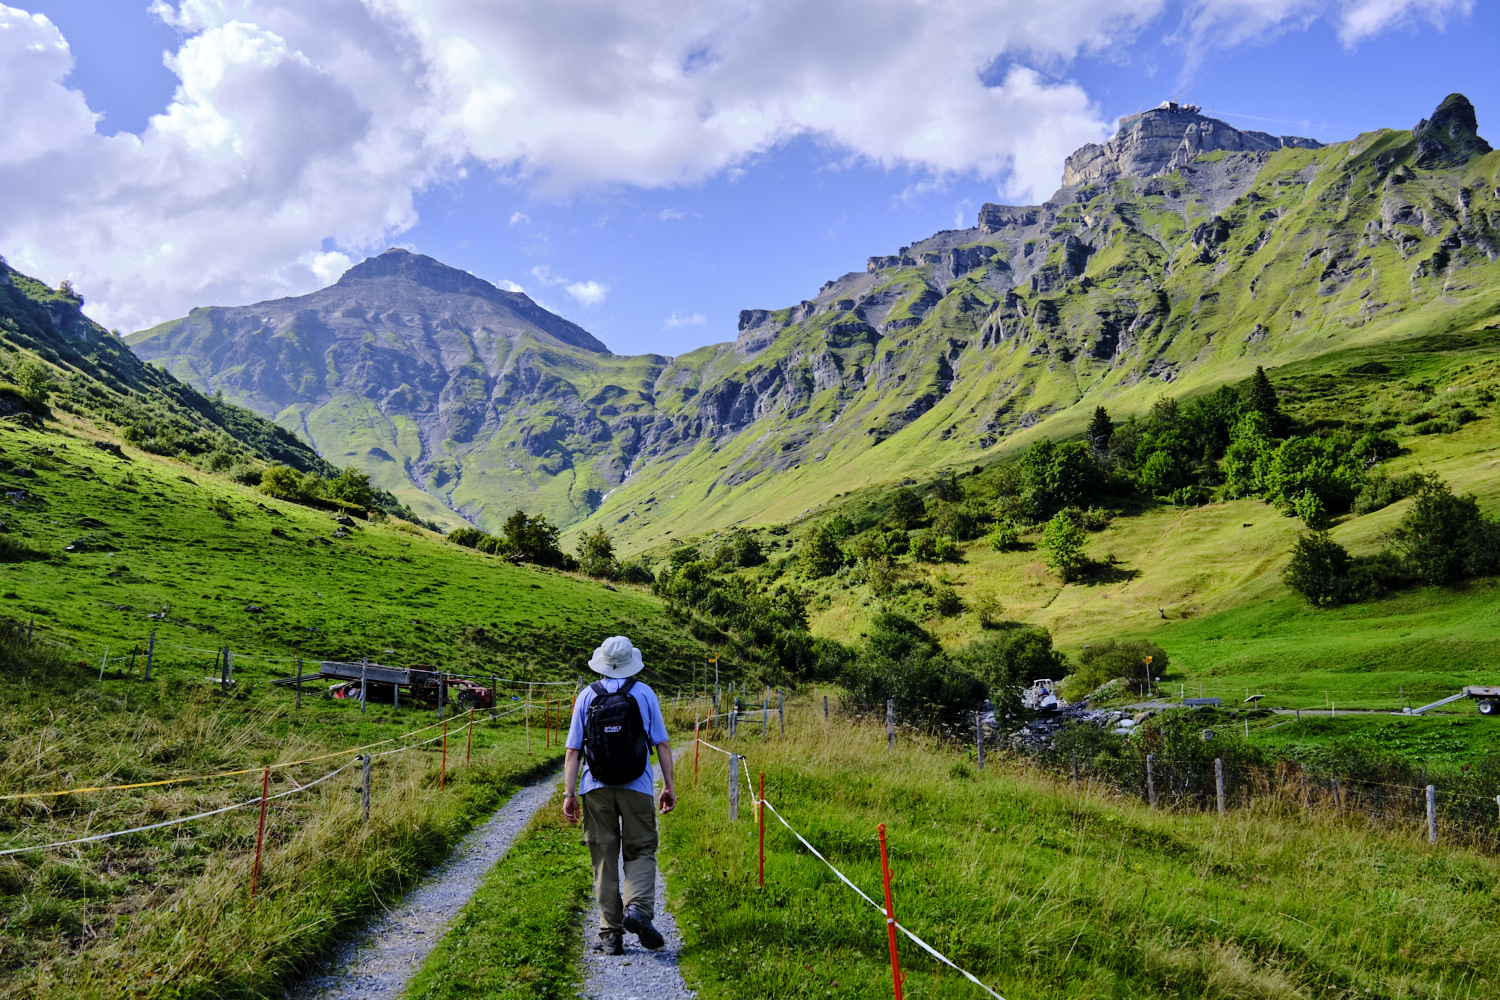
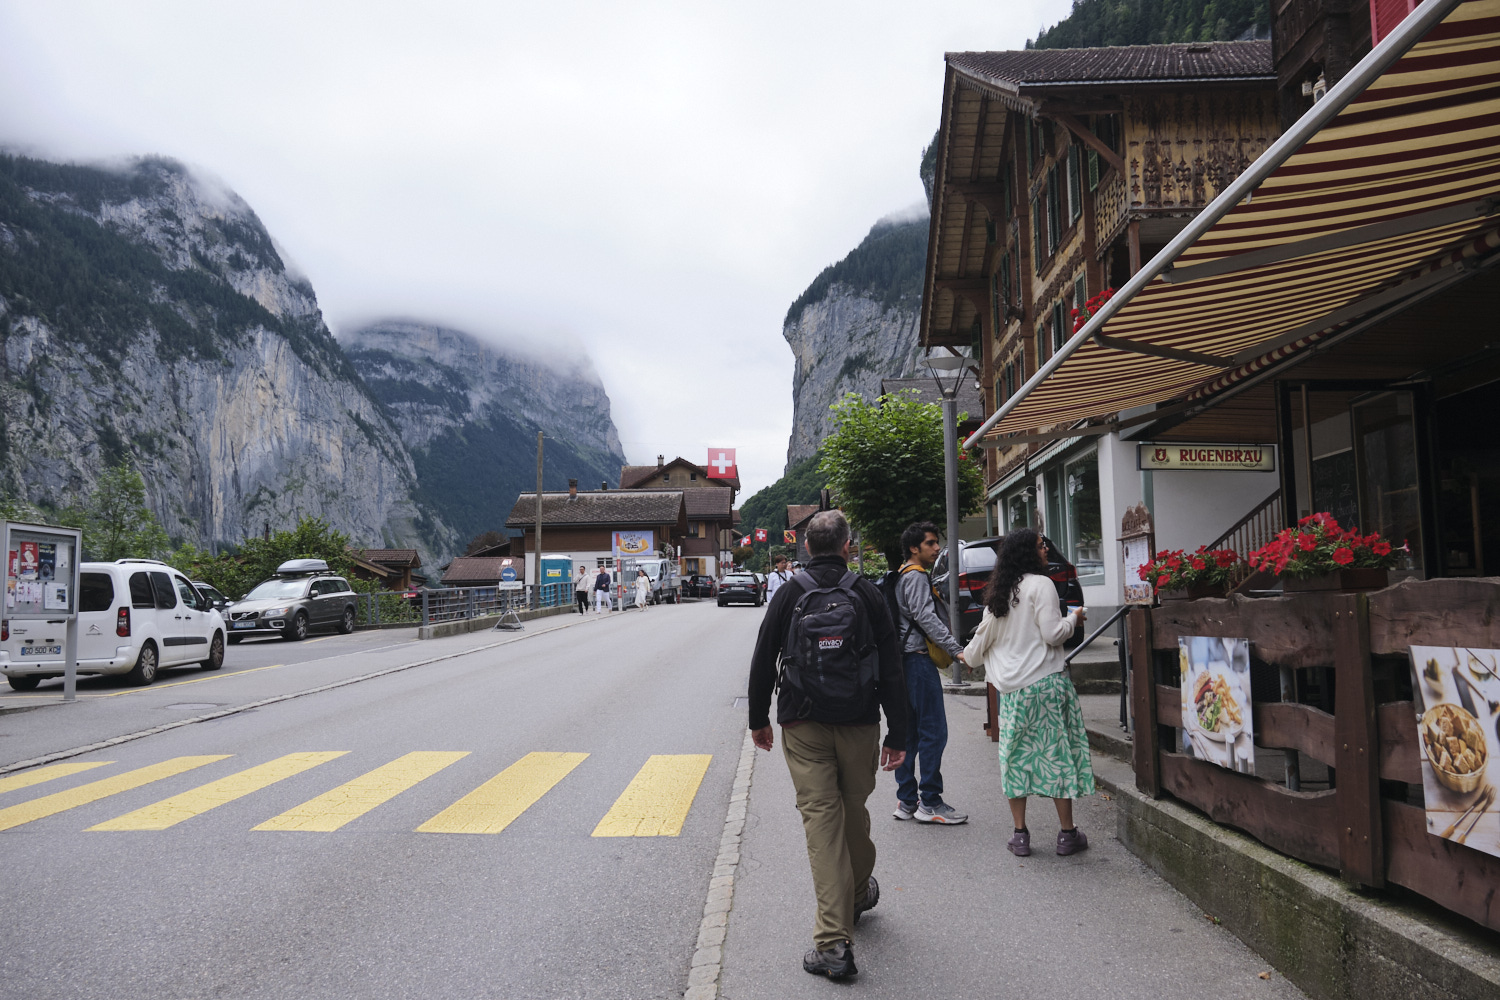
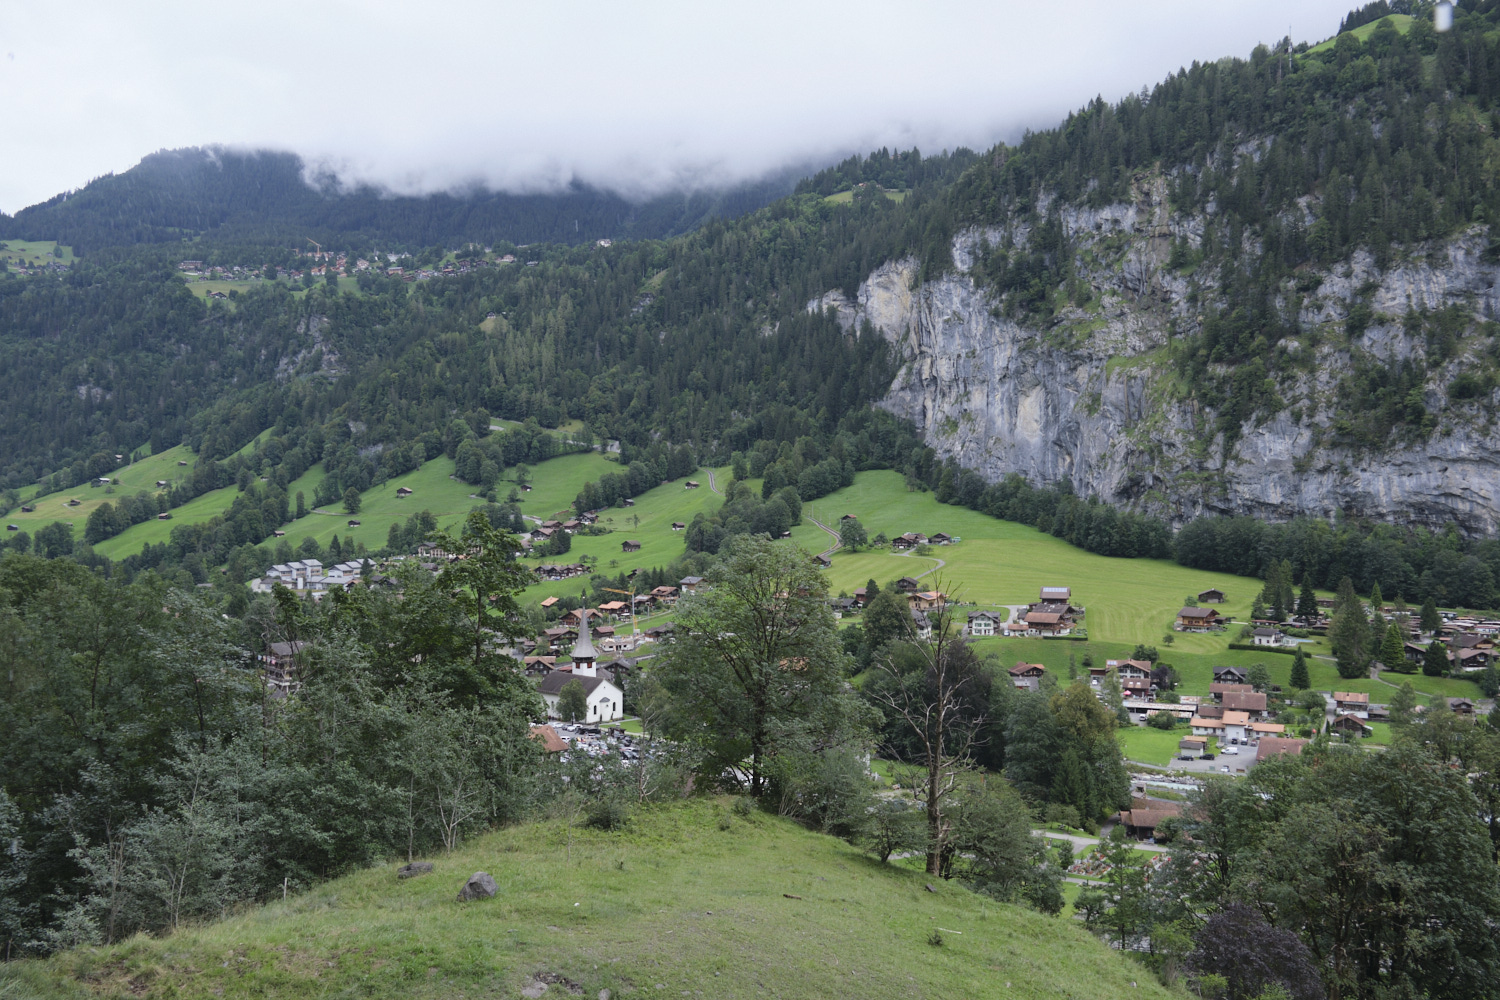
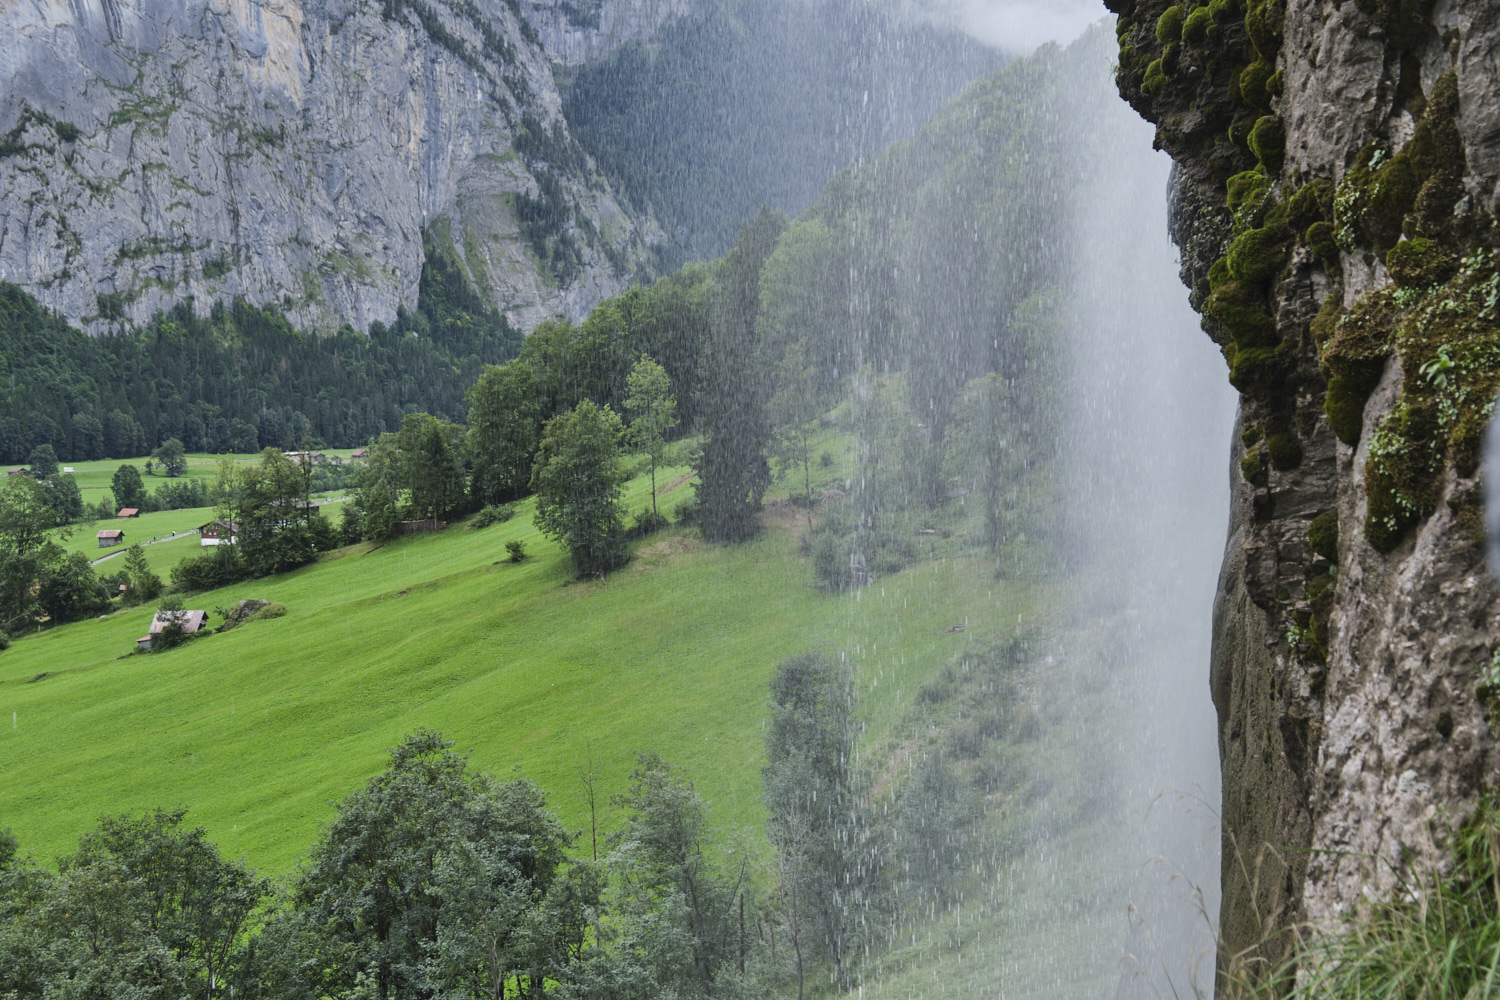
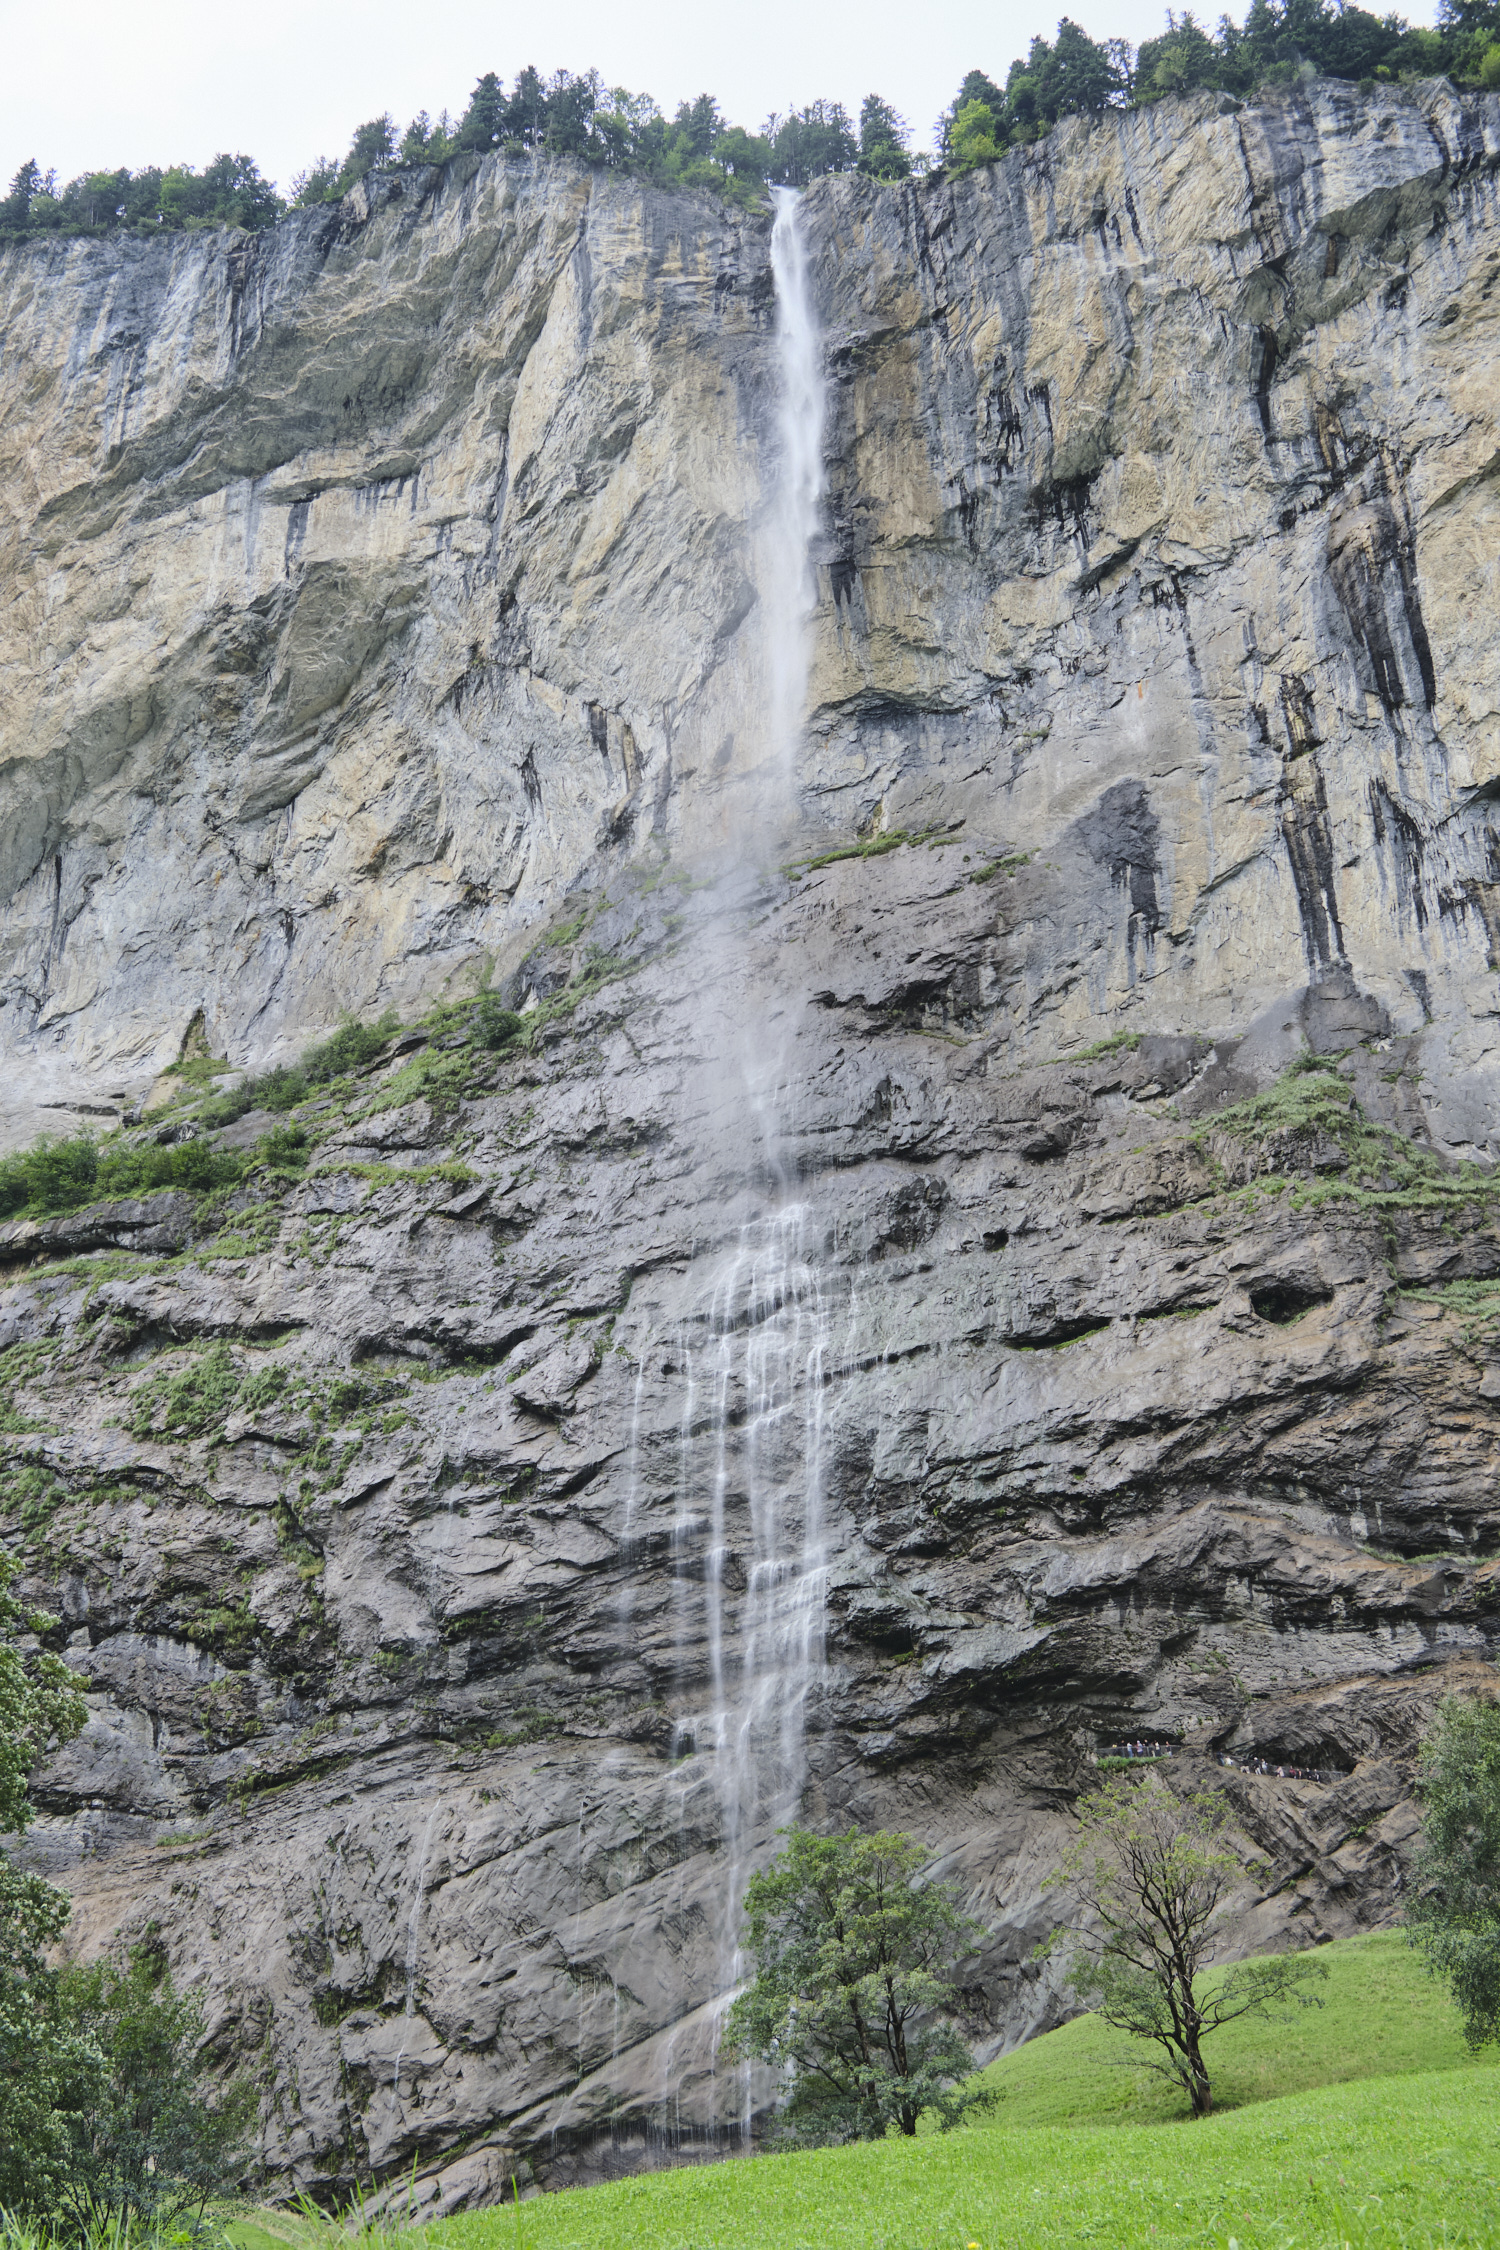
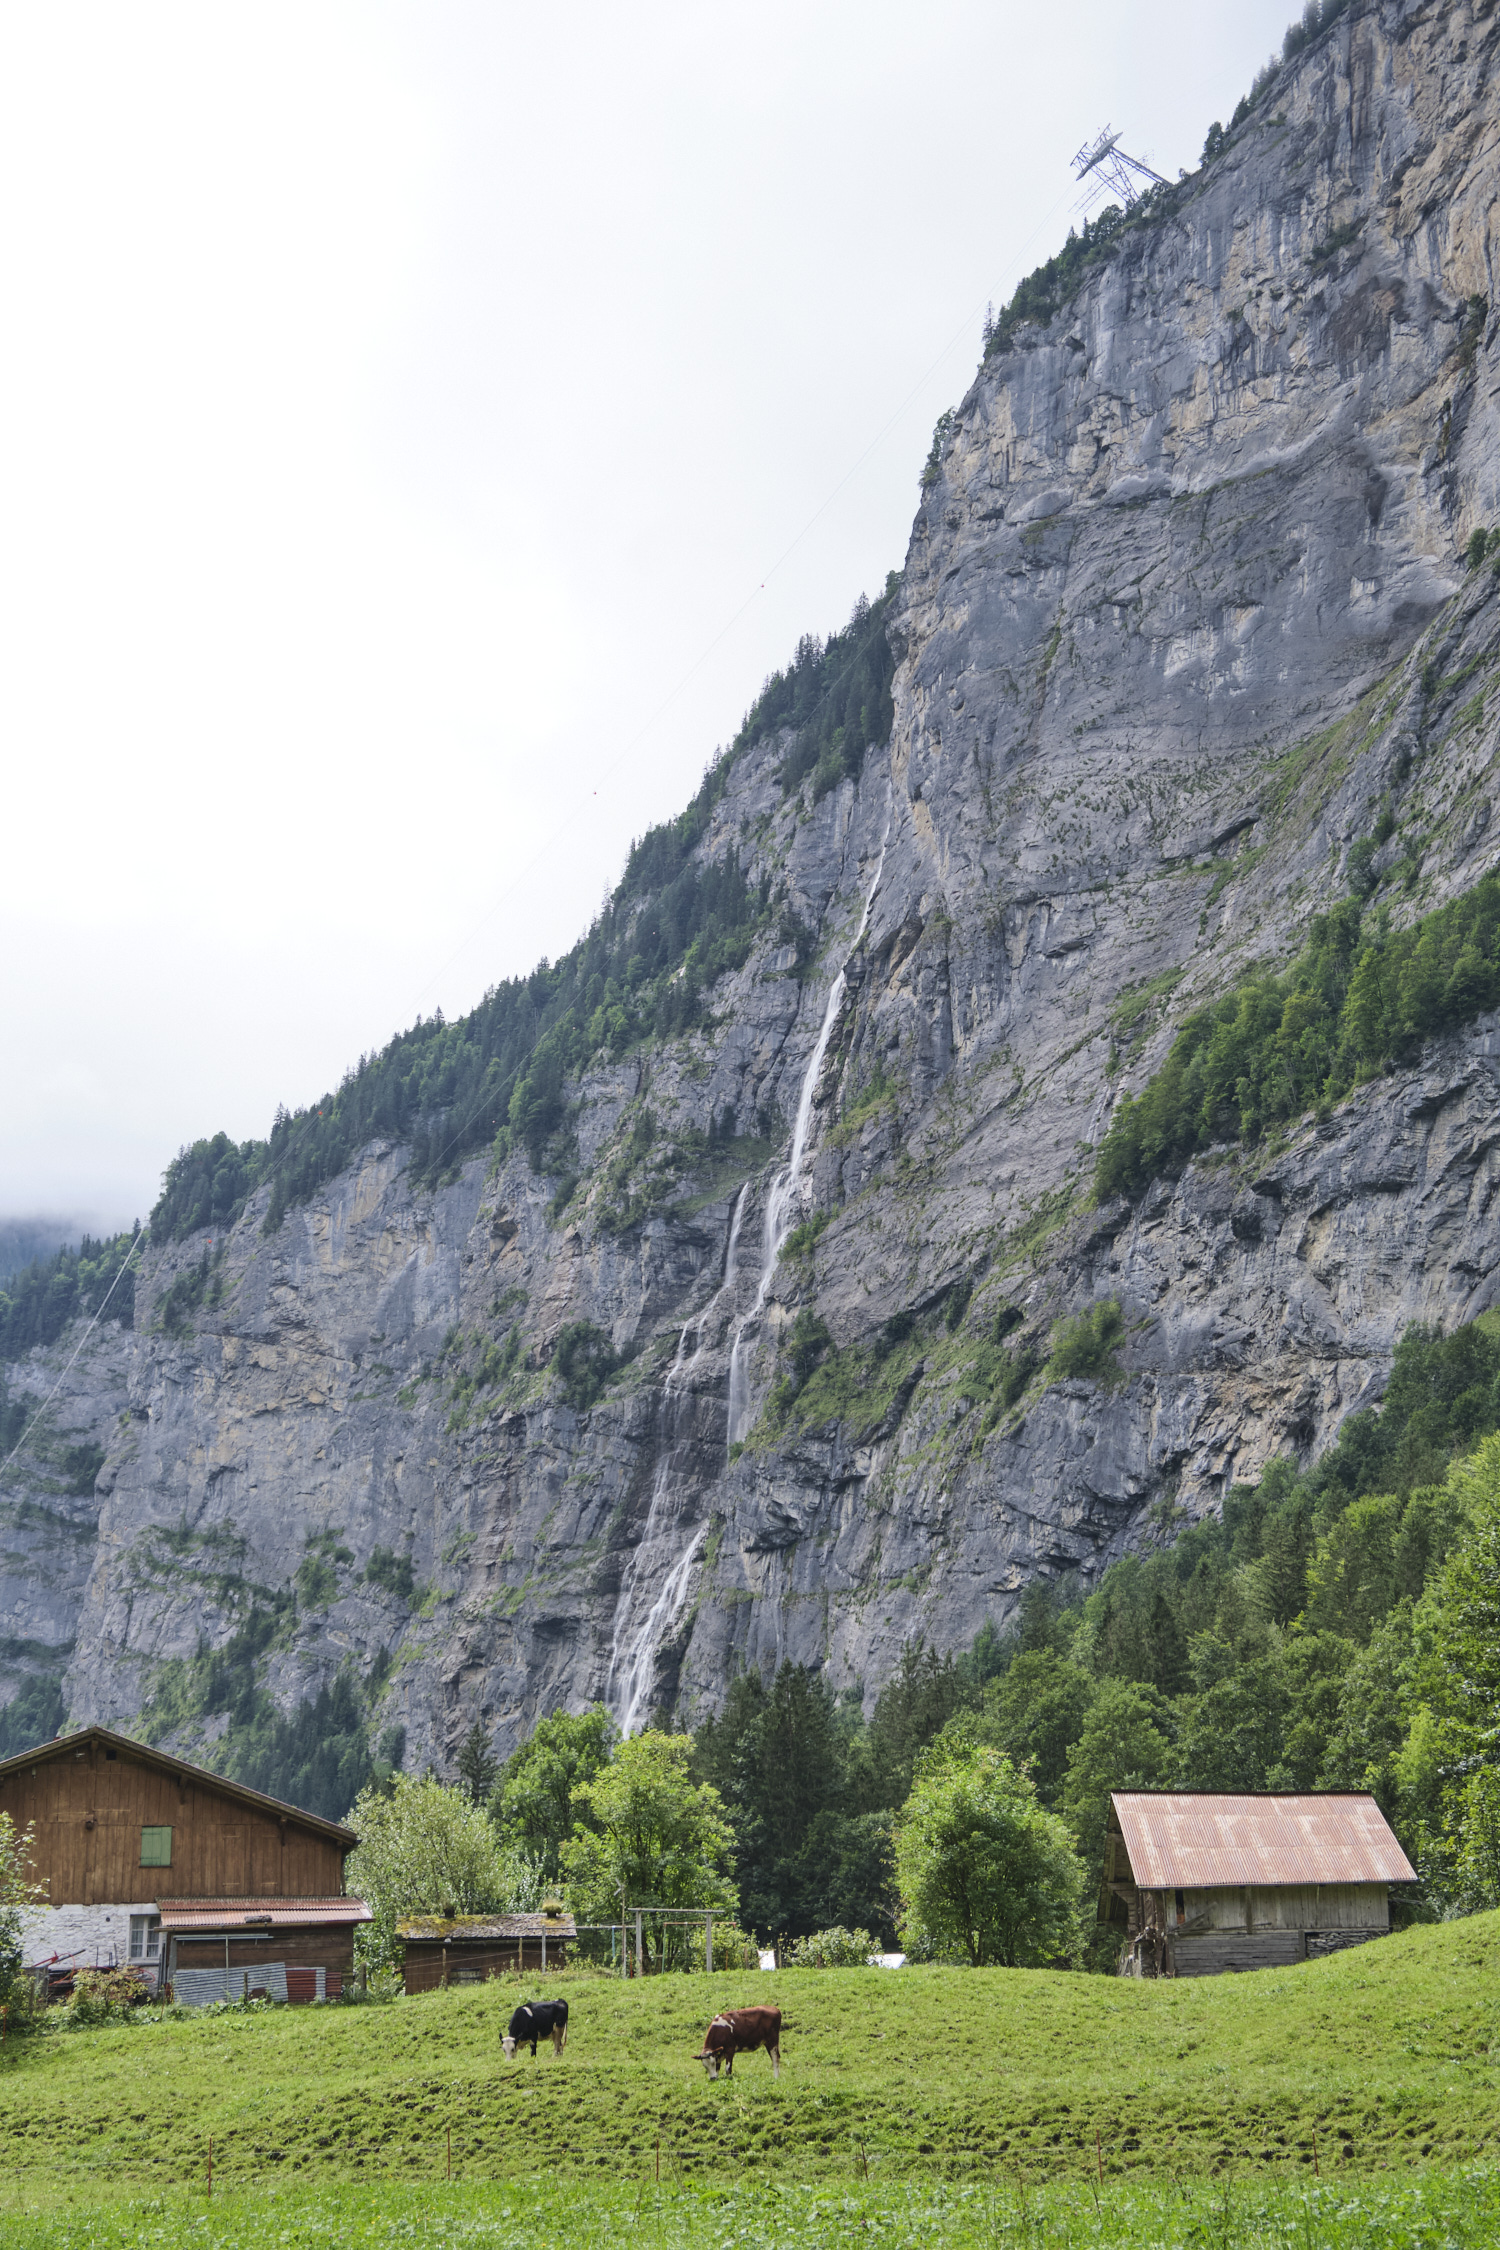
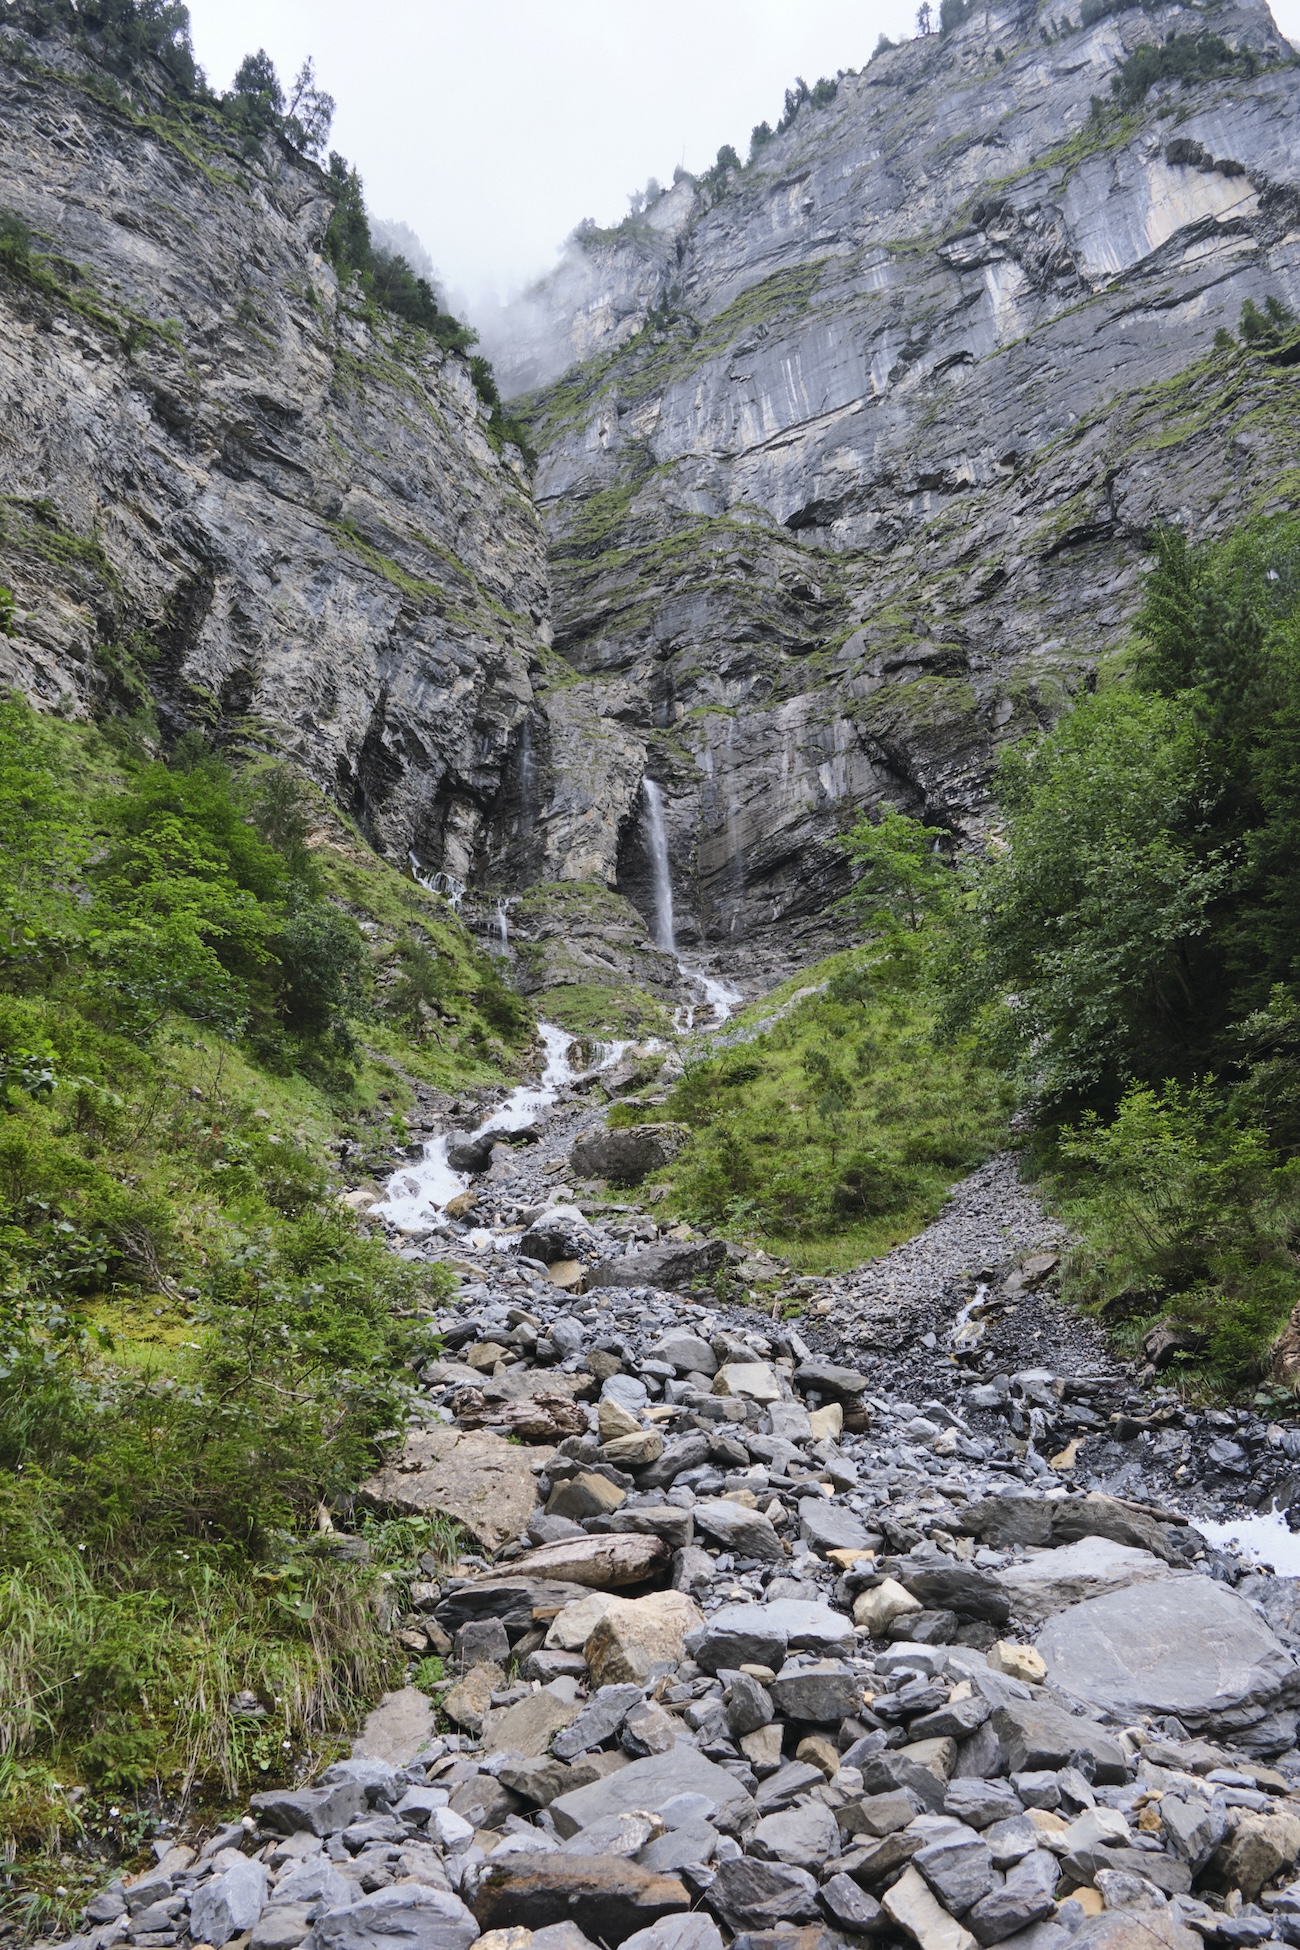
Our second day in Switzerland was cloudy and foggy. We had planned to travel to a high peak but realized all we would see is clouds (in fact there is a local TV station that airs live footage from the local peaks and there wasn’t much to see), so we opted for a valley hike instead. We stopped in a local grocery store and bakery to pick up fresh-baked bread, cheese, and fruit. Then we took the cog train back to Lauterbrunnen, walked around the town, and then headed to a nearby waterfall.
There was a large crowd on the path leading up to the lookout “behind” the waterfall. We waited and took our turn looking out. From that vantage point it really seemed more like a mist or a light rain so it wasn’t quite as impressive as anticipated, but still fun.
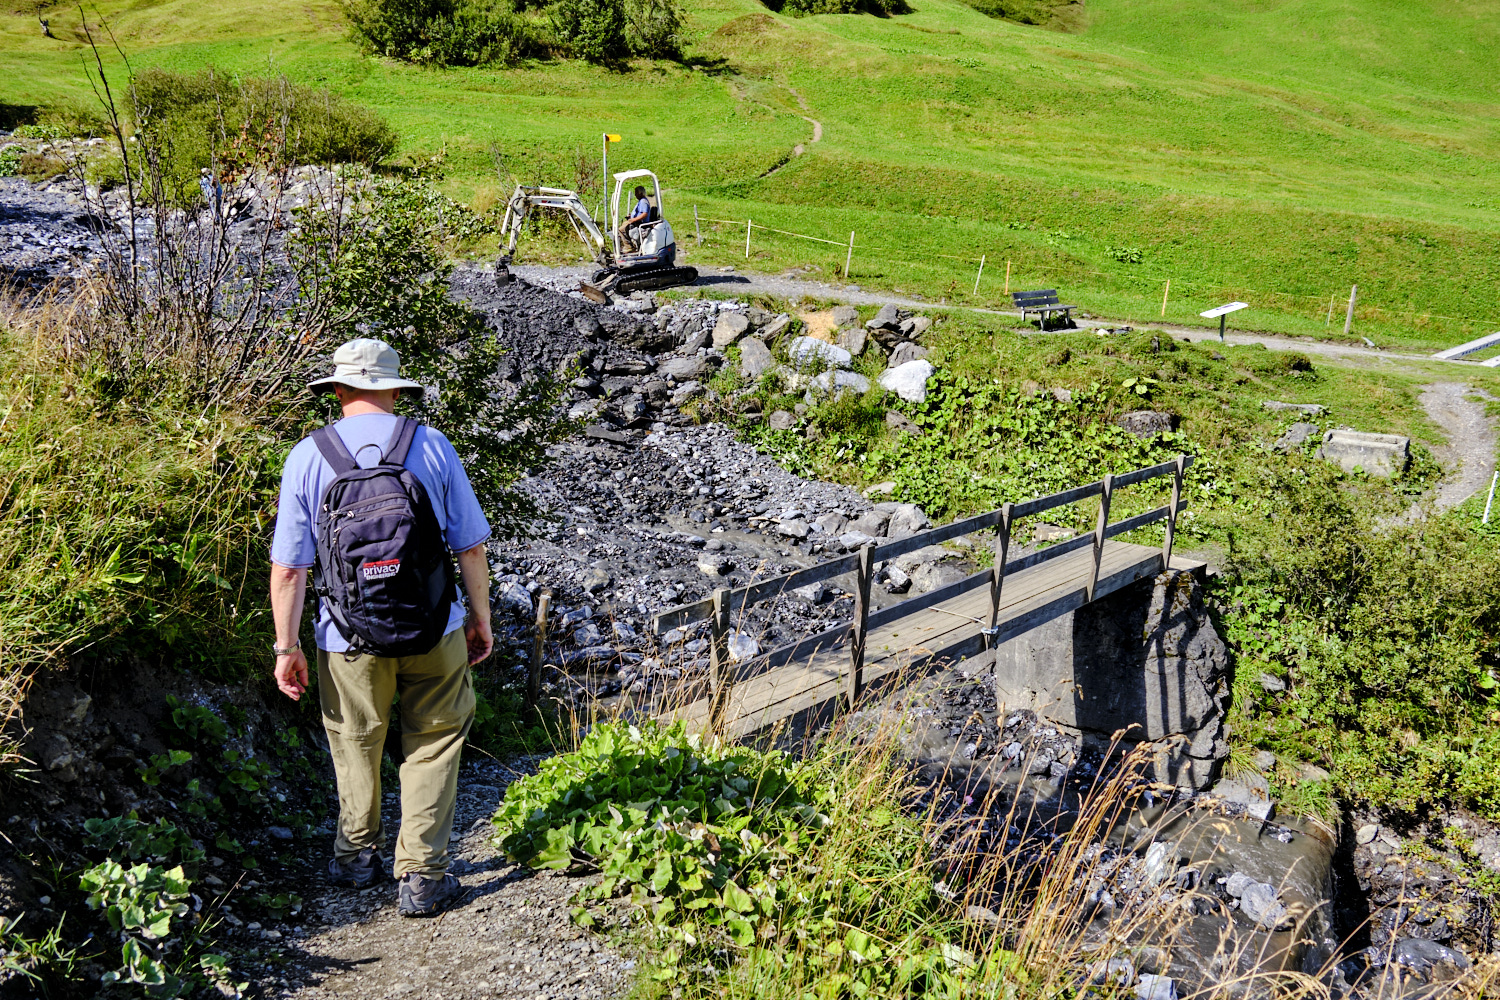
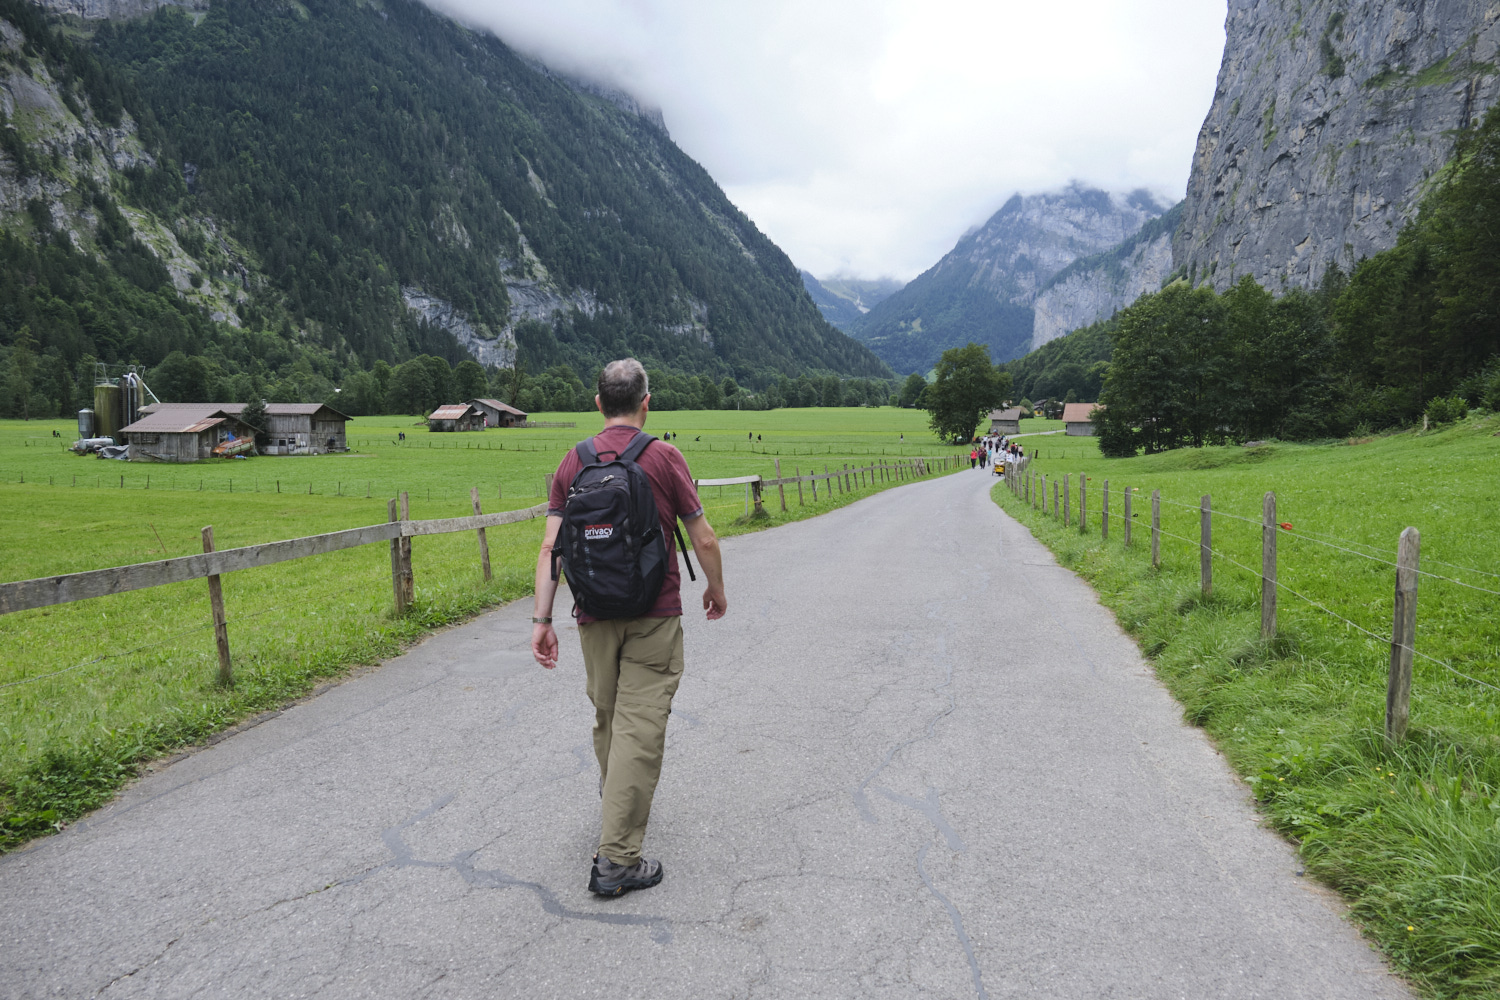
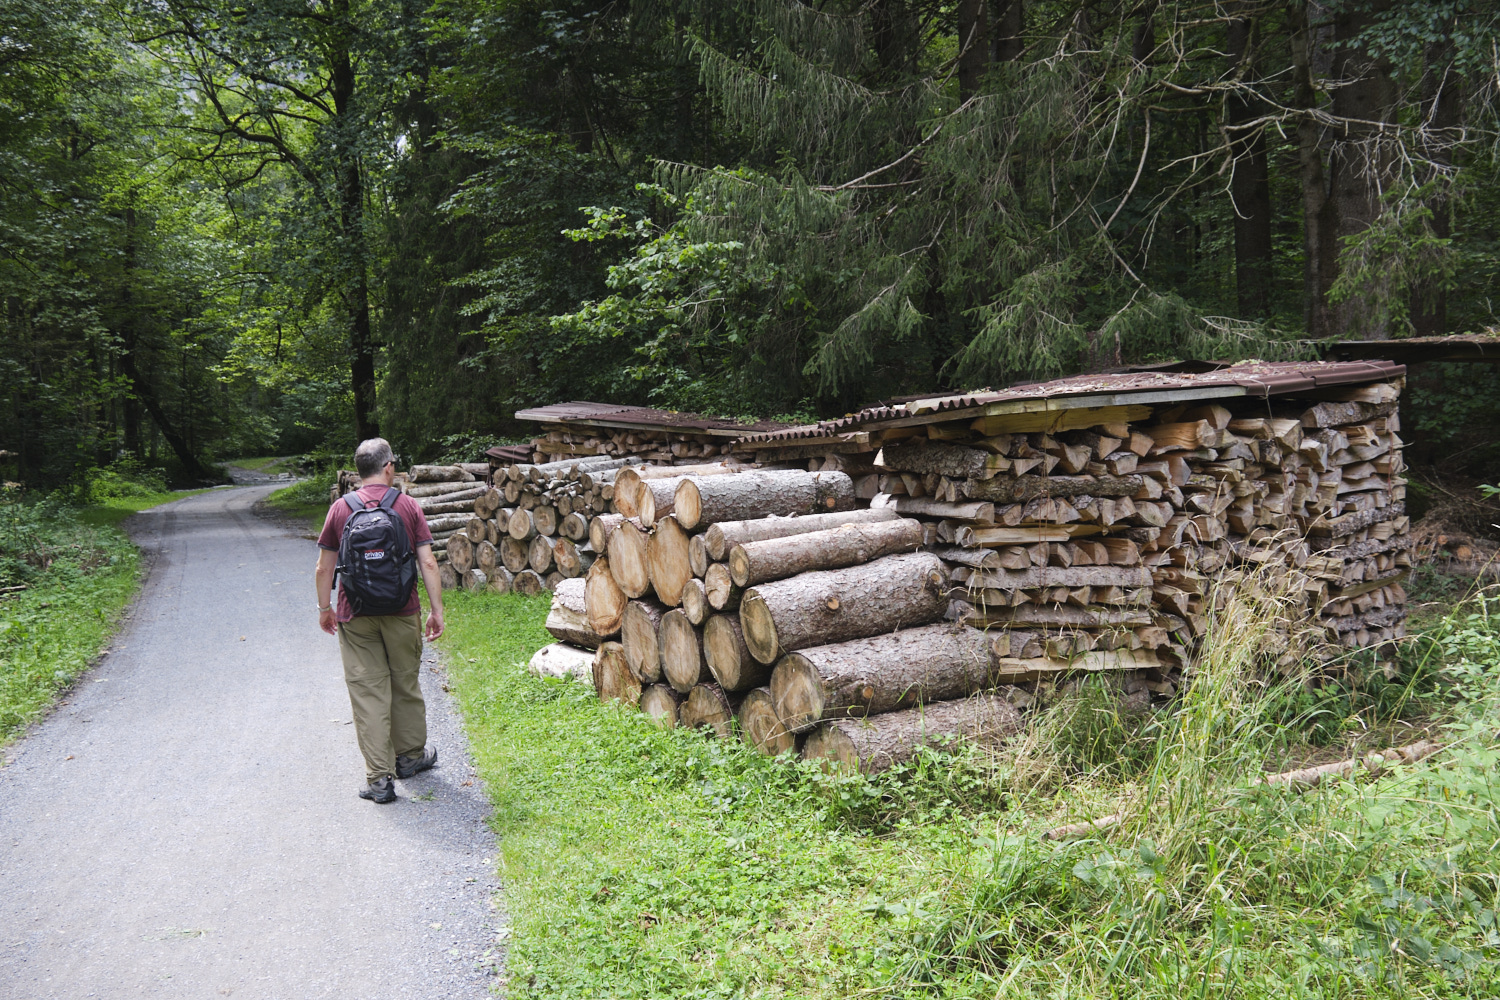
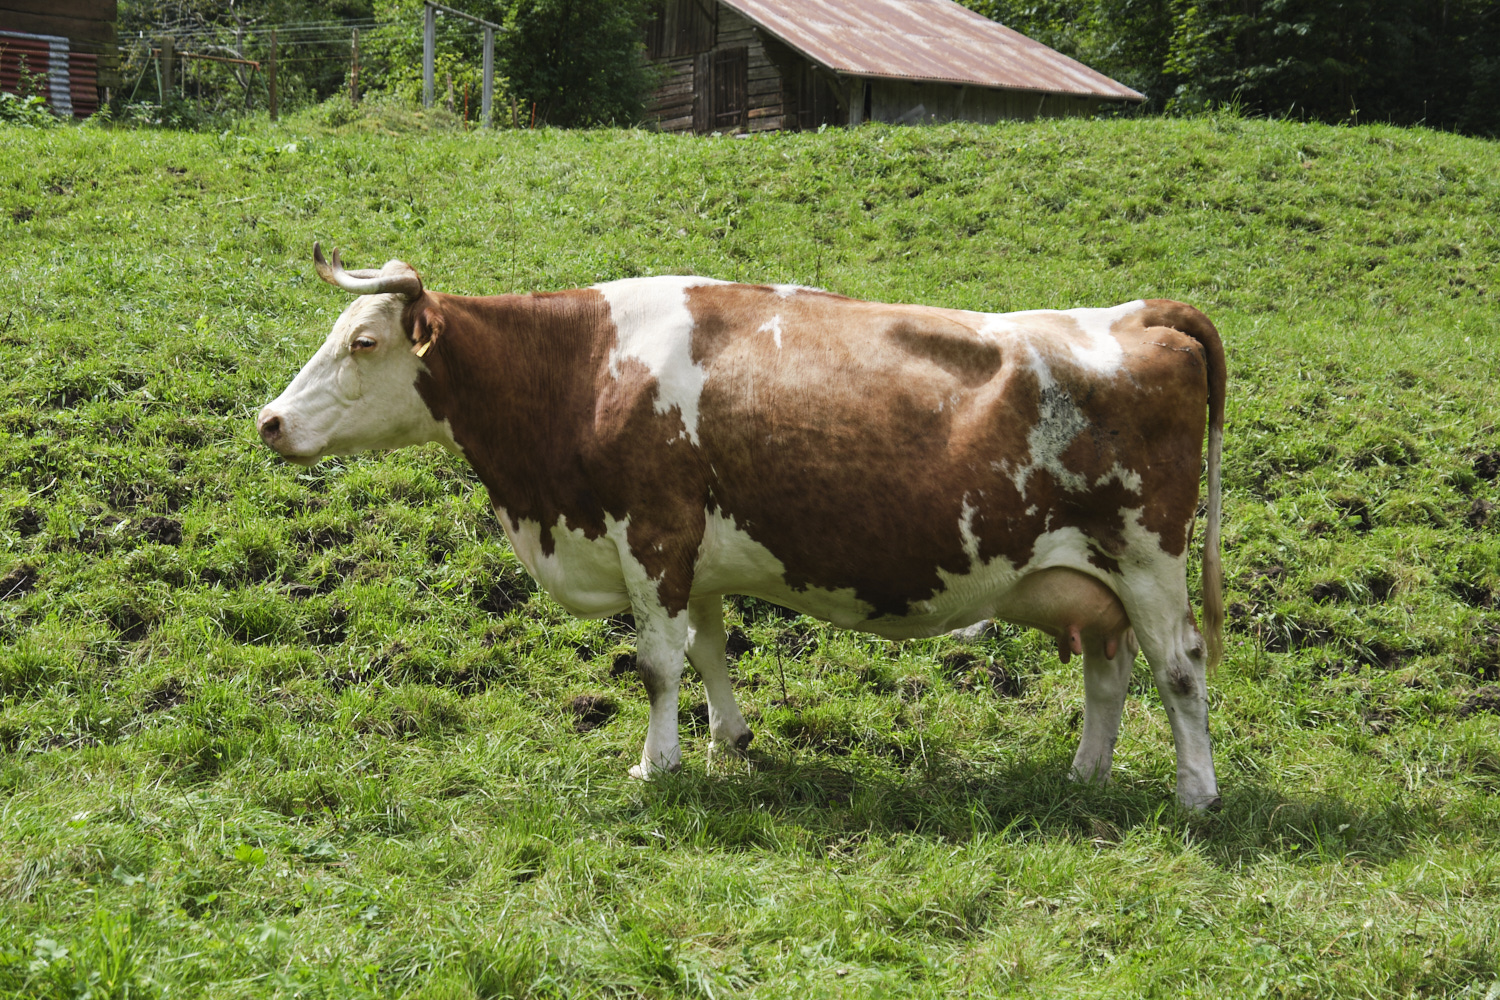
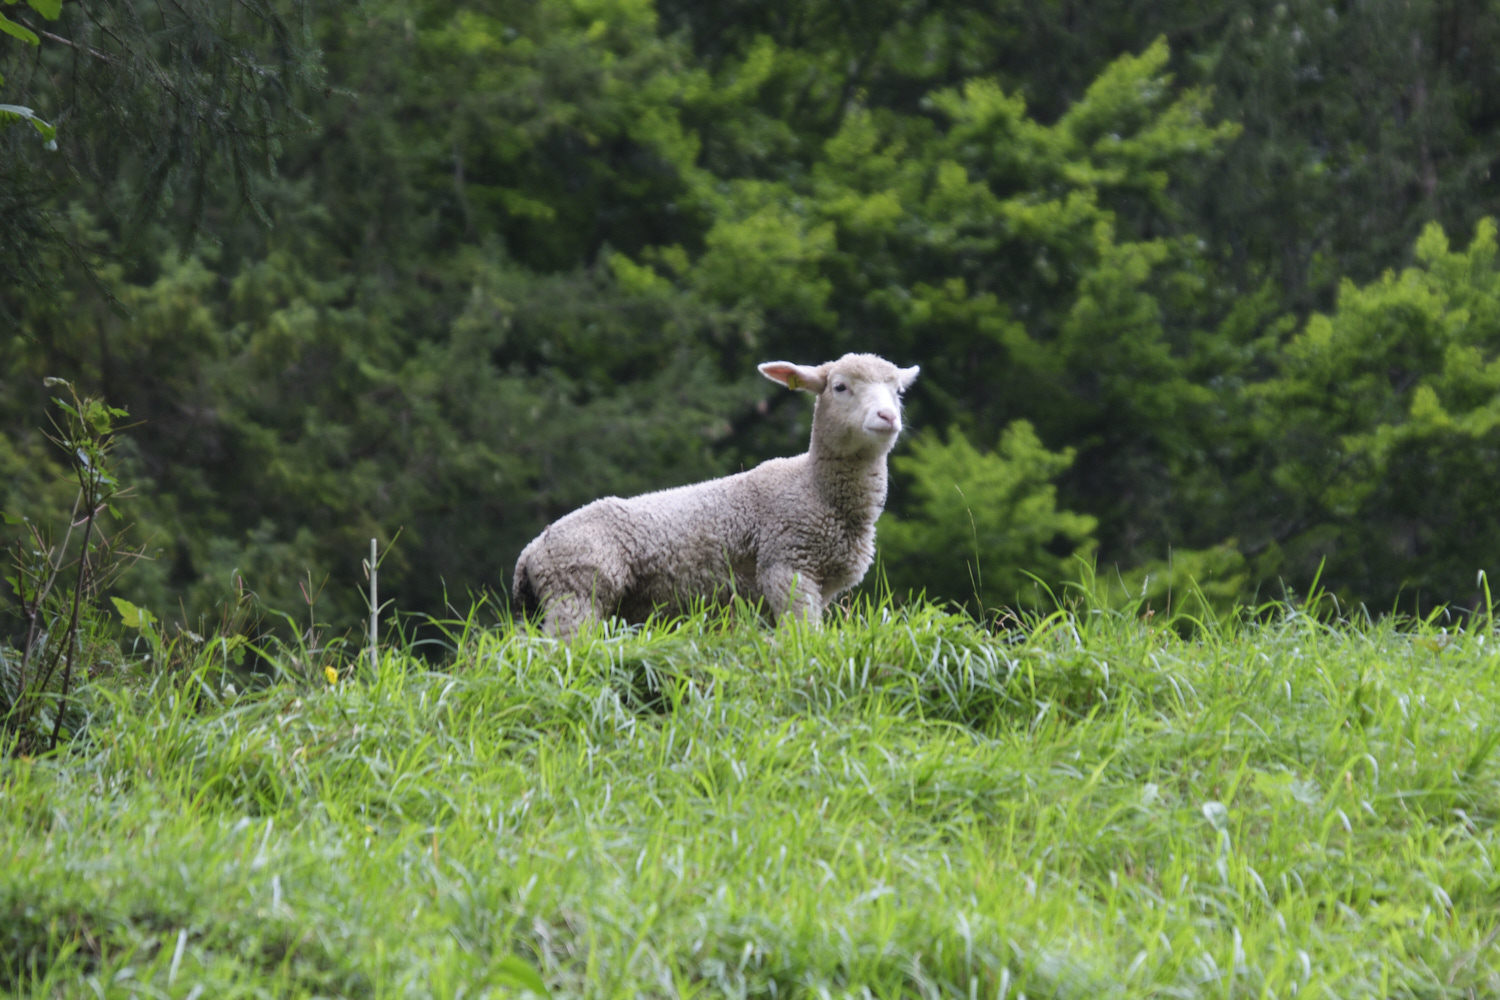
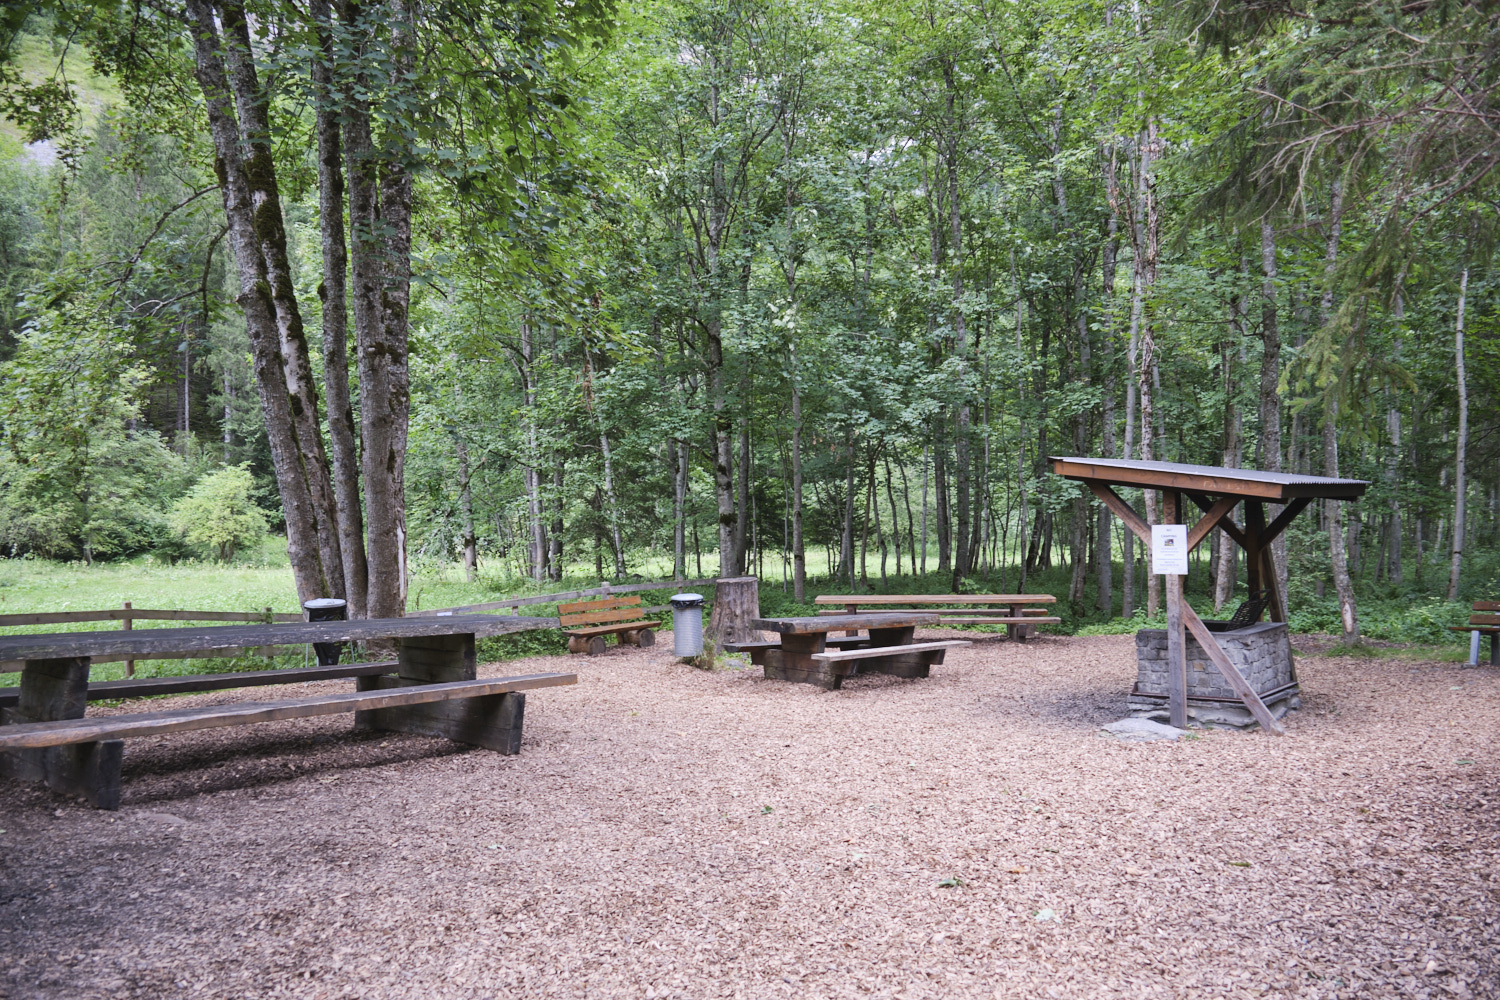
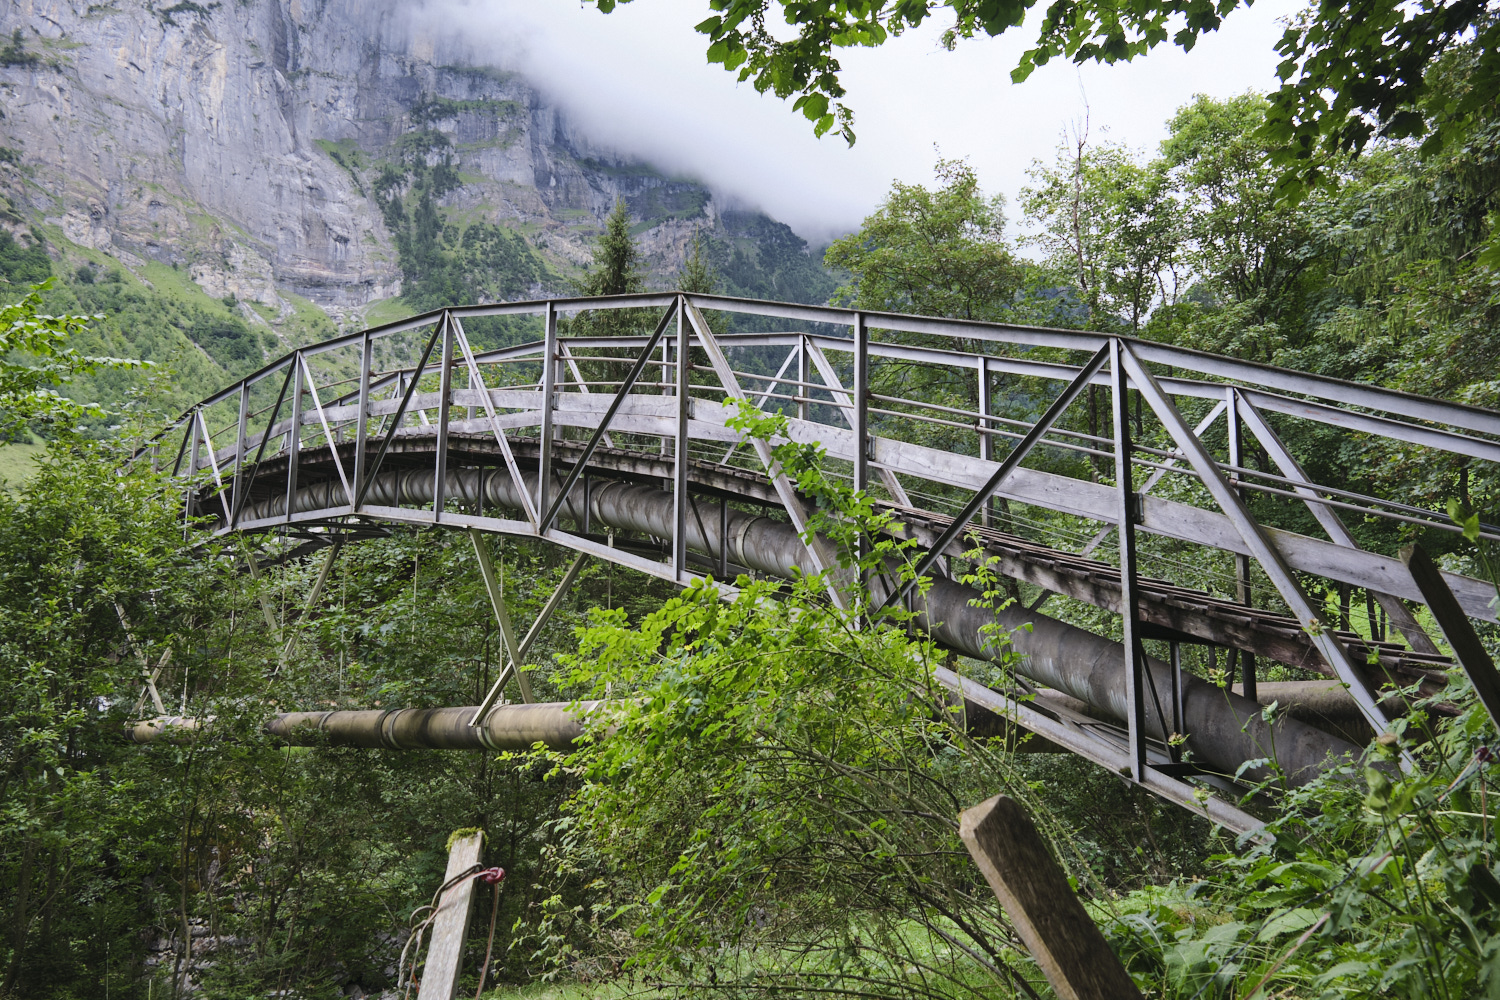
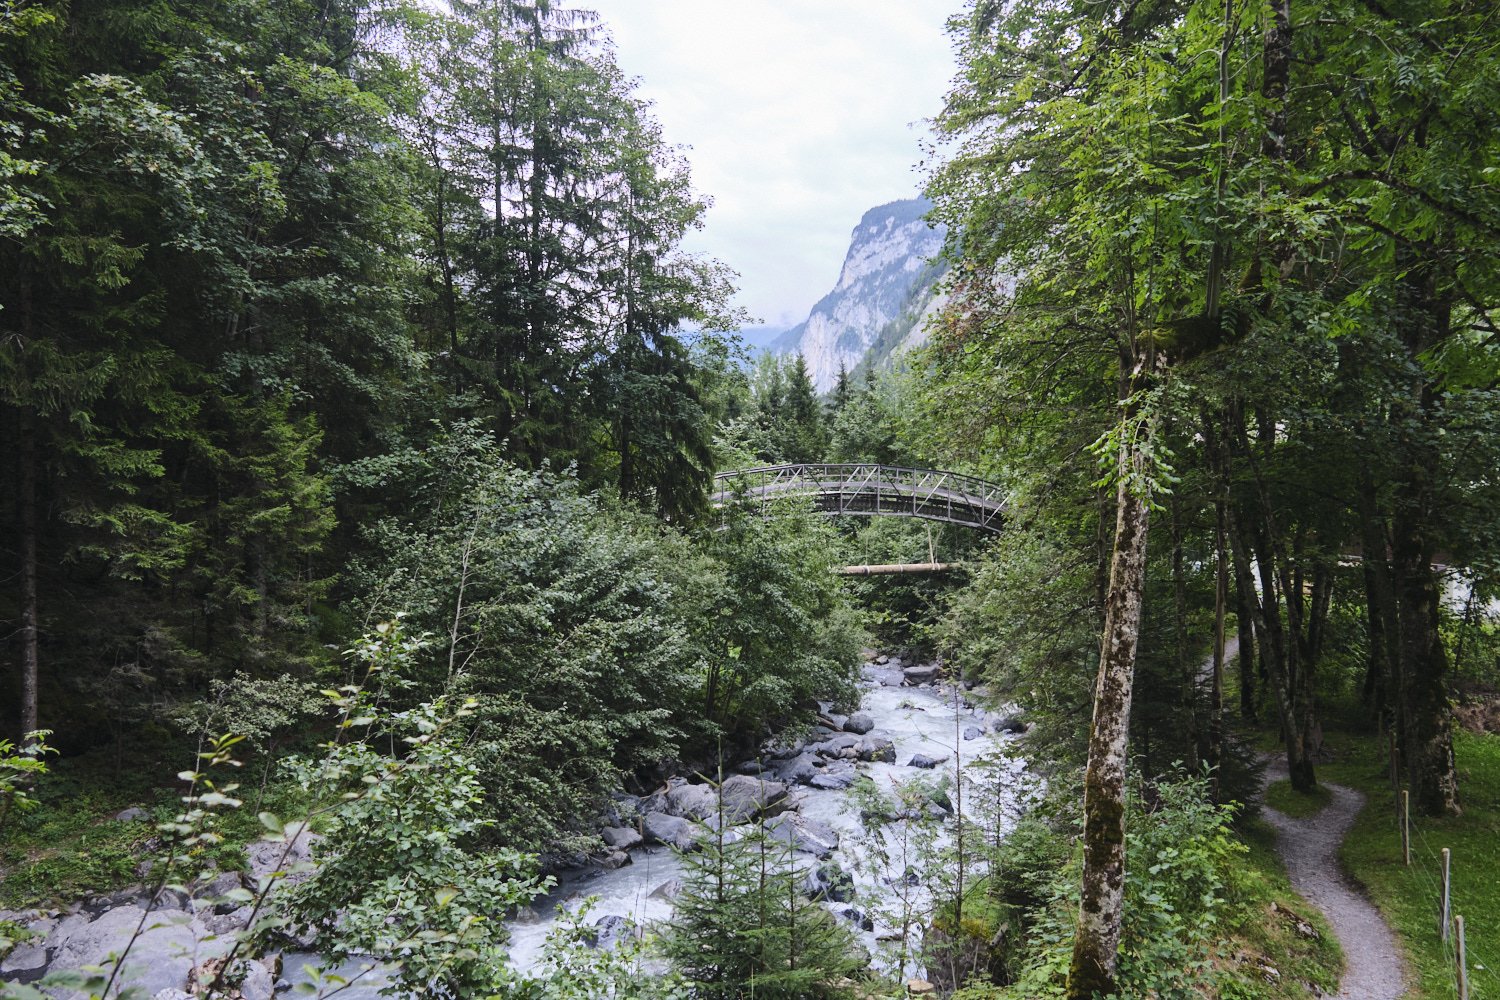
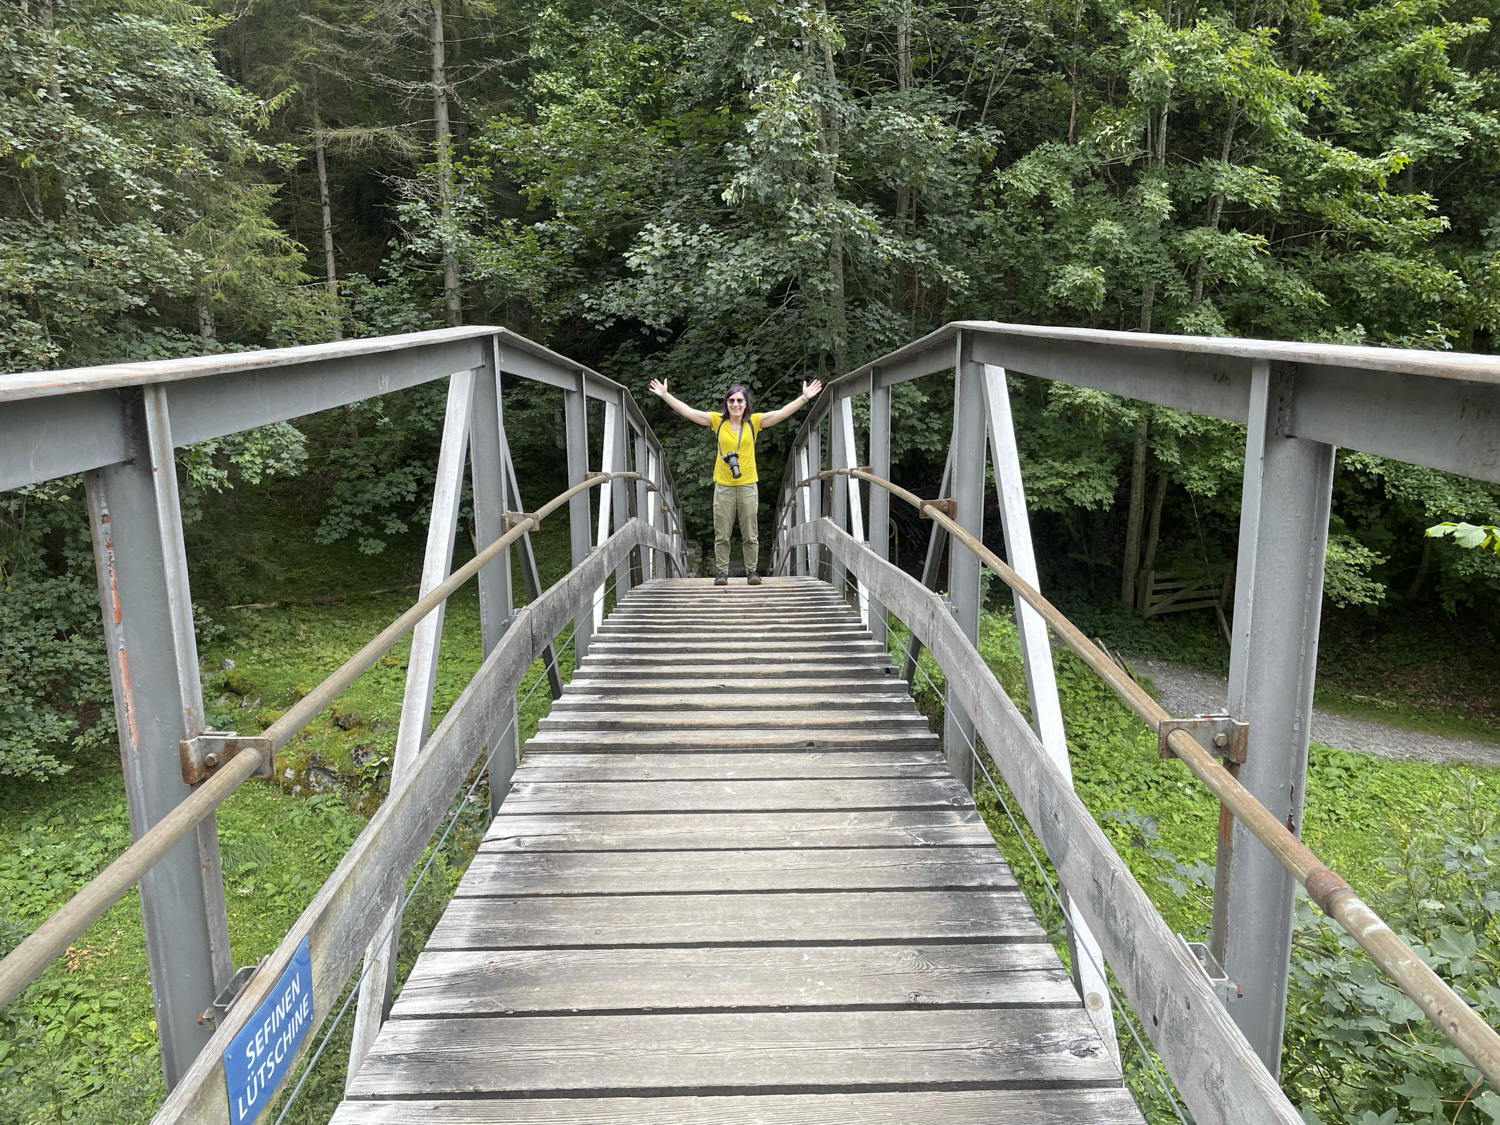
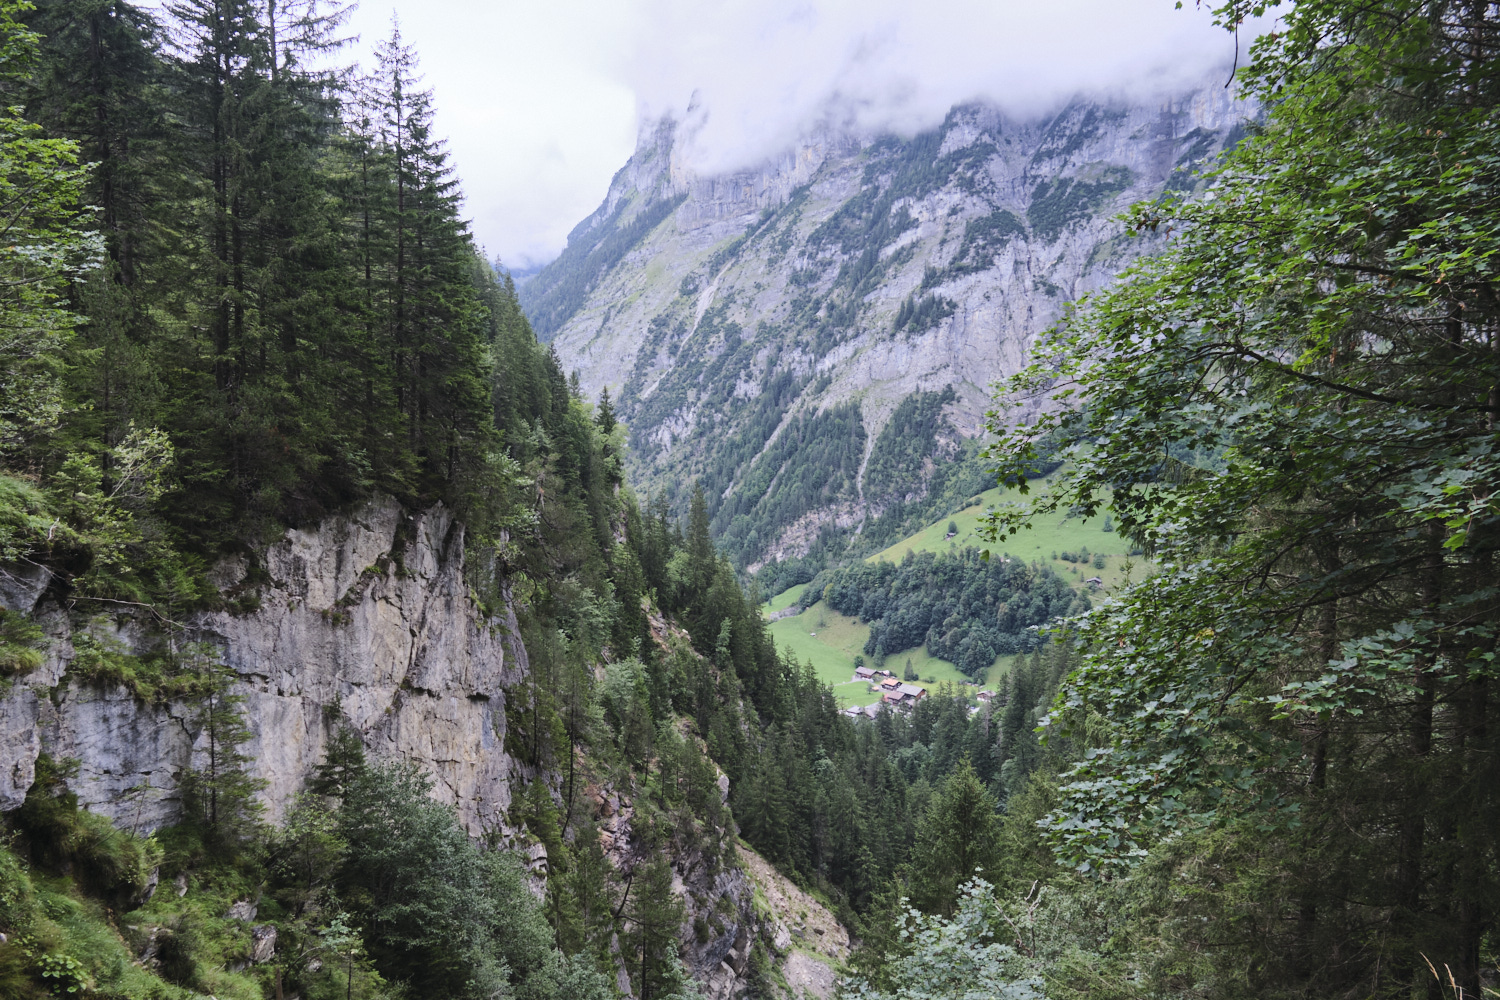
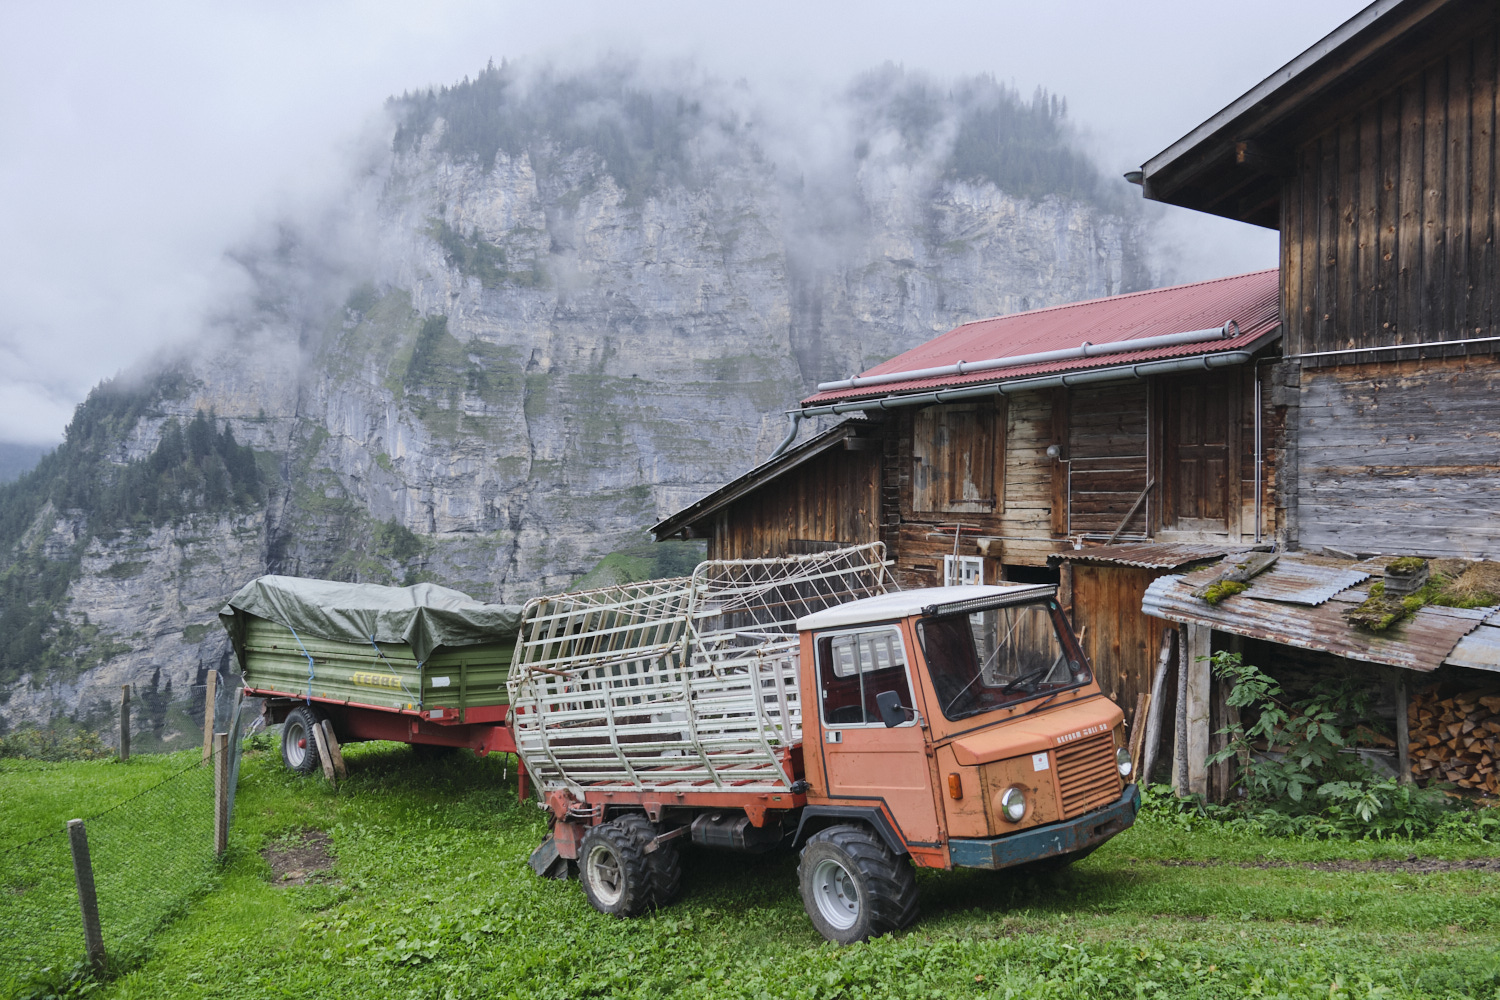
After we came down from the waterfall we continued down the valley path towards Stechelberg. We walked through lots of farmland with cows and sheep. We walked past a whitewater river and a lot more waterfalls. We also saw lots of split logs piled in neat stacks by the side of the path, drying out for winter. The mostly-level path was well maintained, with lots of benches and picnic tables. We stopped at a picnic area and ate our lunch.
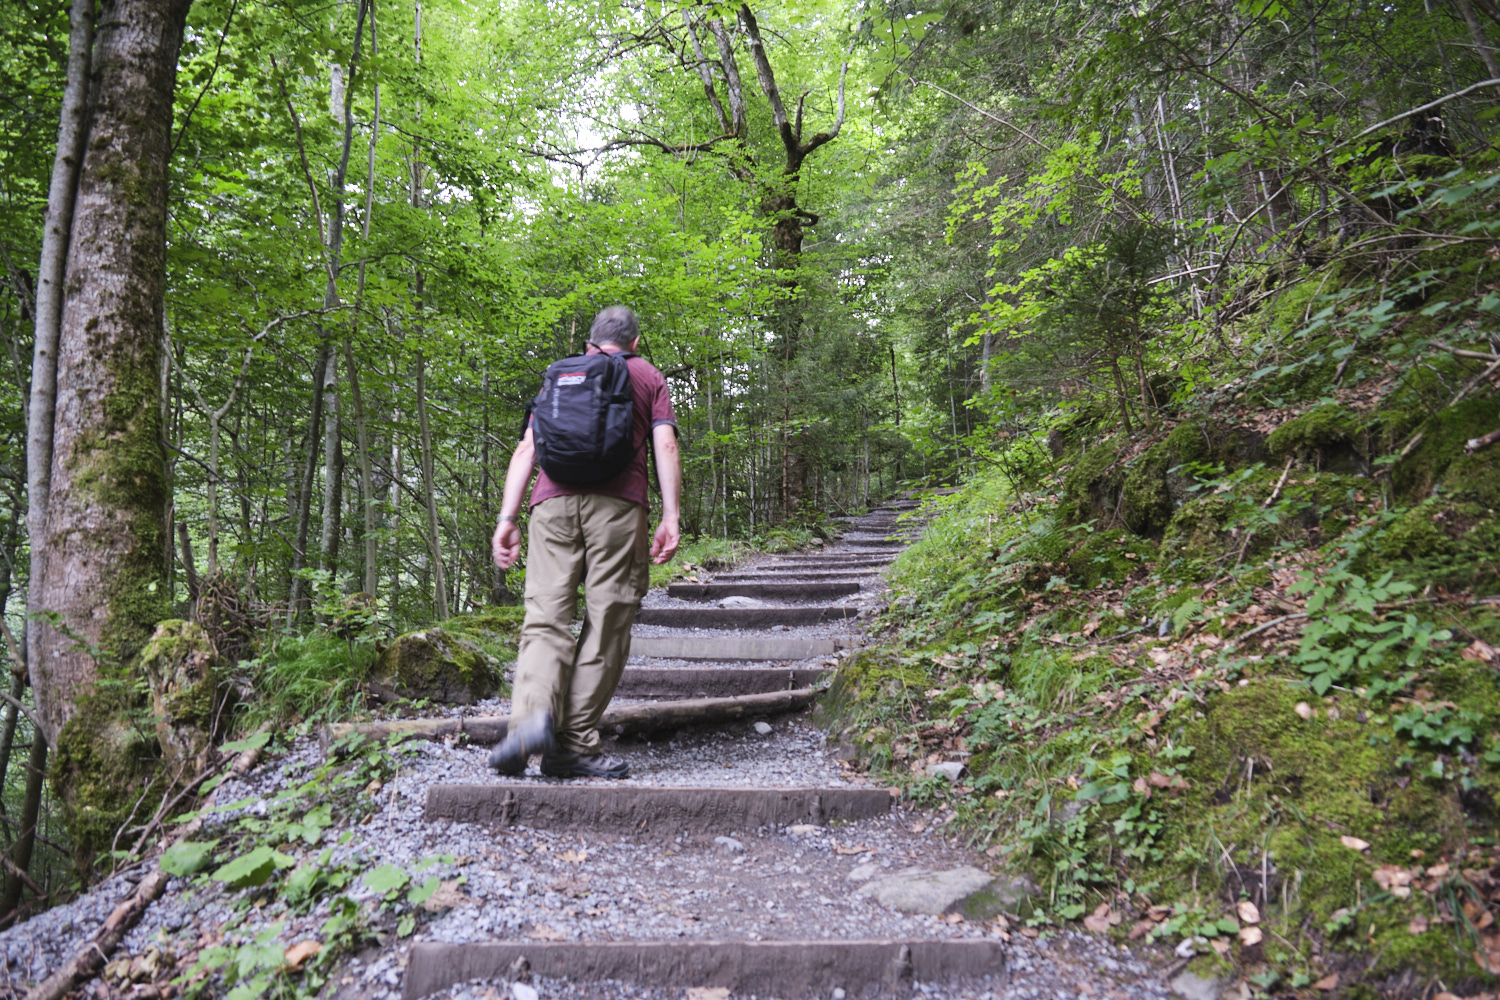
The path continued on through a more wooded area and finally began a steep climb with several hundred stair steps, winding past more waterfalls.
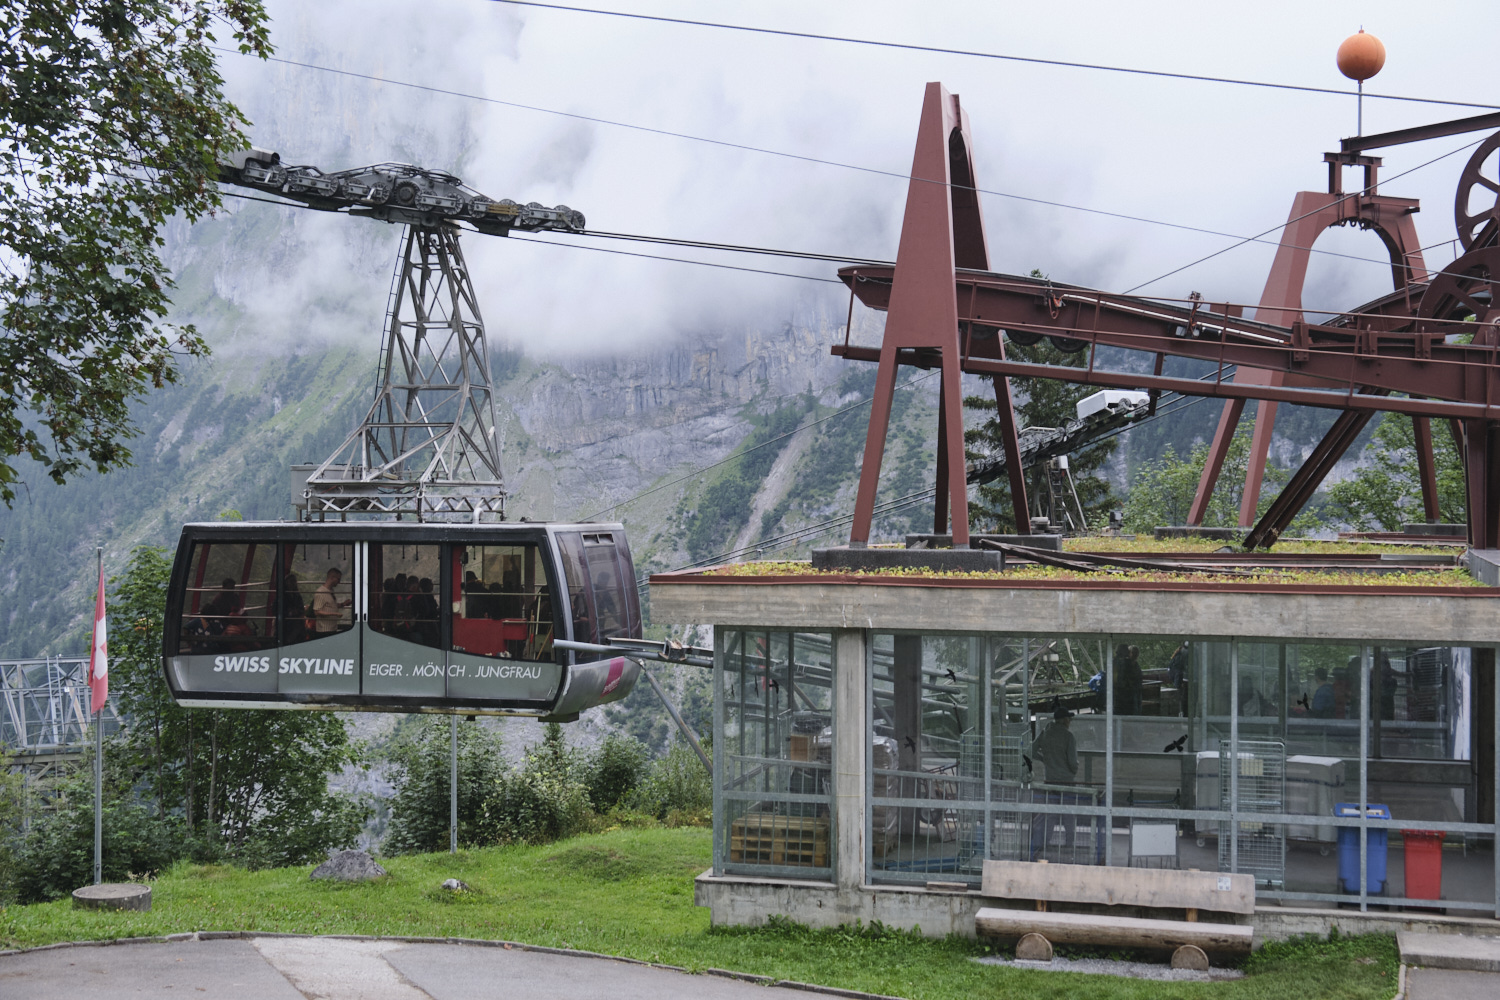
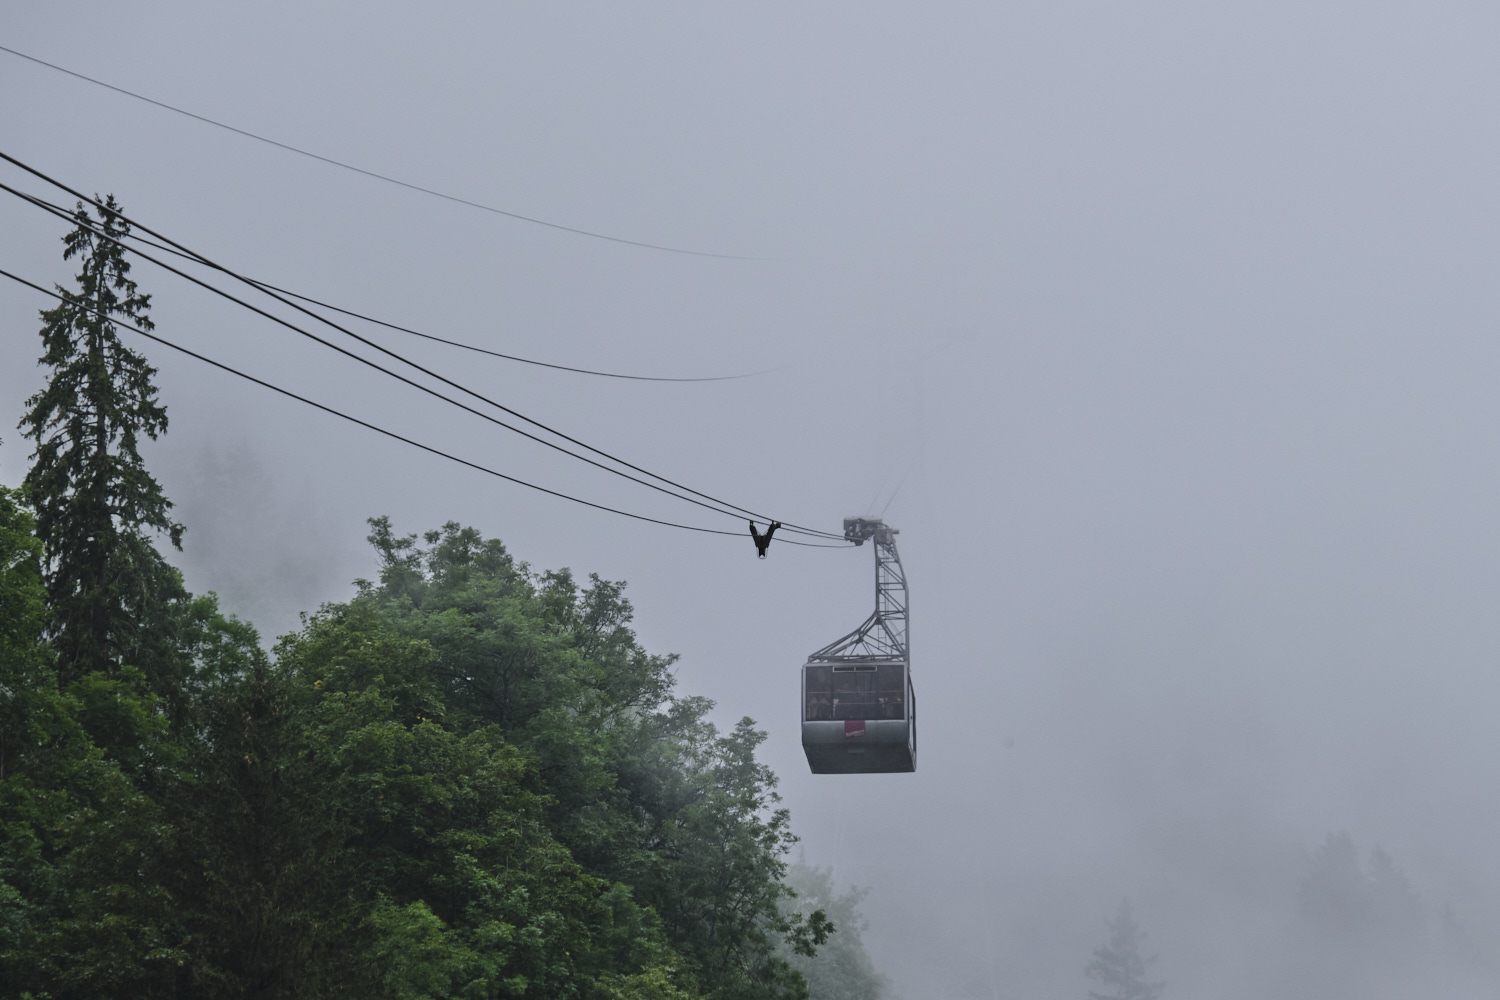
Finally we reached the town of Gimmelwald, another town that prohibits personal cars. Gimmelwald is accessible by foot and cable car. There is a cable car up from the valley level and another one that continues on up to Mürren. The cable cars hold about 100 people and are timed to arrive at the same time and wait a few minutes so passengers wishing to travel on both can easily hop out of one and into the other and continue on their journey. Since Mürren appeared to be blanketed with fog we just walked around Gimmmelwald rather than continuing up the mountain. Later, we took the cable car back down to Lauterbrunnen.
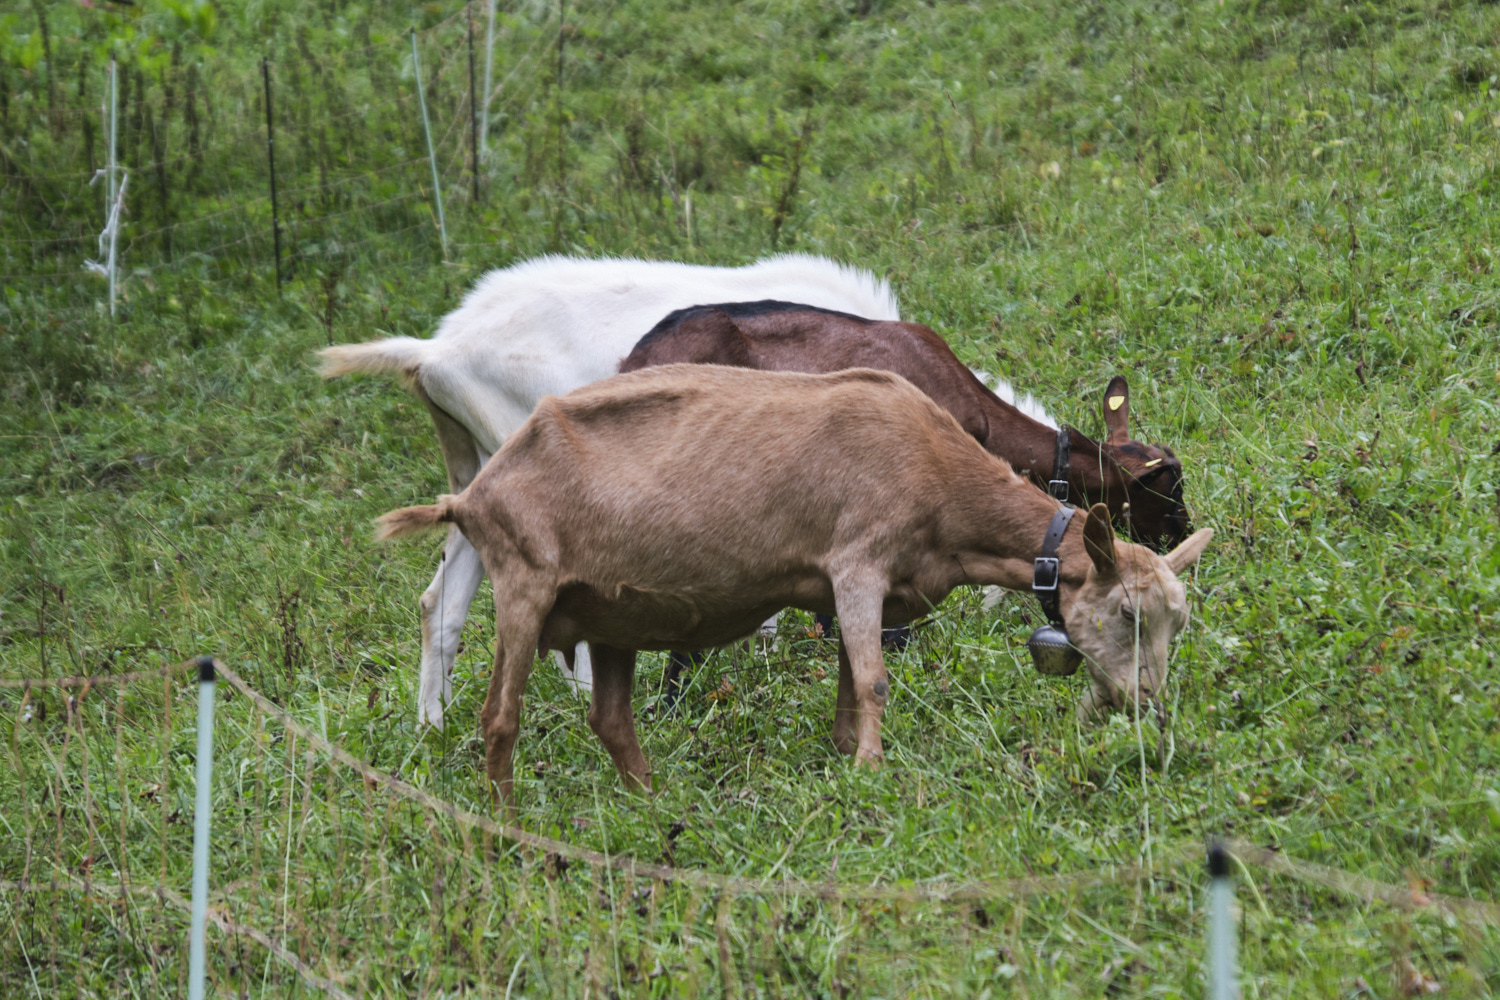
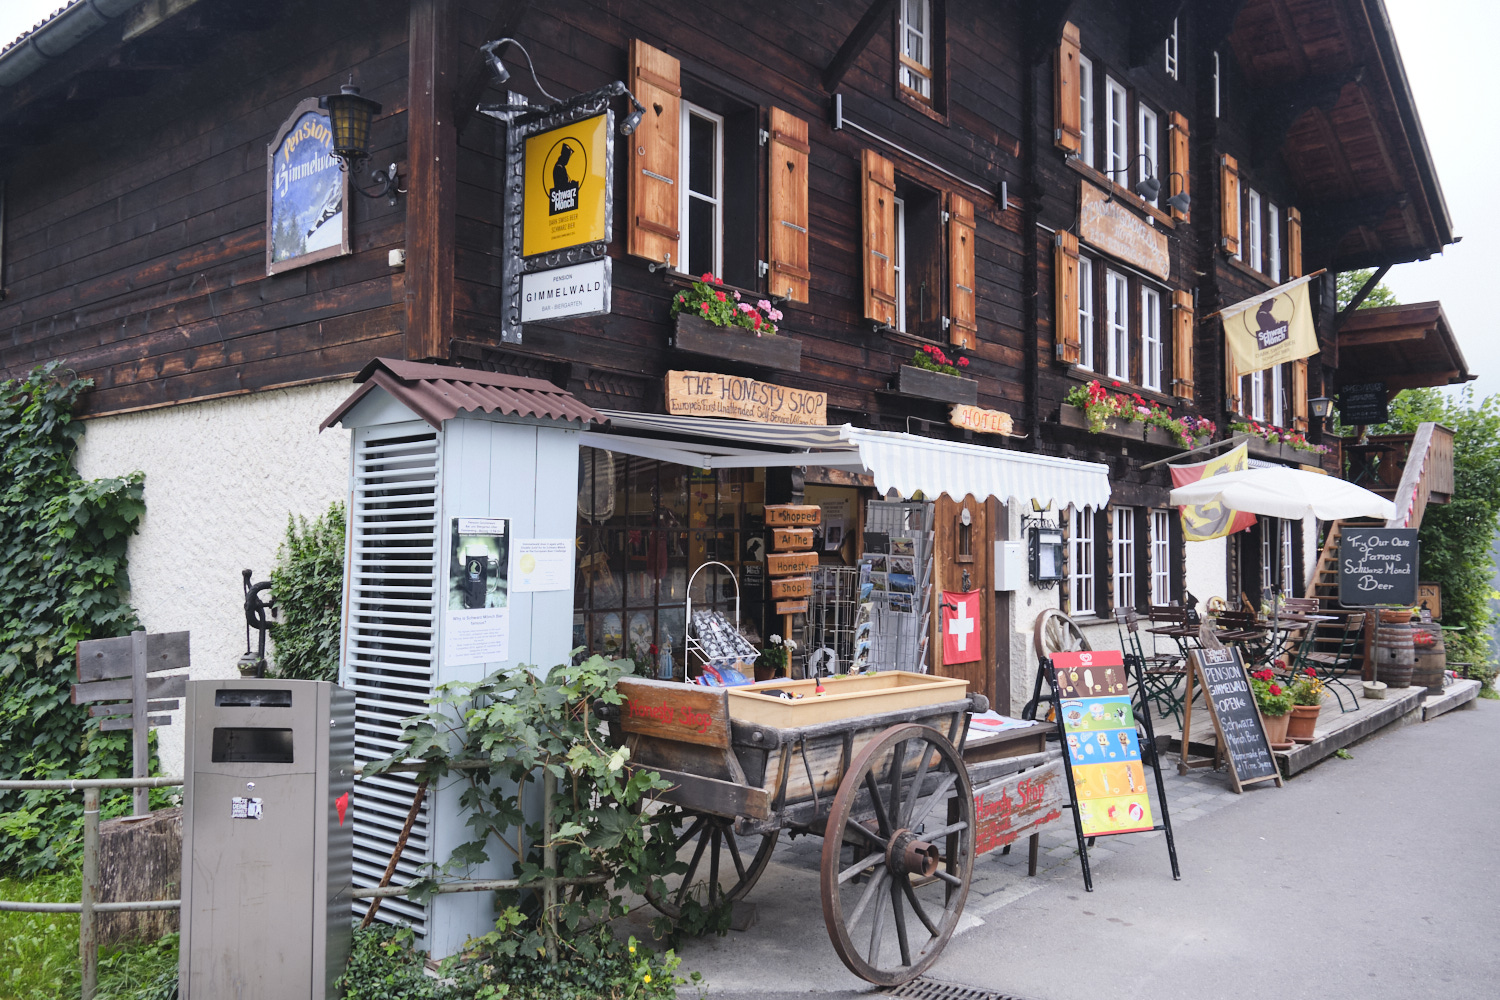
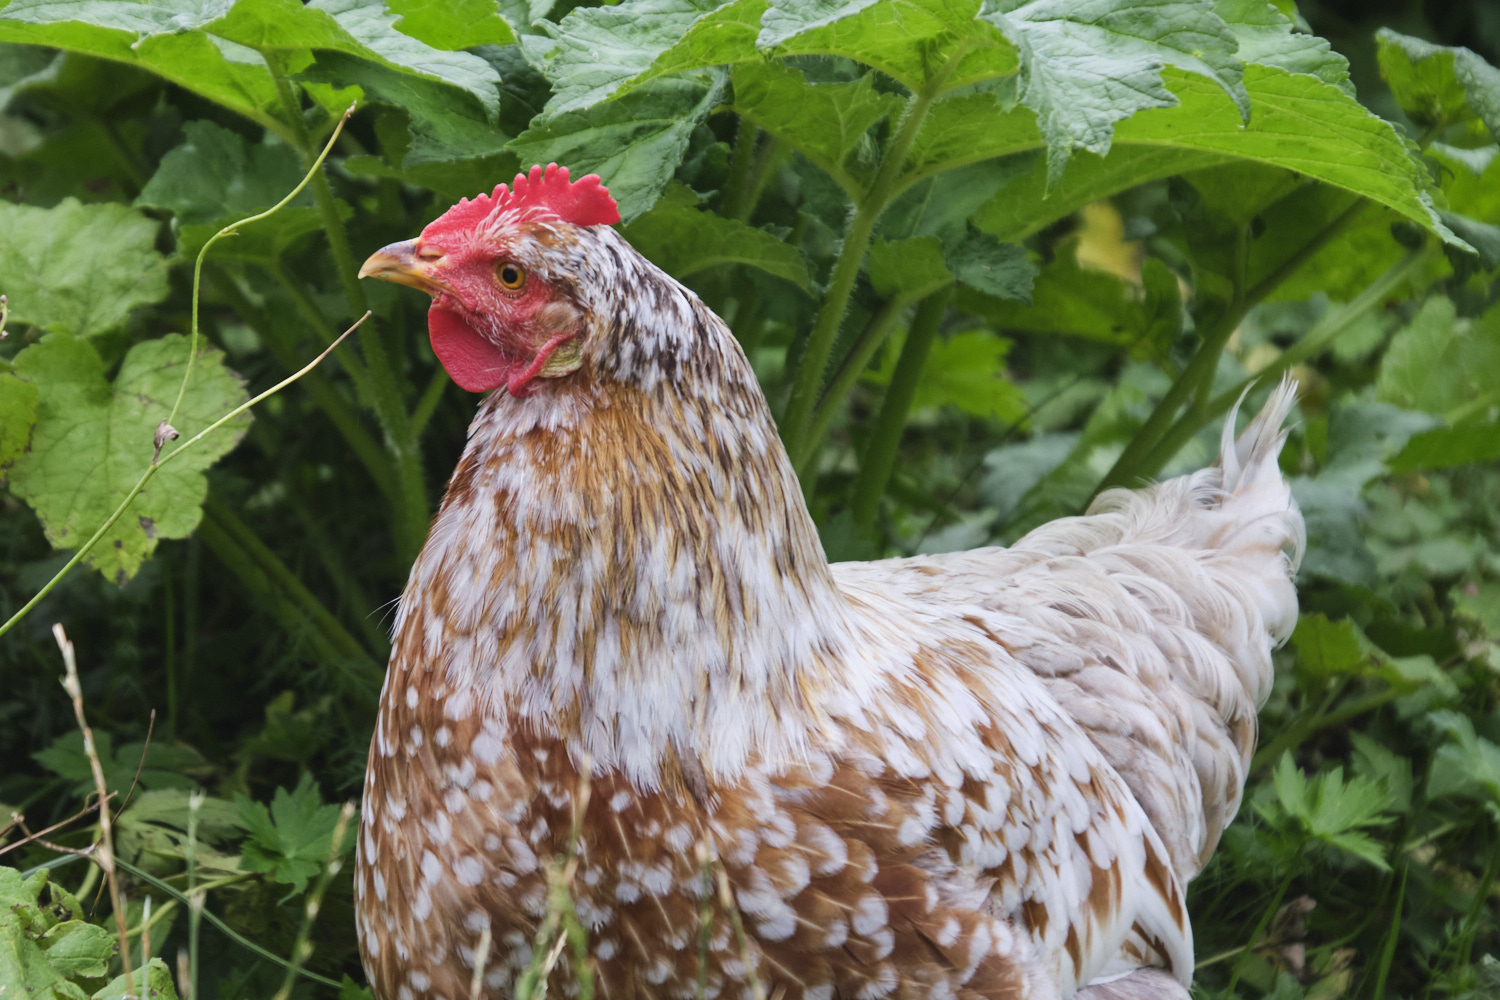
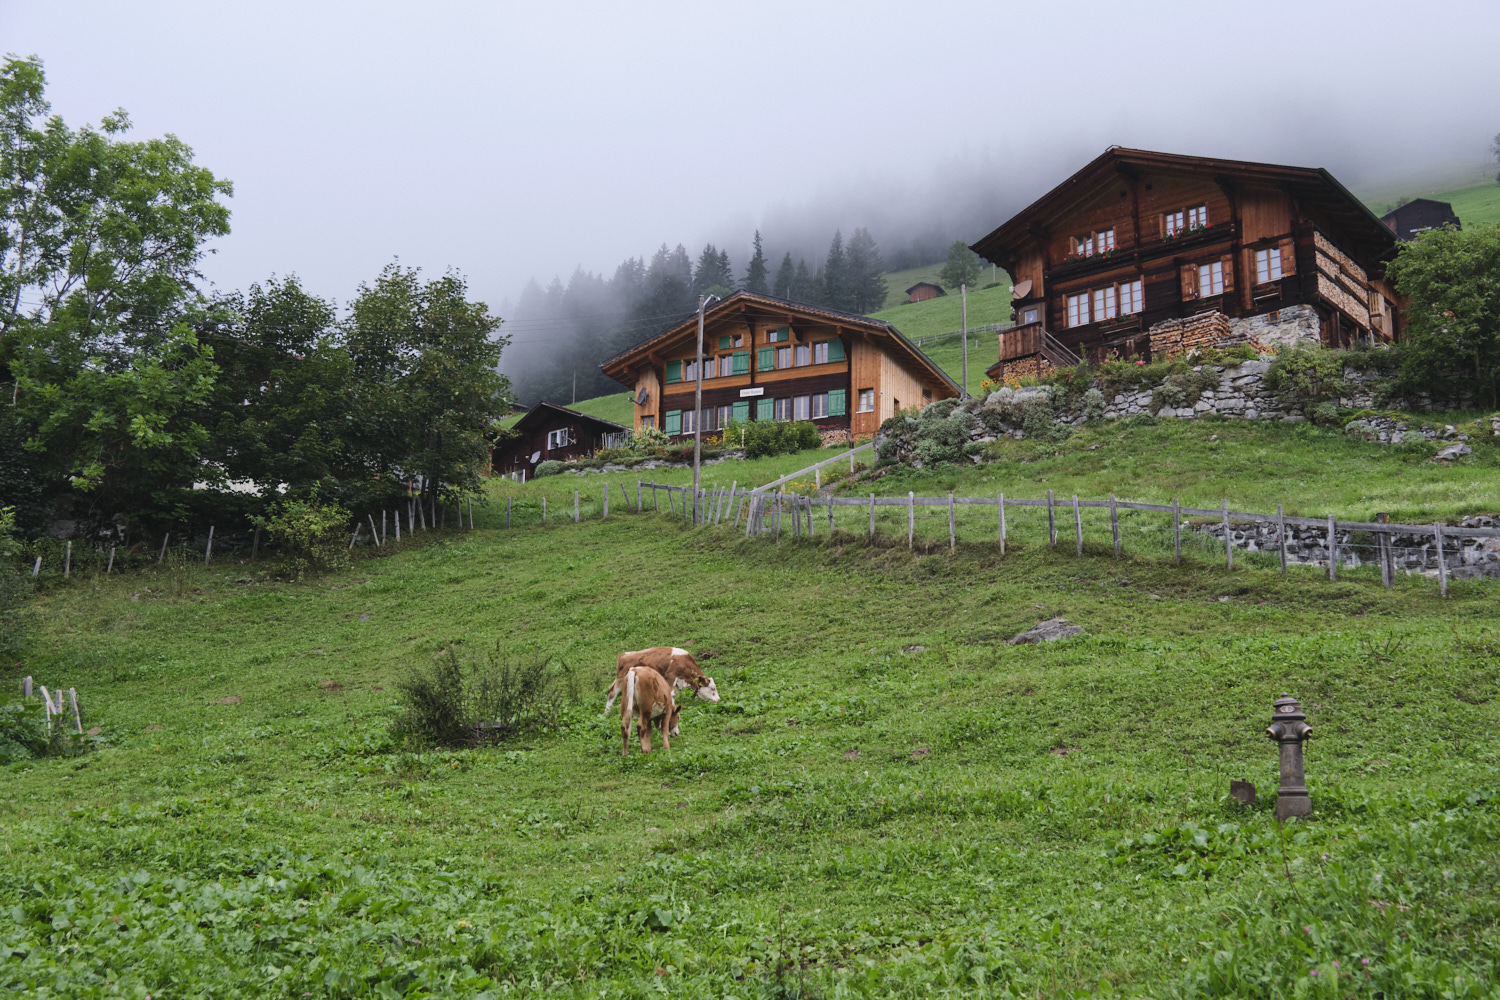
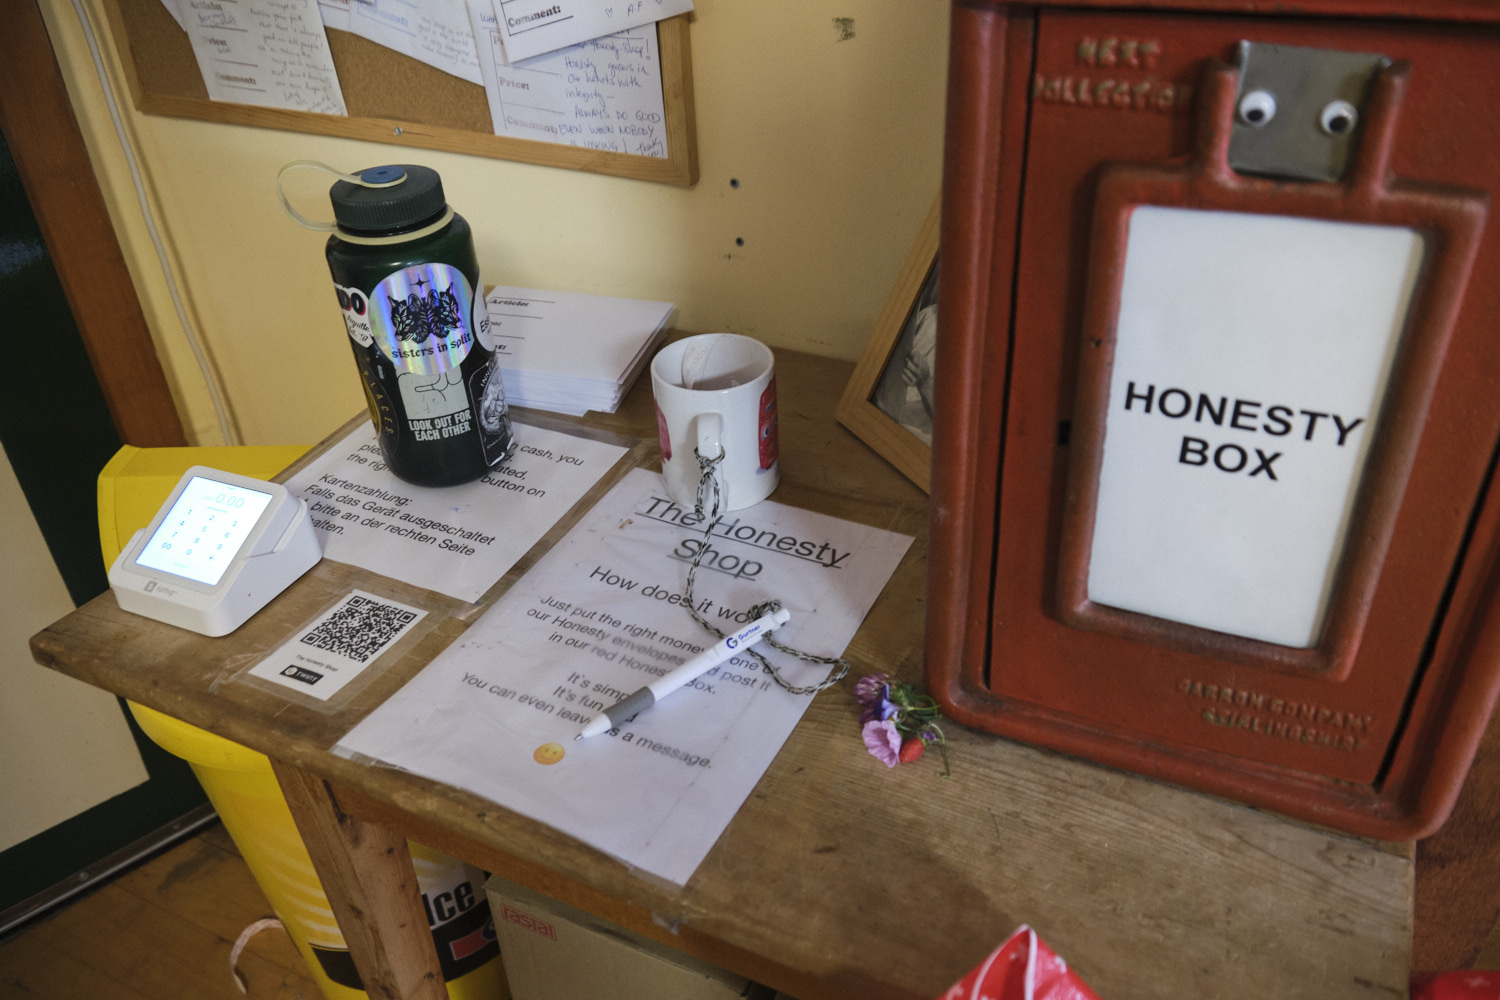
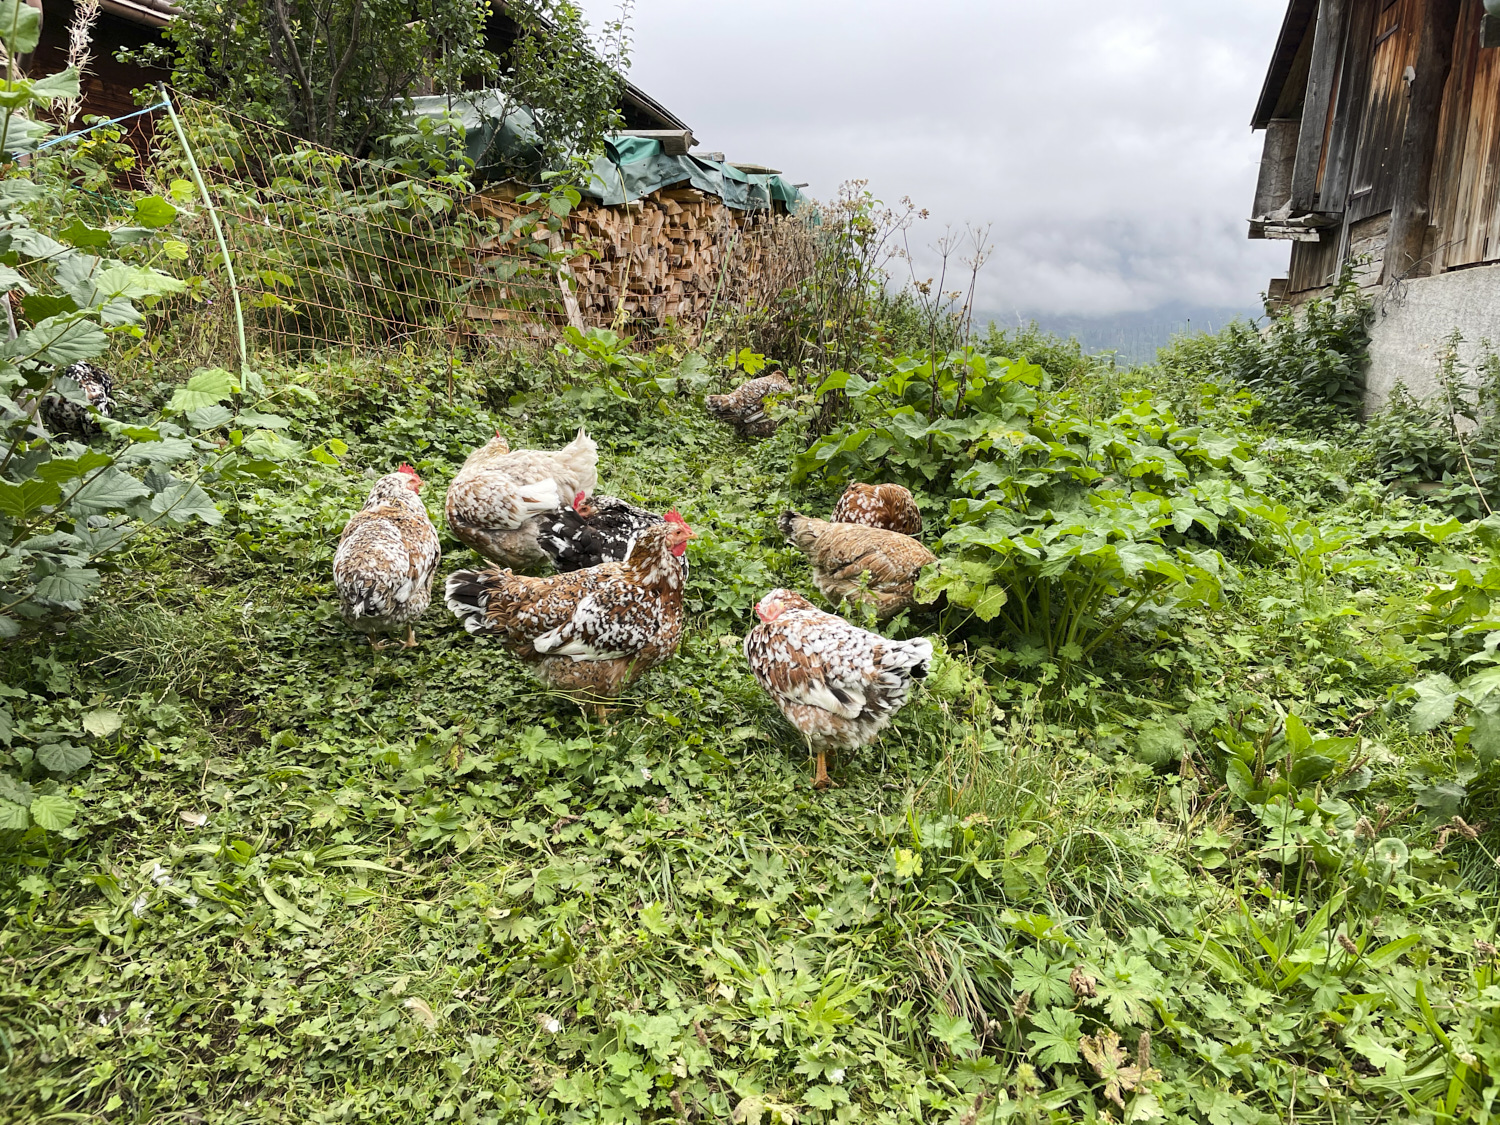
Gimmelwald is much less touristy than the other towns we visited in the region and it doesn’t have a lot of places to stay or eat. We saw working farms, some self-service cheese outlets, and an “honesty shop” where you are on your honor to pay for what you take. We saw goats, chickens, and lots of cows. And, of course, where there are cows there are also cow bells.
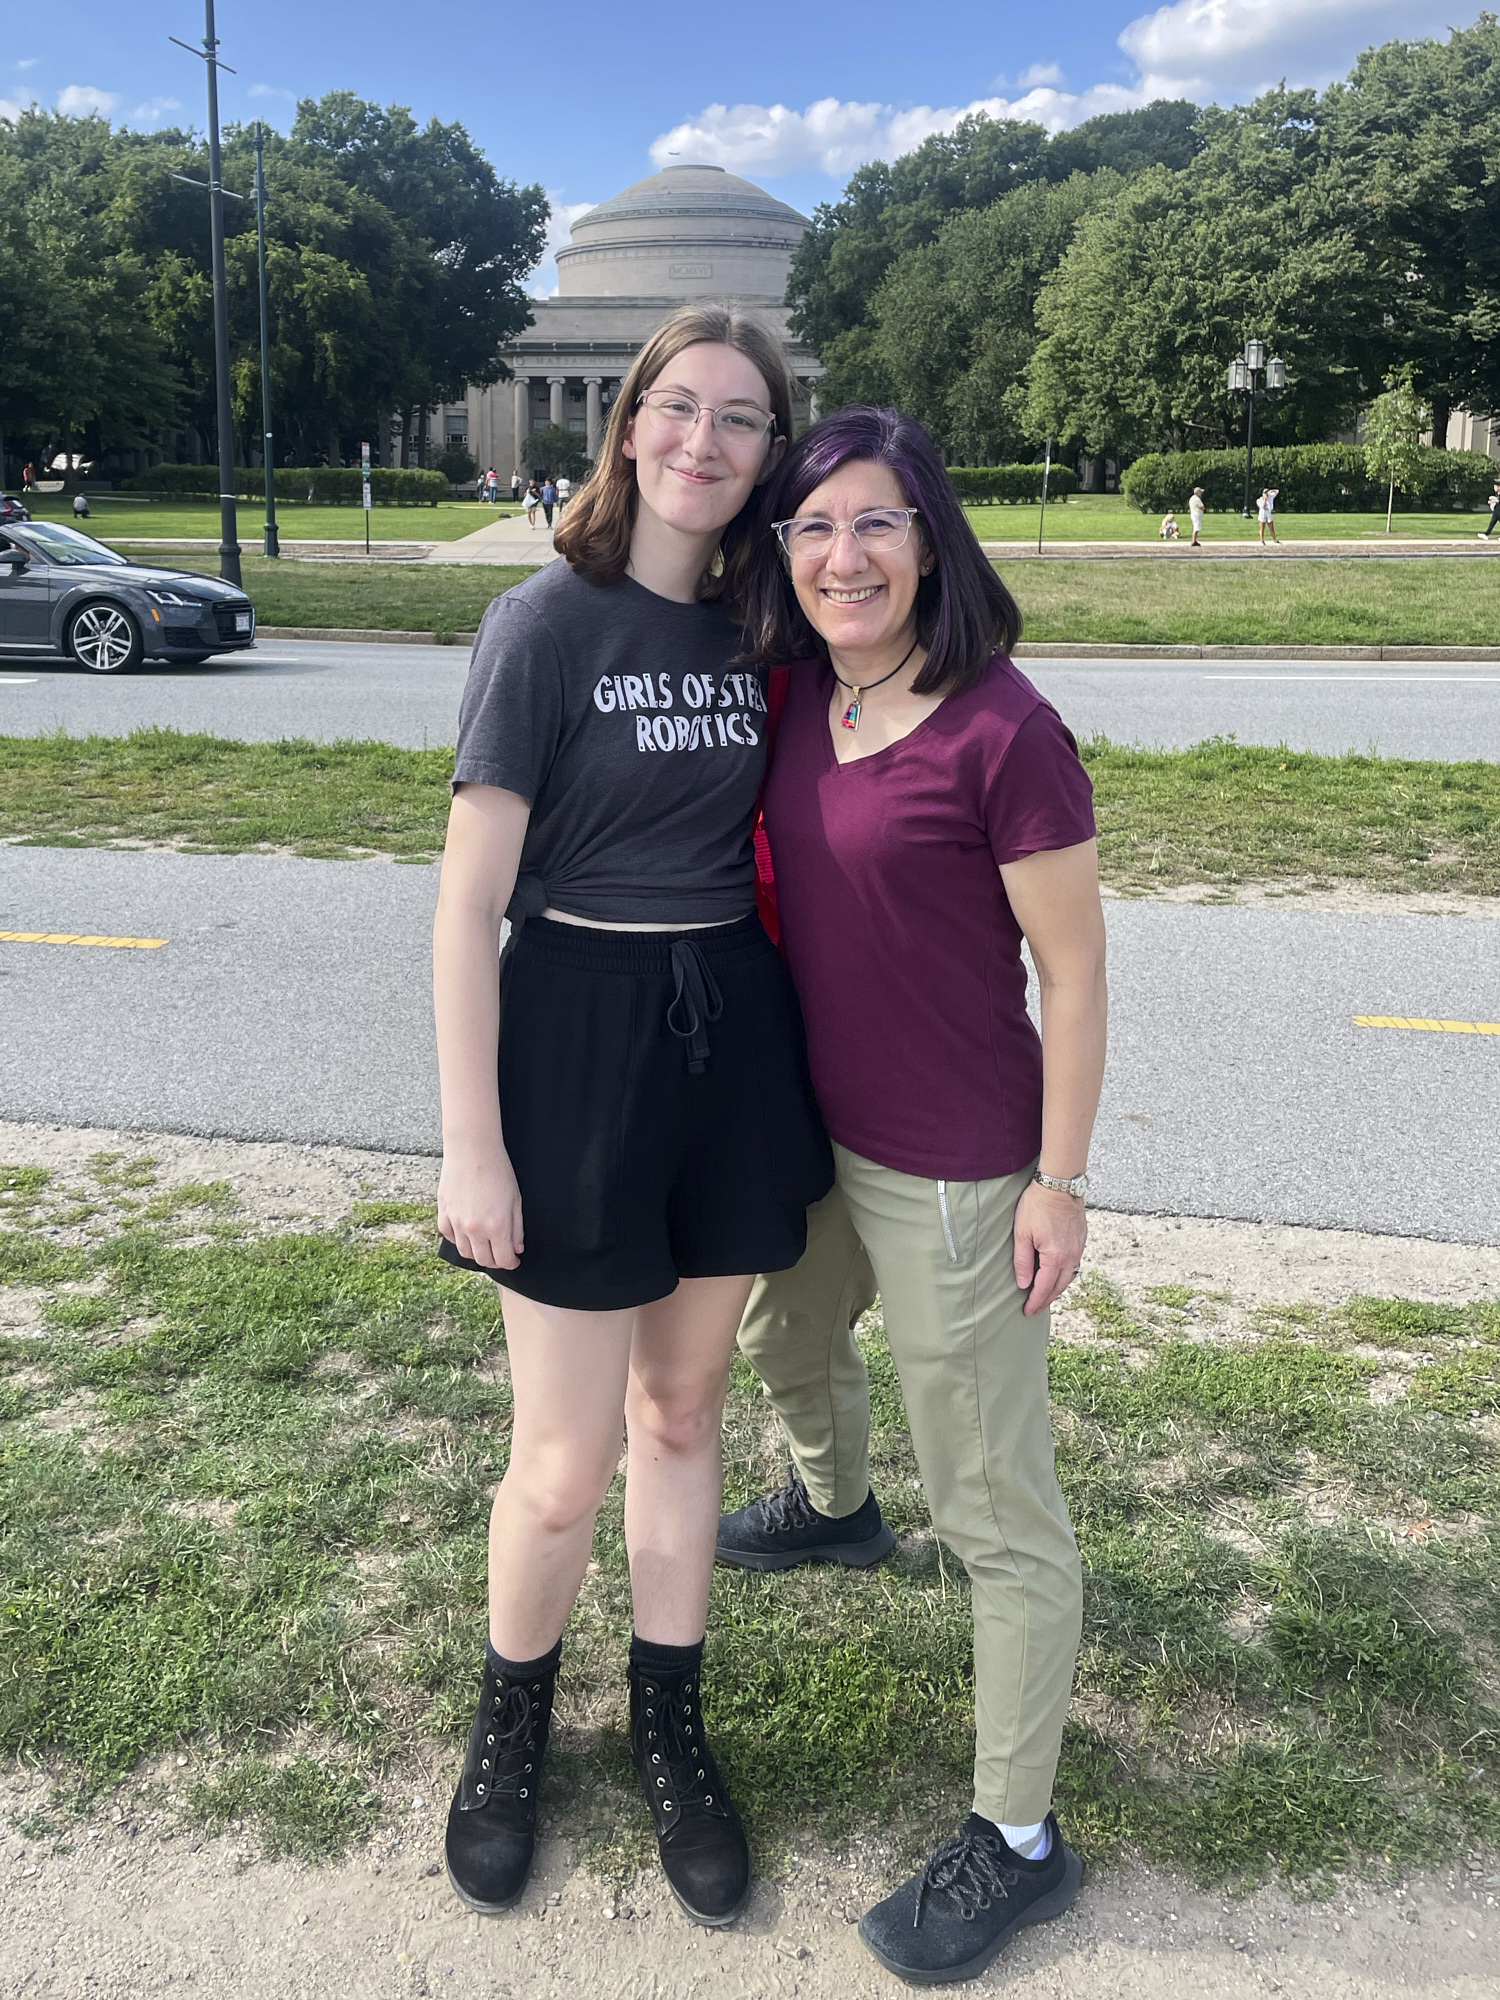
We flew to Boston two Saturdays ago to drop our youngest kid off at college and then headed back to the airport to catch our flight to Zurich. It was a great way not to think too much about our newly-emptied nest. Plus, the timing worked out to combine a work trip with vacation in a really lovely spot. In this blog post I’ll post about our arrival in Switzerland and then tell you about the rest of the trip (but mostly show you photos) in the next six posts. [part 2 | part 3 | part 4 | part 5 | part 6 | part 7]
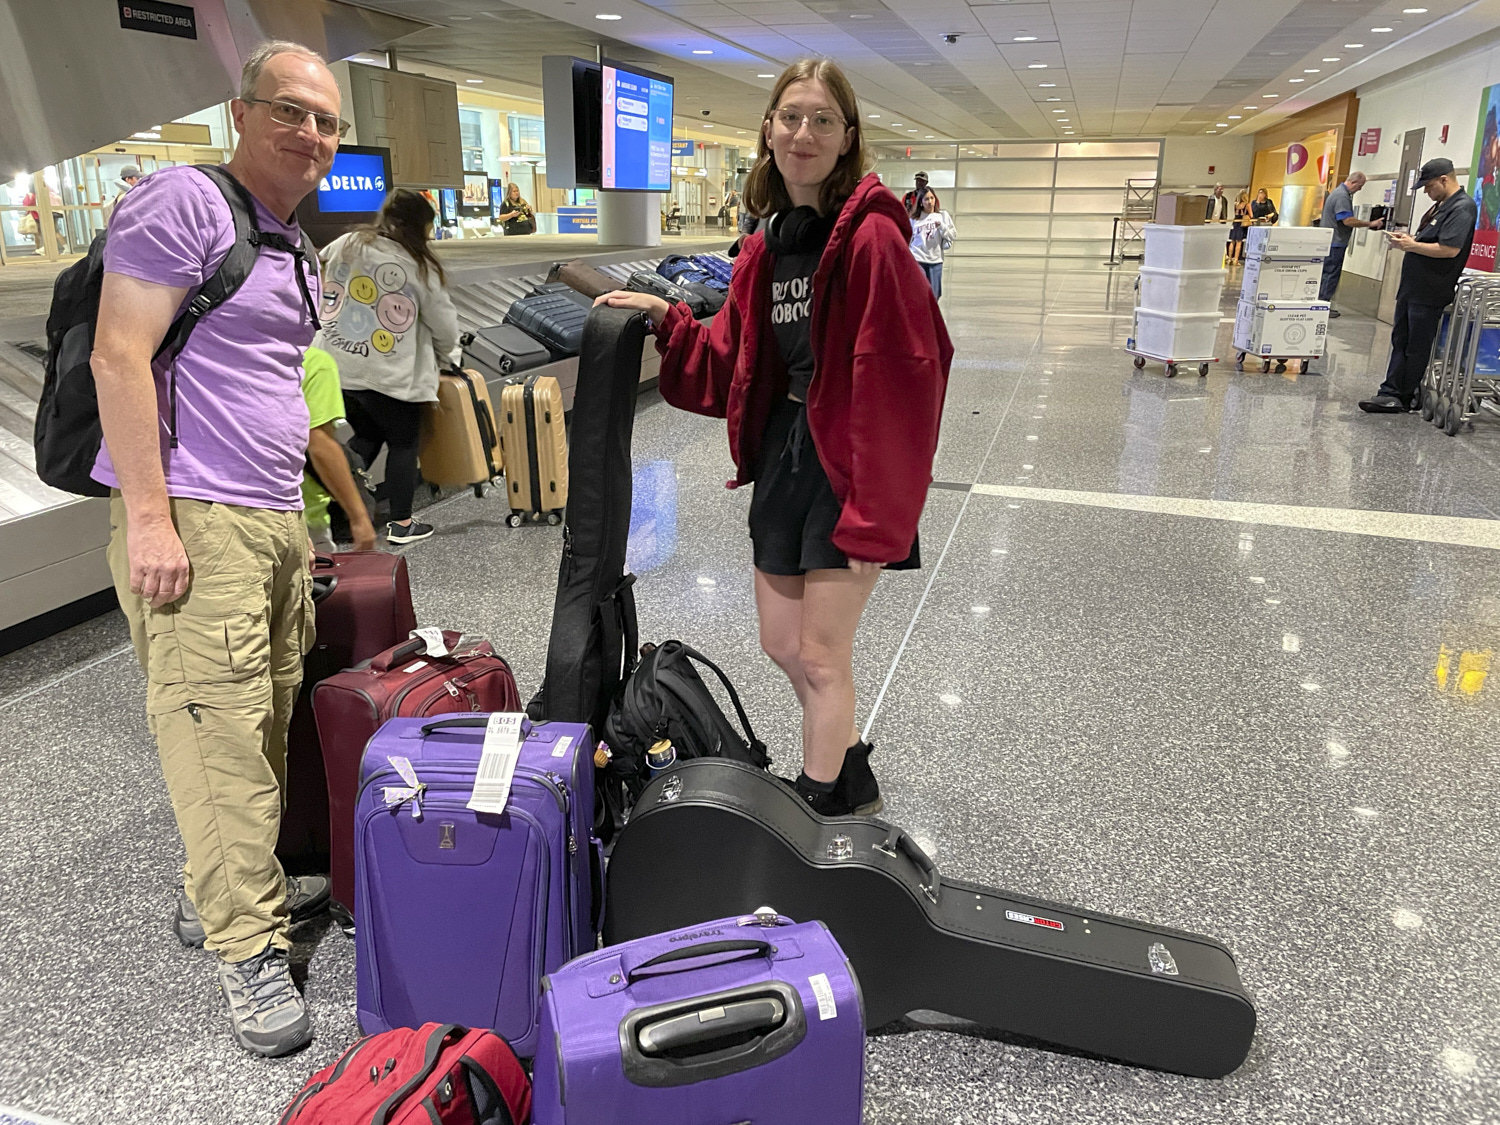
Here is all the stuff we brought with us to Boston. The purple bags are the parents’ bags, headed to Switzerland. The rest of the stuff goes with the college student (actually not very much, we bought the bulky bedding and other stuff when we arrived and we’ll send her winter clothes later). We had to buy an extra seat on the plane for the guitar and bass to make sure they wouldn’t have to be checked as luggage. But with the new heavy-duty guitar case and the extra-small plane we were on, we couldn’t fit both instruments in one seat. Thankfully, there was an extra seat in business class and the airline gave the guitar a free upgrade.
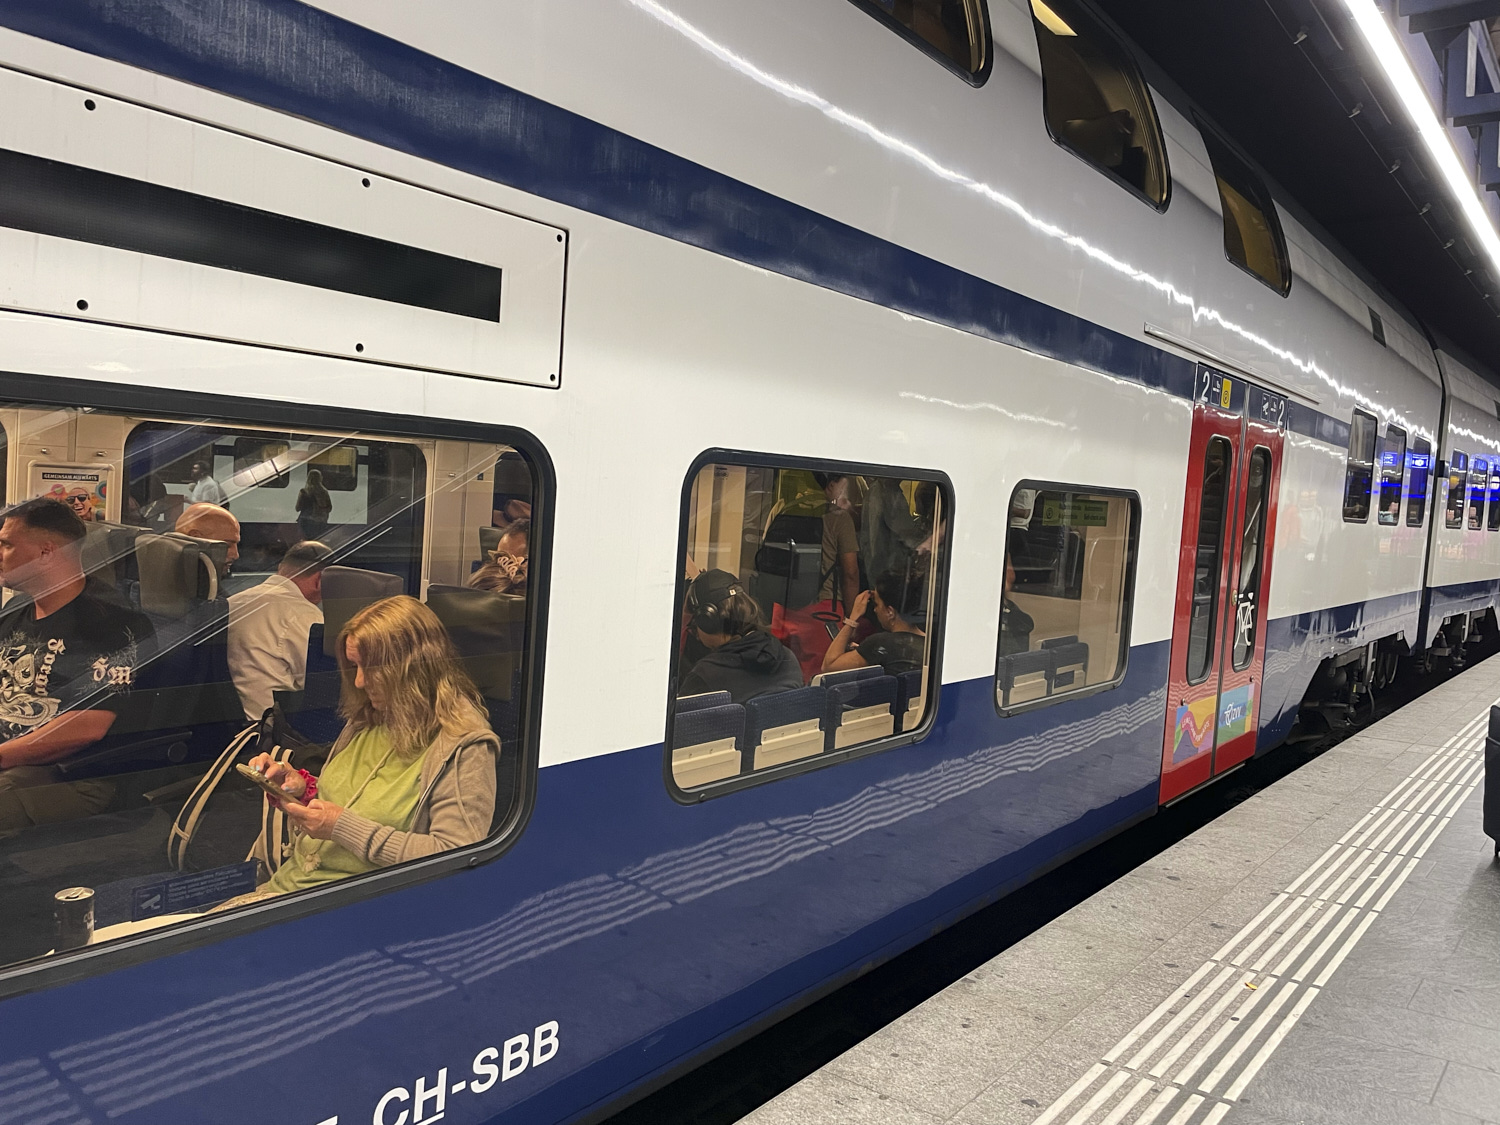
After saying farewell to the college student, we had an uneventful overnight flight to Zurich. We arrived, went through customs, grabbed lunch at the train station, and immediately boarded a train towards the Berner Oberlin region. We made great use of the handy SBB Mobile Swiss train app, which lets you plan your journey, pay for your tickets online, and gives you detailed updates on train arrival, station maps, etc. It shows you what platform your train is coming in on and how to get to your next train quickly and easily so you don’t miss your connection. We travelled on many trains on our trip, almost all of them were on time or just a few minutes late, and we did not miss any connections despite most of them being under 10 minutes. The trains were, for the most part, very clean and quiet. What’s also remarkable is the app covers almost all the Swiss transit systems, even though they are owned and operated by different companies. We used the app to buy tickets on regular trains, cog trains, funiculars, busses, and cable cars across multiple cities. If you have a travel pass, you can also add that to the app and it will take that into account and offer the appropriate discounts. We did not buy a travel pass on this trip because I could not find one that seemed to be worthwhile given our itinerary so we just paid per ride and got a few free local rides from the city passes the hotels are required to provide.
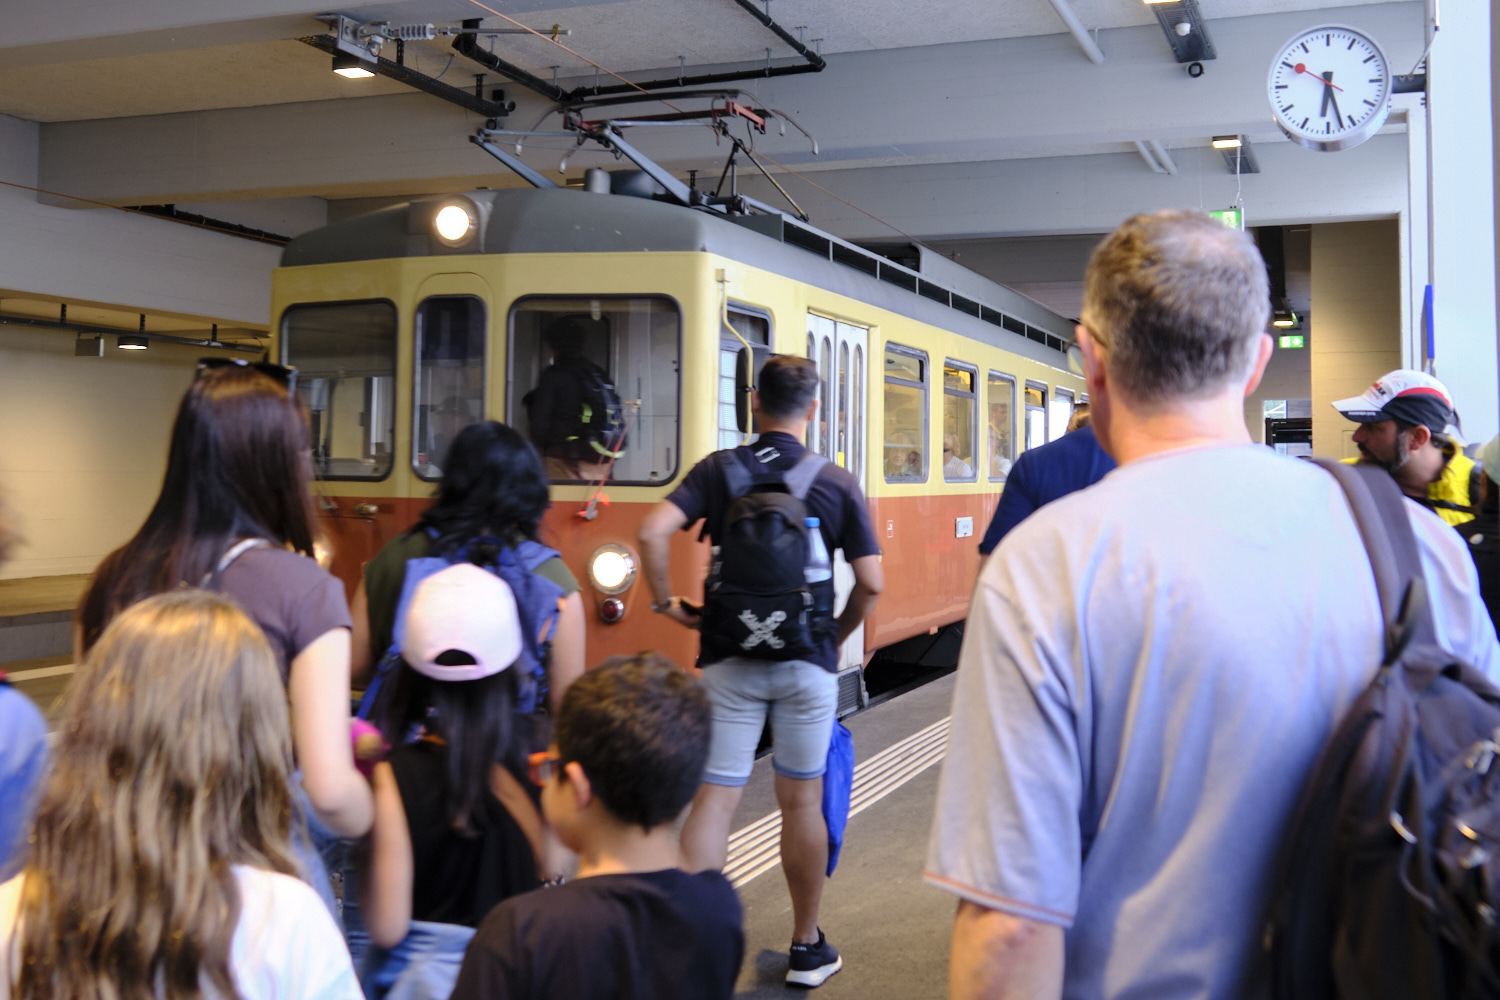
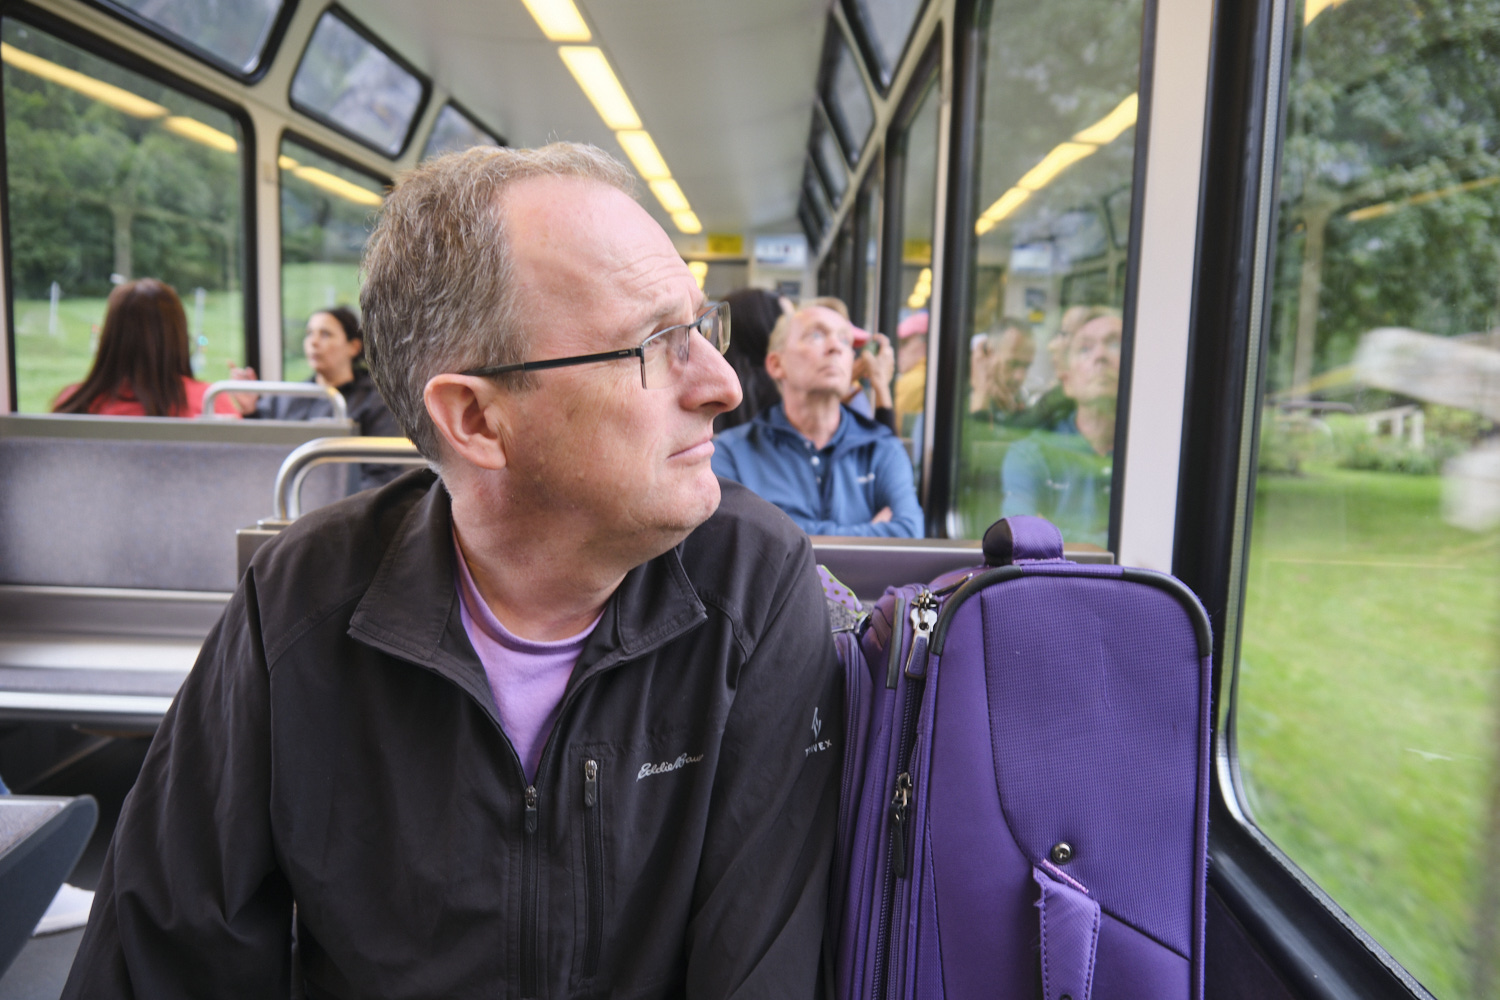
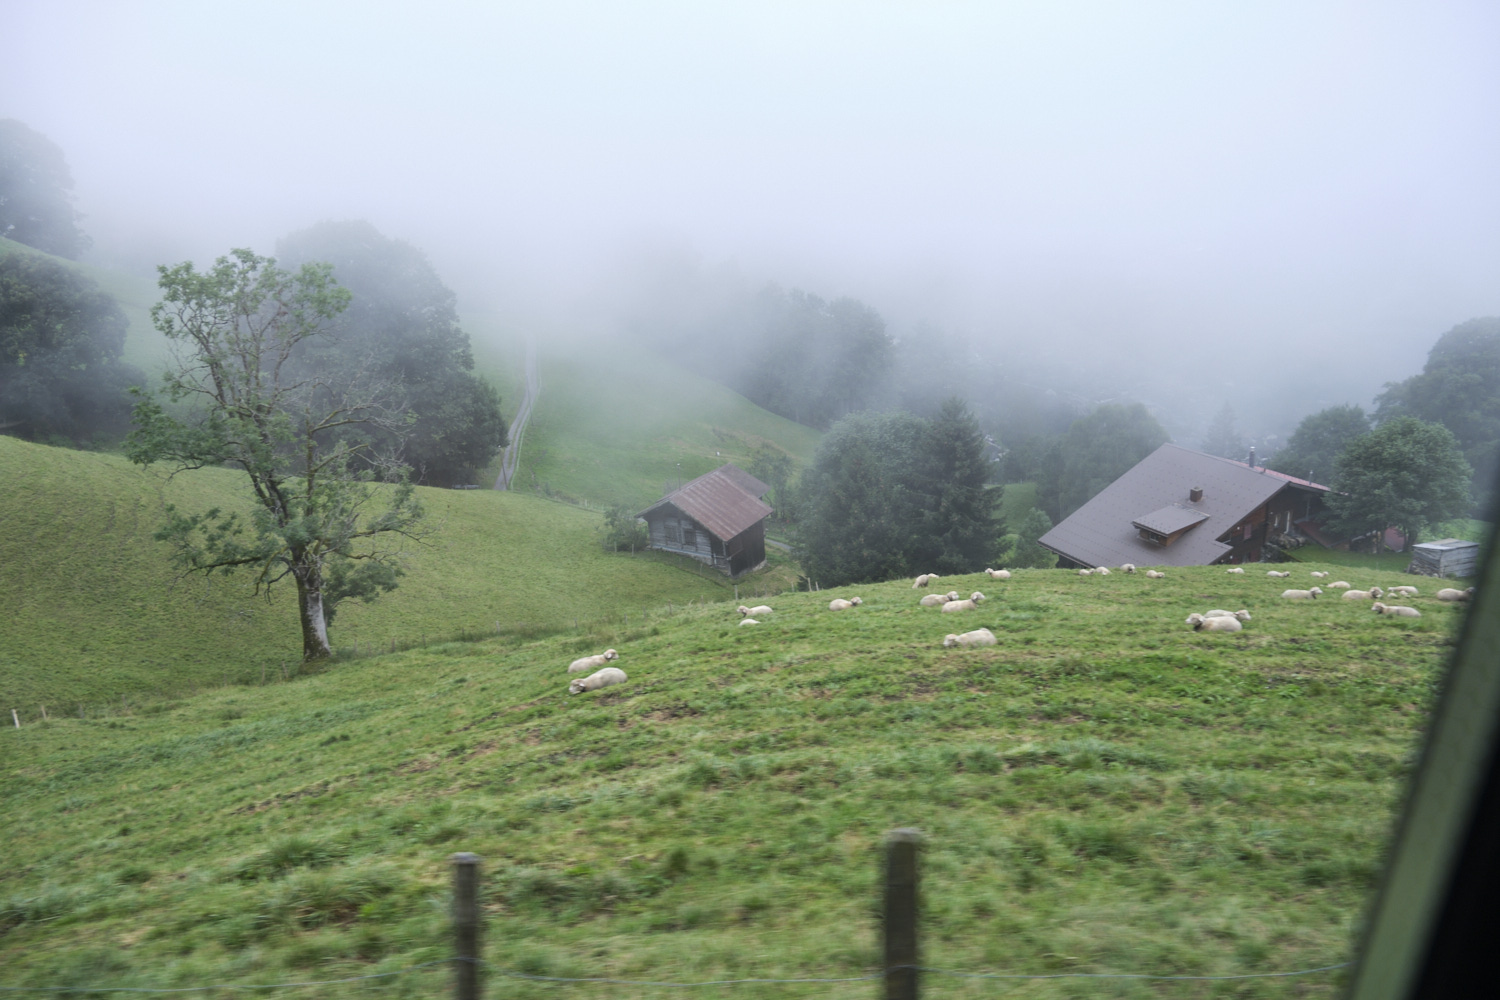
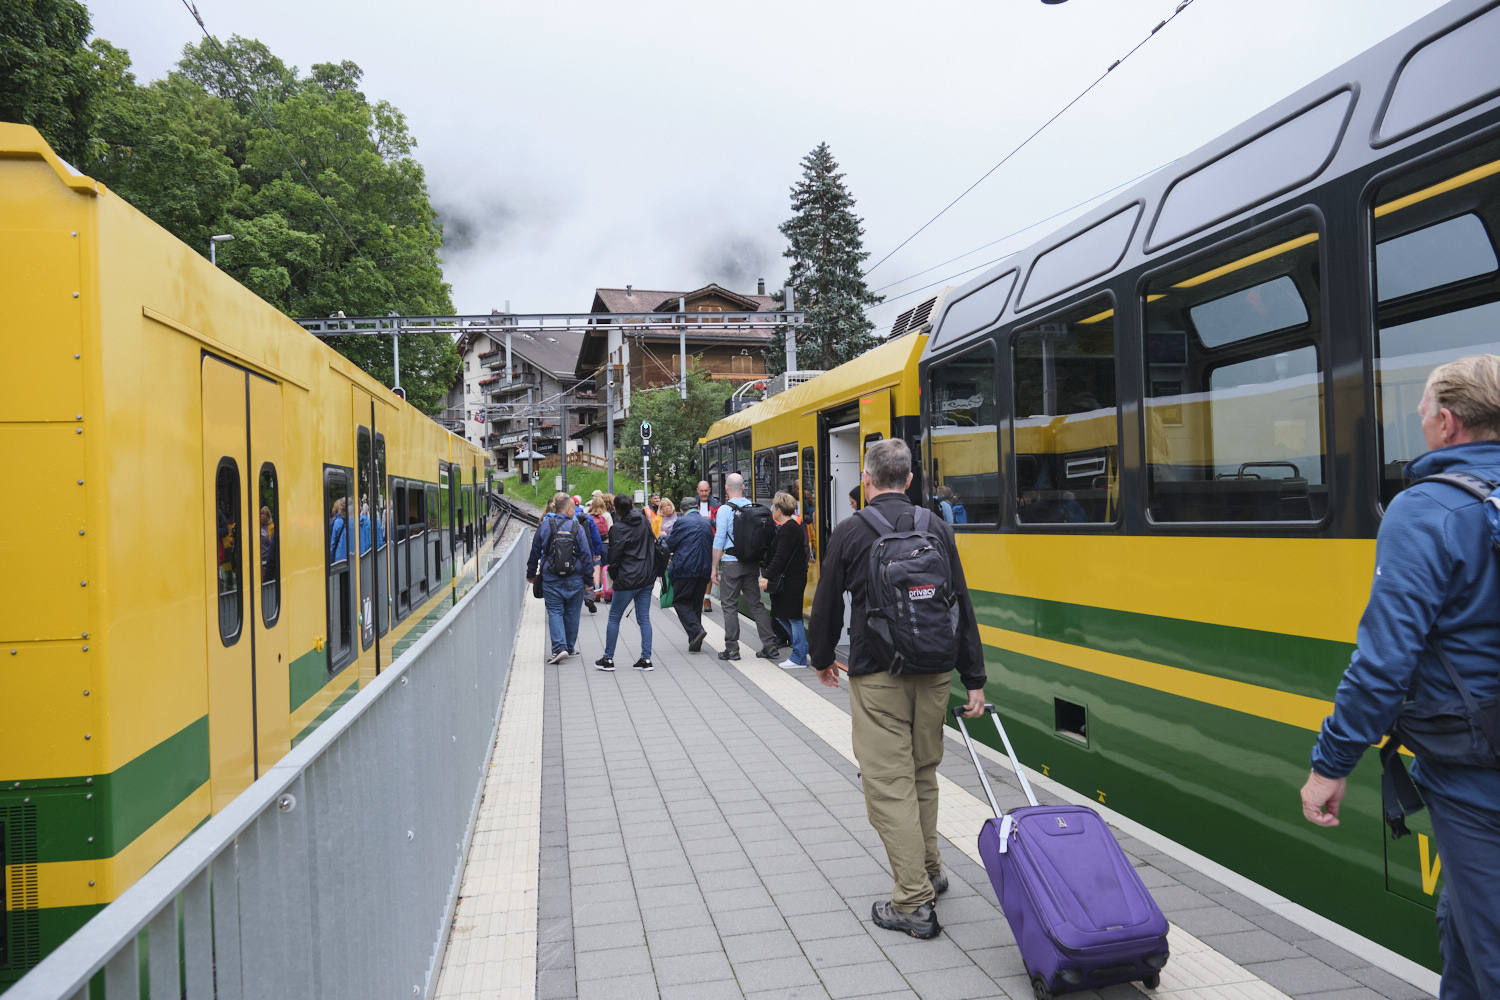
Our first train trip required four hops and took about three hours. We went from the Zurich airport to Bern, then we changed trains and went to Interlaken Ost, then changed again to travel to Lauterbrunnen, and finally, took a cog railroad train from Lauterbrunnen to Wengen. We travelled past traditional Swiss and modern brutalist buildings and through lots of farms. The final leg was up a mountain and was particularly picturesque in a train car with lots of windows.
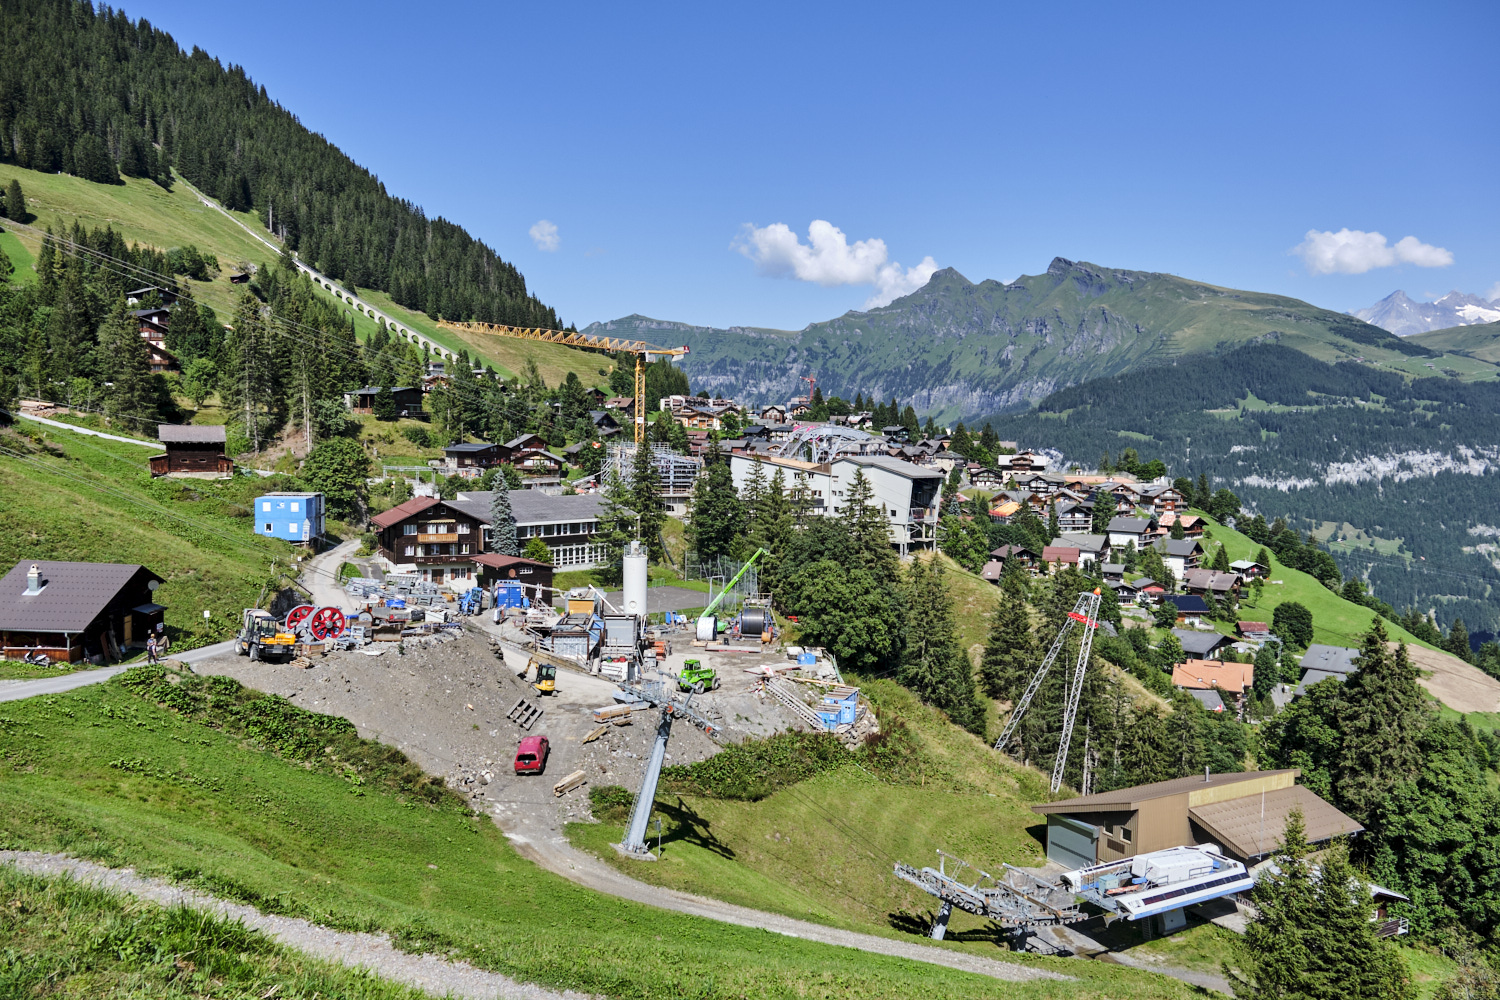
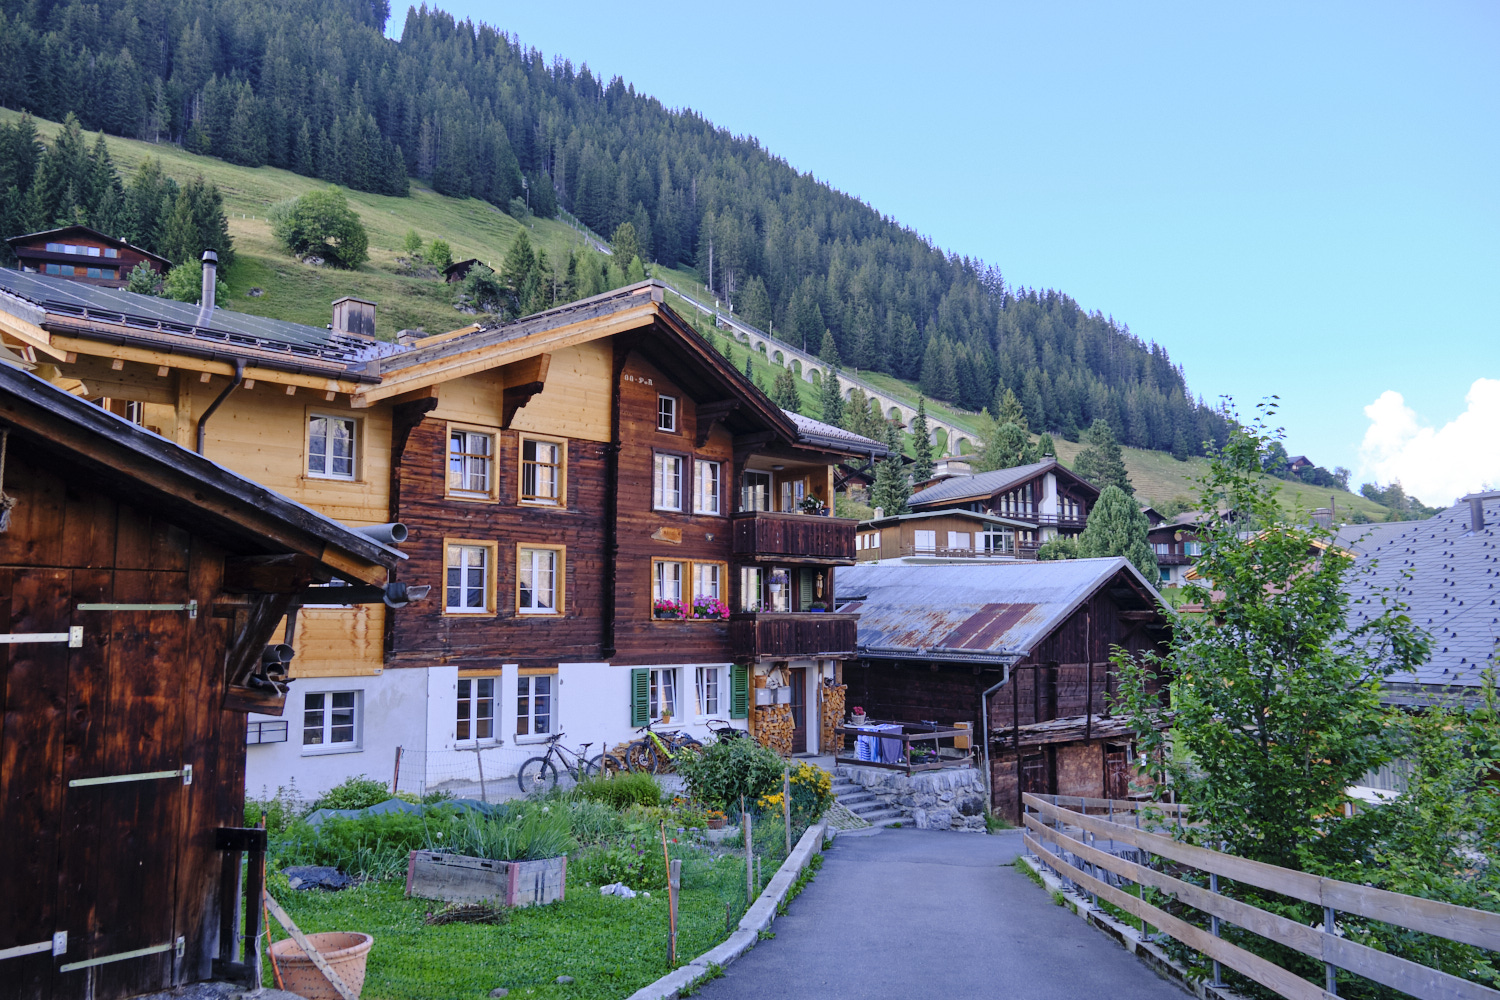
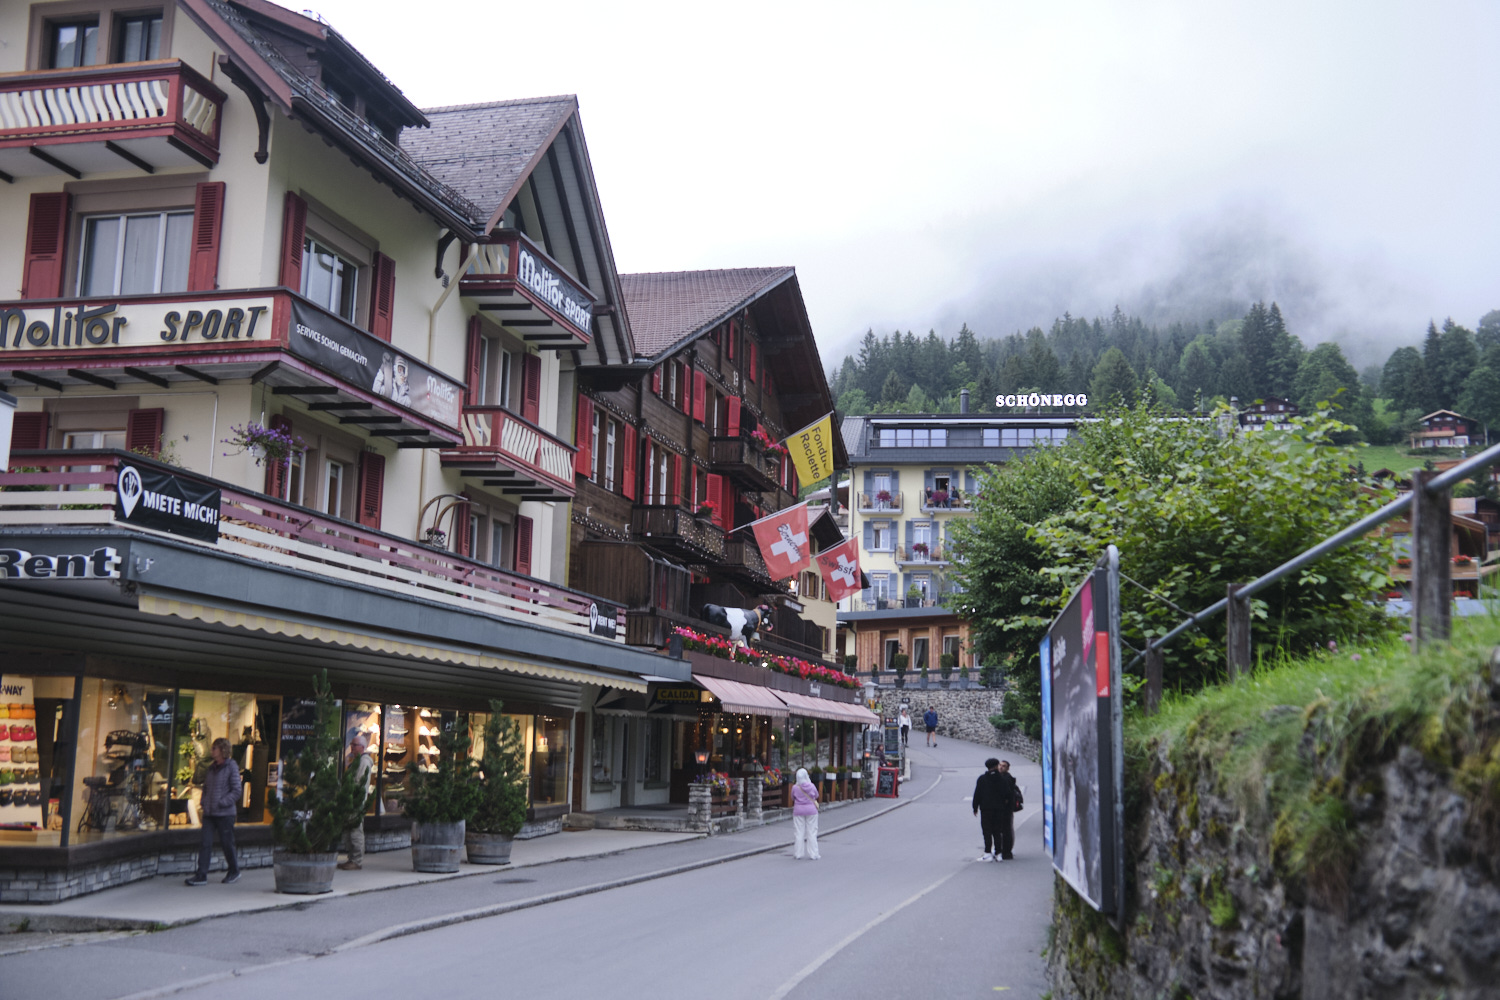
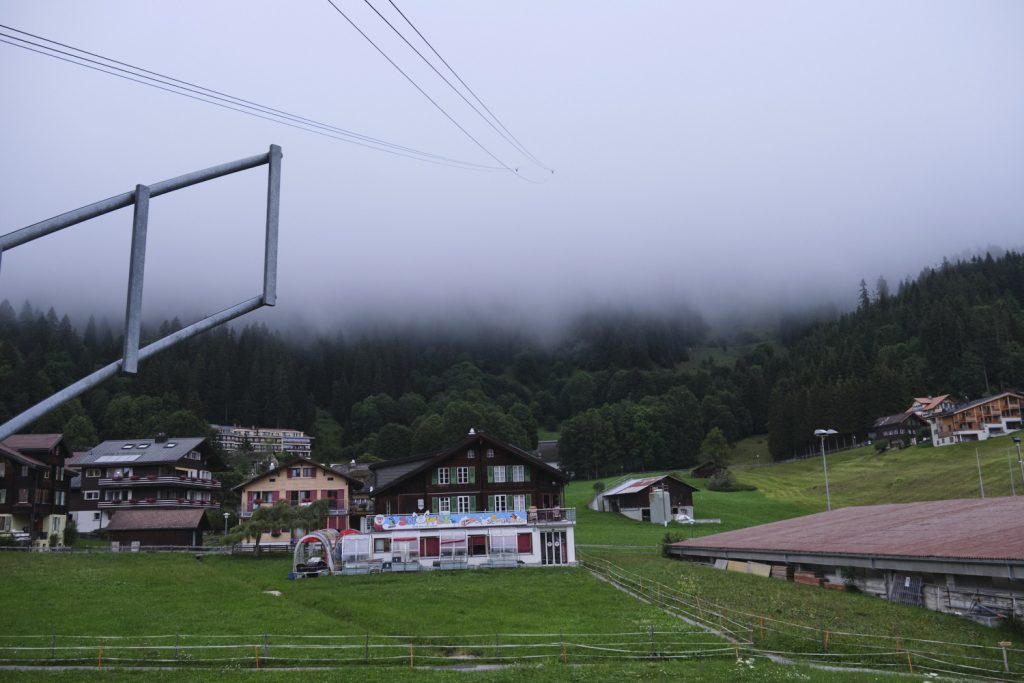
We arrived in Wengen on a cloudy, foggy day. Wengen is one of many small towns in the region that do not allow private cars. There are golf carts and taxis (and lots of construction vehicles), but we just walked the 10-minutes through town to reach our hotel at the top of the hill.
After checking in and surveying the nearby construction we headed to a nearby hotel for a traditional Swiss fondue dinner. After dinner we explored the town some more as the fog settled in.
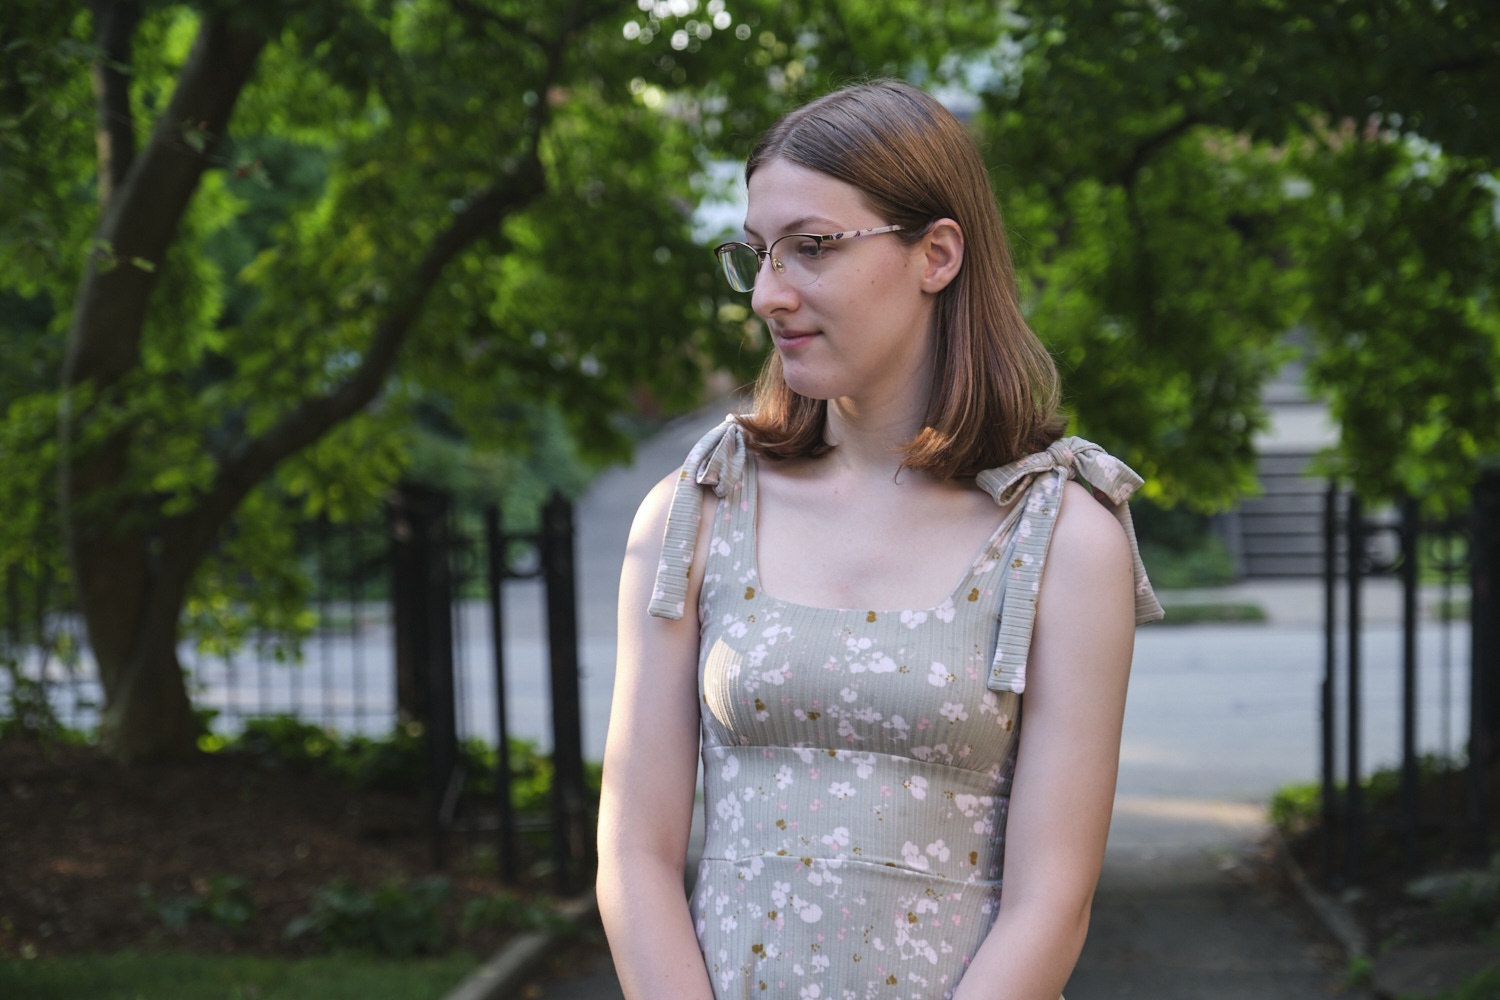
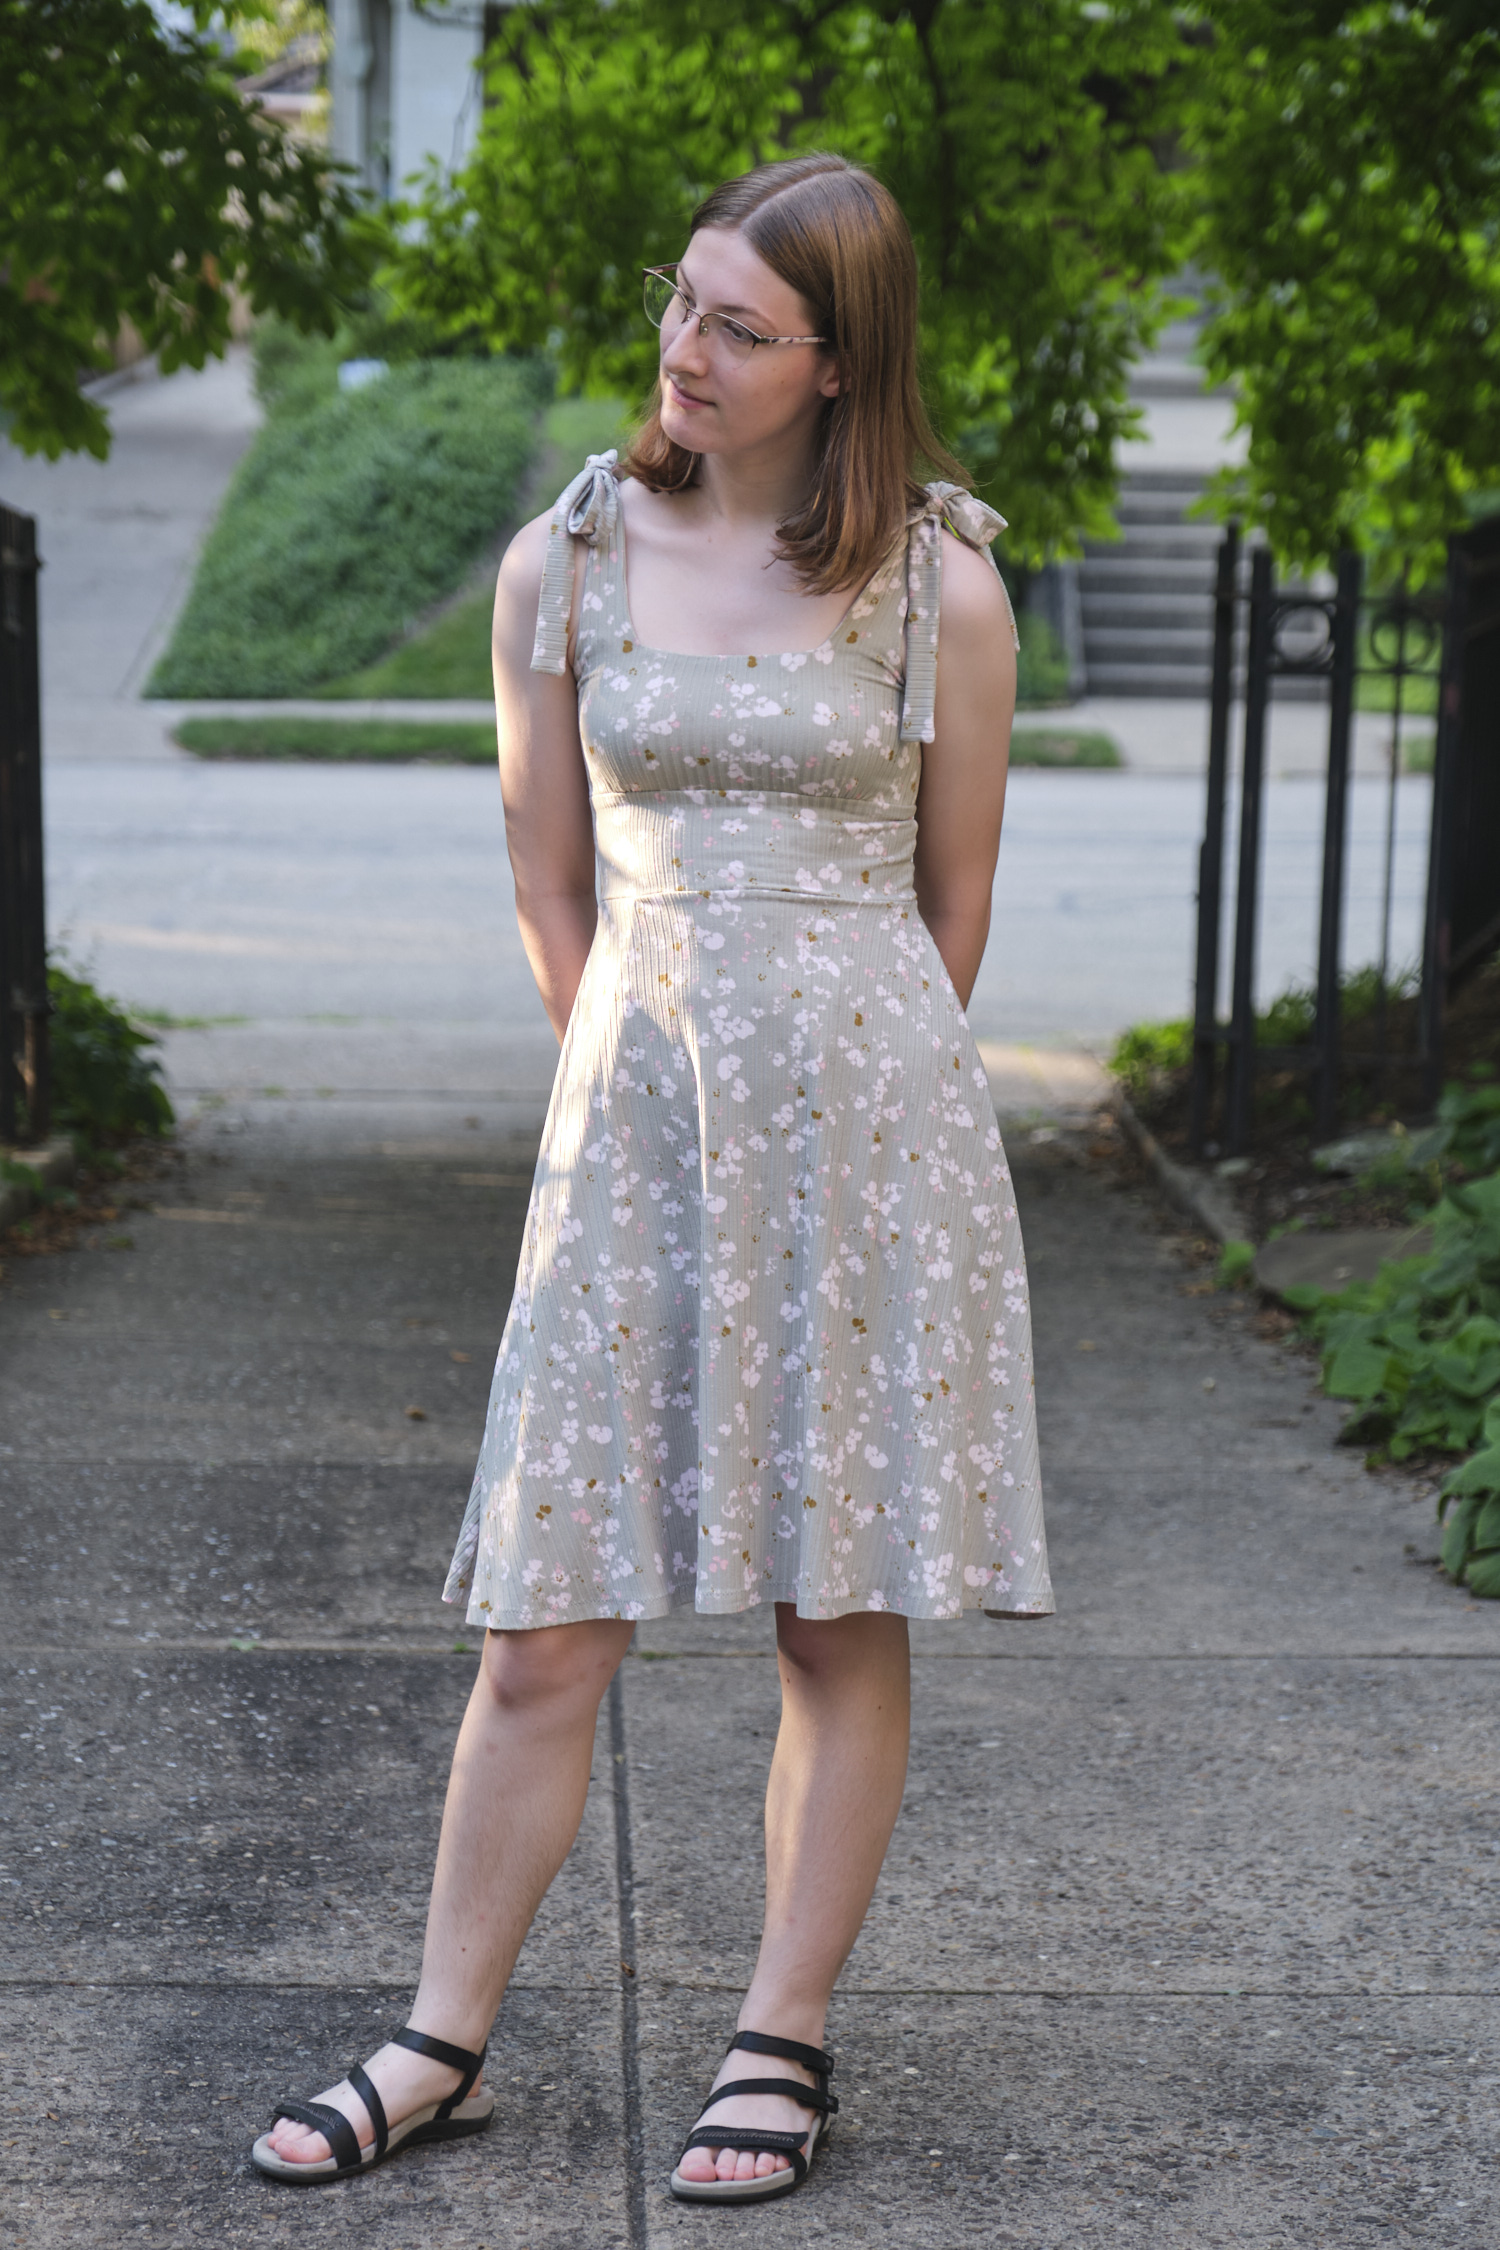
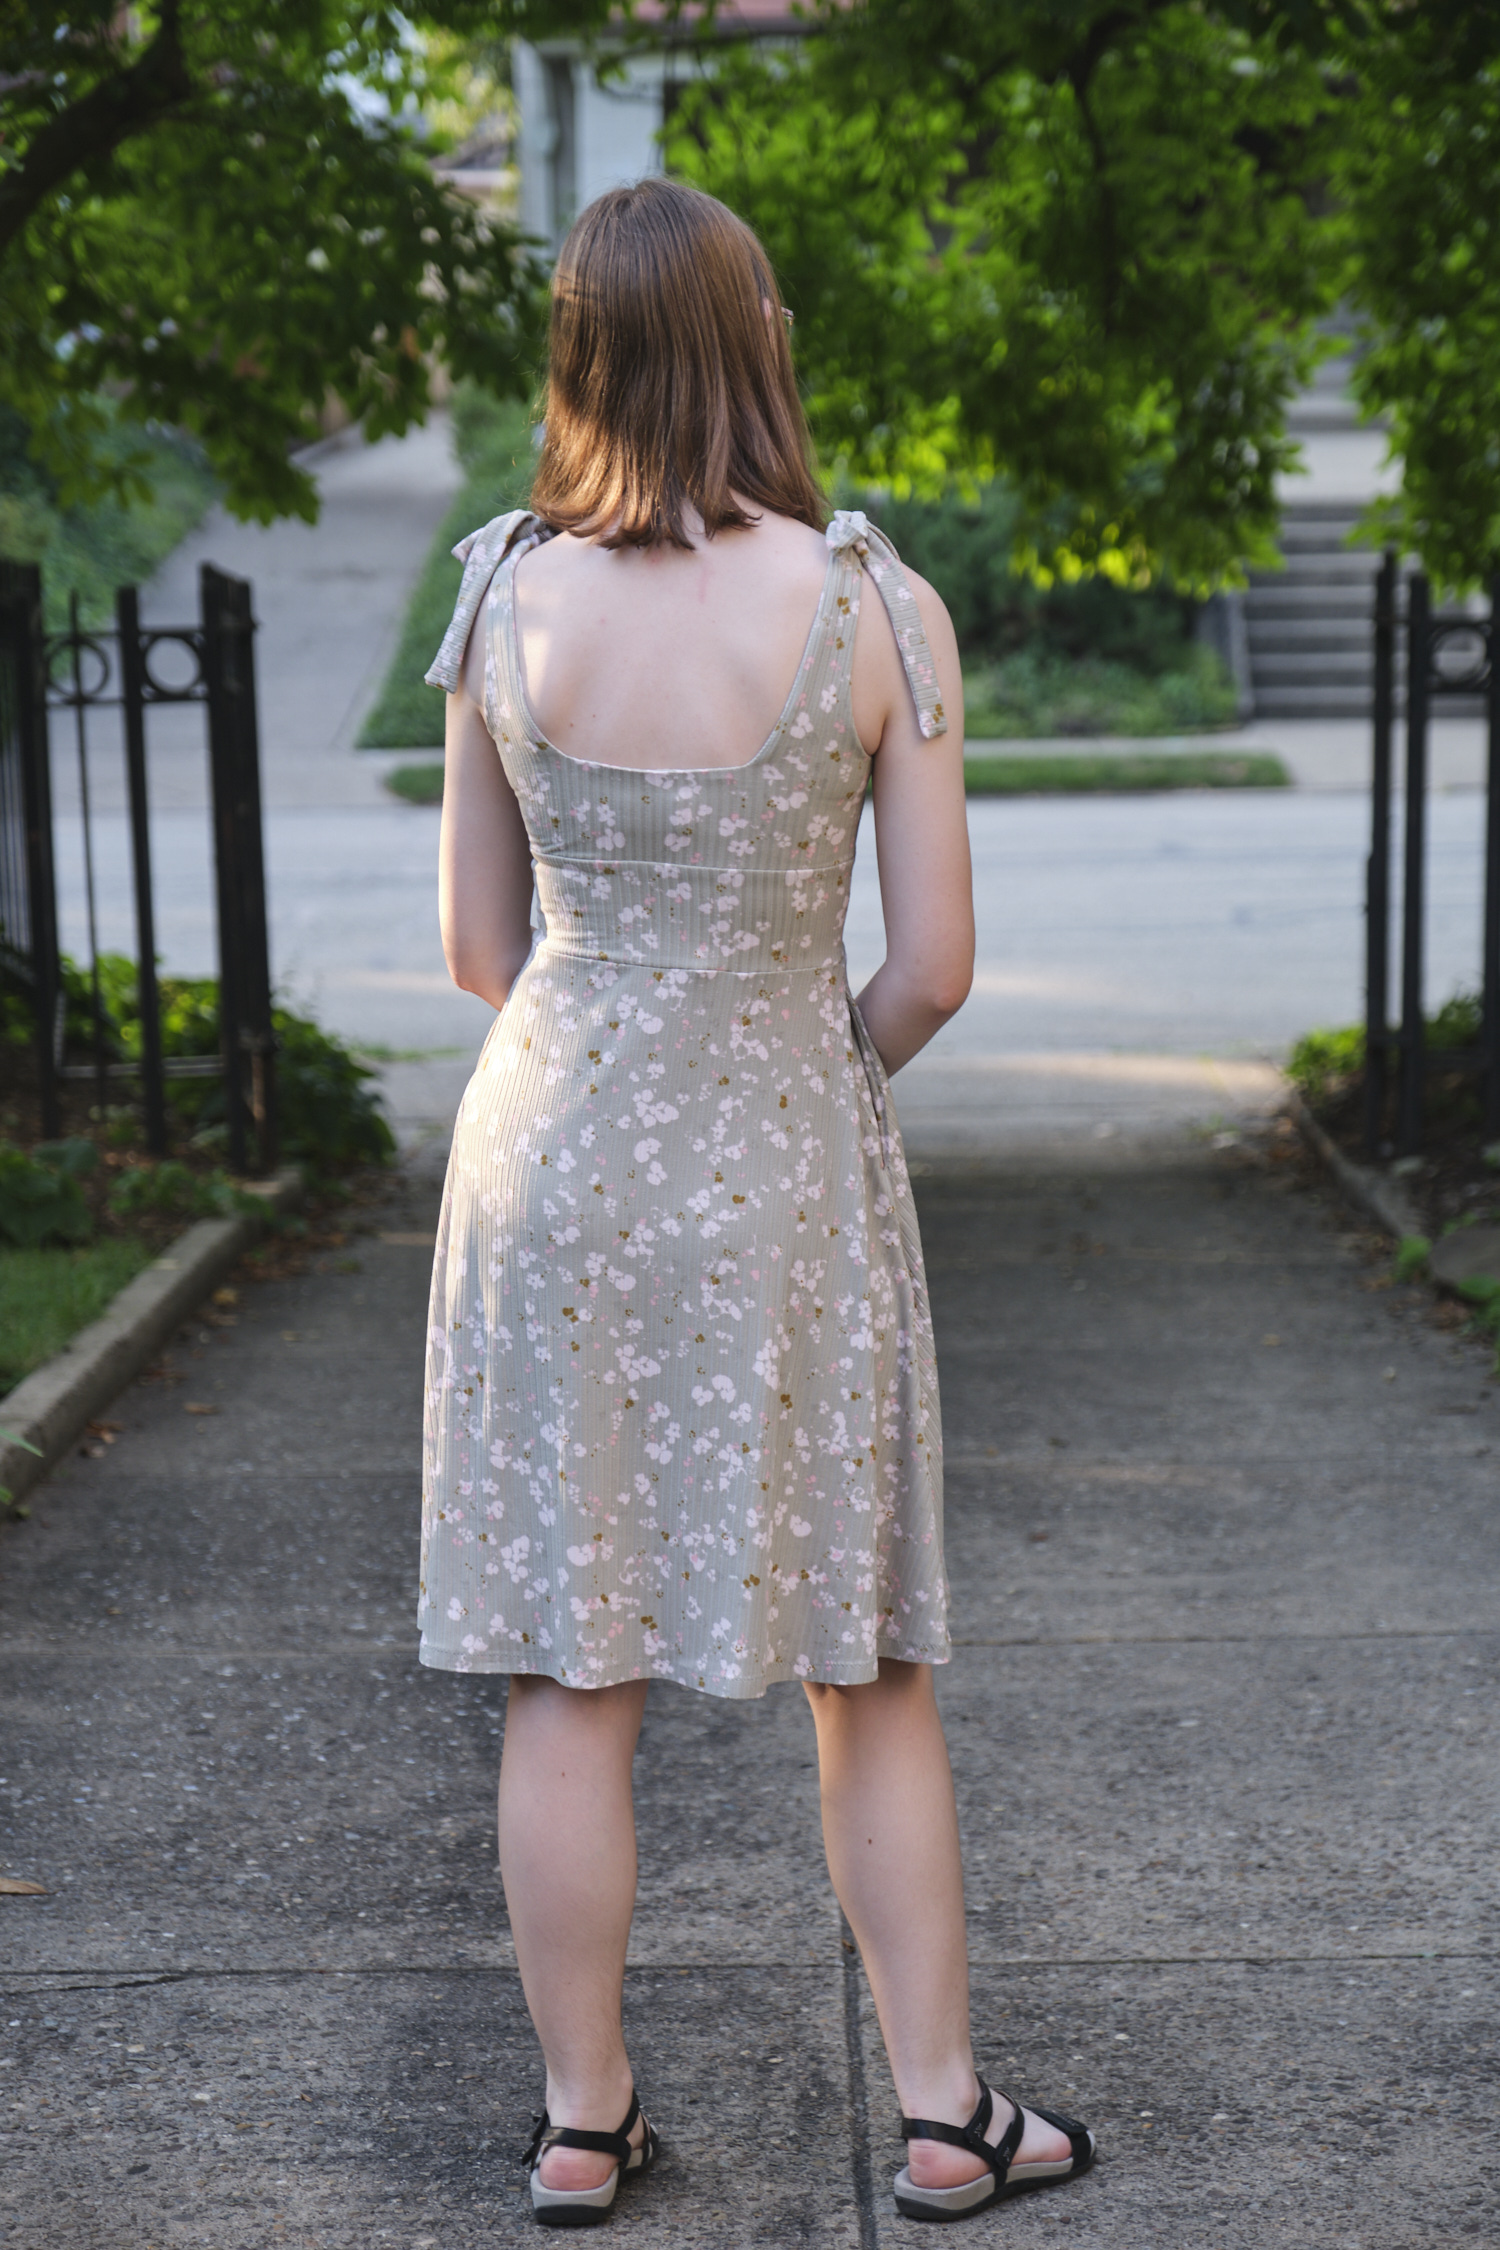
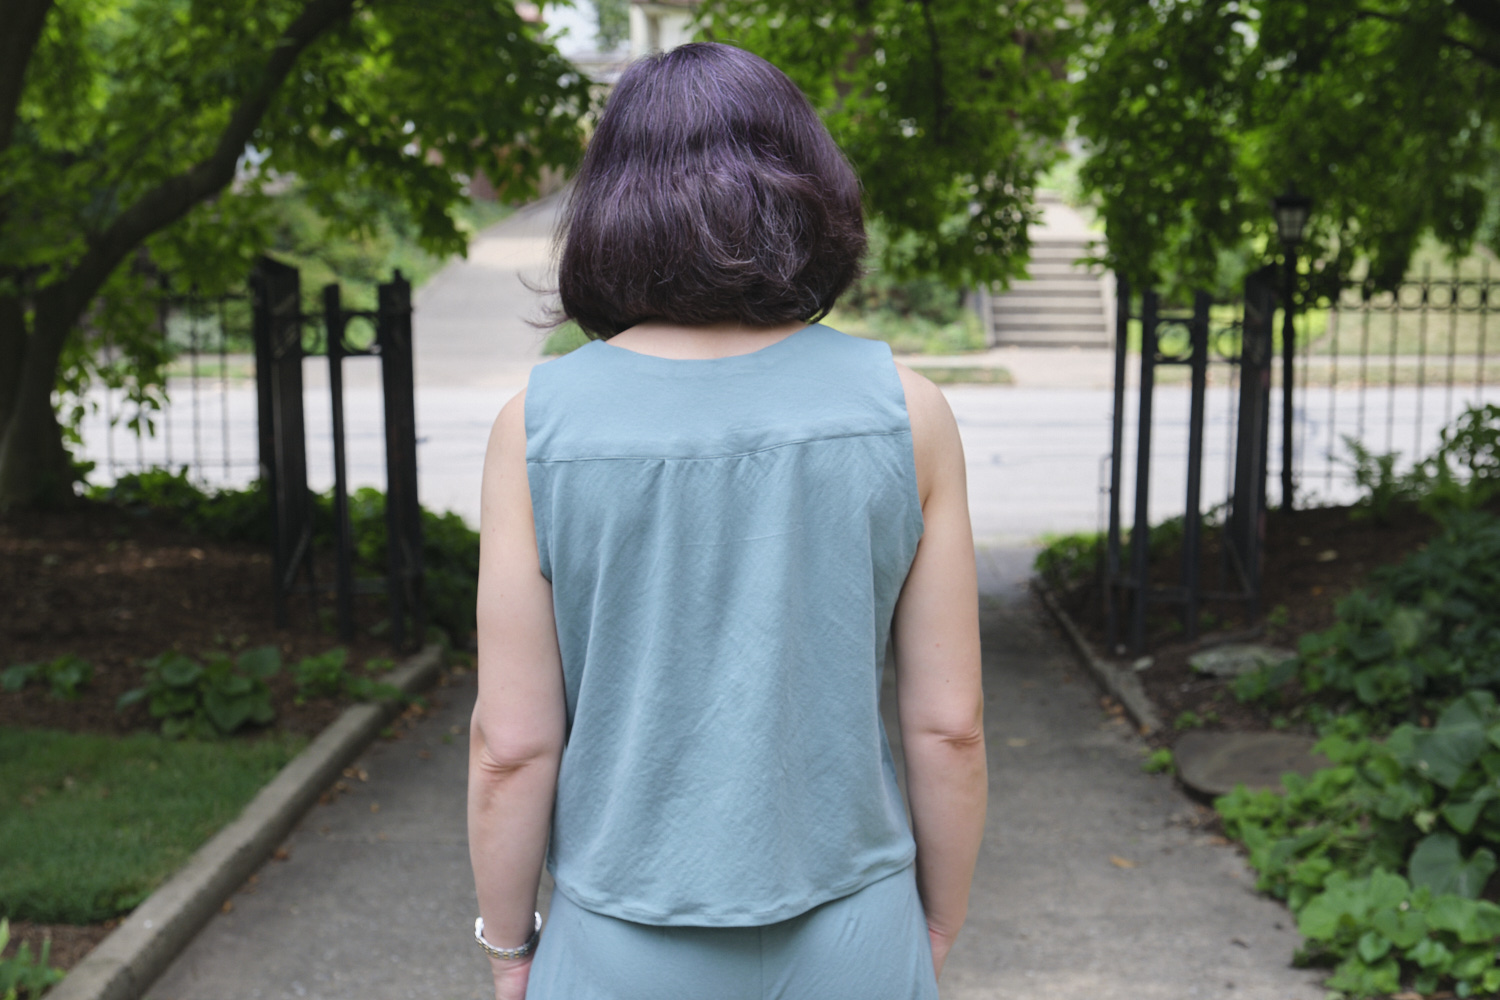
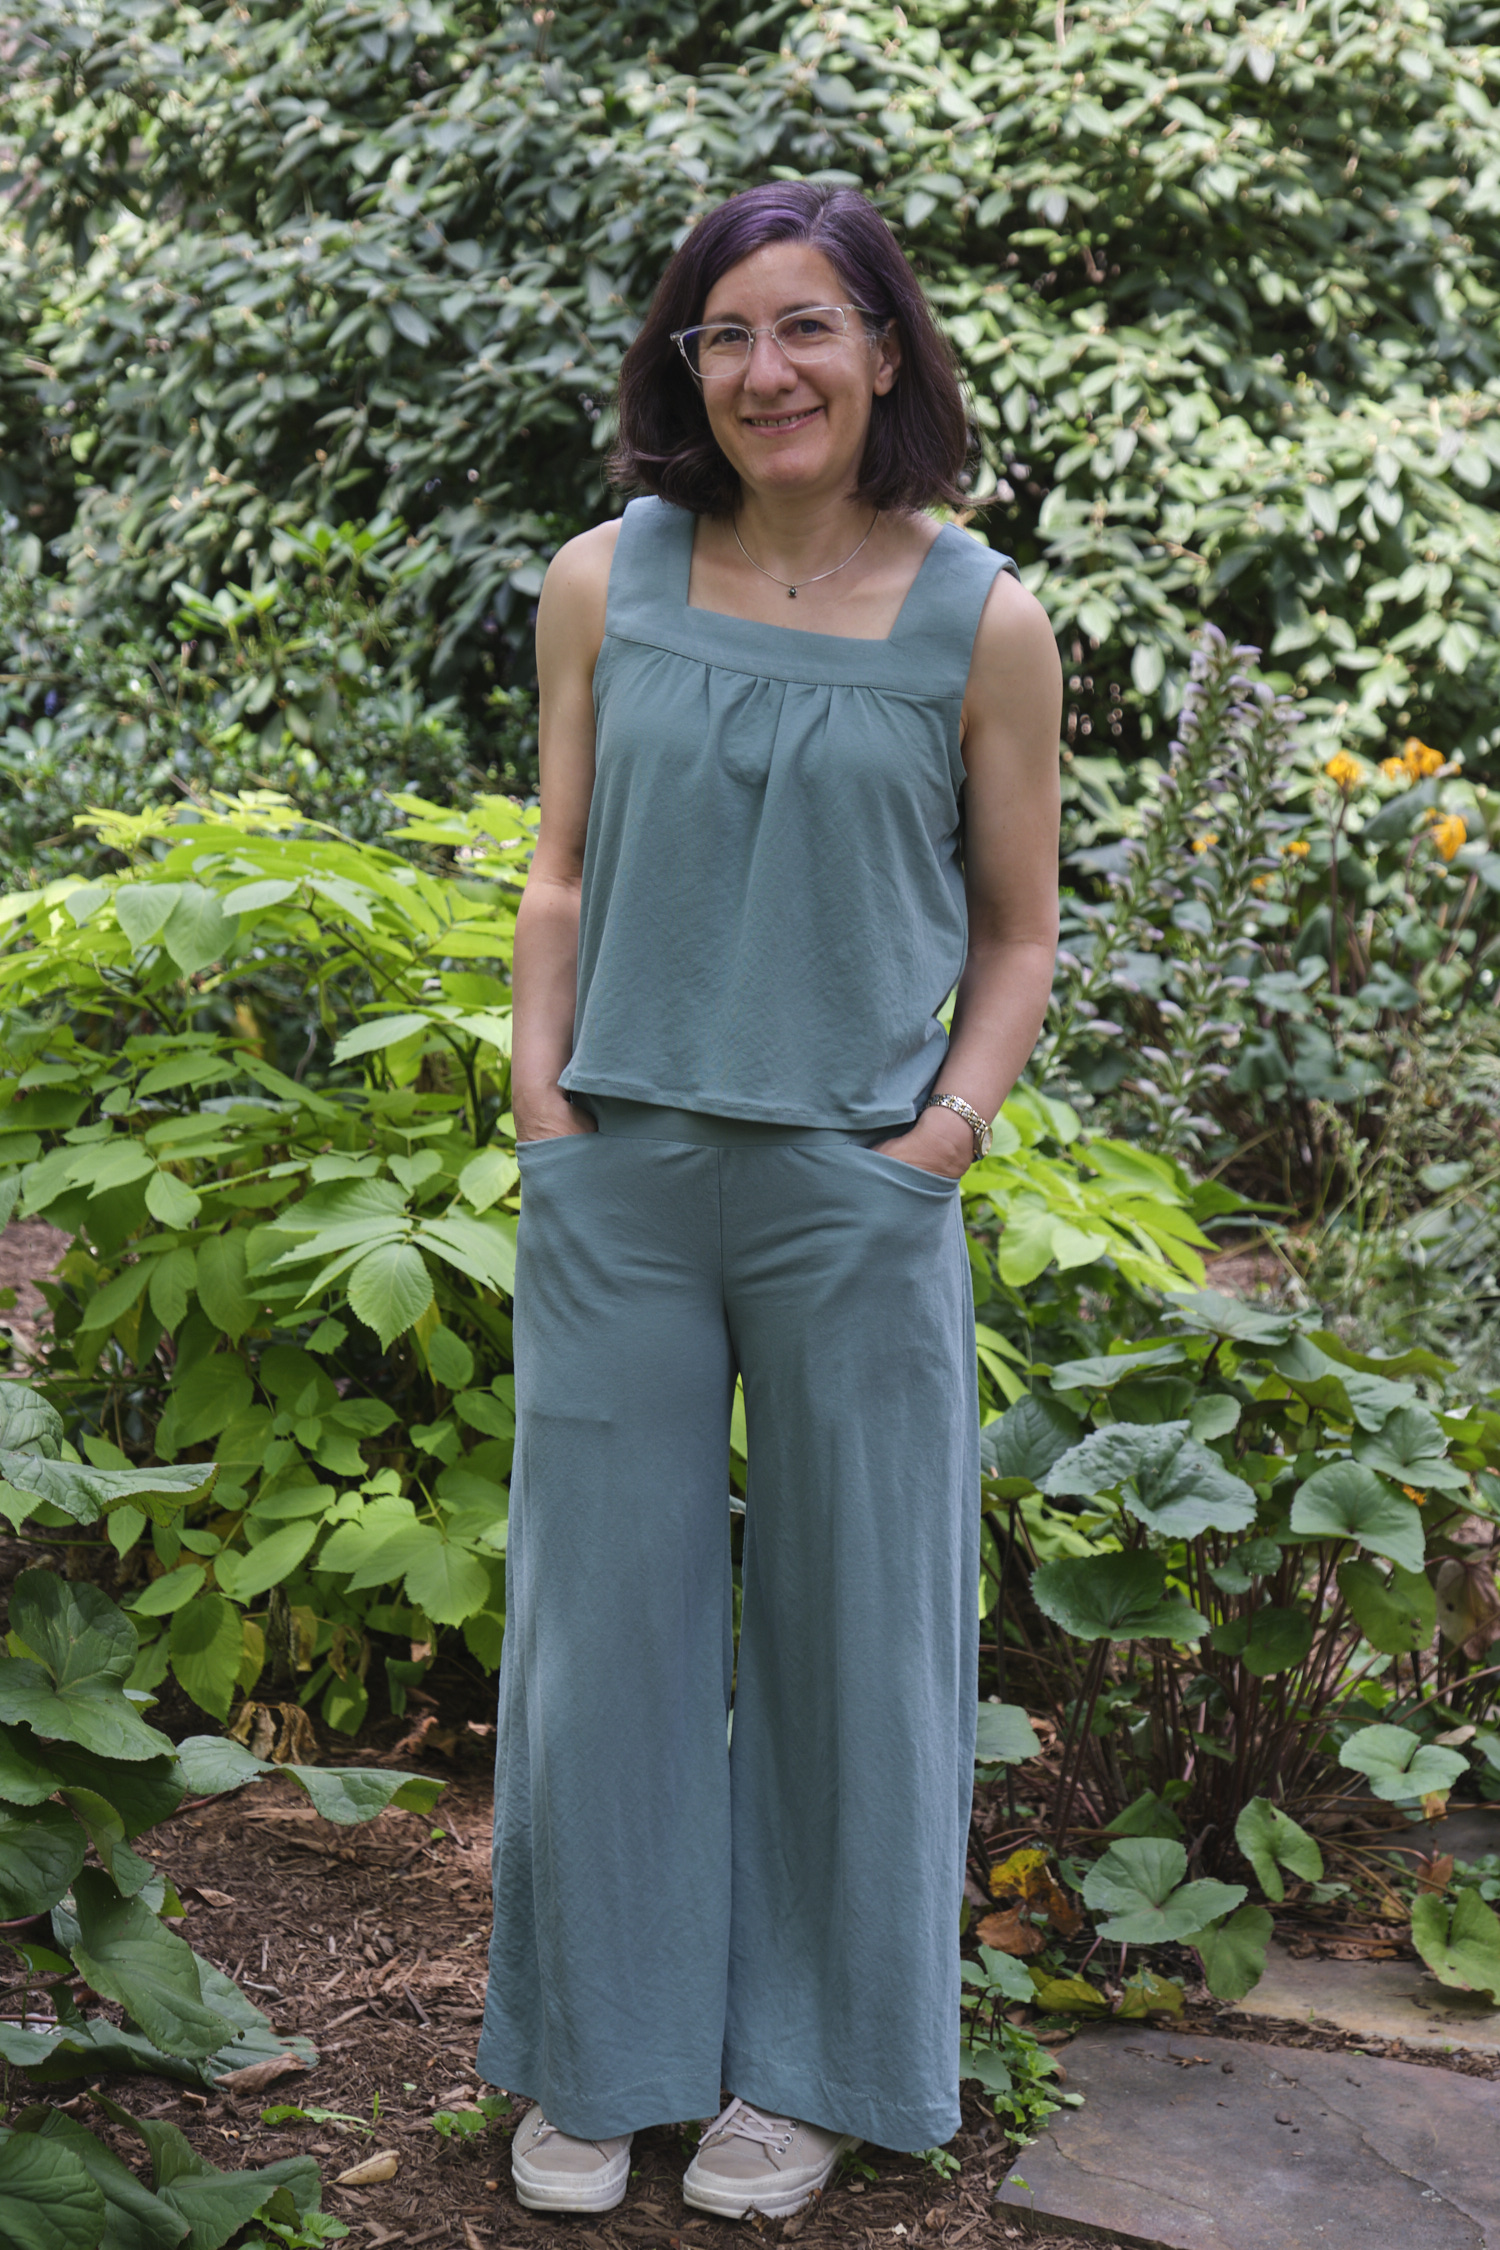
Last winter when Petite Stitchery introduced the adult Dovie longlline crop and dress pattern, I knew my teen daughter would love it. Sure enough, I showed her the pattern and for months she kept asking me when I would make it for her. She picked out a 180 gsm light sage green polyester/spandex yummy rib fabric from Surge Fabric and I finally got around to sewing her dress. I sewed the size XS knee length option with the regular front neckline (there is also a lower cut option). The bodice is lined and I used the same fabric for the lining.
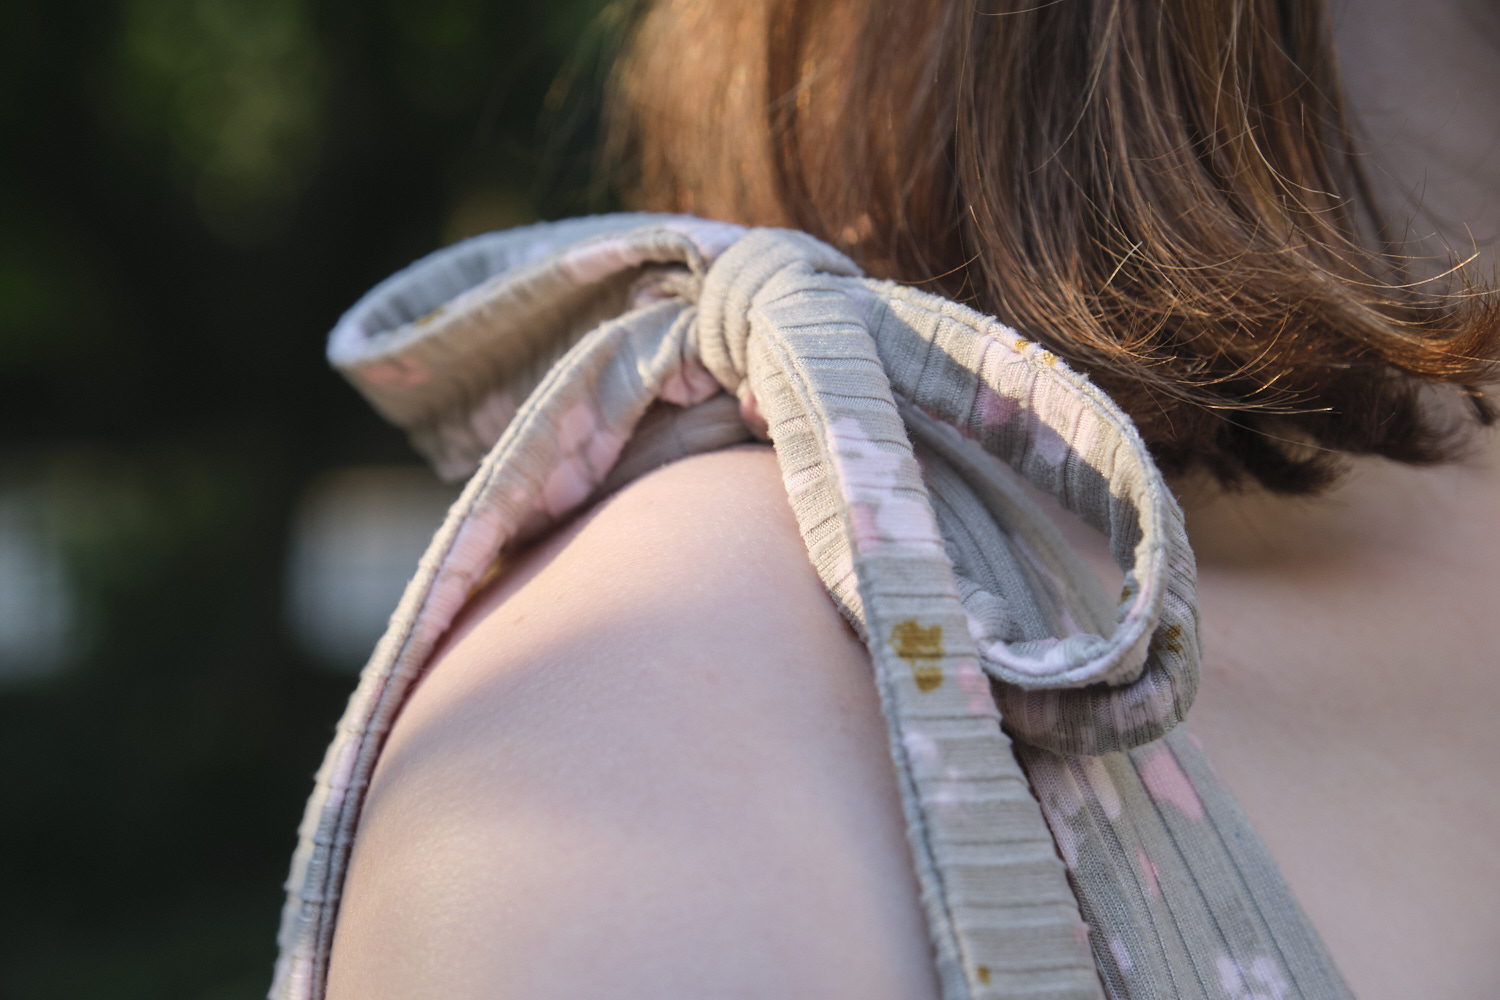
The dress was pretty quick to sew — I would have finished the whole thing in one afternoon/evening, except that I added pockets (not in the pattern) and that took extra time so I had to finish hemming it and sew the shoulder ties the next day. The pattern instructions were ok, but could have been clearer. I’m spoiled by Sinclair and Pattern Emporium, which provide very detailed instructions and tips in their patterns. This pattern offered on a little advice on what type of stitches to use (I ended up using a shallow zigzag on my sewing machine for most of it and surging around the waistband, pocket bags, and sides of the skirt) or detailed fabric recommendations for dress and lining (I lined it with the same fabric as the dress but saw suggestions in the Facebook group for lining with power mesh or athletic knit for more support). The pattern also inexplicably is calibrated off by a factor of 10. All of the measurements in the pattern have to be multiplied by 10 (my projector calibration setting is 12.8% for all the other pattern companies but is 128% for PS) — easy to do but why? This pattern uses the burrito method to make the lined bodice straps, and I would probably have been stumped by the instructions if I hadn’t just made a Sinclair Bloom top that used the same technique. I briefly thought I was supposed to attach the waistband to the bodice and the lining waistband separately to the lining, but after pinning it that way figured out that all four layers get sewn together at once.
The pattern suggested that this dress would require 2 7/8 yards of fabric, but from looking at the pieces for size XS, I figured I could make it in less than 2 yards. Indeed, I had almost half a yard left from my 2-yard piece of fabric. I think the crop top version could be made out of leftovers from other projects.
The pattern suggests adding clear elastic in several places, some of which didn’t seem necessary to me. I ended up adding clear elastic to the horizontal part of the front and back neckline as well as right under the bust.
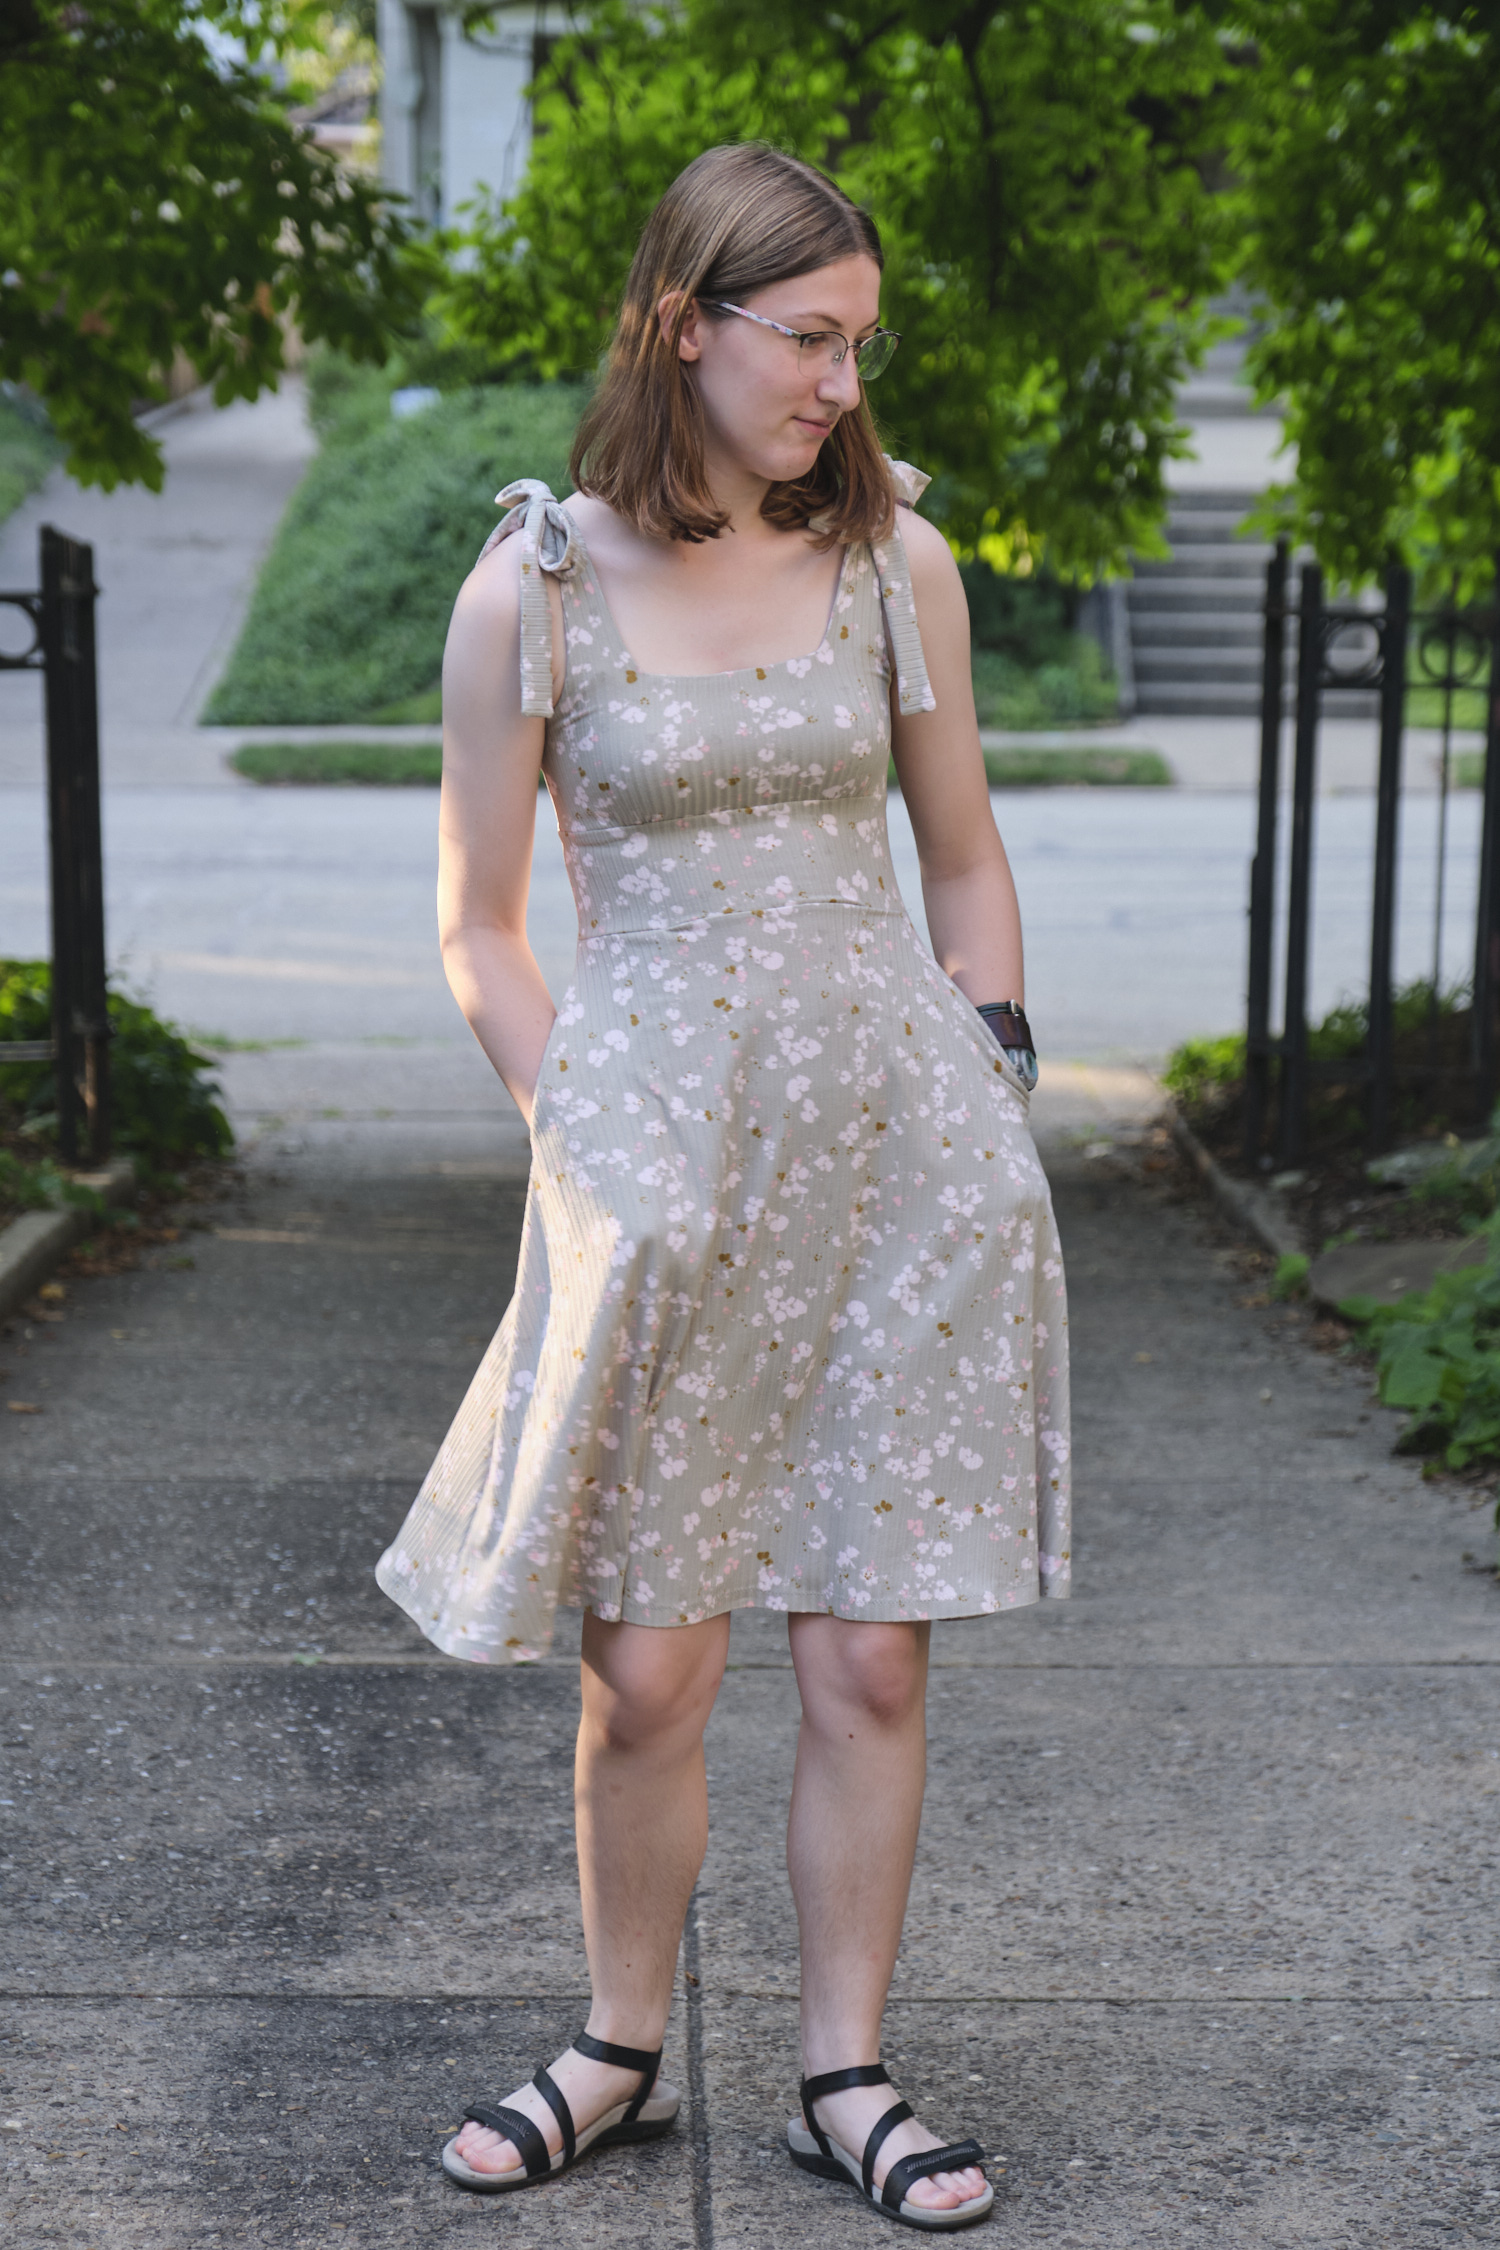
My daughter and I agree that pockets are required on all dresses, so I borrowed the pocket pattern from the Sinclair Yasmin dress and added deep pockets that easily hold a cell phone. The waistband provides sufficient anchoring for pockets and there is enough room at the hips that the pockets do not show through the skirt (although if you put enough in them they will obviously show). My daughter went out with friends and put her phone and wallet in the pockets and came back and told me the big pockets were great and her friends were jealous.
My daughter is about 5’5″ and the knee length comes exactly to her knee. I’m a few inches shorter so would probably cut the skirt about three inches shorter for me.
This is a super cute pattern. The optional (and removable) shoulder ties take it up a level of cuteness too. The cup size options make it easy to get a good fit at the bust. In the Facebook group people report that if you use supportive enough fabric for the lining the dress can be worn without a bra.
After I finished making my daughter’s dress, I decided it was so cute that I needed a crop top for myself. Except I don’t actually wear crop tops so I took the size small Dovie crop top pattern and added an extra 2.5 inches to the waistband height (extending a total of 5 inches, but it gets folded in half). I used about 2/3 yard of lavender DBP.
I cut and sewed the entire bodice in about 2 hours, having already figured everything out for the dress. The waistband assembly is a bit different for the top, and that’s where I got a bit stumped and there was some trial and error until I landed on the following approach that worked very well for me. I sewed up the sides of the waistband to form a tube and folded it in half so that it has an outer and lining piece. I aligned and pinned the raw edges of the outer and lining and then used a large zig zag stitch along the edge to hold them together. Then I aligned the waistband with the bodice main and lining, pinned, and stitched all 4 layers together with a large zig zag. Finally I surged over the zigzags and added clear elastic to the seam as I went, giving it a gentle stretch. I didn’t bother with the shoulder ties since I expect to wear this with with sweaters or jackets.
It’s a cute little top, but I don’t think it is quite as cute as the dress. Nonetheless, it will go with a number of pants and skirts in my wardrobe, and I expect I will get a lot of wear out of it. I’m modeling it here with DBP Sinclair Cleo palazzo pants I made last year. The look is definitely enhanced with the the right bra (on me that means wide straps, padded cups). I think the straps are set slightly too wide for me, and possibly a tad too long, and if I make this again I’ll try to adjust that.
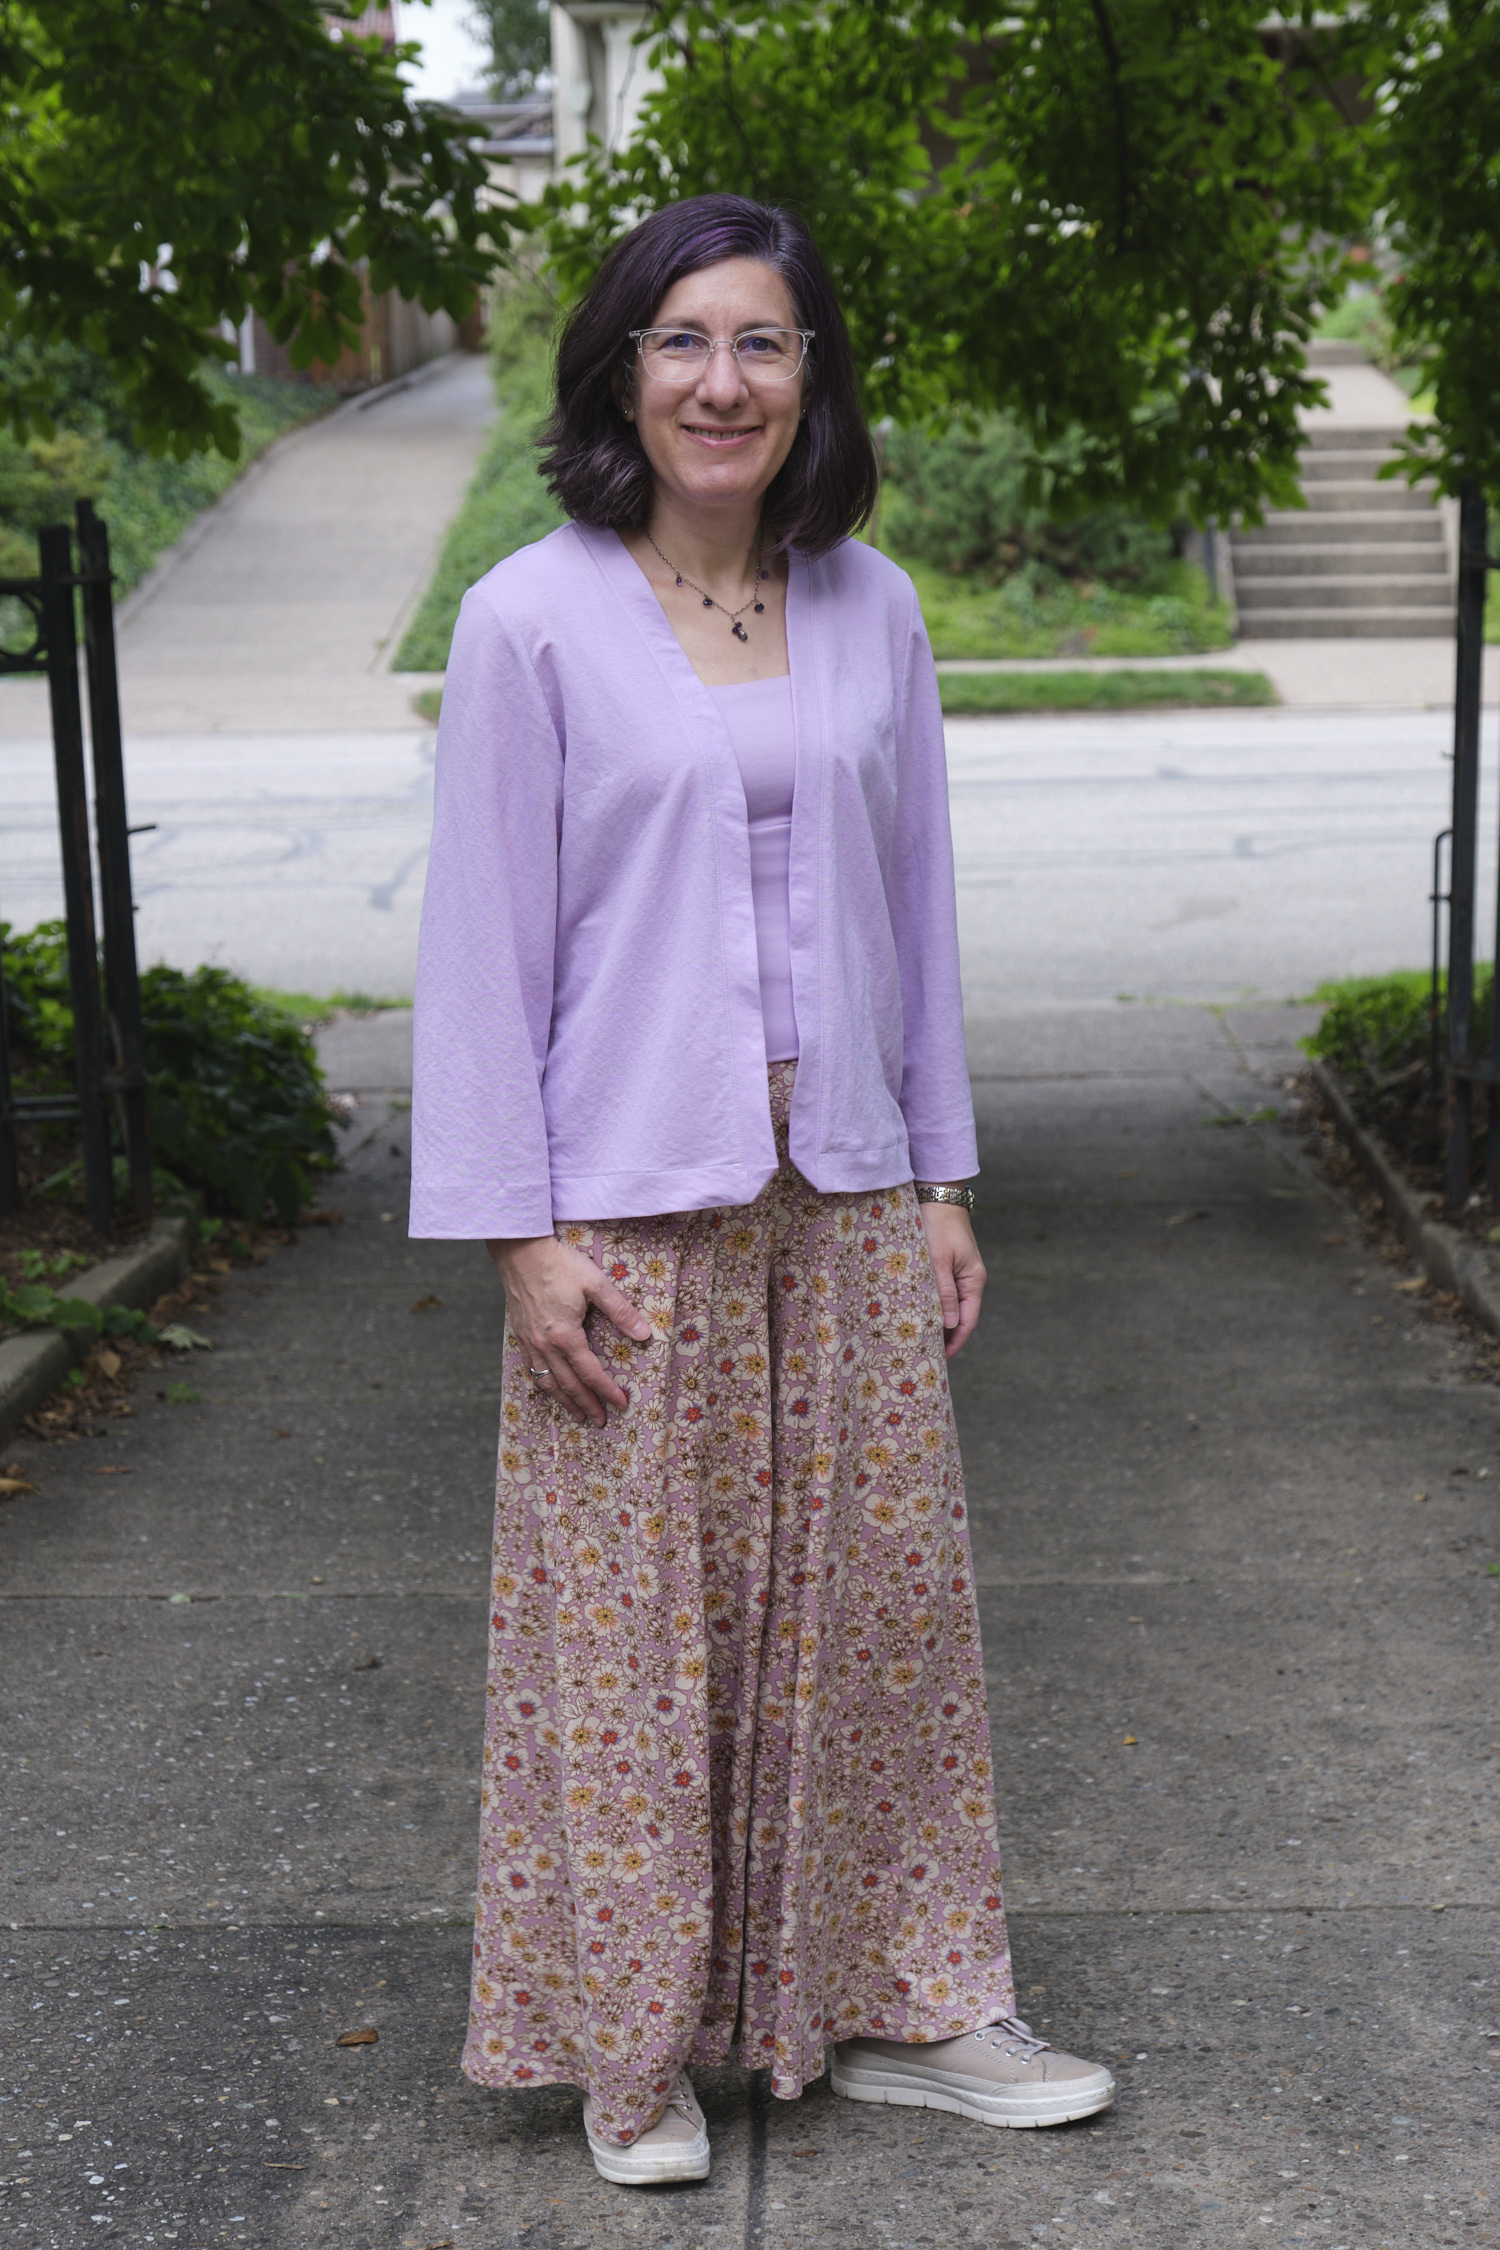
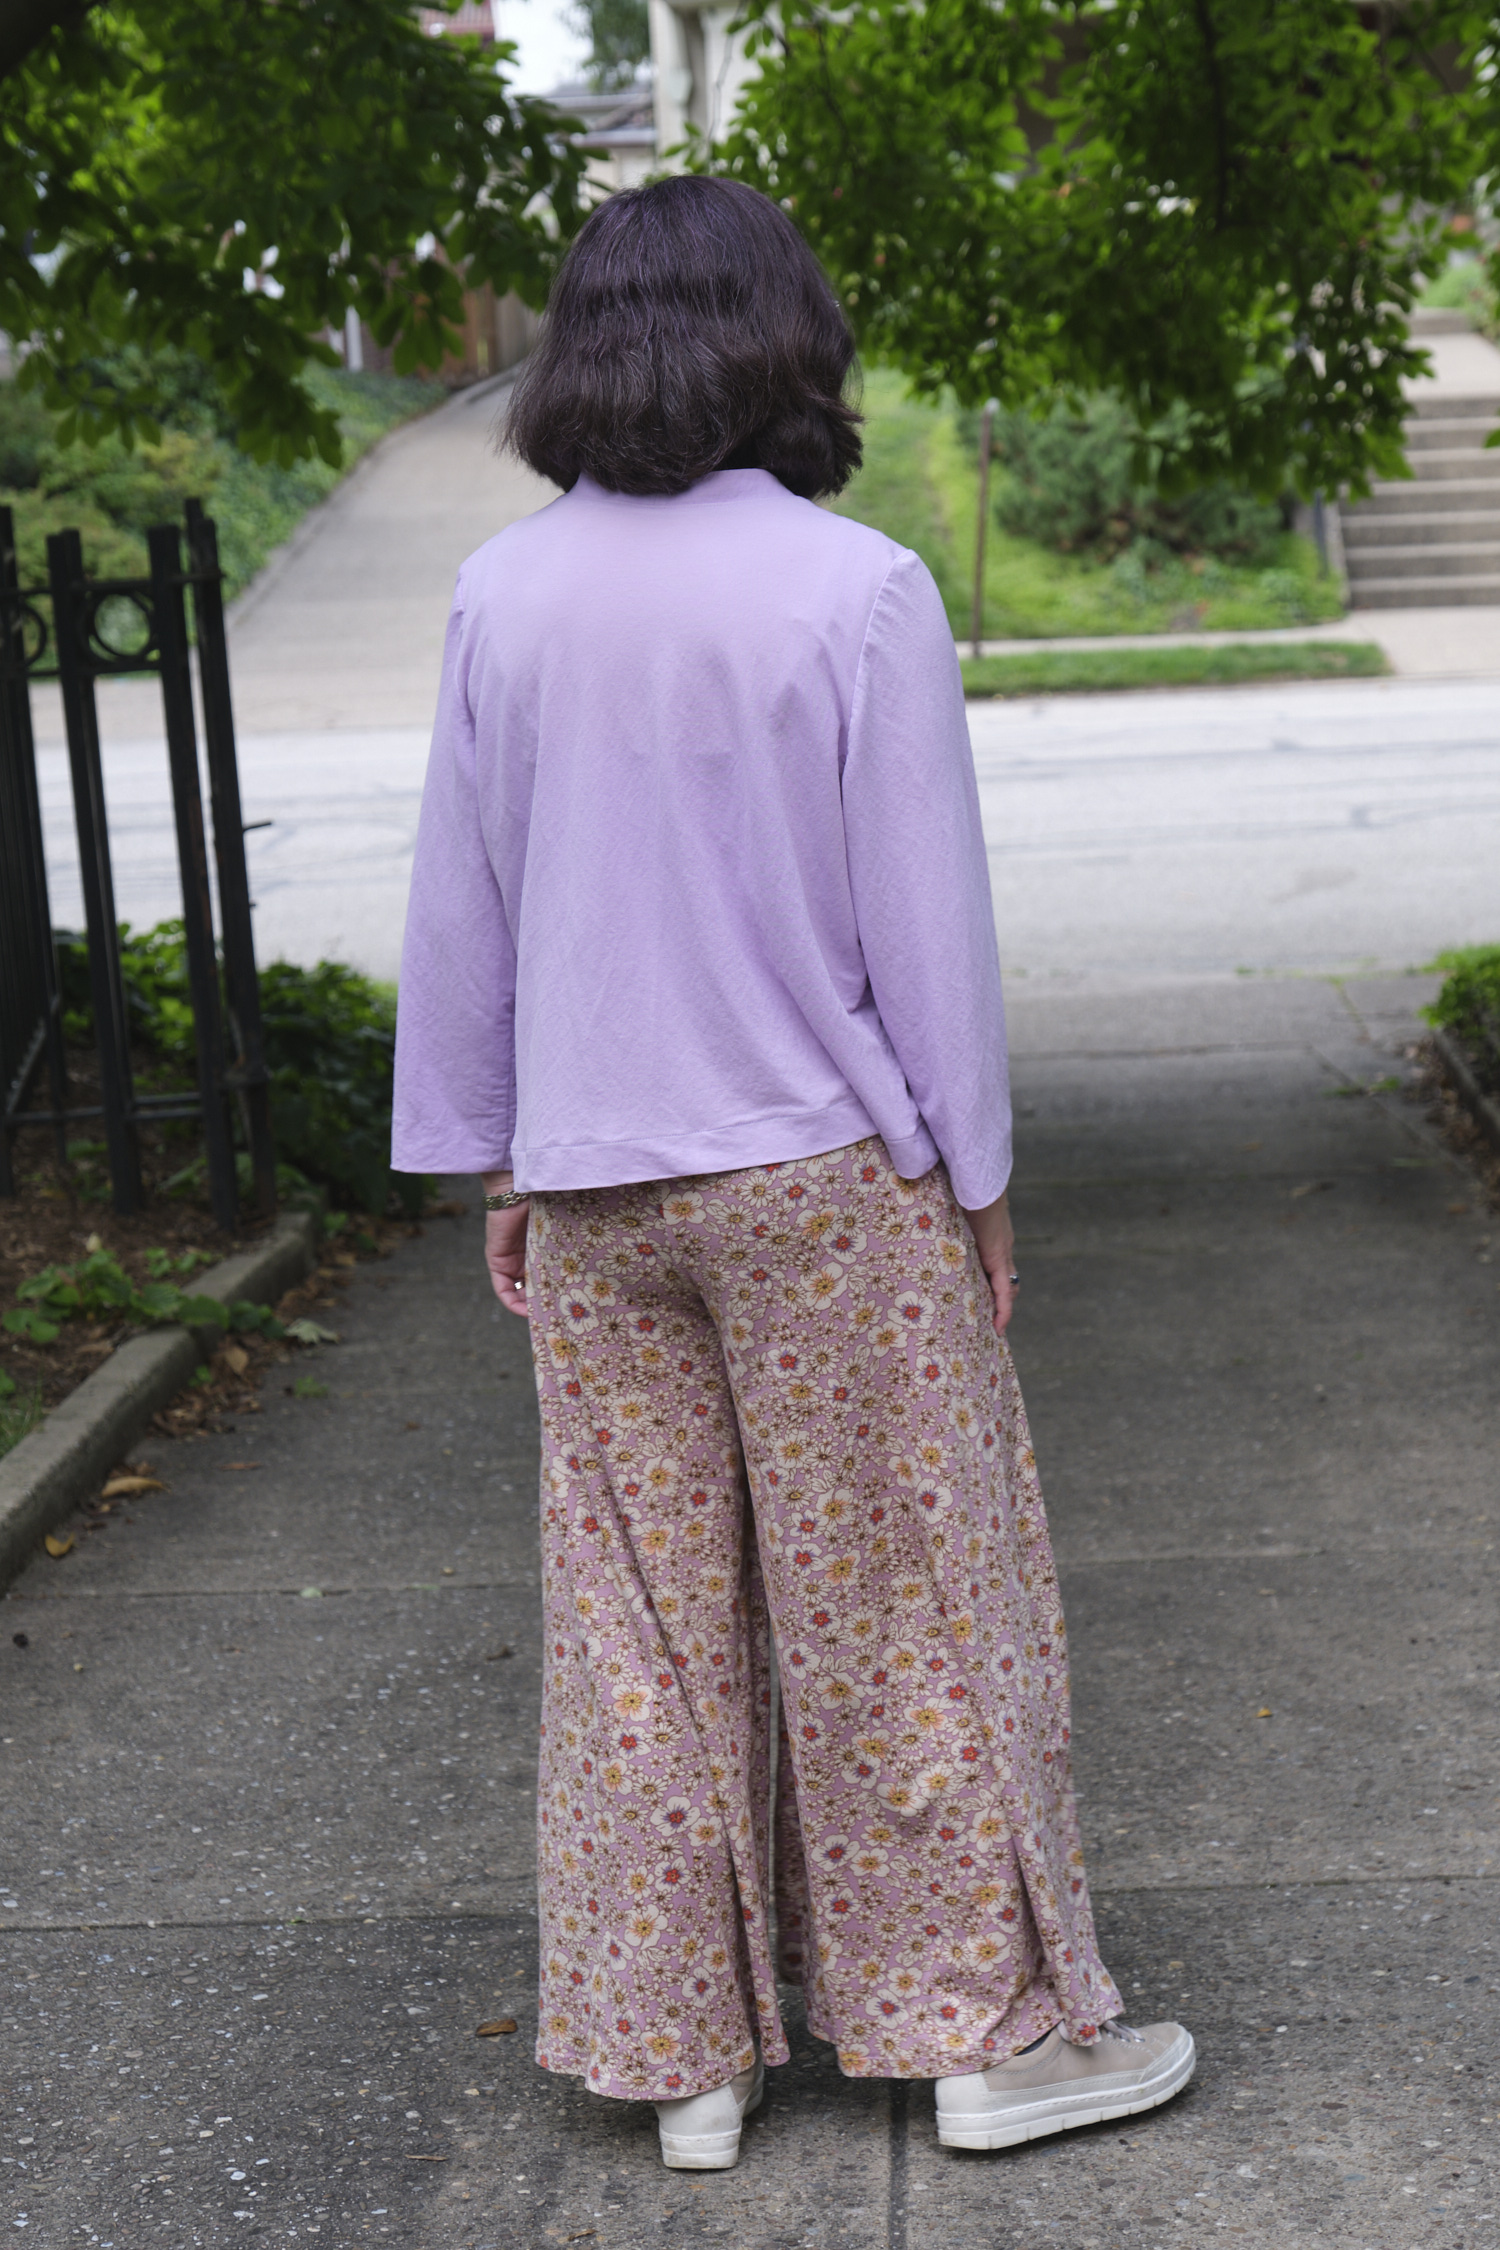
I had some lavender PyLos Liknit in my stash so decided to make a Pattern Emporium Songbird Kimono jacket to match. I used the crop length with the narrow binding and extended the binding to the bottom (as I have done previously with this pattern). I used 1-inch fusible knit stay tape again to interface the binding. I used the tapered sleeve option and shortened it by 2.5 inches. This is a fantastic pattern with very clear instructions and lots of useful sewing tips. This time I got it right the first time.
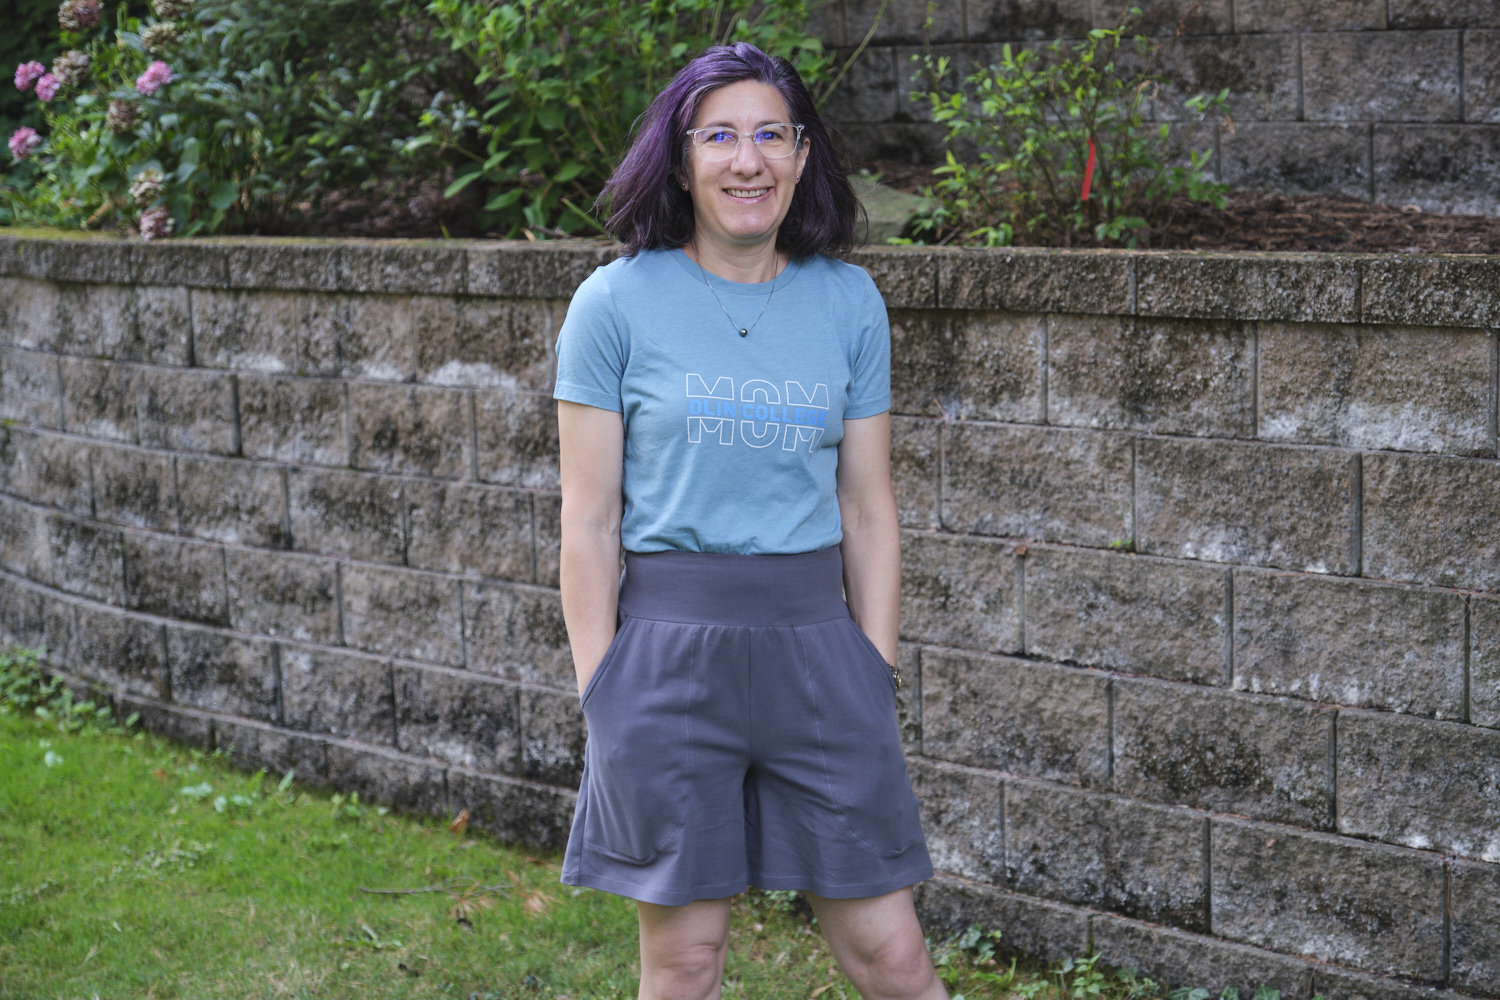
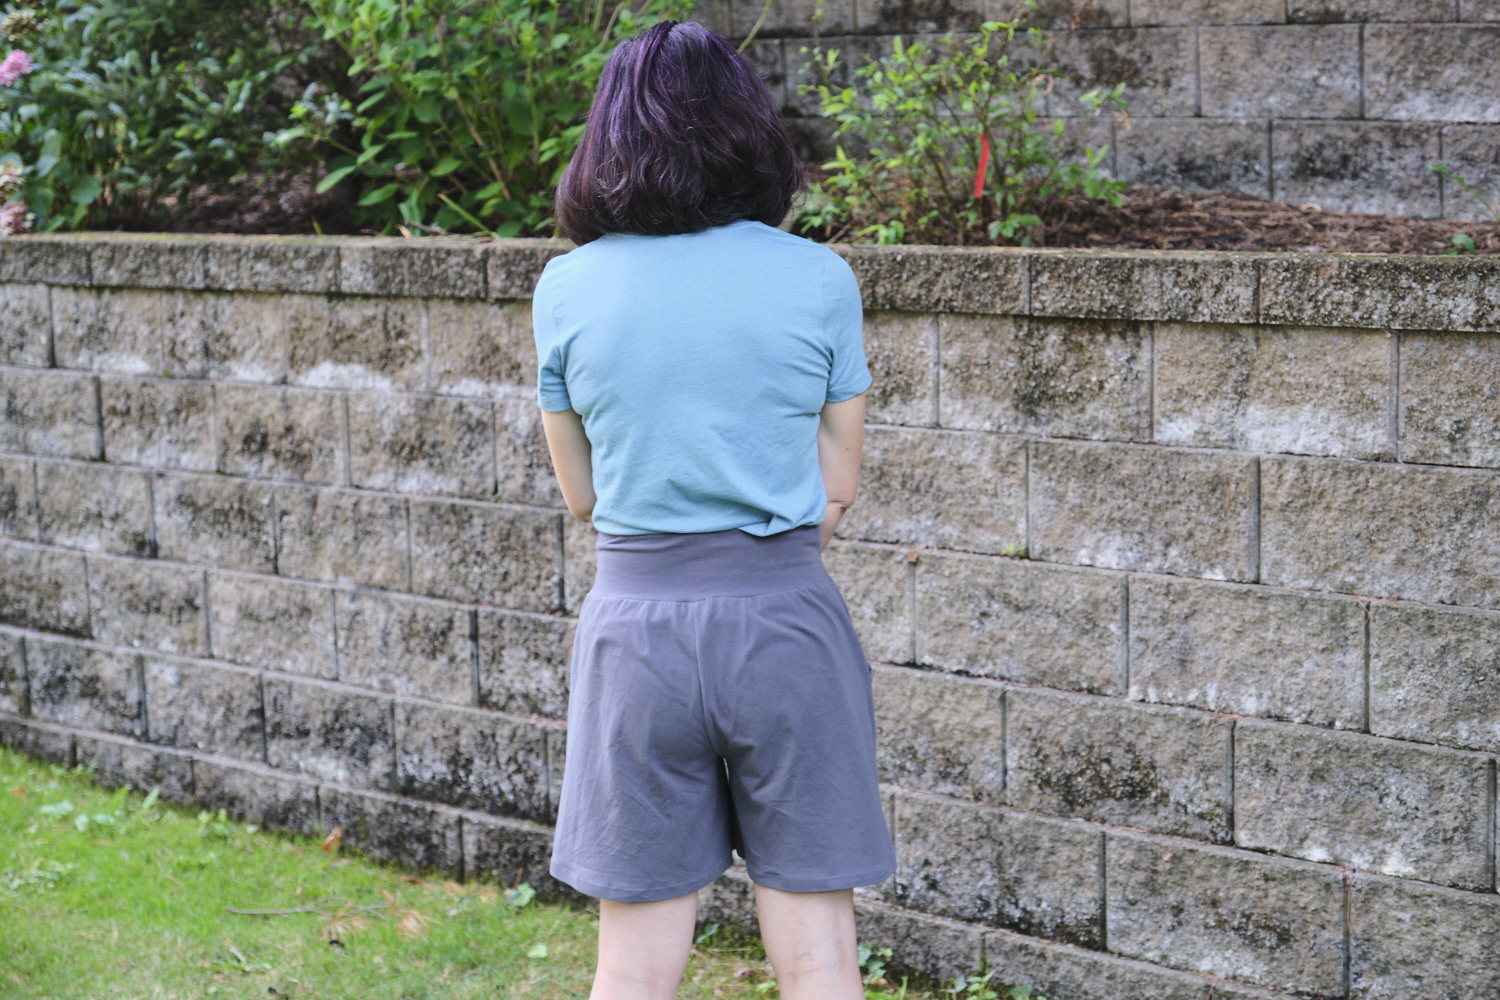
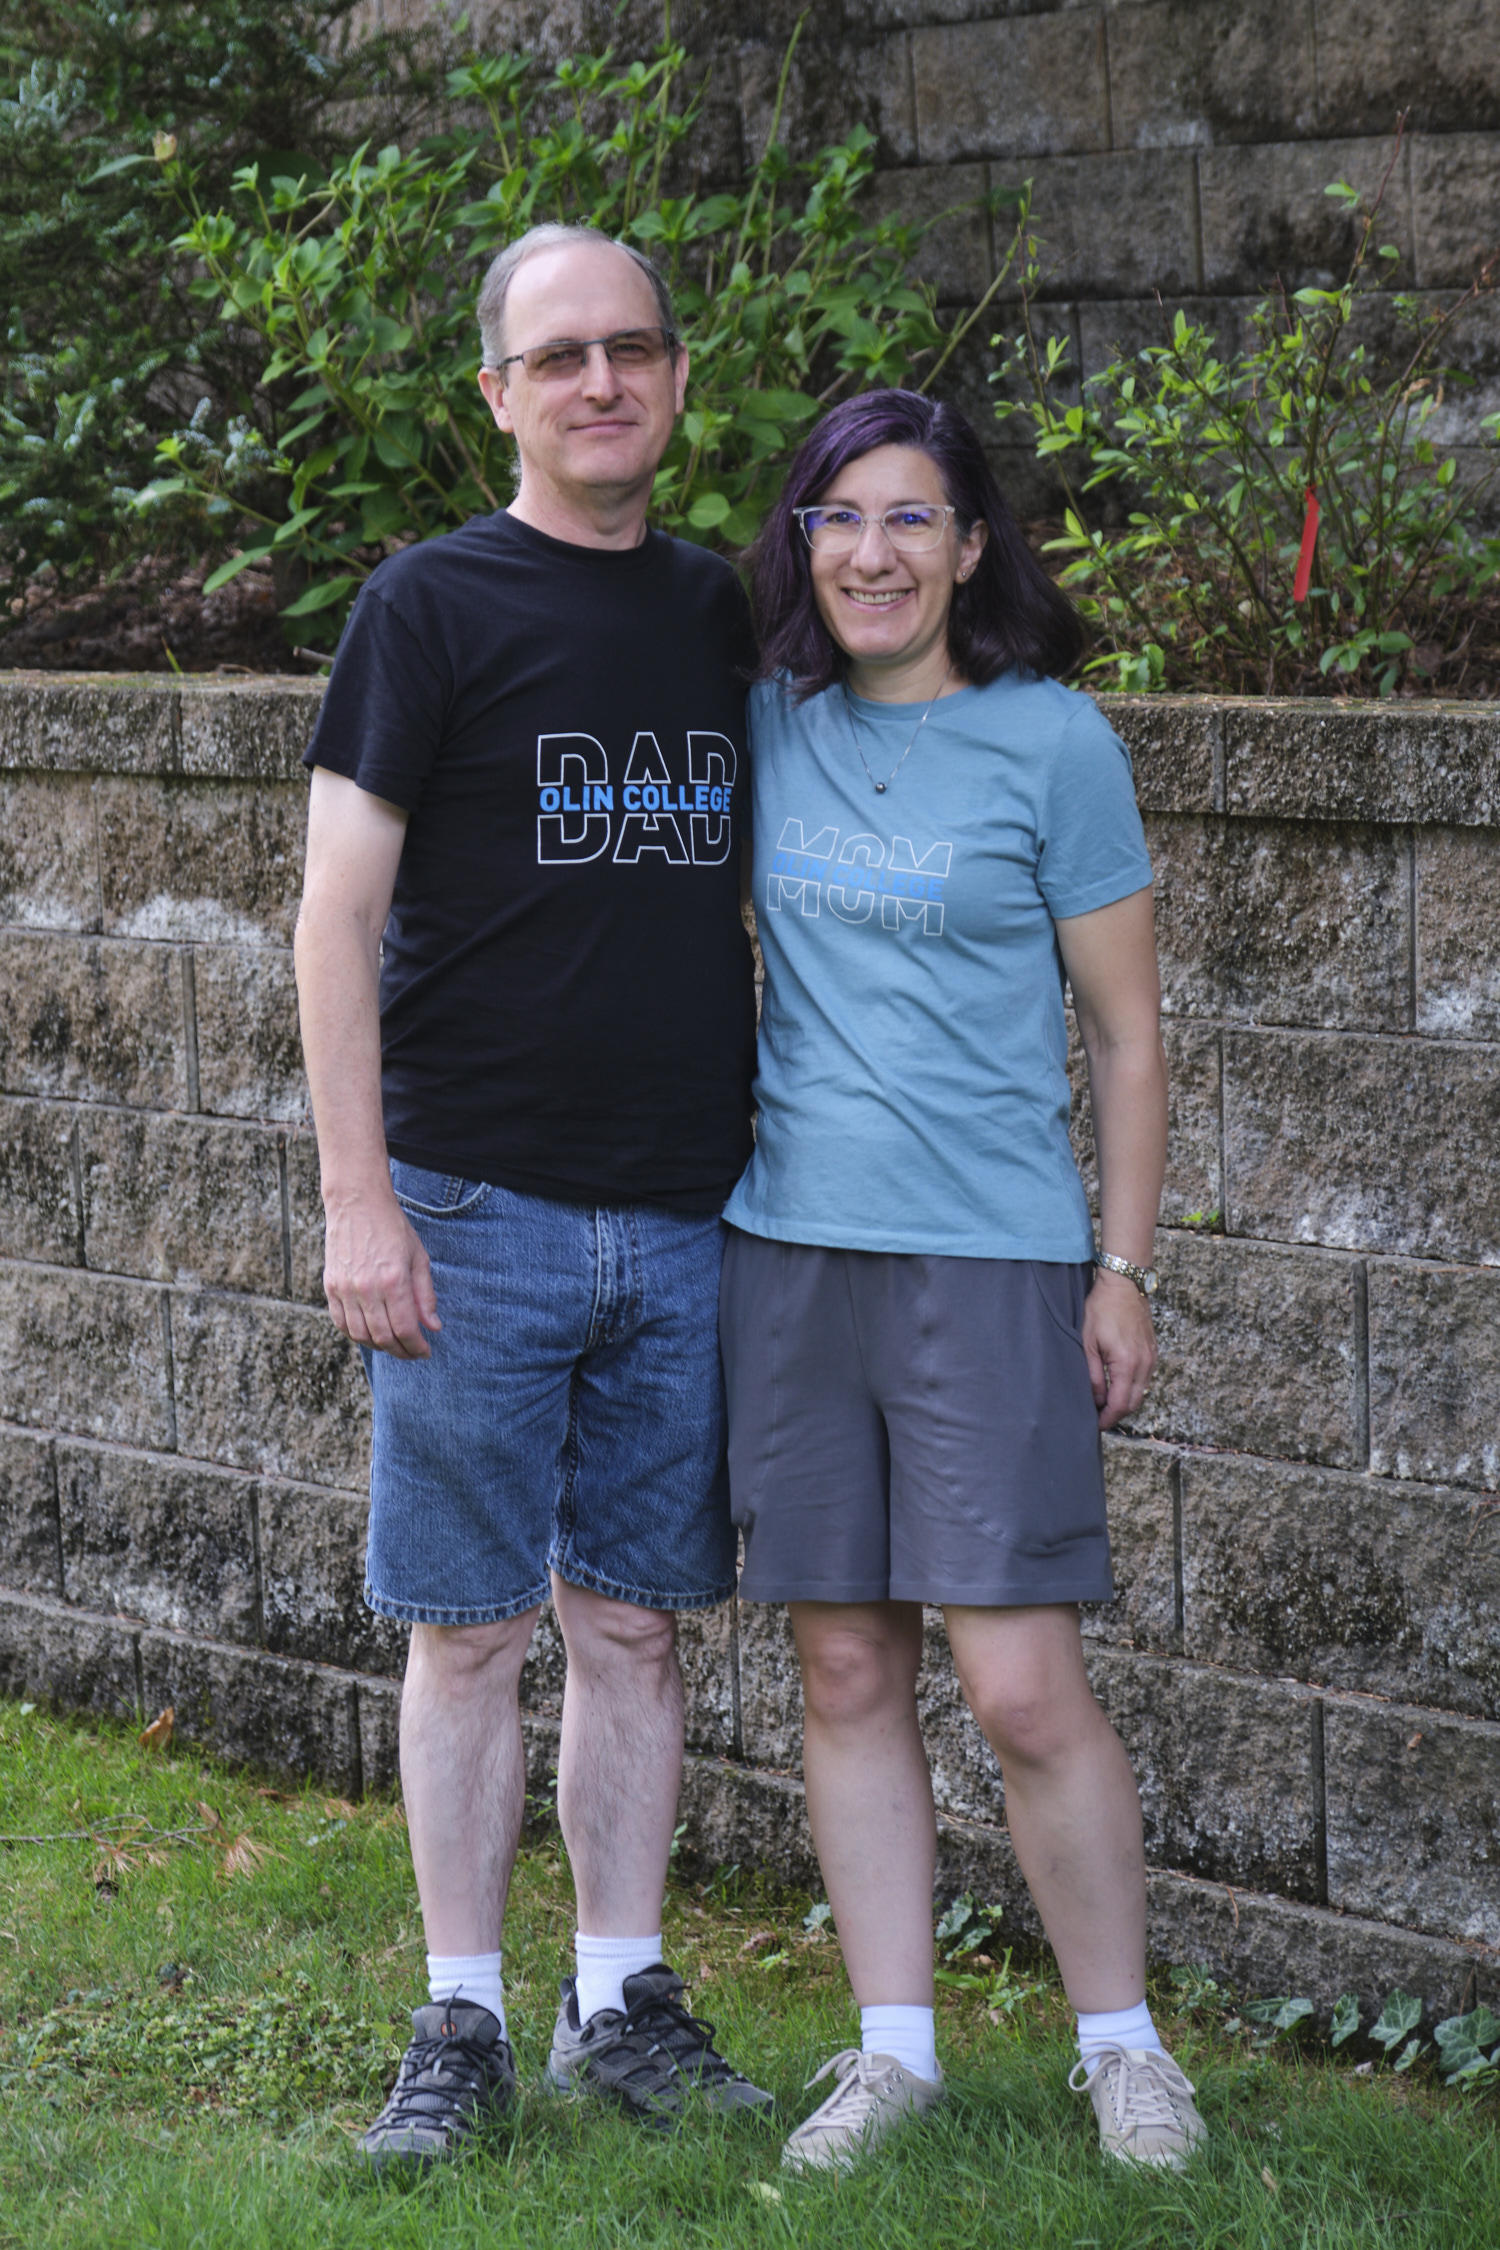
I bought the Pattern Emporium Just Peachy Stretch Shorts pattern last winter and finally got around to making myself a pair of shorts out of leftover grey cotton-lycra fabric from my stash (that I previously used to make Urban tapered pants). They come with elastic or yoga waistbands with are fairly similar to the PE Walk Boldly and Urban pants respectively with the same back darts and hip shape. The main differences are that they are (obviously) shorter than pants and the shorts have a taller yoga waistband and a straight inseam while the pants have a curved inseam.
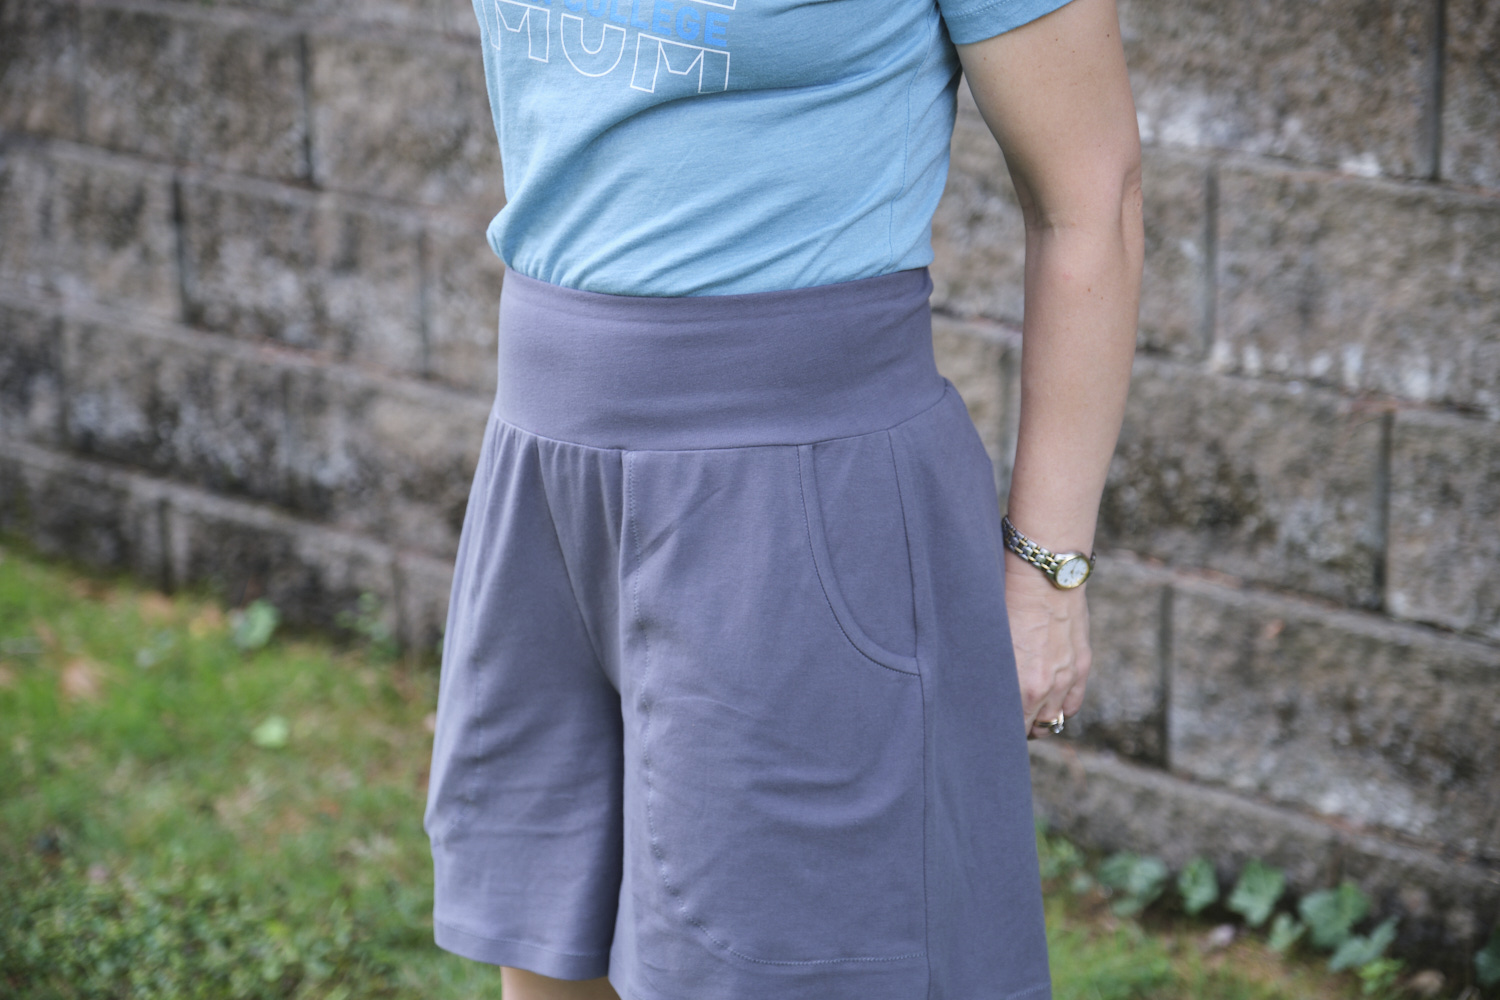
I made my usual size AU10 with a size AU8 waistband. I made the mid rise with a yoga waistband, stitched front pockets, and length 3, which has about a 6-inch inseam. I have learned from my past experience with PE pants that because I’m short, the mid rise ends up being a high-rise fit on me, especially with a yoga waistband added. I followed the pattern pretty much as-is except for lengthening the pocket bags and adding half-inch elastic to the fold in the yoga waistband. I used a zigzag on my sewing machine for the pocket stitching and to sew down the 5/8-inch hem (fused in place with seam tape first).
I struggled a bit stretch the size 8 waistband to fit the size 10 shorts smoothly and in the end it puckers a little bit more than I would like. I probably should have made wider darts in the back or graded the waistband or switched to a contour waistband like I’ve used on some of the pants.
I love the way the pockets are finished with a binding. It’s a really nice finishing touch and the instructions were easy to follow (the instruction said to make the binding longer than needed and cut off the ends after it was sewn, and that worked really well).
The shorts are super comfy and I will probably wear them for casual wear and sleeping. Even with added elastic, the waistband is not as firm as I would like due to the fabric I used not having great recovery. I probably should have added a power mesh or athletic knit layer for a firmer feel. It is not actually too lose, it is just a feeling thing, especially when I load the pockets.
I don’t actually wear shorts very much outside my house (except for bike shorts and soccer shorts) so I don’t really need a large collection of shorts, but when I need more, I will use this pattern again. It would work well for both casual as well as dressy shorts (perhaps made out of ponte, scuba, scuba suede, stretch velour, etc.).
I have made several pairs of pants and a cardigan from PyLos LiKnit fabric and I adore all of them. I made a Sinclair Bondi elbow sleeve top from black LiKnit which is ok, but the LiKnit doesn’t really have enough stretch for this pattern without some adjustments (more ease or maybe adding darts?). Since the LiKnit behaves almost like a woven, I decided to try making a woven top with seafoam LiKnit and I selected the recently-released Sinclair Bloom. I made the sleeveless version at the shortest length with the rounded back neck. I treated the LiKnit fabric exactly as if it were woven, using regular straight stitches for the seams and top stitching.
There is some complexity to this pattern, but as usual, the Sinclair pattern is fairly detailed and pretty easy to follow. The front and back yoke are lined (I used the same LiKnit fabric), and the front yoke is interfaced with fusible woven interfacing. I used a medium weight, which was probably a little heavier than needed–next time I’ll try a lighter weight interfacing. The front and back have some gathers, which I’m afraid I didn’t distribute evenly enough, but they’re mostly ok. The sleeveless version uses the “burrito” method to encase the neck and shoulders, which is a fun technique.
Despite being a knit, the LiKnit fabric worked pretty well with this pattern. I may try one in another color of LiKnit with sleeves. I would also like to try this pattern with cotton double gauze.
I’m overall pretty happy with how this top came out, and it looks great with my seafoam LiKinit Urban Boldly mashup pants! In fact I wore this outfit to a conference last week and got complements from complete strangers. Also it was very light weight and packable, and doesn’t need to be ironed.
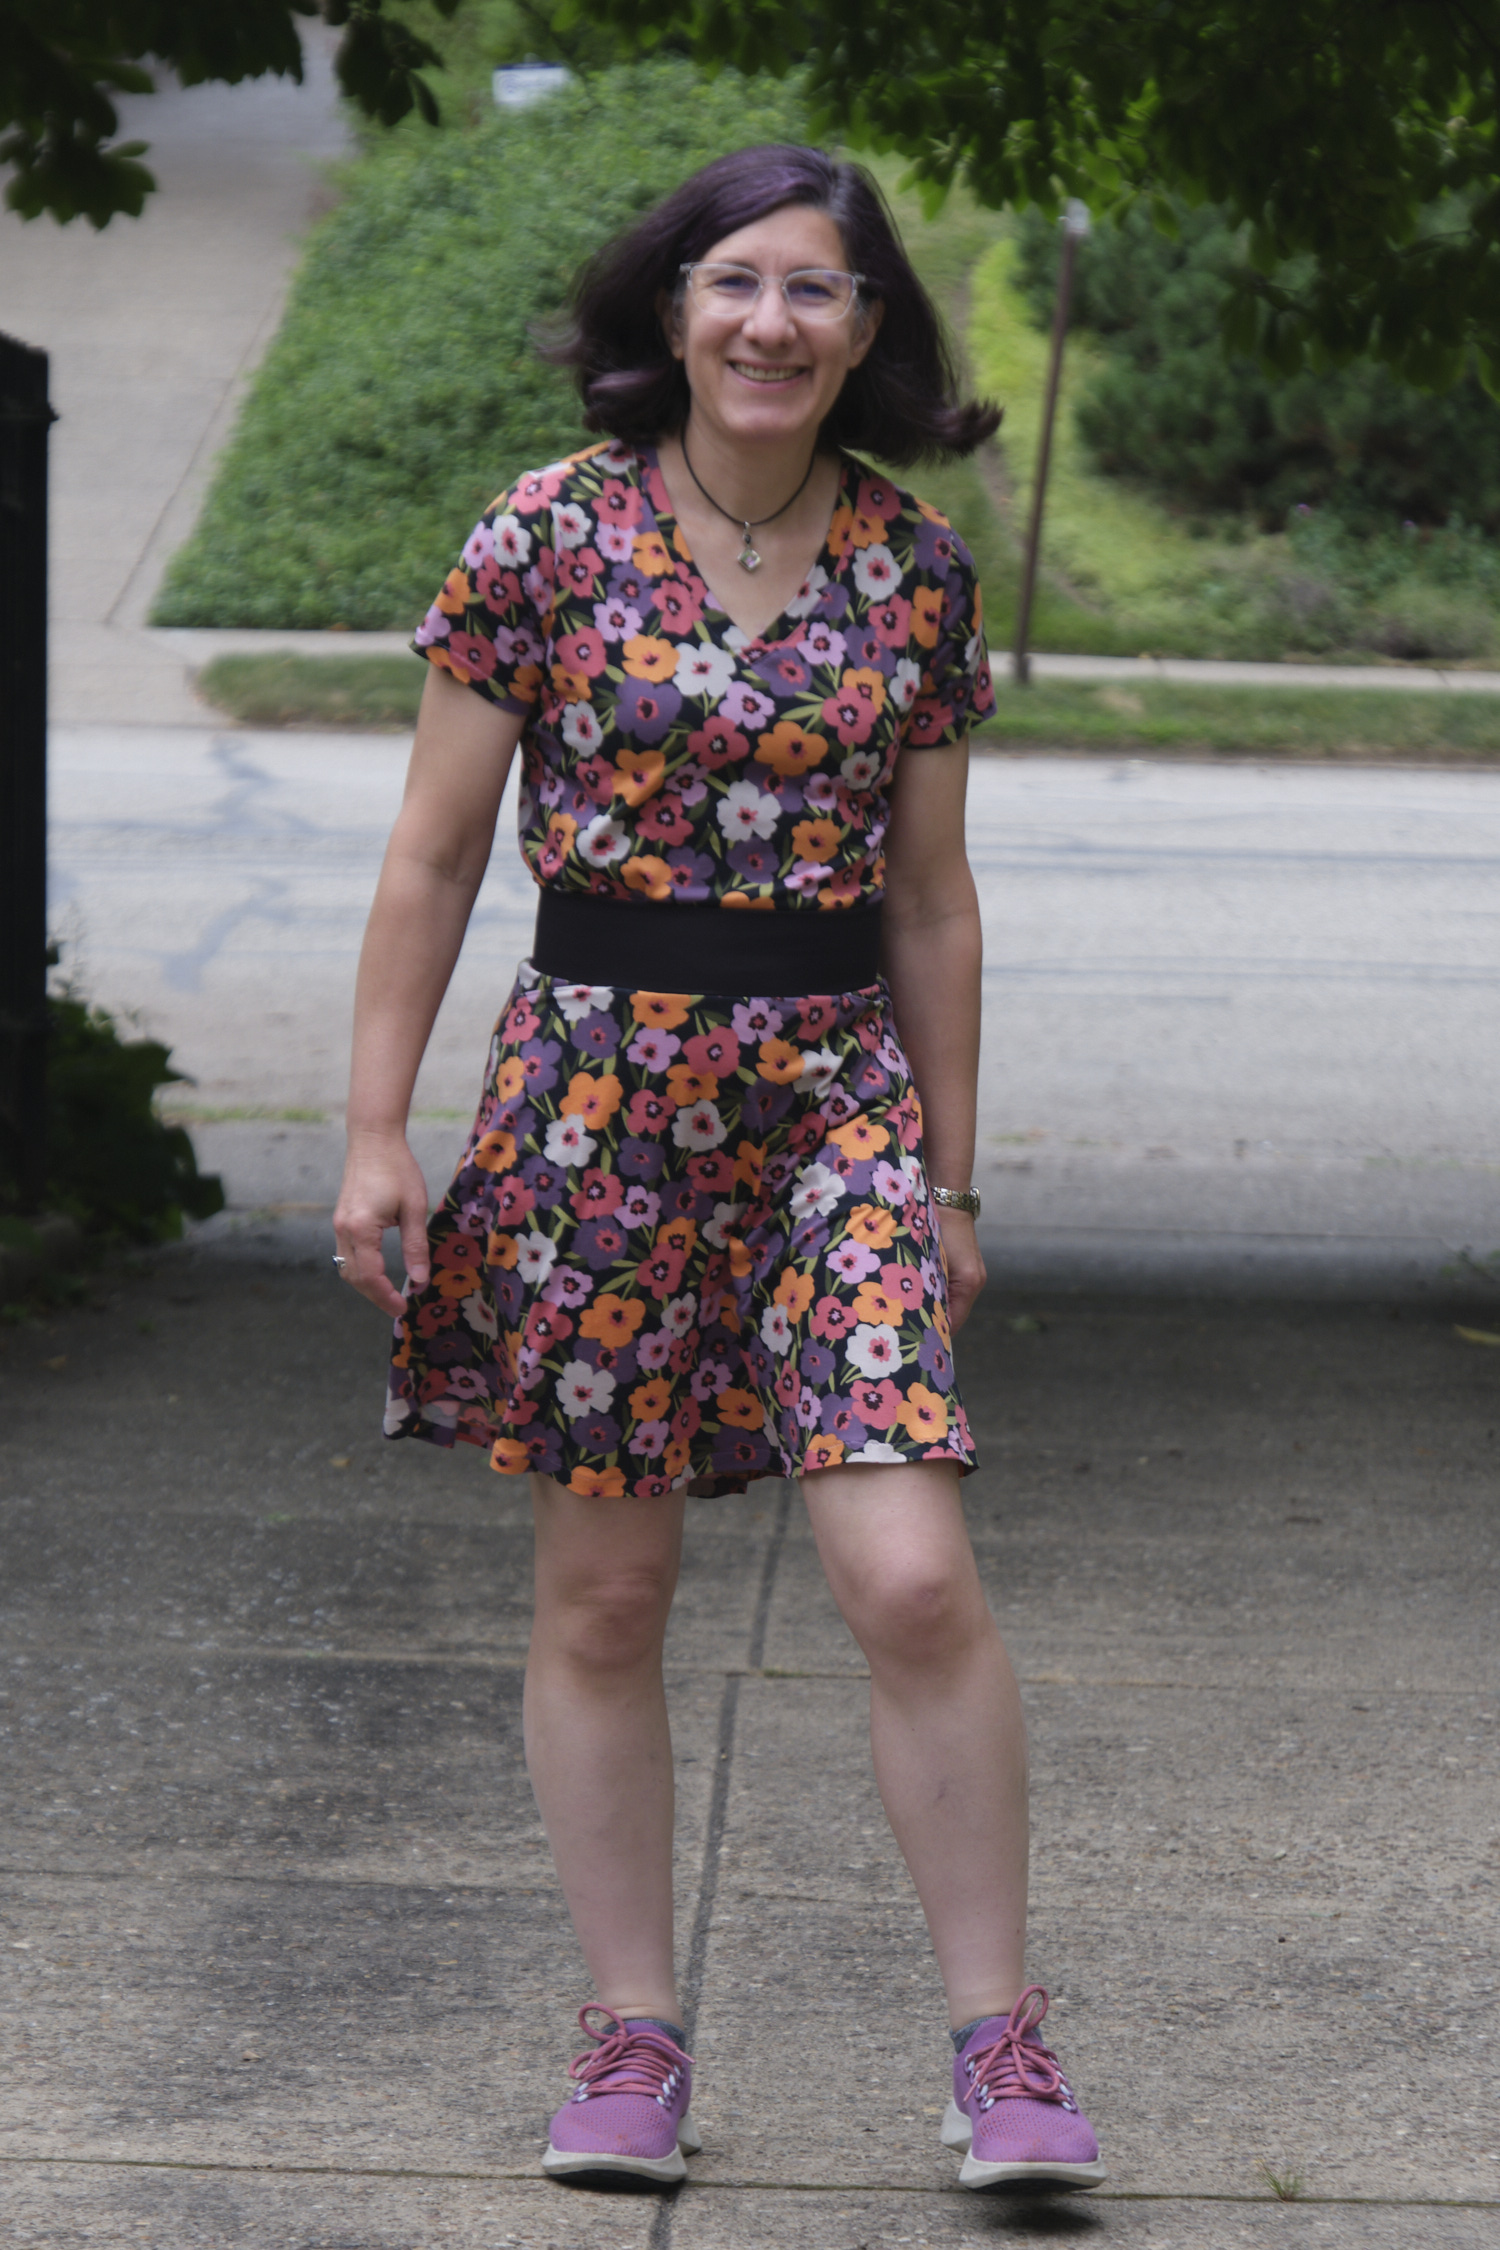
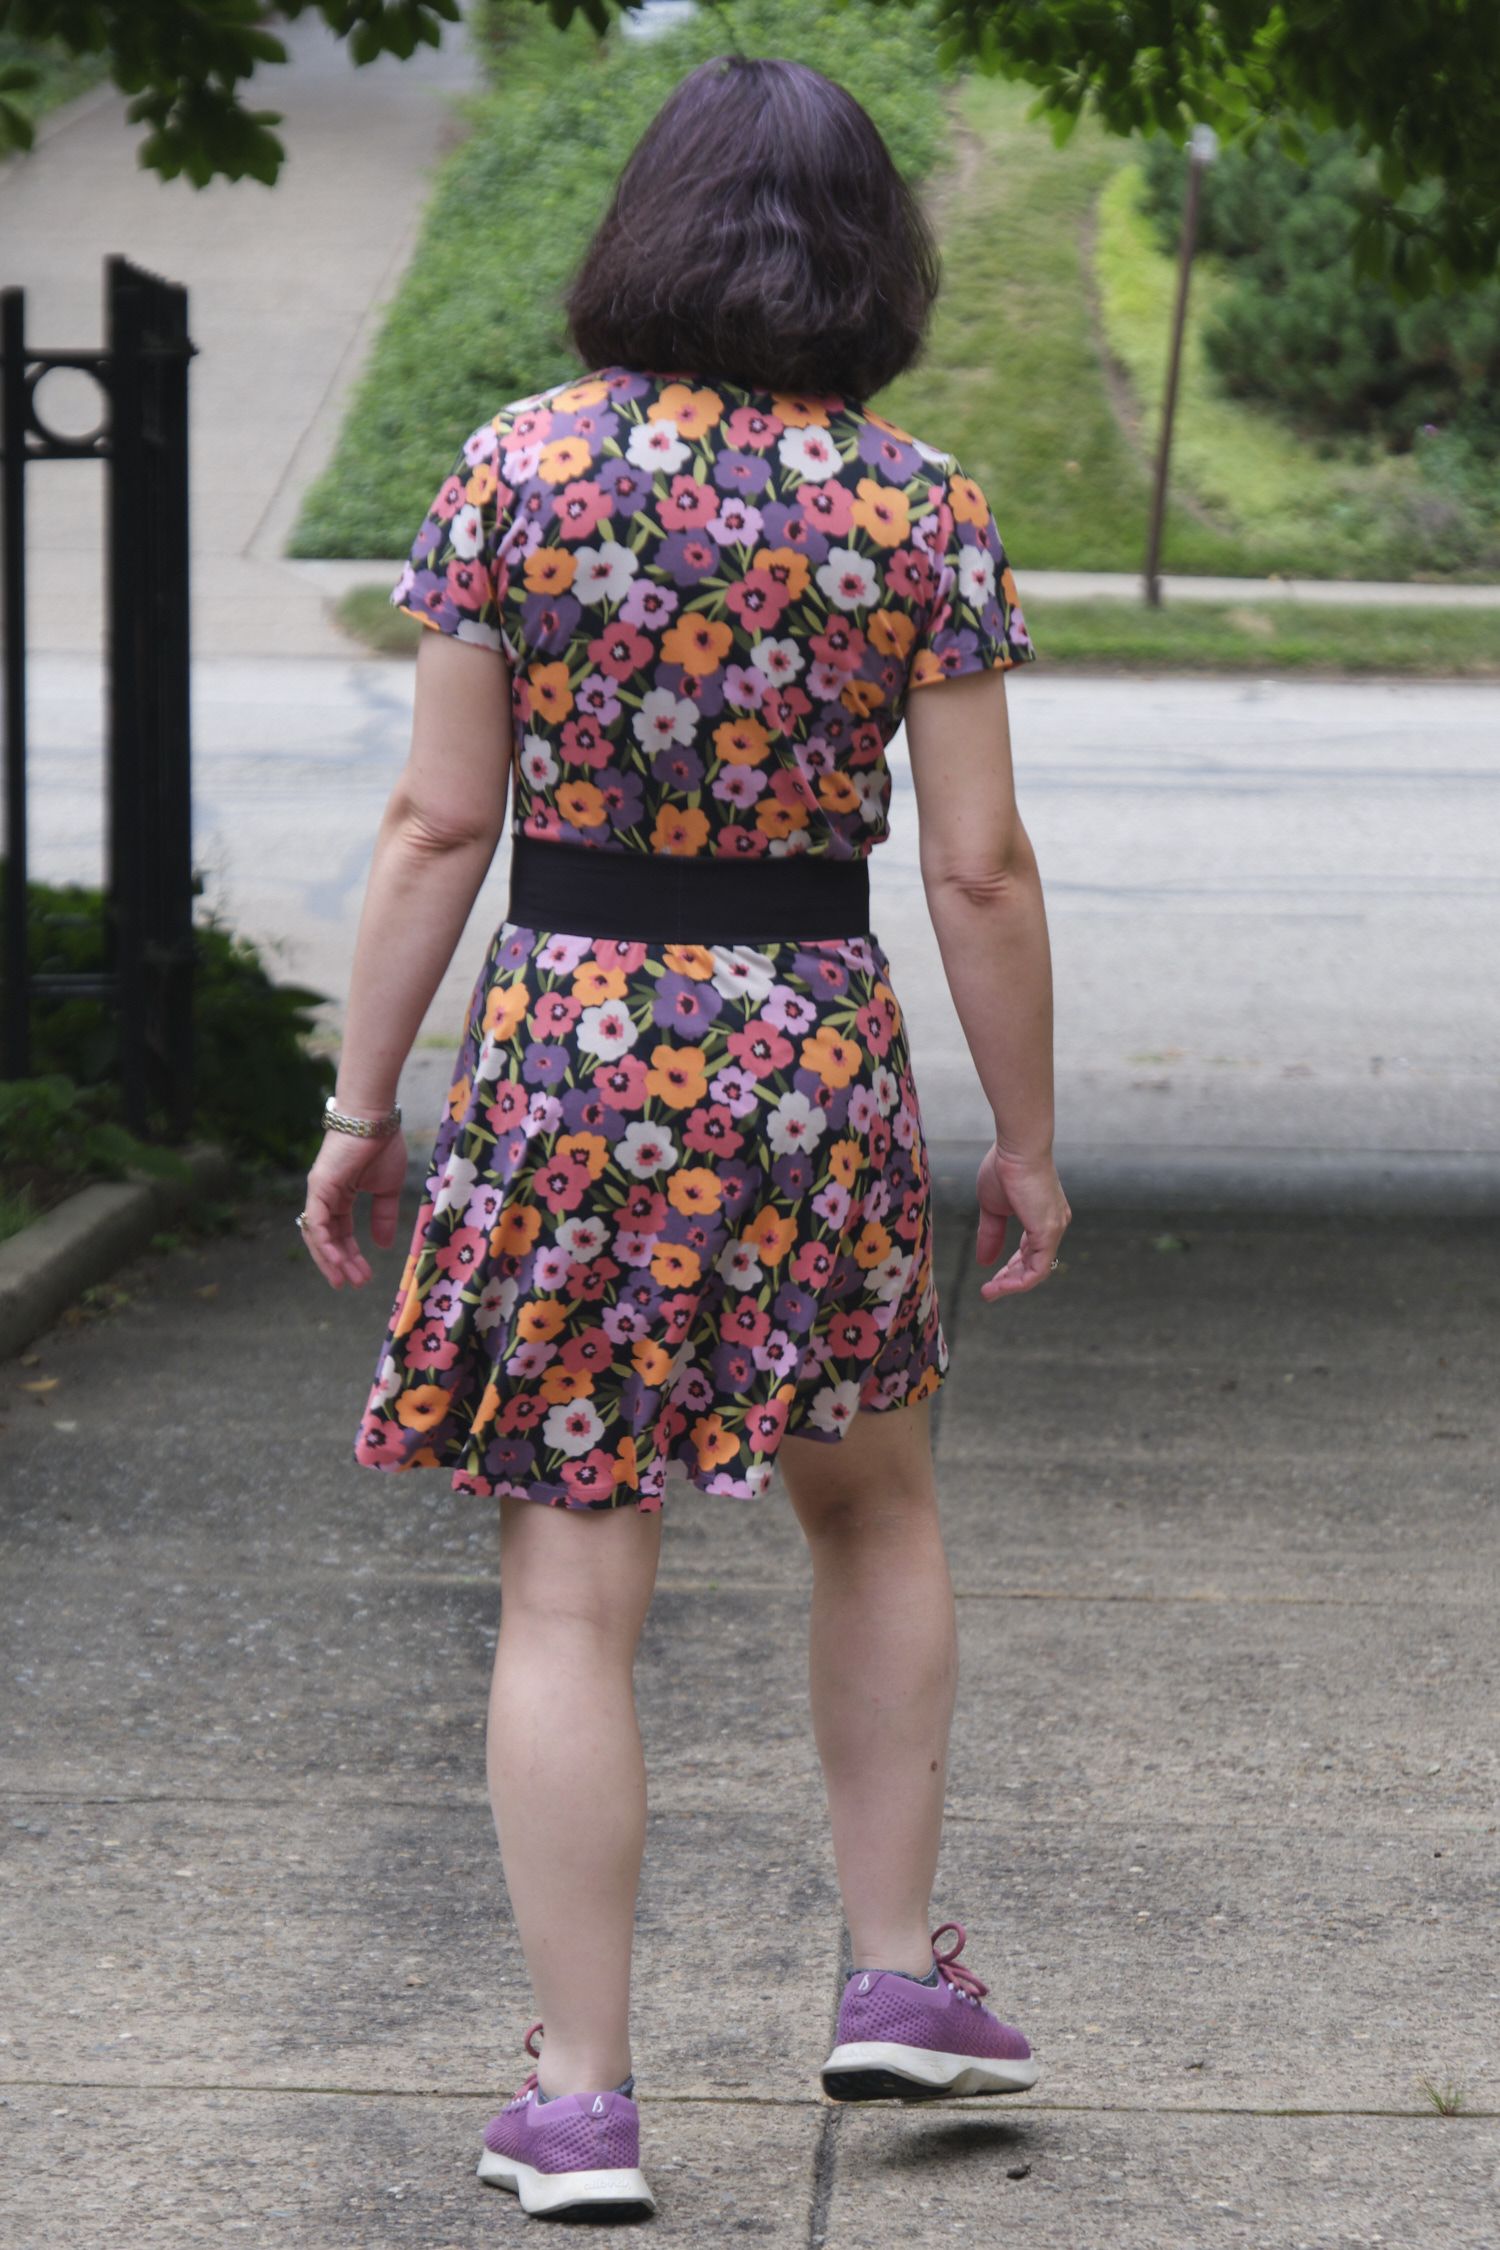
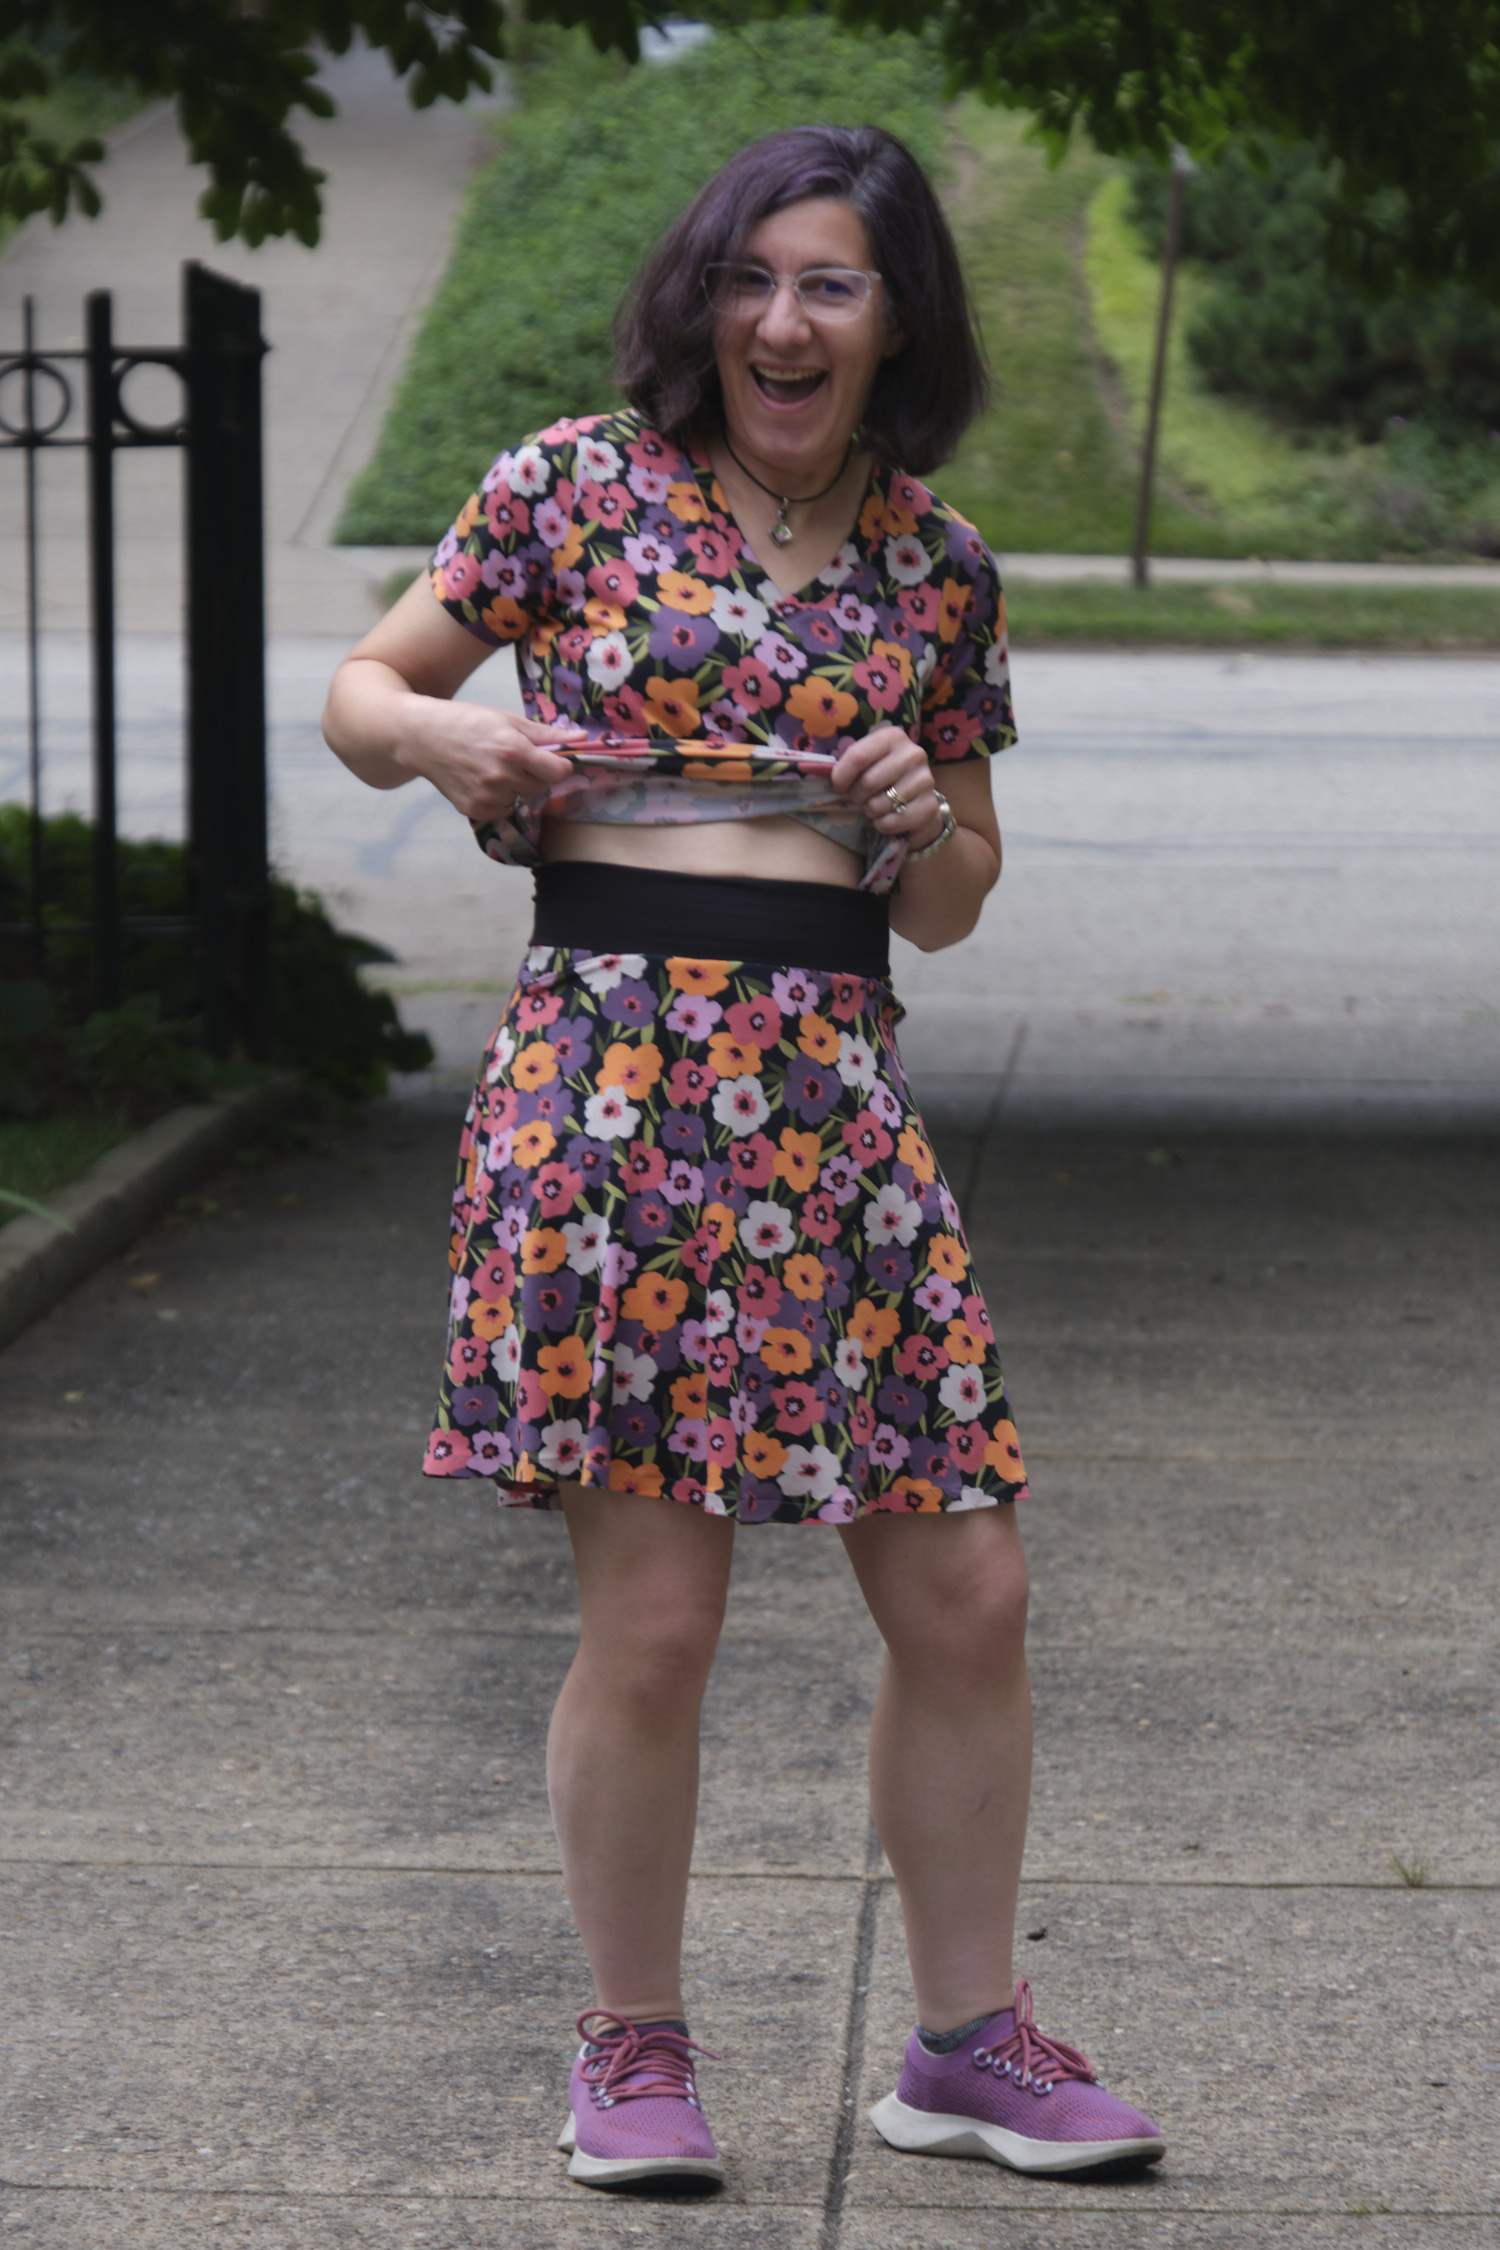
The Pattern Emporium Heartlight Skirt pattern is a versatile pattern for very flattering flared A-line knit skirts of all lengths. It’s also super fast and easy, unless you’re me and you make it harder for yourself. I did two things that made constructing my skirt harder the first time (adding pockets and using a waistband fabric a lot firmer than the skirt fabric), but now that I know what I’m doing I can continue to add pockets and add firmer waistbands and it shouldn’t be too bad the second time around. And if you want to try either of these things, keep reading for some tips.
I was planning to use this bright floral DBP fabric for a dress, but liked how it went with my purple double-gauze pants, so made a Sinclair Bondi v-neck t-shirt instead. I also realized that the colors in the fabric coordinate with a number of other things I own (including my sneakers), so having separates in this fabric would be useful. I decided to make a skirt, and coincidentally Heartlight was the Friday discount pattern a couple of weeks ago, so I bought it and figured I would give it a try. I loved the shape of the skirts this pattern makes and the soft yoga waistband, but I was disappointed it didn’t come with pockets. I read on the PE Facebook page that people had added pockets, some using another PE pattern that I don’t own, and others improvised based on the pockets in PE pants patterns.
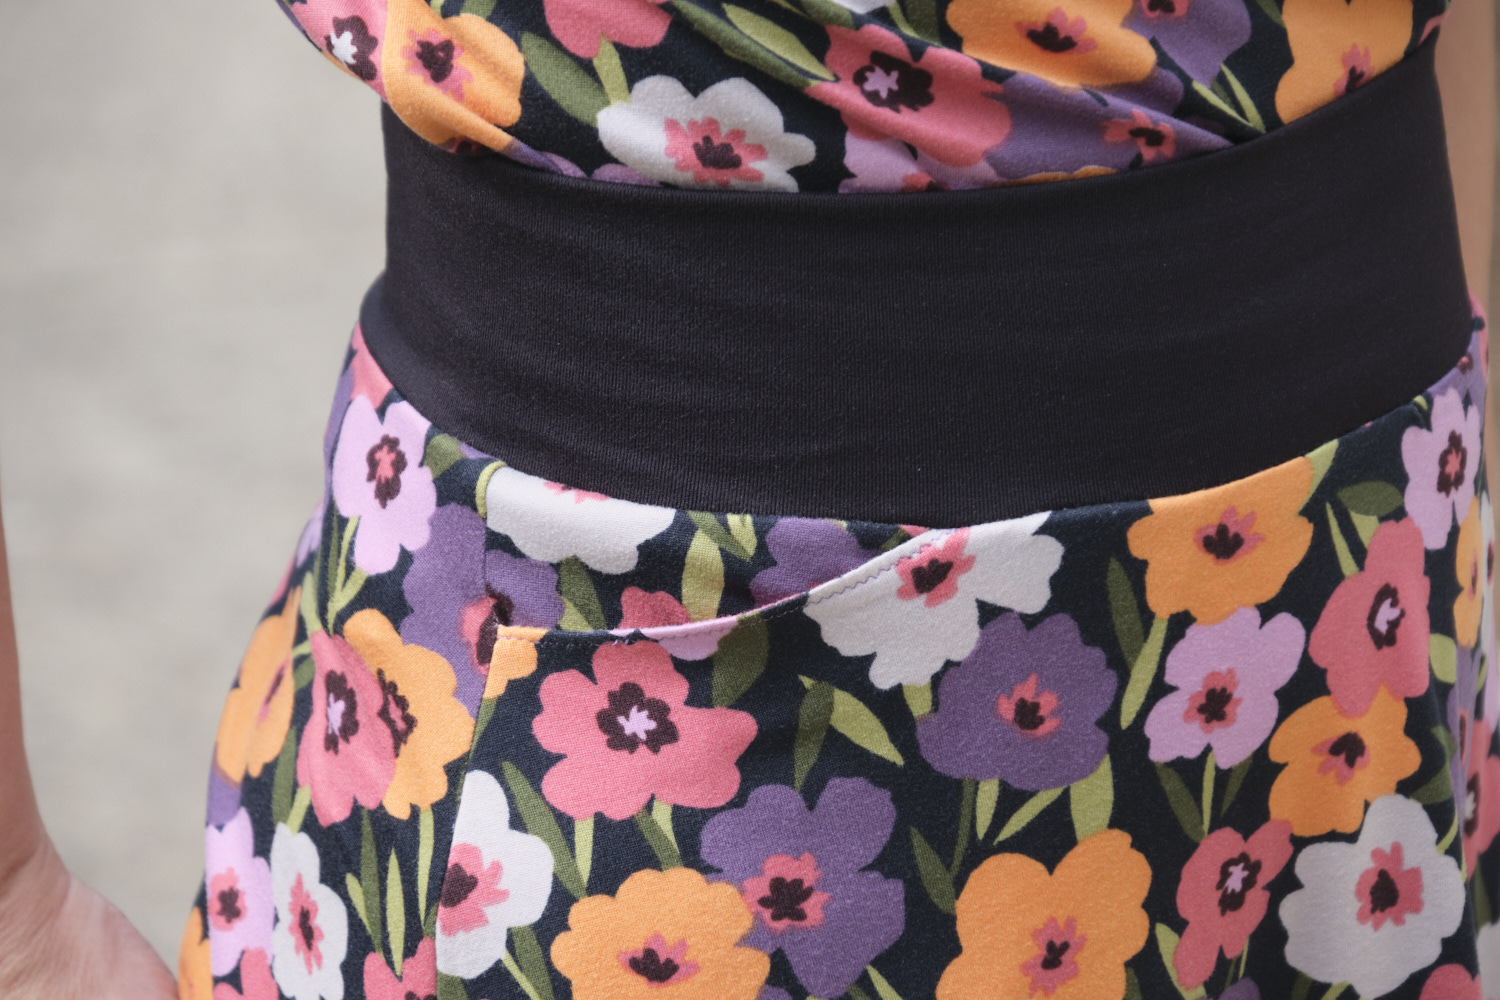
I cut the pattern out using my projector. I cut a size AU10 about 2 inches above the knee length (thinking that since this wasn’t a petite pattern, this is what I would need, but it actually ends up being more above the-knee than I was expecting). The skirt front and back plus the pocket pieces I cut used less than a yard of fabric. If you are taller or want a longer skirt it will obviously use more fabric, but the pattern has some tips about how to cut the skirt in pieces to use the fabric more efficiently and to allow this pattern to be used with narrower fabrics. Because DBP is very soft and stretchy, it does not have enough hold for a yoga waistband unless you add elastic or line it with another fabric. Especially since I was planning to add pockets, I knew I needed a different fabric for the waistband. I also realized that my floral fabric was very busy and might benefit from being broken up by a black waistband. I decided to use black 256 GSM athletic brushed poly for a nice firm yoga waistband.
I referred back to the PE Walk Boldly pants pattern jeans pocket instructions. As the shape of the hip on the pants does not match the skirt I could not use the pants pattern piece, but I improvised following the same concept. I made pocket rectangles about 6 inches wide and 8.5 inches deep, and then doubled them for the front and back of the pocket bag. I angled the rectangle to align with the skirt side seam and adjusted the top edge to align with the waist of the skirt. I opted for a straight slash pocket opening.
Once I figured out how to make the pockets work they were pretty easy to cut and sew. I stitched the top of the pocket to the skirt front, understitched and topstitched, then folded it in half, surged the bottom, and then basted the rest of the pocket top and side to the skirt front piece (ok I realize that really requires an entire tutorial and not just a diagram and single sentence unless you are already familiar with making these sorts of pockets). The pockets are big enough for my phone and are well anchored in the waistband.
My biggest problem came attaching the waistband, largely due to the difference in stretch and firmness of the two fabrics. I followed the pattern instructions and used the quarter method to distribute fabric and pinned in place with 8 pins. I knew that stretching the athletic knit waistband to fit the DBP skirt would be difficult, so I decided to machine baste it before sewing it together. It was a complete disaster, with parts bunched up too much and some parts not joined together at all because the waistband had curled under. I unpicked a few spots and tried to fix them, and grew increasingly frustrated as I went. I eventually declared it a mess and went out to dinner. After I came back I unpicked the entire waistband (easy because it was basting stitches) and started over. This time I started by basting the two edges of the yoga waistband together with a wide zigzag stitch over the edge. This ensured the two edges would stay together and prevented them from curling. Then I applied the quarter method again, but this time used a lot more pins. I machine basted the whole things and it looked much better. Finally, I surged the layers in place, stretching the waistband as I went. After that all that was left was to hem the bottom, which I did using hem tape and a zigzag stitch.
The end result is comfortable and looks good, and I even like it untucked too… actually I’m more likely to wear it that way. I like the fact that the skirt is a little big swishy, without having all the fabric of a full-circle skirt (I love those too, but not for every occasion) and that it doesn’t require any gathering to make it. I’m pretty happy with how the pockets came out, although with DBP you always have to be careful how you load pockets to keep them from stretching out awkwardly. The PE “foxy” pocket style would also probably work with this pattern. Although the firm athletic knit was a bit of a pain to deal with, it makes for a great waistband that feels like it will stay put as I wear it, even with loaded pockets. I might make a black skirt entirely out of this fabric. I would also like to try this pattern in a rayon ponte and also try a longer length.