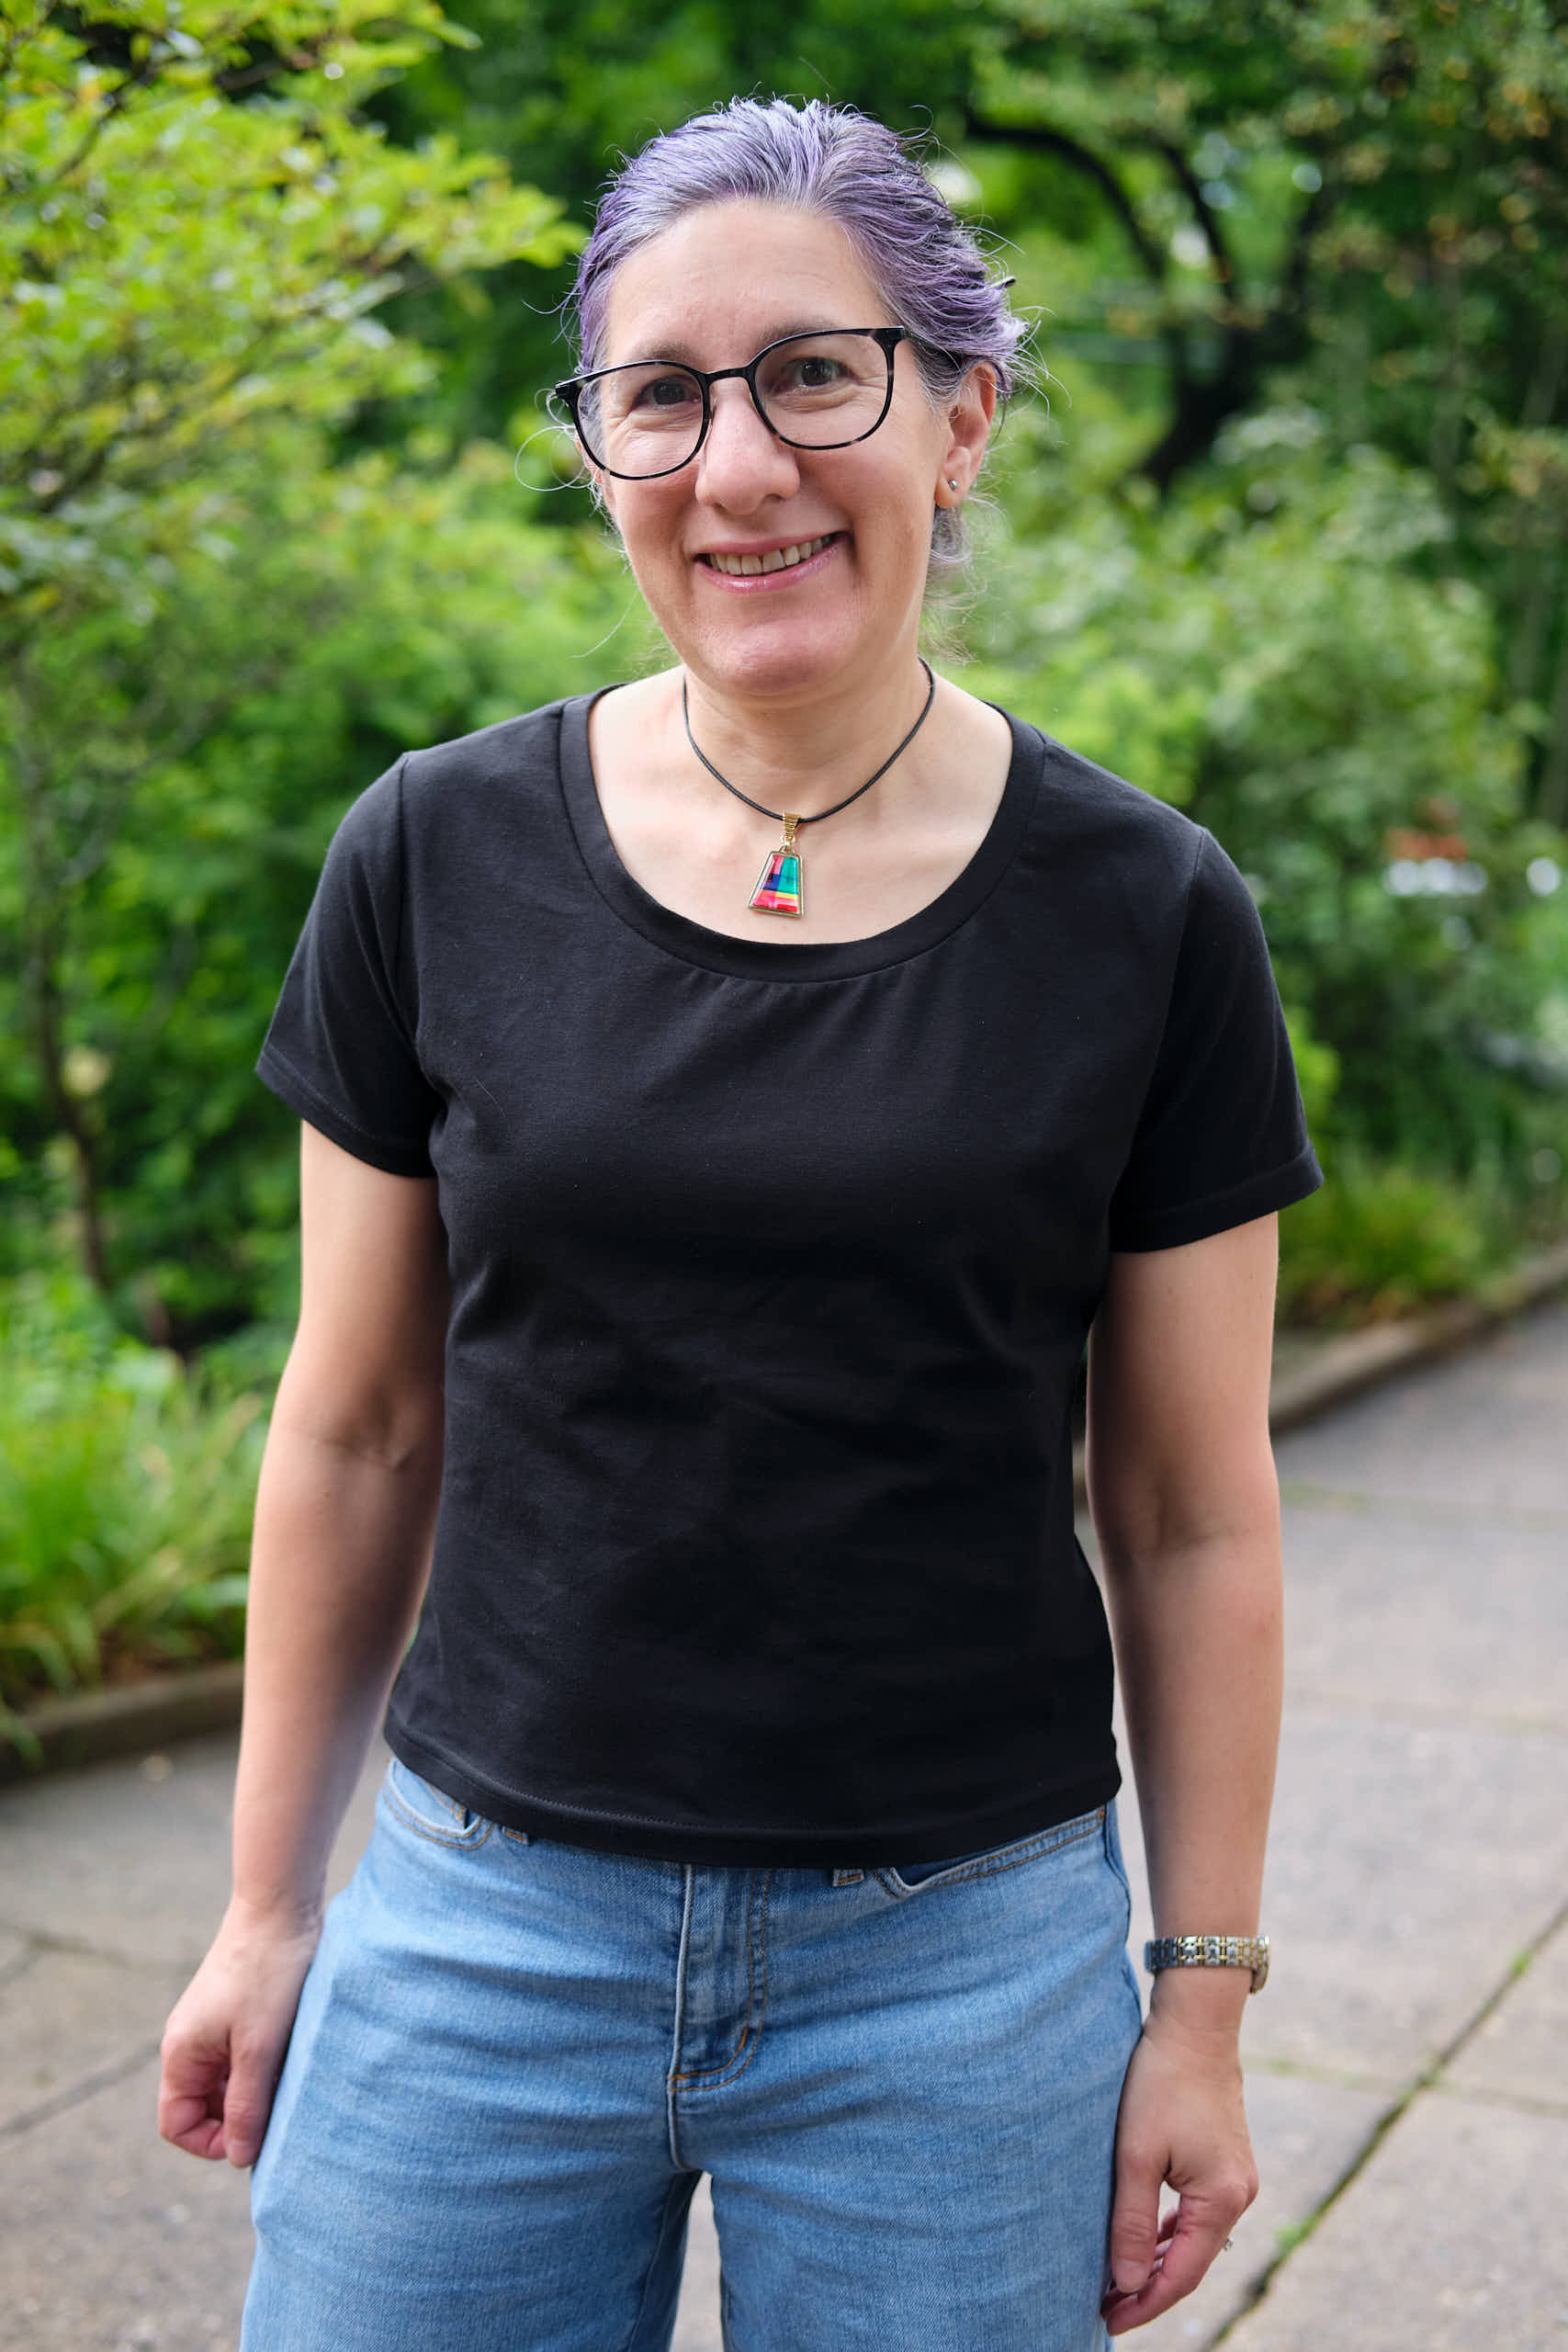
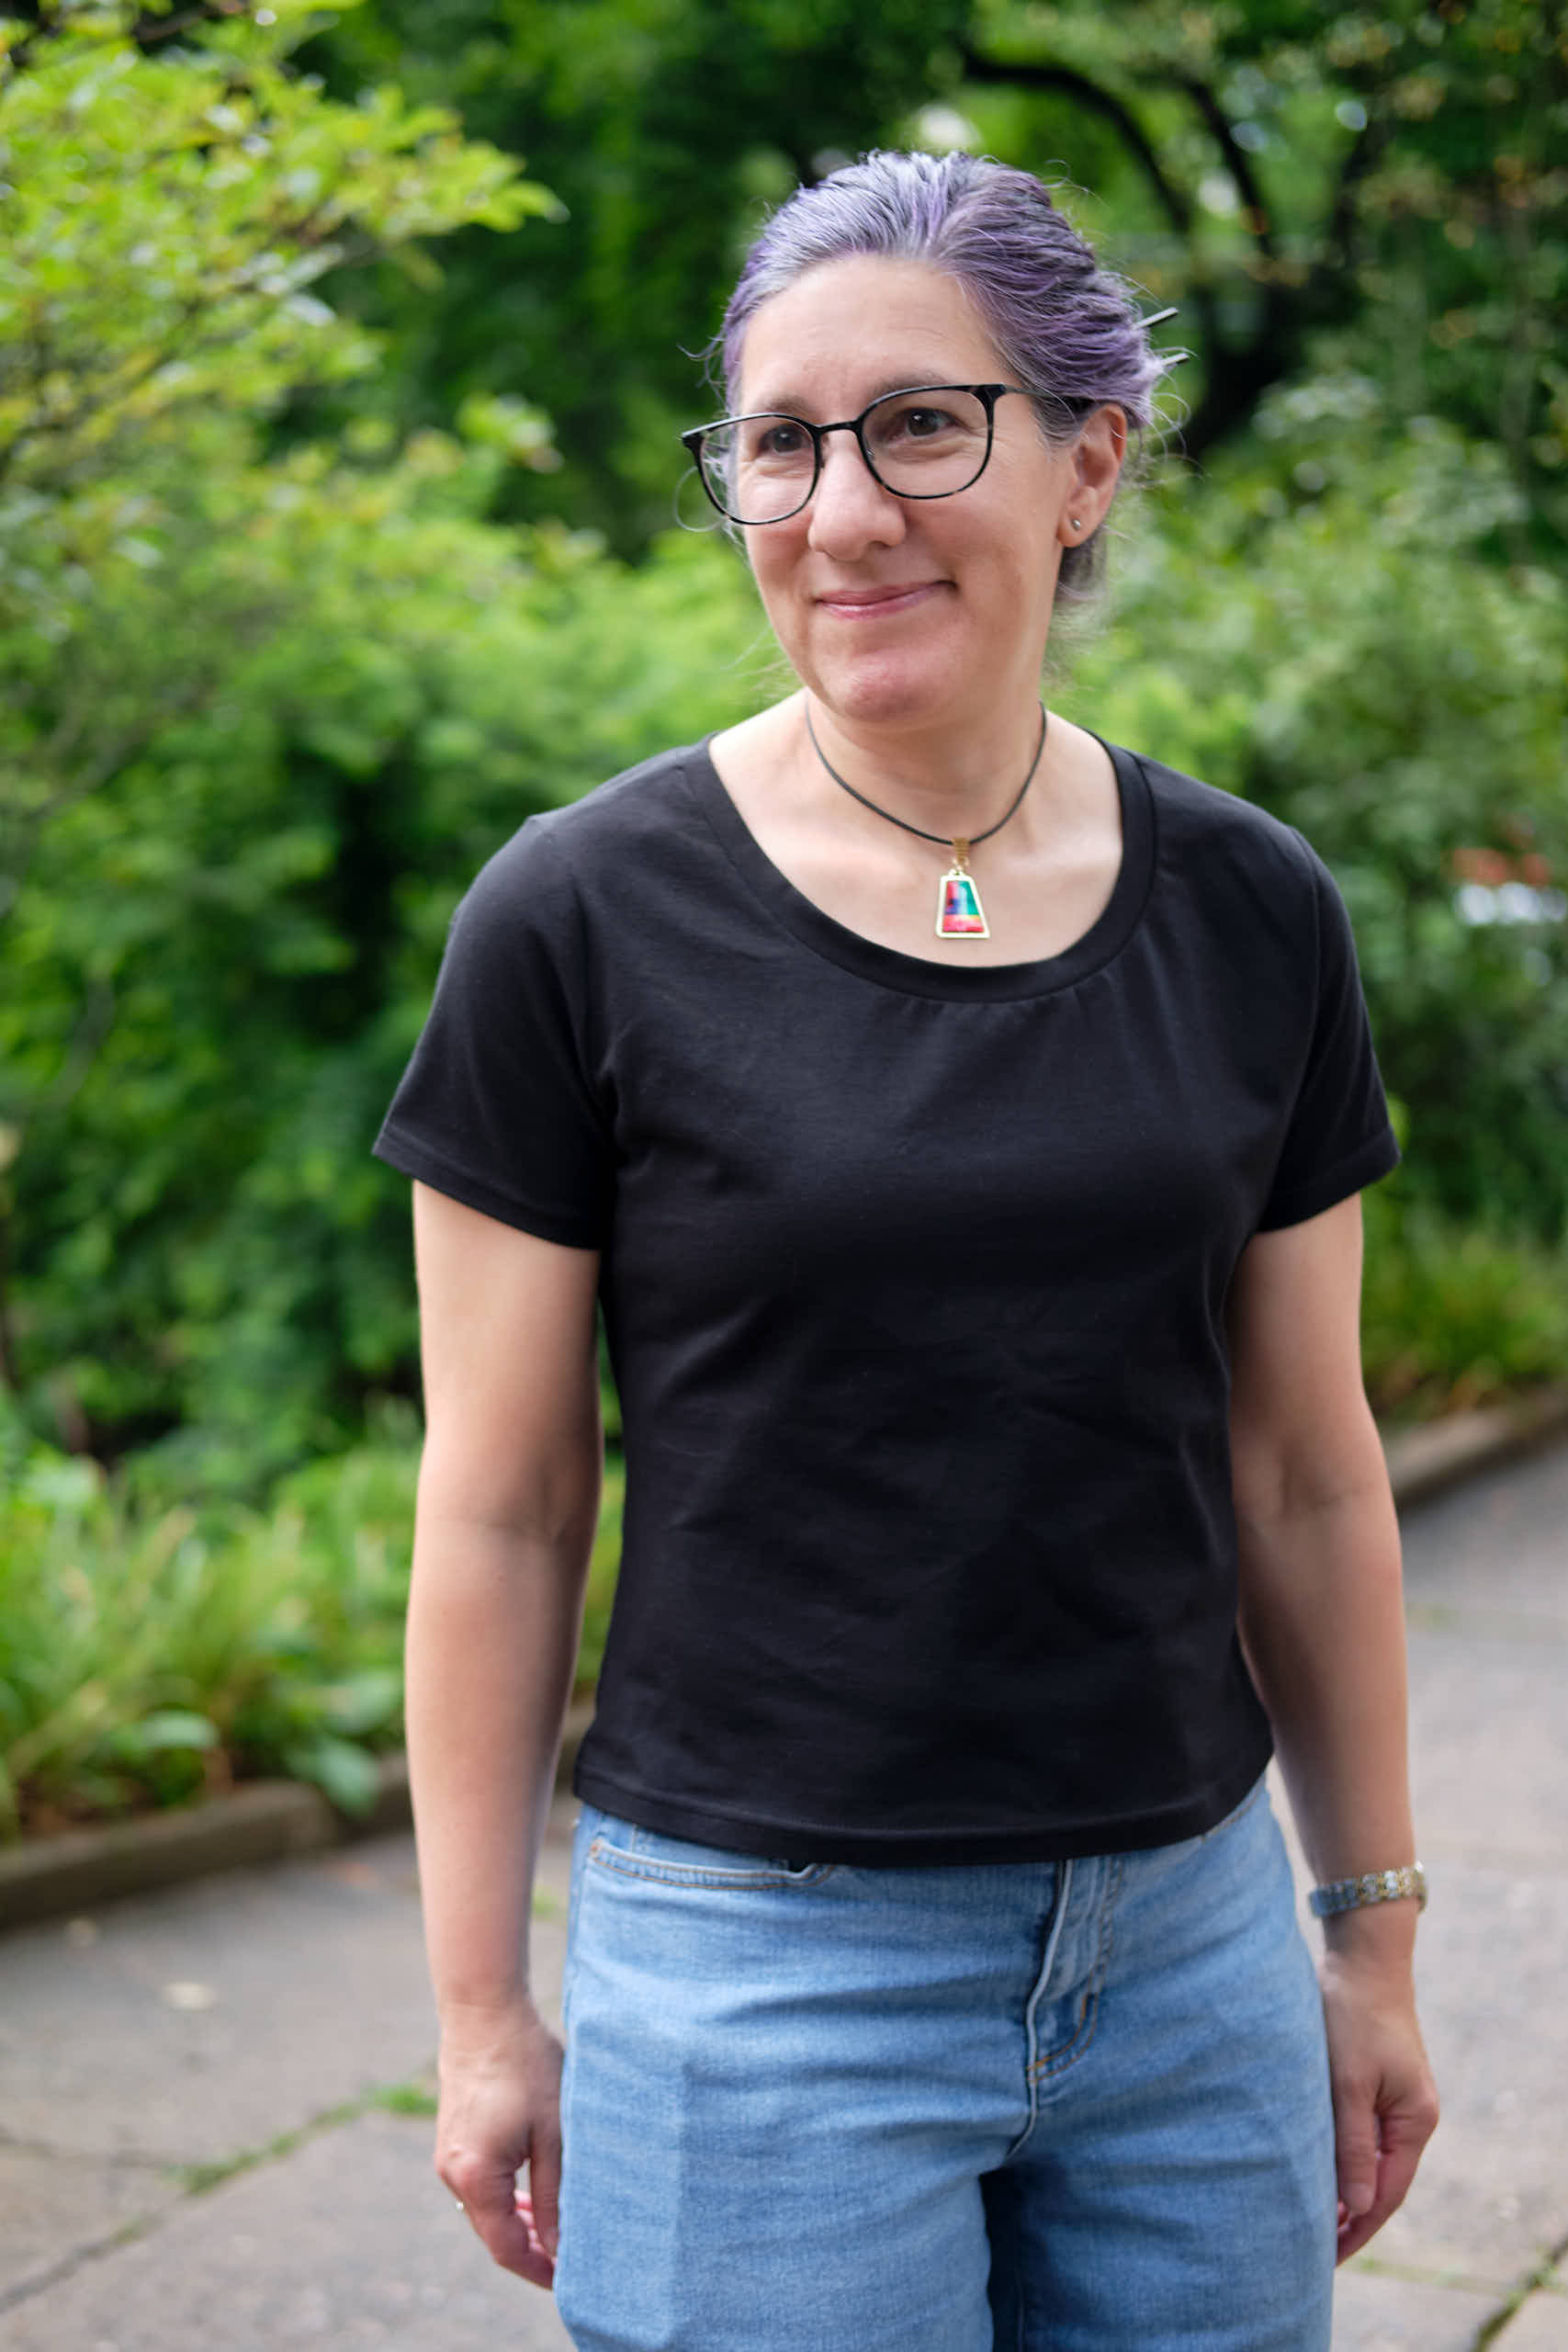
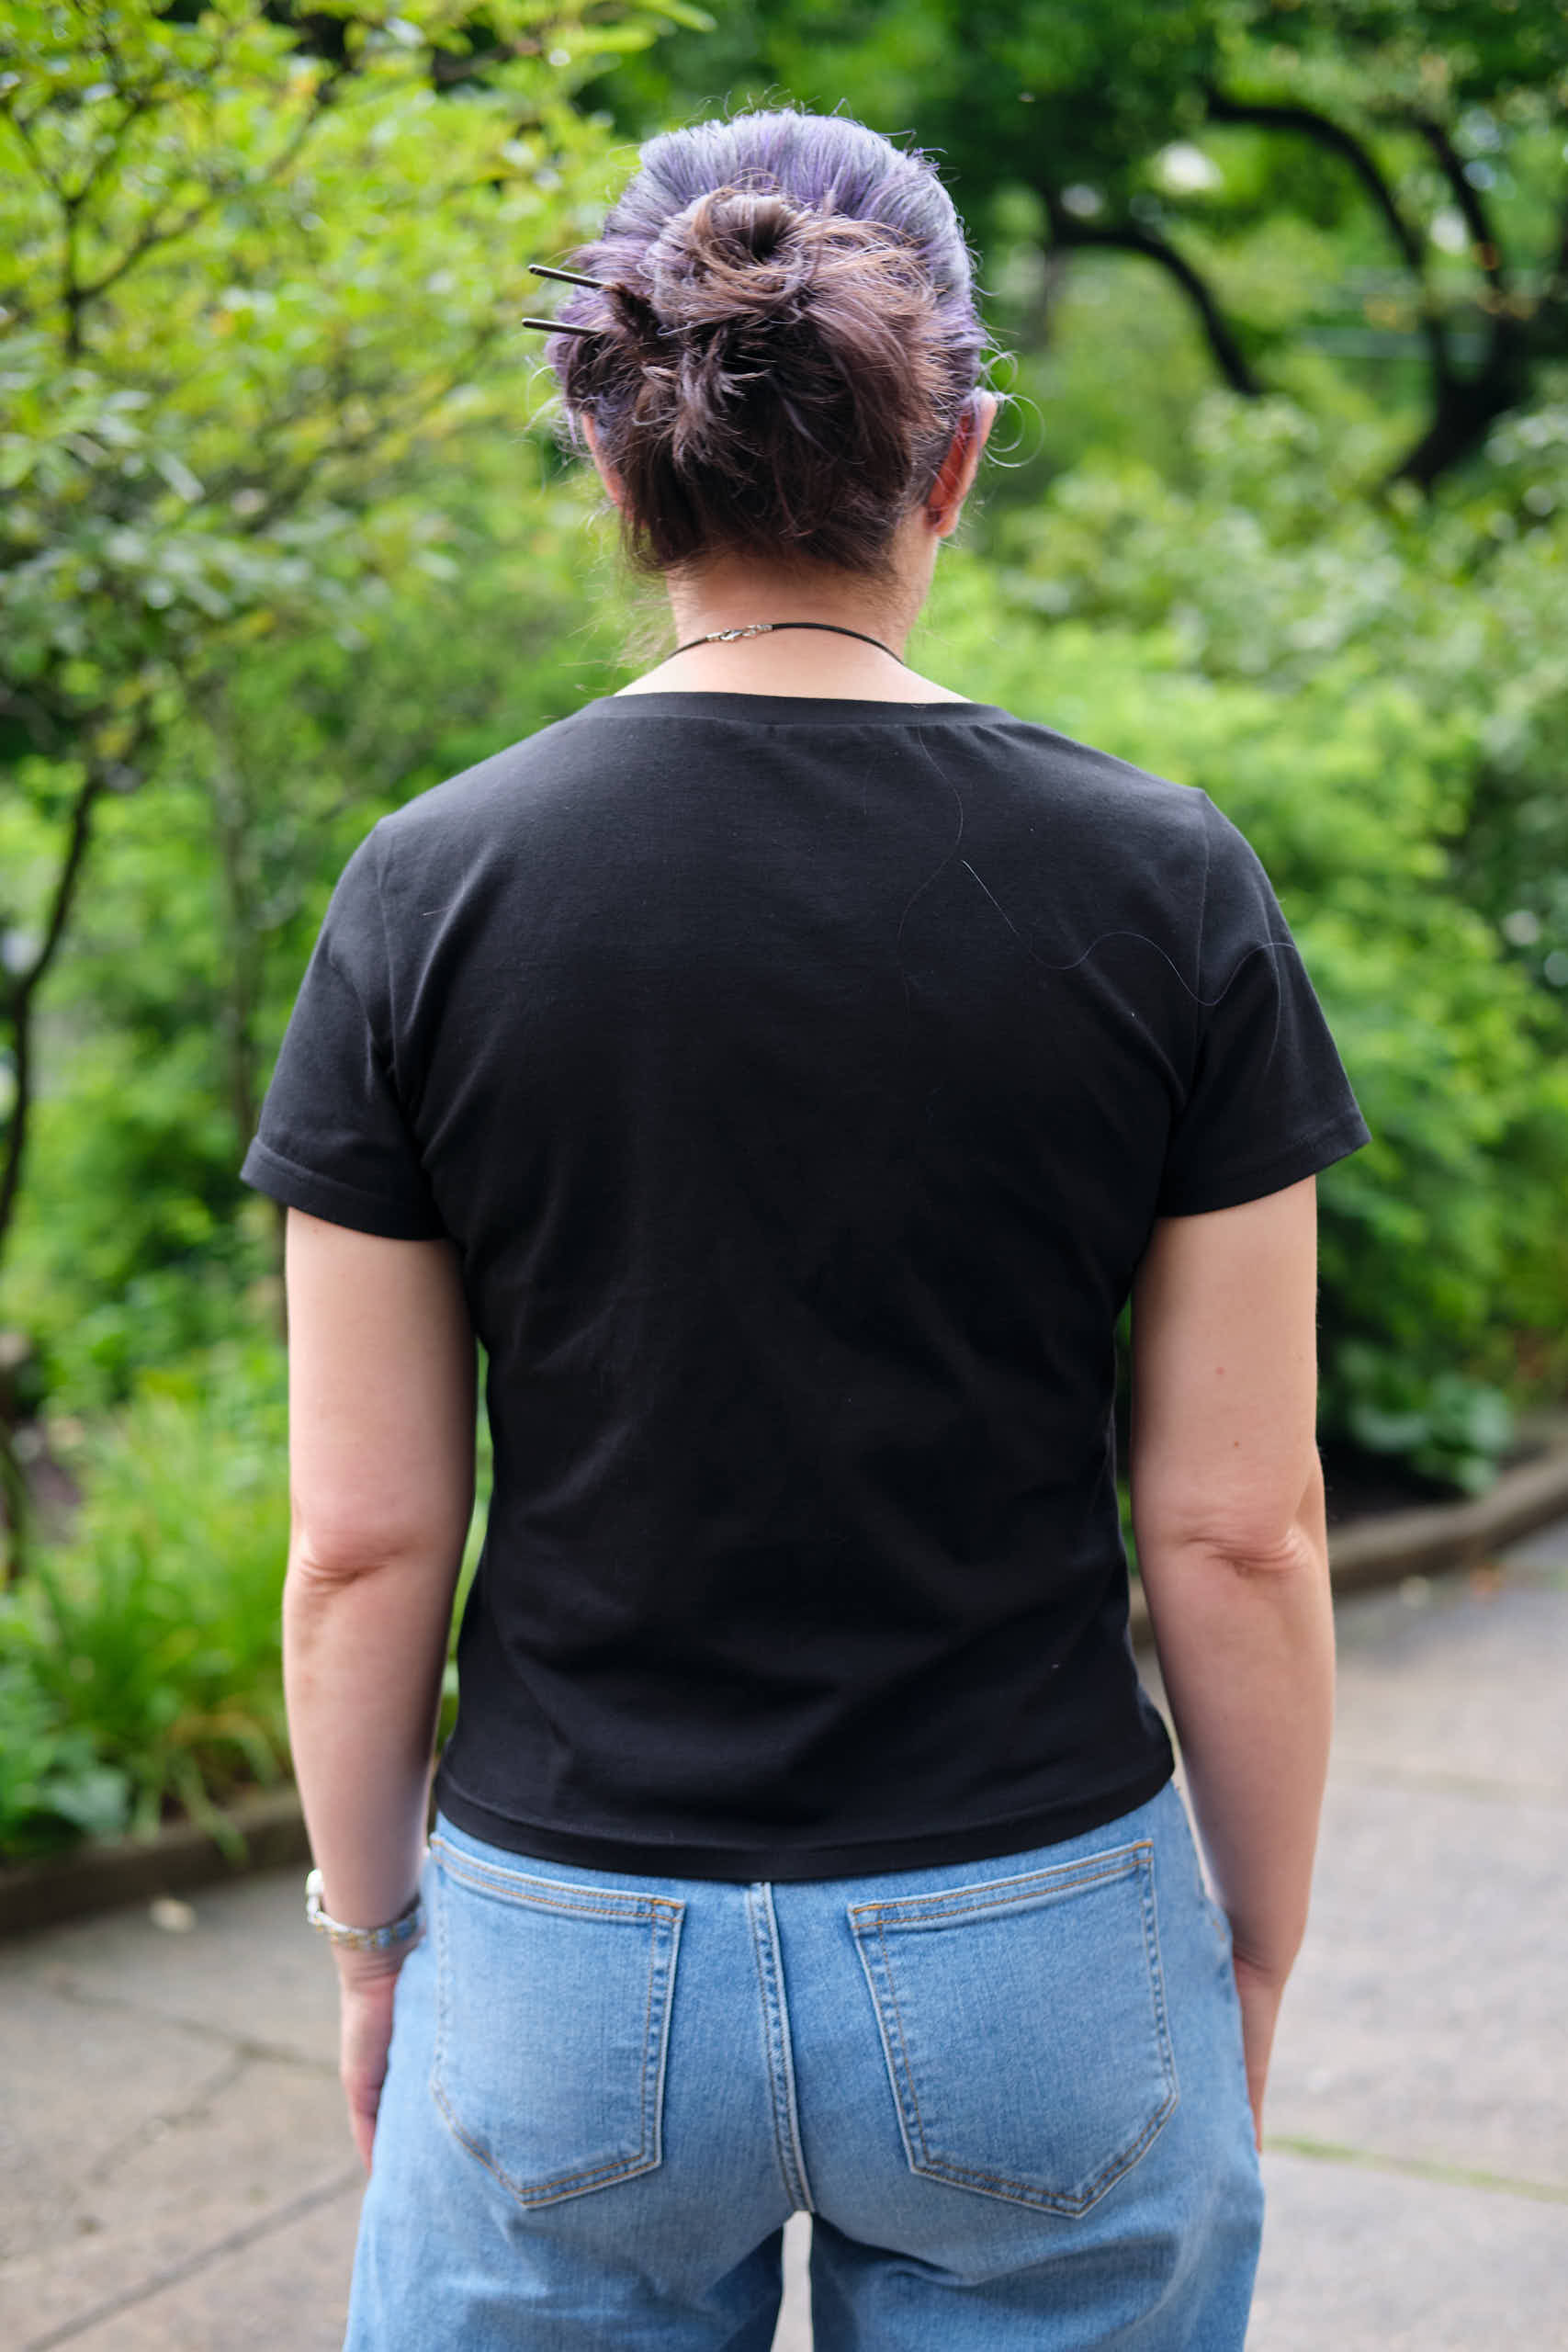
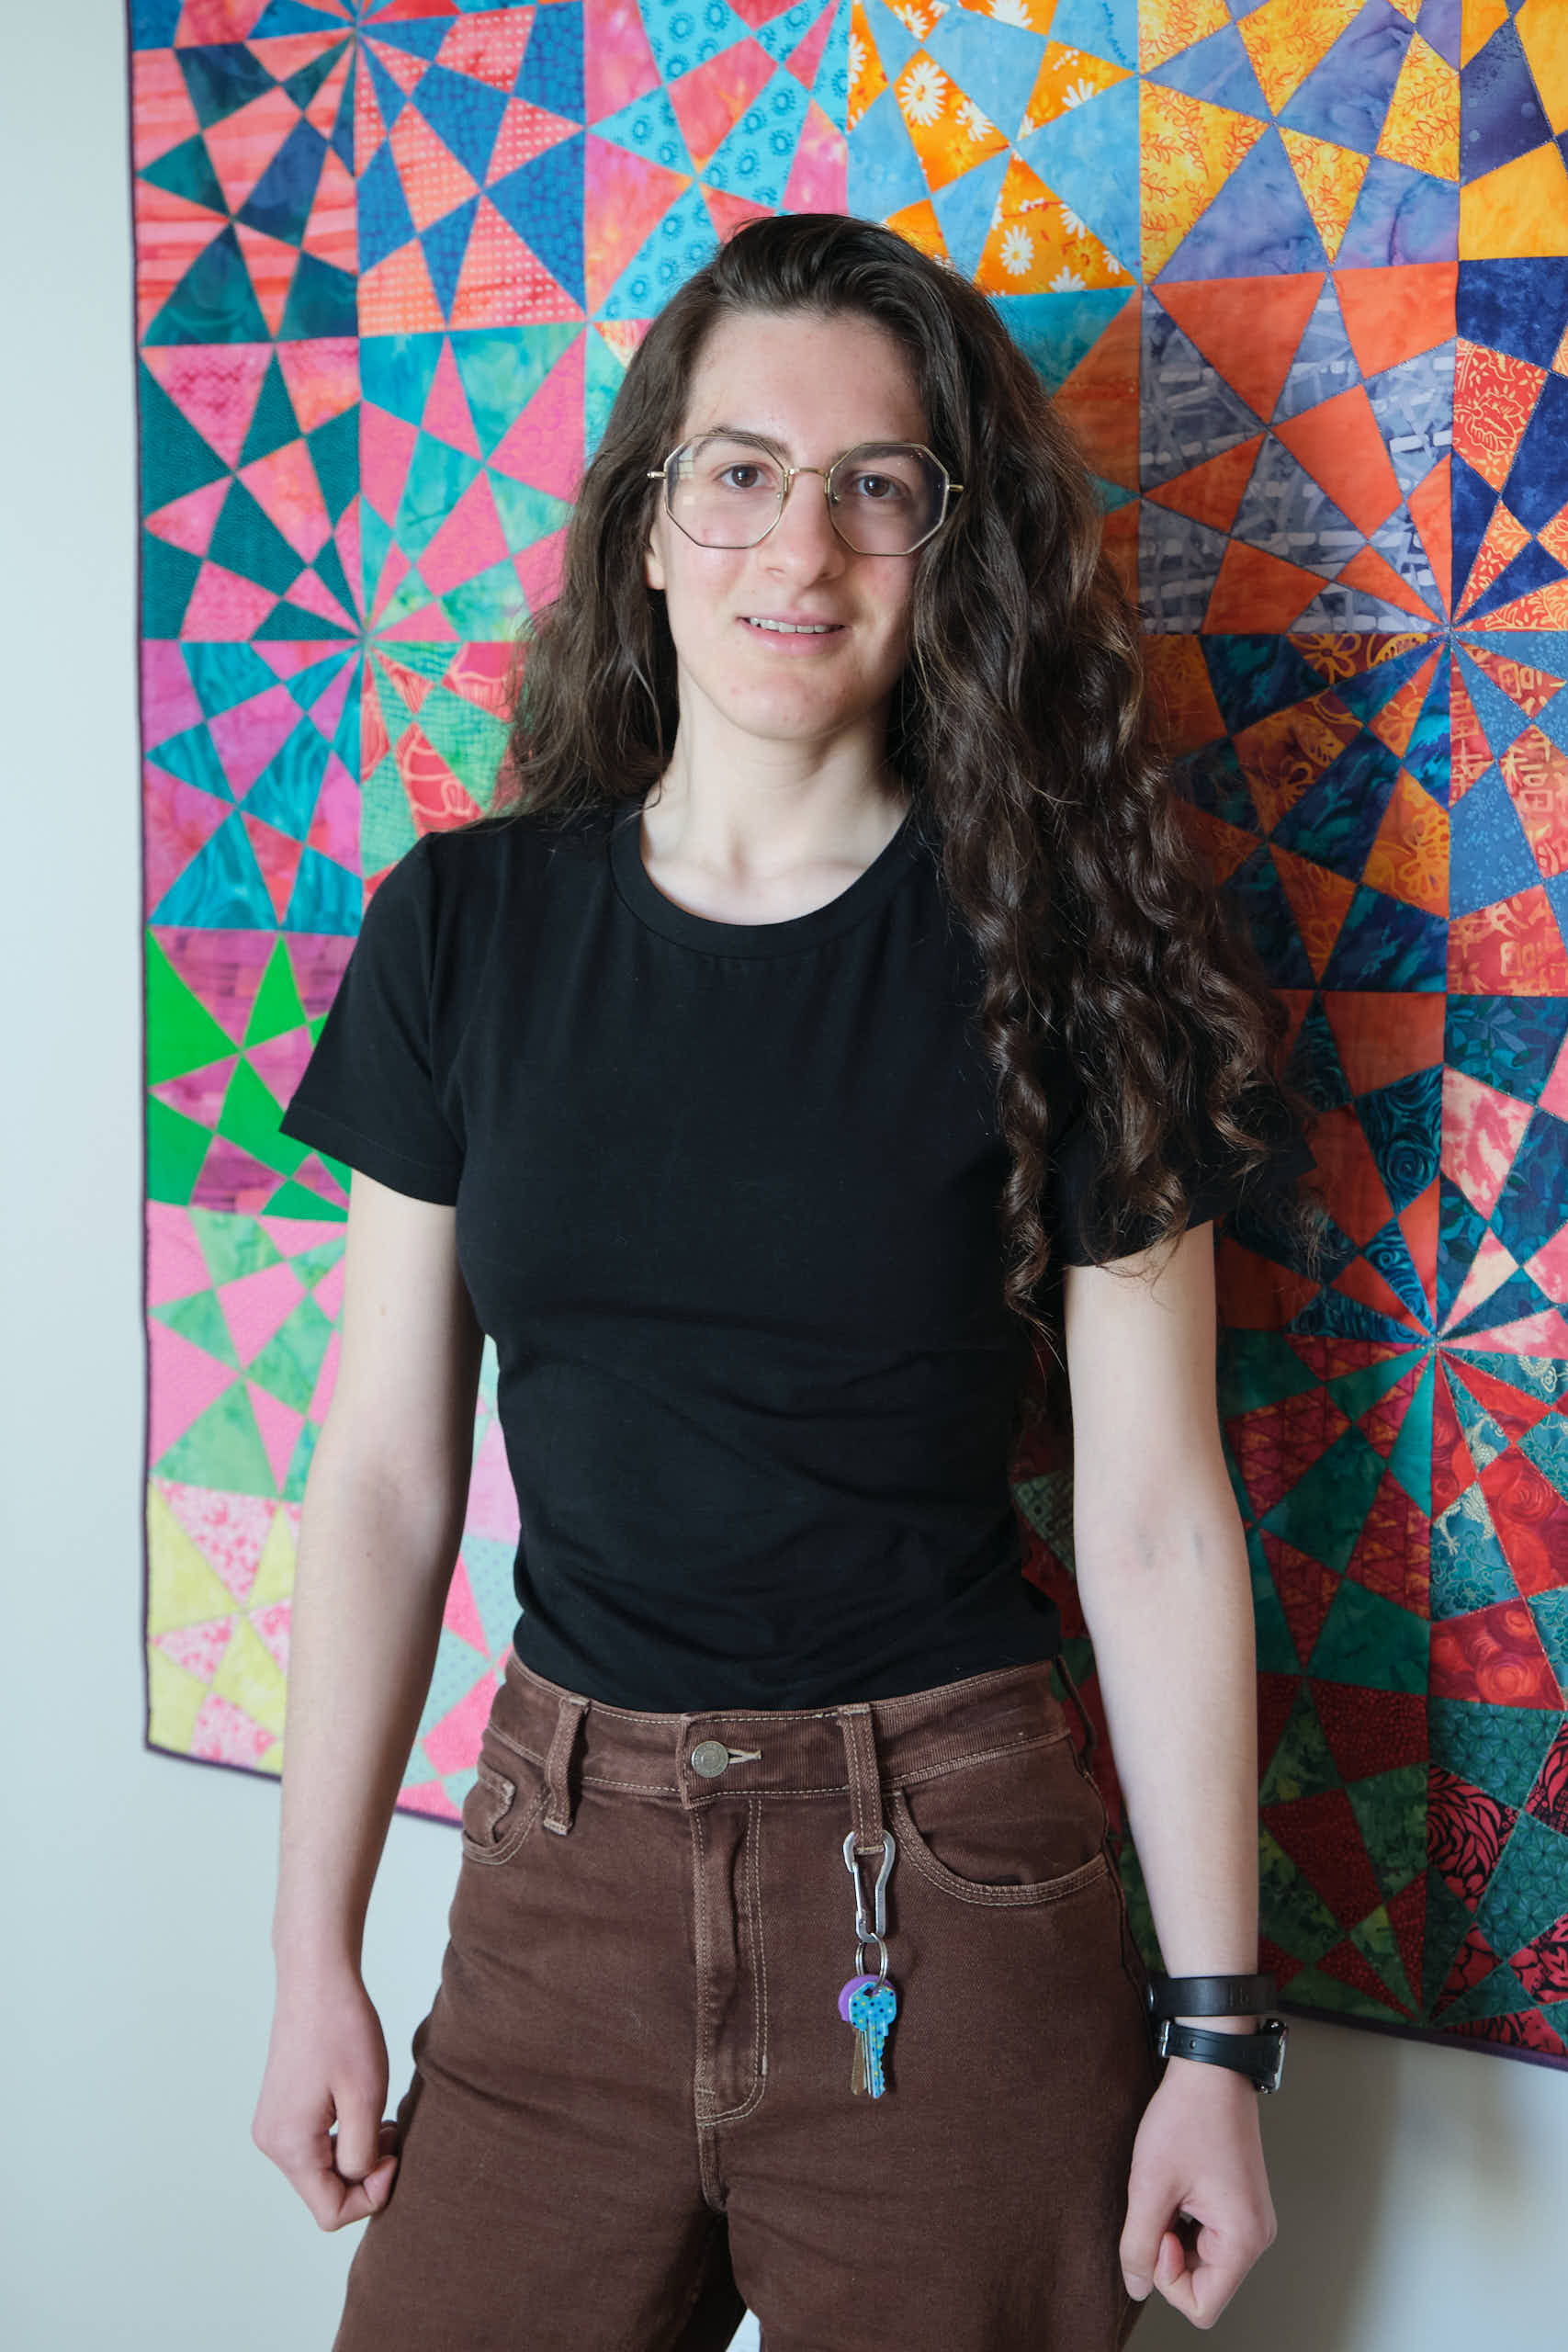
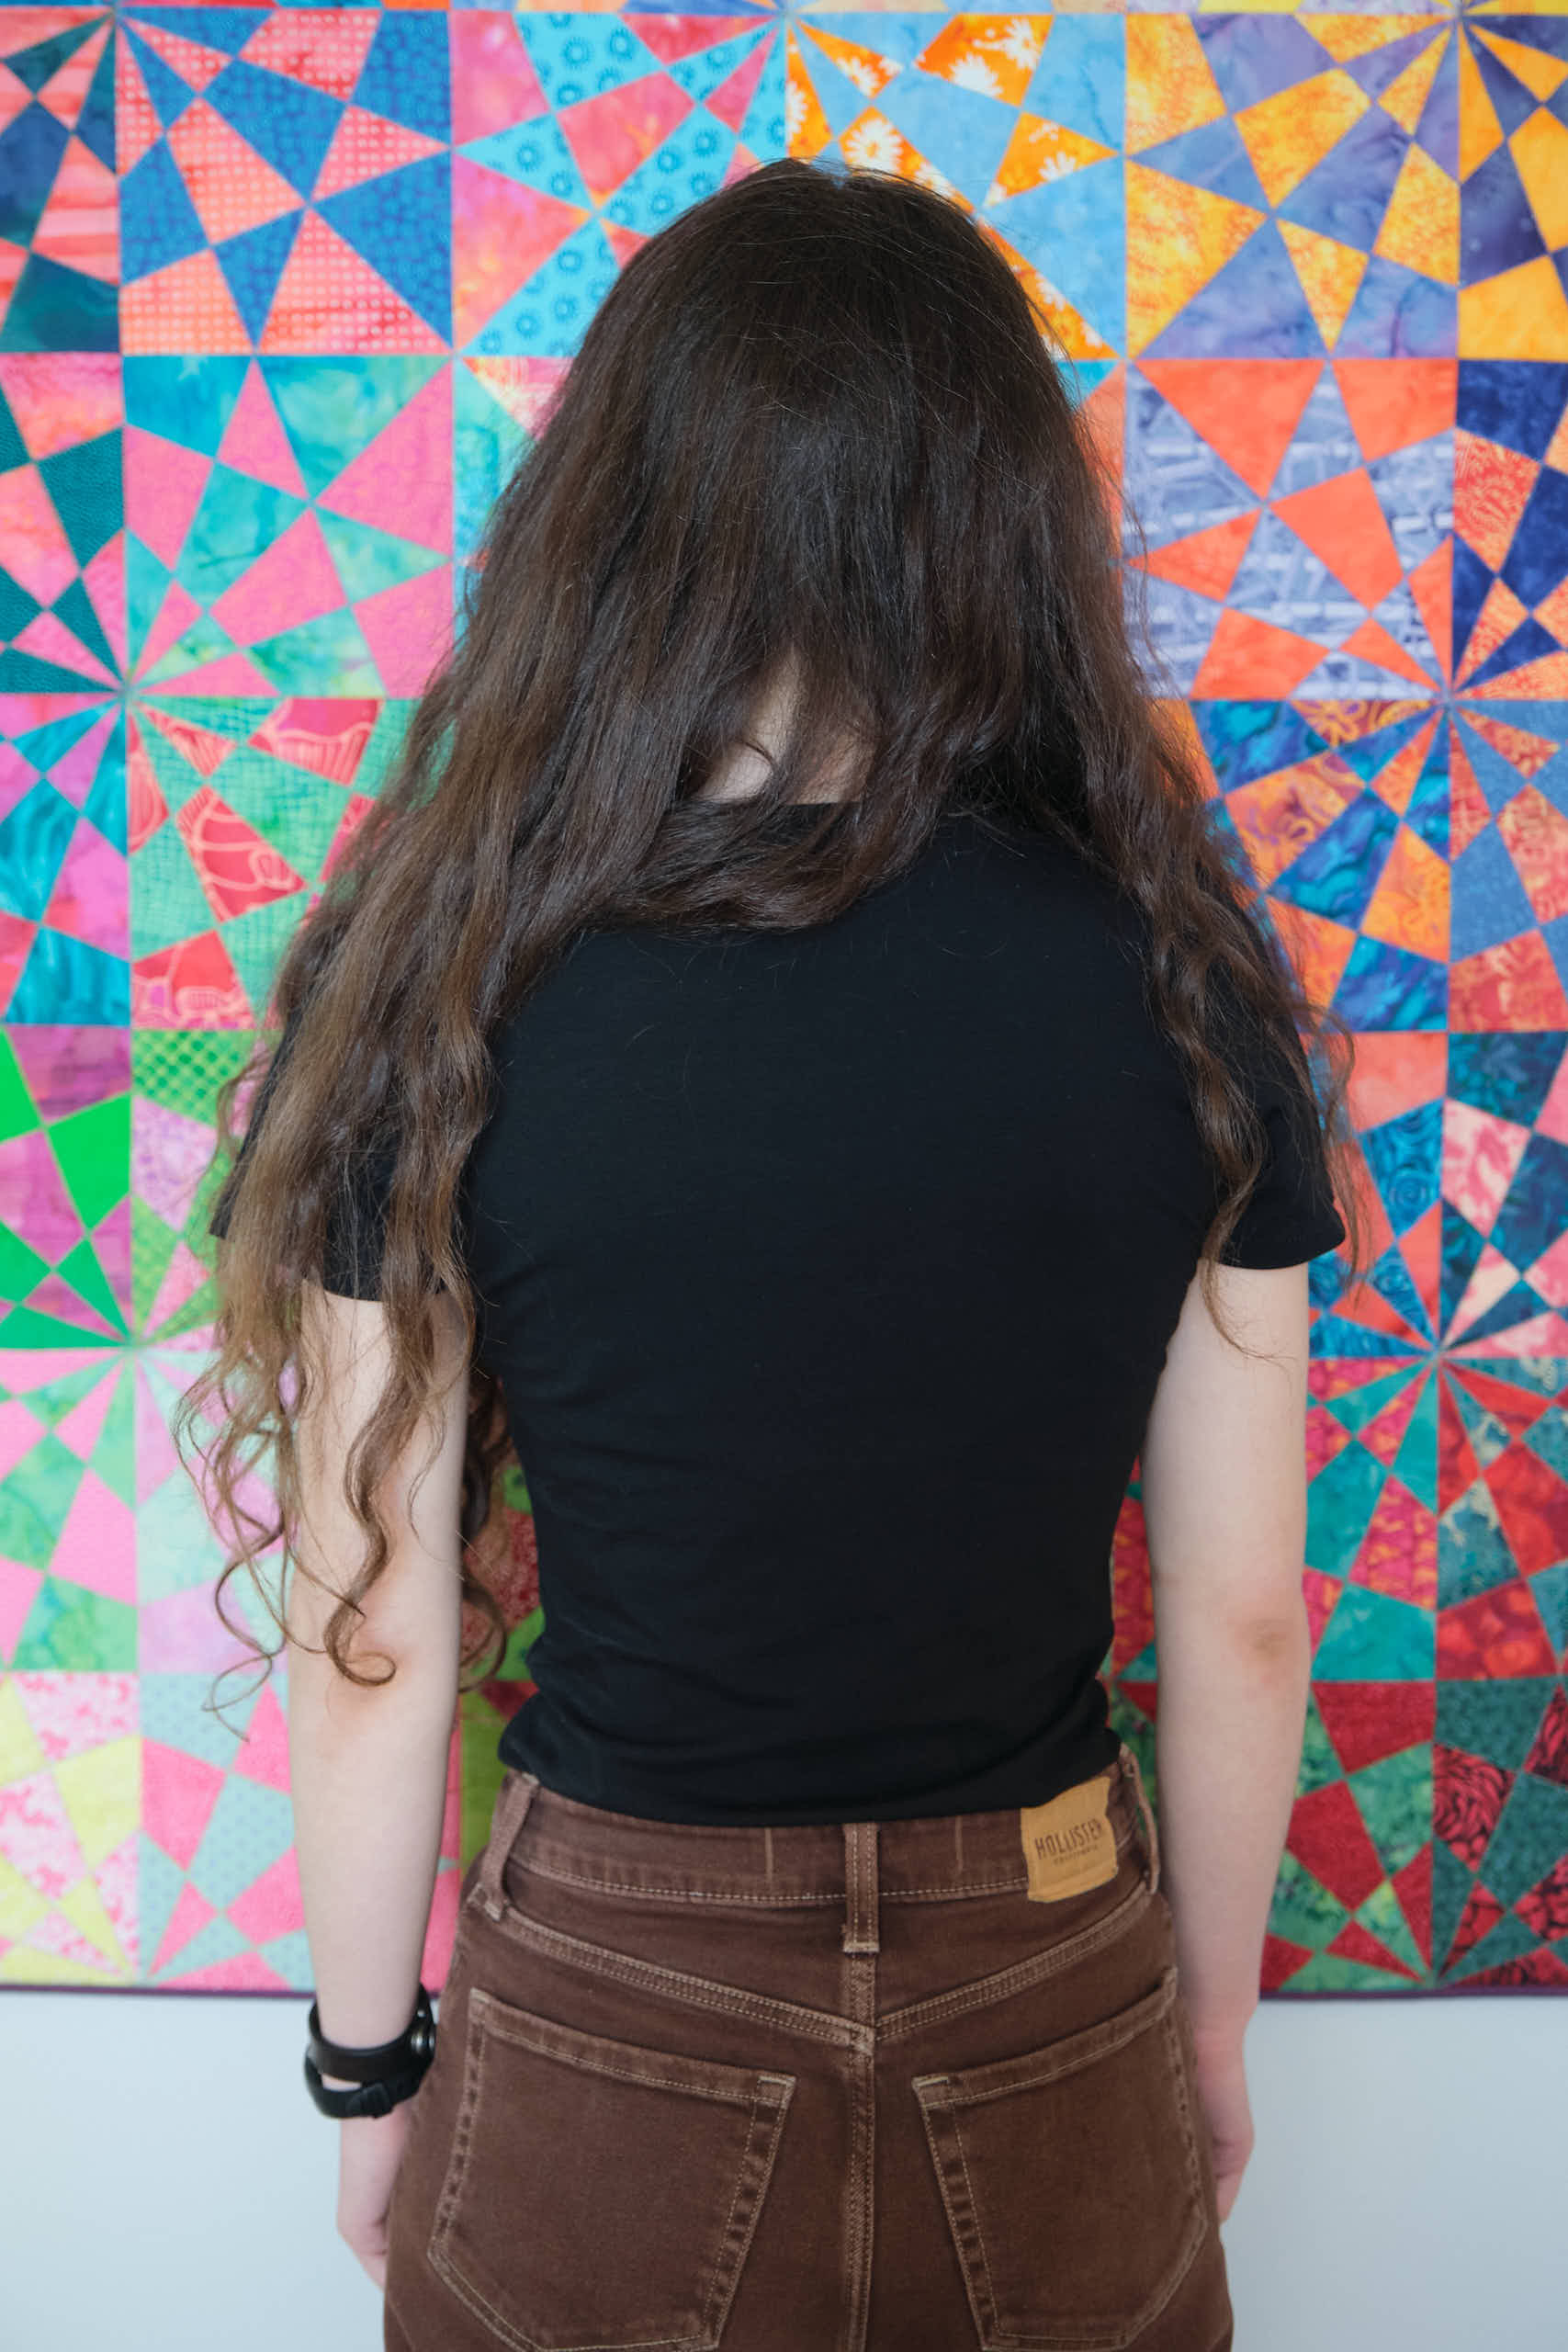
Sinclair Bondi classic fitted t-shirt 6p, wide screwp neck, short sleeves, broad and sloped shoulder adjustment, 2.5 inch above hip length, less than 1 yard of black cotton-lycra.
I made my daughter the perfect fitted black t-shirt to her specifications a few months ago, so now it was time to make one to my specs. This is about the billionth bondi t-shirt I’ve made, but maybe the first with this combination of adjustments: size 6p with broad and sloped shoulder adjustment, wide screwp neck, waist cut 2.5 inches above hip length. I used less than 1 yard of the black Santa Cruz cotton lycra from CaliFabrics that I used for my daughter’s shirt. This length works really well for me for a shirt I’m not going to tuck in. The size 4p also works for me in this pattern (see the recent turquoise DBP shirt I made in 4p), but I like the extra bit of ease with the size 6p in this fabric. This was a very fast make, even though I took the time to convert to cover-stitch mode for the sleeve and bottom hems. The Santa Cruz fabric is really nice, a bit more polished than some of the generic CL fabrics I’ve bought. However, I have an even nicer (and a bit more expensive) CL in my stash that I’m looking forward to trying for a long-sleeve t-shirt.
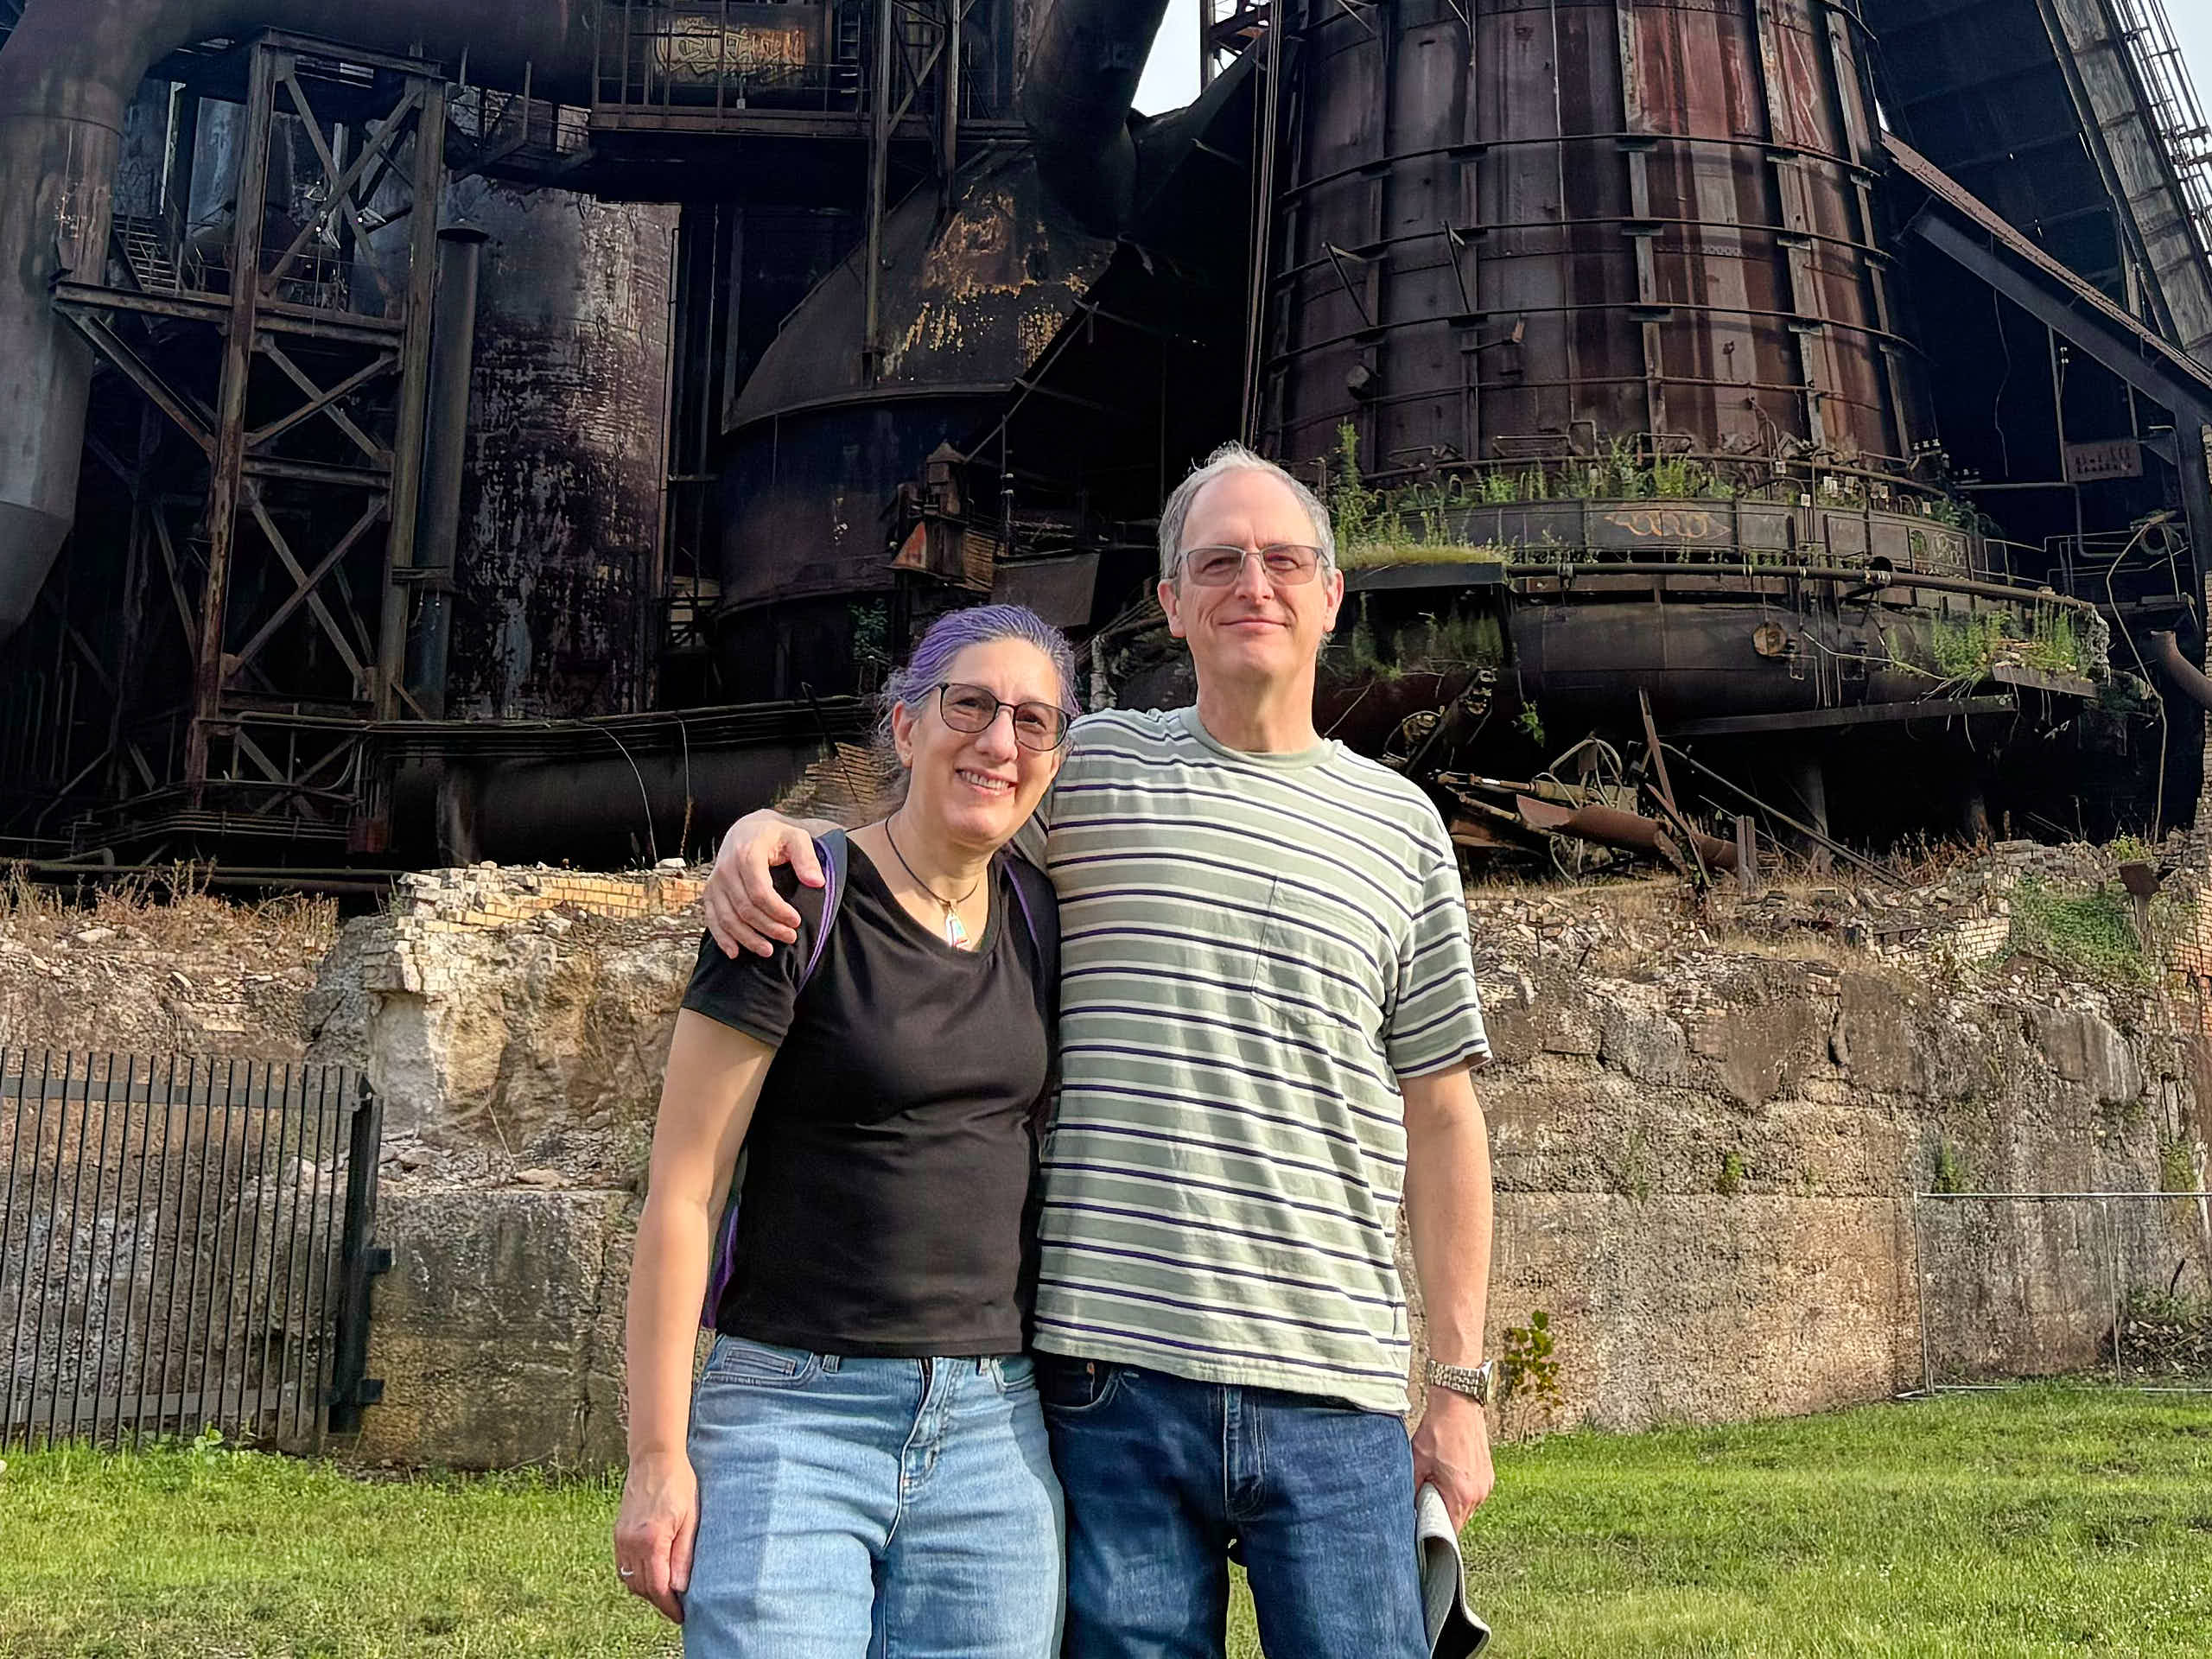
And here’s a photo wearing the top “in the wild” at the Carrie Furnace.
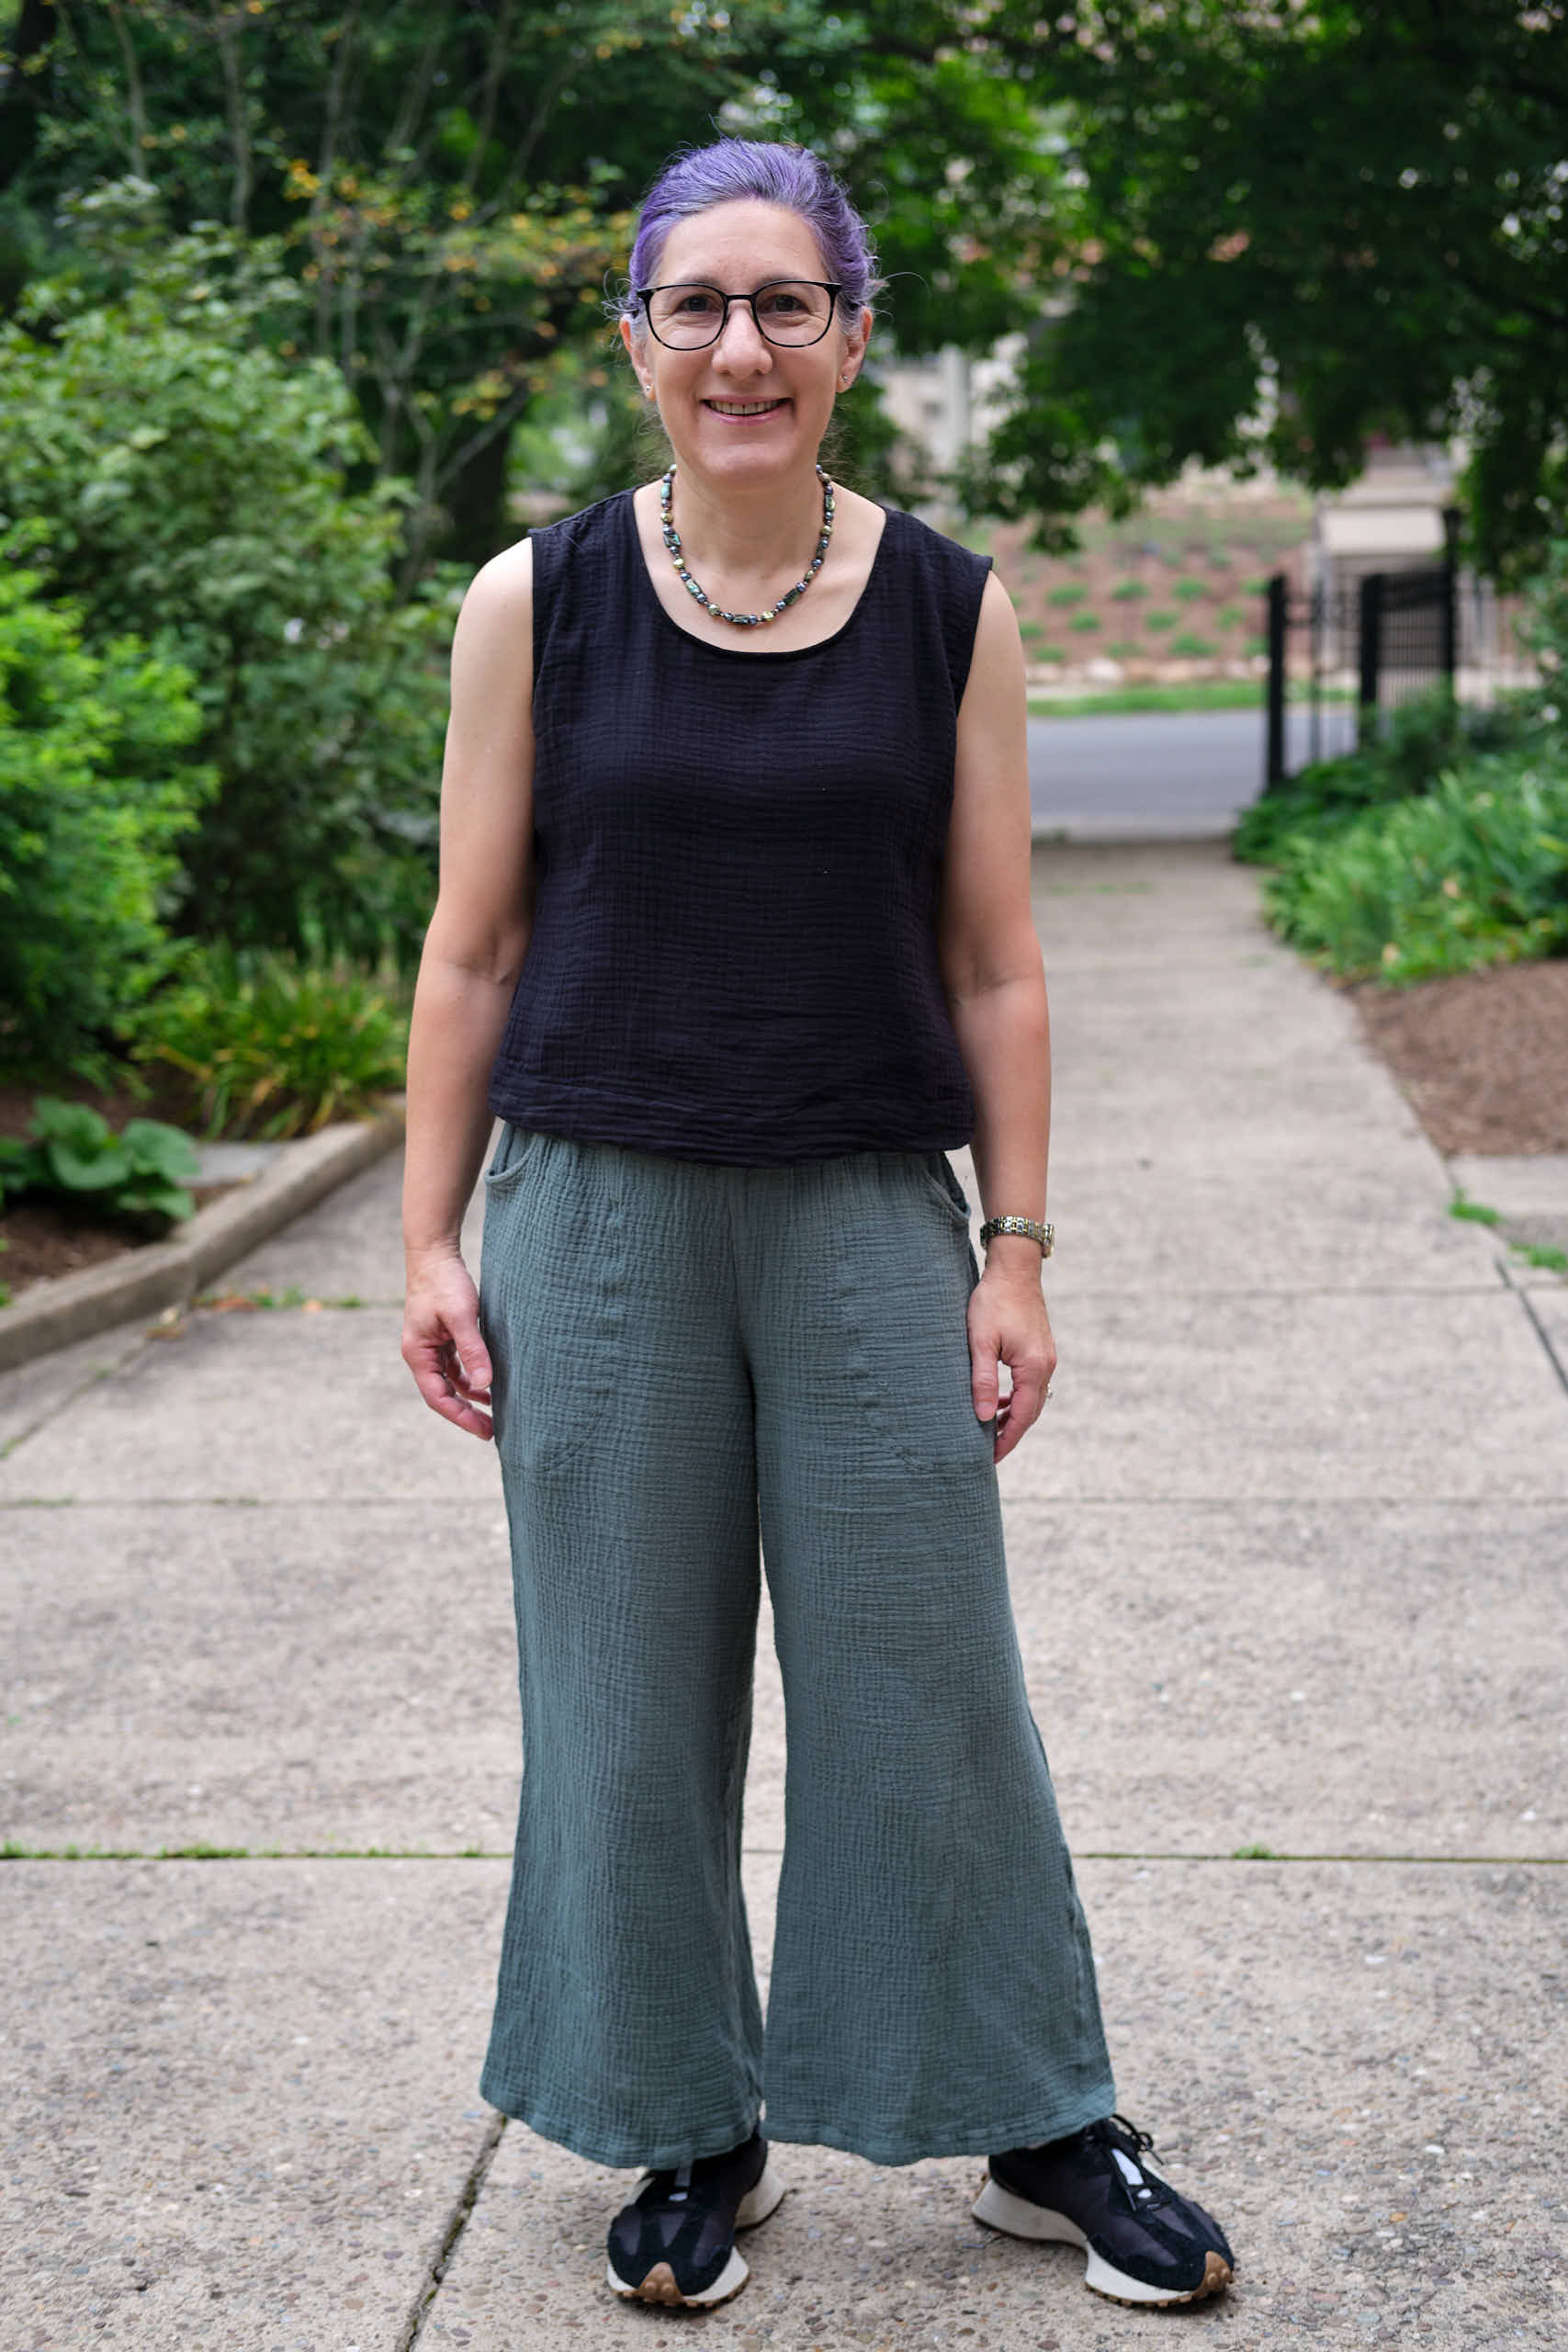
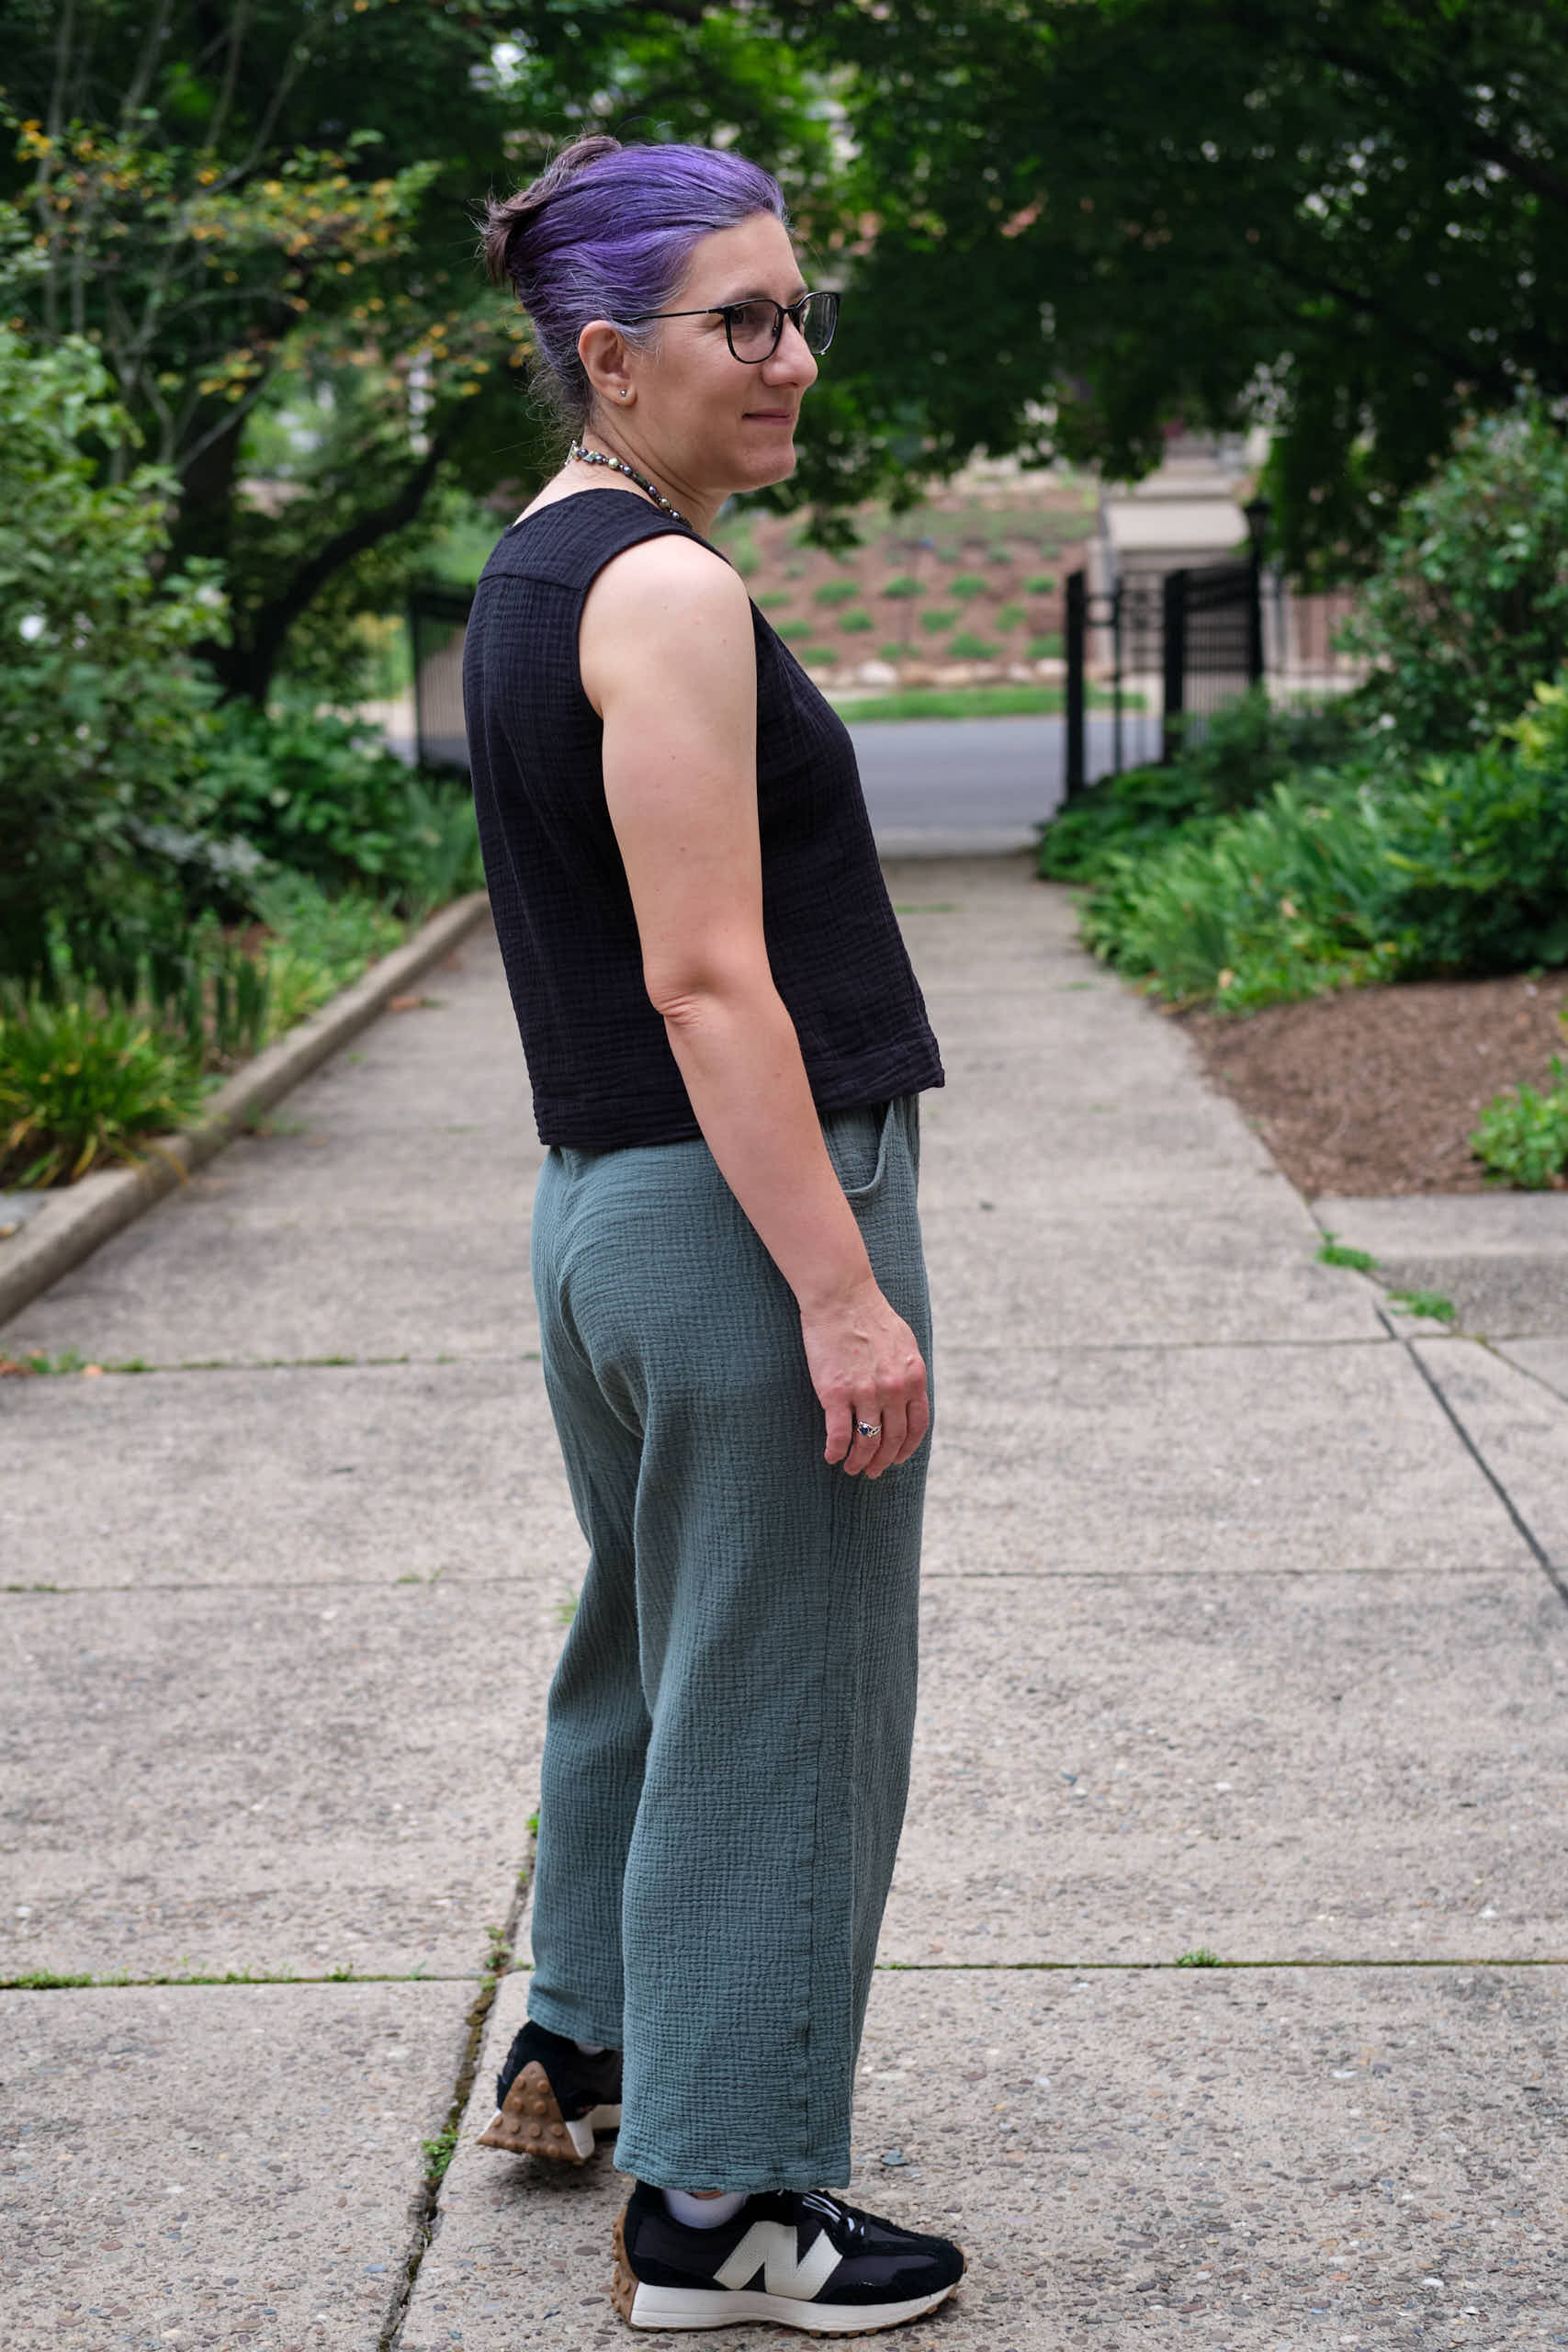
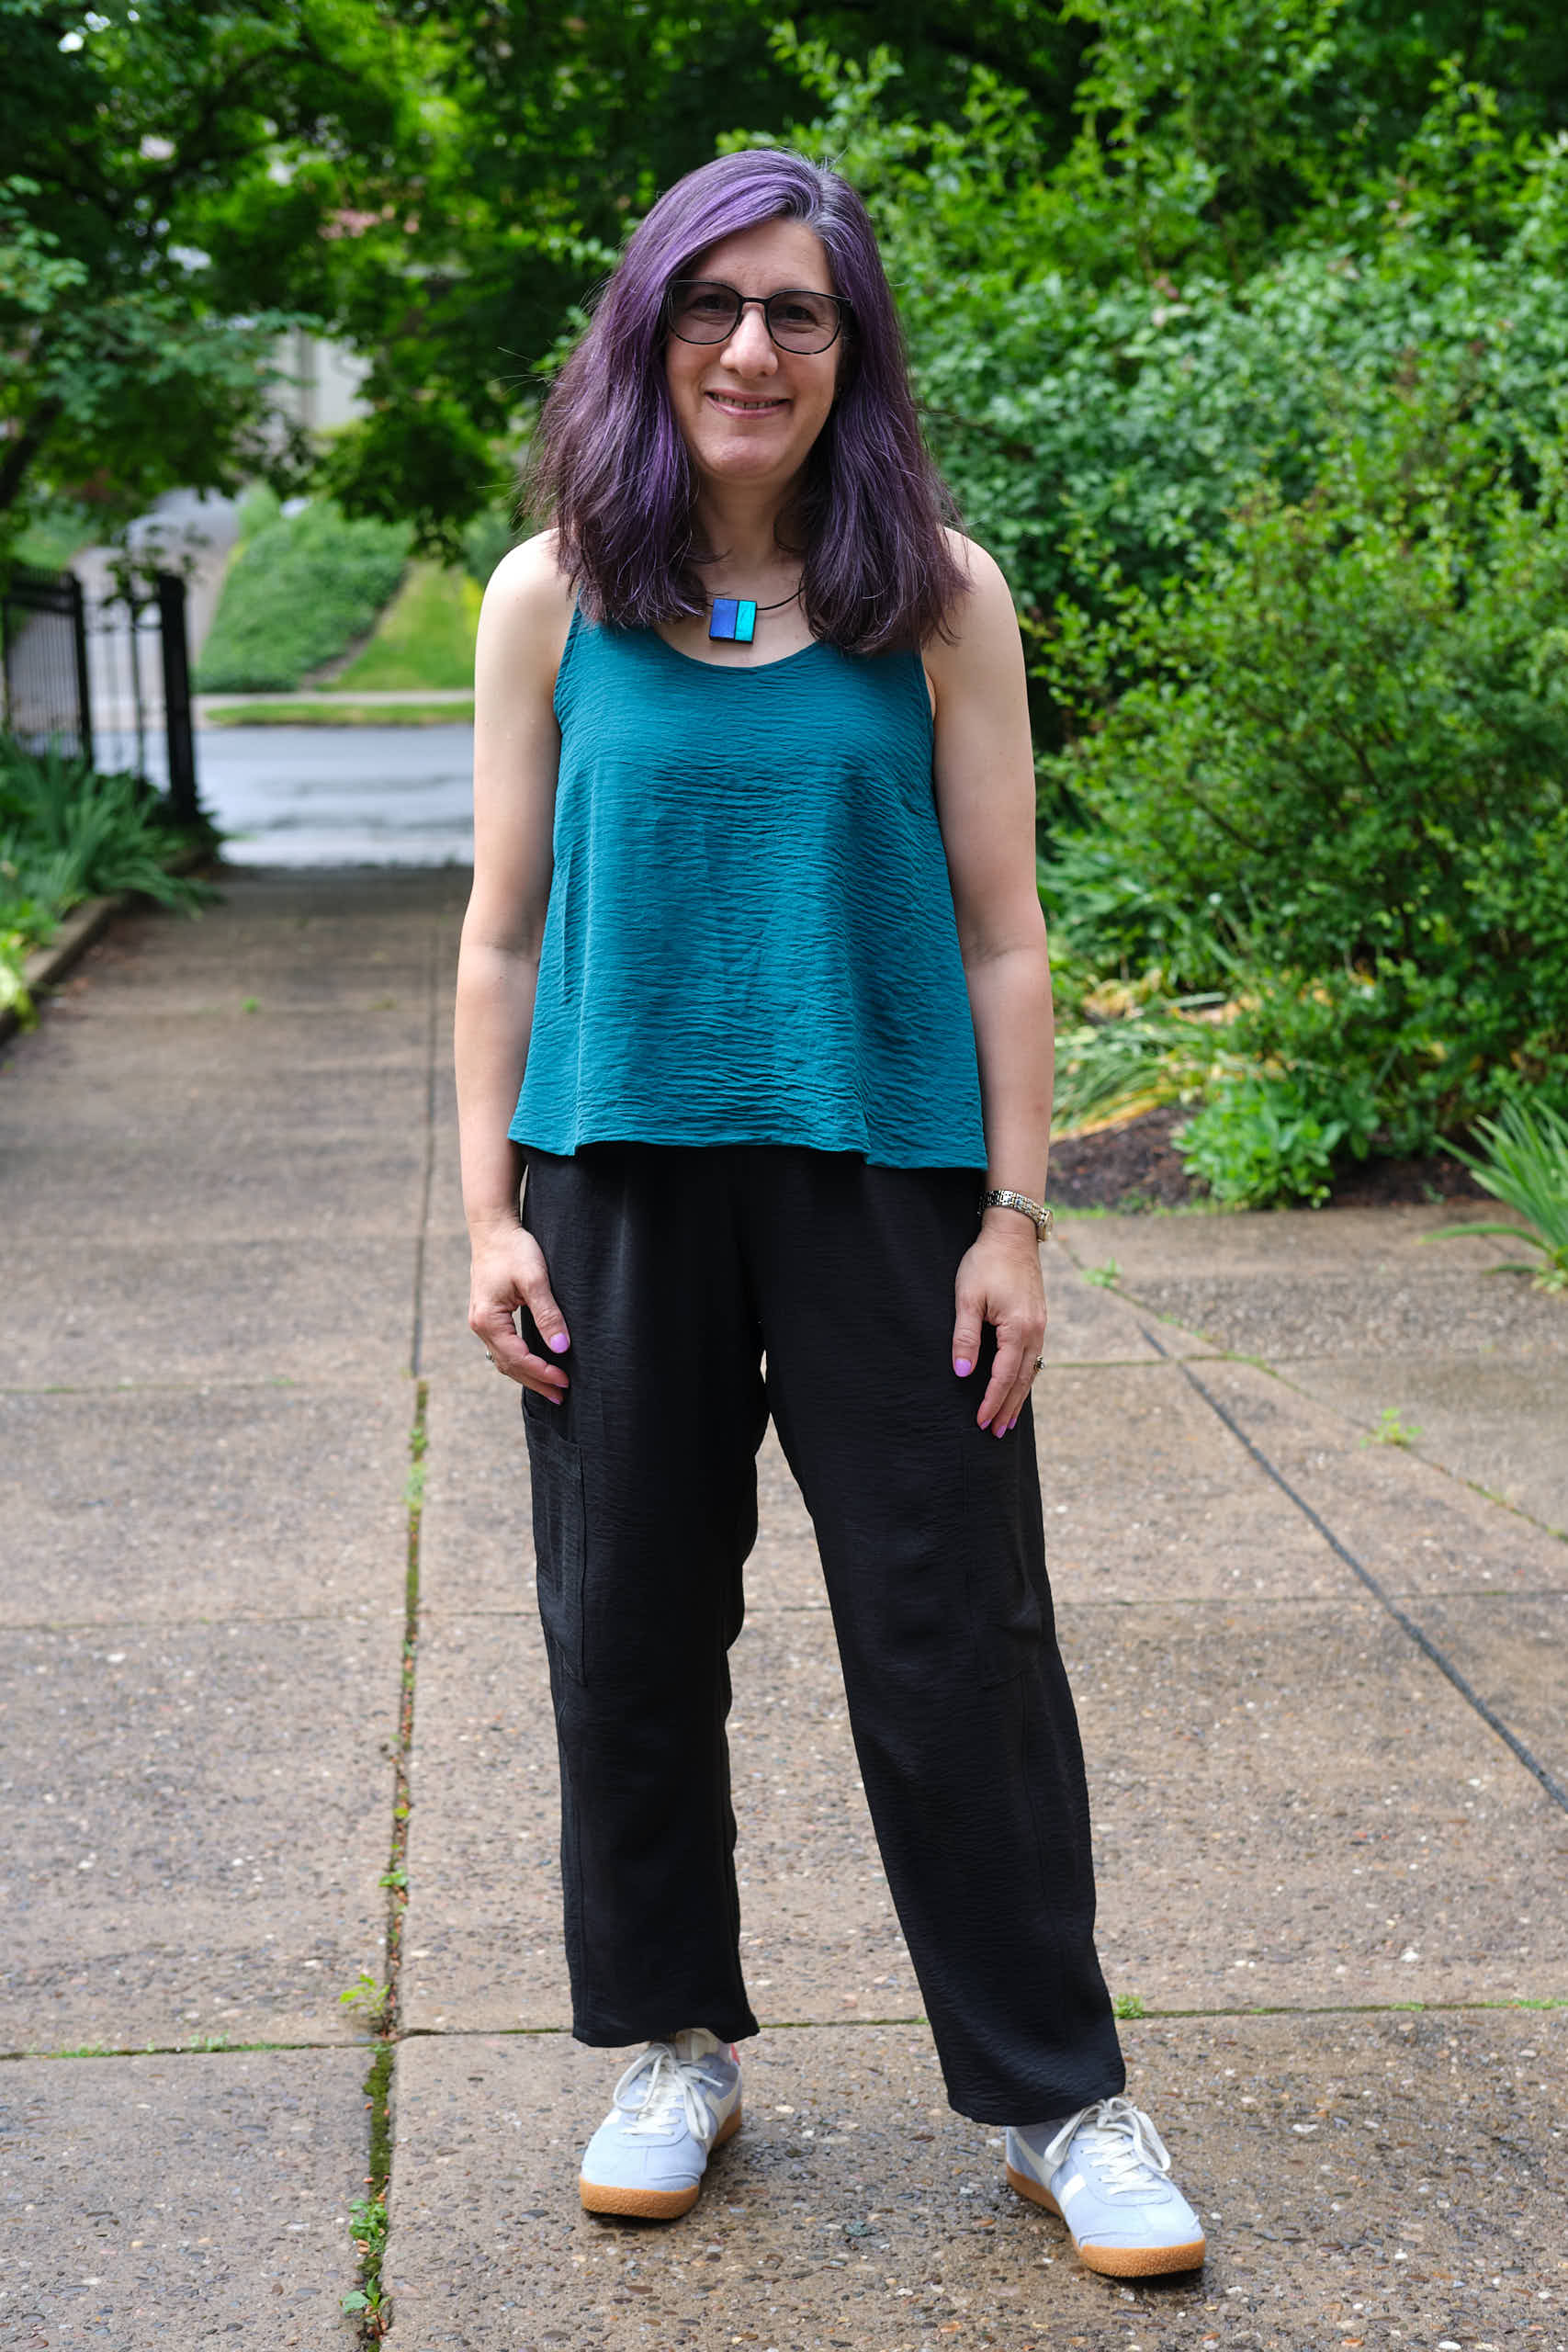
Pattern Emporium Meet You There dress bodice made with less than 1 yard black double gauze fabric (washed and ironed before cutting), size AU8, regular bodice shortened by 2 inches and then extended 8 inches down at a slight angle and folded under 2 inches for hem, mid neck, sleeveless, used batik quilting cotton for facings
I really like the fit of my sleeveless brown print Meet You There dress that I made earlier this summer and thought the bodice would make a nice top. The pattern suggests adding a ruffle to the bodice to make a top, but an Australian sewist named Mel made a super cute version with an extended bodice rather than a ruffle (she used a fabric with an egg print and made a fun video to go with it) and I thought it was a great idea.
When I made my last Meet You There dress I shortened the regular AU 8 bodice by 2 inches to be closer to my natural waist. So I took that as the waist for the top and then extended the side seams by 8 inches from there, sloping them gently out about 3/4 inch and then straight down for the bottom 4 inches to make it easier to hem. I folded up the hem 1/2 inch and then another 1.5 inches and top stitched. I used batik cotton for the neck and arm-hole facings on the brown dress and it was much easier than fussing with the loosely woven gauze. So for this top I used some thin, tightly woven black fabric from my stash, probably a cotton poplin.
The top is cut from less than a yard of black cotton double gauze left over from making a skirt for my daughter. I thoroughly ironed the gauze before cutting it.
I’m very happy with the fit of this top (modeled here with PE Vacation Vibe pants I made last summer in dark sage double gauze). I sized down from AU10 for both my dress and this top — it’s about as close-fitting as I could get with a non-stretch woven with no fasteners. It does take a little effort to get it off, though. The mid neck is a great neck style for me, and I like the sleeveless shoulders that are plenty wide and easily cover my bra straps. I’m not sure the back yoke is entirely necessary, but it adds a cute detail and a convenient place to sew a tag (on the inside). I’m also pleased with how this length worked out for me — just right for a top that I won’t be tucking in. The double gauze is light weight, dries quickly, and doesn’t need to be ironed.
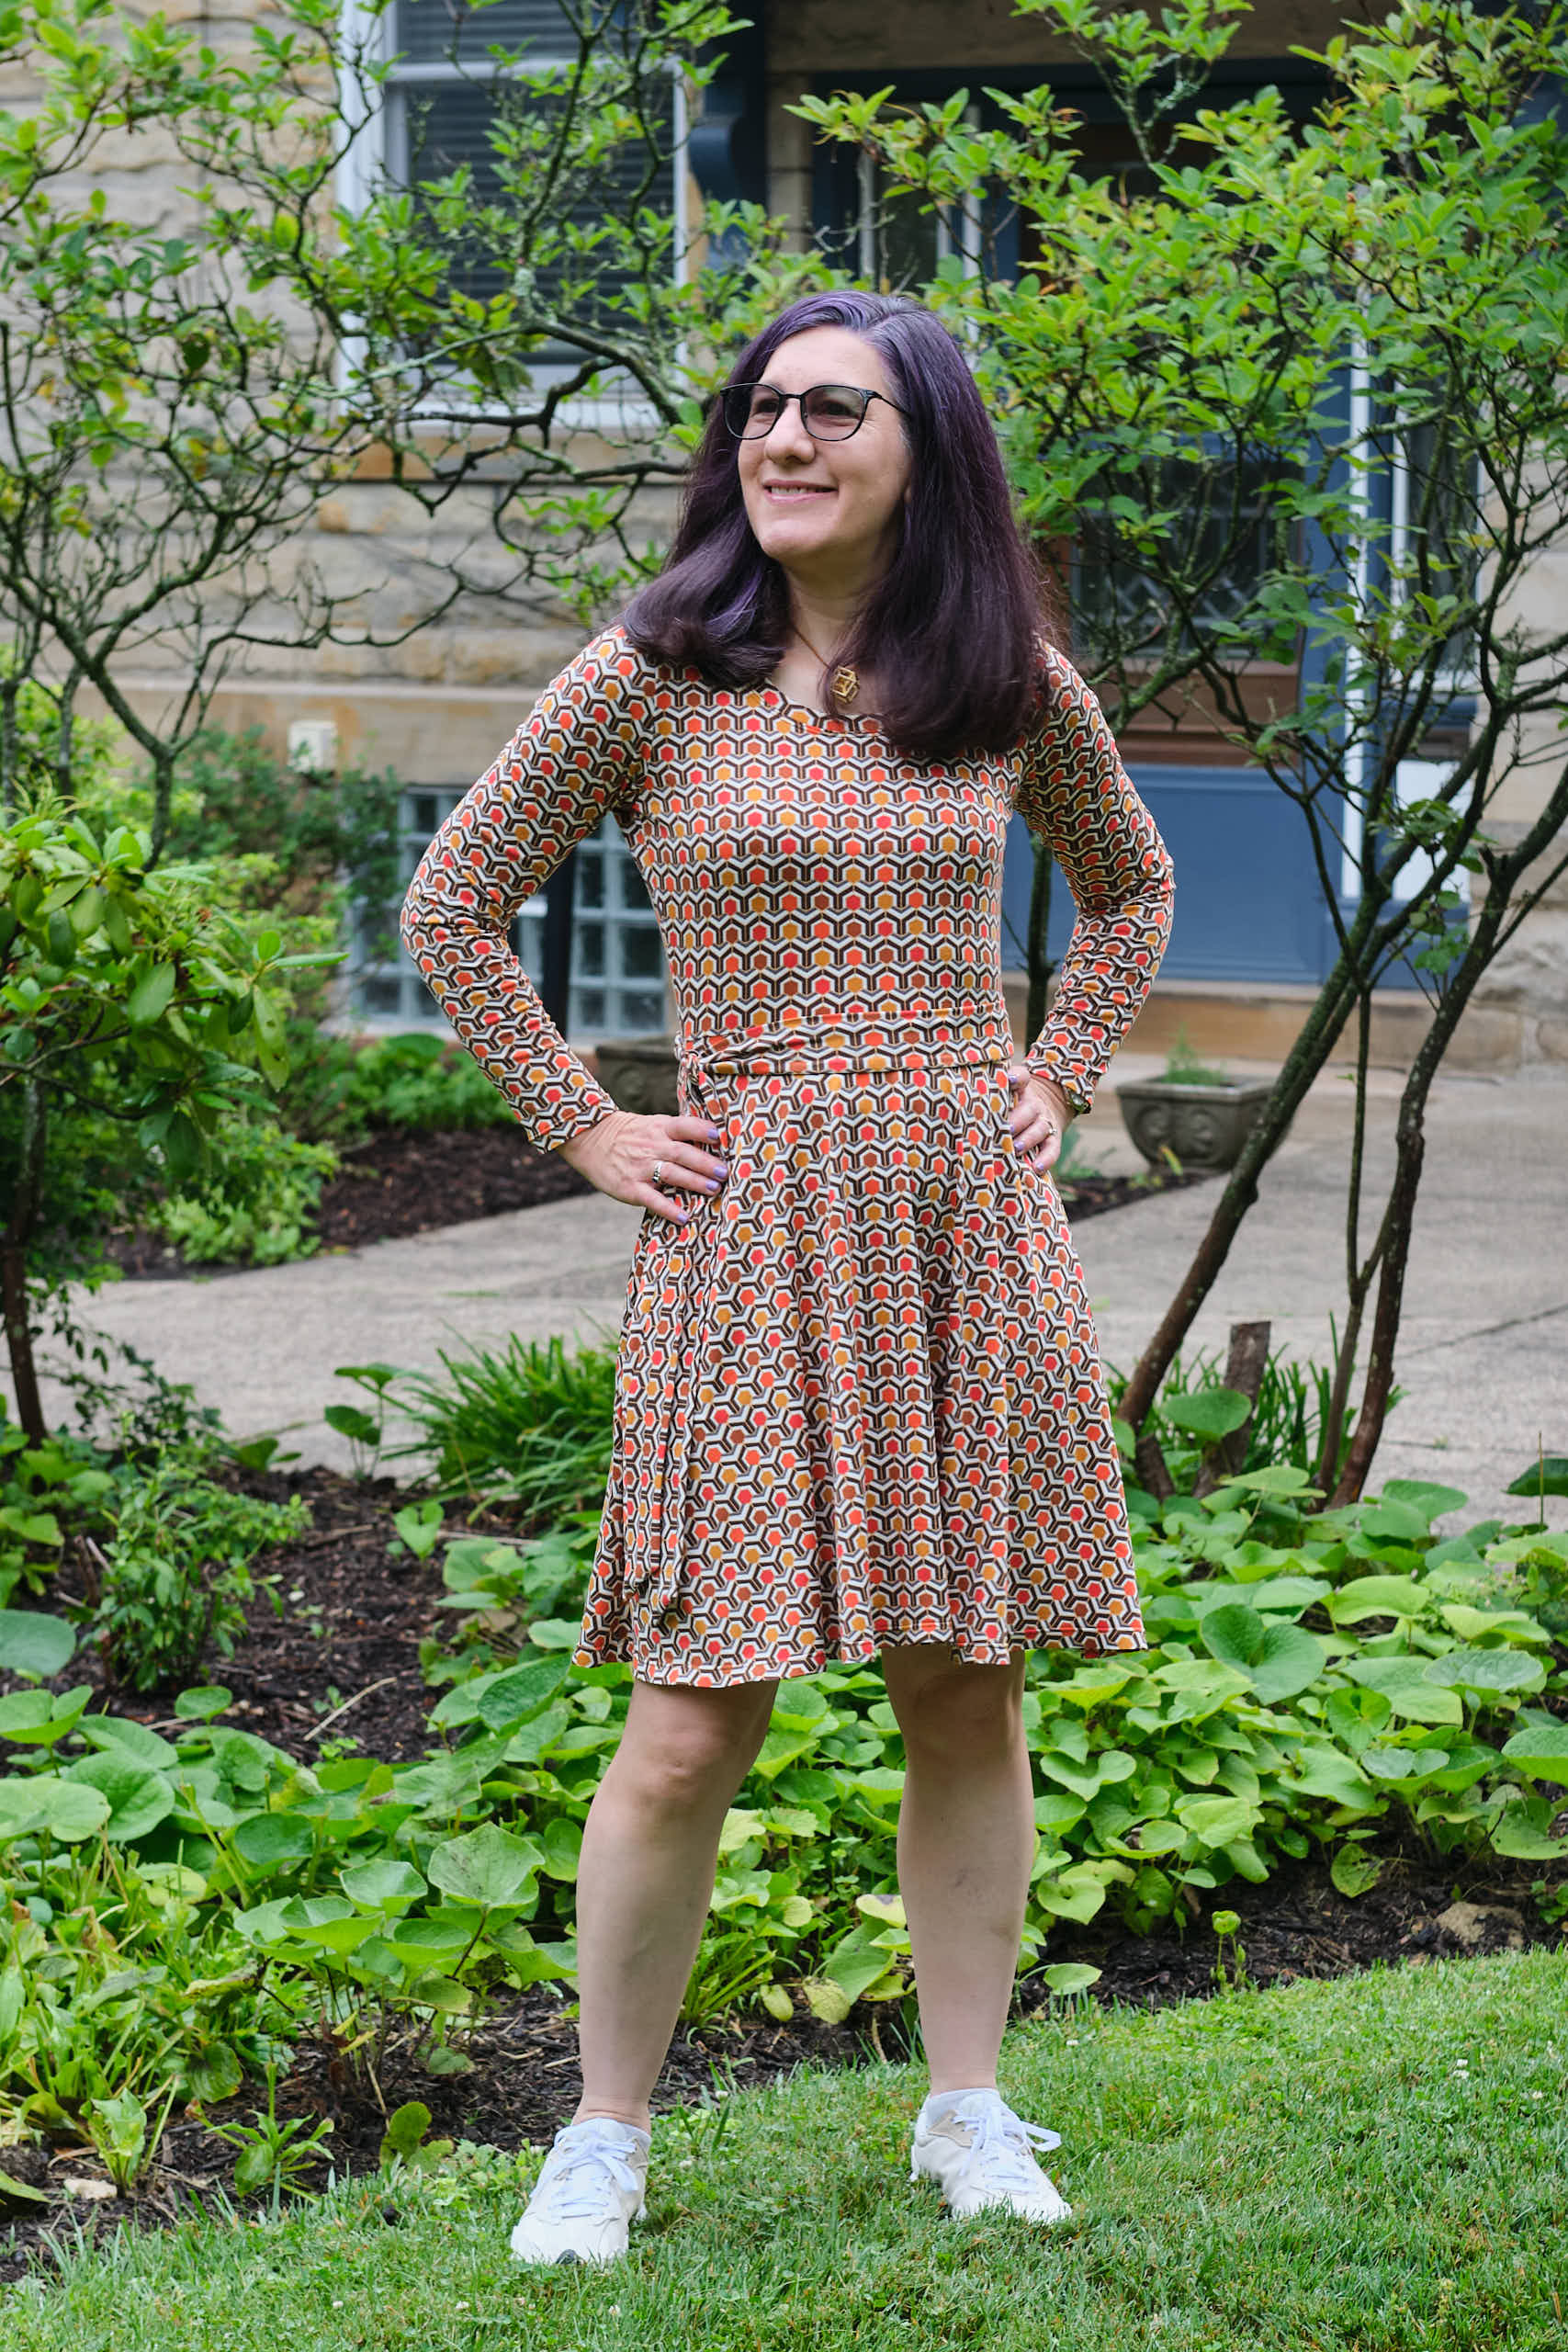
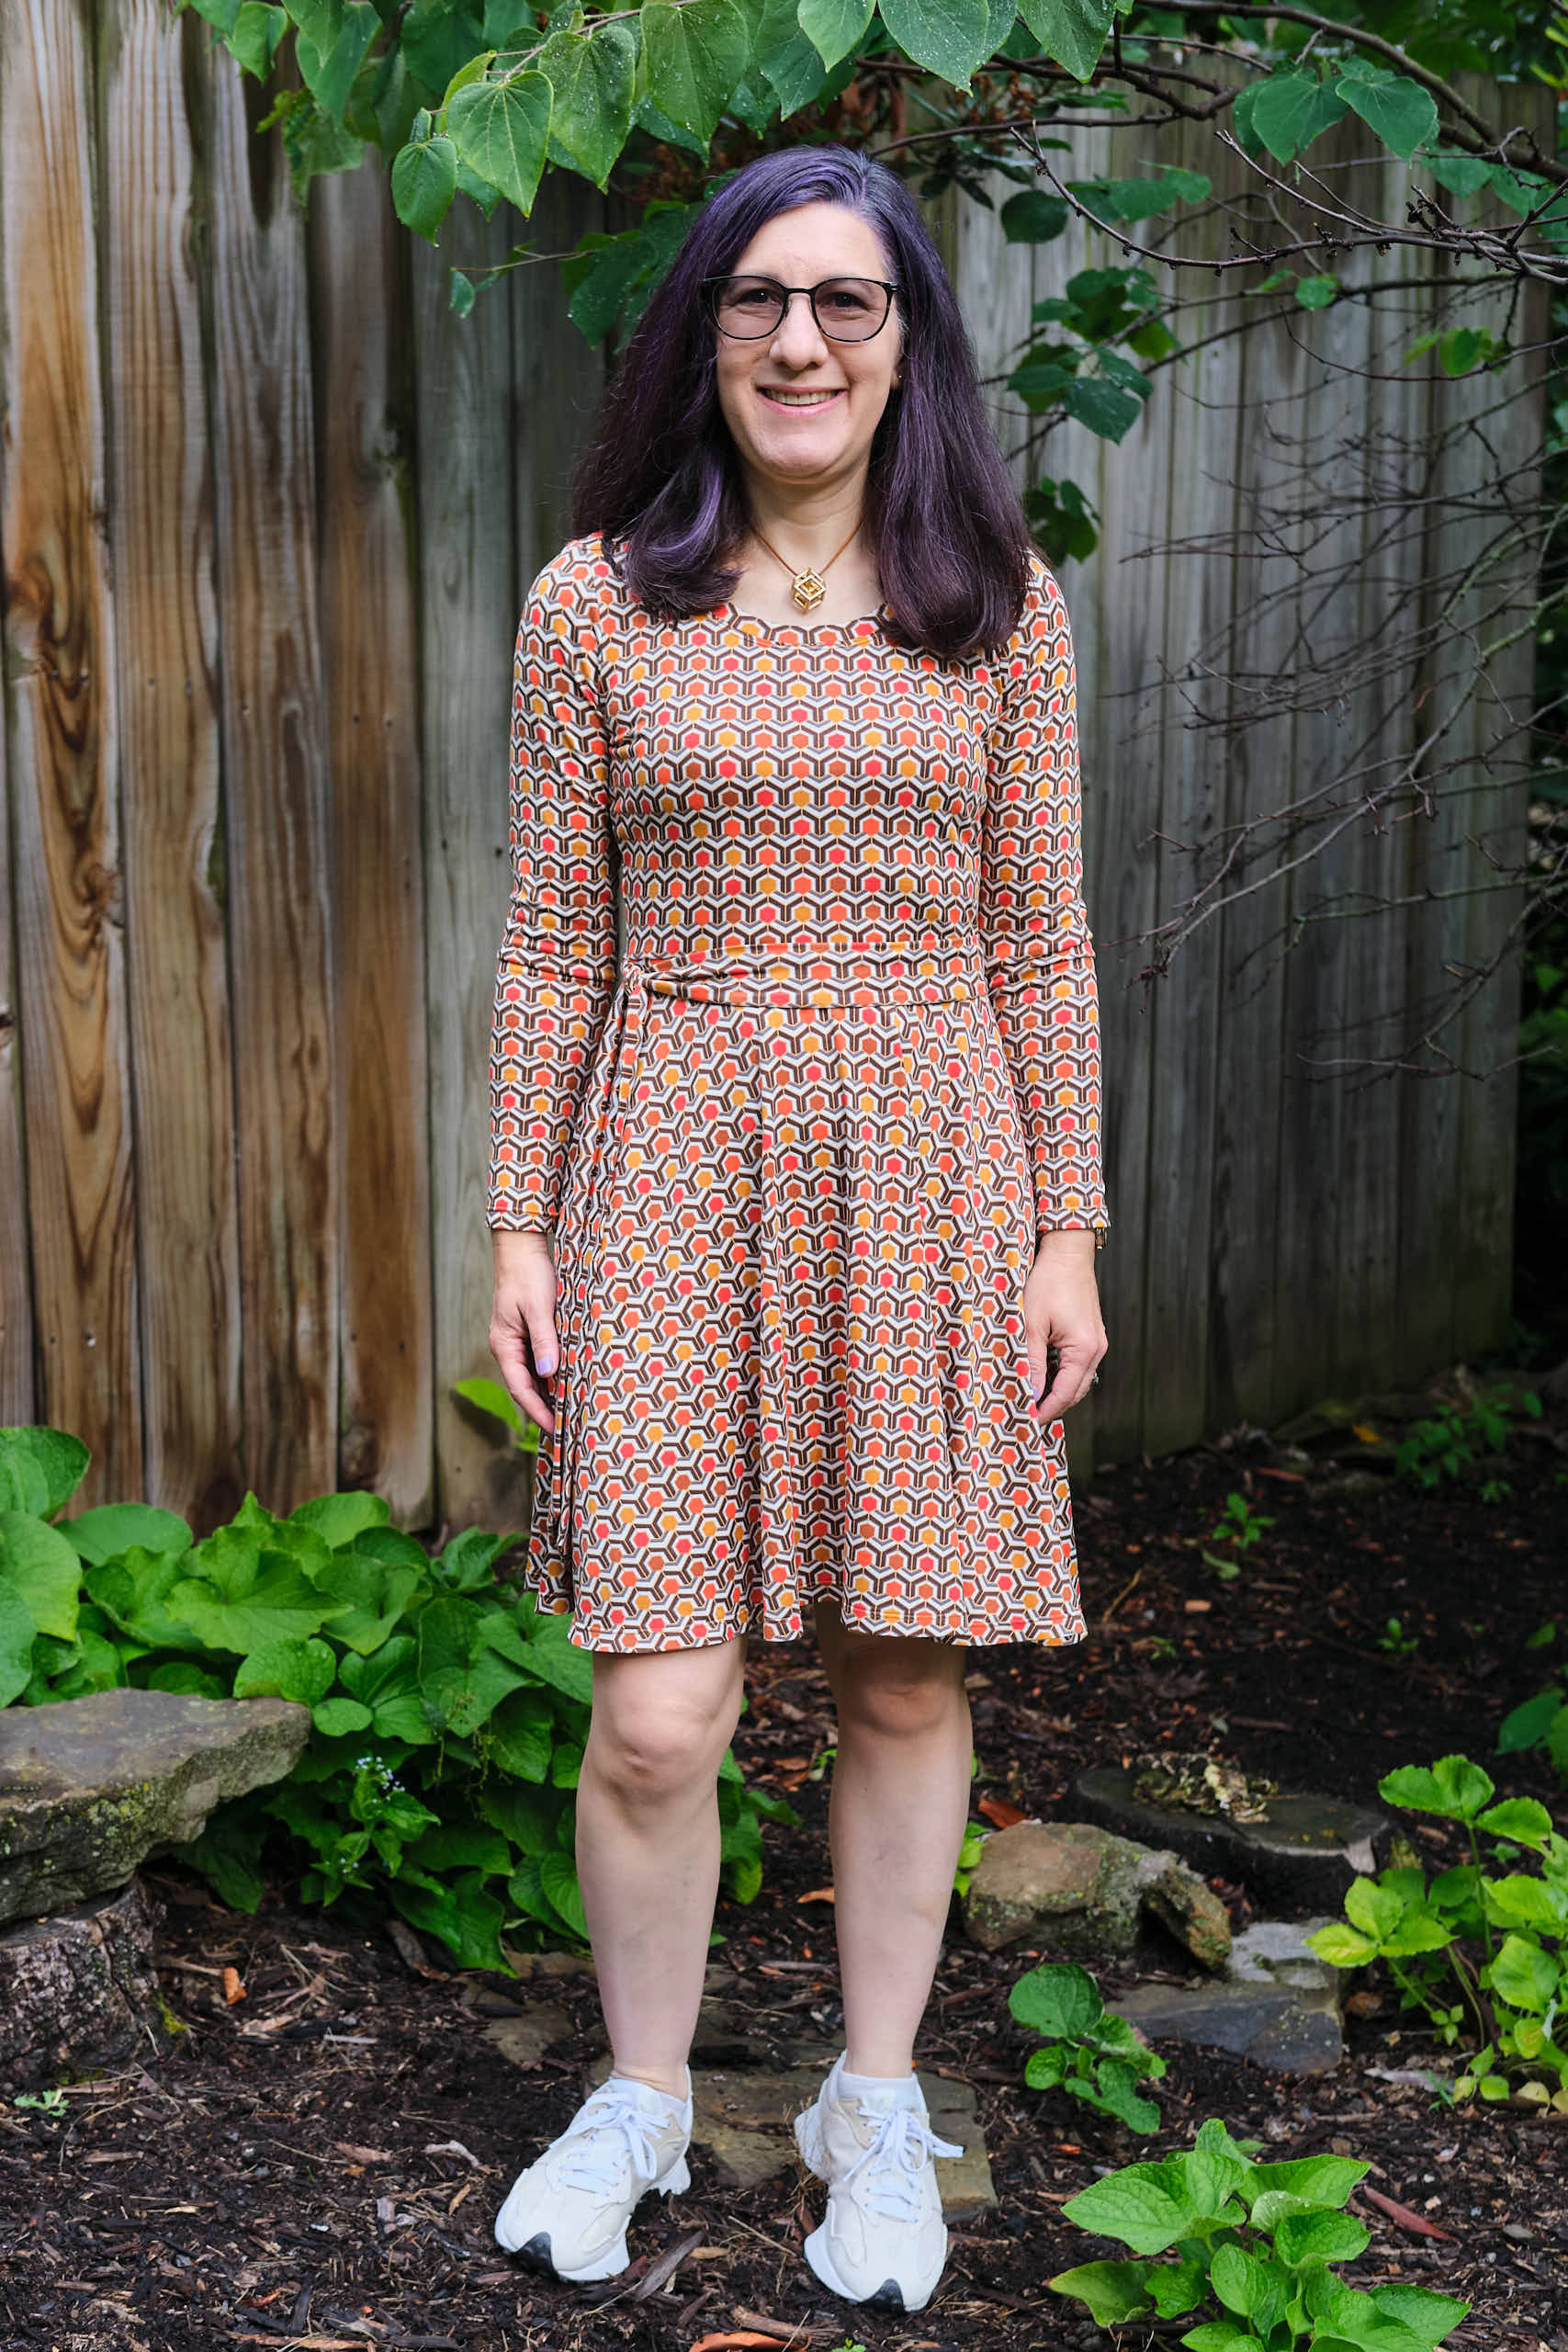
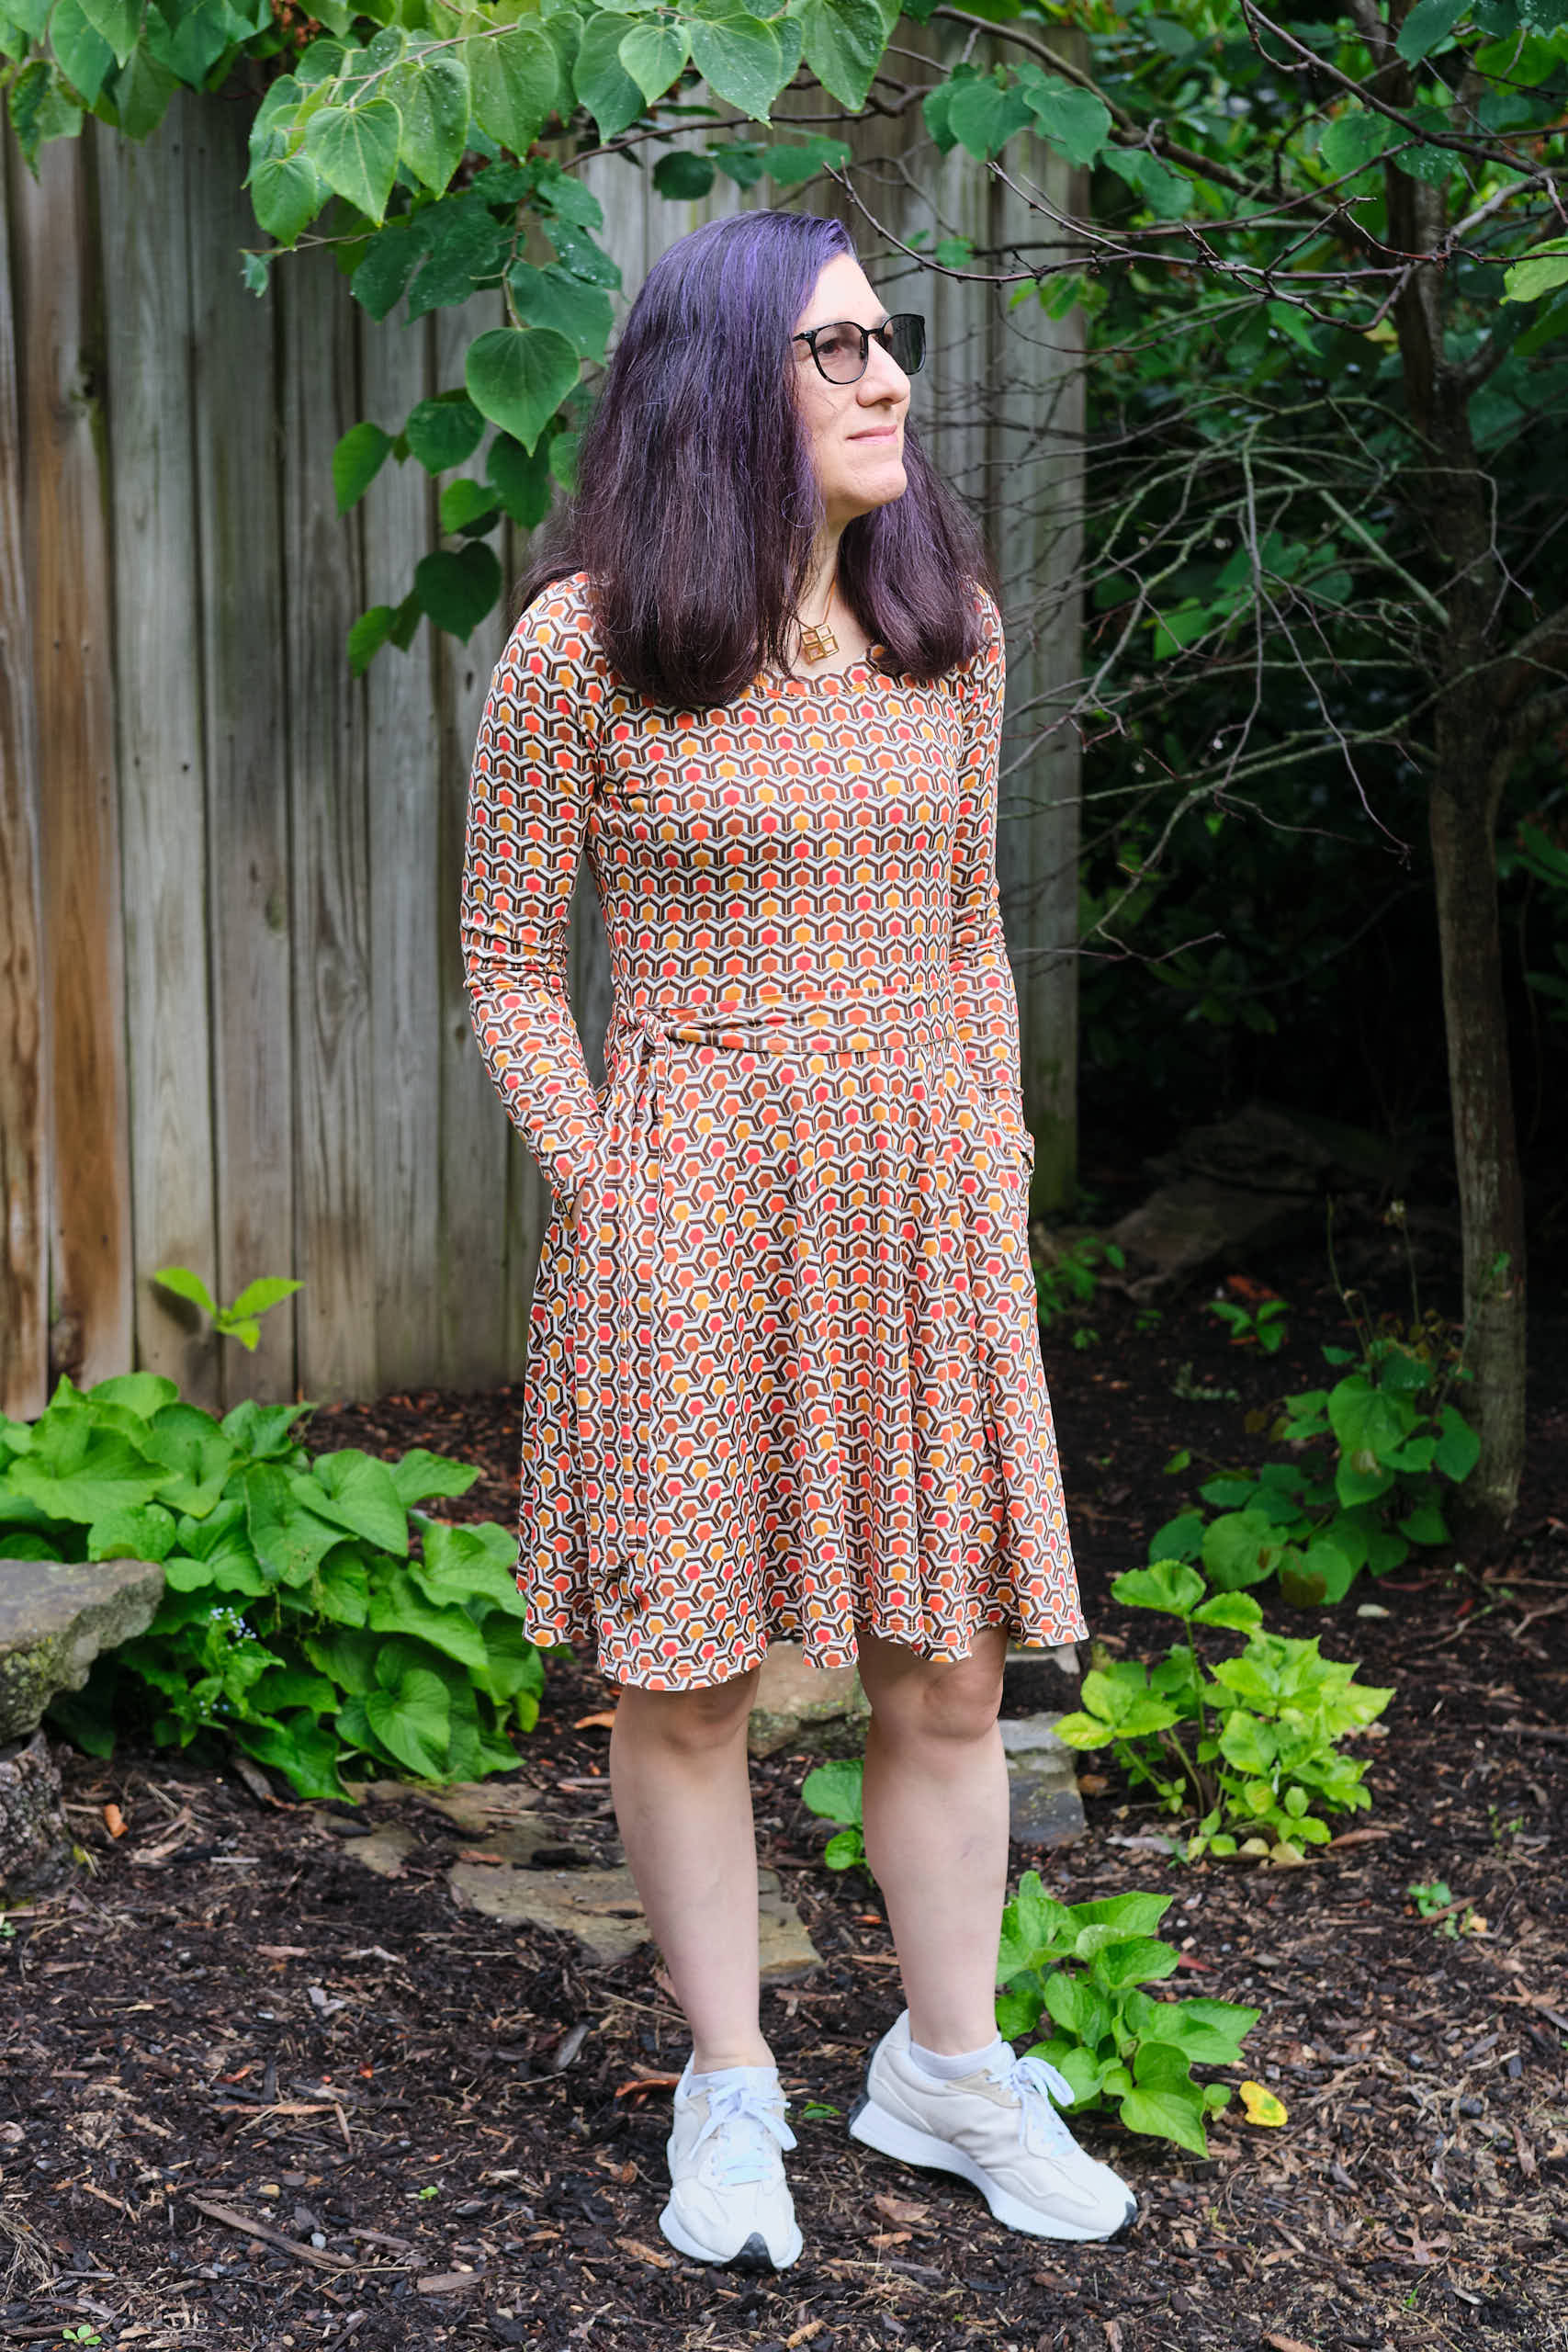
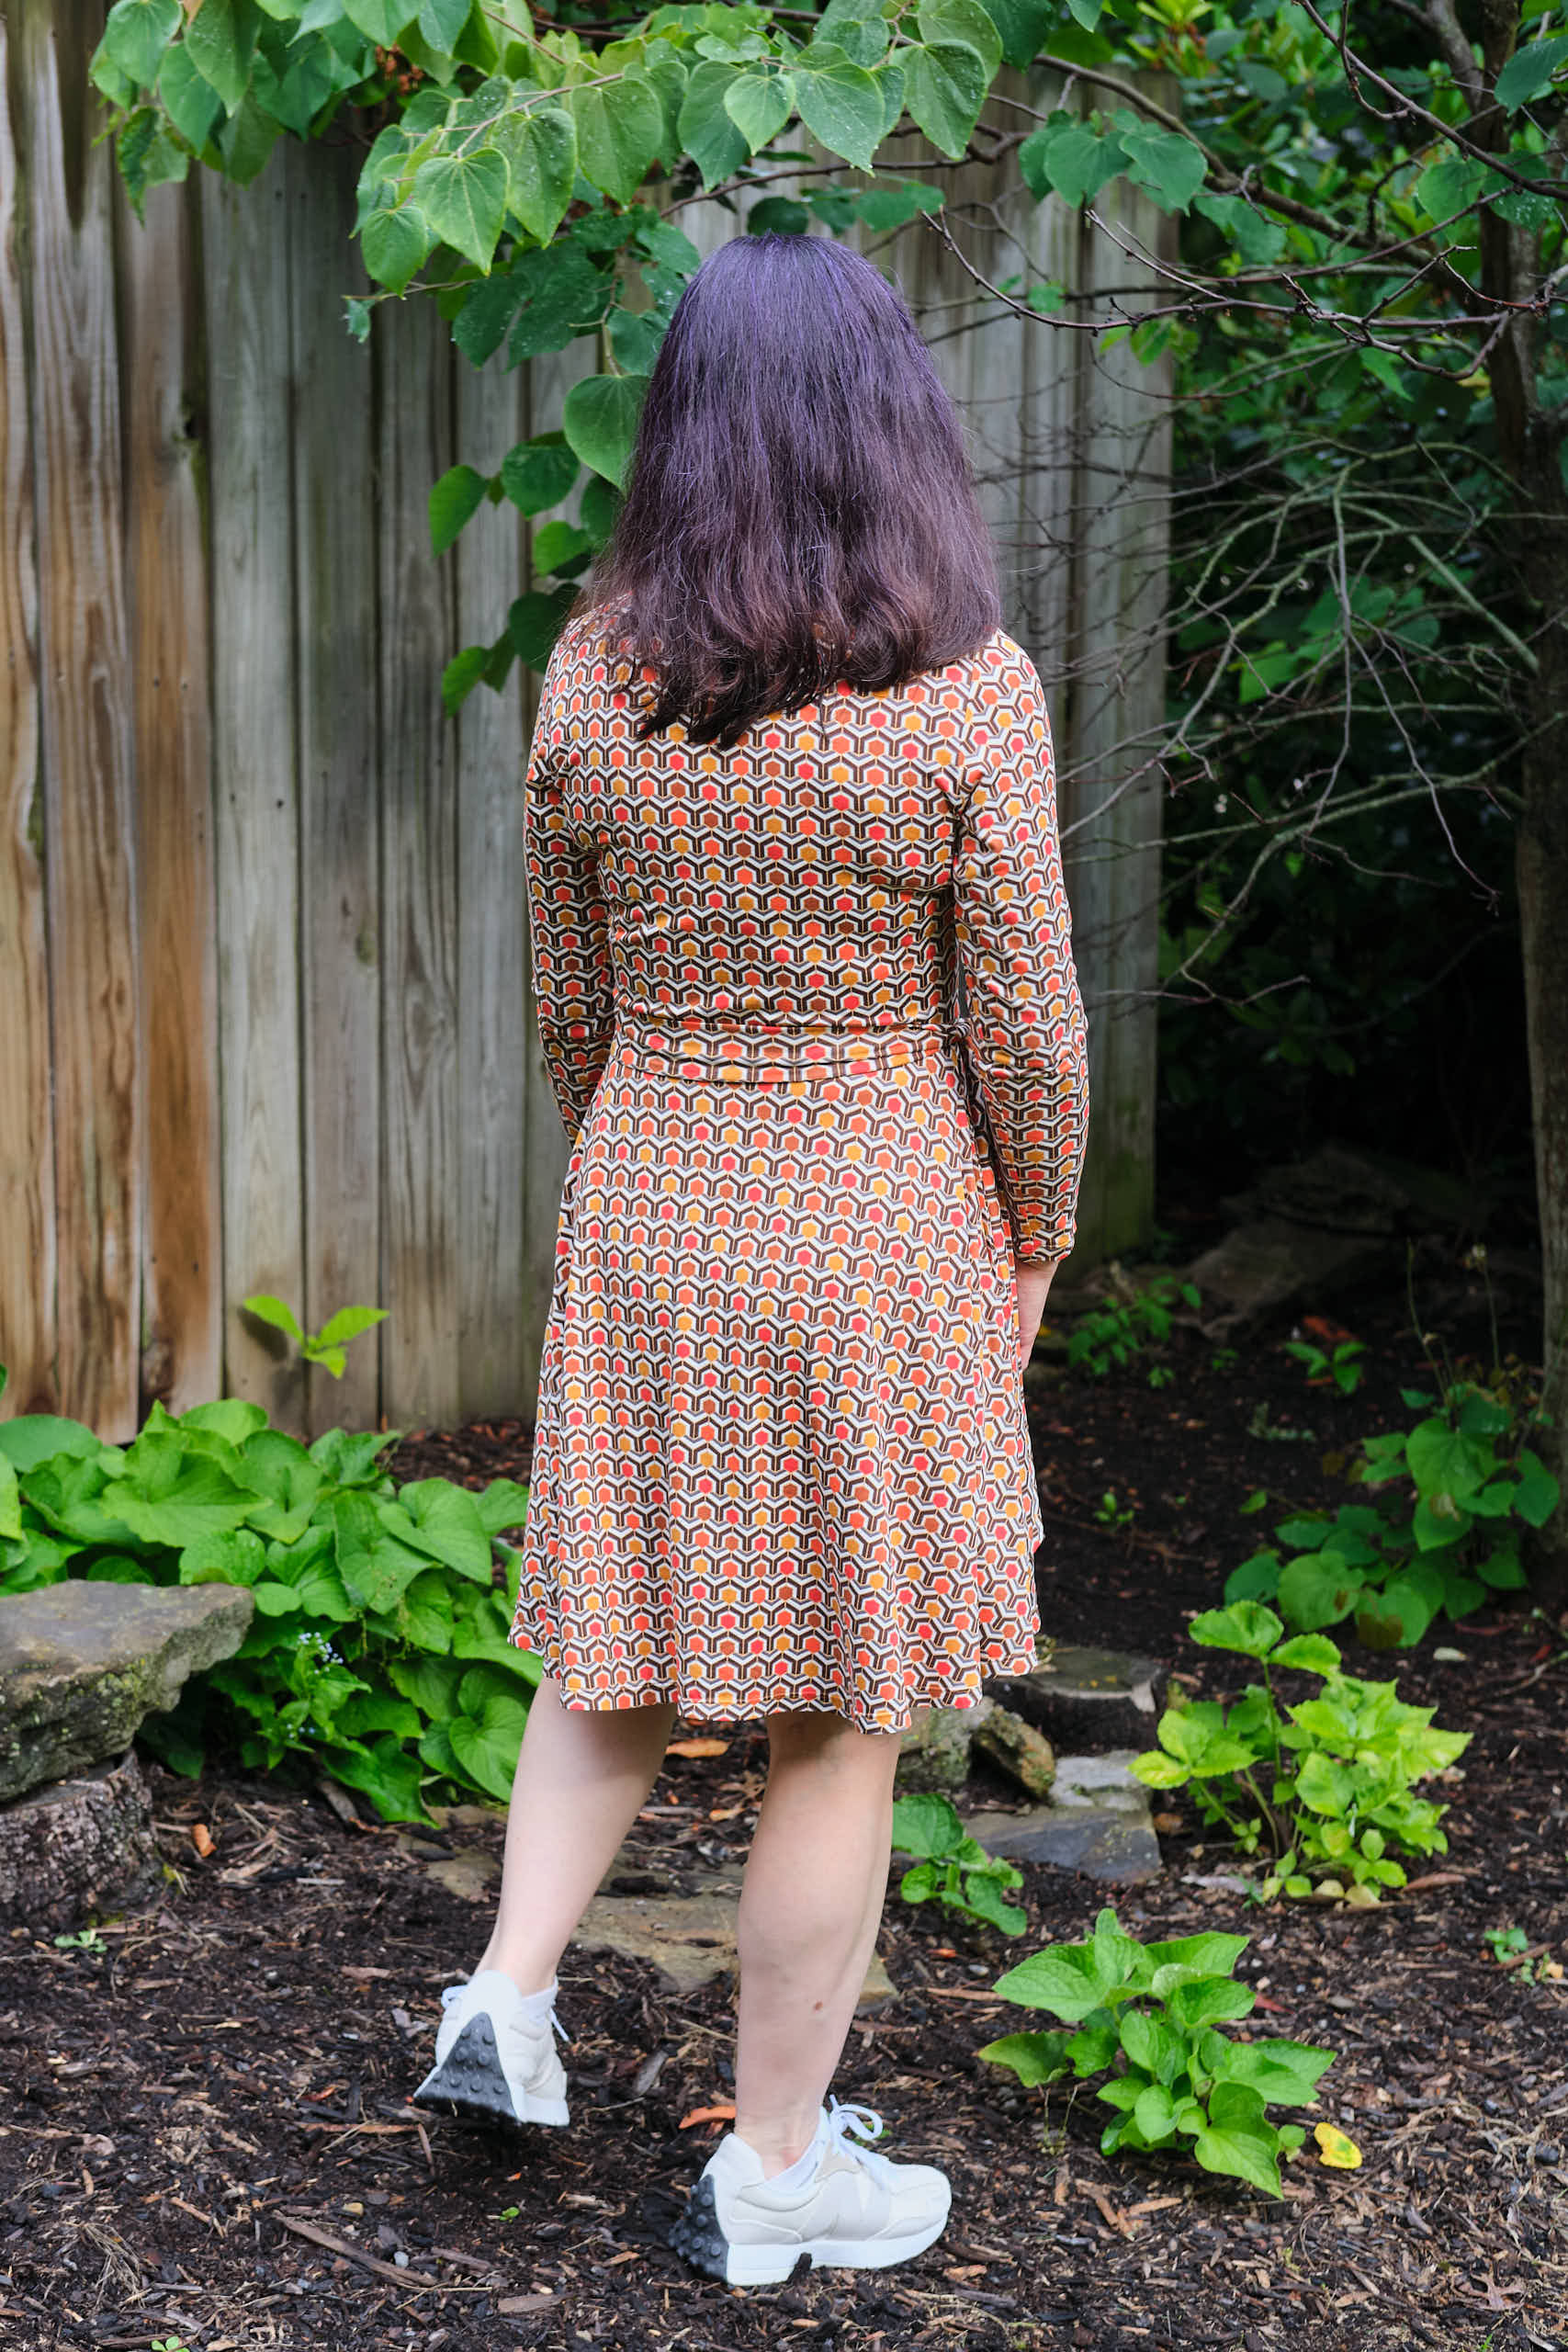
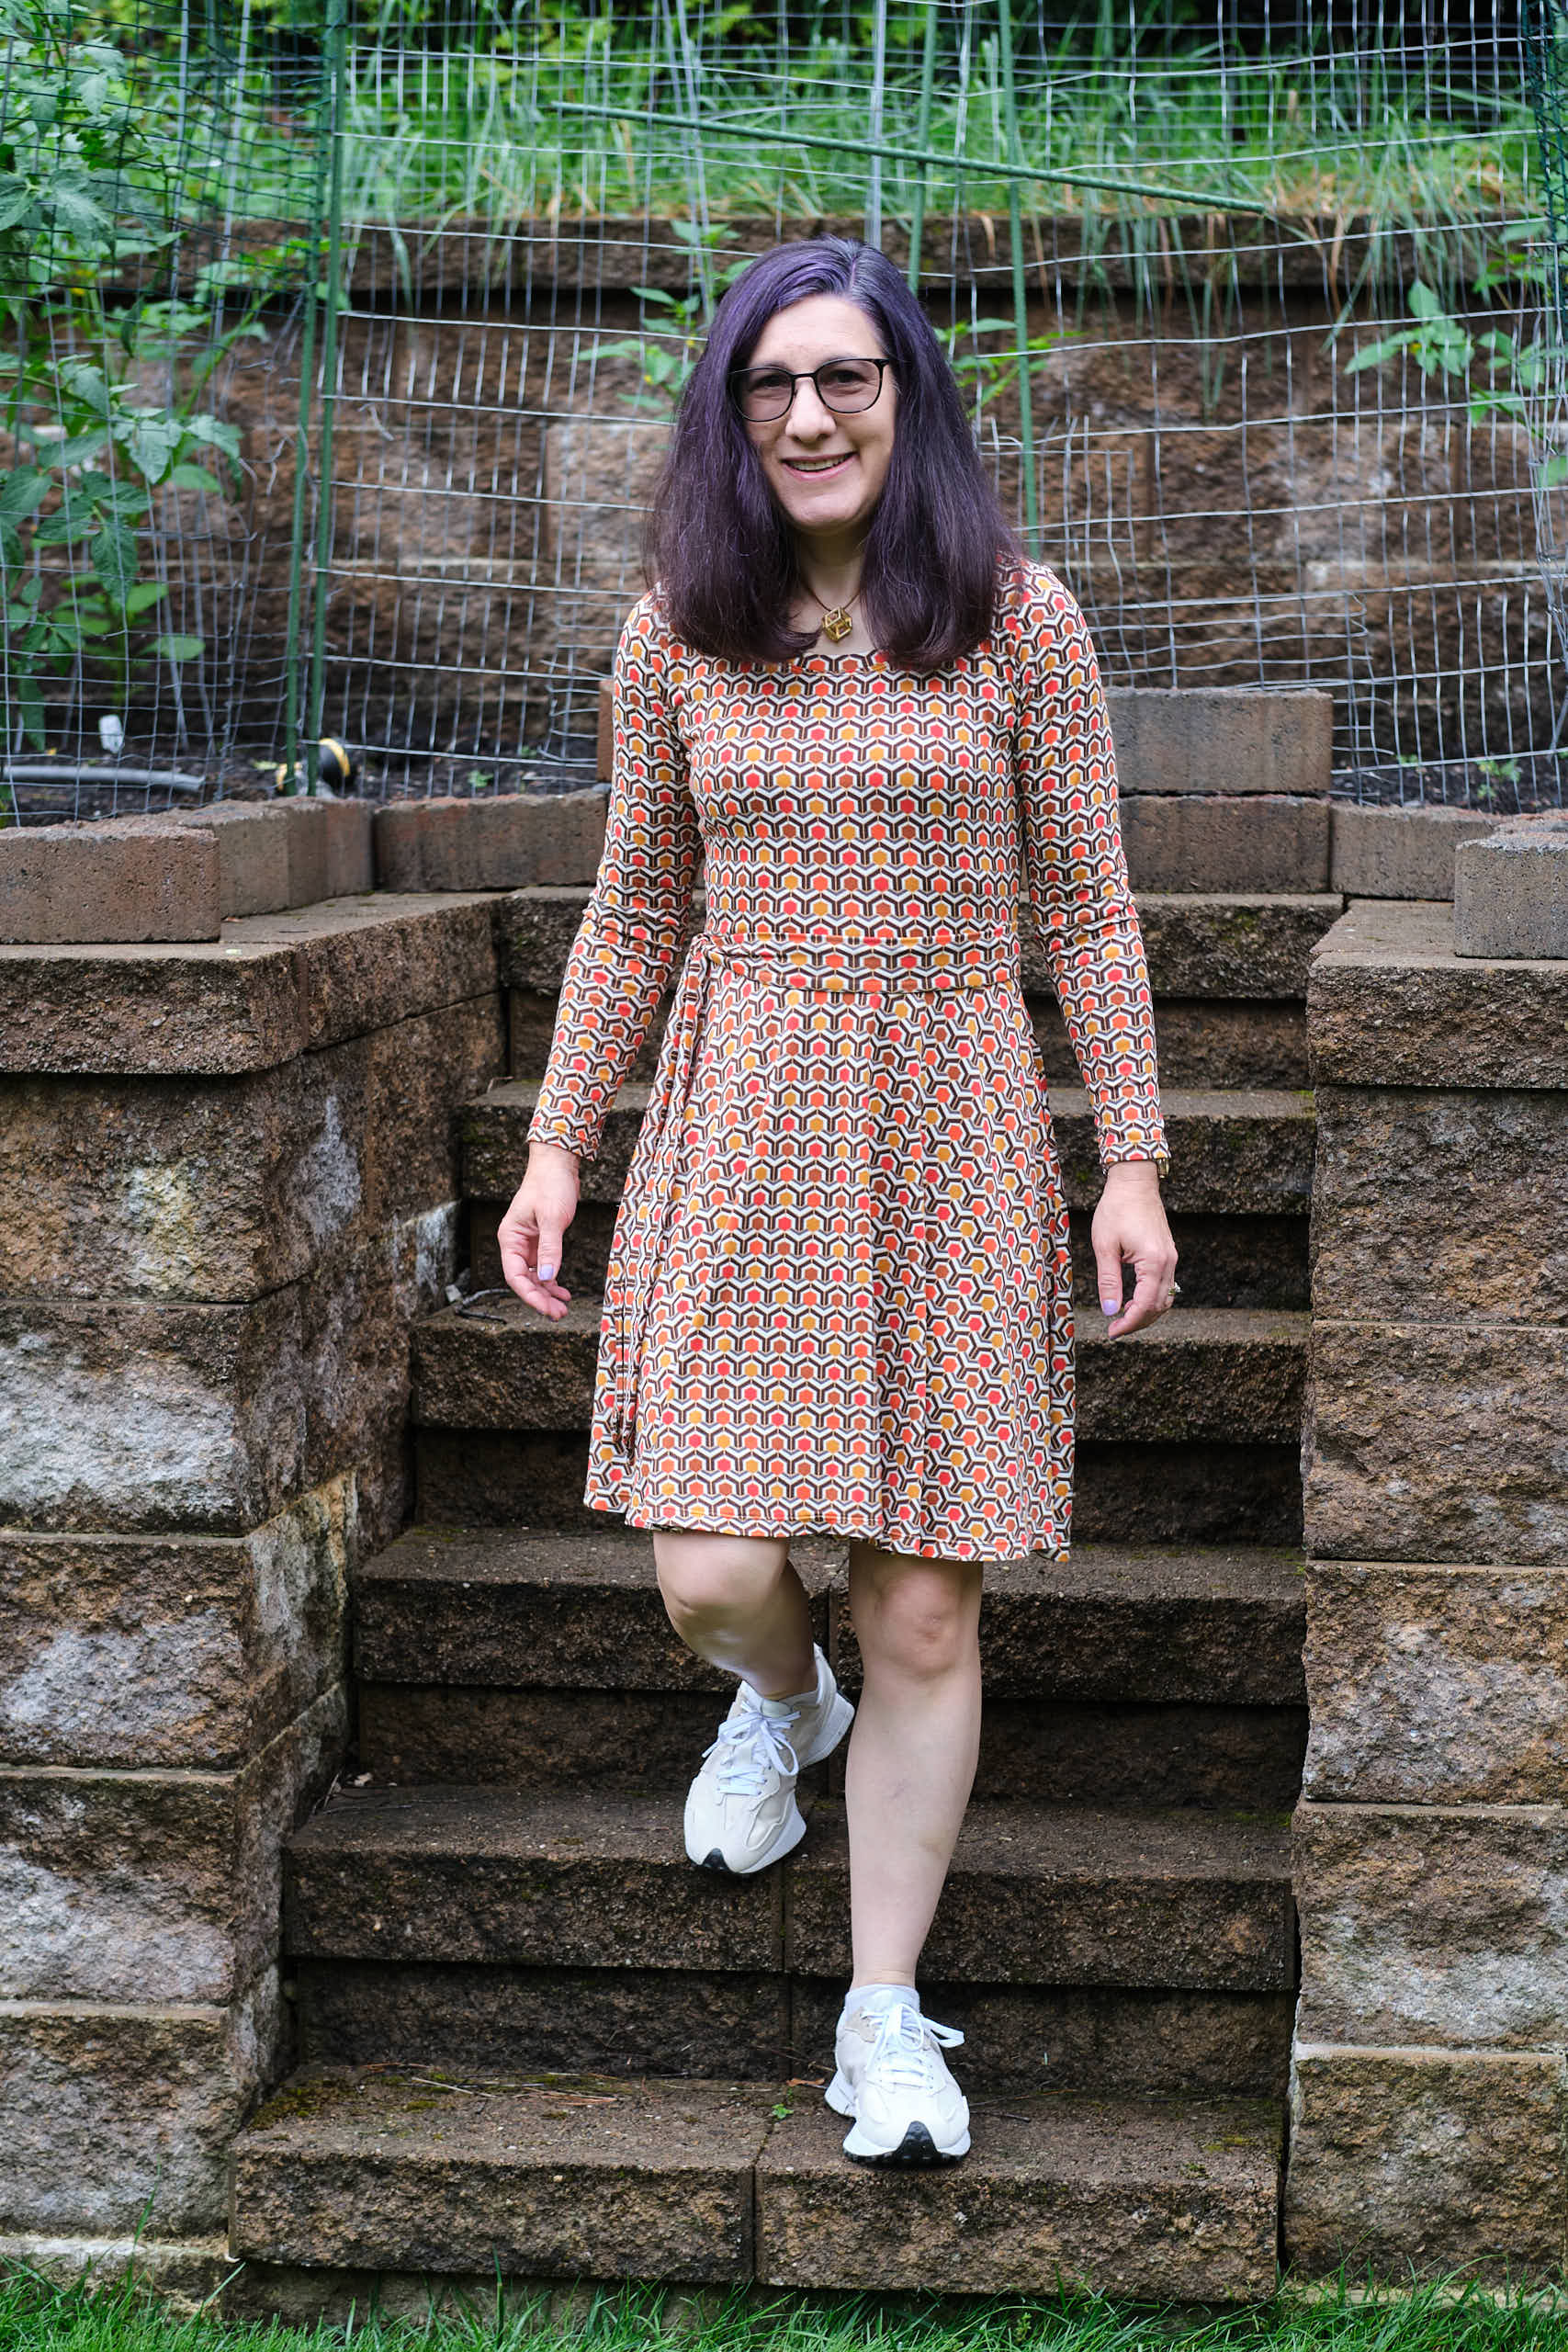
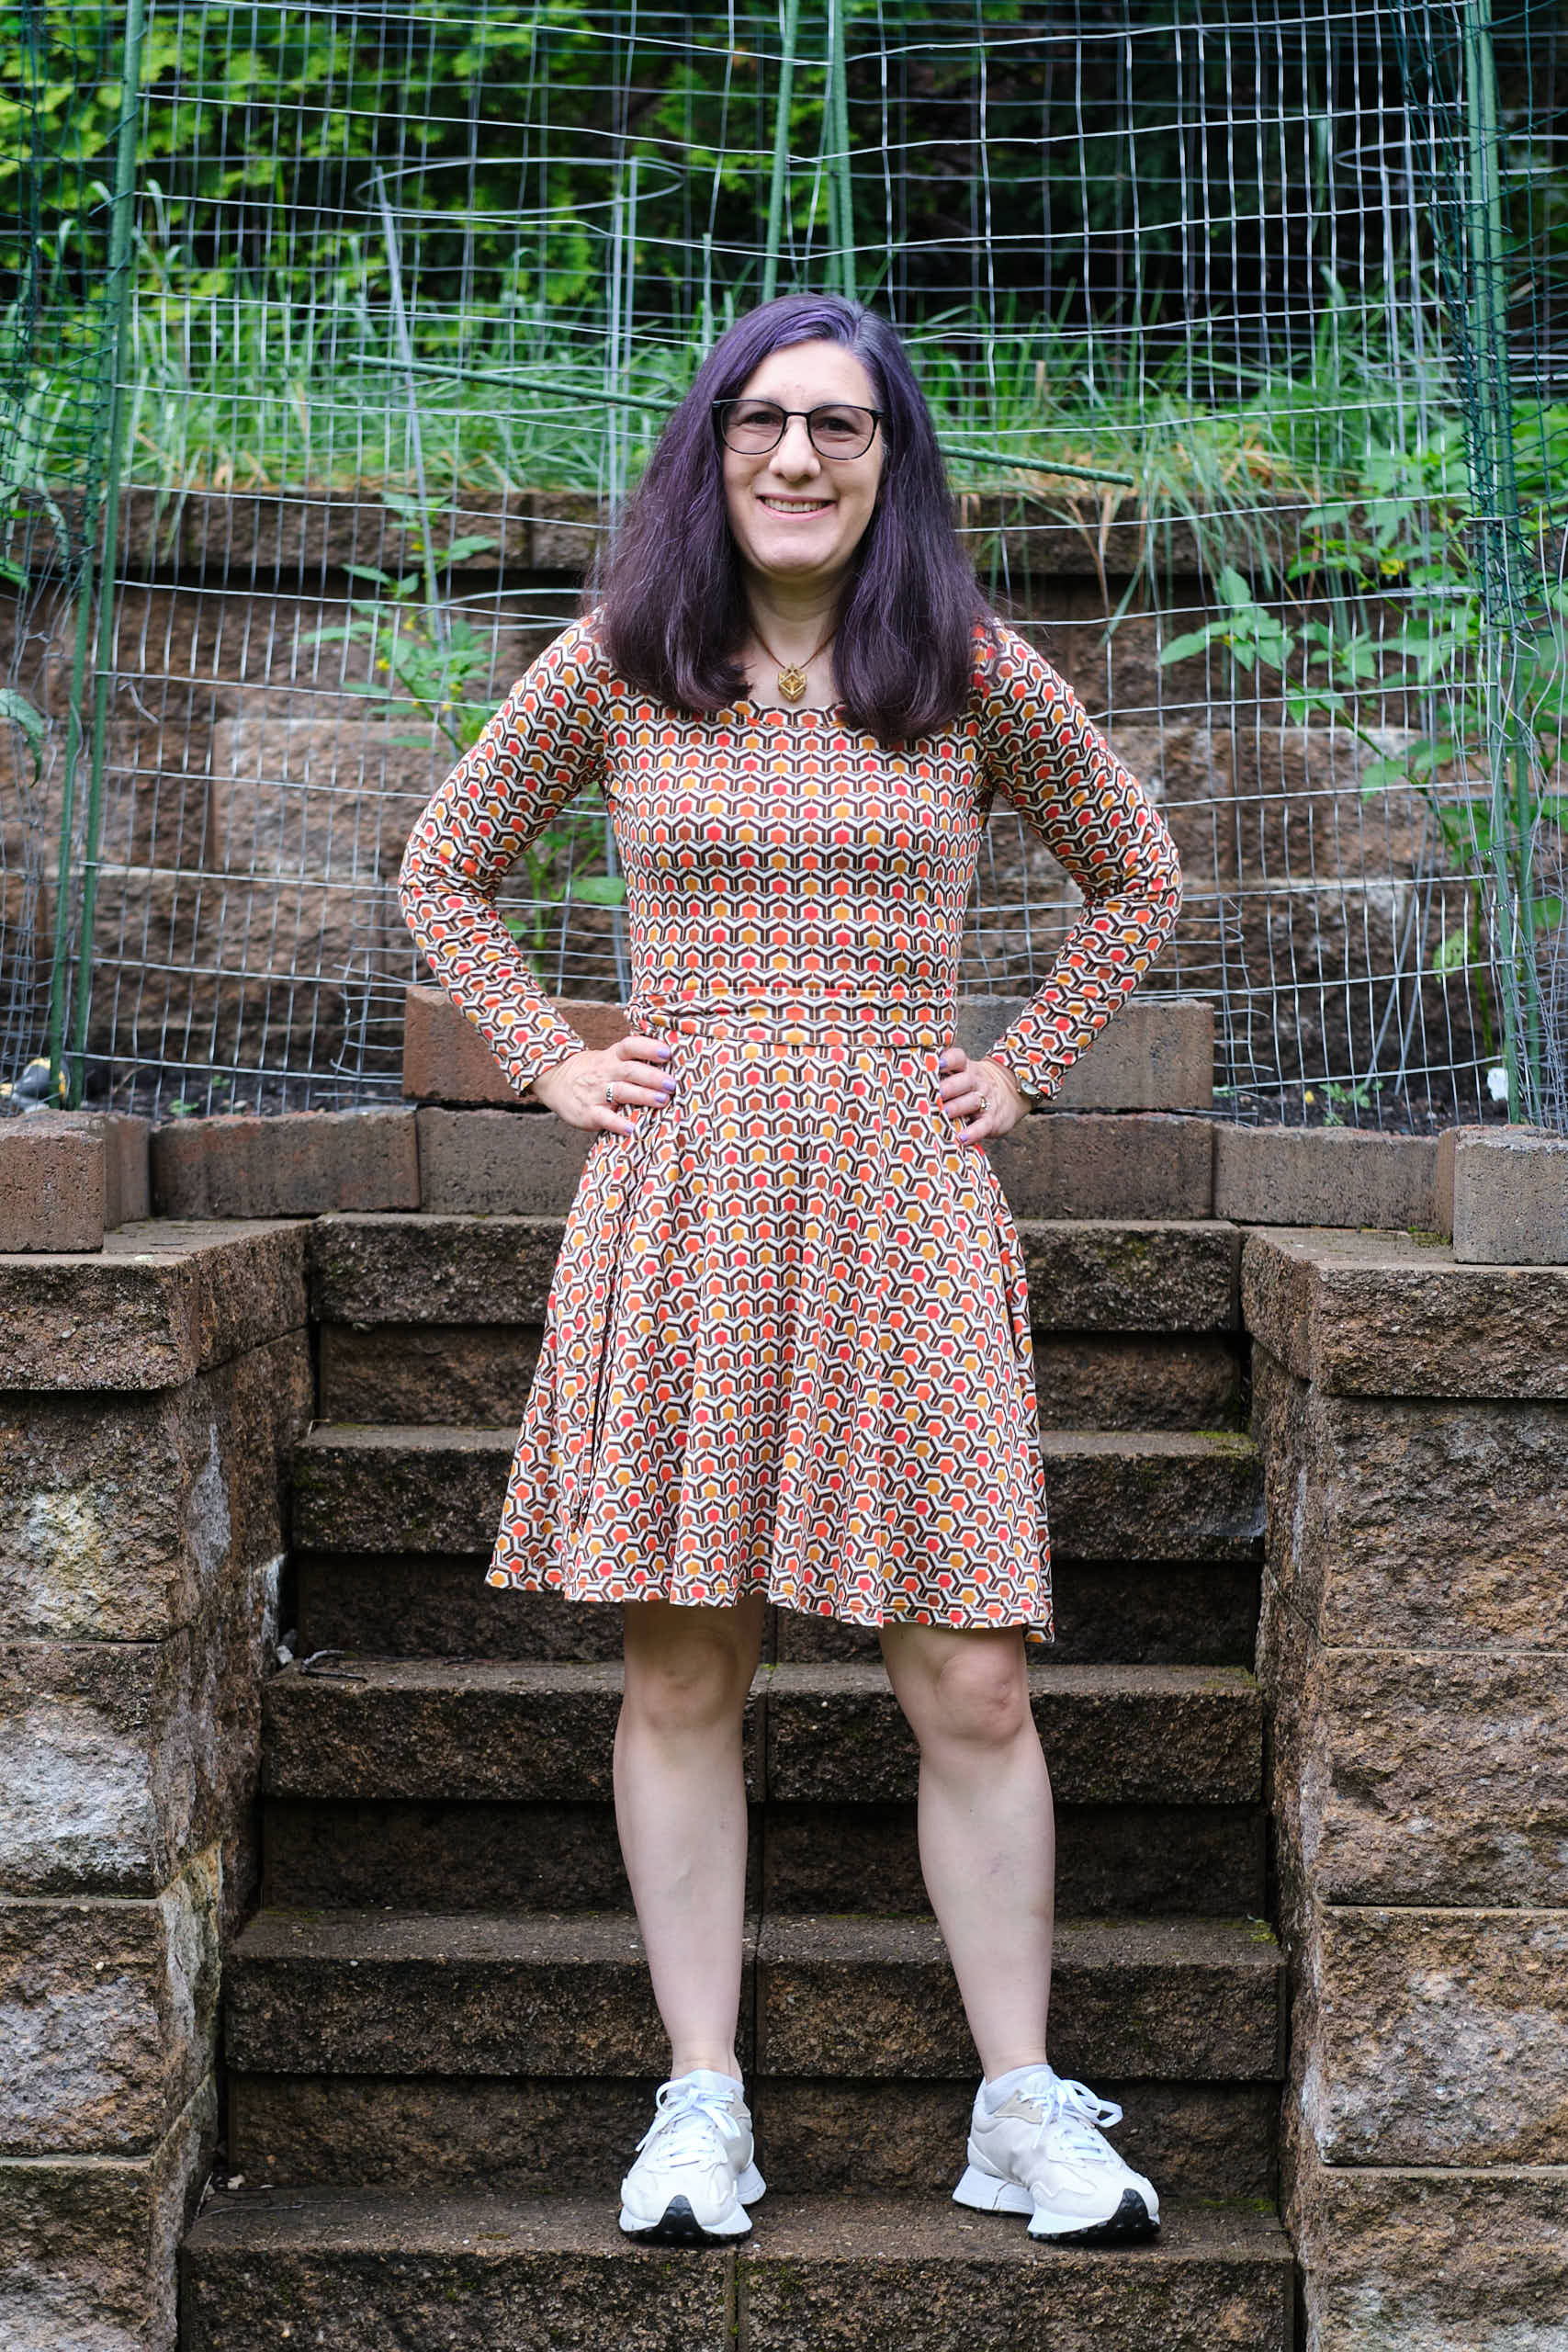
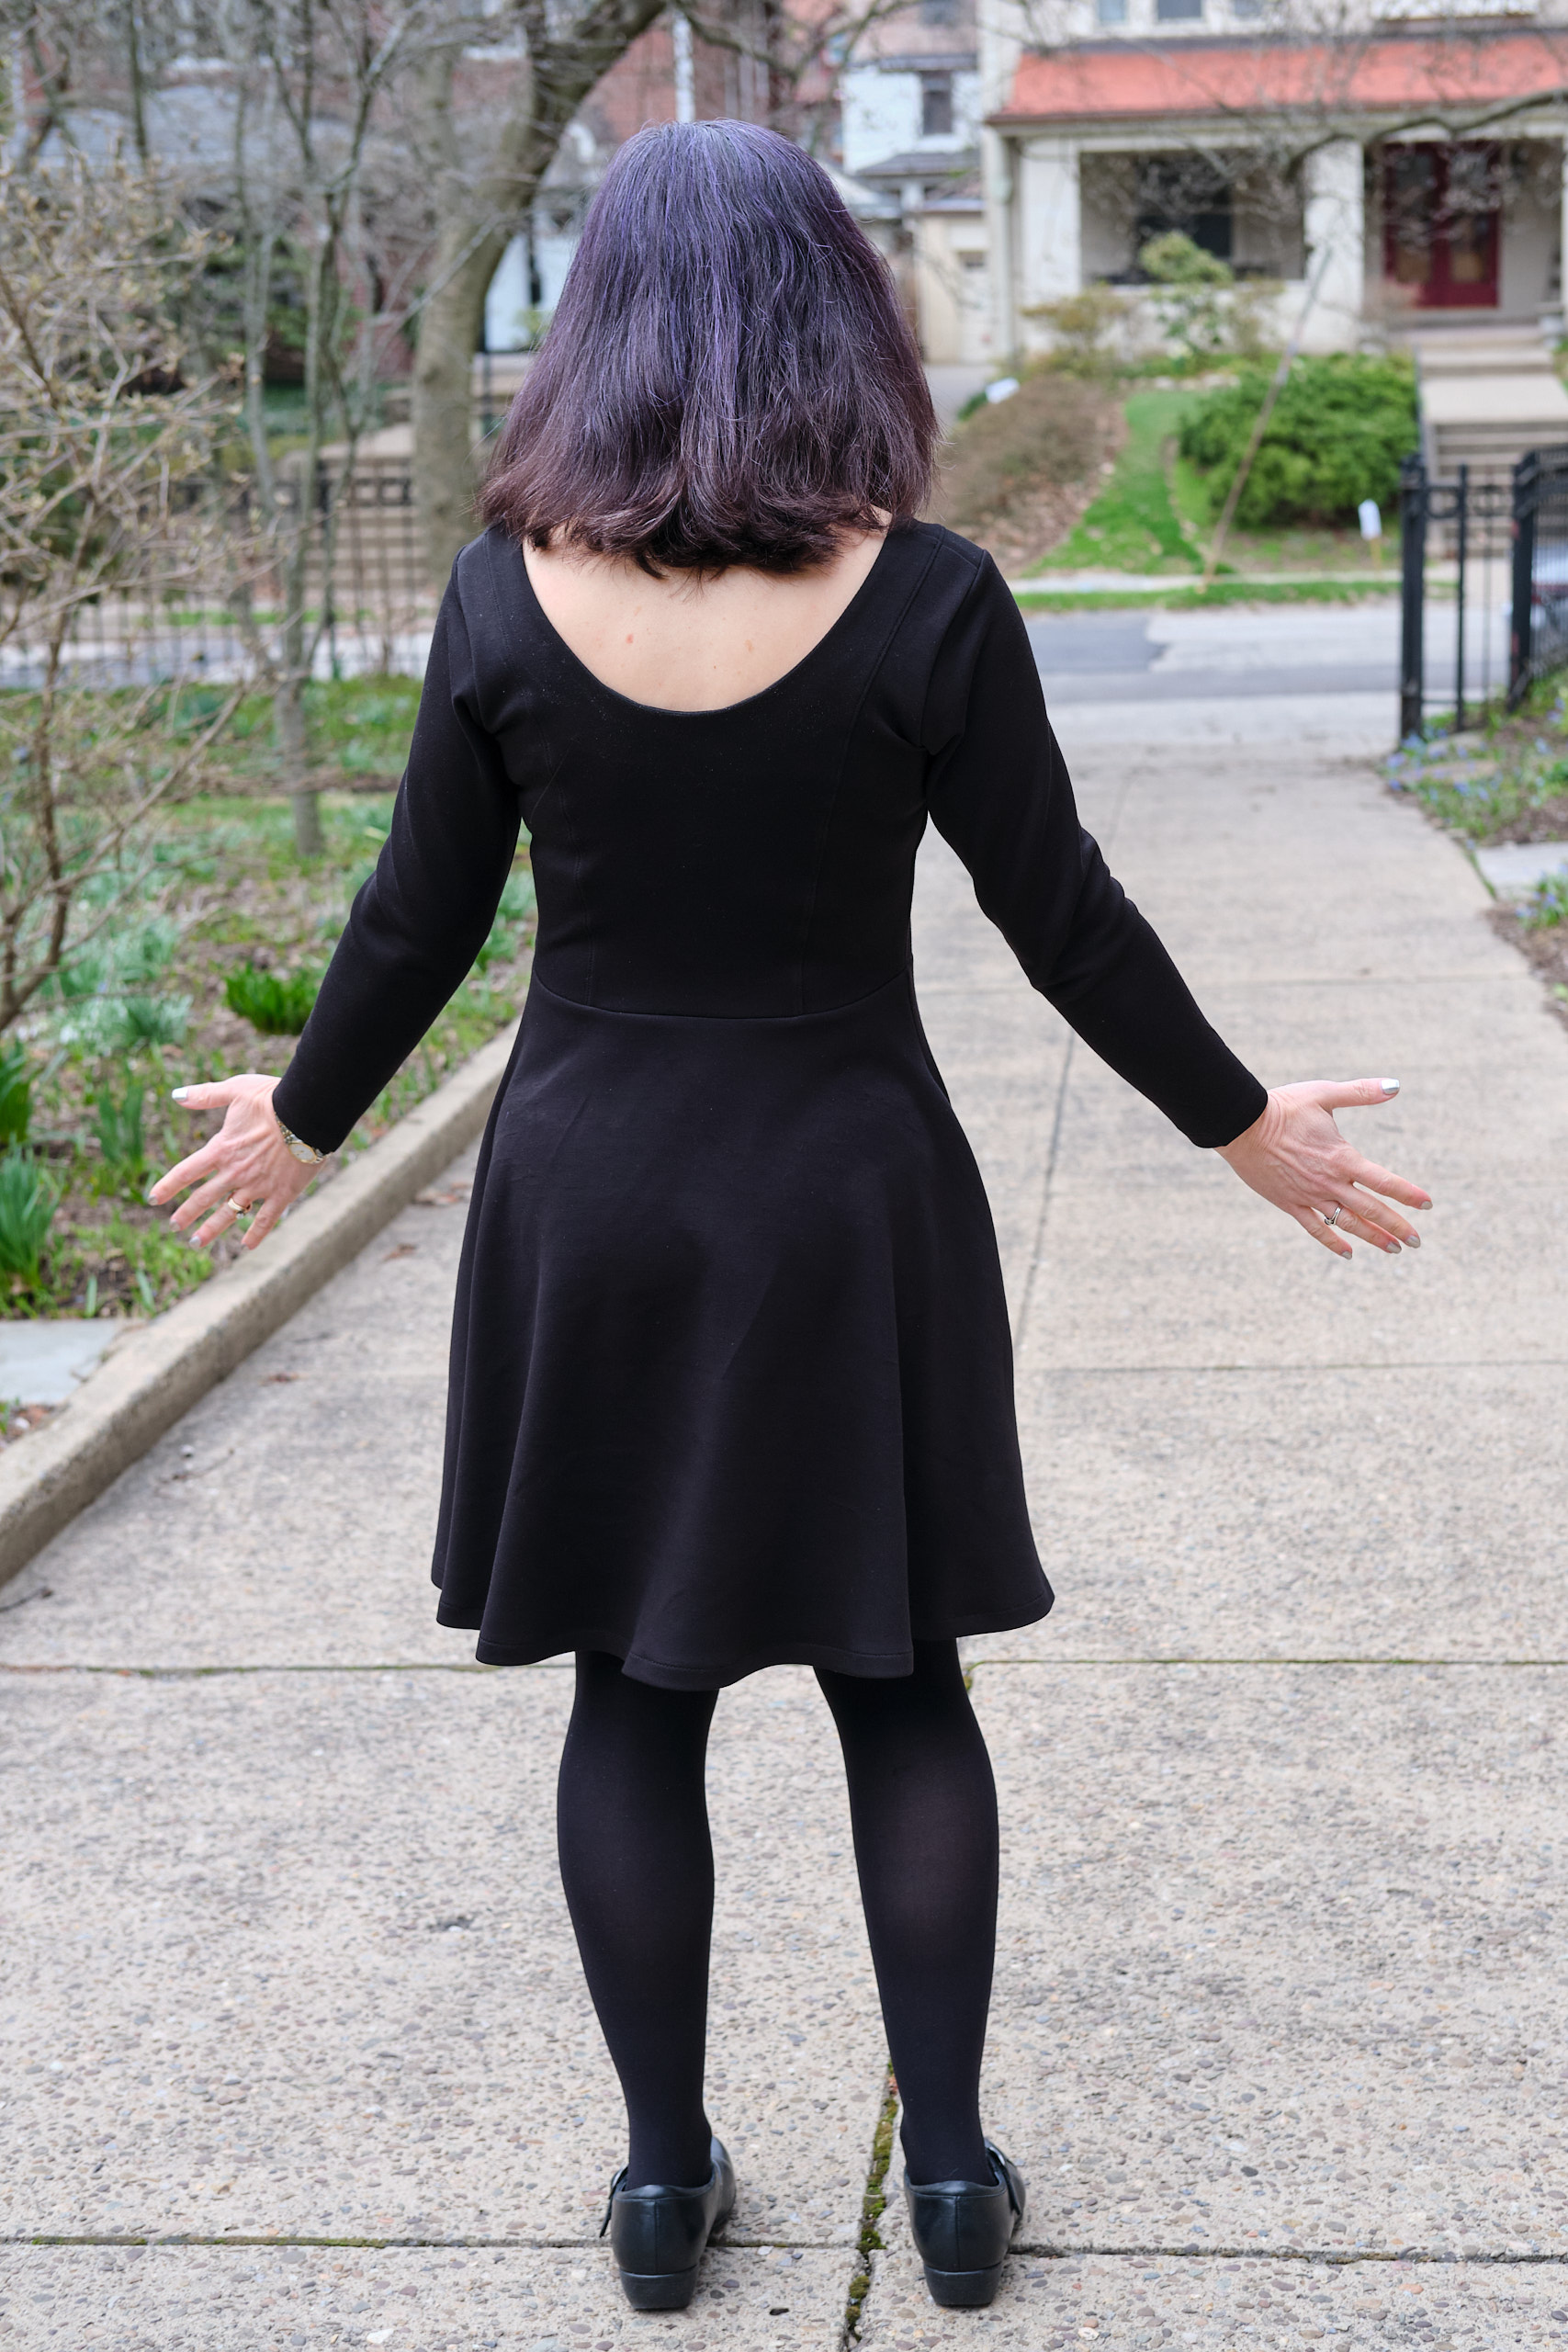
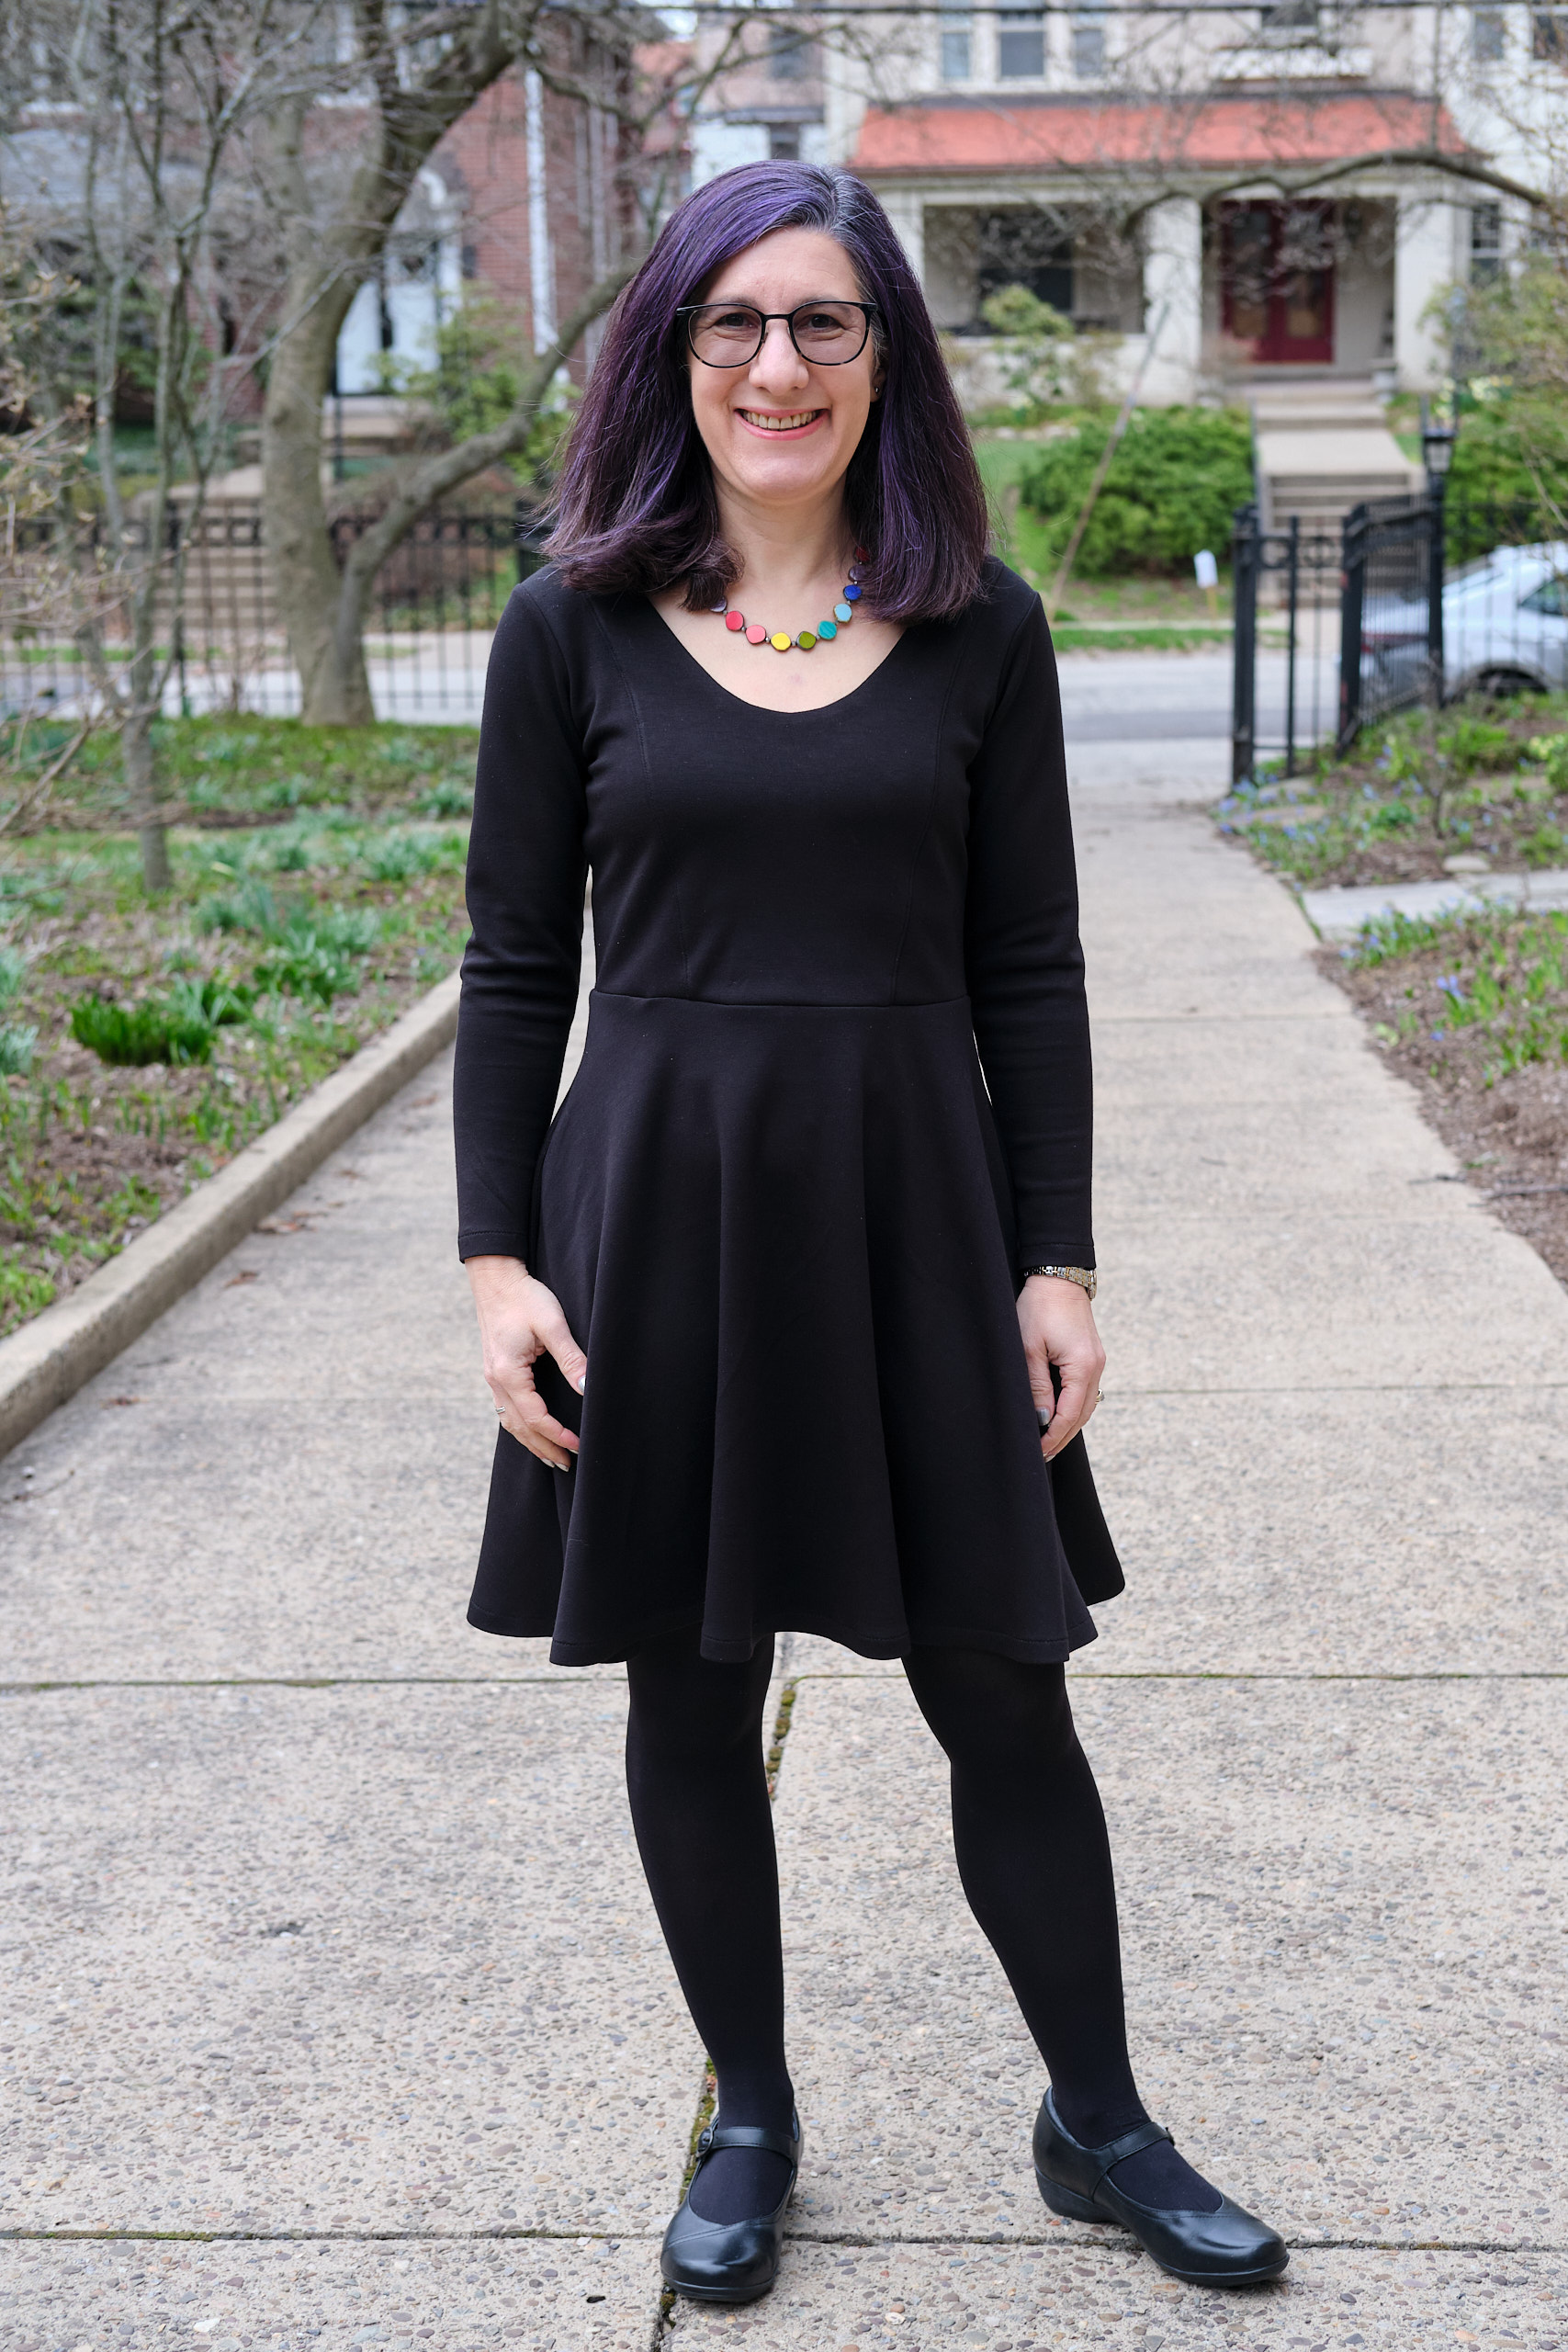
Sinclair Valley Knit Skater Dress with half-circle skirt from Flared skirts ADD-ON, size P6, 1.5 yards double-brushed polyester, long-sleeve, above knee length plus one inch, bodice extended 1.3 inch and no waistband, pockets modified so as not to attach to waist, low “screwp neck” with cover stitching and self-fabric belt
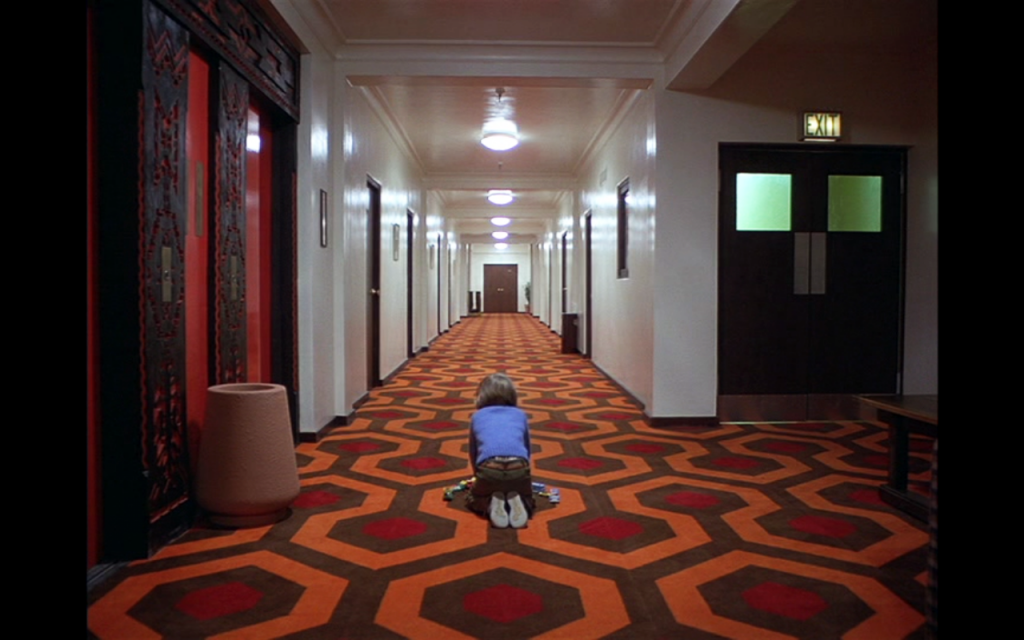
I bought Cali Fabrics’ double-brushed polyester “Autumn tones retro geometric” fabric with red, orange, and mustard hexagons because I can’t resist sewing clothes from fabric that looks like it should be covering a chair. But when my husband saw the fabric, he told me it reminded him of the hexagon carpet on the floor of the Overlook Hotel in the 1980 horror film The Shining. It is not quite the same design, but I can see the resemblance. These hexagons are stacked rather than arranged in a half-drop format, their colors vary, and their dark borders are truncated, making the hexagons look like rows of little houses.
The carpet pattern was designed by David Hicks. It turns out you can buy that carpet, as well as wallpaper, fabric, clothes, and all sorts of other things made in that exact pattern as well as other variations and colorways. There seems to be officially licensed “Hicks Hexagon” carpets, but also lots of knockoffs. Apparently, a lot of people are fans of the carpet because of the movie, but it is also a very cool design. I might have to make another dress with the actual Hicks Hexagon fabric, although I’m not actually a big fan of The Shining (or any horror movie for that matter).
Because this is a busy pattern, I knew I wanted a fairly simple dress design. The fabric seemed to want to be a long-sleeve skater dress, so that’s what I went with, despite the fact that it is summer and it will be a while before I get much wear out of this dress. Fortunately, I finished the dress just in time to wear it to work for what is likely to be the last coolish day for a while.
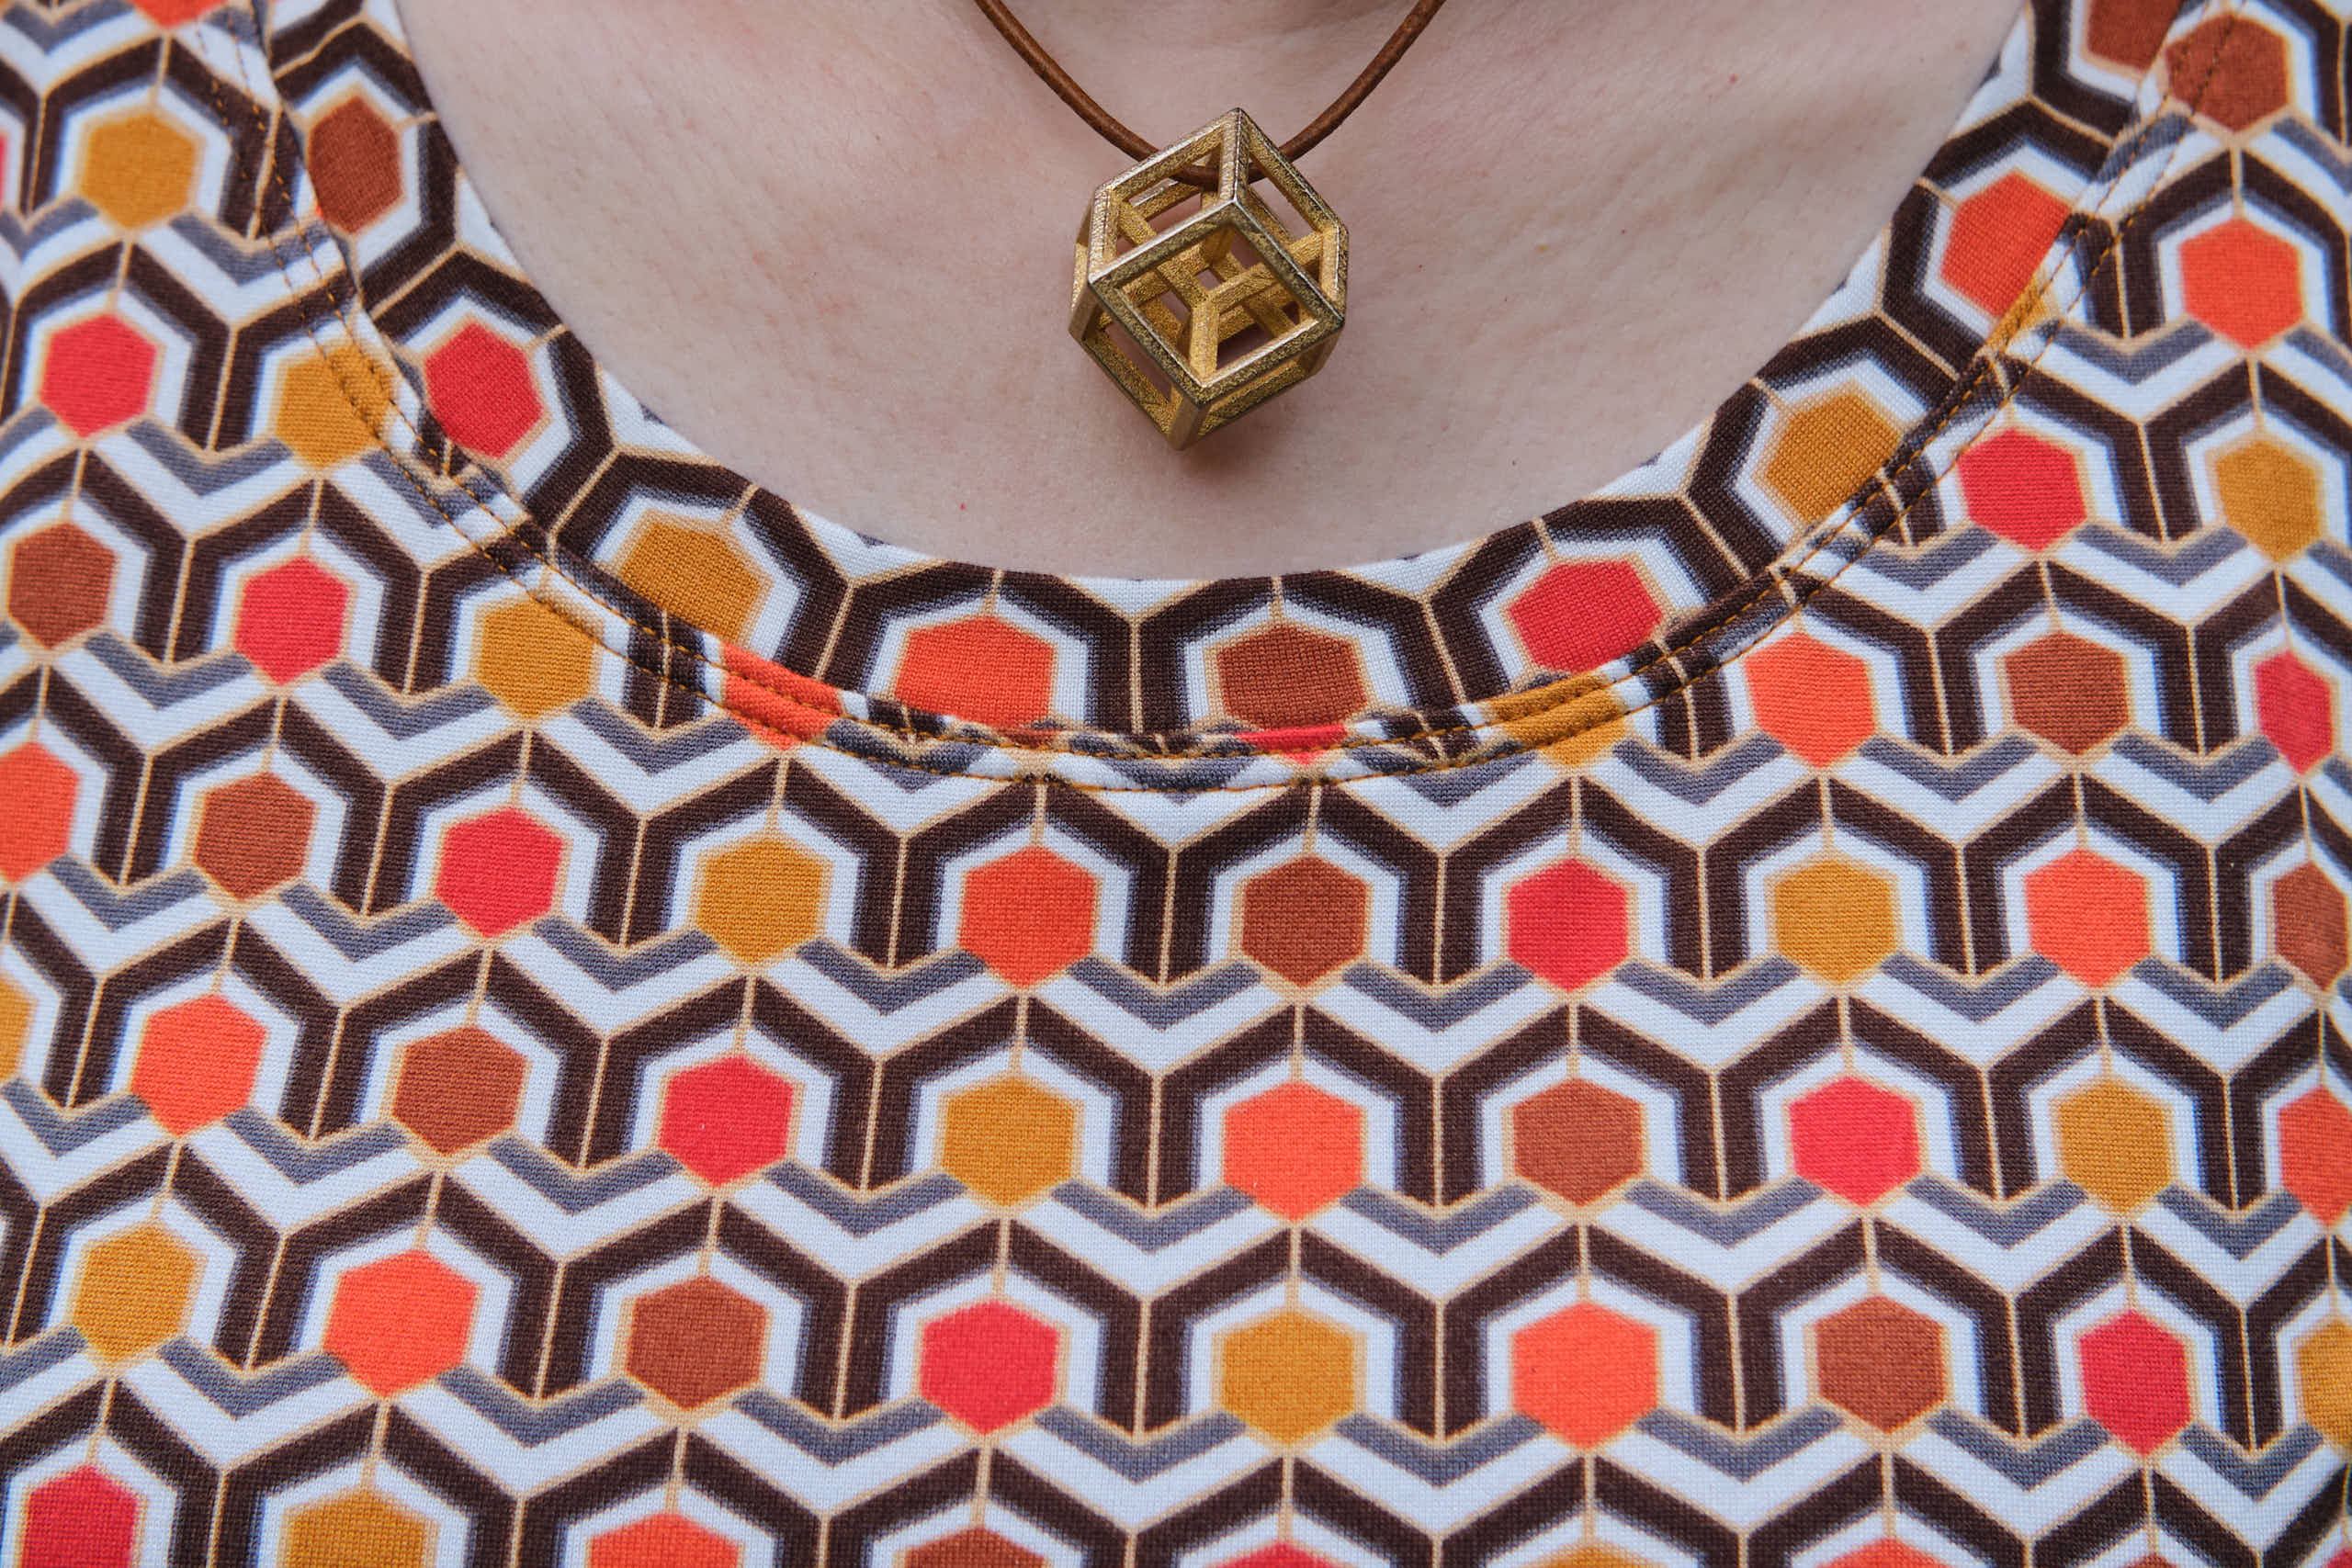
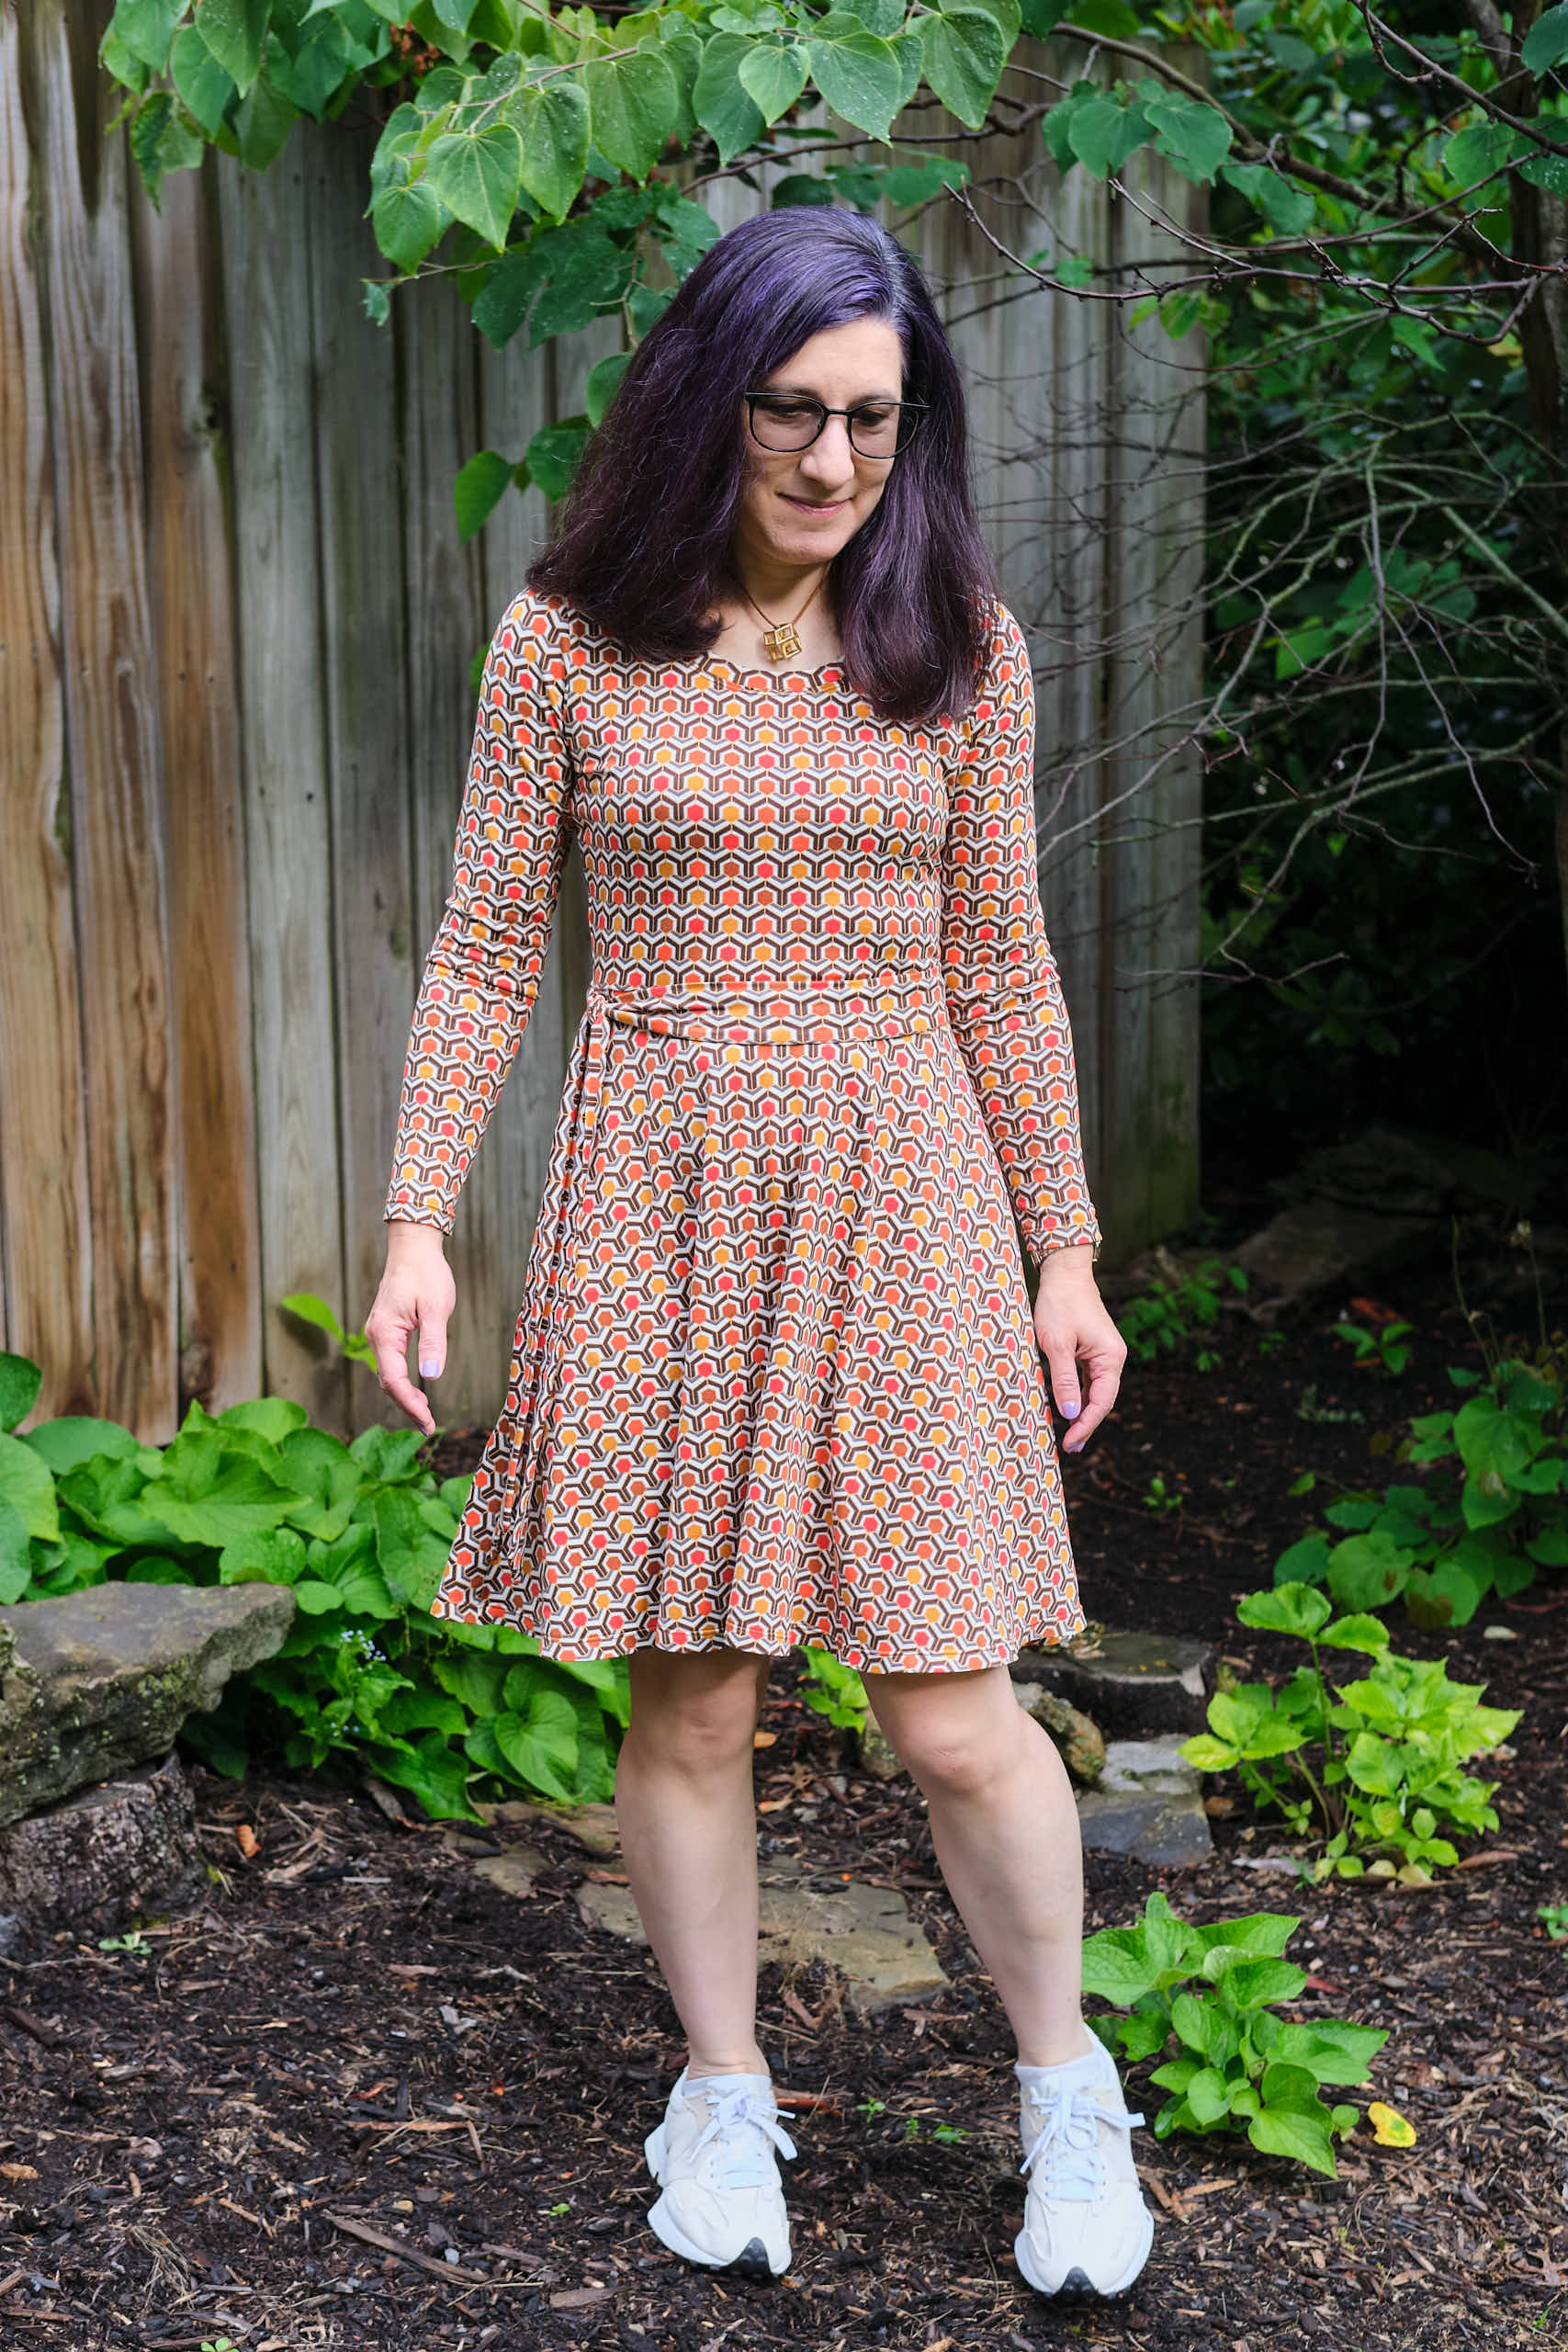
I chose the Sinclair Valley Knit Skater Dress with half-circle skirt from Flared skirts add-on, a pattern combo I have made at least five other times. The pattern is pretty fast and easy, and fits well without much modification (although I keep thinking I should add a slight broad and sloped shoulder adjustment and then forget to do it). I was pretty happy sizing up from my usual P4 to P6 when I made my PETS skater dress with this pattern last year so went with the P6 again. Since I omitted the waistband I extended the length of the bodice by 1.3 inch. As I have done in the past, I modified the pockets so they do not attach to the waist to prevent the waist from being distorted when I put my phone in my pocket. I also found from past experience that I prefer a neckline in between crew and scoop. I’ve made several tops and dresses with my “screwp neck” modification, but recently worked out a low screwp neck variation, which I decided to use on this dress. It is a bit lower than my other screwp neck, but still not as low as the scoop neck designed for this pattern. I like this level of scoop because it plays well with a lot of my necklaces.
I sewed almost everything on my serger and then fused and cover-stitched the hems with a narrow cover stitch and one of my fancy cover-stitching feet. I used the same narrow cover stitch on the neck band. After much debate about what color thread to use, I chose a dark mustard color that blends with the fabric better than the off-white thread I used for the interior seams. After I tried it on, I decided I wasn’t completely happy with the way the bodice and skirt meet because of the busy pattern and the fact that the top of the skirt is curved while the bottom of the bodice is flat. So I made a 2-inch-wide self-fabric belt to tie around the waist. I think the belt pulls it together better and also adds to the vintage vibe.
It’s summer right now, so I’m wearing the dress with bare legs and off-white sneakers. I could see adding orange or mustard tights in the fall. I may need to make a cropped cardigan in orange, brown, or mustard to go with it for fall.
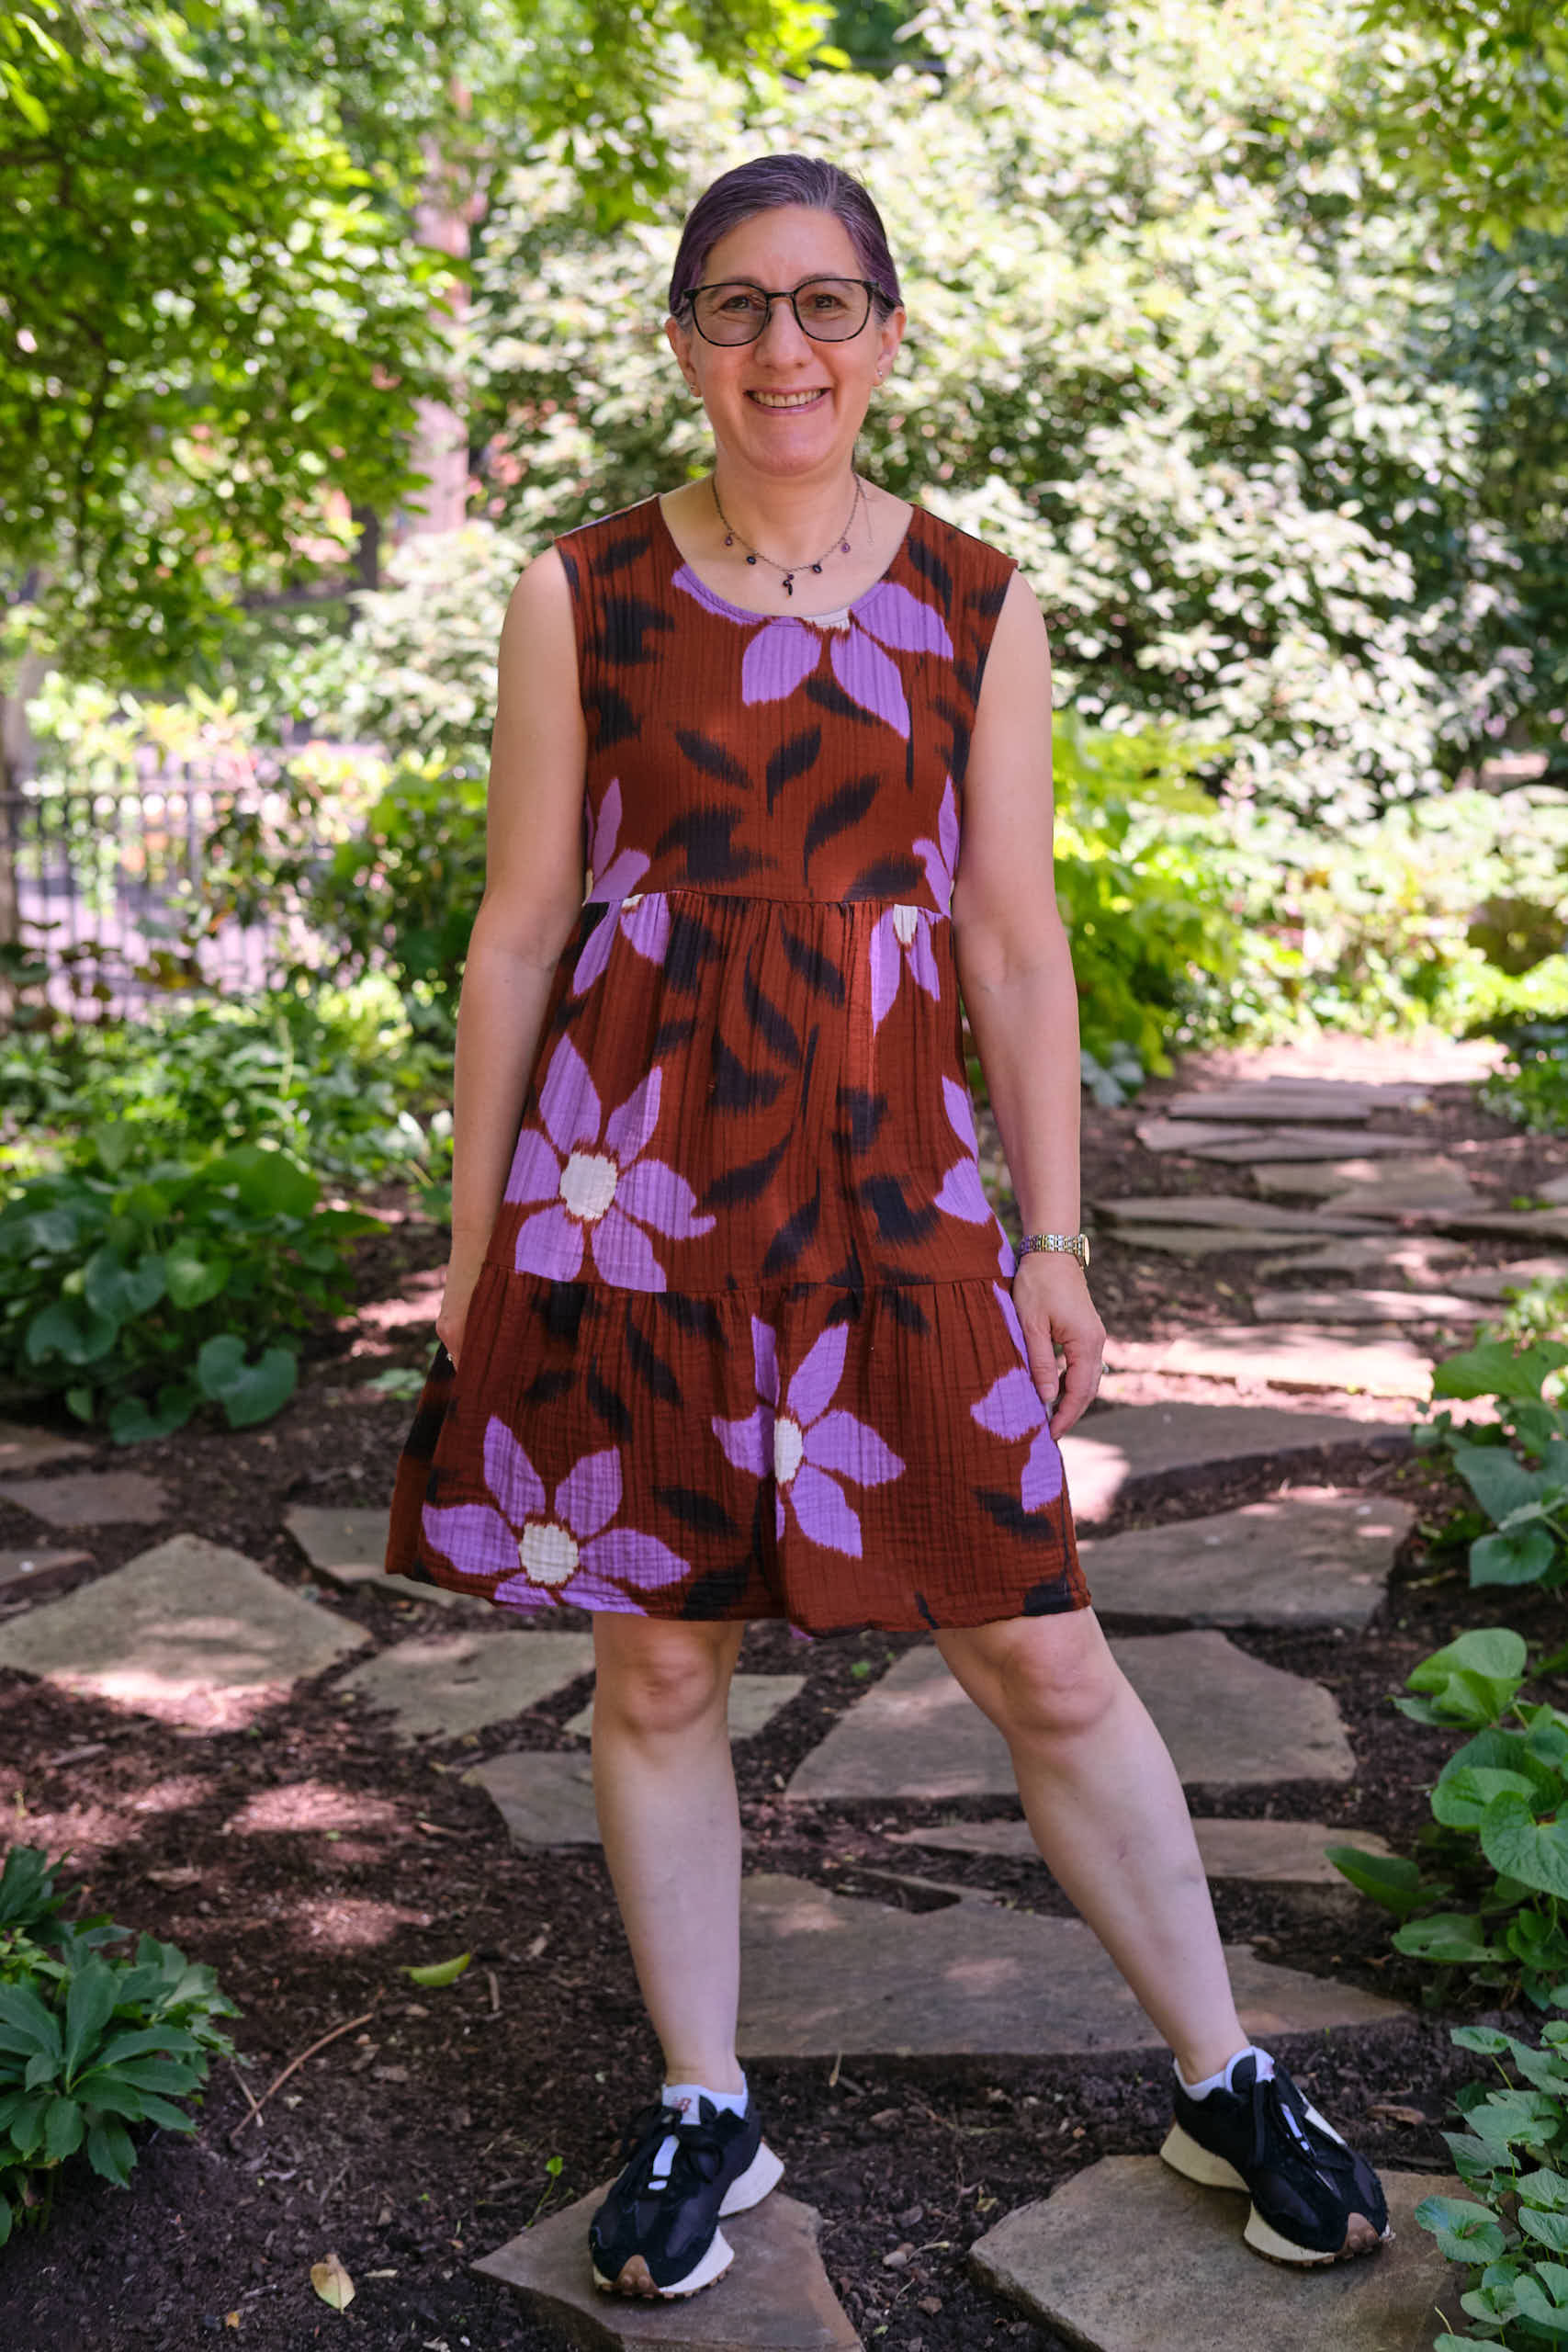
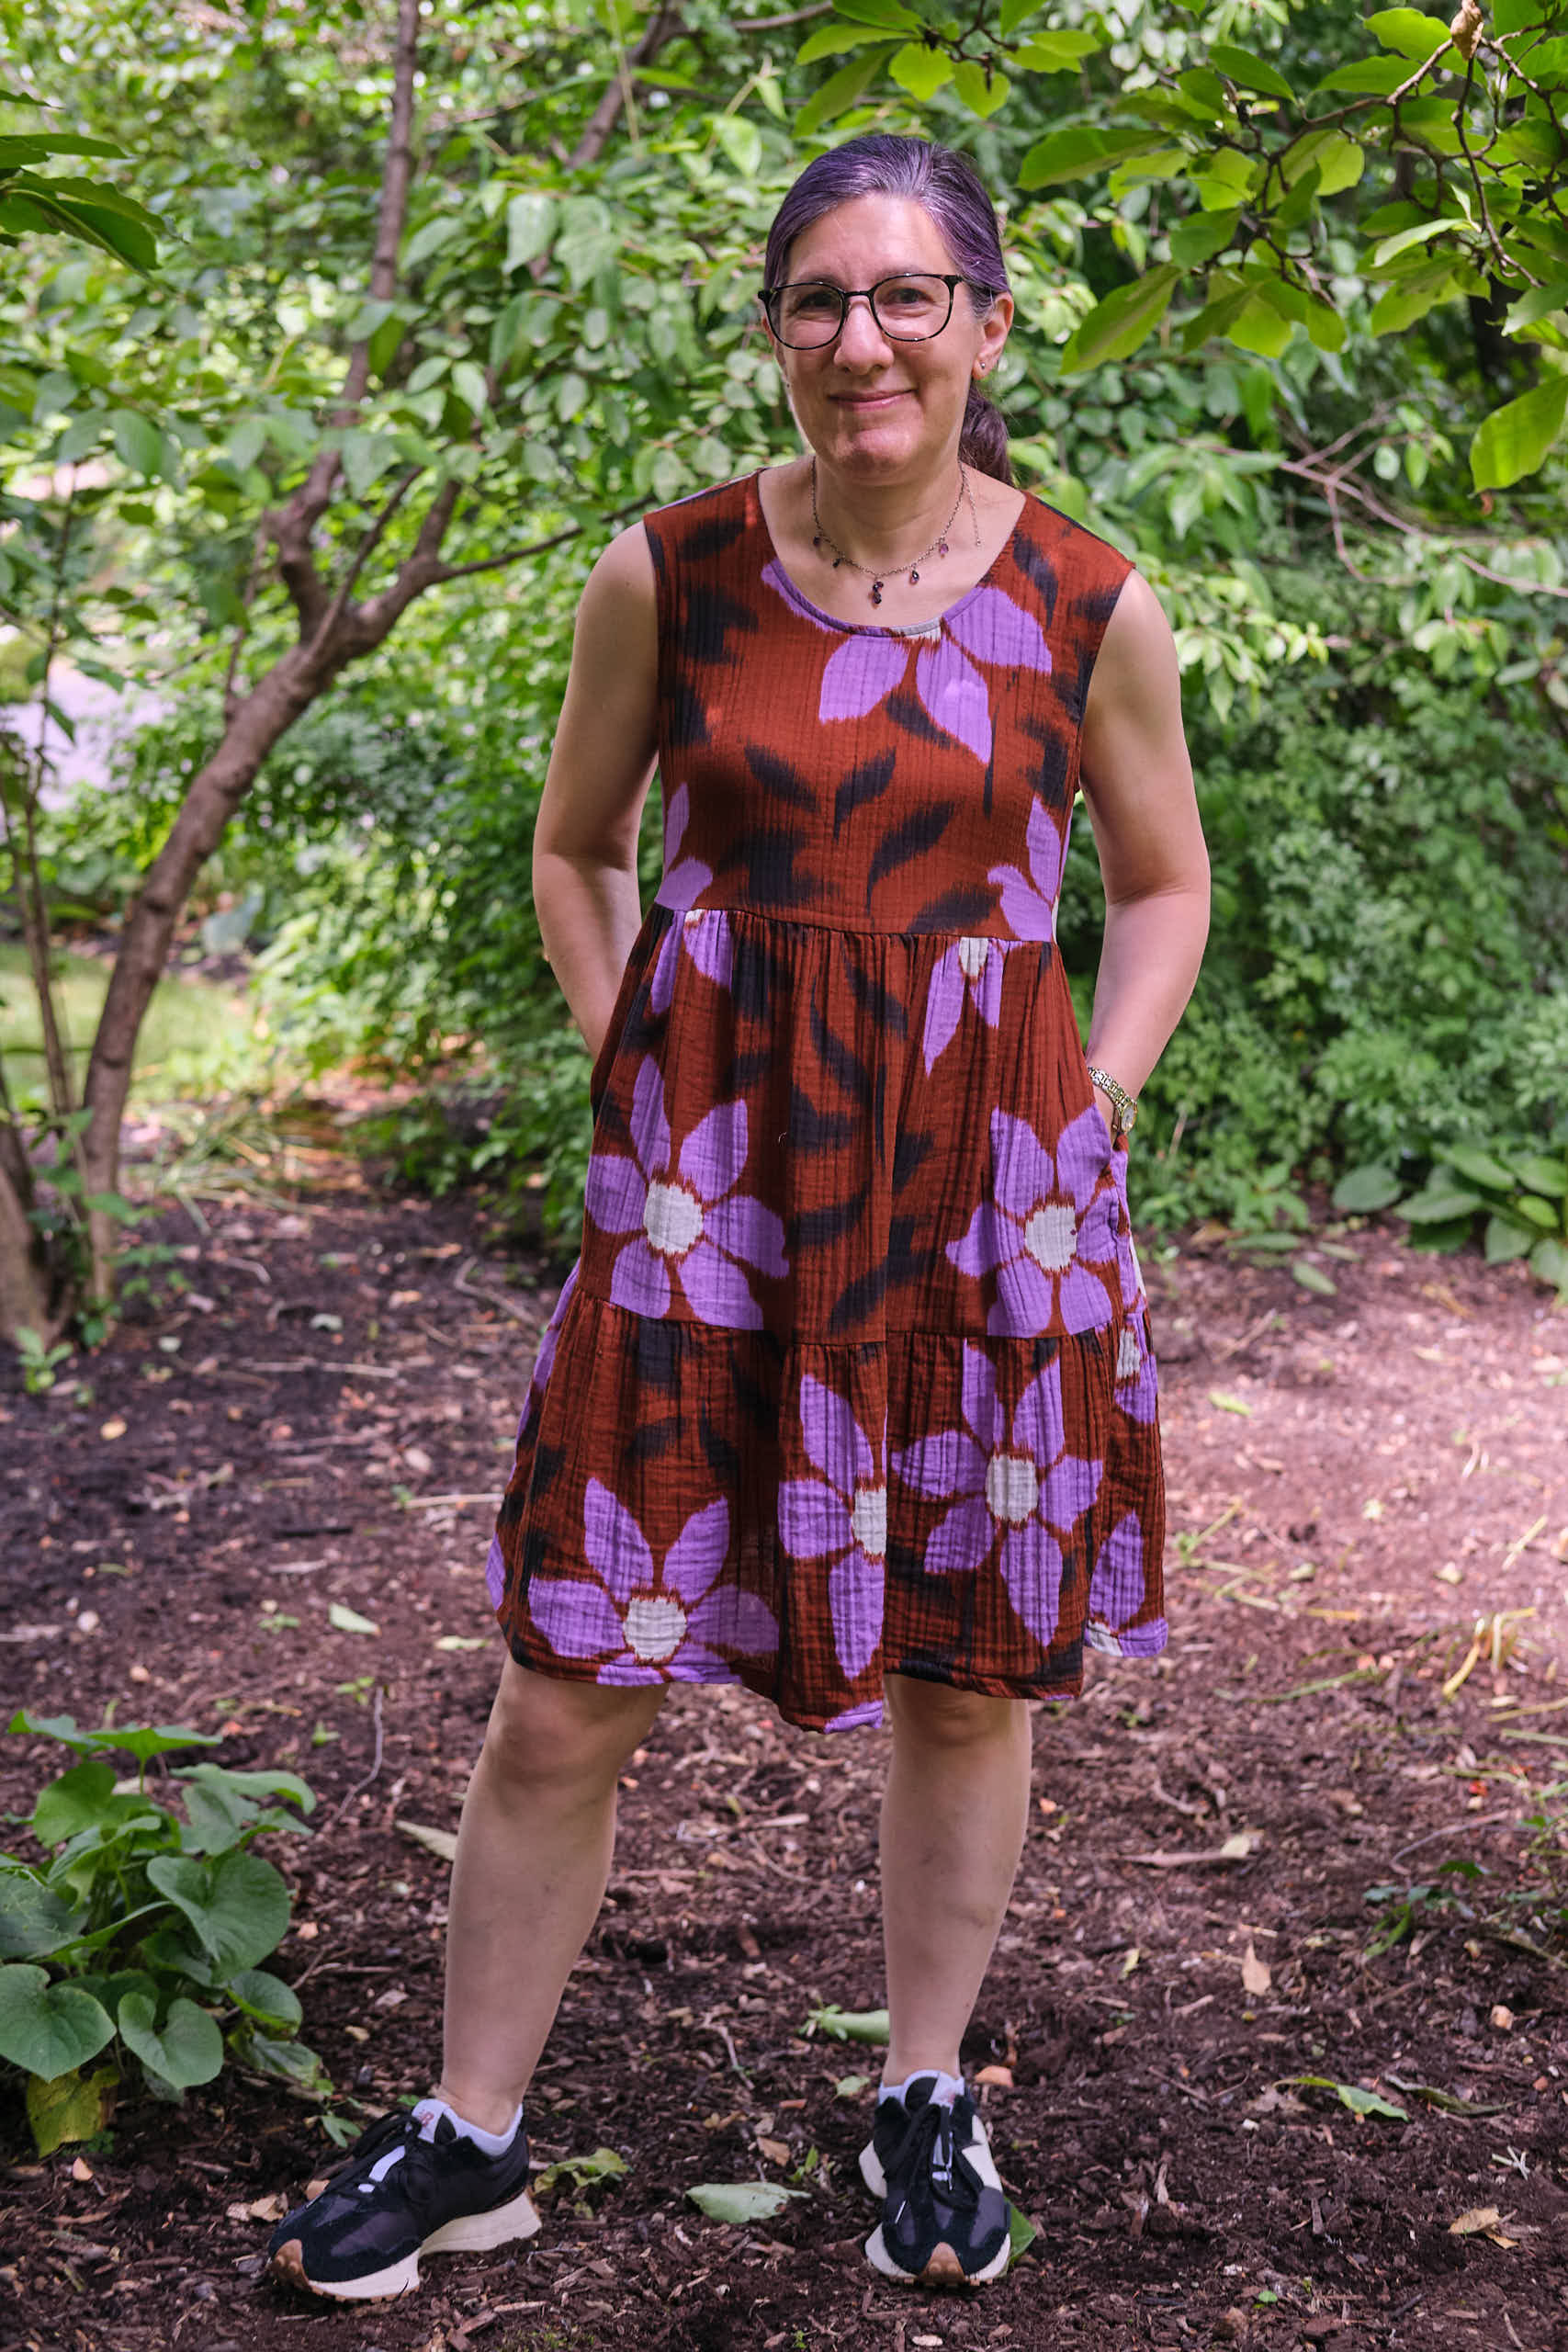
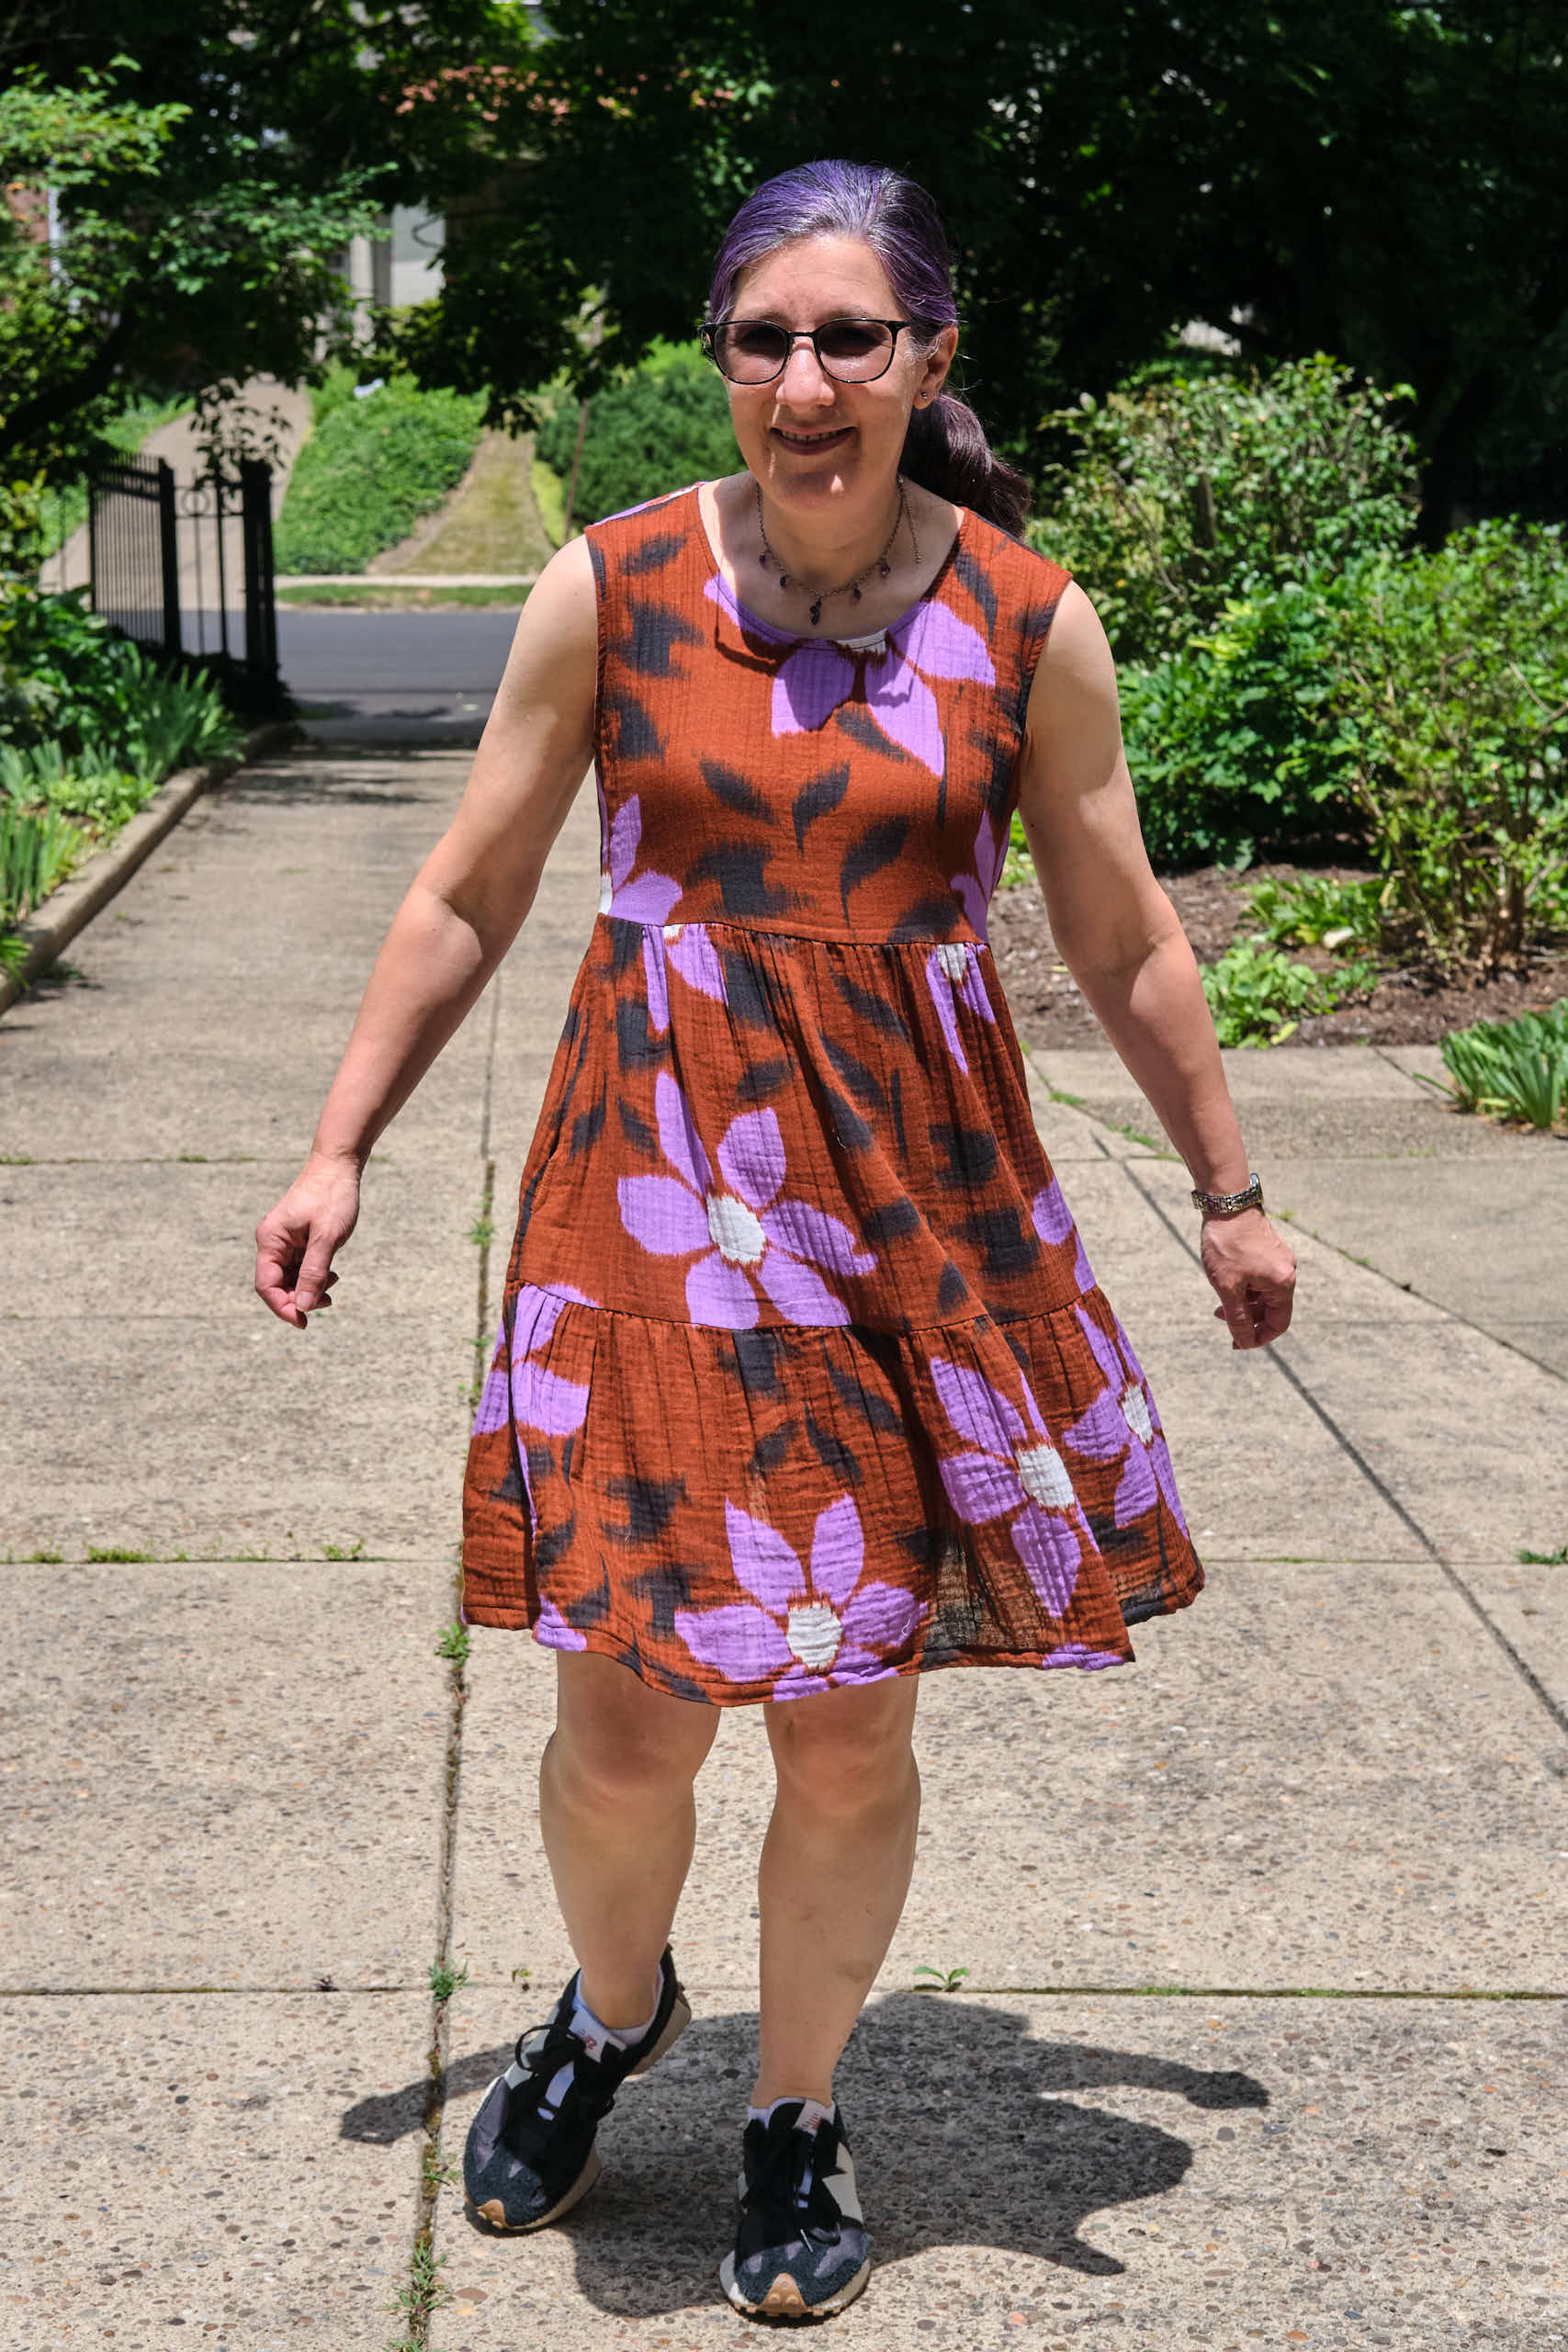
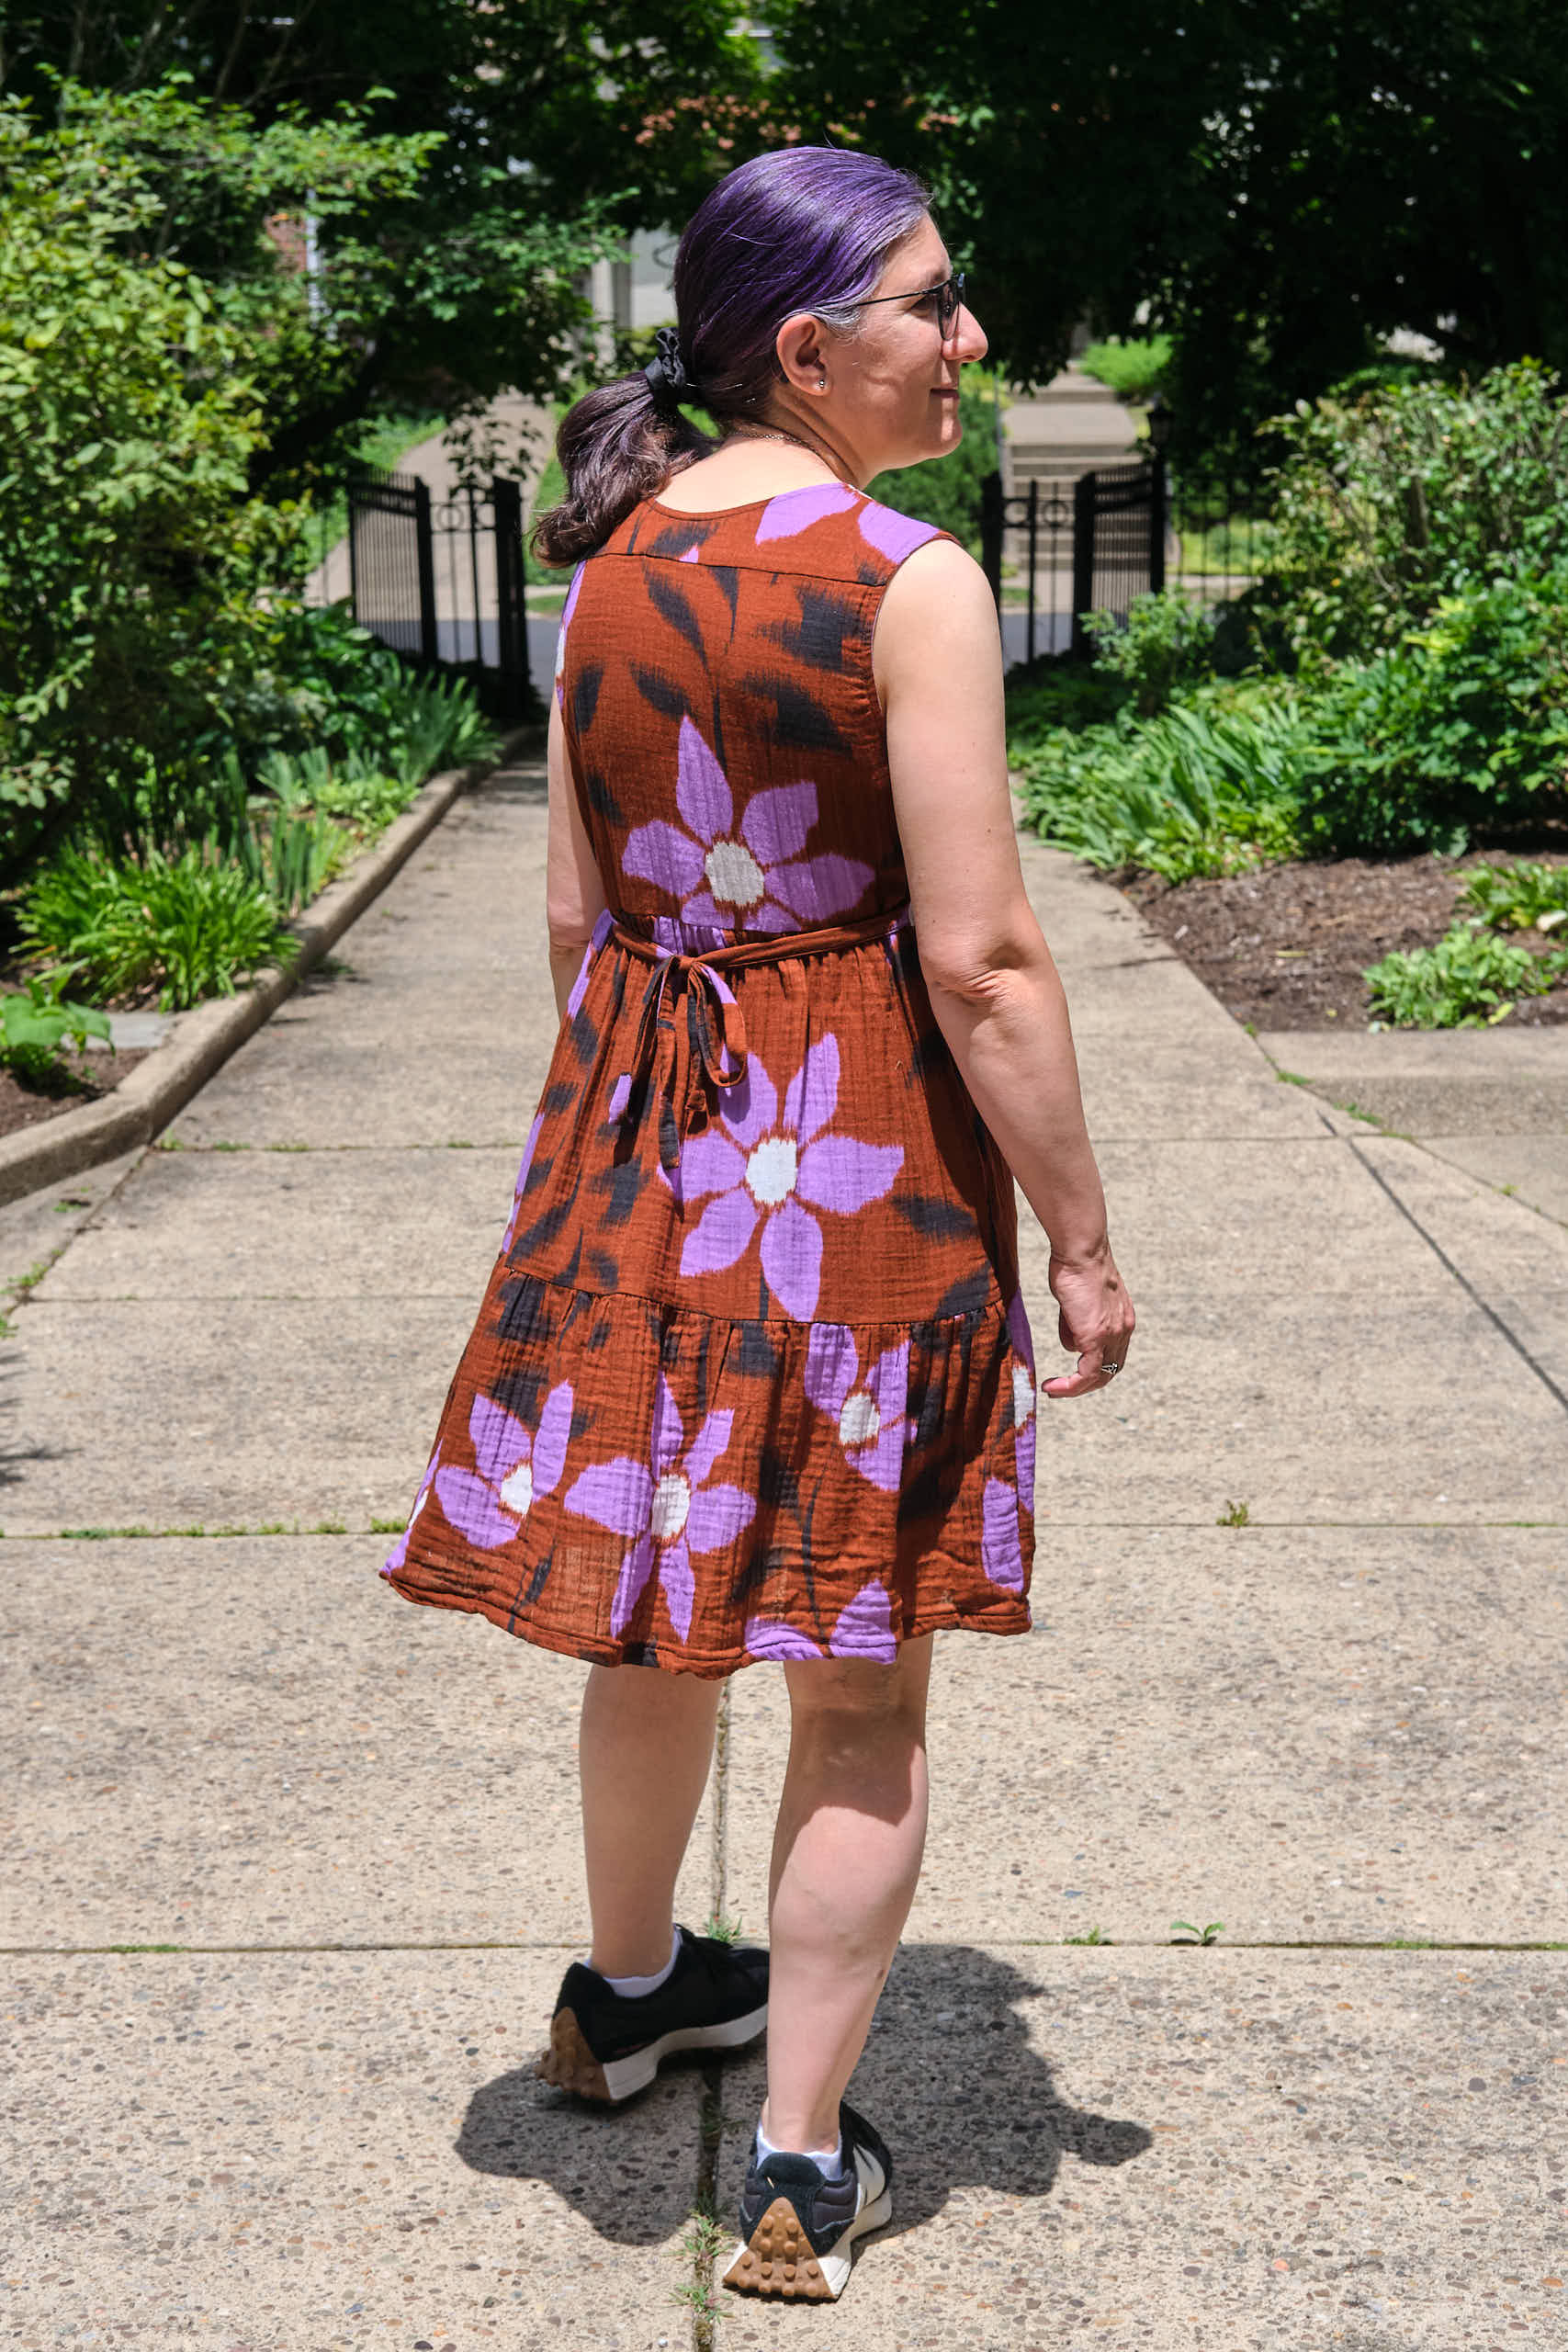
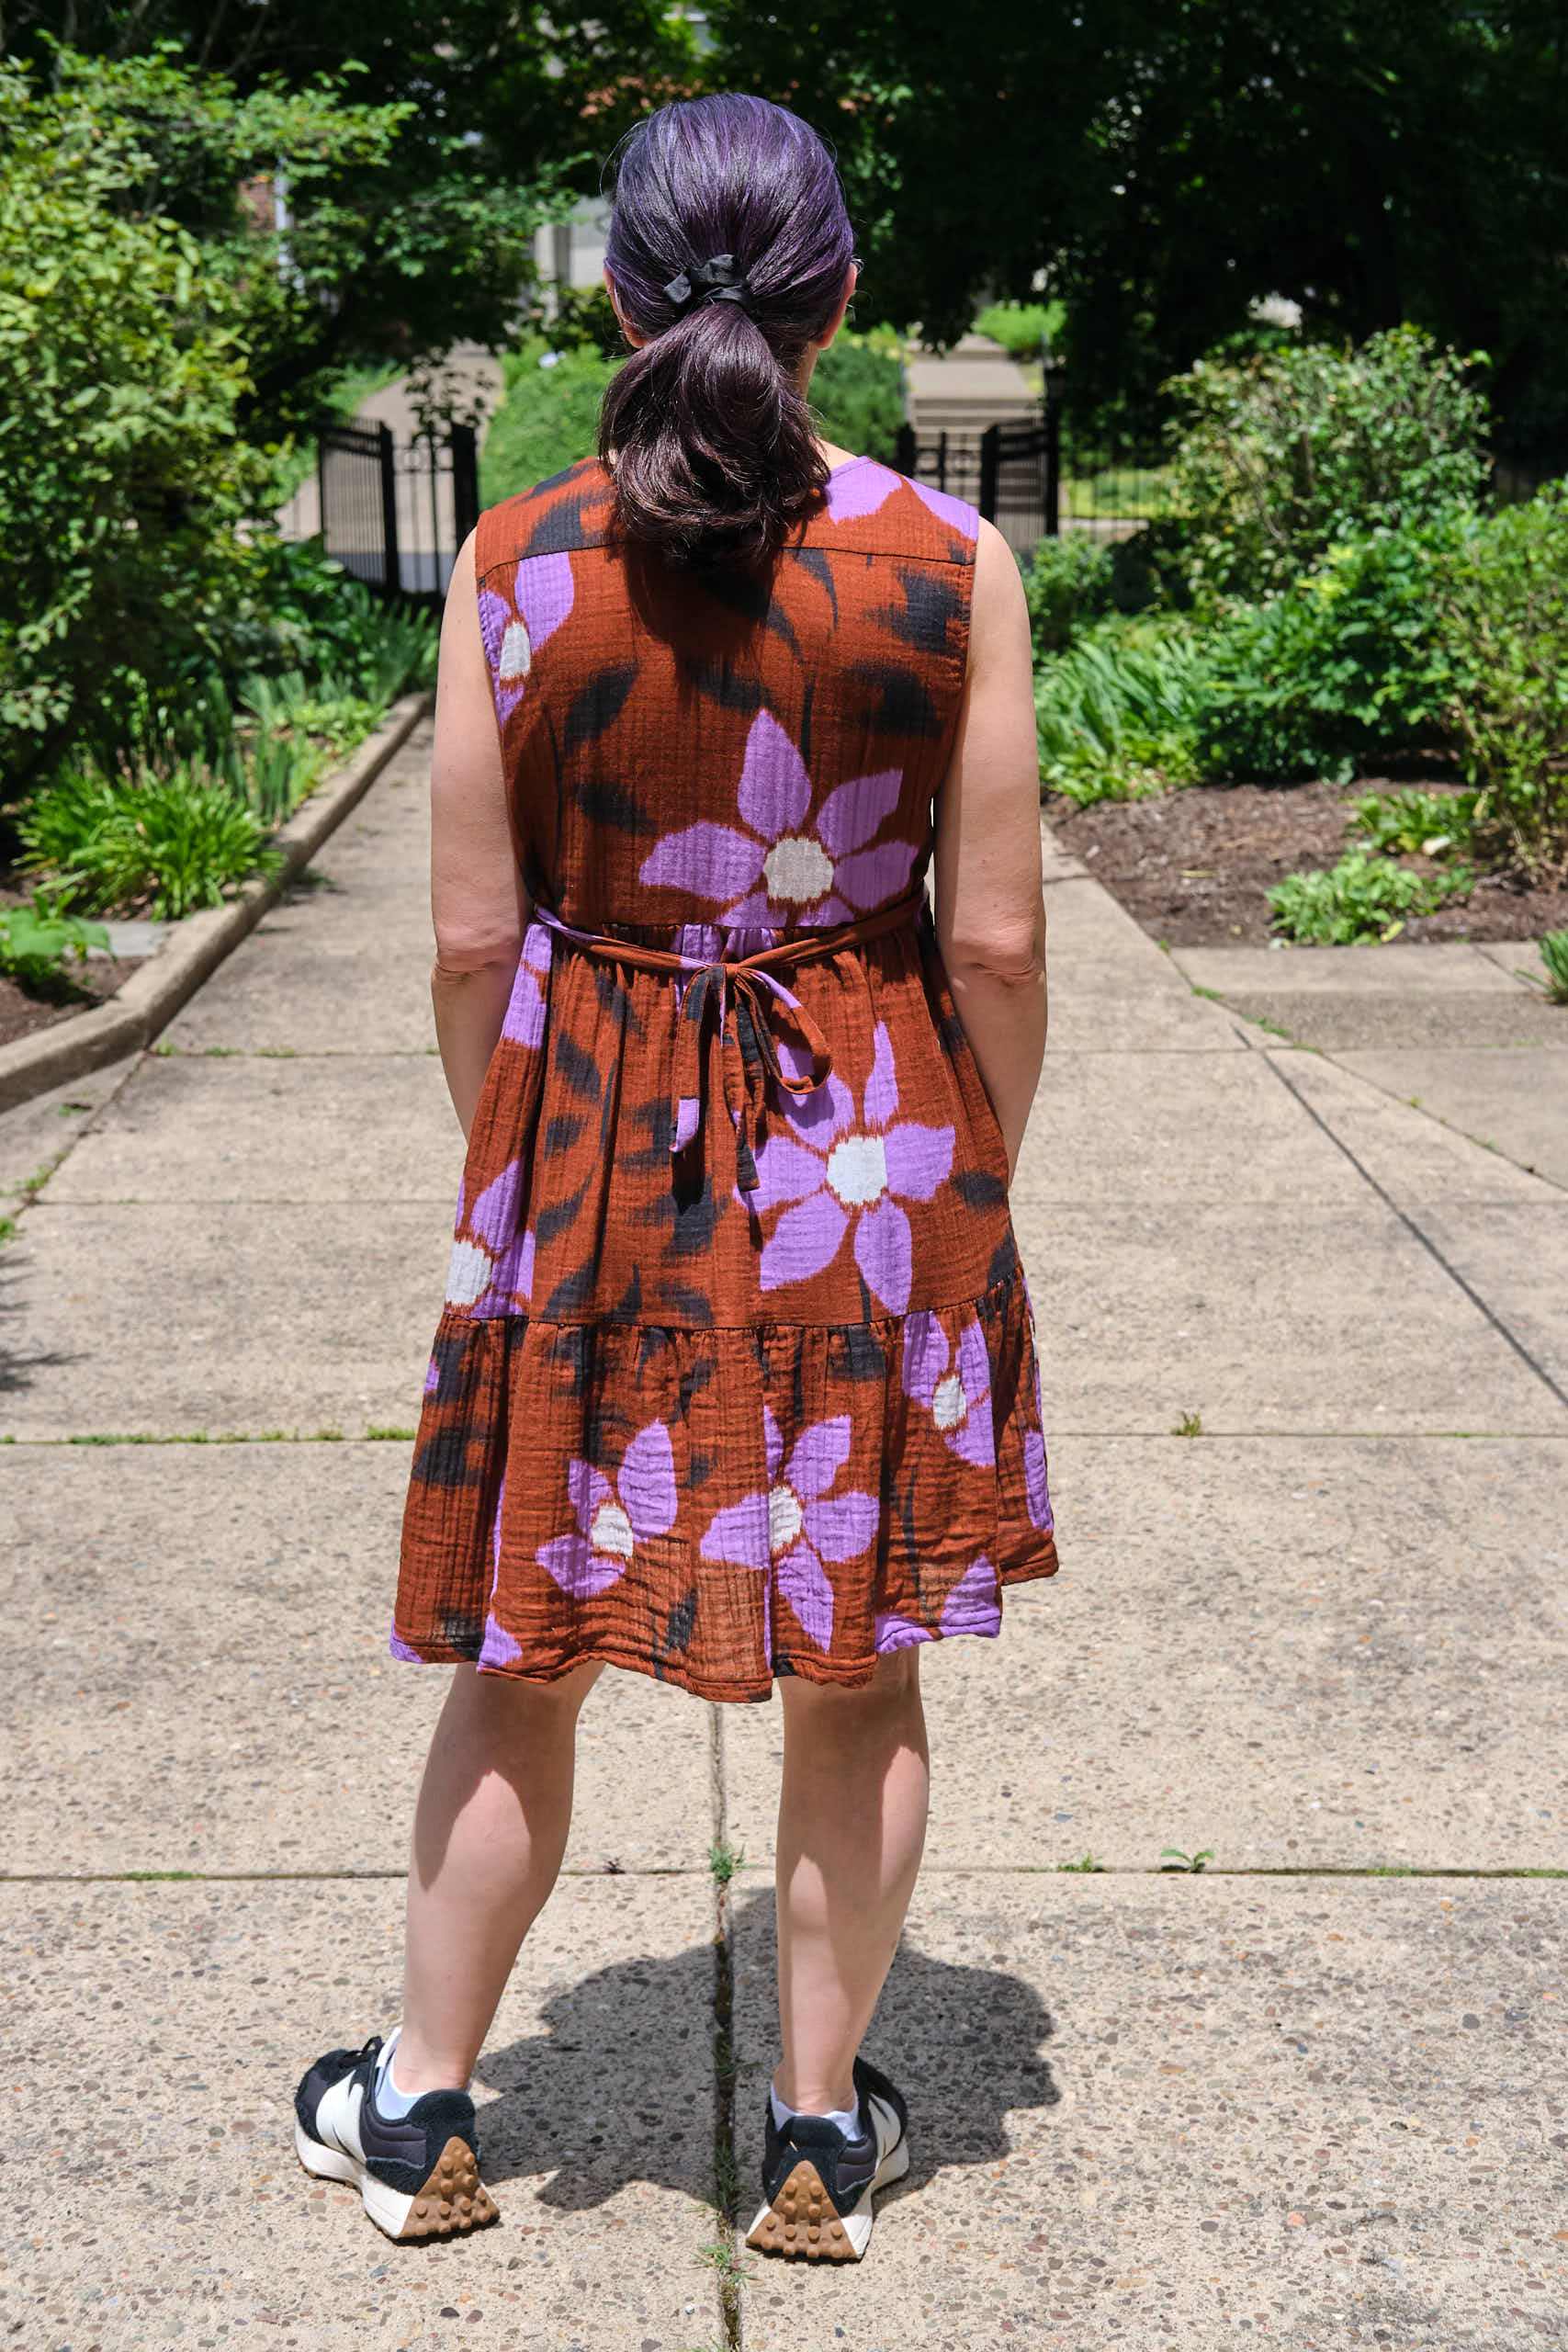
Pattern Emporium Meet You There dress, made with 1.5 yards brown and purple large floral print double gauze fabric (washed and ironed before cutting), size AU8, knee length (with 2 long tiers), regular bodice shortened by 2 inches, mid neck, sleeveless back ties, pockets (sewed down bottom of pocket openings), used batik quilting cotton for facings
I’ve enjoyed my orange cotton double gauze Meet You There dress from last summer, and have been looking for a nice double-gauze print to use to make another one. I found this lovely brown and purple large floral print at Califabrics last December and finally got around to sewing it up.
I decided to size down from an AU10 to an AU8 to make the dress a little less roomy, and I shortened the bodice by 2 inches and kept the tiers at their full length. I also made the sleeveless version this time, shortened the ties by about 3.5 inches and sewed up the bottom of the pocket openings (as I did for the orange dress).
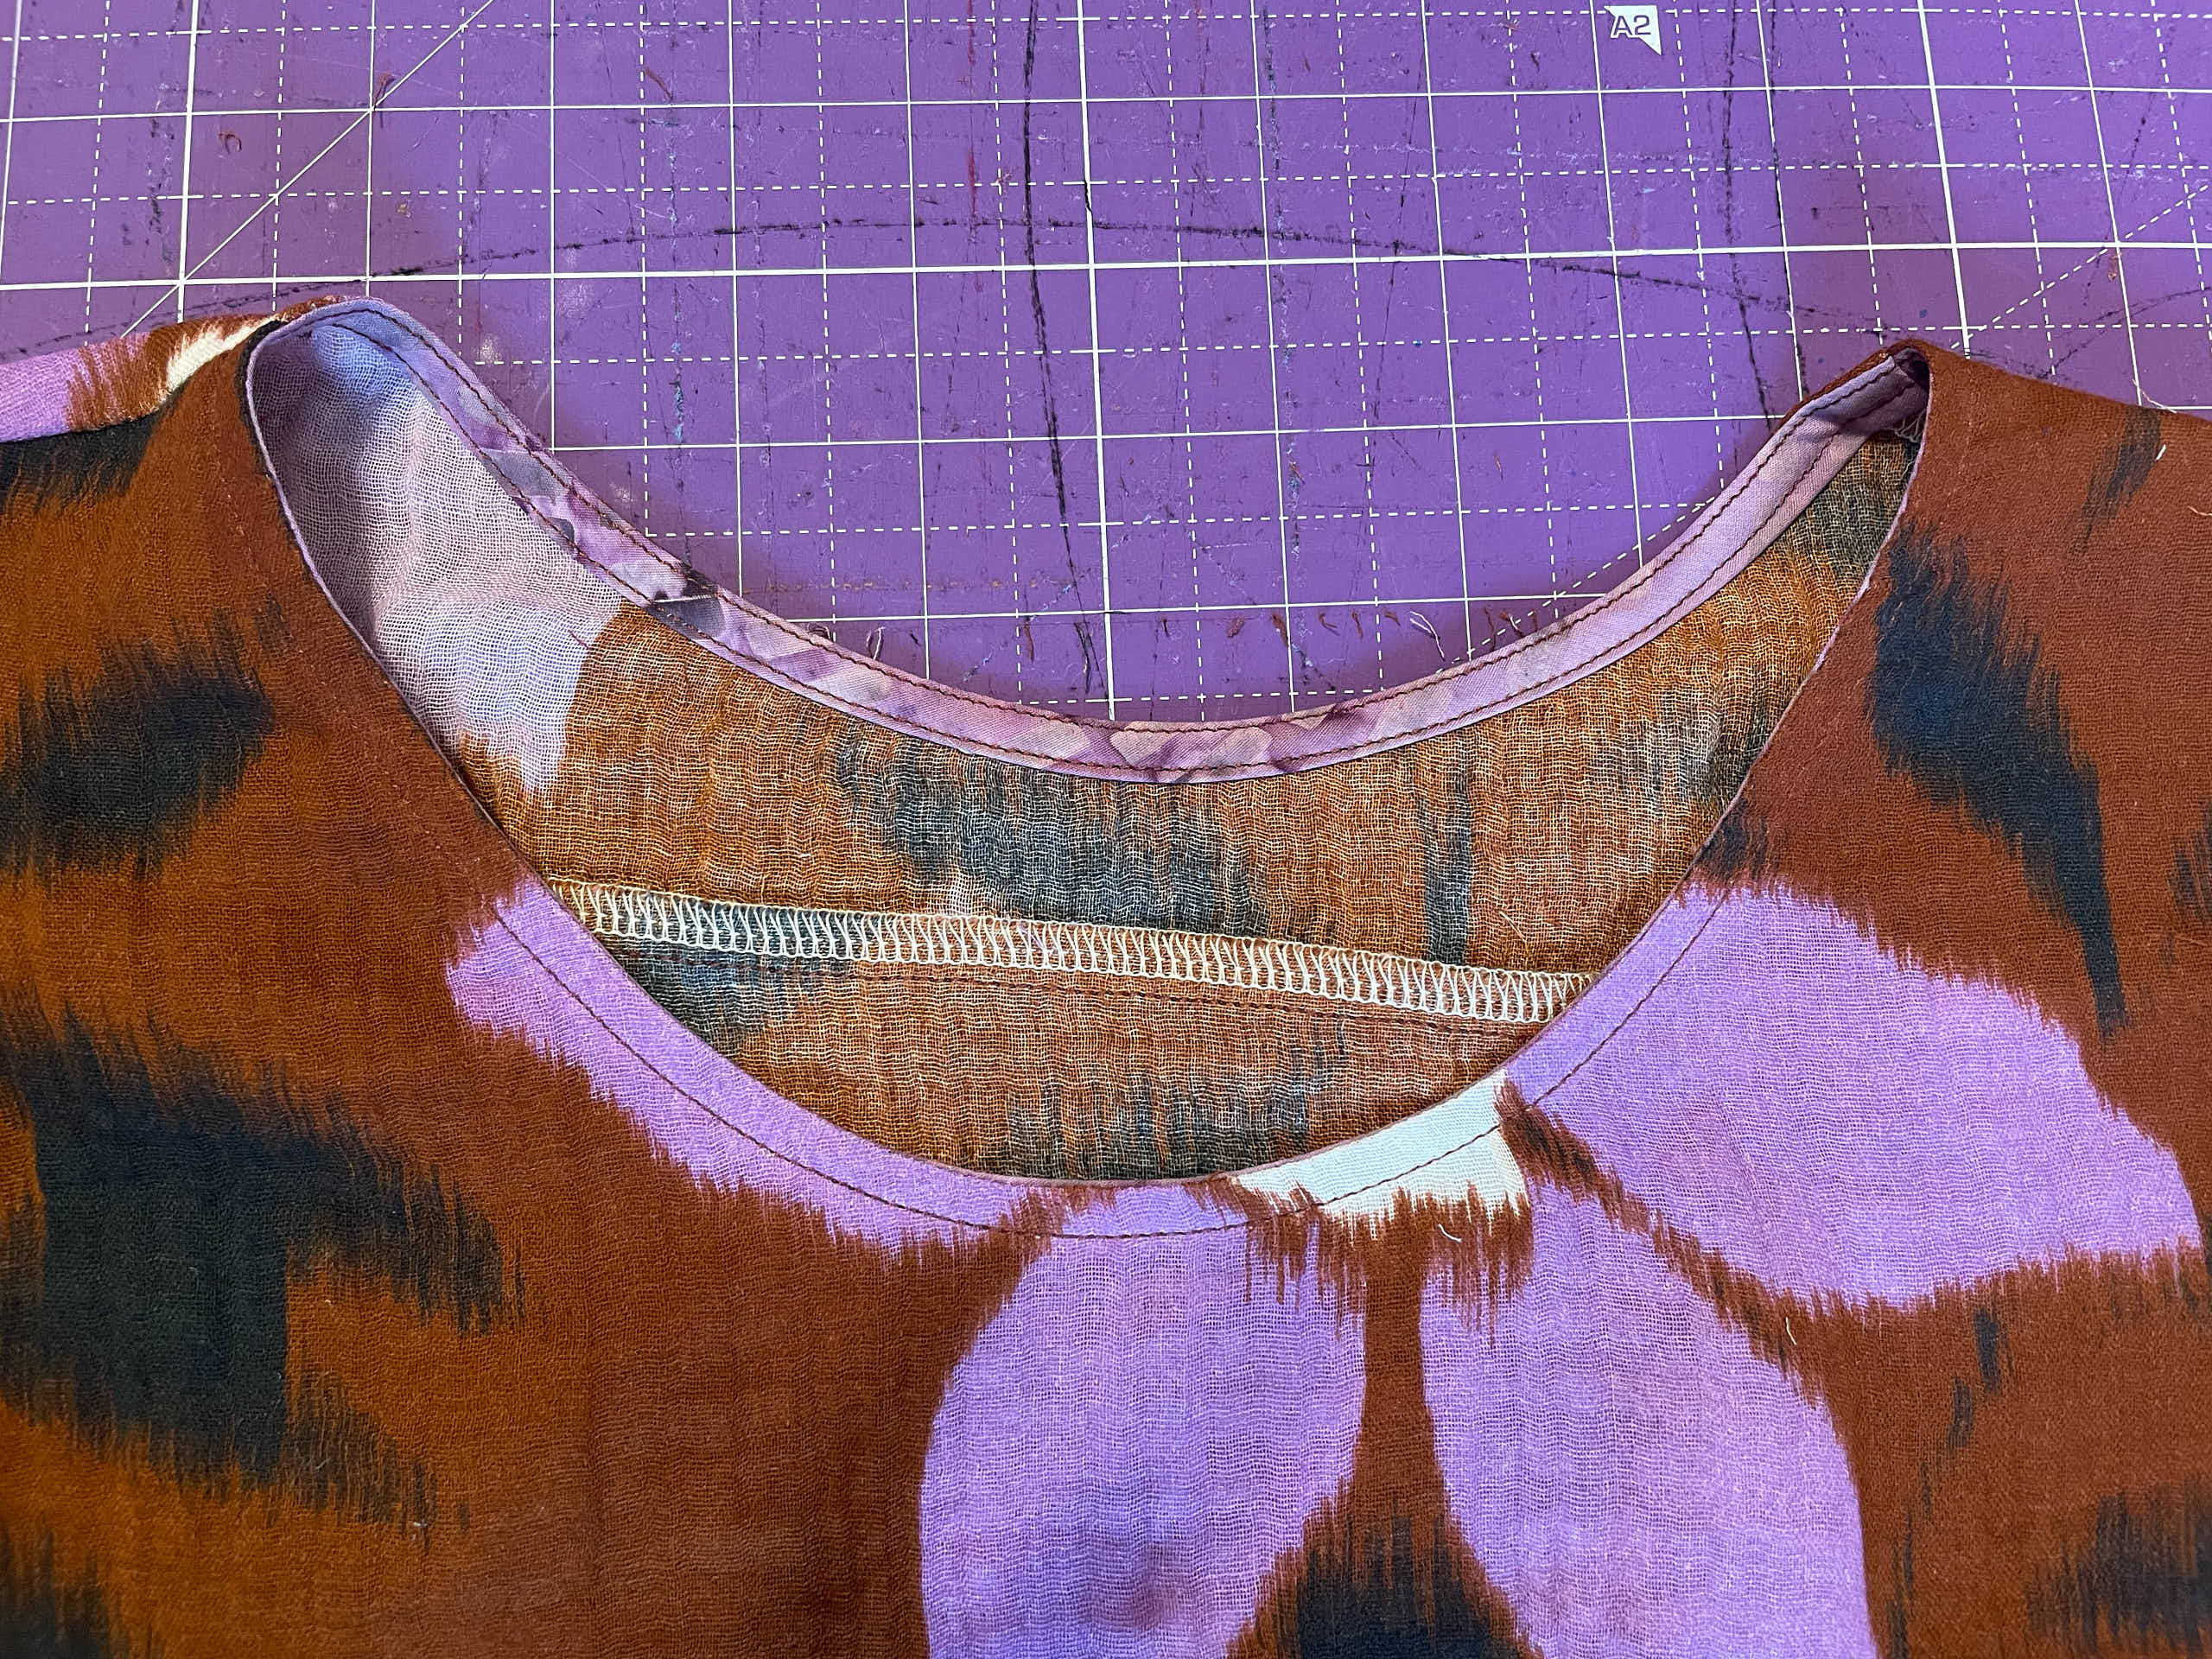
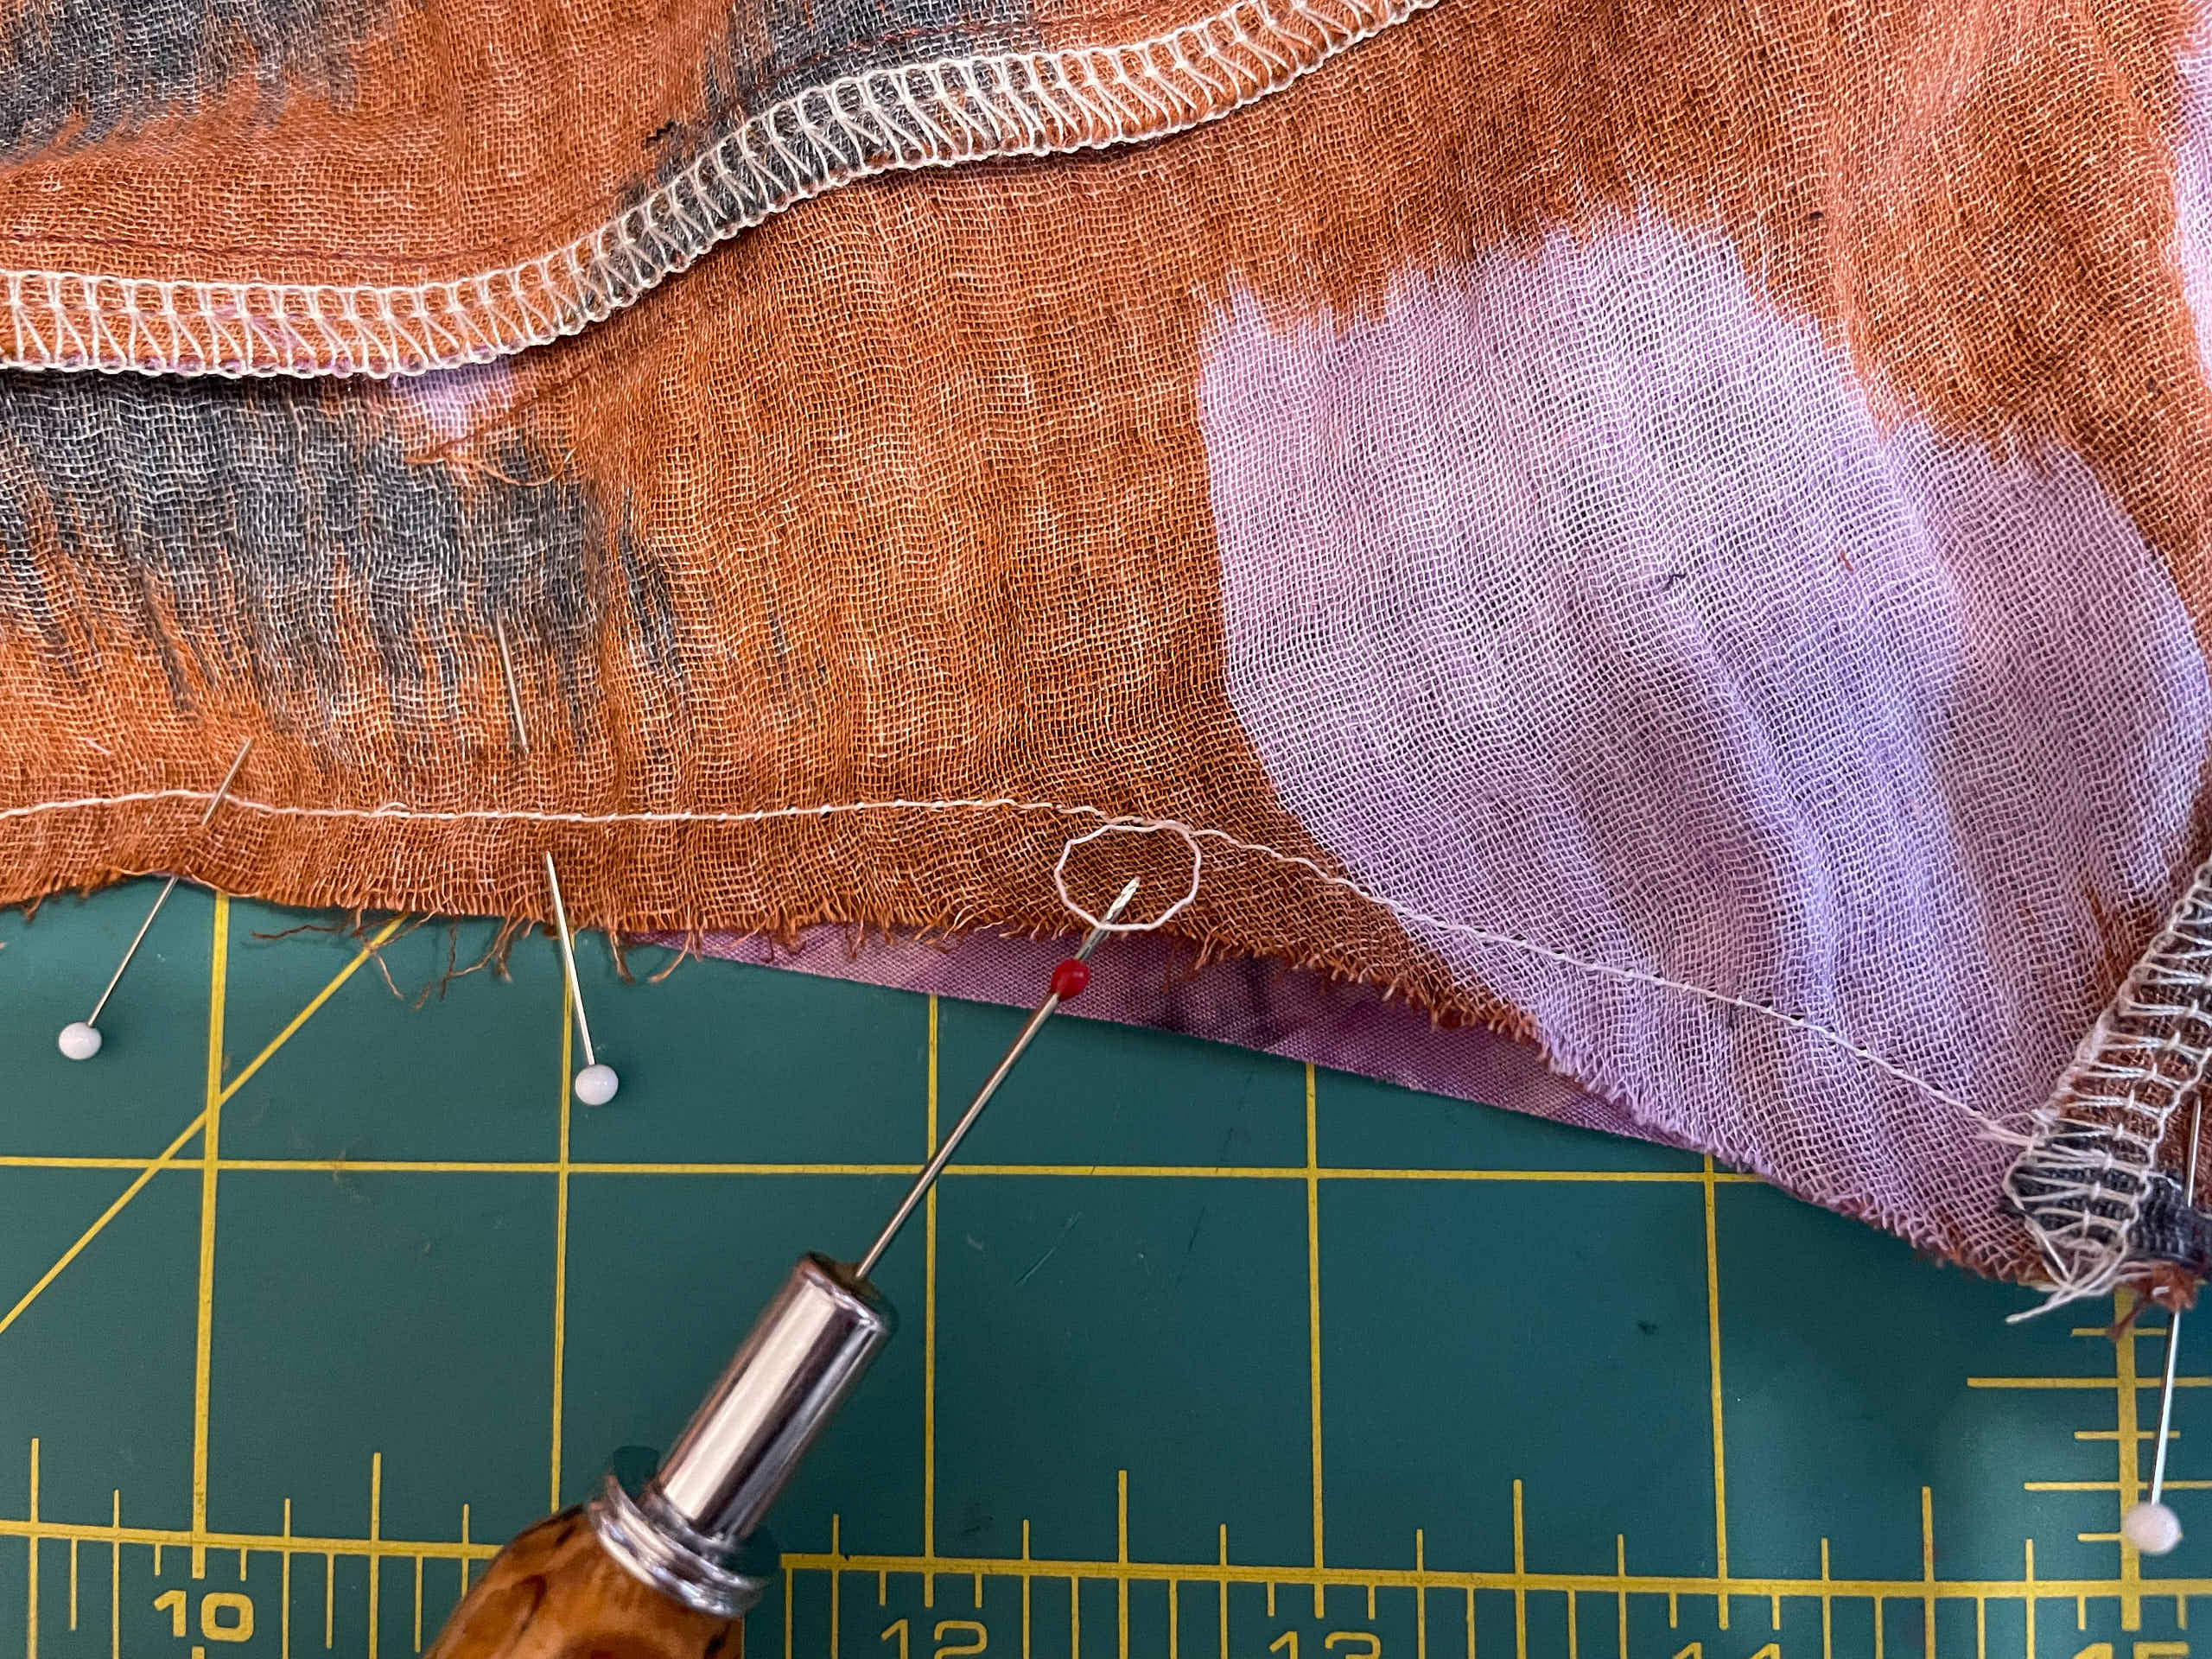
The other change I made that I really like is I cut the facings from purple batik quilting cotton instead of from the double gauze. From my previous double-gauze sewing experiences I’ve discovered that it is really difficult to keep double-gauze facings from stretching. Kate constantly warns us not to stretch the facings in her fantastic instructions. However, when sewing double-gauze, I find this nearly impossible. It was so much easier to use the batik fabric for the facing — no stretching. I gently pulled the stay stitching to bring the neck and arms in a smidge to fit the facing. I picked a batik that coordinates nicely, but since it is sewn on the inside of the dress you don’t actually see it so you could use anything that isn’t going to show through. Since I made this one sleeveless I had to sew facings on the neck and two arms holes so was happy to use this technique!
After I finished sewing the dress, I ran it through a quick wash and hung it up to dry. This light and airy fabric was completely dry in a few hours. This will be a nice dress to travel with in the summer as it is lightweight and can be easily washed in a sink.
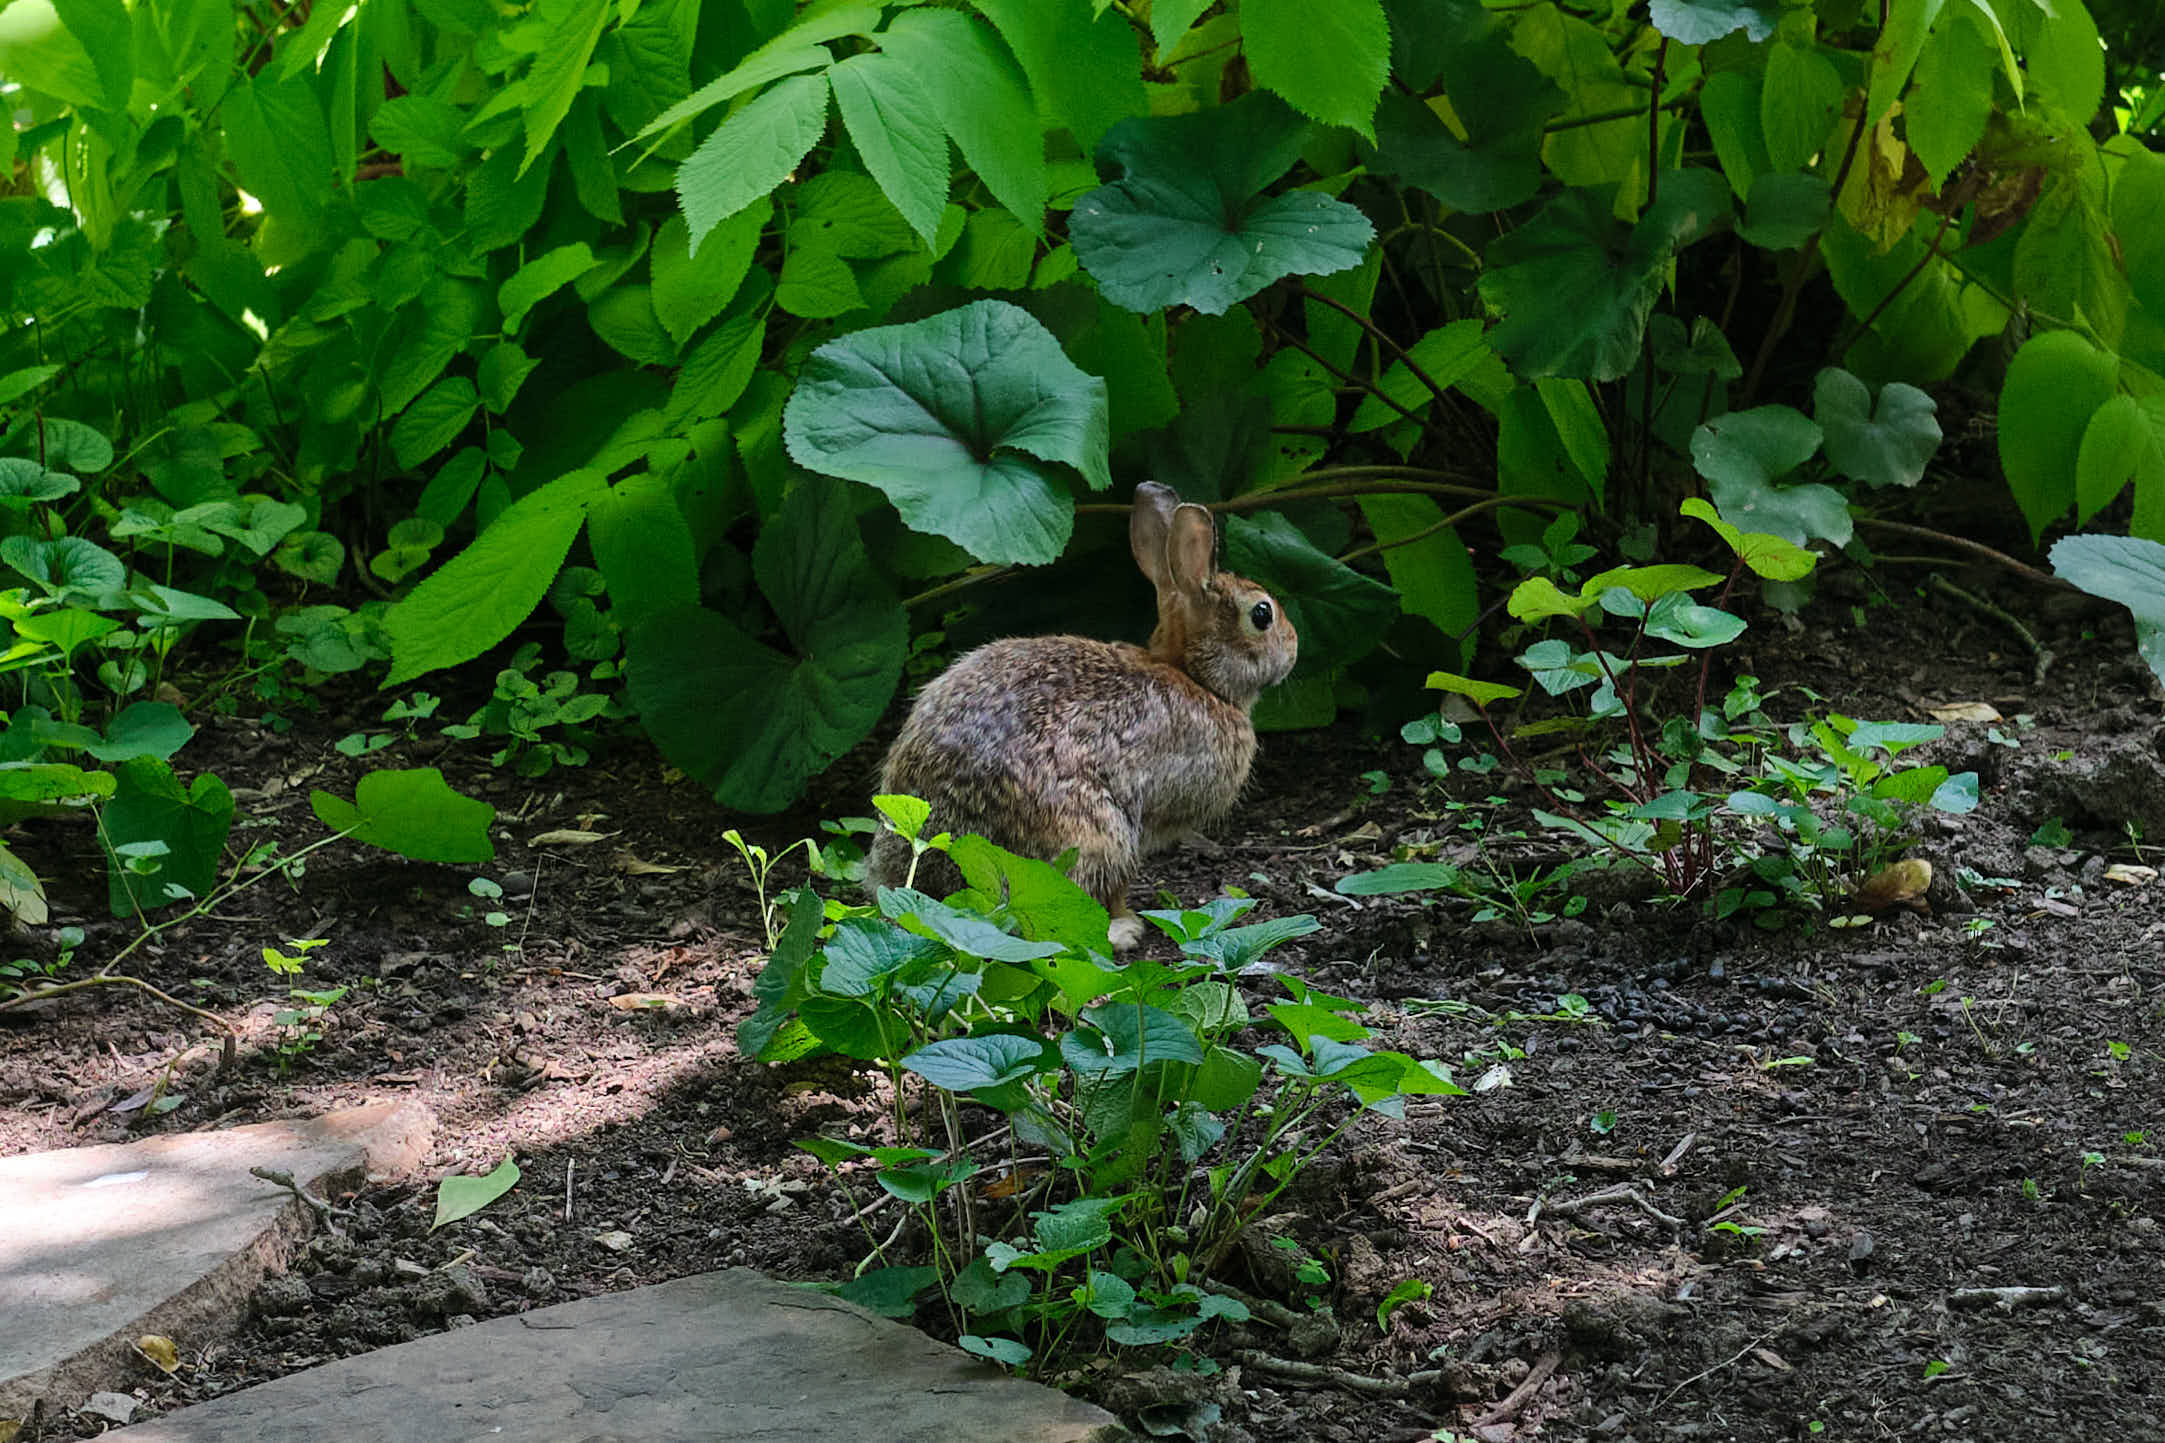
I’m very happy with how this dress turned out! Here are some more photos and a bonus picture of the rabbit who joined our photo shoot.
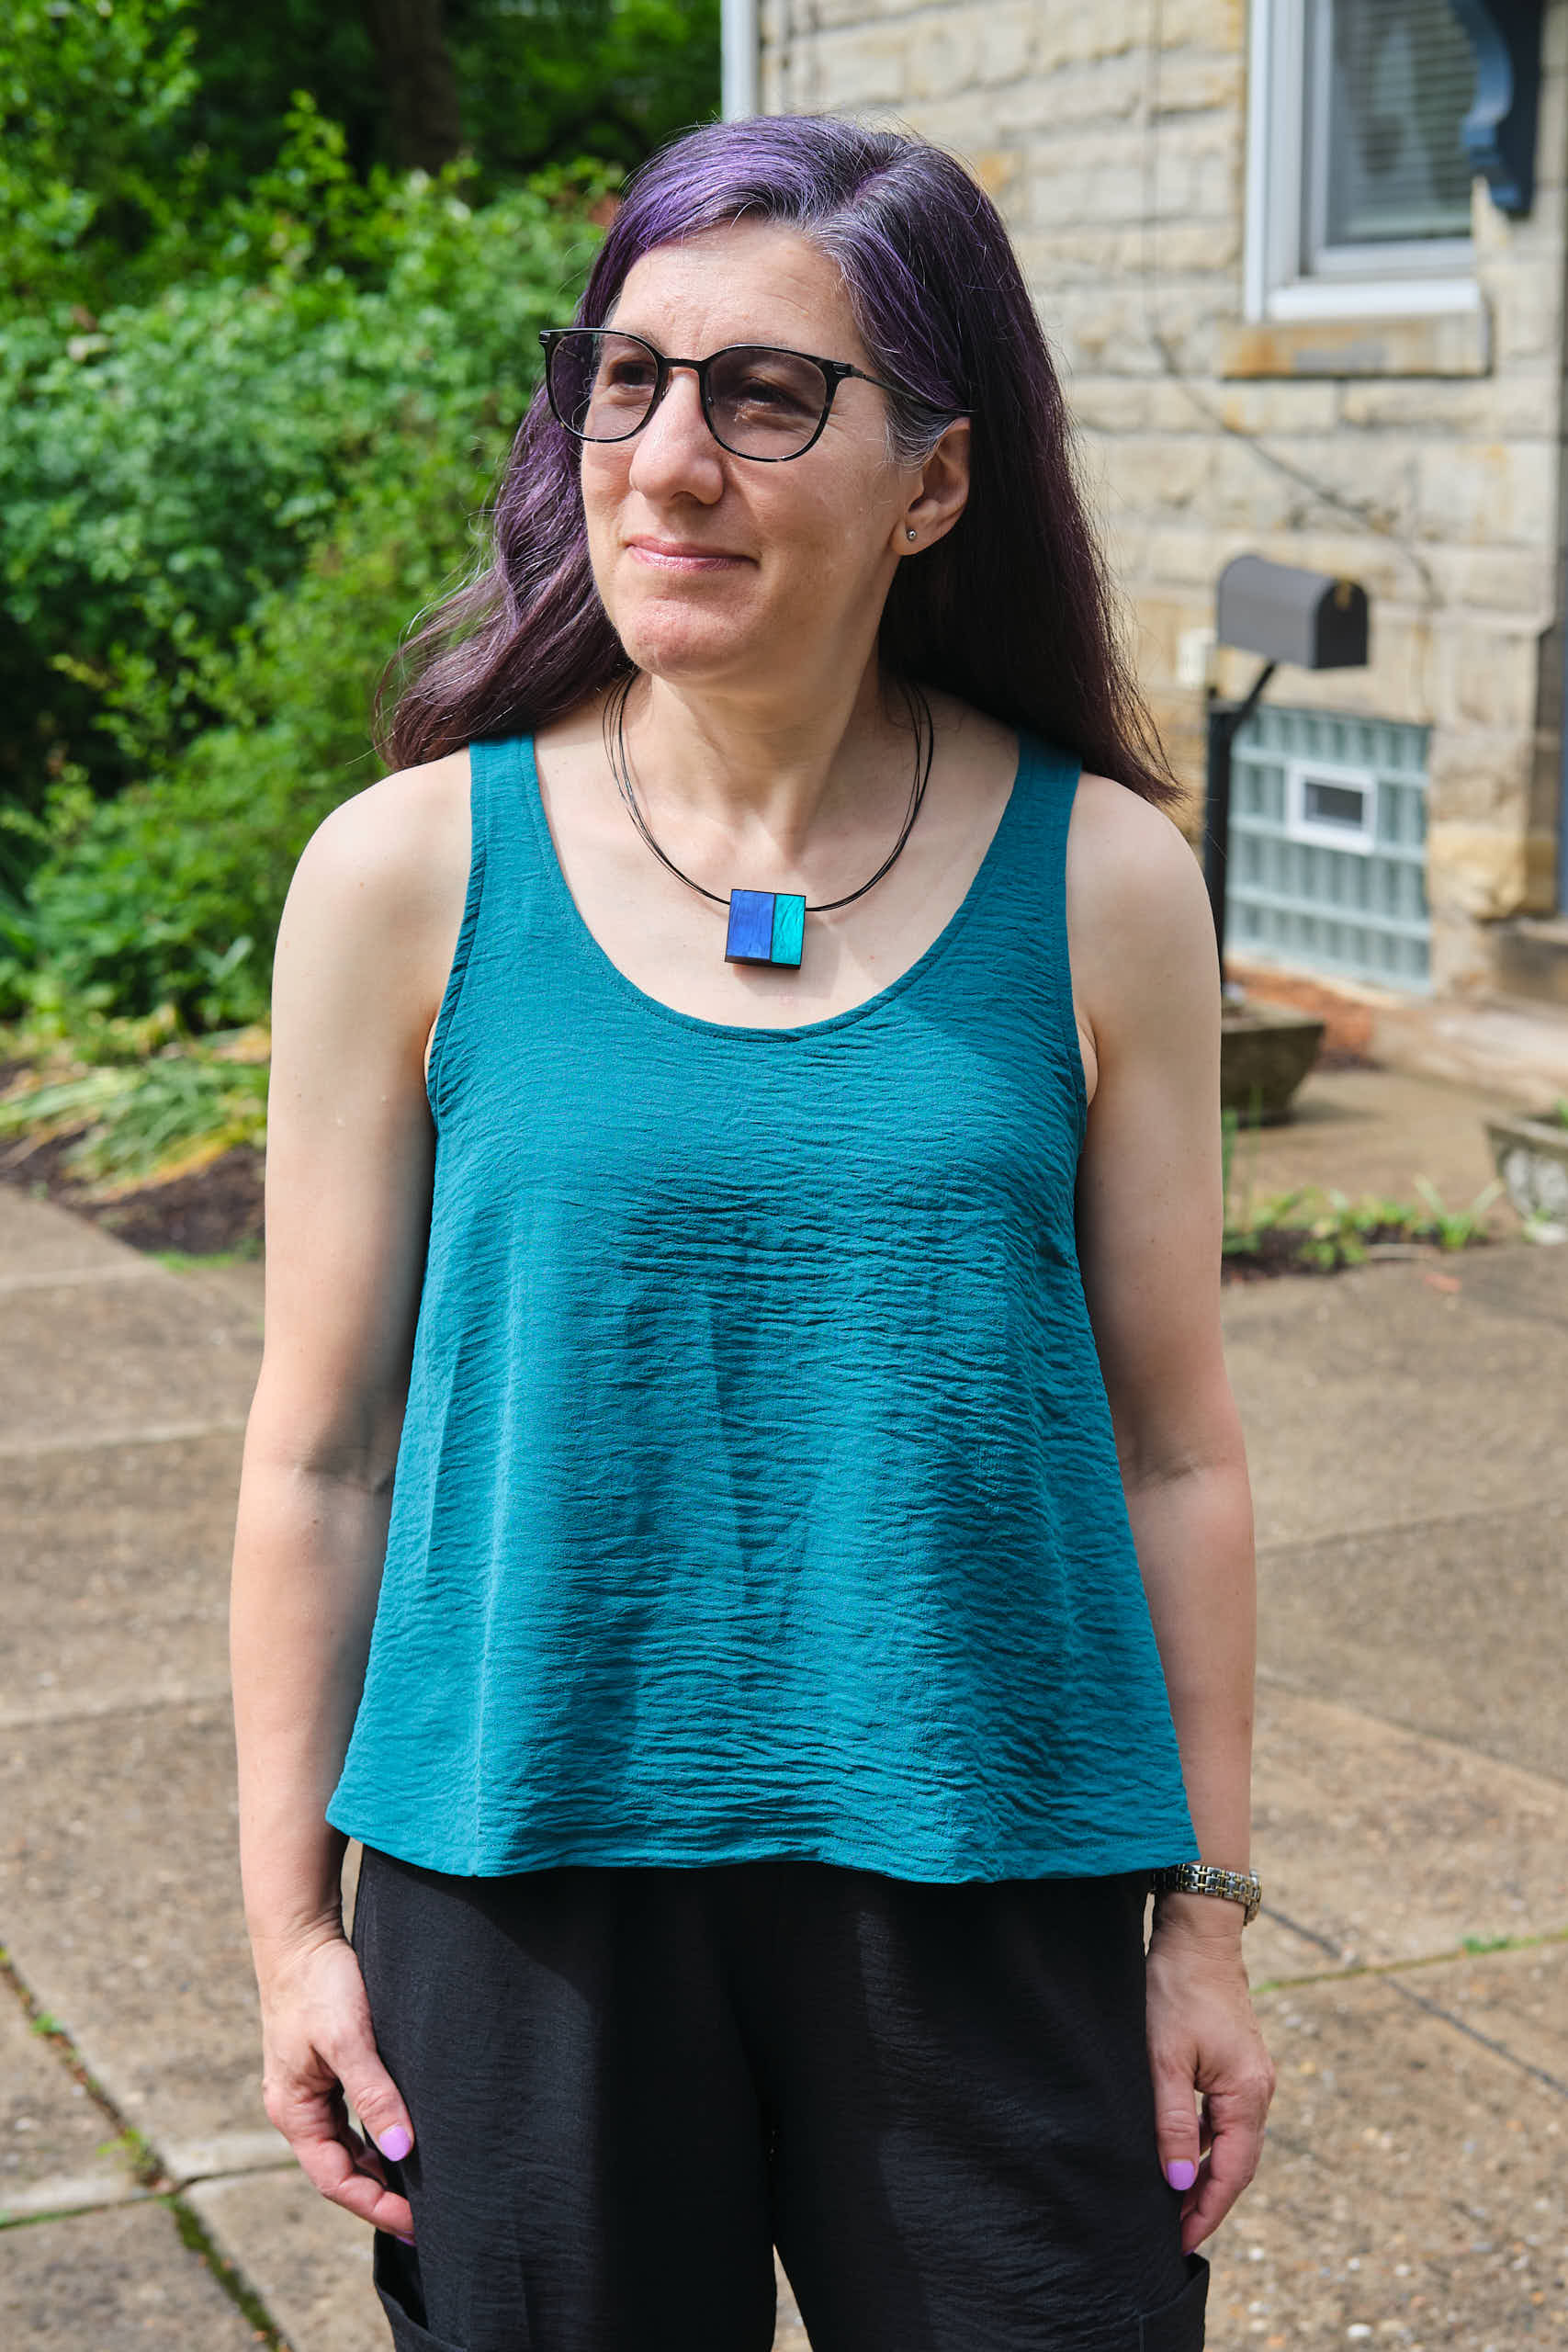
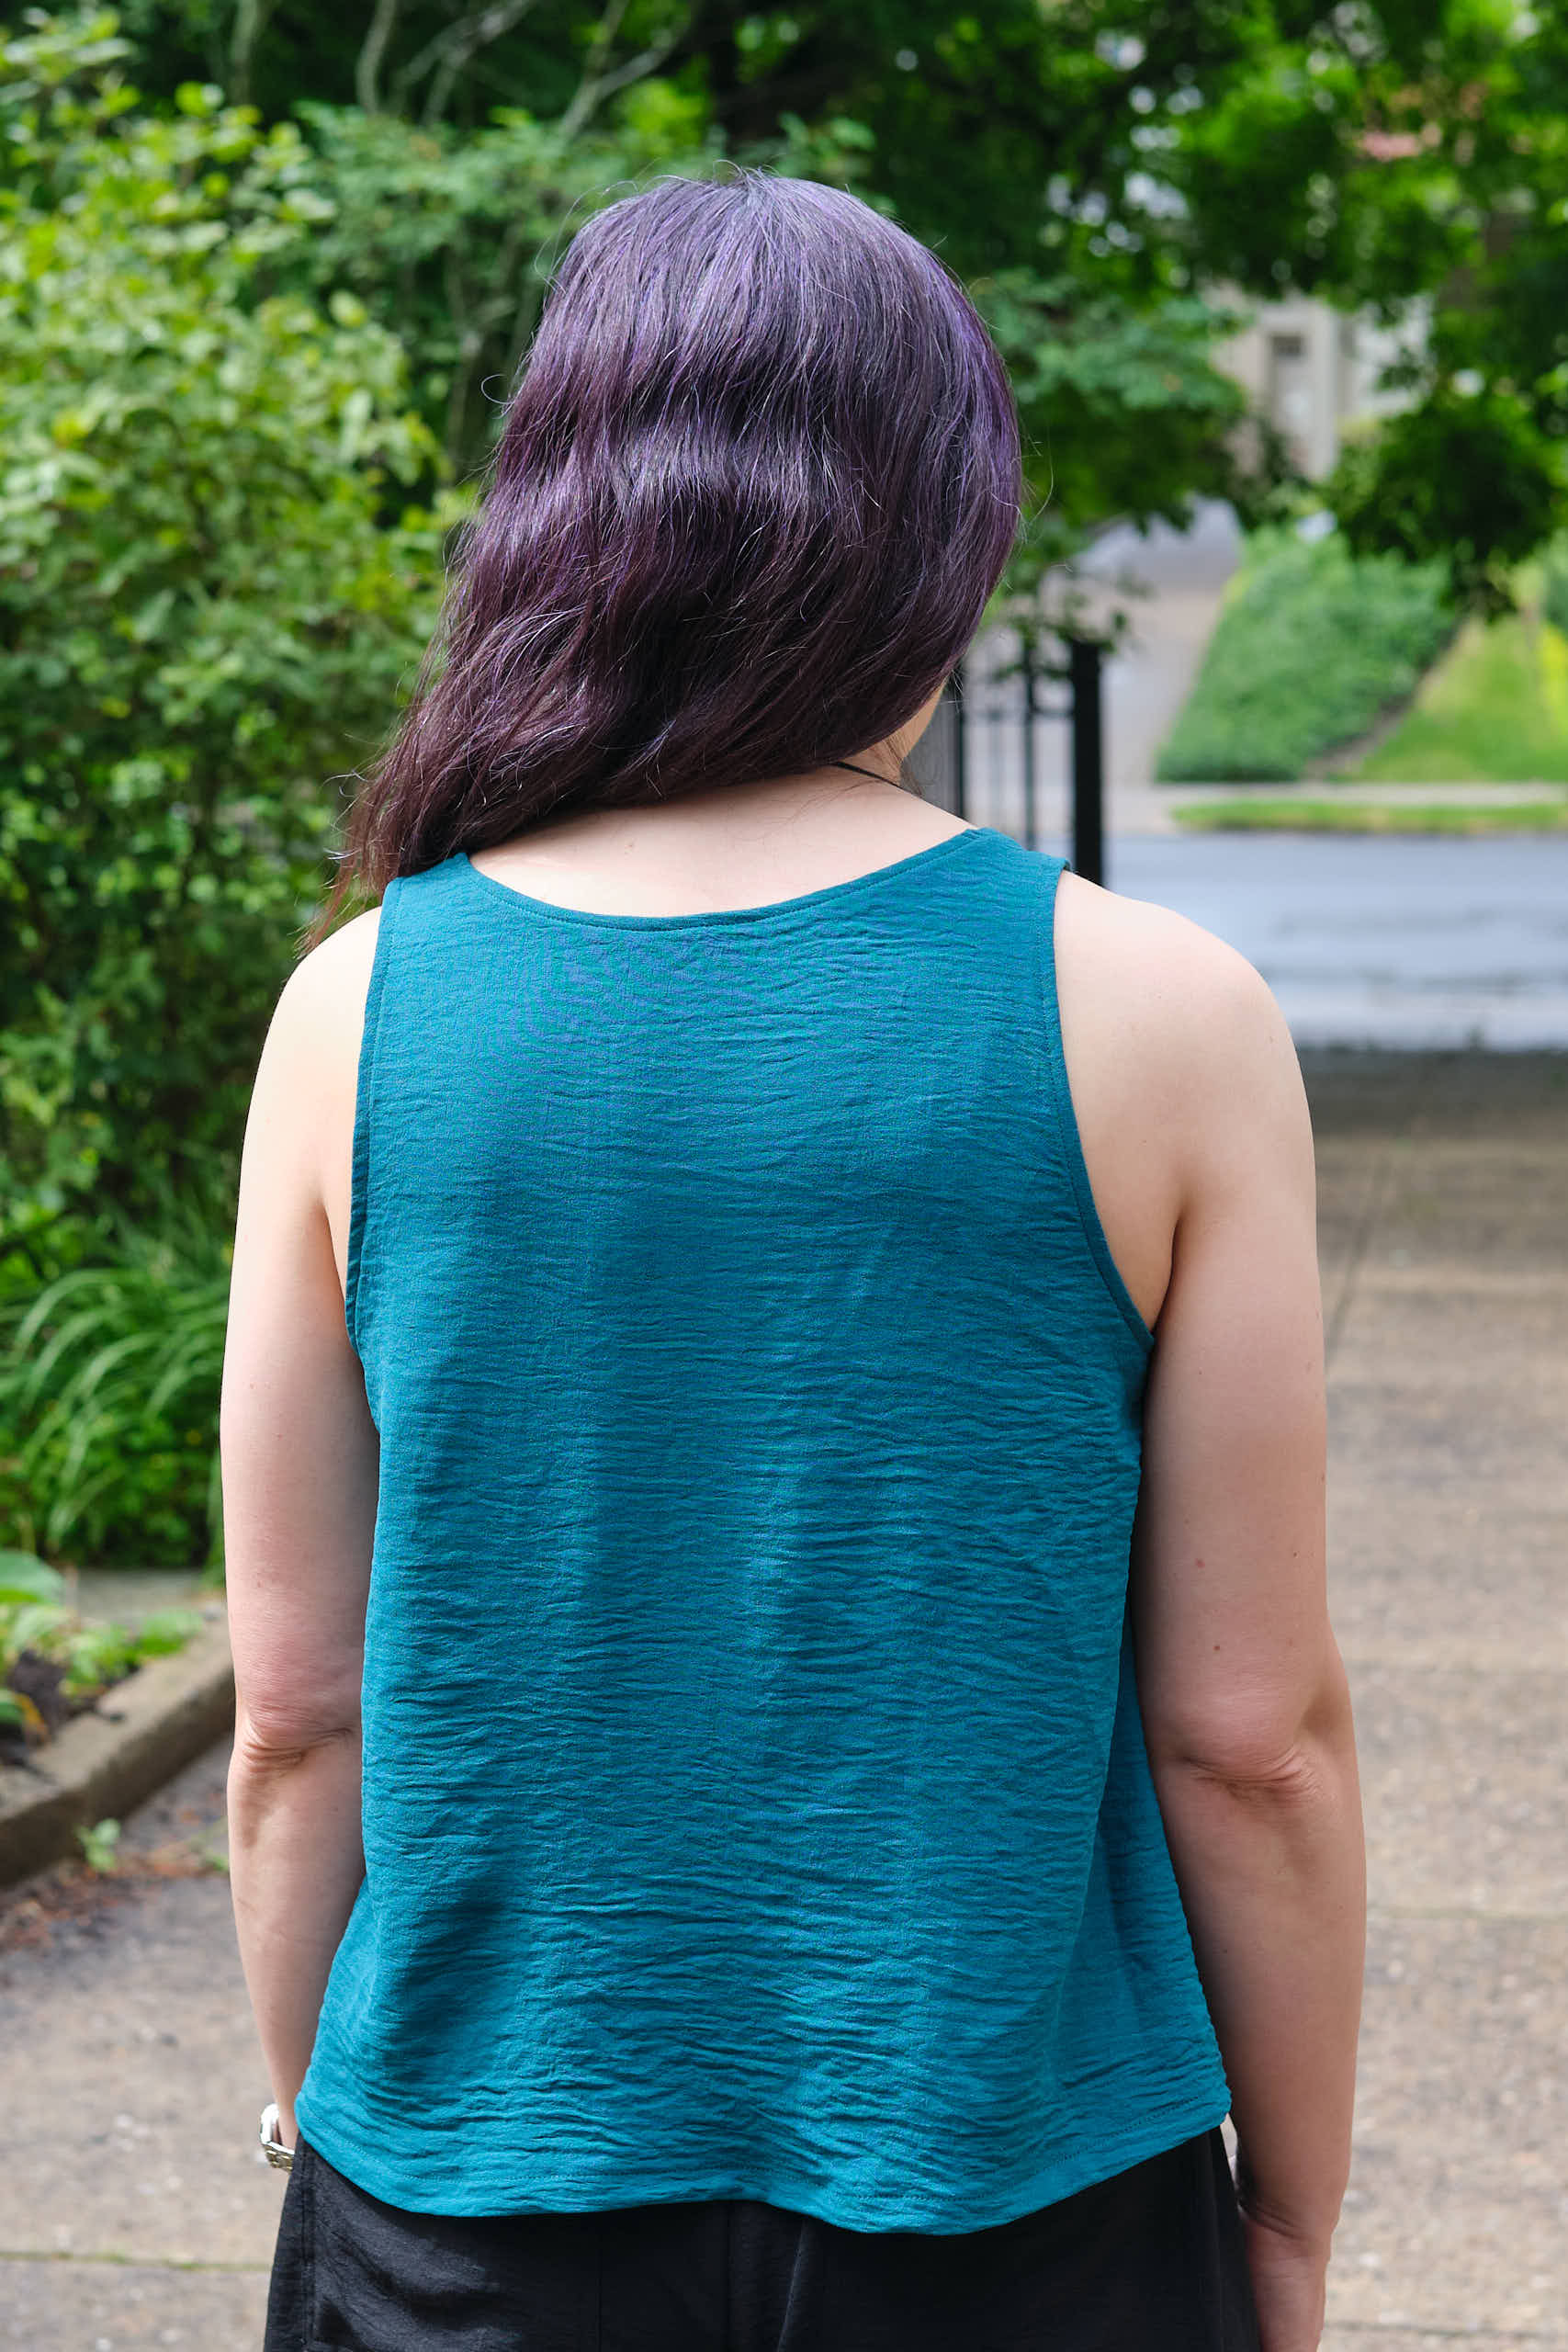
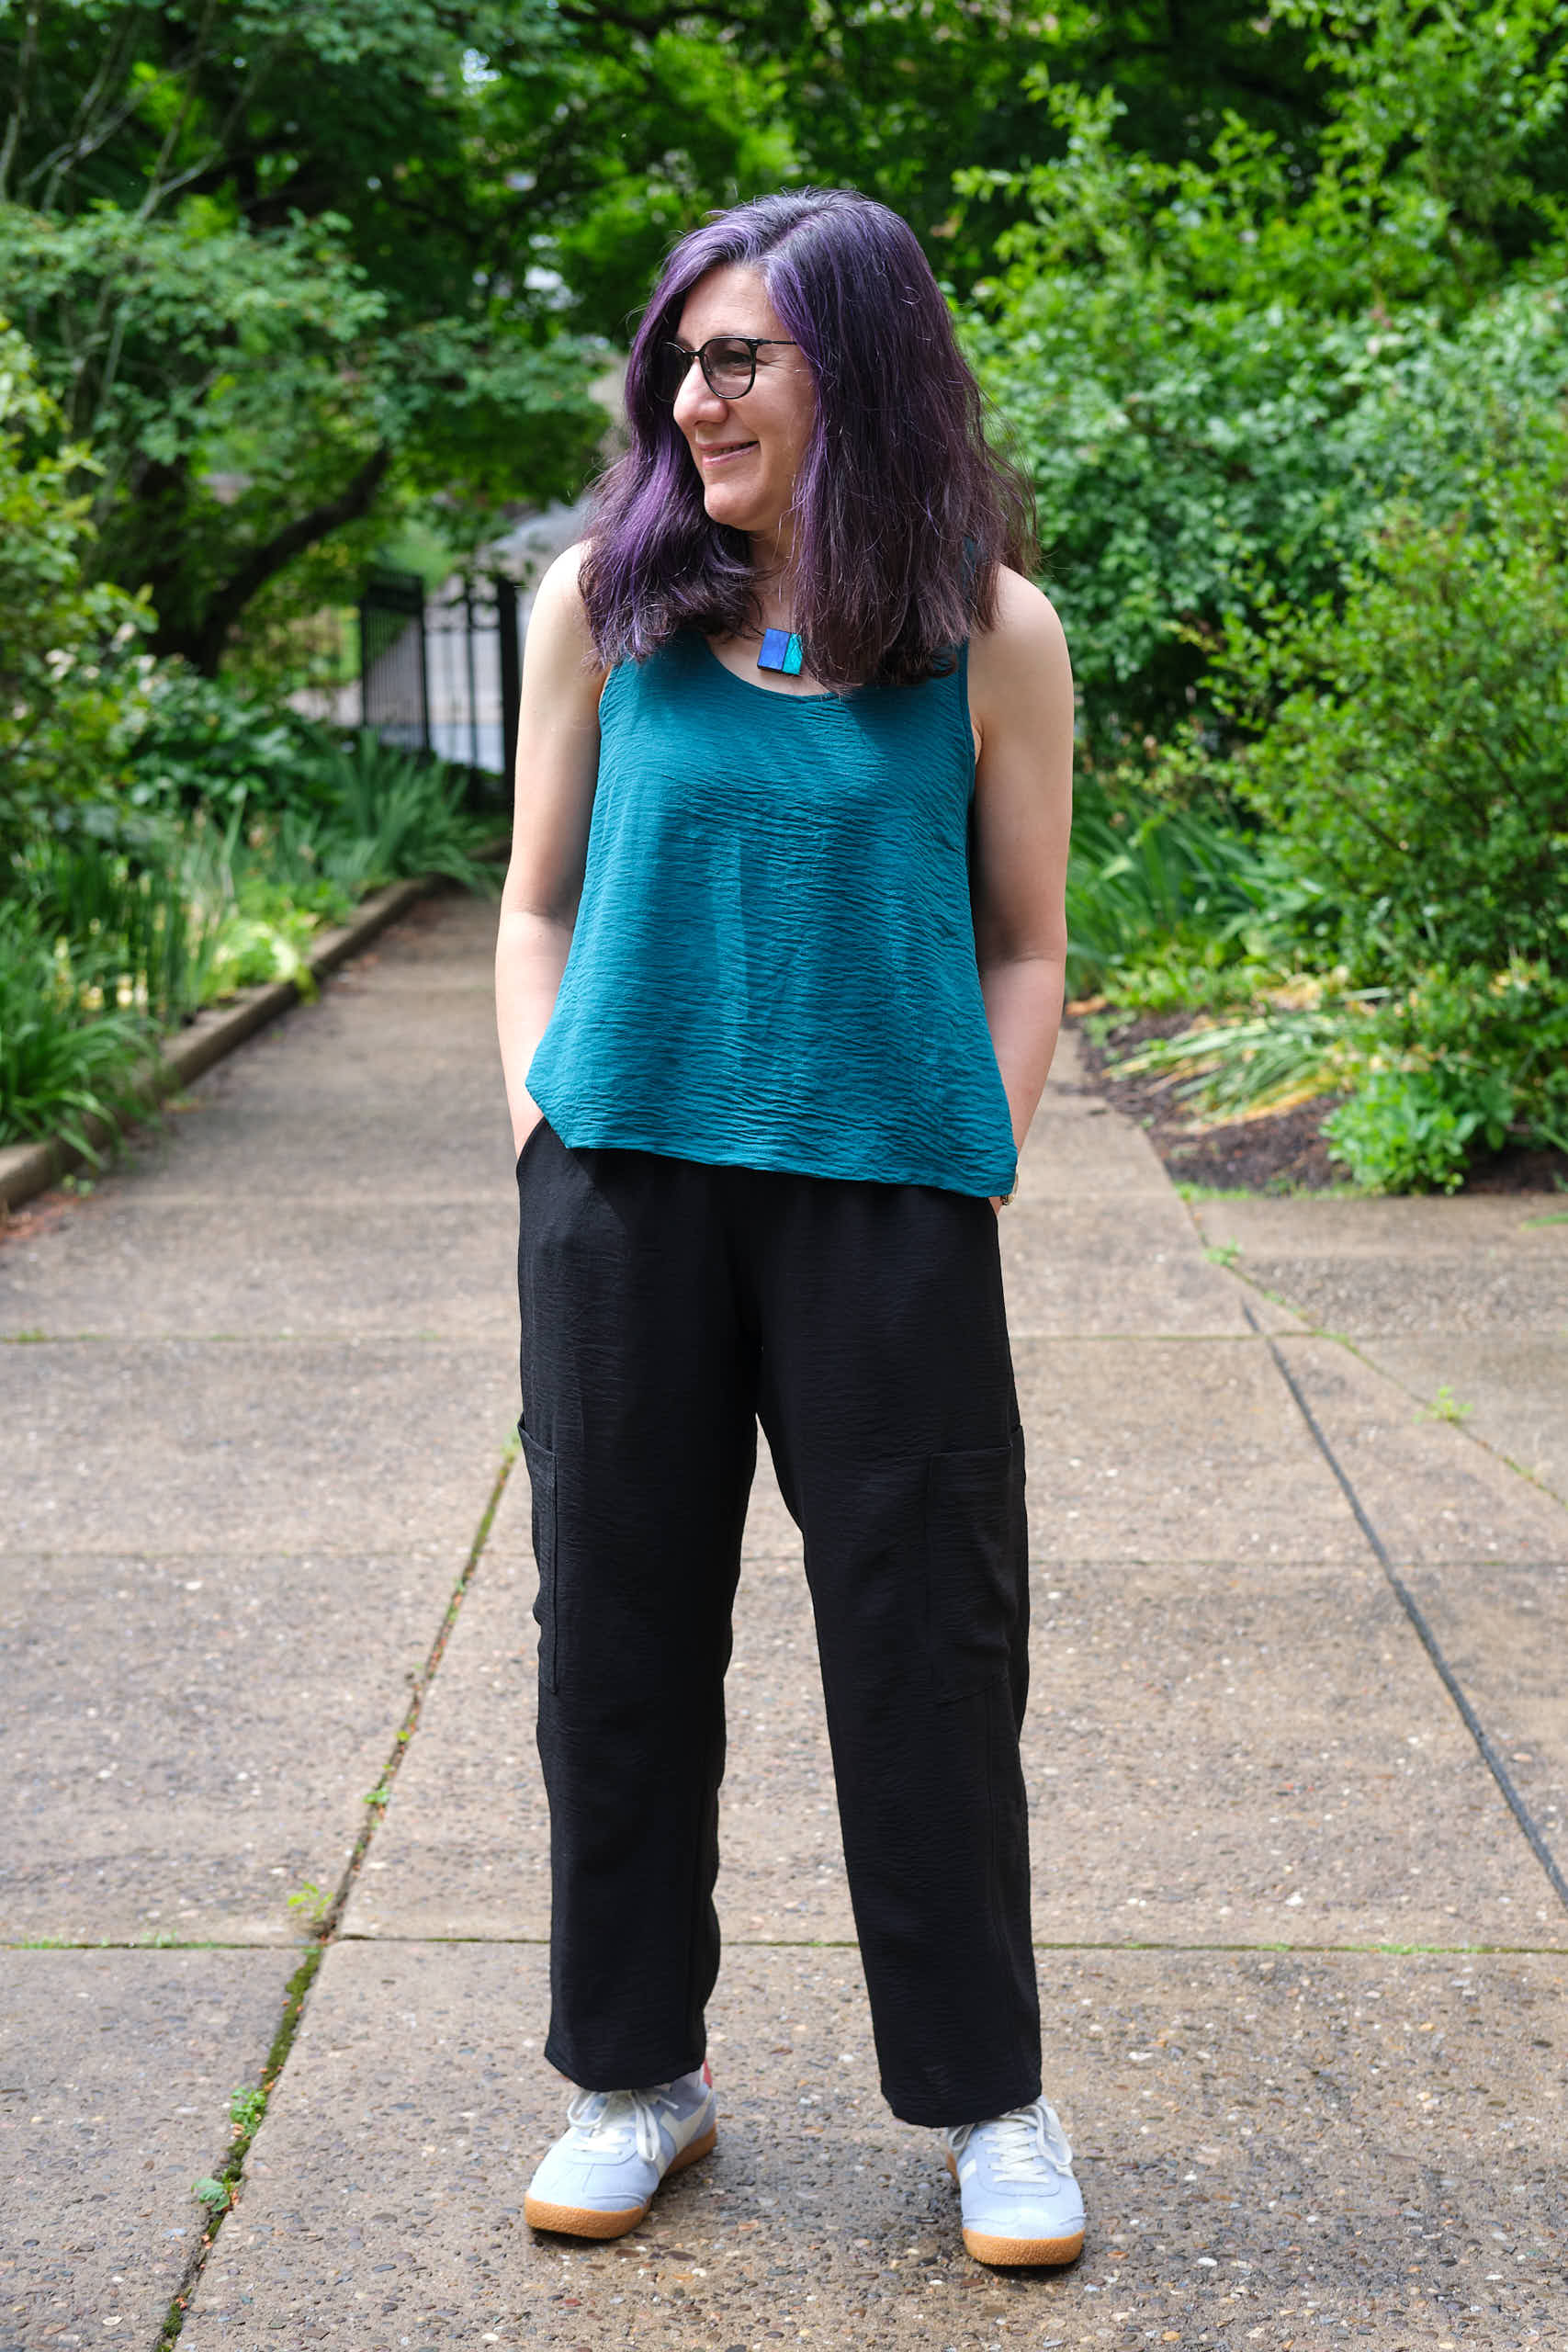
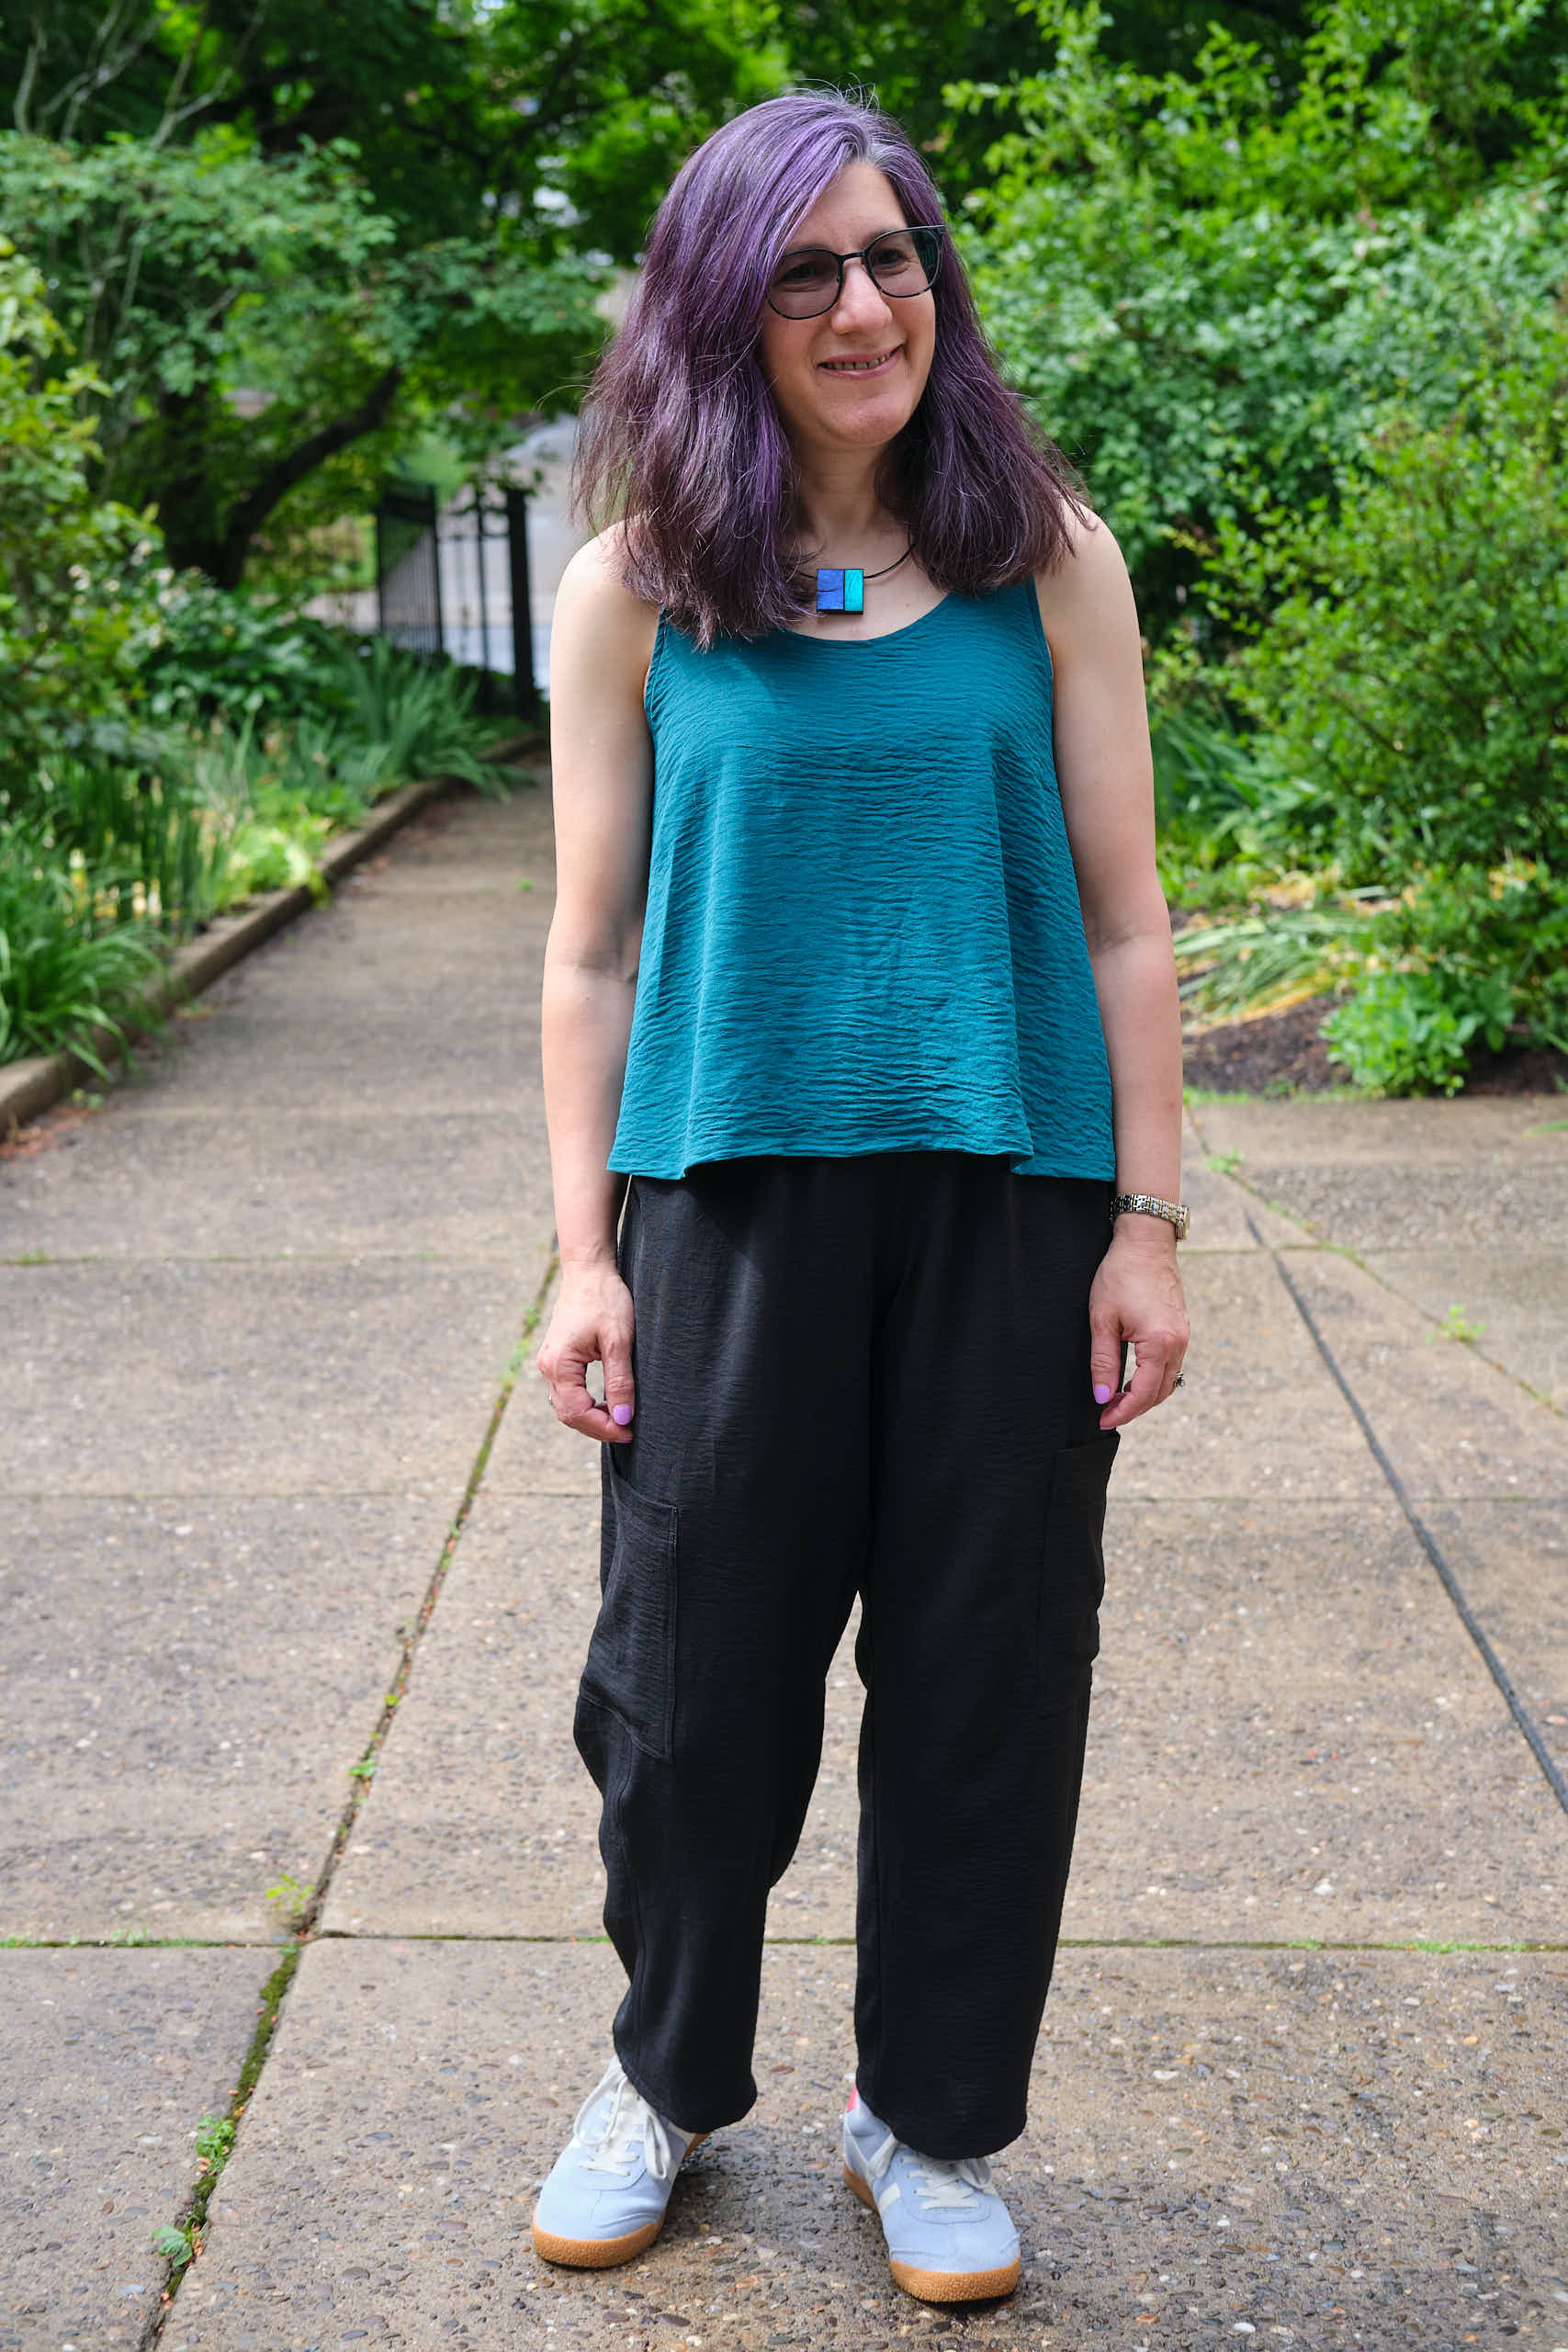
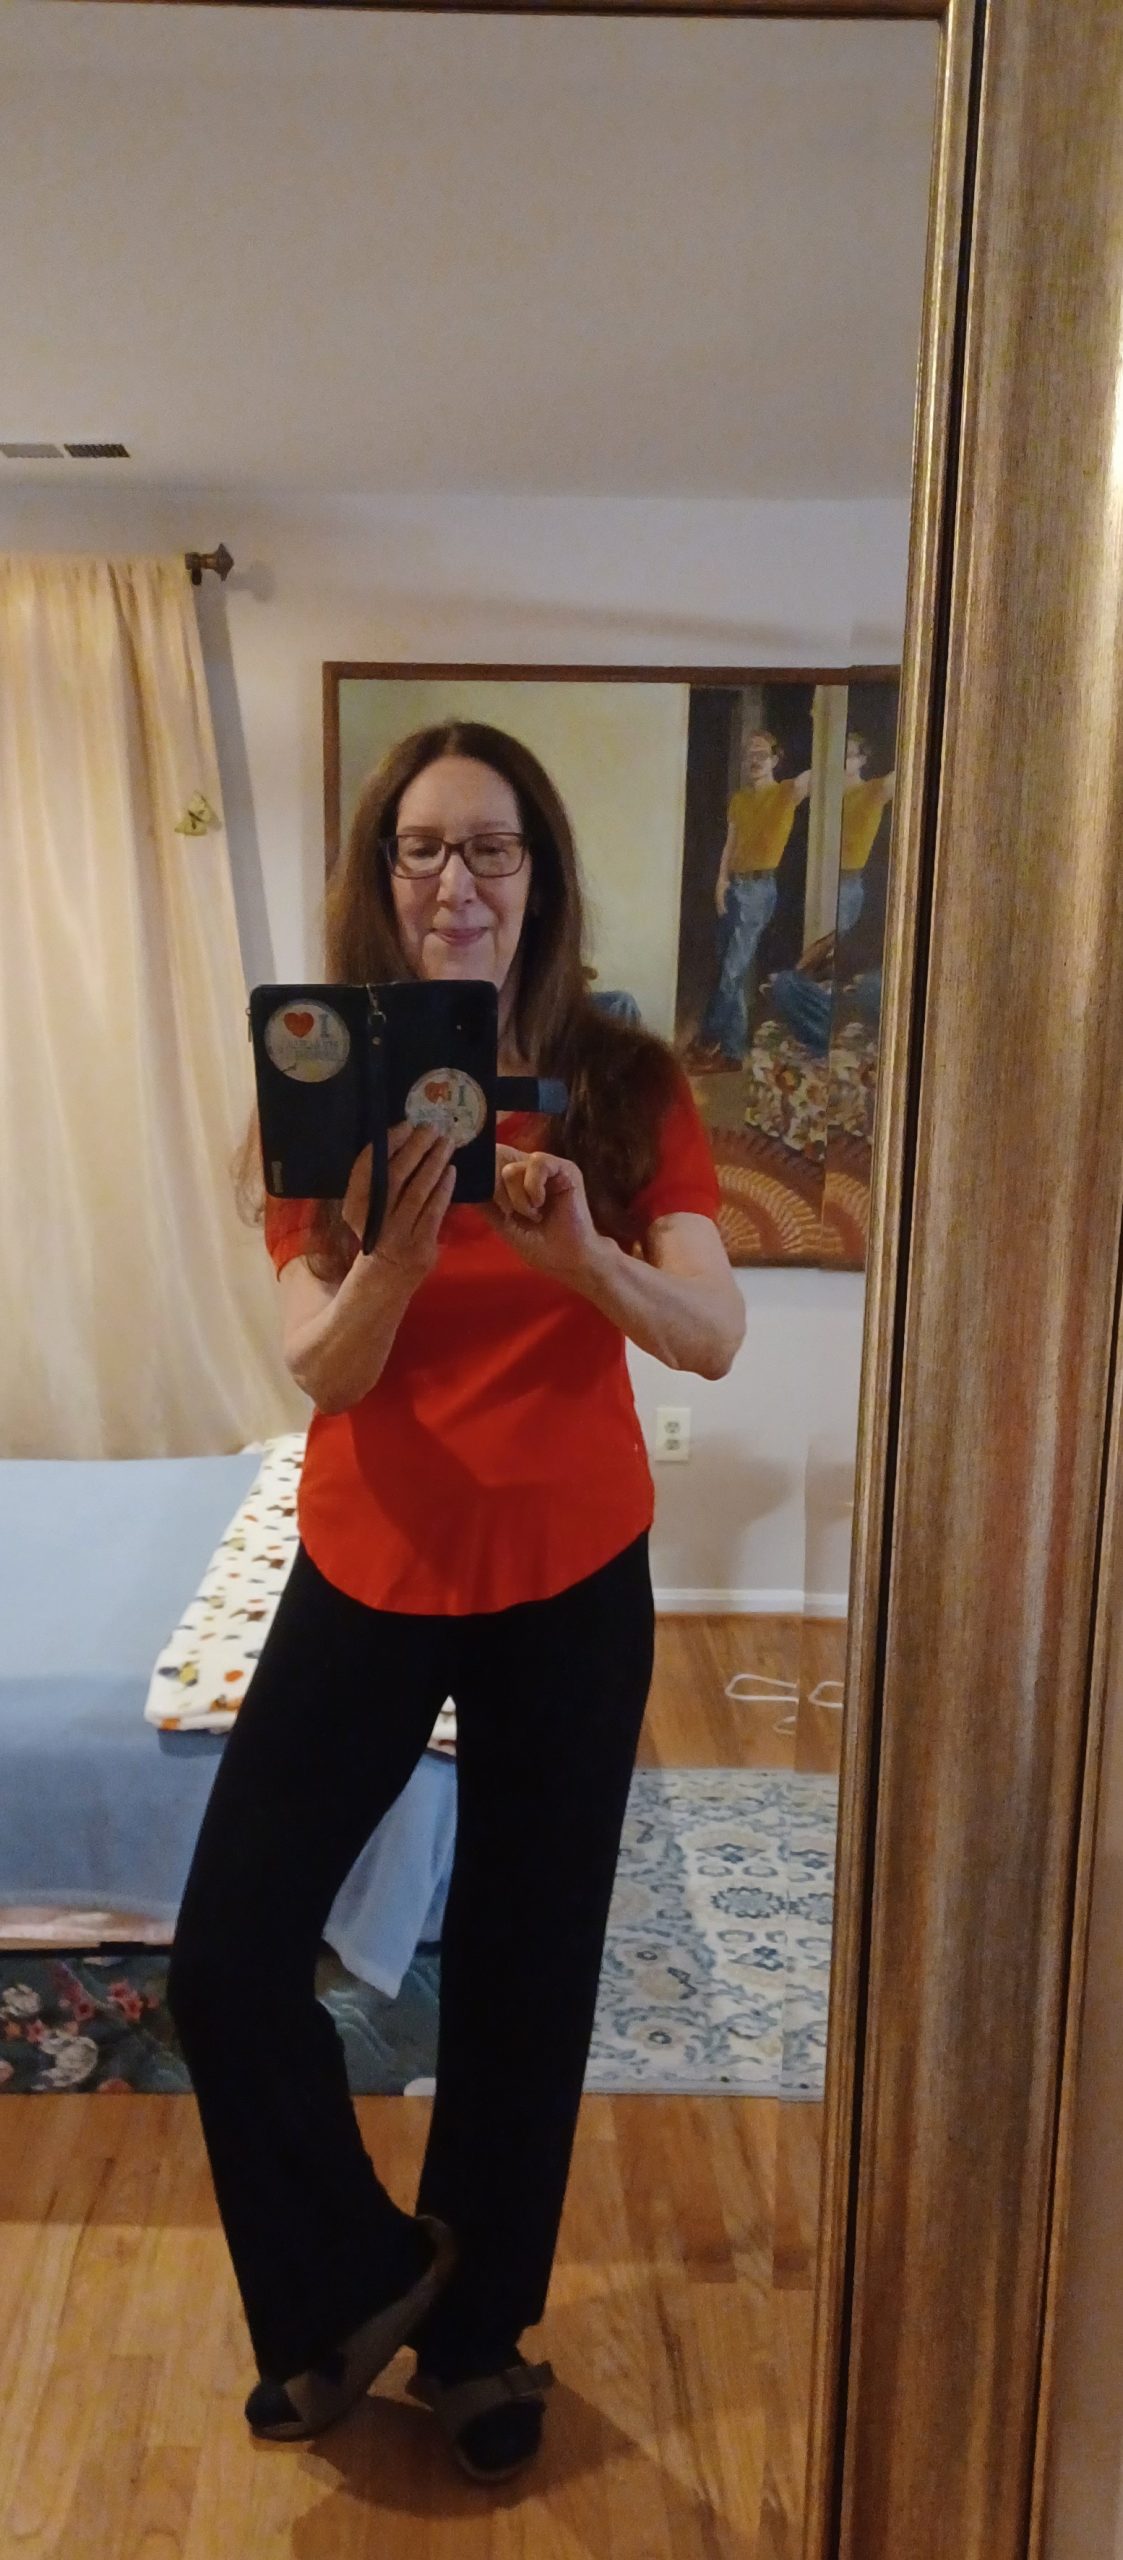
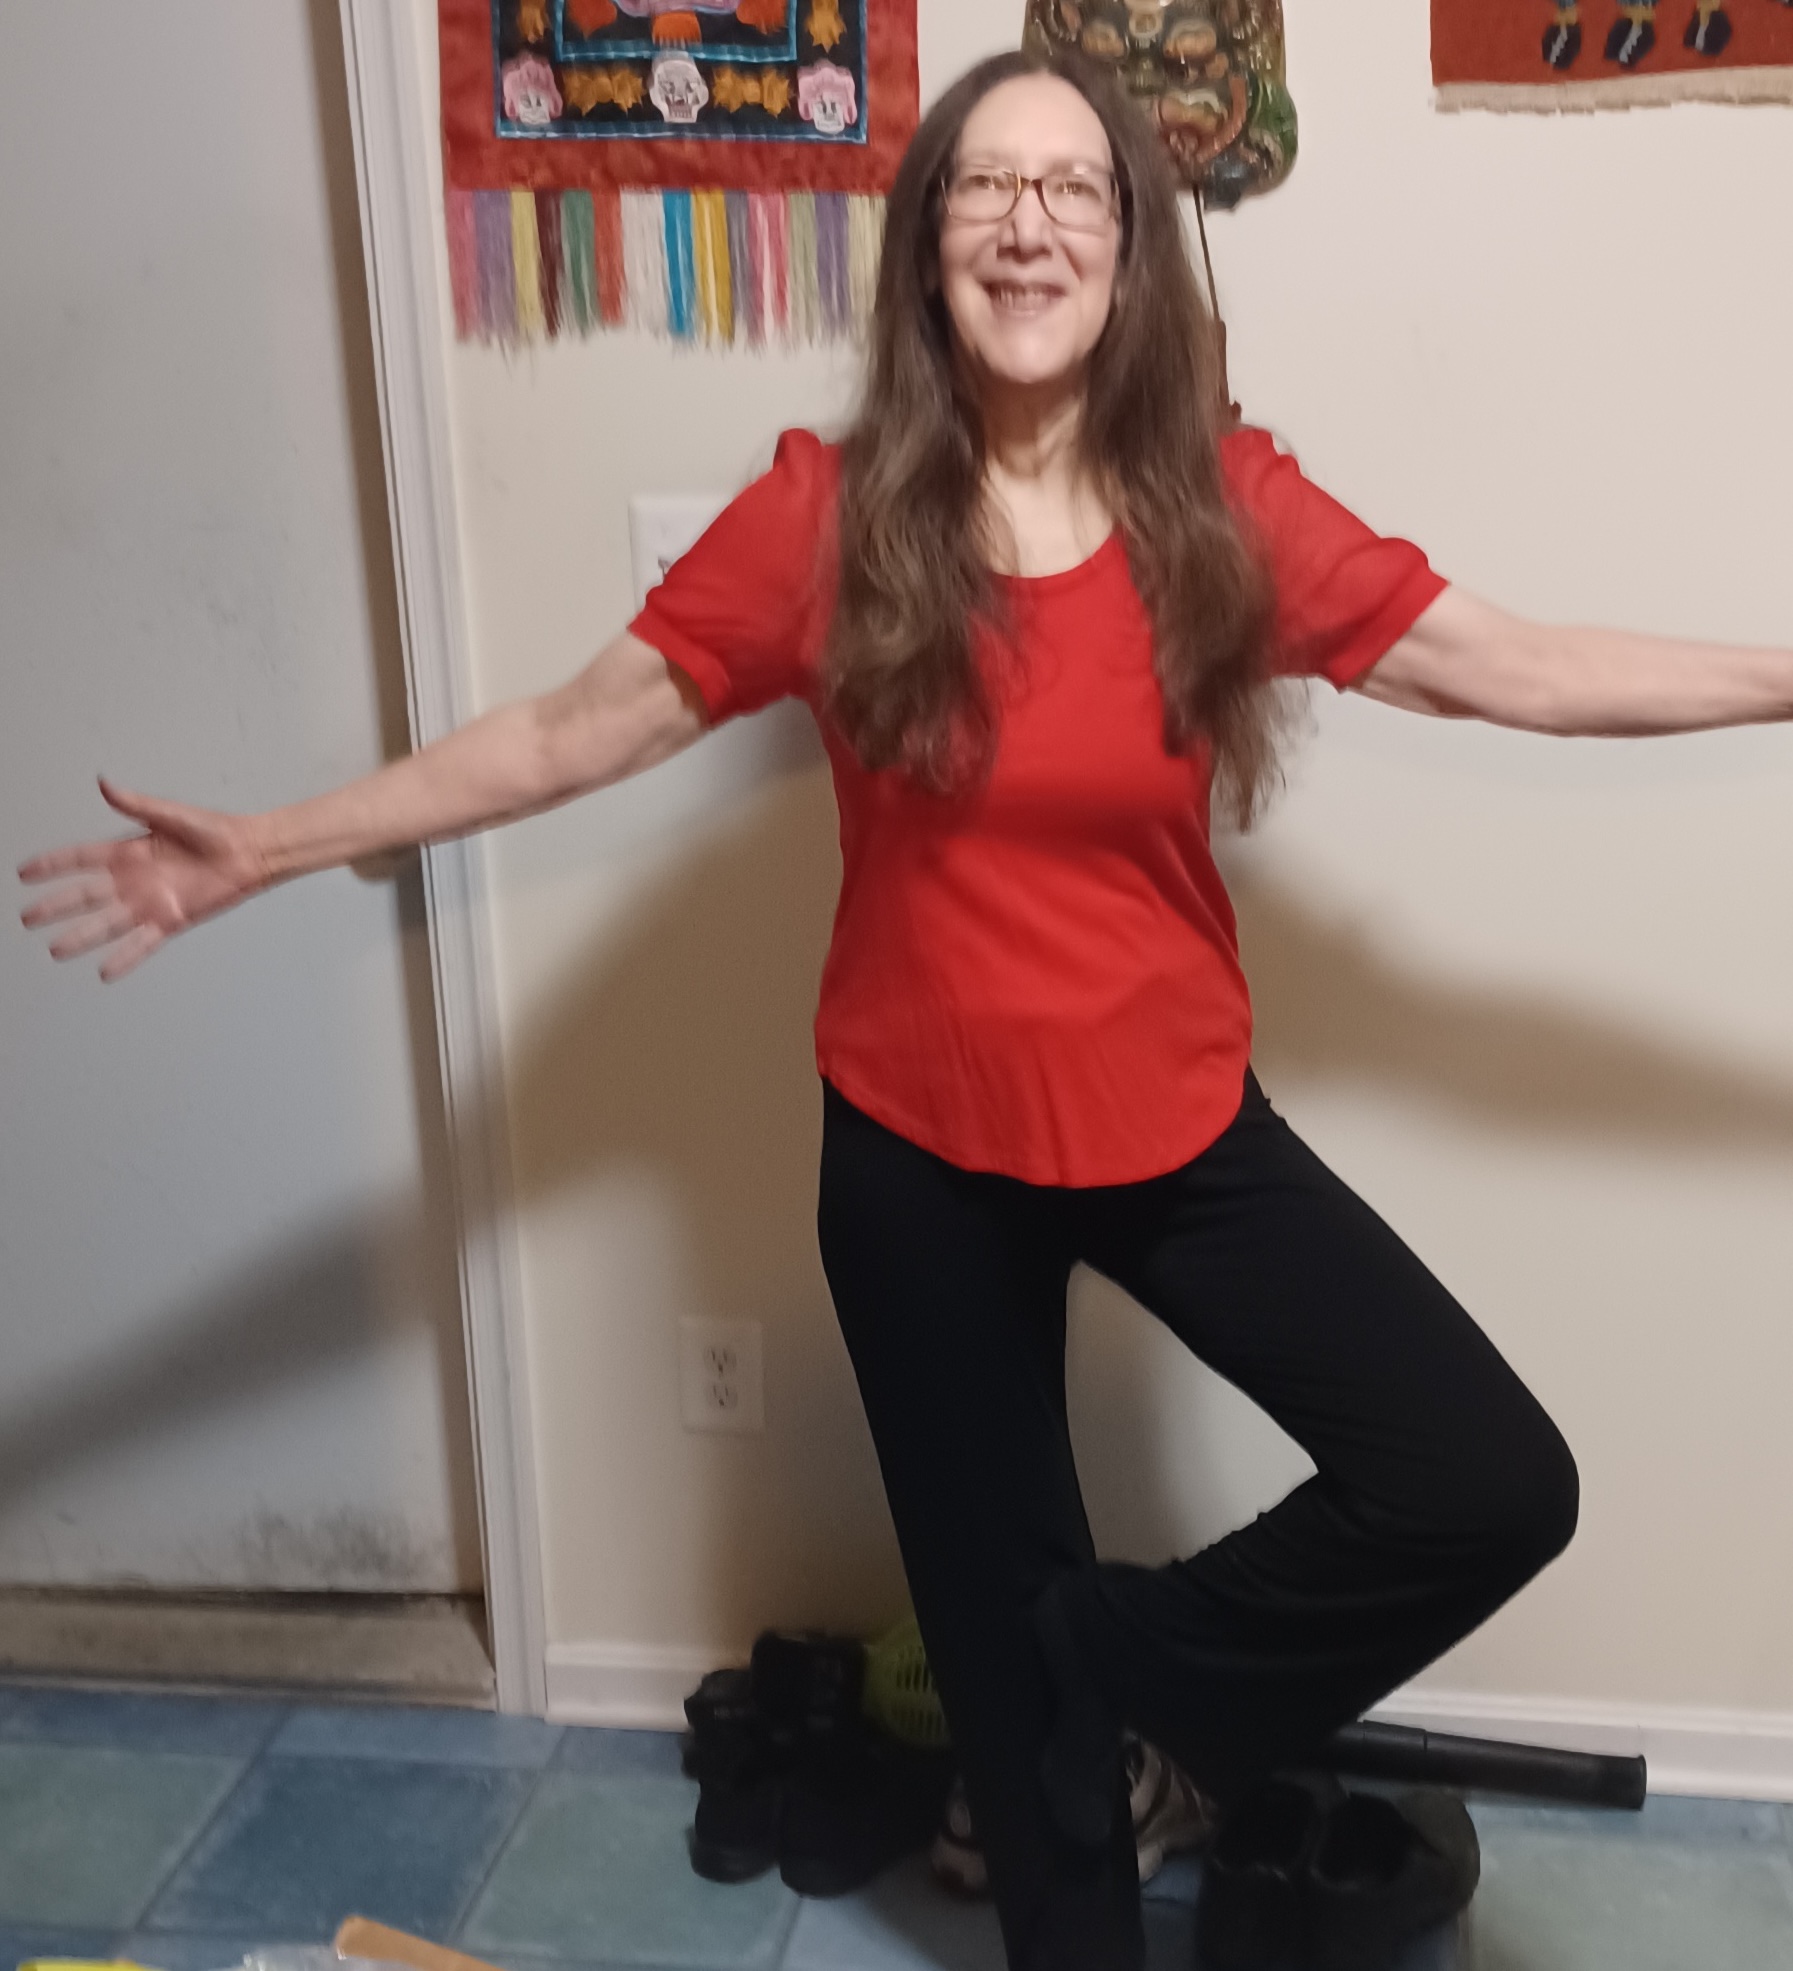
I decided to make a new airflow top to go with my new black airflow Making Moves pants and selected the Pattern Emporium Rise & Shine Sleeveless Top pattern, which I had never tried before. I made it in a size AU8, length 2, low neckline, simple hem, without a center seam or bust darts. This version is easy to cut out: just a front, a back, and 1-inch bias-cut facing strips for the neck and two armholes. Kate’s instructions and video on sewing the neck and armhole facings are clear and easy to follow, but I had to take it pretty slow, so it took a while.
I made the pattern as written, and it came out pretty perfect. I did struggle with a few things, which I’ll note here.
When I projected the pattern I found the notch marks on the neck facing too small to easily see projected on my fabric so I extended them and made them darker.
The airflow fabric grows and spreads a bit (but not as much as double gauze), but pops back. However, the folded facing does come out a bit wider than it should. This is not a problem, as the facing is on the inside of the shirt.
Joining the right shoulder after sewing on the neck facing was challenging. I had to try three times to get it right, and the seam is still a bit bulky. However, following the advice to tack it dow helped.
To sew a 5/8-inch simple hem I machine-basted 5/8″ from the edge (after serging), then folded at the basting line and pressed. I was able to sew at 1/2″ from the front side of the fabric without needing to pin it. When I was done, I pulled out the basting stitches.
I used less than a yard of 58″-wide 175gsm 100% polyester airflow fabric. The airflow has no spandex and thus officially no stretch, but it does have a bit of give due to the crinkle texture. Airflow is very inexpensive (especially when Mily Mae Fabrics puts it on sale), requires no ironing, and is less slippery to sew than a lot of other polyester wovens. However, it doesn’t hold a crisp crease when pressed. The color I used was called aqua, but I think it is more of a teal.
Length 2 is a good length for me to wear untucked. There is also room to tuck it in on high waisted pants, but if I was going to regularly tuck I might make the longer length. Rise & Shine has more of a swing shape than most of the other Pattern Emporium woven tops (Be Mine, About Town, Spill the Tea), which are all built on the same basic bodice and have side seams that do not slope out as much. Rise & Shine is designed to be sleeveless and sleeves cannot be added (although I could see mashing it with Be Mine to have sleeves with the swing shape). The neckline comes with high and mid options, but the mid option is similar to the low option on the Be Mine top. You would have to improvise (or maybe mash with the Meet You There dress mid neckline) to have an in-between option. I made the lower option and it is definitely lower than I usually wear, but I think it works out ok for a summer top.
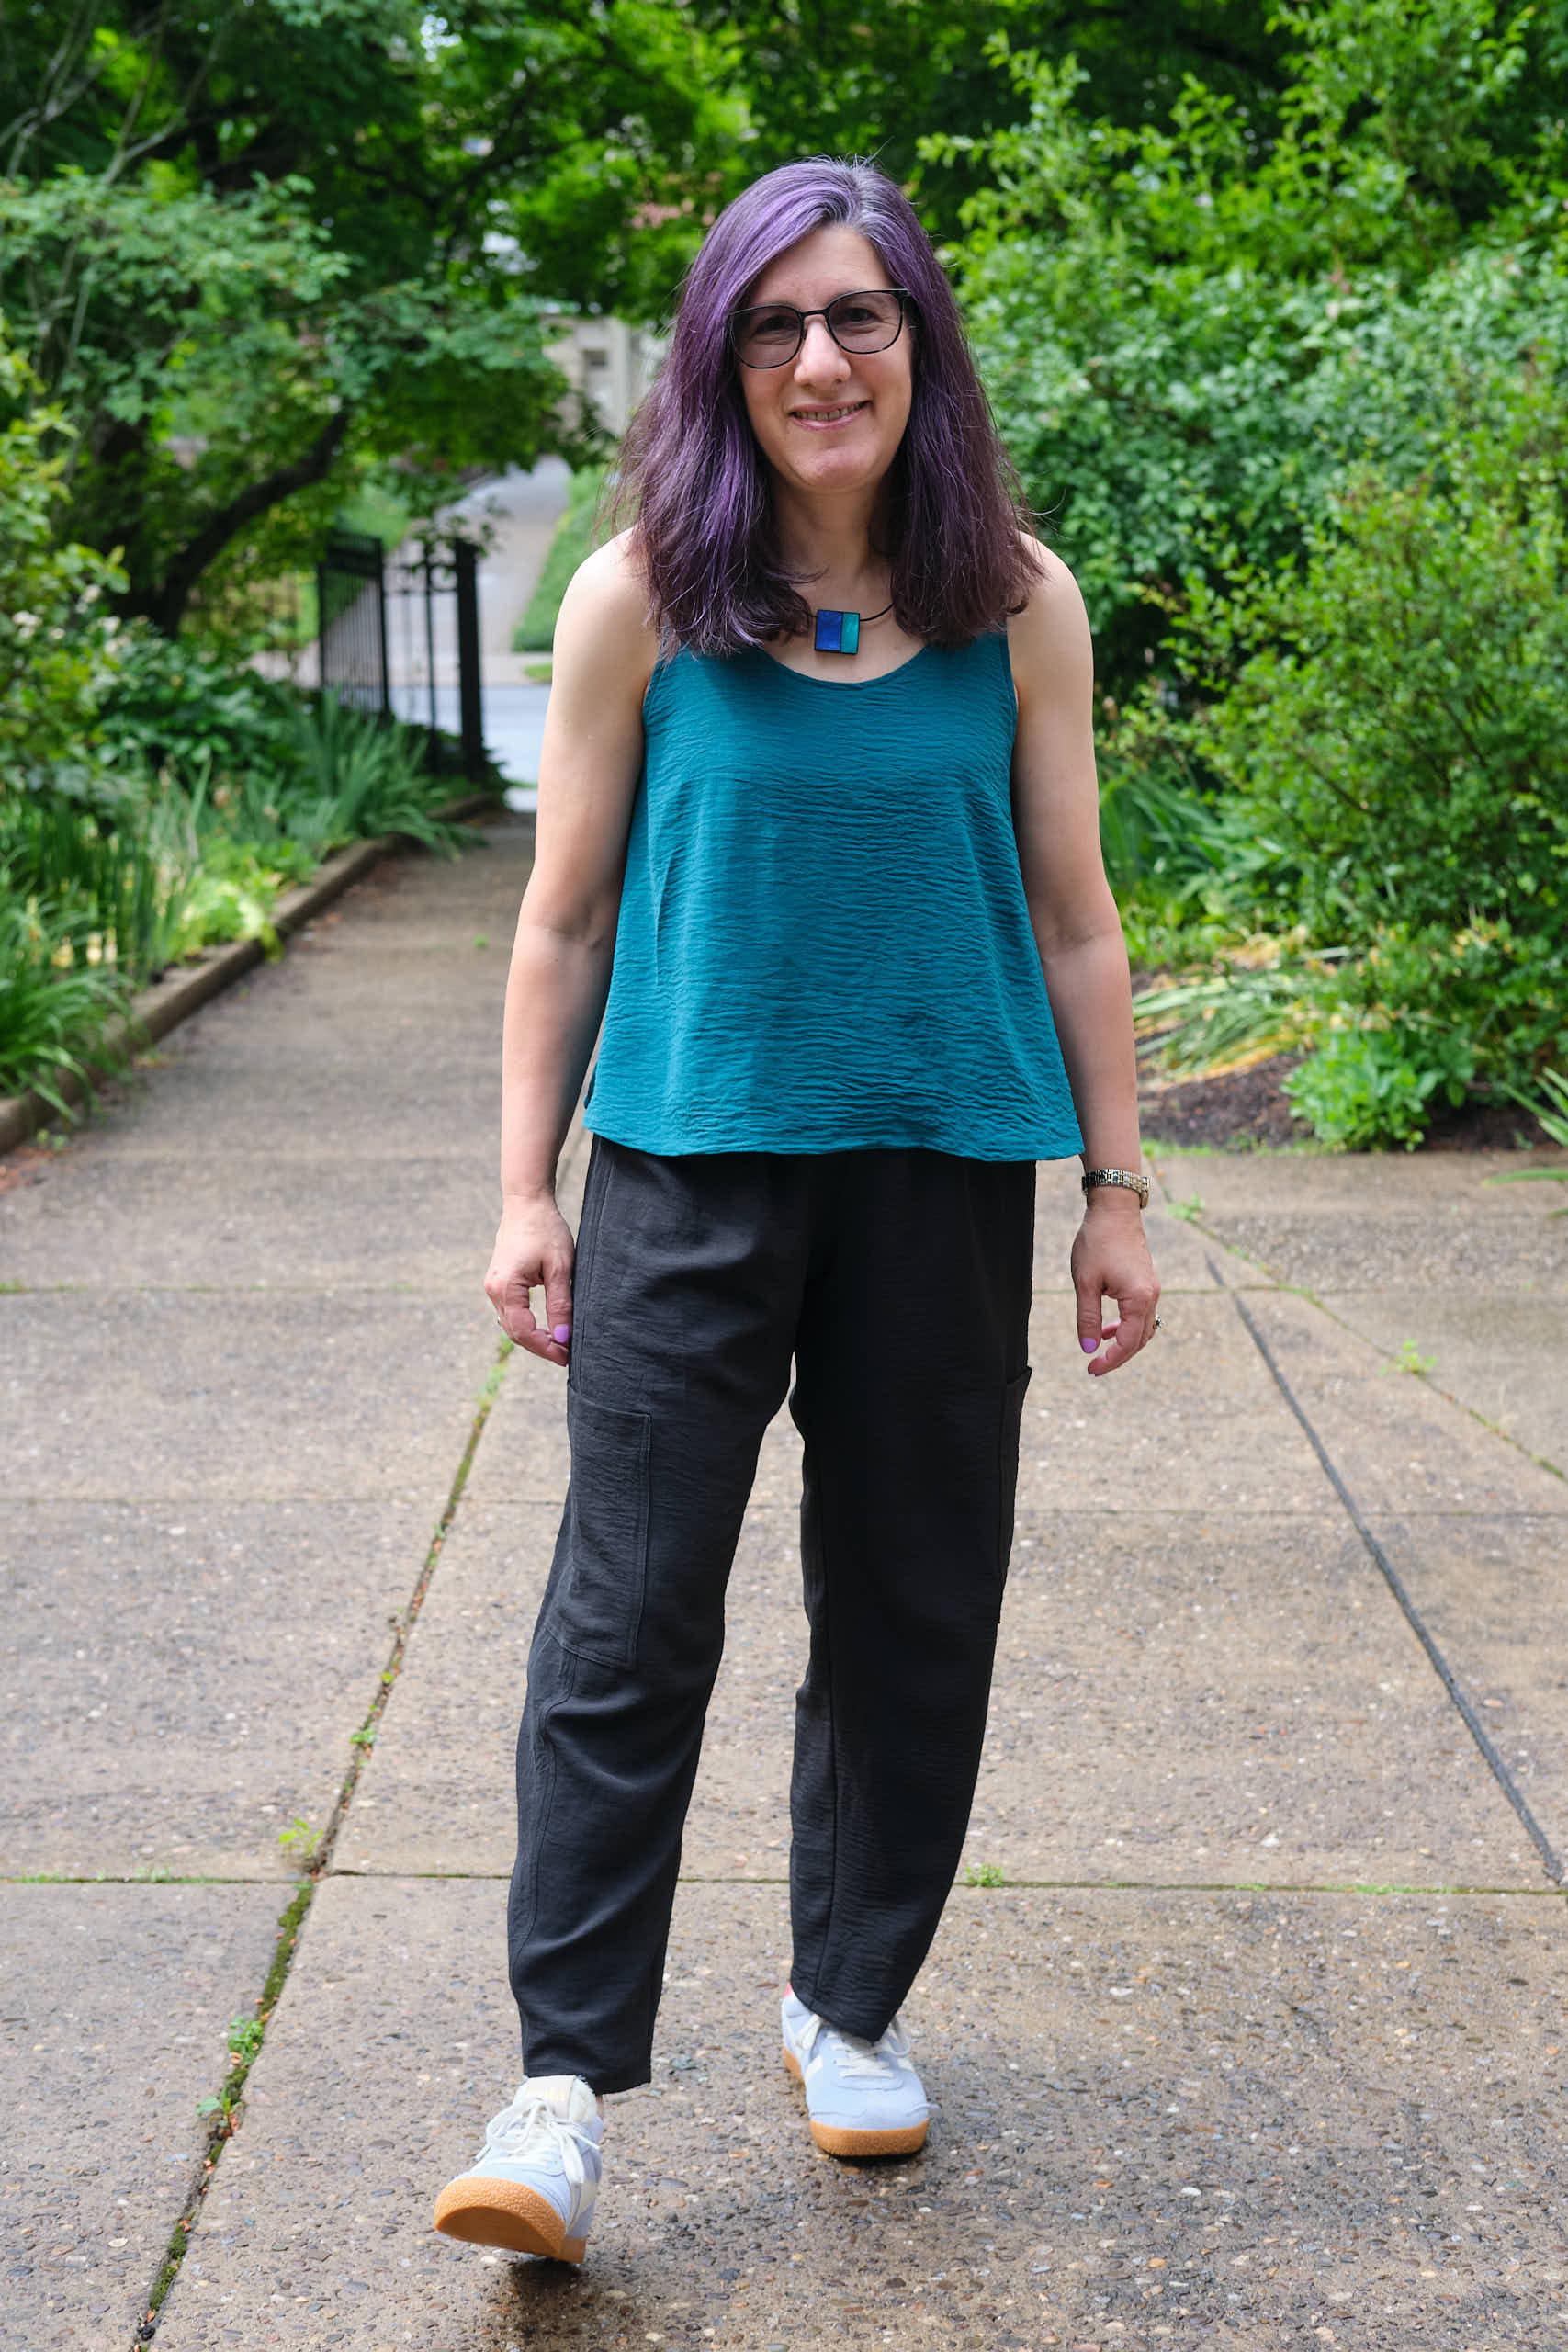
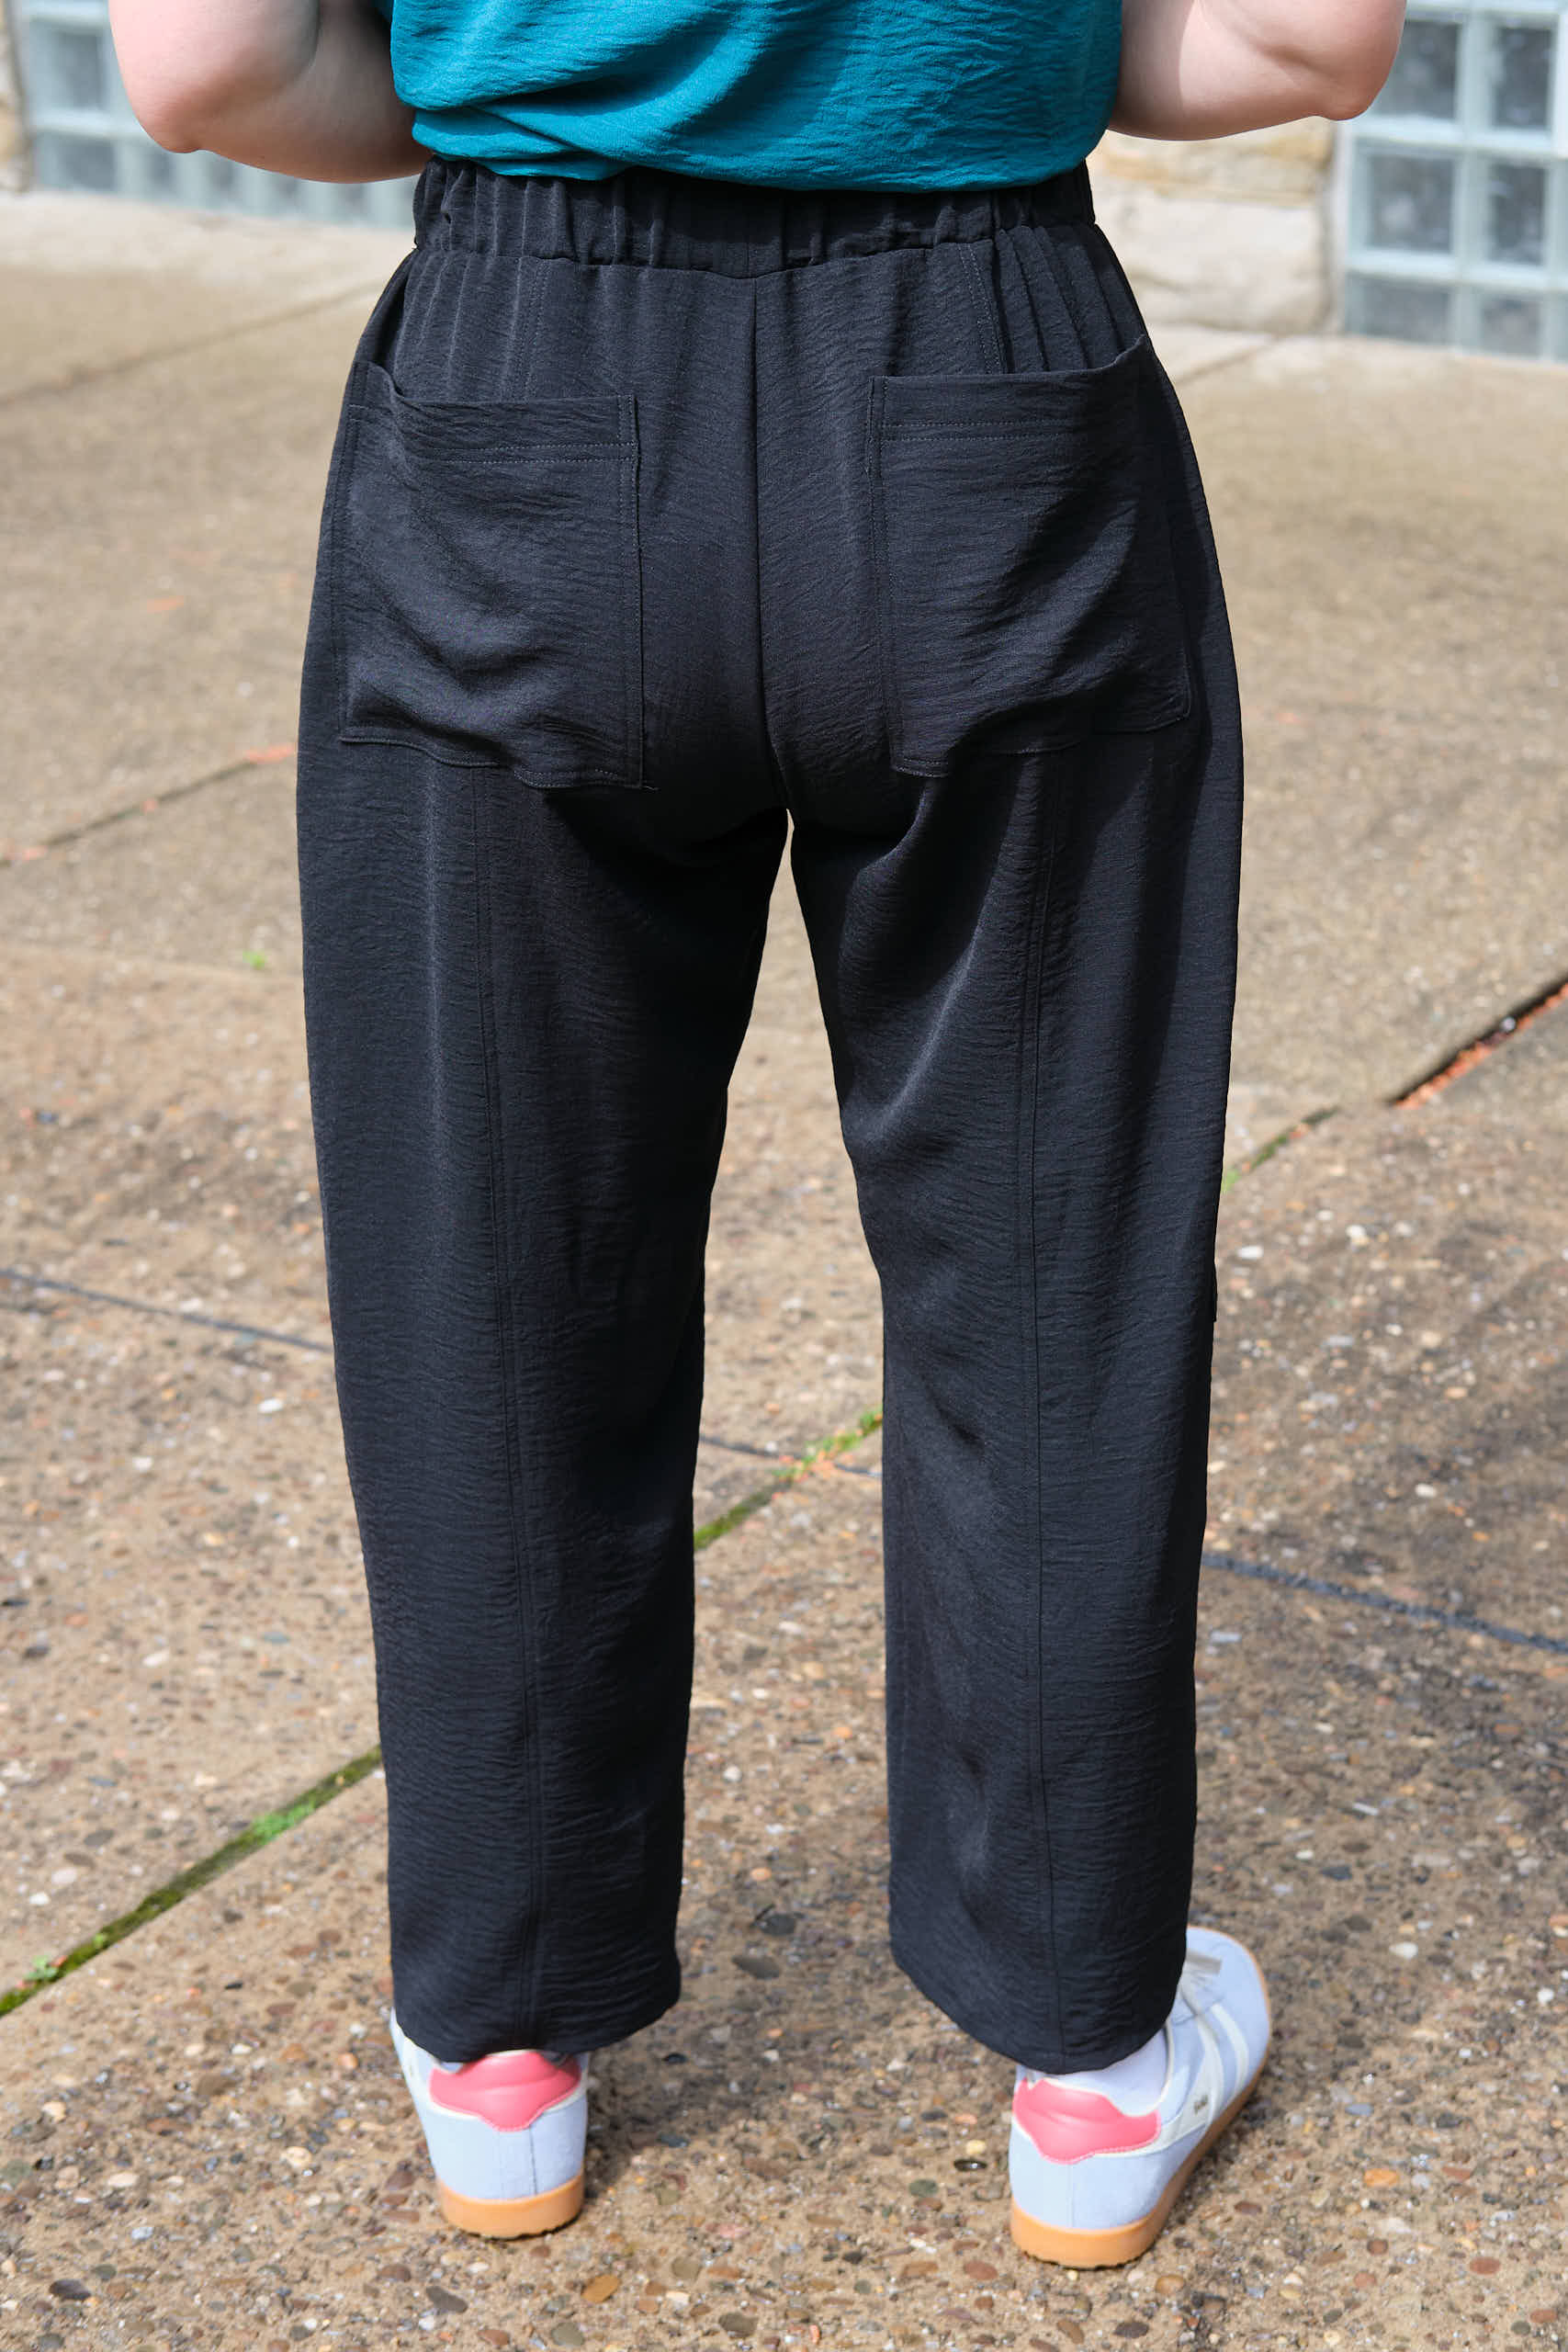
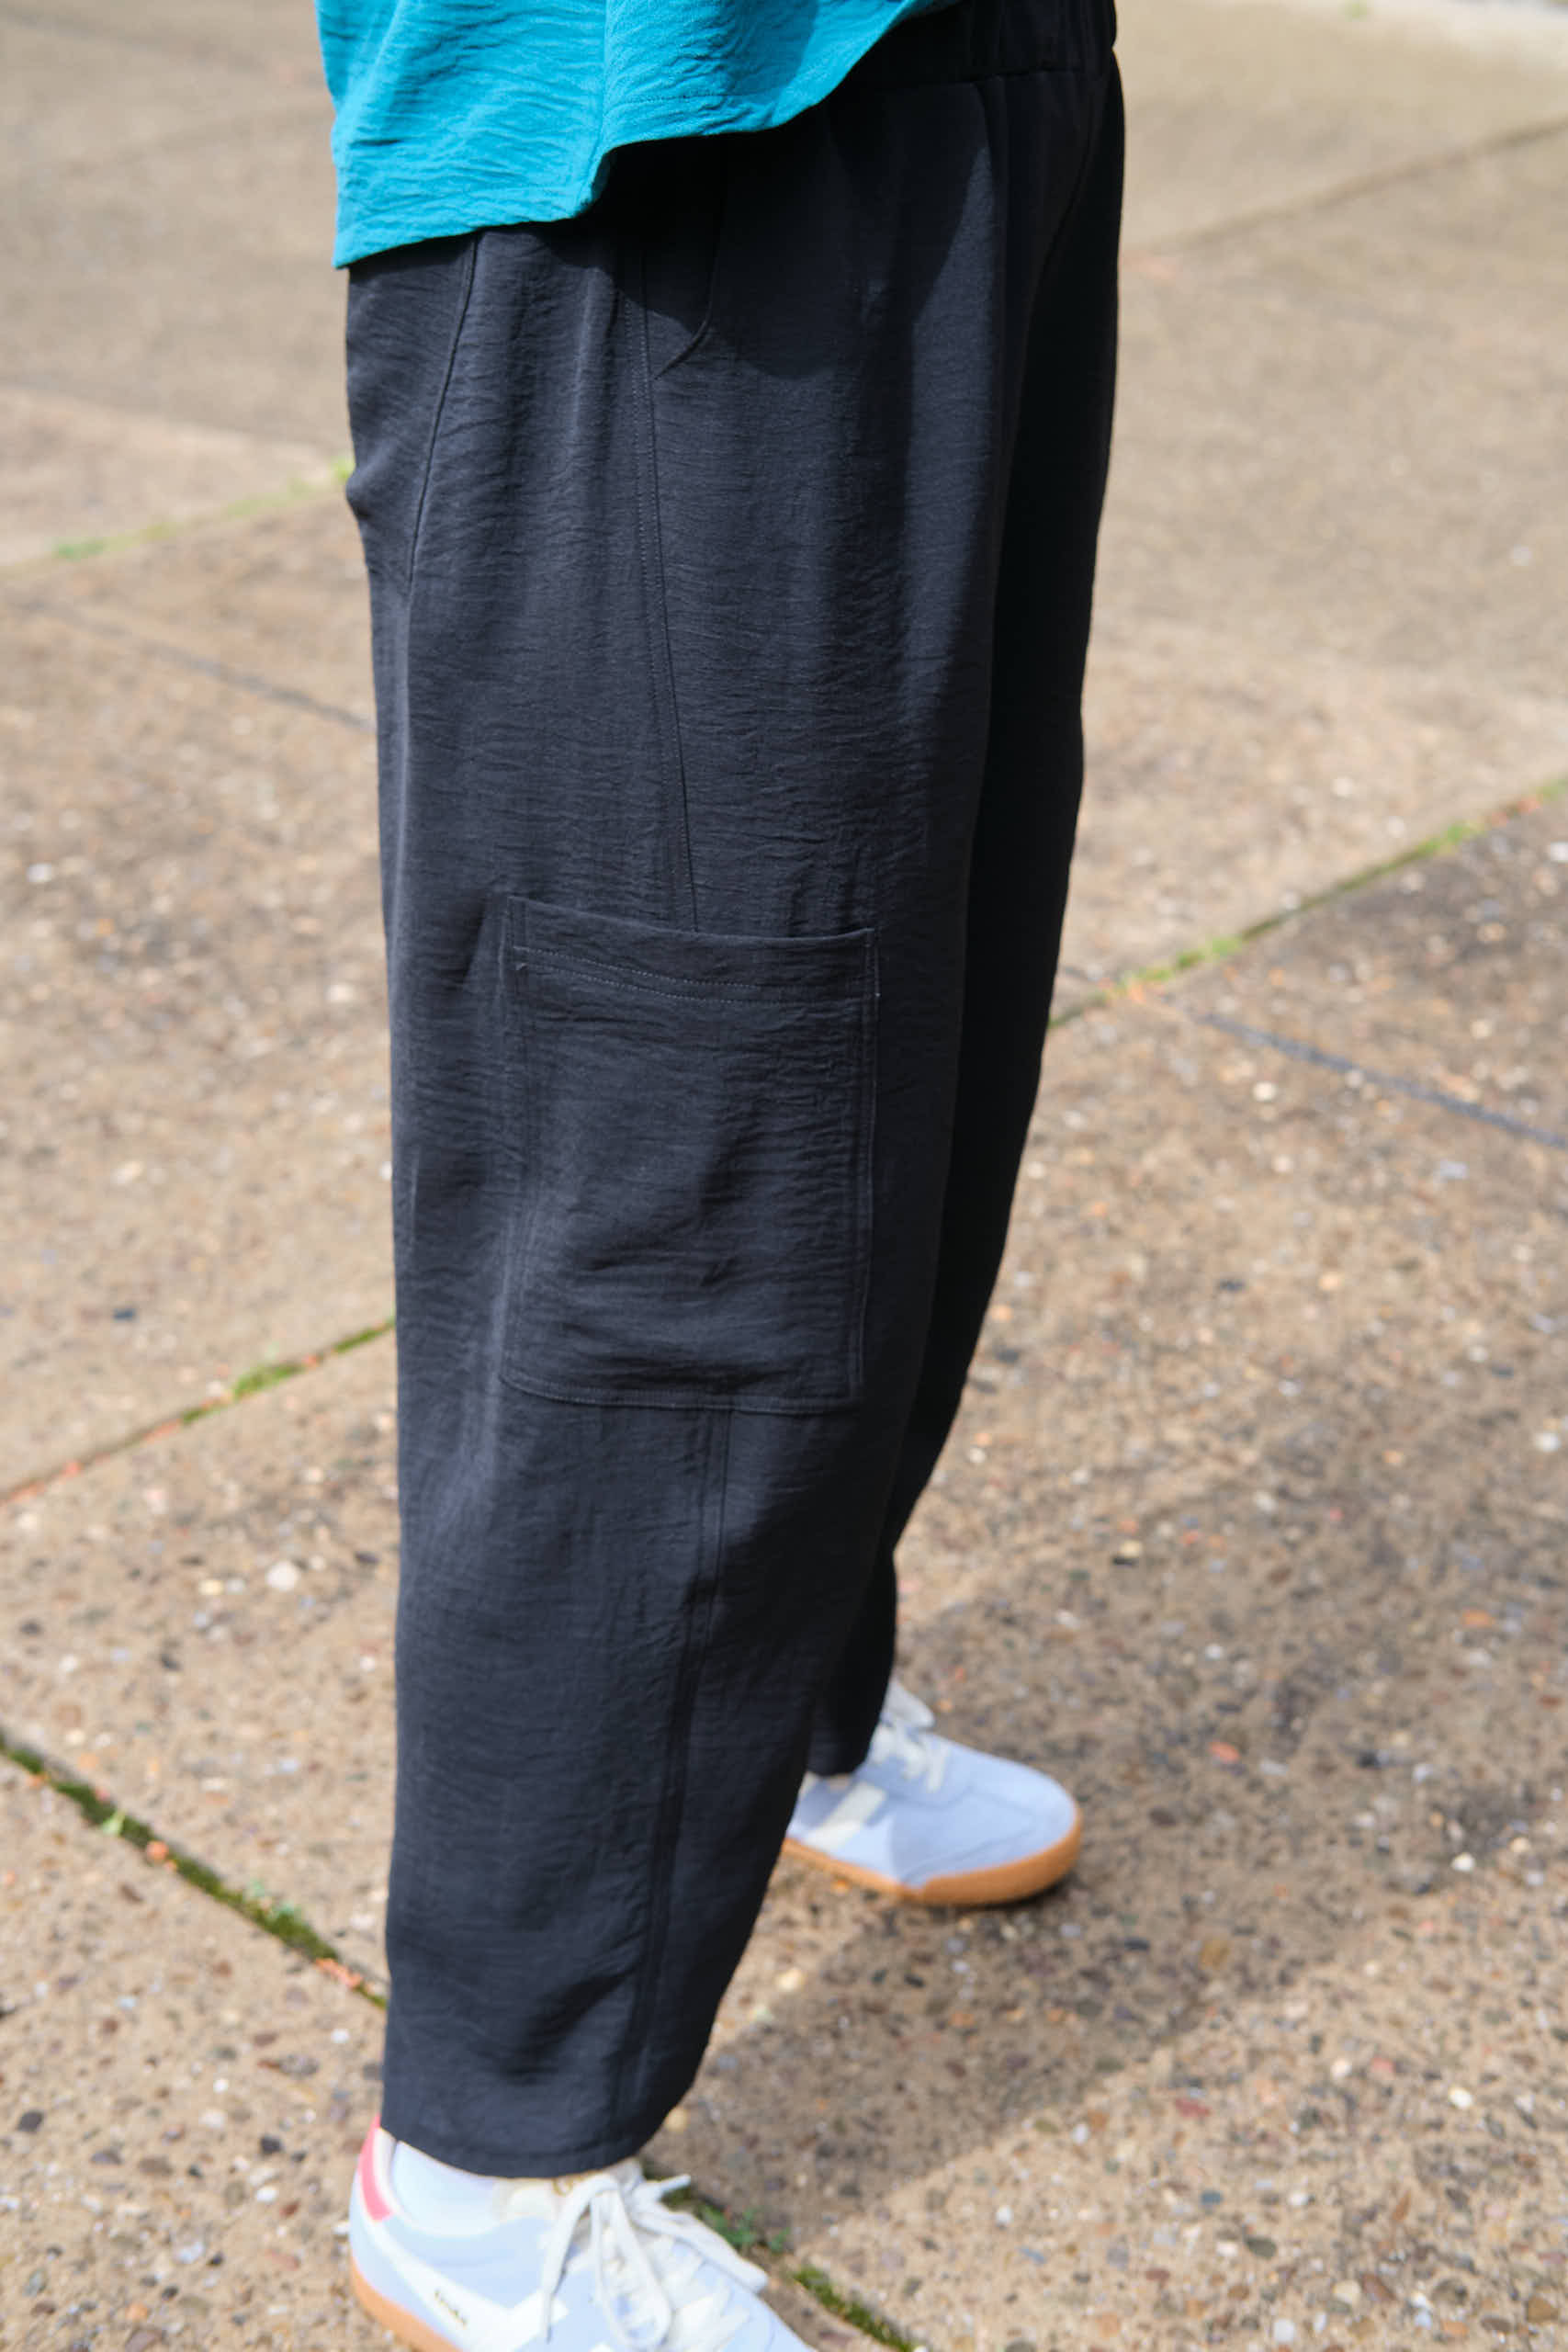
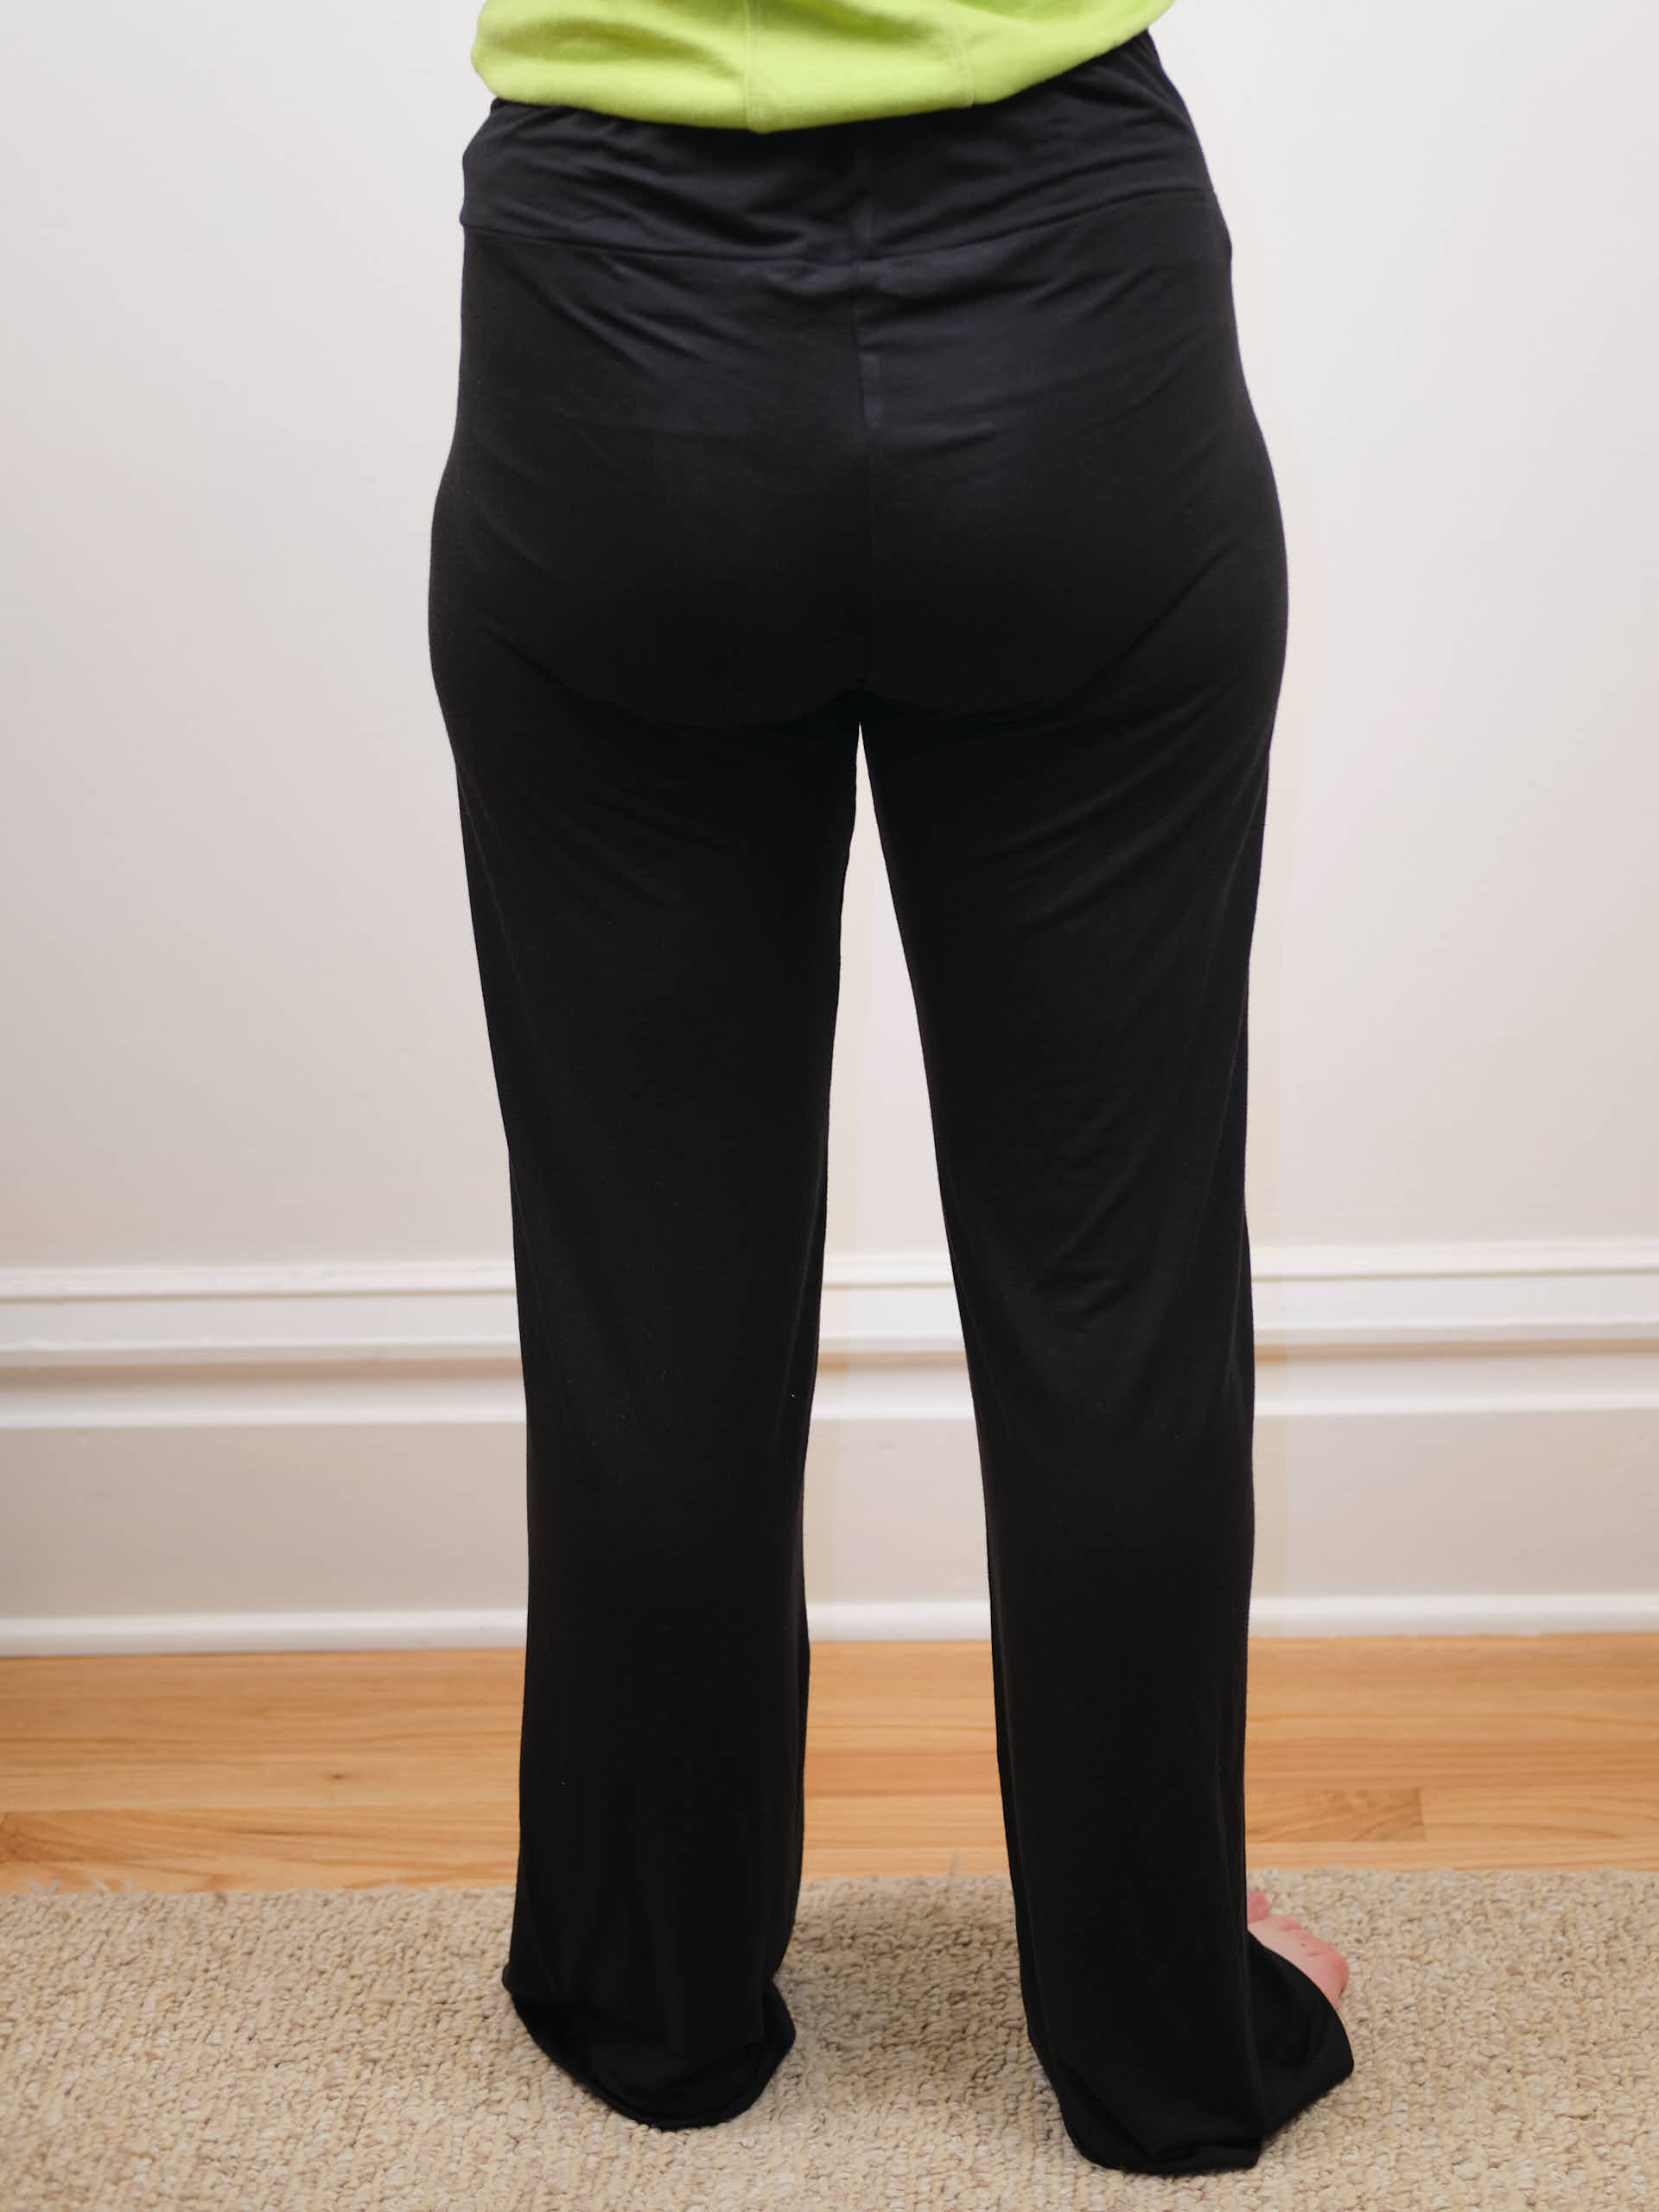
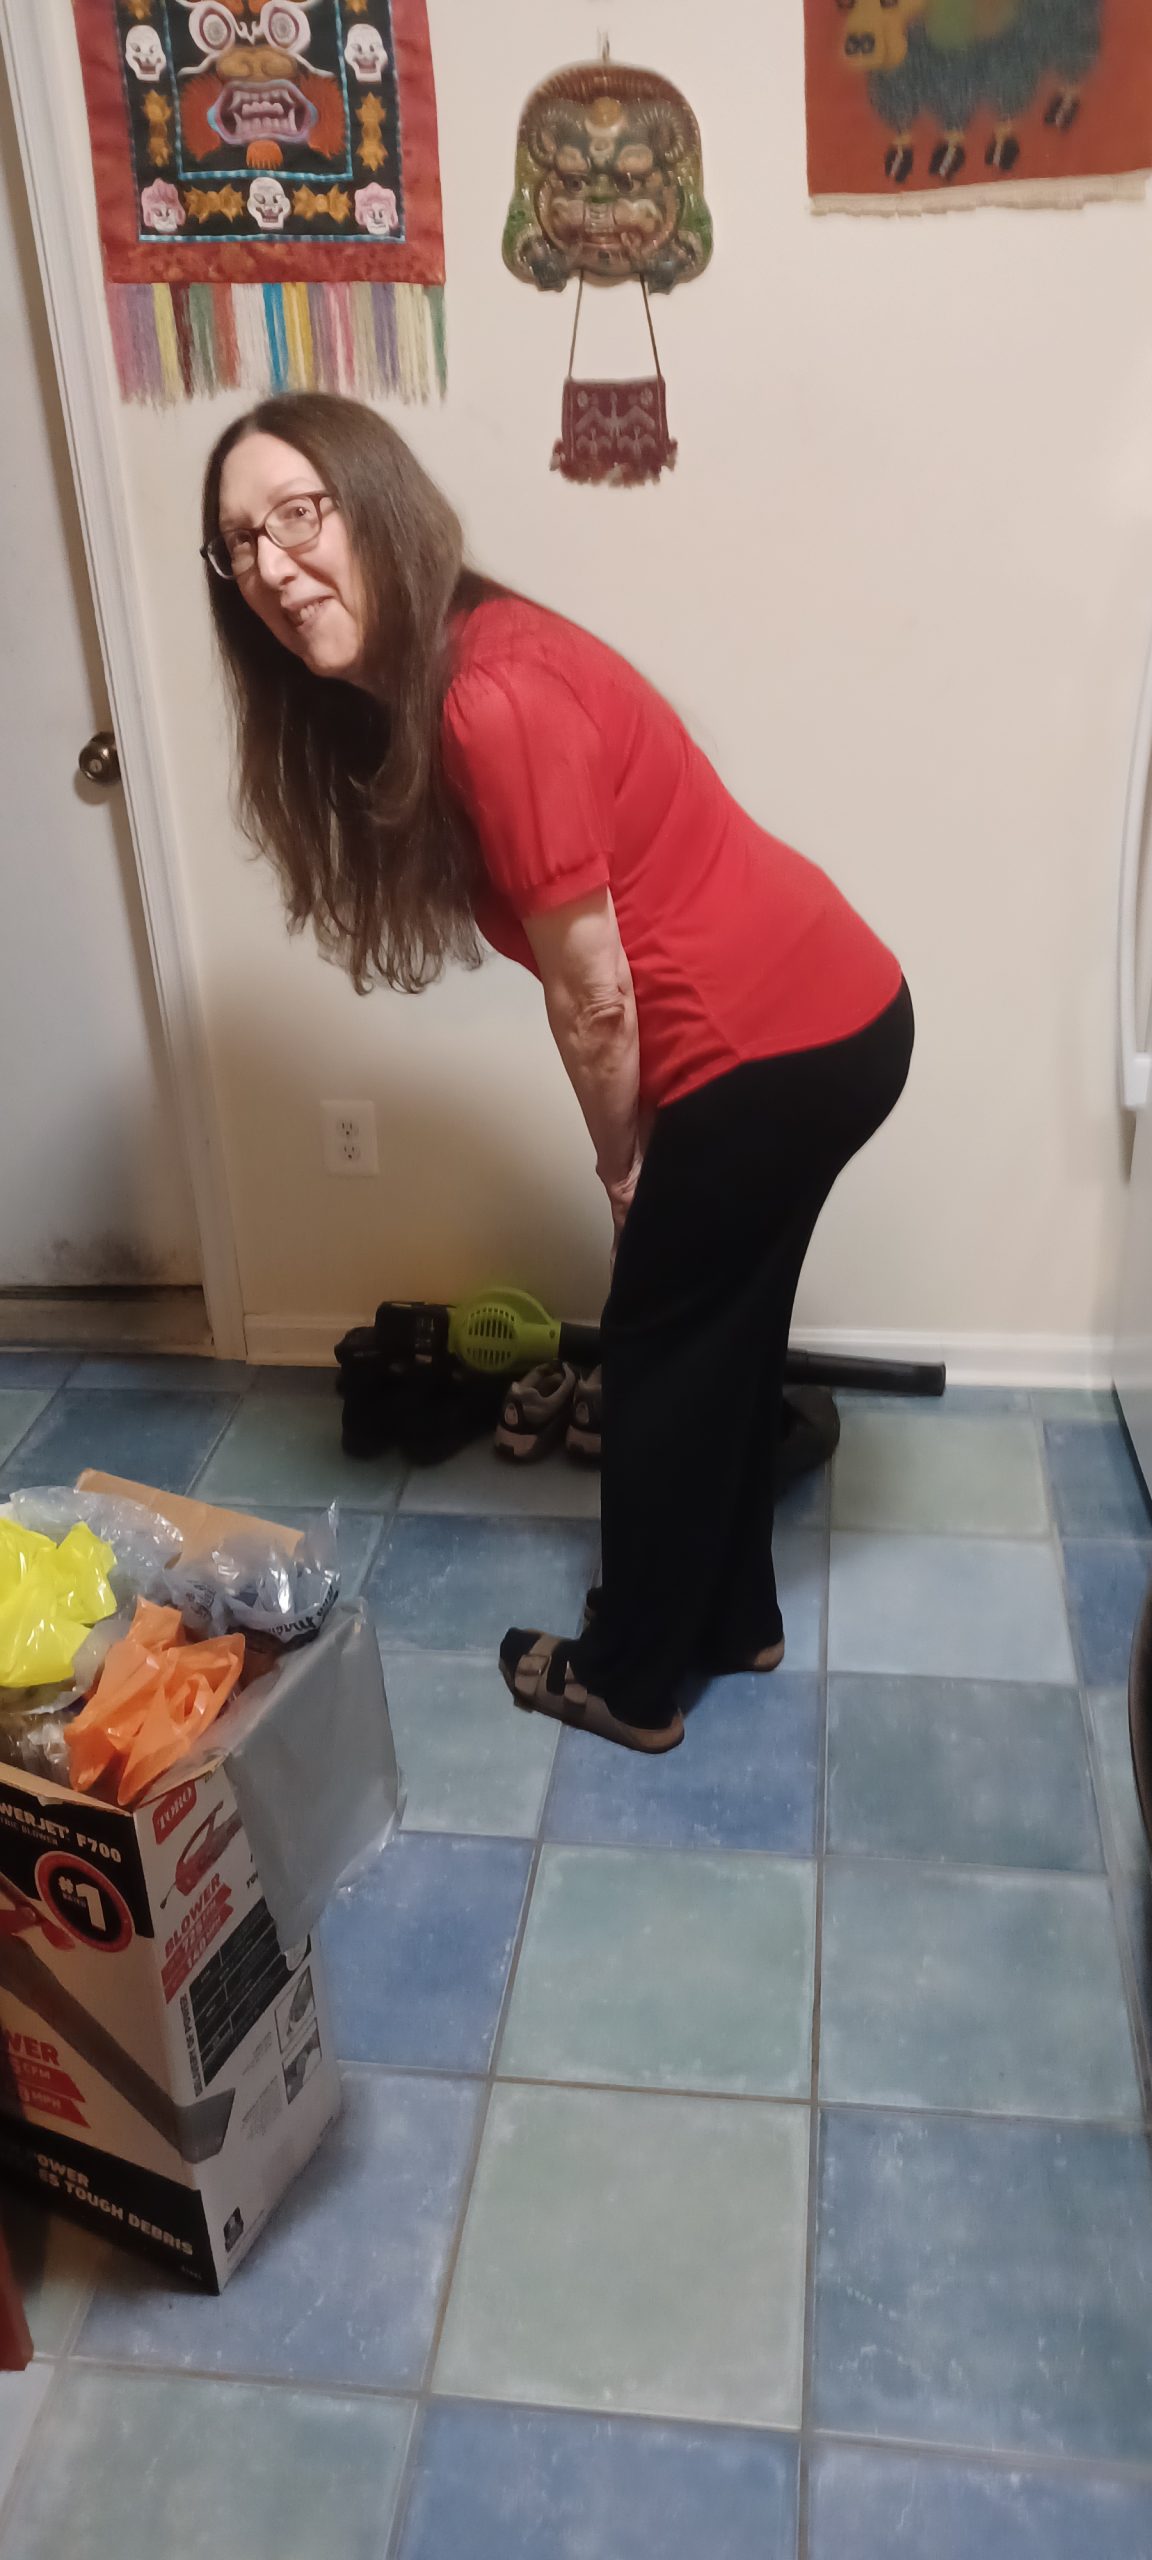
Pattern Emporium Making Moves Subtle Barrel Leg Pants, size AU 10, midrise, short length, 1.5-inch elastic waistband, front, back, and side pockets (with front pocket opening raised 1.5 inches), from 2 yards black polyester airflow.
I’ve been wanting to sew a pair of Pattern Emporium Making Moves Subtle Barrel Leg Pants since the pattern was released earlier this year. I finally got around to sewing them up from about 2 yards of black 100% polyester 175 gsm airflow fabric that I got on sale from Mily Mae Fabrics. The airflow has no spandex and thus, officially no stretch, but it does have a bit of give due to the crinkle texture. It requires no ironing, and is less slippery to sew than a lot of other polyester wovens. However, it doesn’t hold a crisp crease when pressed.
I like high-rise, loose-fitting pants with large pockets, and while I think wide-leg pants generally look best on me, they can have a lot of fabric to potentially trip over or drag through the mud (or across wet bathroom floors). So barrel-leg pants give me a loose fit and room for pockets without the extra fabric. The Making Moves pattern comes in both high-rise and mid-rise. Based on my past experience with Pattern Emporium high-rise pants being too high for me (especially in the back), I opted for the mid-rise. I like the way the mid-rise turned out, but I might add another half inch of rise next time and extend the front and back crotch by half an inch.
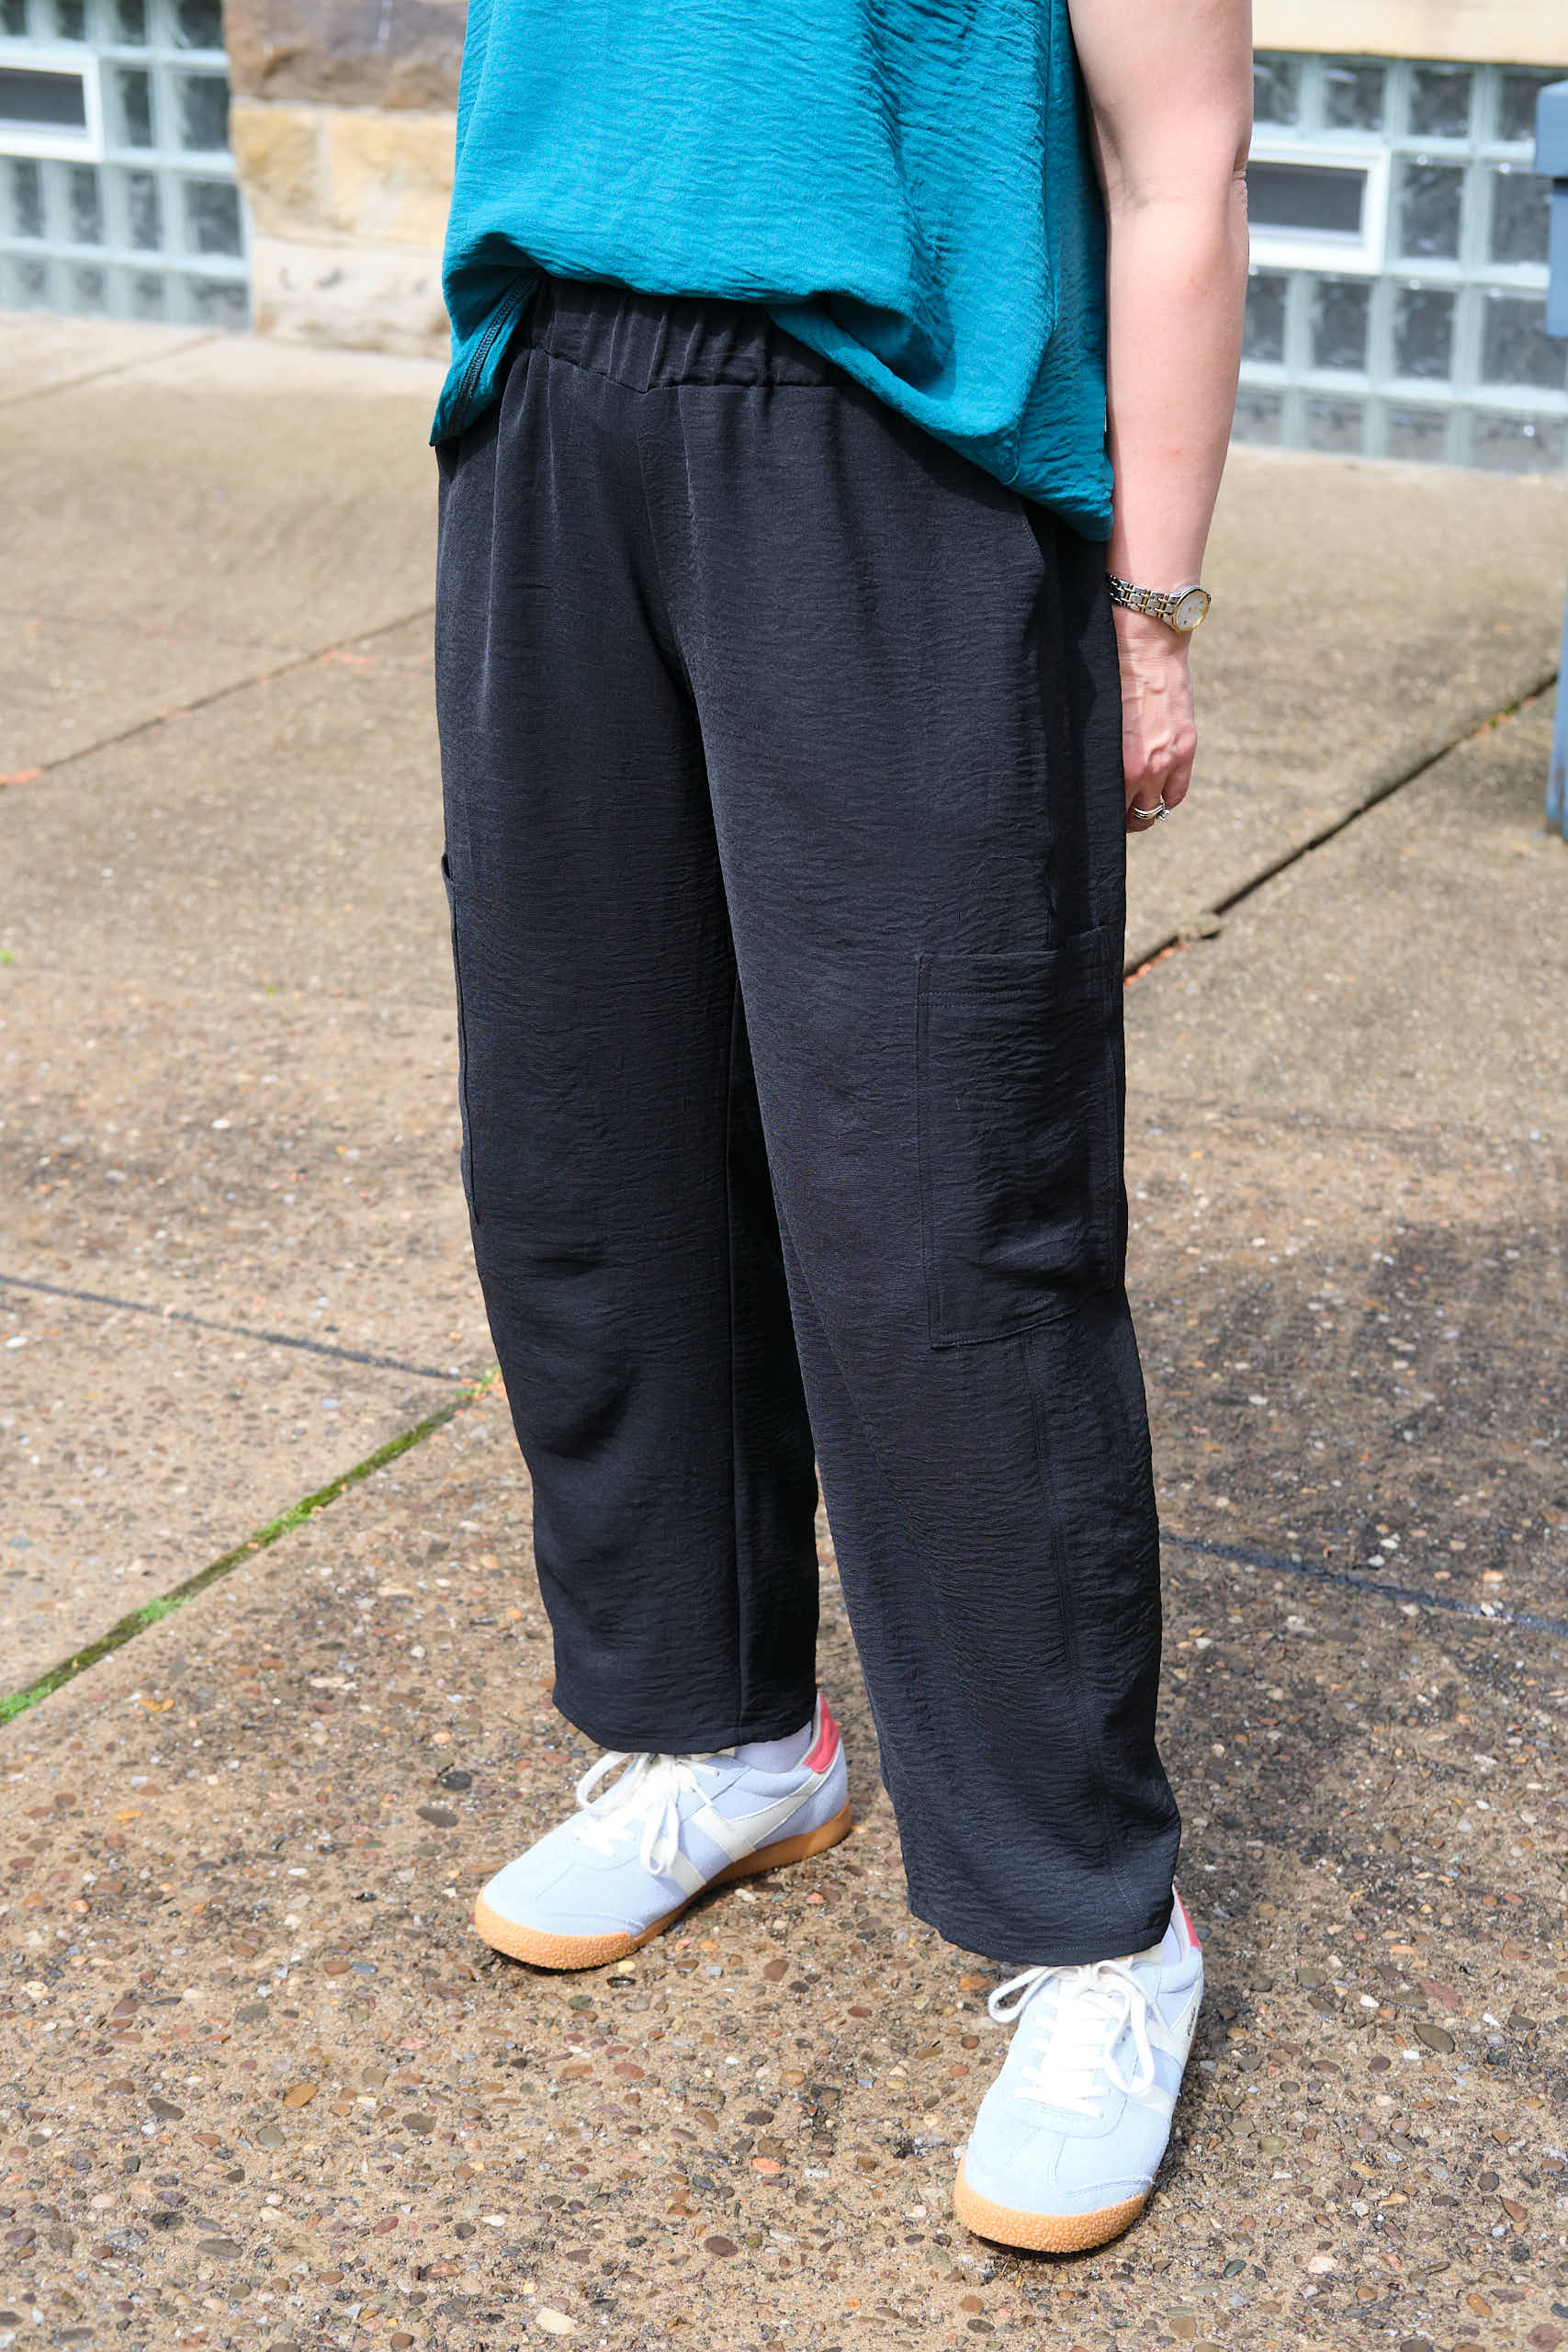
The Making Moves pattern offers lots of pocket options, and I decided to exercise all of them! I made a slight modification to the front pockets to prevent my phone from falling out of my pocket: I raised the bottom of the pocket opening by about an inch and a half (basically, I followed the line of the high-rise pocket opening). I also made the back pockets and side pockets, following the pattern instructions. And I used the back-leg-seam option and added all the optional top-stitching.
The pattern is easy to follow, and there’s nothing difficult about the construction, but making these pants with all the options is a lot of work and takes a while. I love how all the features look, but in this thin, drapey fabric, the back and side pockets are not all that useful because the fabric doesn’t really have enough structure to support them if you put anything of any weight in them. The side pockets are unobtrusive, but the back pockets don’t stay flat against my bottom. Unless I were using a much heavier or more rigid fabric (which isn’t recommended) I would probably make only the front pockets next time.
I made the 1.5-inch waistband with Dritz non-roll elastic. I only recently realized there were different kinds of elastics and now I see why non-roll is a good idea for waistbands. The elastic waistband looks ok, but does have a lot of gathers, which is why heavy fabrics aren’t recommended. I’m tempted to try a high-stretch denim and replace the waistband with the one from the Walk Boldly knit pants.
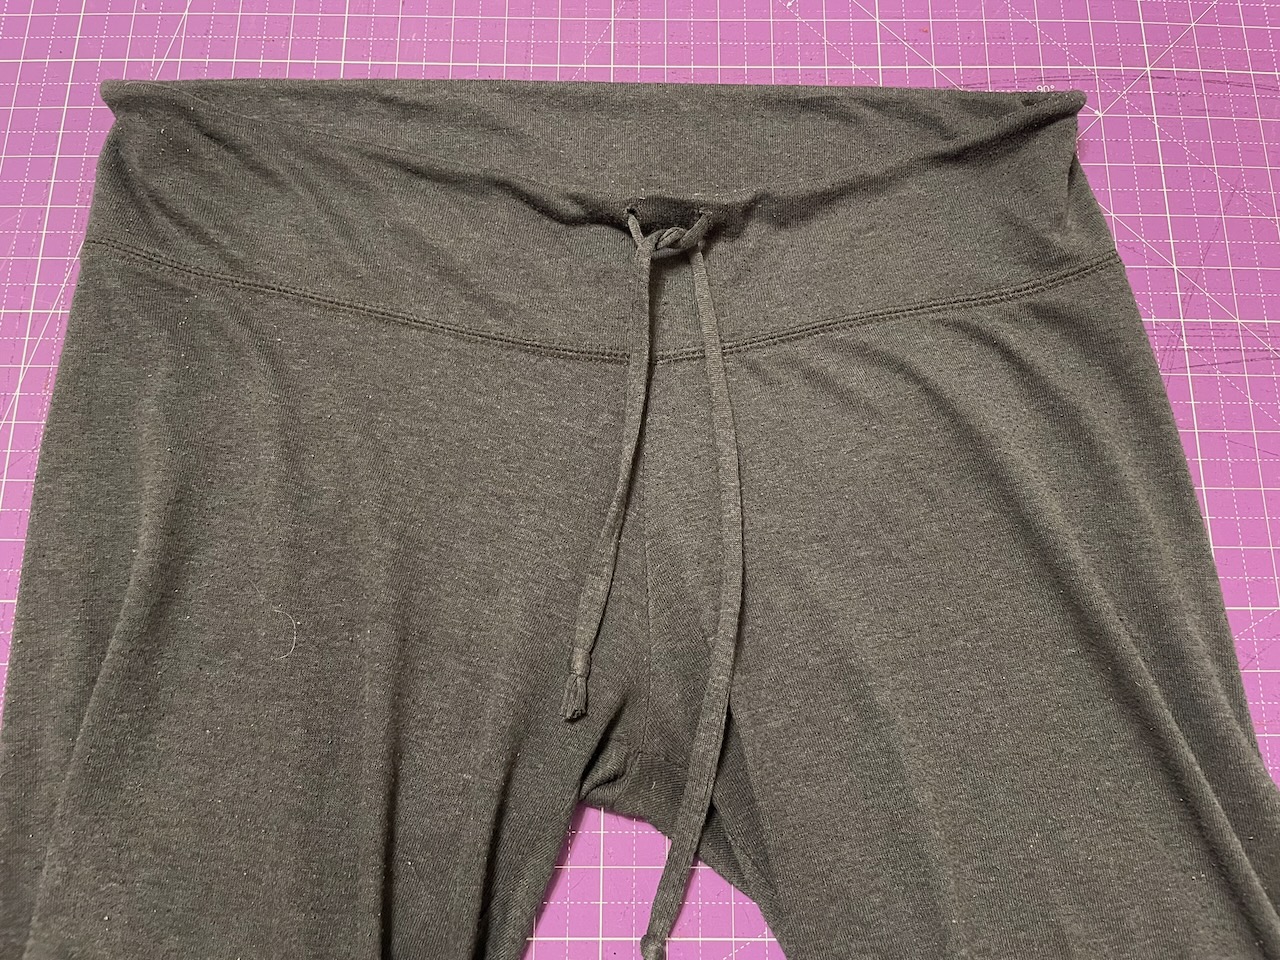
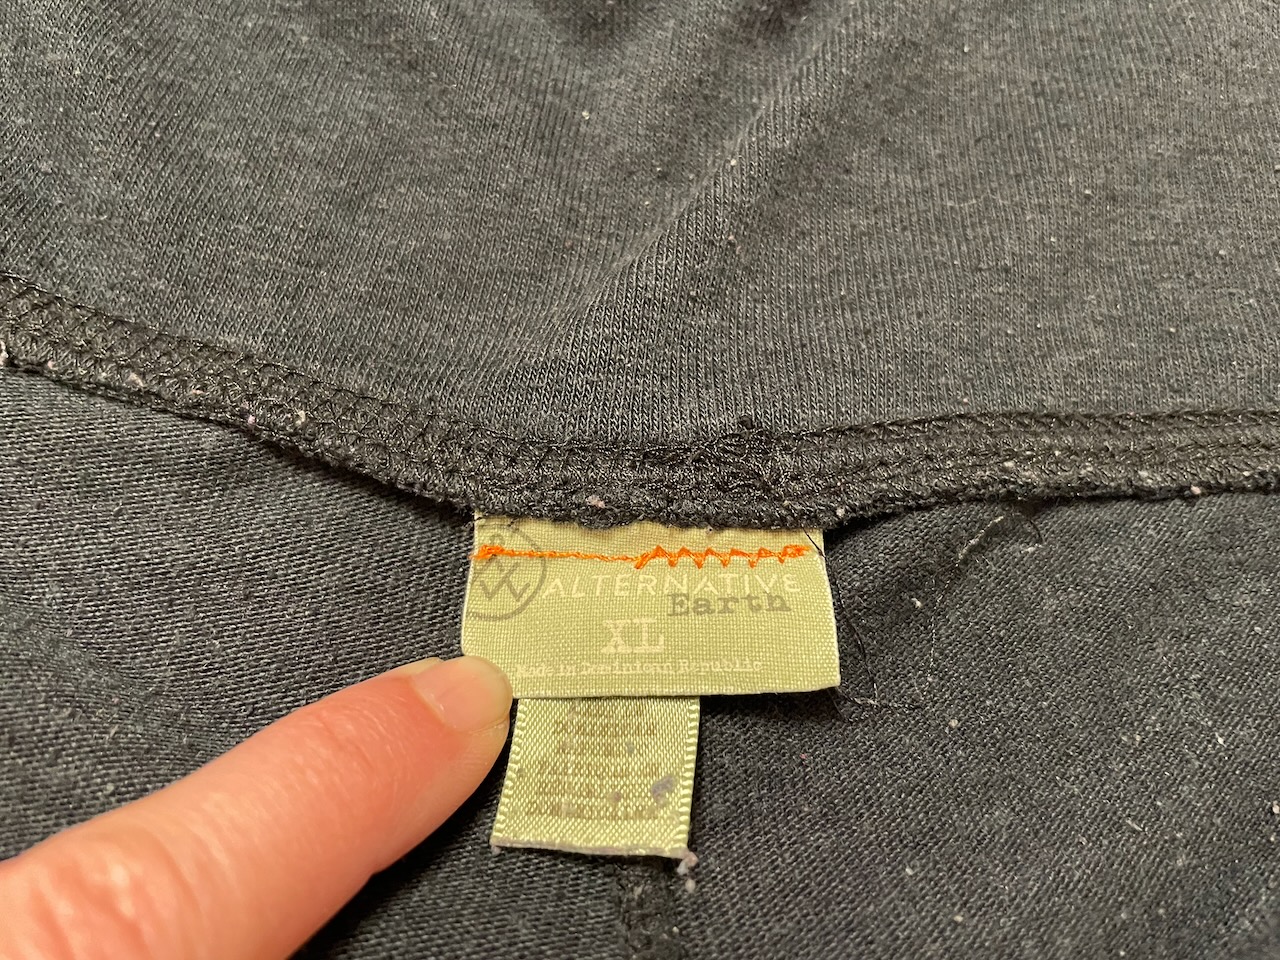
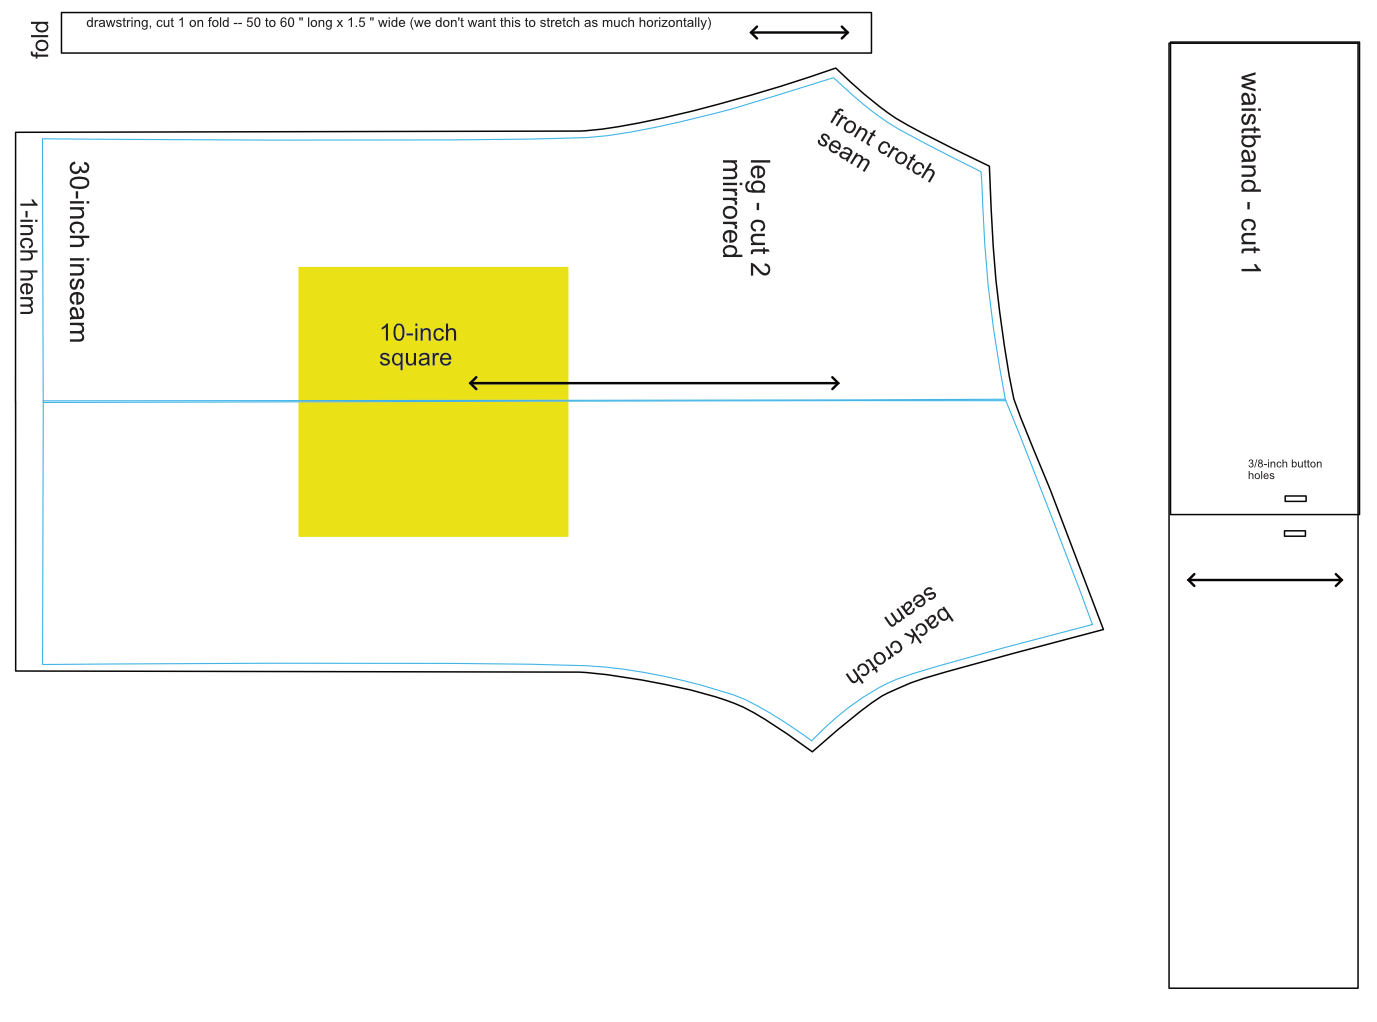
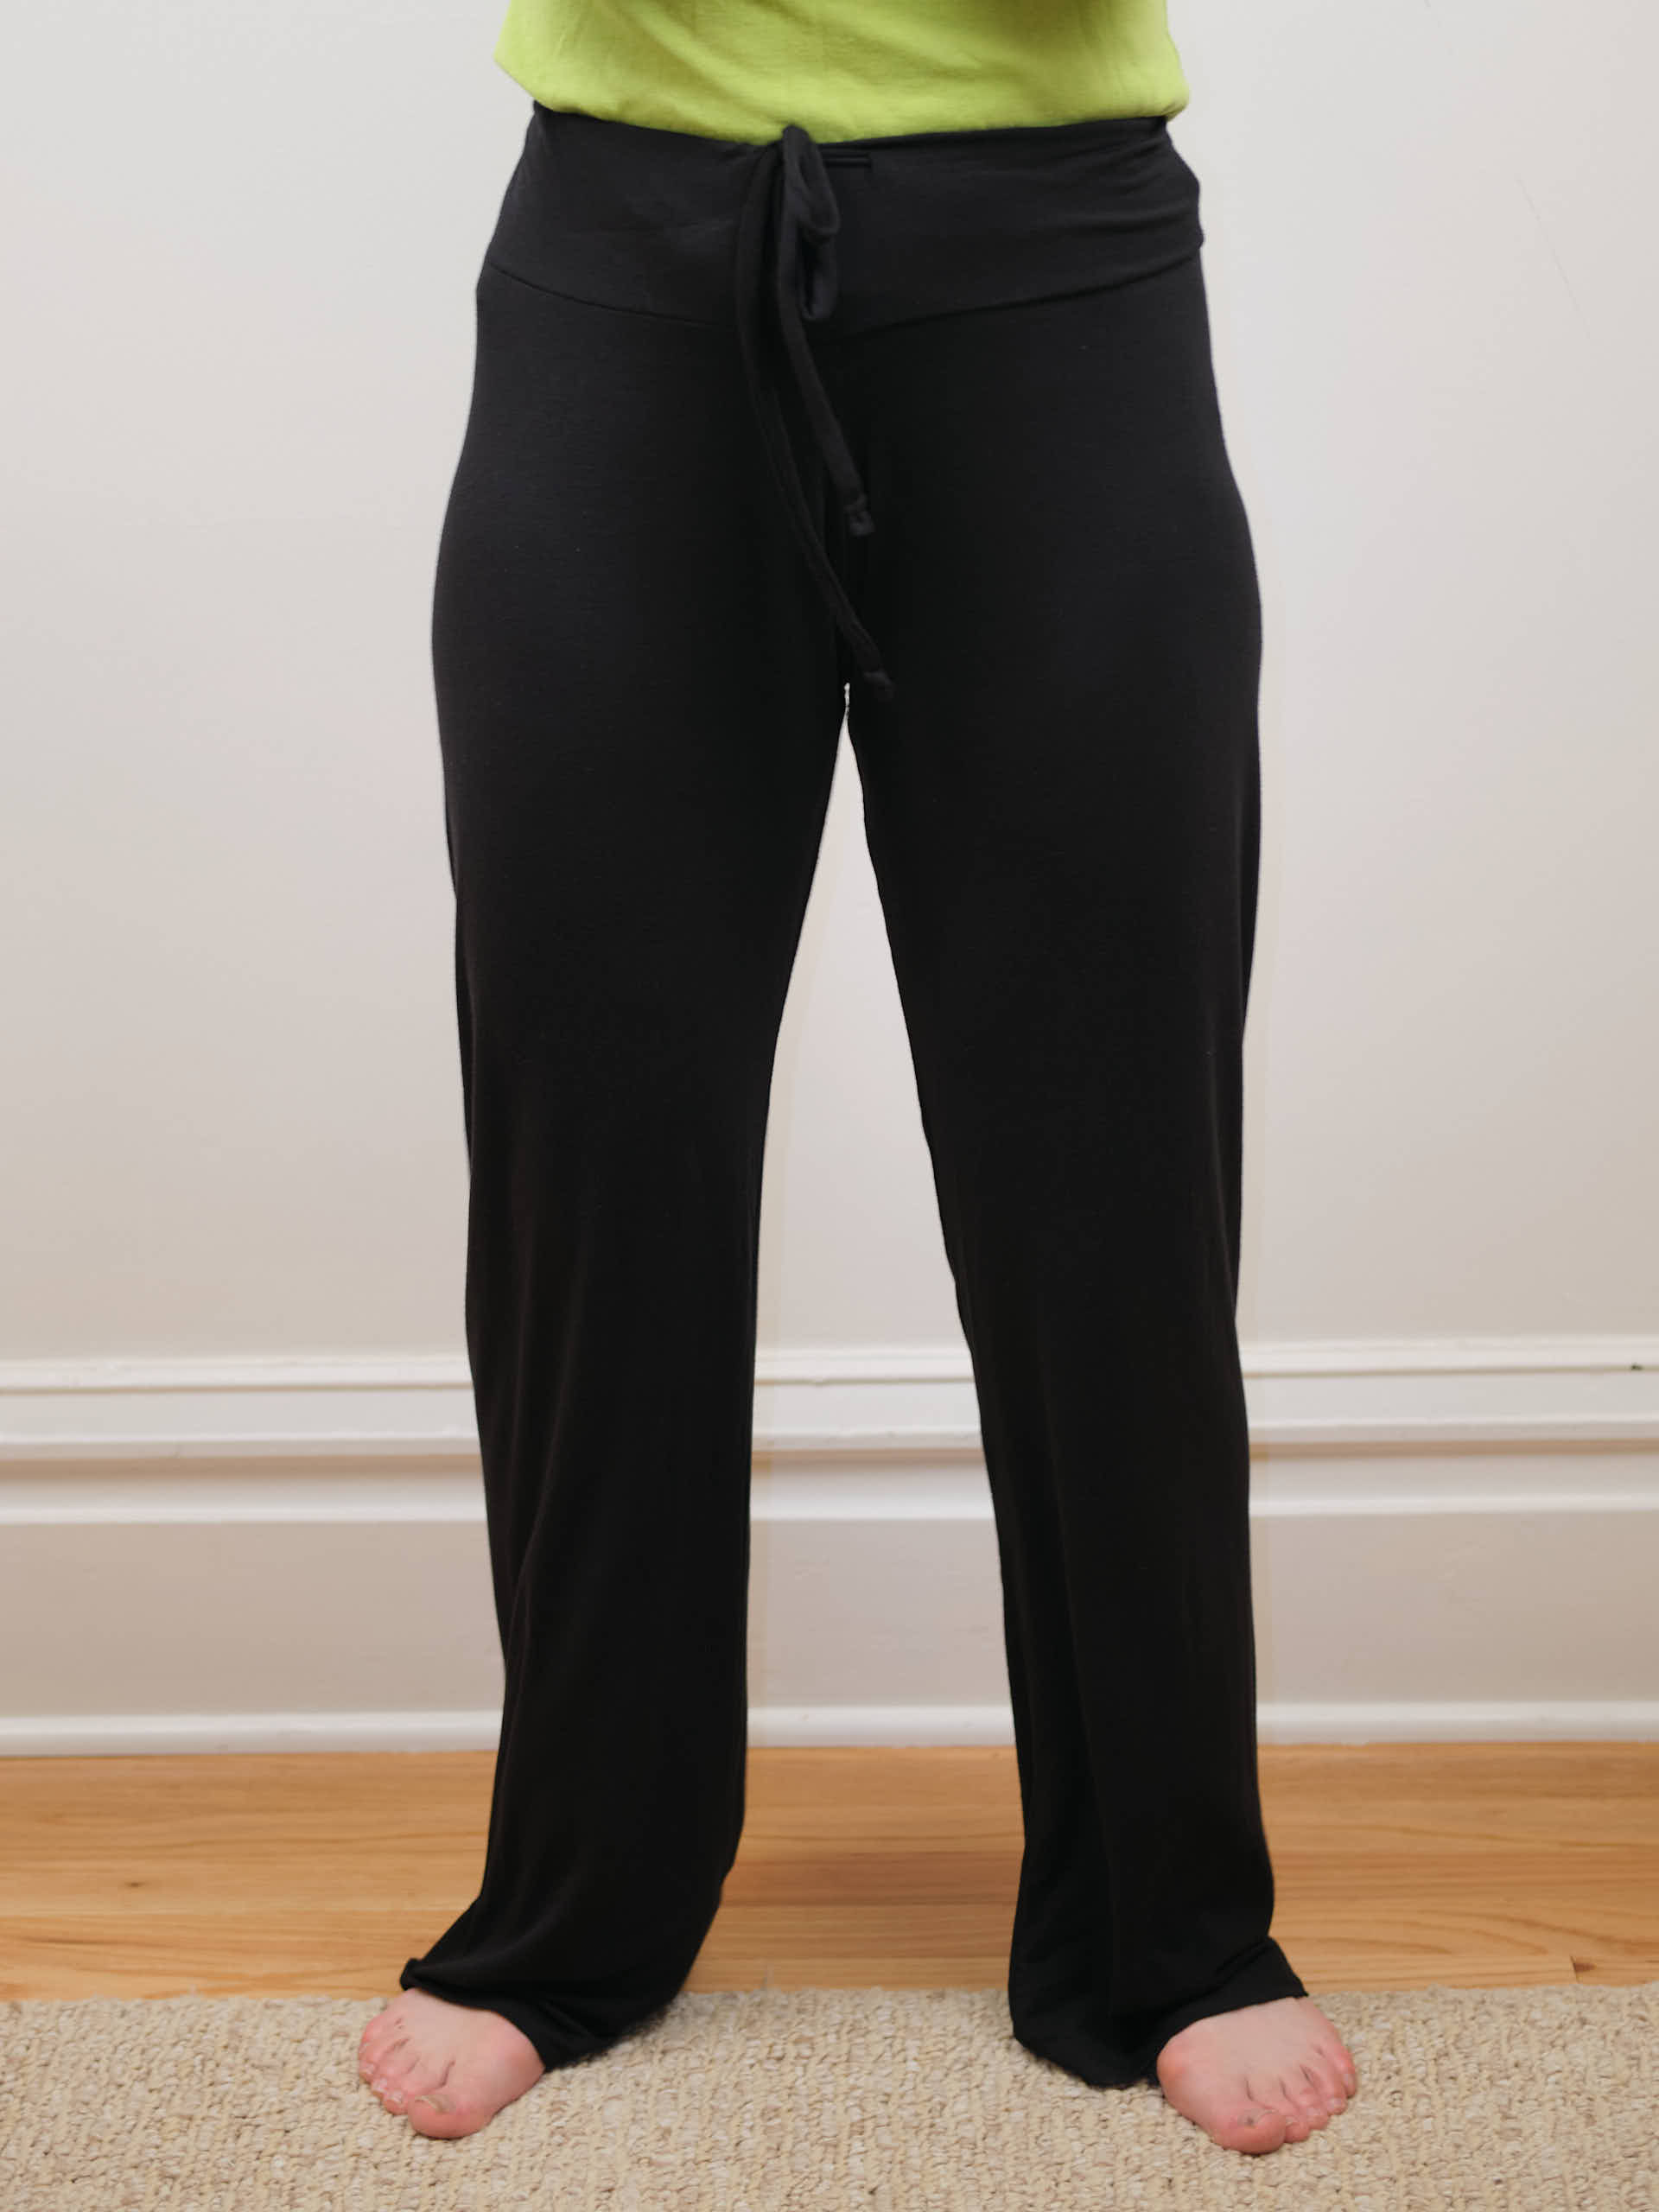
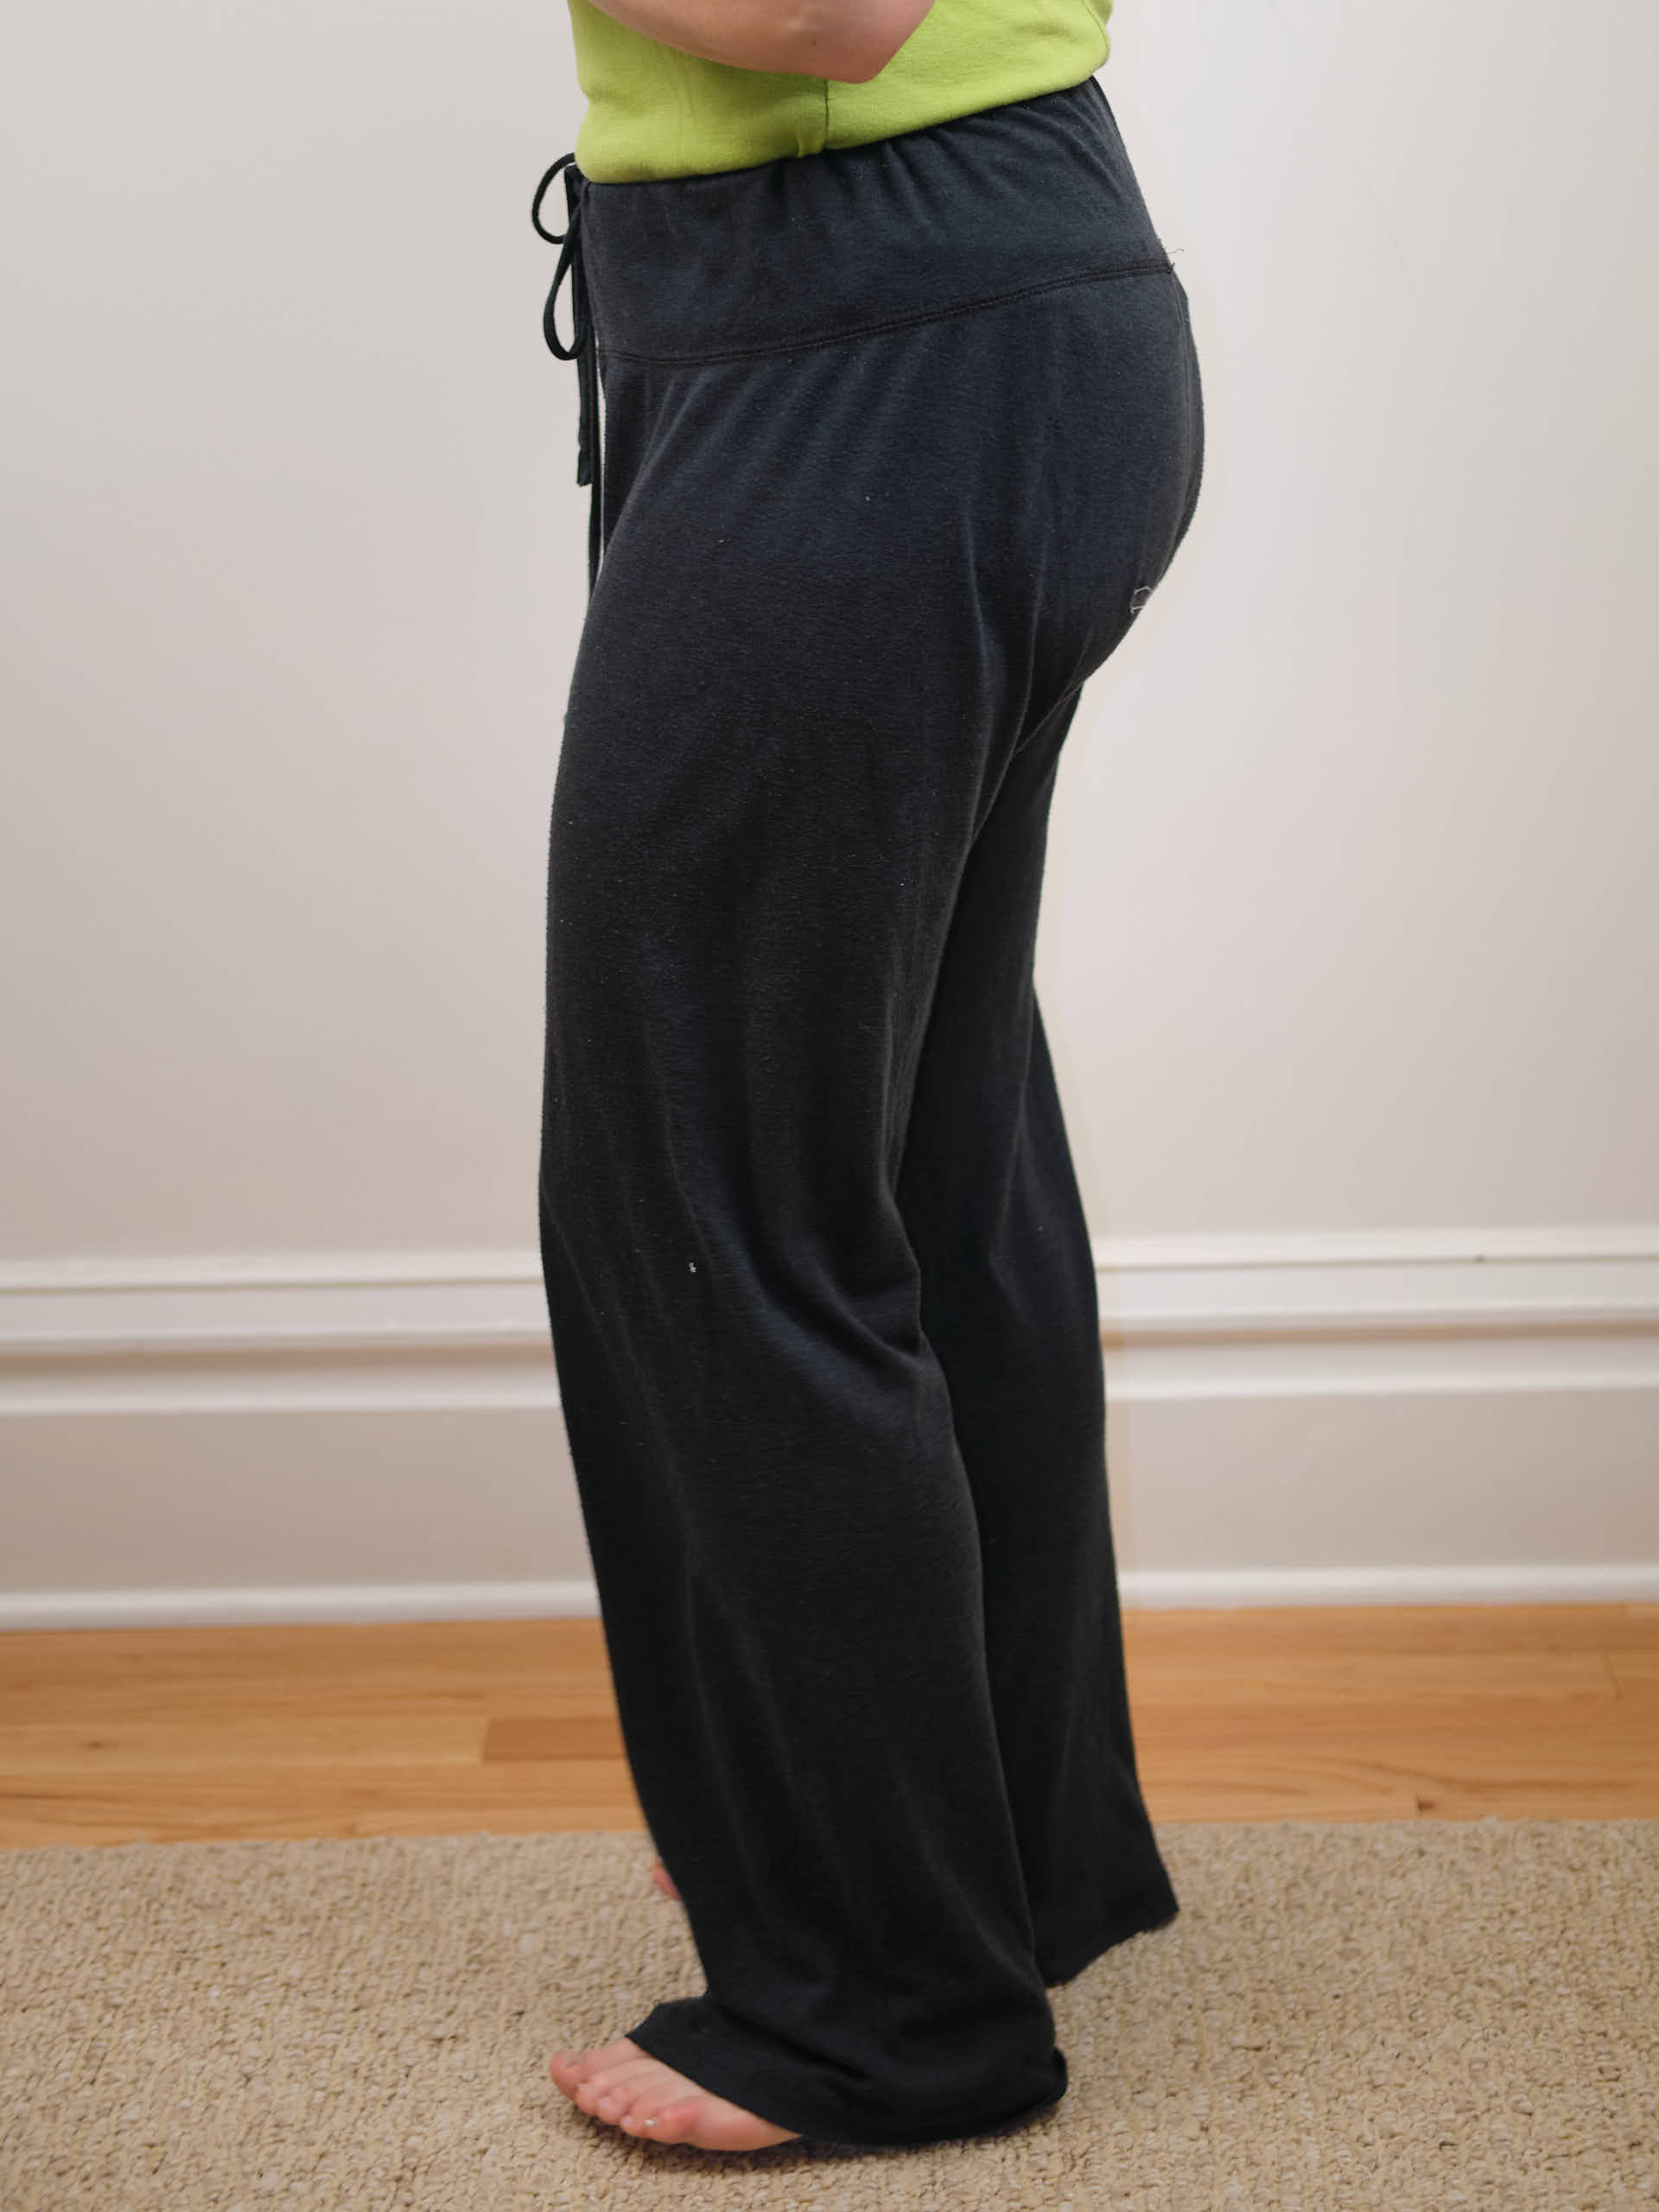
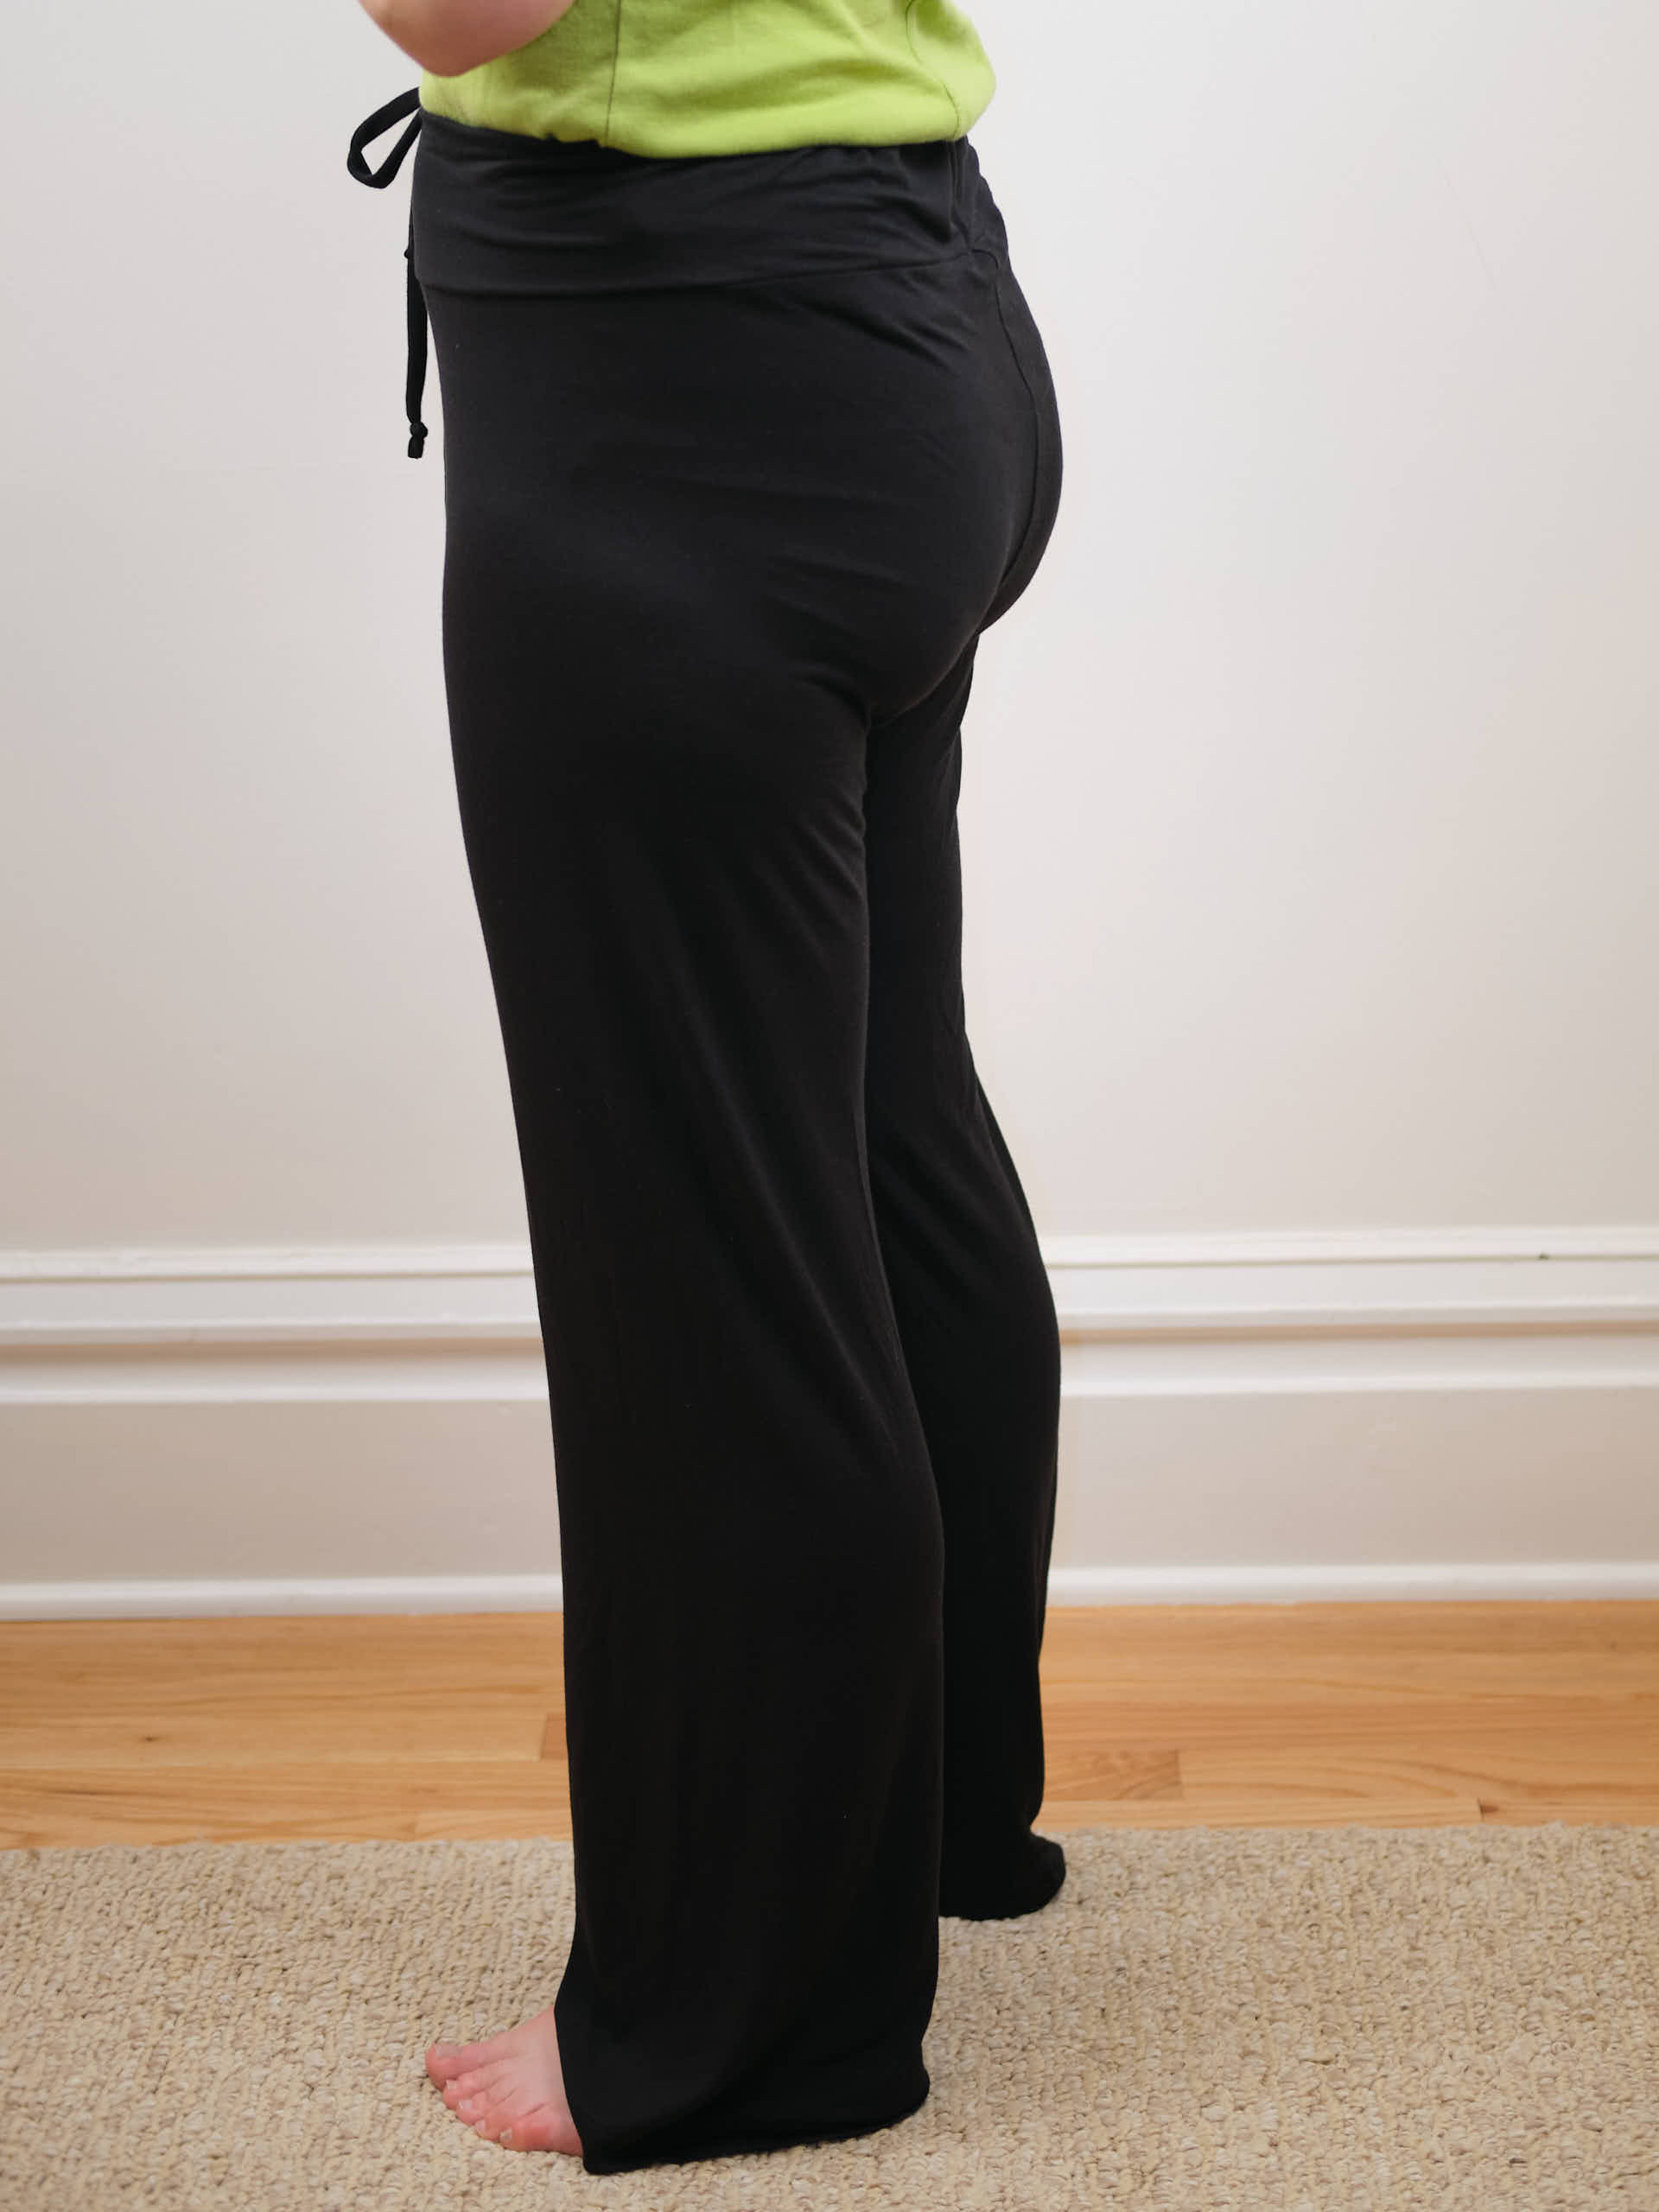
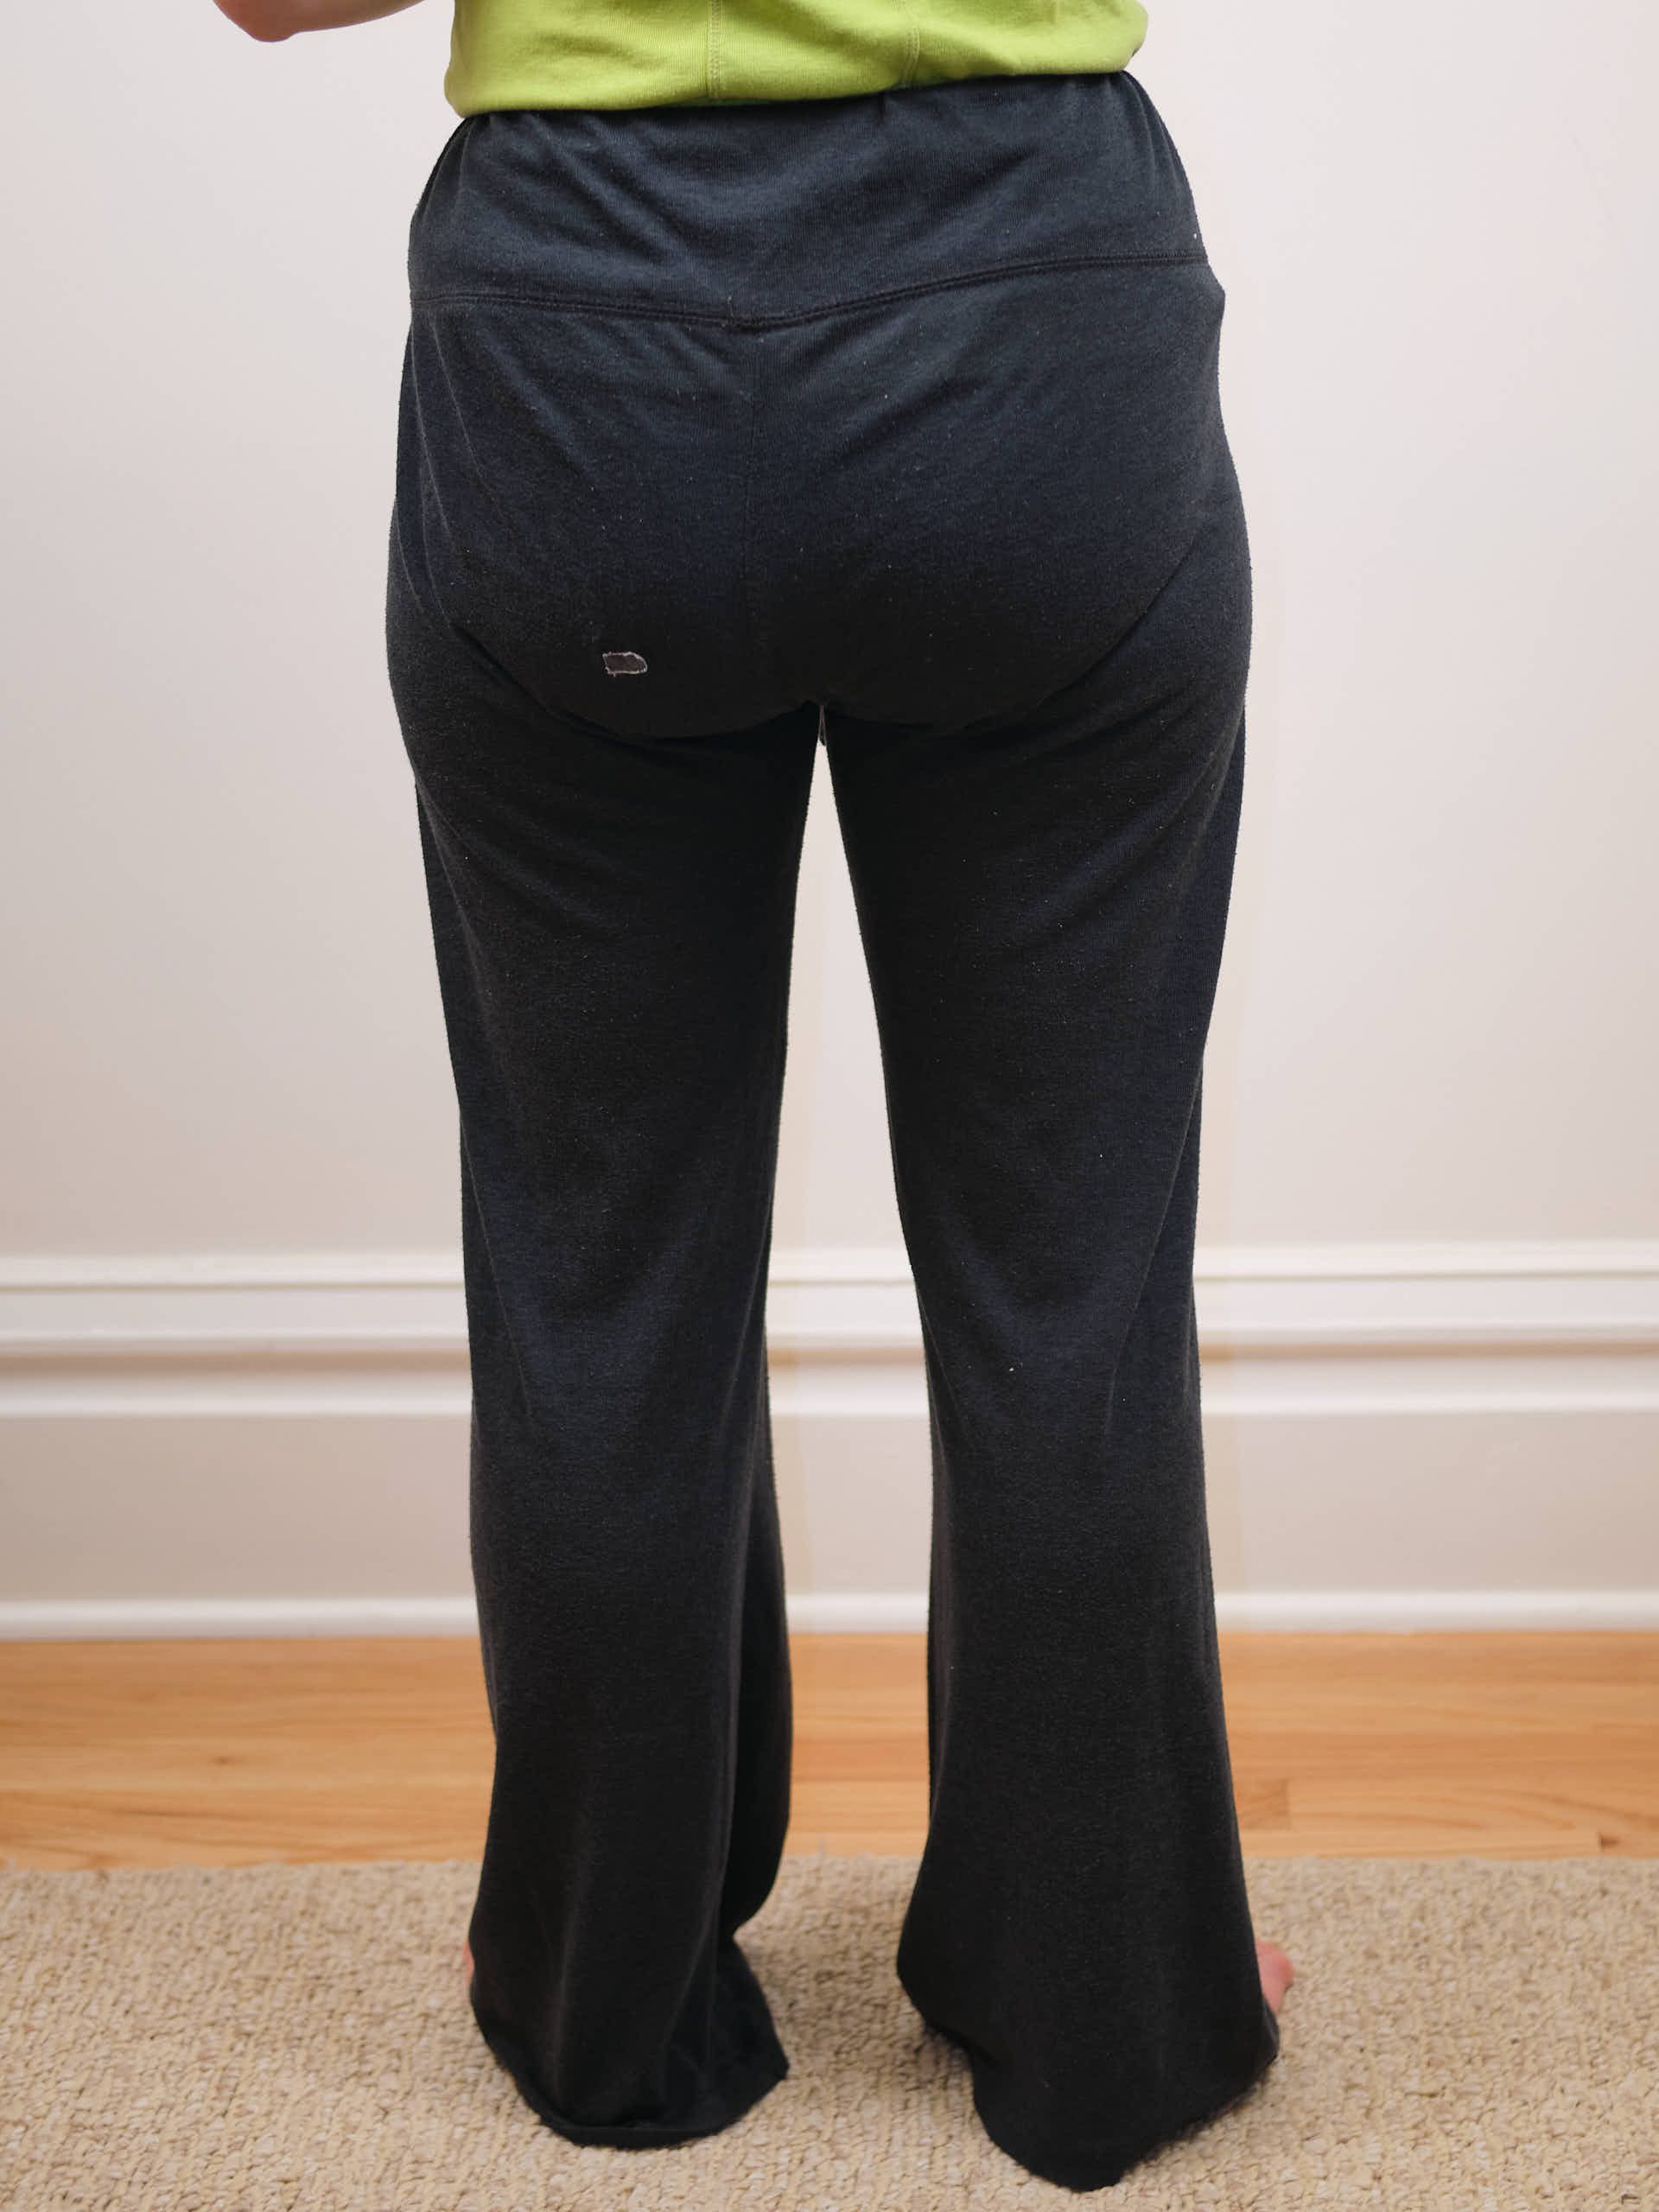
When my Aunt Nancy asked me whether I could replicate her well-loved and patched light-weight yoga pants that she has been unable to replace, I told her I would give it a try. I borrowed the pants from her and observed their fabric and construction. According to the tags, they were “Alternative Earth” brand pants, a brand that seems to have gone out of business. They were size XL and made from a dark charcoal light-weight blend of 50% polyester, 38% cotton,12% rayon knit, similar to a triblend tshirt. The pants had no side seam and thus were constructed from just four pattern pieces: a left and right leg piece, a waistband tube, and a drawstring. They are super simple, not fancy: thus I’m calling them the Not-so-fancy Nancy Pants.
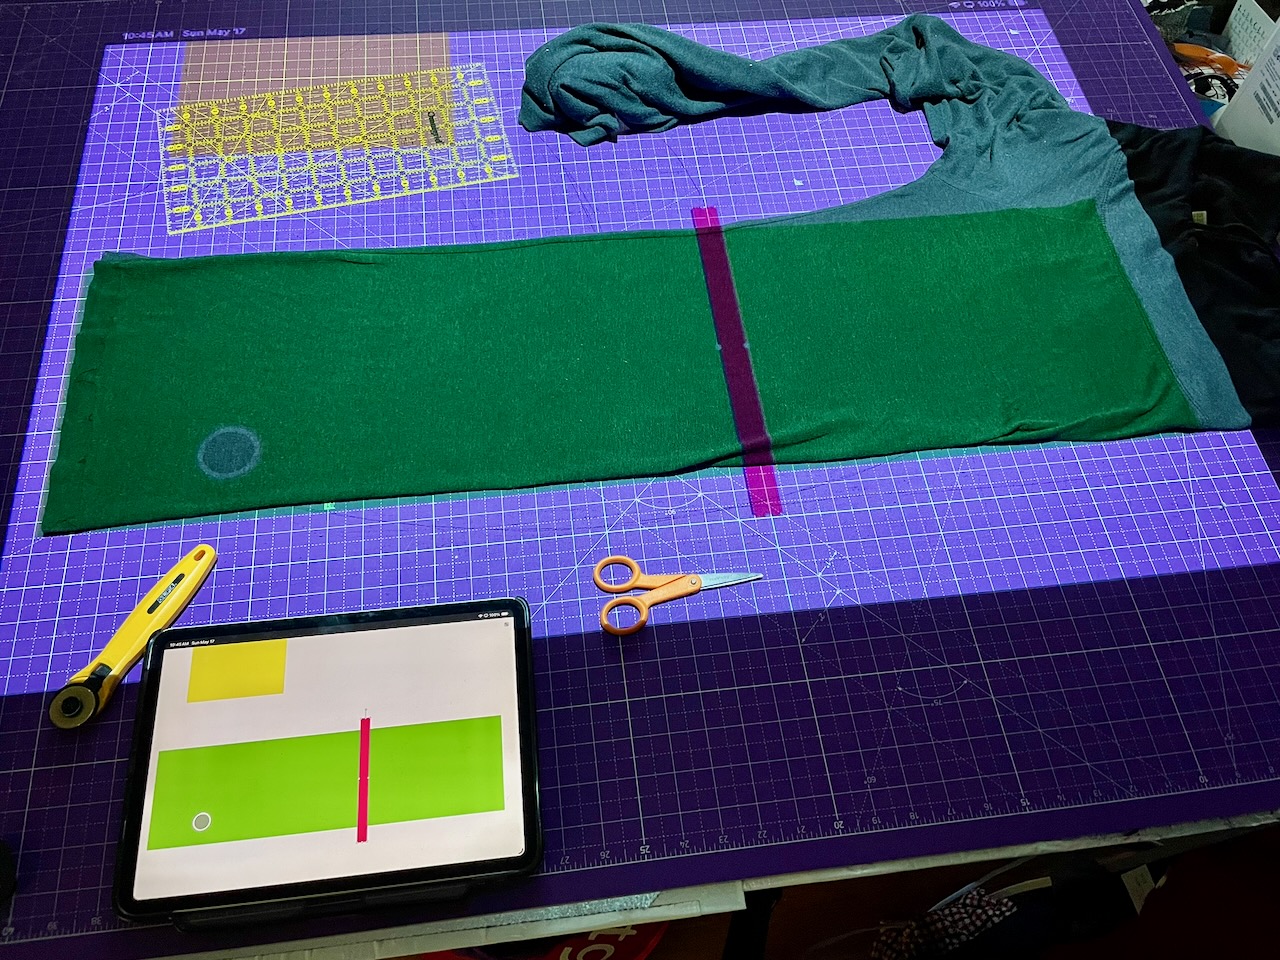
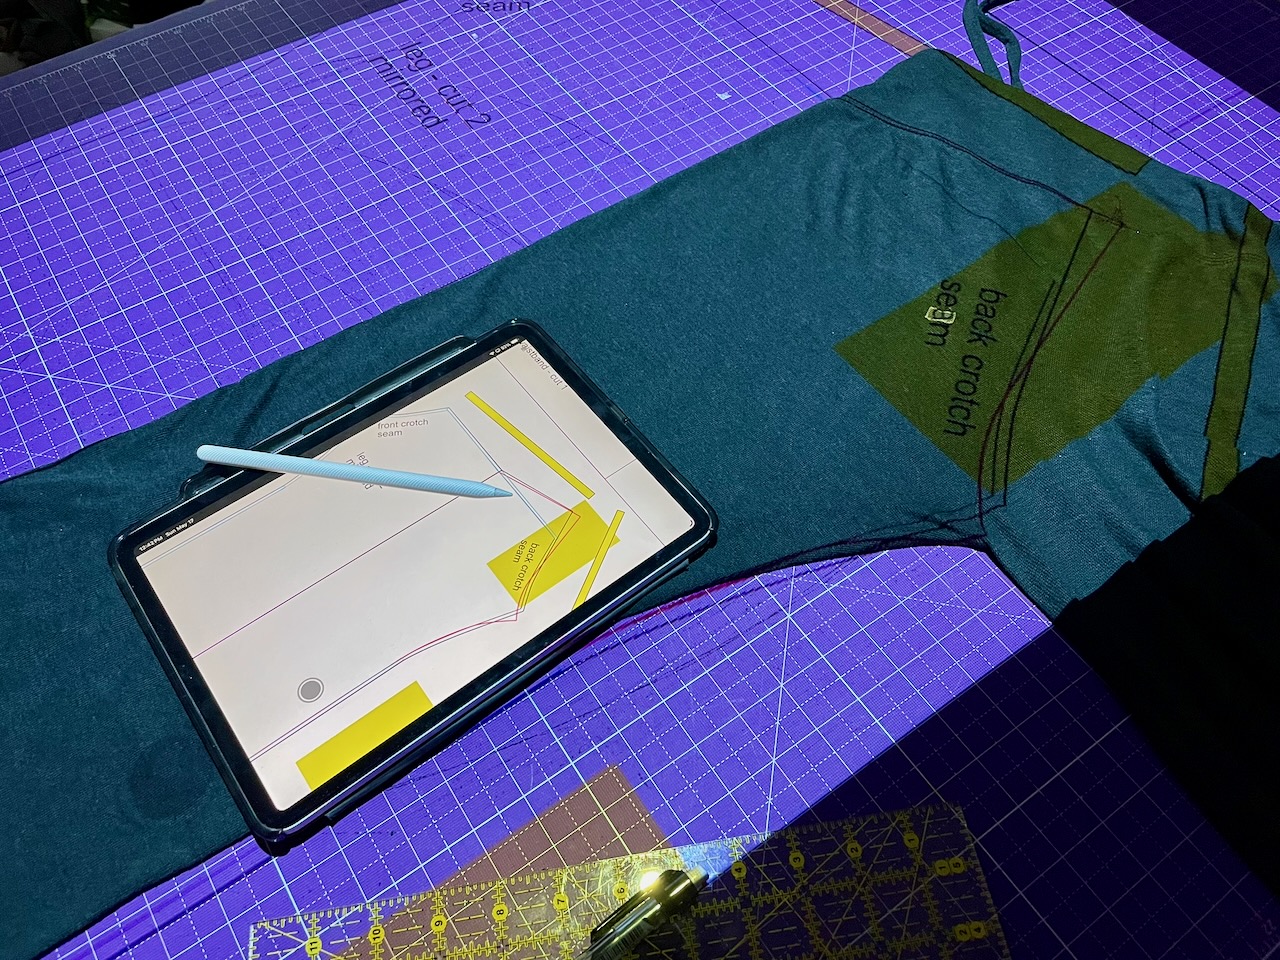
I decided to make a digital pattern for the pants by tracing them using my ipad and projector. I setup a blank document in Affinity Designer, drew a square, and calibrated the zoom setting so the projected square matched the size in the document. Then I folded the pants and put the pants on my cutting table and drew a series of rectangles, stretching them so their projections covered the pant leg and crotch. Once the rectangles were situated, I used the pen tool on my ipad to trace the outline of the folded pants. If the pants’ legs were symmetrical, I would have been able to make a mirror image copy and connect the front and back. However, I realized that the front rise was quite a bit lower than the back rise. Thus, I spent some time rearranging the pants and tracing until I had the whole crotch area drawn correctly. This would have been much easier if I had taken the pants apart, but I enjoyed the challenge of my non-destructive approach. Another option that might have been fun would have been the painter’s tape method, which I’ve heard about but never tried.
Once I got the pants leg traced, I added a quarter-inch seam allowance and 1-inch hem. I measured the waistband and drawstring and drew the corresponding rectangles.
Then I cut out the pants from black 190GSM 95% modal / 5% spandex knit fabric. This is a super soft, lightweight, and breathable fabric with a lot of stretch. I wouldn’t use it for anything with pockets, as it is too stretchy to support a pocket well, but the Not-so-fancy Nancy pants do not have pockets.
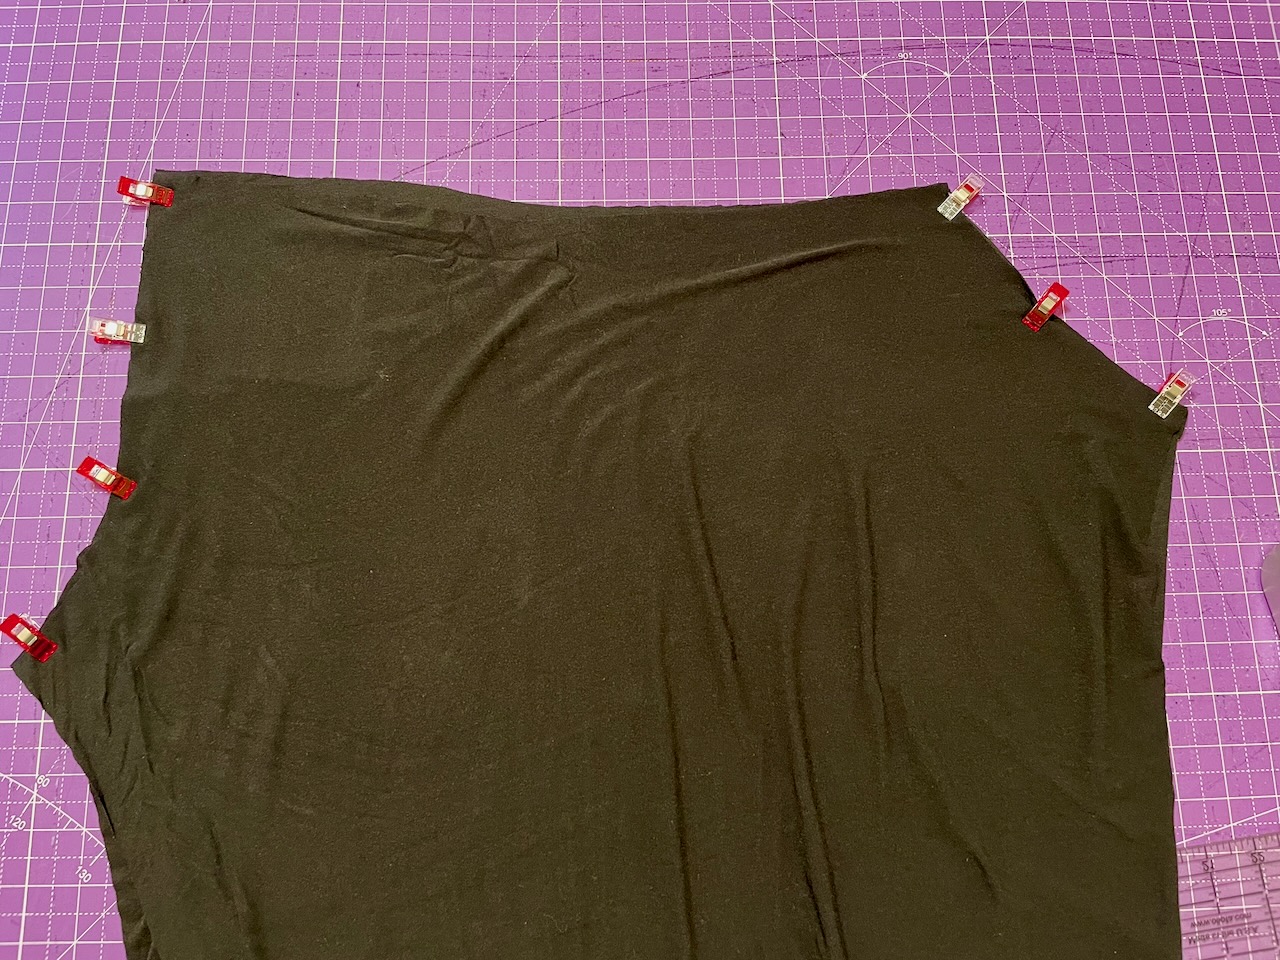
The pants were very quick to sew together. I studied the original pants to determine the correct sewing order. I serged the left and right legs together at the front and back crotch seams. Then I aligned the front and back crotch seams, right sides together, folding the legs in half vertically, and clipped the inseams together. I surged up one leg and down the other.
I cut two small notches in the center of the waistband for the drawstring. As this fabric doesn’t unravel, I didn’t bother reinforcing these holes. Then I joined the short ends of the waistband piece to form a loop and folded it in half horizontally. (The original pants had a continuous waistband that must have been cut from a fabric tube, so it doesn’t have a back seam — this is the main difference between my pattern and the original). I clipped the waistband to the top of the pants and serged it all together.
I folded the drawstring piece in half vertically, wrong sides together and serged. Then, I used a loop turner to turn the drawstring right-side out. I threaded the drawstring through one of the holes in the waistband, around the band, and out the other side. I knotted the ends of the drawstring. Finally, I turned up the bottom of the legs one-inch and hemmed them with a shallow zig-zag stitch on my sewing machine.
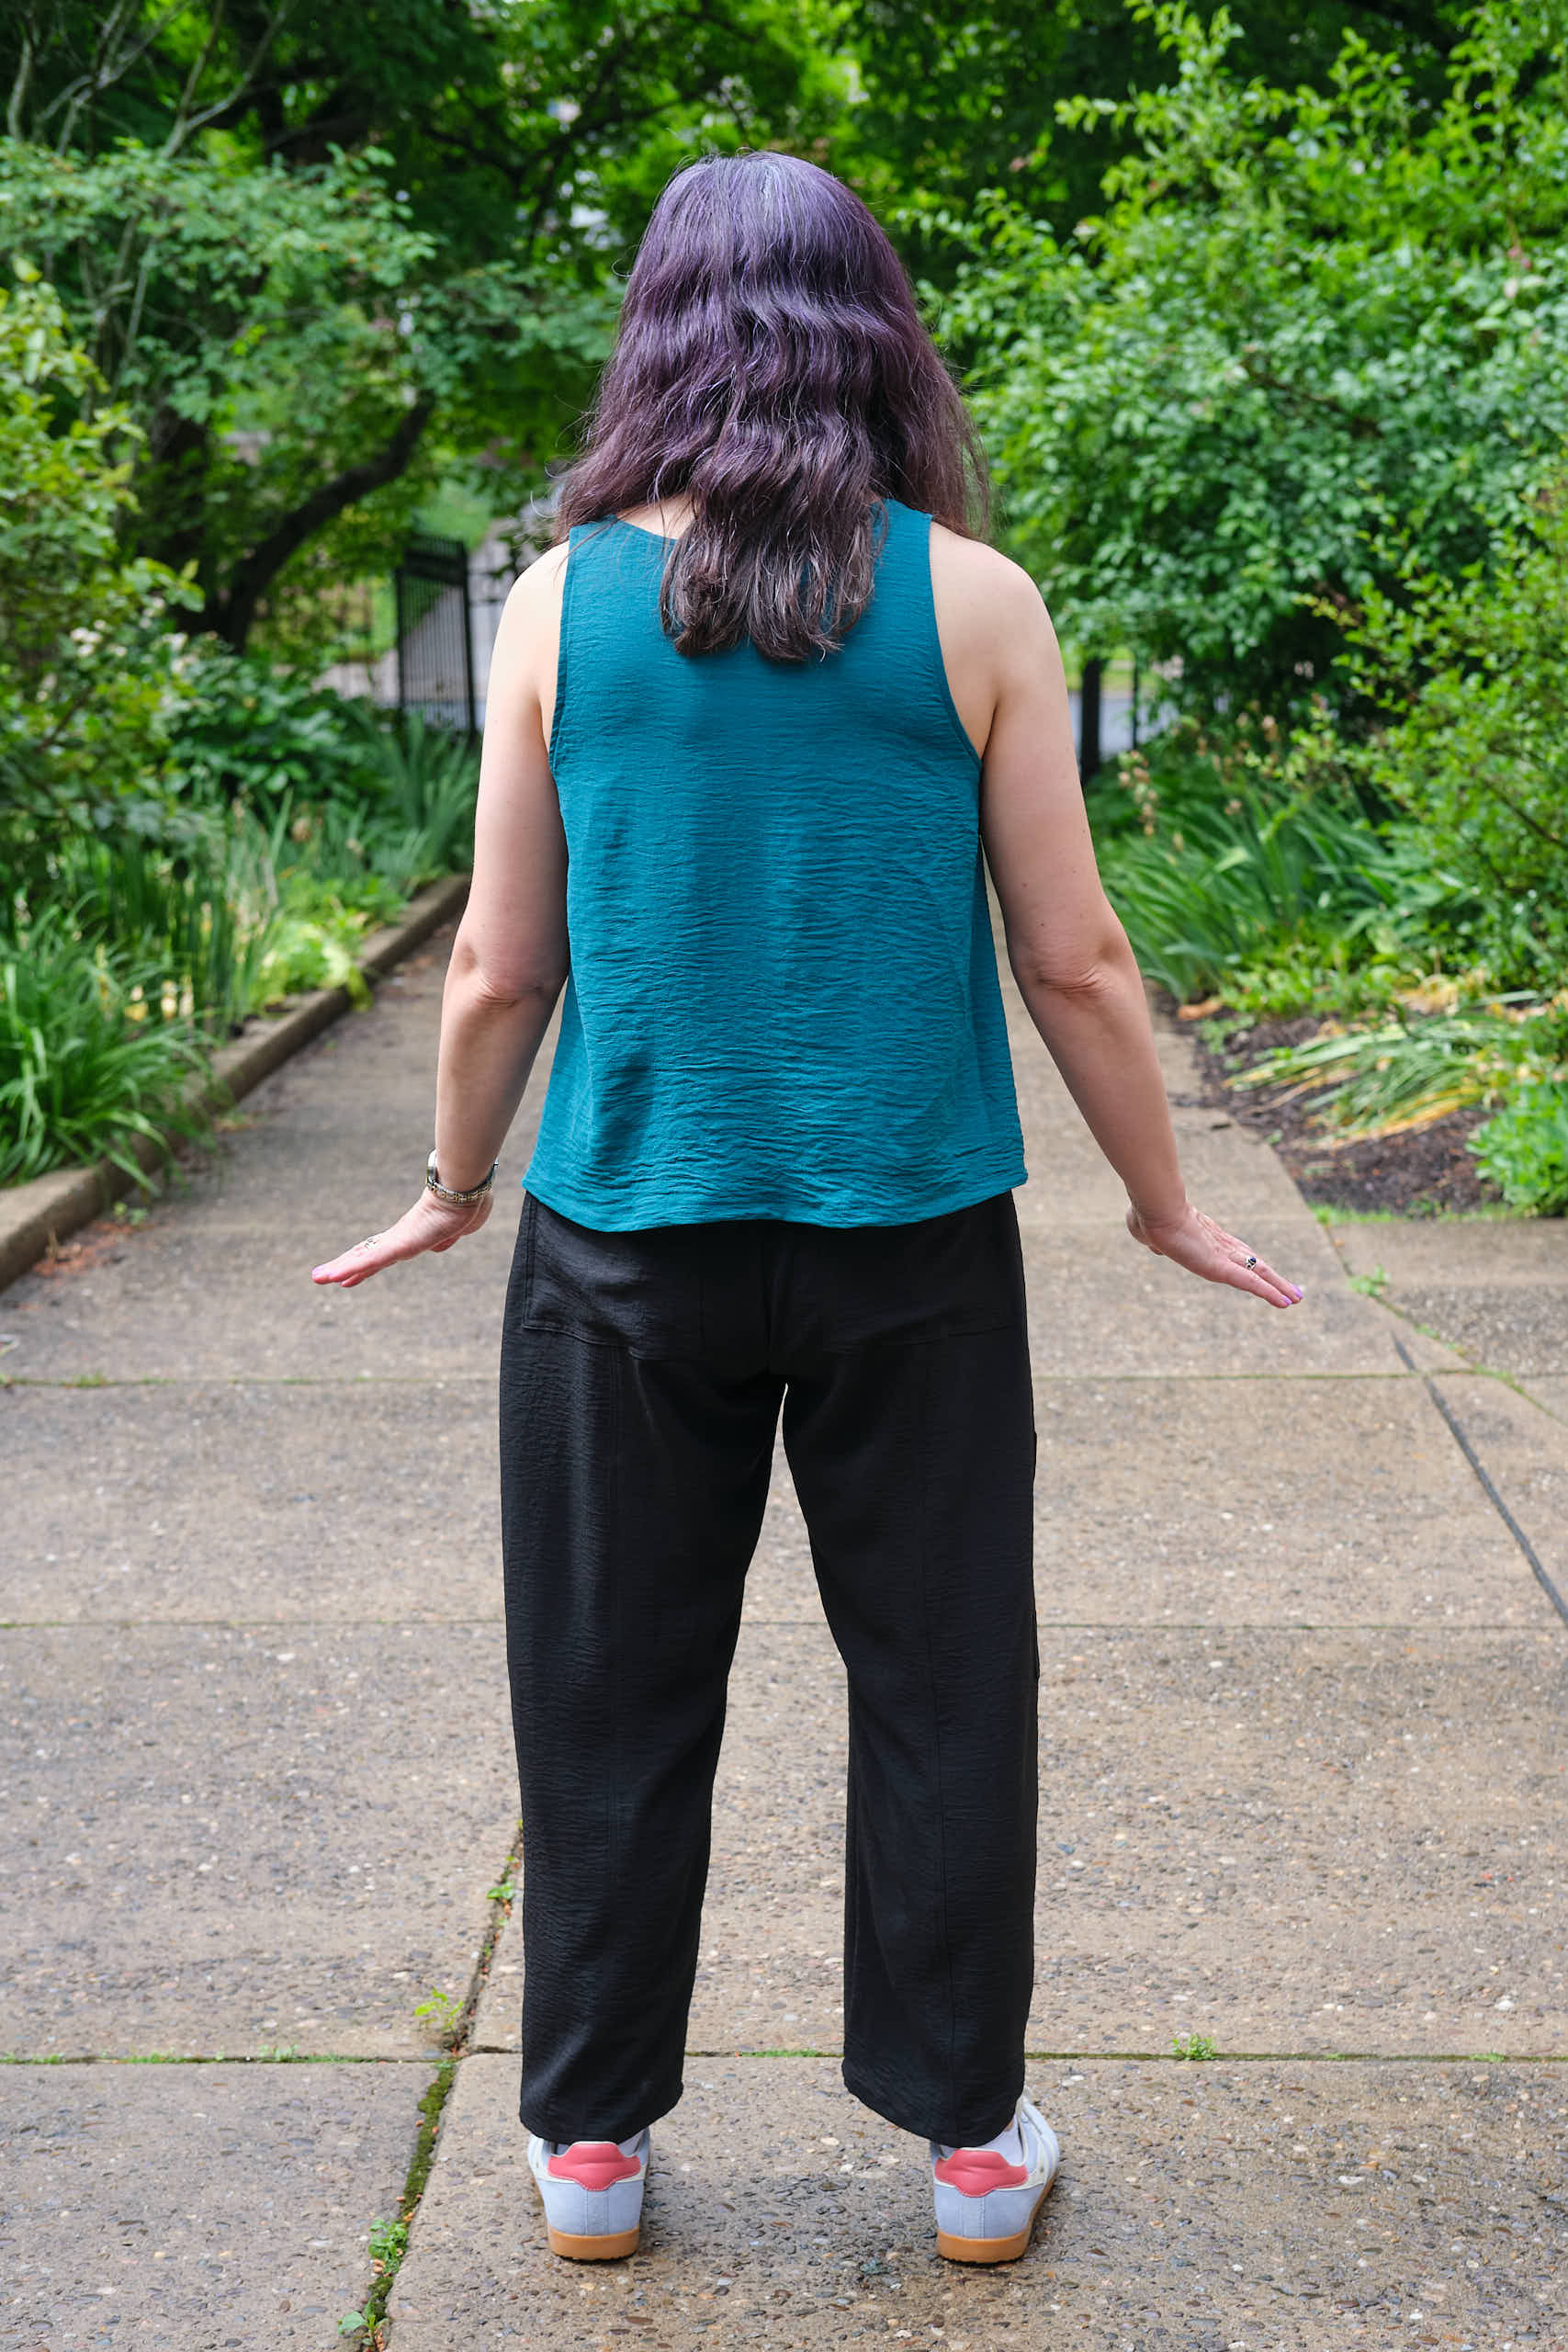
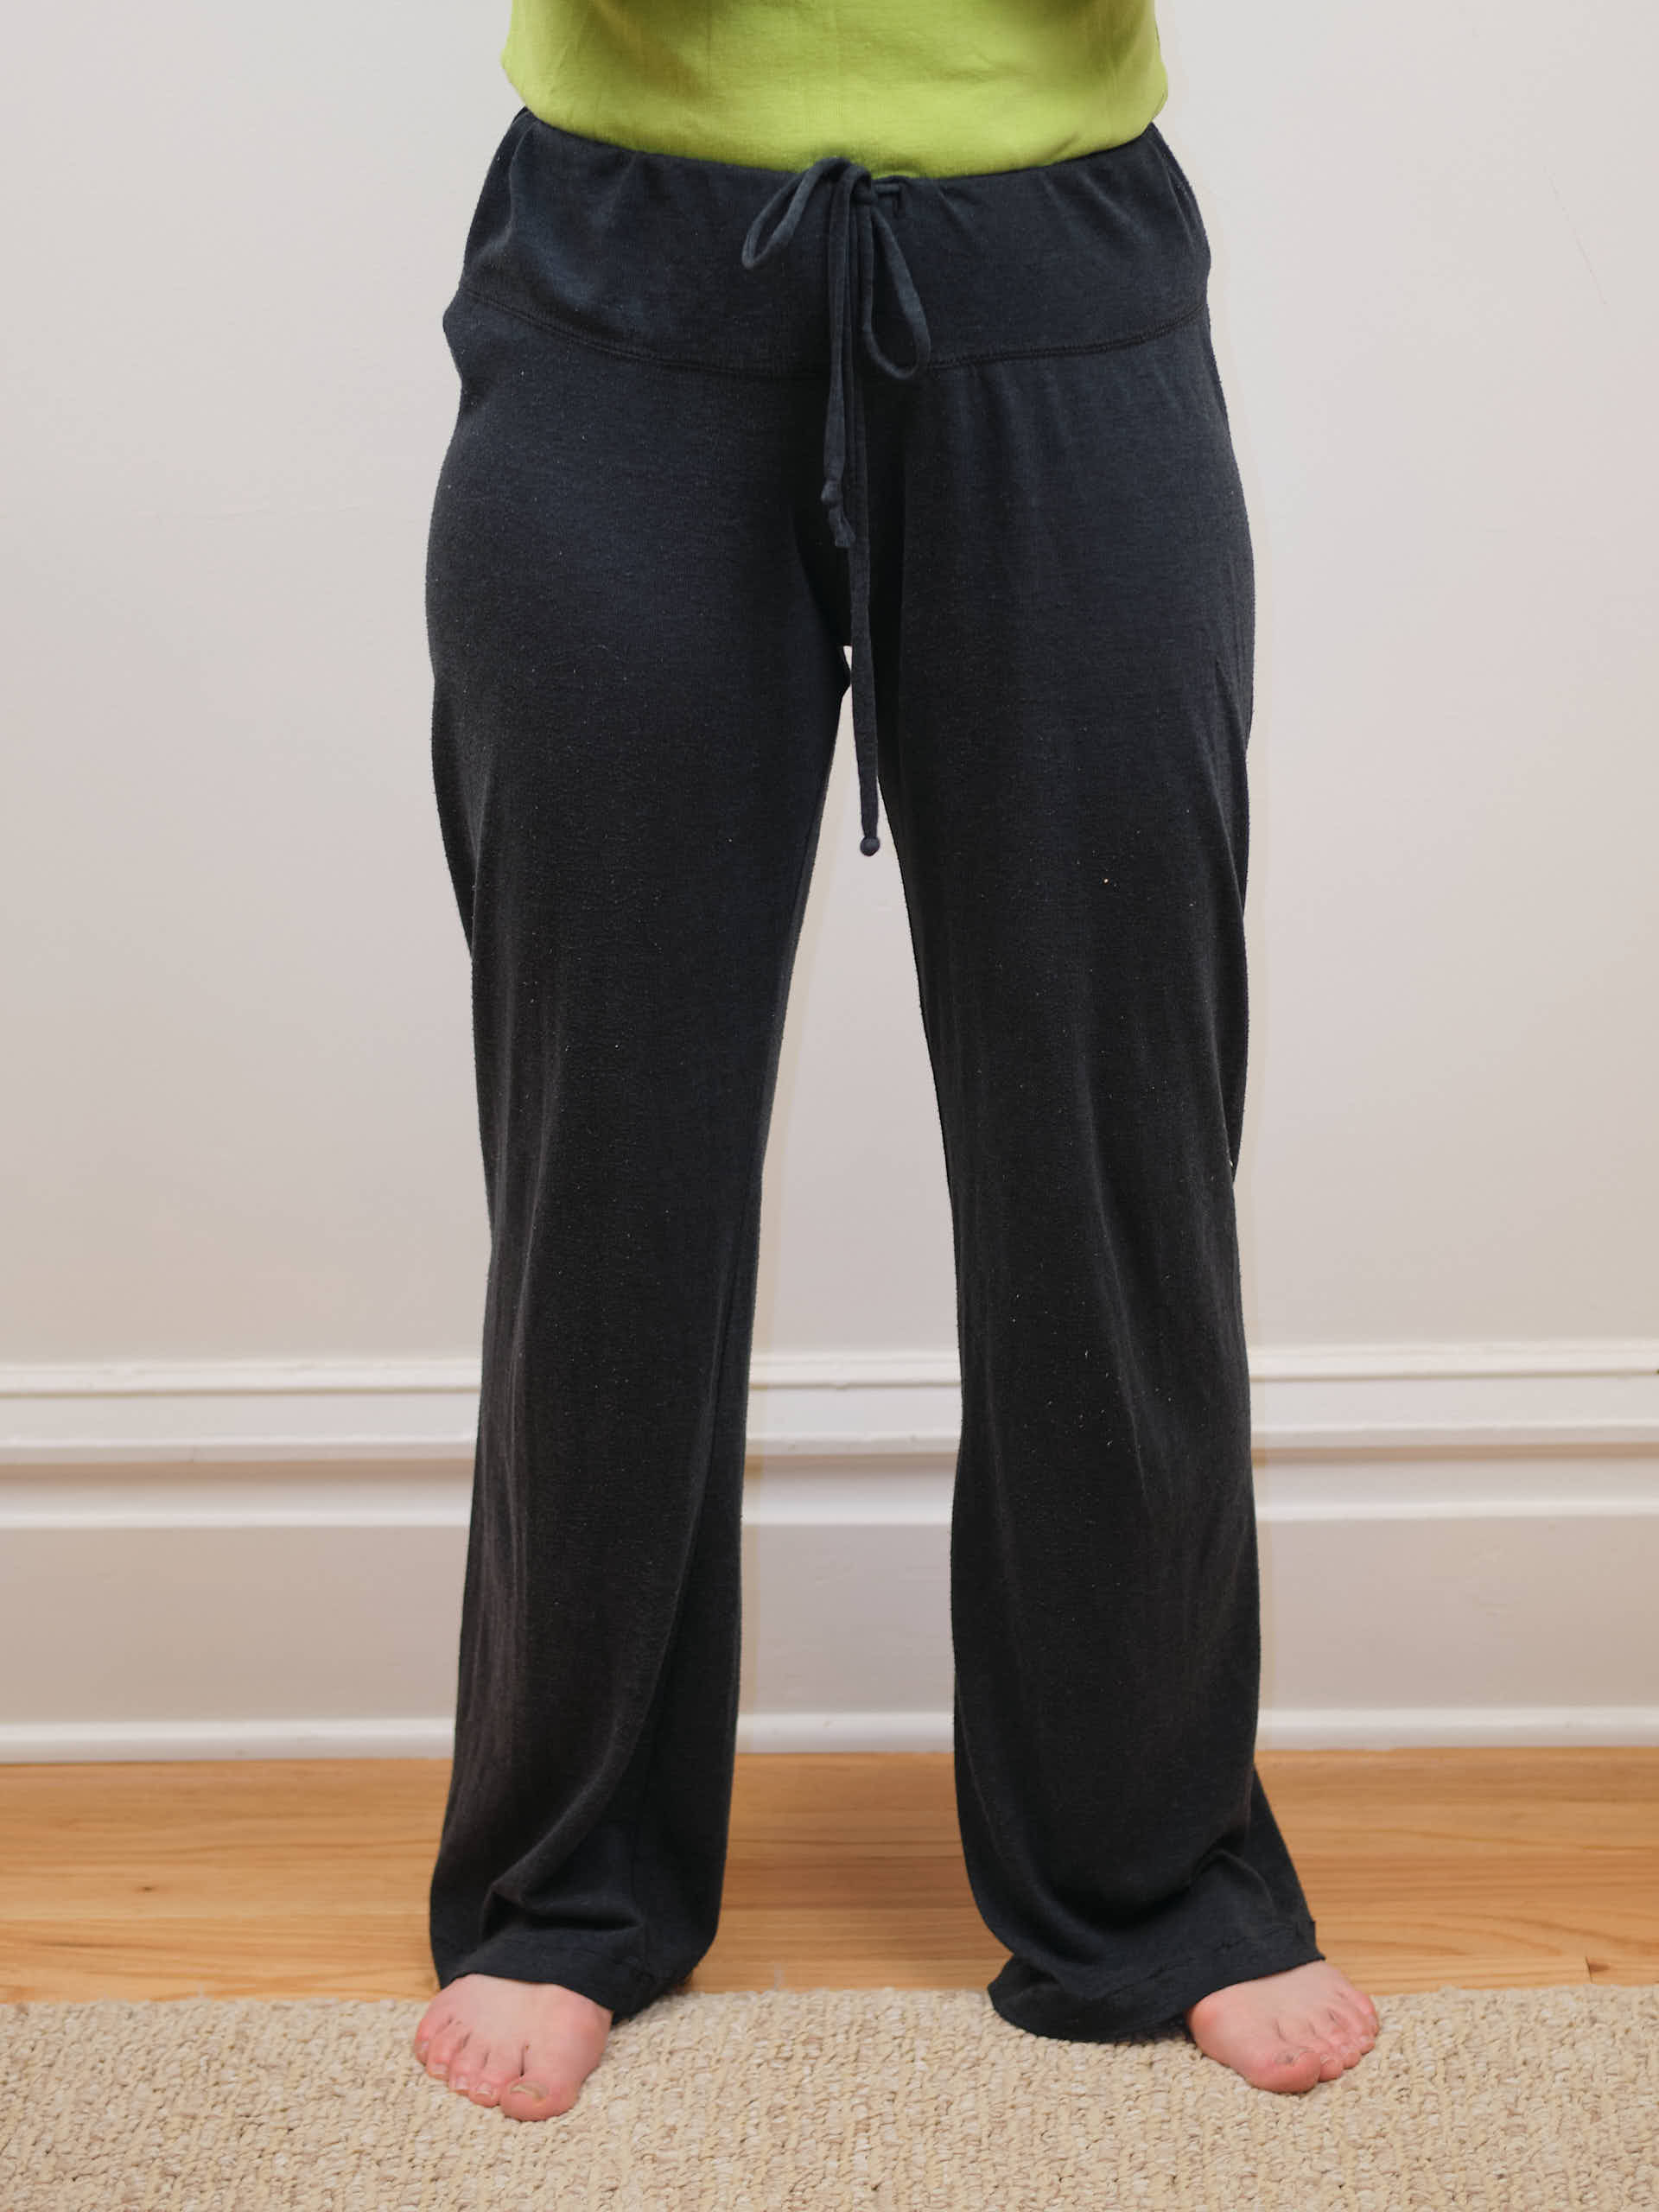
Here you can see a side-by-side comparison of the old and new pants modeled by yours truly. The top row is the old pants, and the bottom row is the new pants. Note that the pants are too, because my Aunt Nancy is actually several inches taller than me, but you can still get the idea. The modal fabric I used for the new pants is darker, stretchier, and fits closer to the body, but otherwise is a pretty good dupe.
After I finished the pants, I packed the new pants and the originals up and mailed them to Aunt Nancy. A few days later, she sent me these photos and asked for a second pair. They are soft and comfy and a perfect fit.
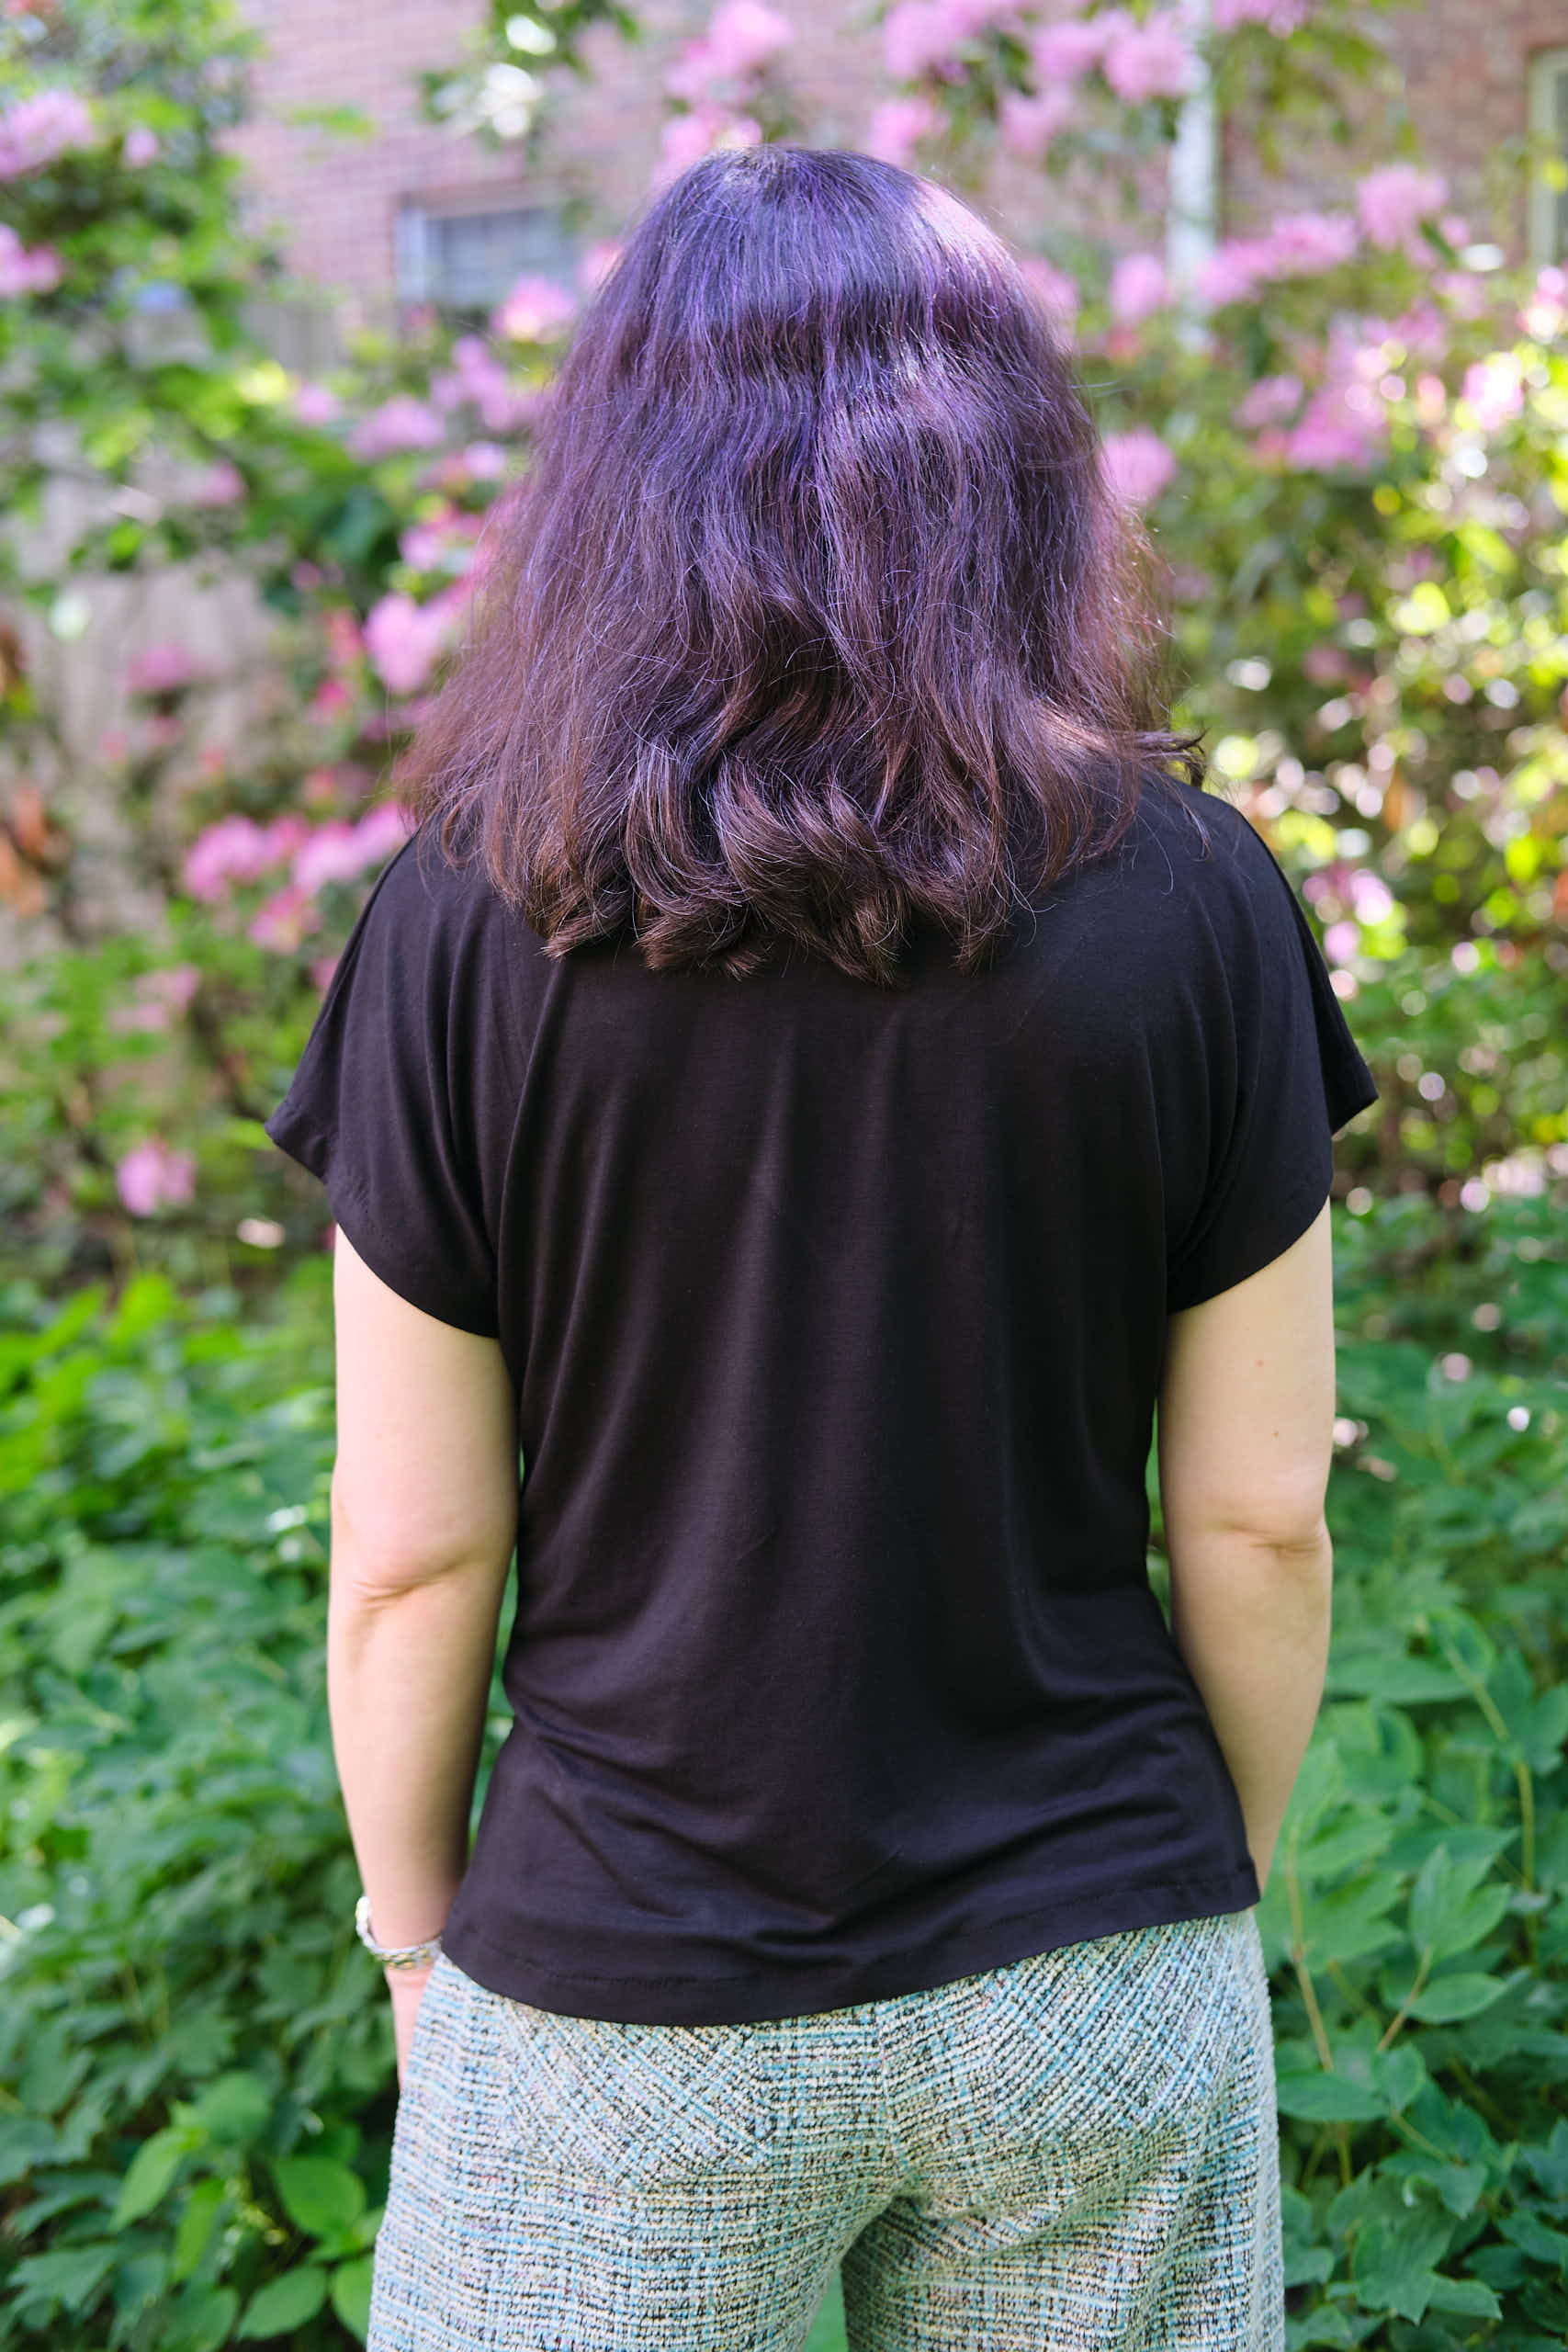
I was intrigued by the bold V-neck and simplicity of the Sonia Estep Designs Lena bold v-neck dolman top when I saw it in my Facebook sewing feed, so I decided to purchase it and give it a try. This is my first pattern from SED. From the measurements, it looked like size 4 would fit me but would be tunic length on me, so I shortened the pattern by 4 inches (I just took it off the bottom).
It was very fast to cut out the three pattern pieces (front, back, and neck band) from the black modal spandex fabric that I bought on sale from Mily Mae. I thought I could sew the whole top in an hour, but sadly the v-neck construction was non-trivial with my stretchy and slippery modal spandex. I’m not entirely sure why, but I think I spent almost 2 hours on the v-neck and about an hour on the rest. And even after all that effort, the point of the V is slightly off and the shirt doesn’t lie as smoothly as I would like where it meets the neck band (but top-stitching with a shallow zigzag stitch helped smooth it out somewhat). Next time, I would try zigzagging along the long edge of the neckband to hold the two layers together before trying to assemble the neckband. The sleeve hems were also more difficult than anticipated and might have benefited from pre-hemming before sewing the side seams. I like the drape of the modal spandex and it is very comfy to wear.
I’m glad I shortened the hem. This is a good length for me to wear tucked in or out, and it looks great with my new tweed pants!
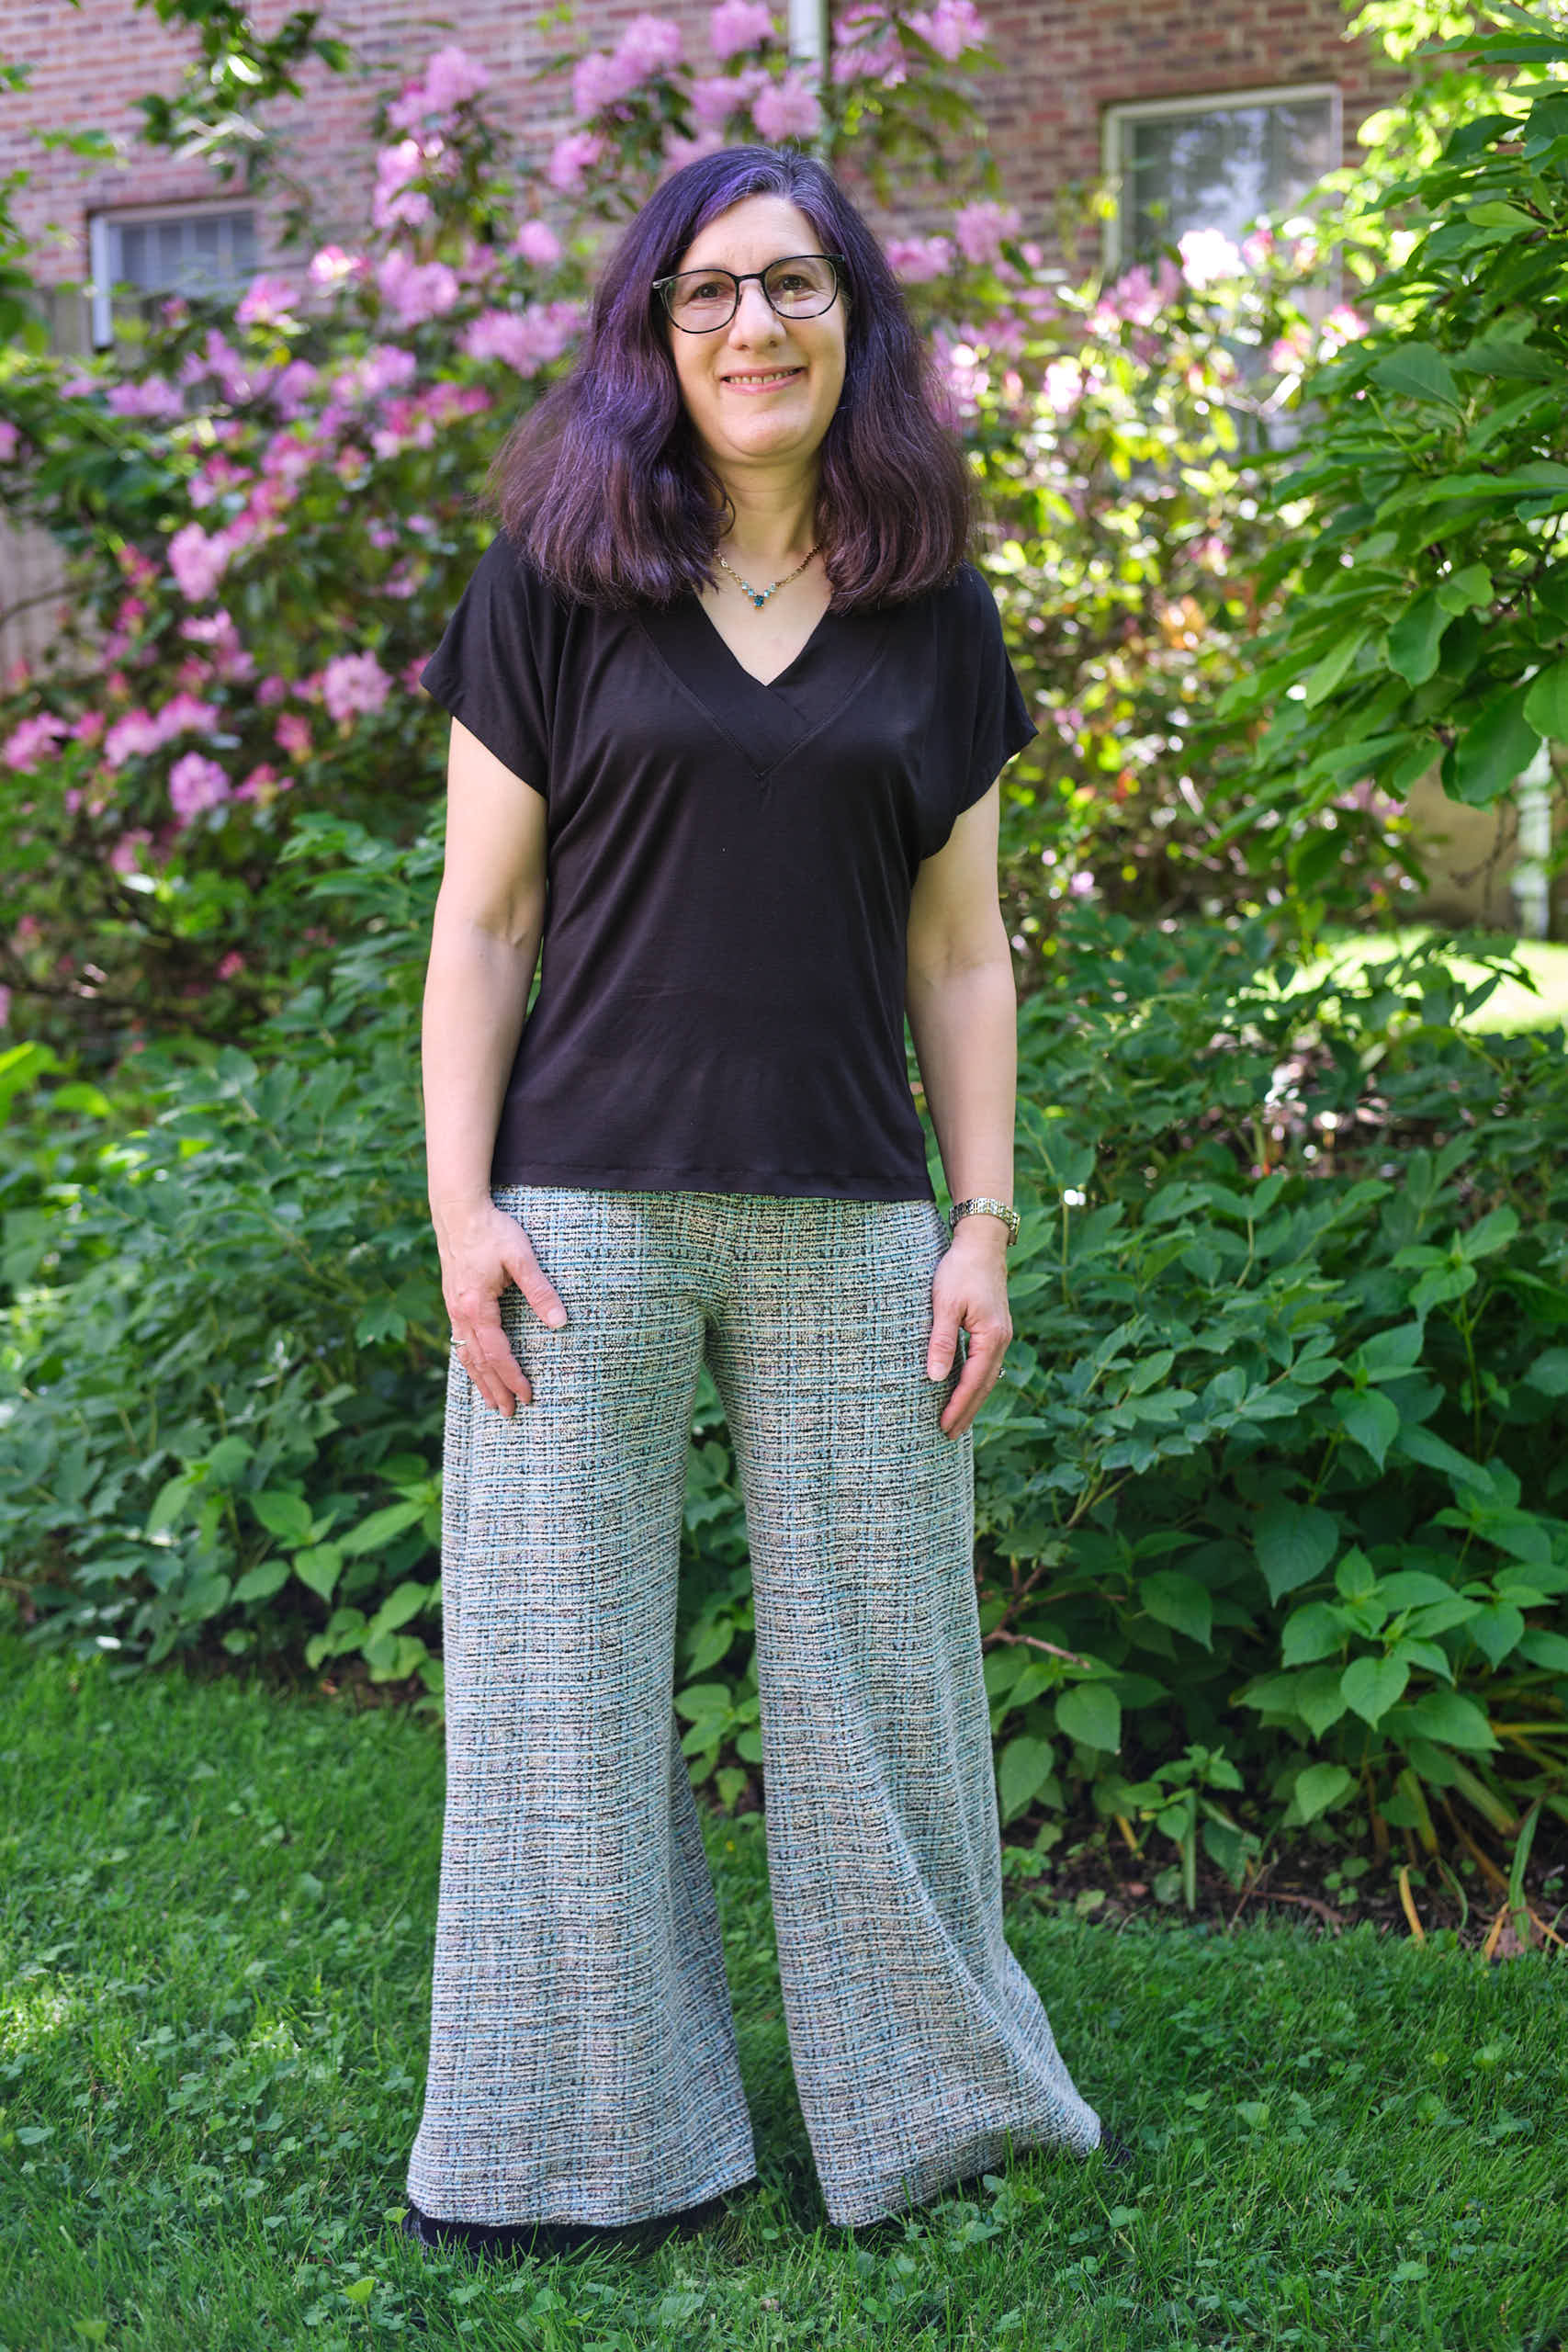
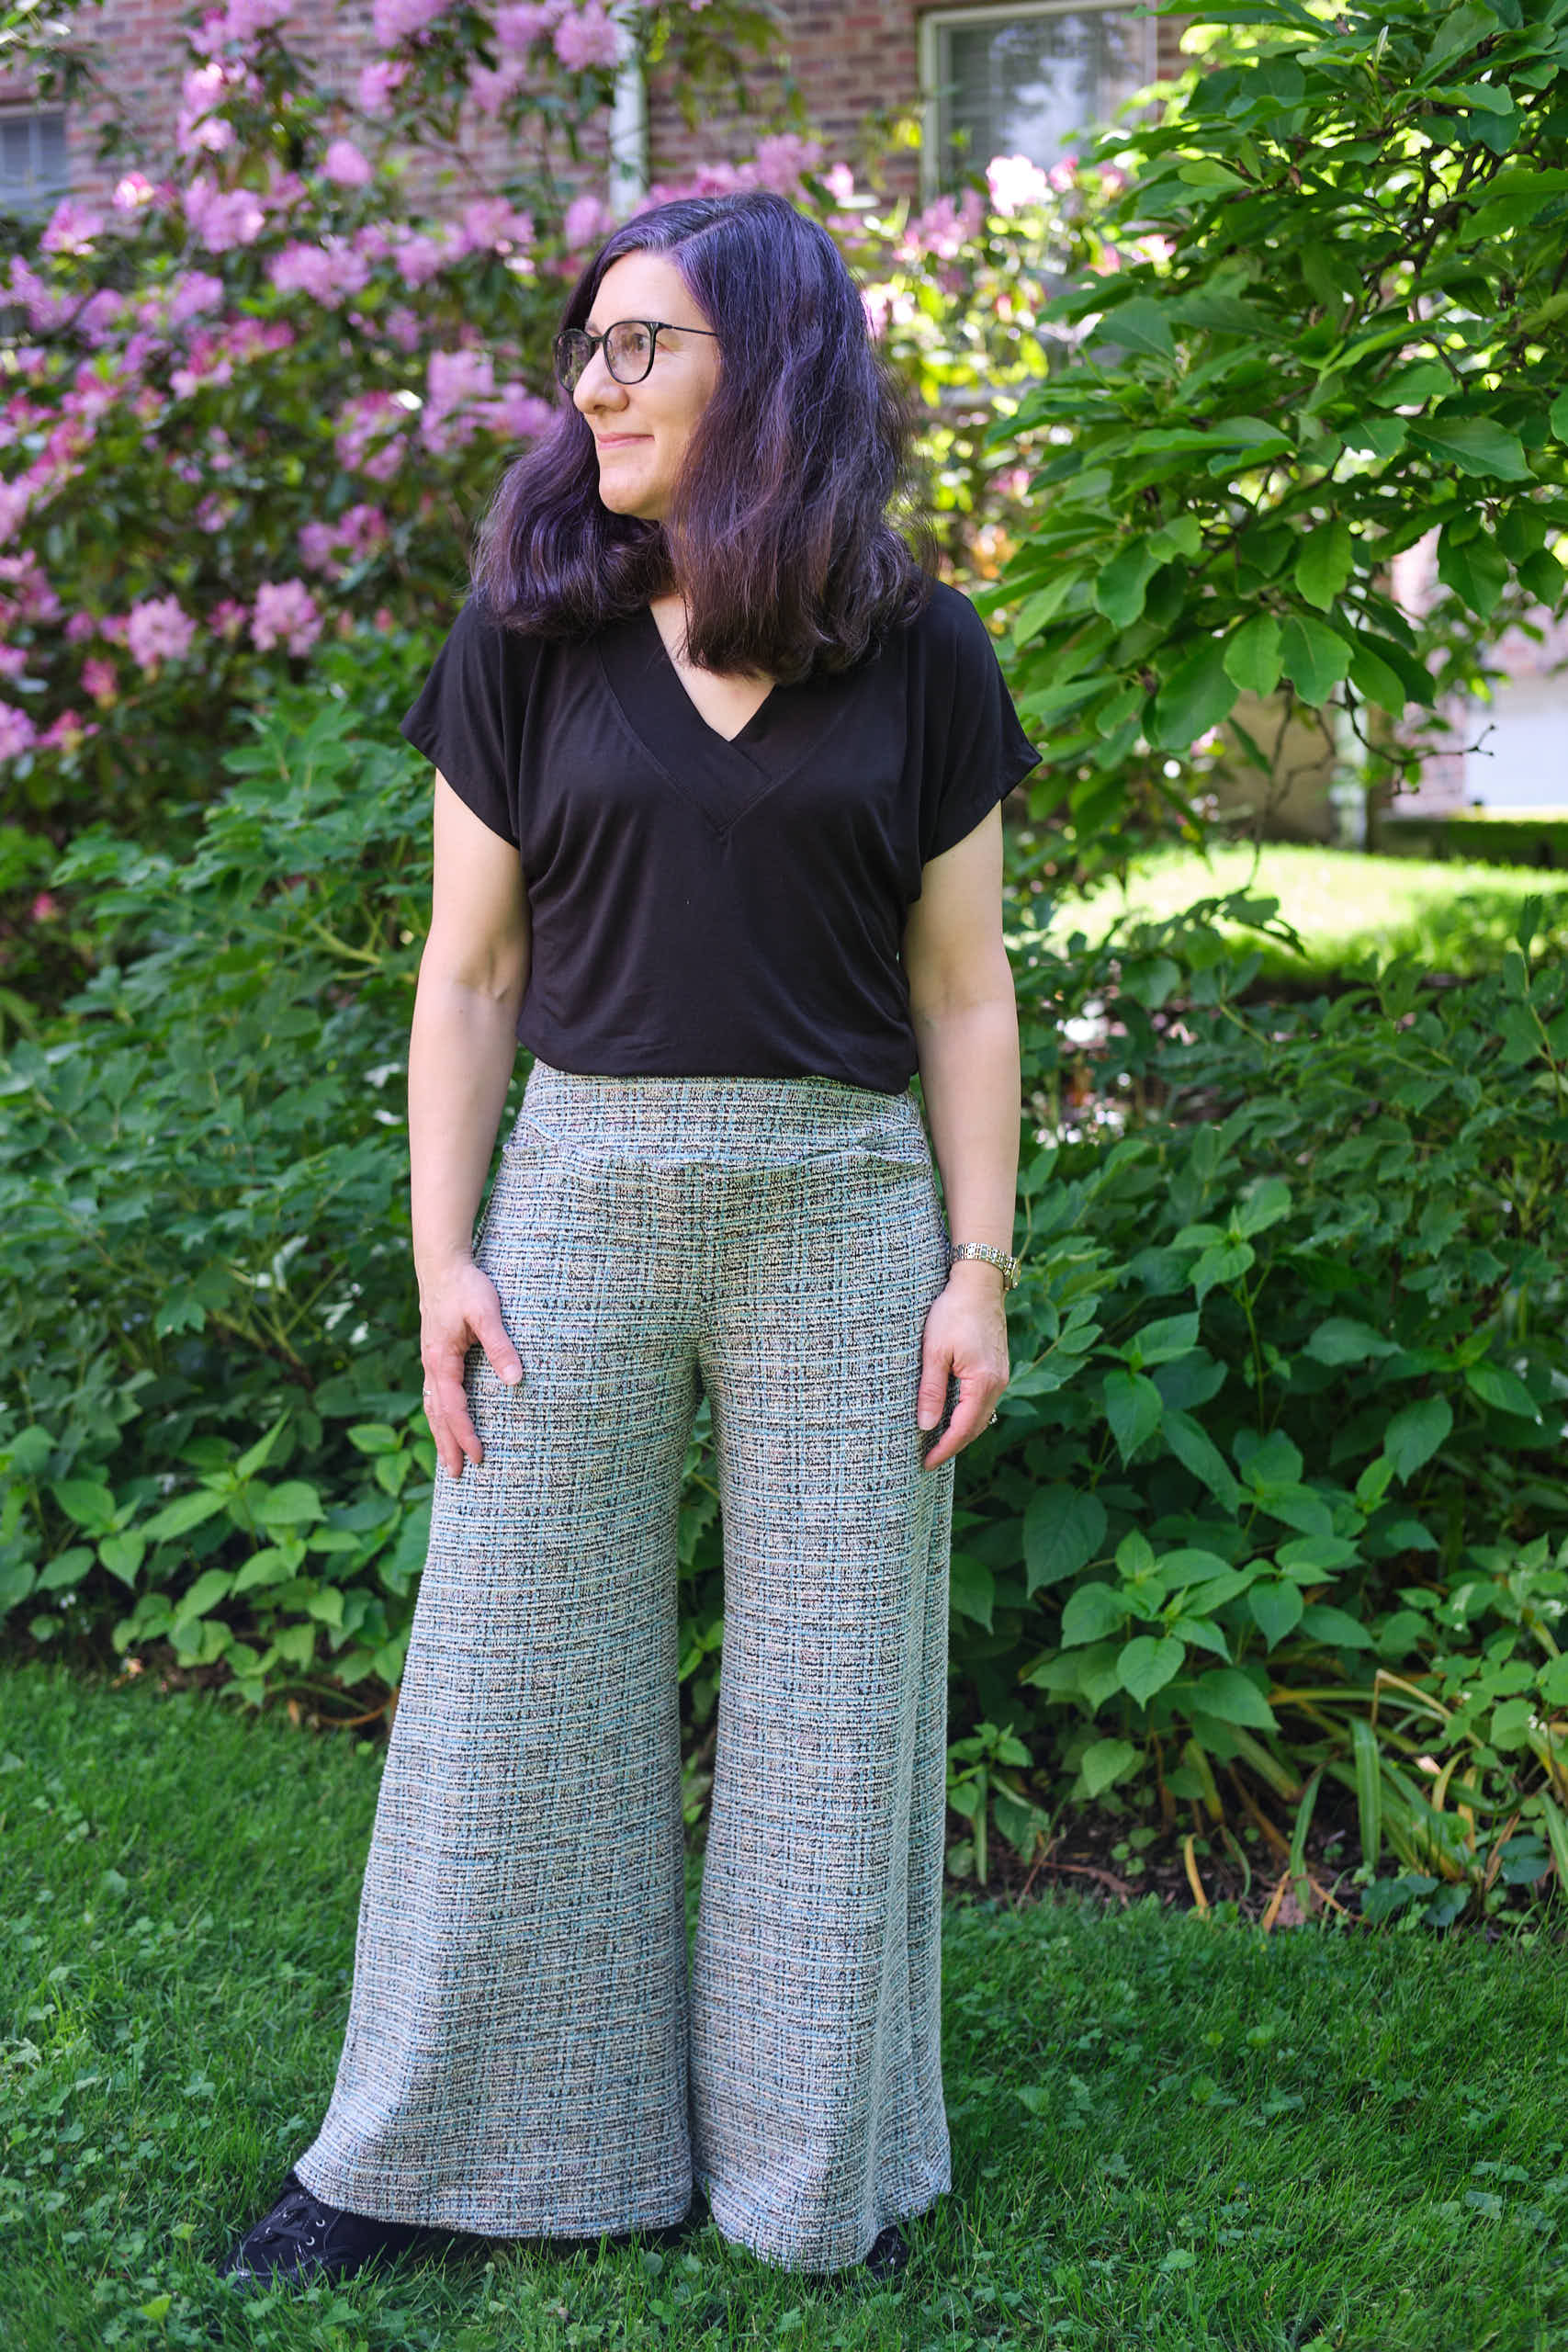
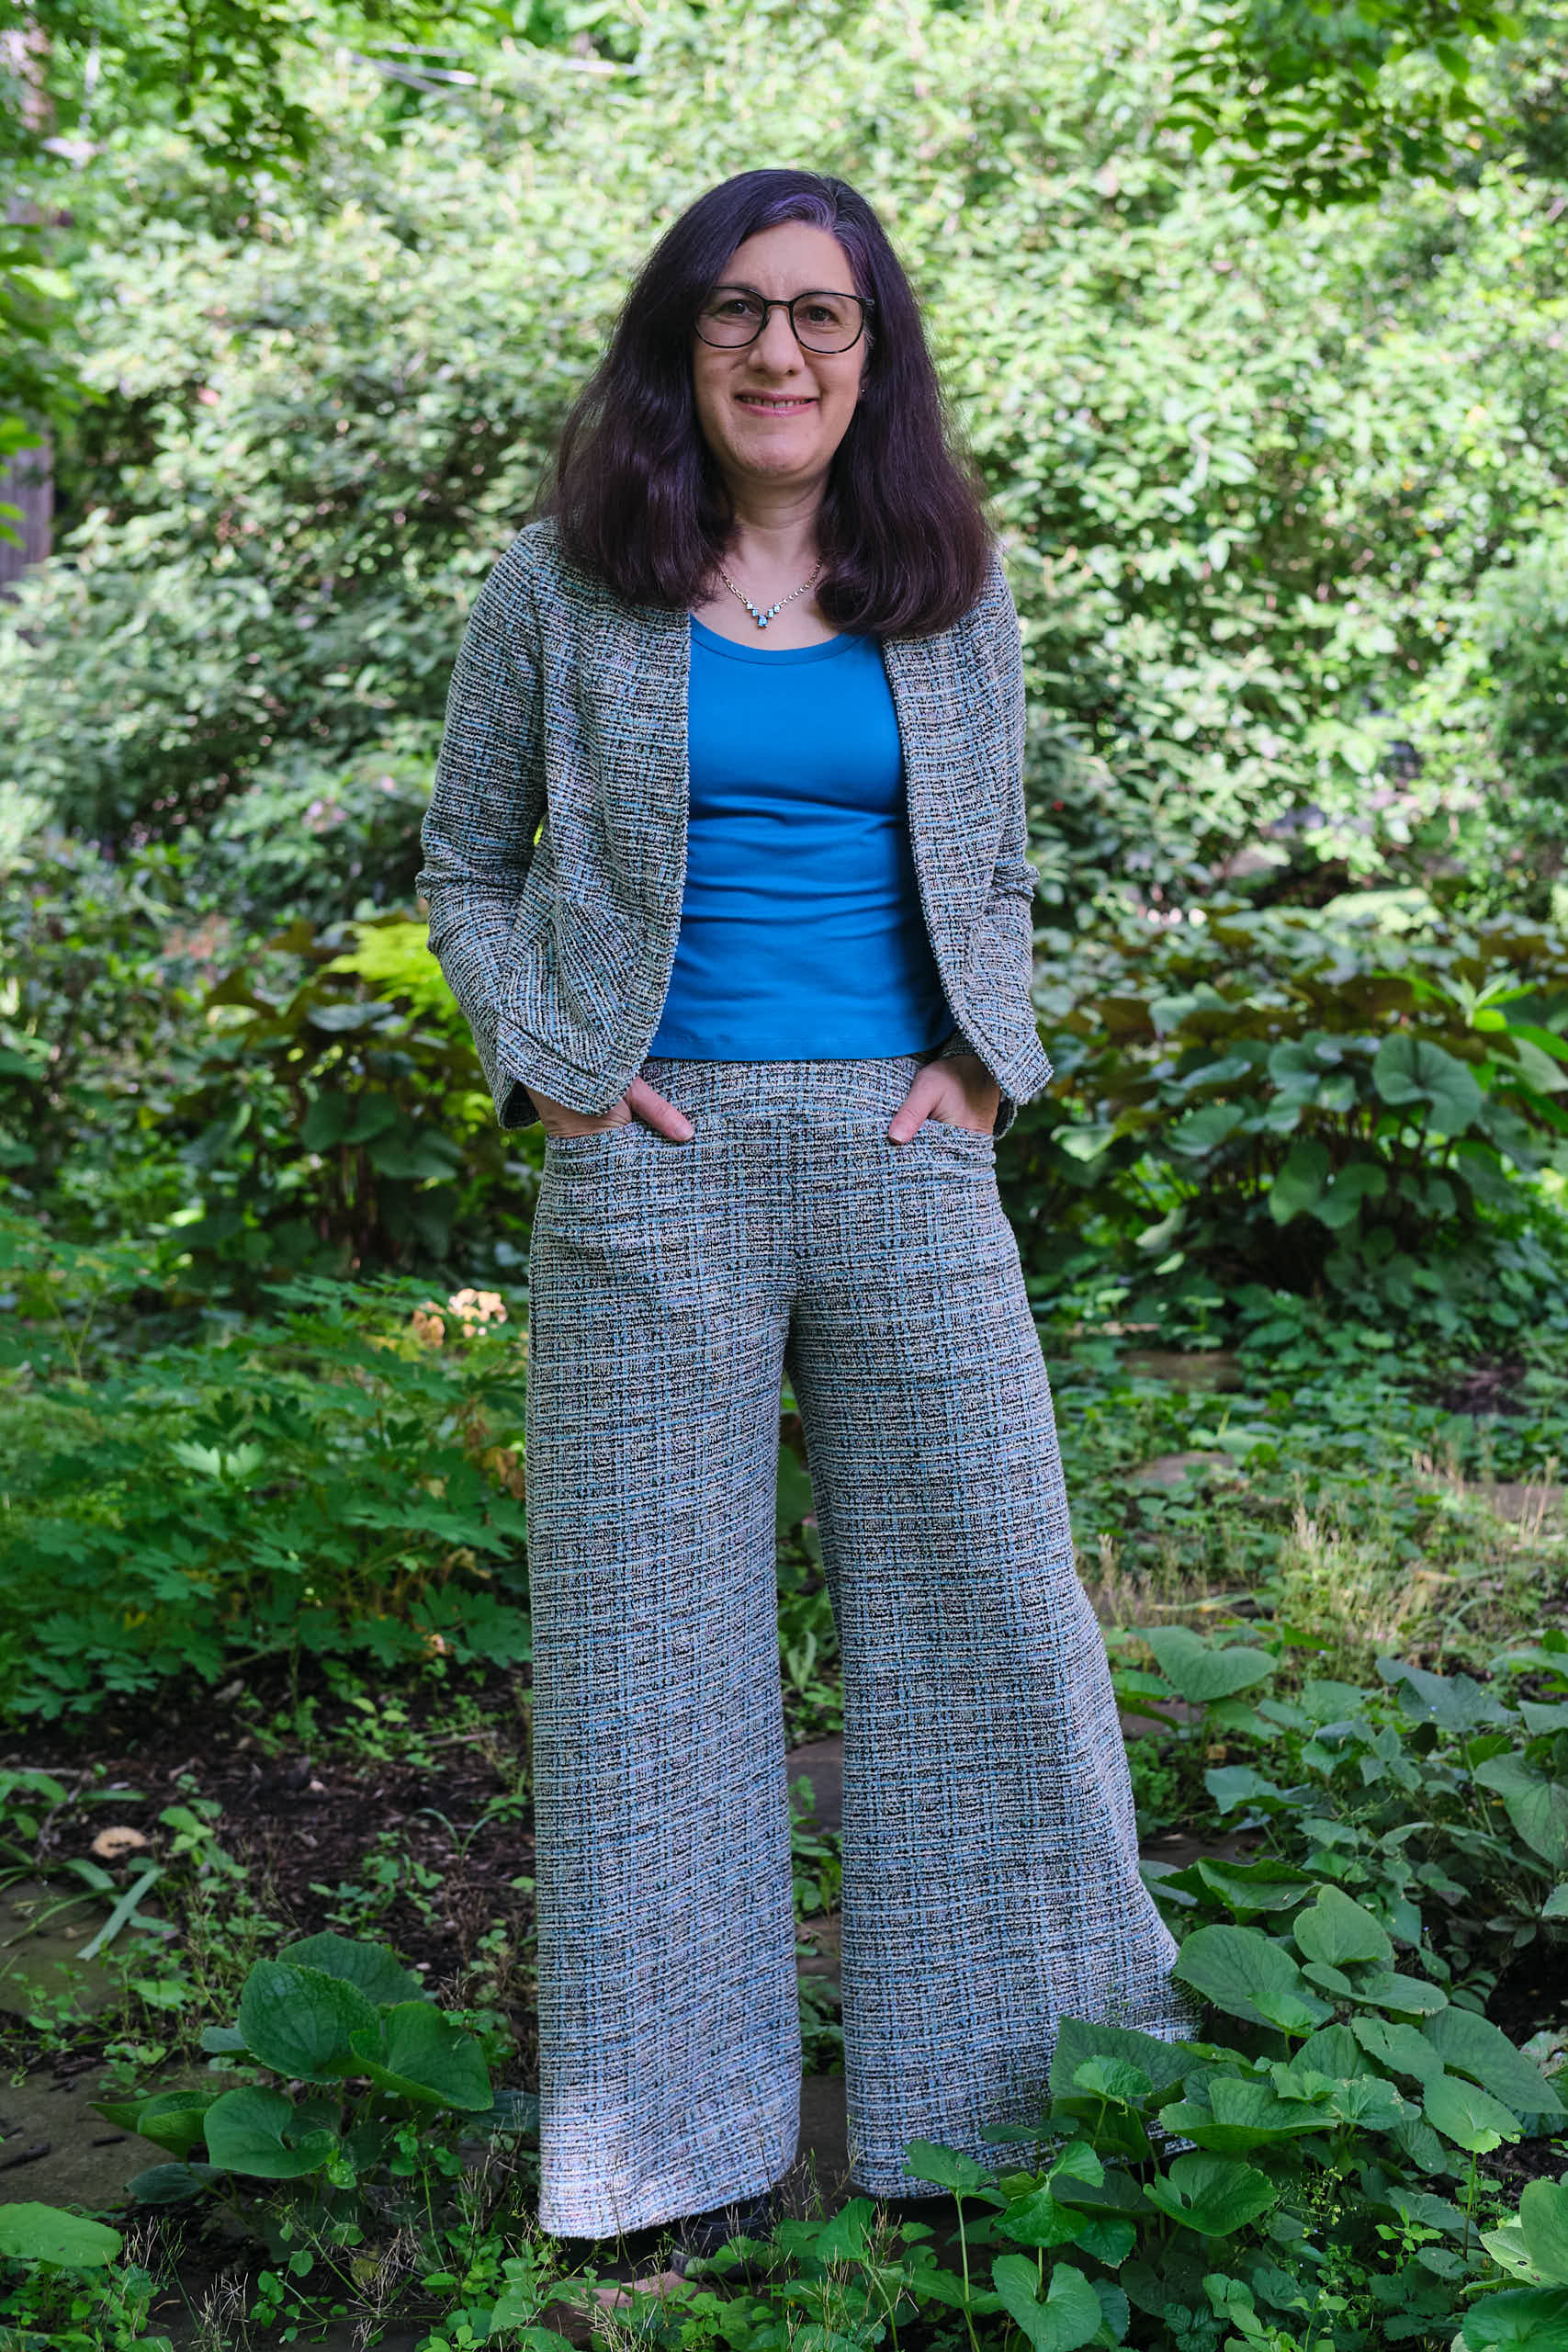
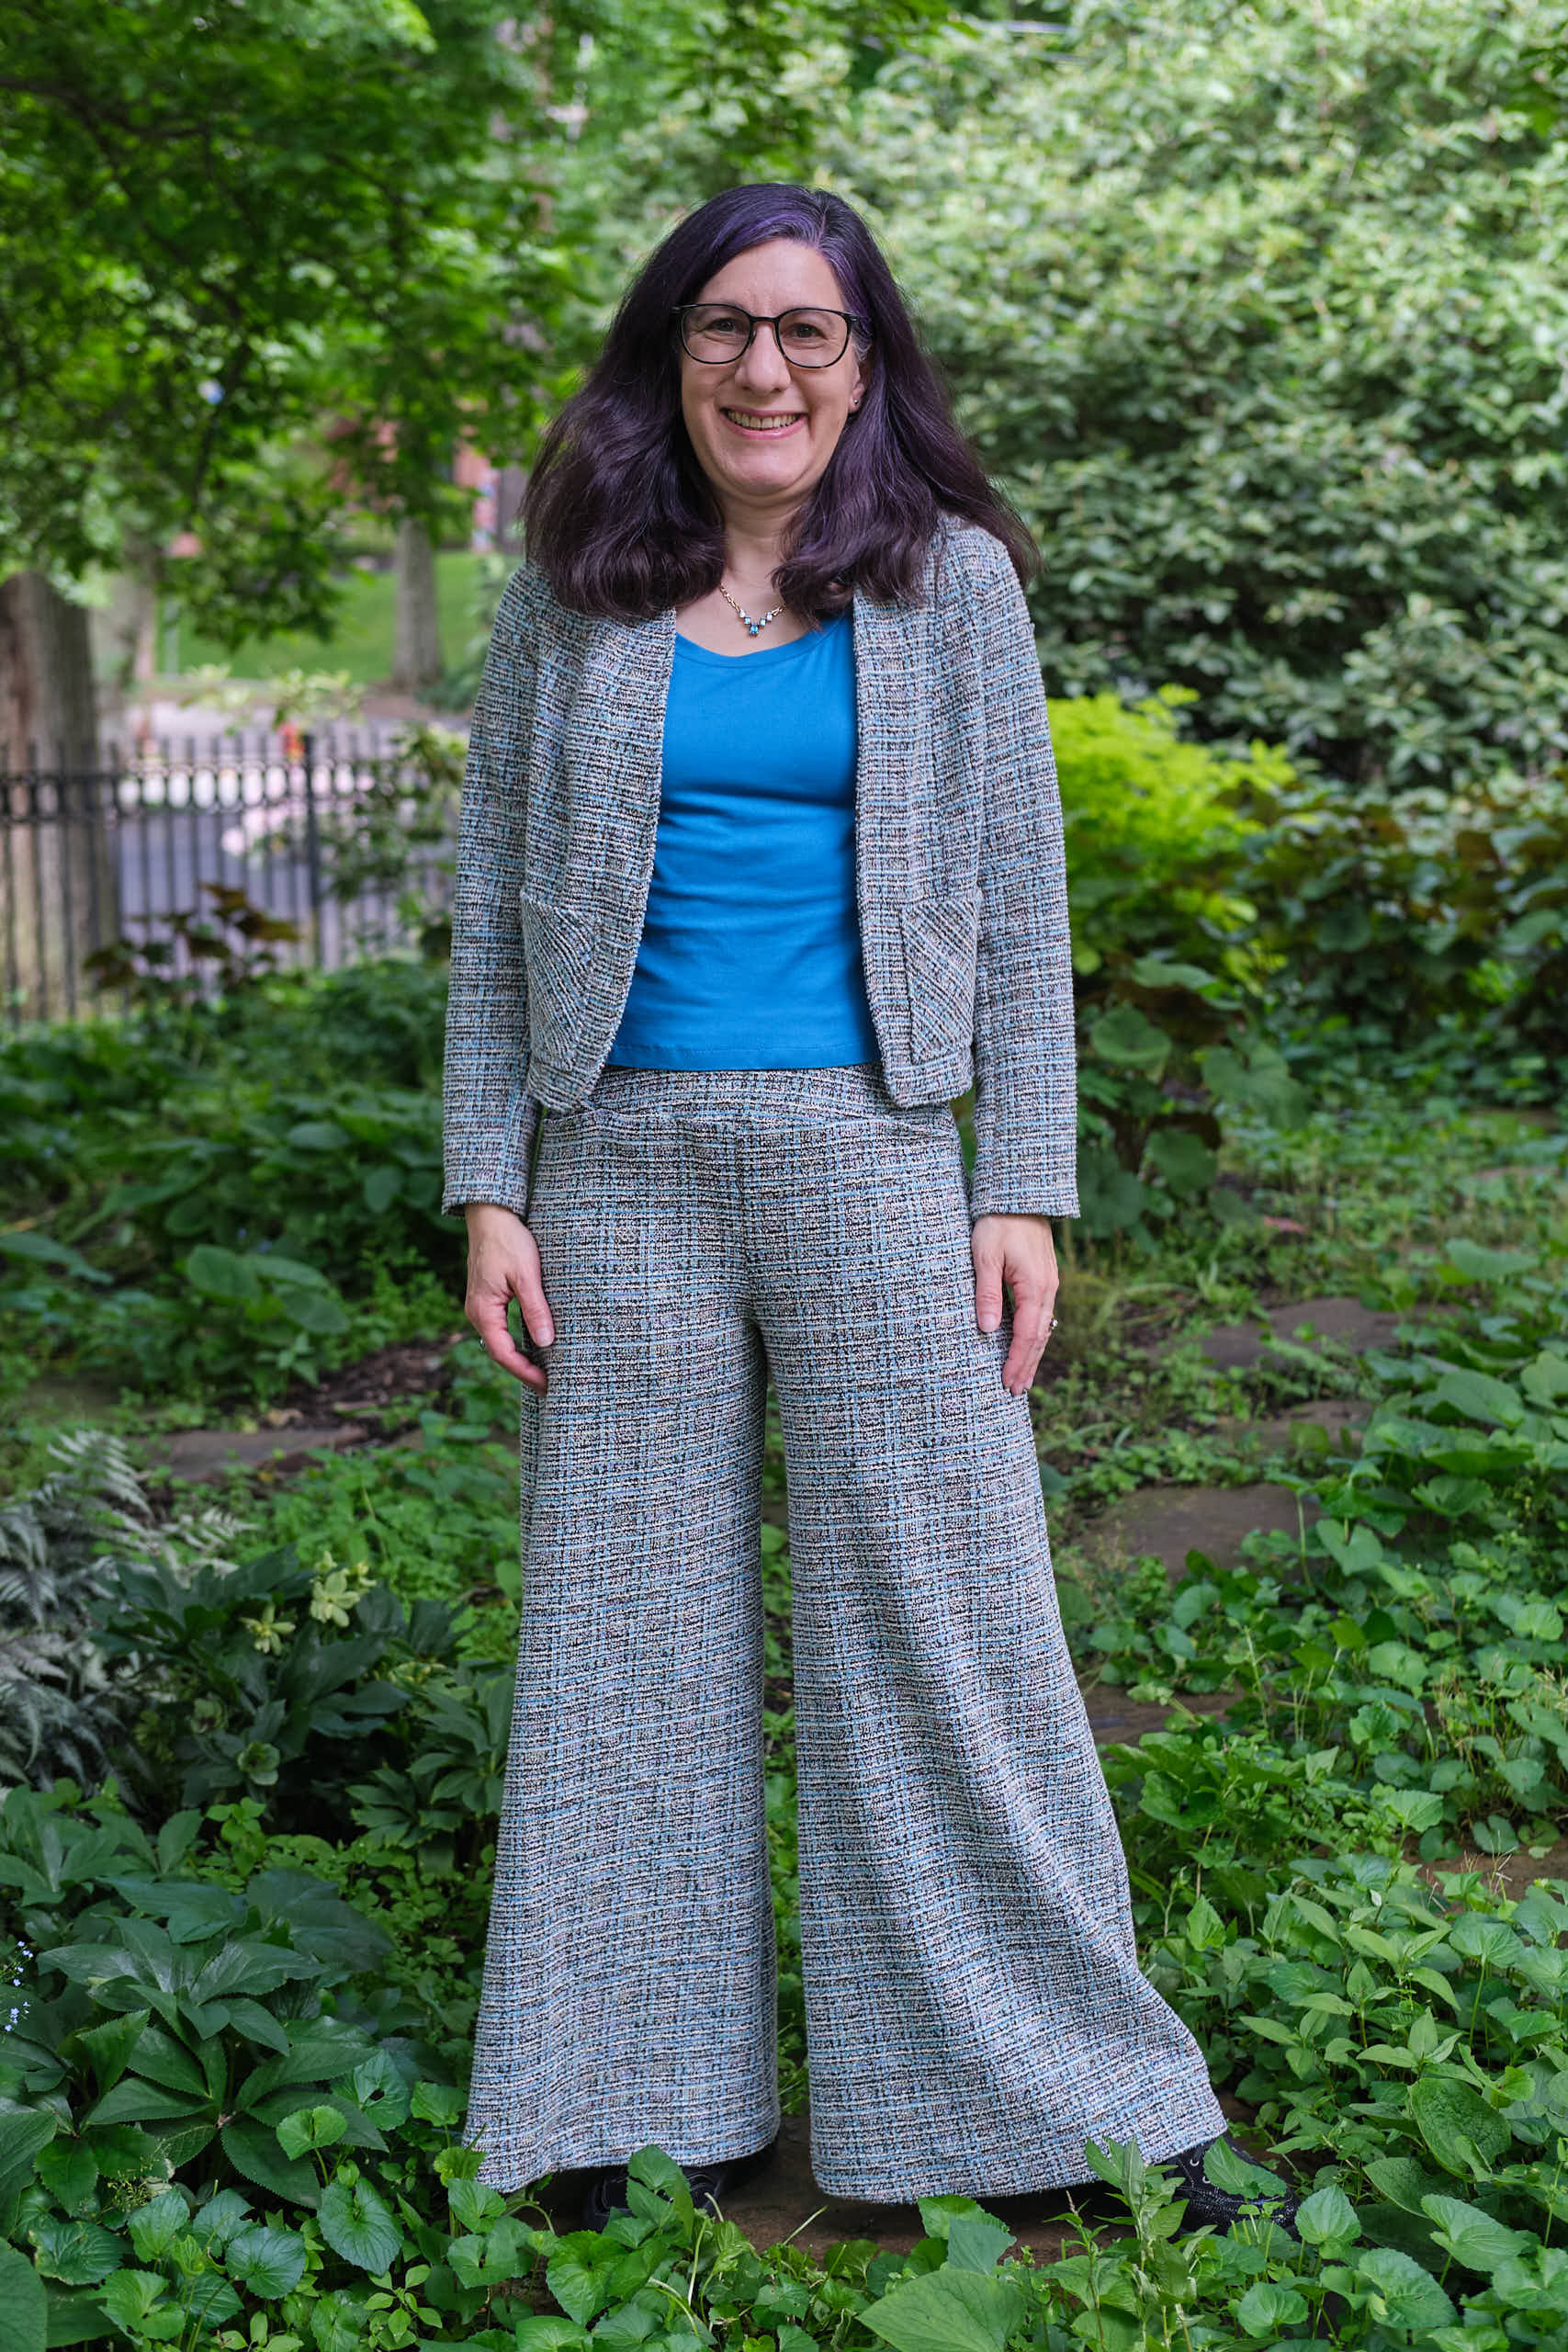
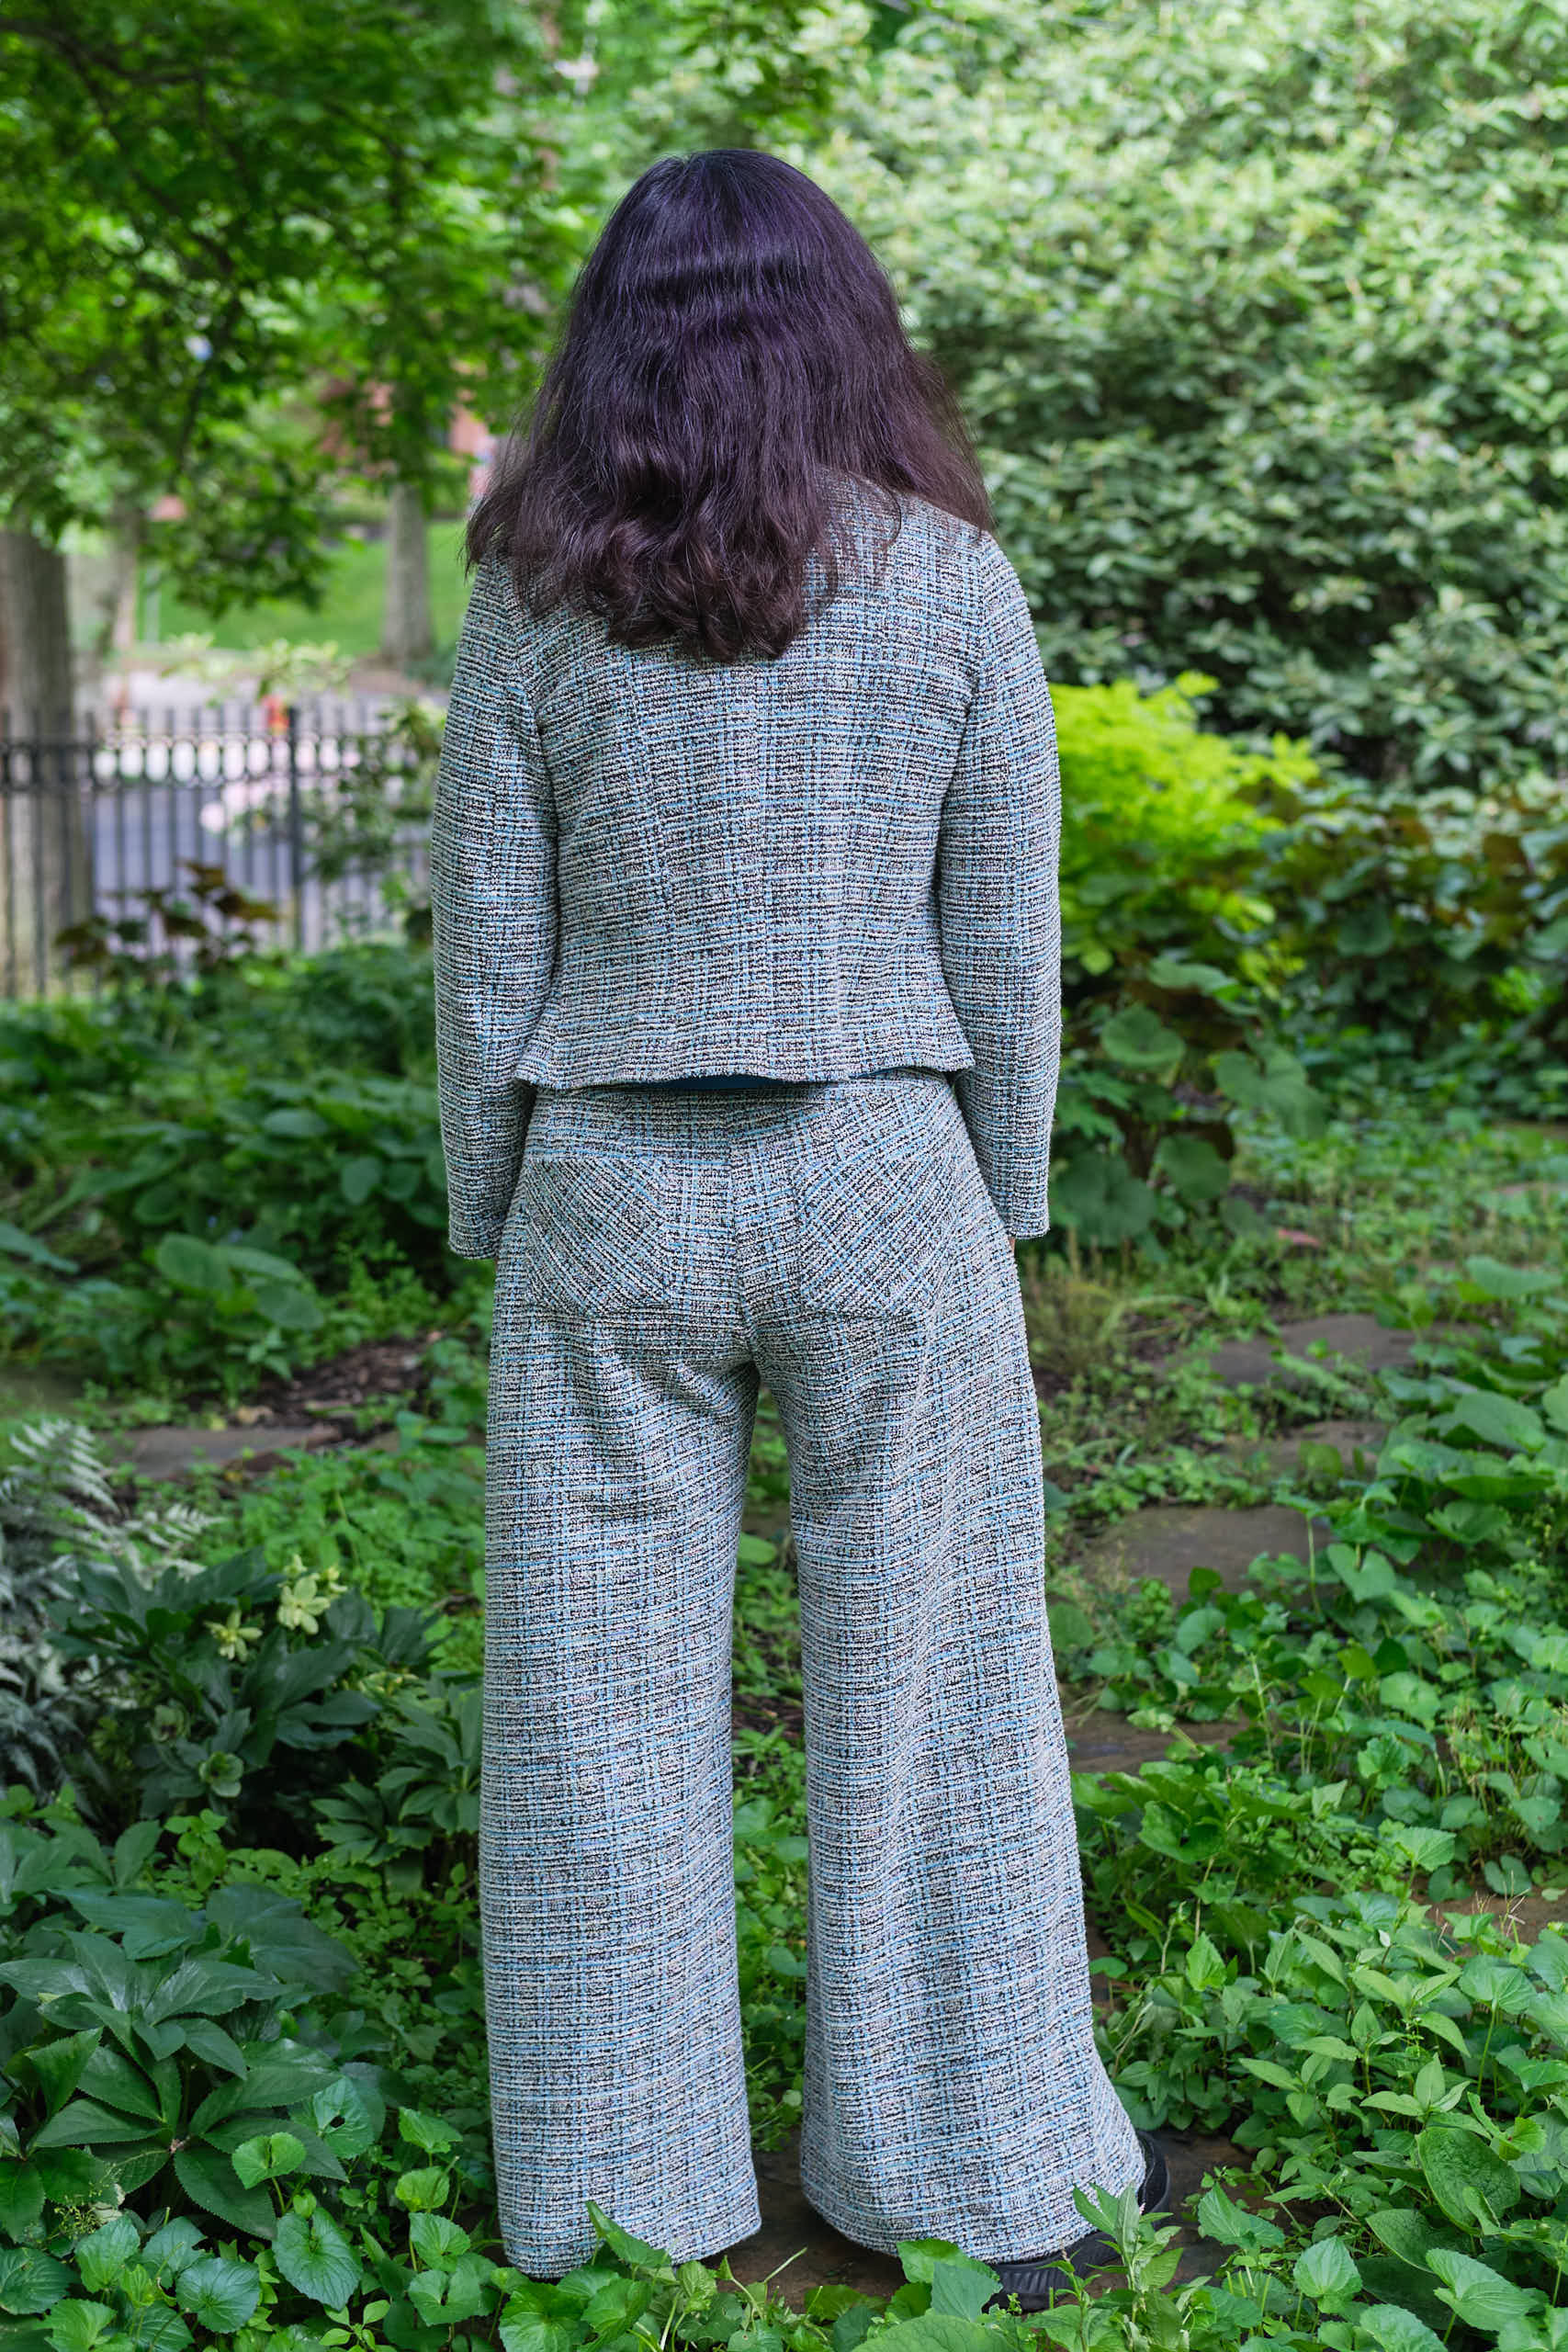
Pattern Emporium Walk Boldly Pants with modified yoga waistband from Pattern Emporium Urban Pants, size 10 AU short length with adjustments at waist and crotch, modified jeans pockets and back patch pockets. From ~1.5 yard blue/black tweed bouclé knit, waistband lined with athletic knit.
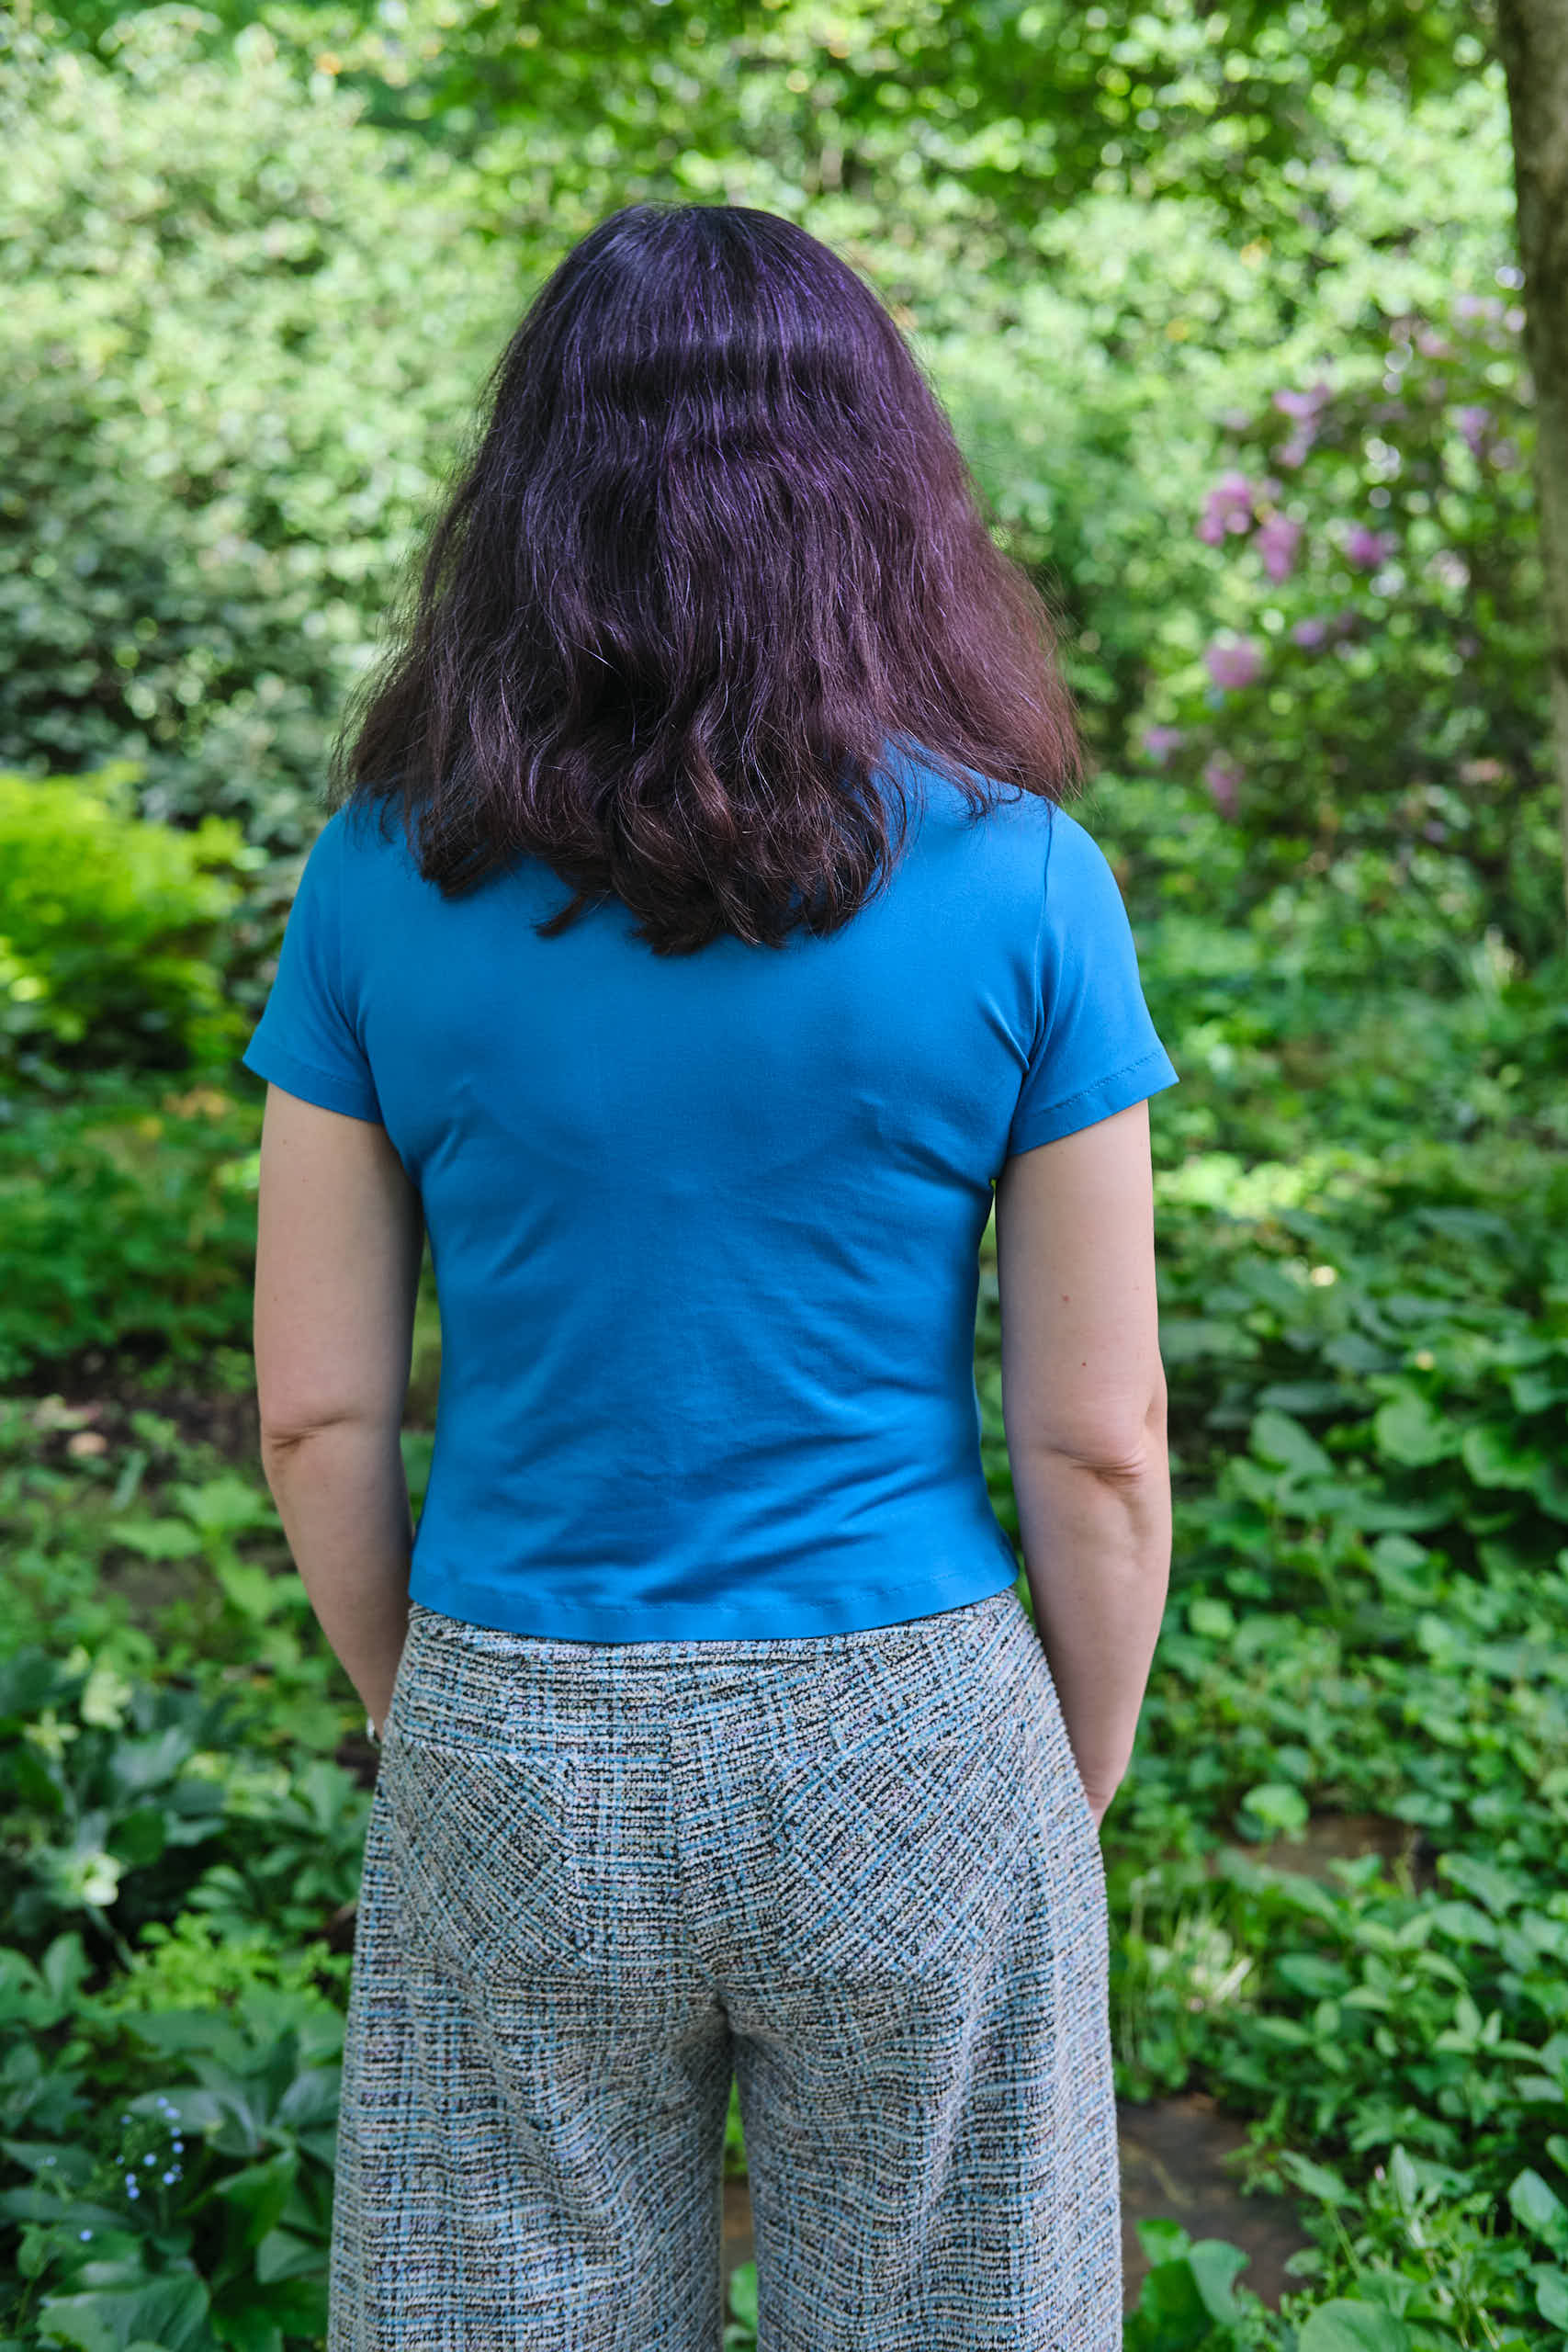
Sinclair Bondi classic fitted t-shirt, size 4p with broad and sloped shoulder adjustments, cropped length, low screwp neck, in <1 yard of turquoise double-brushed poly.
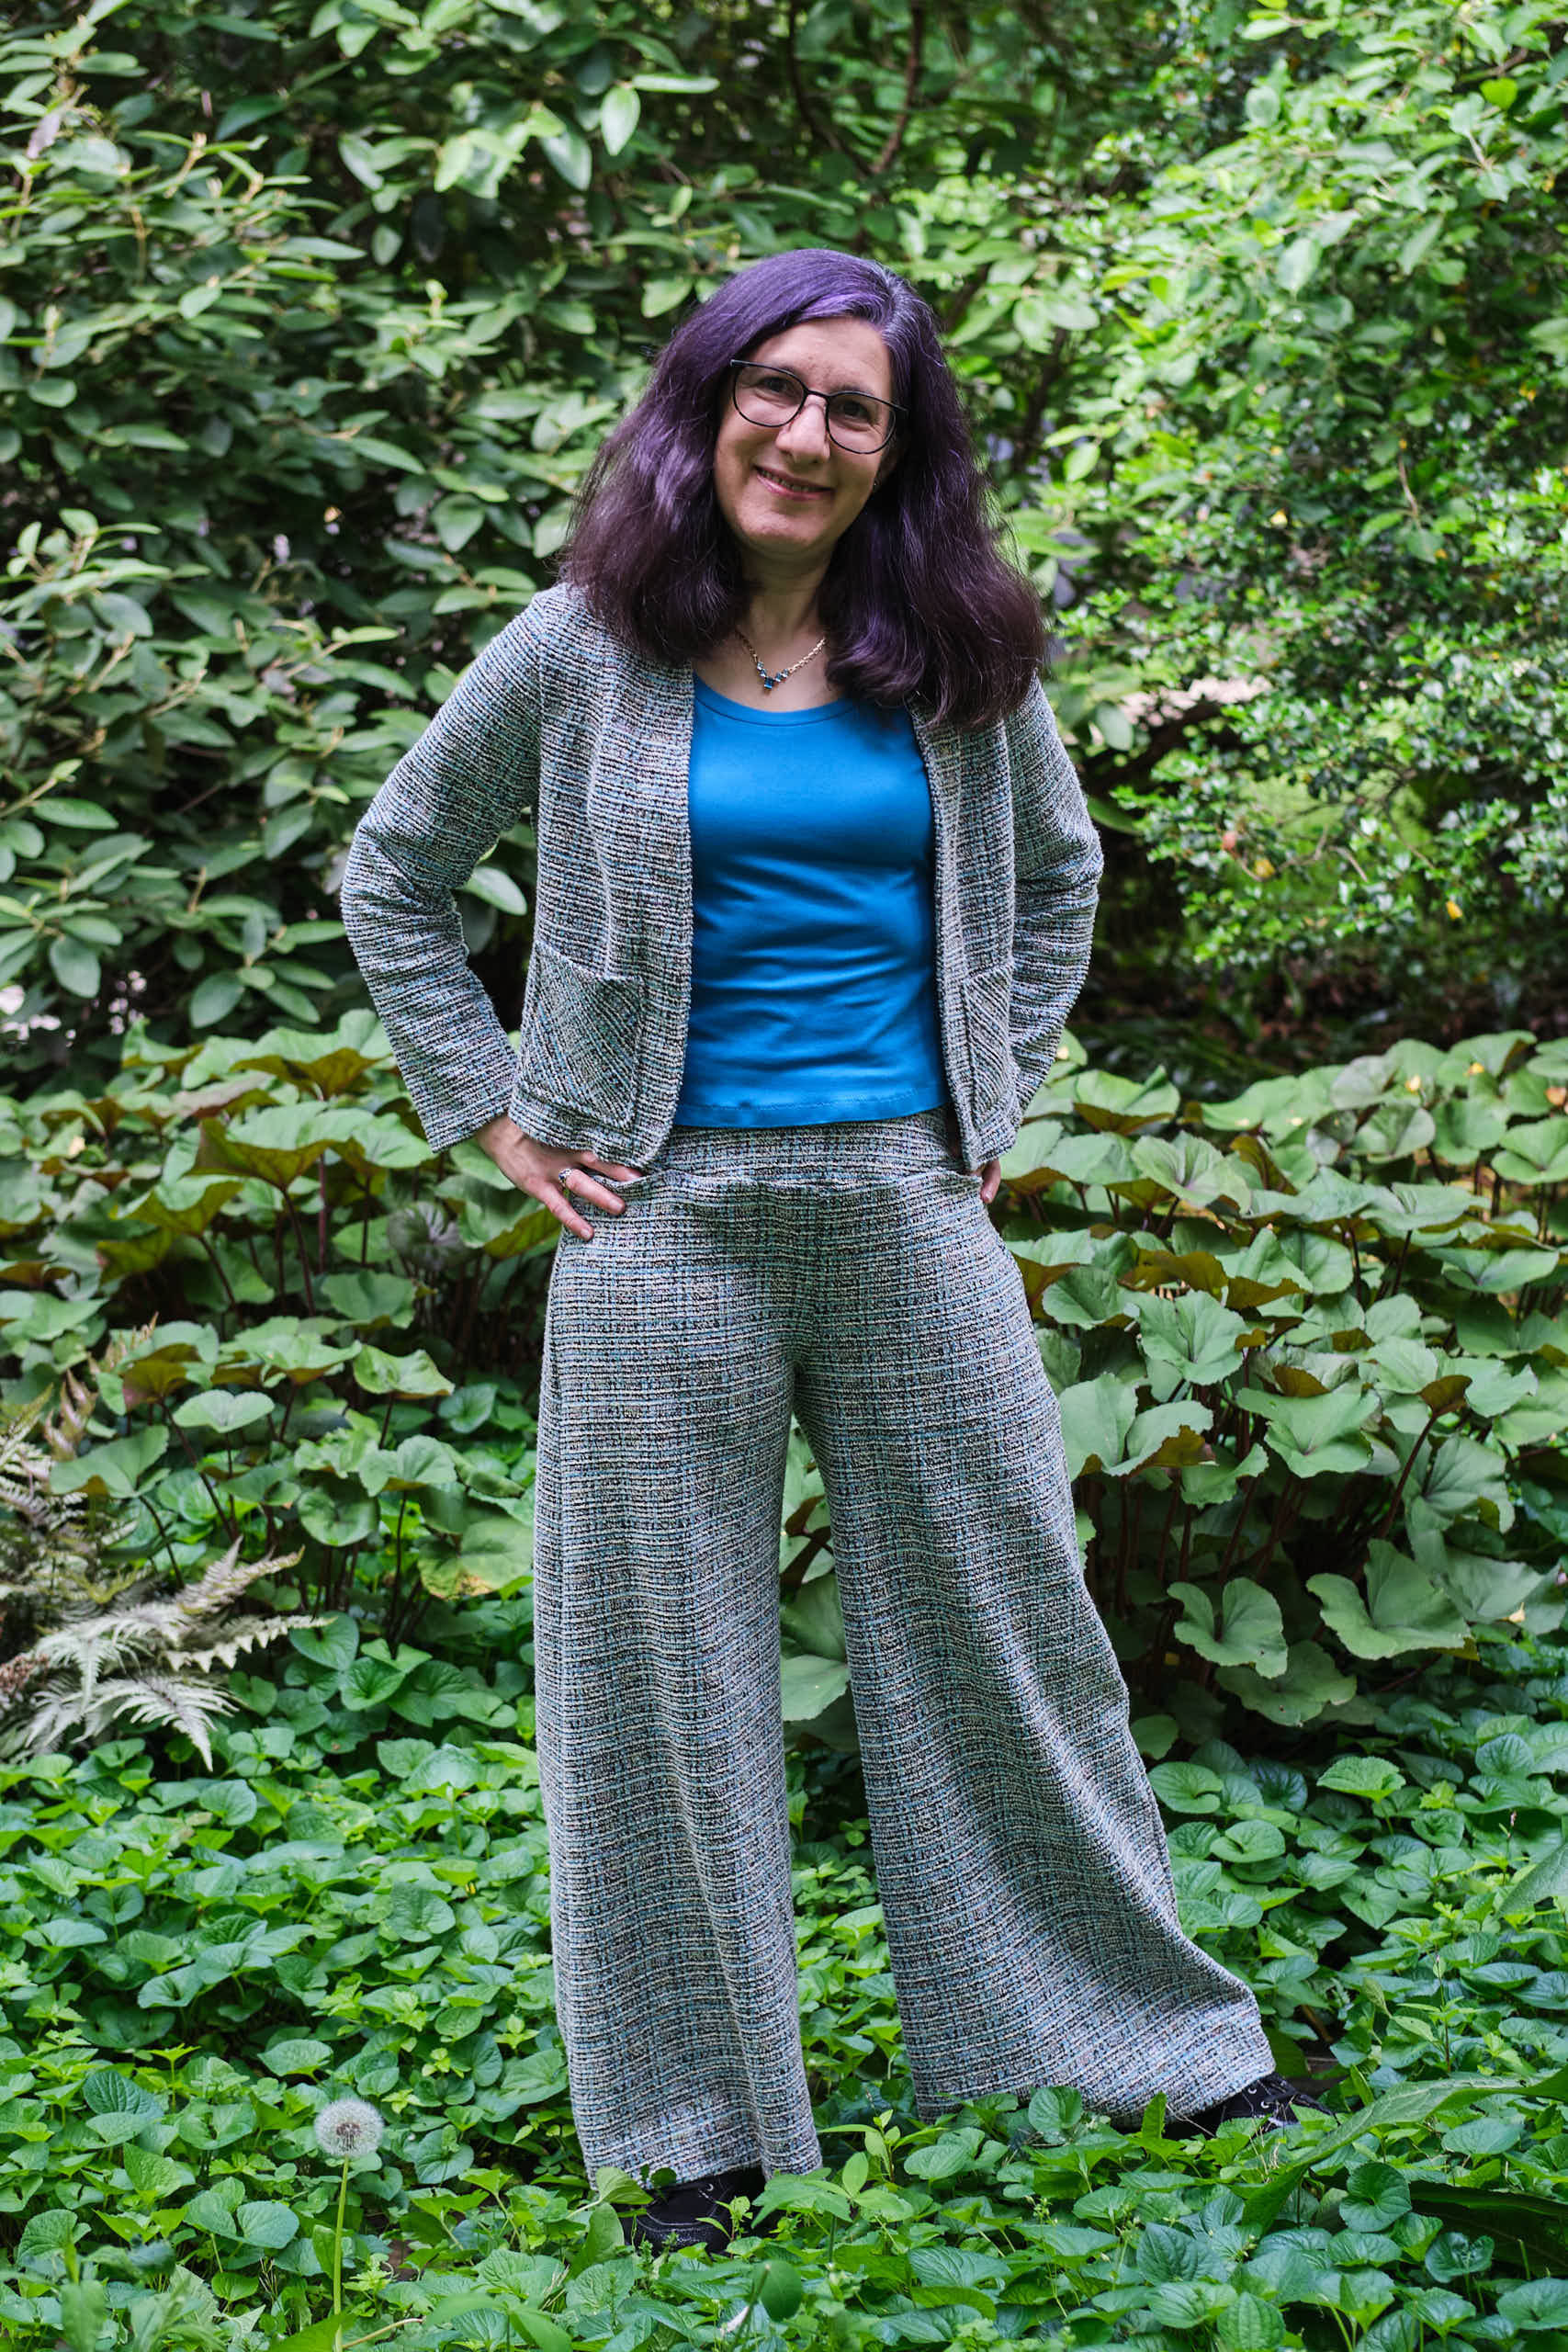
I’m enjoying wearing my tweed bouclé knit jacket and dress, and since I still had more of the fabulous blue/black tweed bouclé knit, I decided to make a pair of wide-leg pants to go with the jacket. I used the Pattern Emporium Walk Boldly Pants pattern with a modified yoga waistband from Pattern Emporium Urban Pants. The Walk Boldly pattern really shines with more structured knit fabric that shows off the wide legs, and the Urban pants yoga waistband is a great substitute for the Walk Boldly elastic waist. I made these pants in my usual size AU 10 with my usual modifications. I used the lower waist, tapered the waist in a bit, lengthened the front crotch, contoured the yoga waistband and split it into separate inner and outer pieces, made the inner piece from a heavy athletic knit, and sewed half-inch elastic into the top of the waistband seam between the layers. I used the jeans pockets but sewed the pocket openings on a straight diagonal. And I added back patch pockets to play up the Channel vibe of the outfit.
Cutting the tweed was a bit of a challenge. I knew I wanted the vertical lines in the fabric to align vertically with the grain. I also attempted some plaid matching horizontally, but eventually gave up as the knit fabric was too fiddly for that. Fortunately, the plaid pattern is fairly subtle and so the lack of plaid matching is not obvious.
Now I have a dress, jacket, and pants in the tweed bouclé knit, and I still have a little bit more than a yard left. Perhaps I need a skirt? A sleeveless top? Or maybe I’ll use it to make something for someone else?
After I finished the pants, I decided I needed a turquoise blue scoop-neck top to go with the pants. I had just barely enough turquoise double-brushed poly left over from another project in my stash. I tetrised my adjusted size 4p Sinclair Bondi classic fitted t-shirt pattern to fit the little fabric I had with short sleeves and a cropped length — it was as long as fit the piece of fabric I had, but coincidentally, at 3-inches above hip length, also the perfect length to wear under the jacket untucked. It is a great length on me with high-waisted pants, but may show a smidge of midriff when worn with lower-riding pants. I made my usual broad and sloped shoulder adjustments and tried a new, slightly lower version of my screwp neck, this one made from the size 00 wide scoop. The DBP fabric is soft and stretchy, but also a little bit clingy to my rib cage, making me consider sizing up next time I sew a top with DBP.
Sinclair Bondi classic fitted t-shirt 4, high crew neck, short sleeves, graded in from armscye to hem, broad shoulder adjustment, less than 1 yard of black cotton-lycra.
After making my daughter an almost perfectly fitted sage green t-shirt, I modified the Sinclair Bondi pattern with a couple more adjustments she requested — broad-shoulder adjustment and a slightly higher crewneck. Here it is in black Santa Cruz cotton lycra from CaliFabrics. This is a nice, smooth 190 GSM fabric with 75% horizontal, 30% vertical stretch.
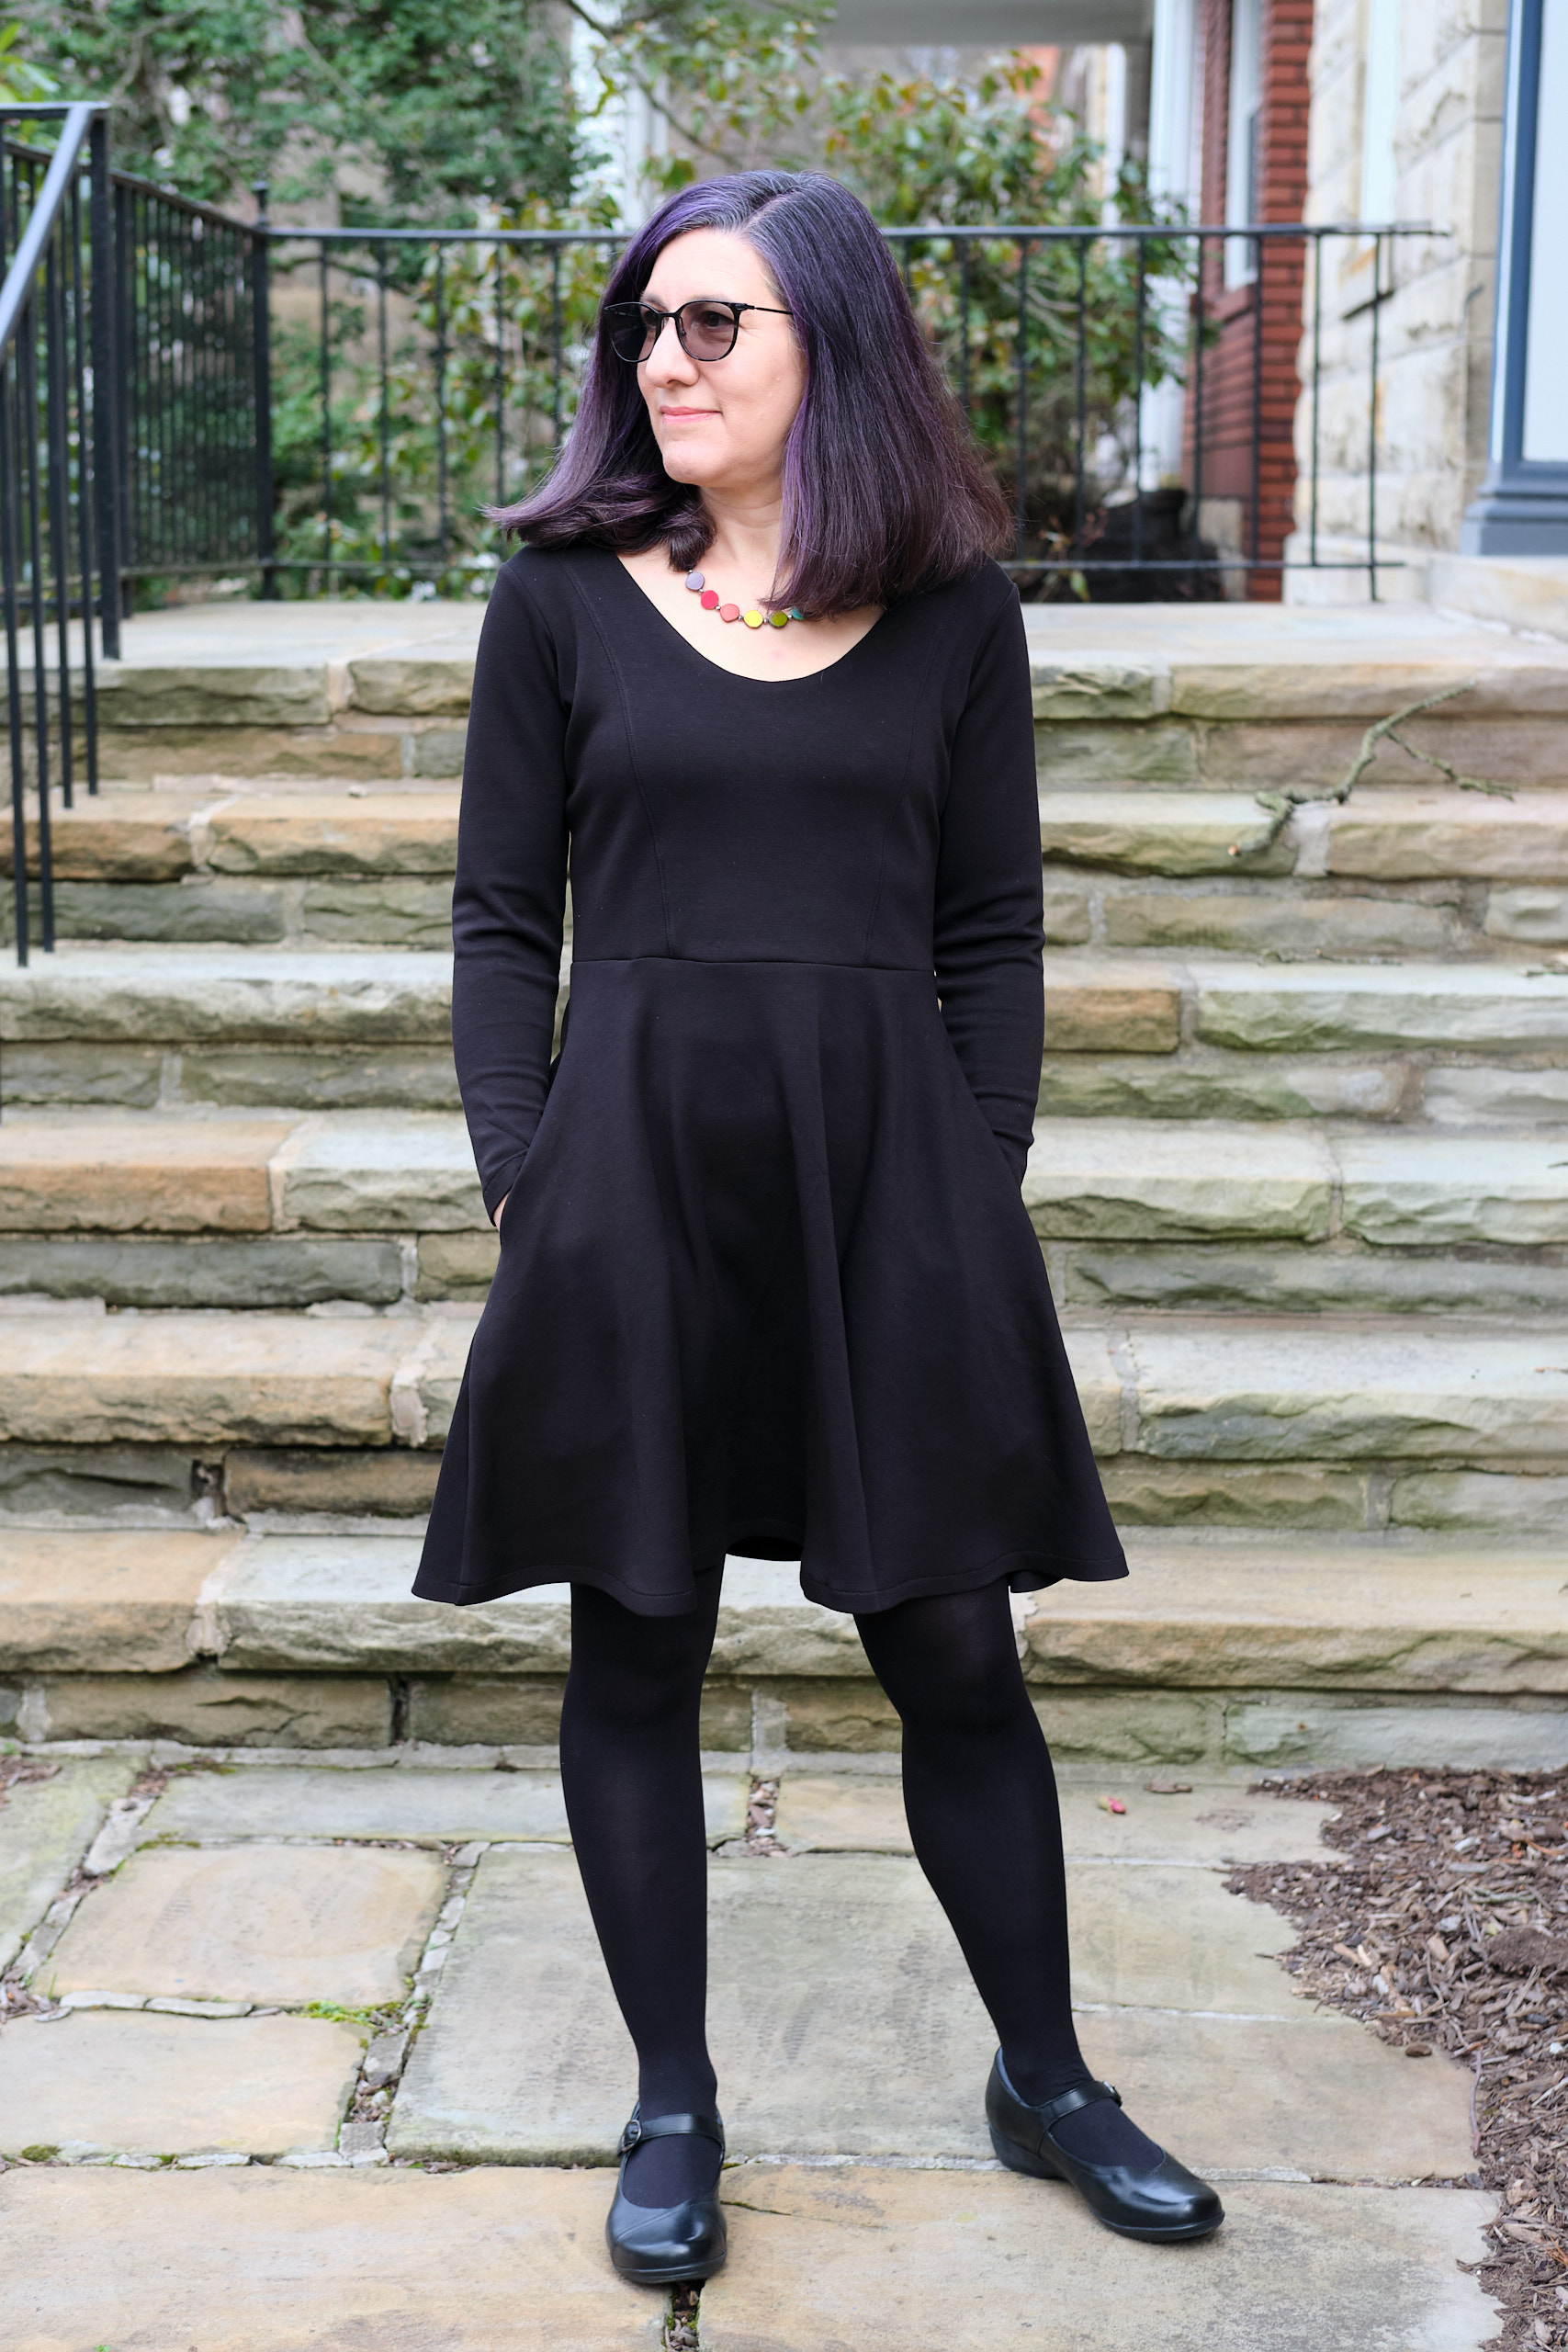
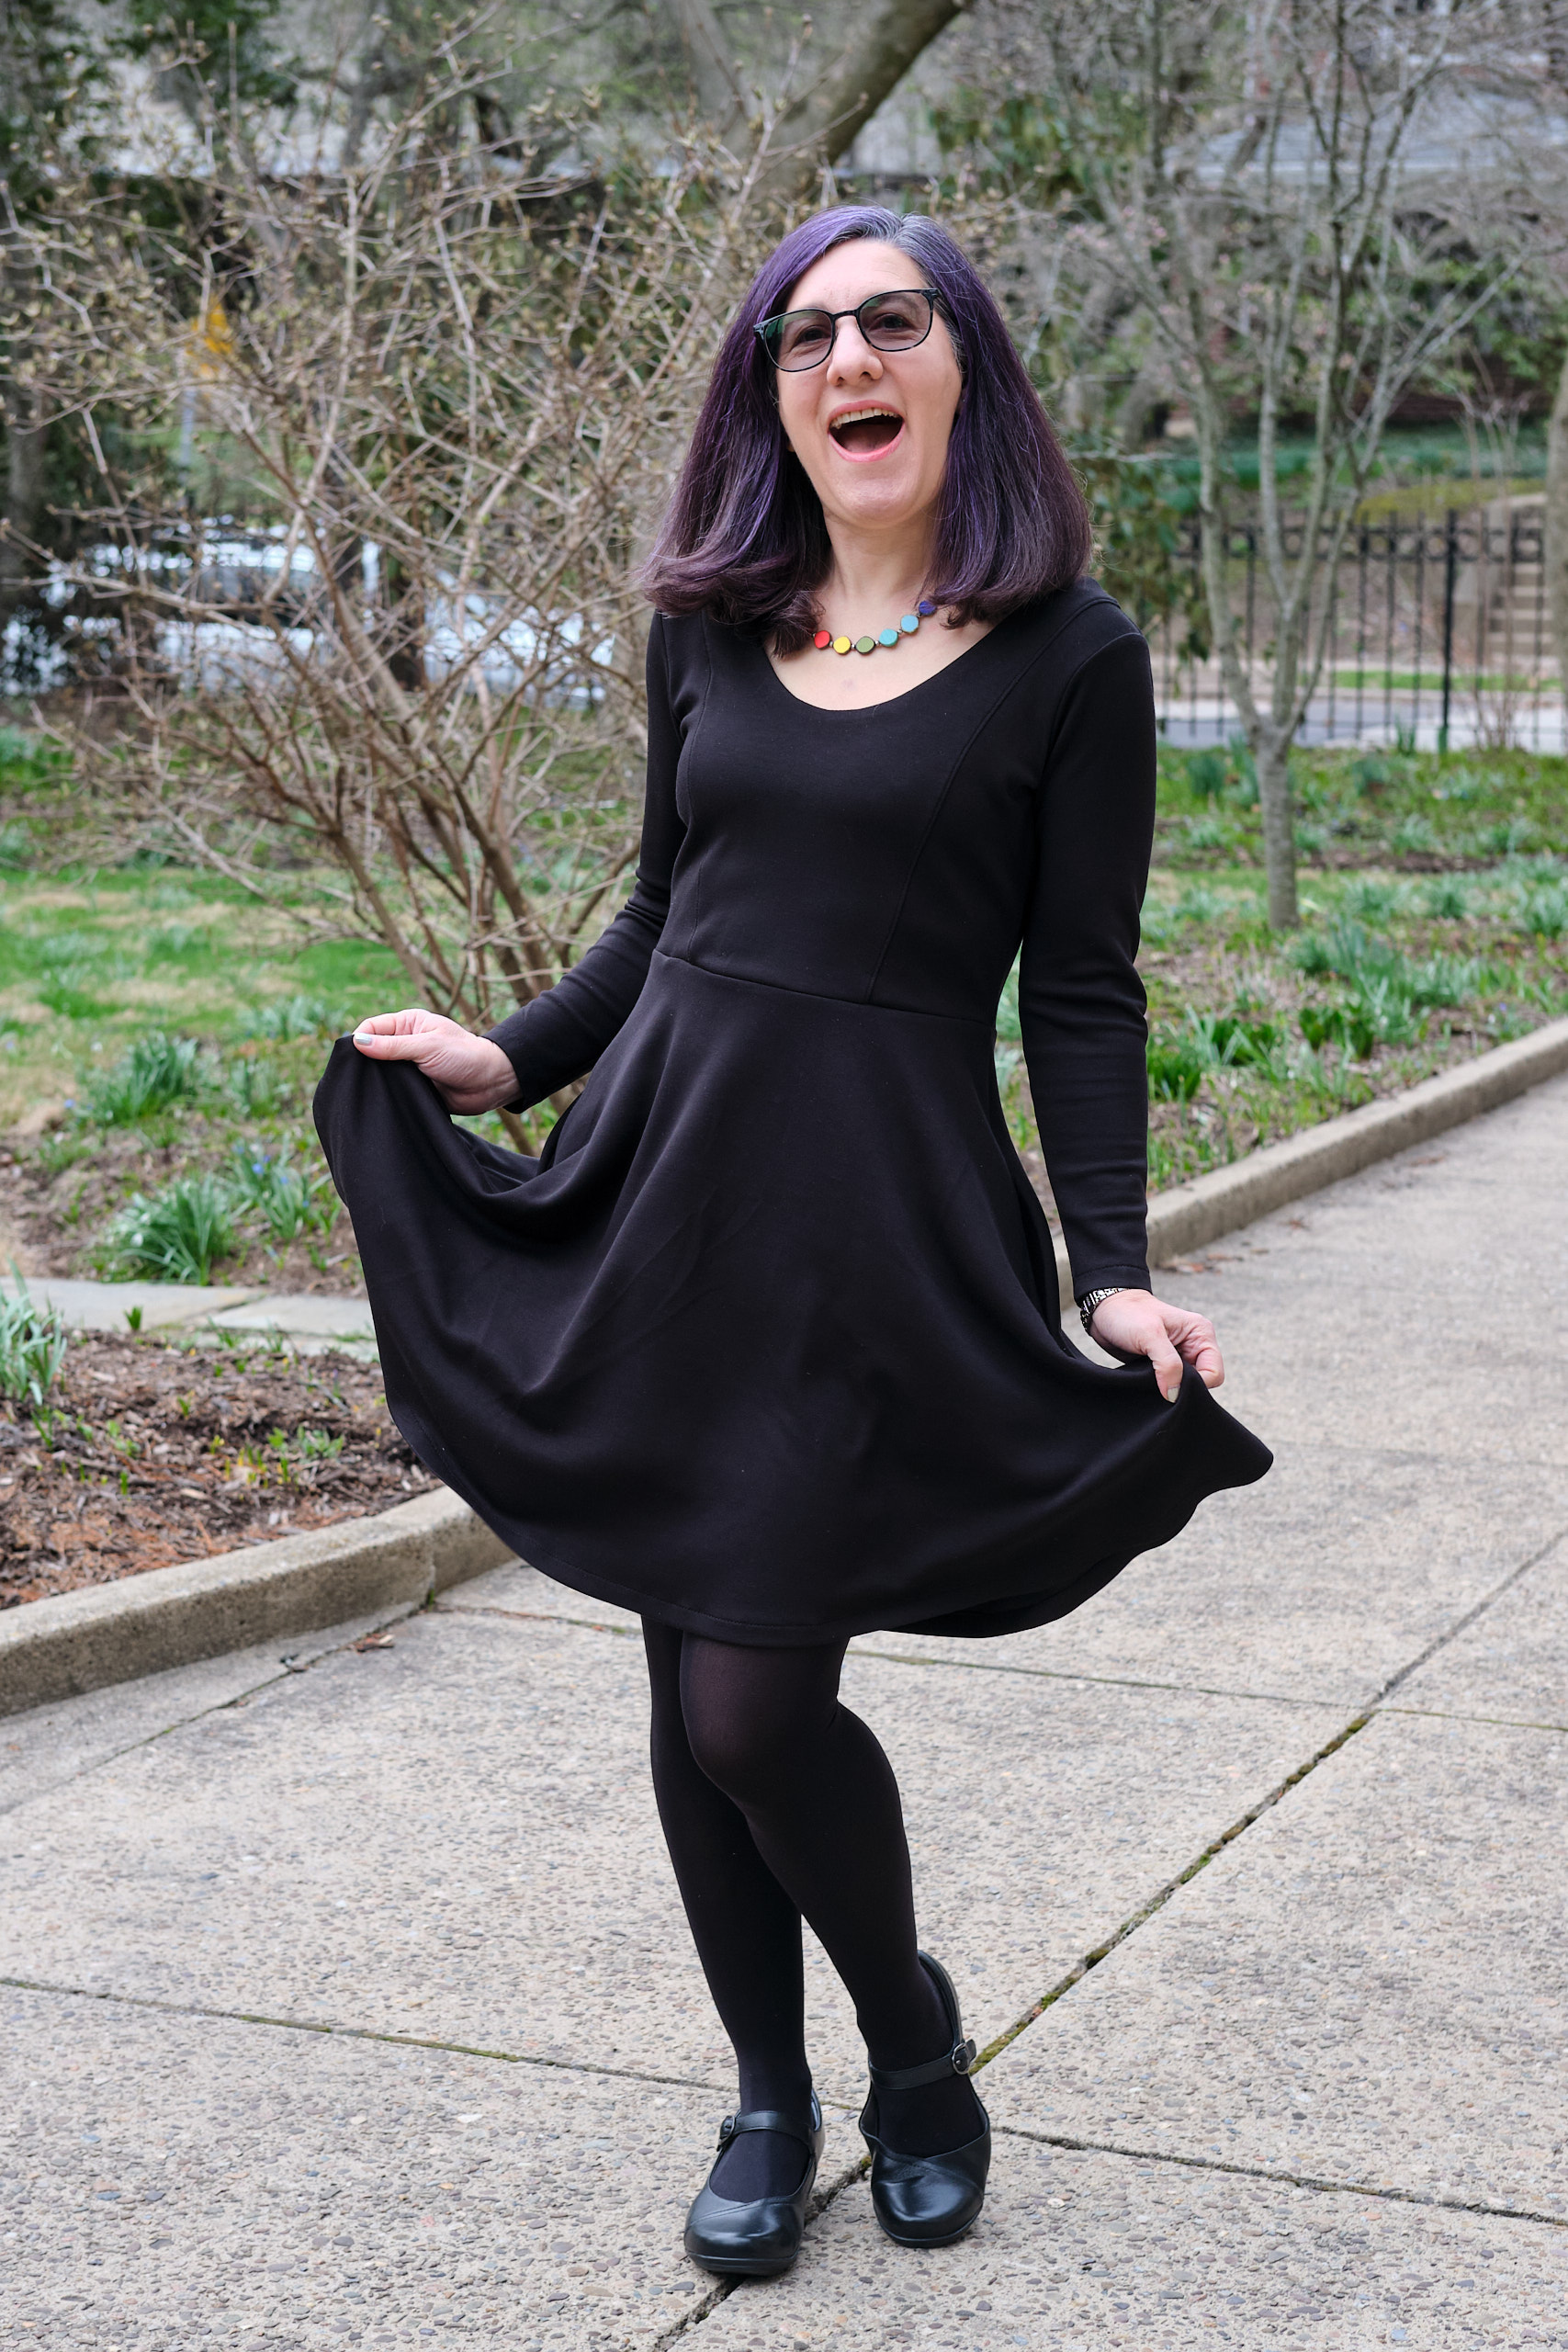
Boo & Lu Periwinkle Dress, size 4, dress skirt shortened 1 inch, long sleeves shortened 2-inches, 2 yards black butter scuba with black ITY lining.
I have plans to make a long gown with a stretch lace overlay and was looking for the right pattern. I wanted a princess-seamed lined bodice without a neck band and a flared long skirt, but not a full circle skirt. I was thinking about using the Patterns for Pirates Gala Gown, which has a 3/4 circle skirt with an optional slit. I was hoping for a pattern that used less fabric in the skirt and was a little bit sleeker, but without being a fitted skirt. I thought about just modifying the Gala skirt, but then I noticed the Boo & Lu Periwinkle Dress, which I hadn’t previously considered because I wasn’t interested in the bodice flounce, which, while actually pretty cute, reminds me too much of dresses I wore in the 80s. But when I noticed that the bodice flounce was optional, I looked at the pattern again more closely. Periwinkle has half-circle skirt and for the maxi version it is closer to a one-third-circle skirt, which was exactly what I was looking for. I’m sure I’ll sue the Gala pattern for something else, but I think Periwinkle will work better for this particular project.
Before I make the gown, I decided to try out Periwinkle in the regular dress length for a basic little black dress. I used Mily Mae black butter scuba, which is a medium-weight rayon/poly/spandex that has a smooth “buttery” texture on the right side and a very smooth and shiny texture on the wrong side. I previously used this fabric to make a pair of black wide-leg pants. I used about 2 yards of the scuba for the dress and lined the bodice with black ITY for a nice lightweight lining. I made the pattern as written except or shortening the skirt by 1 inch and the sleeves by 2 inches and using pocket bags I have used previously on other dresses.
The pattern was fairly easy to understand and sew. The princess seams and lining were pretty straightforward. I did all top-stitching with a shallow zigzag. The pocket instructions say to baste the pocket seam before topstitching, and I decided to actually sew it because just basting it doesn’t make sense to me. Also, the pocket instructions fail to suggest sewing up part of the pocket bag opening to keep things from falling out of your pocket. But I went ahead and did that anyway.
The front and back neckline plunge pretty deep on me, more than I was expecting, but I think they look good. I can still wear this dress with a normal bra, but my back may be chilly in the winter without a sweater or jacket. After looking at the photos of the back, I think I accidentally swapped the front and back center bodice pieces. If I had sewn them correctly, I think the front would be a little shallower and wider and the back would be a little narrower and deeper, not pull towards the shoulders so much, and the little bit of bunching in the back armscye would go away. Next time I will try to sew it correctly, but I also think I may raise the back scoop a tad. But these are minor issues. I think the pattern elevates my basic black dress to a not-so-basic level. I can dress it up or down for work or dressy occasions. I’m pretty happy with how it came out despite the oops, and I expect I will use this pattern for the lace-overlay gown when I get around to making it.
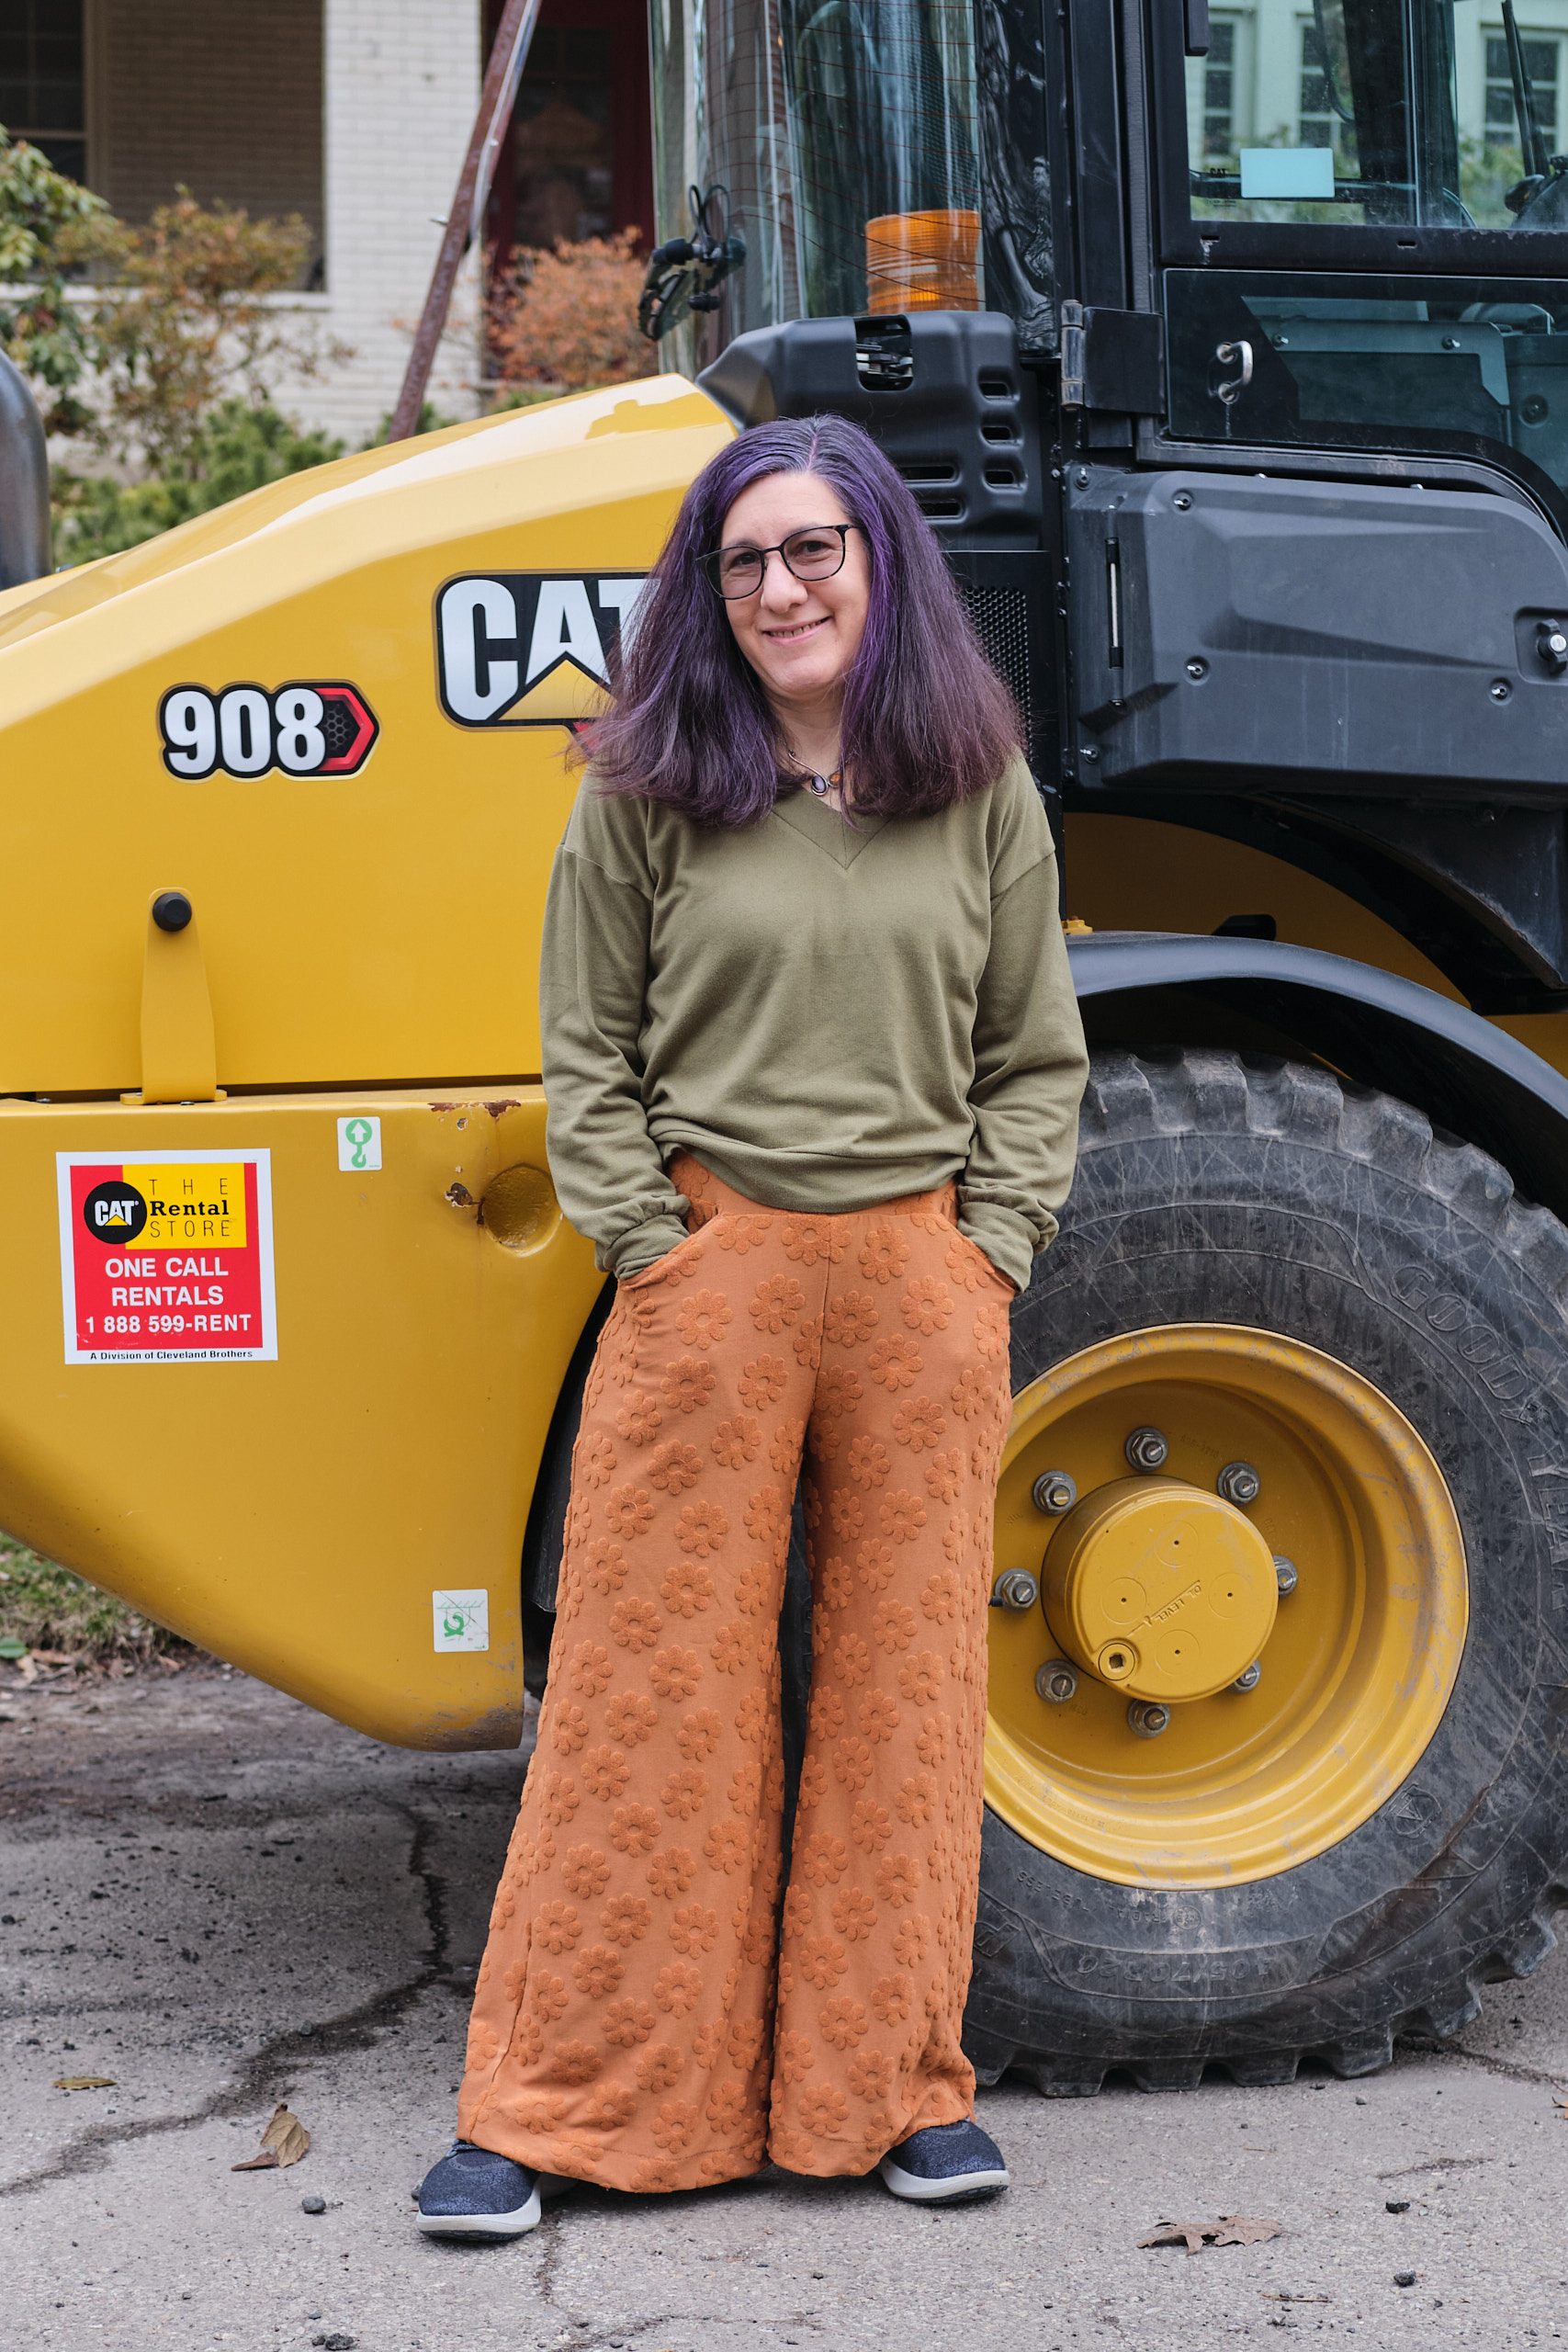
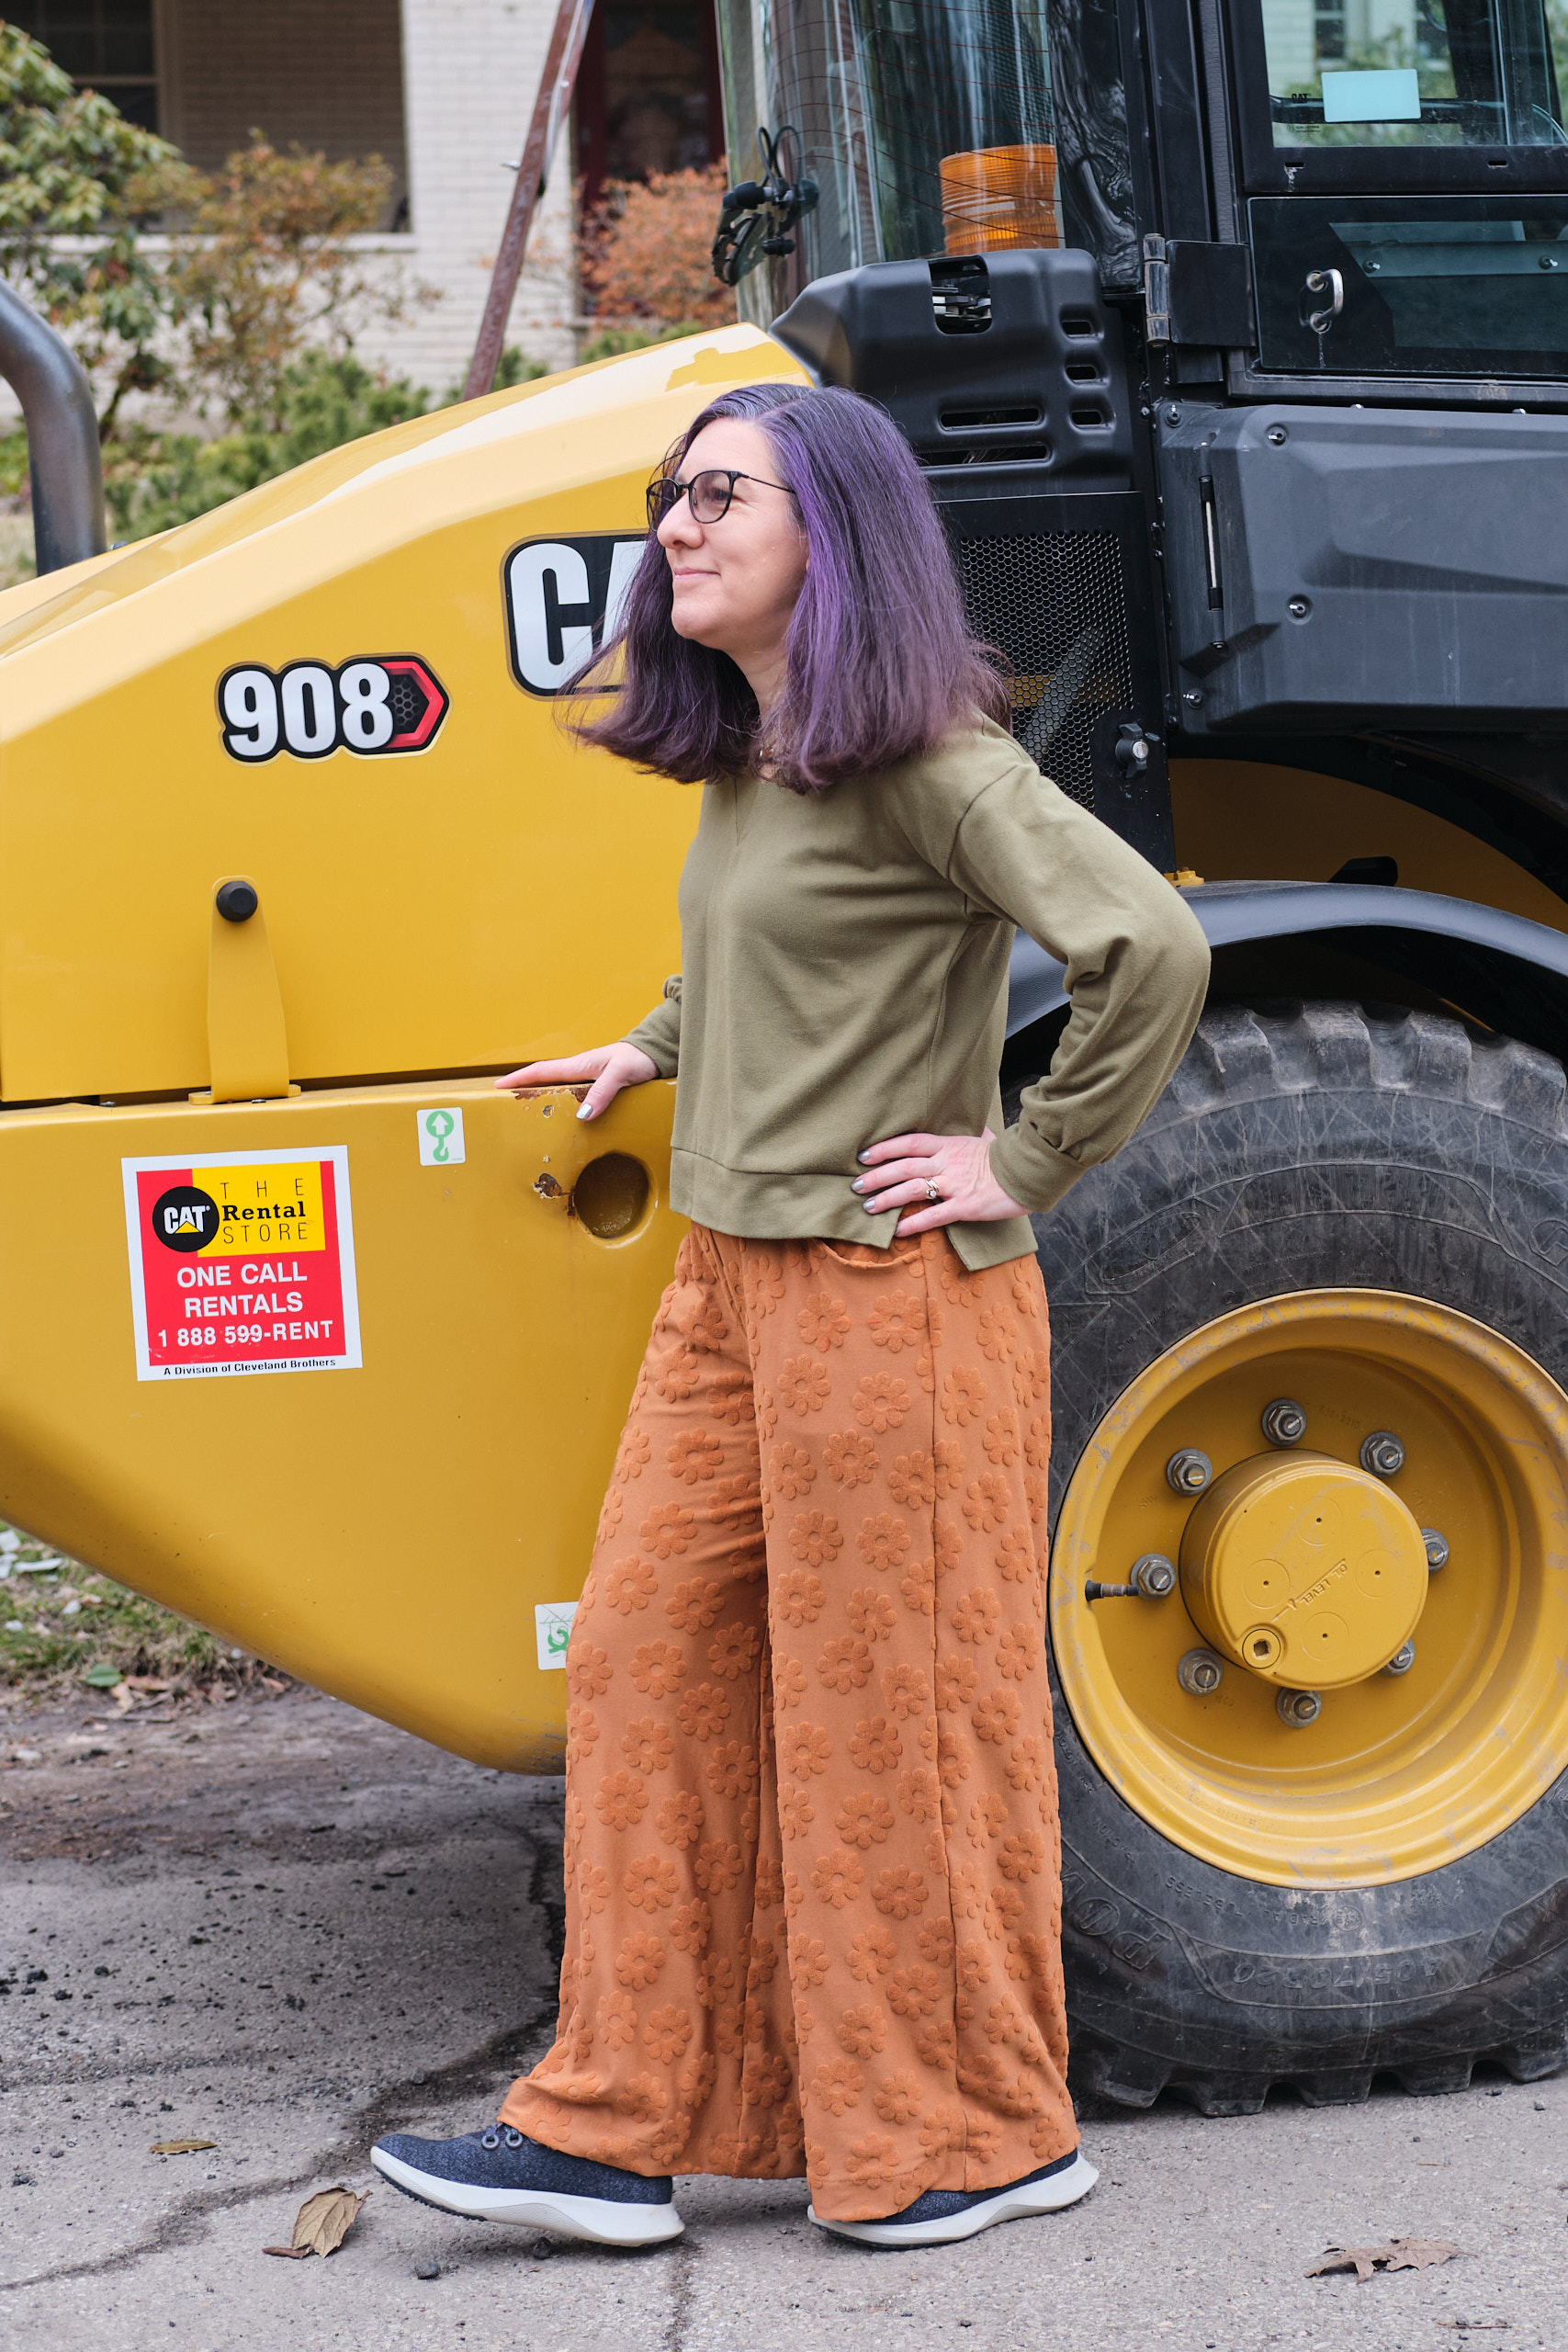
Pattern Emporium Walk Boldly wide leg pants, size AU 10, midrise, short length, jeans pockets, small extension to front and back crotch, 2 yards caramel poly/spandex daisy jacquard.
I bought some caramel daisy jacquard fabric on clearance a couple of years ago, and it has been sitting in my stash with an uncertain future. It’s a mid-weight 250 gsm poly/spandex that feels smooth on the back. The daisies are soft and look like a towel. Last summer, I saw another sewist use a similar fabric in green to make a pair of Pattern Emporium Walk Boldly pants, and I decided I should do the same. After my flurry of brownish sewing projects, I decided it was time to sew the caramel pants before I take the brown thread out of my serger.
I’ve made lots of Urban Boldly mashups with a yoga waistband, but it’s been a while since I made a genuine unmashed pair of Walk Boldlys with an elastic waistband. I think last time I made them I used the high rise, but I realized that although I like high-rise pants, this high-rise is too high on me since it doesn’t come in a petite size. So this time I went with the mid-rise, short length size AU 10. I made only one small alteration to the pattern, extending the front and back crotch by about half an inch. I added clear elastic to the pocket openings before understitching to reduce drooping. I serged the bottoms, turned it under 1.75 inch, pressed, and sewed in place with a shallow zigzag.
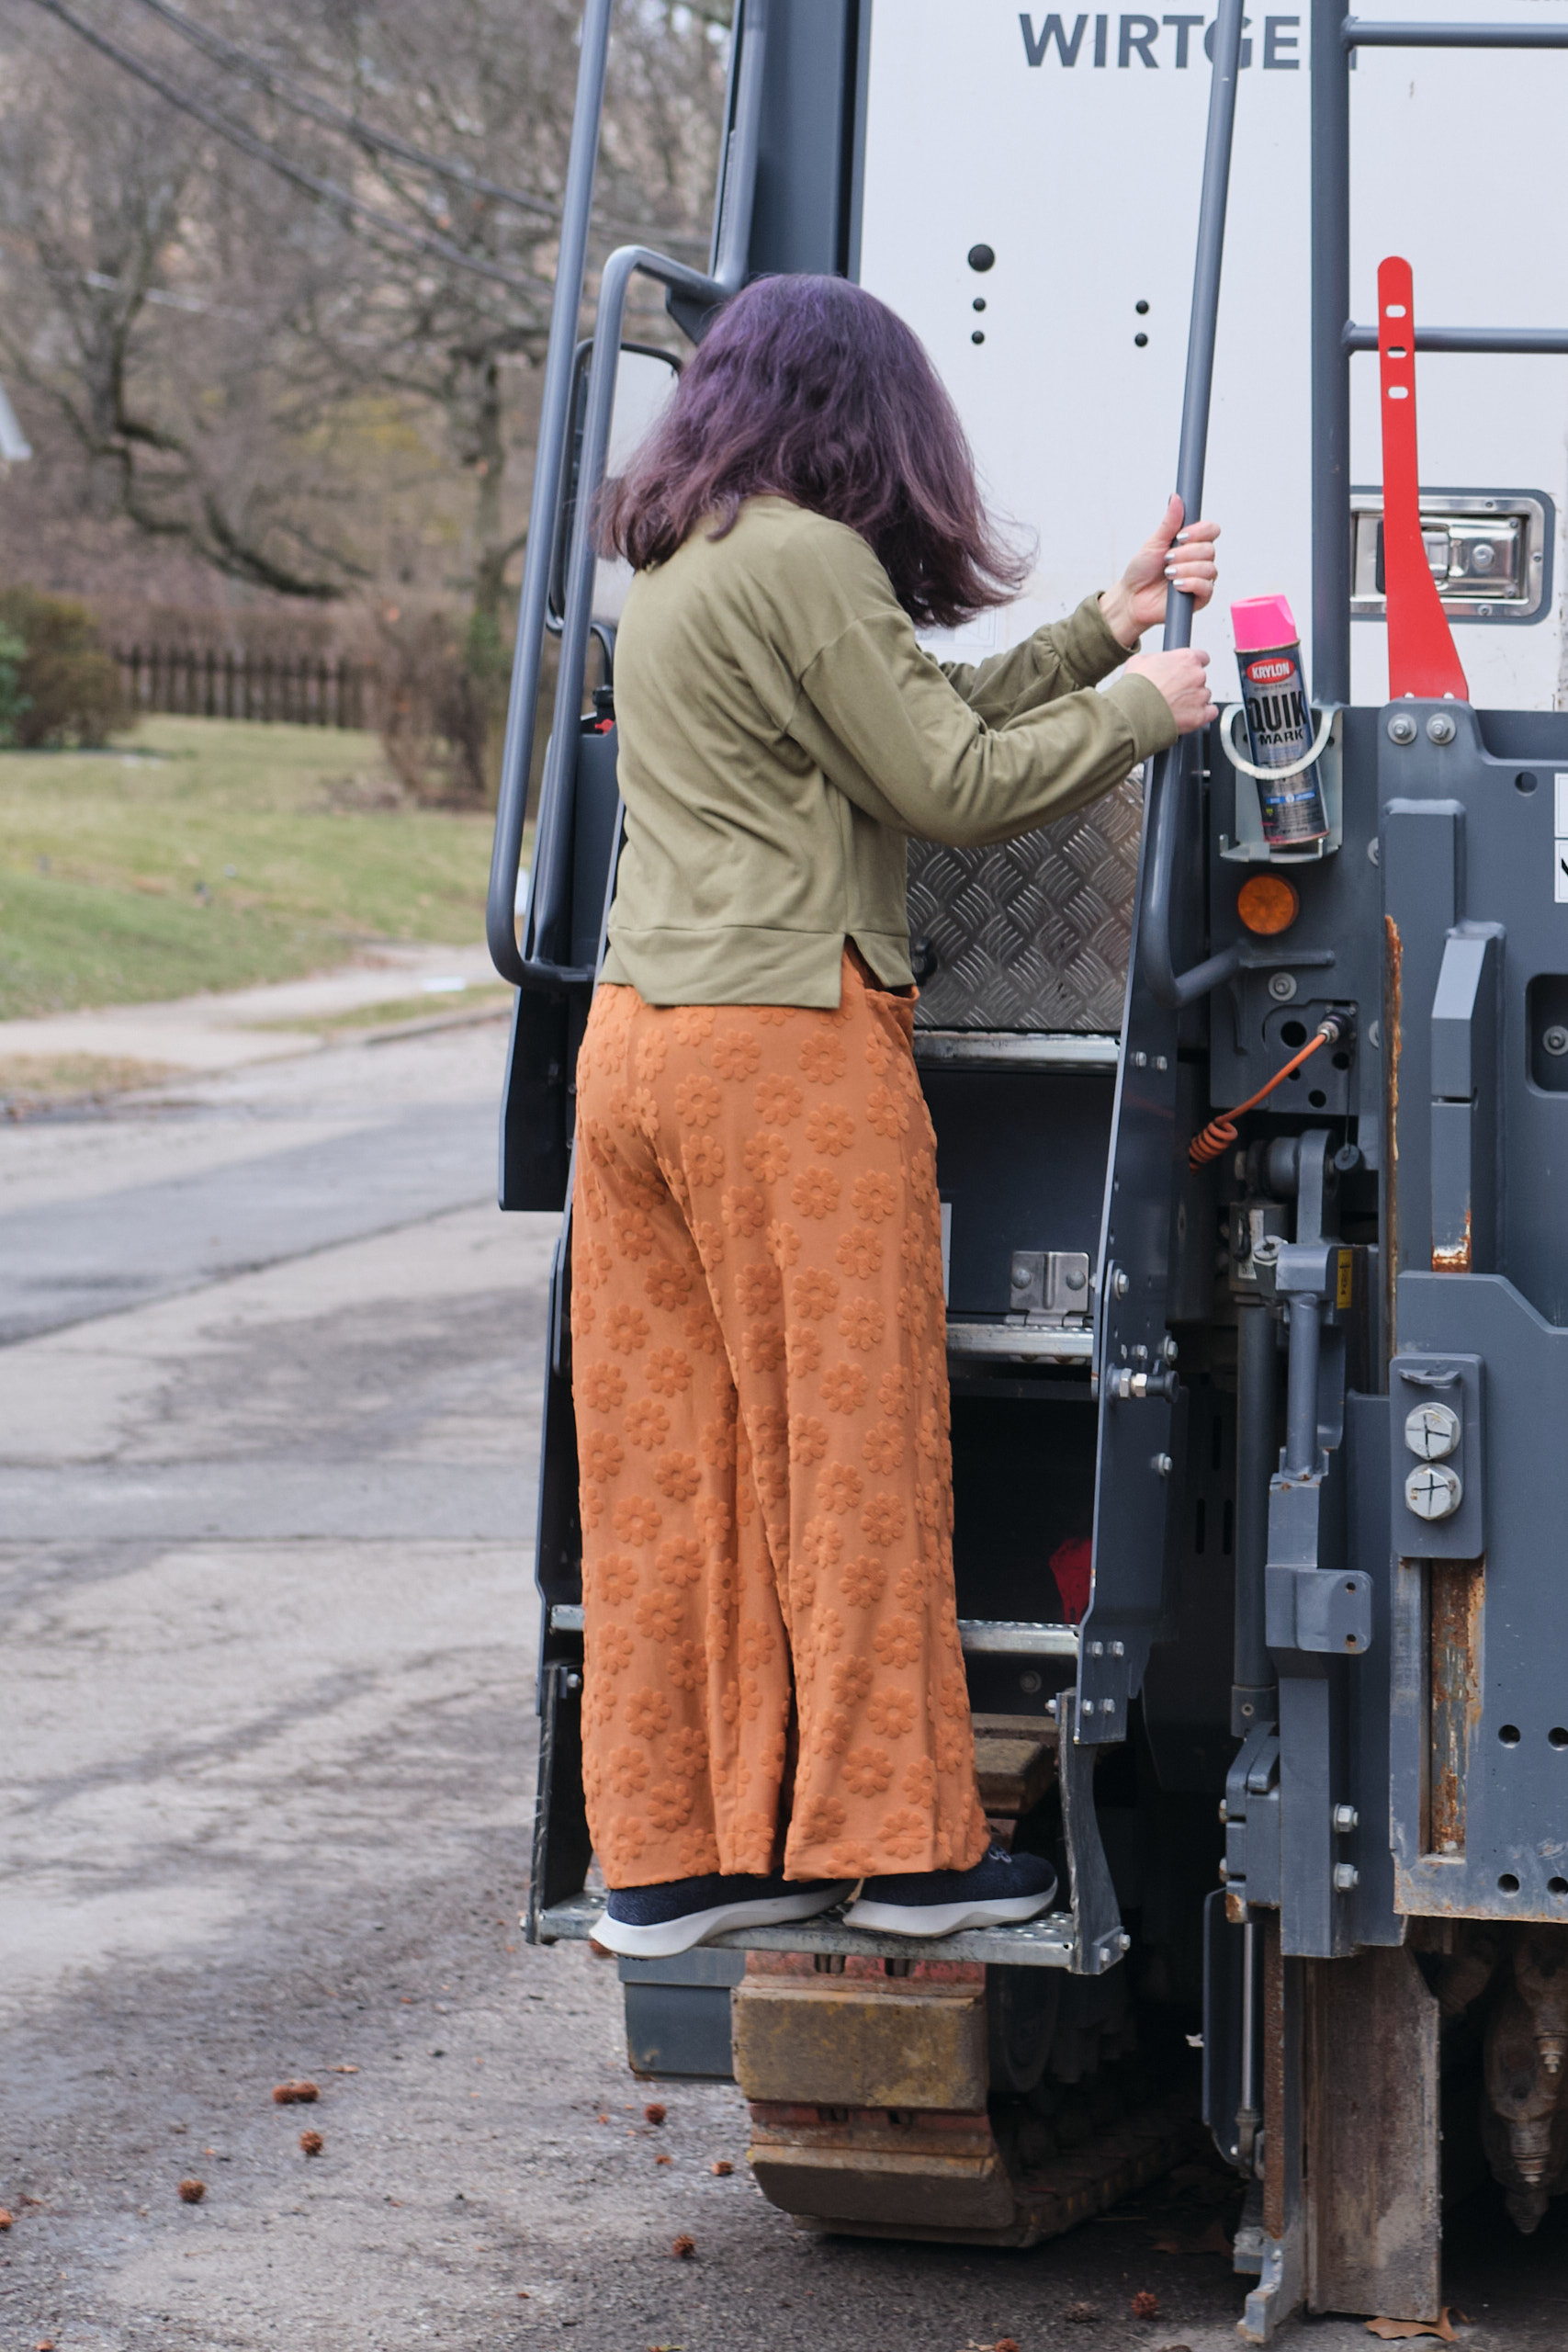
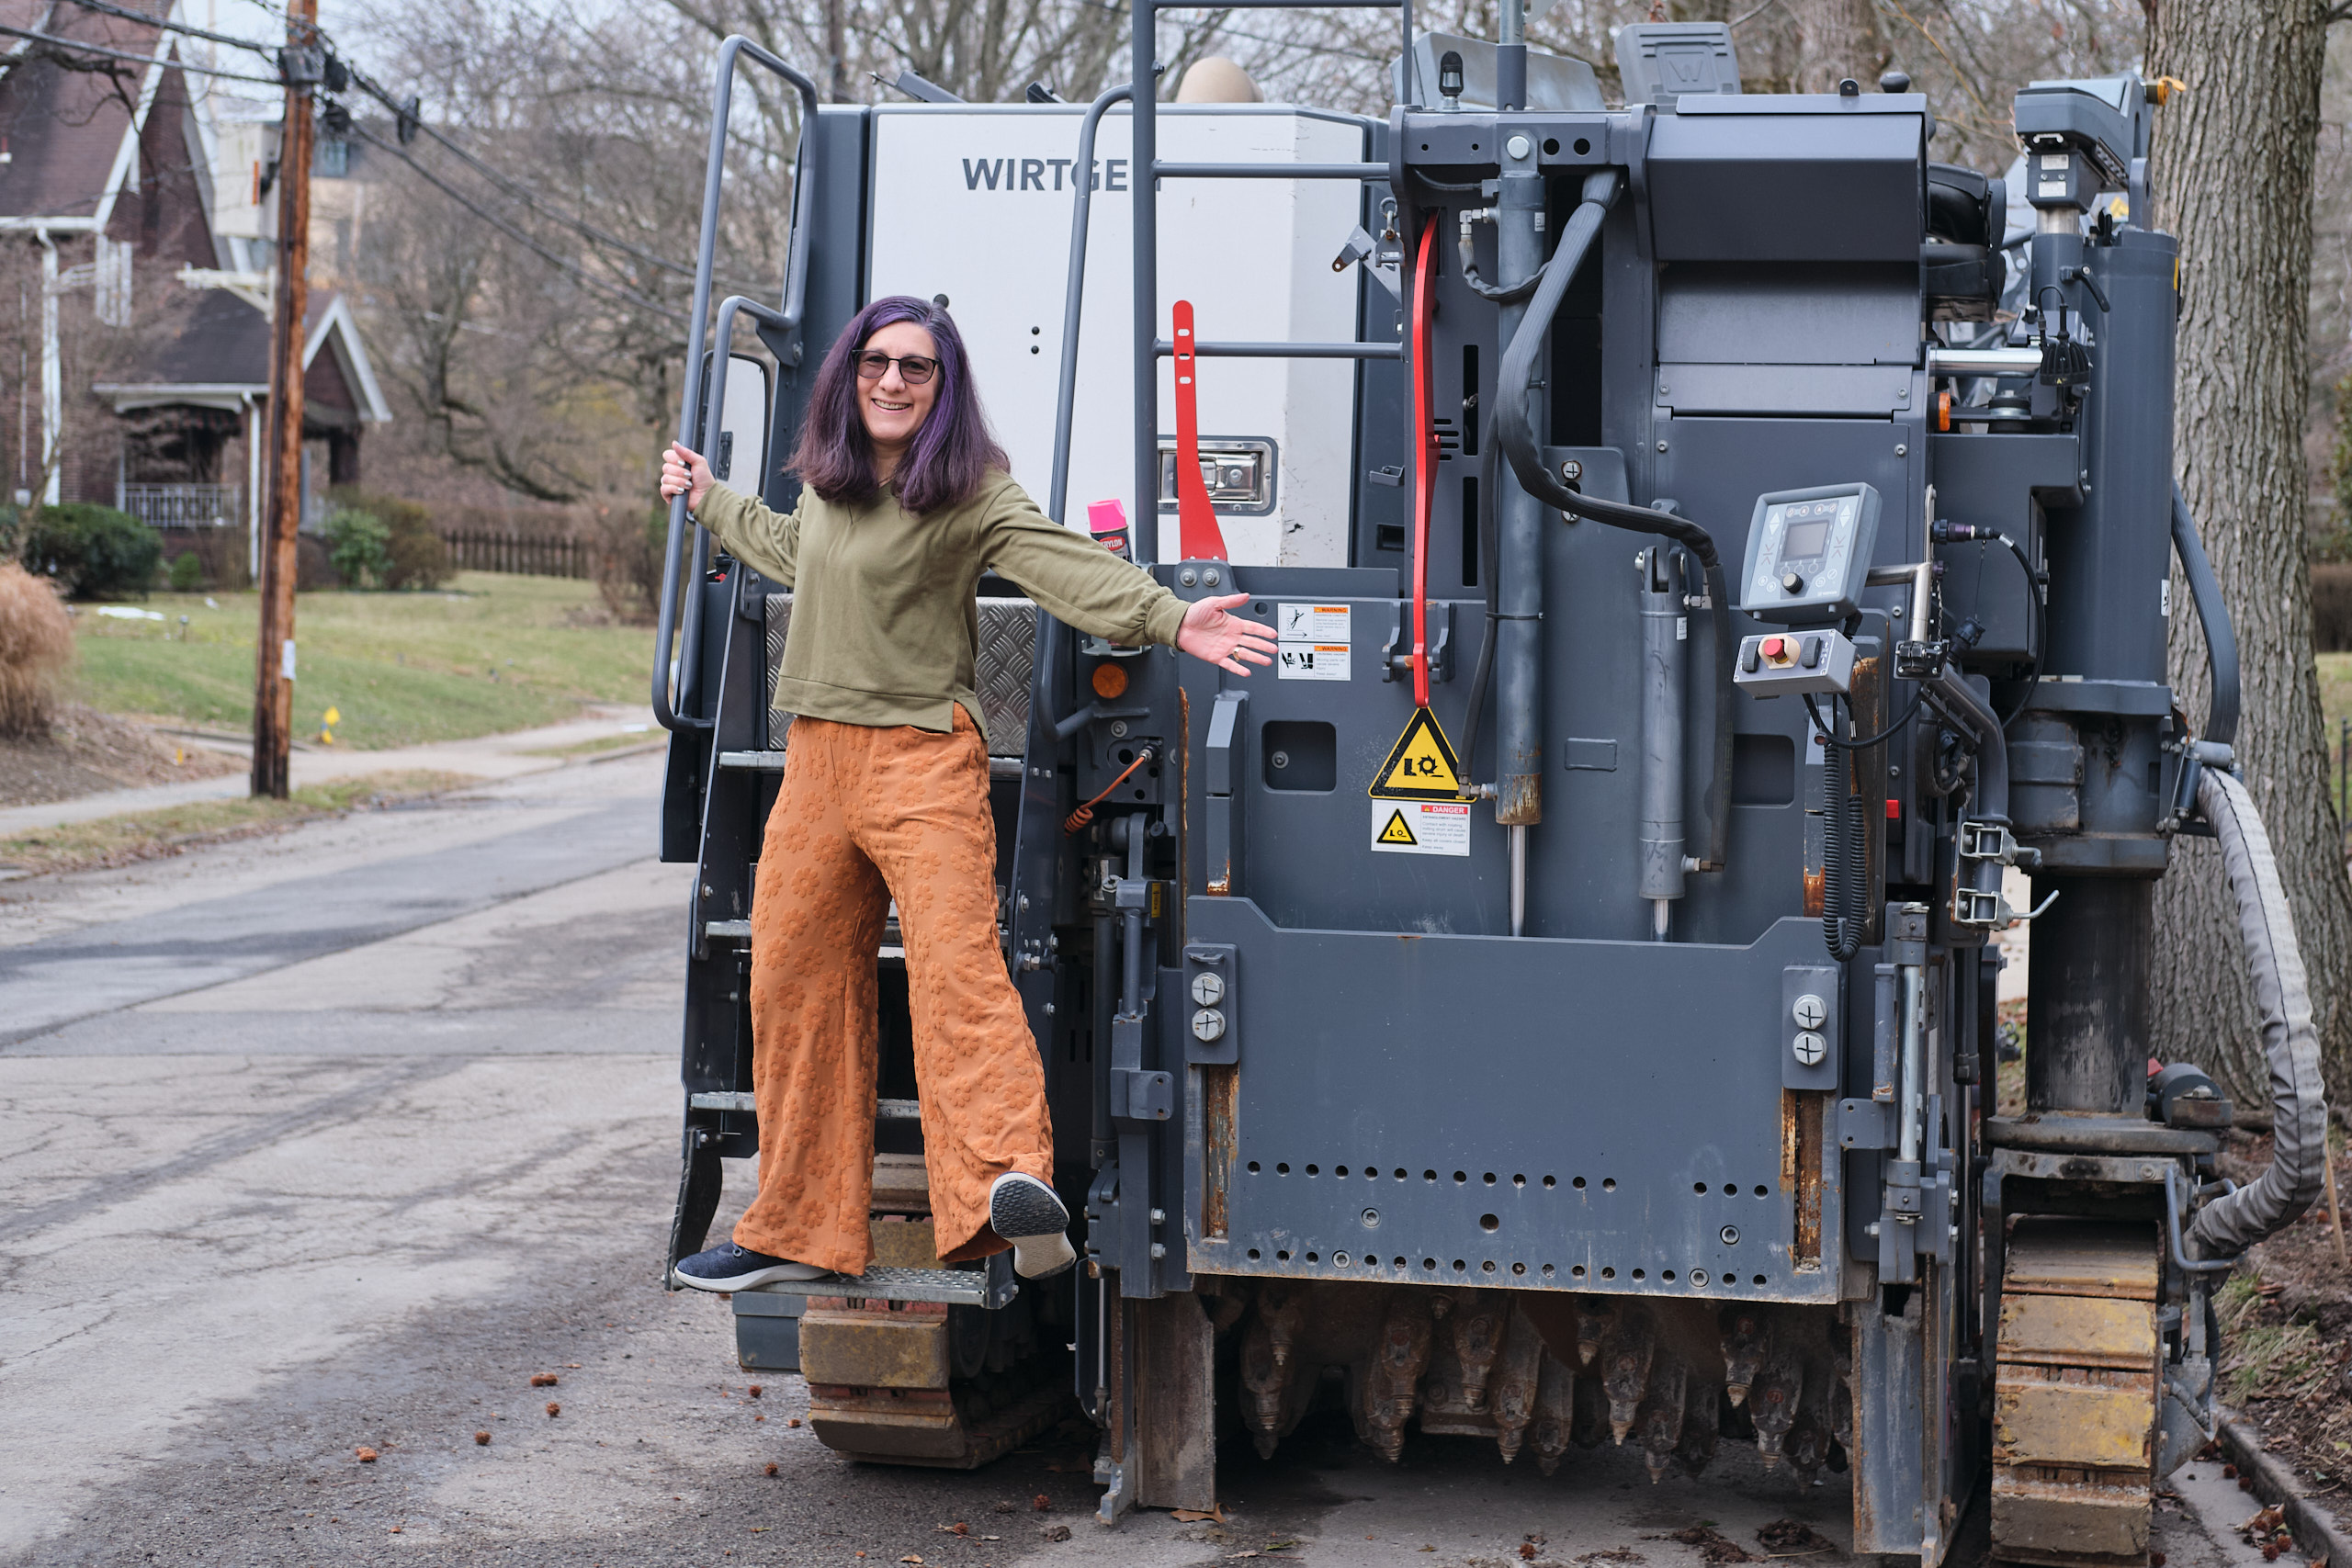
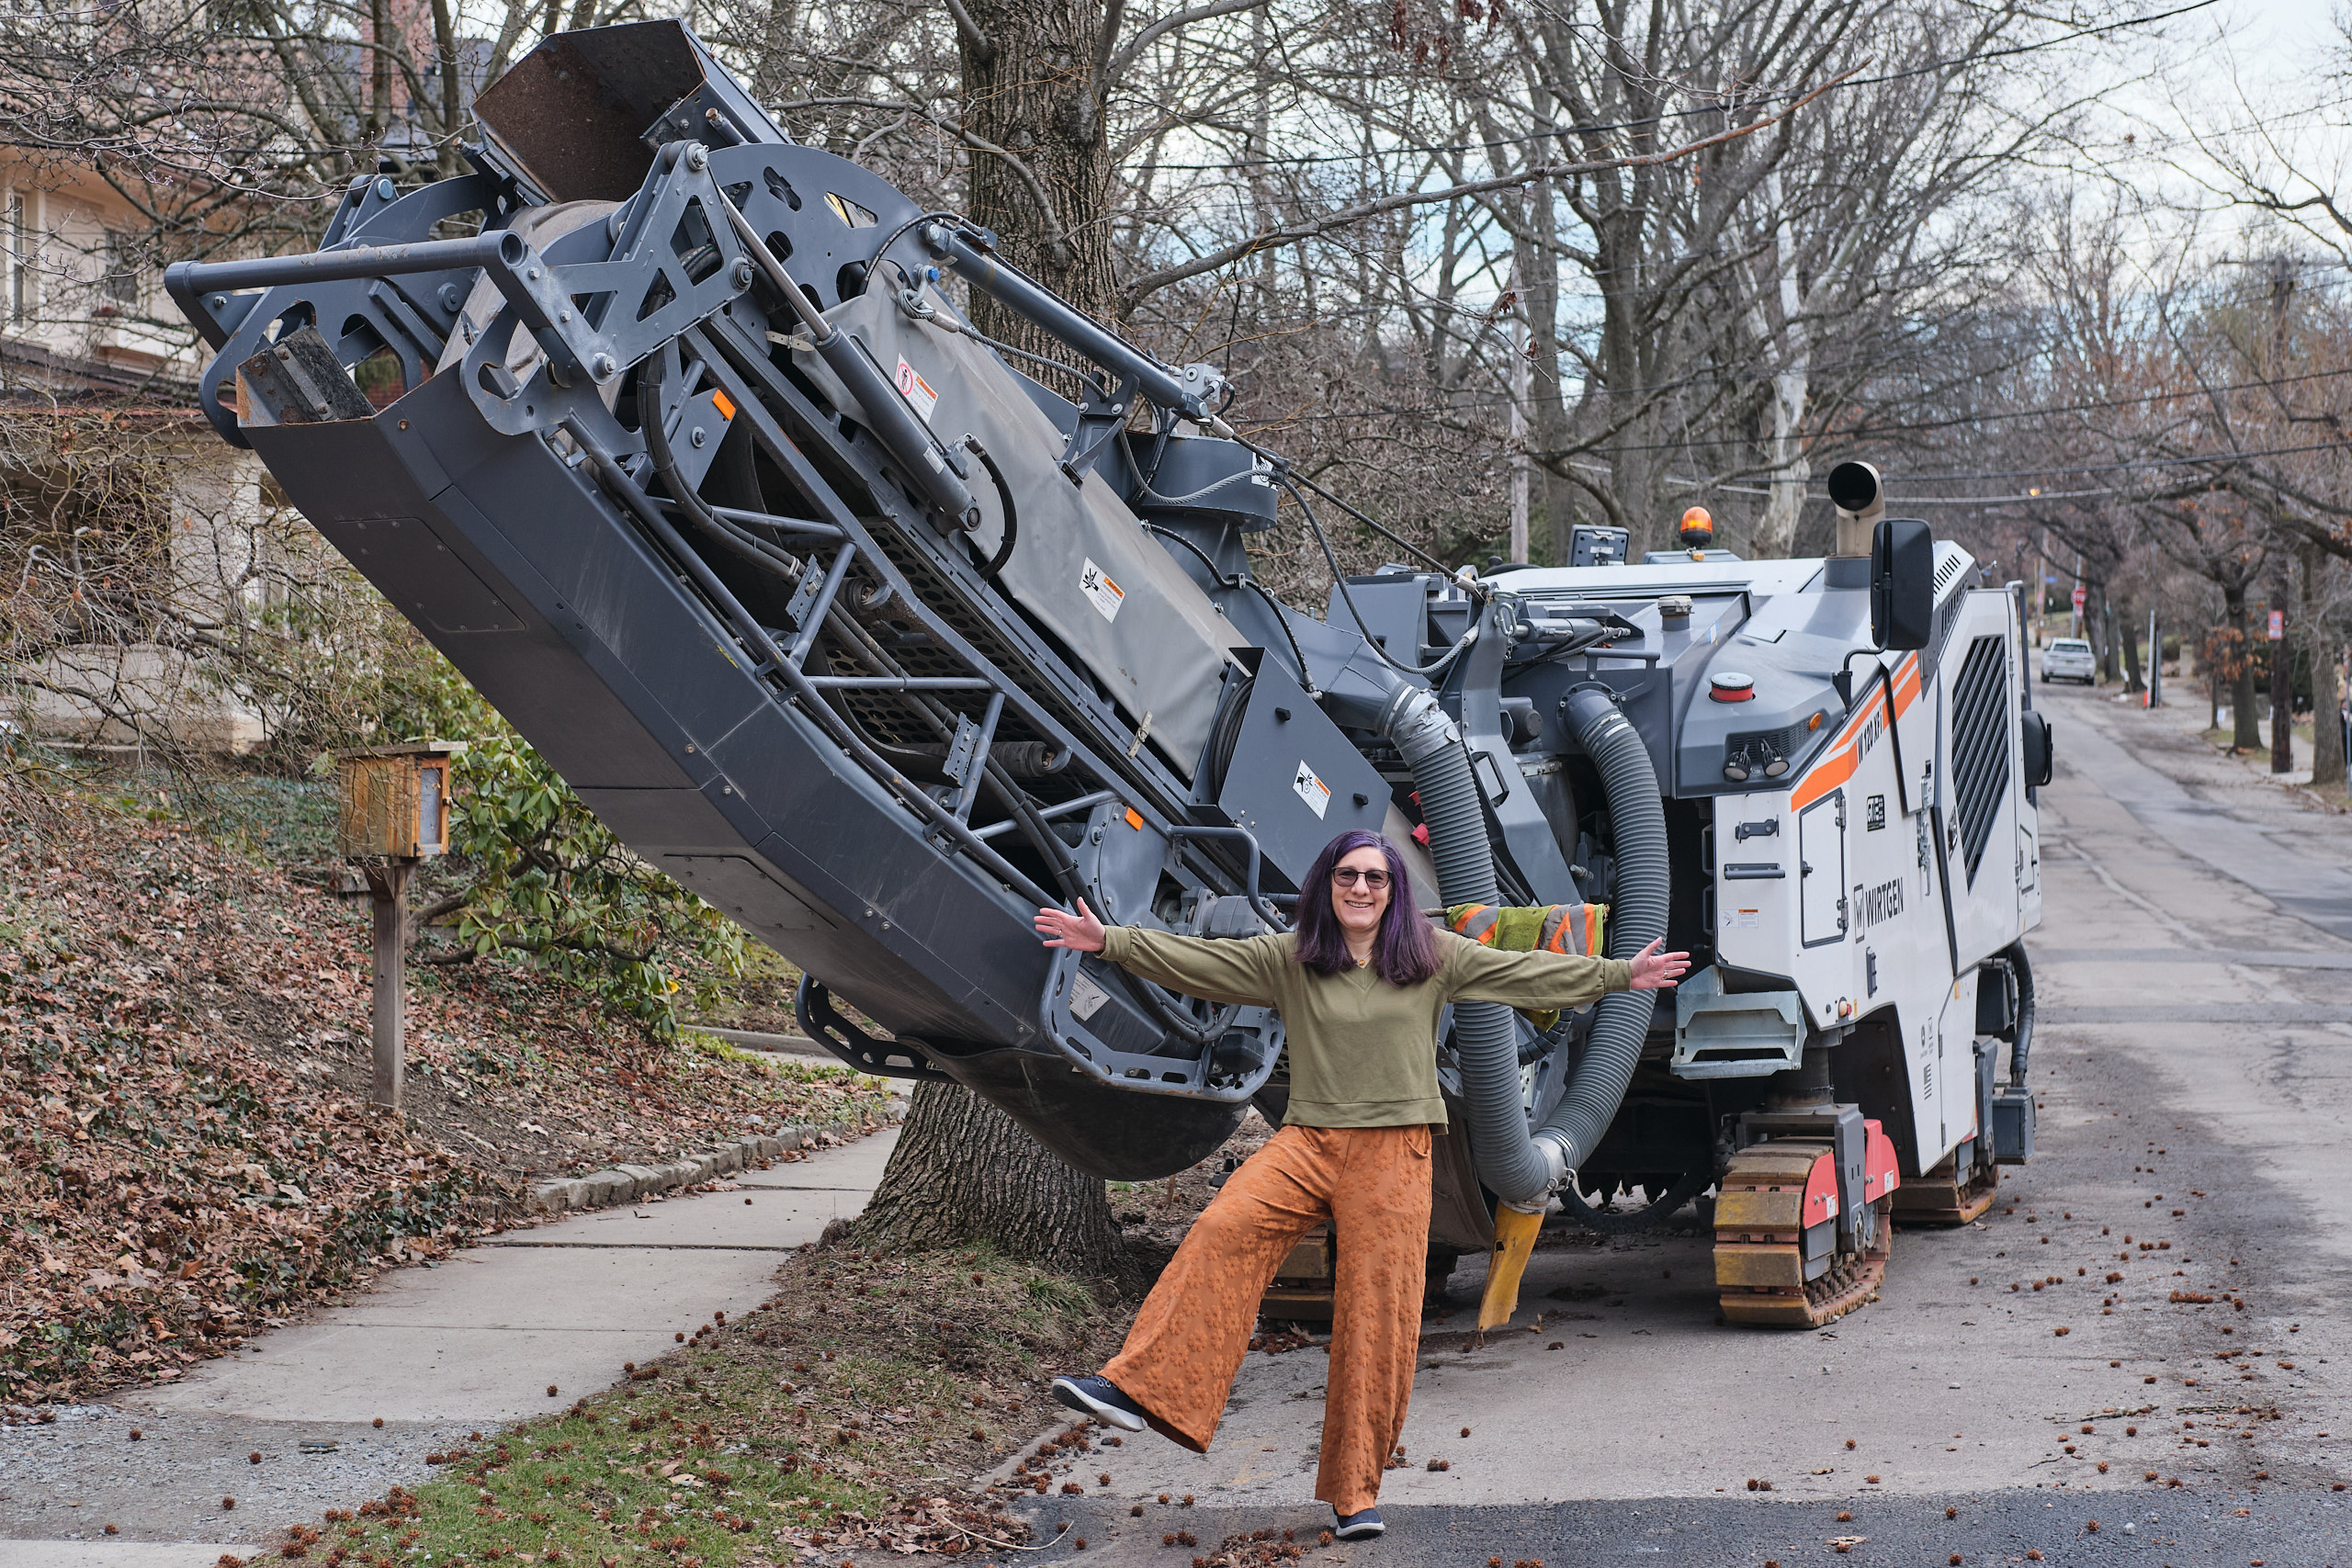
The pants were easy and quick to sew, and a lot of fun to wear. I’m modeling them here with a PE Sweet Cheeks sweater, which is the Walk Boldly’s BFF.
I went outside with my photographer to do a photo shoot and noticed I was going to be photobombed by the construction vehicles parked up and down my street as part of a never-ending water pipe replacement project that has turned my street into an obstacle course. So I suggested to my photographer that we use the construction vehicles as a backdrop.
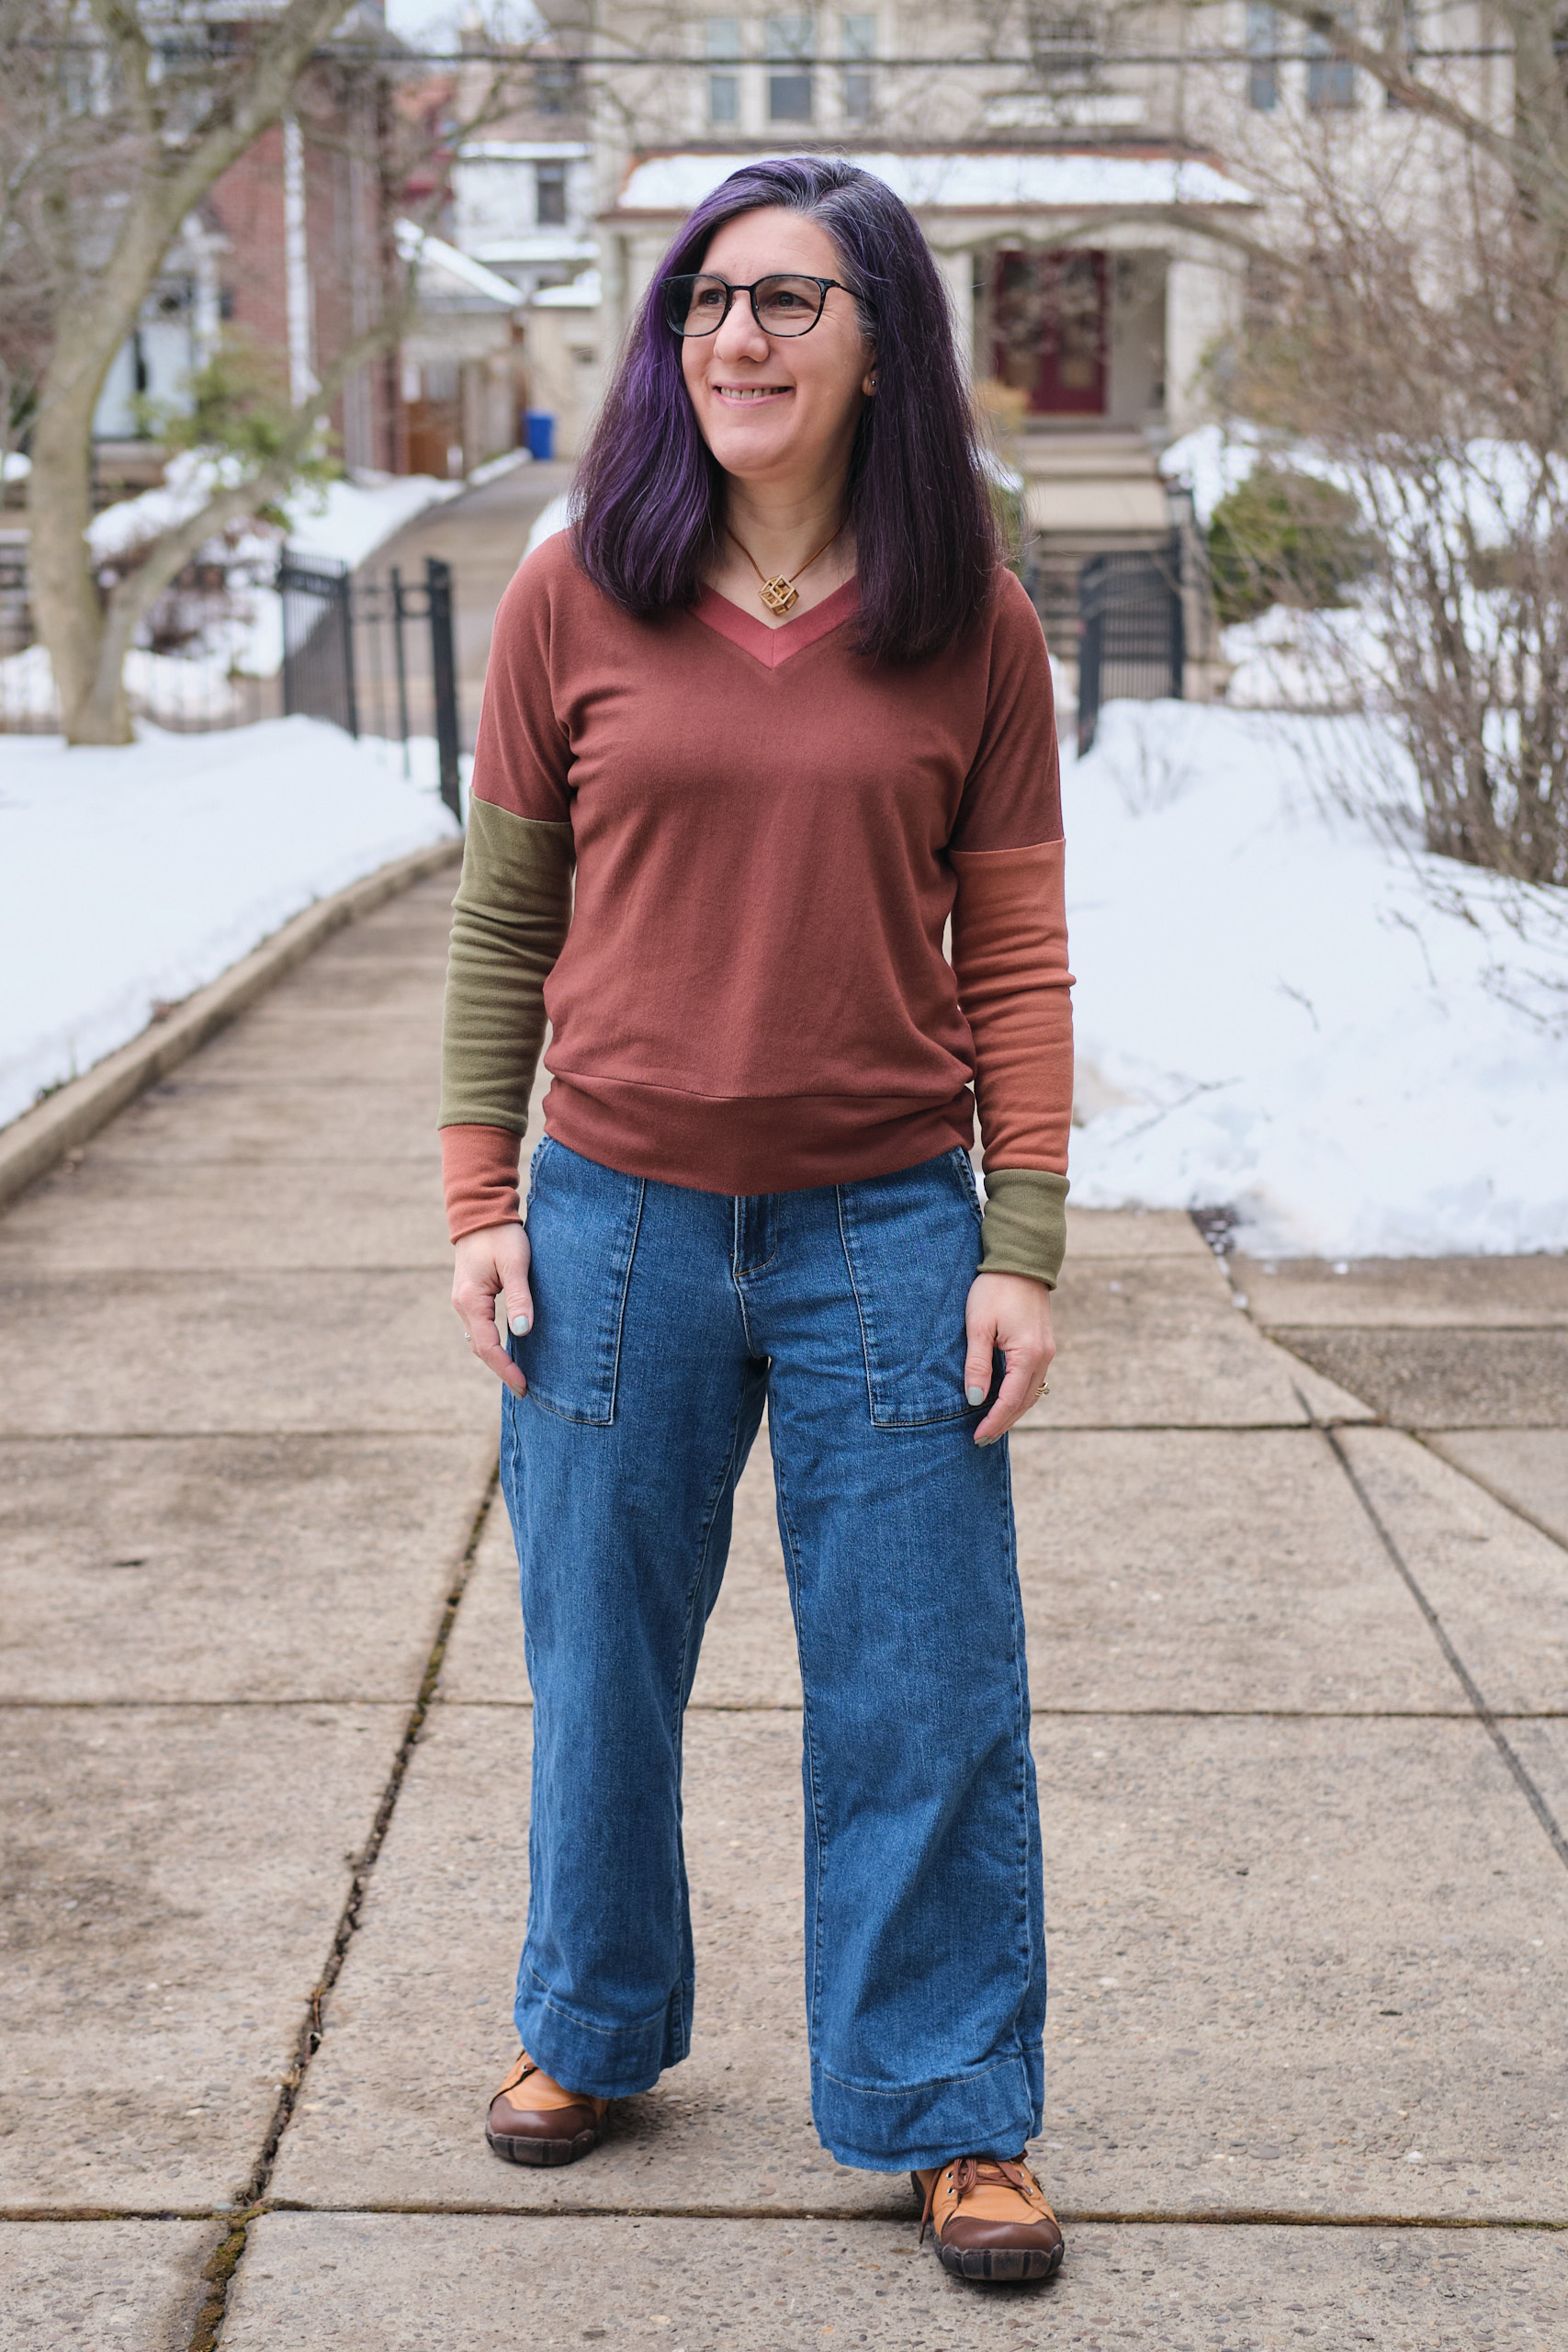
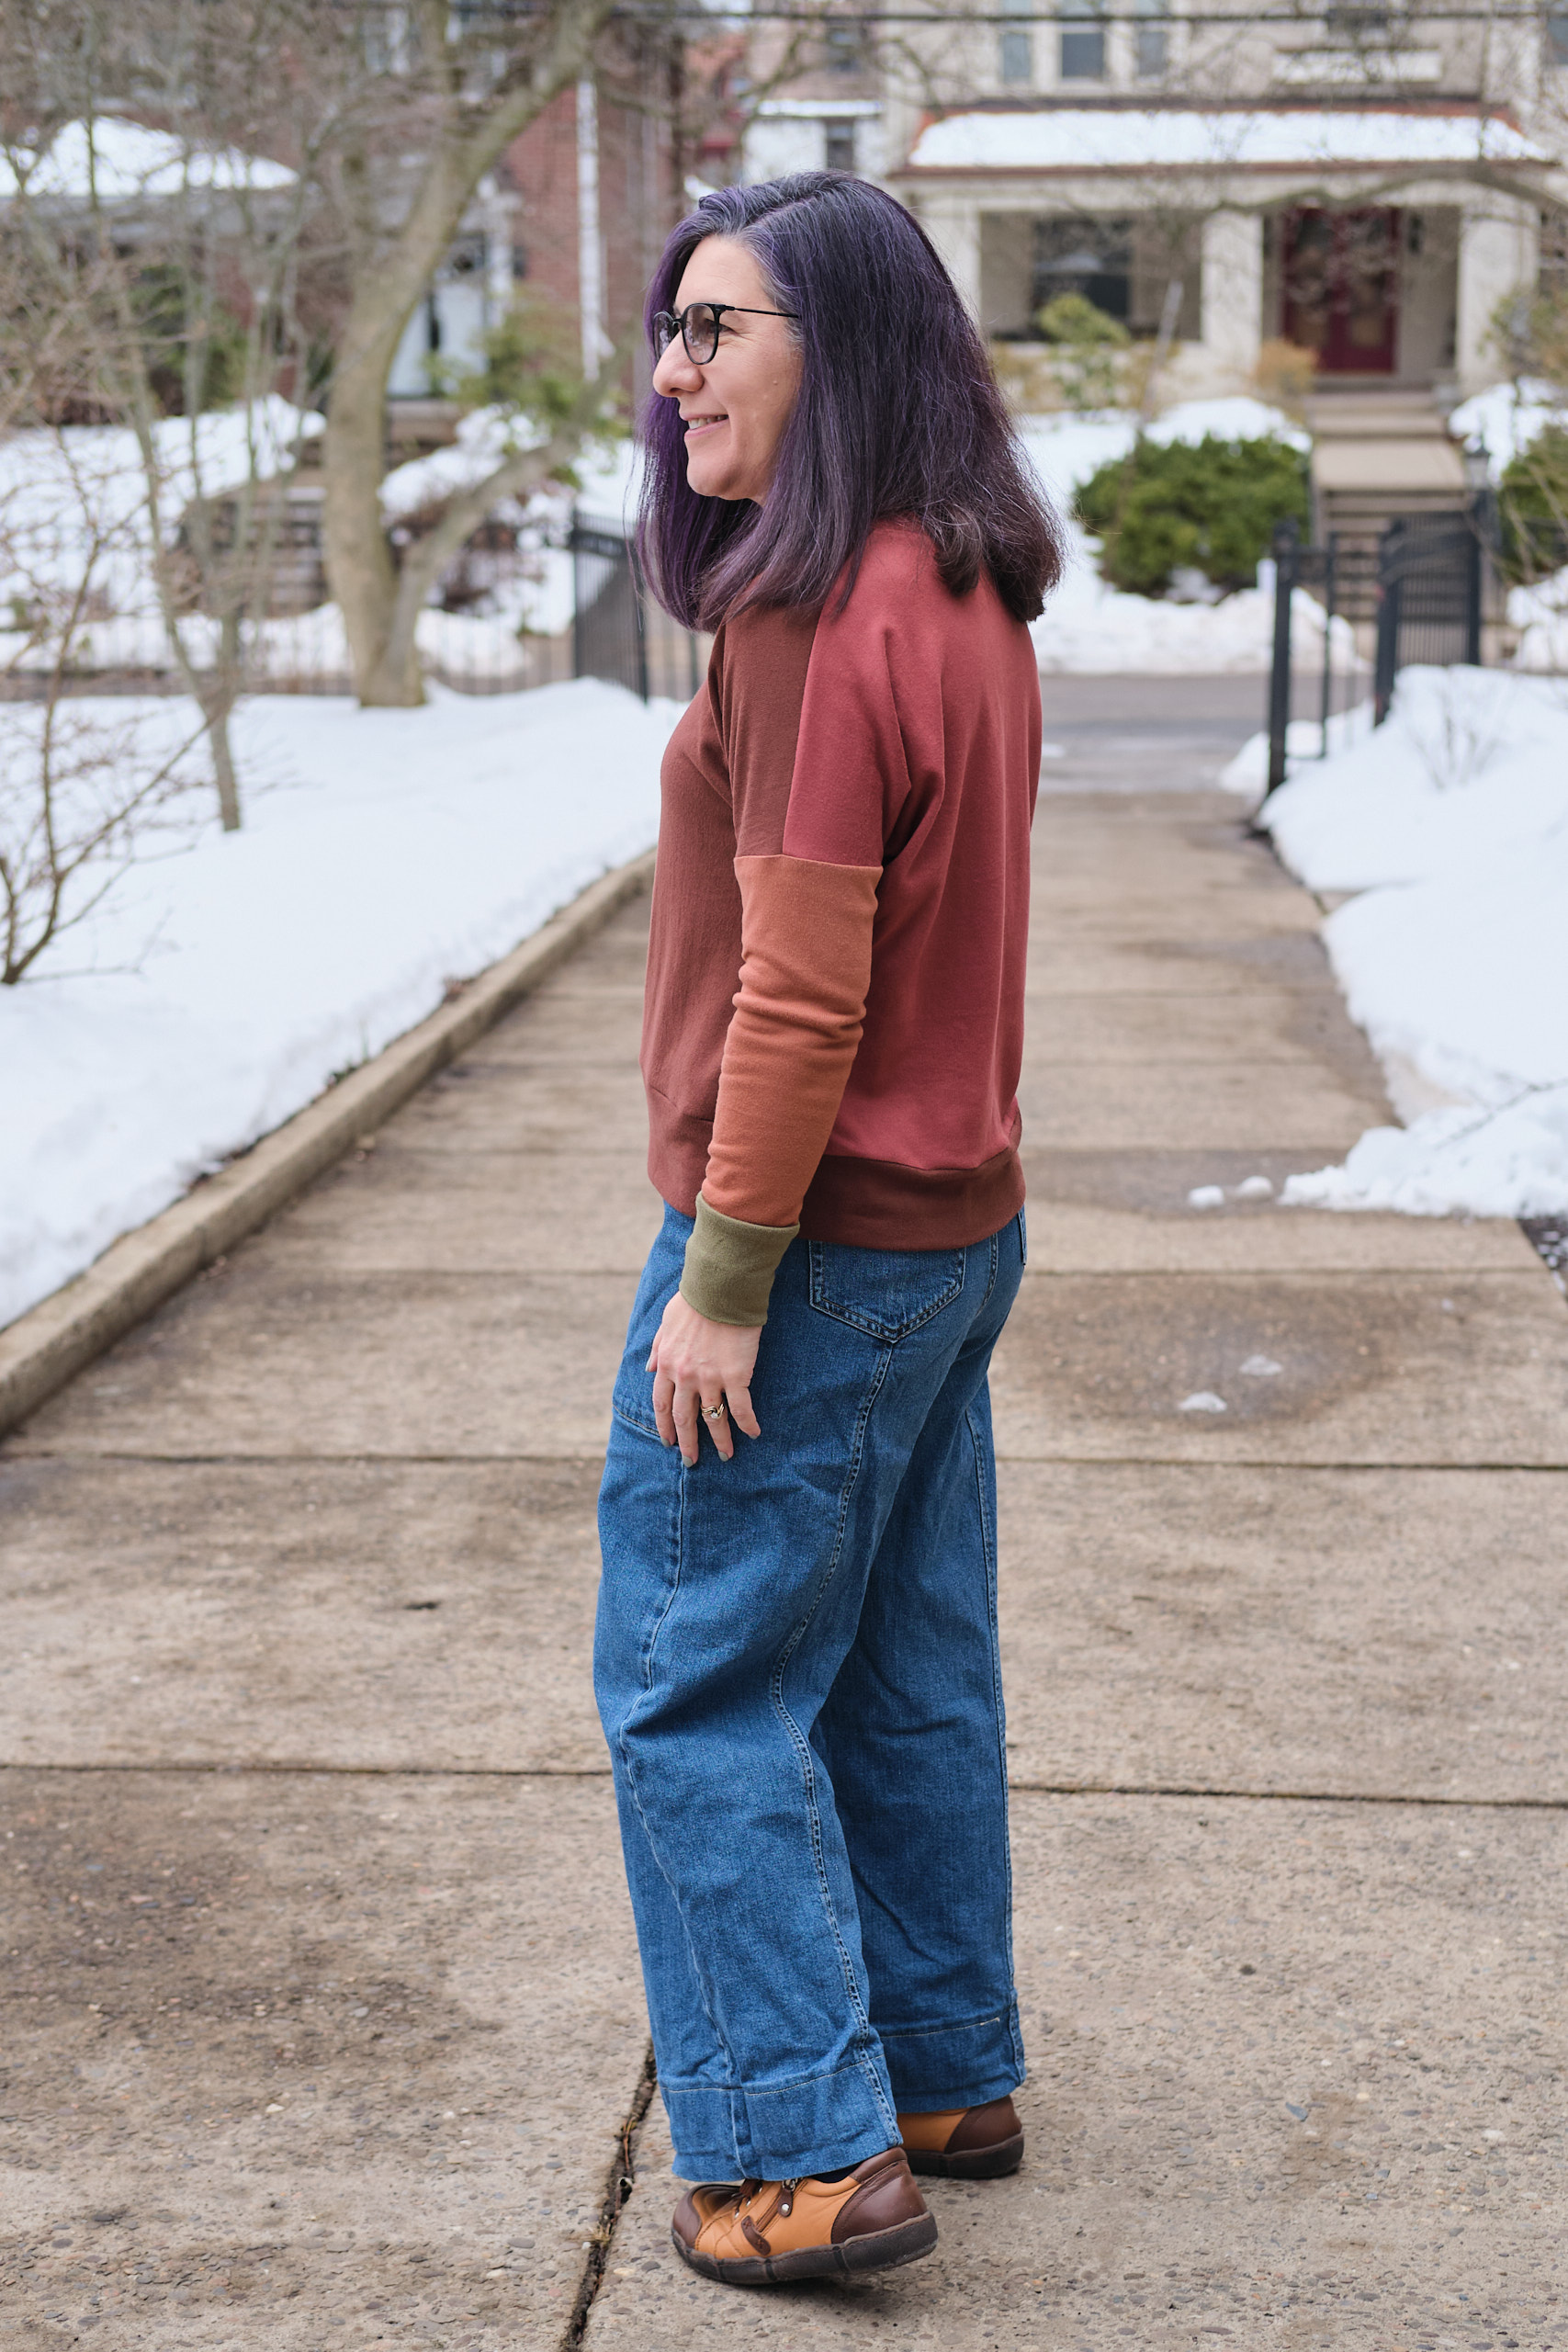
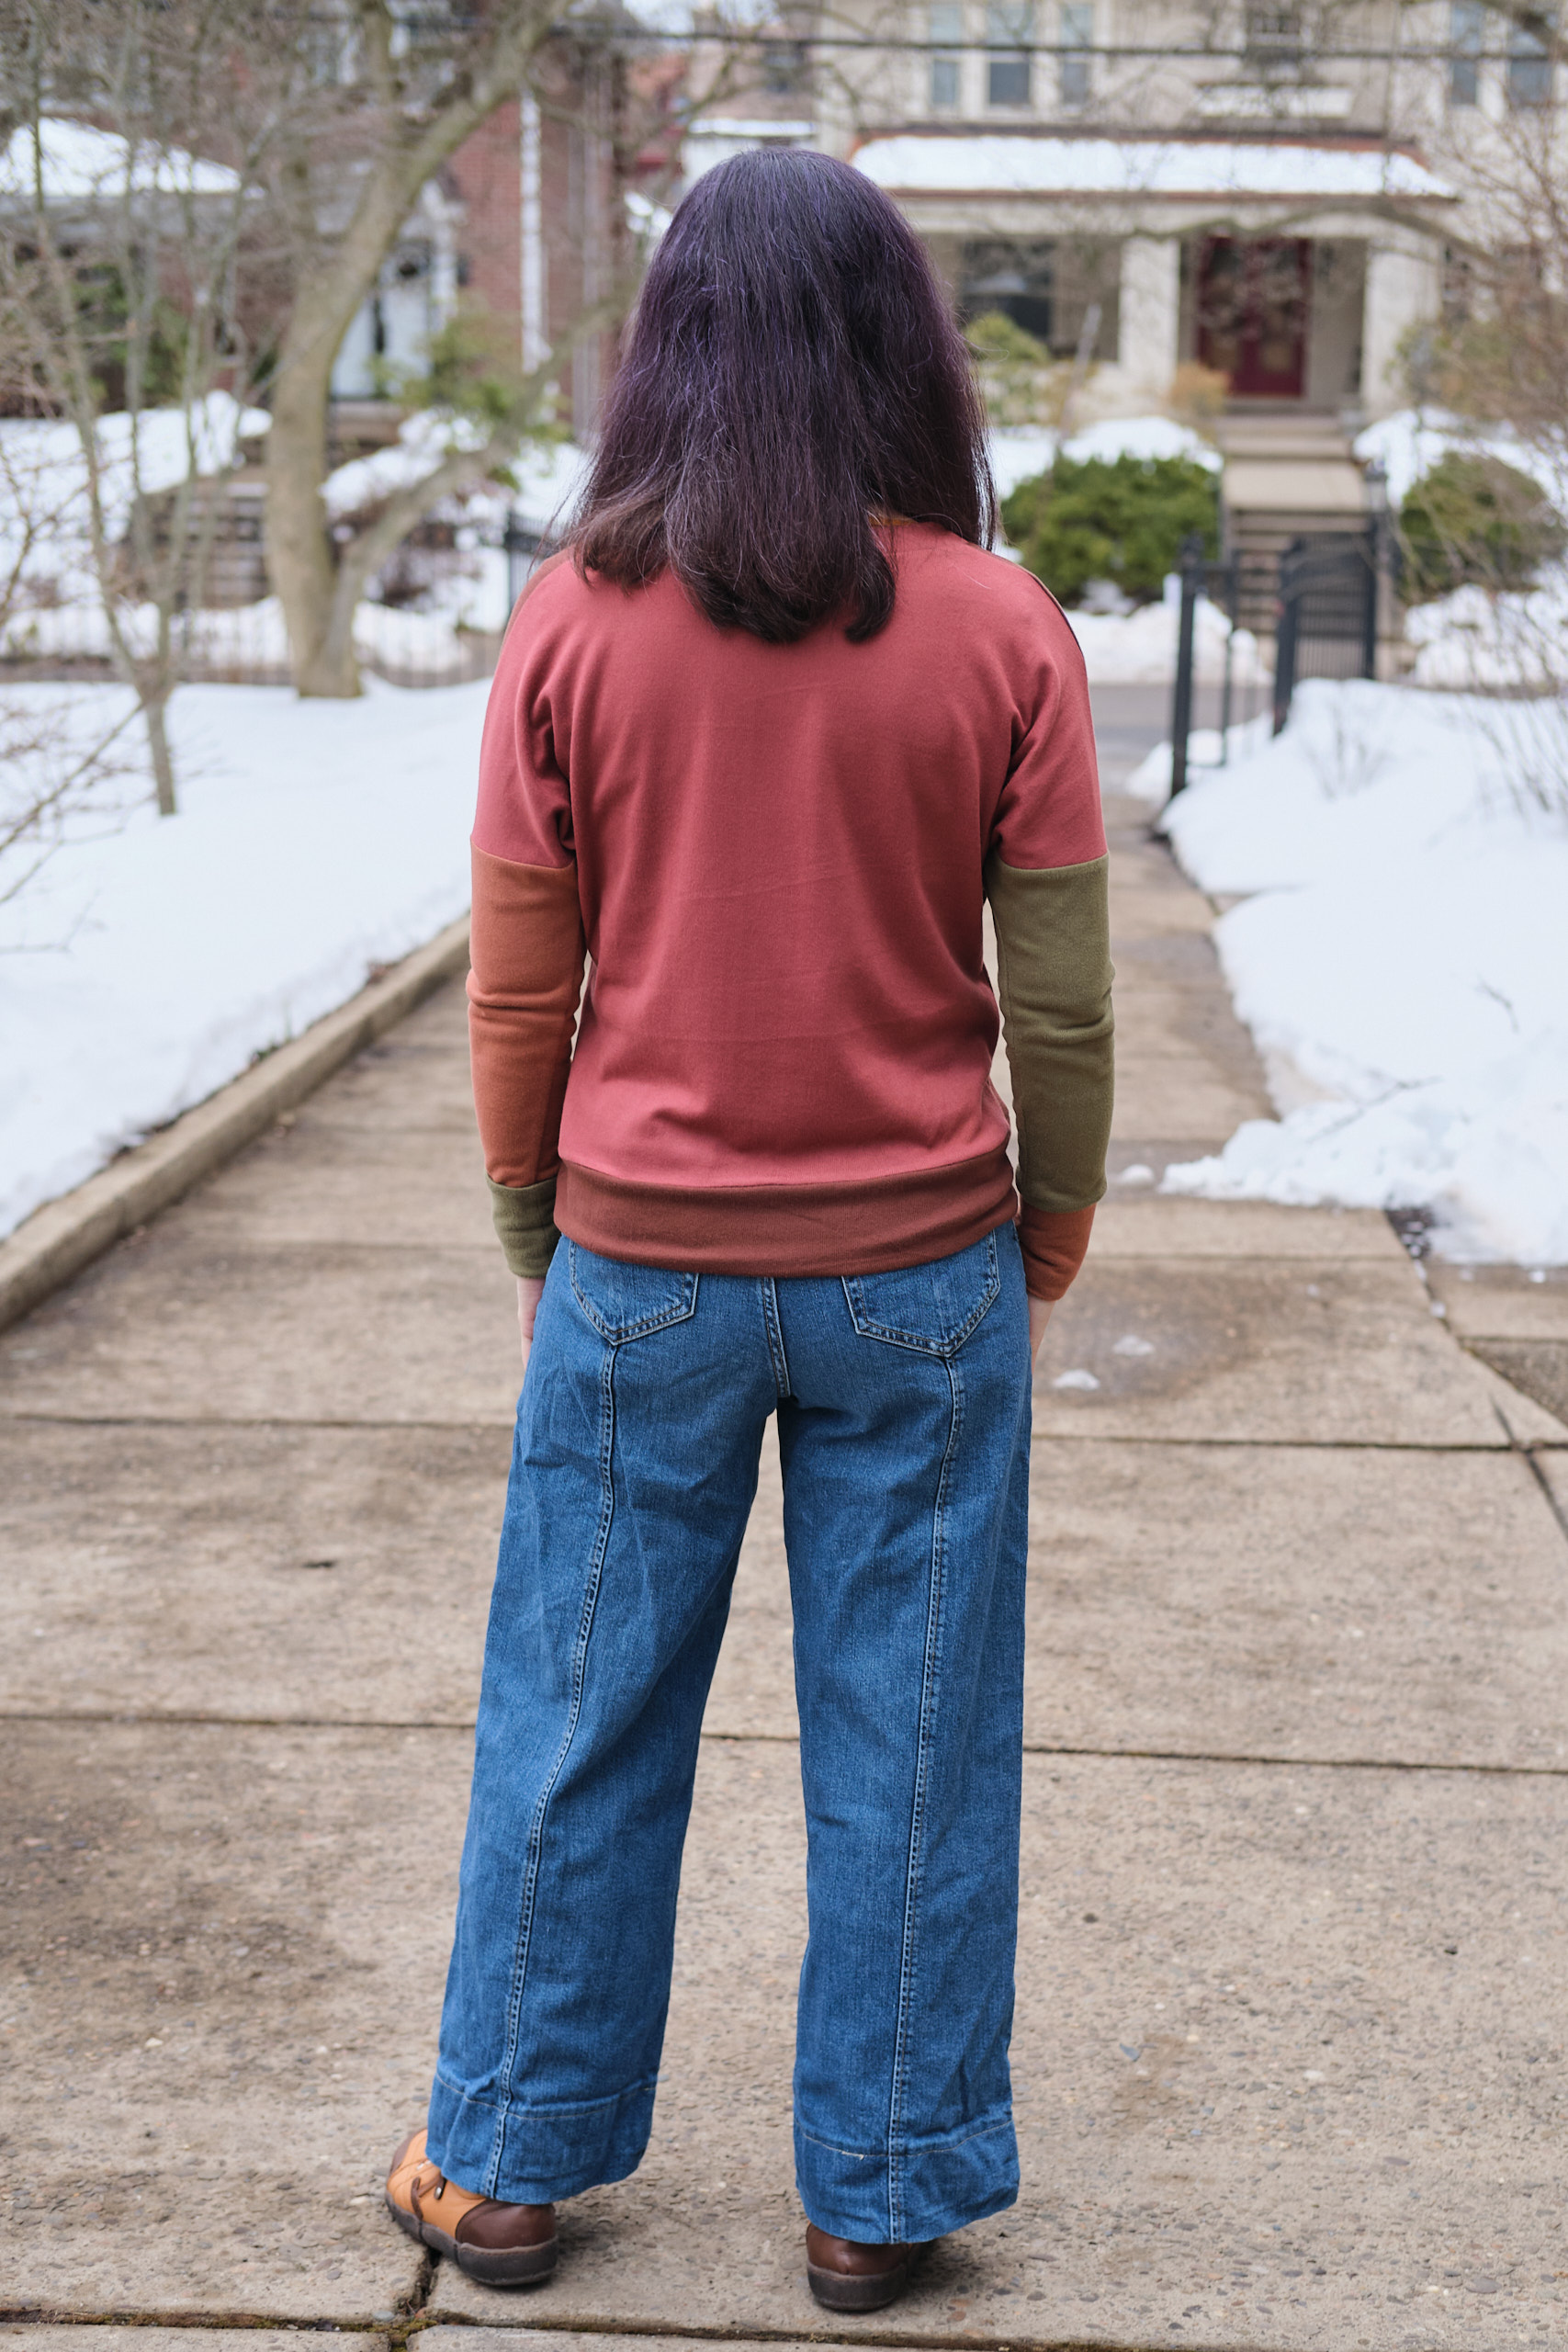
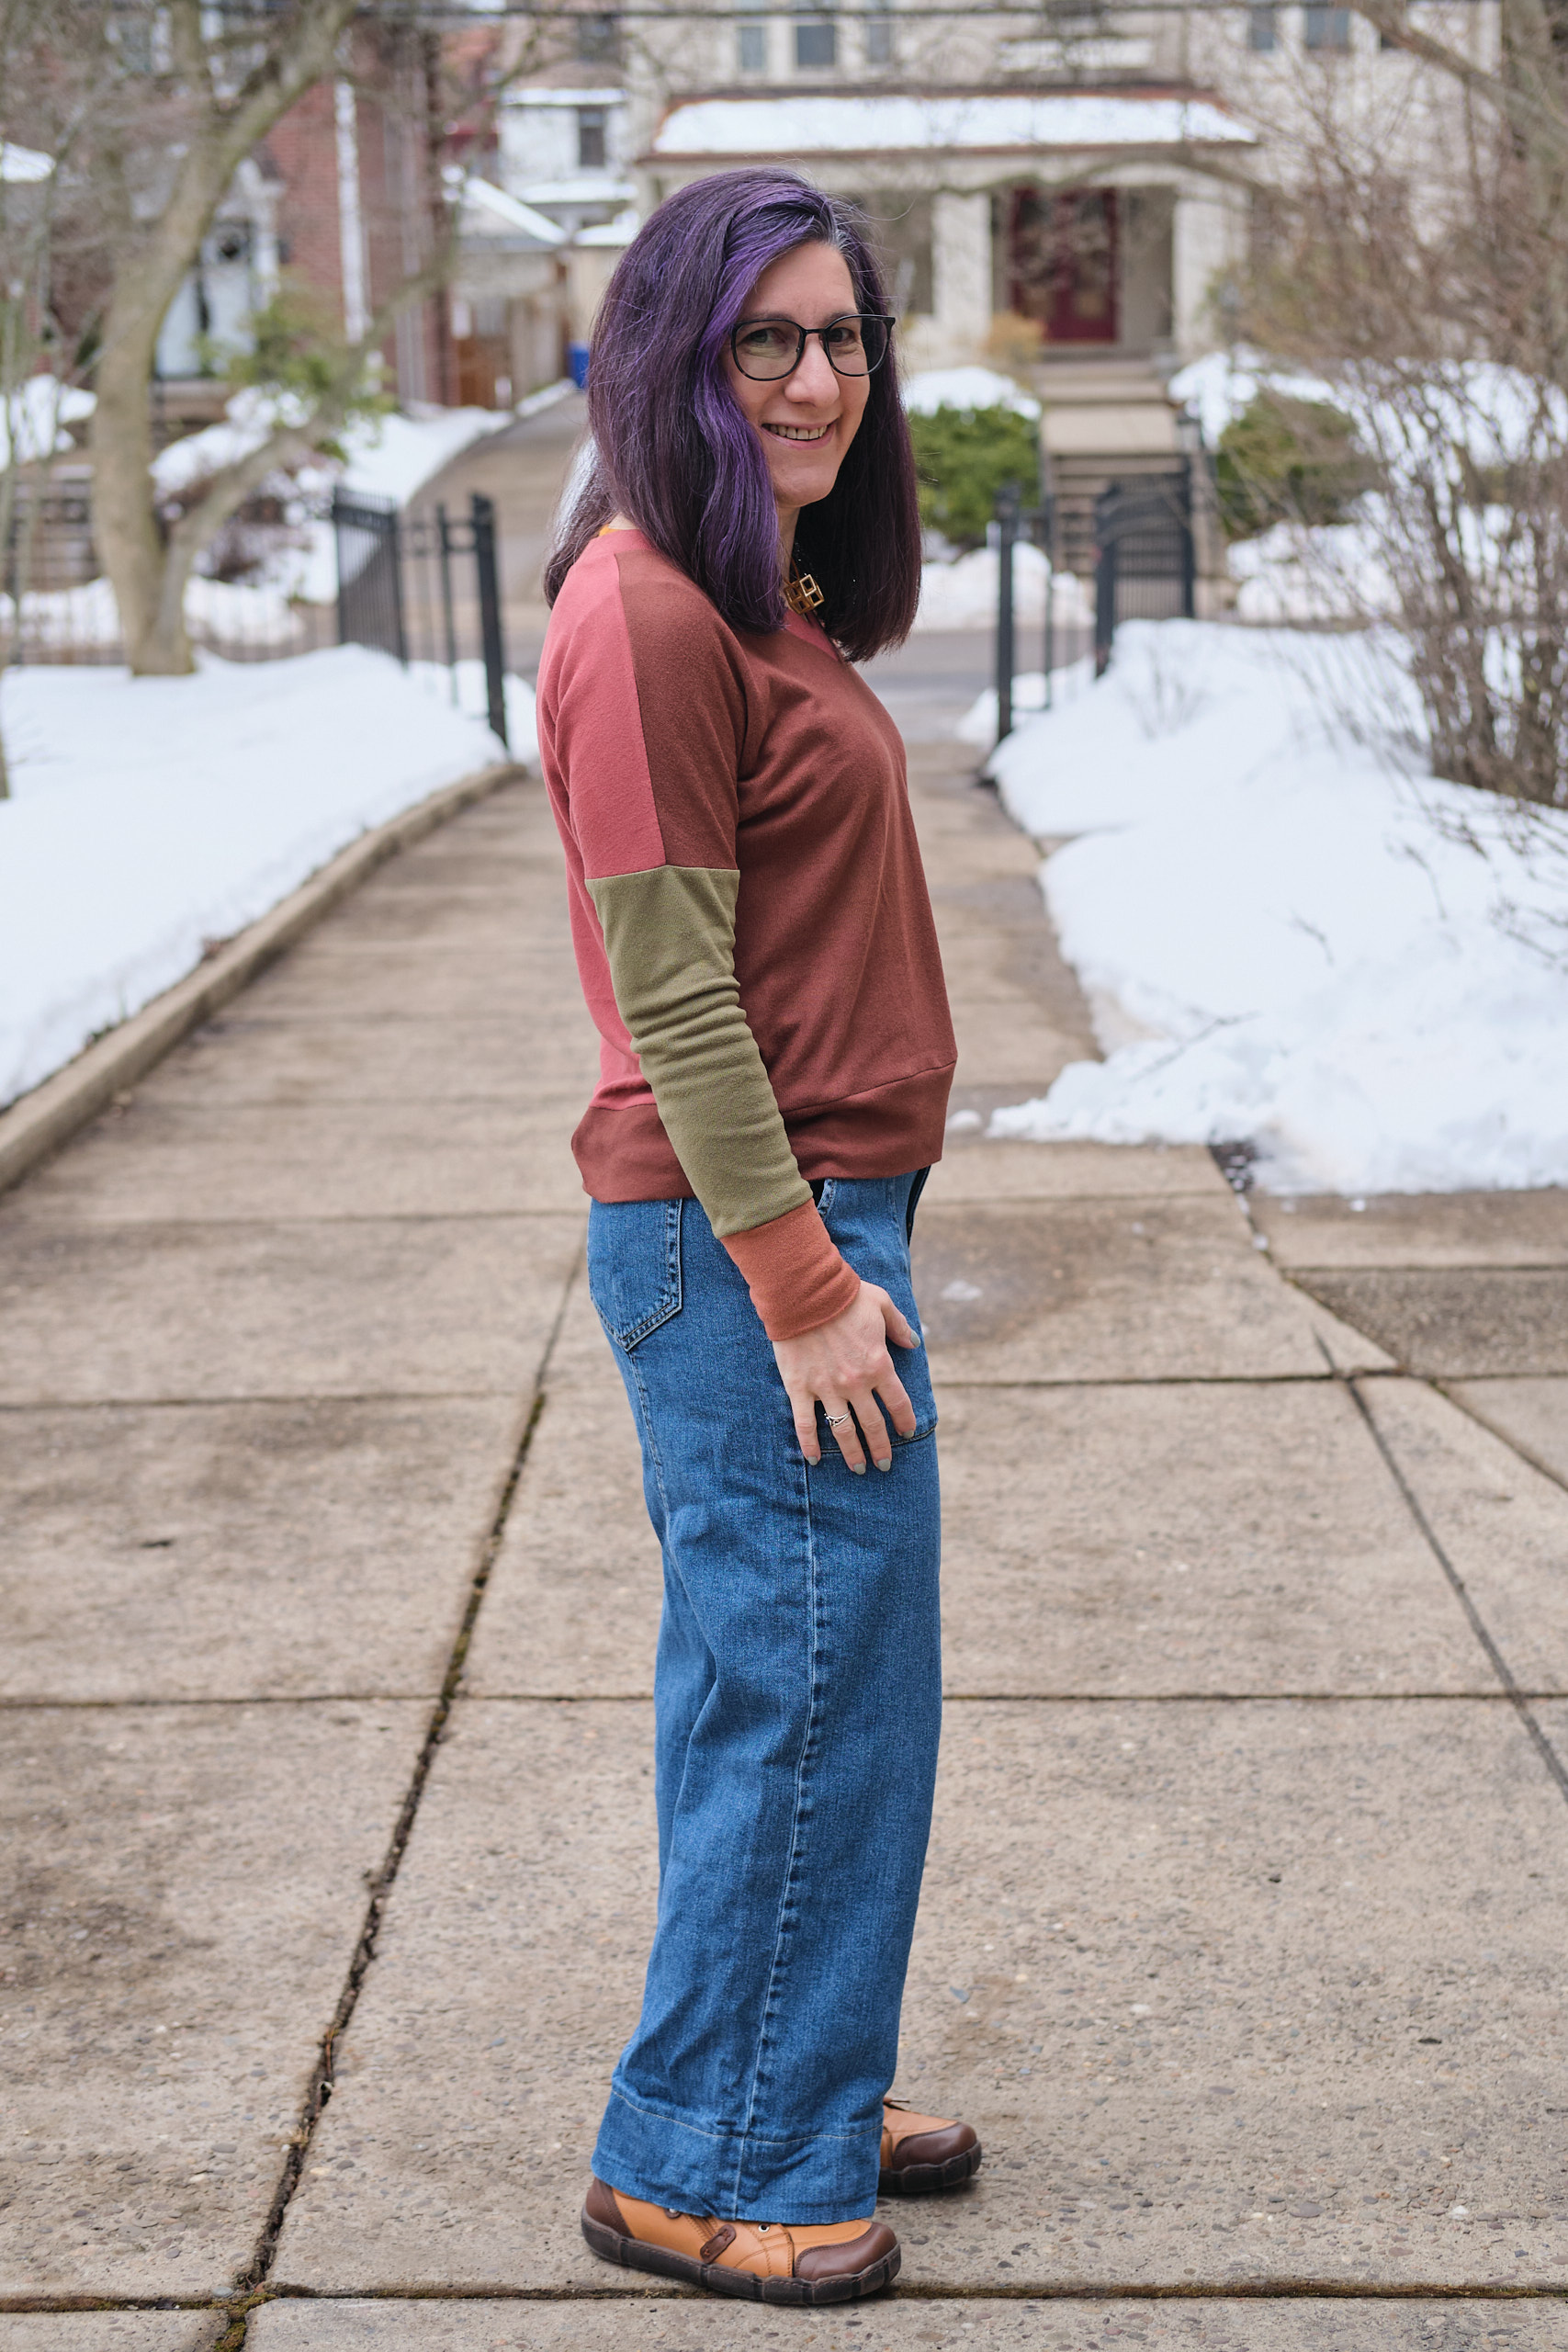
Petite Stitchery Adult Hollis Raglan, size small, top length, wide neckband, sleeves shortened by 2 inches. Made from four colors of hacci scraps.
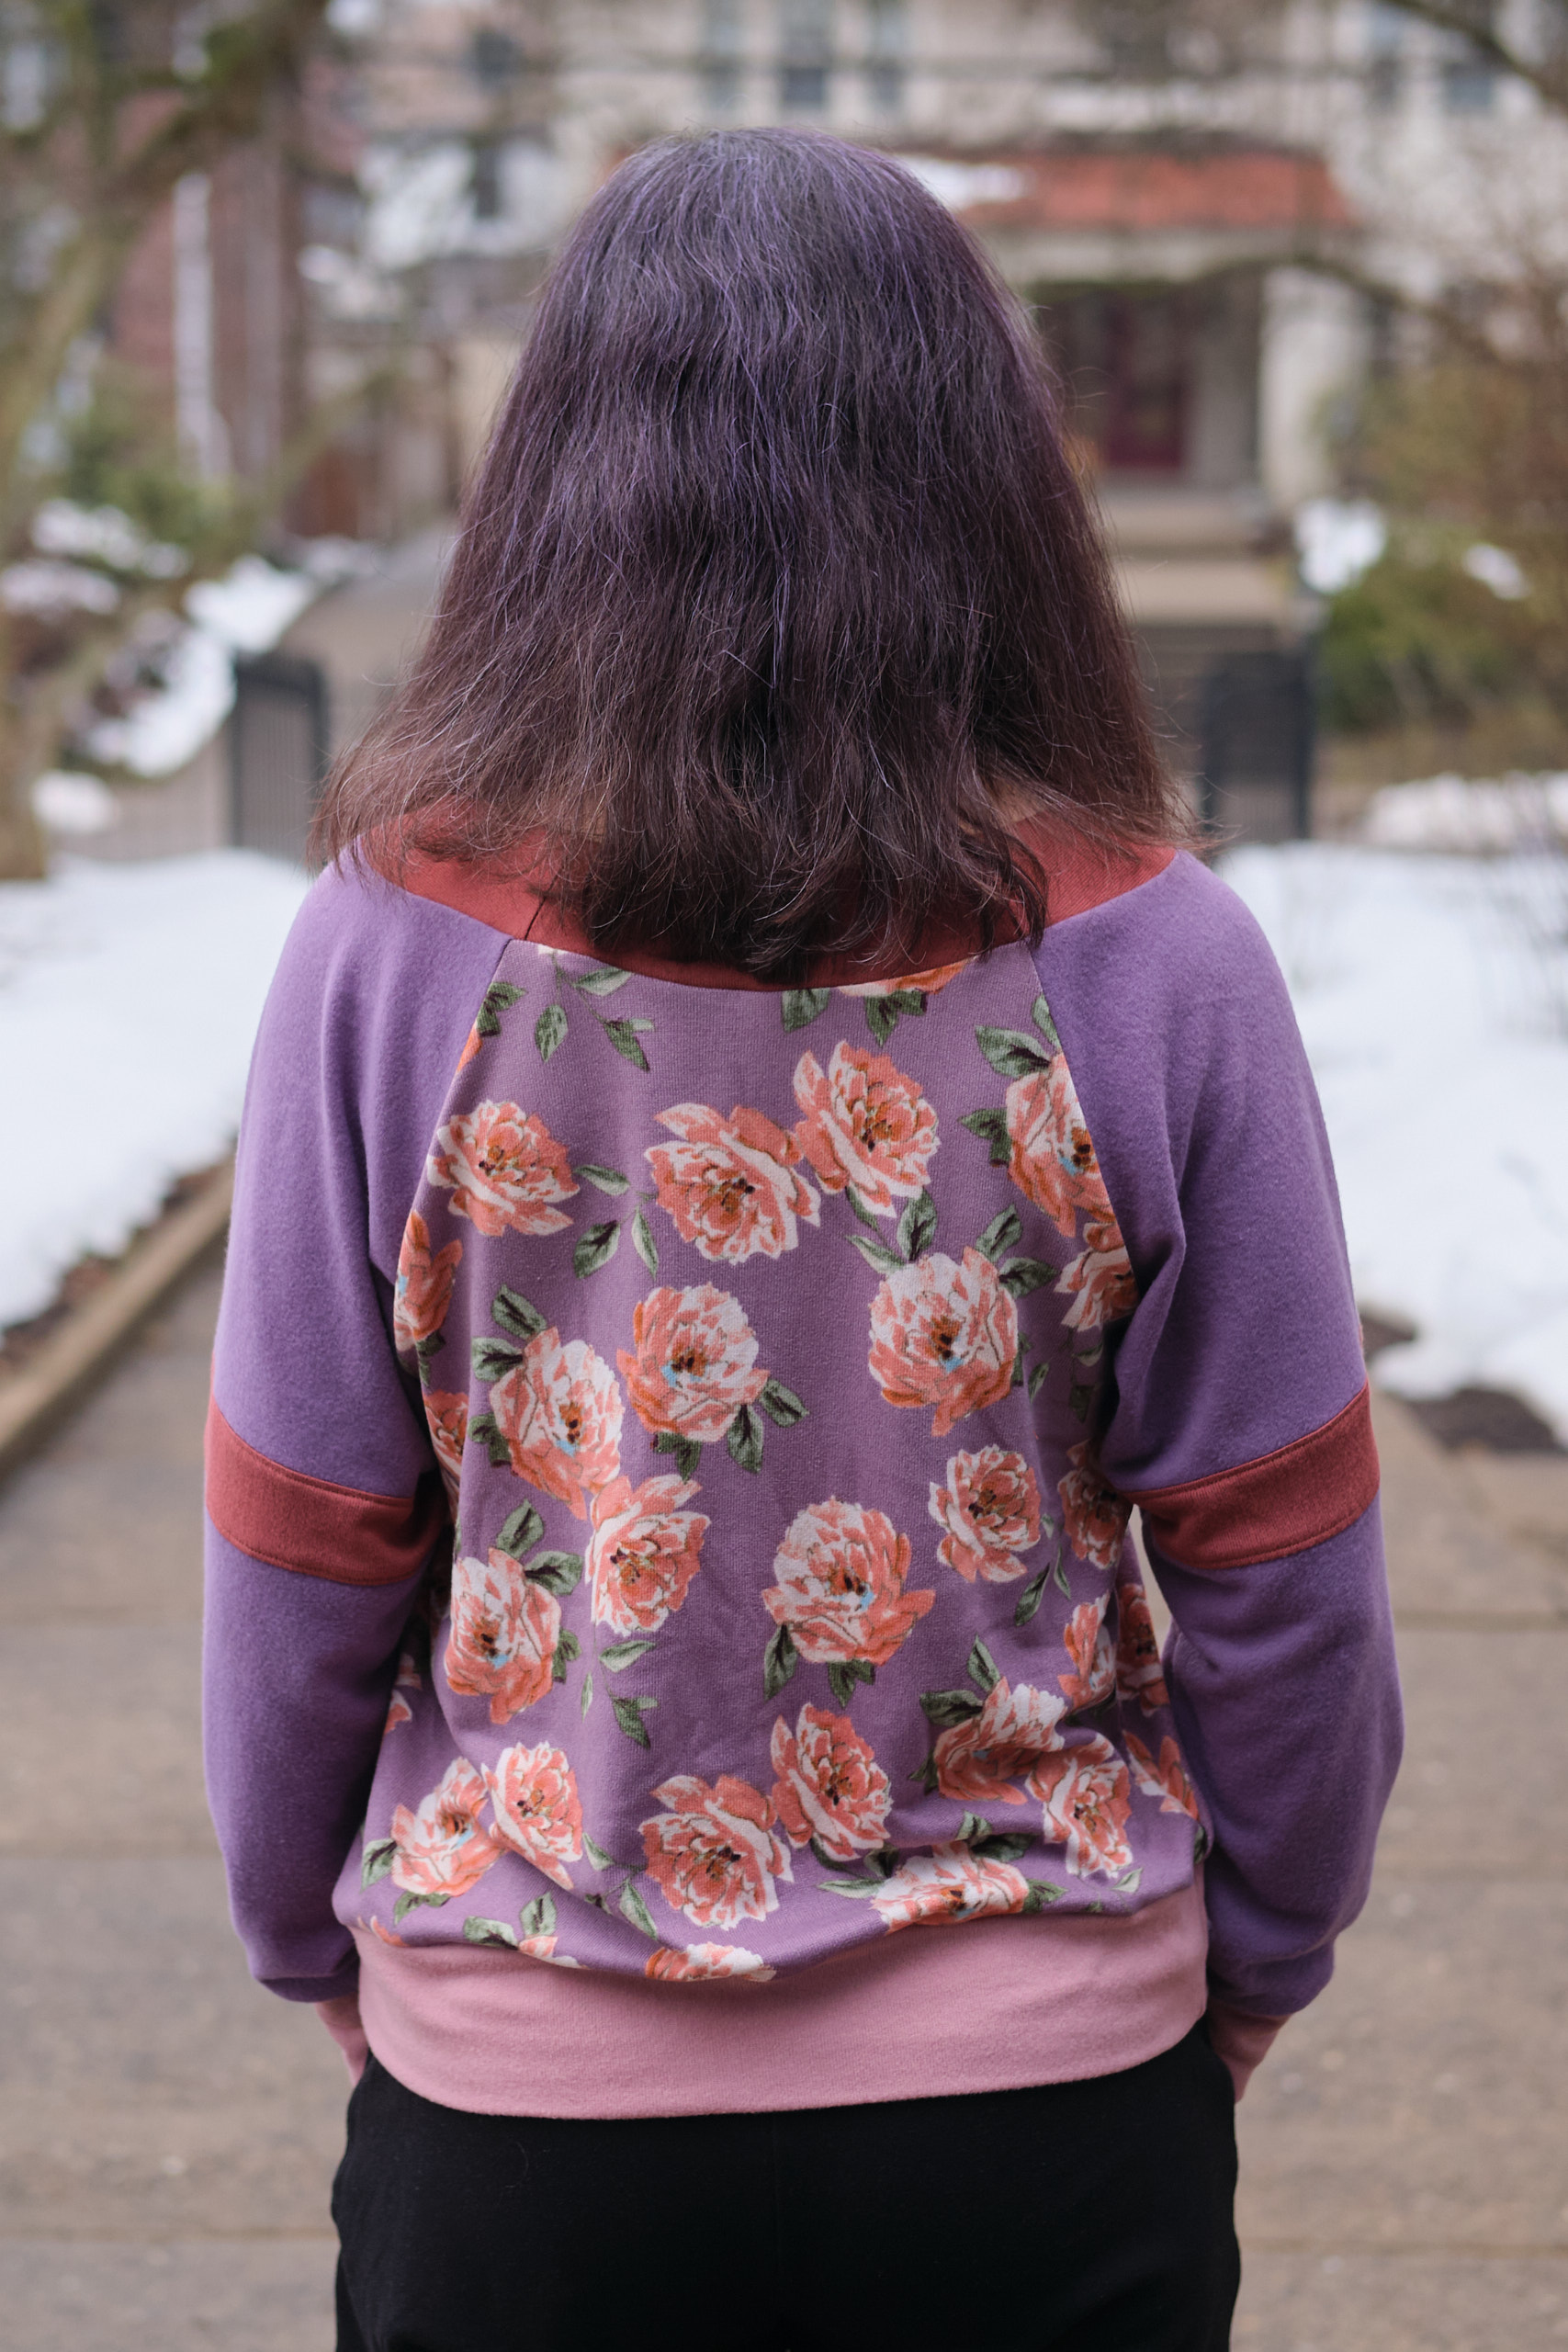
I bought the Petite Stitchery Adult Hollis Raglan top pattern when it came out in 2024 and had plans to sew it up but never did. I was going planning to make one out of Polartec sweatshirt fleece, but never quite figured out a color combination that I liked. Last week while I was making another color blocked sweater from hacci sweater knit, I found a floral hacci that has been in my stash for a while and saw that I had other haccis that went with it. So I decided to take the plunge and finally make a Hollis.
The main fabric I used for the bodice is a purple “super soft large floral hacci” that I bought during a Mily Mae clearance sale for $3.50 per yard in 2023. It is 180 gsm poly/spandex and fairly stretchy. I paired it with a grape poly/rayon/spandex 200 gsm brushed hacci from Surge that I bought in 2024. I added scraps of 200 gsm poly/spandex sienna and rosy mauve hacci brushed on the inside, leftover from recent sweater and dress projects.
This is my second PSCO pattern, and like the Dovie dress that I made previously, the projector pattern files are sized at 10% of actual size. Not a big deal, but still a minor annoyance. The instructions were pretty easy to follow, but sometimes I wanted more details, for example, should I sew a particular seam with a straight stitch or a stretch stitch — often they tell you, but not always.
I cut a size small, top length, with the thick neckband. I shortened the sleeves by 2 inches, but otherwise made the pattern as written. The neckband construction is fairly unique. The front of the V is cut out in one piece, plus a facing, thus there is no seam at the point of the V. It’s an interesting construction technique and would lend itself to low stretch fabrics. I’m not sure it is any easier than other v-neck construction approaches I’ve tried though. I used my sewing machine to baste together the bands, sew on the cuffs, and top stitch the sleeve bands. Basting was essential to keep things from shifting. Everything else I sewed on my serger.
Hollis was a fun sew, and I would definitely consider making another to use up scraps. It is a loose, but not oversized fit, and I think it would work with a wide range of knit fabrics. I still might make a sweatshirt fleece version someday. In the mean time, I have a lot of the purple floral and solid purple hacci left over. Should I make matching pants?
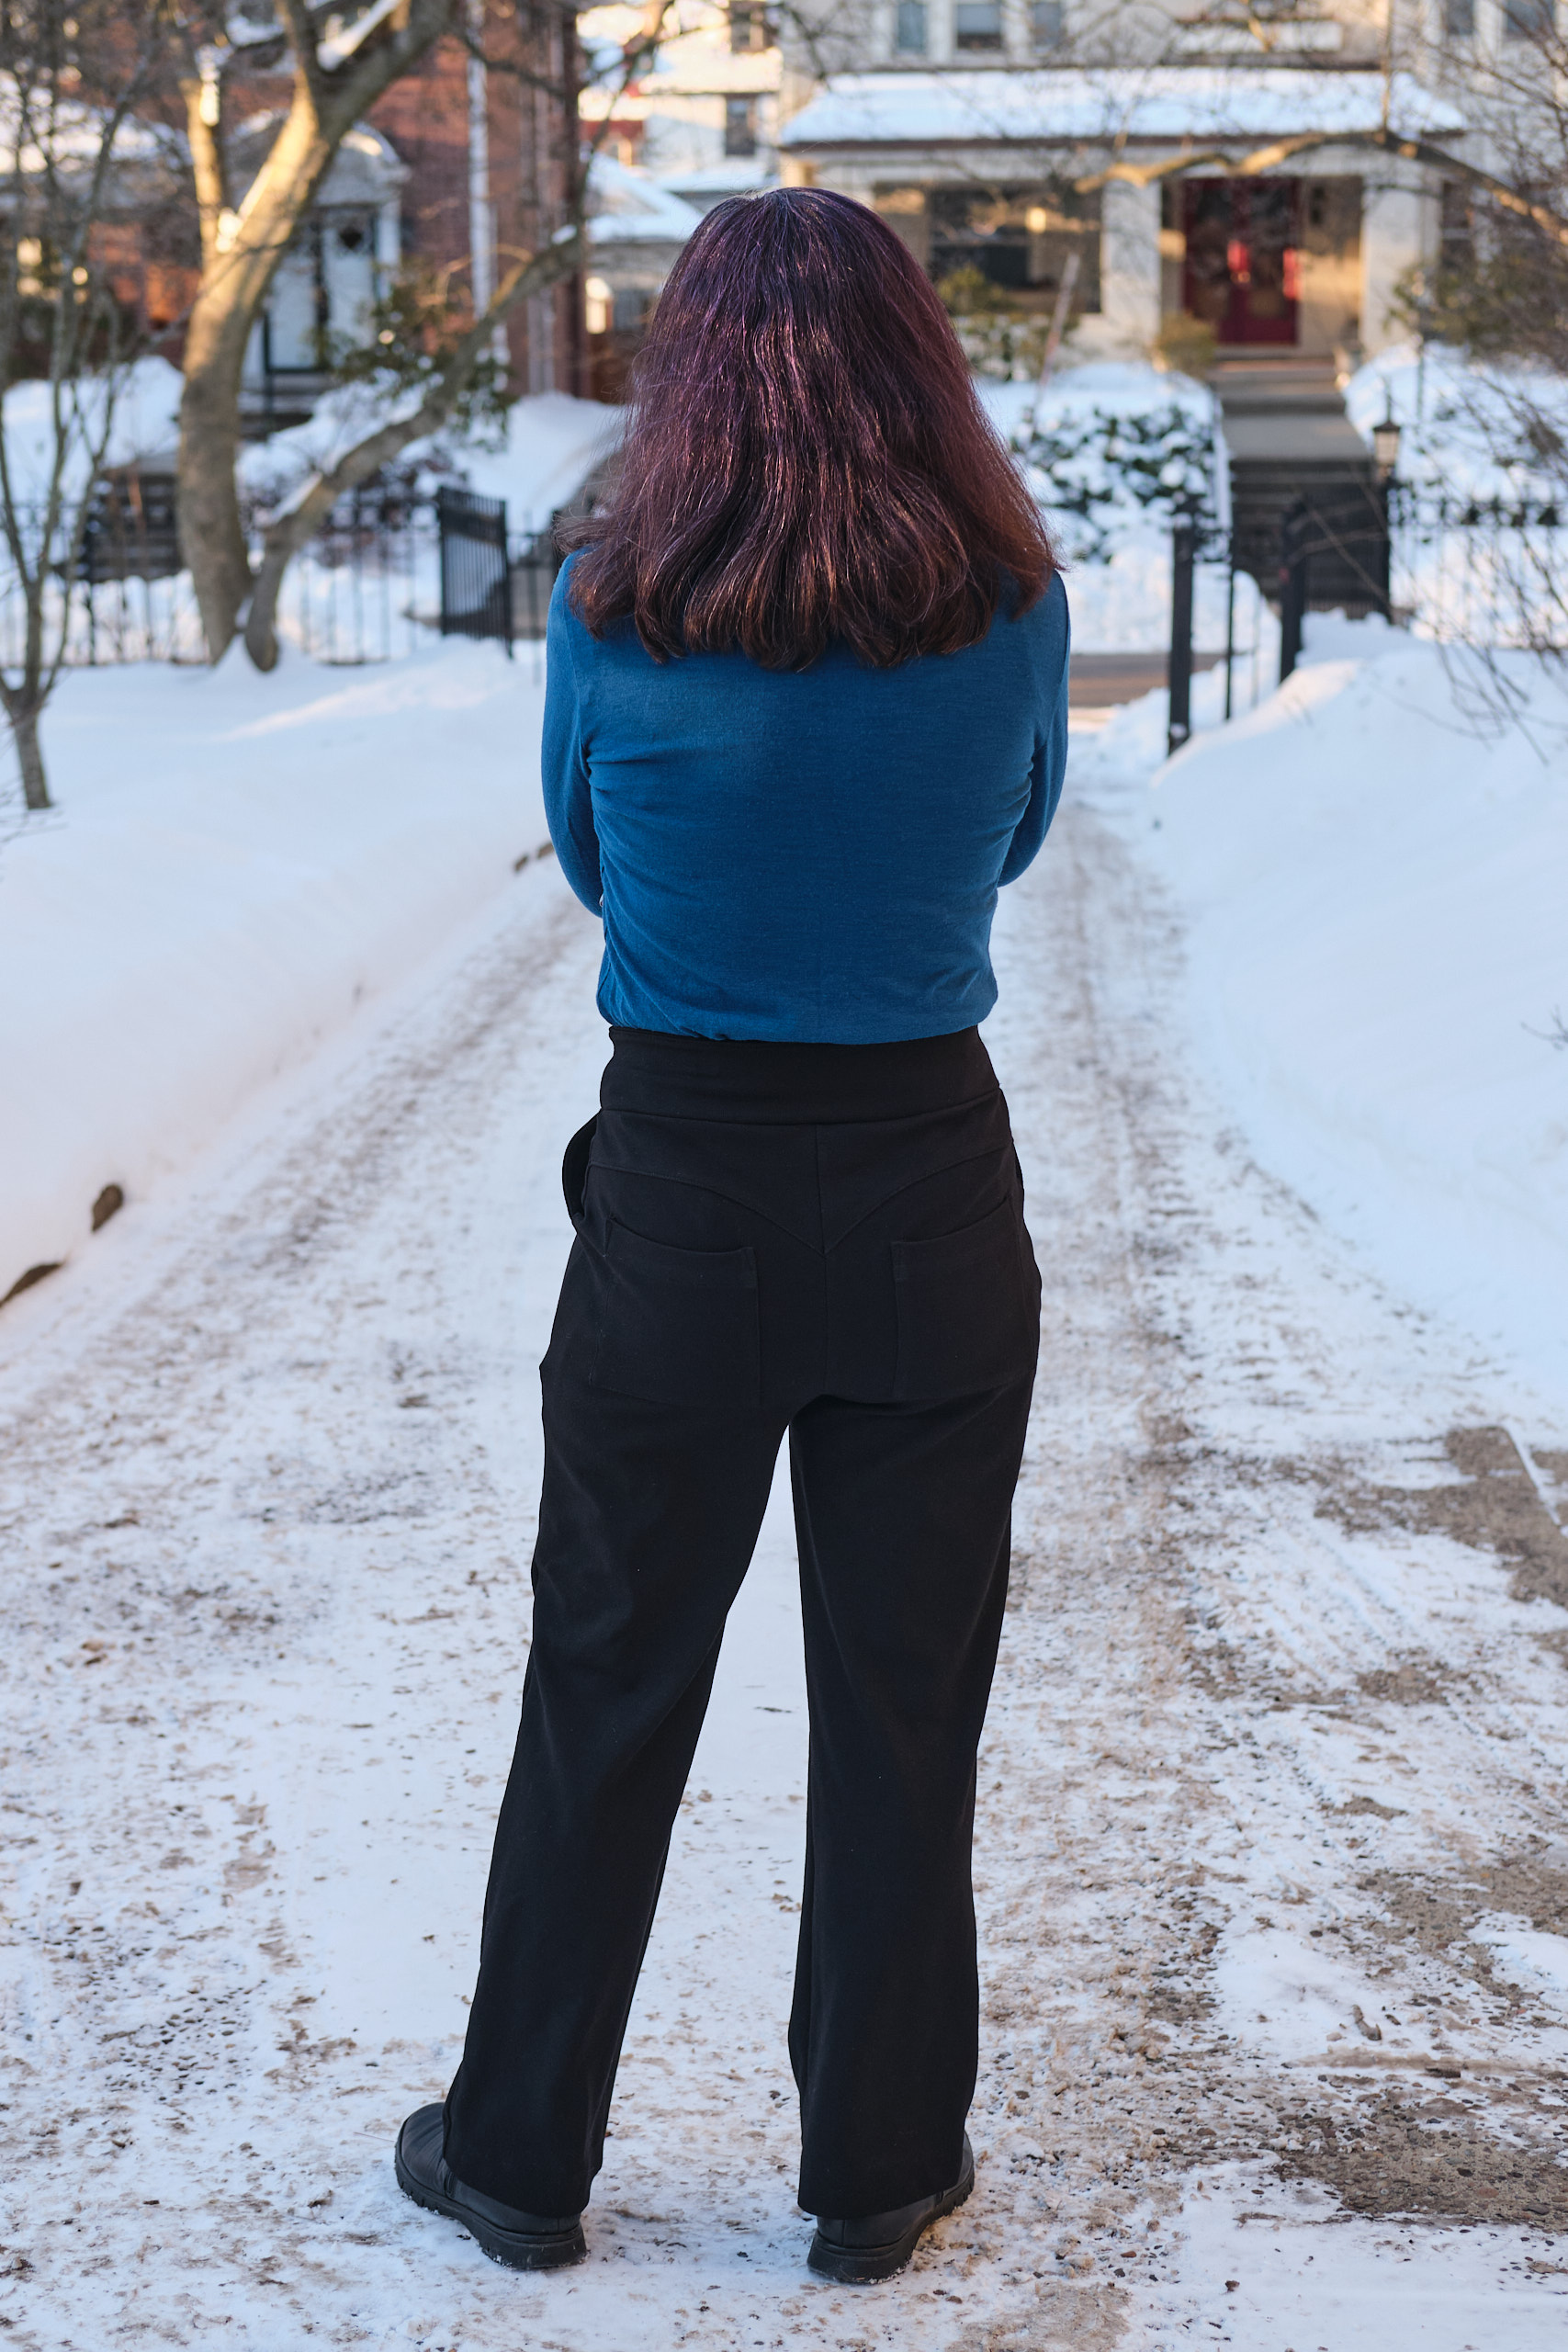
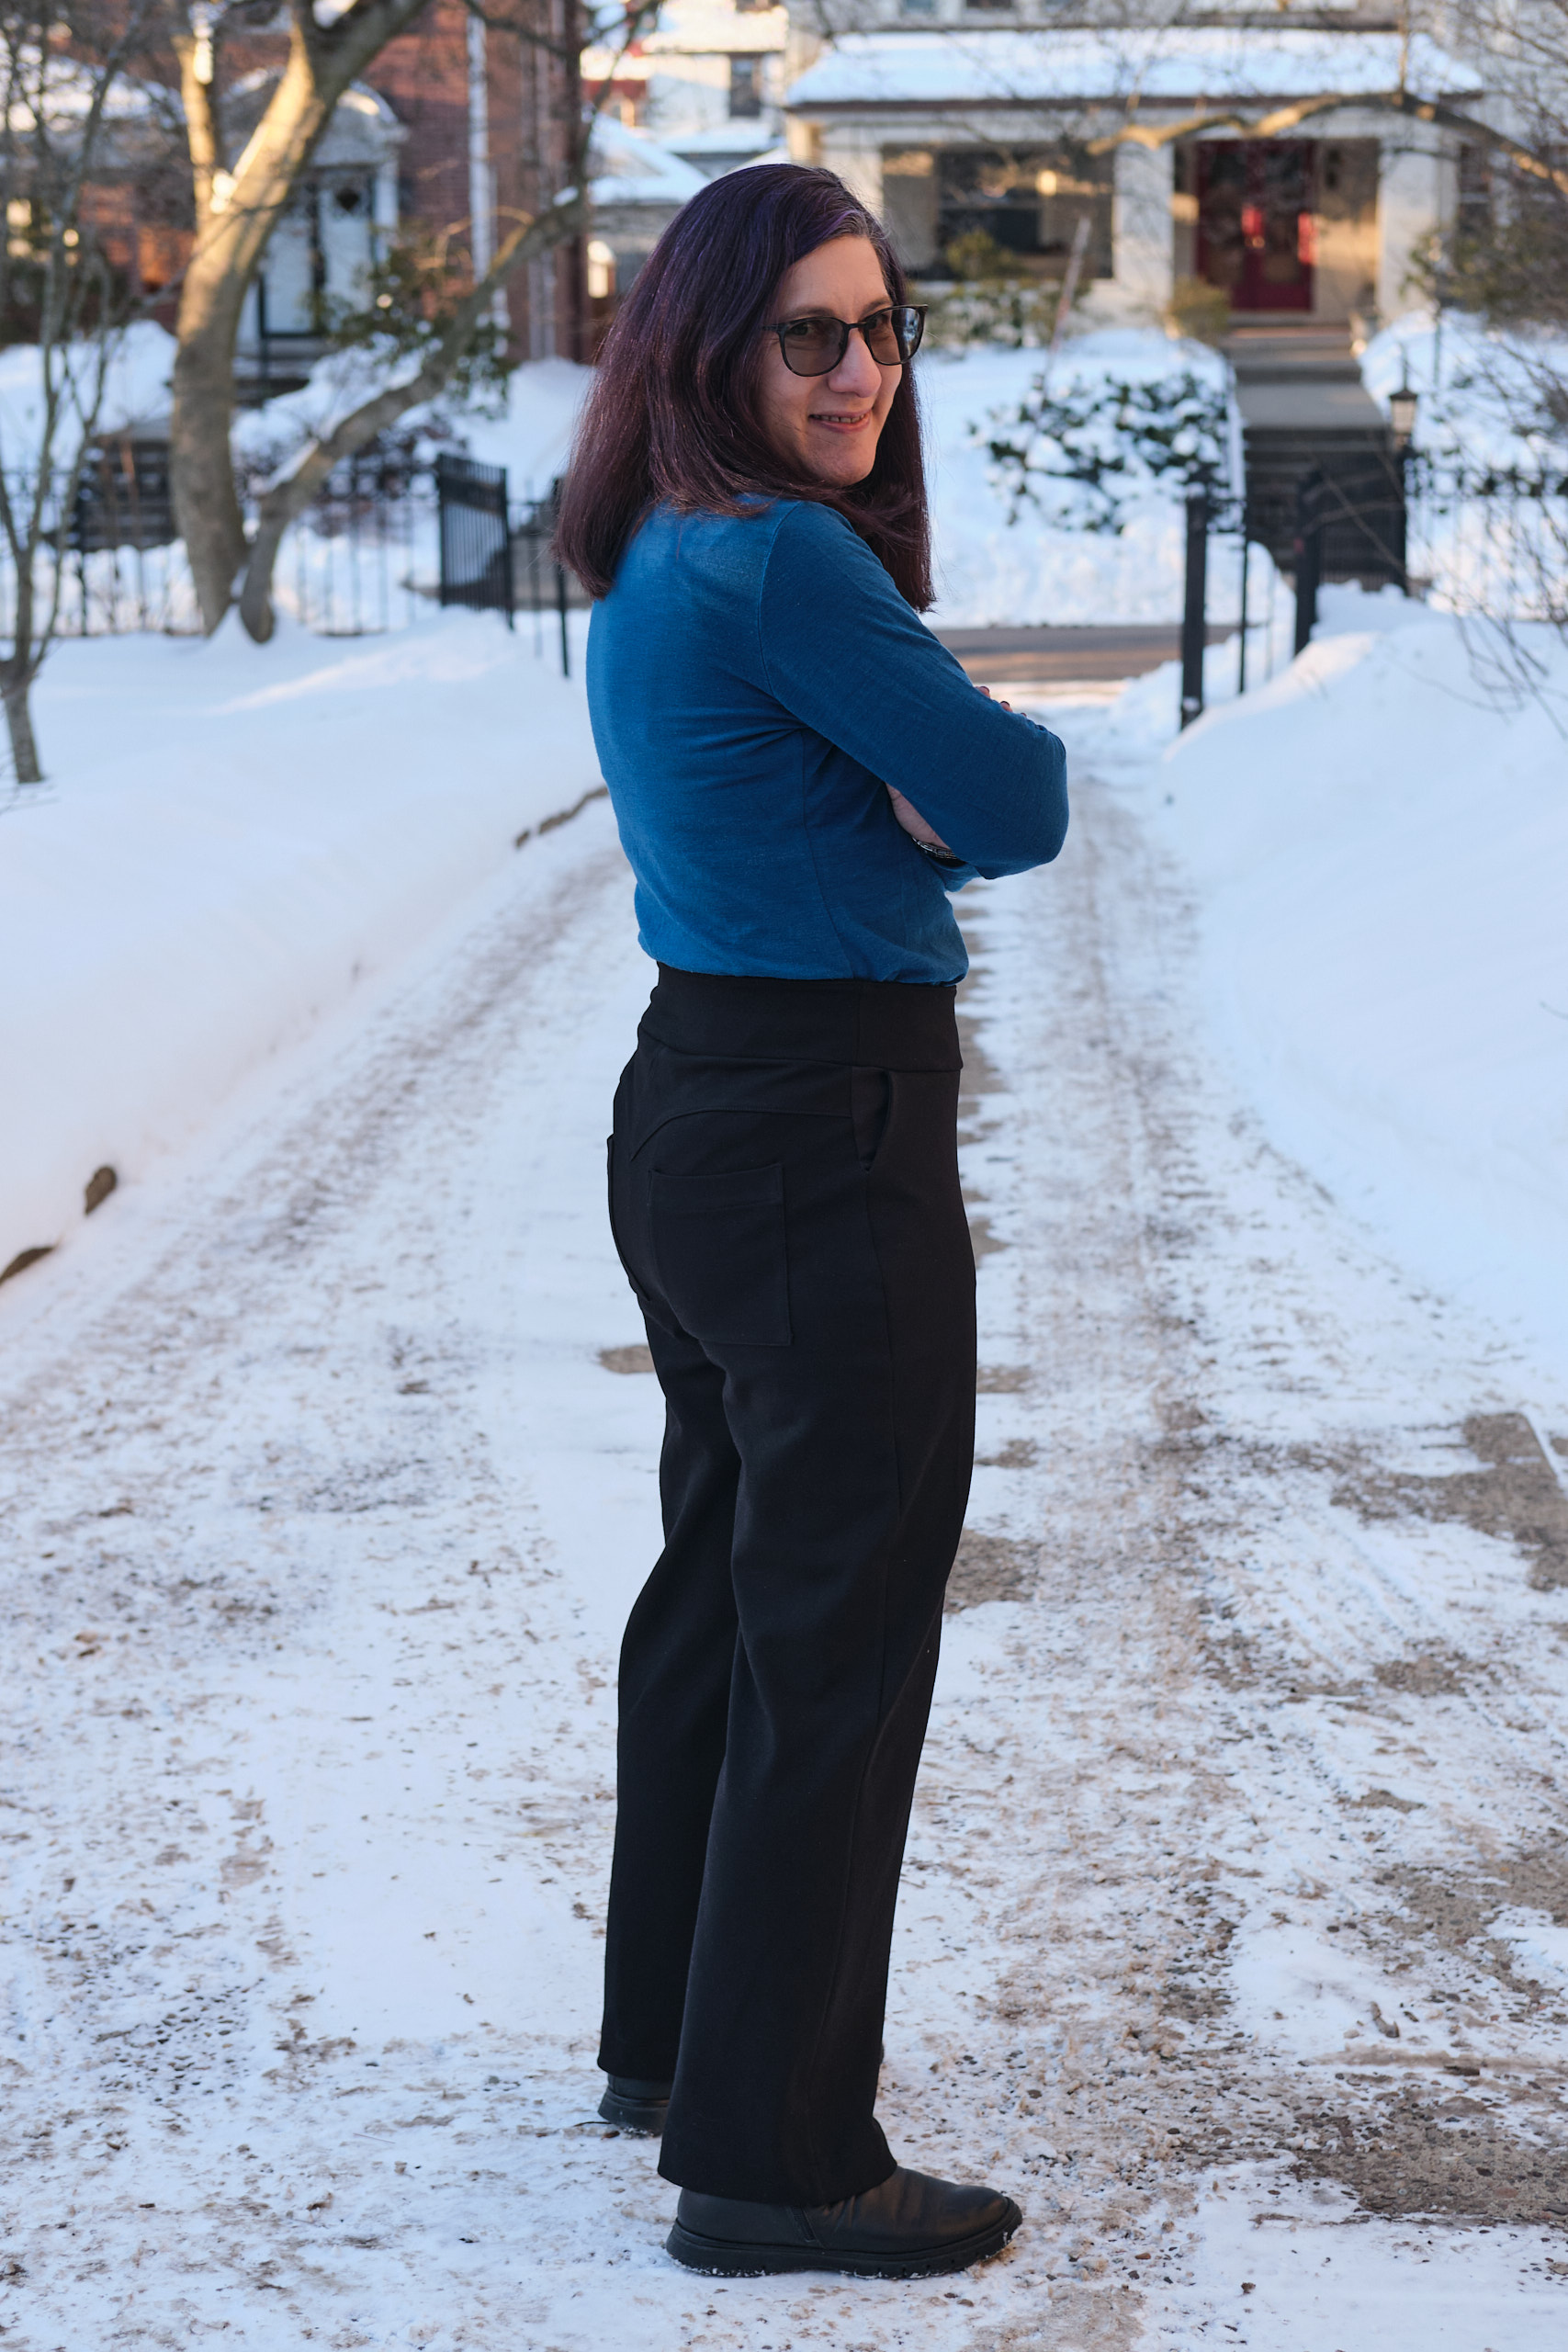
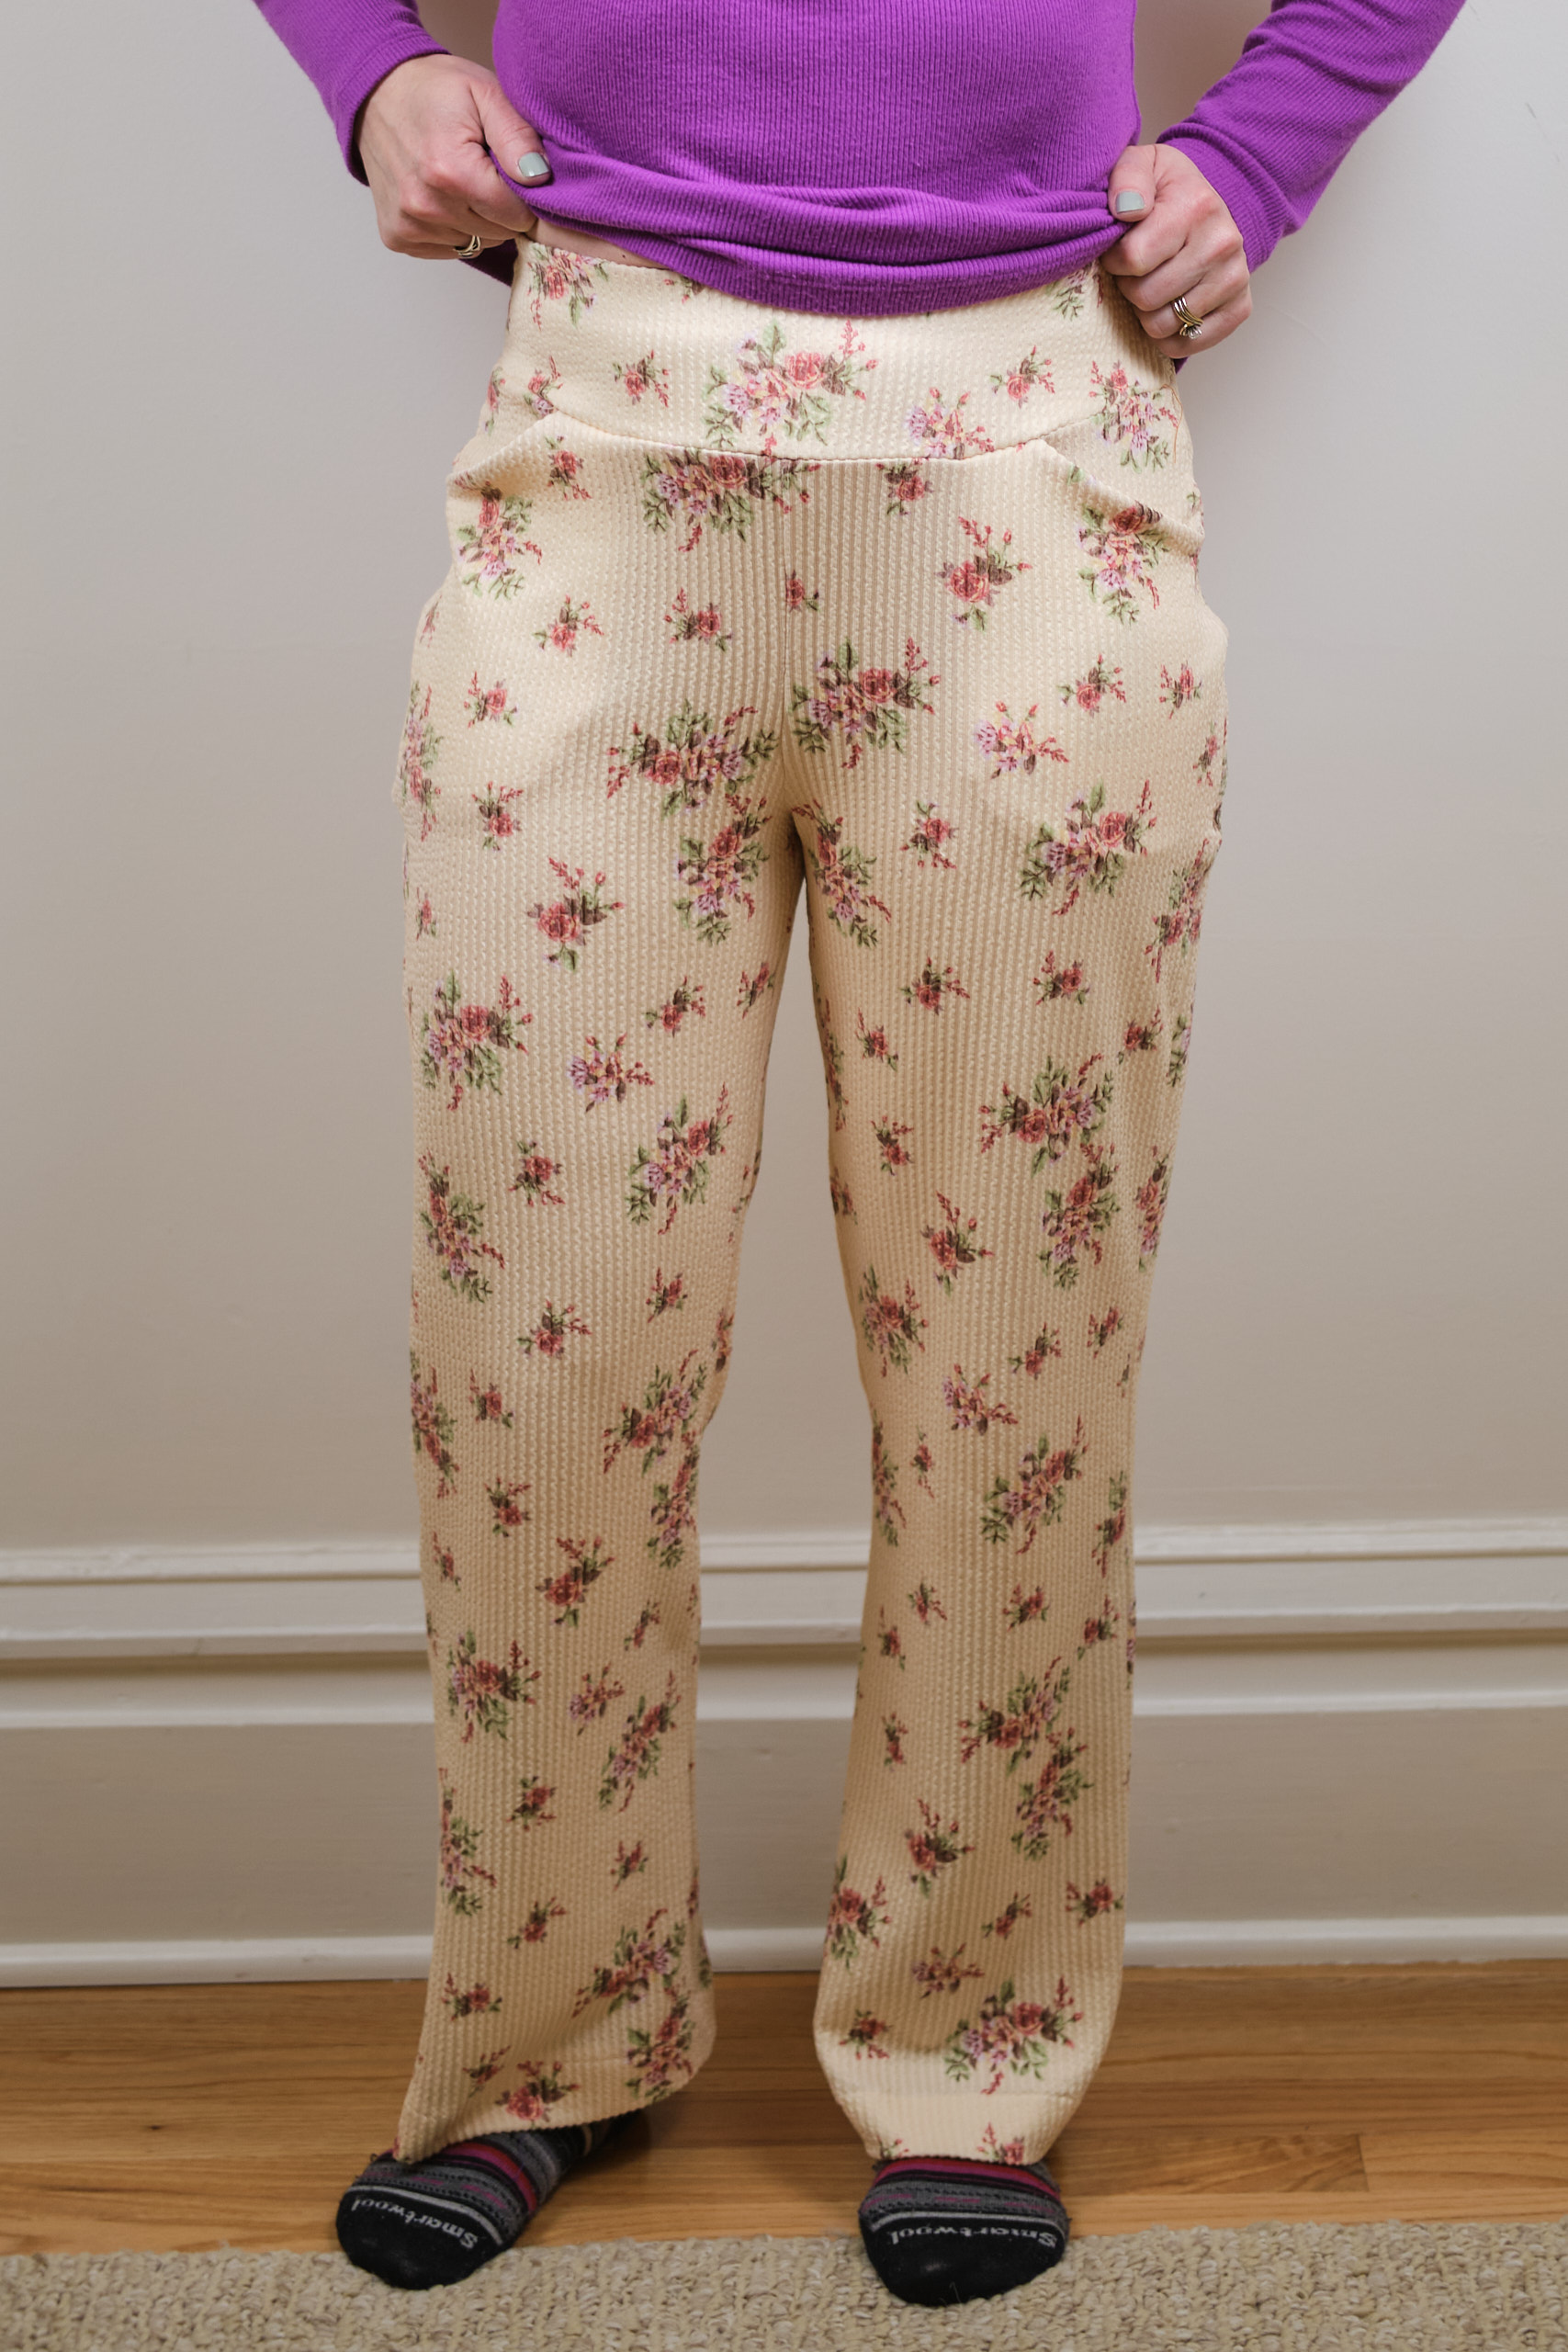
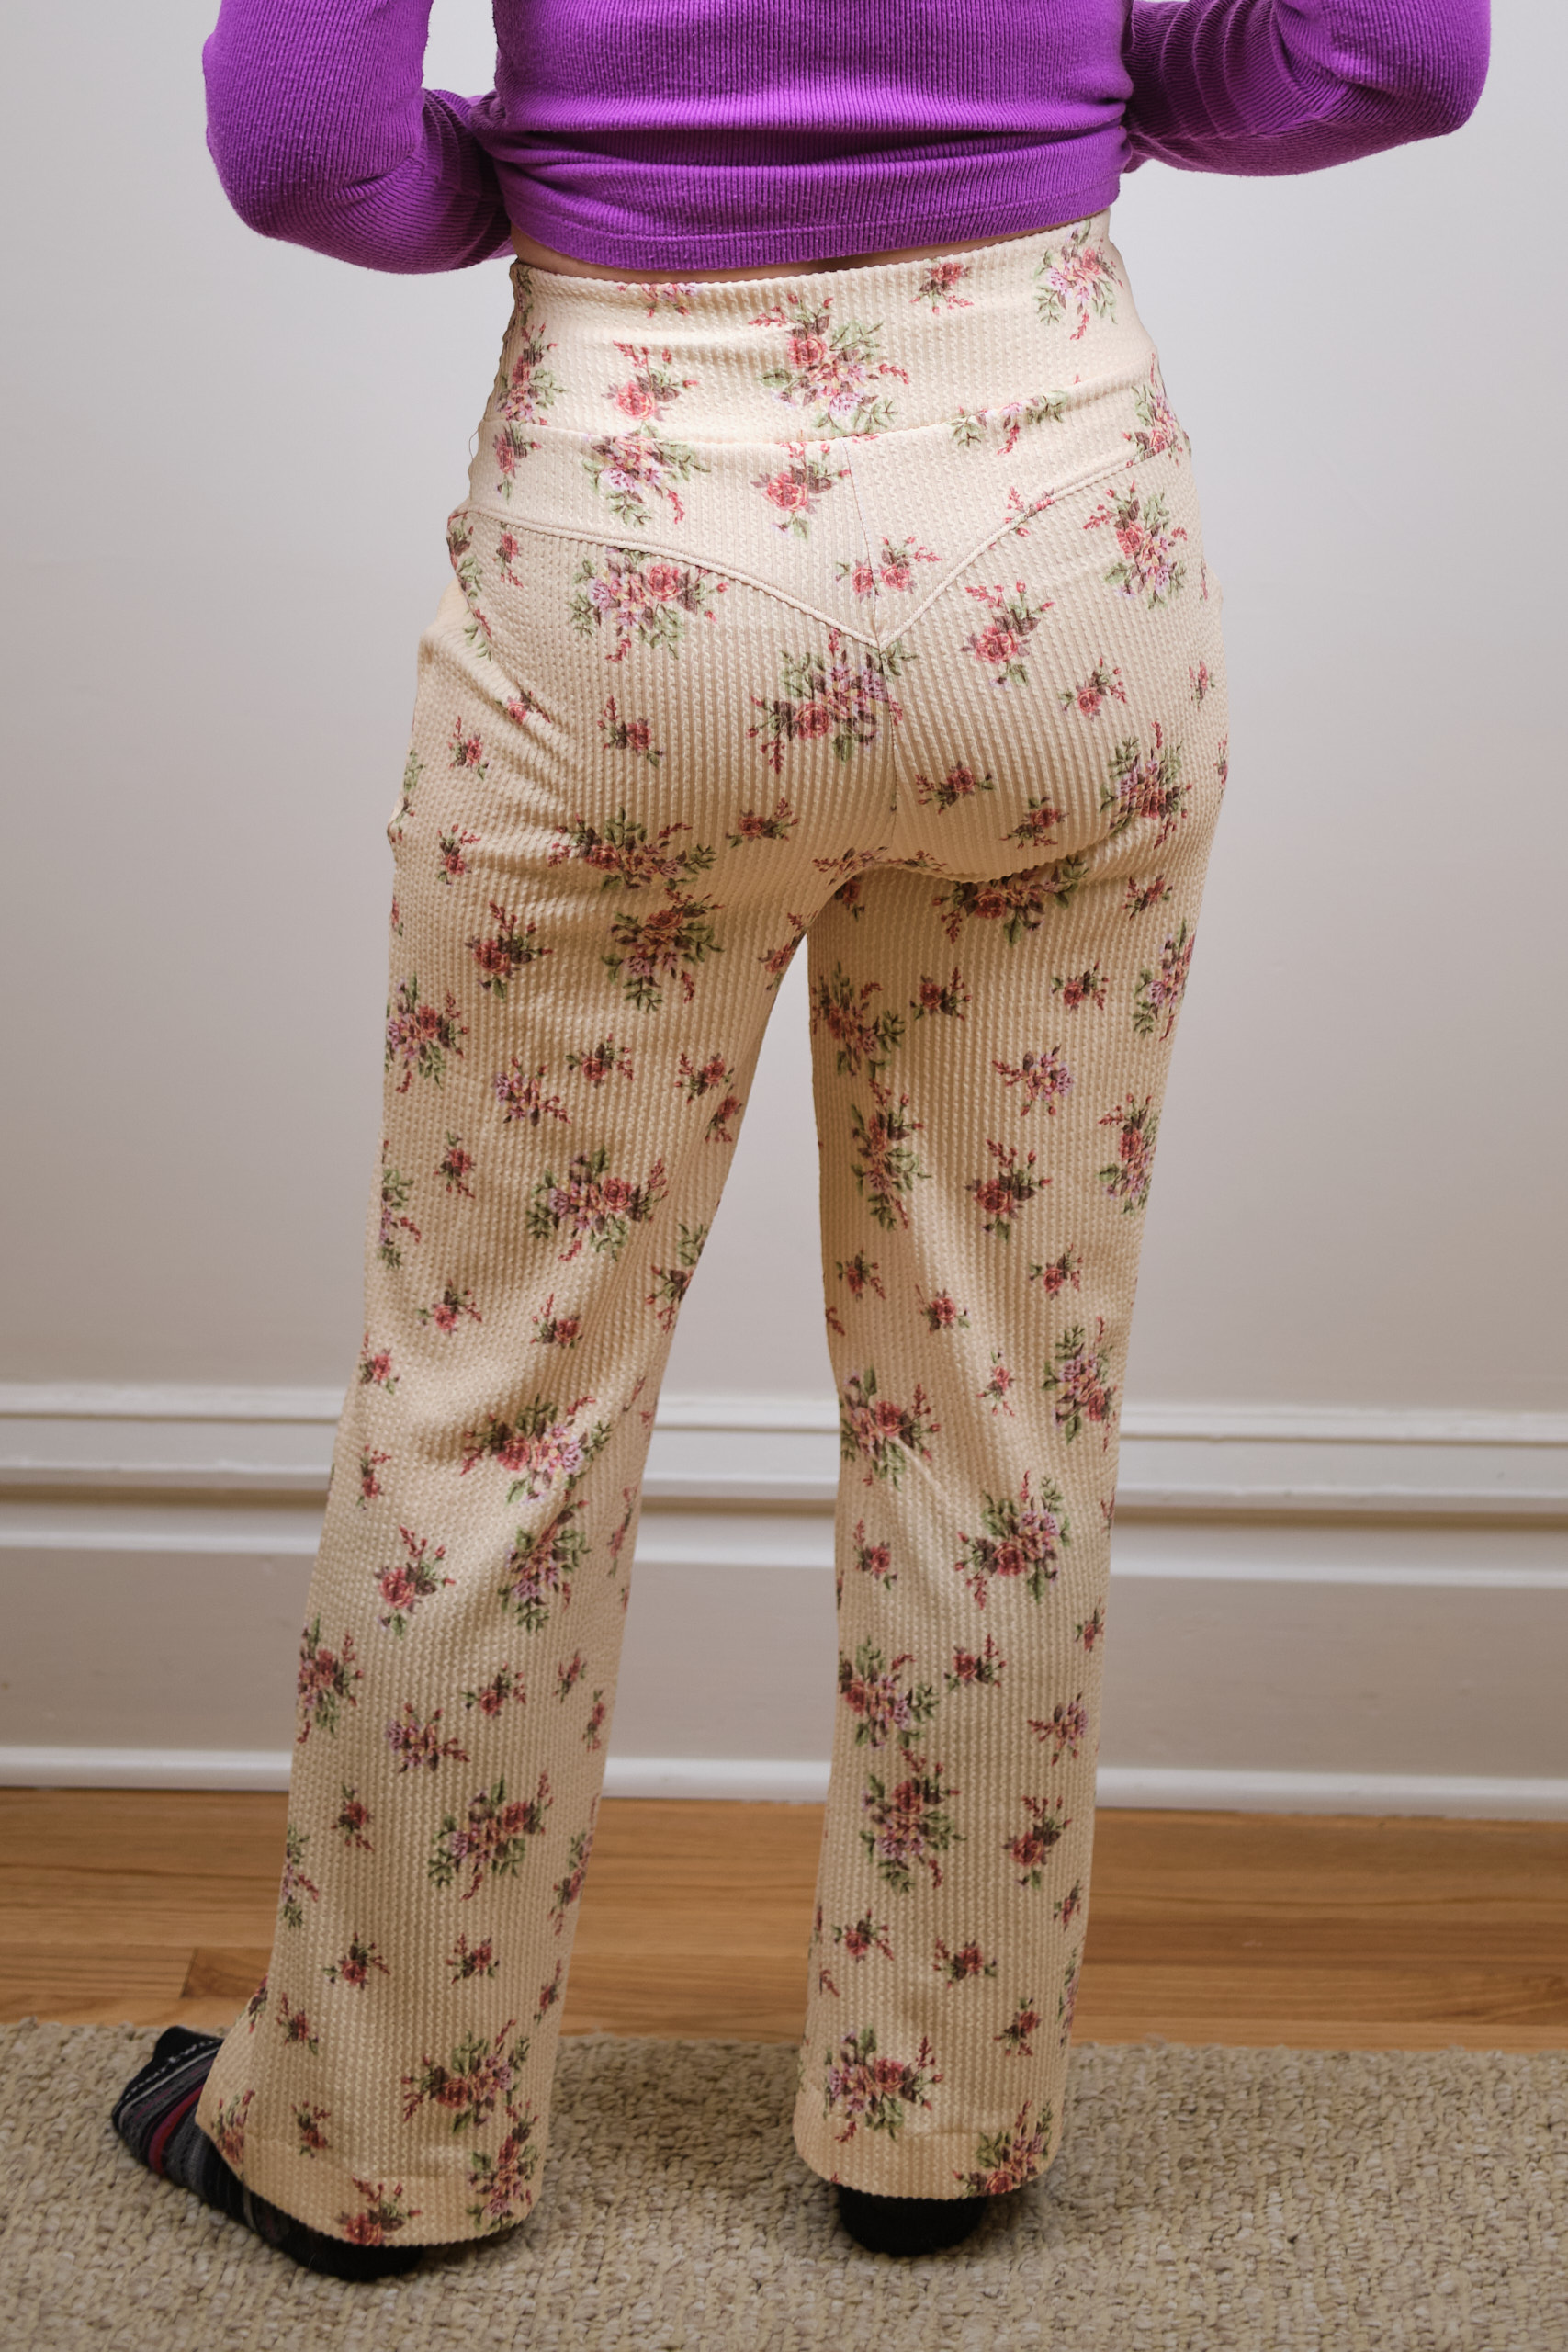
When Sanna Sinclair announced she was looking for pattern testers for a pull-on ponte pants pattern, I had to sign up. This is my most-frequently worn type of pant. Most of my ponte pants are wide-leg, so was eager to try this straight-leg version. This style also includes a back yoke for shaping instead of back darts.
Sanna introduced a new collaboration platform for this test, which I found somewhat frustrating to use, but hopefully will improve over time. Other than the platform glitches and confusion, this pattern test was fun to do and the pattern was very fast and easy.
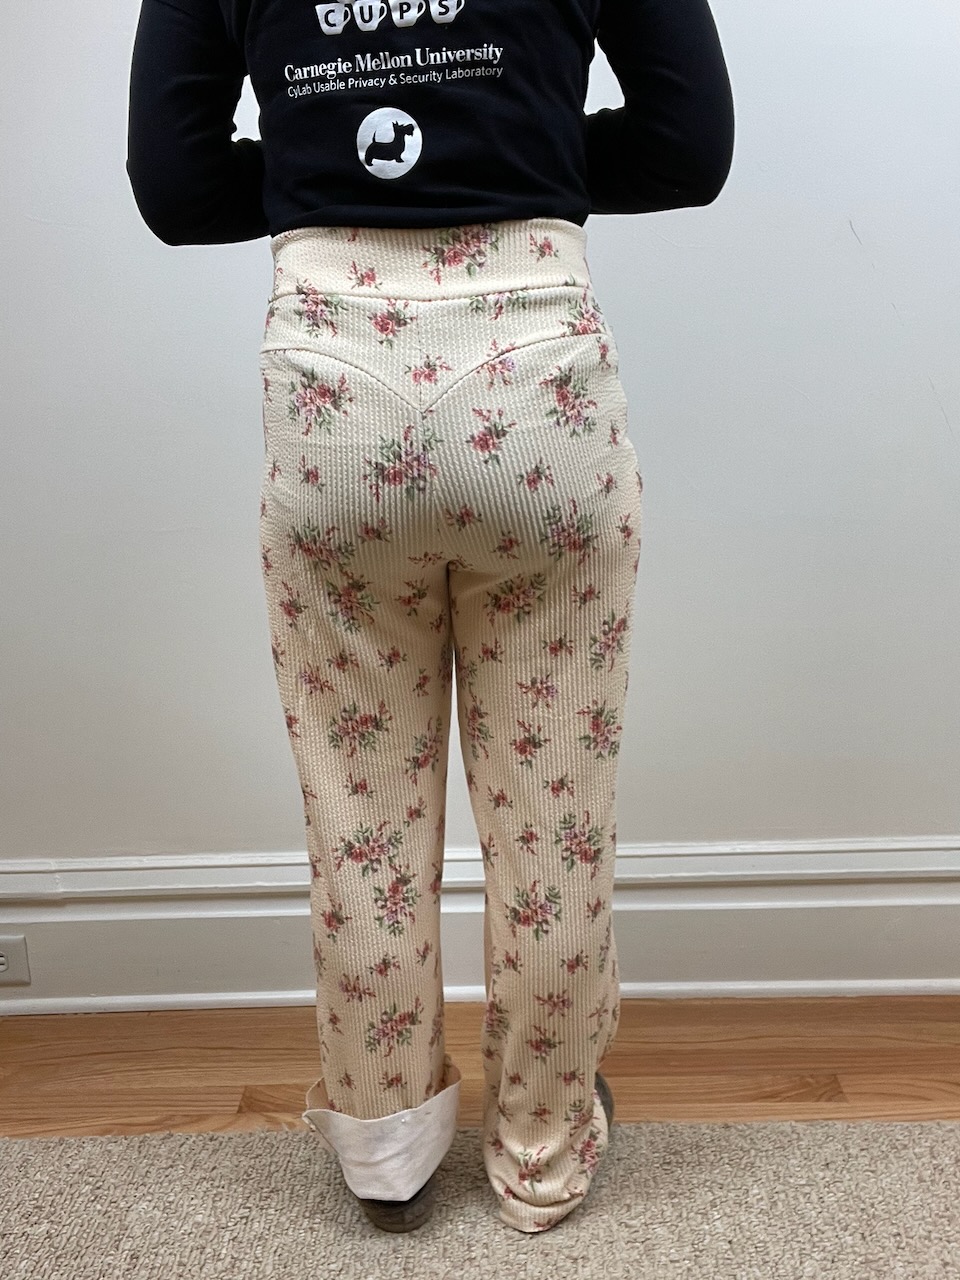
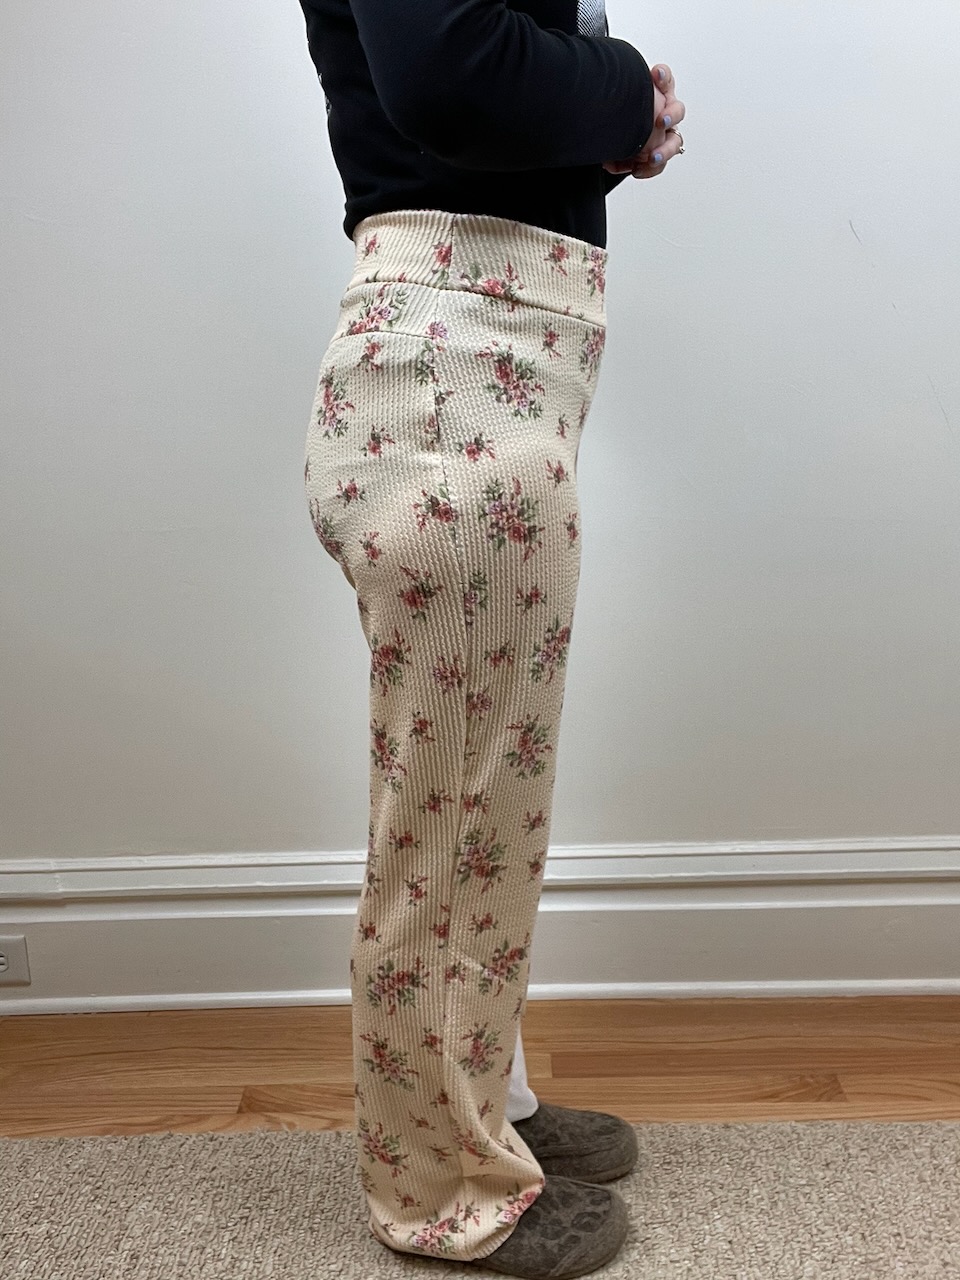
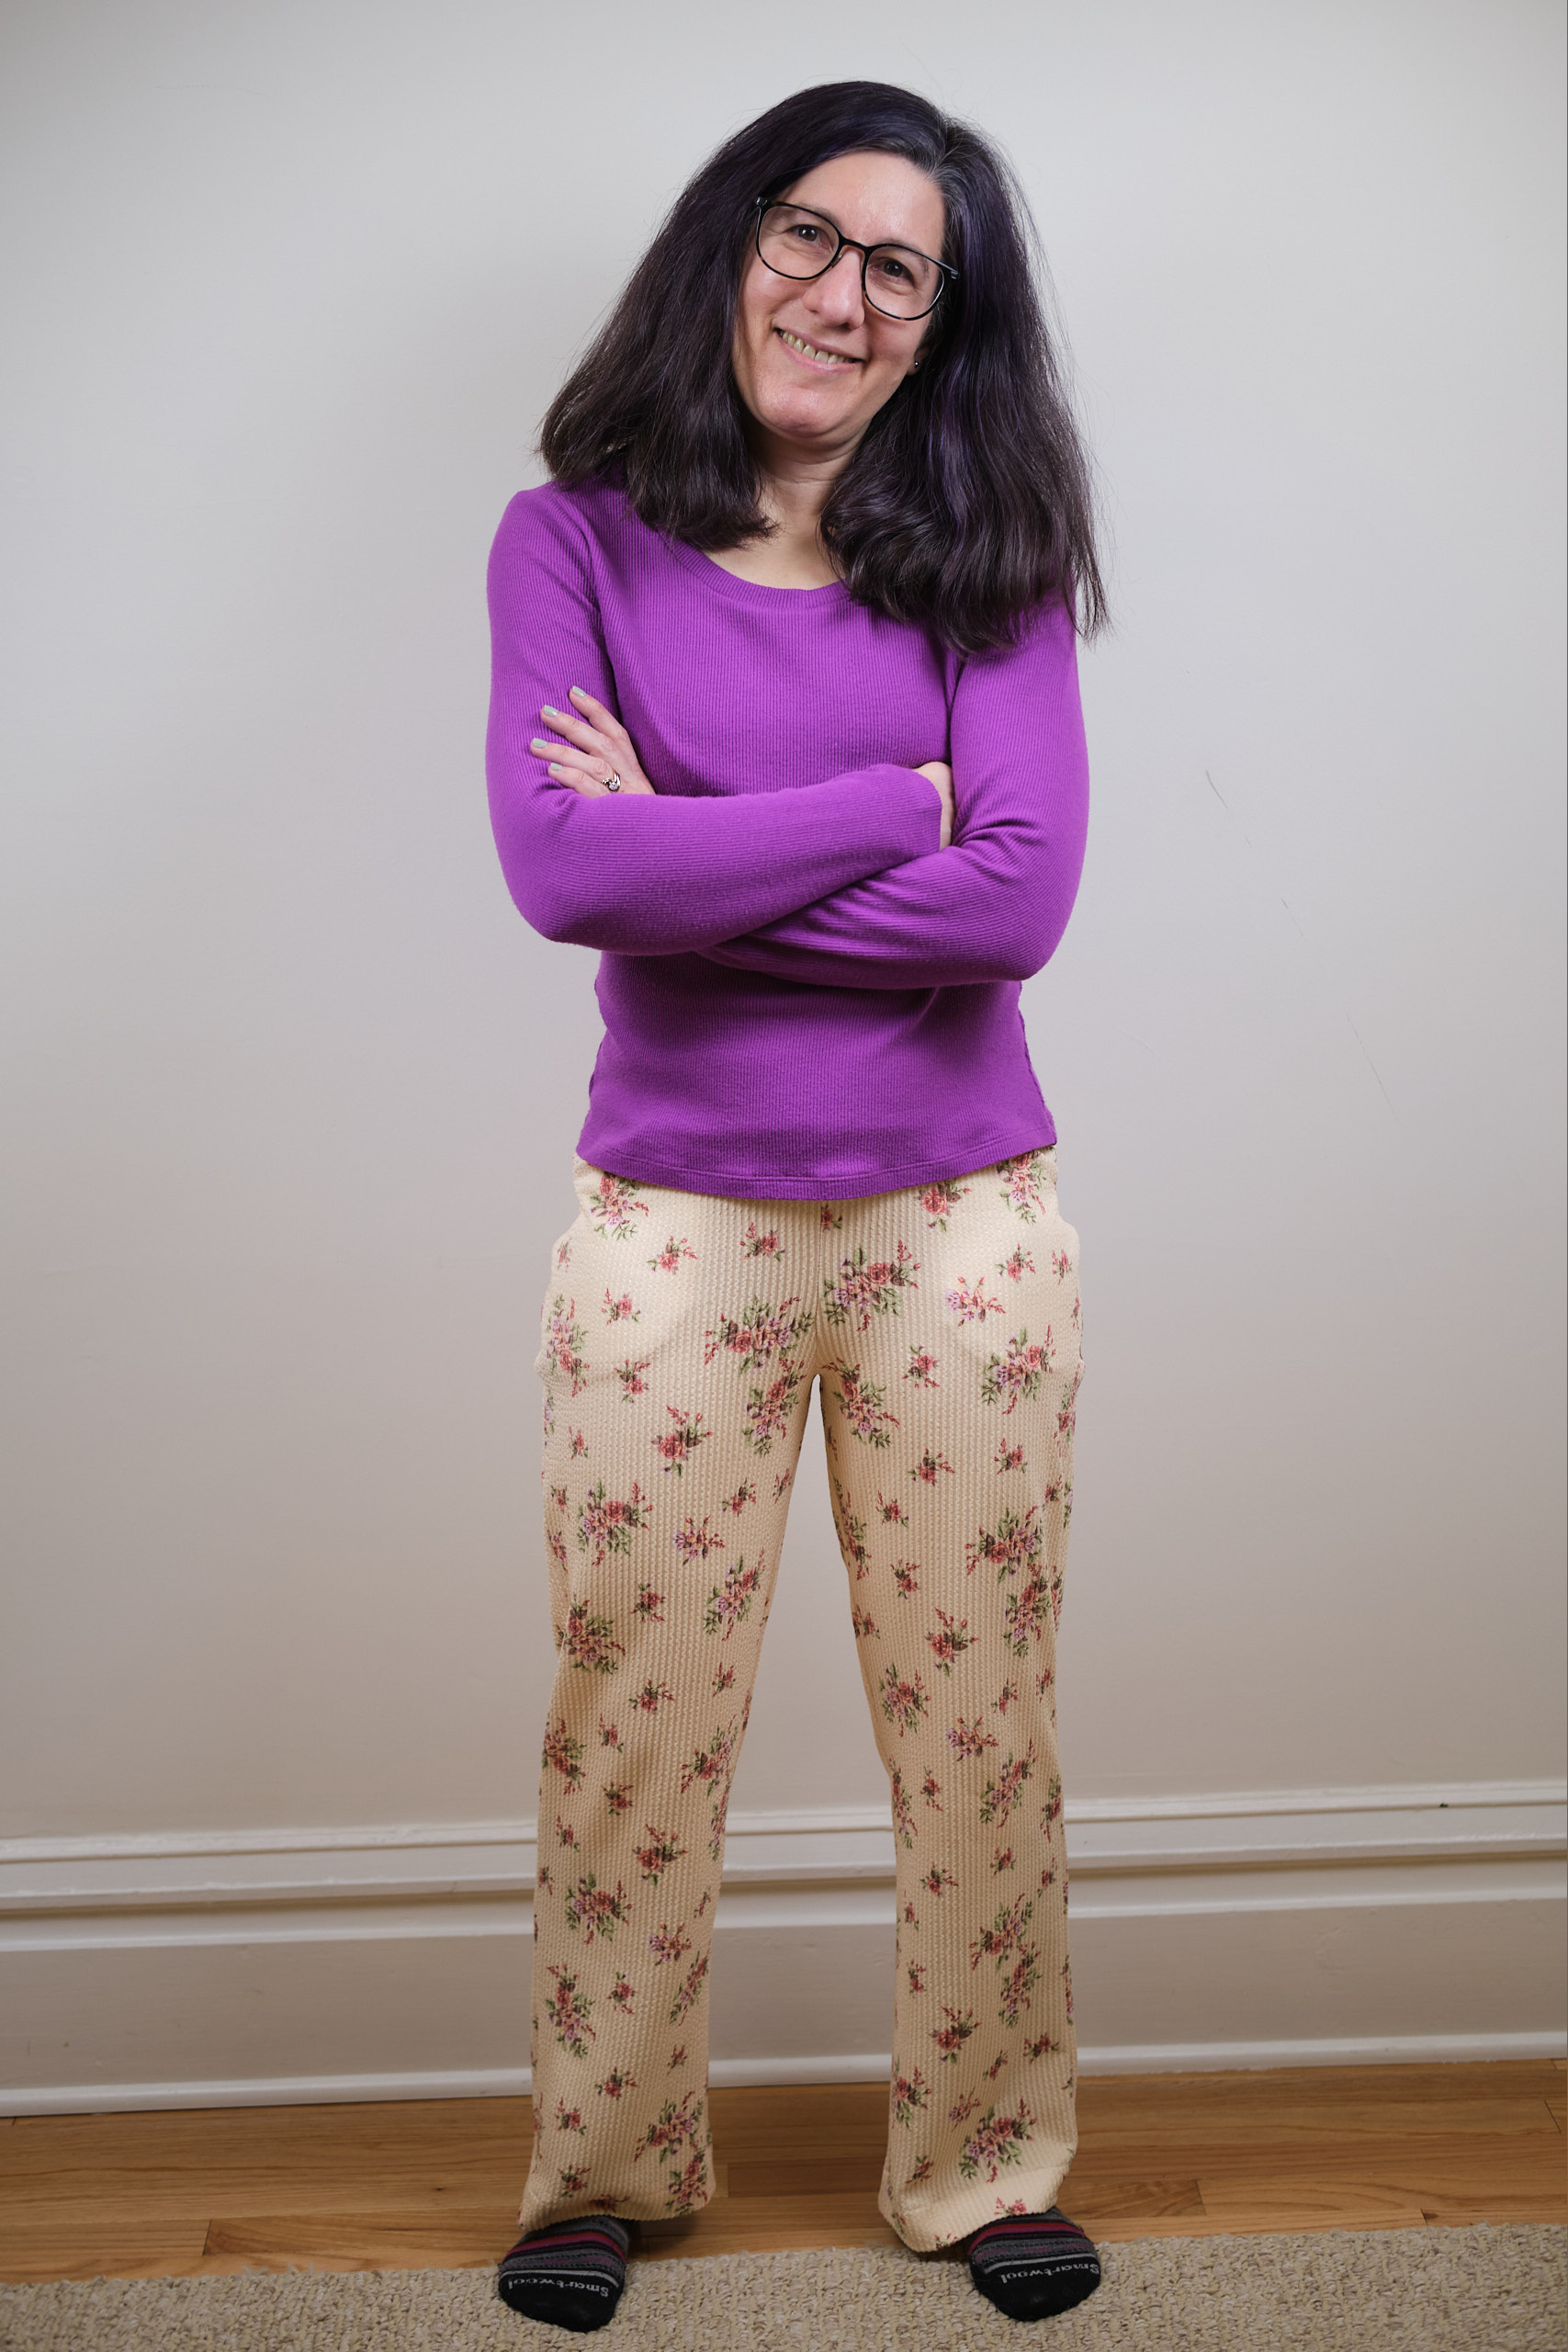
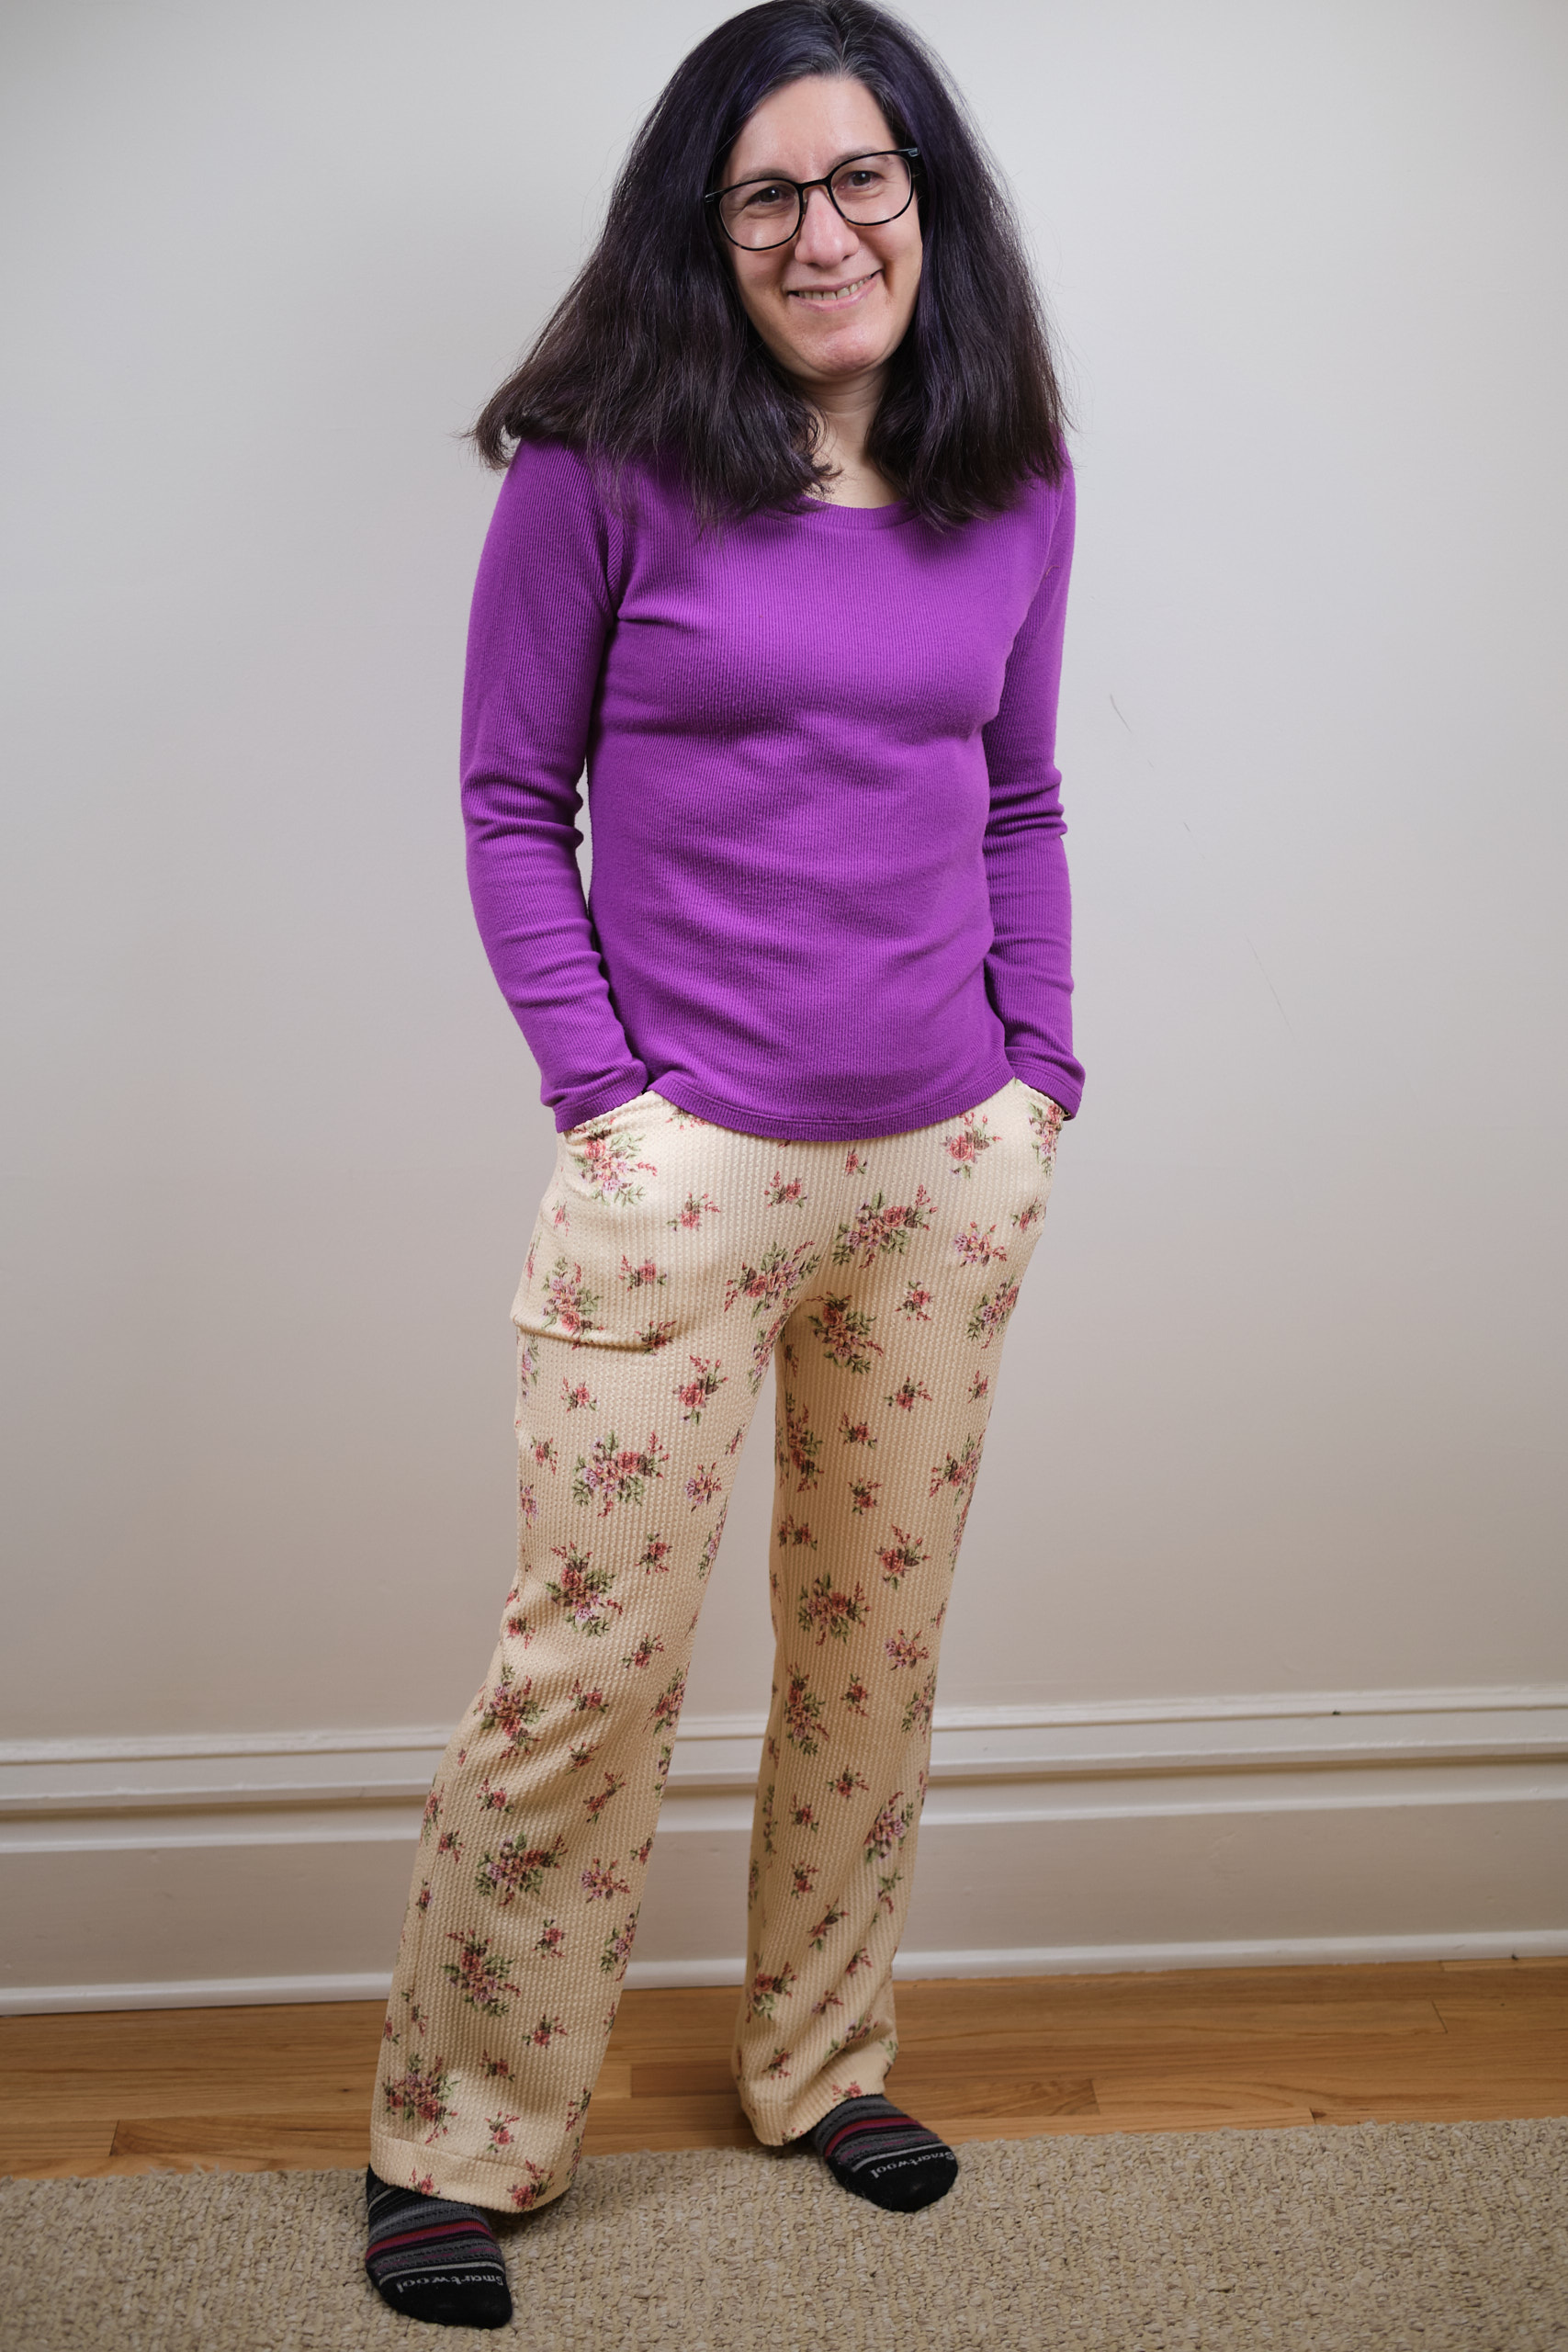
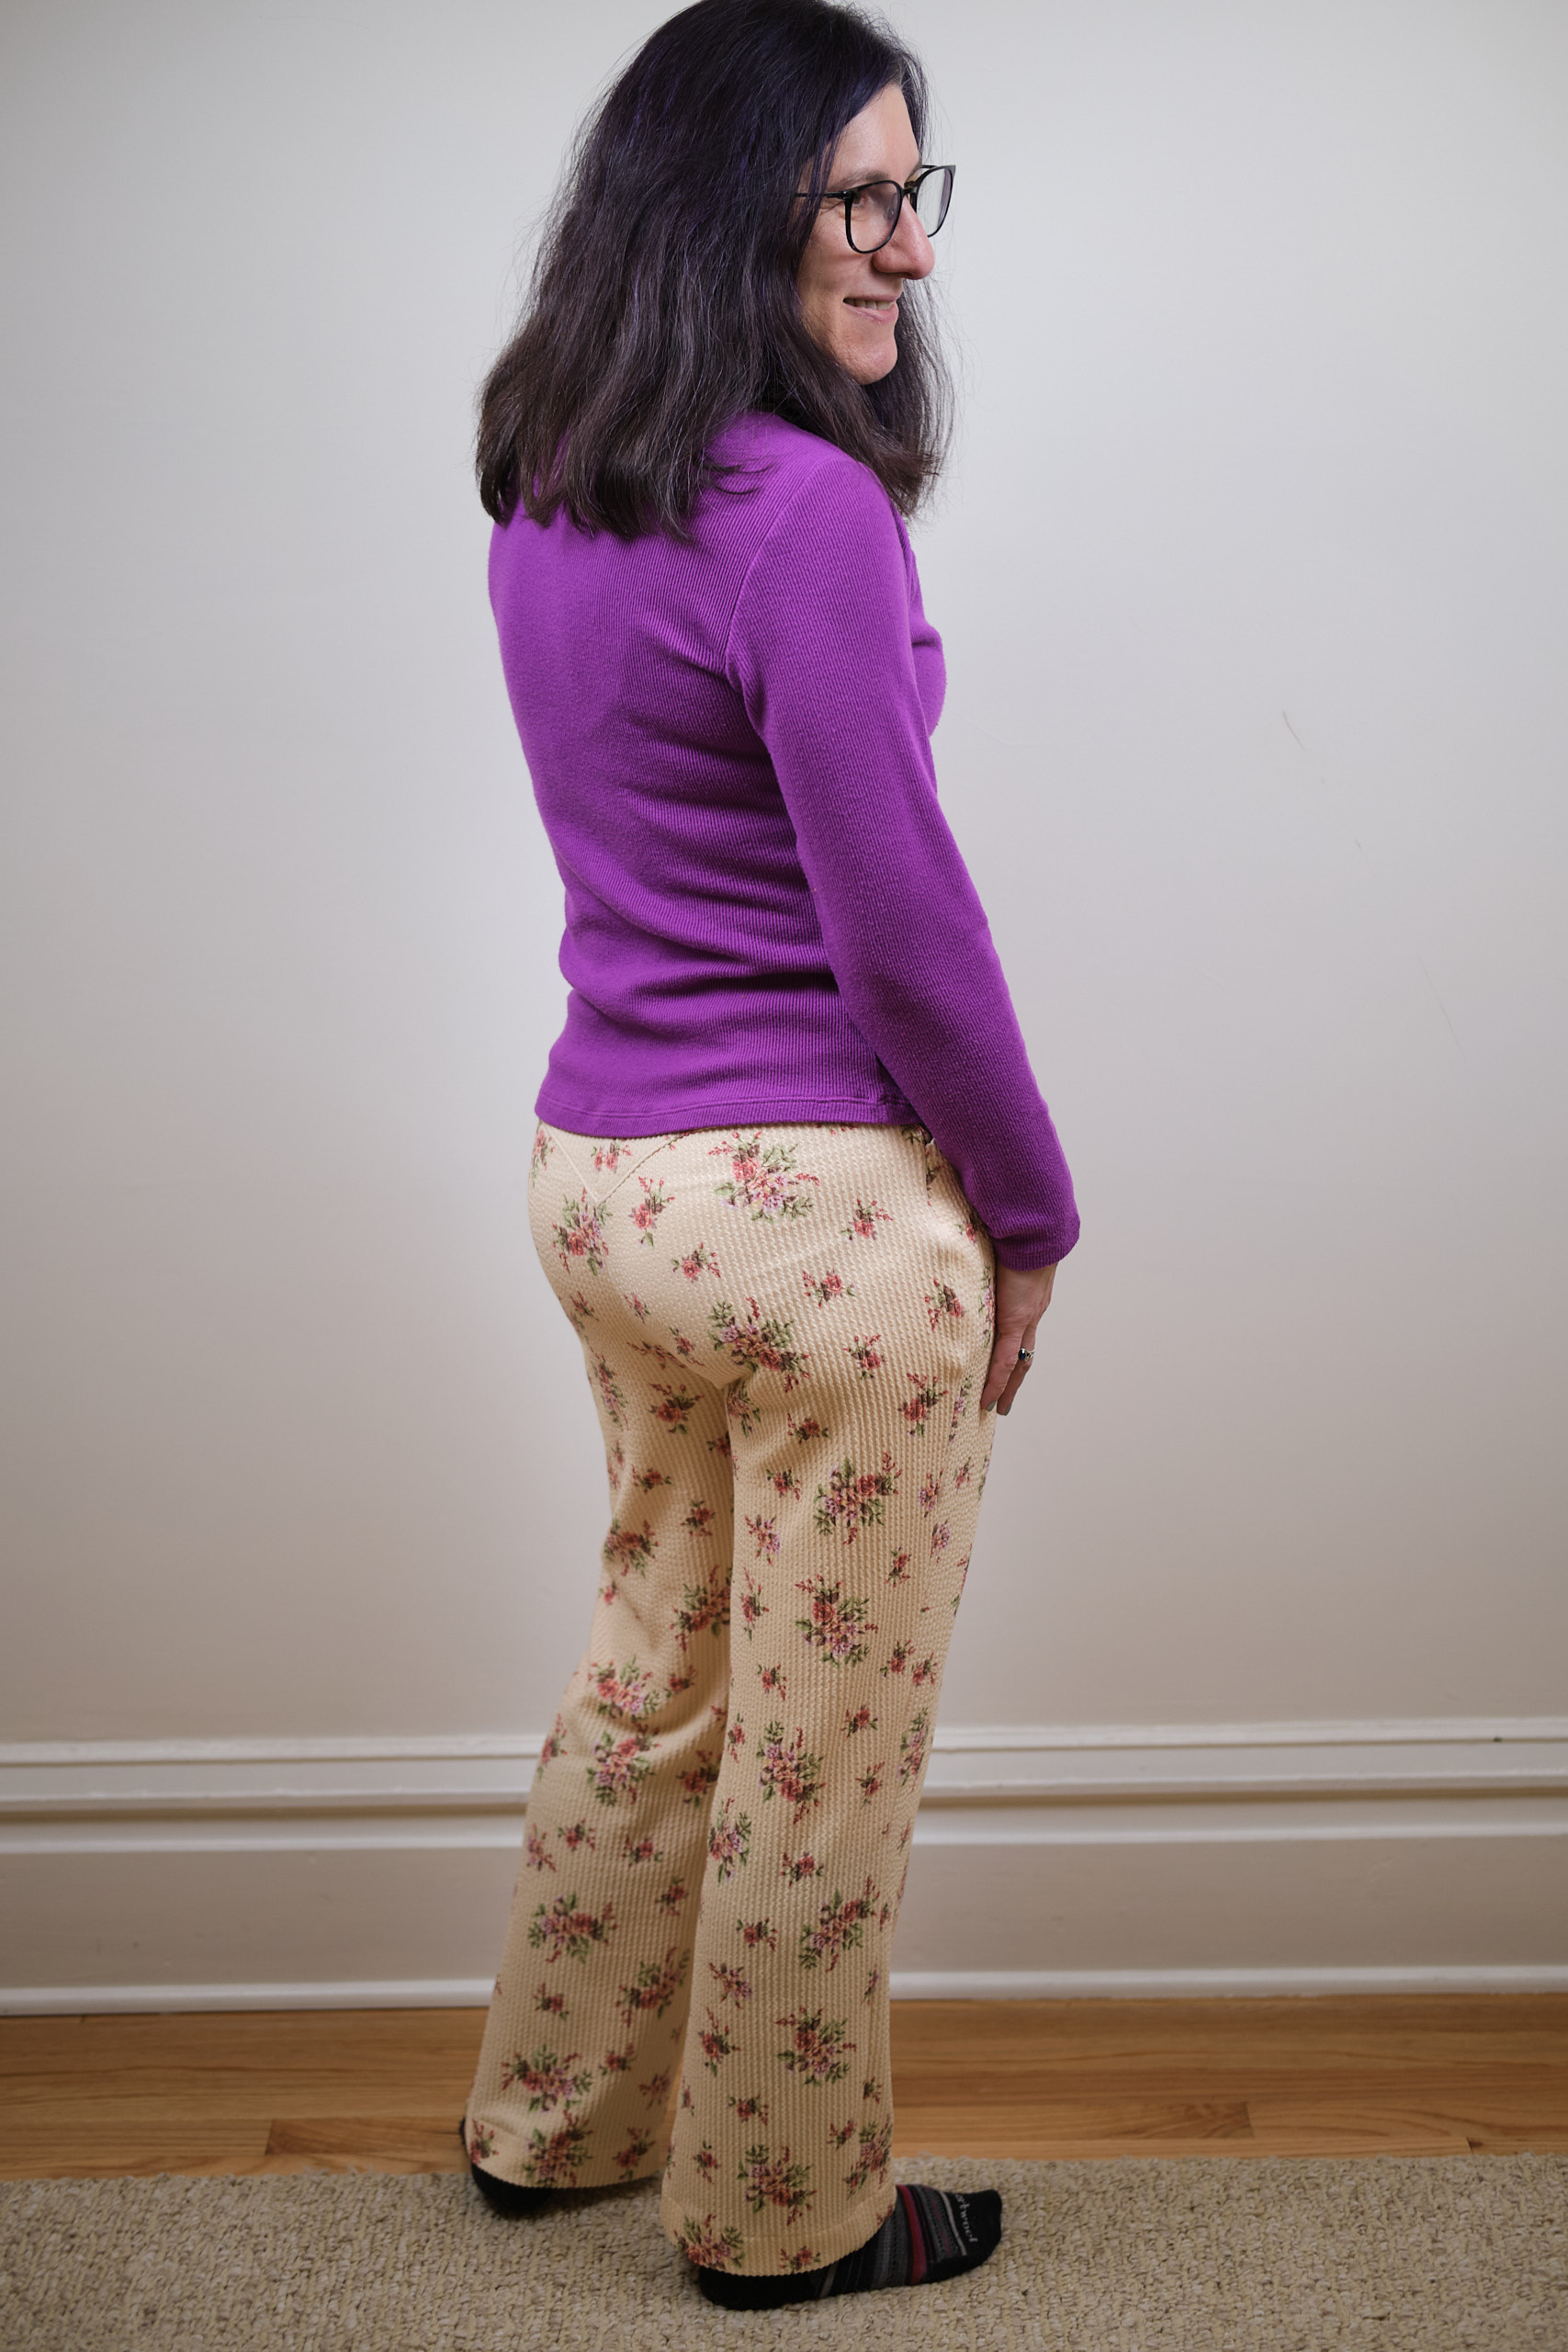
I decided to make a muslin before cutting into my ponte fabric. I have about 5 yards of a yellow floral polyester urban rib fabric that an online fabric store sent me by mistake with my order. Of all the surprise fabrics to find in your order, this was not one I was particularly excited about. I call it the “ugly fabric.” It is not actually that bad, but it is not a fabric that I would have bought. so I decided I might as well use it to practice. I cut out a pair of Helen 6p pants from the rib fabric and basted them together. Since I wasn’t planning on actually wearing these pants I didn’t bother with pockets or elastic. However, the fit turned out to be quite good so I decided I would finish them later and turn them into PJs.
I moved on to making a good pair from black designer ponte fabric. I sewed both the front and back pockets on this pair, and shortened them by 2 inches when I cut them out. Otherwise, I followed the pattern as written. I found it to be easy to follow and overall a quick an satisfying sew. The order of sewing the pant leg seams is a bit difference than what the Pattern Emporium knit pants patterns call for, but this way seemed to work just fine. The pattern advises using a piece of 1-inch elastic in the contour waistband. I did that and the fit is good, but when I don’t tuck in my shirt it does slip a bit. Next time I think I will grade the waist to a 4p. The pockets were not that hard to make and I think both the front and back are a good size. However, I don’t love the shape of the rectangular back pockets and the front pockets gape open a bit, despite stitching clear elastic between the facing and the lining at the pocket opening. This was discussed during the fit test, and the final V2 version offers an alternate back pocket shape and changes the angle of the front pocket opening — both great improvements.
I took photos of my black V1 pants for the finals as I didn’t have time to sew up a V2. Taking photos of black pants is actually really hard to do, and it was really cold that day. I’ve worn these to work multiple times. I think they look great on, and they feel like secret pajamas. Modeled here with a wool Bondi long-sleeve shirt.
This week I returned to the ugly fabric PJ pants. I removed all the basting stitches, laid the pieces out on my cutting table, and projected the V2 pattern onto them. I trimmed the legs to match the minor changes that were made to V2 and also added the front pockets, because even PJs should have pockets. I recut the waistband pieces with the top graded to size P4, and I cut out the front pocket linings and facings. In a couple of hours, I had the whole thing sewn back together, this time with elastic and front pockets. The fit is very good, and I’m sure I’ll be wearing these a lot around the house. Modeled here with a magenta Bondi. The V2 fit is even better than V1, and the front pockets are great. I also love the back yoke on these pants: they make my butt look great! I look forward to making another pair in ponte or other office-worthy fabric and trying the new back pockets and the faux fly (which I usually skip, but I’ve seen it on pants made by other testers, and it is super cute).
Sinclair Soho Relaxed Dolman top, 4p cut on the fold, cropped 6.5 inches above top length and banded, 3 inches shifted from bodice to sleeves, sleeves shortened and cuffed with Sinclair Crew pullover tall cuffs, wider v-neck band, Versailles brushed hacci color blocked with sienna (2/3 yard), nutmeg (1/3 yard), peat moss (1/3 yard), and teddy bear (3/4 yard).
I bought five colors of the Surge Fabrics Versailles brushed hacci sweater knit when it was on sale last year because I love it so much. It is 95%Poly/5%Spandex, soft and cozy on the inside, has a smooth sweater look on the outside, a nice drape, good stretch and resilience, and a great weight (200 gsm). It is comfy to wear and very easy to sew with. I’ve used it for a scoop-neck PE Sweet Cheeks sweater,v-neck PE Sweet Cheeks sweater for me, and another for a friend, and a Sinclair Joanne faux wrap dress. I’ve had the pile of Versailes sitting in my sewing room for a while and with all the colors stacked together I keep wanting to use them all at the same time to make a color blocked sweater. I’ve had a vision of this in my mind for several months, but hadn’t fully worked out the details until this week.
I thought about using the Sinclair Crew pullover pattern as I did for my family holiday sweater project, but the sweater in my vision was a dolman sleeve or drop shoulder design, not too oversized. After hacking the Sinclair Soho relaxed dolman sweater last week, I knew I could hack it into the color block sweater I imagined. For last week’s sweater I merged the sleeves and the bodice and added tall cuffs from the Crew pattern. This time I kept the sleeves but shifted three inches from the bodice to the sleeves so that the sleeves would begin above the elbow instead of below the elbow (which is how they sit in the first Soho sweater I made from a green rib sweater knit). I shortened the sleeves and added the Crew tall cuffs again. I also shortened the bodice by 6.5 inches before adding the band, same as I did last week.
I had five colors of the Versailles fabric and had to decide how to place them. I knew I wanted to use the teddy bear, sienna, and nutmeg together, but adding both the rosey mauve and peat moss seemed to be too much. I decided I would use one or the other, but not both. I think either would have been fine, but I eventually settled on the peat moss, rather than the much lighter mauve. My vision was to use a different color for the front and back and to have them meet a third color at the sleeve. I decided to do the two sleeves different colors and then make the cuffs from the opposite colors. I used the back color for the v-neck and the front color for the bottom band.
I switched out the Soho narrow v-neck band for the PE Sweet Cheeks wide three-piece v-neck band to make it work with my unruly rib knit last week. I didn’t think I would have the same problem with the Versailles, but I liked the idea of the wide band. So I decided to try to use the Soho band but just make it wider. It is supposed to be 1.8 inches wide and I cut it 2.8 inches wide. I followed the same instructions and first basted it in place just be sure. It worked perfectly and I ended up with my desired 1-inch wide v-neck band, which has a nice sharp 90-degree point and the heft I was looking for to balance the color blocks.
Everything was serged except for joining the short ends of the bands, sewing the point of the v-neck, and basting the neck band. As everything is banded, no need for hems and I decided not to topstitch anything. Thus, this sweater came together pretty quickly once I stopped obsessing over which colors to put where.
Earth tones are not my usual palette, and I don’t normally wear this much brown, but I really like this combo and it looks exactly like I imagined it would! I even had the perfect pair of shoes to match (these are the only brown shoes I own). I also really like the fit and drape of my cropped Soho, and it fits my shoulders without any adjustments. Note that in the photos here, I am wearing a long-sleeve t-shirt underneath because it is cold outside, so it clings just a bit to the undershirt, but you probably didn’t notice.
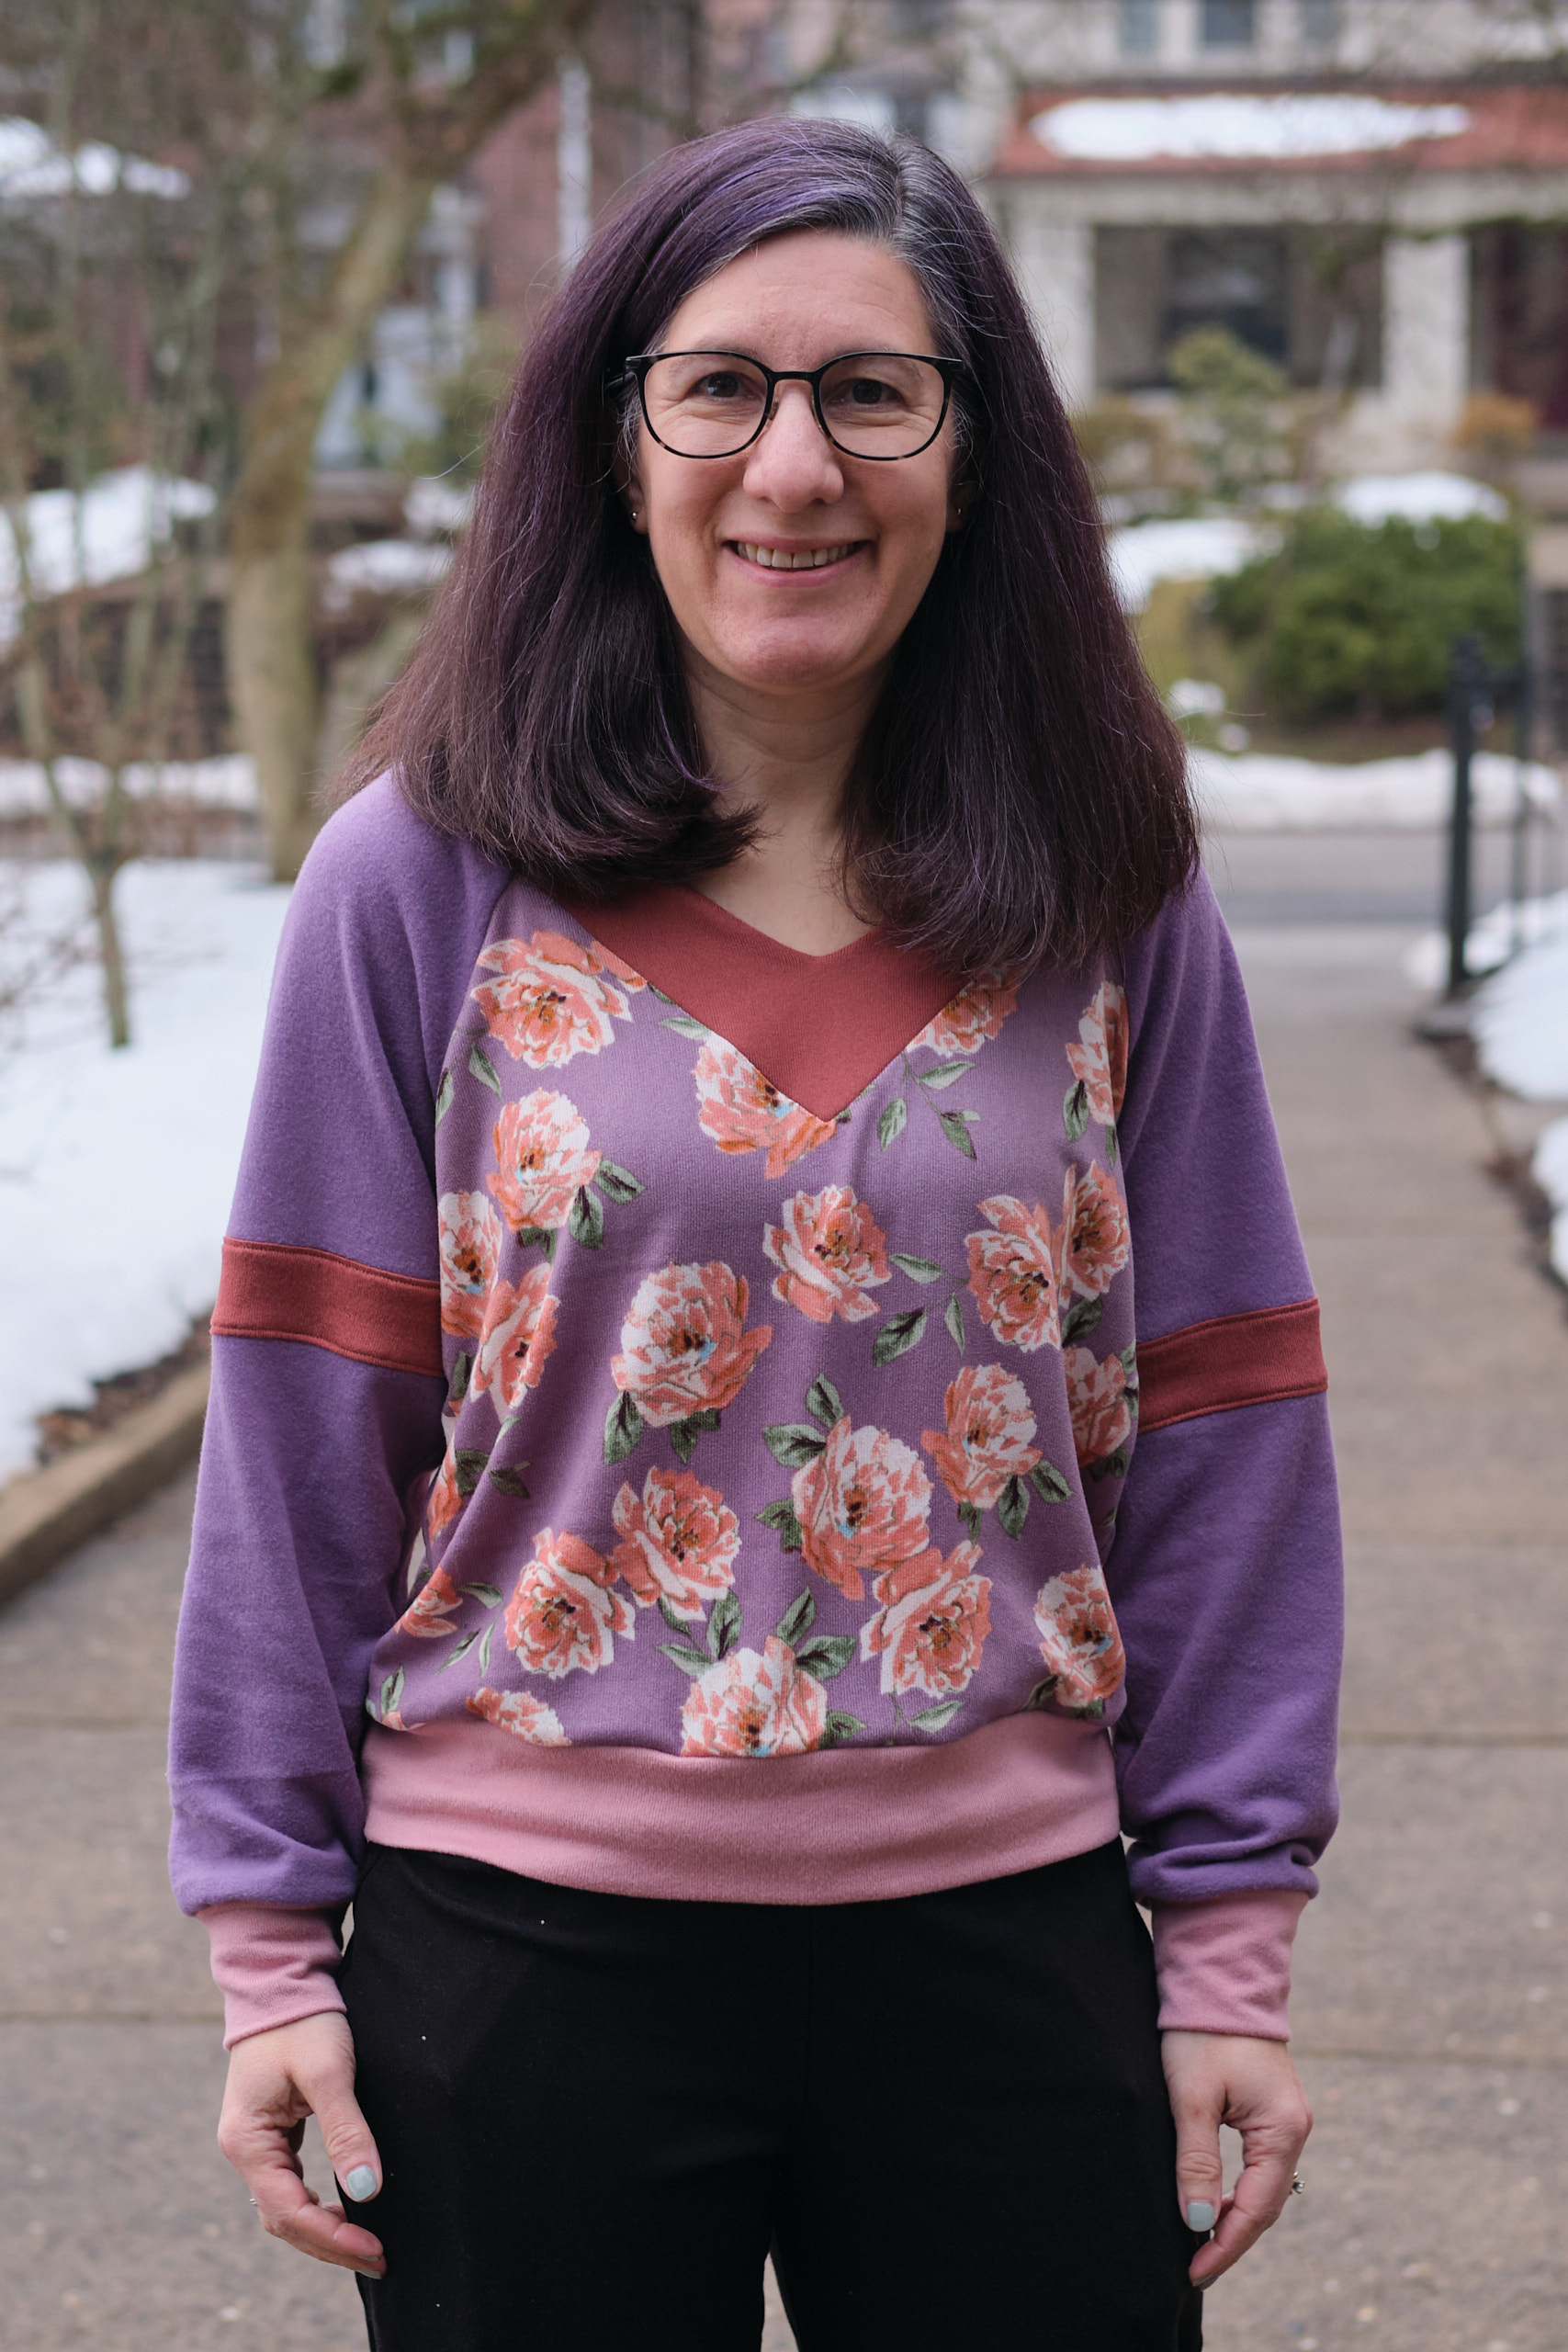
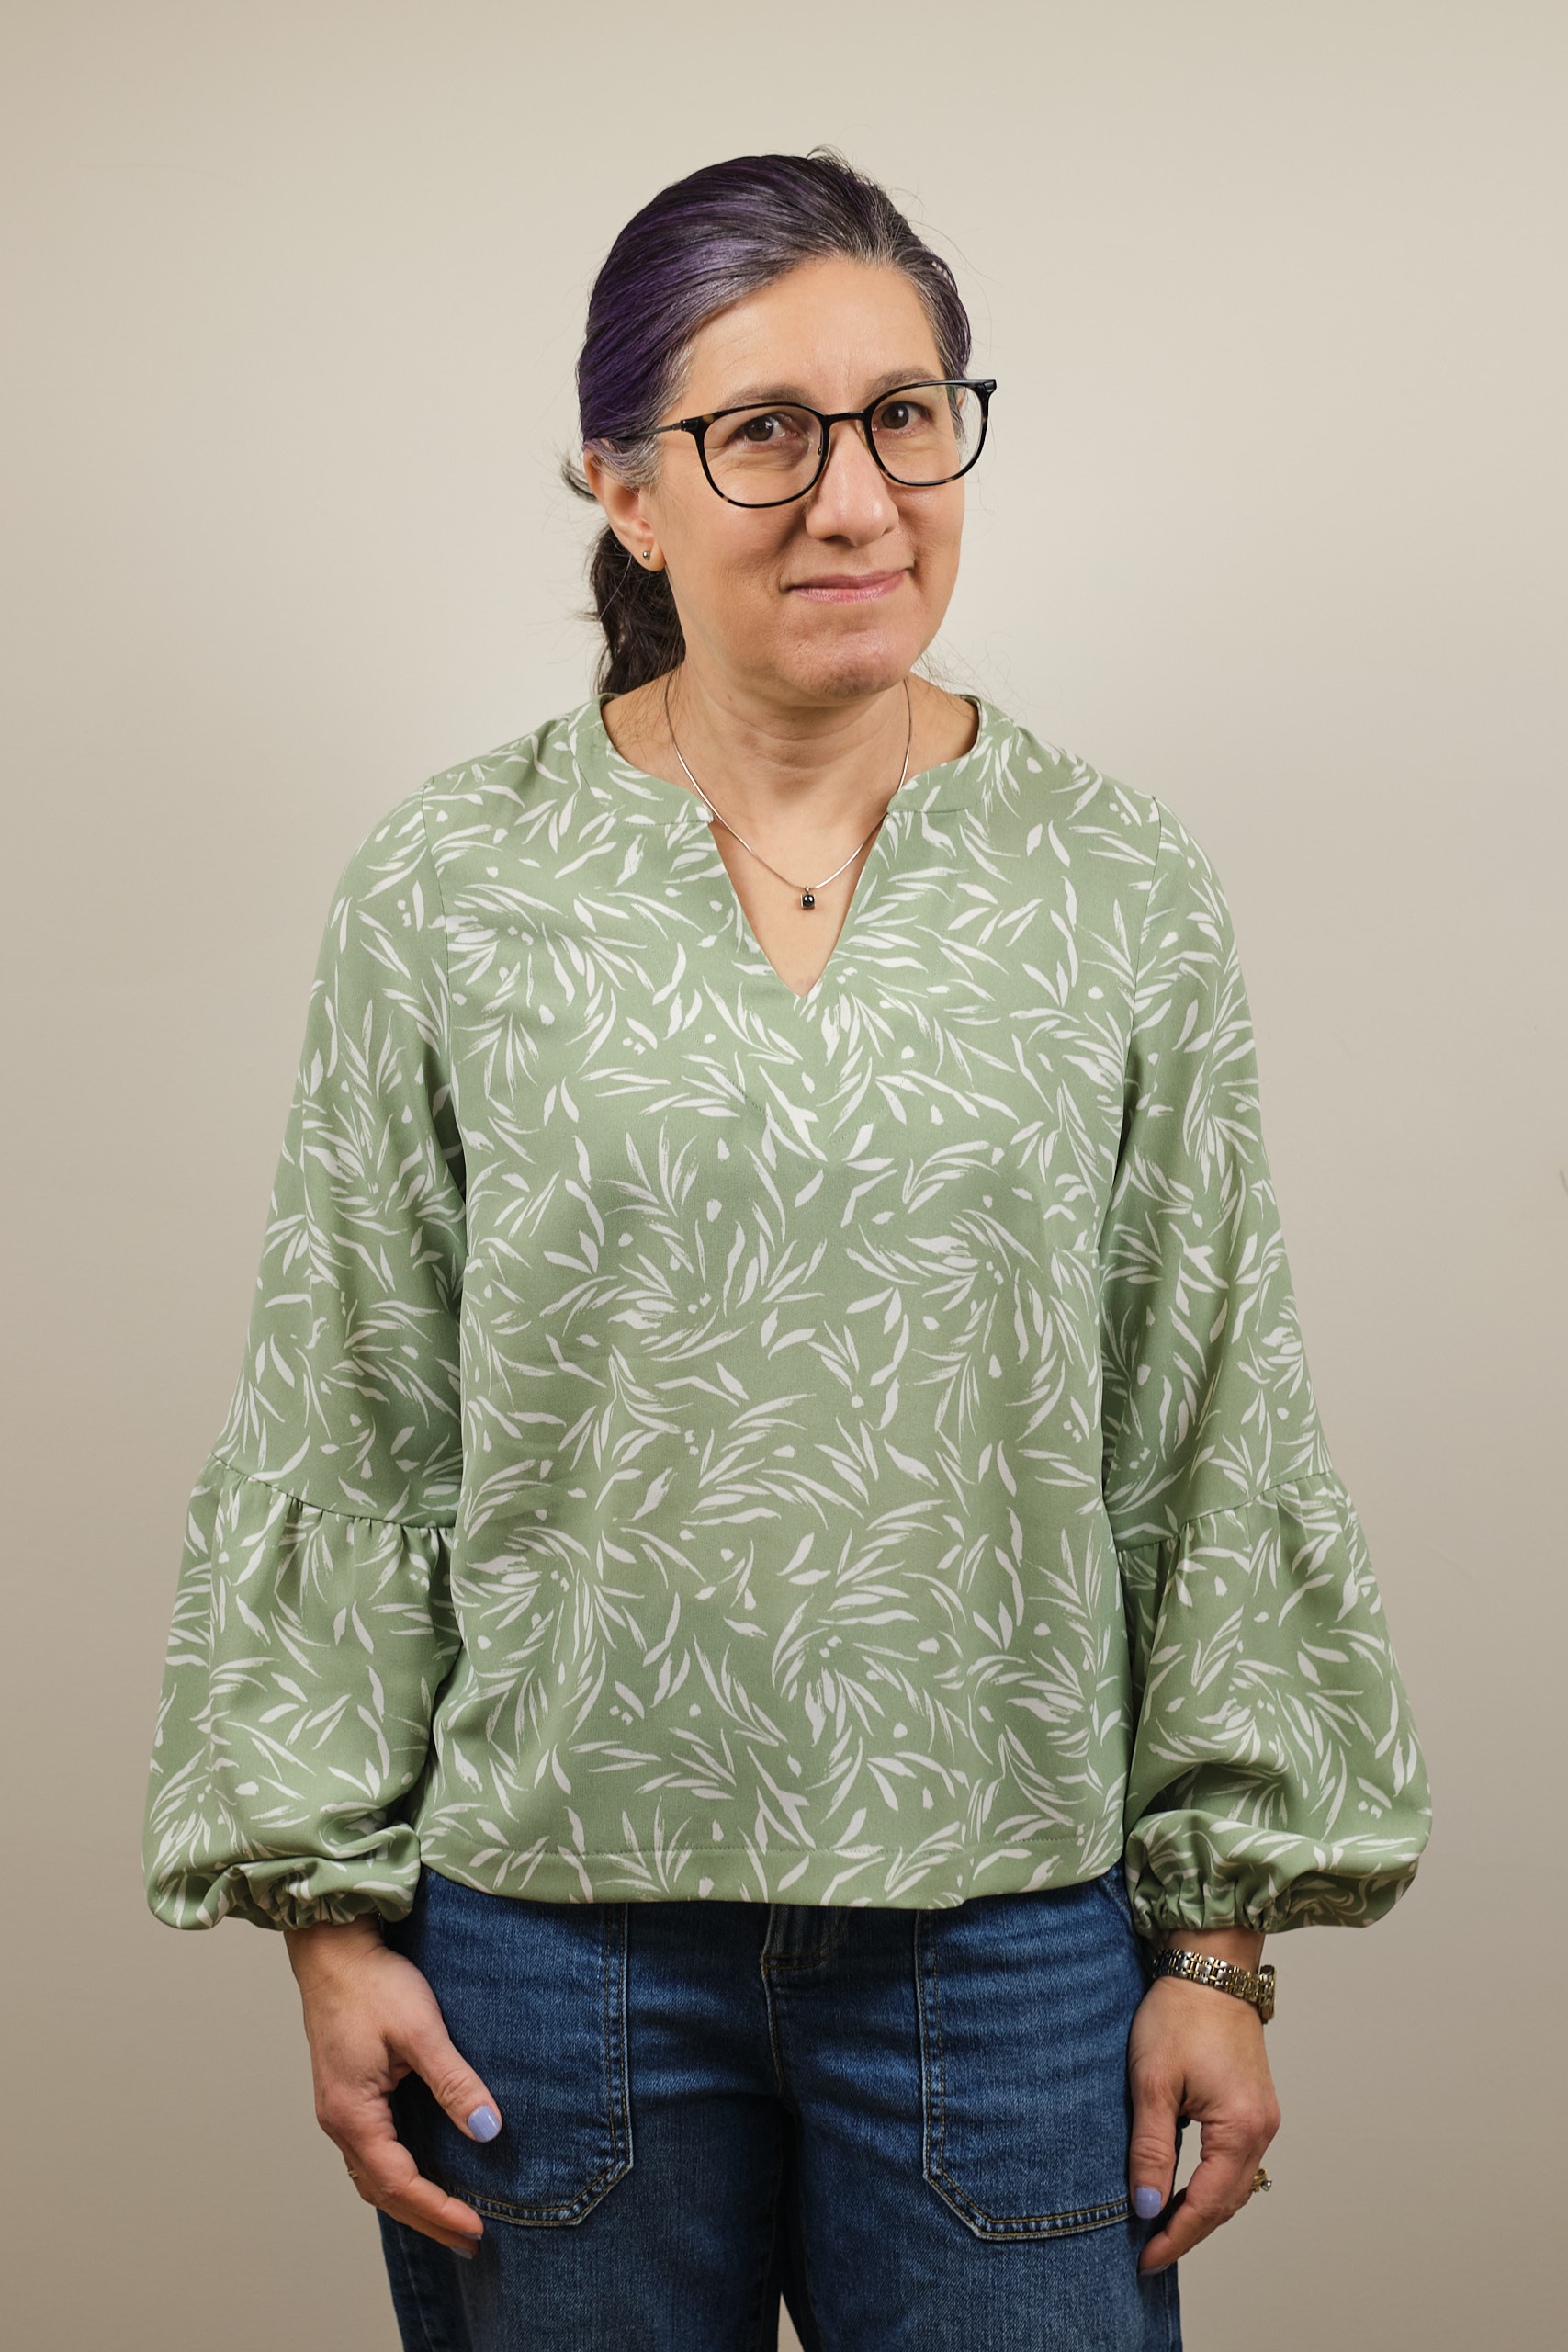
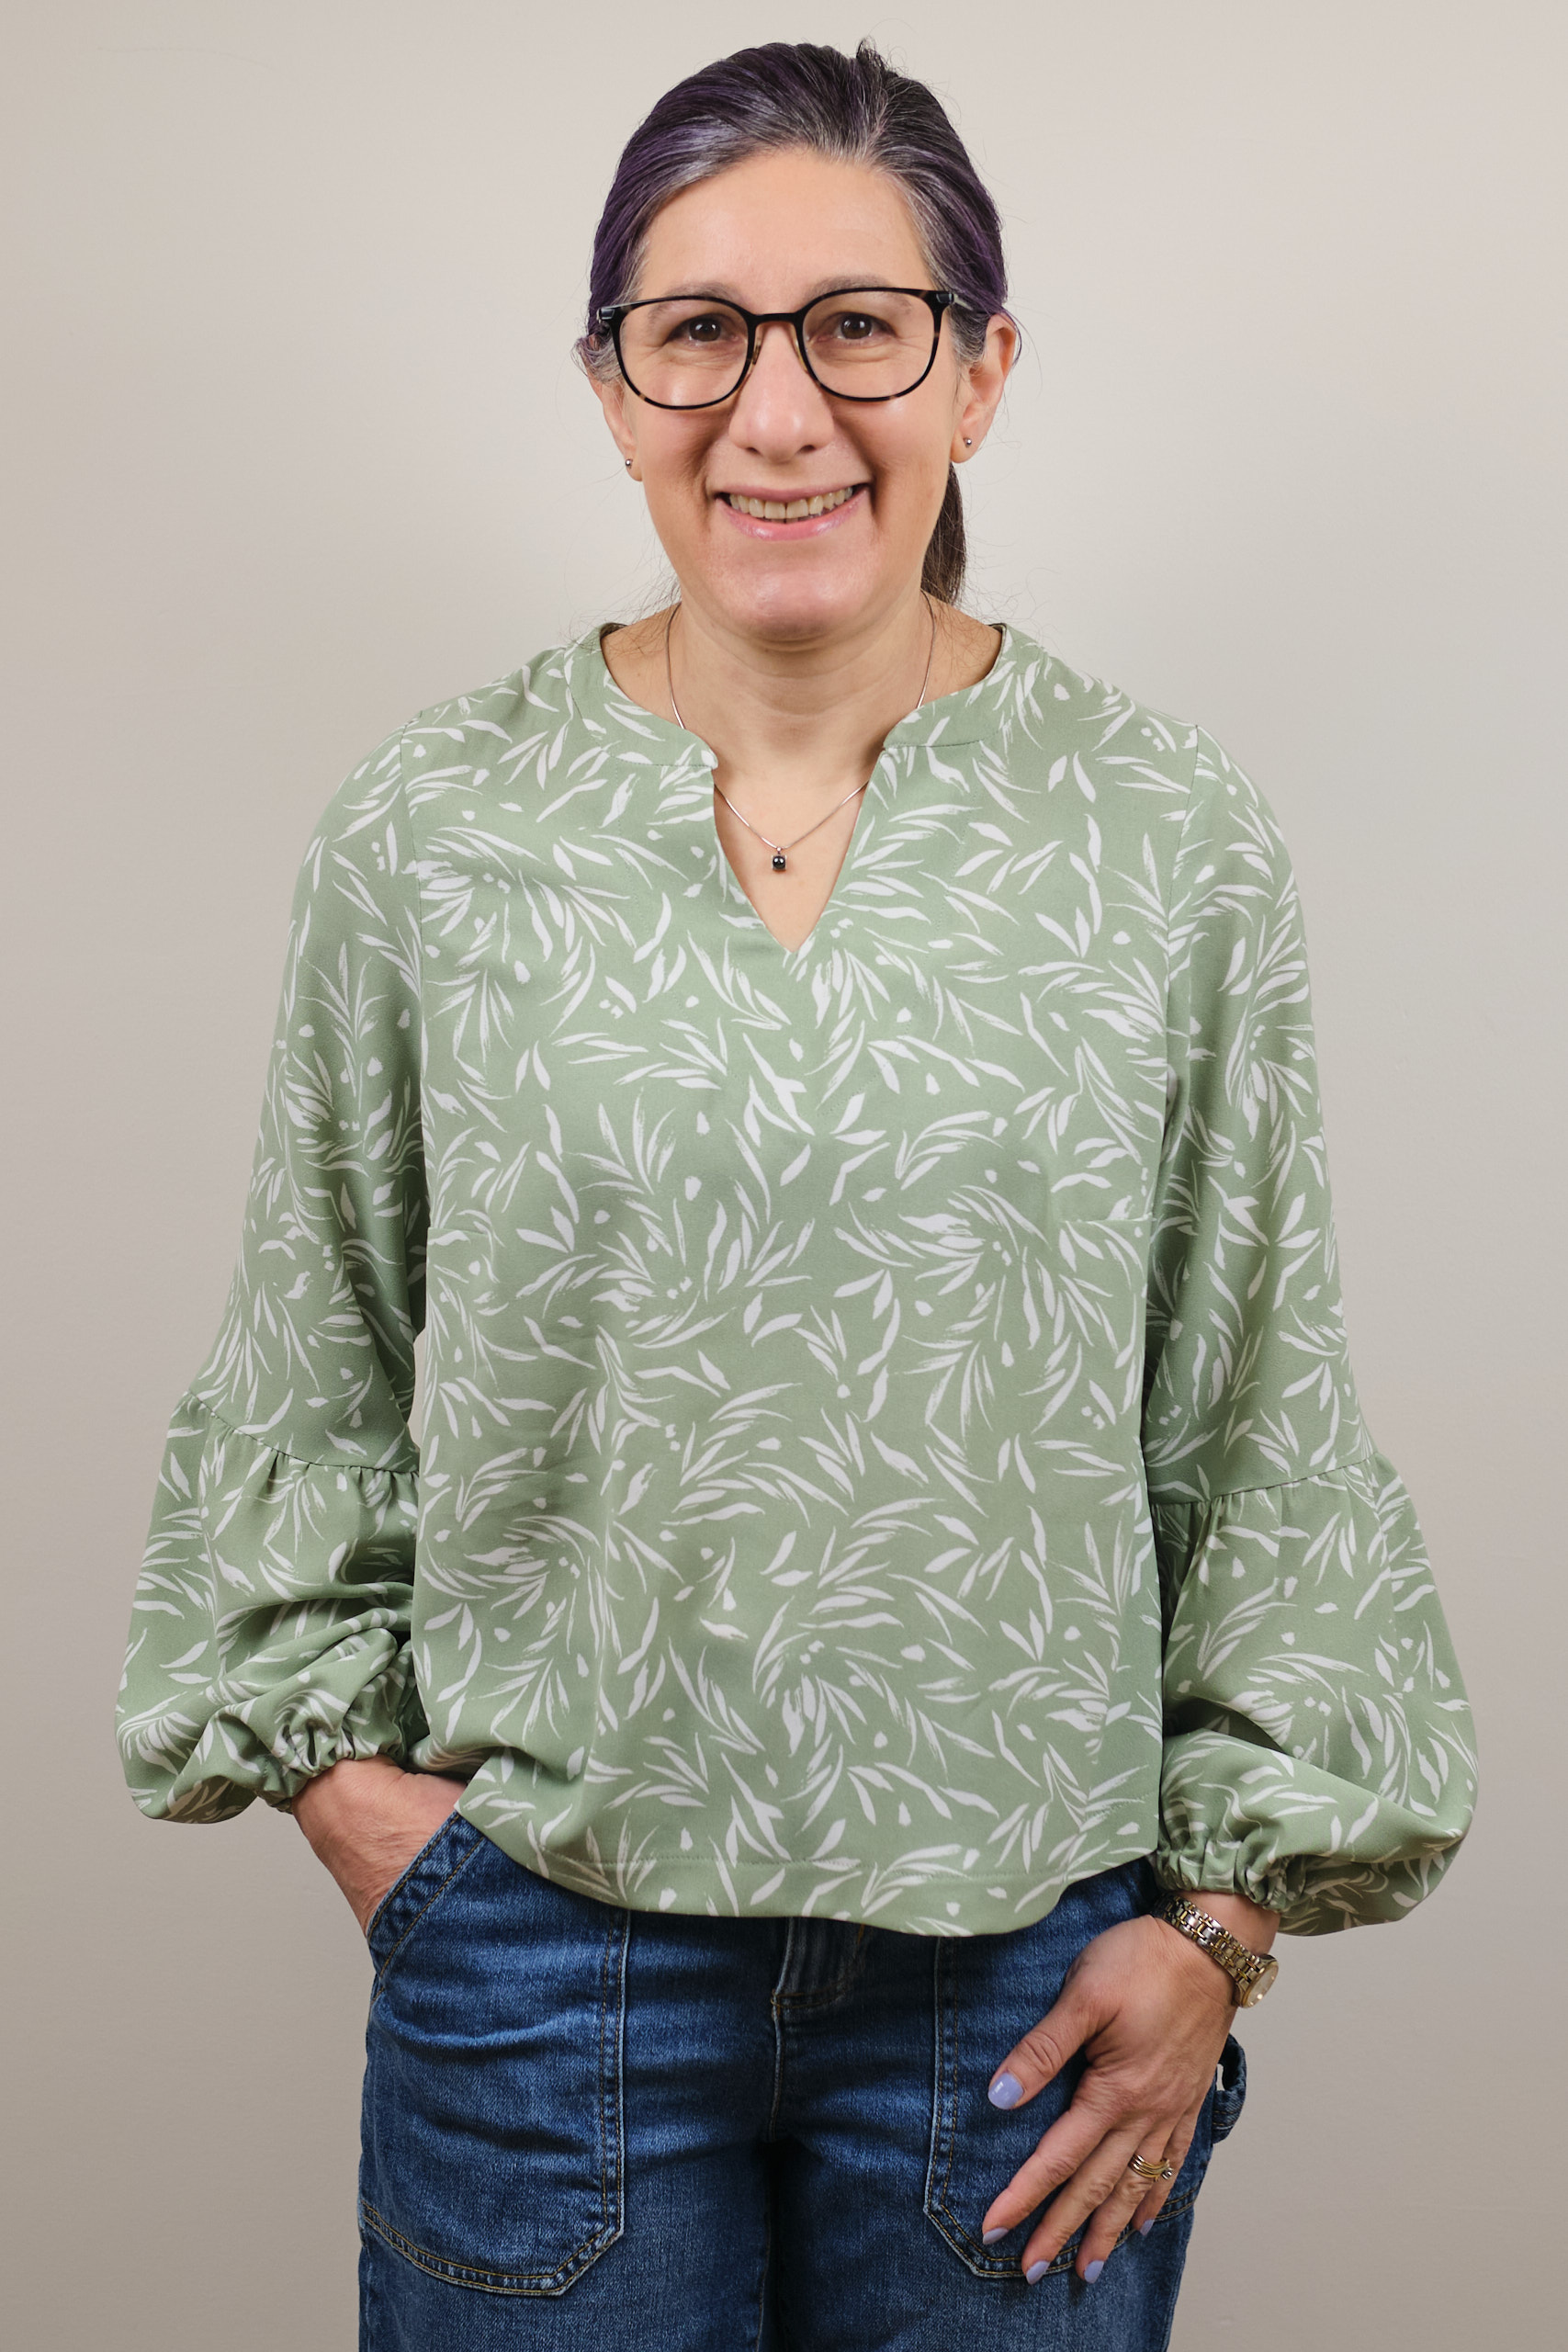
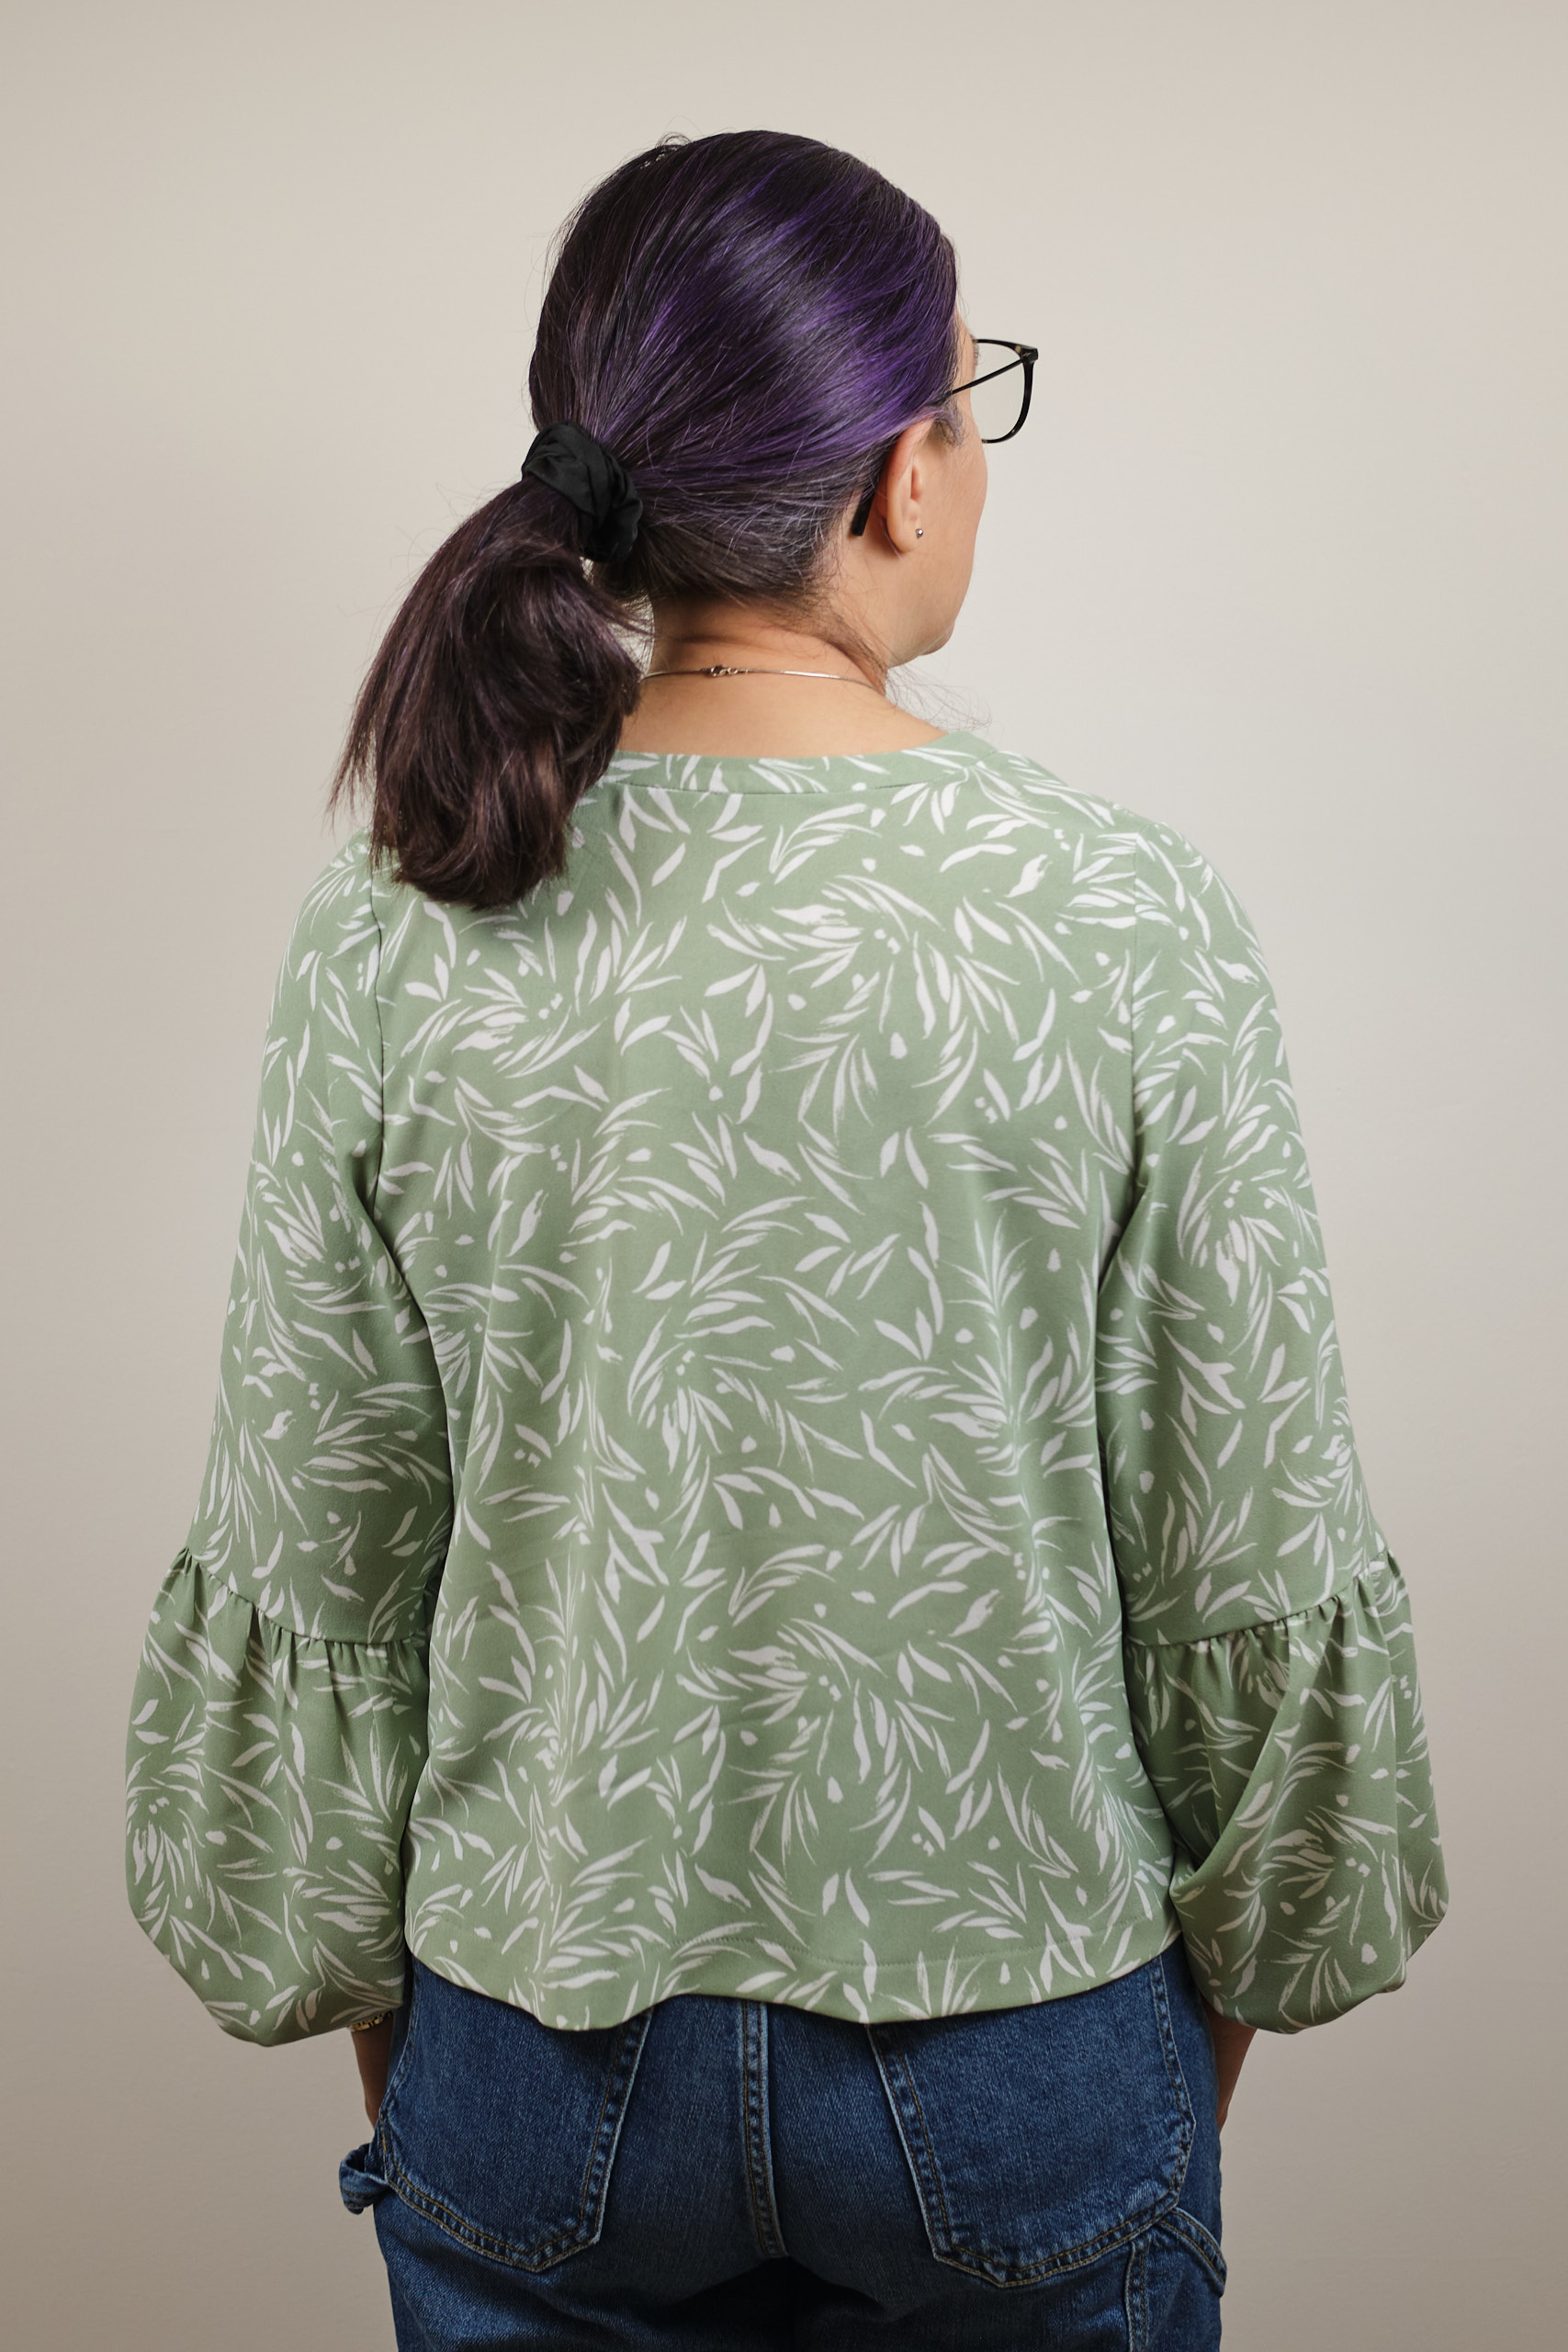
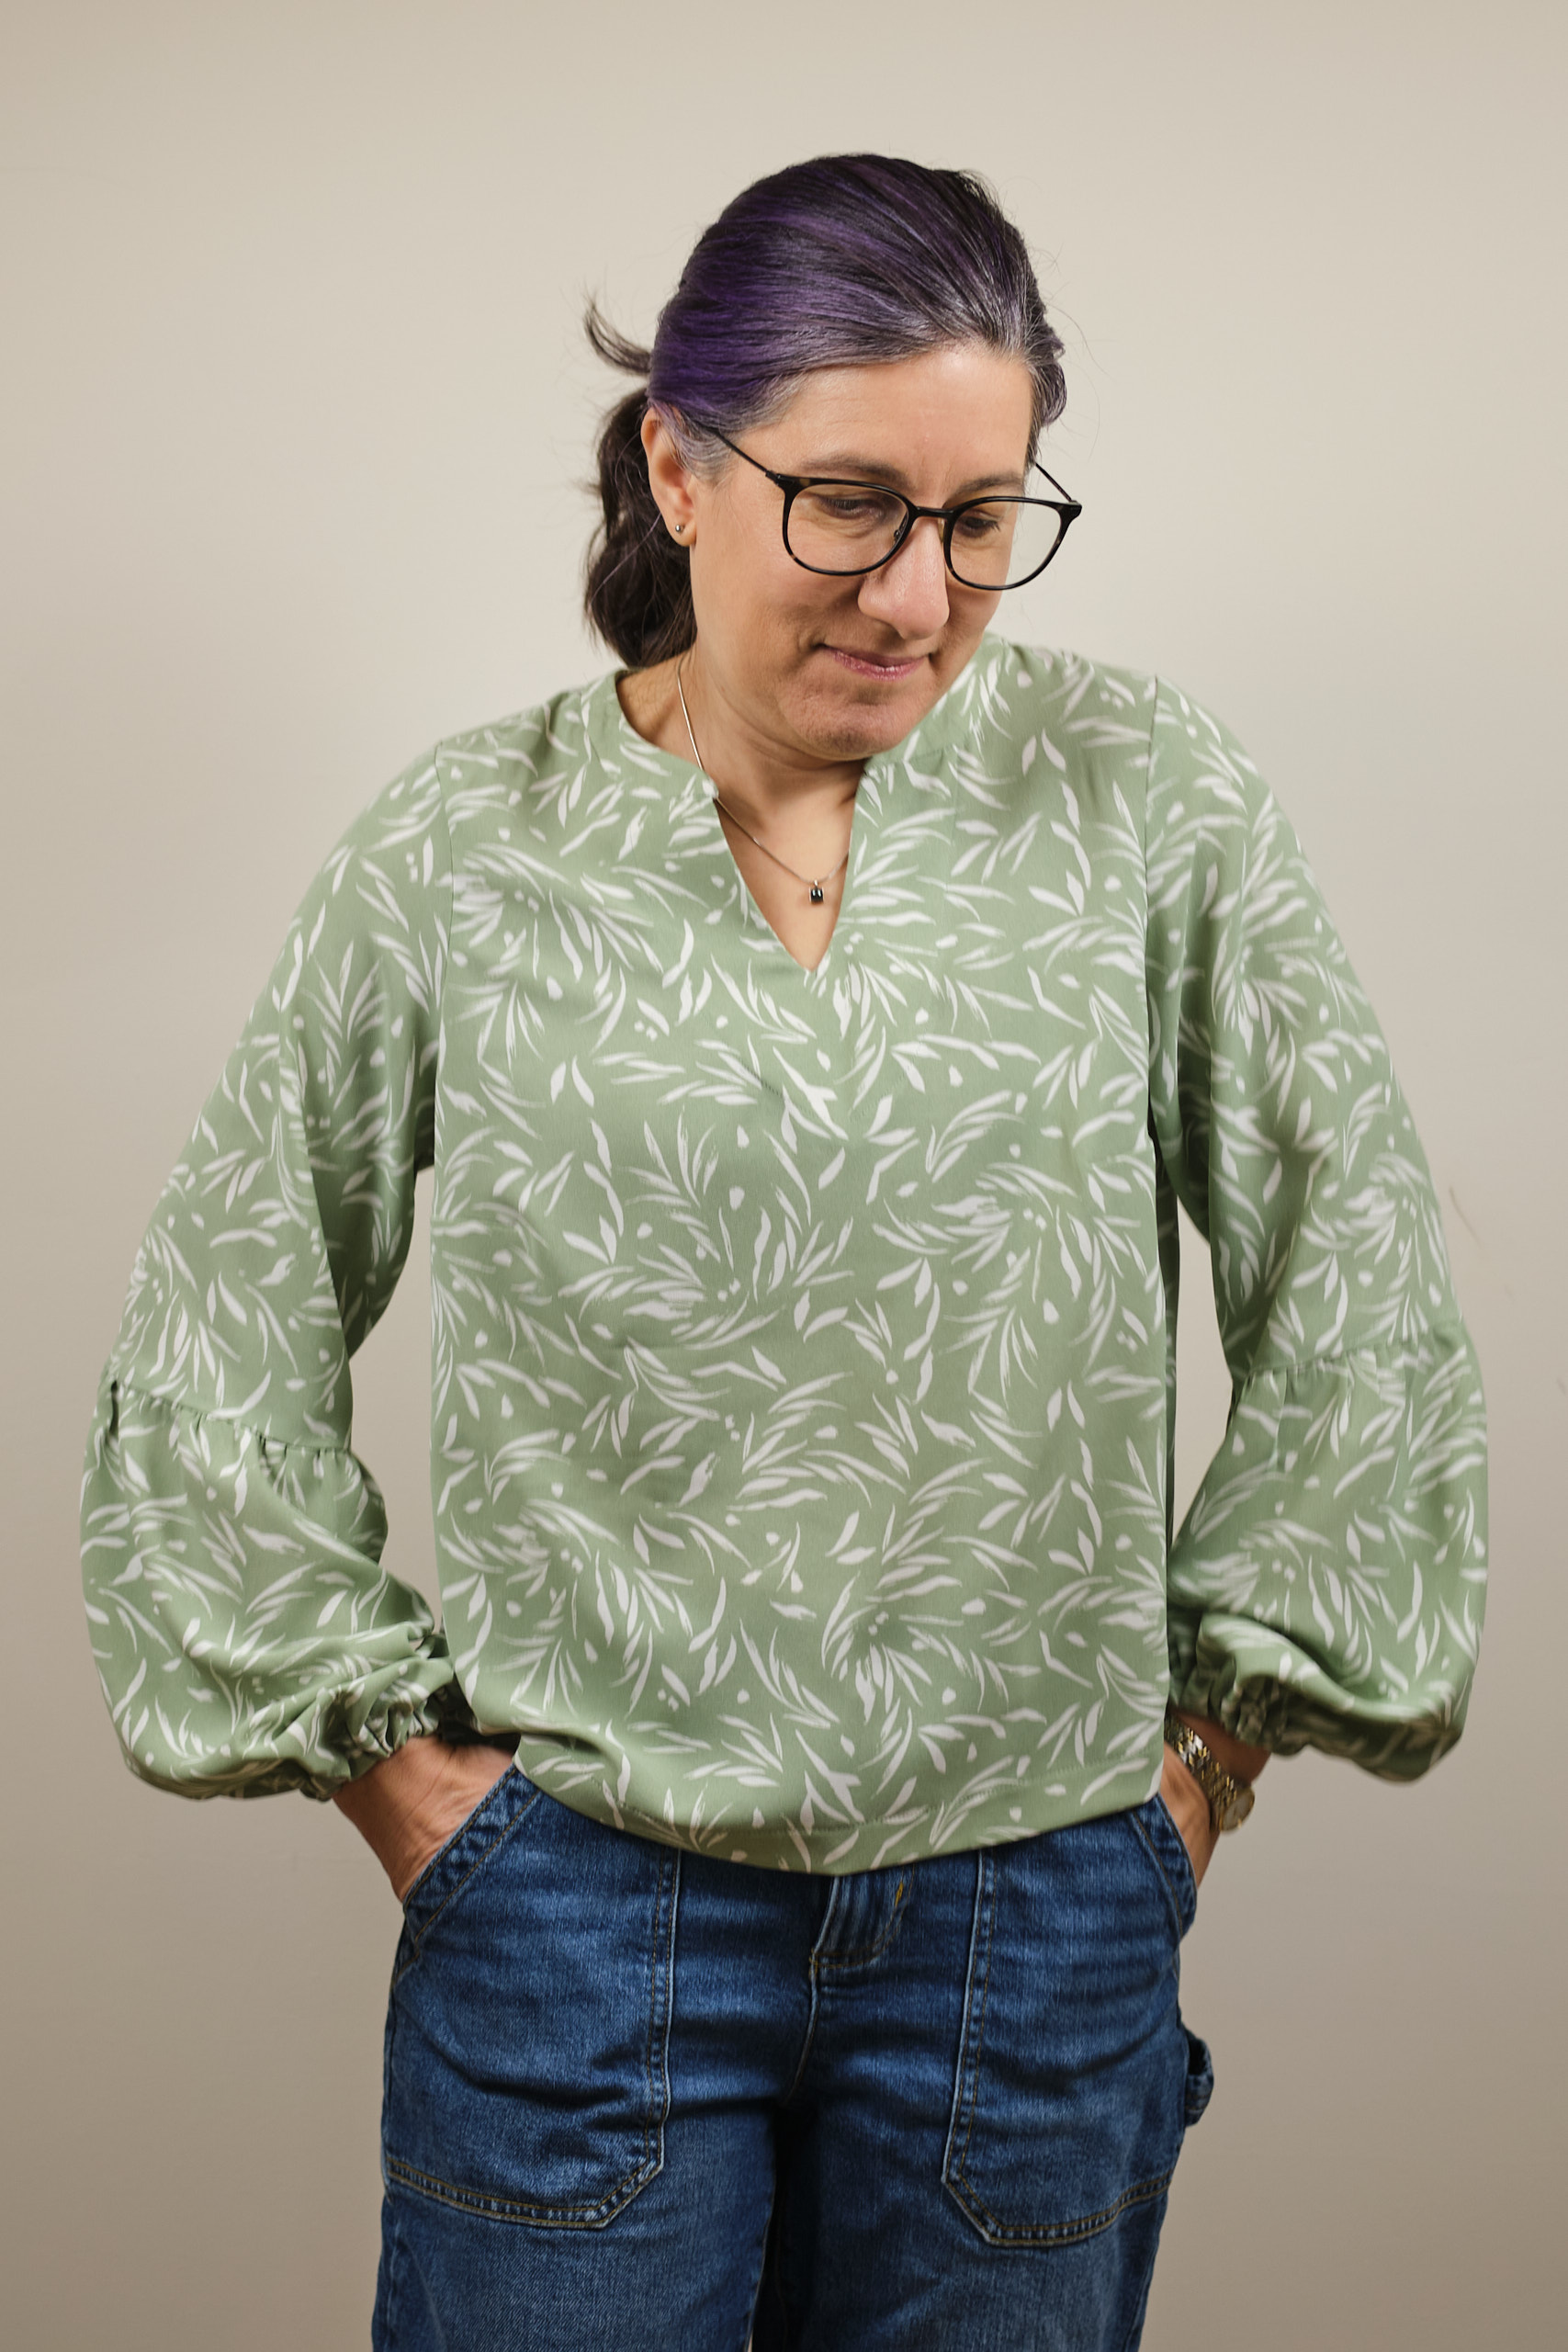
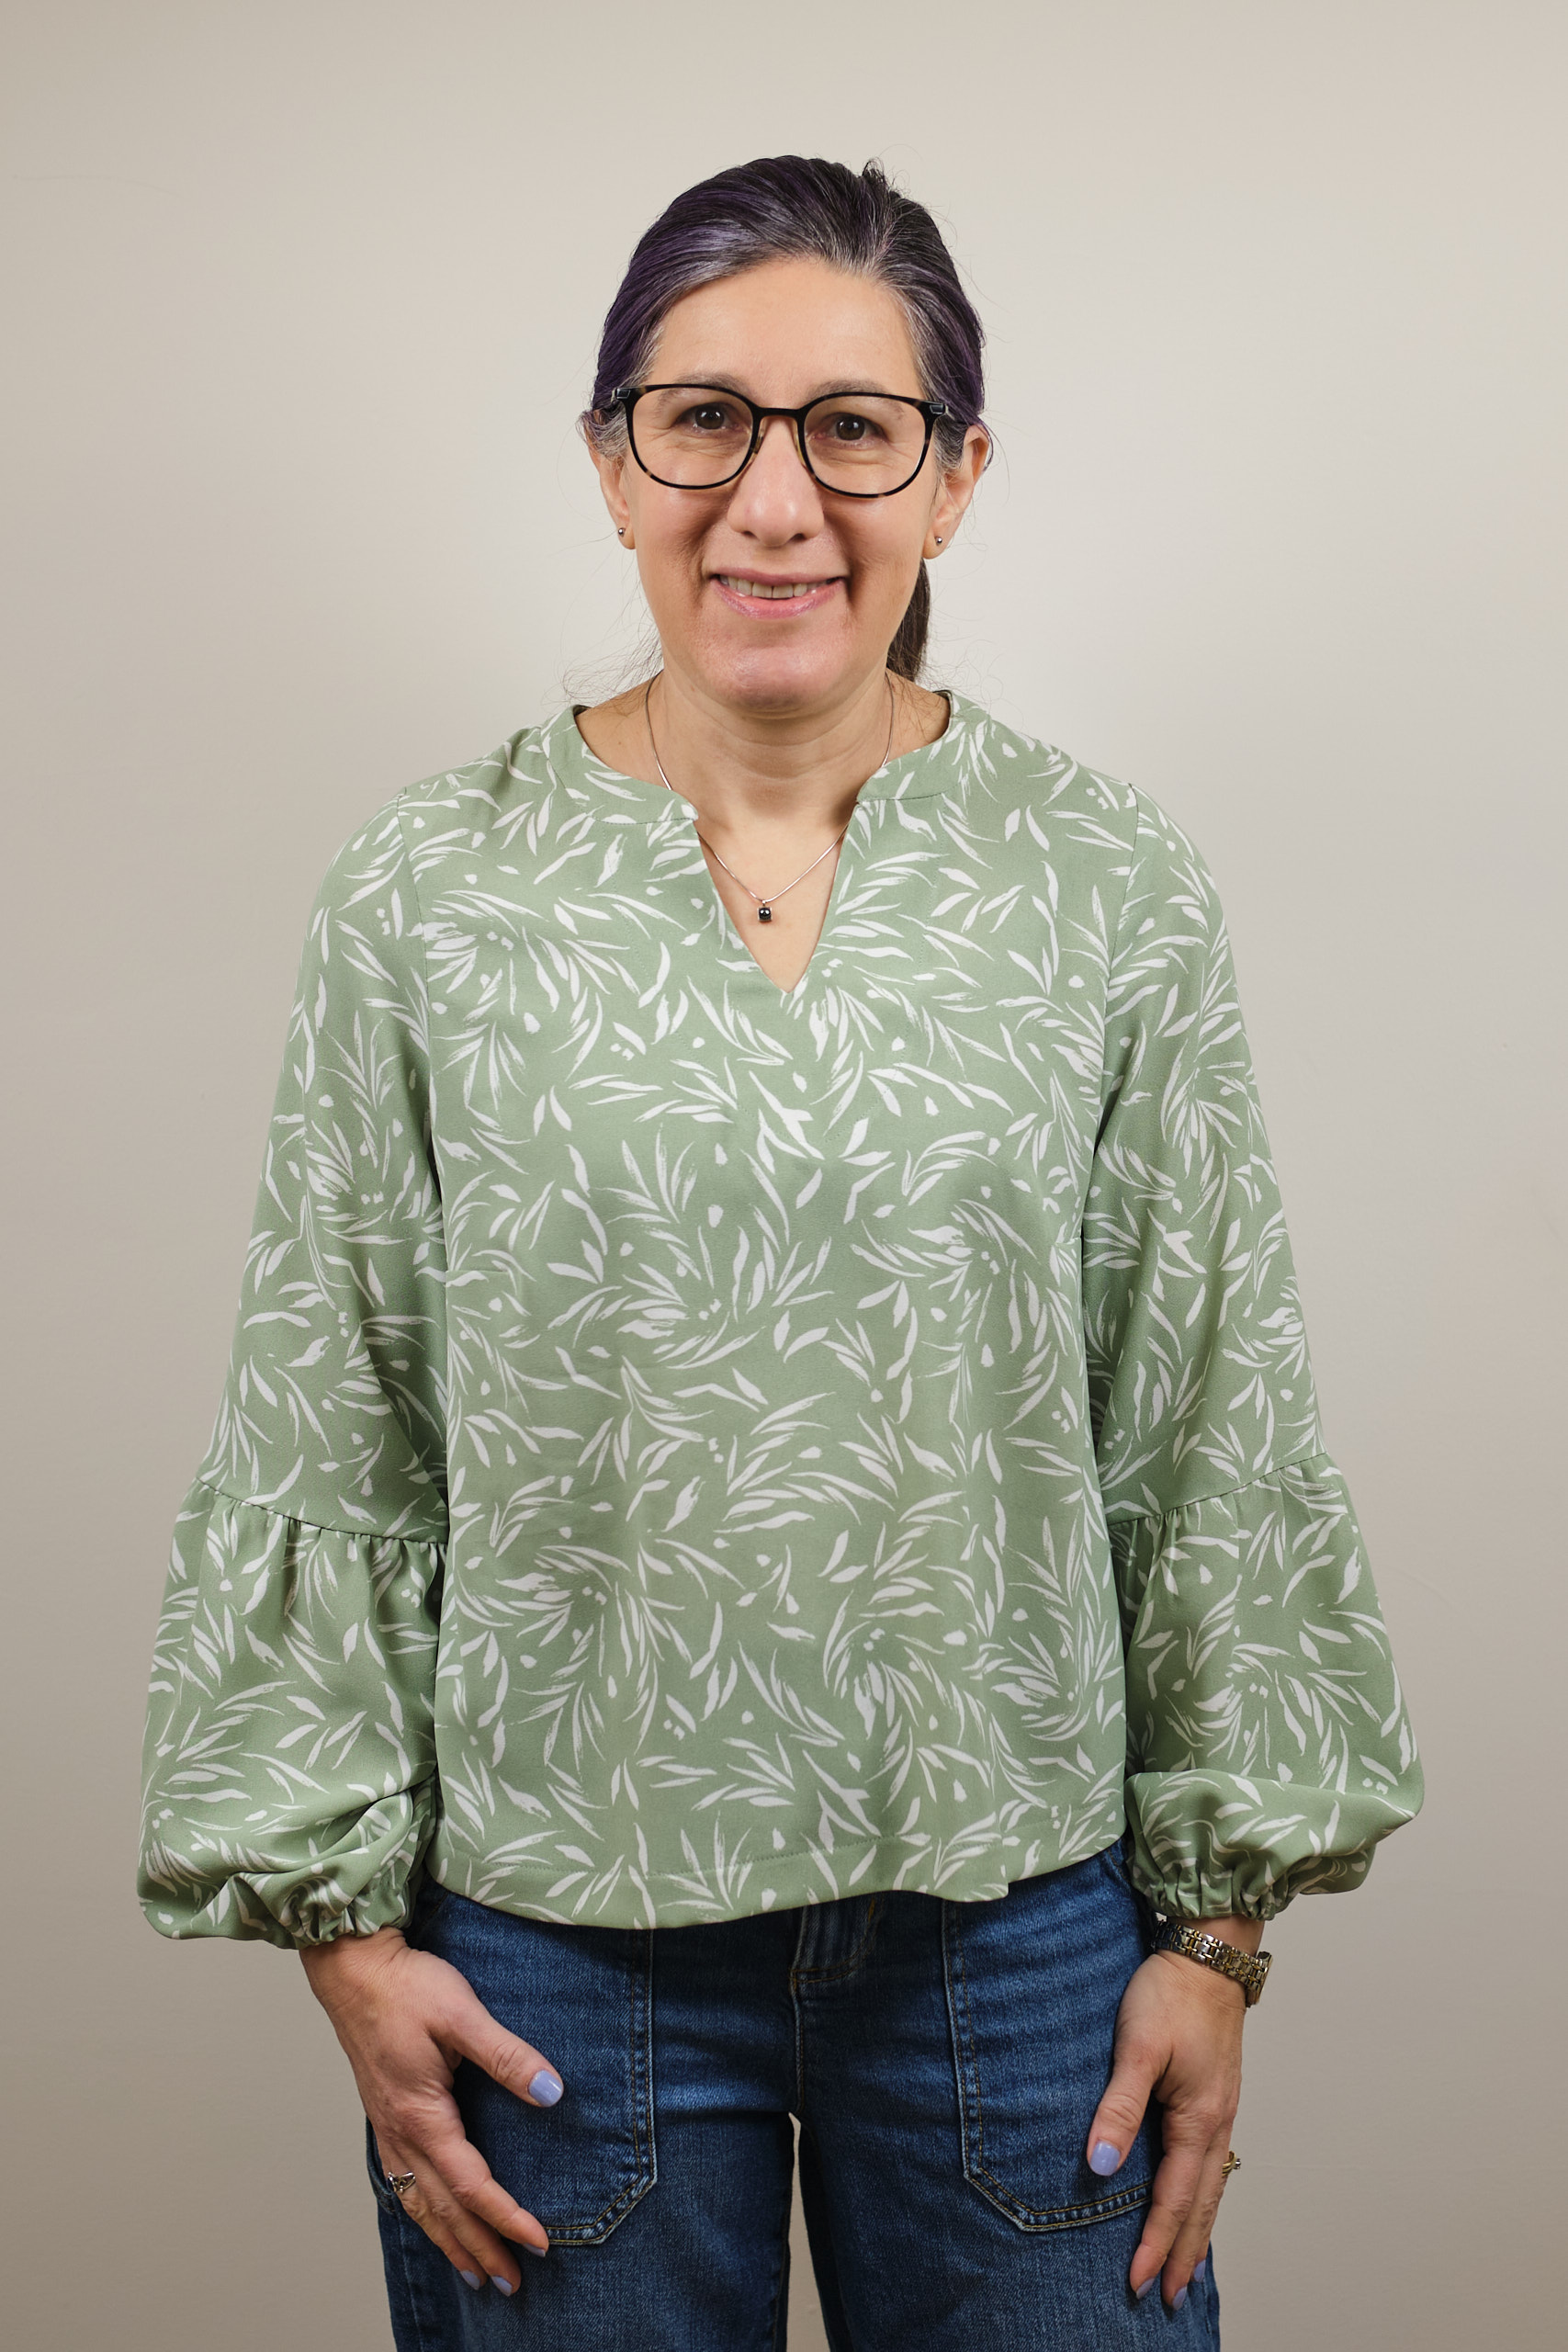
Love Notions Muse blouse, straight bodice, tiered sleeves, size small, shortened bodice and sleeves, from 2 yards or light sage Tess Cey.
In January, I applied to be a pattern tester for Muse, a new top pattern from Love Notions Sewing Patterns. (Here I am in the release video!) I have sewn a few of their patterns, but never tested a pattern for them before. I wasn’t invited to be a part of the main testing group, but was invited to join the later “finals” testers group. This group gets the revised pattern after the first group has already tested it and is assigned a size and features and asked to sew up and photograph the near-final version of the pattern.
Unlike past pattern testing I’ve done that uses a Facebook group for communication, Love Notions uses the Basecamp project management system. There is a section for sharing documents, another for uploading final photos, a to-do list for changes that need to be made to the pattern or instructions, and discussion boards. One of the fun aspects of pattern testing is communicating with and getting feedback and advice from other sewists. It is also nice to see the issues I’ve found with a pattern taken into account as the pattern evolves into the final version.
When I joined the Basecamp group, I could see there had already been a lot of discussion about certain aspects of the pattern and these had been addressed in the revised pattern. I also saw advice about trimming seam allowances and setting in sleeves that was not yet in the pattern instructions but that I could apply immediately.
The new pattern is called “Muse” and it is a woven blouse pattern that can be made with regular short sleeves, balloon sleeves, or tiered sleeves. It can be sewn with a straight bodice or a skirted bodice, optionally with a balloon hem. It is cold and snowy in Pittsburgh, so I asked to sew the long-sleeve version. I’ve also not loved the look of most skirted woven tops on me, so I requested to sew the straight bodice. I was assigned to sew size small, according to my measurements.
This pattern was designed for someone who is 5’5″ (as are most women’s sewing patterns that don’t come in petite sizes). The instructions recommended shortening the bodice by .5 inch for every inch shorter than 5’5″ you are, so I shortened it by 1.5 inch. The instructions didn’t offer advice about shortening the sleeves, but I know from past experience that I usually need to shorten sleeves by about 2 inches on most patterns. I asked in the Basecamp group about how to do this on the tiered sleeve and was advised to remove 1 inch from each part, which seemed to work fine.
I used a light sage polyester woven “cey” fabric called Tess Cey from Mily Mae Fabrics. I bought it when it was on sale for $3.75/yard. (Apparently, CEY is an acronym for continuous environmental yarn and refers to a type of polyester fabric made with sustainable practices that tends to be soft, drapey, and wrinkle-resistant.) This fabric is a little slippery to work with. It is not a stretch fabric, but it does have a little bit of mechanical stretch. It doesn’t tend to wrinkle, but it does hold a crease when pressed with an iron. I used about 2 yards of fabric.
Some testers described this pattern as a “quick sew.” I did not find it quick (and others also disagreed with that description). I think I spent between 5 and 6 hours on it. The main reason it took so long was that the collar construction instructions were confusing and it is a multi-step process. Now that I know how to do it, it would go faster next time, but it will still be an involved process, with inner and outer interfaced layers, top stitching, and stitch-in-the-ditch or hand stitching to finish. Sewing the point of the V is tricky because once you sew past the point in the fabric you no longer can see your 3/8 inch guide on your sewing machine. I ended up marking the stitch lines around the point in pencil so I could see where to stitch. I didn’t cut the facing around the v-neck 100% symmetrically and this was evident when I initially top-stitched the V. I removed the stitching and did it again and it looked a lot better the second time. Next time I will double check the facing before I sew it on. I pinned the collar pieces together backwards and the pieces didn’t fit together right. But I realized my mistake and repinned before sewing. The final version of the pattern instructions are a bit clearer on the process. It still takes soe effort but it is a really nice finish. The final version also now has a ruffled neck option.
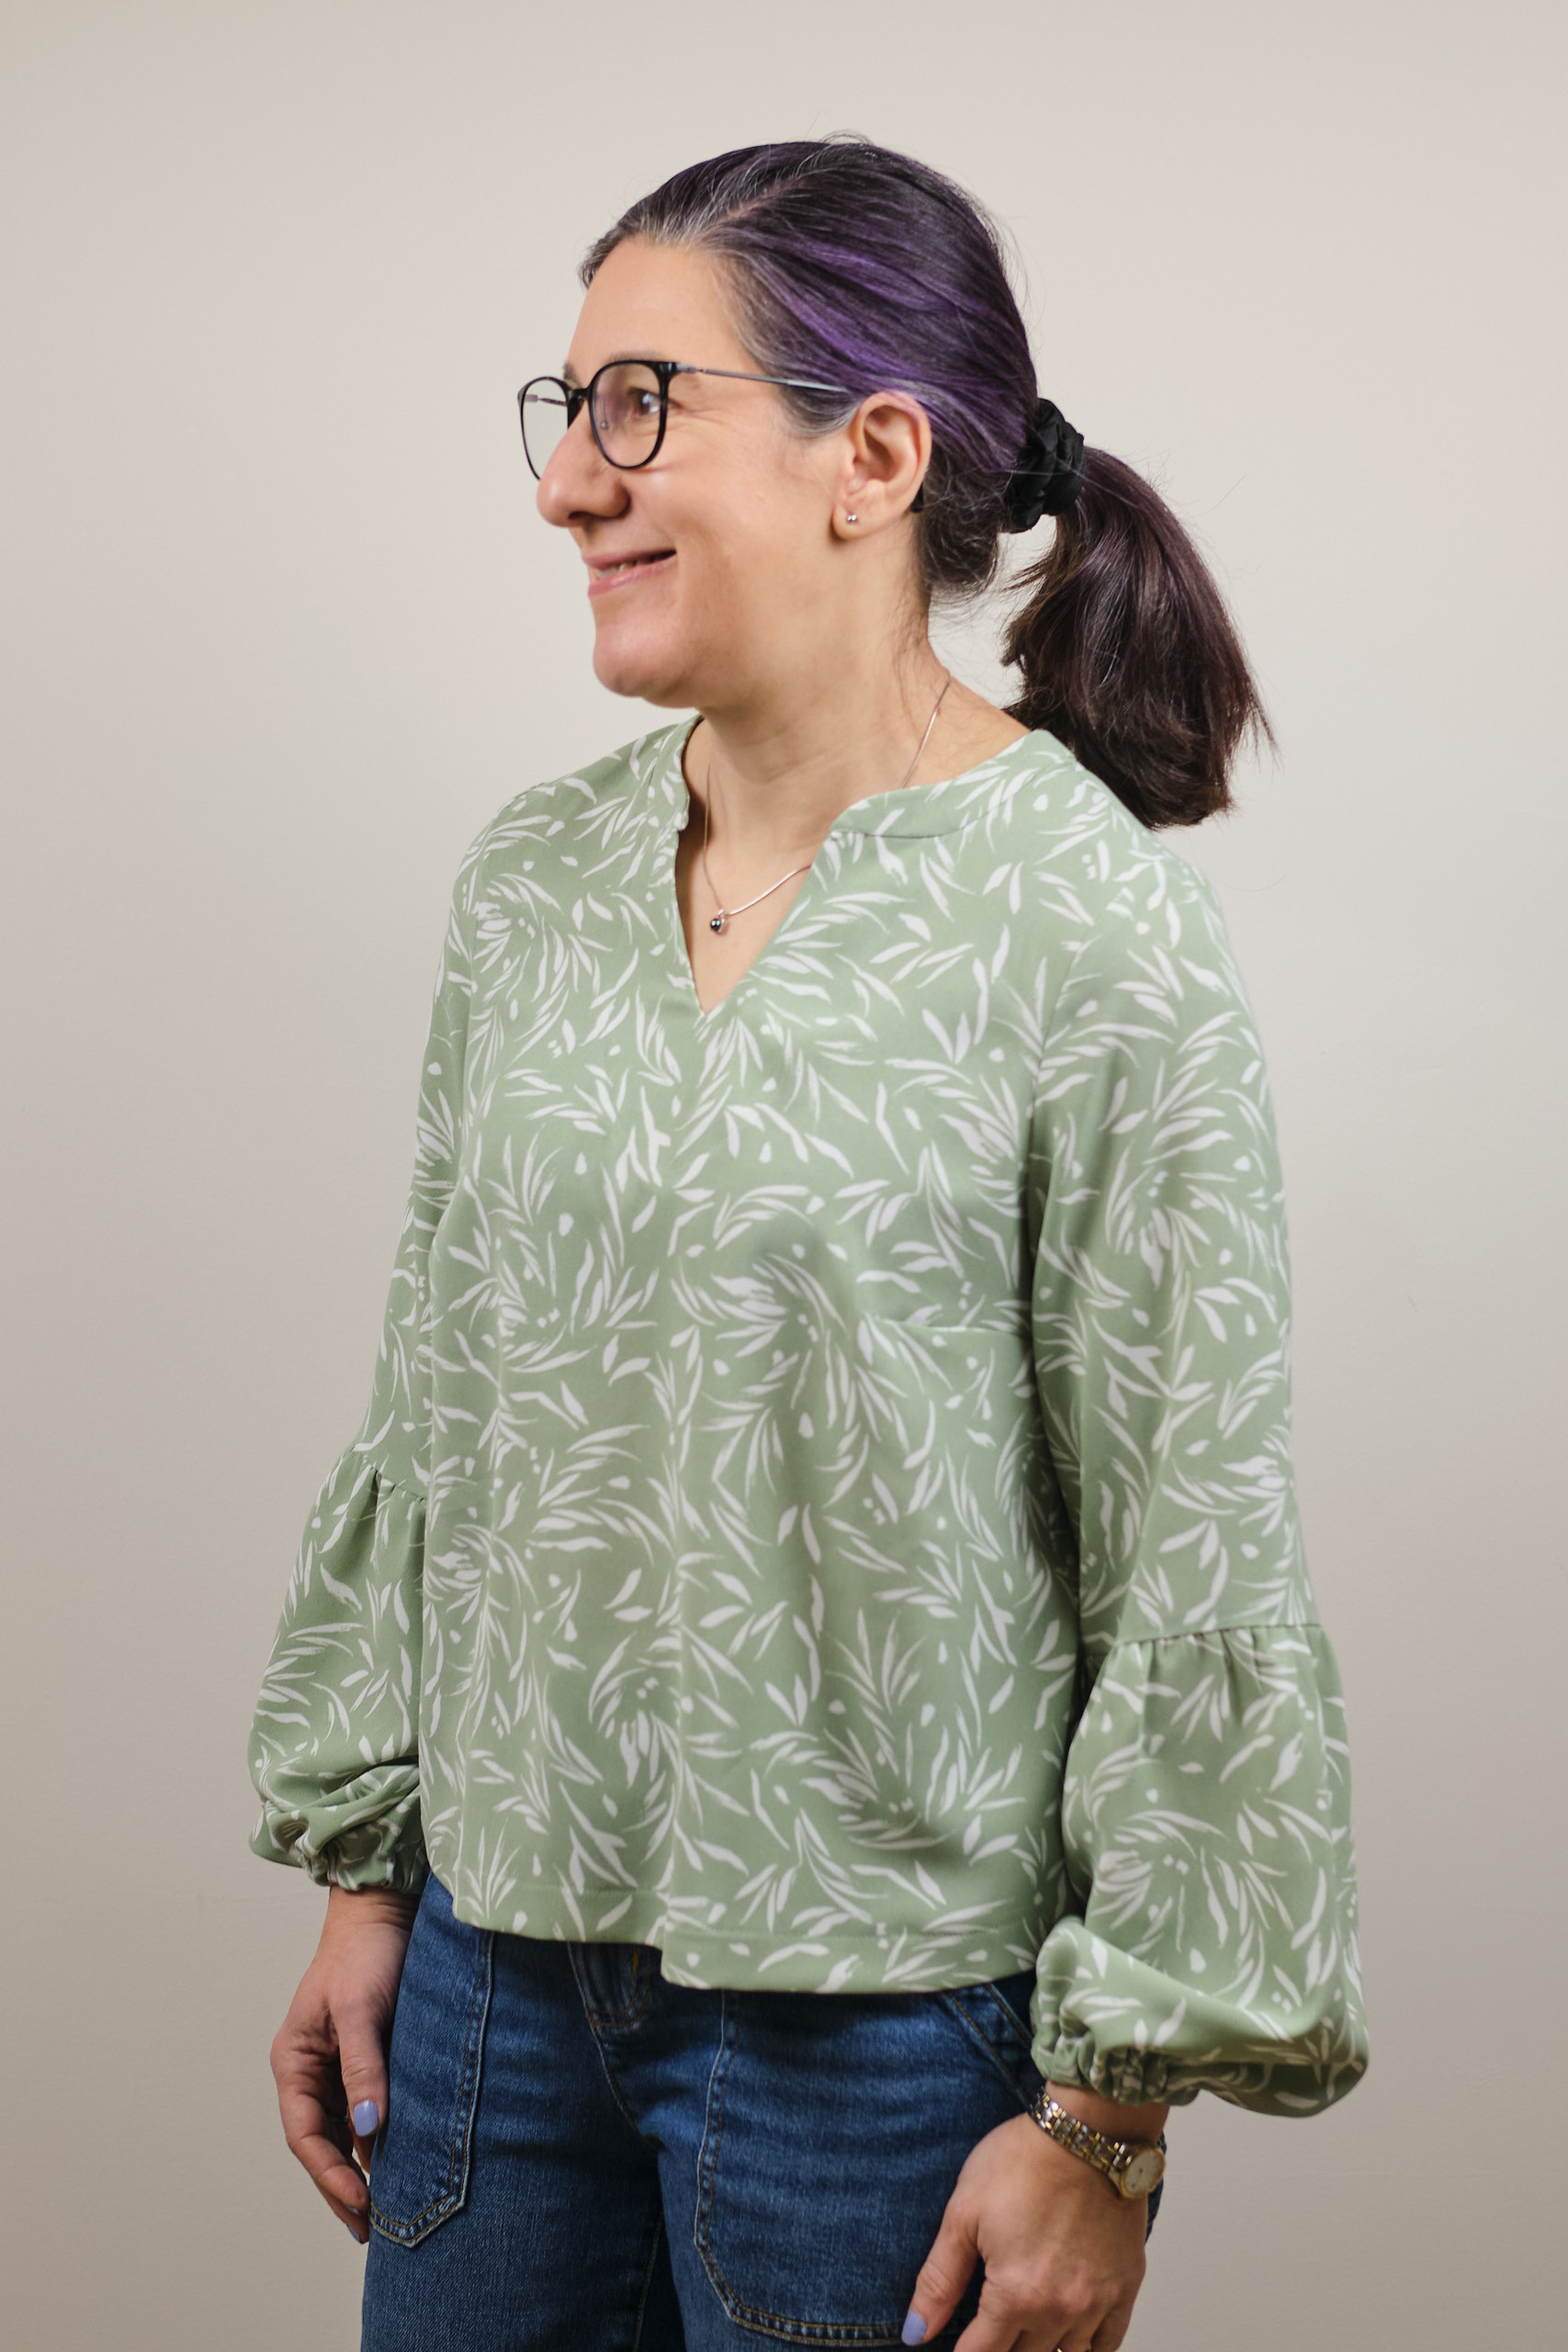
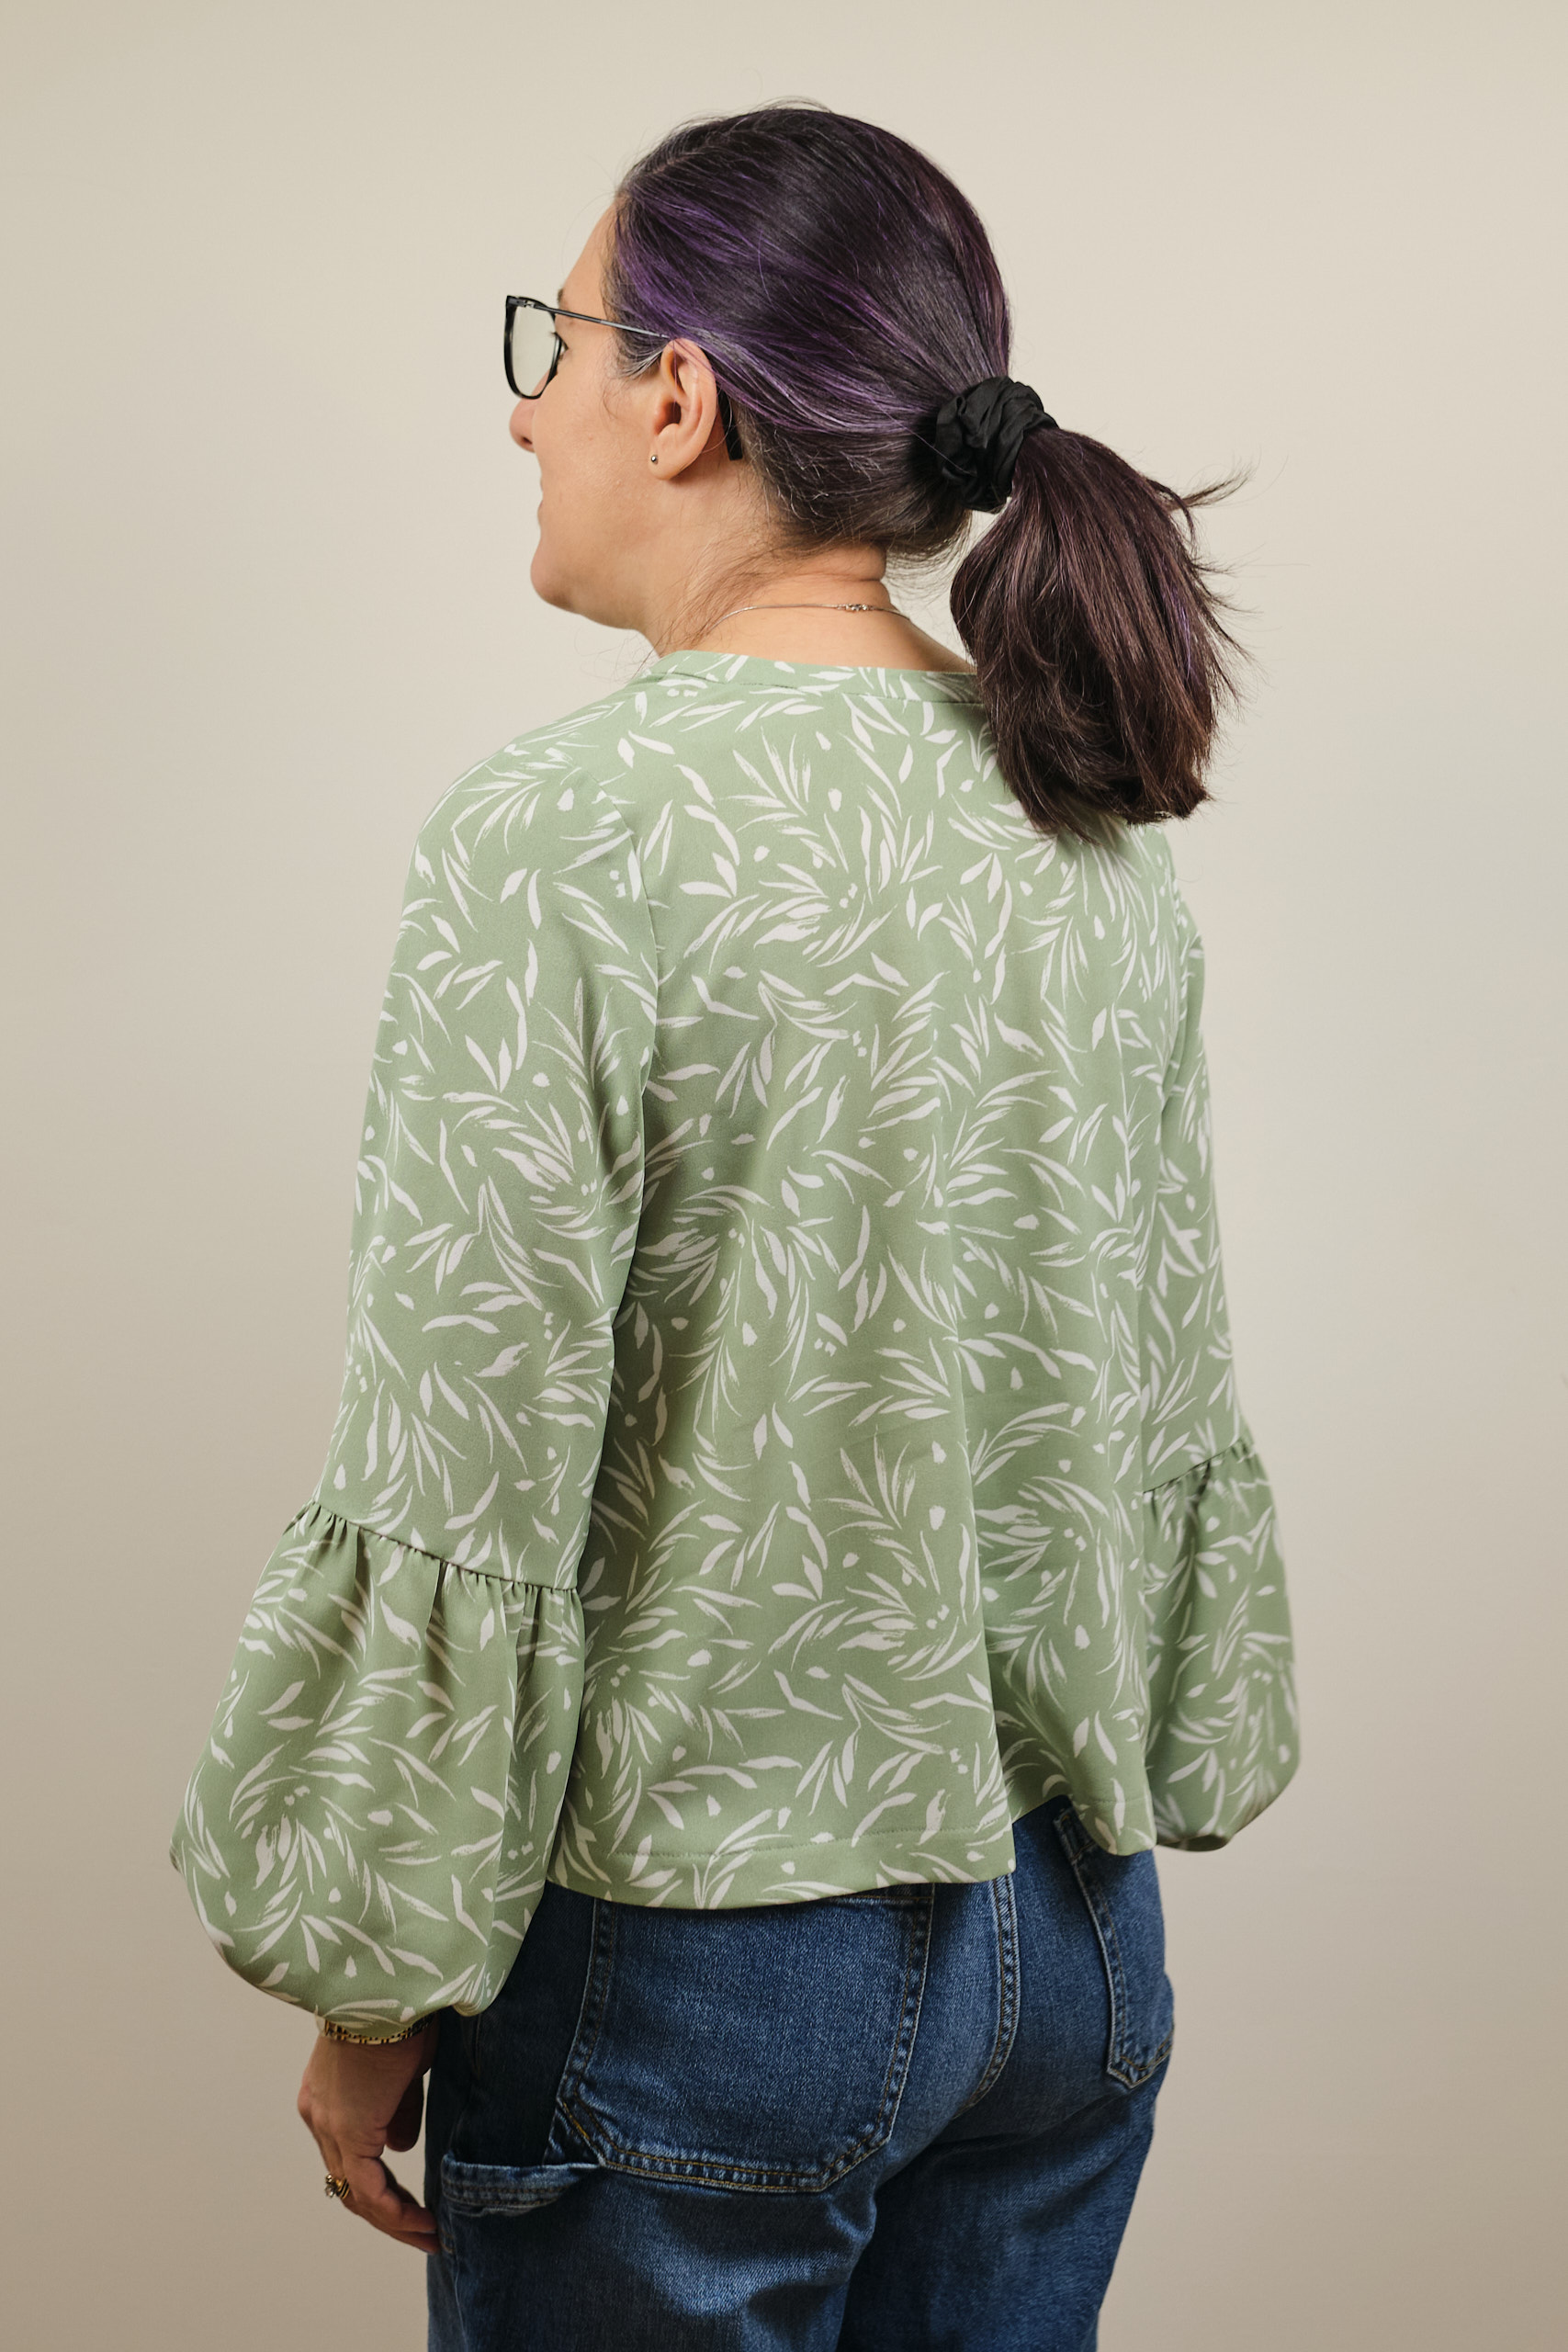
The height and sleeve adjustments worked well for me. The tiered sleeves were pretty easy to construct and look nice. The pattern called for 5.5 inches of elastic at the wrist of each sleeve. I used 7 inches instead for more comfort, and could probably have gone even bigger. The final version of the pattern has adjusted the elastic lengths based on tester feedback, but it’s always a good idea to wrap the elastic around your wrist and adjust as appropriate for you.
I often do broad and sloped shoulder adjustments on fitted tops. I didn’t do that on this one because it seemed like more of a loose fit, but in hindsight, I should have at least done a broad shoulder adjustment, as the fabric at the shoulders pulls slightly. Other testers mentioned the shoulders were tight so the final version of the pattern has about 3/8 inch more room in the shoulders. I’m not sure about a sloped shoulder adjustment as that would require adjusting the bust dart, which was already set slightly too low for me. I will at least adjust the point of the dart up a bit next time or possibly leave it out altogether.
My complaints above are all minor issues that, especially with a print fabric, most people will probably not notice on the finished garment, which I think looks great! I’m sure I will get a lot of wear out of it and enjoy wearing it once the warm weather returns someday.
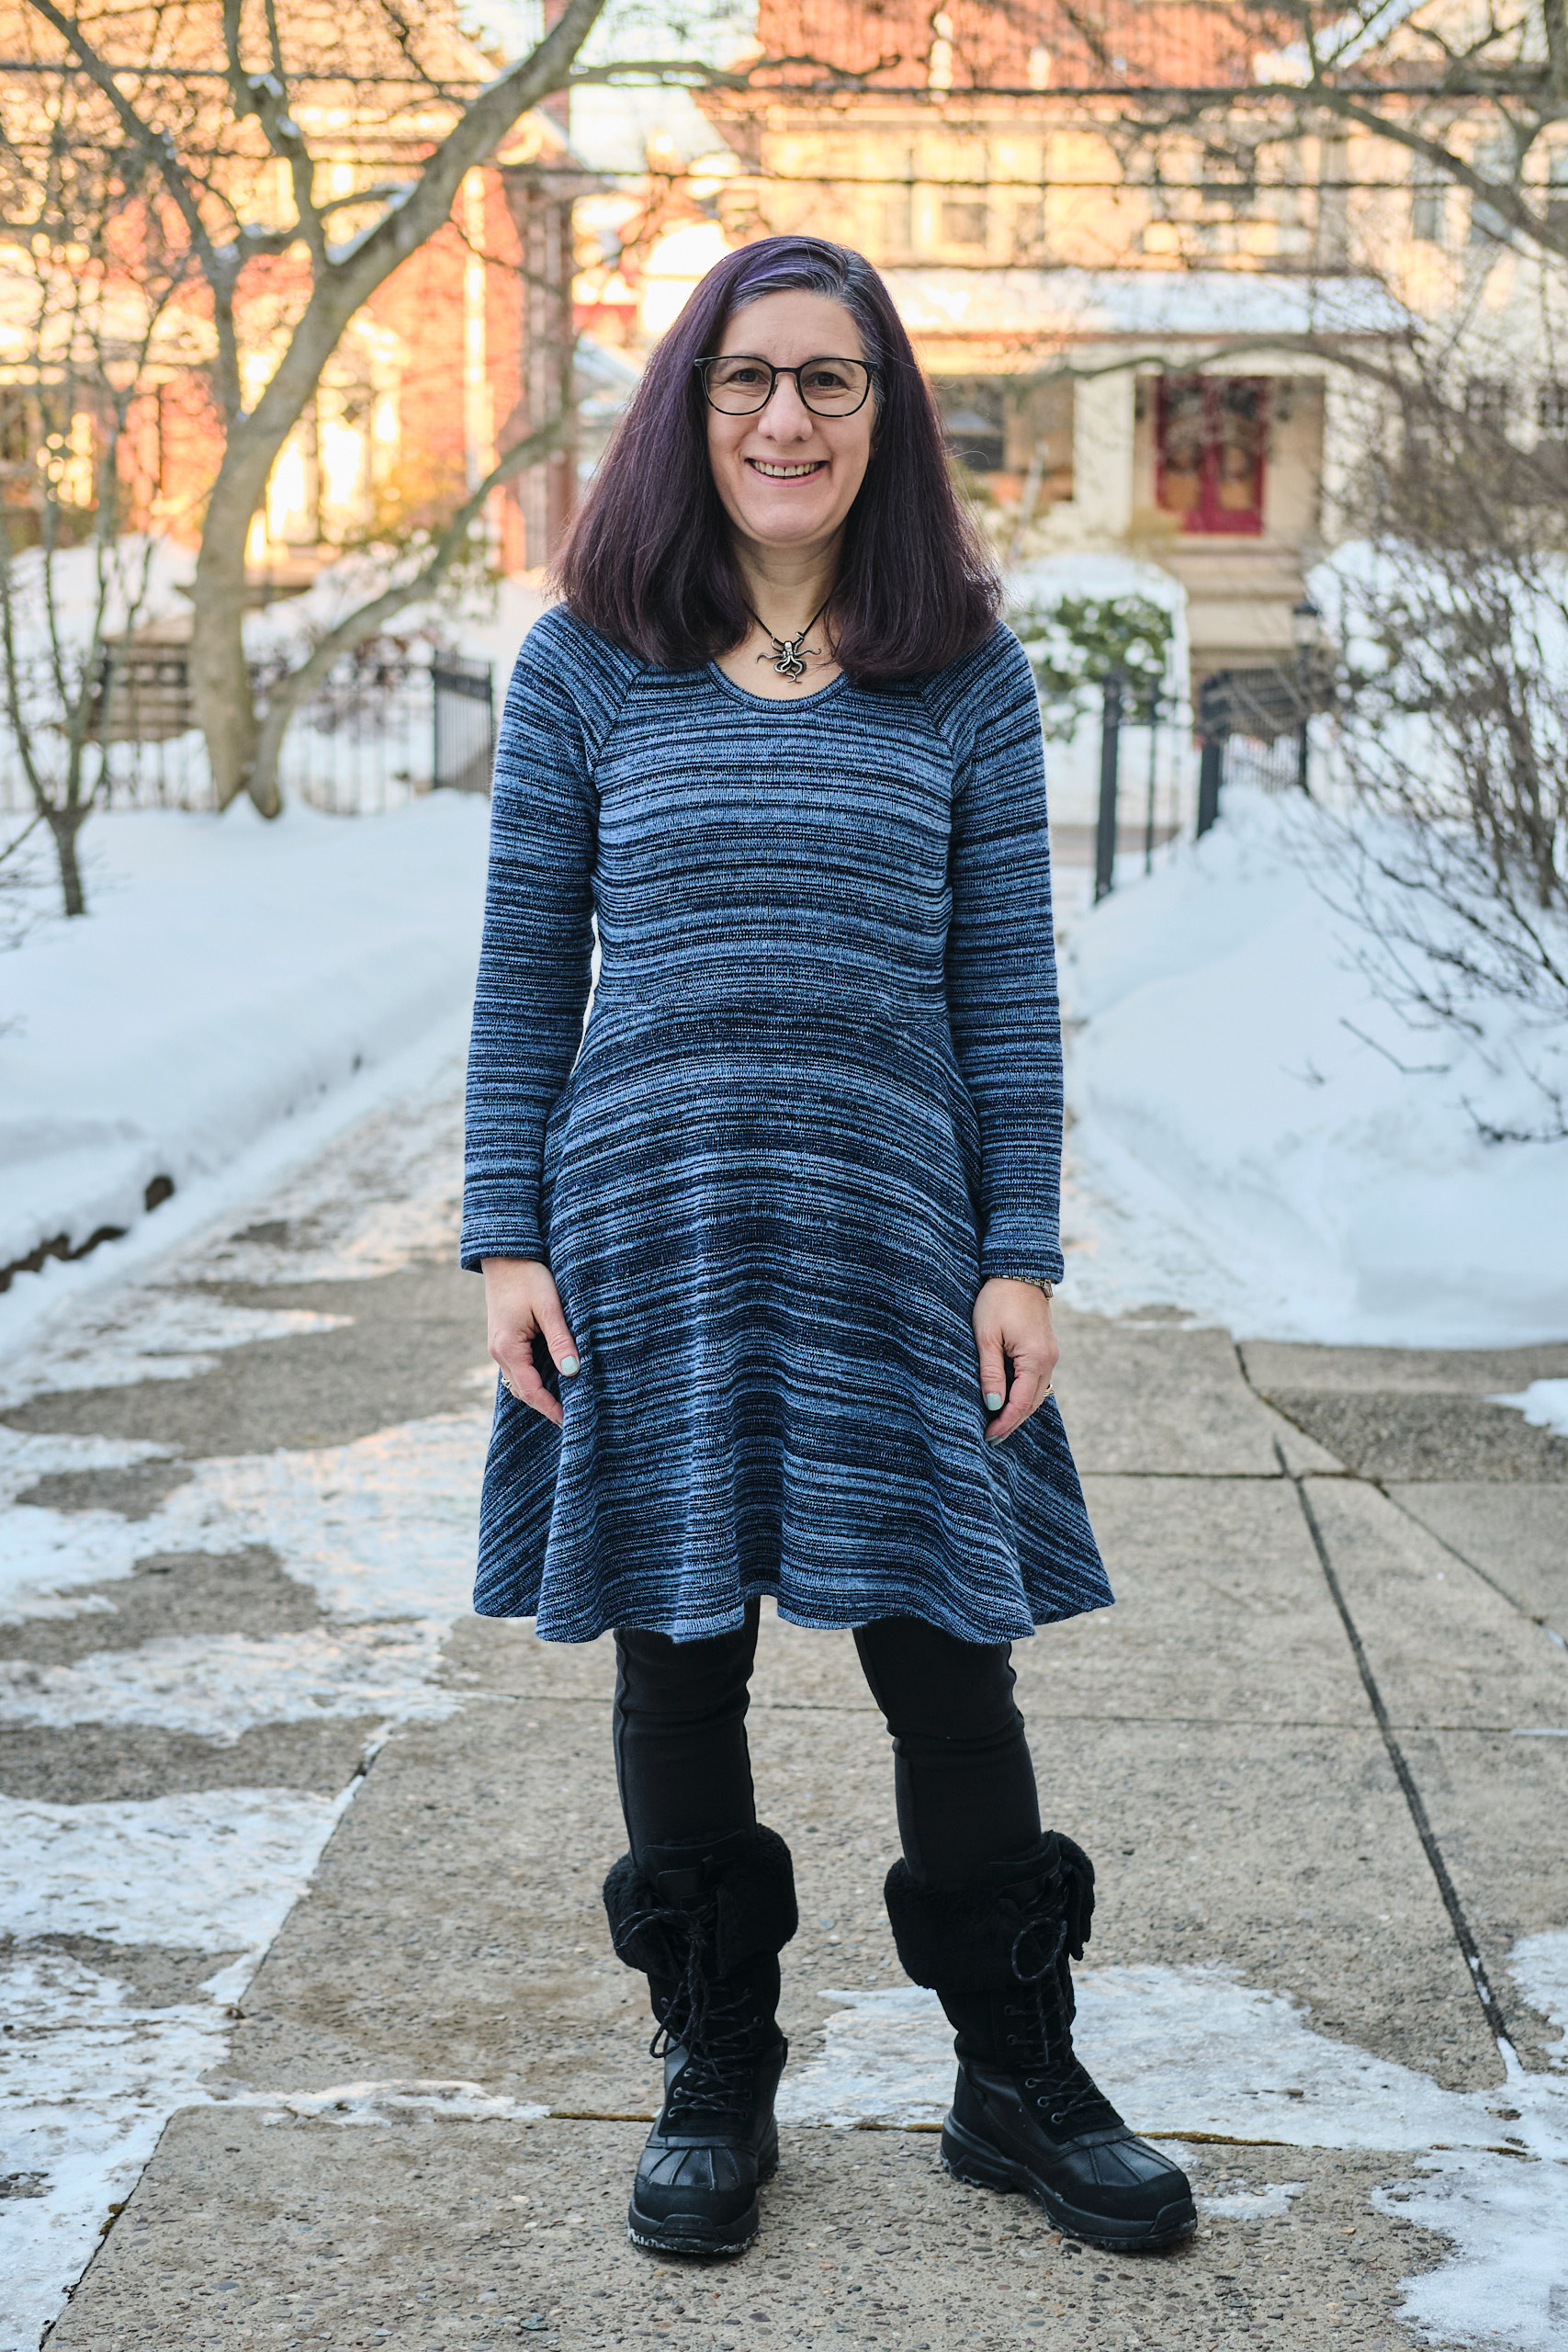
Rivet Patterns Senna Raglan Dress in size 6, high scoop neck, 1 inch above knee length half-circle skirt, sleeves shortened 1 inch, graded in at waist, from 2 yards brushed back polyester/spandex sweater knit.
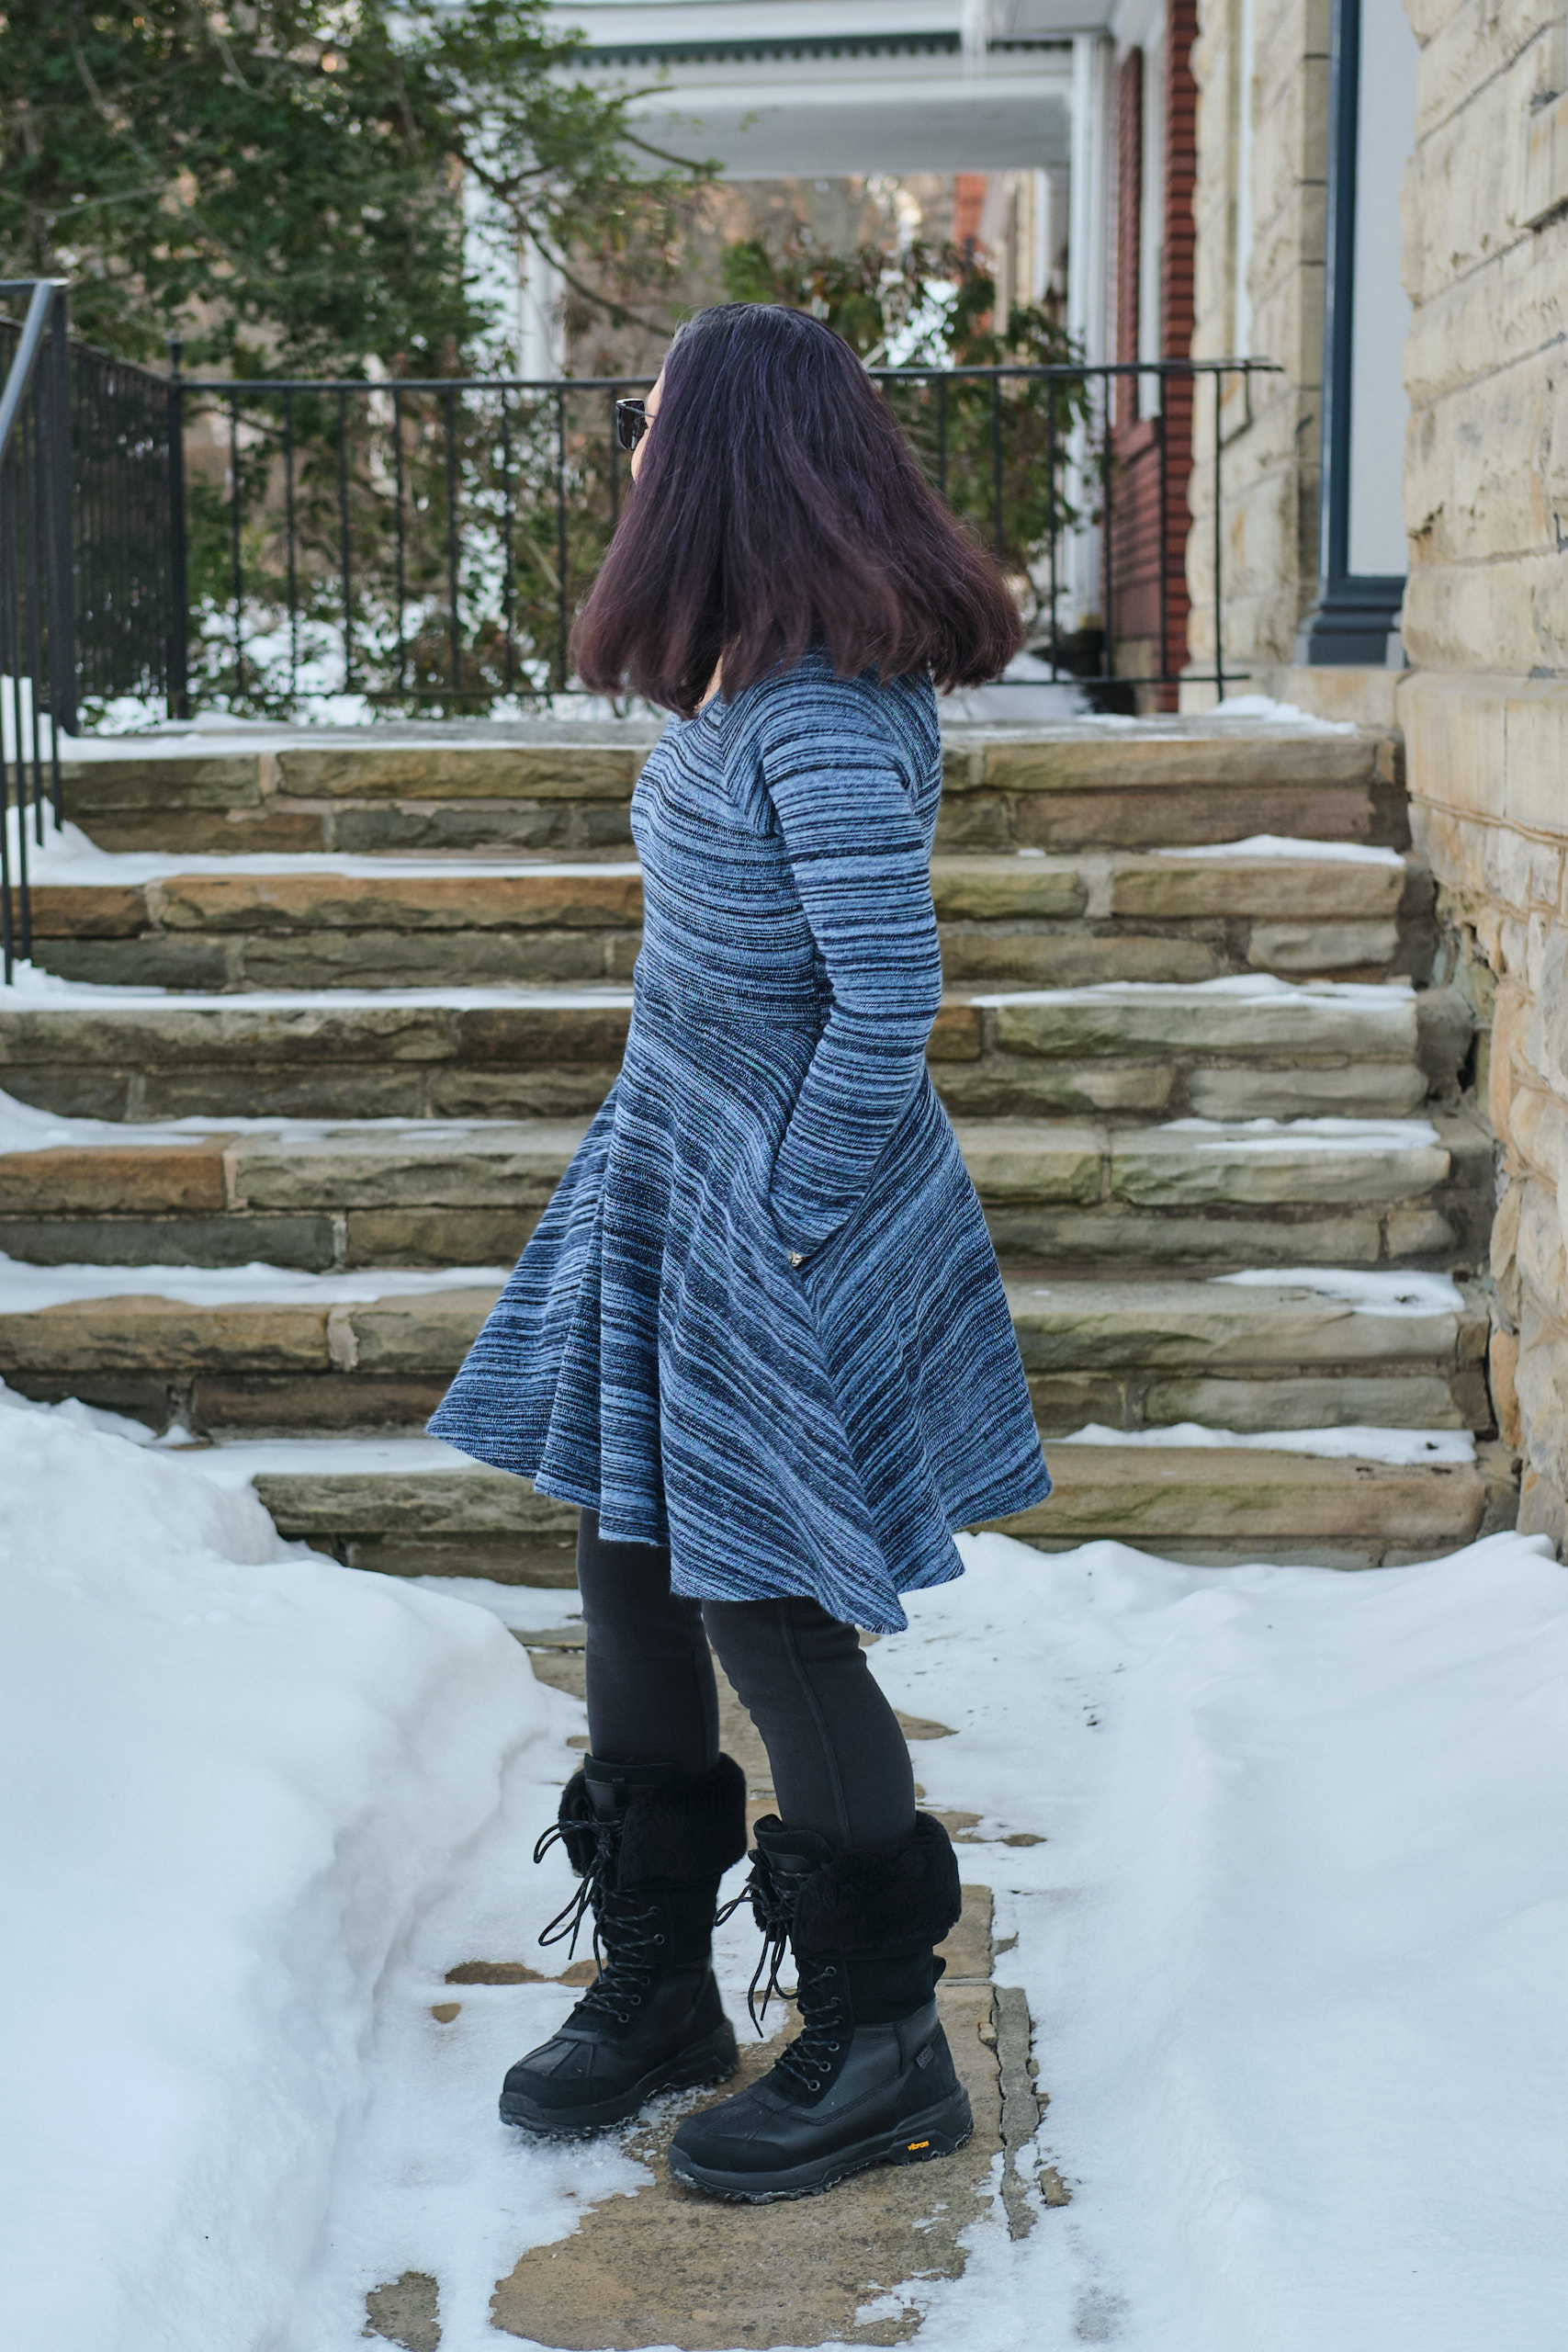
I had never tried a pattern from Rivet Patterns before, but when they recently came out with an upgraded raglan dress pattern, I decided to give it a try. The Senna Raglan Dress is a standard skater dress, but with raglan sleeves (sleeves that have a diagonal line to the collar rather than set into the shoulders). This version comes with a choice of a gathered or half-circle skirt, three necklines, and optional inseam pockets. Some of the testers made cozy sweater knit versions that inspired me to make a Senna sweater dress to wear during our current frigid weather.
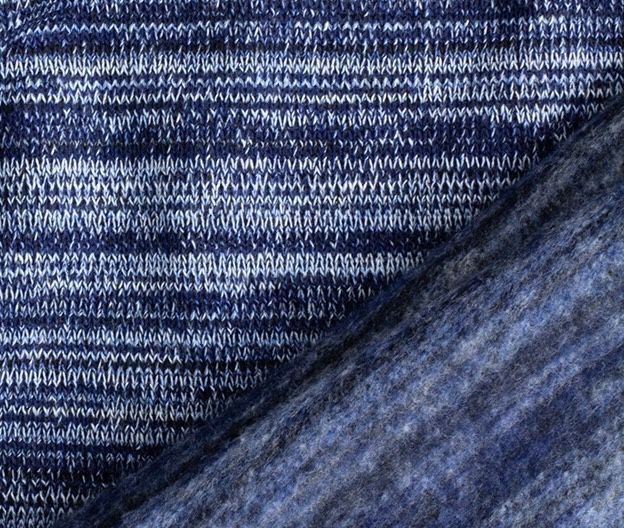
I tend to stock up on sweater knit when it is on sale, but I only want to sew it during sweater season. I found a lovely brushed back polyester/spandex sweater knit last Fall that was knit from blue, white, and charcoal variegated yarn. The front is smooth, and the back is very soft and fuzzy. It is 250 gsm with 50% horizontal and 25% veritcal stretch. The brushed back makes the fabric fairly thick and very cozy. I bought two yards, with plans to make a sweater, but I figured out how to tetris the Senna dress pattern to fit in 2 yards (the pattern suggests that at least 2.5 are required for the version I wanted to make).
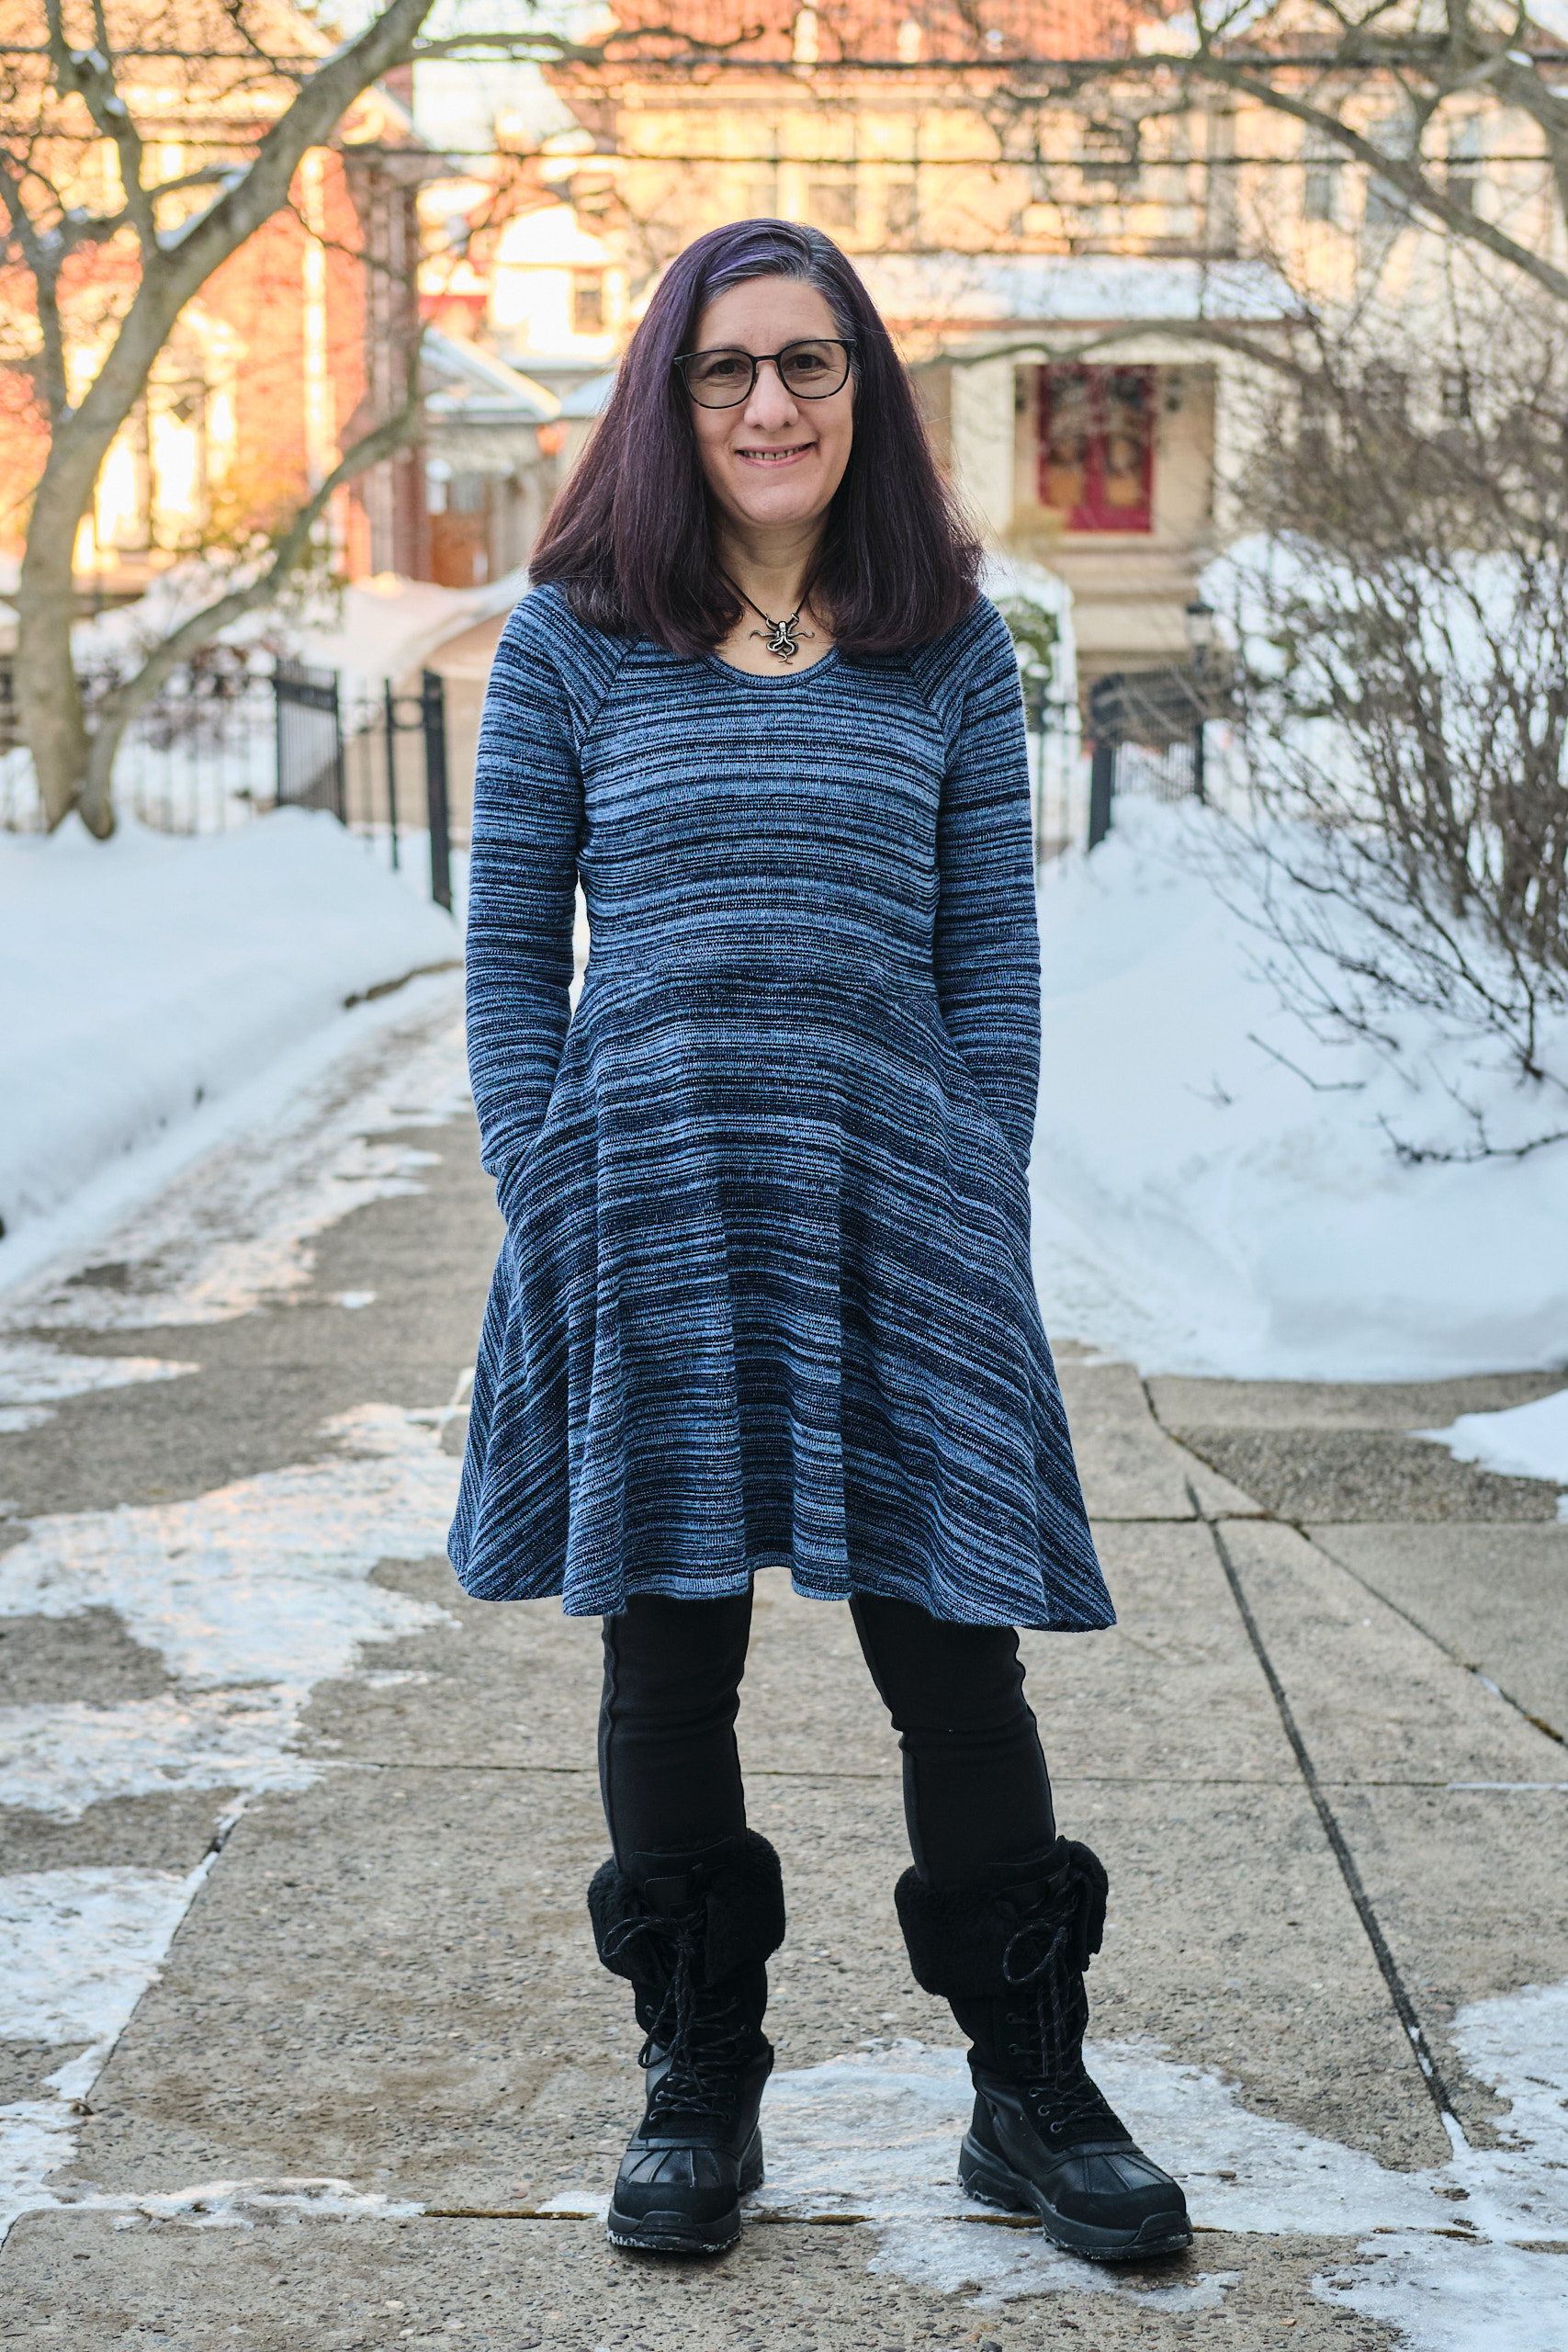
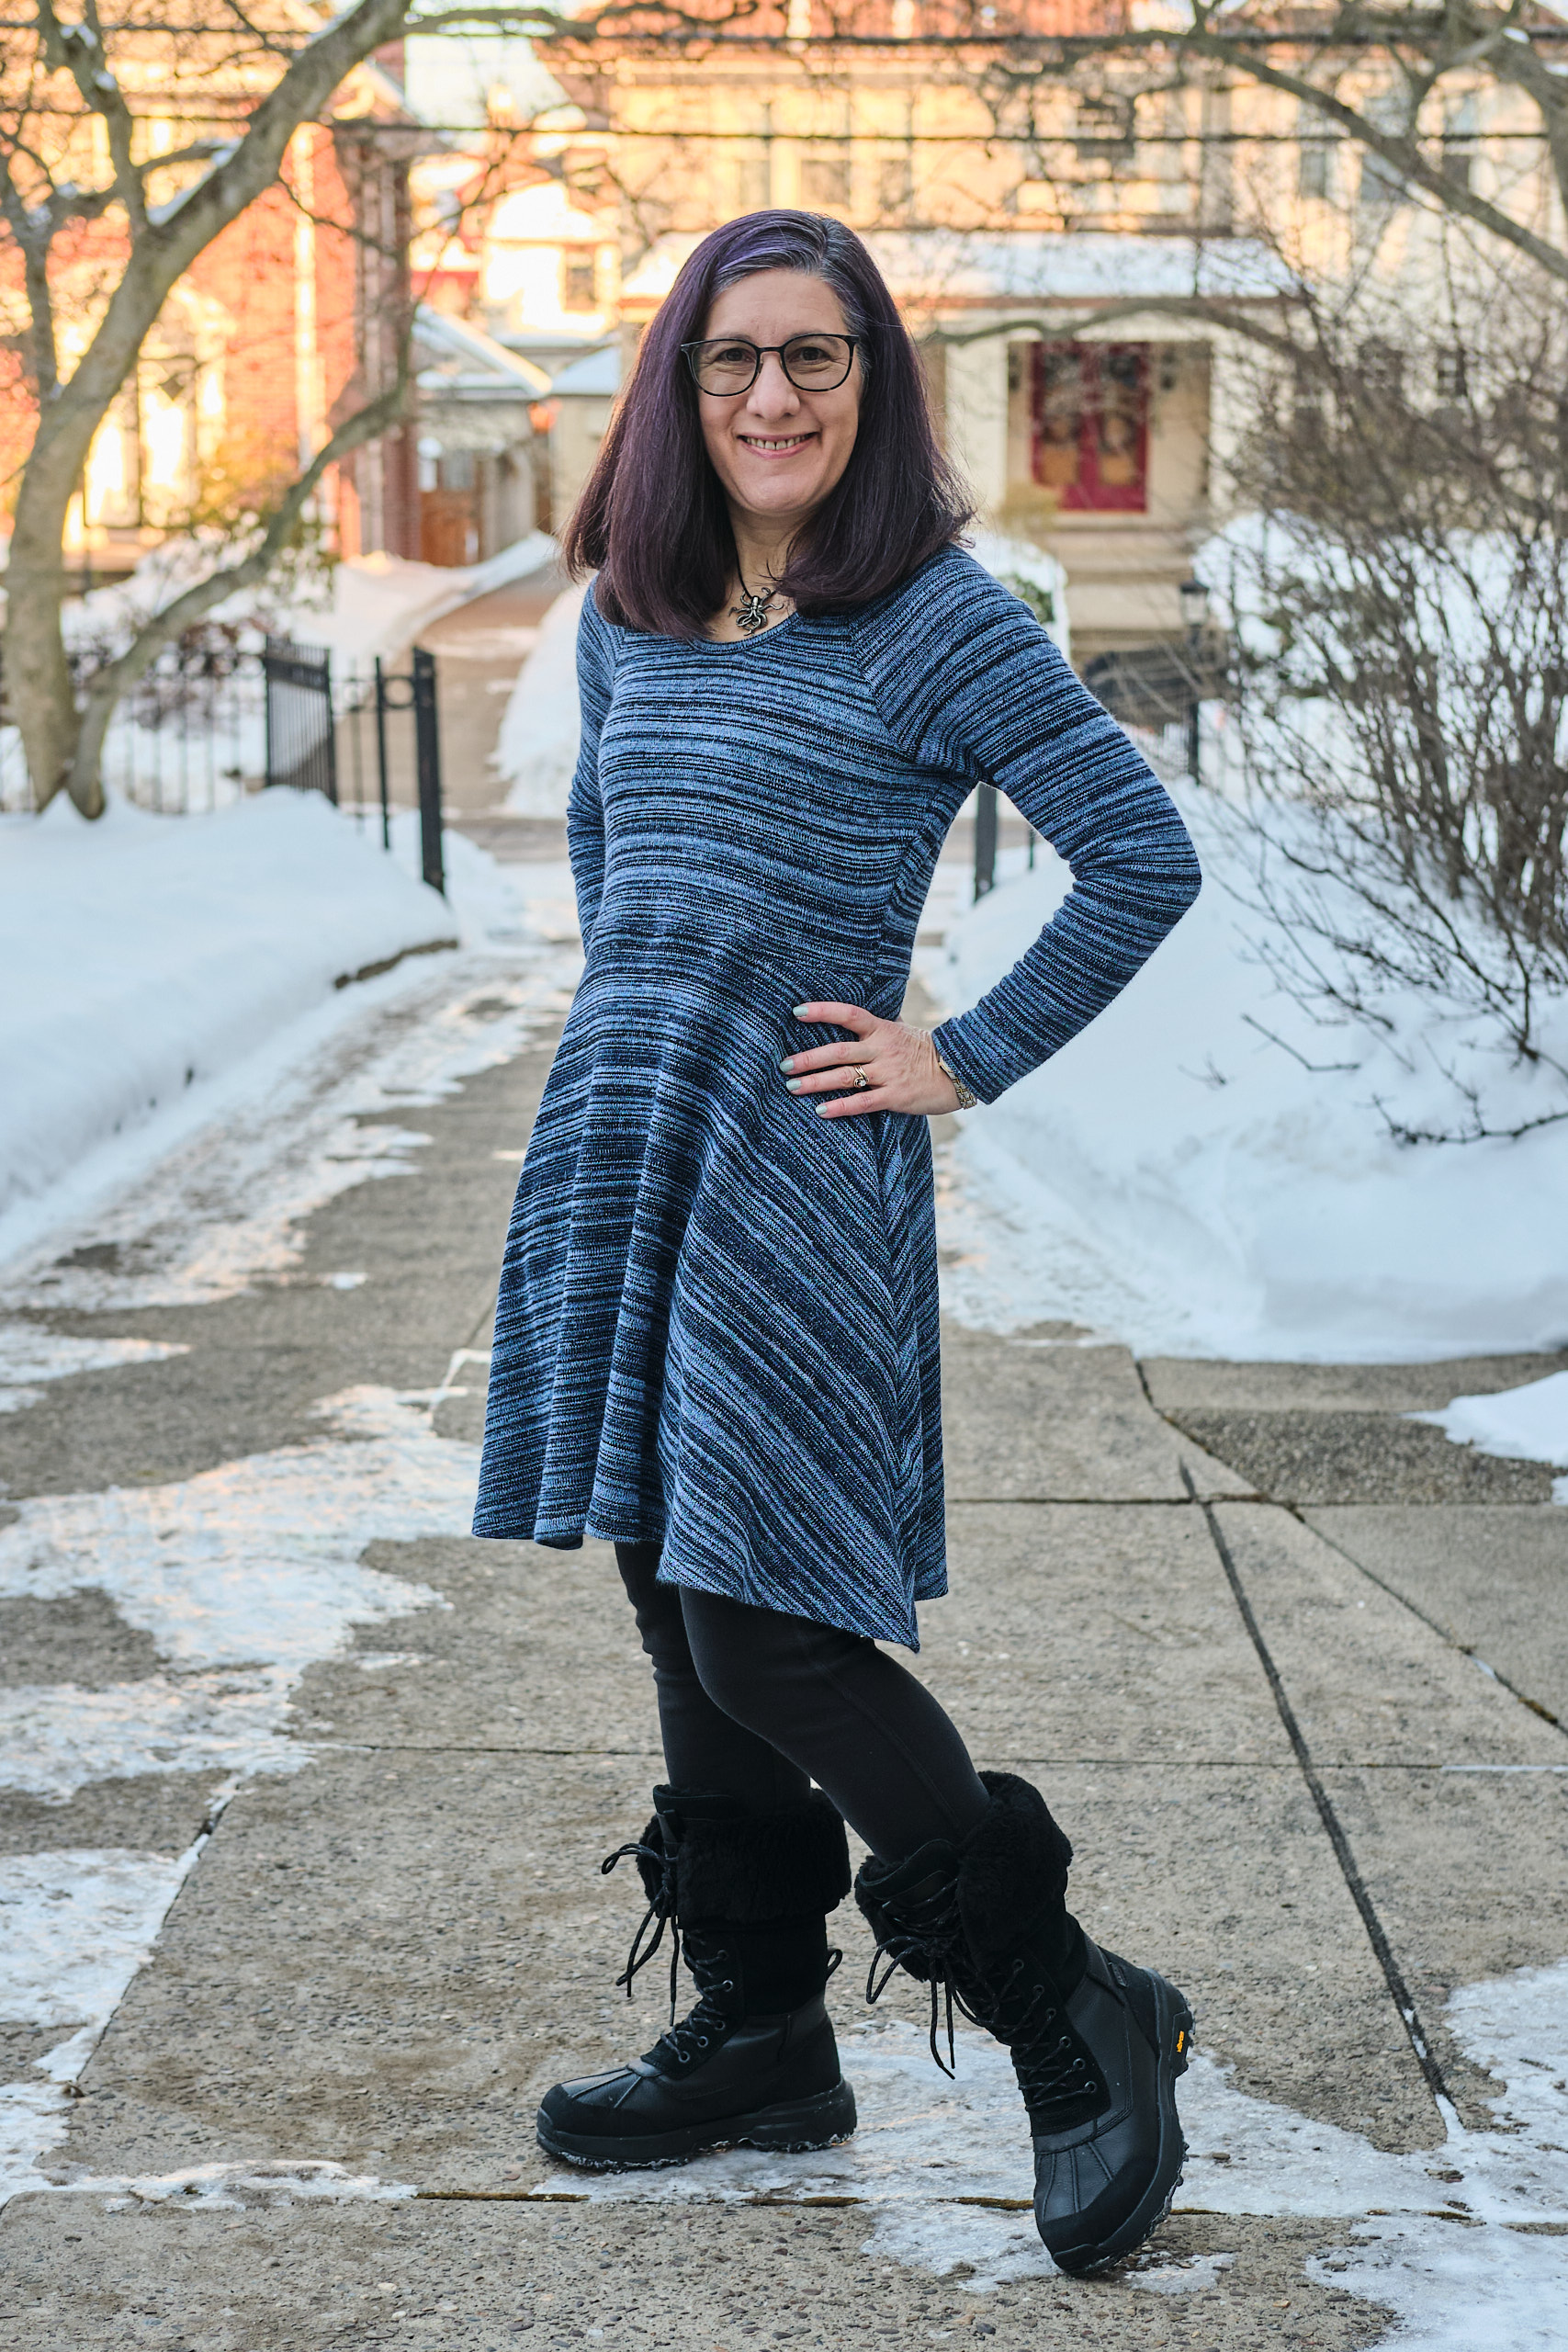
I was between size 4 and 6 on the pattern size chart. Because the fabric is so thick, I decided to cut a size 6, but in hindsight a 4 would have fit better. I shortened the sleeves by 1 inch and cut the half-circle skirt 1 inch below the above-the-knee length, which I’ve found on me usually results in a skirt right at the knee — my favorite length. I cut the high scoop neck.
This pattern was pretty fast and easy to sew together, and the sweater knit was easy to sew on my serger, despite the thickness. I sewed the whole thing with black thread, which is what I already had on my serger and sewing machine. I thought about switching to blue, but the black actually blended better than anything else. There isn’t actually much stictching that you can see on the outside other than the sleeve hems, bottom hem, and top stitching at the waist. The pattern instructions are fairly terse, but pretty clear. This is a knit pattern with a 3/8-inch seam allowance, which is not my favorite, though, as it requires trimming 1/8-inch off your seams as you sew.
I did run into a problem with the neck band though. My sweater knit has some spandex in it and is appropriately stretchy, but it does not have great recovery, especially around the edges. It started stretching out around the neck as I was sewing it, and the neckband stretched a lot as I was folding it in half and pressing it. I realized I should have stabilized the neckline with stay stitching before I sewed the bodice together and that I needed to do something different with the neck band. The obvious thing to do was to make the neckband out of some other fabric with better recovery. I thought about looking through my stash for something in navy that might work, but I really wanted a band that matched the sweater knit fabric in the rest of the dress. I once had a similar problem with another sweater dress, but I didn’t fully realize it until after I sewed the neck band on and saw that the whole neck was too stretched out to be wearable. I saved it by threading some elastic through the neckband, but it never did lie perfectly flat. I thought maybe I could improve on that solution this time by sewing elastic to the neck band before I sewed it together. While I was looking for suitable elastic I found my 1-inch ultra-light fusible knit stay tape and thought that might do the trick. So I cut out a new neck band (1.75″ wide and 24″ long) and fused two 24″ strips of stay tape to the back. Then I joined the ends and folded it in half lengthwise and pressed. I could see it was now a much less stretchy band, but it had a little bit of give — hopefully enough to fit the slightly stretched out bodice. I used the quarter method, as advised by the pattern instructions, and pinned the neck band to the bodice neck. I could see I was going to have to stretch the neckband more than it really wanted to stretch, but I decided to try it anyway. I basted it with a zigzag stitch on my sewing machine, stretching as I went. Amazingly, it worked. After checking to see that it looked ok, I sewed the neckband on with my serger, trimming only about 1/16″ as I sewed. Then I pressed well, and voila, a well-fitting neckband that was not stretched out. This sweater knit definitely did not want to be a neck band, but where there’s a will there’s a way!
I’m a diehard pocket fan, but I have to admit that sewing a good set of pockets takes time and makes the project take a lot longer than it would without the pockets. I was intrigued by the pocket construction on this dress, which was a little bit different than what I’m used to. I actually hoped for a miracle and to discover that this was the secret way to make pocket construction less painful, but alas, it was not. The difference here was only sewing the pocket opening to the dress at first, and sewing the part of the pocket bag above and below the opening later when sewing the front to the back. I still had difficulty sewing at exactly the right place when I sewed front to back, and I still had to unpick a bit, but it all worked out fine in the end. The pocket bags are large, as I like them.
The pattern suggests adding 1/4-inch elastic at the waist for stability. I decided to do that, but used clear elastic threaded through the slot on my serger foot for easy attachment. I took their advice and folded the seam with the elastic up towards the bodice and topstitched it in place to encase the elastic.
I finished the dress right before bedtime, tried it on, gave it a twirl, and it was…. just ok. It was fine, but didn’t look as great as I had expected it would. The waist wasn’t sitting smoothly. I thought, maybe I should make a belt for it. I went to bed, and the following evening tried it on again. This time I figured out the problem: too much ease at the waist. Actually, too much ease everywhere, but a problem mostly at the waist. I probably should have cut a 4 instead of a 6. I went back to my sewing room and basted a seam from the top of the pocket opening to the waistline and then up about 3 inches above the waistline, taking it in about 1 inch at the waistline. I did this on both sides and tried it on. What a difference it made! I cut the fabric about a quarter inch from the basting line and then surged it. The dress looks so much better now. The waist is smooth and it hugs my curves a lot more.
The next morning when I dragged my photographer out to snap some quick fashion photos in our snowy driveway before work, I styled the dress with my new tall, warm snow boots and some fleece-lined leggings. Then I put on my coat and walked to work. The dress was cute, cozy and comfortable all day.
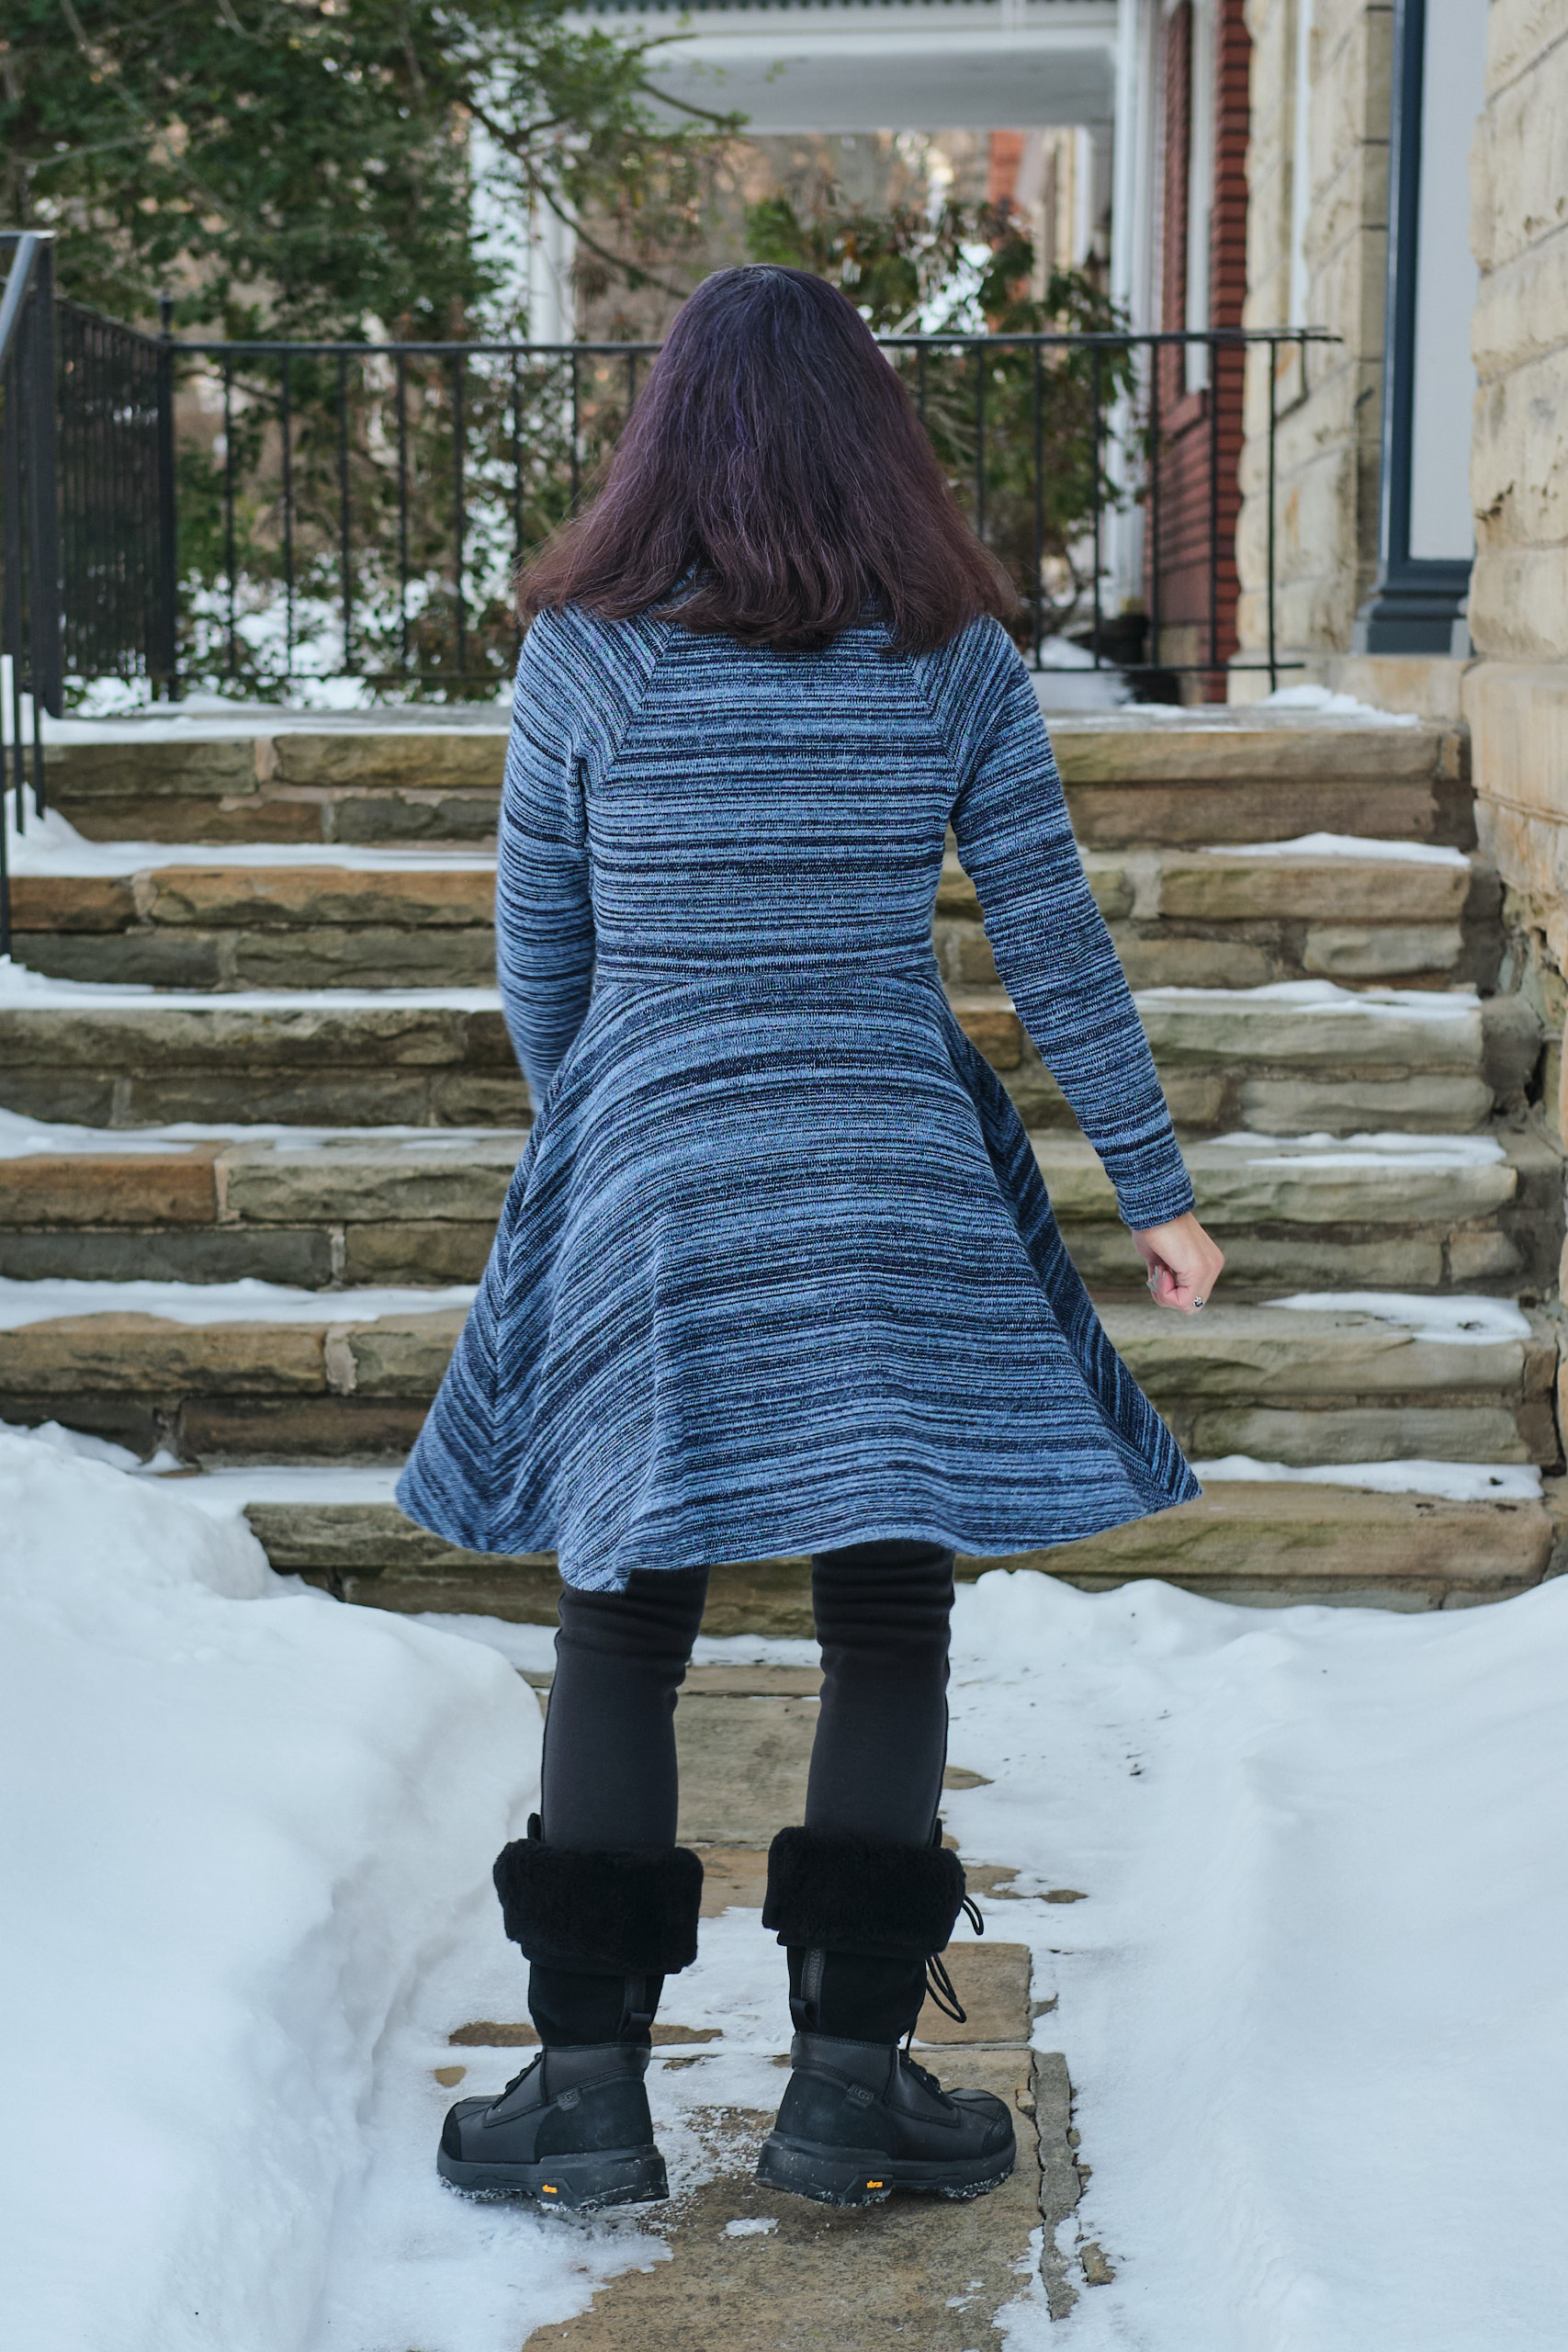
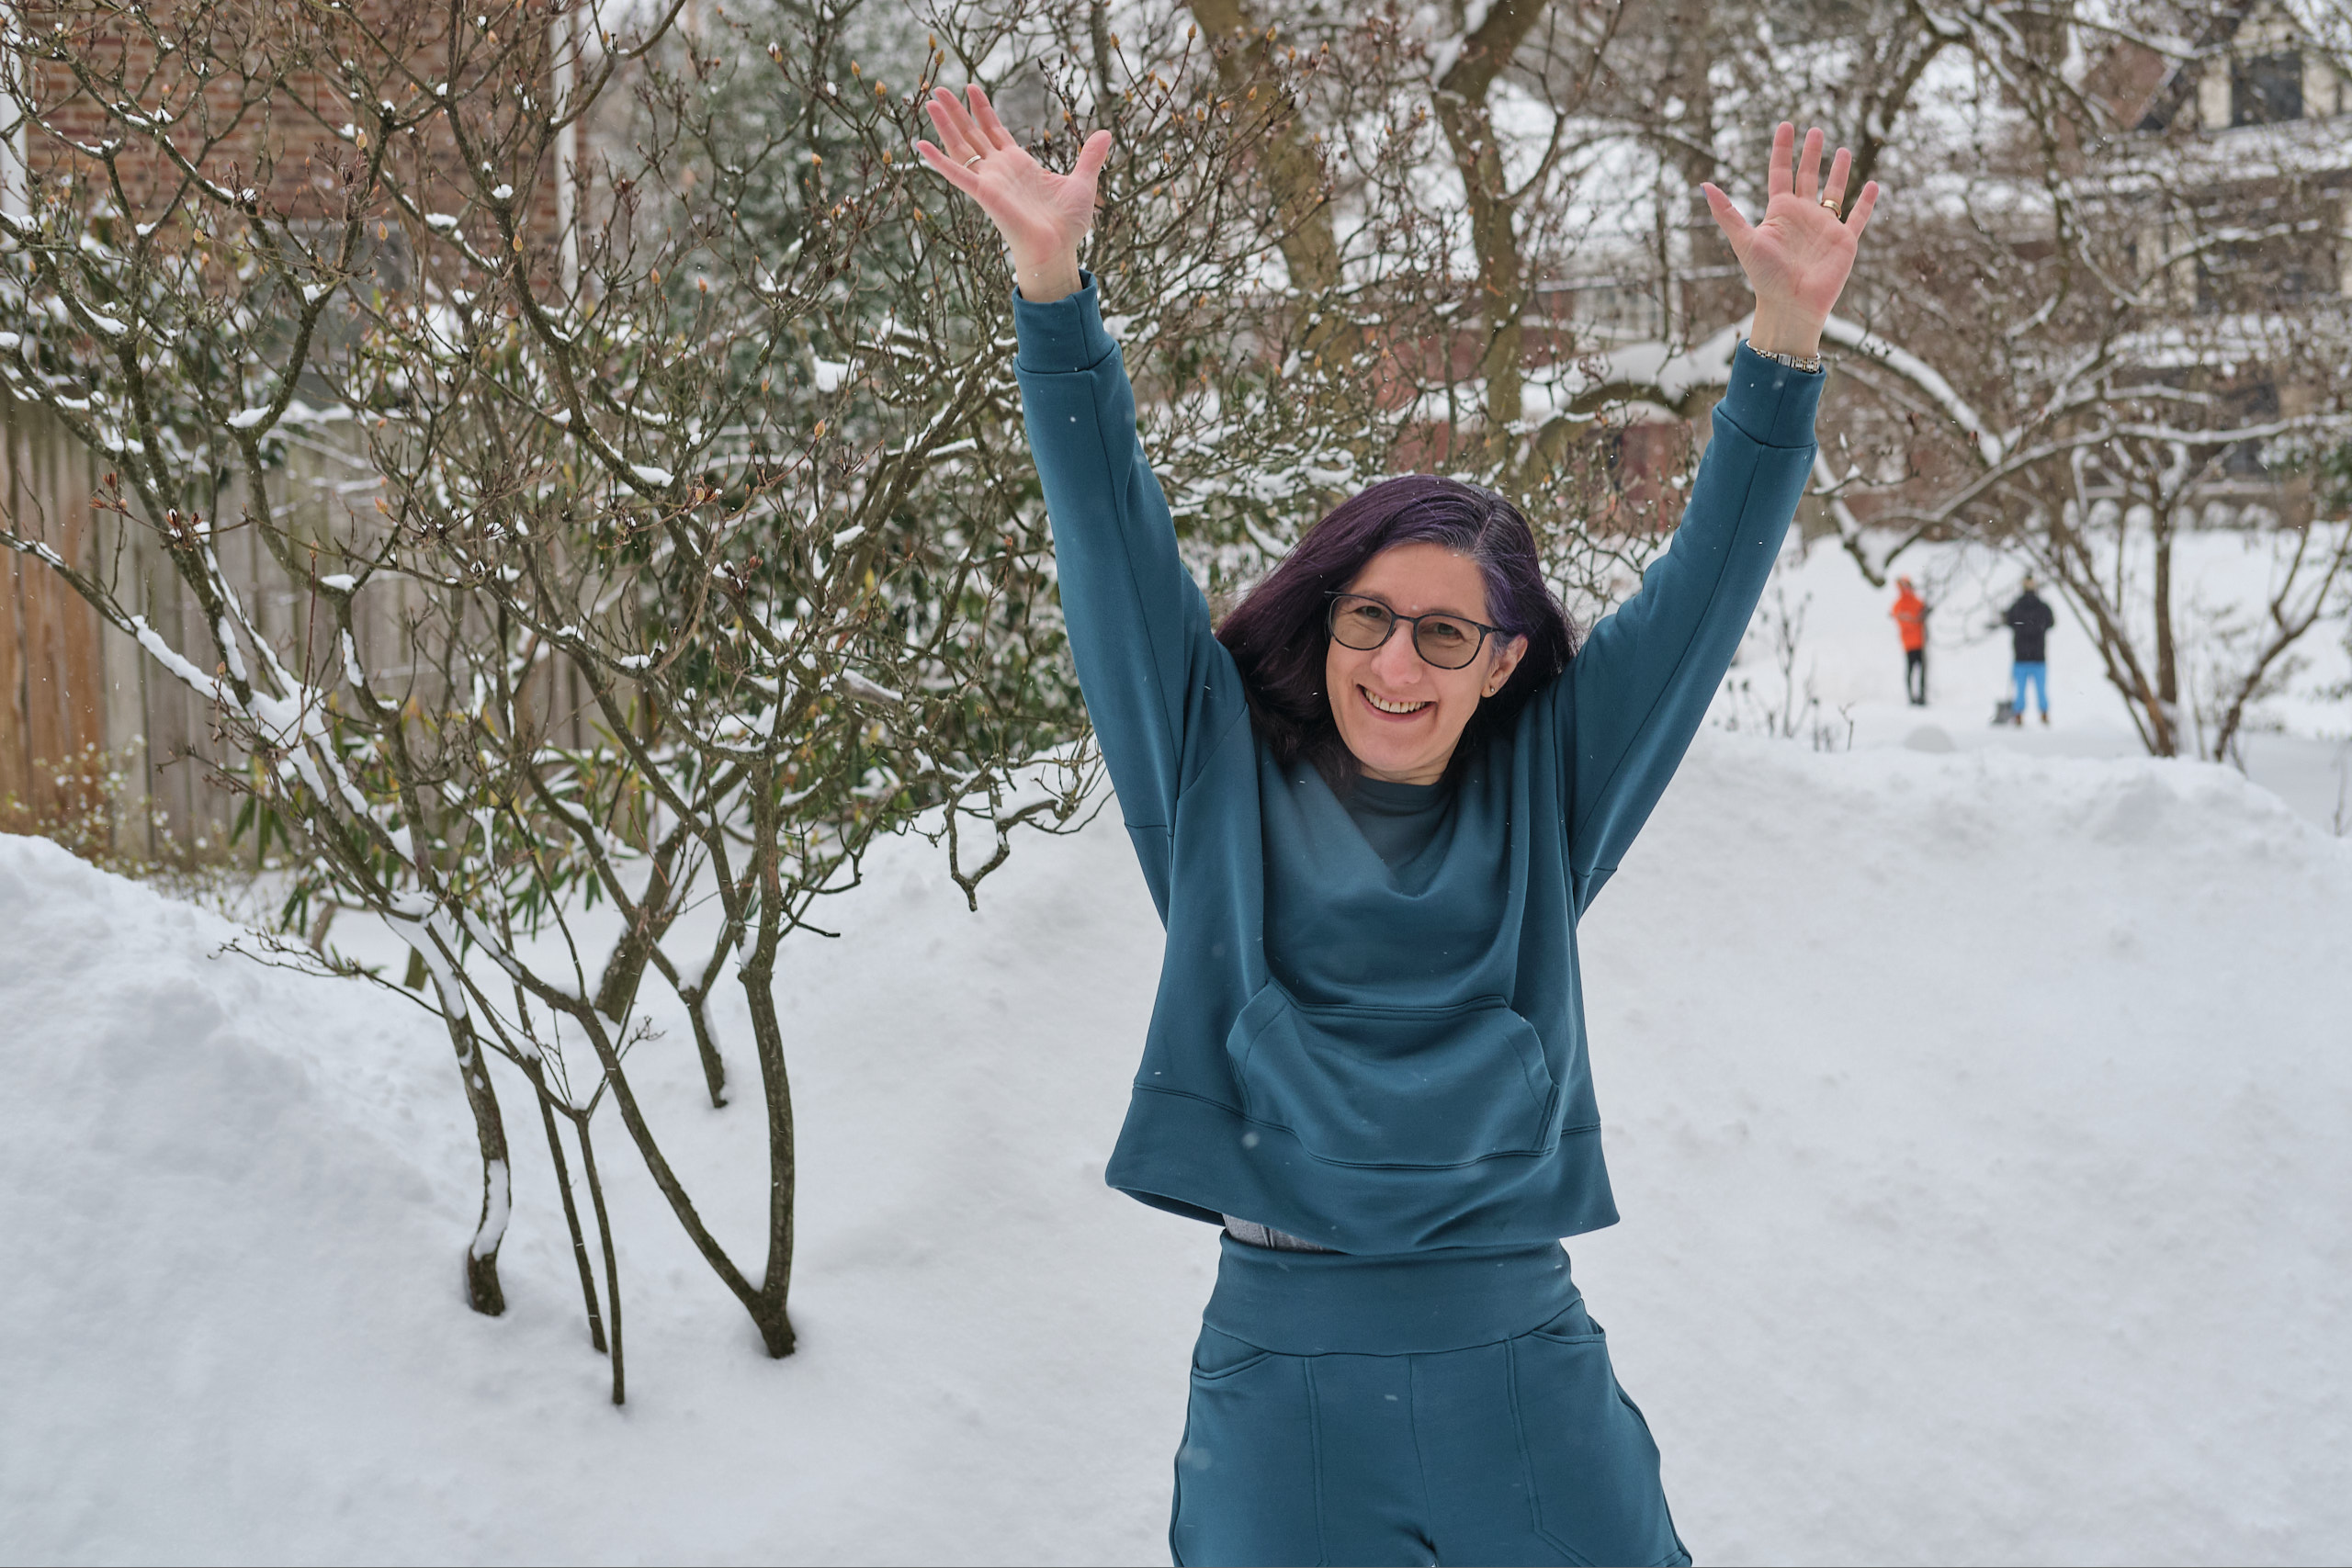
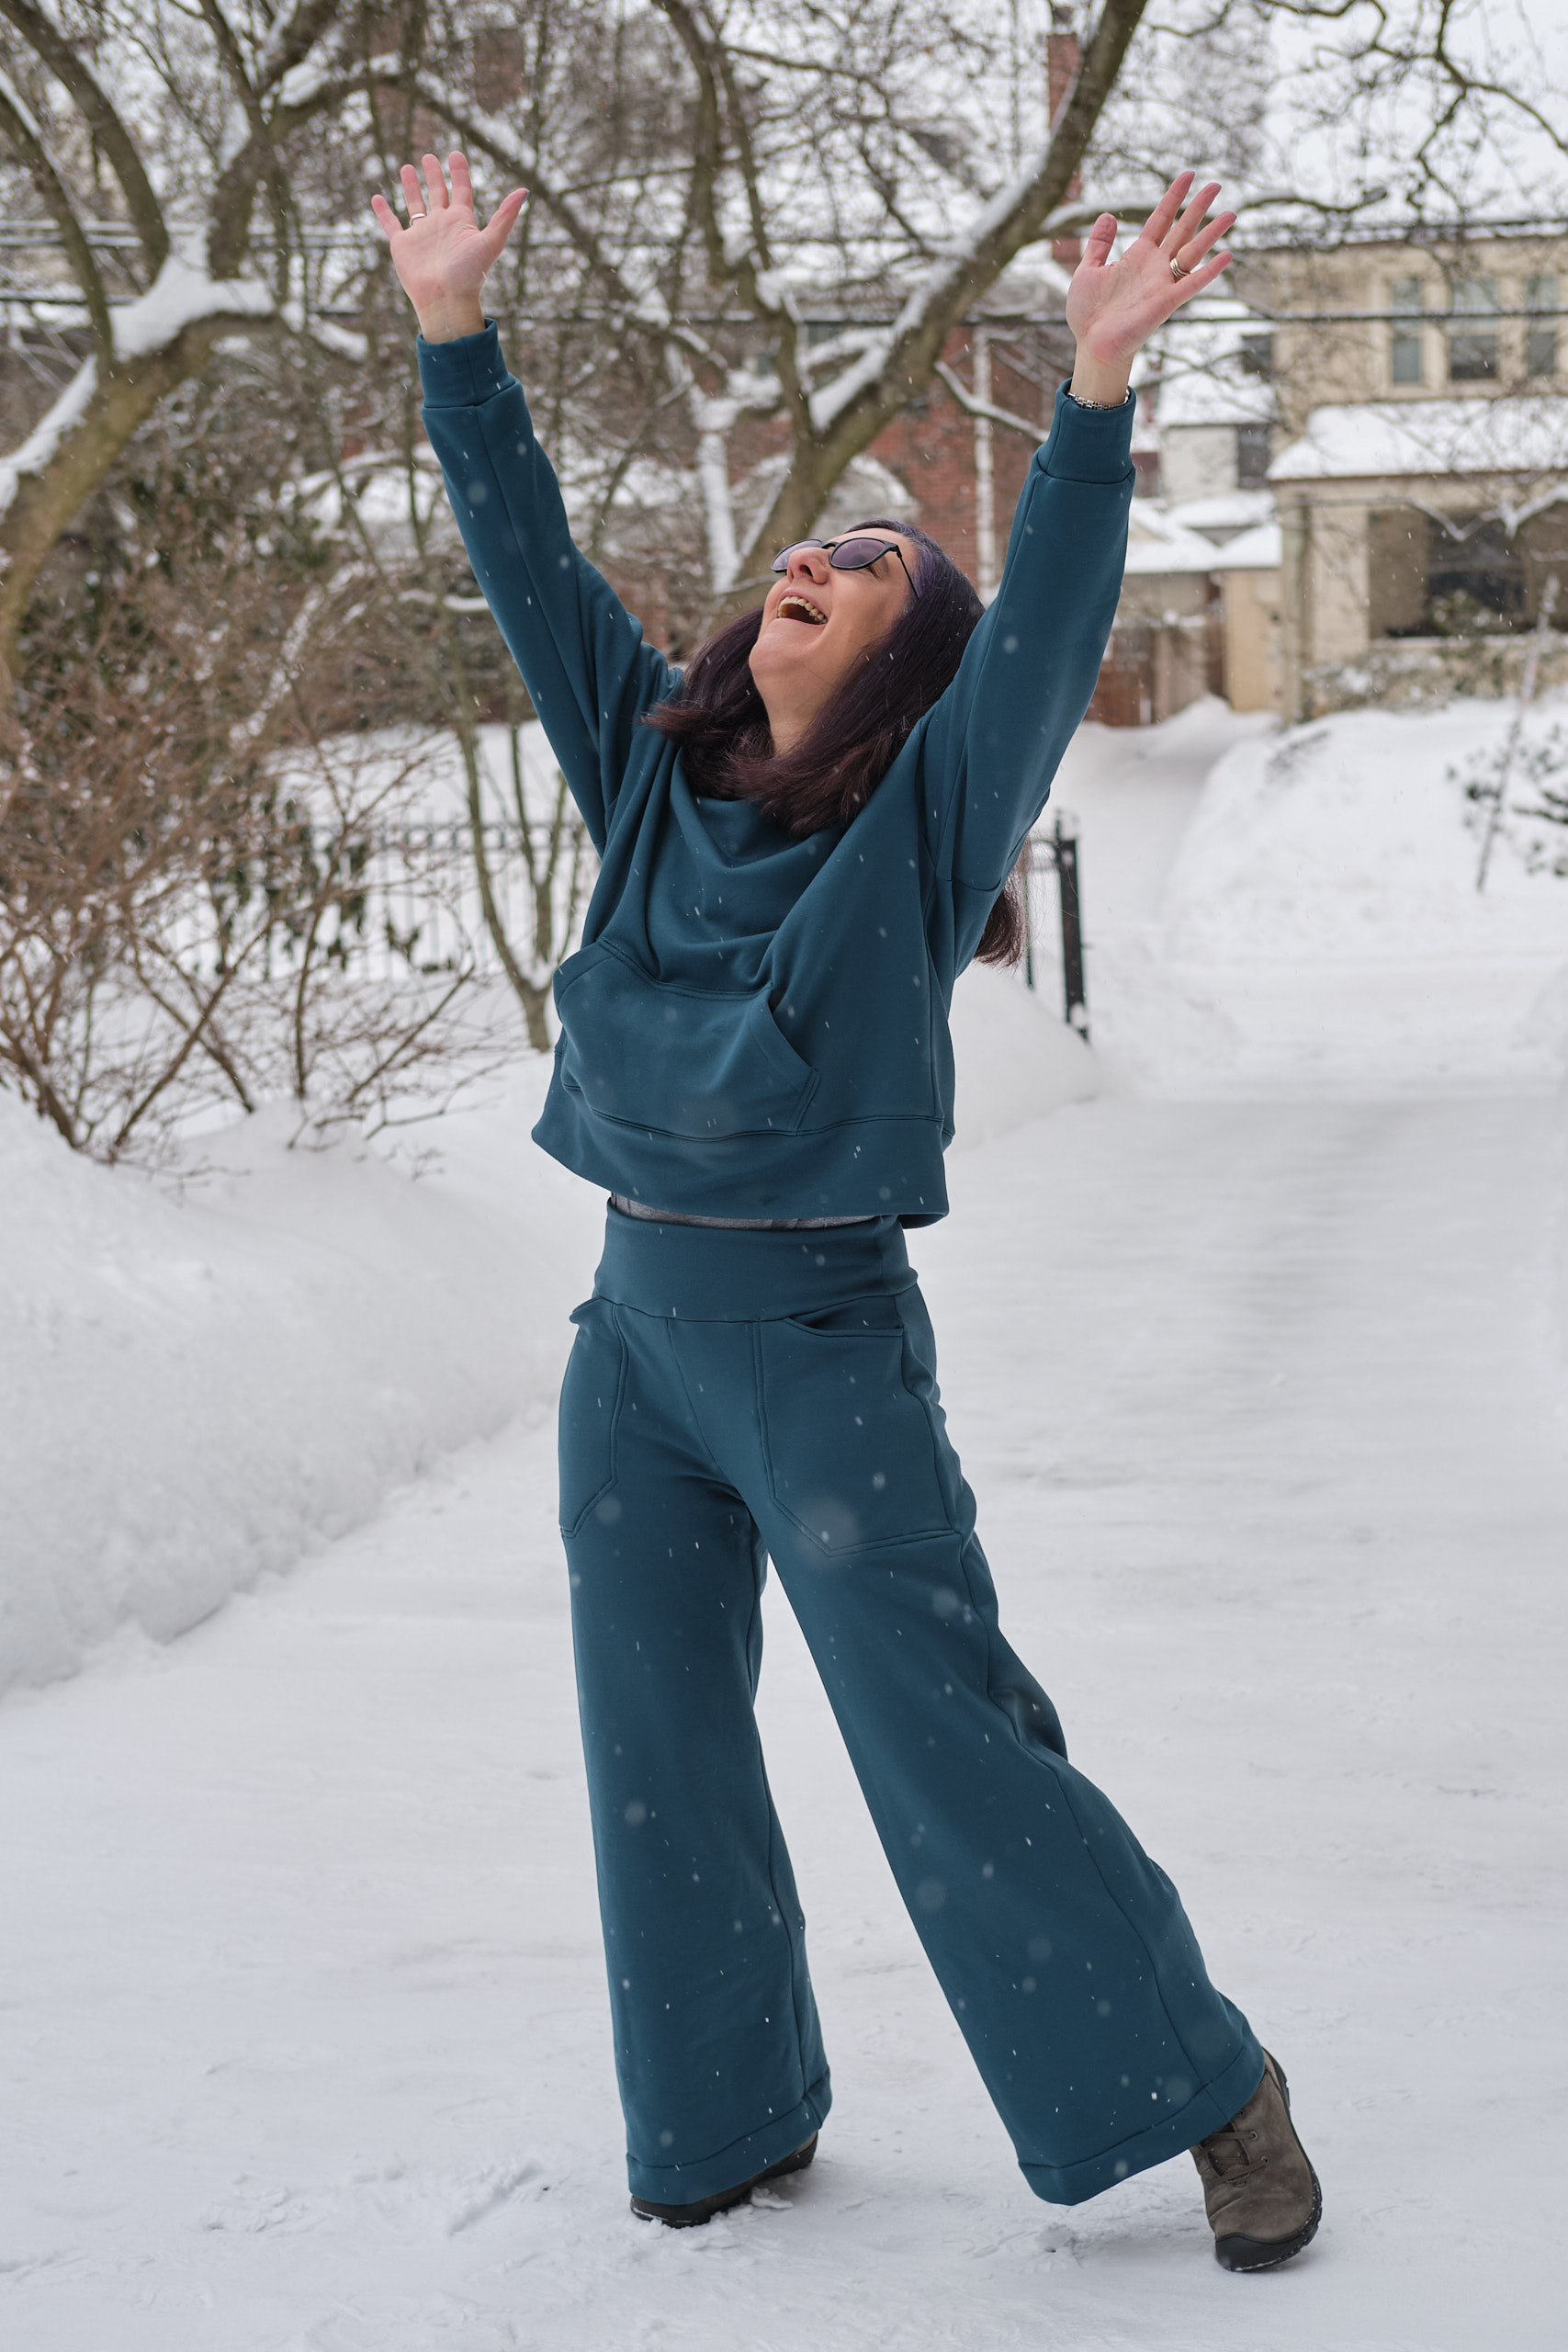
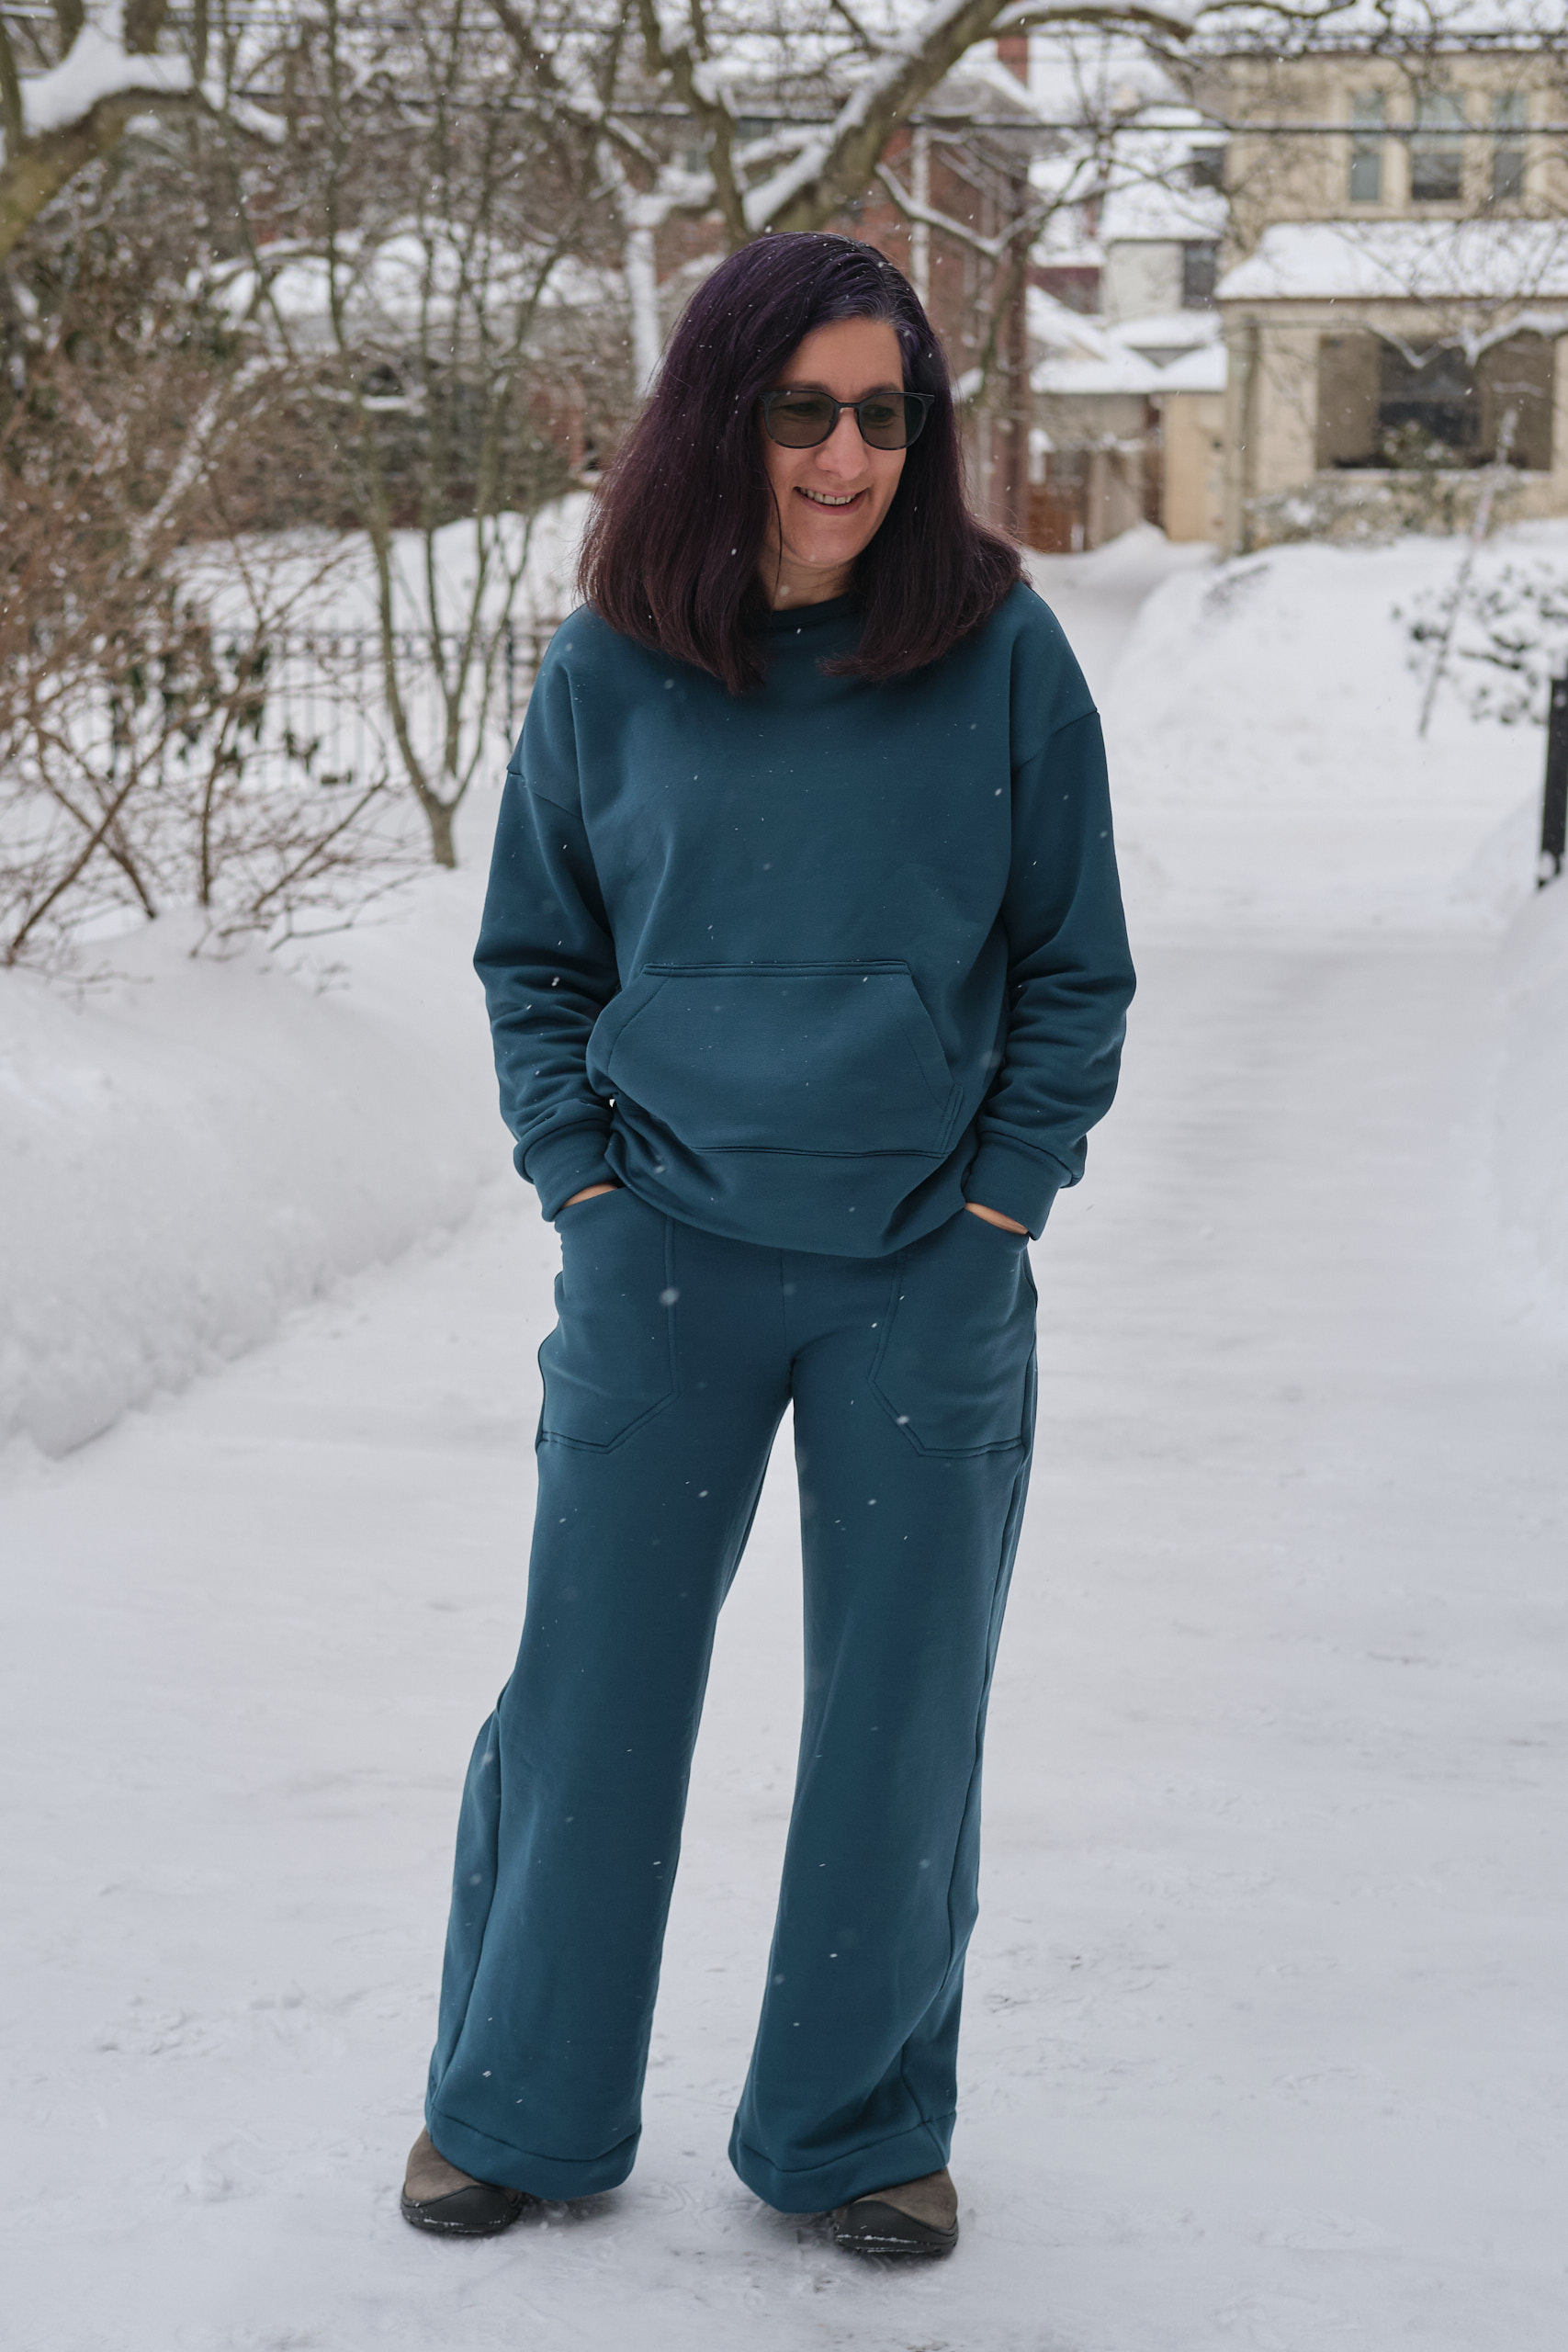
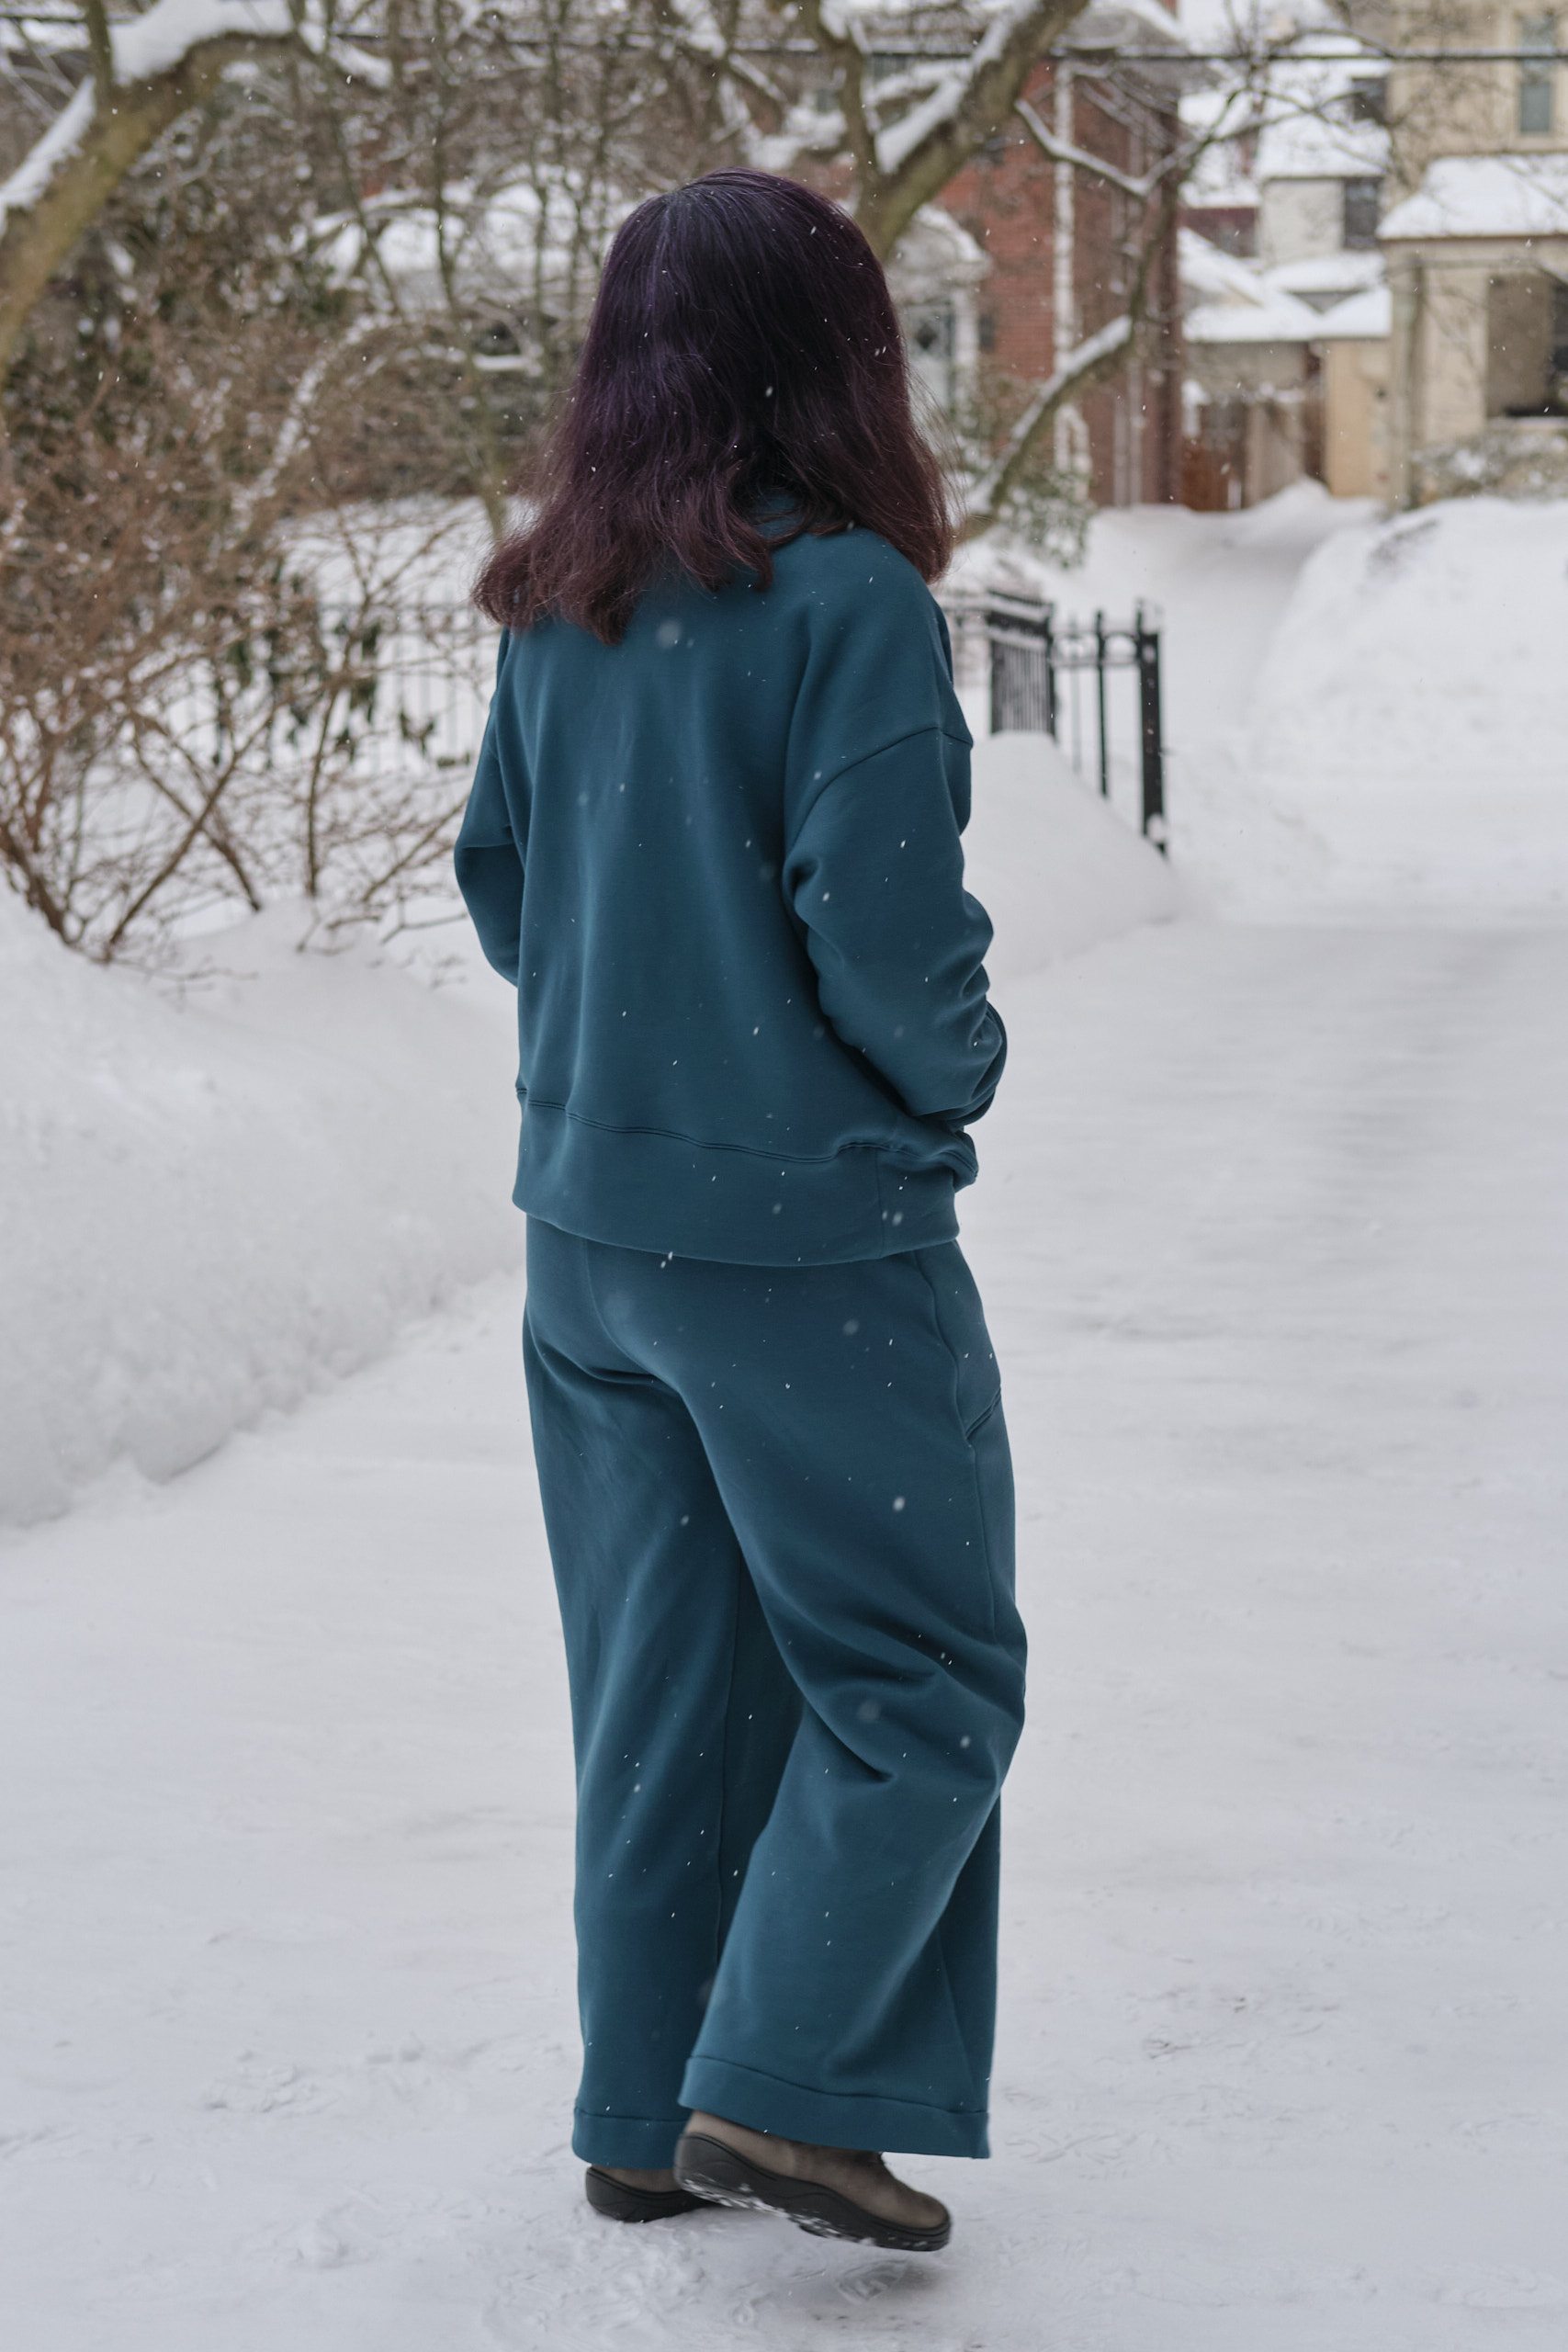
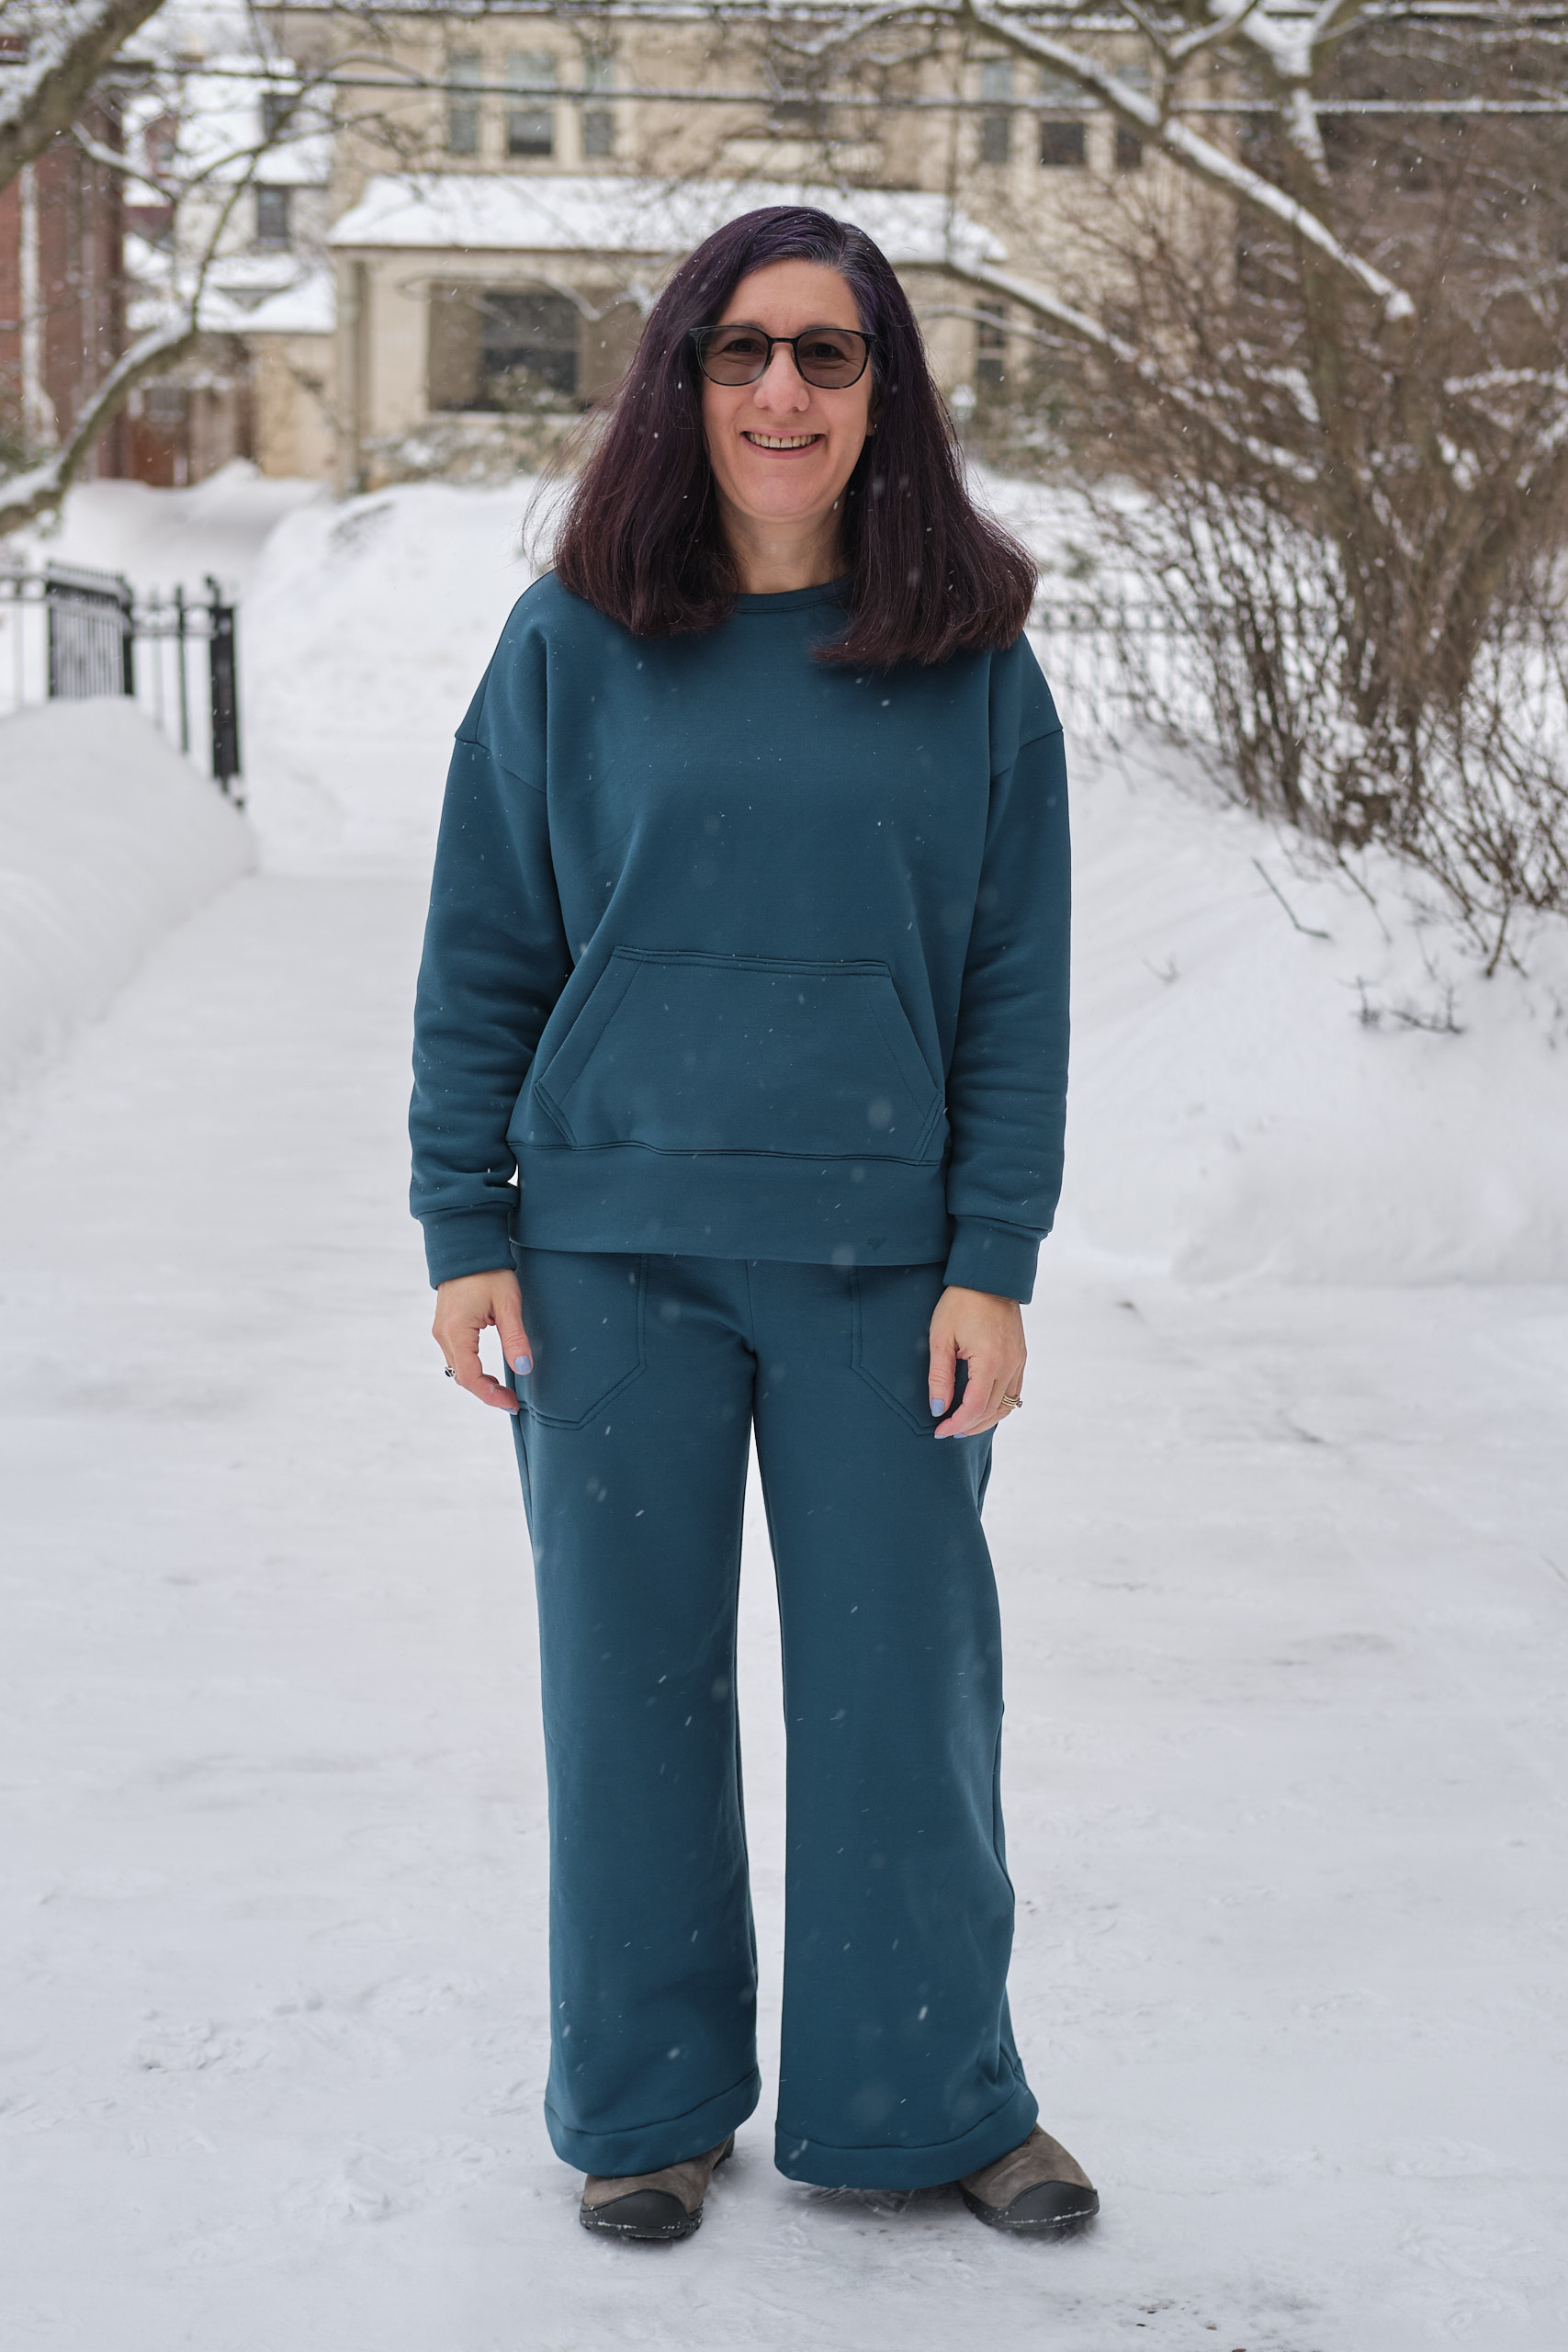
Greenstyle Bianca Pullover in size E, hip length shortened by 1 inch, sleeves shortened by 1 inch, kangaroo pocket, 1.5 yard spruce Polartec stretch sweatshirt fleece.
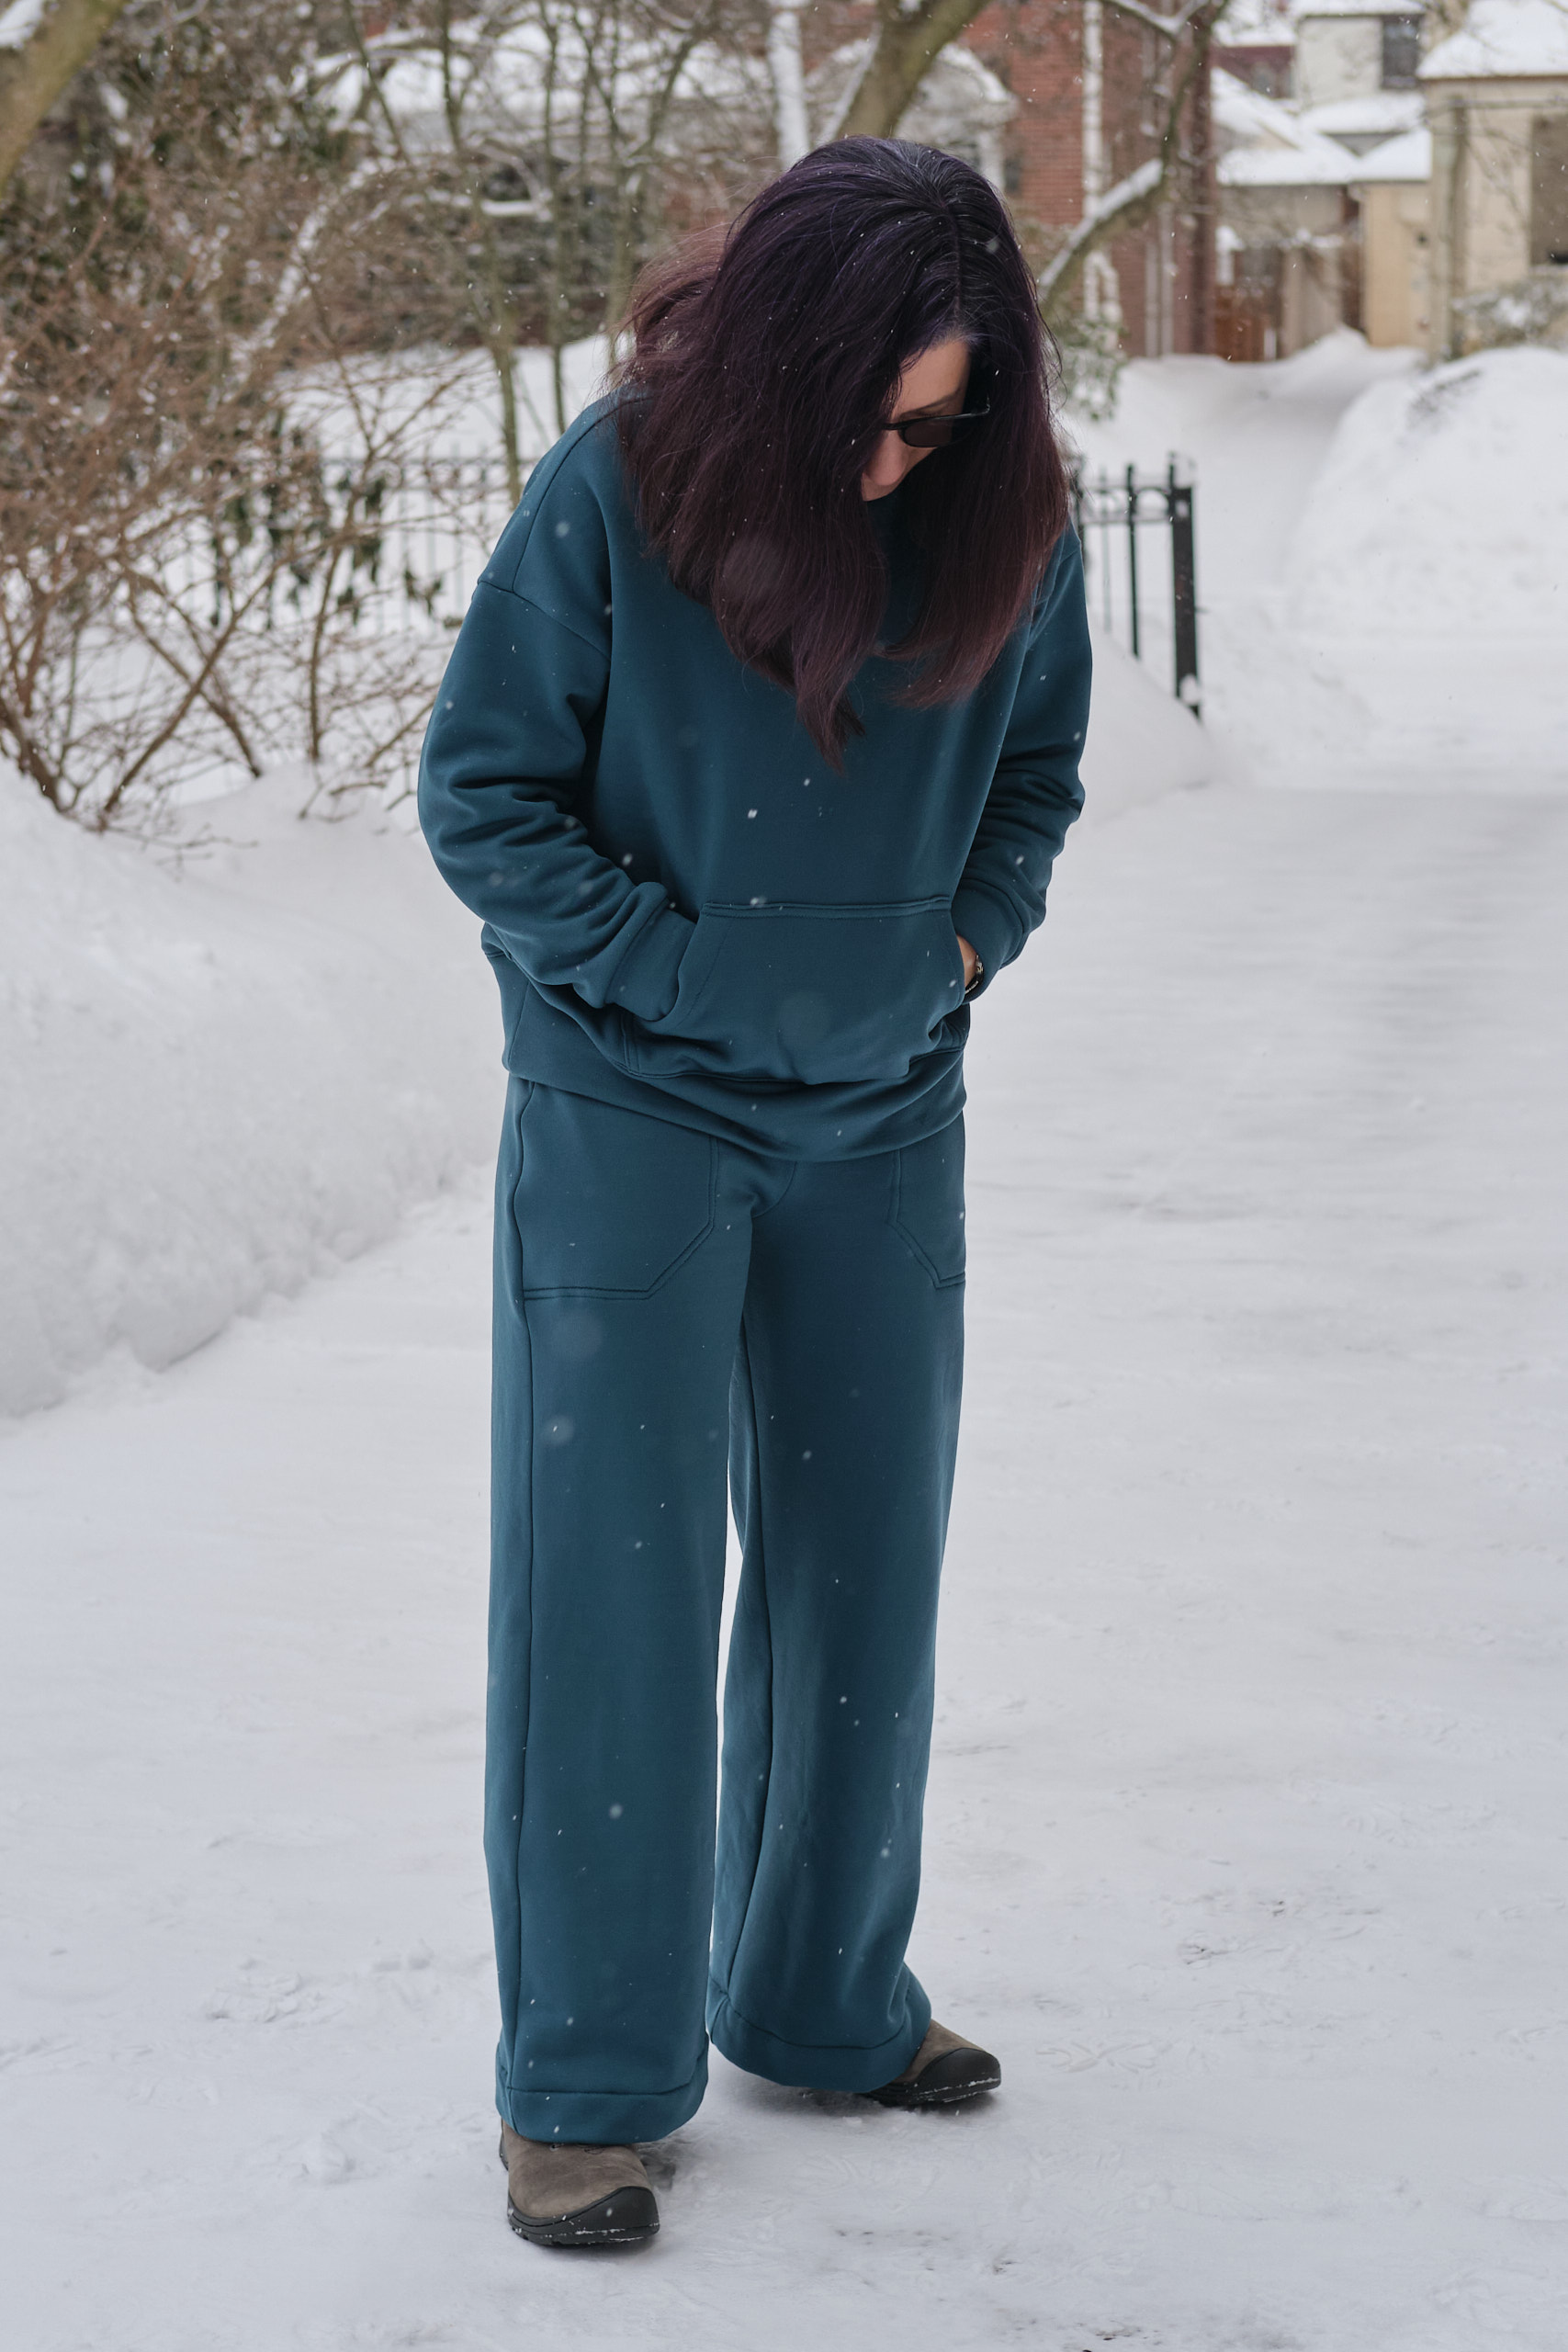
I wanted to make a fleece loungewear set similar to what I’ve been seeing from retailers lately. I started with the fleece wide-leg pants, and then debated about what top to make. I knew I wanted a sweatshirt-style top, but I wanted it to be a bit oversized, but not too long, and I wanted it to have a kangaroo pocket. I liked the fit of the Greenstyle Surge top I just made, although I didn’t want it to be quite that oversized and I wanted a different neck. So I took a look at the other Greenstyle top patterns and decided to try the Bianca Pullover. There’s a nice blog post with lots of Biancas on the Greenstyle website.
The Bianca pattern uses a different odd size scheme than Surge. This time my measurements suggested I was somewhere between D and E. Given the bulky nature of my fabric and the fact that the kangaroo pocket looked too small in the D size, I went with E. The only changes I made were shortening both the sleeves and the bodice by 1 inch.
Bianca was pretty easy and quick to sew, but the instructions were rather minimal. For an experienced sewist, this was fine, but the pattern might be more intimidating than it needs to be for beginners because it doesn’t explain what type of stitch to use where, when you should top stitch, etc. I decided to use a shallow zigzag (1.8 length, 1.1 width) for all my top stitching since this is a pretty stretchy fabric and I don’t want my seams to pop. The pattern specifies a 3/8-inch seam allowance, so I trimmed 1/8-inch as I serged most of the seams. This works, but I prefer knit patterns with 1/4-inch seam allowances so trimming isn’t necessary. I ended up sewing the neckband on with 1/4-inch seam allowance and not trimming because I didn’t want to make the neck band any narrower than it was already.
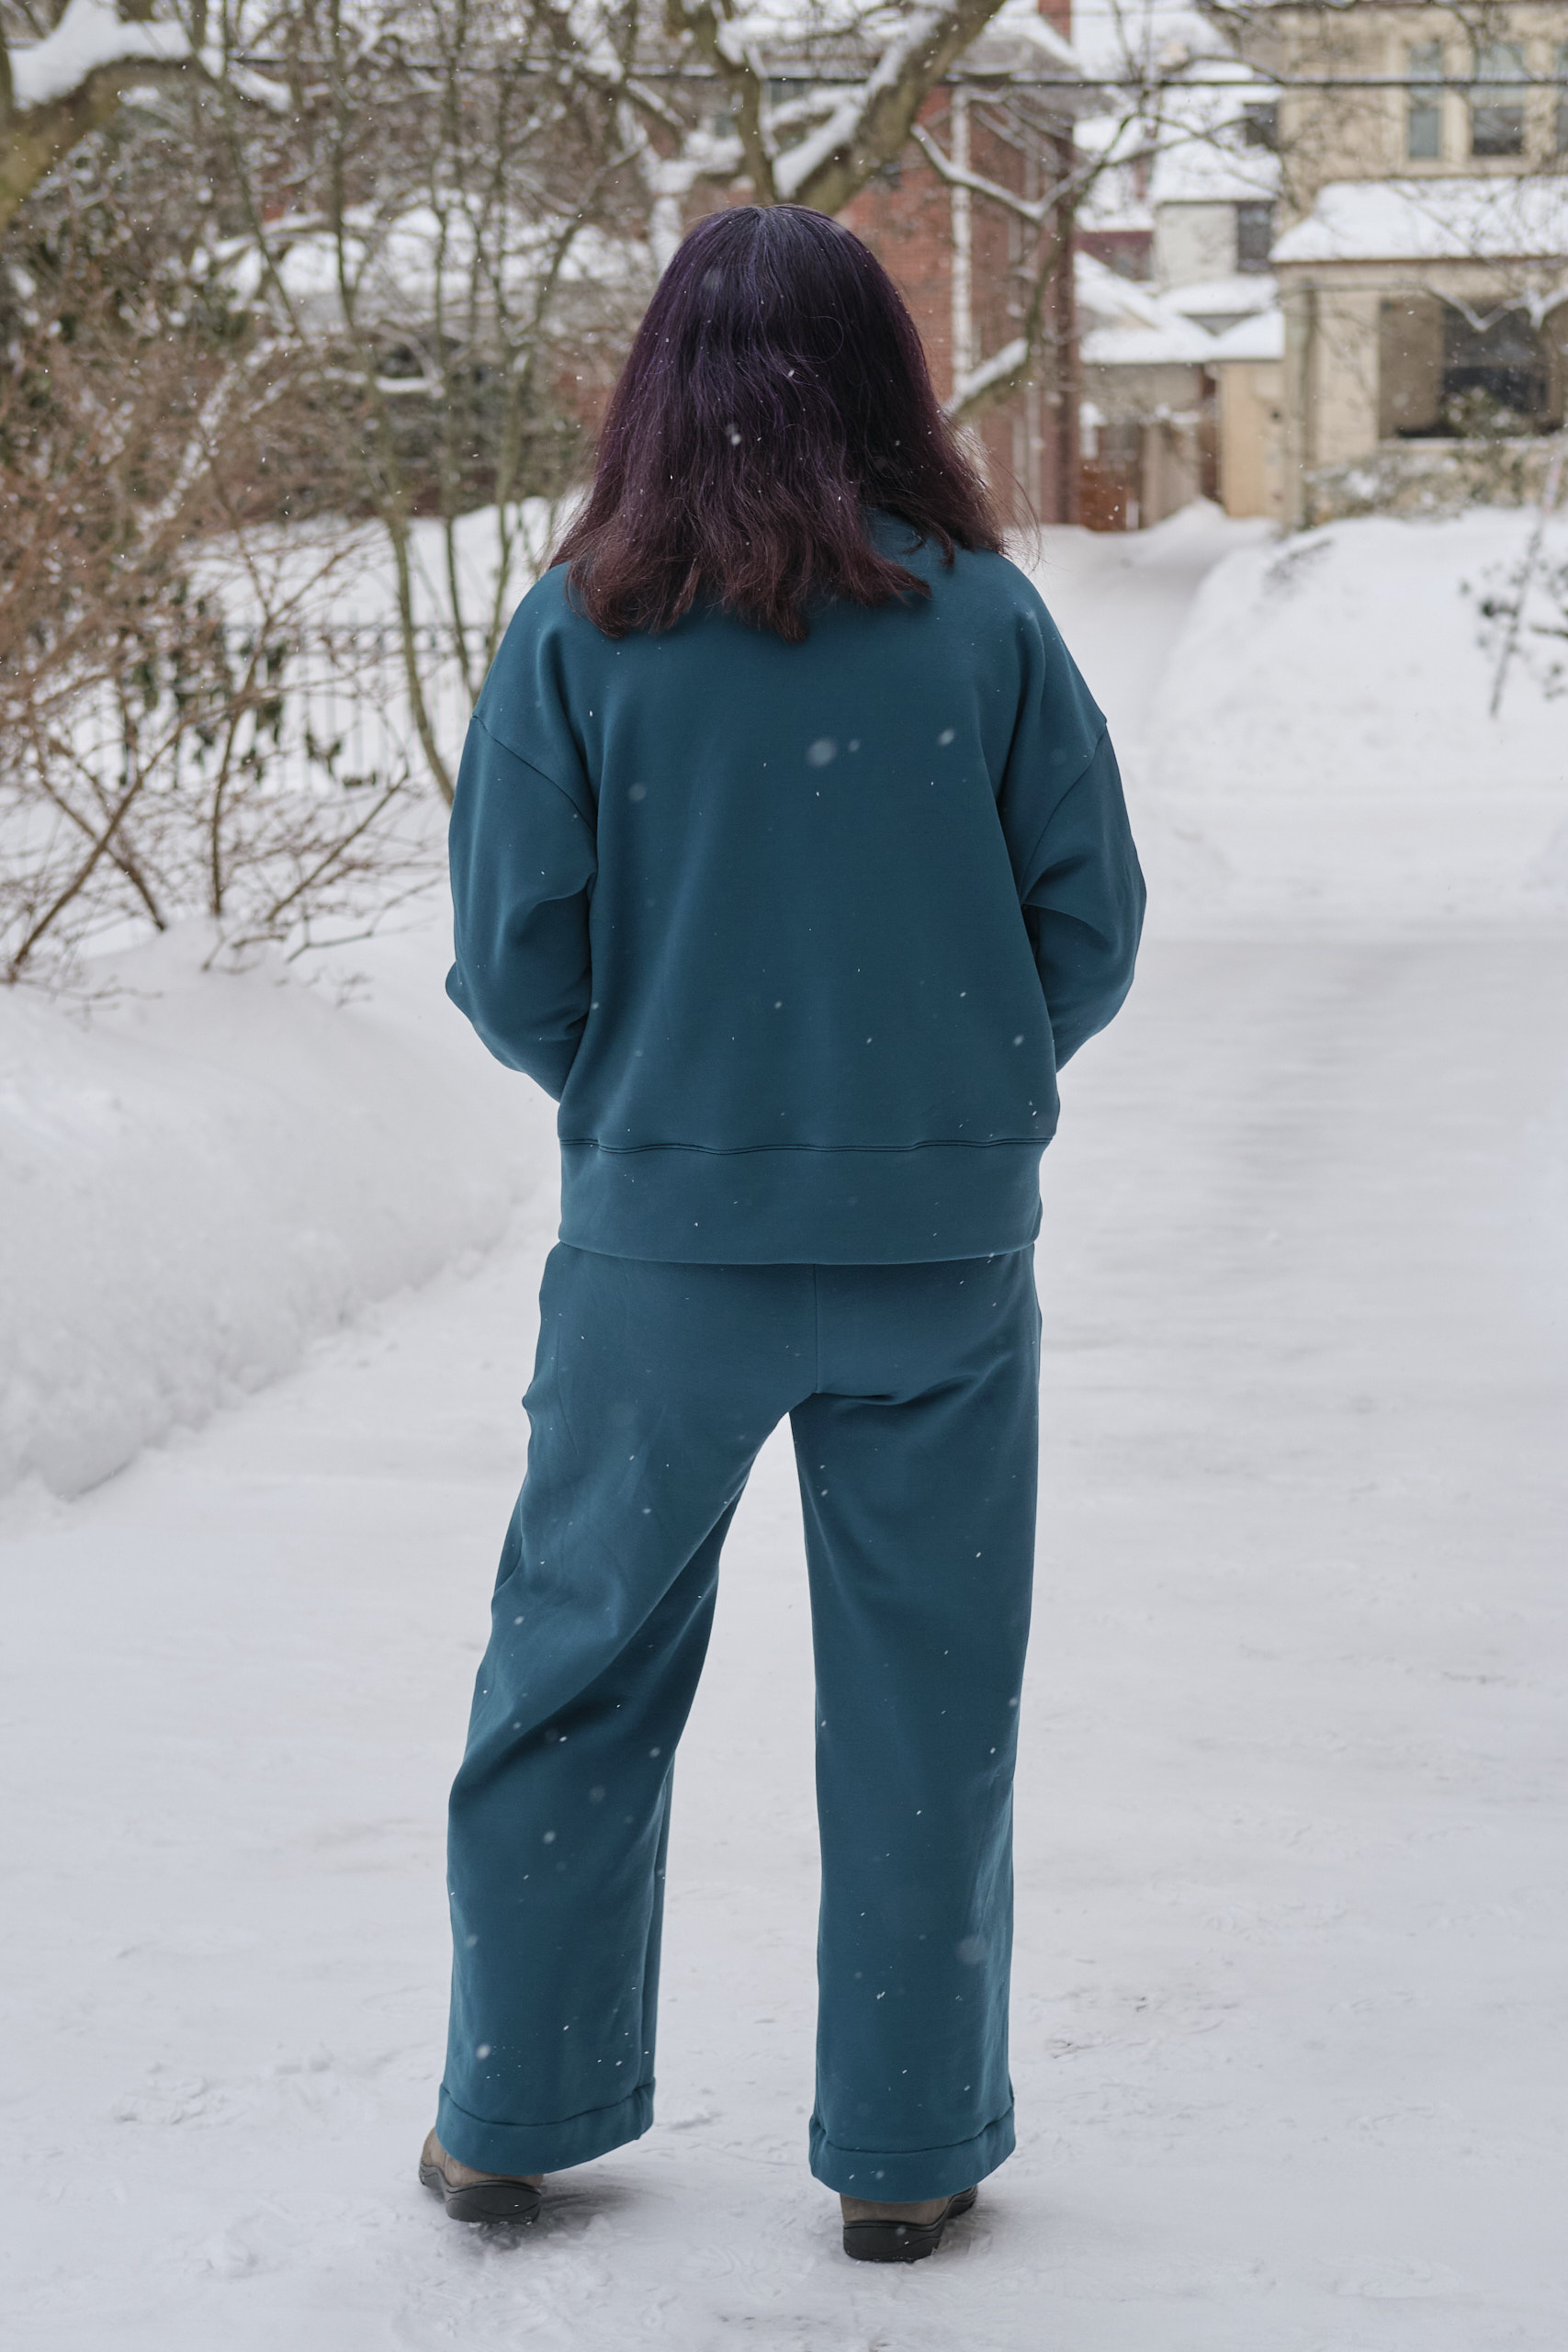
I’m very pleased with how the top came out, and I love how the complete lounge set works together. It is super comfy and cozy, and I even went outside in the snow for a photo shoot (we got over a foot of snow the day before). I will probably make more Biancas. It’s a great drop shoulder top that looks and feels roomy, but not enormous. For less bulky fabric I might go down to size D (but might keep the size E kangaroo pocket). It has options for a hood, side pockets, and for sewing with and without bands. Most commercial sweatshirts with kangaroo pockets also have hoods and I love the fact that when I sew my own clothes I can make it the way I want it with a kangaroo pocket and no hood.
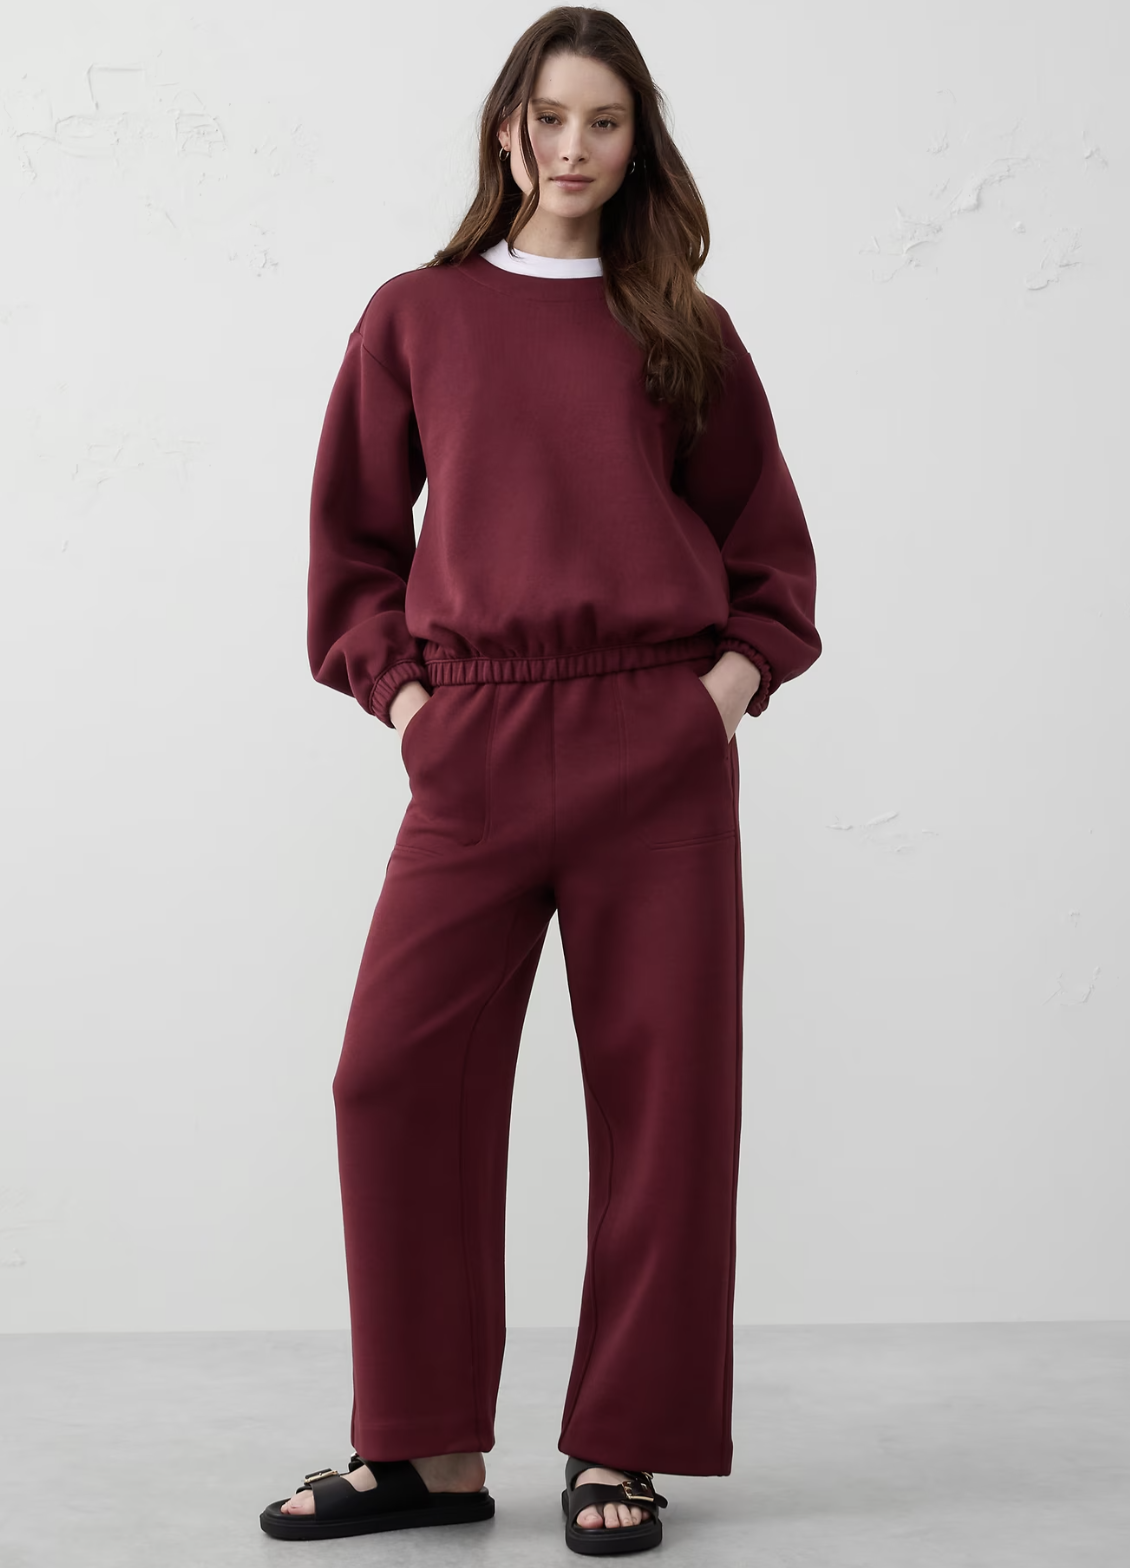
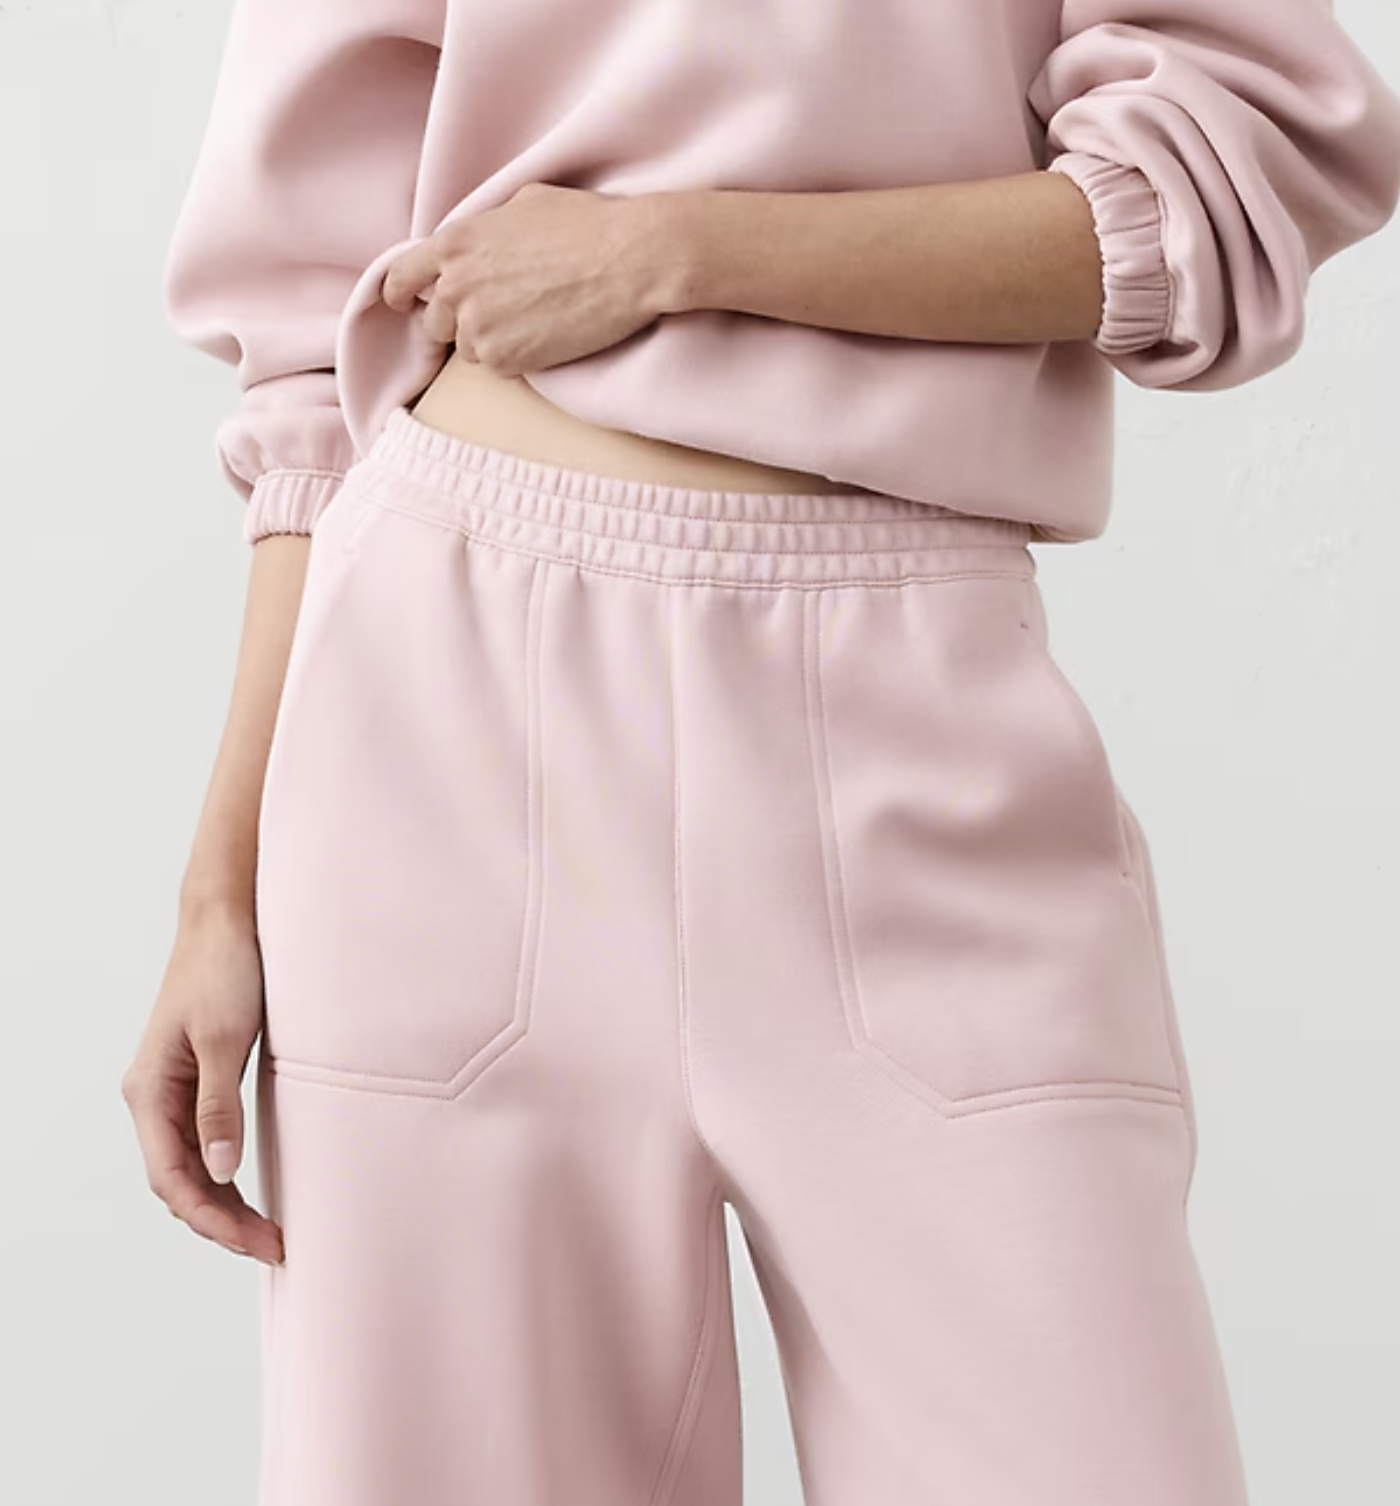
Here’s a photo of a fleece lounge set from a retailer and some more photos of my lounge set.
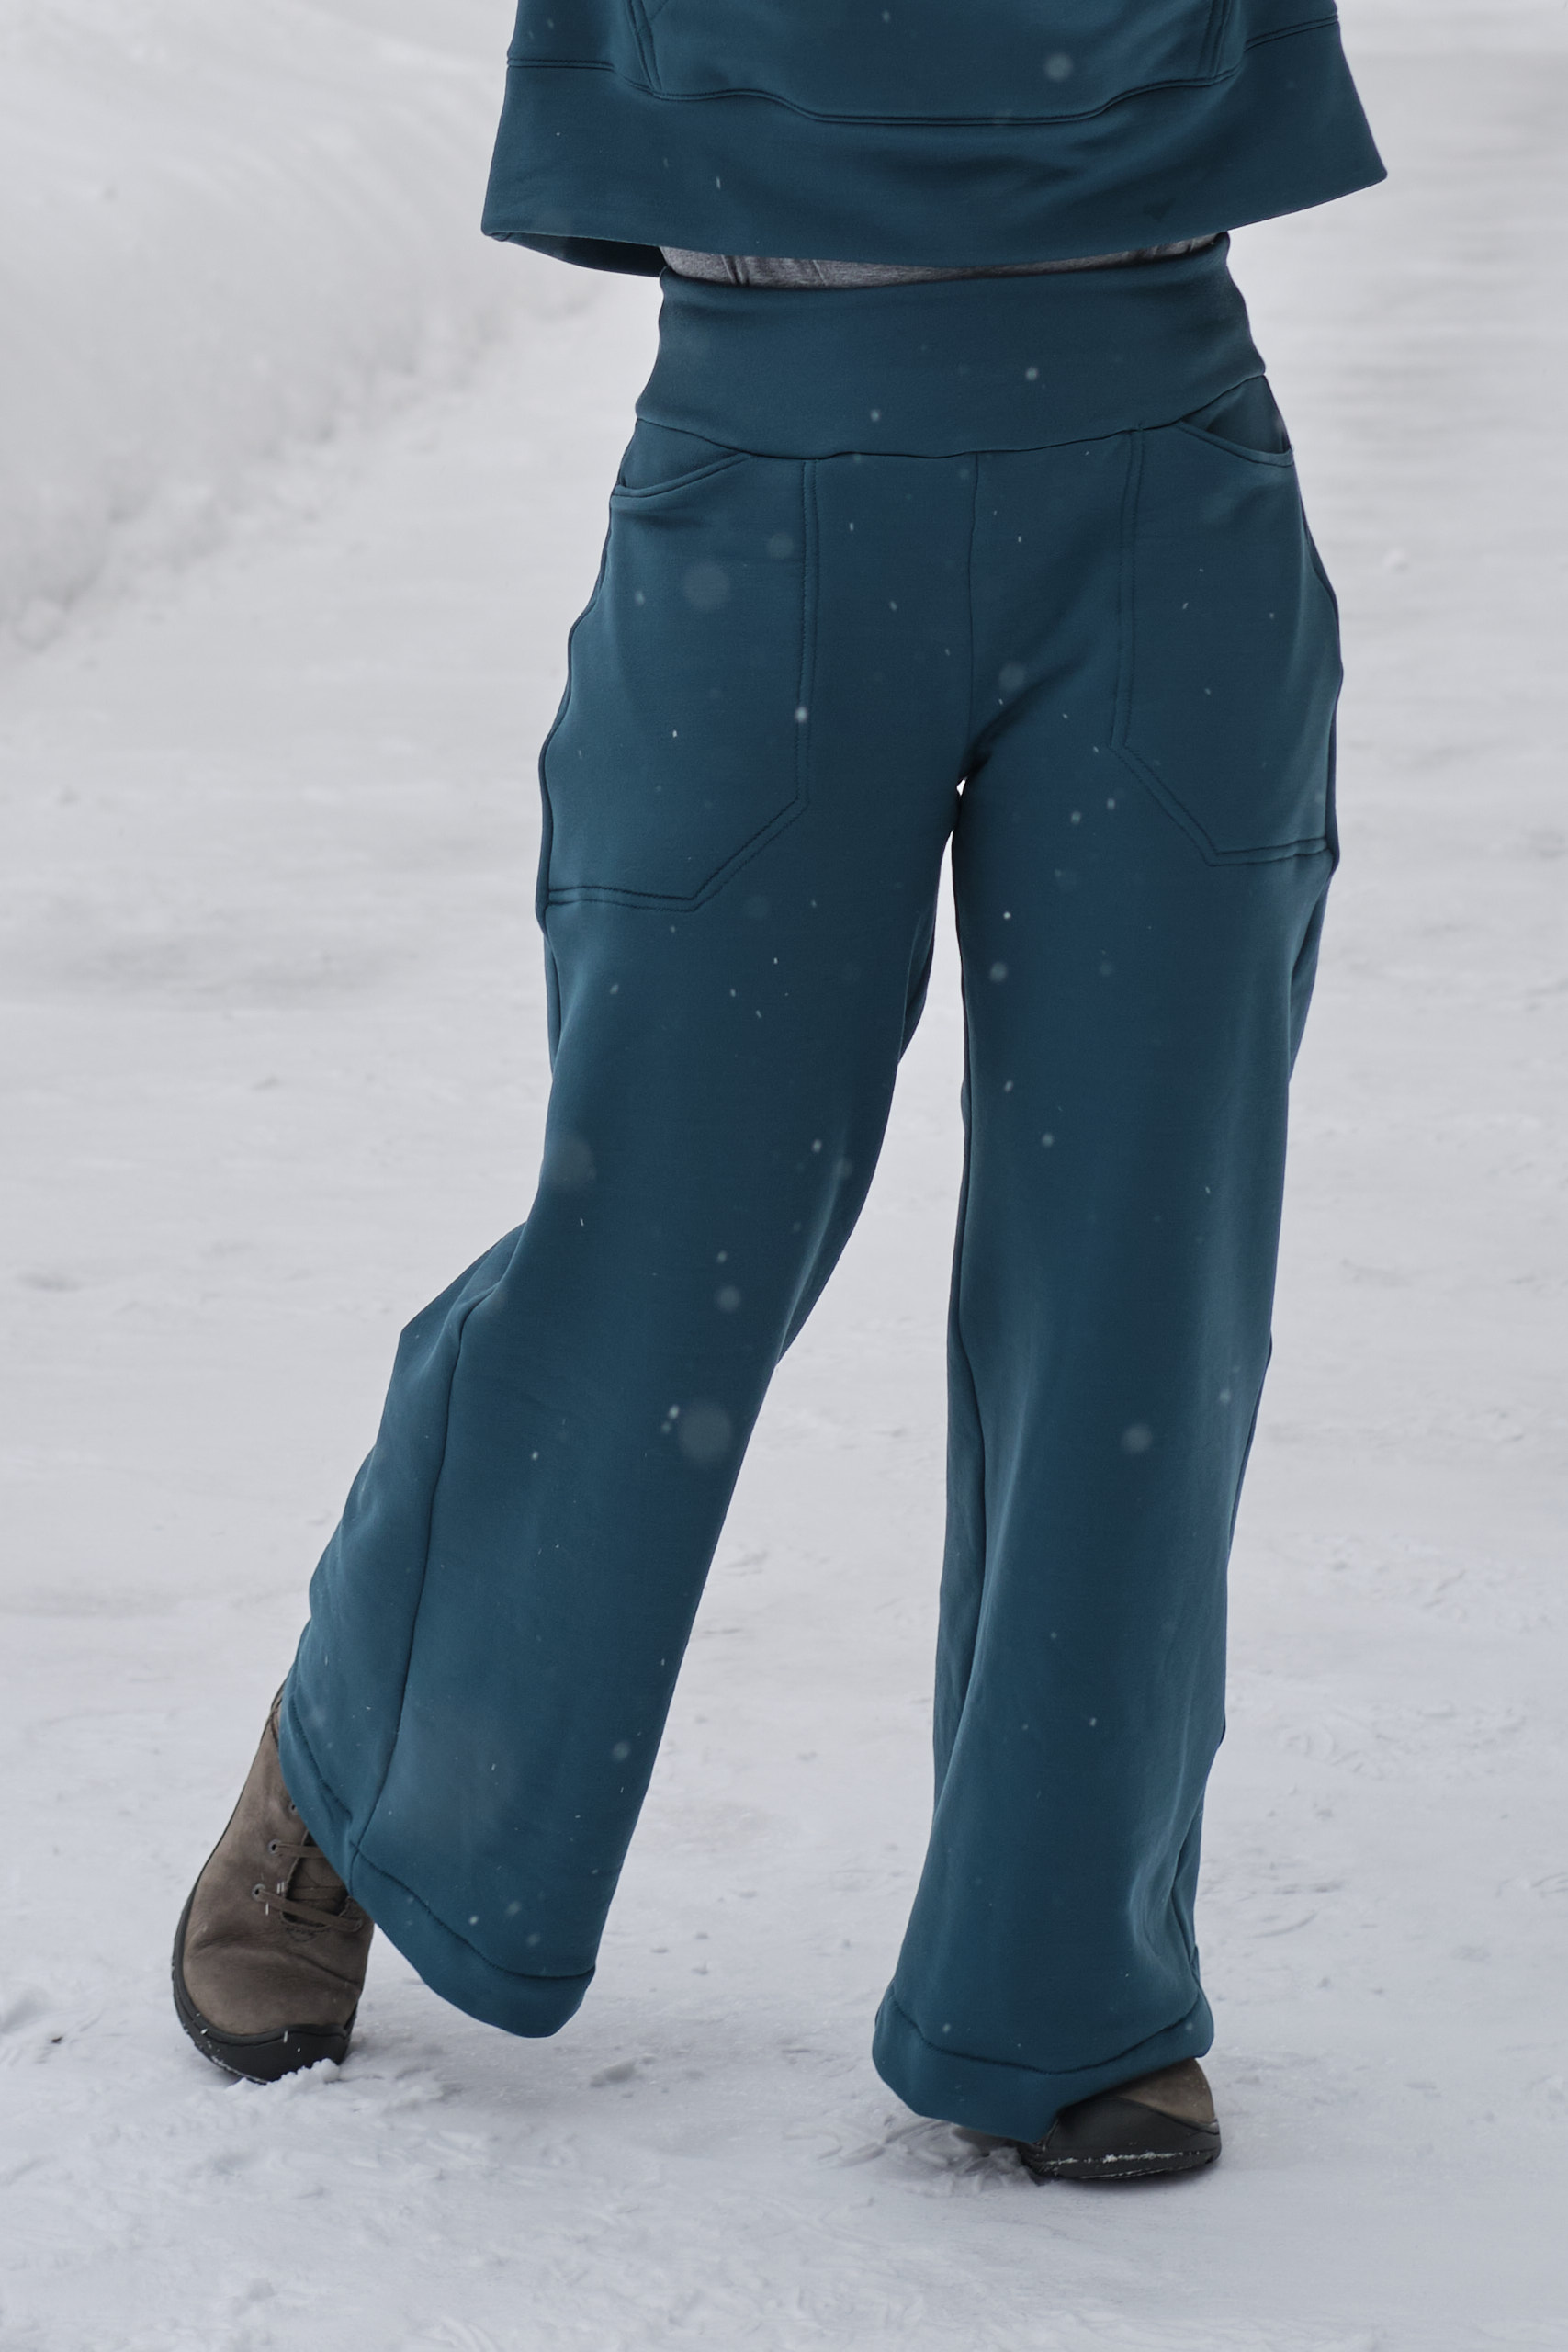
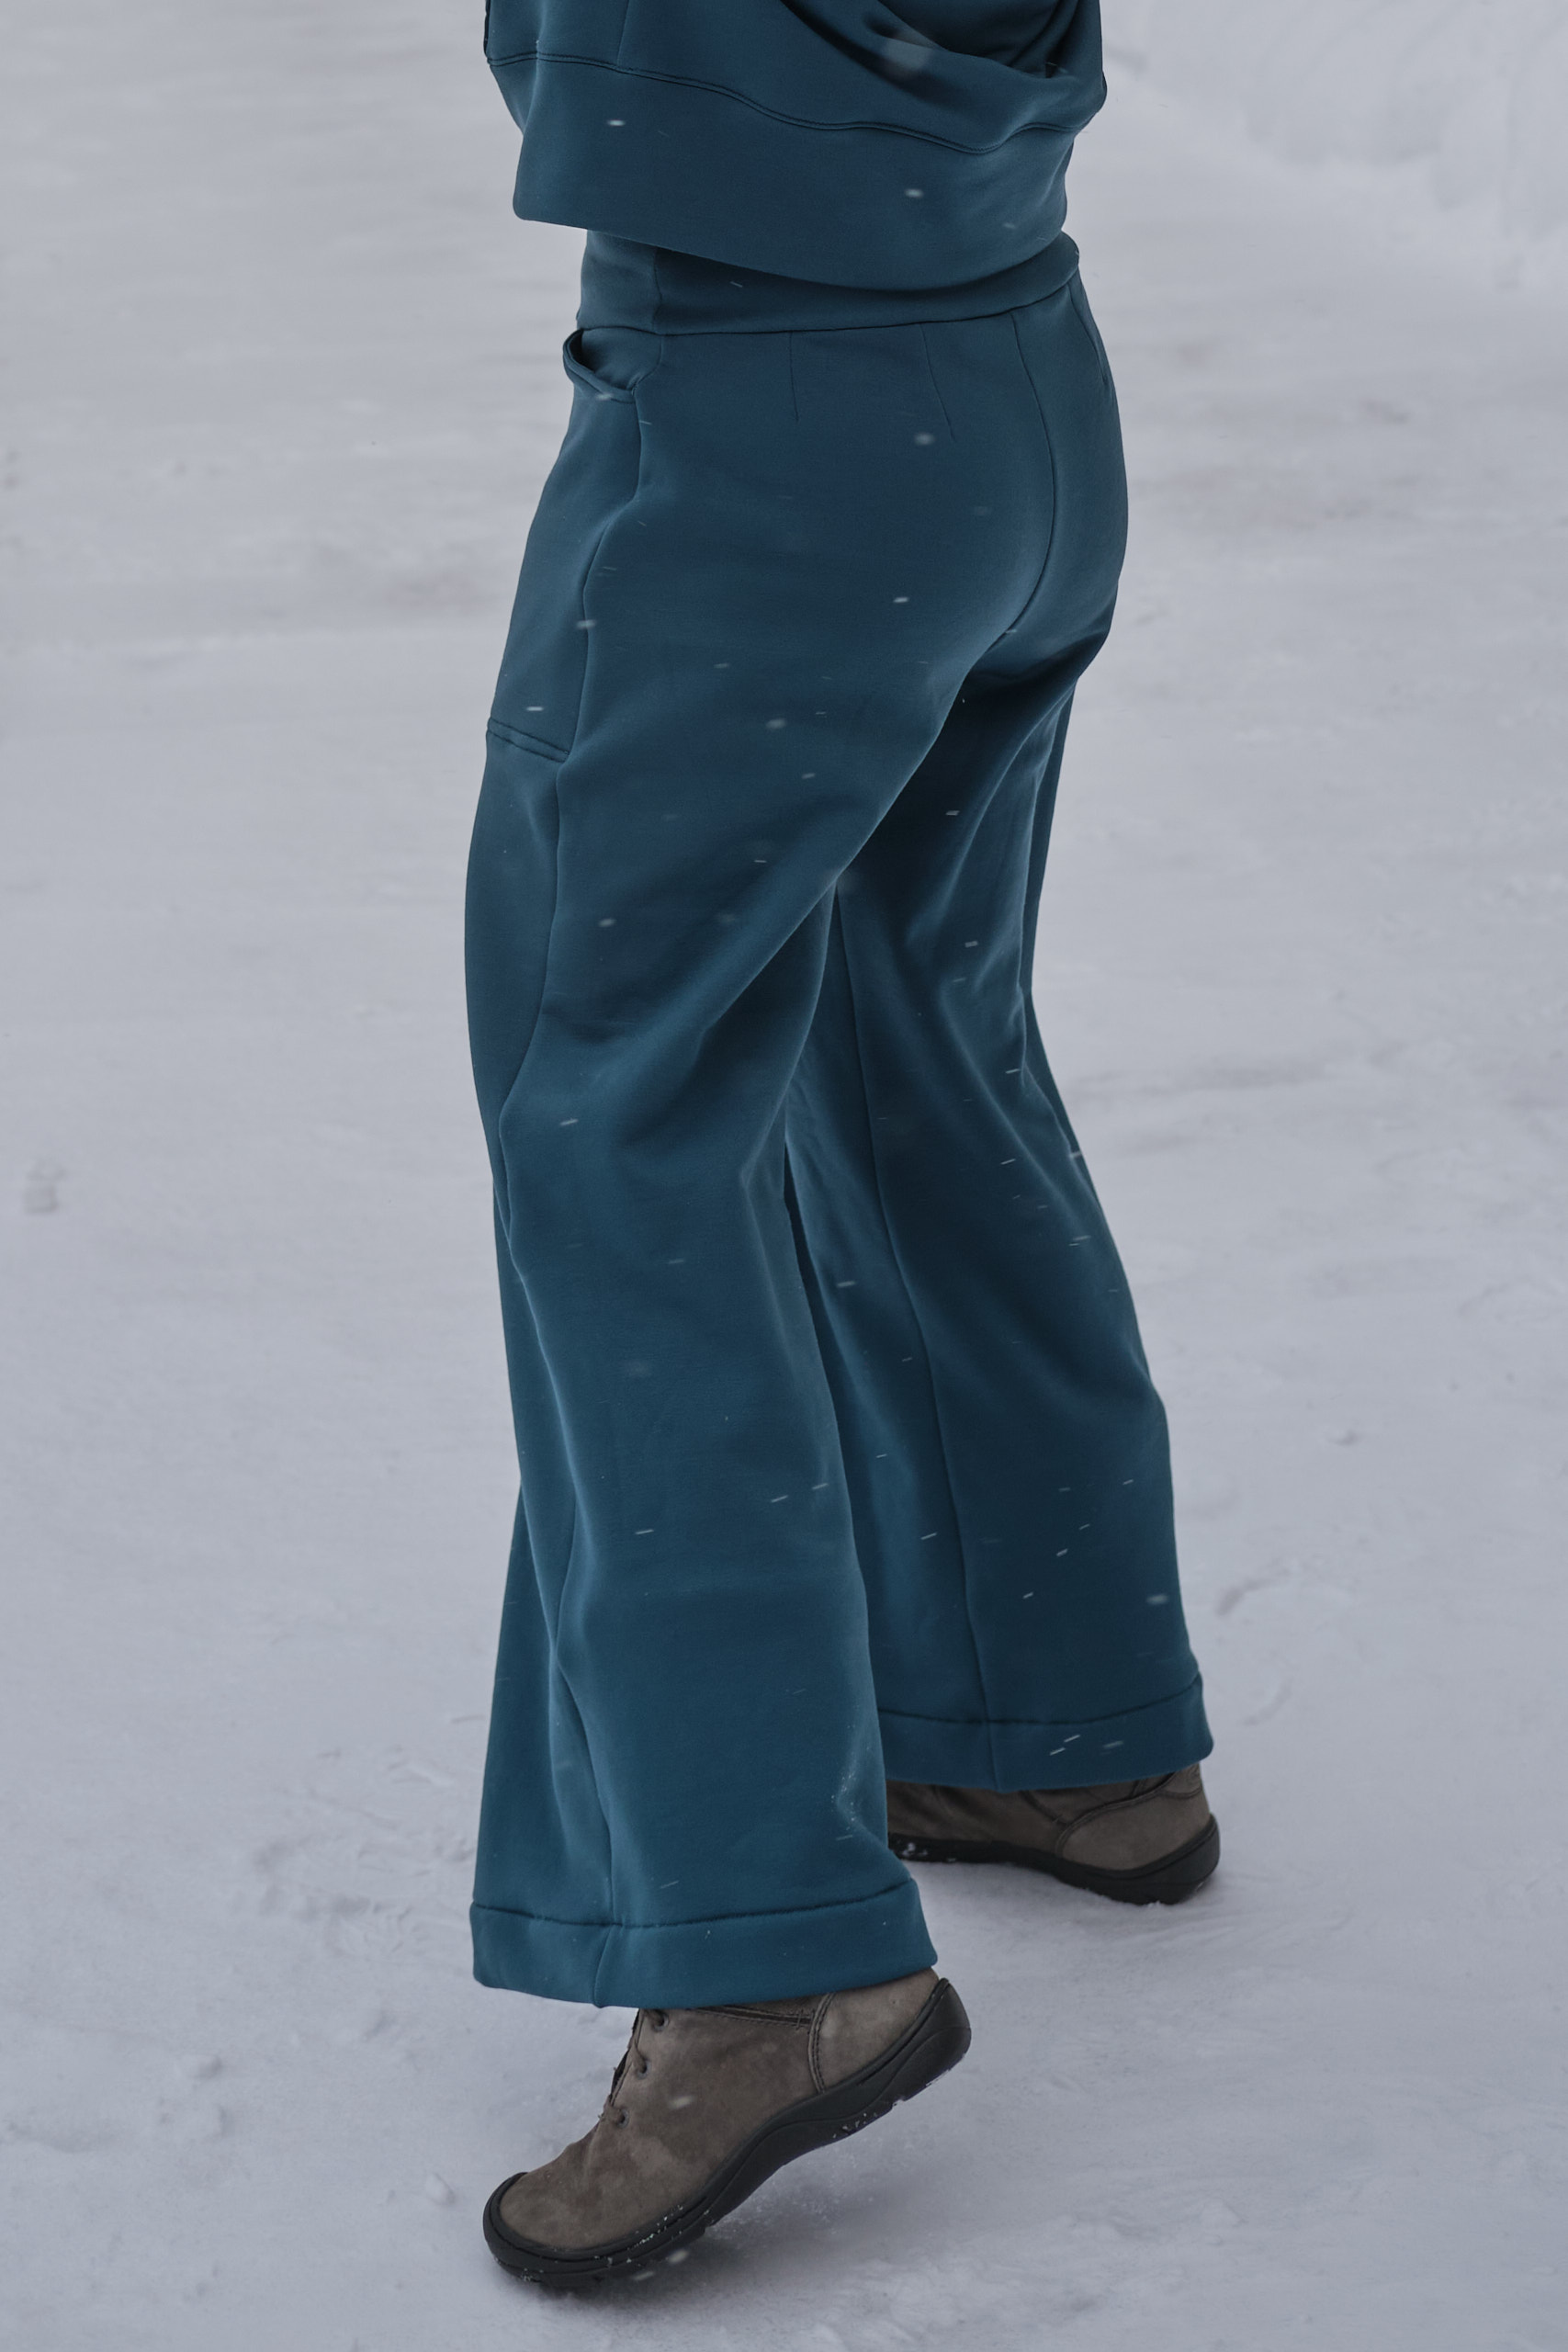
Pattern Emporium Urban wideleg pantssize AU 10, low rise, graded in at waist, modified contour waistband with sewn-in elastic, shortened by 1.5 inches, jeans pockets top-stitched down, 1.5 yard spruce Polartec stretch sweatshirt fleece
Two years ago, I bought some purple Polartec stretch sweatshirt fleece from Surge Fabrics and liked it so much that I subsequently bought three yards each of charcoal, denim blue, and avocado Polartec sweatshirt fleece when Califabrics got some designer deadstock in. The fabric is very soft and cozy on the inside, with a smooth finish on the outside that resists pilling and abrasion. The fabric has a lot of stretch, which adds to the comfort and makes it suitable for a lot of knit patterns. When the fabric arrived, I was disappointed that the denim blue was more green than blue and the avocado was the shade of green that avocados eventually turn when they’re a bit past their prime, or, more charitably, the color of green olives. I made a Pattern Emporium Sweet Cheeks sweatshirt from the purple fleece and a pair of PE Urban Tapered Pants from the charcoal fleece. I love them both: they are cozy, warm, and comfortable. Later, I made a pocket hood scarf from most of the rest of the purple fleece (with the fluffy side on the outside). I had planned to make some coordinating loungewear out of the denim blue and rotten avocado, but every time I looked at these fabrics, I was disappointed that they weren’t the colors I was expecting. But alas, it is cold outside this week (actually for the rest of the month), and I really want some cozy loungewear, so I decided that I would just accept that the denim blue was actually dark teal or maybe spruce, and go ahead and make a lounge set. I auditioned several threads to coordinate with the spruce, and found my blue threads were all terrible matches, so I settled on a green thread. So spruce it is!
Once I accepted that I had 3 yards of spruce fleece to work with, I decided that it is actually a lovely color and I was excited to figure out which patterns to use to make my lounge set. I started with the pants and in my next post I’ll write about the top.
I chose the Pattern Emporium Urban wideleg pants pattern, which I have made many times before, in purple, black, grey, and magenta ponte. These are easy to sew and I love the back darts. I’ve tweaked the pattern in a bunch of different ways, but have settled on the size AU 10 with a low waist (which is more of a high-waist on me) with the waist graded in and the waistband adjusted to be a contoured waistband with 3/8-inch elastic sewn in. I also like to extend the crotch seam a tad (but forgot to do it this time). I use the jeans-style pockets but raise the pocket openings and cut them straight instead of curved. I also cut them 1.5 inches shorter than the pattern and this time I gave them a 1.75-inch hem.
The Urban pants pattern actually works great with this fluffy stretch fleece fabric. The only bit that didn’t work so well was the pockets. The jeans pockets are folded to form a pocket bag, so you end up with three layers (two pocket layers and a pants layer). That was too bulky with this fluffy fabric. I should have used one of the pocket styles in which you sew one layer of pocket either inside or outside the pants leg. Rather than take them apart, I top-stitched the pockets down after assembling the pants, using two rows of very narrow zigzags a quarter-inch apart (1.8 length, 1.1 width on my Bernina). It would have been much easier to do this with only 2 layers instead of 3 and to sew it down before assembling the pants, but it worked out ok and I think it looks just like the pockets I’ve seen on pants being sold at retailers. My Triumph in cover stitch mode could also have done the topstitching and = would probably have been an even cleaner look, but it would have been difficult to do after the pants were assembled and would have required rethreading and converting the Triumph to cover stitch mode.
I’m very happy with how these pants came out, the color is great, and they are super cozy and warm! Now, on to the top….
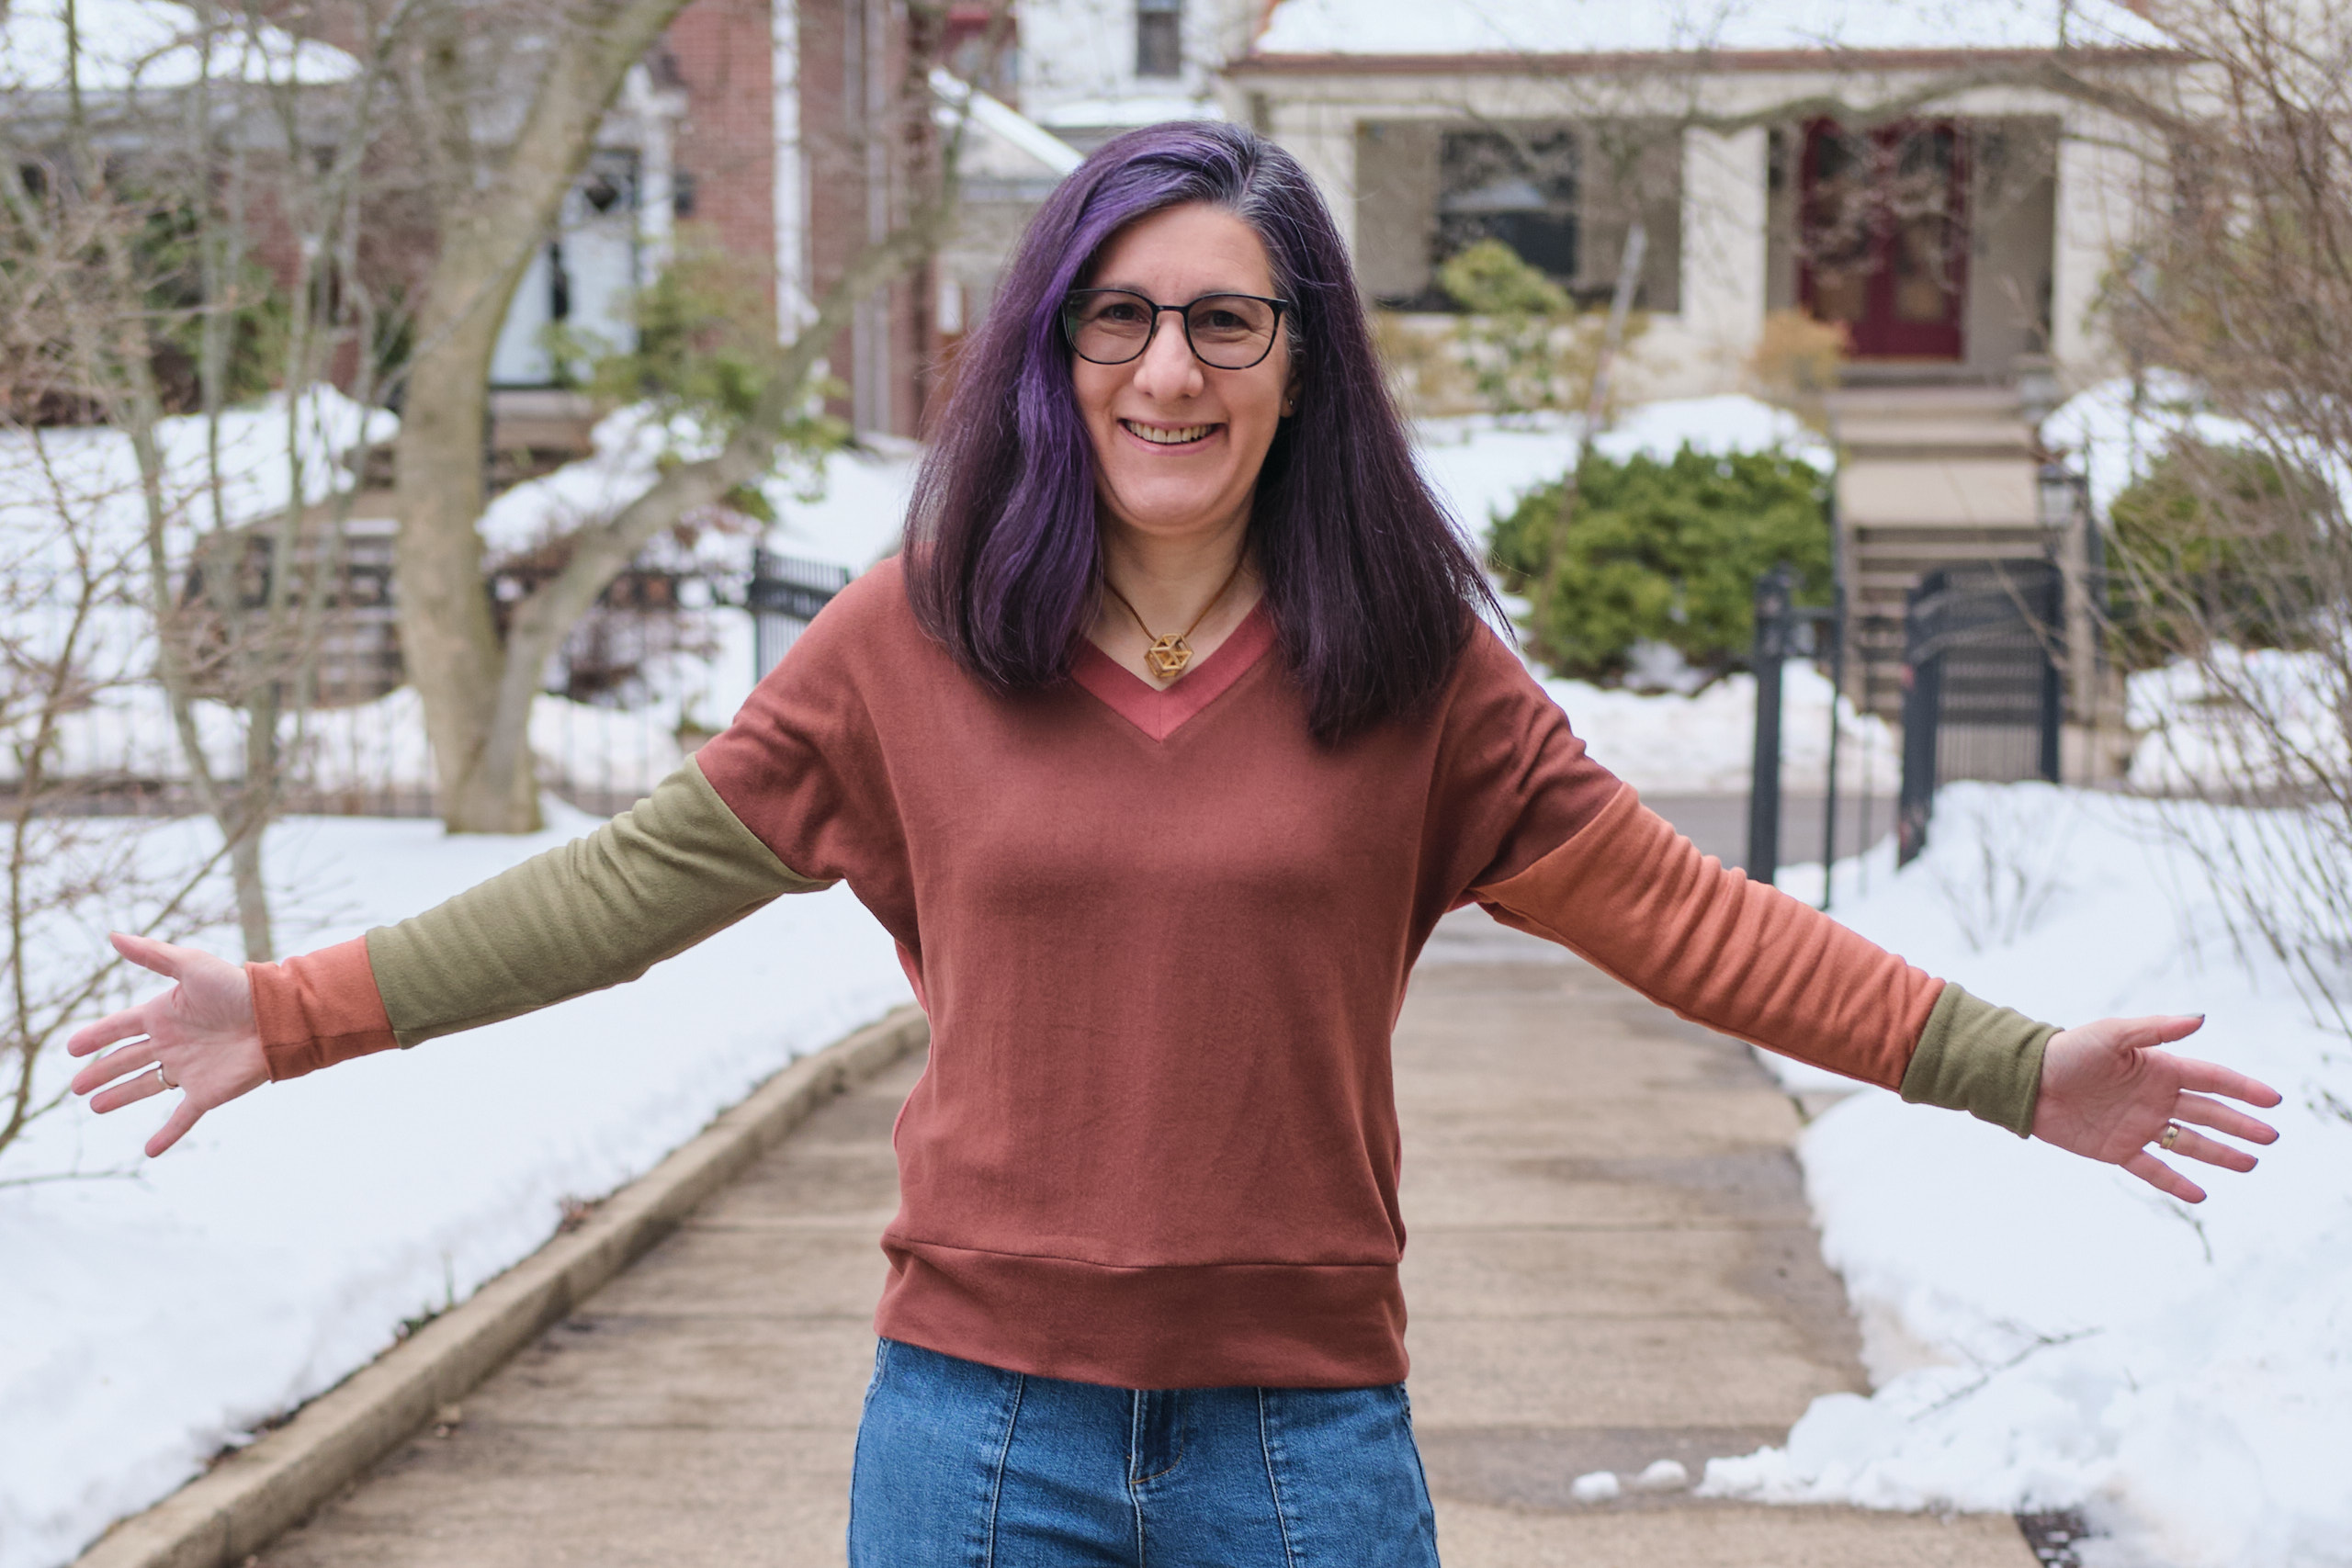
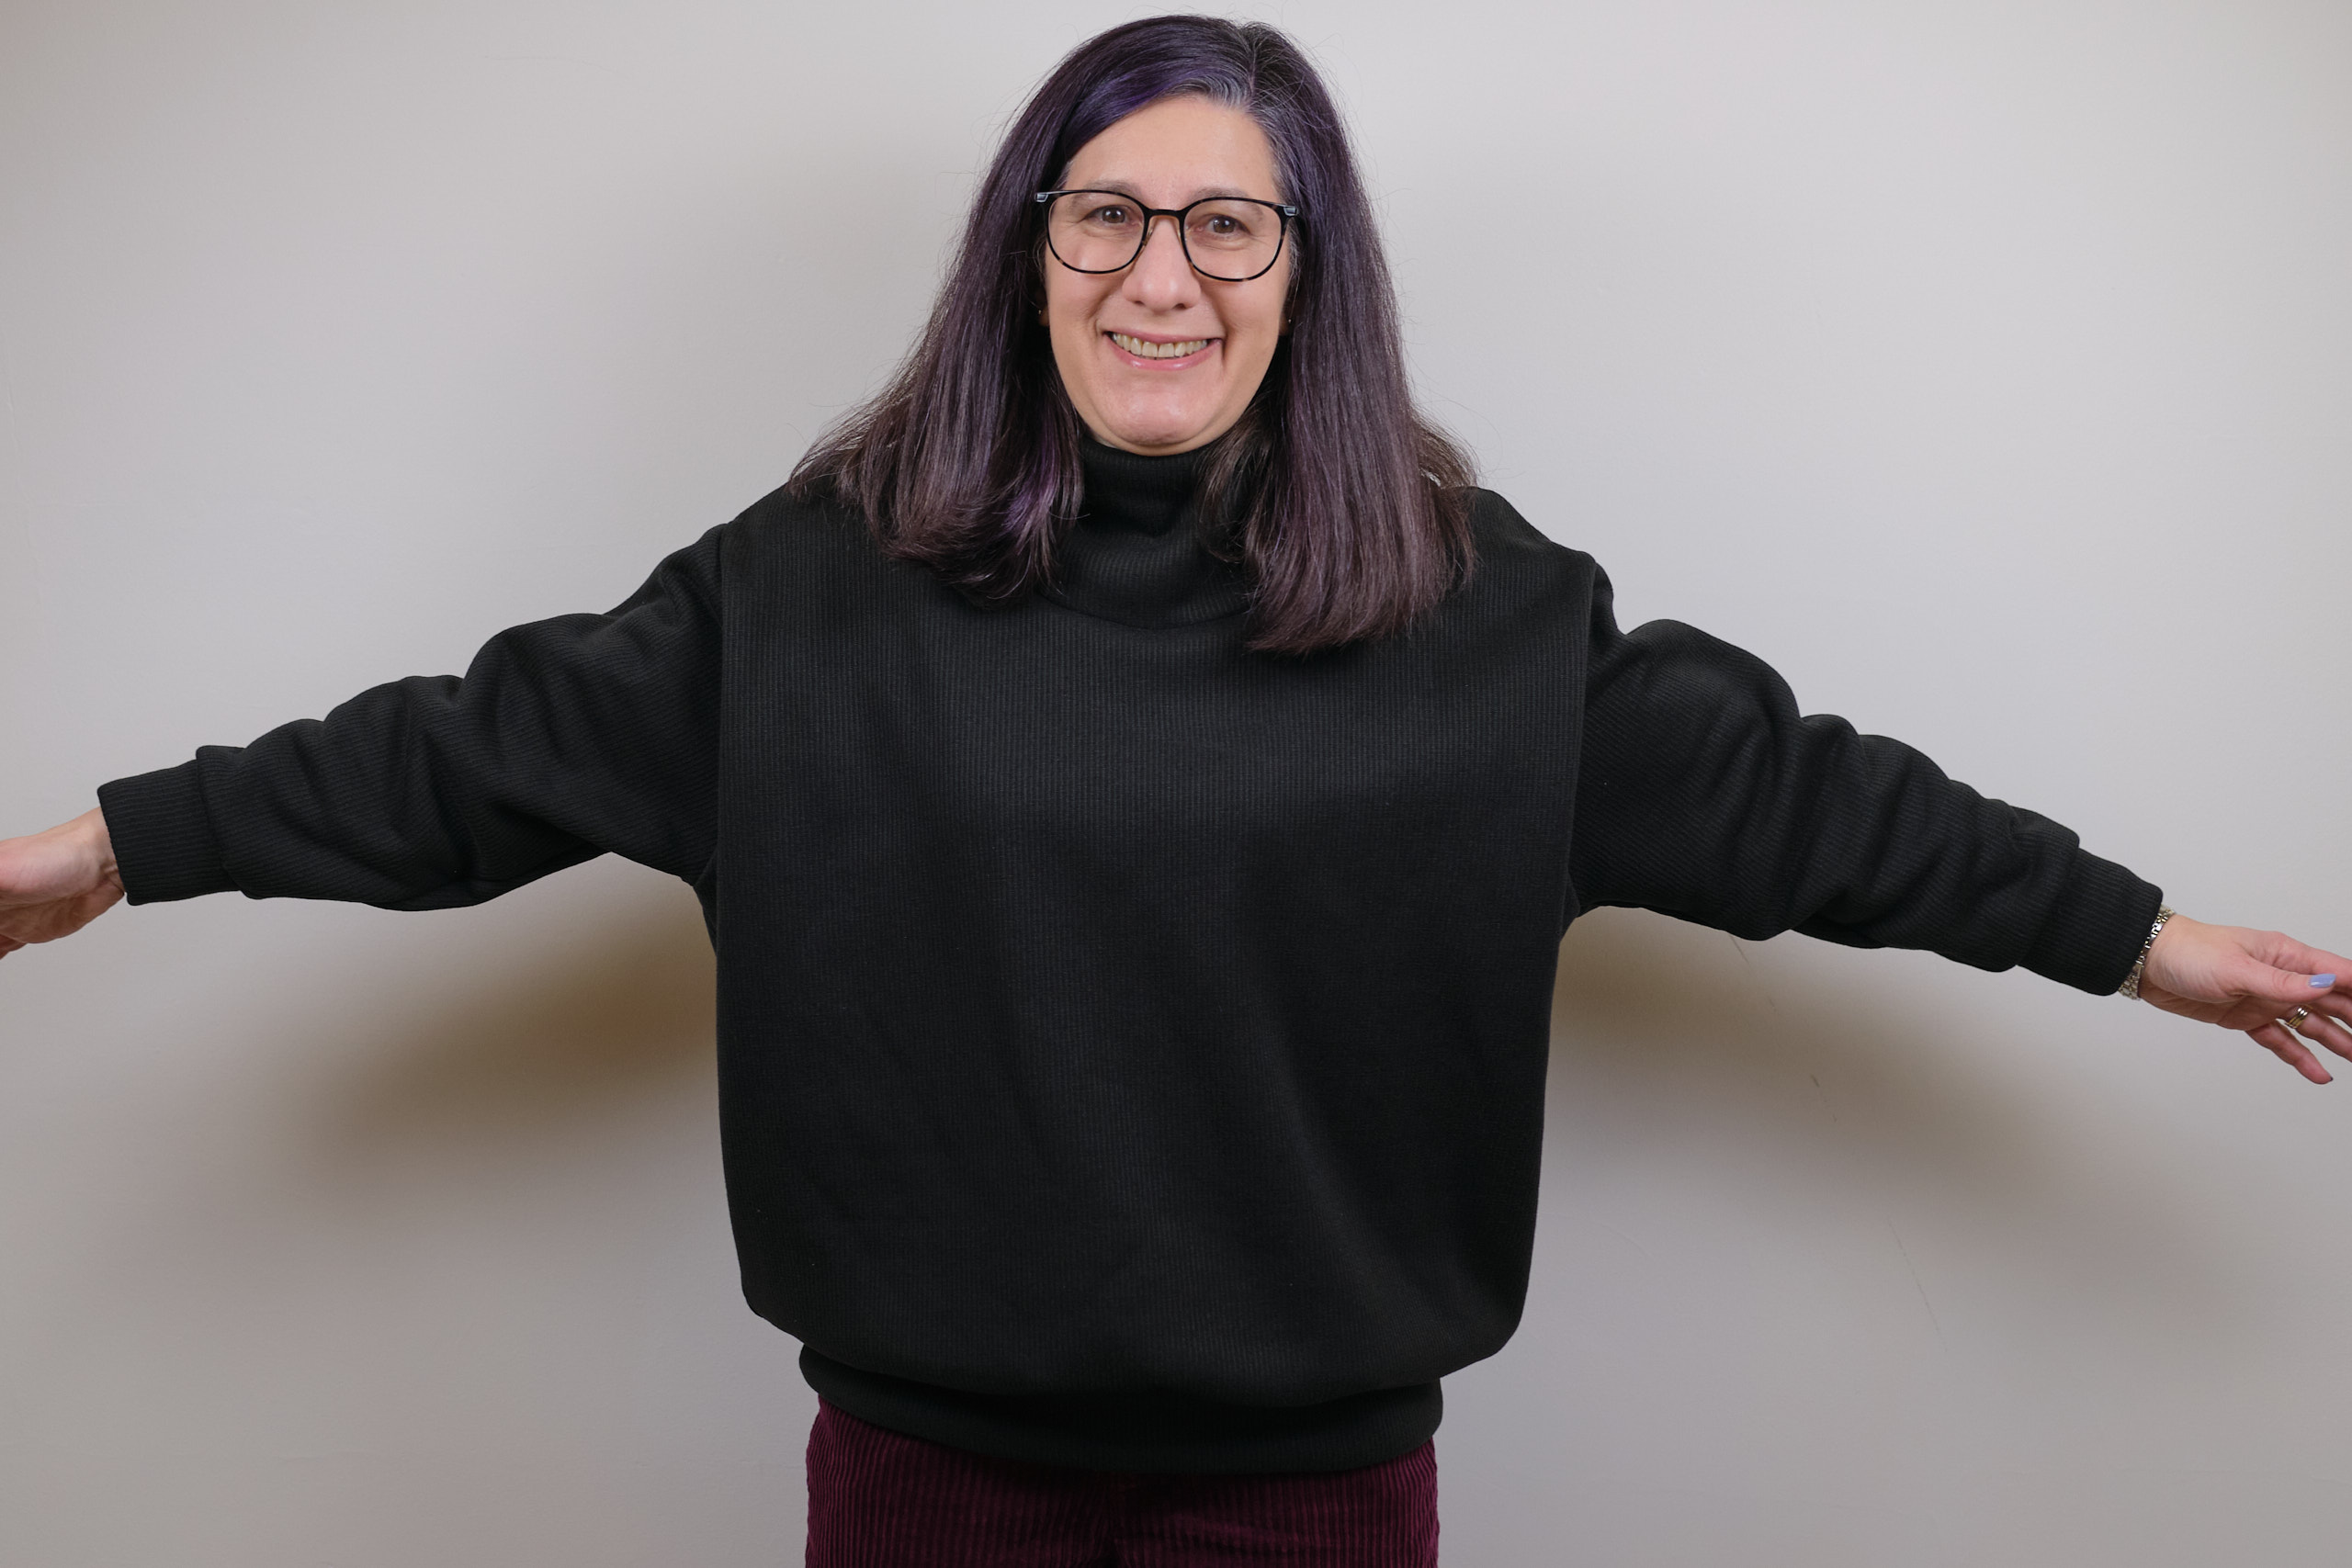
Greenstyle Surge Sweatshirt, size C2 regular length, sleeves shortened by 2 inches, in 1 yard black Polartec Windpro ribbed fleece.
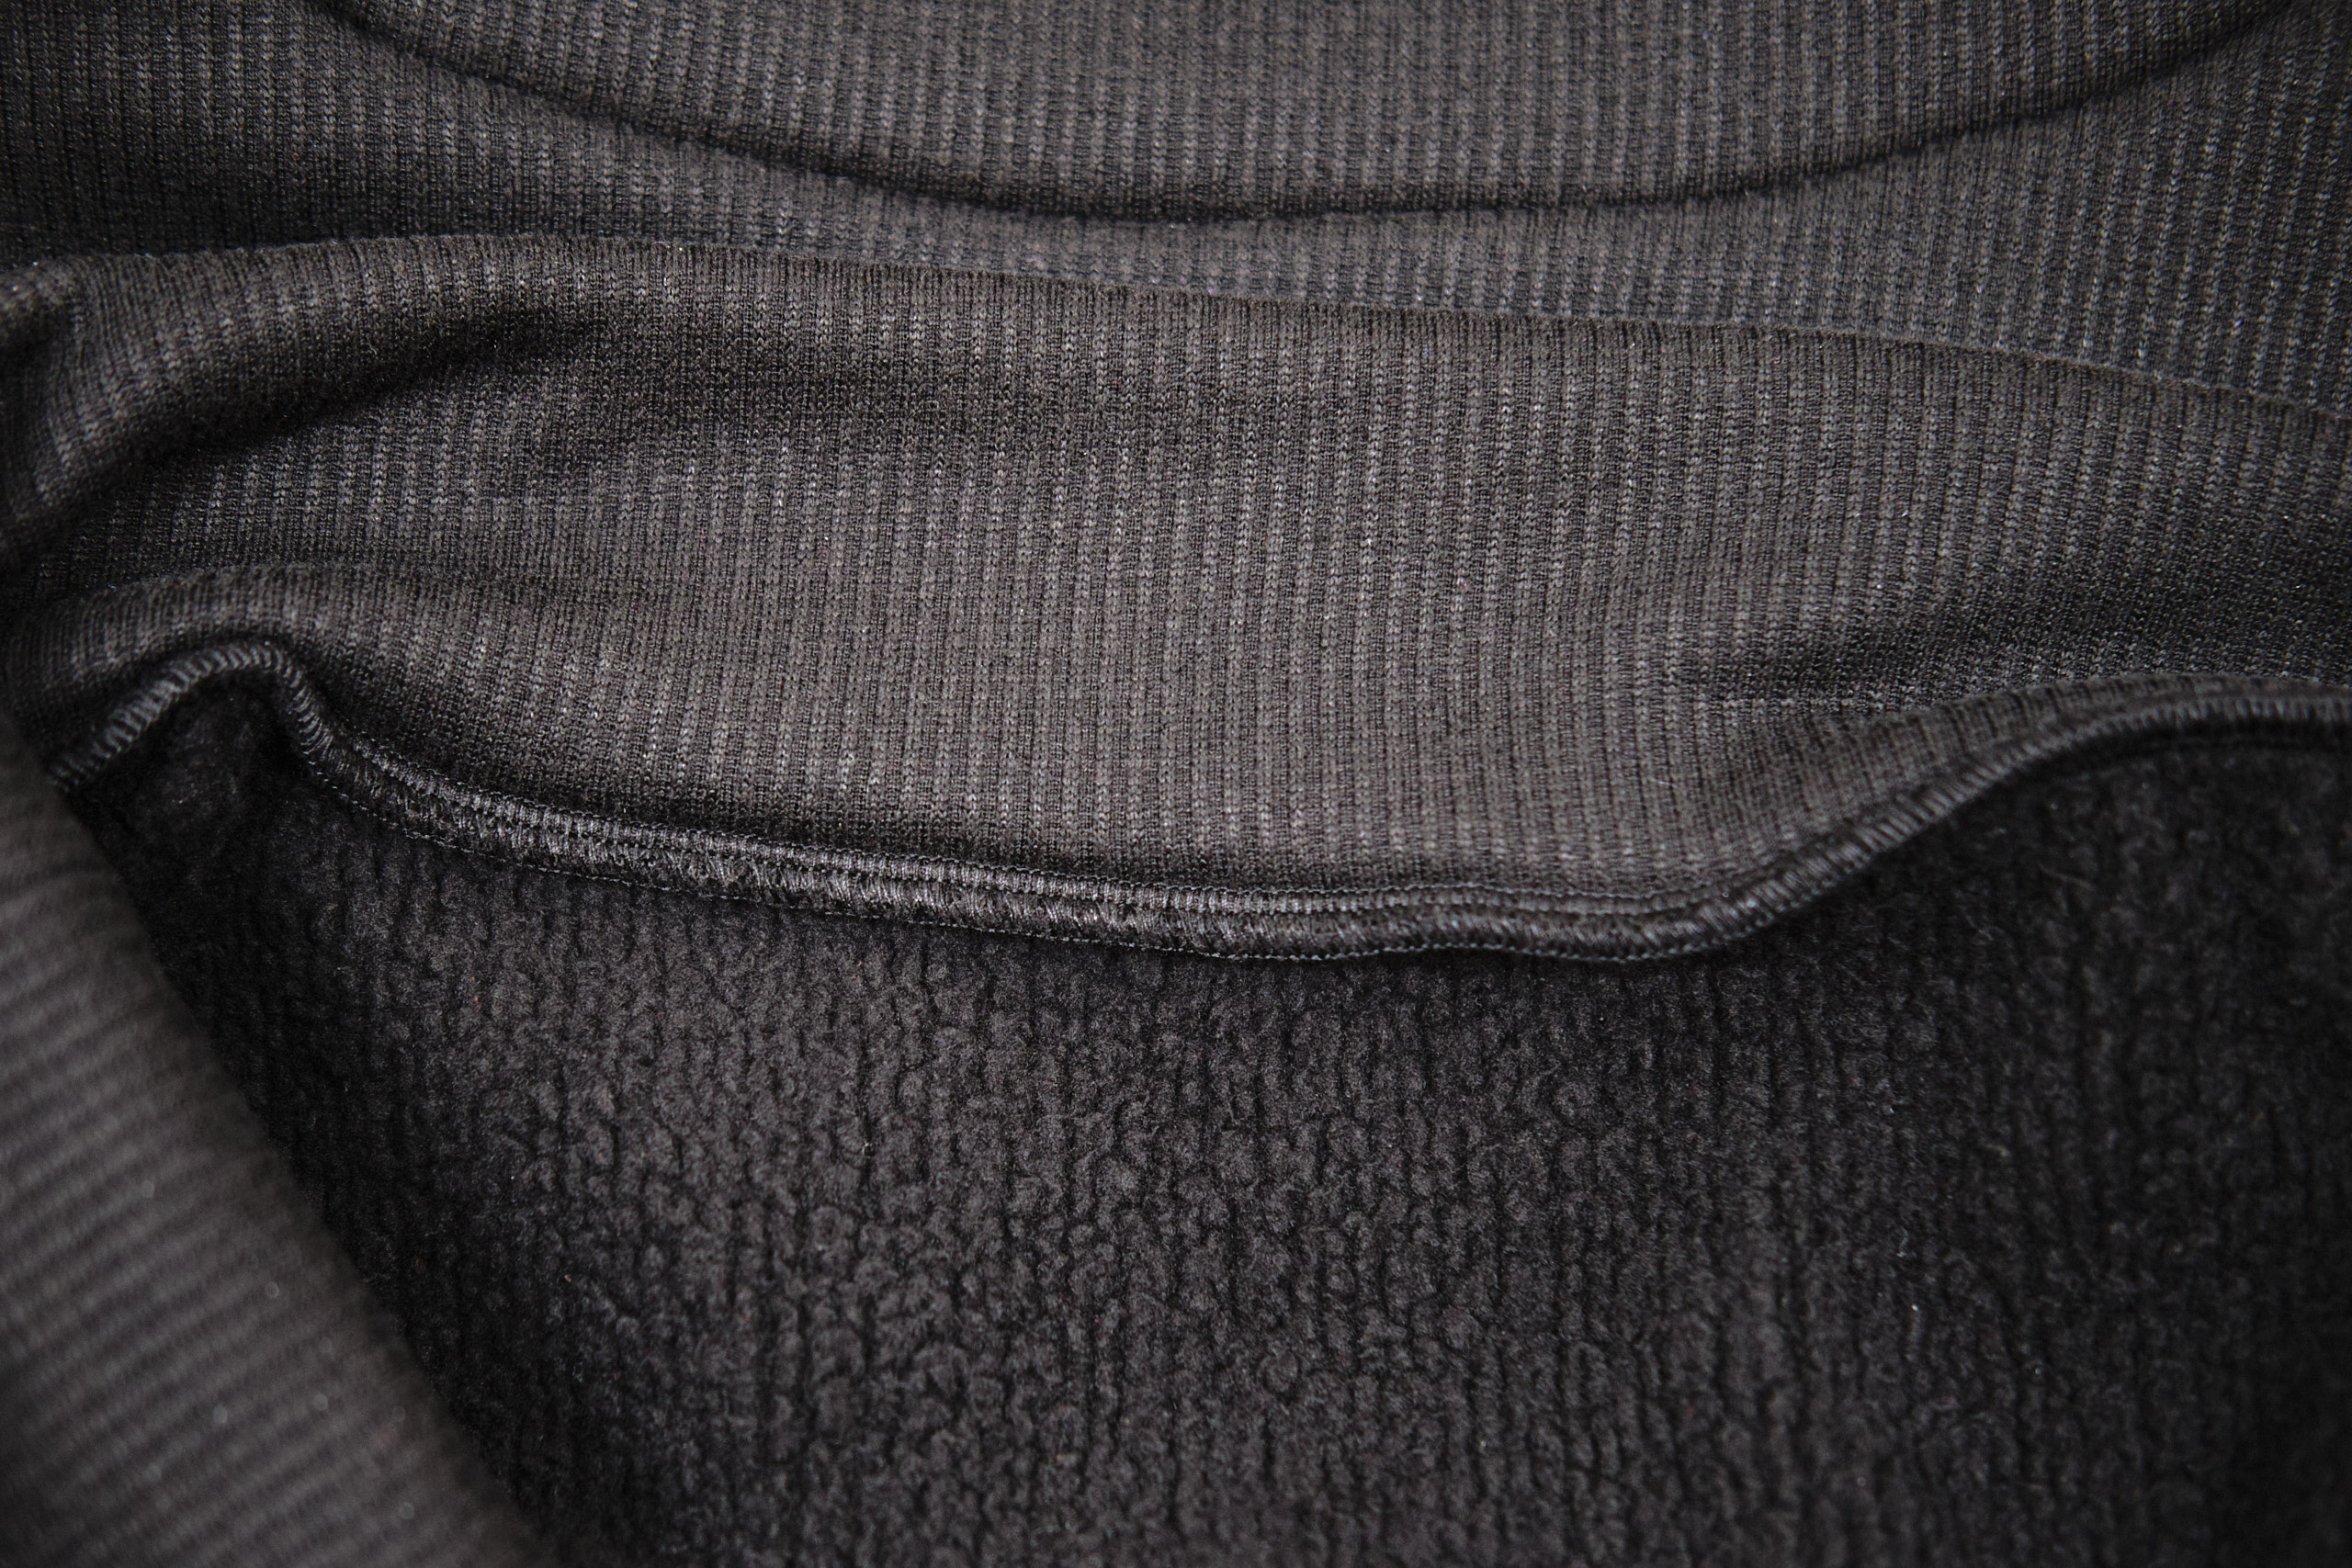
When Kayla Tarey hacked the Greenstyle Sav’s sweatshirt pattern into an oversized sweatshirt suitable for a heavy, low-stretch knit, I wanted to try it too. Kayla used Surge Fabric’s Polartec Wind Pro ribbed sweater fleece, which is 100% Polyester, 380gsm, with 25% horizontal and 0 vertical stretch. It has a 2×2 rib knit on the front side and soft sherpa fleece on the back. This seemed perfect for a cold-weather sweater. The folks at Greenstyle turned Kayla’s hack into the Surge Sweatshirt pattern, making it much easier for everyone to copy this style. The pattern works for a variety of knit fabrics, but because it doesn’t have a neck band and the bottom band and cuffs don’t require a lot of stretch, it works fine for heavy 2-way stretch fabric that doesn’t have a lot of stretch. I had 2 yards of black Wind Pro and decided to try it out.
I projected the pattern and cut it out. Kayla had suggested checking the projector calibrations on the fabric because it is so thick. I measured some of the projected pattern pieces with both one layer of fabric and two and noticed only minimal differences between the size of the projection on the fabric and on the cutting mat without any fabric. I also found the fabric cuts quite easily with a rotary cutter.
GreenStyle has unusual sizing, and the size chart for this pattern said I was mostly a size C2, but a B1 at the bust. This was my first Greenstyle pattern so I wasn’t entirely sure what to do, but as this is supposed to be an oversized pattern and the fabric is hefty, I decided to go with the bigger size. I debated grading parts of it down or shortening it, but ultimately decided to only shorten the sleeves with my usual 2-inch adjustment. Amazingly, I was able to cut the whole thing from just 1 yard of fabric! I think this is because the drop sleeves are actually pretty short since part of their length comes from the width of the bodice. Now I unexpectedly have an extra yard of this fabric to make a sweater for someone else.
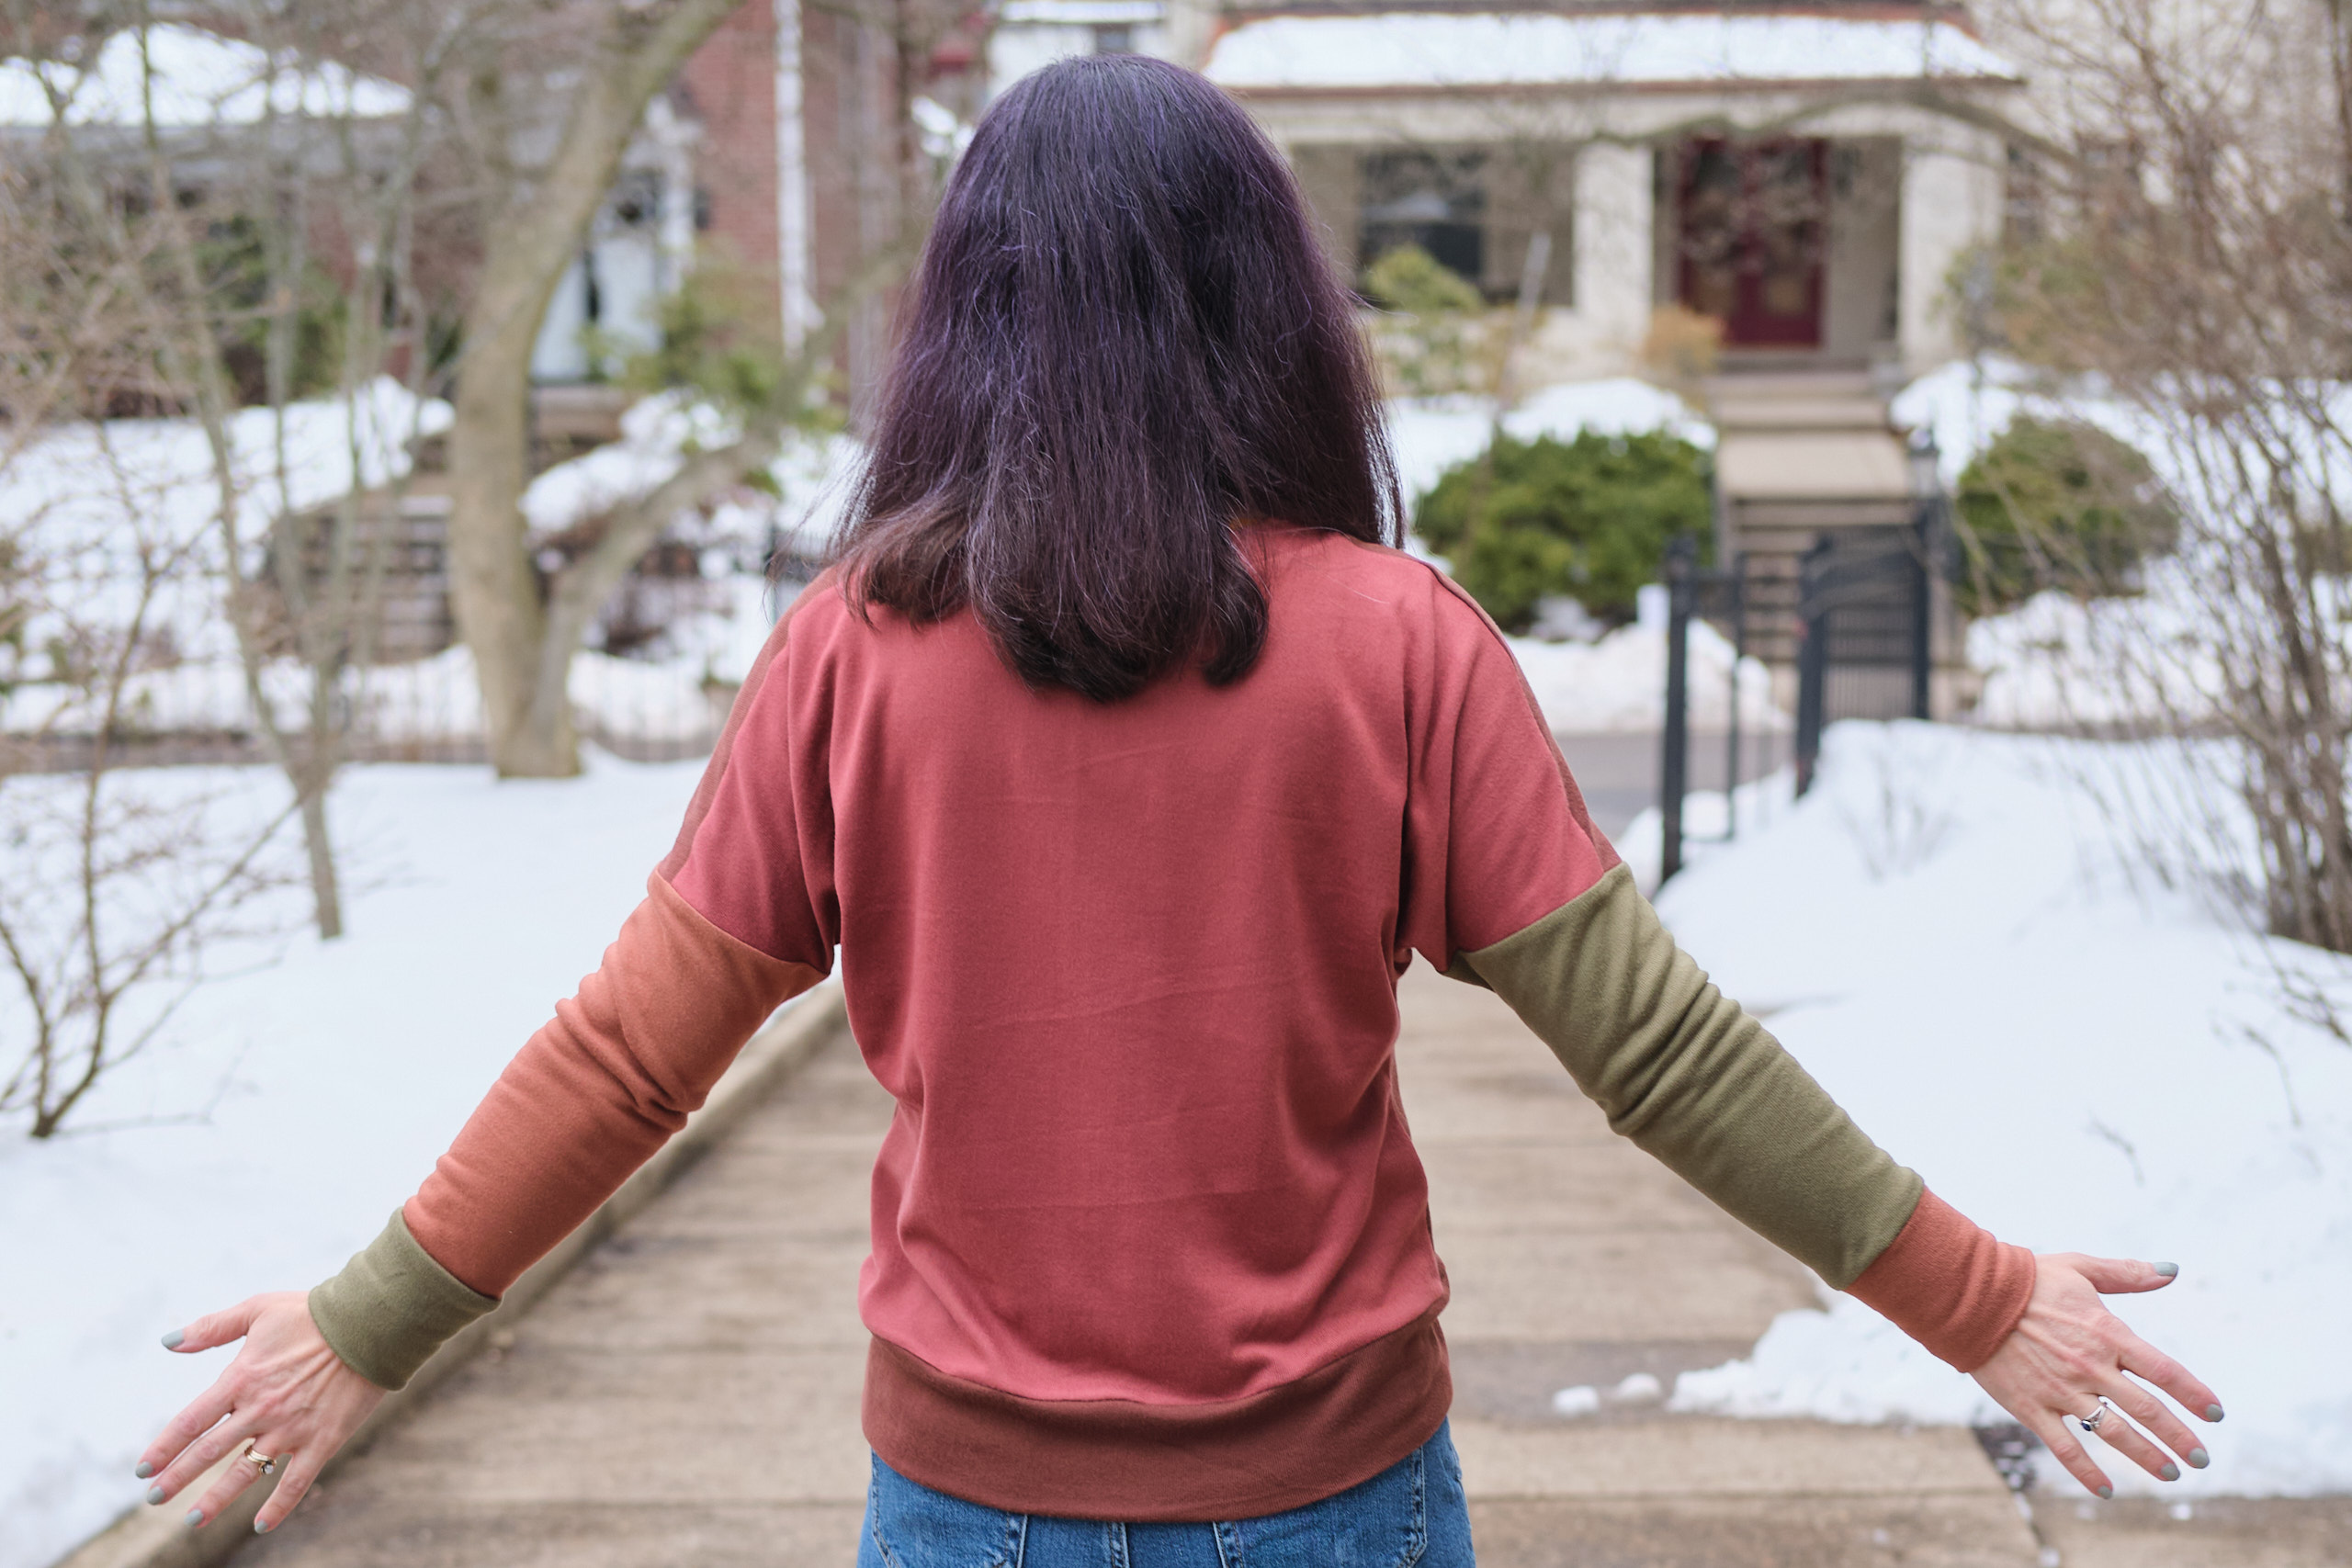
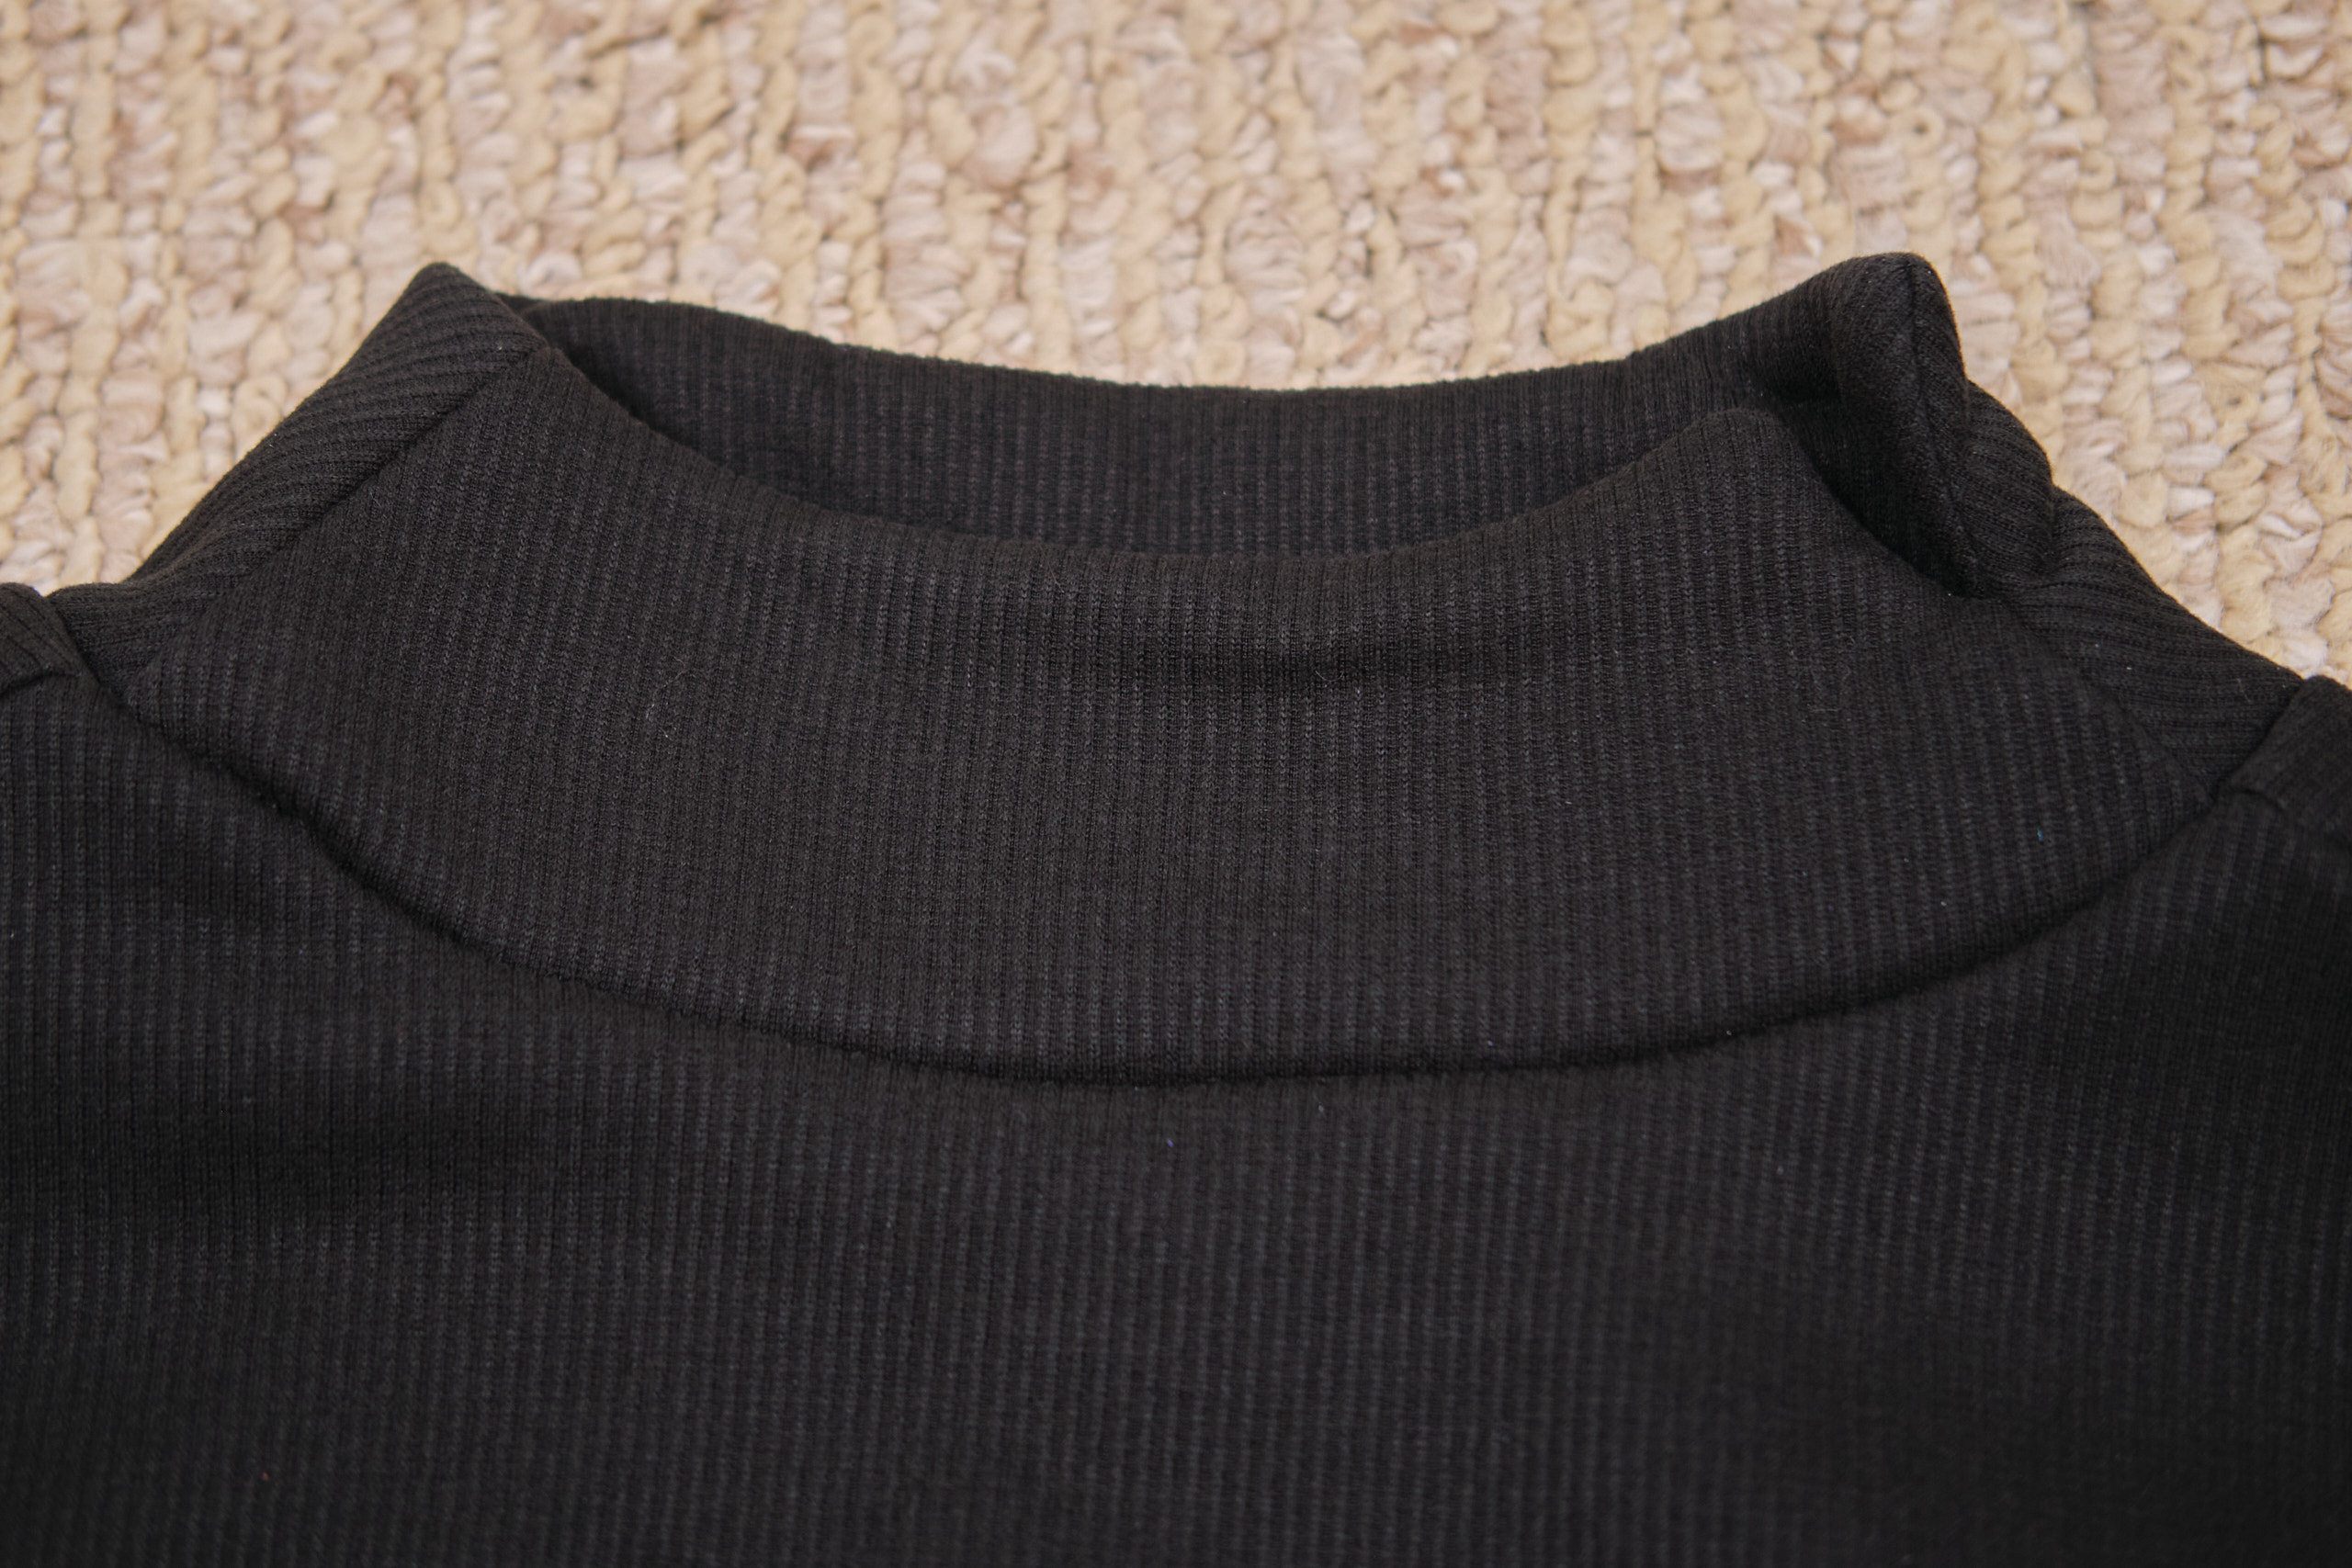
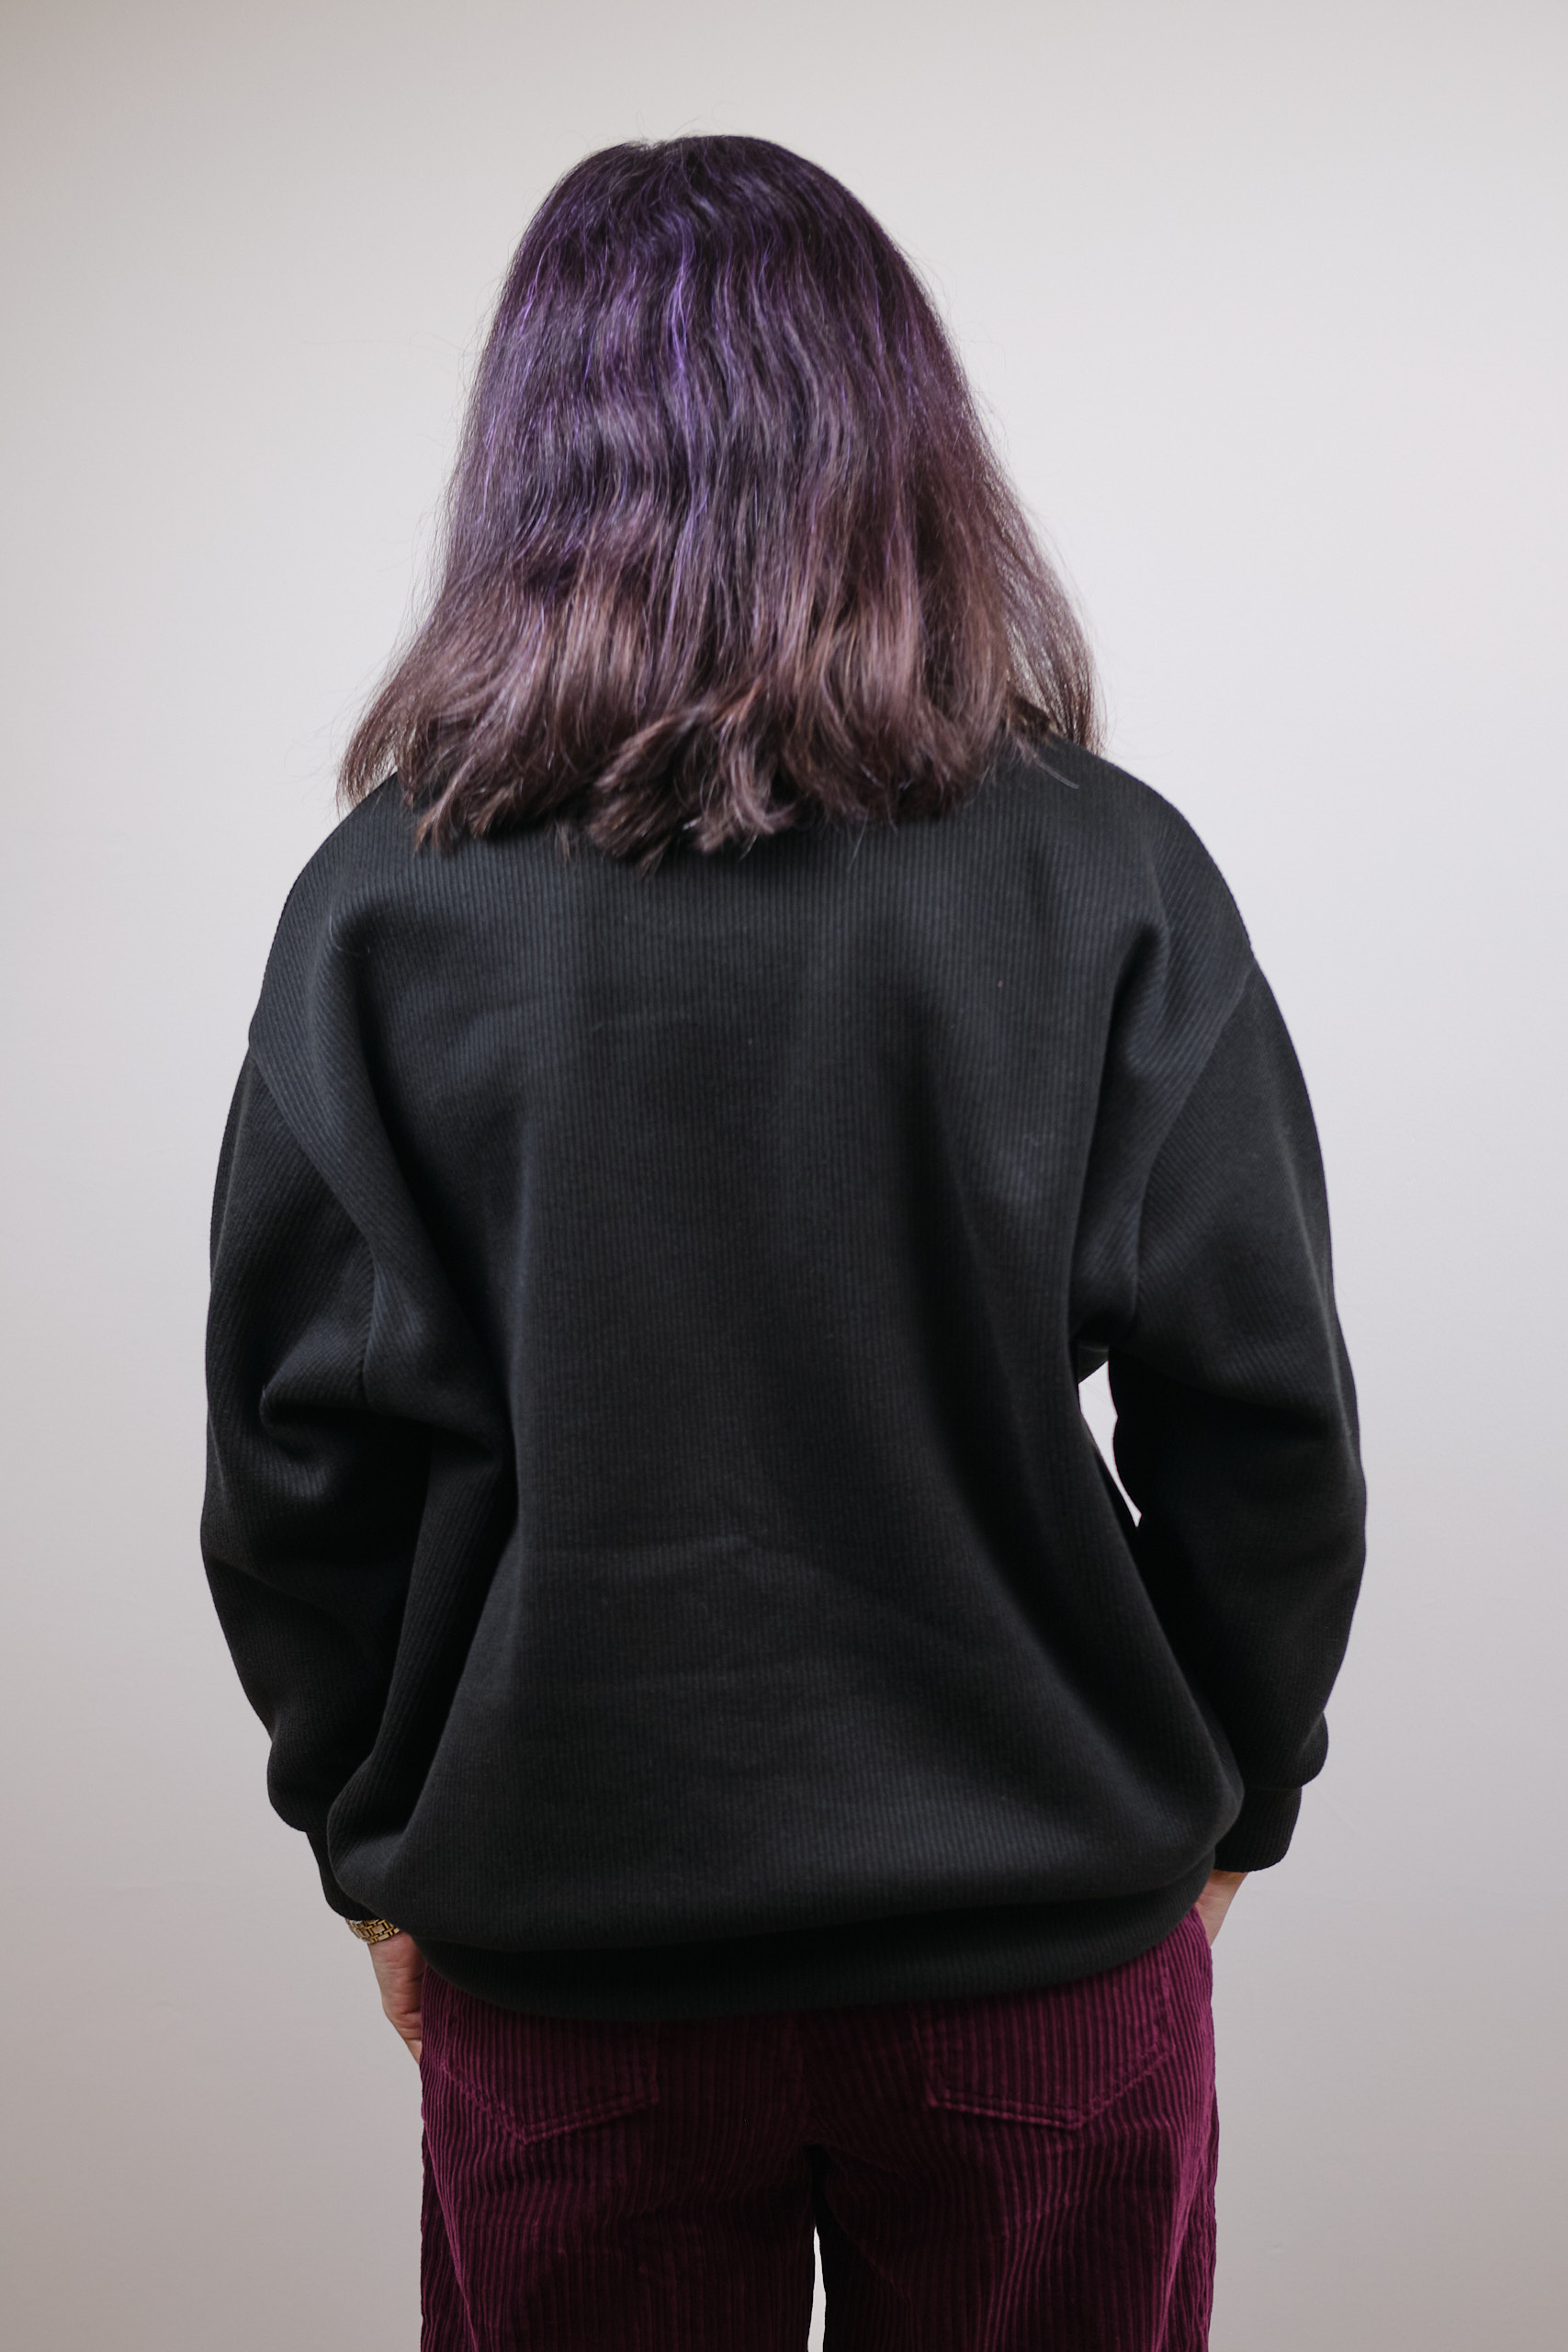
Most of the sweatshirt came together pretty quickly. The pattern has a 3/8-inch seam allowance so I trimmed 1/8-inch off with my serger as I sewed. My Triumph serger was able to sew and trim the heavy fabric without a problem. I used my sewing machine to join the seams on the bands and cuffs. I basted the bottom band and the cuffs to the shirt with a long zigzag stitch after stretching them (just a little bit) and pinning in place. I was able to easily serge the bottom band through three layers of fabric, but the cuffs were too bulky to get under my serger foot. Perhaps I could have made it work if I switched to a smaller foot (I have all the feet so there was probably something that would have worked), but I decided to just sew them with a zigzag on my sewing machine. The neck band construction looks complicated but is actually pretty easy, and is sewn on a sewing machine and finally attached with a serger. It has a cute little notch on one side that nobody will ever see because my hair hides it, but maybe if I wear a ponytail, it will show.
The finished shirt is definitely oversized, but not too oversized. It is very warm and comfortable. I find a lot of turtlenecks and cowls uncomfortable, but this neck band stands far enough away from my neck that it doesn’t bother me. I almost didn’t make this shirt because I didn’t want a high neck. I debated trying a V-neck, a quarter zip, or a scoop neck with facing, but eventually decided to just make the pattern as written, and I’m glad I did.
If I were making this out of a lighter-weight fabric I might go down a size or two, and I might also try this a few inches shorter, or use the pattern for the cropped version and make it a few inches longer. The pattern also has optional pintuck accents that I did not use. I think it looks better without them. Or maybe I would try the Greenstyle Bianca pullover pattern, which is less oversized, has a similar shape, but comes with neck and pocket options. It’s going to be cold here for a while and I have more cozy fabric in my stash, so let’s see!
I made this shirt yesterday and wore it to work today. I walked to work in single-digits and with a coat on top it did the job!