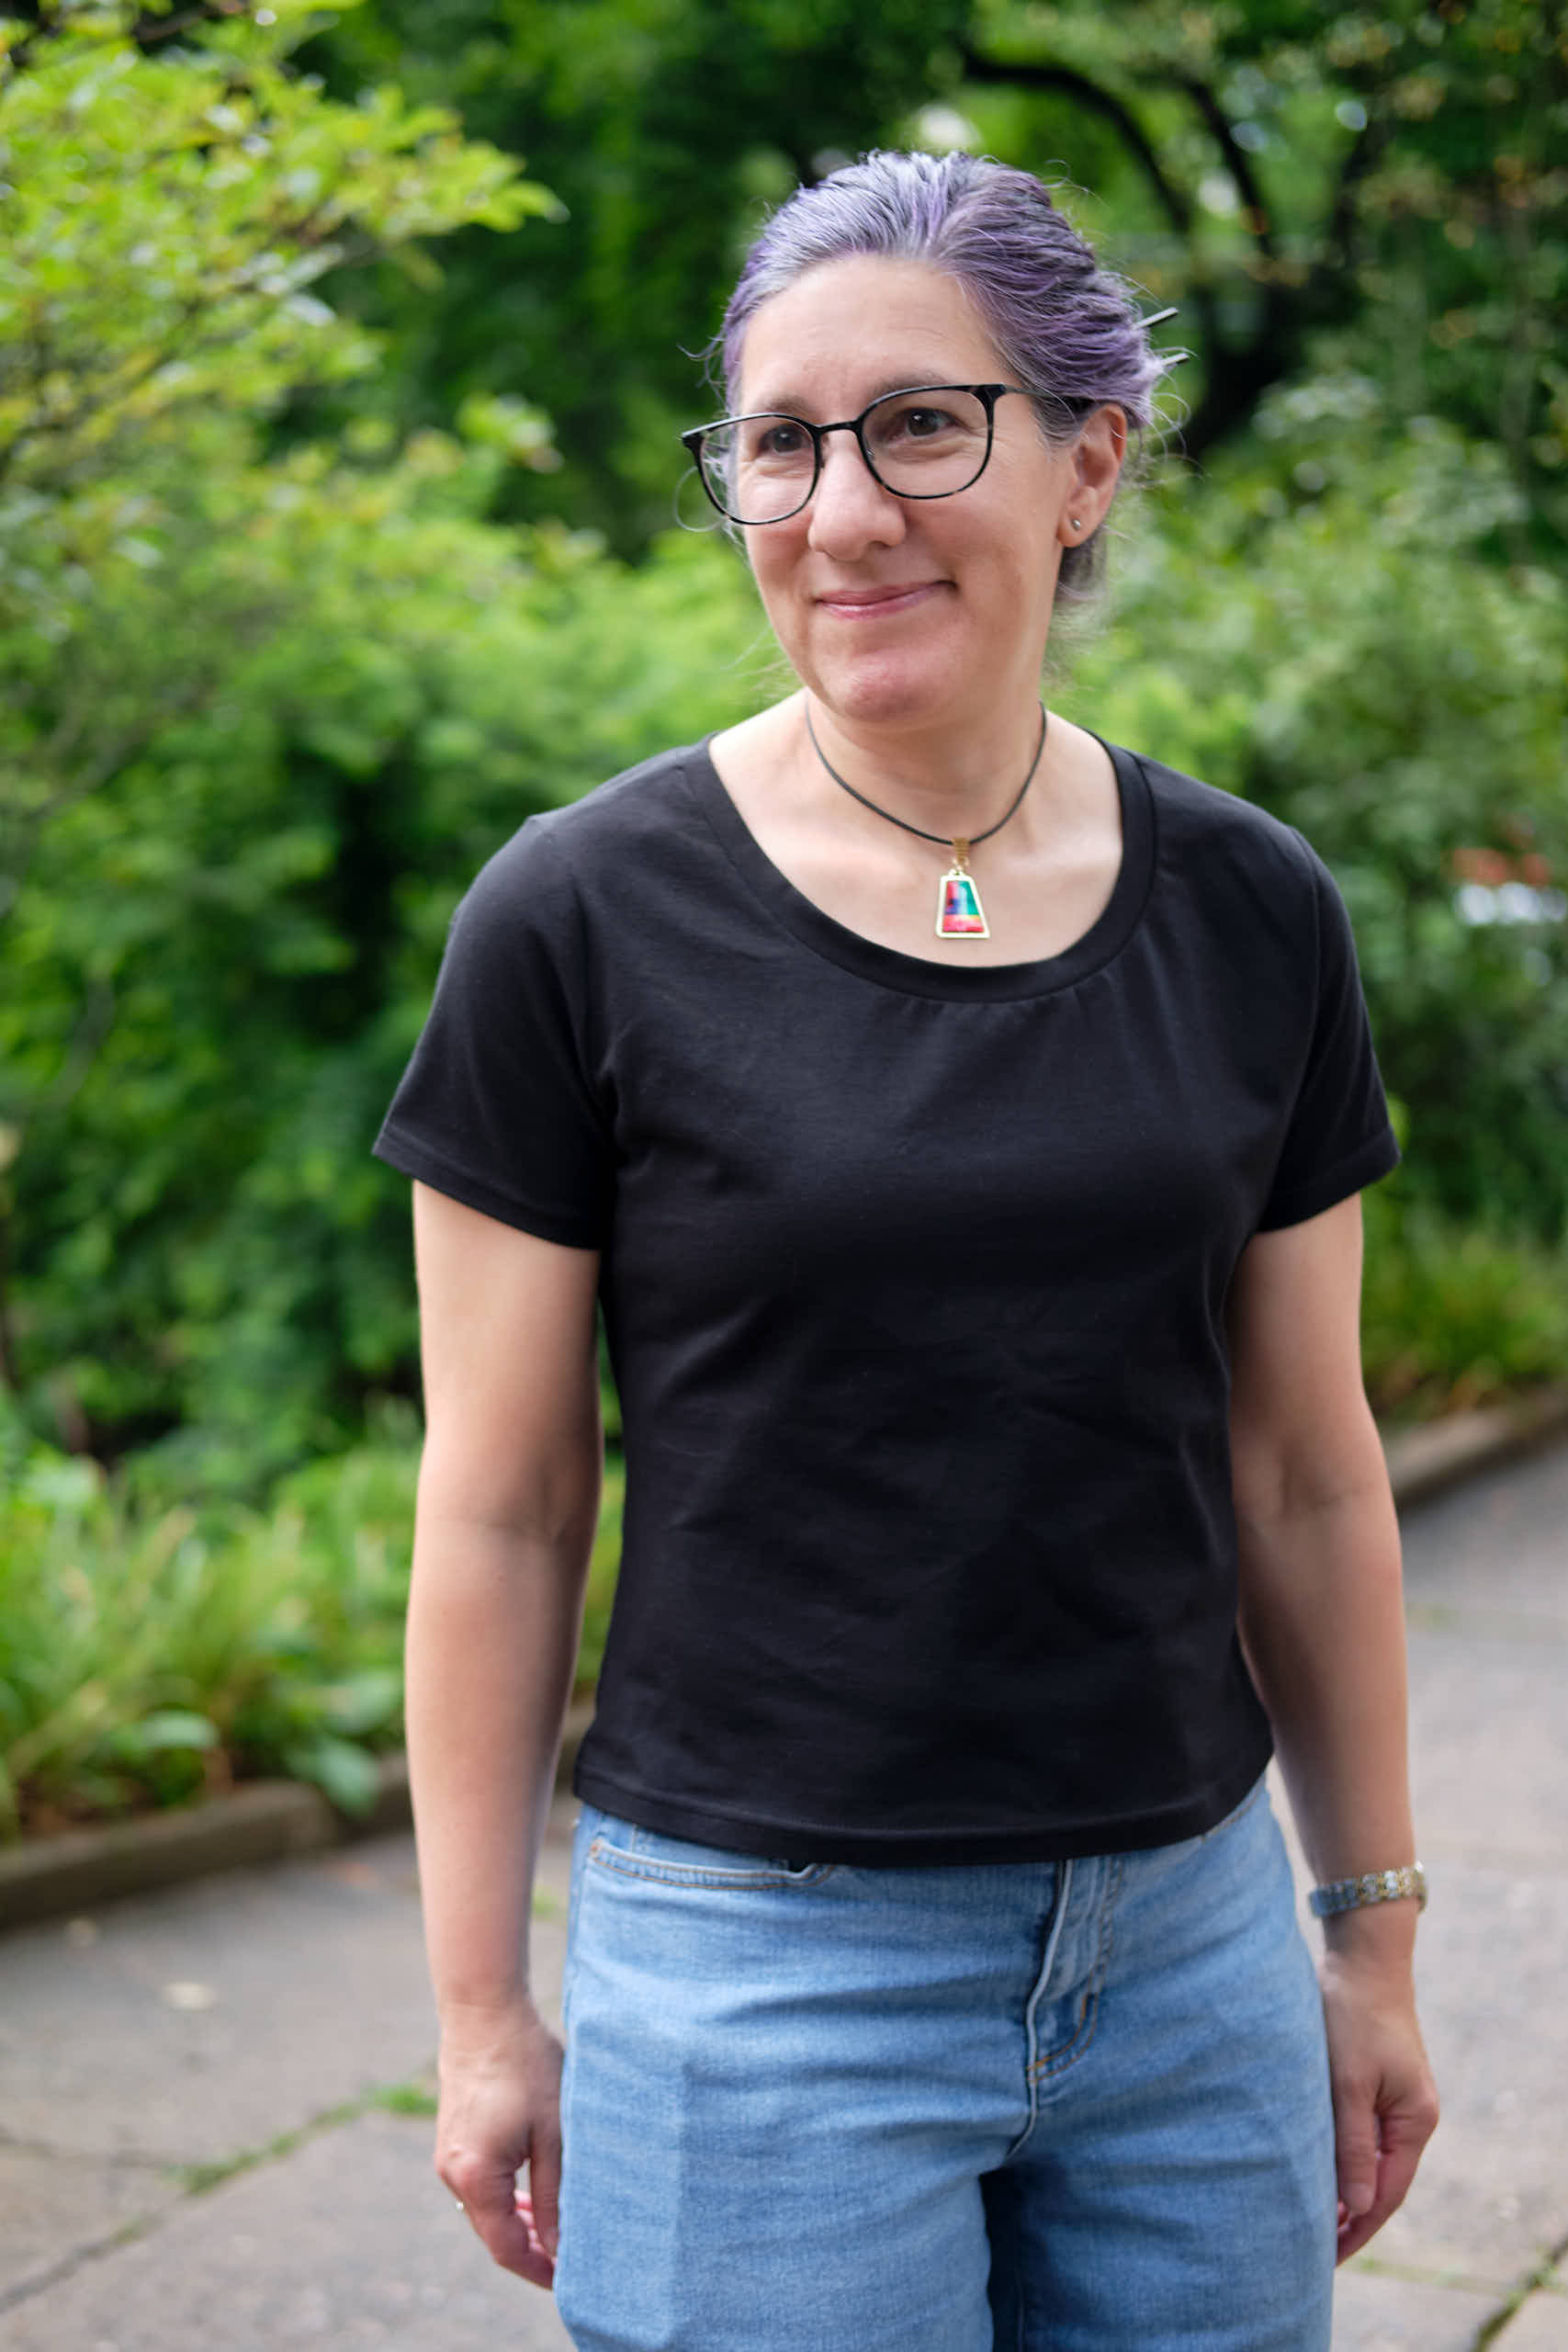
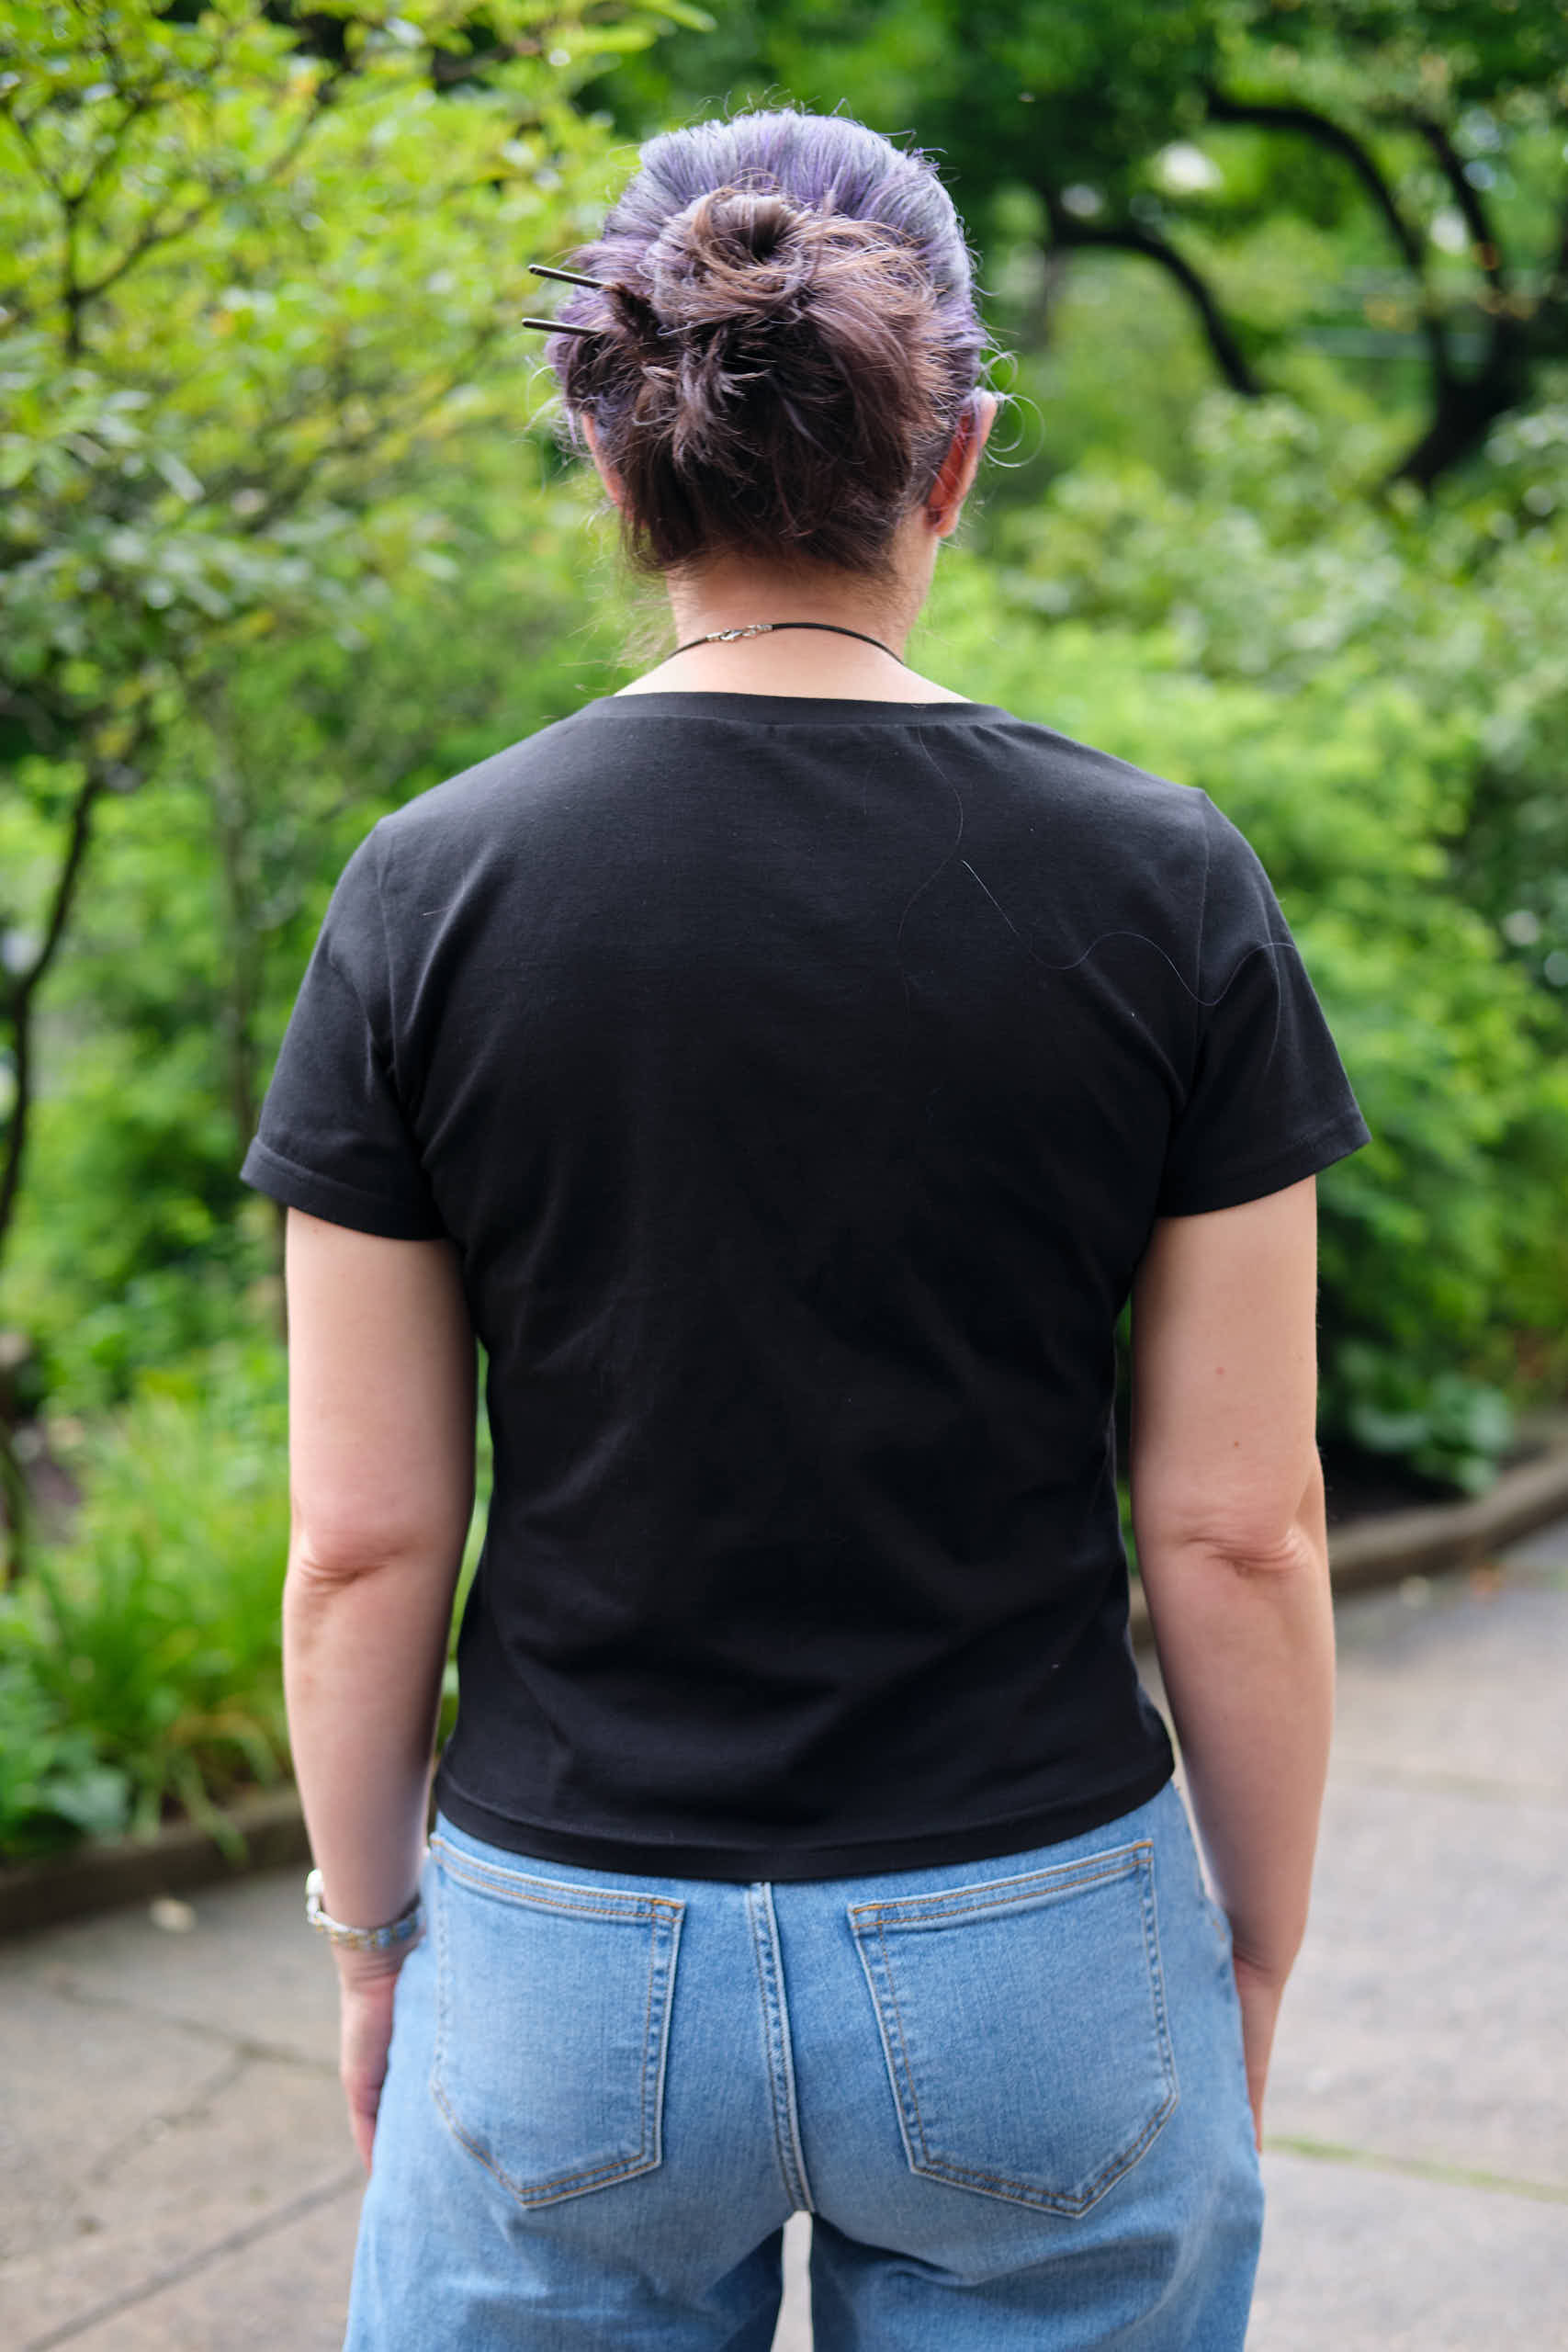
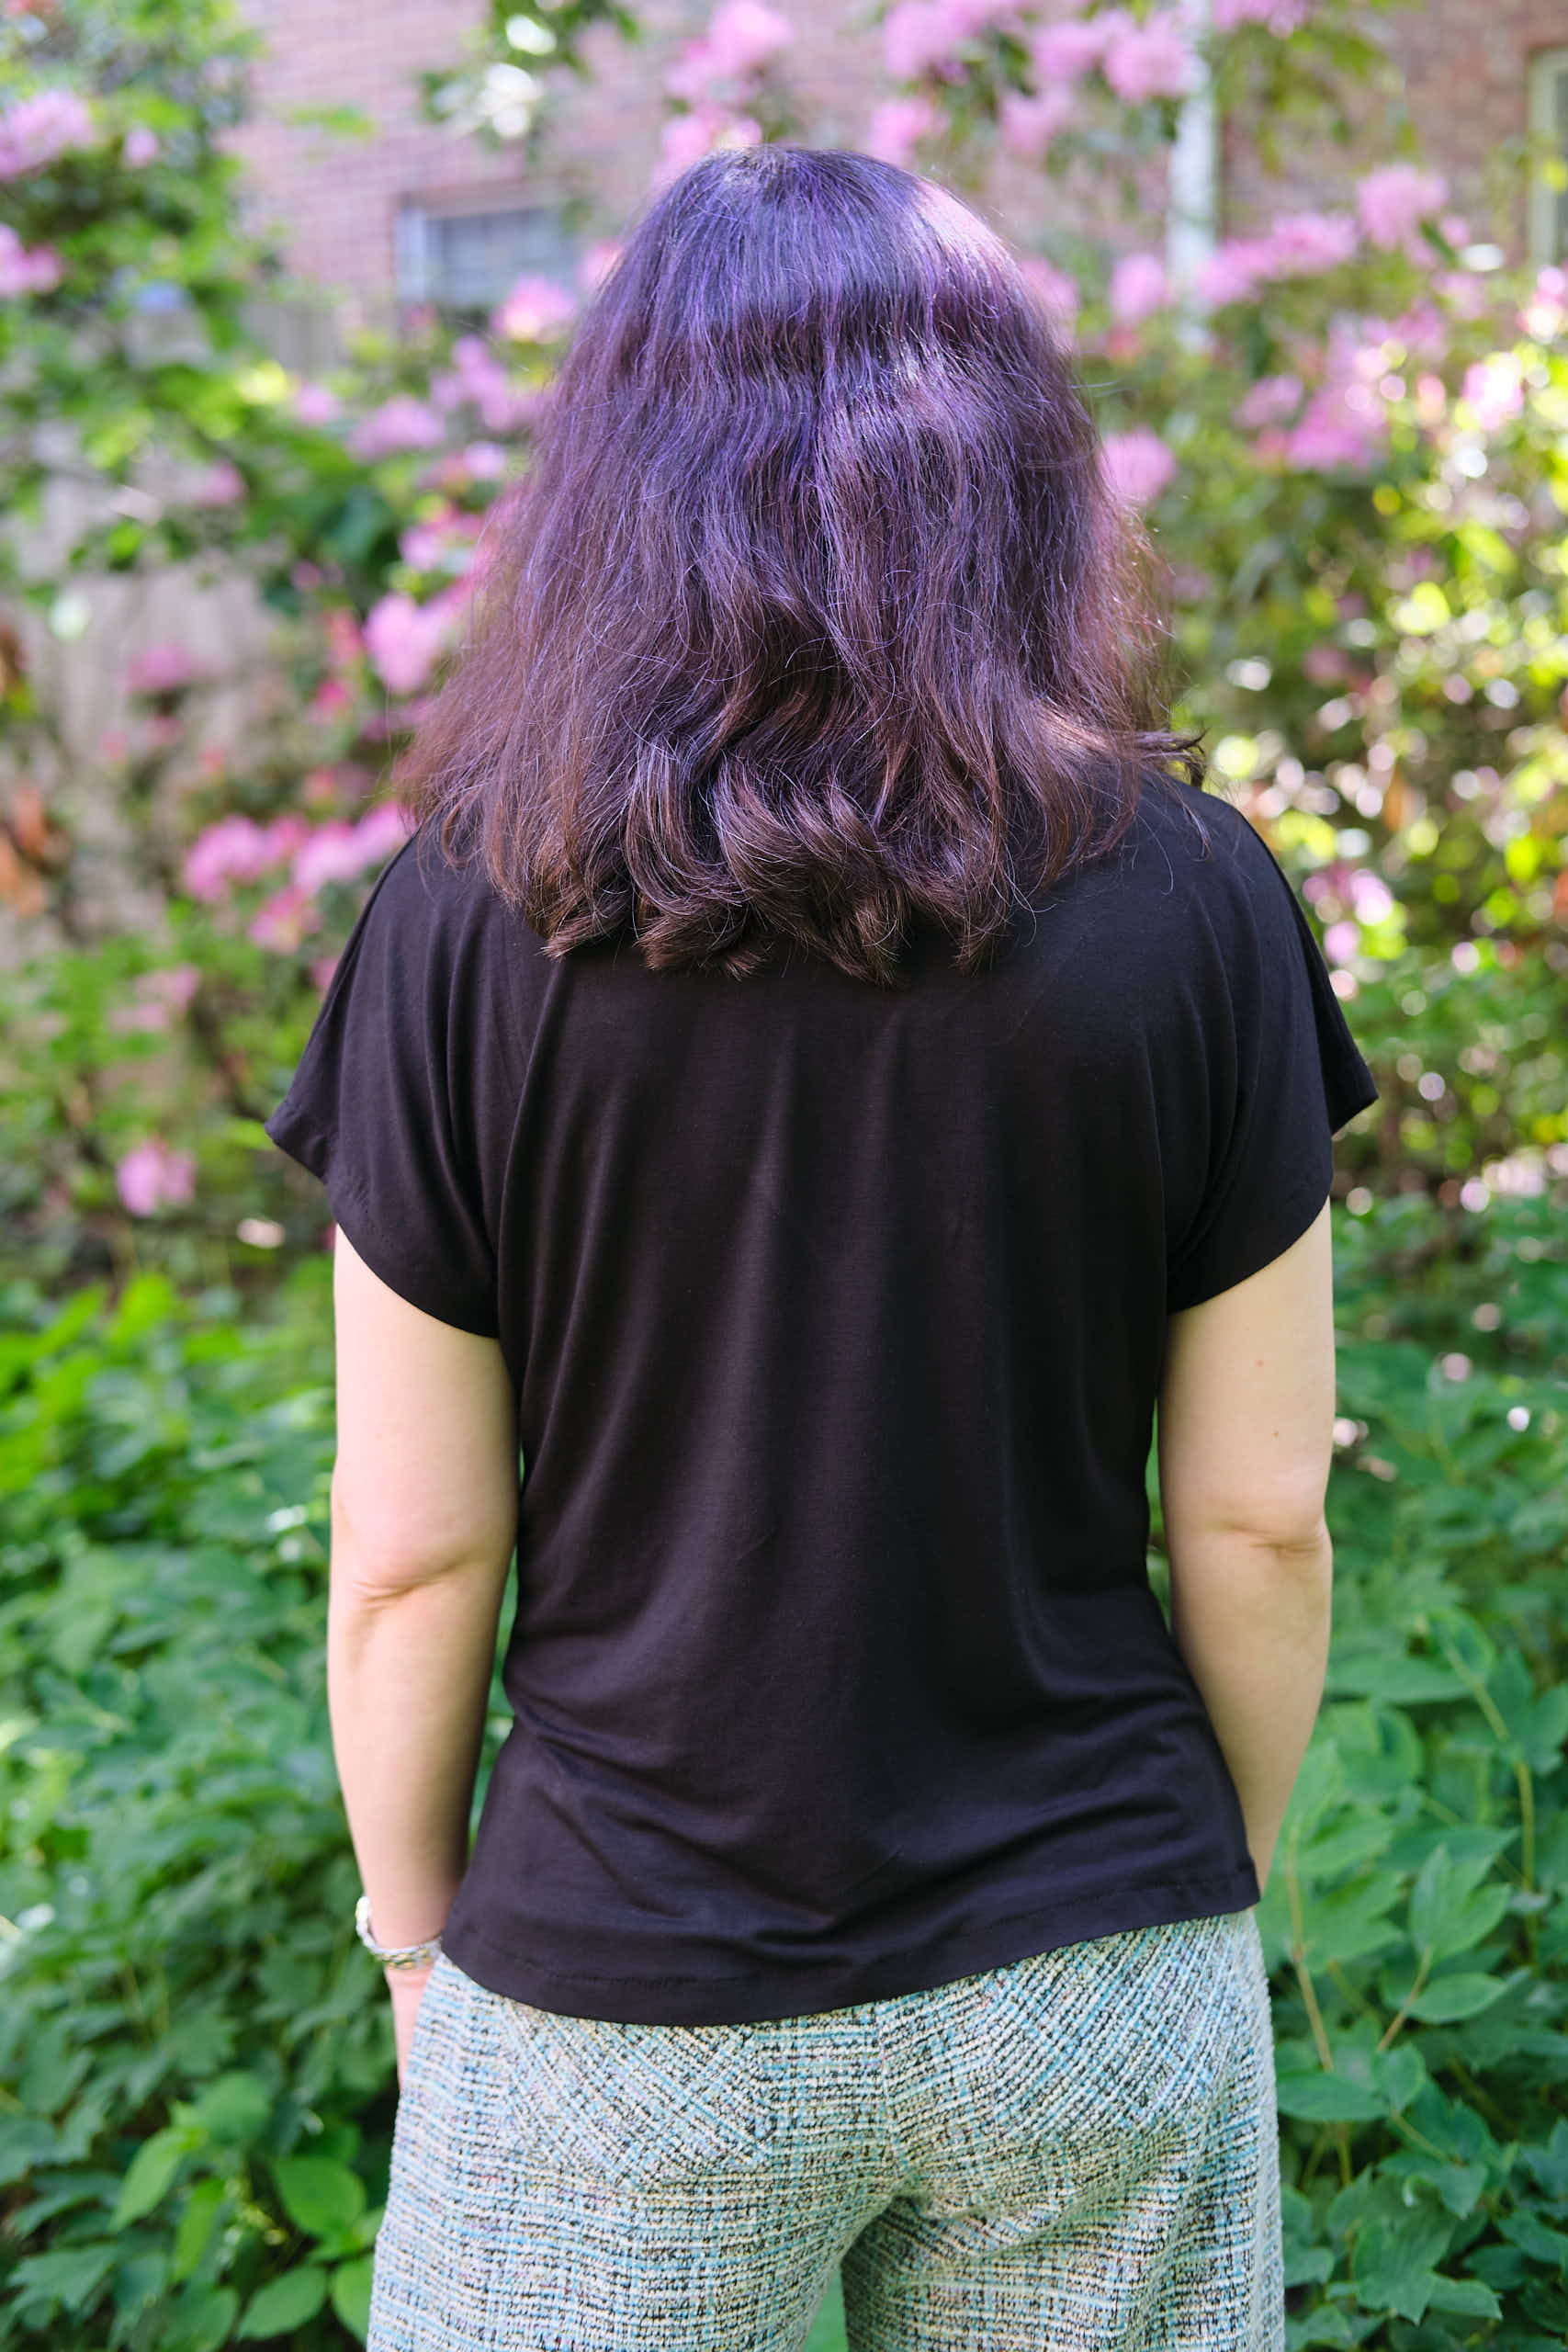
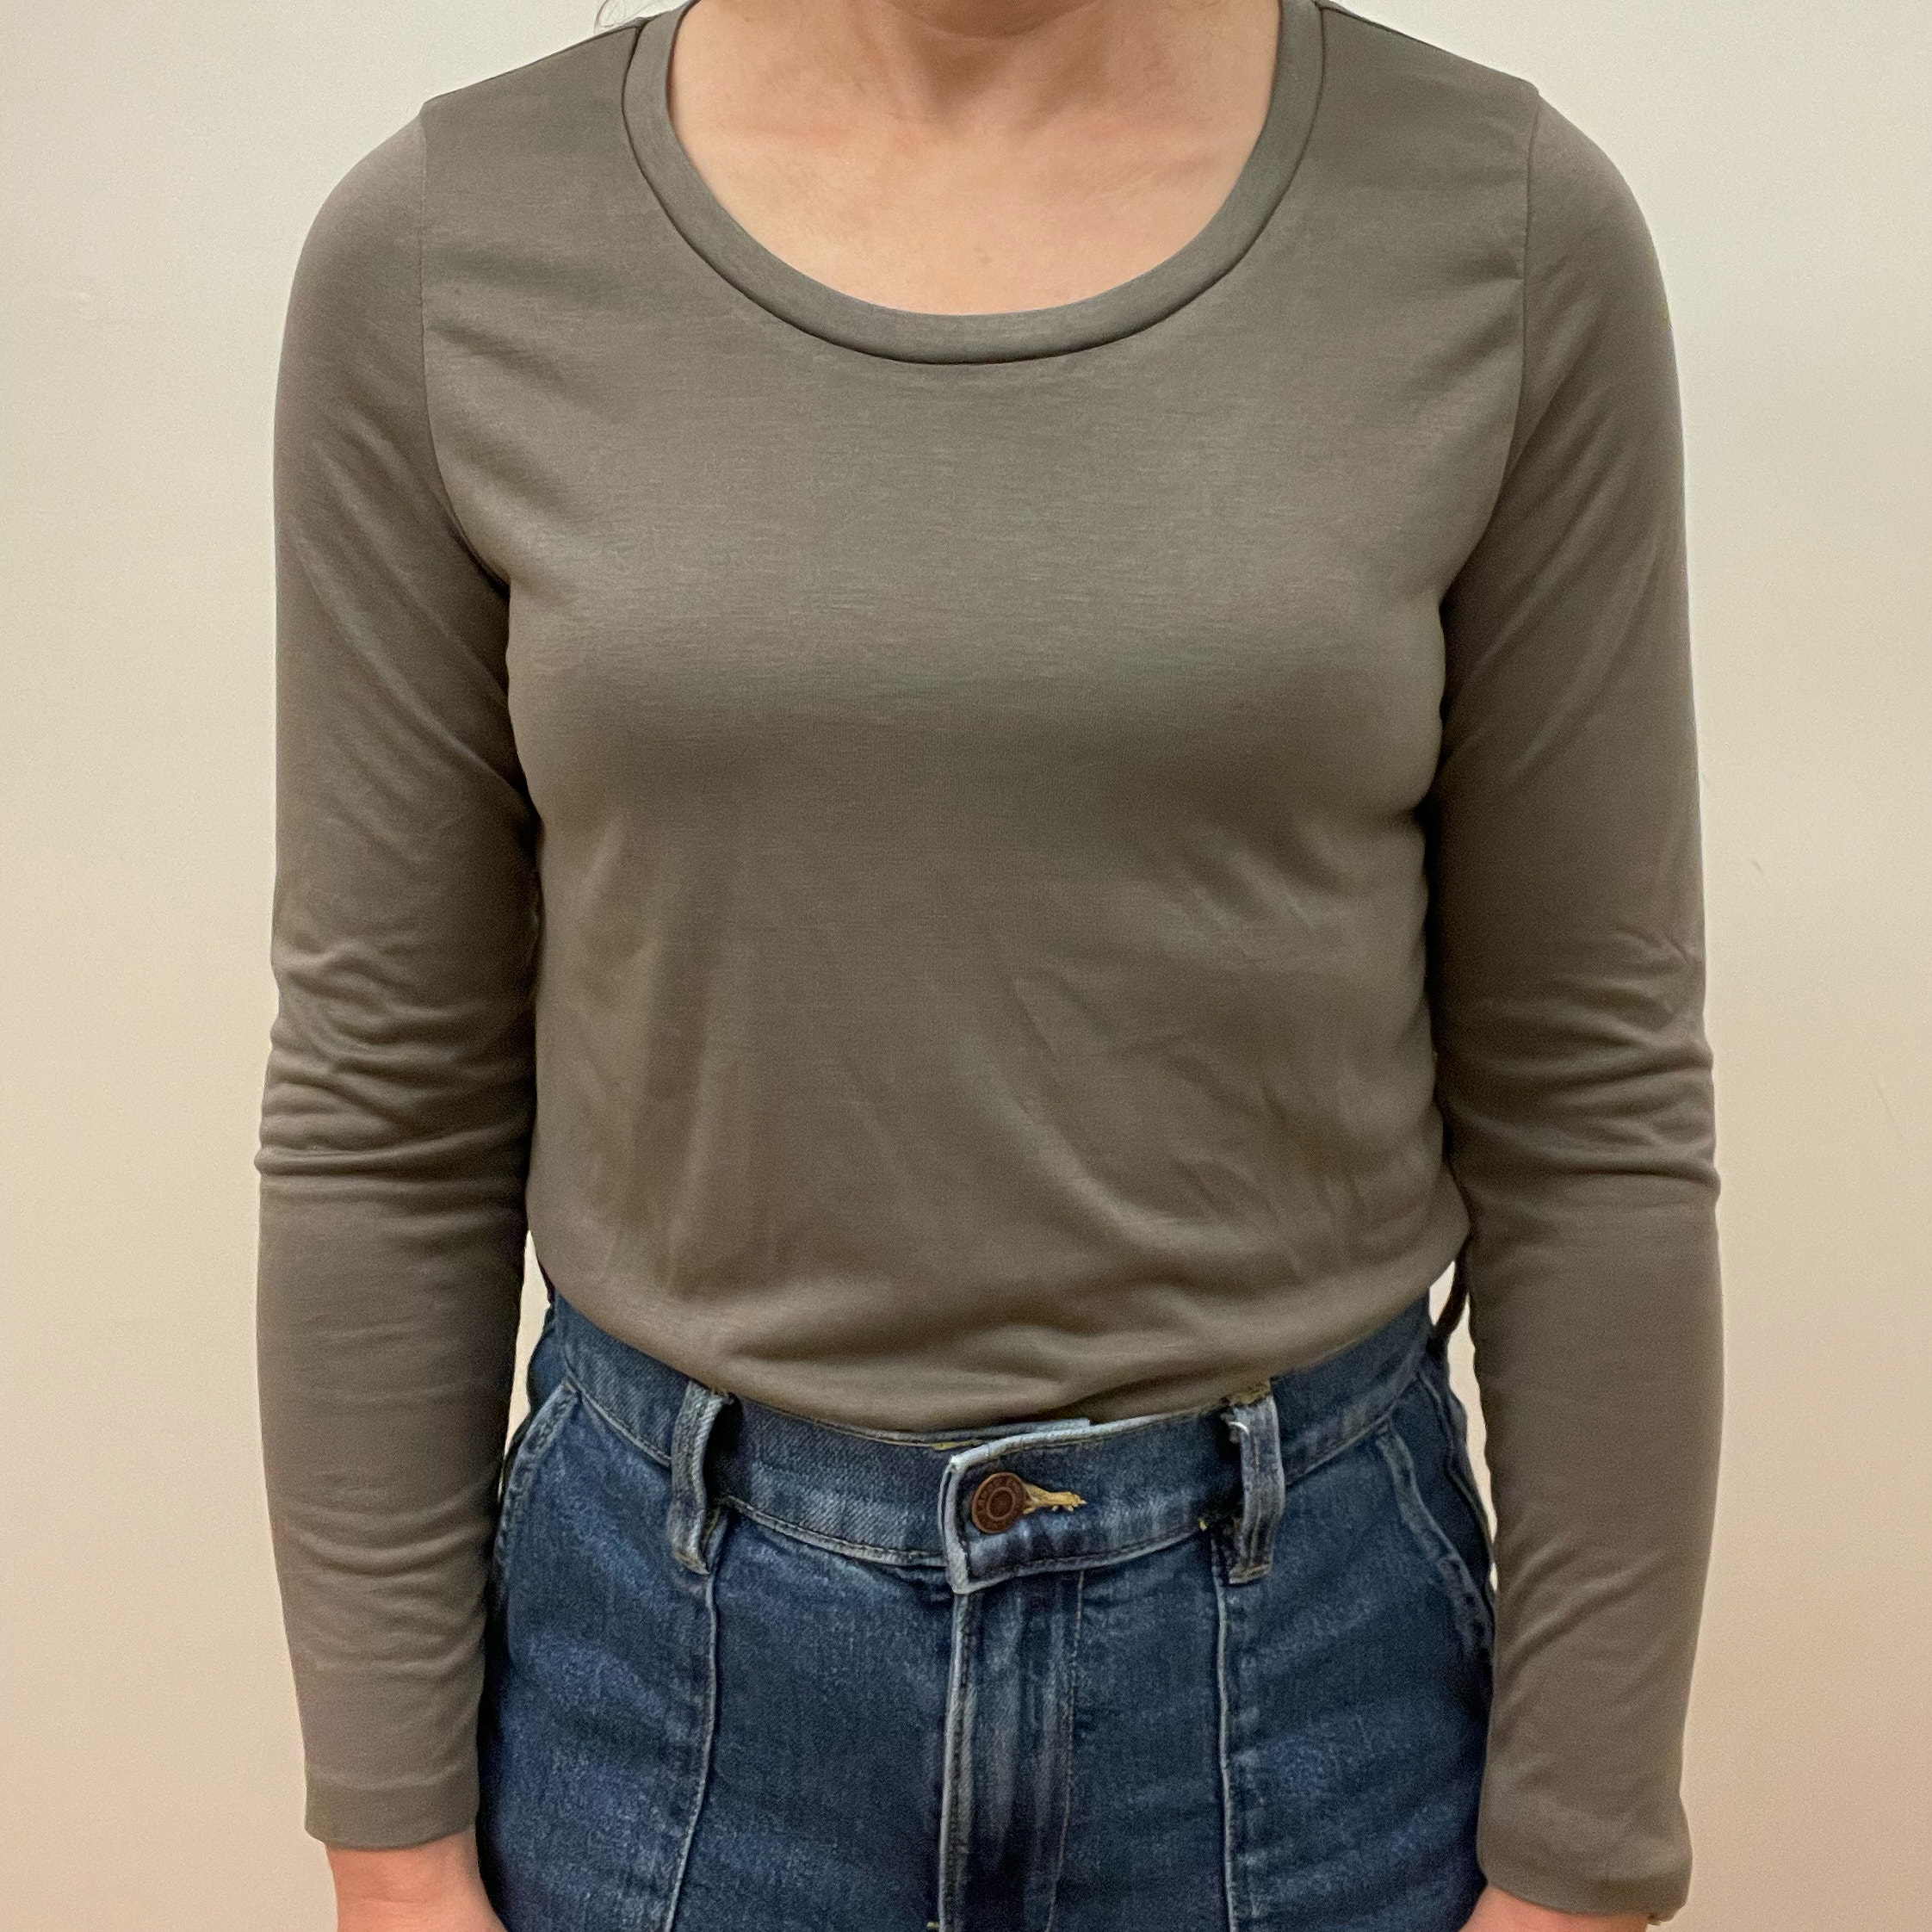
Sinclair Bondi classic fitted t-shirt 6p, wide screwp neck, short sleeves, broad and sloped shoulder adjustment, 2.5 inch above hip length, less than 1 yard of black cotton-lycra.
I made my daughter the perfect fitted black t-shirt to her specifications a few months ago, so now it was time to make one to my specs. This is about the billionth bondi t-shirt I’ve made, but maybe the first with this combination of adjustments: size 6p with broad and sloped shoulder adjustment, wide screwp neck, waist cut 2.5 inches above hip length. I used less than 1 yard of the black Santa Cruz cotton lycra from CaliFabrics that I used for my daughter’s shirt. This length works really well for me for a shirt I’m not going to tuck in. The size 4p also works for me in this pattern (see the recent turquoise DBP shirt I made in 4p), but I like the extra bit of ease with the size 6p in this fabric. This was a very fast make, even though I took the time to convert to cover-stitch mode for the sleeve and bottom hems. The Santa Cruz fabric is really nice, a bit more polished than some of the generic CL fabrics I’ve bought. However, I have an even nicer (and a bit more expensive) CL in my stash that I’m looking forward to trying for a long-sleeve t-shirt.
And here’s a photo wearing the top “in the wild” at the Carrie Furnace.
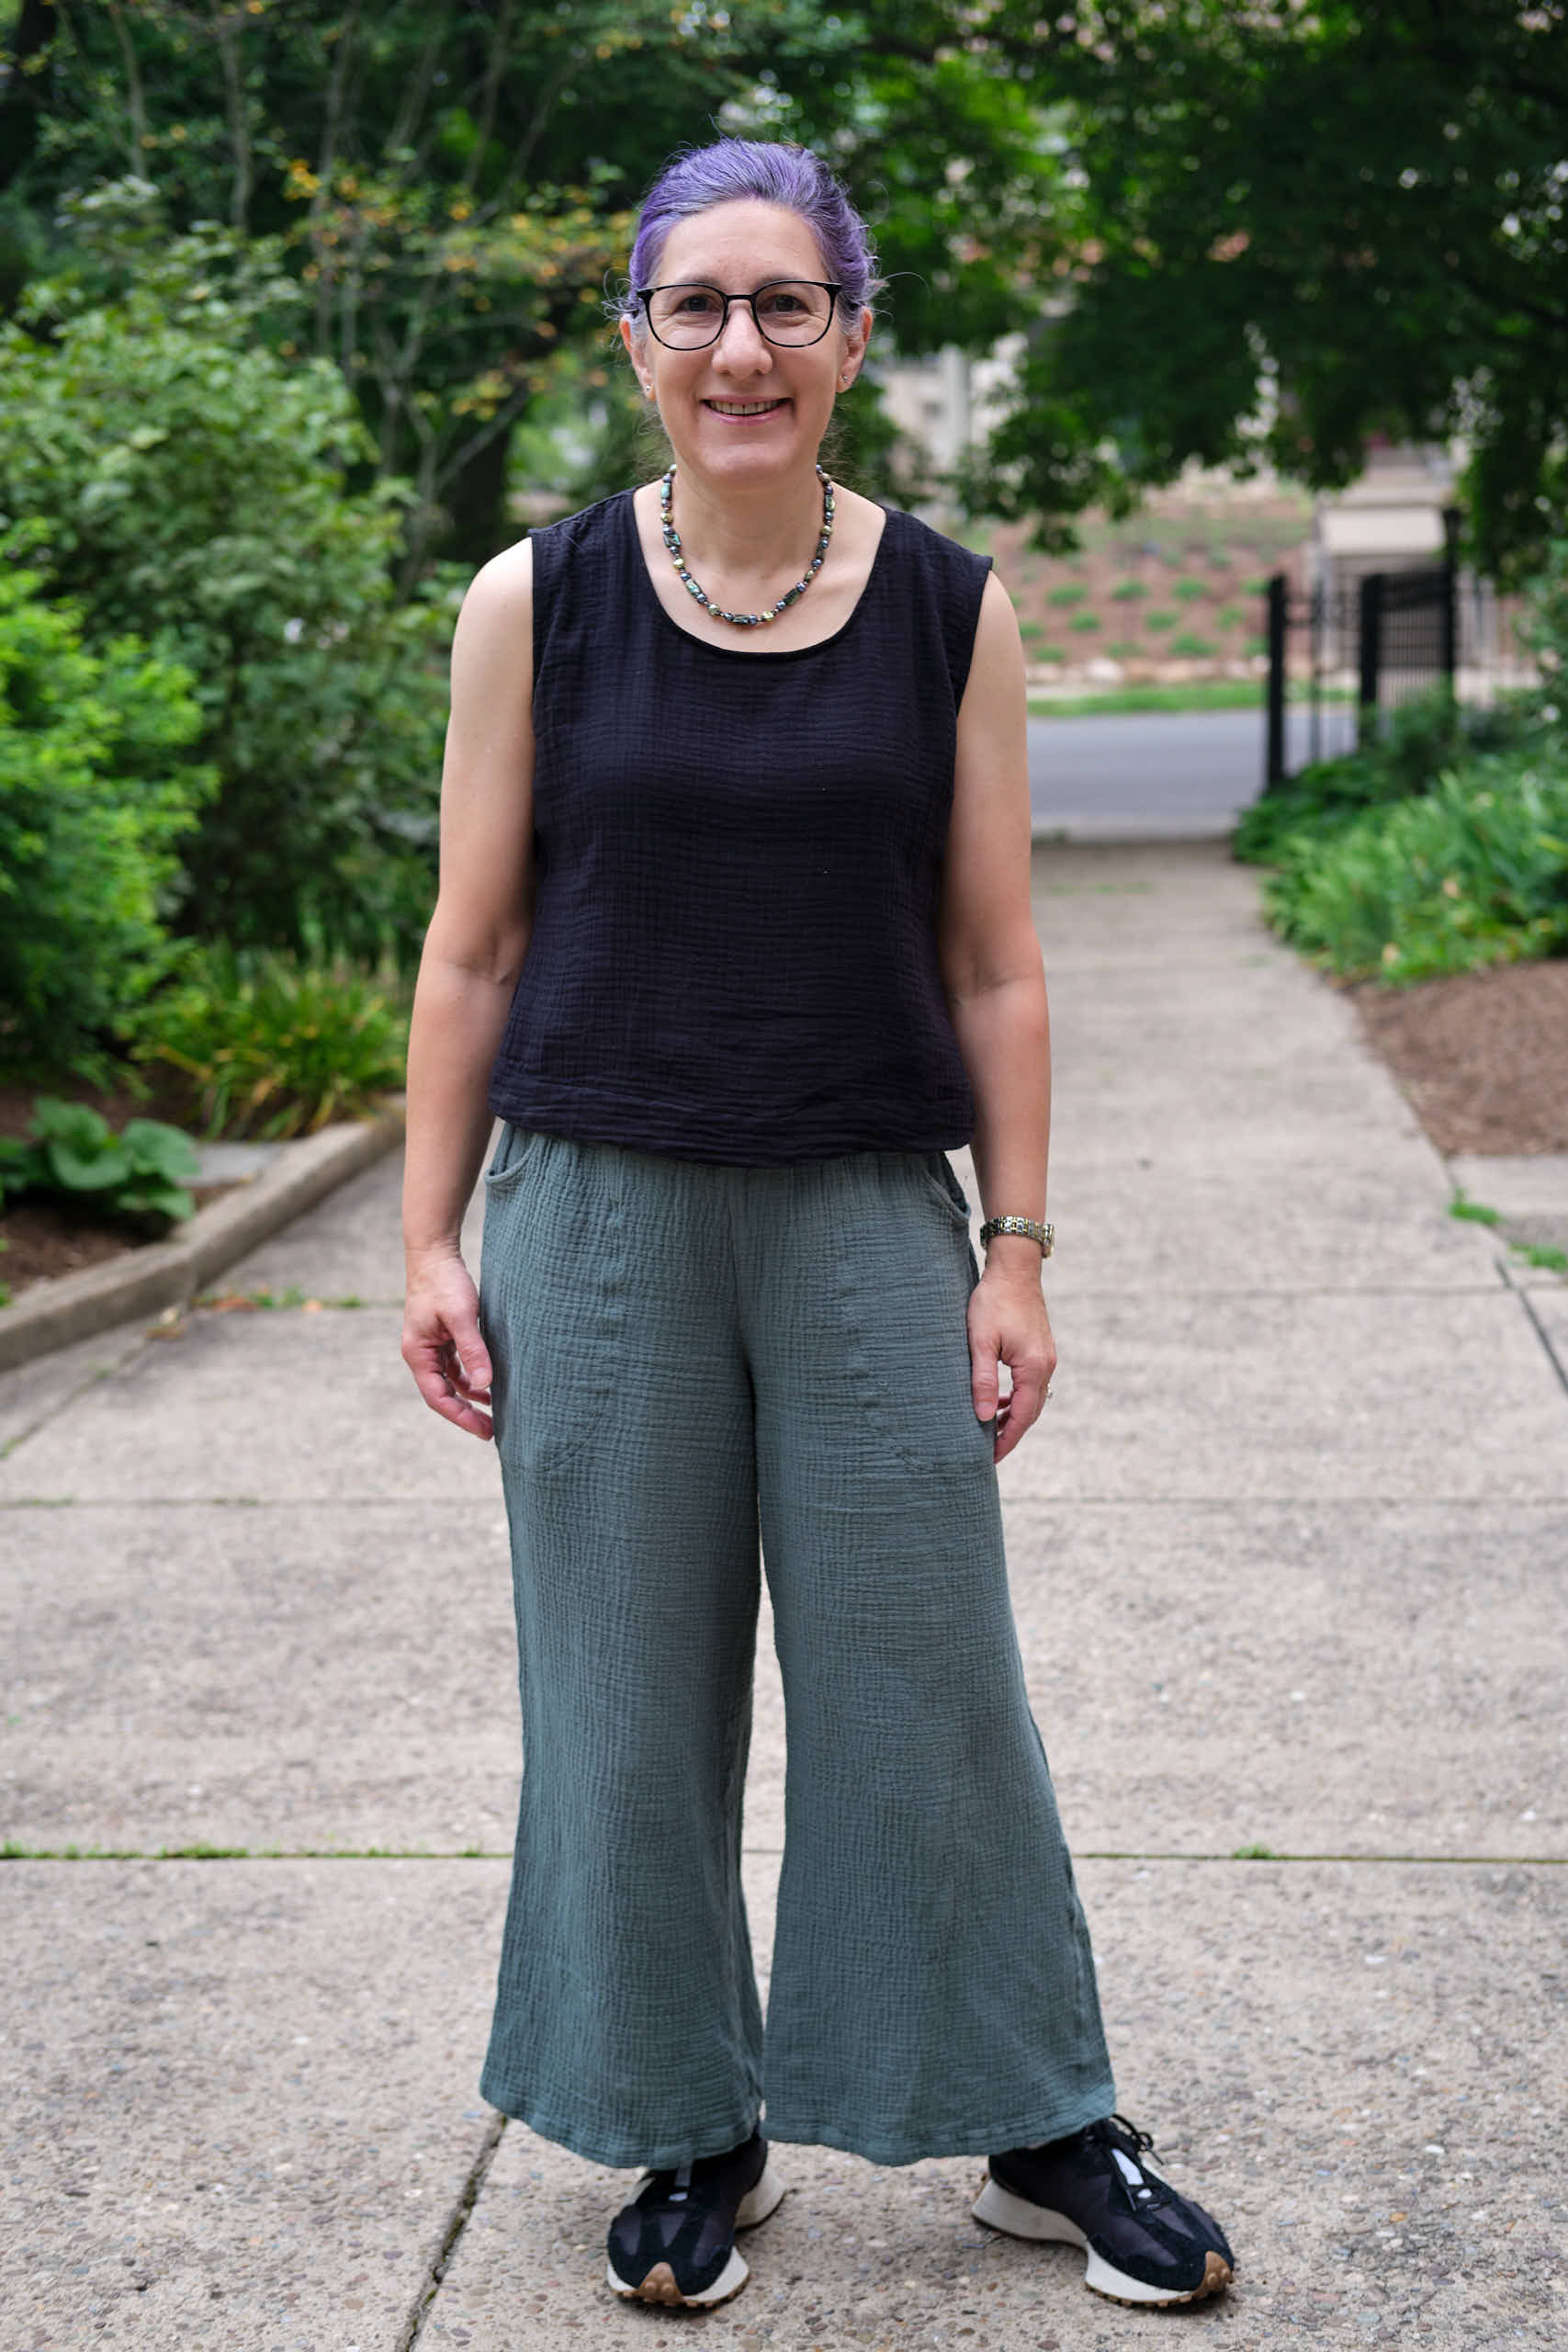
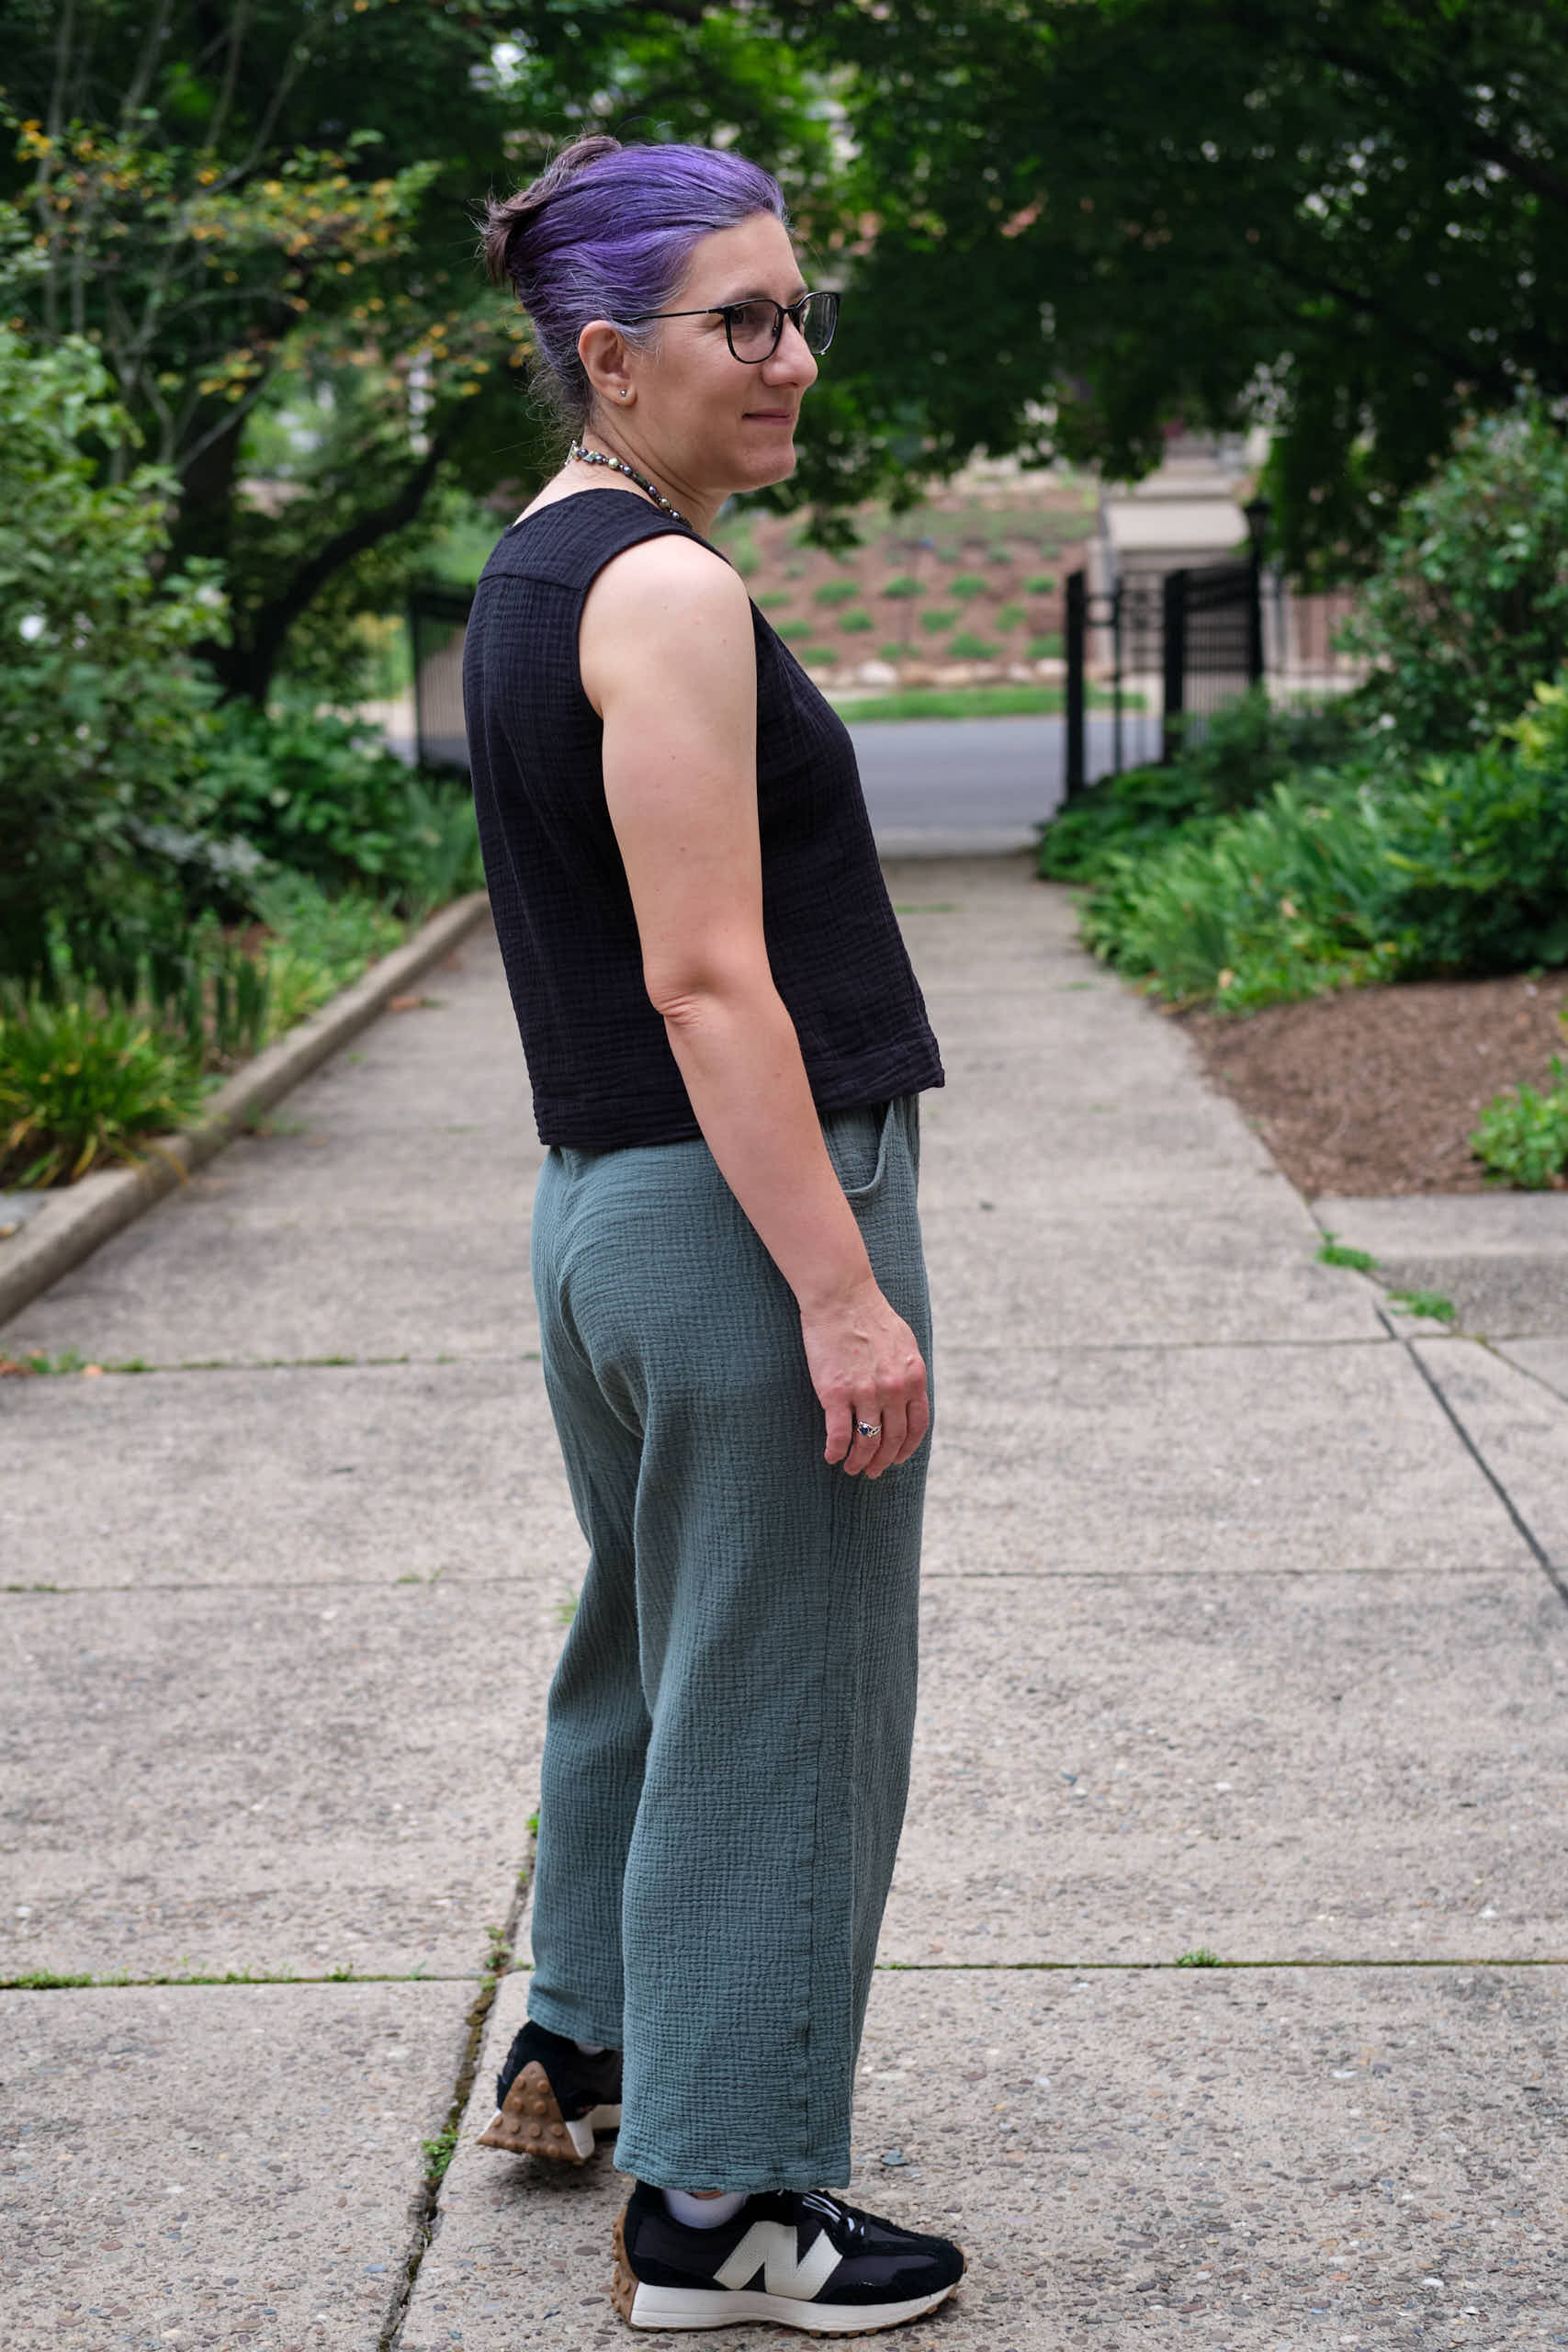
Pattern Emporium Meet You There dress bodice made with less than 1 yard black double gauze fabric (washed and ironed before cutting), size AU8, regular bodice shortened by 2 inches and then extended 8 inches down at a slight angle and folded under 2 inches for hem, mid neck, sleeveless, used batik quilting cotton for facings
I really like the fit of my sleeveless brown print Meet You There dress that I made earlier this summer and thought the bodice would make a nice top. The pattern suggests adding a ruffle to the bodice to make a top, but an Australian sewist named Mel made a super cute version with an extended bodice rather than a ruffle (she used a fabric with an egg print and made a fun video to go with it) and I thought it was a great idea.
When I made my last Meet You There dress I shortened the regular AU 8 bodice by 2 inches to be closer to my natural waist. So I took that as the waist for the top and then extended the side seams by 8 inches from there, sloping them gently out about 3/4 inch and then straight down for the bottom 4 inches to make it easier to hem. I folded up the hem 1/2 inch and then another 1.5 inches and top stitched. I used batik cotton for the neck and arm-hole facings on the brown dress and it was much easier than fussing with the loosely woven gauze. So for this top I used some thin, tightly woven black fabric from my stash, probably a cotton poplin.
The top is cut from less than a yard of black cotton double gauze left over from making a skirt for my daughter. I thoroughly ironed the gauze before cutting it.
I’m very happy with the fit of this top (modeled here with PE Vacation Vibe pants I made last summer in dark sage double gauze). I sized down from AU10 for both my dress and this top — it’s about as close-fitting as I could get with a non-stretch woven with no fasteners. It does take a little effort to get it off, though. The mid neck is a great neck style for me, and I like the sleeveless shoulders that are plenty wide and easily cover my bra straps. I’m not sure the back yoke is entirely necessary, but it adds a cute detail and a convenient place to sew a tag (on the inside). I’m also pleased with how this length worked out for me — just right for a top that I won’t be tucking in. The double gauze is light weight, dries quickly, and doesn’t need to be ironed.
I decided to make a new airflow top to go with my new black airflow Making Moves pants and selected the Pattern Emporium Rise & Shine Sleeveless Top pattern, which I had never tried before. I made it in a size AU8, length 2, low neckline, simple hem, without a center seam or bust darts. This version is easy to cut out: just a front, a back, and 1-inch bias-cut facing strips for the neck and two armholes. Kate’s instructions and video on sewing the neck and armhole facings are clear and easy to follow, but I had to take it pretty slow, so it took a while.
I made the pattern as written, and it came out pretty perfect. I did struggle with a few things, which I’ll note here.
When I projected the pattern I found the notch marks on the neck facing too small to easily see projected on my fabric so I extended them and made them darker.
The airflow fabric grows and spreads a bit (but not as much as double gauze), but pops back. However, the folded facing does come out a bit wider than it should. This is not a problem, as the facing is on the inside of the shirt.
Joining the right shoulder after sewing on the neck facing was challenging. I had to try three times to get it right, and the seam is still a bit bulky. However, following the advice to tack it dow helped.
To sew a 5/8-inch simple hem I machine-basted 5/8″ from the edge (after serging), then folded at the basting line and pressed. I was able to sew at 1/2″ from the front side of the fabric without needing to pin it. When I was done, I pulled out the basting stitches.
I used less than a yard of 58″-wide 175gsm 100% polyester airflow fabric. The airflow has no spandex and thus officially no stretch, but it does have a bit of give due to the crinkle texture. Airflow is very inexpensive (especially when Mily Mae Fabrics puts it on sale), requires no ironing, and is less slippery to sew than a lot of other polyester wovens. However, it doesn’t hold a crisp crease when pressed. The color I used was called aqua, but I think it is more of a teal.
Length 2 is a good length for me to wear untucked. There is also room to tuck it in on high waisted pants, but if I was going to regularly tuck I might make the longer length. Rise & Shine has more of a swing shape than most of the other Pattern Emporium woven tops (Be Mine, About Town, Spill the Tea), which are all built on the same basic bodice and have side seams that do not slope out as much. Rise & Shine is designed to be sleeveless and sleeves cannot be added (although I could see mashing it with Be Mine to have sleeves with the swing shape). The neckline comes with high and mid options, but the mid option is similar to the low option on the Be Mine top. You would have to improvise (or maybe mash with the Meet You There dress mid neckline) to have an in-between option. I made the lower option and it is definitely lower than I usually wear, but I think it works out ok for a summer top.
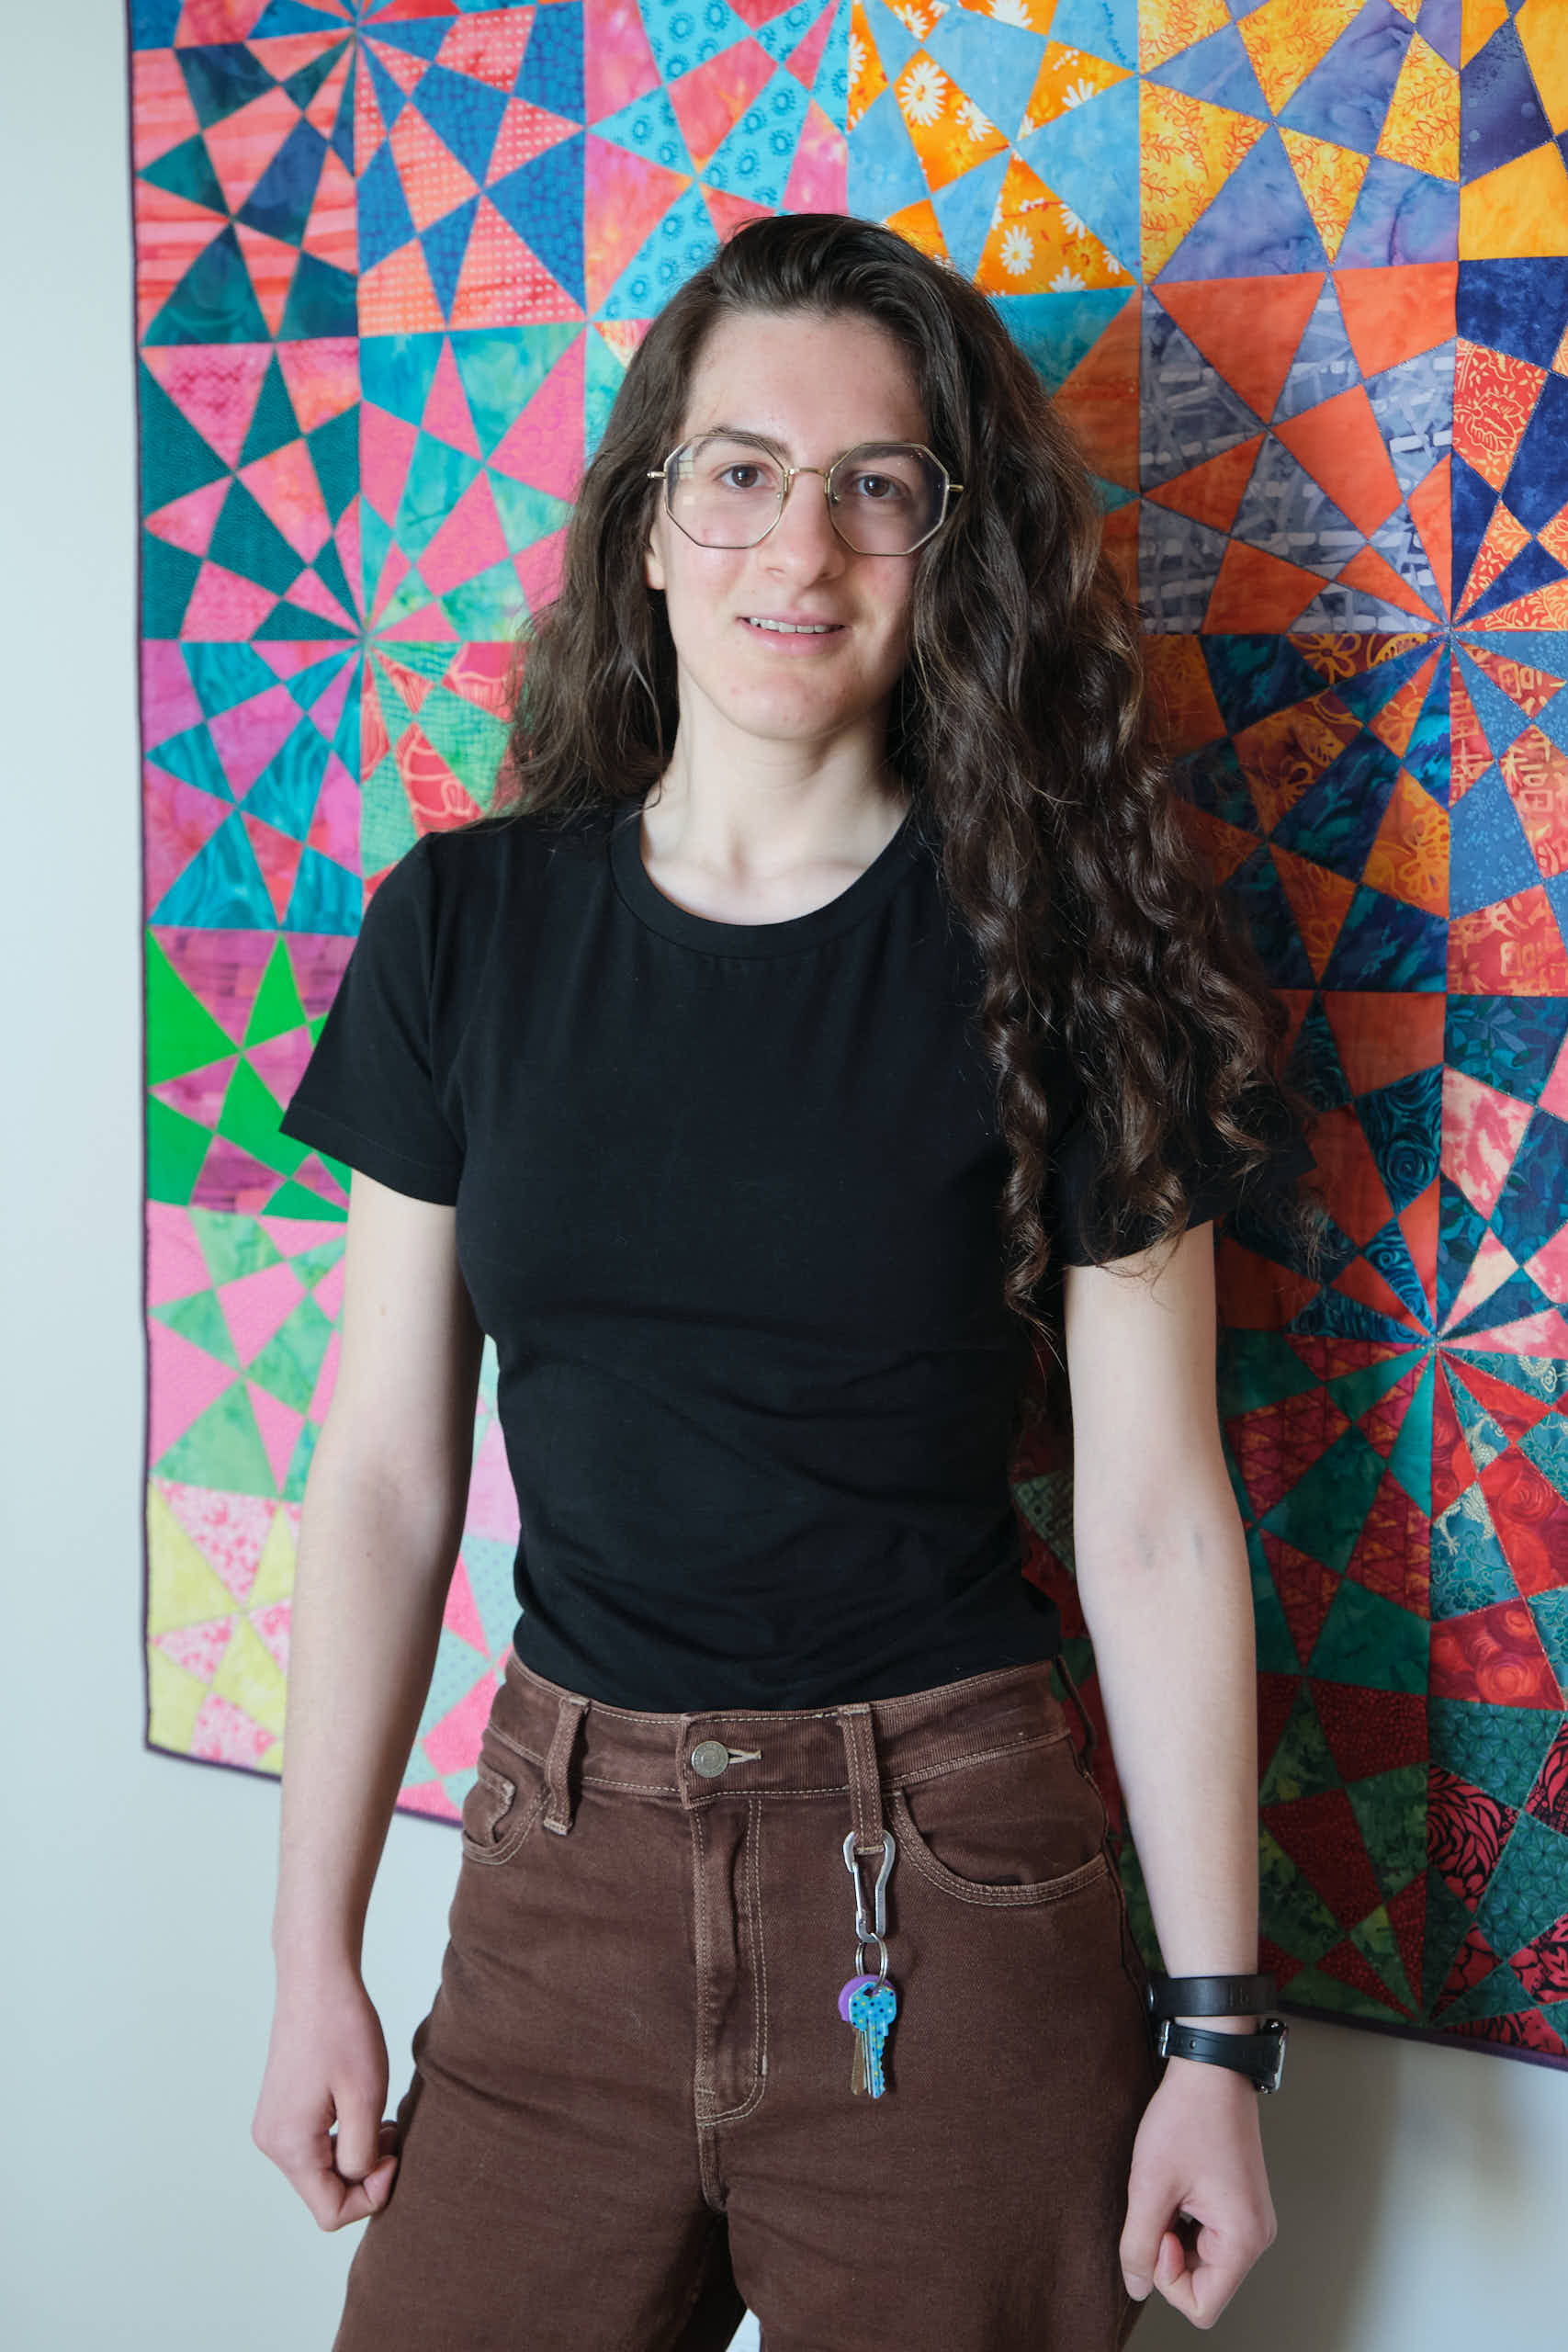
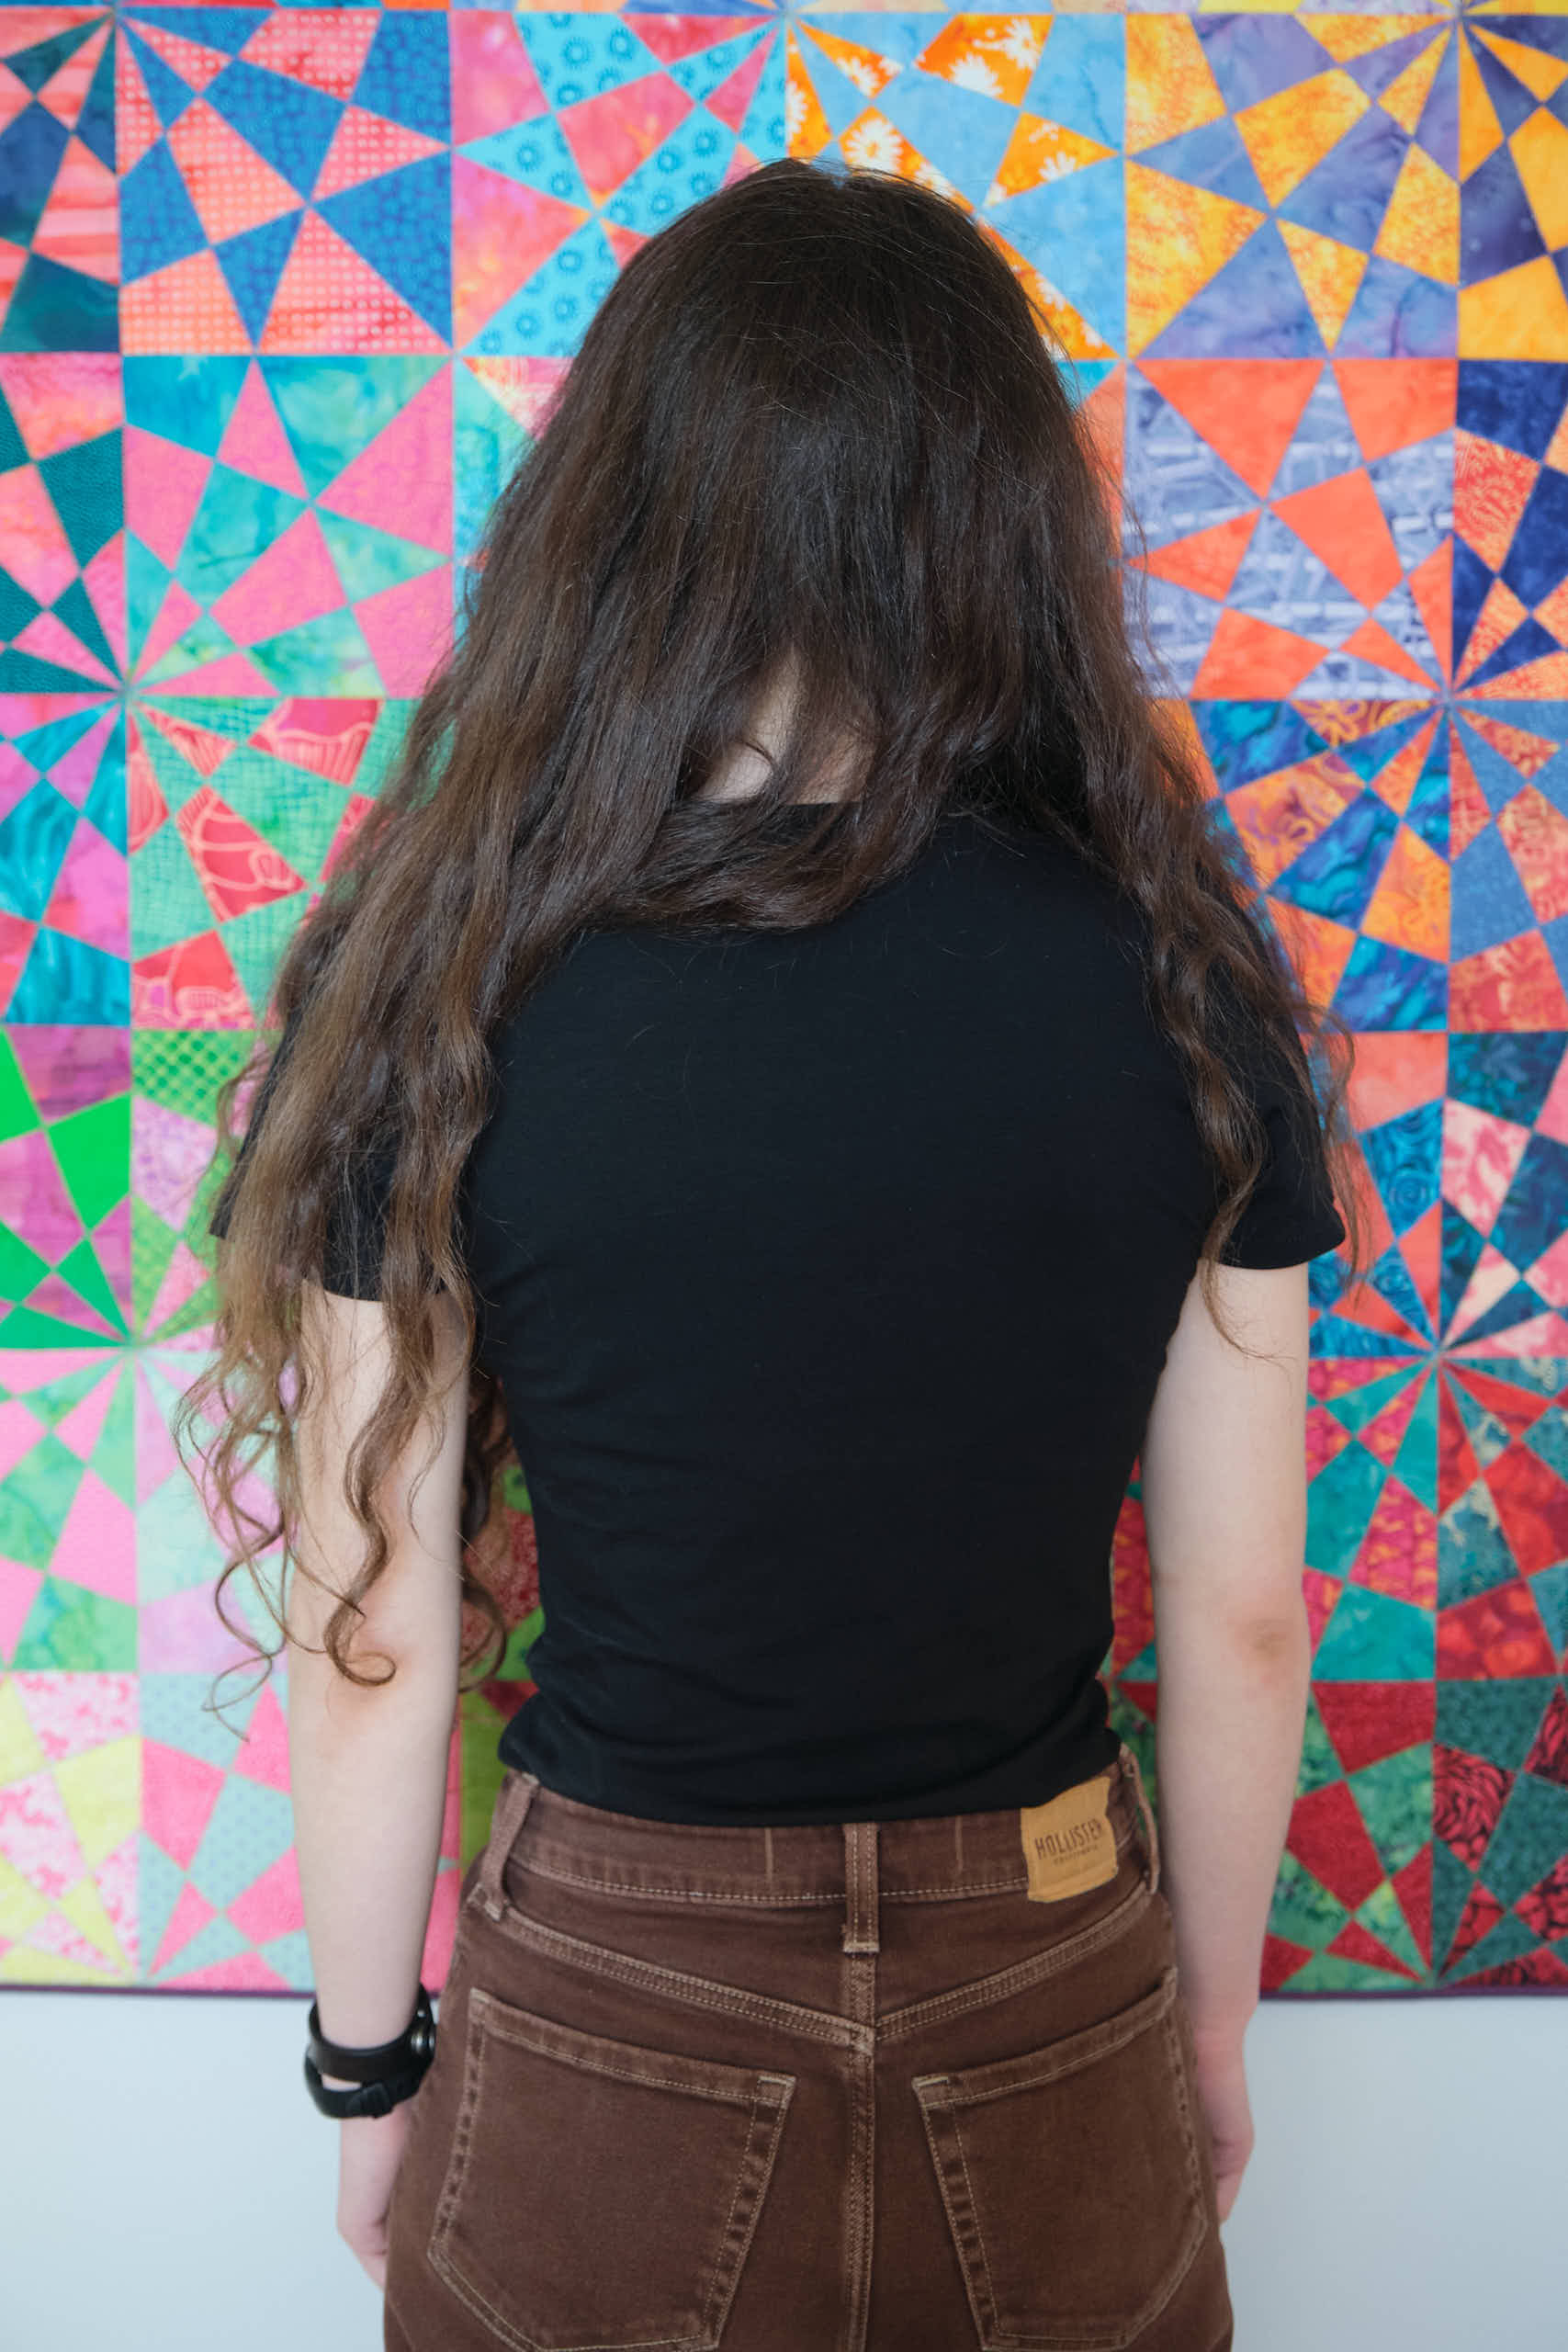
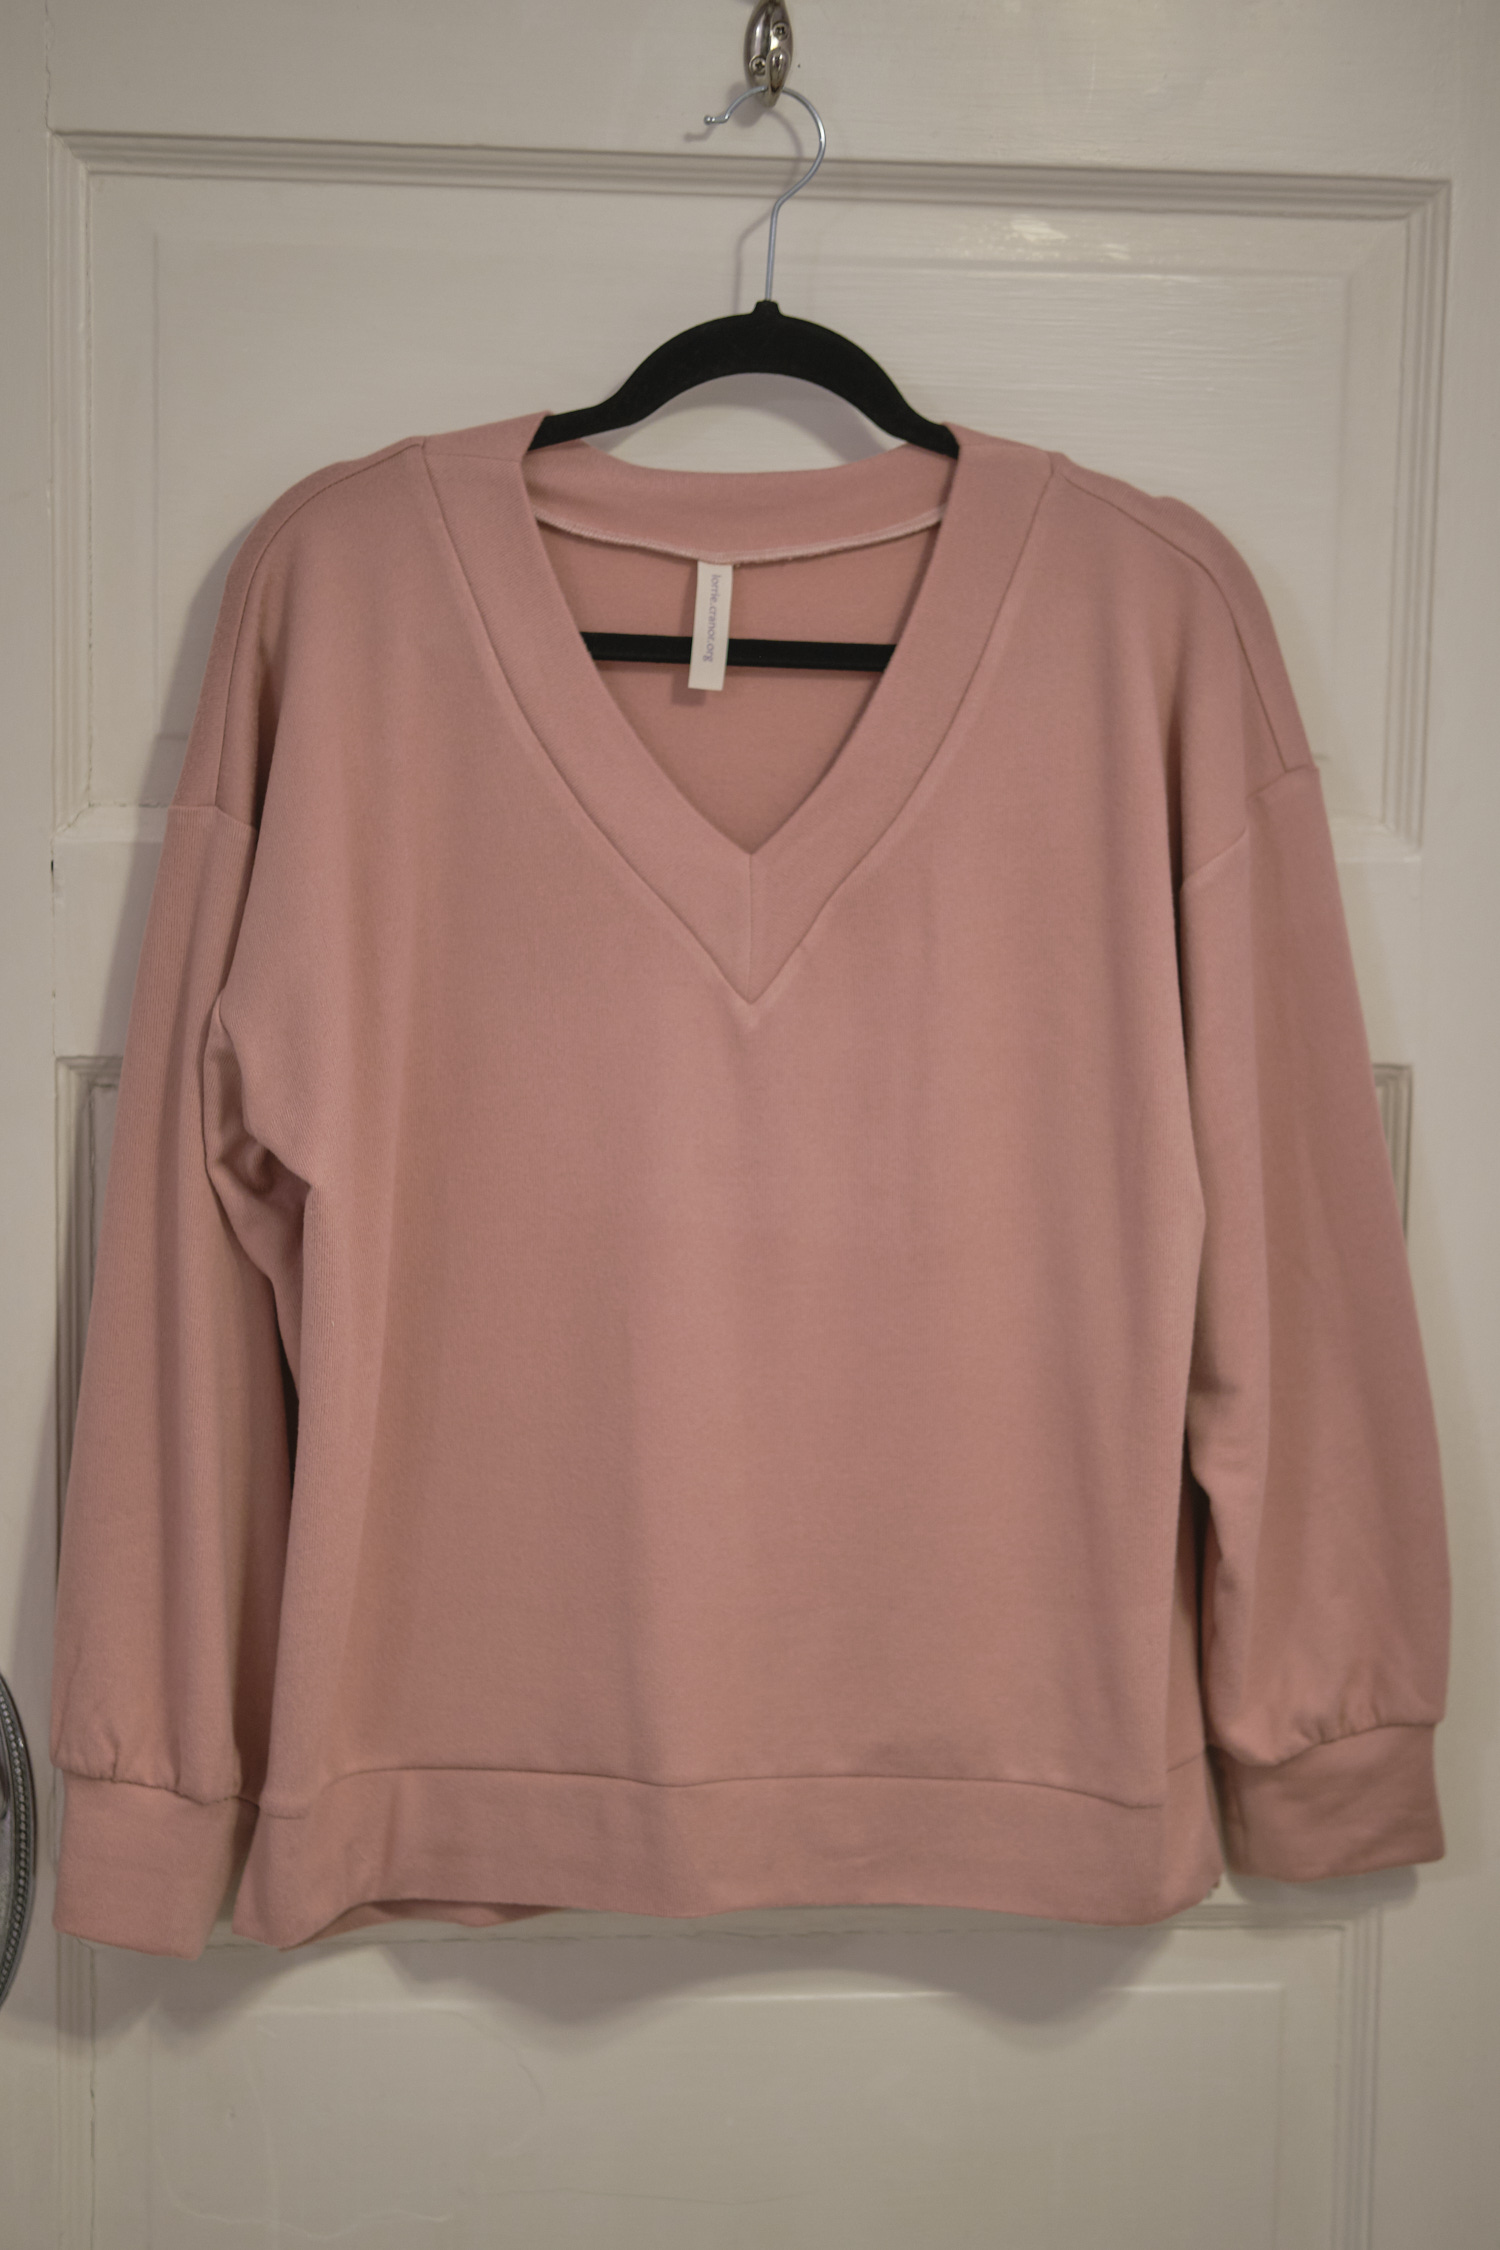
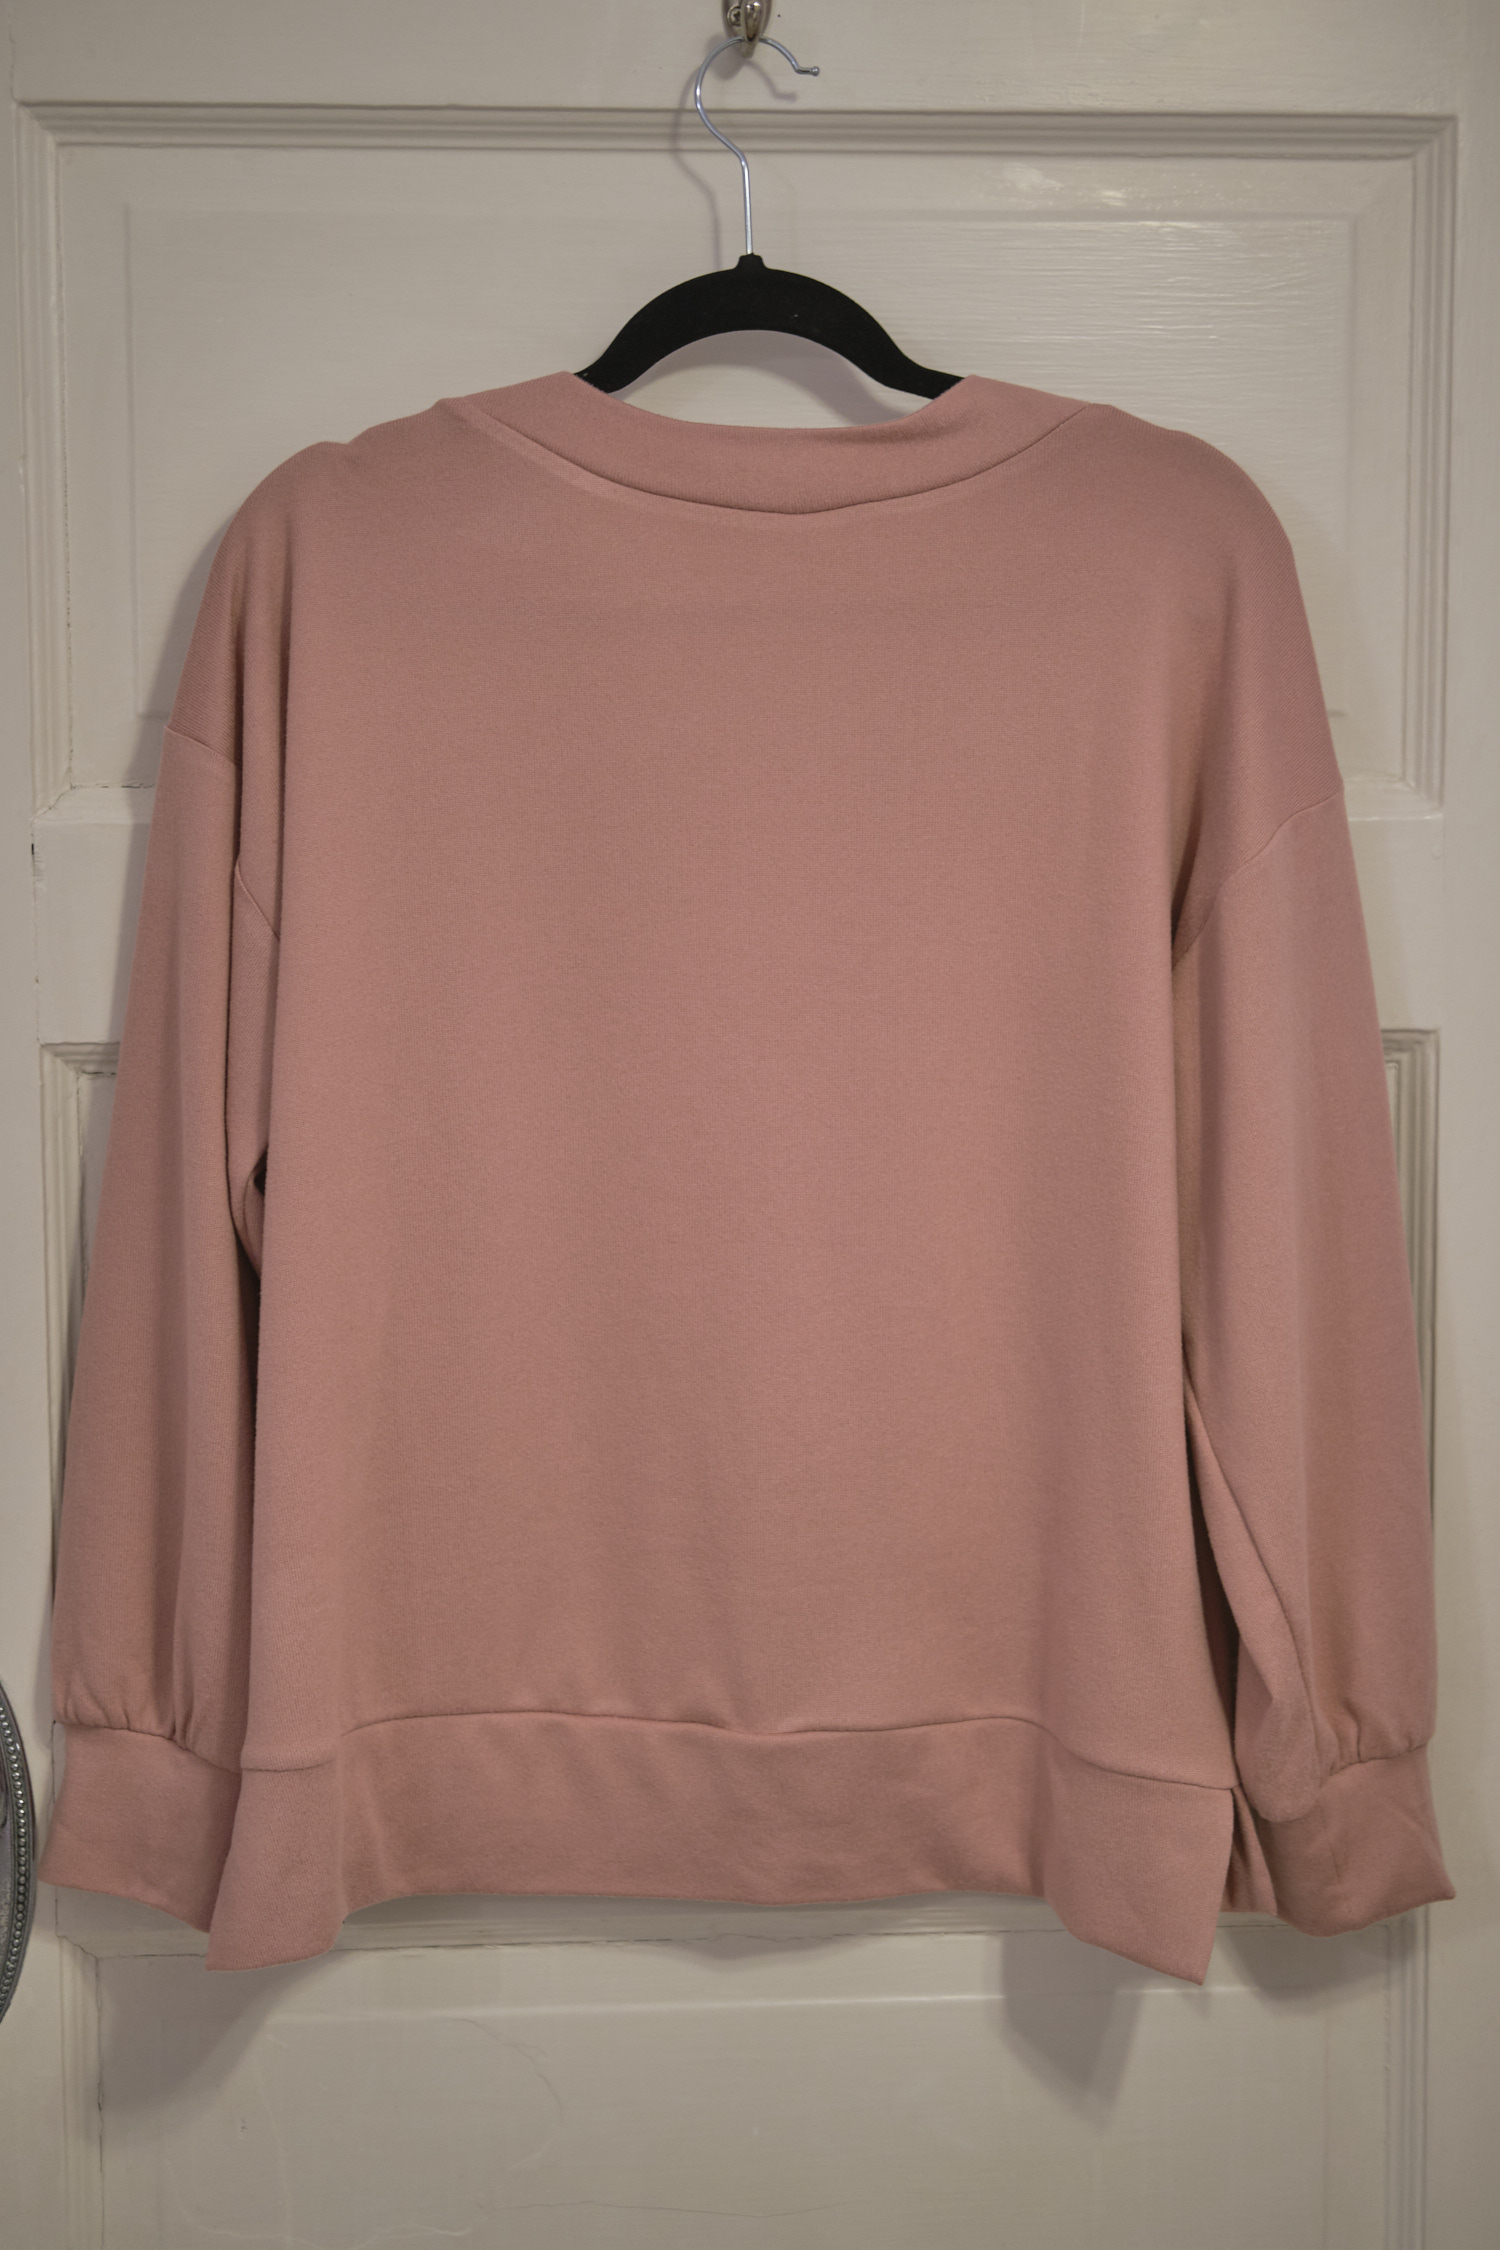
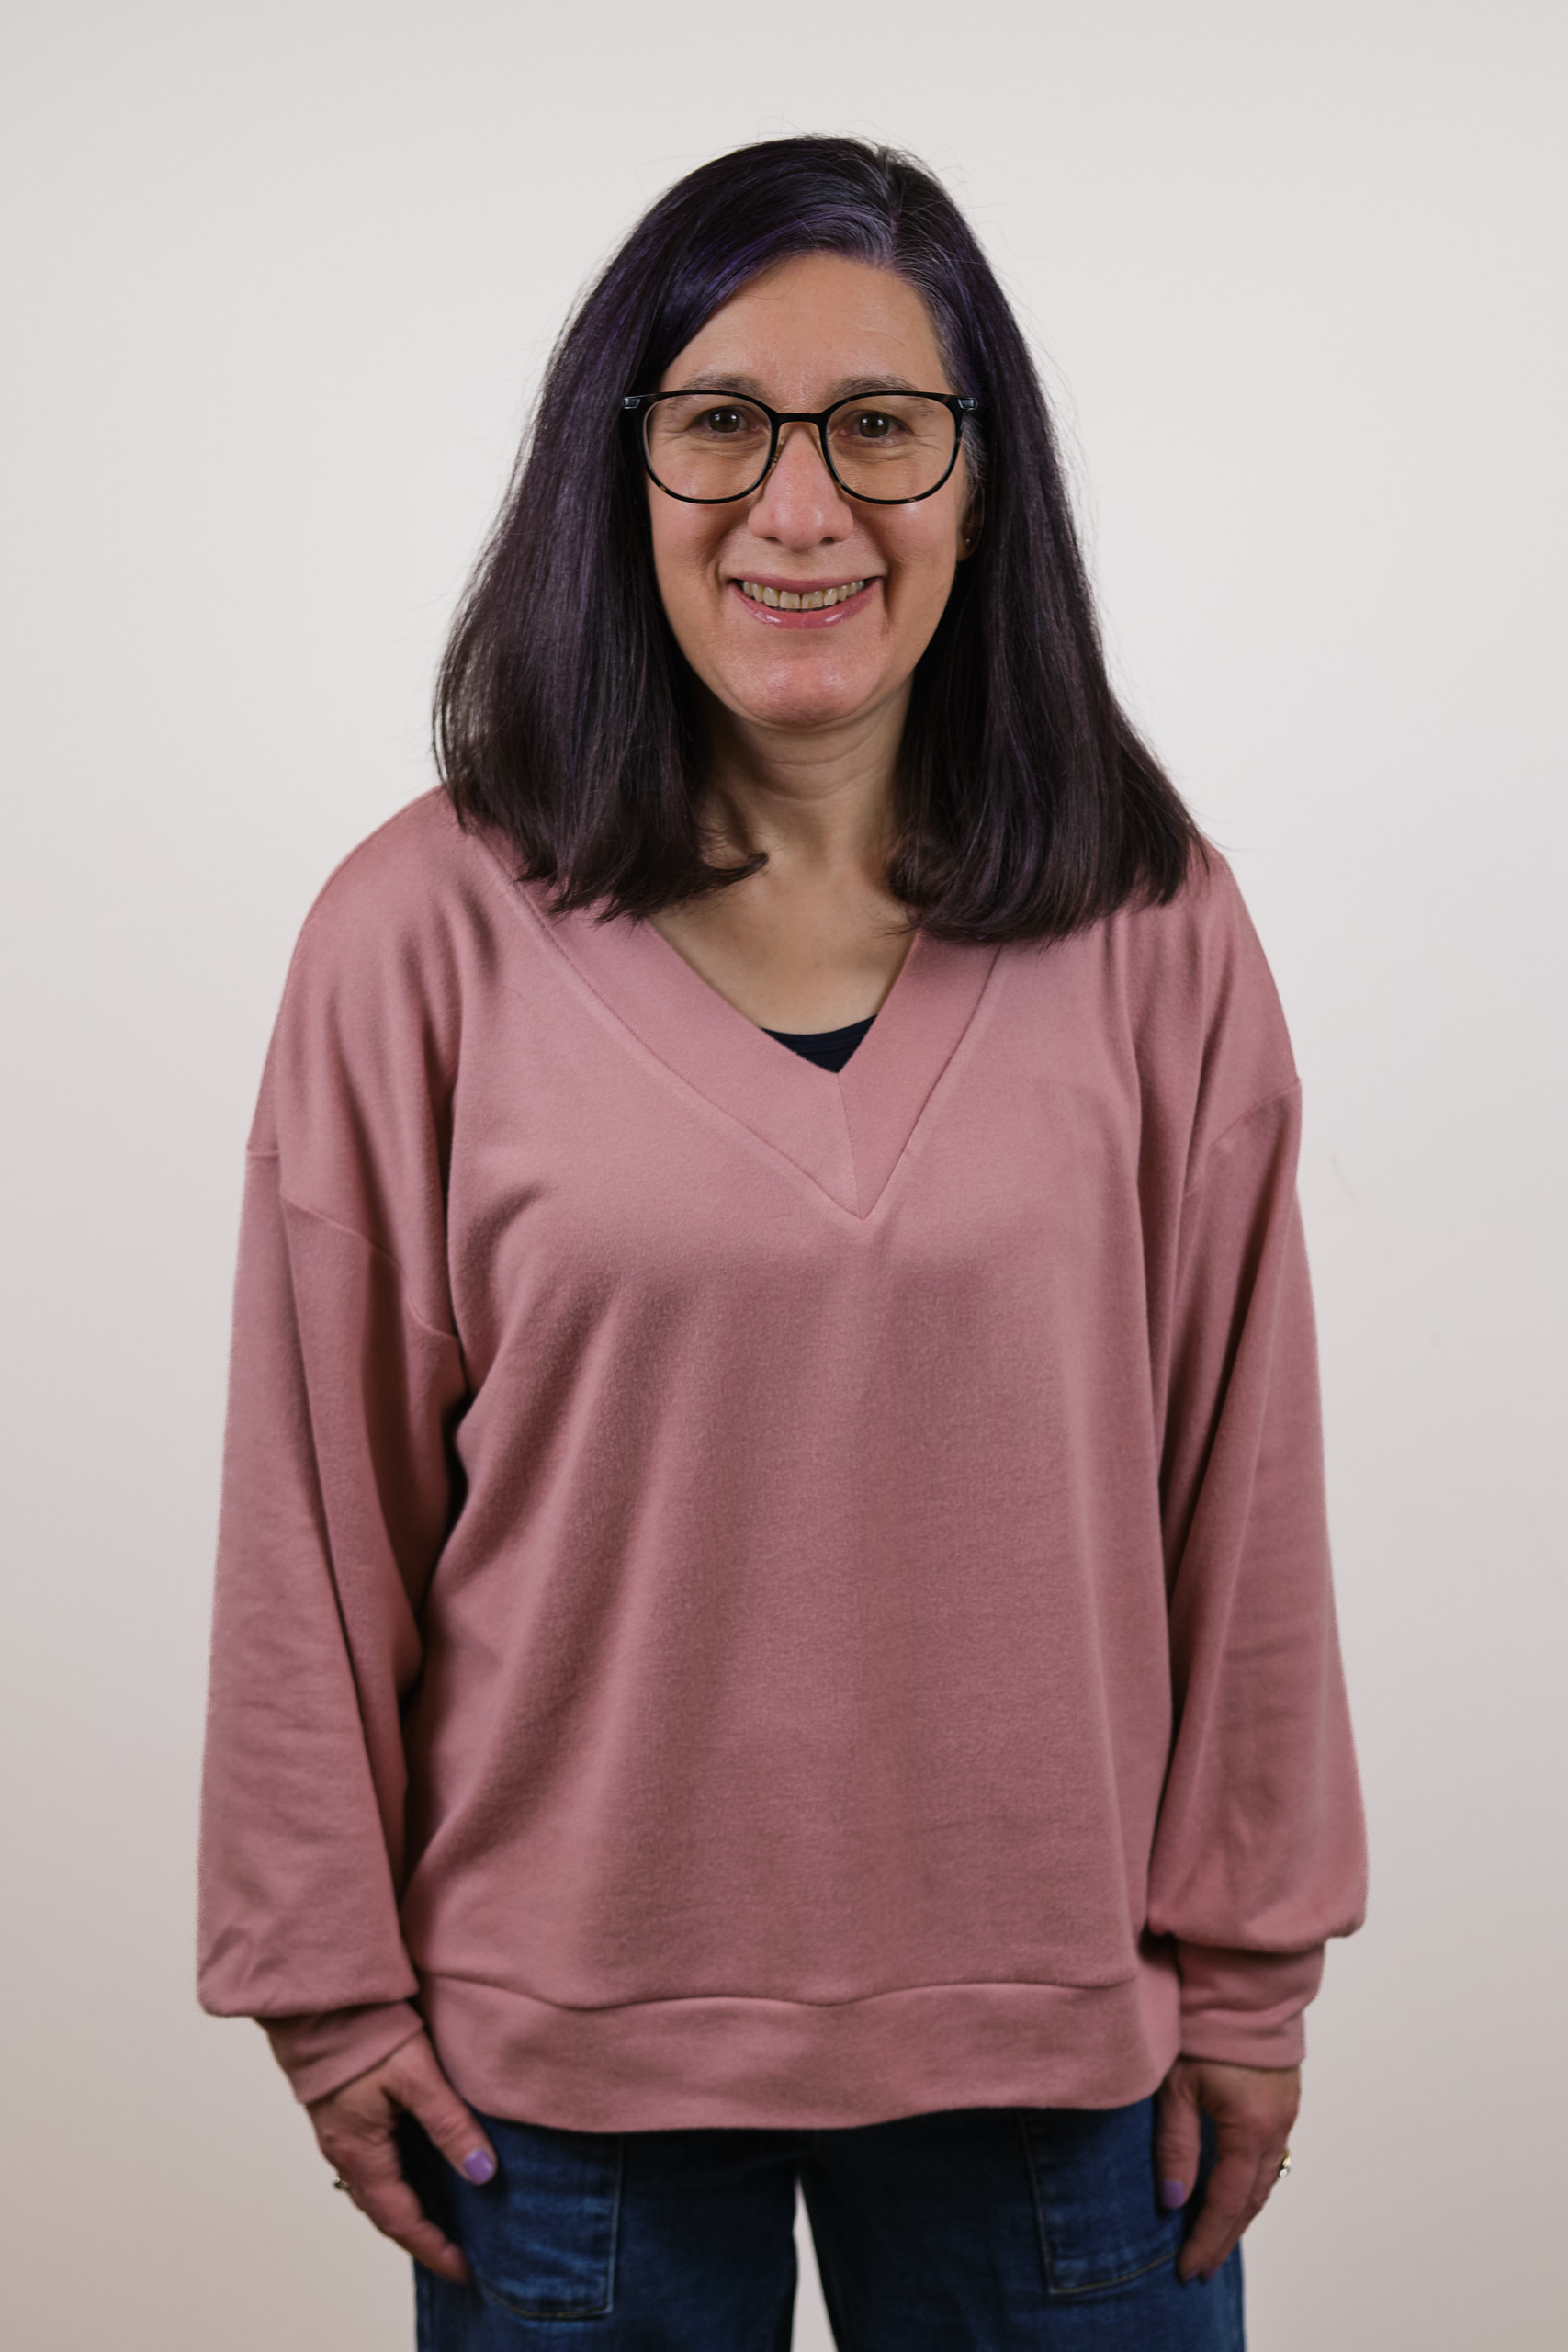
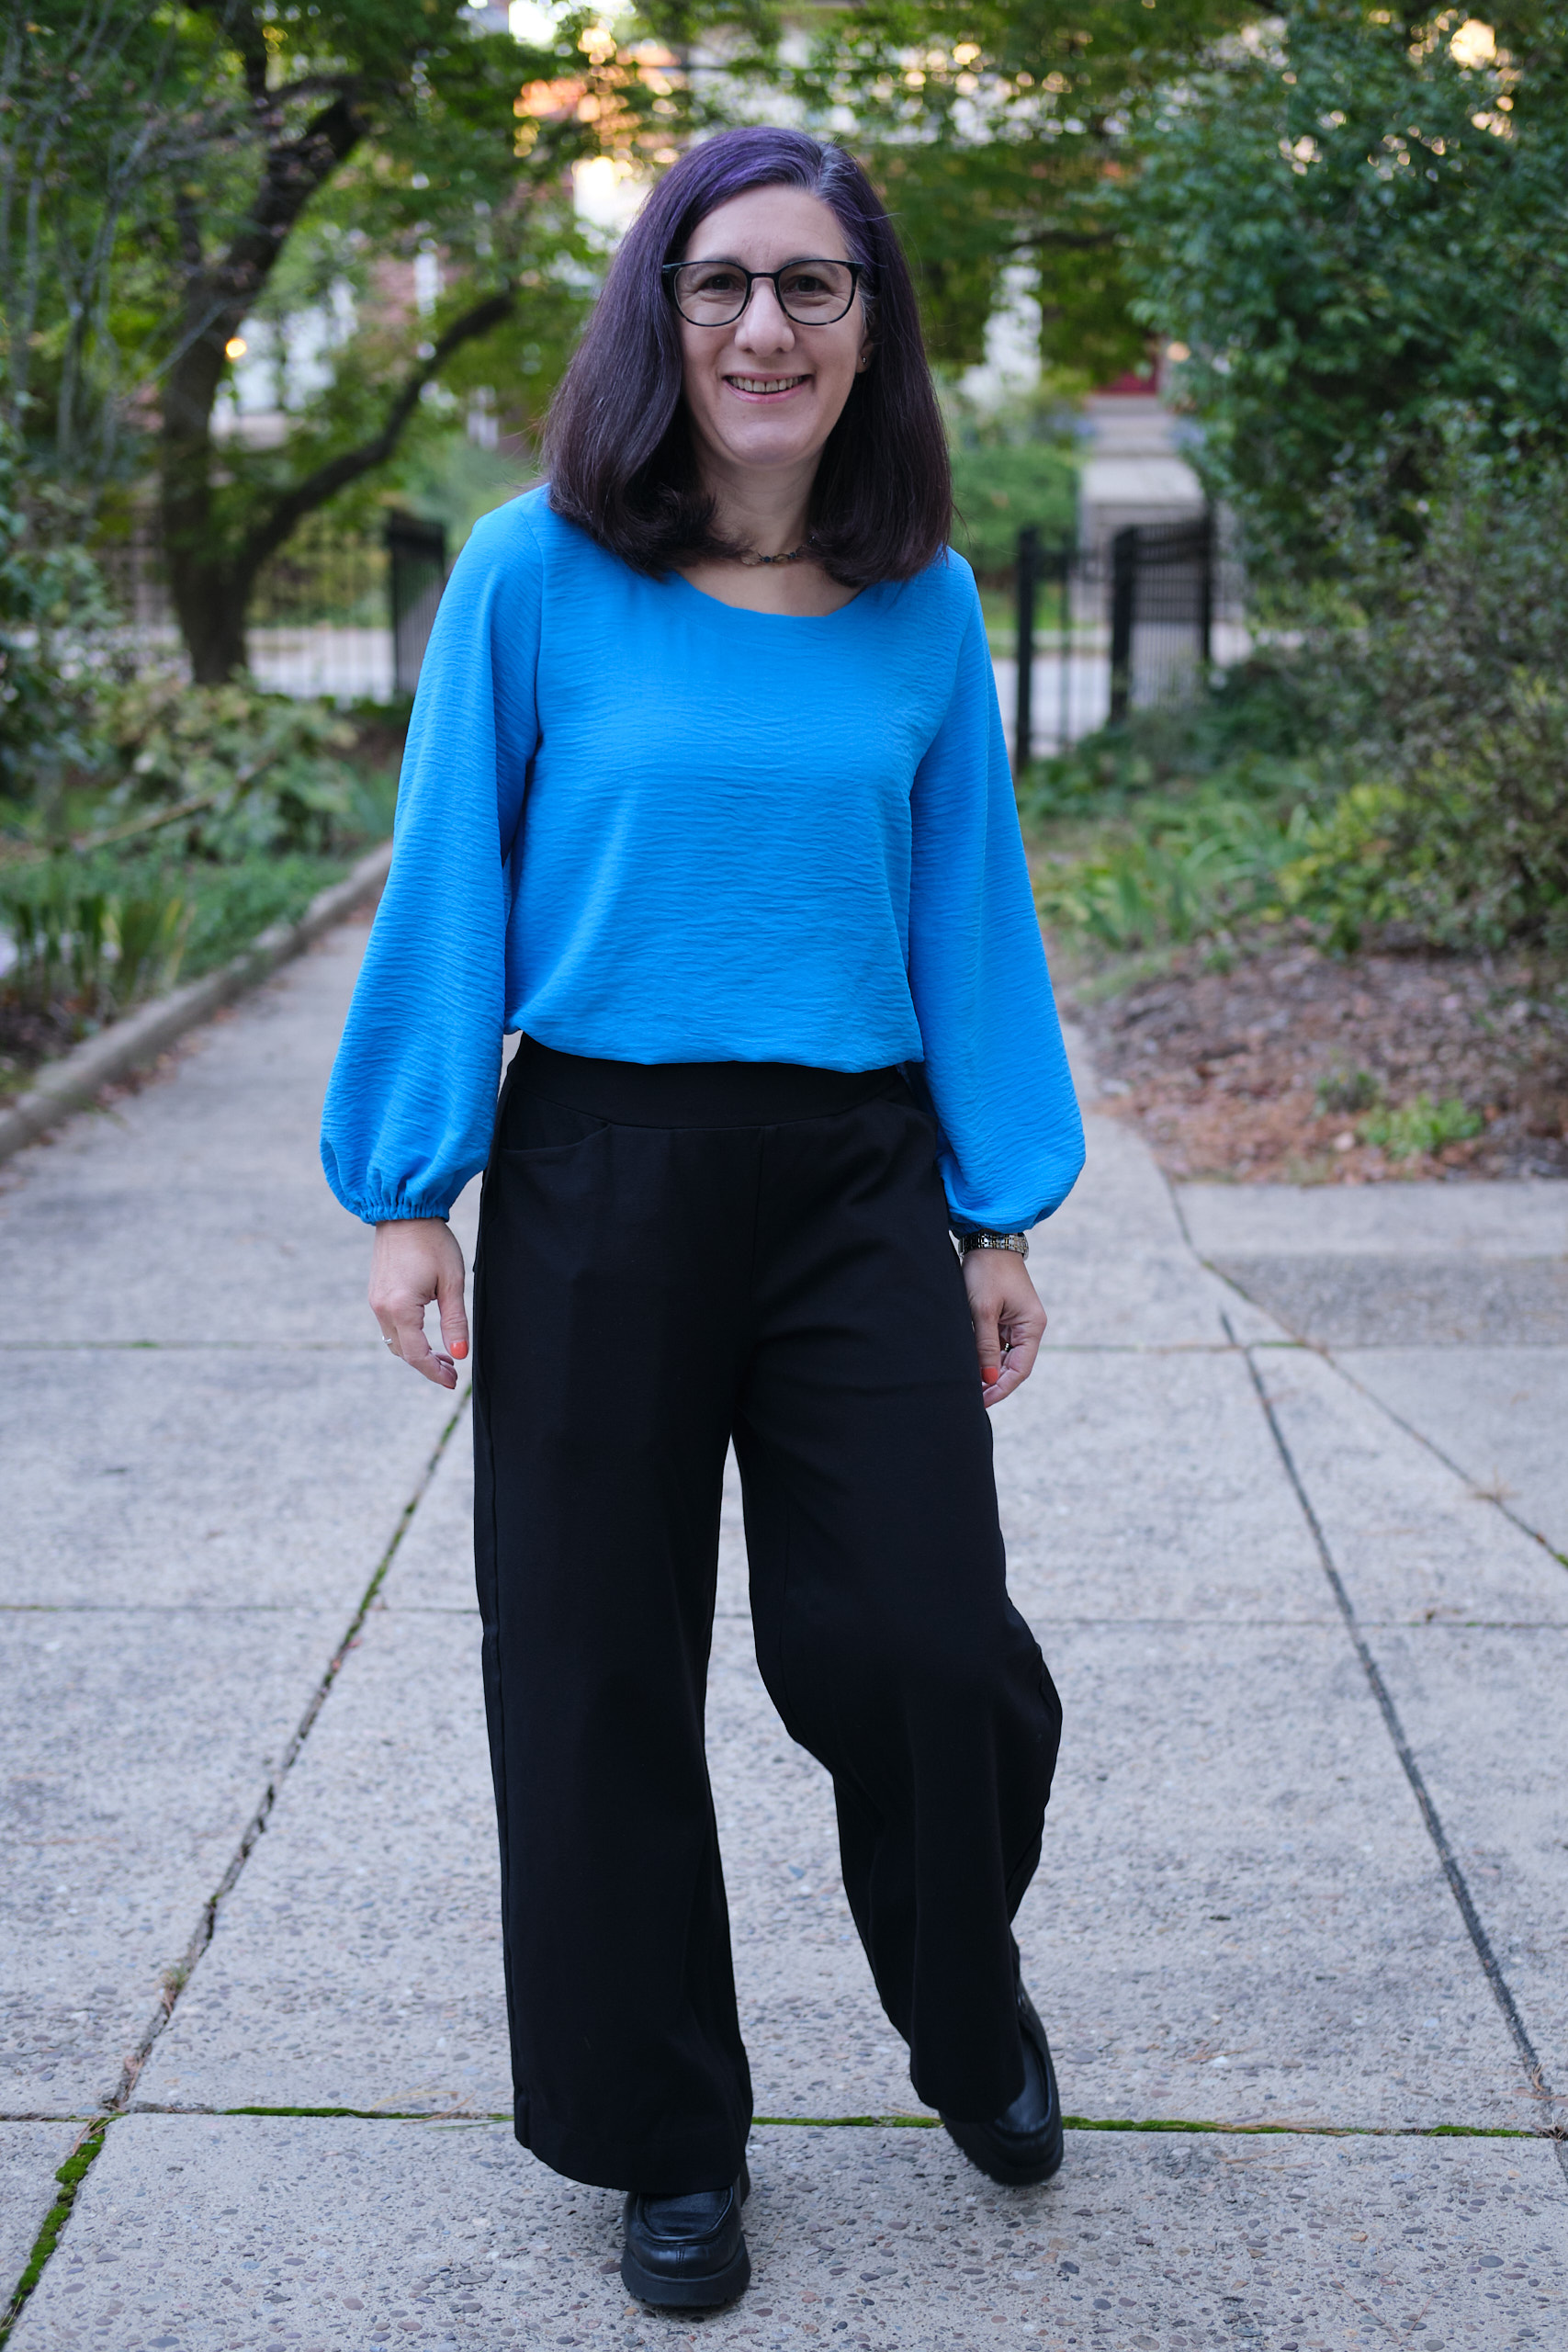
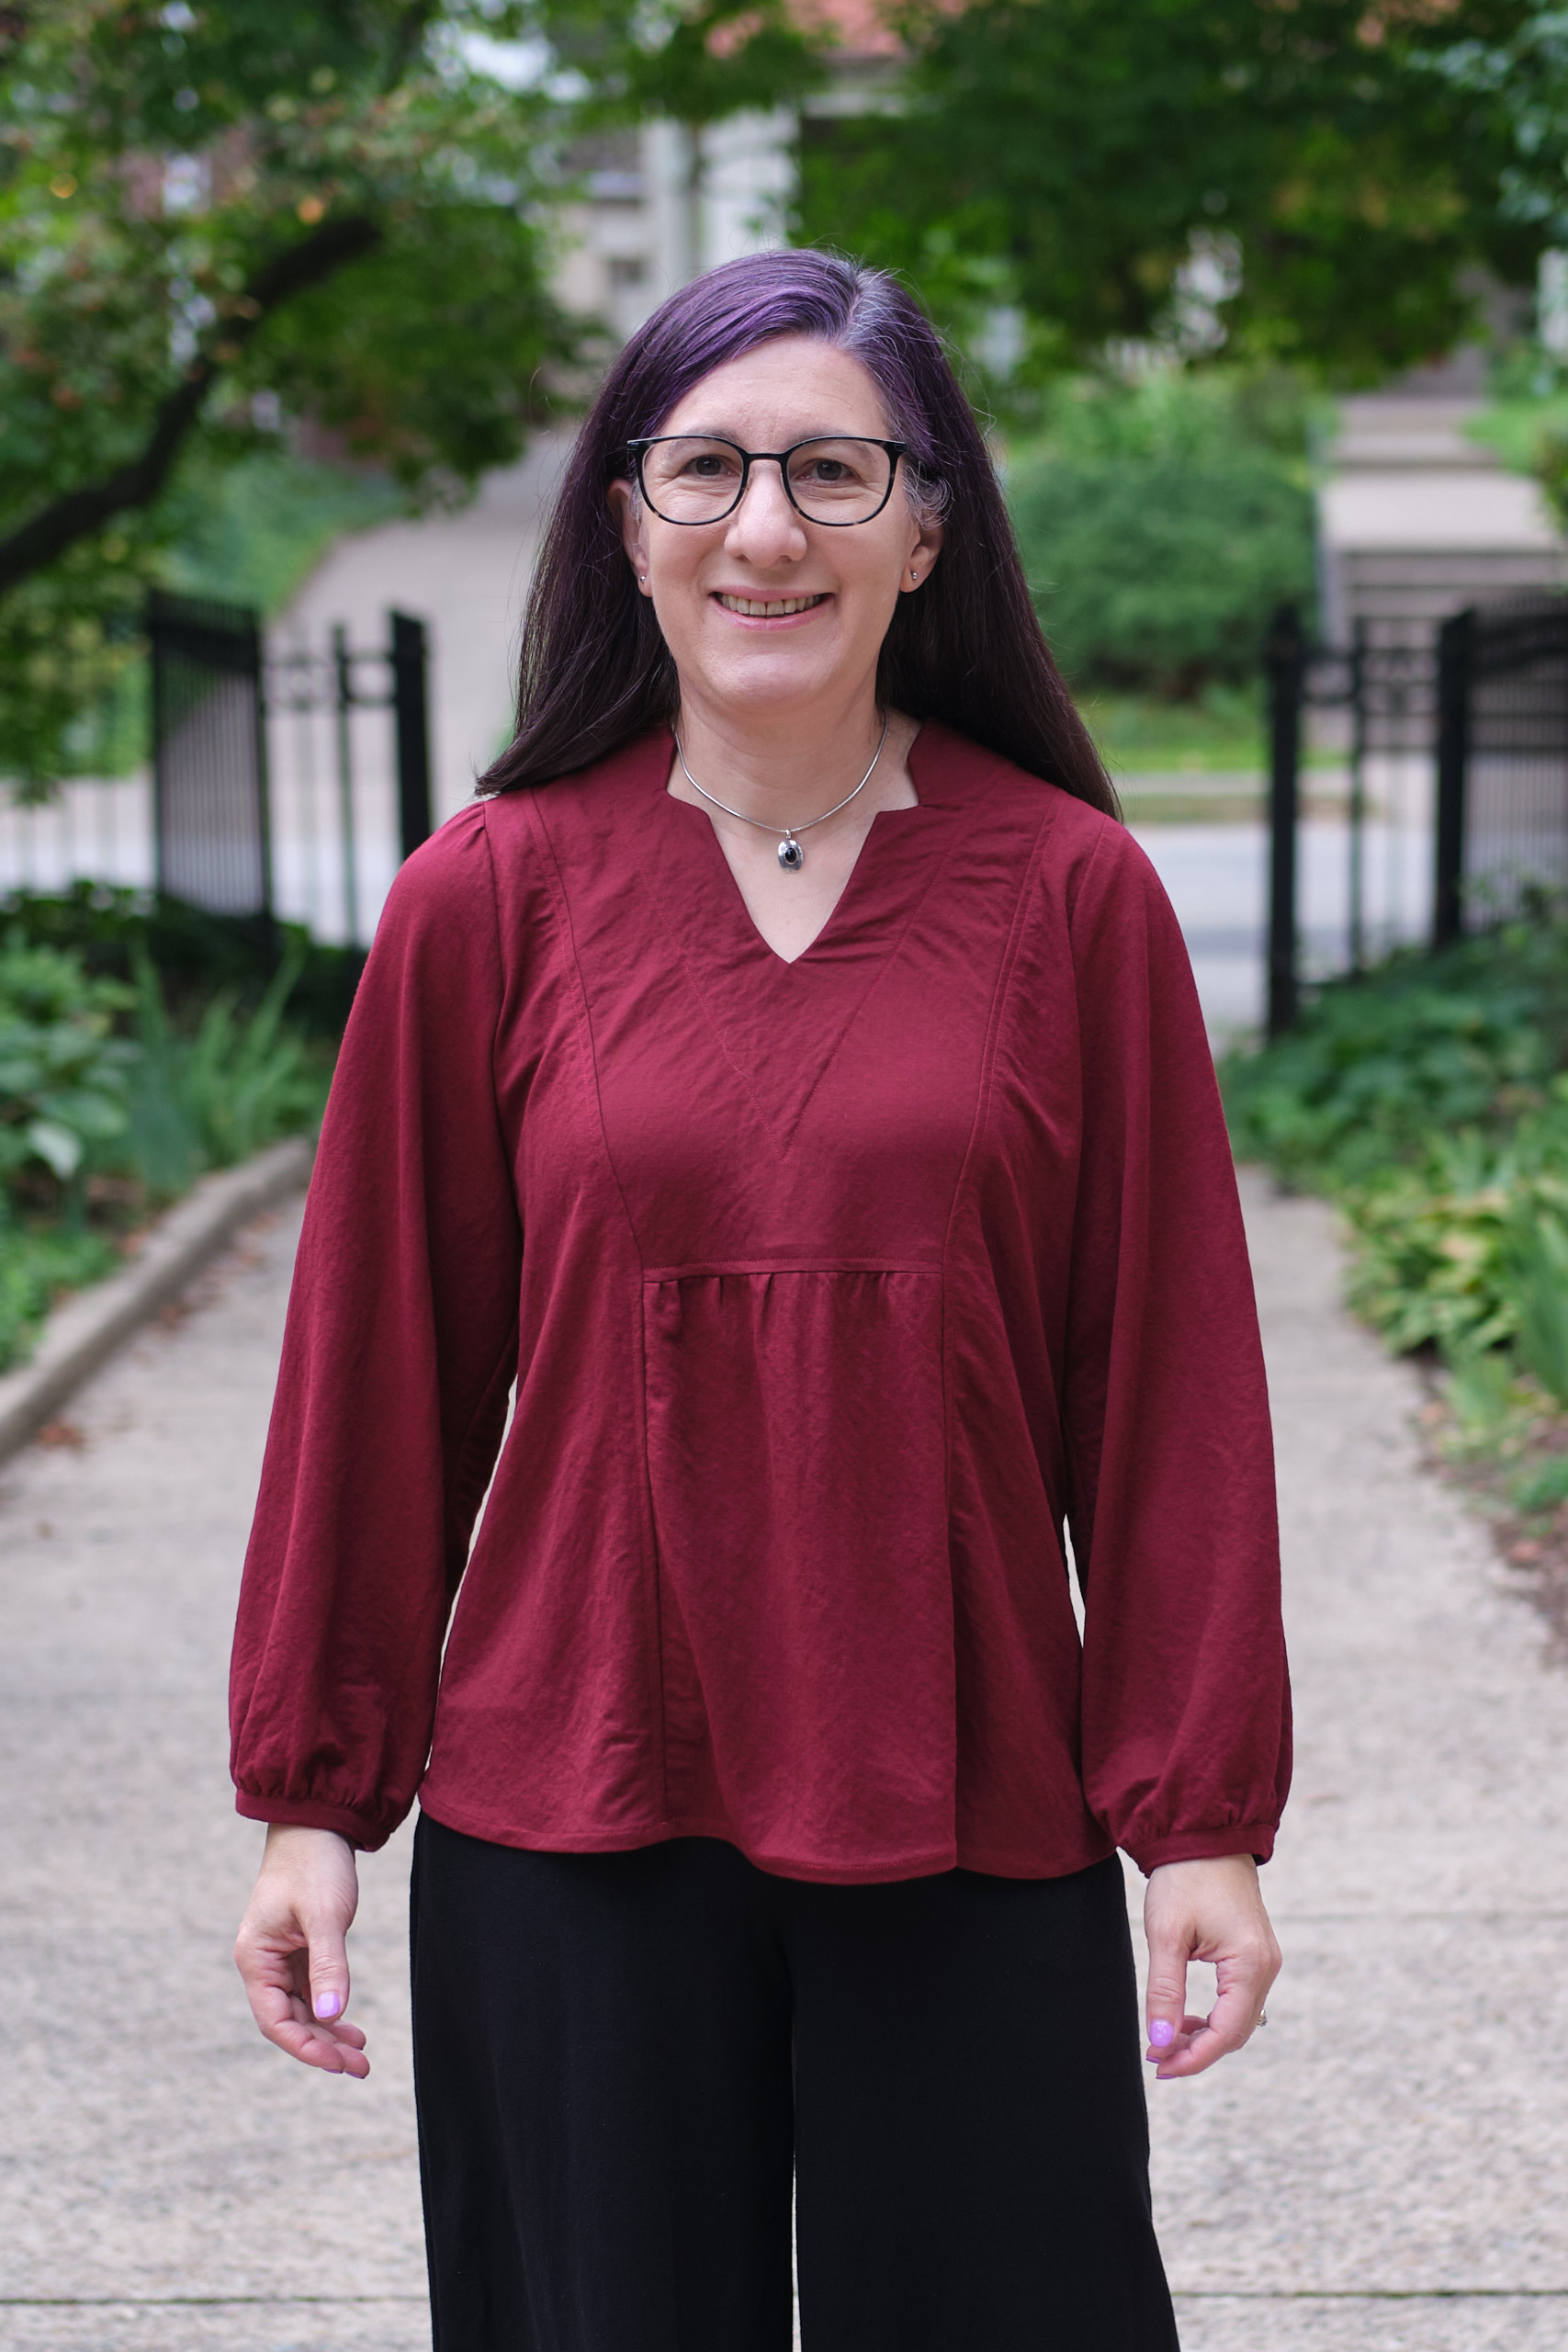
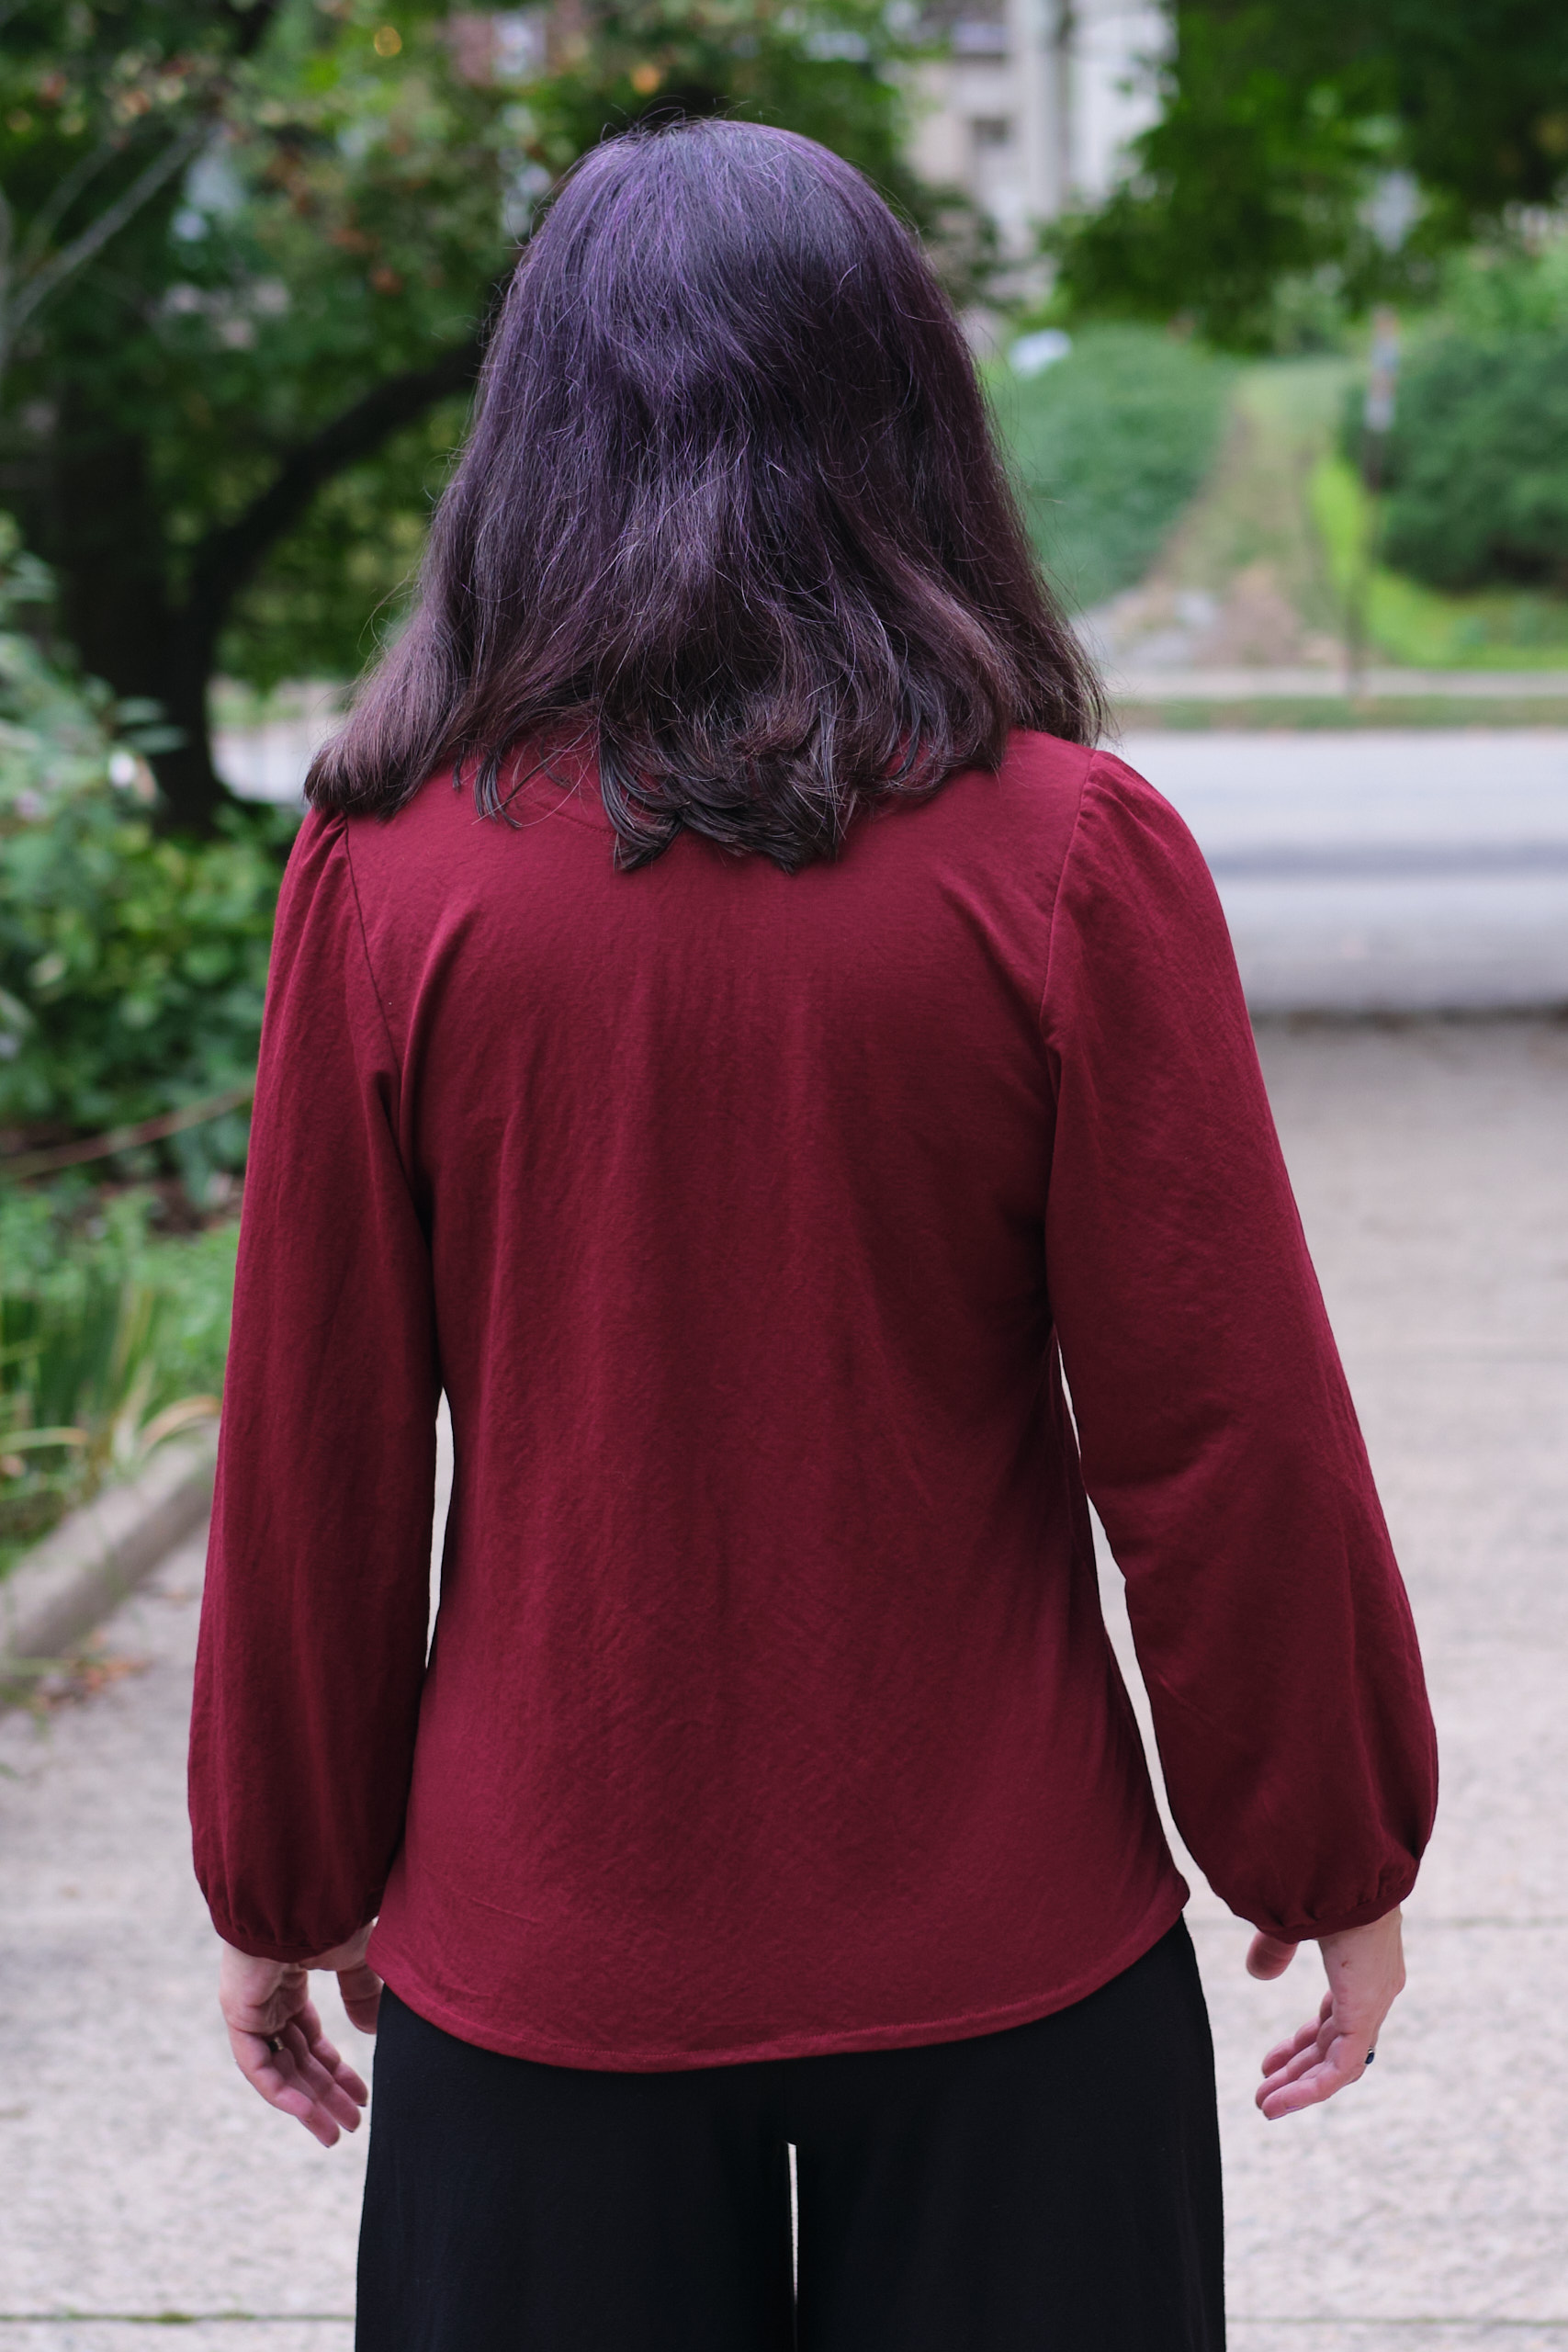
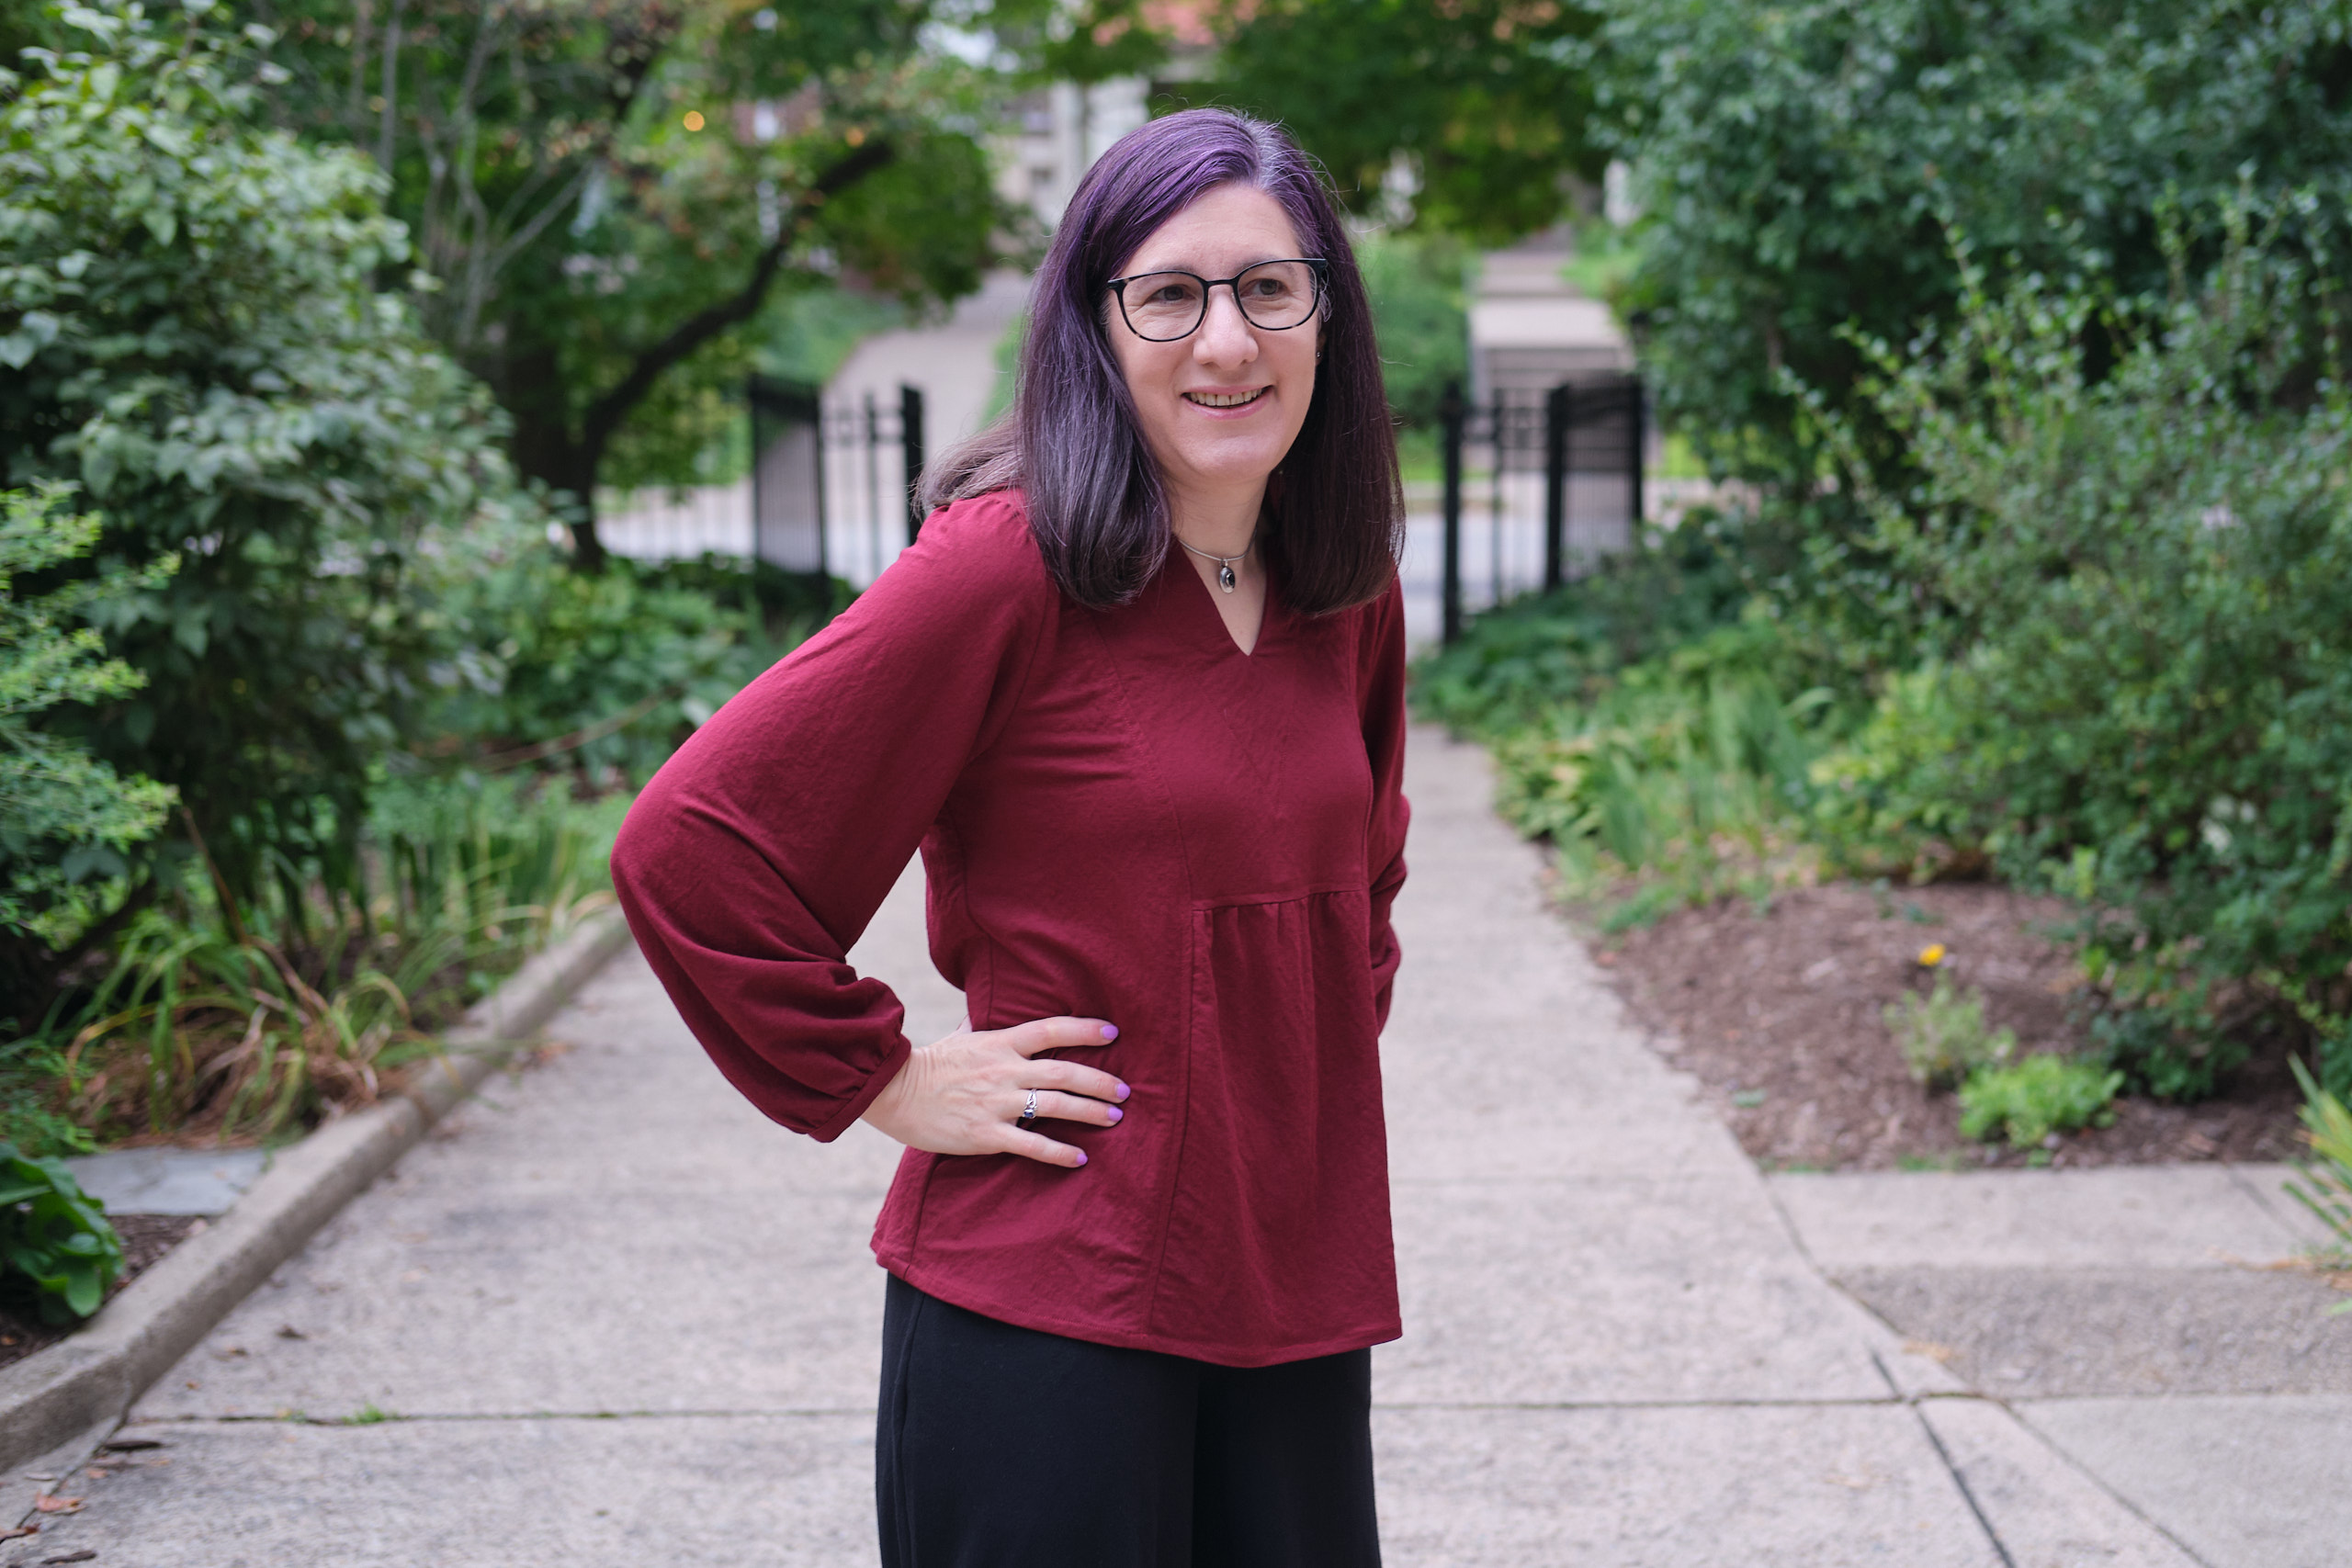
I was intrigued by the bold V-neck and simplicity of the Sonia Estep Designs Lena bold v-neck dolman top when I saw it in my Facebook sewing feed, so I decided to purchase it and give it a try. This is my first pattern from SED. From the measurements, it looked like size 4 would fit me but would be tunic length on me, so I shortened the pattern by 4 inches (I just took it off the bottom).
It was very fast to cut out the three pattern pieces (front, back, and neck band) from the black modal spandex fabric that I bought on sale from Mily Mae. I thought I could sew the whole top in an hour, but sadly the v-neck construction was non-trivial with my stretchy and slippery modal spandex. I’m not entirely sure why, but I think I spent almost 2 hours on the v-neck and about an hour on the rest. And even after all that effort, the point of the V is slightly off and the shirt doesn’t lie as smoothly as I would like where it meets the neck band (but top-stitching with a shallow zigzag stitch helped smooth it out somewhat). Next time, I would try zigzagging along the long edge of the neckband to hold the two layers together before trying to assemble the neckband. The sleeve hems were also more difficult than anticipated and might have benefited from pre-hemming before sewing the side seams. I like the drape of the modal spandex and it is very comfy to wear.
I’m glad I shortened the hem. This is a good length for me to wear tucked in or out, and it looks great with my new tweed pants!
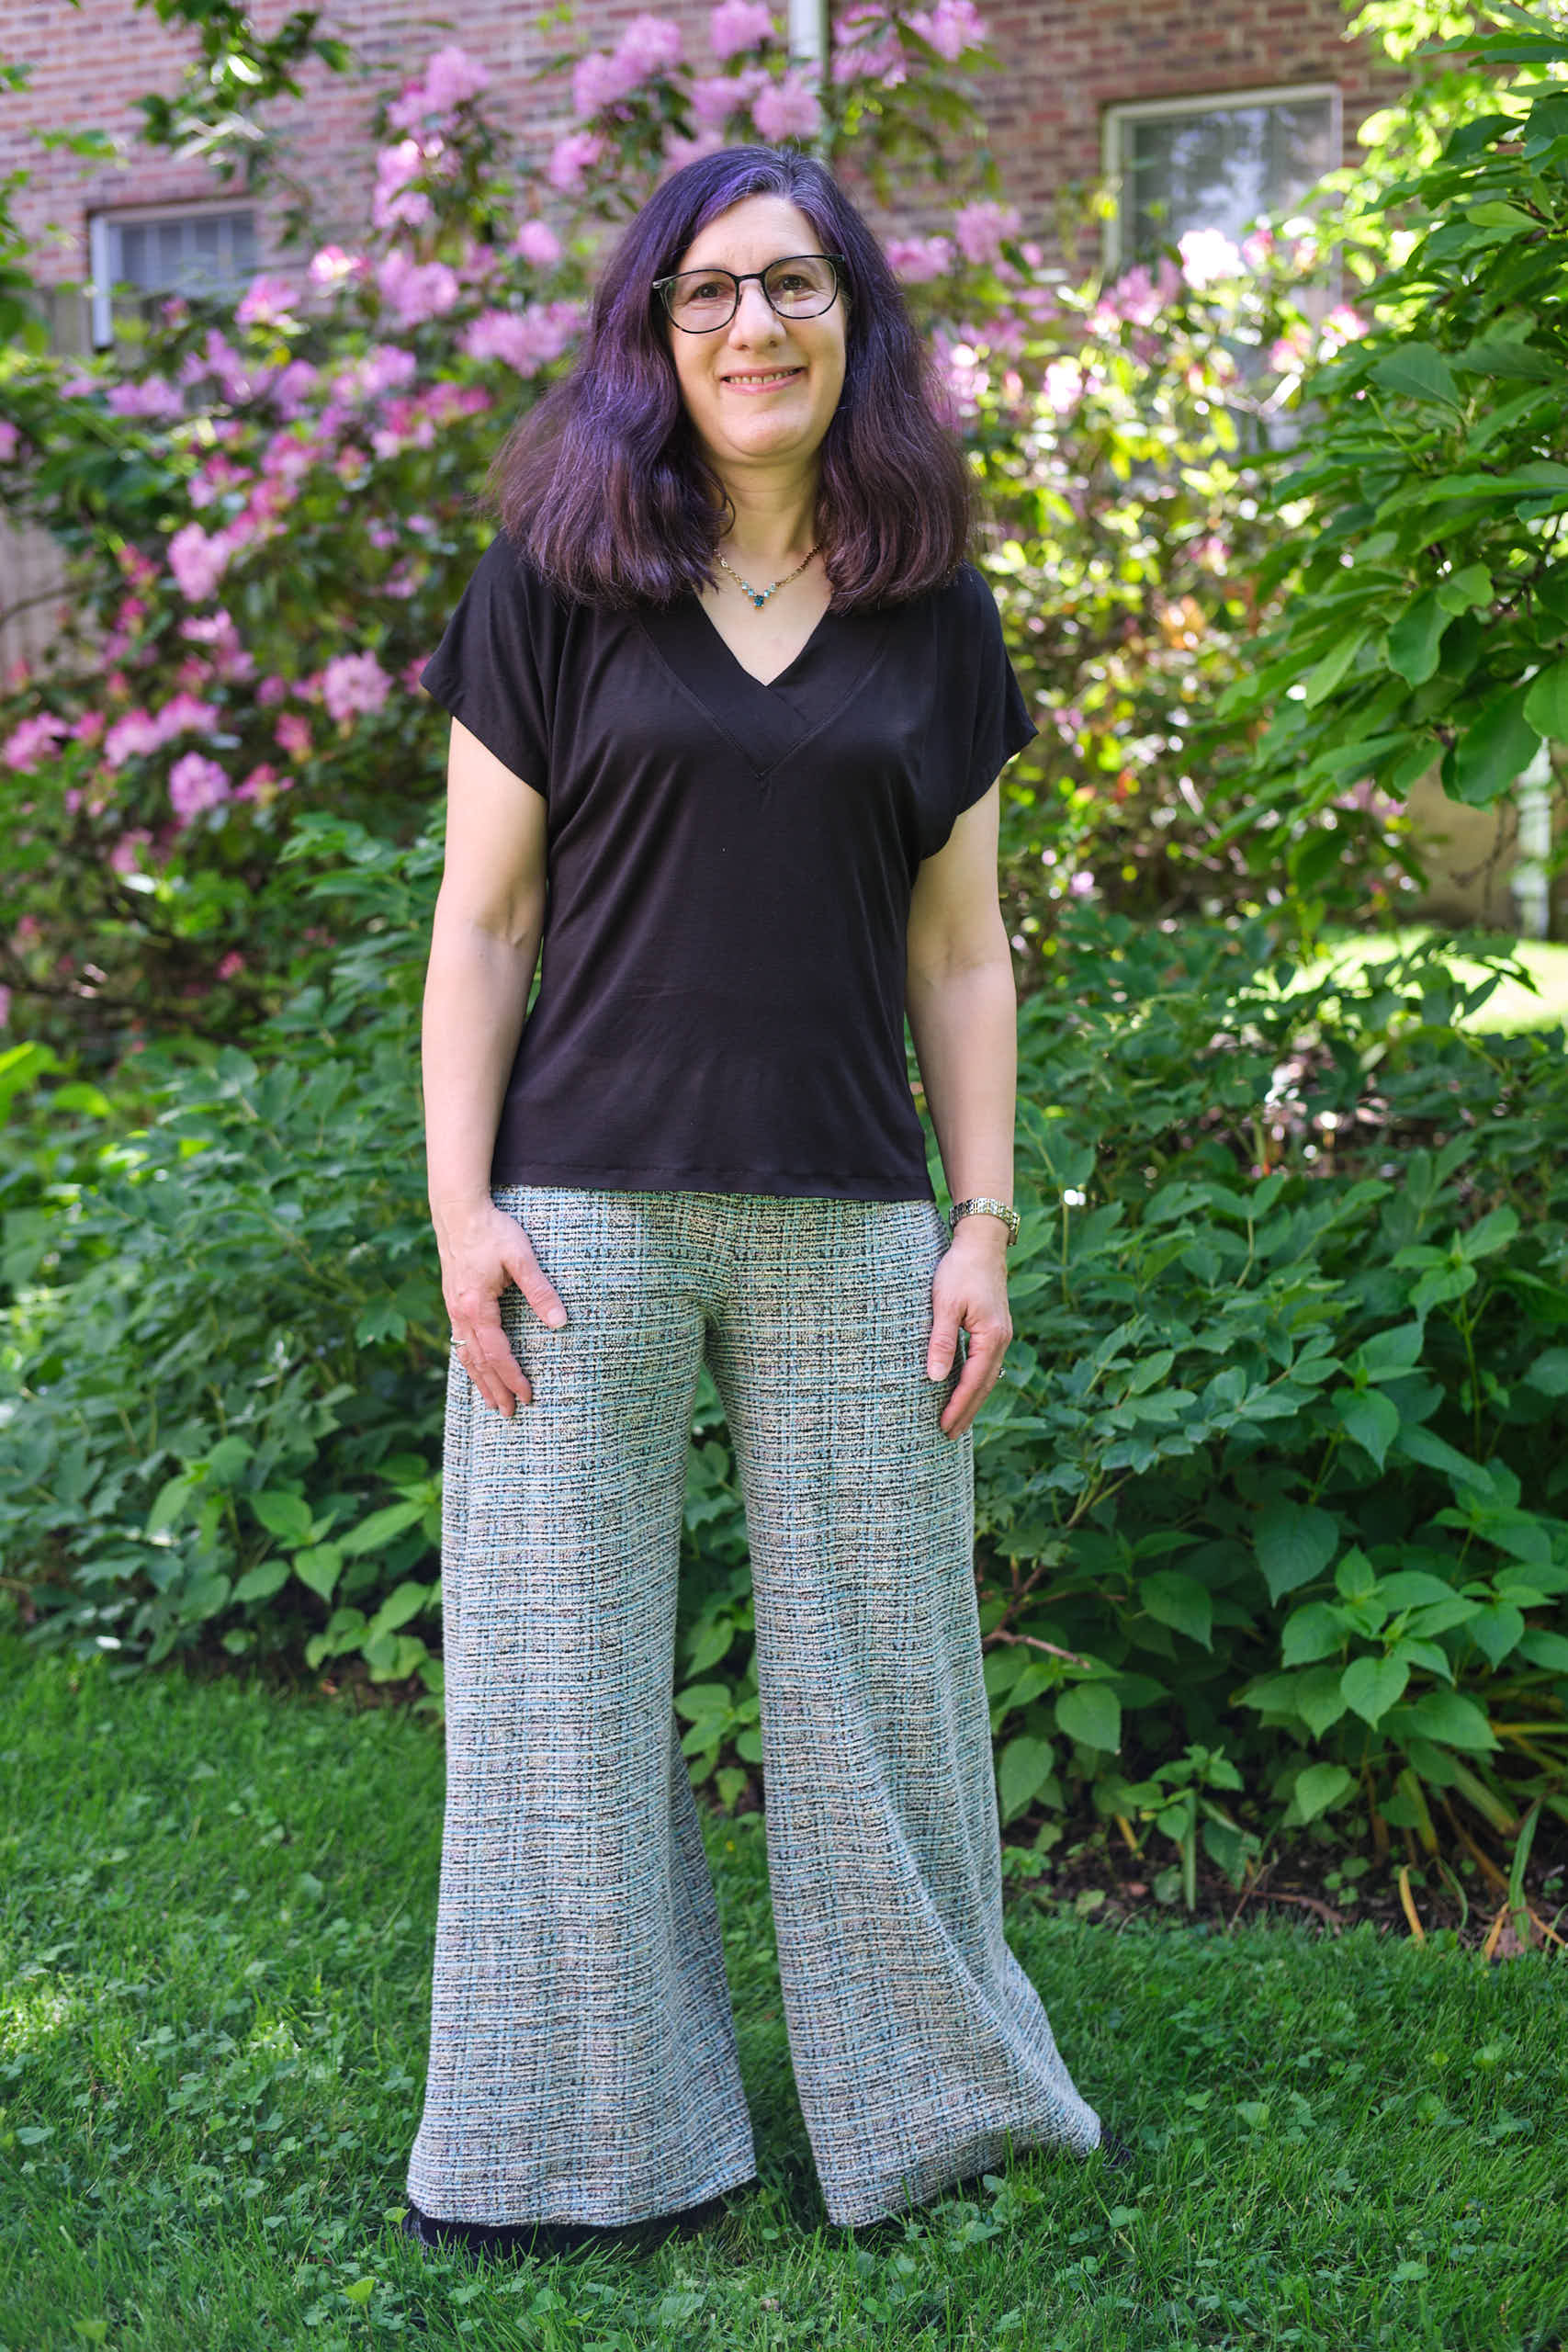
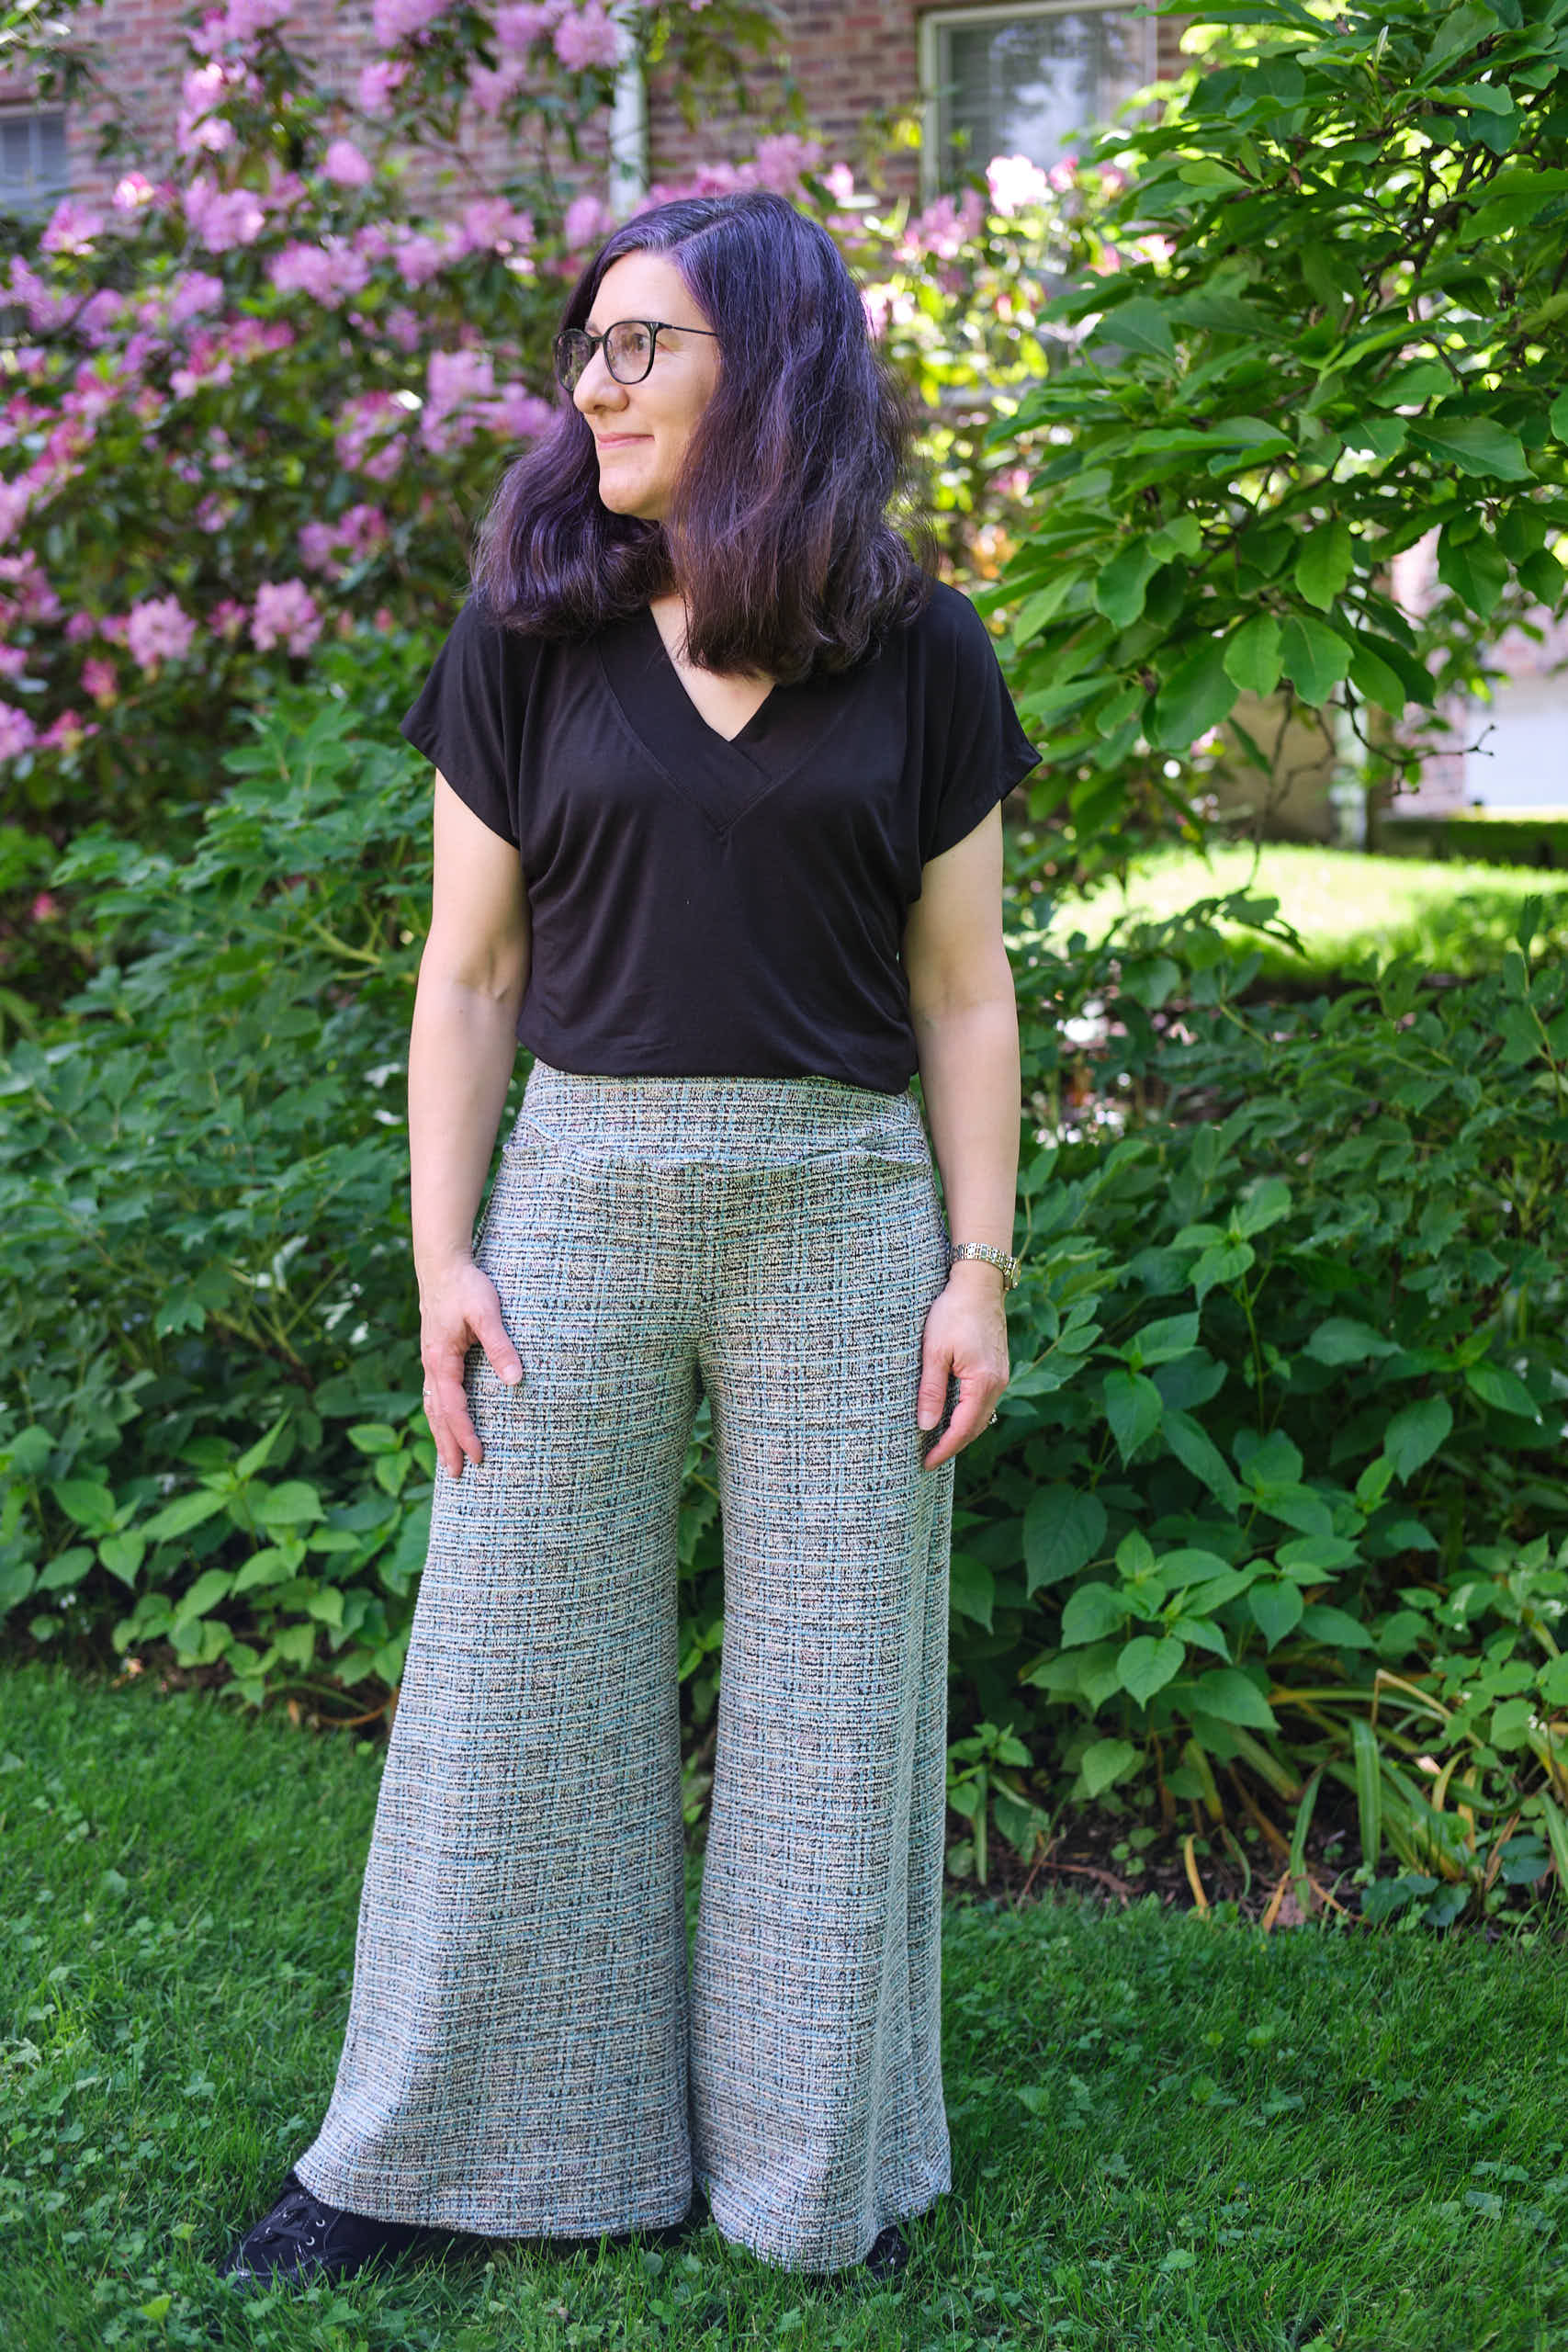
Pattern Emporium Walk Boldly Pants with modified yoga waistband from Pattern Emporium Urban Pants, size 10 AU short length with adjustments at waist and crotch, modified jeans pockets and back patch pockets. From ~1.5 yard blue/black tweed bouclé knit, waistband lined with athletic knit.
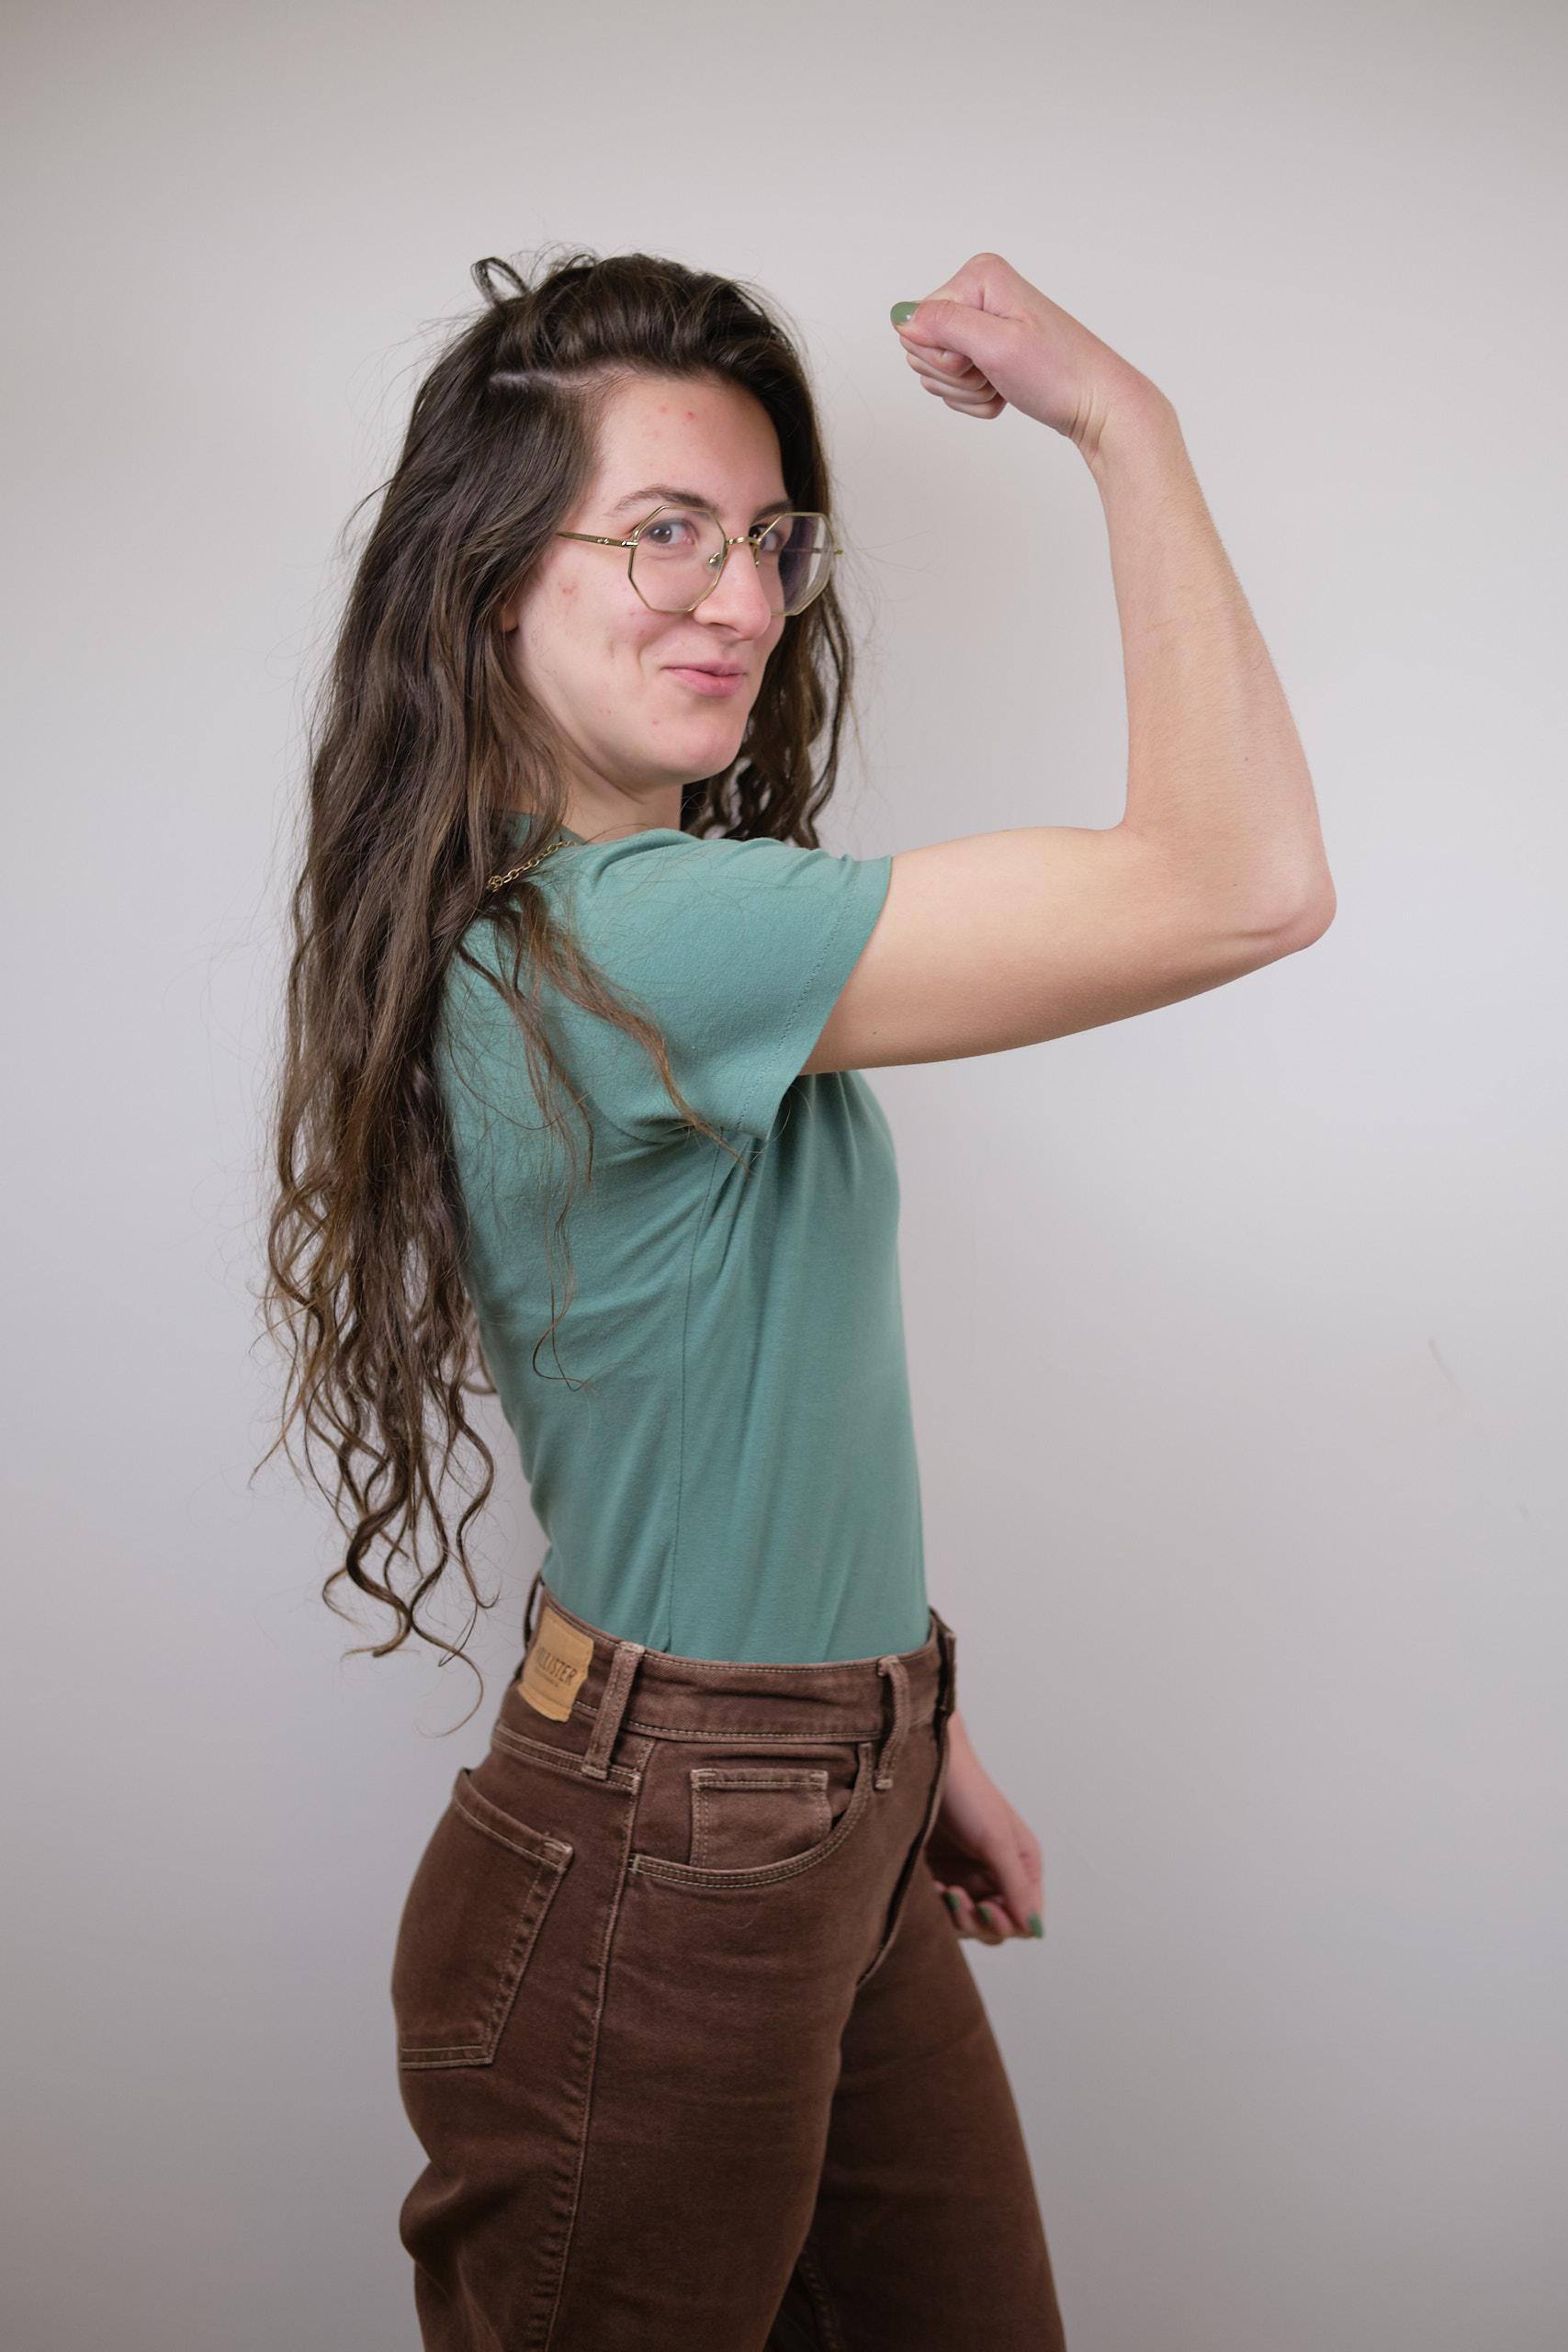
Sinclair Bondi classic fitted t-shirt, size 4p with broad and sloped shoulder adjustments, cropped length, low screwp neck, in <1 yard of turquoise double-brushed poly.
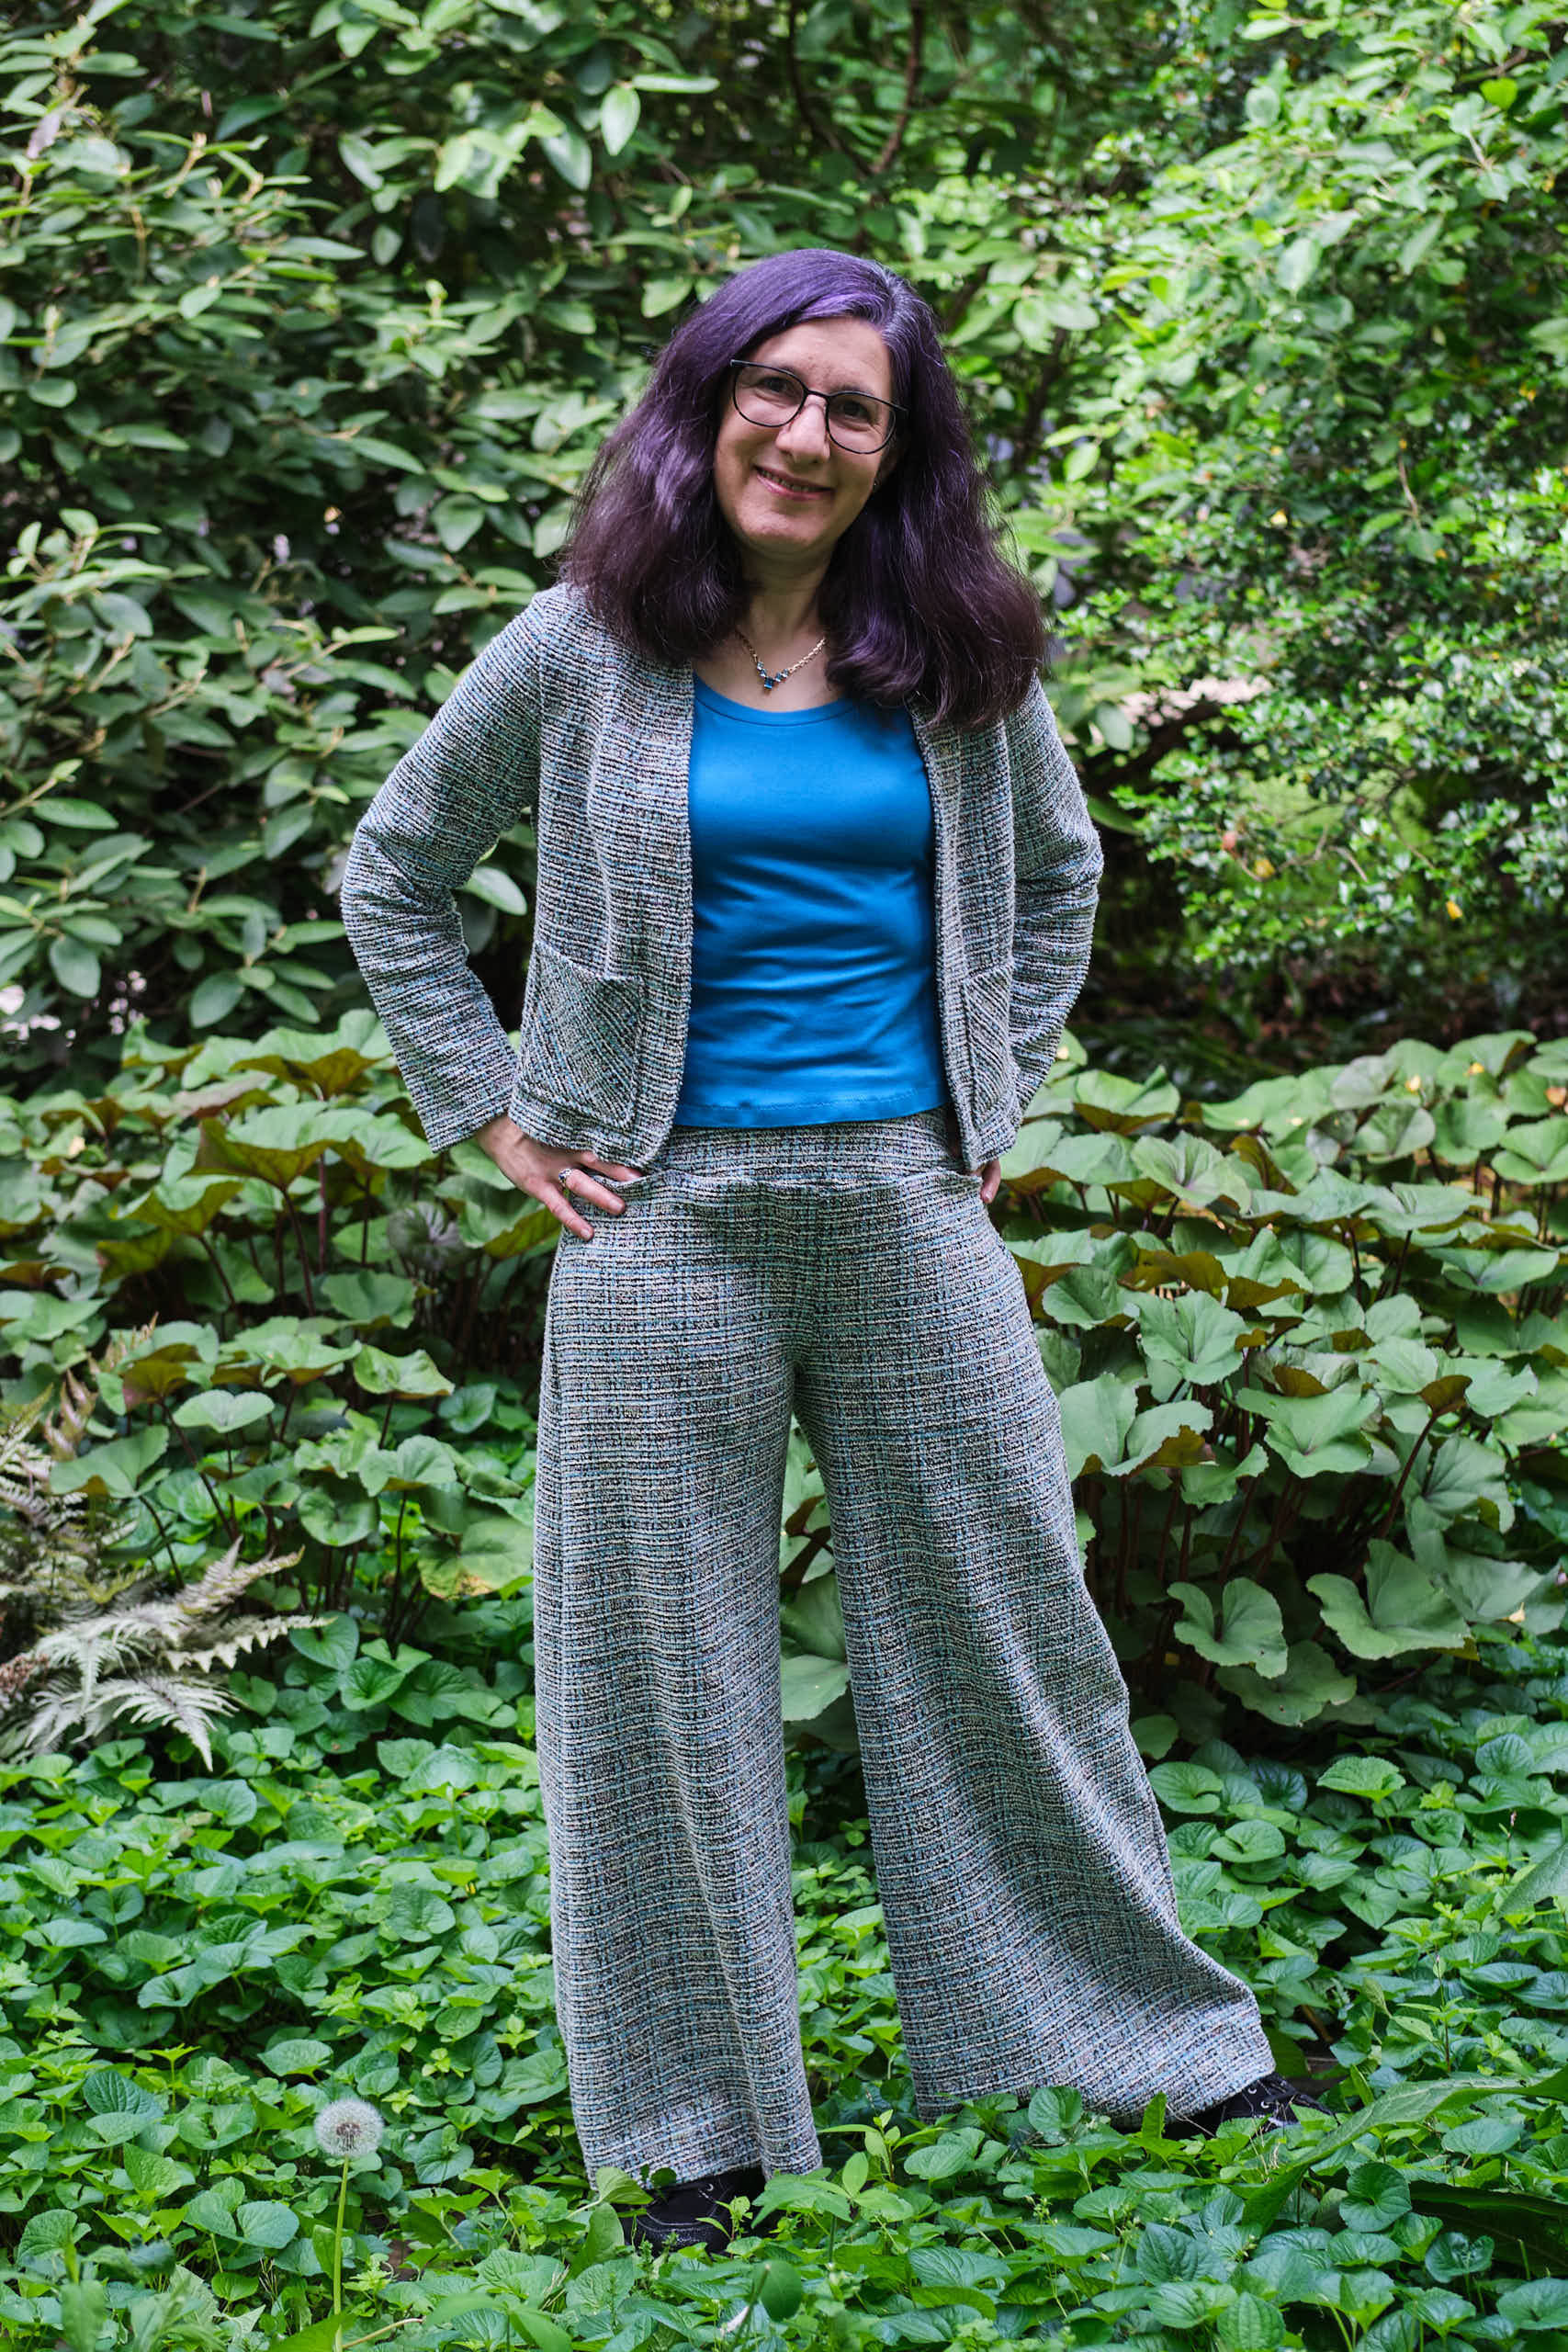
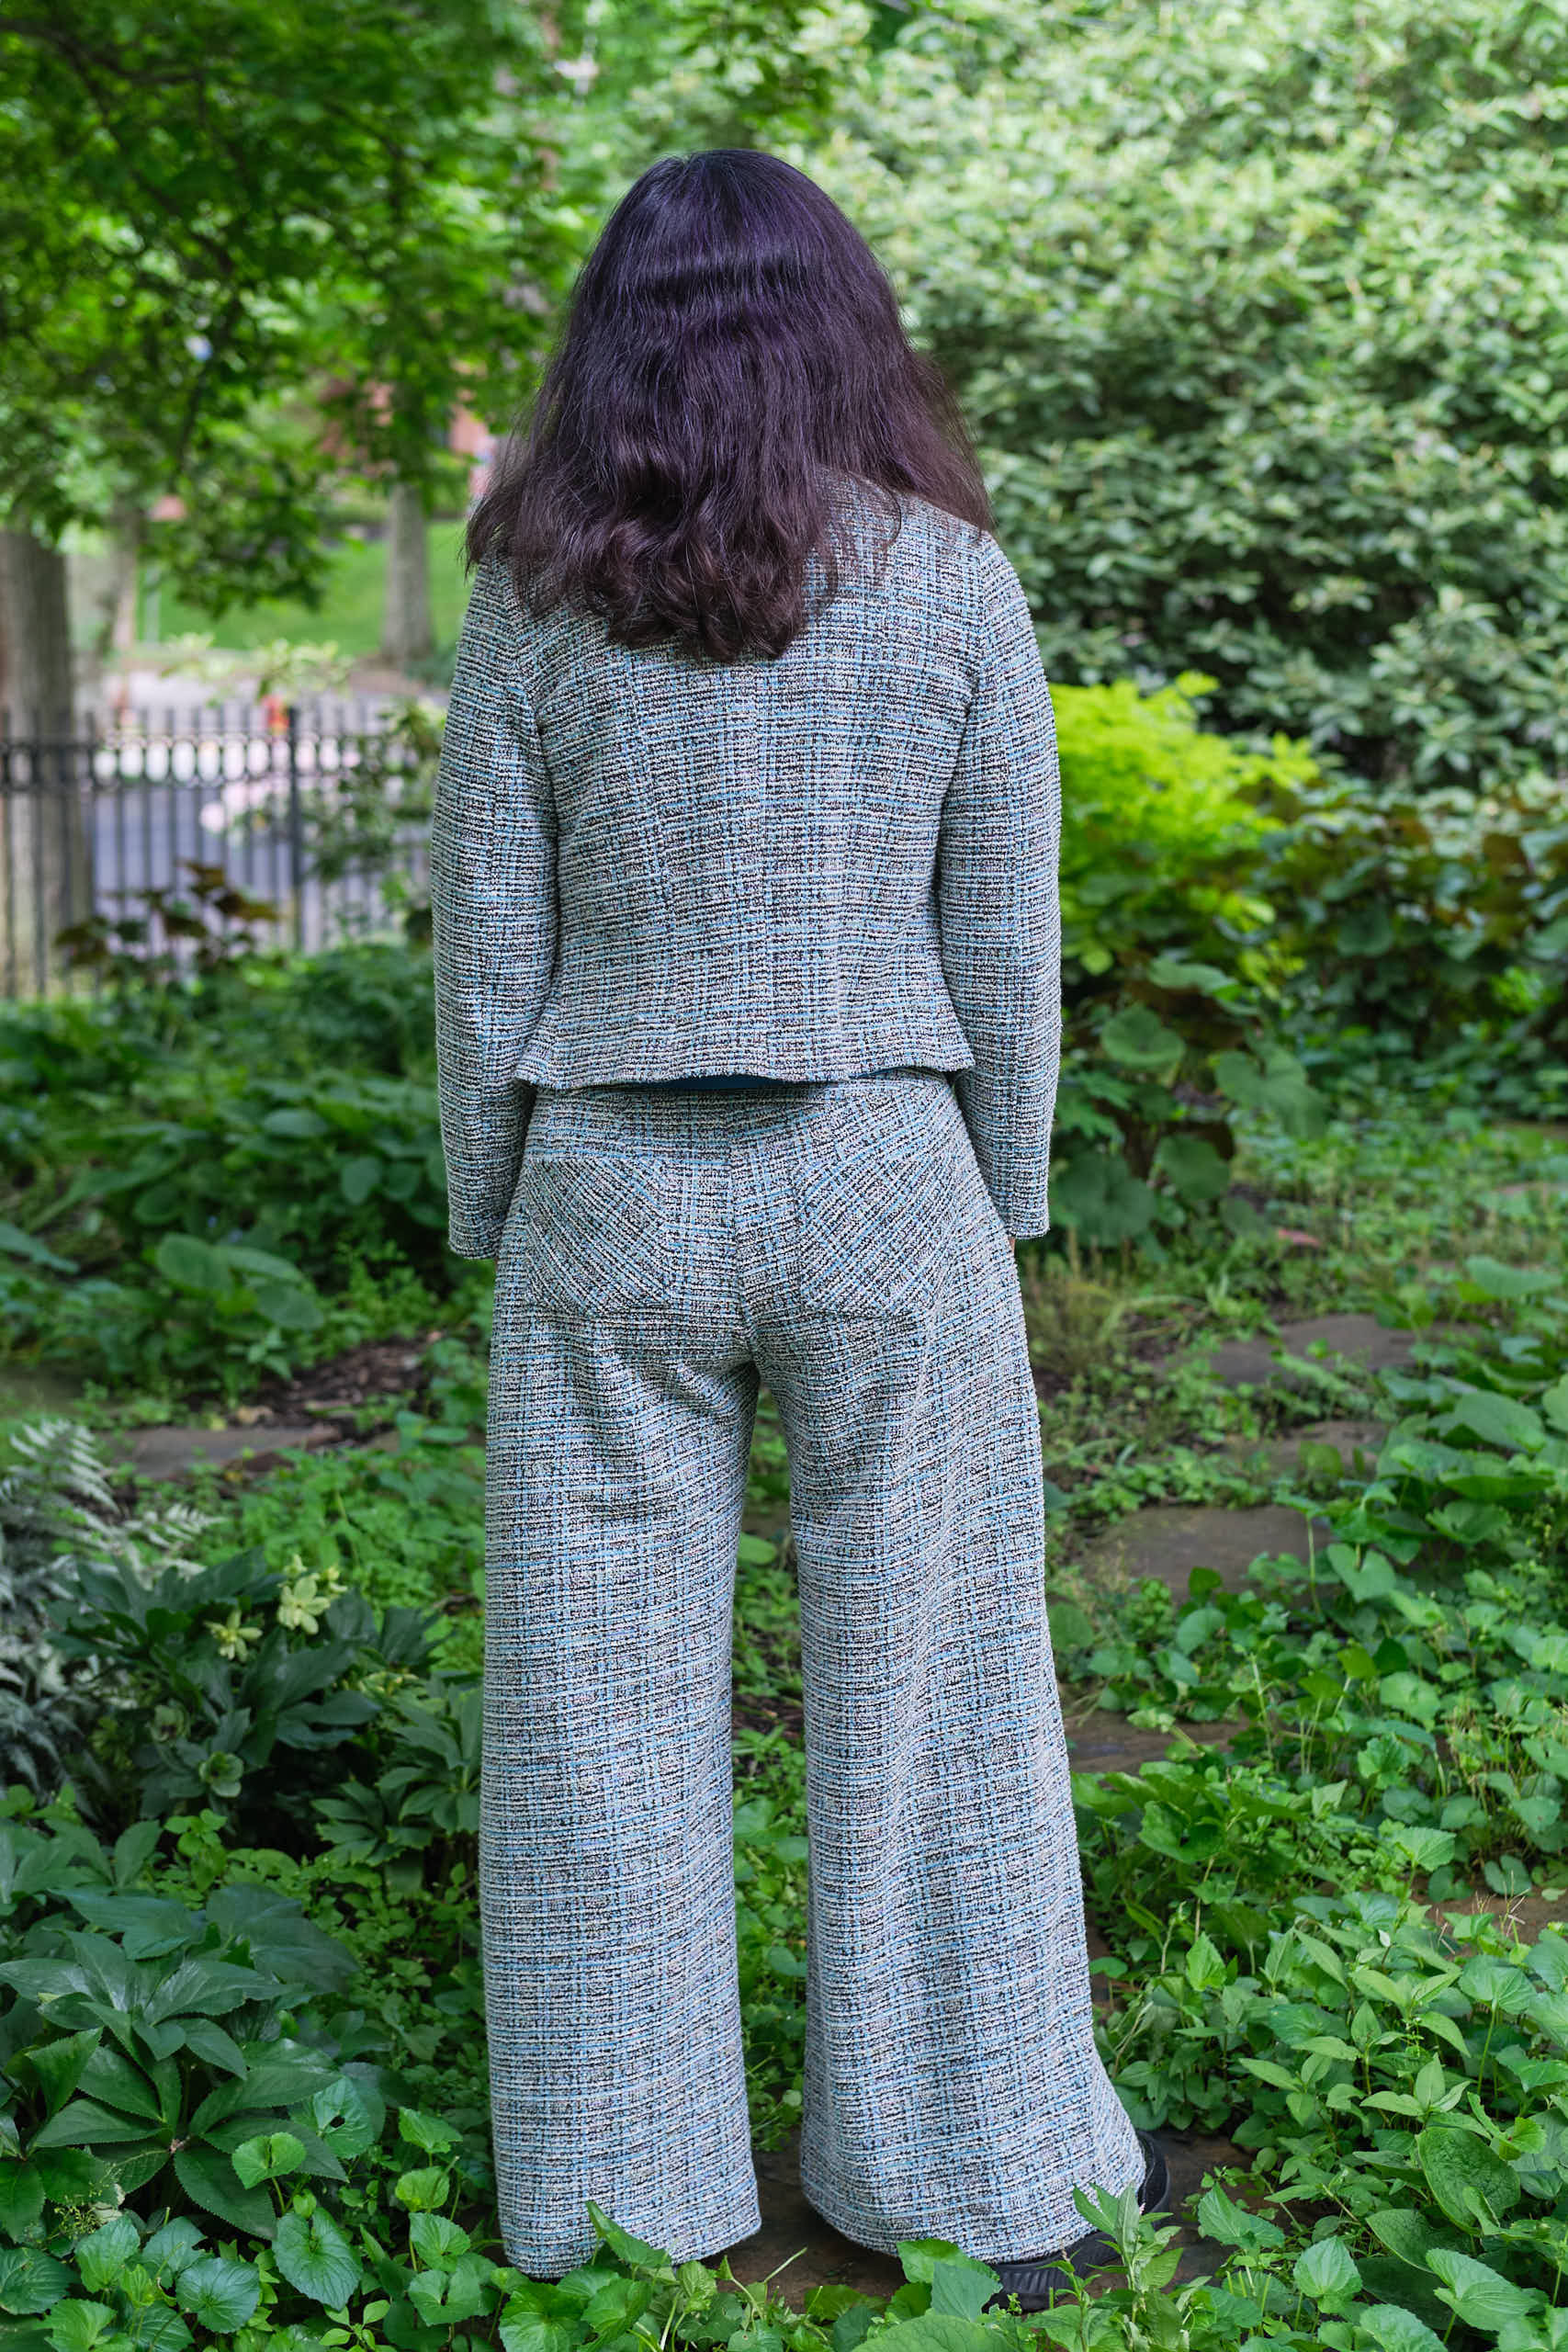
I’m enjoying wearing my tweed bouclé knit jacket and dress, and since I still had more of the fabulous blue/black tweed bouclé knit, I decided to make a pair of wide-leg pants to go with the jacket. I used the Pattern Emporium Walk Boldly Pants pattern with a modified yoga waistband from Pattern Emporium Urban Pants. The Walk Boldly pattern really shines with more structured knit fabric that shows off the wide legs, and the Urban pants yoga waistband is a great substitute for the Walk Boldly elastic waist. I made these pants in my usual size AU 10 with my usual modifications. I used the lower waist, tapered the waist in a bit, lengthened the front crotch, contoured the yoga waistband and split it into separate inner and outer pieces, made the inner piece from a heavy athletic knit, and sewed half-inch elastic into the top of the waistband seam between the layers. I used the jeans pockets but sewed the pocket openings on a straight diagonal. And I added back patch pockets to play up the Channel vibe of the outfit.
Cutting the tweed was a bit of a challenge. I knew I wanted the vertical lines in the fabric to align vertically with the grain. I also attempted some plaid matching horizontally, but eventually gave up as the knit fabric was too fiddly for that. Fortunately, the plaid pattern is fairly subtle and so the lack of plaid matching is not obvious.
Now I have a dress, jacket, and pants in the tweed bouclé knit, and I still have a little bit more than a yard left. Perhaps I need a skirt? A sleeveless top? Or maybe I’ll use it to make something for someone else?
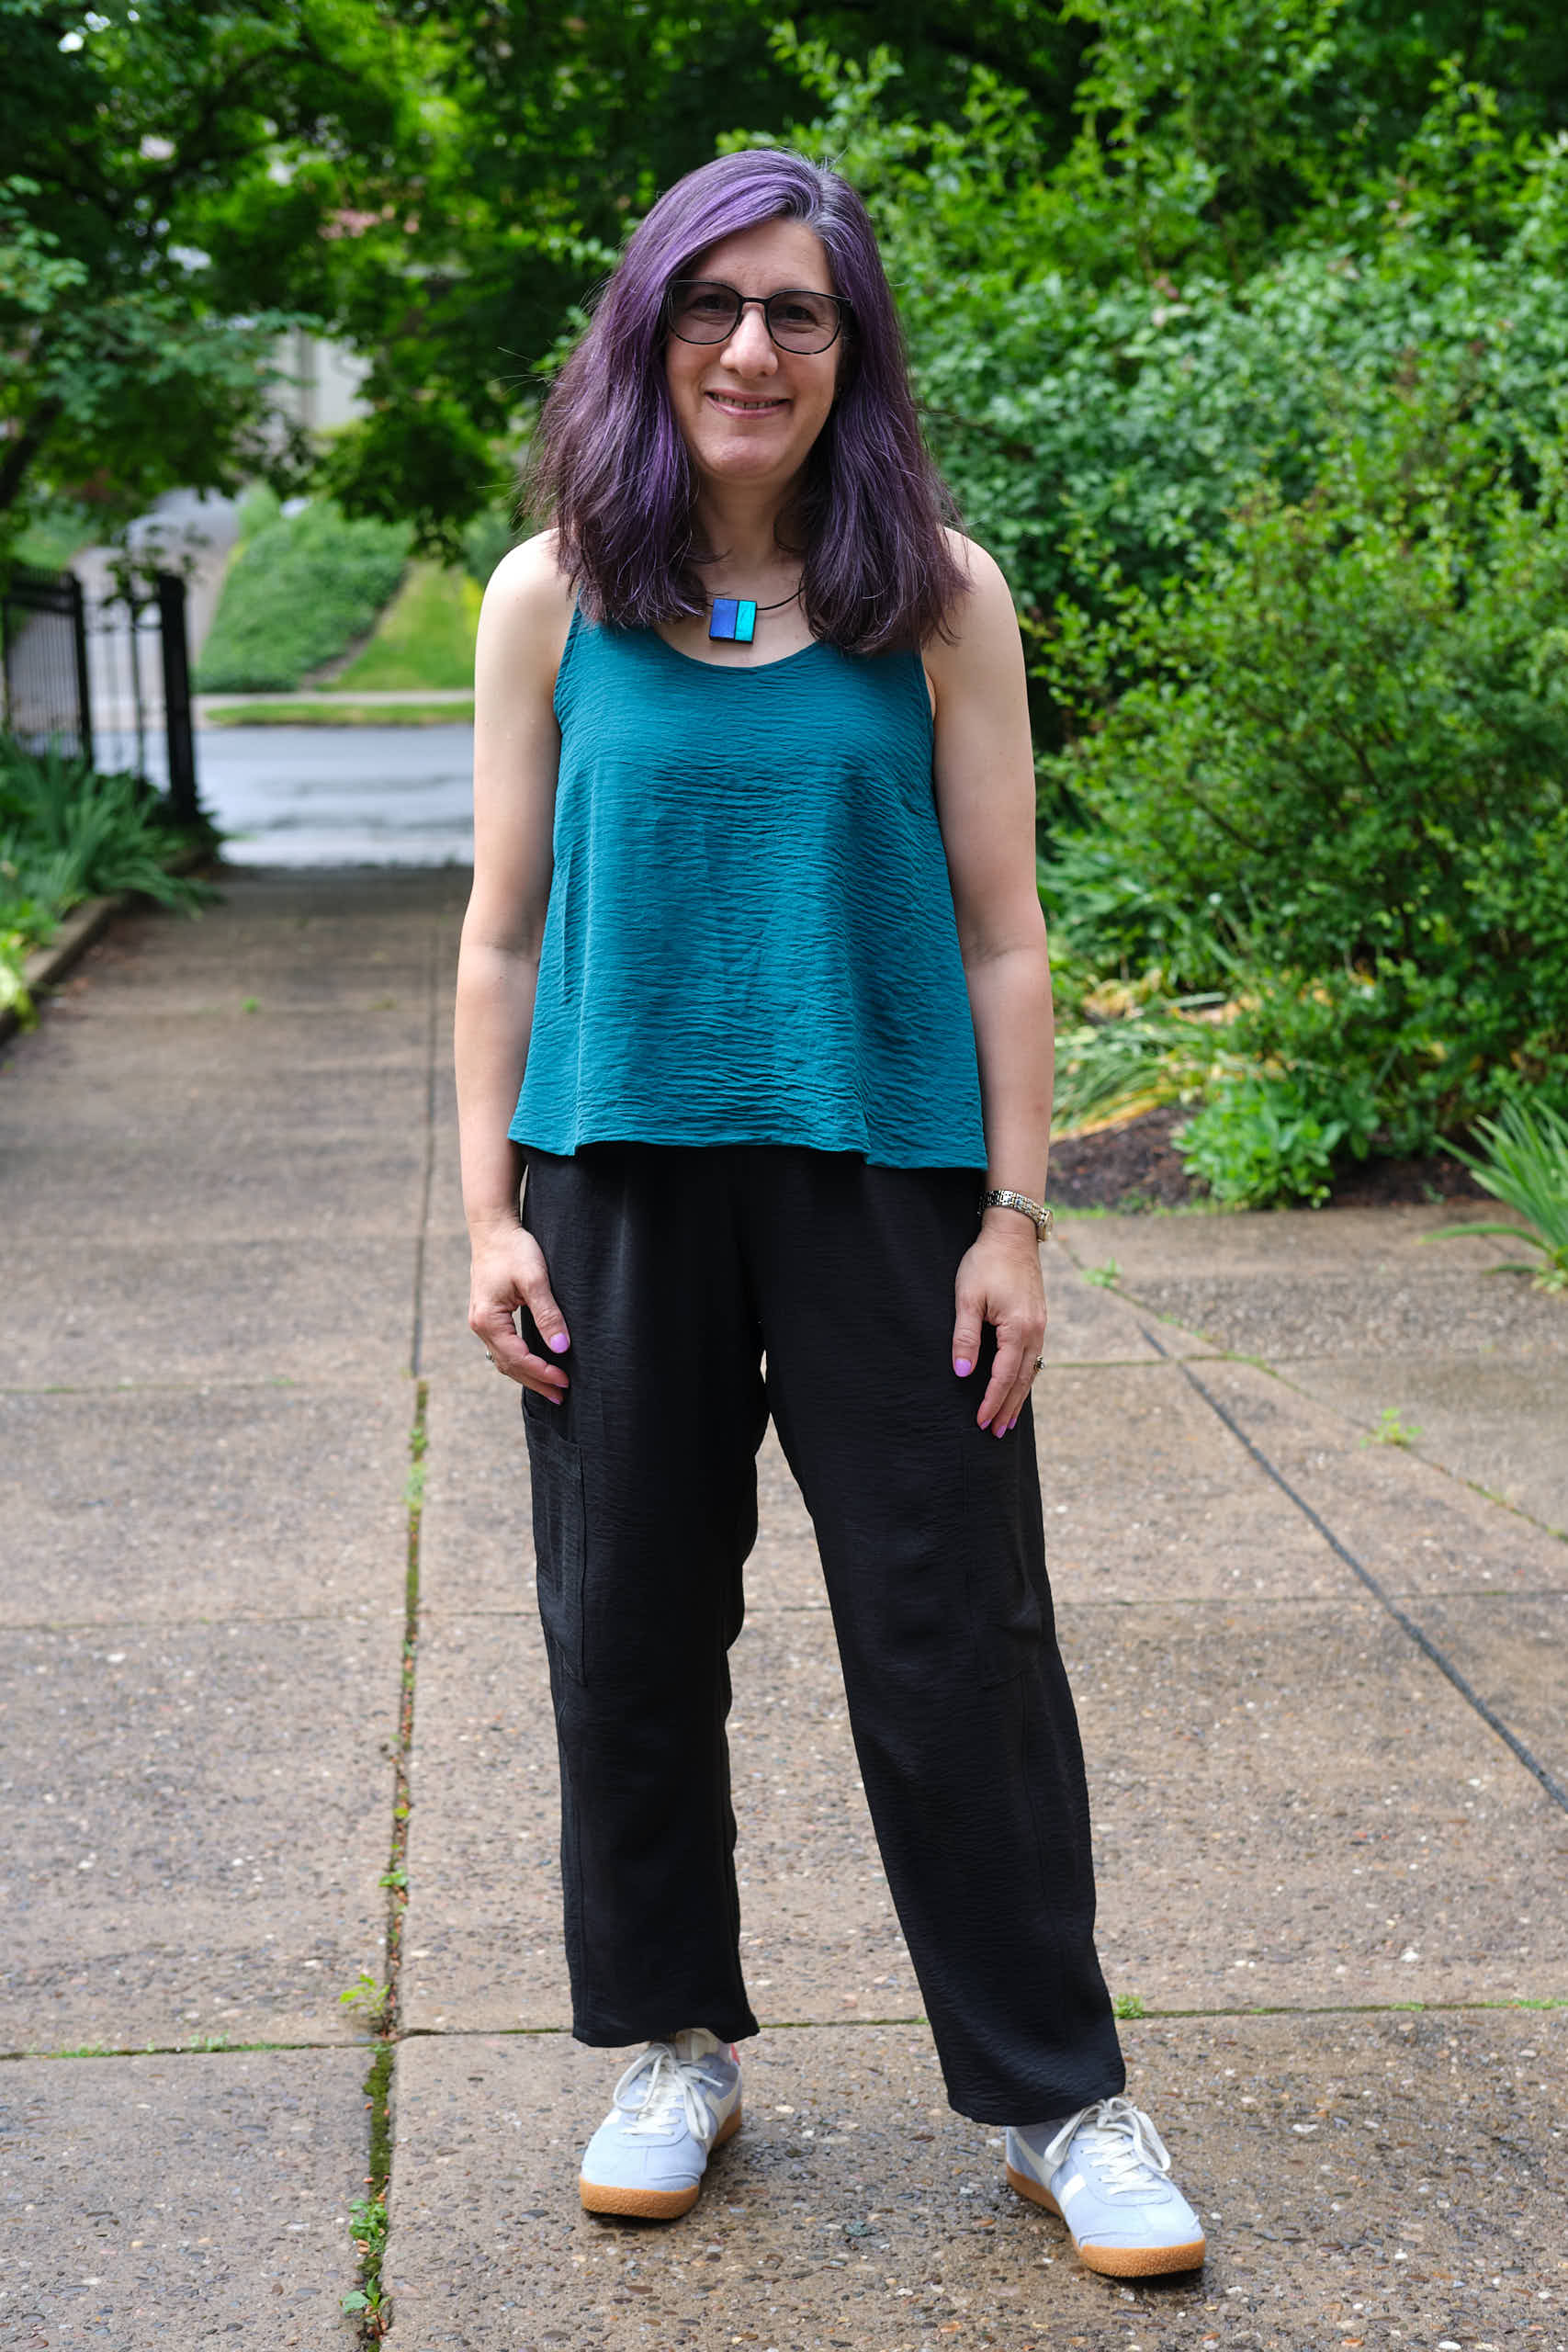
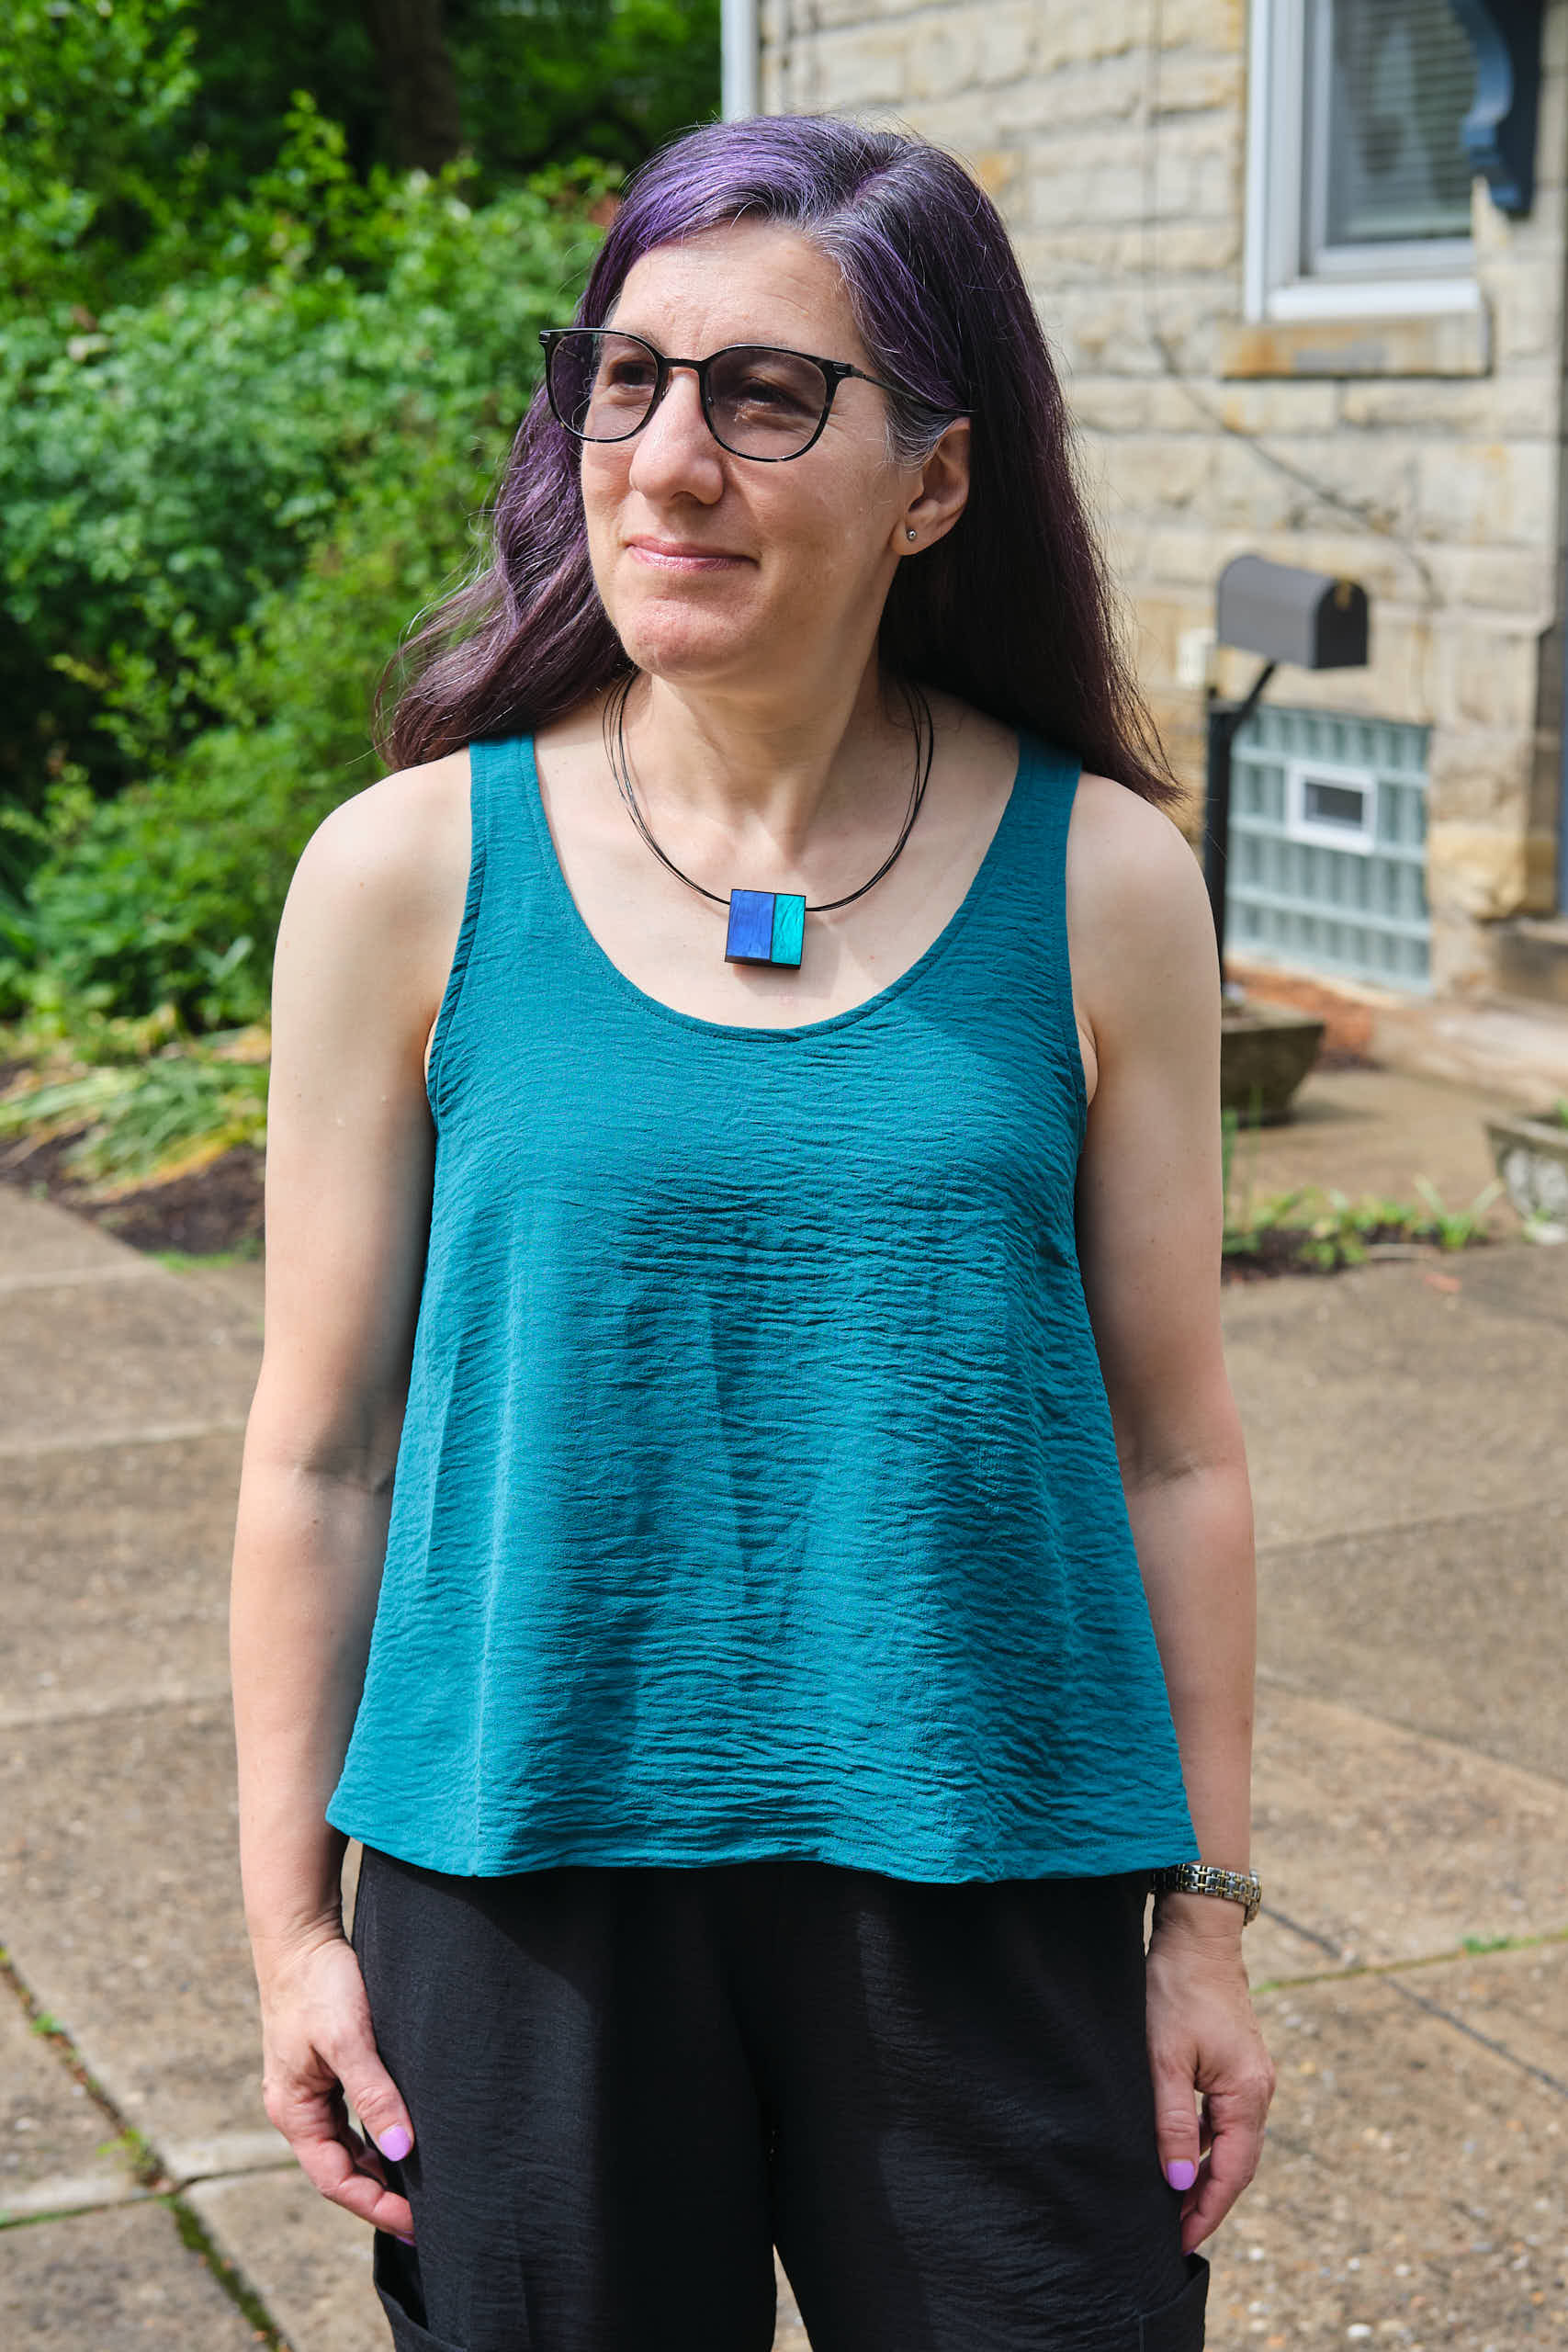
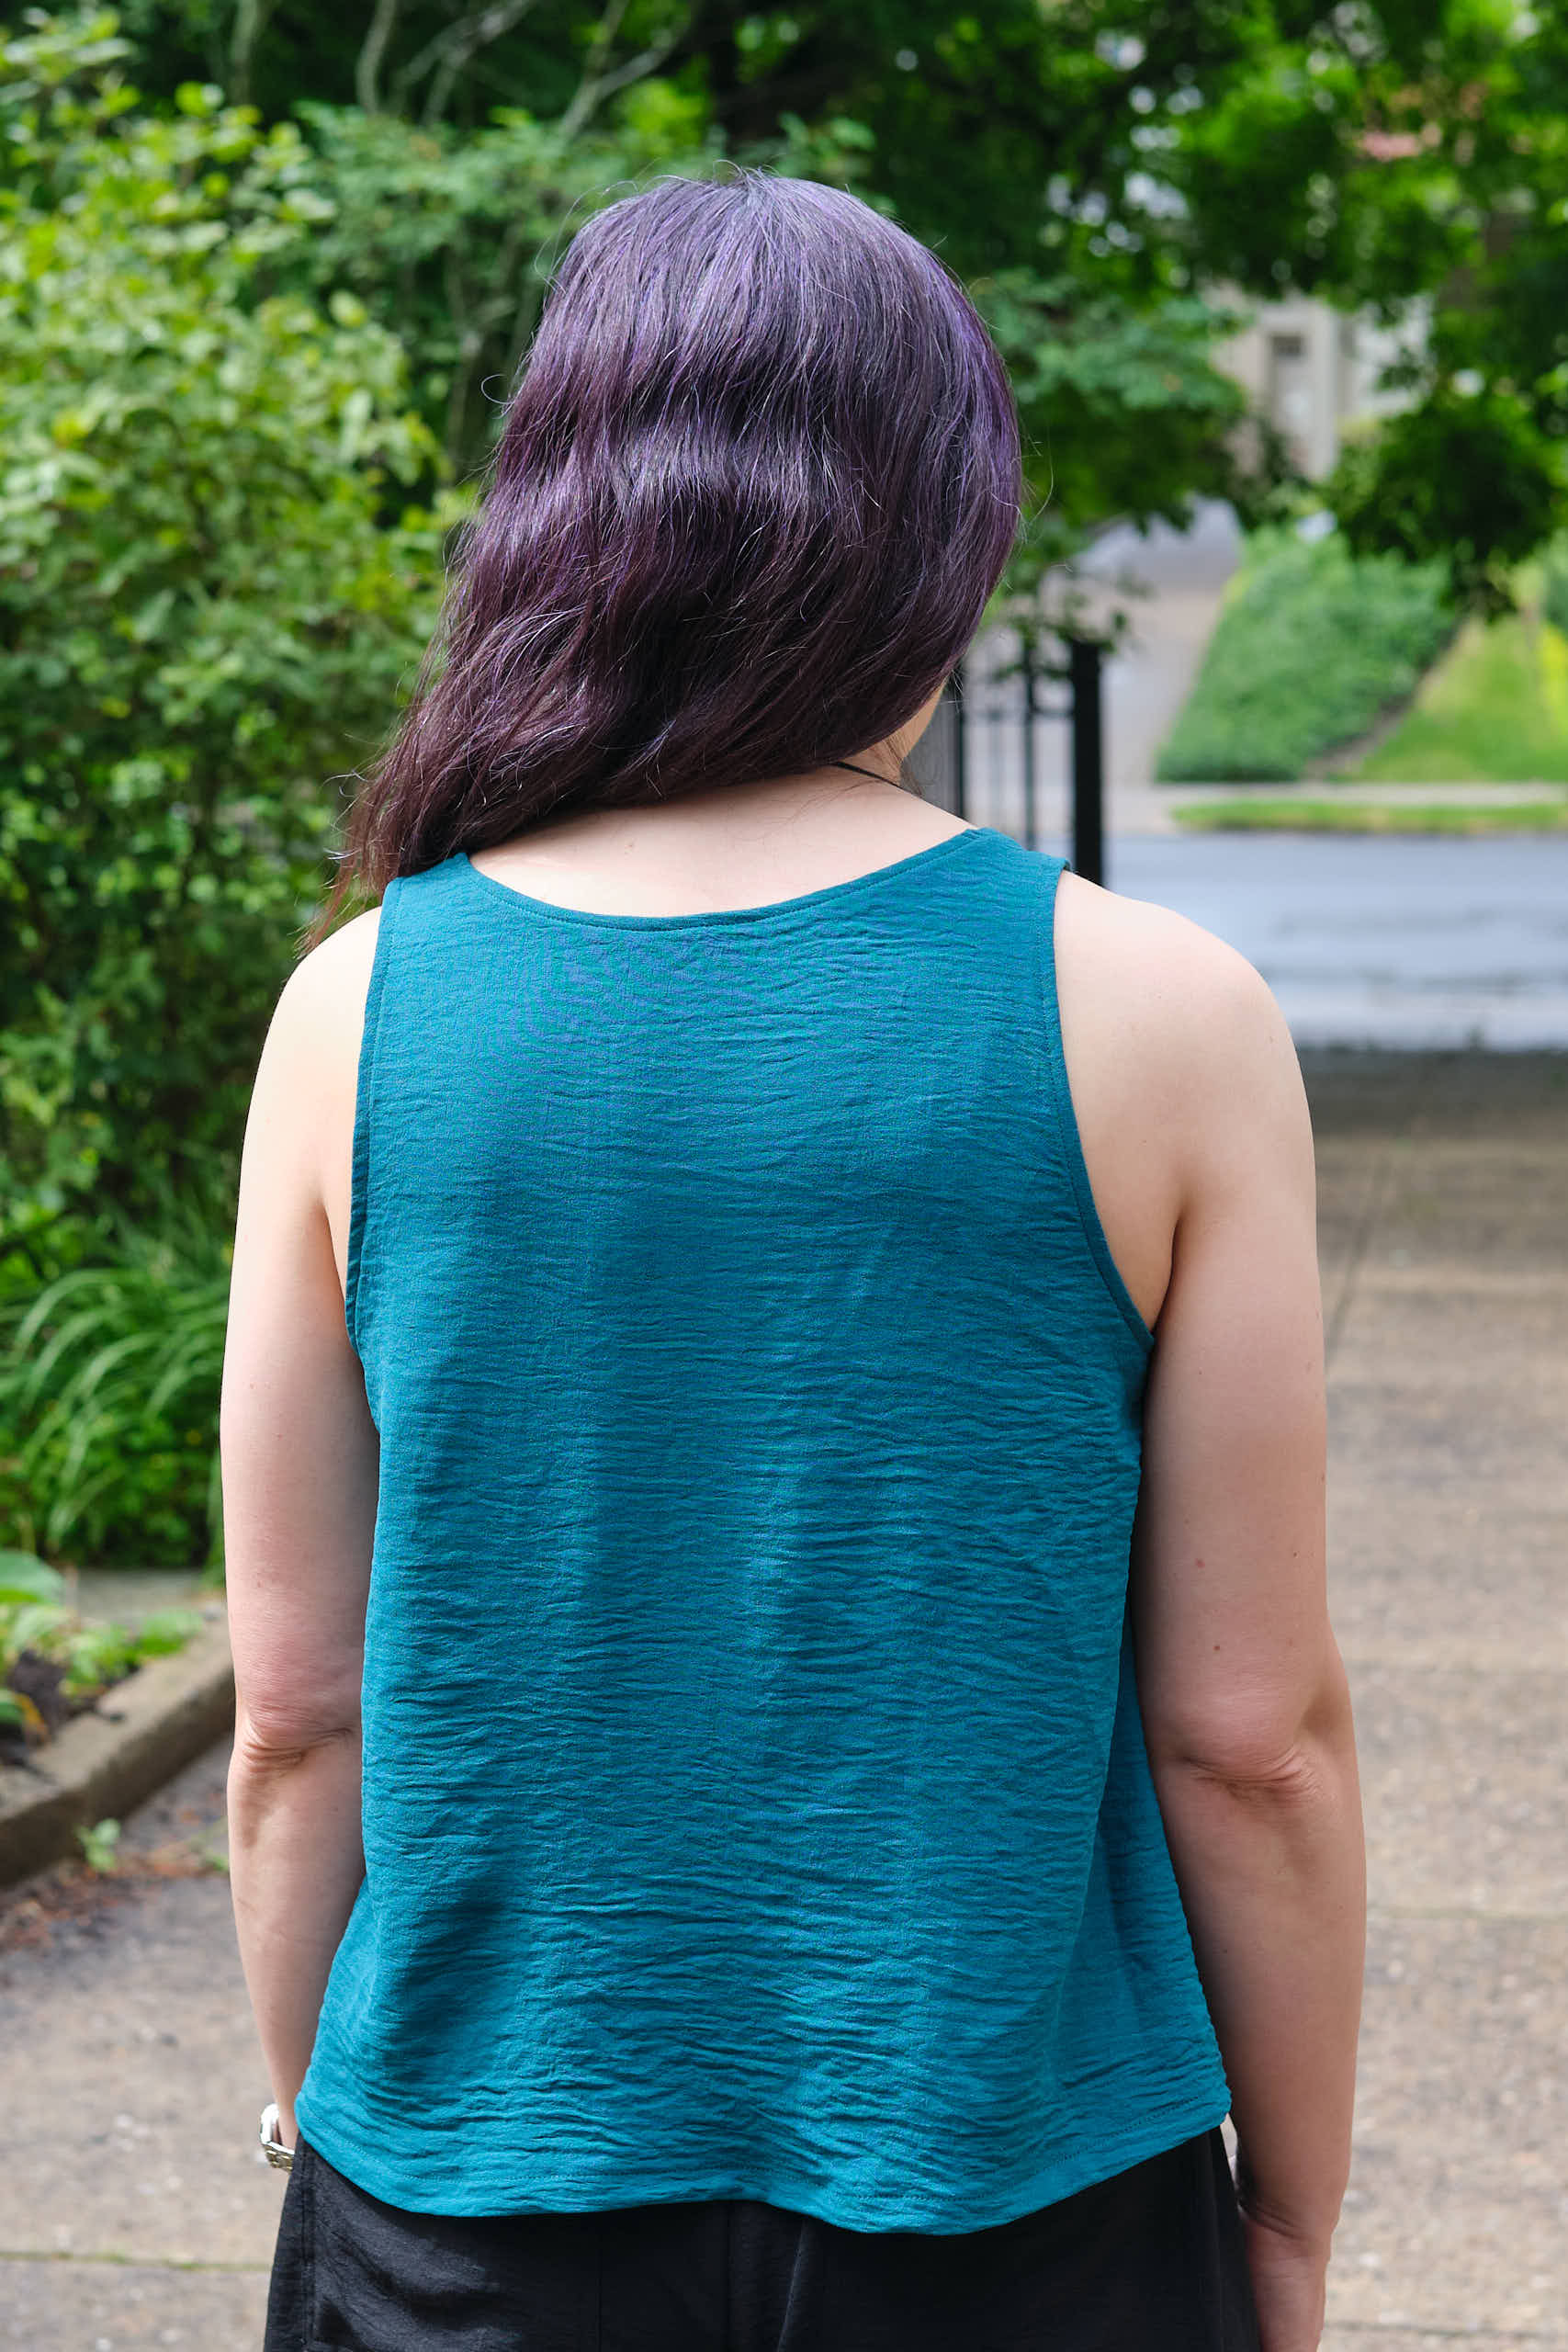
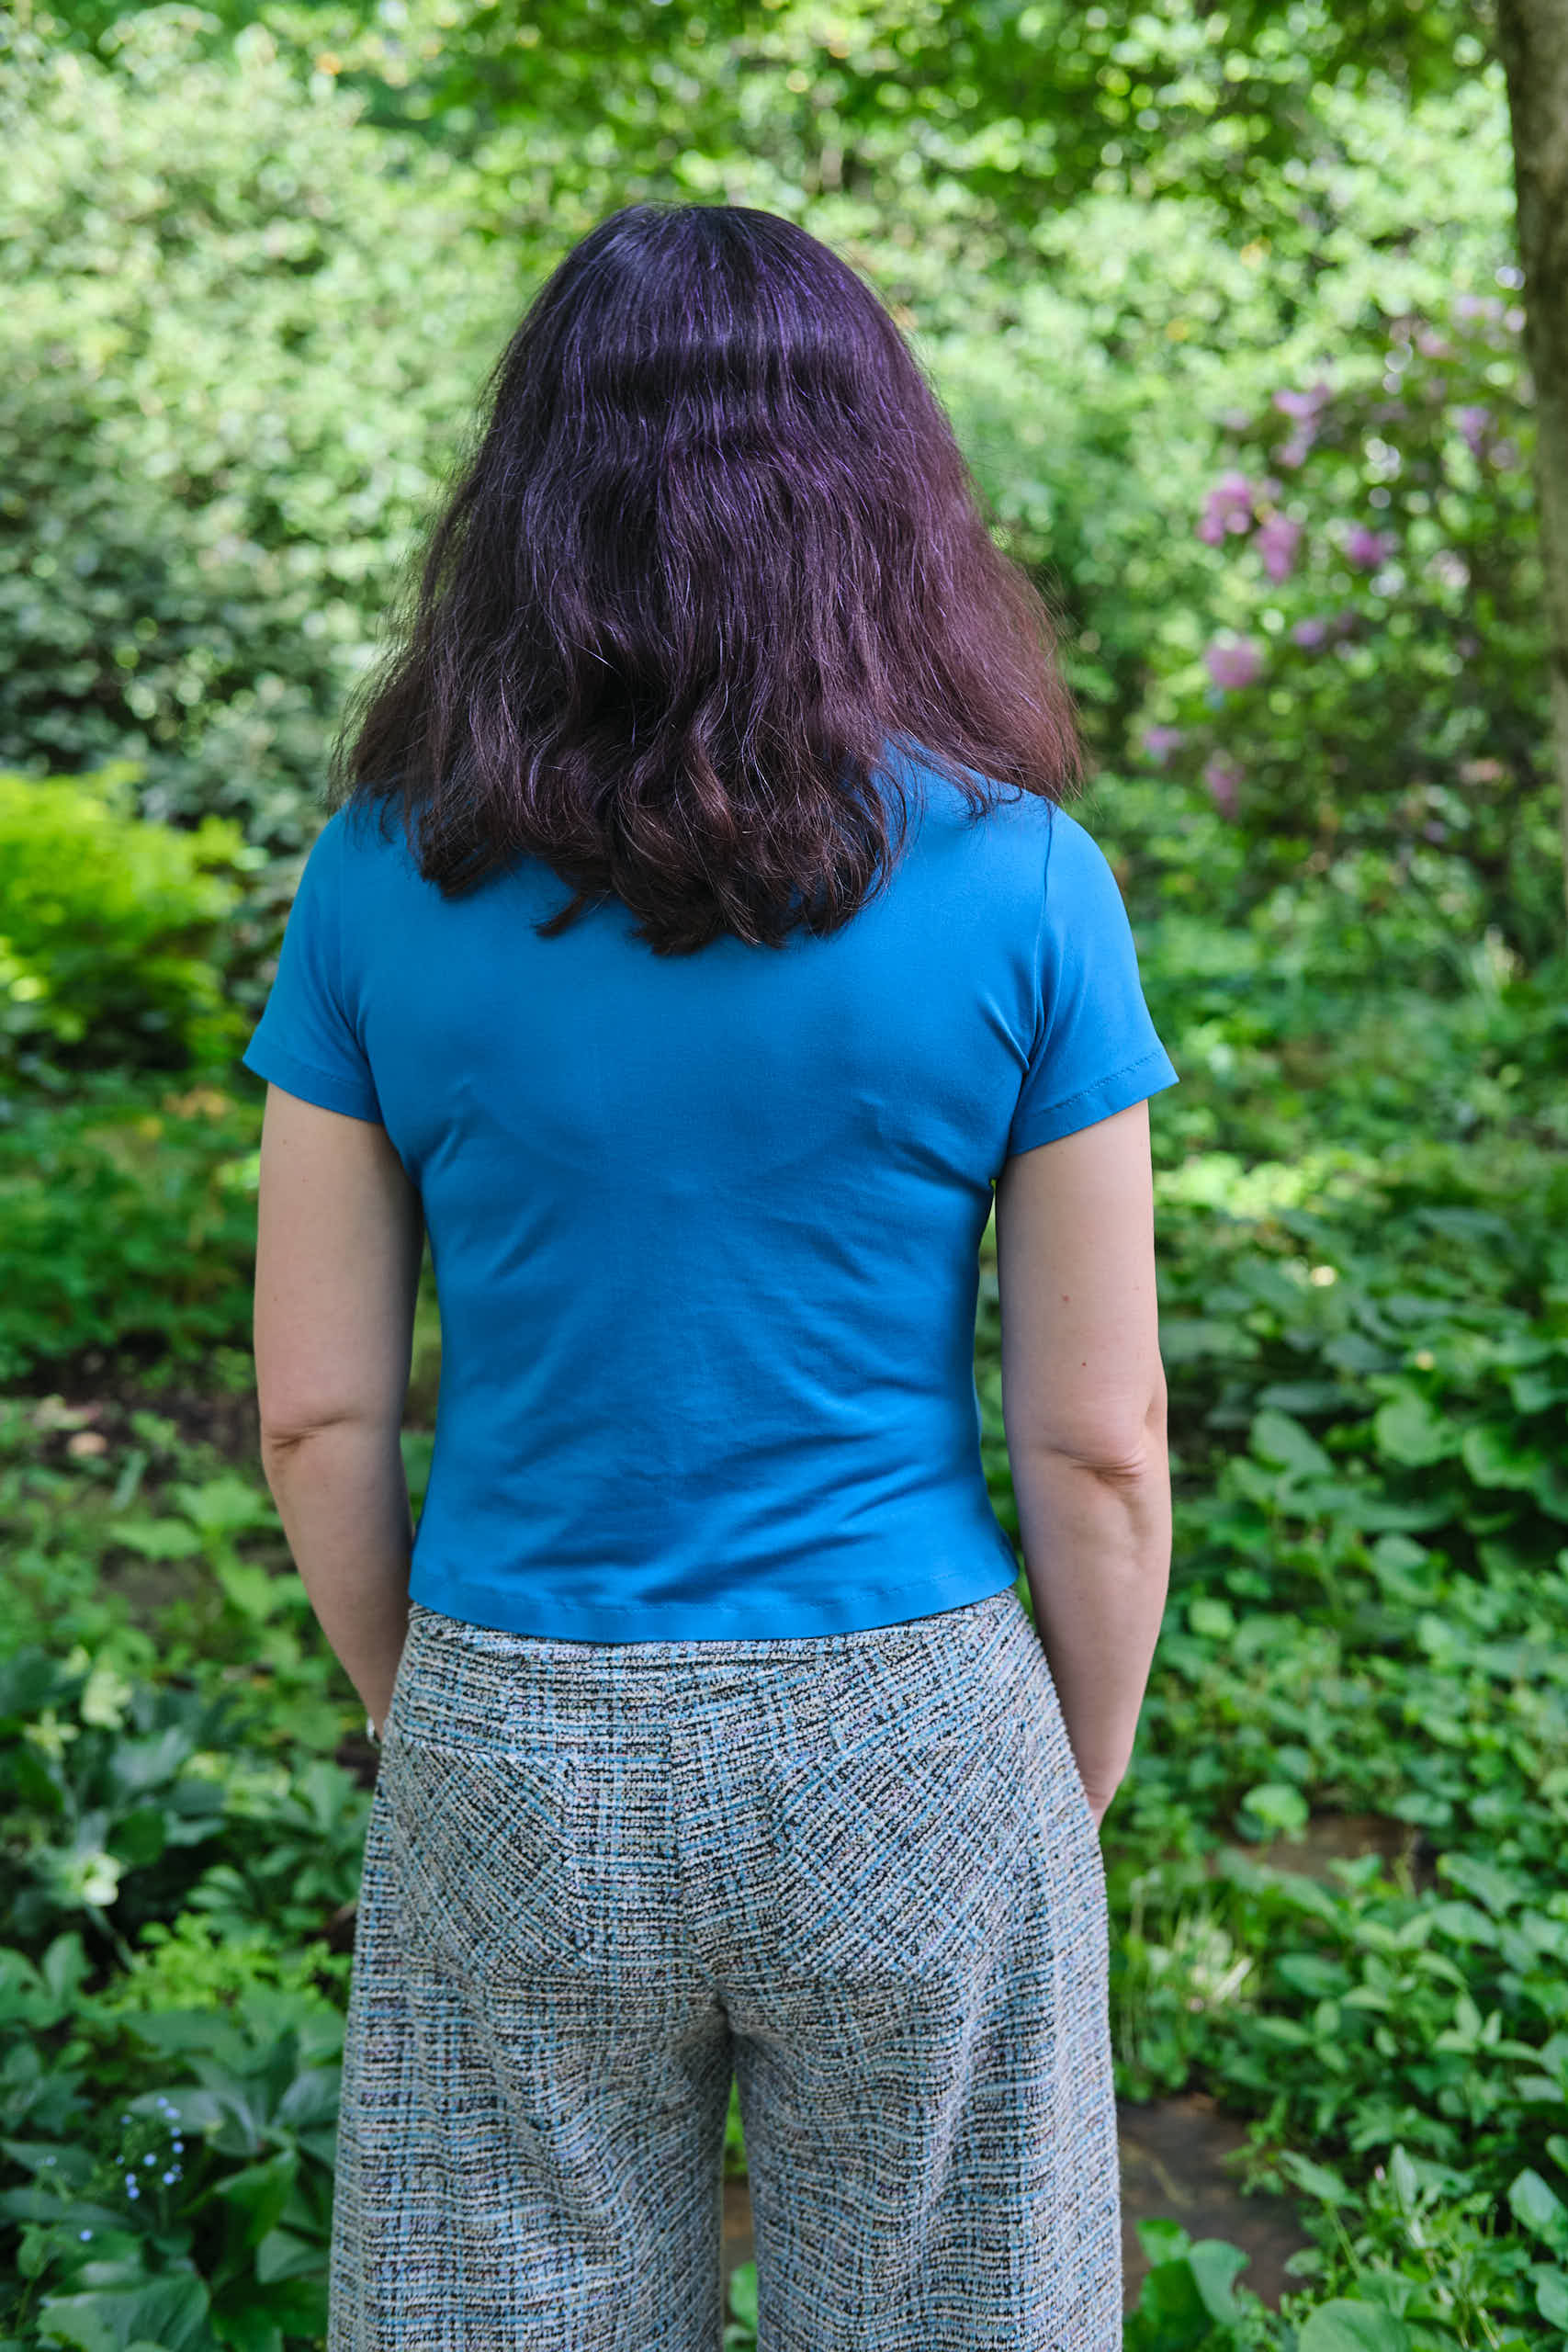
After I finished the pants, I decided I needed a turquoise blue scoop-neck top to go with the pants. I had just barely enough turquoise double-brushed poly left over from another project in my stash. I tetrised my adjusted size 4p Sinclair Bondi classic fitted t-shirt pattern to fit the little fabric I had with short sleeves and a cropped length — it was as long as fit the piece of fabric I had, but coincidentally, at 3-inches above hip length, also the perfect length to wear under the jacket untucked. It is a great length on me with high-waisted pants, but may show a smidge of midriff when worn with lower-riding pants. I made my usual broad and sloped shoulder adjustments and tried a new, slightly lower version of my screwp neck, this one made from the size 00 wide scoop. The DBP fabric is soft and stretchy, but also a little bit clingy to my rib cage, making me consider sizing up next time I sew a top with DBP.
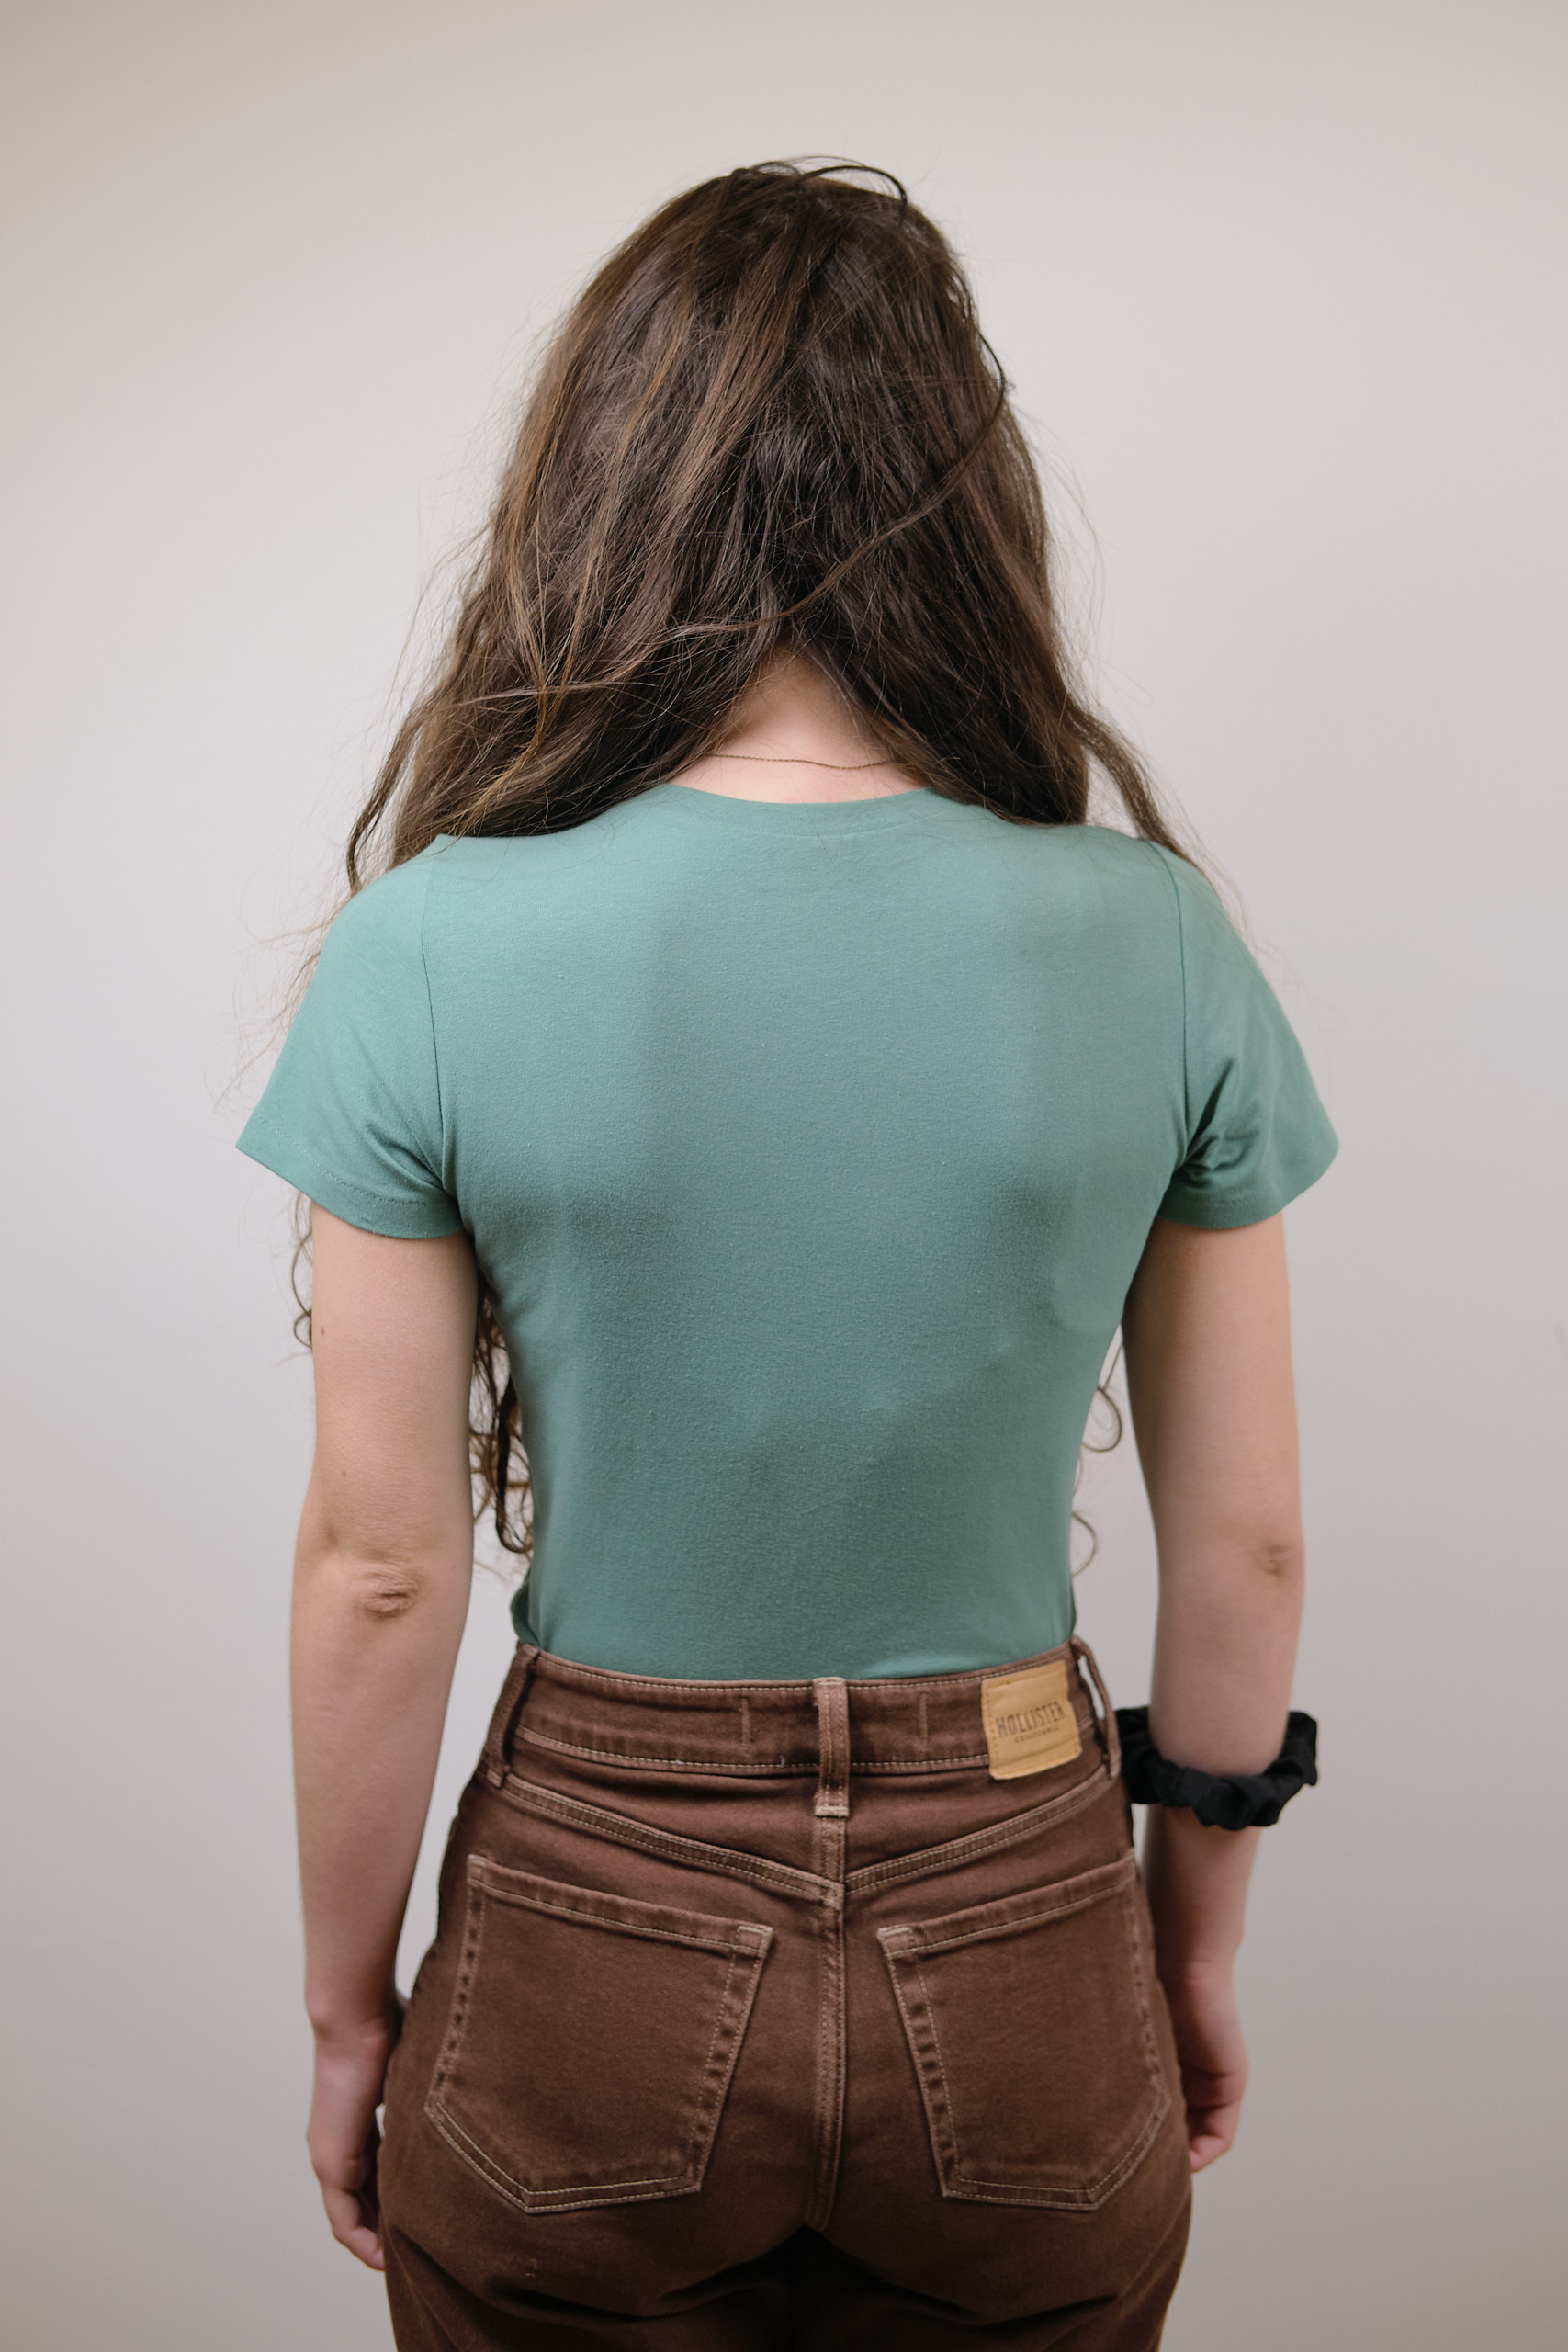
Sinclair Bondi classic fitted t-shirt 4, high crew neck, short sleeves, graded in from armscye to hem, broad shoulder adjustment, less than 1 yard of black cotton-lycra.
After making my daughter an almost perfectly fitted sage green t-shirt, I modified the Sinclair Bondi pattern with a couple more adjustments she requested — broad-shoulder adjustment and a slightly higher crewneck. Here it is in black Santa Cruz cotton lycra from CaliFabrics. This is a nice, smooth 190 GSM fabric with 75% horizontal, 30% vertical stretch.
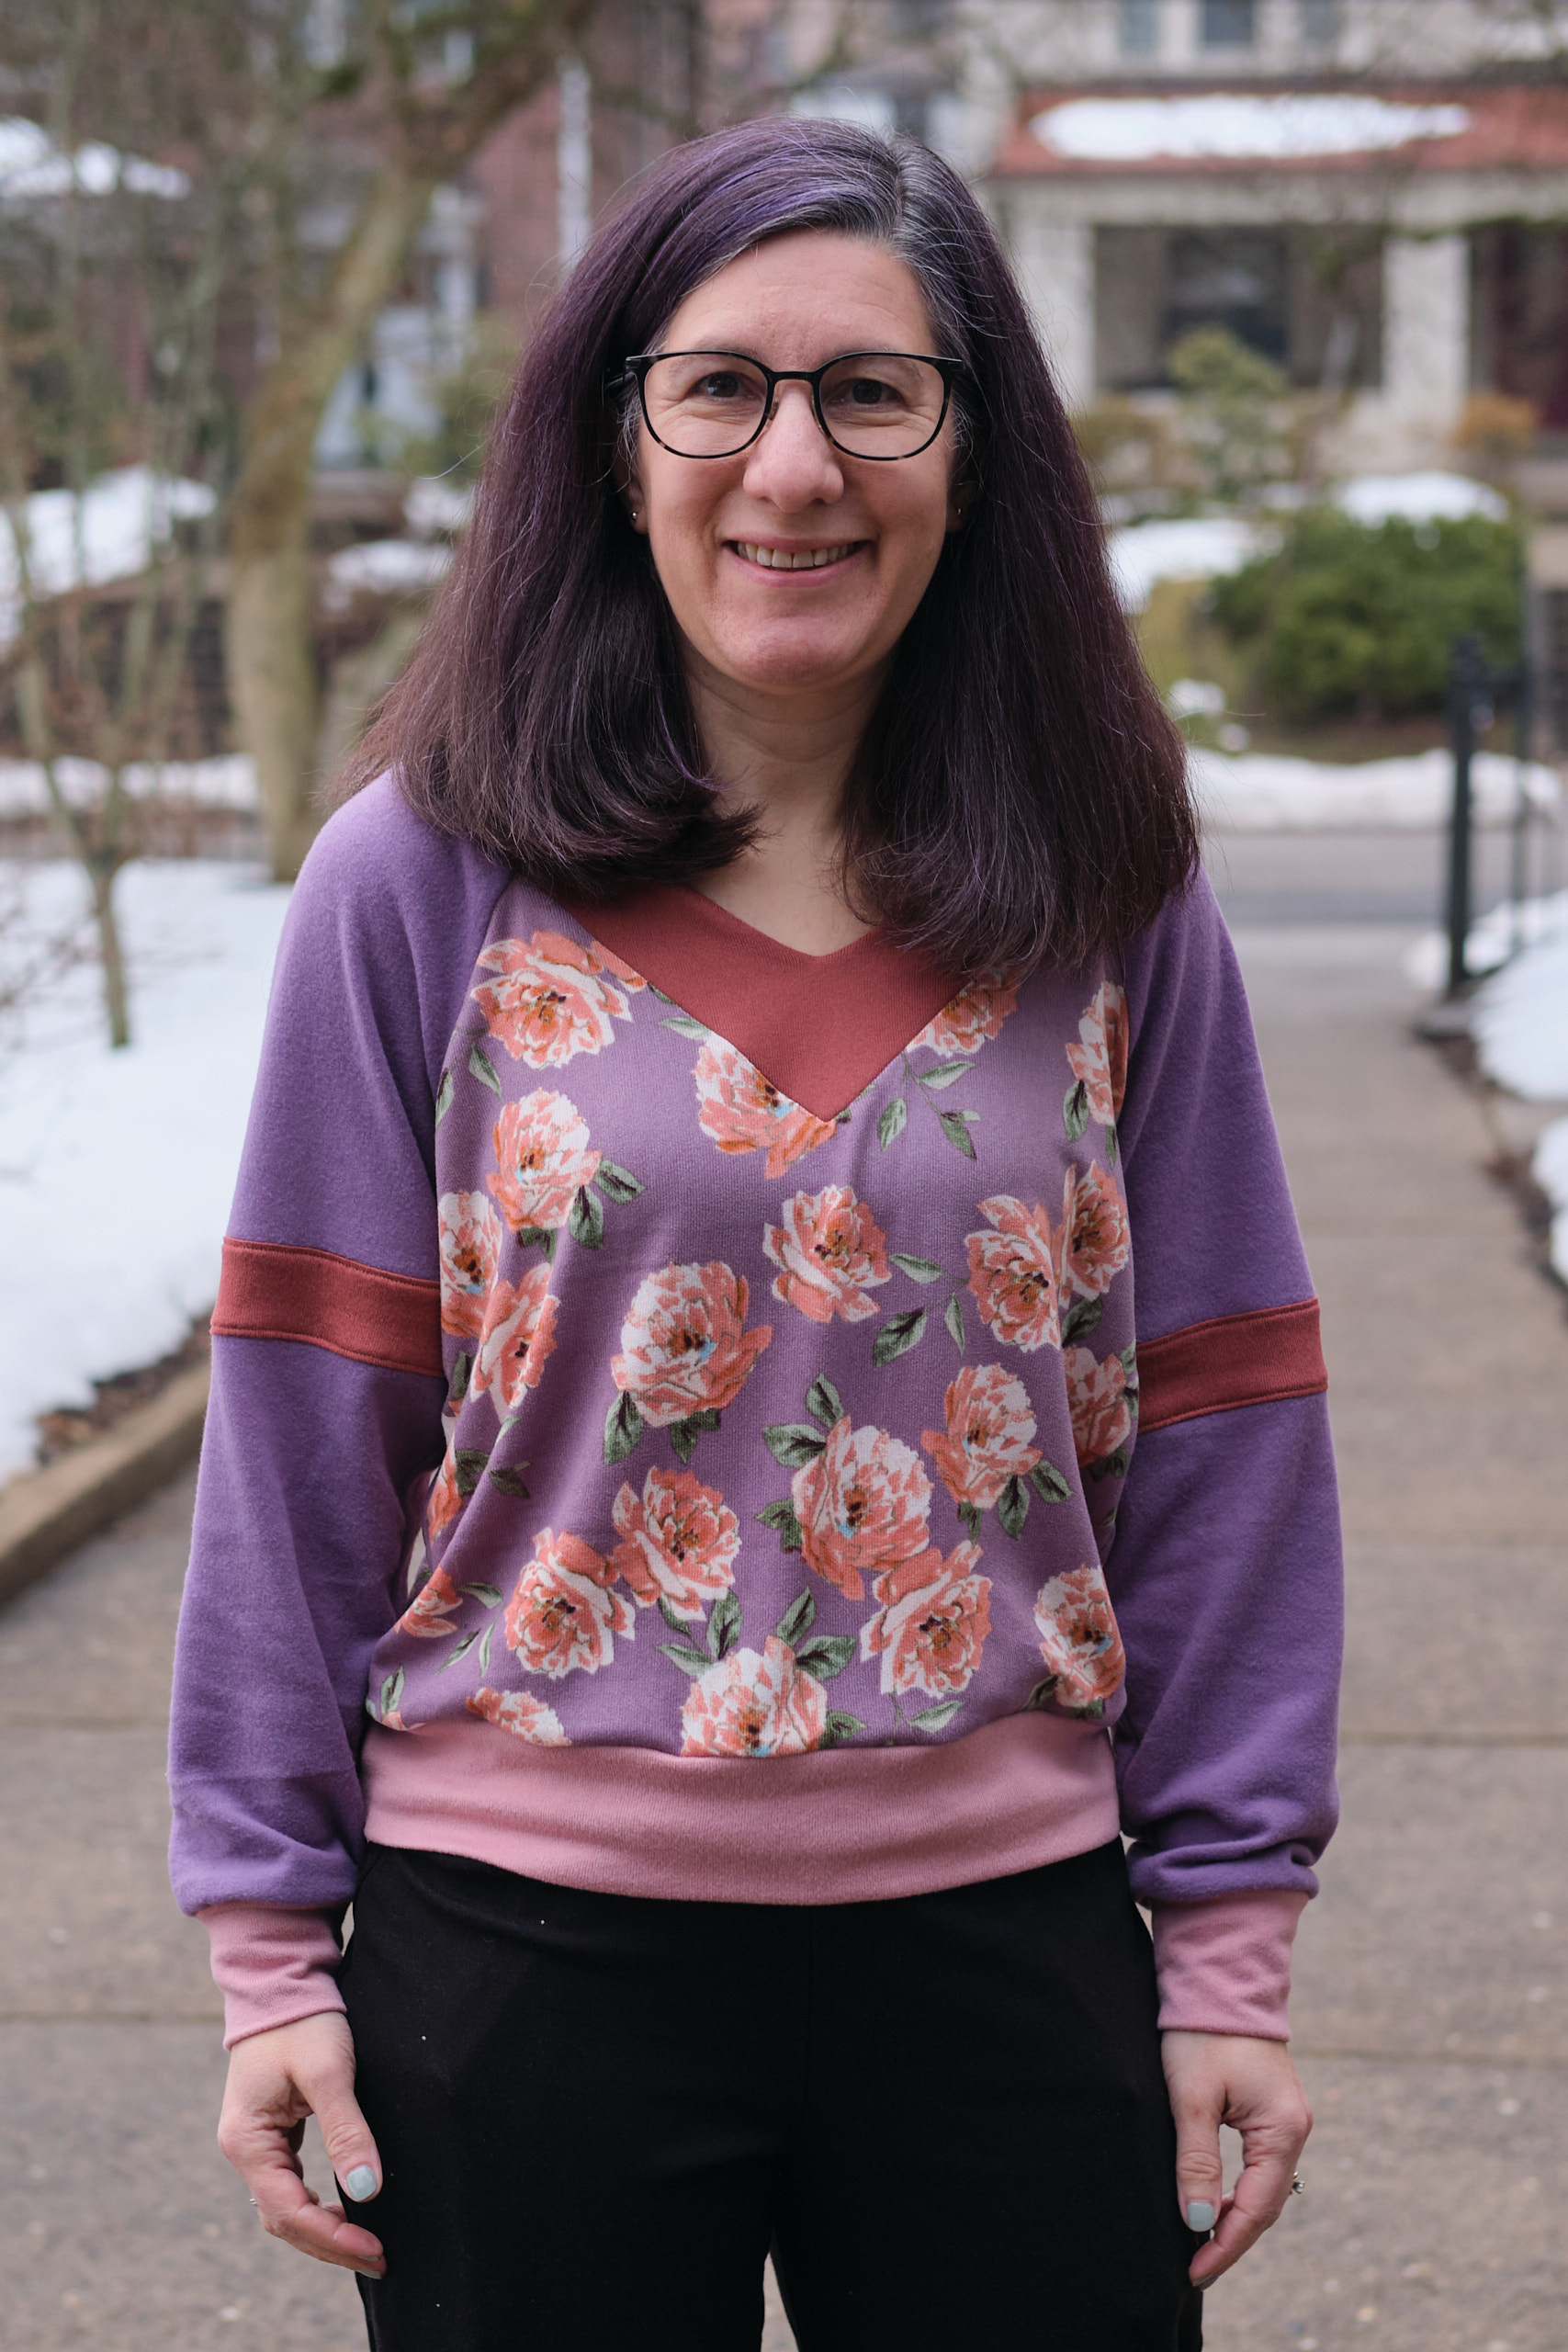
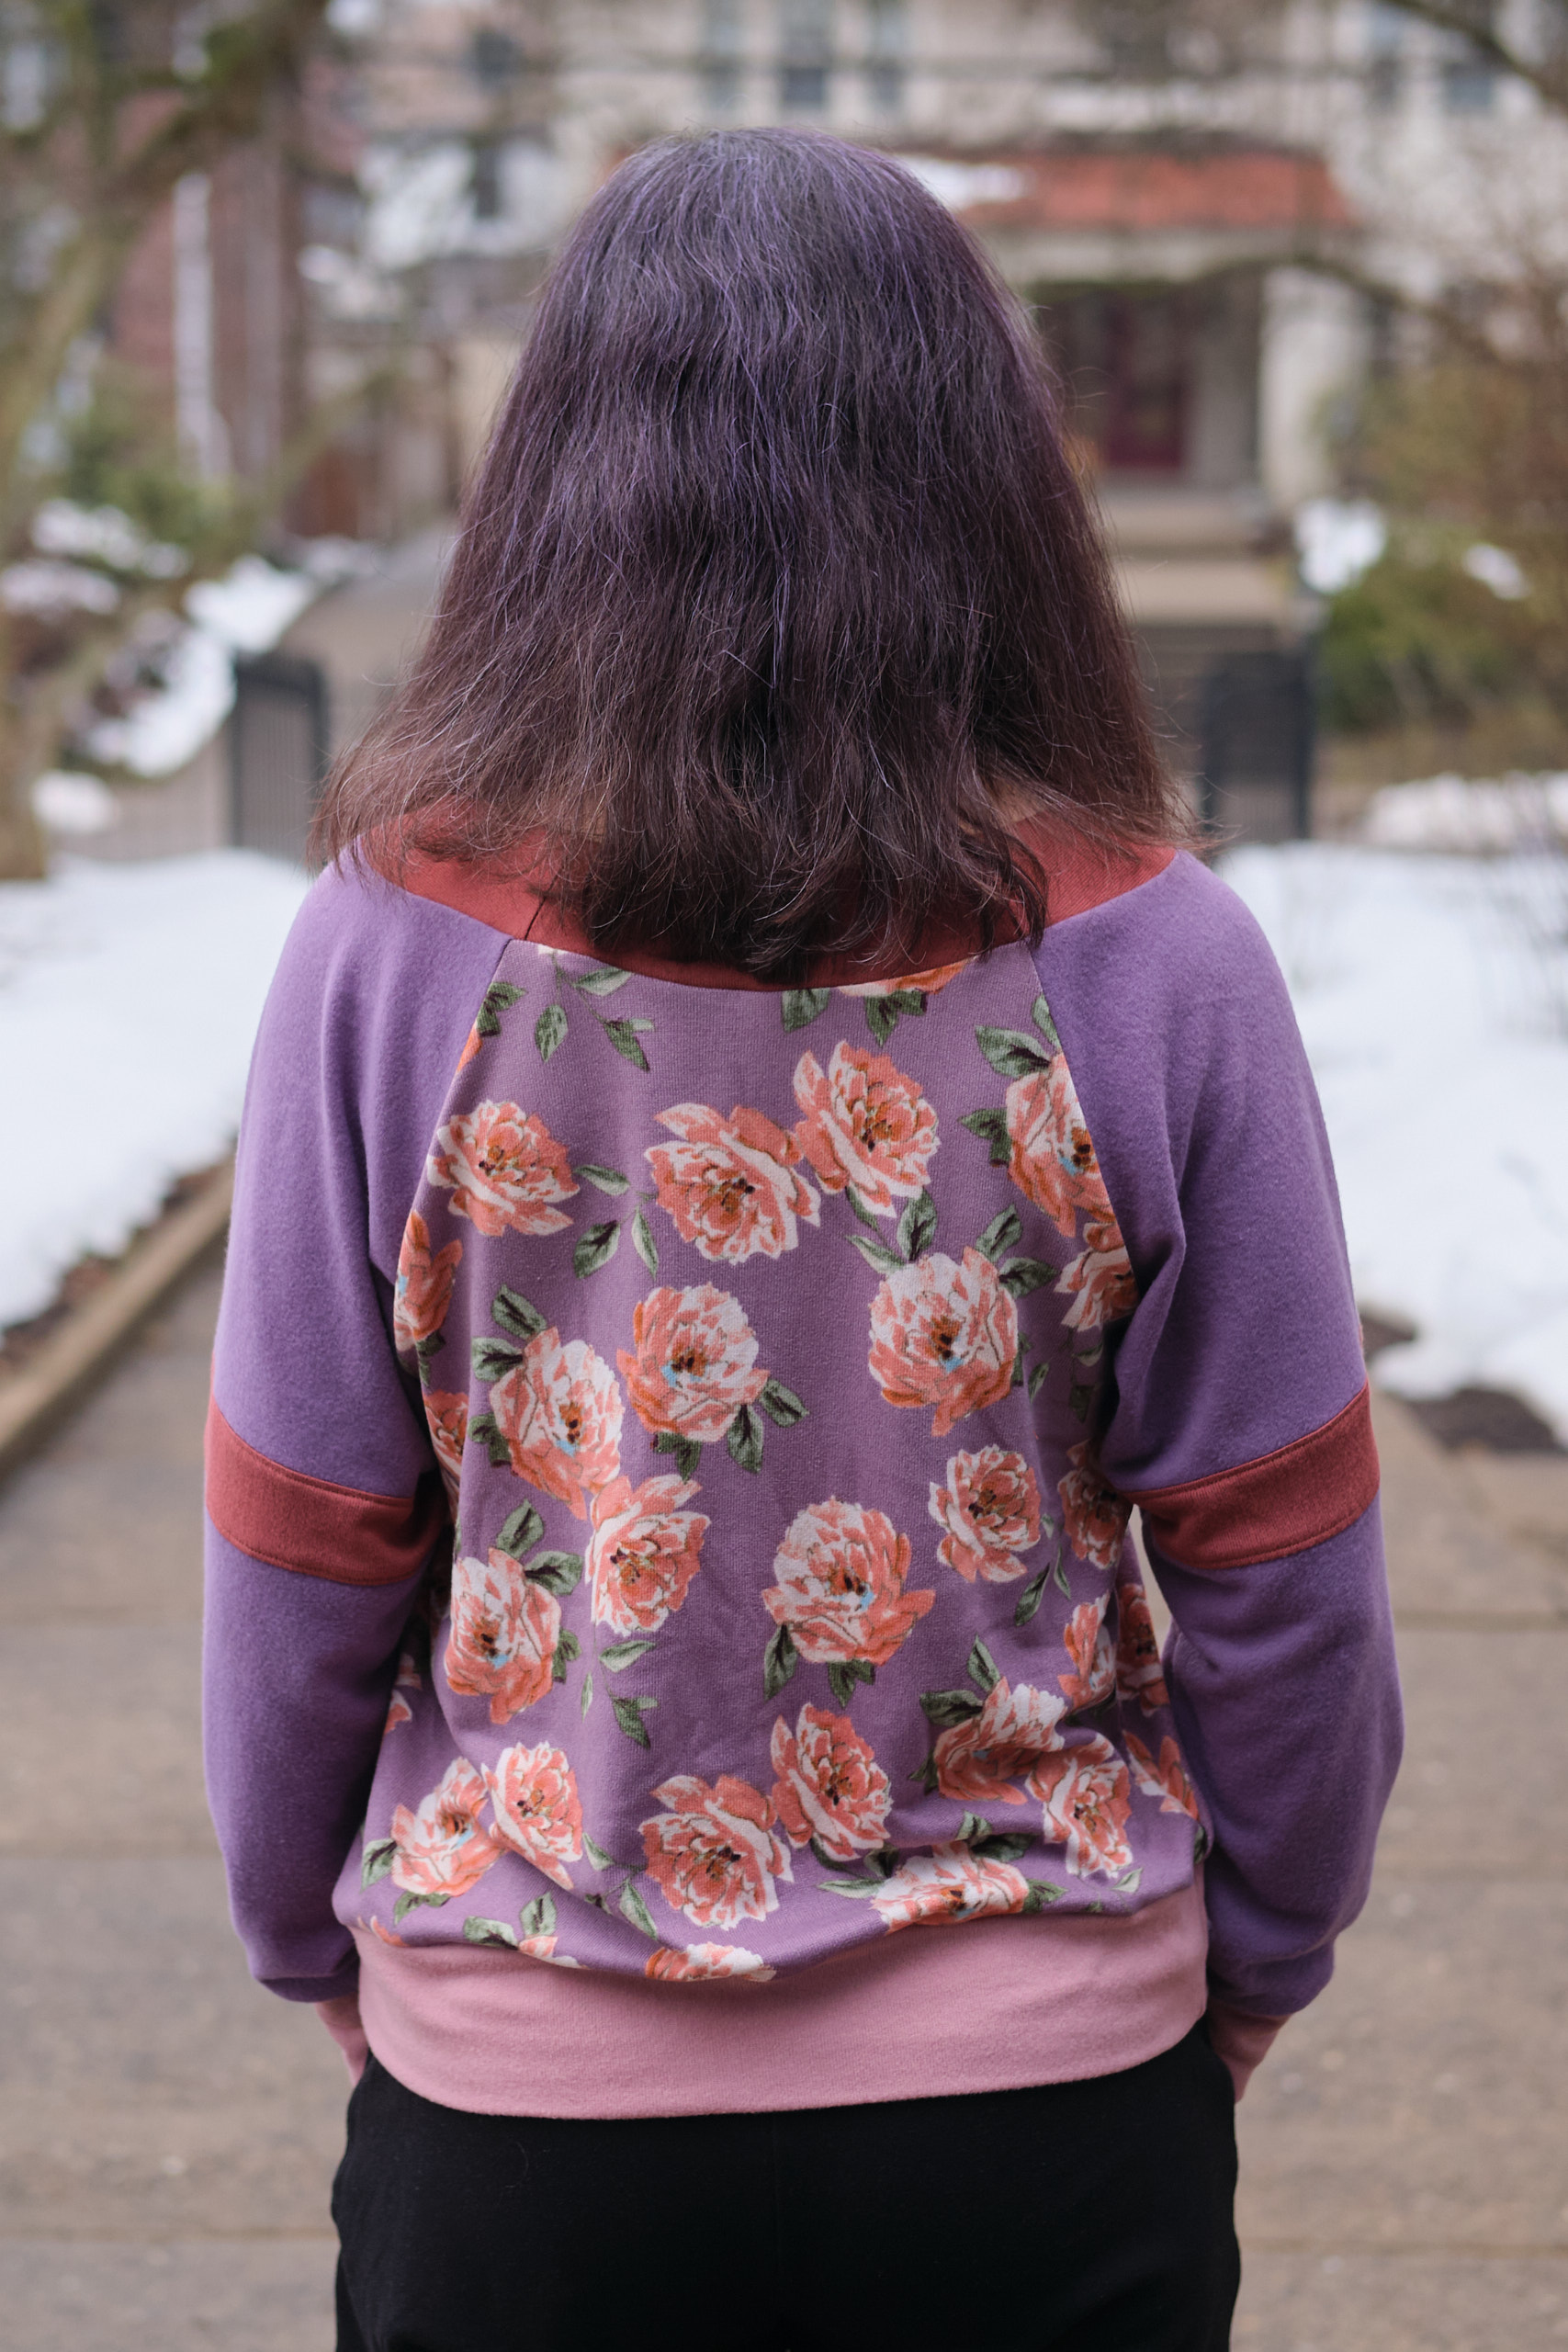
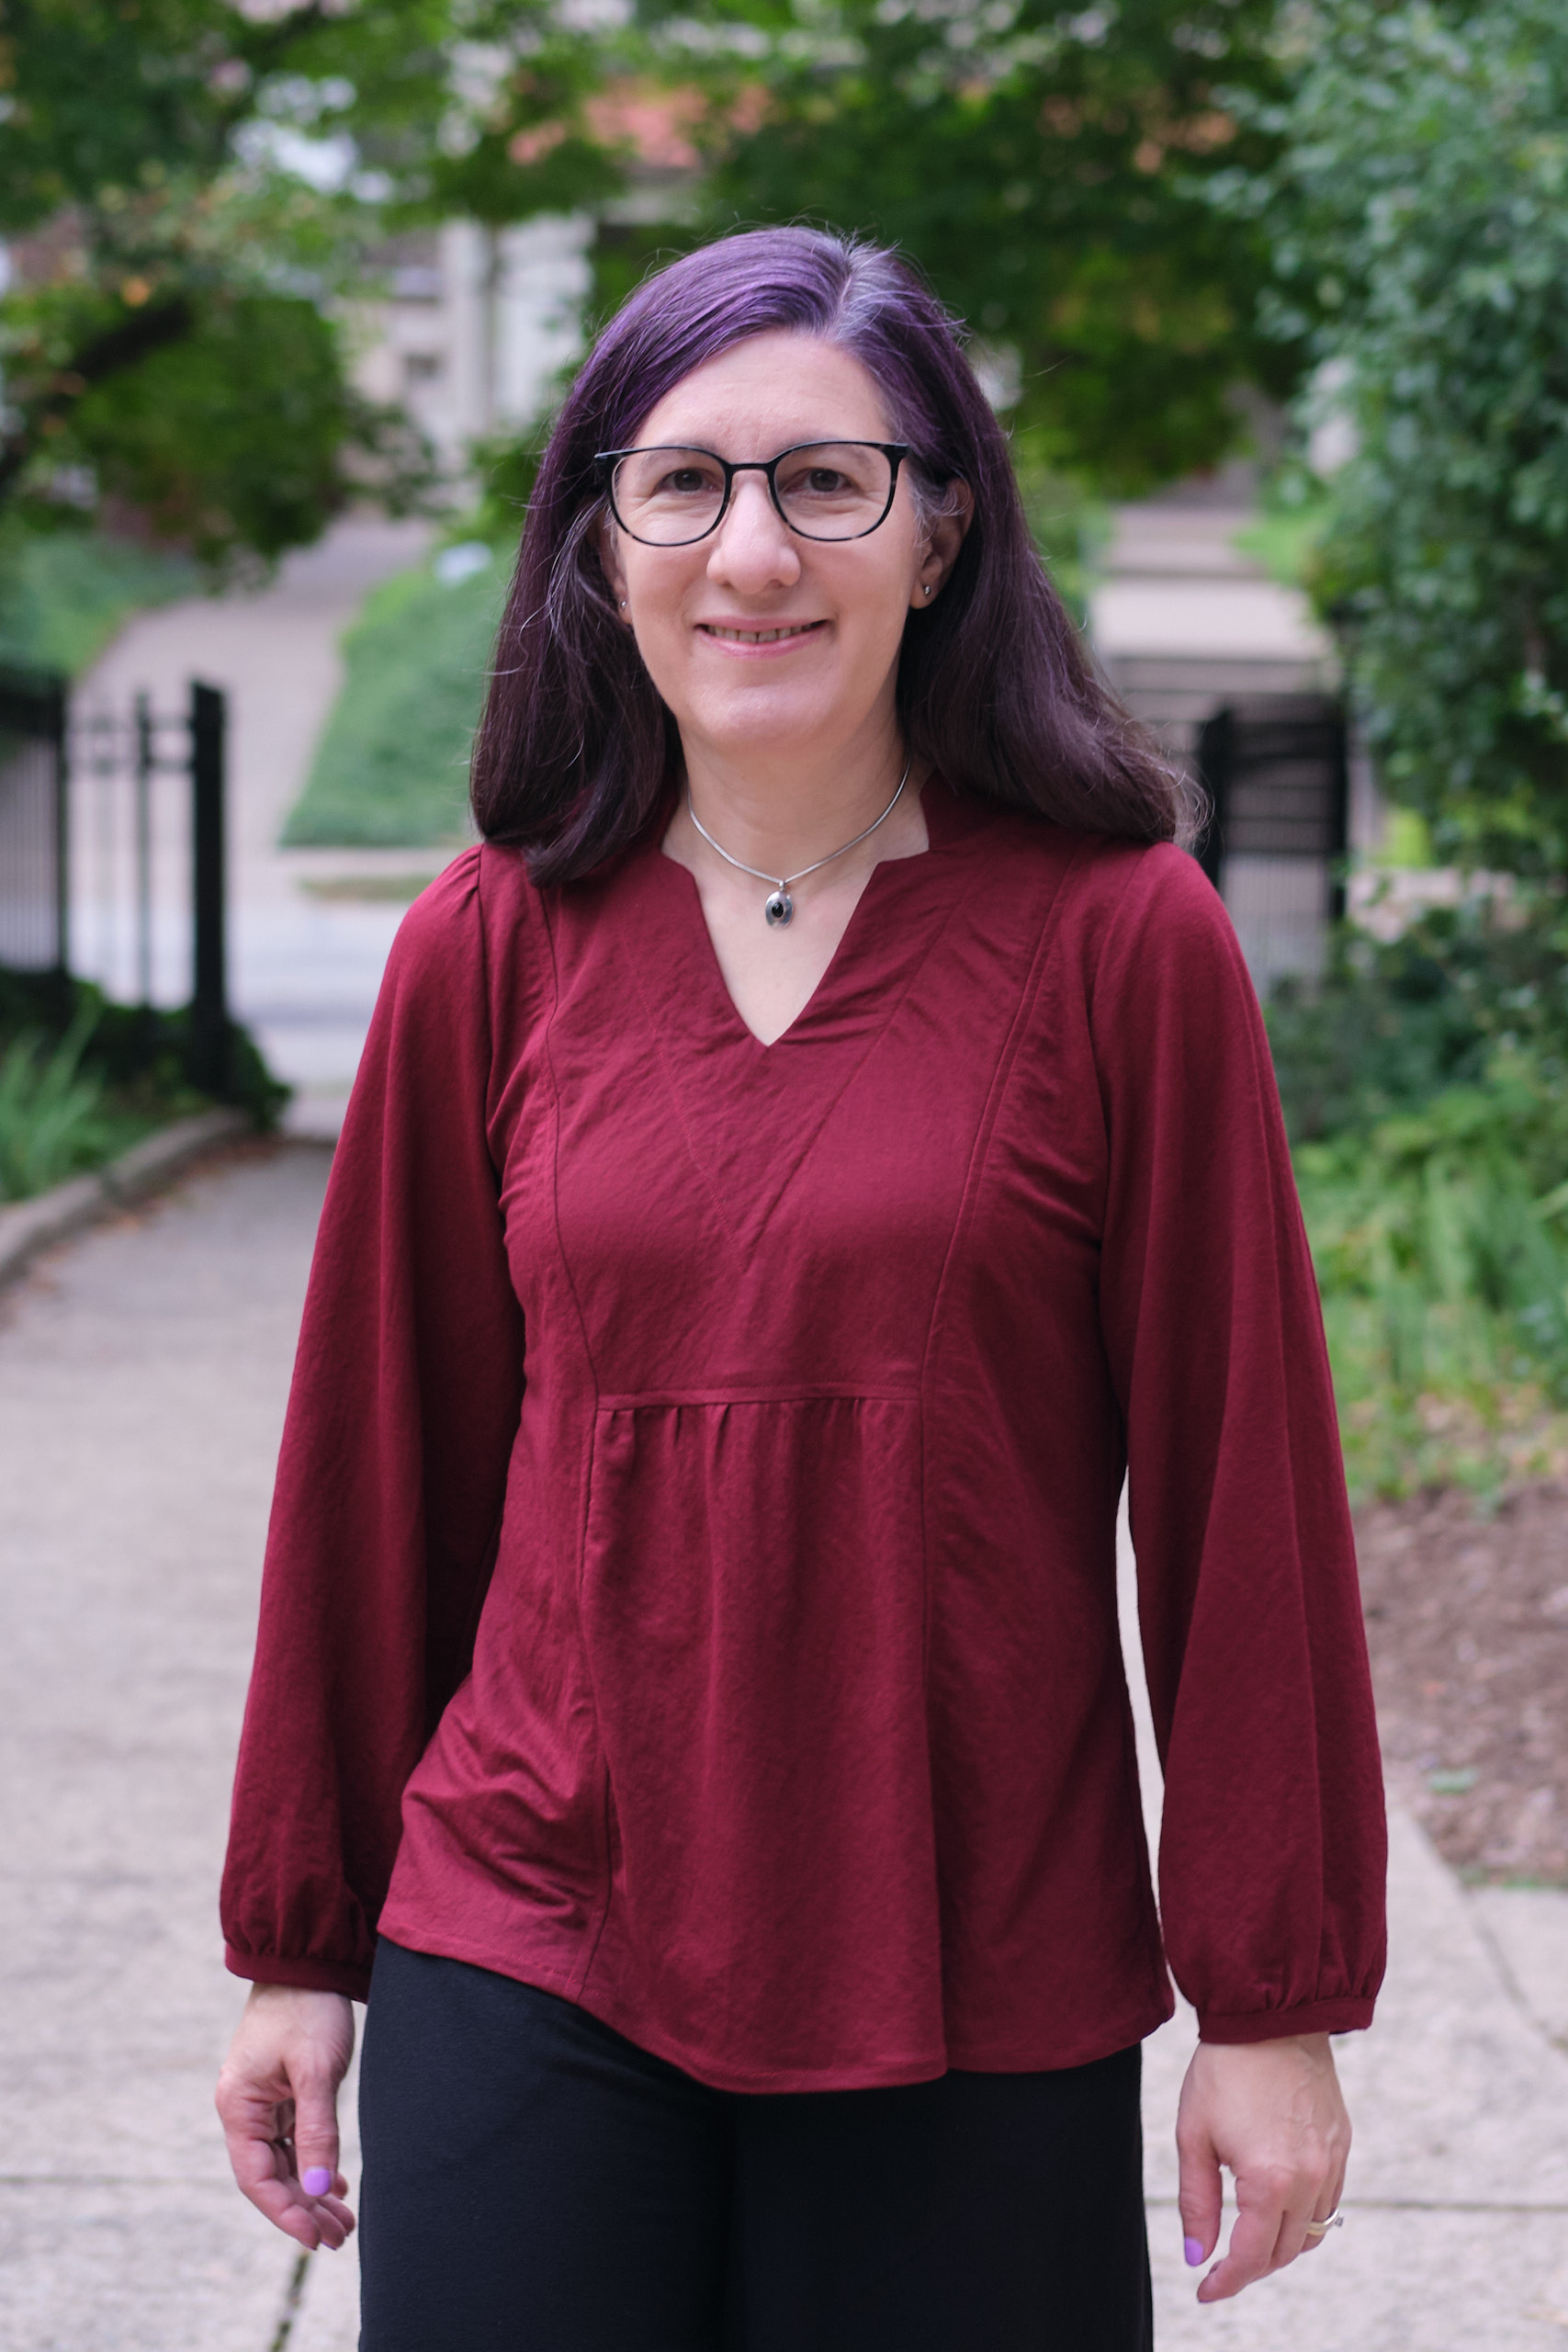
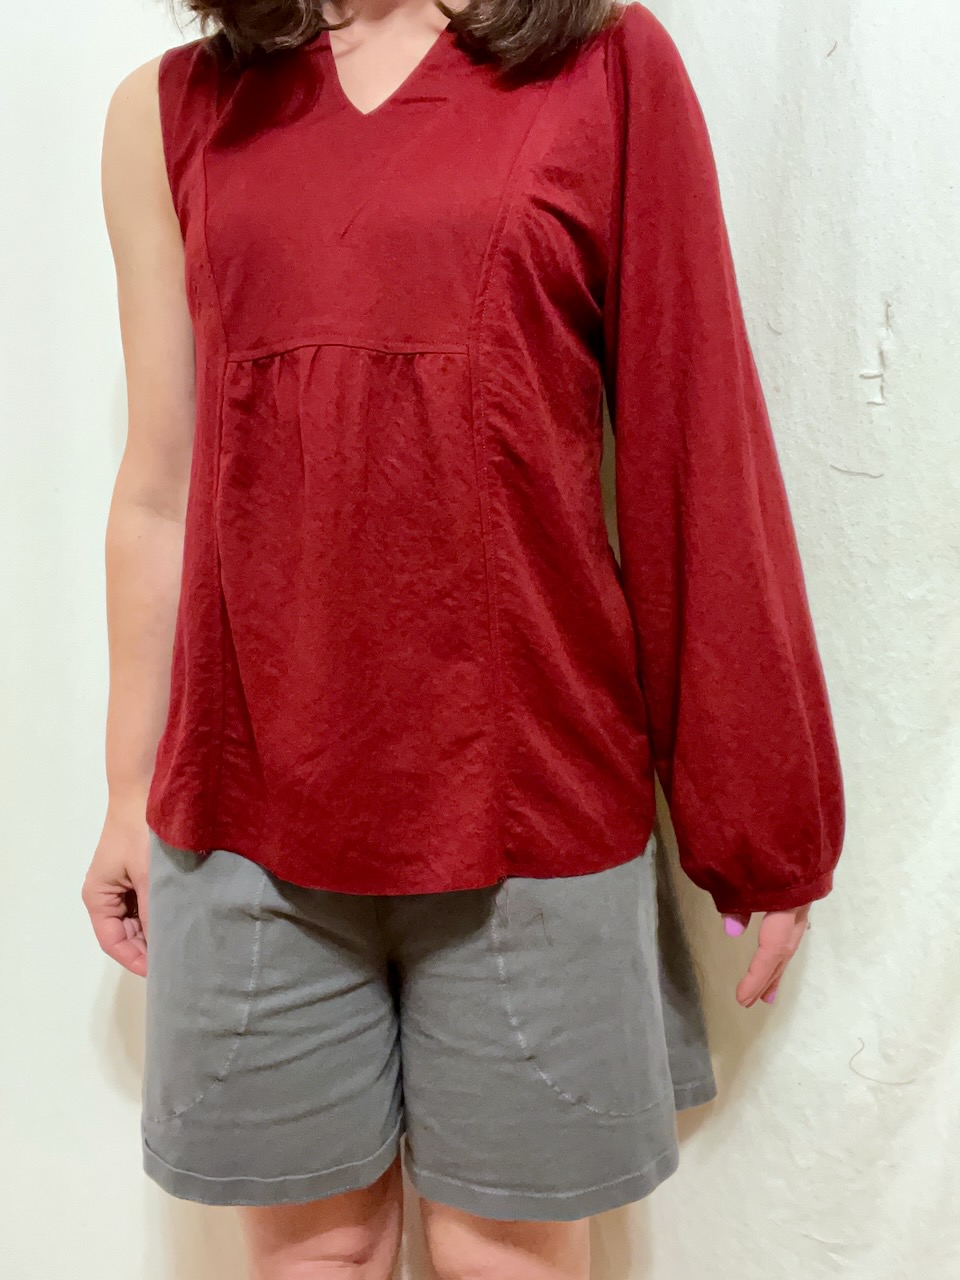
Petite Stitchery Adult Hollis Raglan, size small, top length, wide neckband, sleeves shortened by 2 inches. Made from four colors of hacci scraps.
I bought the Petite Stitchery Adult Hollis Raglan top pattern when it came out in 2024 and had plans to sew it up but never did. I was going planning to make one out of Polartec sweatshirt fleece, but never quite figured out a color combination that I liked. Last week while I was making another color blocked sweater from hacci sweater knit, I found a floral hacci that has been in my stash for a while and saw that I had other haccis that went with it. So I decided to take the plunge and finally make a Hollis.
The main fabric I used for the bodice is a purple “super soft large floral hacci” that I bought during a Mily Mae clearance sale for $3.50 per yard in 2023. It is 180 gsm poly/spandex and fairly stretchy. I paired it with a grape poly/rayon/spandex 200 gsm brushed hacci from Surge that I bought in 2024. I added scraps of 200 gsm poly/spandex sienna and rosy mauve hacci brushed on the inside, leftover from recent sweater and dress projects.
This is my second PSCO pattern, and like the Dovie dress that I made previously, the projector pattern files are sized at 10% of actual size. Not a big deal, but still a minor annoyance. The instructions were pretty easy to follow, but sometimes I wanted more details, for example, should I sew a particular seam with a straight stitch or a stretch stitch — often they tell you, but not always.
I cut a size small, top length, with the thick neckband. I shortened the sleeves by 2 inches, but otherwise made the pattern as written. The neckband construction is fairly unique. The front of the V is cut out in one piece, plus a facing, thus there is no seam at the point of the V. It’s an interesting construction technique and would lend itself to low stretch fabrics. I’m not sure it is any easier than other v-neck construction approaches I’ve tried though. I used my sewing machine to baste together the bands, sew on the cuffs, and top stitch the sleeve bands. Basting was essential to keep things from shifting. Everything else I sewed on my serger.
Hollis was a fun sew, and I would definitely consider making another to use up scraps. It is a loose, but not oversized fit, and I think it would work with a wide range of knit fabrics. I still might make a sweatshirt fleece version someday. In the mean time, I have a lot of the purple floral and solid purple hacci left over. Should I make matching pants?
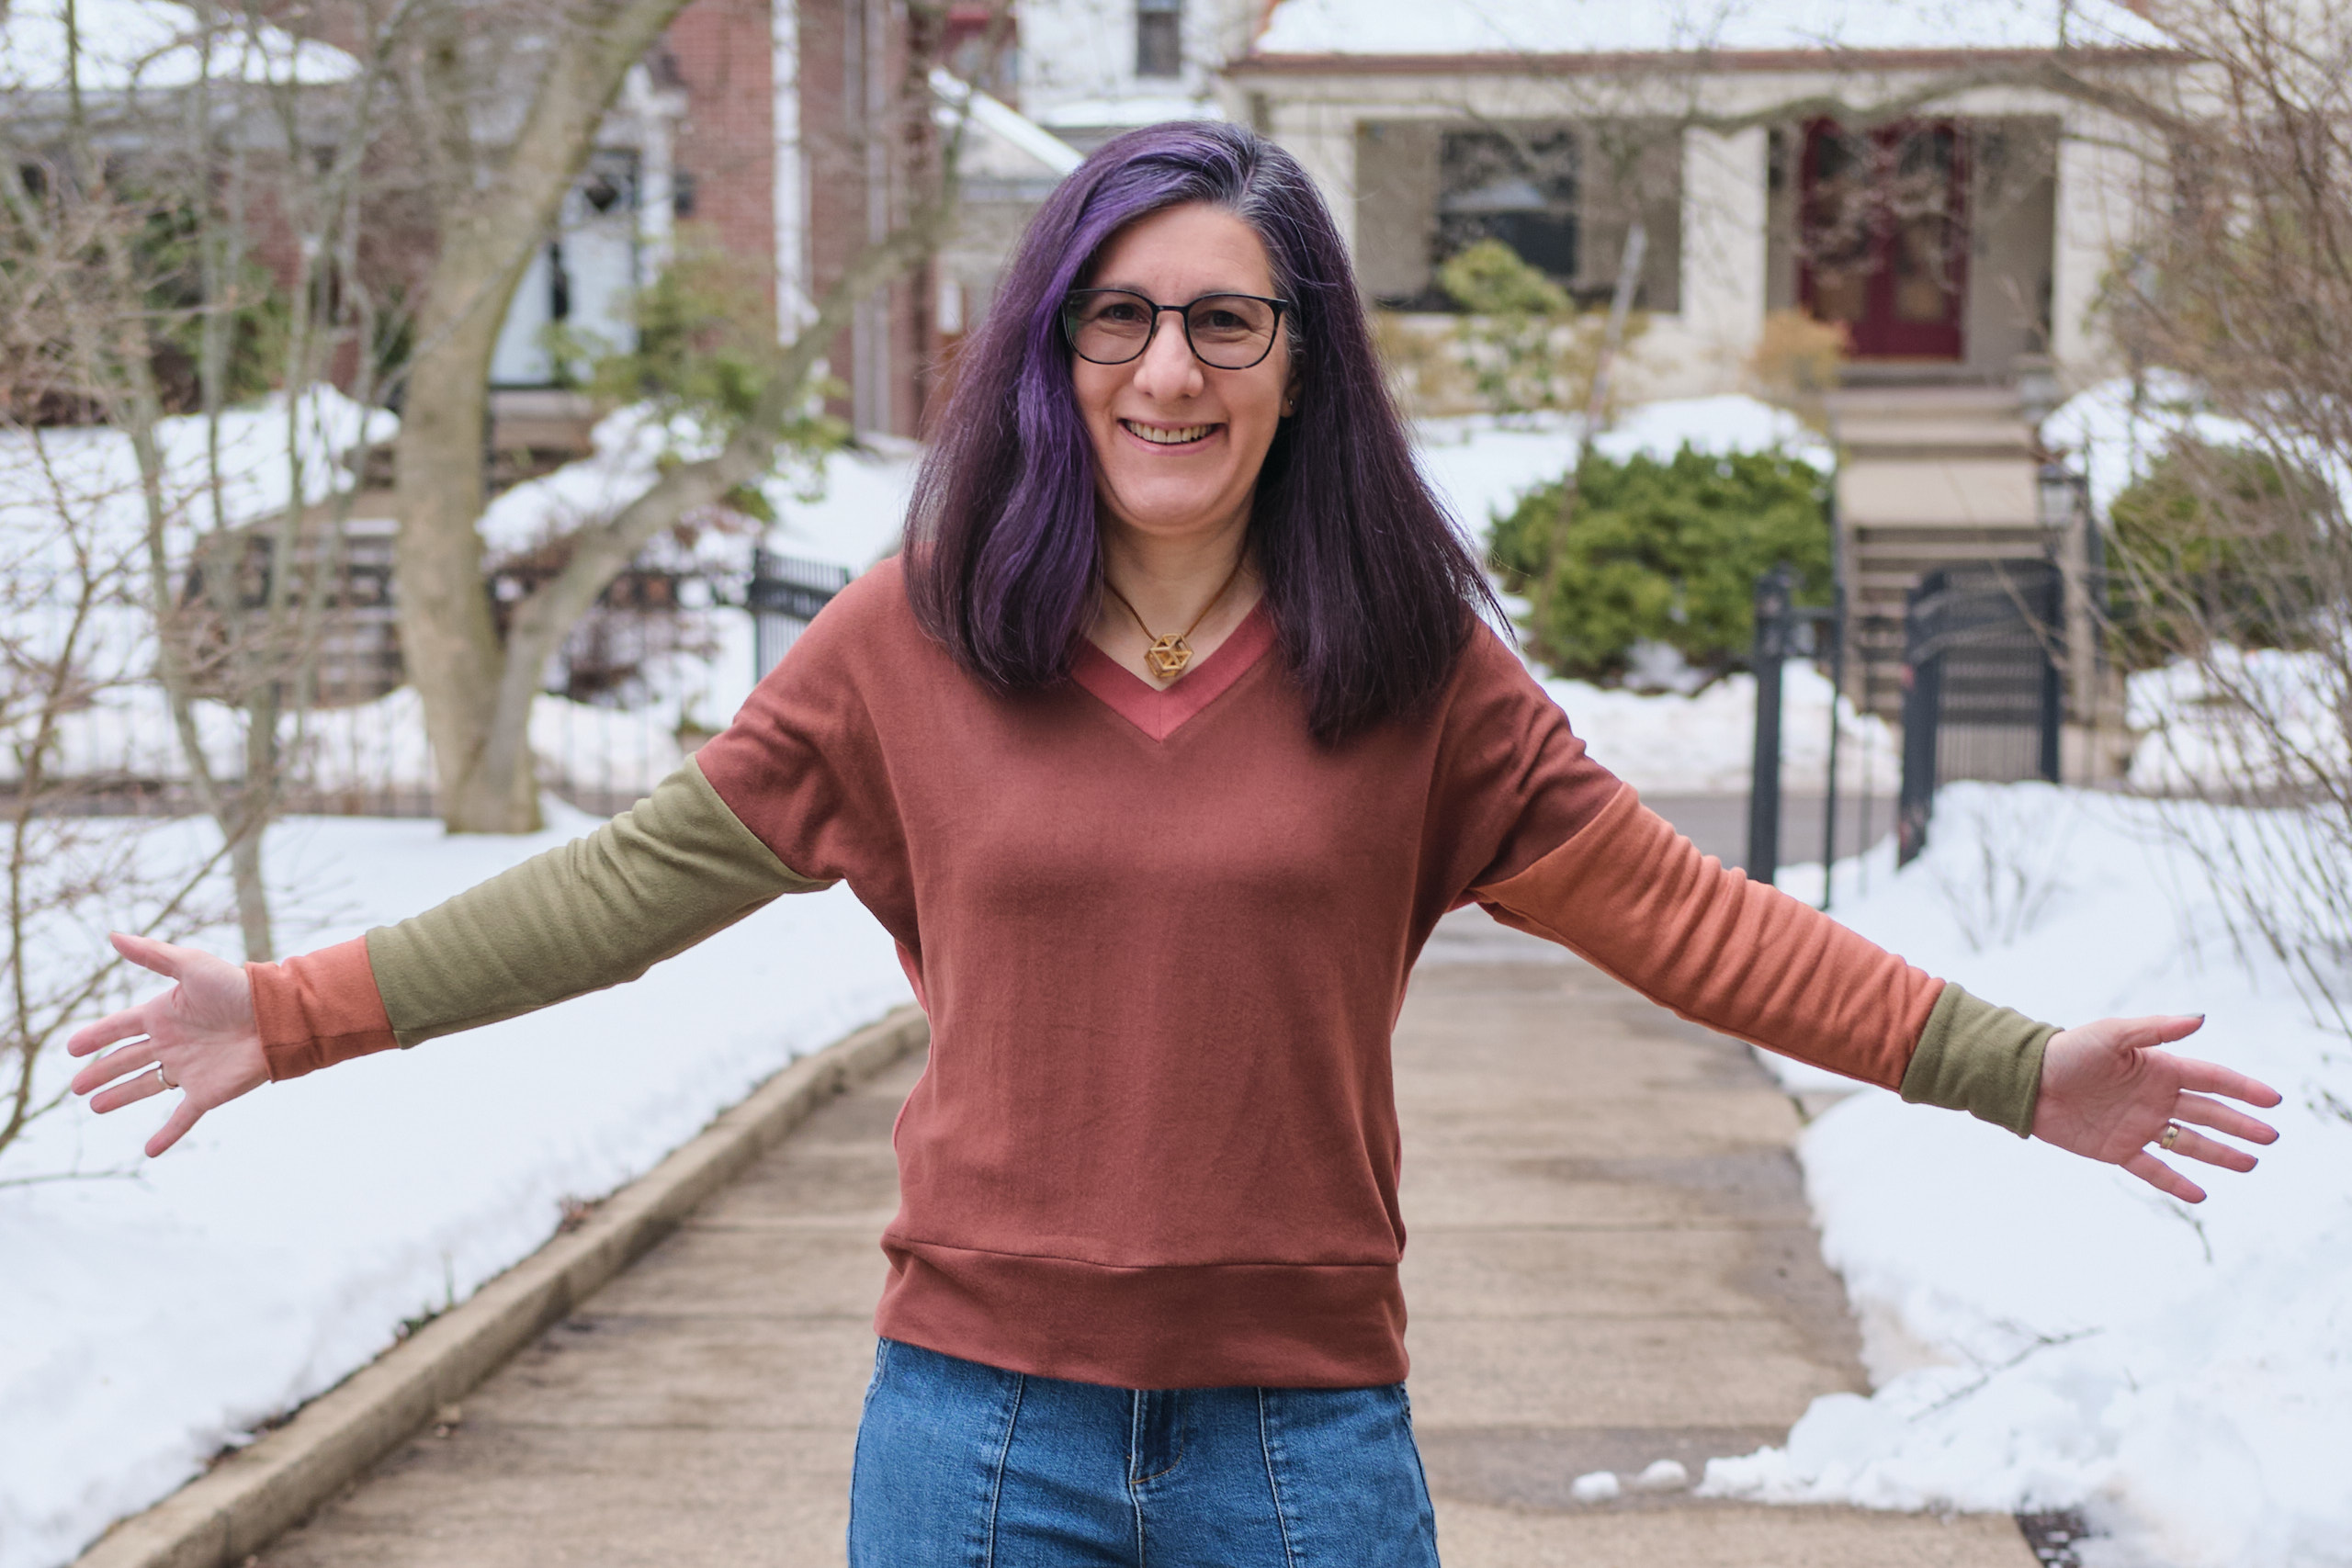
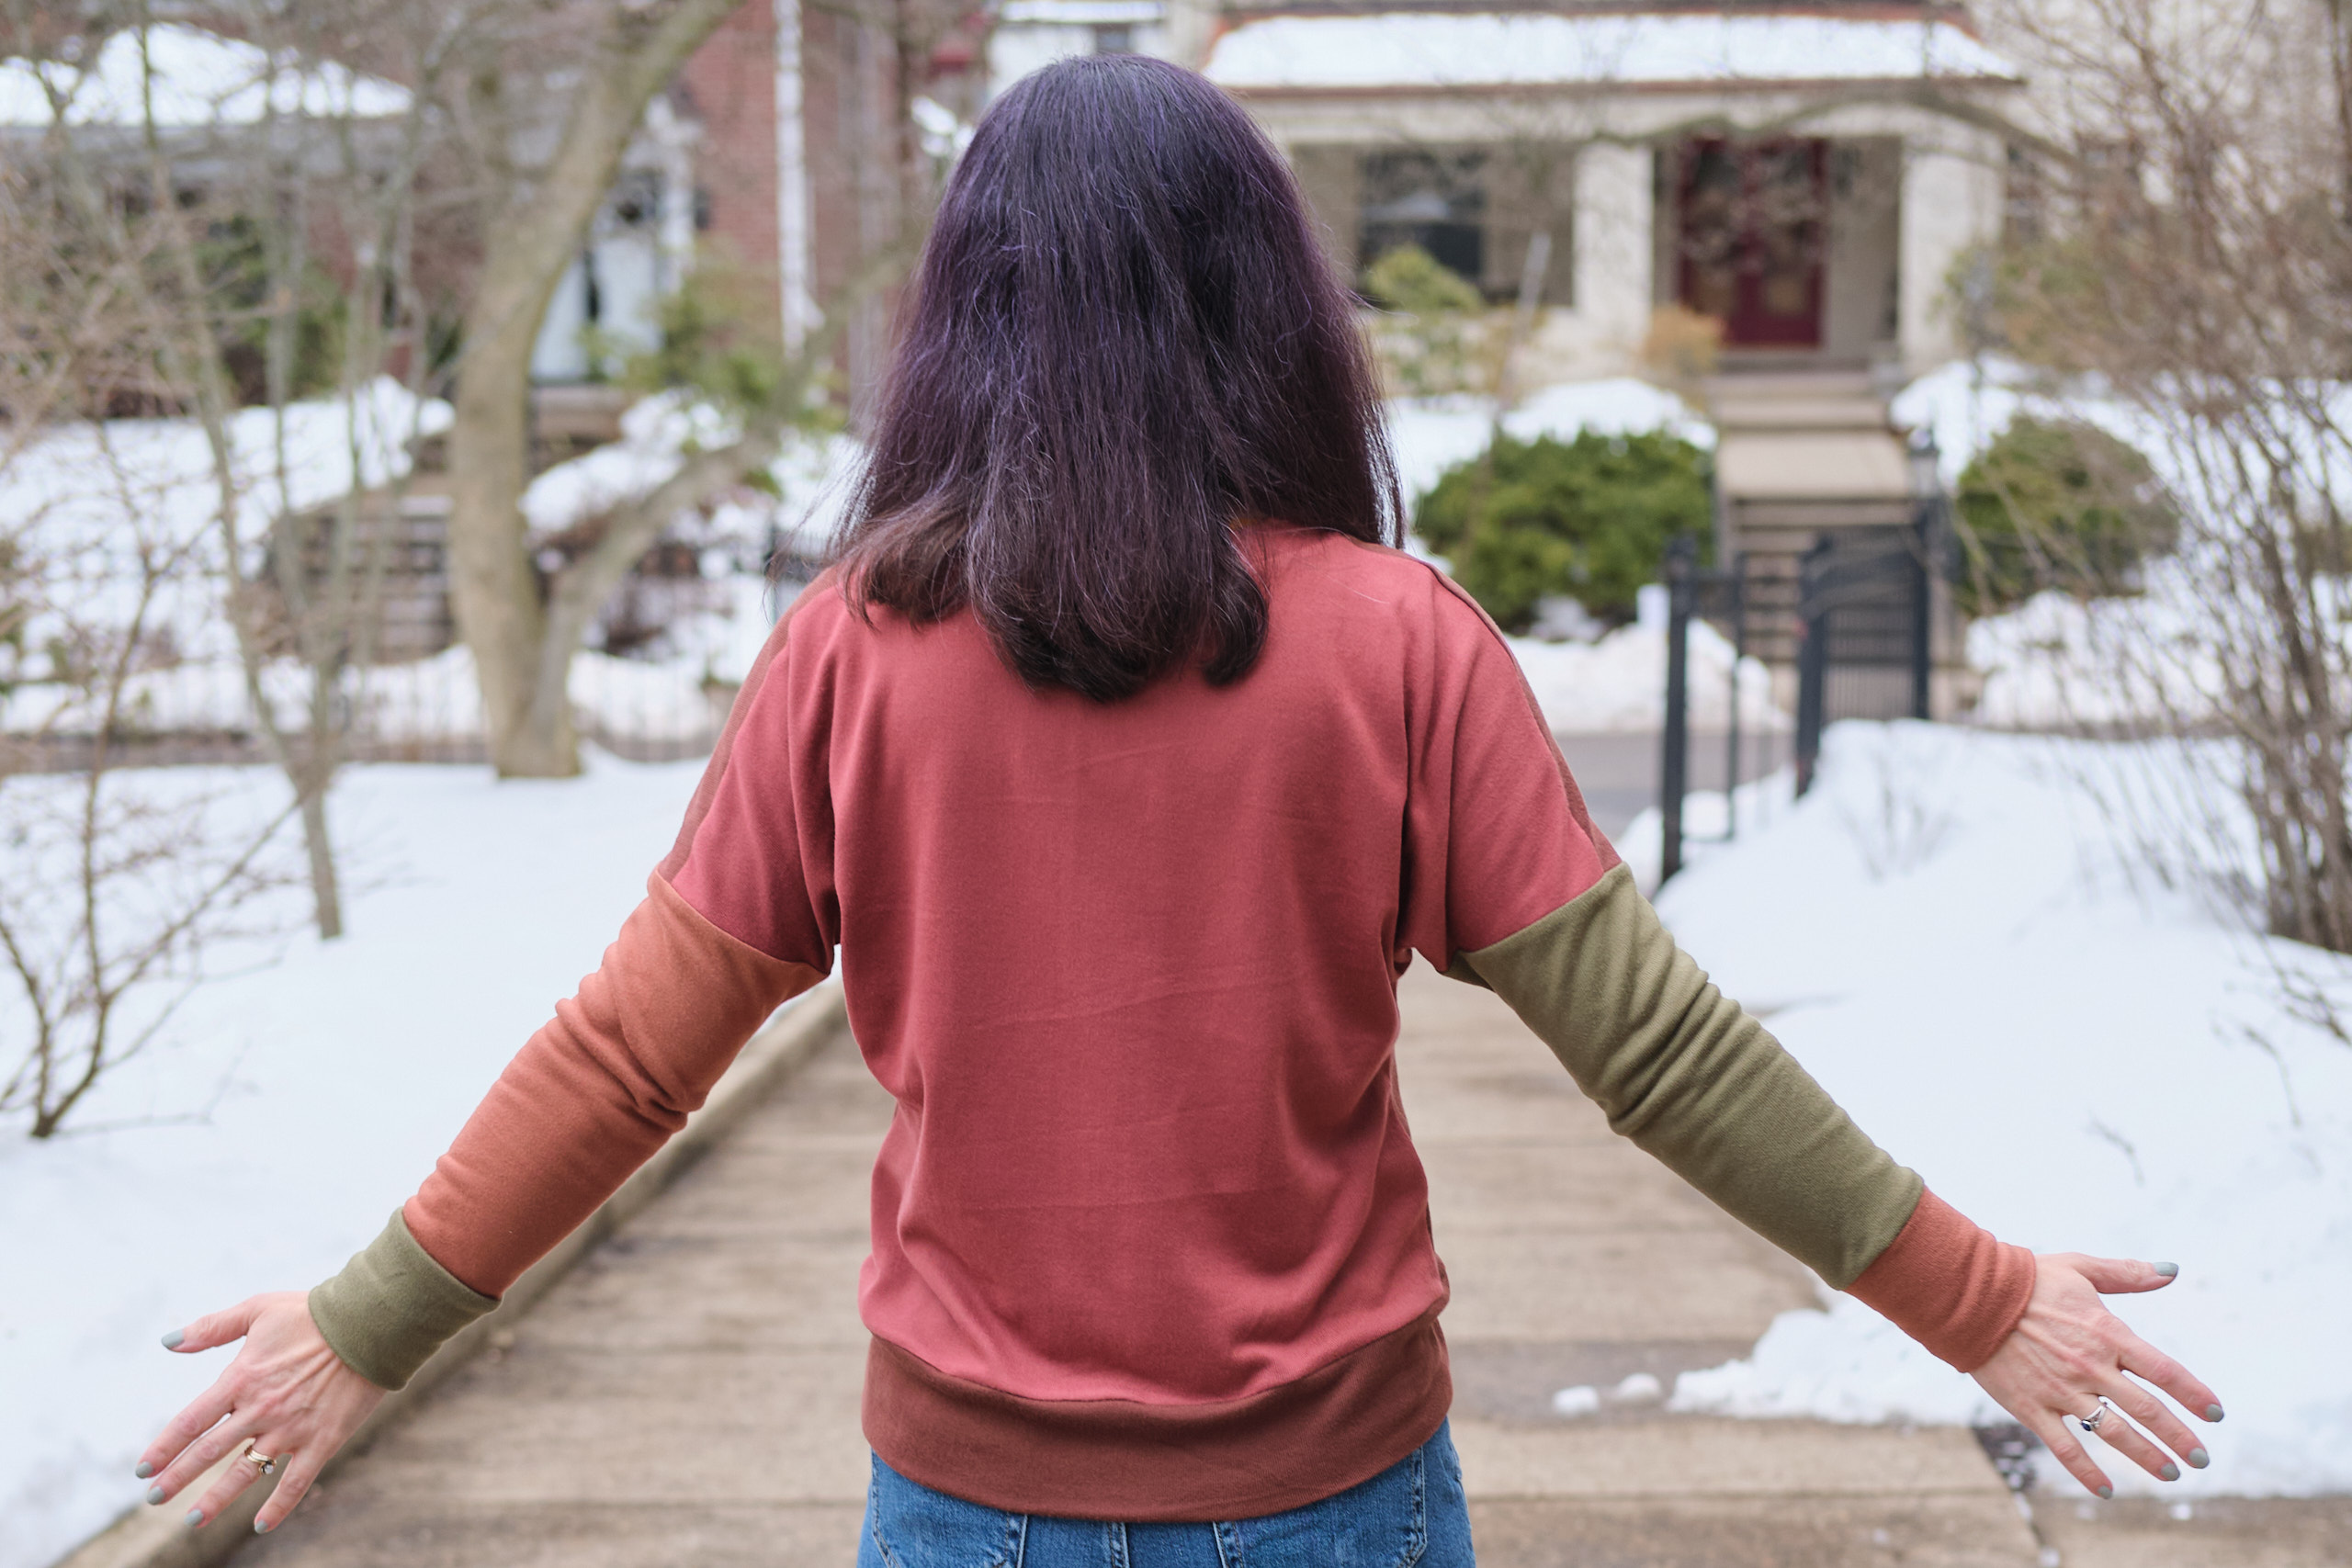
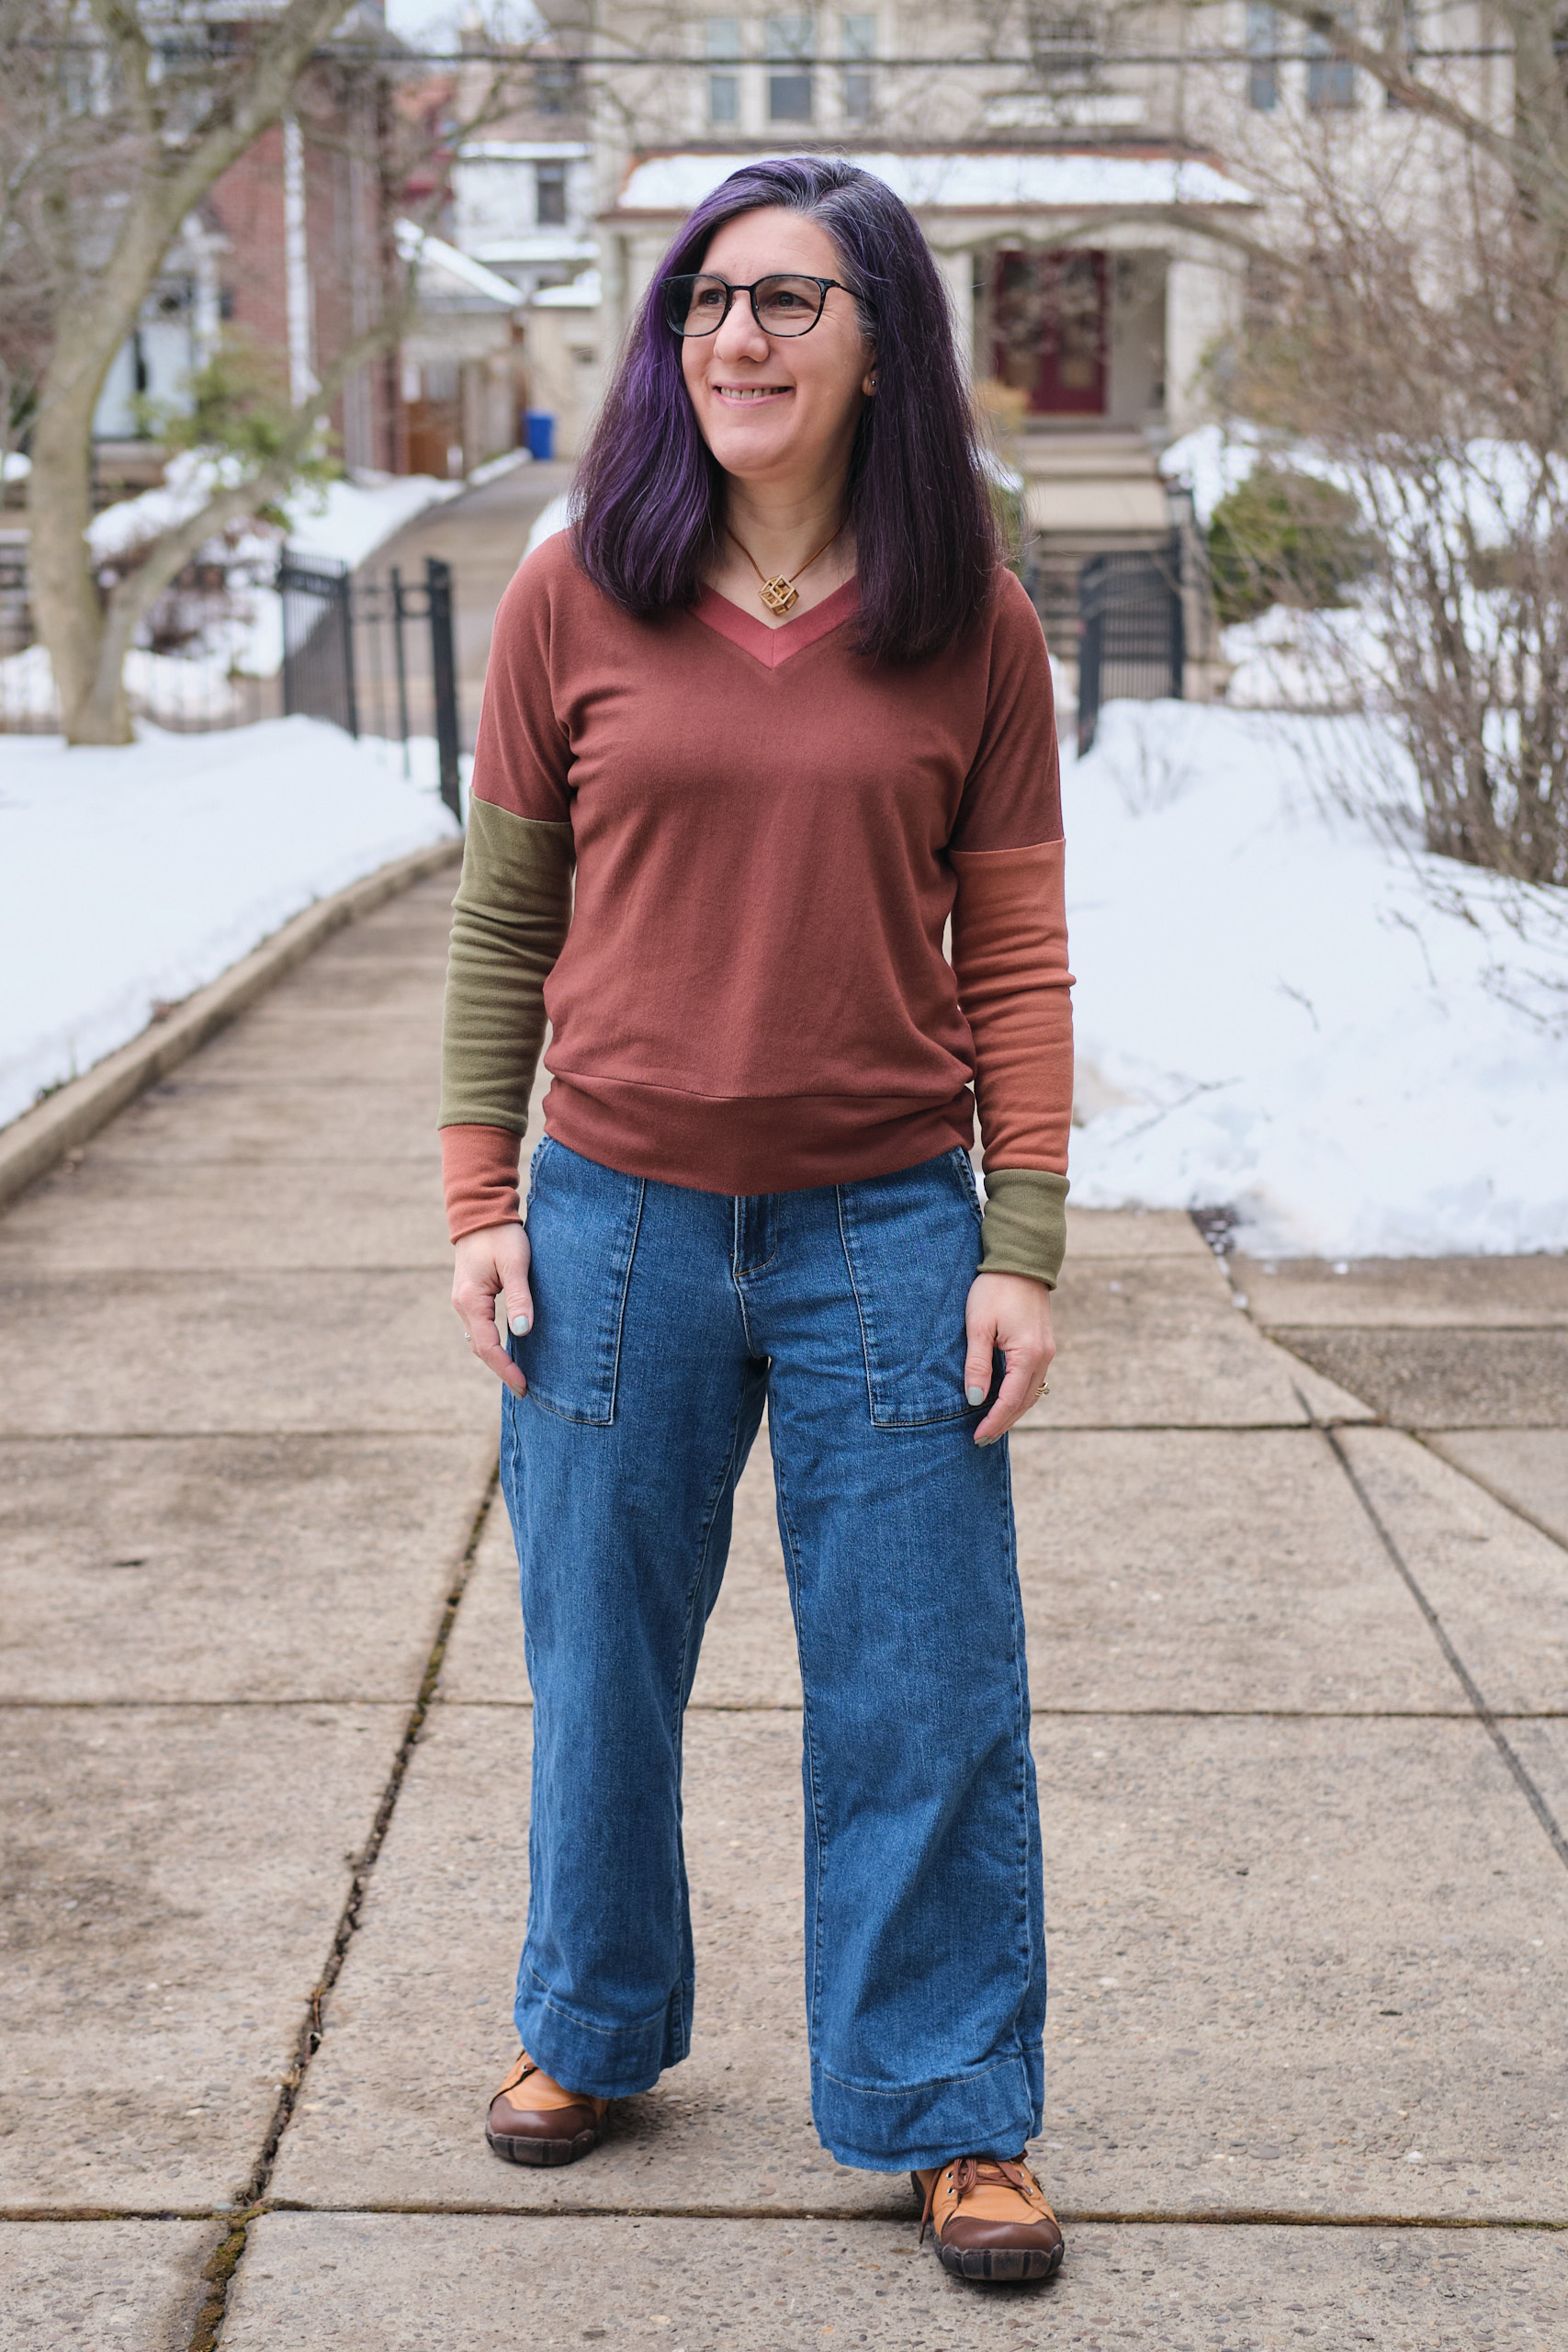
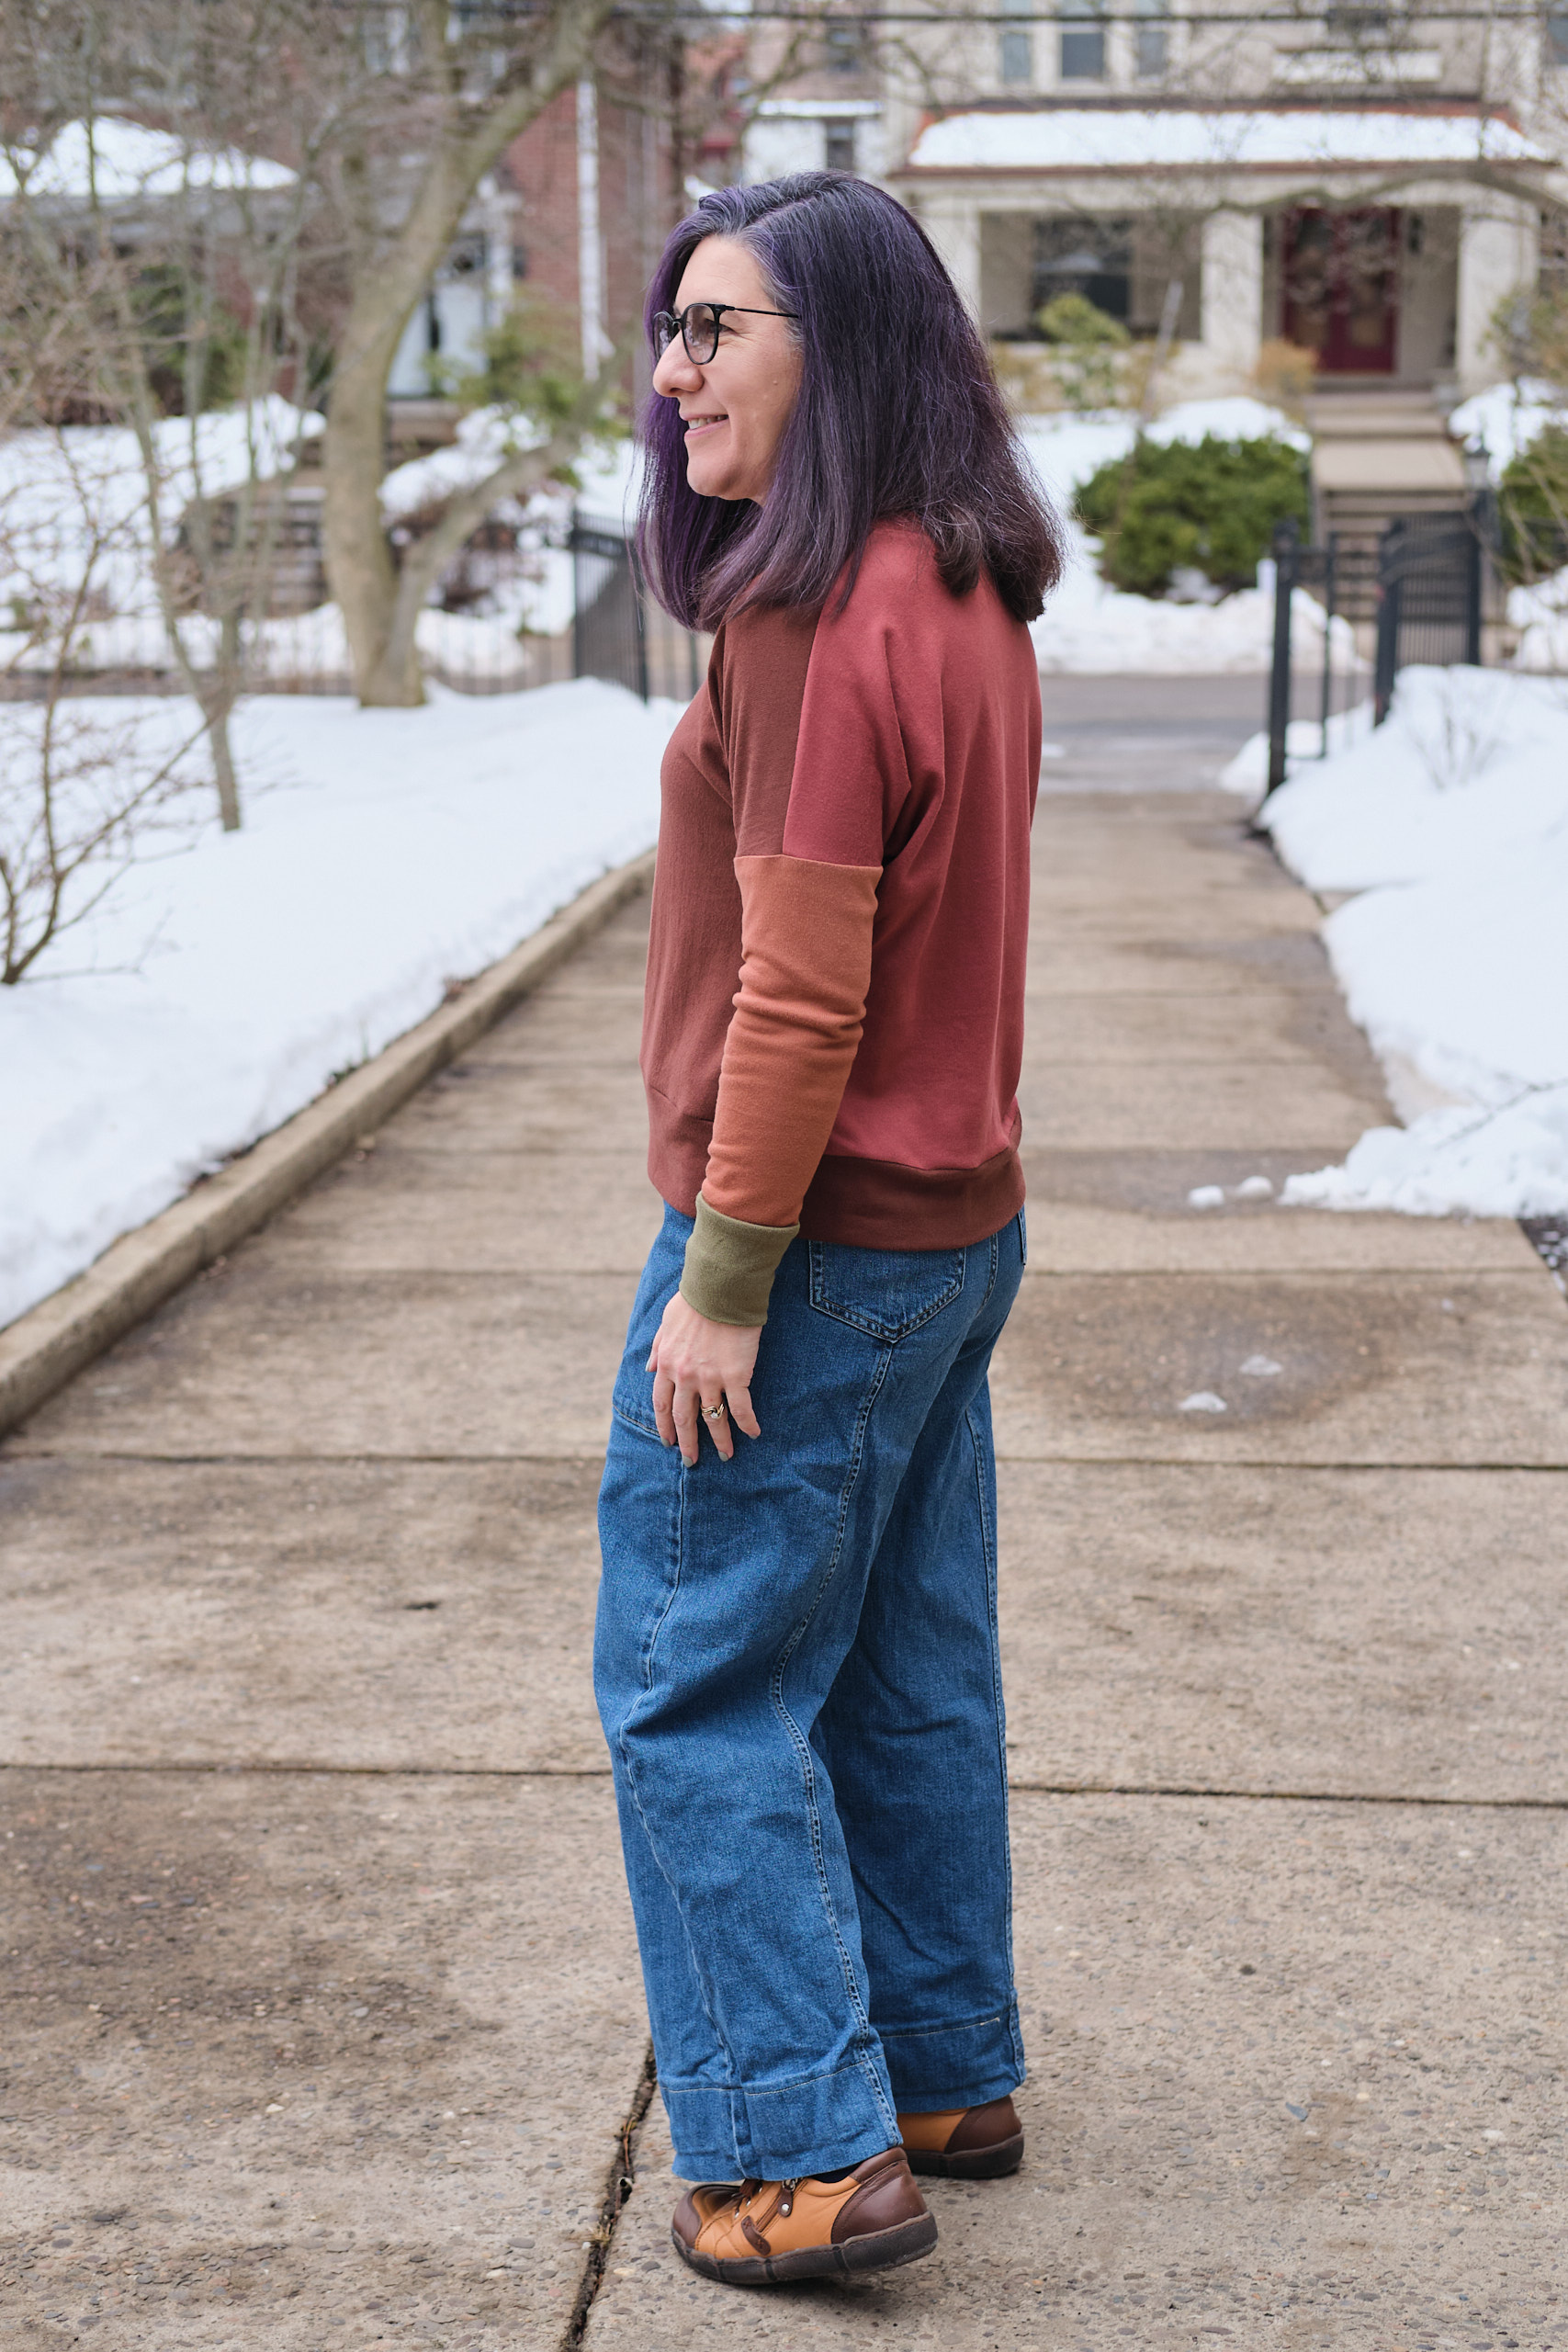
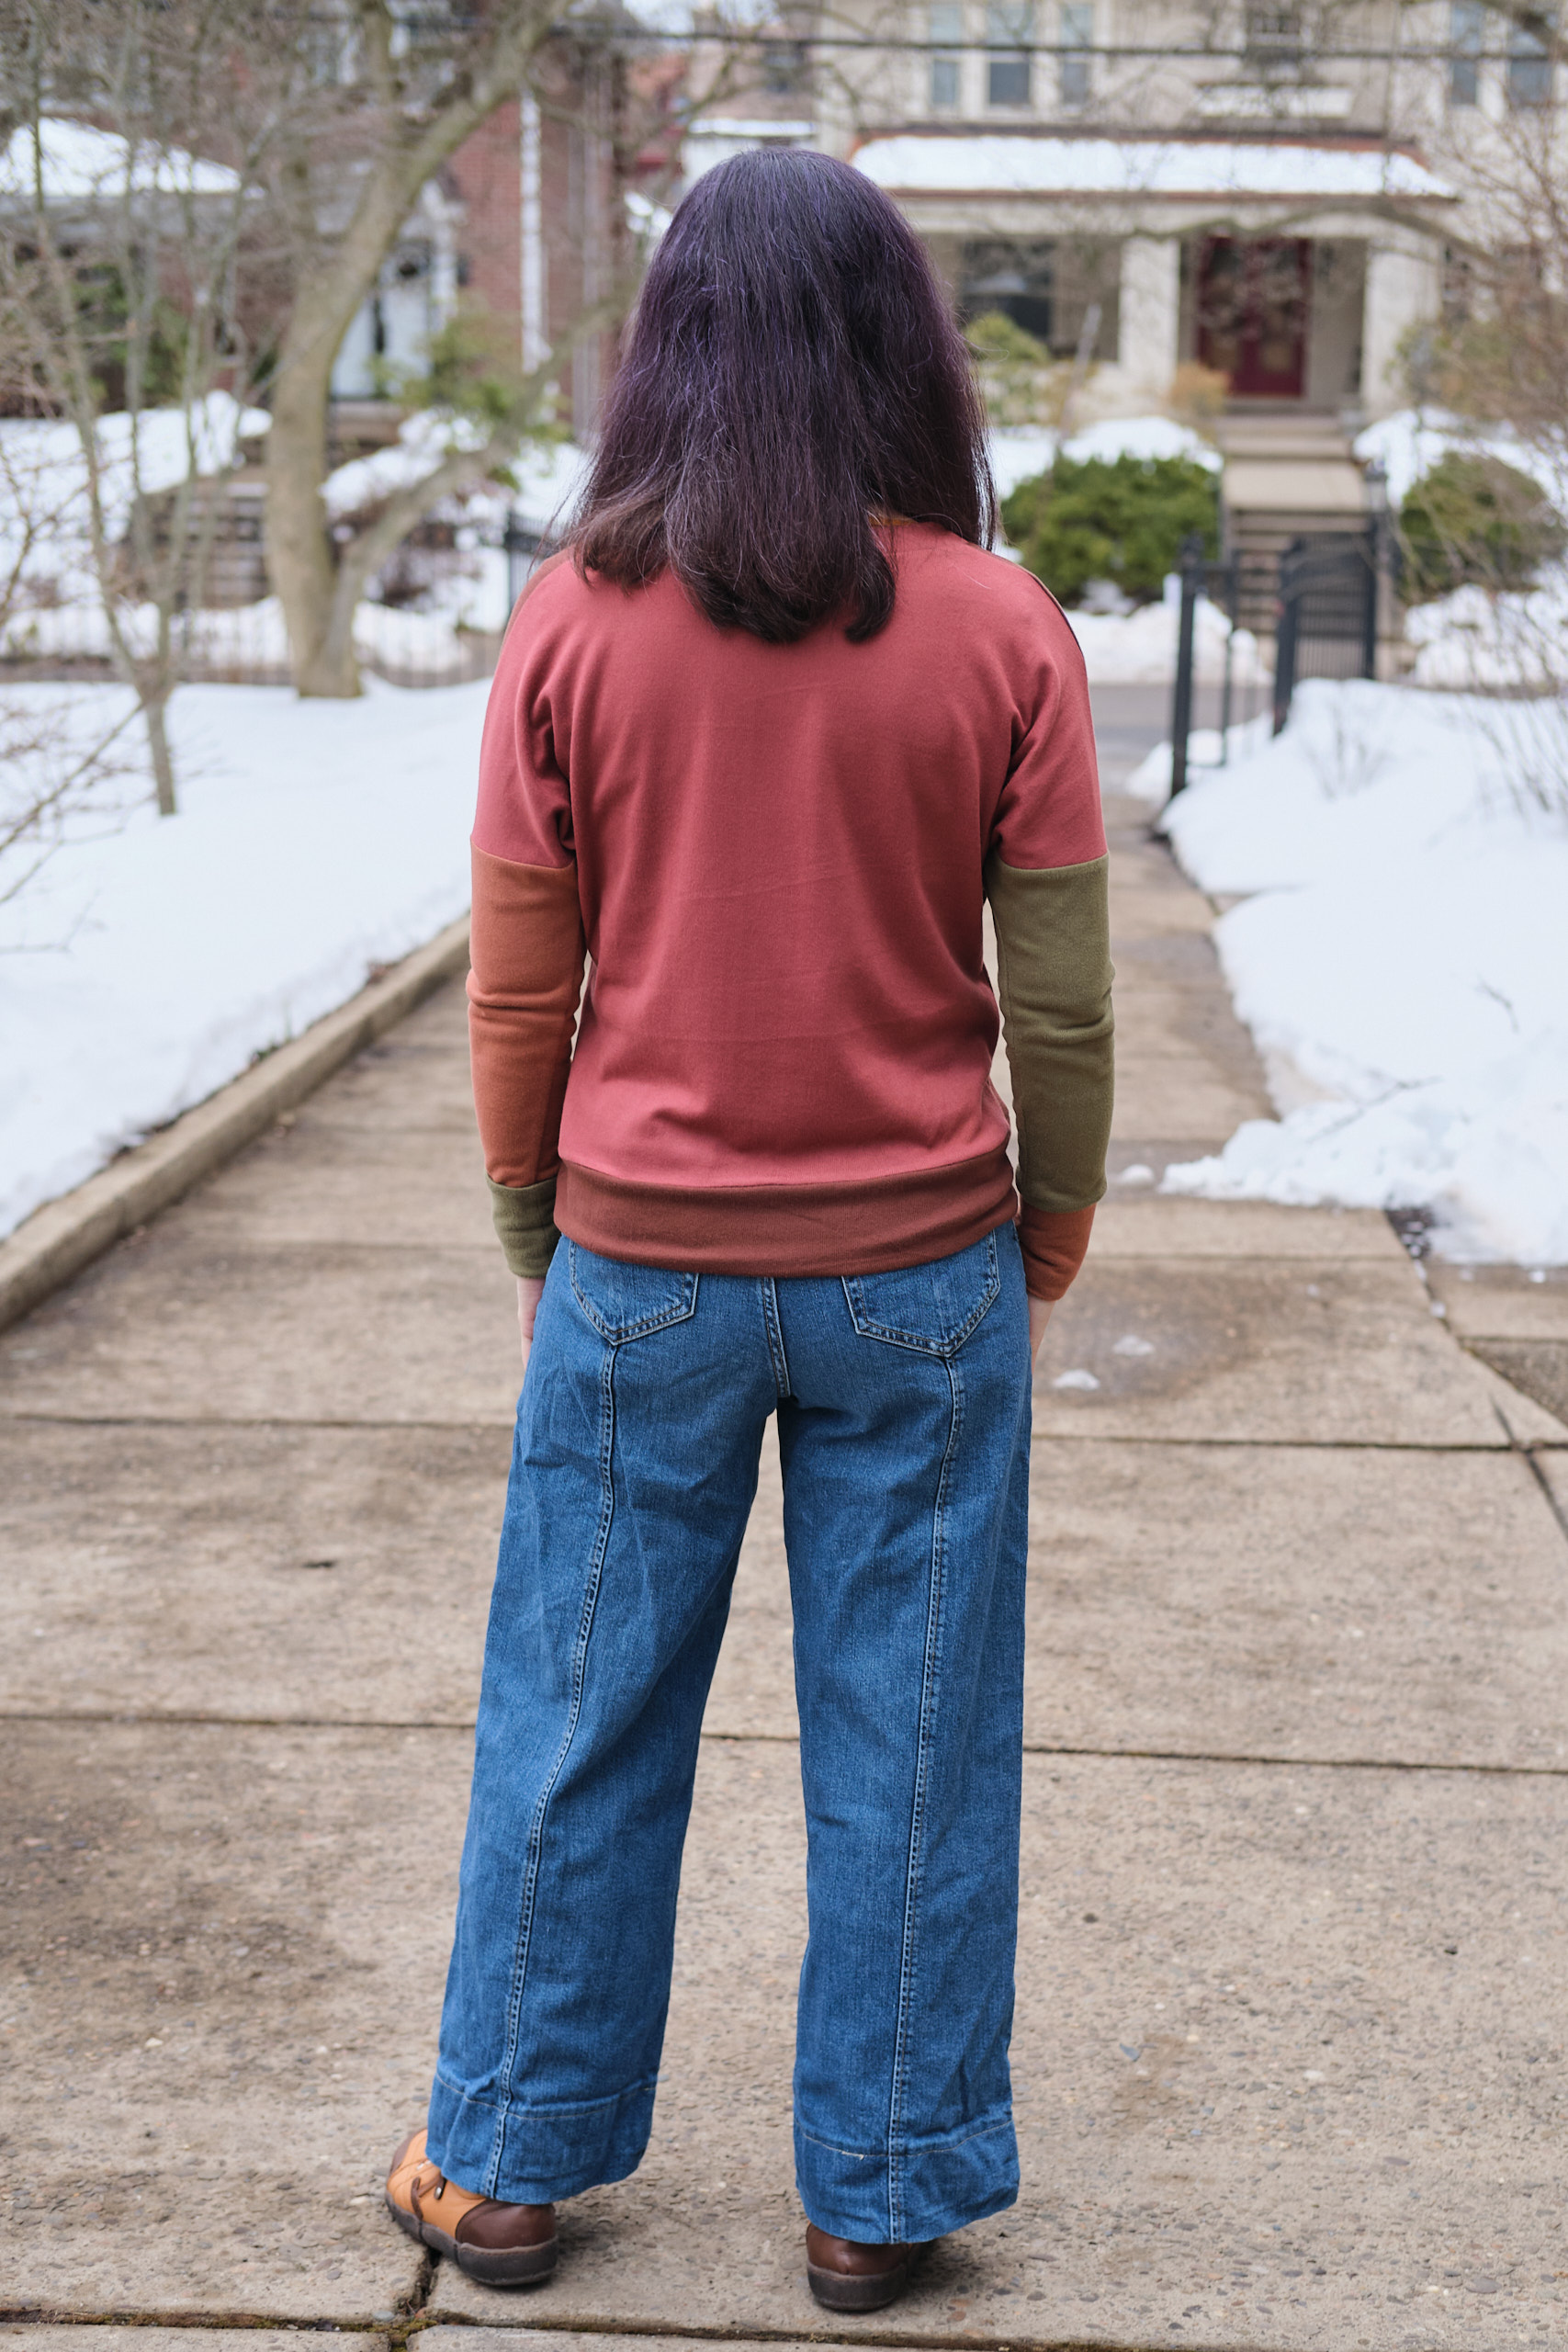
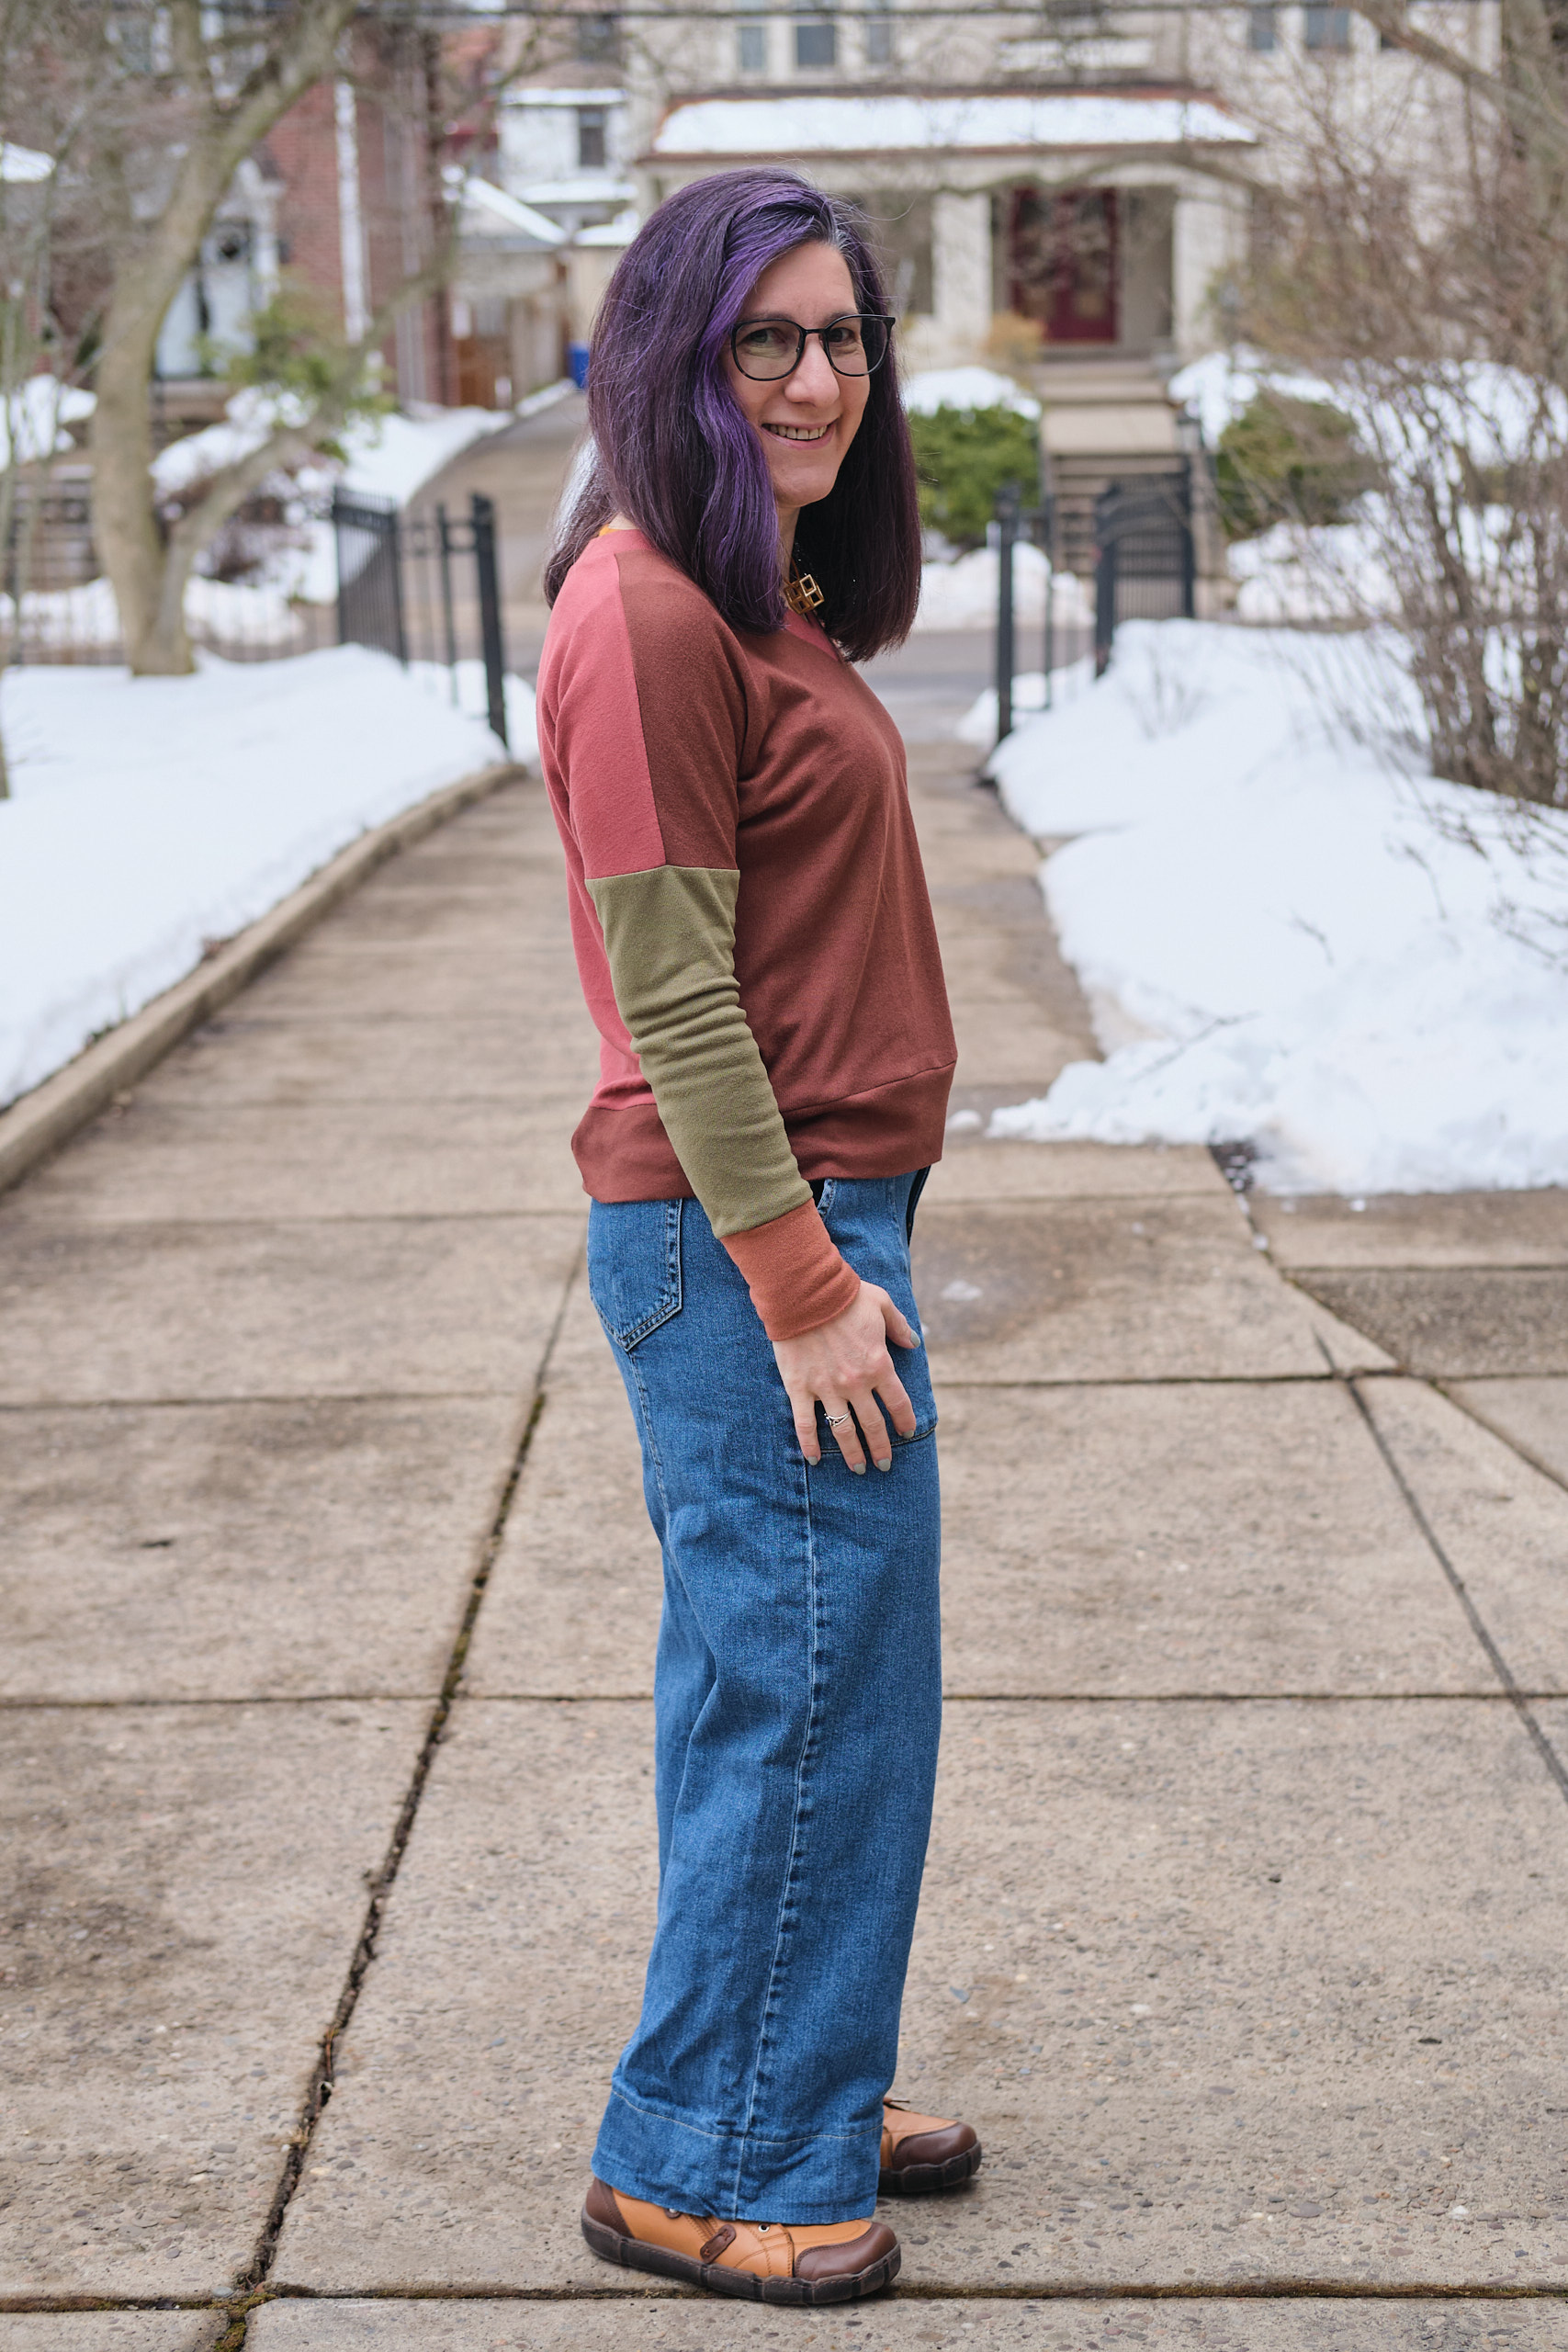
Sinclair Soho Relaxed Dolman top, 4p cut on the fold, cropped 6.5 inches above top length and banded, 3 inches shifted from bodice to sleeves, sleeves shortened and cuffed with Sinclair Crew pullover tall cuffs, wider v-neck band, Versailles brushed hacci color blocked with sienna (2/3 yard), nutmeg (1/3 yard), peat moss (1/3 yard), and teddy bear (3/4 yard).
I bought five colors of the Surge Fabrics Versailles brushed hacci sweater knit when it was on sale last year because I love it so much. It is 95%Poly/5%Spandex, soft and cozy on the inside, has a smooth sweater look on the outside, a nice drape, good stretch and resilience, and a great weight (200 gsm). It is comfy to wear and very easy to sew with. I’ve used it for a scoop-neck PE Sweet Cheeks sweater,v-neck PE Sweet Cheeks sweater for me, and another for a friend, and a Sinclair Joanne faux wrap dress. I’ve had the pile of Versailes sitting in my sewing room for a while and with all the colors stacked together I keep wanting to use them all at the same time to make a color blocked sweater. I’ve had a vision of this in my mind for several months, but hadn’t fully worked out the details until this week.
I thought about using the Sinclair Crew pullover pattern as I did for my family holiday sweater project, but the sweater in my vision was a dolman sleeve or drop shoulder design, not too oversized. After hacking the Sinclair Soho relaxed dolman sweater last week, I knew I could hack it into the color block sweater I imagined. For last week’s sweater I merged the sleeves and the bodice and added tall cuffs from the Crew pattern. This time I kept the sleeves but shifted three inches from the bodice to the sleeves so that the sleeves would begin above the elbow instead of below the elbow (which is how they sit in the first Soho sweater I made from a green rib sweater knit). I shortened the sleeves and added the Crew tall cuffs again. I also shortened the bodice by 6.5 inches before adding the band, same as I did last week.
I had five colors of the Versailles fabric and had to decide how to place them. I knew I wanted to use the teddy bear, sienna, and nutmeg together, but adding both the rosey mauve and peat moss seemed to be too much. I decided I would use one or the other, but not both. I think either would have been fine, but I eventually settled on the peat moss, rather than the much lighter mauve. My vision was to use a different color for the front and back and to have them meet a third color at the sleeve. I decided to do the two sleeves different colors and then make the cuffs from the opposite colors. I used the back color for the v-neck and the front color for the bottom band.
I switched out the Soho narrow v-neck band for the PE Sweet Cheeks wide three-piece v-neck band to make it work with my unruly rib knit last week. I didn’t think I would have the same problem with the Versailles, but I liked the idea of the wide band. So I decided to try to use the Soho band but just make it wider. It is supposed to be 1.8 inches wide and I cut it 2.8 inches wide. I followed the same instructions and first basted it in place just be sure. It worked perfectly and I ended up with my desired 1-inch wide v-neck band, which has a nice sharp 90-degree point and the heft I was looking for to balance the color blocks.
Everything was serged except for joining the short ends of the bands, sewing the point of the v-neck, and basting the neck band. As everything is banded, no need for hems and I decided not to topstitch anything. Thus, this sweater came together pretty quickly once I stopped obsessing over which colors to put where.
Earth tones are not my usual palette, and I don’t normally wear this much brown, but I really like this combo and it looks exactly like I imagined it would! I even had the perfect pair of shoes to match (these are the only brown shoes I own). I also really like the fit and drape of my cropped Soho, and it fits my shoulders without any adjustments. Note that in the photos here, I am wearing a long-sleeve t-shirt underneath because it is cold outside, so it clings just a bit to the undershirt, but you probably didn’t notice.
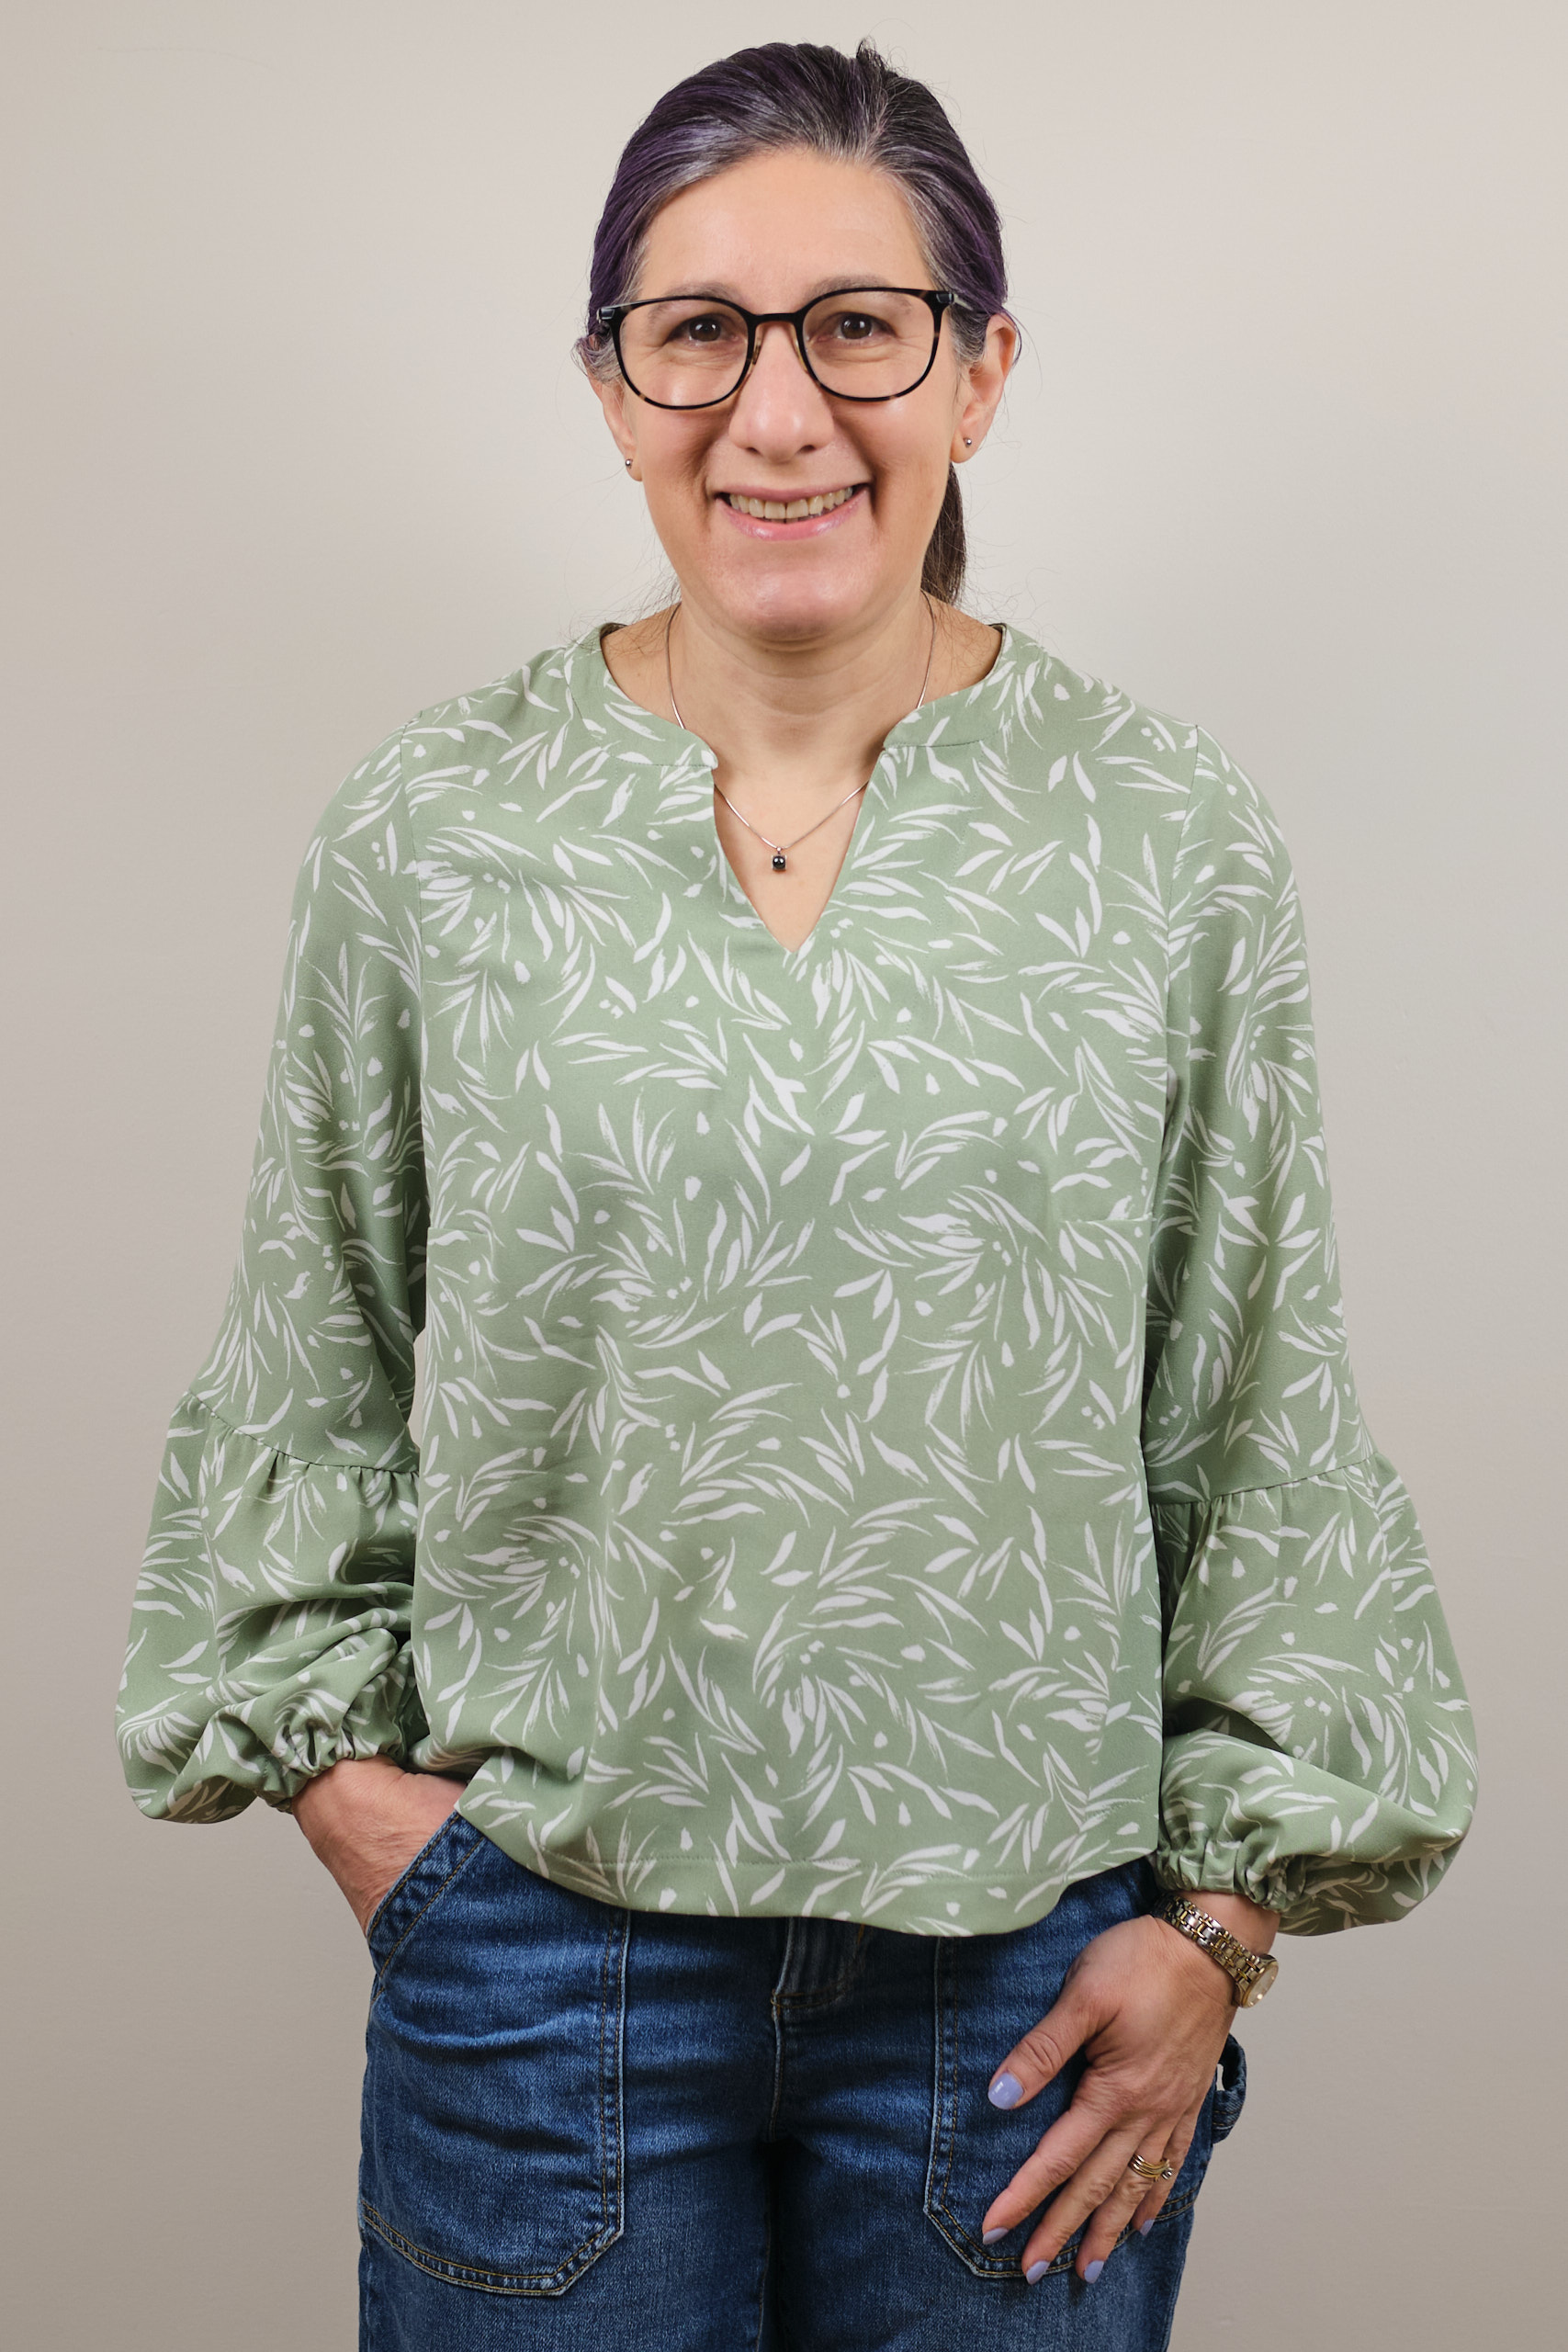
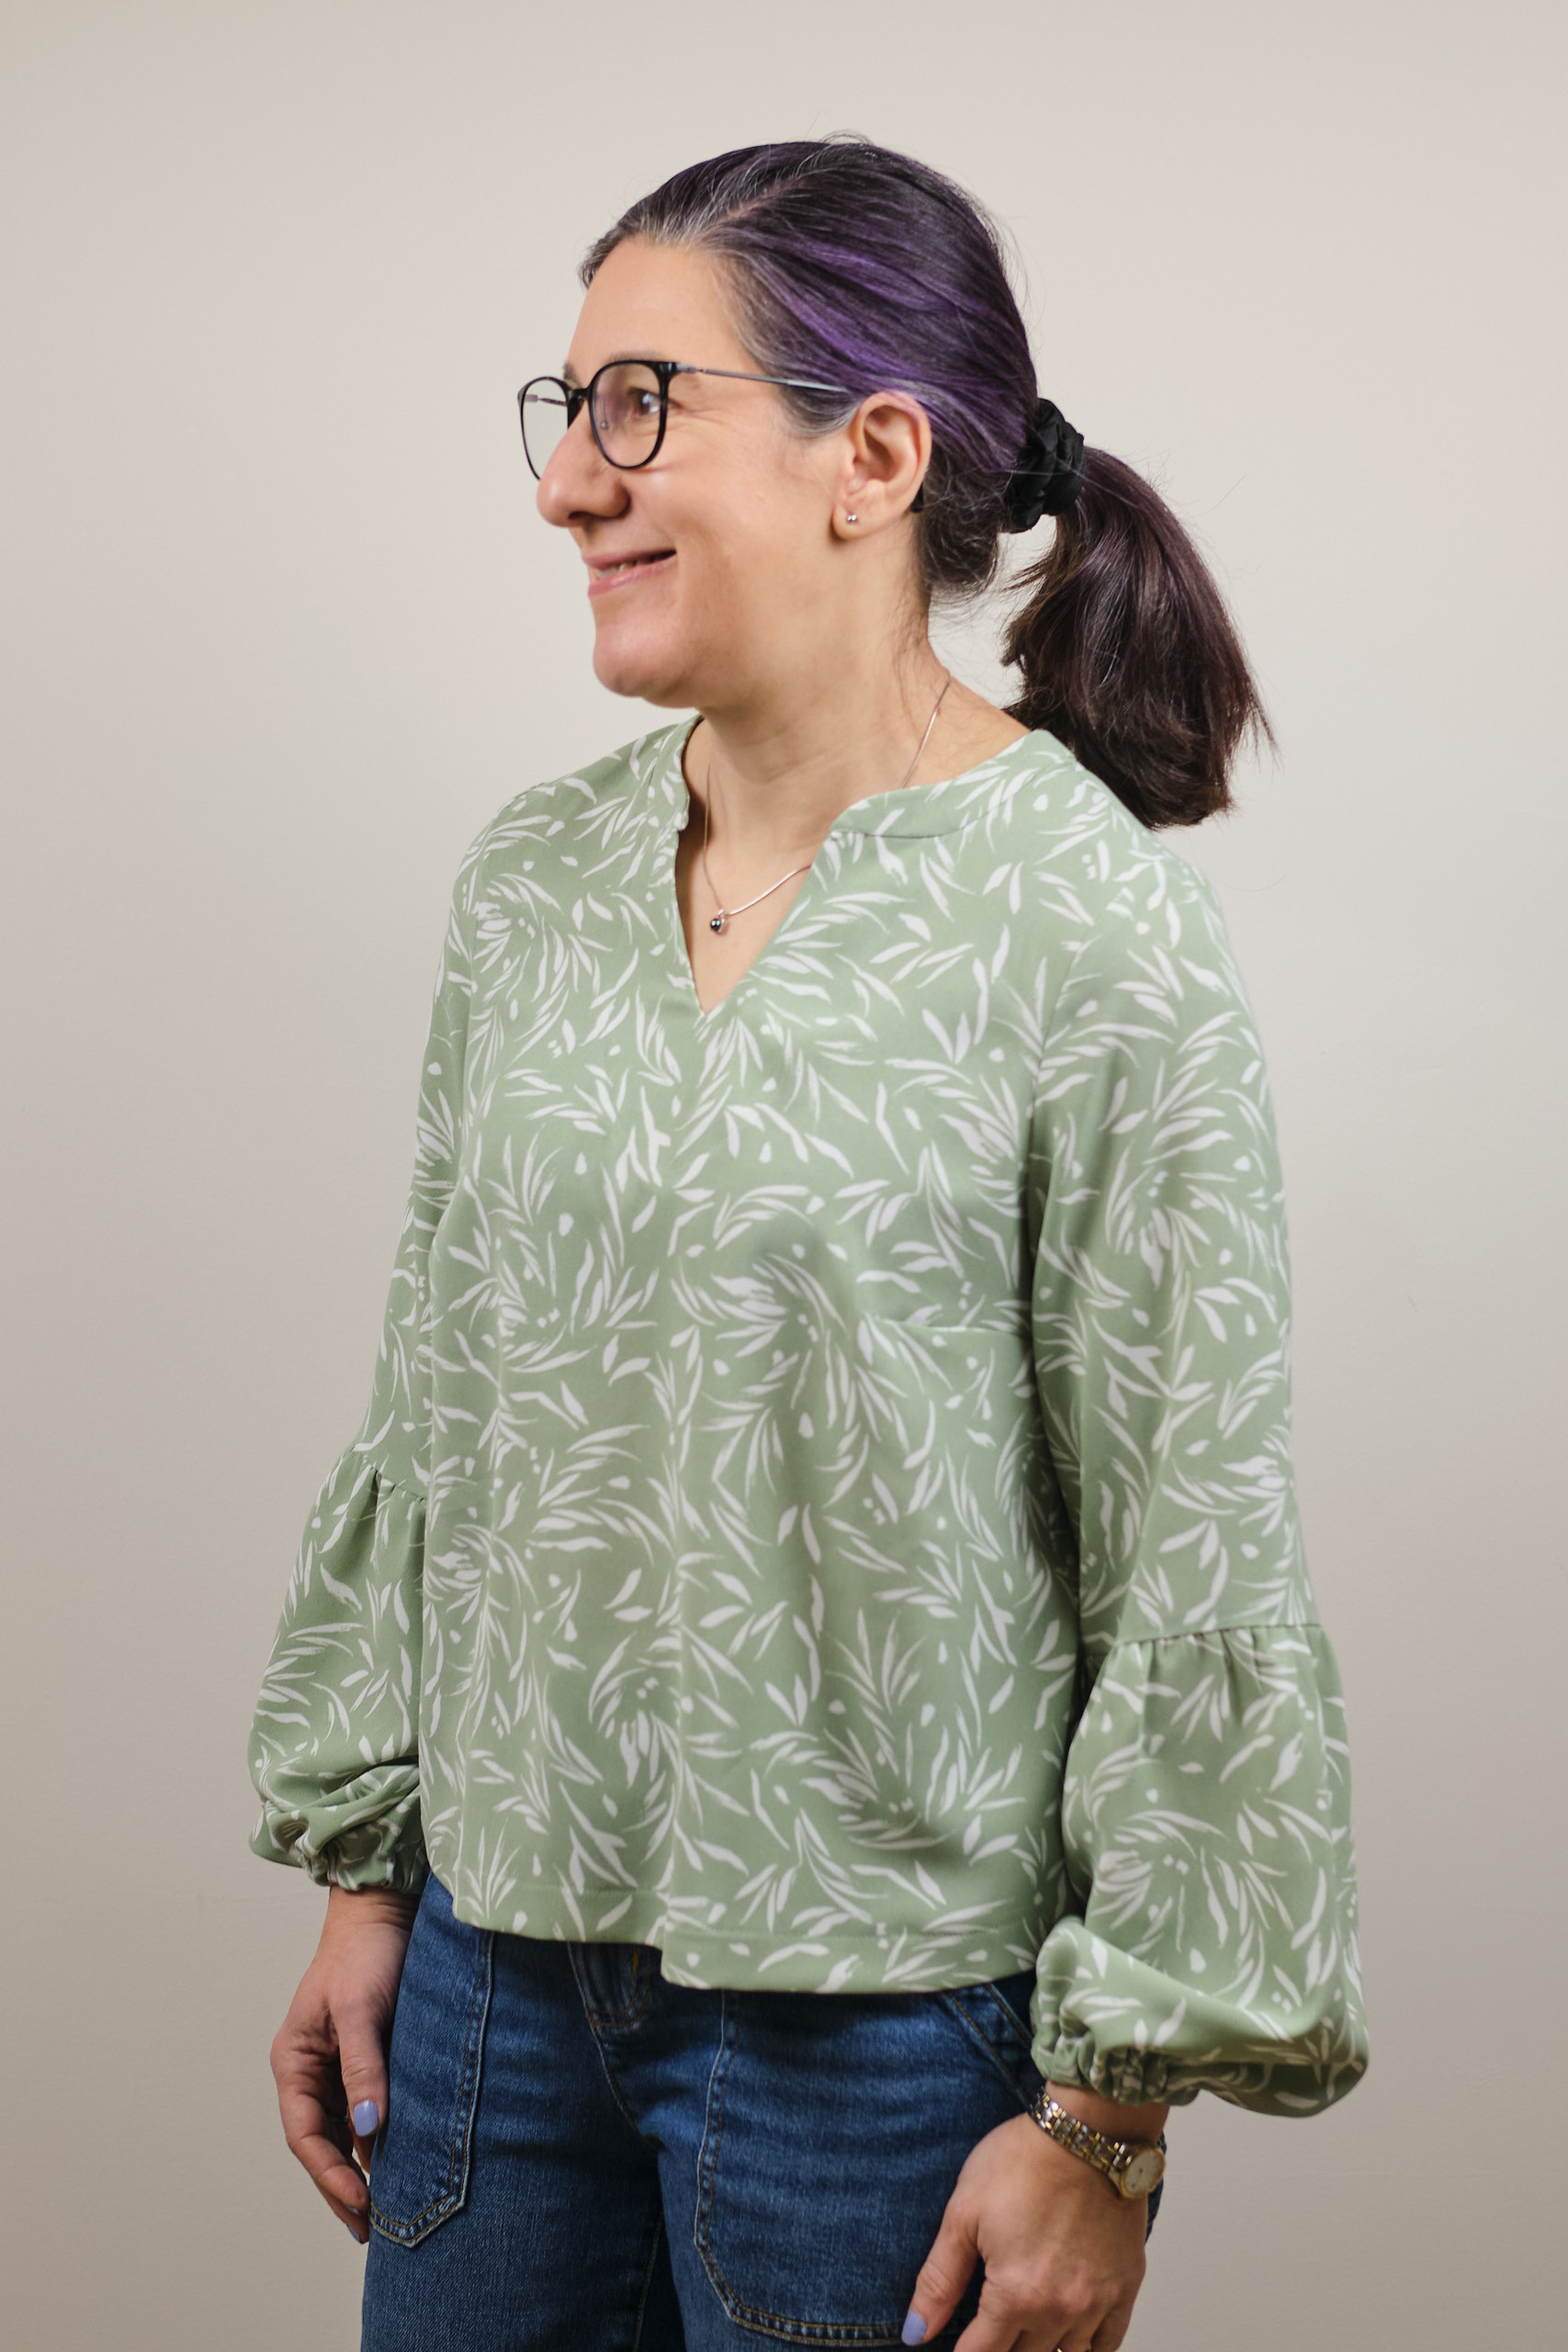
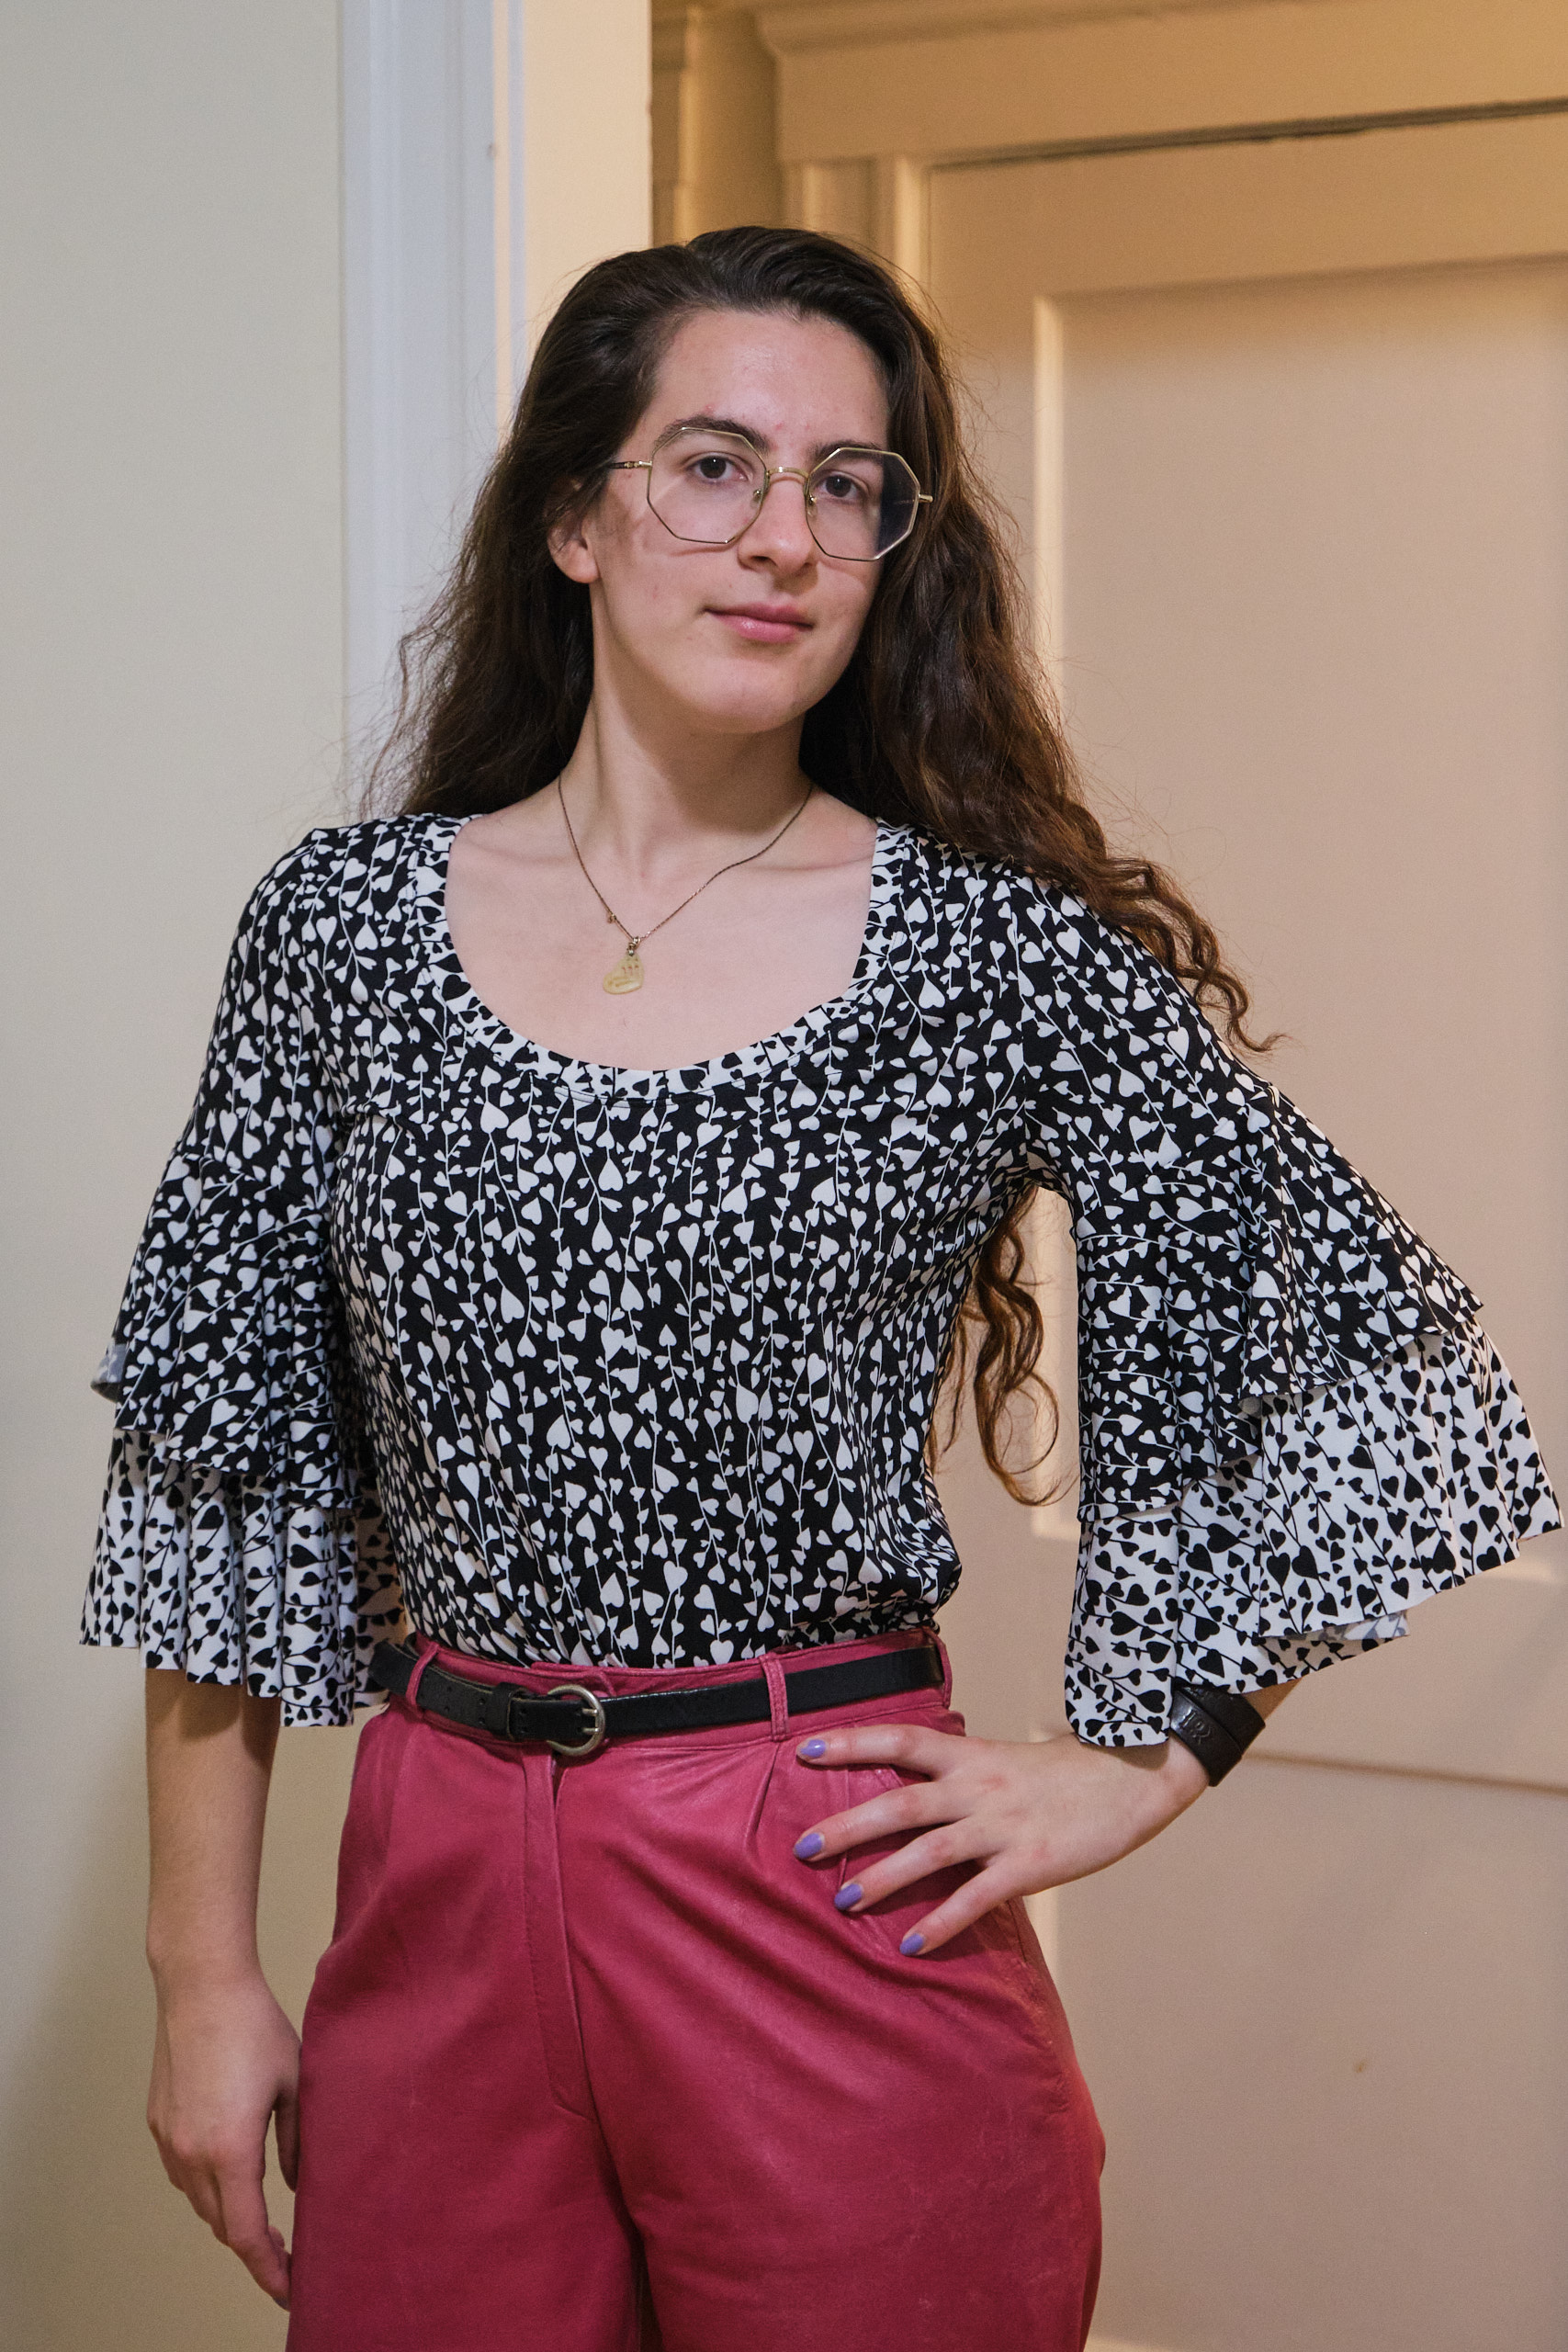
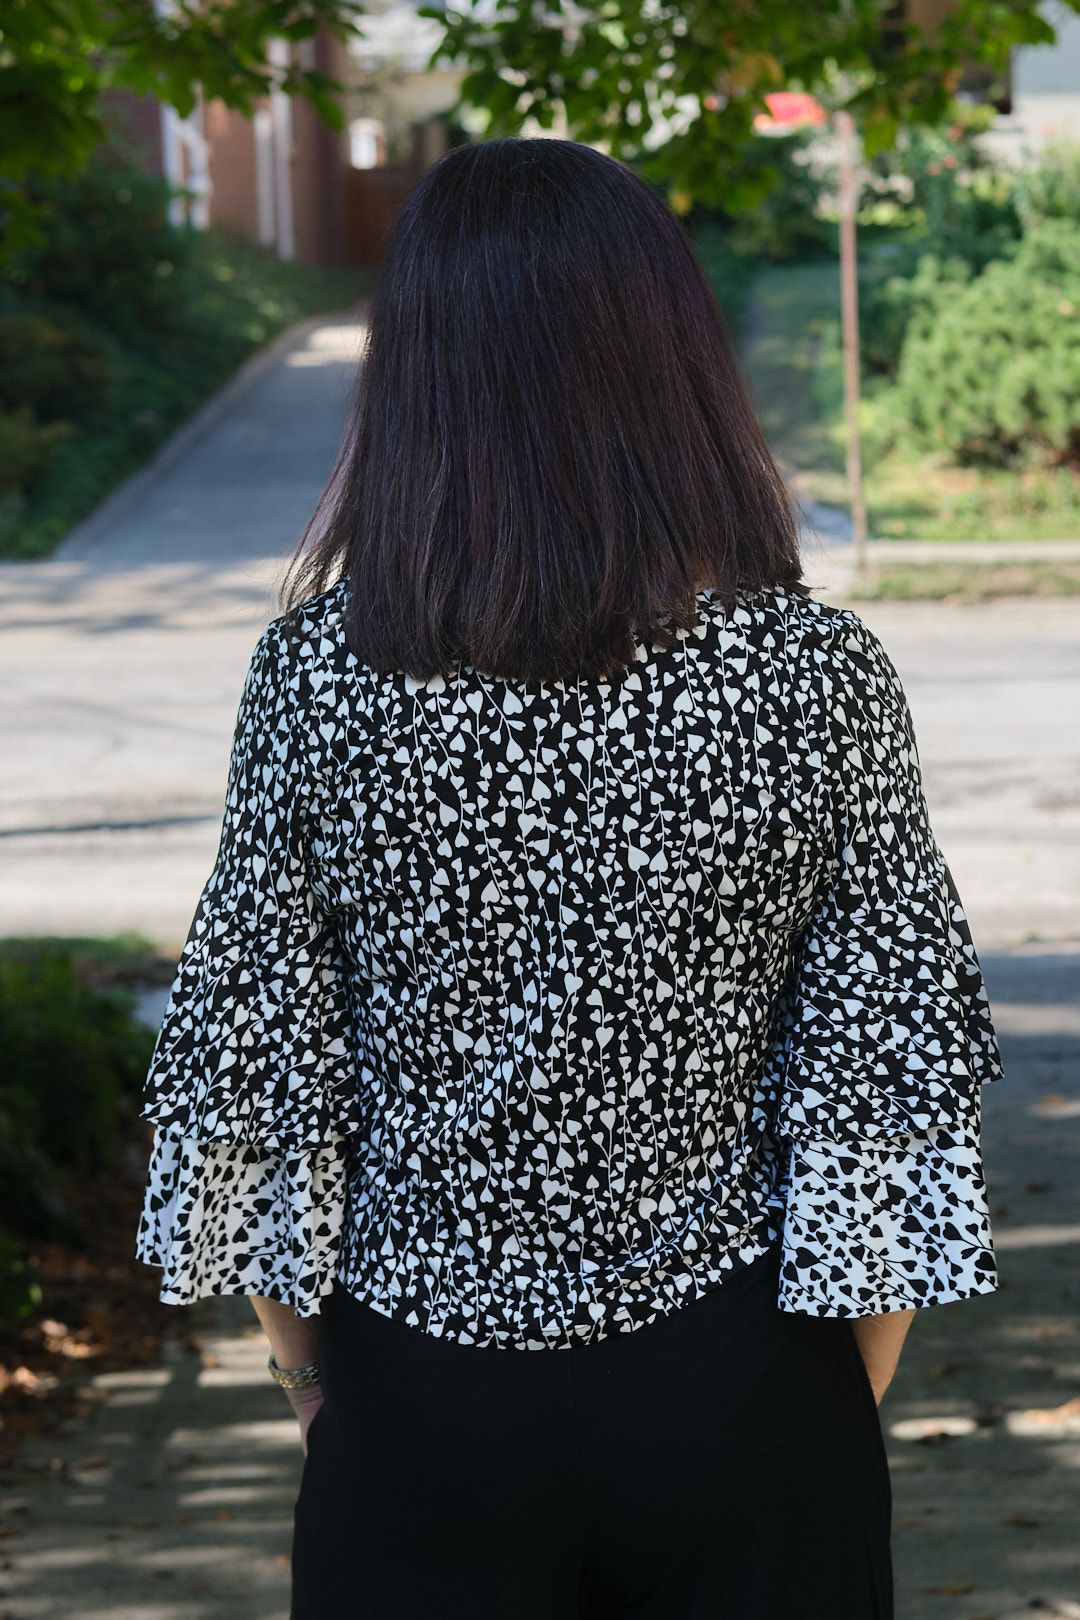
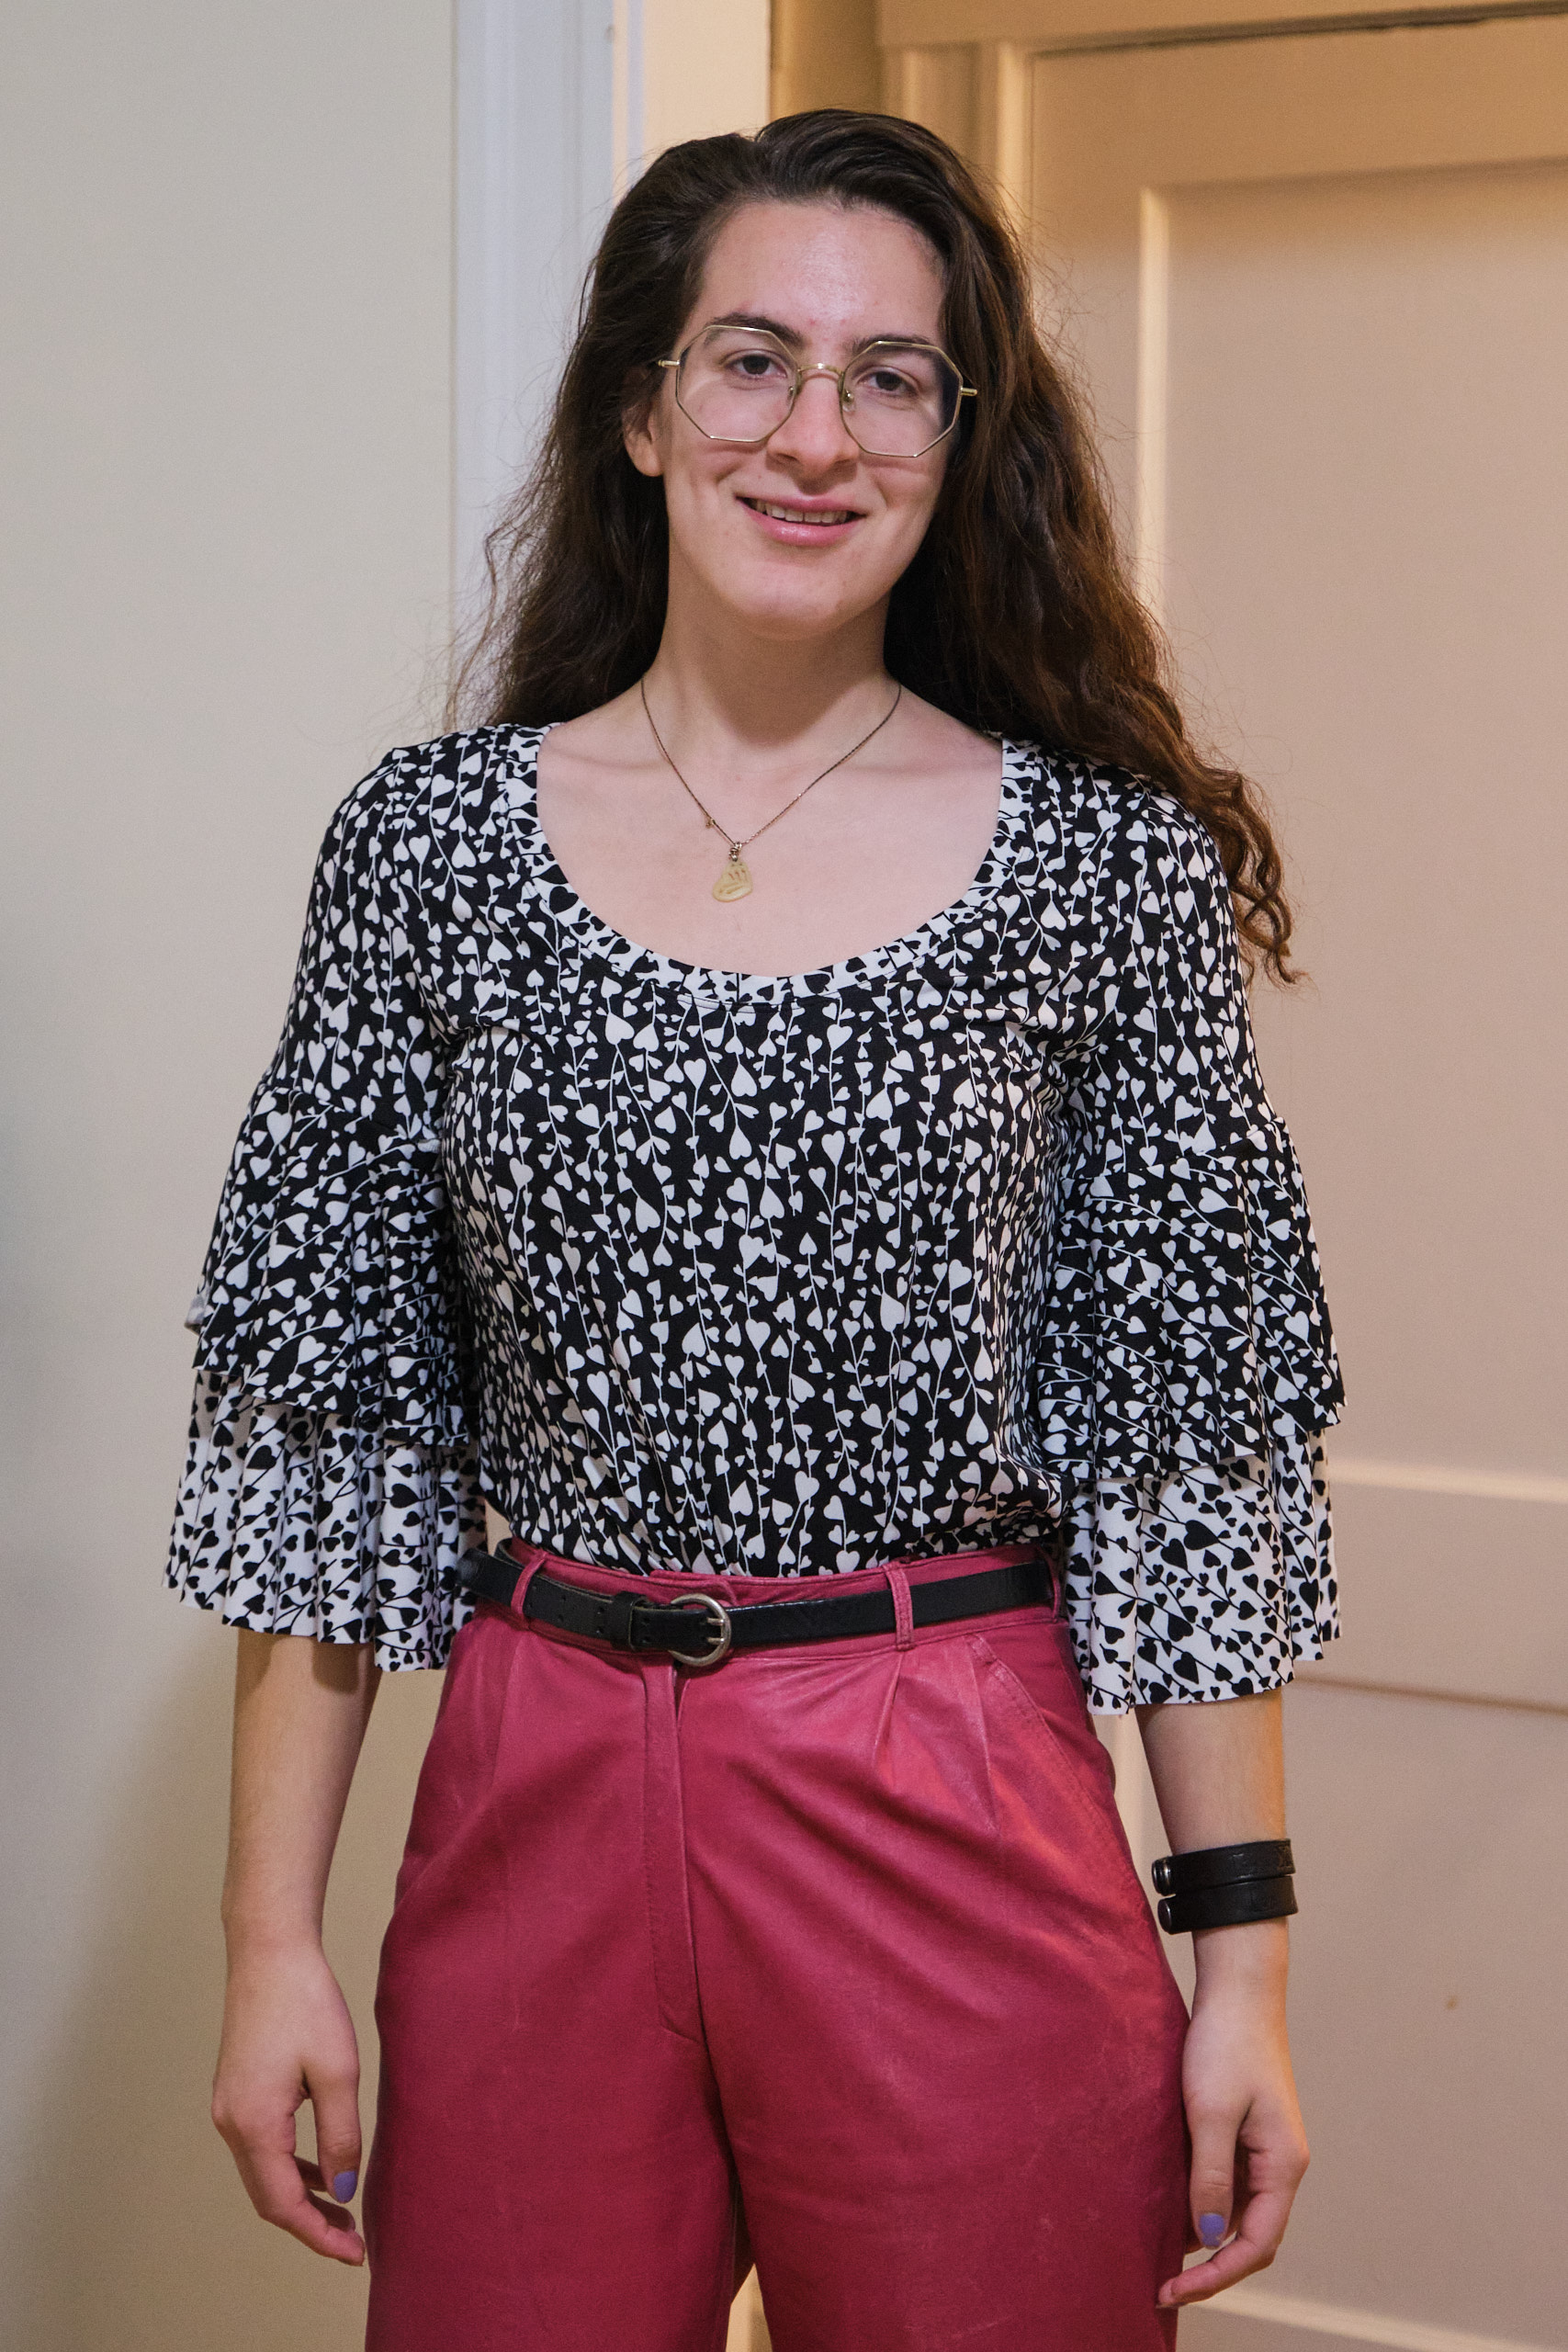
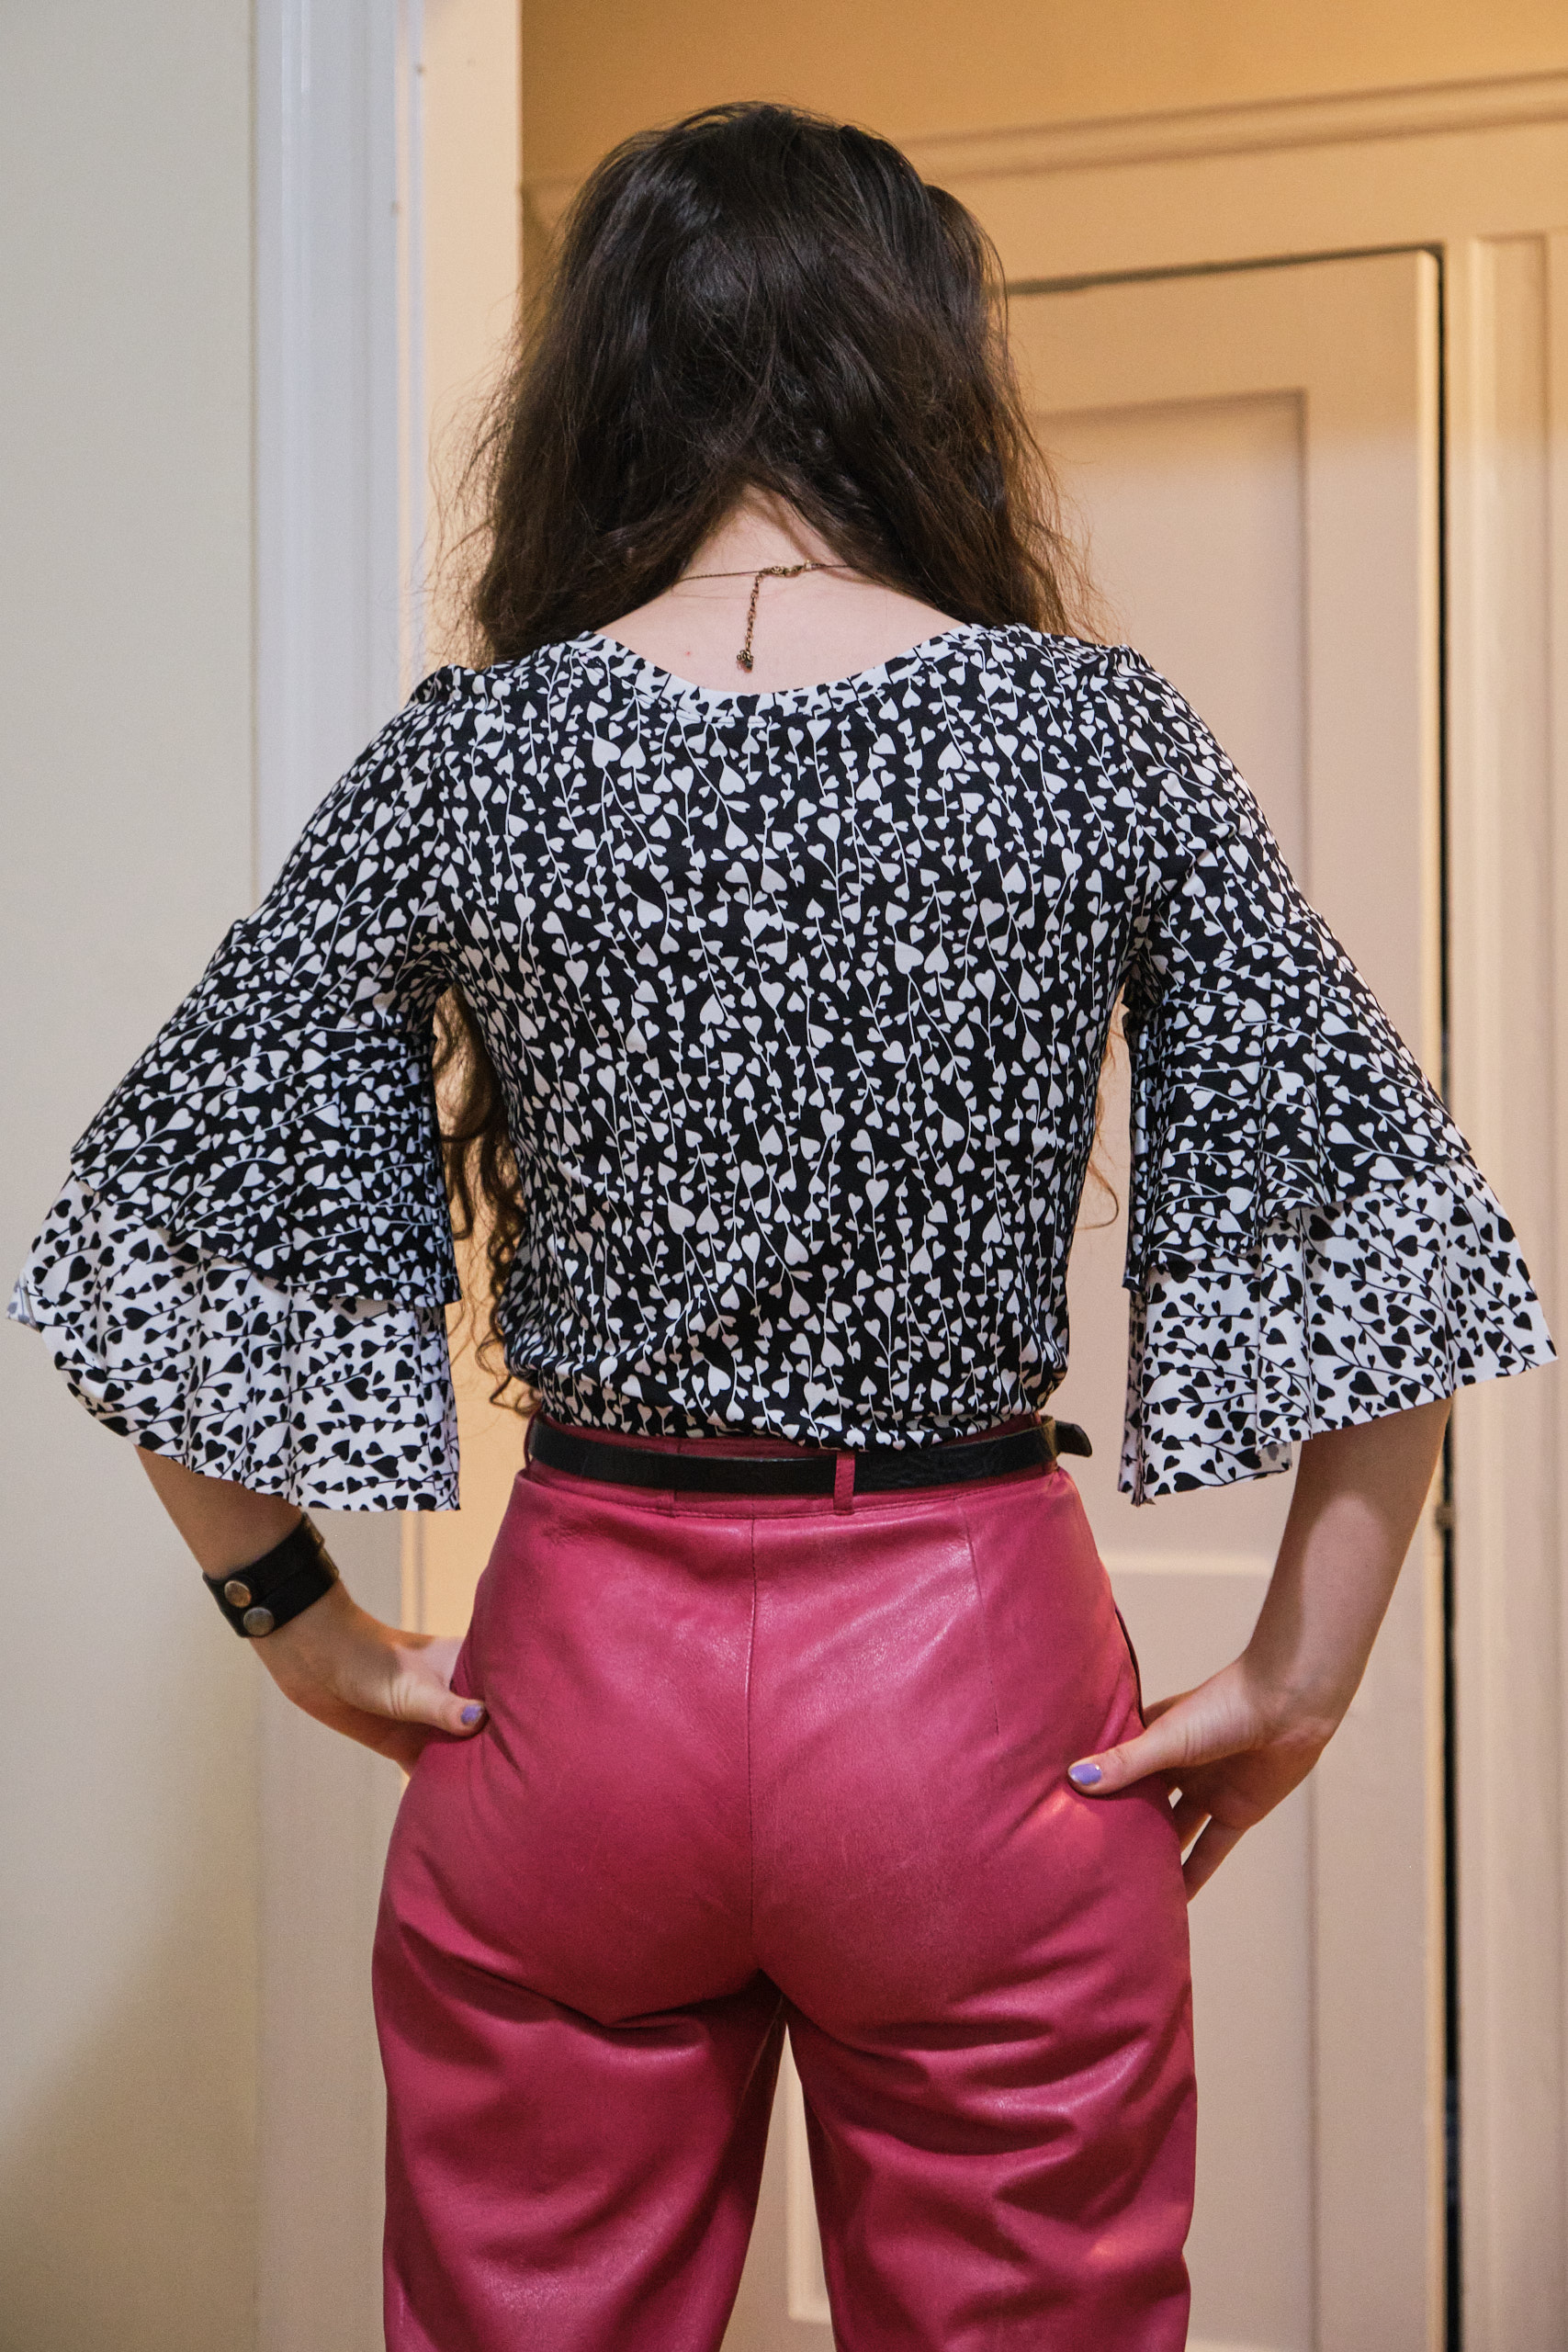
Love Notions Muse blouse, straight bodice, tiered sleeves, size small, shortened bodice and sleeves, from 2 yards or light sage Tess Cey.
In January, I applied to be a pattern tester for Muse, a new top pattern from Love Notions Sewing Patterns. (Here I am in the release video!) I have sewn a few of their patterns, but never tested a pattern for them before. I wasn’t invited to be a part of the main testing group, but was invited to join the later “finals” testers group. This group gets the revised pattern after the first group has already tested it and is assigned a size and features and asked to sew up and photograph the near-final version of the pattern.
Unlike past pattern testing I’ve done that uses a Facebook group for communication, Love Notions uses the Basecamp project management system. There is a section for sharing documents, another for uploading final photos, a to-do list for changes that need to be made to the pattern or instructions, and discussion boards. One of the fun aspects of pattern testing is communicating with and getting feedback and advice from other sewists. It is also nice to see the issues I’ve found with a pattern taken into account as the pattern evolves into the final version.
When I joined the Basecamp group, I could see there had already been a lot of discussion about certain aspects of the pattern and these had been addressed in the revised pattern. I also saw advice about trimming seam allowances and setting in sleeves that was not yet in the pattern instructions but that I could apply immediately.
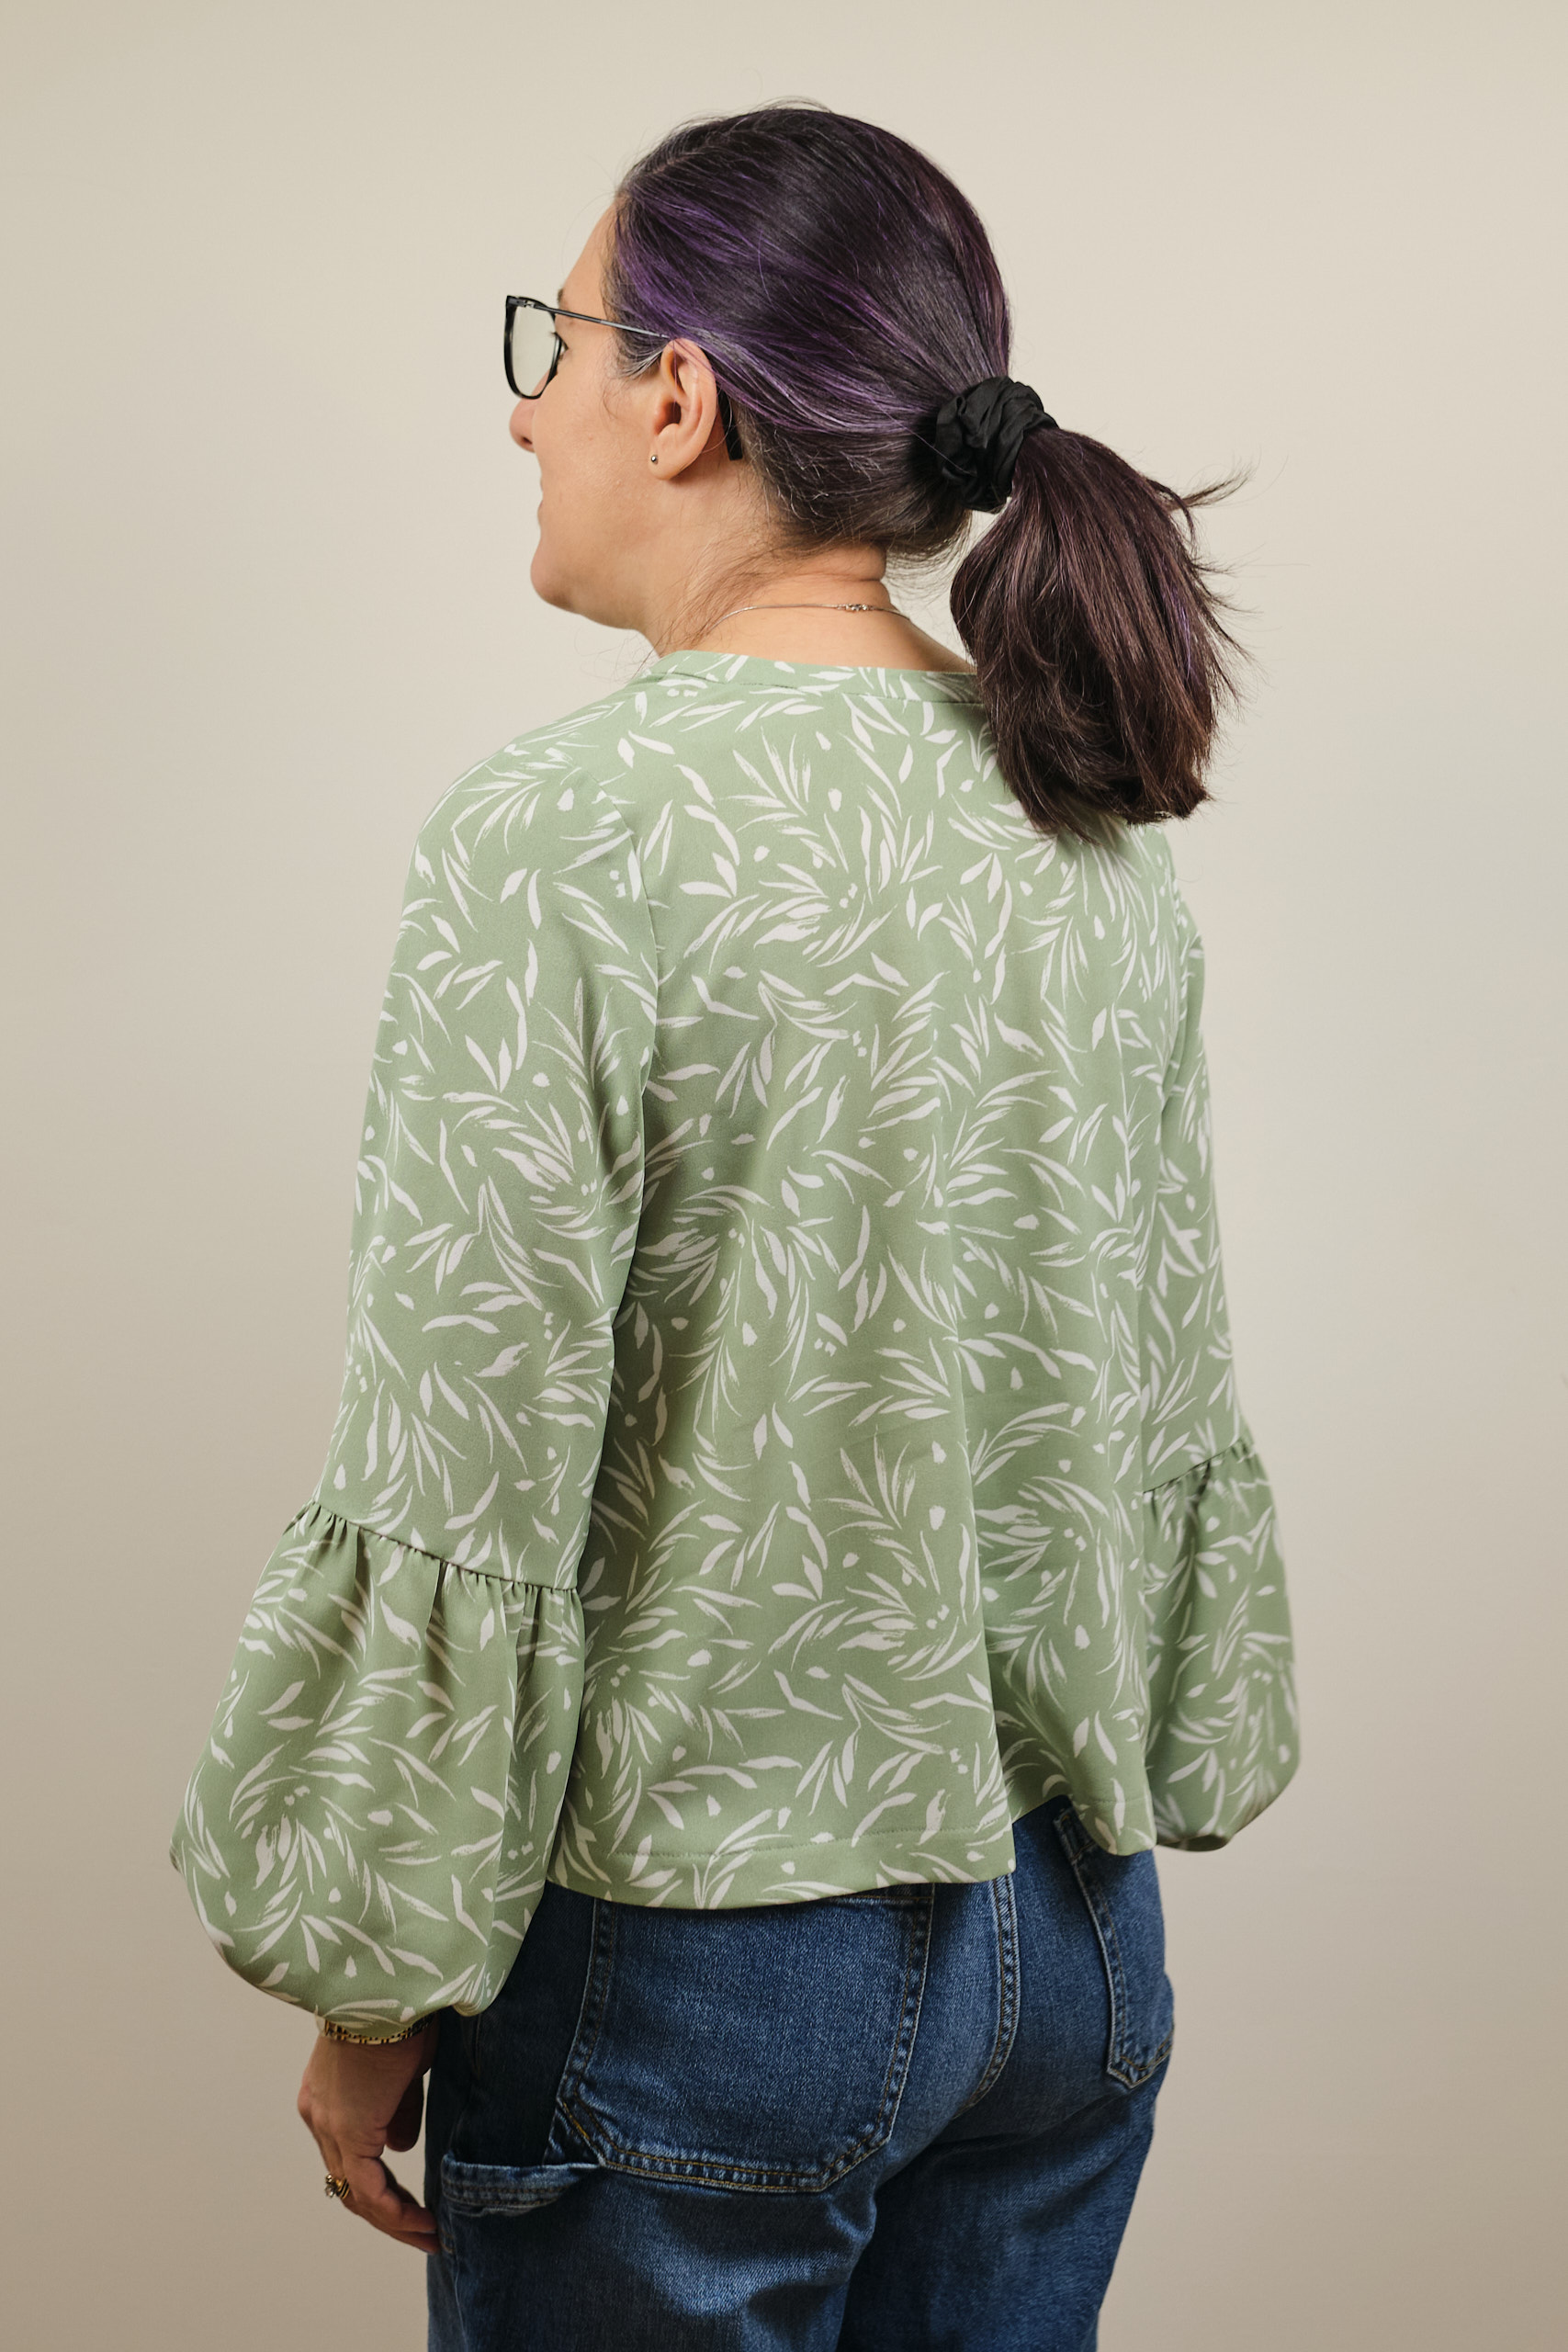
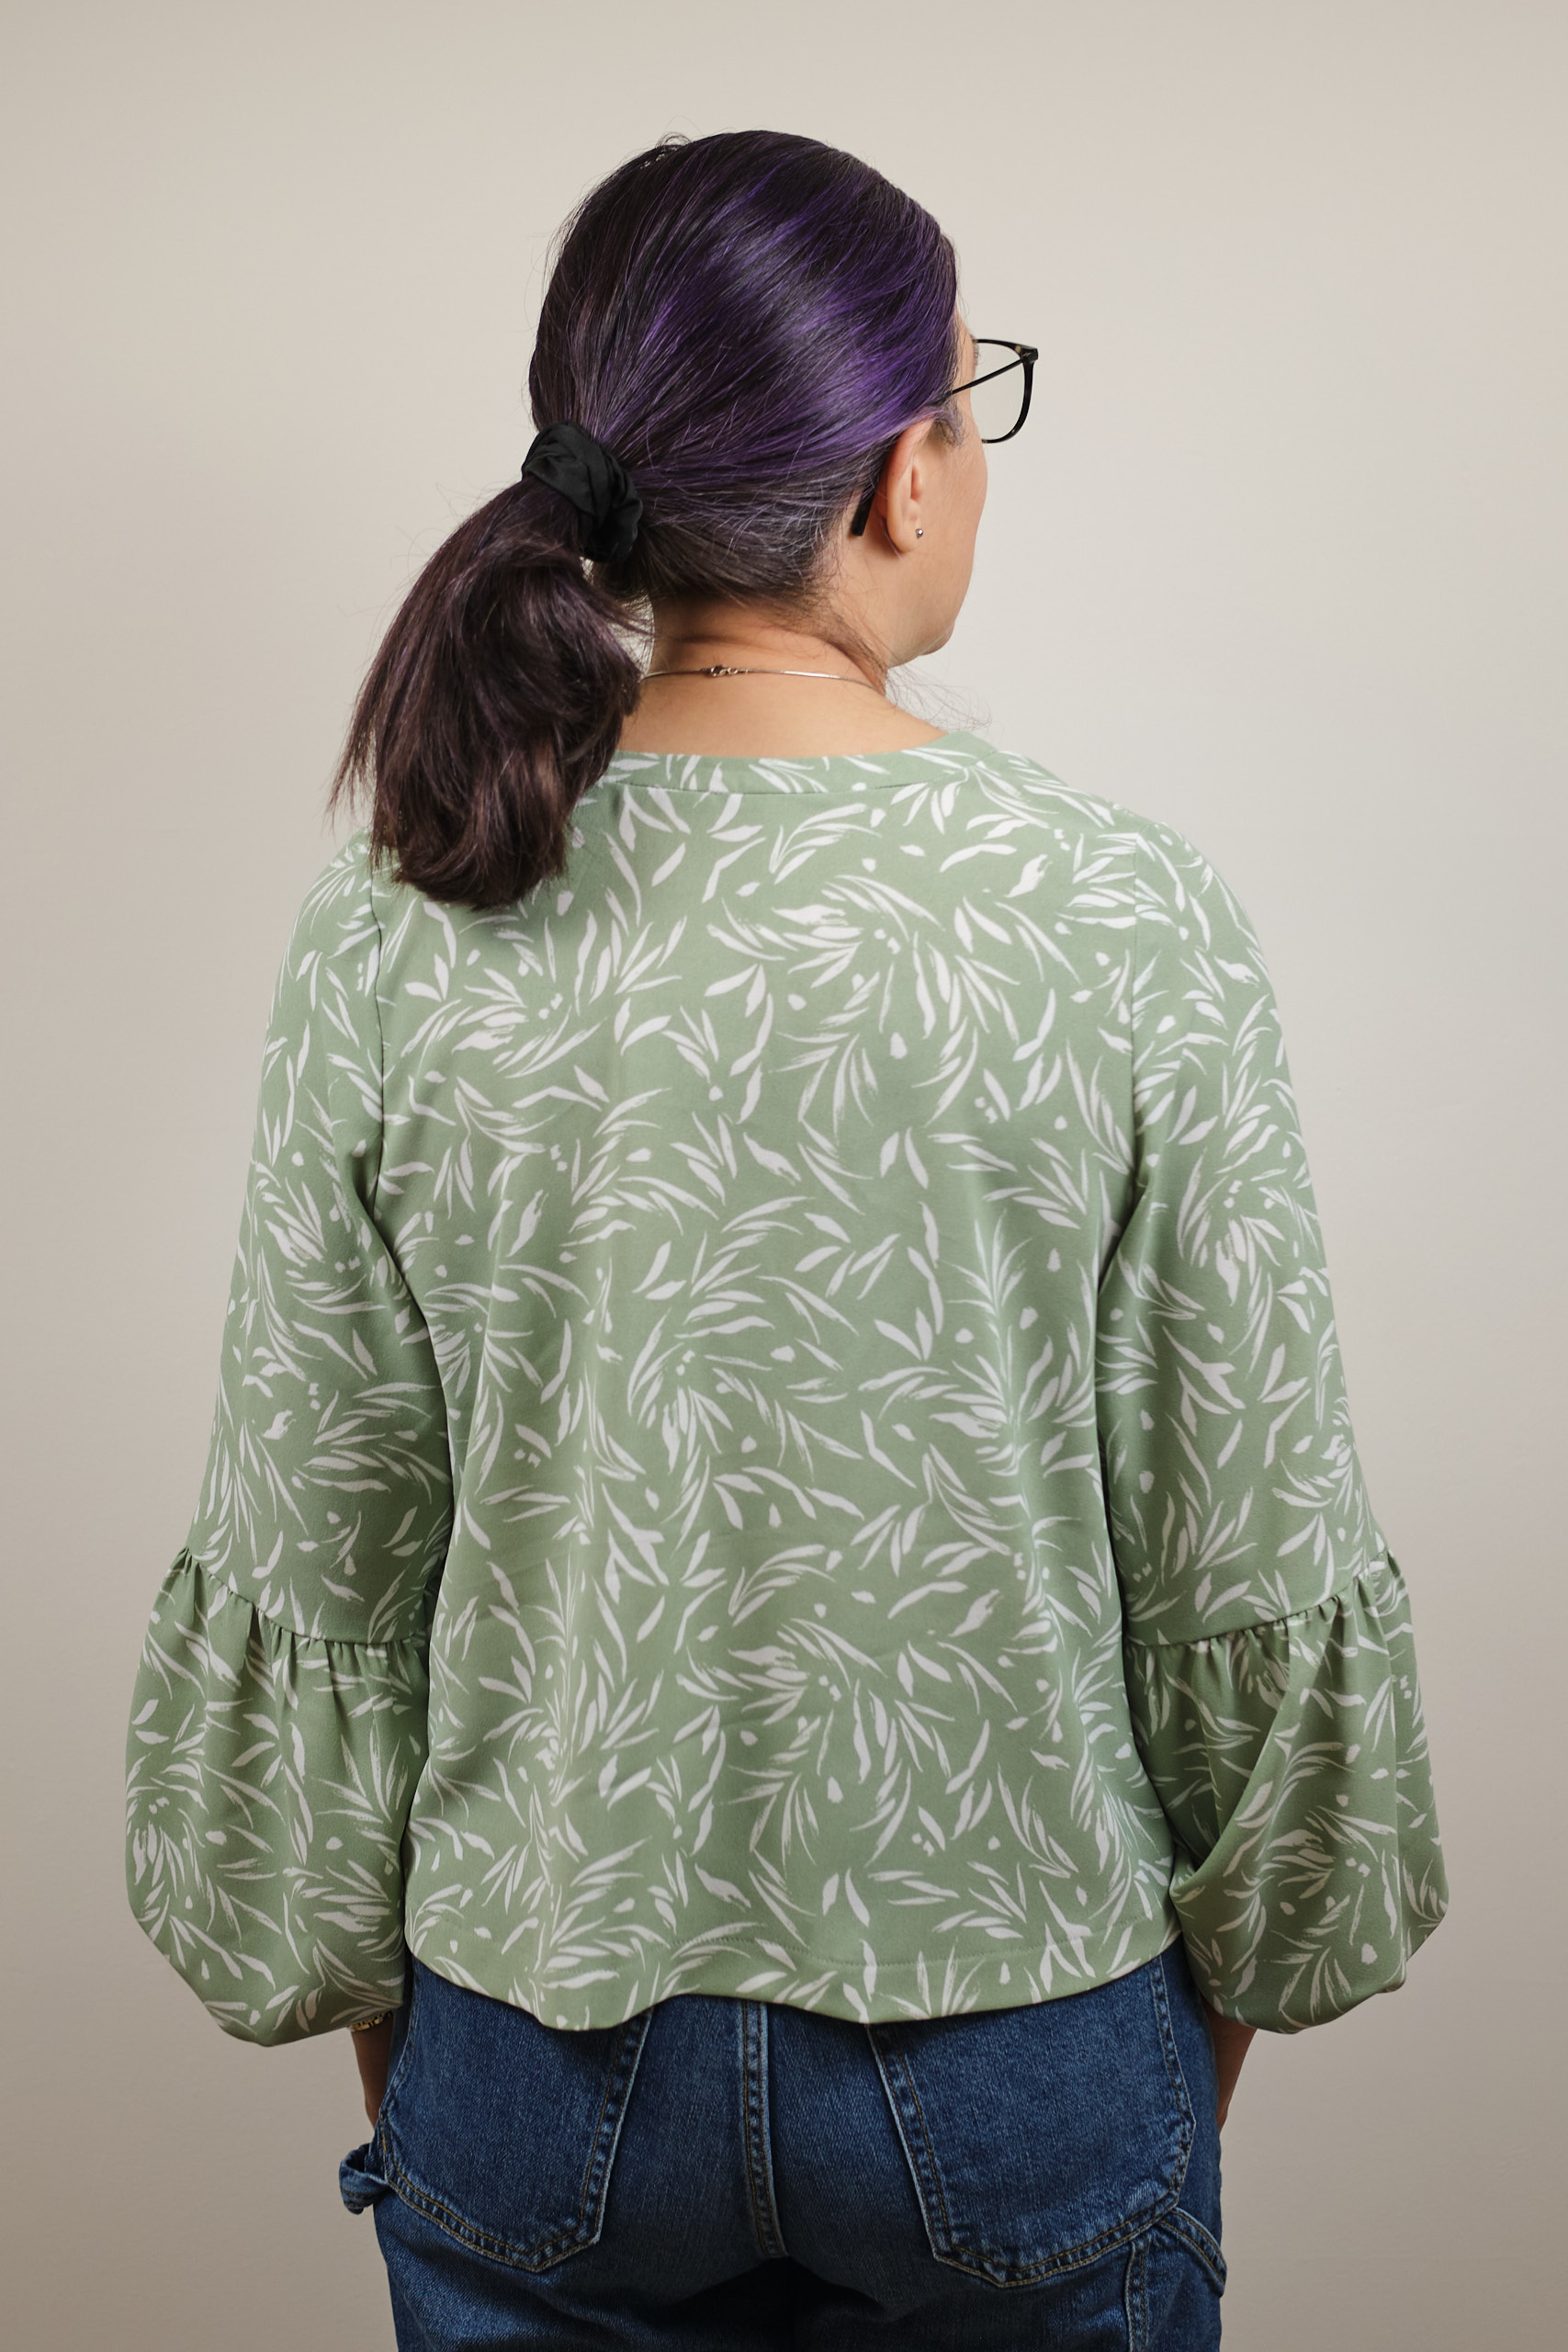
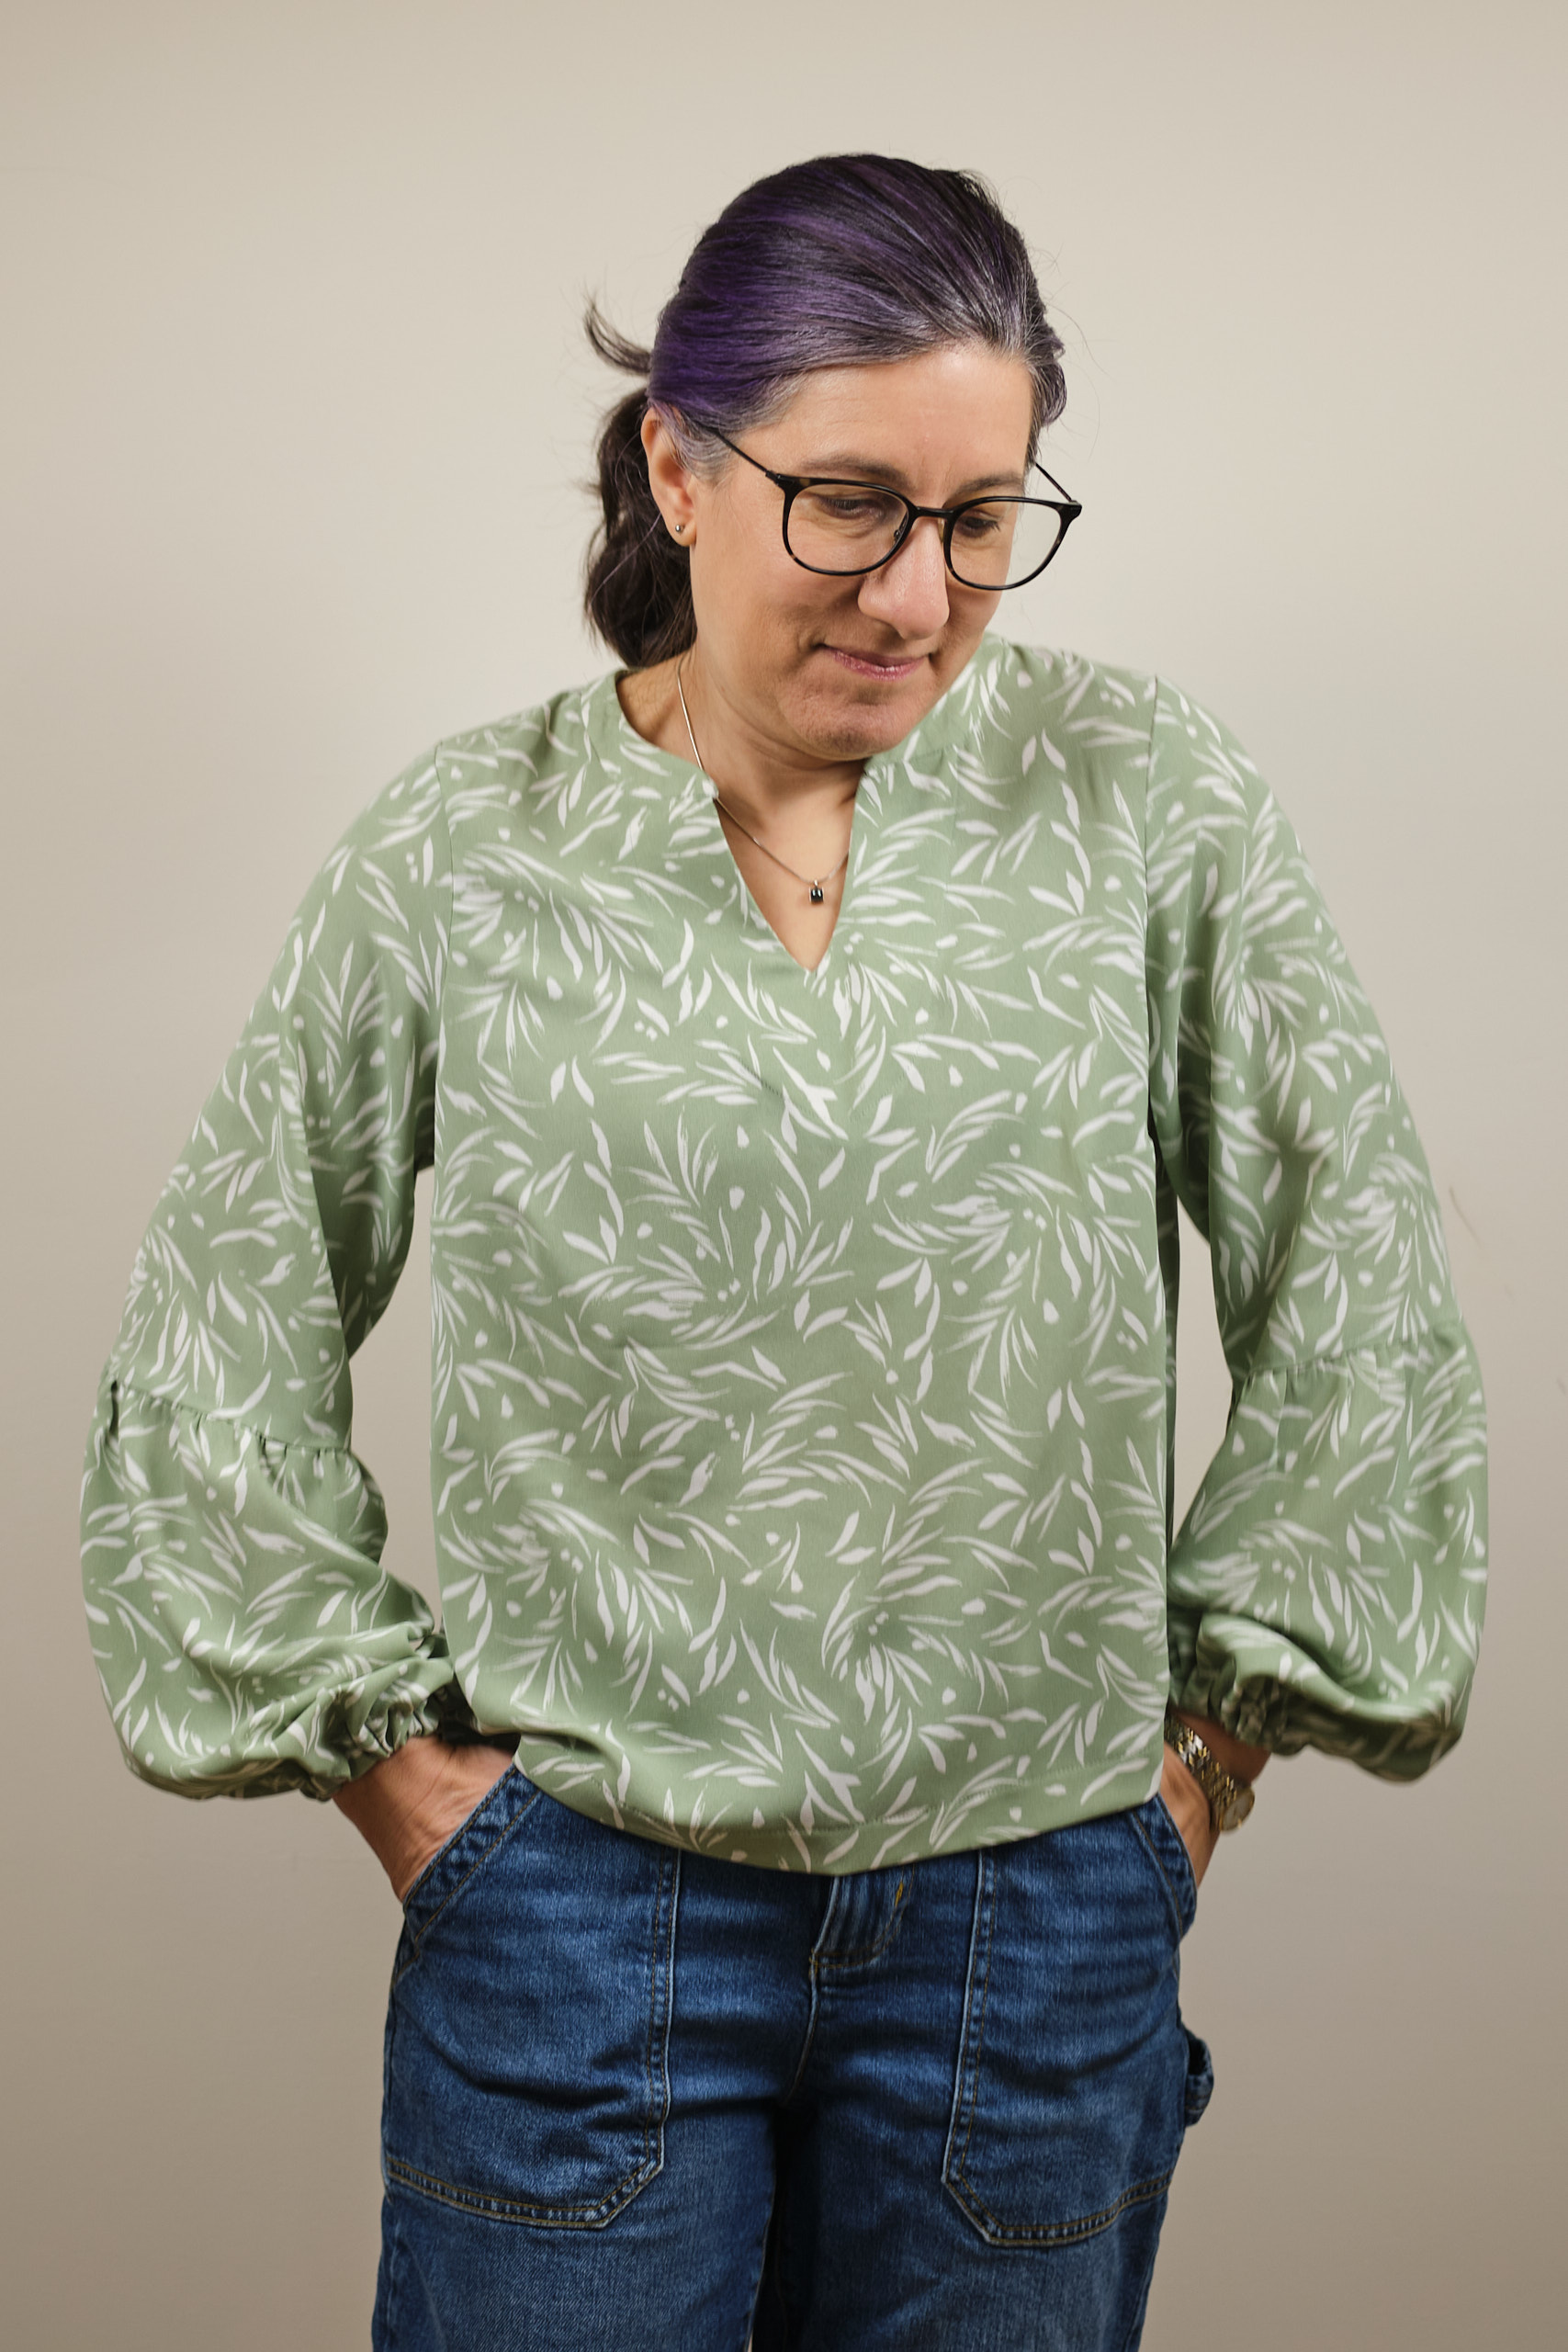
The new pattern is called “Muse” and it is a woven blouse pattern that can be made with regular short sleeves, balloon sleeves, or tiered sleeves. It can be sewn with a straight bodice or a skirted bodice, optionally with a balloon hem. It is cold and snowy in Pittsburgh, so I asked to sew the long-sleeve version. I’ve also not loved the look of most skirted woven tops on me, so I requested to sew the straight bodice. I was assigned to sew size small, according to my measurements.
This pattern was designed for someone who is 5’5″ (as are most women’s sewing patterns that don’t come in petite sizes). The instructions recommended shortening the bodice by .5 inch for every inch shorter than 5’5″ you are, so I shortened it by 1.5 inch. The instructions didn’t offer advice about shortening the sleeves, but I know from past experience that I usually need to shorten sleeves by about 2 inches on most patterns. I asked in the Basecamp group about how to do this on the tiered sleeve and was advised to remove 1 inch from each part, which seemed to work fine.
I used a light sage polyester woven “cey” fabric called Tess Cey from Mily Mae Fabrics. I bought it when it was on sale for $3.75/yard. (Apparently, CEY is an acronym for continuous environmental yarn and refers to a type of polyester fabric made with sustainable practices that tends to be soft, drapey, and wrinkle-resistant.) This fabric is a little slippery to work with. It is not a stretch fabric, but it does have a little bit of mechanical stretch. It doesn’t tend to wrinkle, but it does hold a crease when pressed with an iron. I used about 2 yards of fabric.
Some testers described this pattern as a “quick sew.” I did not find it quick (and others also disagreed with that description). I think I spent between 5 and 6 hours on it. The main reason it took so long was that the collar construction instructions were confusing and it is a multi-step process. Now that I know how to do it, it would go faster next time, but it will still be an involved process, with inner and outer interfaced layers, top stitching, and stitch-in-the-ditch or hand stitching to finish. Sewing the point of the V is tricky because once you sew past the point in the fabric you no longer can see your 3/8 inch guide on your sewing machine. I ended up marking the stitch lines around the point in pencil so I could see where to stitch. I didn’t cut the facing around the v-neck 100% symmetrically and this was evident when I initially top-stitched the V. I removed the stitching and did it again and it looked a lot better the second time. Next time I will double check the facing before I sew it on. I pinned the collar pieces together backwards and the pieces didn’t fit together right. But I realized my mistake and repinned before sewing. The final version of the pattern instructions are a bit clearer on the process. It still takes soe effort but it is a really nice finish. The final version also now has a ruffled neck option.
The height and sleeve adjustments worked well for me. The tiered sleeves were pretty easy to construct and look nice. The pattern called for 5.5 inches of elastic at the wrist of each sleeve. I used 7 inches instead for more comfort, and could probably have gone even bigger. The final version of the pattern has adjusted the elastic lengths based on tester feedback, but it’s always a good idea to wrap the elastic around your wrist and adjust as appropriate for you.
I often do broad and sloped shoulder adjustments on fitted tops. I didn’t do that on this one because it seemed like more of a loose fit, but in hindsight, I should have at least done a broad shoulder adjustment, as the fabric at the shoulders pulls slightly. Other testers mentioned the shoulders were tight so the final version of the pattern has about 3/8 inch more room in the shoulders. I’m not sure about a sloped shoulder adjustment as that would require adjusting the bust dart, which was already set slightly too low for me. I will at least adjust the point of the dart up a bit next time or possibly leave it out altogether.
My complaints above are all minor issues that, especially with a print fabric, most people will probably not notice on the finished garment, which I think looks great! I’m sure I will get a lot of wear out of it and enjoy wearing it once the warm weather returns someday.
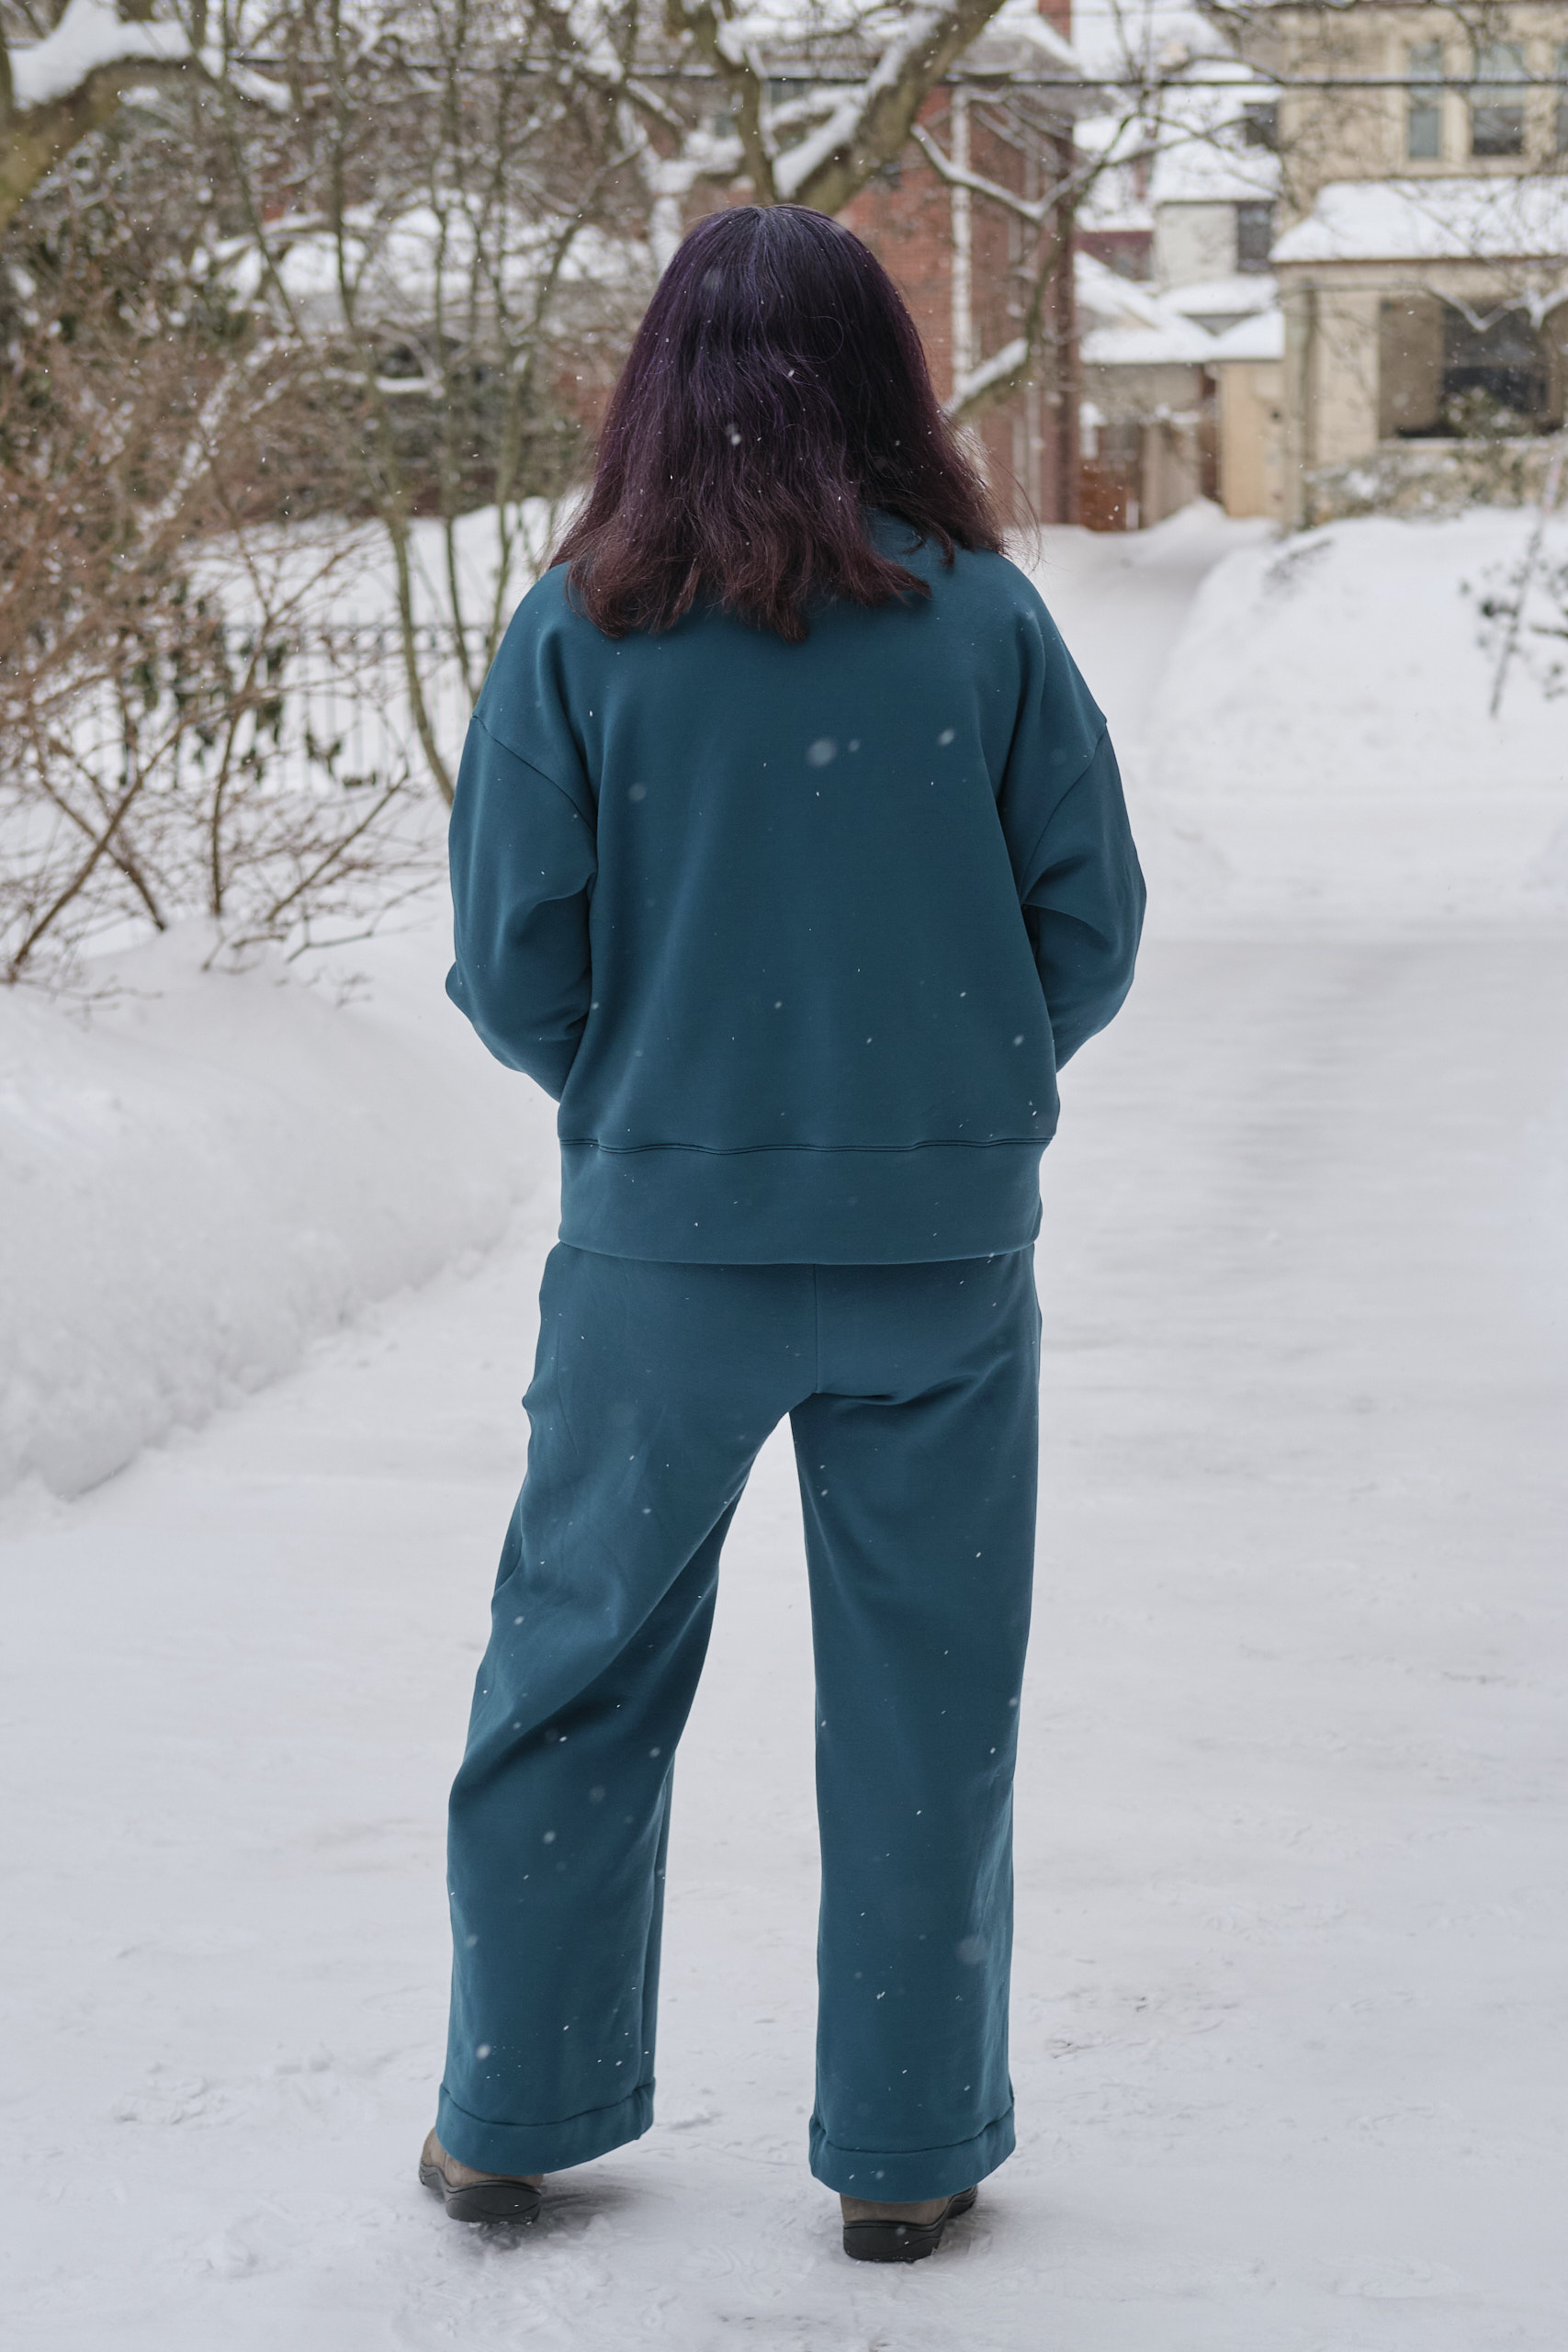
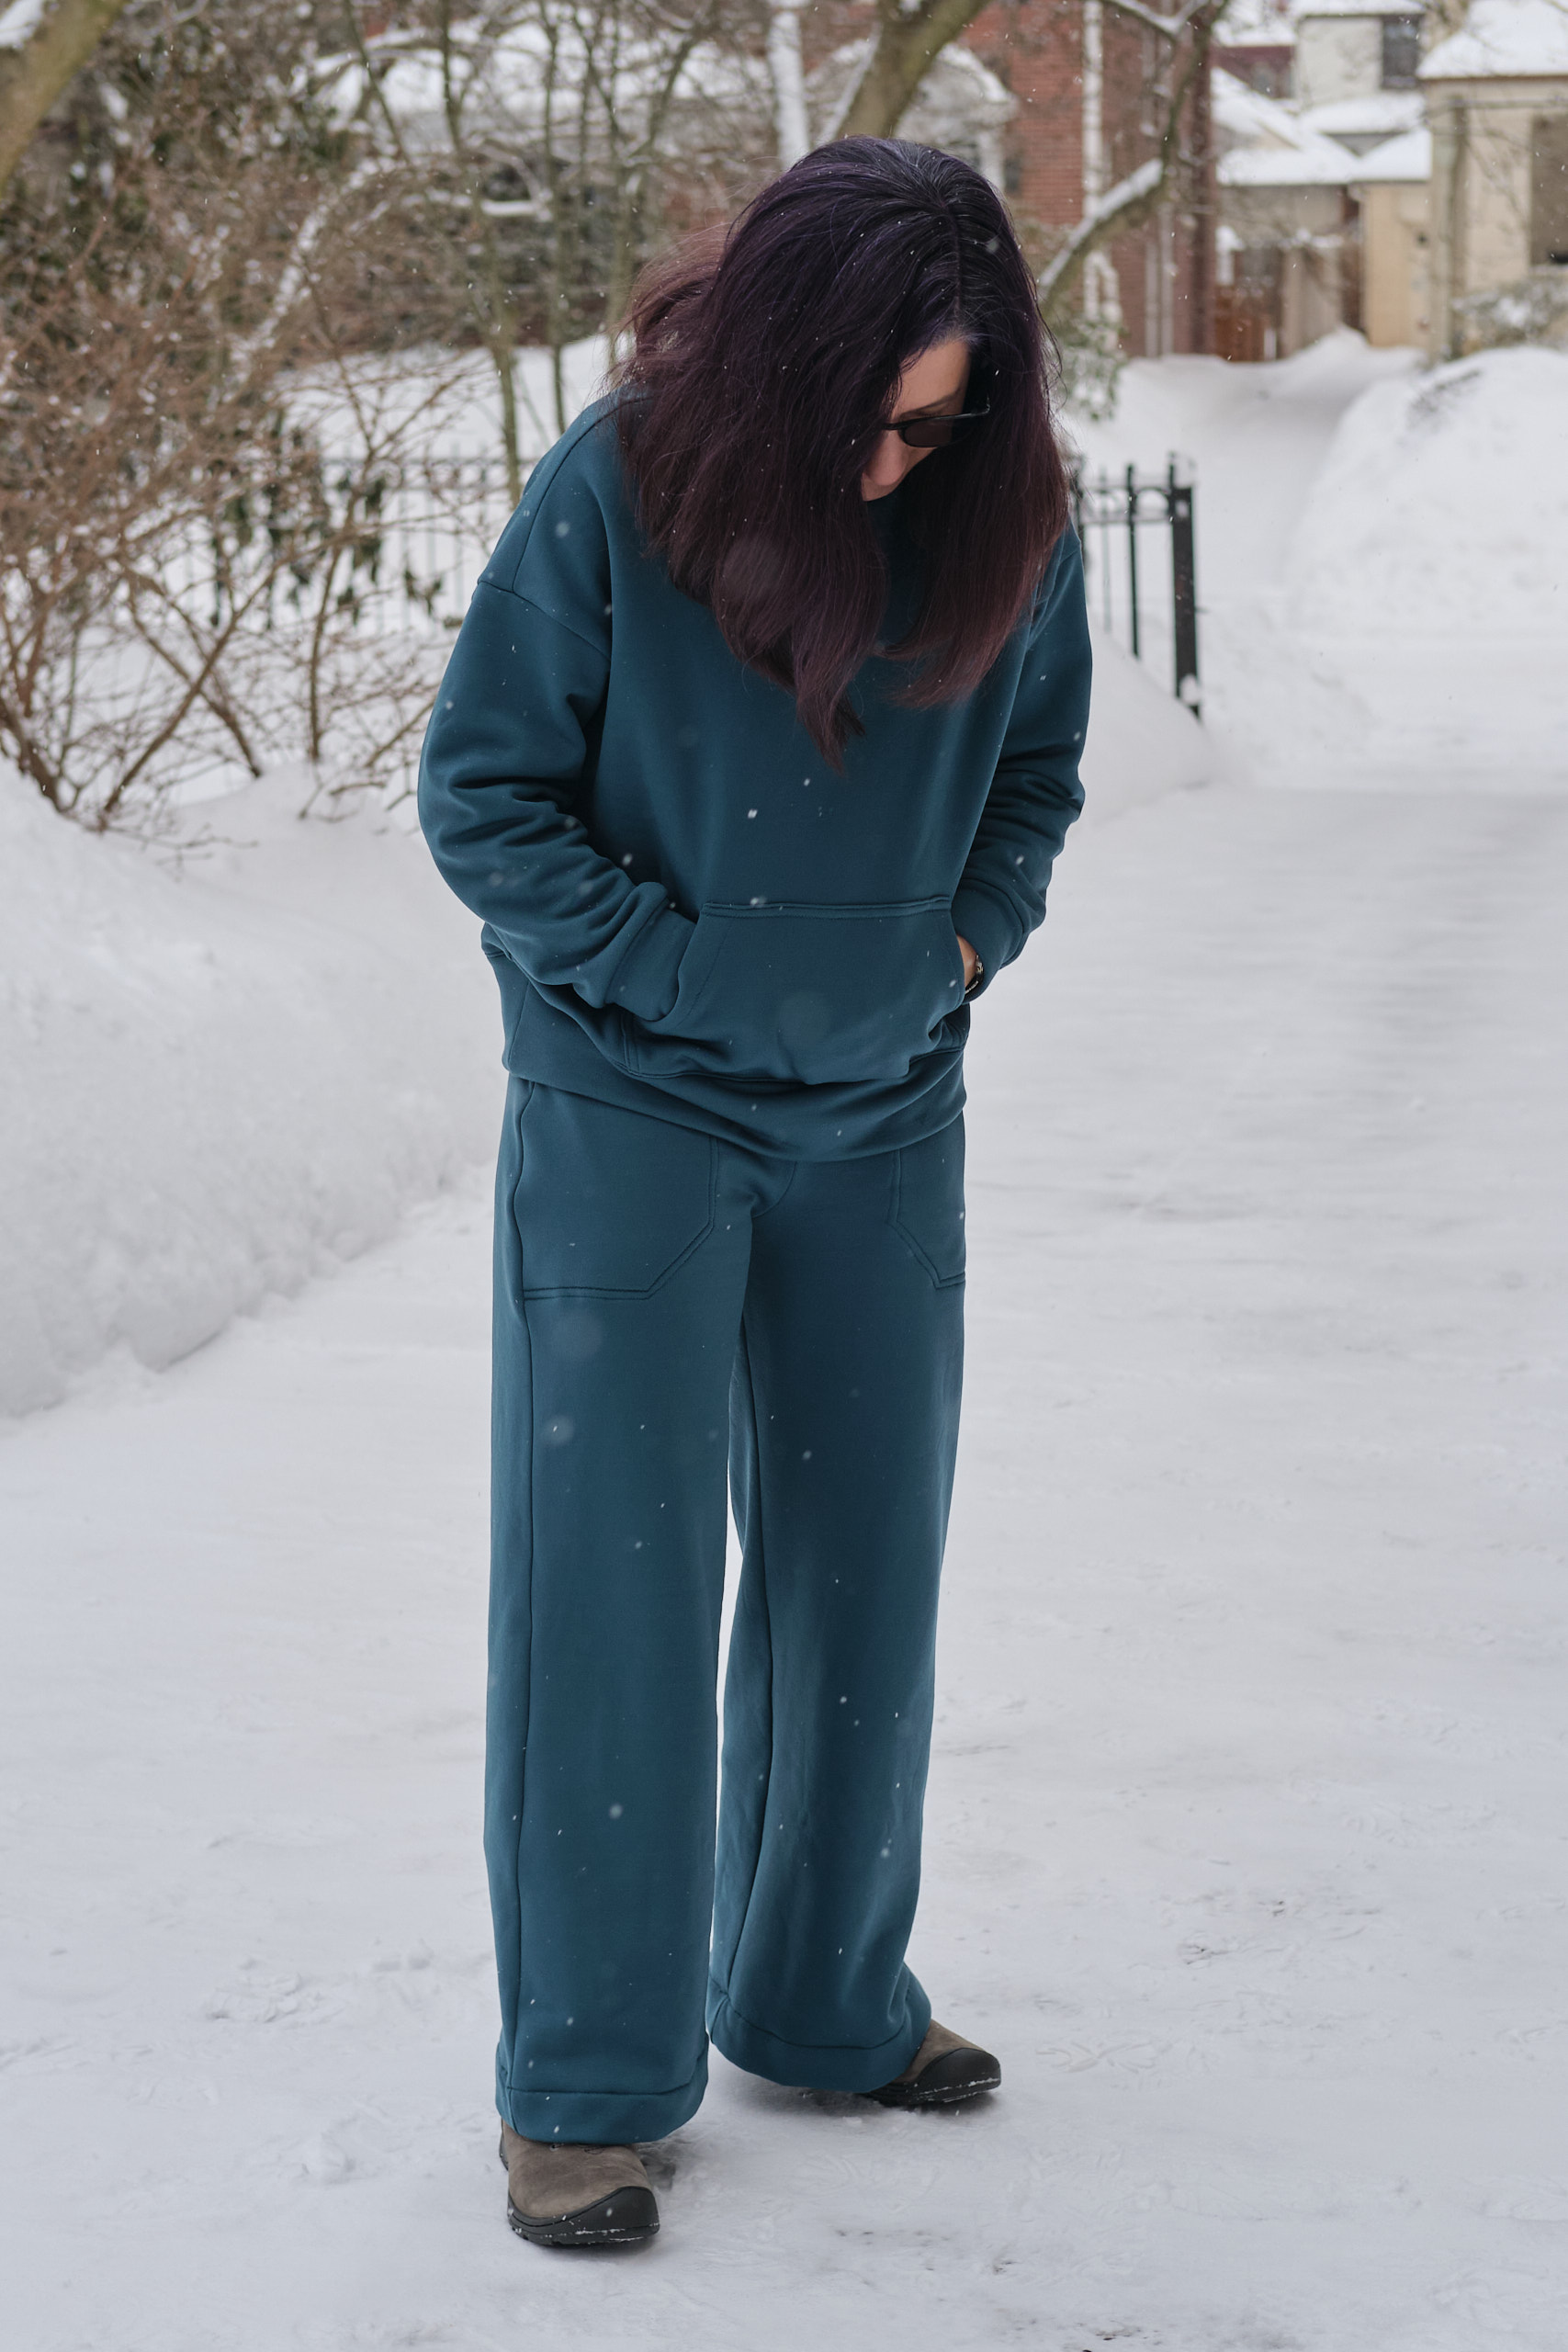
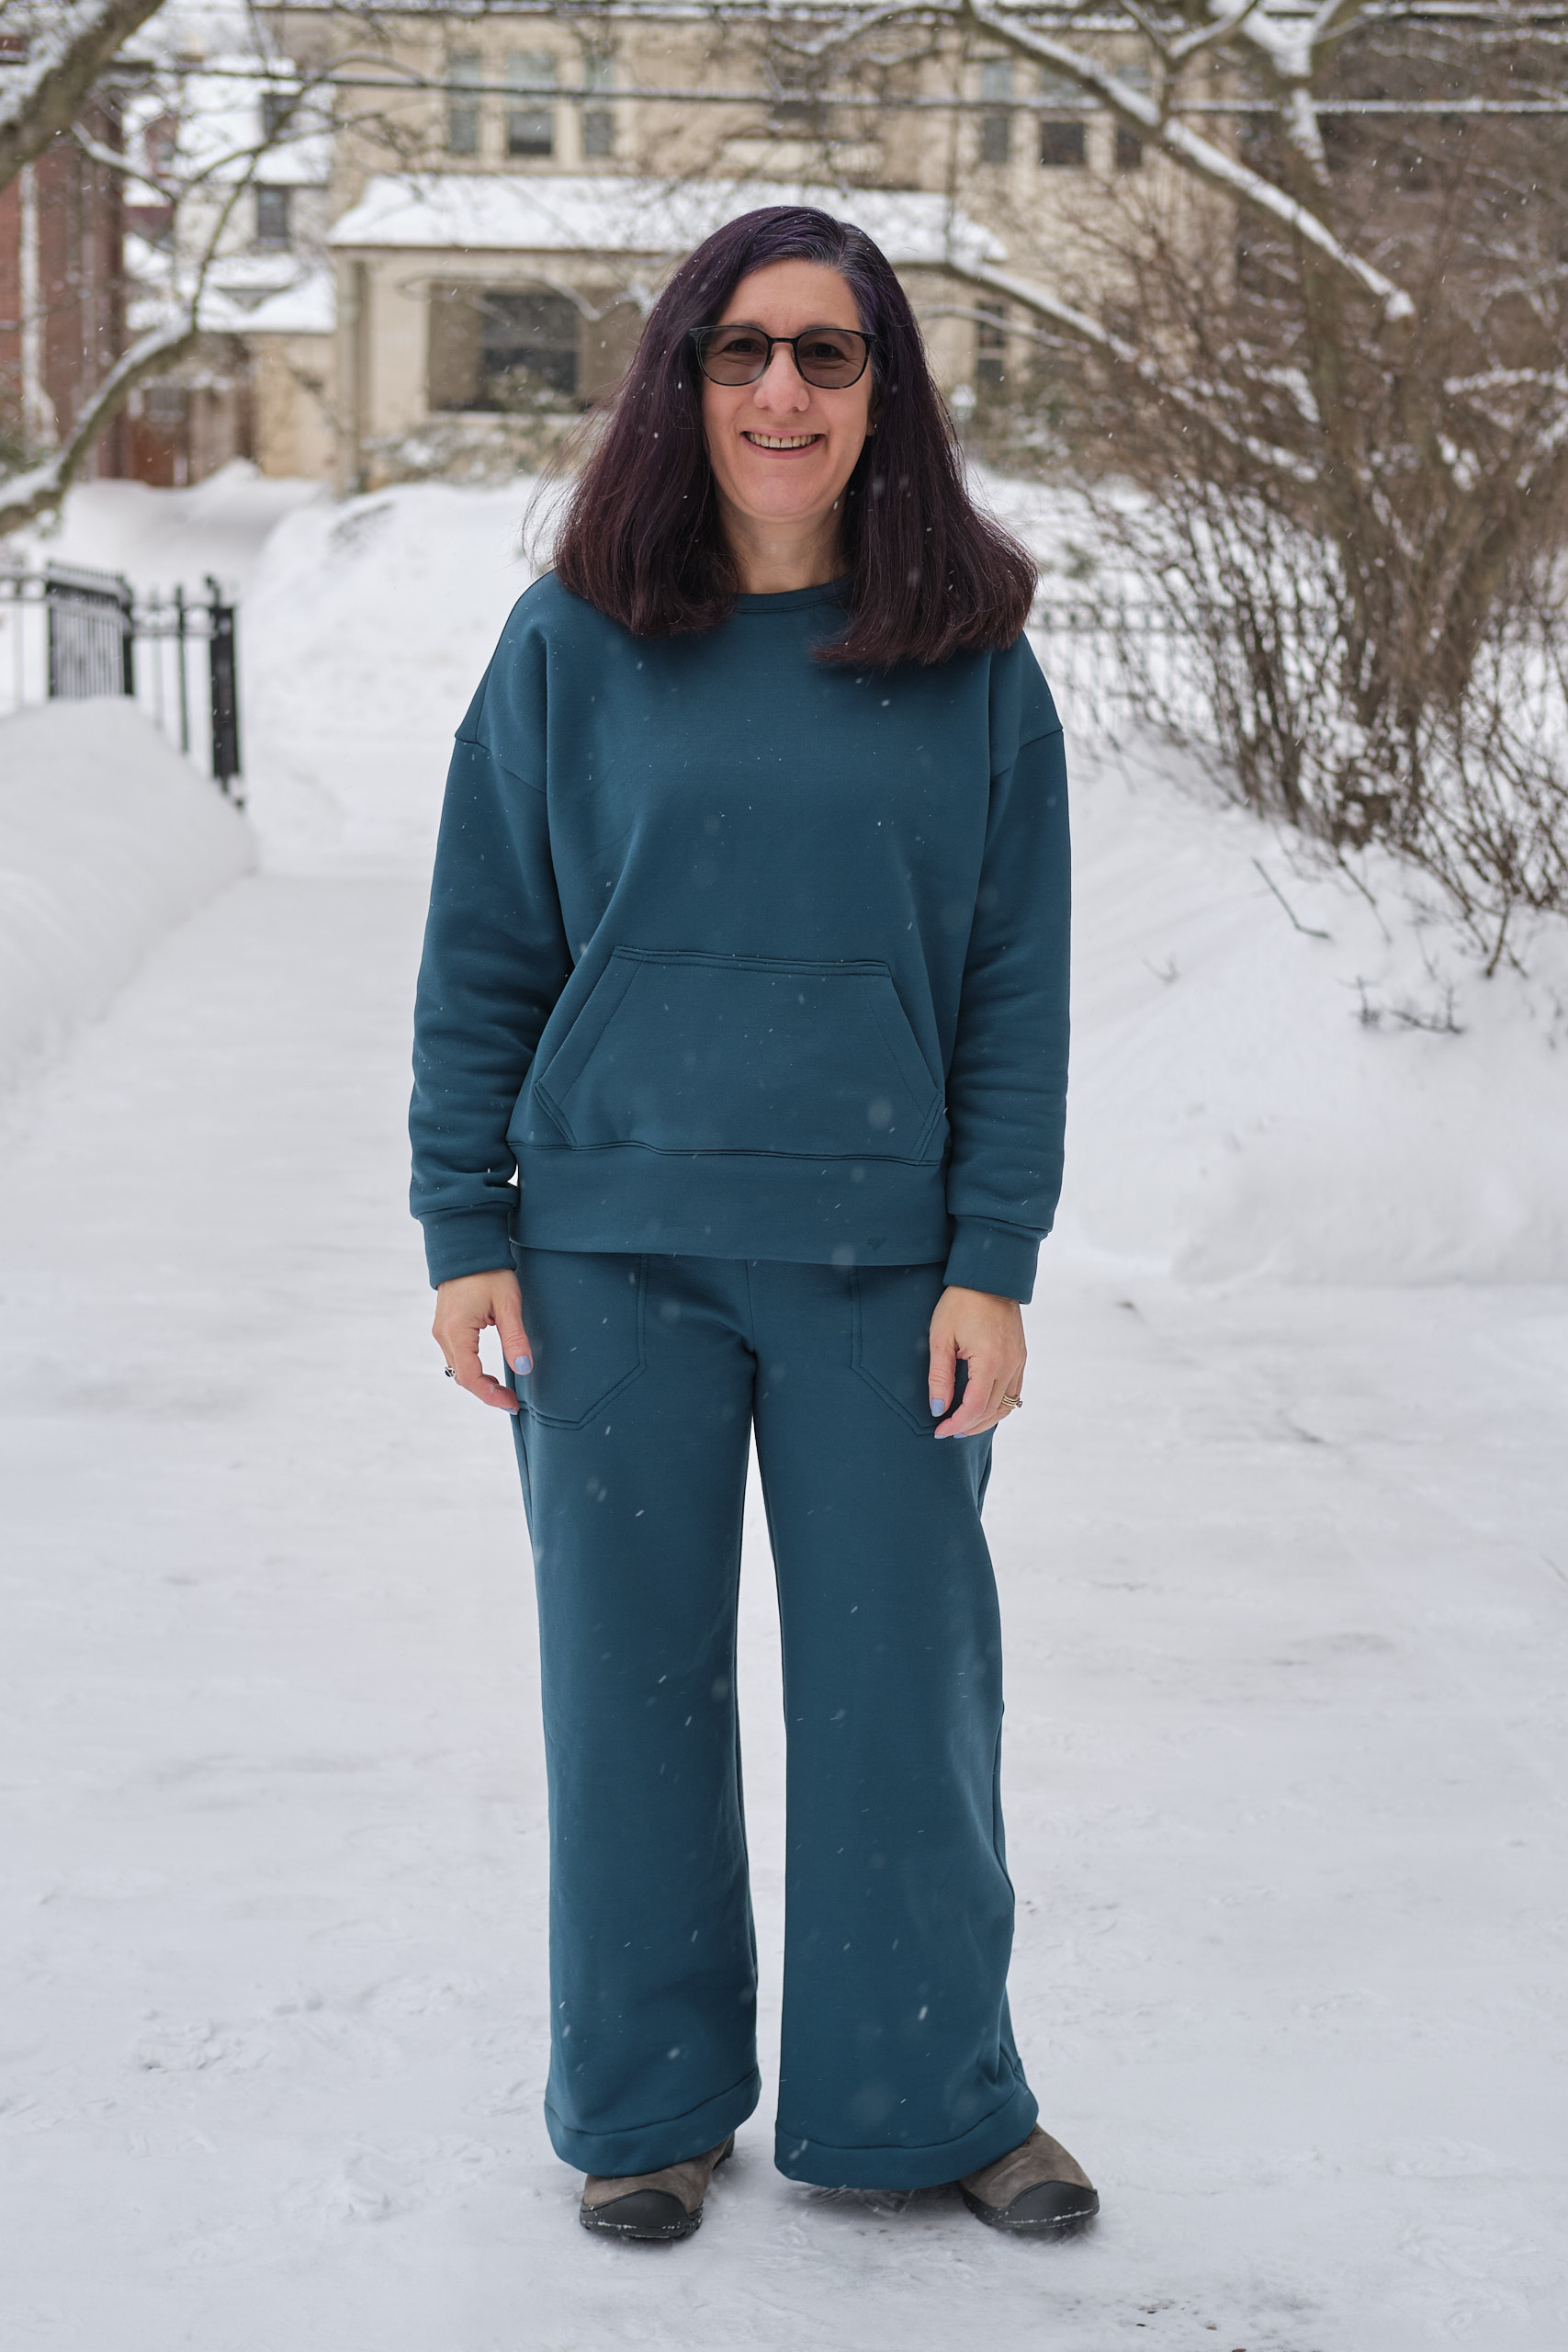
Greenstyle Bianca Pullover in size E, hip length shortened by 1 inch, sleeves shortened by 1 inch, kangaroo pocket, 1.5 yard spruce Polartec stretch sweatshirt fleece.
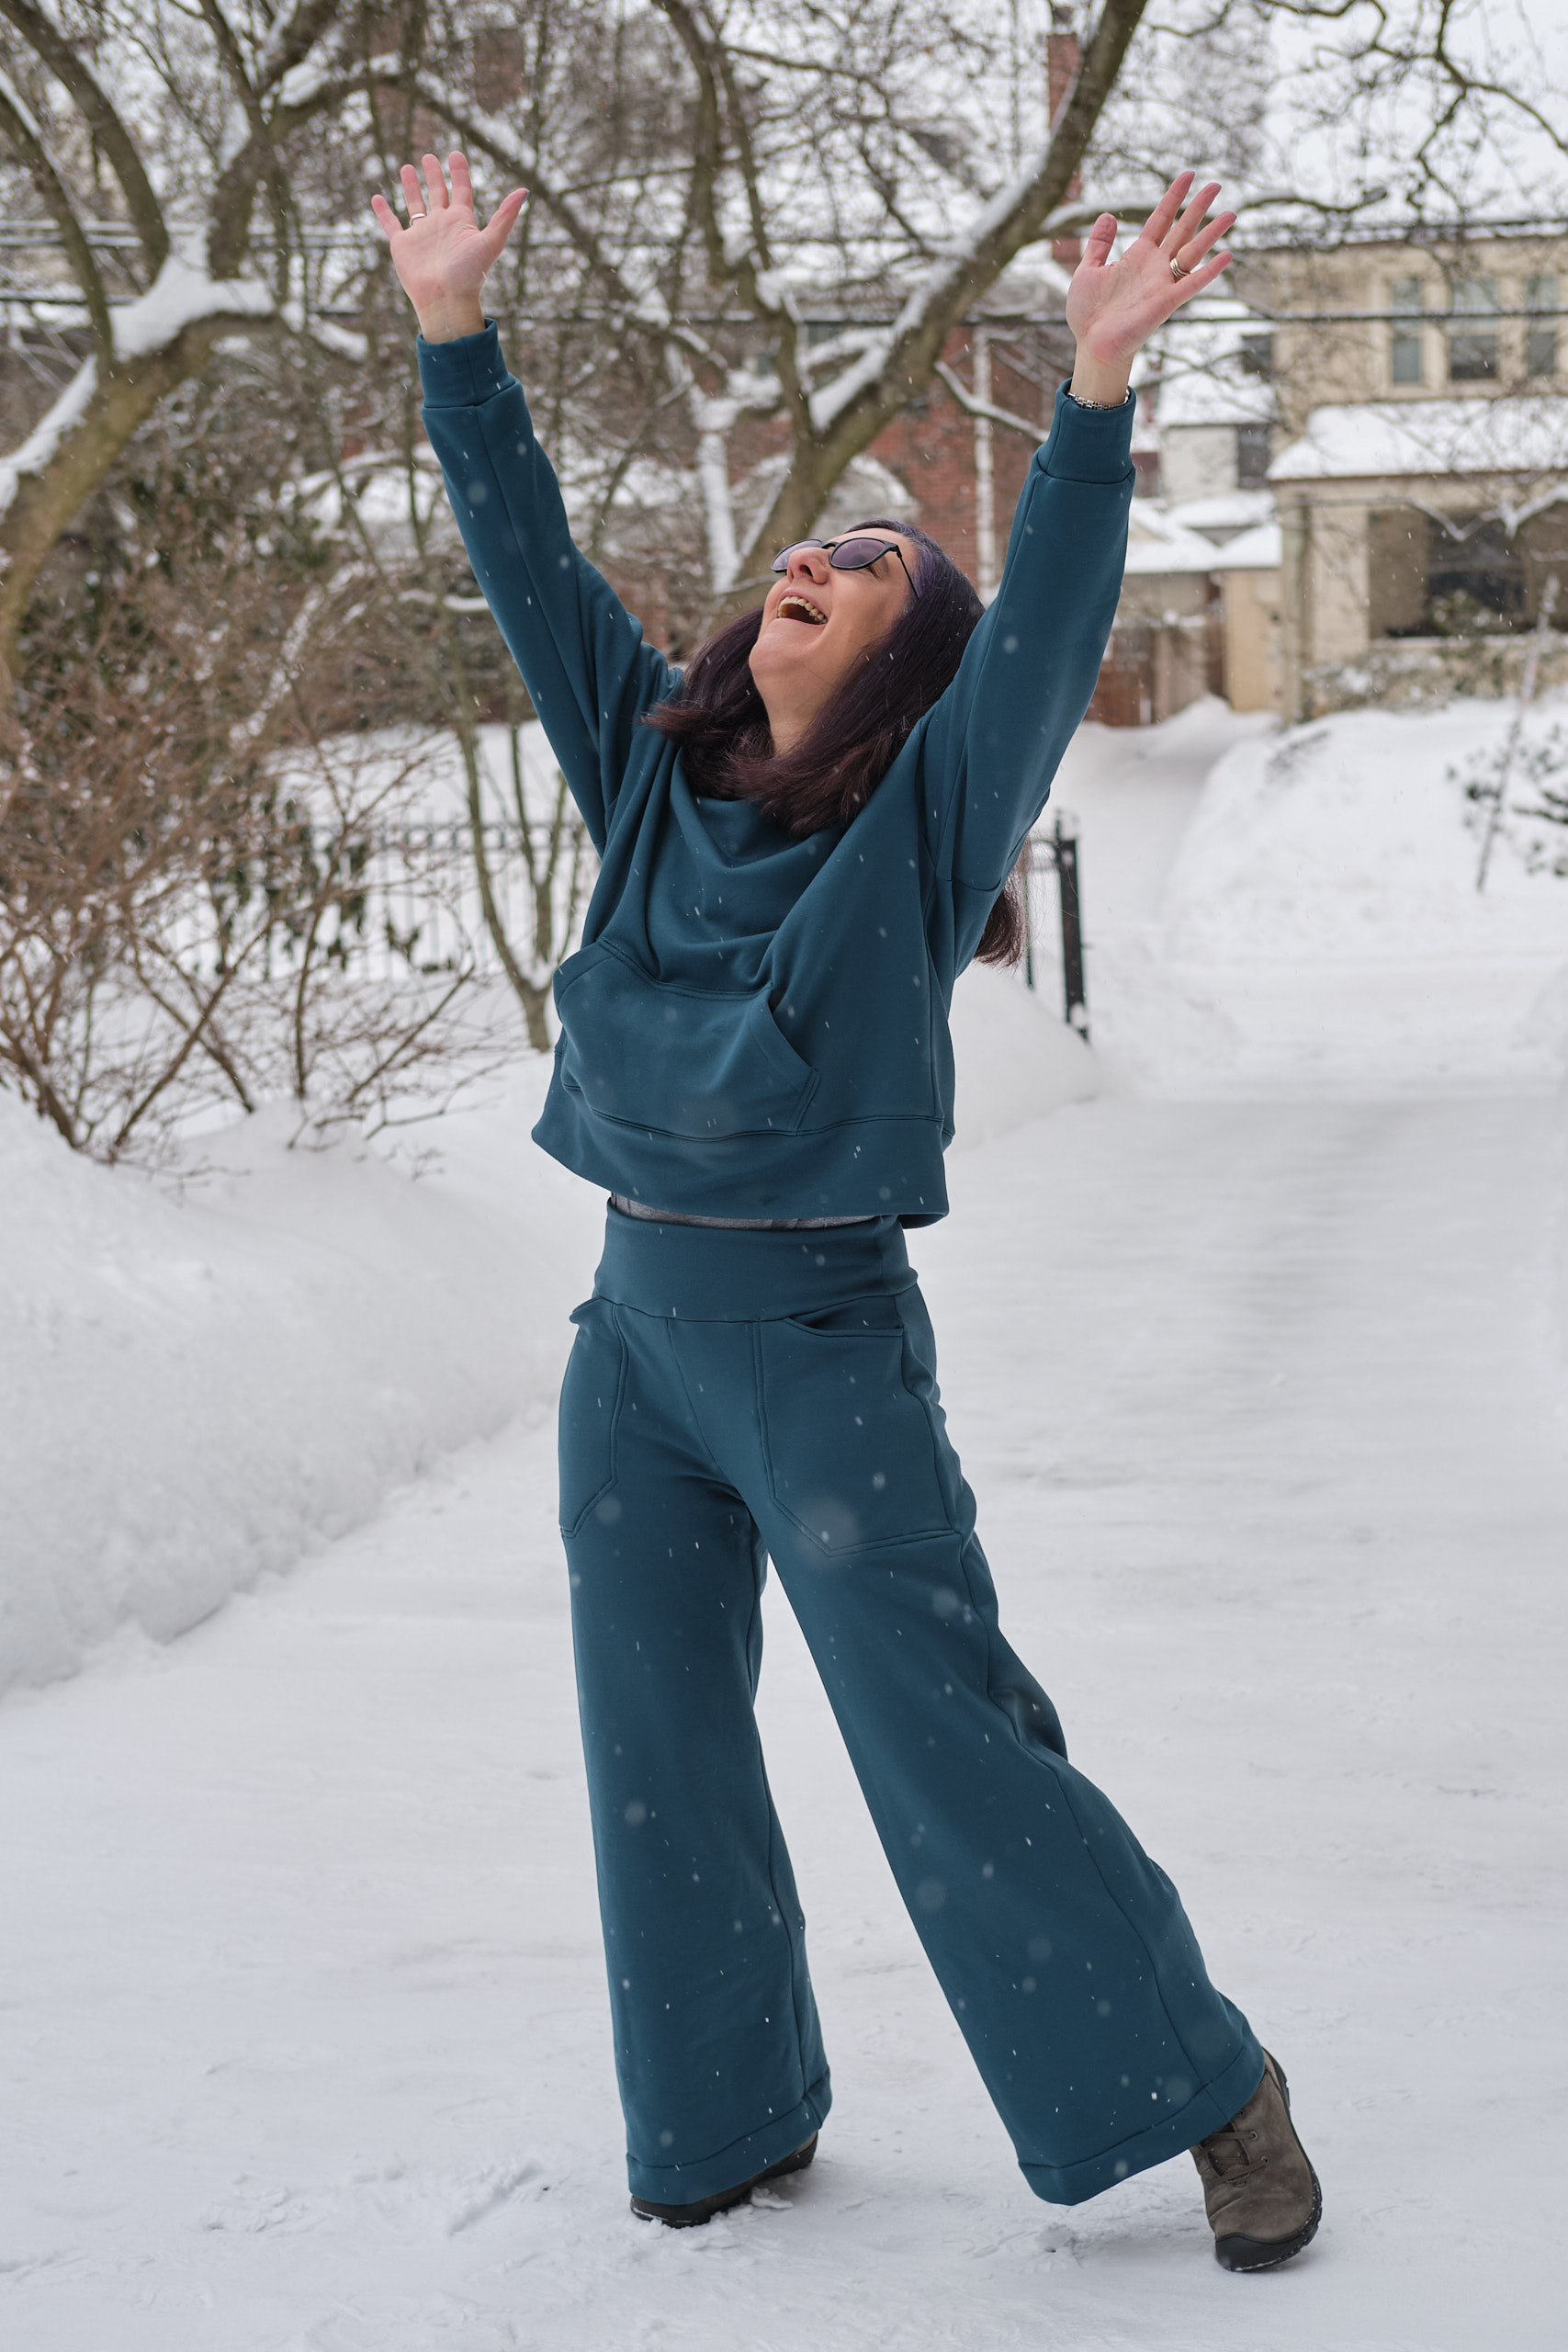
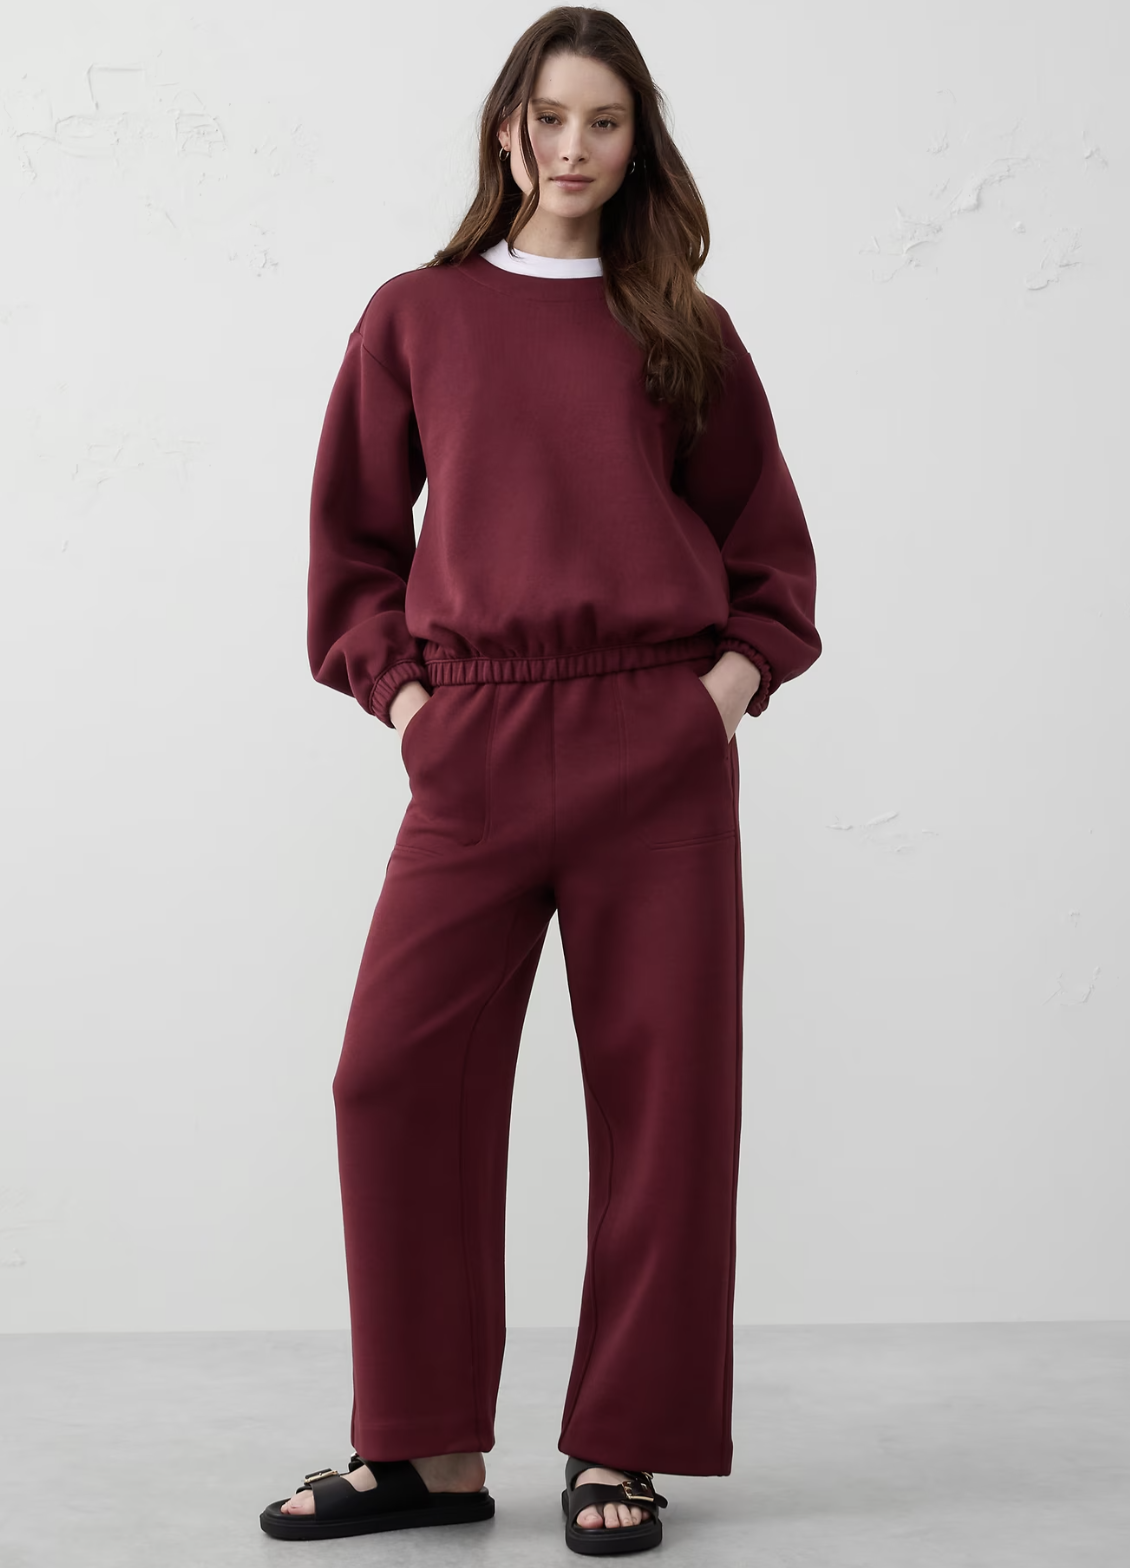
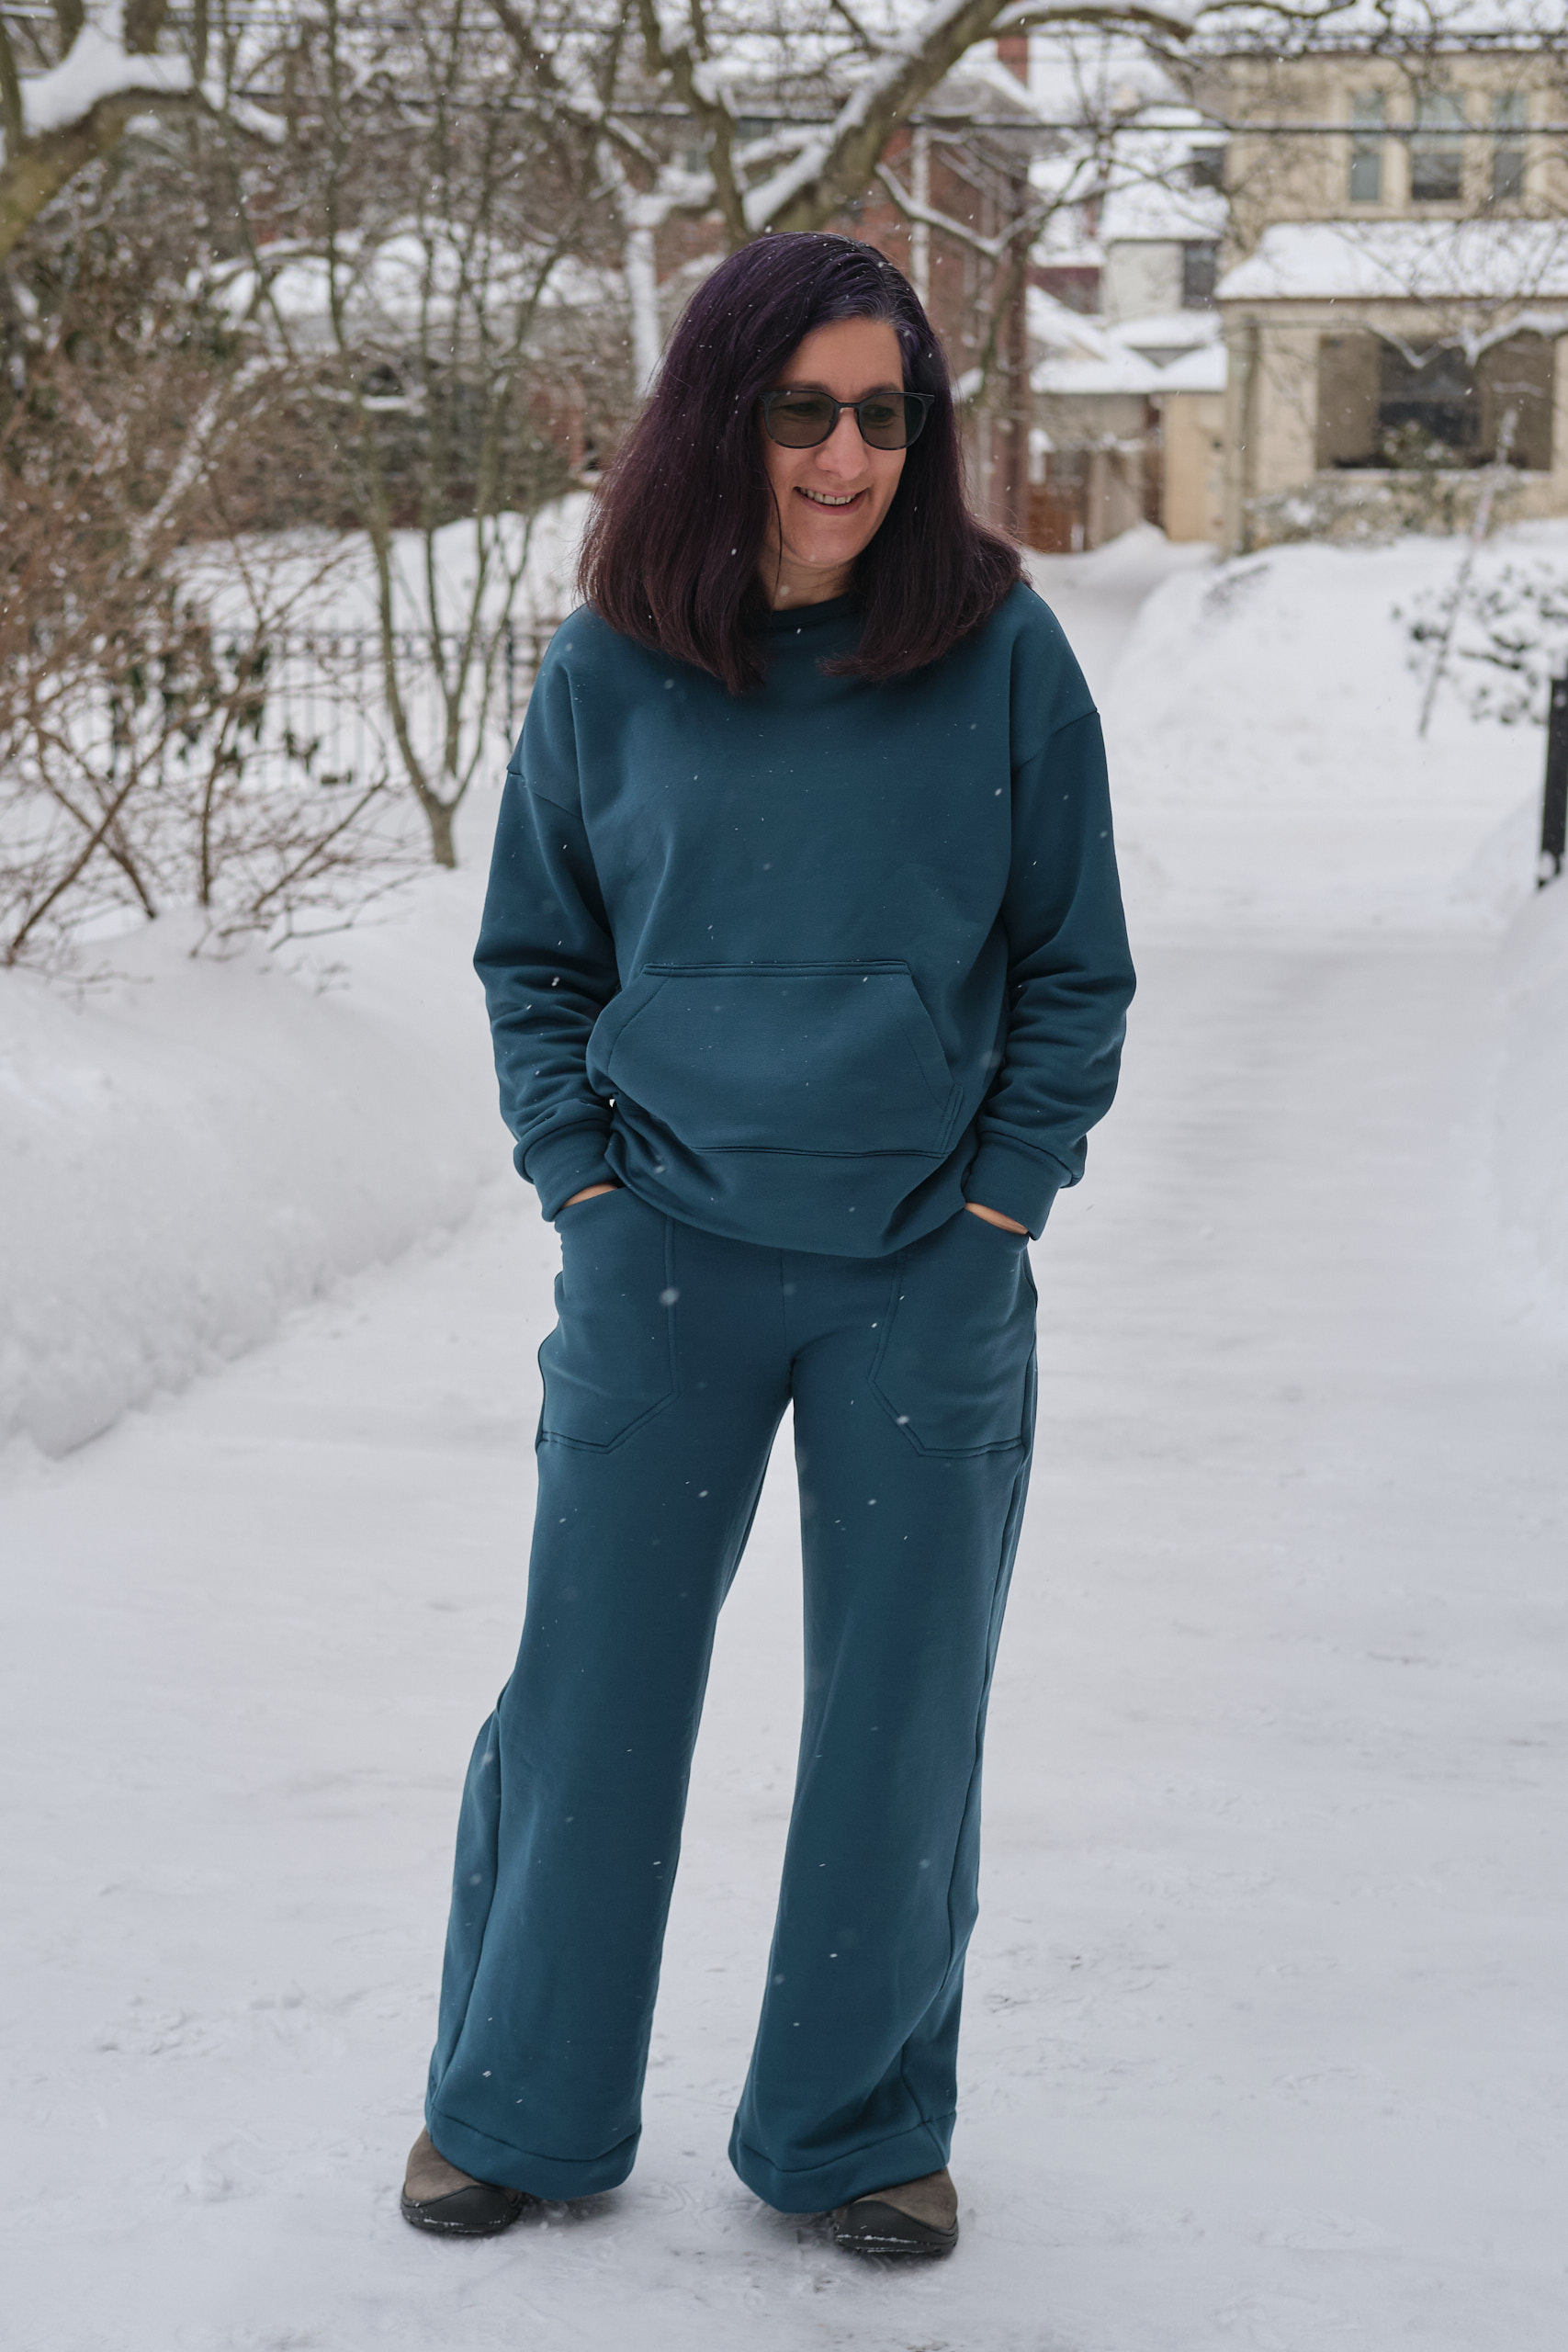
I wanted to make a fleece loungewear set similar to what I’ve been seeing from retailers lately. I started with the fleece wide-leg pants, and then debated about what top to make. I knew I wanted a sweatshirt-style top, but I wanted it to be a bit oversized, but not too long, and I wanted it to have a kangaroo pocket. I liked the fit of the Greenstyle Surge top I just made, although I didn’t want it to be quite that oversized and I wanted a different neck. So I took a look at the other Greenstyle top patterns and decided to try the Bianca Pullover. There’s a nice blog post with lots of Biancas on the Greenstyle website.
The Bianca pattern uses a different odd size scheme than Surge. This time my measurements suggested I was somewhere between D and E. Given the bulky nature of my fabric and the fact that the kangaroo pocket looked too small in the D size, I went with E. The only changes I made were shortening both the sleeves and the bodice by 1 inch.
Bianca was pretty easy and quick to sew, but the instructions were rather minimal. For an experienced sewist, this was fine, but the pattern might be more intimidating than it needs to be for beginners because it doesn’t explain what type of stitch to use where, when you should top stitch, etc. I decided to use a shallow zigzag (1.8 length, 1.1 width) for all my top stitching since this is a pretty stretchy fabric and I don’t want my seams to pop. The pattern specifies a 3/8-inch seam allowance, so I trimmed 1/8-inch as I serged most of the seams. This works, but I prefer knit patterns with 1/4-inch seam allowances so trimming isn’t necessary. I ended up sewing the neckband on with 1/4-inch seam allowance and not trimming because I didn’t want to make the neck band any narrower than it was already.
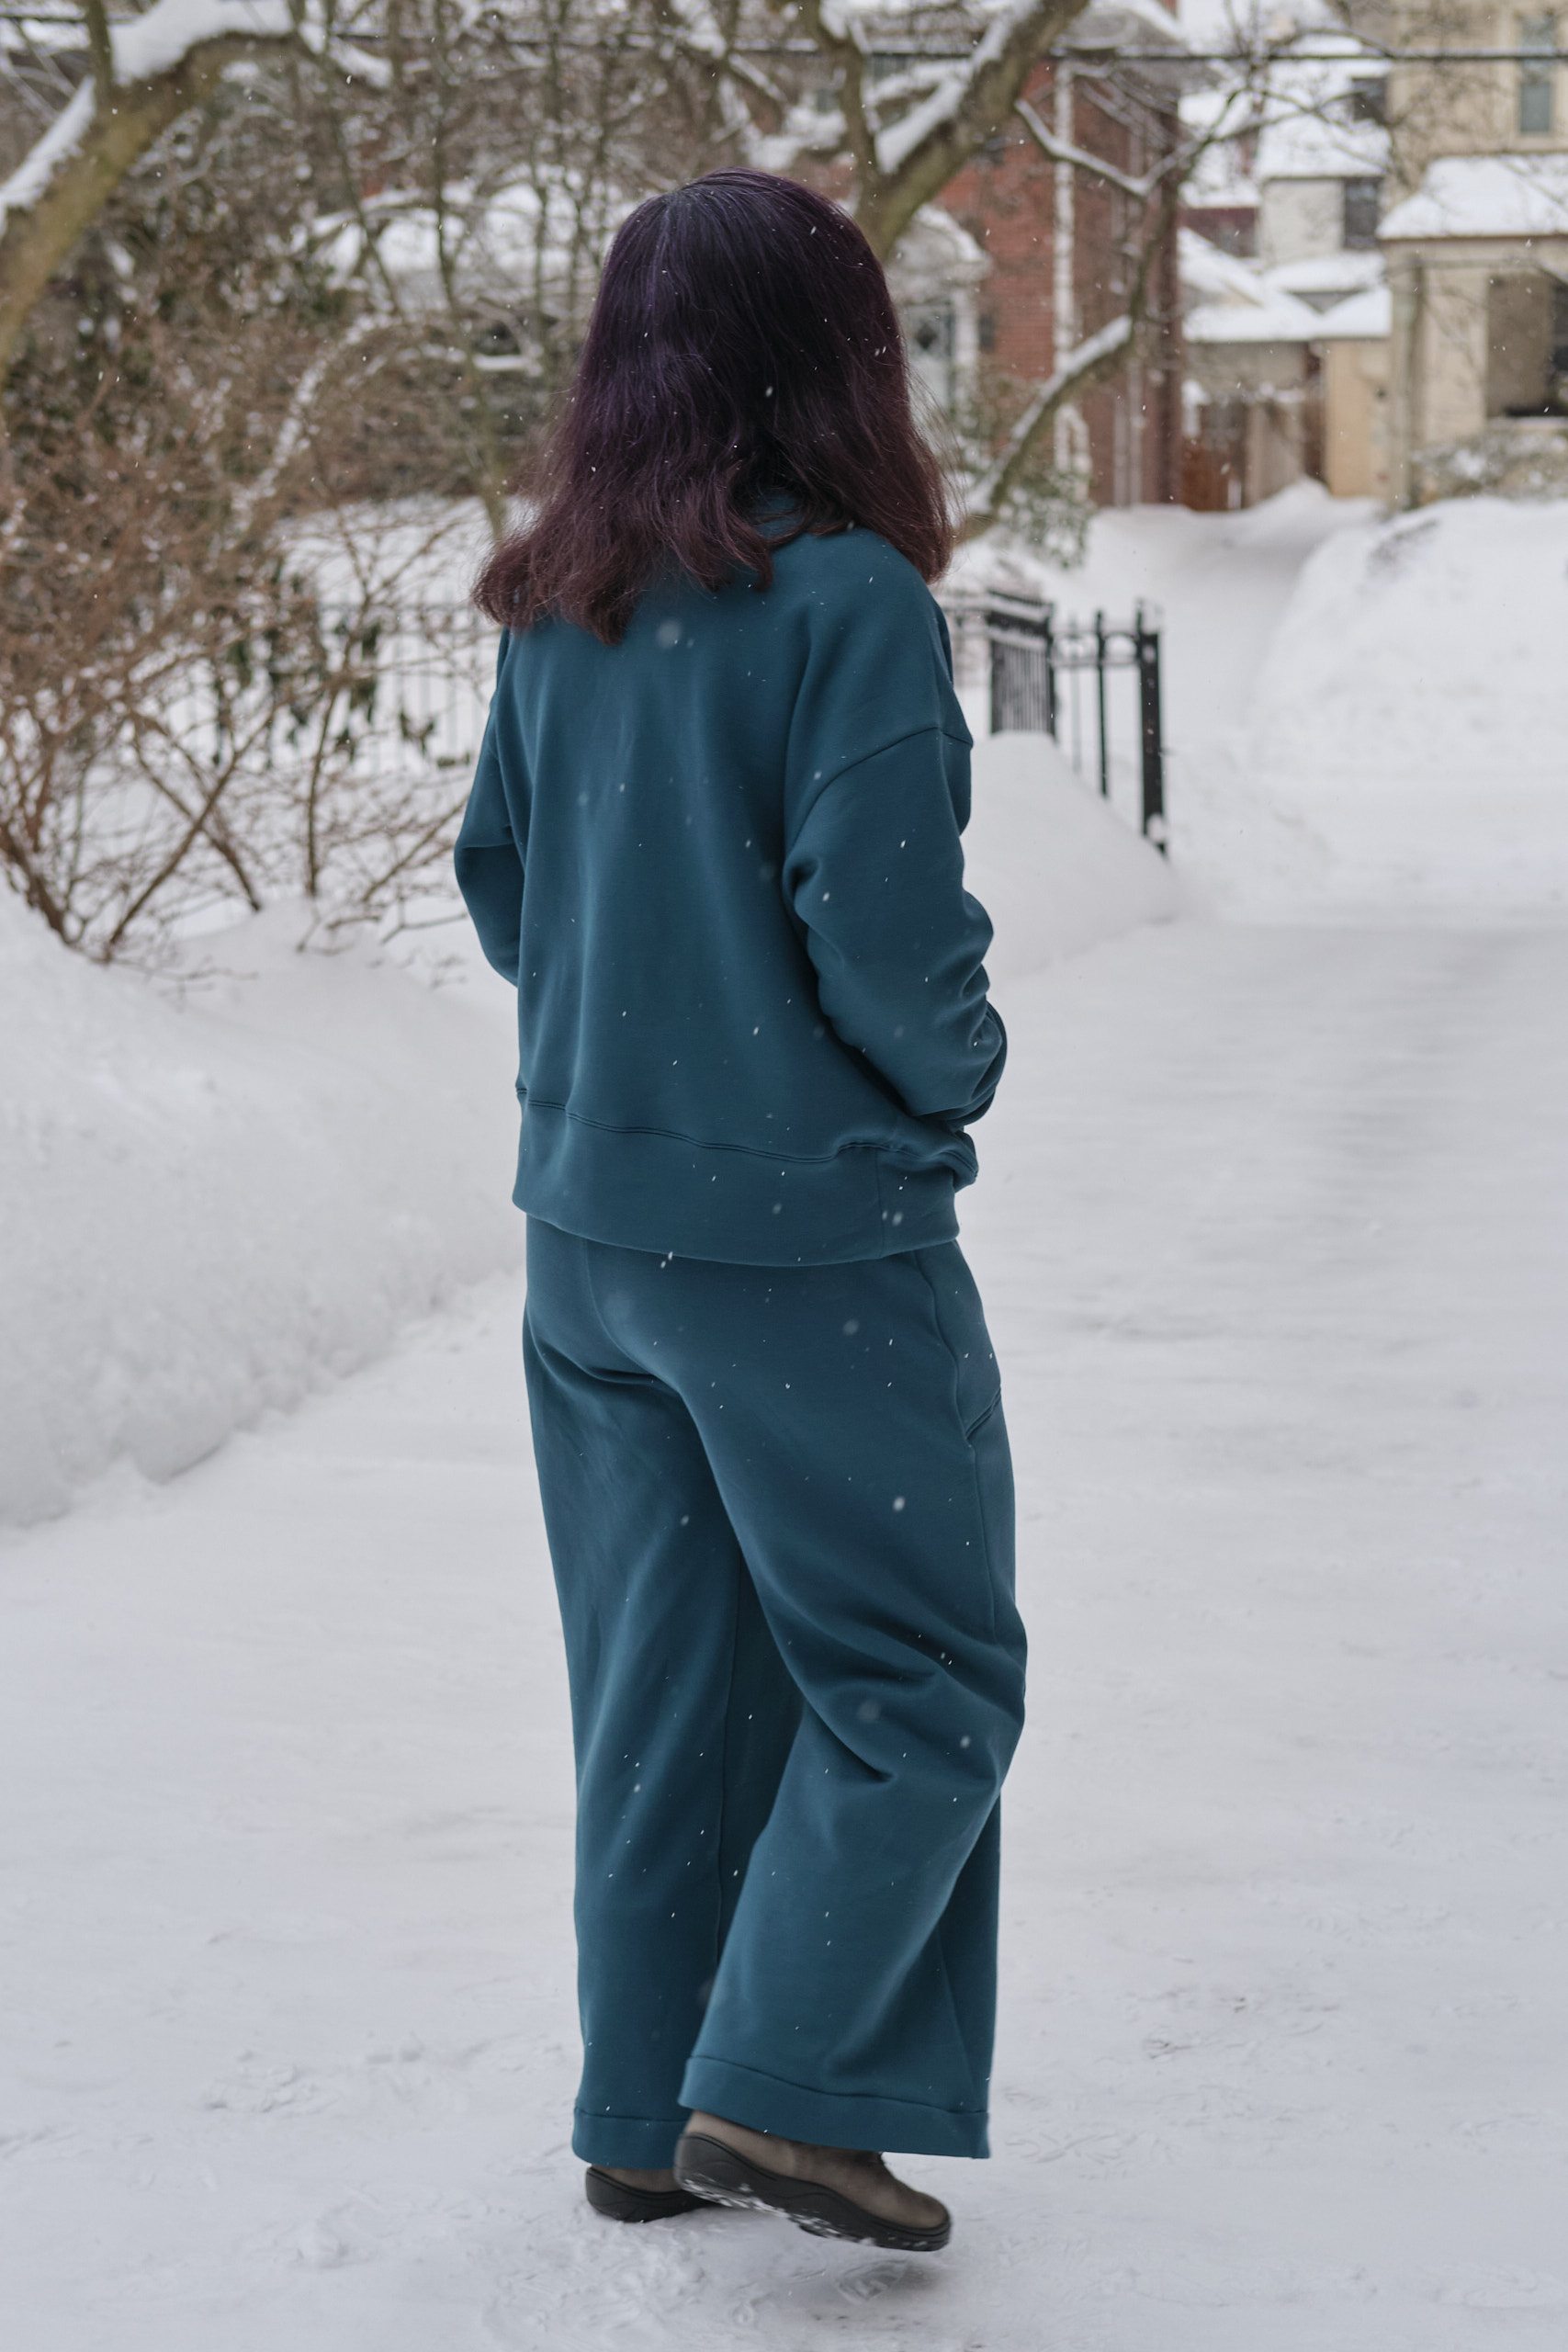
I’m very pleased with how the top came out, and I love how the complete lounge set works together. It is super comfy and cozy, and I even went outside in the snow for a photo shoot (we got over a foot of snow the day before). I will probably make more Biancas. It’s a great drop shoulder top that looks and feels roomy, but not enormous. For less bulky fabric I might go down to size D (but might keep the size E kangaroo pocket). It has options for a hood, side pockets, and for sewing with and without bands. Most commercial sweatshirts with kangaroo pockets also have hoods and I love the fact that when I sew my own clothes I can make it the way I want it with a kangaroo pocket and no hood.
Here’s a photo of a fleece lounge set from a retailer and some more photos of my lounge set.
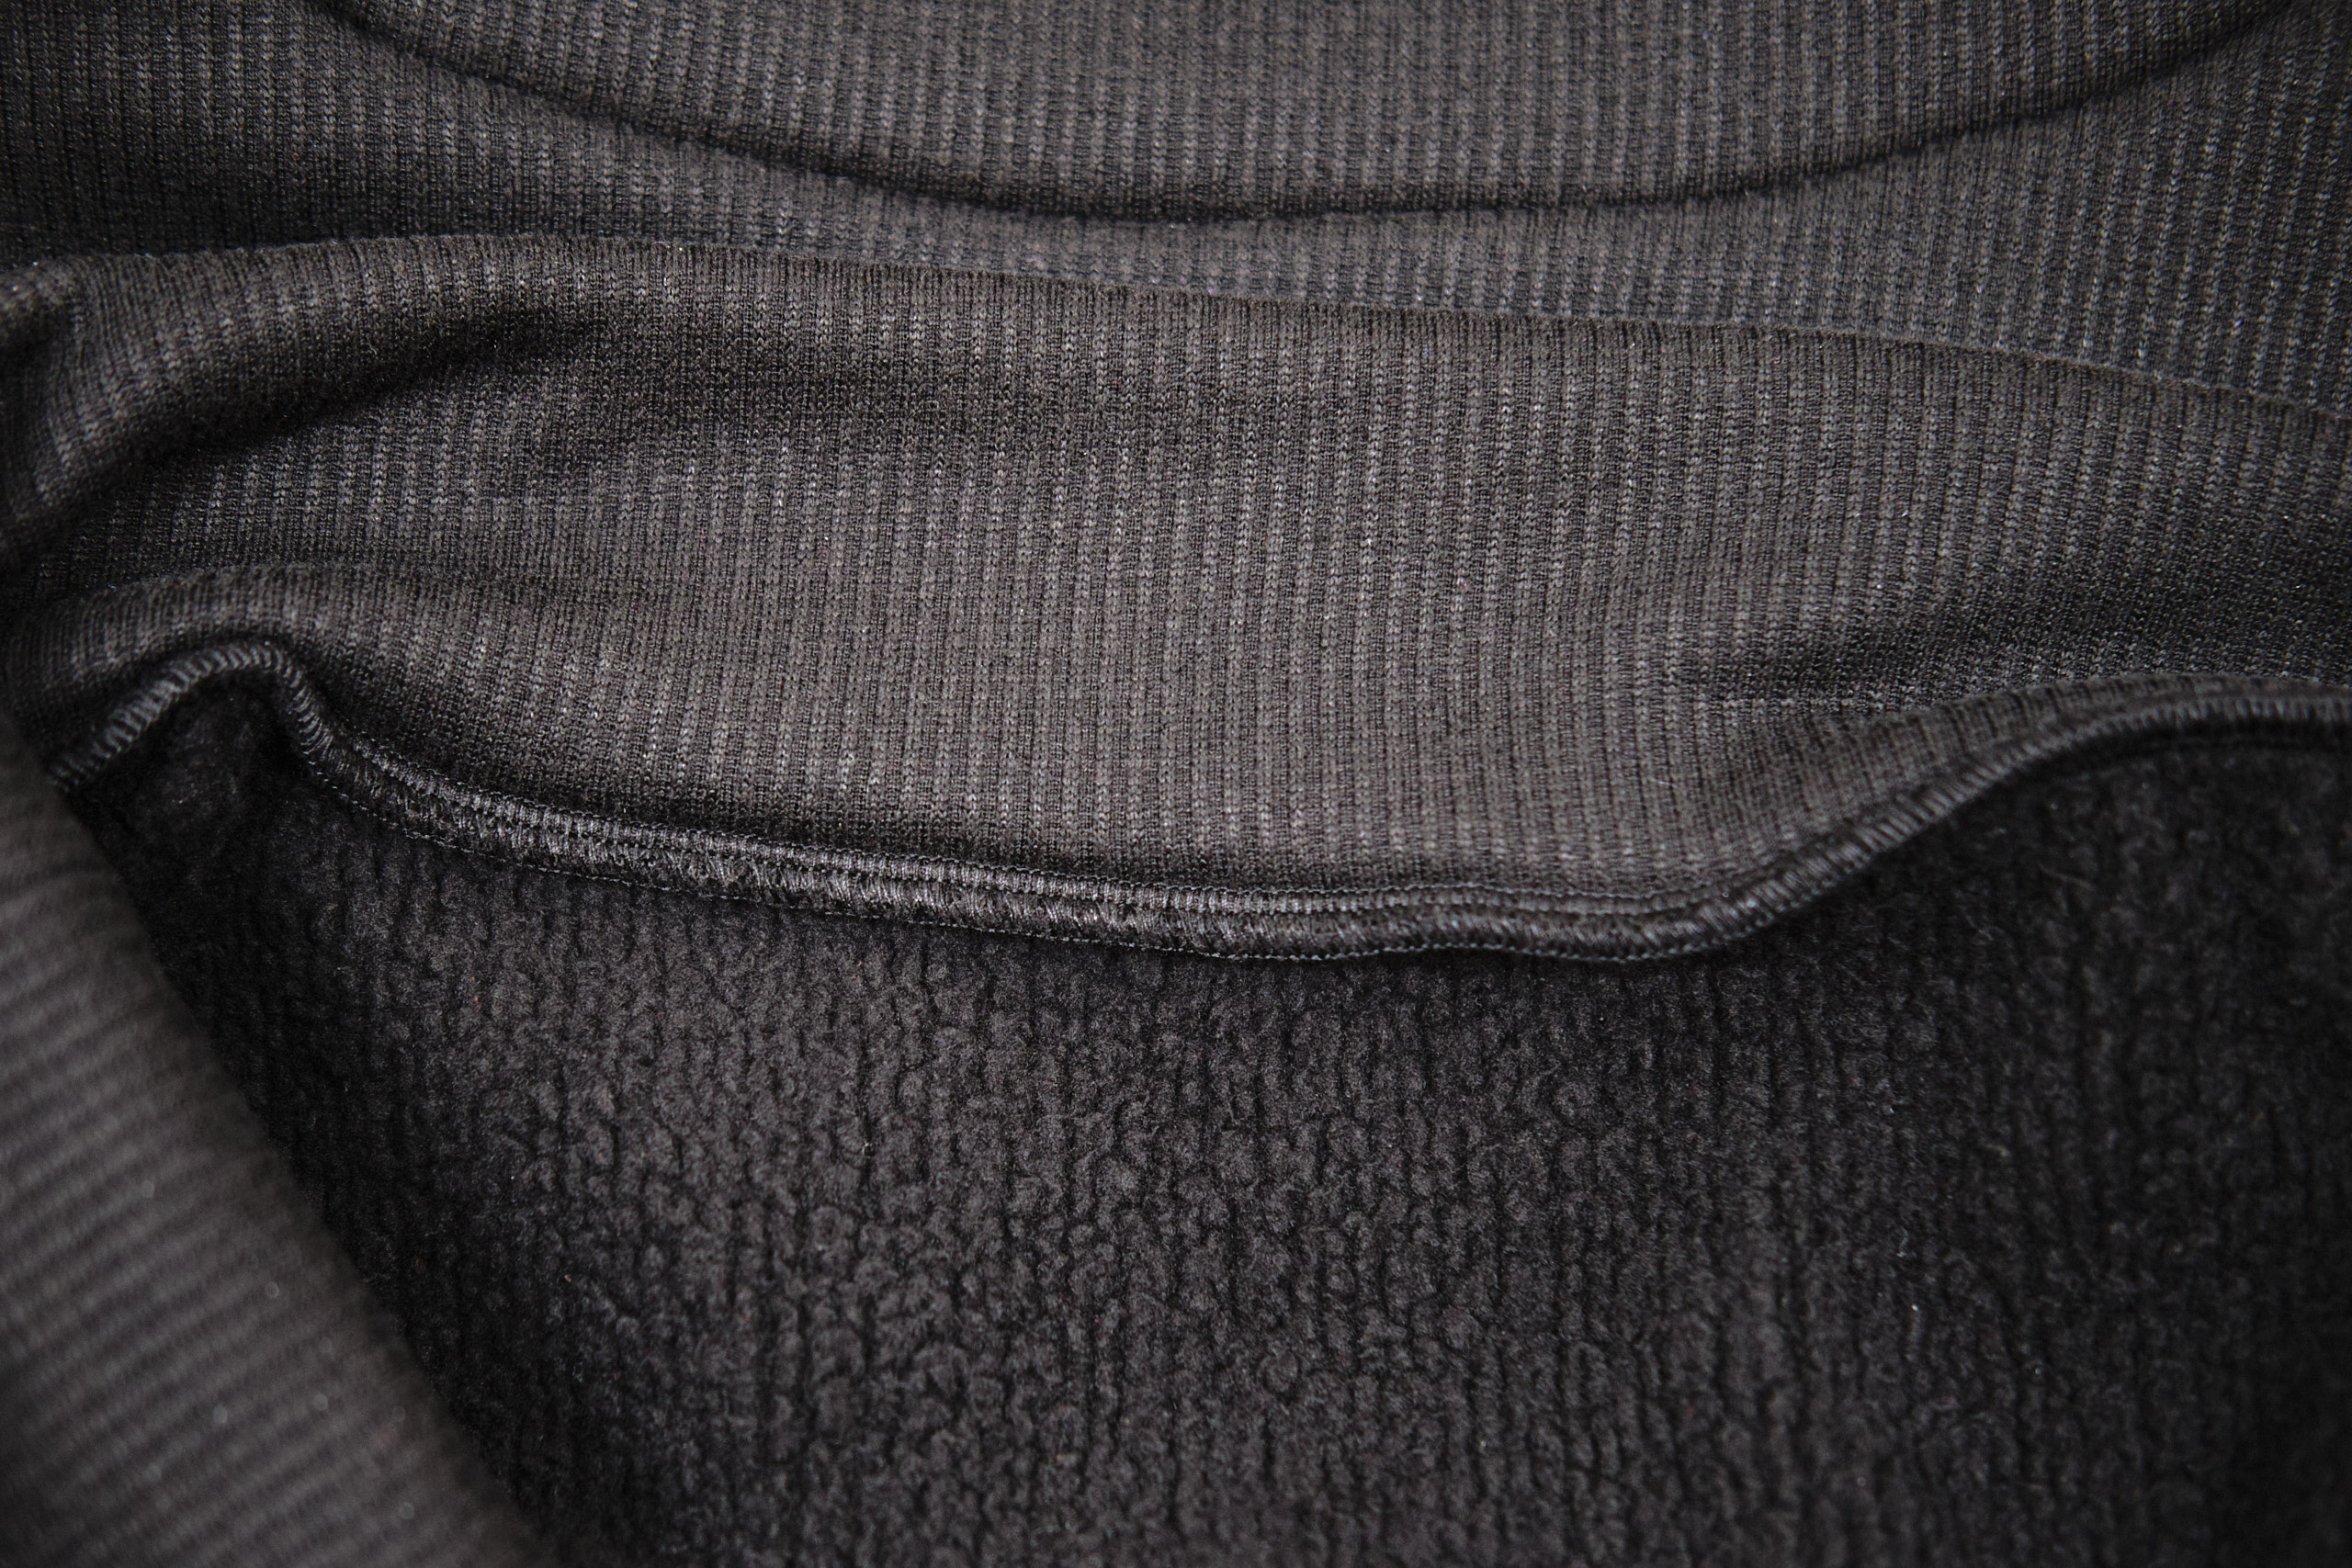
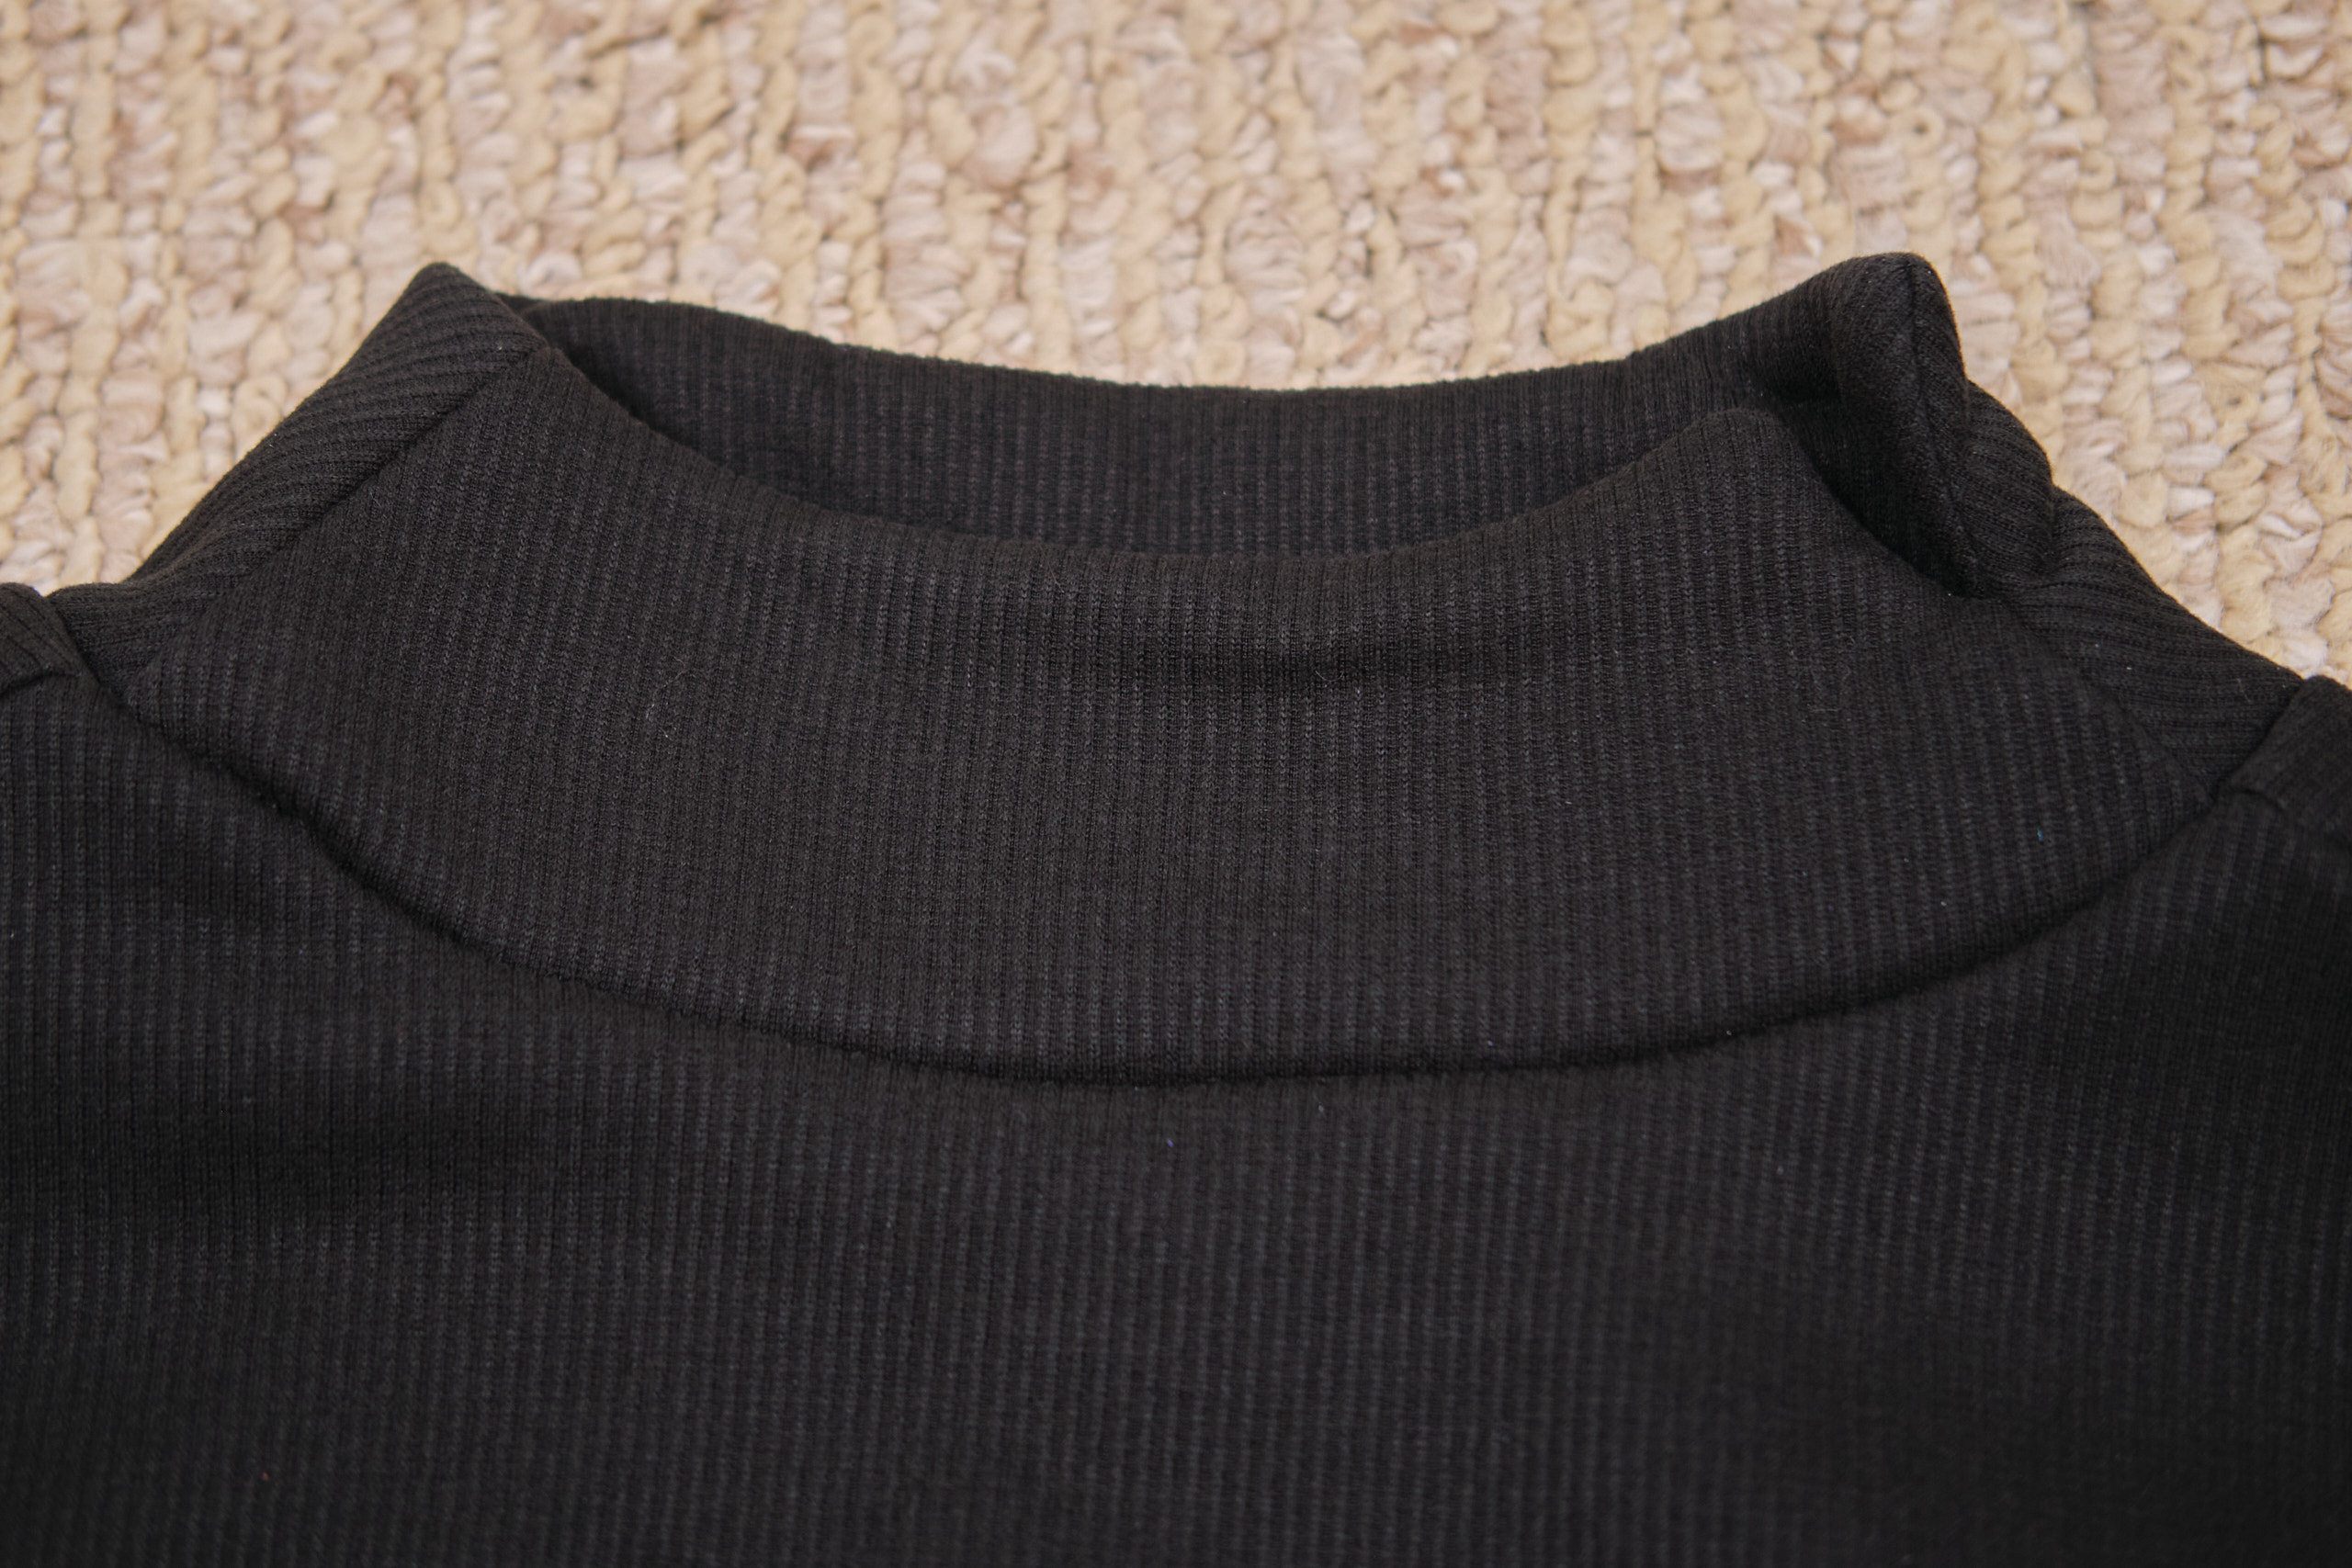
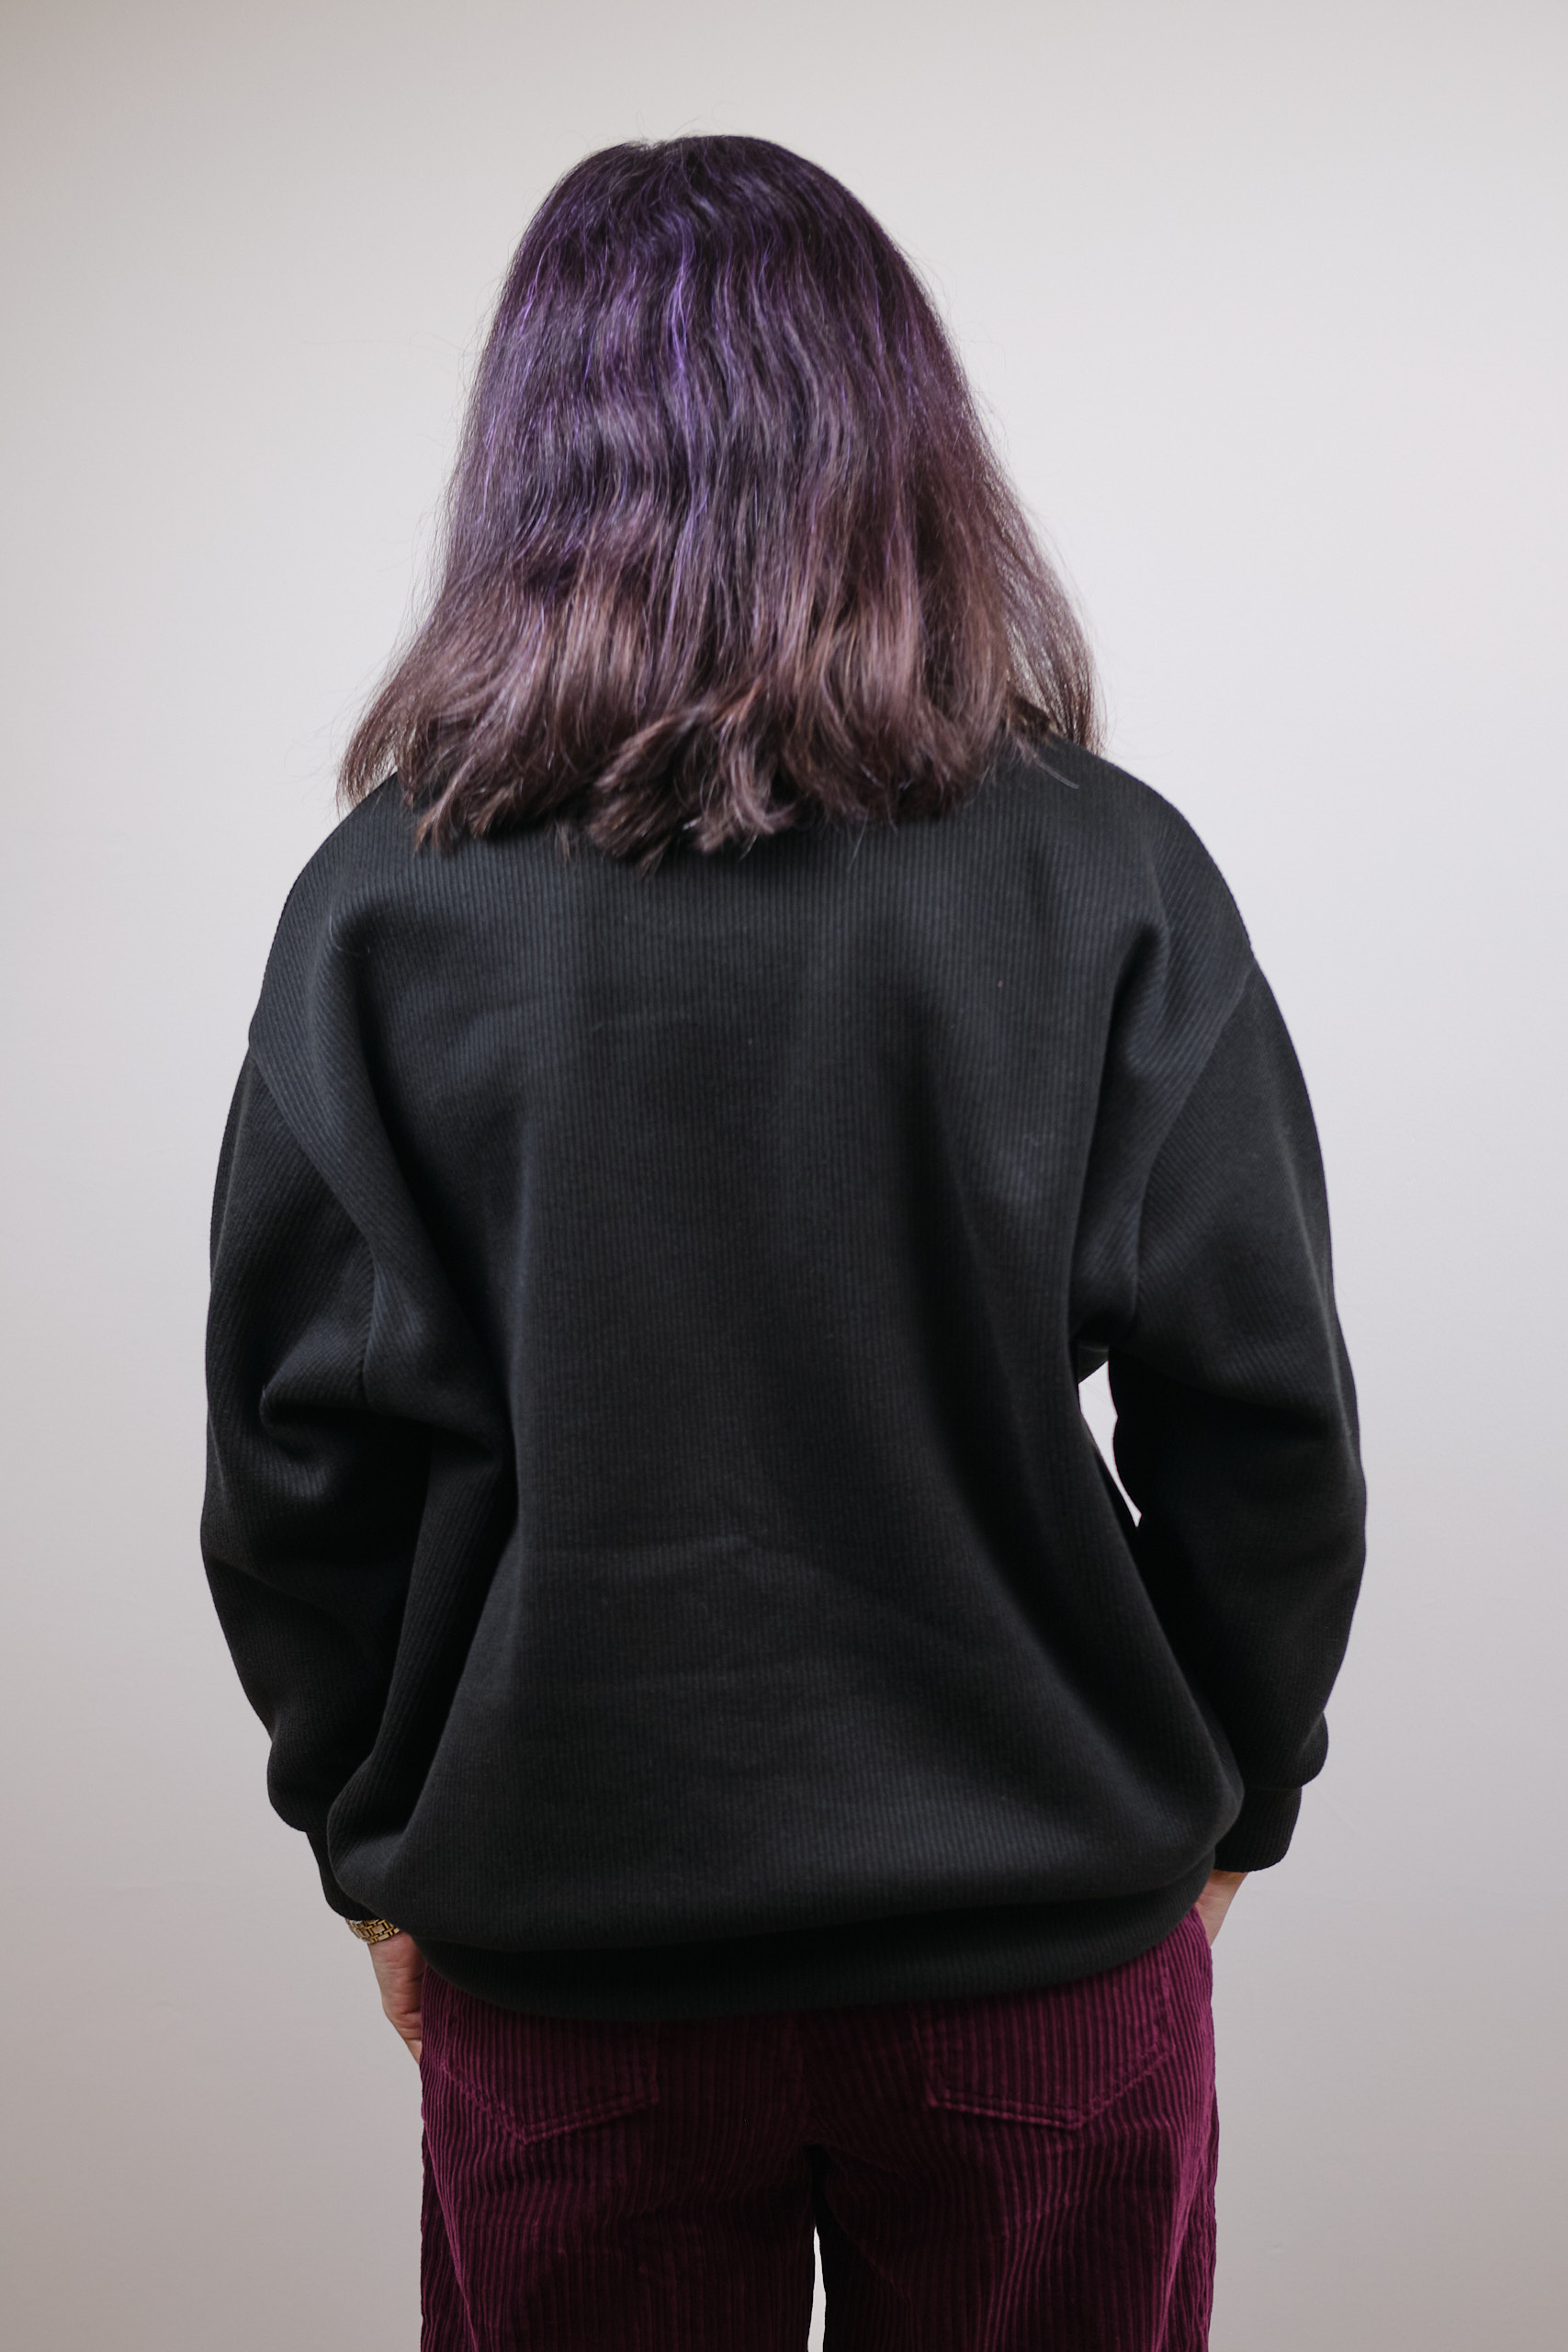
Greenstyle Surge Sweatshirt, size C2 regular length, sleeves shortened by 2 inches, in 1 yard black Polartec Windpro ribbed fleece.
When Kayla Tarey hacked the Greenstyle Sav’s sweatshirt pattern into an oversized sweatshirt suitable for a heavy, low-stretch knit, I wanted to try it too. Kayla used Surge Fabric’s Polartec Wind Pro ribbed sweater fleece, which is 100% Polyester, 380gsm, with 25% horizontal and 0 vertical stretch. It has a 2×2 rib knit on the front side and soft sherpa fleece on the back. This seemed perfect for a cold-weather sweater. The folks at Greenstyle turned Kayla’s hack into the Surge Sweatshirt pattern, making it much easier for everyone to copy this style. The pattern works for a variety of knit fabrics, but because it doesn’t have a neck band and the bottom band and cuffs don’t require a lot of stretch, it works fine for heavy 2-way stretch fabric that doesn’t have a lot of stretch. I had 2 yards of black Wind Pro and decided to try it out.
I projected the pattern and cut it out. Kayla had suggested checking the projector calibrations on the fabric because it is so thick. I measured some of the projected pattern pieces with both one layer of fabric and two and noticed only minimal differences between the size of the projection on the fabric and on the cutting mat without any fabric. I also found the fabric cuts quite easily with a rotary cutter.
GreenStyle has unusual sizing, and the size chart for this pattern said I was mostly a size C2, but a B1 at the bust. This was my first Greenstyle pattern so I wasn’t entirely sure what to do, but as this is supposed to be an oversized pattern and the fabric is hefty, I decided to go with the bigger size. I debated grading parts of it down or shortening it, but ultimately decided to only shorten the sleeves with my usual 2-inch adjustment. Amazingly, I was able to cut the whole thing from just 1 yard of fabric! I think this is because the drop sleeves are actually pretty short since part of their length comes from the width of the bodice. Now I unexpectedly have an extra yard of this fabric to make a sweater for someone else.
Most of the sweatshirt came together pretty quickly. The pattern has a 3/8-inch seam allowance so I trimmed 1/8-inch off with my serger as I sewed. My Triumph serger was able to sew and trim the heavy fabric without a problem. I used my sewing machine to join the seams on the bands and cuffs. I basted the bottom band and the cuffs to the shirt with a long zigzag stitch after stretching them (just a little bit) and pinning in place. I was able to easily serge the bottom band through three layers of fabric, but the cuffs were too bulky to get under my serger foot. Perhaps I could have made it work if I switched to a smaller foot (I have all the feet so there was probably something that would have worked), but I decided to just sew them with a zigzag on my sewing machine. The neck band construction looks complicated but is actually pretty easy, and is sewn on a sewing machine and finally attached with a serger. It has a cute little notch on one side that nobody will ever see because my hair hides it, but maybe if I wear a ponytail, it will show.
The finished shirt is definitely oversized, but not too oversized. It is very warm and comfortable. I find a lot of turtlenecks and cowls uncomfortable, but this neck band stands far enough away from my neck that it doesn’t bother me. I almost didn’t make this shirt because I didn’t want a high neck. I debated trying a V-neck, a quarter zip, or a scoop neck with facing, but eventually decided to just make the pattern as written, and I’m glad I did.
If I were making this out of a lighter-weight fabric I might go down a size or two, and I might also try this a few inches shorter, or use the pattern for the cropped version and make it a few inches longer. The pattern also has optional pintuck accents that I did not use. I think it looks better without them. Or maybe I would try the Greenstyle Bianca pullover pattern, which is less oversized, has a similar shape, but comes with neck and pocket options. It’s going to be cold here for a while and I have more cozy fabric in my stash, so let’s see!
I made this shirt yesterday and wore it to work today. I walked to work in single-digits and with a coat on top it did the job!
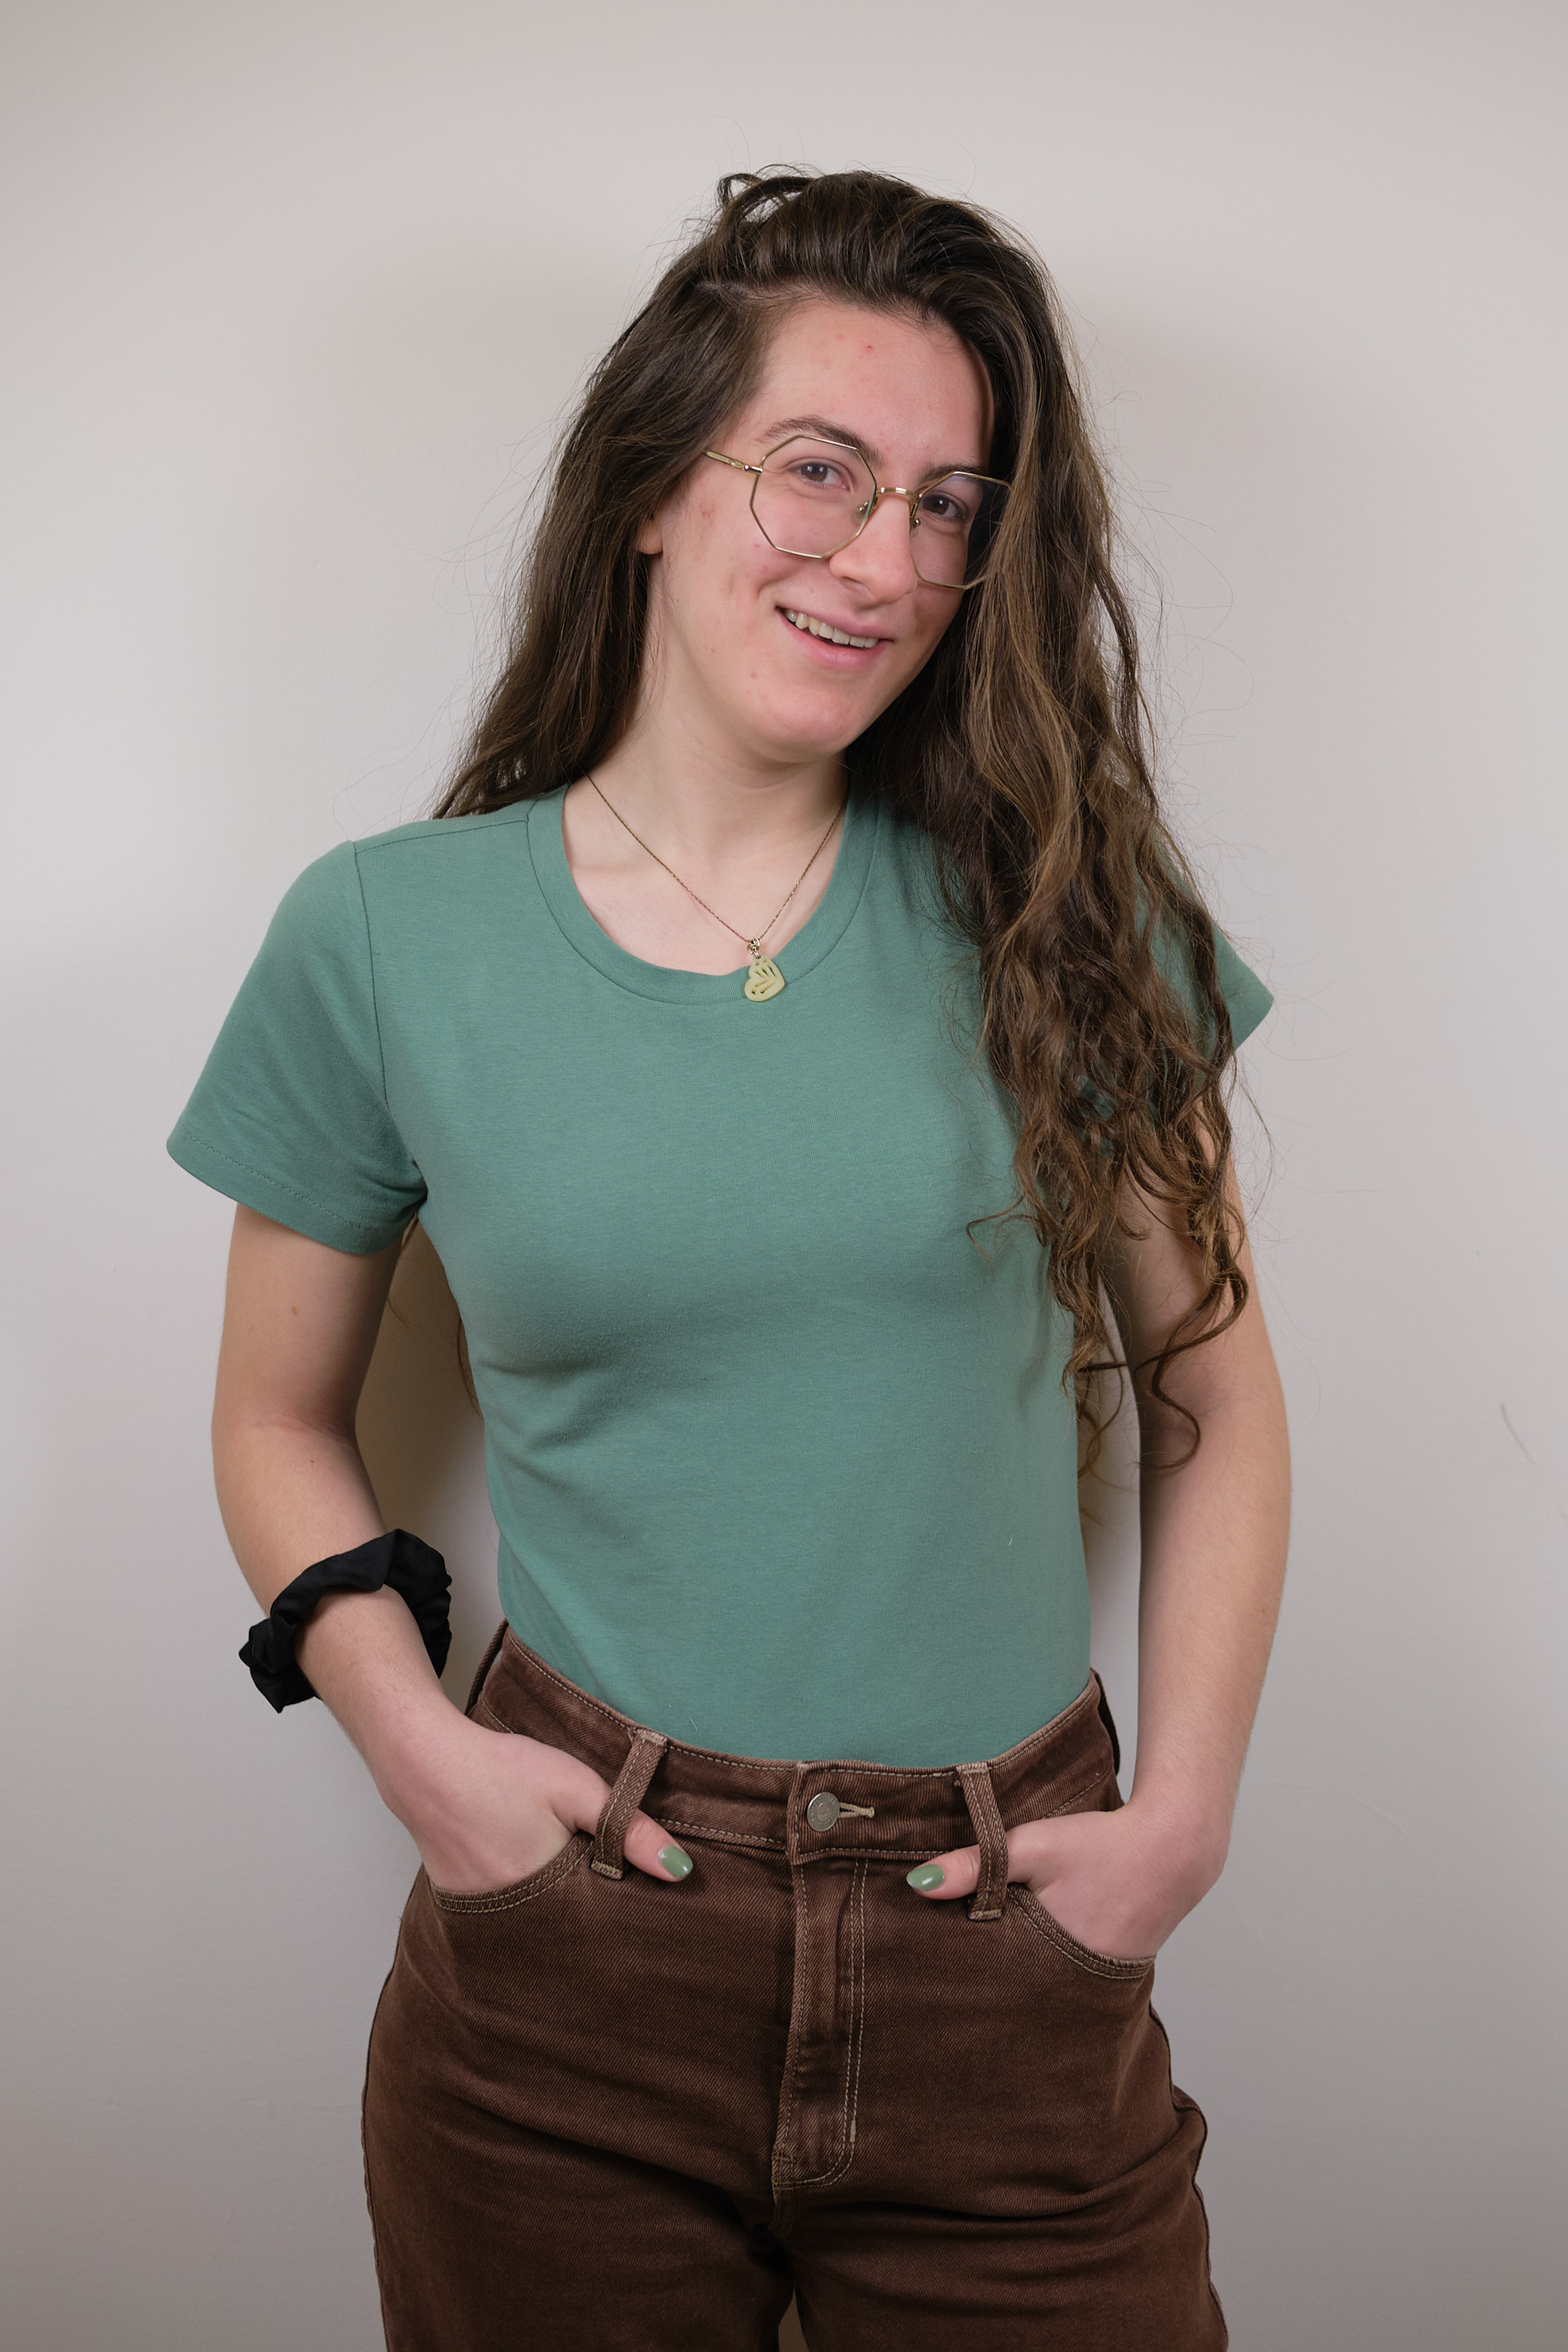
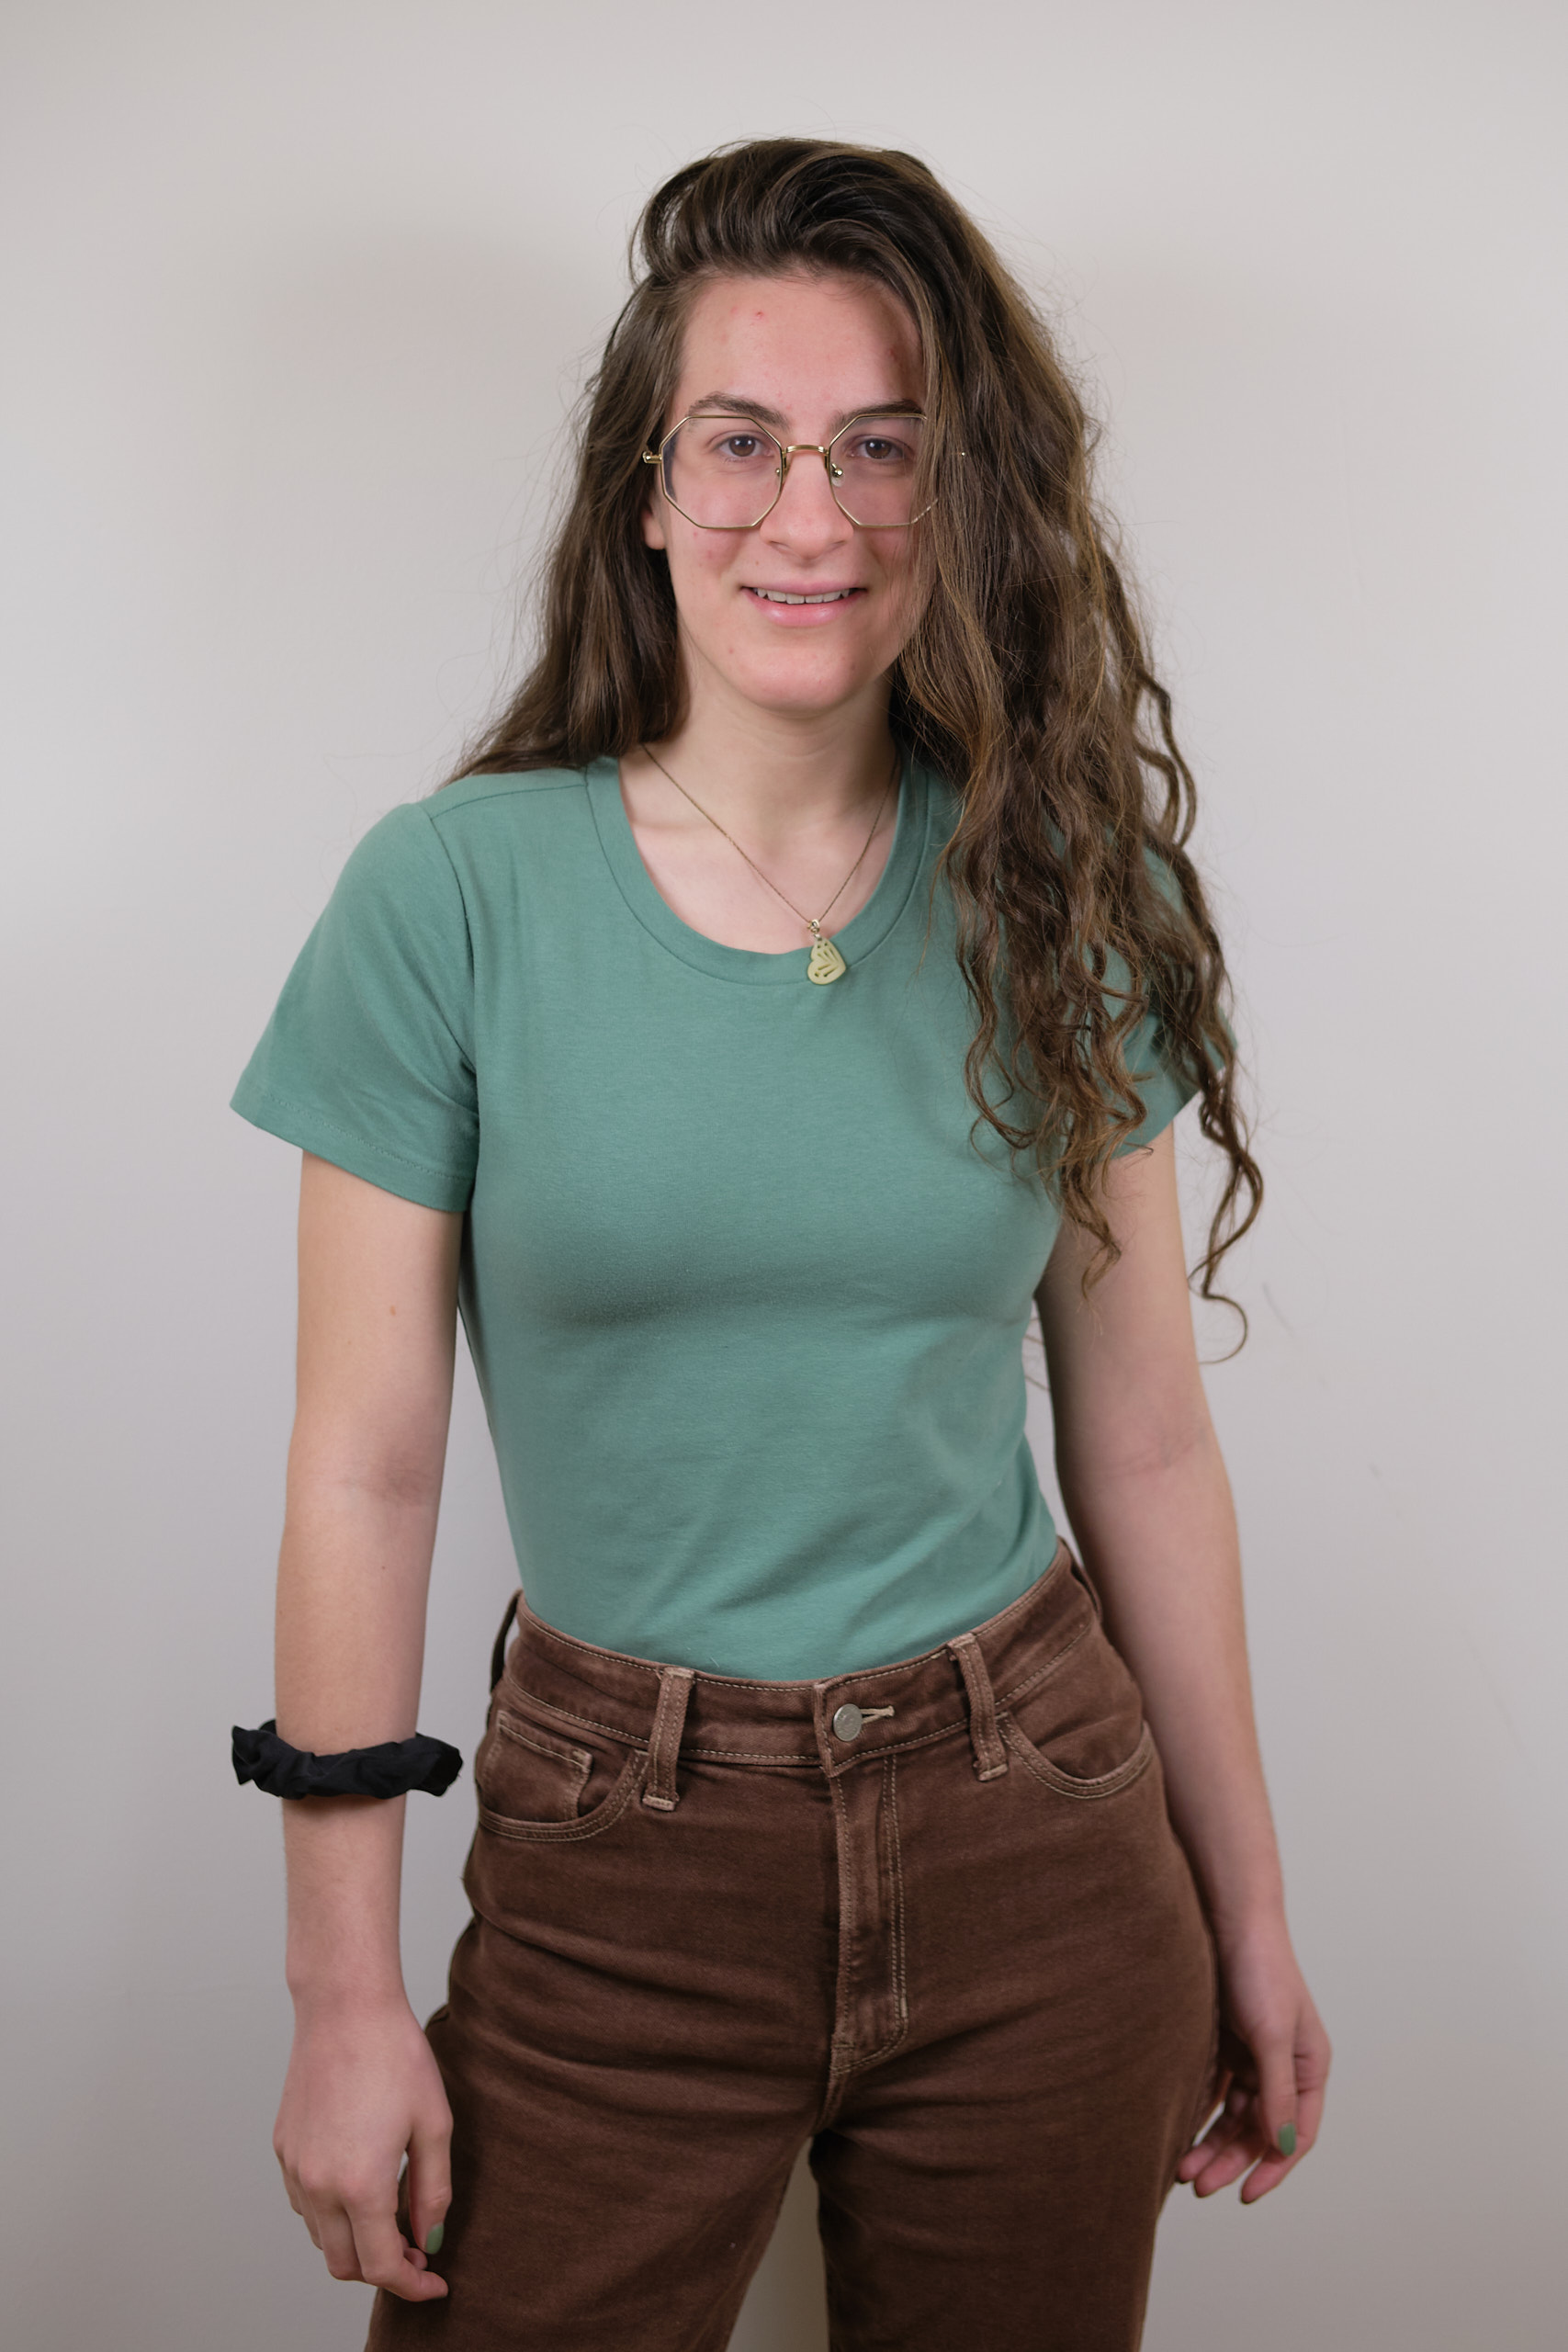
In December, while travelling, I ventured into a mall for the first time in a long time, probably since last December. I don’t live near a mall that is all that convenient, and I think I’m just about over malls. I spent a lot of time wandering around malls in high school, and mall walking when I lived in New Jersey. Now I shop online or in neighborhood stores and make a large fraction of my clothes anyway. But the reason I mention all this is I found myself in a clothing store in a mall with one of my young-adult daughters as she was debating what size to buy in a plain white t-shirt when neither size she was considering fit her quite the way she wanted. I looked at the cotton Lycra t-shirt and sighed. “I could make you one of these that would fit you exactly the way you want,” I told her. So she left the store without the t-shirts.
A week later, I showed her what cotton-lycra fabric I had in my stash. Sadly, I had no white, and not enough black for a shirt. But I had just enough sage green (left over from a cropped t-shirt for my other daughter) that I thought I could eke out a shirt for her. I discussed her shirt preferences and adjusted my Sinclair Bondi classic fitted t-shirt pattern for her. I cut a size 4 regular crew neck one-inch-above-hip length and graded it in from the bottom of the armscye to the hem for an even more fitted fit. After trying it on she asked for further grading. The end result fits her really well. Next time (after I order some black and white CL fabric) I will do a broad shoulder adjustment and then the shoulders will fit even better. She also asked for the crew neck opening to be raised half an inch, which is just her personal preference.
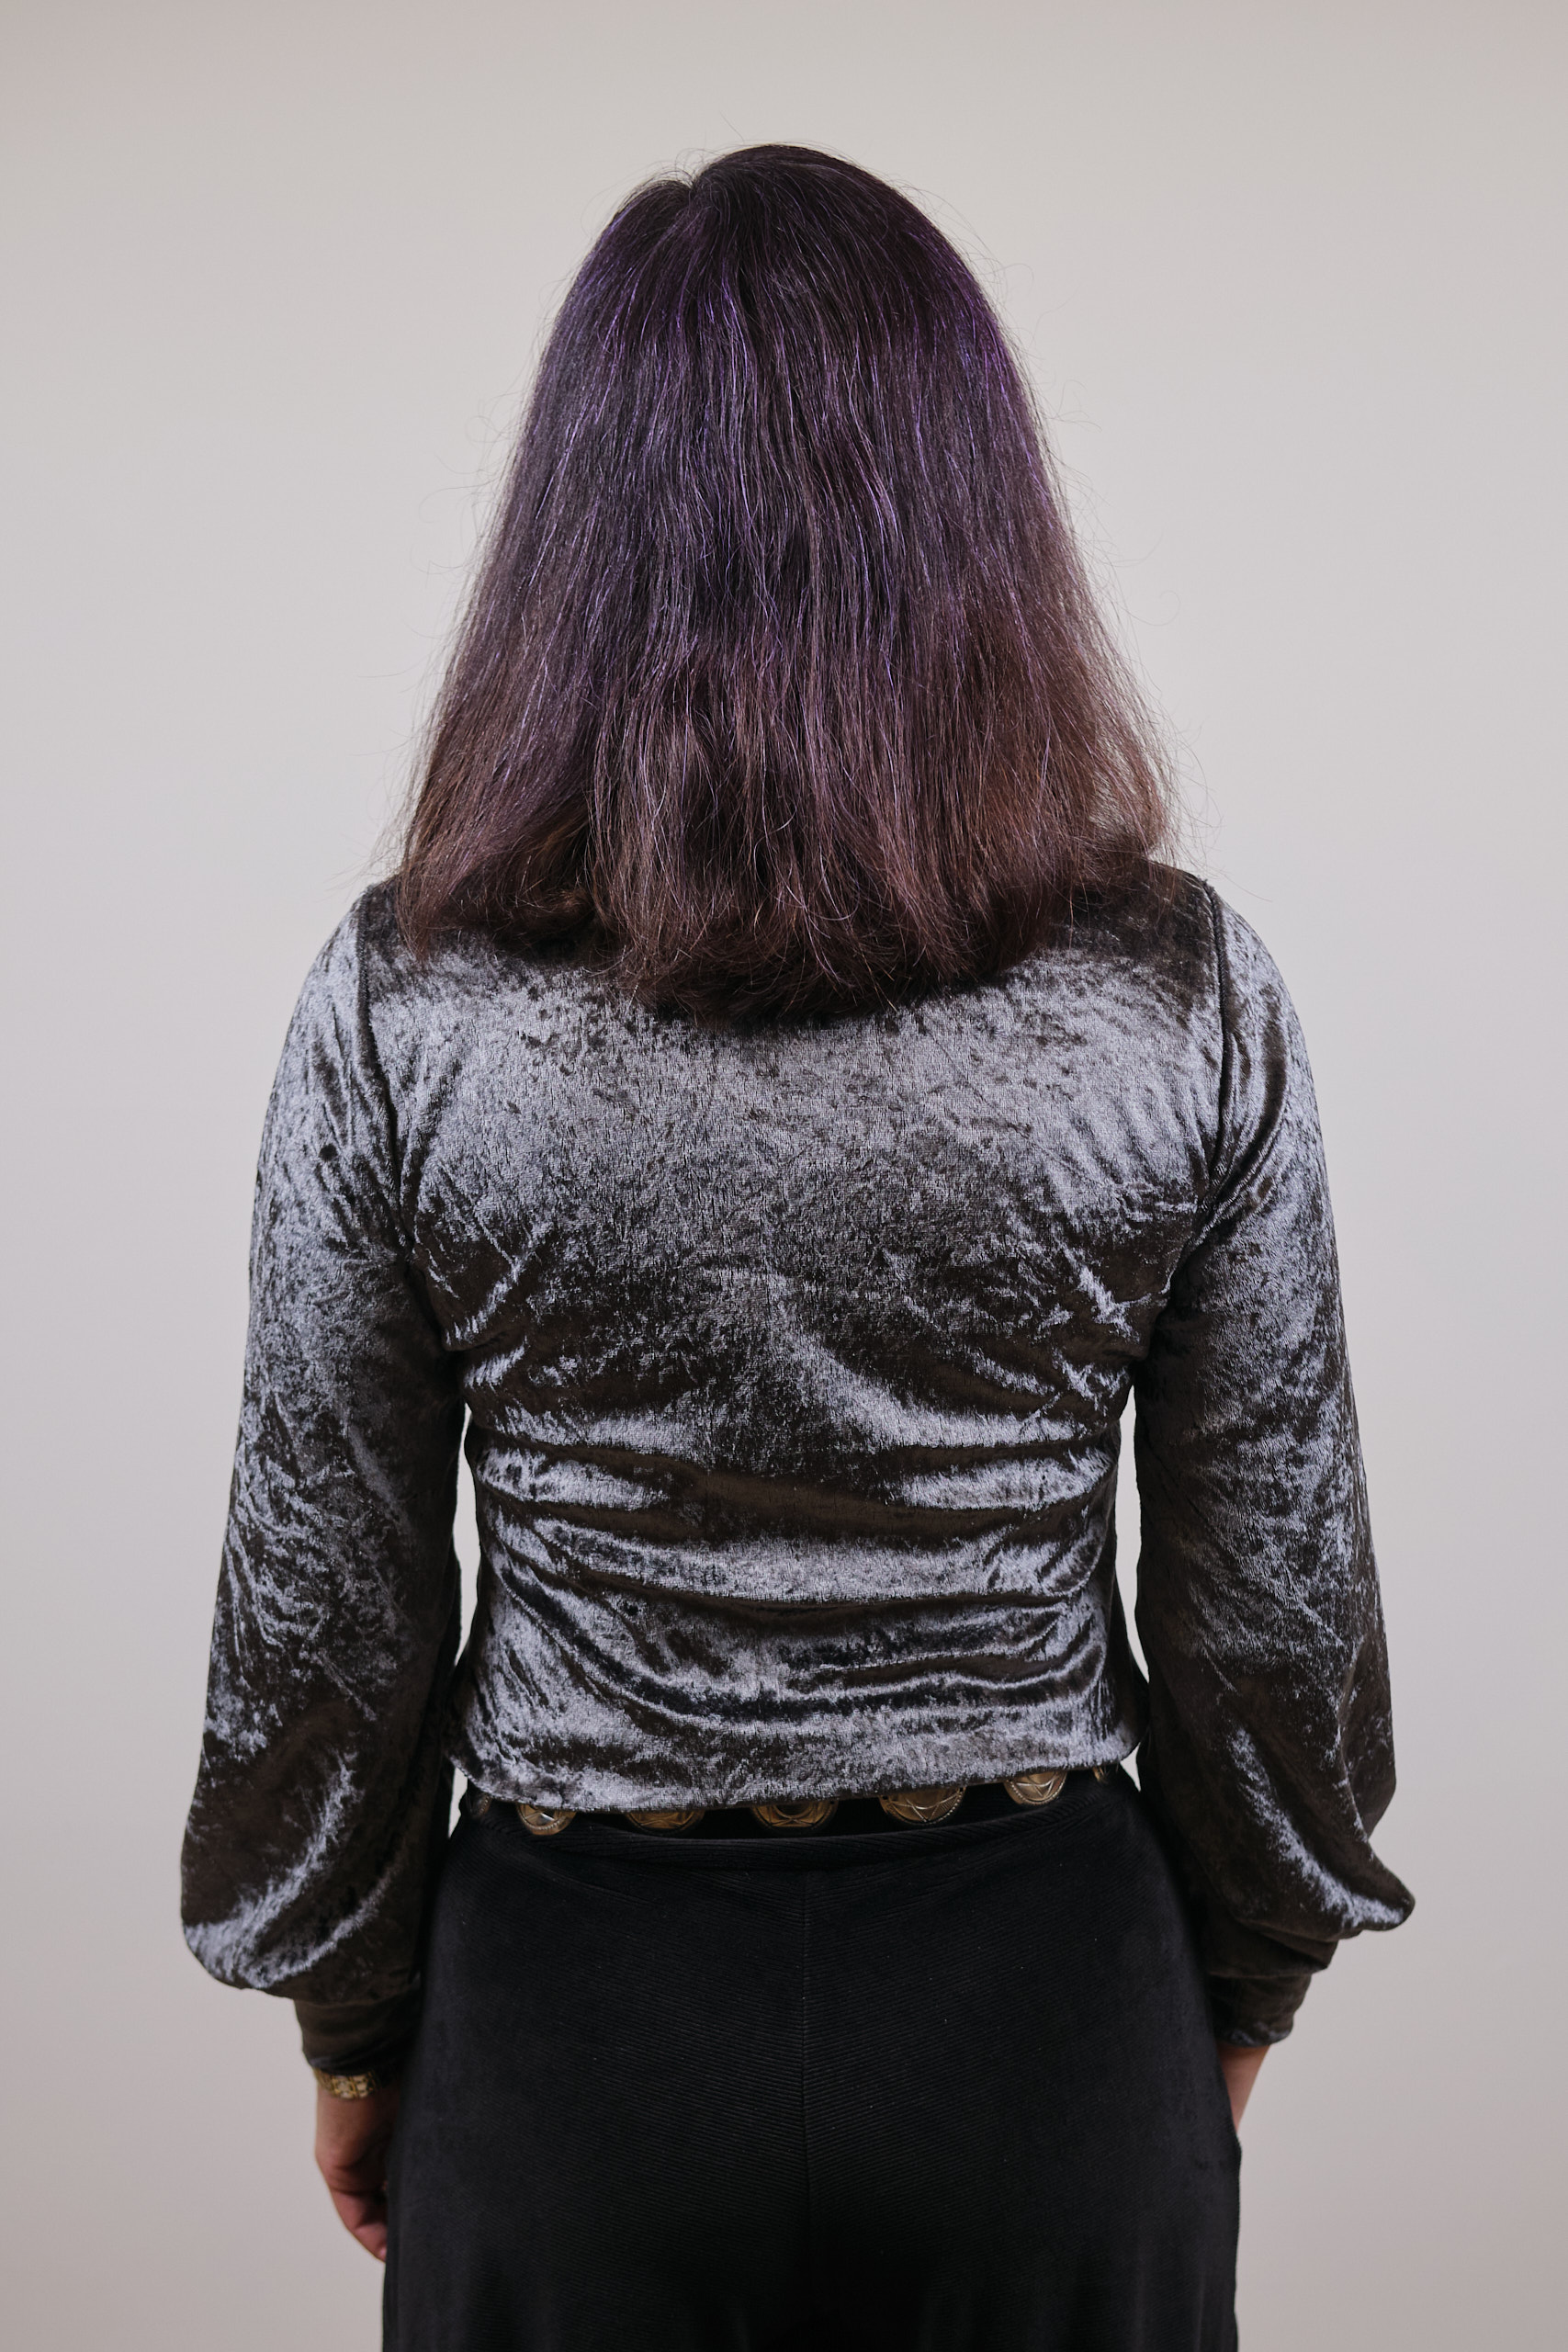
Sinclair Bondi classic fitted t-shirt 6p, screwp neck, broad and sloped shoulder adjustments, bishop sleeves with long cuff, 1.5 yards 160 gsm 2-way stretch dark grey polyester crushed velour.
I bought a yard and a half of dark grey polyester crushed velour last winter and thought it might make a nice dressy top. It’s a medium-weight 160 gsm all polyester with no spandex. I didn’t notice until I got it out to sew it that it was only 2-way stretch, not 4-way stretch.
Most knit patterns I own (and most that my favorite pattern makers sell) are designed for 4-way stretch knits. These are knits that stretch BOTH horizontally and vertically. They are in many ways easier to work with than 2-way knits that stretch only horizontally (or occasionally only vertically) and tend to be easier to fit and more forgiving. When sewing a fitted knit shirt, it is obvious that we want some significant stretch in the horizontal direction to go around the body. But it is also helpful to have at least a little bit of vertical stretch so that the top doesn’t get stuck and ride up around the bust. A lot of vertical stretch can be problematic on a dress as the waistband may get pulled down and the dress may not be able to support pockets. A loose-fitting garment (a typical cotton t-shirt, for example) doesn’t need stretch to fit, since it doesn’t really even try to conform to the body. Some garments get around lack of stretch by adding seams and darts to help the garment contour to the body. Generally, patterns designed for woven fabric do this.
So, I wanted to make a somewhat fitted top out of my 2-way stretch velour, and none of the fitted top patterns I own claim to be suited for 2-way stretch fabric. (Actually, one of my patterns claimed it was for 2-way stretch, but that turned out to be an error in the pattern description that I caught because all the photos of garments people made with the pattern seemed to be using 4-way stretch fabric. A lot of people assume 2-way stretch is stretch in 2 directions, but that’s actually not how the term is used.) I considered using a woven pattern but after too much overthinking I finally decided to throw caution to the wind and use my favorite Sinclair Bondi classic fitted t-shirt pattern and just size up one size. Actually, this was not a completely reckless thing to do as I have made a lot of Bondis and I have a good sense for how it fits and how to customize it for me. I recently had problems using a low-stretch fabric with a different knit shirt pattern, but sizing up one size seemed to make it work.
The crushed velour was a bit slippery to work with, it shed silver dust all over the place as I cut and sewed it, and the edges curled a bit. The fabric listing said to iron it only on the wrong side, but I recklessly ironed it any which way I could to get it to behave, and it doesn’t seem to be any worse for the wear. I positioned the pattern carefully so that the fabric nap would all go the same way, and when wearing the garment, it would feel smooth when running my hands from top to bottom. My youngest daughter recently ranted about how much she hates it when the nap runs the “wrong way,” and she doesn’t like the feel of the rough fabric against her skin. I wasn’t about to make that mistake!
Sizing up one size seemed to have done the trick and made the 2-way fabric work quite nicely with my 4-way stretch pattern. The shirt is comfortable to wear and mostly stays in place, especially when tucked in. The sleeve cuffs want to bunch up, probably because the nap is going the wrong way on the inside of the cuff — I suppose I could have turned them the other way and violated my daughters’ rule on the outside, or maybe added a seam so the nap would go the right way on both sides.
Anyway, it was good enough for my New Year’s Eve outfit, and I could even wear another shirt underneath since the weather was frigid. I also wore my Sinclair Cleo palazzo pants (also in stretch velour, but this one is a 4-way stretch). My daughters suggested I wear it with the chain belt I’ve had since high school, which apparently is fashionable again.
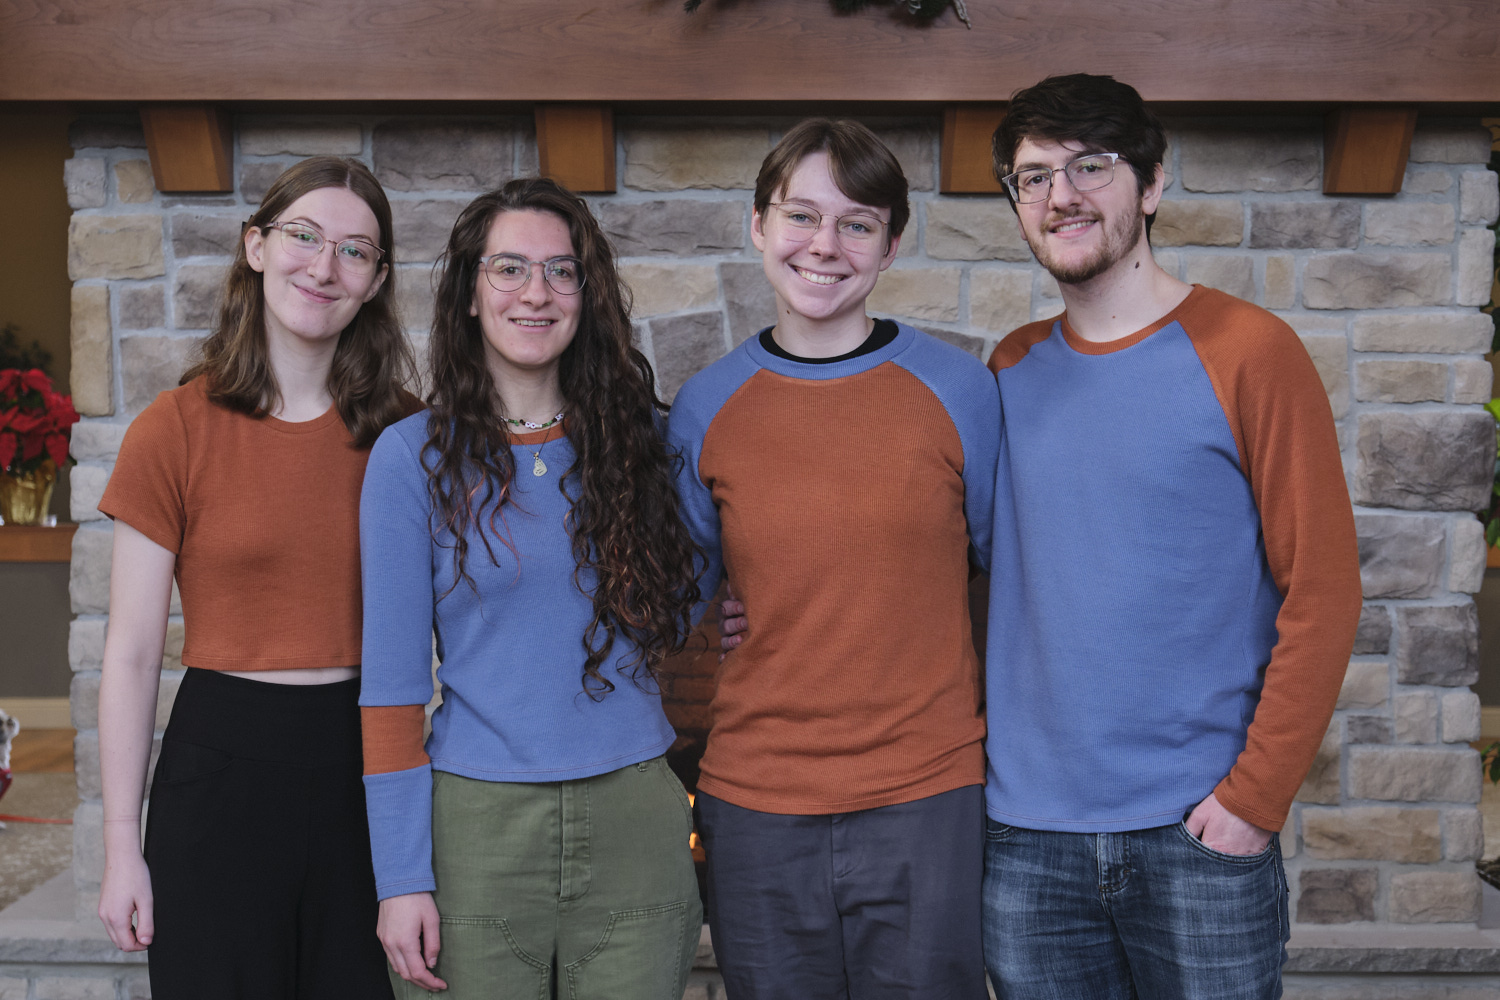
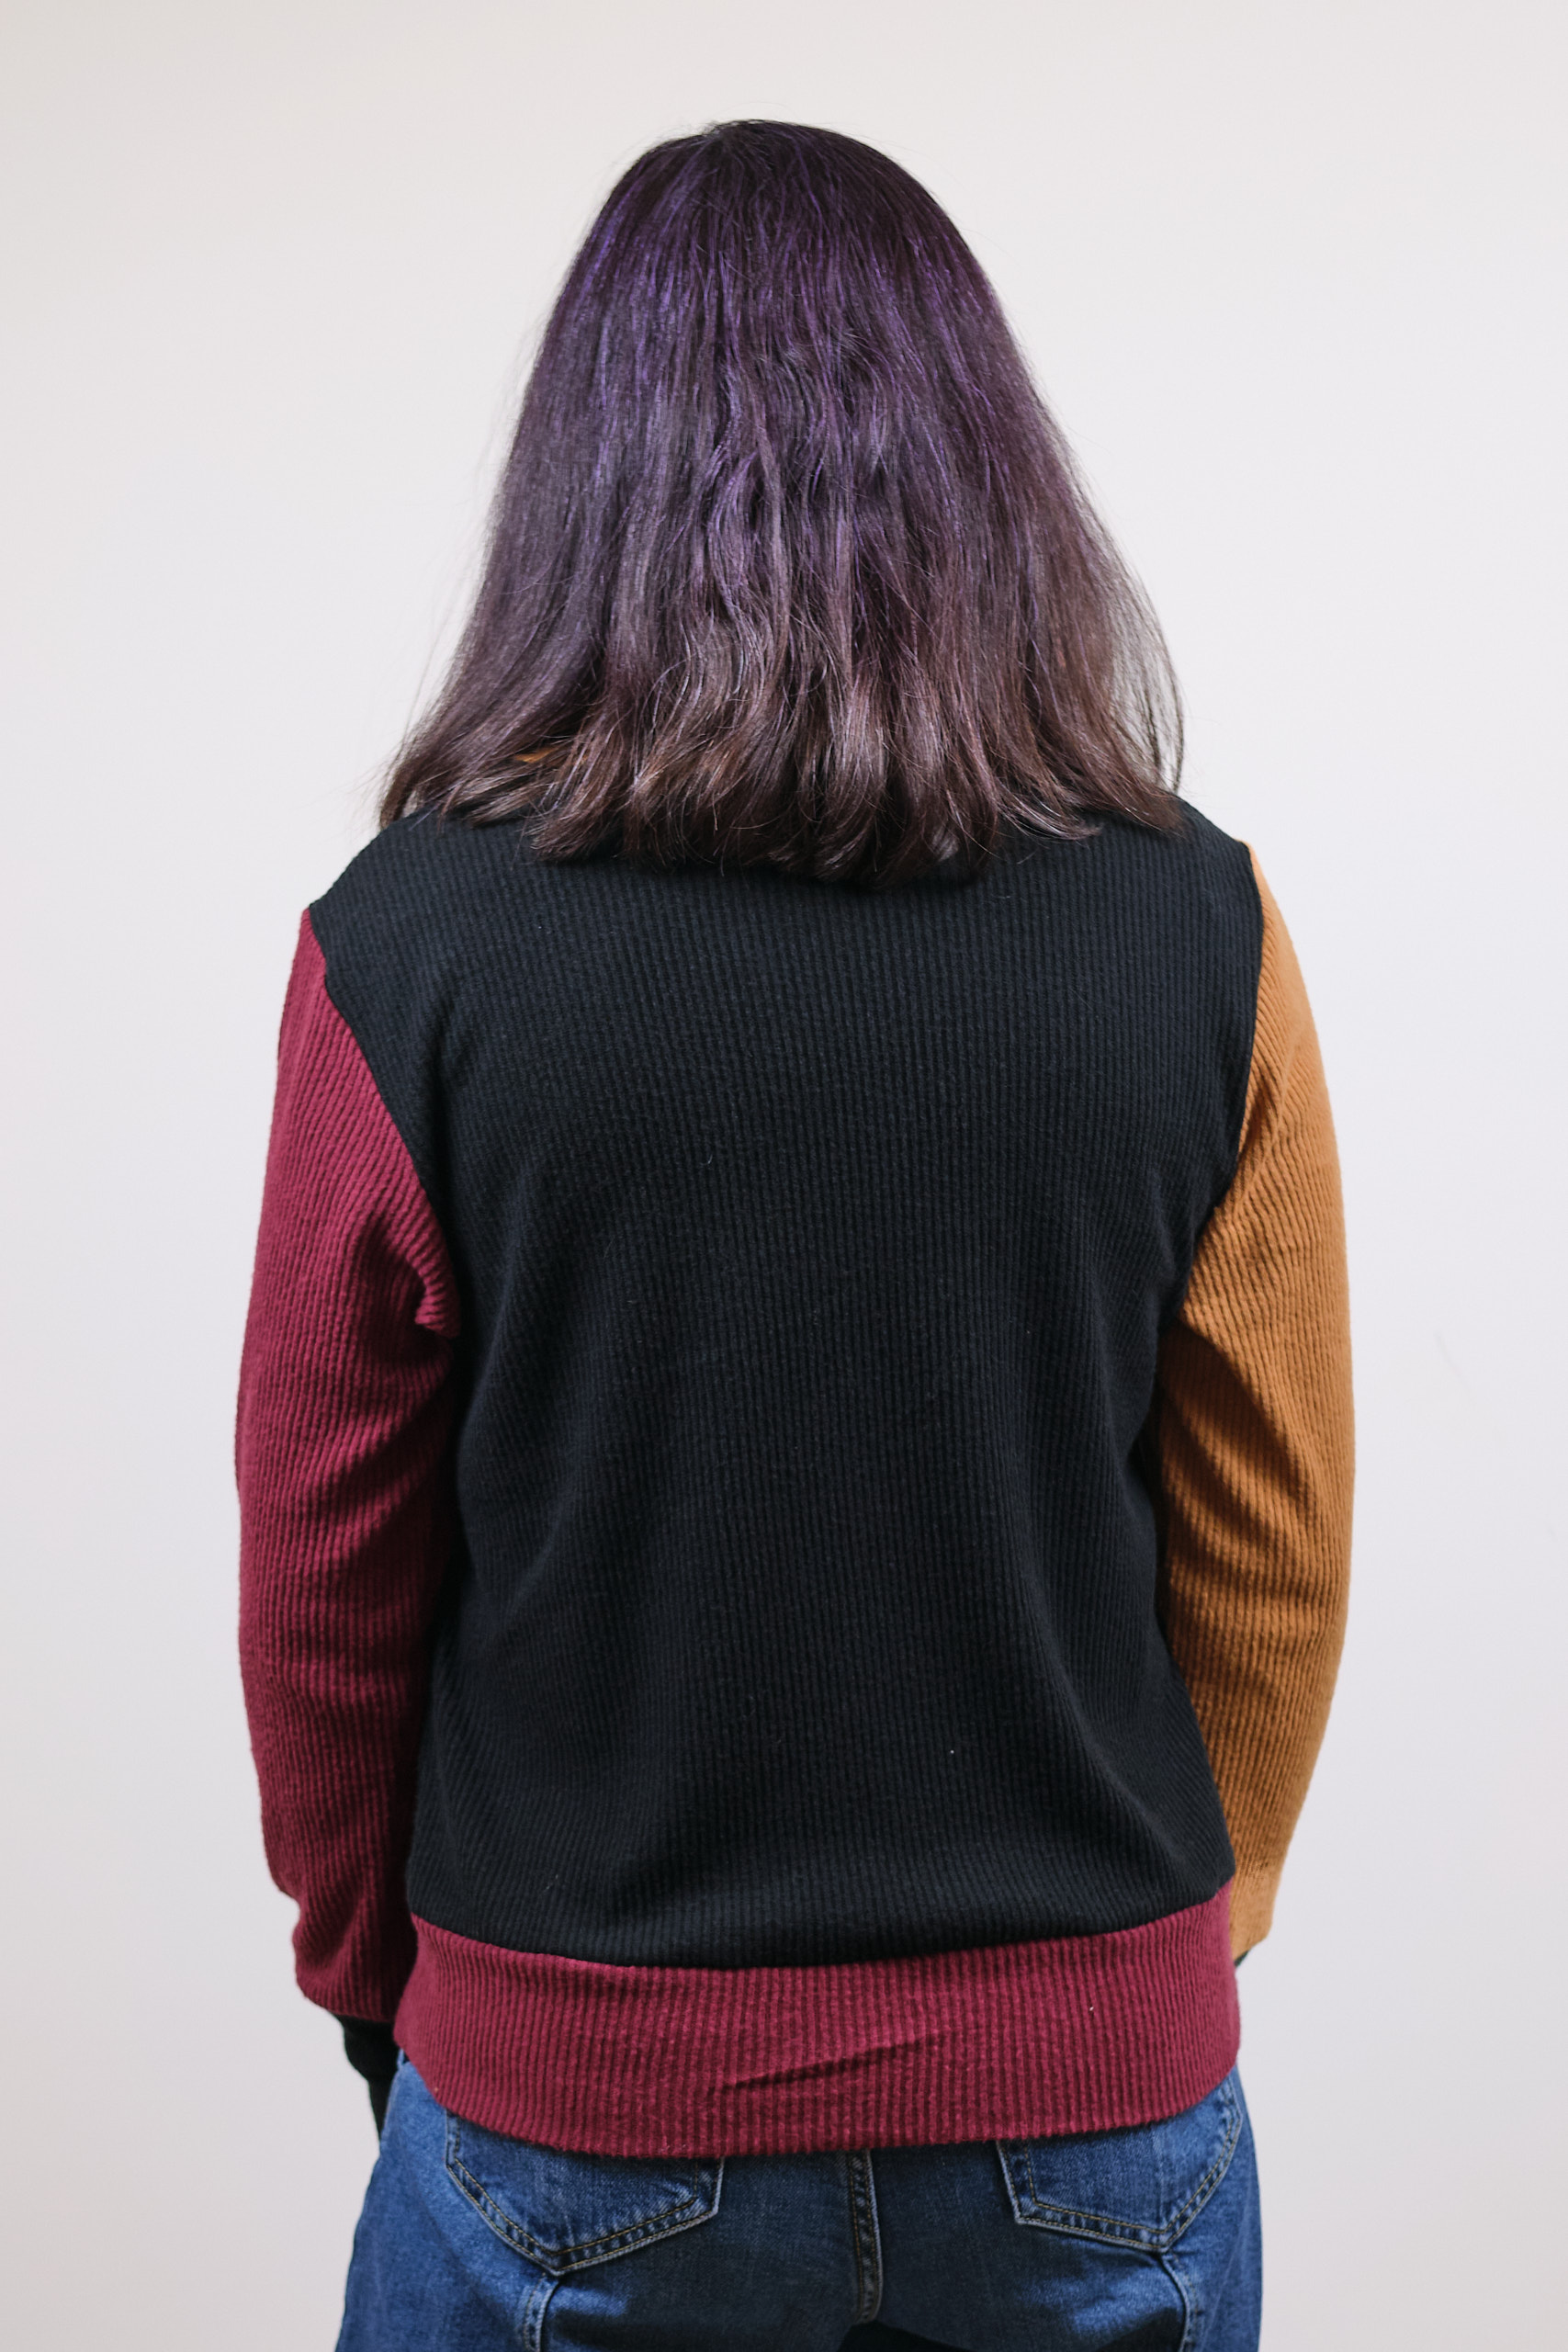
Sinclair women’s Crew pullover, hip length with banded bottom and tall cuffs – two in size 6P and one in 6T plus 4T cropped version, brushed cashmere rib
Sinclair men’s Crew pulloverhip length with banded bottom in size 38 short, 38 regular, and 34 short, brushed cashmere rib
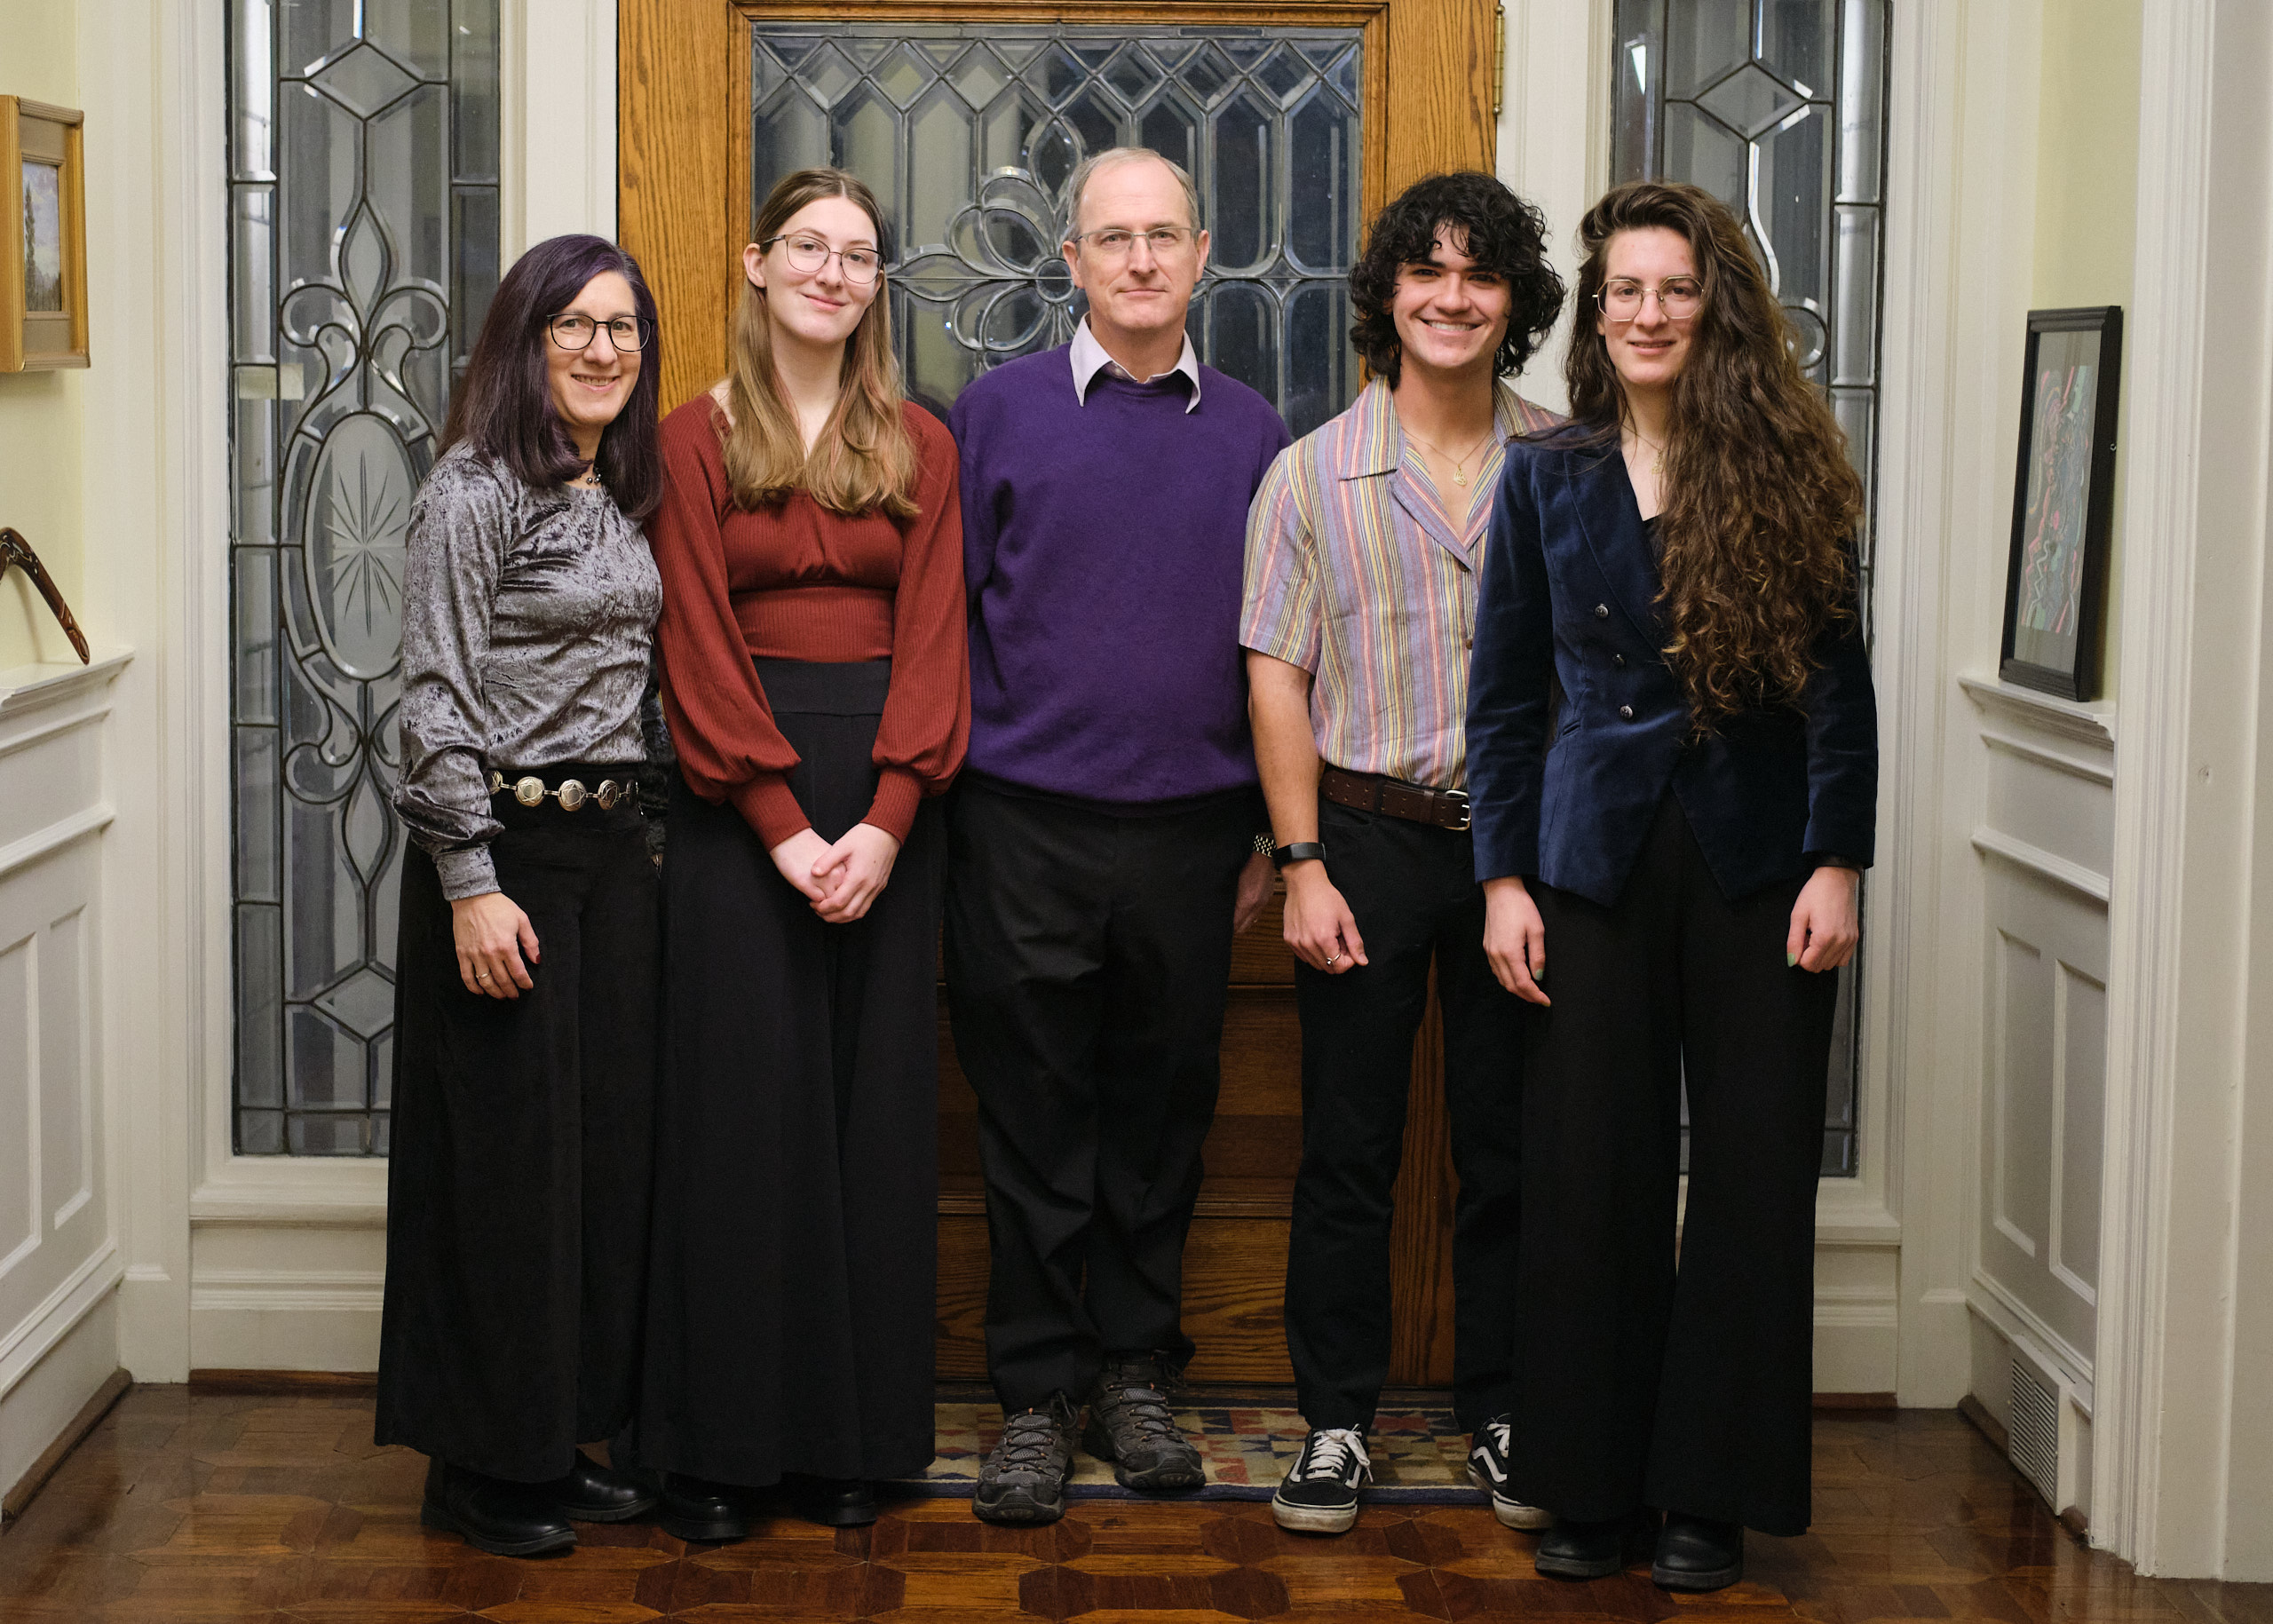
Last year I made my son and his partner a pair of matching raglan shirts in two colors of Monaco rib knit from Mily Mae Fabrics using the Sinclair Demi and Tao patterns, and I had left over fabric so I made my daughters Sinclair Bondi shirts to match. It made for a nice family photo.
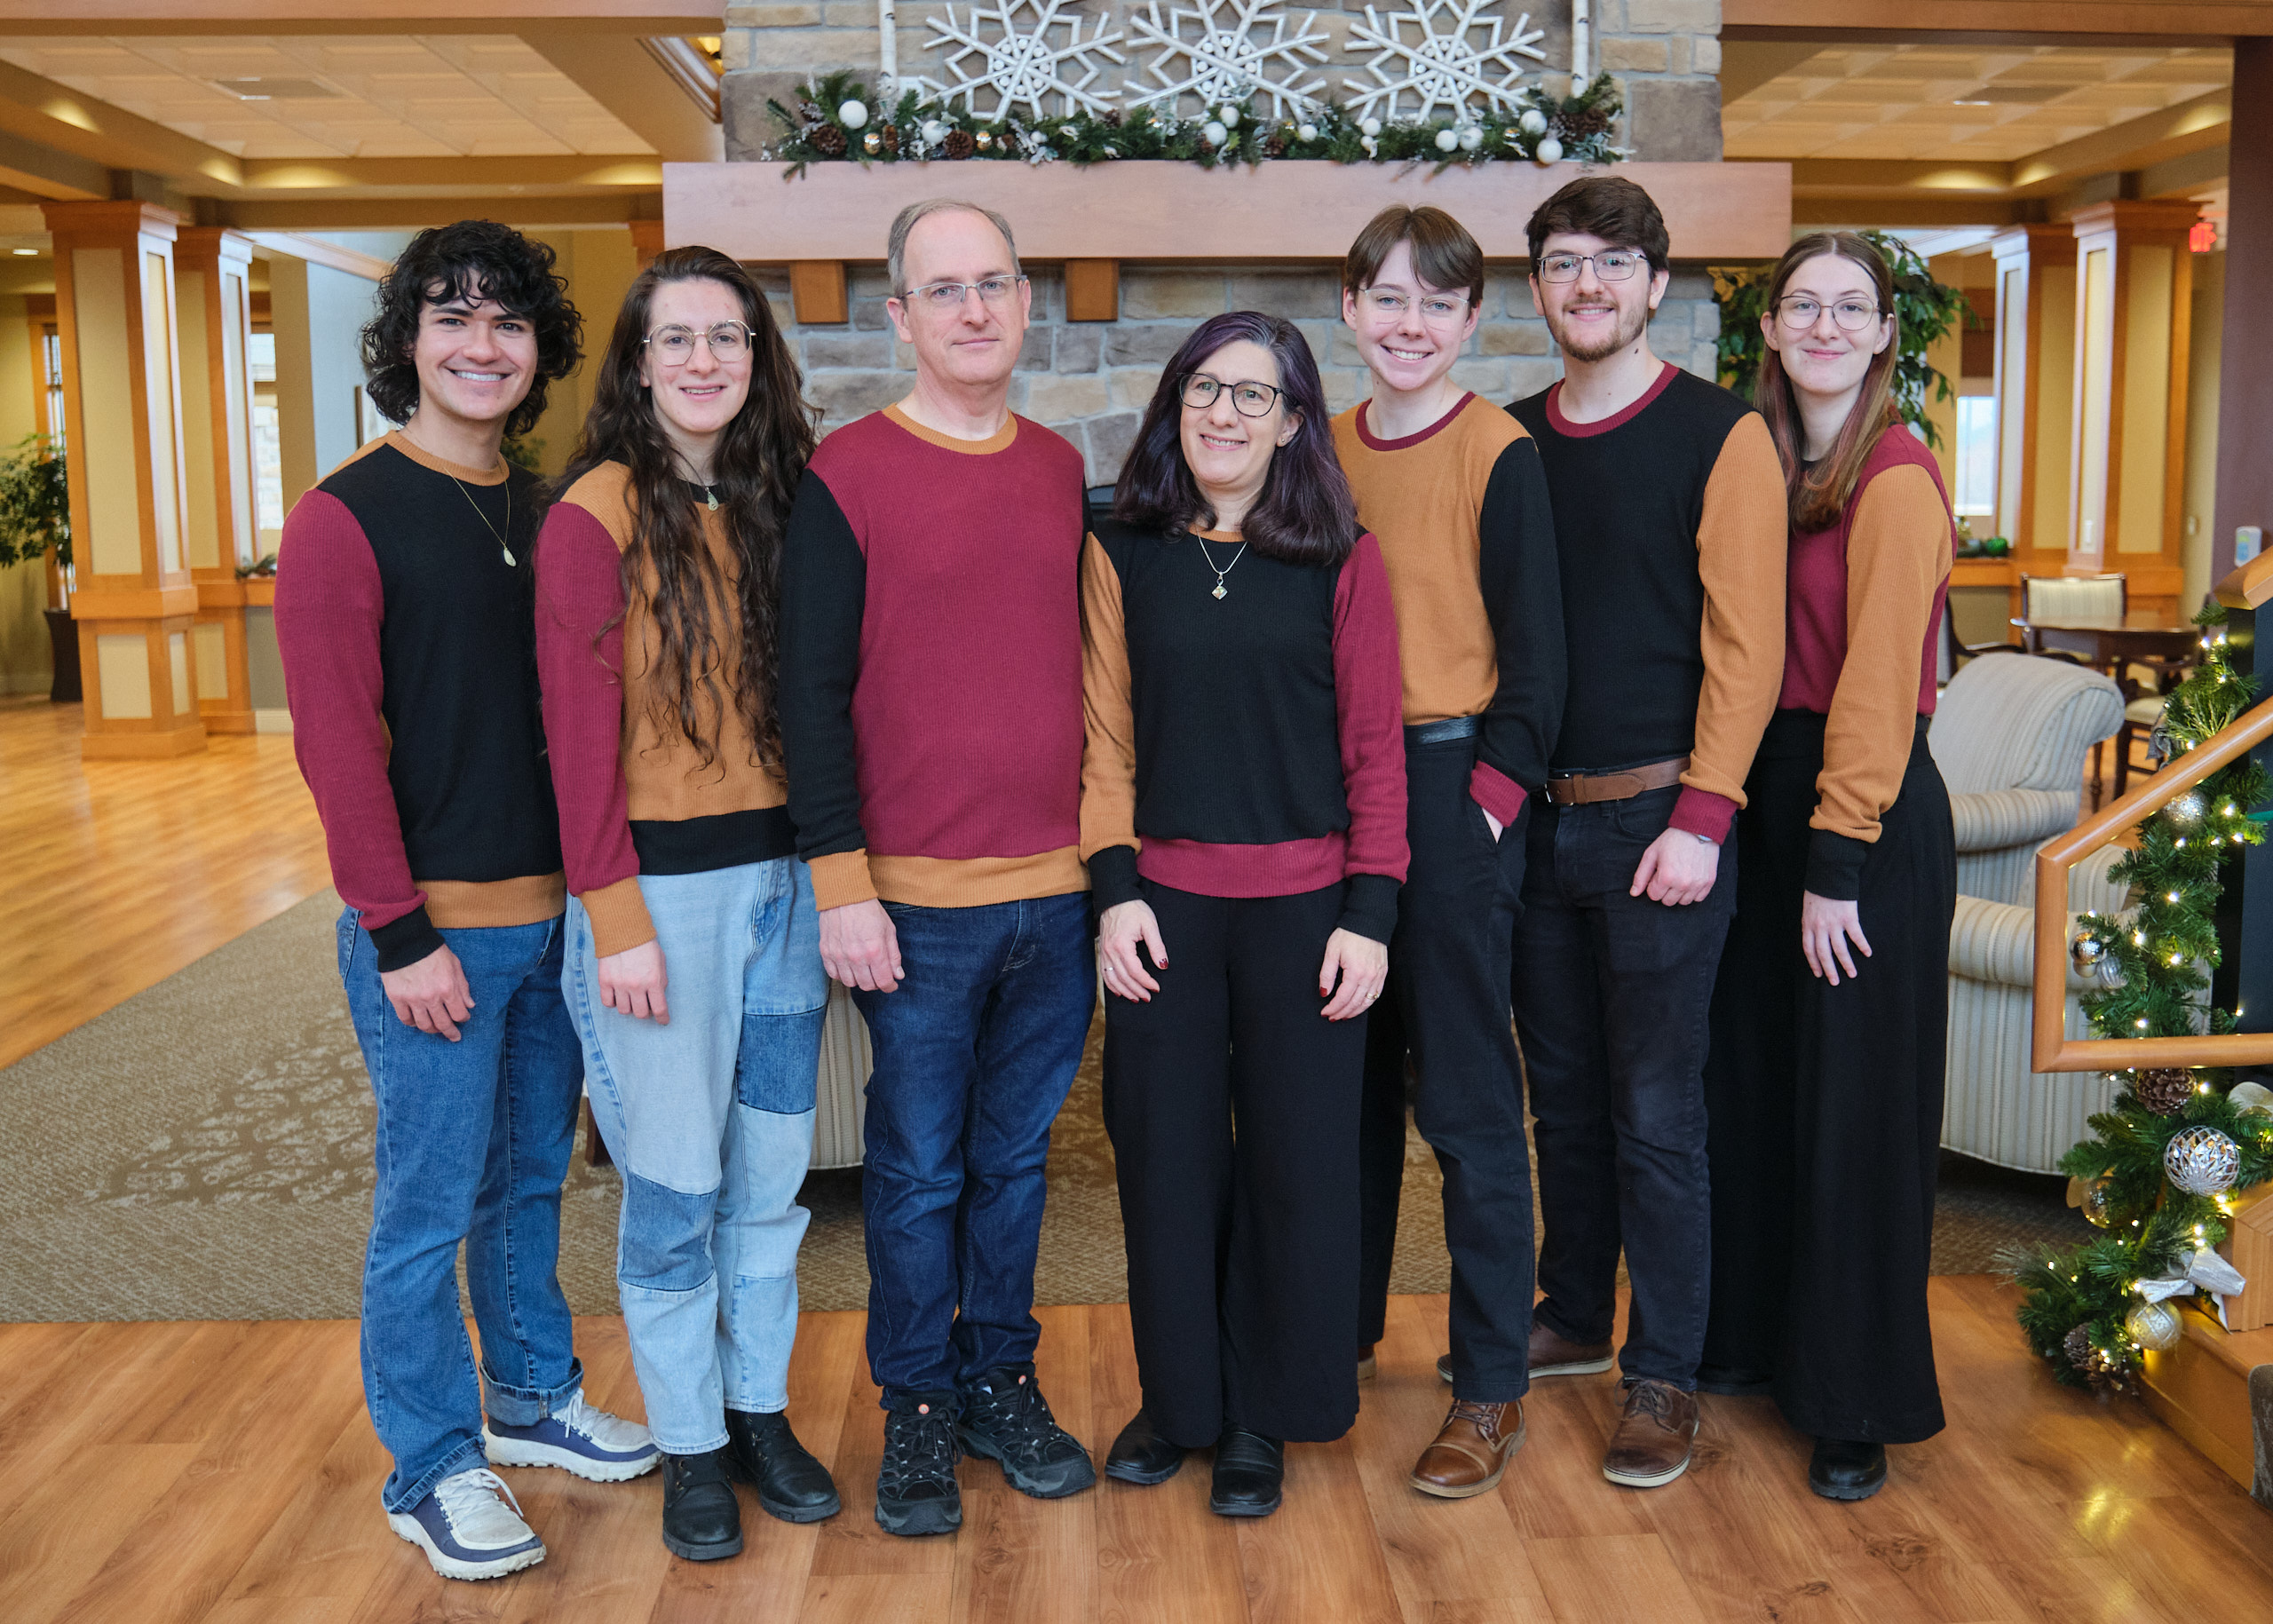
This year I planned in advance to make matching color block sweaters for the whole family. I bought 14 yards of brushed cashmere rib (220 GSM 68% Poly/28% Rayon/4% Spandex) from Mily Mae Fabrics when it was on sale for about $4 per yard. As it turns out, 8 yards would have probably been sufficient for the seven sweaters I made, but I didn’t know what color combinations I would use and you never know.
I selected the Sinclair Crew pullover top this year, which comes in both men’s and women’s cuts. I made one of each for myself and my husband and then went into assembly line production mode, cutting out several at a time and sewing each step on the whole bunch before I went on to the next step.
I made the Sinclair women’s Crew pullover, hip length with banded bottom and tall cuffs – two in size 6P and one in 6T. I also improvised a size 4T cropped version that was 4 inches shorter than hip length and graded to size 0 at the waist (for my college-student daughter who only wears cropped tops). I also made the Sinclair men’s Crew pullover hip length with banded bottom in size 38 short, 38 regular, and 34 short. I did not make any modifications to the pattern except for the cropped version.
This is a pretty easy pattern to sew, and with all the bands there was no hemming involved. These bands stretch gently to fit the fabric they attach to, no gathering needed. The fabric I used was also pretty easy to work with and I was able to sew everything together without any basting.
I made each sweater with a different color combination, and I also played with different approaches to color blocking. Mine has each sleeve a different color. I like them all, but I think my favorites are the ones with different color fronts and backs with the third color for the sleeves.
We did a crafty Christmas gift exchange at work, where we were each randomly assigned a colleague to make a gift for. I couldn’t ask my gift recipient for her size, as that would spoil the surprise. She is a lot taller than me, but my guess is she is otherwise a similar size. I decided I couldn’t make her anything too fitted without knowing her actual size, so I selected the Pattern Emporium Sweet Cheeks Roomy Sweater. This is a very oversized pattern. My correct size according to my measurements is AU 10. I made an AU 10 sweater in a heavy fabric, and it is a super comfy oversized sweater that would probably be fine sized down a size or two. I also made one sized down to a size AU 4 in the cropped length in a lighter weight brushed hacci sweater knit, and it fits just fine. I decided to size down only to an AU 8 for my friend and make the hip length. I also shorten the sleeves for me but I made the full length sleeves for my tall friend.
I love the Versailles brushed hacci sweater knit because it is brushed on the inside and feels very cozy. I bought more yardage in several colors last Fall when it was on sale for about $5 per yard. I decided to use the rosey mauve color (basically a pale pink) for my friend’s sweater.
My friend was surprised that I made something that fit her without measuring her, and especially that the sleeves were long enough. My friend is wearing it in the photo above. Here you can see it on a hanger and me trying it on.
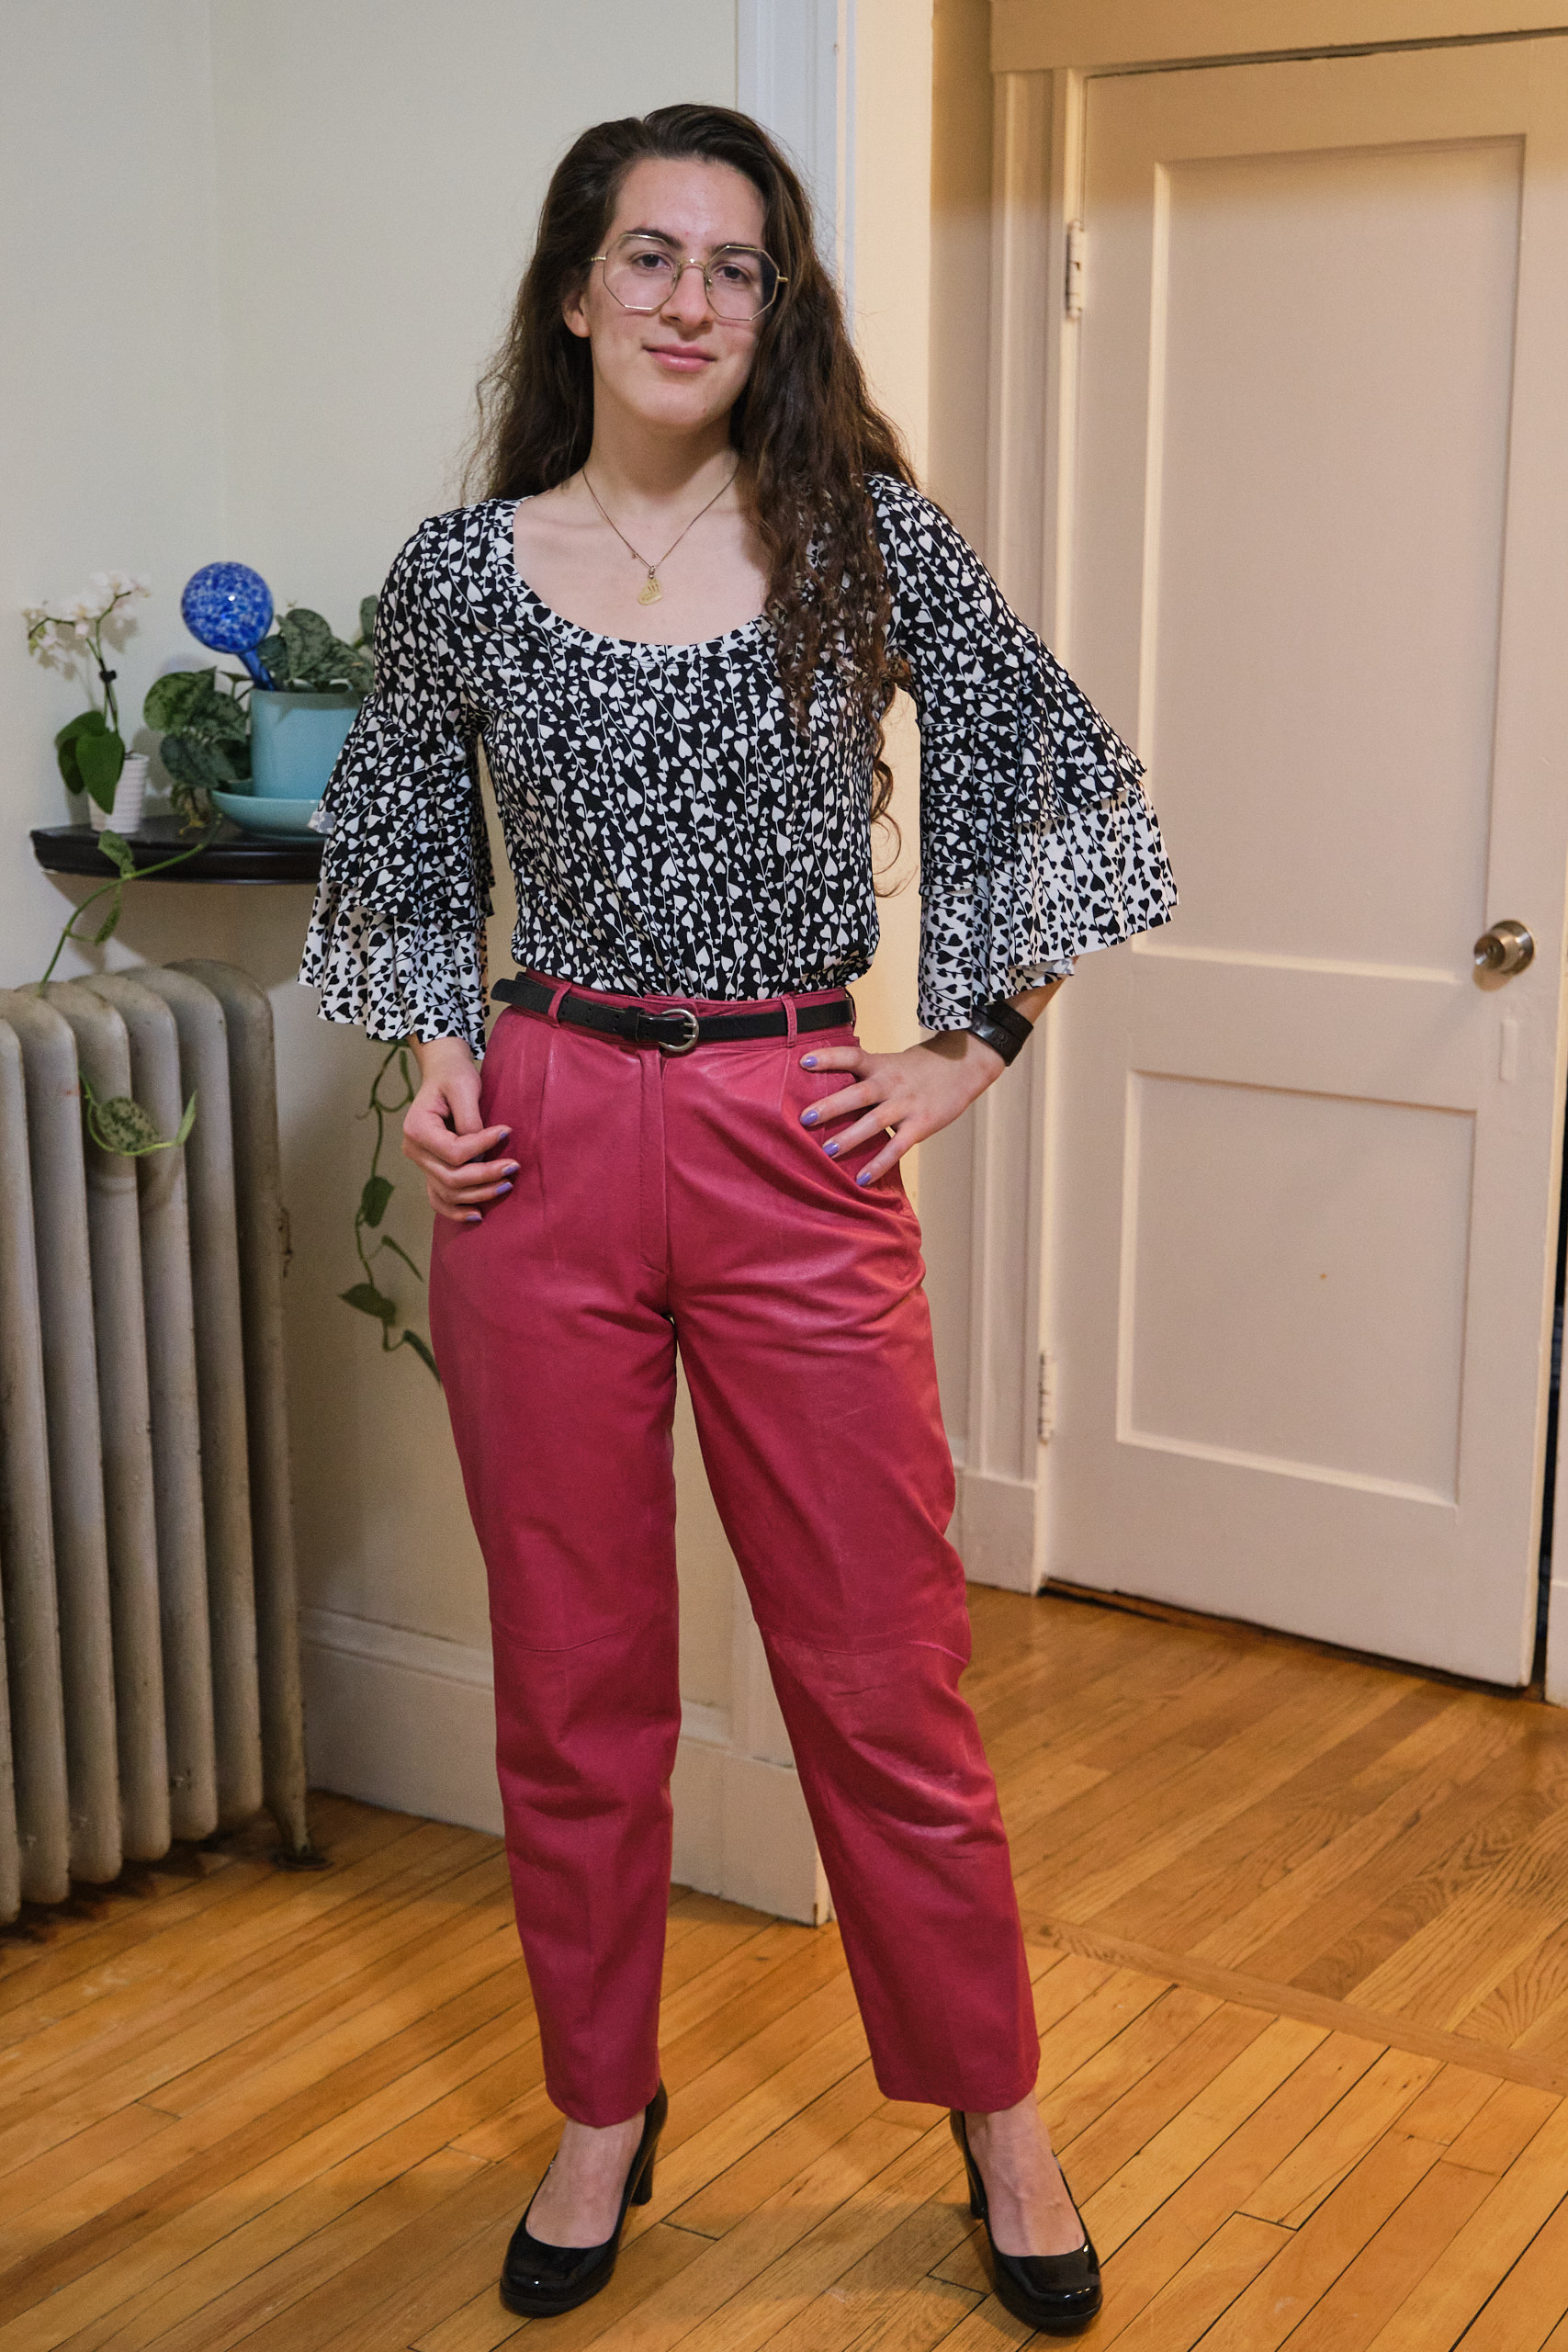
Pattern Emporium Allure Bell Sleeve Top with plain sleeves size AU10, Wanderlust high scoop neck, hem shortened 3.5 inches, sleeves shortened 1 inch, 1.5 yard of 43″-wide ginger-red wool jersey knit.
Size AU 10, screwp neck, sloped shoulder adjustment, hem shortened 3.5 inches, short sleeves, <1 yard dusty olive cupro jersey.
Size AU 12, screwp neck, broad and sloped shoulder adjustment, hem shortened 3.5 inches, sleeves shortened 1 inch, <1 yard dusty olive cupro jersey.
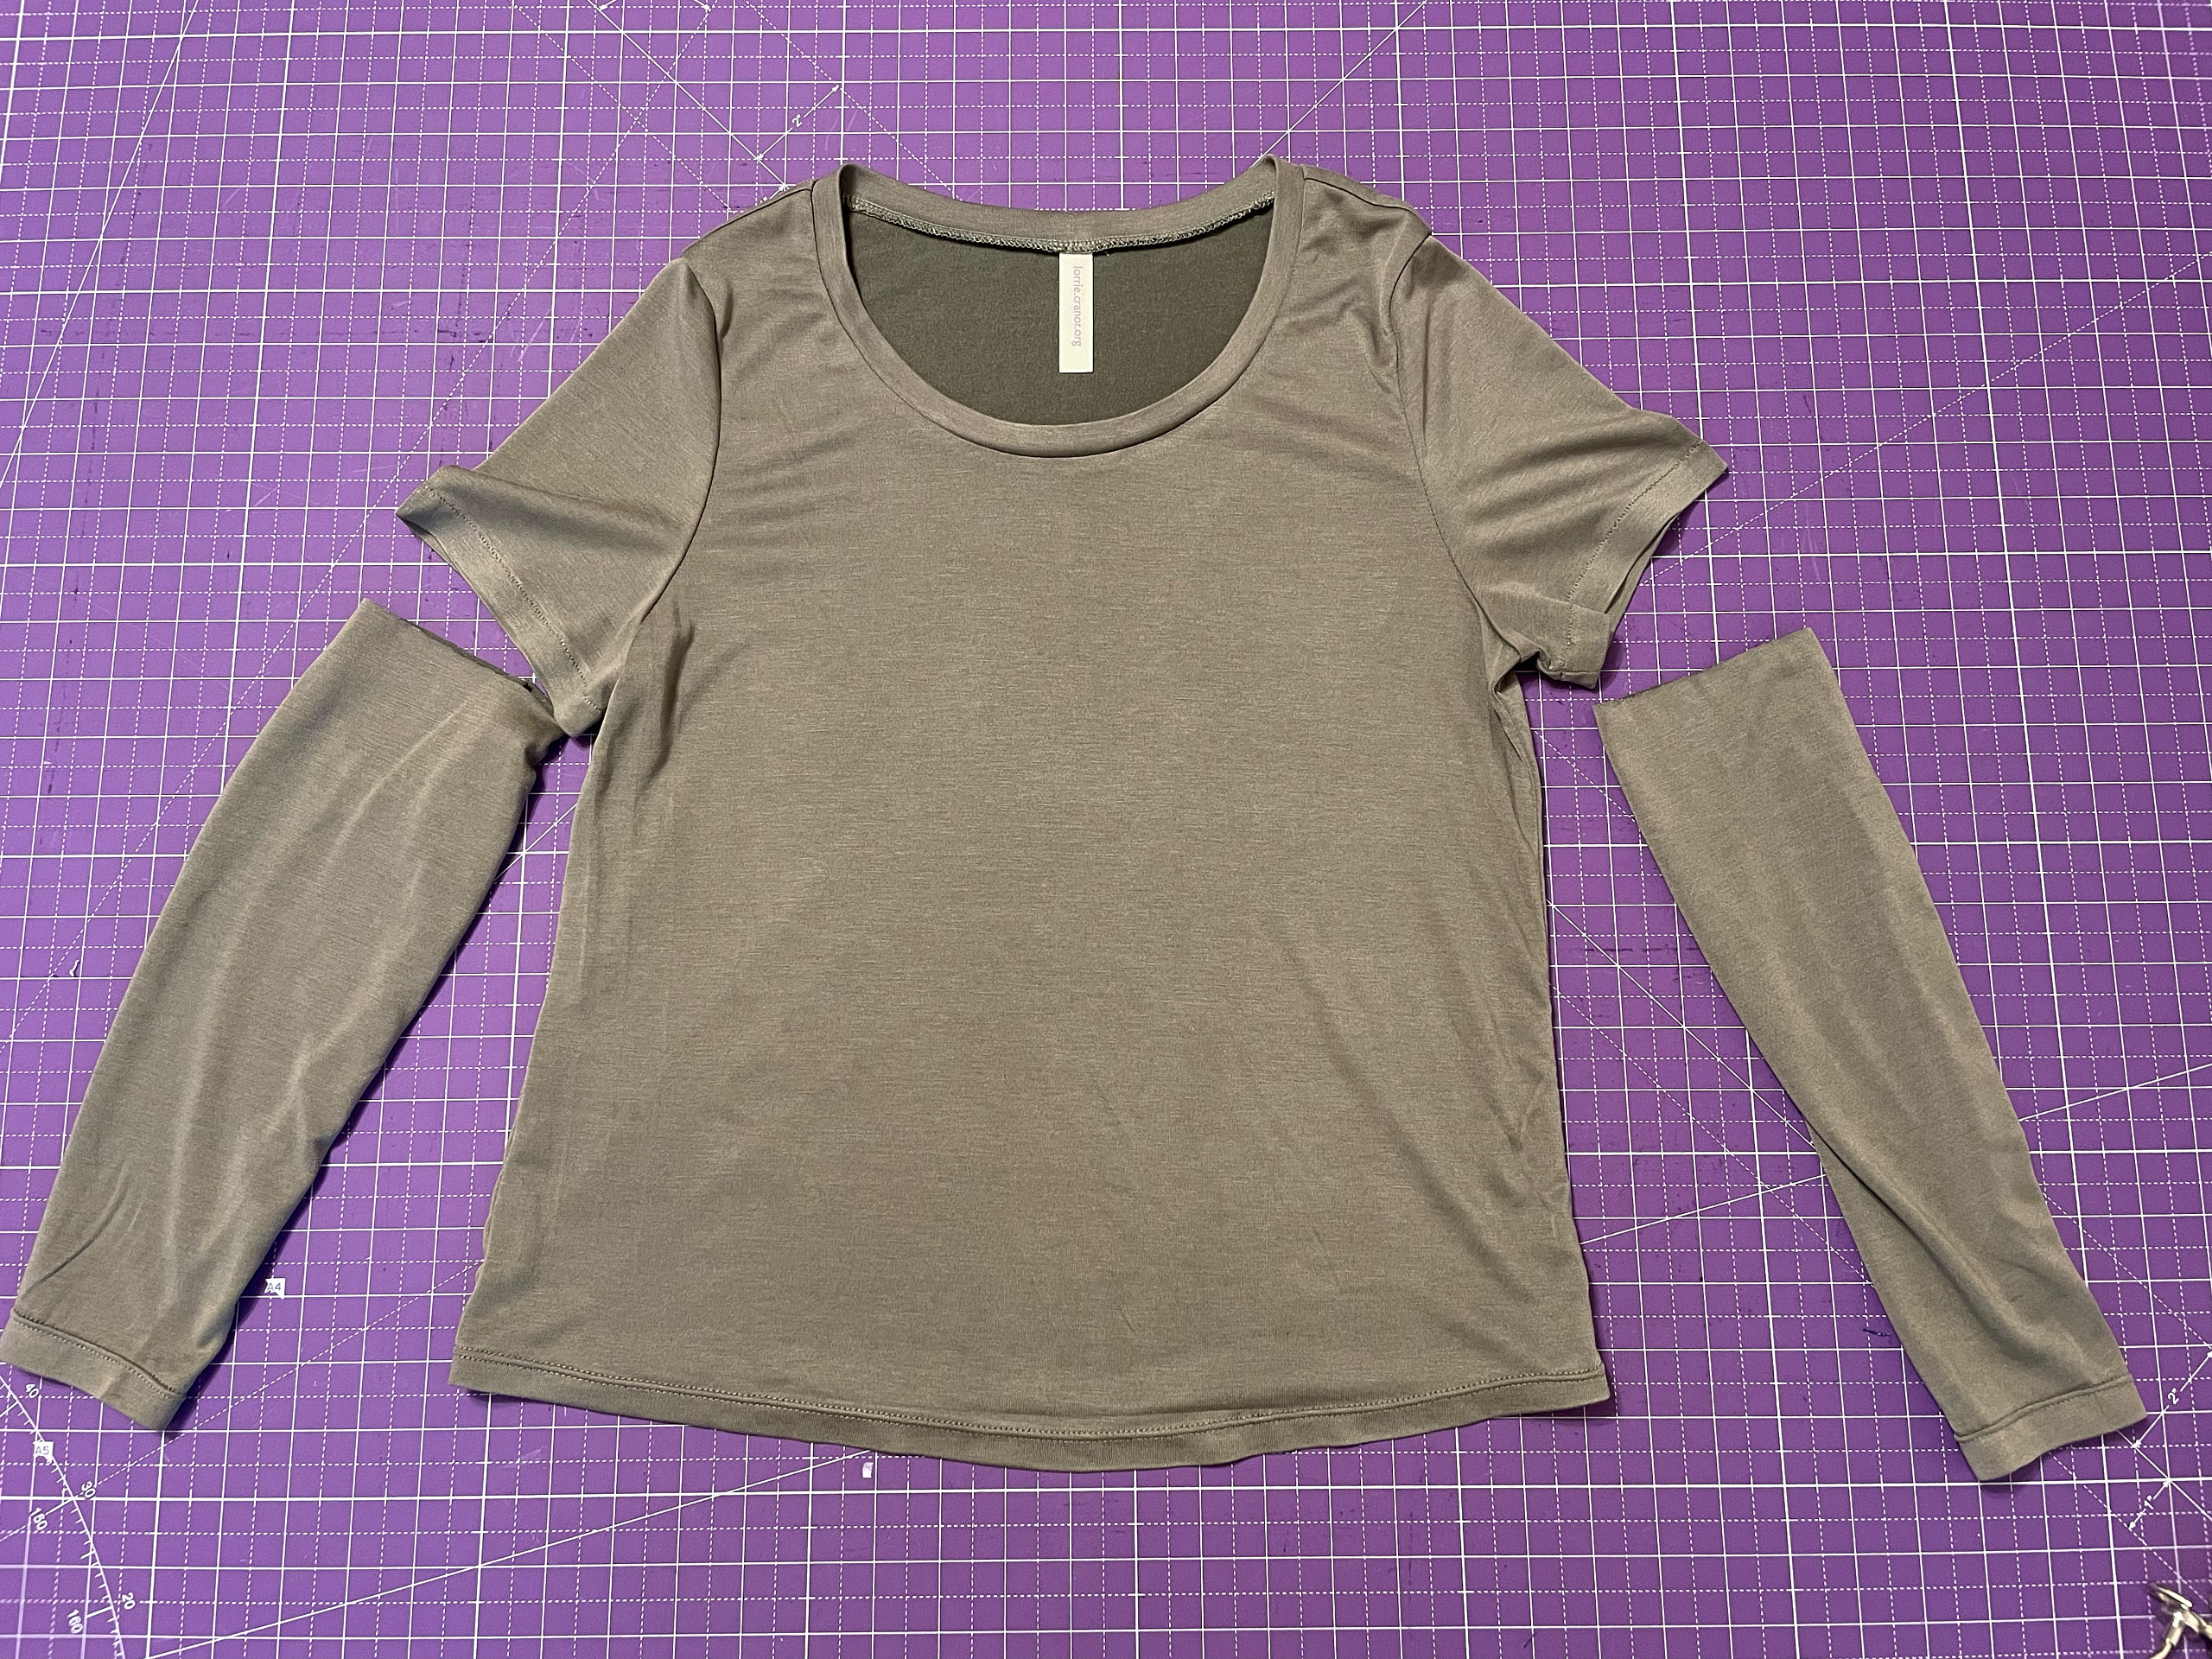
I was quite pleased with my double-bell-sleeve Pattern Emporium Allure top, but wanted to try it with simple sleeves. The pattern comes with bonus plain sleeves that are slightly shaped for elbow curvature.
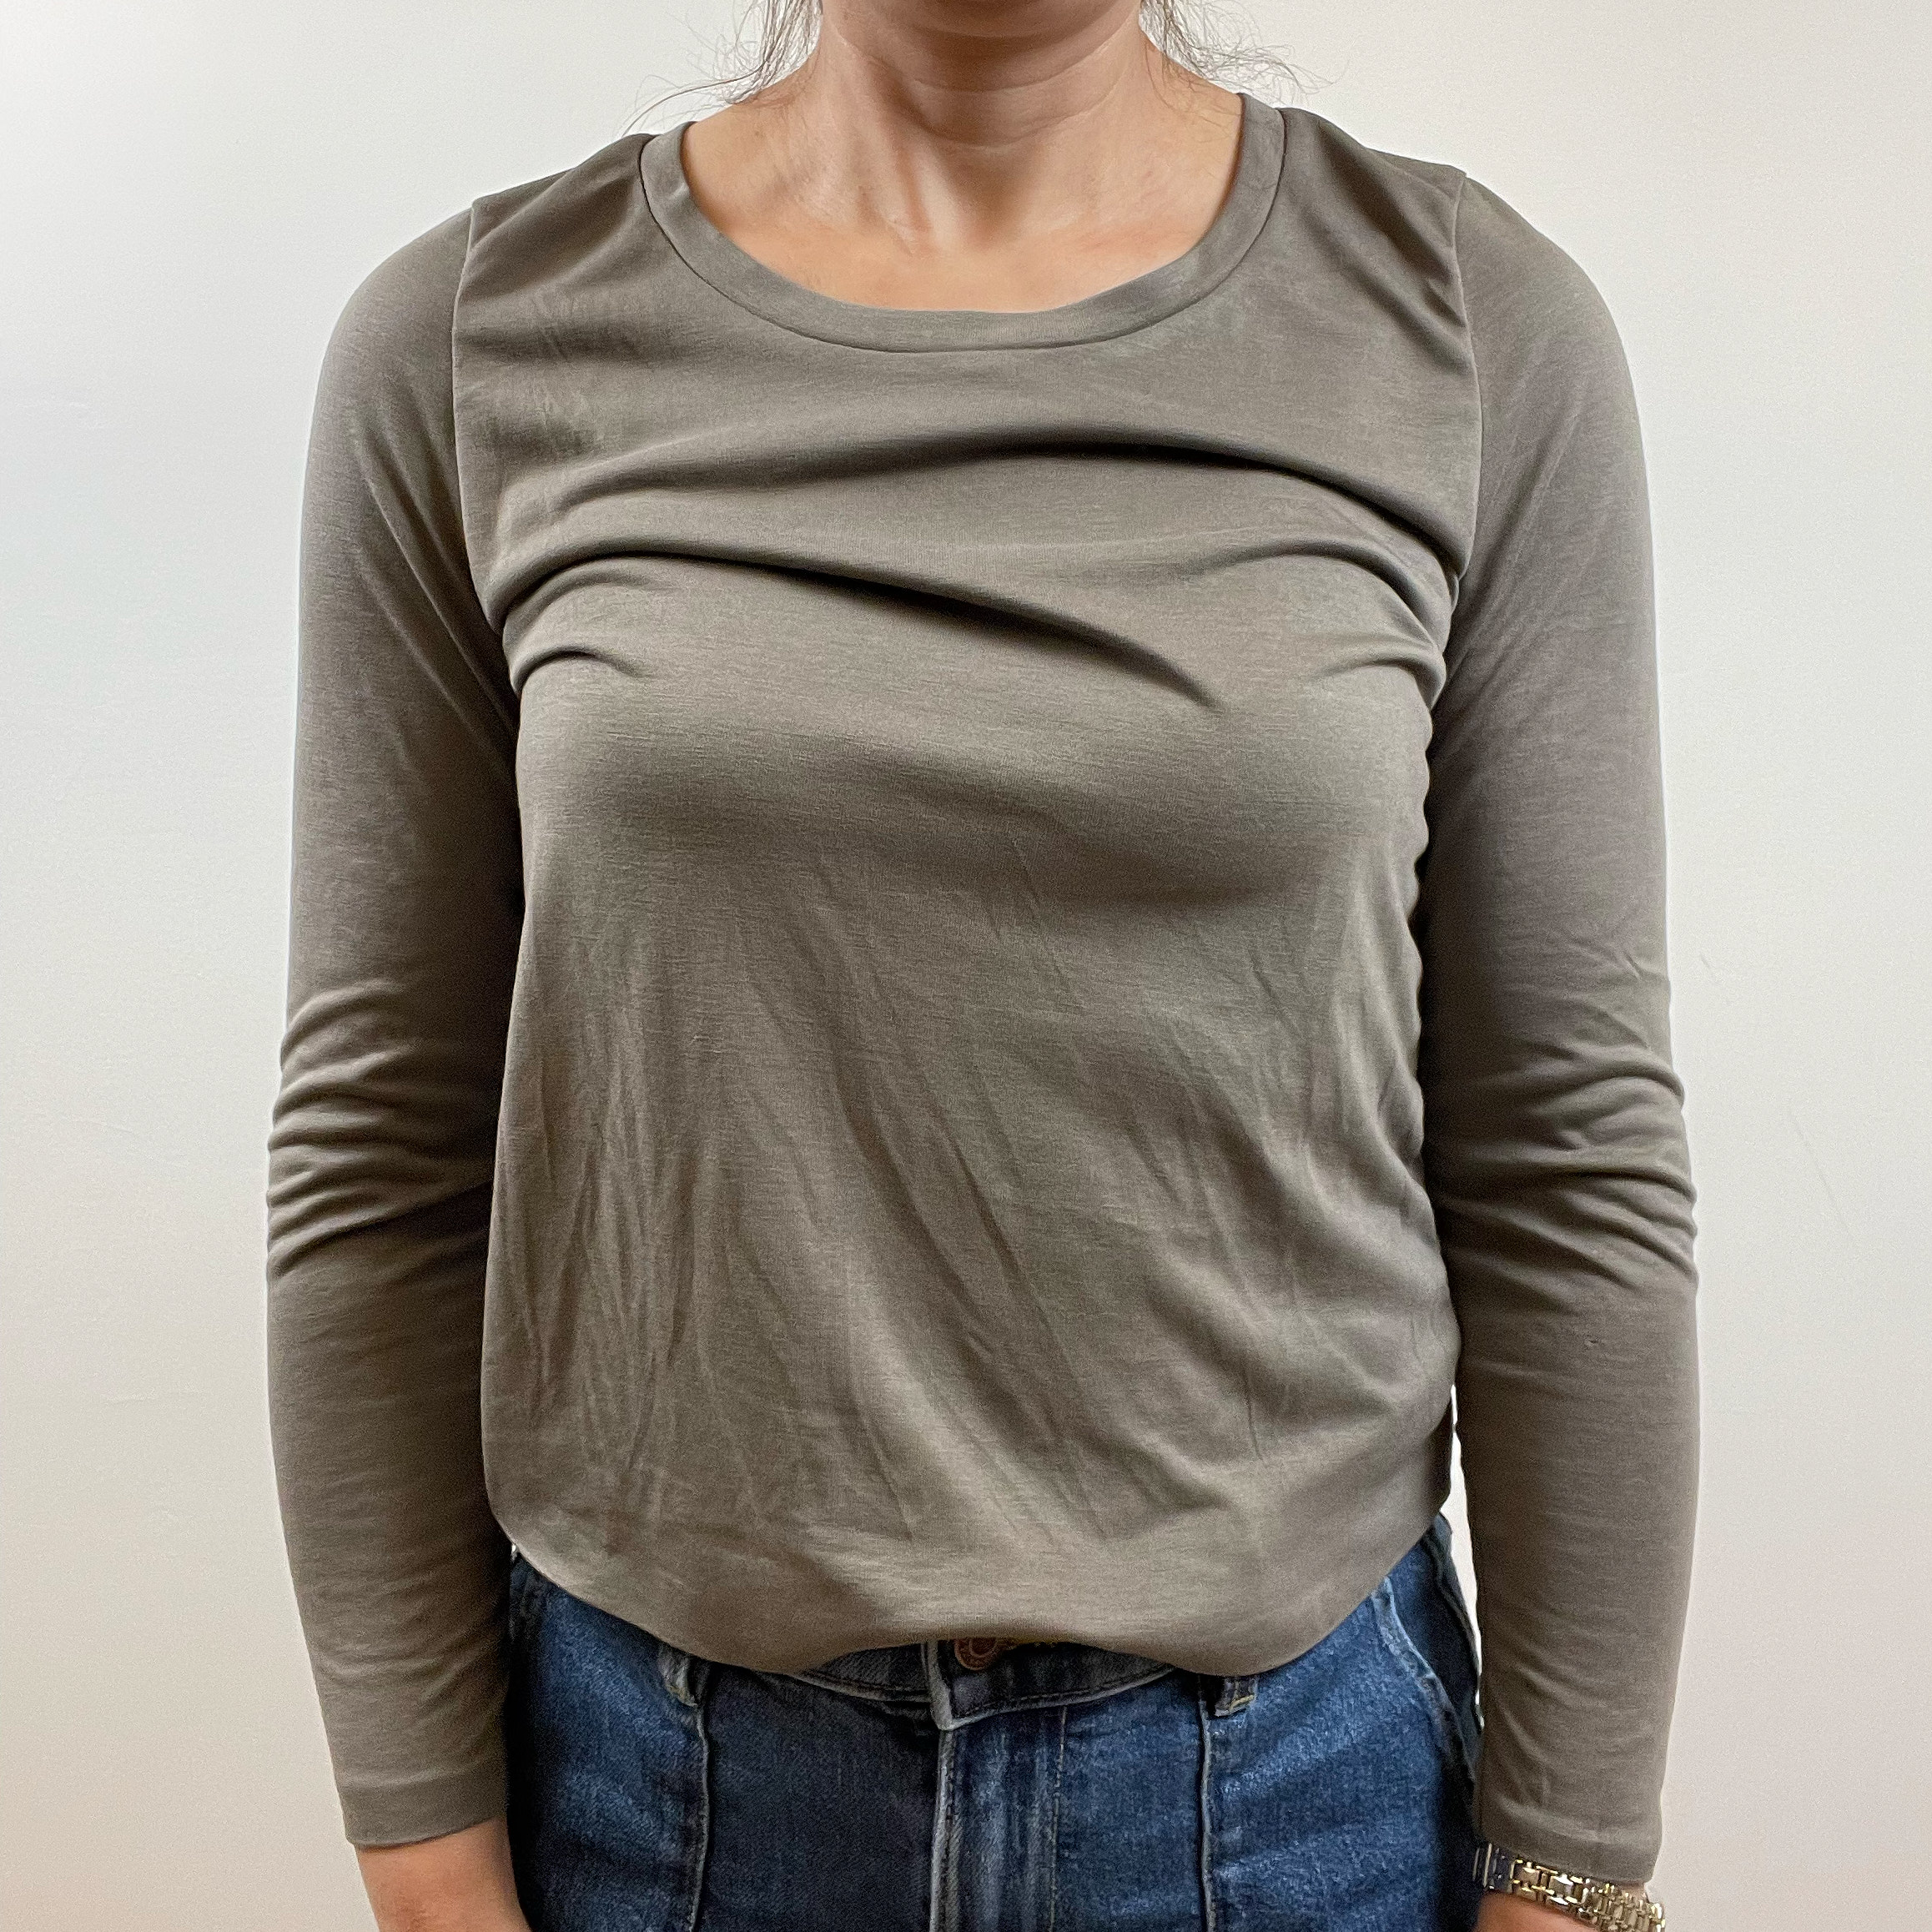
I have previously made quite a few long-sleeve knit shirts using the Sinclair Bondi pattern, which I like quite a bit and I think fits me really well (especially after I made a few minor adjustments). However, it is fairly fitted and I don’t think it works as well for fabric that doesn’t have a lot of 4-way stretch (although that hasn’t stopped me from using it with less stretchy fabrics, sizing up a size). For example, I noticed a lot of drag lines in the back when I used it with a low-stretch light-weight wool. Allure is semi-fitted, slightly less fitted than Bondi, so I thought it might work better for low-stretch jersey fabrics. When I put the two patterns on top of each other I could see that the Bondi size 6 and the Allure size AU10 are about equivalent. The Bondi is more fitted in the waist, flares out more at the hem, and is wider across the bust in the front. I normally make Bondi in size 4P, but size up to a 6P when using low-stretch fabric.
First, I made a plain-sleeve Allure in size AU10 from a lightweight 150 gsm, ginger-red hand-washable wool jersey knit fabric from Knitfabric.com. The fabric was advertised as having 25% stretch in each direction, but it seems to me it has more like 50% horizontal stretch and <25% vertical stretch. I used about a yard-and-a-half of 43″-wide fabric. I cut the hem about 3.5 inches shorter than the regular length, which is a good length on me for wearing a shirt untucked (which is mostly what I do), but long enough that I can tuck it in if I want to. I also did a sloped shoulder adjustment and shortened the sleeves by 1inch. I wanted a scoop neck, but knew from my previous Allure that I wanted it a little higher. So I used the front neck line from the Wanderlust dress high scoop neck and adjusted the size of the neckband accordingly. I hemmed the bottom and sleeves with a shallow zig zag stitch on my sewing machine after first folding and pressing it with knit stay tape.
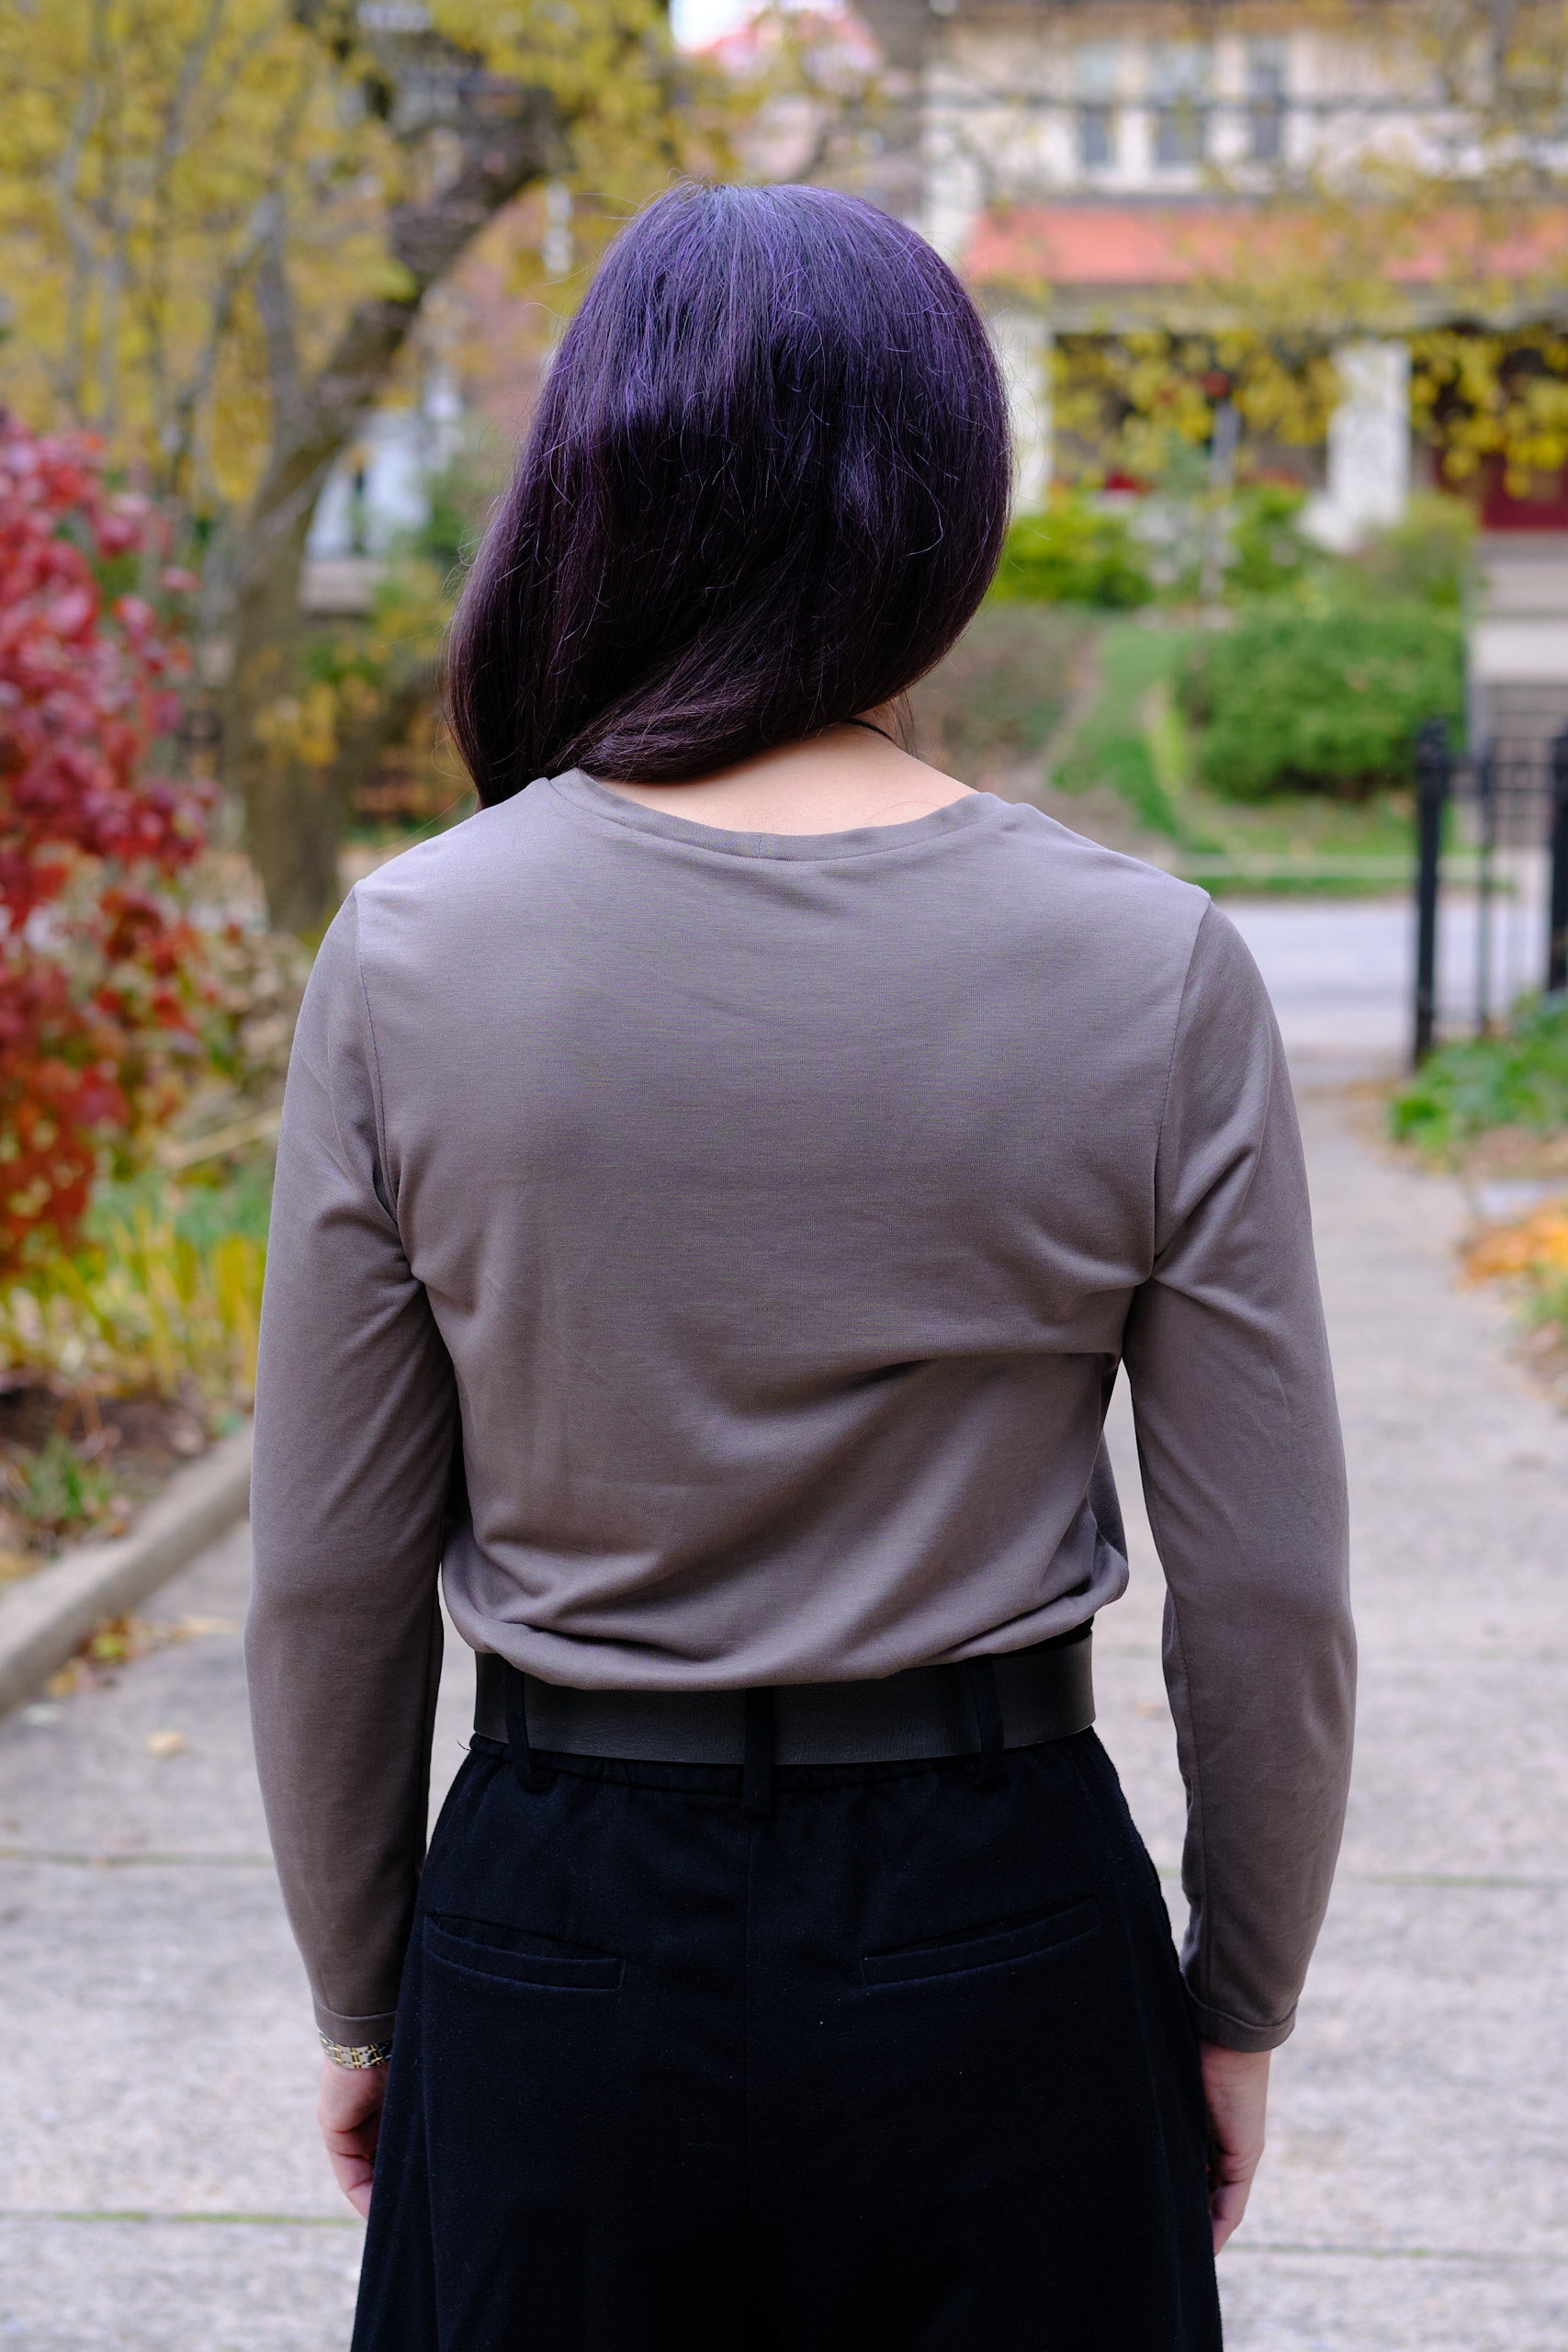
I mostly liked the way this came out, but found the neckline still a little too low and wide in the front and too low in back for my taste. so for my next top, made from dusty olive cupro jersey from Surge Fabrics, I raised the front neckline about .75 inch and brought the sides in about .5 inch. I also brought the back neckline in about .5 inch and raised it to the same height as the back of the crewneck — similar to the “screwp neck” that I like with the Bondi pattern. I used less than a yard of 58″-wide fabric. This jersey cupro is 180gsm and advertised as having about 50% horizontal and 25% vertical stretch. The vertical stretch seems to me less than that. The fabric color is almost grey — the olive is very dusty. None of my green threads were a good match for this fabric so I ended up using steel grey. The curpo fabric is 65% modal and 35% poly and does not require any special care. It has a very silky feel. I coverstitched the hem, sleeves, and neckline with the steel grey thread.
The neckline came out exactly the way I wanted it on this one after I futzed with the length of the band (I basted it on, decided it was too tight, removed it and cut another one 1.5 inches bigger). But overall the top was too tight. I learned from past experience with a cupro jersey dress that it doesn’t stretch much and fits tight. The sleeves were uncomfortably tight on me. But I thought it would still work in this semi-fitted pattern. But it was too tight and had lots of drag lines. And when I raised my arms and put them back down the shirt stayed bunched up around the bust. It took less than a yard of fabric and I had started with two yards, so I decided to give this one to my daugter and try again.
It fit my daughter fine but the sleeves were too tight on her and not quite long enough (she is taller than me) so I turned them into short sleeves.
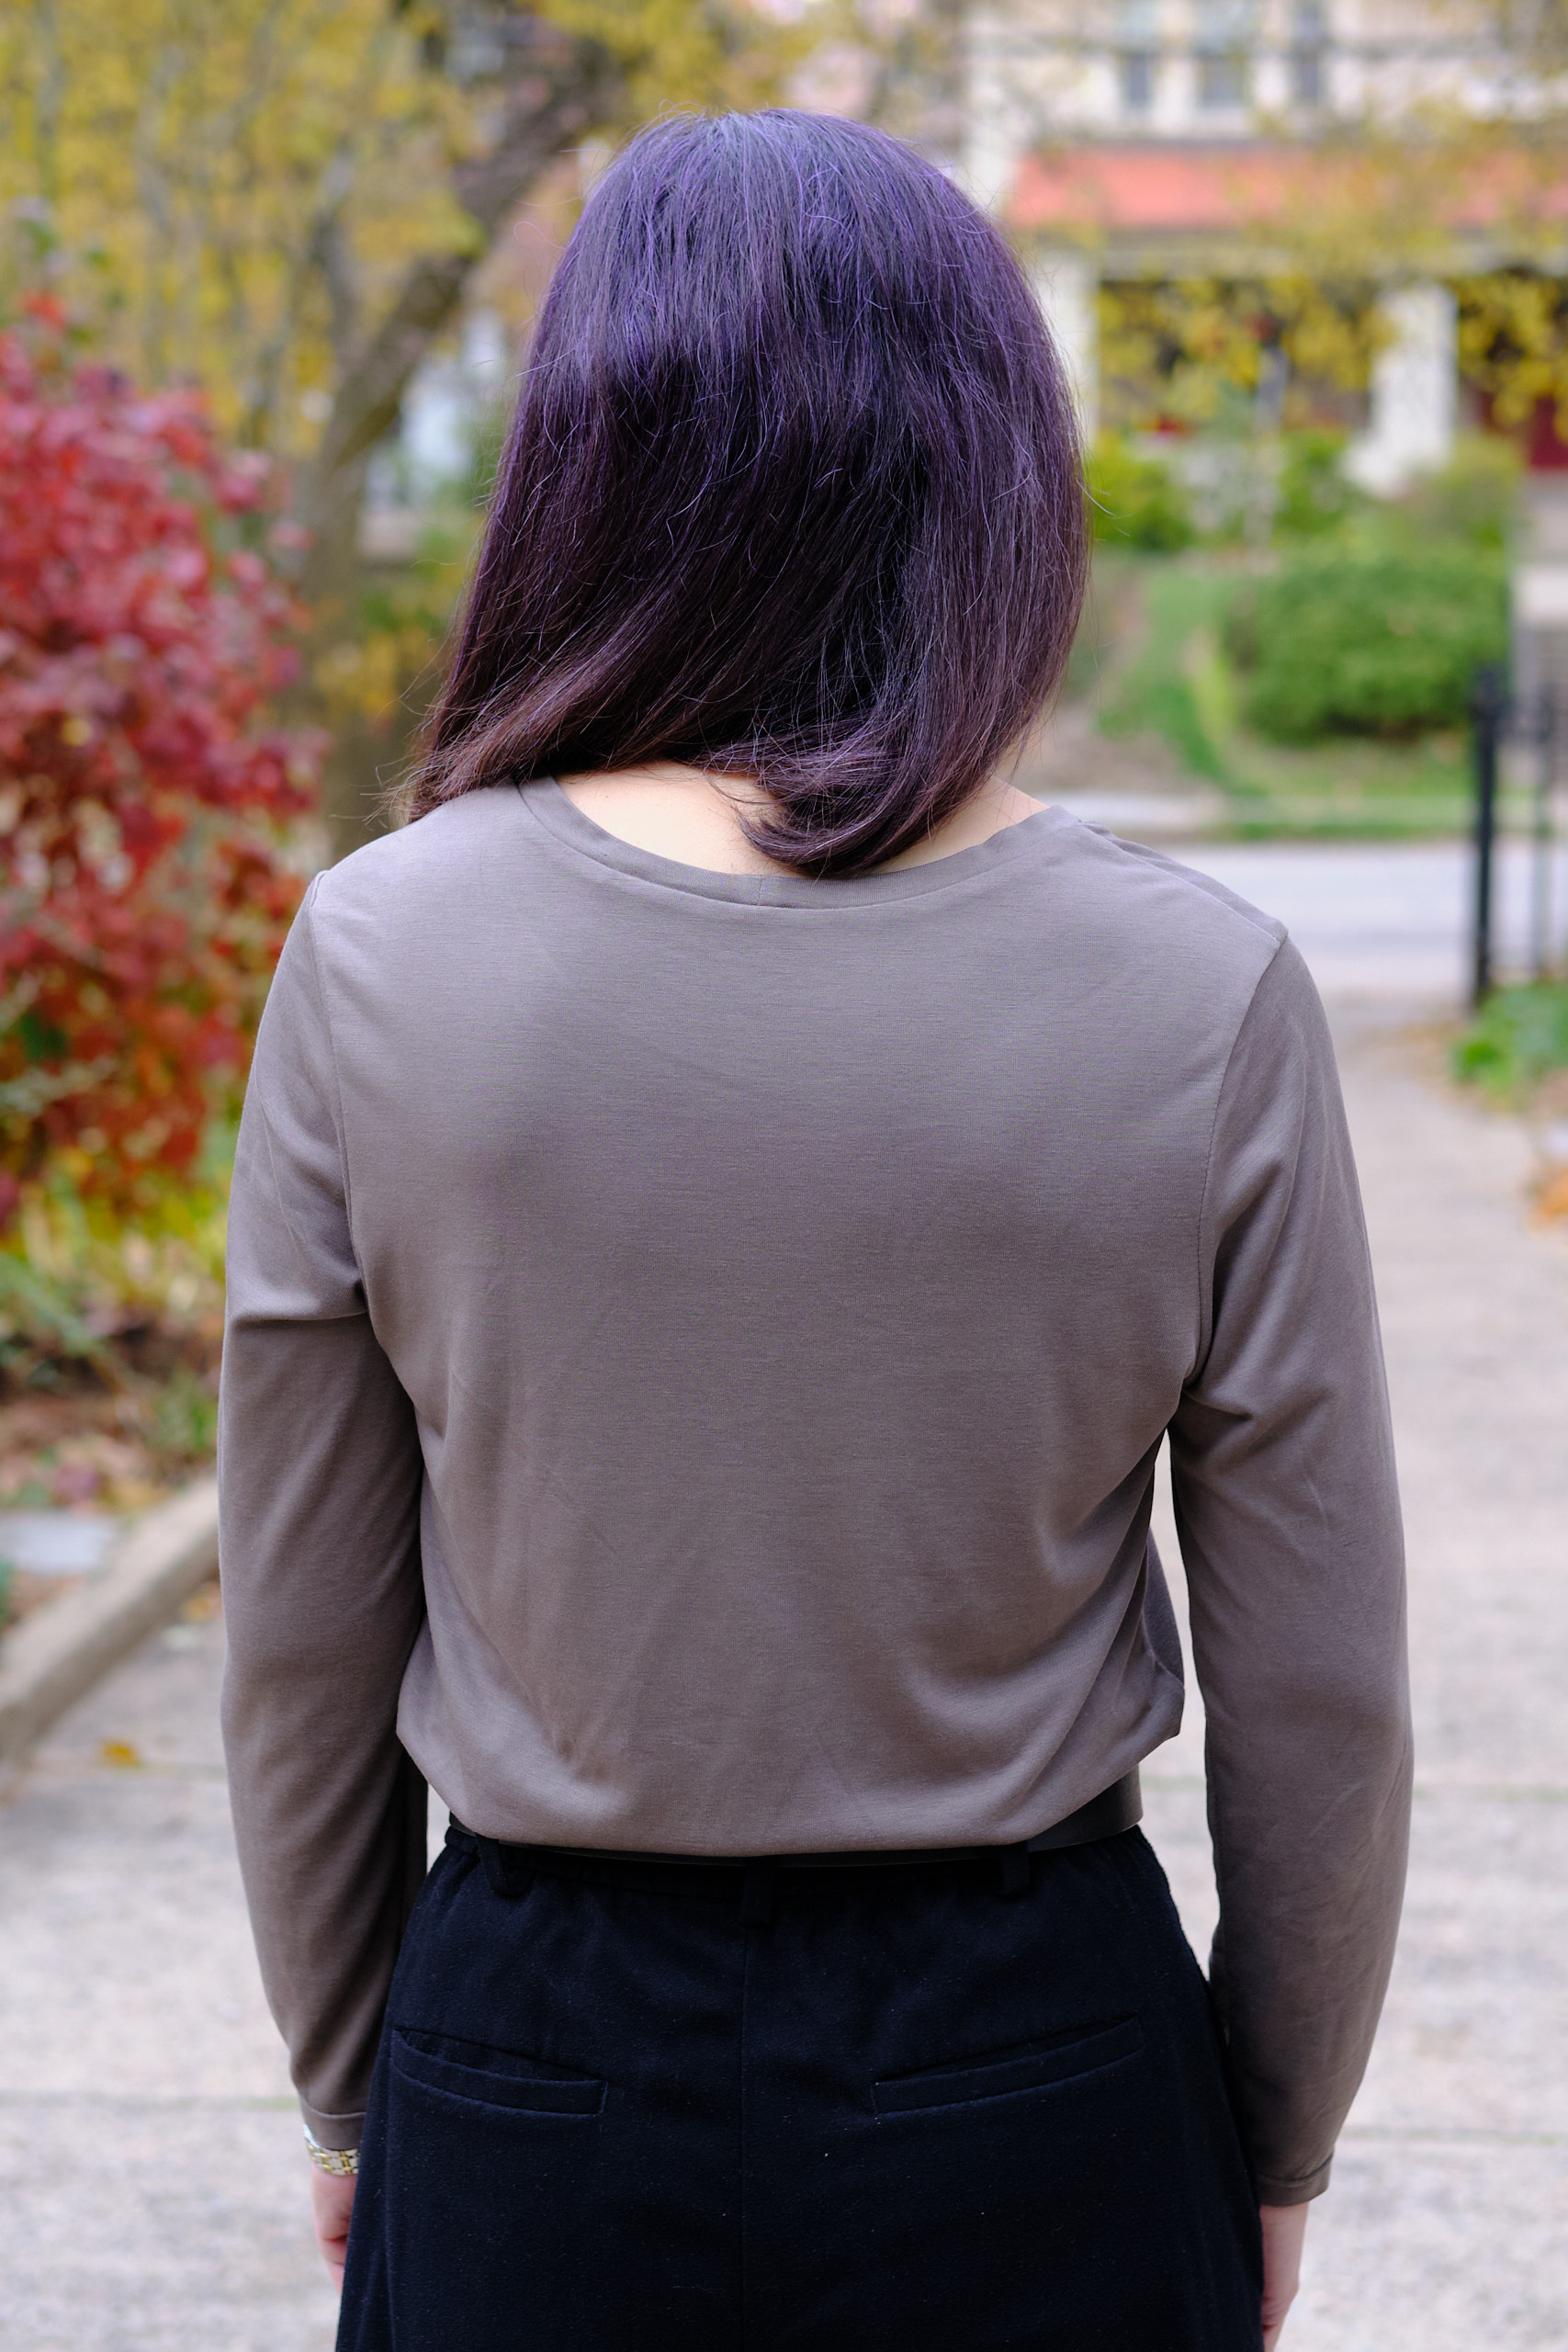
I made another Allure from the dusty olive cupro, this time size 12. I also added a .75-inch broad shoulder adjustment, in addition to the sloped shoulder adjustment — an adjustment I usually make with Bondi too. I used the screwp neck, shortened the hem by 3.5″ and shortened the sleeves by 1 inch.
This time the fit was very good. However, you can still see some drag lines at the shoulder, I think due to the lack of vertical stretch. I will definitely size up if I use this fabric again.The cupro fabric is an easy-care soft and silky fabric and has a nice drape, but it also seems to stick to itself and doesn’t smooth itself out without help, as you can see in these photos. We got the last photo below after a lot of smoothing. I think this is lovely fabric, but it doesn’t seem to work that well for a semi-fitted t-shirt. I think it works better in a dress because there is weight pulling it down. I think it would also work better with princess seams, in an oversized style, or even with a woven pattern. This one will be fine as a layering piece under a sweater or jacket.
Pattern Emporium Allure Bell Sleeve Top with modern bell sleeves in short and long lengths, size AU10, less than a yard of ITY, scoop neck, shortened 5 inches.
I had some fabric leftover black and white ITY fabric from my double-faux wrap dress and decided to use it to make a double-bell sleeve top for my daughter for her birthday last month. I used the Pattern Emporium Allure Bell Sleeve Top pattern, a pattern I had previously used only to add bell sleeves to the Wanderlust dress. Allure comes with a wide range of sleeve options. I decided to use the modern bell style in short and long lengths and attach them to short sleeves. I cut size AU 10 with a wide scoop neck. The pattern falls at hip length, so for me I would make it 2-3 inches shorter to account for my short height. My daughter prefers shorter tops and she is only an inch taller than me, so I shortened it by 5 inches.
The pattern came together pretty quickly and I’m really happy with the results. I’m sure I’ll be making more Allure tops. For me I will shorten it less next time, use the sloped shoulder adjustment I used on the Wanderlust dress, and probably also uses the Wanderlust neck band, which is slightly less scooped. Here you can see me modeling it before I sent it to my daughter.
And here’s my daughter modeling it when I visited her last week. I wore it untucked, she preferred to tuck it in.
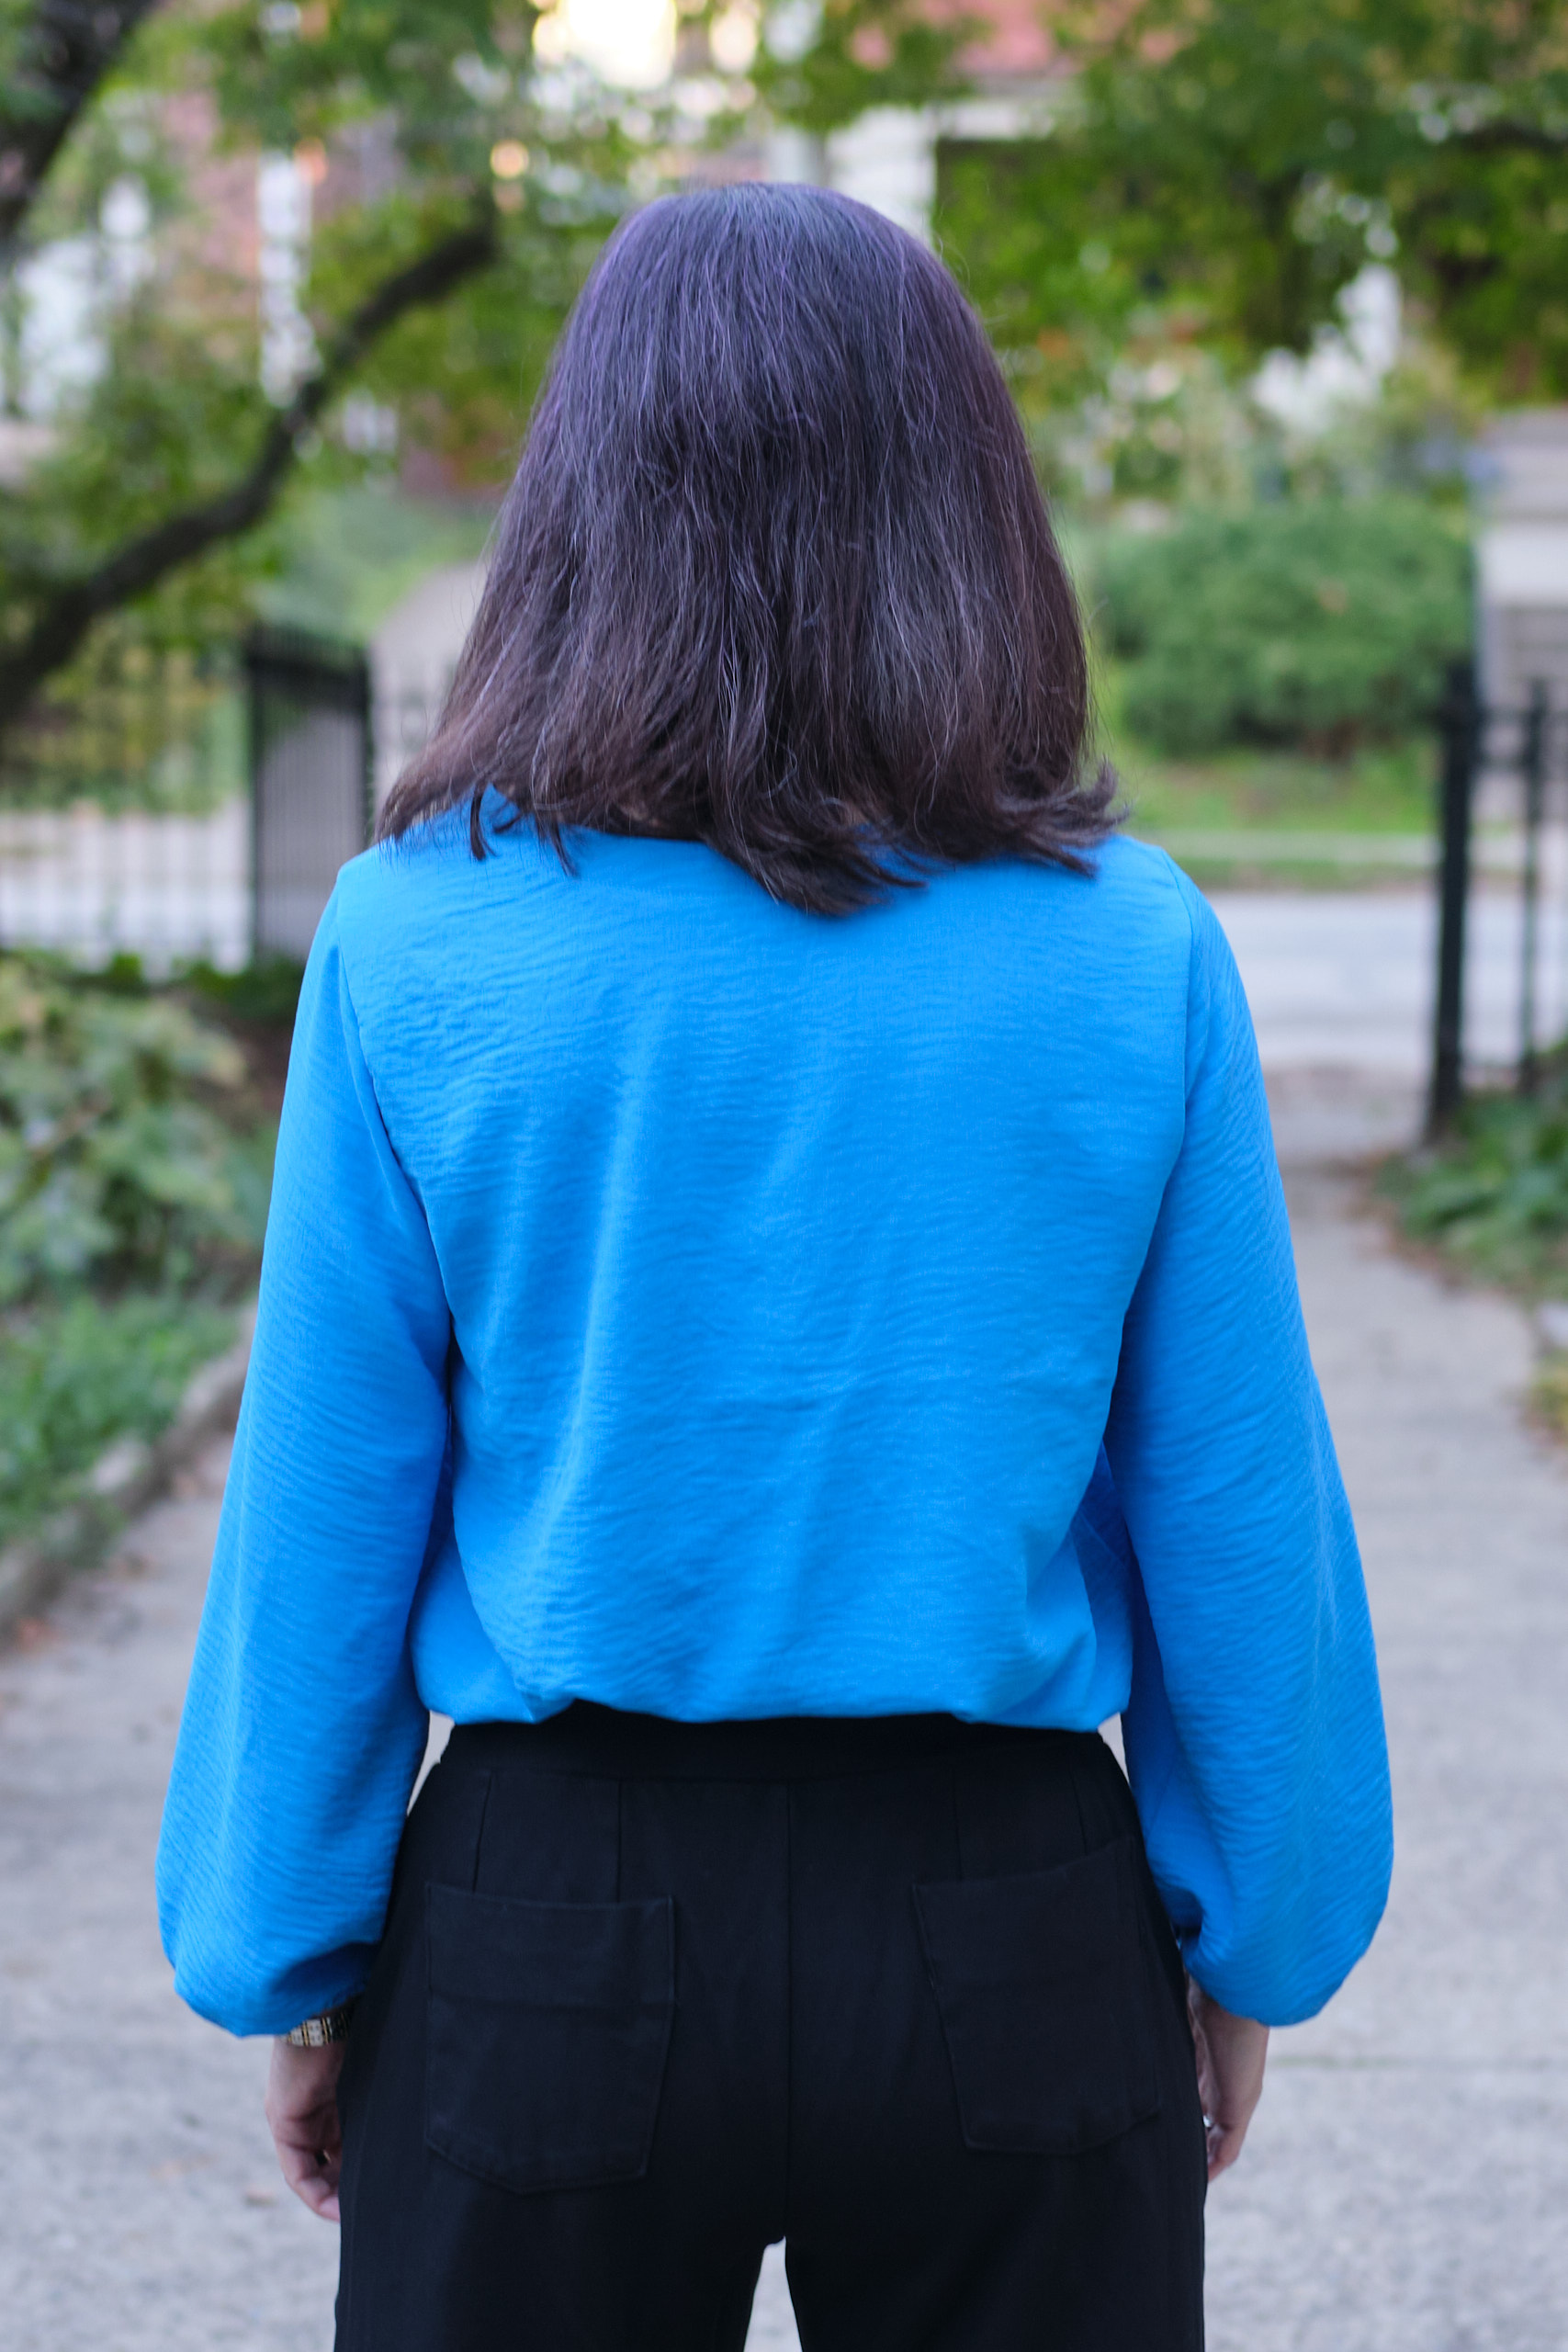
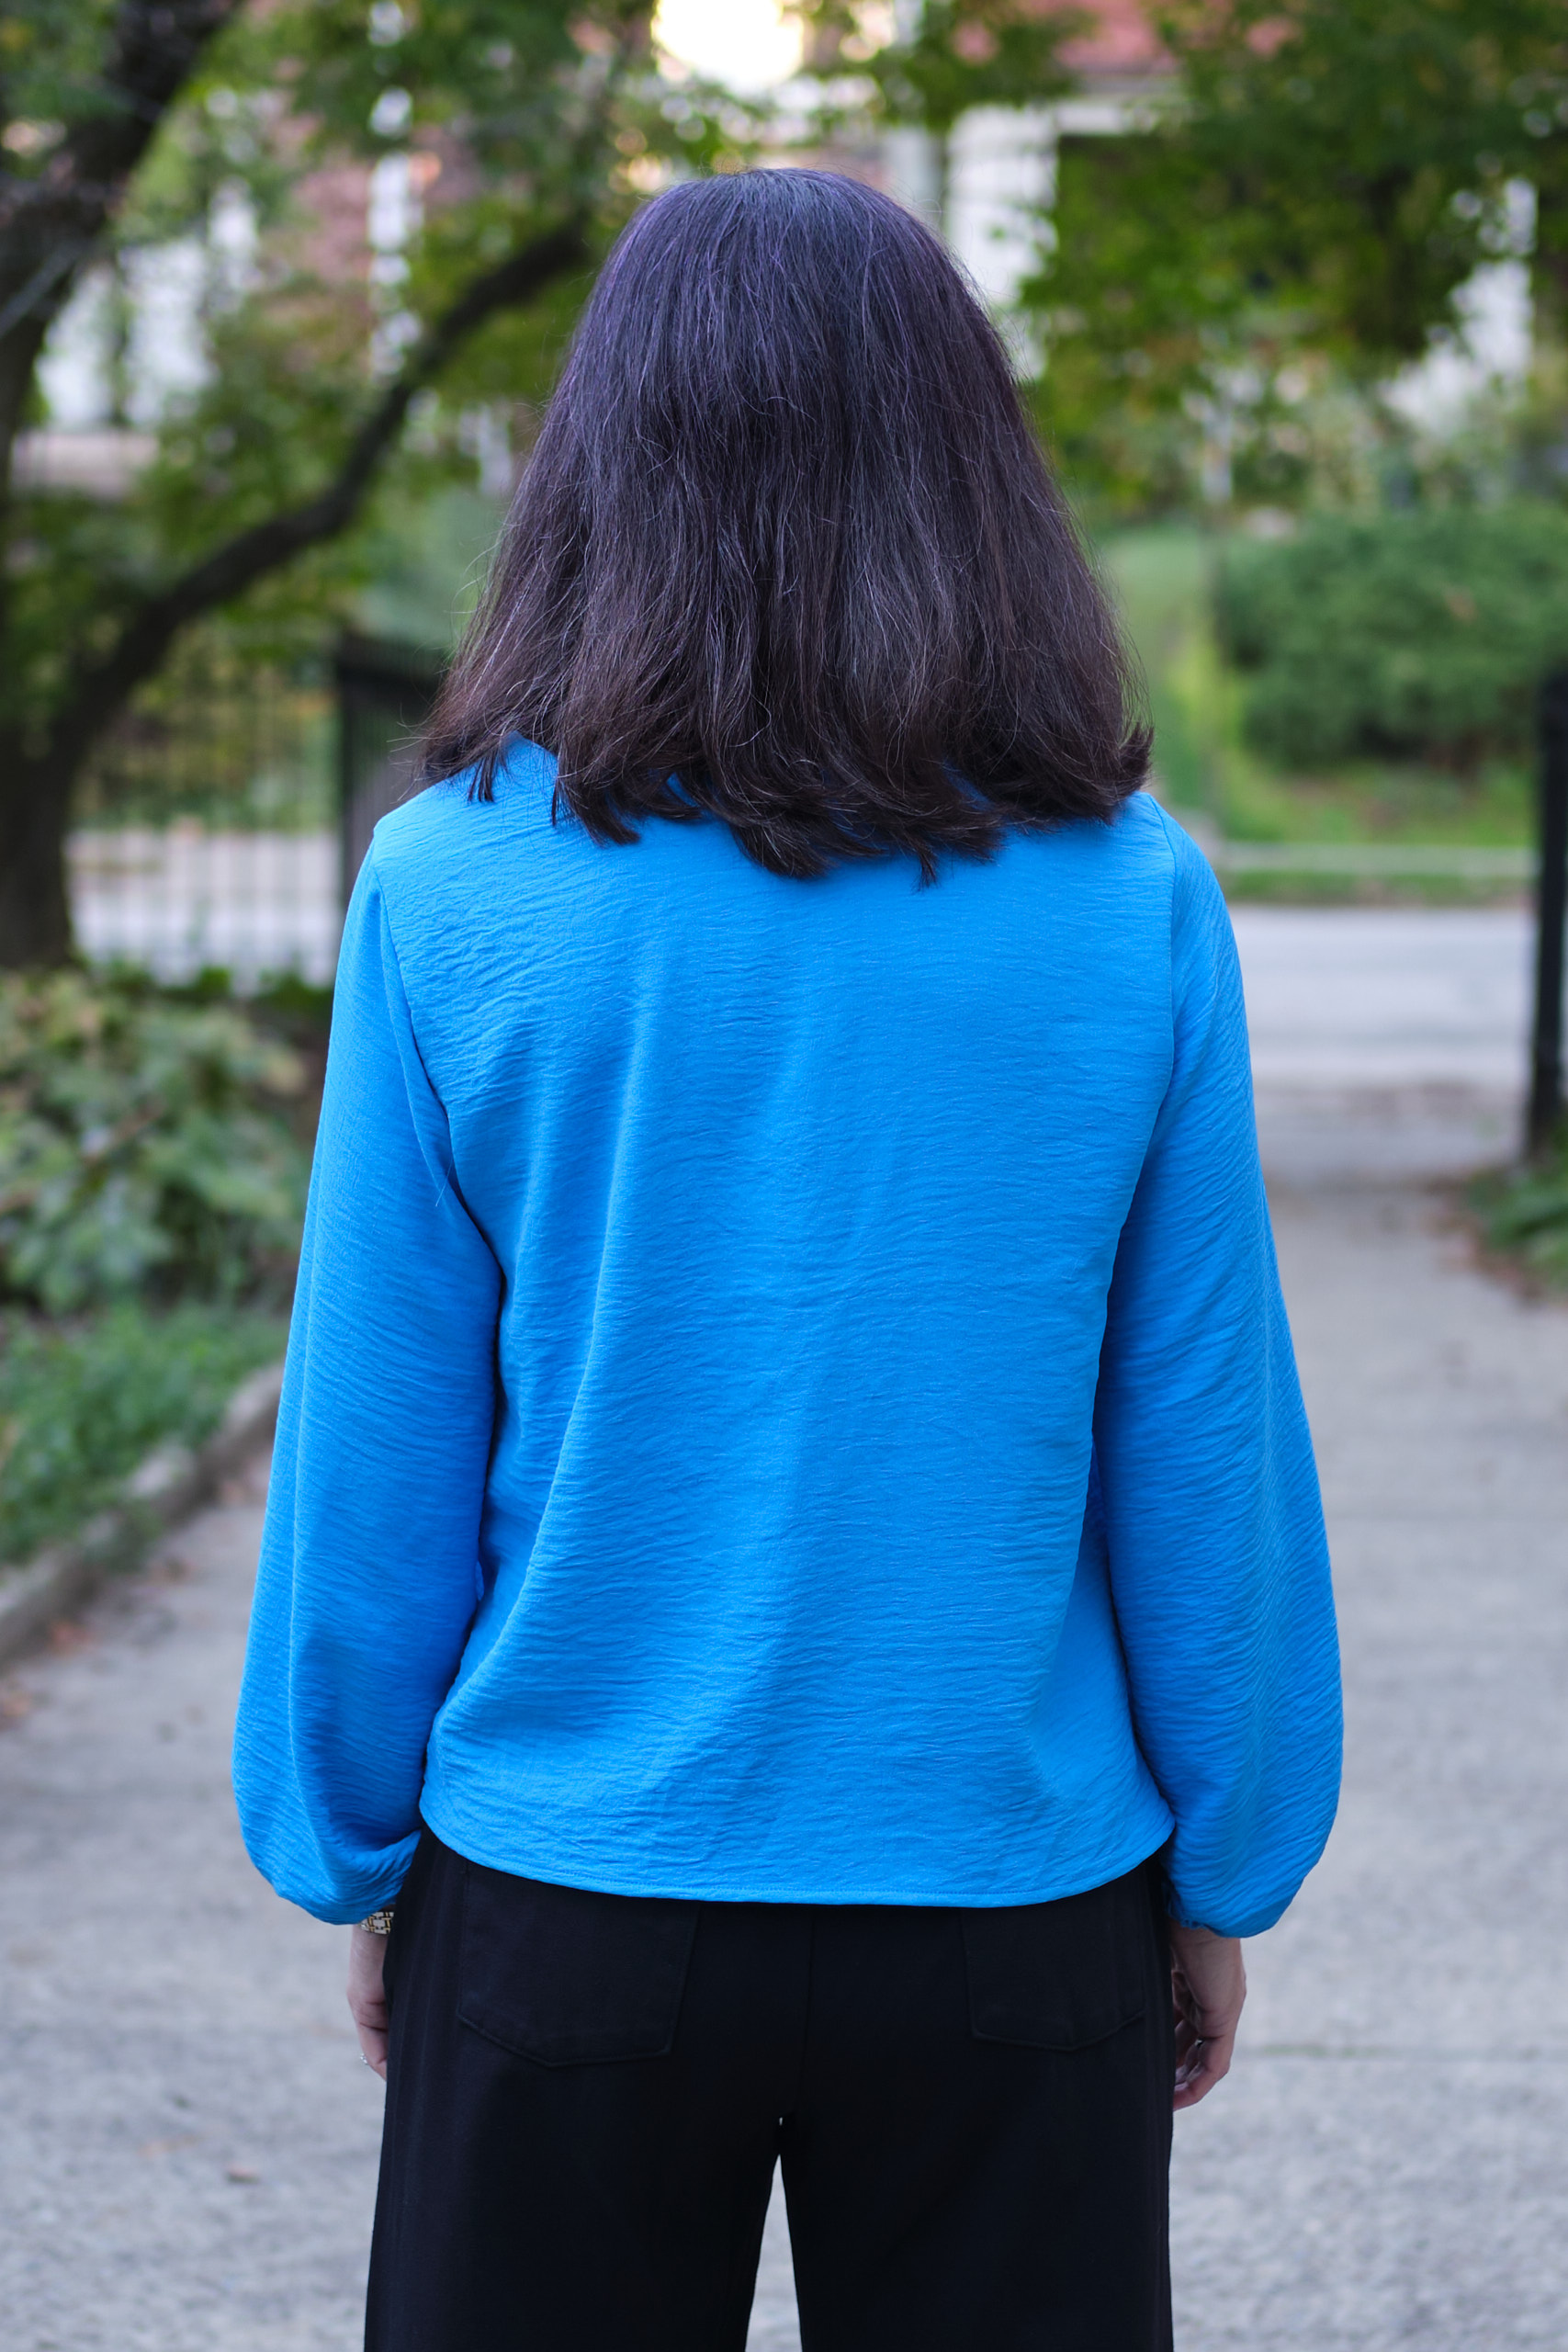
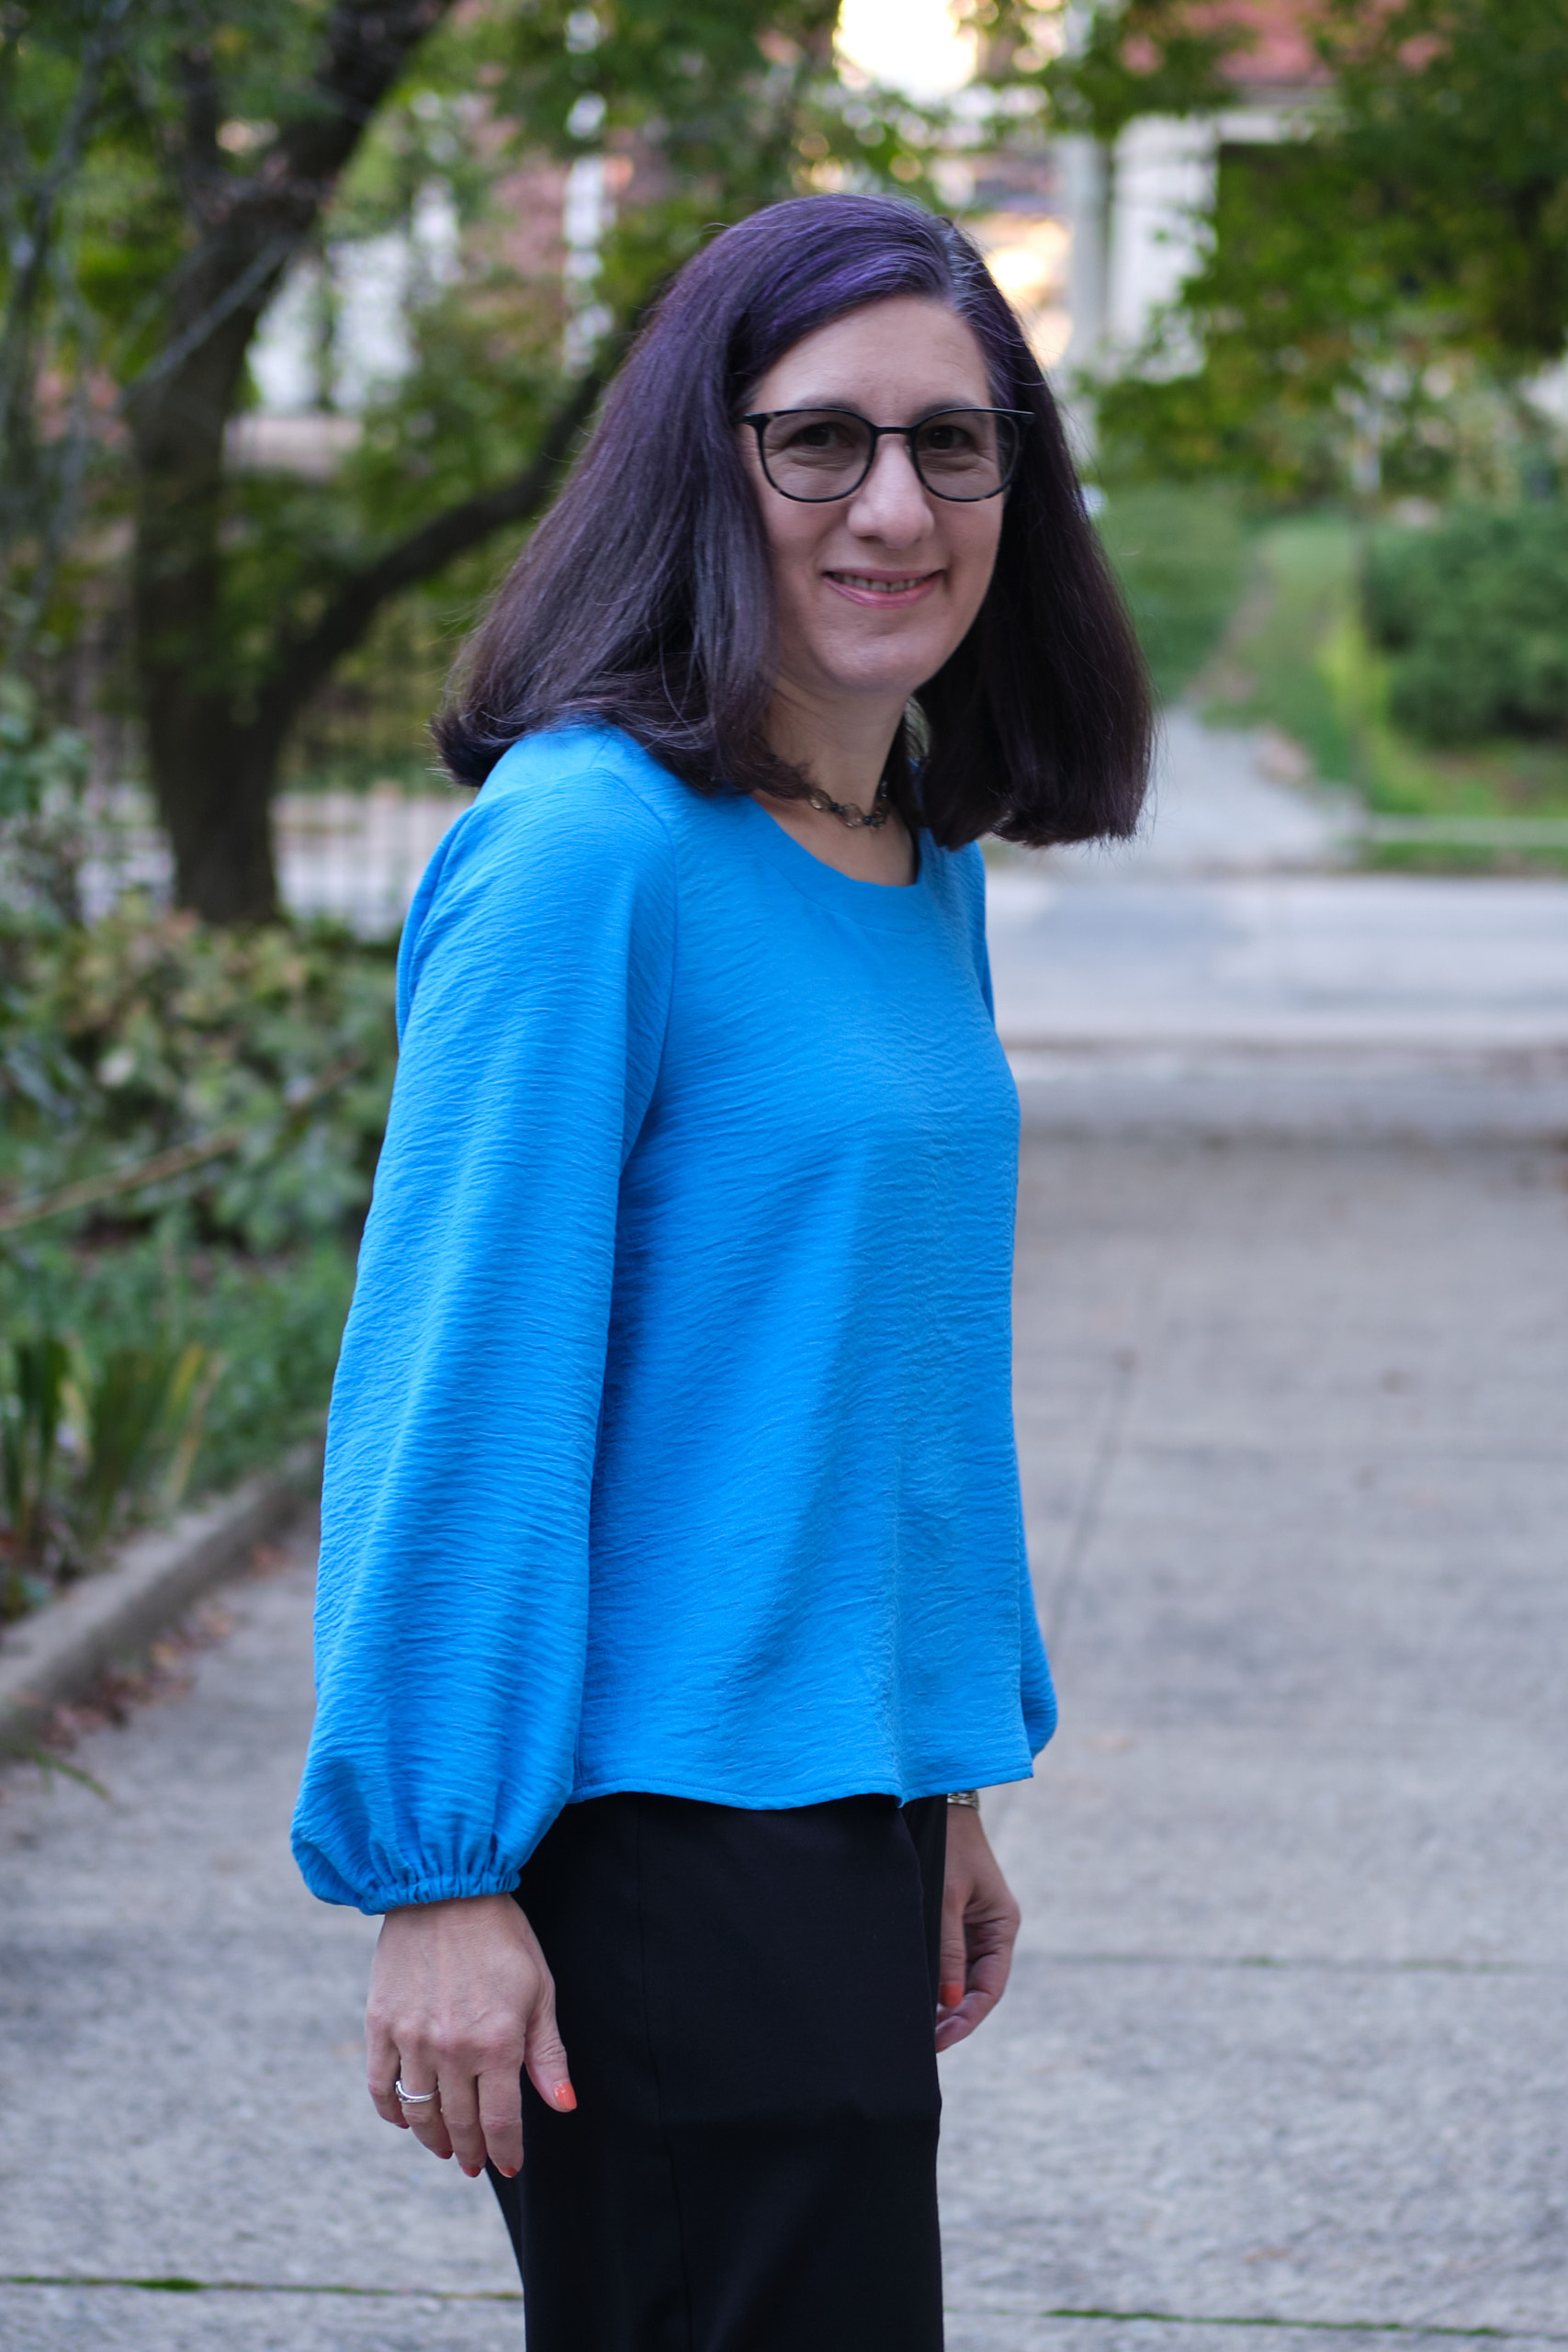
I made my lilac Be Mine and Spill the Tea mashup cap sleeve blouse as a simple, elegant summer top. So I decided to try the mashup again, but this time with the flared long sleeves from the Pattern Emporium Spill the Tea pattern. Although the size chart suggests that I am a size AU10, I sized down for all my Be Mine tops to an AU8, but they still seem a little big, so I decided to try an AU6 this time. I used the Mily Mae cobalt airflow polyester fabric this time – same woven crinkle fabric as the lilac top but a different color.
Once again, I sloped the shoulders and eliminated the front and back seam to keep this super simple. I also skipped the wide hem this time and serged the hem, and then folded it under a quarter inch twice and stitched it down with my quarter-inch edge foot. The flared sleeves were easy to assemble and attach. I shortened them by 1.5 inches before I cut them out, anticipating that I usually need to shorten sleeves unless it is a petite pattern. I sewed the whole thing together in a few hours one evening after dinner.
I like the sized-down fit, and didn’t have any problem getting it on or off. The flared sleeves aren’t as dramatic as the Be Mine balloon sleeves, but they still have plenty of drama, and they are easier to wear under a sweater. The top works both tucked and untucked.
I wanted to make a short-sleeve top to go with my magenta suit. I bought lots of polyester crinkle airflow woven fabric when it was on sale at Mily Mae and I thought the polyester lilac airflow would go well with the magenta. (Note, the airflow is advertised as non-stretch, but because of the crinkle texture, it actually does have a bit of stretch (which could, perhaps, allow sizing down a size). It’s actually fairly similar to the Surge Florence stretch woven that I used recently for a Spill the Tea top; the Florence is just a bit crisper.) I considered making another PE Spill the Tea top, but wanted something without ties. I love the look of the ties, but not futzing with them and having to keep them from getting in the way as I go about my day. I realized that the PE Be Mine Balloon Sleeve top has a very similar bodice to Spill the Tea and that the sleeves are interchangeable. The balloon sleeves are awesome, but don’t play well under jackets and sweaters (and there’s no point wasting a fabulous balloon sleeve under a sweater). So I thought I could get a more practical and layerable top for wearing with jackets and sweaters by putting the Spill the Teas cap sleeves on the Be Mine top bodice.
I cut a size AU 8 Be Mine bodice with a sloped shoulder adjustment and eliminated both the front and back center seam. I cut the regular length with the mid neckline and the wide facing. This was fairly quick to sew together without the center seams and no hemming, bands, or binding needed for the cap sleeves. The part that took the longest was the wide hem, which I think looks really nice on an untucked shirt and adds some weight to this light-weight fabric. But the wide hem is quite the process: it requires stitching, surging, trimming, understitching, folding, top stitching, and pressing between each of these steps. The simple hem option would have been much faster.
I’m pleased with how my top turned out. It looks good tucked or untucked, coming or going!
I tested Cassie V1 but was traveling when the V2 pattern released and didn’t get back until after the testing period was over. So here’s my V2, better late than never.
Cassie is a v-neck pattern for woven fabrics. In the original V1 pattern the neckline crossed over, but too many sewists complained about gaping, so the final V2 was switched to a v-neck without the crossover, but including a pair of cute notches. I decided to try the pattern in PyLos LiKnit, a stable knit fabric made from 55% Rayon/45% Nylon. It has about 25% stretch horizontally, but minimal vertical stretch. I treated it as a woven when I sewed. I think it behaved pretty well for this pattern, although it has a little bit more thickness than a woven and it stretches a bit, so it made it harder to get sharp points in the notches and a crisp V. However, the stretch also made the top more comfortable to wear and easier to get on and off.
I cut out a 4p AB cup top with long sleeves and made no pattern modifications. I top stitched all the optional places where it was suggested. My original attempt at sewing down the neck binding was a bit off and caused the v-neck to be uncentered. Fortunately it was pretty easy to unpick and resew (although looking at the finished product now I realize it still isn’t perfectly centered… oh well).
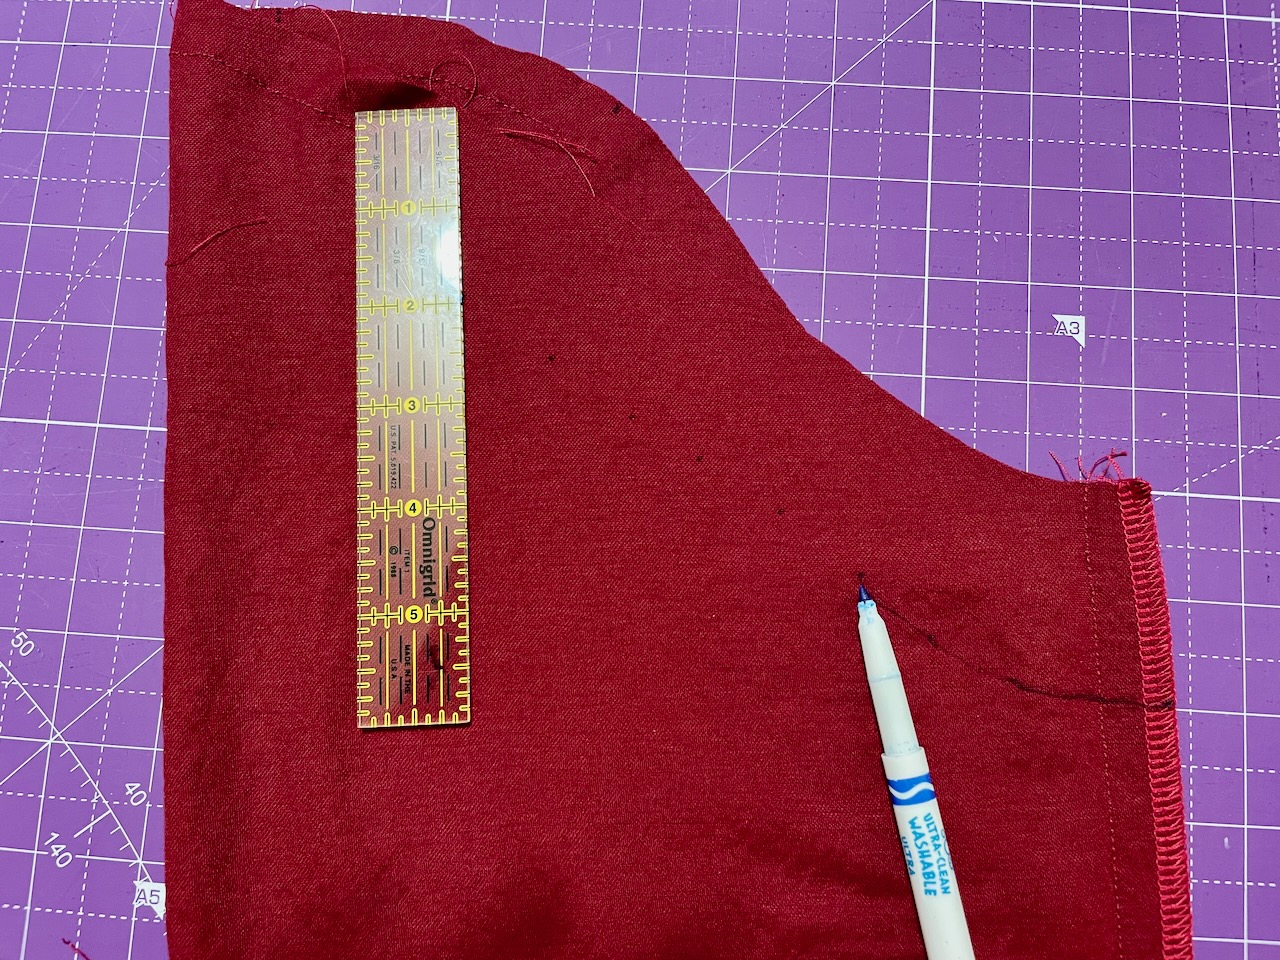
After I sewed the first sleeve on I tried it on and was disappointed to see the sleeve hanging well past my wrist. I’m used to sleeves that are too long on me, but was surprised the sleeve was too long on a petite pattern. Since this sleeve is gathered and the band added before you sew it to the garment, there is no opportunity to check the sleeve length before it is finished. I went back and looked at photos posted by other sewists and noticed that most opted for the 3/4 length rather than the long sleeve. It looks to me like the long sleeves in this pattern just run long. The sleeve bands took a while to construct and I didn’t want to take them apart. So instead I unpicked the sleeve head and cut two inches off the top of the sleeve head. I was able to mark my cutting line by using a ruler to draw dots every inch or so two inches from the top edge of the sleeve. Then I connected the dots. I cut along the line and reattached the sleeves. This time it worked much better. (Warning for other sewists, unless you have particularly long arms, if you sew the long-sleeve version you will likely need to shorten the sleeves!)
Overall, I’m happy with this top. This is not a style I normally wear, and it may be more difficult to layer than my typical long-sleeve tshirts. But it goes well with both wide and skinny jeans as well as black dress pants, and it should not require ironing. I really like this long-sleeve version (now that I shortened the sleeves) but I also like the sleeveless and 3/4 length versions other sewists made.