Wonderful Wanderlust

It was my first time trying the Pattern Emporium Wanderlust fit and flare dress pattern, and I couldn’t help myself: I made three of them.

I saw some geometric poly/rayon/spandex double knit fabric on the Seweird Facebook group and had to order it immediately — I have a thing for geometric double knits, the more they look like something you might upholster a chair with, the more I want to wear them! And double knits tend to be soft, stretchy, and washable, with a nice body and weight to them, good for more structured garments but without the need for zippers. This one is a grey and red chevron knit, and I knew it needed to be a dress. I didn’t want to use a pattern I had already used with a geometric double knit (e.g. this Sinclair Alana dress or this Sinclar Valley Skater Dress with a full circle skirt) and none of the other patterns I already owned seemed quite right. I wanted a sleek fit-and-flare style with pockets and wide sleeves, but without princess seams or a waist seam. I checked out my favorite pattern companies and thought Wanderlust might work with the addition of some statement sleeves and pockets (the pattern doesn’t mention them but I found some examples in the PE Facebook group of Wanderlust dresses with pockets).

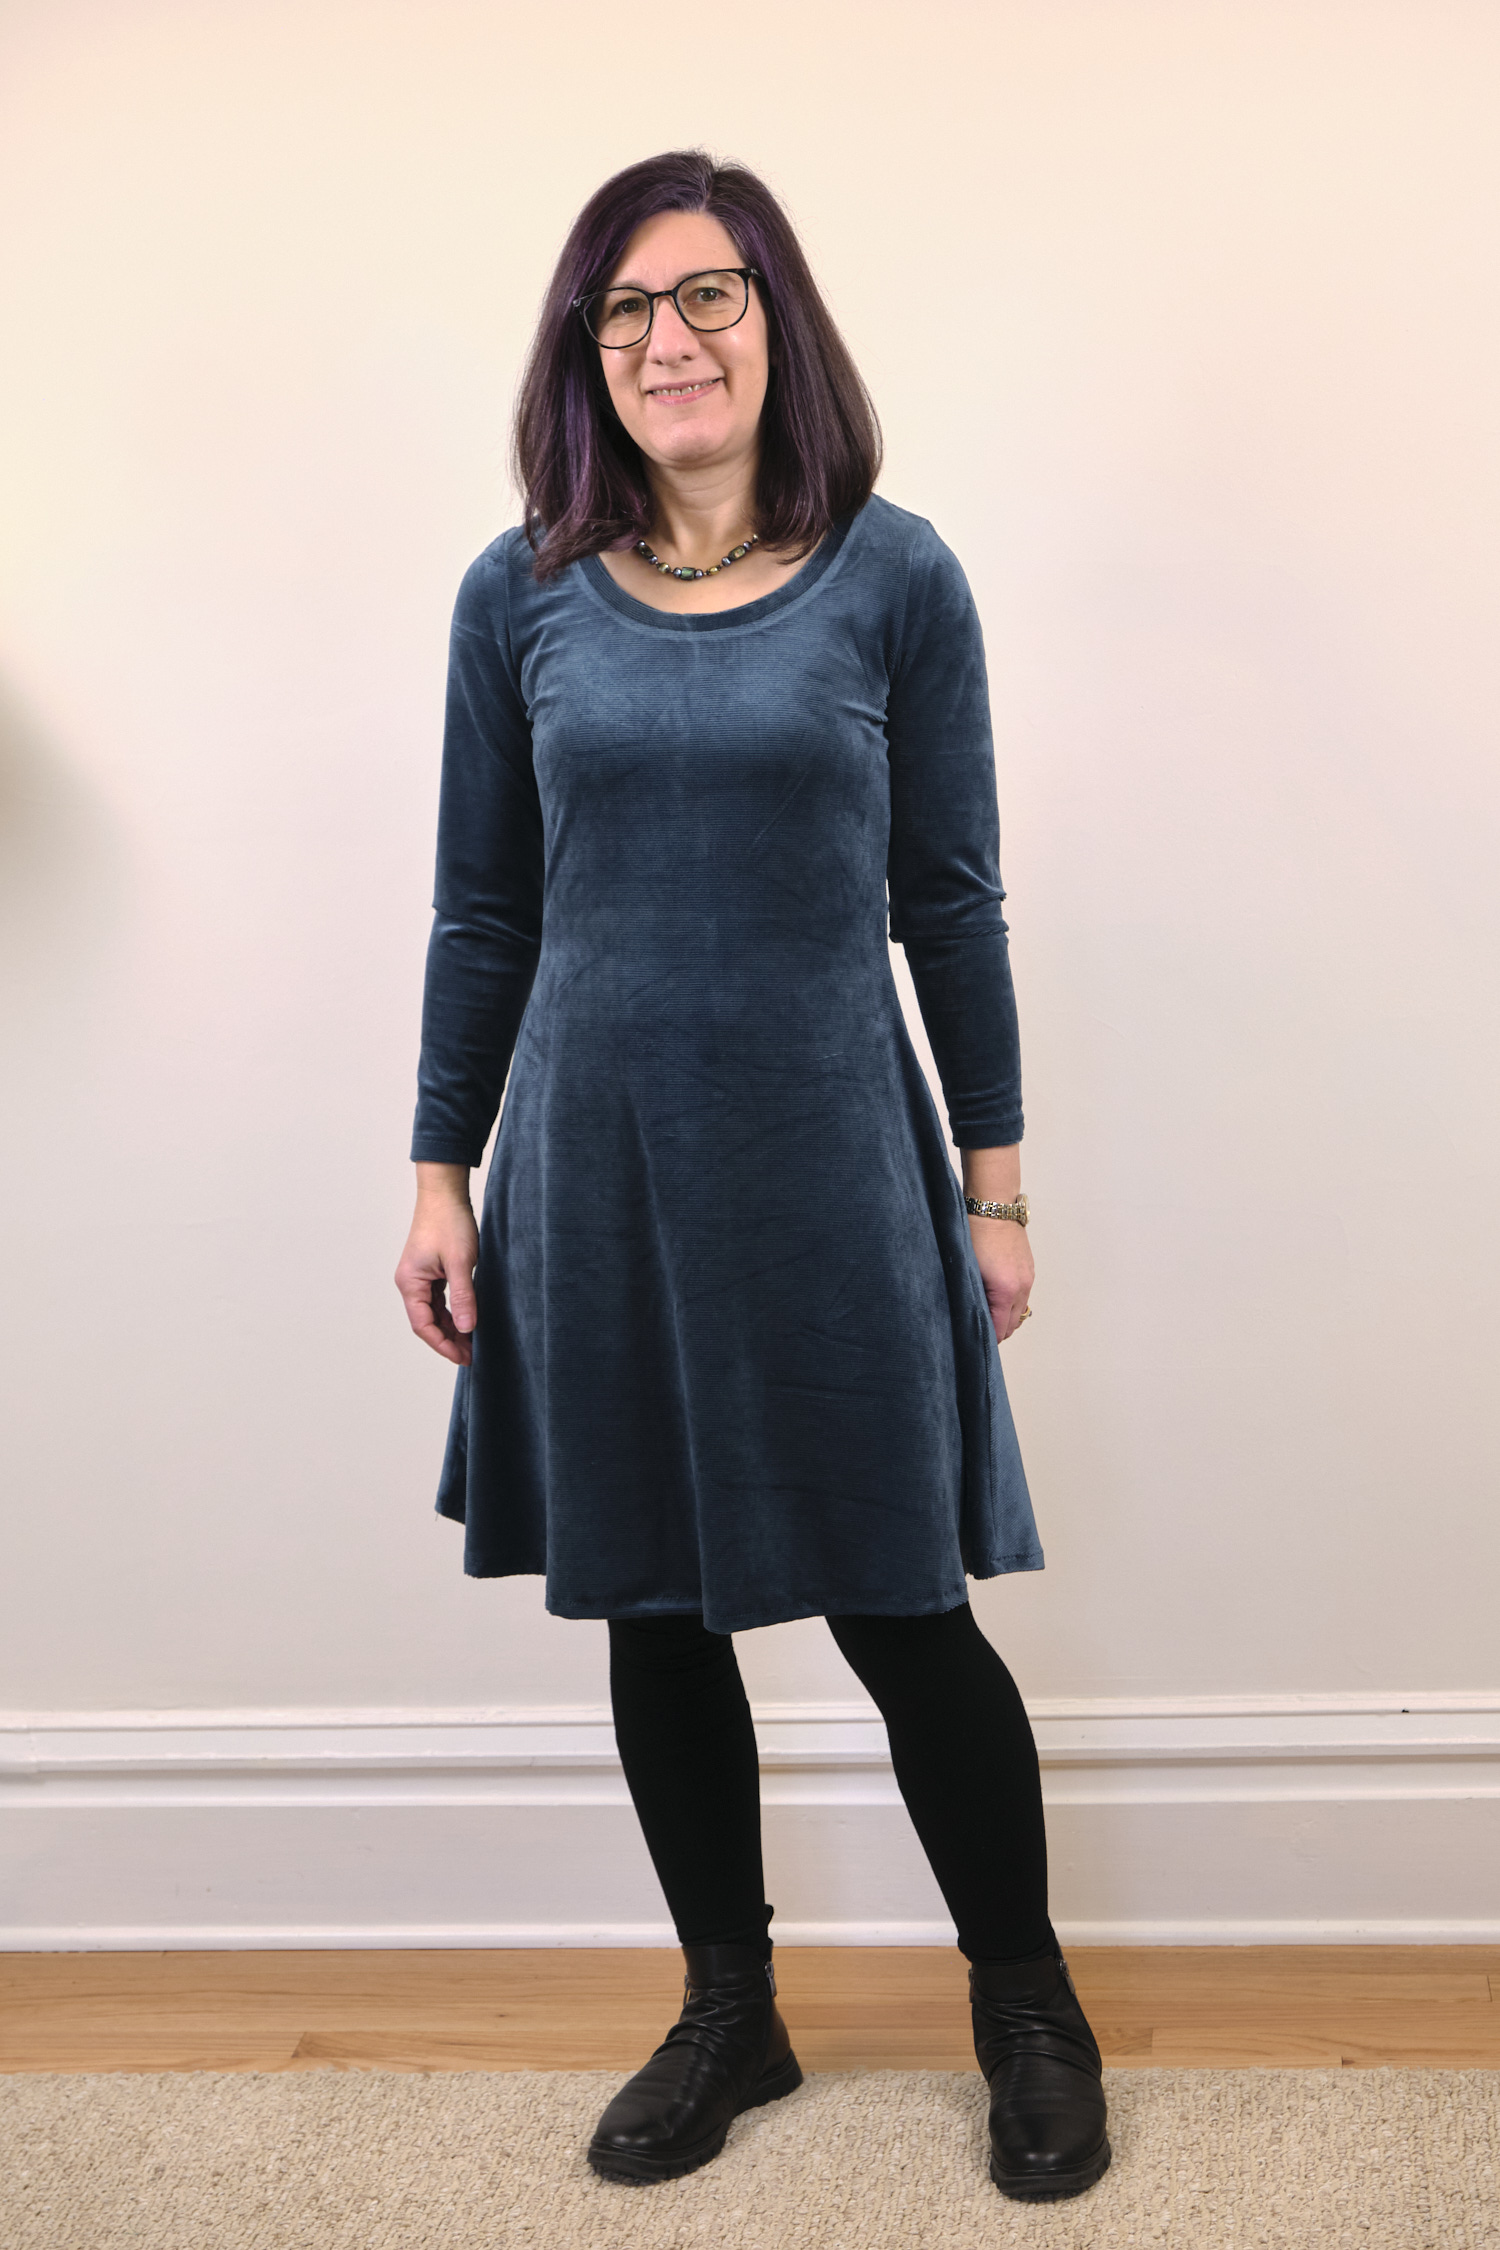
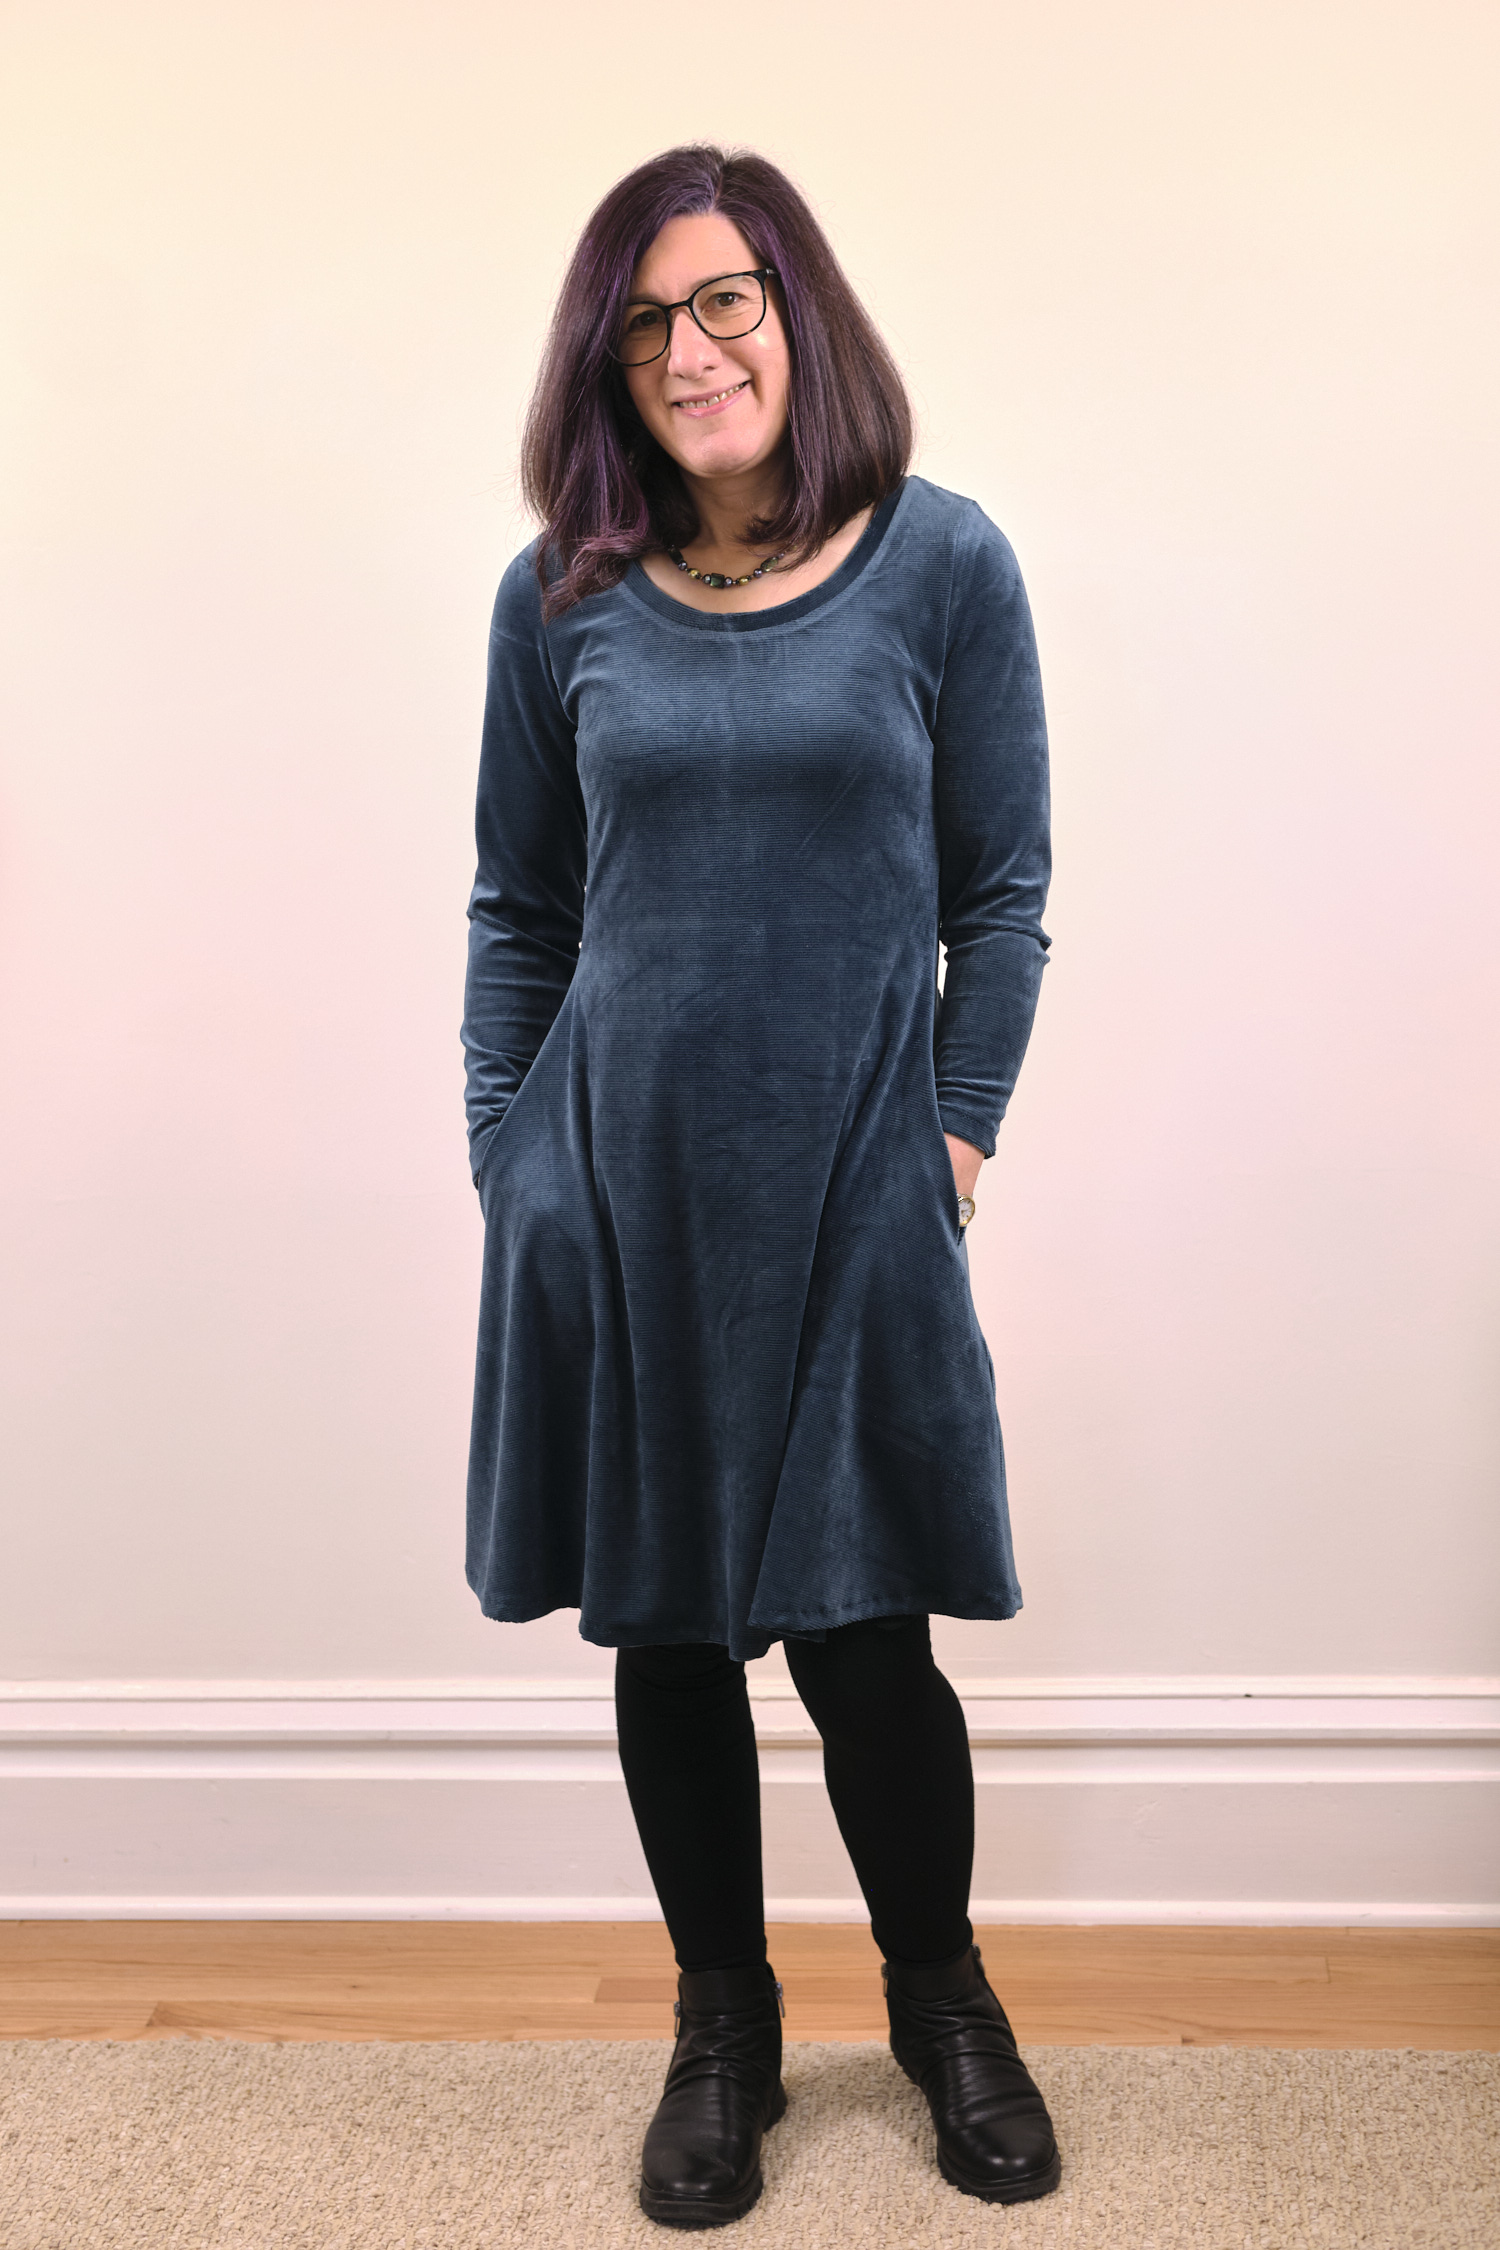
Since I had not previously used this pattern, I decided it would be a good idea to try it with some fabric I was less in love with before cutting into my new double knit. I selected a balsam green poly/spandex stretch corduroy (purchased from Surge Fabrics) from my stash. I bought it last year and found it more shiny and velour-like than I was expecting. I decided to use it for my (hopefully wearable) muslin. I cut a size 10 in knee length with a scoop neck and long sleeves, making no adjustments to the pattern except adding side seam pockets and cutting an inch off the sleeves before hemming. It was a very quick sew except for the pockets. I also found the corduroy a bit painful to press, as every time I pressed a seam it would create a press line somewhere I didn’t want it. I eventually found I could press it from the back and use a press cloth and it came out more or less ok.

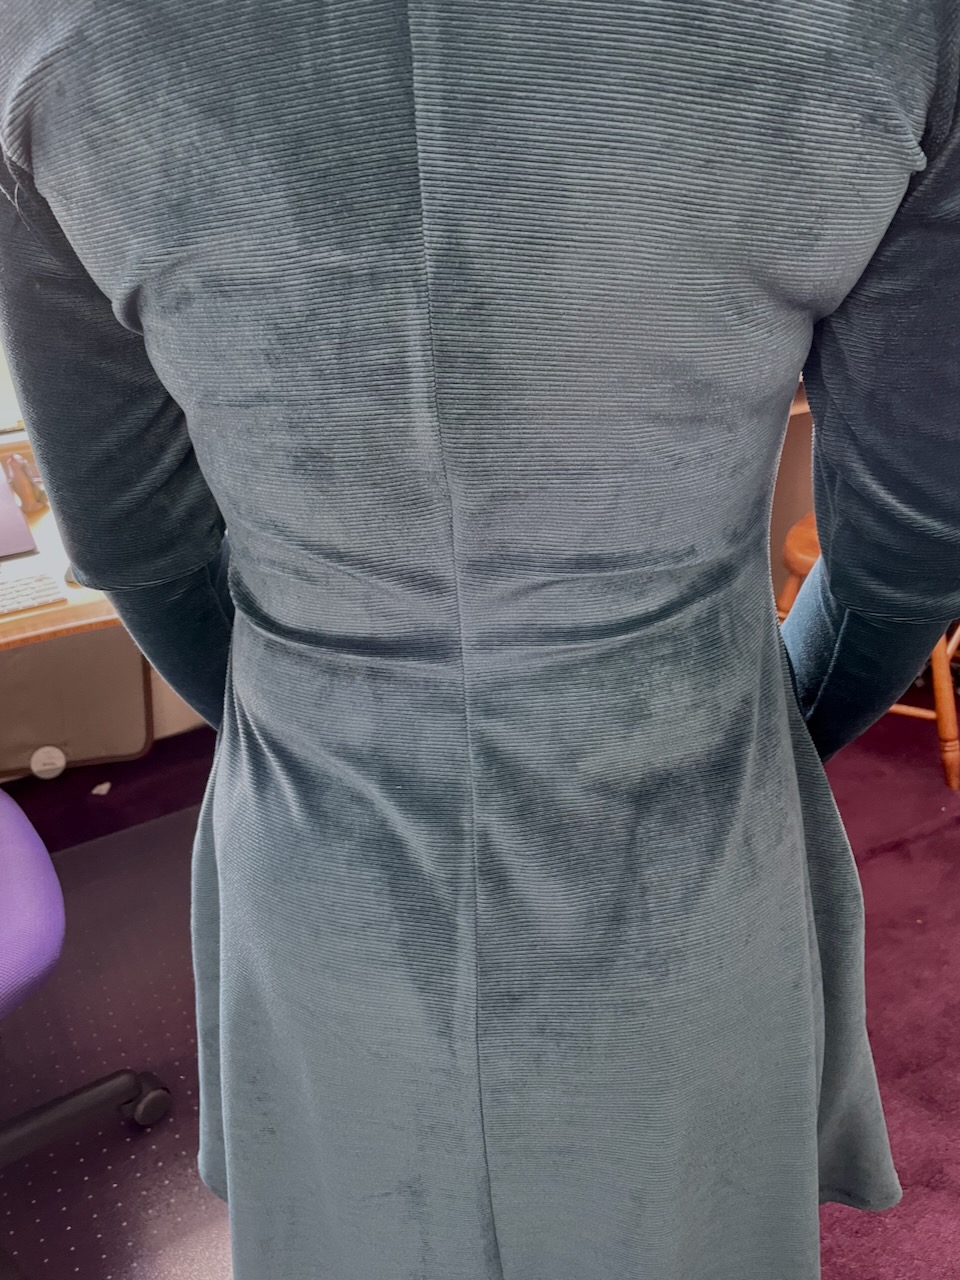
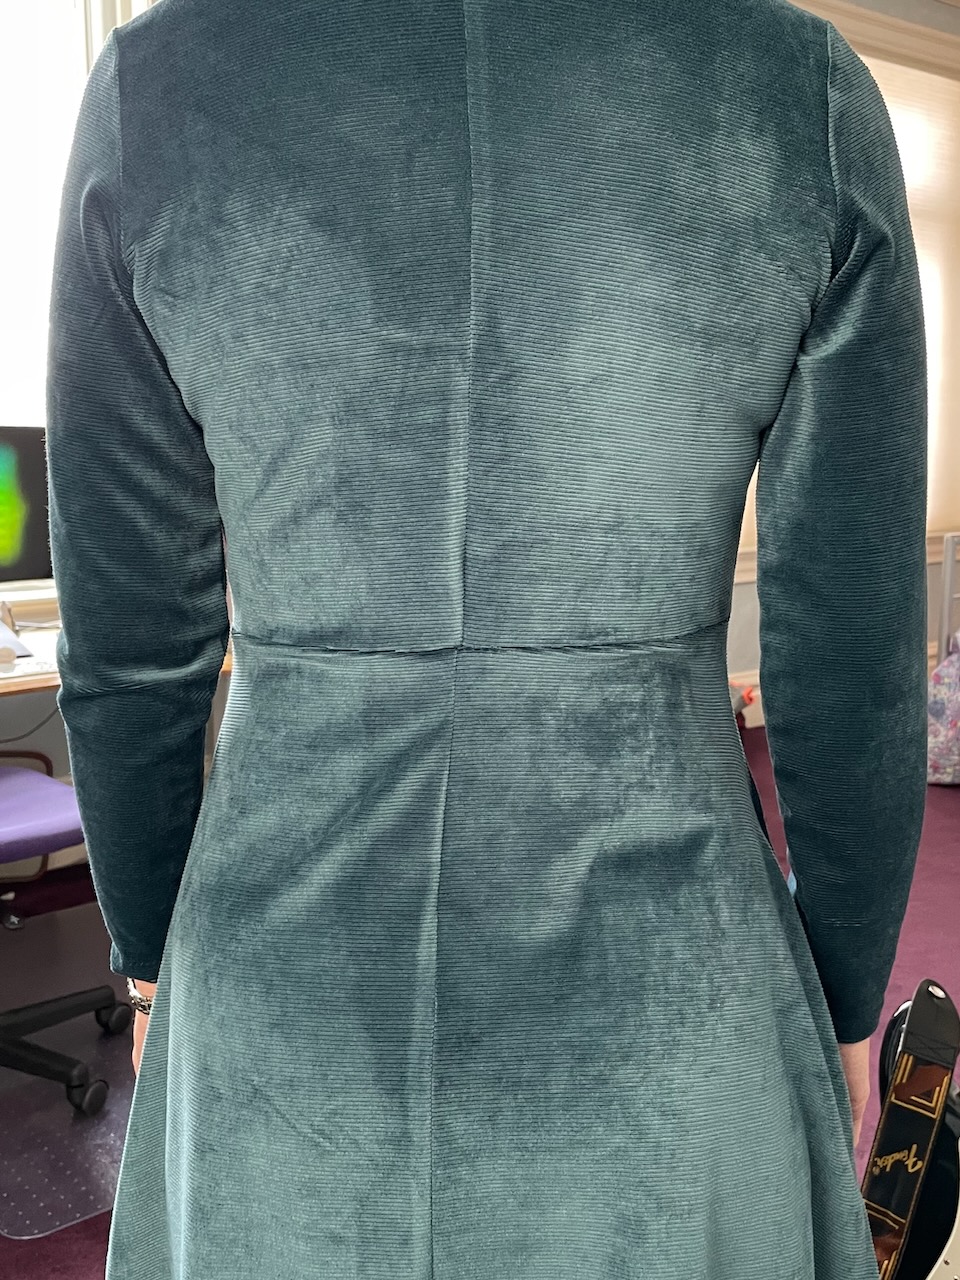
I tried on the dress, and having learned about shoulder and back adjustments in my last sewing project, I looked carefully at the back and sew the folds at the waist that suggested a swayback adjustment was needed. I also noted the folds under the arm pit suggesting I might also have benefitted from a sloped-shoulder adjustment. It was too late to do the sloped-shoulder adjustment but I went ahead and machine basted in a swayback adjustment and was happy with the results so sewed that in. Now the dress has a waist seam in the back (but not the front).

I’m actually quite happy with the finished dress and wore it right away! It is super comfy and I’m glad I put in the extra time to add the pockets!

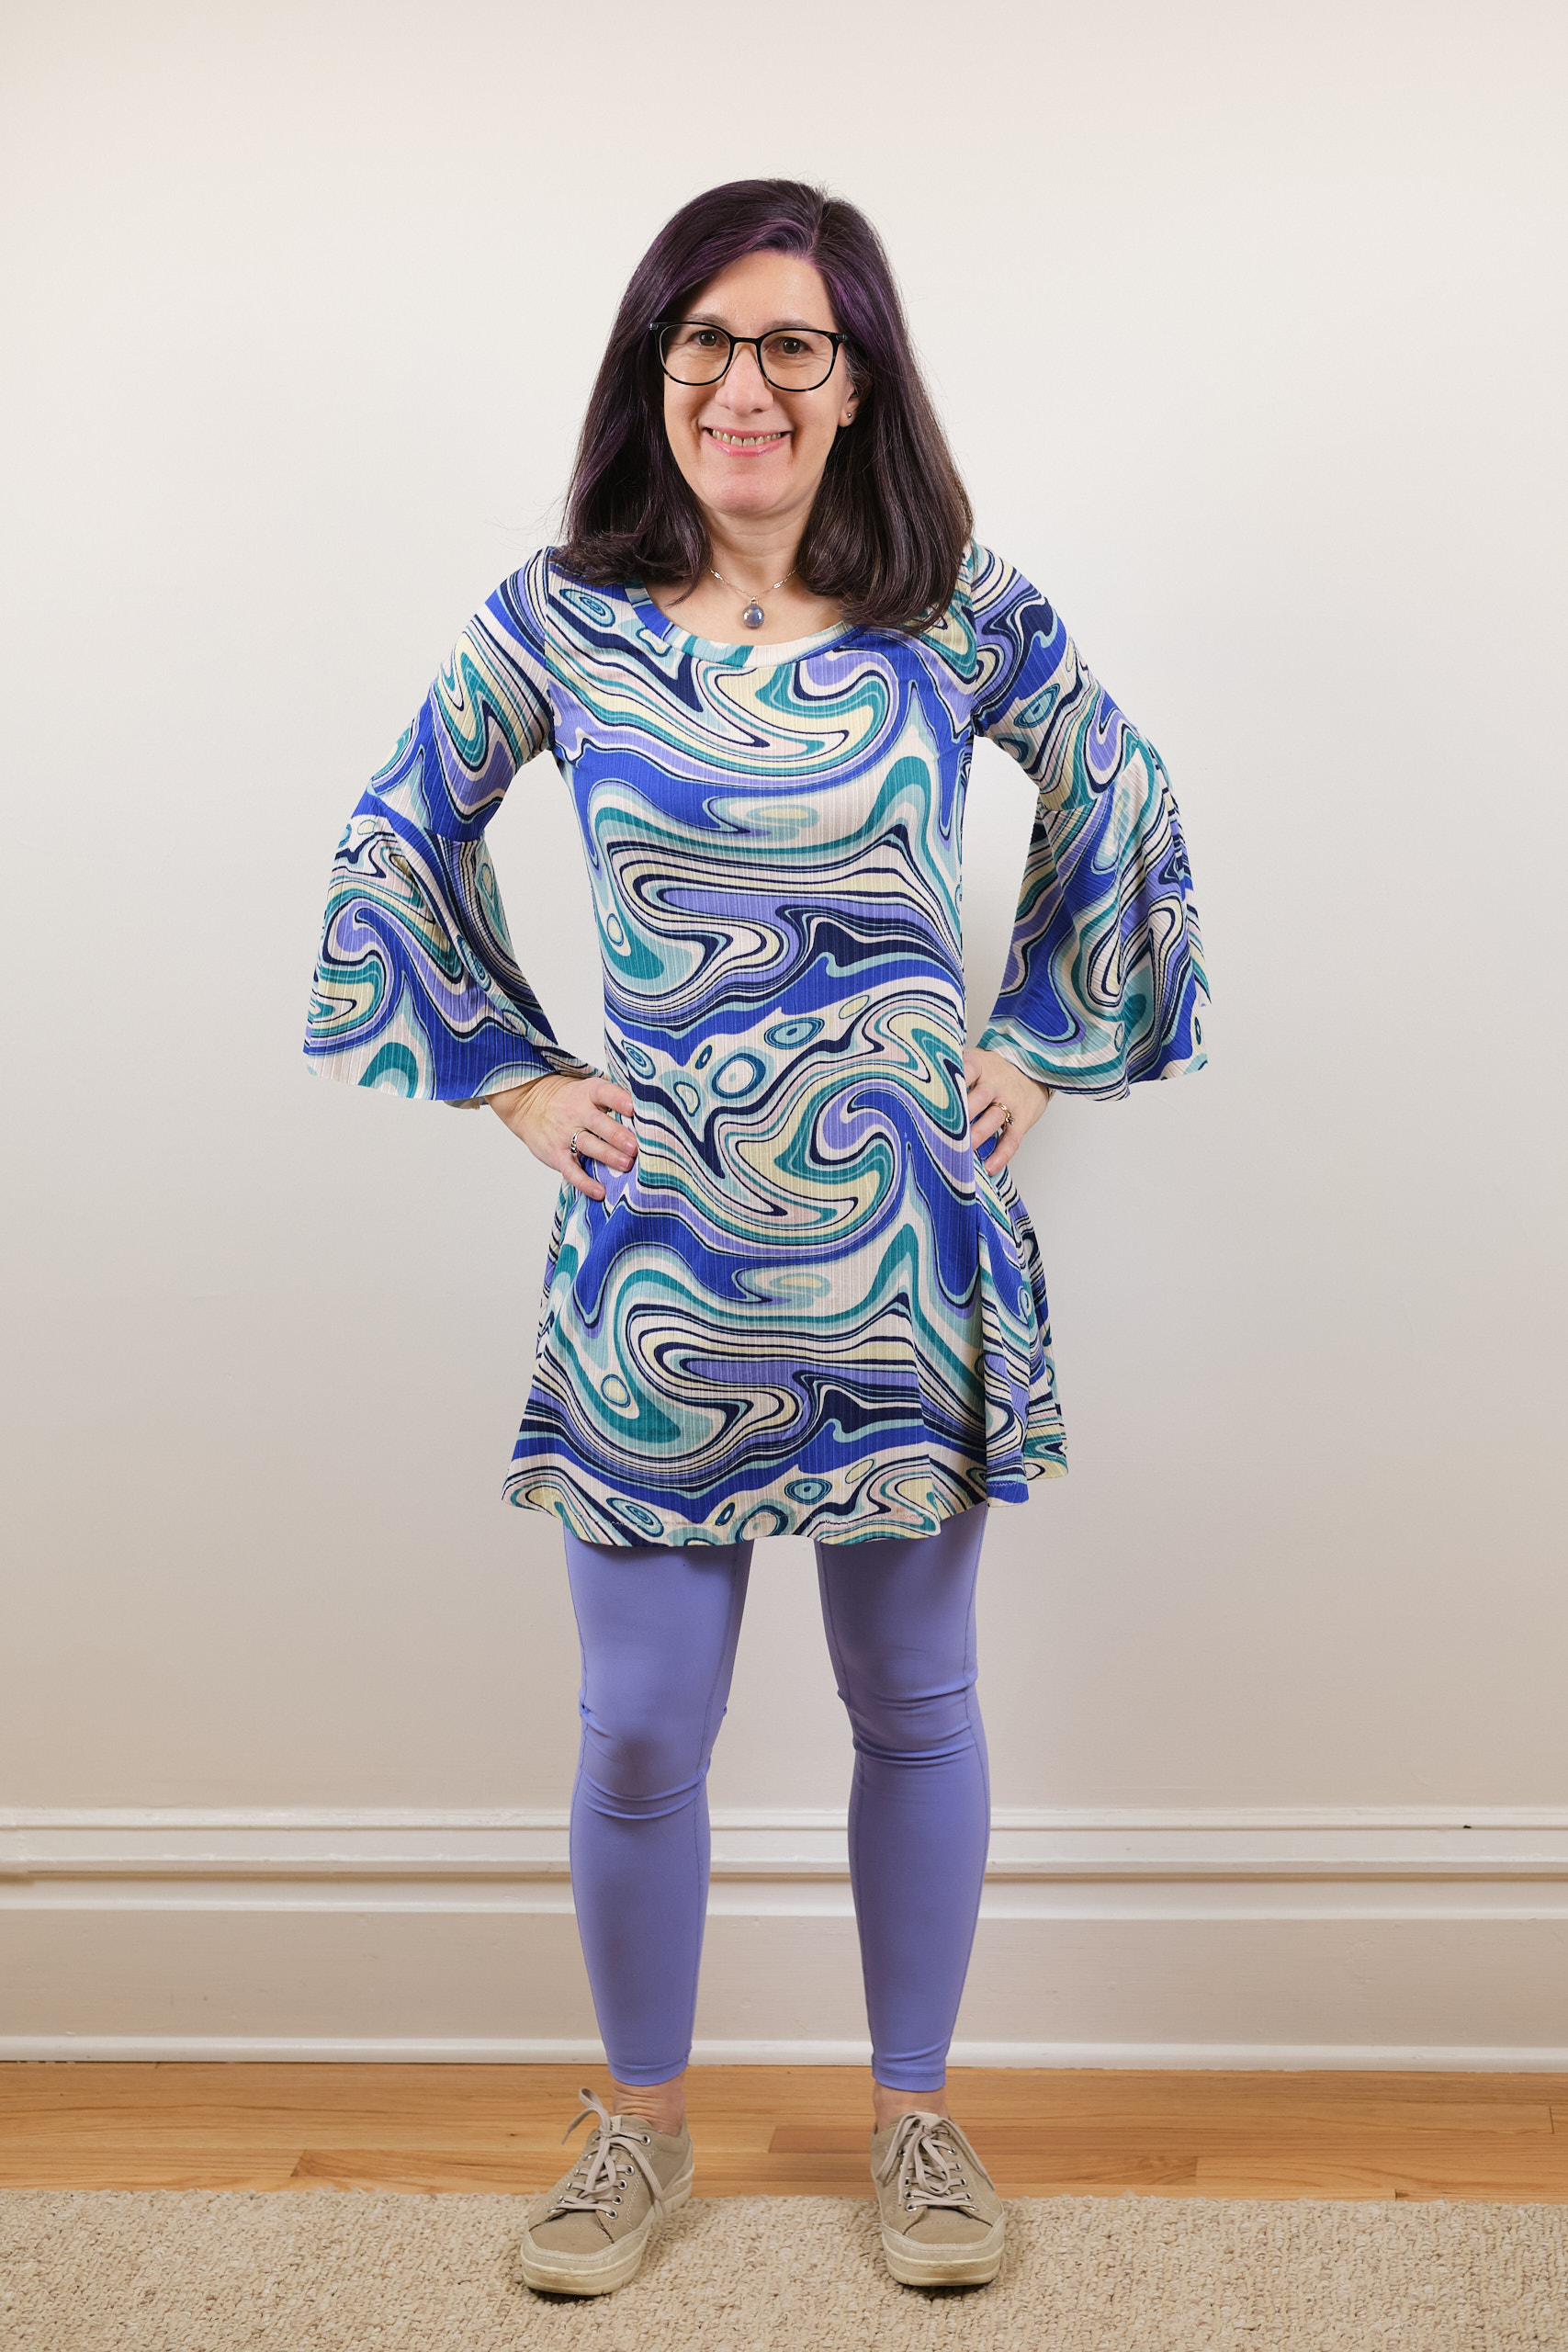
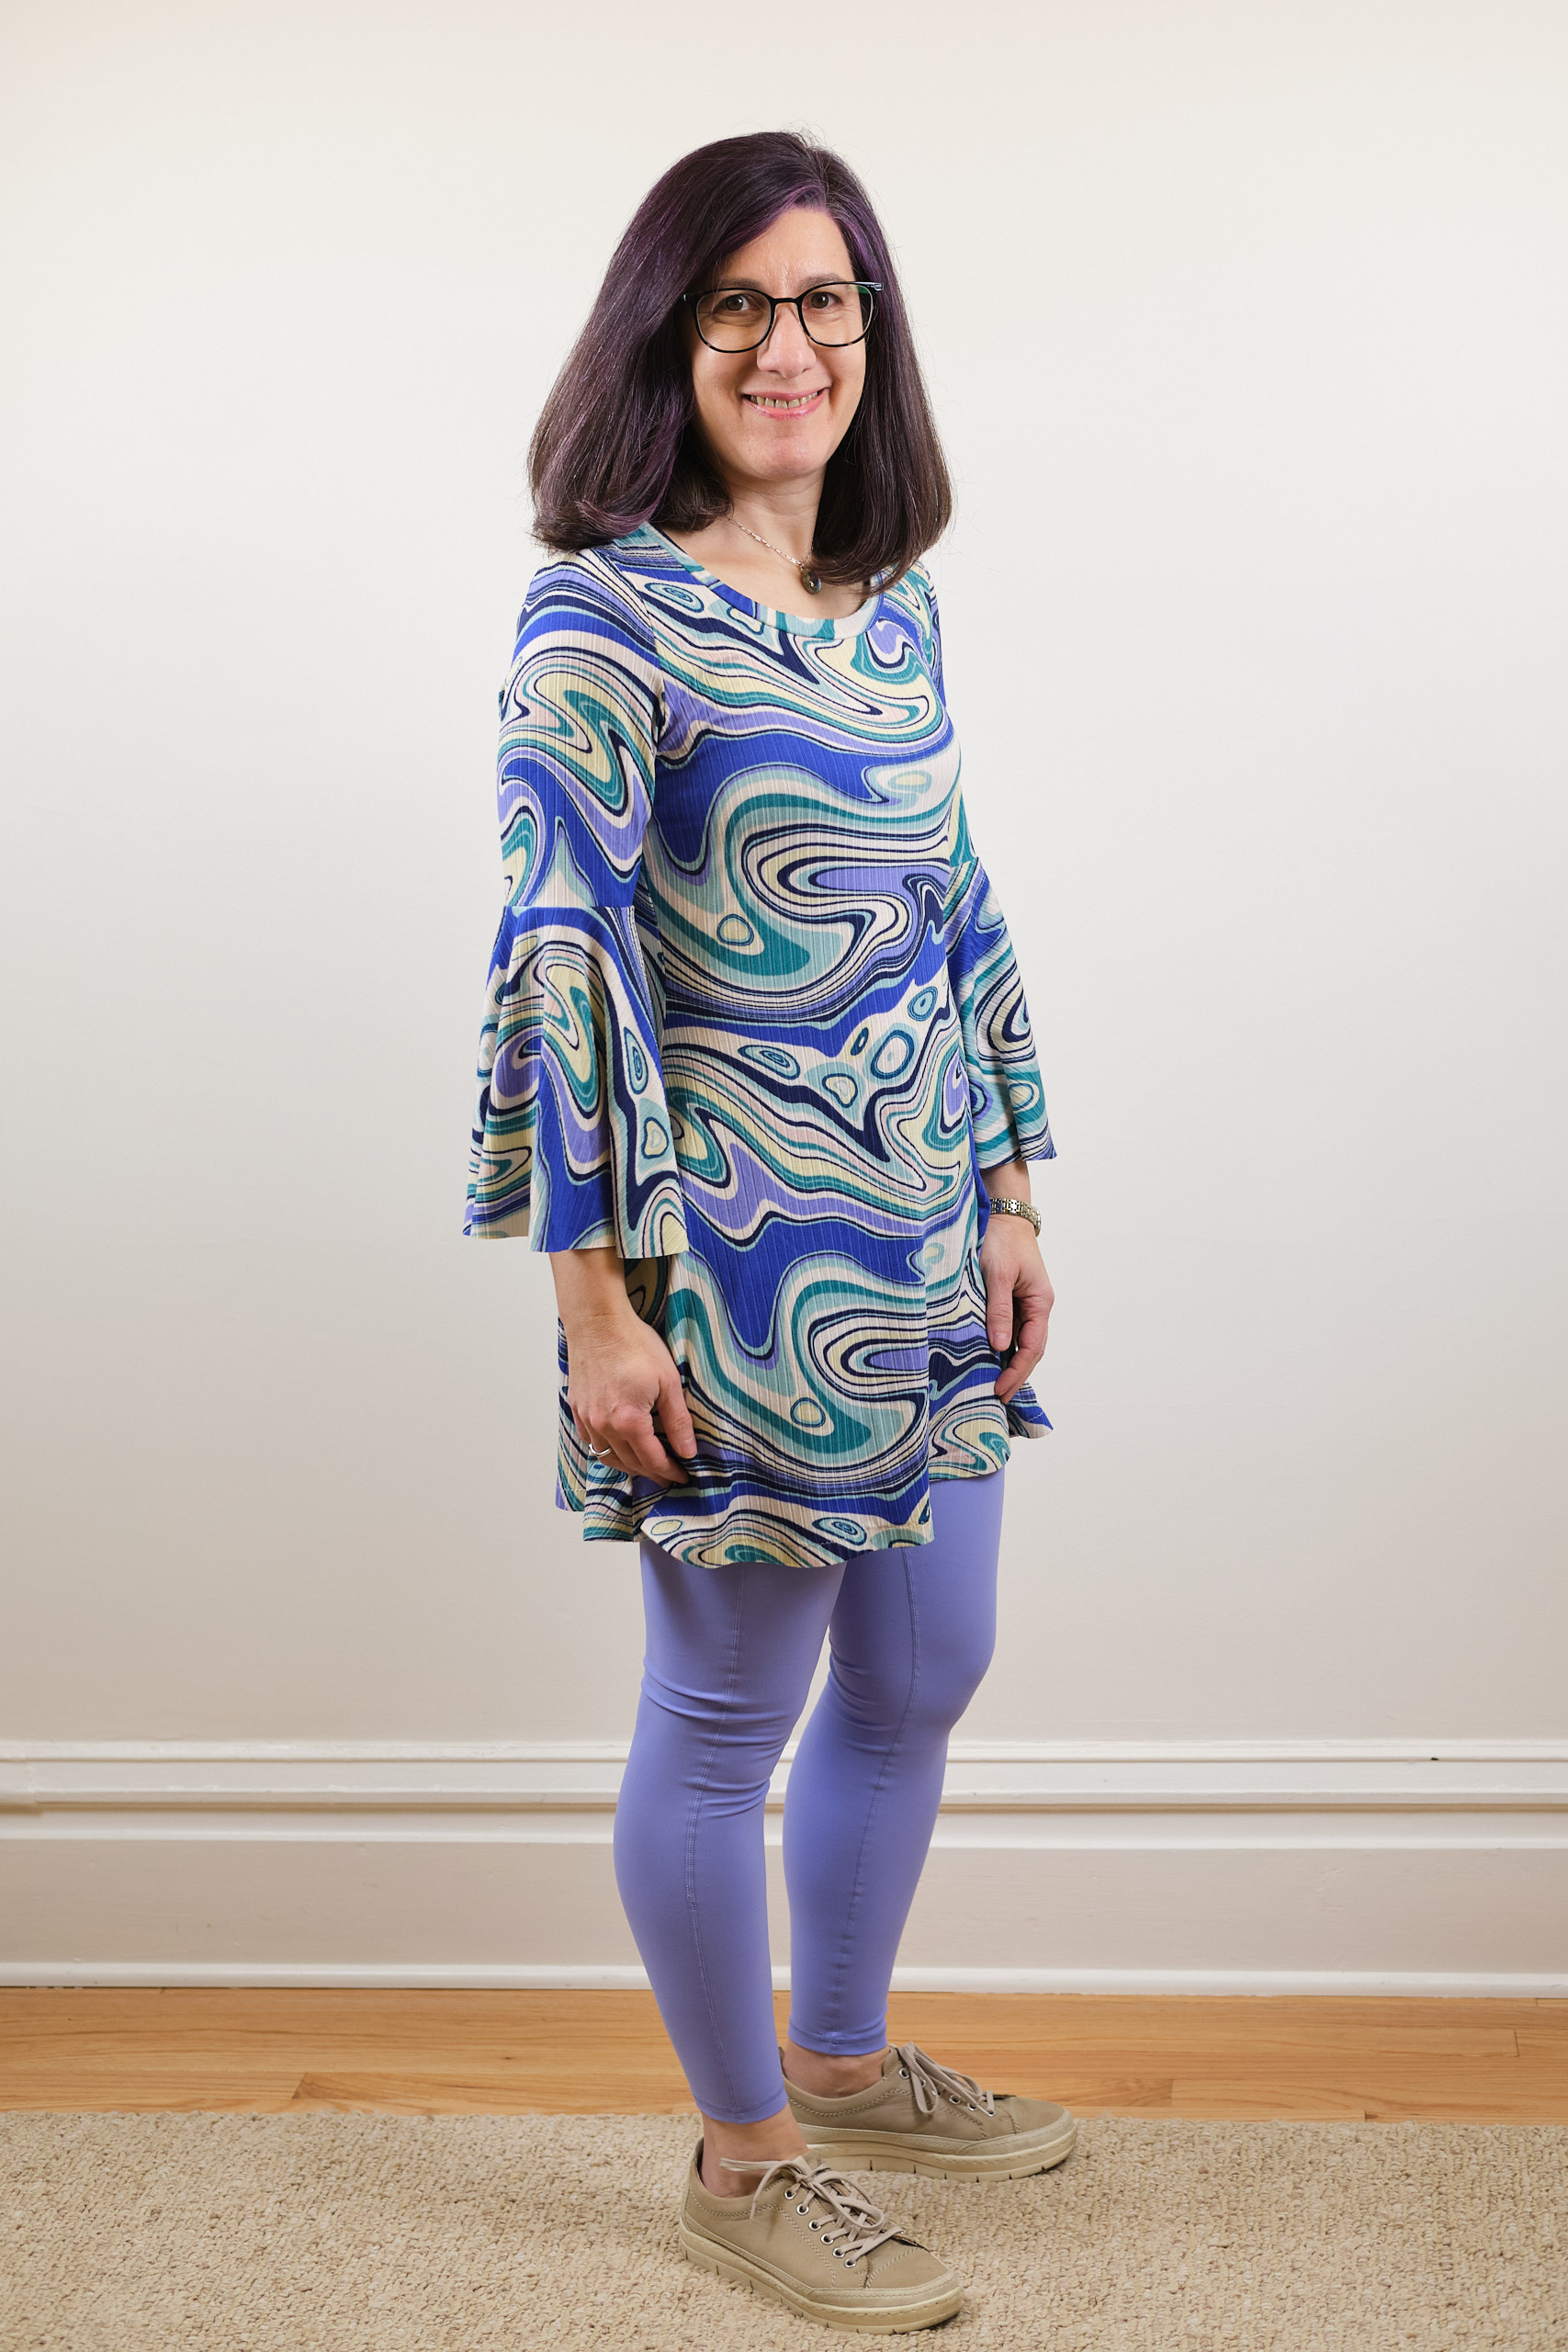
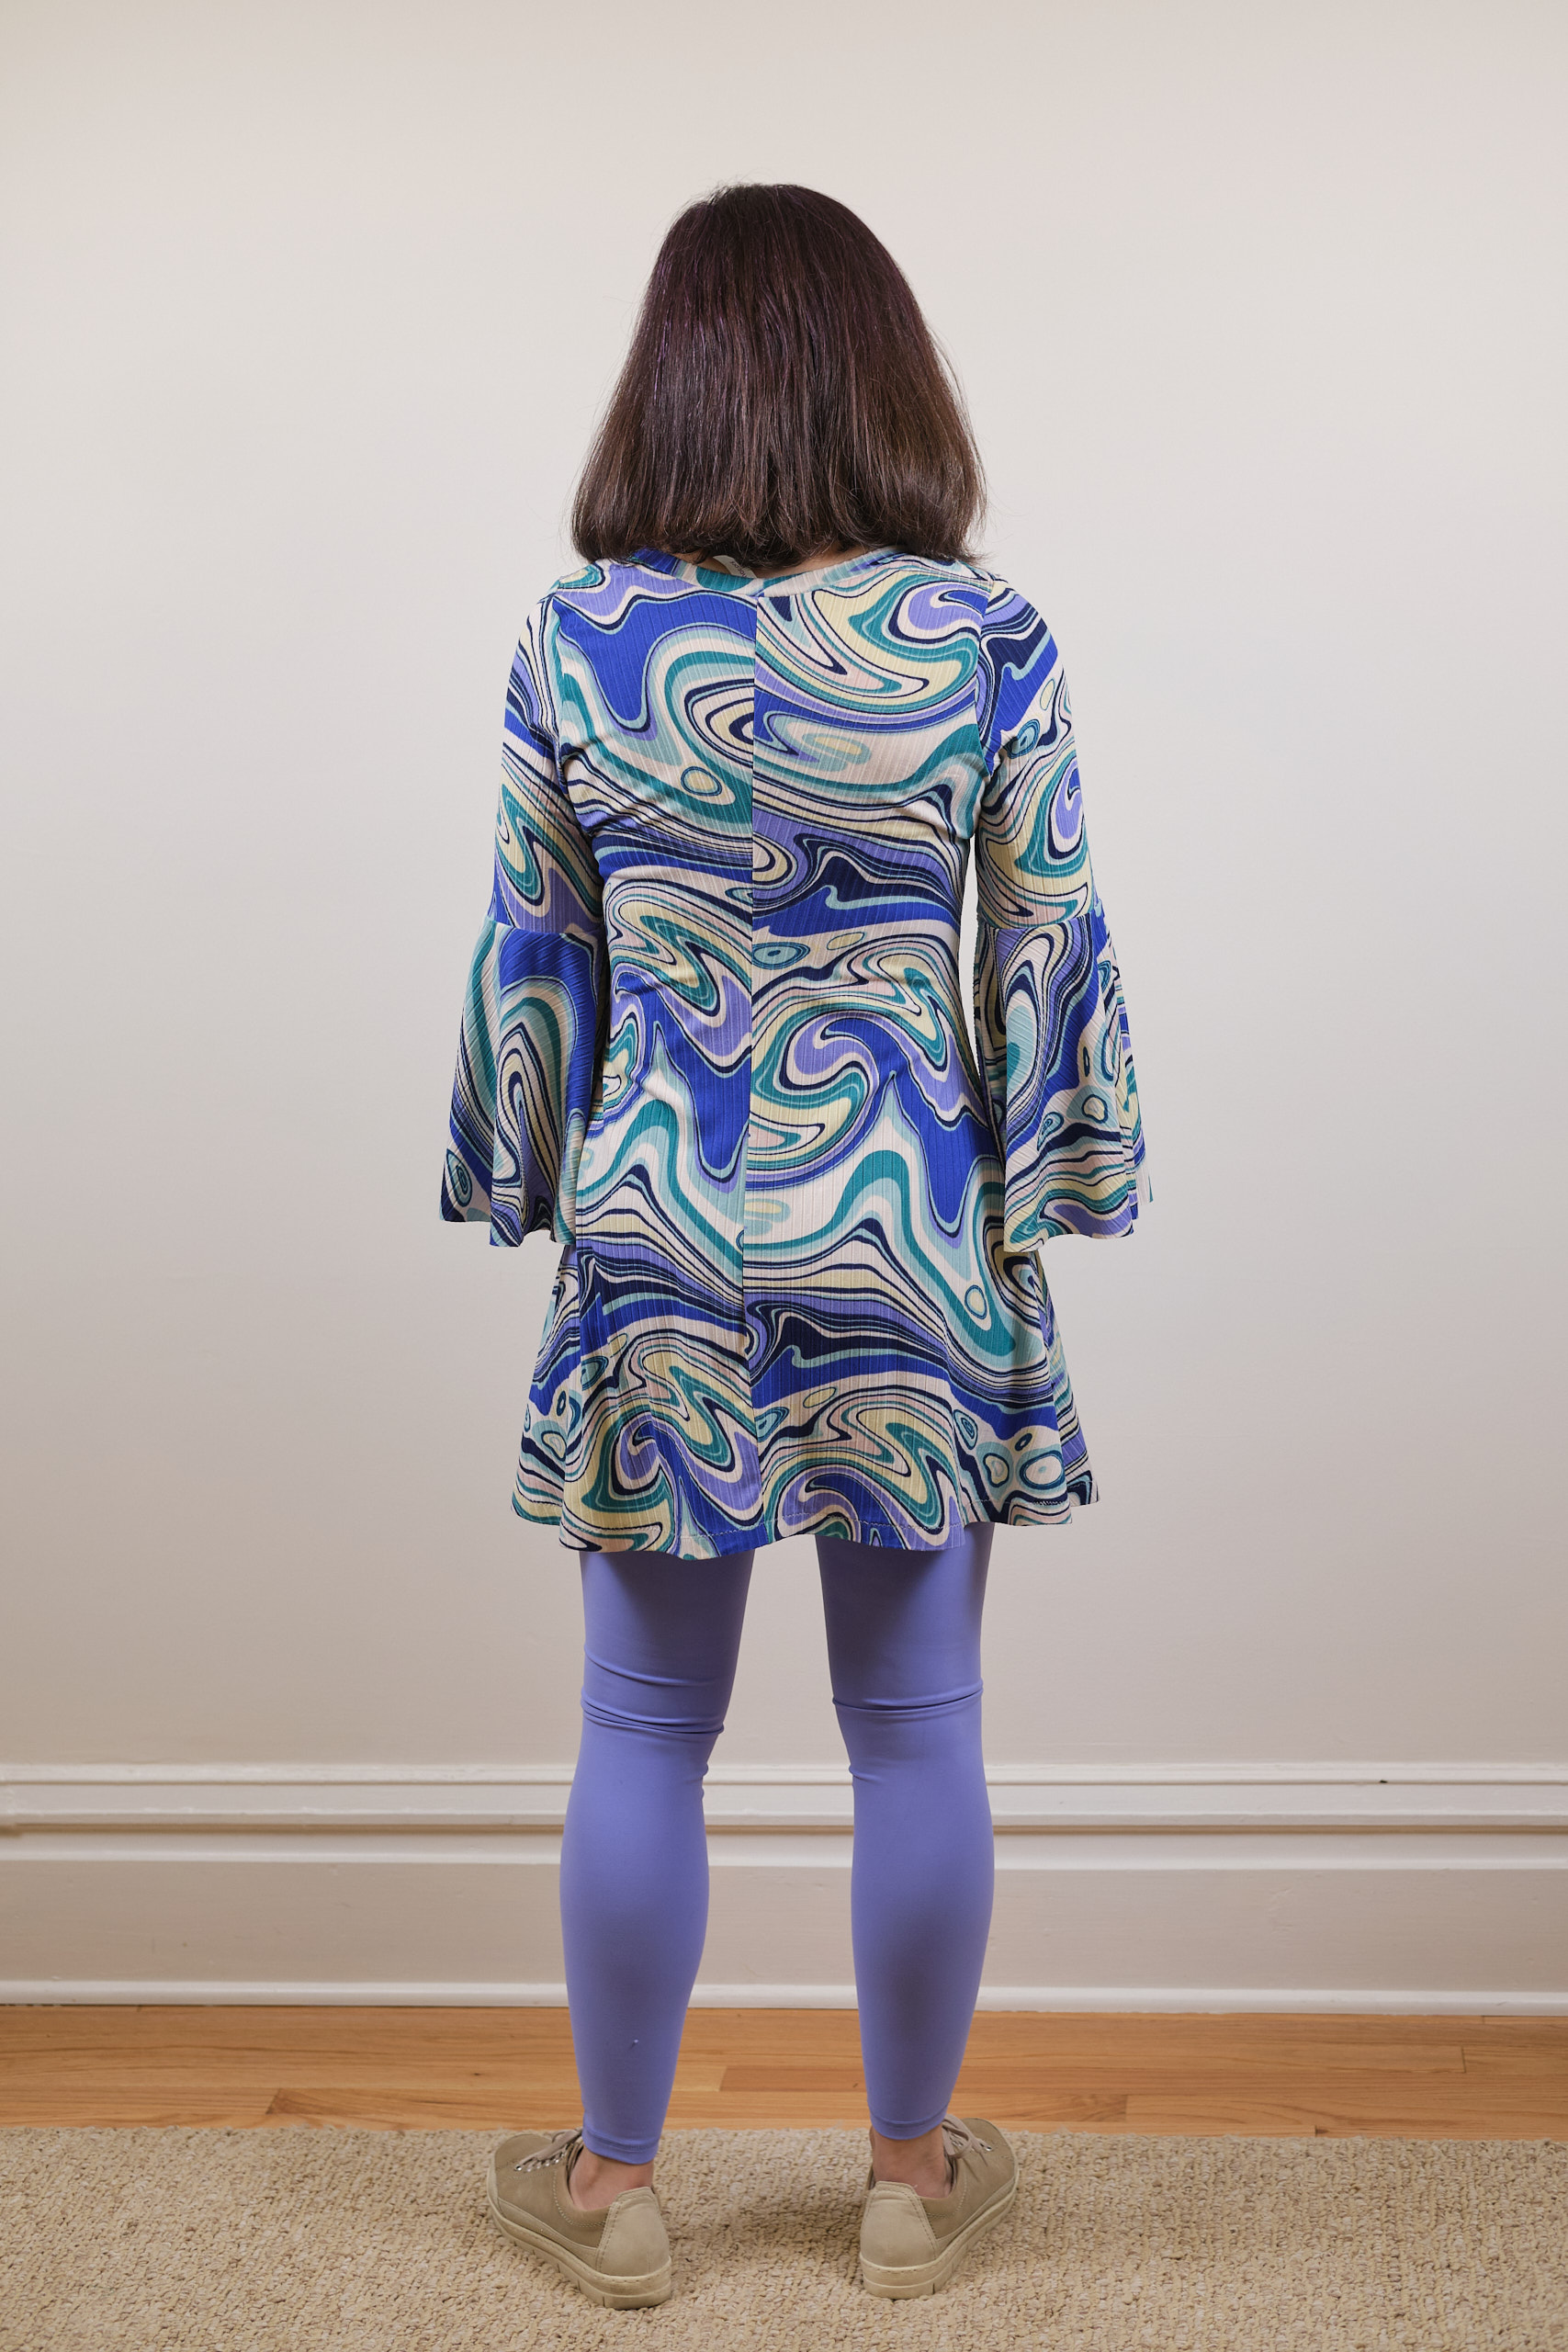
I decided this was the right pattern to use for the double-knit, but I also wanted to test the sloped-shoulder adjustment and some bell sleeves. So I decided to make another muslin, this one to be assembled quickly with no intention of wearing it. I grabbed some lightweight poly-spandex rib knit with a colorful wave pattern from my stash that I bought on clearance from Mily Mae Fabrics. I made a t-shirt from it last summer and my daughters did not approve of the print, so I figured I might as well use it for a muslin I wouldn’t actually wear. I adjusted the pattern in Affinity Designer to include the swayback and sloped shoulder adjustments. I cut out the front and back pieces at the short length. I decided to use the modern bell sleeve from the Pattern Emporium Allure Bell Sleeve Top pattern, with a long bell attached to an above-the-elbow half sleeve. I cut out one sleeve and bell. I machine-basted everything together. The fit was great and I discovered I had made (most of) the cutest little dress. I showed my husband and one of my daughters and they agreed: the dress was adorable and I really should cut out the other sleeve and properly finish it. I thought about adding pockets, but I didn’t think the stretchy rib knit would be able to support them so, reluctantly, I broke my self-imposed rule of never sewing a dress without pockets. I decided it was short enough that I could consider it a tunic and wear it with pocket leggings. I went ahead and cut out the remaining pieces and put it aside to finish after I made the double-knit dress.

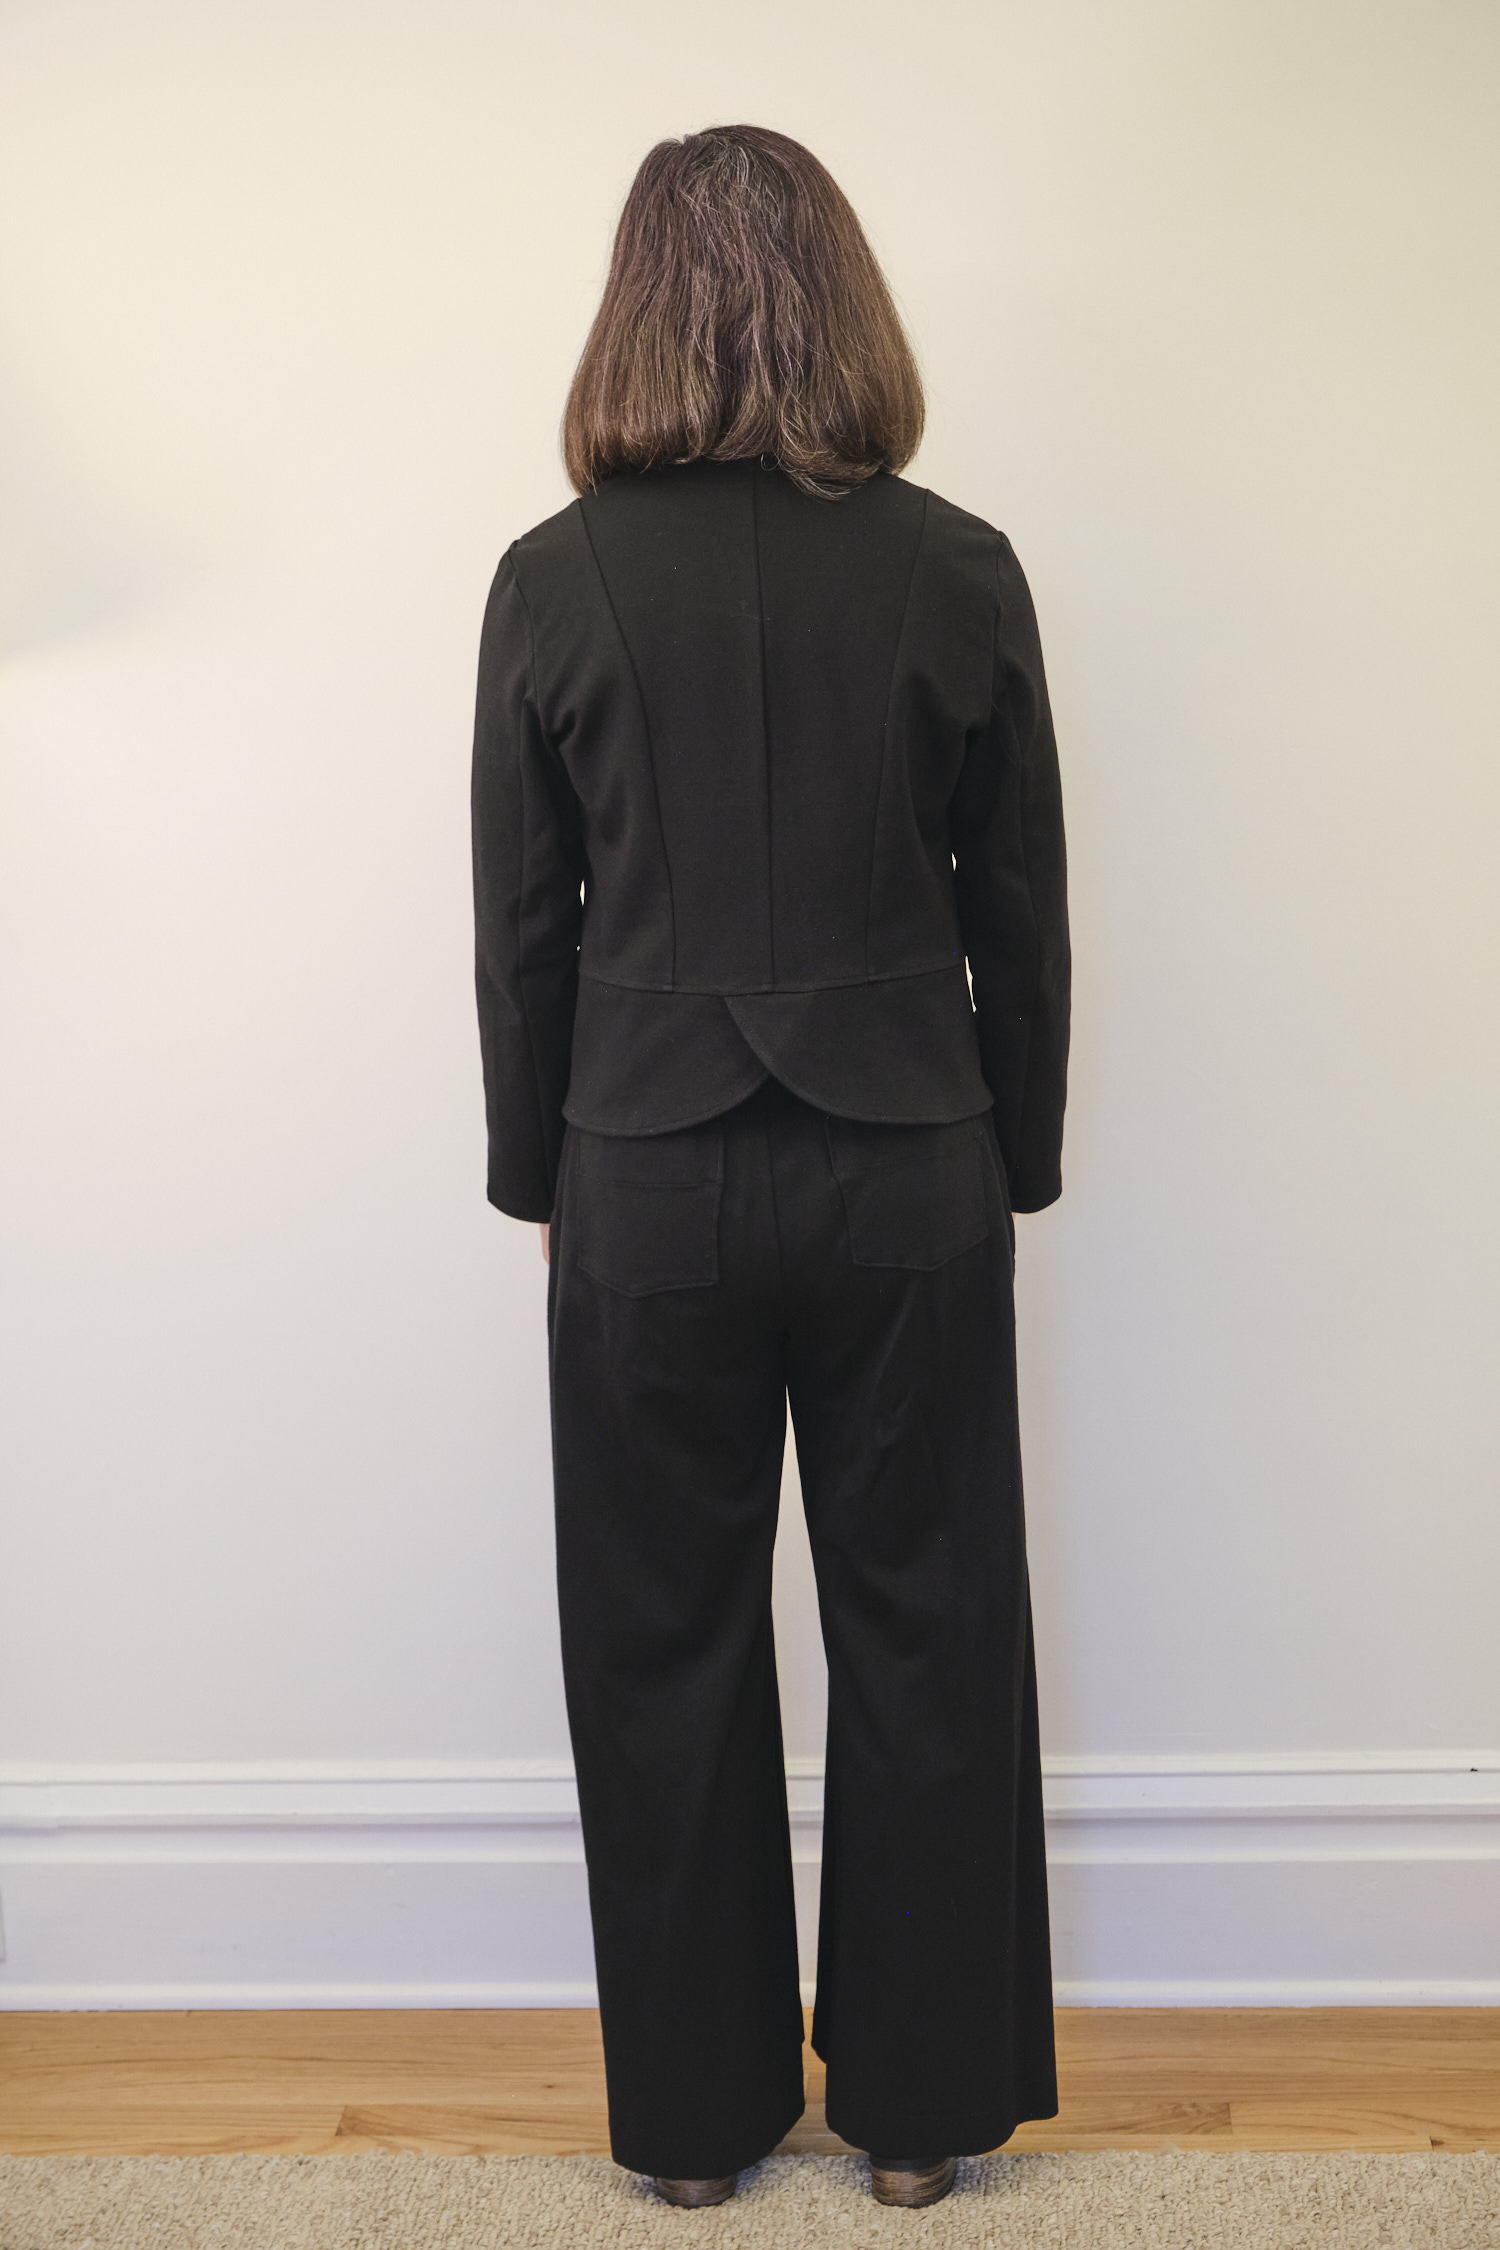
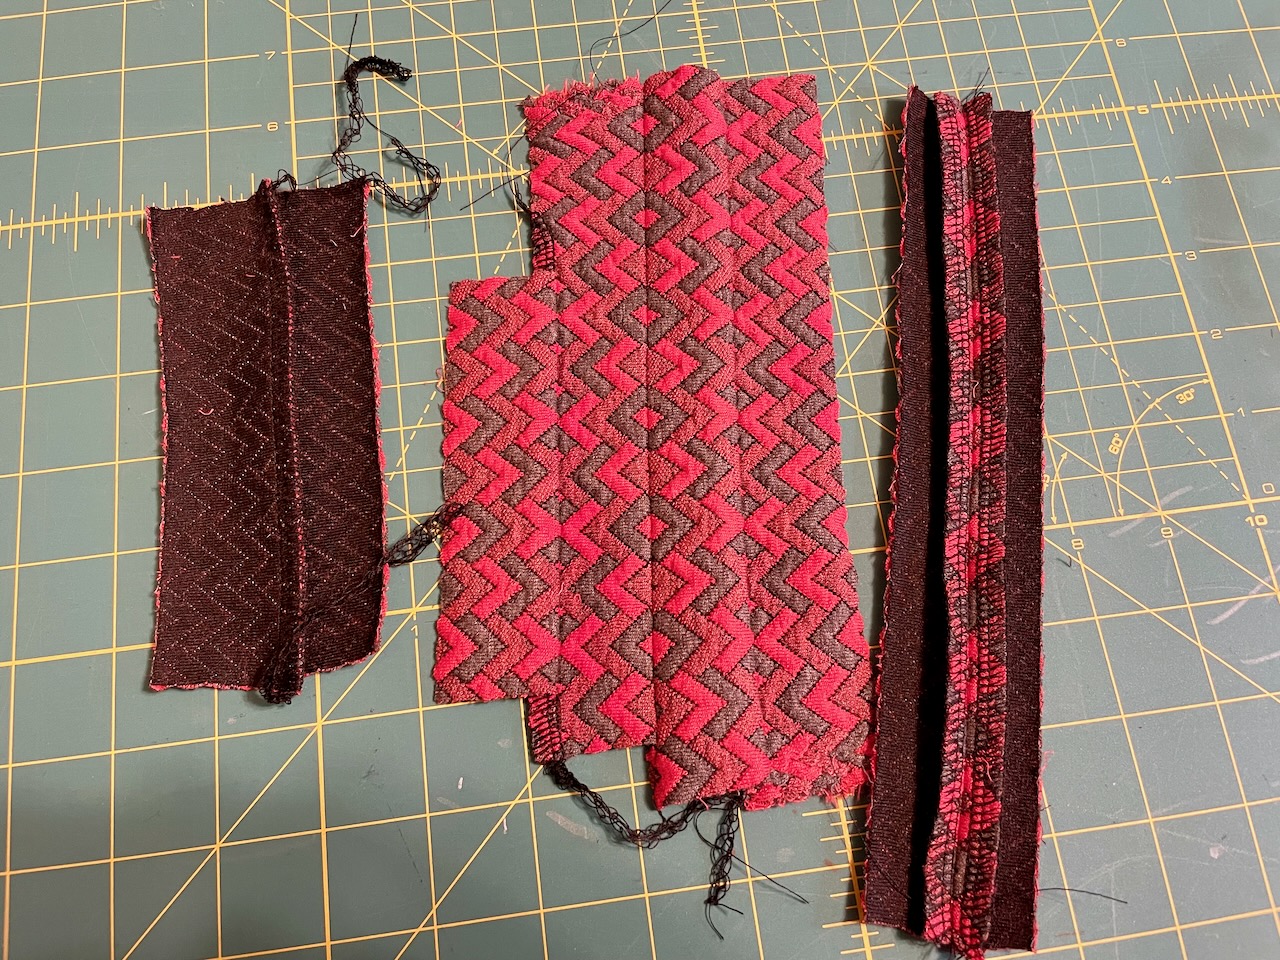
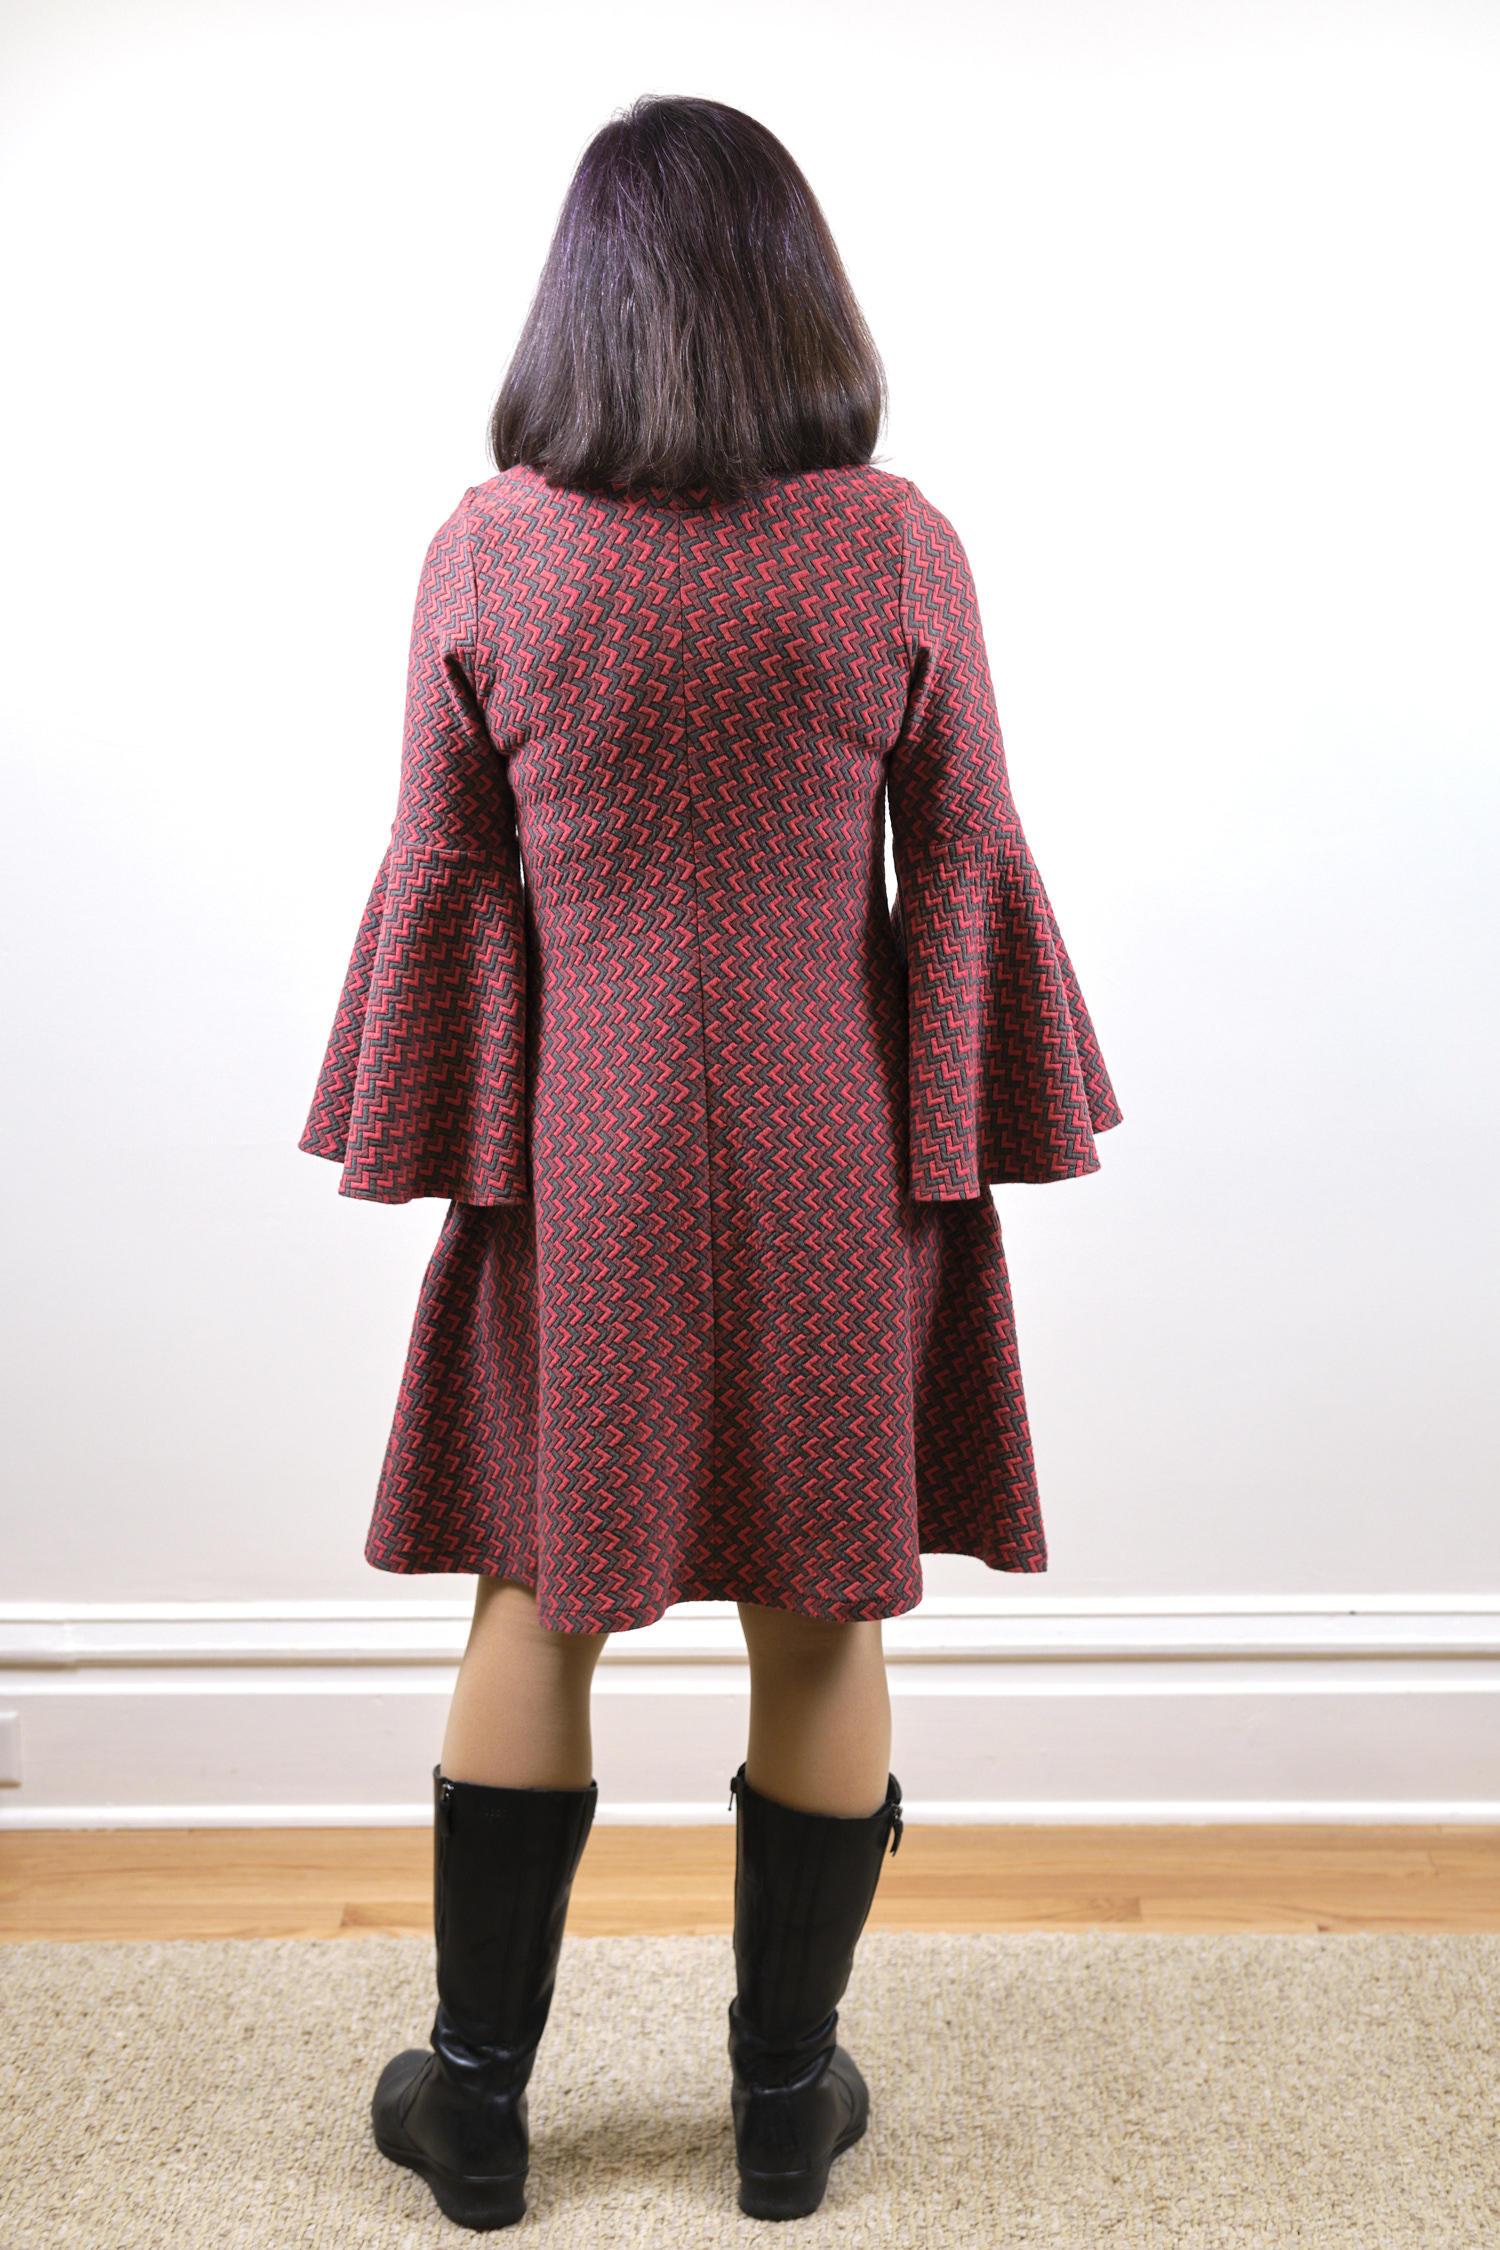
So then I turned to the double-knit and realized there were a few details to be worked out. The big problem was that the fabric had about 70% stretch lengthwise but only about 40% widthwise. Normally, I would cut a dress on the length of the fabric, and given the direction of the chevrons, this was the most straight forward thing to do. But I felt the dress would work much better with the 70% stretch going around the body. Unfortunately, this would mean that all the chevrons would be pointing in the same direction around the dress, which seemed strange to me. I decided to solve the problem by adding a front center seam to the dress and turning half the front and half the back upside down so that the chevrons would point inward. I similarly cut one of the sleeves upside down so the sleeve chevrons would point in opposite directions.

I realized that my newly-created center front seam would look best if the chevrons matched exactly in the center — basically a stripe matching problem. I cut a few pieces of the fabric to test my ability to match and realized I needed some help. I read some stripe-matching tutorials and watched some videos and tried a few approaches. I liked the approach of using quarter-inch double-sided fabric tape to align the seam and then serging it in place. However, this created a bulky ridge down the center. Sewing the seam with my sewing machine with a 3/8 seam allowance (with serged edges) and pressing the seam open seemed like it was going to be a better approach, but it required carefully pinning every inch or so to get it right.

I also debated the length of the bell sleeves. On rib-knit dress I intended to leave the ends unfinished, but the double-knit did not have a smooth raw edge and also did not drape as much, so I decided to add 1.5 inches to the long-length bell (still shorter than the XL bell).

The final issue to work out was what to do about the neck band. I decided I could either cut it horizontally (with less stretch) or vertically in two pieces so I could flip one of them and have them meet in the middle. I decided to cut out the horizontal one with an extra inch of fabric due to the low strech and baste it to the dress and see if it worked.

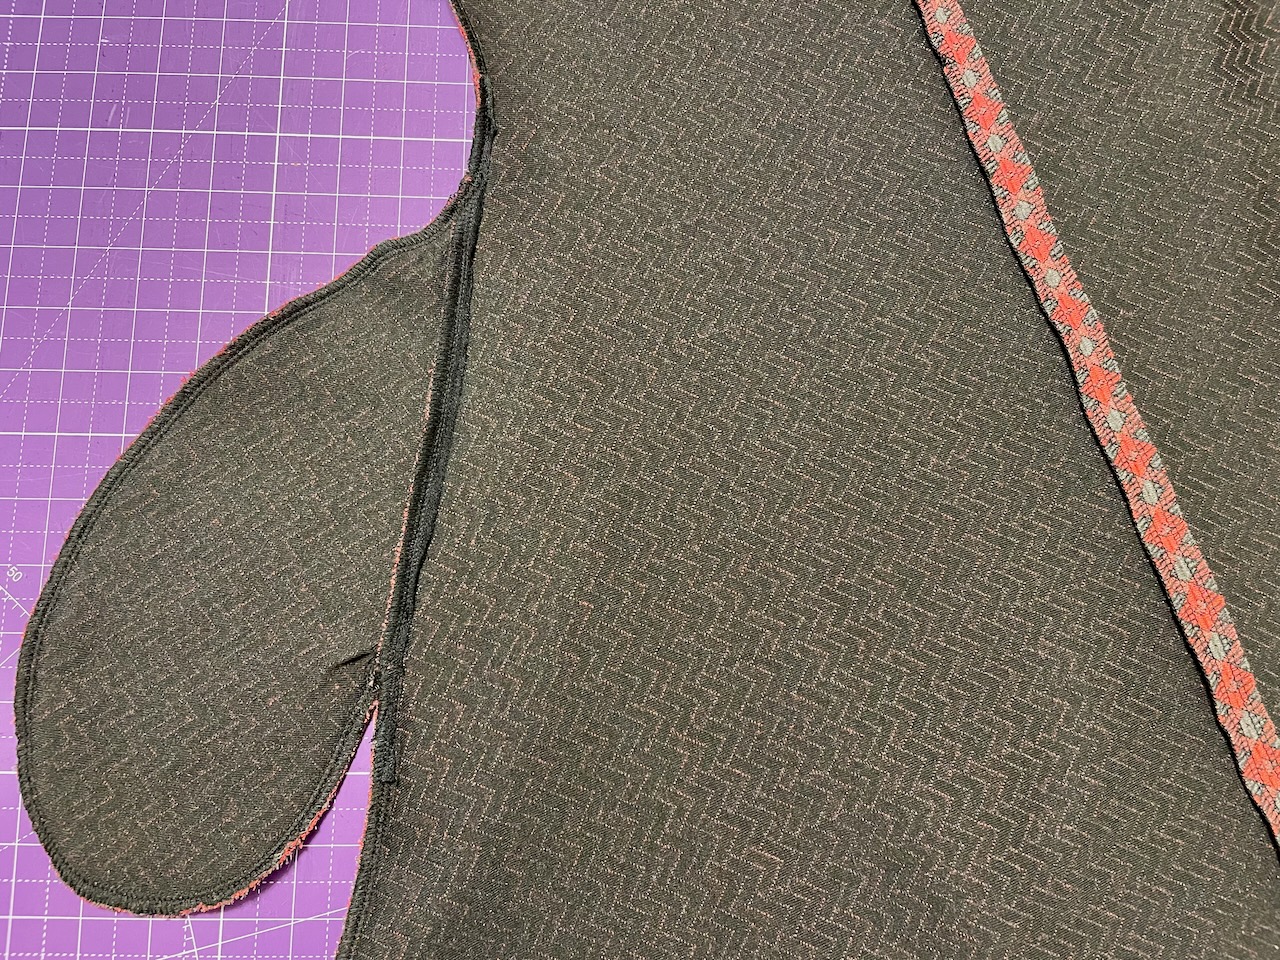
Finally I was ready to sew! I started with the front and back center seams, loaded them up with a ton of pins, machine-basted them, checked the positioning, and then sewed them with a very shallow zigzag stitch and a 3/8-inch seam allowance. The alignment was great! Then I added the pockets, the tops of the sleeves,and sewed the main dress together. Once again, the pockets took longer than I would have liked.

Next I machine-basted on the neckband. My first attempt was ok, but seemed to be a bit too long and I realized too late was not cut entirely straight. I unbasted it, cut a new band an inch shorter and much straighter and based it on. This one worked so I serged it in place. Next I serged the sleeve bells and carefully hemmed them by serging the edge, turning under 3/8 inch, and sewing at 1/4 inch with my sewing machine. I machine-basted the sleeve bells to the sleeves and then serged them in place. Finally, I serged the hem, folded it under 3/4 inch and fused it with hem tape, and then zigzaged it in place.

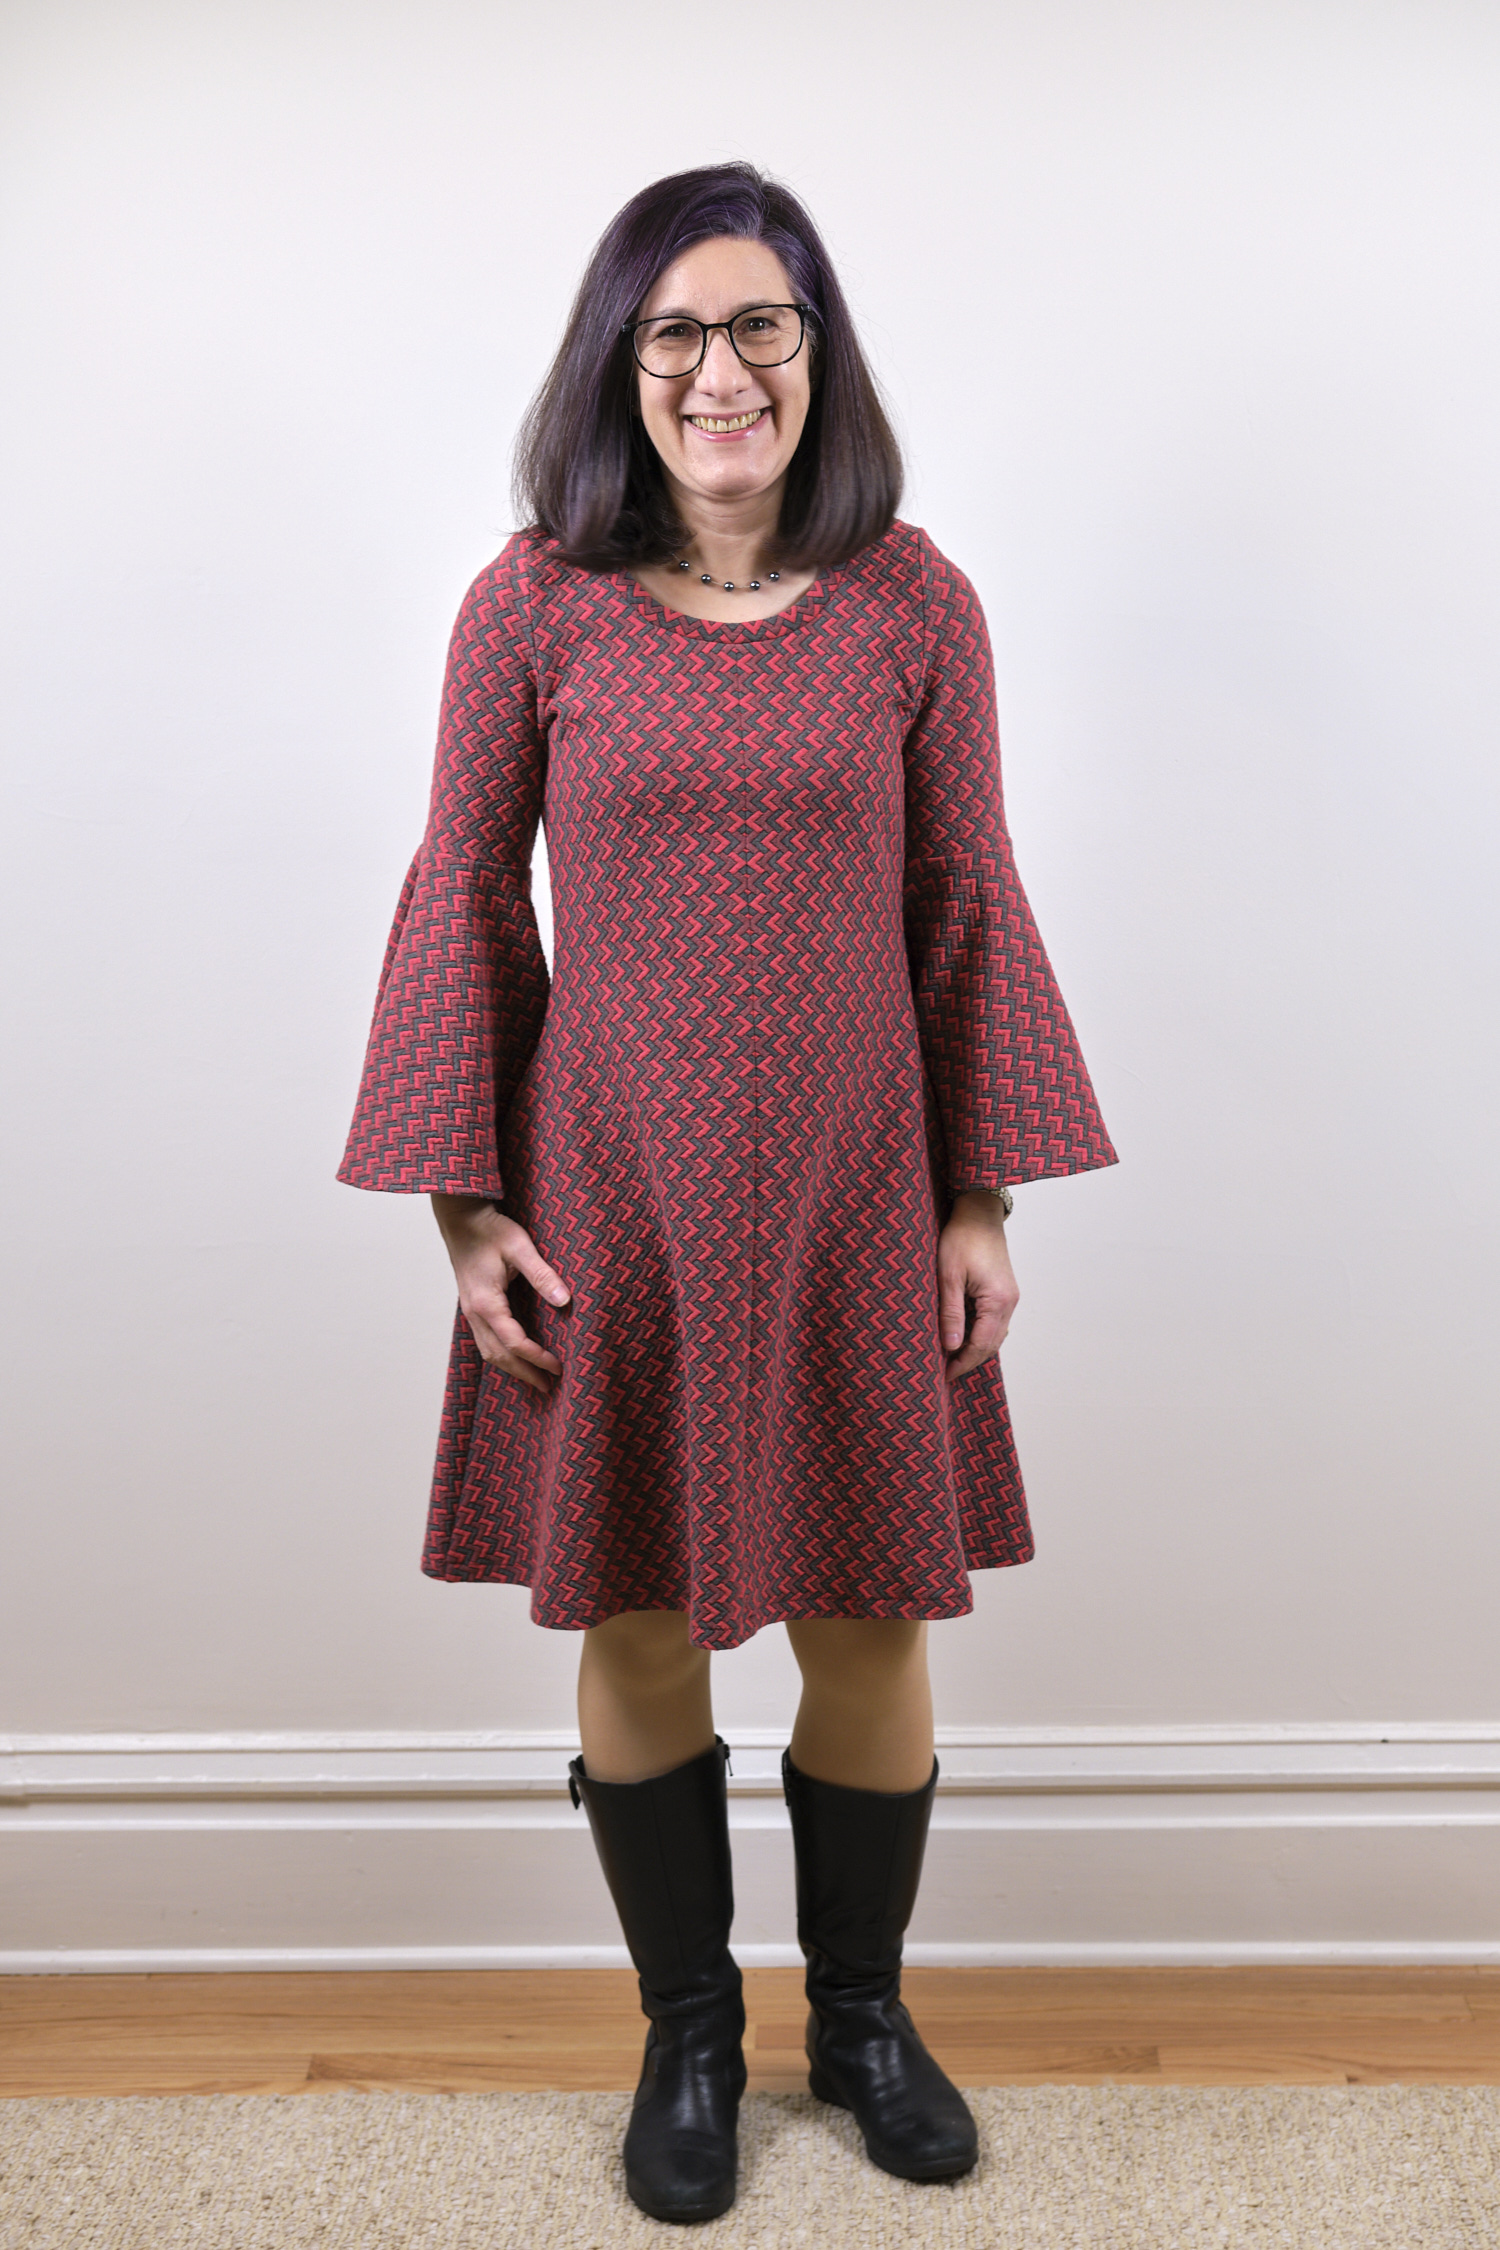
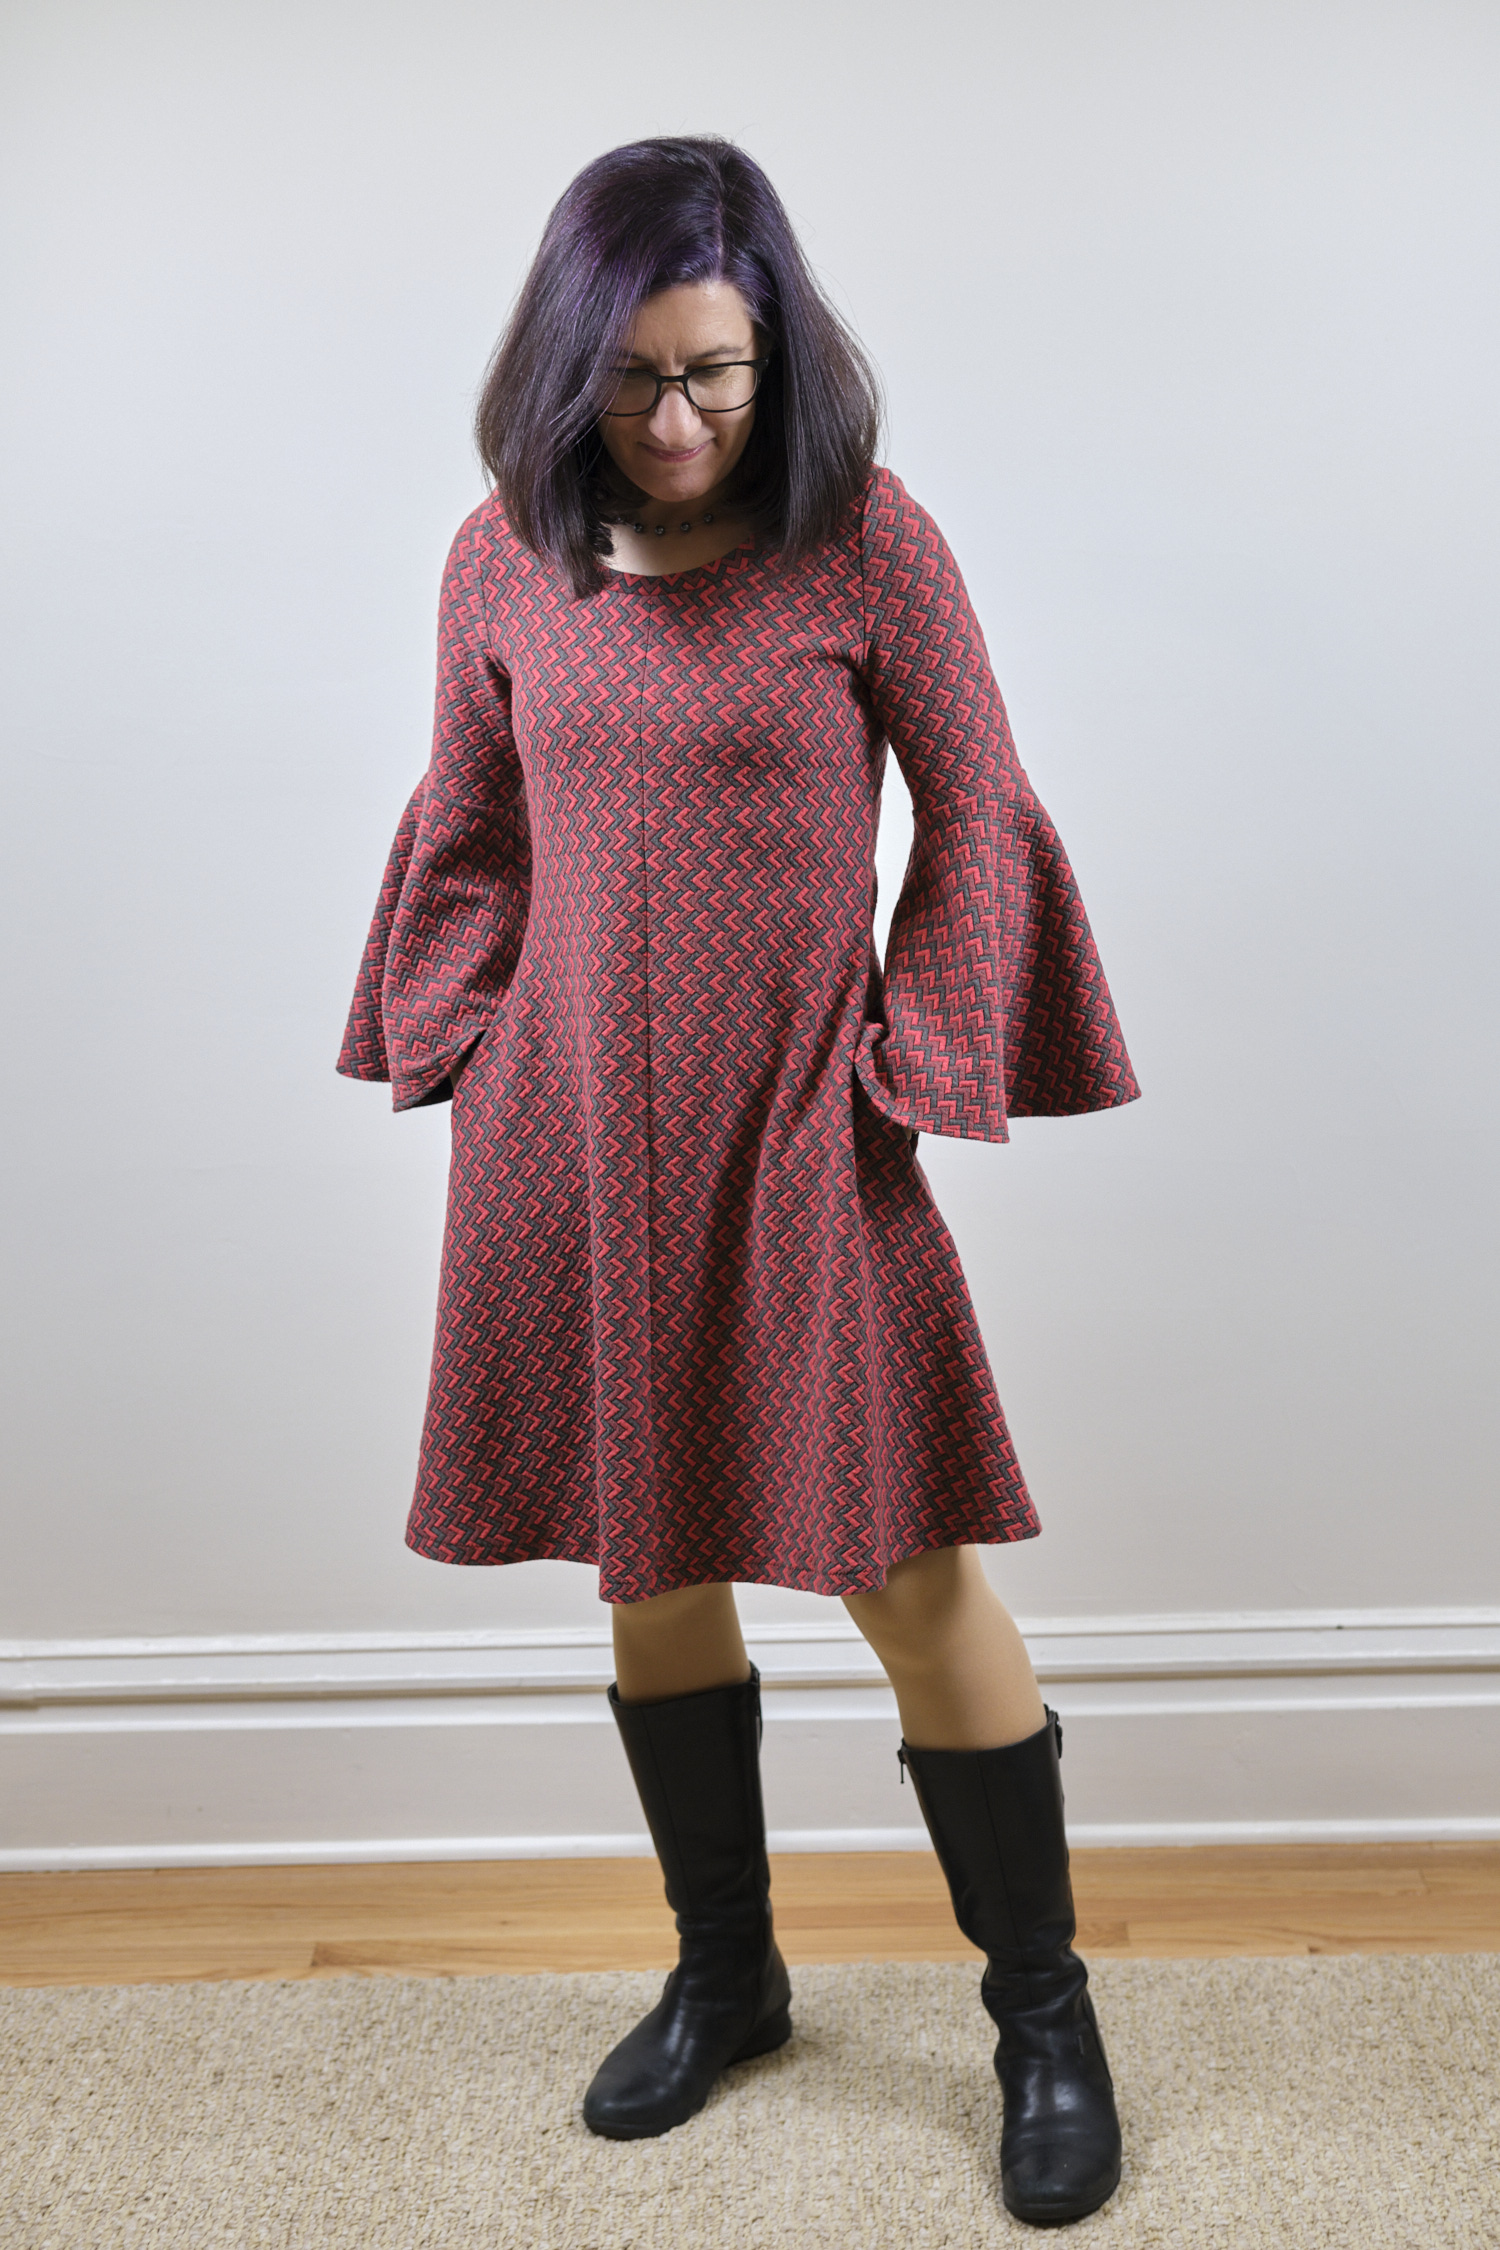
I must say I’m pretty pleased with the results: the fabric, the fit, the sleeves…. THE SLEEVES!

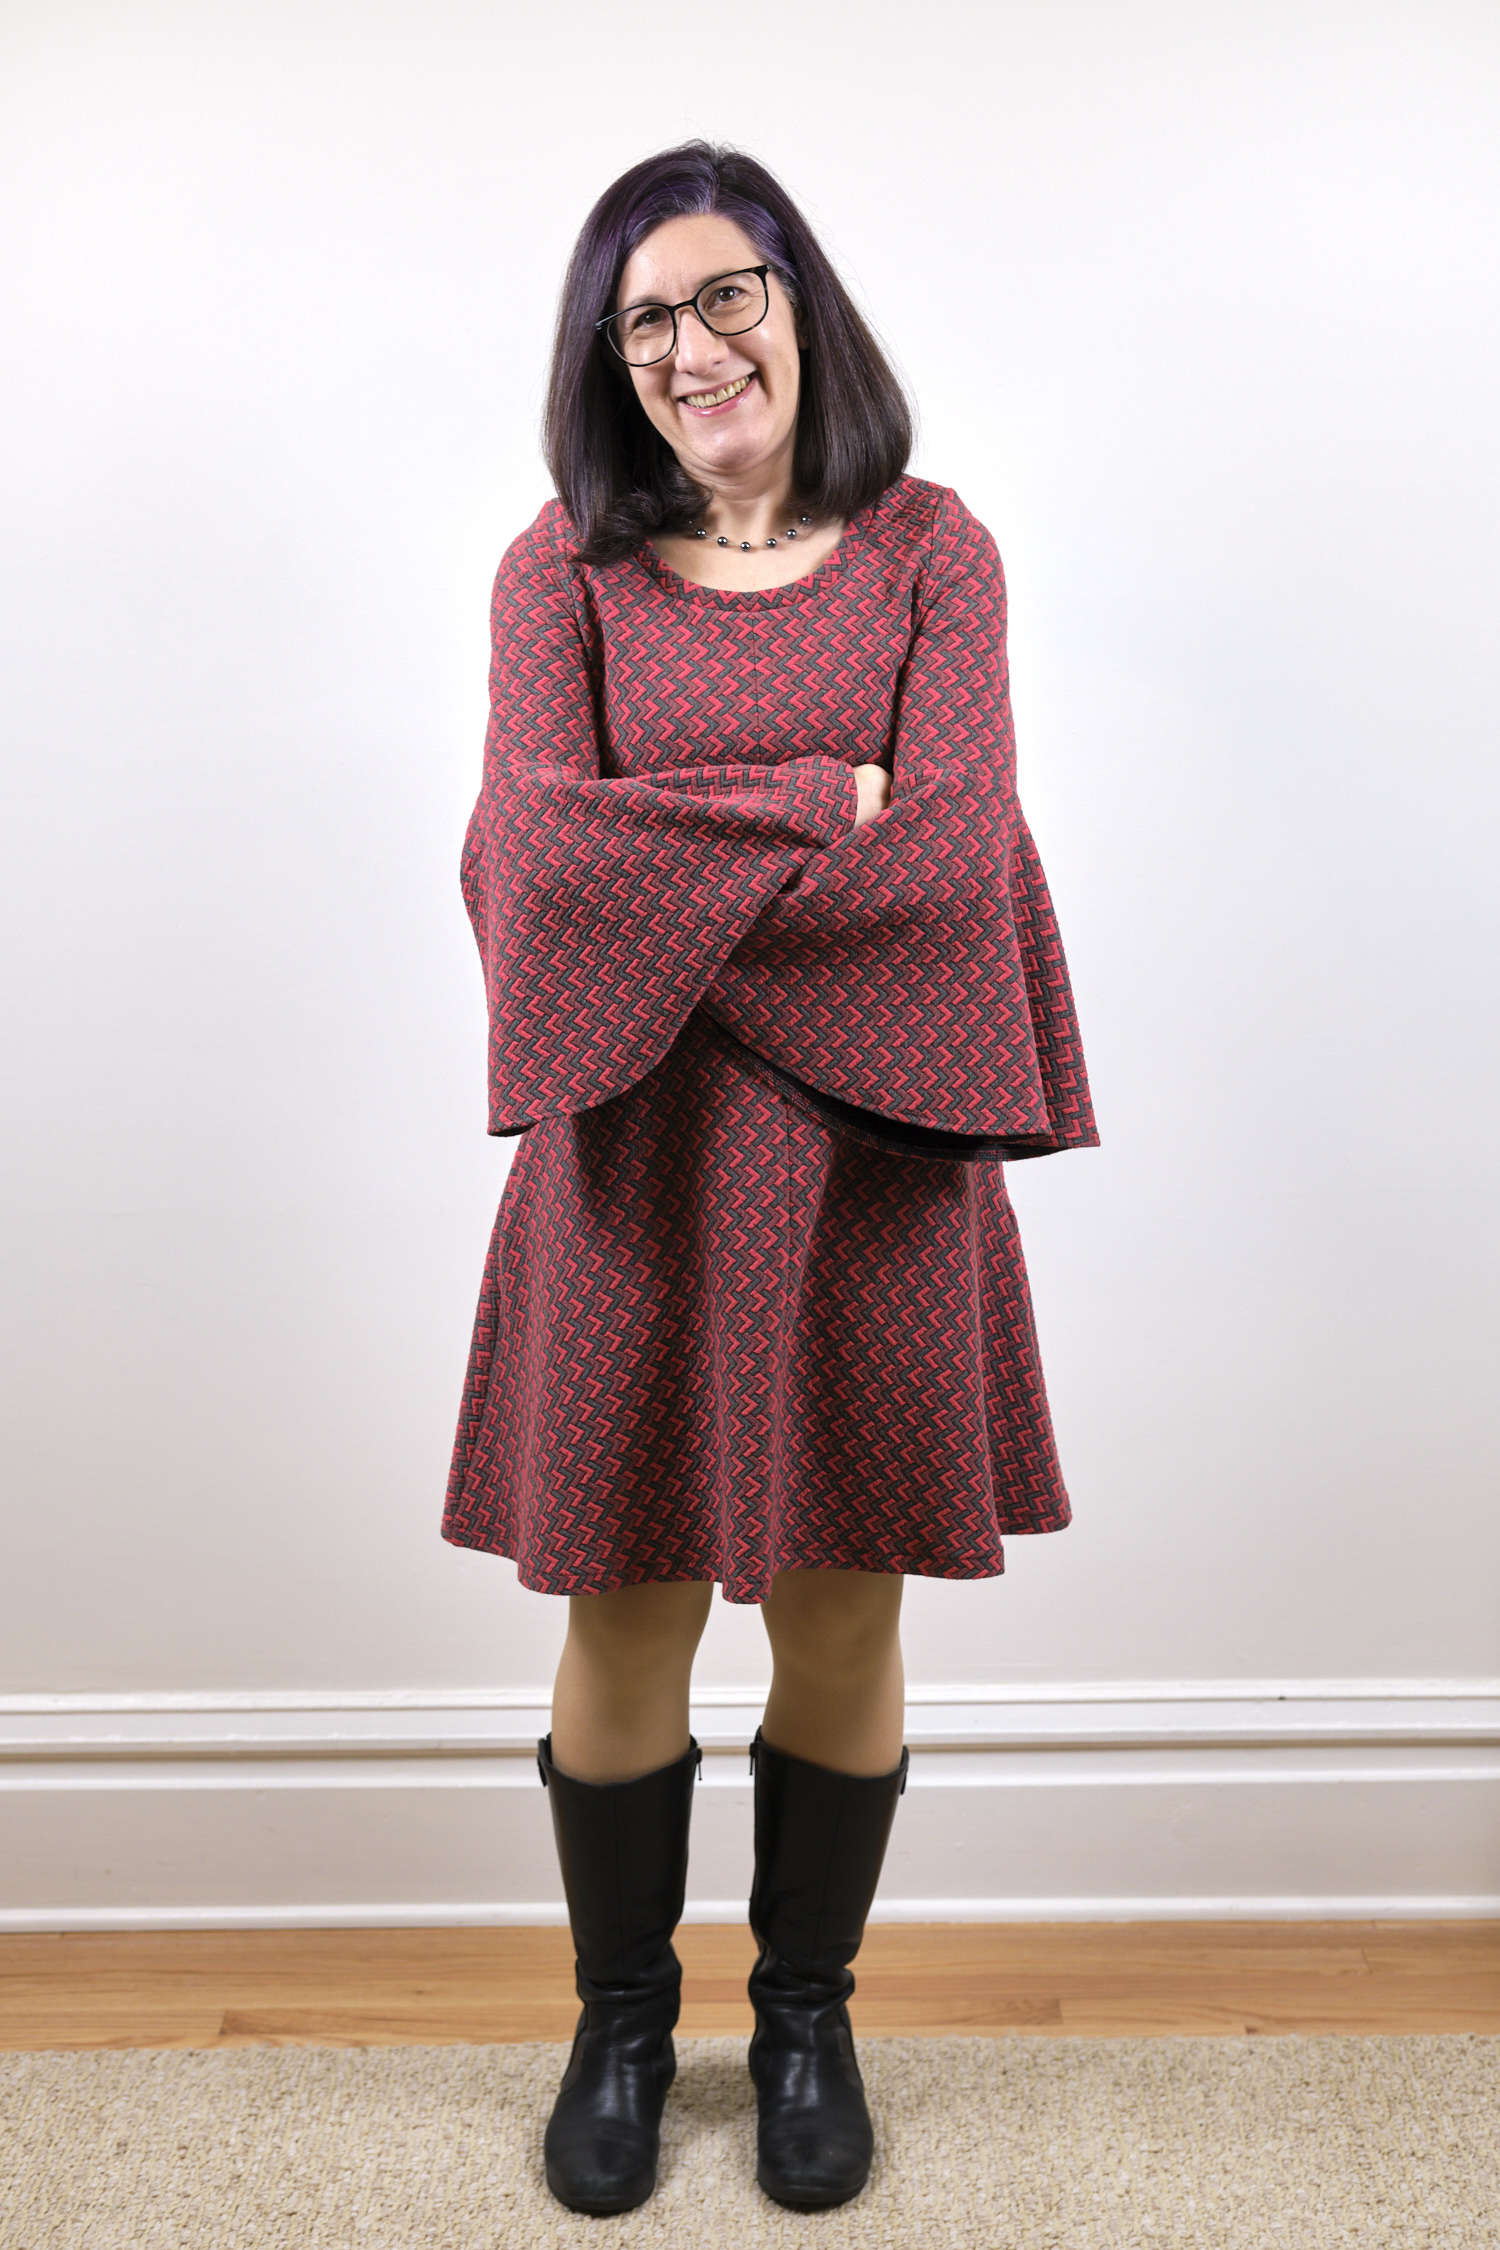
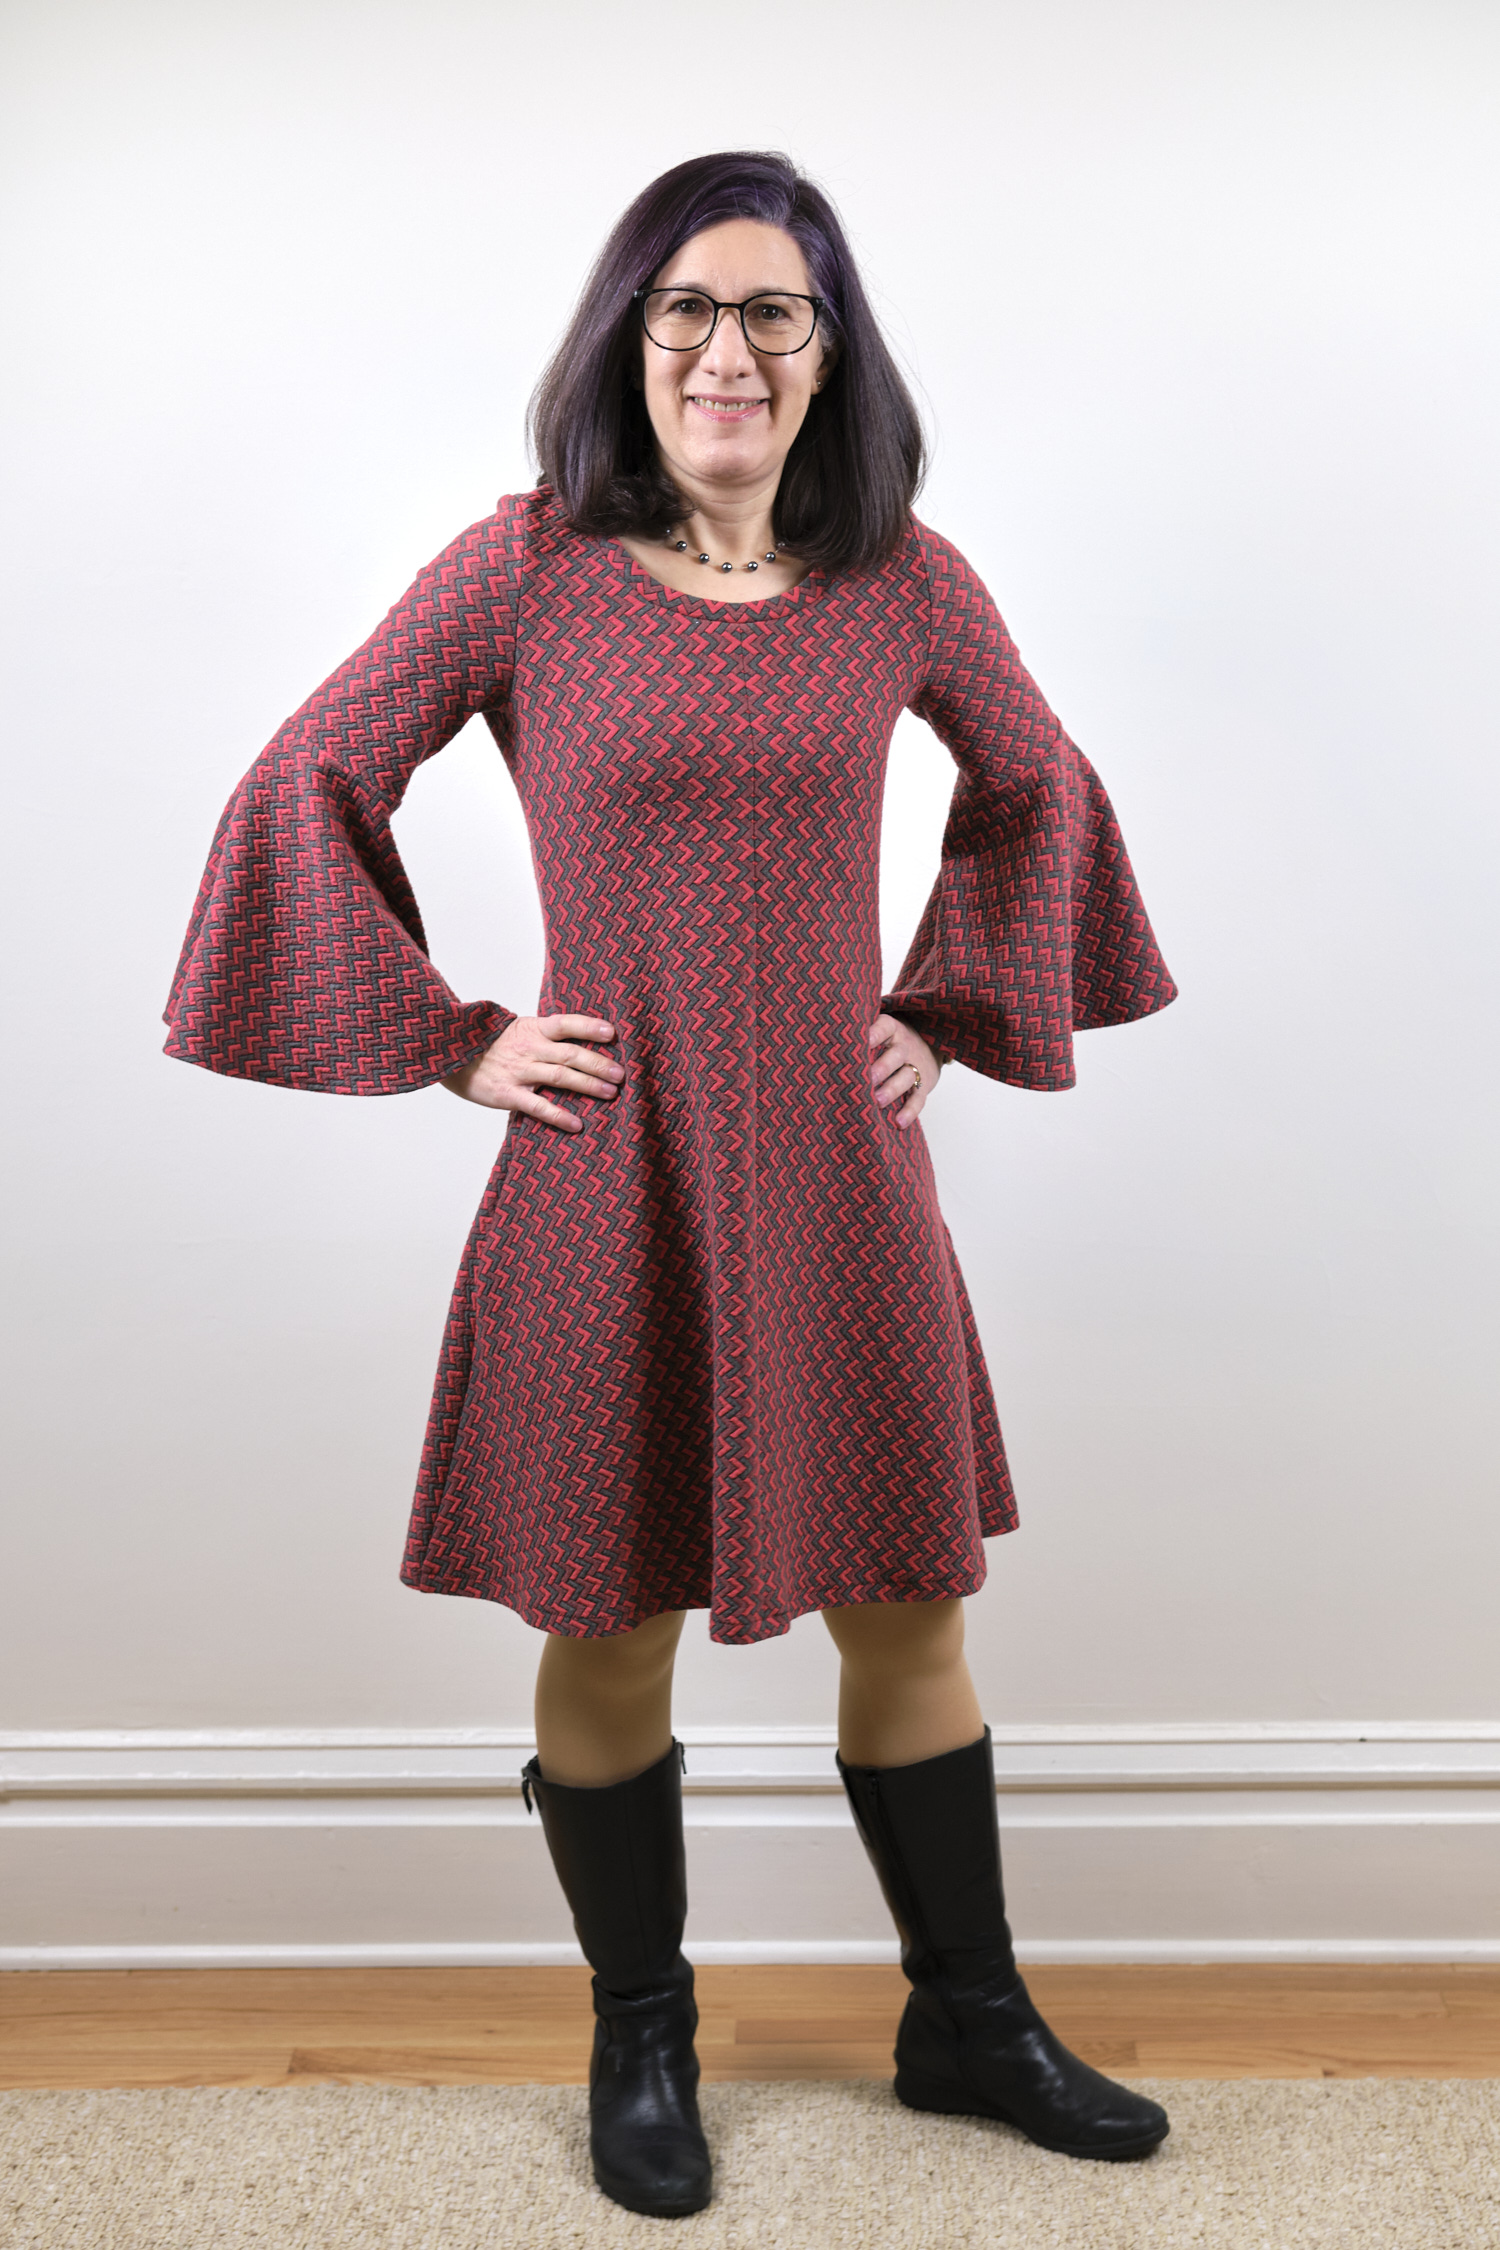
And pockets too! I love the 60’s style made from modern fabrics and the front seam matching. The positioning of the chevrons in opposite directions worked out really well. I was so excited I almost wore the dress to work the day after I finished it, and then remembered I would have to walk 20 minutes in the below-freezing weather to get to work, so decided to wait for a bit warmer weather a couple of weeks later.

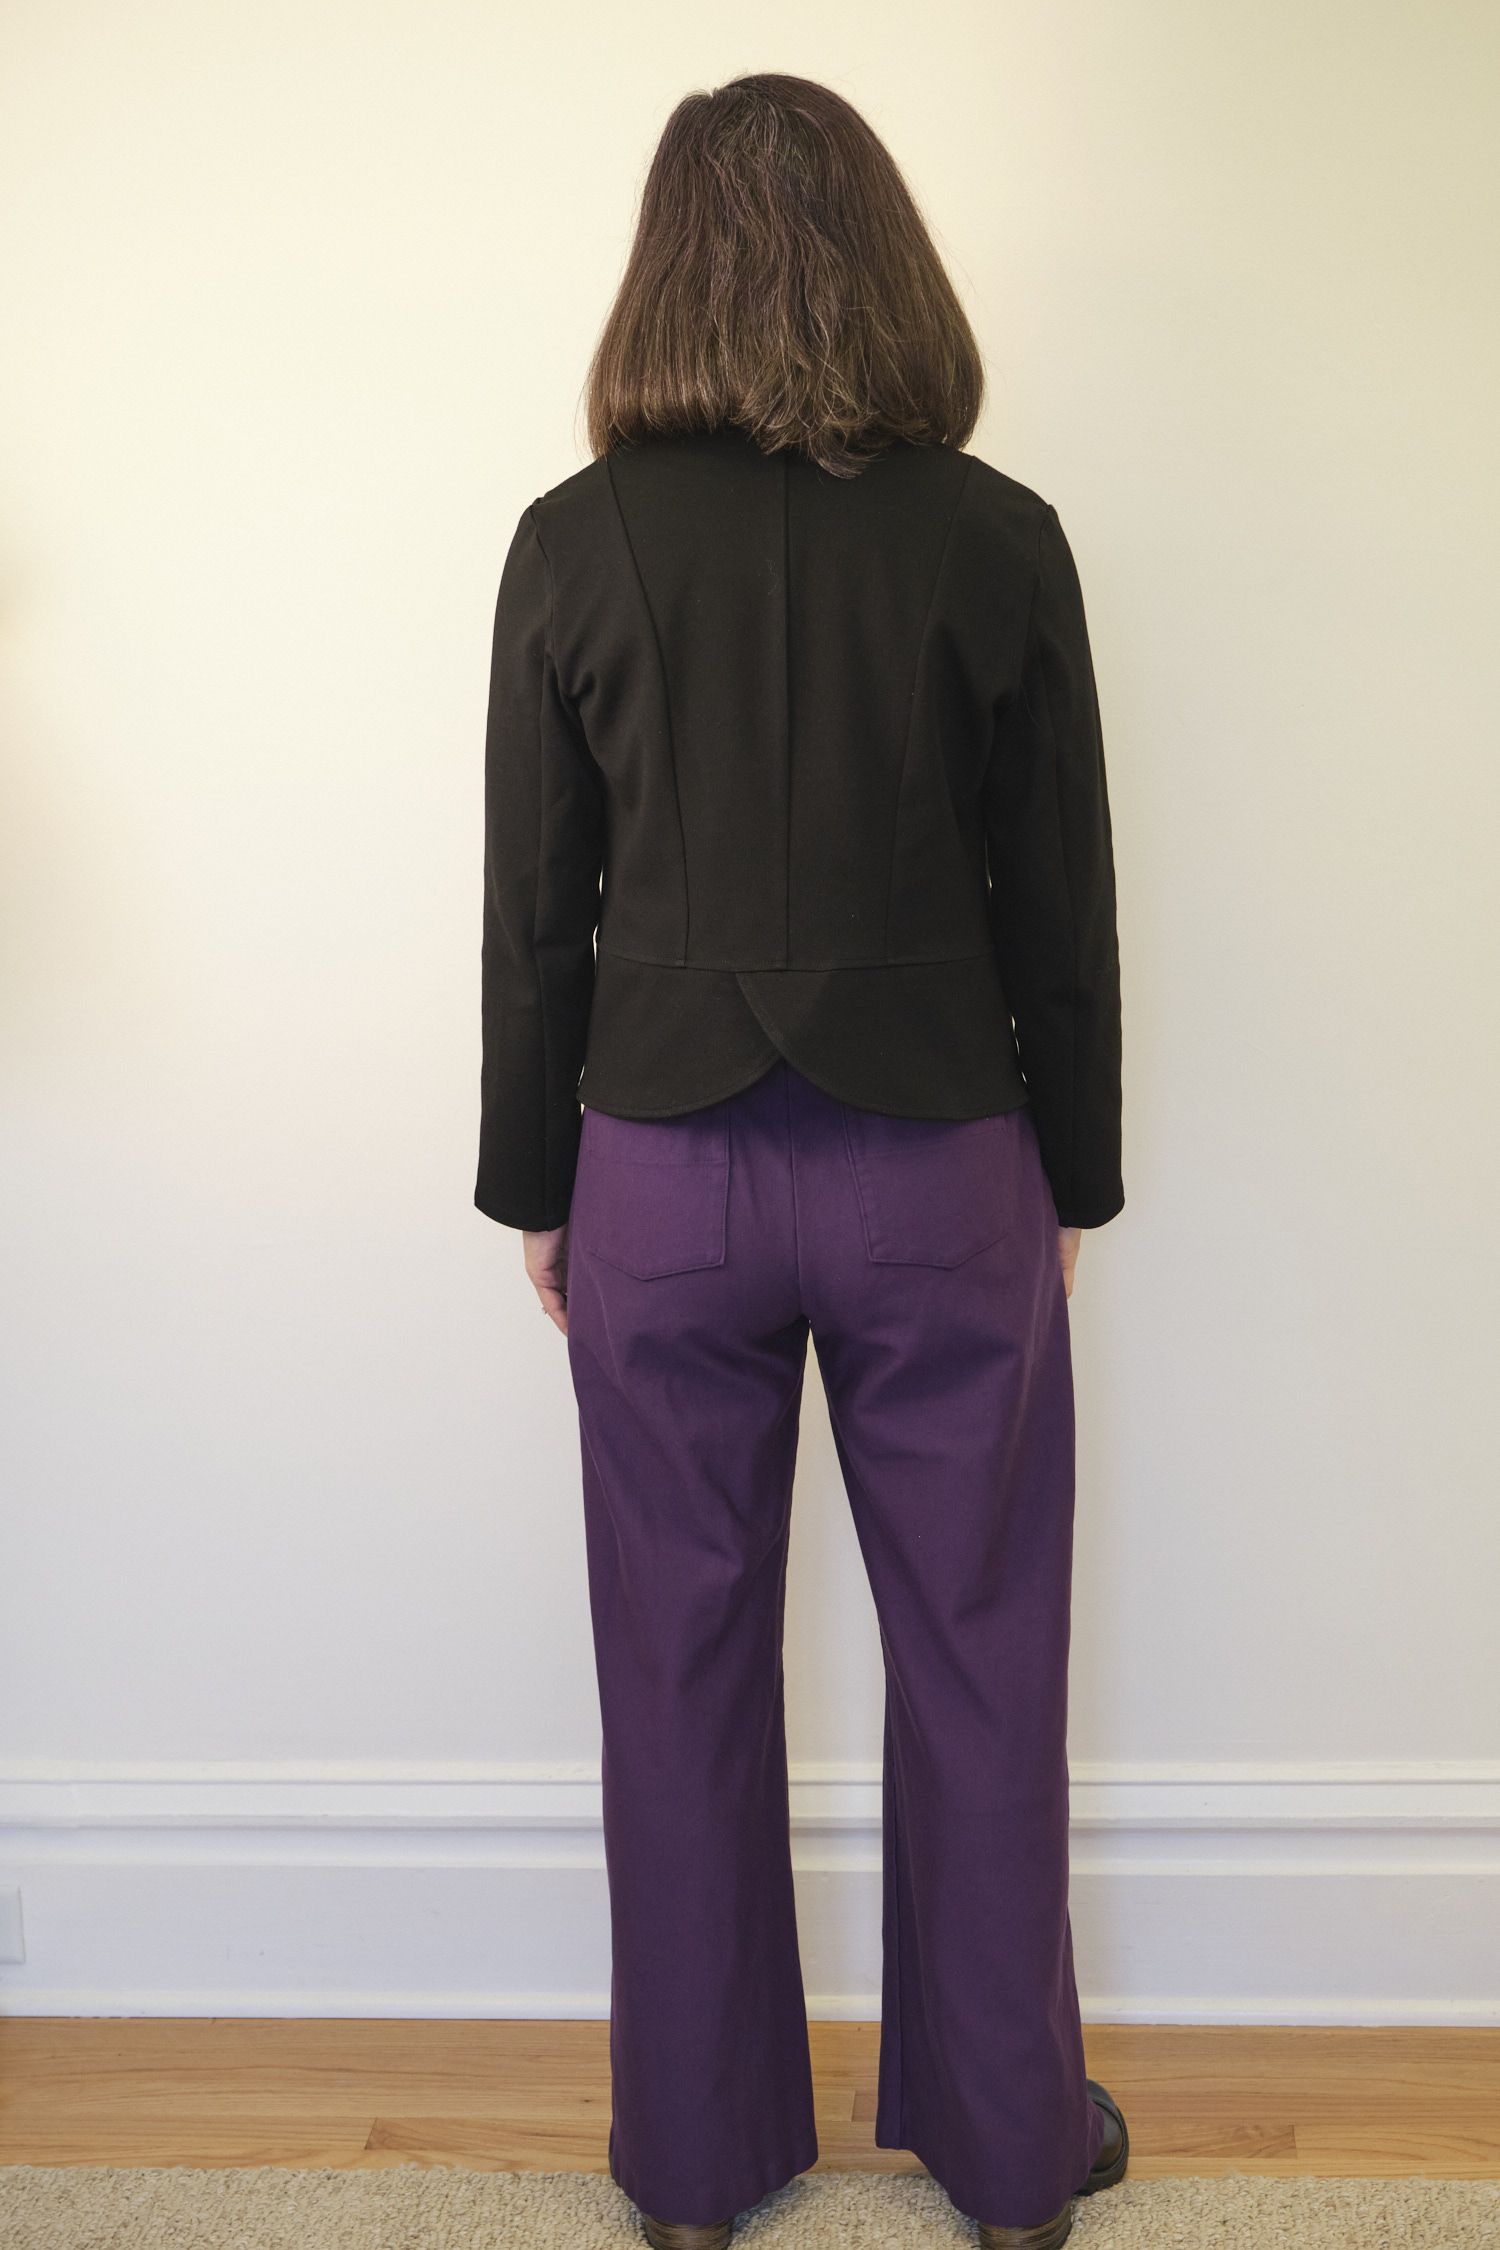
It took a few weeks before I had time, but I finally got around to finishing the accidental dress, and it is indeed super cute and it works well with my periwinkle pocket leggings. I’m not sure when it will be warm enough to wear it outside the house, but I’m ready!

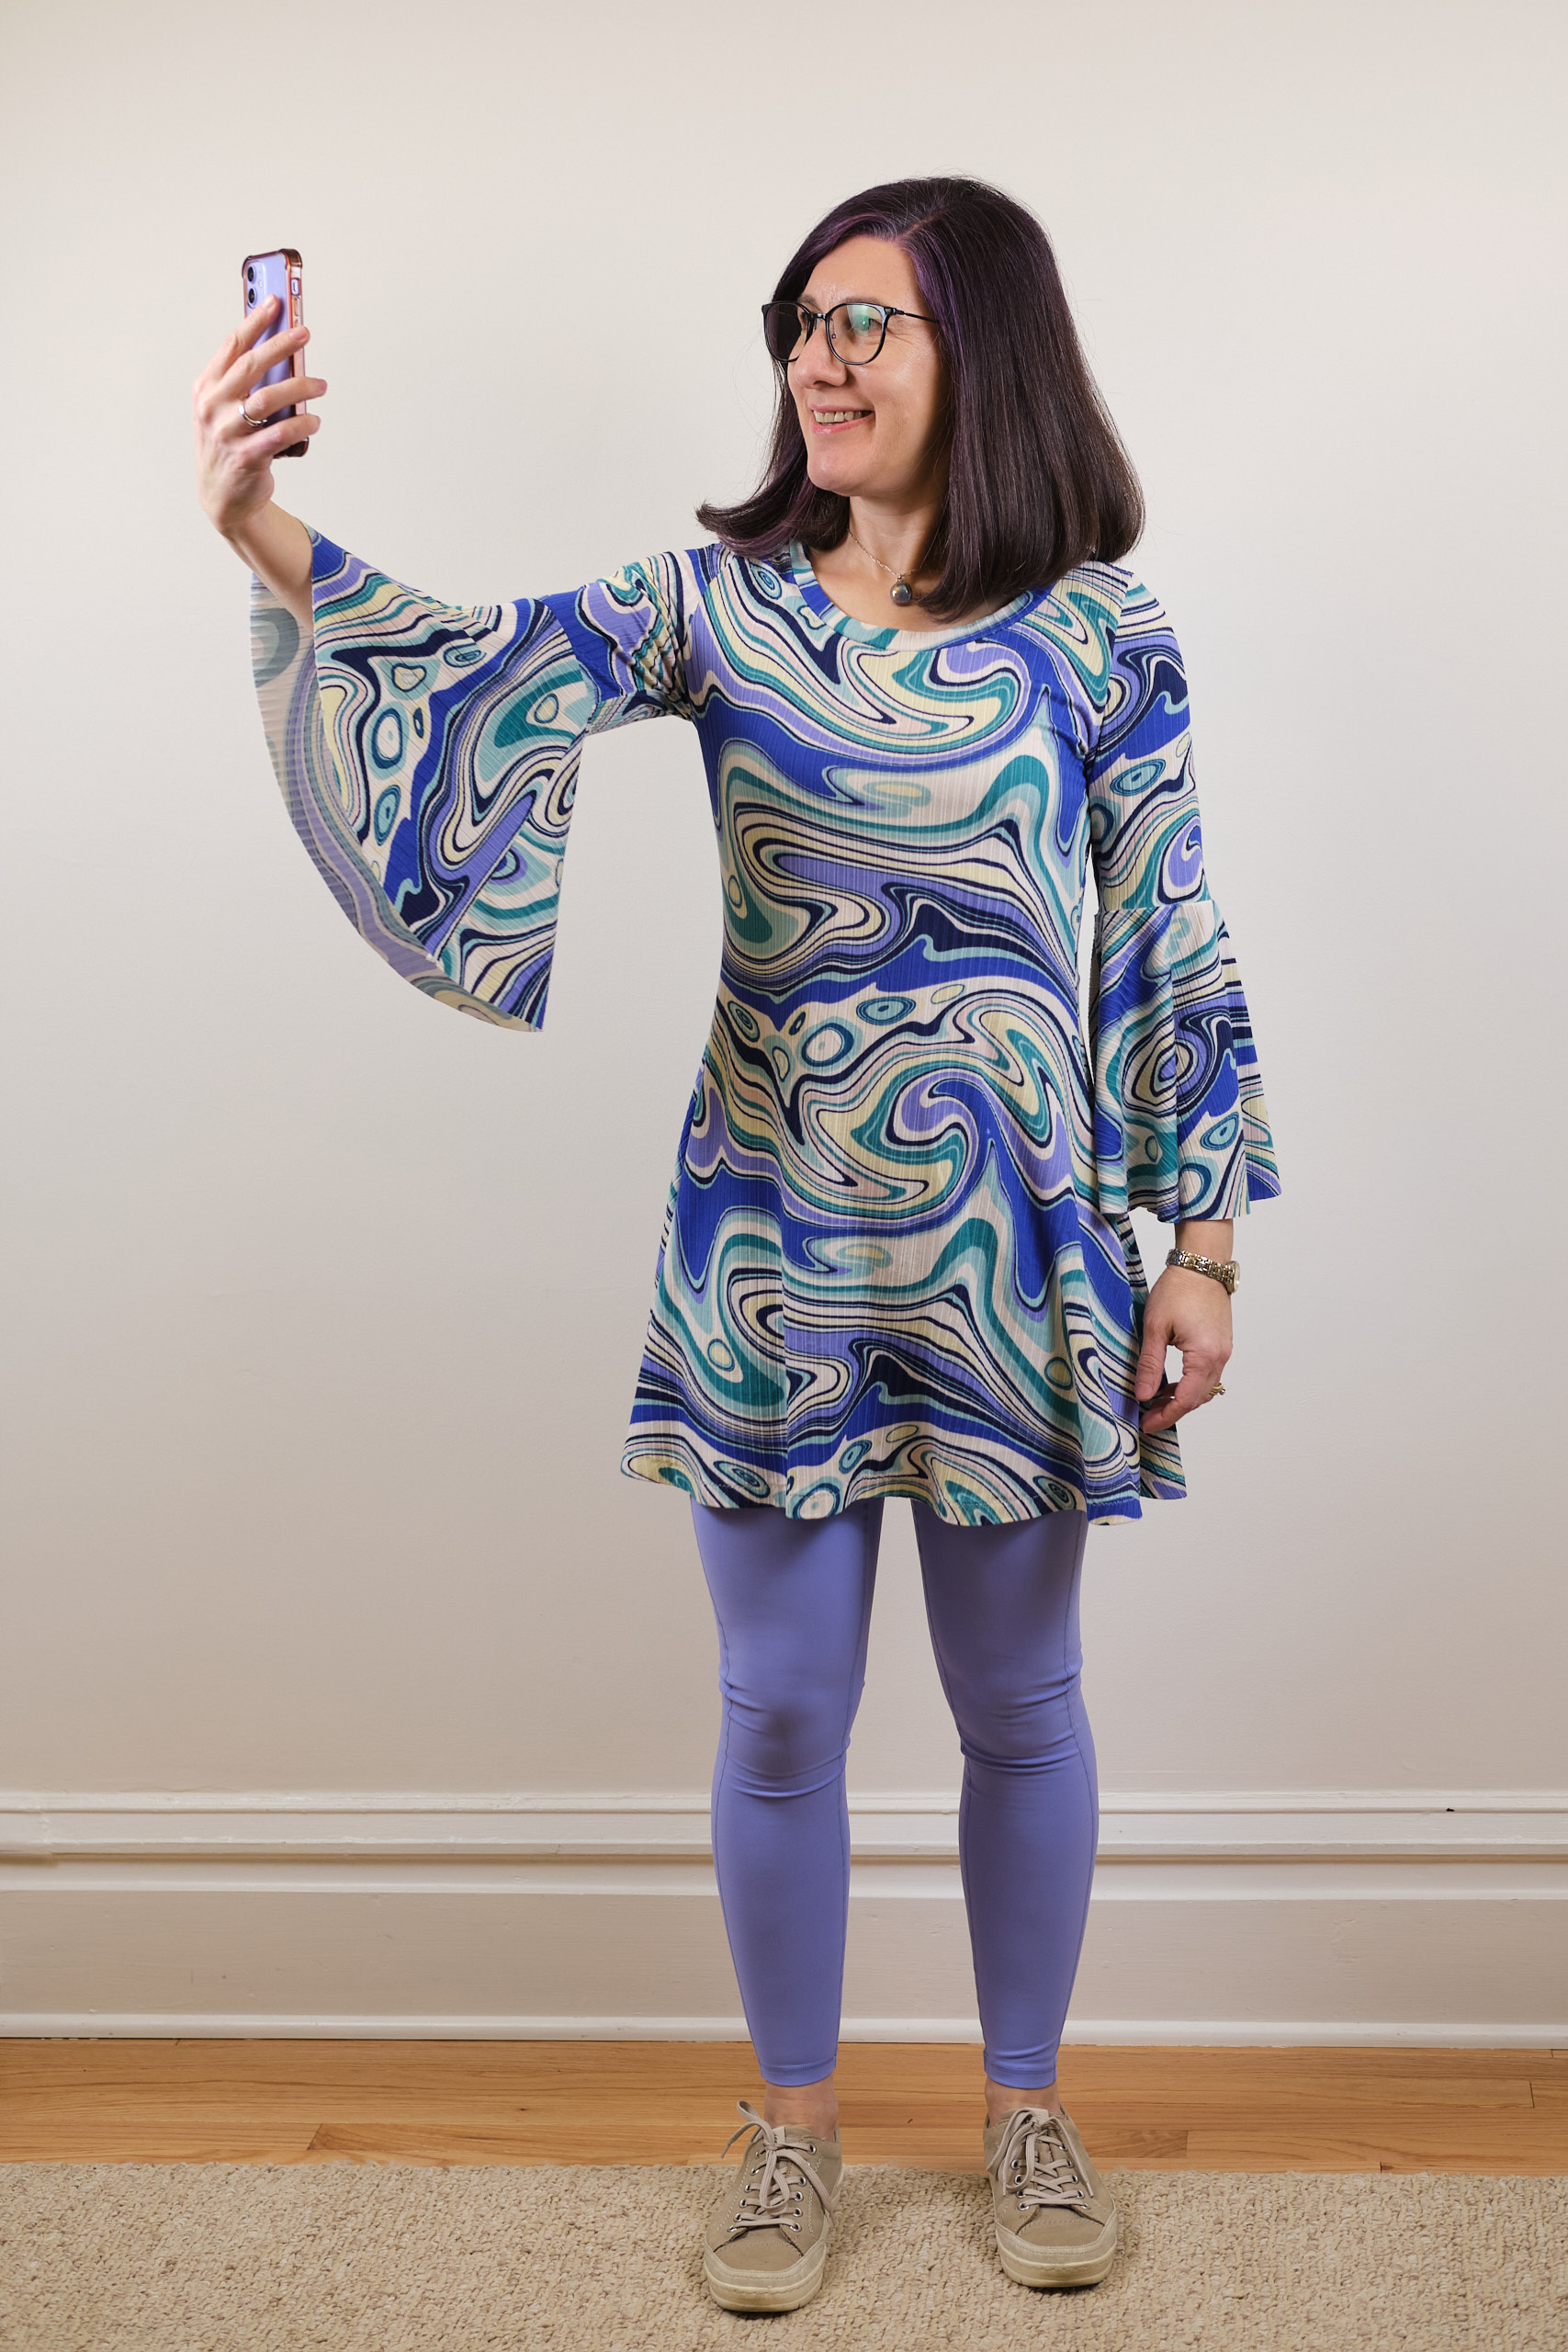
Side note: I have photo studio lights now! While I love to take my fashion photos outside, it is too cold this time of year for a lot of outdoor fashion photography. We have this great off-white wall with nothing on it in the room that used to be our kids’ playroom, but the lighting in the room wasn’t great. So I bought a pair of inexpensive softbox photo lights and now I have a photo studio. Most of the photos on this page were taken with my Fuji X-T30 camera with a 35 mm lens. The last set were taken on a tripod with a self timer since my photographic assistant was unavailable.

Pocket scarf

I had carpel tunnel release surgery on my left hand this week (I did the right hand a month ago), and its healing well but I have to keep it bandaged up for a week. A polar vortex is forecasted here for the coming week and I was concerned about not being able to fit a glove over my left hand. I thought about sewing a large mitten, but I saw the free pattern from Sinclair for a Mojo scarf with pockets, I decided to give it a try. I do, after all, like to put pockets on everything. The pattern comes in Sinclair’s full range of sizes, in a narrow and wide width, and with the option of adding a hood, ears, and cape. I went with my usual size 4p, narrow width, and hood. I decided I didn’t need a cape and ears, although those could be fun too.

I used leftover Polartec sweatshirt fleece from a sweatshirt I made recently, and sewed it with the fuzzy side out. The fabric is about 70 inches wide so I cut the length of the scarf as one piece and chopped off some of the end for a pocket. This resulted in a scarf that was slightly too short, so when I realized that I added three inches on to each end. You can see the extra seam near the bottom of the back of each pocket.

It was pretty straightforward to sew, but took longer than I expected. I guess it is just a lot of fleece and layers to sew as everything is double-layered, which makes it warm and reversible with a nice clean finish. I sewed almost all of it on my serger (except for some basting, topstitching and closing the seam in the back after I turned it right-side out), and was glad to have a machine that could easily sew through so many layers of plush fleece.

I didn’t know a darn thing about darning

My daughter came home with a hole in the elbow of her favorite wool thrifted sweater and asked me to fix it. I wasn’t very successful with my first and only knitting project back in high school and haven’t tried knitting anything since, but I understand the basic principles involved. I’ve also never darned anything before. The easy thing would have been to just use my sewing skills and sew the hole closed, leaving a bit of a “scar.” I didn’t know a darn thing about darning, but gosh darn it, how hard could it be?

I only had blue, pink, and purple yarn on hand so I “borrowed” some green yarn from a friend. I didn’t really match but my daughter deemed it close enough.

I checked with the Internet and discovered that the technique I should use is called “Swiss darning” for repair, which replicates the damaged knitting stitches. An alternative approach is to fill in the missing stitches with weaving, but Swiss darning looks much nicer. I found some online tutorials that showed how to do this using thread to provide a vertical scaffolding for the stitches. And then I found this video that offered an alternative approach that looked completely magical: https://www.reddit.com/r/oddlysatisfying/comments/17gmbmd/mending_a_sweater/ (watch the 1 minute 25 second video it is amazing!) I decided to try it. It took me closer to half an hour and I did rewatch the video several times. I didn’t have exactly the right colored thread, but with a latch hook and a yarn needle I achieved something I am darn proud of on my first try! My daughter was pretty happy with it too.

And here’s what it looks like on the other side.

Boo! (& lu Onyx blazer)

I’ve collected a few Boo & Lu PDF sewing patterns but had not gotten around to sewing any of them until now. I’ve been thinking about sewing up the Onyx blazer since it came out because it has princess seams for nice shaping, can be made in either knit or woven fabrics, and it is collarless. I have a closet full of blazers with collars, but over the past few years have found that blazer collars are increasingly uncomfortable on the back of my neck so I’m looking to expand my collection of collarless blazers, which it seems are harder to find (both ready made and in patterns). The Onyx also has several options, including a hip-length version with optional pockets, a peplum version, a tulip-bottom version, and a cropped version. I may eventually try them all. The pattern also includes options for bows on the back of the blazer. While they are cute, I am less likely to add them to a blazer for me to wear. There is a kid’s version of this pattern and I think the bows would be super cute on a blazer for a child.

I started with the tulip version since it looked like a style I would likely wear a lot and it looked like I had enough leftover black ponte fabric from a pair of pants to make it. It has a lot of pieces, but they are all fairly small, so I was able to make good use of some of the scraps. This version requires only a little bit more than a yard of fabric (assuming ~58 inch width) in my size. I made a size 6, with a 1/2-inch small bust adjustment and sleeves shortened by 2 inches. (And it matches the pants — PE Walk Boldly — so now I have a suit!)

Boo & Lu Onyx blazer, size 6 with tulip bottom in black ponte, modelled with Sinclair Bondi top and PE Walk Boldly pants

The pattern includes a lot of instructions and notes, including suggestions for a full bust adjustment and small bust adjustment. In my case, I needed a small bust adjustment, something I had never attempted previously. The pattern has step-by-step instructions for the full bust adjustment, and then suggests doing the opposite for a small-bust adjustment. Most online tutorials take a similar approach. Bust adjustments are somewhat complicated as they involve making adjustments to a flat pattern piece designed to fit a round part of the body. Generally, you take paper pattern pieces and cut them apart and tape them back together. Since I am working with projected PDF files, I figured I should be able to do this electronically in Affinity Designer. I found an AD tutorial that explained how to do full bust adjustments. After watching the tutorial I attempted to follow the steps on my own, except the opposite. I realized that my AD skills are still fairly poor, but I learned quite a few things about using AD in the process — I should really watch more AD tutorials when I get a chance! I had trouble getting my head around how to execute this adjustment in the opposite direction, but after a lot of puzzling, I eventually figured it out and completed an adjustment that seems to have worked out ok.

I projected my pattern pieces with the adjustment and cut out the Onyx tulip pattern with no other adjustments. I knew the sleeves would be too long (they always are unless the pattern comes in petite sizes) but decided to cut the full length and adjust the sleeves on the finished garment after I tried it on.

The pattern has 3/8-inch seam allowances and offers five options for finishing the seam allowances. I chose the easiest, which was to just surge all the seams with a 1/4 seam allowance, trimming off 1/8-inch as I went. Since ponte is a knit, this works well and with all black fabric and black thread, it looks fairly neat too, although of course not nearly as nice as a bound seam allowance. The main downside is that ponte is fairly thick fabric and it would have been nice to be able to press some of the seams open rather than having them pressed together to one side. I think if I make another Onyx in ponte or other heavy fabric I might take the time to serge all the edges (without trimming) that will be seamed and then sew the 3/8-inch seam allowance on my sewing machine. But I am somewhat of a lazy sewist, so then again I might not!

For the most part, the blazer went together fairly easily, but I struggled a bit with attaching the sleeves. The pattern has great instructions and everything is nicely marked, but I still somehow clipped everything together backward, but realized something was off before sewing. I eventually figured it out, clipped everything together properly, and basted it with my sewing machine. Then I serged it together, but made the mistake of starting and stopping at the shoulder, which made it more difficult to smooth out the shoulder line. Next time I will start and stop in the armpit — or maybe just do this on my sewing machine and skip the serging.

Another problem I ran into was one of the front princess seams not lying as smoothly as I wanted. At first I thought it was a pressing issue, but after pressing again I realized one of my seams actually had an unwanted dip in it — it was only off by about an eighth of an inch, but it was enough to cause a noticeable bump in the princess seam right in the middle of the bust line. I resewed about 3 inches of seam on the correct seam line and that fixed the problem.

The instructions noted that the facings might not stay smoothly in place, and indeed mine did not. I tried their suggestion of fusing them in place with a few small pieces of fusible hem tape, and that did the trick. The interfacing I used on my facings was some leftovers from another project that I grabbed, and it was more of a medium weight than a lightweight interfacing. Next time I might try a lighter-weight interfacing.

Attaching the tulip pieces was fairly straightforward except for lining the corner of the tulip up with the front facing. Perhaps due to my heavy fabric and interfacing, I could not get the tulip corner aligned perfectly. I did try unpicking a few stitches at the bottom of the facing and clipping the corner, but it is not aligned as well as I would have liked. This is one downside of the tulip version that should not be an issue in the cropped or hip-length version of this pattern.

I made good use of several feet on my Bernina sewing machine. The patchwork foot with guide made the quarter-inch top stitching around the edges very easy. I also used my darning foot to stitch in the ditch to hold the facings down and my edgestitch foot for the sleeve hems.

Overall, I liked the instructions in the pattern and found the suggestions and photos helpful. I did find a couple of things that are probably errors. On page 11 the finished measurements for the four variations appear to be mislabelled. The crop version has the longest length, but clearly it should be the shortest. Even accounting for that, my finished garment was about an inch shorter than the measurements would suggest. The other error is on page 71 where dark lines are drawn on a photo of the facing to show the raw edges finished with a serger. I believe the lines on the top of the neck facing should be on the bottom of the neck facing.

The blazer fits me well and goes well with both pants and dresses. It has a really nice tailored look, but is less work than a fully lined tailored blazer. I expect I will wear it a lot. When I took photos of the back (see below with PE Walk Boldly pants in black and PE Urban Wide Leg pants in purple, Sinclair Bondi top) I did notice some drag lines beneath the back shoulders. After pondering the cause, I believe it is likely a shoulder slope issue so I plan to try a muslin with a sloped shoulder adjustment and see if it helps before I make another one.

I’m looking forward to making more Onyx blazers. I’m planning out a ponte suit in a bright color with matching wide-leg pants. I’ve already worked out how to cut the blazer and the pants out together from 3 yards of fabric. I love the length on the tulip version, but would also like to try the hip-length with pockets (I will certainly have to shorten it though). The cropped length is fairly short, but I might make it specifically to wear with a dress, and I might round the front corner more similar to the tulip version. The peplum version is also cute, although wonder if it will be too poofy around my waist. I could also see lengthening the cropped version to be the same length as the tulip version…. so many options!

(It’s too cold outside for outdoor photos now so will have to make due with indoor fashion shoots. I’ll try to improve the lighting though.)