Spill the Tea

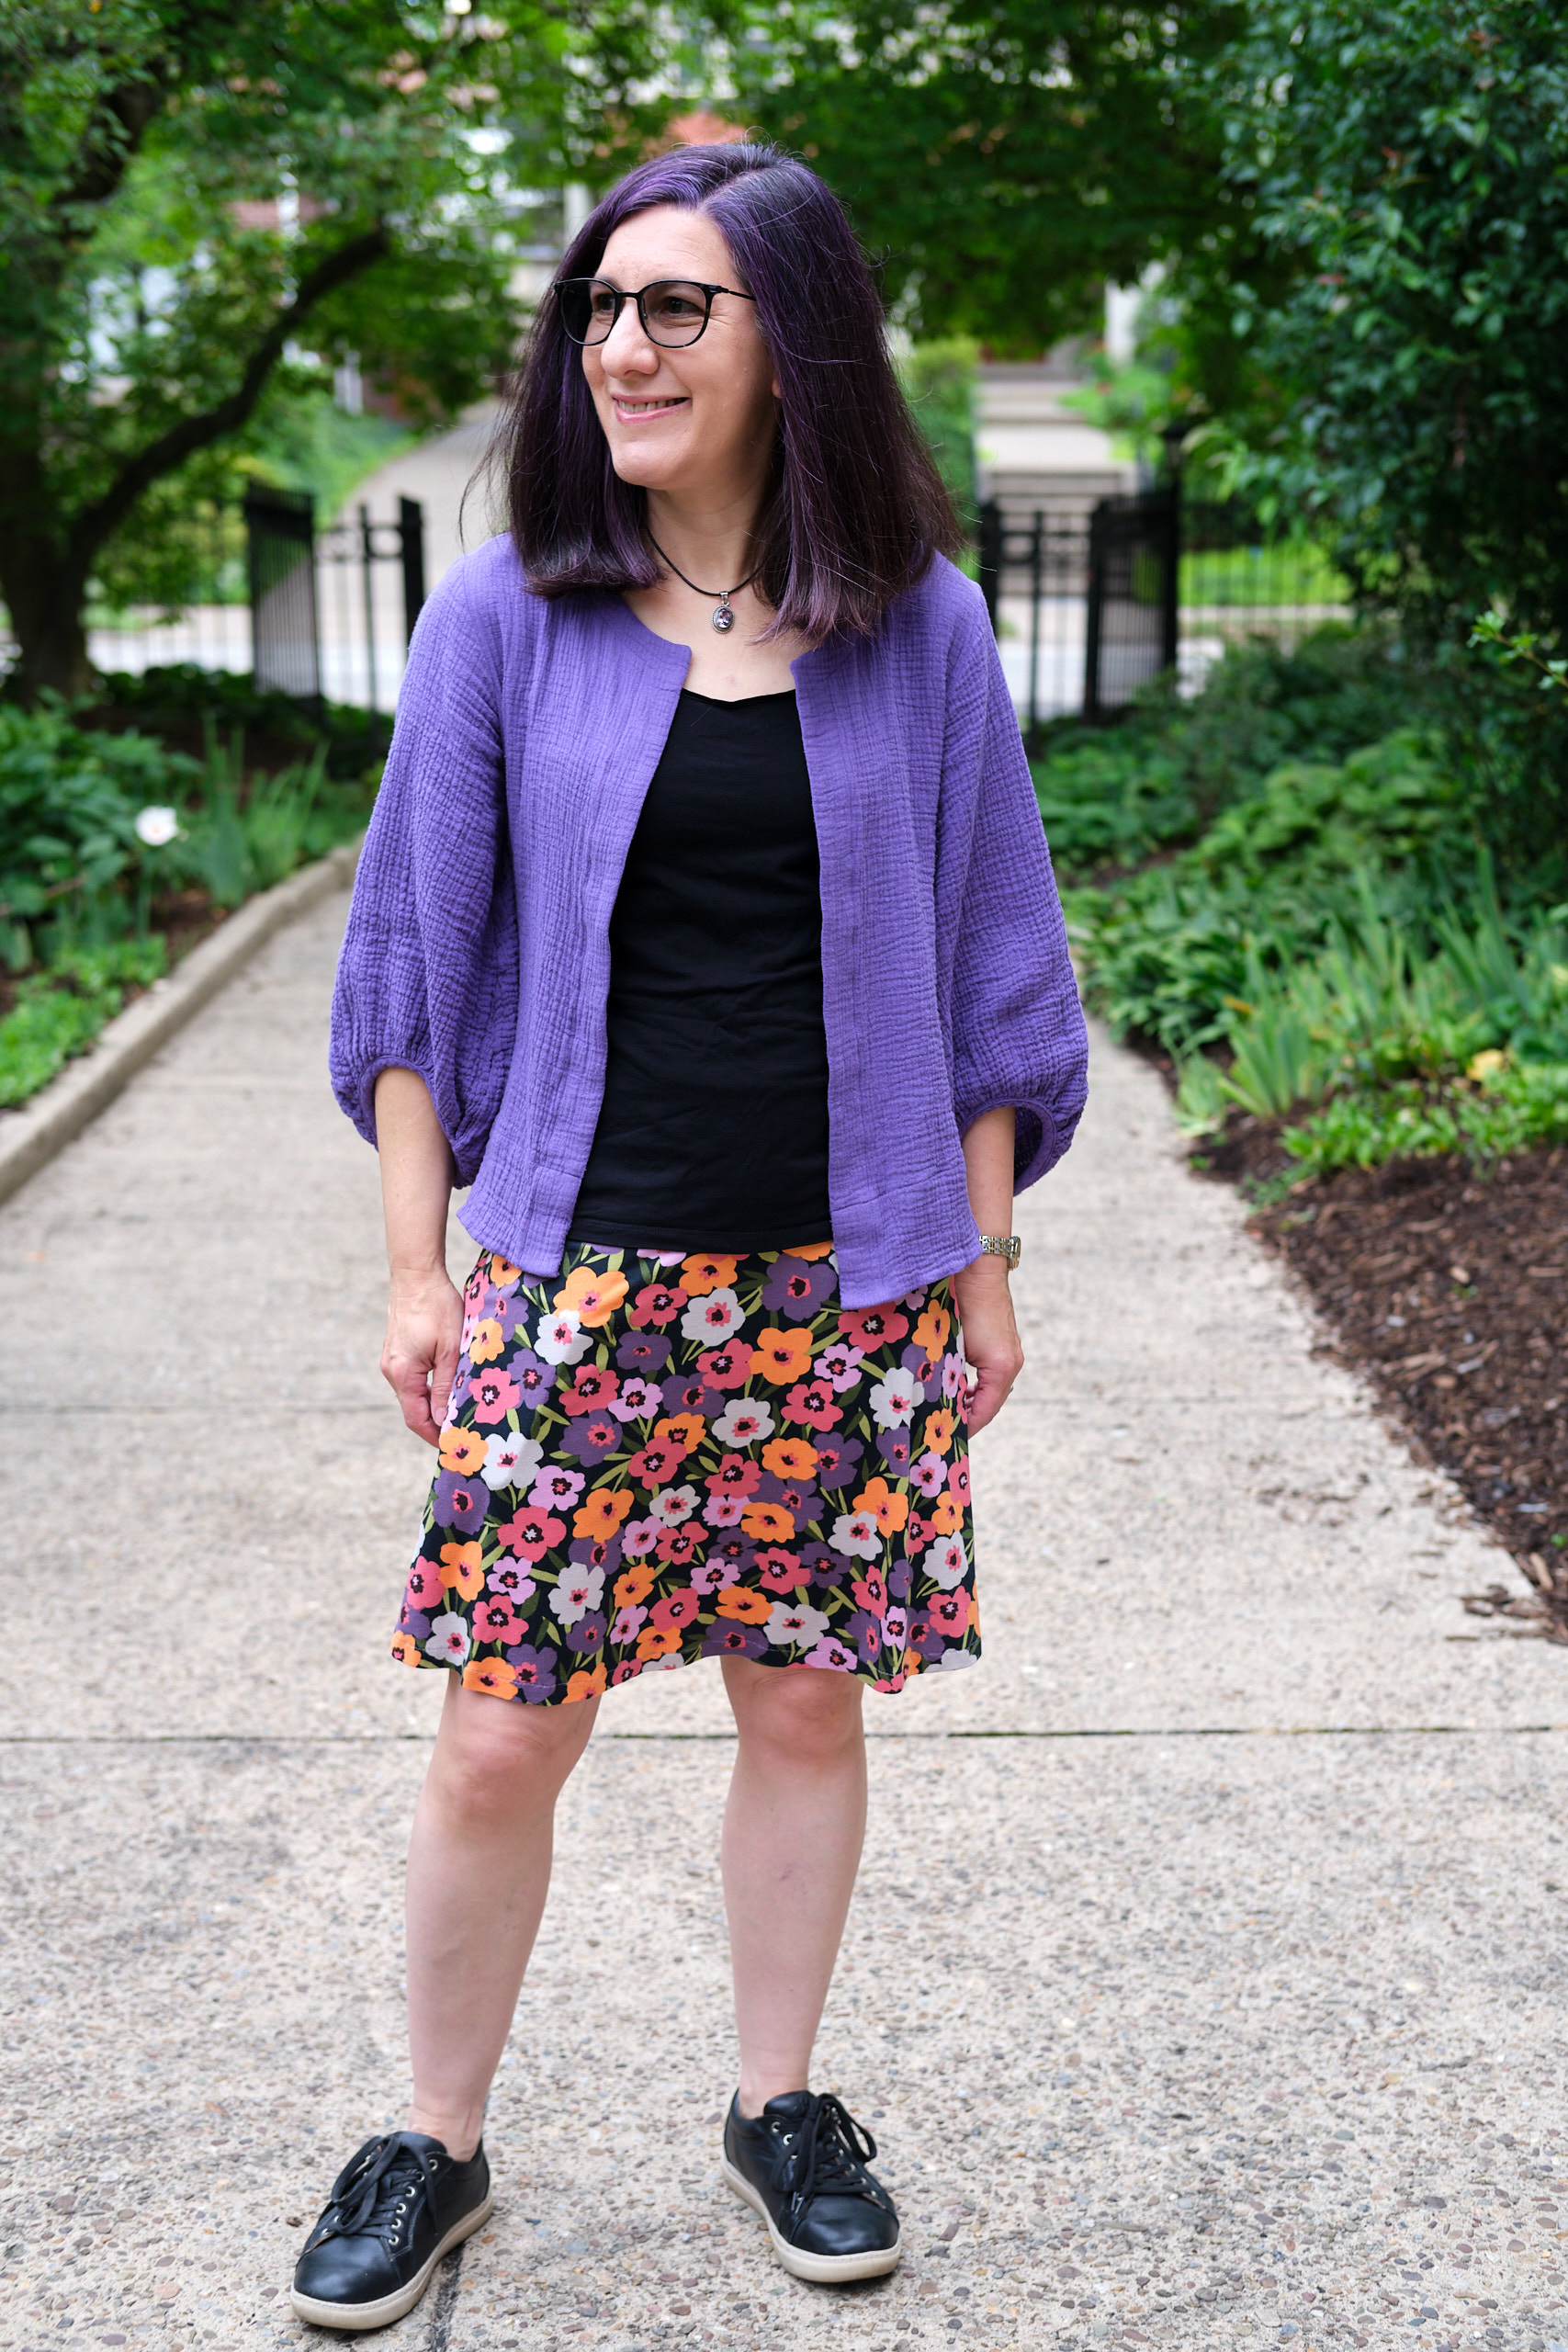
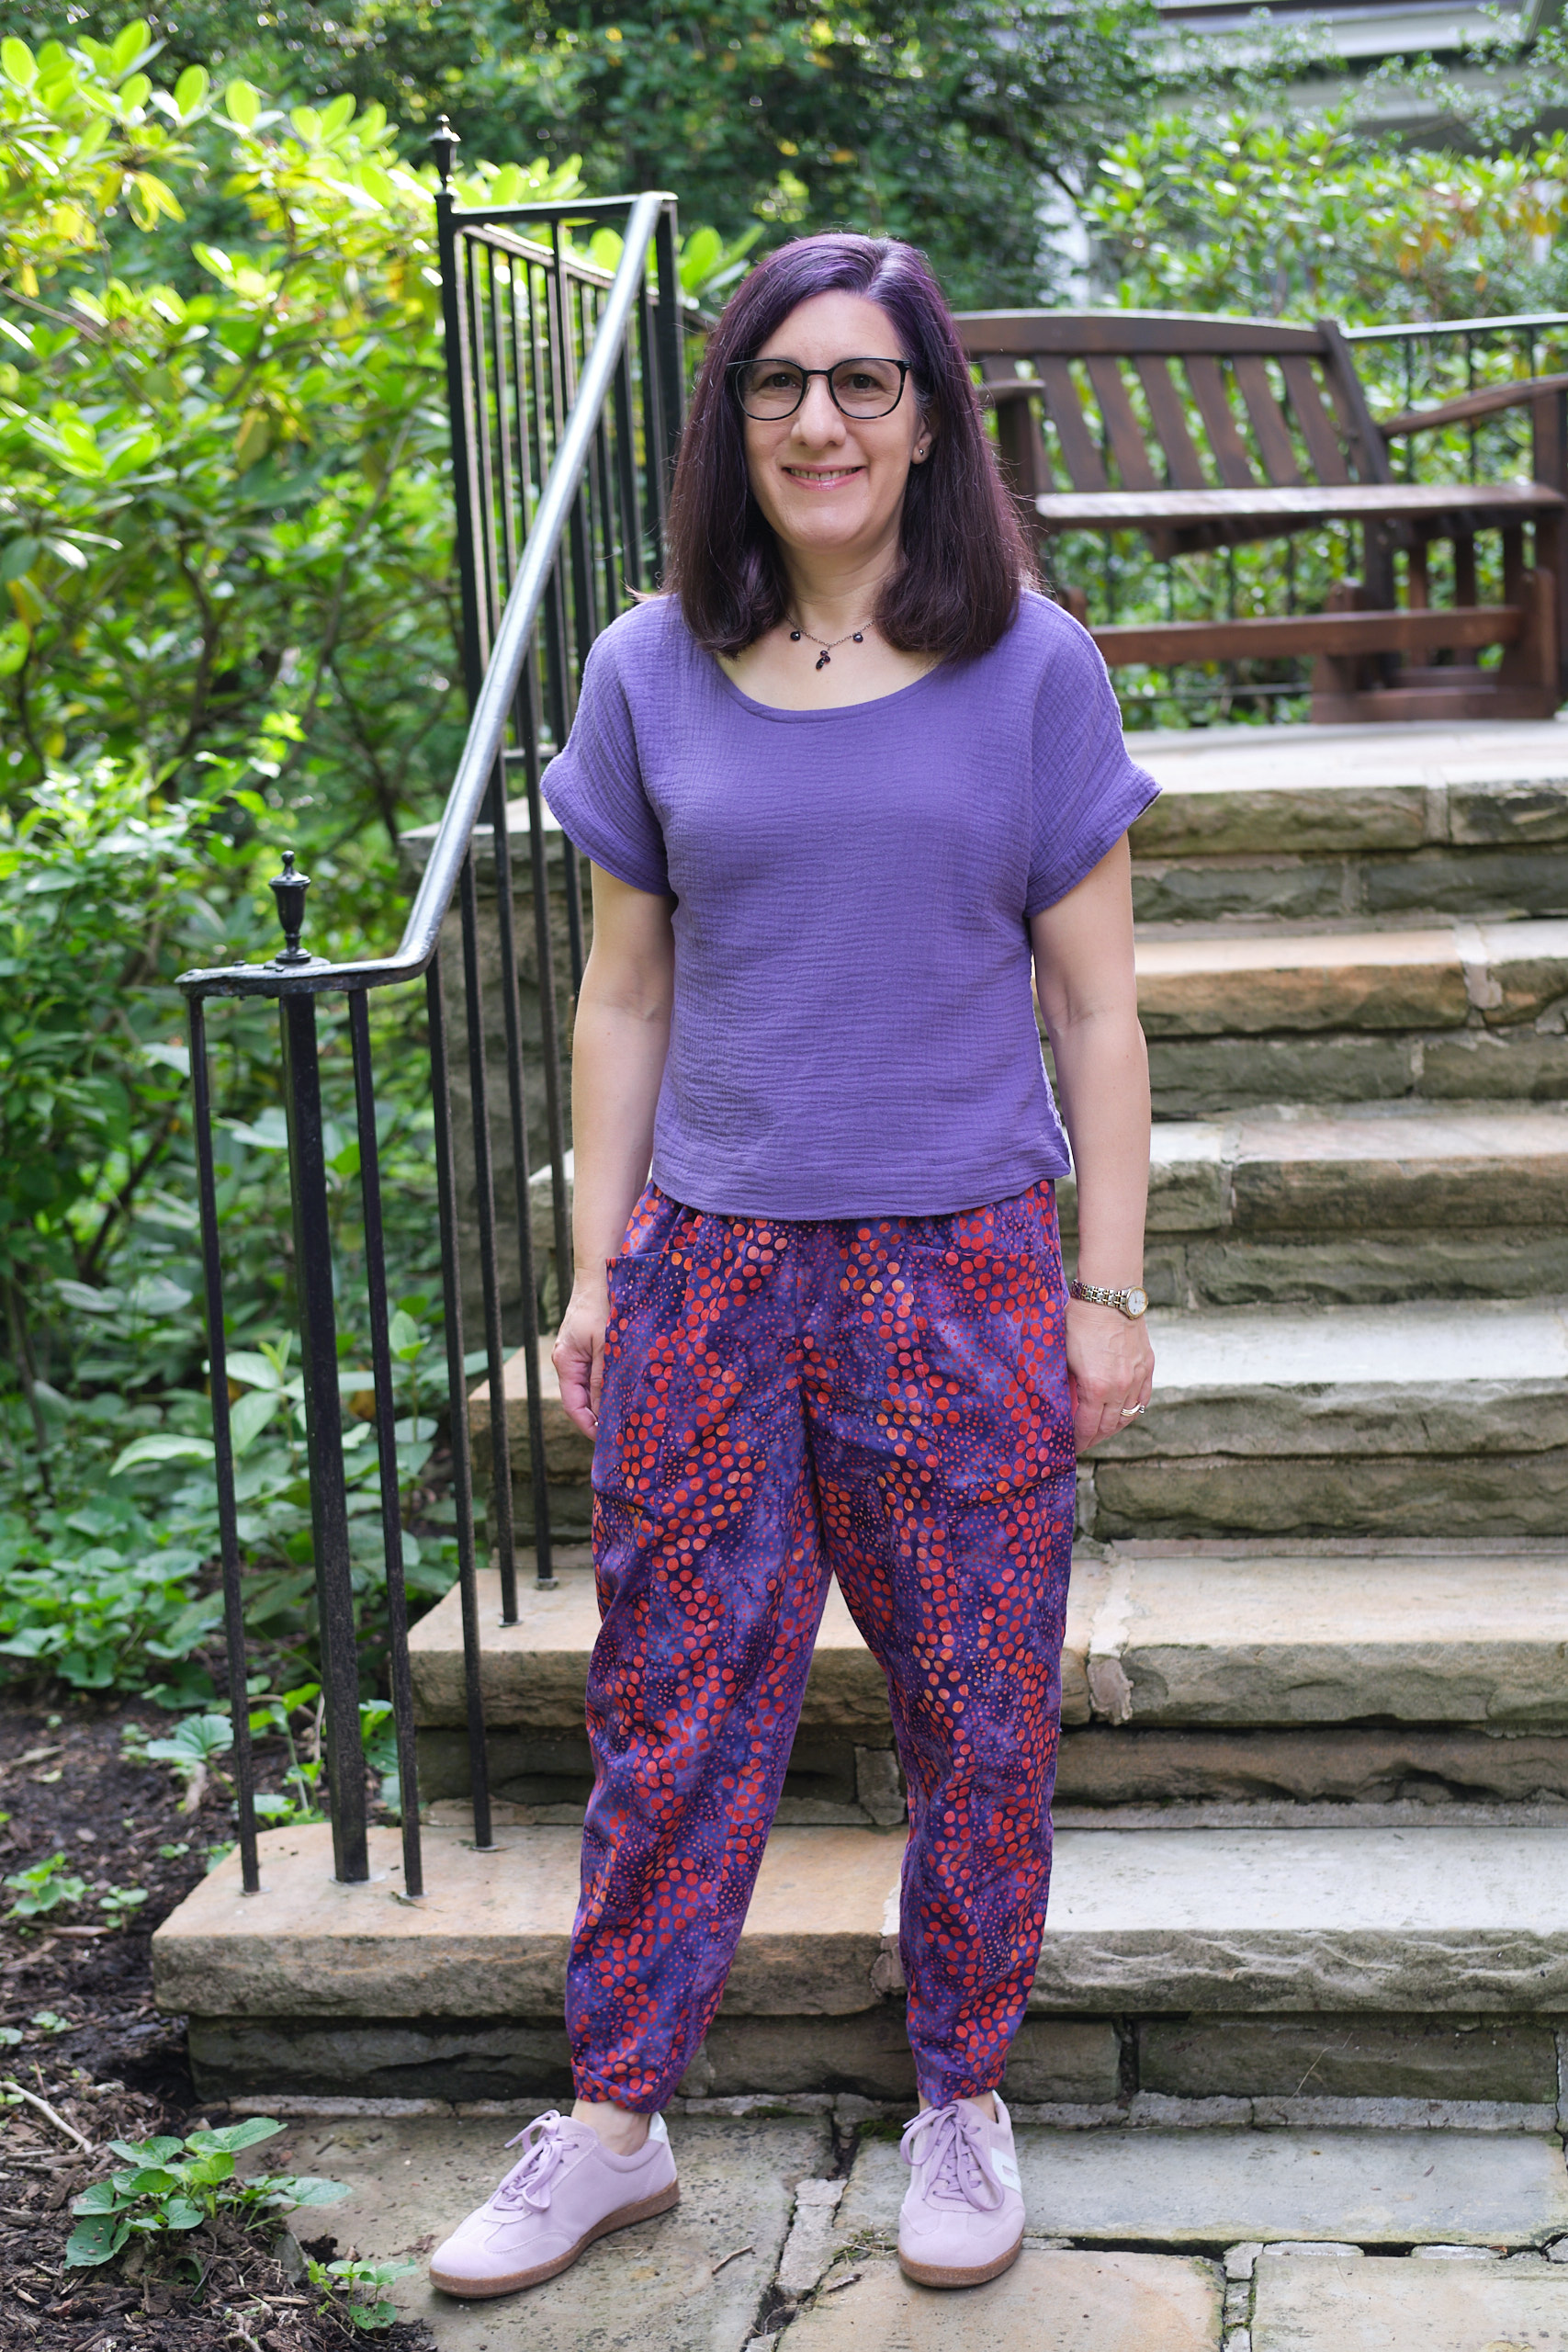
Pattern Emporium Spill the Tea tapered tie neck blouse, size AU8, 1 yard polyester Florence stretch woven, regular length, plain back, shorter tie, center front opening raised 1 inch, sloped-shoulder adjustment

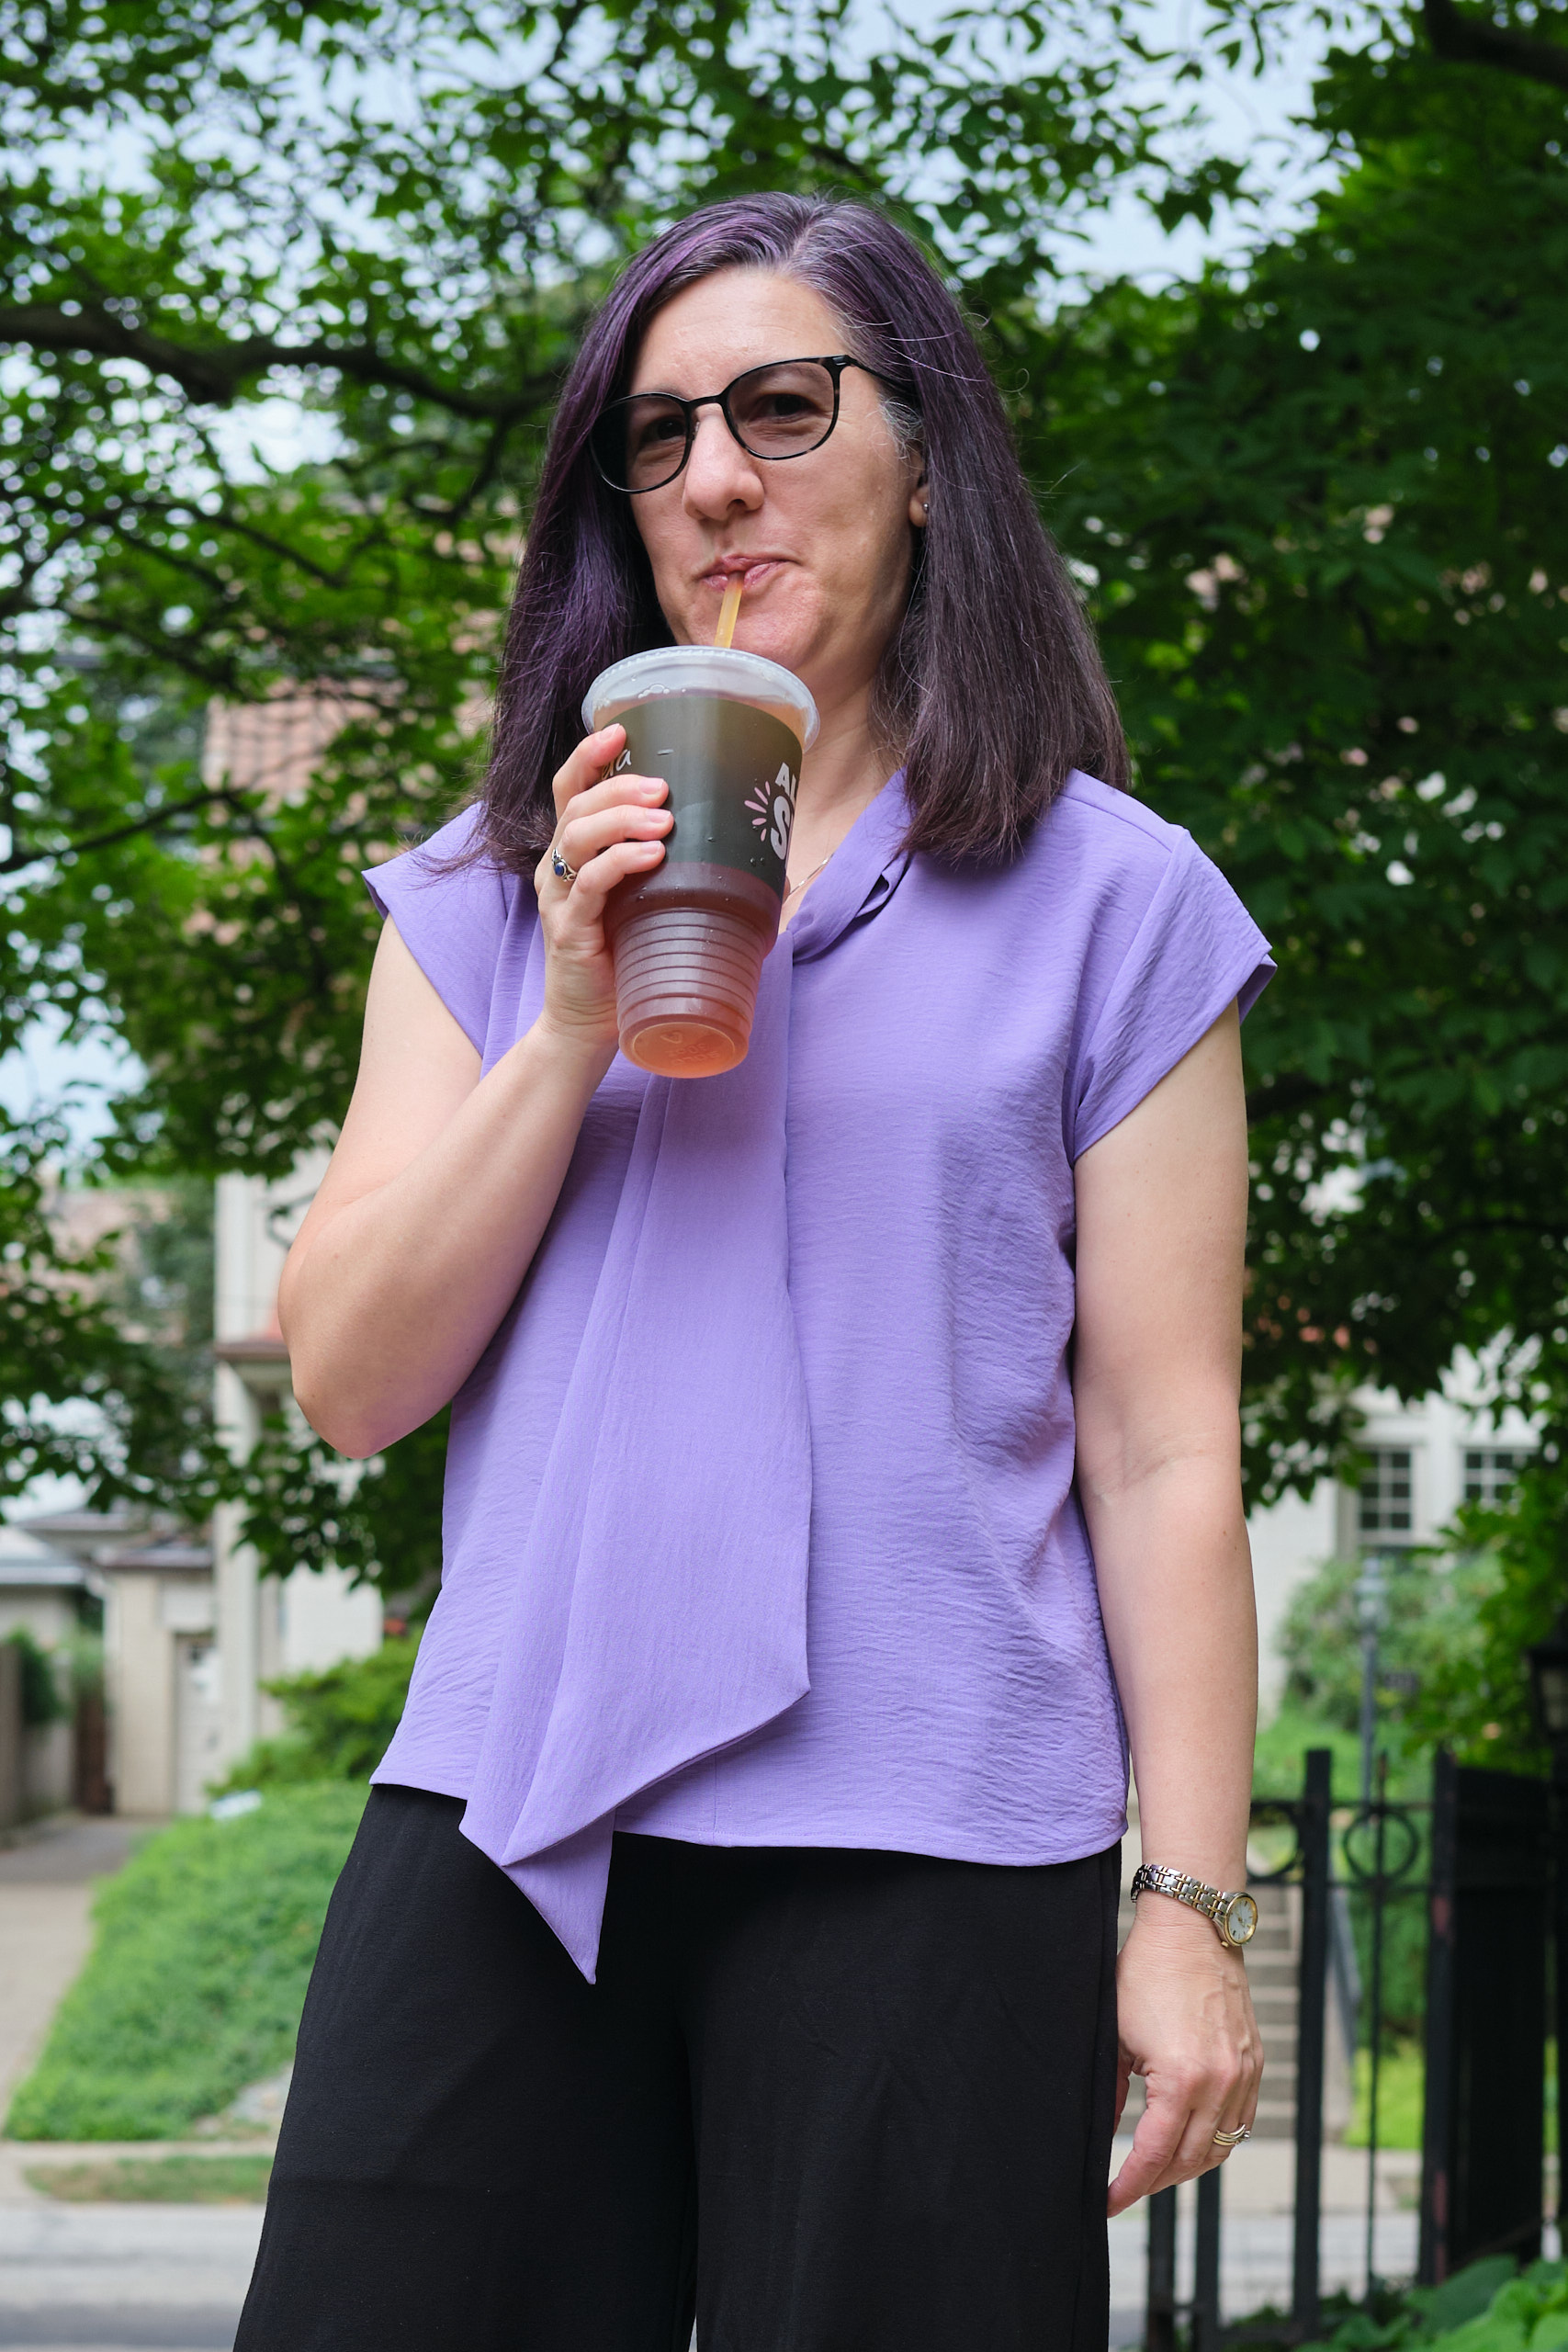
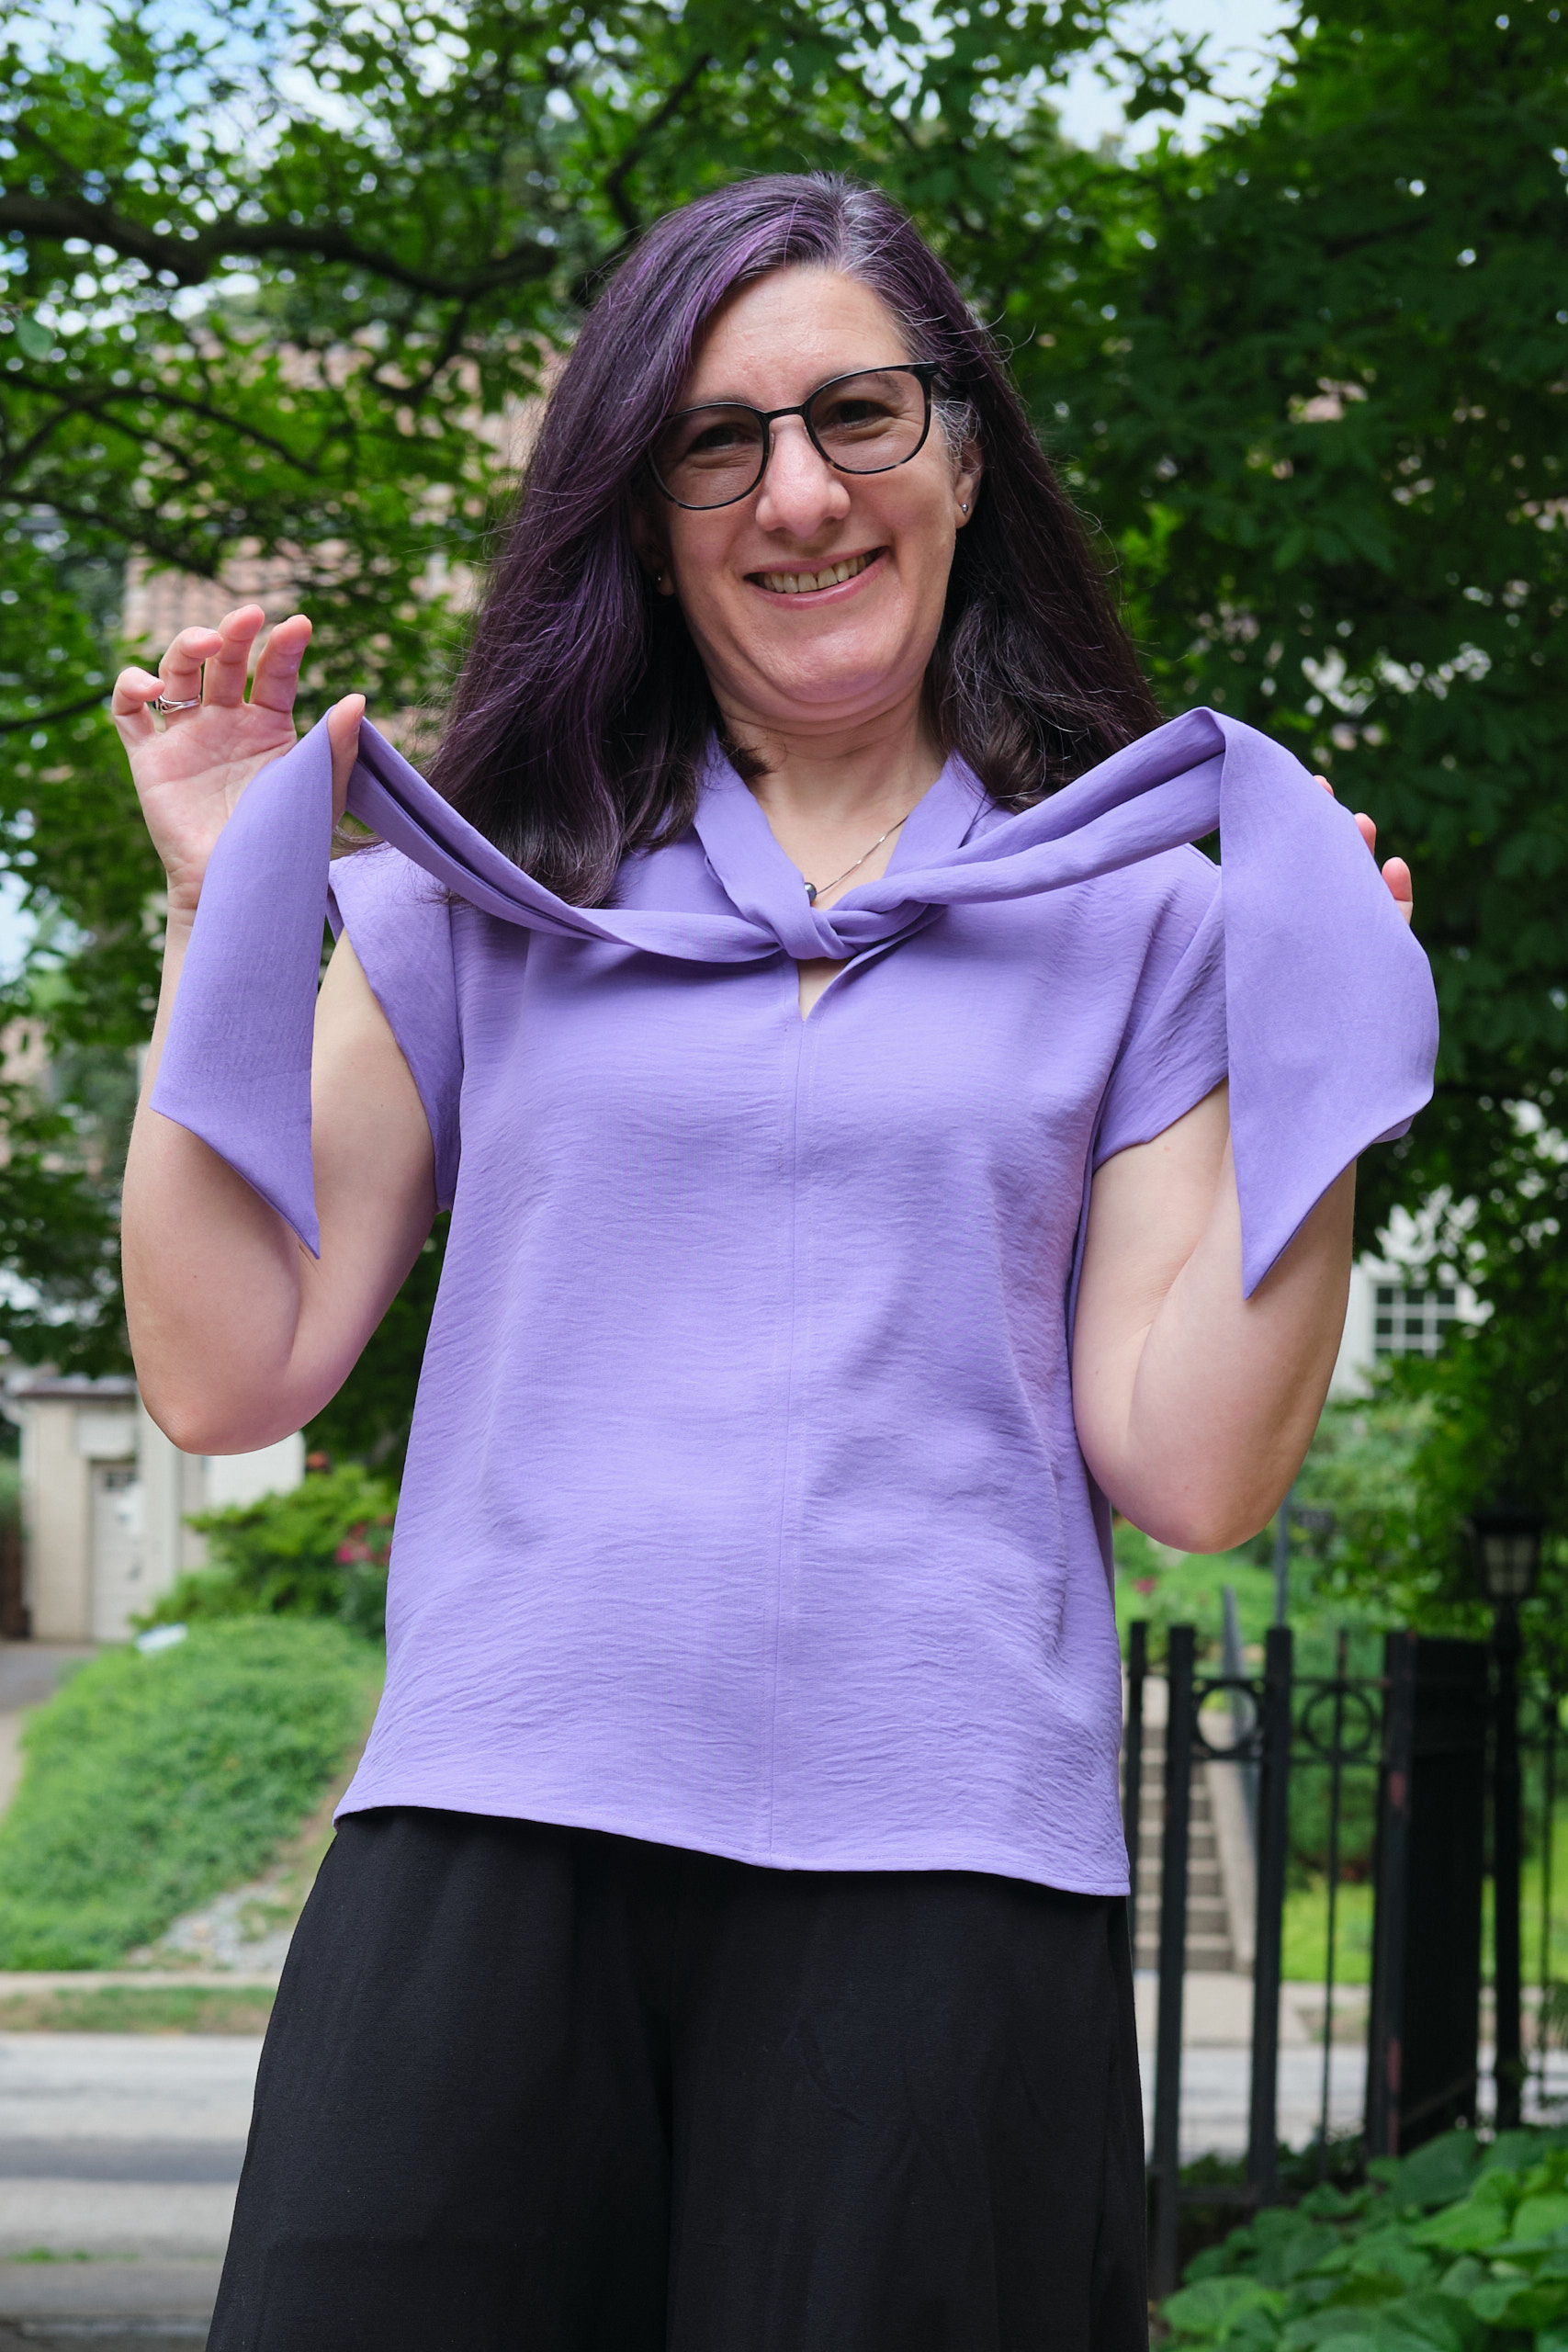
The Pattern Emporium Facebook group is filled with lovely Spill the Tea tie-neck blouses. I don’t own any tie neck blouses or even very many woven blouses, but I was intrigued by this pattern, especially the cute cap sleeve version. I normally shy away from any blouse that needs to be ironed or buttoned and has fussy collars or ties that I find always shift around and look sloppy when I wear them. This pattern doesn’t have buttons but I was a little bit uncertain about the tie.

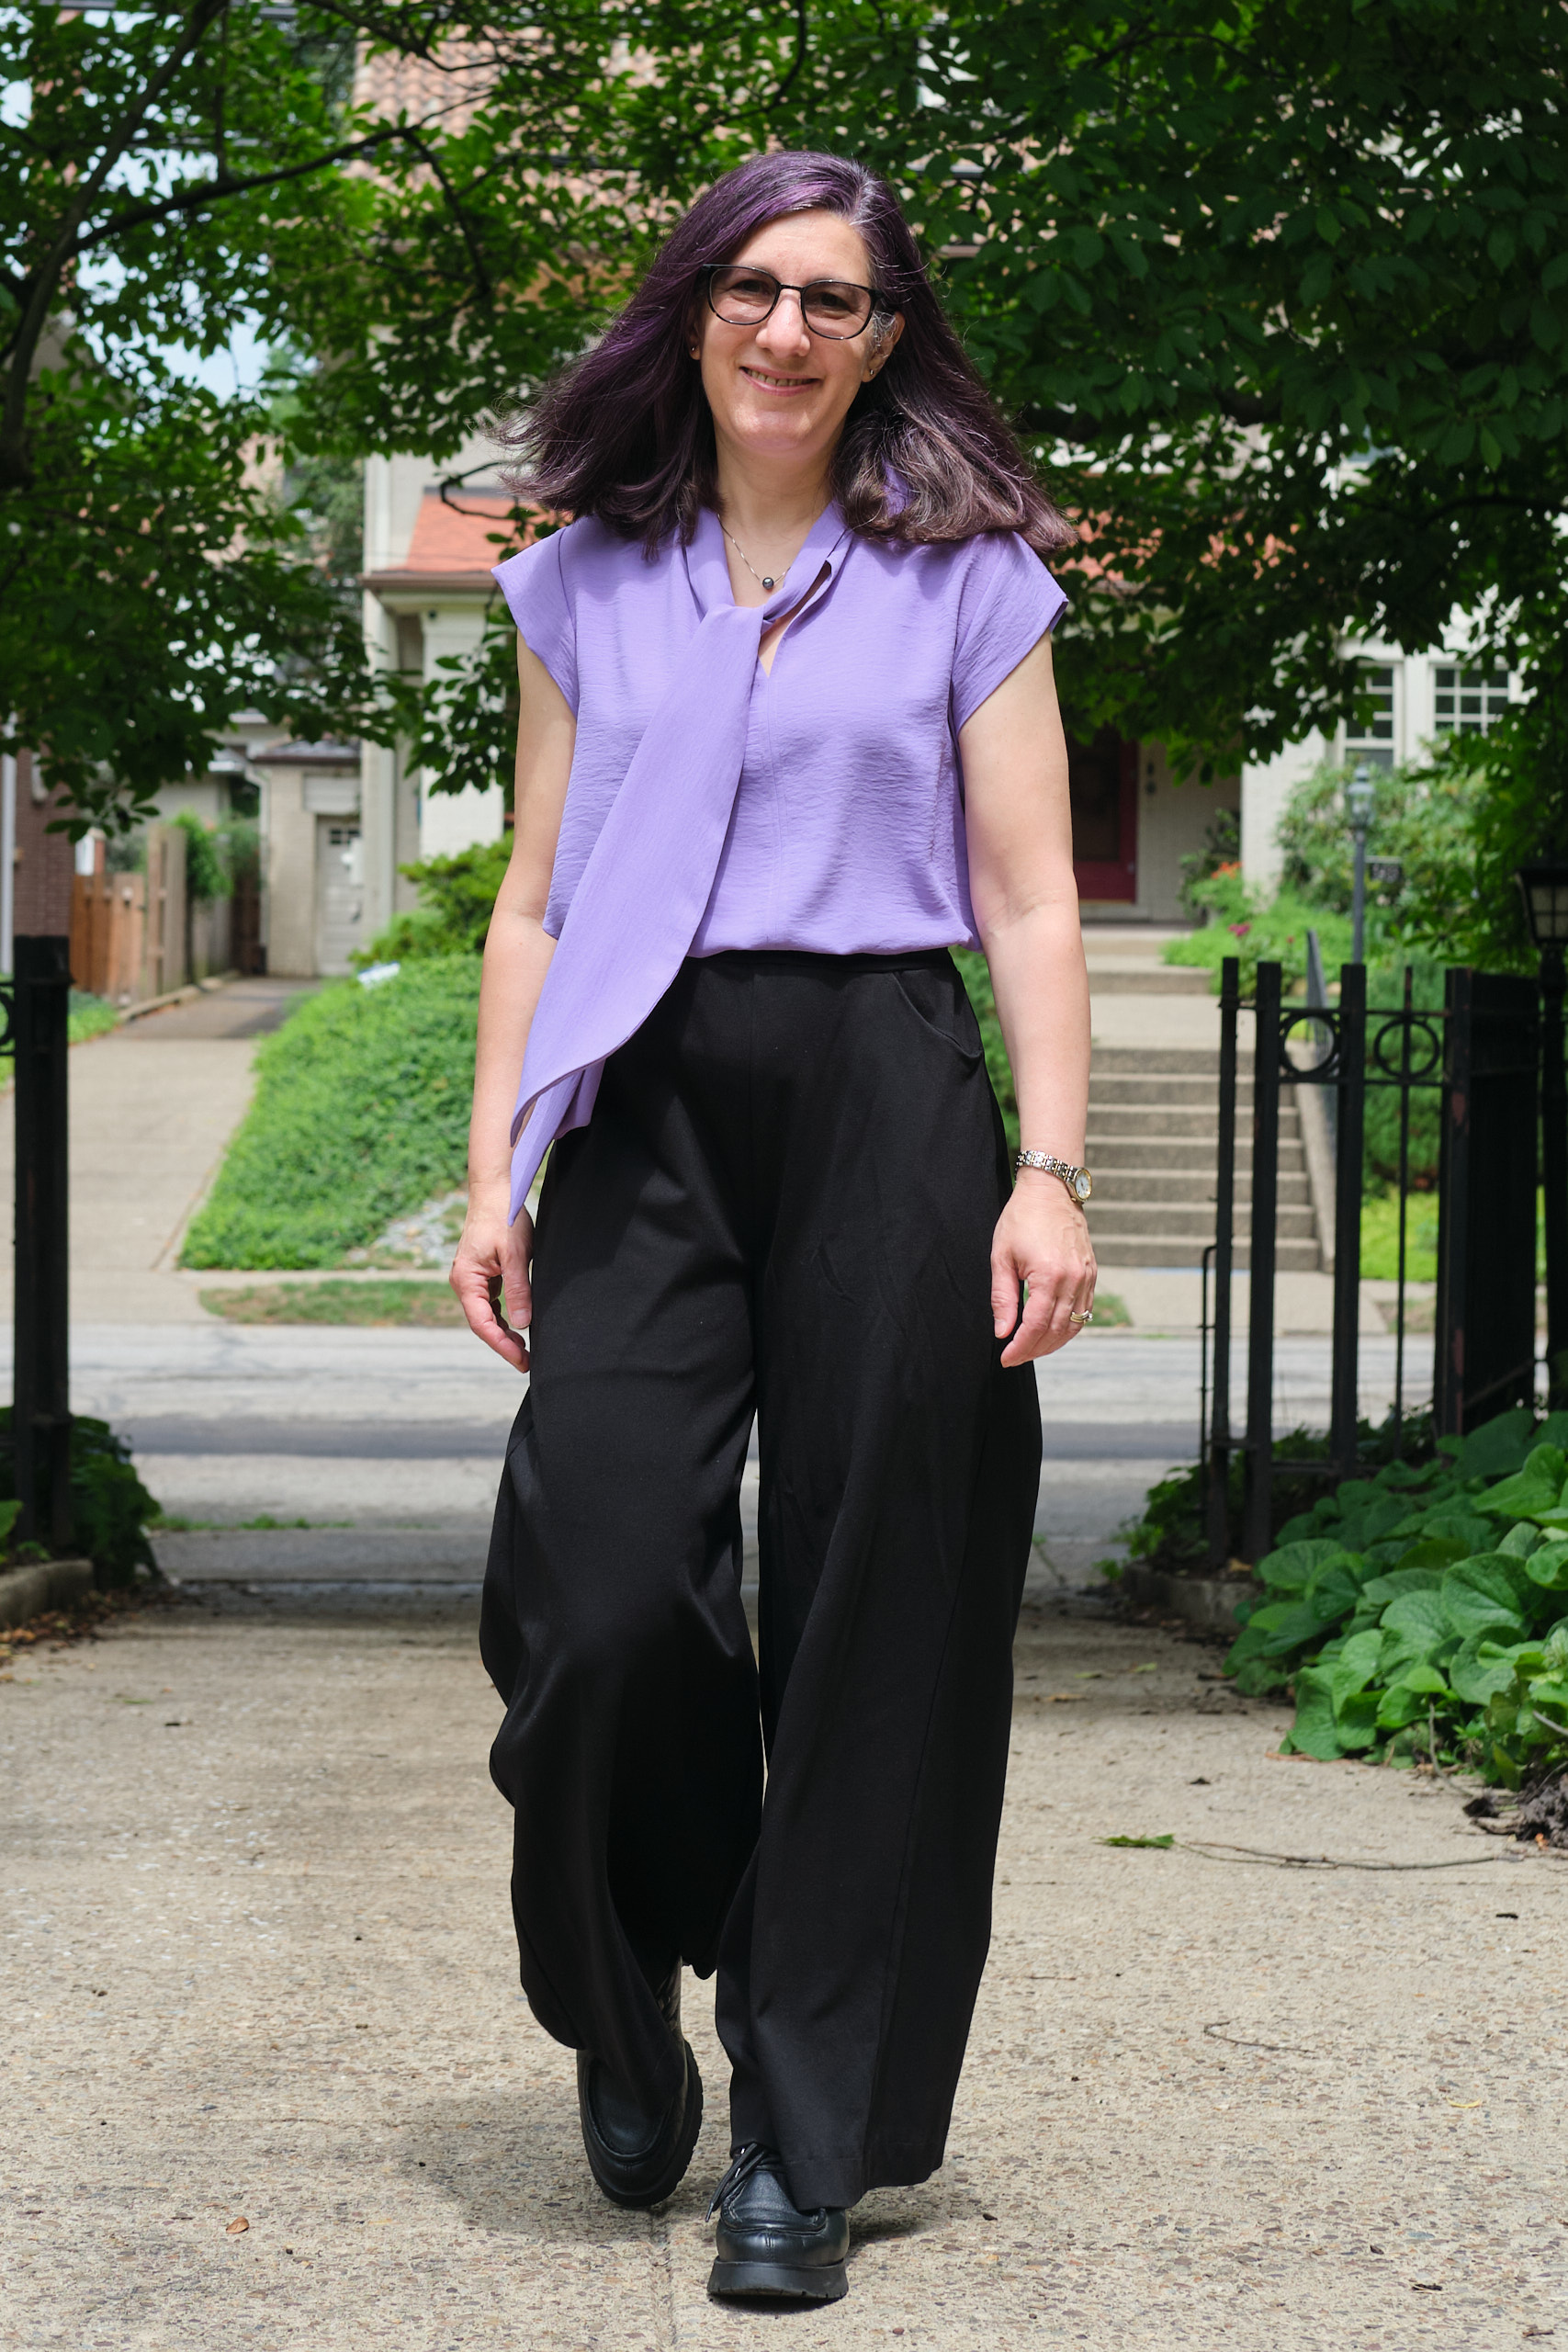
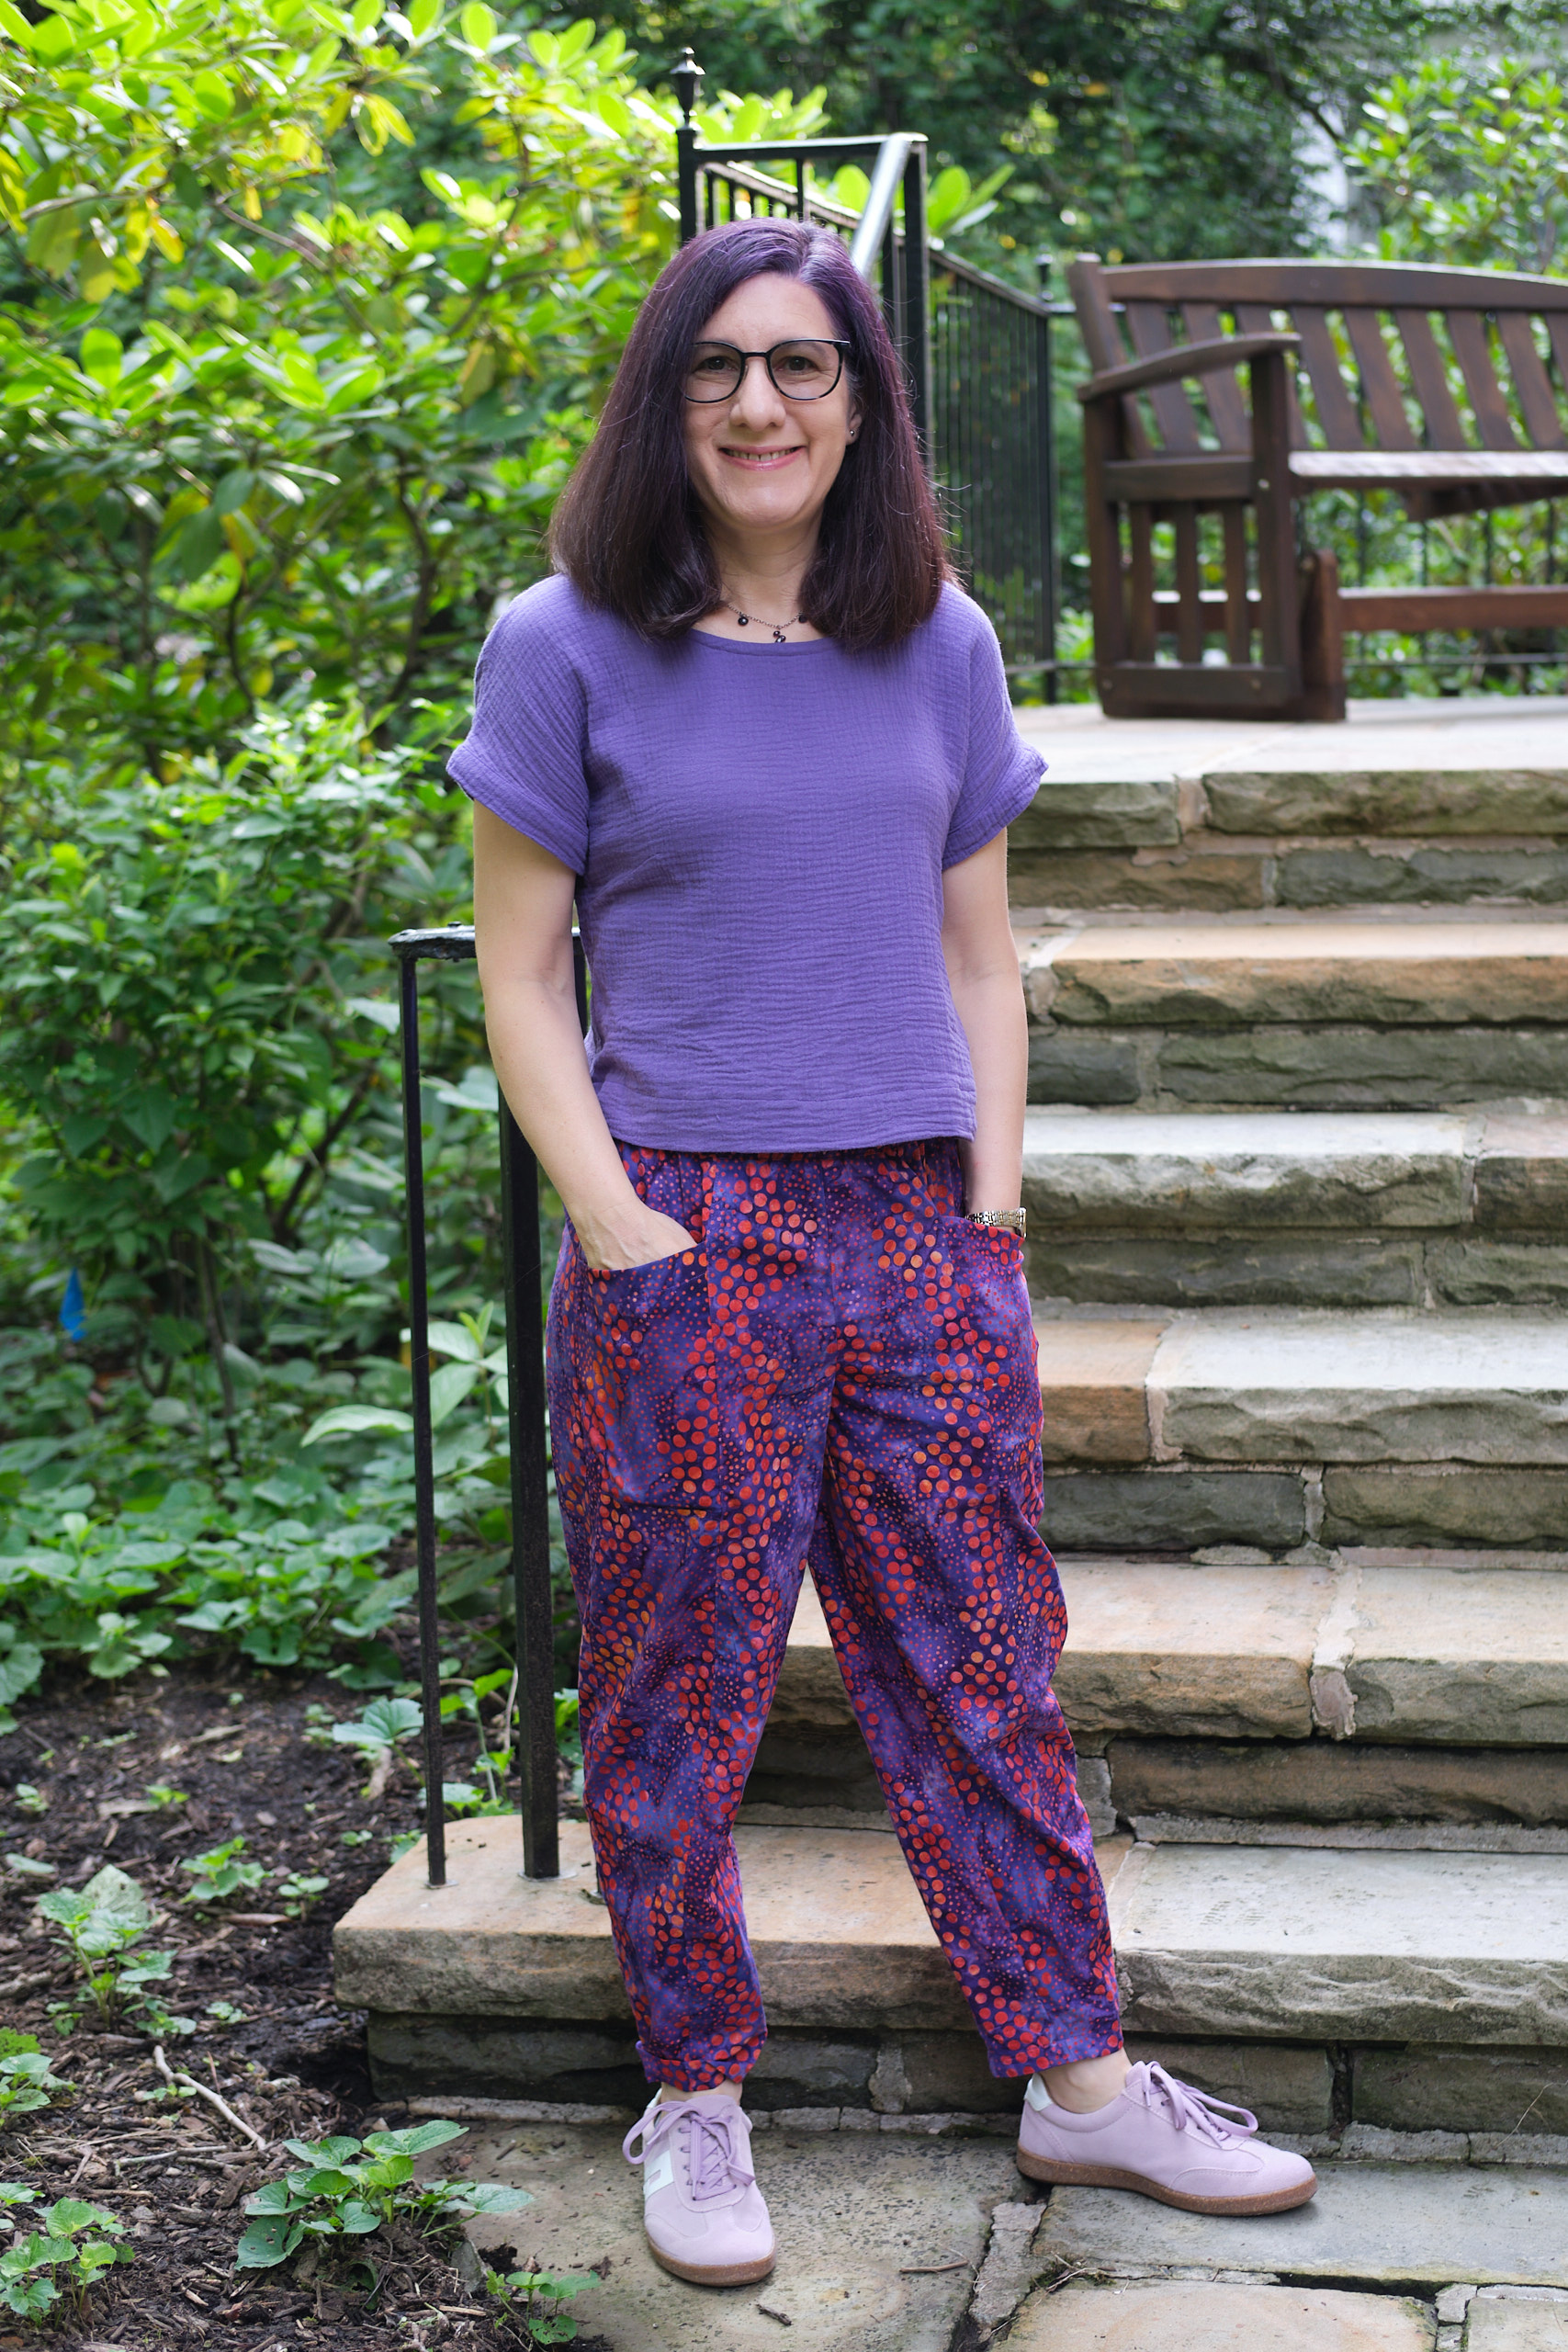
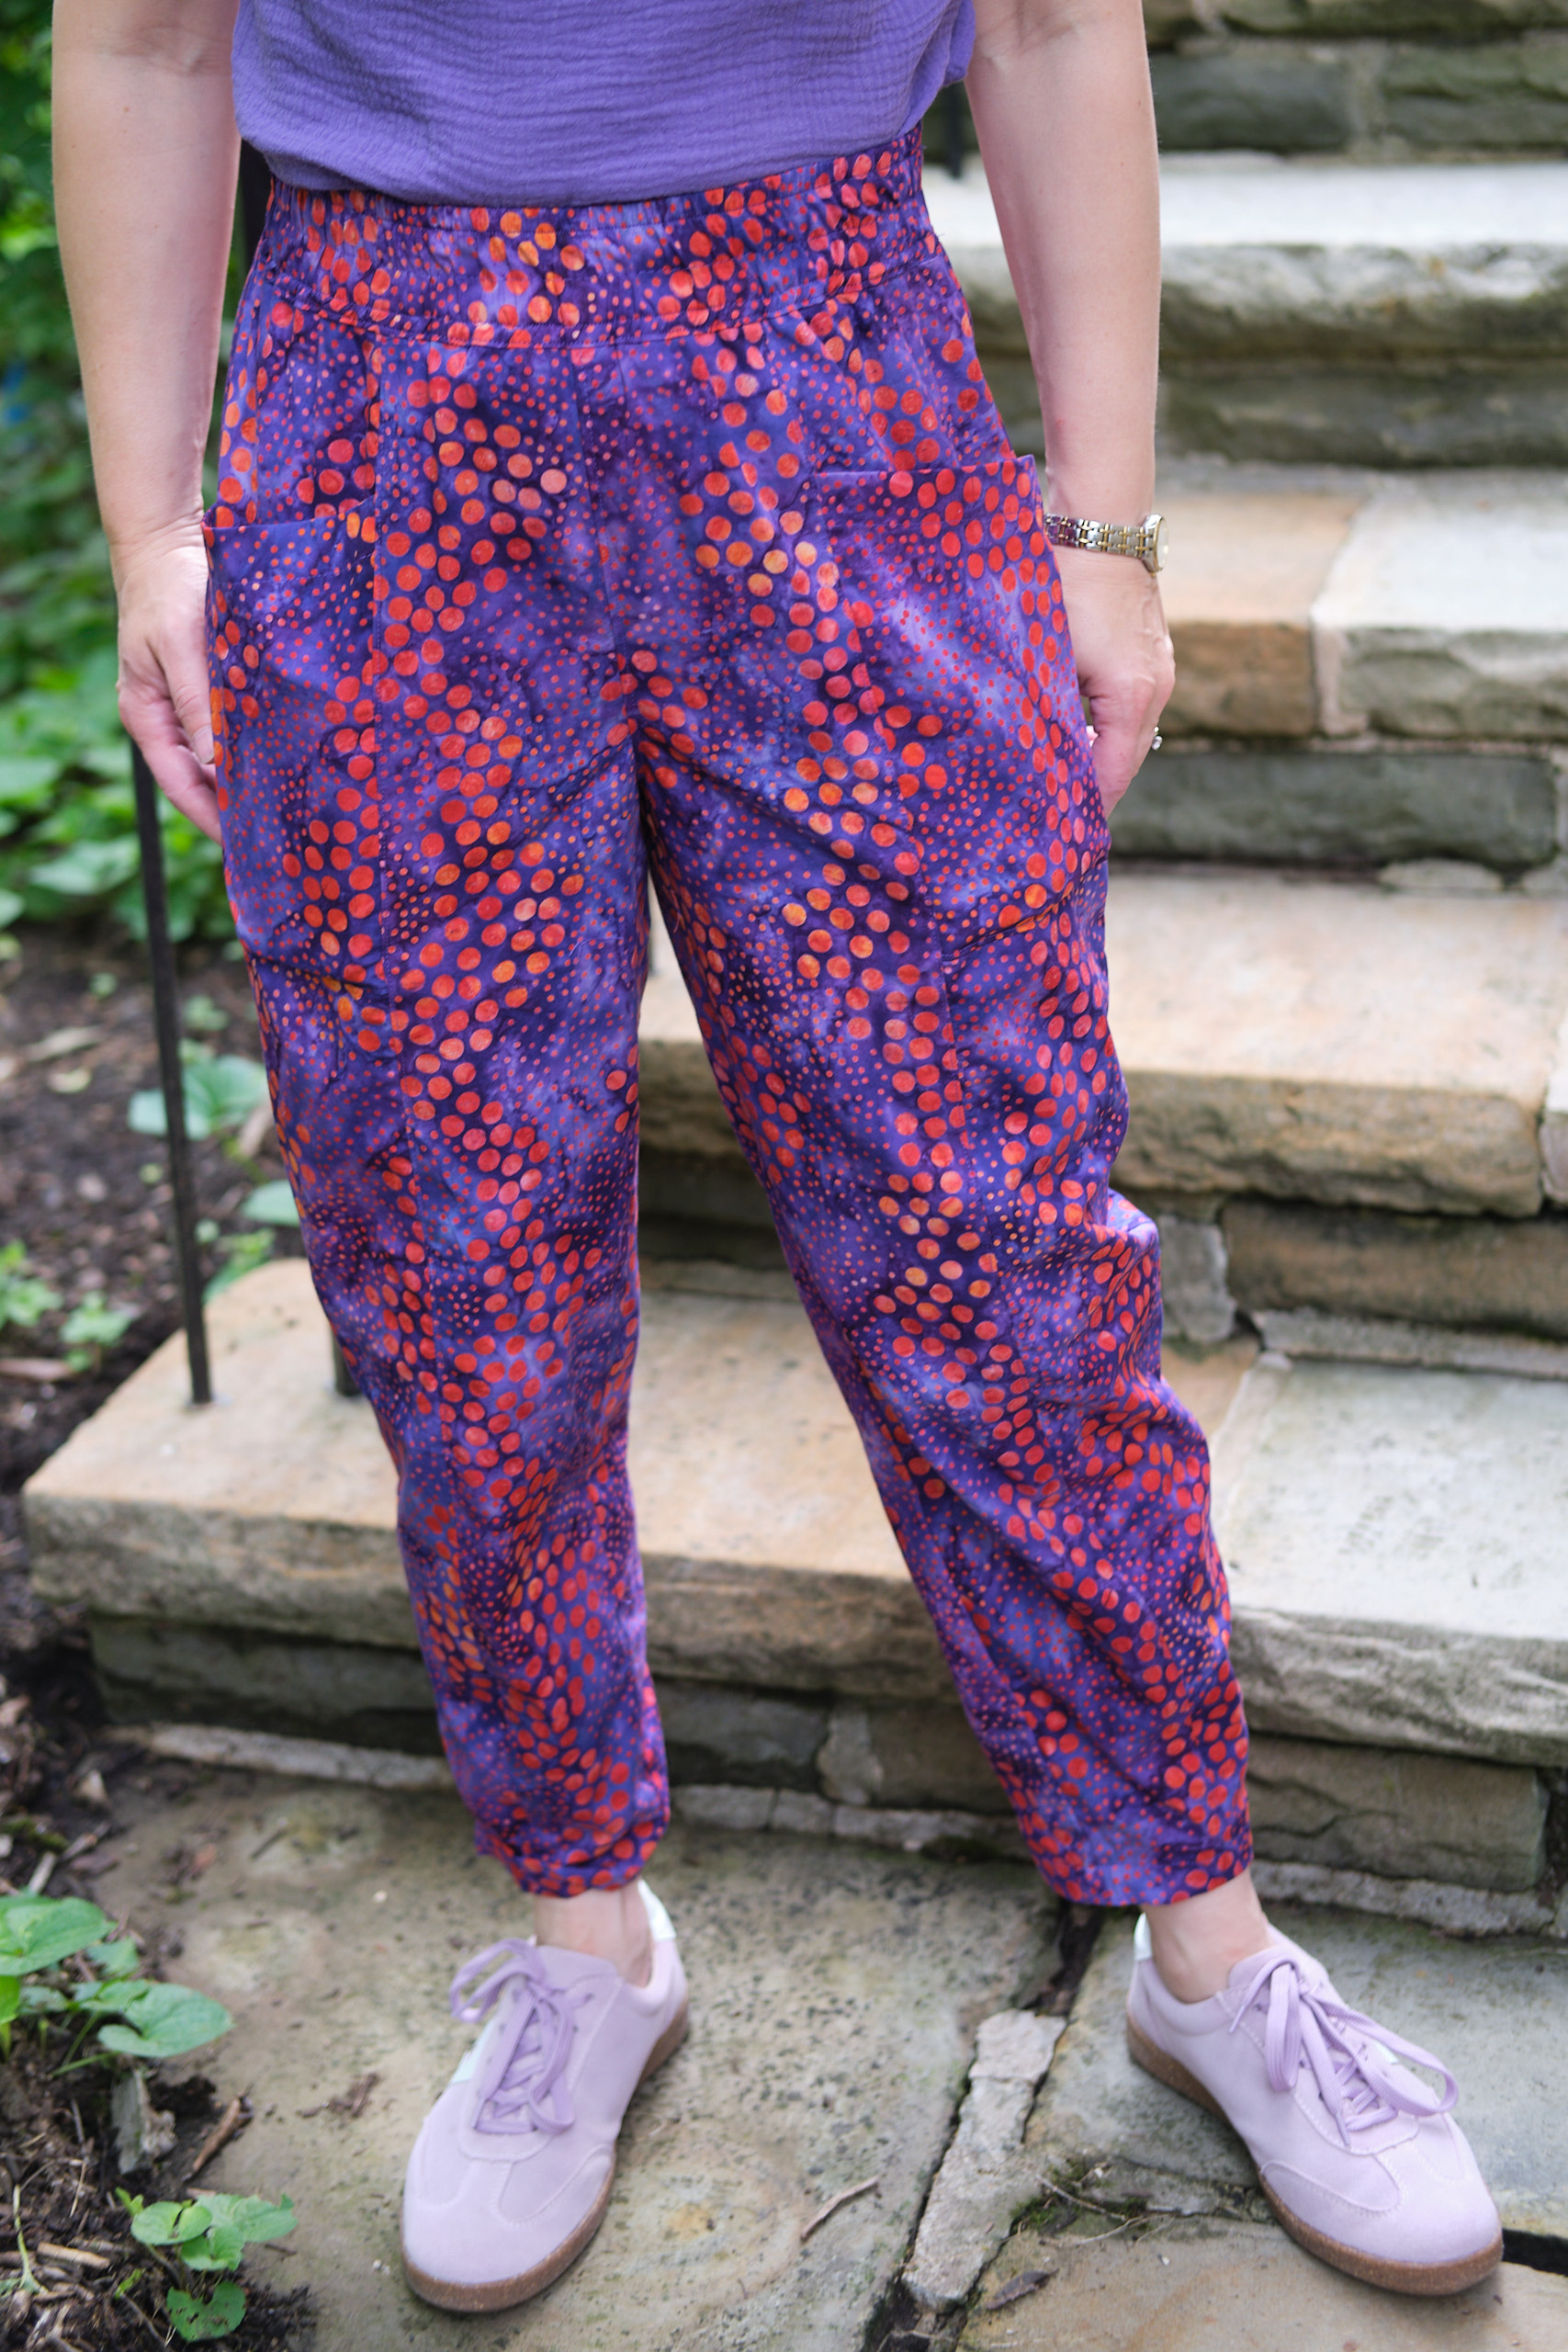
I don’t have a lot of drapey woven fabric in my stash, but I found a couple of yards of medium weight 100% polyester Florence stretch woven in flourishing lavender than I bought last year from Surge, and decided to give Spill the Tea a try. The Florence fabric has a subtle crinkly texture and has a little bit of body but a very fluid drape. It doesn’t need to be ironed and it stretches a bit. The lavender Florence seemed perfect for this blouse, and it allowed me to get one more make with purple thread before changing the thread in my serger (my previous three makes were an Alva double-gauze purple top, Nori purple batik quilters cotton pants, and Be Mine purple double-gauze jacket).

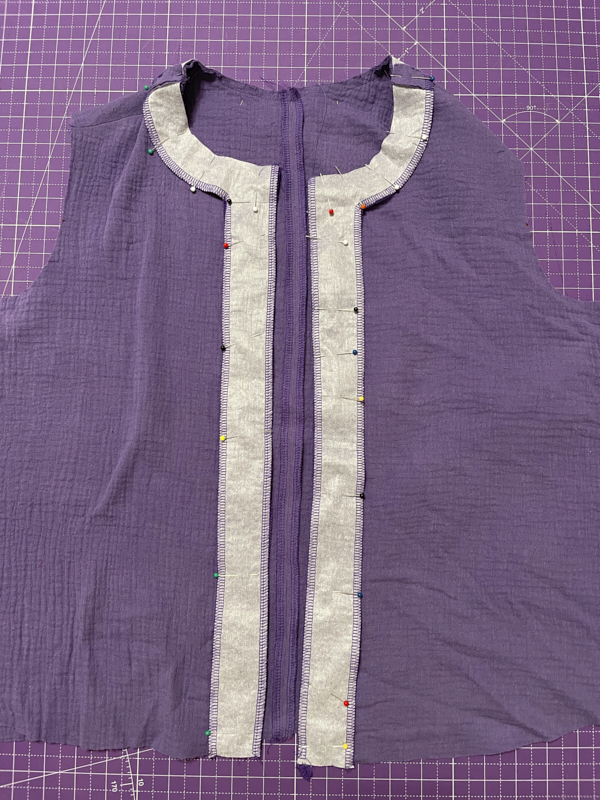
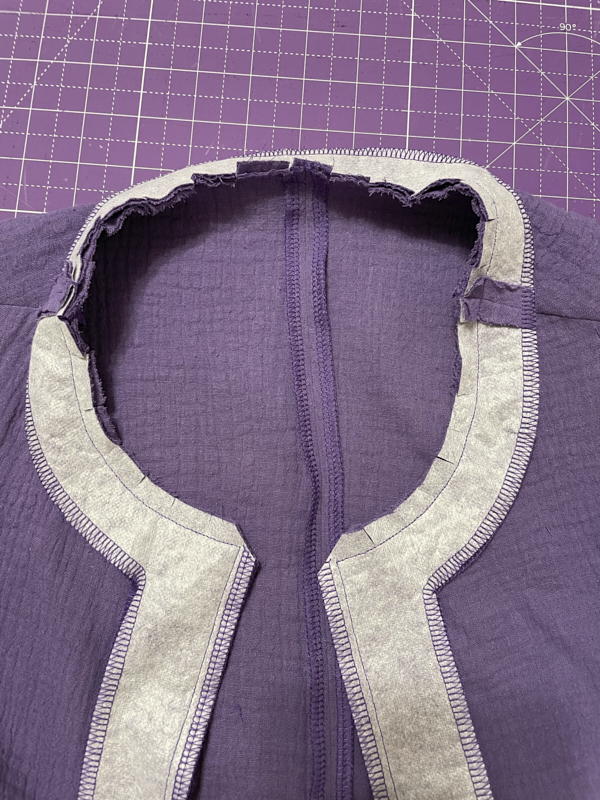
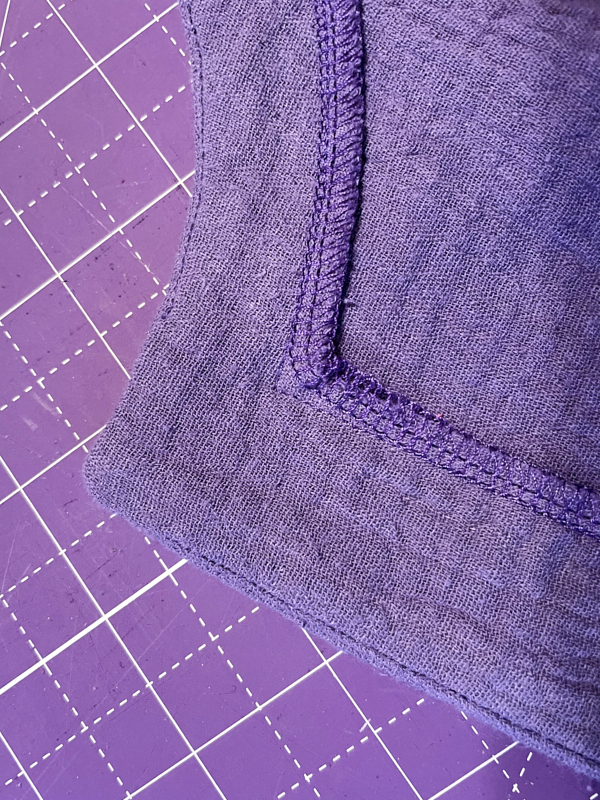
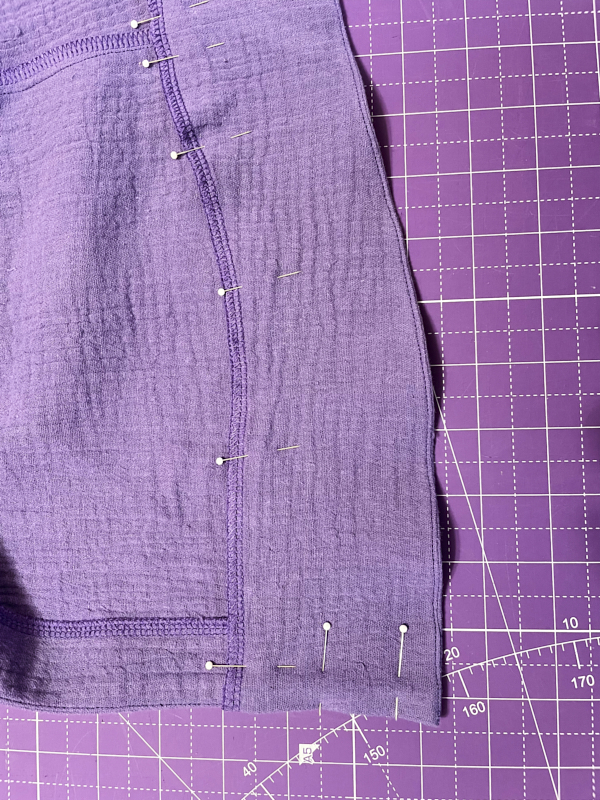
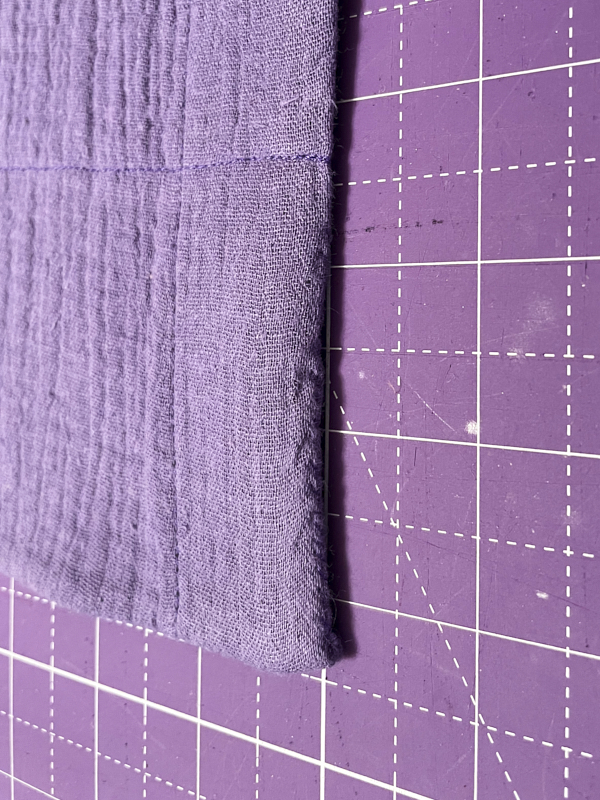
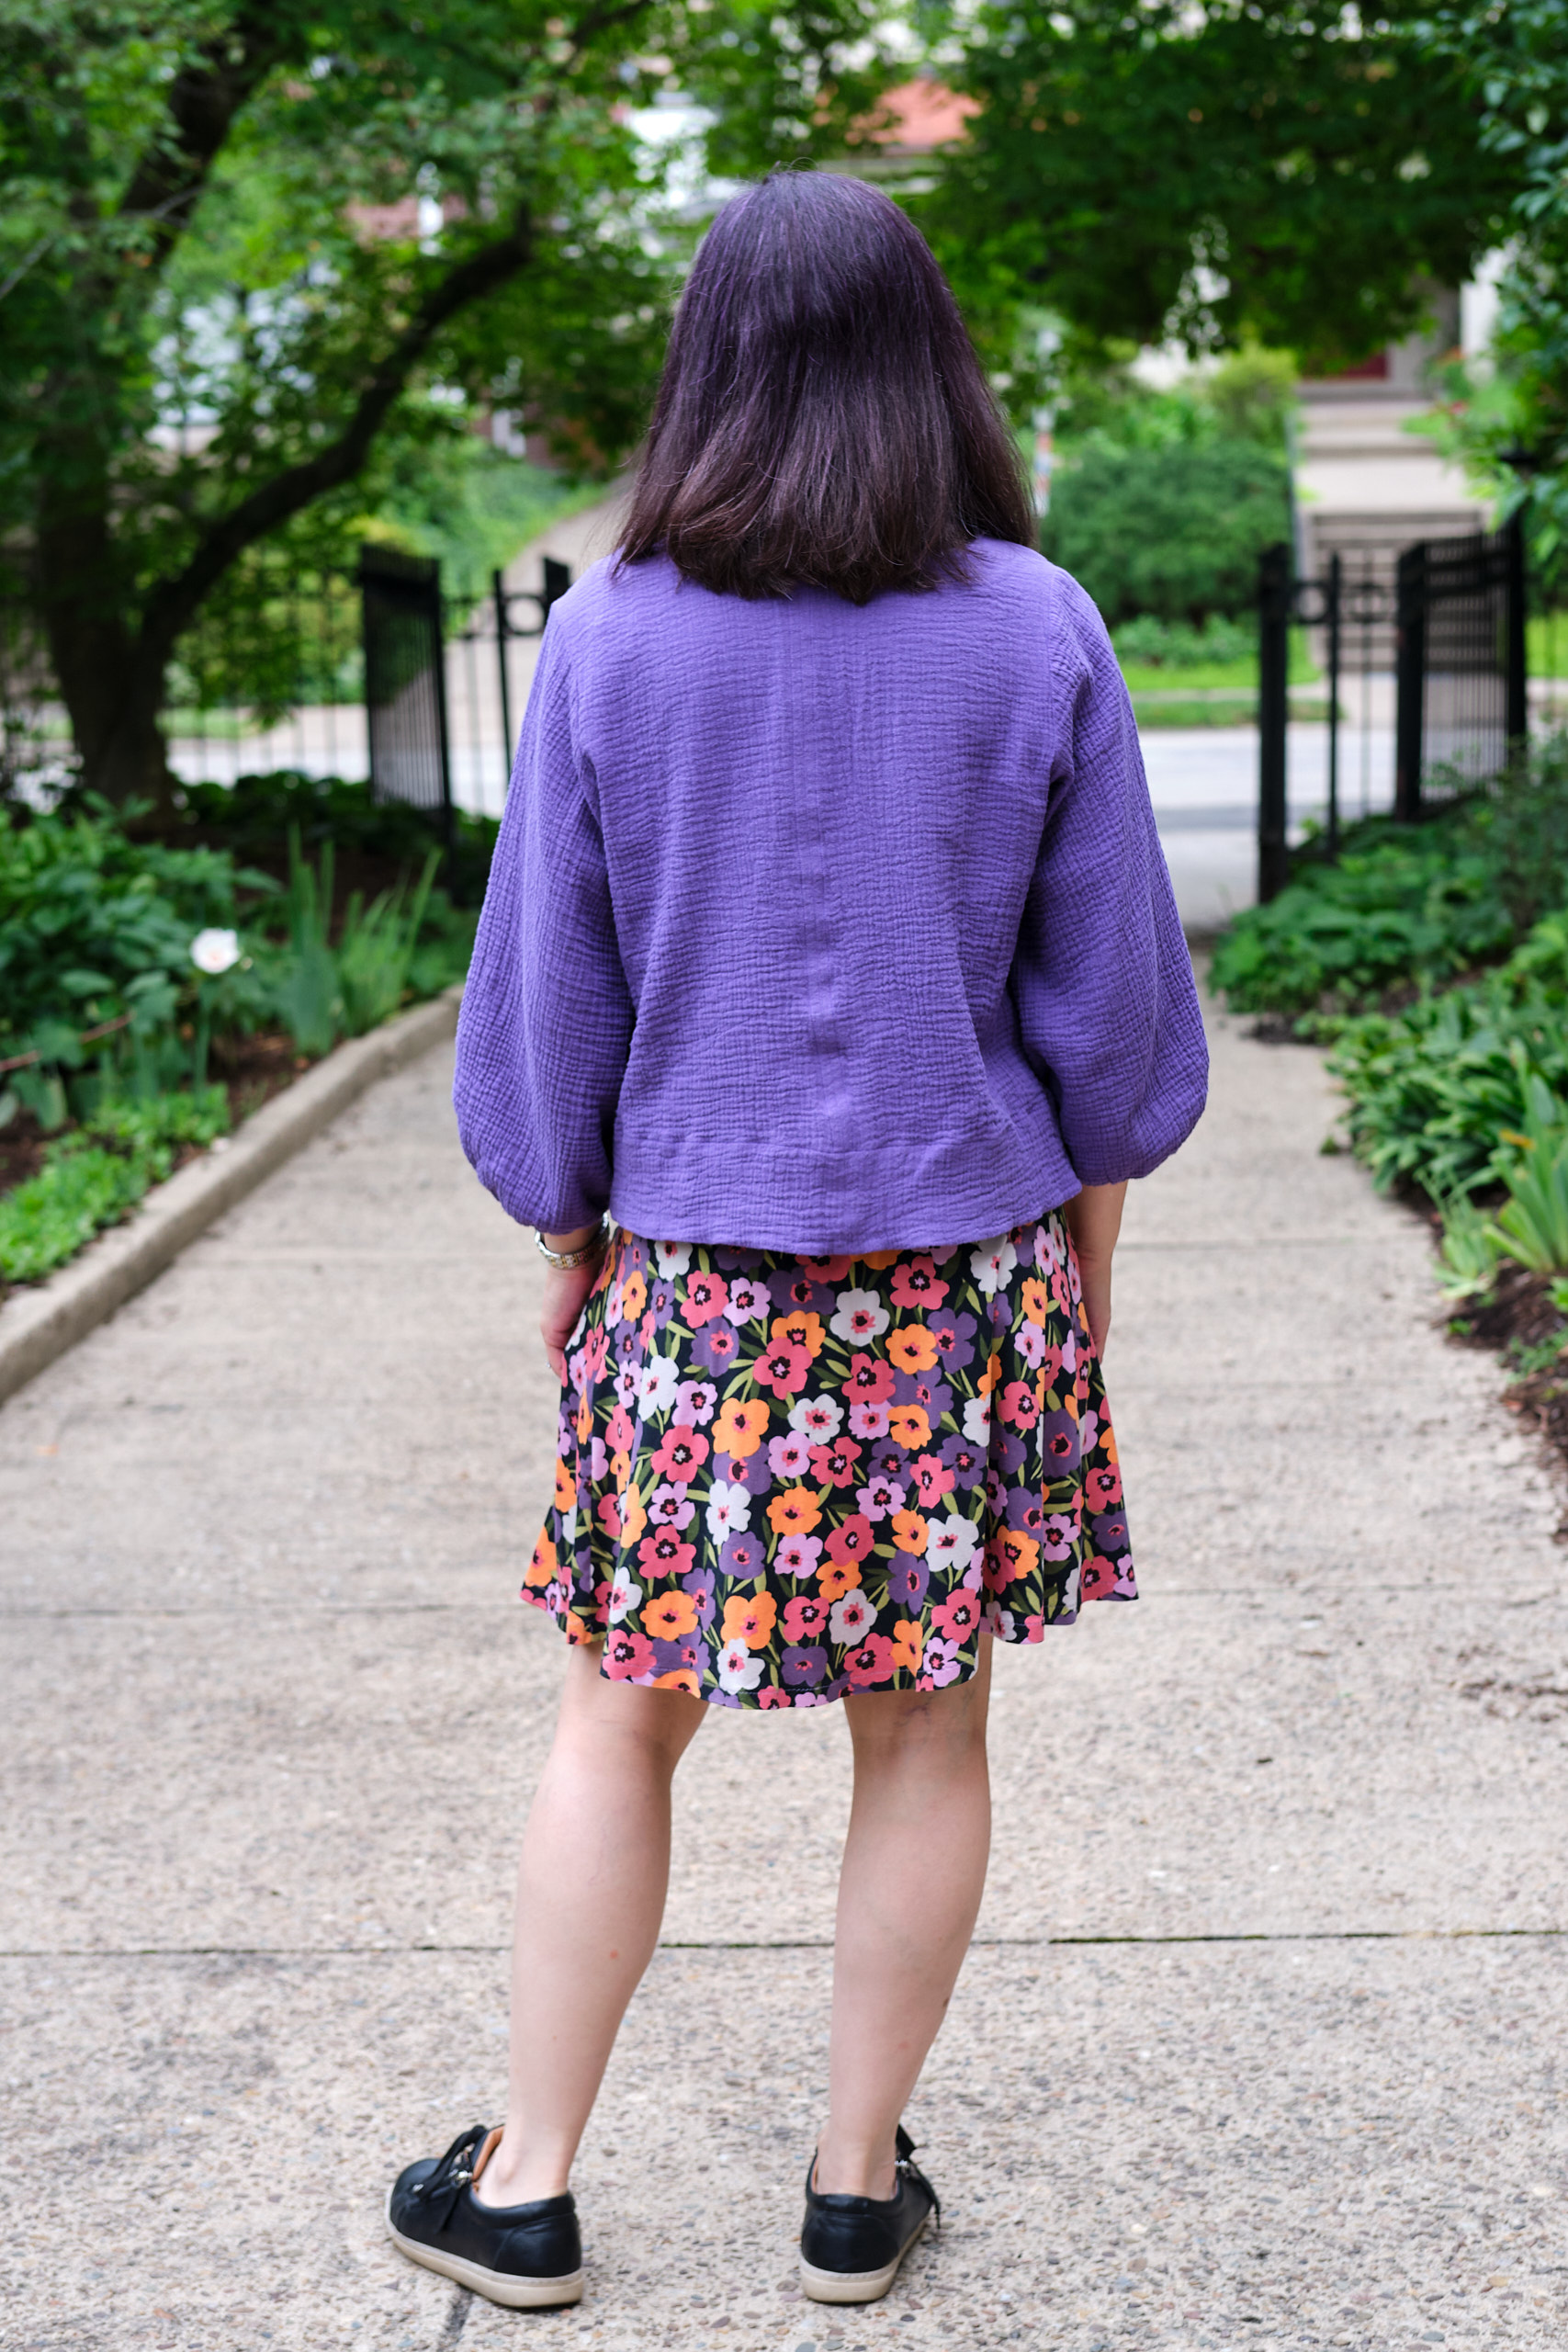
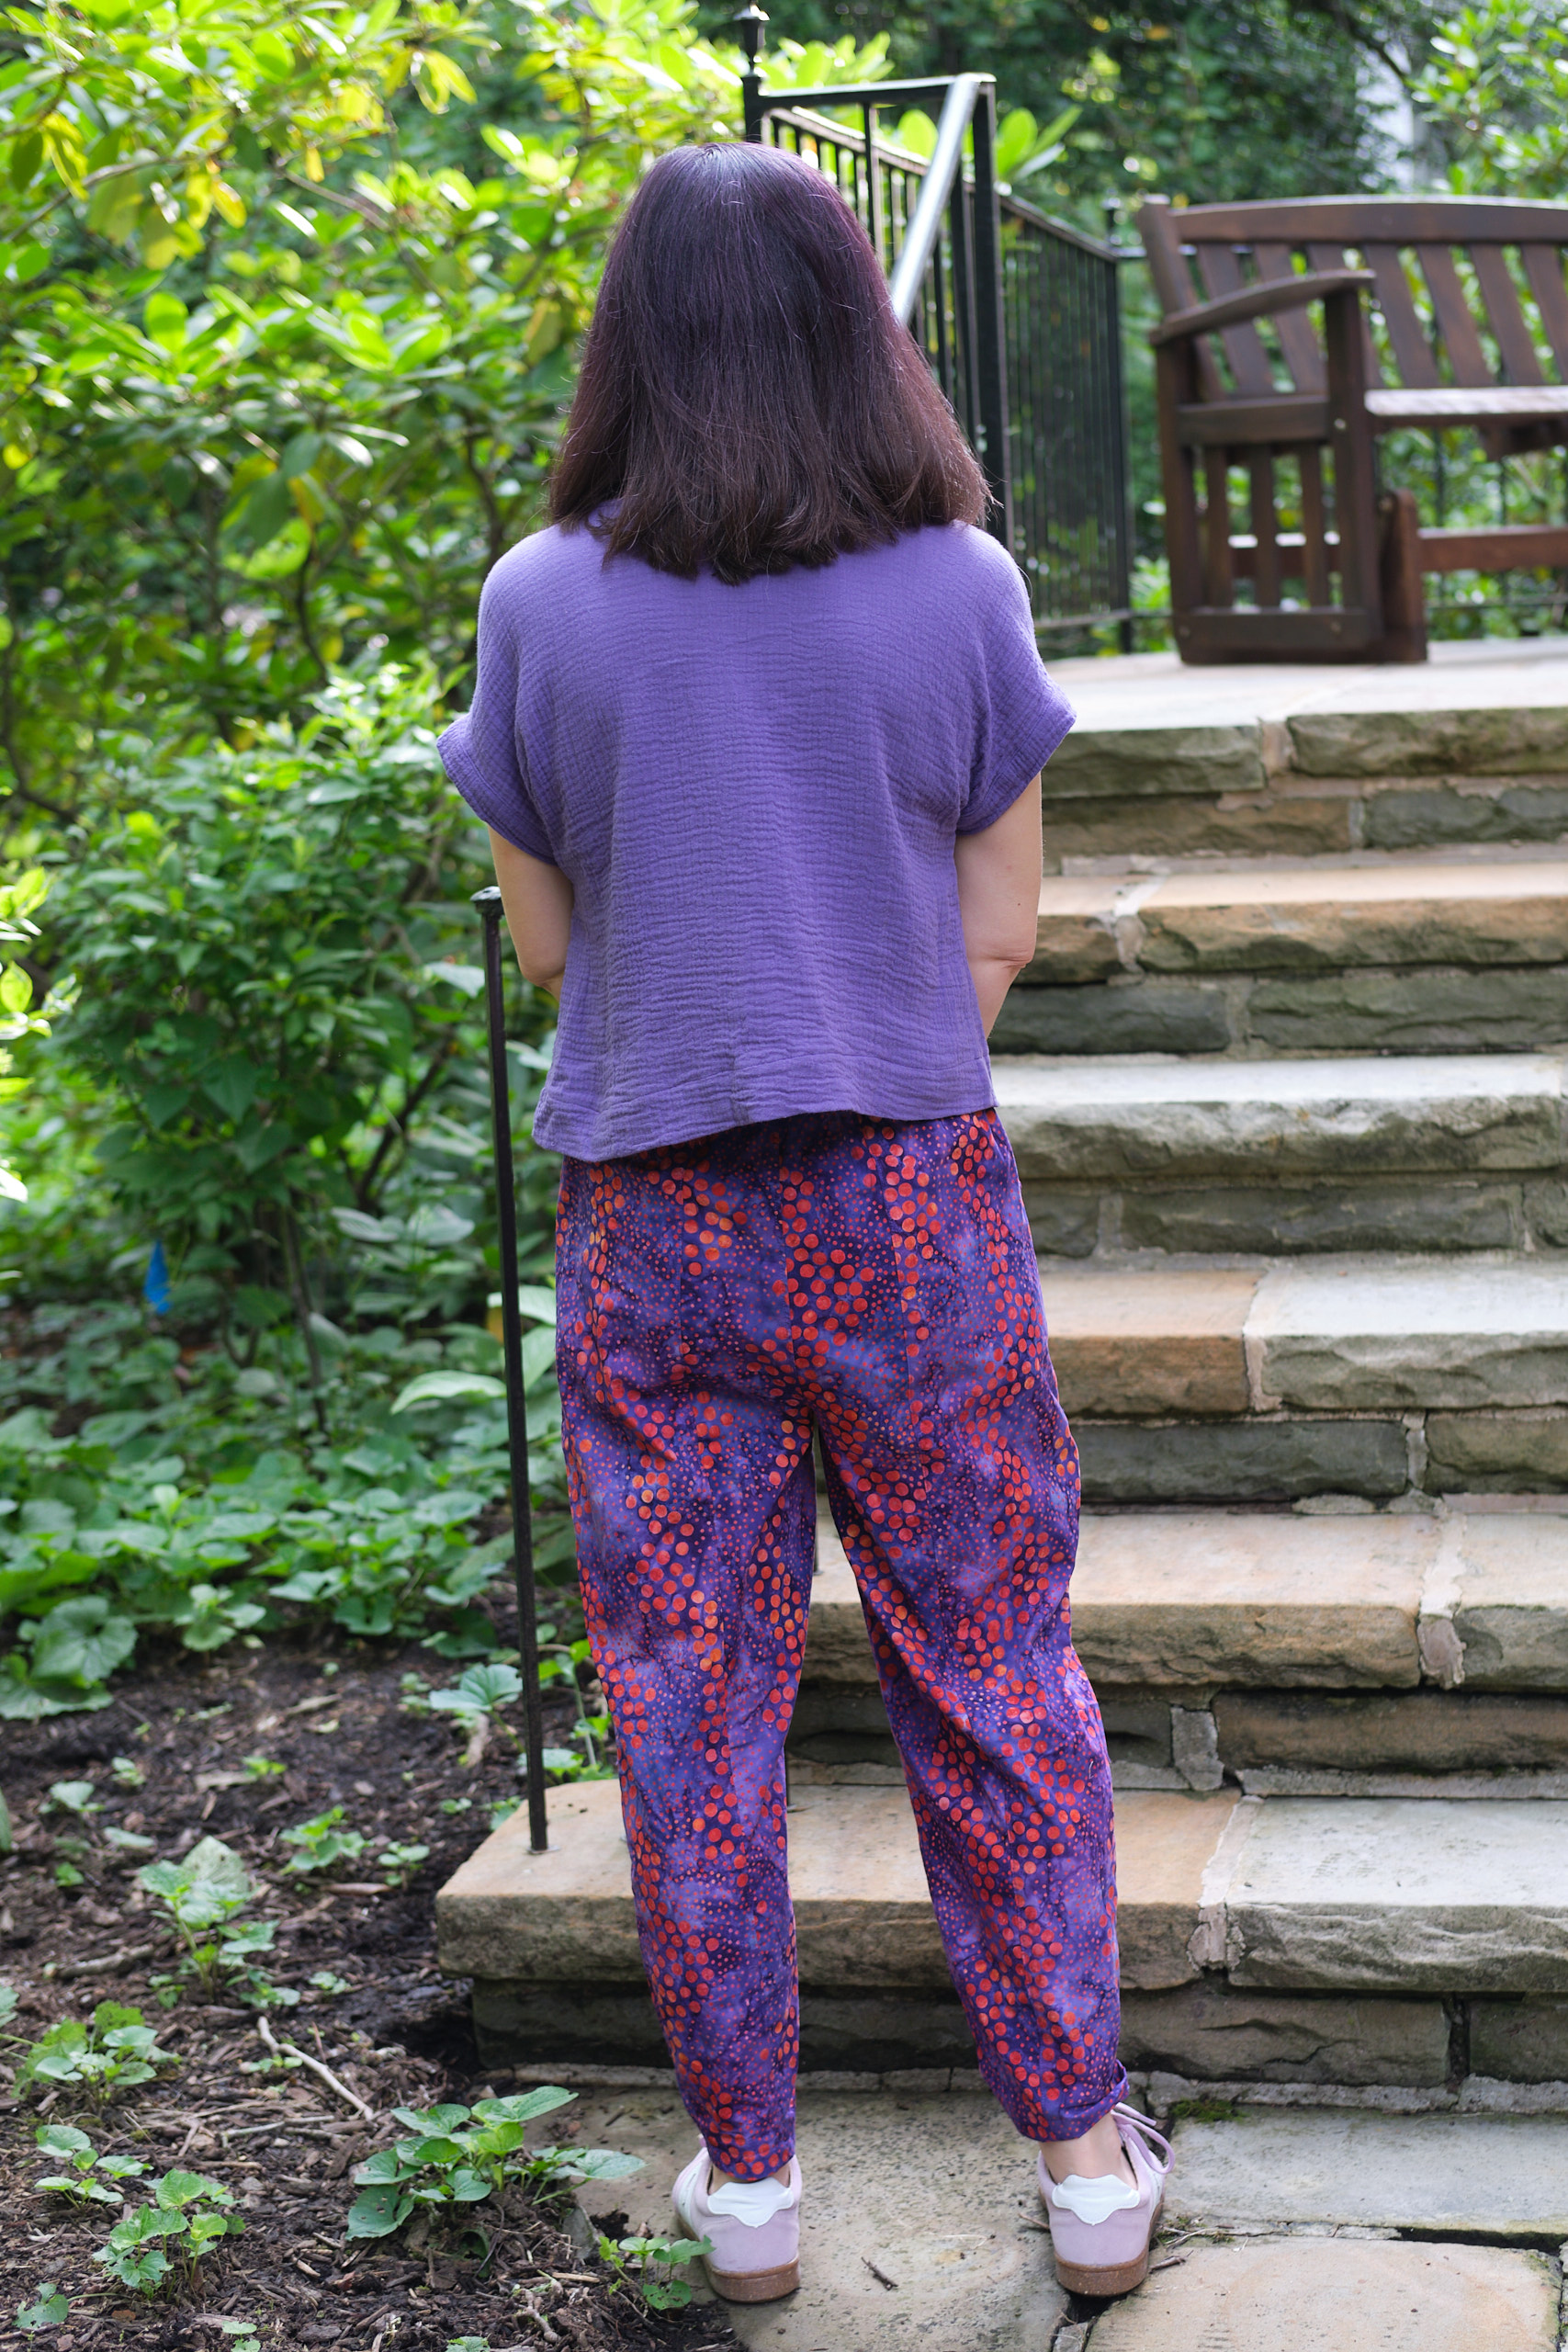
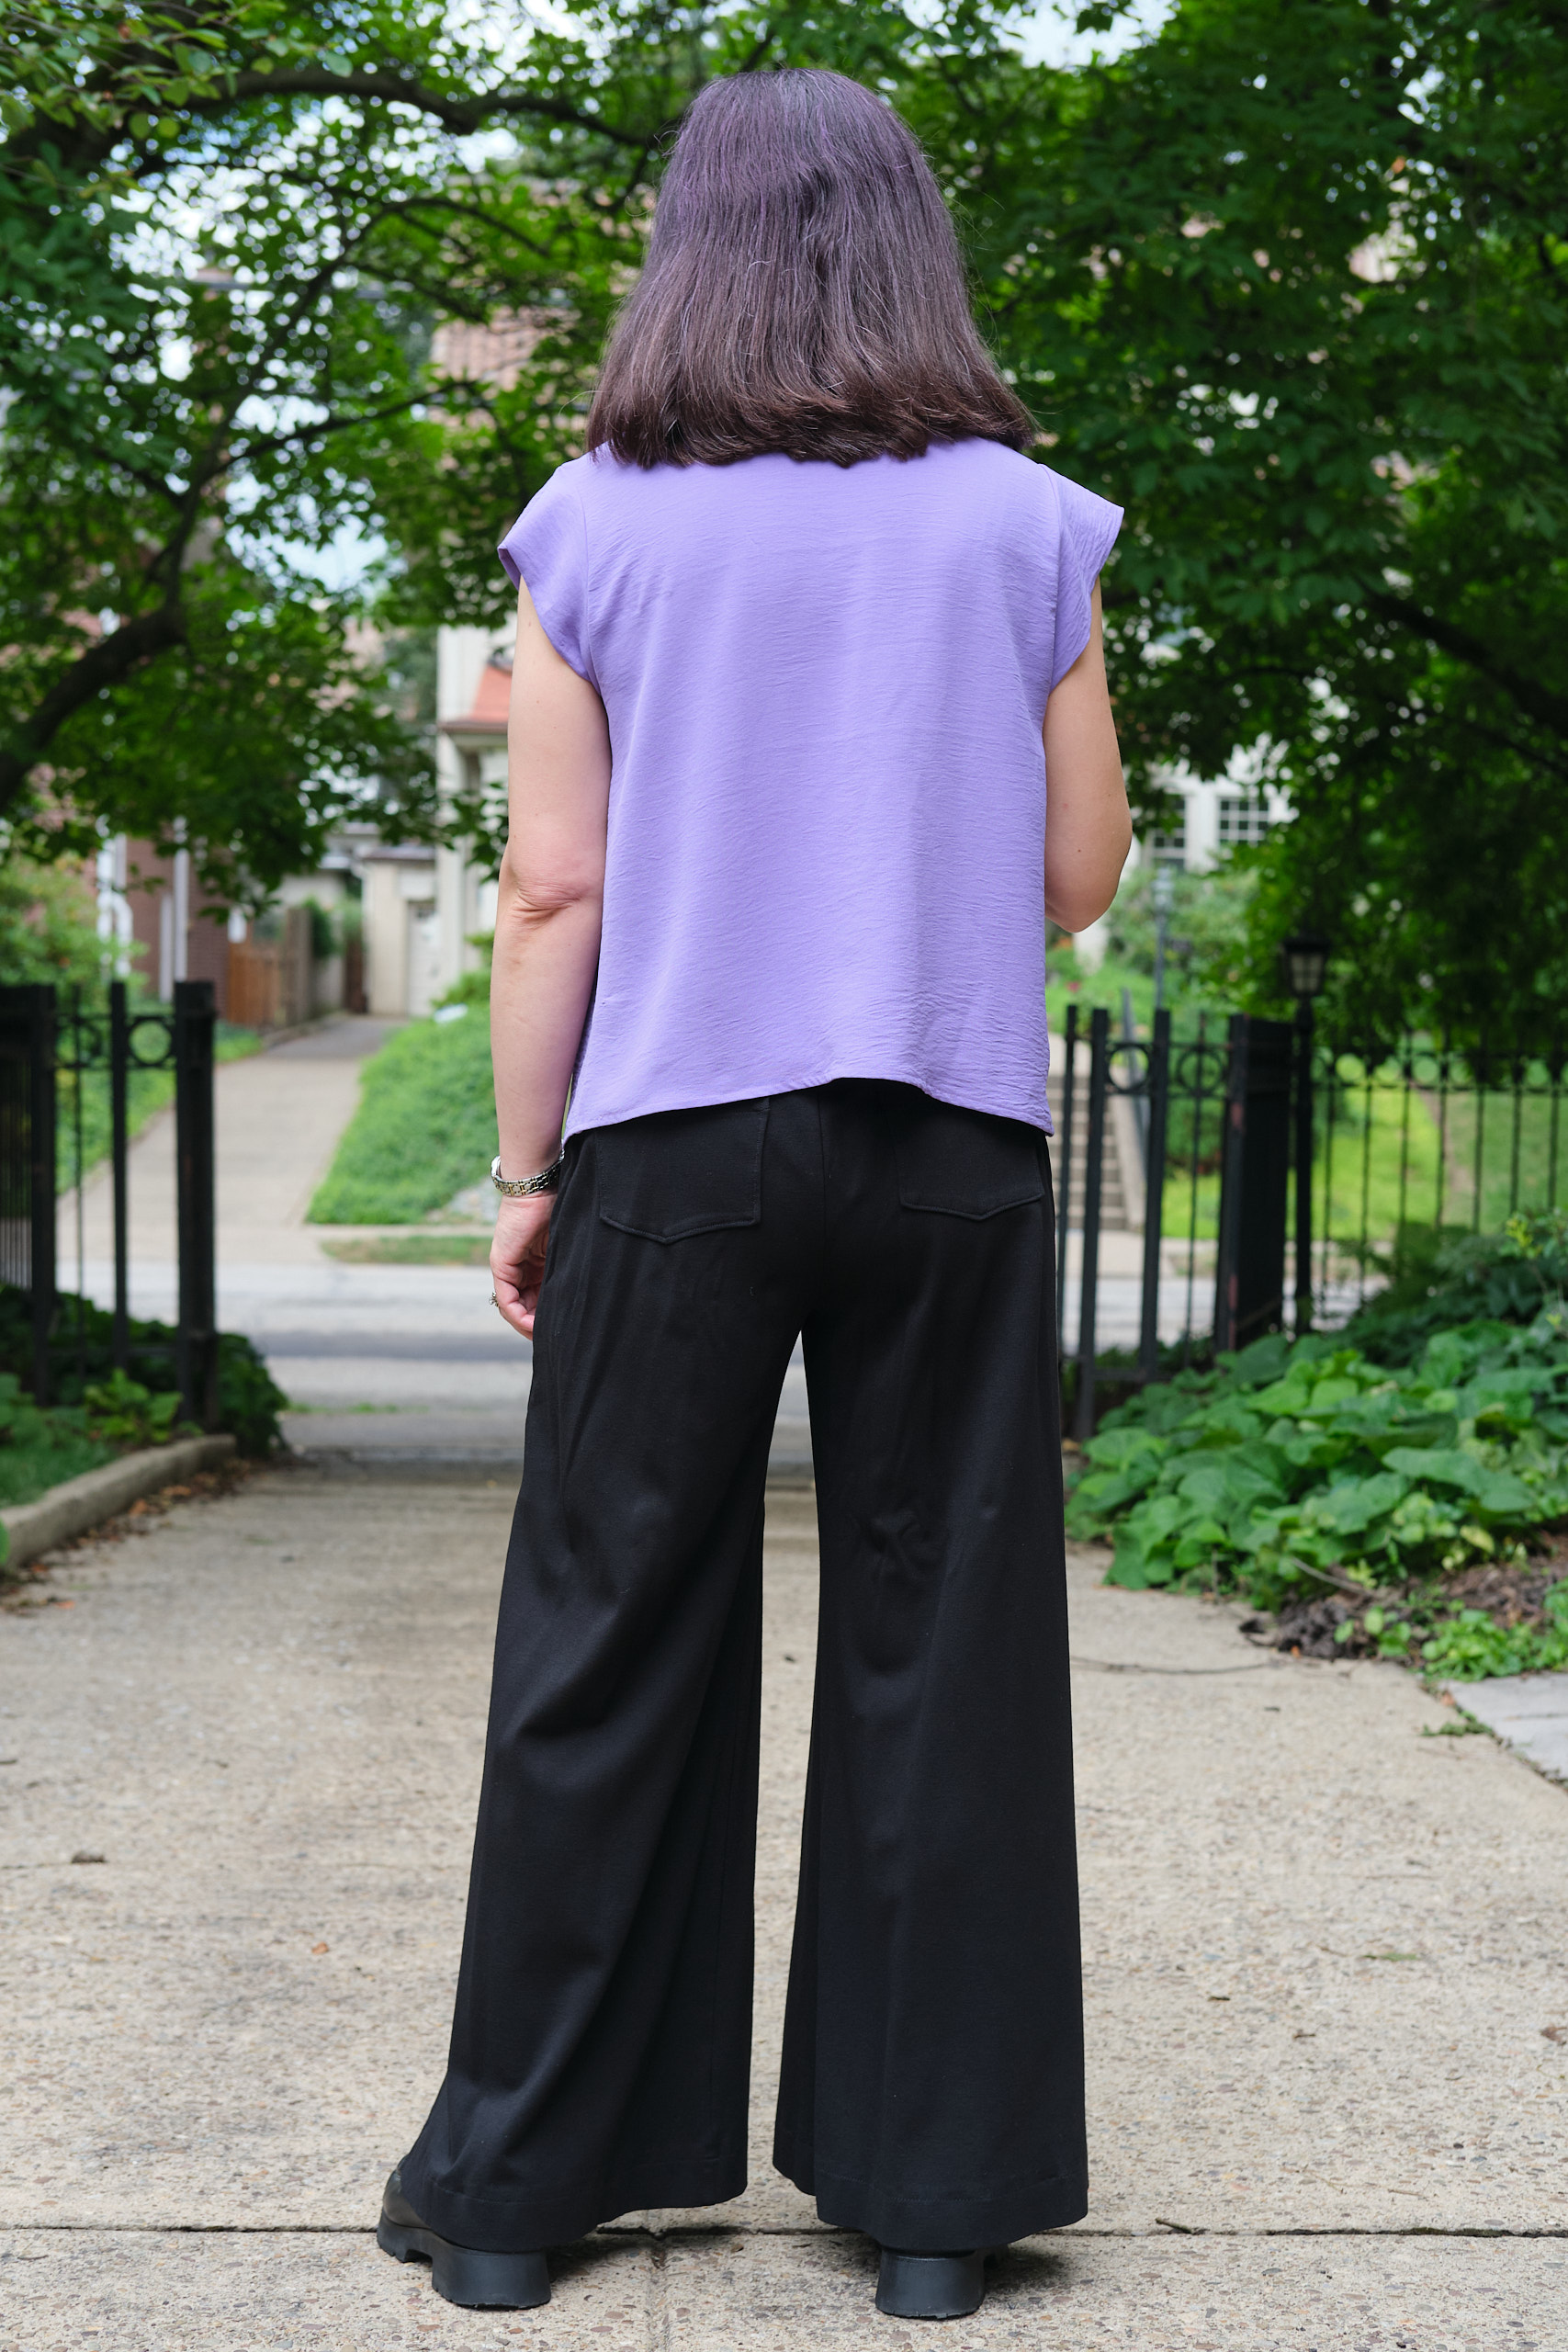
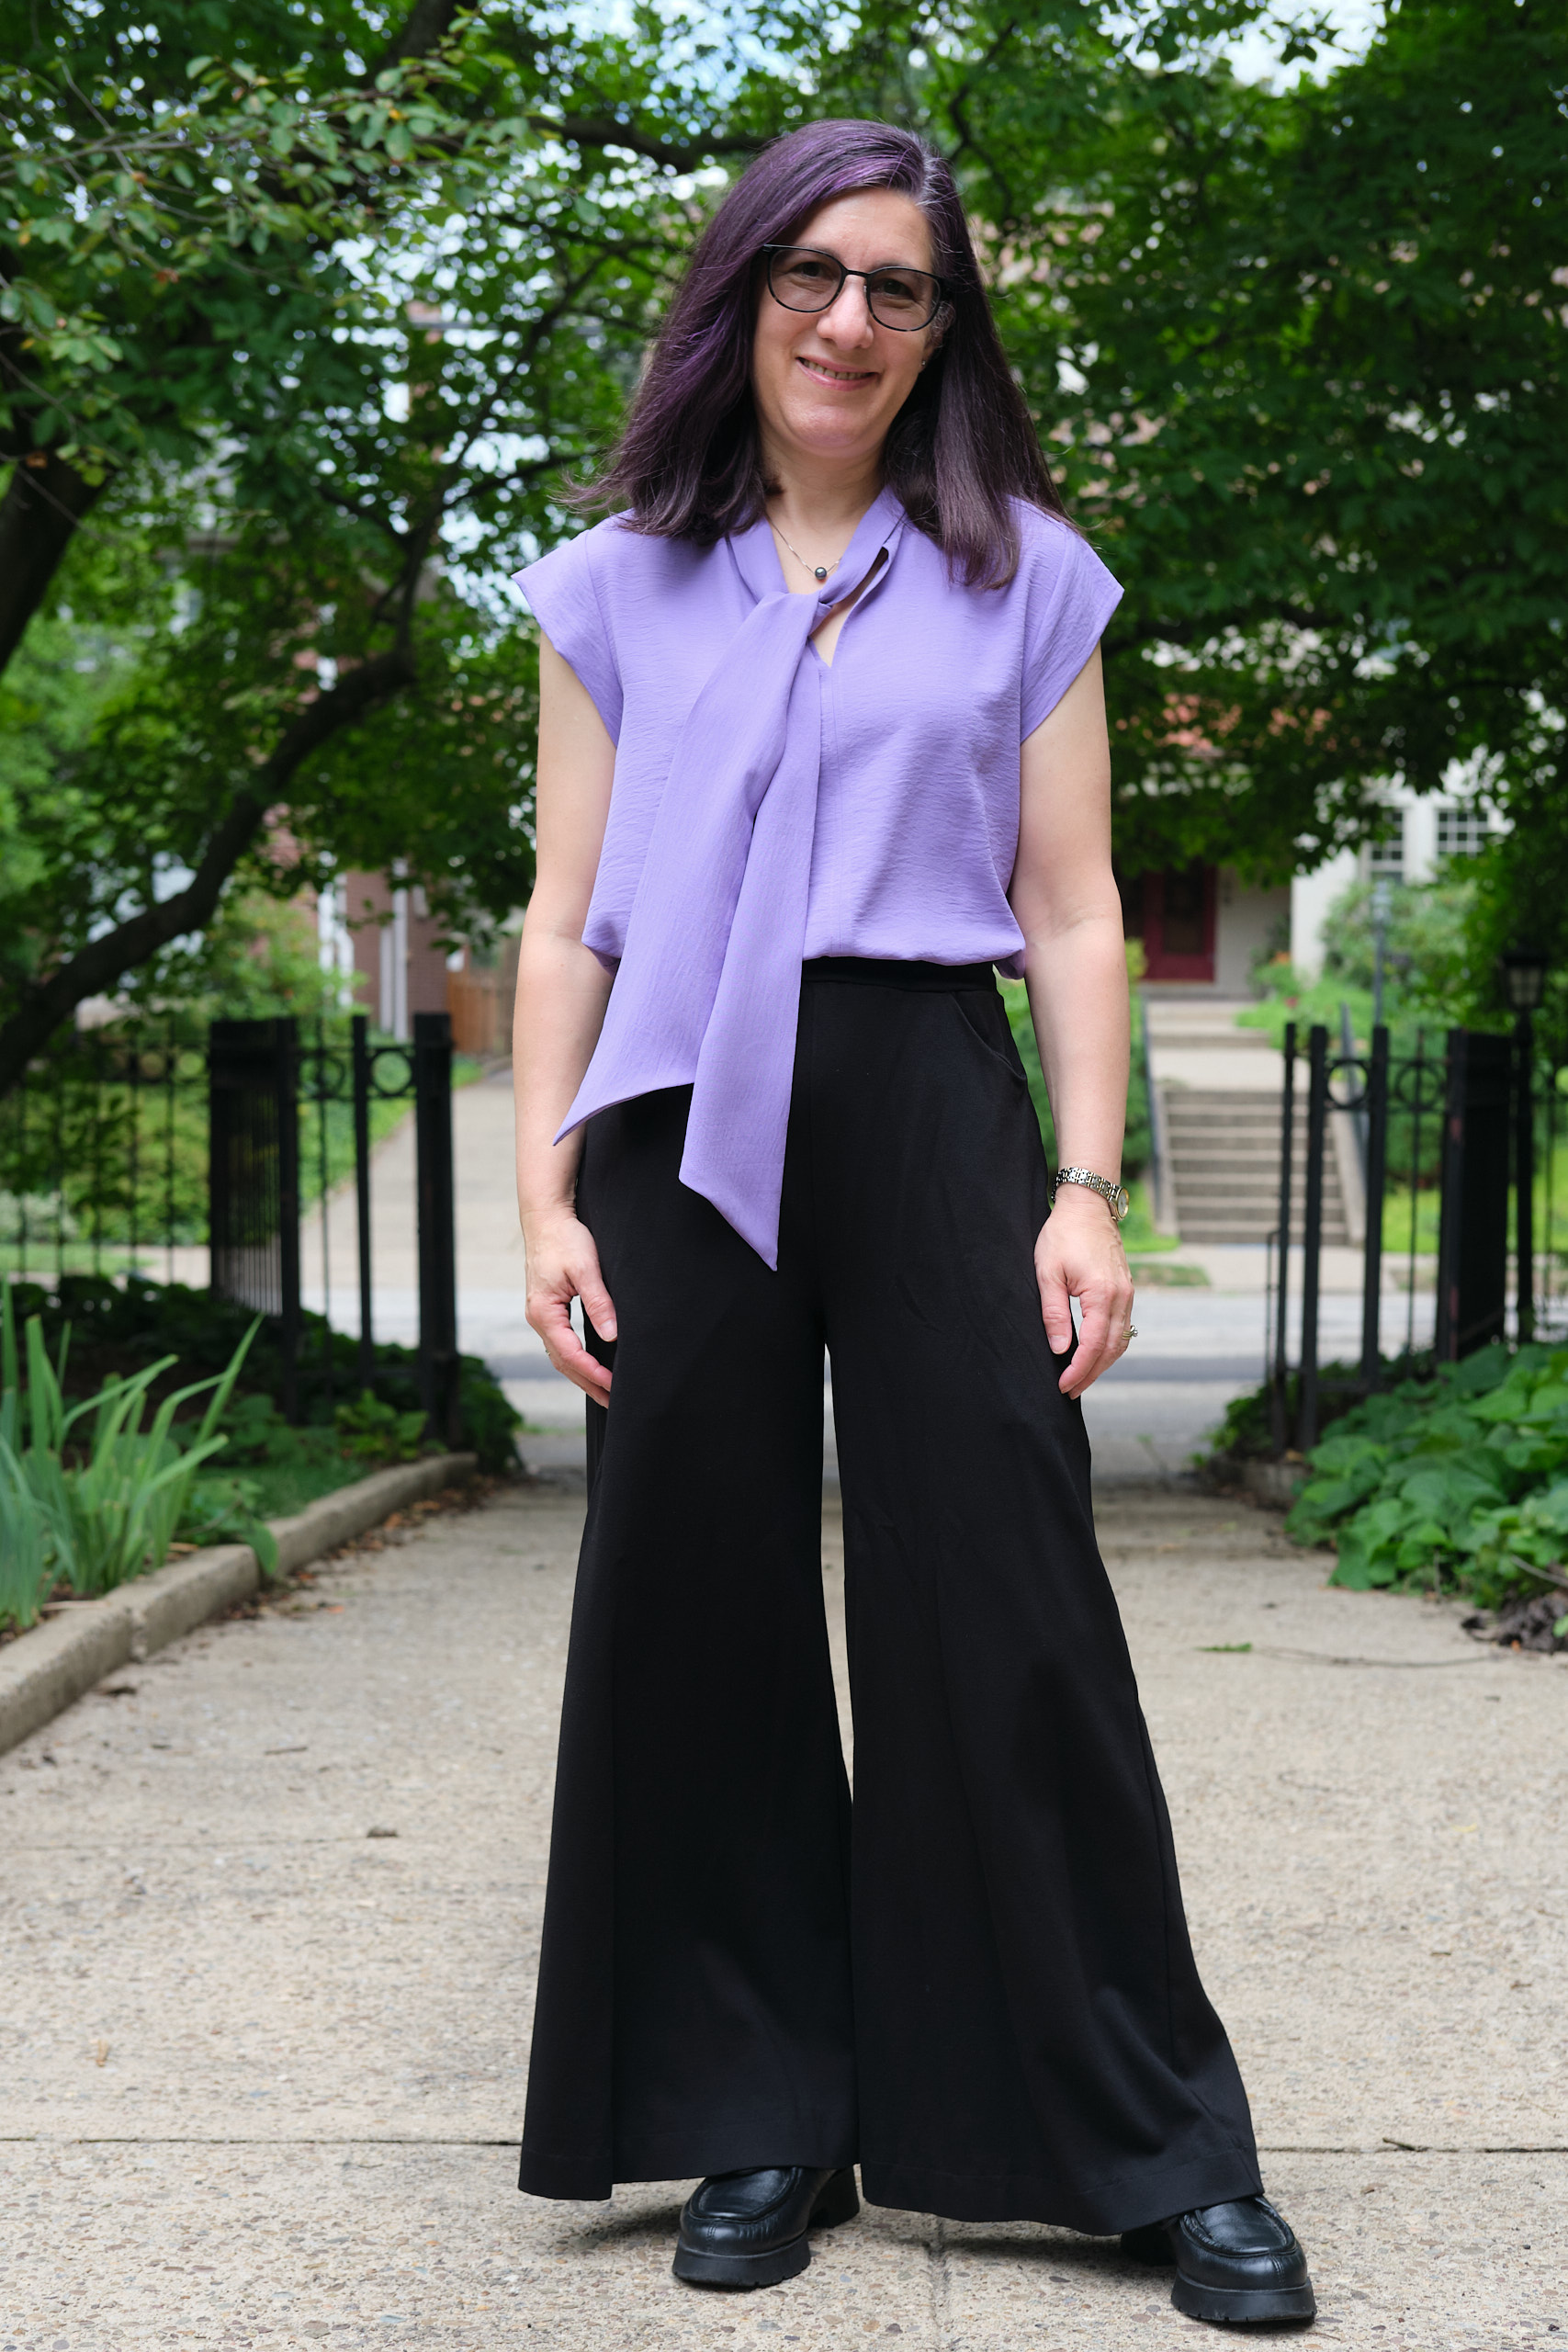
I selected the regular length with the shorter tie and opted for the cap sleeves. I proactively added a 1/2-inch sloped shoulder adjustment and raised the center front opening by 1 inch (both adjustments that I tend to need). I finished the bottom hem by serging the edge and folding it under 1/4 inch twice and top stitching.

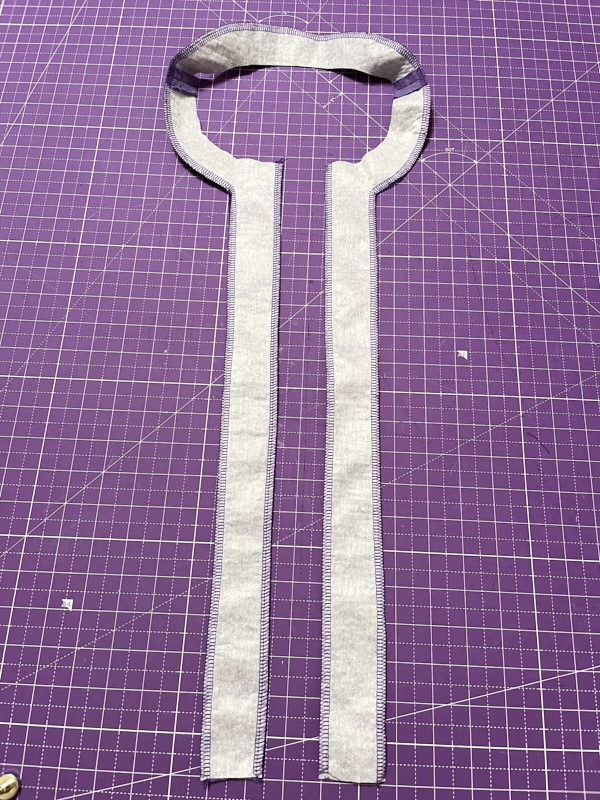
The Florence fabric is a bit slippery and made this pattern more challenging. It does hold a press, but takes some effort. The edges start fraying fairly quickly. I made a number of sewing mistakes that required unpicking and resewing, but in the end everything worked out ok. My good sewing machine is still in the shop so I’m using my backup machine, which adds to the challenge. When I sewed the front center seam, I don’t think I used a full 5/8-inch seam allowance, and thus when I turned under the seams and tried to top-stitch them at 1/4-inch, the turned-under seams were slightly too small. I should have serged those edges before turning them under to make sure the turned-under edge was more than 1/4-inch. I also accidentally sewed one of the cap sleeves on inside out (nobody to blame but me for this). The tie assembly is clever and a little bit tricky, and I managed to sew too far into the burrito and sewed the opening closed. But I recovered from all of these mistakes. I did take the advice to hand baste the cap sleeve edges together, and I was glad I did. I was also glad to have a serger to clean up all the fraying edges. With all those mistakes, the pattern wasn’t as much of a quick sew as it should have been.

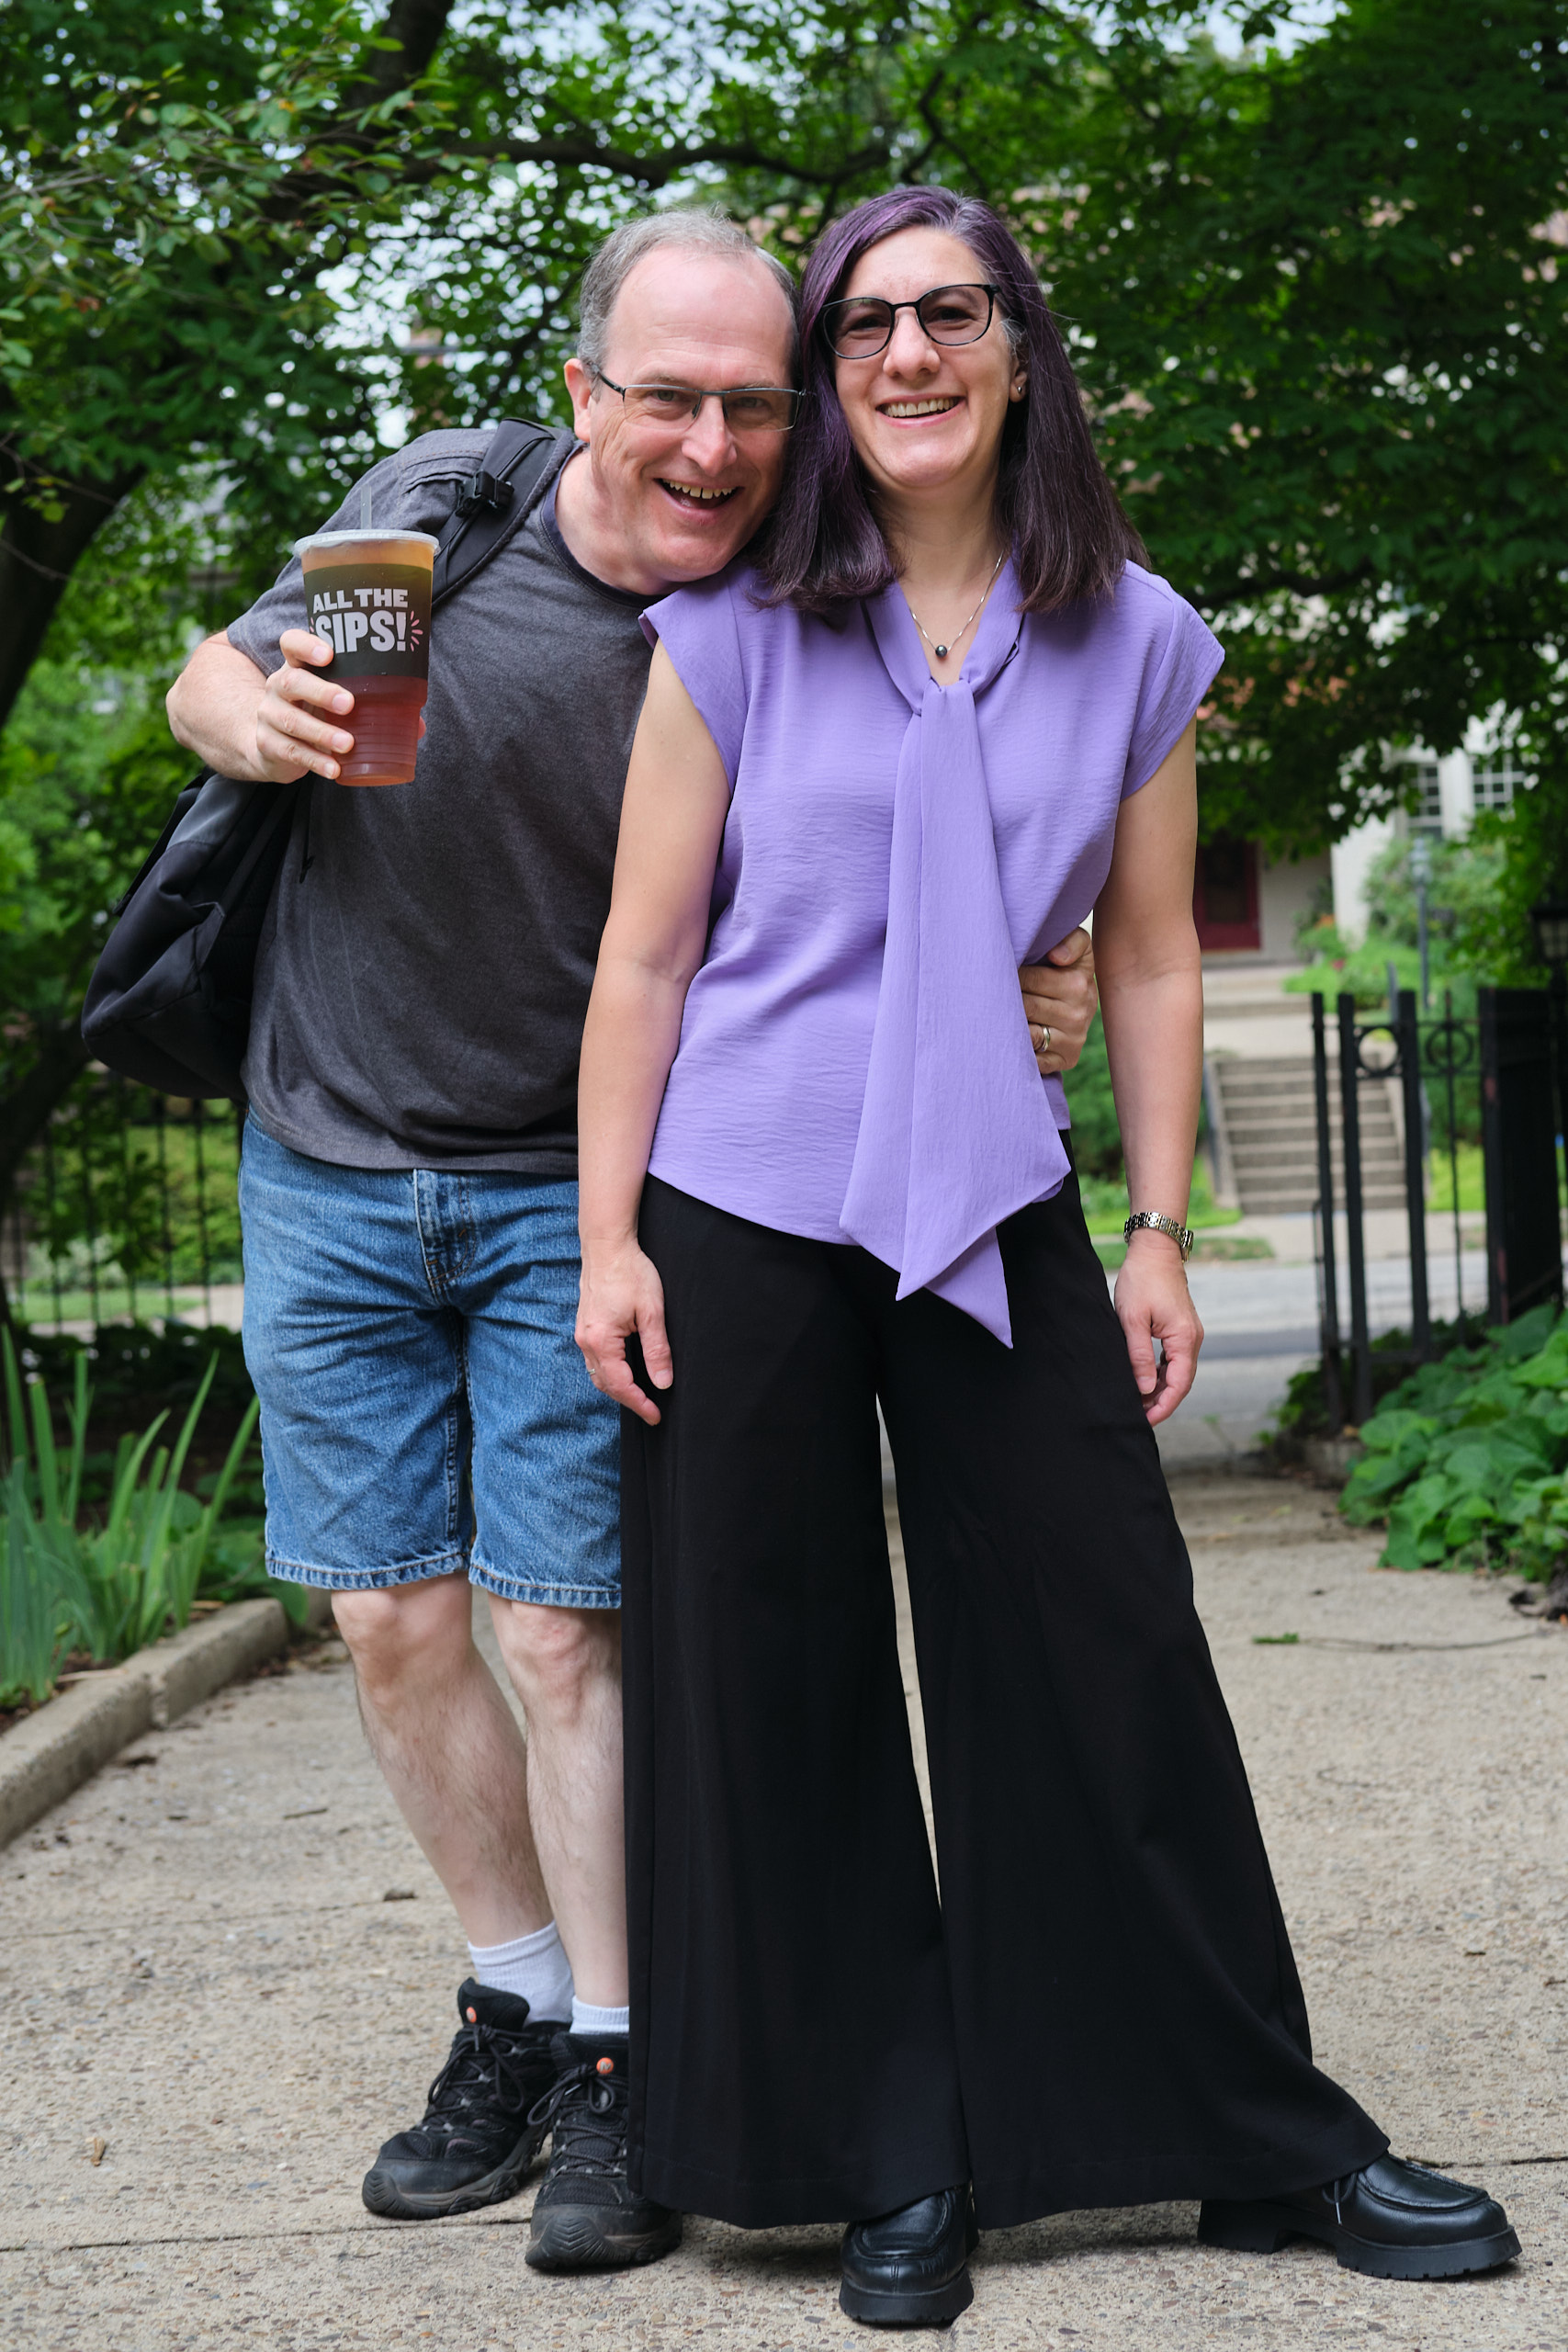
Despite the mistakes, the end result looks great and has a very professional-looking finish. I really like the folded cap sleeves (no hemming required), and may used them on other patterns. It looks good both tucked in and untucked. We’ll see whether I end up liking tie-front blouses or not. I see from photos that people are wearing the tie sloppy, so I guess that’s the thing to do. I found if I folded it in half before tying it was a bit less sloppy. It also looks good untied. I’m unlikely to wear it tied in a bow.

Pattern Emporium has a blog post with lots of Spill the Tea blouses in different fabrics that was helpful. I also found the Lifting Pins and Needs Bow Tie Heaven video useful.

I don’t think I would sew with the Florence fabric without a serger or a pattern in which all the seams were enclosed. But I like this fabric a lot: drapey with body, a little bit of stretch, opaque, washable, and doesn’t require ironing. I will probably buy more and would like to try making some wide-leg pants with it (and possibly other tops or a dress).

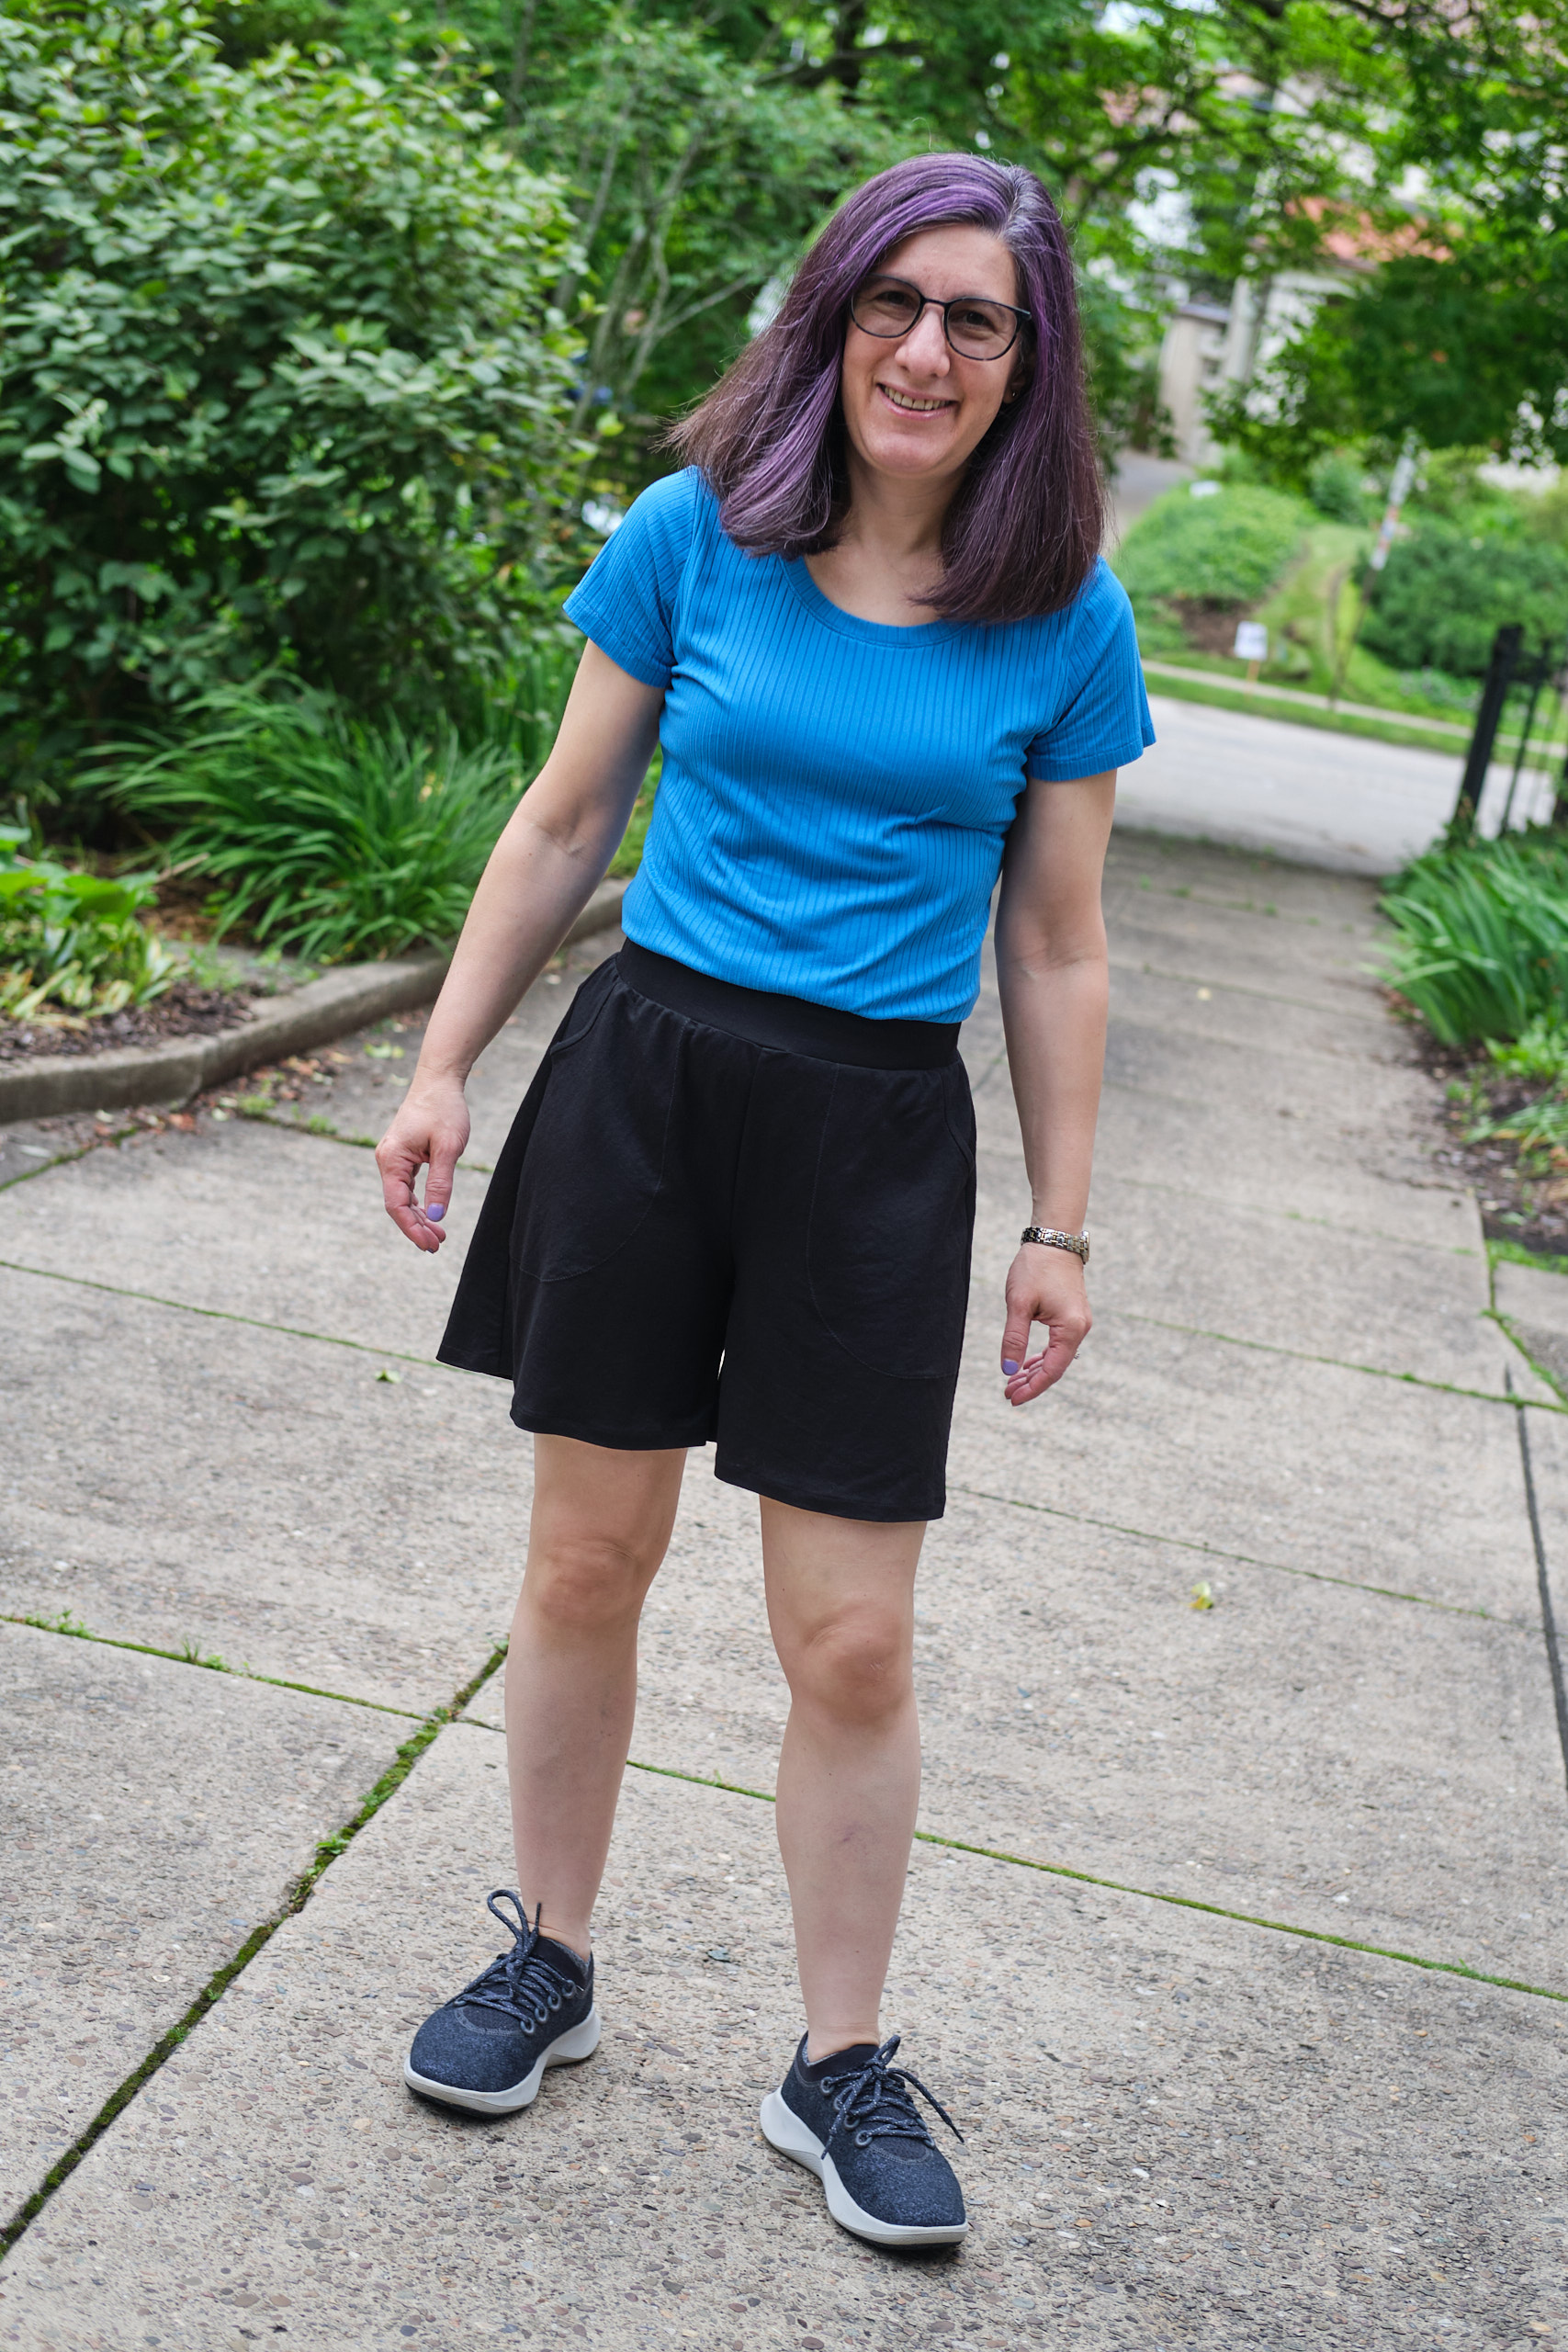
Ok, enough purple for a while. Next up…. blue?

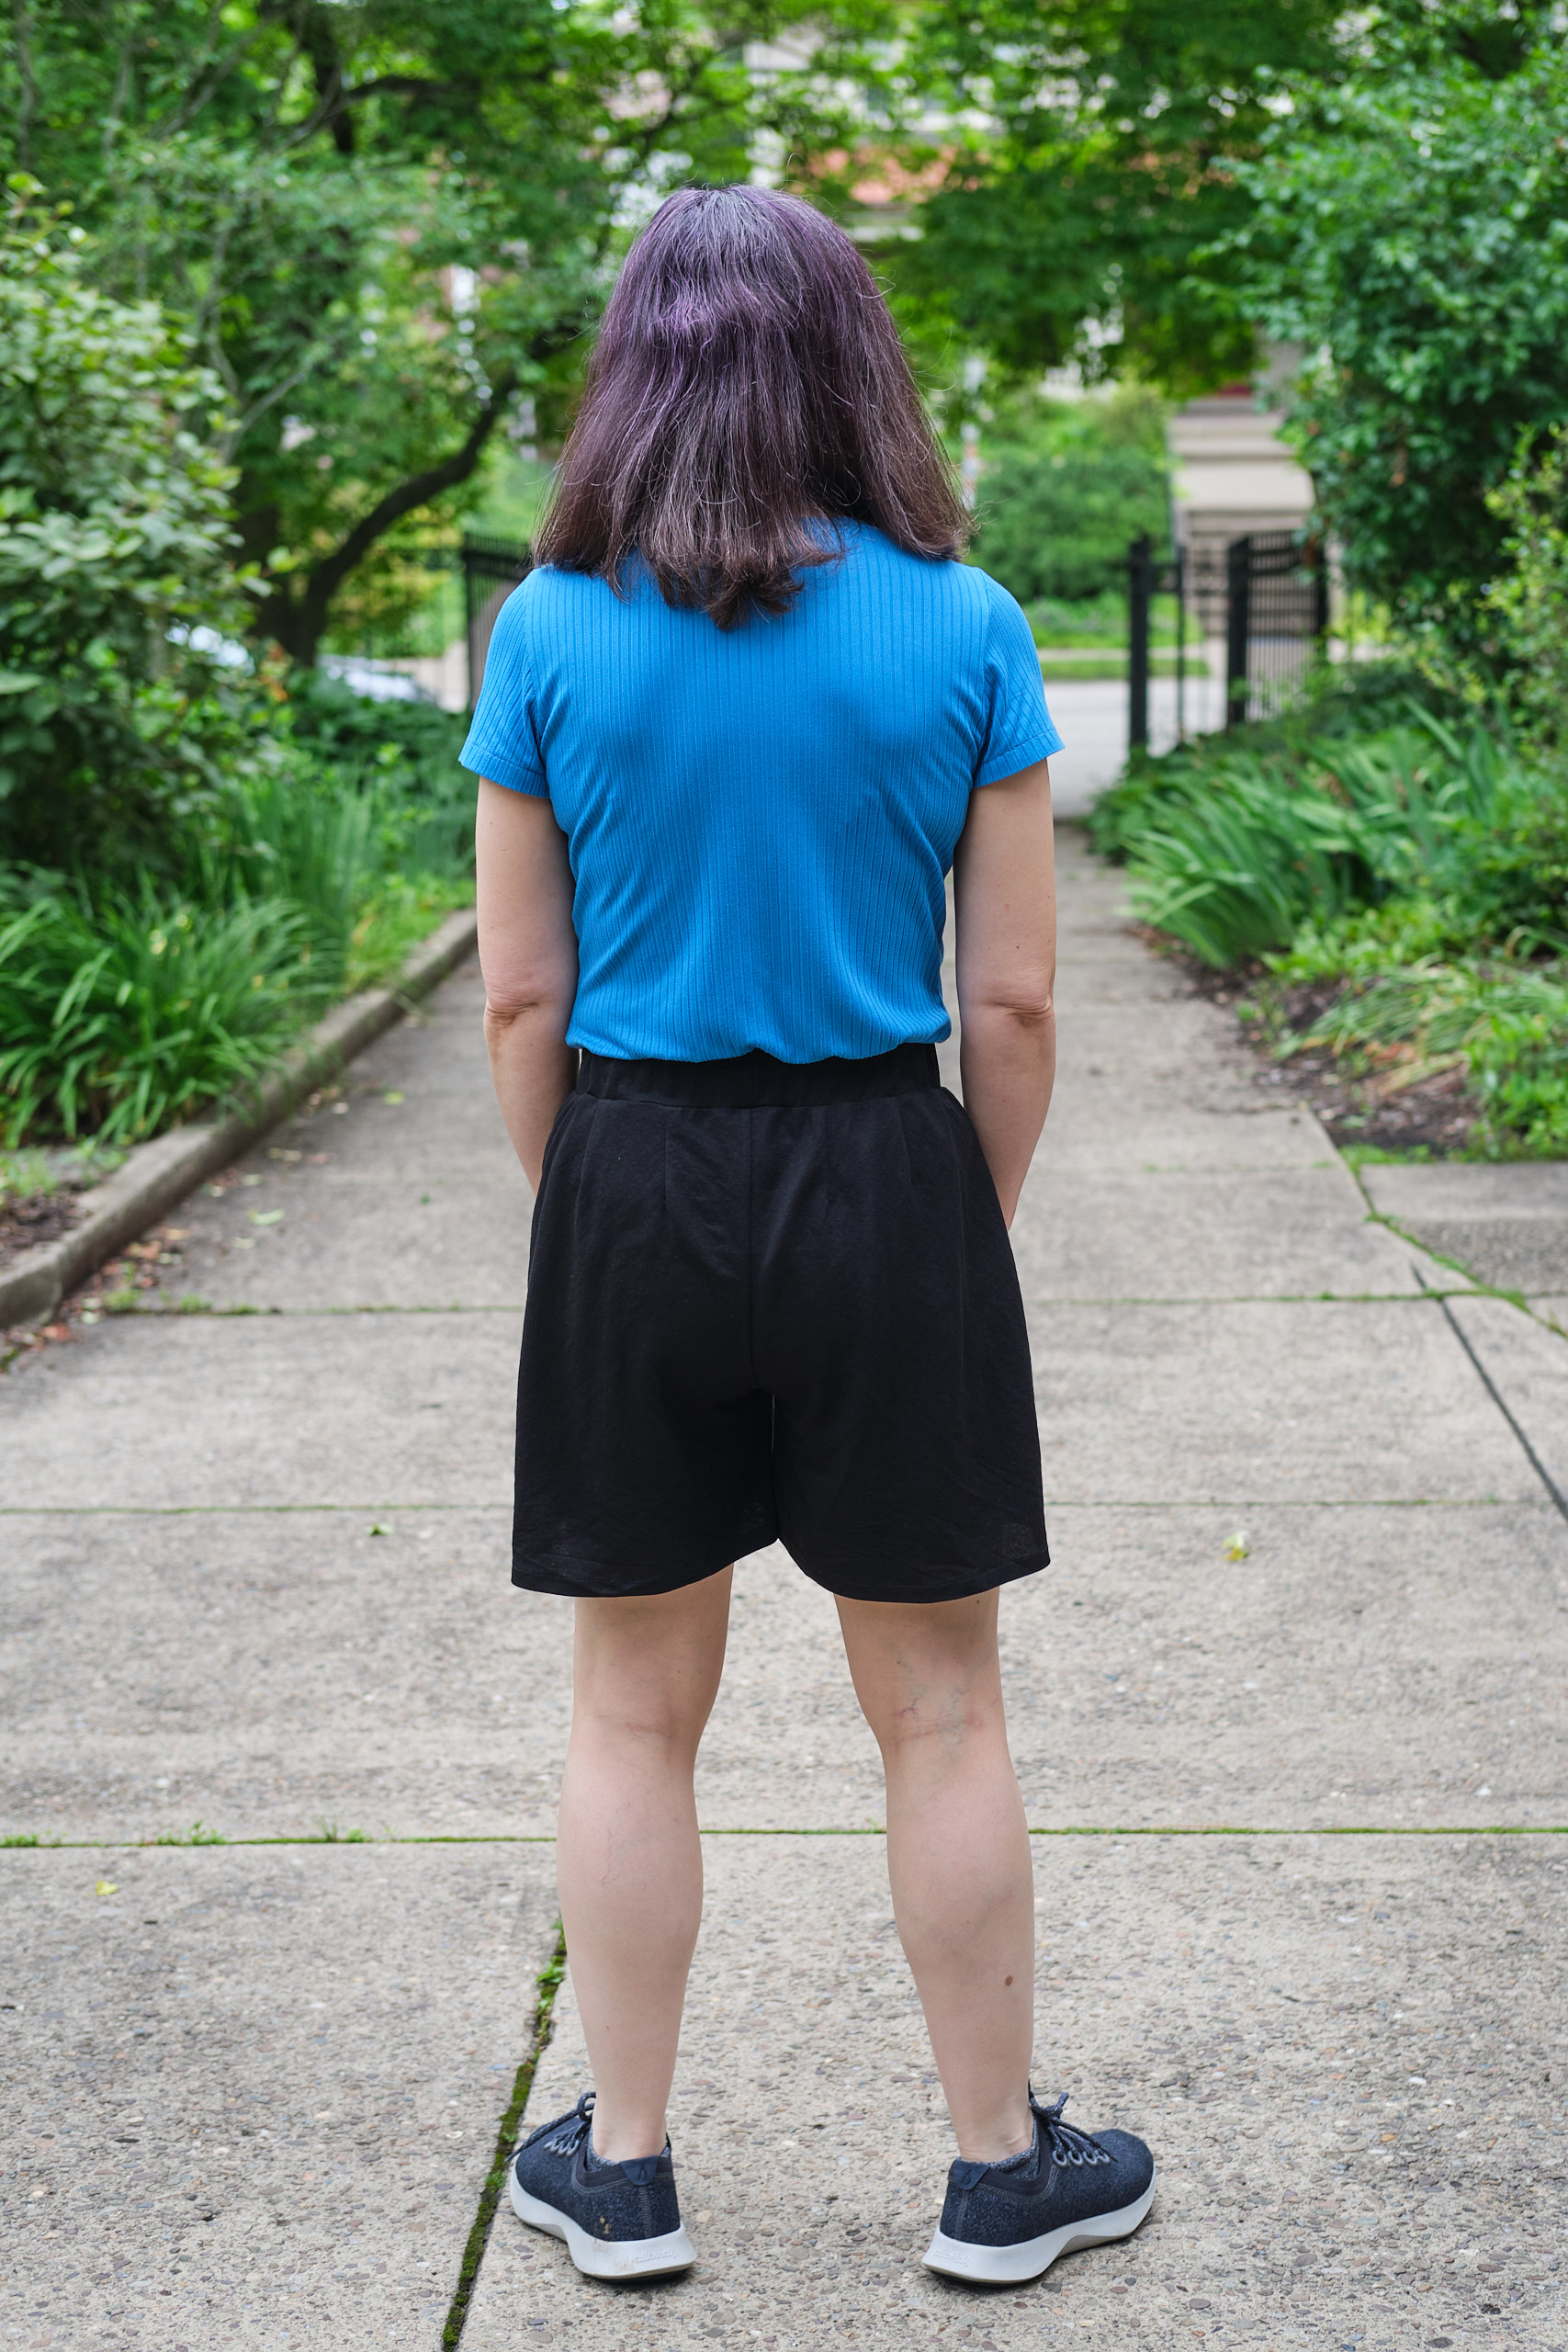
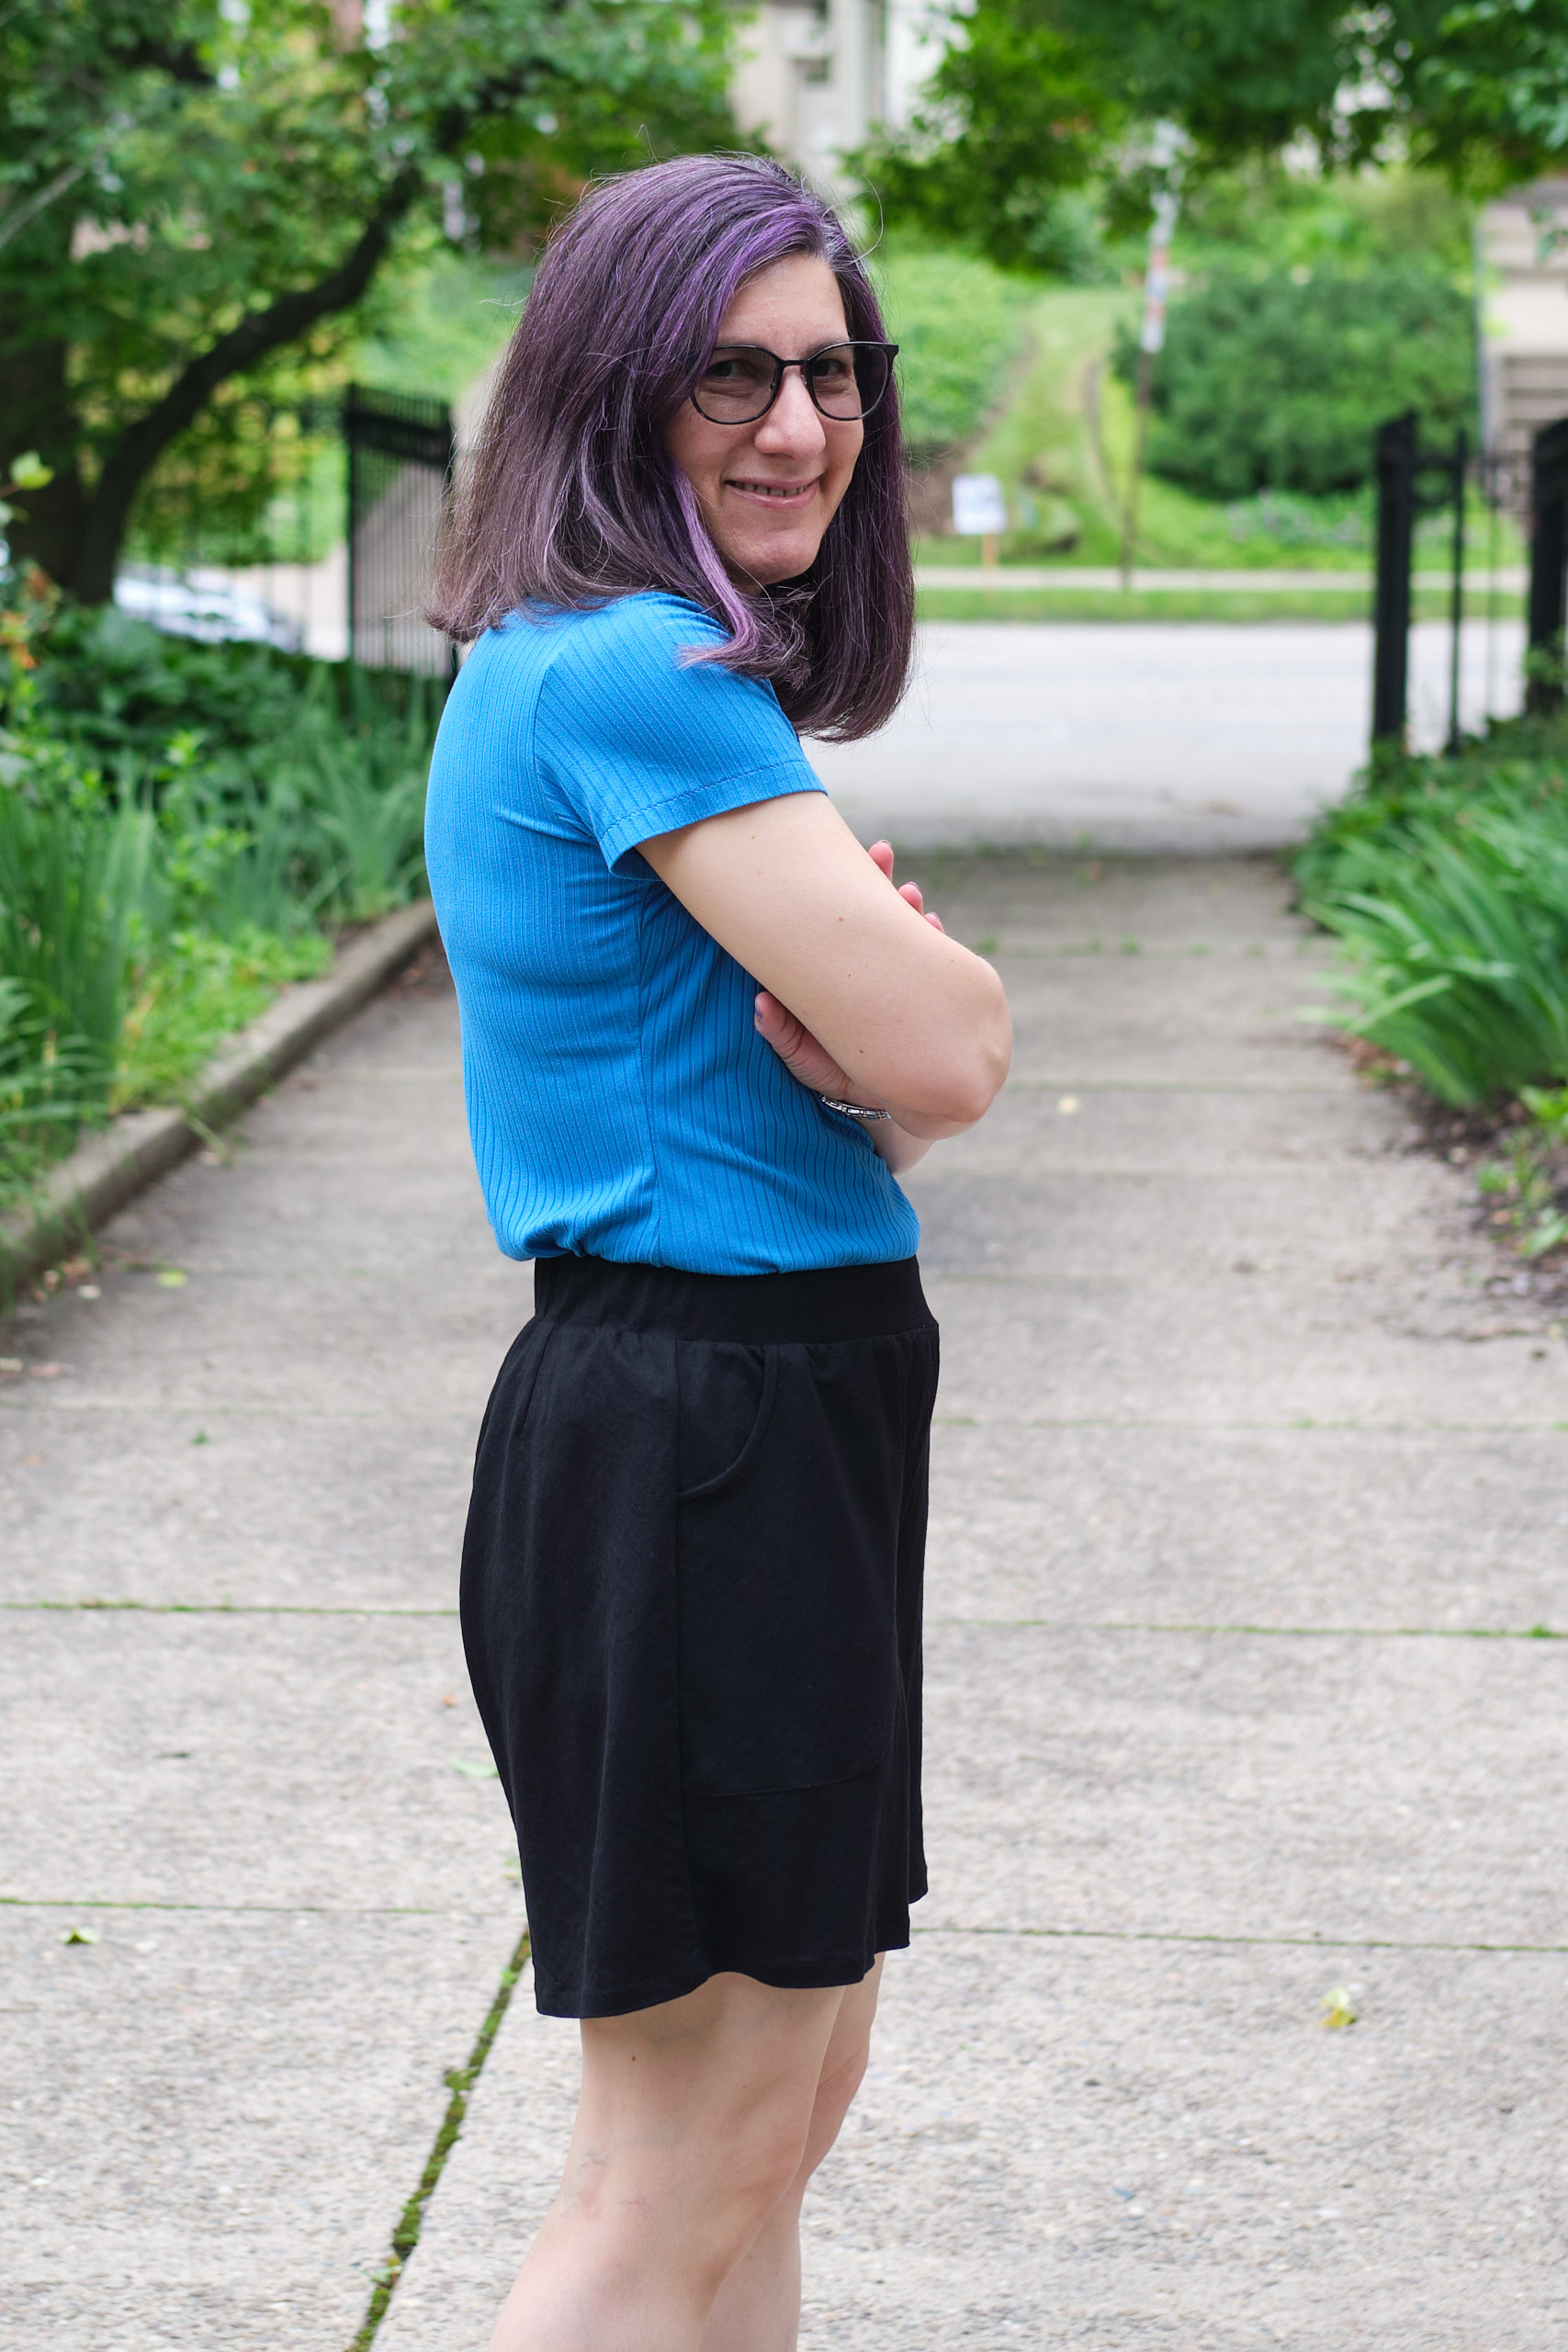
I’m modeling Spill the Tea with PE Walk Boldly pants in black ponte. My older daughter took the photos with my camera.

My husband photobombed me and brought me some tea so I could spill the tea in my Spill the Tea blouse

Be Mine Jacket Hack

Pattern Emporium Be Mine Balloon Sleeve top with jacket hack, size AU8, 1.5 yards cotton double gauze, high neck, regular length, wide facing, no button loop, sloped-shoulder adjustment

I love the Pattern Emporium Be Mine Balloon Sleeve top pattern but find it difficult to wear under a sweater, and even if it fits, a sweater would hide the beautiful sleeves. So when I saw that sewist Livia Jonker-Yamada had hacked Be Mine into a jacket, I was excited to give it a try myself so that I could wear it over a shirt. I waited for Liv’s promised blog post with instructions, but it never came so I figured it out myself.

I started with the size AU8 pattern, which is one size smaller than the size chart recommends but this is an oversized pattern and sizing down worked well for me on my first Be Mine top. I could probably go down one more size for a more fitted top. I used the high neck option so that the neck opening would hit above a scoop-neck t-shirt. I added a half-inch sloped shoulder adjustment as I did on my first Be Mine. I decided to make this jacket from purple cotton double gauze since I still have a lot left even after making PE Vacation Vibes pants and a Sinclair Alva top and I thought it would coordinate with a lot of things in my wardrobe. The double gauze is a good weight for a light summer jacket, it has enough body to help the sleeves balloon, and once you’re done sewing it doesn’t need to be ironed. Having previously experimented with both ironing and not ironing gauze before cutting and sewing, I am firmly on team wash and iron now, despite the fact that ironing the wrinkles out of a couple of yards of double gauze is fairly tedious.

Most of the hack is pretty obvious: you follow the instructions for eliminating the back button, sew the back pieces together, and then you don’t sew together the two front pieces. The tricky part is what to do to have a nice clean finish on the jacket front openings. It looked to me like Liv split the neck facing and added vertical strips to it to face the jacket opening edges. I couldn’t work out exactly what she did where the front edges met the wide hem facing so I improvised a bit.

In the photos below you can see the split neck facing sewed to the merged back facing on its owned and pinned to the bodice. When I split the front facing, I made sure to add my 3/8-inch seam allowance to the split on both sides. The vertical facing is 1 3/4 inches wide and runs the length of the top. I decided to cut neck and vertical facing as a single piece to avoid the need for a joining seam. I used Heat n Bond Ultra Lightweight Fusible Interfacing and fused it to a piece of gauze before cutting out the facings. After I sewed the front and back facings together, I serged around the outer edges and also along the inner edge of the vertical pieces. That last bit of inner edge surging probably wasn’t necessary.

After I finished sewing on the neck and vertical facings I clipped the seam allowance around the neck as per pattern instructions and trimmed the corners to make it easier to turn them under. Then I understitched and top stitched according to the pattern instructions. It was impossible to understitch all the way into the corners, as you can see in this photo, but that didn’t seem to be a problem. I did the topstitching all in one go, from the bottom, up one side of the front, around the neck, and back down the other side of the front, pivoting at the corners. I used an edge foot for all the top stitching and under stitching.

Then I added the sleeves (hand basting the sleeve bindings so the gauze would behave), closed up the sides, and turned to adding the wide bottom hem facing. I split the front hem facing piece in half, adding 3/8 inch seam allowances to the inside edge of each piece. Then I sewed the front hem facing pieces to the back hem facing pieces and serged the top edge. I pinned the facing to the bodice, folding in the seam allowance. I sewed everything together and understitched following pattern instructions. Then I top-stitched just below the serged edge at the top of the hem facing. Finally, I was left with the unsolved problem of what to do with the unstitched 3-inch edges where the hem facing meets the bodice on the jacket opening edges. I decided to whip stitch that closed by hand, which seemed to have worked well.

I decided not to add buttons as I rarely button jackets (and I’m still a bit afraid of button holes). I’ve recently read that tie-front tops are quite fashionable right now, so I thought about adding ties, but decided I was unlikely to actually tie them (or wear them fashionably without a shirt underneath), so I left the jacket with no closures. As a result, it was a little tricky getting the neck openings aligned for the photographs, but they mostly stay in place.

The jacket looked neat and crisp, but since I will never iron it again I threw it in the wash to see how it would look crinkled up. When I took it out it looked great except for the center back seam, which didn’t lie flat because I forgot to top-stitch the seam allowances in place. After a quick trip back to my sewing machine to topstitch, the jacket was complete. That was yesterday, and today I wore my new jacket to work with the PE Heartlight skirt that I sewed last summer. When the outdoor temperature cools down a little I expect I will wear it a lot with wide-leg pants.

Pets dress for PETS conference

Sinclair Valley Knit Skater Dress with half-circle skirt from Flared skirts ADD-ON, size P6, 2 yards Spoonflower modern jersey, short-sleeve, above knee length plus one inch, bodice extended 1.3 inch and no waistband, pockets modified so as not to attach to waist, “screwp neck” with cover stitching

After the success of my hot pepper dress for the PEPR conference, I obviously needed to prepare for the 2025 Privacy Enhancing Technologies (PETS) conference by making a pets dress. I searched for a knit fabric with at least three types of pets, but couldn’t find anything (I found all dogs or all cats, and some other options in quilting cotton).

Spooflower.com had some nice custom options with multiple pets, but most were too cute for the look I was going for — a nice pattern for baby clothes but not the vibe I wanted. I found “Pop Art Pets” designed by Susan Faiola and showed it to my husband and he thought it was great, so I ordered two yards in Modern Jersey, my favorite Spoonflower fabric. It’s 95% polyester, 5% spandex, feels like cotton with a nice drape and takes color well. It has a bit more than 25% horizontal stretch and less vertical stretch. I have been less impressed with Spoonflower’s cotton spandex jersey, as I find it feels almost rubbery when you print it with dark colors and they fade over time. When the fabric arrived in the mail I was quite happy with it. My husband pointed out that the dog in the fabric looked a lot like a dog we know named Daisy, so after I finished the dress I borrowed Daisy to take some photos.

I chose the Sinclair Valley Knit Skater Dress with half-circle skirt from Flared skirts add-on, a pattern I have made several times. The pattern is pretty fast and easy, and fits well without much modification. It actually fits like a glove, and as this fabric has less stretch than fabrics I’ve used in the past, I decided to size up from my usual P4 to a P6. Since I omitted the waistband I extended the length of the bodice by 1.3 inch. As I have done in the past, I modified the pockets so they do not attach to the waist to prevent the waist from being distorted when I put my phone in my pocket. I also found from past experience that I prefer a neckline in between crew and scoop, so I used my usual “screwp neck” modification. The fit of the dress is just about perfect!

I sewed almost everything on my serger and then fused and cover stitched the hems with a wide cover stitch. I used the same wide cover stitch on the neck band. This is the first time I’ve ever tried to cover stitch a neck band. I took it very slowly and it came out really well. I used my regular serger foot and it was a bit tricky to see the stitches; next time I need to try one of the feet designed for cover stitching that provides more visibility (I’m sure I have multiple options in my 29-foot accessory kit, I just need to figure out which one to use).

Nori (and Alva) for Lorrie

Sinclair Nori Woven Peg Trousers, size P6, 2 yards batik quilting cotton, 2-inch elastic waist

Sinclair Alva Woven Dolman Style Top, size P2, A/B cup, 1 yard double gauze, shorter deep hem, cuffed arm holes

I’ve never sewn pants out of woven fabric, but I liked the peg-leg (almost barrel leg) style and pocket style on the new Sinclair Nori Woven Peg Trousers so I decided to give the pattern a try. I don’t have a lot of woven garment fabric in my stash, but the instructions said it worked with quilting cotton, and I do have a lot of that. I selected a fun batik fabric that I had several yards of, but I ended up needing only about 2 yards of it.

I cut out a size 6P and machine-basted it together to check the fit. I was very happy with the fit, but prefer a higher back rise. I reduced the seam allowance where the center back meets the waistband to increase the rise by almost half an inch (and I marked this on my pattern so that I will cut a higher back rise next time). Then I removed the basting and sewed the pants together according to the pattern instructions. Most seams were sewn on my sewing machine with a 5/8-inch seam allowance, then surged, and then top stitched. This process is much more involved than sewing knits, but it produces a nice finish.

I went with the 2-inch elastic option for the waistband. As there is no stretch in this pattern, the waistband casing is the same size as the top of the pants, and thus become quite gathered after you insert the elastic. To keep everything smooth, the instructions recommended adding three rows of stitching through the waistband. That was a little tricky to do while stretching the elastic and the stitching isn’t as consistent as I would have liked, but I got it done and it looks pretty good. It is also comfortable to wear. Here’s a photo with my shirt tucked in so you can see the waistband.

The pattern offers cuffed or hemmed options. I went with the simple hem.

The pants are very comfortable but don’t look sloppy. And the pockets are plenty big and I love them! I expect I will enjoy wearing these pants and will probably make more in other fabrics. I would like to try these in chambray and perhaps a lightweight stretch woven. It would also be fun to try a colorblocked version of these pants.

My Bernina 440 QE sewing machine has been giving me trouble for a while, and in the middle of this project I got so frustrated with it that I packed it up and got my old Viking 500 out from under the table, wound a bobbin, and used it to finish the project. There’s a reason I’ve kept it all these years. Now I just need to find someone in Pittsburgh who will fix my Bernina.

Next, I decided to make a purple Alva top to go with the pants (and lots of other things in my wardrobe). Recall that I bought 18 yards of cotton double gauze when it was on $3/yard clearance last summer. This top used up less than a yard of it! Before I started cutting I ironed a 3-yard piece of it, so now I need to find something else to make with the rest of the ironed piece.

After reading comments from other sewists on the small end of the size range that the Alva top runs large, I sized down to a P2 (normally I would make a P4 or P6 in Sinclair tops). I cut the A/B cup version with a small dart, but I’m not sure the dart is actually needed for those with small busts and it doesn’t hit me in quite the right place. I will try modifying the pattern to leave it out next time.

I sewed this top entirely on my regular sewing machine without using my serger (which was sad because I had to use my Viking, which is actually a fine machine, but doesn’t have some of the conveniences I have grown accustomed to). This pattern includes instructions for French seams. I’ve never sewn French seams before, but this seemed like an easy pattern to try them on. They are more work than serging the edges, but they do give a nice finish and weren’t that hard to do. I managed to do the collar binding more neatly than I did on my double gauze dress last month, largely because I followed the advice to hand baste the binding in place (that made it much easier).

I decided to use the deep hem option but wasn’t sure whether to go higher or lower. I cut the lower option. When I tried it on before hemming I decided I liked the lower option better so cut off the bottom two inches before hemming. I also debated plain sleeve openings or adding cuffs, and in the end added the cuffs for a more finished look.

Overall I’m happy with the Alva top, and it does go nicely with my Nori pants and the wide leg pants I made out of the same fabric. With this fabric, the Alva doesn’t drape all that well, and it tends to hang away from my body, especially in the back. This might be less of an issue with the longer hem length or a more drapy fabric.

Just Shorts

Pattern Emporium Just Peachy stretch shorts, size AU10 with waistband adjusted to AU8, black Pylos LiKnit, length 3, mid rise, elastic waistband, back darts, stitched pockets (with pocket opening adjusted higher)

Sinclair Bondi 22 fitted t-shirt, aqua wide lush poly spandex, short sleeve, hip length, “screwp neck

Summer is here and I reached for a pair of shorts to wear out of the house and couldn’t find any I liked. They were all either shorts I wear for playing soccer, shorts I wear for sleeping, shorts that don’t sit where I want them to at my waist, shorts that I find uncomfortable to sit in, or shorts with inadequate pockets. Clearly I need to sew myself some new shorts.

I used the Pattern Emporium Just Peachy stretch shorts pattern to sew up some black PyLos LiKnit shorts. I used this pattern once before to make grey cotton Lycra shorts that I mostly wear for PJs (the yoga waistband is super comfy but doesn’t stay put as well as I would like when I put my phone in my pocket. This time I used the mid rise with the elastic waistband option. I went with length 3, stitched pockets, and back darts. I adjusted the pocket opening to be higher (basically used the bottom of the high-waist pocket opening) — this makes it less likely for things to fall out of my pockets without the need to increase the length of the pocket bags. I stitched the pockets with a zigzag stitch. Next time I will try to cover stitch. I do love the way the look of the binding over the pocket opening edge.

I used the AU10 pattern with the AU8 waistband. I should probably have graded the waist of the leg pieces to match the waistband too — next time.

The rayon/nylon knit LiKnit fabric is very light and these are super lightweight shorts to wear and pack for travel. They look almost like linen shorts but are much softer and easy to care for. They also dry quickly when you get caught in a rainstorm (ask me how I know).

The shorts are modeled here with a short-sleeve 4p screwp neck Sinclair Bondi t-shirt in aqua wide lush poly spandex from Mily Mae Fabrics (which I made last year and may not have blogged). Normally I will wear the shirt untucked but leaving it tucked in here so you can see the shorts waistband and pocket details better.

Overall, I’m happy with these shorts and I have already worn them several times in the hot weather, including on a trip (they travel well!). They fit well but I personally would like them to sit a little higher at my waist, especially in front. Next time I make this pattern I would add a bit of rise, perhaps somewhere between the low-rise and high-rise line, and narrow the pocket bags so my phone will stay vertical.