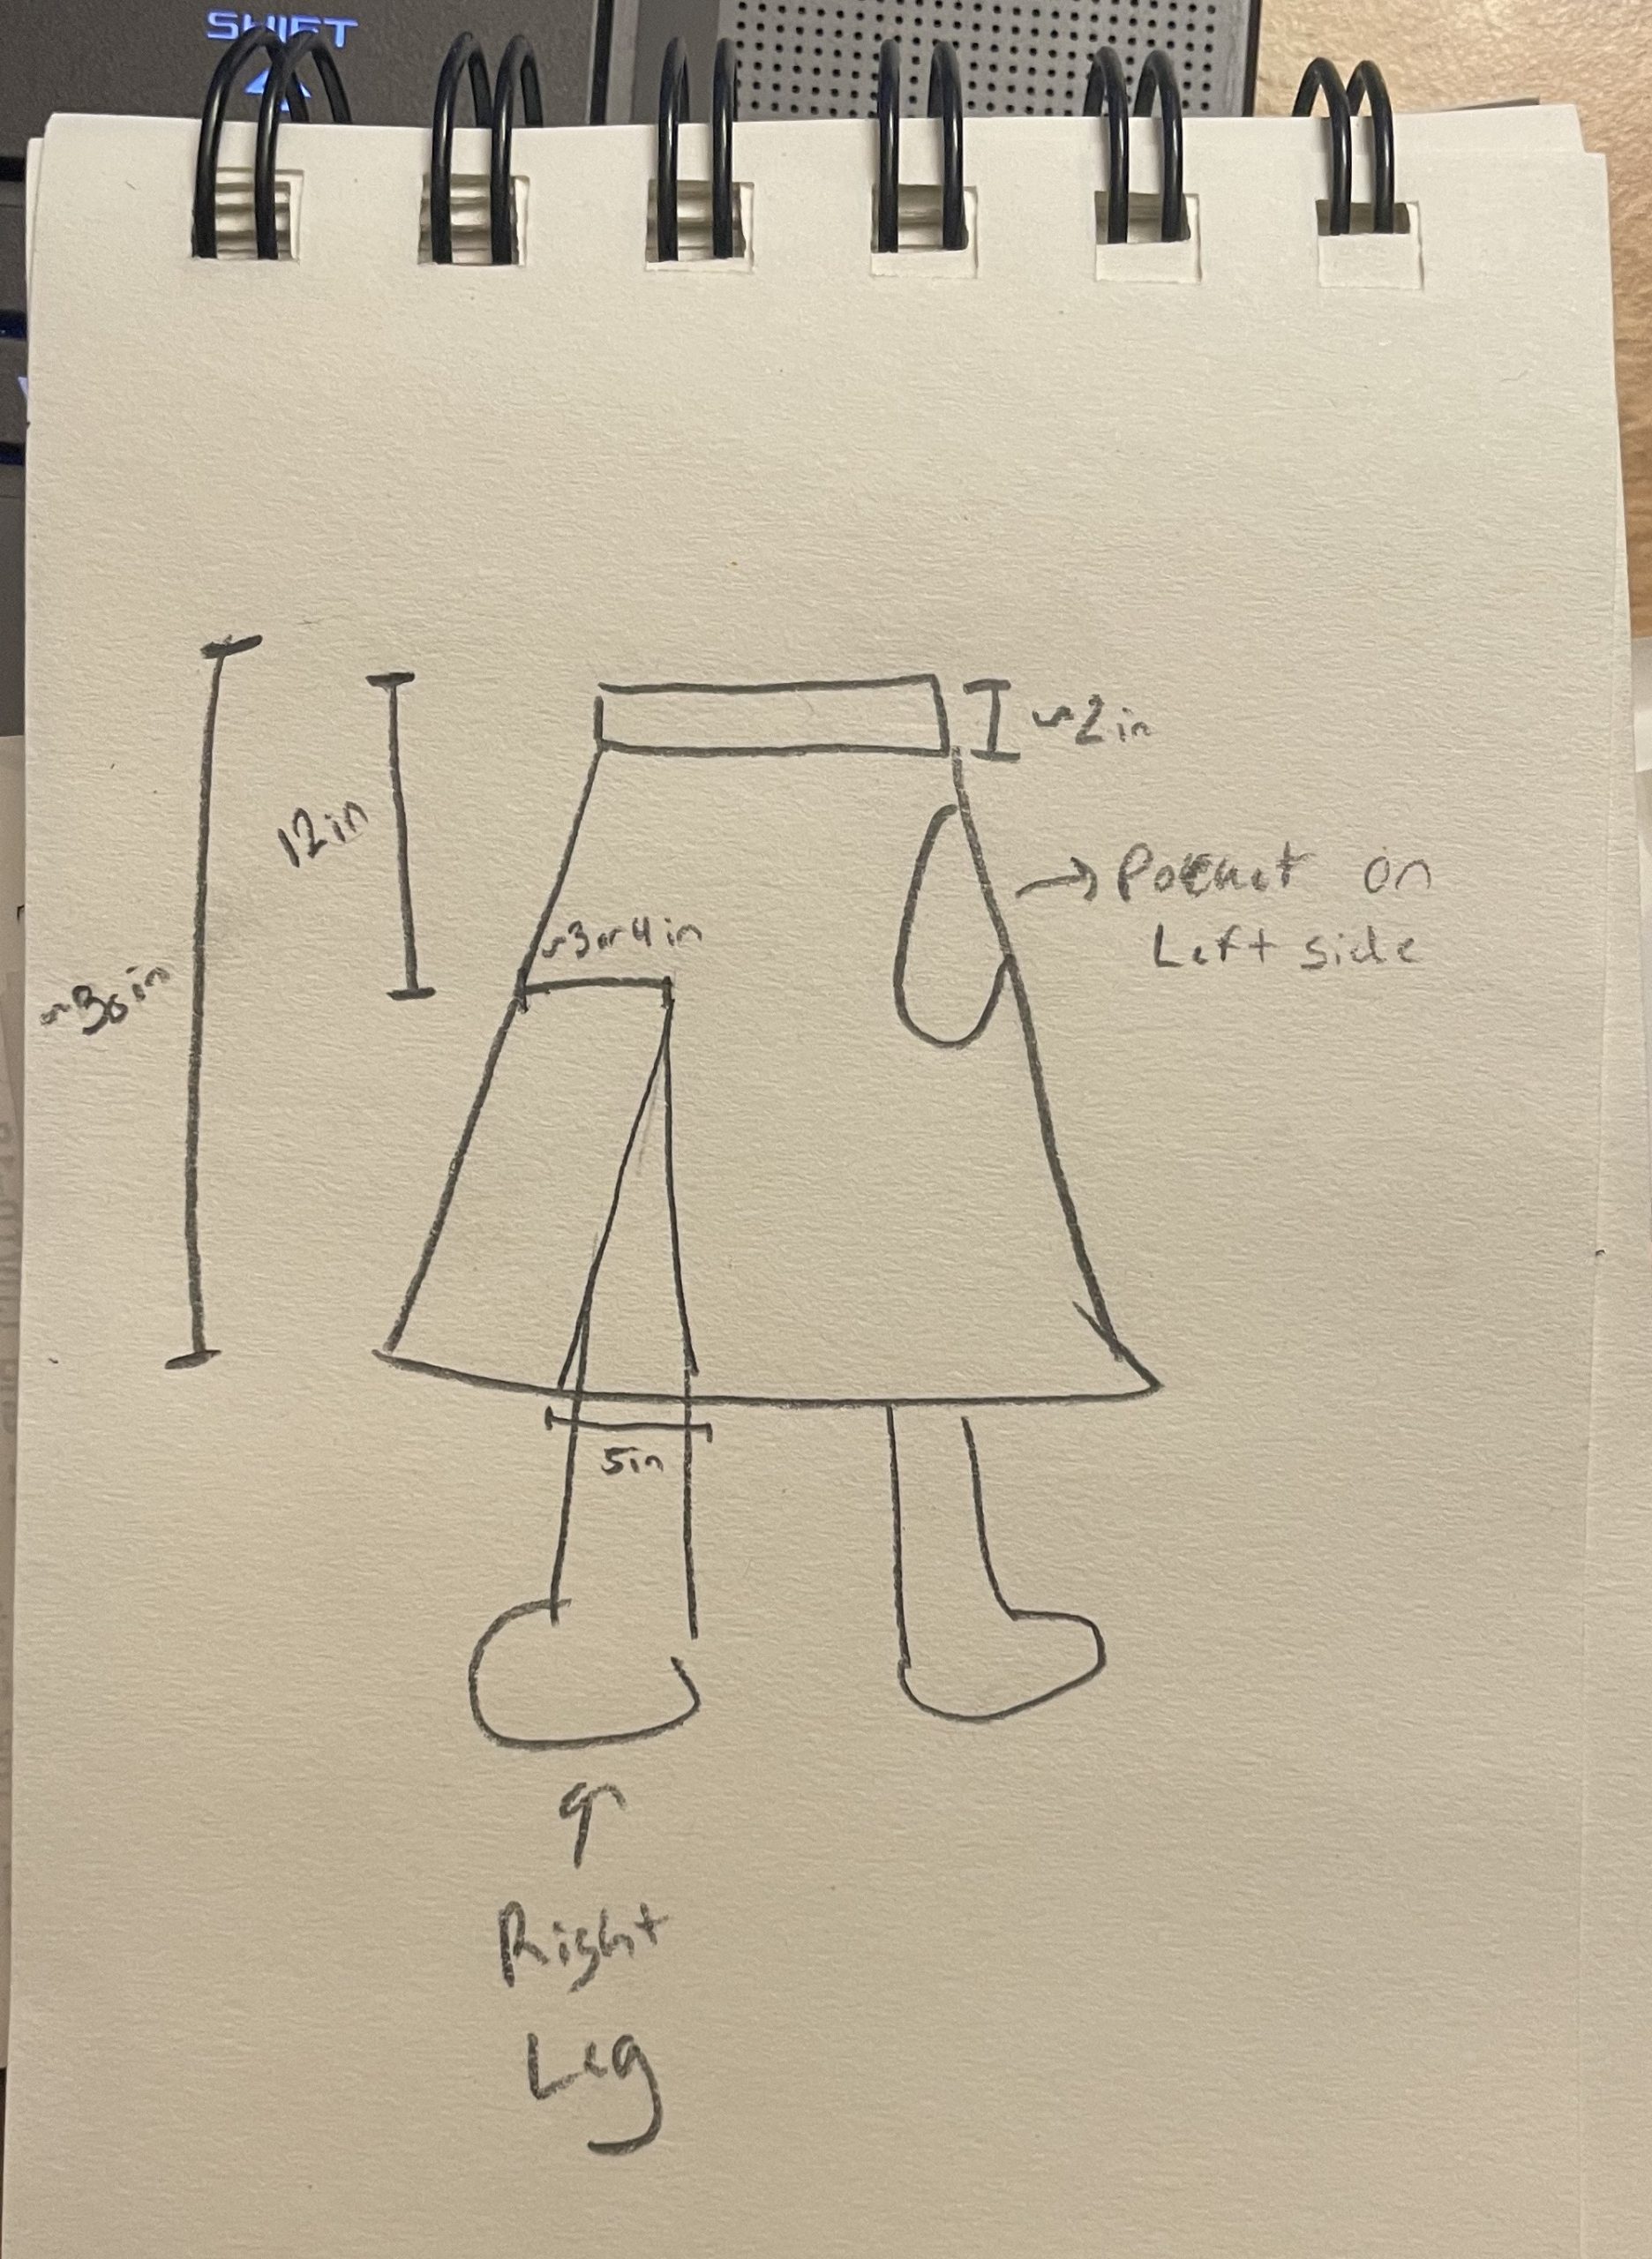
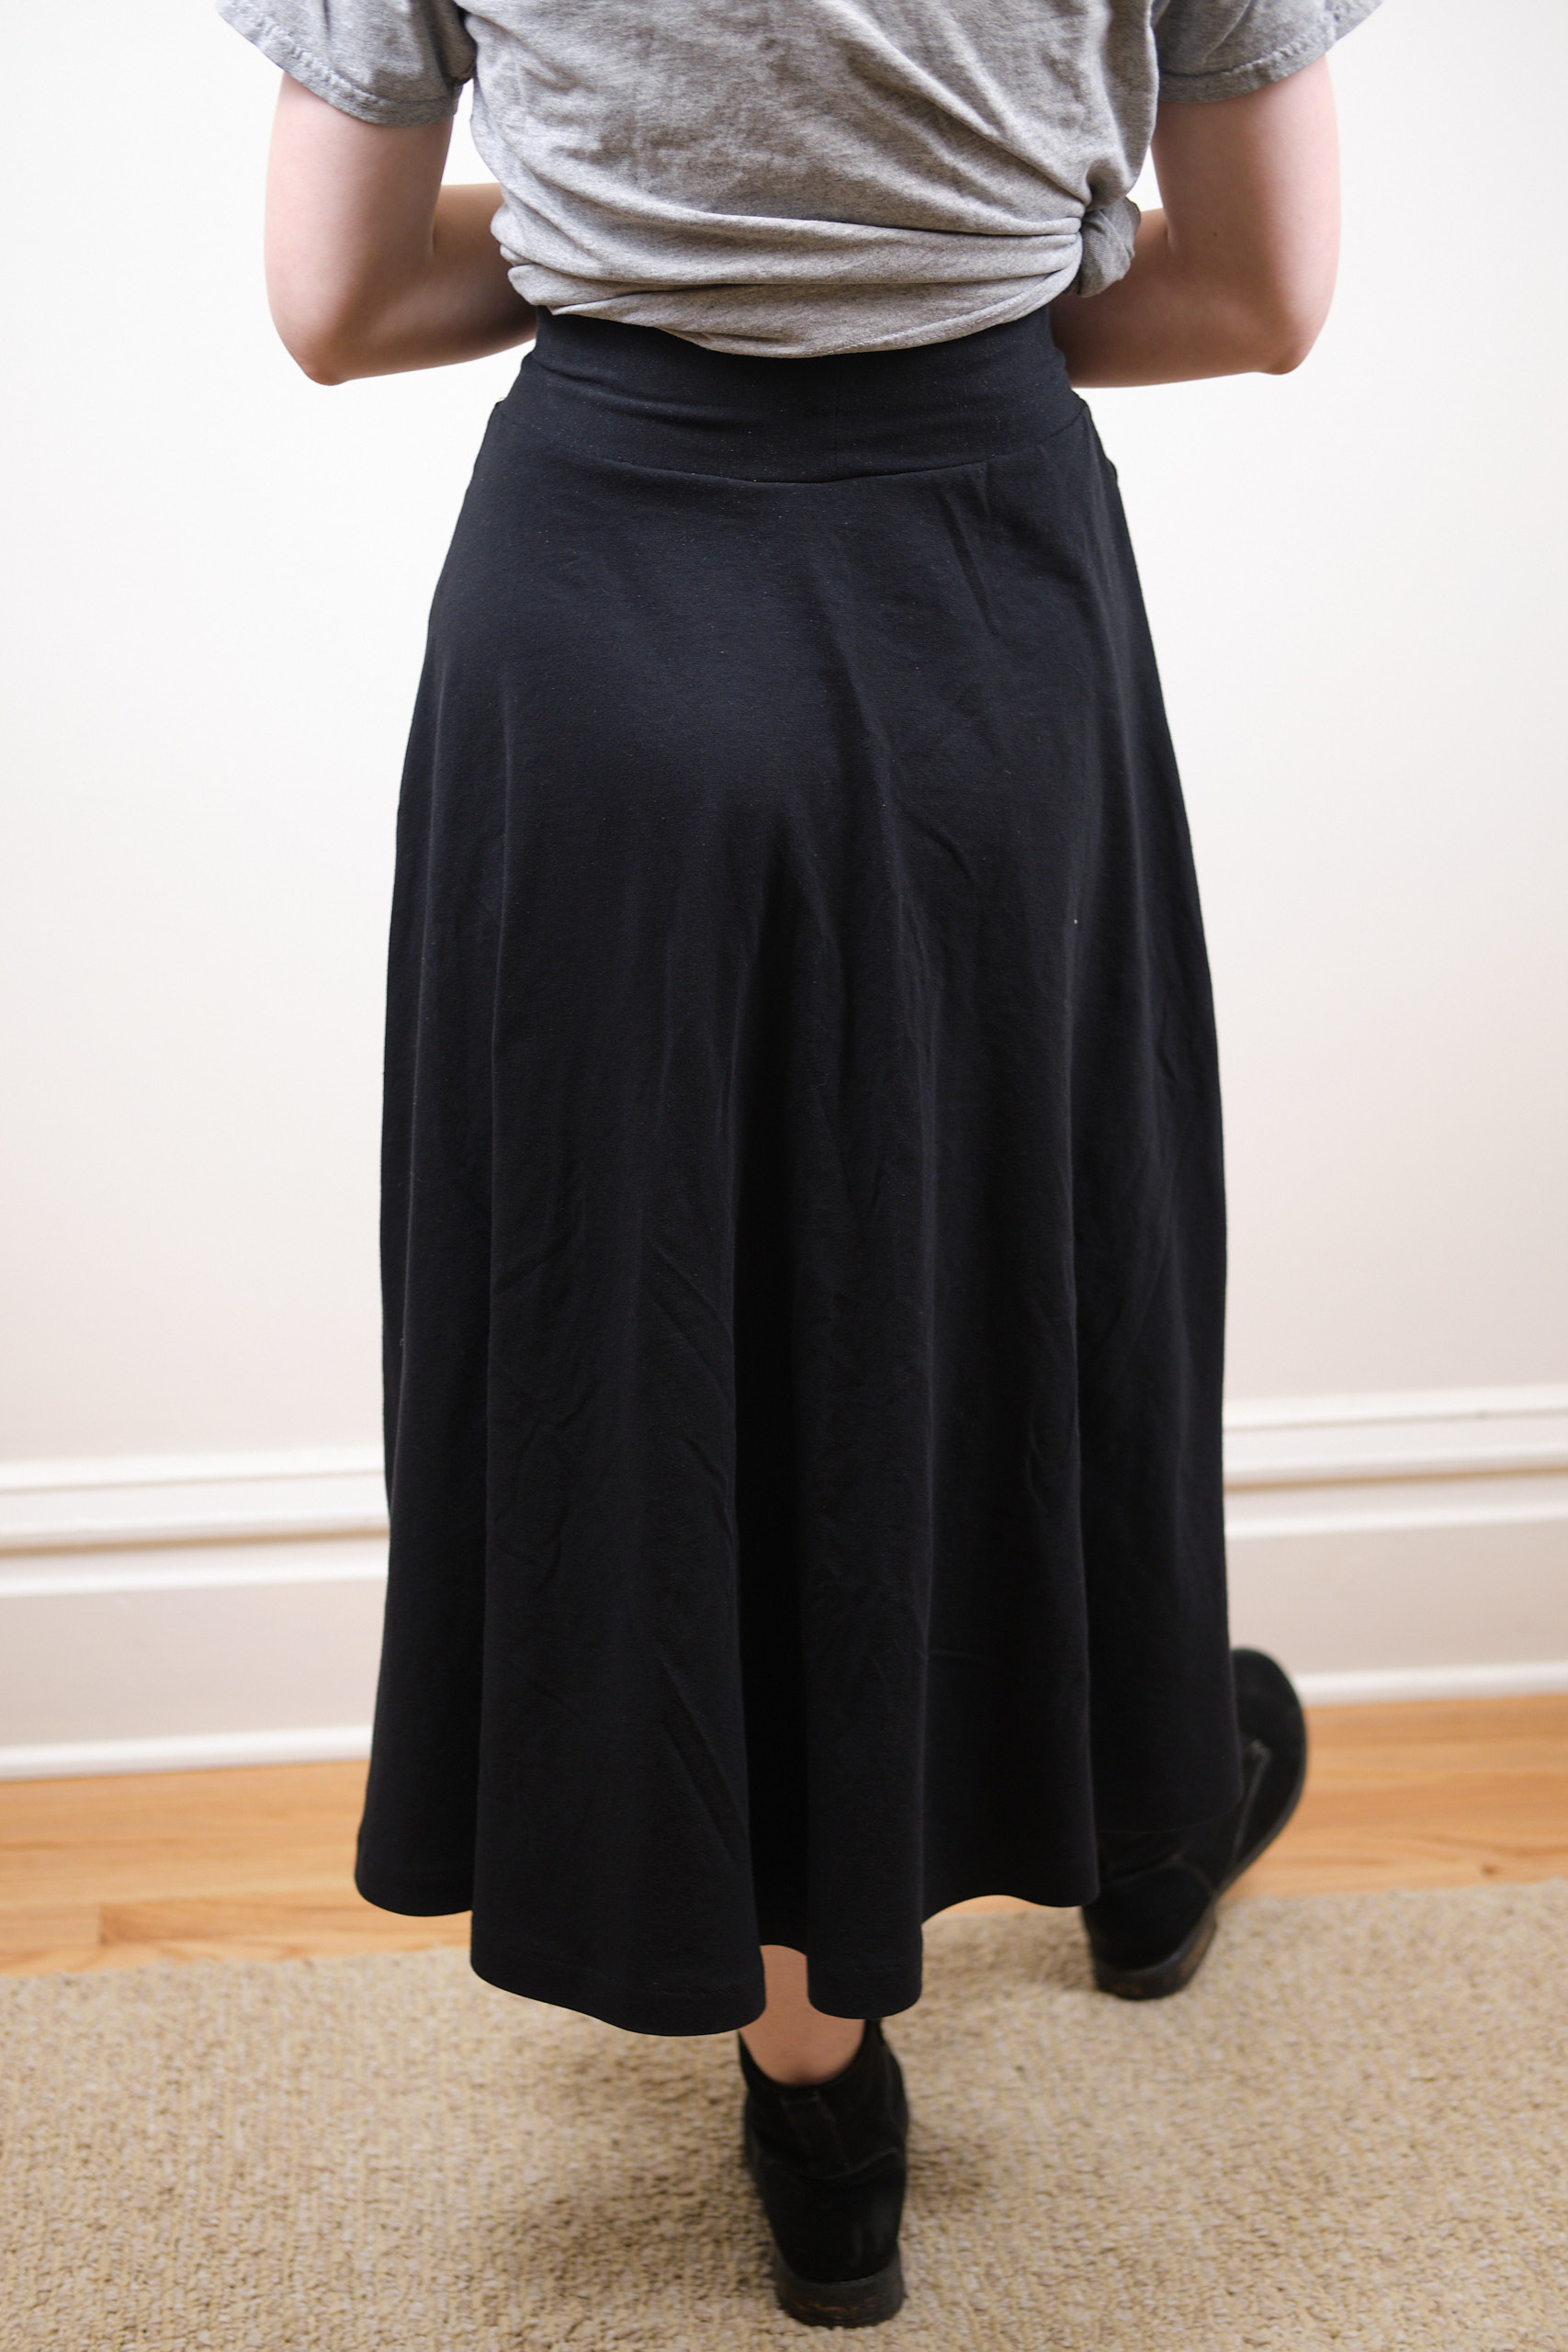
My daughter joined a fire spinning club and has to wear 95% cotton or wool clothing while playing with fire. Personally, I would go with tight jeans in this situation, but she doesn’t like to wear jeans. I previously made her a pair of black cotton french terry pants (which apparently I never photographed), but a few weeks ago she emailed me that she wanted a black skirt, and sent a sketch of what she had in mind. She wanted a midi-length skirt with a slit on the right side, but in several inches from the side seam so that she could dance in it, ideally pockets, and a waistband that wouldn’t move around. She wanted the skirt to have a little bit of swish, but not so much fabric that it would be a big fire hazard.
I decided to use the Pattern Emporium Heartlight skirt pattern, which I previously used to make a short skirt for myself, modified to have pockets. I used the size AU 10 pattern with AU 8 waistband, just as I had made for myself. I used about 2 yards of 95% cotton/25% spandex black jersey fabric.
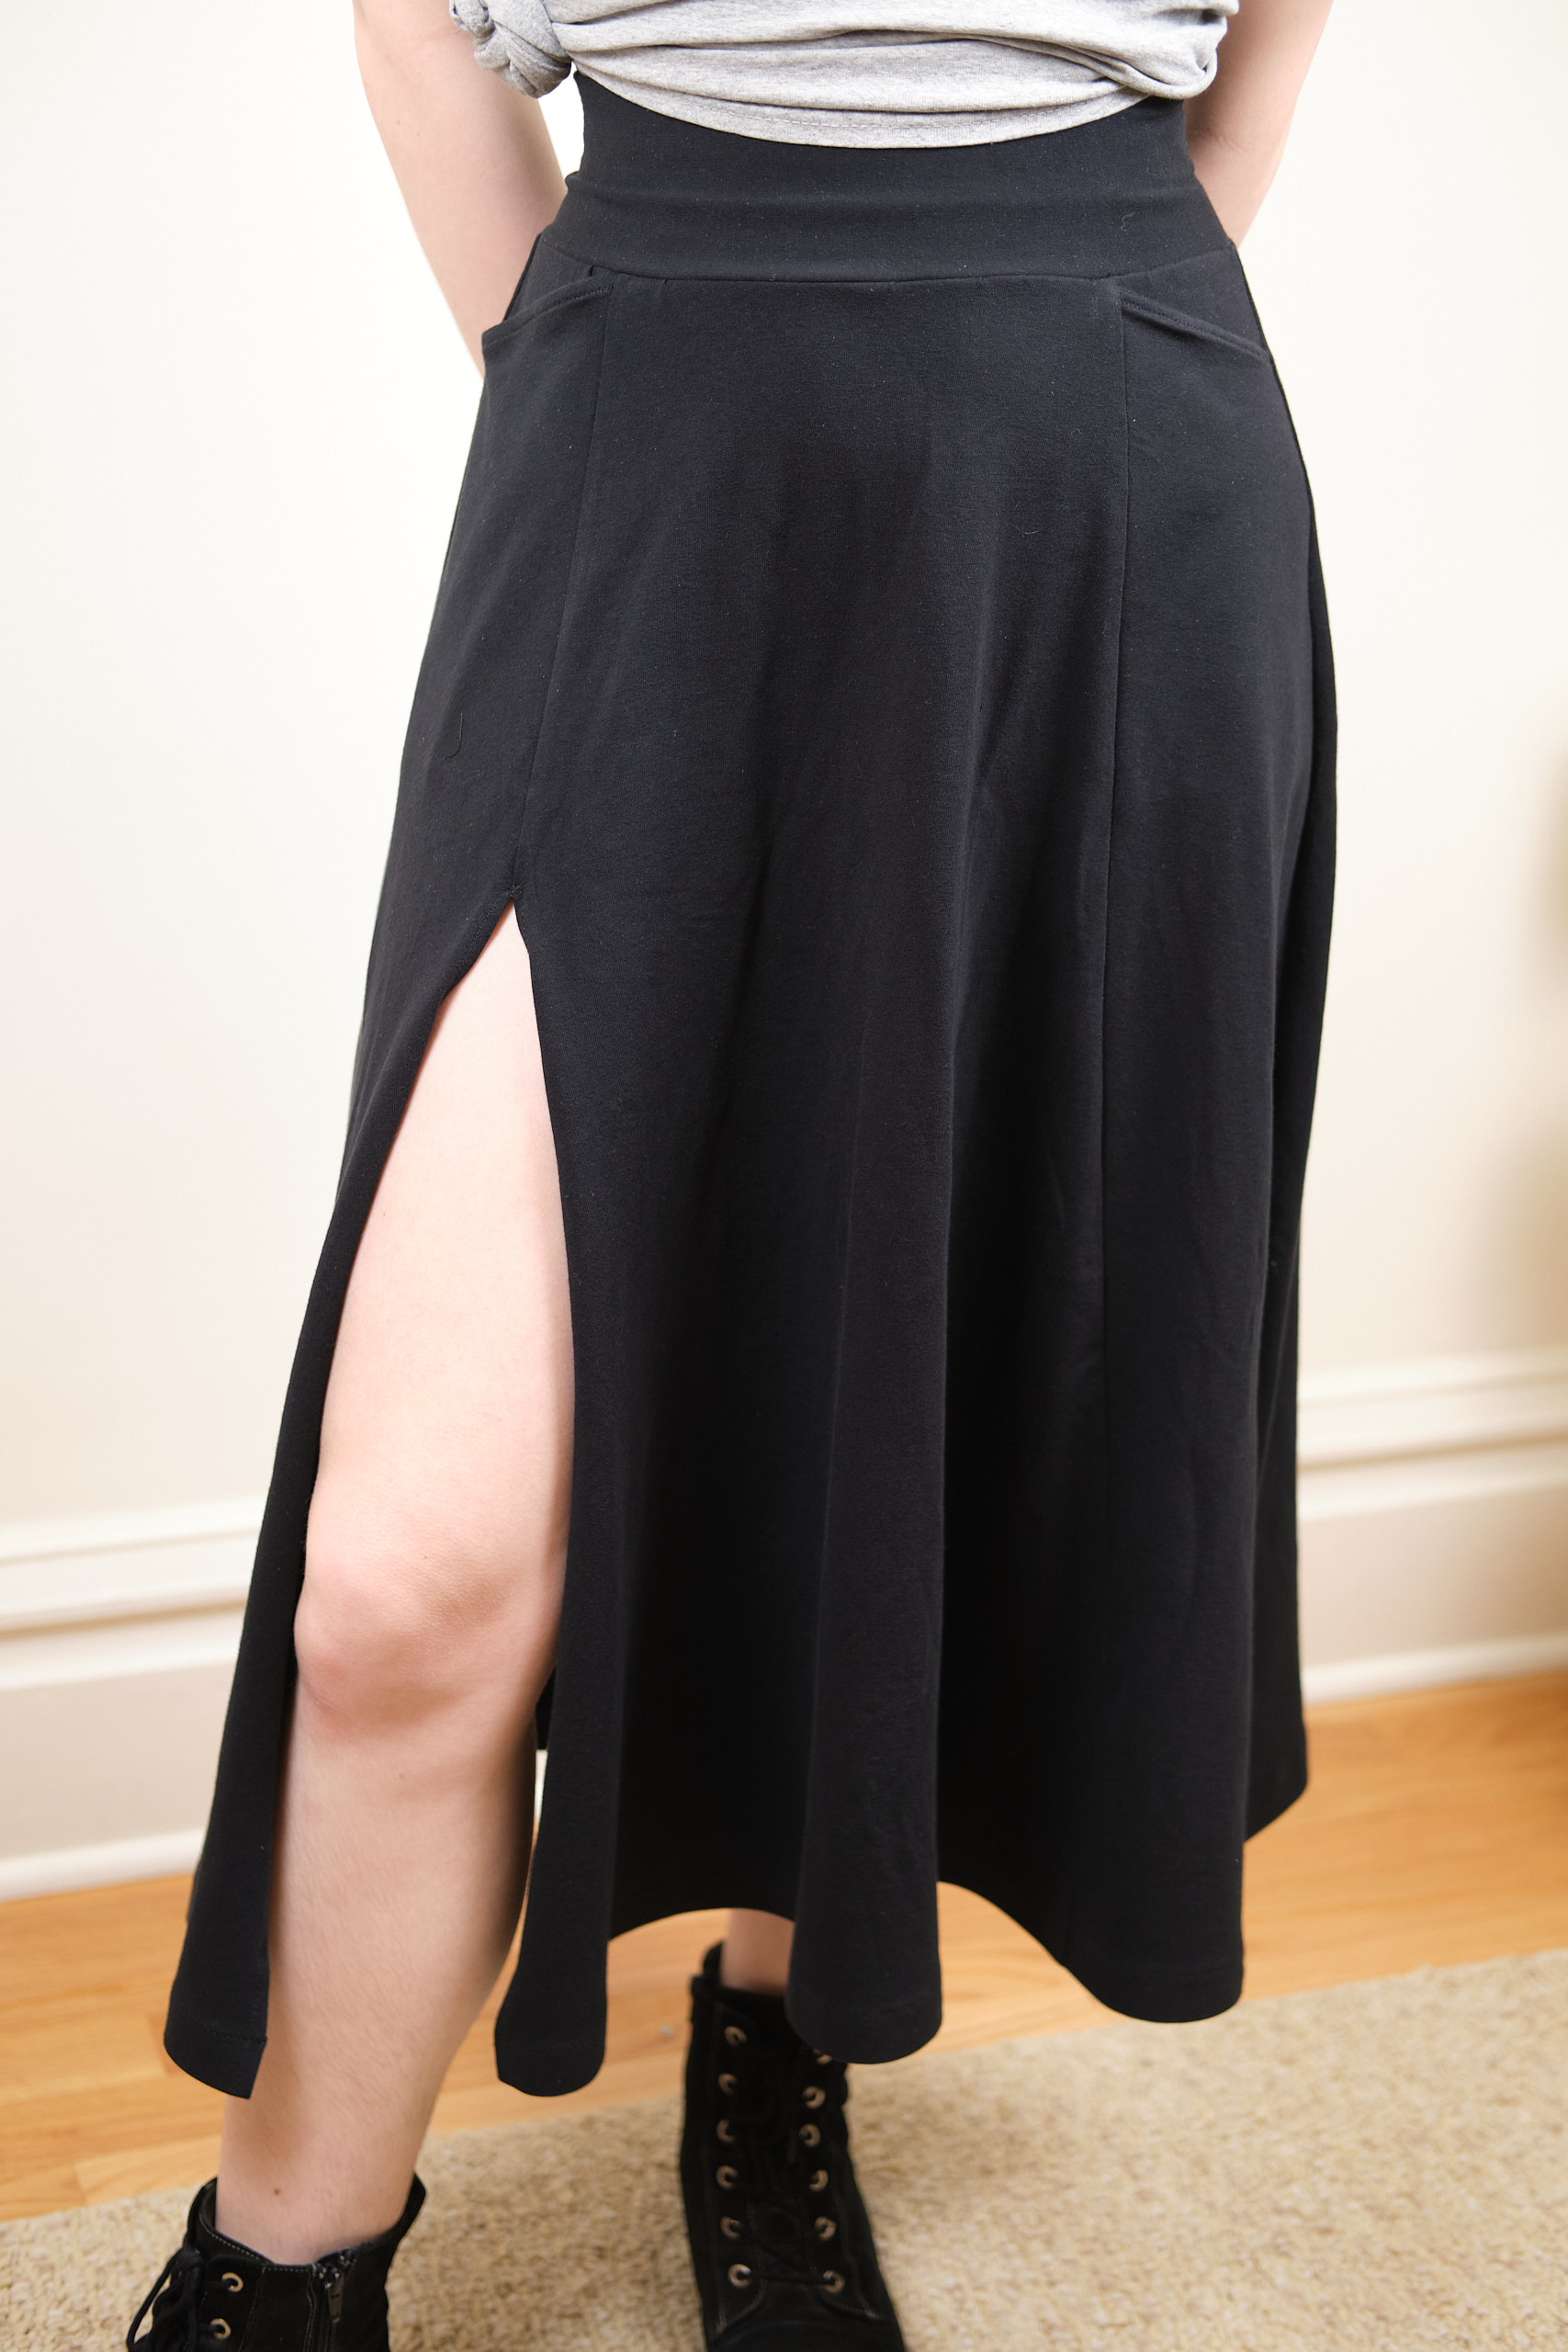
To achieve the slit I split the front panel of the skirt into three pieces. I drafted pocket bags that I could anchor between the side seam and the interior front seams, with top diagonal pocket openings. I’m showing the front pattern piece in the figure below, divided into three, with the pocket pieces laid over it. The pockets fold up at the green dashed line. (I know she only asked for one pocket, but once I figured out that I could anchor them in, I decided to give her two.)
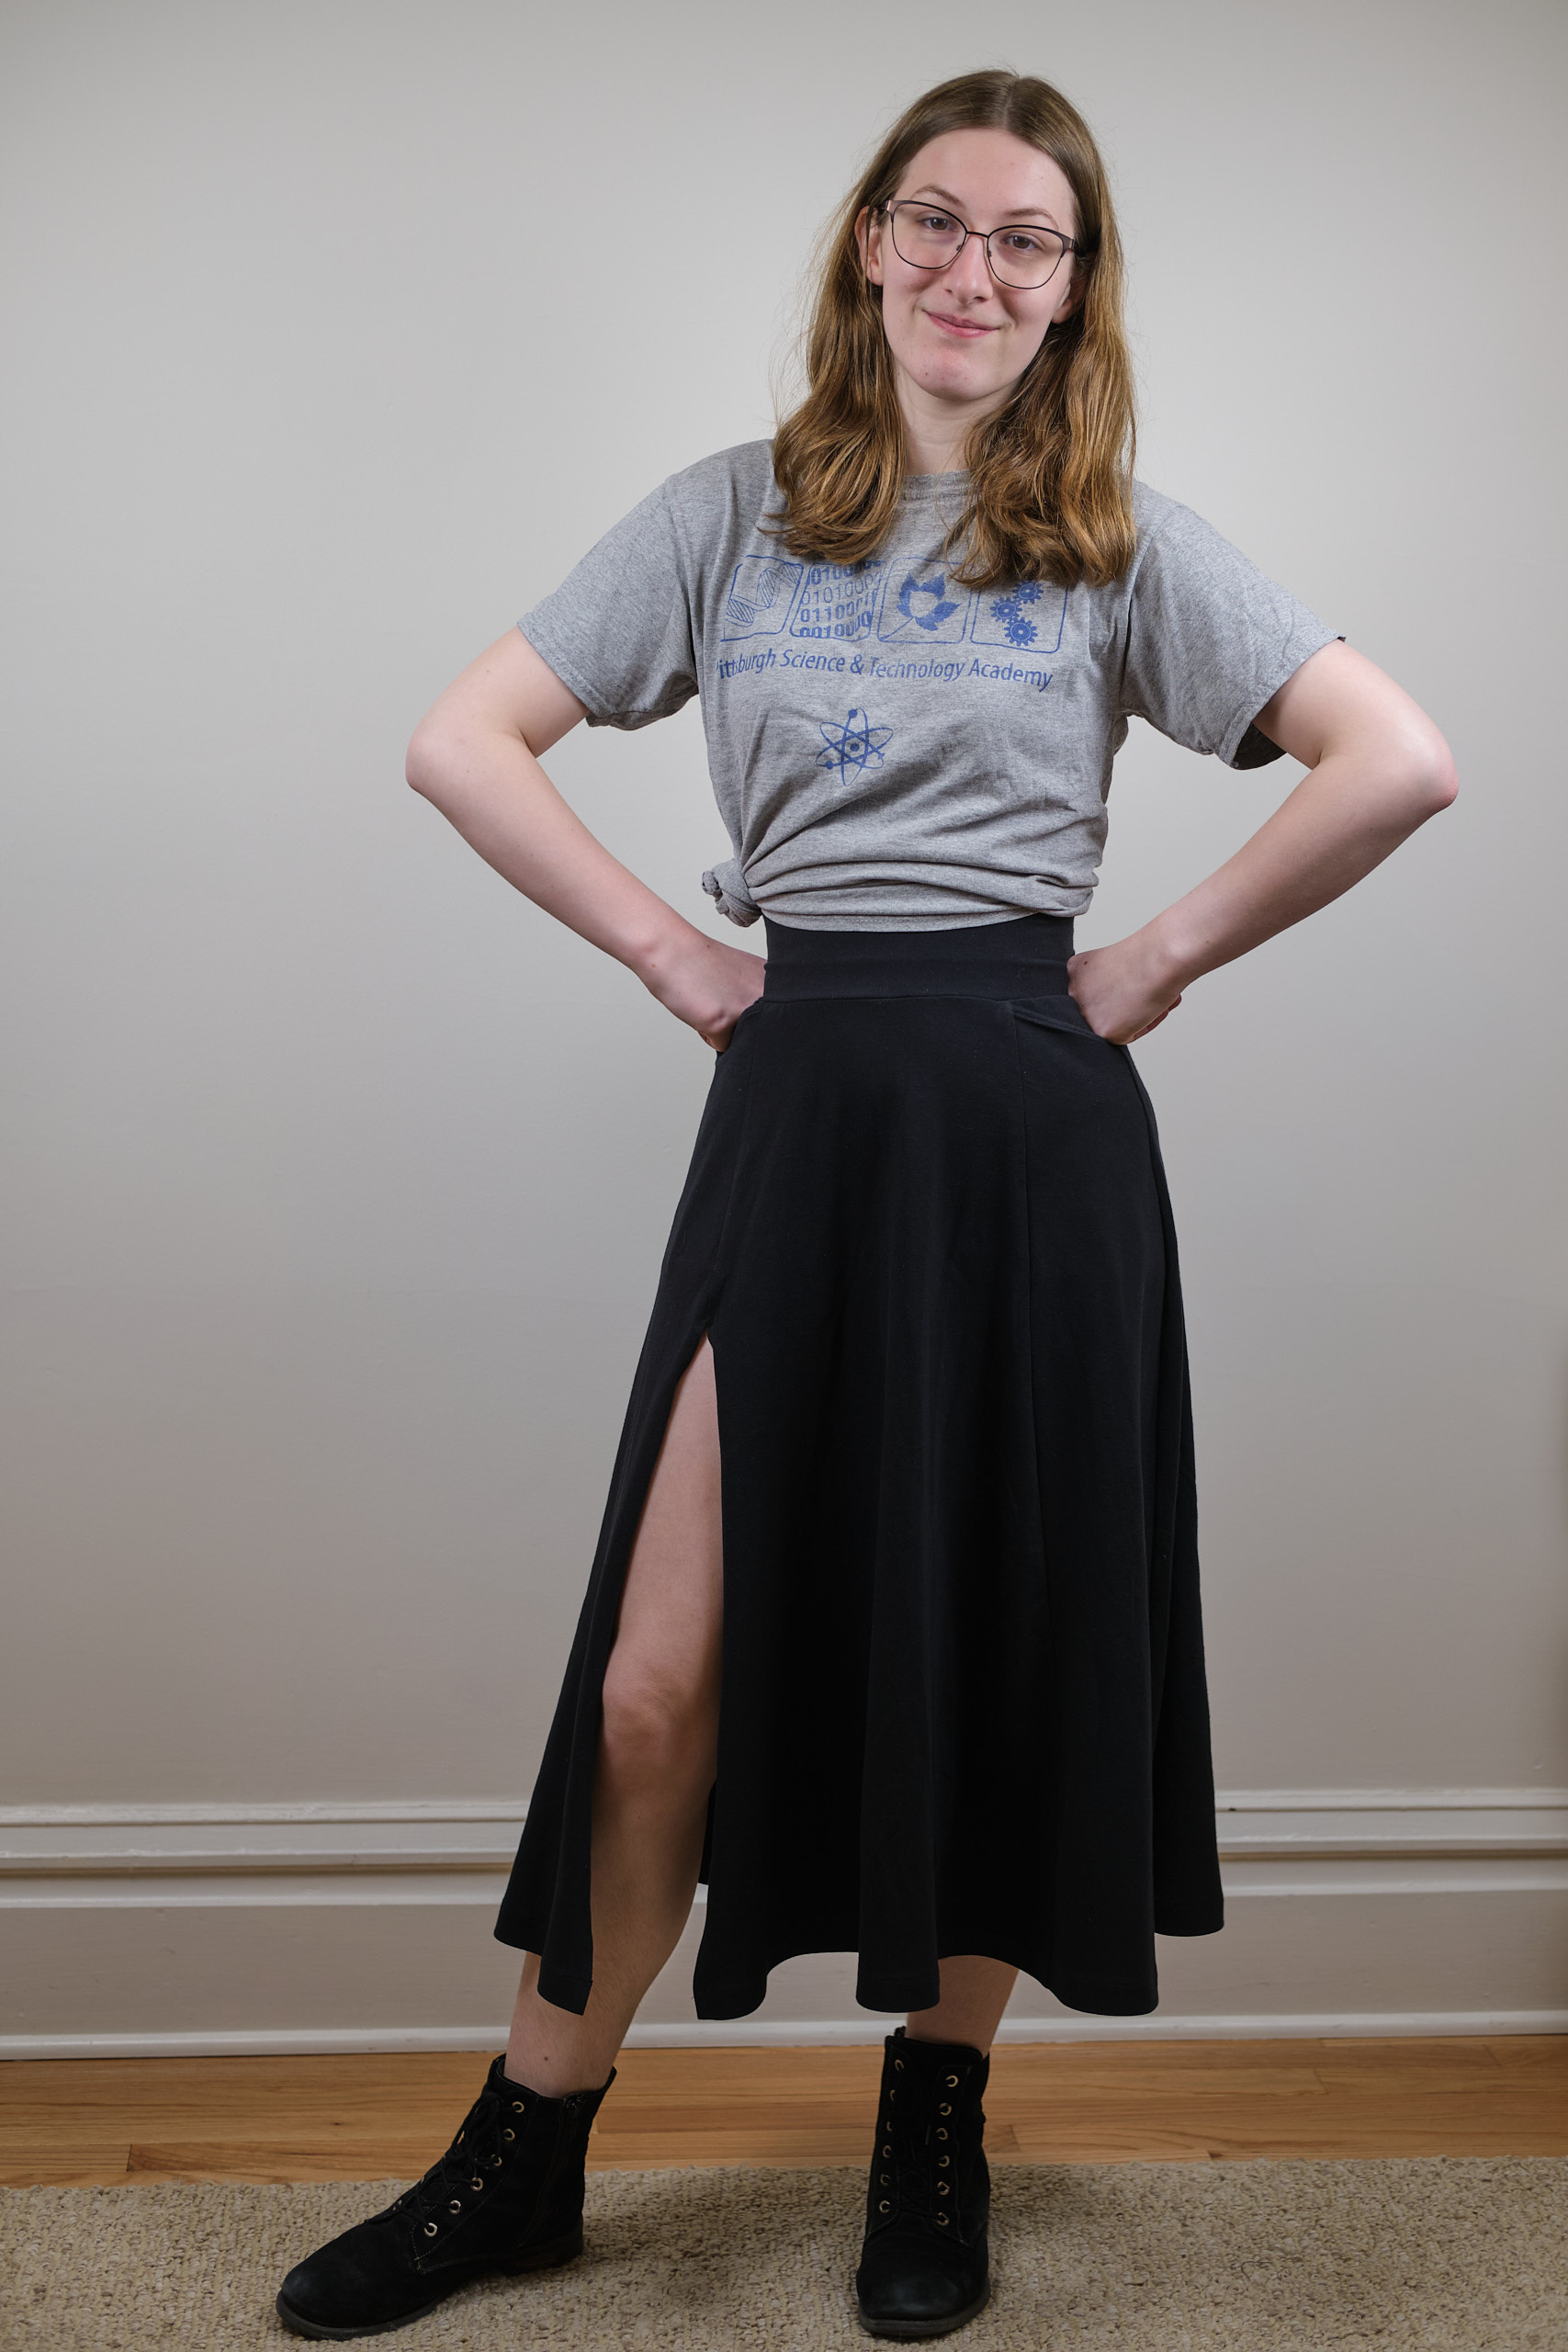
I sewed up the left seam but only sewed the top 10 inches of the right seam and then serged the raw edge of both sides of the slit and top-stitched them down. After she tried it on and found the waist not as secure as she wanted, I threaded elastic into the waistband.
She says it is exactly what she wanted for her fire spinning performances and she likes it so much that she will wear it even when she is not performing.
I’ve spent the past few months pondering back and shoulder adjustments and trying them out. While making my first Wanderulst dress I realized I needed a swayback adjustment to remove the extra folds of fabric at the back of my waist. But I also noticed that my shoulders slope down quite a bit so I tried a sloped shoulder adjustment as well in my second and third Wanduderlust dresses.
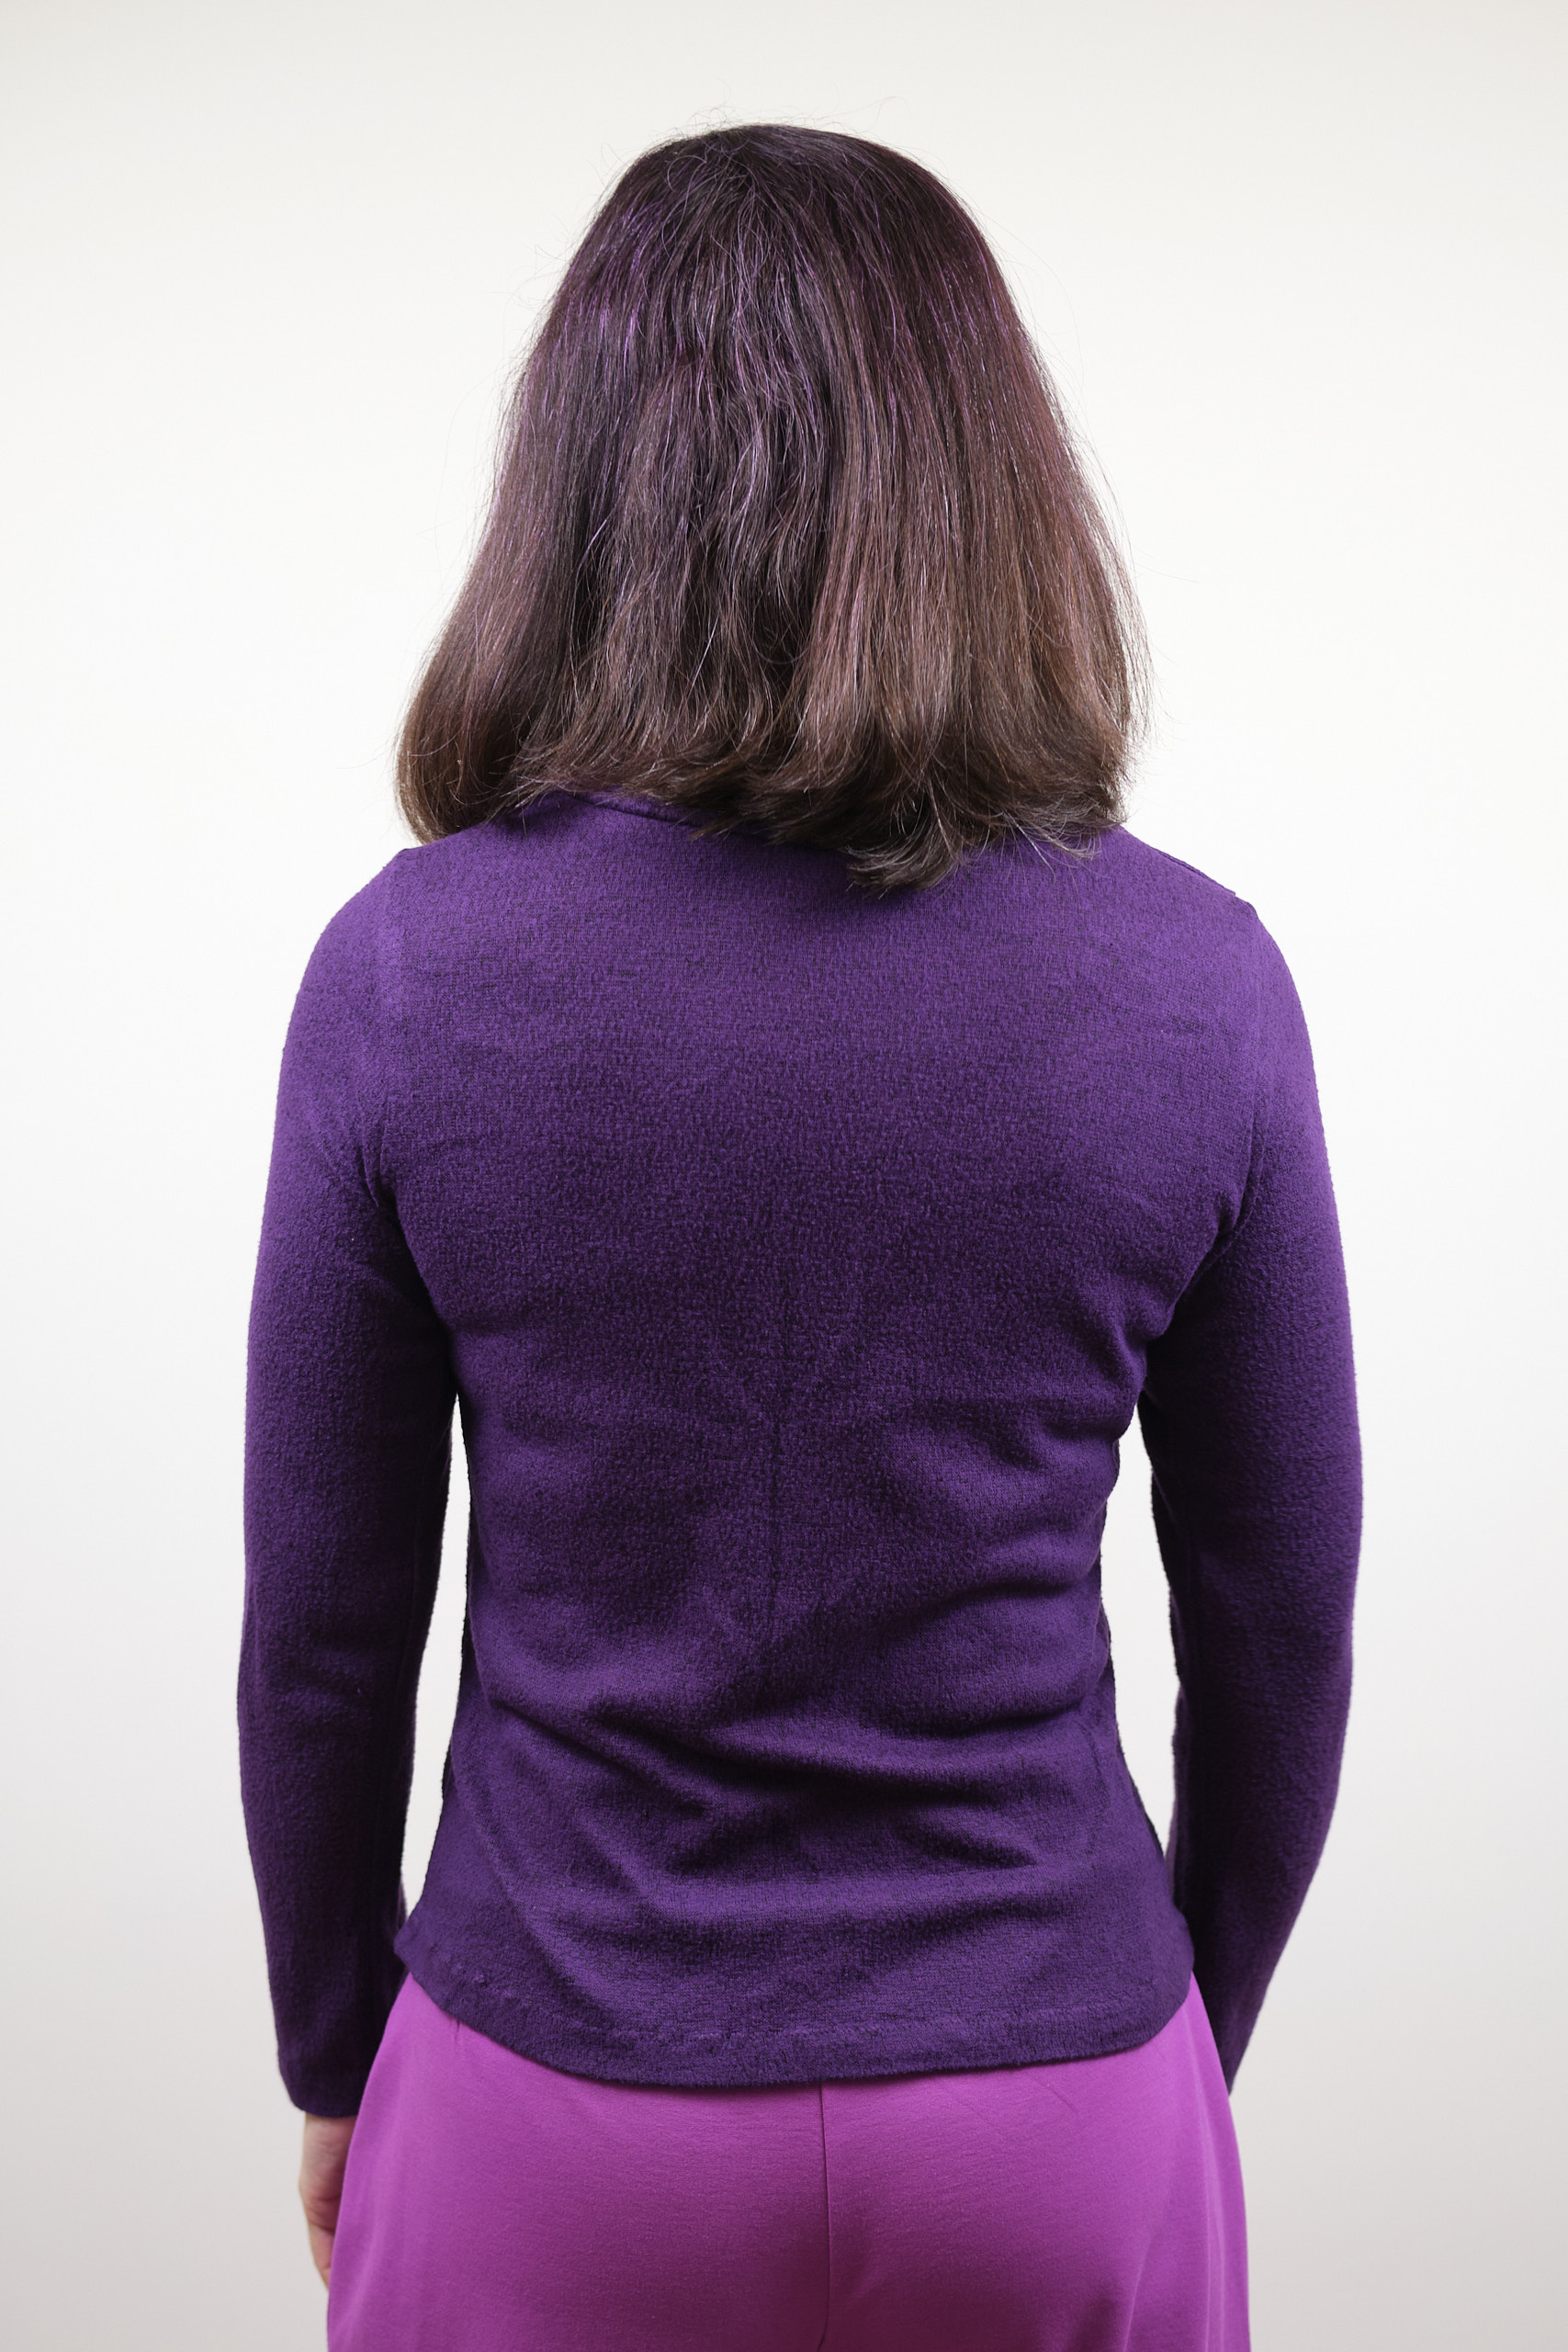
I also noticed that my Sinclair Bondi t-shrts and sweaters didn’t look as good in the back as they did in the front. Here’s one that I made recently in size 6p from rayon/poly/spandex plum sibley brushed sweater knit from Surge Fabrics. The fabric is super soft and stretchy and it fits reasonably well but you can see some minor issues in the back.
Then I made a Bondi sweater with the sloped shoulder adjustment from a washable wool with only about 25% stretch. I noticed that I have more significant drag lines under my arm pits in the back, probably due to the fact that this fabric is not very stretchy. I posted photos in one of the online sewist Facebook groups and someone pointed out to me that my shoulders are both sloped and broad. I set up my cell phone behind me transmitting its camera image to my laptop so I could study my back, and tried on a bunch of different tops and jackets so I could see what was going on.
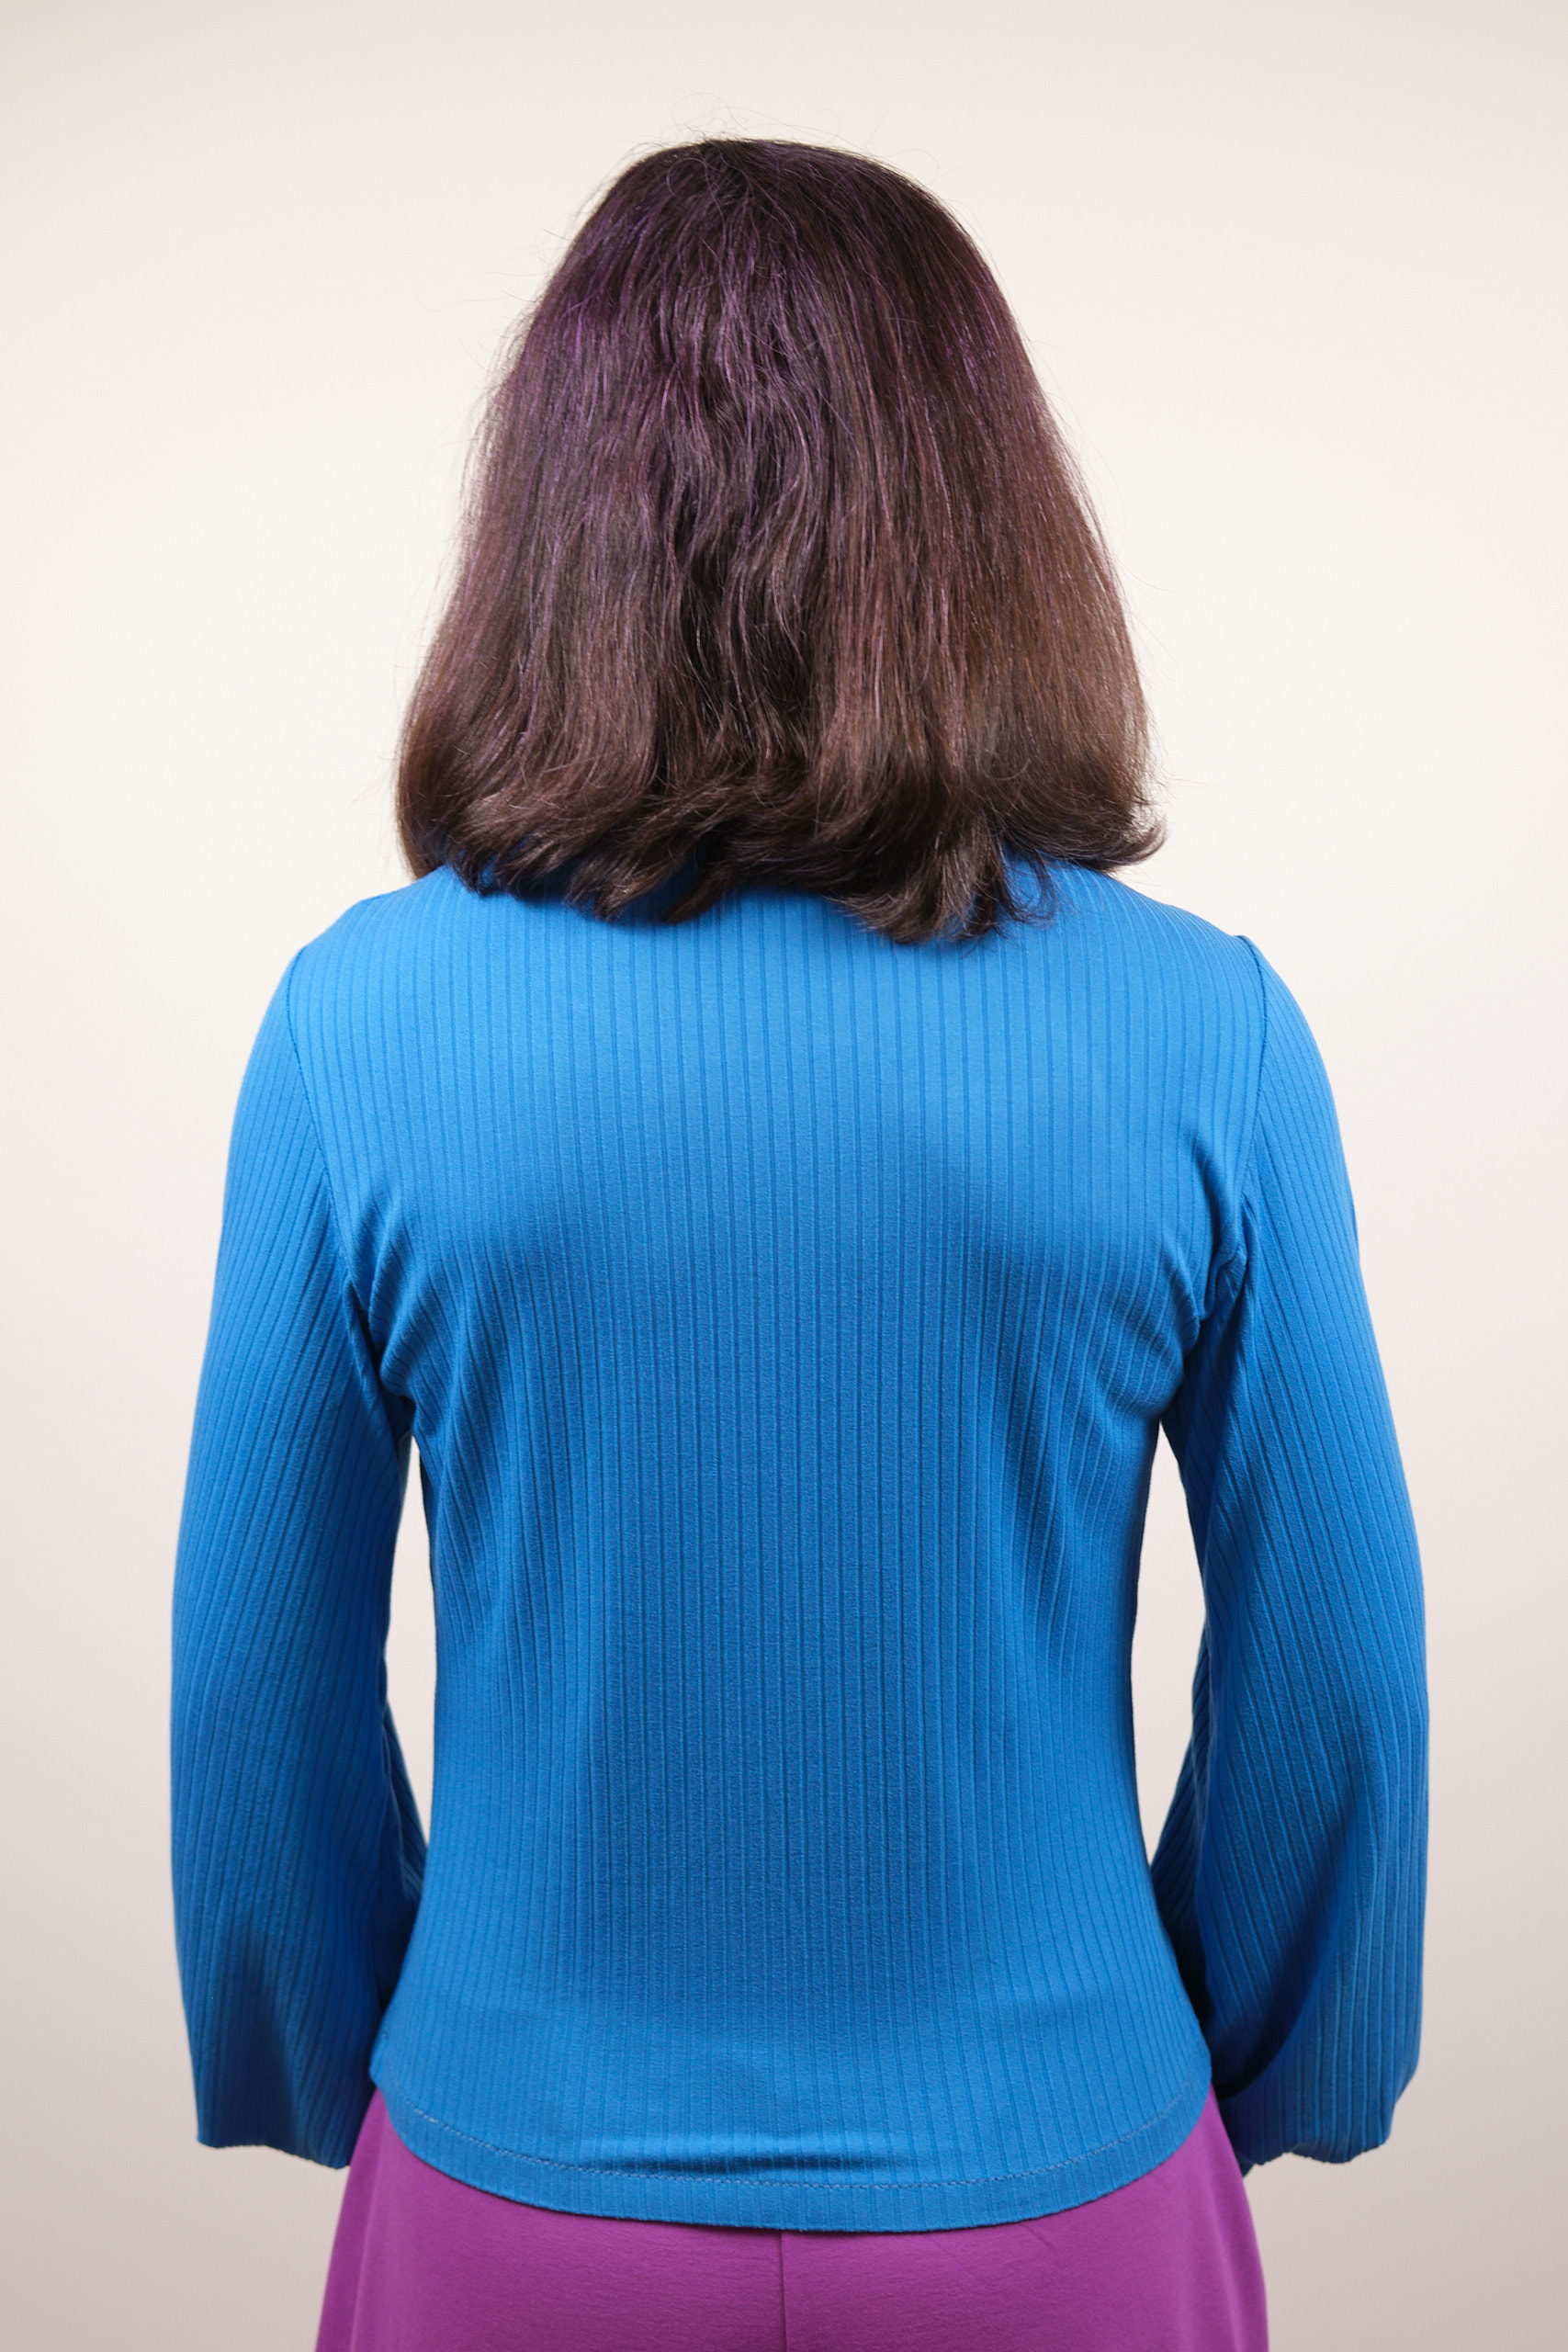
I made a Bondi t-shirt in size 6p with both sloped and broad shoulder adjustments (and bishop sleeves) from an aqua wide lush poly-spandex fabric from Mily Mae. This was better, but the drag lines were not completely gone.
After studying the black ponte Onyx blazer I made a few months ago, I eventually noticed that the top of the shoulder seam was not actually at the top of my shoulder and had a tendency to slip down my back. I realized that when I pulled my shirt or jacket forward to get the shoulder seam where it belonged, it tended to bunch up around my neck. And this is why I find it uncomfortable to wear most jackets with collars! I thought perhaps what I needed was a forward shoulder adjustment, which involves basically taking the top of the shoulder from the front pattern piece and moving it to the back. I went into Affiinty Designer and moved an inch of the Bondi tshirt pattern (already adjusted for sloped and broad shoulders) from the front to the back and cut out another tshirt. I didn’t take a photo, but the results were not great.
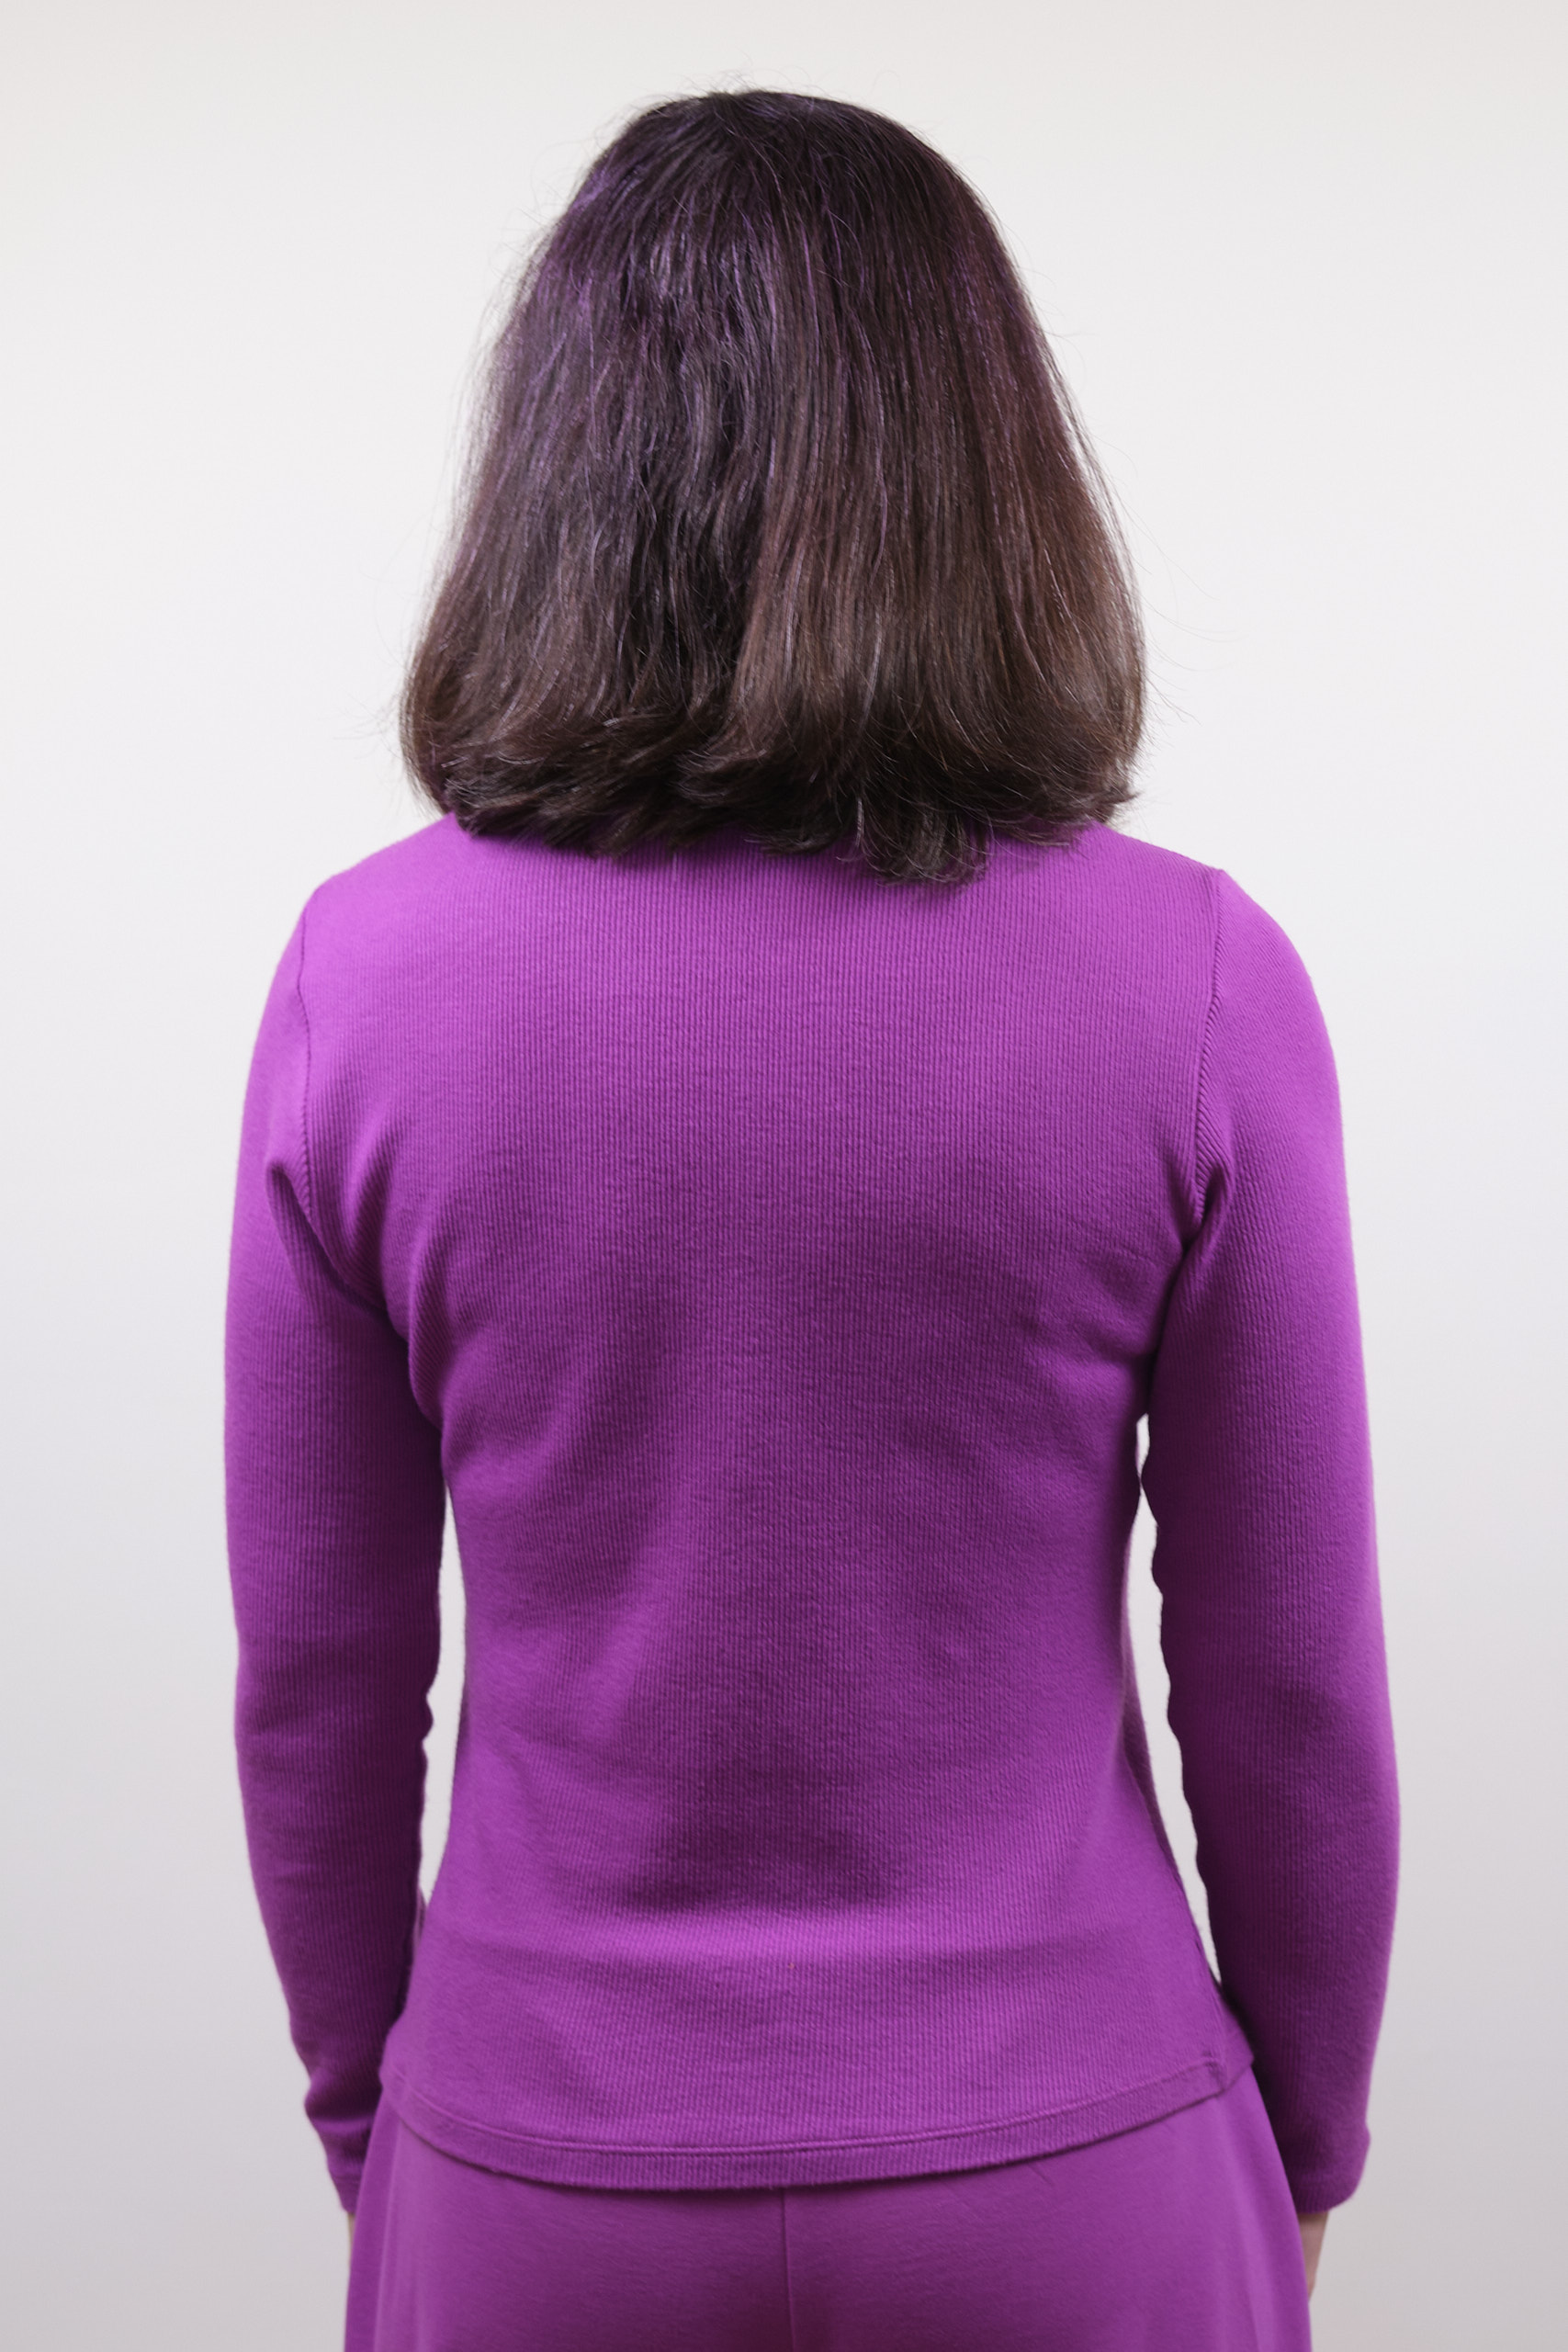
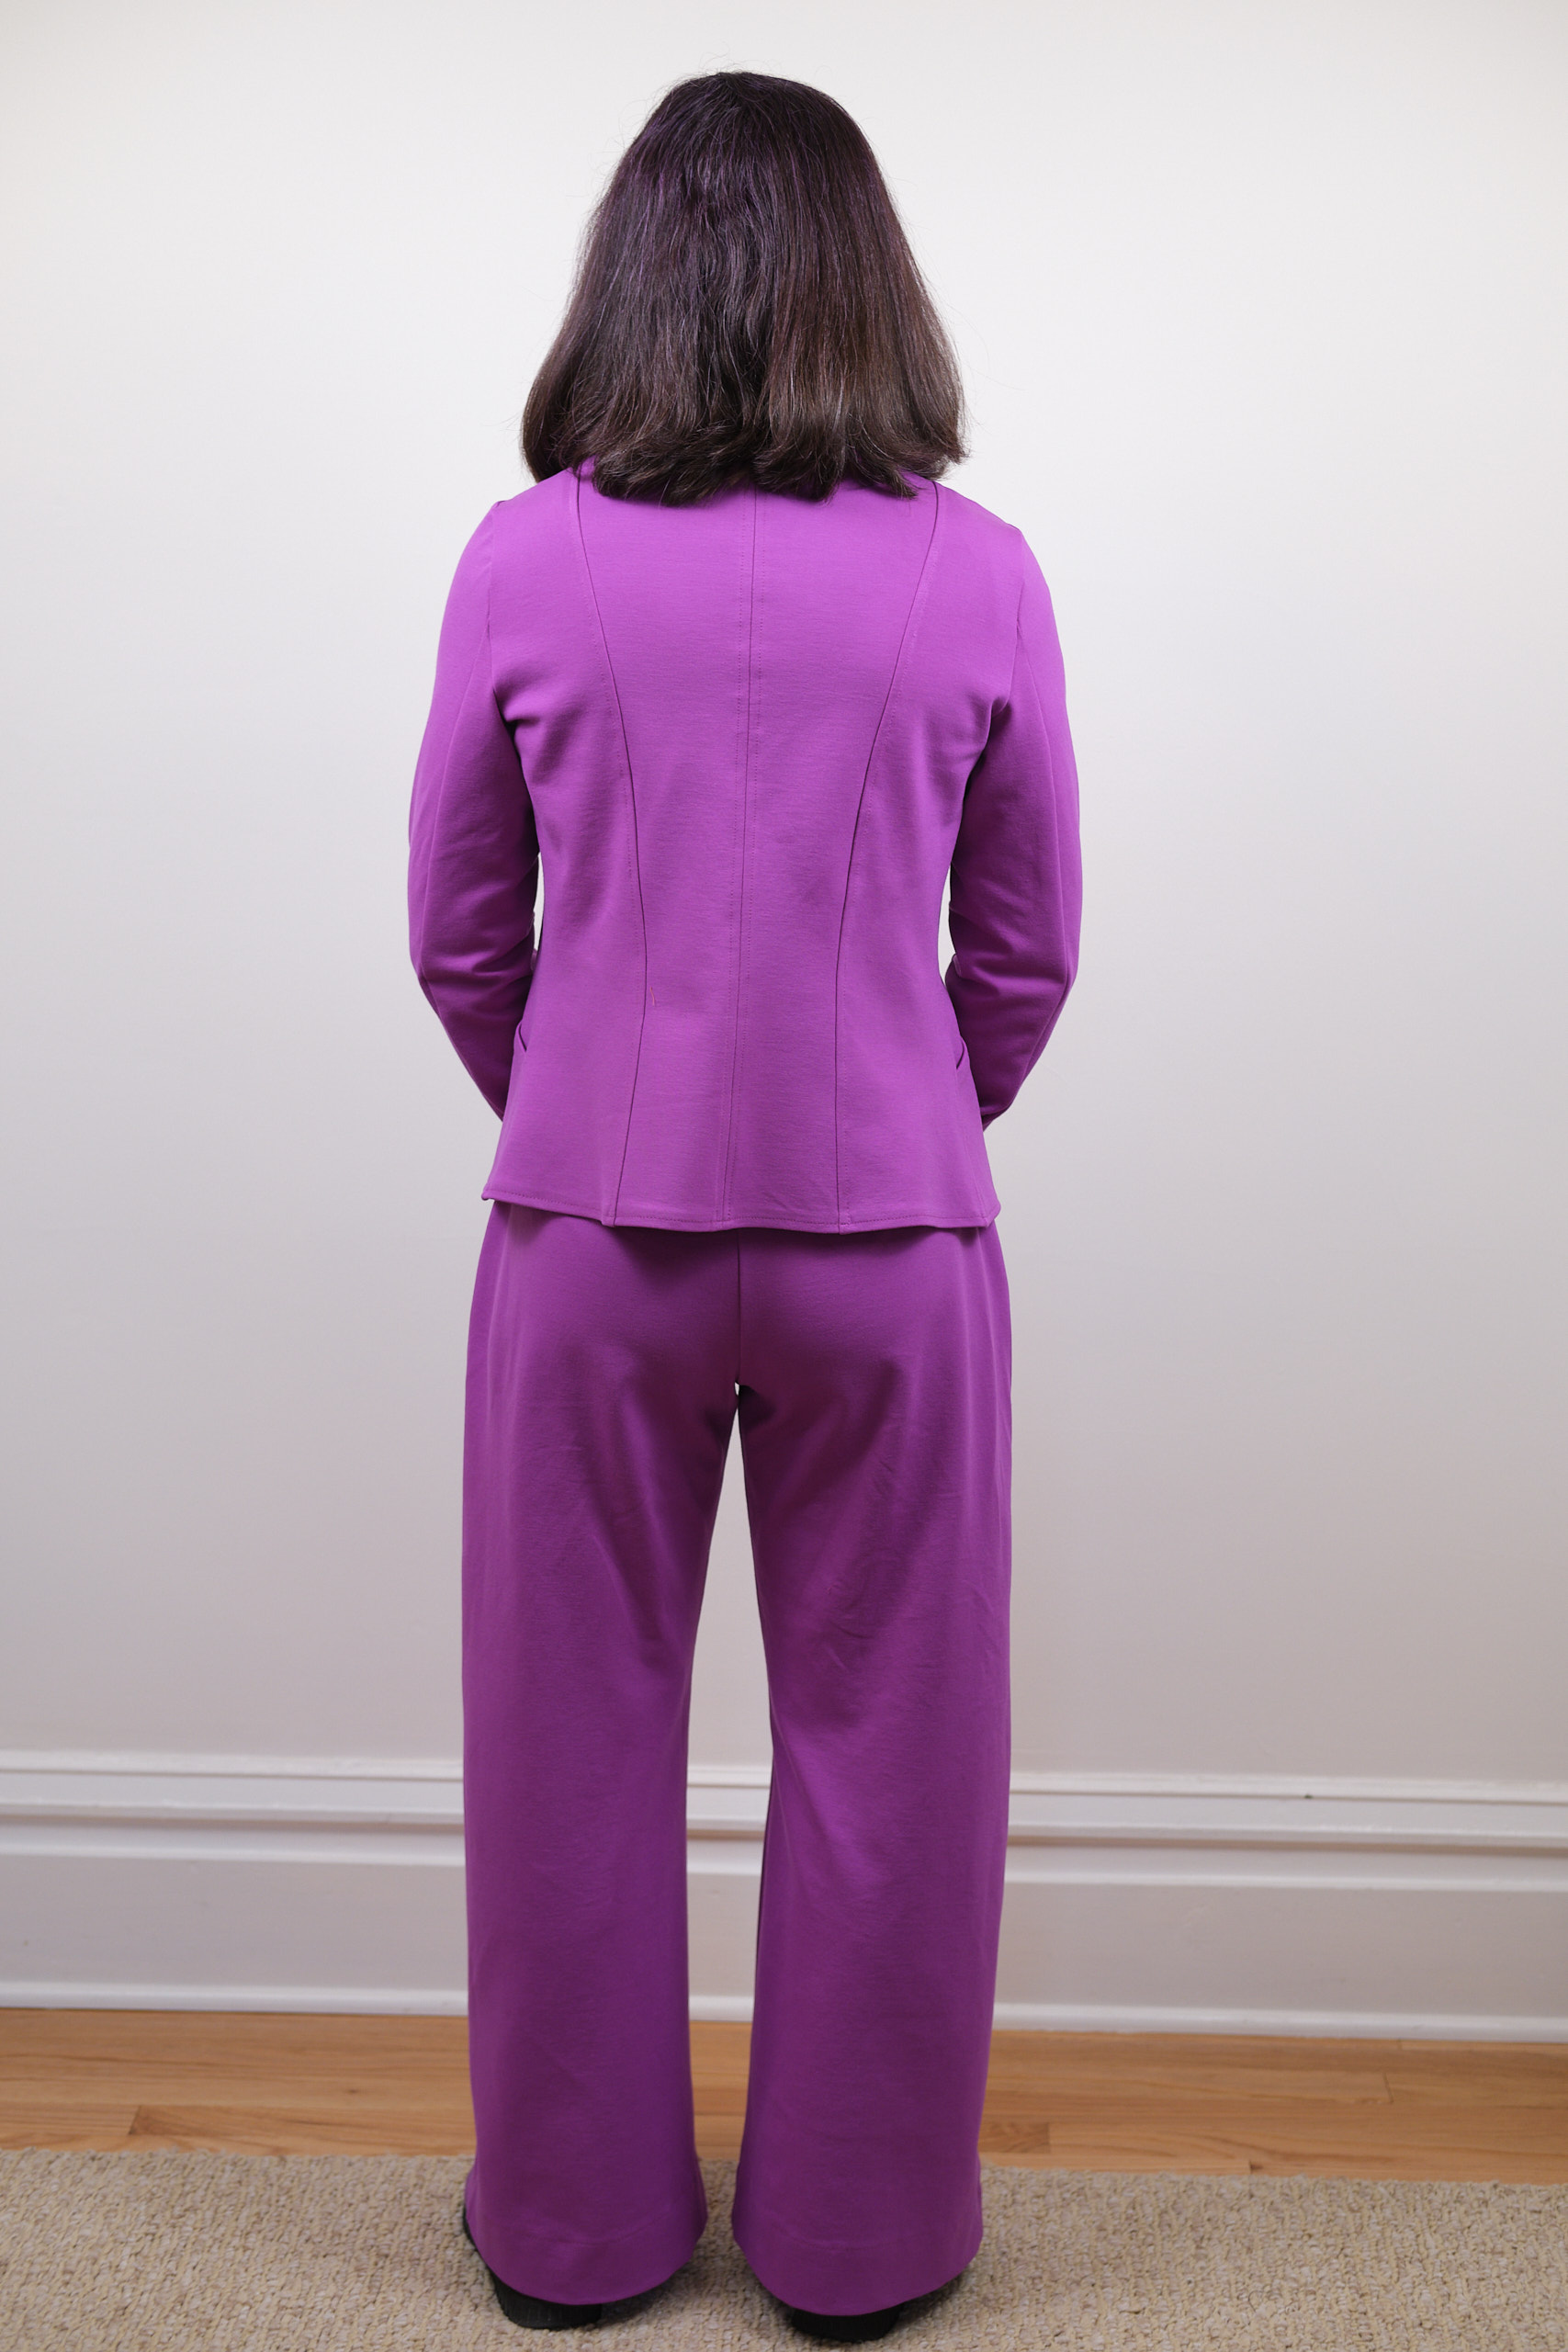
I decided to stick with the sloped and broad shoulder adjustment for my next Bondi in size 4p, made from purple (looks like magenta) monaco rib poly/rayon/spandex from Mily Mae. I think it came out pretty well, despite some minor back issues. I think I’m done adjusting the Bondi for now.
I bought three yards of a beautiful magenta ponte fabric from Mily Mae last year because I love the color (it matches the highlights in my hair) and I love working with this kind of ponte (67% Rayon/28% Nylon/5% Spandex). I thought about making a dress out of it, but eventually decided on a magenta suit. I already have a (store-bought, me altered) purple suit, but I don’t have a pink suit. Magenta is on the more purply side of pink, which means it can be interpreted either as pink or purple.
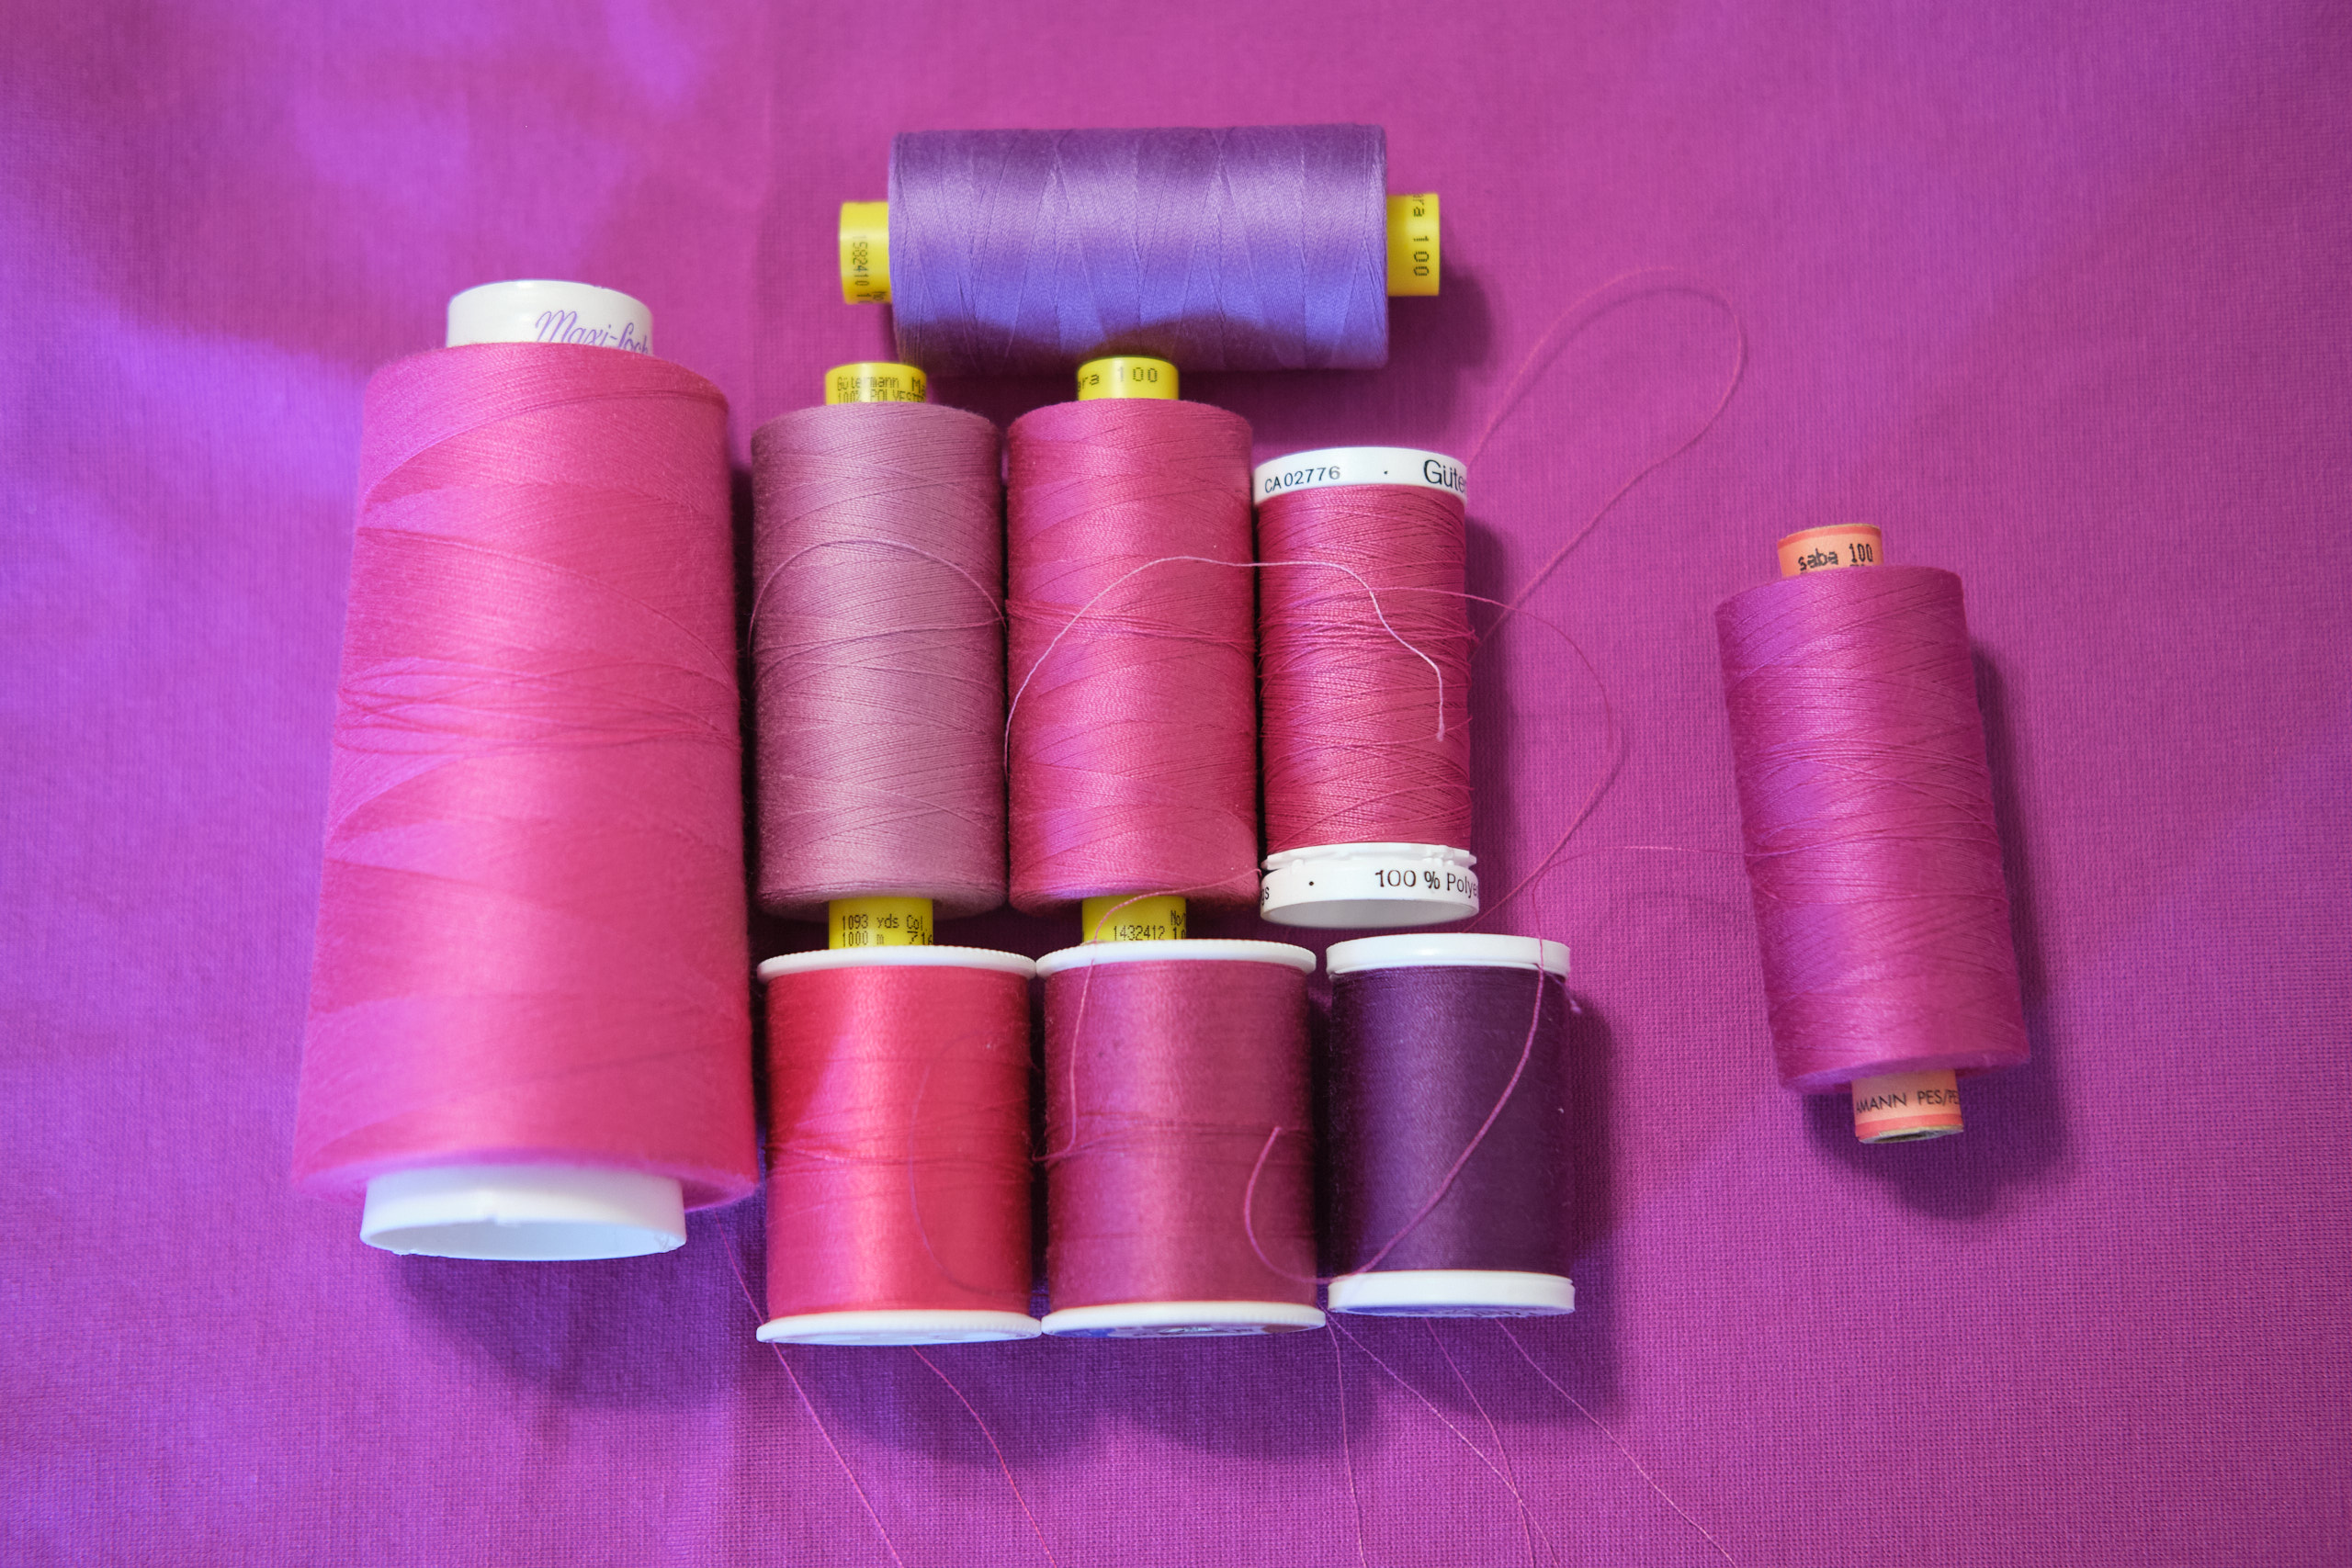
Unfortunately, magenta doesn’t seem to quite match either pink or purple threads, so I had to order several threads online until I found a close match that I could use for top stitching that would blend into the fabric. None of the Gutermann or Coats & Clark threads I ordered were quite right, but Amann Saba all purpose poly wrapped poly core thread tex 30 color 1059 did the trick.
I used the Boo & Lu Onyx blazer pattern for my magenta suit jacket, with the same modifications I used for my hip length grey ponte version with pockets. I had hoped to get the facings interfaced and catching in the top stitching properly this time, but still ran into problems that required extra gluing and fusing to resolve. I still feel there must be a better way to make the facings, and if I make another Onyx maybe I will figure out what it is.
I used the Pattern Emporium Urban Wide Leg pants pattern to make magenta pants to go with the jacket. I haver previously made three tapered and three wide-leg pants with this pattern (plus a few mashups with this pattern and the PE Walk Boldly pants). I made these size AU10 low-rise (which ends up being high-rise on me), with the waist graded in and the waistband modified to be a contour waistband lined in athletic knit and with elastic added. I added front jeans pockets with straight pocket openings.
Last winter I also bought some super soft purple 86% Poly/12% Rayon/2% Spandex Monaco Rib fabric from Mily Mae, and it turns out to be almost the exact same color as the magenta ponte. Why they don’t call them both by the same name is a mystery to me, but regardless, I clearly needed to make a rib-knit sweater to go with my suit. I used my favorite Sinclair Bondi classic fitted t-shirt patten in size 4p hip length with a screwp neck, adjusted slightly for a broad and sloped shoulder. I cover stitched the hems, using the magenta thread spool and a bobbin wound with the same thread for the needle threads.
The whole outfit looks great together, and I will wear it as a suit with my matching magenta booties! I expect I will also wear the pieces as separates. Although this is a color I wear year round (I also have a cashmere sweater and a winter parka in this color), to me it is really a spring color.
April update: I couldn’t resist some magenta jacket photos with the magnificent magnolia trees in front of my house!
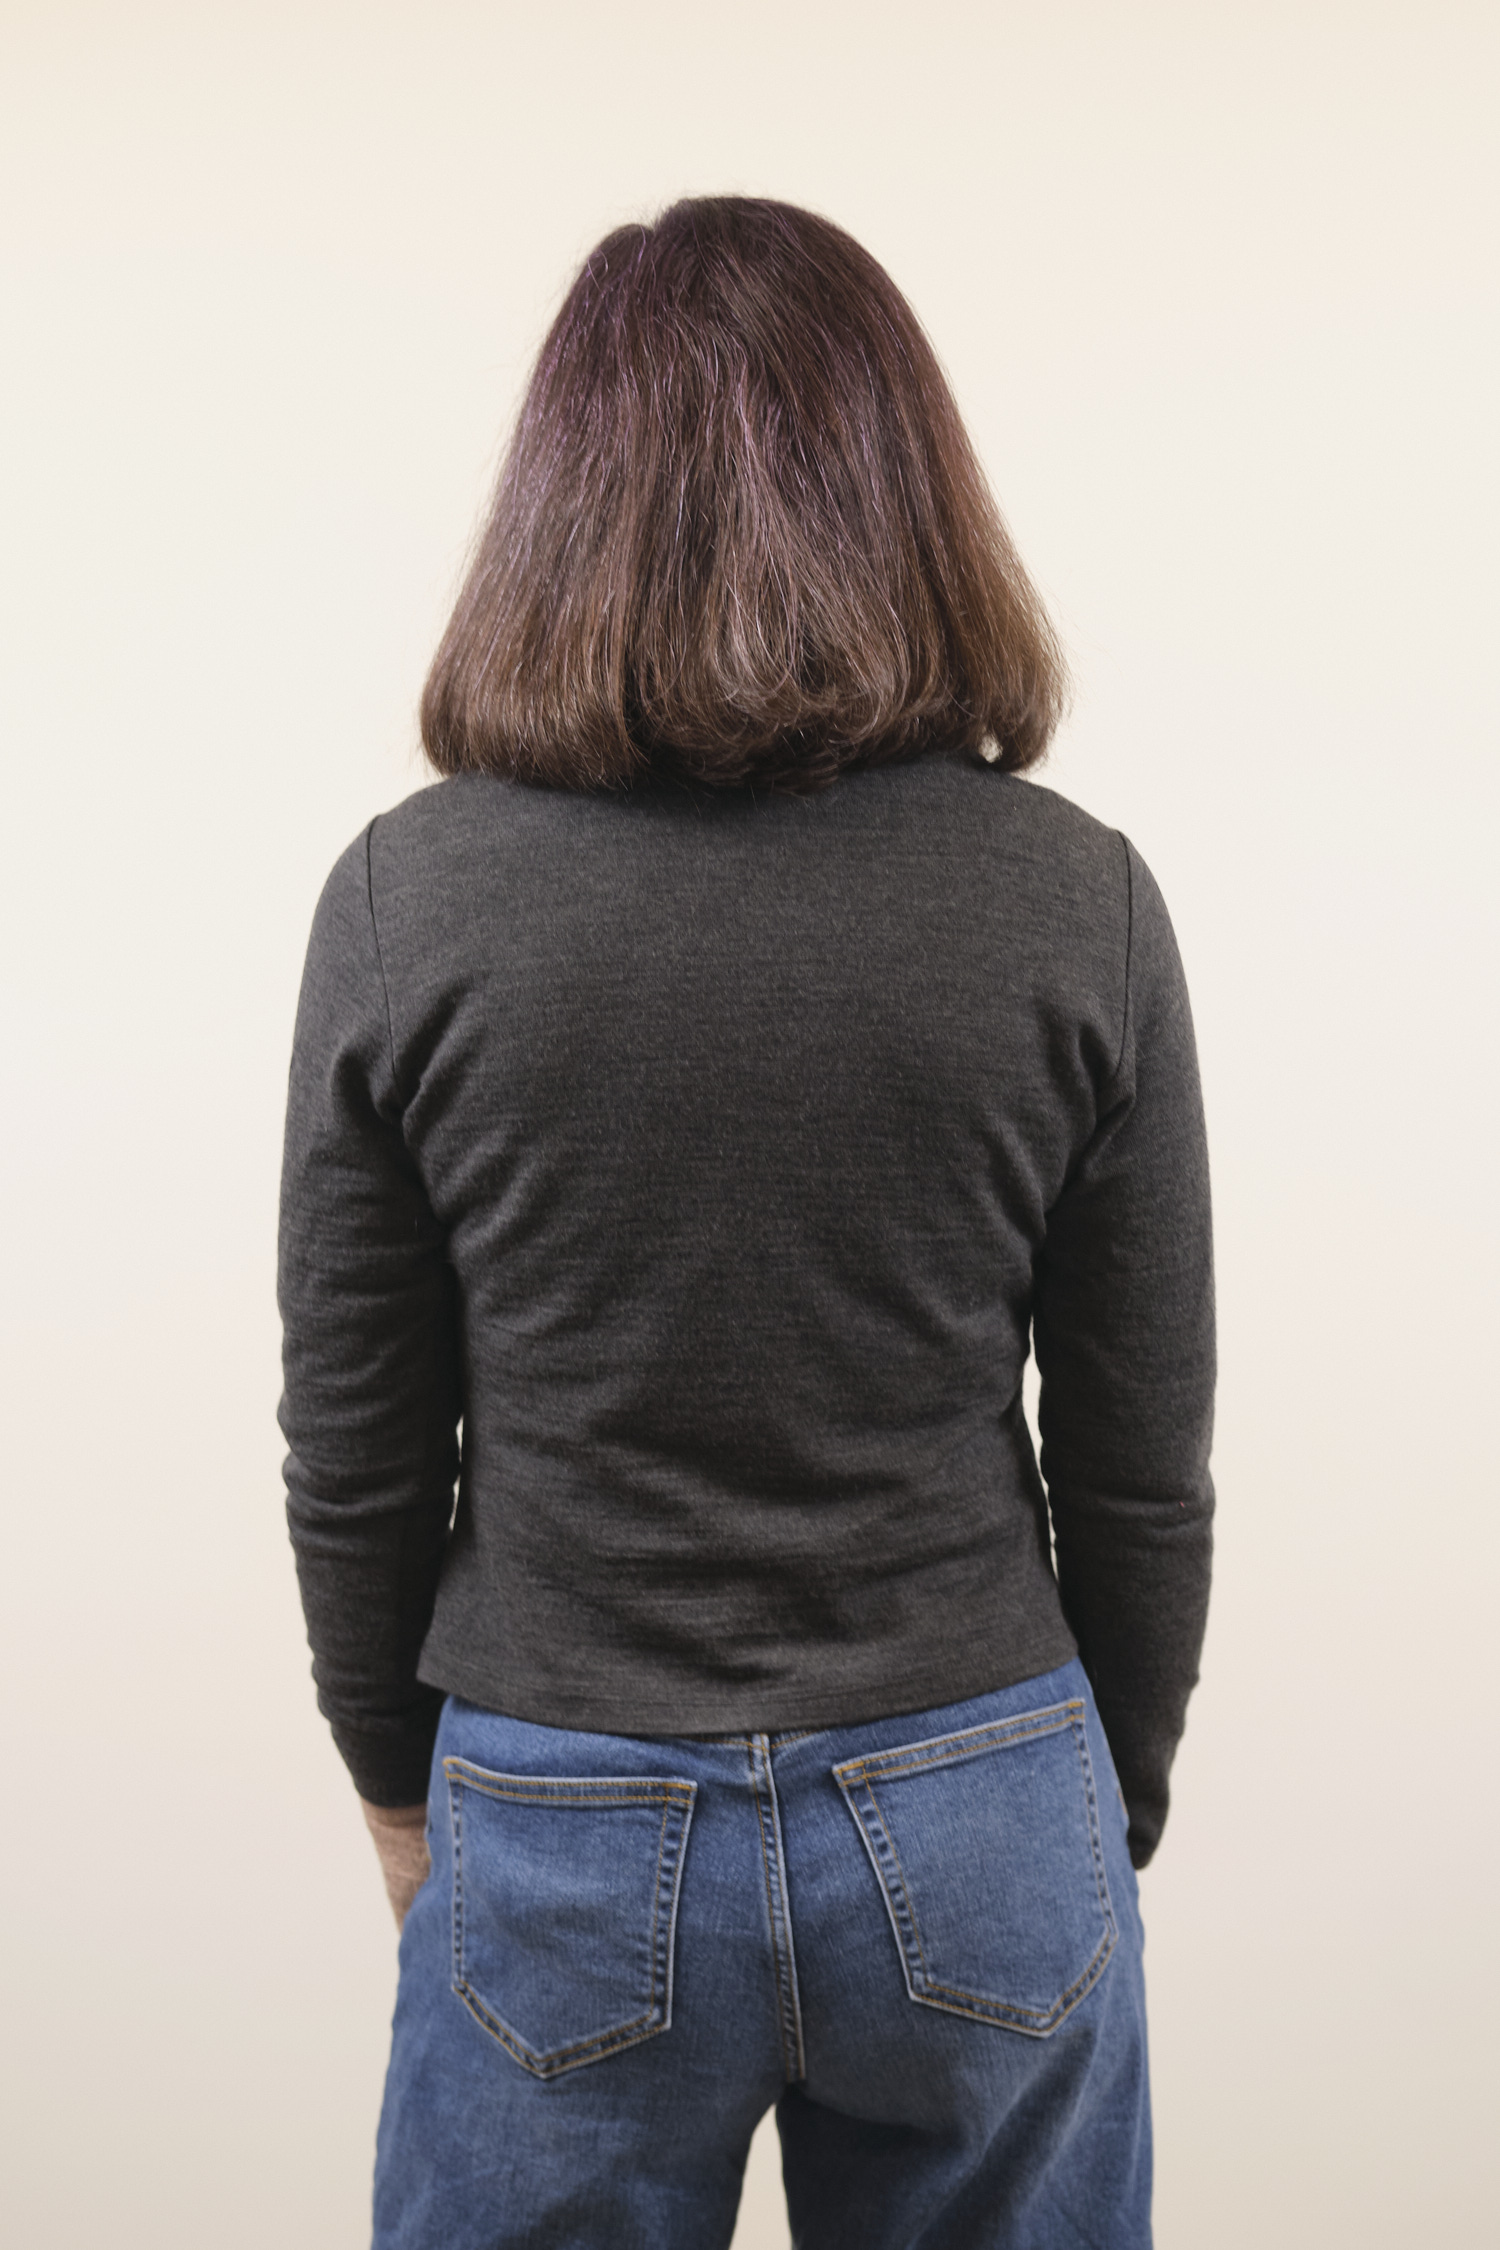
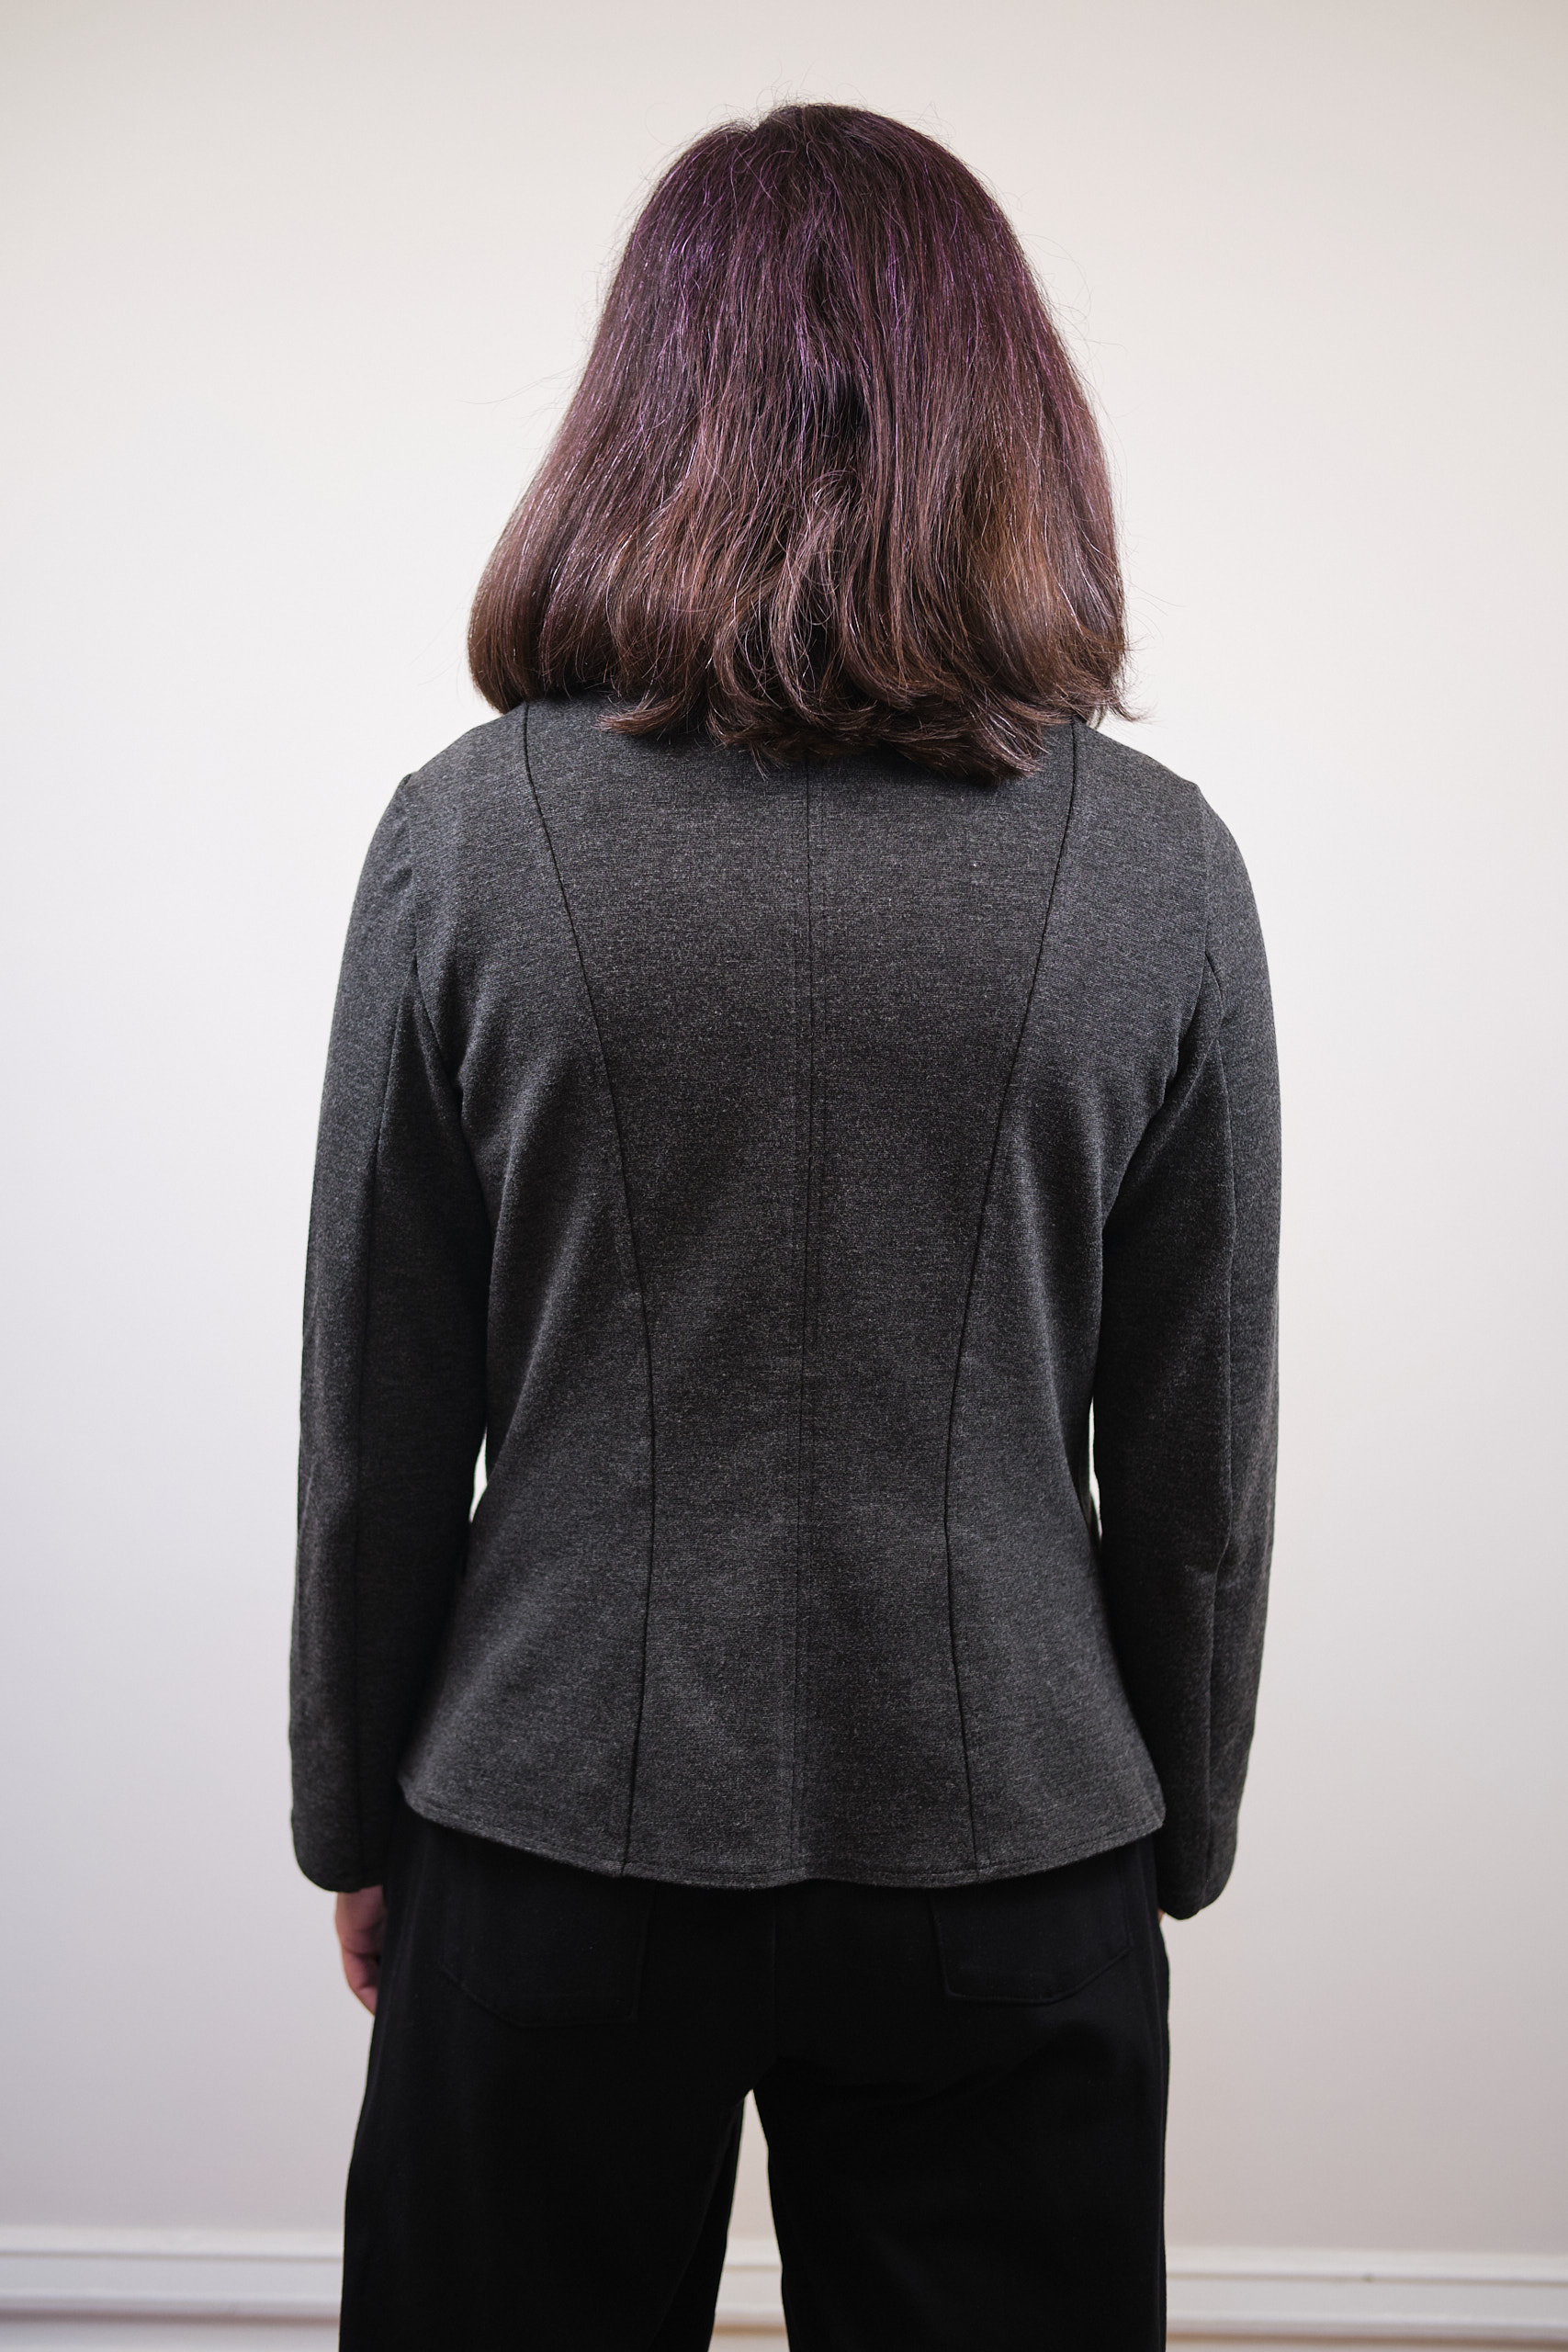
I made another Onyx blazer, this one hip length in charcoal grey ponte (charming heather legacy ponte from Zelouf) with pockets. I tweaked the pattern some more before I cut it out, this time to add a simple sloped shoulder adjustment (in addition to the round-back adjustment and small-bust adjustment I made on my purple cropped Onyx). I noticed that when I raised my shoulders (as in a shrug) the drag lines I saw on the back of my purple Onyx mostly disappeared. So I lowered the outside point of the shoulder by .75 inch and adjusted the shoulder line on the center and side front and back pieces accordingly. Then, I lowered the armscyes to meet the lowered shoulder point, ensuring that the size of the arm openings did not change. This reduced the excess fabric from the shoulder area that had been pooling around the armscye and helped reduce drag lines on the back. The fit of the back is now about as good as I’m going to get so I will stop tweaking and use this going forward. I made a size 4 hip length, shortened by two inches. I reduced the height of the pockets by only about .5 inches and made them a tad narrower to fit the shortened side-front pieces.
For the purple Onyx, I cut the facing pieces using the front-center pattern piece so that I could sew them down when I top stitched the front seams. I used a lightweight fusible interfacing with no stretch. I noticed that the interfaced facing shrunk a little bit, making it more difficult to attach smoothly, but I made it work. However, on the grey ponte, the lightweight interfacing was a complete disaster. When I clipped the facing to the front center pieces, I found the facing was about an inch shorter. I tried to make it work but it was clearly not happening. Then I remembered that I had tricot interfacing (Superpunch Fusi-Knit White HTC1300), which has some stretch to it. So I cut new facing pieces and fused the tricot interfacing on, with the stretch running vertically. This time the facing did not shrink and everything went together the way it was supposed to! This was a great lesson in selecting the right interfacing for the job.
I did most of the sewing on my serger but I used my sewing machine with my quarter-inch edge foot to do the stay stitching, basting, and top stitch the front and back seams. I used my regular edge foot to top-stitch the tops of the pockets. I sewed the arms to the bodice with my sewing machine before serging, and I made sure to start and stop the serged seam in the armpit. As with the purple Onyx, I sewed the center back seam with my sewing machine, pressed it open, and then topstitched a quarter inch on either side of the back seam. This makes for a nice flat seam that looks very nice.
I used fusible hem tape on the bottom hem and sleeve hems before sewing. I also used it to hold the facing edge in place before top-stitching. I used a glue stick in a few places to keep pieces aligned before sewing.
Ponte is a comfortable fabric to wear, washes well, and resists wrinkles, snags, and pills. The charcoal grey should go well with a lot of things and I expect I will wear this one a lot. The pockets are a nice convenience too, although I probably won’t routinely put my phone or anything heavy in them as it will stretch the ponte. The hip length is just long enough to cover an untucked shirt, which makes it a pretty versatile length to wear with a lot of things. Here I am modeling it with black ponte PE Urban Wide leg pants and a Sinclair Bondi top in plum brushed sweater knit. The jacket also looks great with the PE Urban Wide leg pants I made previously in the same charming heather ponte fabric.
Summary of modifications to size 4 hip-length pattern with pockets:
Small-bust adjustment (performed by redrawing the inner curve on the side-front pieces to have less of a contour and then shortening the center front pieces to match the length of the new curve)
Sloped-shoulder adjustment (3/4 inch)
Round-back adjustments (2 5/8-inch adjustments near top and bottom of arscye)
Deepen back neckline by about 3/4 inch and adjust back facing
Shorten bottom hem by 2 inches
Shorten sleeves by 2 inches
Shorten pockets by 1/2 inch and adjust width to match width at hem line
Cut facing and interfacing from front-center pieces instead of facing pieces


