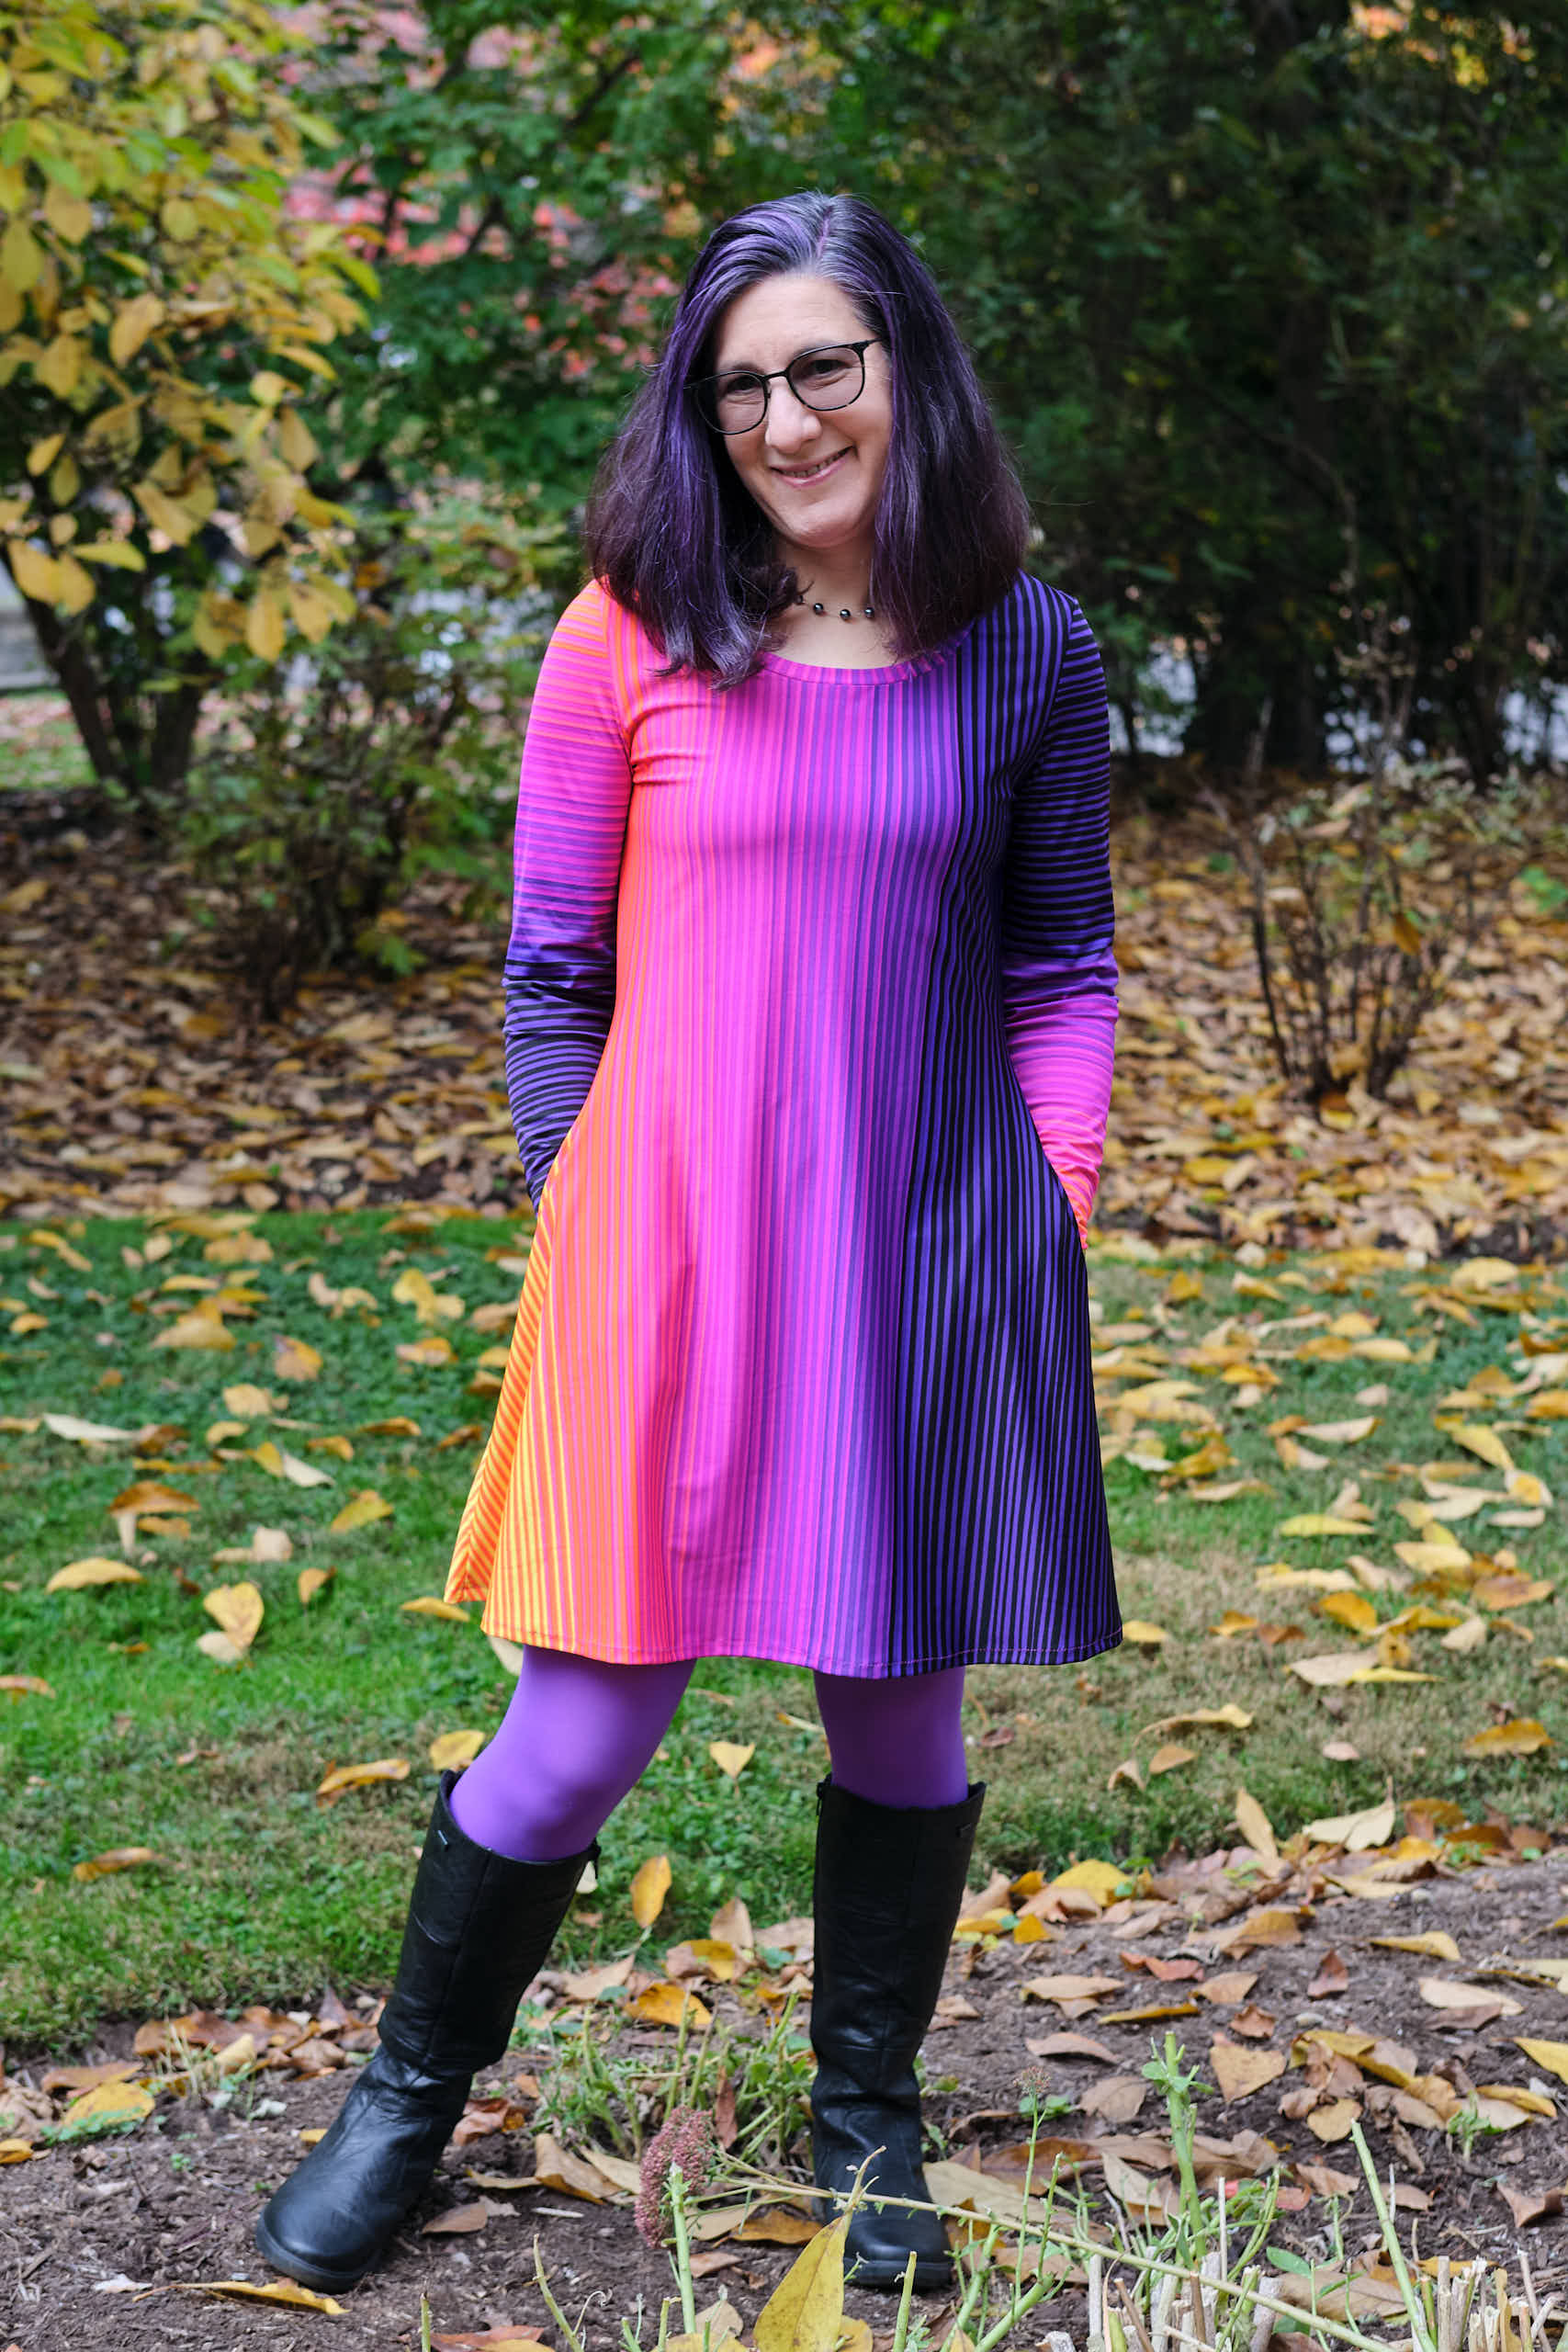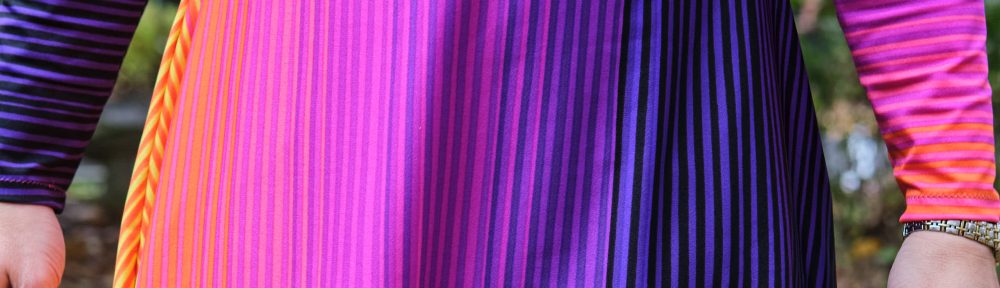
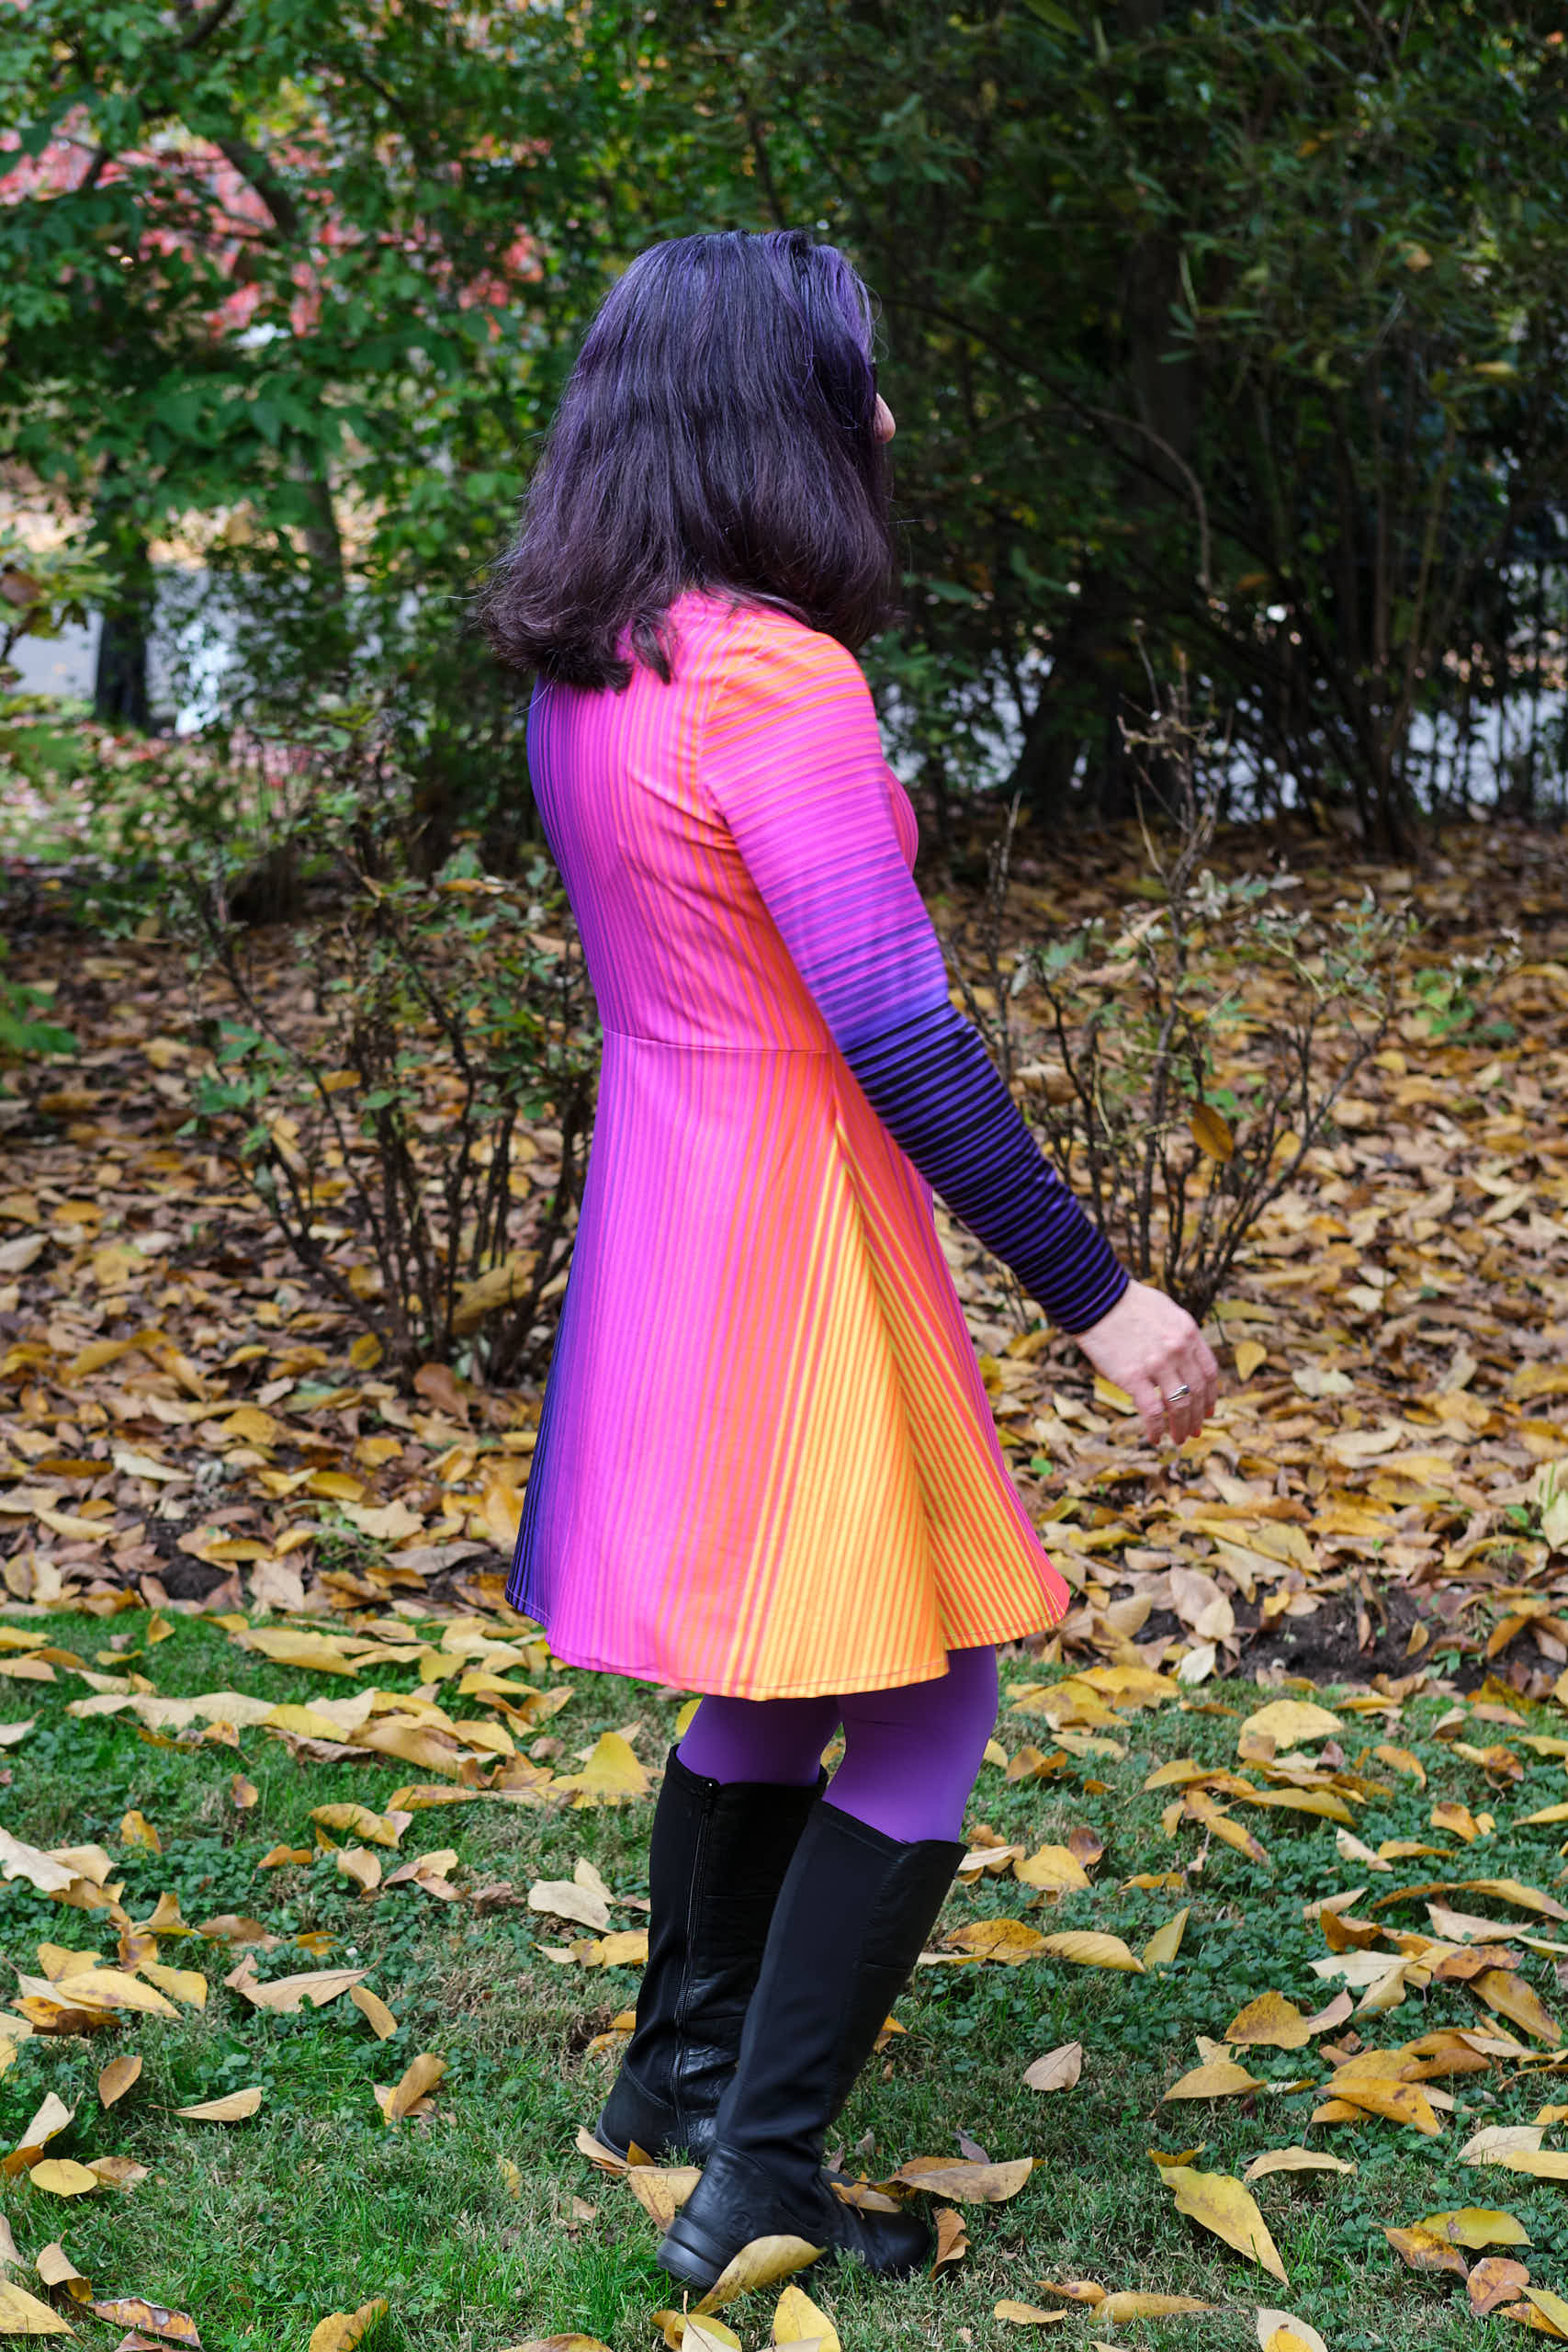
Pattern Emporium Wanderlust Fit and Flare Dress size AU10, 2 inches above knee length, scoop neck, long sleeves shortened 1 inch, sloped and broad shoulder adjustments, sway back adjustment at waist with vertical back seam removed, inseam pockets, from 51″ x 60″ piece of Sunset Fade Mini K-Deer Signature Stripe Athletic 80%Nylon/20%Spandex
Sometimes I see a piece of fabric and I have a vision that I can’t quite get out of my head until I figure out how to turn it into reality. This was one of those times.
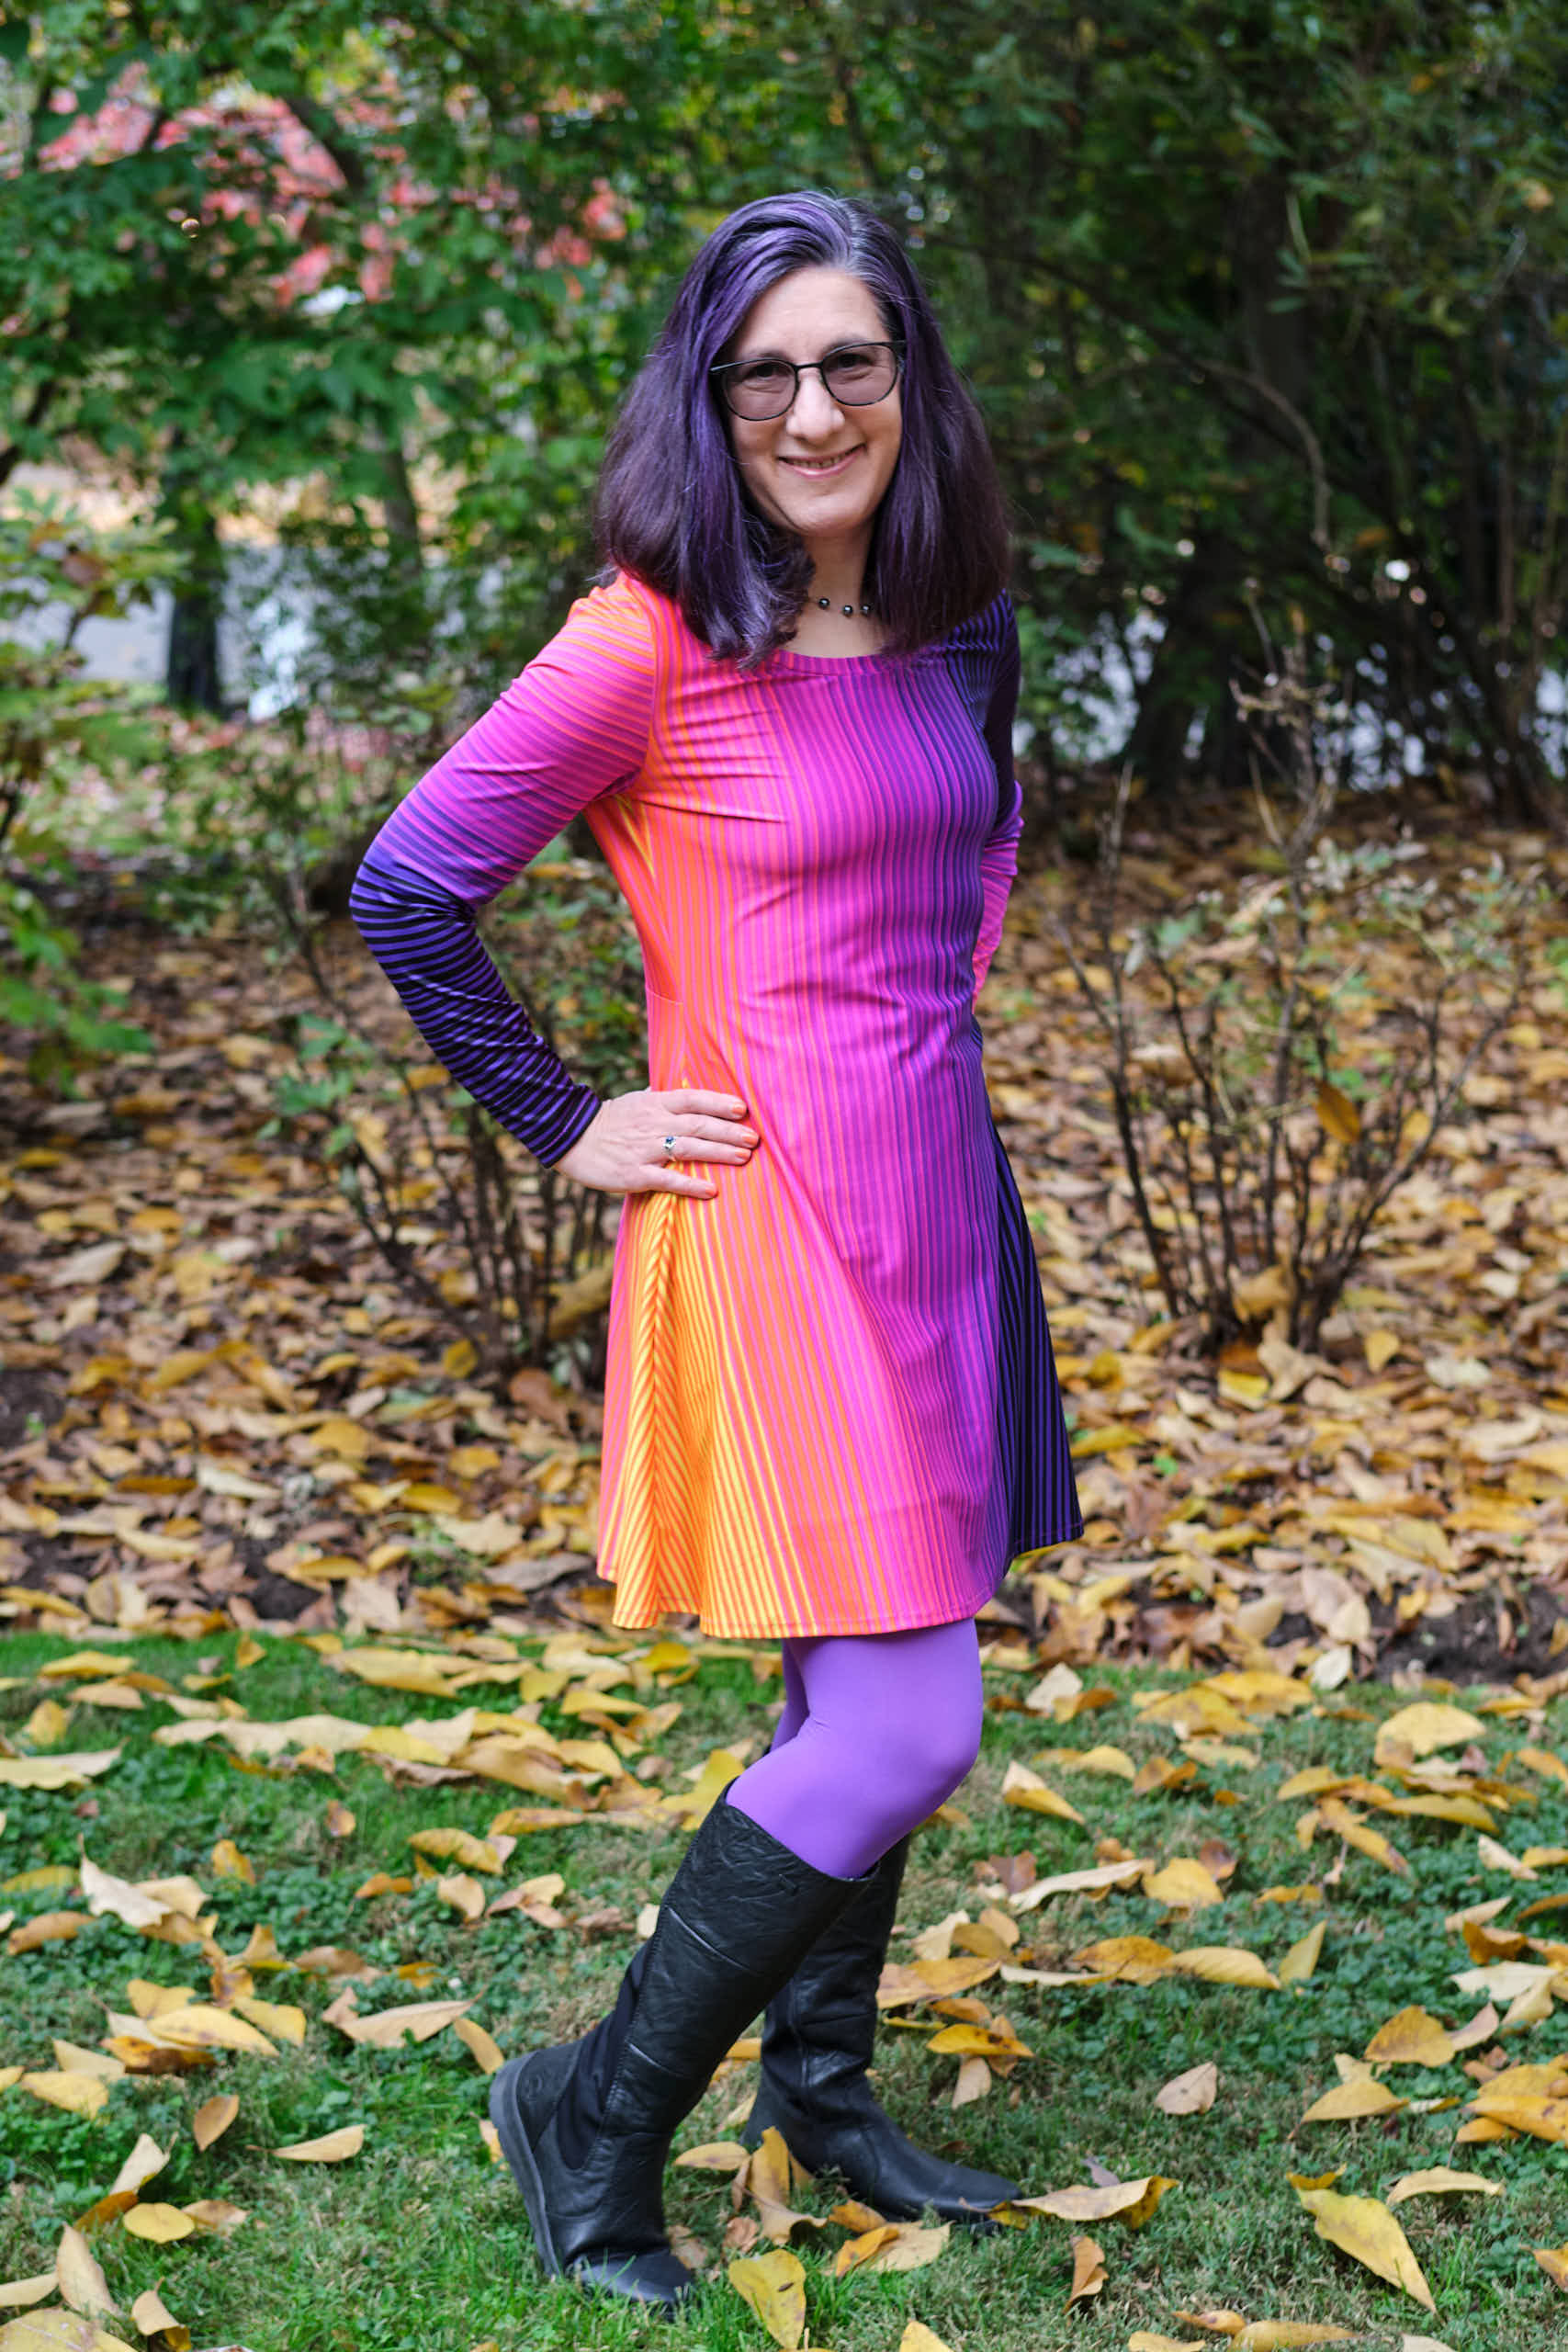
I had been eyeing the deadstock “K-DEER” fabric that Surge Fabrics acquired from a now-defunct yoga wear manufacturer. When I saw they were down to only one yard left of my favorite, a striped sunset print in 80% nylon / 20% spandex, I ordered the last piece for $11.90, figuring it would at least be enough to make myself a long-sleeved shirt. When it arrived, I was pleased to see that the end of the bolt was actually 51 inches of the 60-inch-wide fabric and thought I might be able to make a dress out of it. Seeing as how the manufacturer was using the fabric to make horizontal-striped leggings, I originally imagined a horizontal-striped skater dress, perhaps setting the stripes on the skirt on the diagonal with a seam down the center of the skirt to make a V shape.
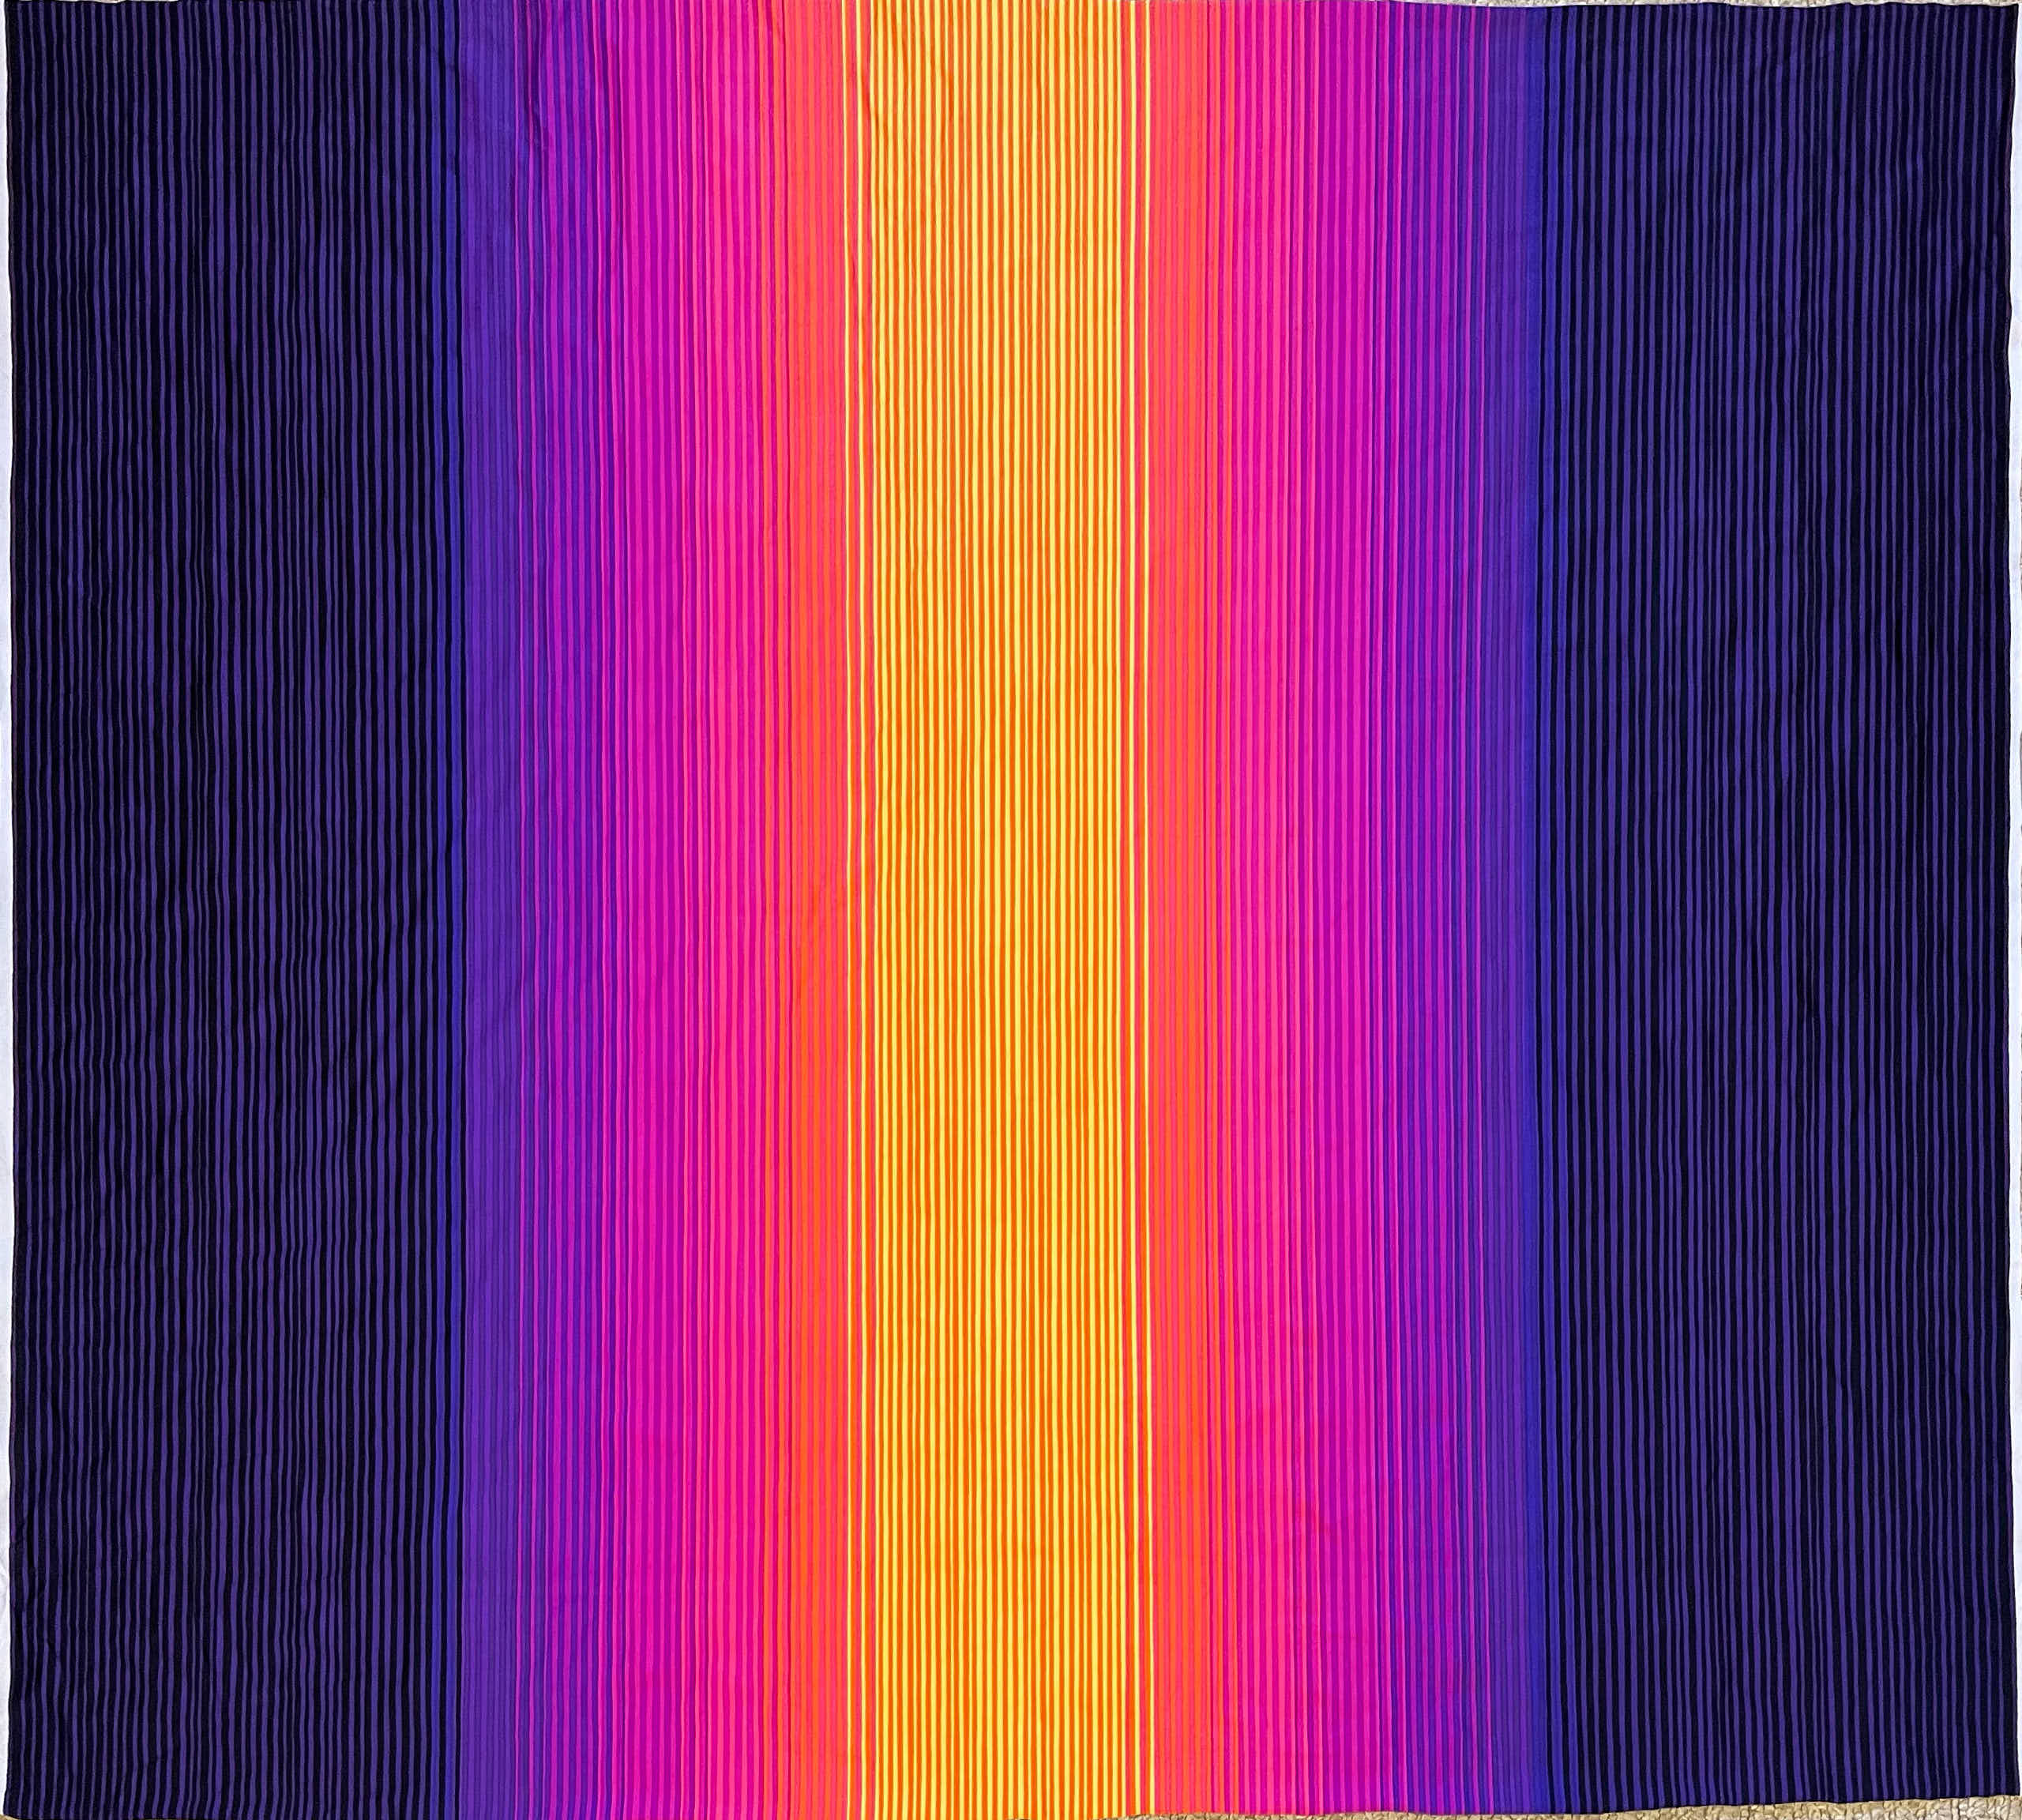
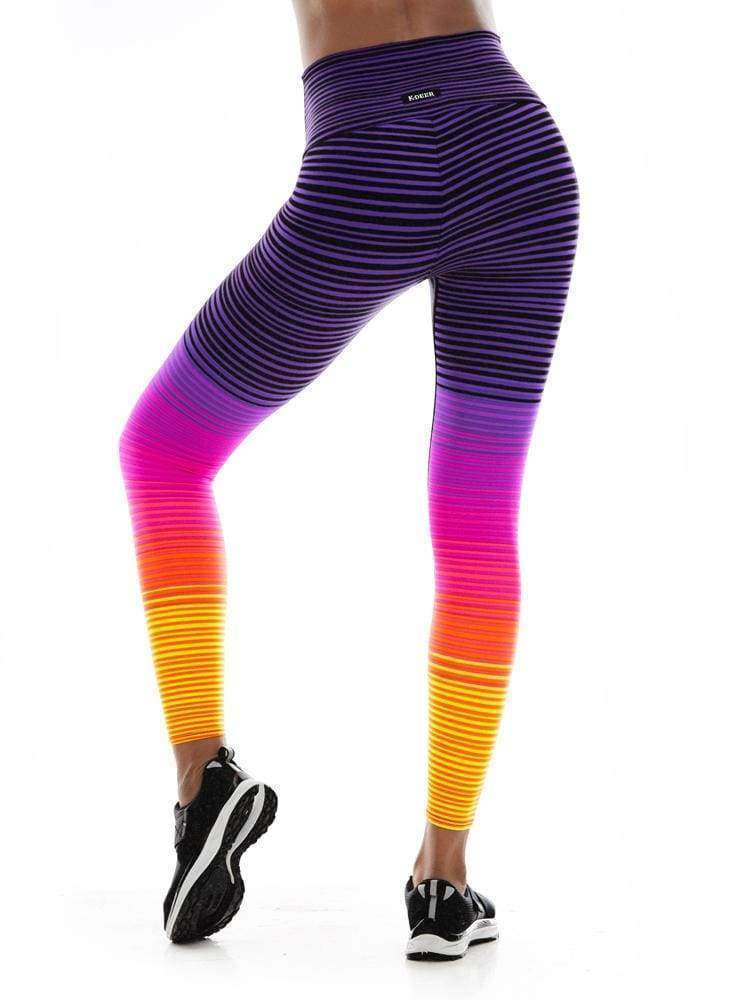
Almost a year later, I pulled the fabric out of my stash and started contemplating which dress pattern to use, and I suddenly realized I wanted the stripes to run vertically rather than horizontally on the bodice, but horizontally on the sleeves. As I started thinking about color placement, I thought I wouldn’t have enough fabric for a dress, so I went back to thinking about a top. I imagined a shirt that was yellow-orange on the right side, purple on the left side, and pink in the middle. I measured the fabric and realized that I might be able to make this work in a dress if I found the right pattern.
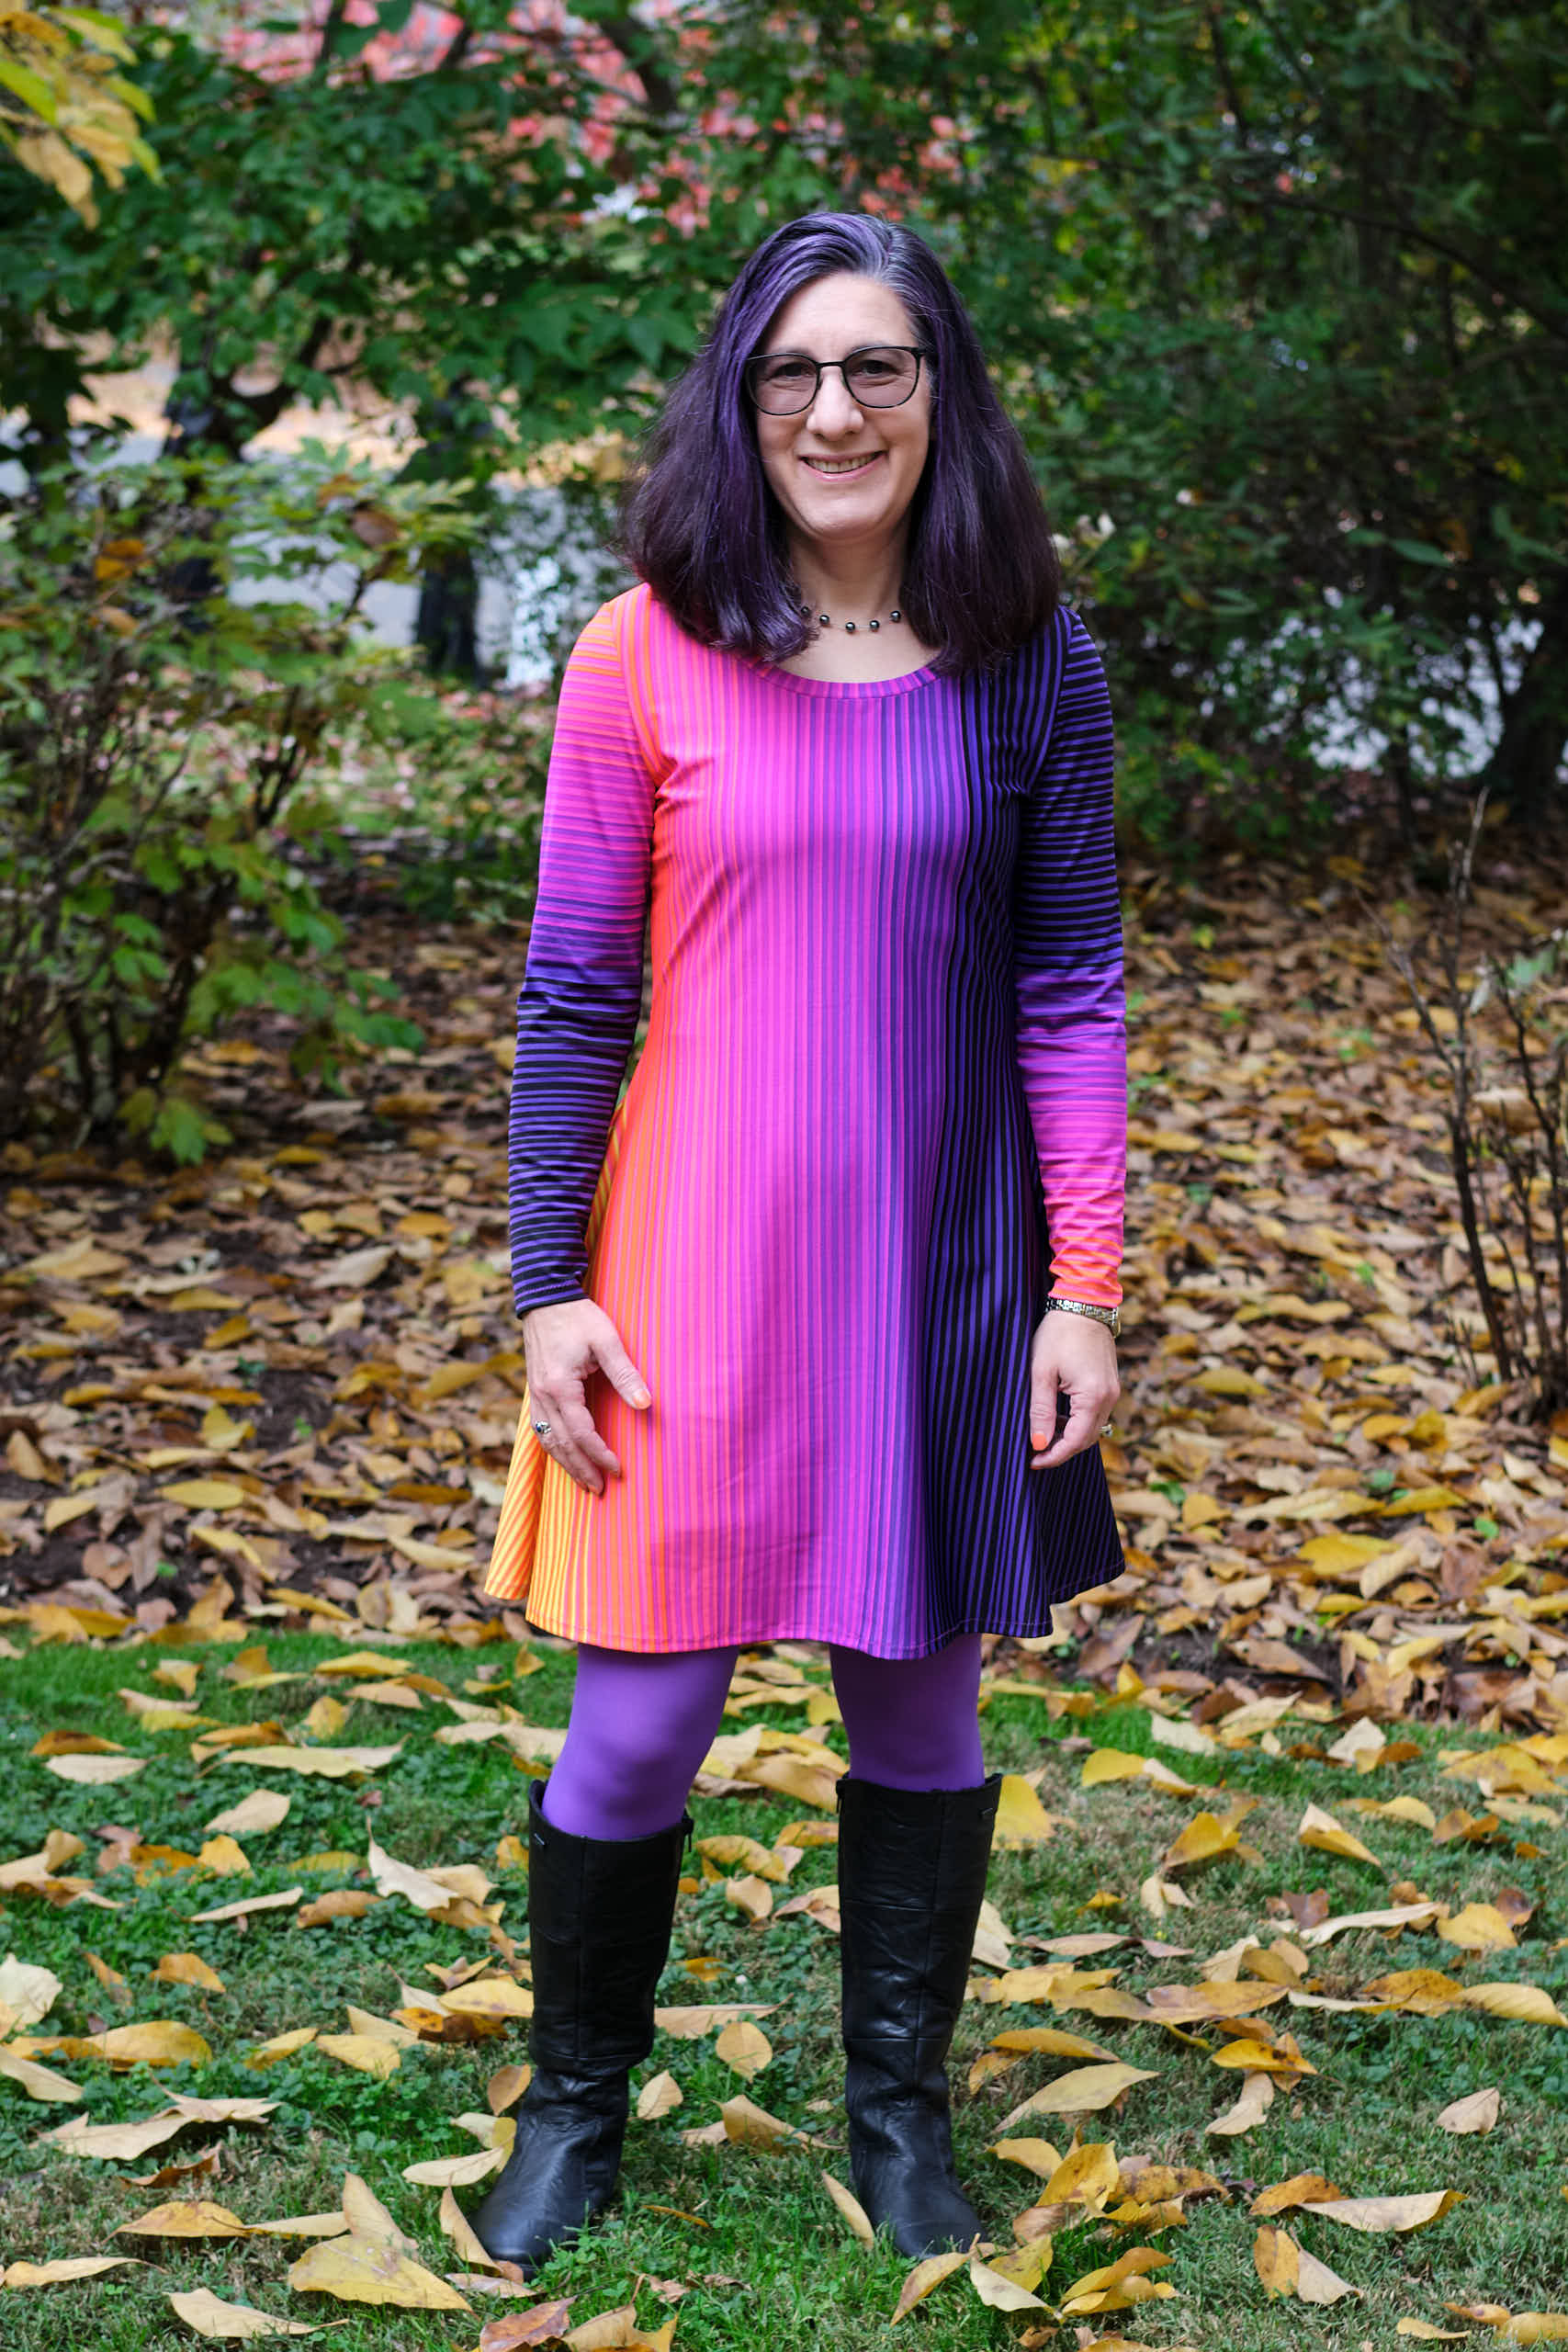
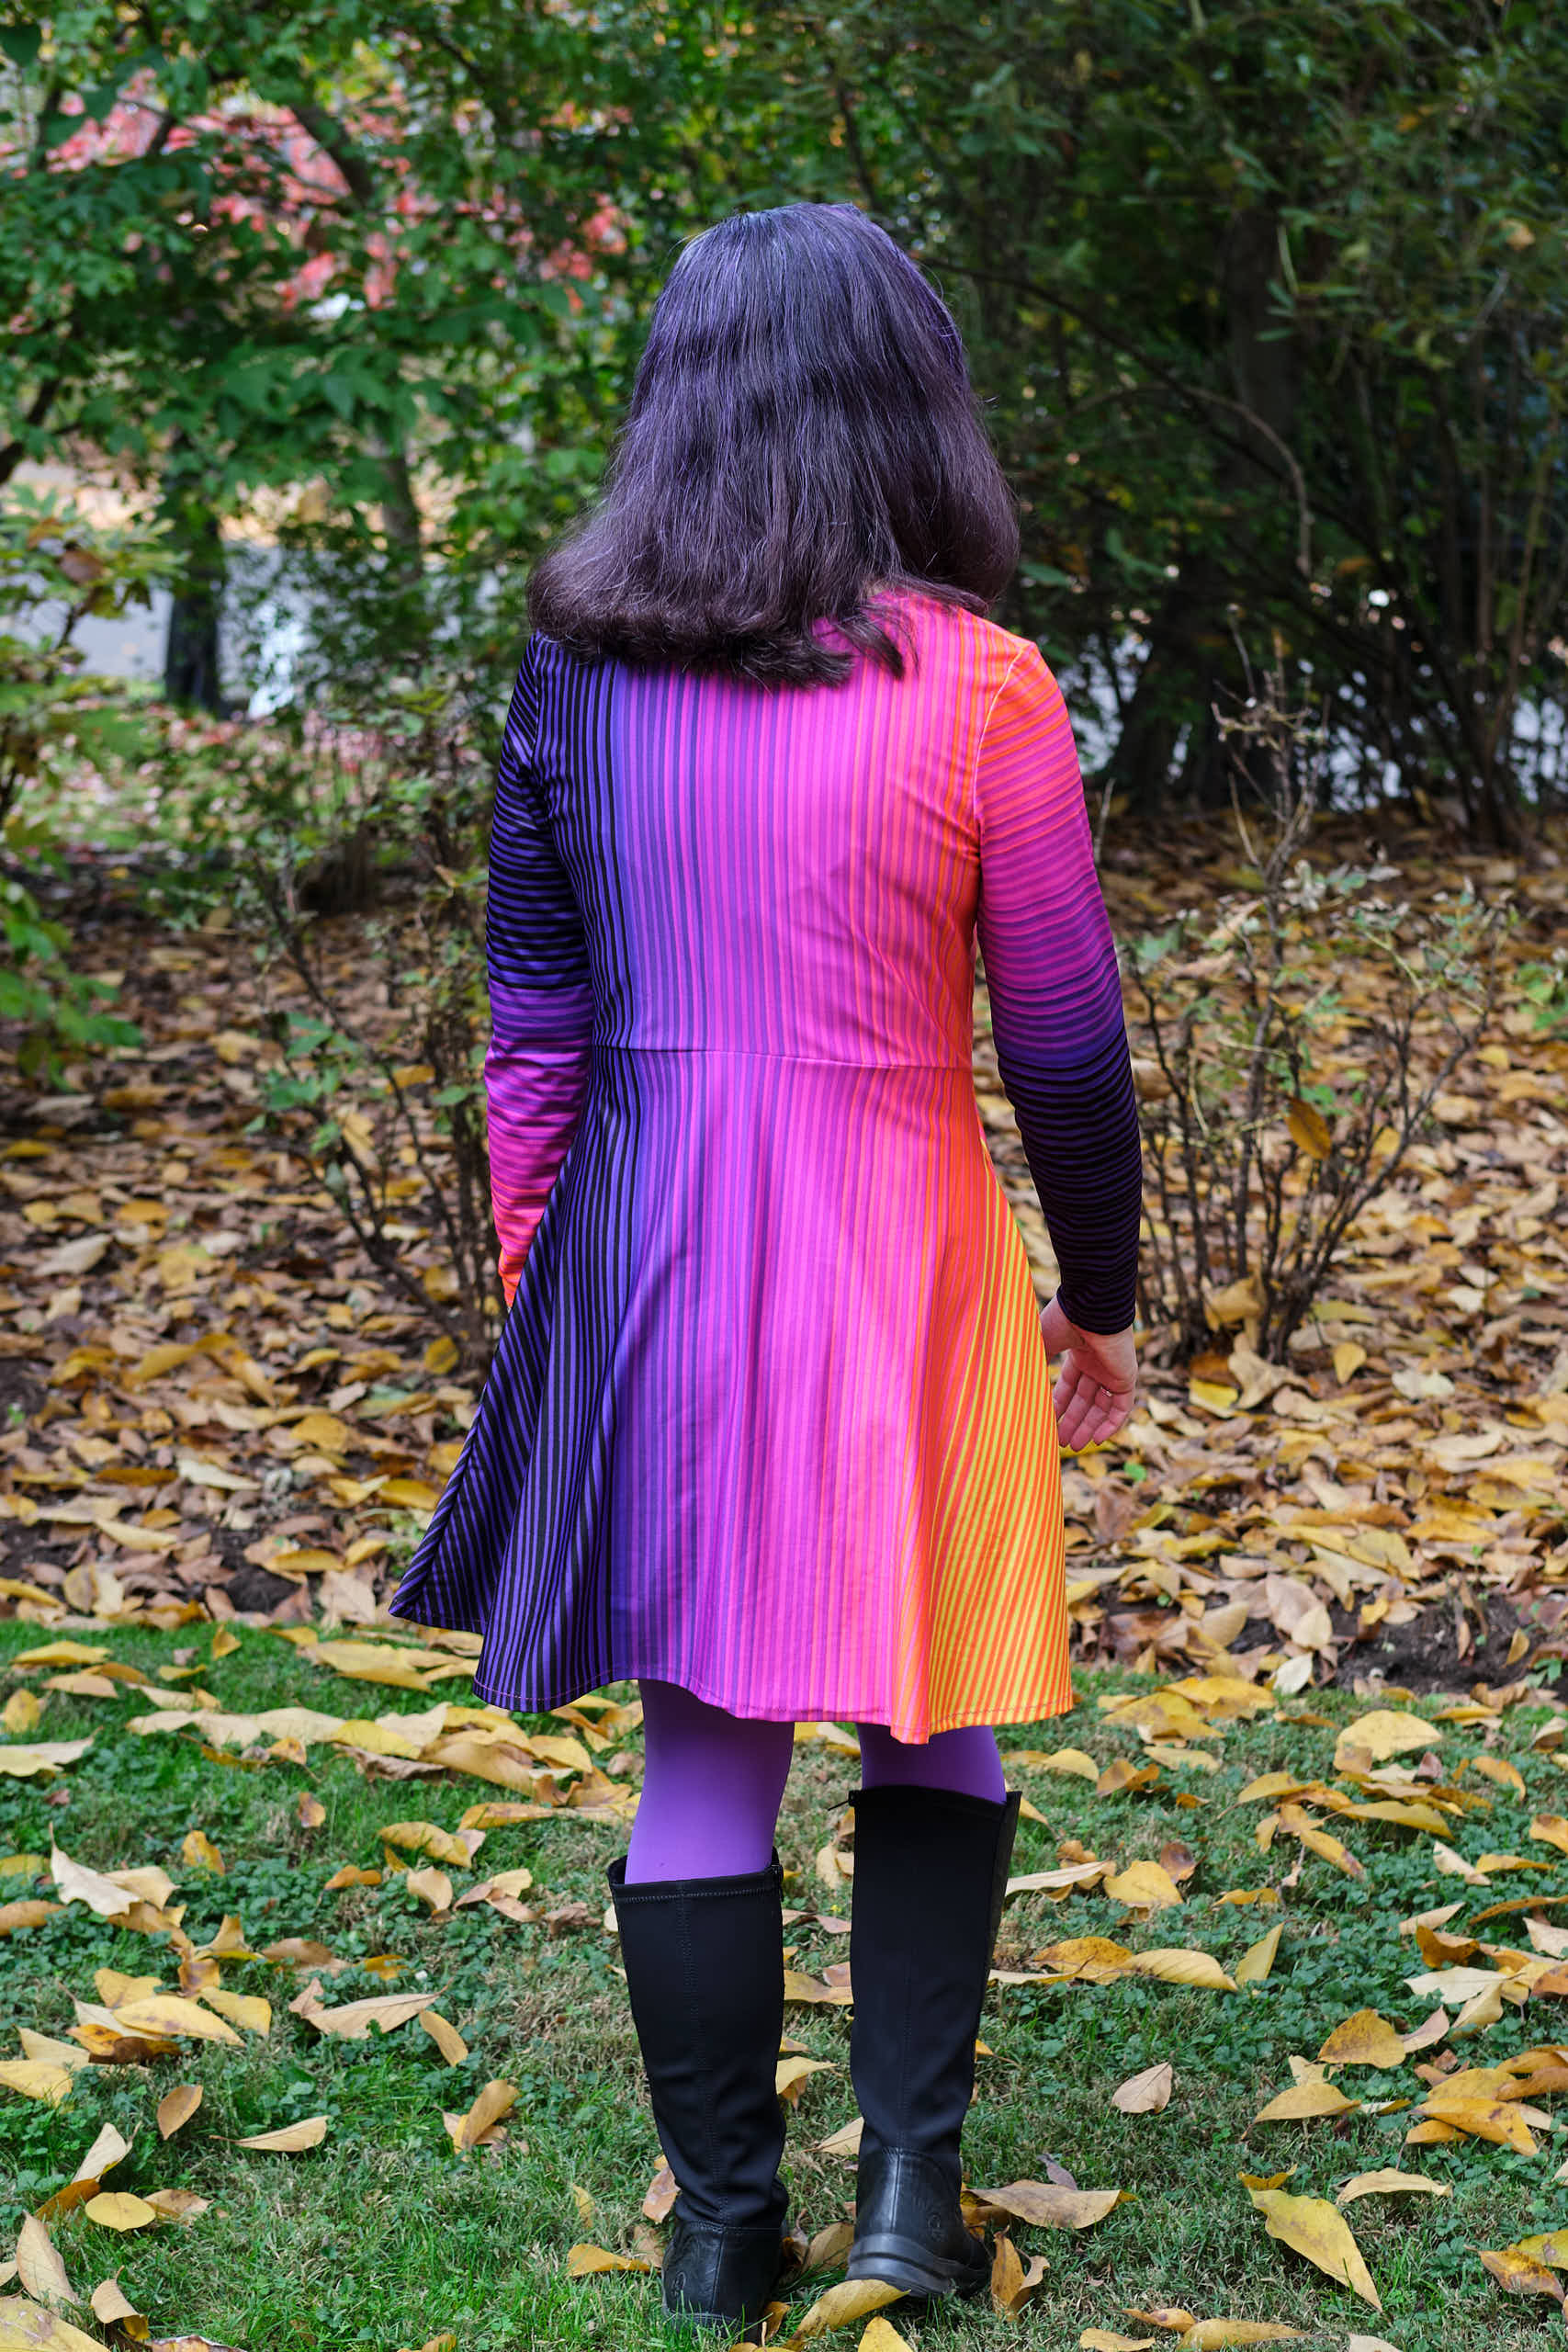
I photographed the fabric and loaded it onto my computer and started playing with pattern pieces. I immediately thought about using the Pattern Emporium Wanderlust Fit and Flare dress pattern because it has no waist seam and thus would allow the vertical stripes to run down the front of the dress without interruption. I started laying the pattern pieces out on my image of the fabric and realized that they would not fit in the arrangement I wanted. One of the problems is that when I previously made this pattern, I had added a number of adjustments to improve the fit for myself, including broad and sloped shoulder adjustments and a sway-back adjustment. This pattern has a vertical seam down the center back, and with the sway-back adjustment, the bodice leans off to the side, requiring a wider piece of fabric. But I realized I could divide the pattern piece at the waist where I had inserted the sway-back adjustment and cut out the top and bottom pieces separately. By doing that, I could also keep the back stripes vertical and fuse the left and right back pieces. Thus, instead of having left and right pattern pieces for the back, I now had top and bottom pattern pieces. With these changes, I was close to getting the pattern pieces to fit on my fabric, but they still didn’t quite fit. I made it work by shortening the knee-length skirt by two inches. I was able to place the vertical stripes according to my vision. For the sleeves I wanted horizontal stripes with colors on the top of the sleeve that would match each shoulder. With some careful sleeve placement, I managed to make this work too.
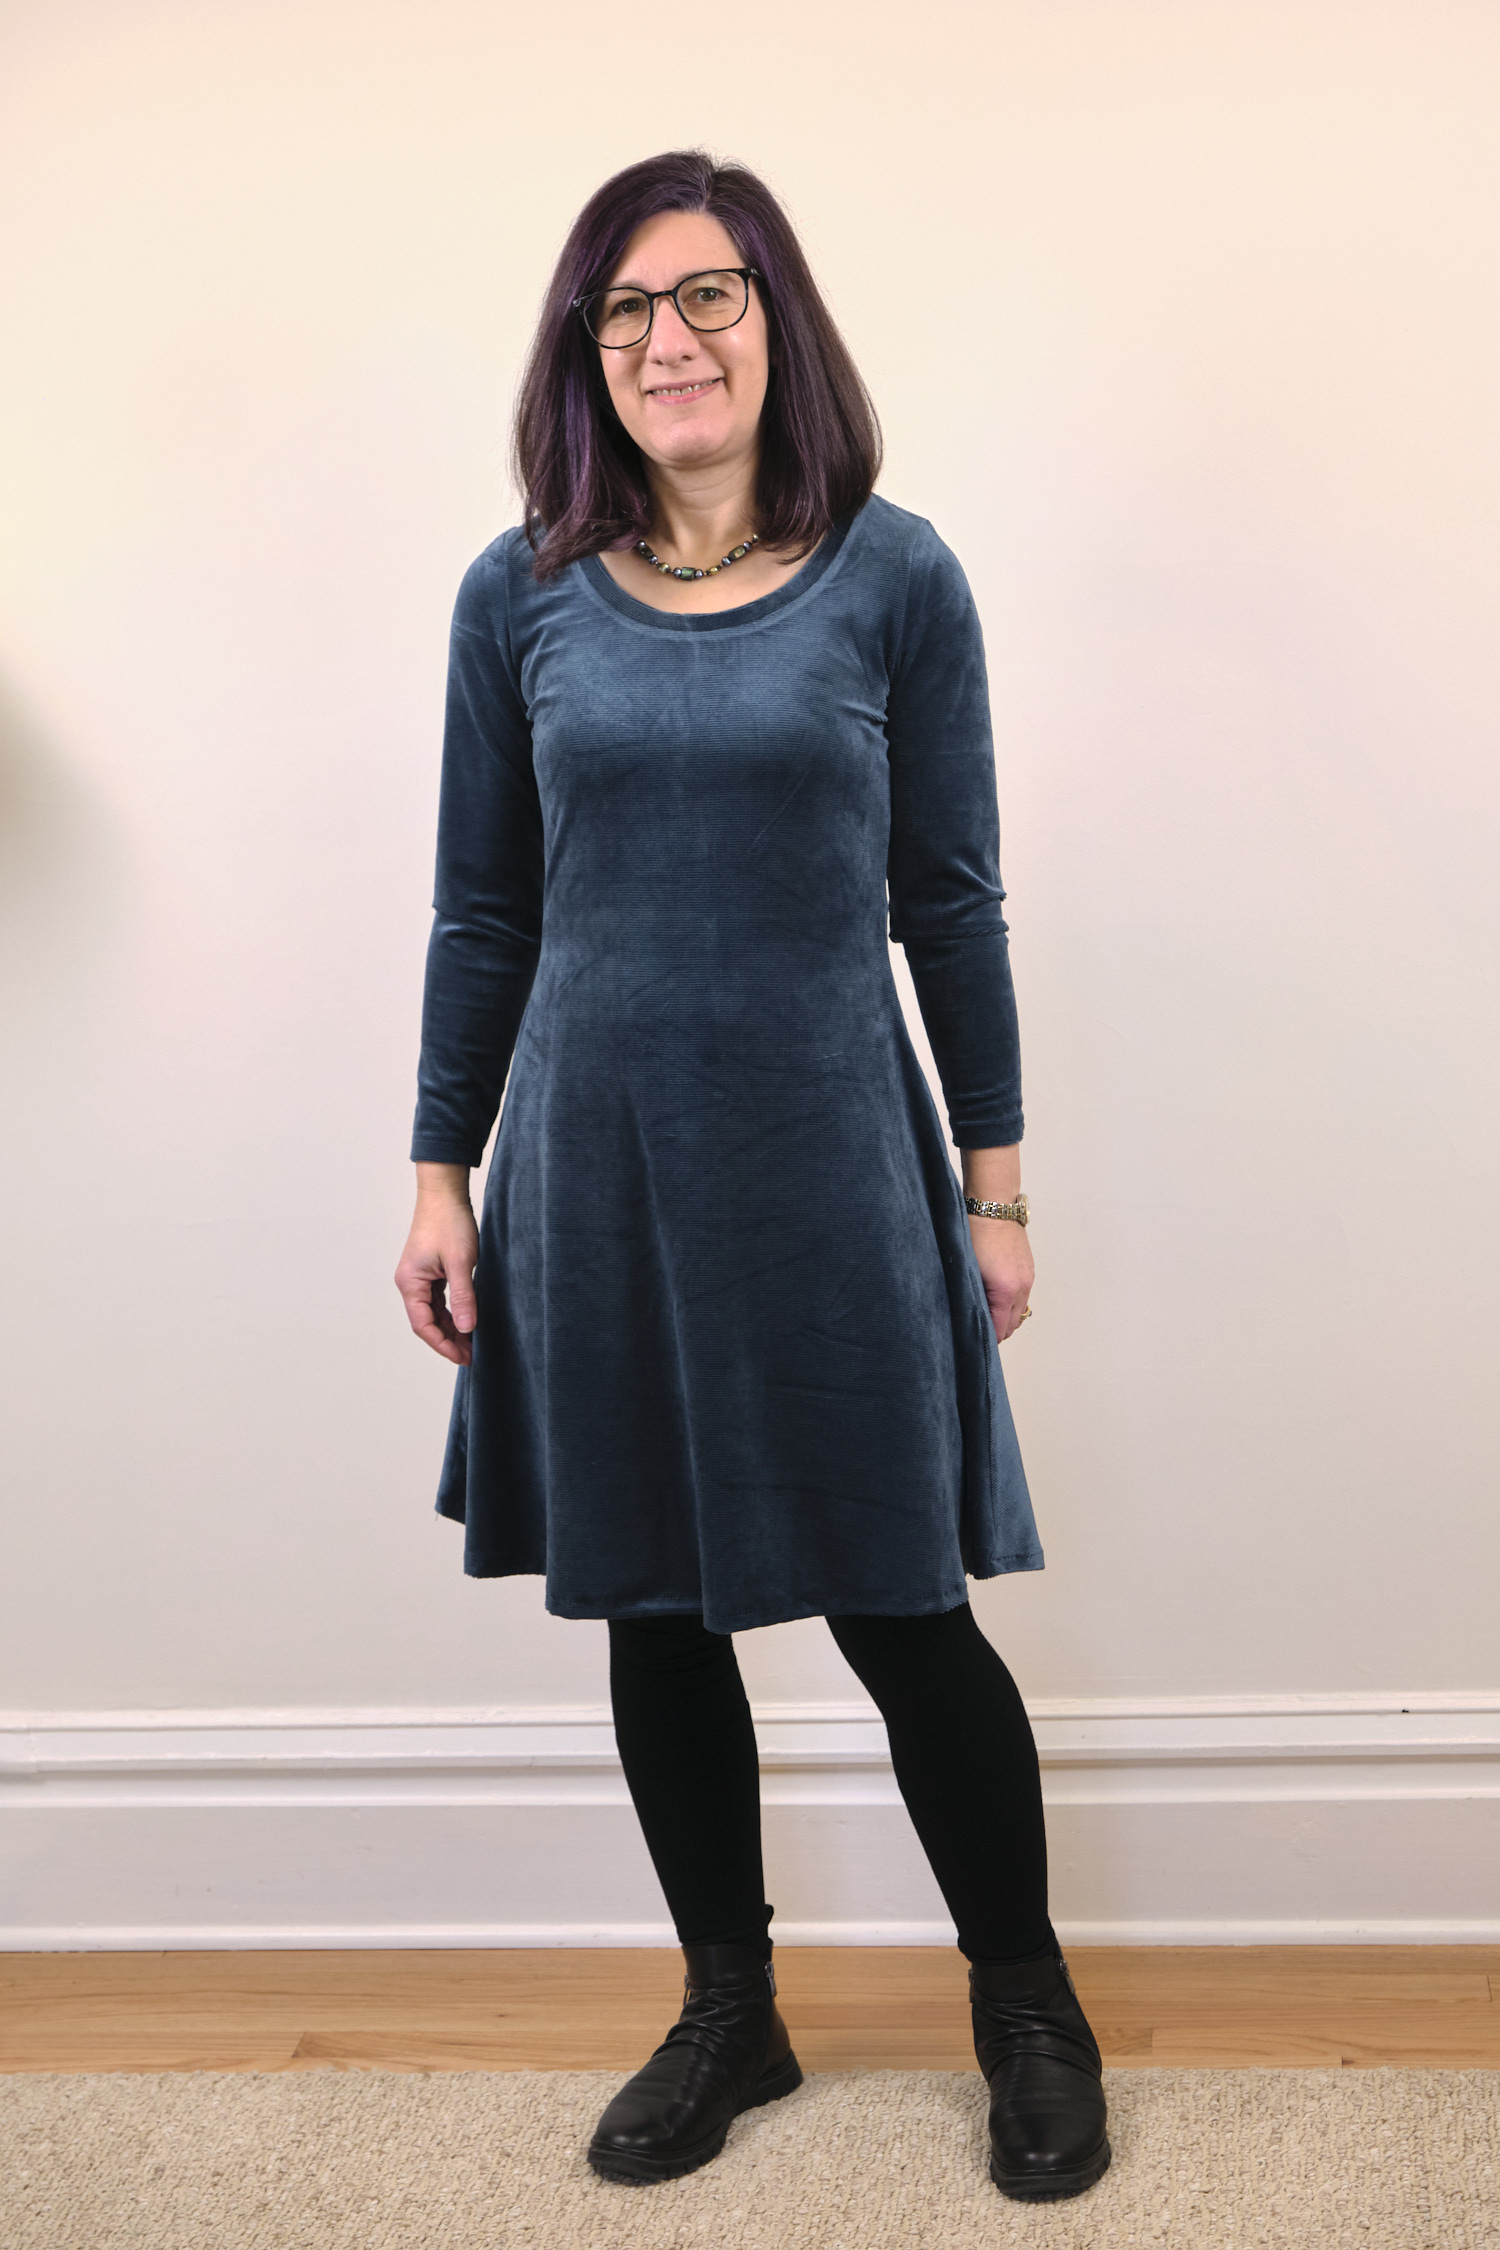
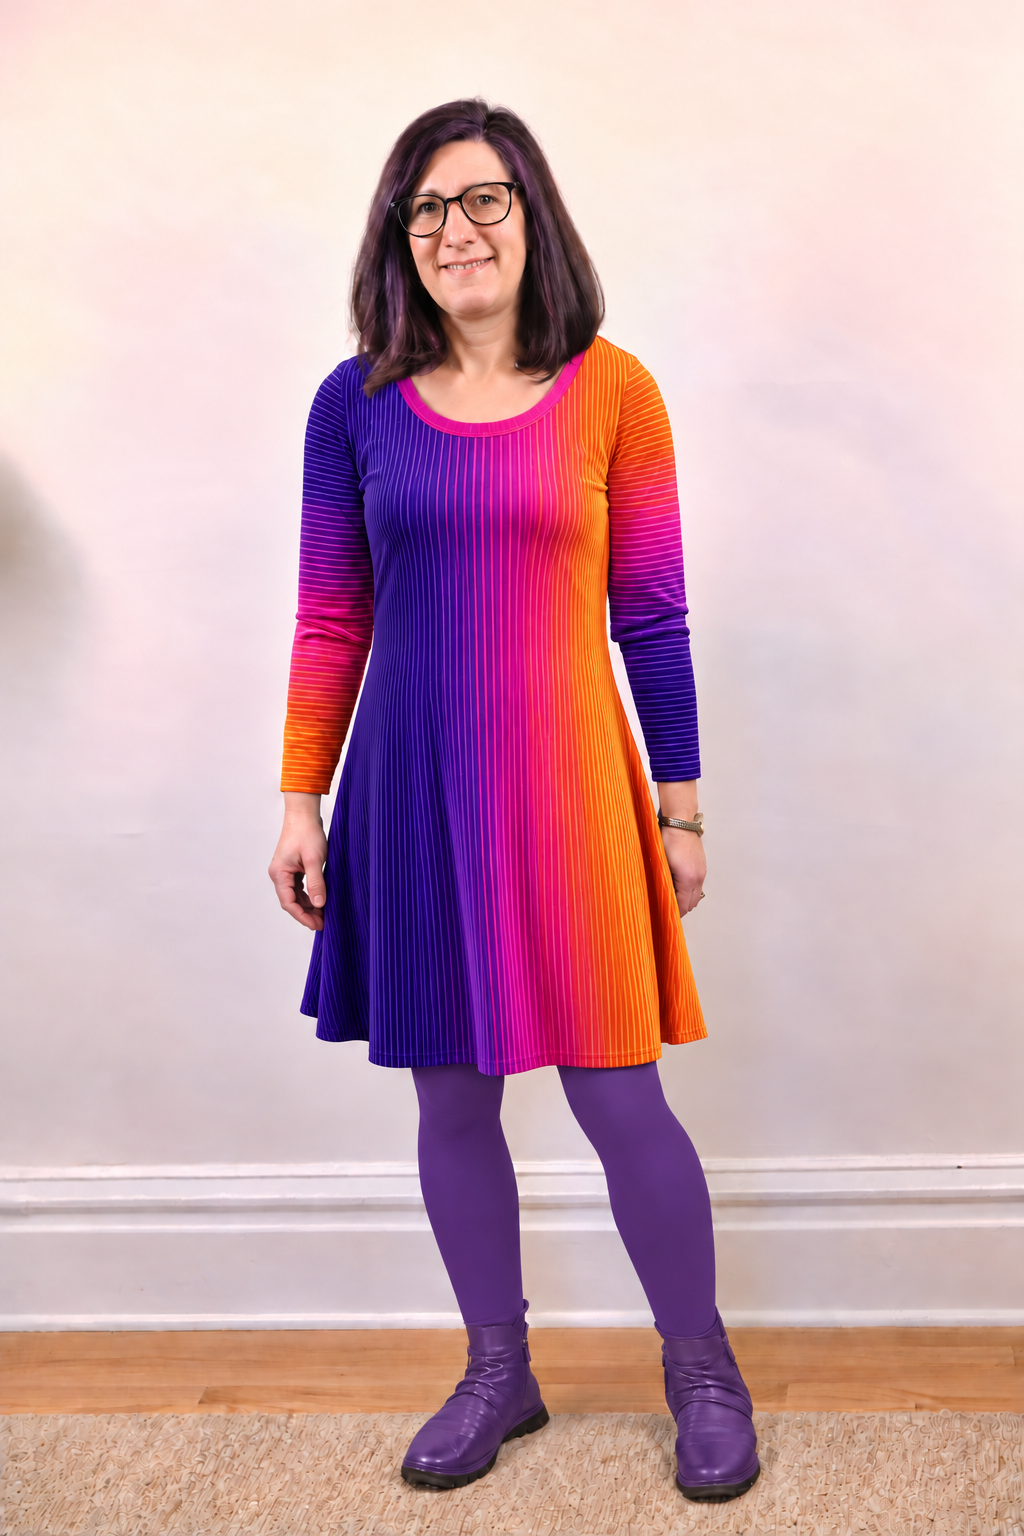
I drew out all the pattern pieces digitally, but I was worried that the dress might not look as fantastic once assembled as it looked in my mind. So before cutting, I enlisted three LLMs to attempt to render my design. I uploaded the photo of the fabric, a photo of me wearing one of my prior Wanderlust dresses, and a description of my desired stripe placement. I started with Claude, which insisted on making a disproportionate diagram of the dress. When I finally conveyed that I wanted it to edit the photo it made a strange and unflattering attempt. Gemini did a better job, but did not accurately map the fabric to the photo. It took some liberties in conveying the fabric design in one image it generated, and failed to follow my instructions on fabric placement in the other. ChatGPT did the best job. After some iteration in which I had it alter the color of my tights and boots (I don’t own purple boots that match these tights, but I wish I did), remove my necklace, render the fabric as a smooth fabric rather than the velour fabric in the original dress, and shorten the dress by two inches, it produced a photo that looked remarkably similar to the vision in my head. This gave me more confidence that my dream was achievable.
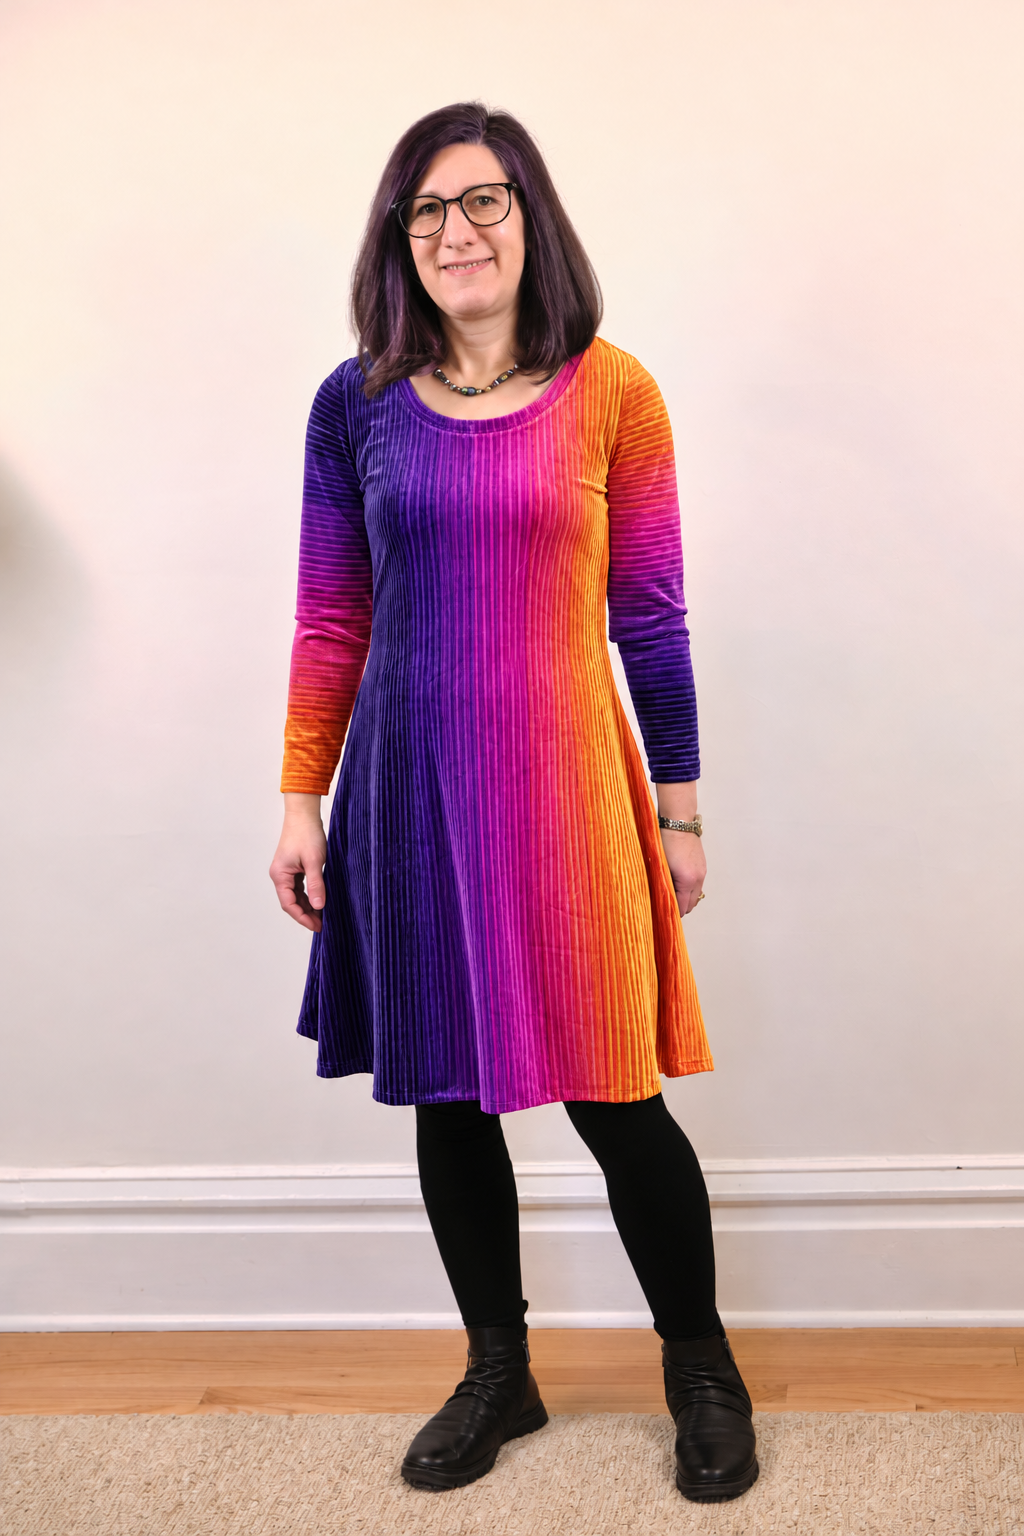
I projected my pattern onto my fabric, placing it carefully, and cut it out with my rotary cutter. I decided I wanted to try the version of the neck band that blended with the dress, especially since I only had enough fabric left to make a solid-color neck band if I made it dark purple. I measured the side of the neck opening I cut for both the front and back piece, calculated 80% of that, added seam allowances and cut separate front and neck bands positioned to align roughly with the colors in the front and back pattern pieces. I came close, but looking at the photo now I see I could have done slightly better if I had cut out the neckband about 1 inch towards the darker part of the fabric. But I think I like this offset version that I made better since it brings some of the orange down towards the center and keeps the center part brighter. The neckband is evenly sewn: I folded it in half and zigzagged it together to keep the 2 layers aligned, then I used the quarter (and eighth) method to align the band to the dress with clips. Then I zigzagged the band to the dress, and finally sewed it with my serger.
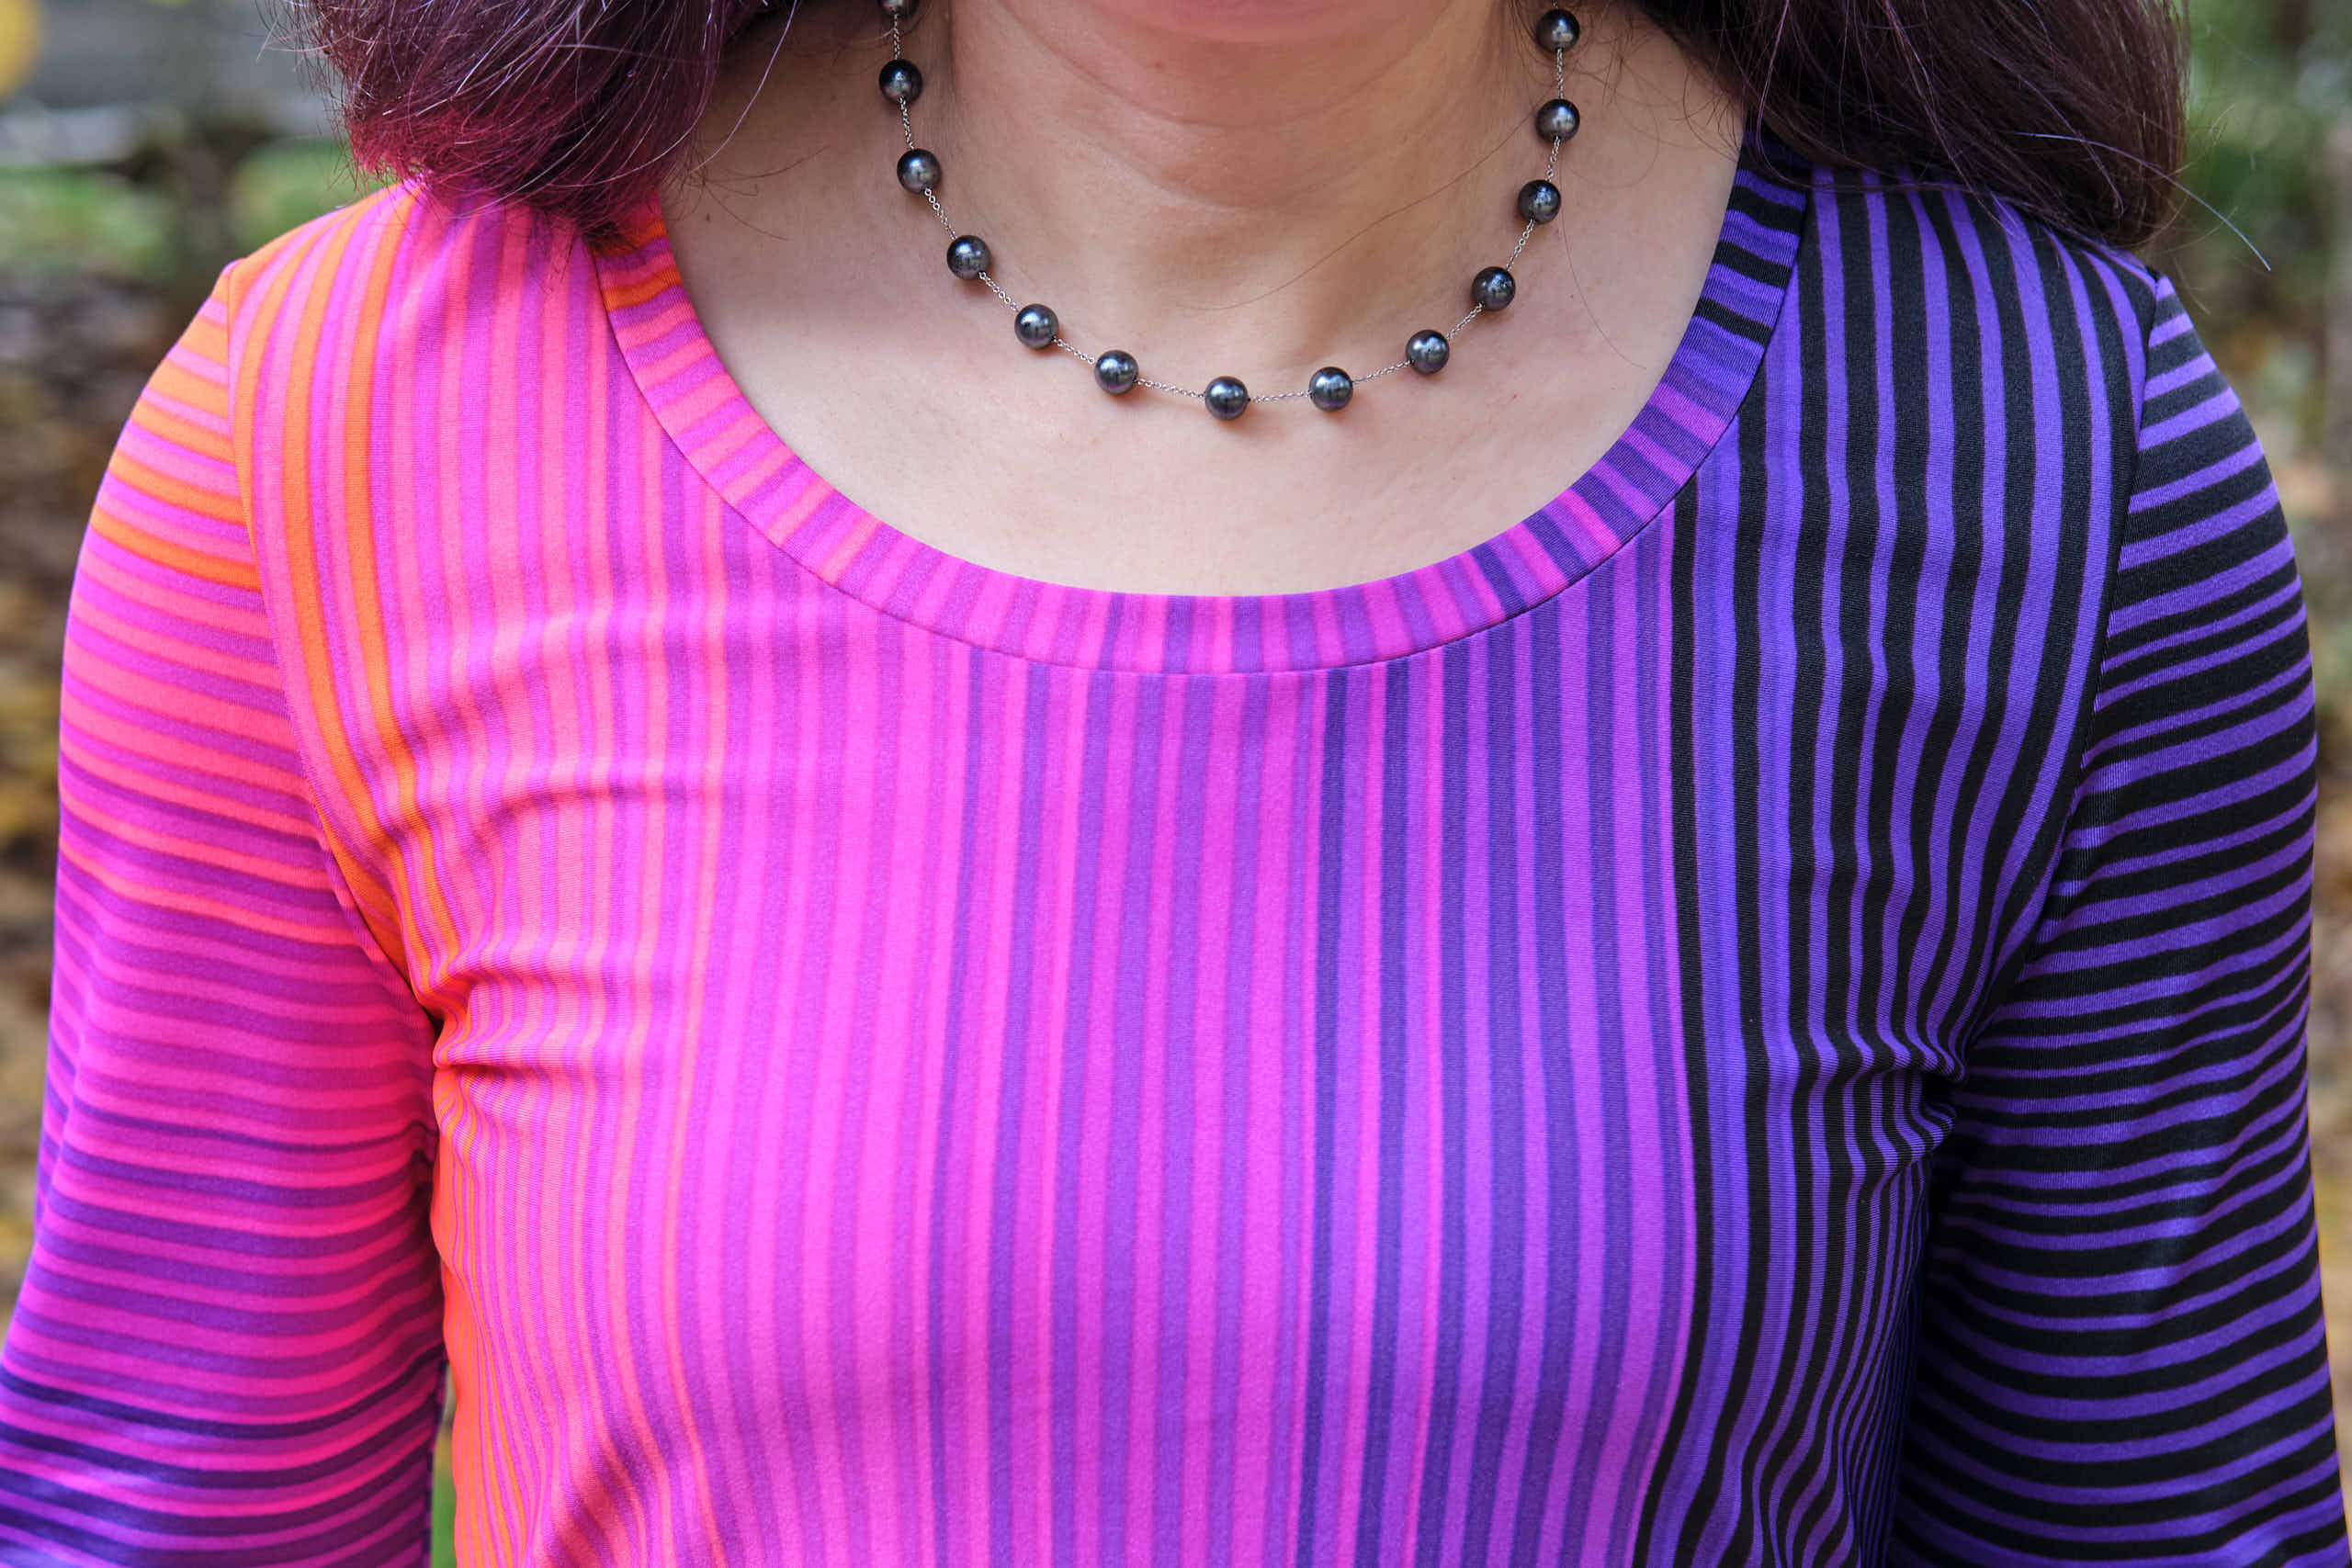
I had hoped the stripes on the sleeves would line up when I sewed the seam on the underside of the arm. The first one did not line up as well as I had hoped so for the second one I basted it in place first with my sewing machine before serging. I find it easier to get good alignment with my sewing machine than my serger. So one arm lines up better than the other, but since this on the inside of the arm it isn’t very noticeable either way.
I hemmed the sleeves and bottom hem with a zigzag stitch on my sewing machine. After some debate, I used magenta thread in an attempt to blend as best I could. Usually, I would use fusible hem tape to fuse the hem before sewing, a process that takes some extra time but makes it easier to get a straight hem. However, this fabric had enough structure and didn’t roll, so I was able to fold it as I sewed, using the presser foot and alignment marks on the sewing machine bed as a guide. I pressed it when I was done.
The dress looks good from both the front and the back. The back stripes align pretty well despite the waist seam.
I like the fact that the dress looks completely different from the left and right sides.
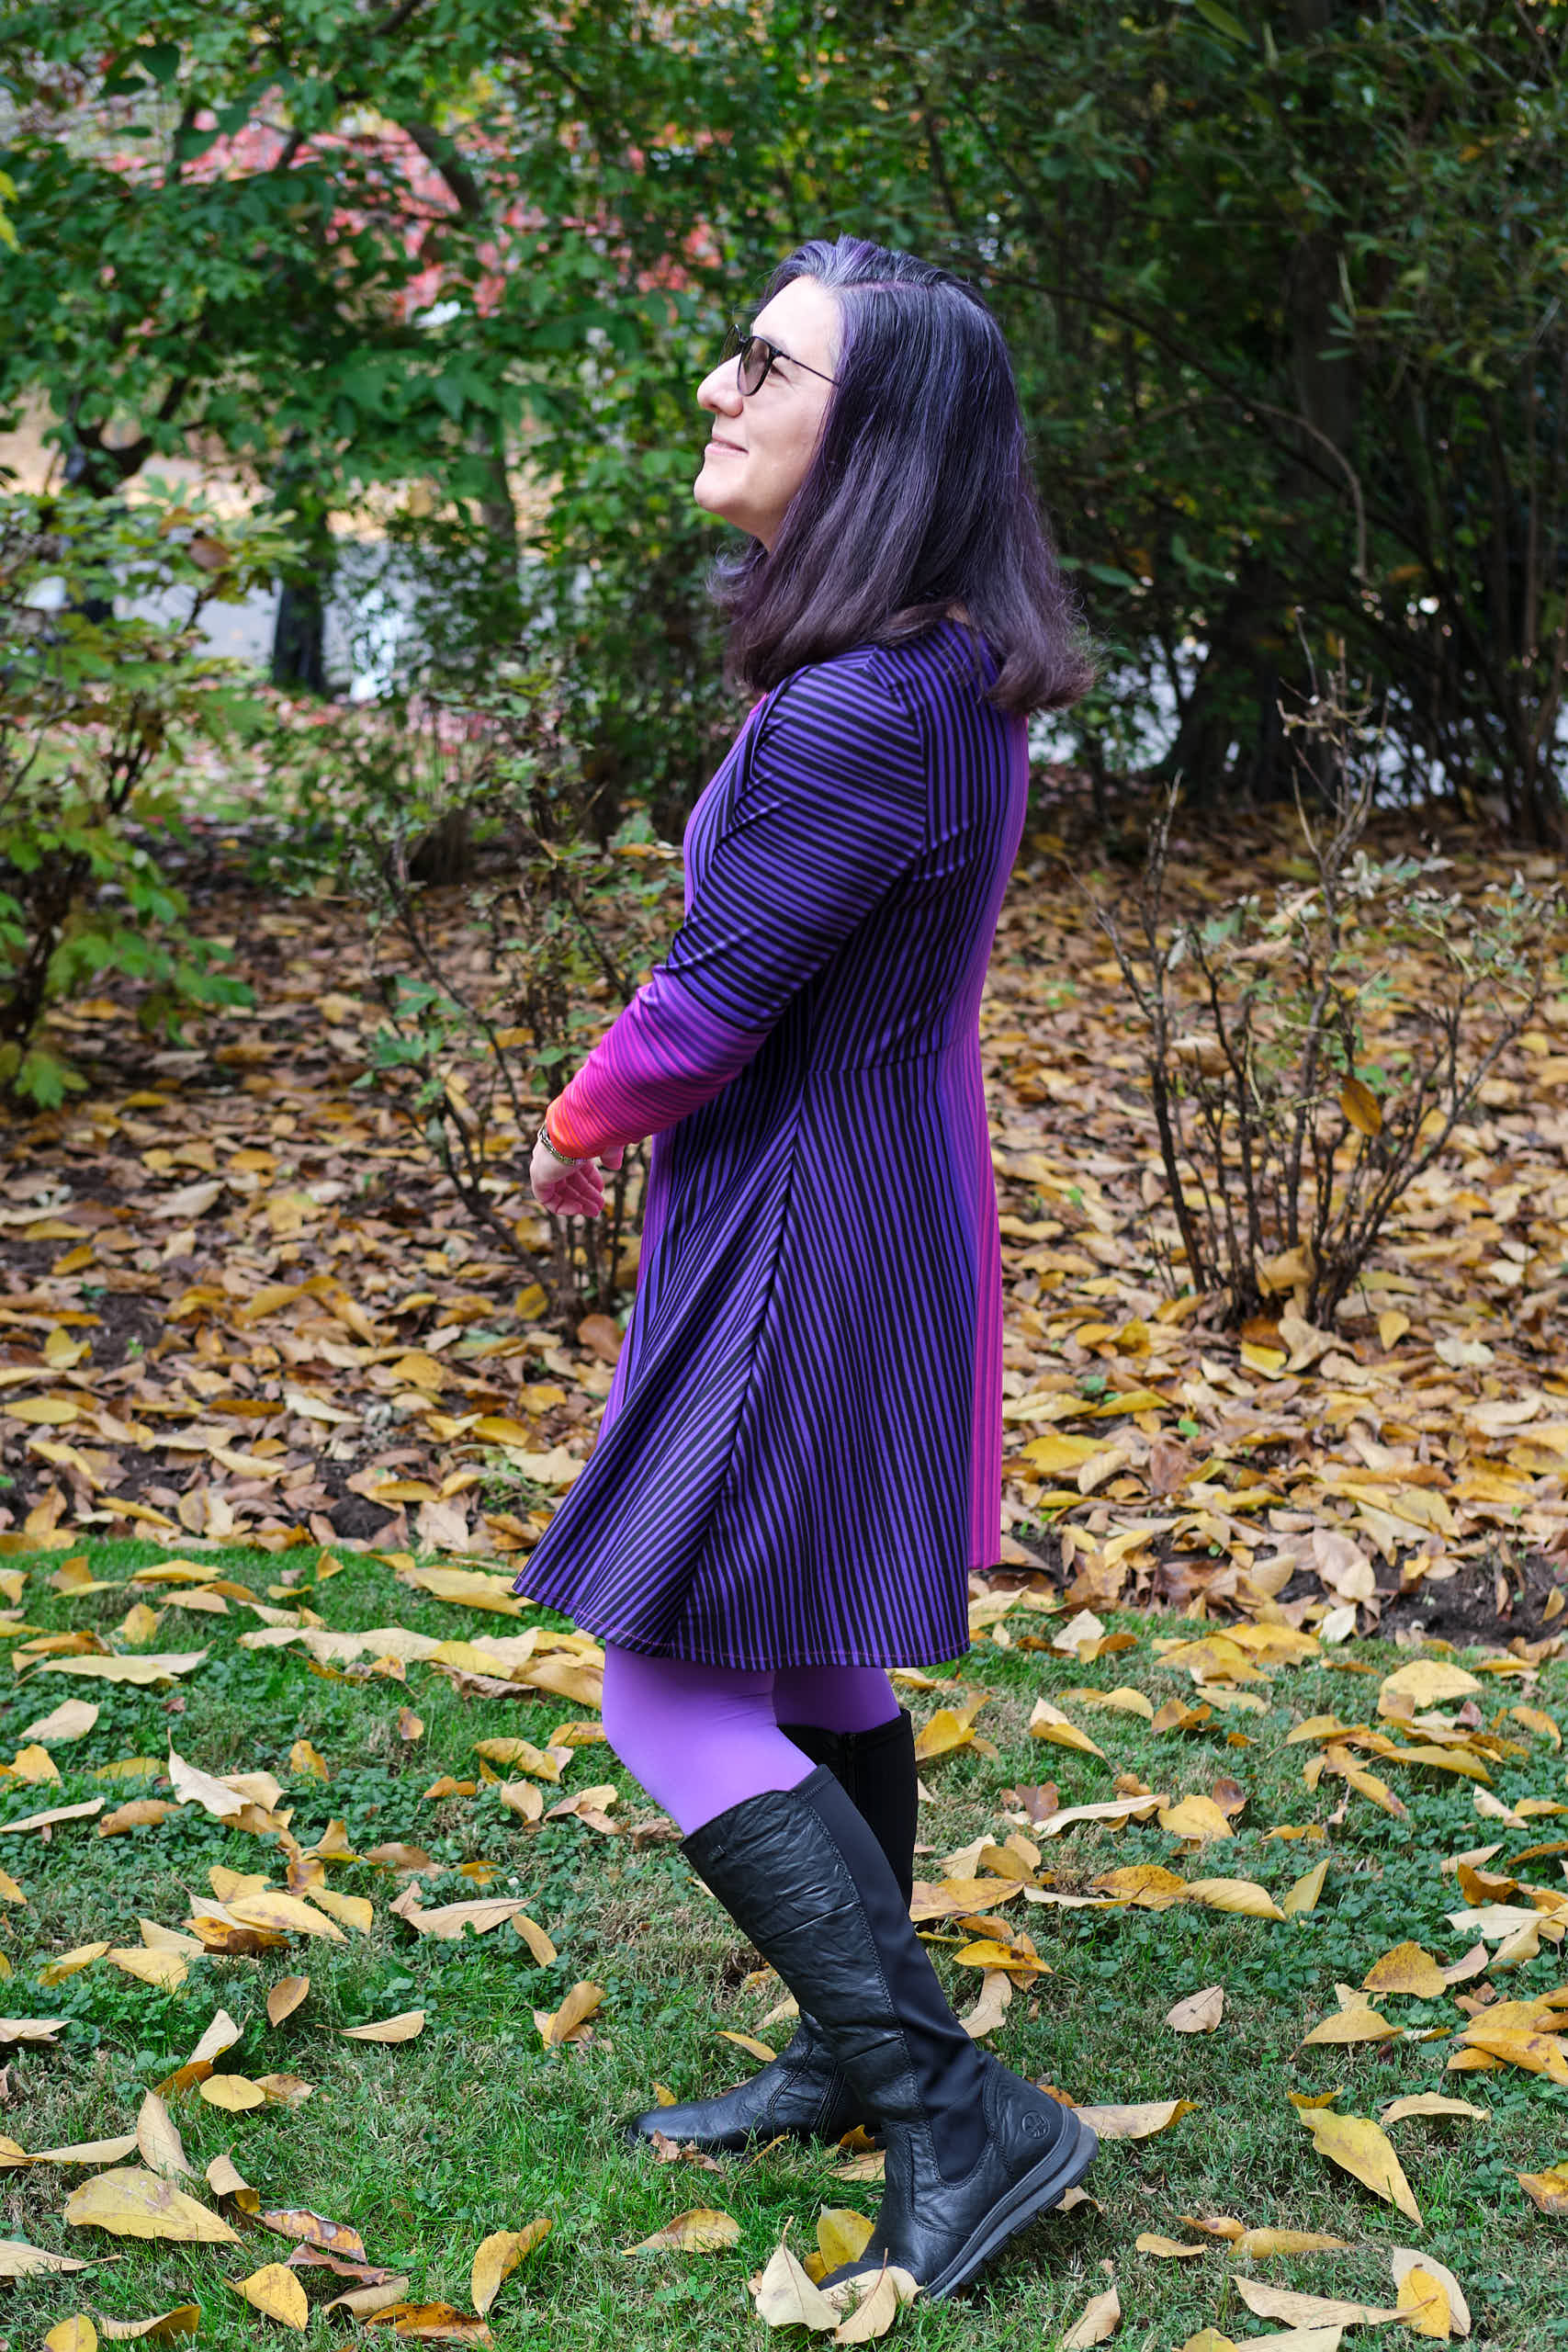
And, of course, the dress has pockets deep enough for my phone.