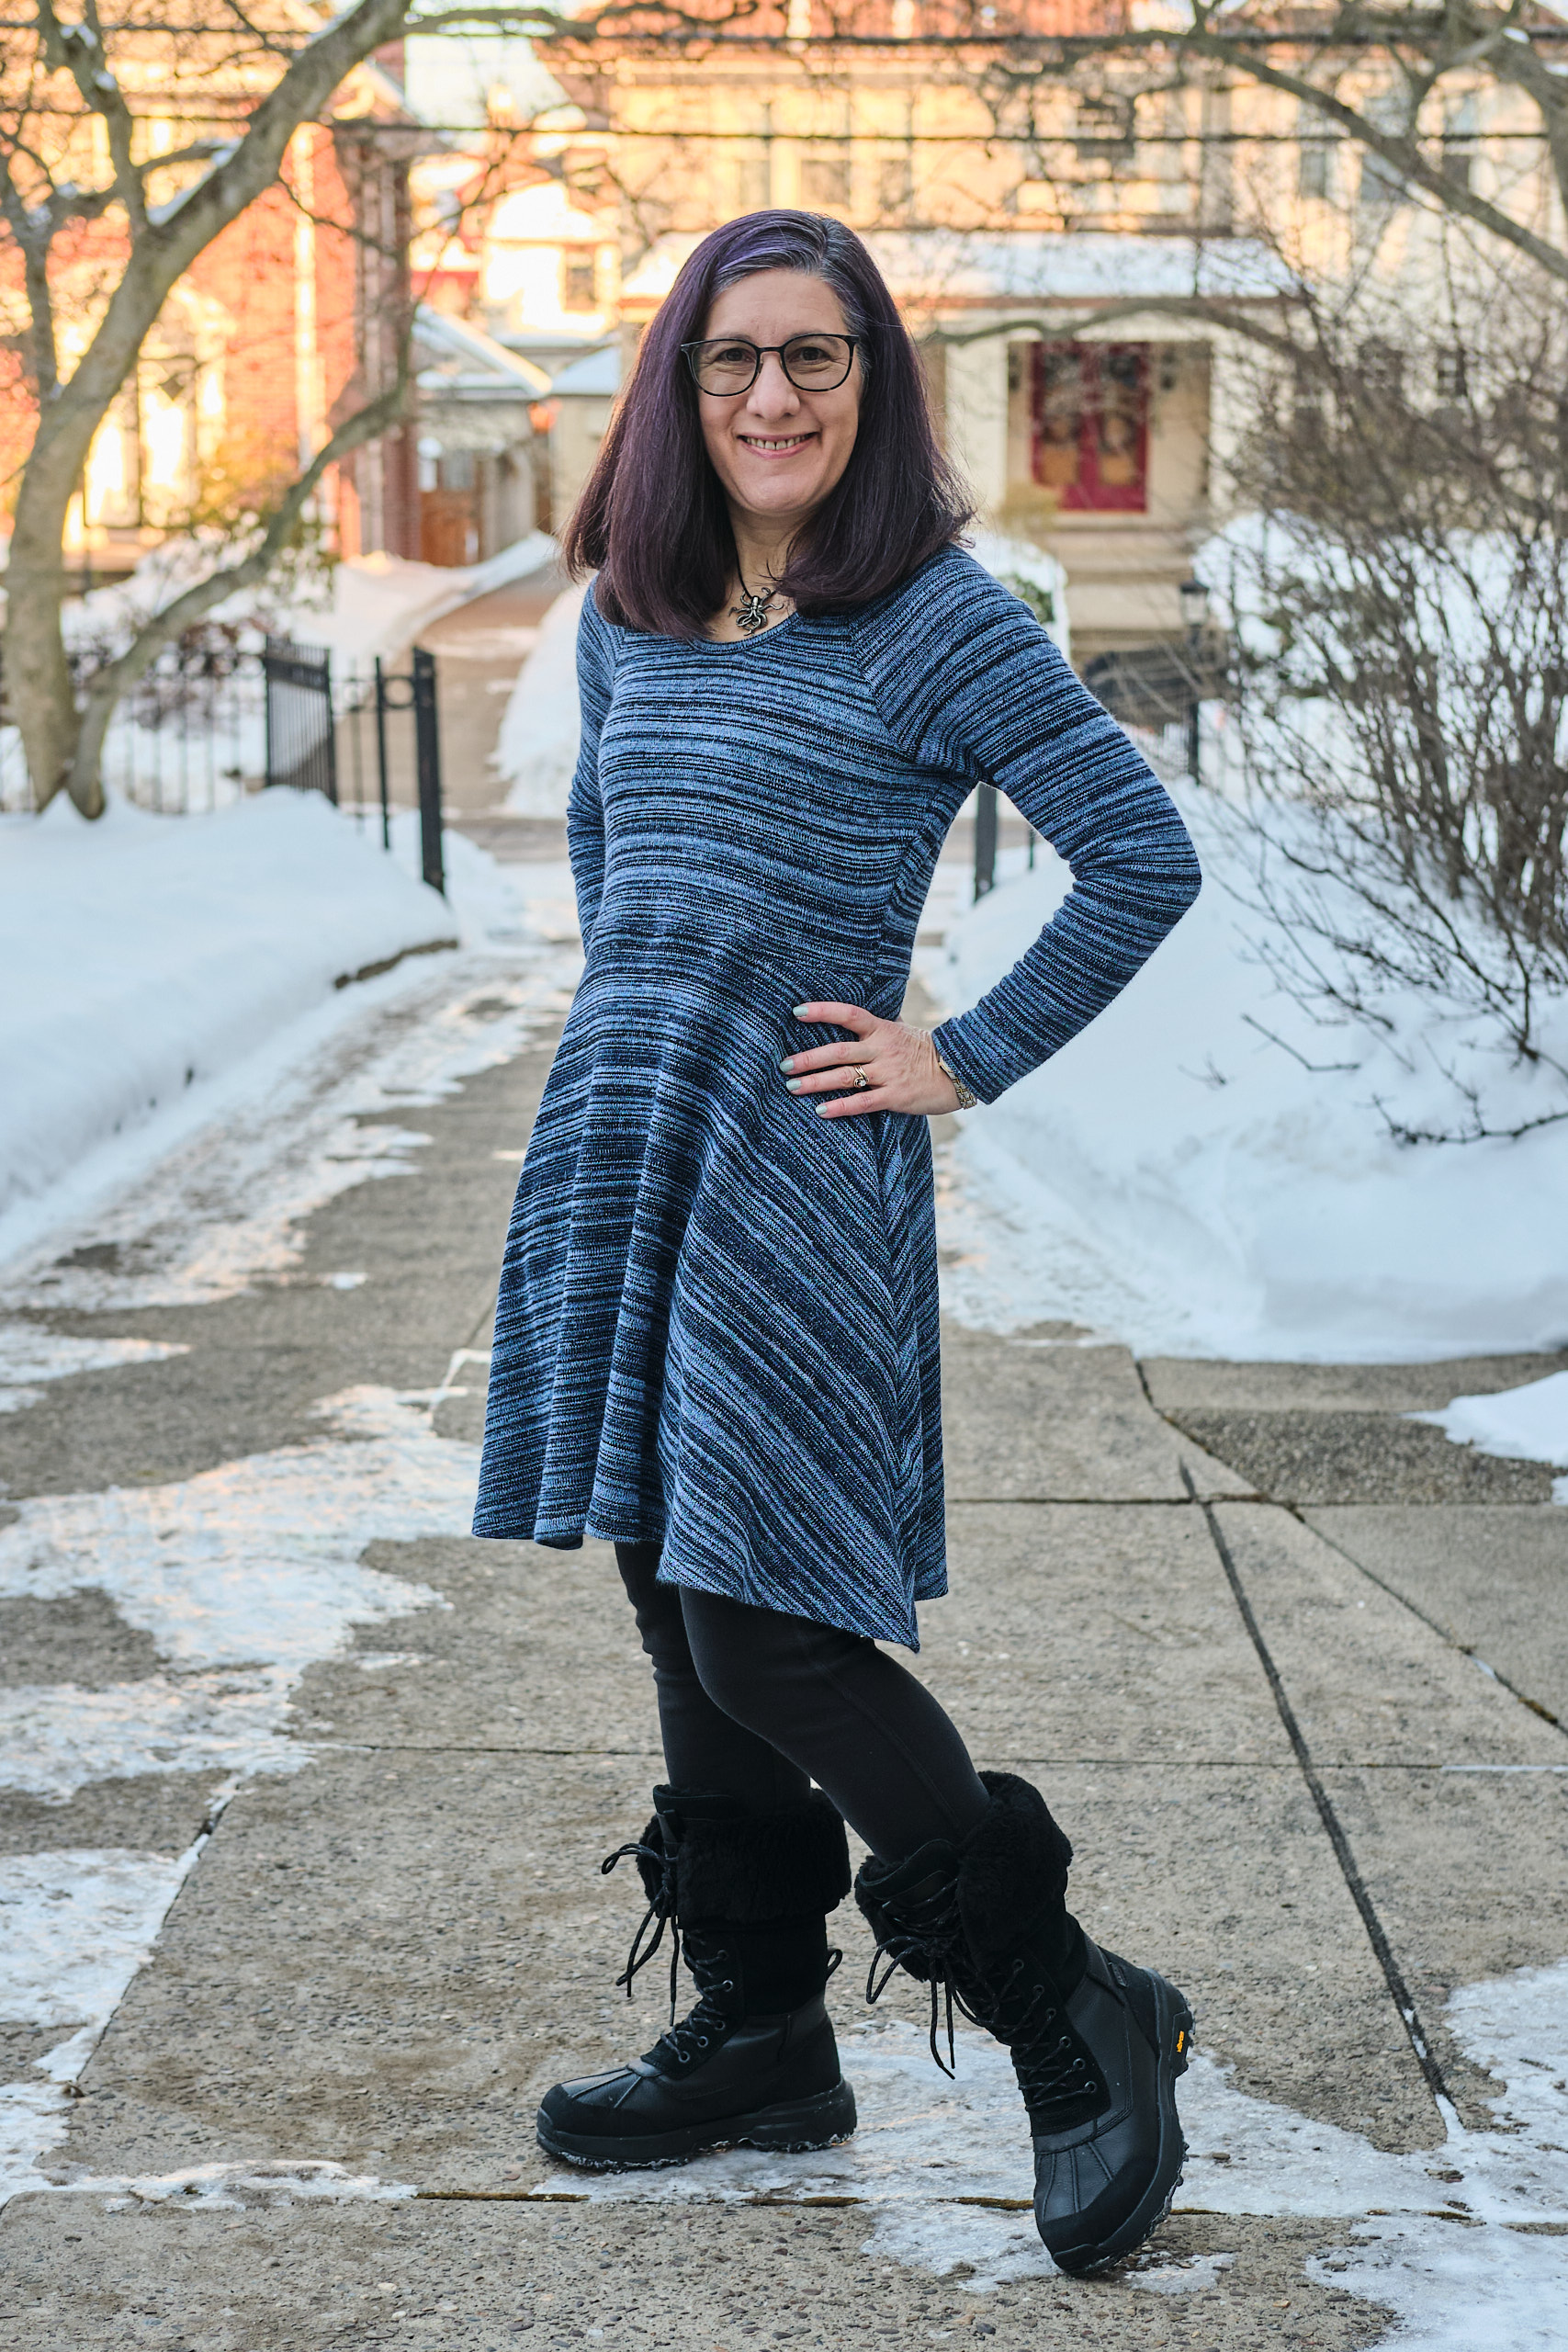
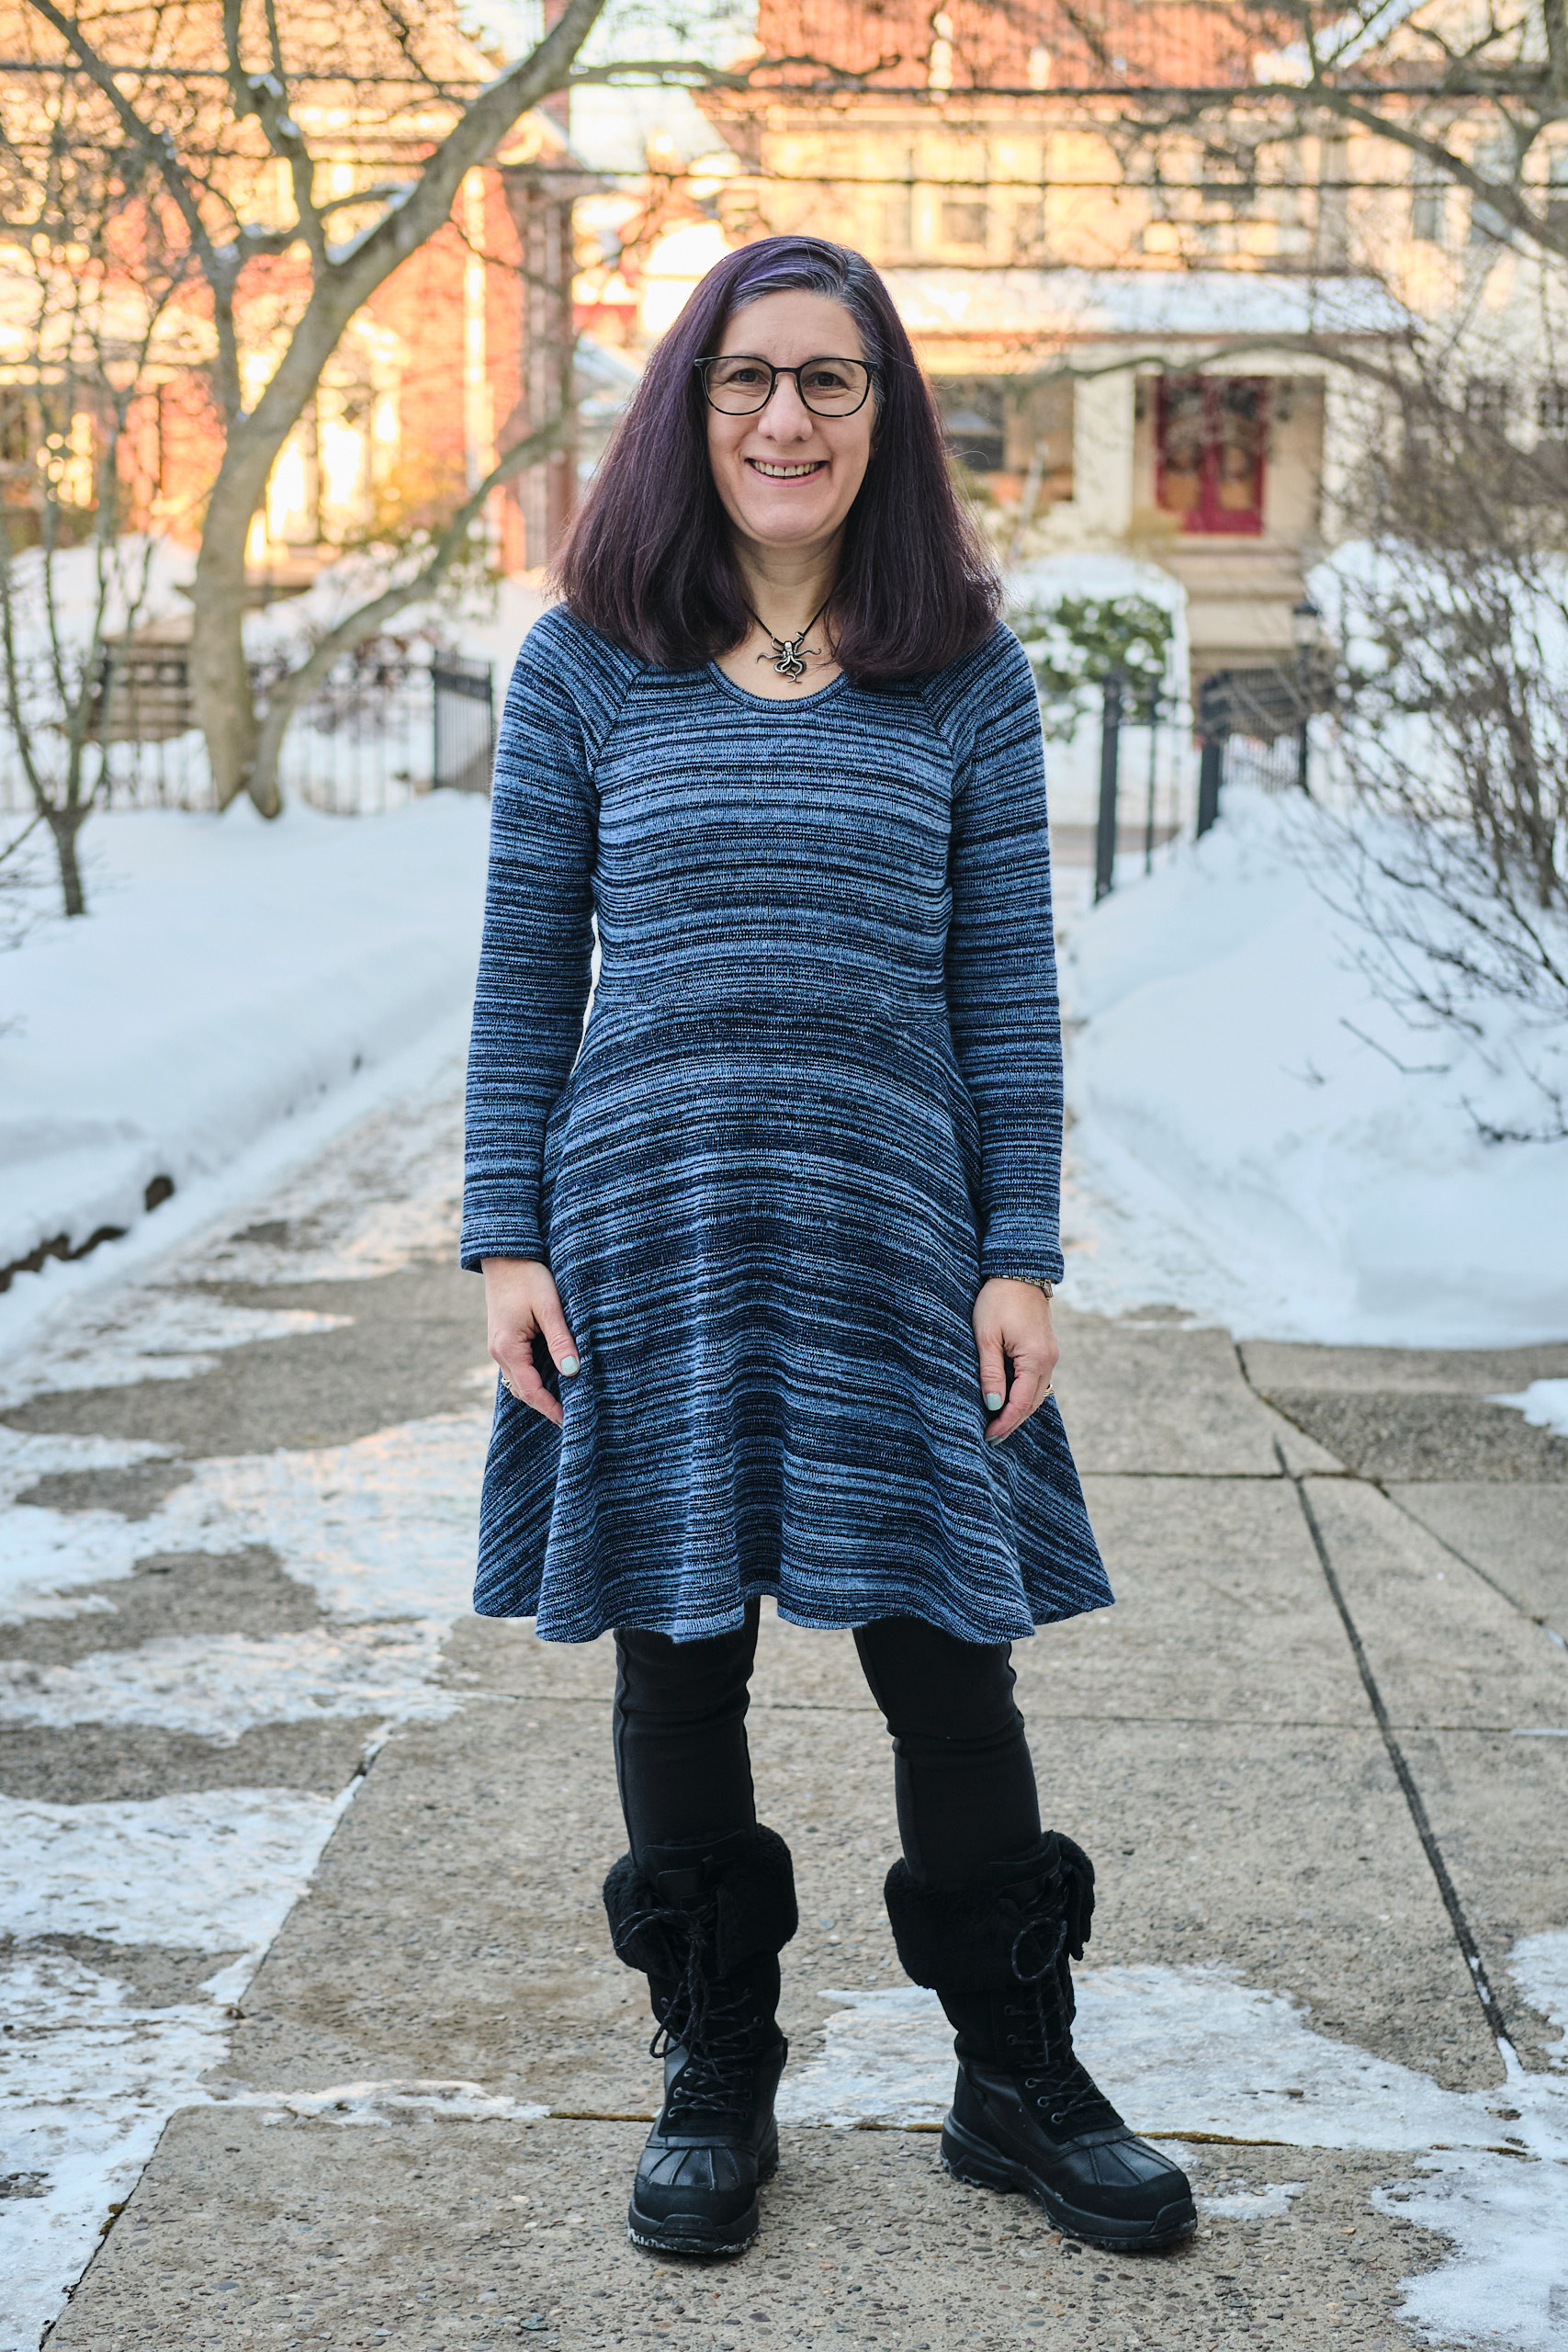
Rivet Patterns Senna Raglan Dress in size 6, high scoop neck, 1 inch above knee length half-circle skirt, sleeves shortened 1 inch, graded in at waist, from 2 yards brushed back polyester/spandex sweater knit.
I had never tried a pattern from Rivet Patterns before, but when they recently came out with an upgraded raglan dress pattern, I decided to give it a try. The Senna Raglan Dress is a standard skater dress, but with raglan sleeves (sleeves that have a diagonal line to the collar rather than set into the shoulders). This version comes with a choice of a gathered or half-circle skirt, three necklines, and optional inseam pockets. Some of the testers made cozy sweater knit versions that inspired me to make a Senna sweater dress to wear during our current frigid weather.
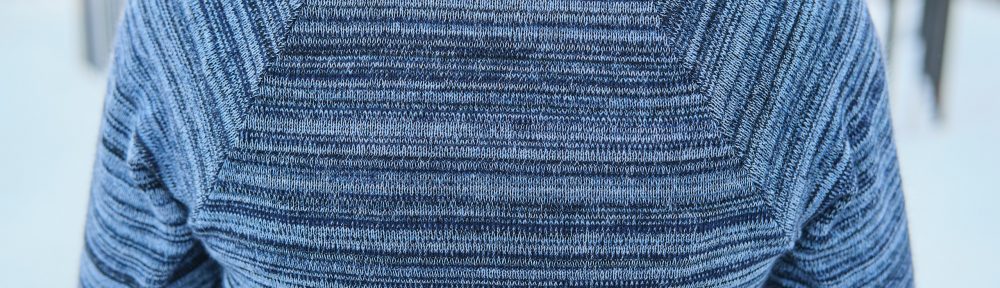
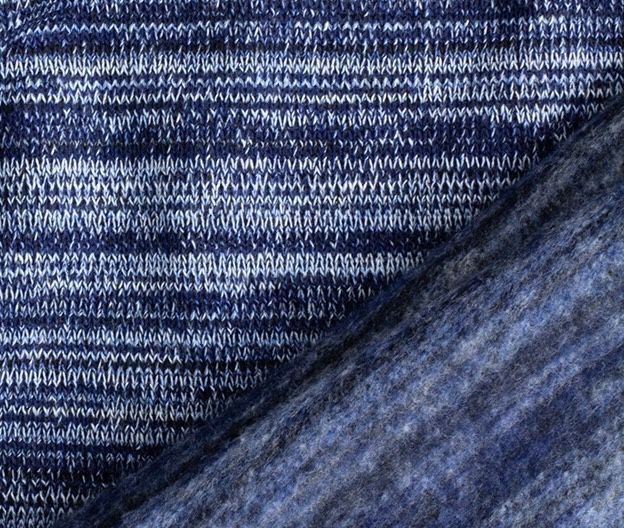
I tend to stock up on sweater knit when it is on sale, but I only want to sew it during sweater season. I found a lovely brushed back polyester/spandex sweater knit last Fall that was knit from blue, white, and charcoal variegated yarn. The front is smooth, and the back is very soft and fuzzy. It is 250 gsm with 50% horizontal and 25% veritcal stretch. The brushed back makes the fabric fairly thick and very cozy. I bought two yards, with plans to make a sweater, but I figured out how to tetris the Senna dress pattern to fit in 2 yards (the pattern suggests that at least 2.5 are required for the version I wanted to make).
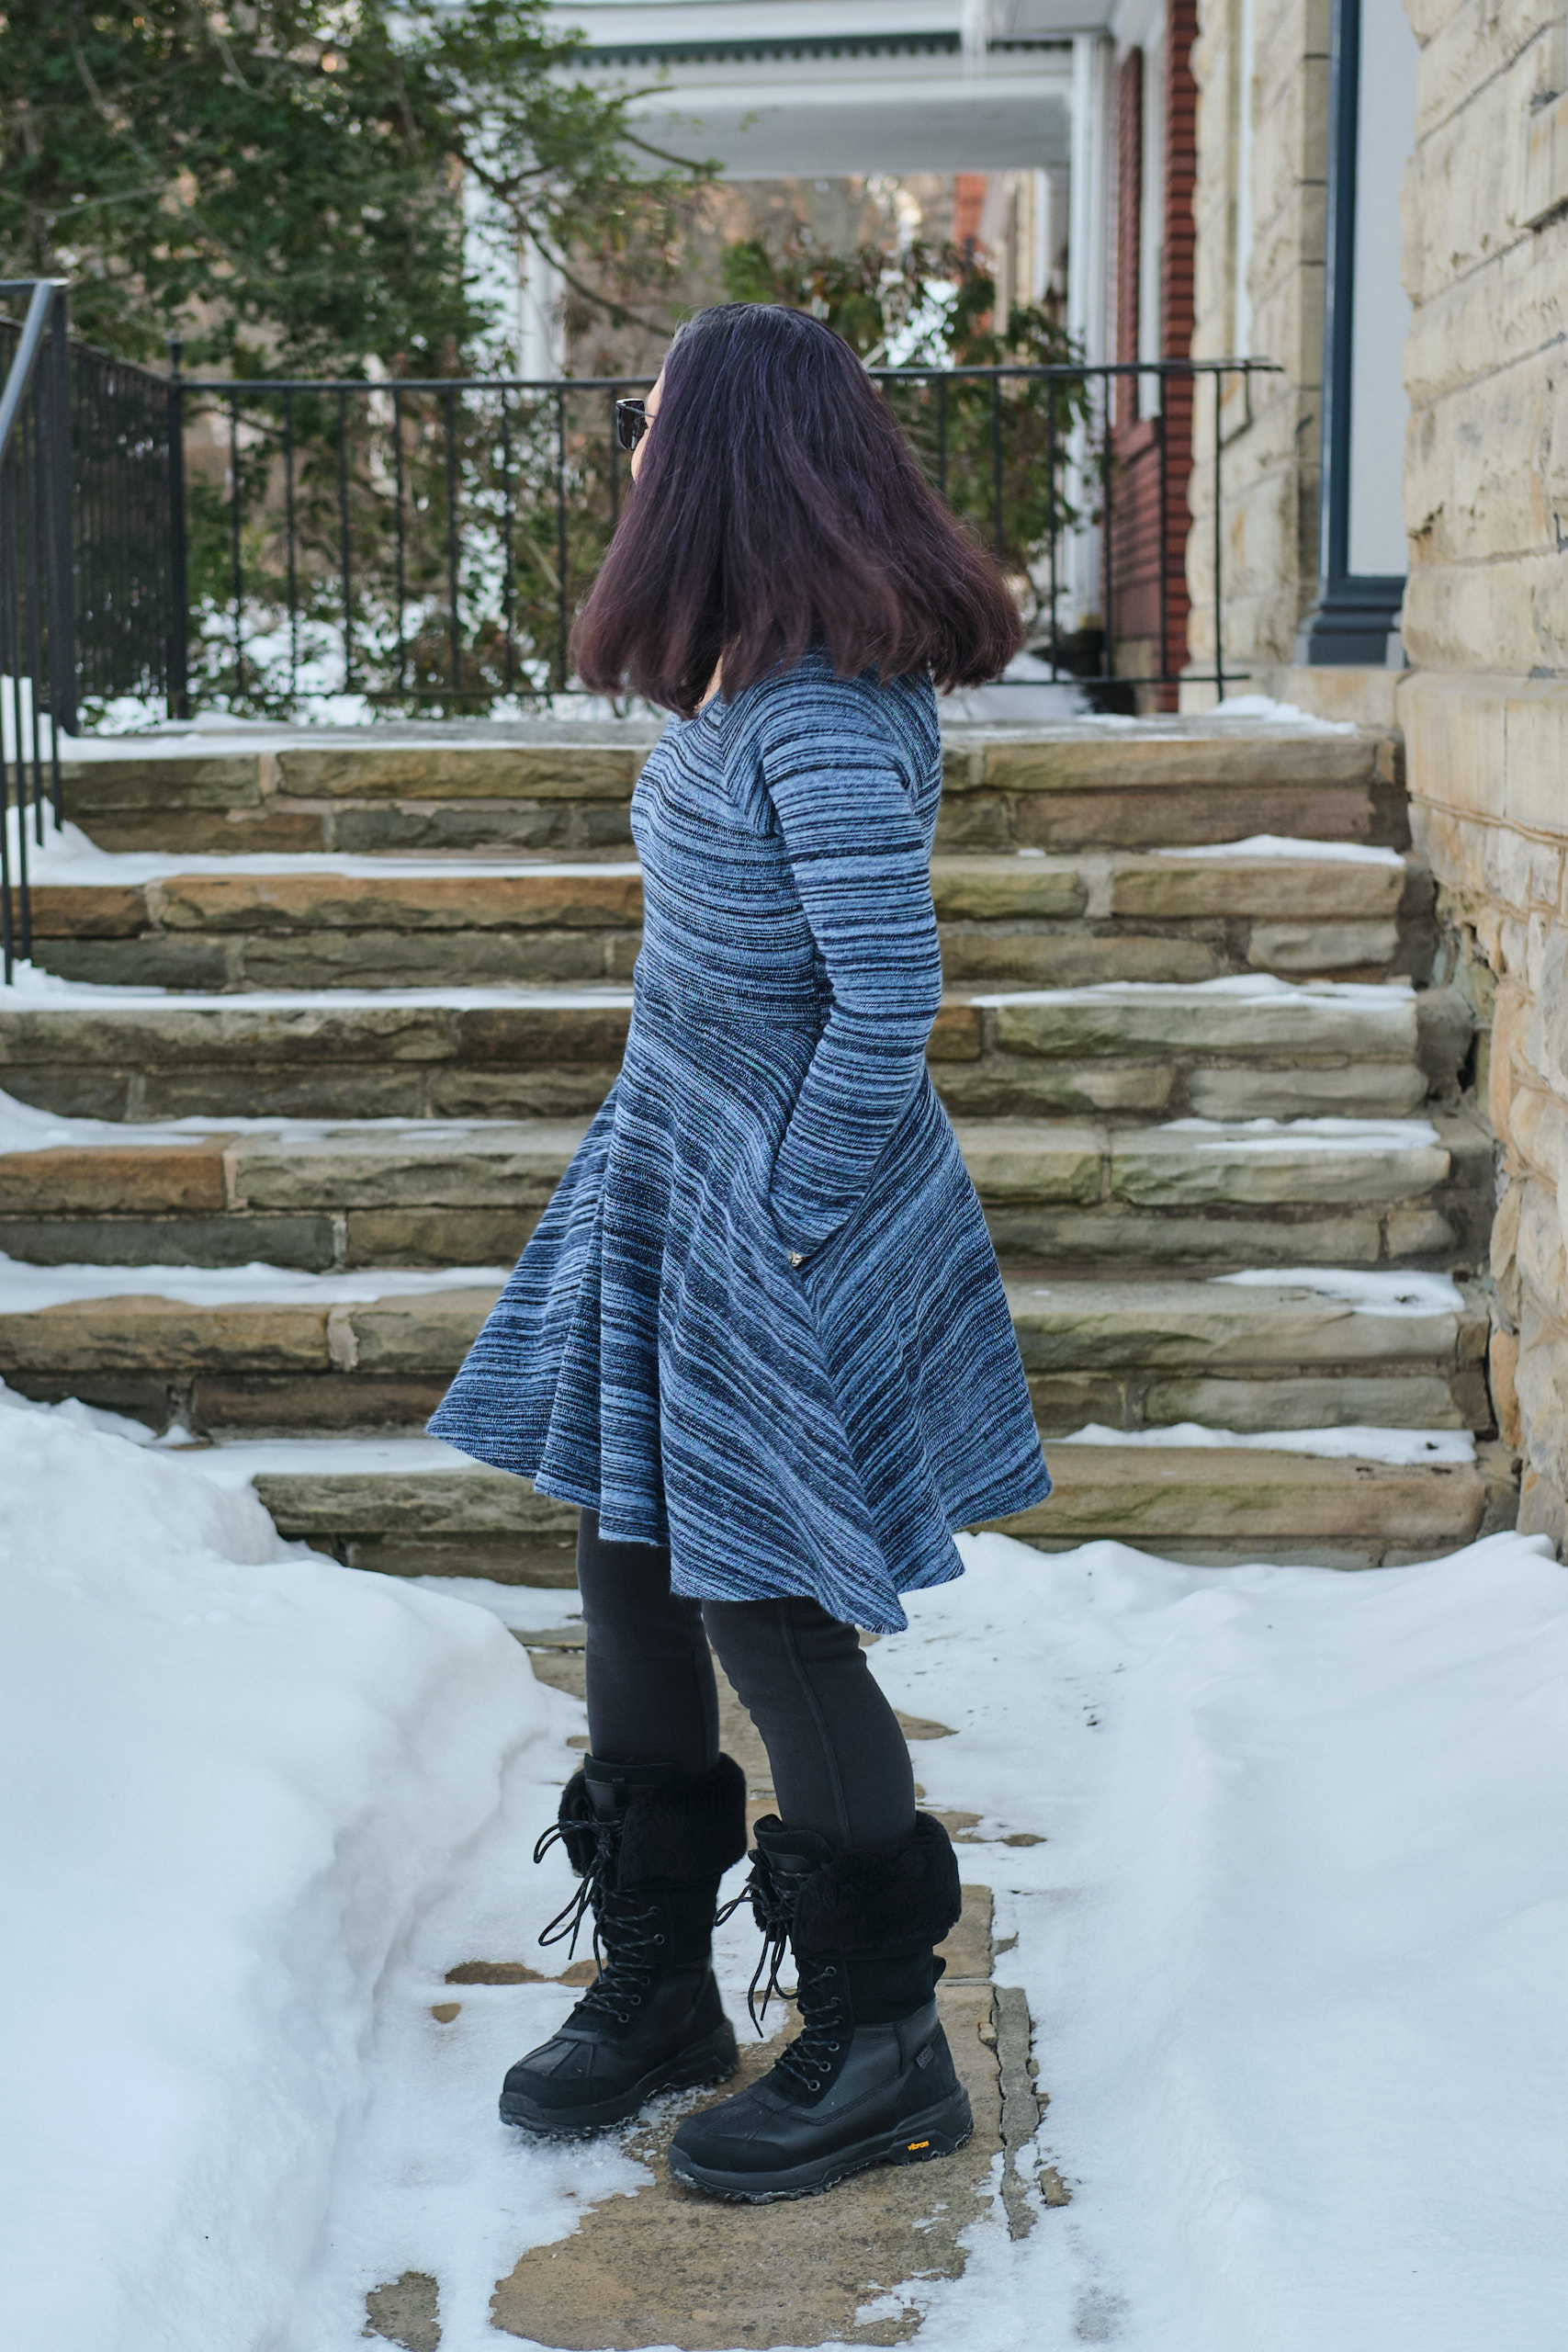
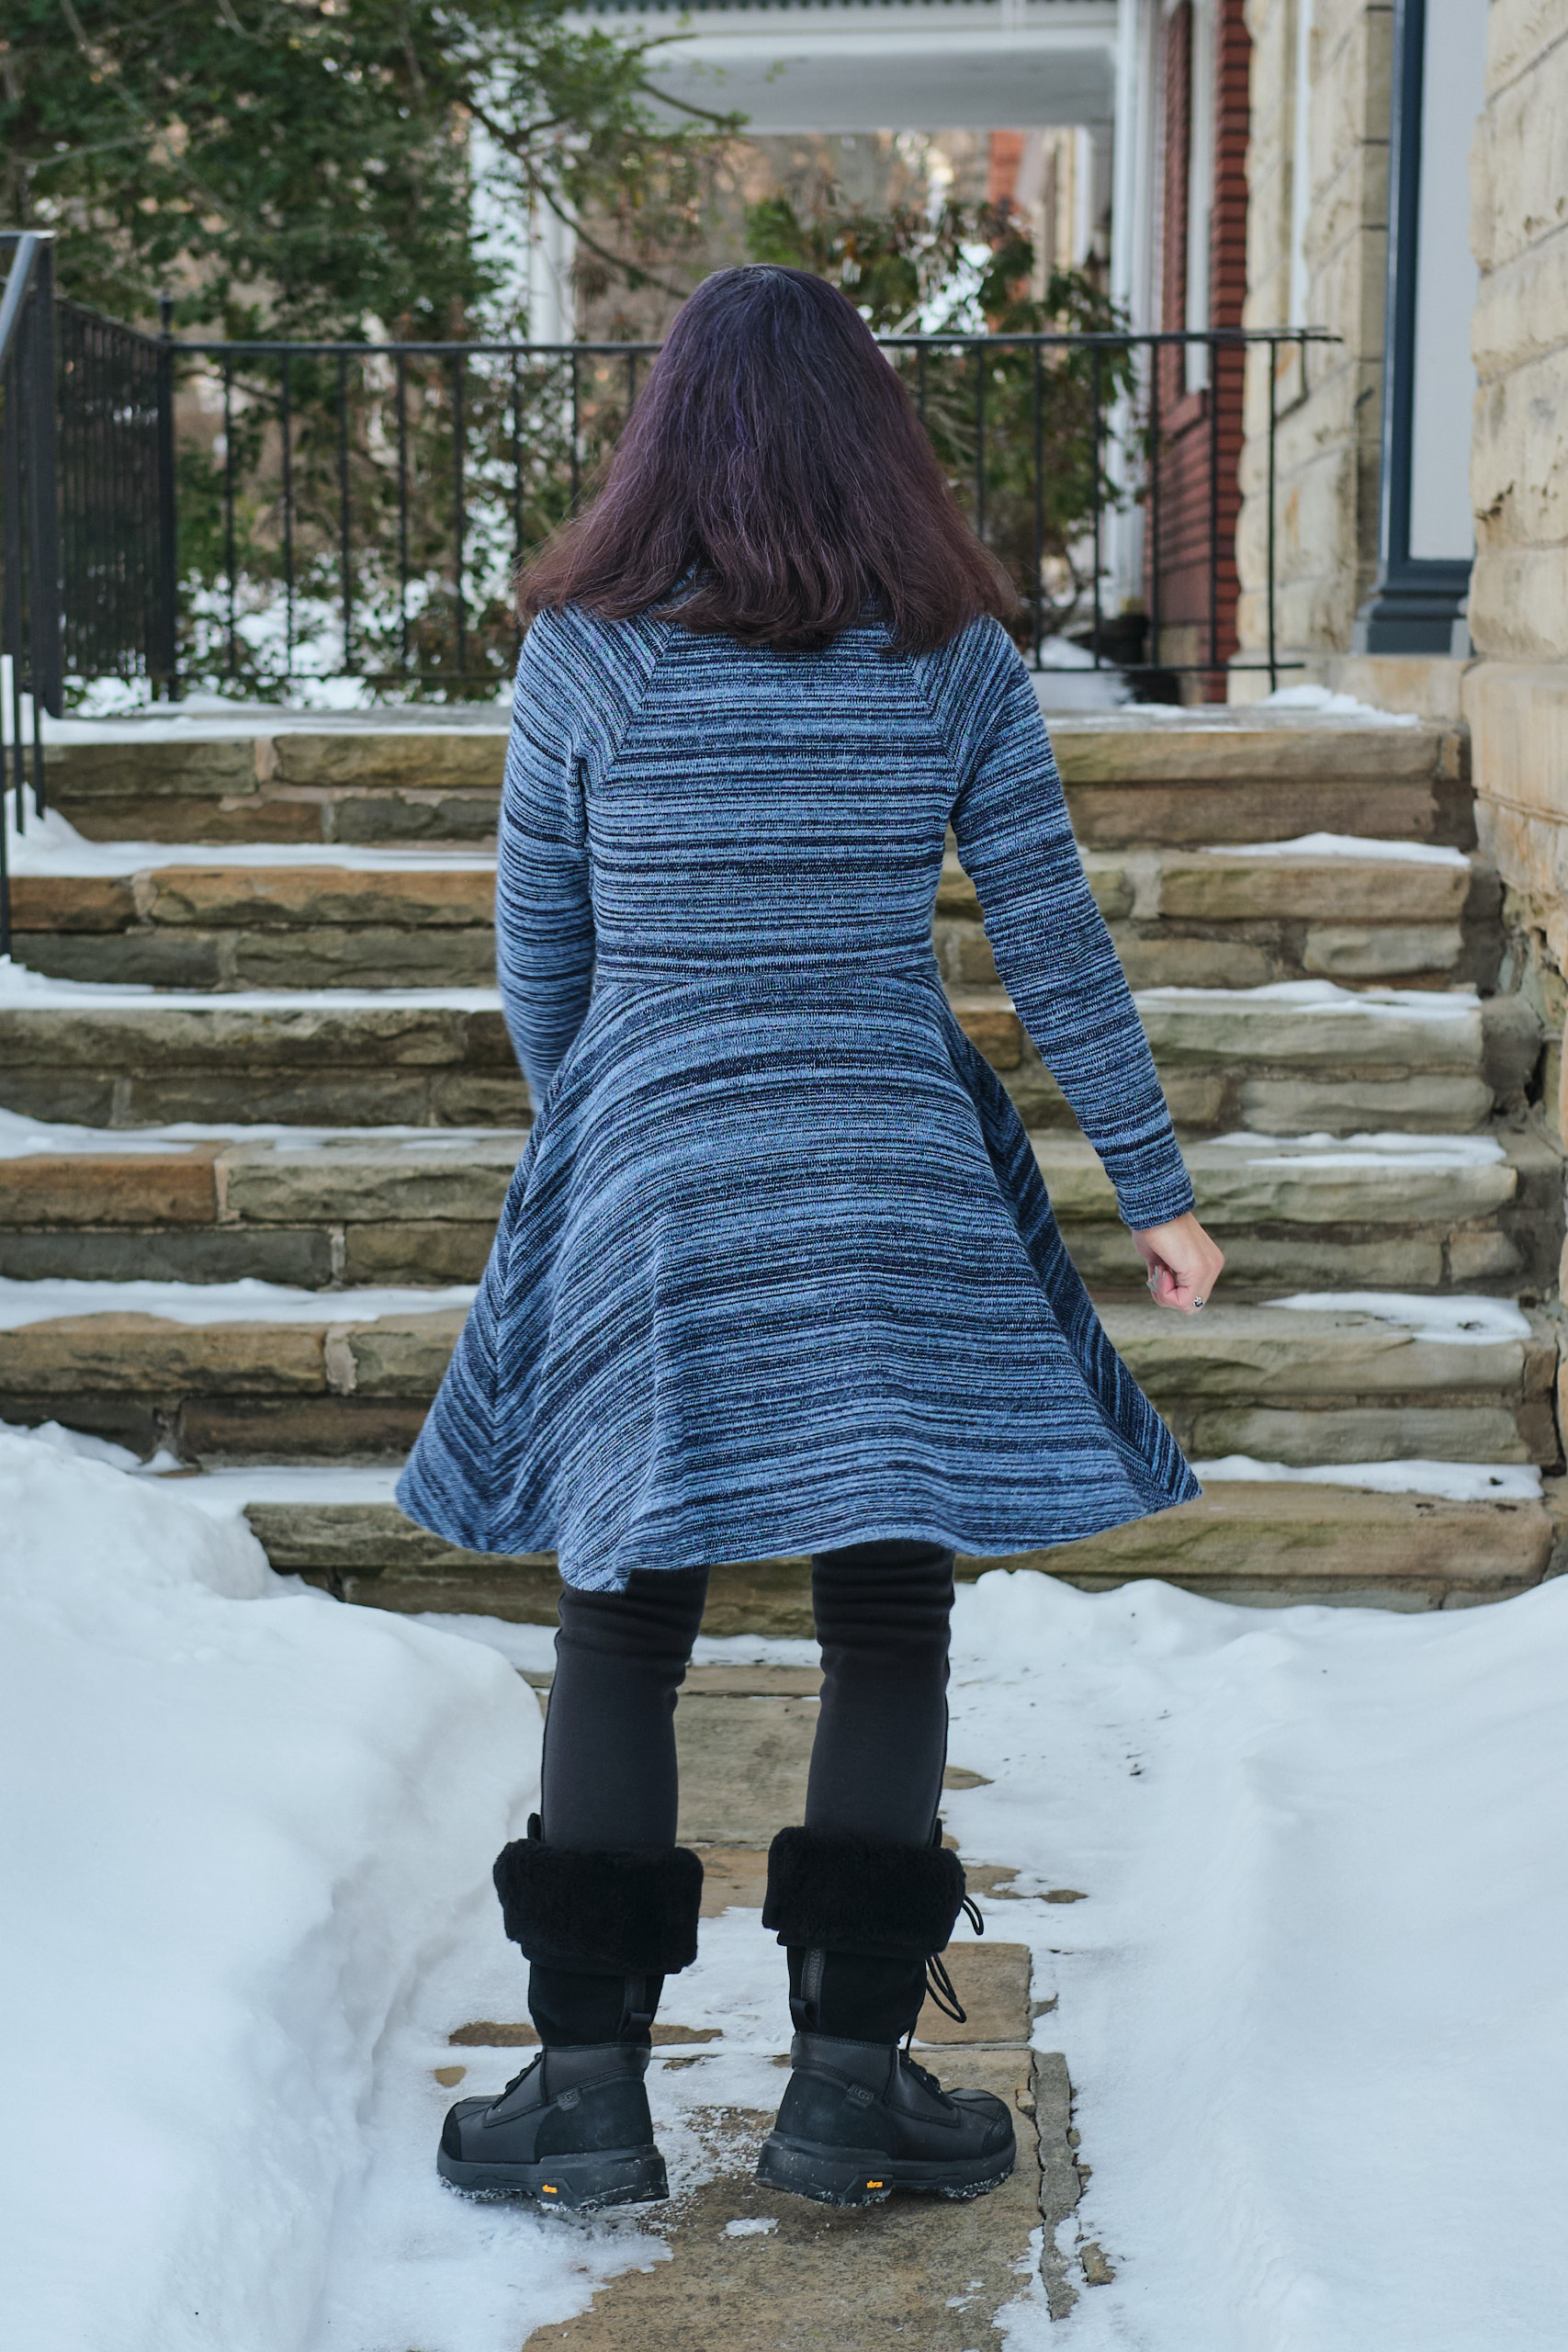
I was between size 4 and 6 on the pattern size chart. Because the fabric is so thick, I decided to cut a size 6, but in hindsight a 4 would have fit better. I shortened the sleeves by 1 inch and cut the half-circle skirt 1 inch below the above-the-knee length, which I’ve found on me usually results in a skirt right at the knee — my favorite length. I cut the high scoop neck.
This pattern was pretty fast and easy to sew together, and the sweater knit was easy to sew on my serger, despite the thickness. I sewed the whole thing with black thread, which is what I already had on my serger and sewing machine. I thought about switching to blue, but the black actually blended better than anything else. There isn’t actually much stictching that you can see on the outside other than the sleeve hems, bottom hem, and top stitching at the waist. The pattern instructions are fairly terse, but pretty clear. This is a knit pattern with a 3/8-inch seam allowance, which is not my favorite, though, as it requires trimming 1/8-inch off your seams as you sew.
I did run into a problem with the neck band though. My sweater knit has some spandex in it and is appropriately stretchy, but it does not have great recovery, especially around the edges. It started stretching out around the neck as I was sewing it, and the neckband stretched a lot as I was folding it in half and pressing it. I realized I should have stabilized the neckline with stay stitching before I sewed the bodice together and that I needed to do something different with the neck band. The obvious thing to do was to make the neckband out of some other fabric with better recovery. I thought about looking through my stash for something in navy that might work, but I really wanted a band that matched the sweater knit fabric in the rest of the dress. I once had a similar problem with another sweater dress, but I didn’t fully realize it until after I sewed the neck band on and saw that the whole neck was too stretched out to be wearable. I saved it by threading some elastic through the neckband, but it never did lie perfectly flat. I thought maybe I could improve on that solution this time by sewing elastic to the neck band before I sewed it together. While I was looking for suitable elastic I found my 1-inch ultra-light fusible knit stay tape and thought that might do the trick. So I cut out a new neck band (1.75″ wide and 24″ long) and fused two 24″ strips of stay tape to the back. Then I joined the ends and folded it in half lengthwise and pressed. I could see it was now a much less stretchy band, but it had a little bit of give — hopefully enough to fit the slightly stretched out bodice. I used the quarter method, as advised by the pattern instructions, and pinned the neck band to the bodice neck. I could see I was going to have to stretch the neckband more than it really wanted to stretch, but I decided to try it anyway. I basted it with a zigzag stitch on my sewing machine, stretching as I went. Amazingly, it worked. After checking to see that it looked ok, I sewed the neckband on with my serger, trimming only about 1/16″ as I sewed. Then I pressed well, and voila, a well-fitting neckband that was not stretched out. This sweater knit definitely did not want to be a neck band, but where there’s a will there’s a way!
I’m a diehard pocket fan, but I have to admit that sewing a good set of pockets takes time and makes the project take a lot longer than it would without the pockets. I was intrigued by the pocket construction on this dress, which was a little bit different than what I’m used to. I actually hoped for a miracle and to discover that this was the secret way to make pocket construction less painful, but alas, it was not. The difference here was only sewing the pocket opening to the dress at first, and sewing the part of the pocket bag above and below the opening later when sewing the front to the back. I still had difficulty sewing at exactly the right place when I sewed front to back, and I still had to unpick a bit, but it all worked out fine in the end. The pocket bags are large, as I like them.
The pattern suggests adding 1/4-inch elastic at the waist for stability. I decided to do that, but used clear elastic threaded through the slot on my serger foot for easy attachment. I took their advice and folded the seam with the elastic up towards the bodice and topstitched it in place to encase the elastic.
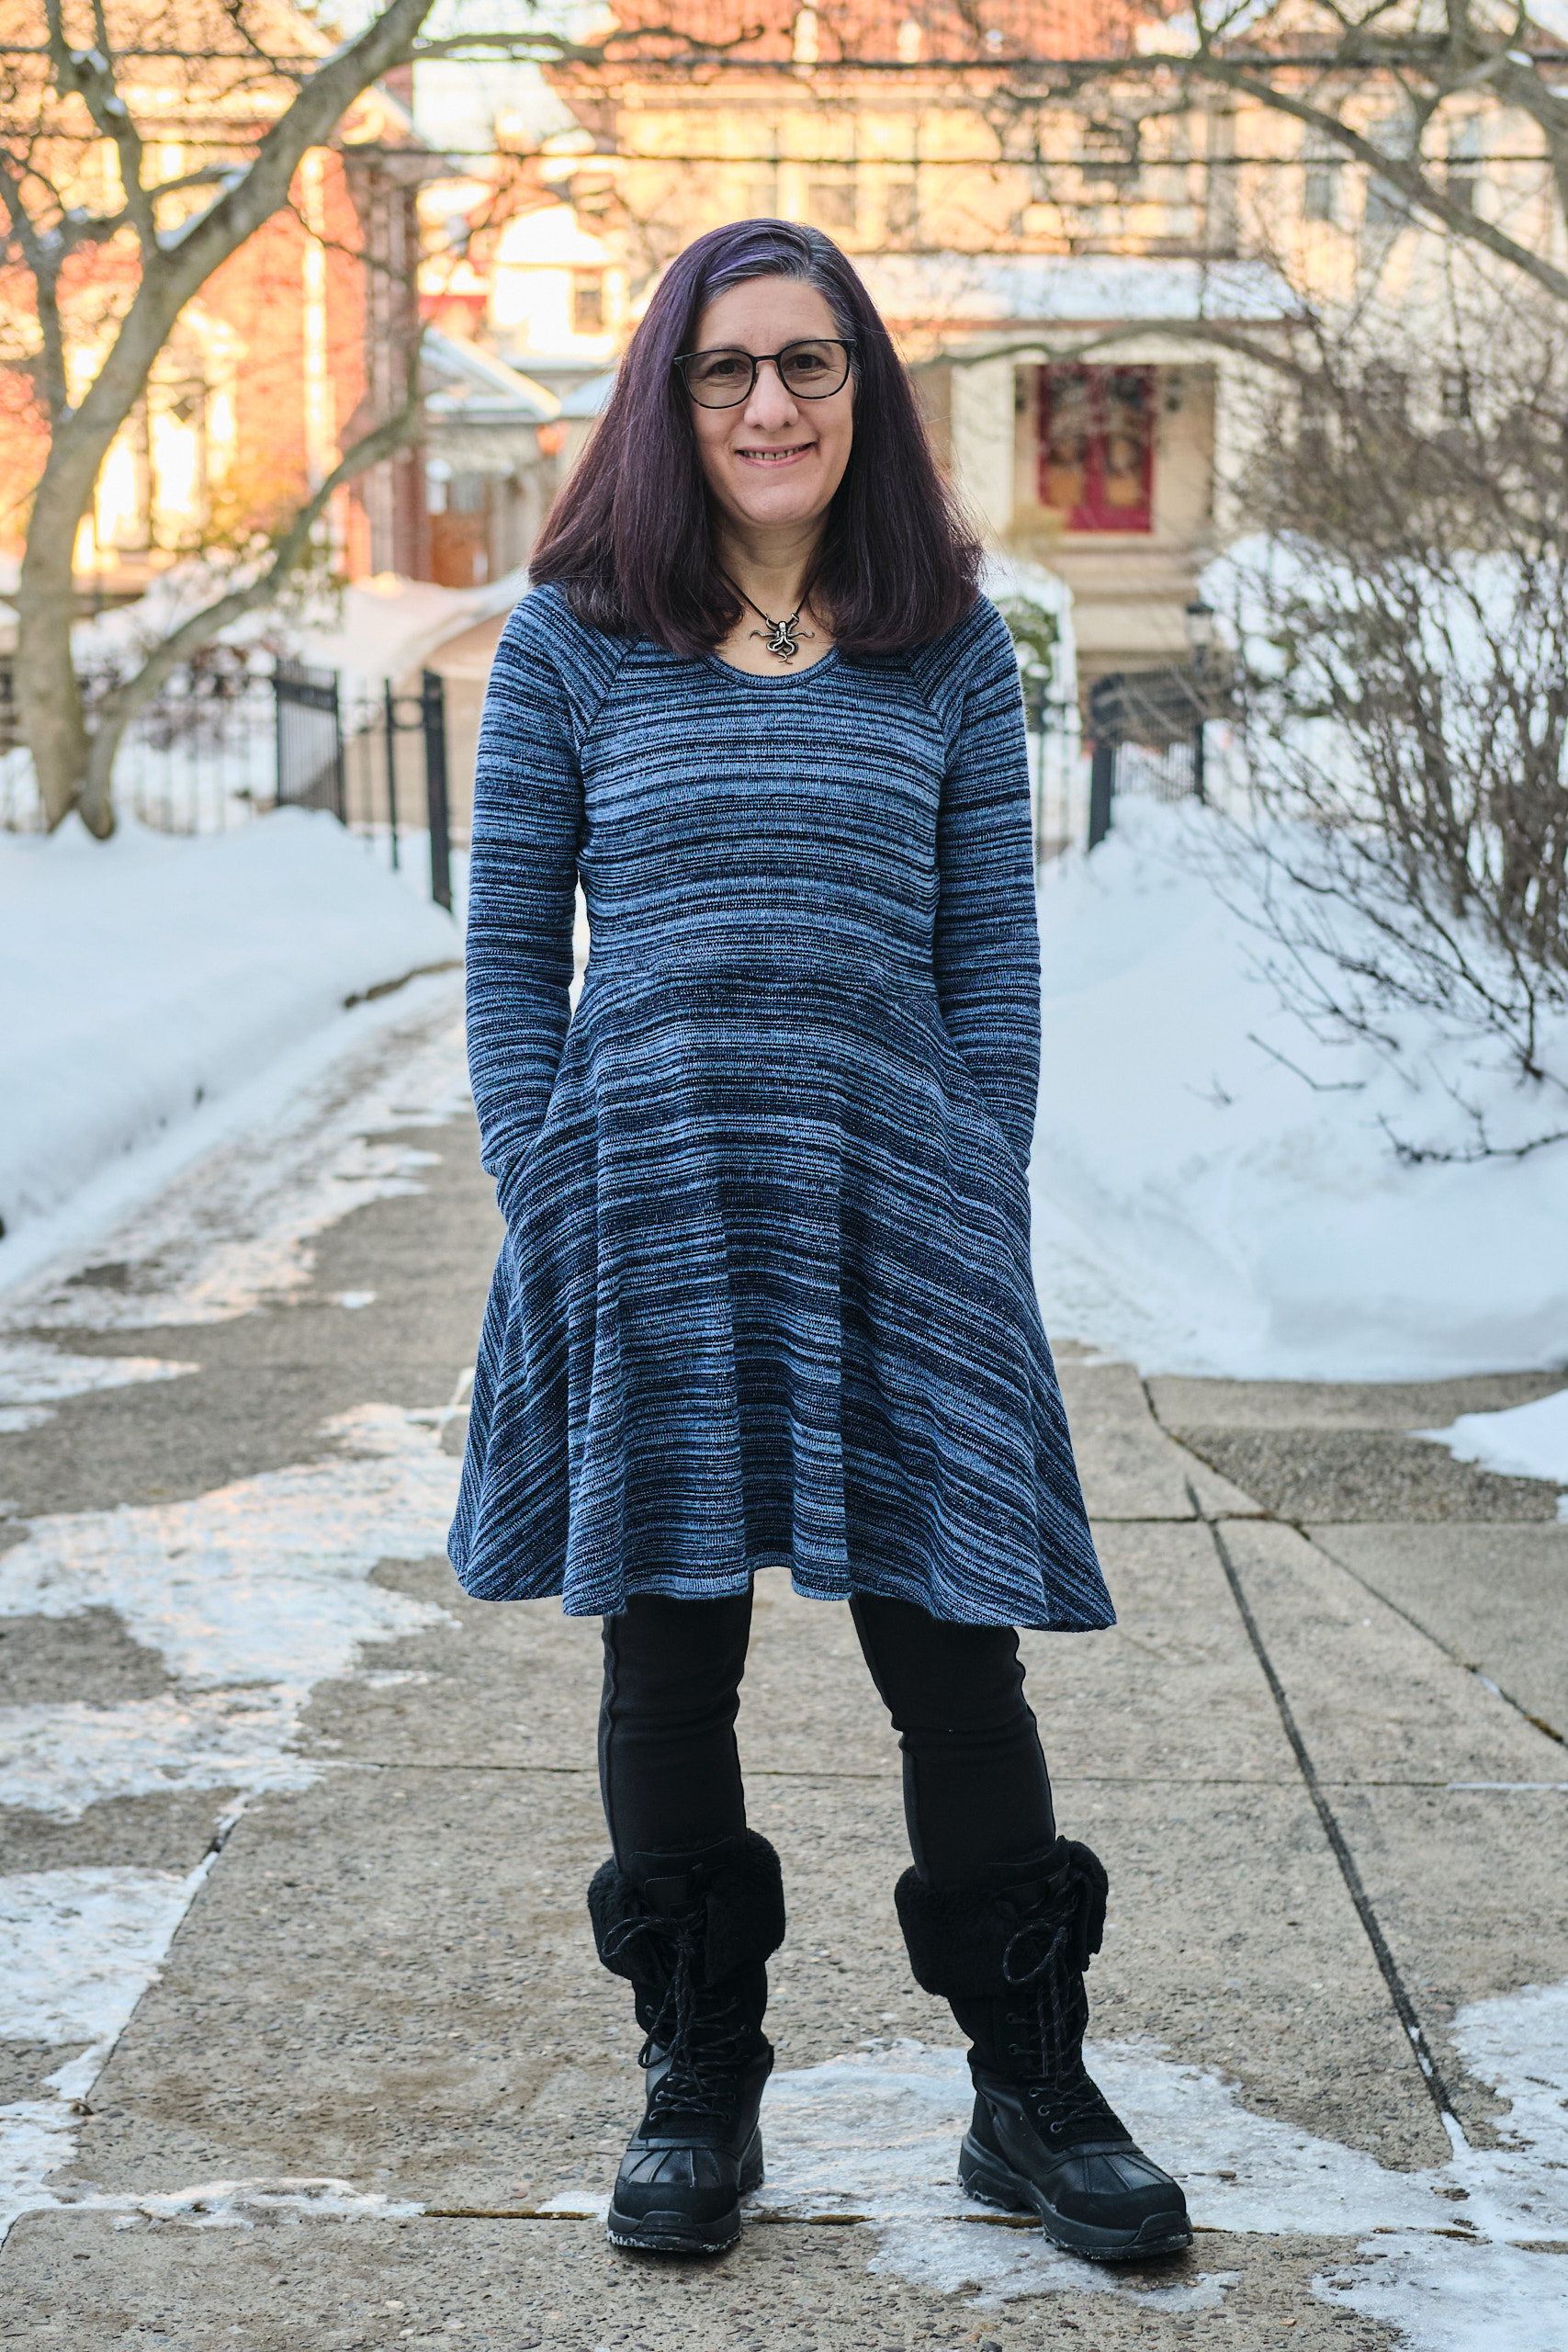
I finished the dress right before bedtime, tried it on, gave it a twirl, and it was…. just ok. It was fine, but didn’t look as great as I had expected it would. The waist wasn’t sitting smoothly. I thought, maybe I should make a belt for it. I went to bed, and the following evening tried it on again. This time I figured out the problem: too much ease at the waist. Actually, too much ease everywhere, but a problem mostly at the waist. I probably should have cut a 4 instead of a 6. I went back to my sewing room and basted a seam from the top of the pocket opening to the waistline and then up about 3 inches above the waistline, taking it in about 1 inch at the waistline. I did this on both sides and tried it on. What a difference it made! I cut the fabric about a quarter inch from the basting line and then surged it. The dress looks so much better now. The waist is smooth and it hugs my curves a lot more.
The next morning when I dragged my photographer out to snap some quick fashion photos in our snowy driveway before work, I styled the dress with my new tall, warm snow boots and some fleece-lined leggings. Then I put on my coat and walked to work. The dress was cute, cozy and comfortable all day.