My first foray into t-shirt quilt making was for my son, as he was getting ready to go to college. I researched the process by reading lots of blog posts, looked at photos of lots of different styles of t-shirt quilts, and decided to make a quilt with a variety of different-sized rectangles and squares rather than the standard square grid quilt.
I had gathered up my son’s old t-shirts, designed the quilt, but hadn’t even finished cutting up the shirts when my son went off to college. I continued working on it while he was away but didn’t manage to finish it before he finished his freshman year at home due to COVID. I got distracted by all the turmoil of COVID and spent my sewing time sewing masks so I didn’t make any more progress on the quilt until after my son went back to school for his sophomore year. I managed to successfully finish the quilt by the time he came home for Thanksgiving but the quilt remains on his bed at home and never made it to school with him.
Shortly after I finished my son’s quilt, I started working on a t-shirt quilt for my middle child, who was then a high school senior. I managed to finish her quilt on time, and she brought it to college with her. It seems to be holding up well to daily use and a trip through the washing machine, and has even traveled with her to summer internships.
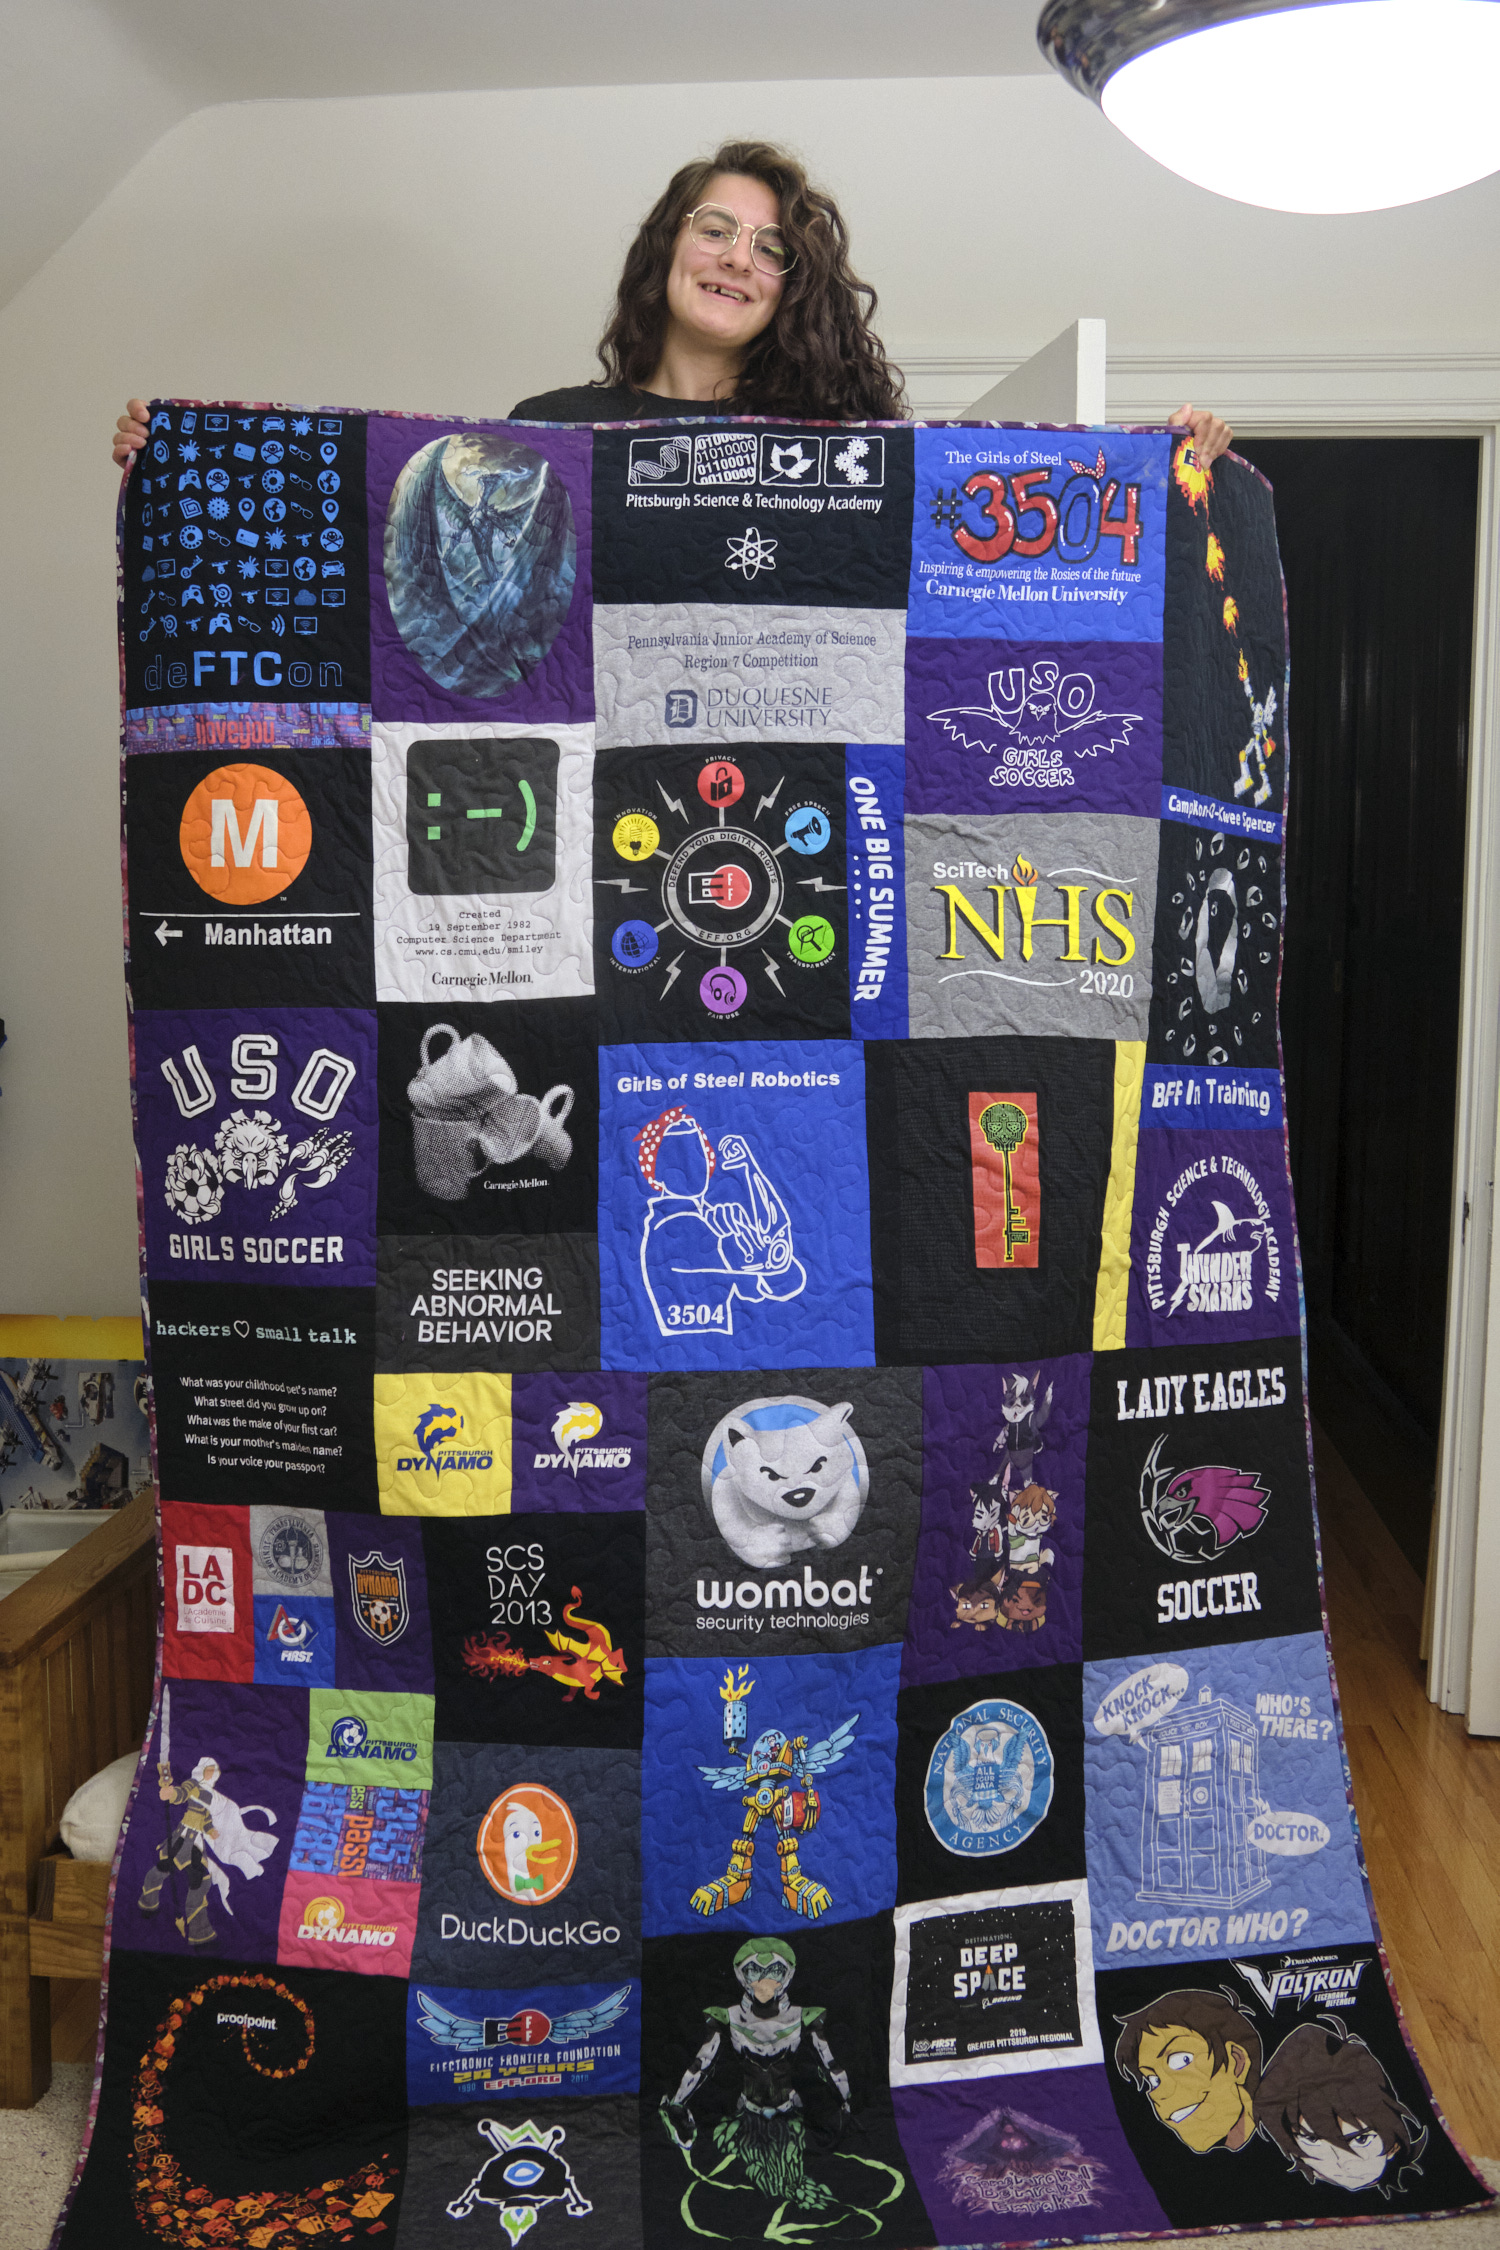
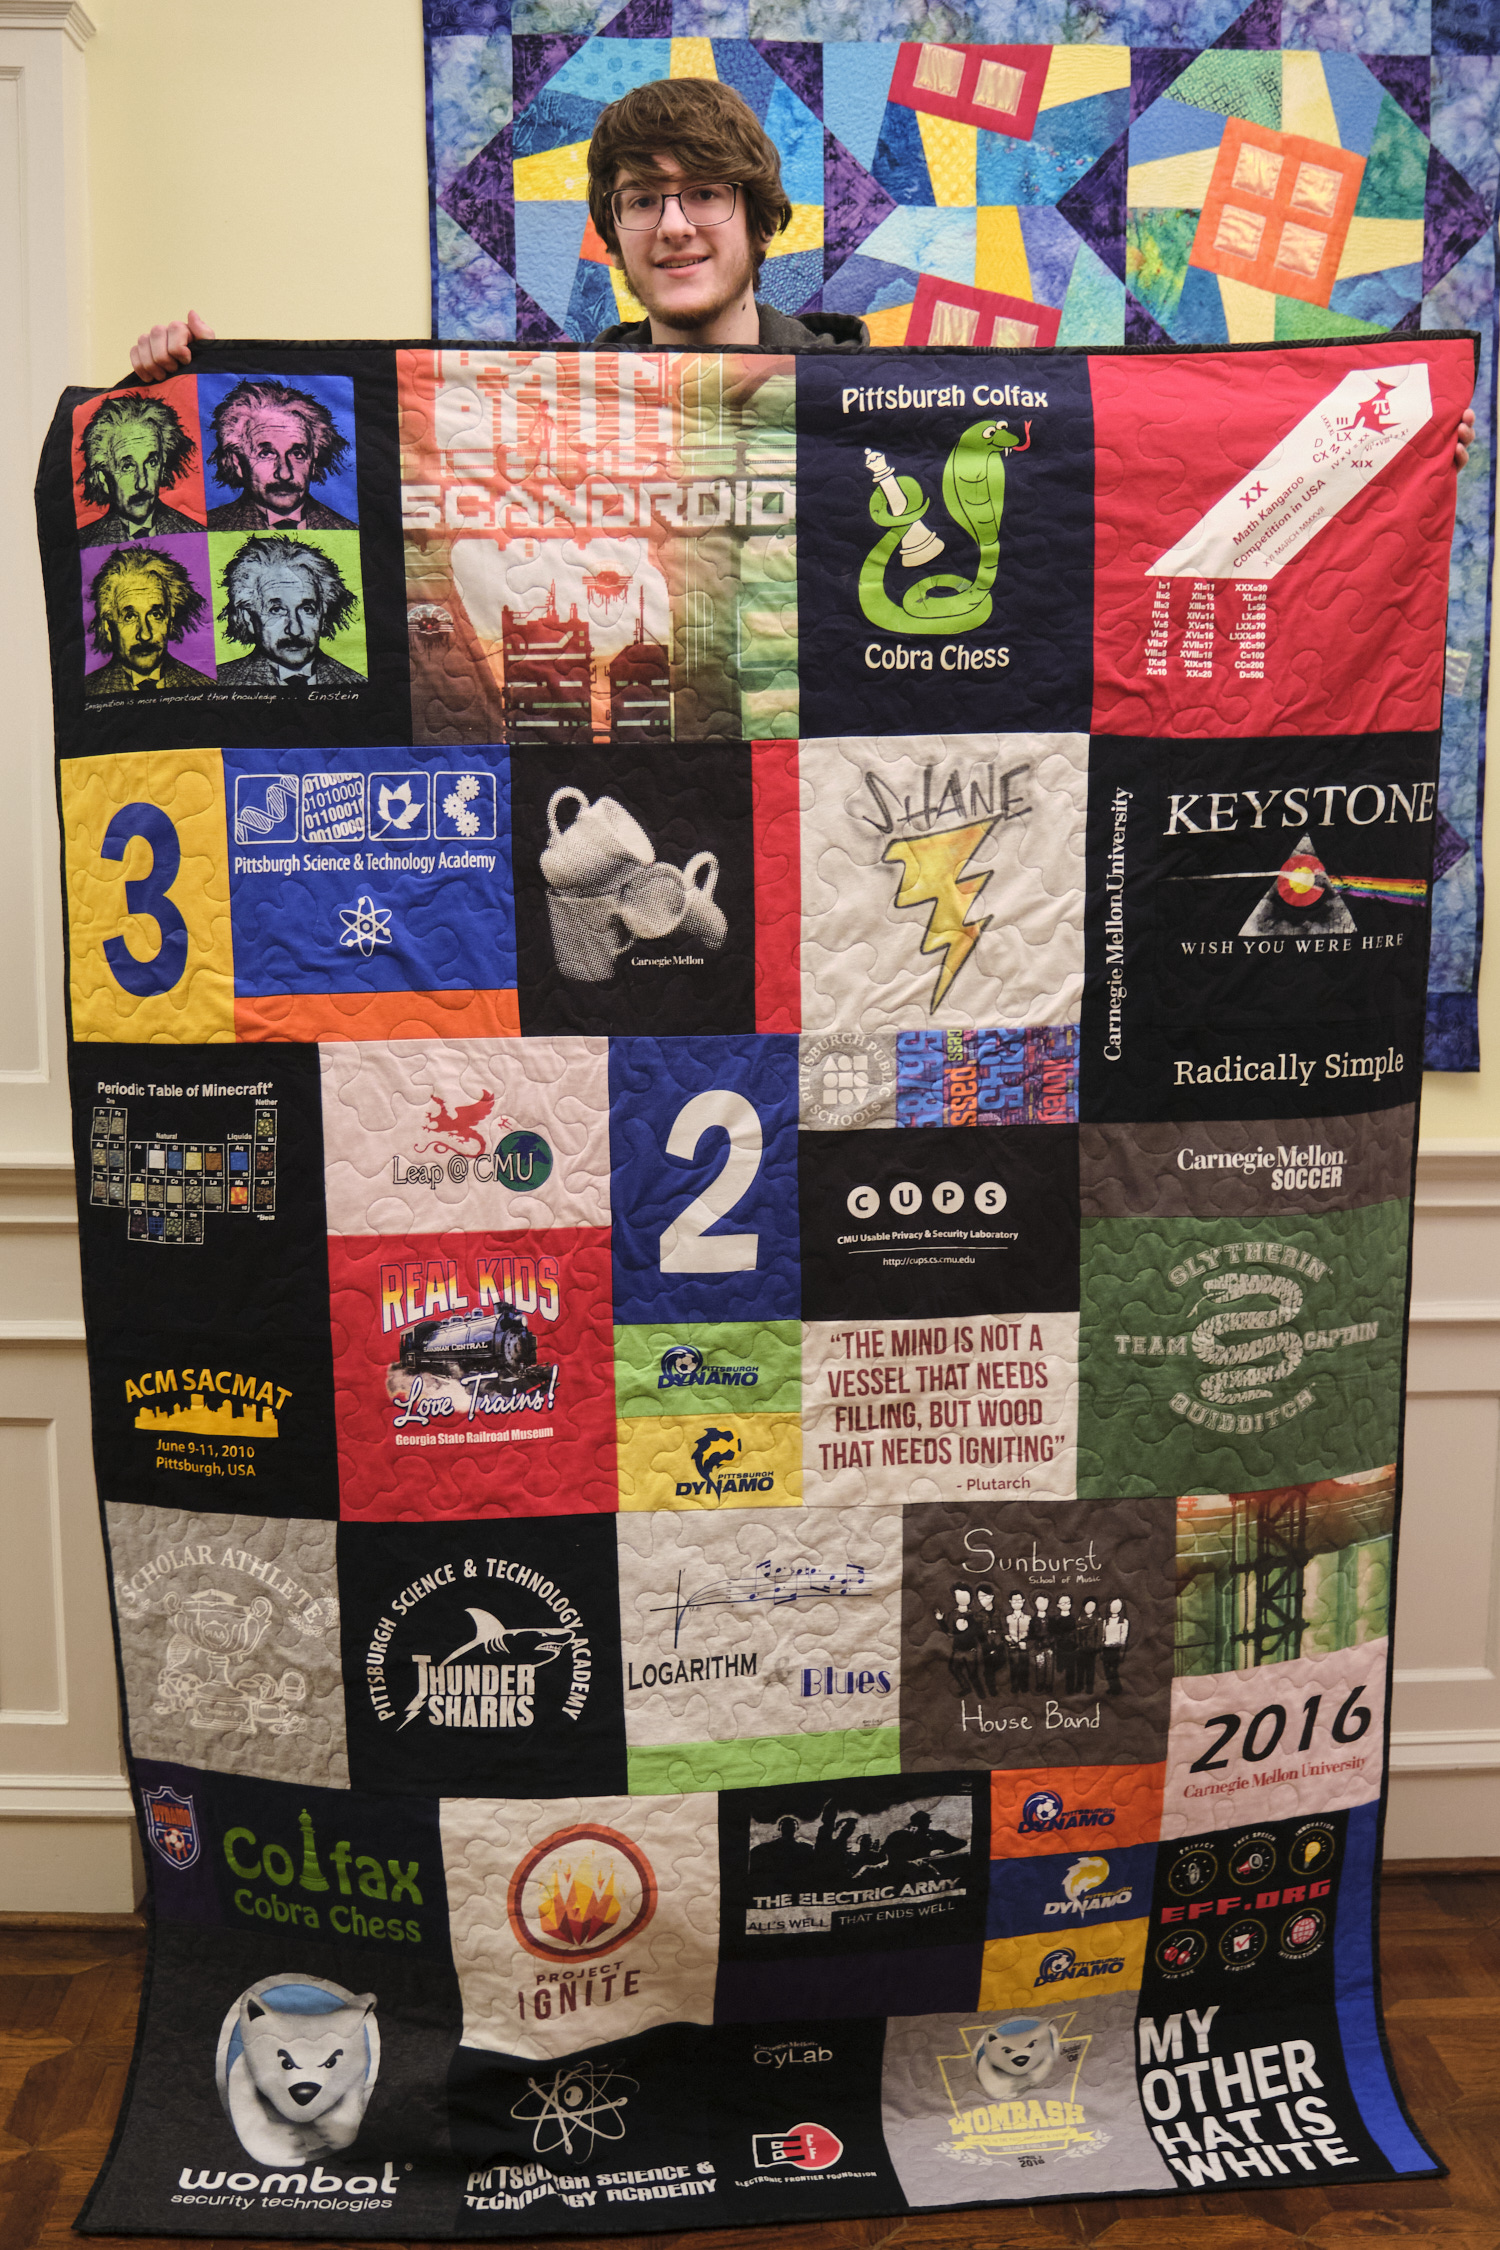
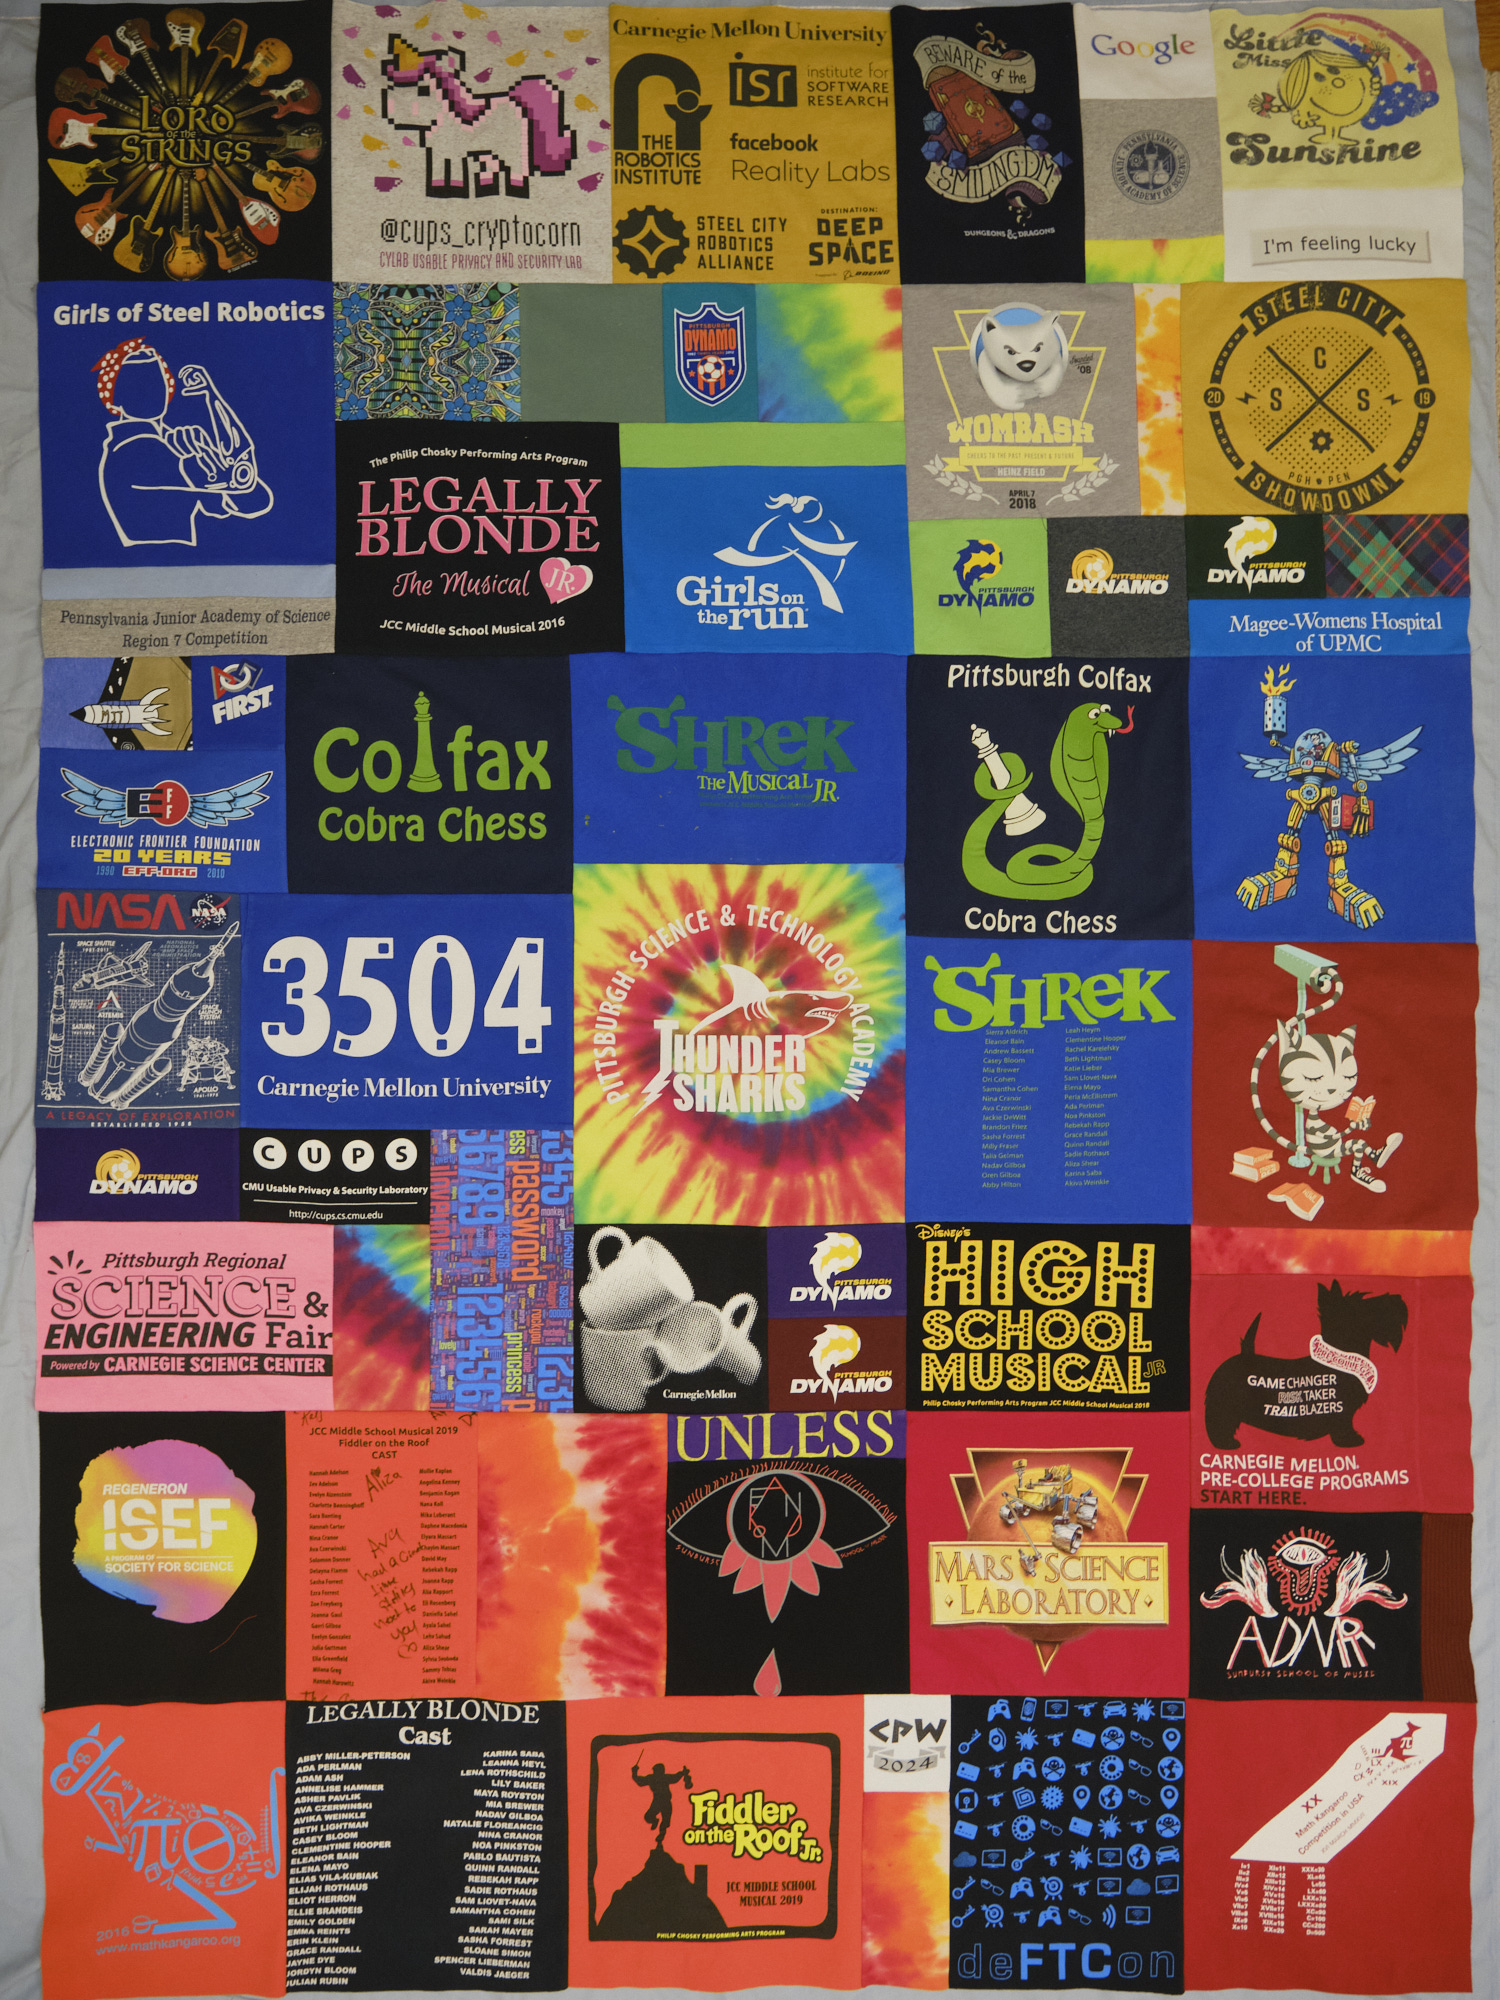
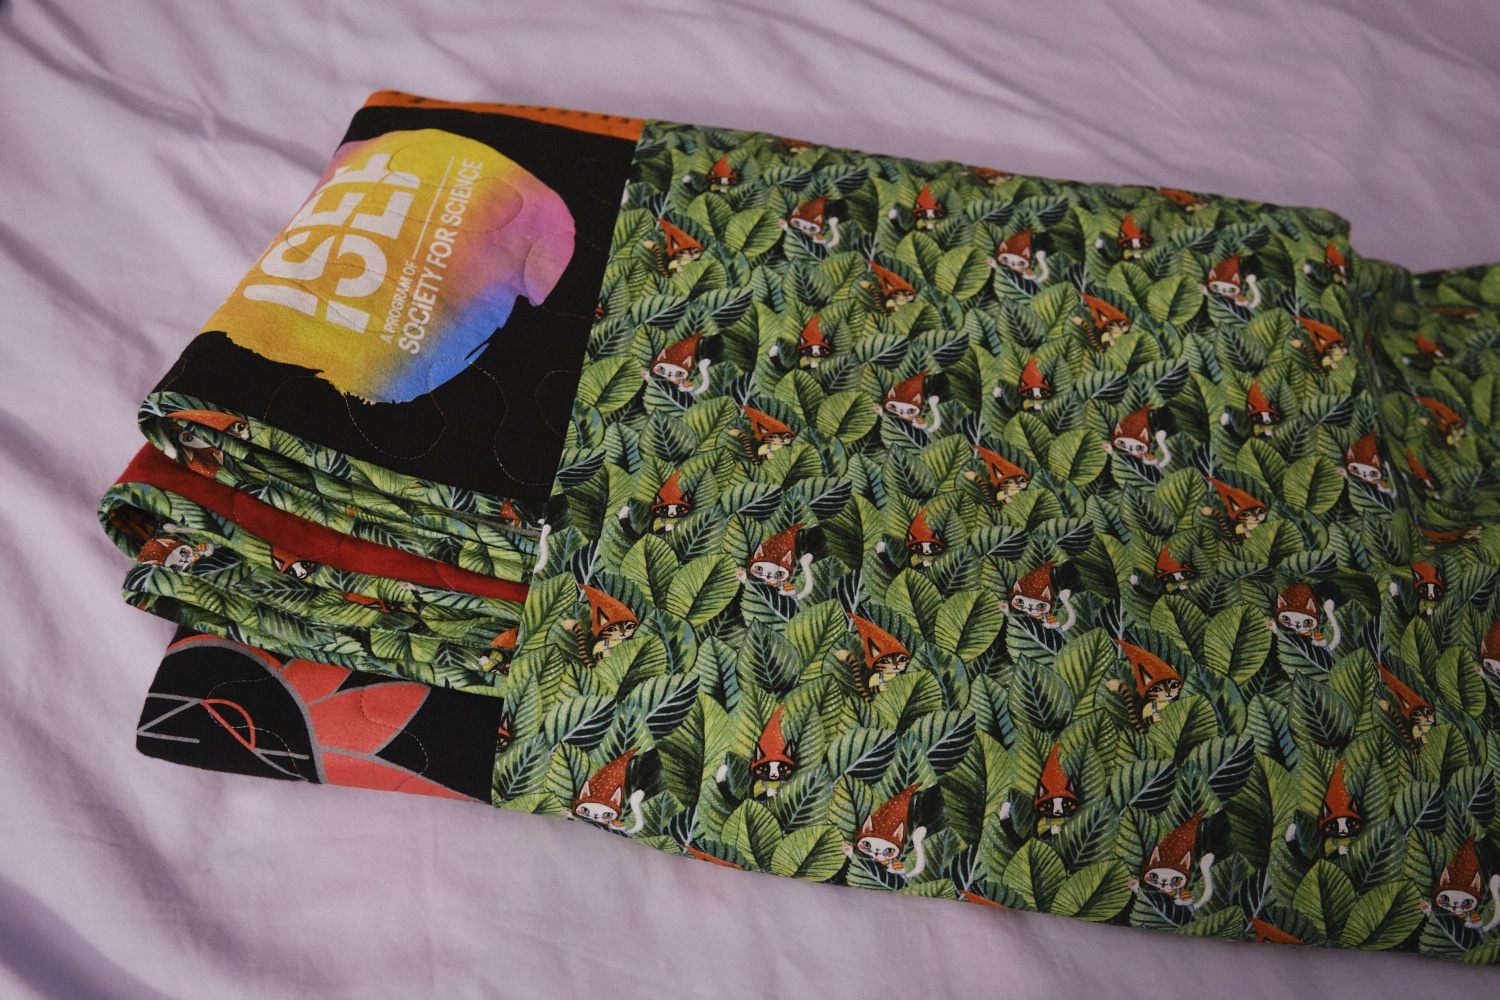
I intended to start my third child’s quilt a year in advance, and I did get her to select the shirts she wanted me to use almost on schedule. But between the second and third quilt I sewed a lot of garments and kept putting off the tedious step of fusing all the t-shirts to fusible interfacing. Plus child #3 requested that I sew her prom dress, and over the summer a sun dress, a cropped shirt, and a couple of pairs of pants. I finished most of the garments before she left for college, but just barely started the quilt. I decided to finish the quilt before sewing any more clothes, and also decided it was time to get my sewing machine tuned up after 15 years of not having it serviced. So after dropping my daughter off at school and spending a week in Switzerland, I came home and got to work. Five weeks later I finished the t-shirt quilt, just in time to personally deliver it to my daughter in Boston while I was in town for a business trip. We’ll start with photos of the finished quilt and happy recipient, and then for those interested in the process, I’ll detail how it was made.
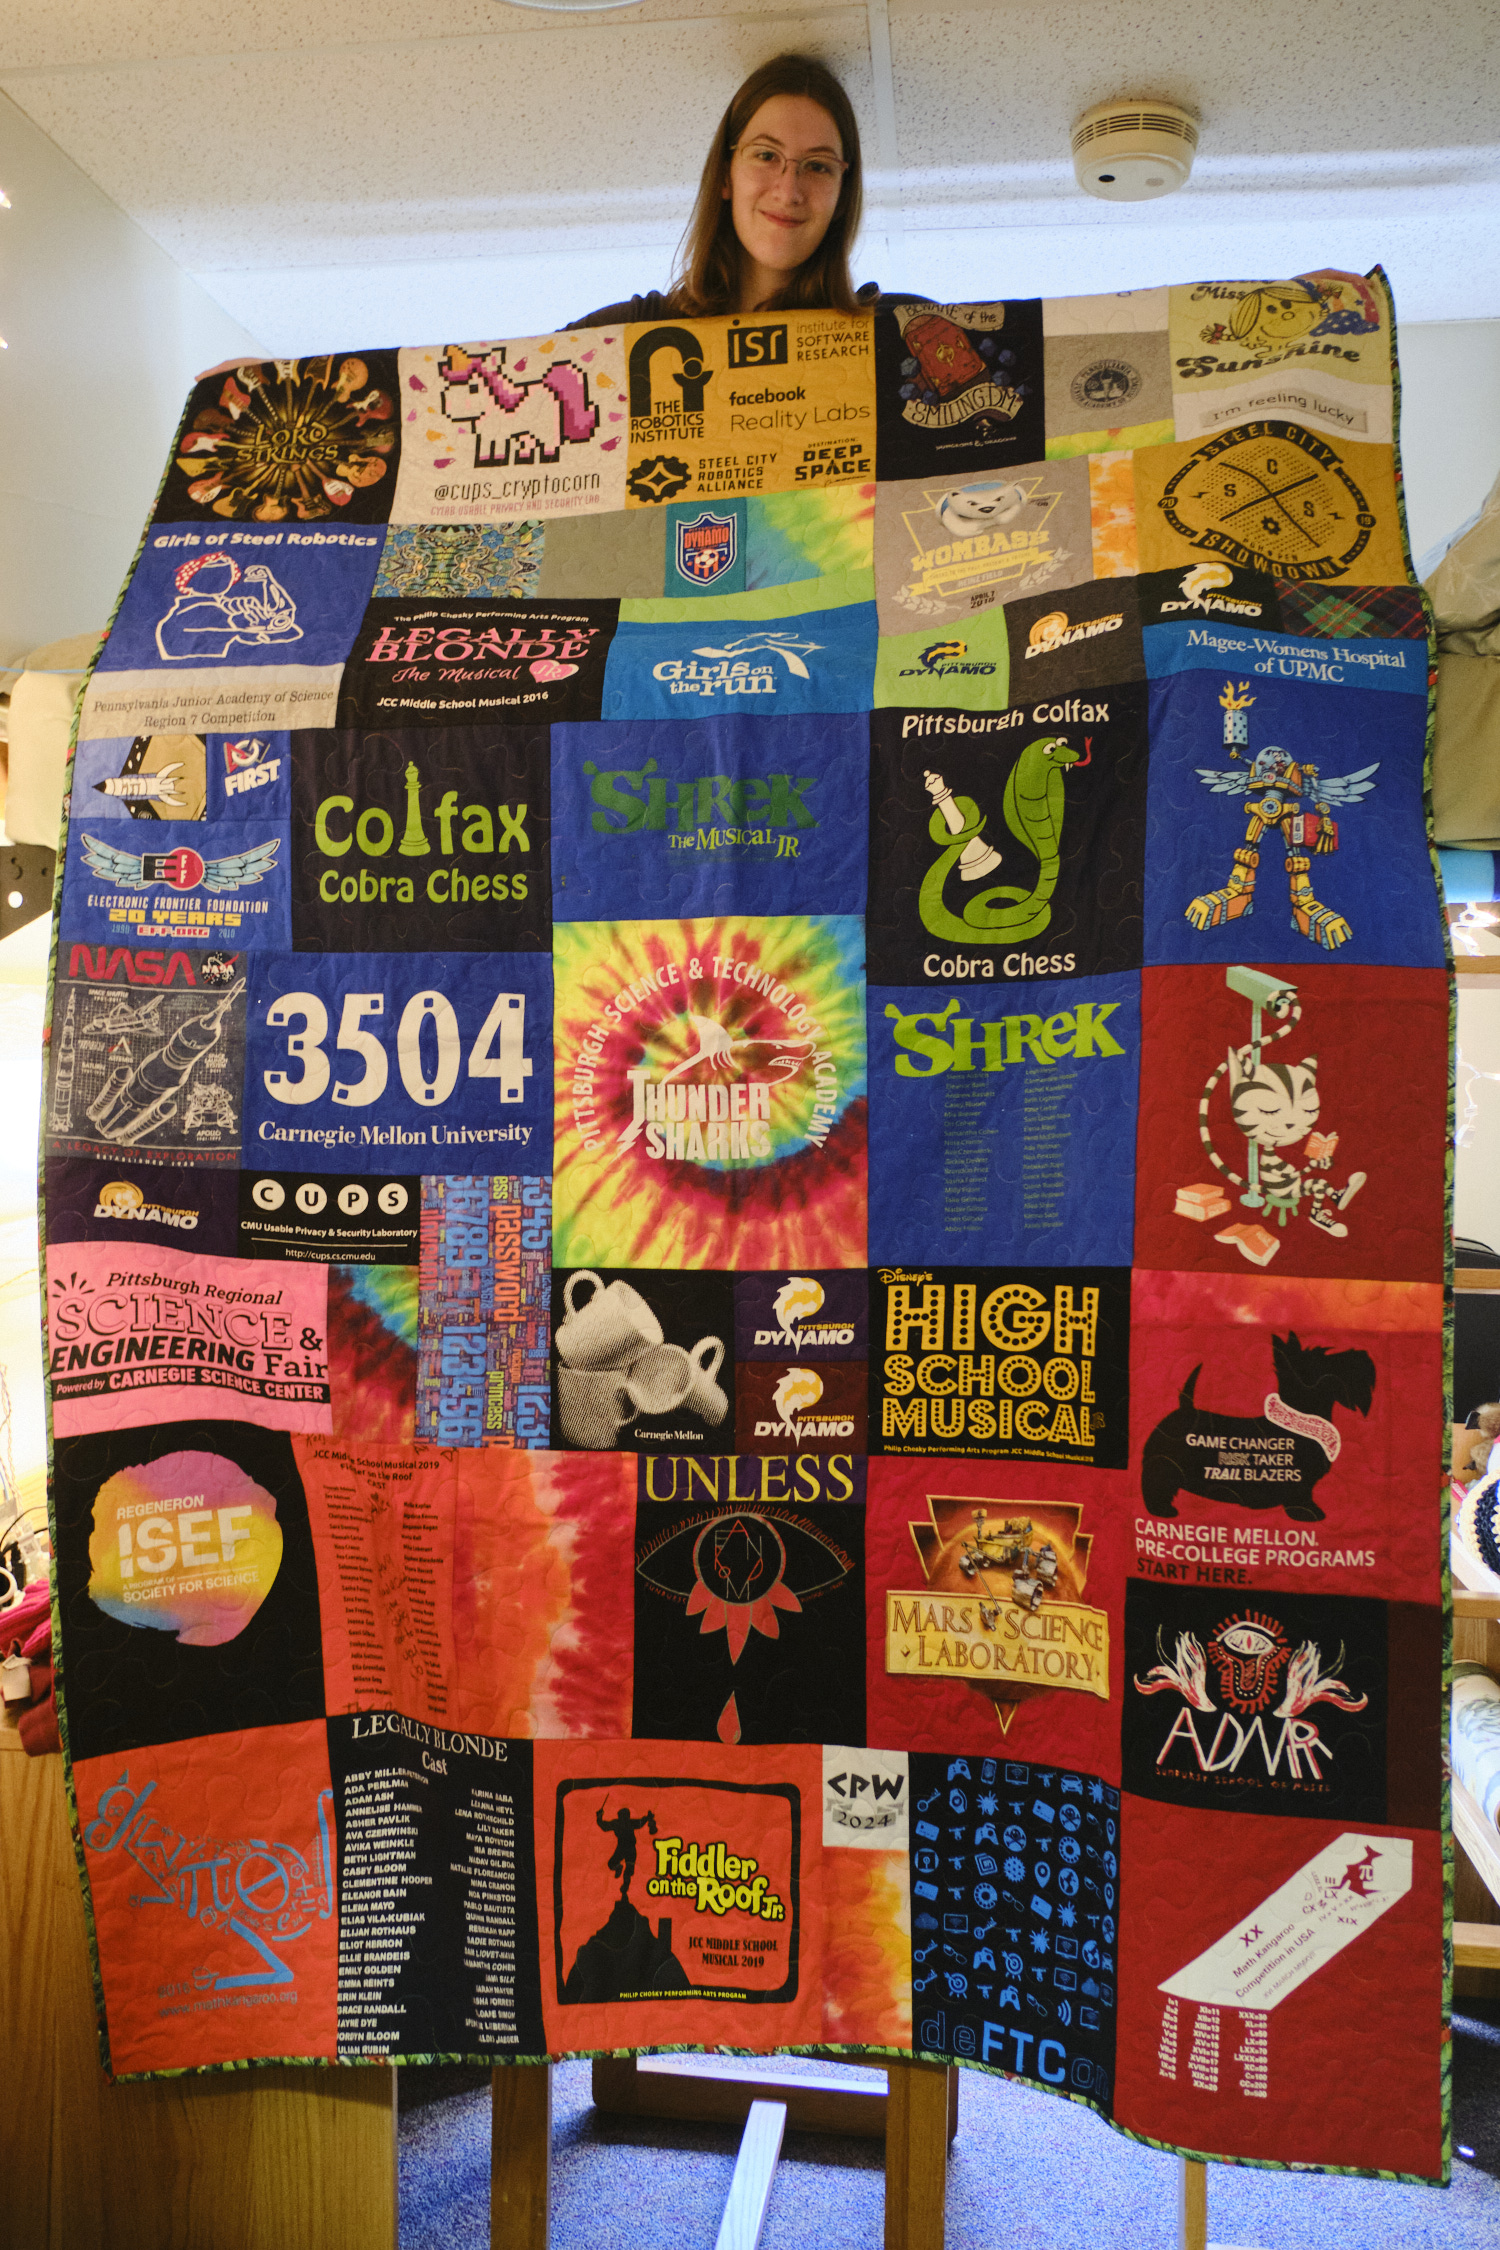
The first step in my process is to select my t-shirts. For the past 10 years or so I’ve been trying to save any t-shirt that someone in my house is discarding if there is any sentimental value or there is any reason I think it might make its way into a t-shirt quilt. So for each of my kids I sorted through my bags of old t-shirts to retrieve those they wanted to include in their quilt. Then I sent them back to their rooms to find any additional shirts they wanted to donate to the cause. We talked about colors and themes and activities they wanted to make sure were included and sometimes we went back to the t-shirt pile to retrieve a few more shirts. My kids all played Dynamo soccer and we have Dynamo shirts in just about every color so I used a lot of Dynamo shirts as filler and to find pieces of a particular color. For my third t-shirt quilt, my daughter had some tie-dyed shirts and wanted a rainbow theme with the shirts arranged in a spectrum. We were short on some colors so I dug through the pile to fill in. I also added some fabric scraps from garments I recently sewed.
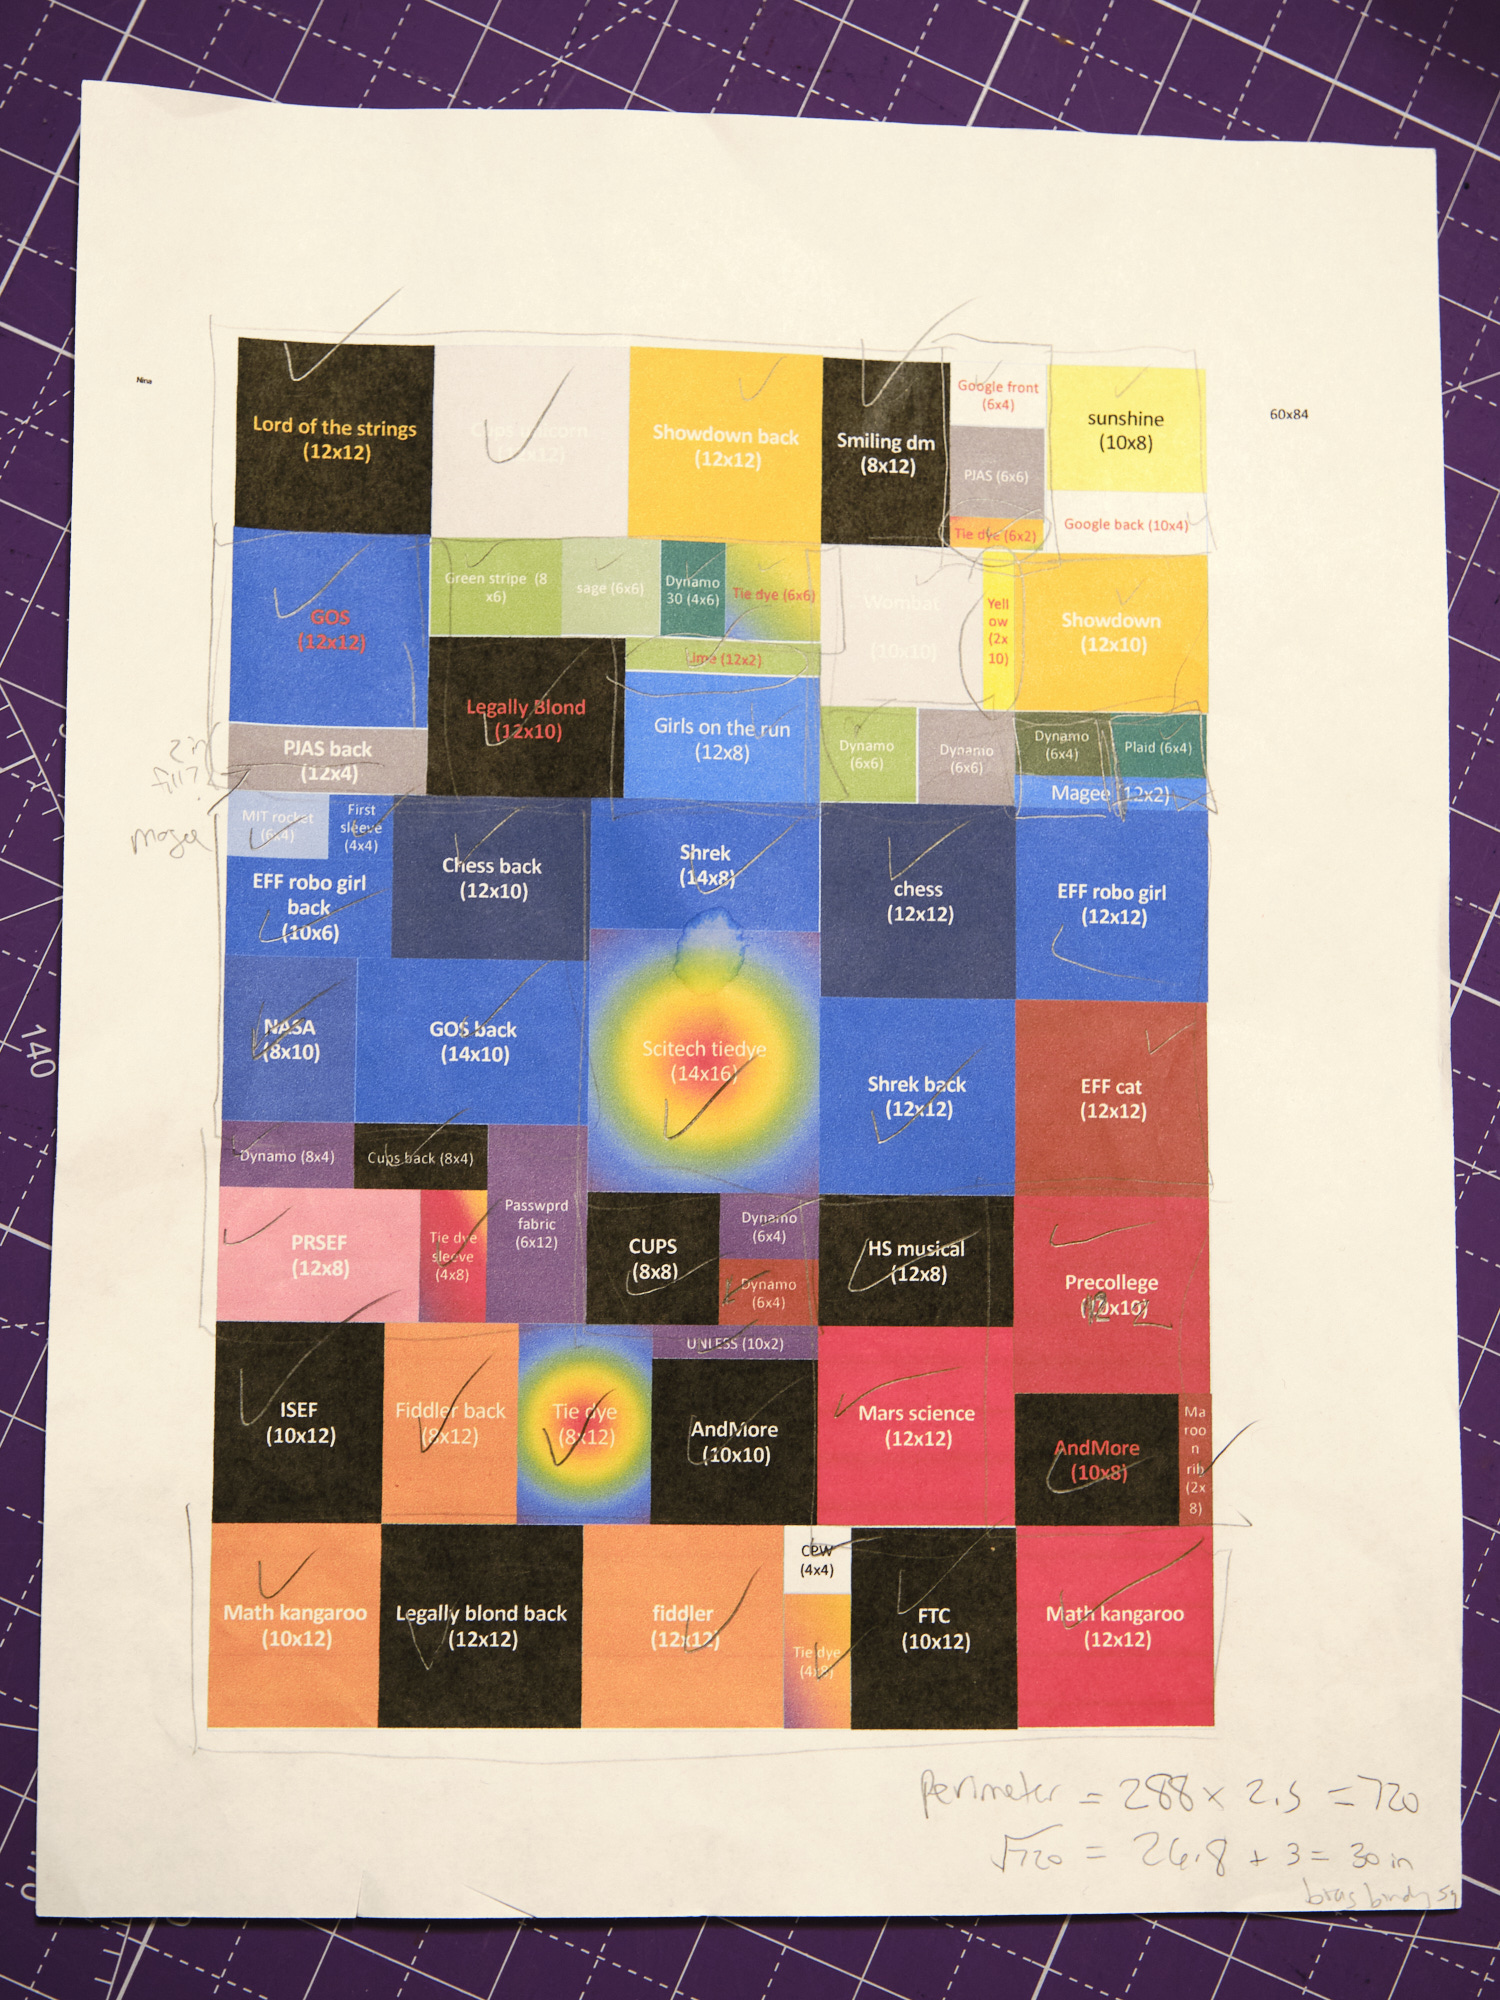
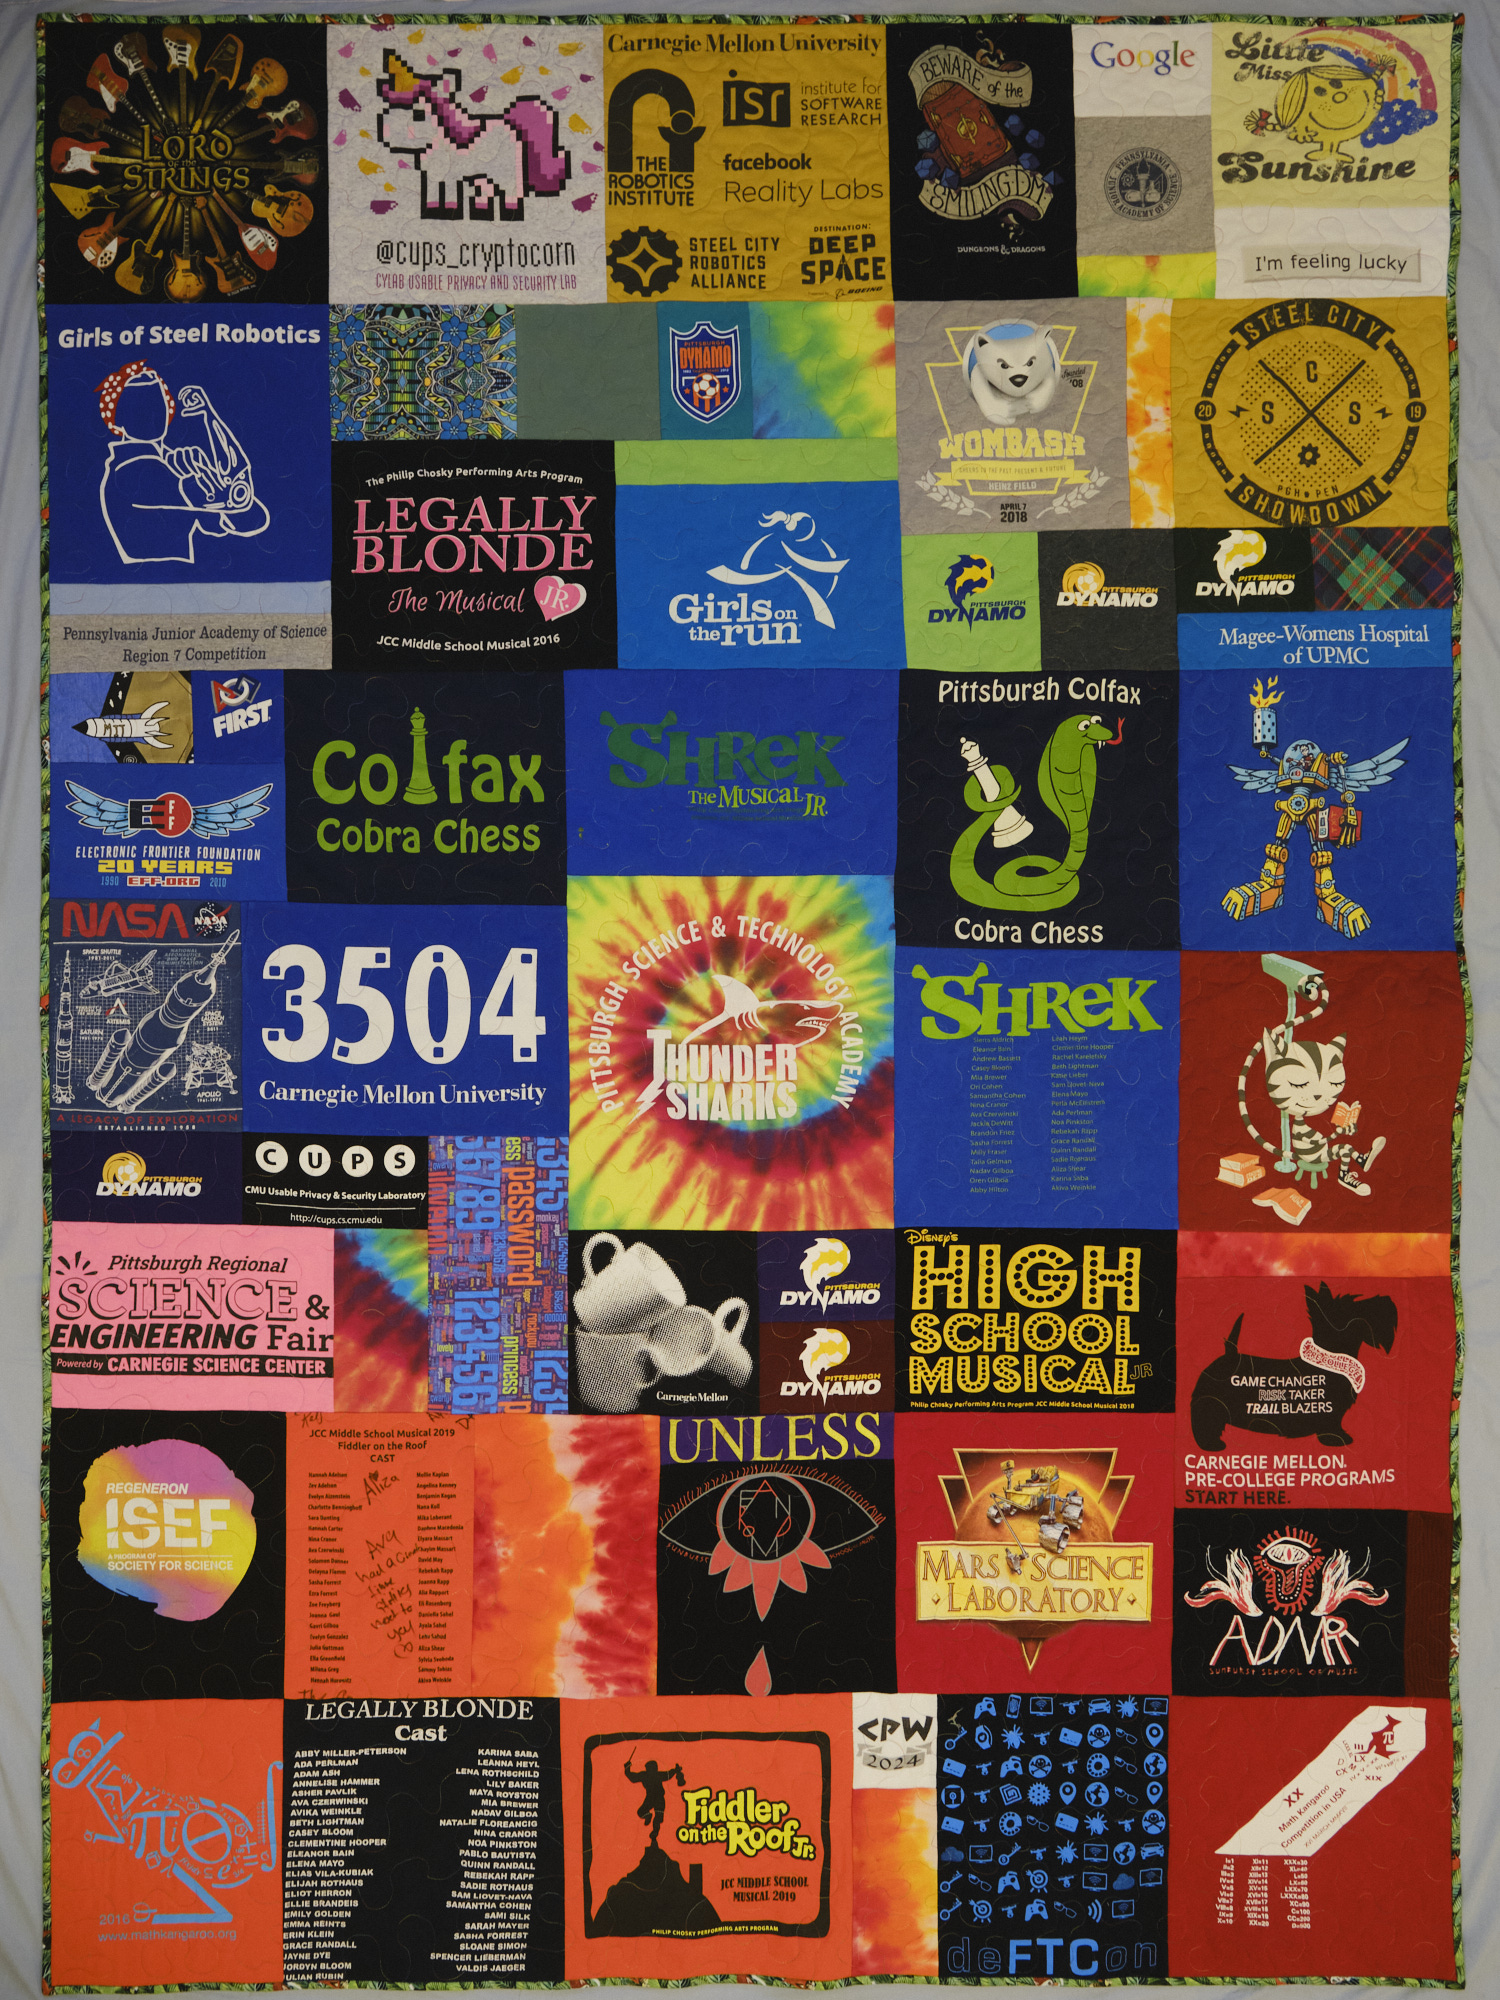
Once I finish selecting shirts I measure them all and make a spreadsheet including a description of the shirt, color, and smallest and largest size block that could be made from the shirt and look good on a quilt. Then I use PowerPoint to make a scale drawing of my quilt (I made all of them 60″ x 84″ to fit a twin bed) and start creating and moving around blocks of the appropriate size and color. I tend to pick a size for the block in the middle of the range to start with and then adjust as the design comes together. My third quilt has more shirts than the other two so I used smaller block sizes for most of the blocks and cropped them closer to the printed images. In the end, I had 67 blocks. Sometimes I decide to leave out a few shirts that weren’t that important to the quilt recipient and that don’t fit well in the design and sometimes I add more shirts. I add the size of each block to the PowerPoint design and then I print it out and keep it handy as a guide for cutting and sewing. Sometimes I make additional changes as I go to correct mistakes.
The next step is to wash all the t-shirts I’m going to use and rough cut them. I use a big scissors to cut them to a size bigger than I anticipate using without precisely measuring them. I save all the t-shirt scraps in case I need a piece to fill in a spot later (generally because I made a mistake). Now my big t-shirt pile is a little smaller and I have a big bag of t-shirt scraps.
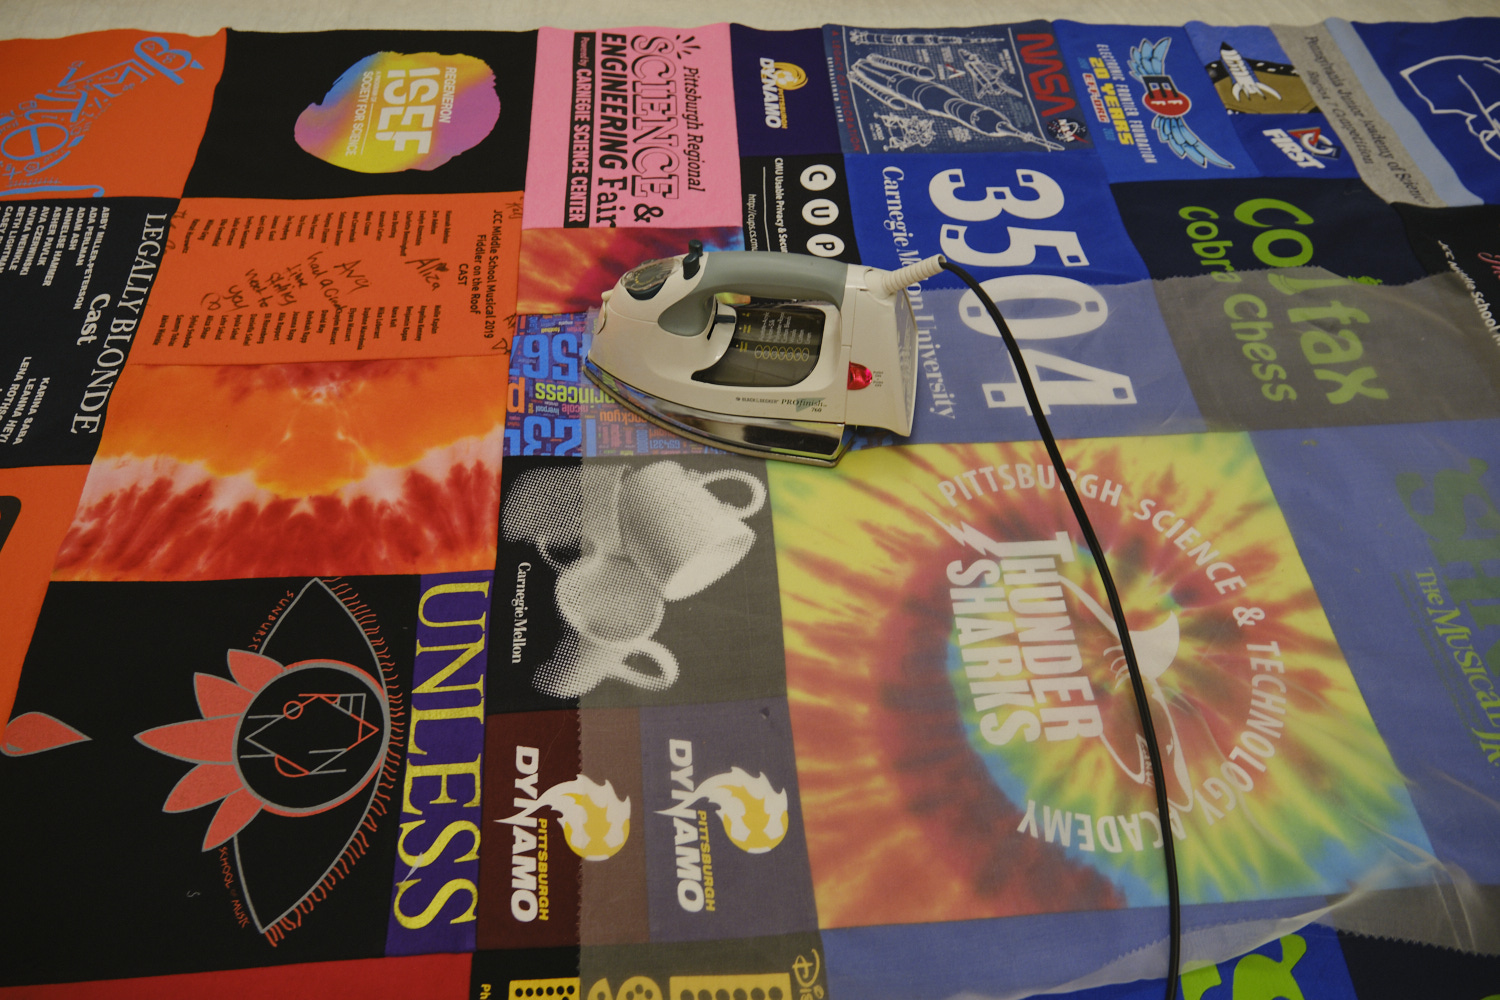
Next comes the tedious step of fusing all the t-shirt pieces I plan to use onto lightweight interfacing to stabilize them. One of the blogs I read recommended Pellon 906F fusible sheerweight non-woven polyester interfacing. I buy this product by the bolt. I do my fusing on a big rectangular ironing pad. Following a suggestion from a blogger, I put a Teflon sheet on the ironing pad to keep the fusible interfacing and the t-shirt ink from sticking to my ironing pad. I put one t-shirt piece, ink-side down, on the Teflon sheet. Then I put a piece of interfacing larger than the shirt on top, fusible side down. Sometimes I do several smaller shirt pieces together and fuse them to a larger interfacing piece. I keep a bowl of water next to my ironing pad and I dip a piece of quilting cotton fabric into the bowl, wring it out, and cover the interfacing piece. Then I set my iron on the wool setting on the wet fabric and press. I hold the iron in place for about 10 seconds and then move it over and press the next section. A big t-shirt piece will take a few minutes to press using this process. I try to have something to watch or listen to while fusing as this process is fairly boring.
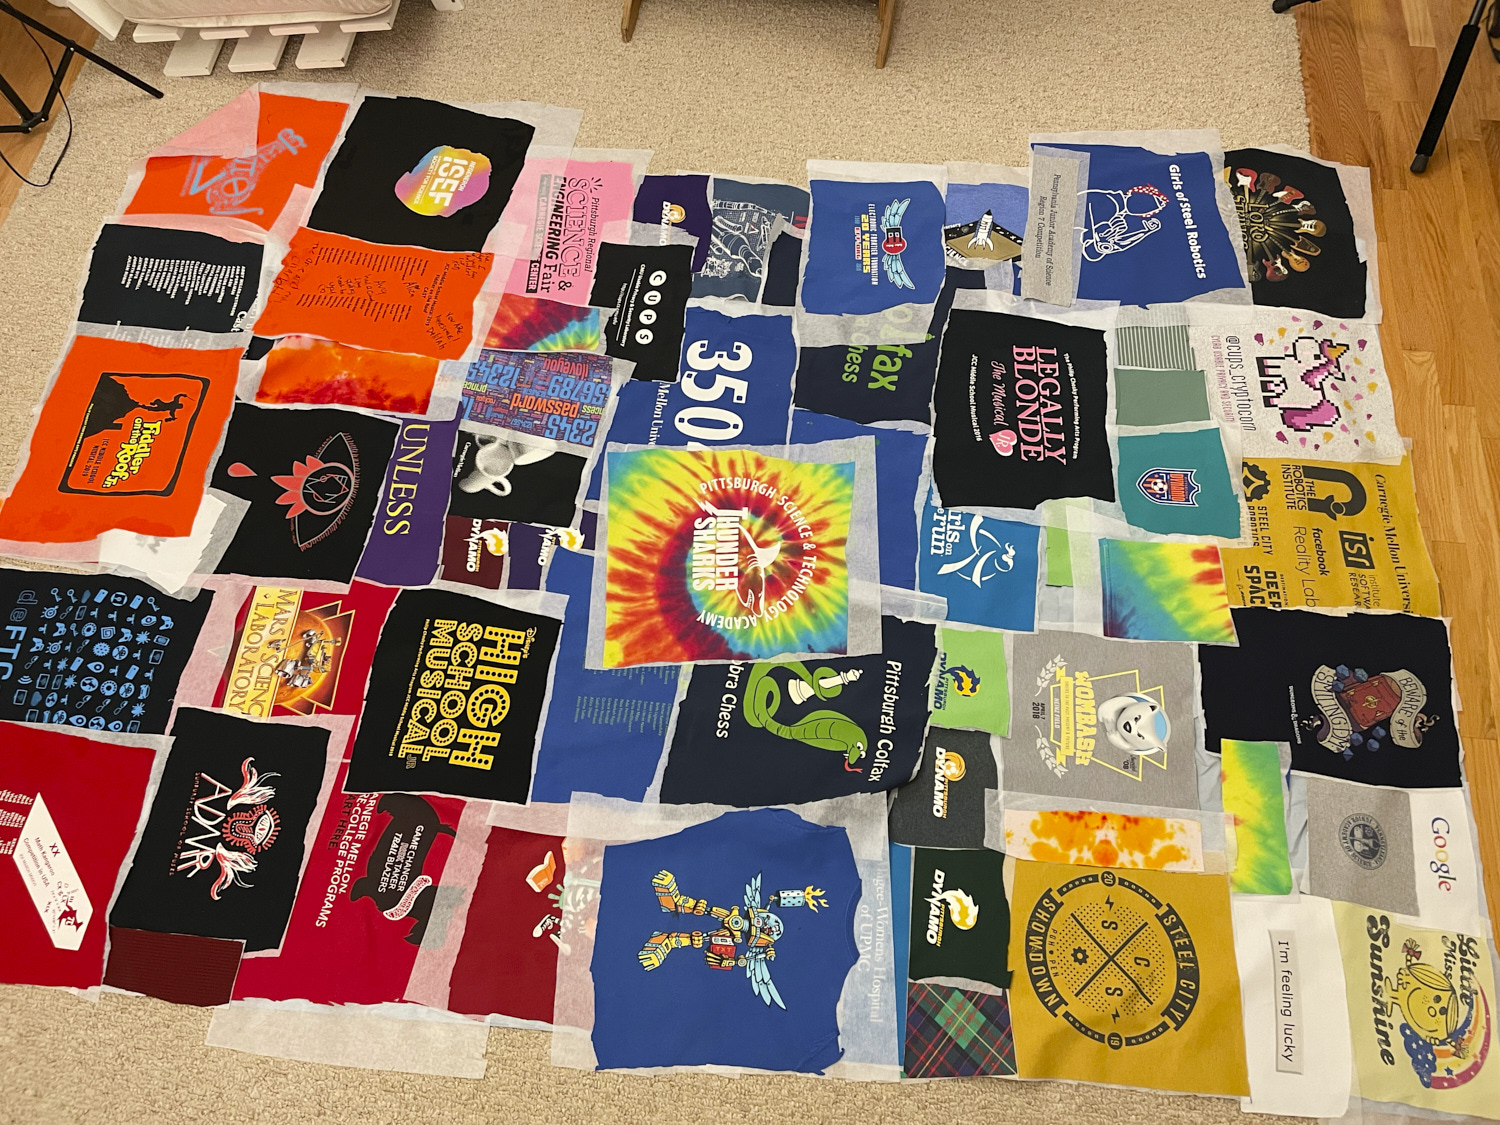
Once the t-shirts are fused, I lay them out on the floor according to my diagram. They are still only rough cut at this point. Then I collect them one section at a time and start working on trimming and sewing.
I refer back to my diagram and trim each piece exactly to the specified size plus half an inch for the quarter-inch seam allowance on all sides. Occasionally I realize at this point that I rough cut a piece too small or not adequately centered and this requires splicing in another piece.
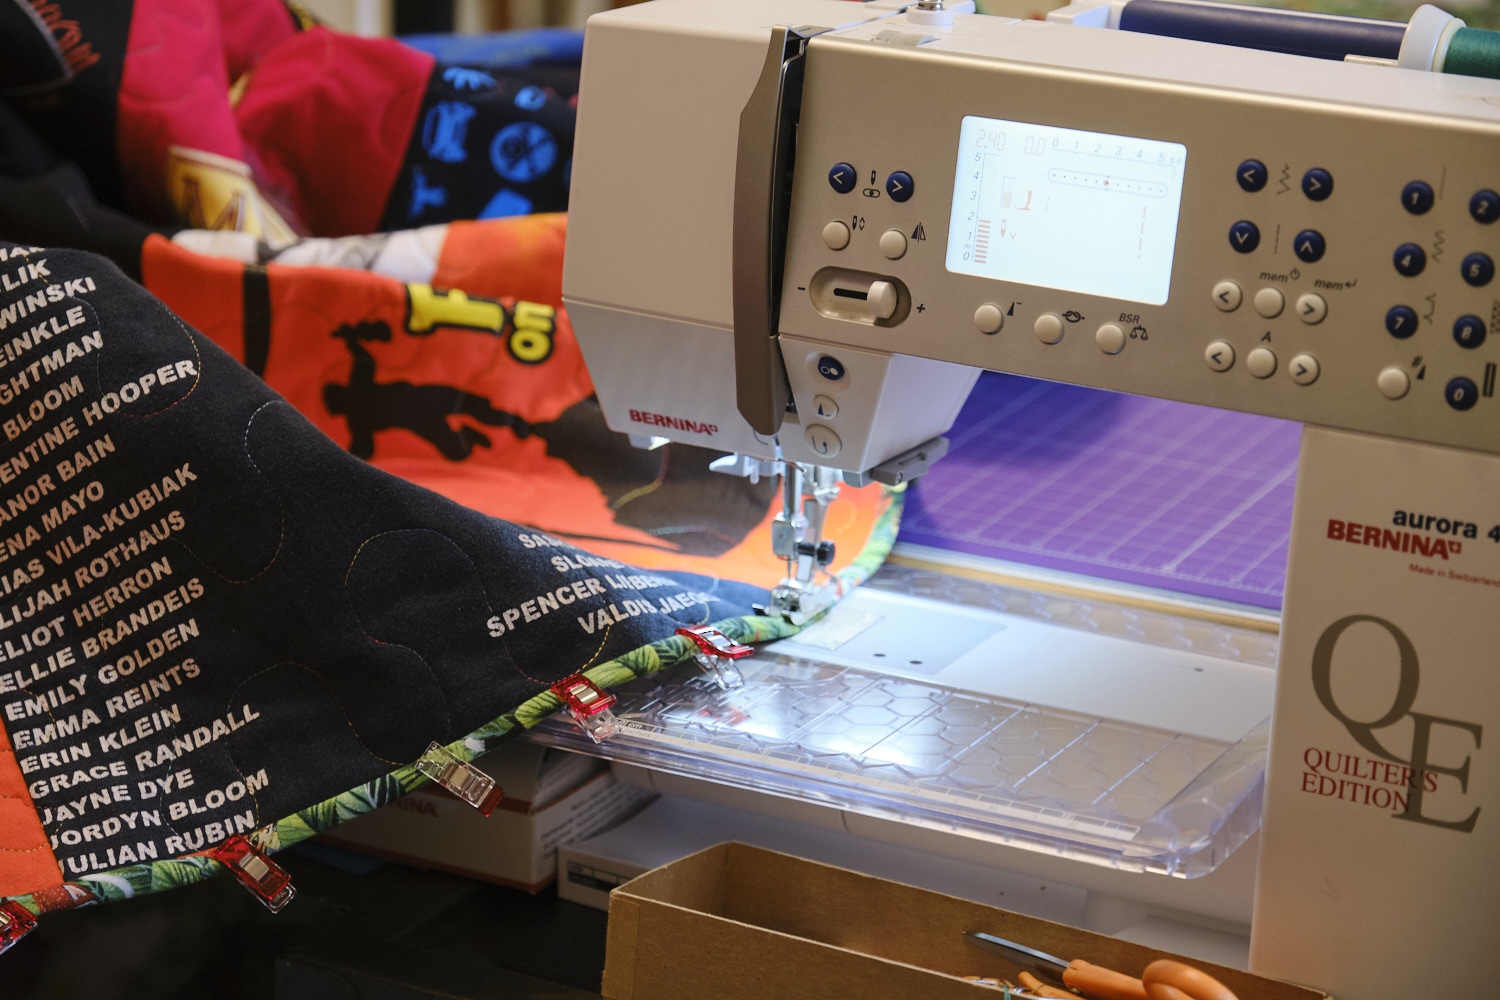
For my first two quilts, I sewed the trimmed pieces together on my regular sewing machine (a Bernina Aurora 440 QE, which has been quite a workhorse for me). However, my Bernina was getting its first ever tune-up when I was ready to start sewing so I pieced this entire quilt with my Brother ST4031HD serger. The serger knife had stopped cutting and I had not yet figured out why, so I kept the knife lowered and serged without trimming. I used grey thread and adjusted the stitch width to be just under a quarter inch as I realized that the thickness of the fabric added to the seam allowance. This technique worked really well and seemed quicker than piecing with a sewing machine. I think this will result in stronger seams, which is nice for a heavy quilt that will likely get a lot of use. I pressed all of the seams in the direction that they seem to naturally want to fall (the top fabric stays straight and folds towards the bottom fabric).
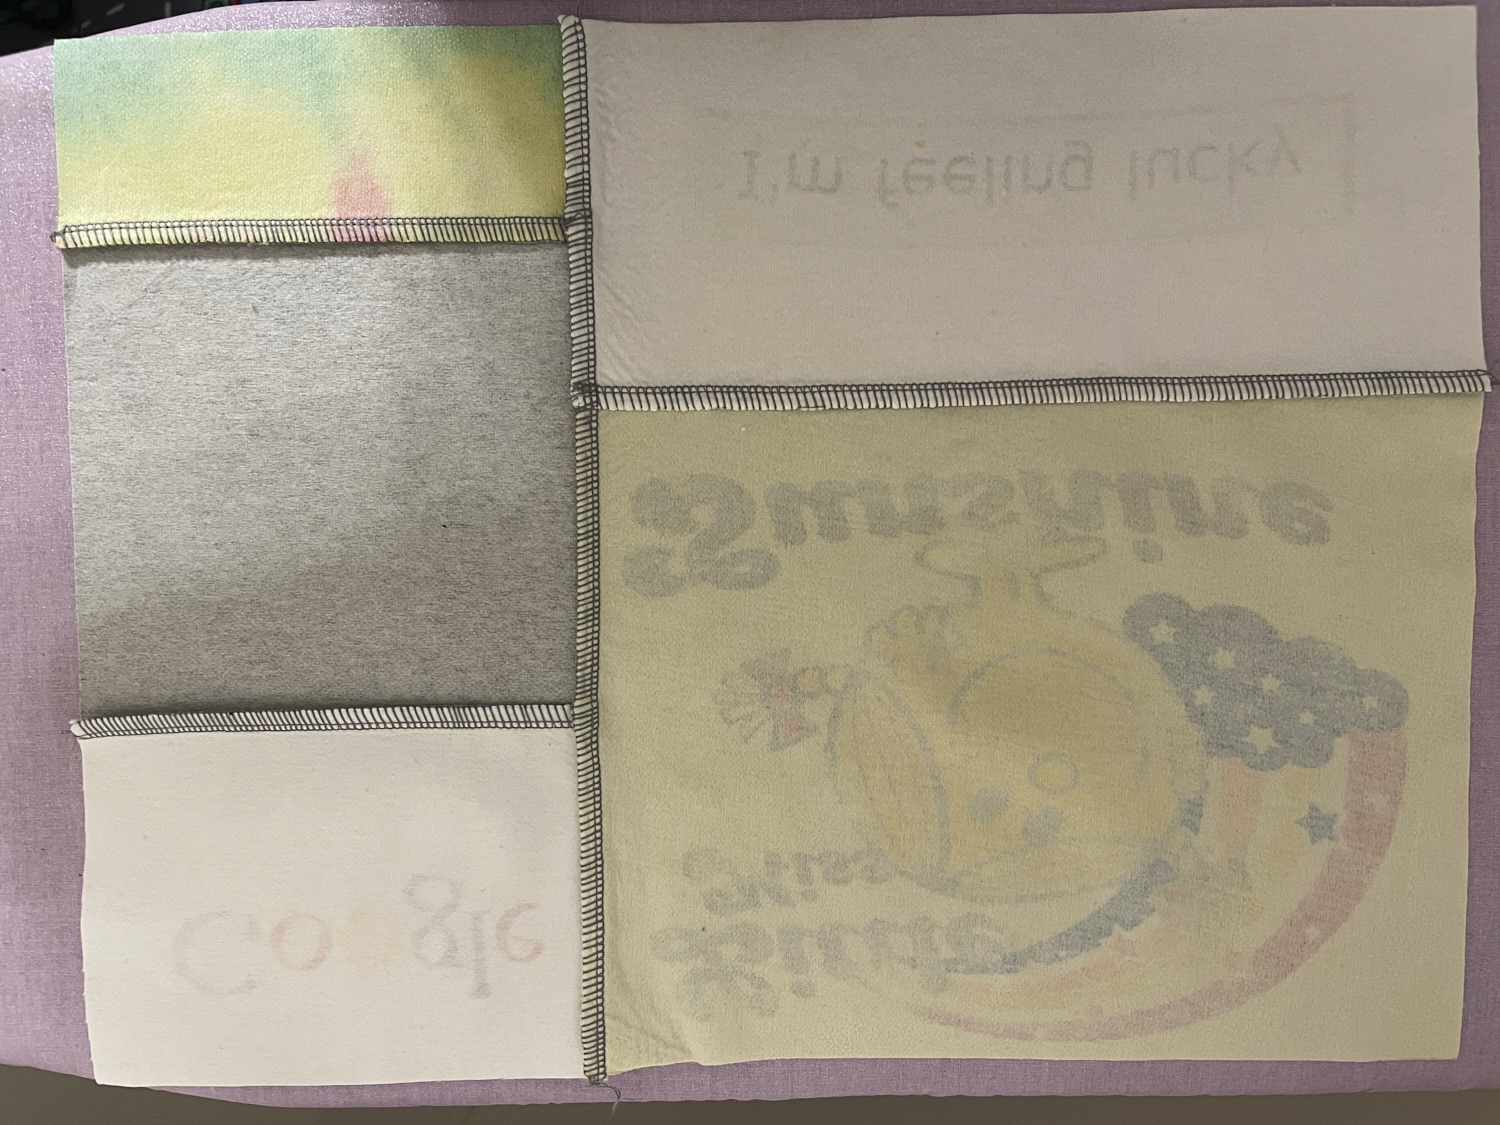
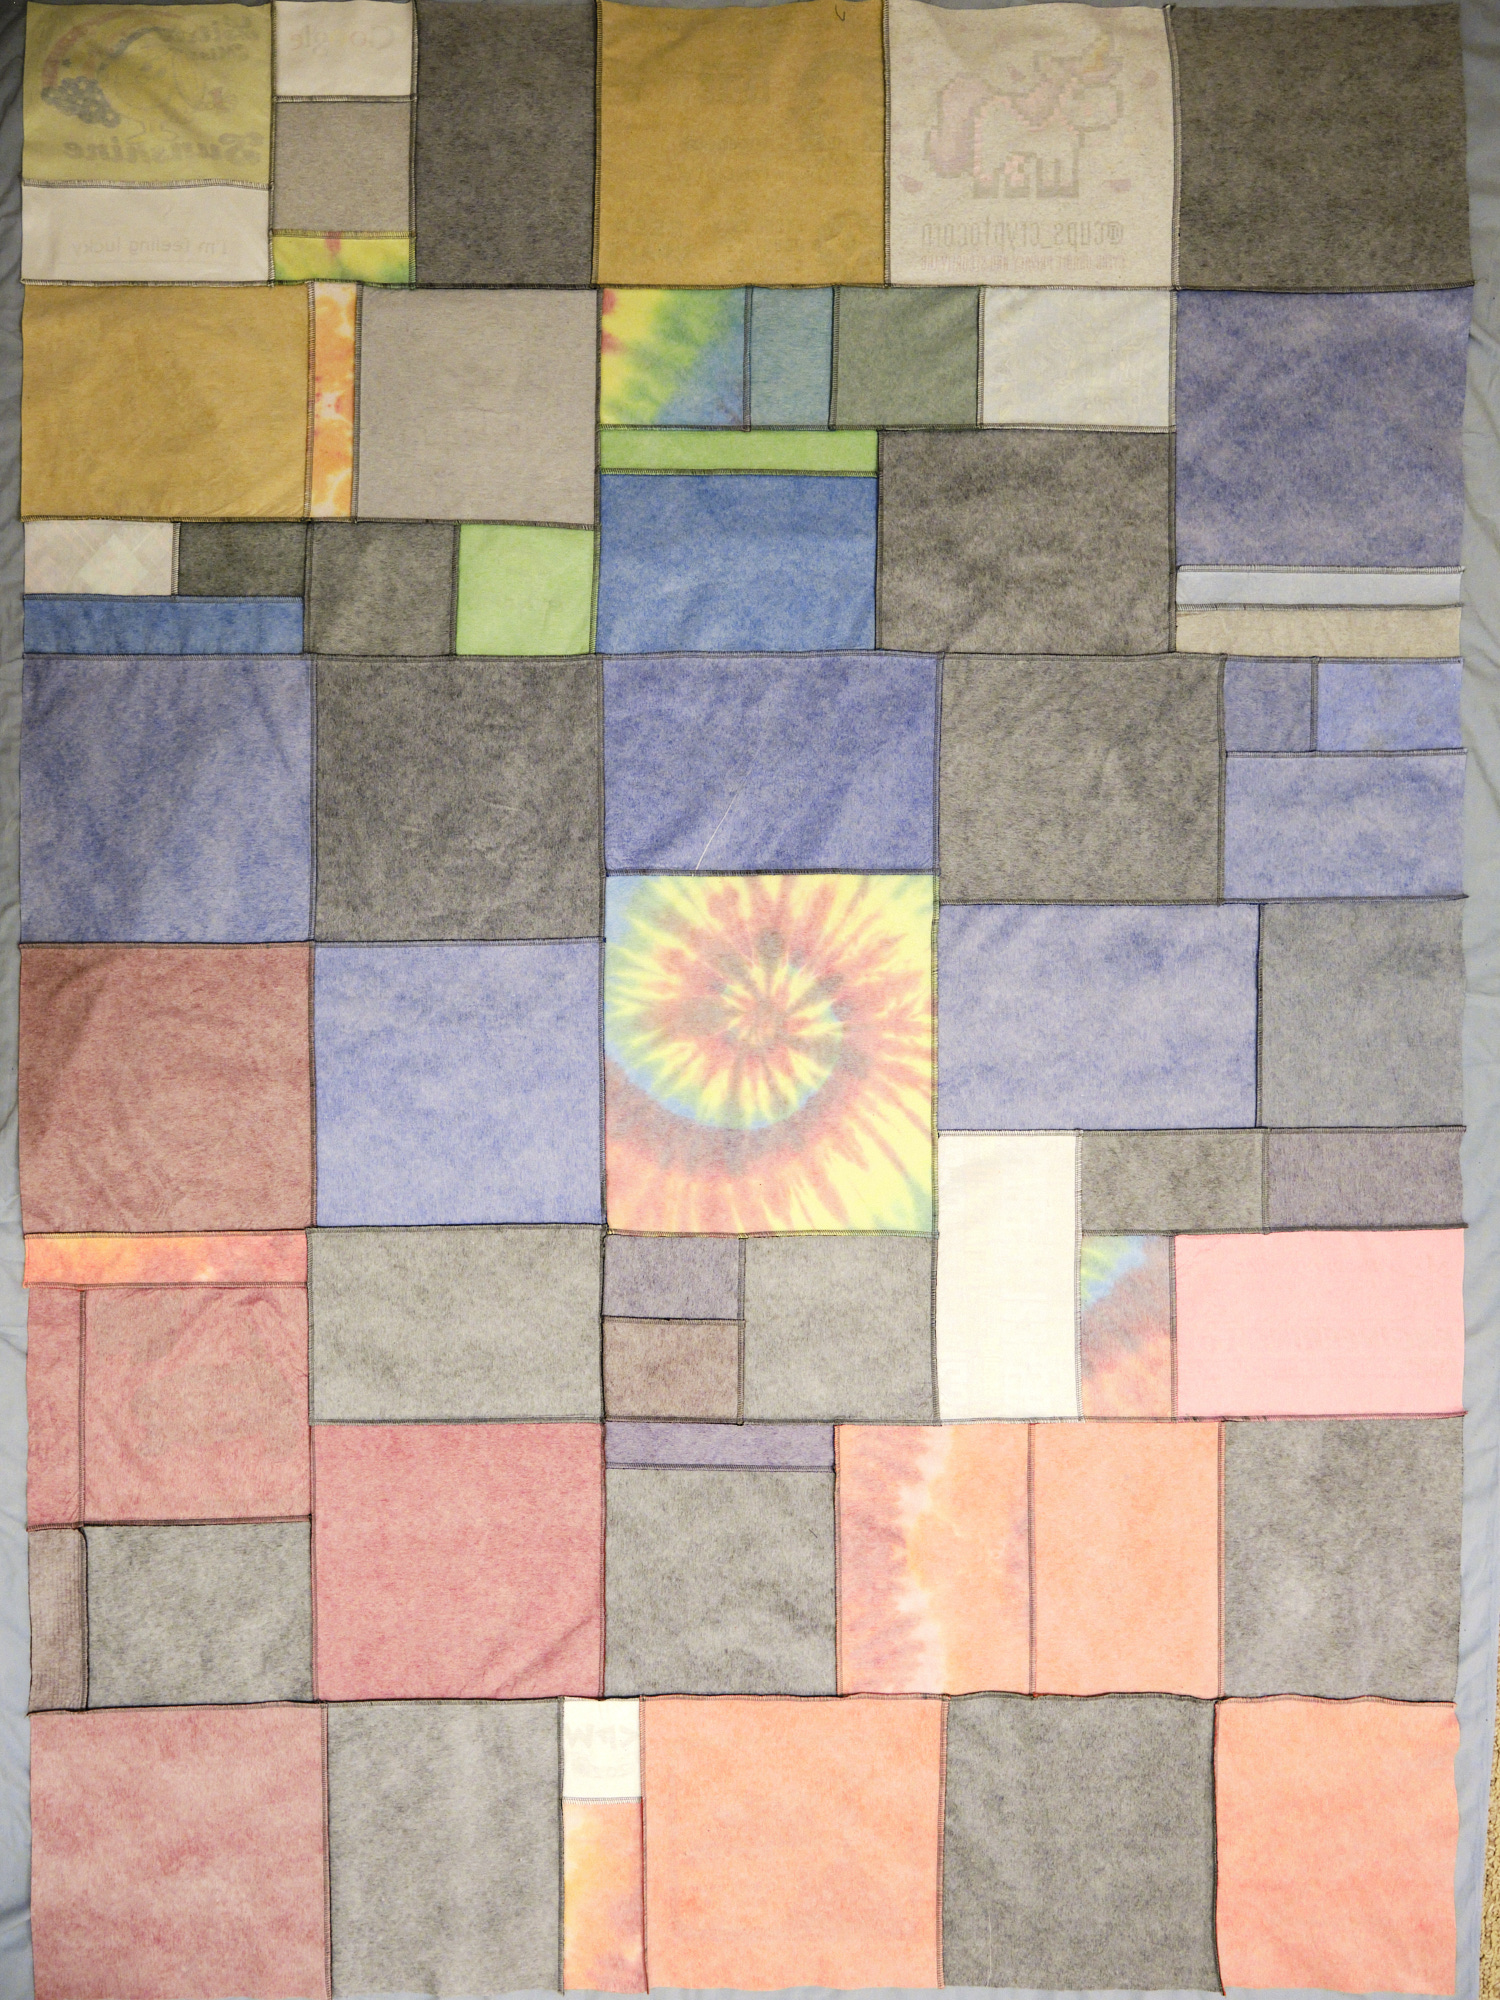
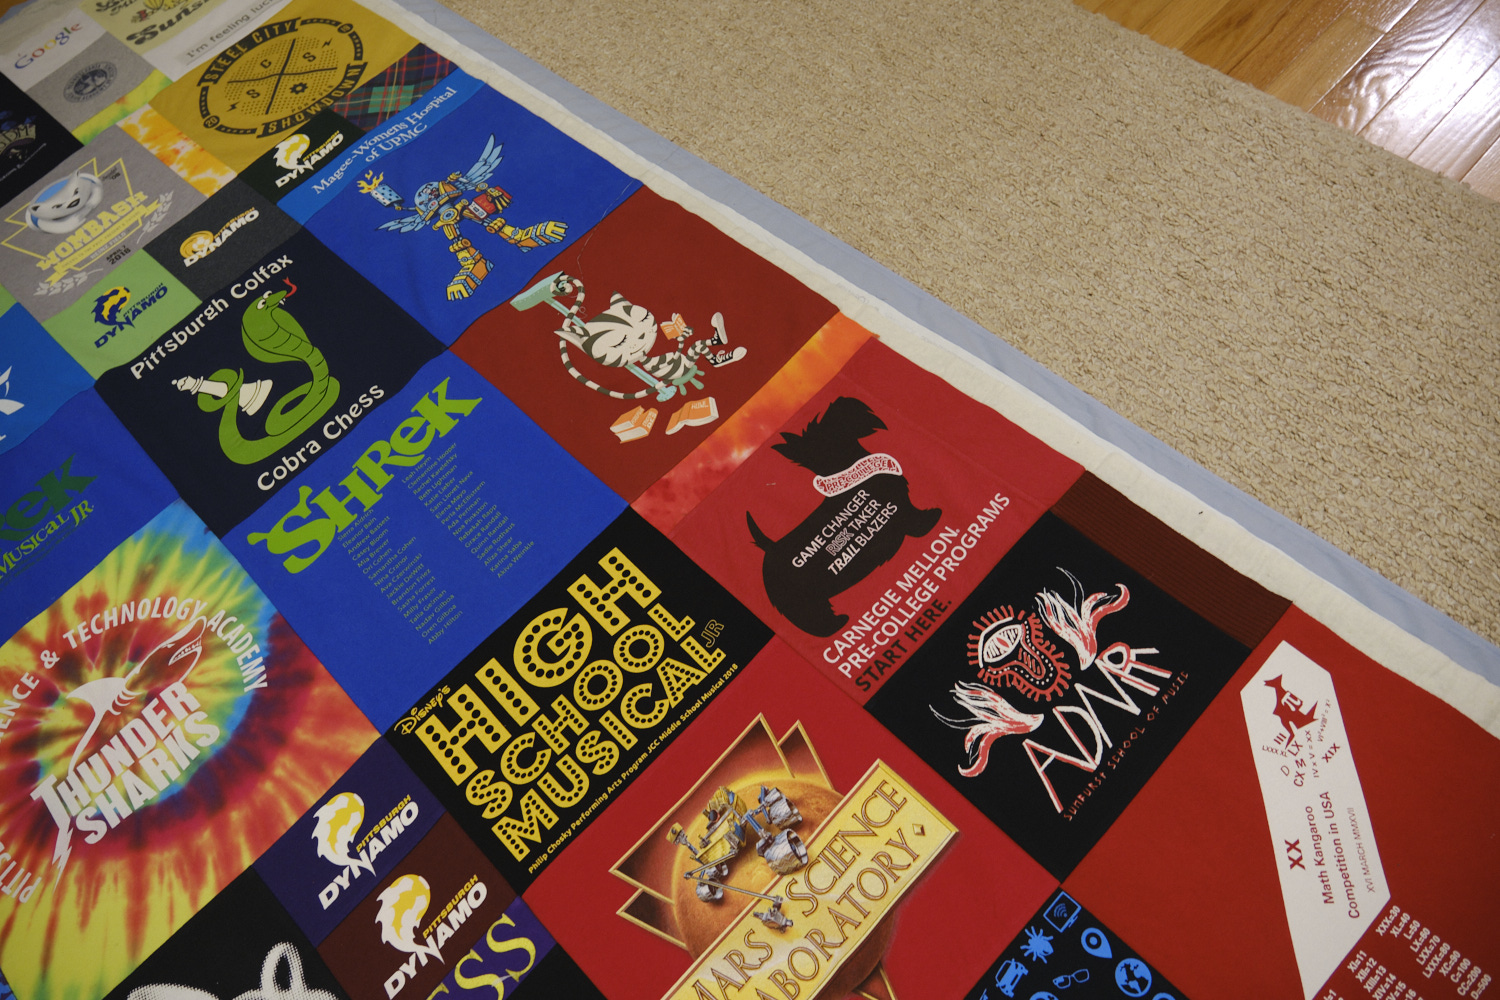
I continued trimming and serging blocks together into units and then serging units together. I made a few mistakes along the way, including discovering too late that I had trimmed a block to the size on my diagram, but that size was typed incorrectly. I corrected it by adding extra strips of fabric. I try to create units that will all be able to be sewn together without having to sew partial seams or sew around corners. I made a mistake that required one partial seam to correct. In the end all the blocks fit together fairly well except in one spot, which required unsewing one seam, trimming off about a quarter inch, and resewing. The trimming and sewing part is probably my favorite part of the t-shirt quilt process. I like watching the quilt come together and all the blocks come out nice and crisp with the interfacing as backing. Here you can see the front and the back side of all the blocks sewn together.
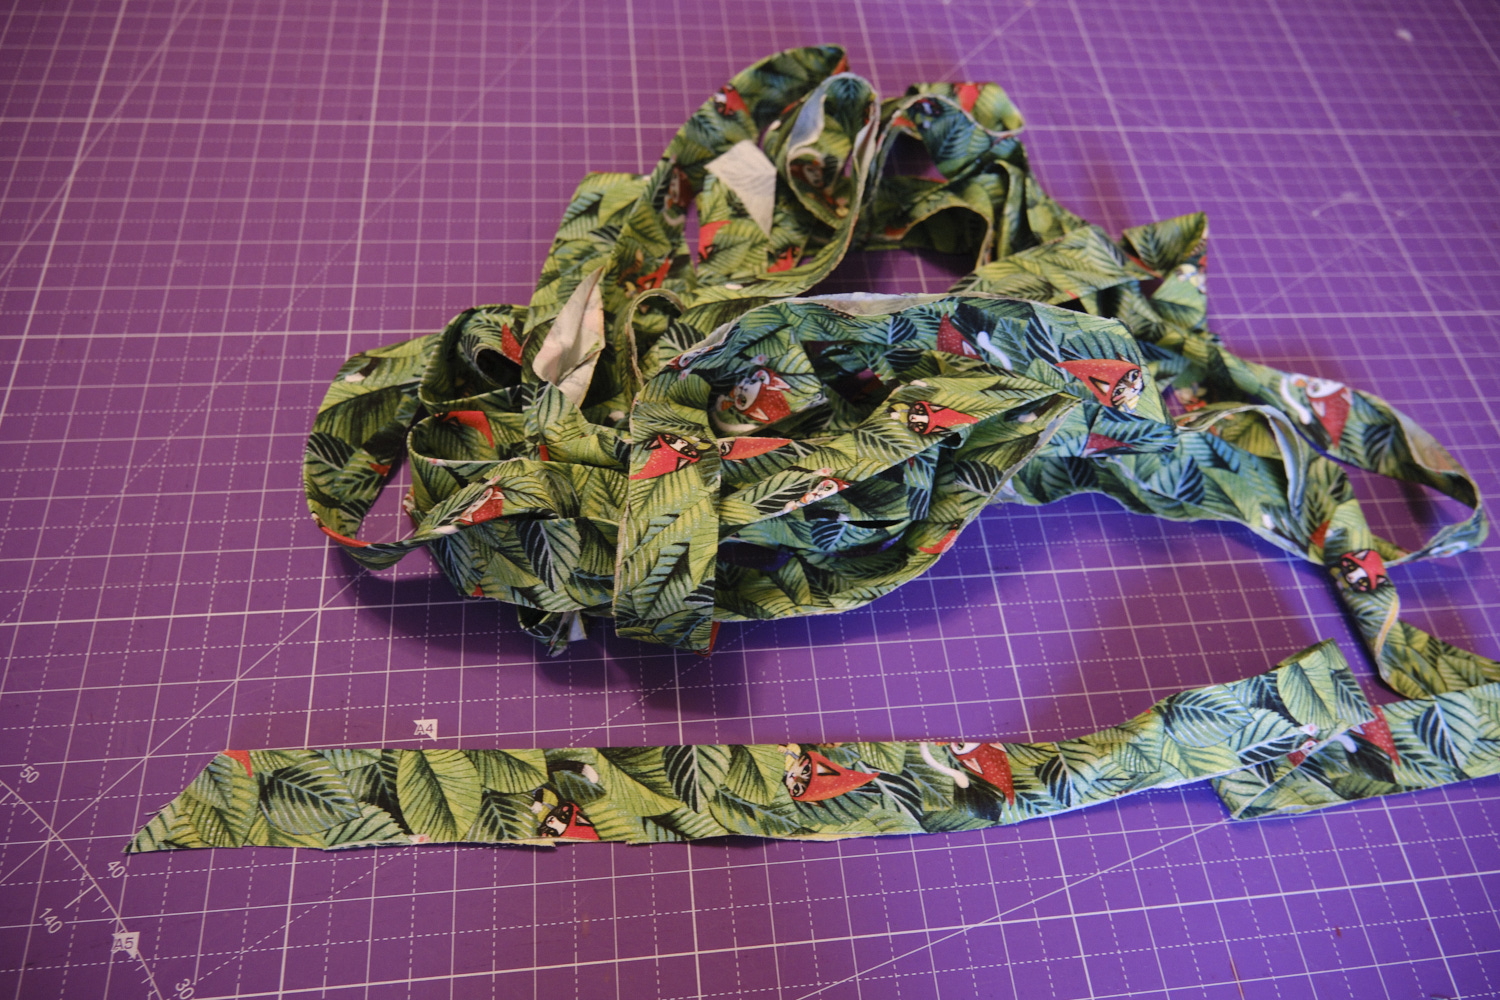
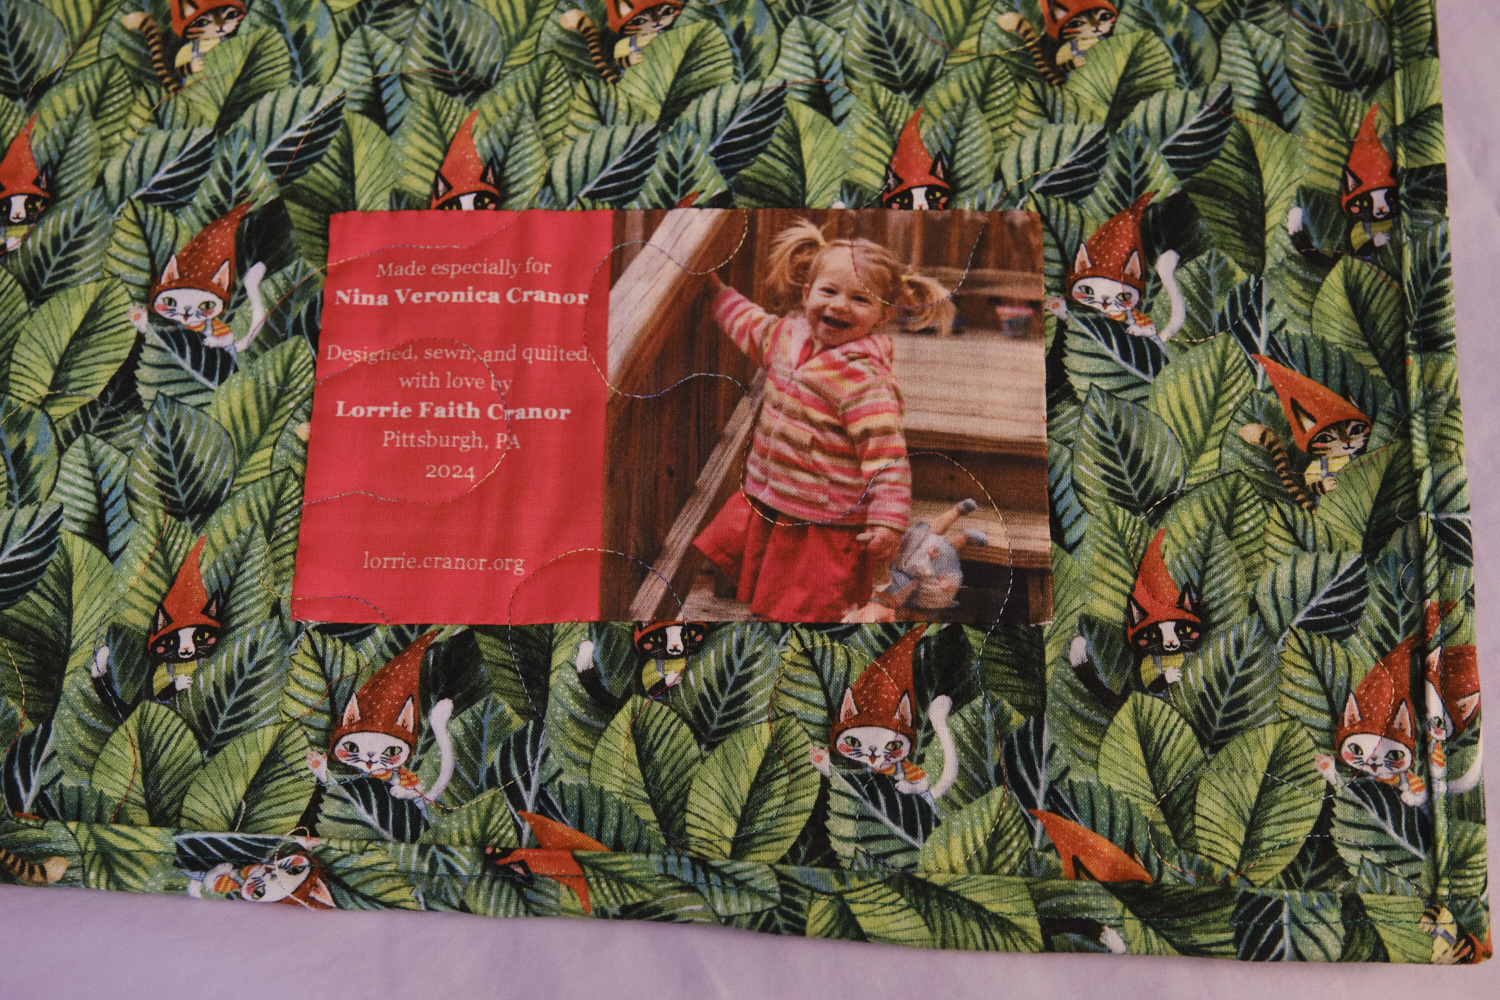
The next step is to prepare the three Bs: backing, batting, and binding. My daughter selected a green cat gnome quilting cotton print for the backing and binding. It wasn’t wide enough for the quilt back so I sewed two pieces together. I also fused a custom-printed quilt label on the bottom right corner and later hand stitched it in place to keep all the corners down. I made 1.5-inch continuous bias binding from a square of the extra backing fabric. I think this is a particularly cool technique for making bias binding although it does require some careful measuring and a lot of cutting. I bought a queen-sized Hobbs HF90 heirloom fusible cotton blend batt so I had to cut that down to the size I need. This batt is a fairly lightweight 80% cotton and 20% polyester, which works well for t-shirt quilts without adding substantially to the weight of an already heavy quilt.
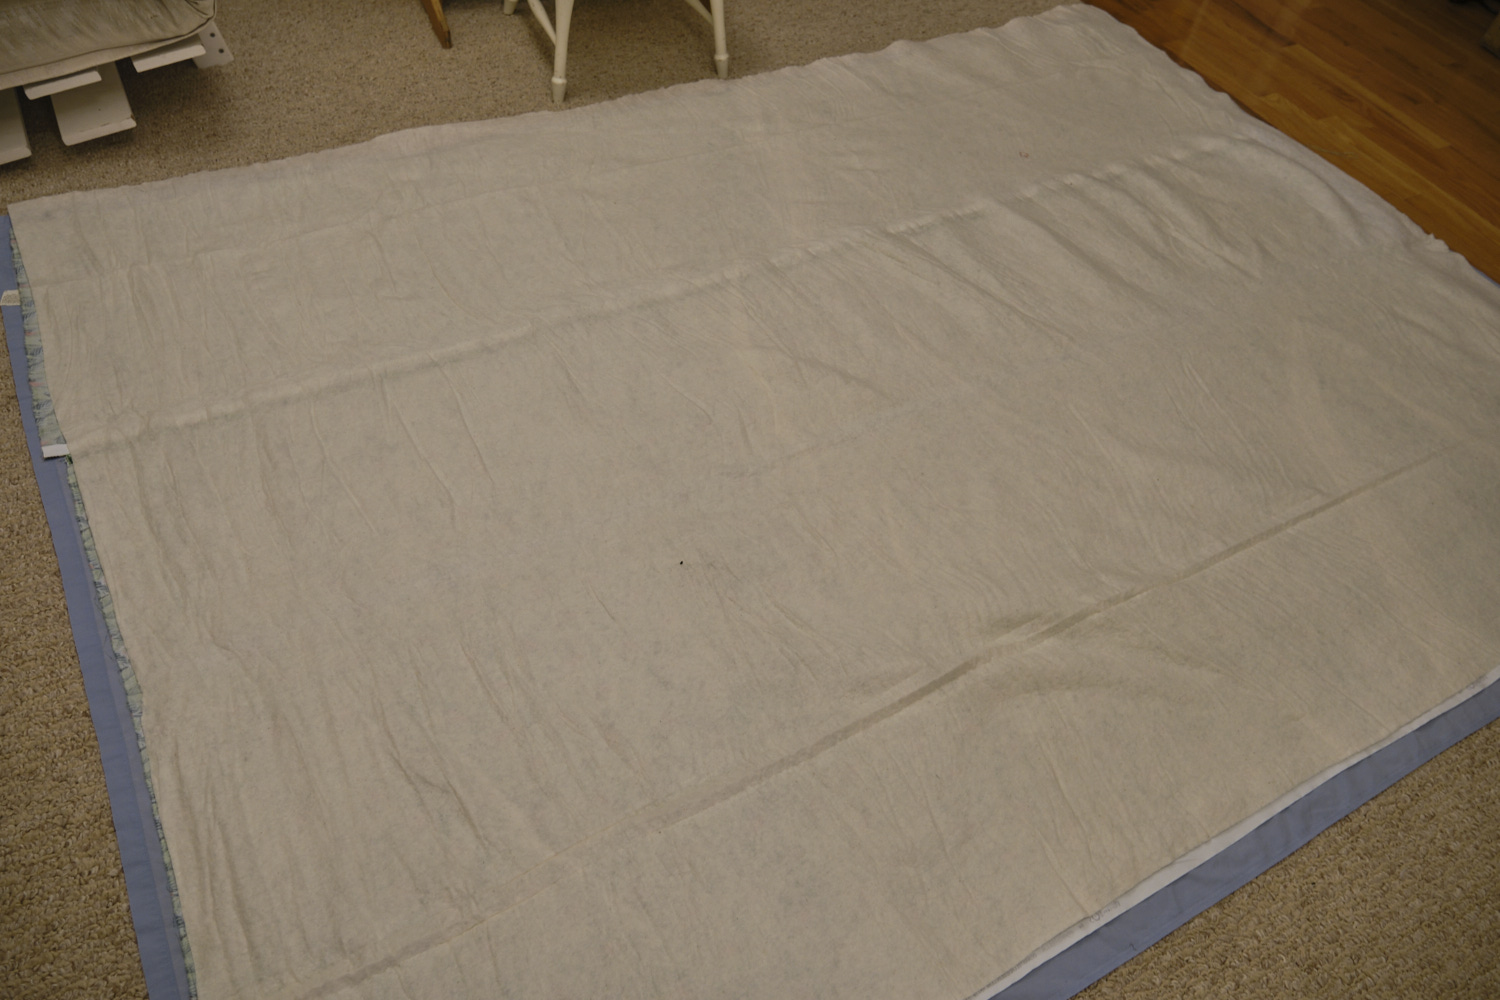
Because the batting is fusible you can put the backing on the floor (I put a large top sheet on top of the carpet first and build my quilt sandwich on top of the sheet), layer on the batting, and layer on the quilt top and then press with an iron to fuse everything in place. I bring my iron down to the floor, lie on the quilt, and do all the fusing. I start in the center and work my way out, using an organza pressing cloth to keep the t-shirt ink from melting onto my iron. After fusing the font I turn the whole thing over and check the back for wrinkles. I did a pretty good job this time and only had to peel back a little bit of the backing to remove a wrinkle. I fused that spot again after straightening it out.
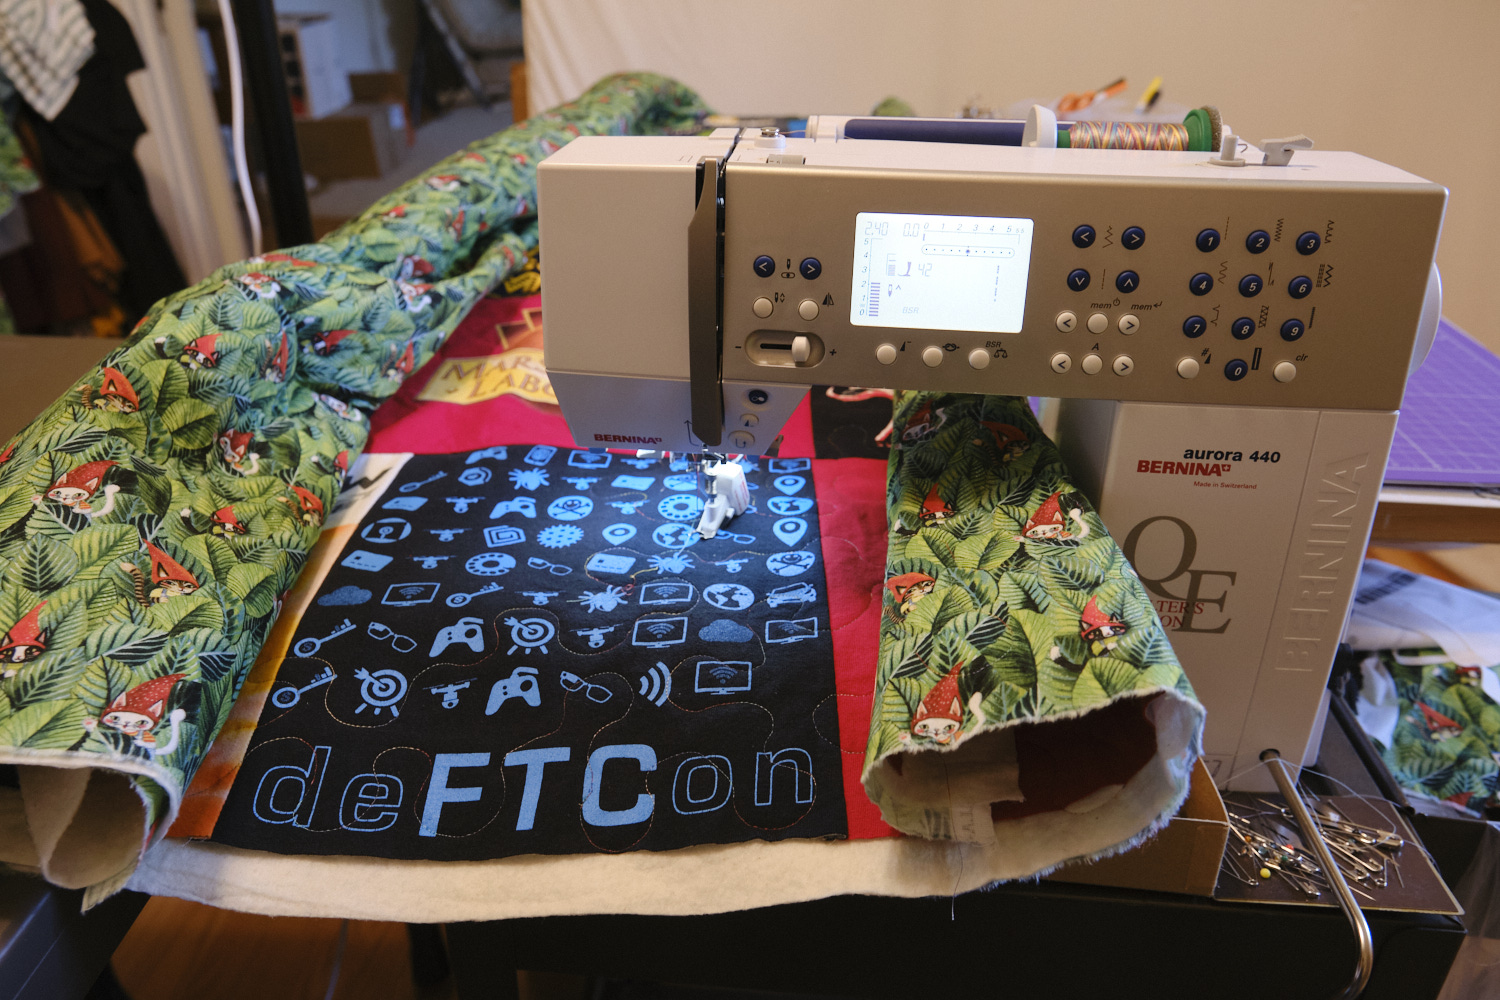
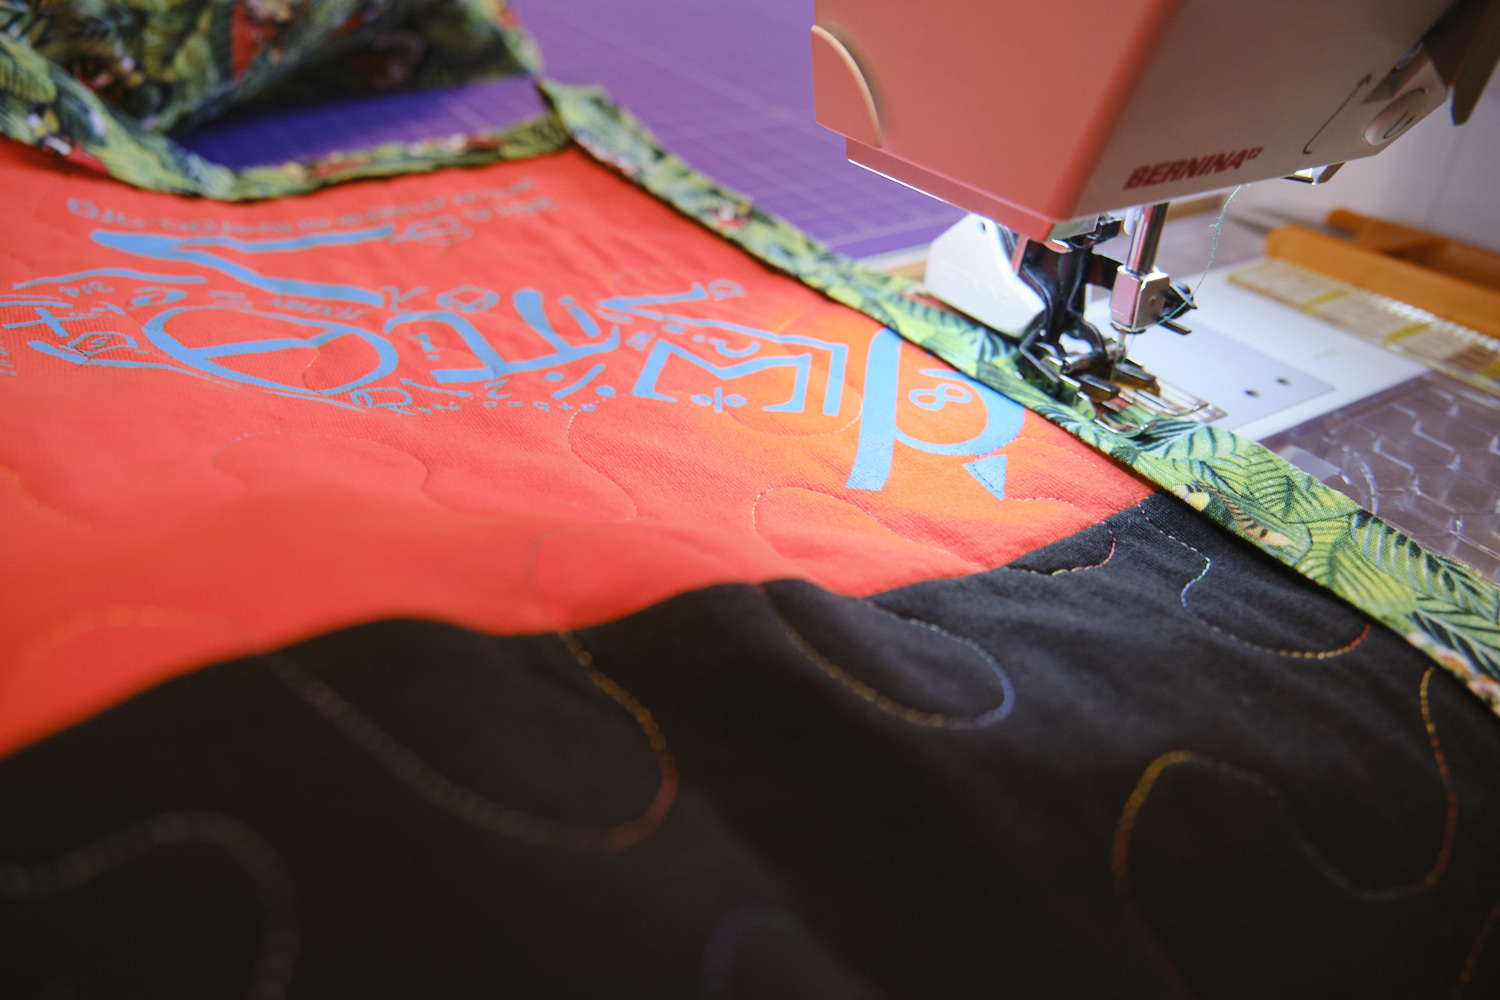
Now the quilt sandwich is ready to sew! Fortunately, my Bernina was back in tip top shape so I used that for quilting with my Bernina stitch regulator (BSR) foot. I selected a spool of Isacord rainbow multicolor polyester embroidery thread that I had bought years ago and never used. I thought it went well with the rainbow theme and it kind of blends into the backing. I could have used just about any color given the range of colors in this quilt. A solid red or medium green would also have worked, and a green might have been better for the backing. I did find the Isacord kind of slippery to work with and I had some problems with skipping, especially over some of the denser ink areas. I used 50 wt cotton thread for my other t-shirt quilts and I liked working with that thread better on a heavy quilt with large-scale quilting rather than small details.
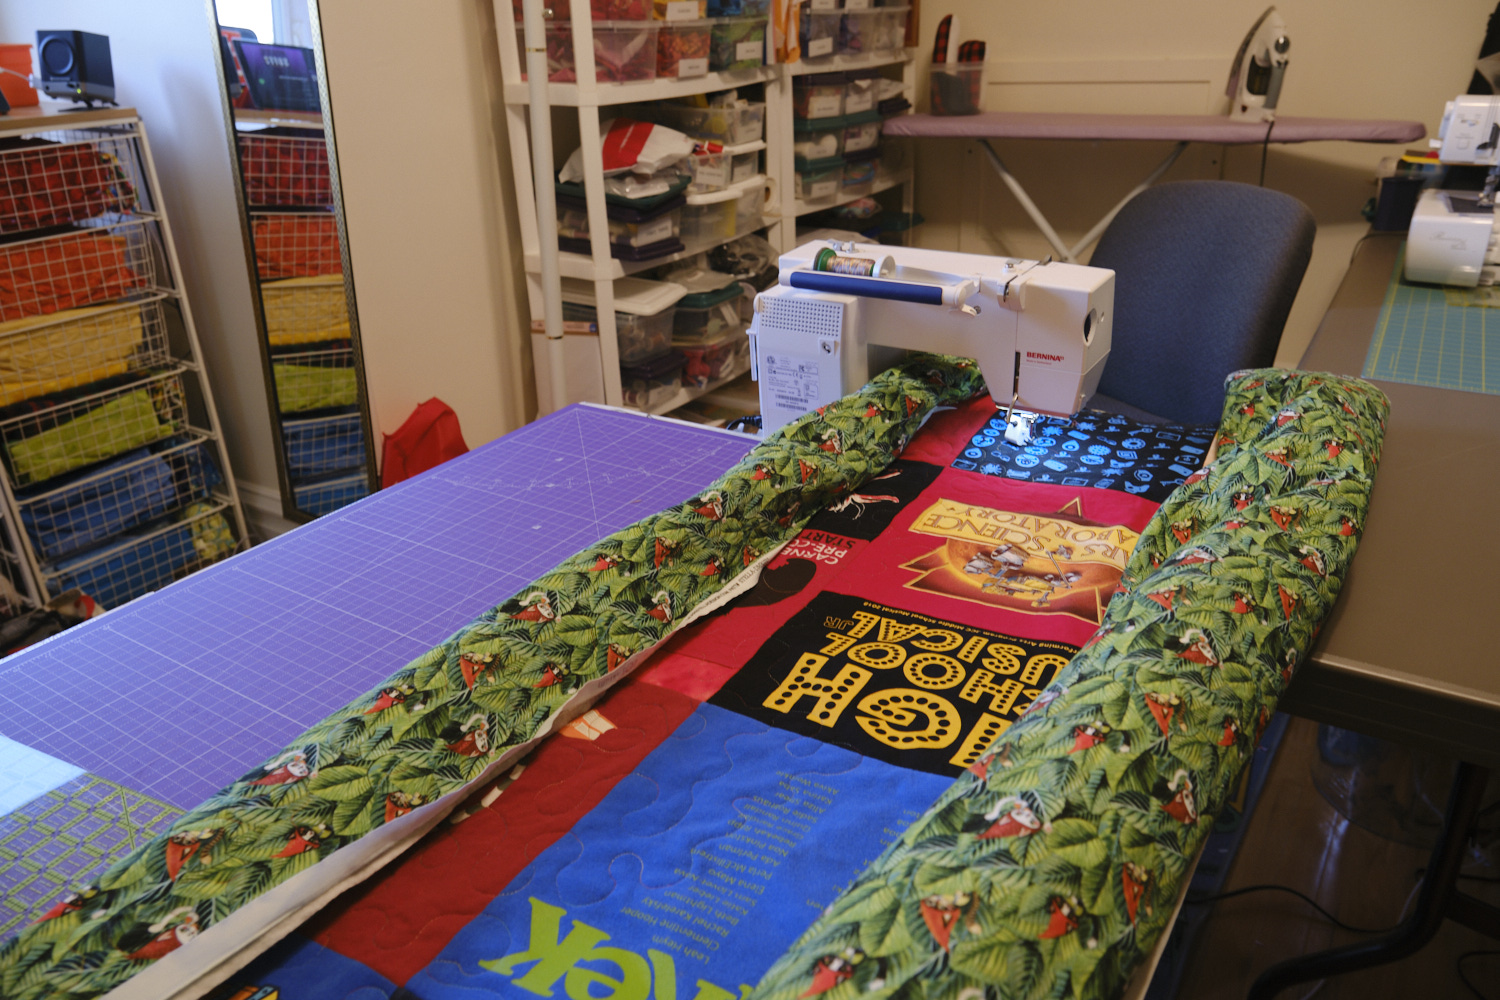
Quilting a bed quilt with a home sewing machine is challenging because you have to roll up the quilt and stuff it under the sewing machine arm, and also drag around a big heavy quilt. As t-shirt quilts are extra heavy, this was quite a challenge. Someday maybe I’ll get a long-arm quilting machine, but for now I do the best I can with the Bernina. I worked up a sweat and some shoulder pain from sliding the quilt around. I quilted this quilt entirely freehand with big meandering stipples. It’s basically doodling with a sewing machine. My stipples came out mostly smooth and round, but there are definitely a number of sharp angles and glitches too: don’t look too closely and you won’t see them!
The last step is to trim the edges of the quilt and attach the binding. I fused the french-fold binding technique, which is how I bind most of my quilts. I sewed the binding along the edge of the quilt with a quarter-inch seam allowance using my Bernina walking foot. There’s a little extra jig required at each corner for nice mitered corners, and then there’s a bit of work needed to join the beginning and end of the binding into a giant rubber band. Attaching the first side of the binding to the front of the quilt was fairly painless (especially compared to quilting the quilt). The classic french-fold binding technique requires hand stitching the binding to the back of the quilt with a slip stitch. This is a very pretty finish, but it would probably take me at least 6 hours for a quilt of this size so I have finished the binding of all my t-shirt quilts by machine. I folded over the binding, used clips to hold it in place, and used the edge foot on my sewing machine to stitch in the ditch. It took me about an hour to go all the way around the quilt.
And then I was done! I took some photos and celebrated! I also sewed up a cute pillowcase with extra backing fabric. I will use it as a bag when I deliver the quilt, and then it can be used with a standard bed pillow.
I still have a lot of t-shirts left, including a lot of shirts that used to be mine. Some day I’ll have to make a t-shirt quilt for me!