Pattern Emporium Be Mine Balloon Sleeve top with jacket hack, size AU8, 1.5 yards cotton double gauze, high neck, regular length, wide facing, no button loop, sloped-shoulder adjustment
I love the Pattern Emporium Be Mine Balloon Sleeve top pattern but find it difficult to wear under a sweater, and even if it fits, a sweater would hide the beautiful sleeves. So when I saw that sewist Livia Jonker-Yamada had hacked Be Mine into a jacket, I was excited to give it a try myself so that I could wear it over a shirt. I waited for Liv’s promised blog post with instructions, but it never came so I figured it out myself.

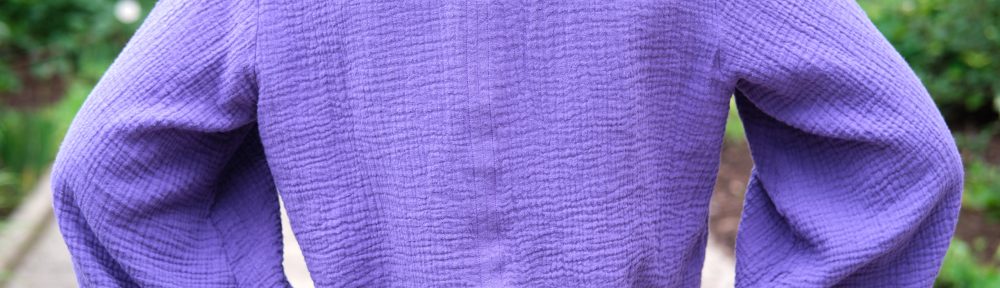
I started with the size AU8 pattern, which is one size smaller than the size chart recommends but this is an oversized pattern and sizing down worked well for me on my first Be Mine top. I could probably go down one more size for a more fitted top. I used the high neck option so that the neck opening would hit above a scoop-neck t-shirt. I added a half-inch sloped shoulder adjustment as I did on my first Be Mine. I decided to make this jacket from purple cotton double gauze since I still have a lot left even after making PE Vacation Vibes pants and a Sinclair Alva top and I thought it would coordinate with a lot of things in my wardrobe. The double gauze is a good weight for a light summer jacket, it has enough body to help the sleeves balloon, and once you’re done sewing it doesn’t need to be ironed. Having previously experimented with both ironing and not ironing gauze before cutting and sewing, I am firmly on team wash and iron now, despite the fact that ironing the wrinkles out of a couple of yards of double gauze is fairly tedious.
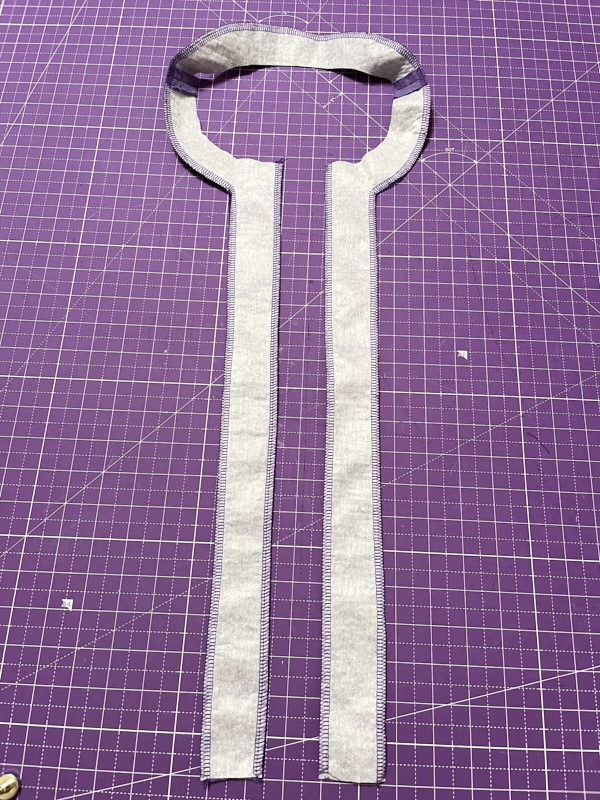
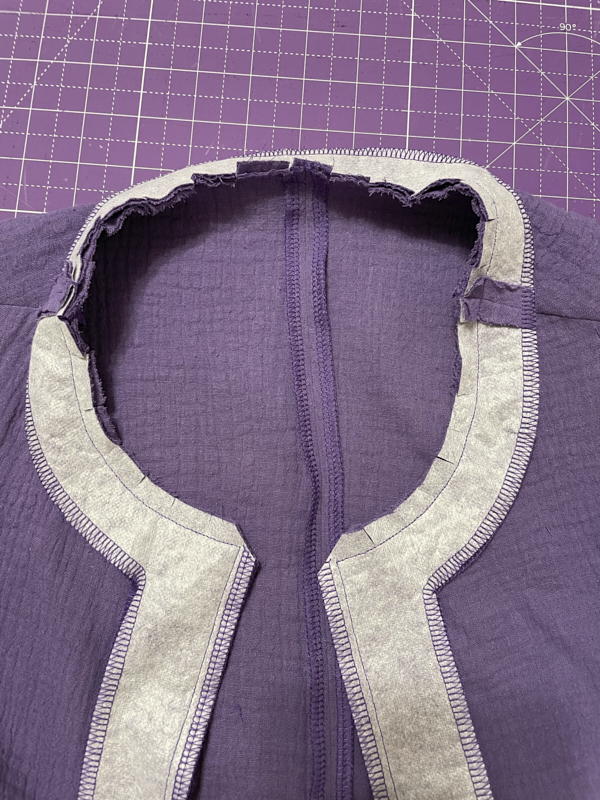
Most of the hack is pretty obvious: you follow the instructions for eliminating the back button, sew the back pieces together, and then you don’t sew together the two front pieces. The tricky part is what to do to have a nice clean finish on the jacket front openings. It looked to me like Liv split the neck facing and added vertical strips to it to face the jacket opening edges. I couldn’t work out exactly what she did where the front edges met the wide hem facing so I improvised a bit.
In the photos below you can see the split neck facing sewed to the merged back facing on its owned and pinned to the bodice. When I split the front facing, I made sure to add my 3/8-inch seam allowance to the split on both sides. The vertical facing is 1 3/4 inches wide and runs the length of the top. I decided to cut neck and vertical facing as a single piece to avoid the need for a joining seam. I used Heat n Bond Ultra Lightweight Fusible Interfacing and fused it to a piece of gauze before cutting out the facings. After I sewed the front and back facings together, I serged around the outer edges and also along the inner edge of the vertical pieces. That last bit of inner edge surging probably wasn’t necessary.
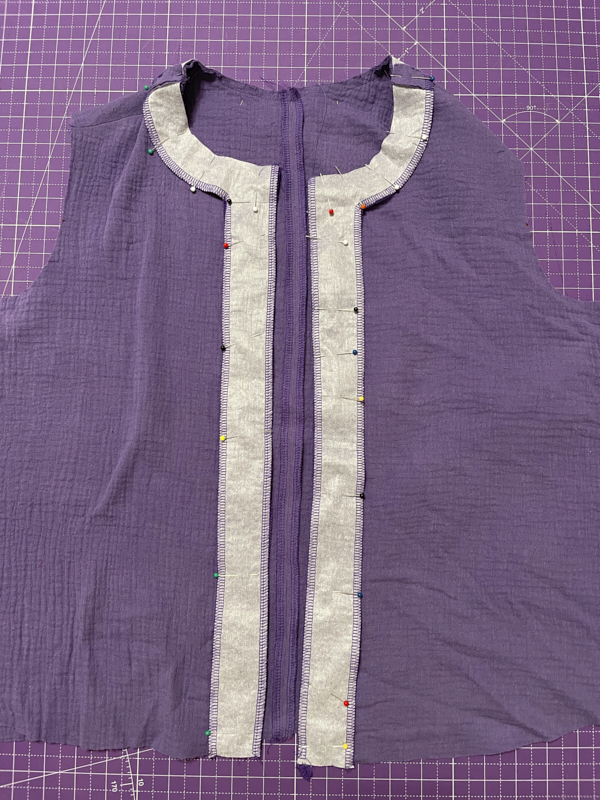
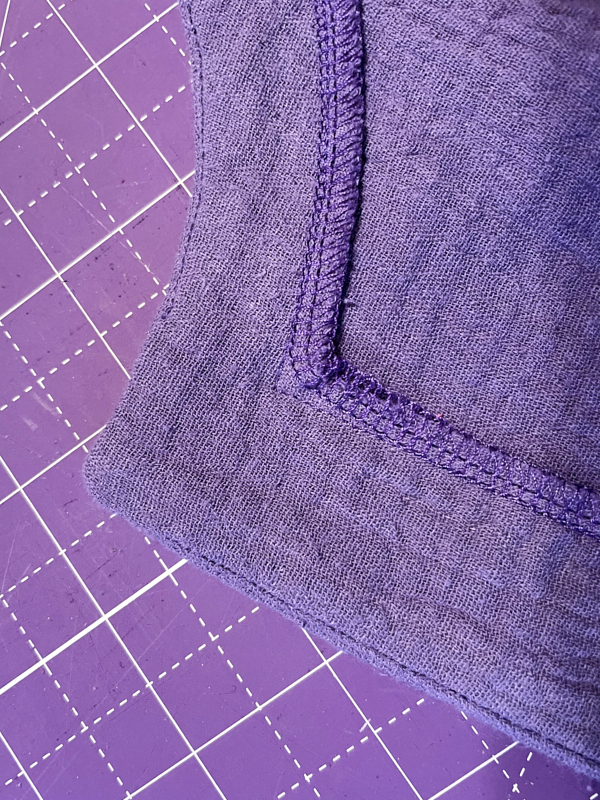
After I finished sewing on the neck and vertical facings I clipped the seam allowance around the neck as per pattern instructions and trimmed the corners to make it easier to turn them under. Then I understitched and top stitched according to the pattern instructions. It was impossible to understitch all the way into the corners, as you can see in this photo, but that didn’t seem to be a problem. I did the topstitching all in one go, from the bottom, up one side of the front, around the neck, and back down the other side of the front, pivoting at the corners. I used an edge foot for all the top stitching and under stitching.
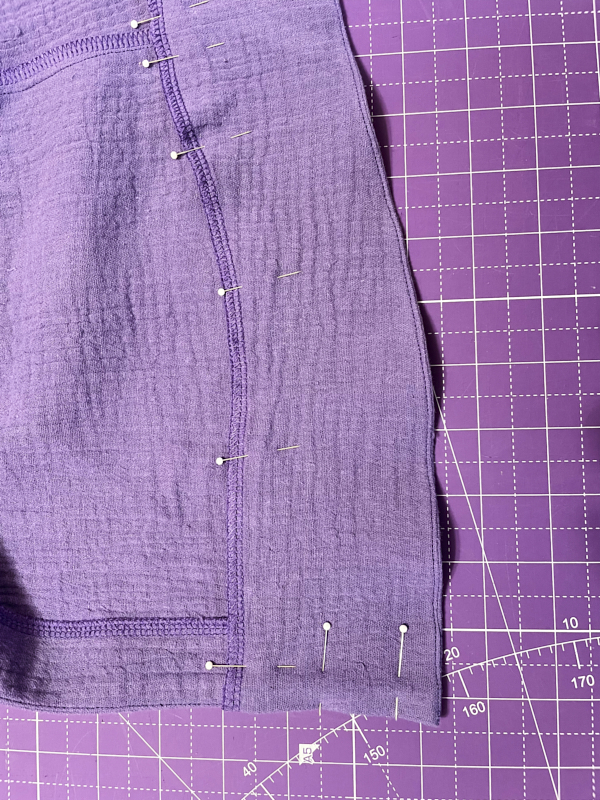
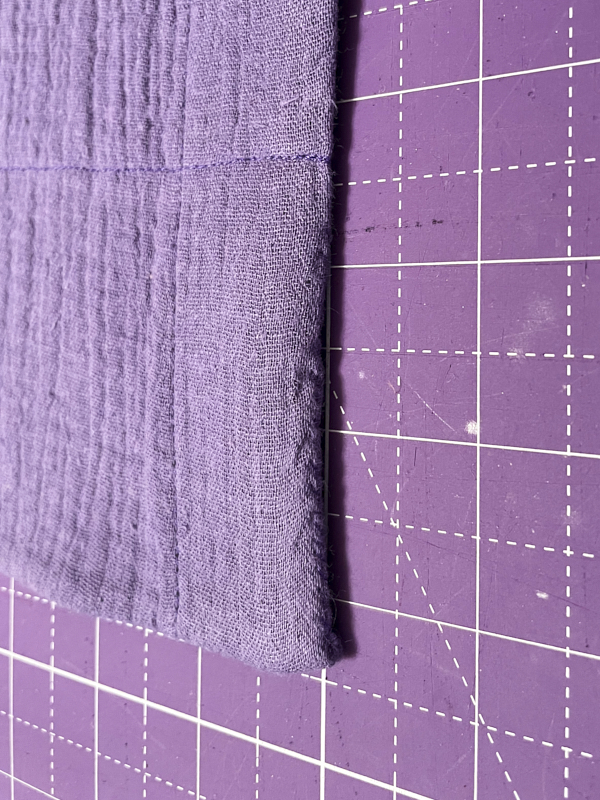
Then I added the sleeves (hand basting the sleeve bindings so the gauze would behave), closed up the sides, and turned to adding the wide bottom hem facing. I split the front hem facing piece in half, adding 3/8 inch seam allowances to the inside edge of each piece. Then I sewed the front hem facing pieces to the back hem facing pieces and serged the top edge. I pinned the facing to the bodice, folding in the seam allowance. I sewed everything together and understitched following pattern instructions. Then I top-stitched just below the serged edge at the top of the hem facing. Finally, I was left with the unsolved problem of what to do with the unstitched 3-inch edges where the hem facing meets the bodice on the jacket opening edges. I decided to whip stitch that closed by hand, which seemed to have worked well.

I decided not to add buttons as I rarely button jackets (and I’m still a bit afraid of button holes). I’ve recently read that tie-front tops are quite fashionable right now, so I thought about adding ties, but decided I was unlikely to actually tie them (or wear them fashionably without a shirt underneath), so I left the jacket with no closures. As a result, it was a little tricky getting the neck openings aligned for the photographs, but they mostly stay in place.
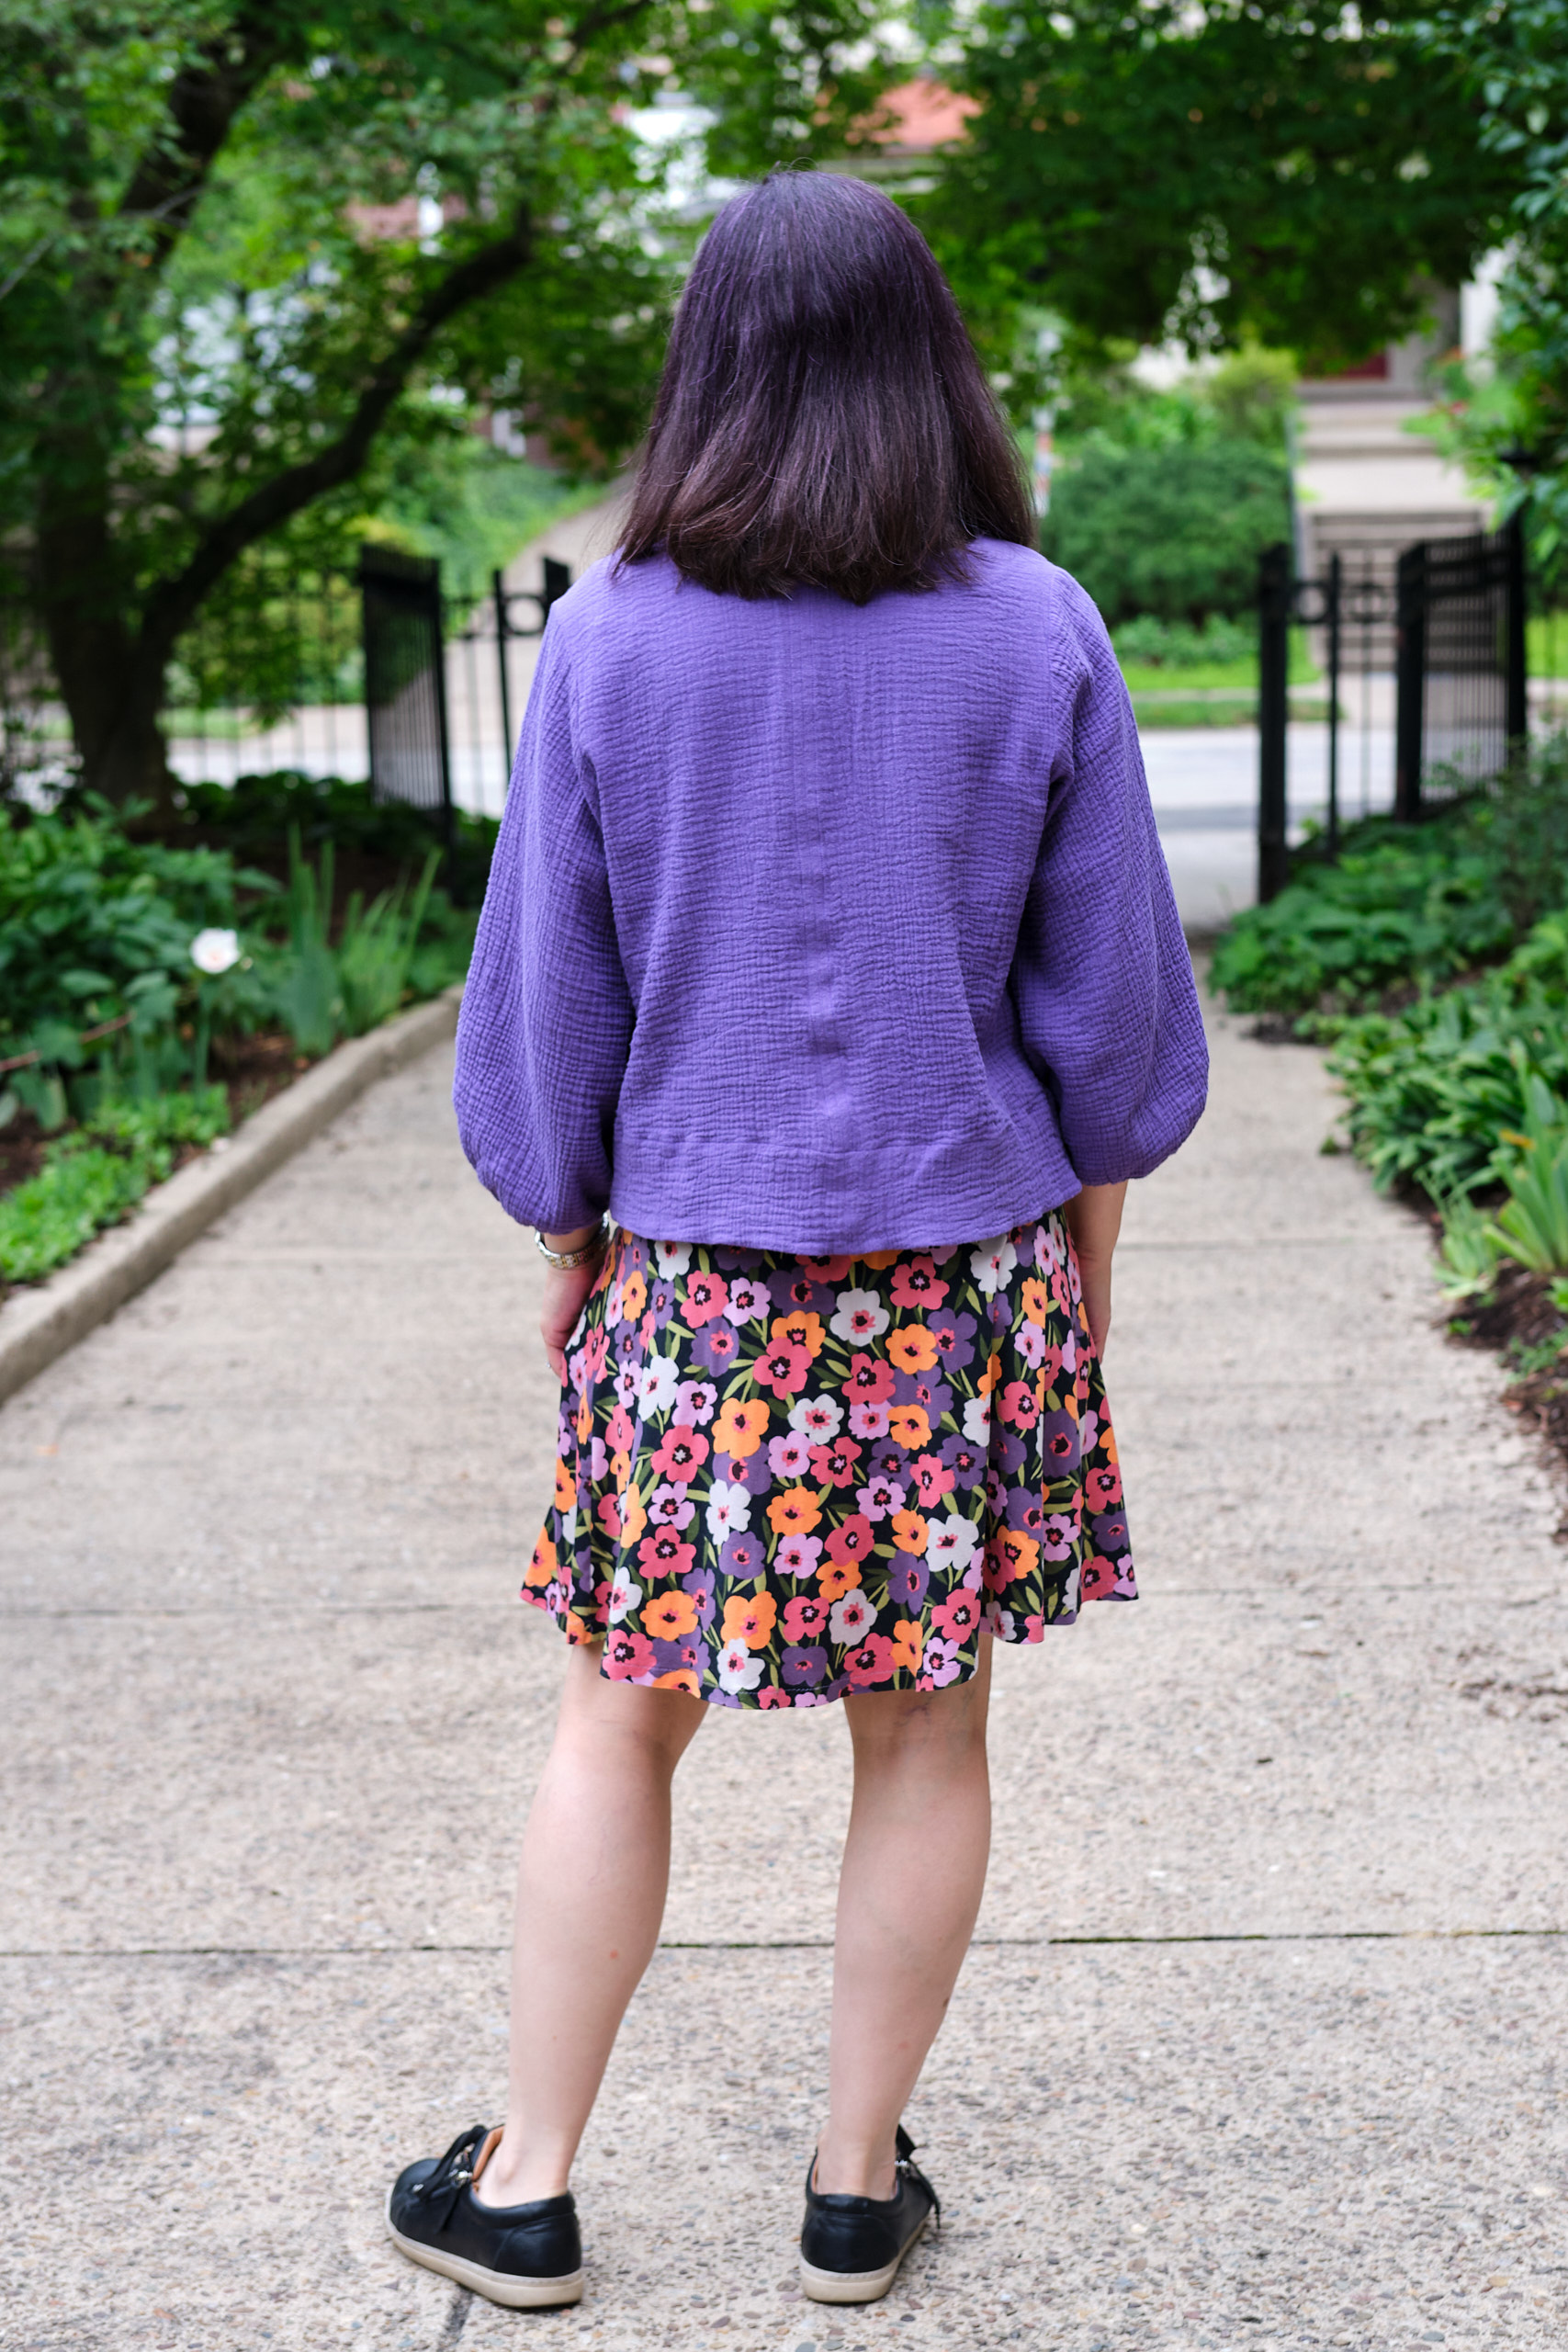
The jacket looked neat and crisp, but since I will never iron it again I threw it in the wash to see how it would look crinkled up. When I took it out it looked great except for the center back seam, which didn’t lie flat because I forgot to top-stitch the seam allowances in place. After a quick trip back to my sewing machine to topstitch, the jacket was complete. That was yesterday, and today I wore my new jacket to work with the PE Heartlight skirt that I sewed last summer. When the outdoor temperature cools down a little I expect I will wear it a lot with wide-leg pants.